One Time Payment
This guide will offer a thorough, step-by-step breakdown of how to create the one-time payments and carry out the import procedure.
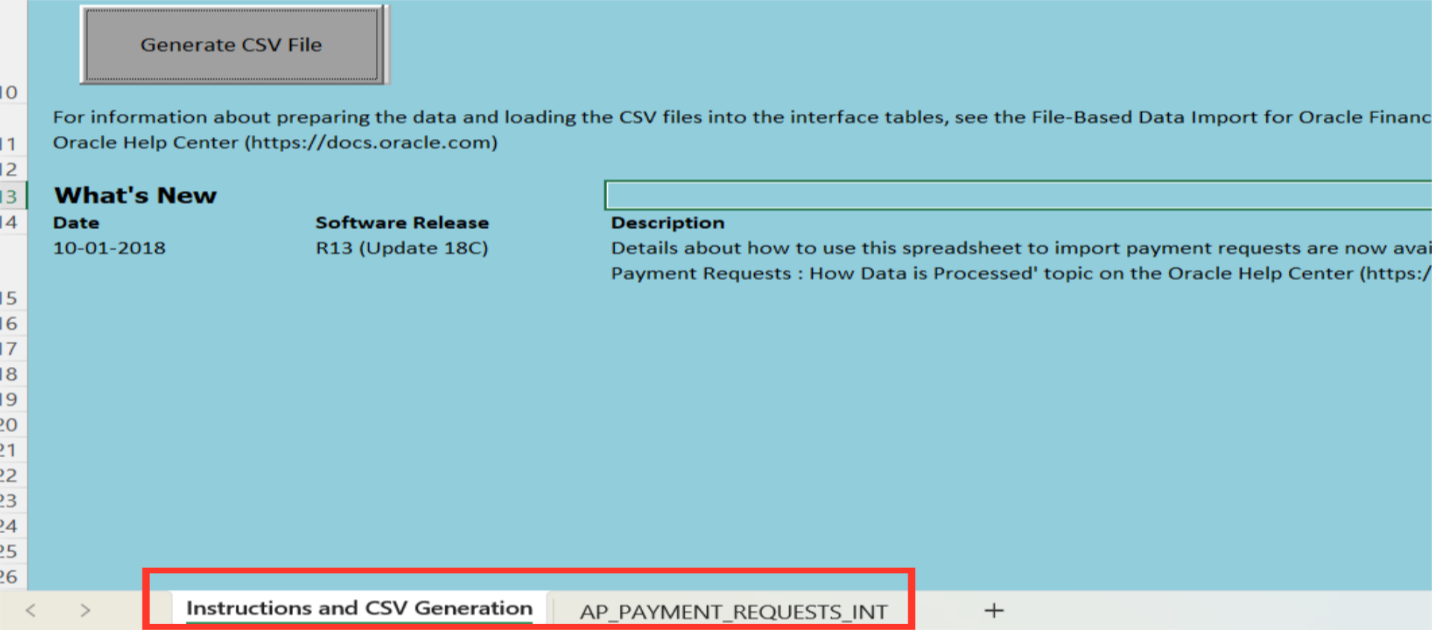
Download the Payables Payment Request Import FBDI spreadsheet from this link (ensure to download the latest release version) and open the same on your local system.
There are two worksheets in the spreadsheet: “AP_Payment_Requests_INT” and “Instructions and CSV Generation.” Instructions on how to import and file data are included in the first sheet. All necessary information, including the party, invoices, and amount, must be filled out in the second sheet.
Each column’s description and instructions for the format and kind of data to be entered are shown when the cursor is hovered over the upper right corner of the column header. Columns with one asterisk (*) indicate mandatory fields; all other columns are optional.
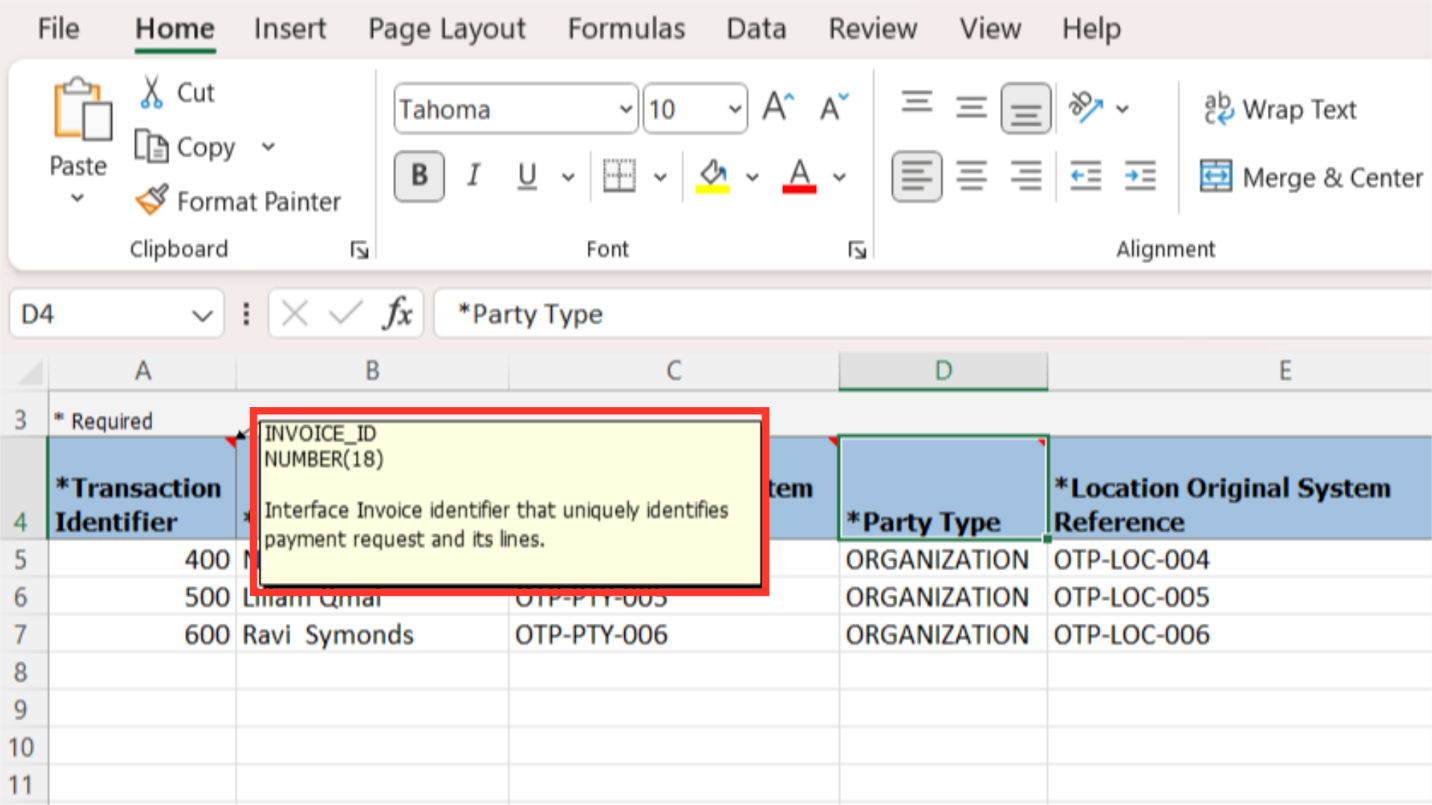
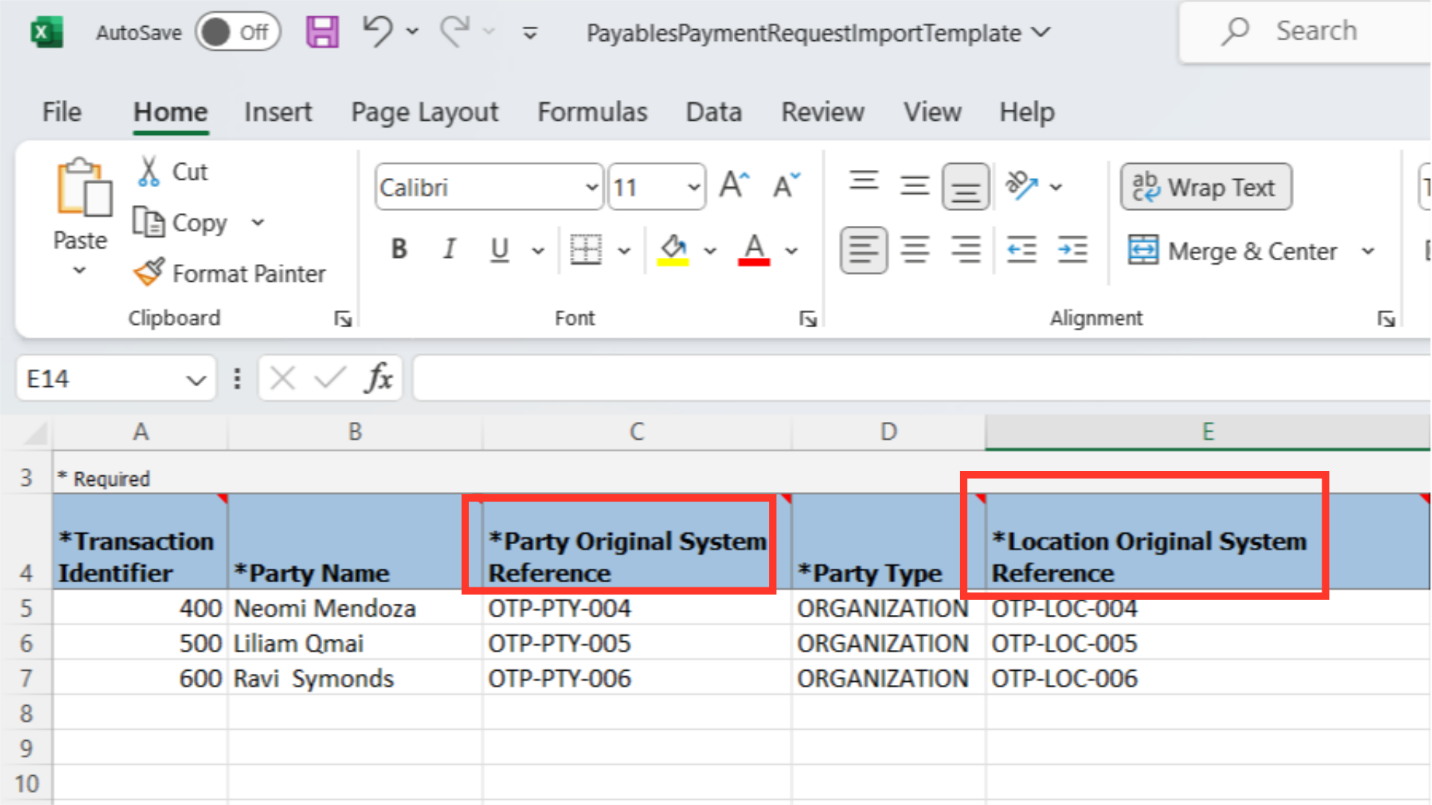
The transaction identifier column is an interface unique identifier that identifies the payment requests and lines.
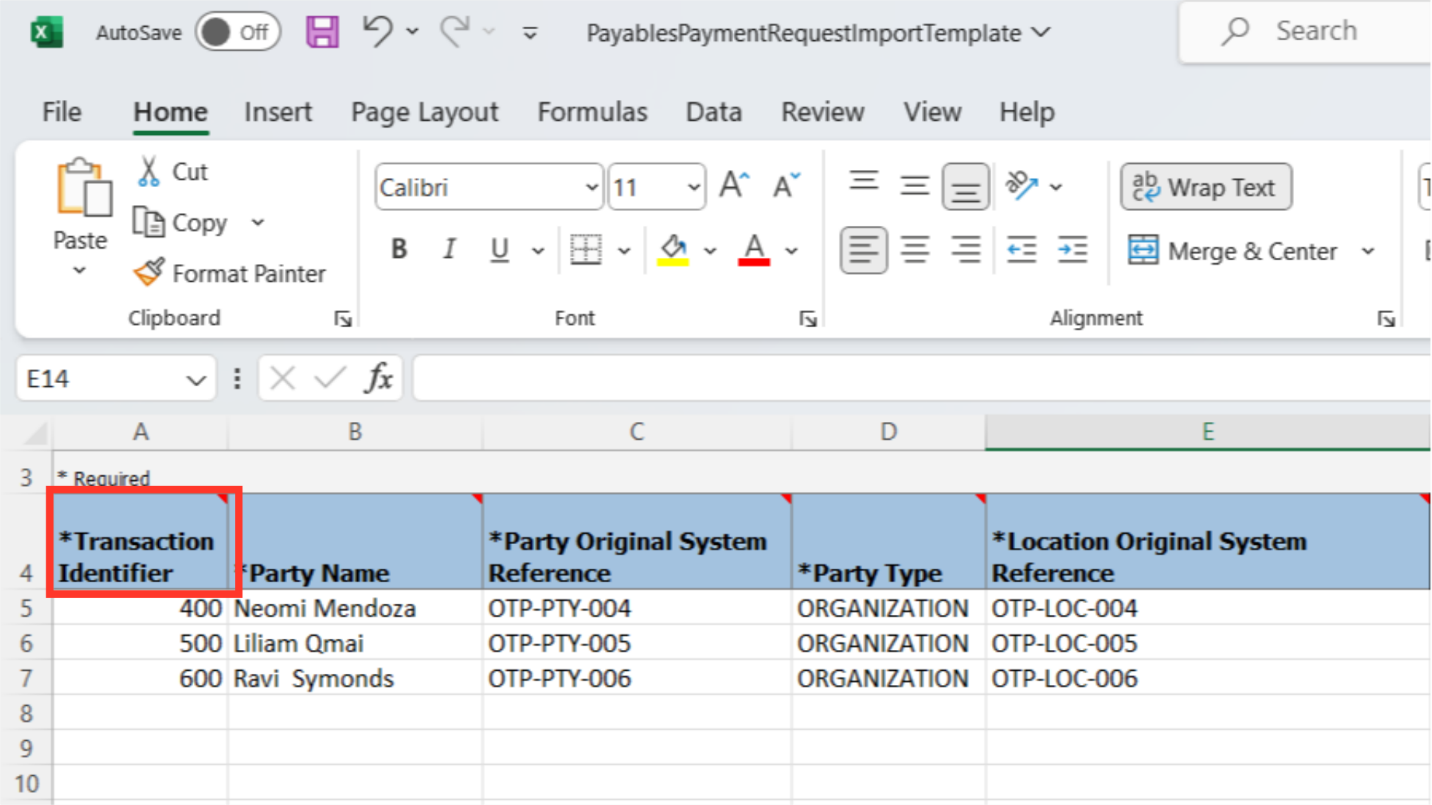
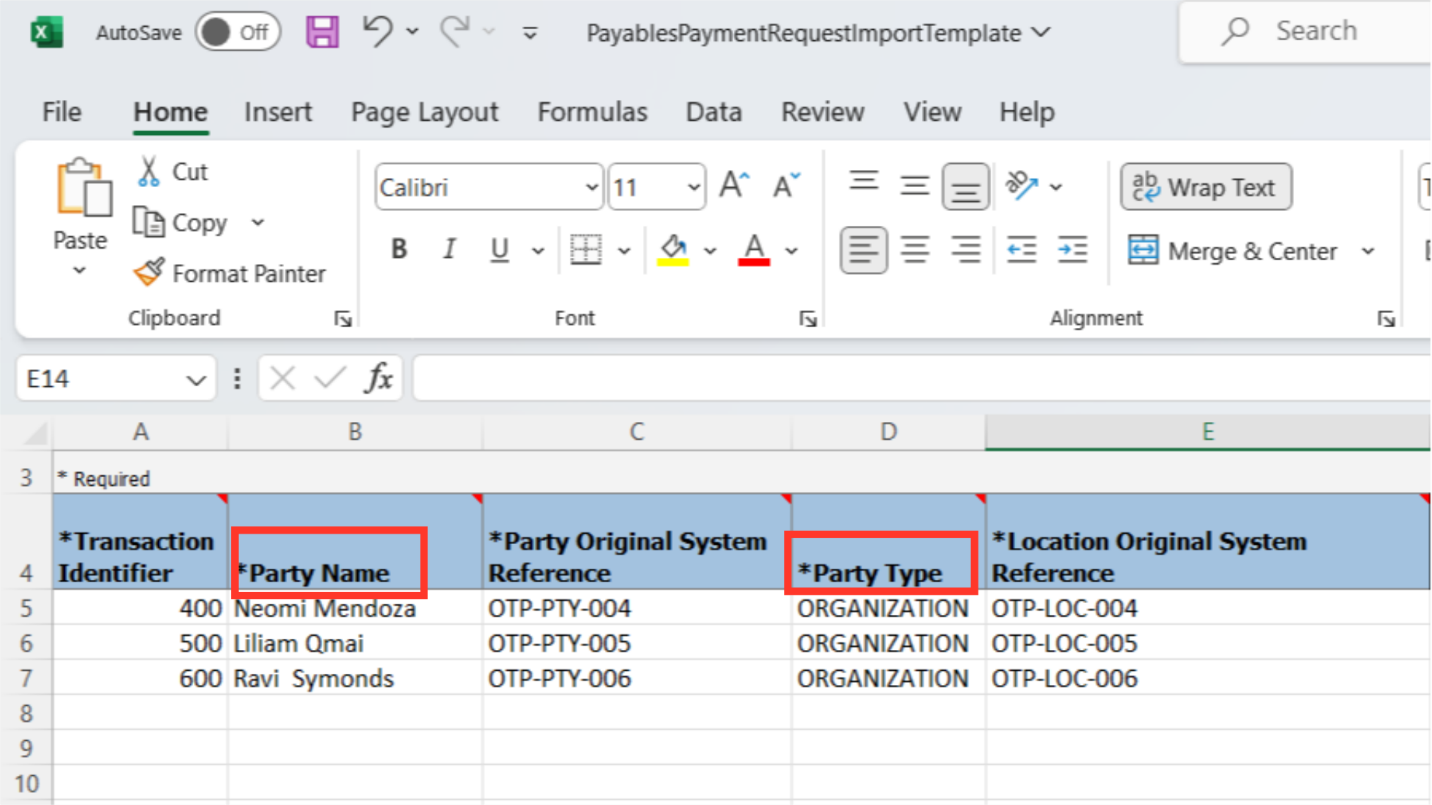
In the Party name column enter the name of the party to whom the payment is to be made, and then mention the type of party in the Party type column.
In the Party Original System Reference mention the Party Reference from the original system or external source. While in the Location Original System Reference mention the Original system reference for the party site address.
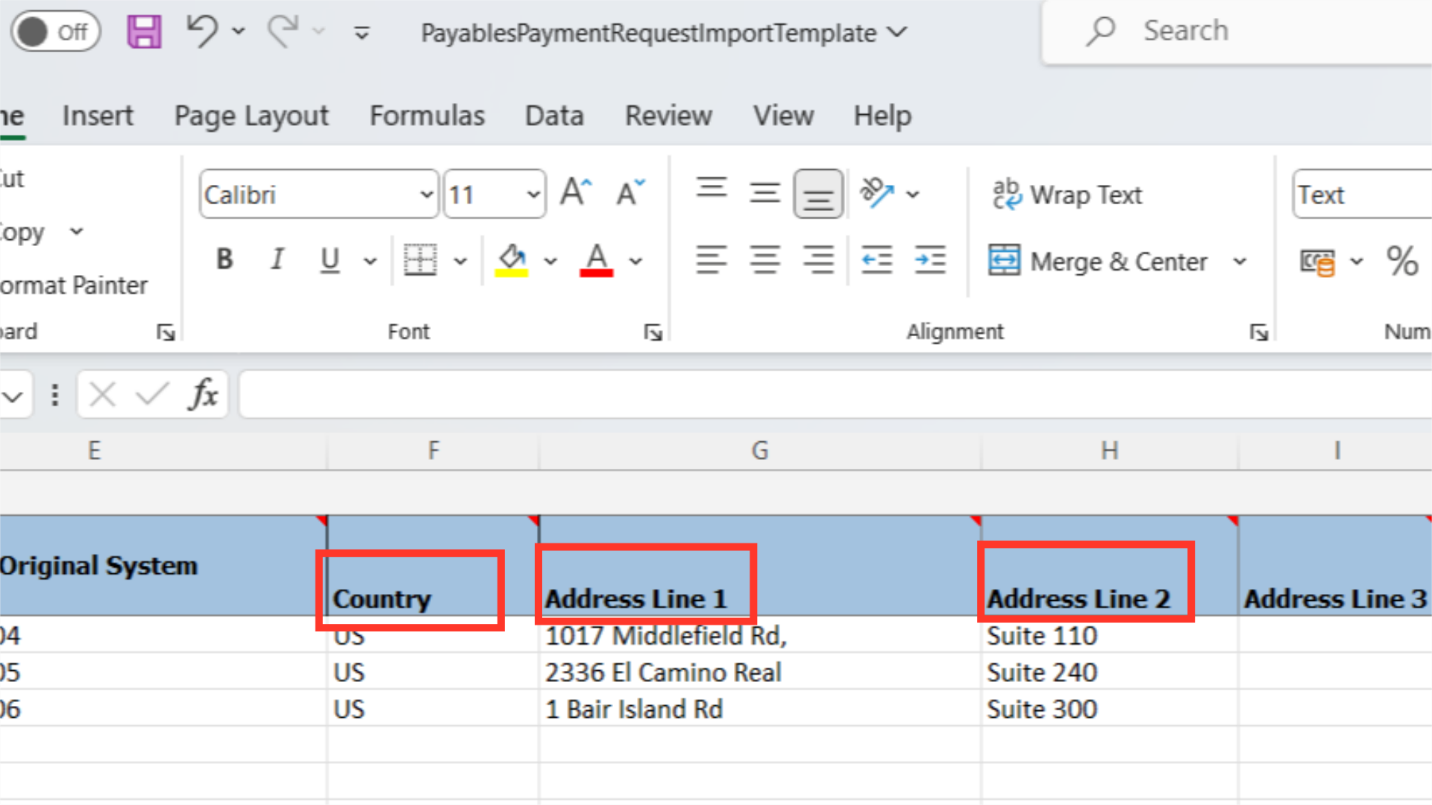
In the Country column enter the 2 digits code of the party’s country. Enter the address details of the party in Address line columns.
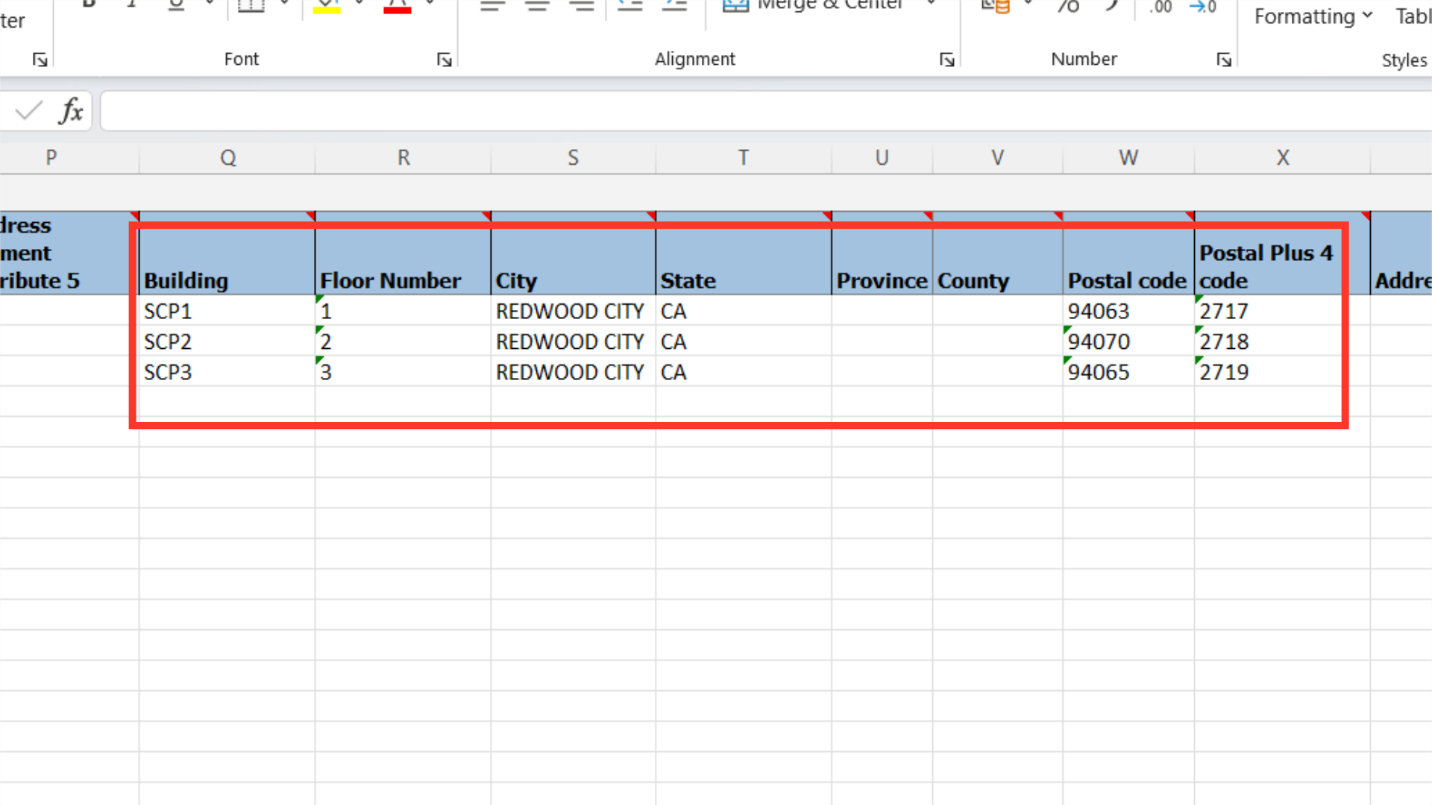
In the highlighted columns, mention the remaining party address details, such as the building, floor number, postal code, etc.
Enter the email address and Tax registration number of the payee in the respective columns.
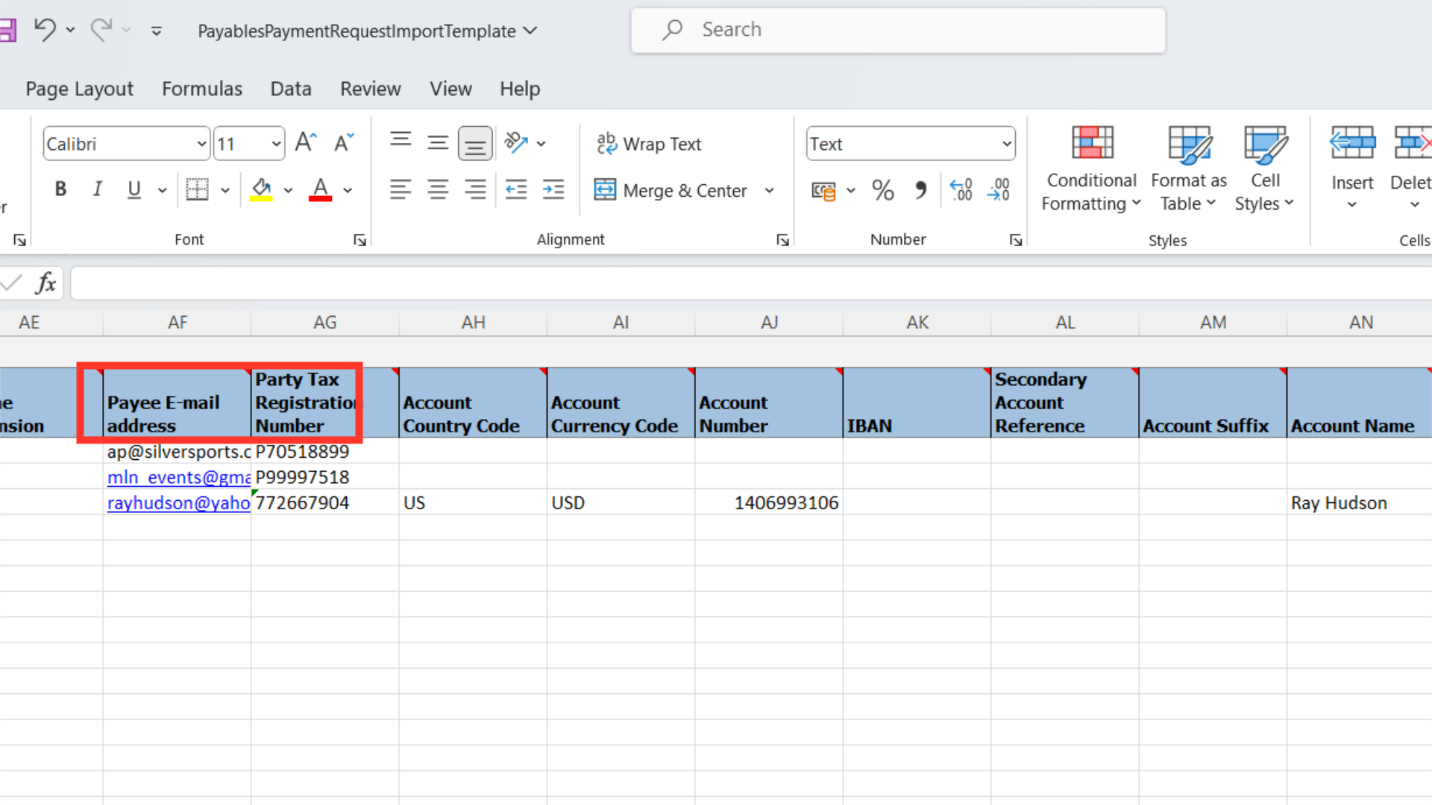
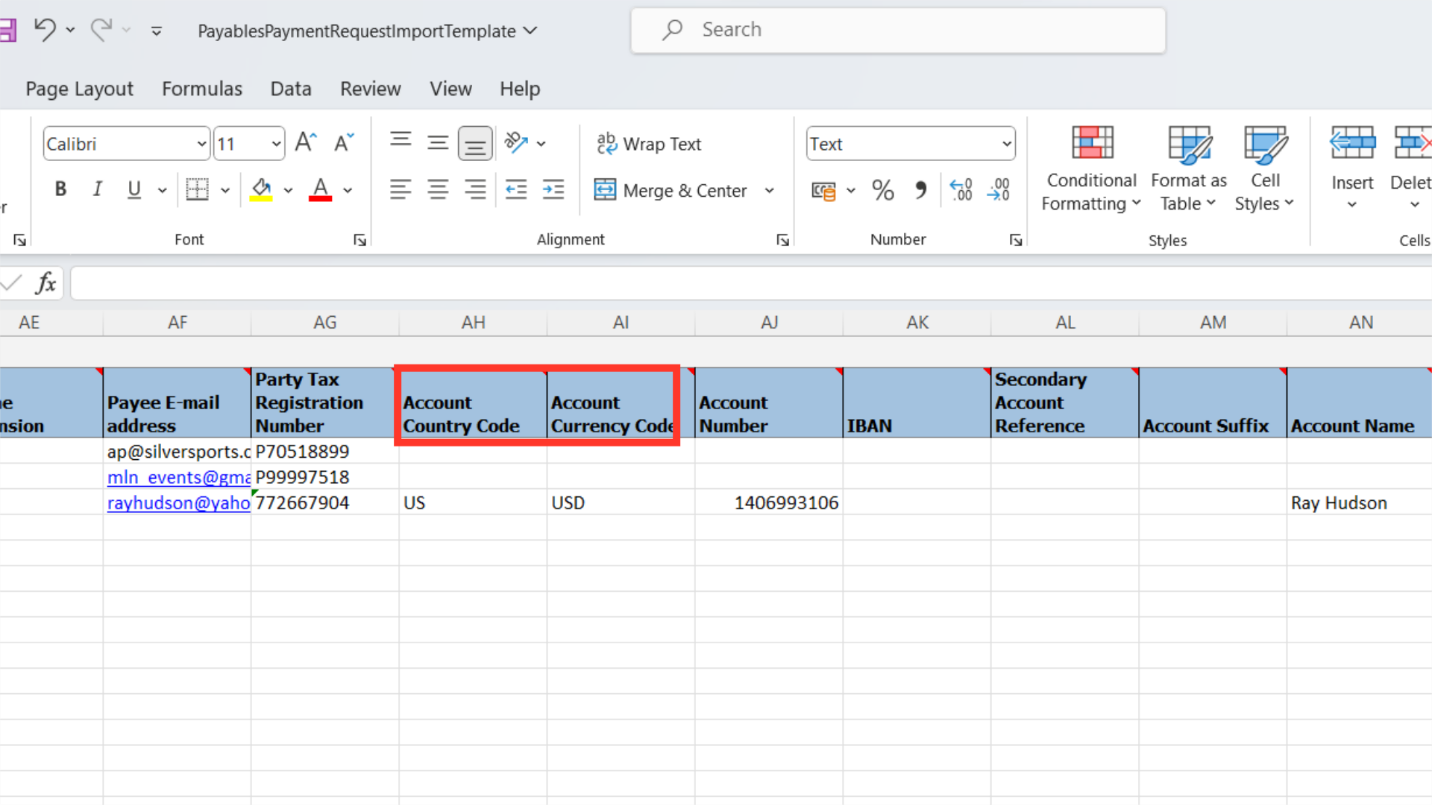
In the column labeled “Account country code,” mention the payee bank’s country code. Enter the currency code of the payee’s bank account in the column labeled “Account currency code.” In the appropriate columns, include other information about the payee’s bank account, such as the account number, IBAN, and Account name.
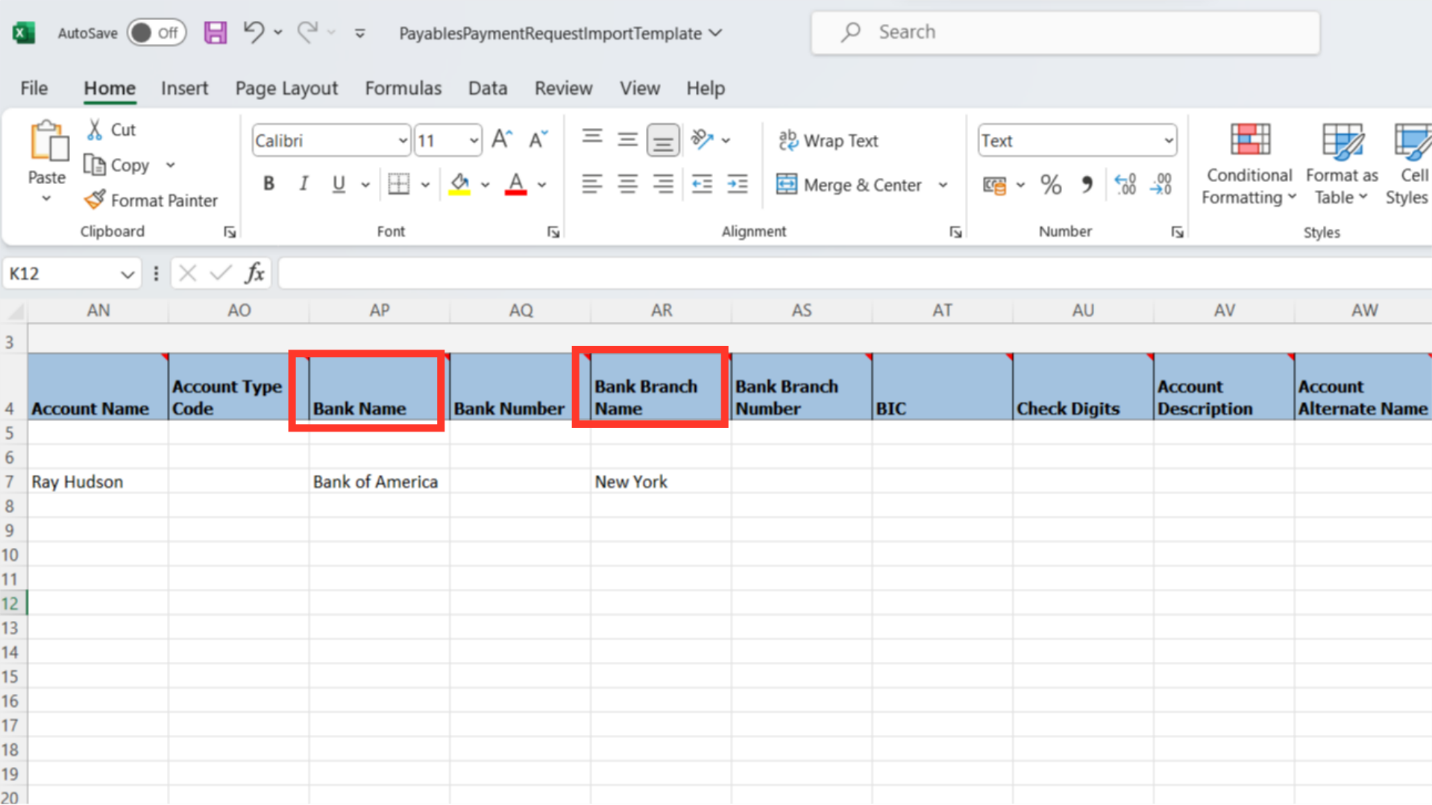
The Payee Bank name and Bank Branch Name should then be entered; these should already be defined in the system. Requests for payments will be denied if they are not defined.
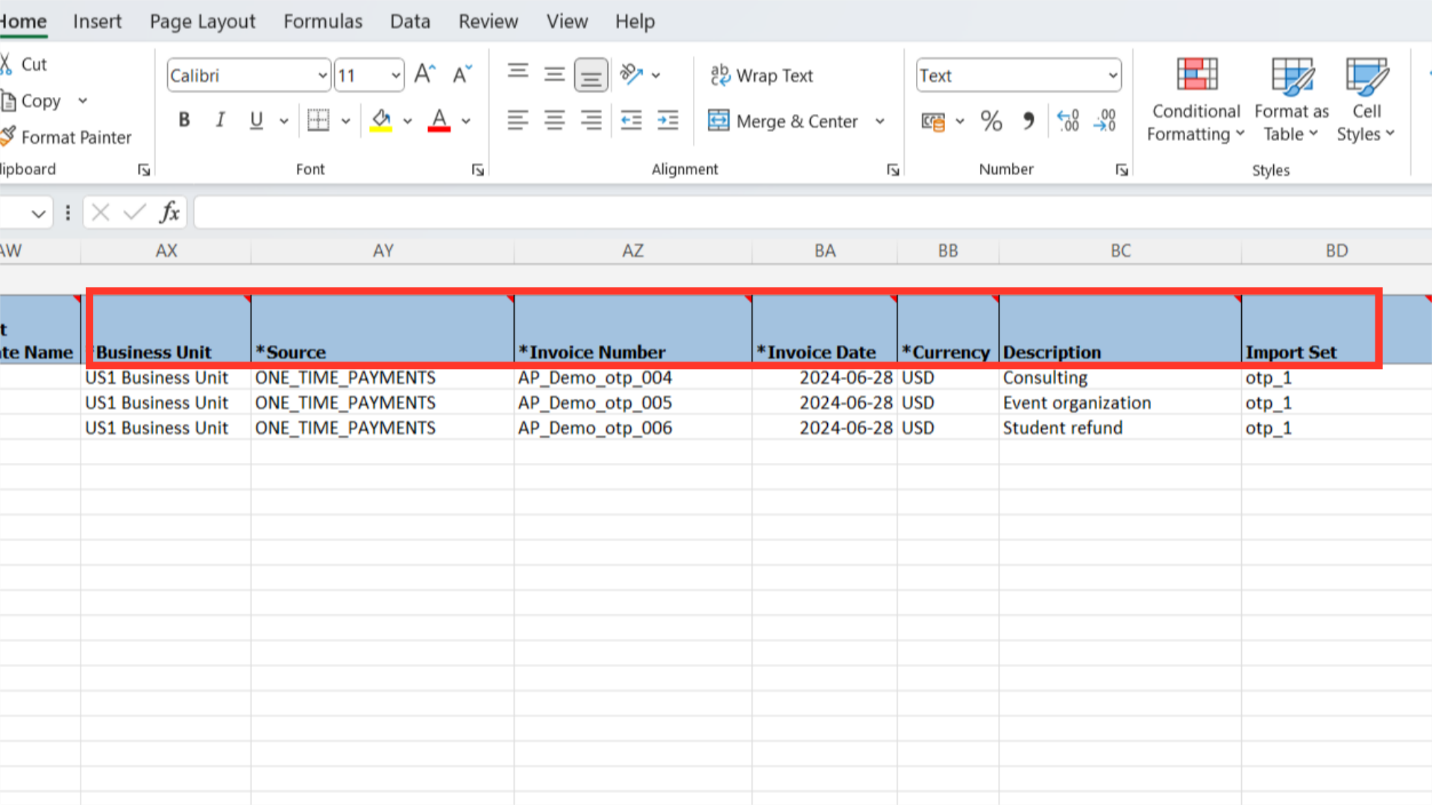
In each column, enter the information such as Business unit, Source, Invoice number, Invoice date, and Invoice currency. Additionally, fill in the description column with any more pertinent information. Invoices for a specific batch can be imported separately by using the Import set column.
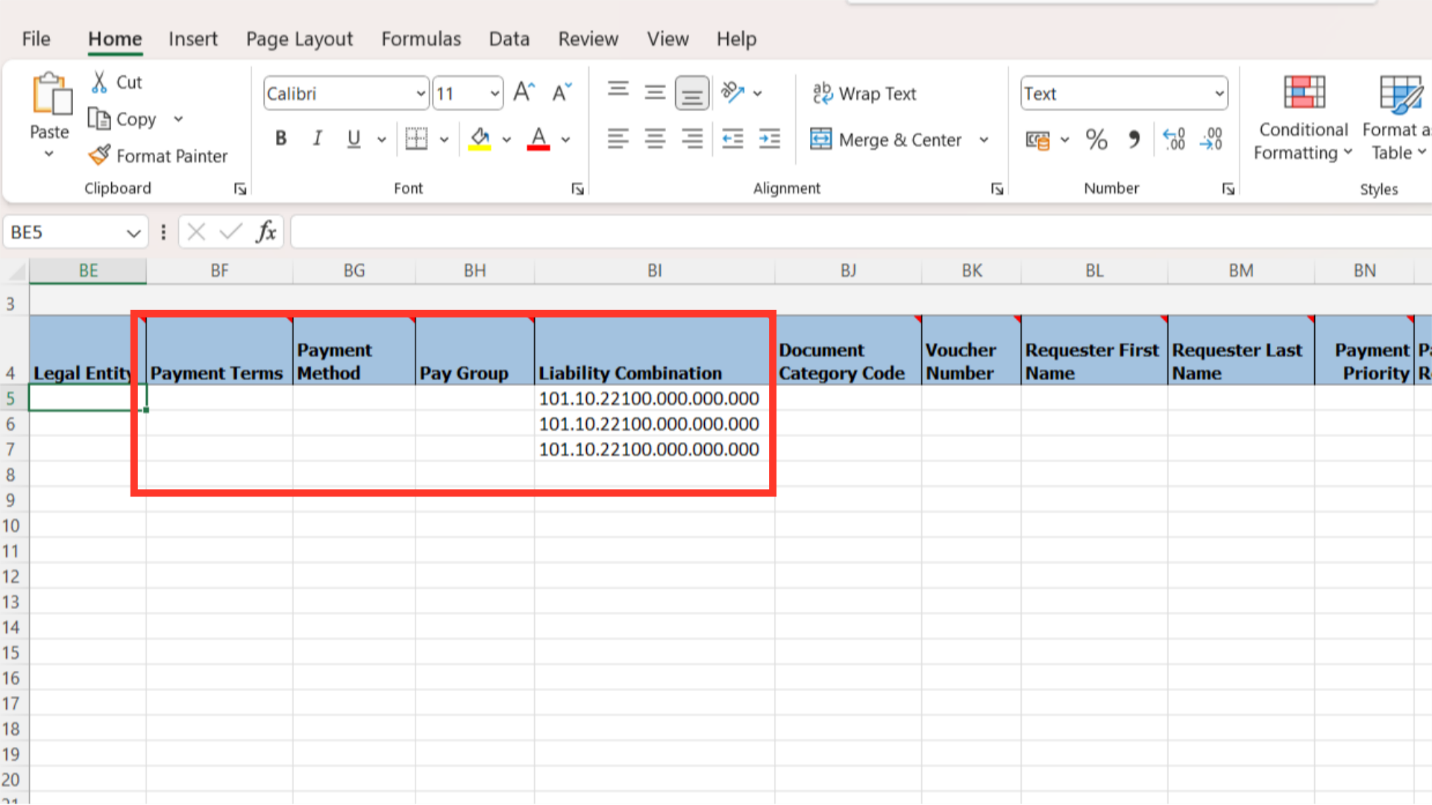
The columns such as Payment Terms, Payment method, Pay group, and Liability are optional, and would be defaulted from the setup if left blank.
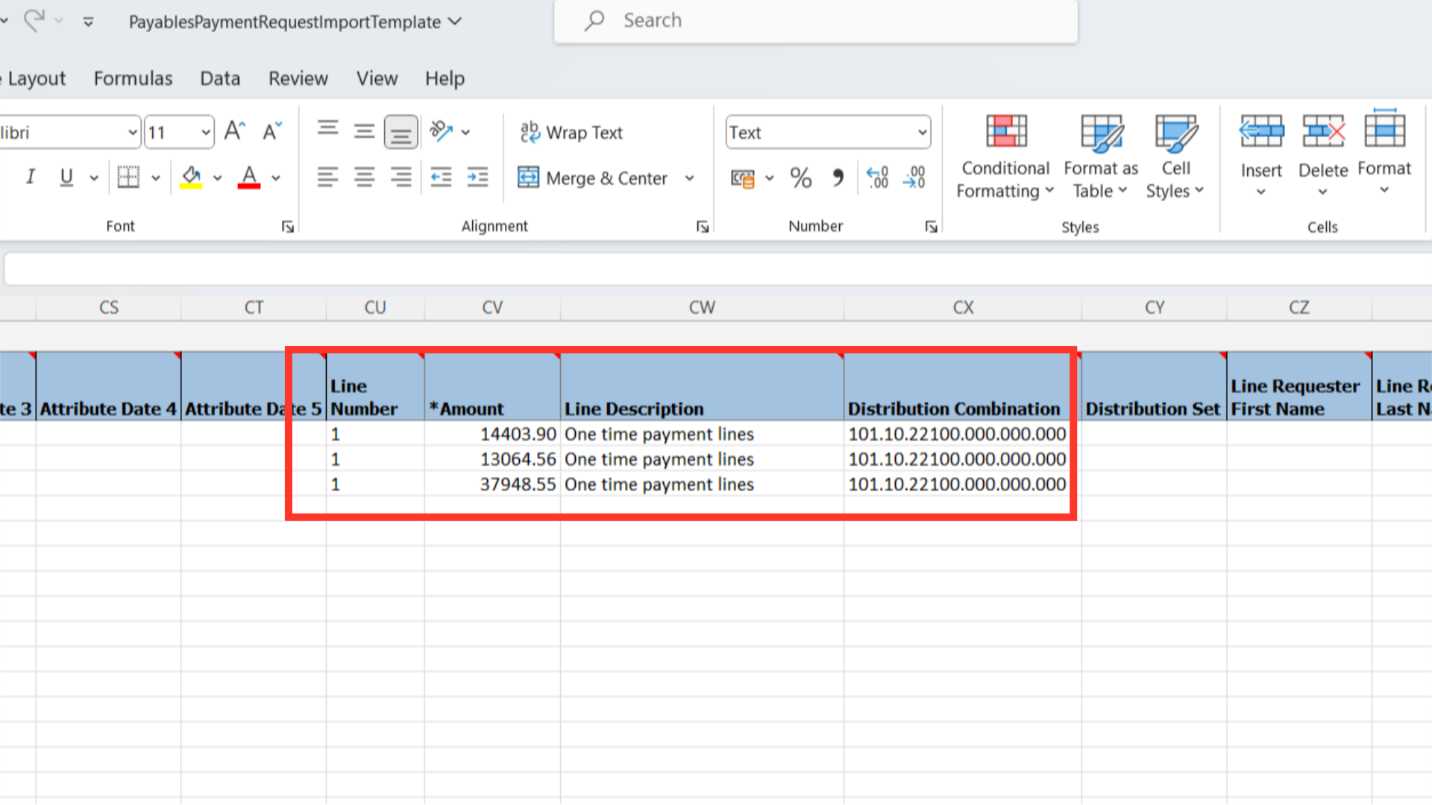
In the corresponding fields, enter the line details, including the line number, line amount, and description. However, if the Distribution combination column is left empty, the setup will take the default from setup.
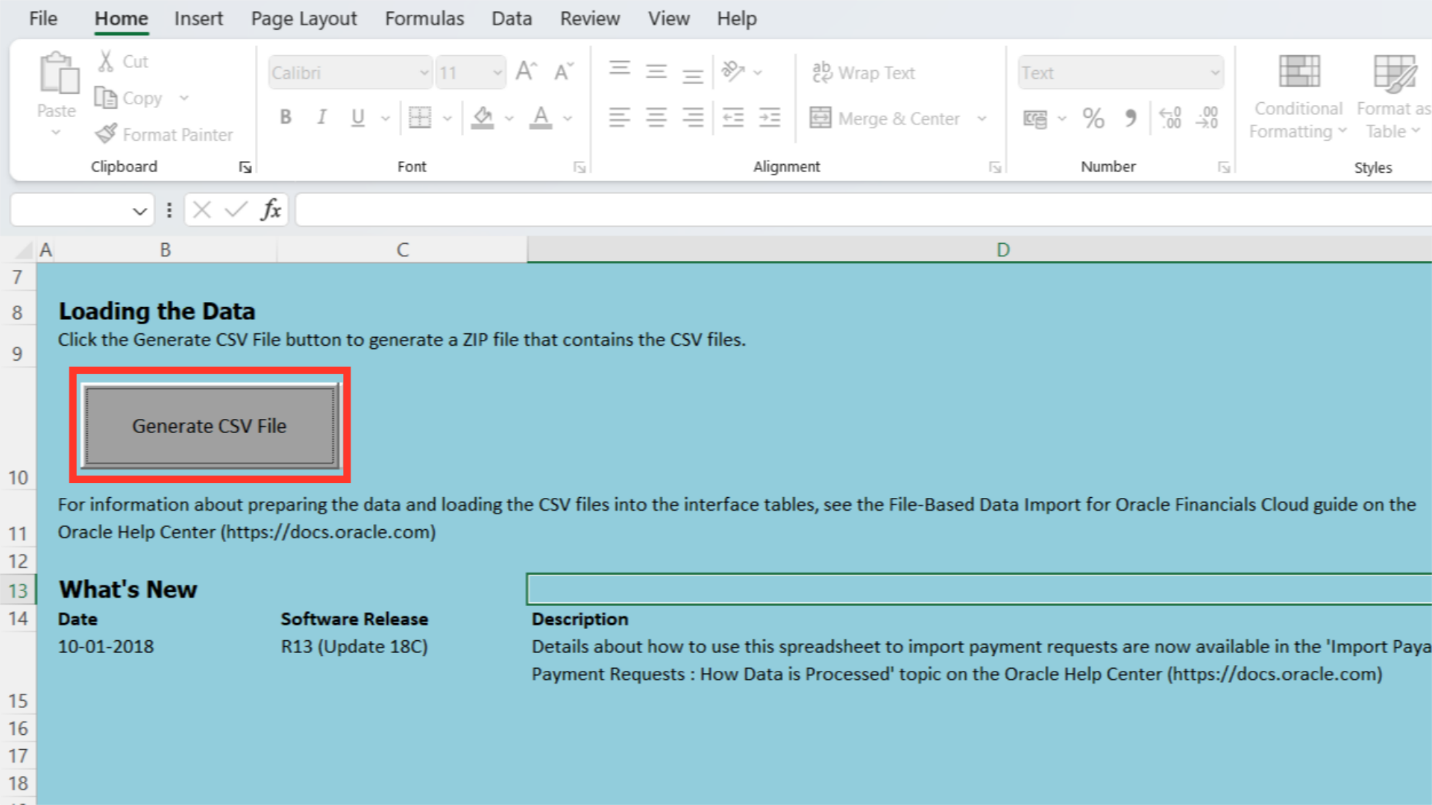
To convert the file into the csv and zip formats, which are compatible with the import of FBDI files, click the Generate CSV file button.
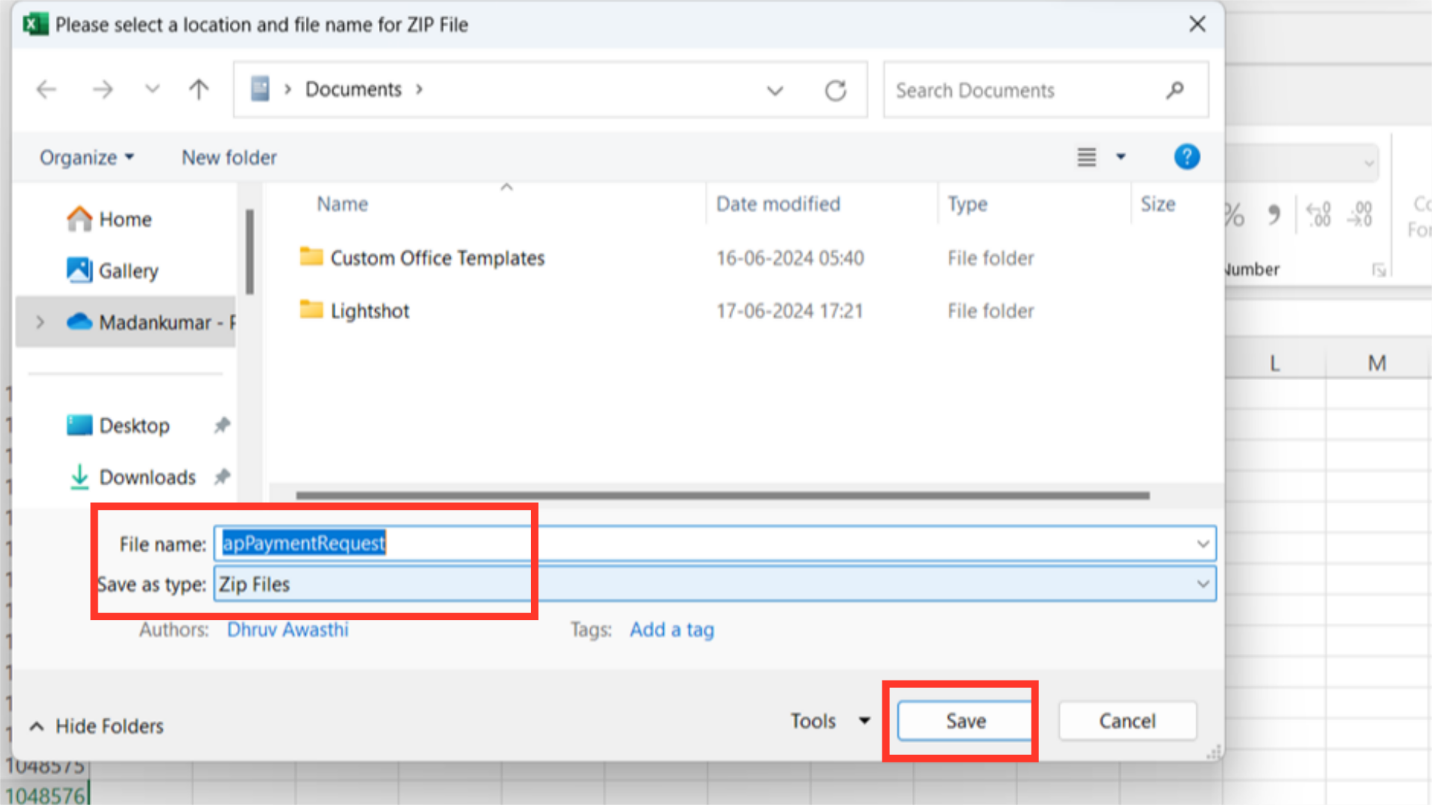
Enter the file name, with zip being the default file type. Choose the folder where these files should be saved so that you can import them into the system.
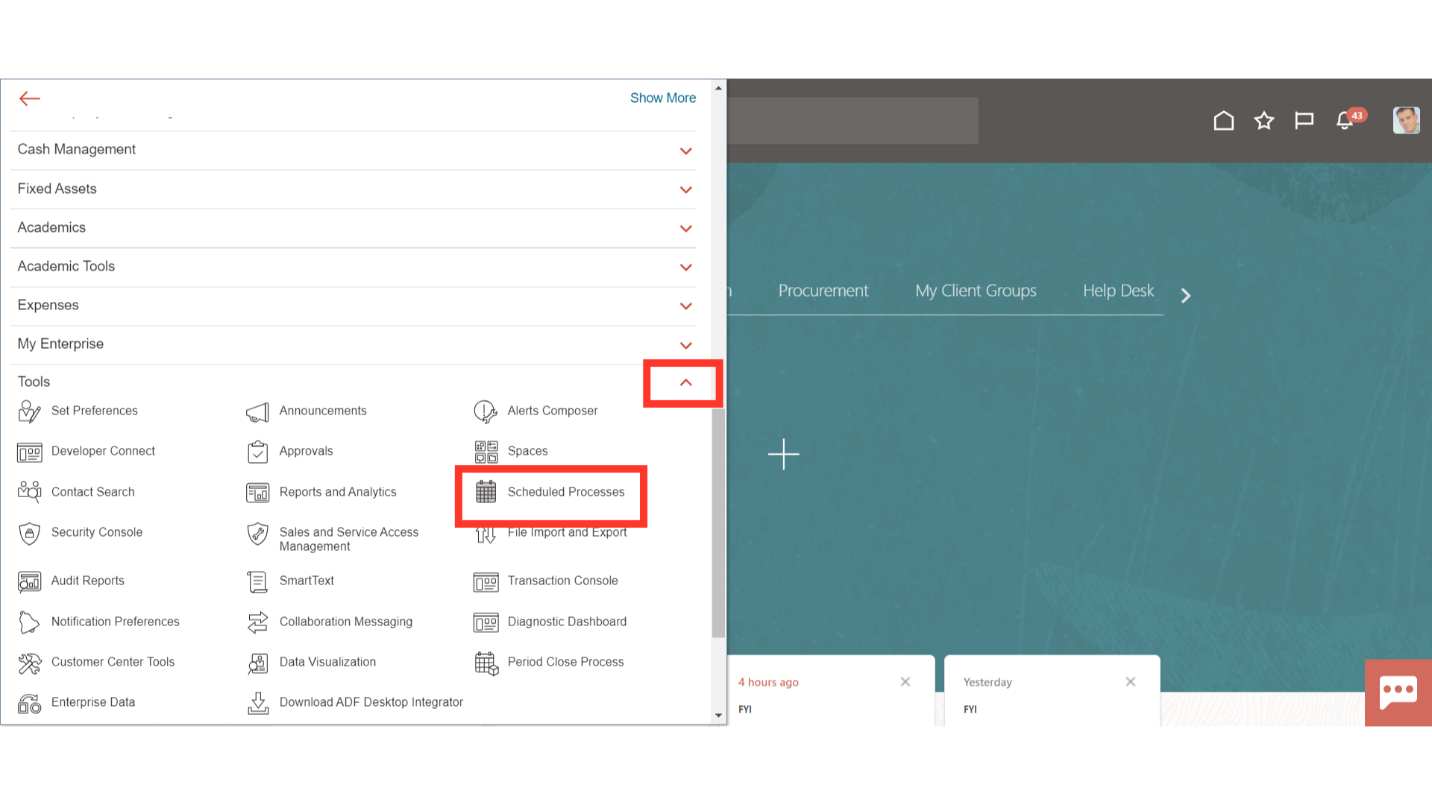
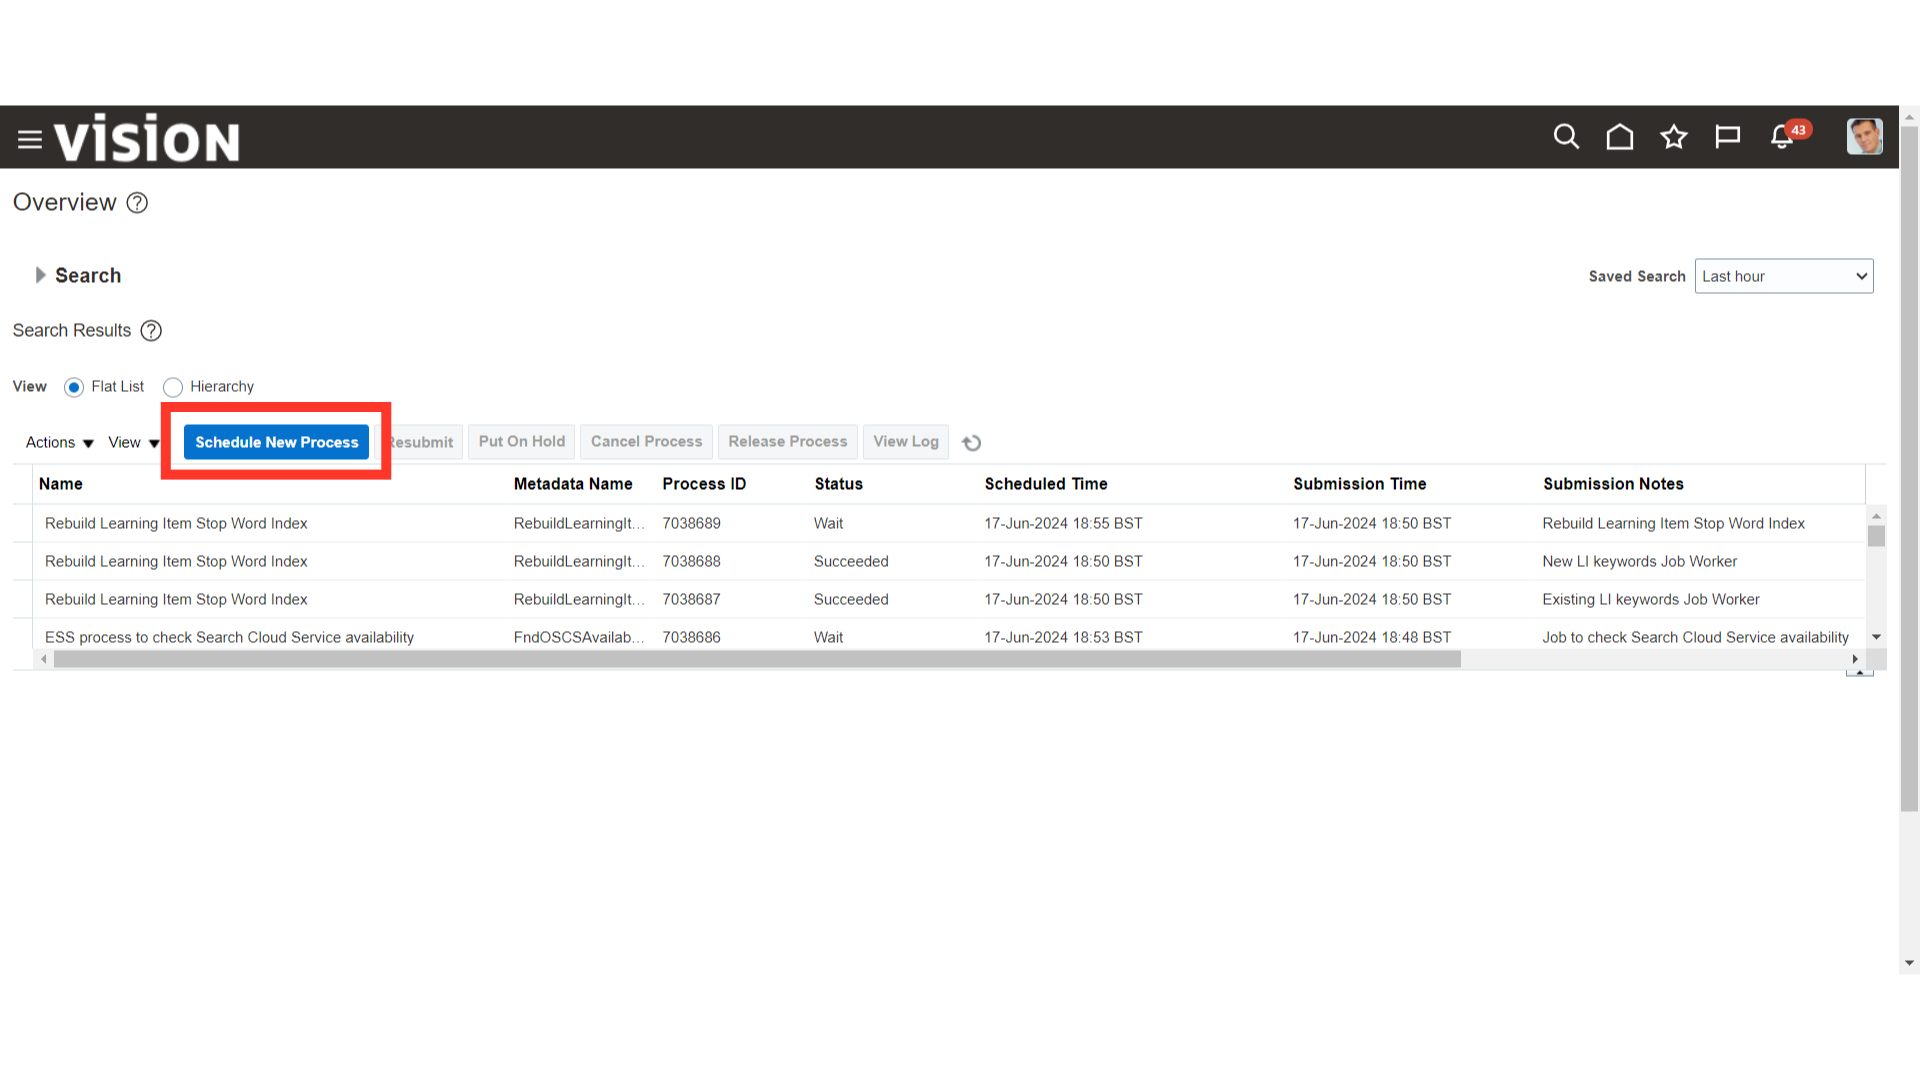
To import the files select the Scheduled Processes submenu by expanding the Tools menu from the navigator on your Oracle Fusion home page.
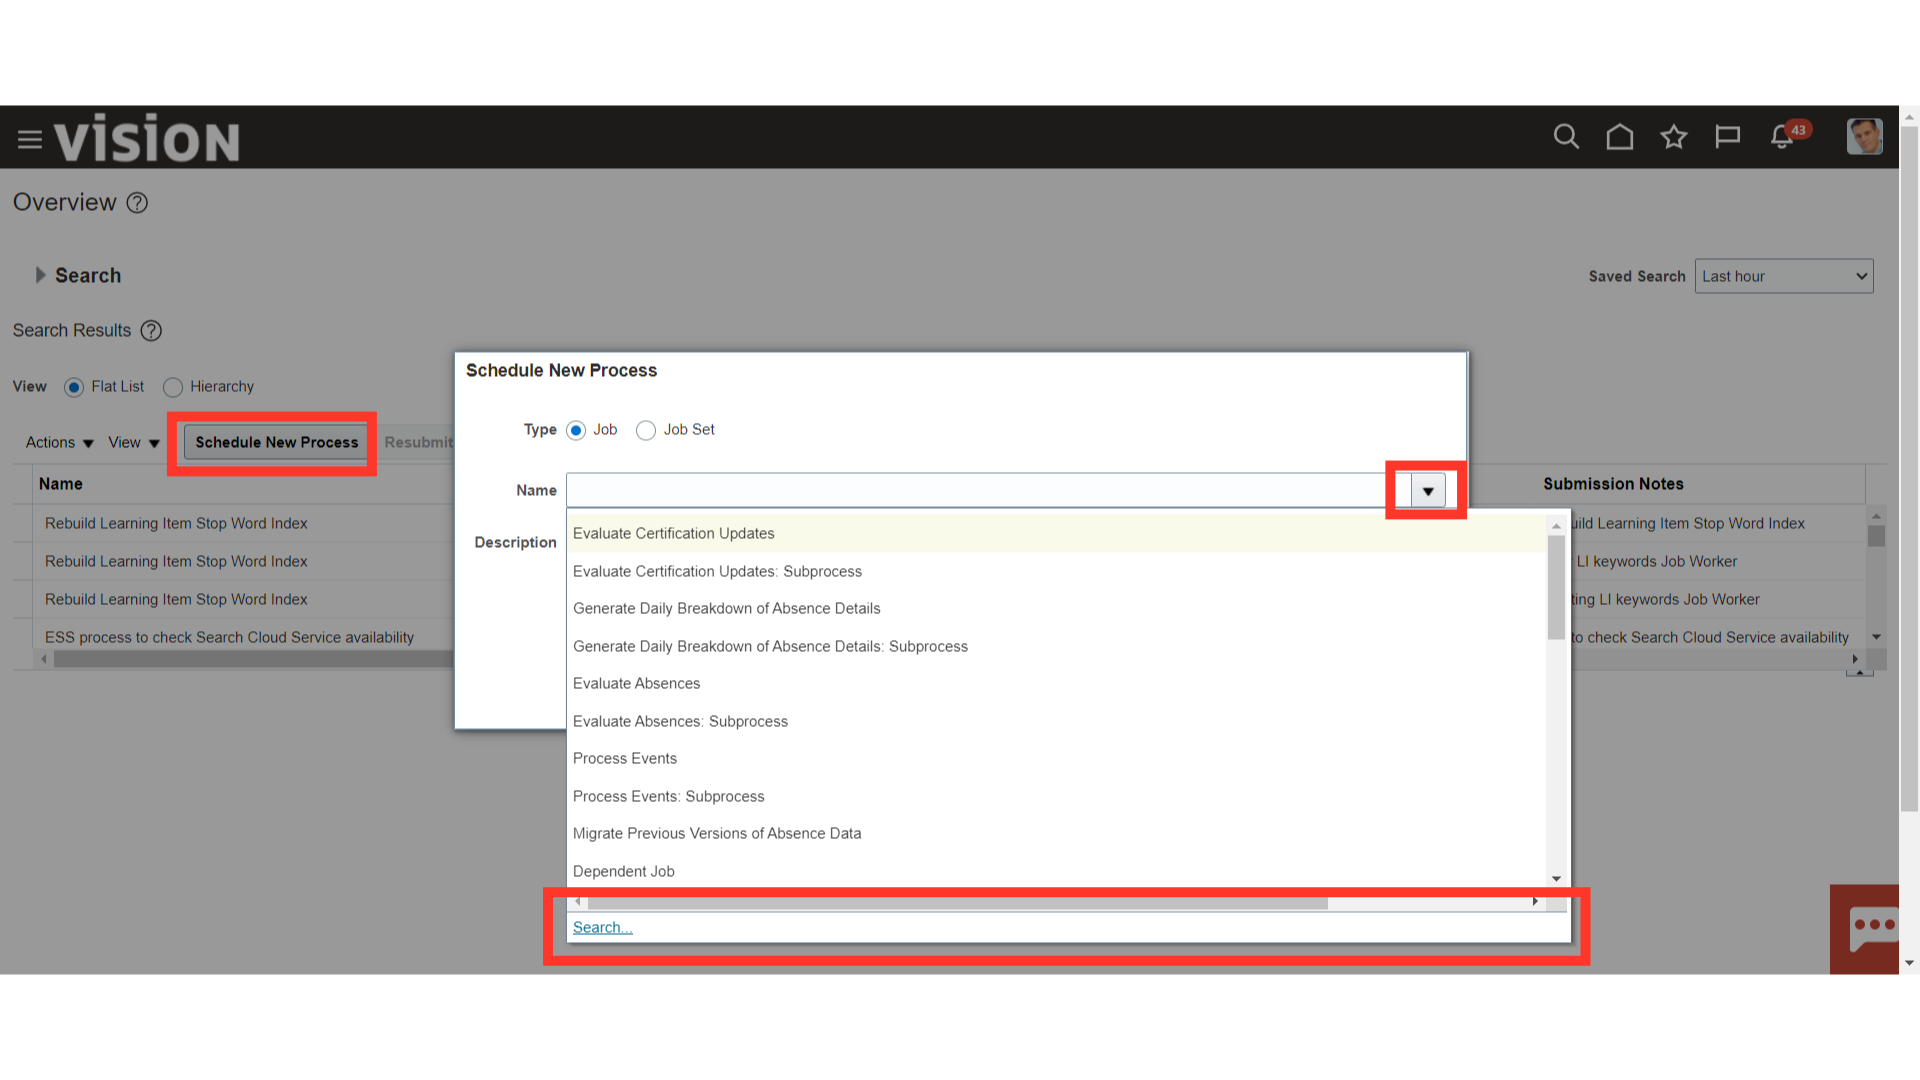
To launch a new process, click the Schedule new process button.
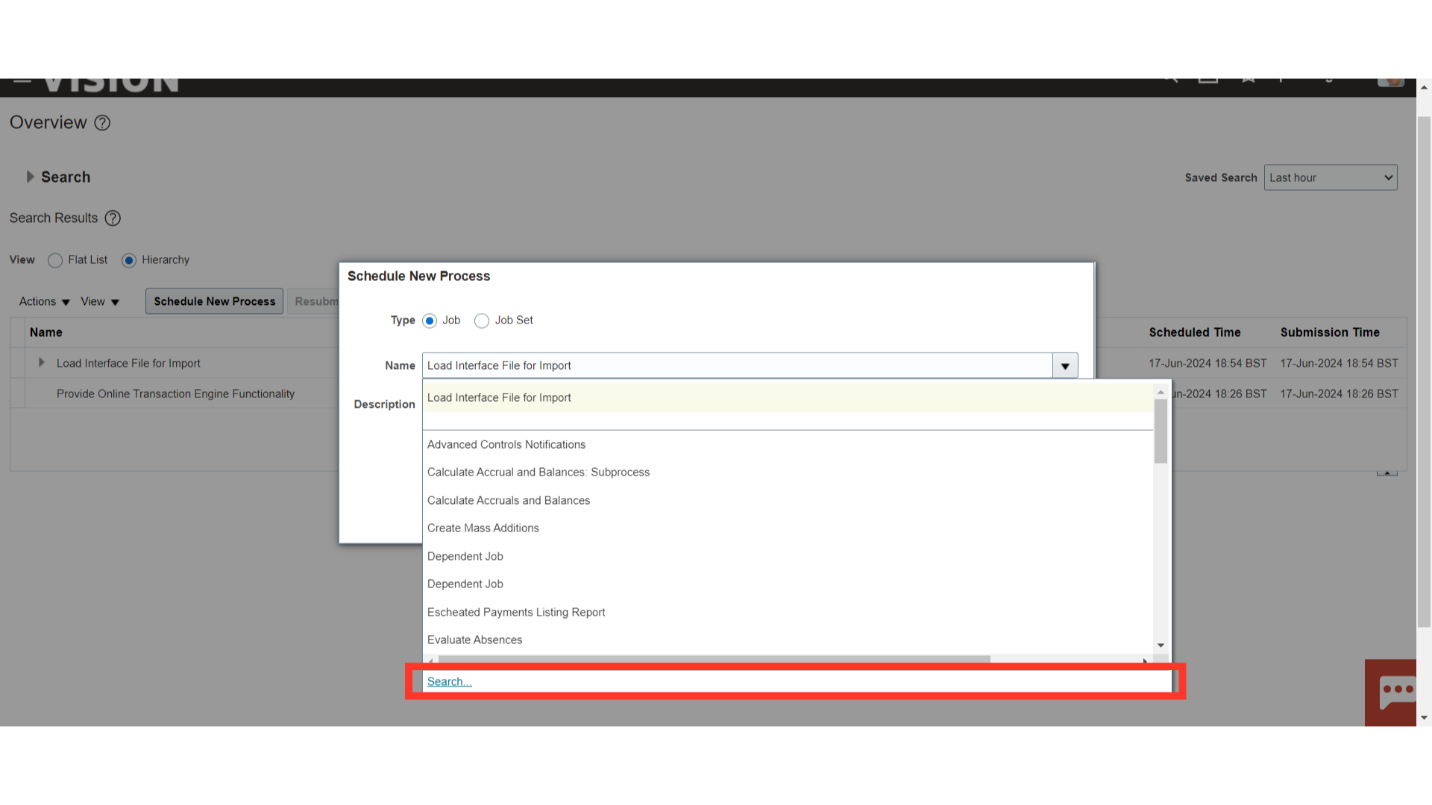
After selecting the Drop-down icon, click the search hyperlink to find the process name.
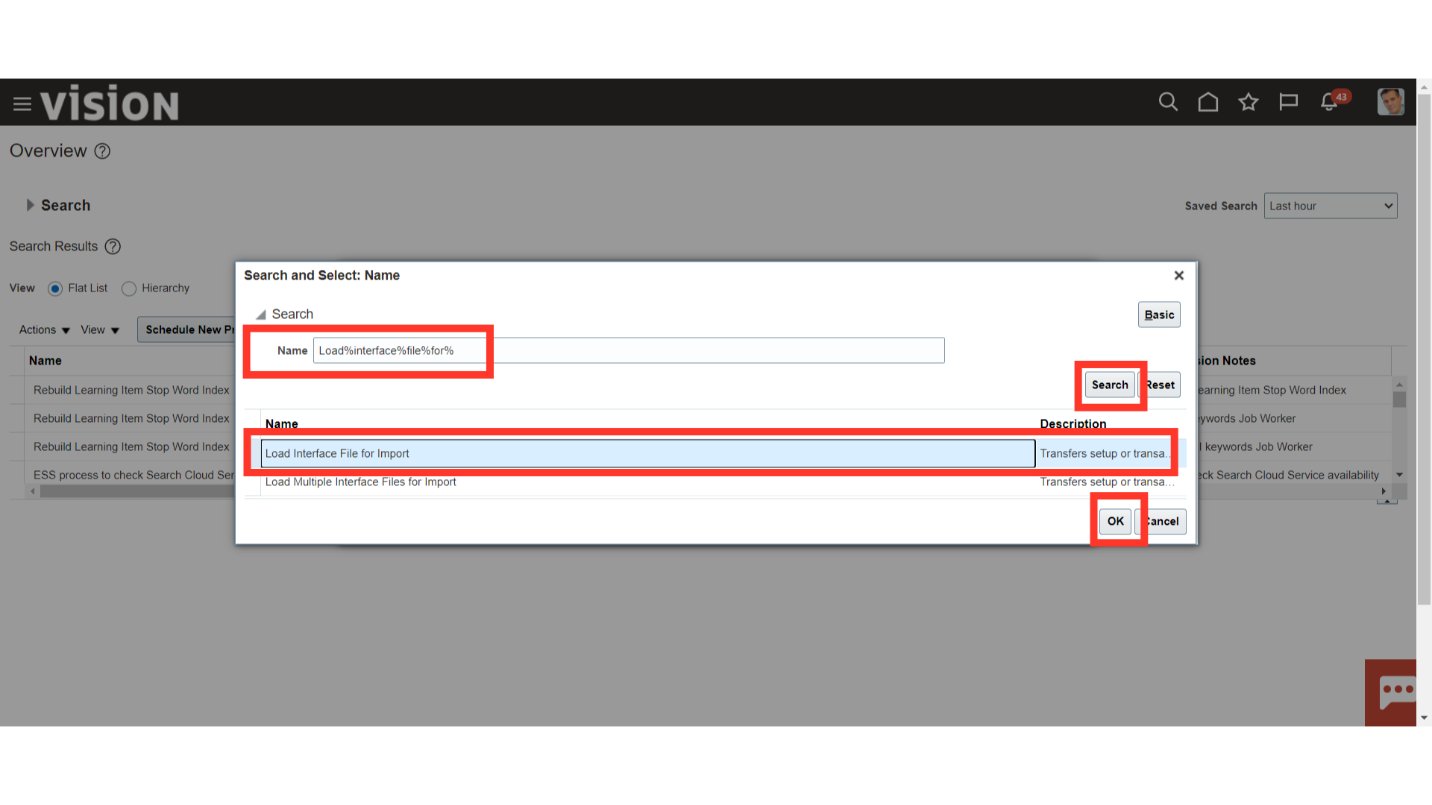
After entering the process name as Load Interface file for Import click on the Search button to search the process name. Select the Load Interface file for import process name, and then click on OK button to continue.
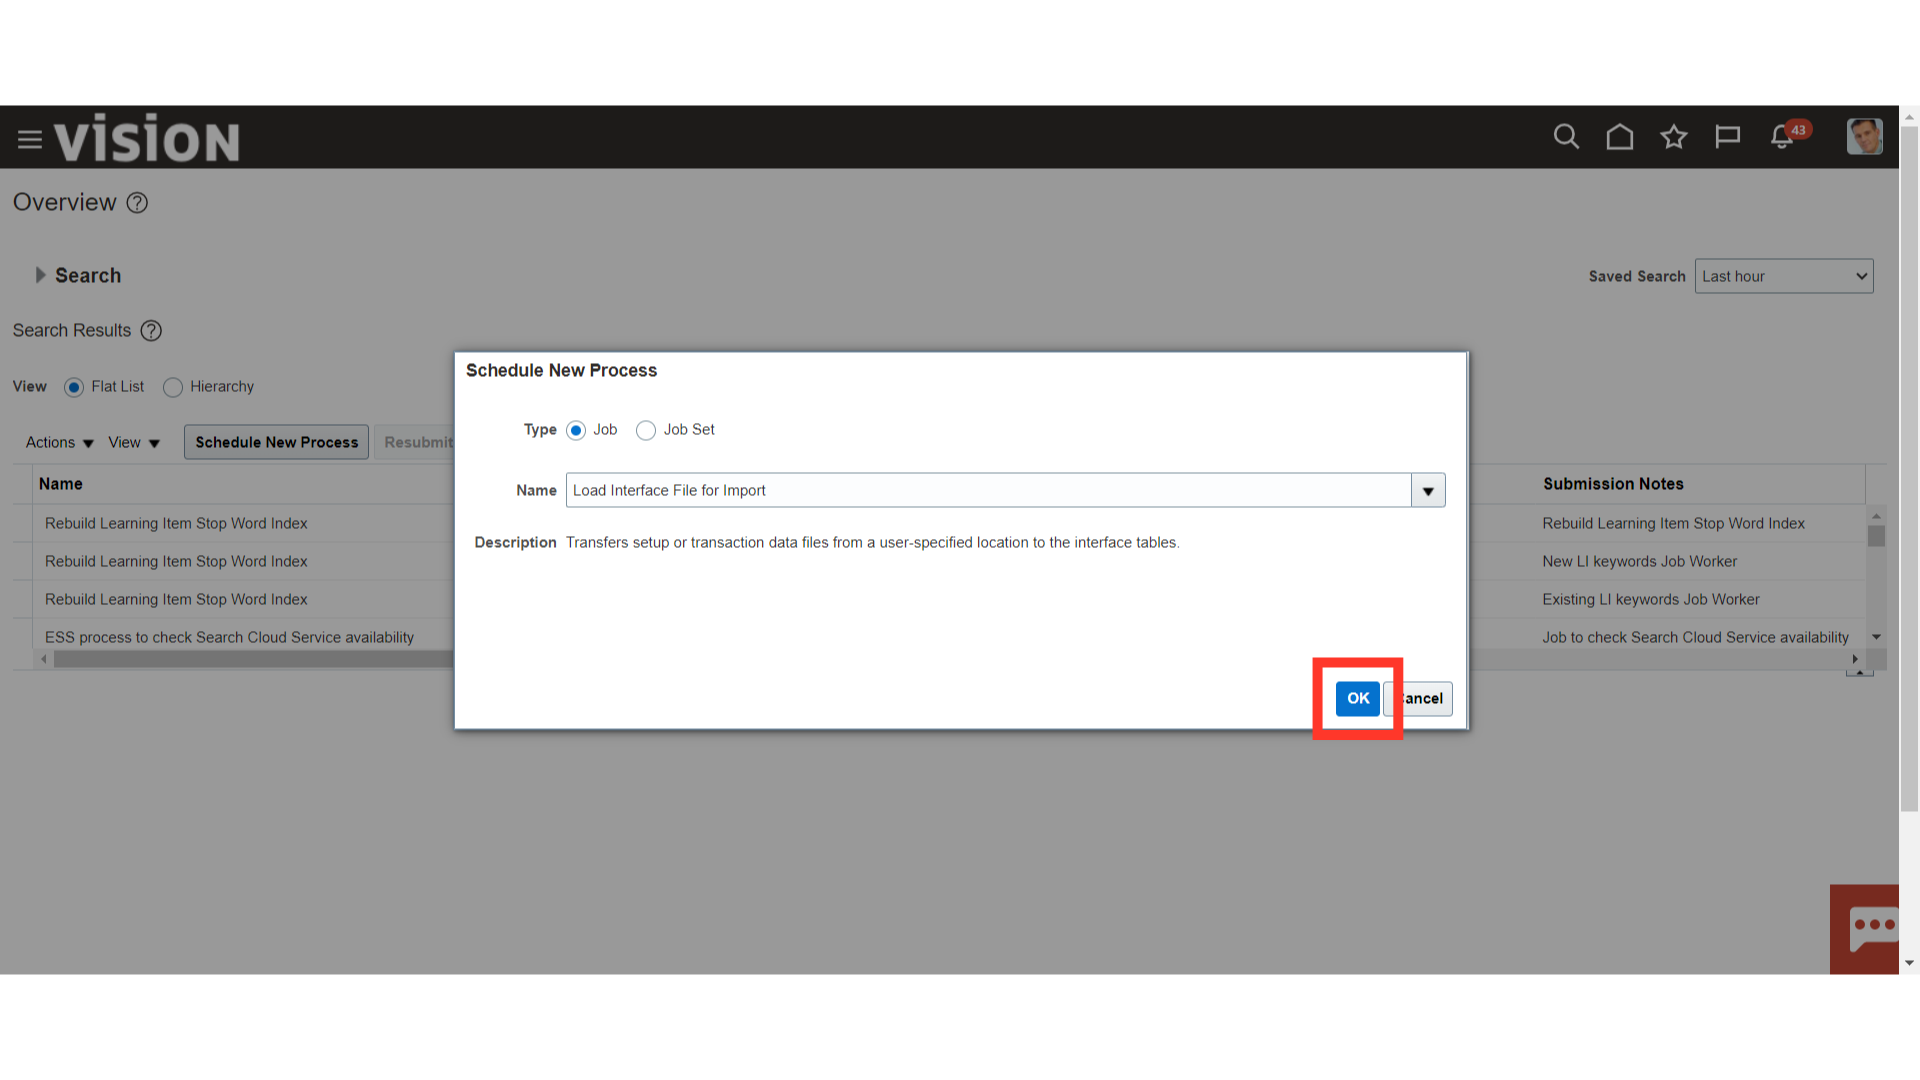
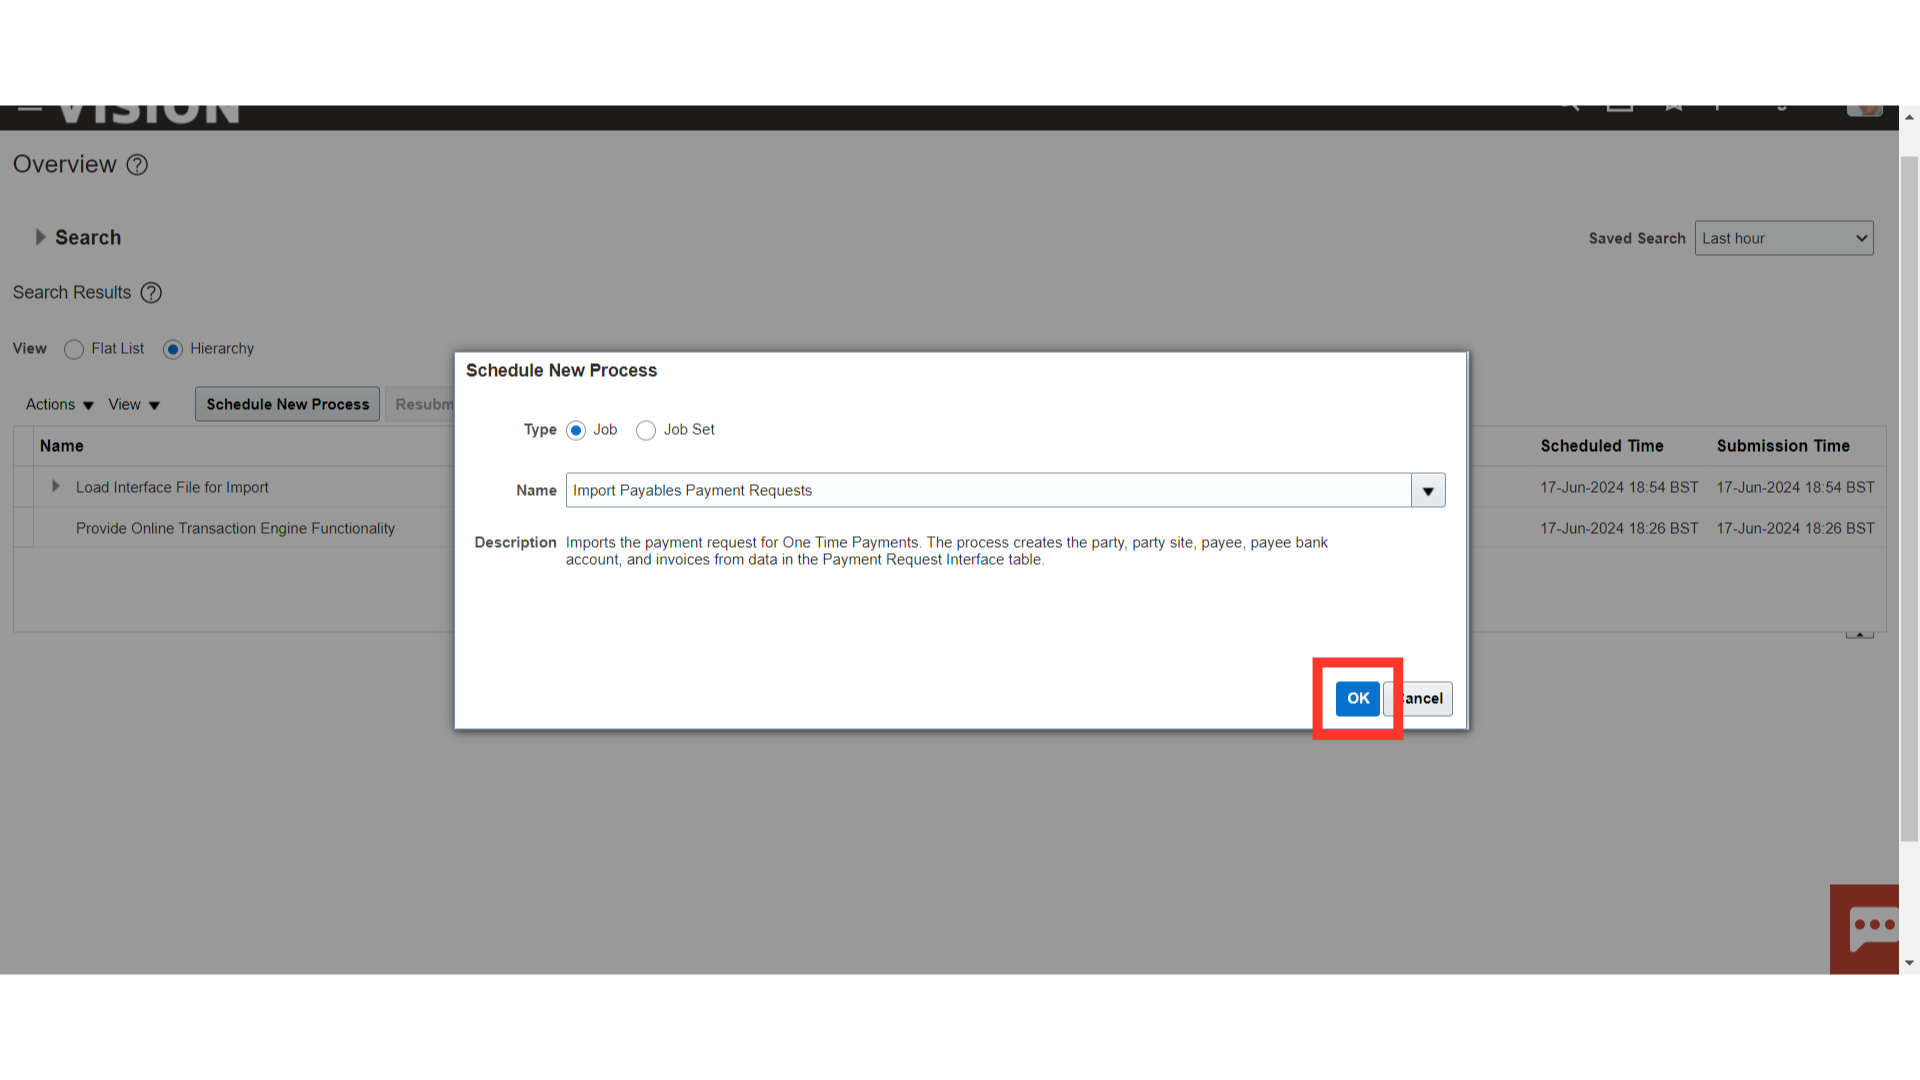
Again, Click on OK to run the Load Interface File for Import process.
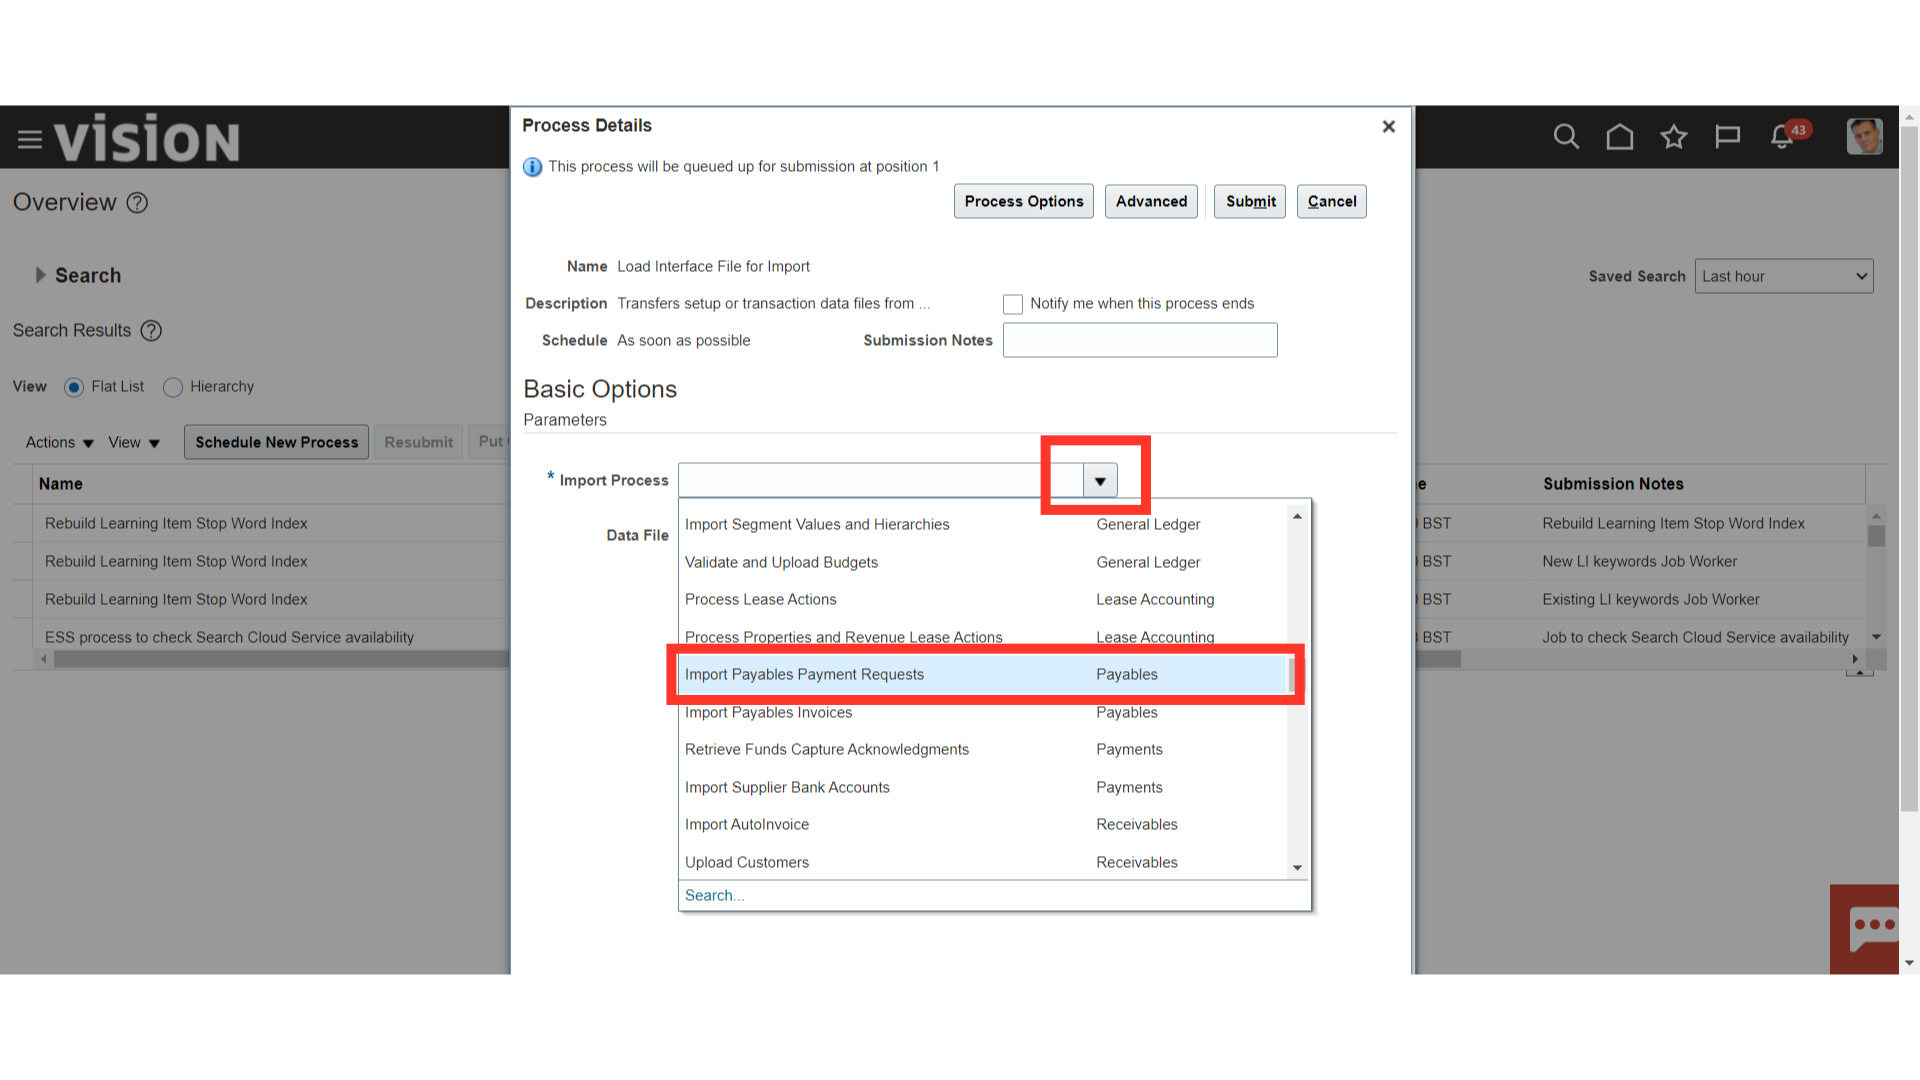
Select the Import Payables Payment requests process from the drop-down for importing the payment requests type invoices.
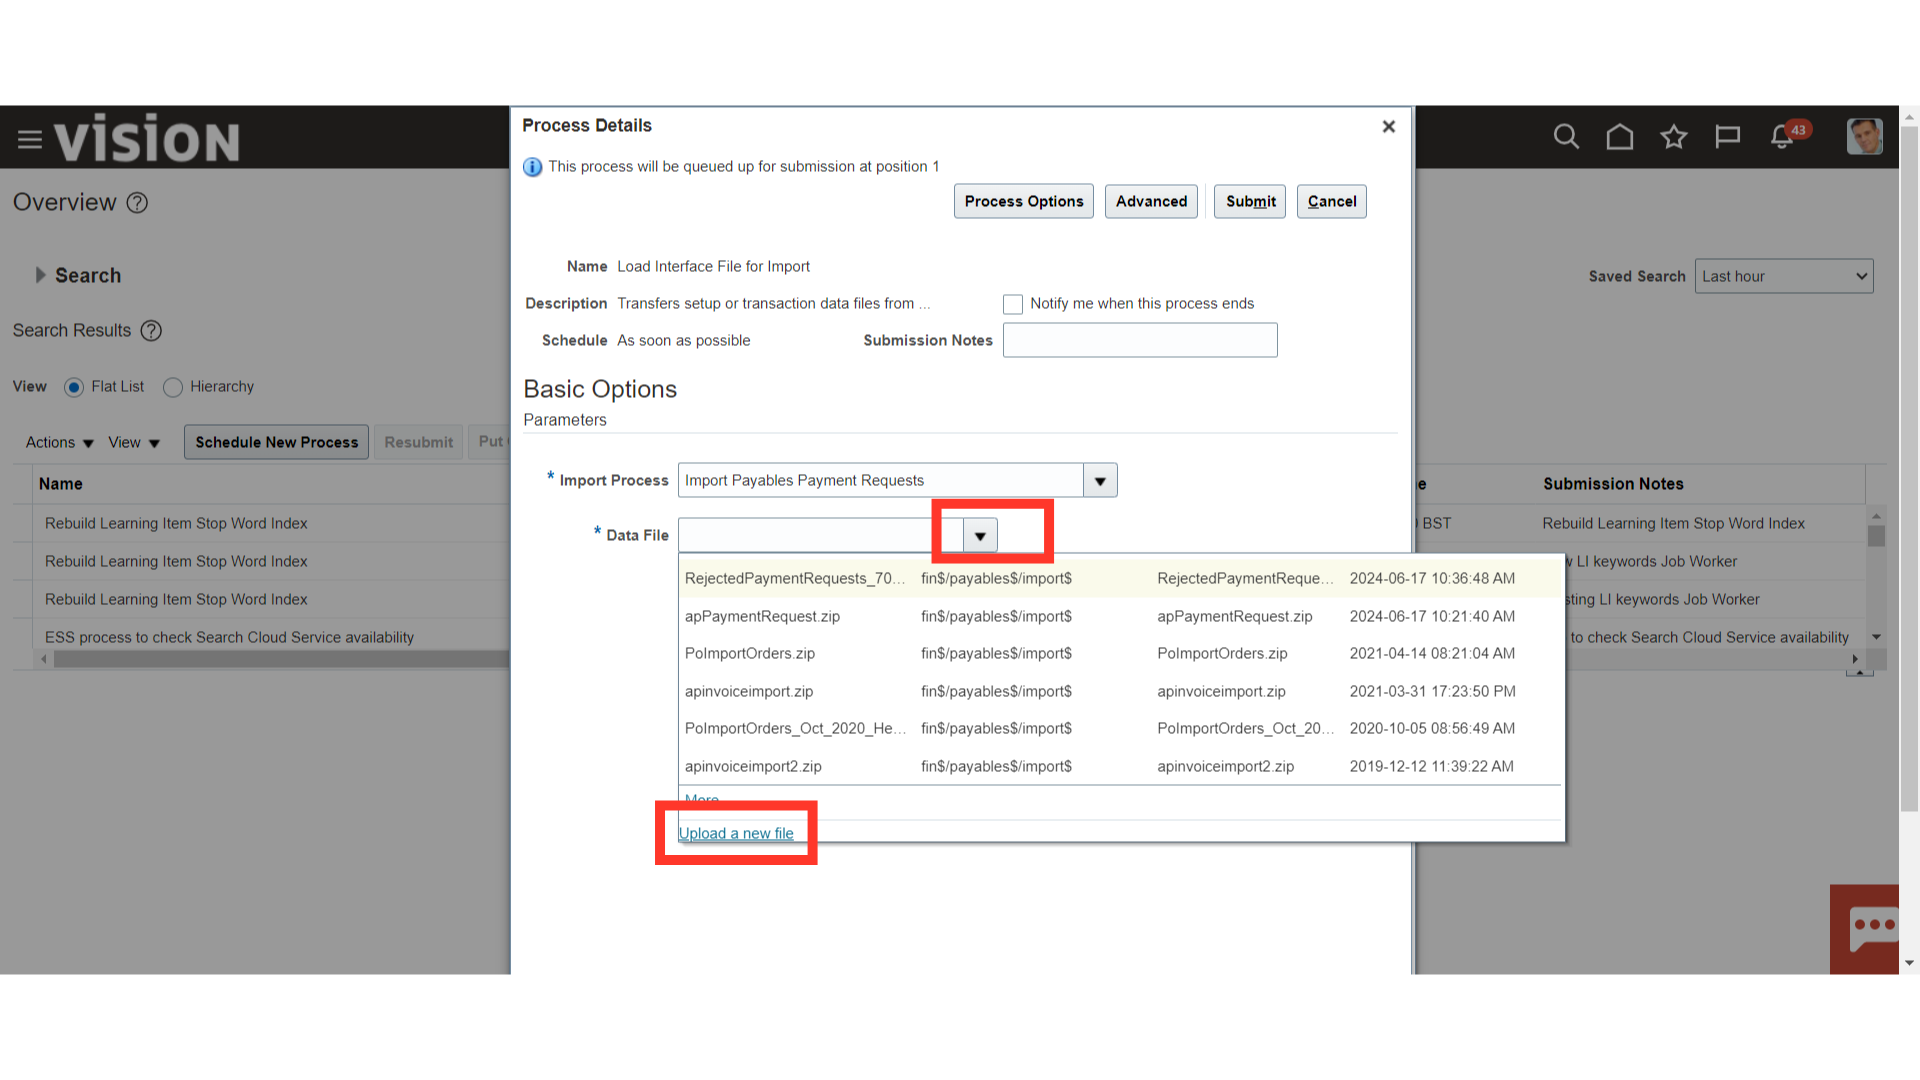
To upload the zip file saved on your local desktop, click on Upload a new File hyperlink.
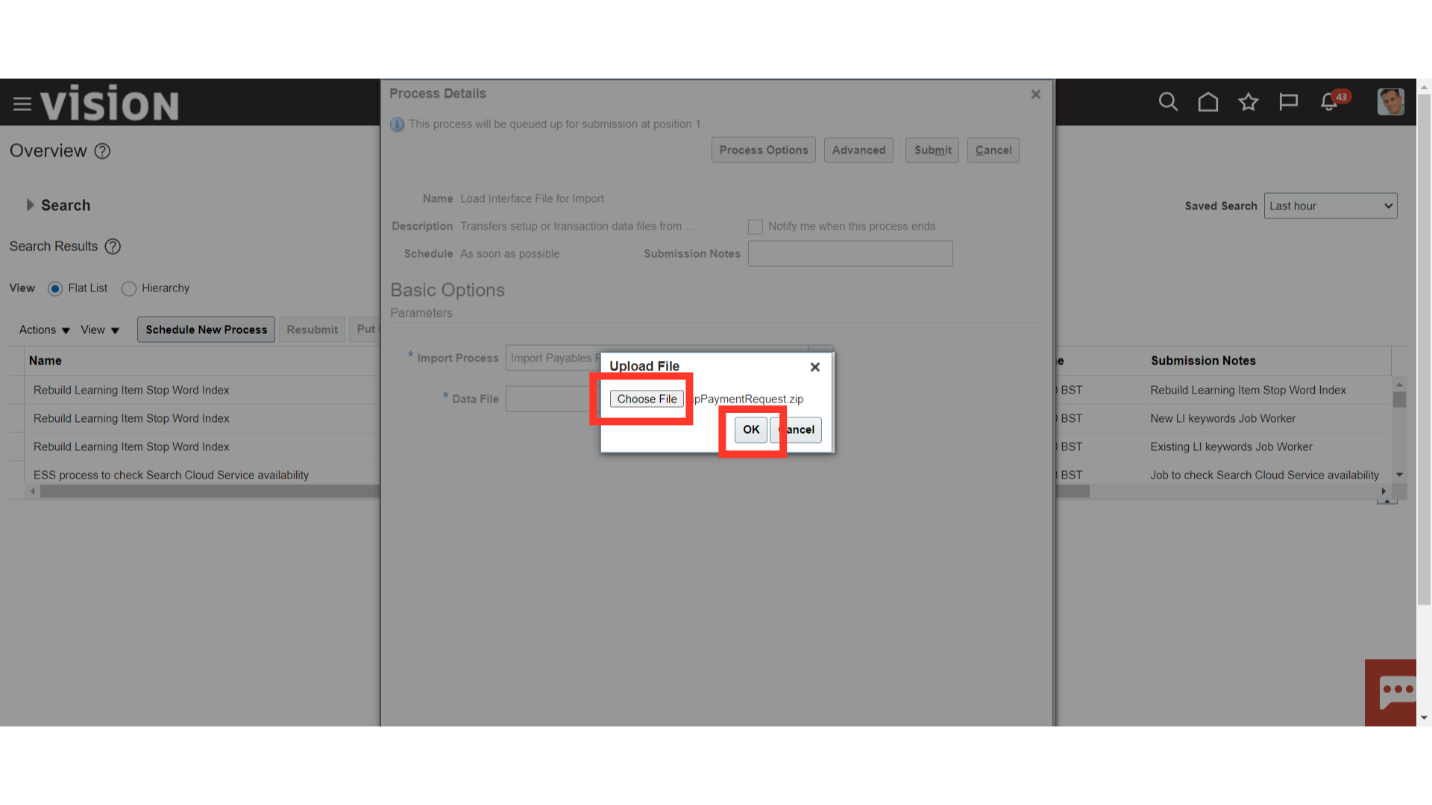
Click on the Choose file button to select the file from your local desktop , and then click on the OK button to continue.
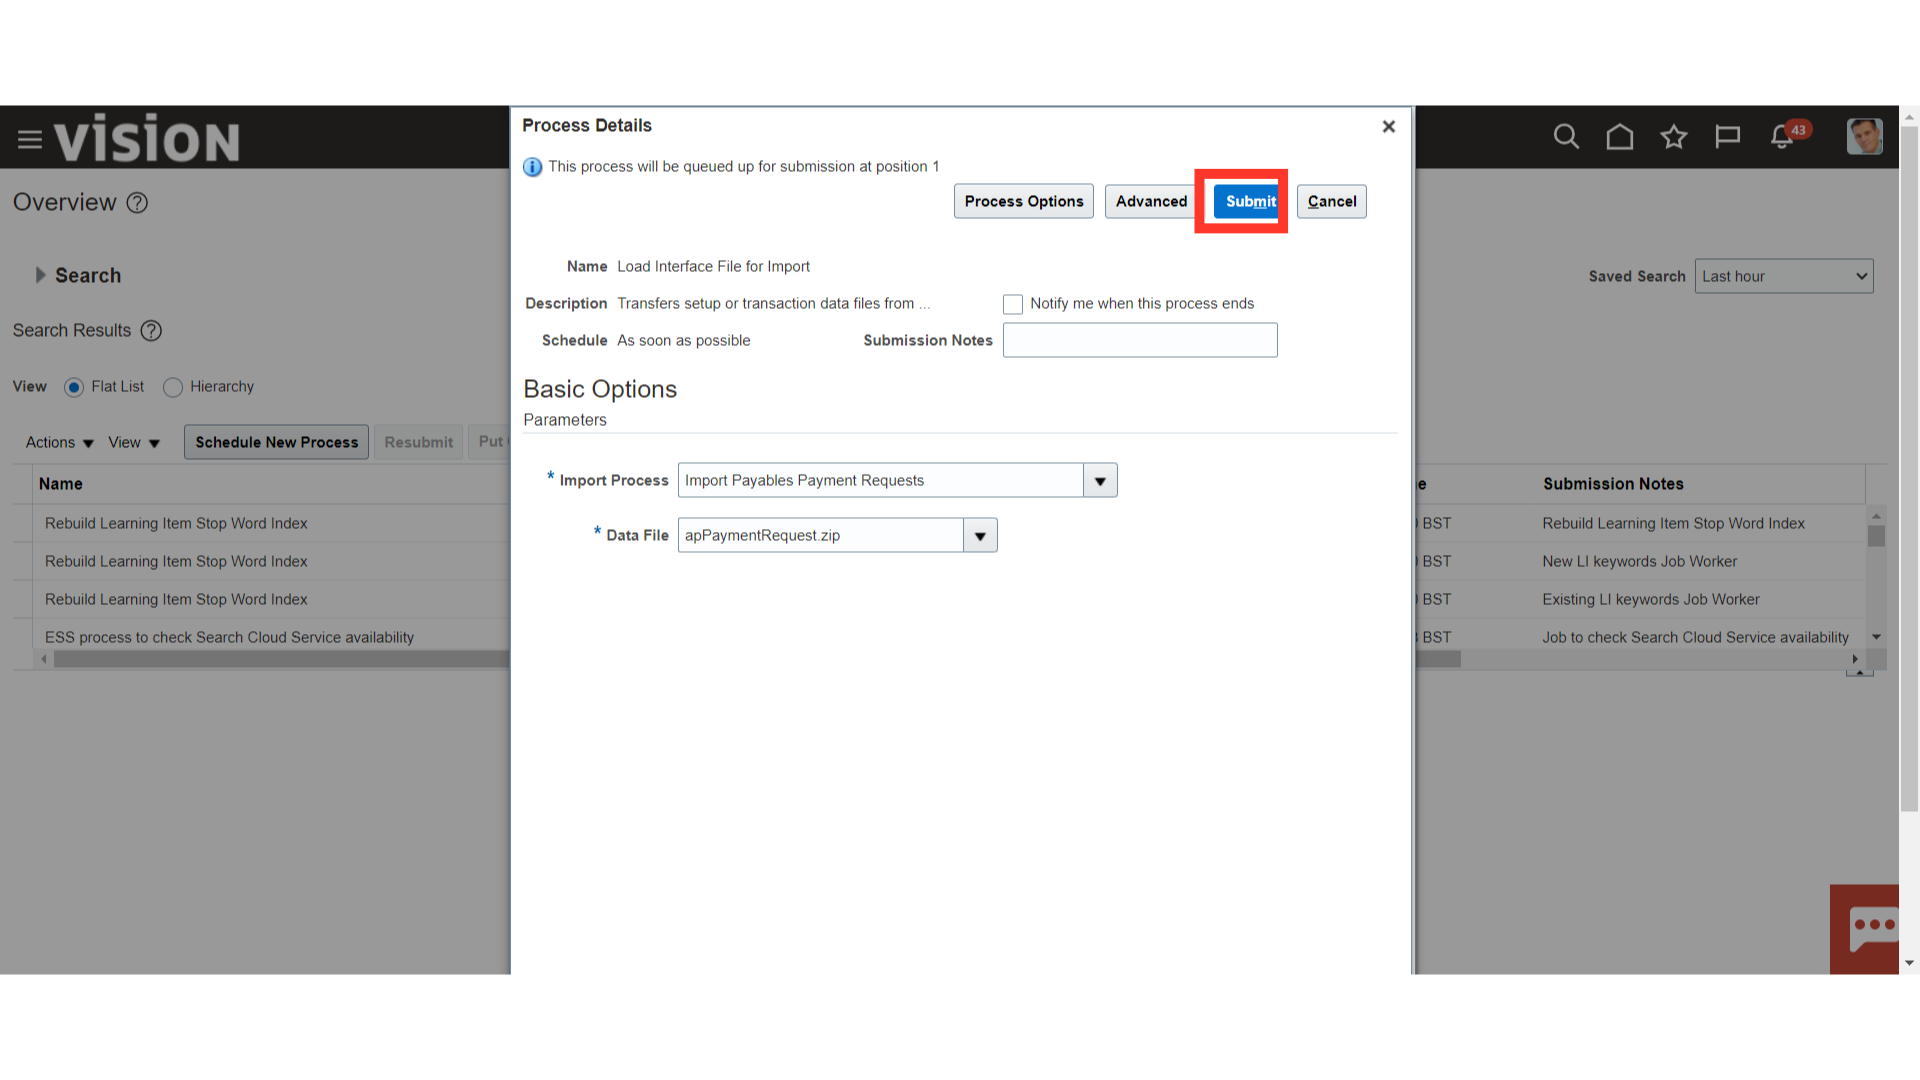
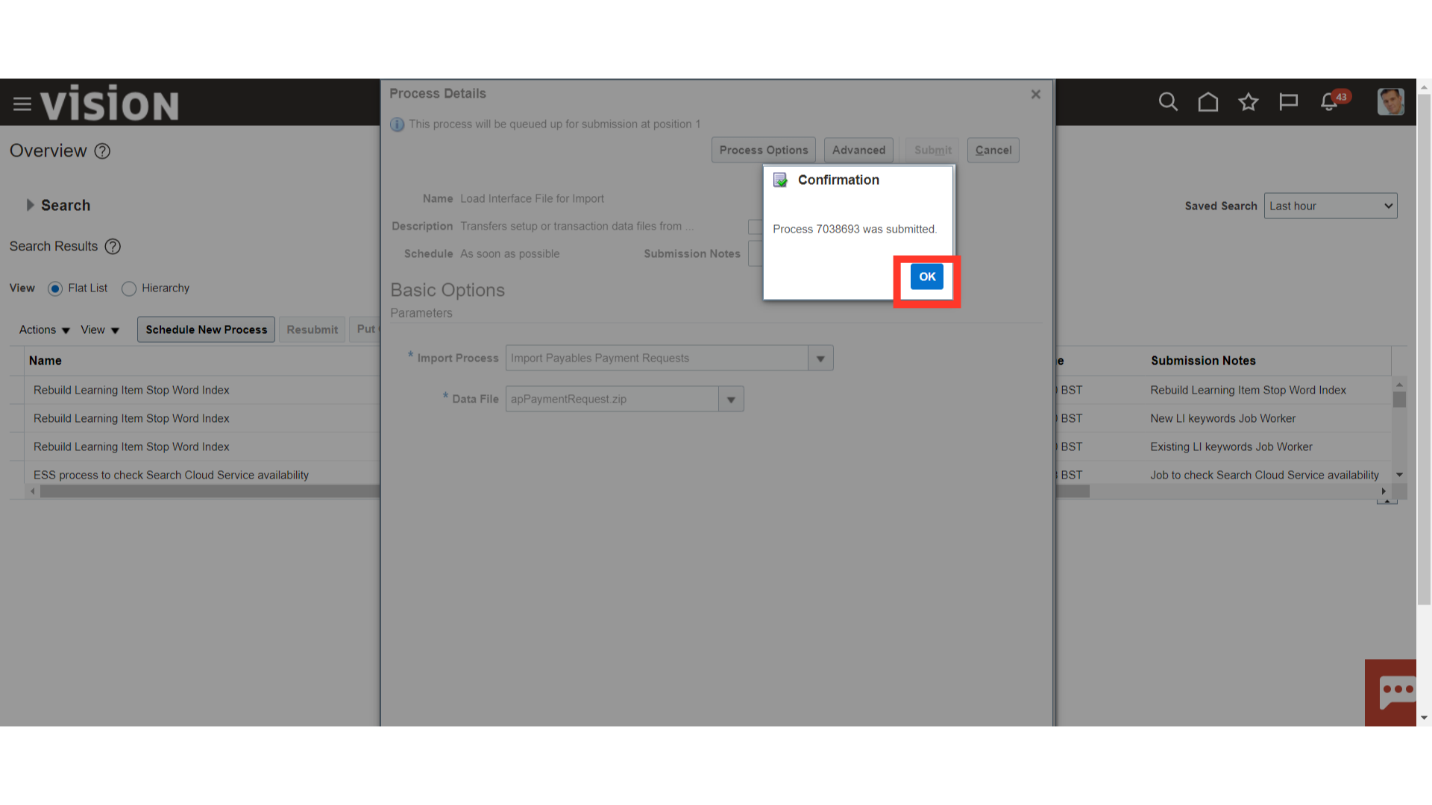
Click on the Submit button to run the Load Interface File for Import process.
A confirmation message is displayed along with the Process ID. Click on the OK button to continue.
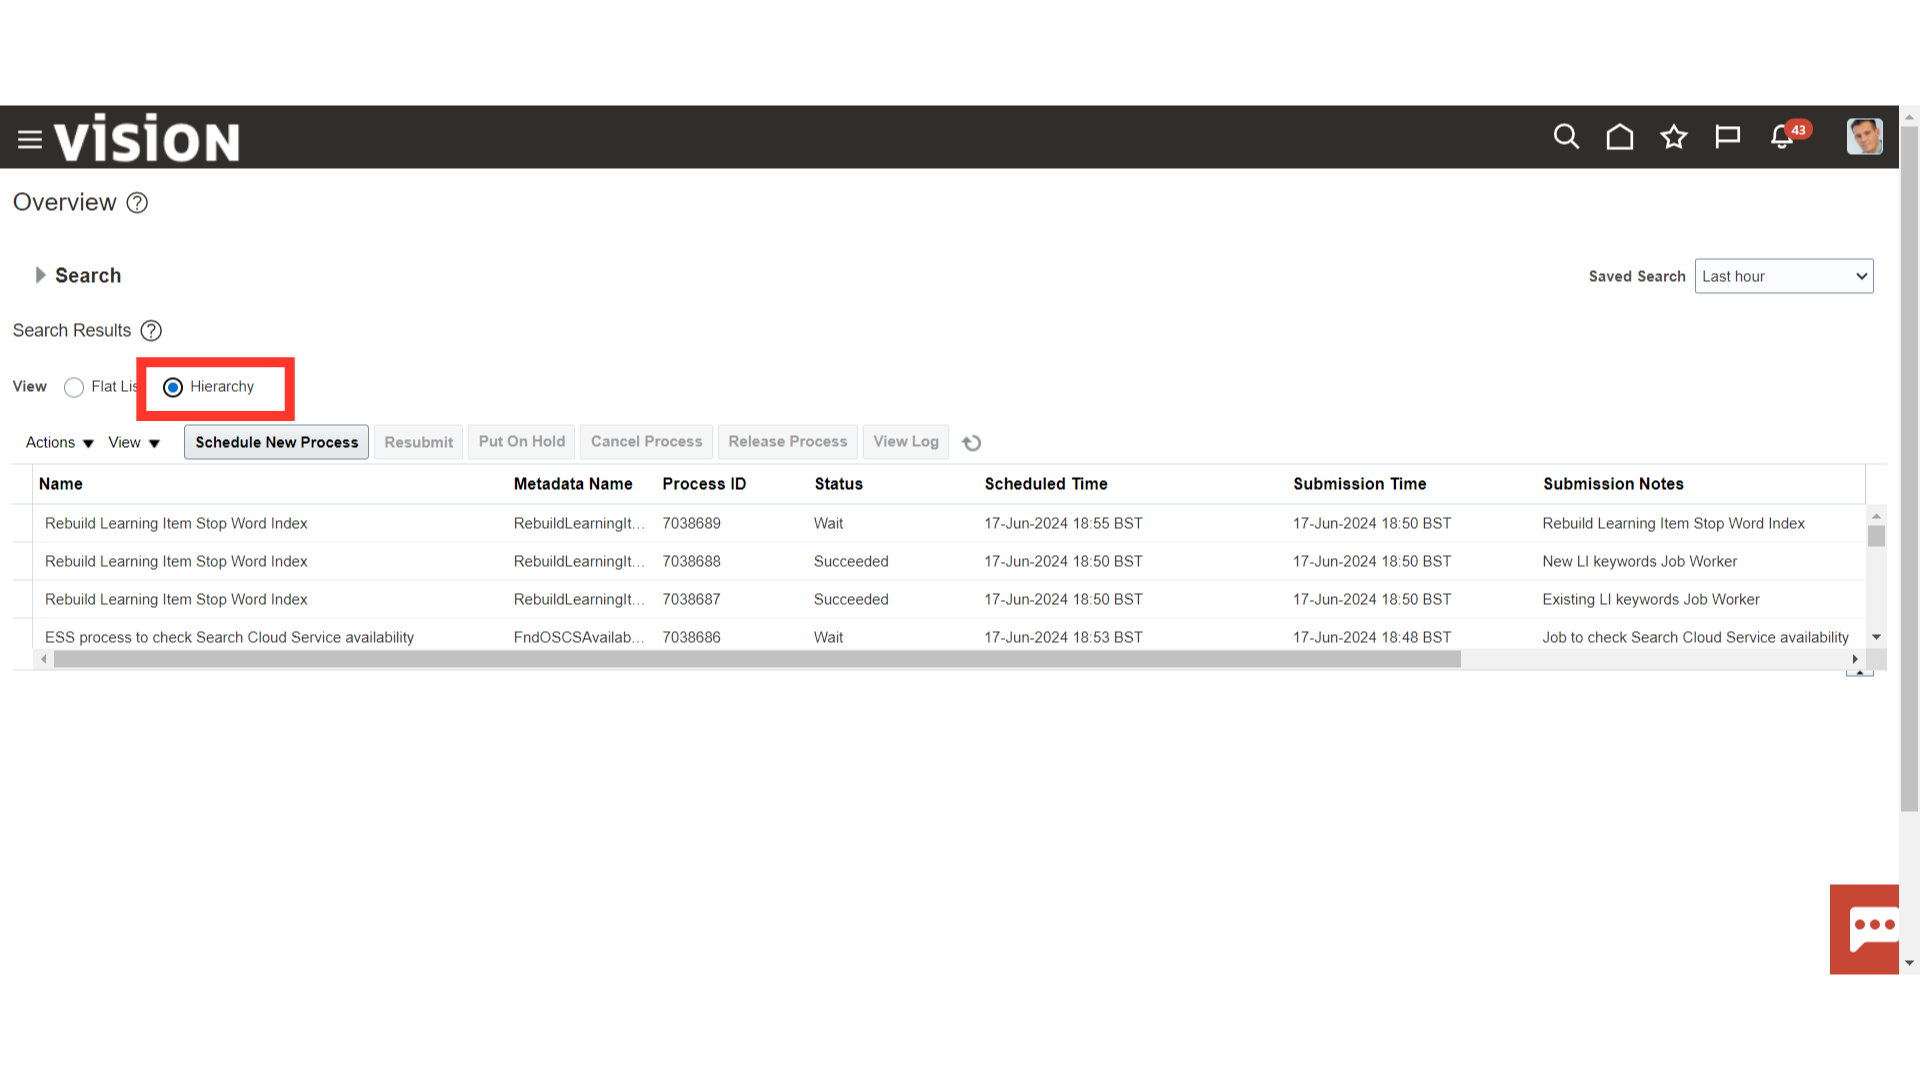
Select the Hierarchy view, to see the status of all the parent-child hierarchies.
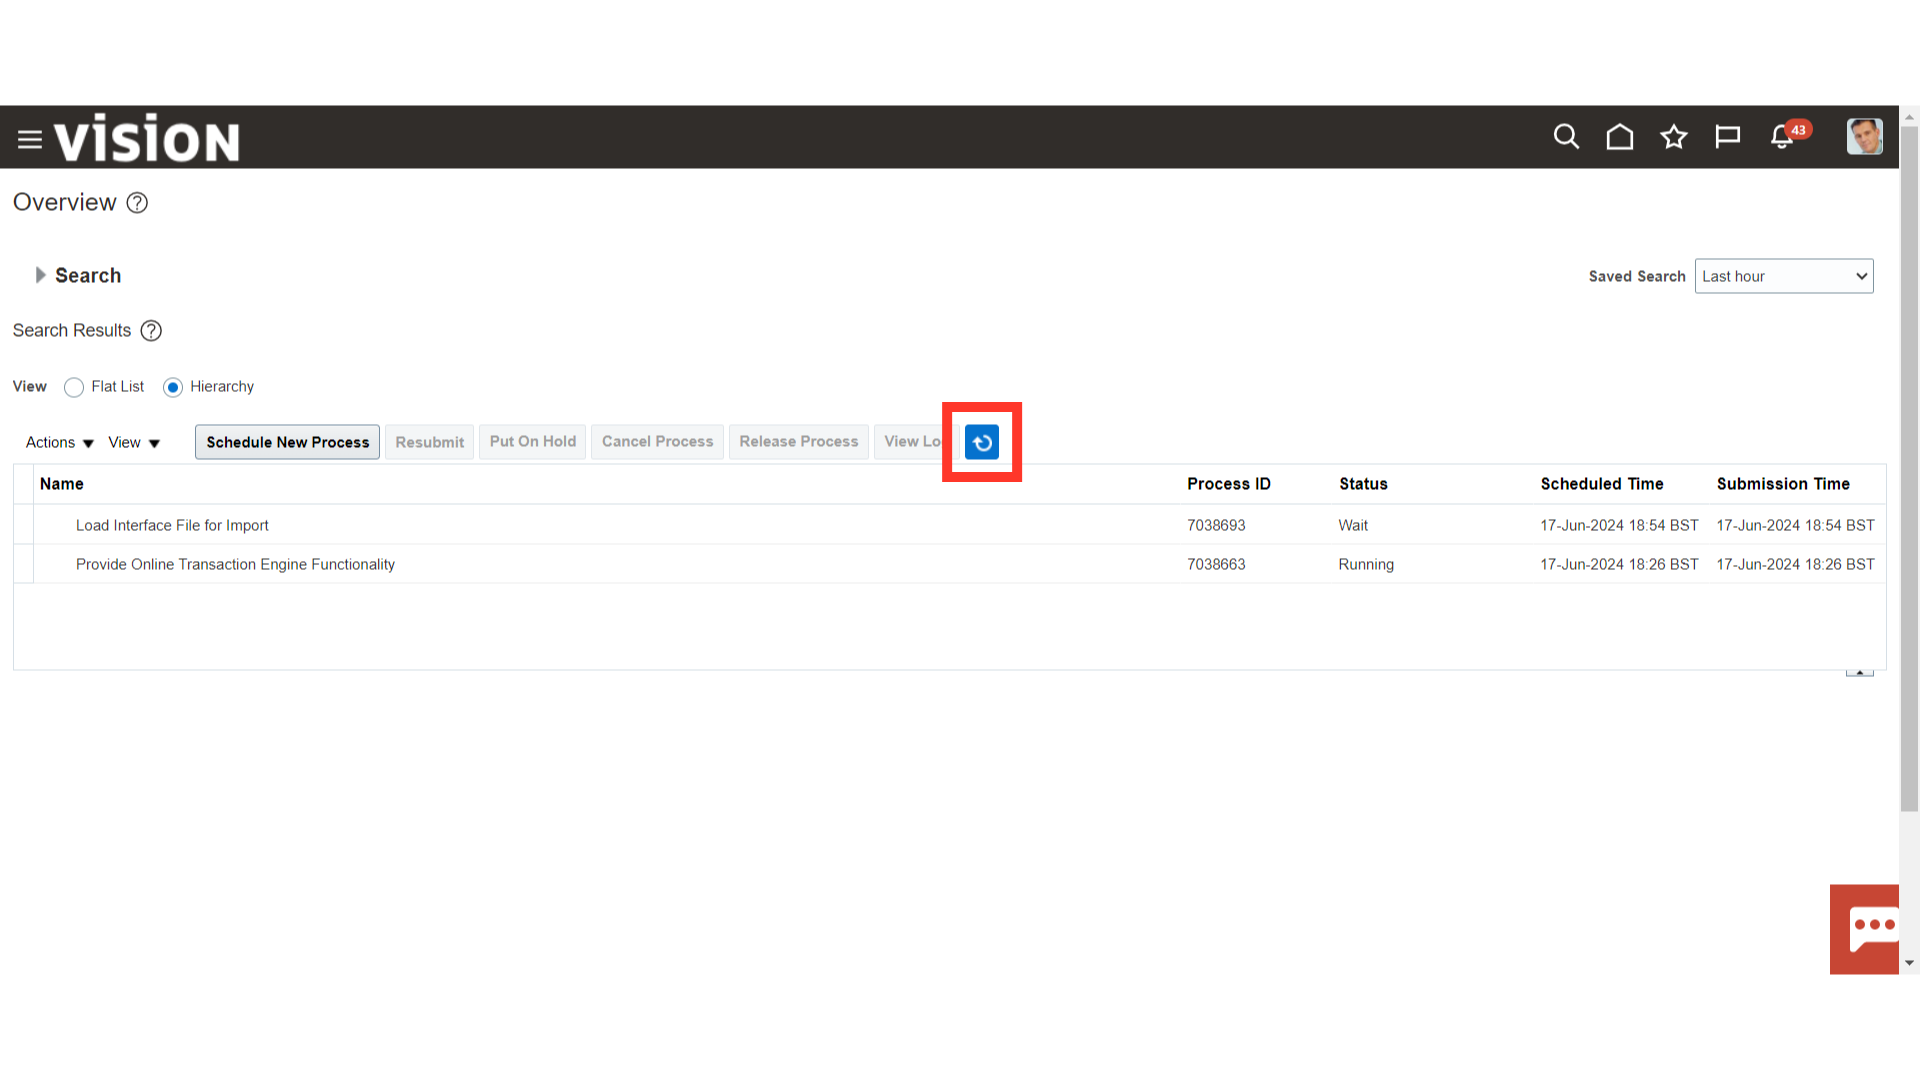
To see the most recent status of the submitted processes, click the Refresh icon.
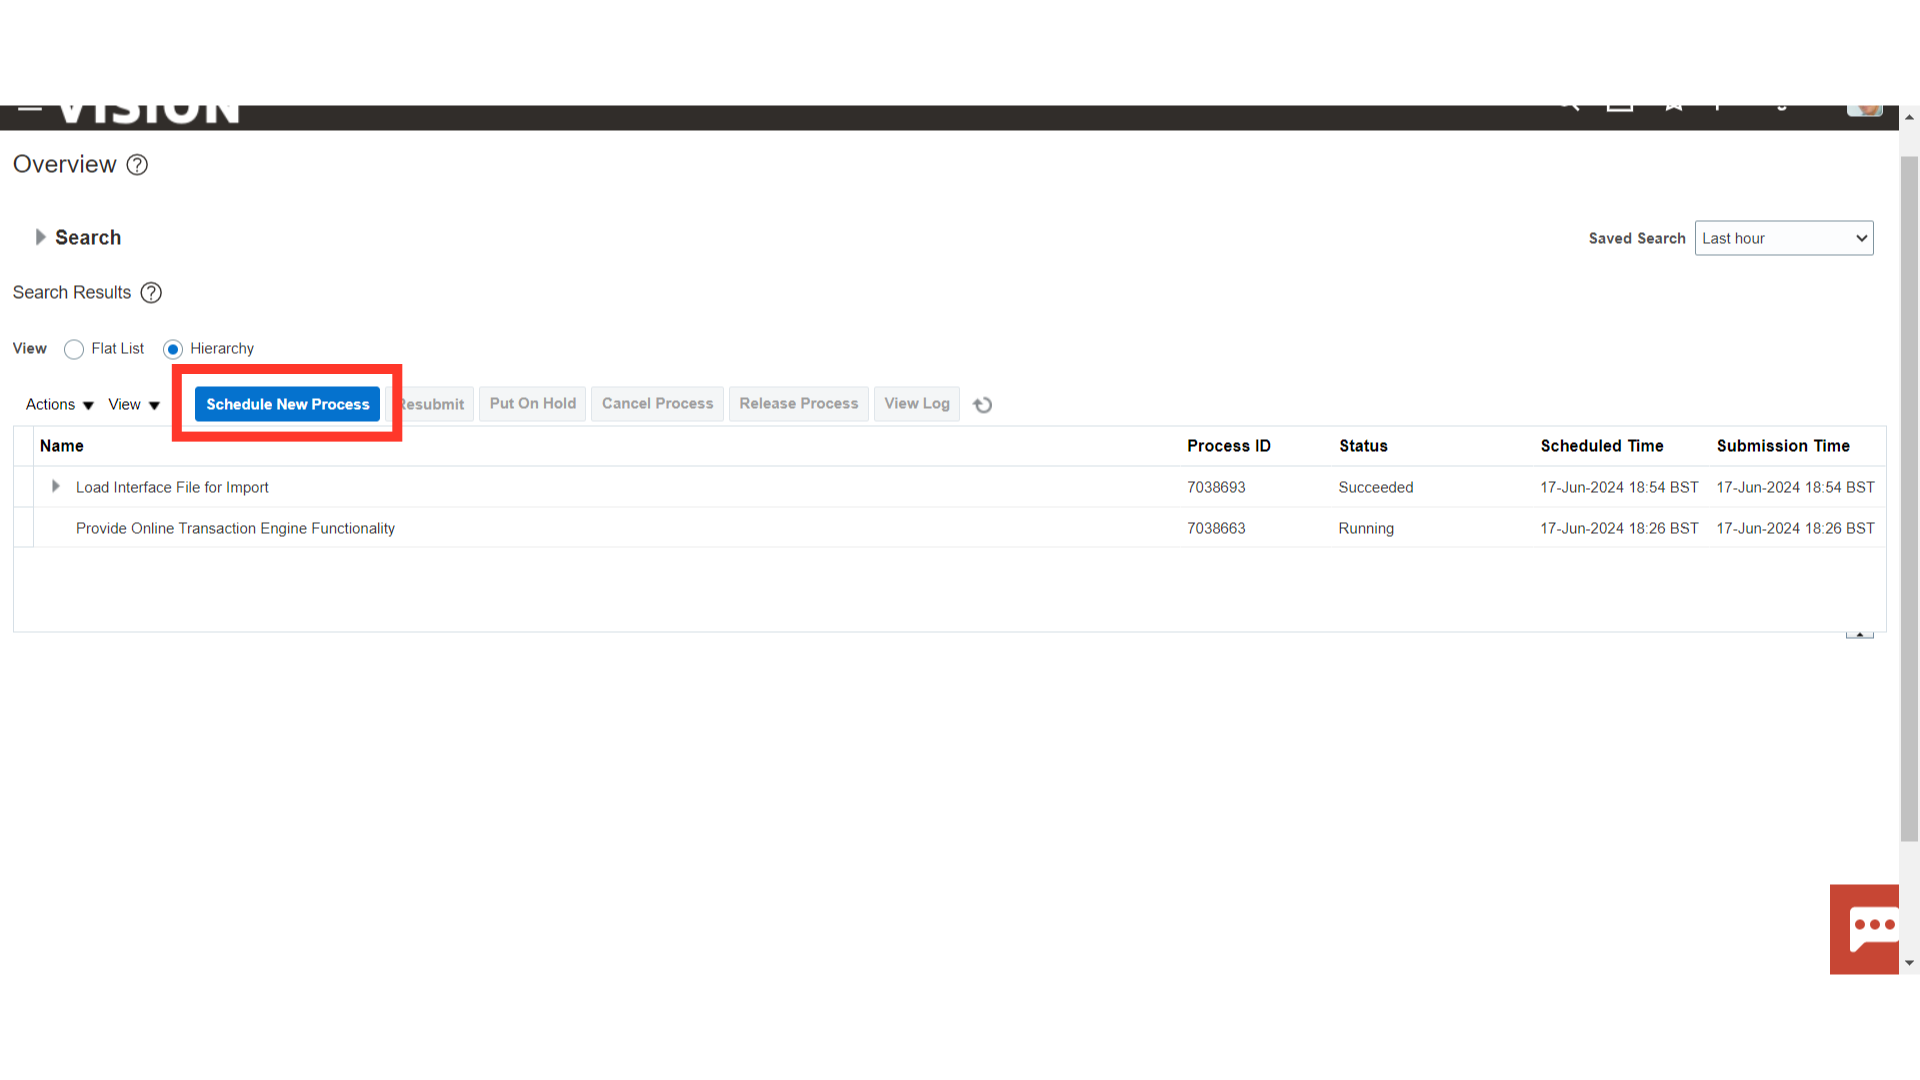
To run the Import Payables Payment Request process, click on the Schedule New Process button.
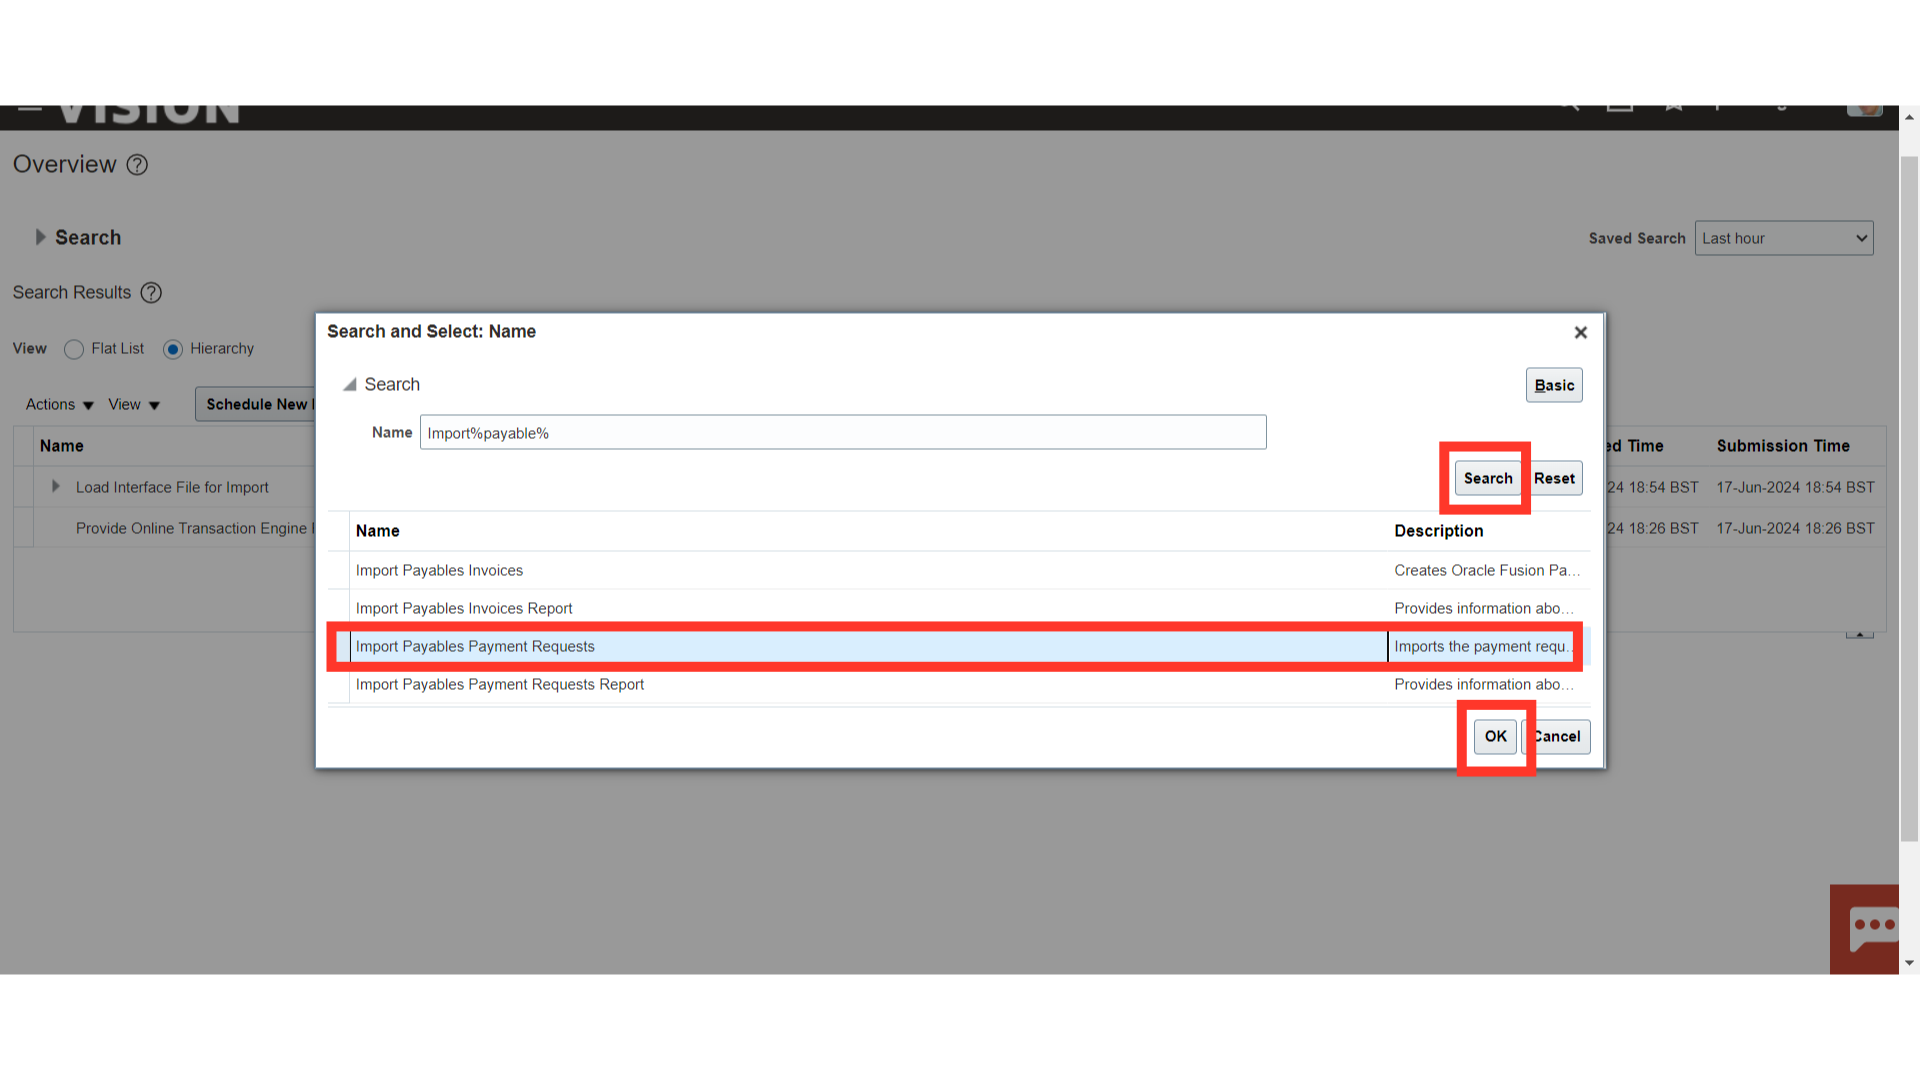
After selecting the drop-down icon, click the search hyperlink to find the process name.
After entering the process name as Import Payables Payment Requests, click on the Search button to search the process name. Select the Import Payables Payment Requests process name, and then click on OK button to continue.
Again click on OK to run the Import Payables Payment Requests for importing the payment requests type invoices.
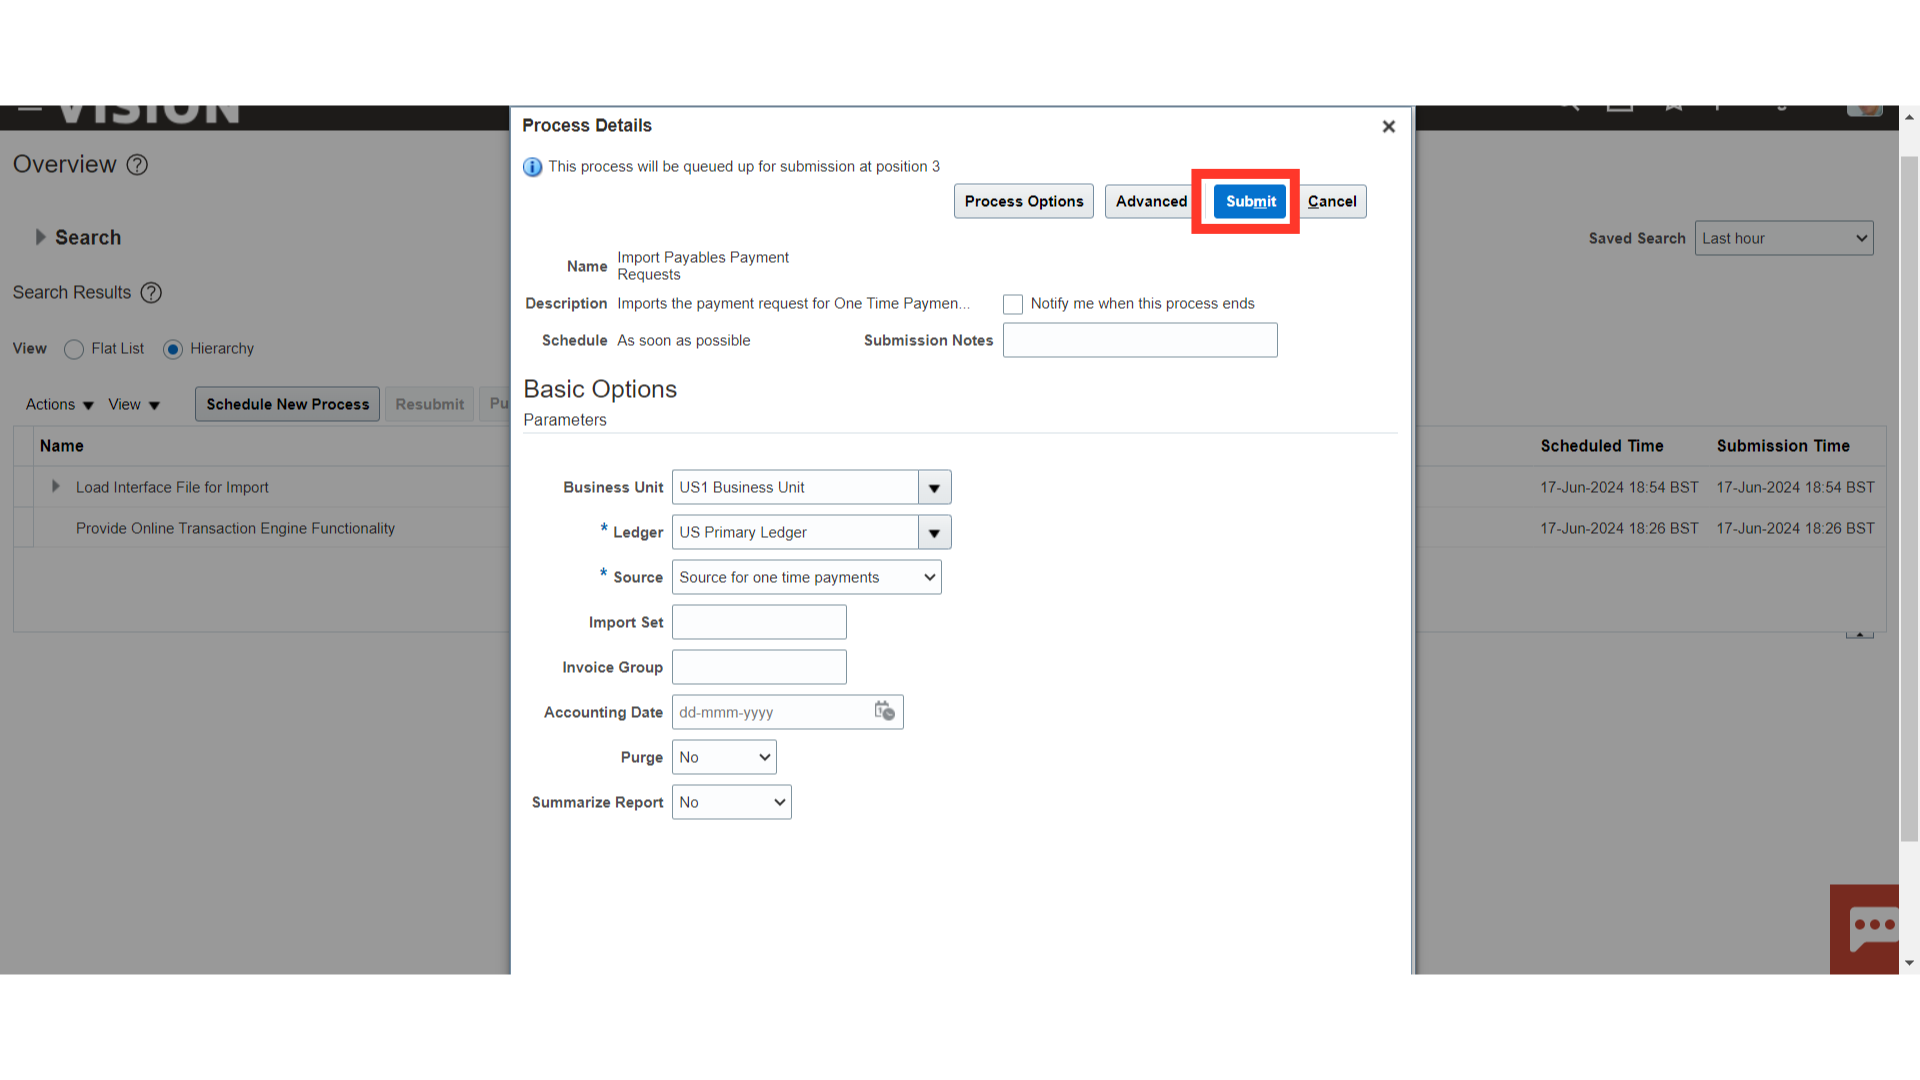
Choose the Business unit from the drop-down menu that is referenced in the spreadsheet along with its ledger. From the list of values, choose the pertinent source listed in the spreadsheet. To import the specified set of invoices in accordance with the entered parameter, you can also enter the Import set, Invoice Group, or accounting date parameters.
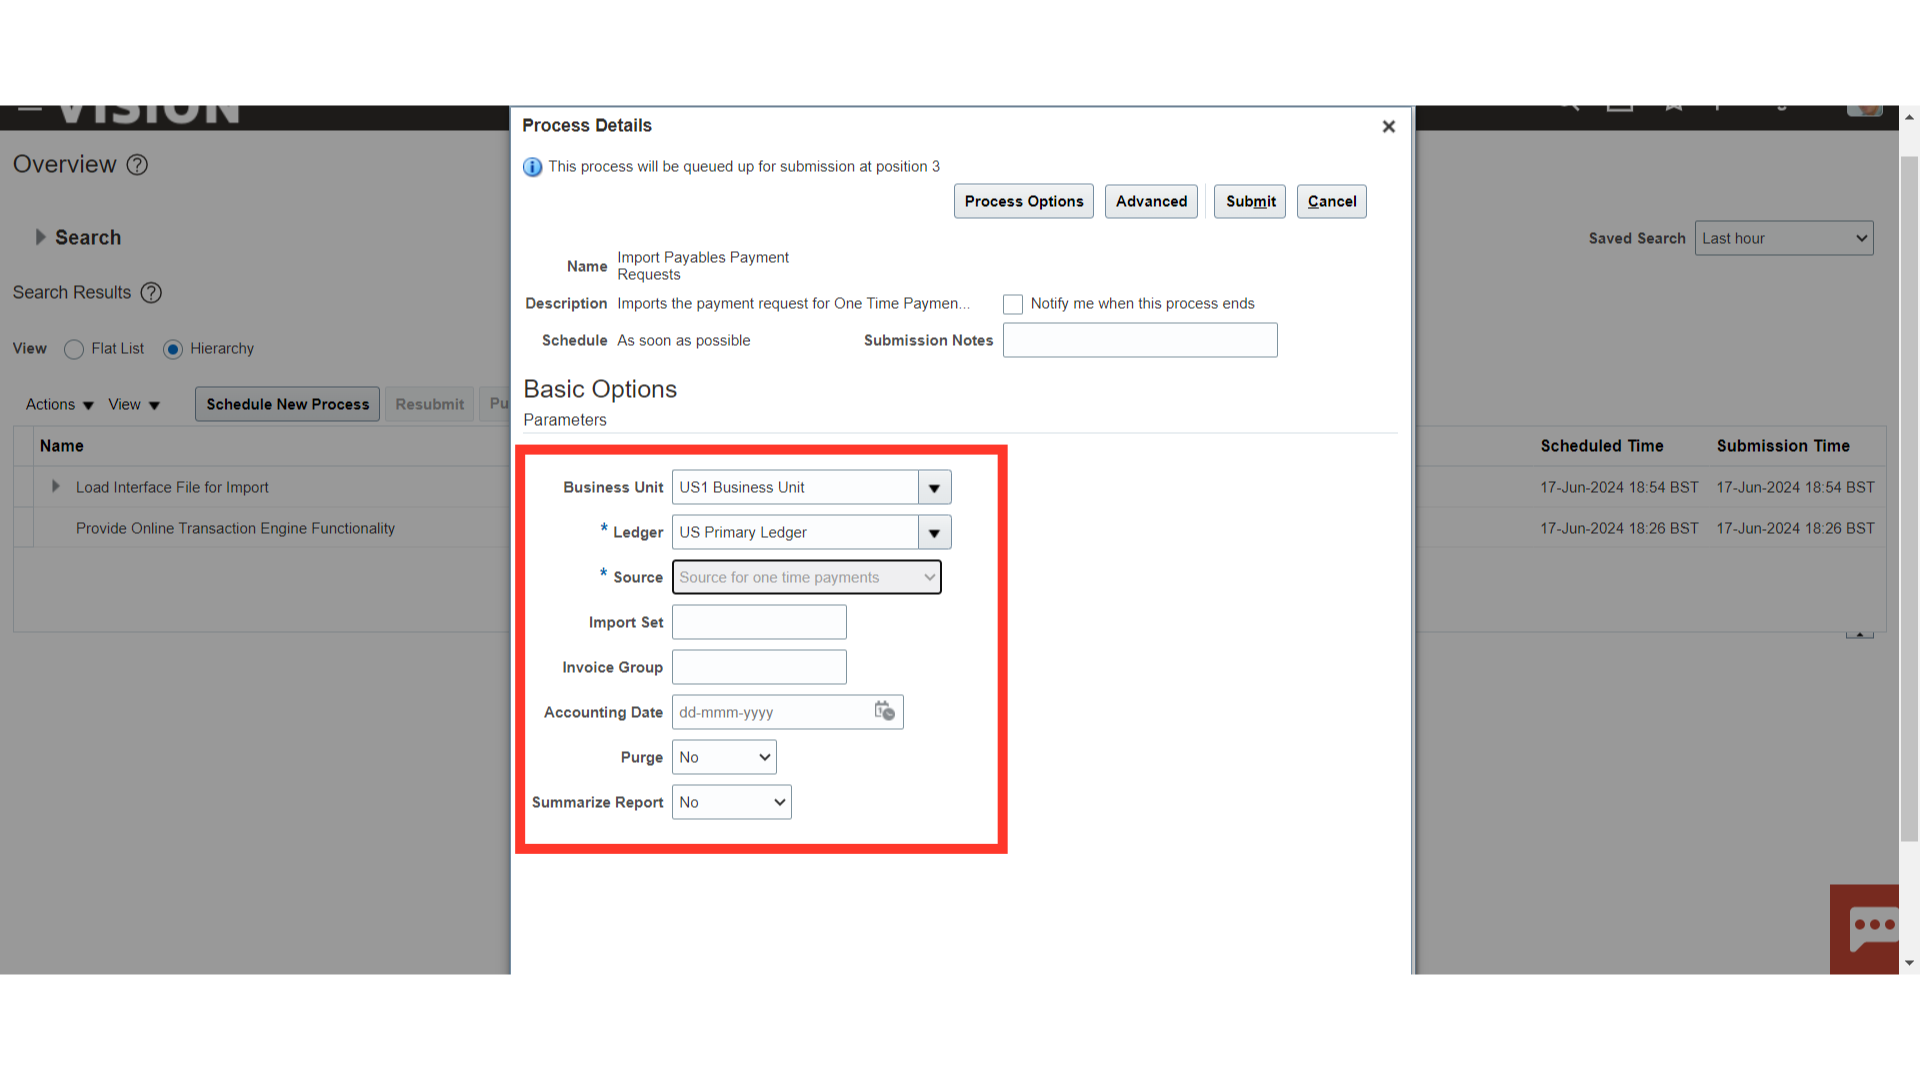
After entering all the parameters click on the Submit button.
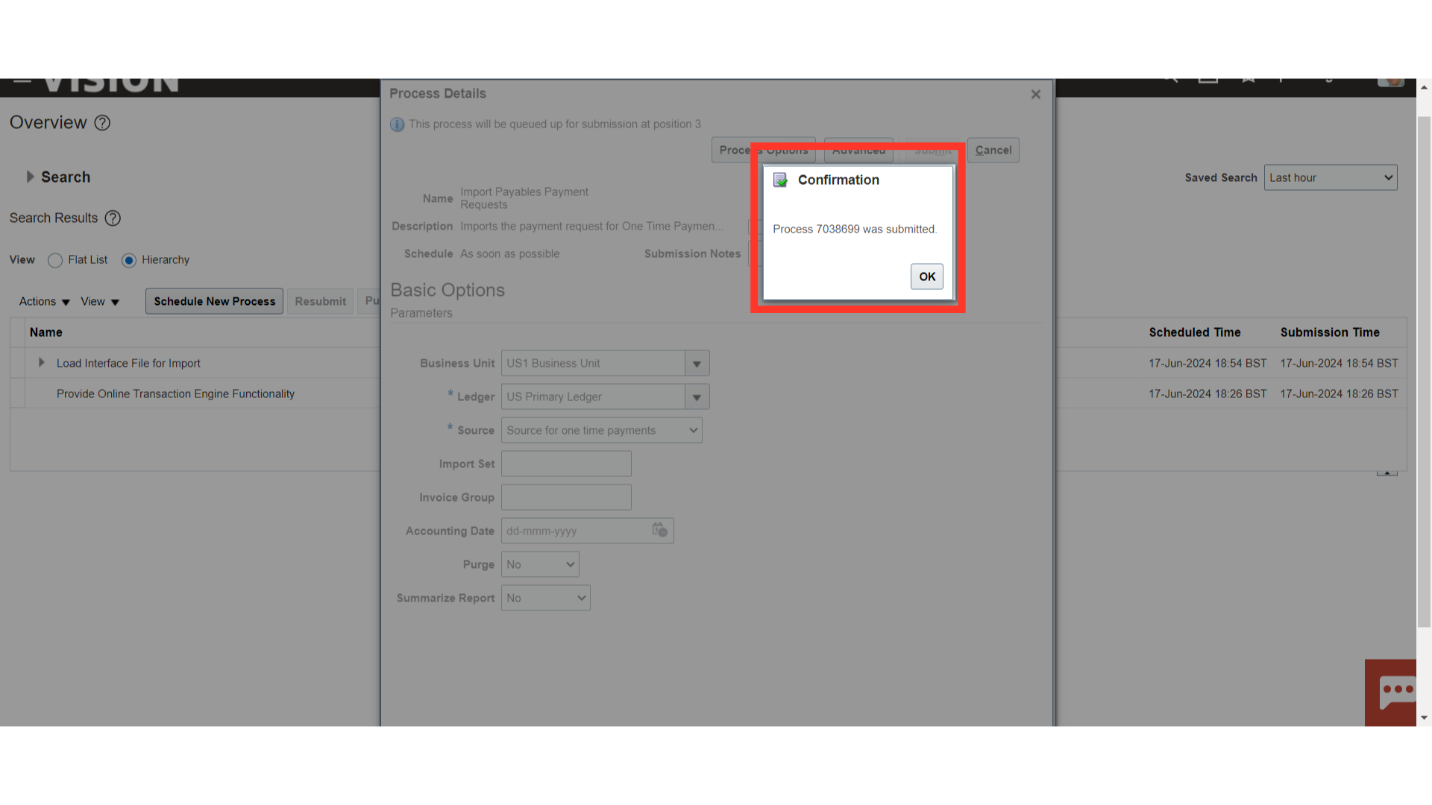
A confirmation message is displayed along with the Process ID. Click on the OK button to continue.
Select the Import Process Payment Requests Report process name from the scheduled process.
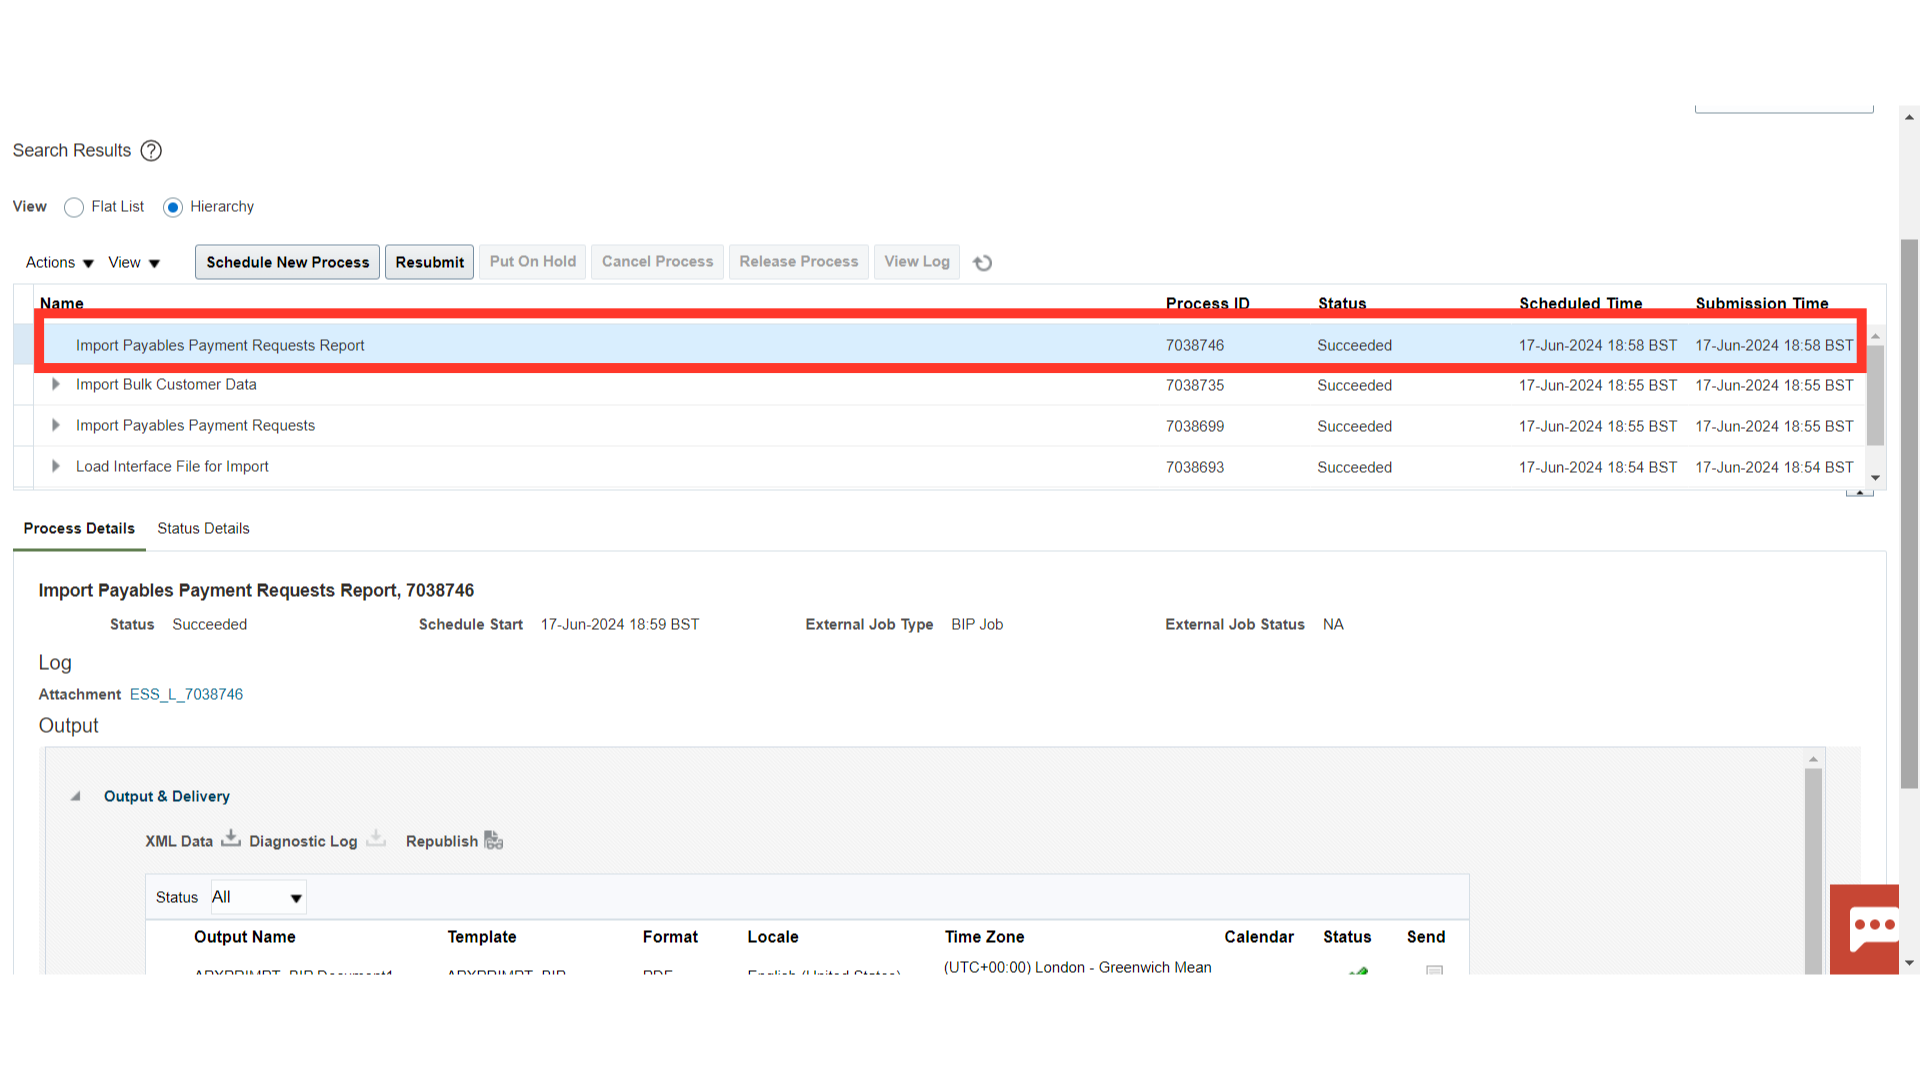
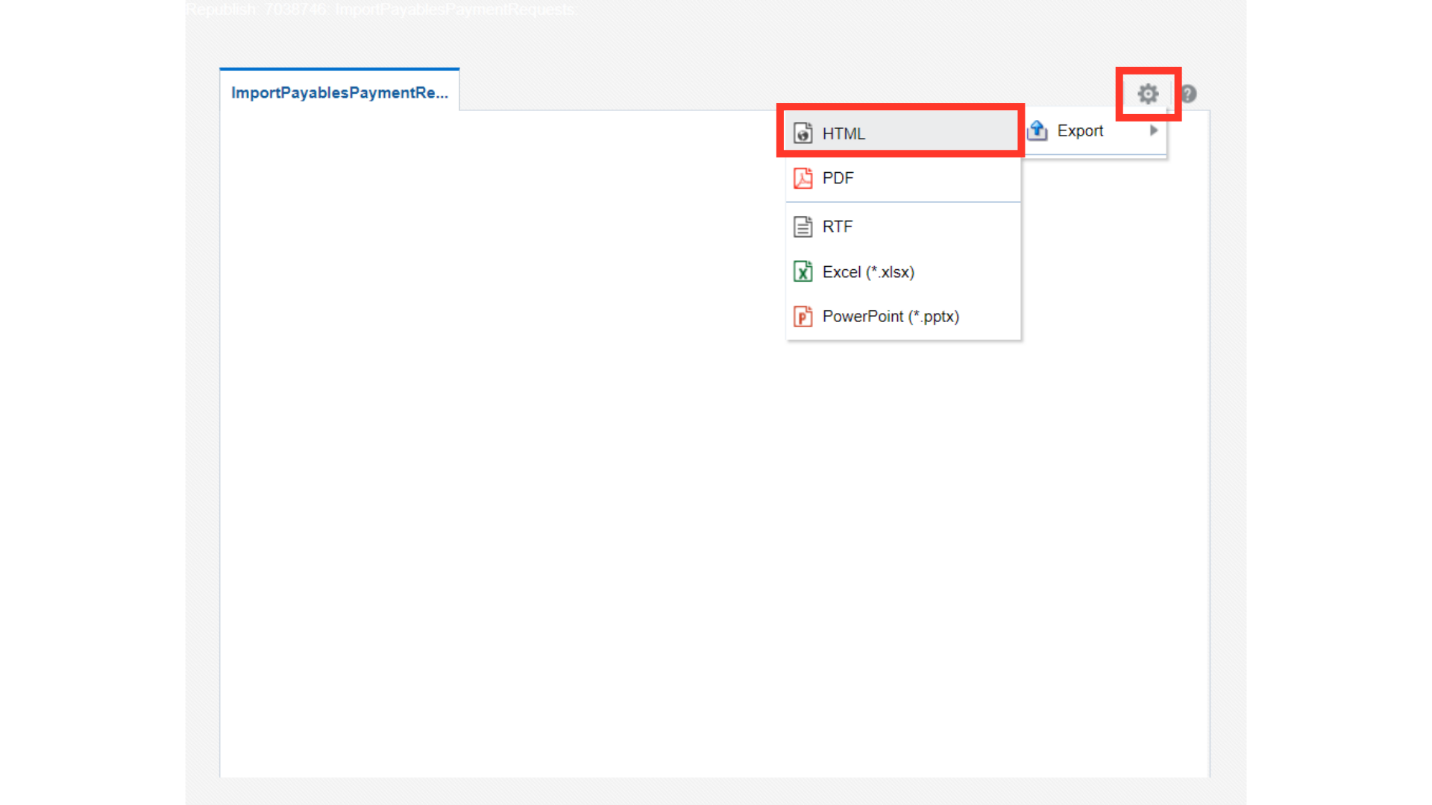
After selecting the process name, click on the Republish button to download the report.
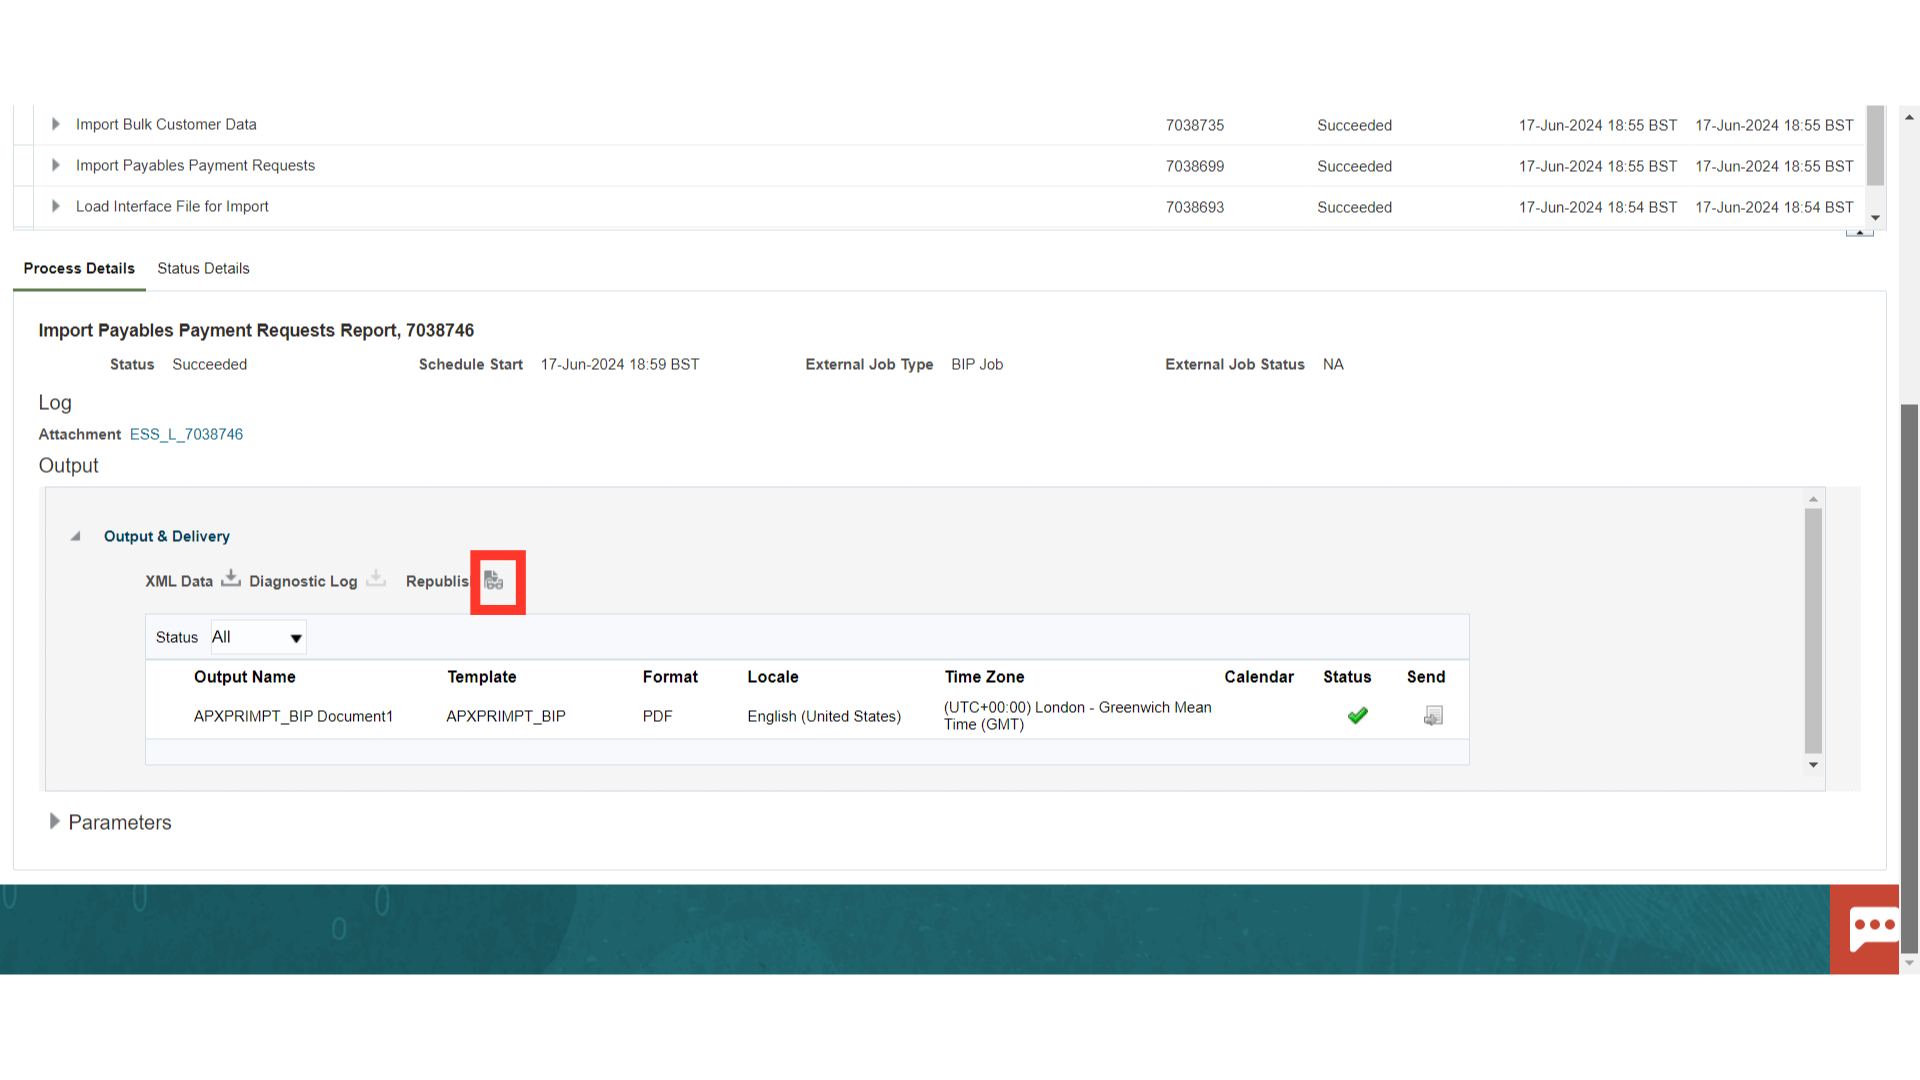
After expanding the settings icon, click on the HTML format under the Export option.
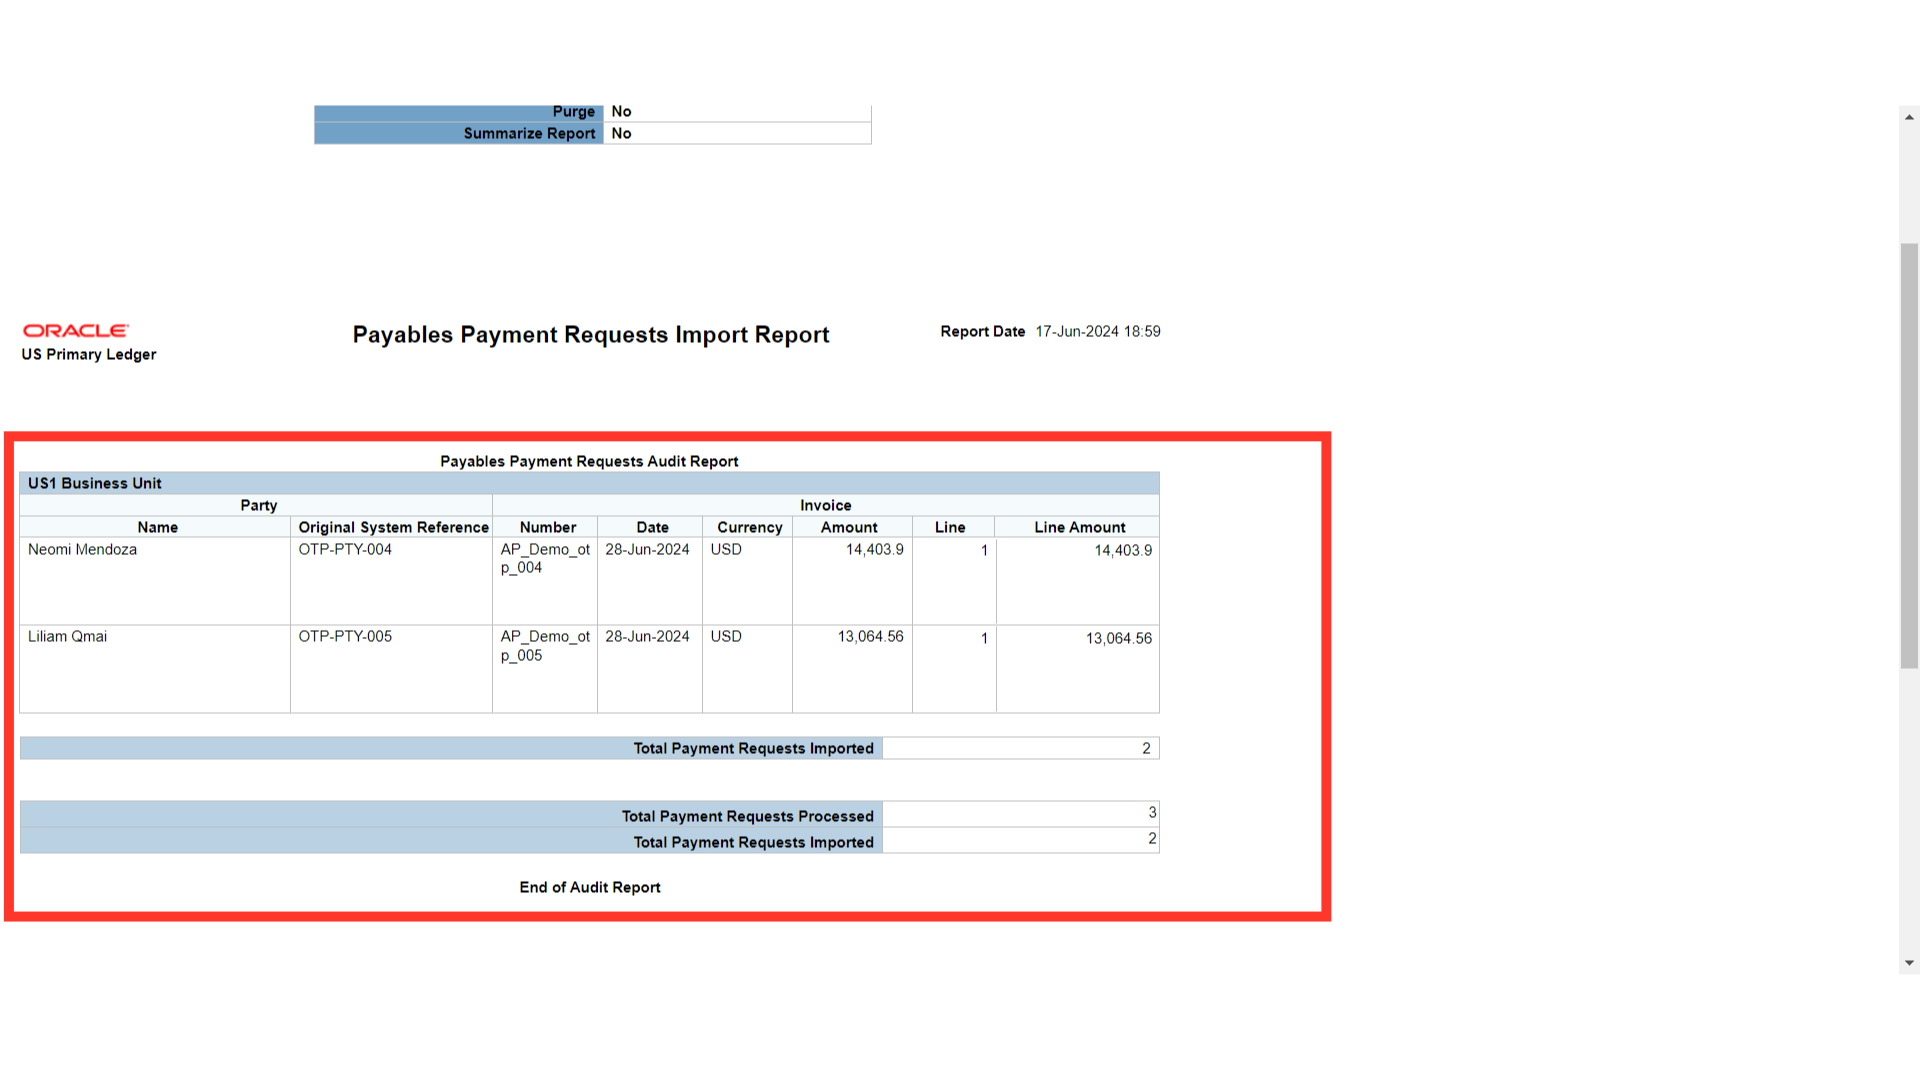
The report contains details of invoice imported successfully in the Payables Payment Requests Audit Report table.
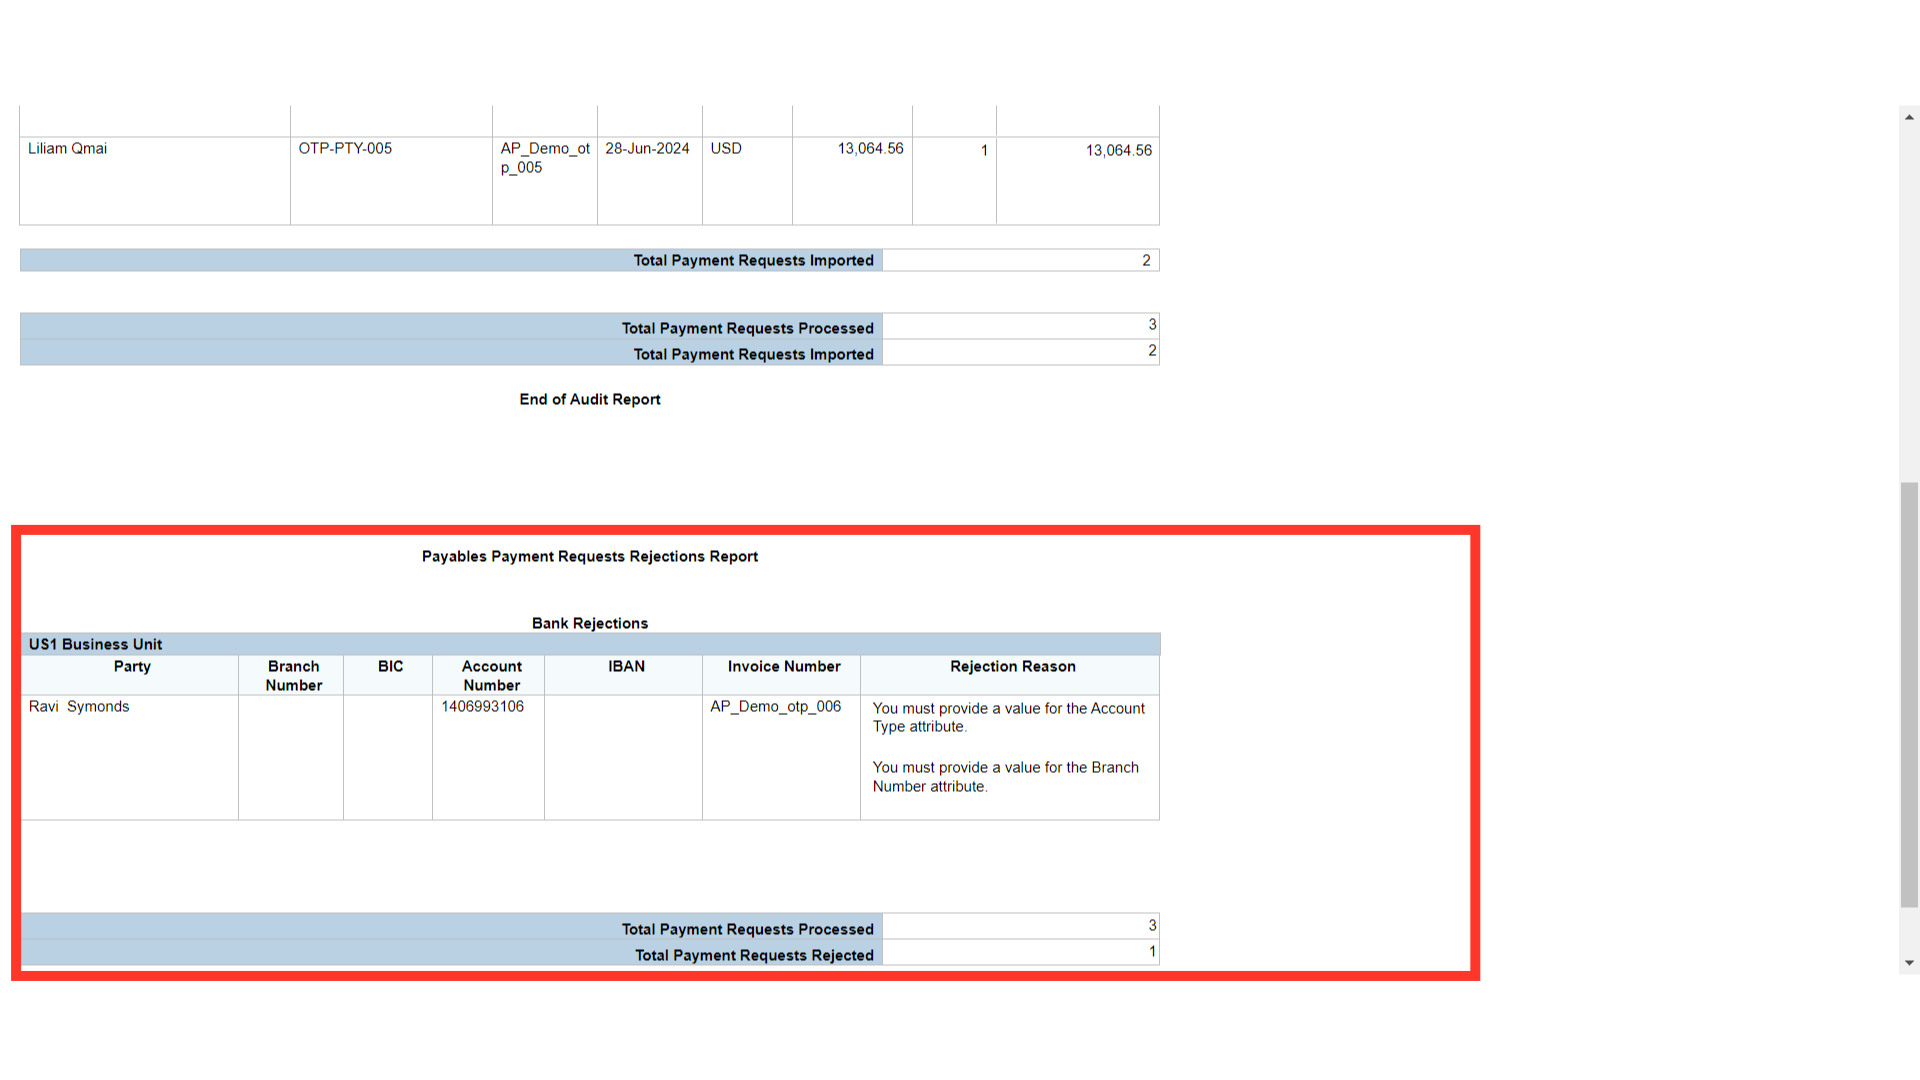
On the other hand, the Payables Payment Requests Rejections report displays rejected invoices. Correct the payment request information and resubmit this template with the corrected data. Only data which was incorrect is required to be submitted again.
Once you’ve verified the Payables Payment Requests Report, navigate to Invoice workbench to view the created invoices. Select the Incomplete link found under the recent infotile.
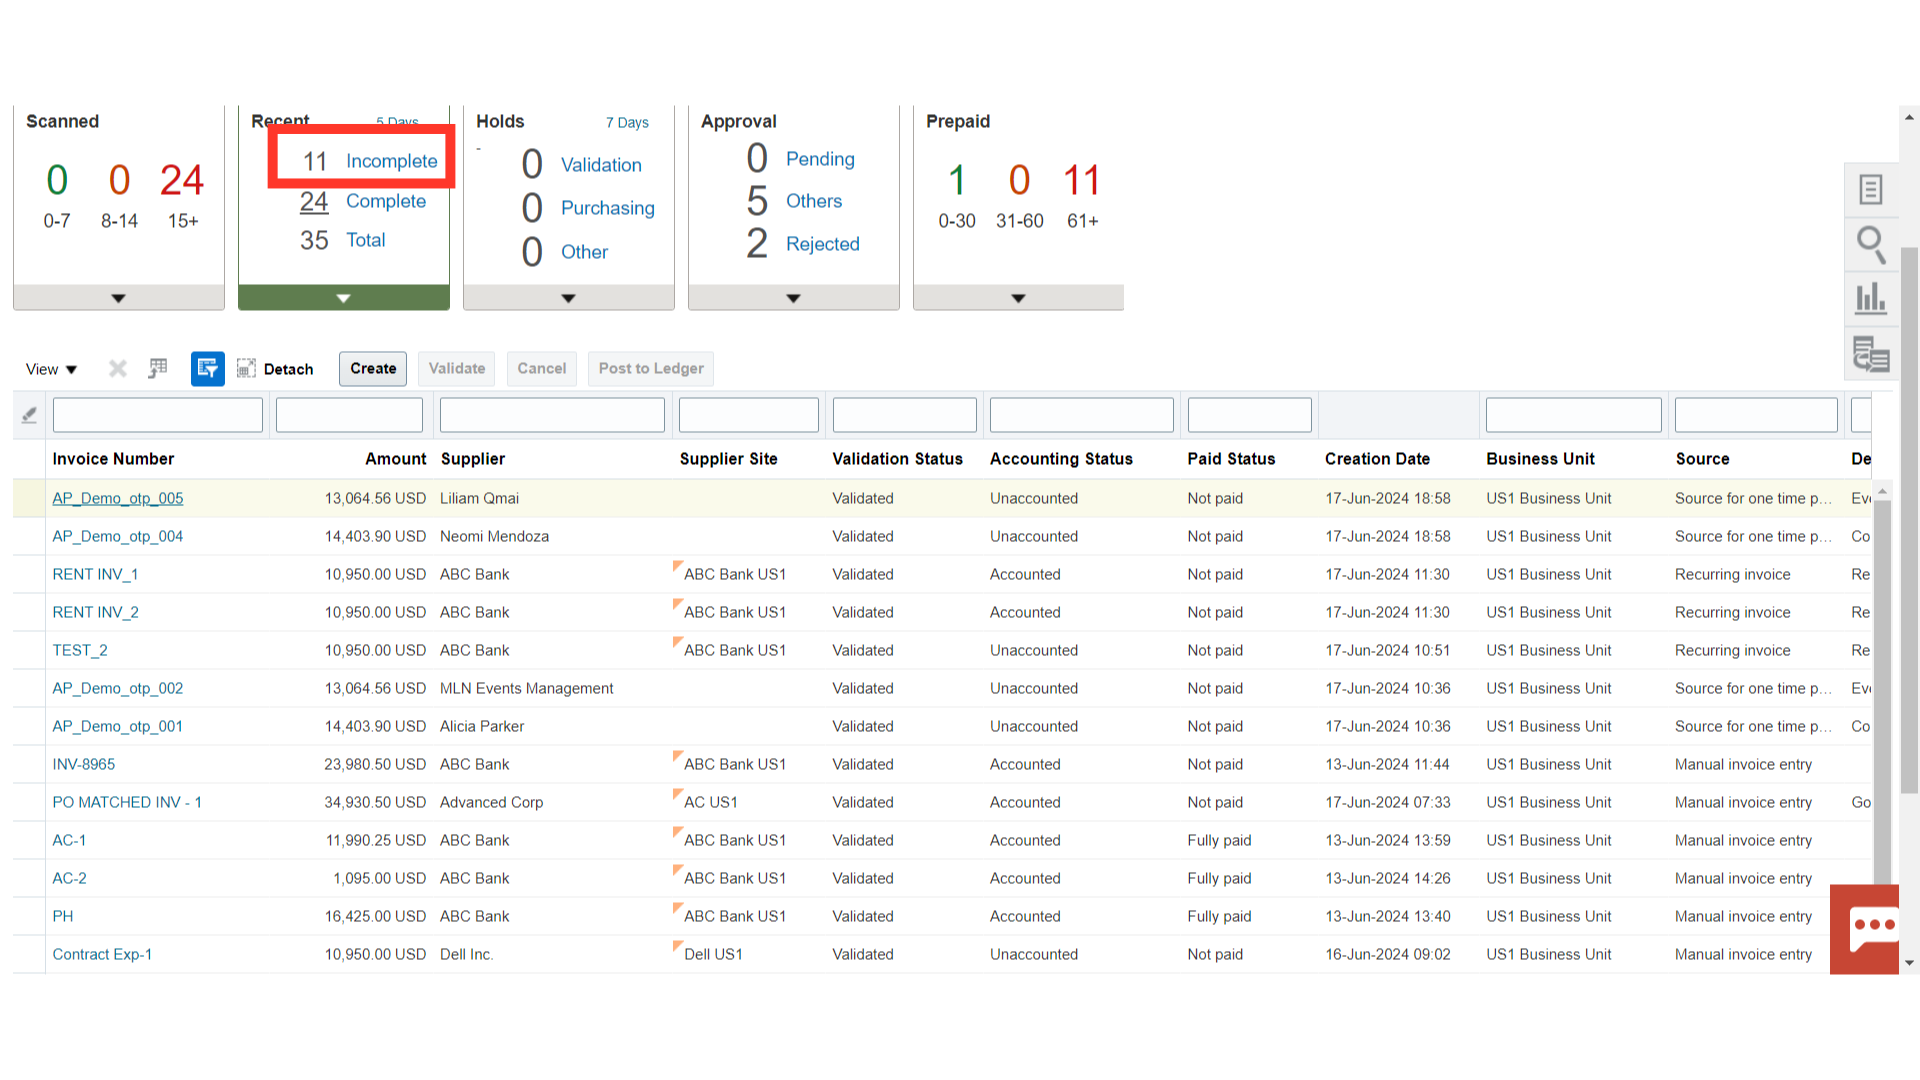
To open the invoice, click on the Invoice number hyperlink to see details of the invoice.
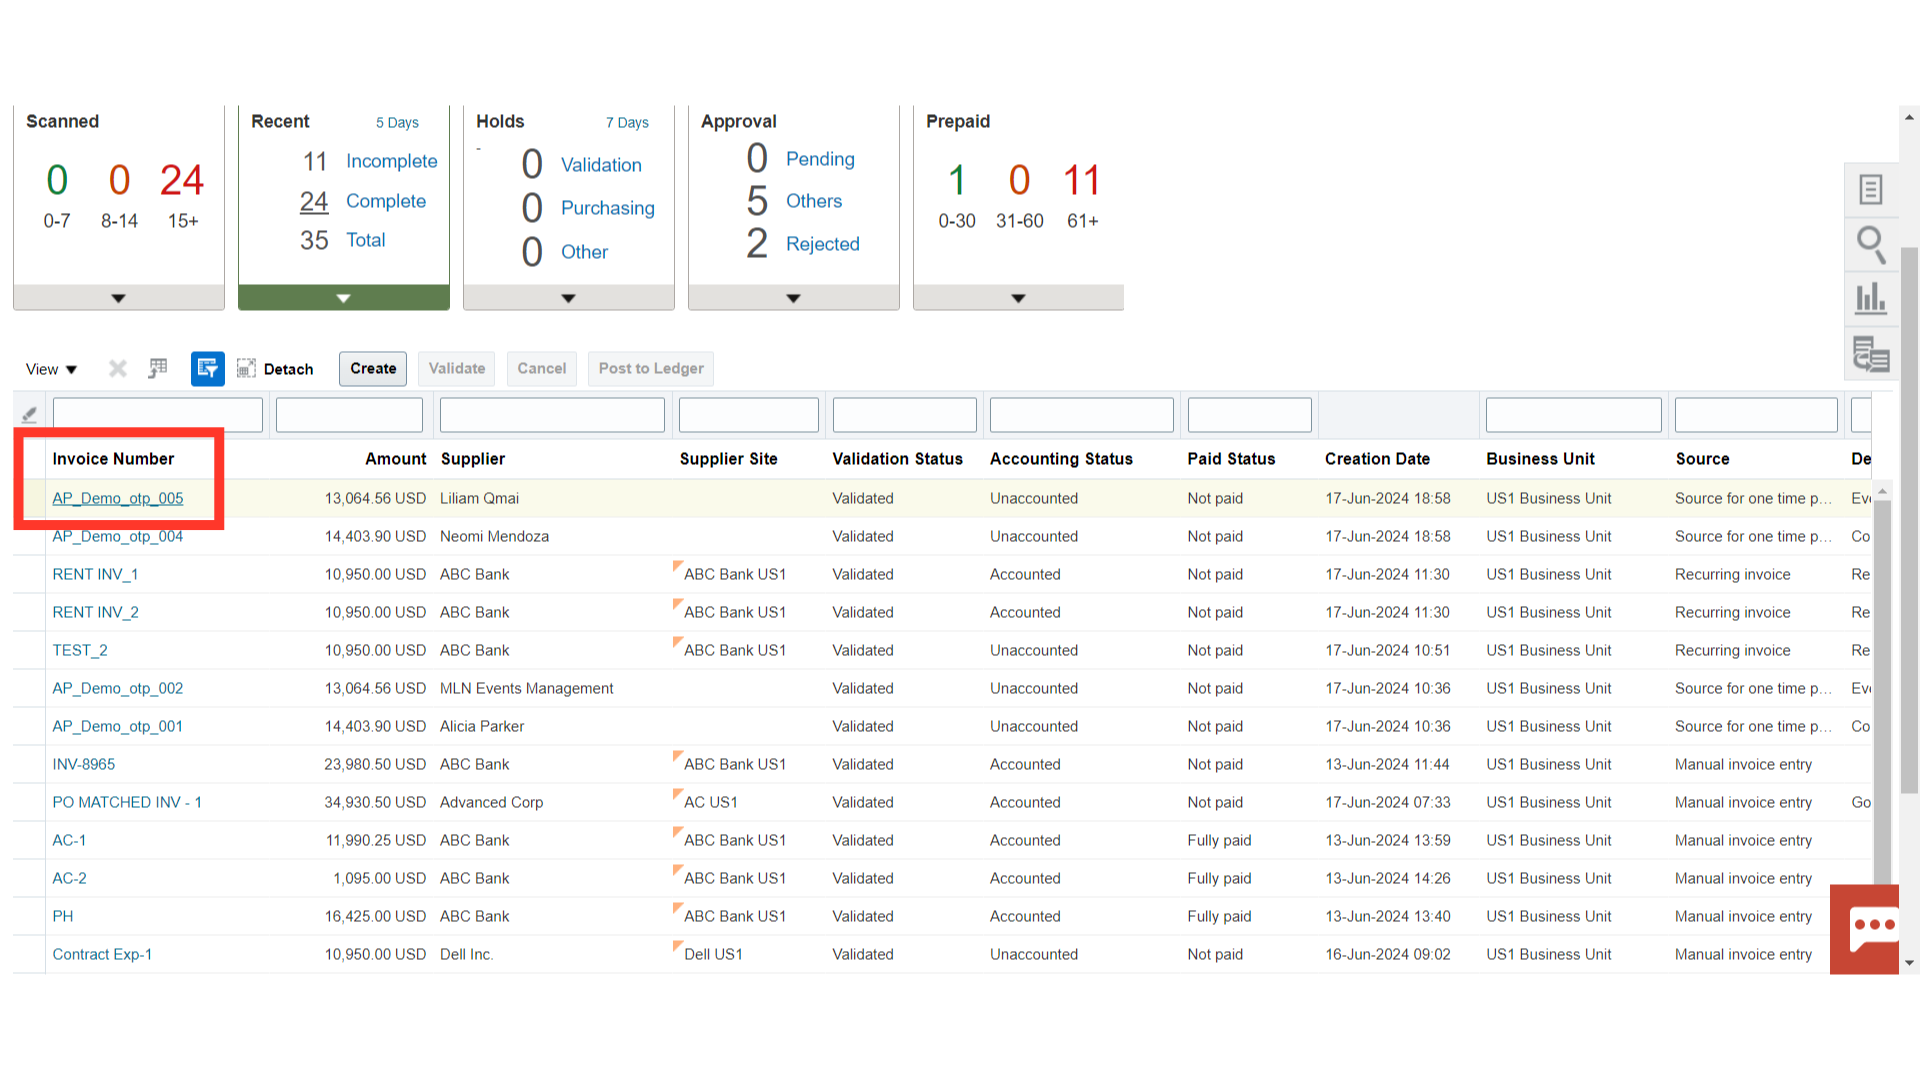
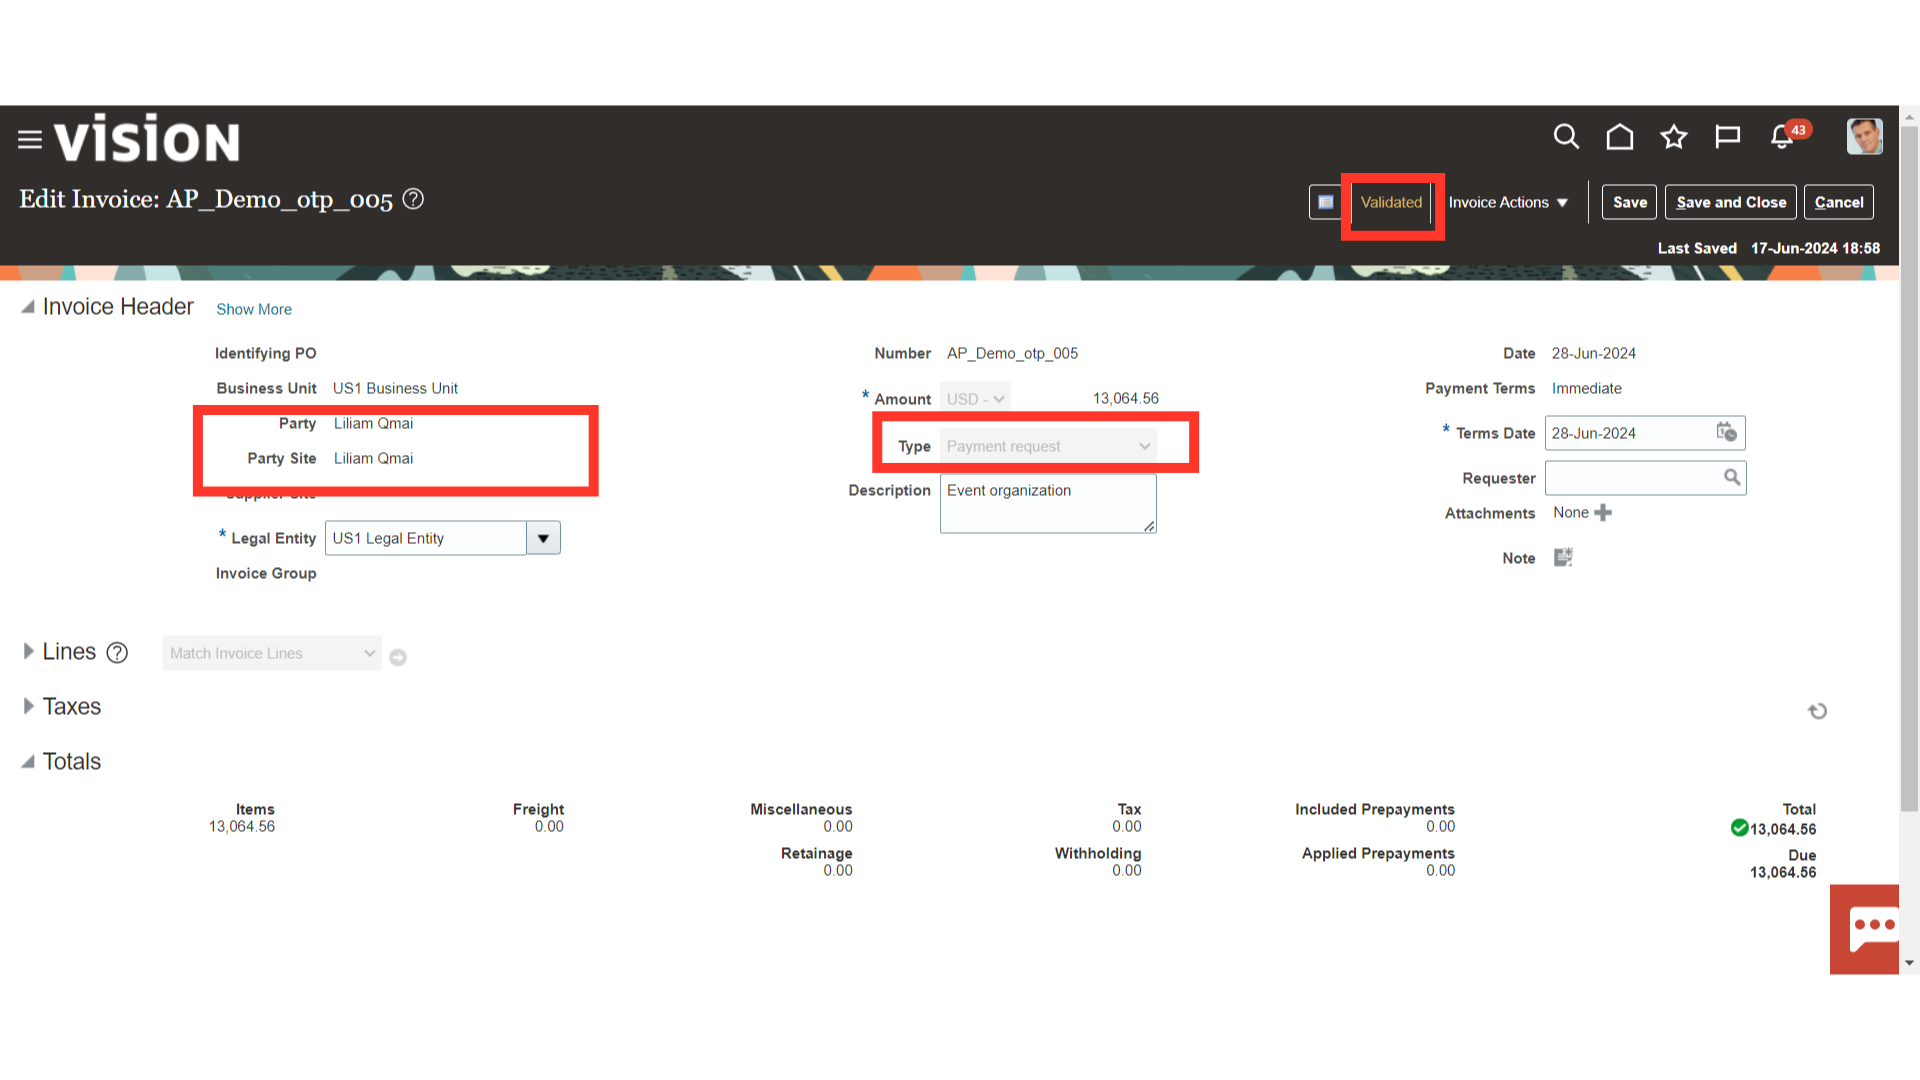
The Party field would be displayed in place of the supplier name in invoices that are payment requests. Invoices would already be in validated status, and to close this invoice page click on the Save and close button.
This tutorial gave a comprehensive explanation of how to create payment requests in the form of invoices, starting with data entry into a spreadsheet, creating a CSV file, and importing the information into Oracle Fusion. It also covered how to run the import payables payments request report process.