Create Customers through Spreadsheet
Use the Upload Customers from Spreadsheet process to upload customer data using the simplified Customer Import FBDI (File-Based Data Import) template. This guide will walk you through filling out the customer spreadsheet so you can upload the data in bulk to the Oracle Fusion Receivables system.
Click on the Navigator icon to access the Receivables menu.
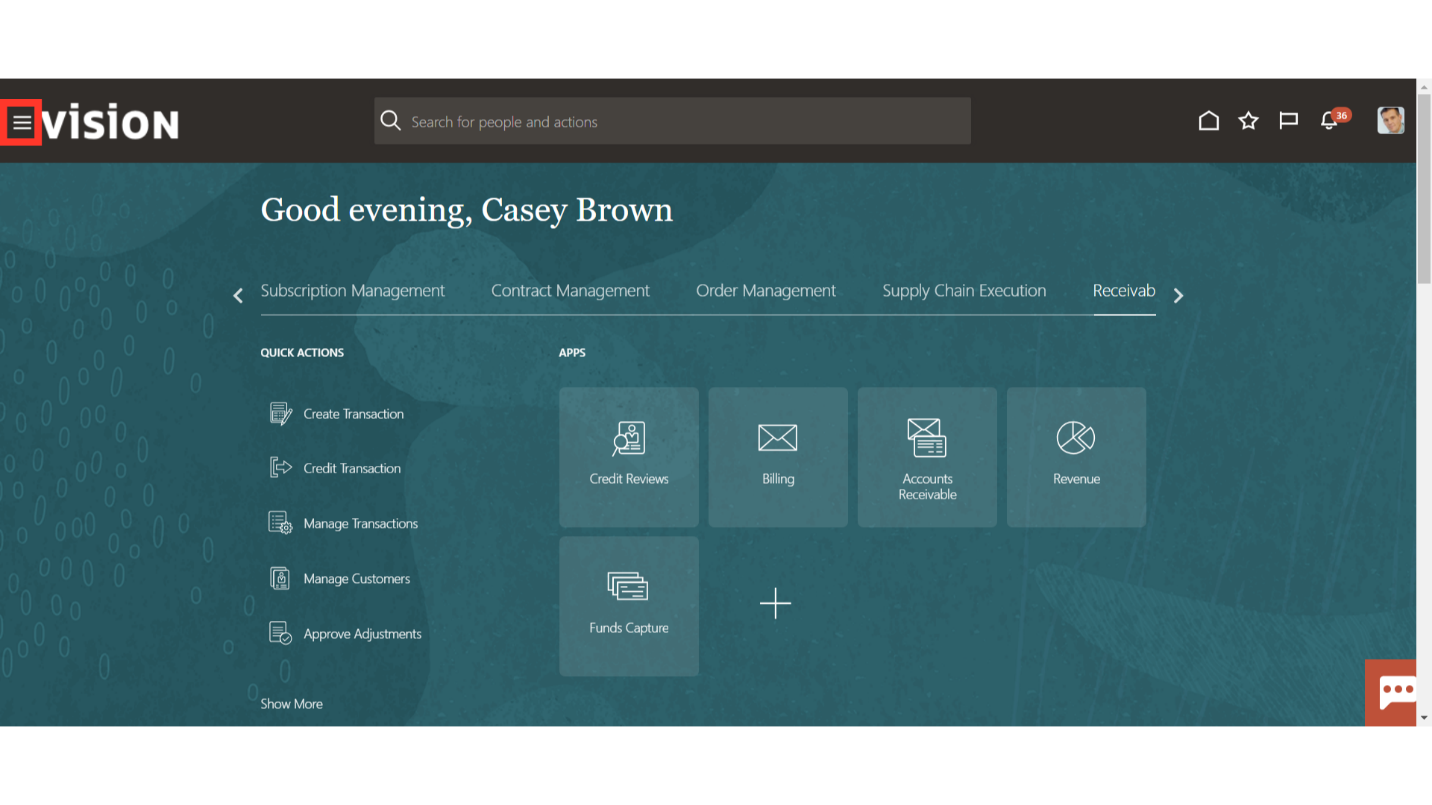
Access the Billing work area by selecting Billing under Receivables from the navigator. Alternatively, on the Home page, you may select the Receivables menu and under that select the Billing submenu.
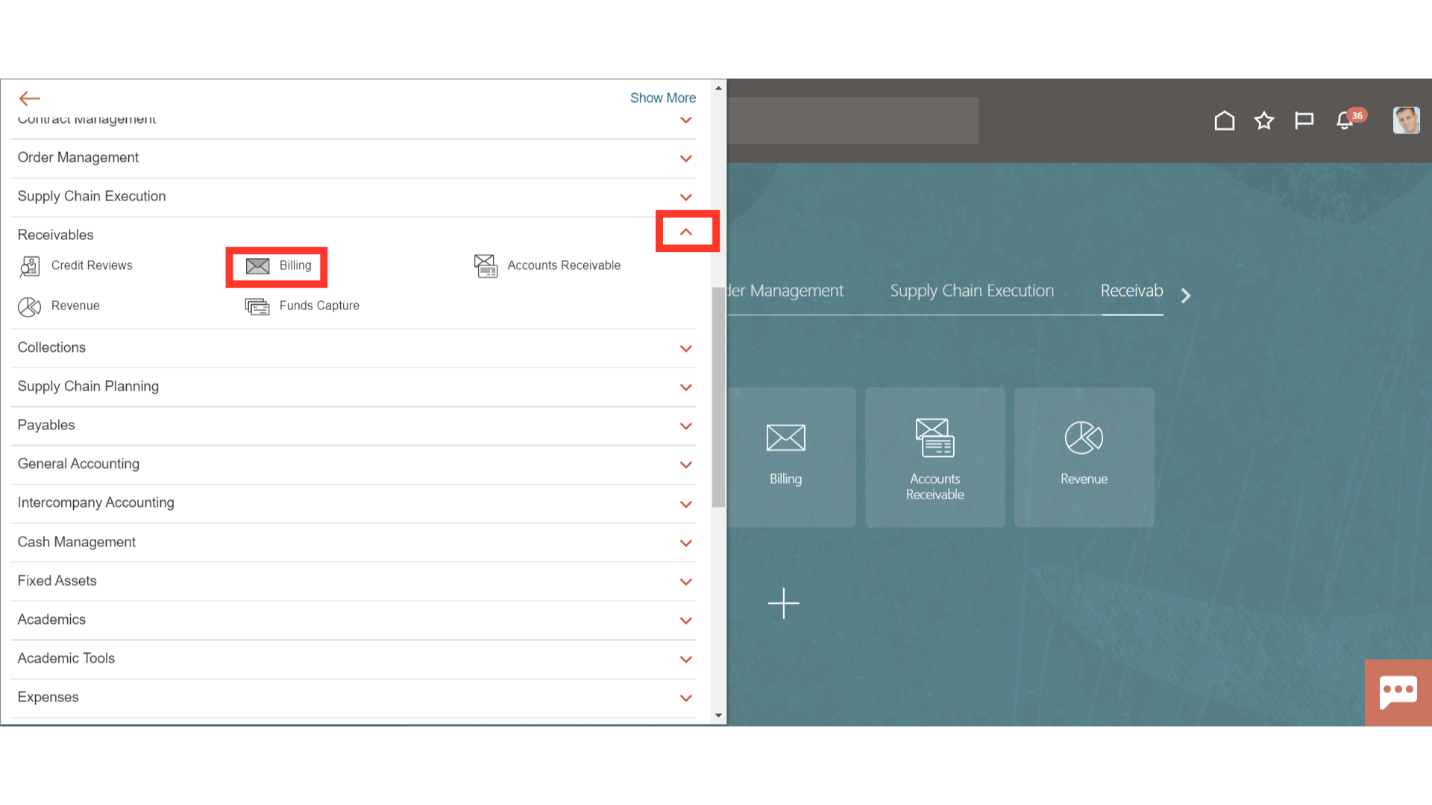
Click on the “Upload Customers from Spreadsheet” hyperlink under customers from the task list.
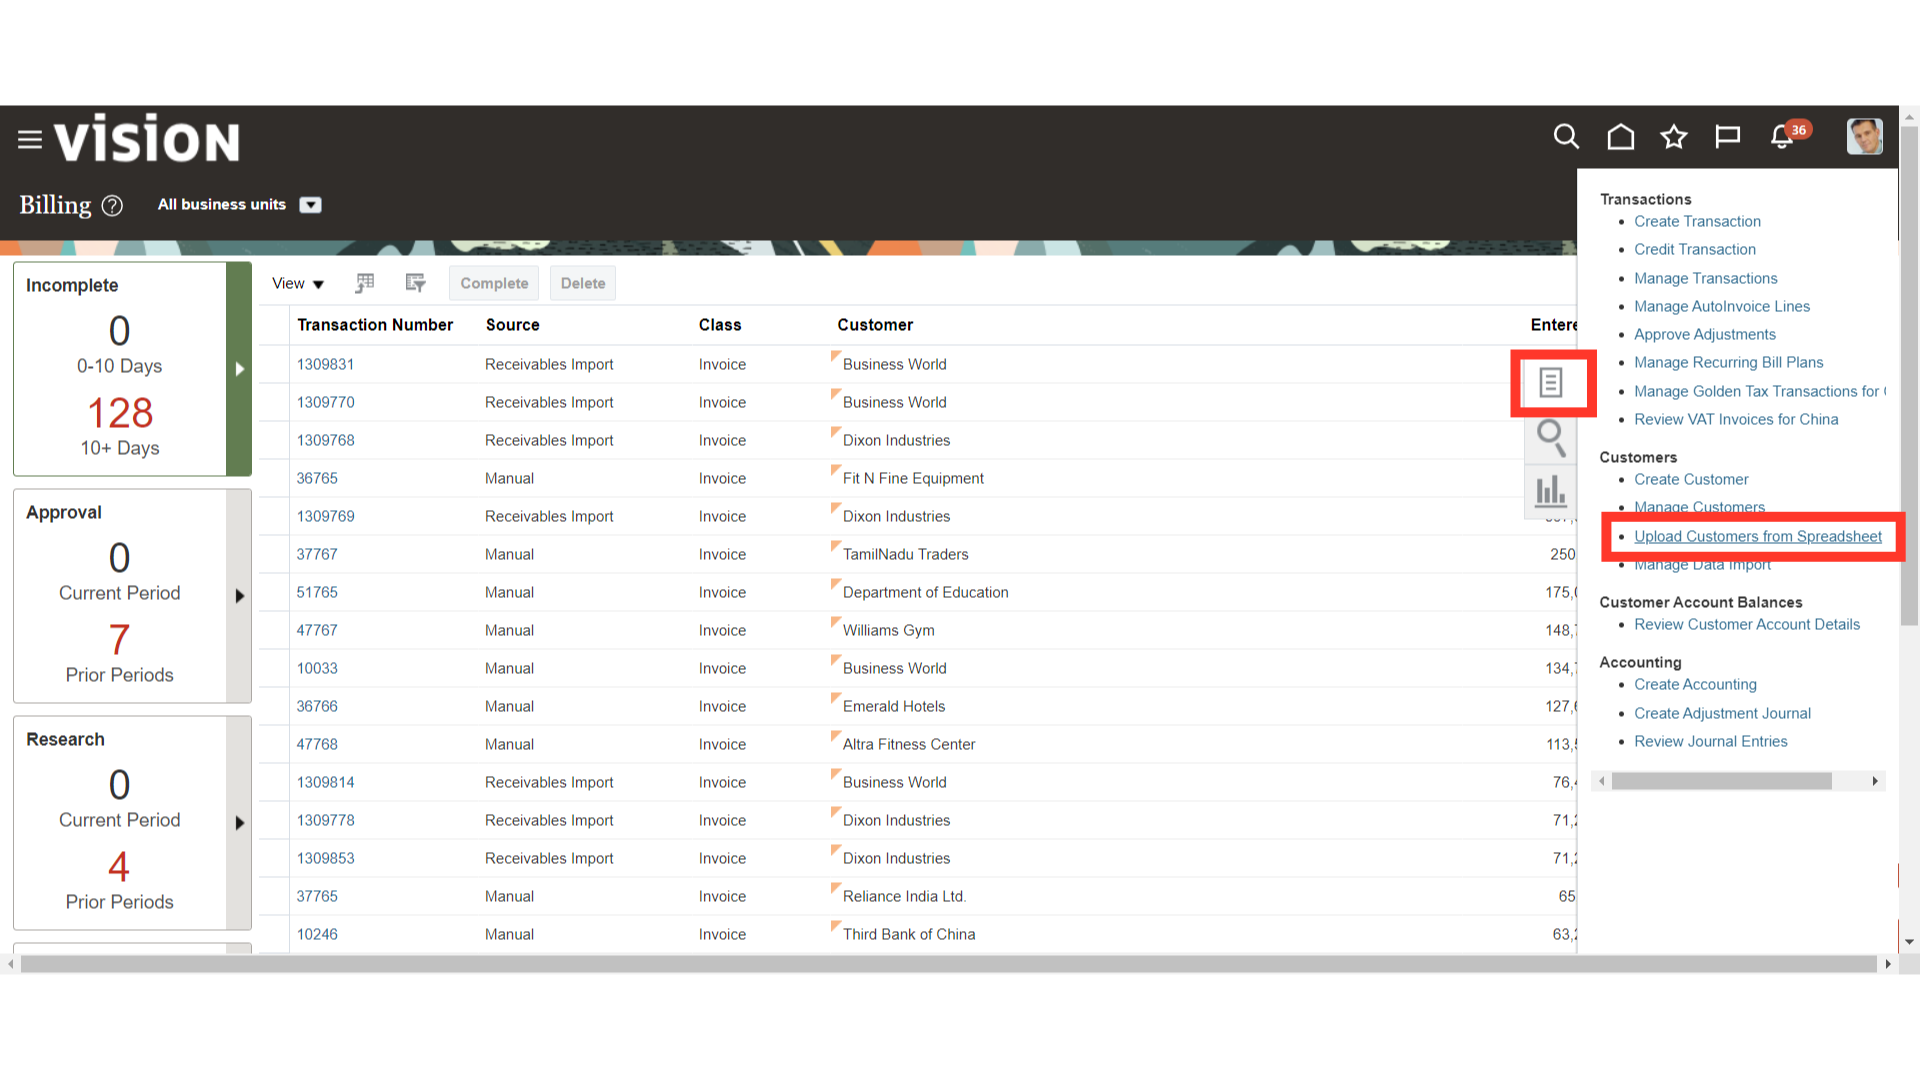
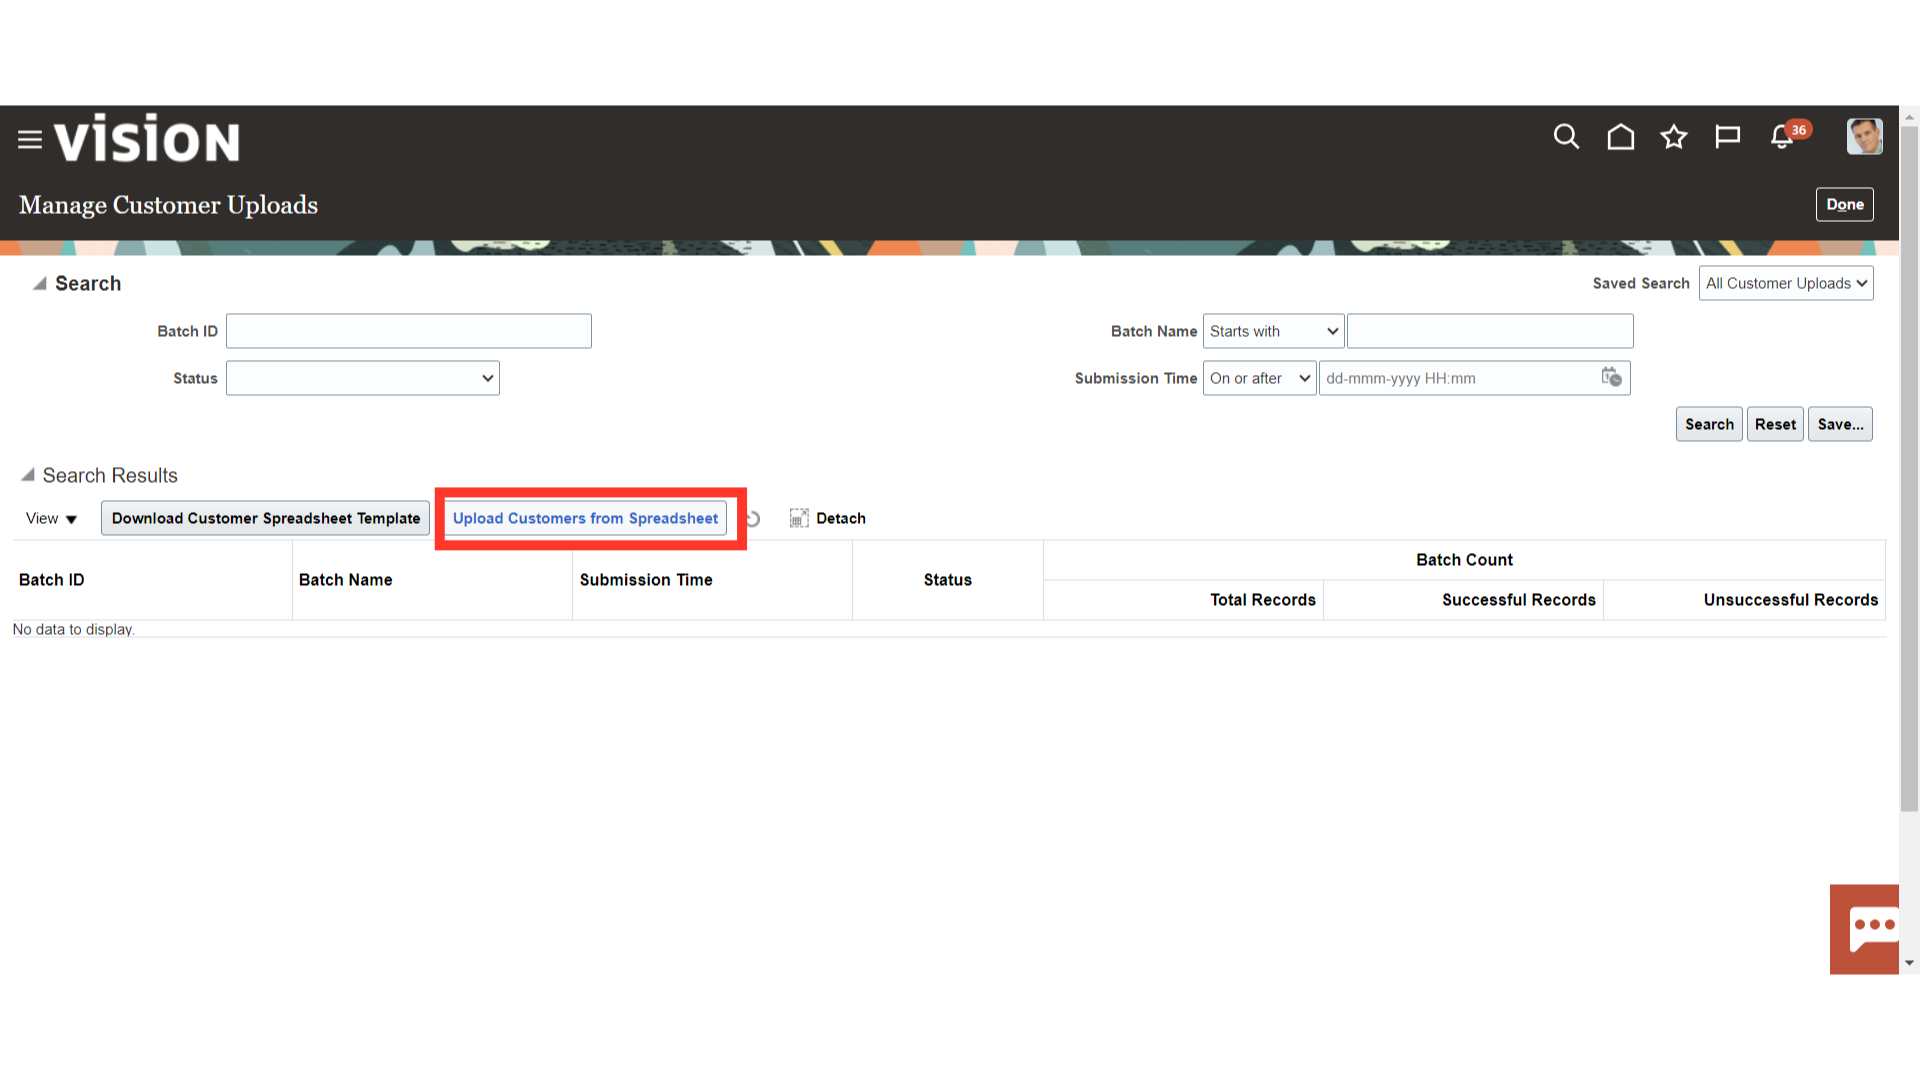
Click the Download Customer Spreadsheet Template button to download the customer spreadsheet template.
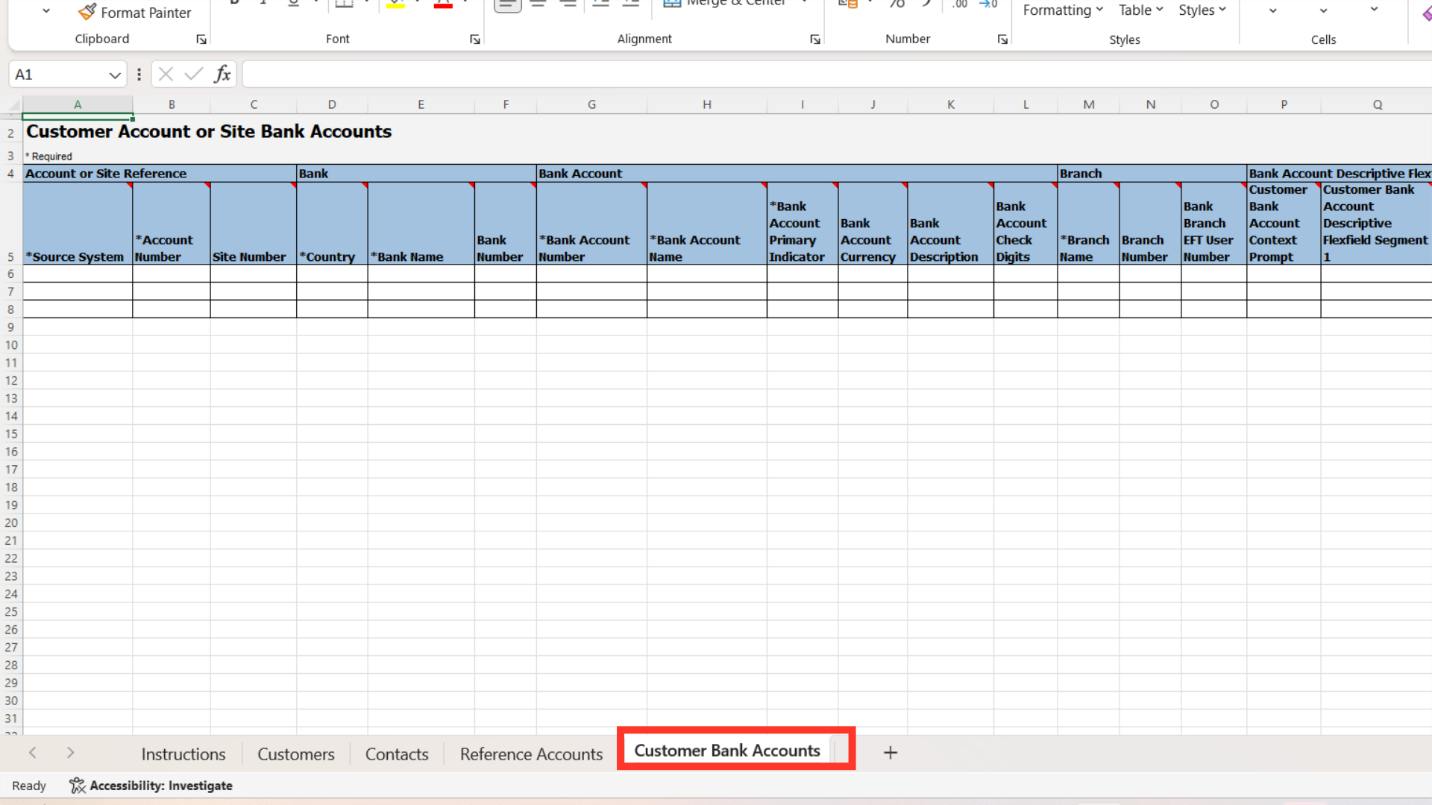
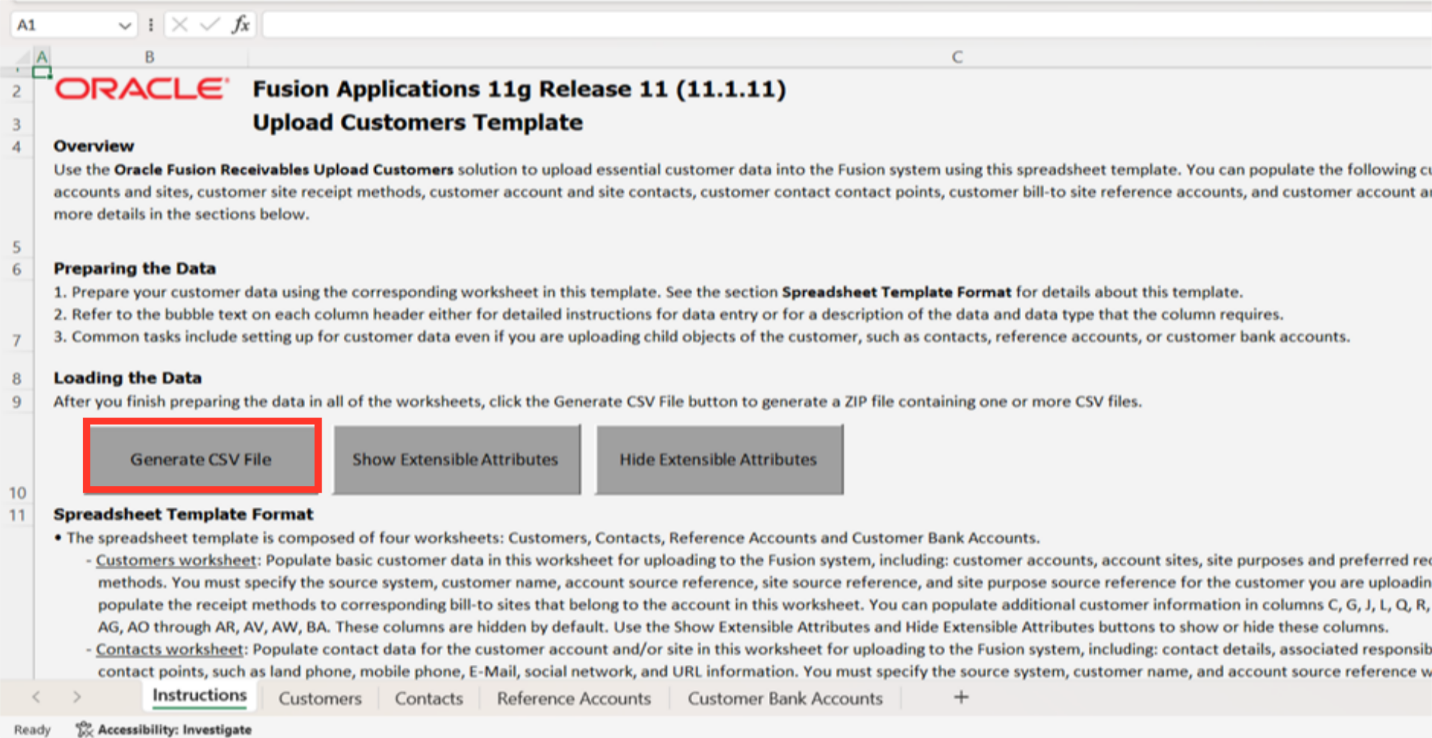
The template was used to generate the Comma Separated Values (CSV) files for loading Customer data from other Oracle applications and external sources to Receivables. Enter data in the designated columns in each of the four worksheets: Customers, Contacts, Reference Accounts, Customer Bank Accounts.
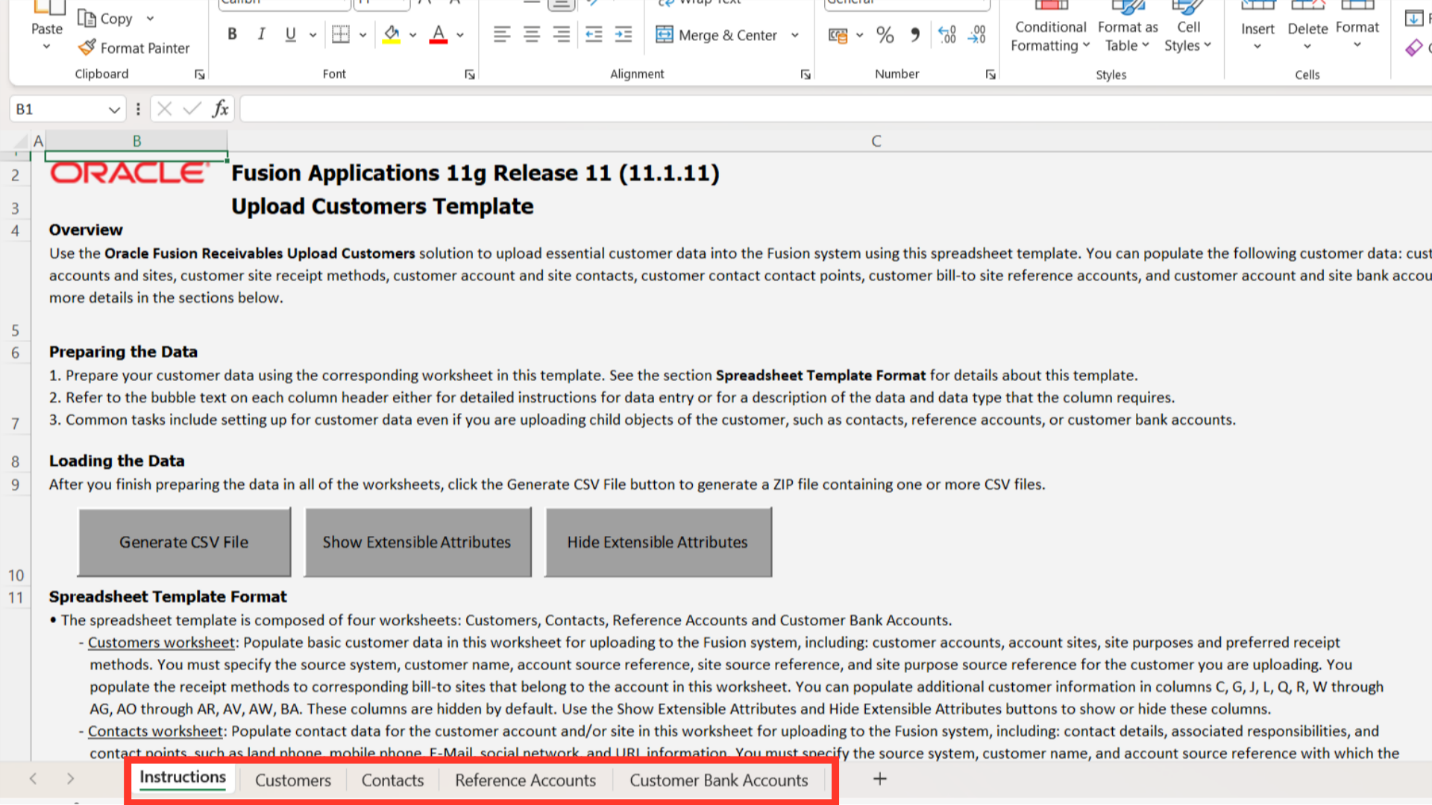
To understand what is required for each column, There is a note present for each of them. Hover the cursor over the right corner of the column header and review the Instructions for the format and kind of data to be entered Columns with one asterisk (*) indicate that it is mandatory; all other columns are optional.
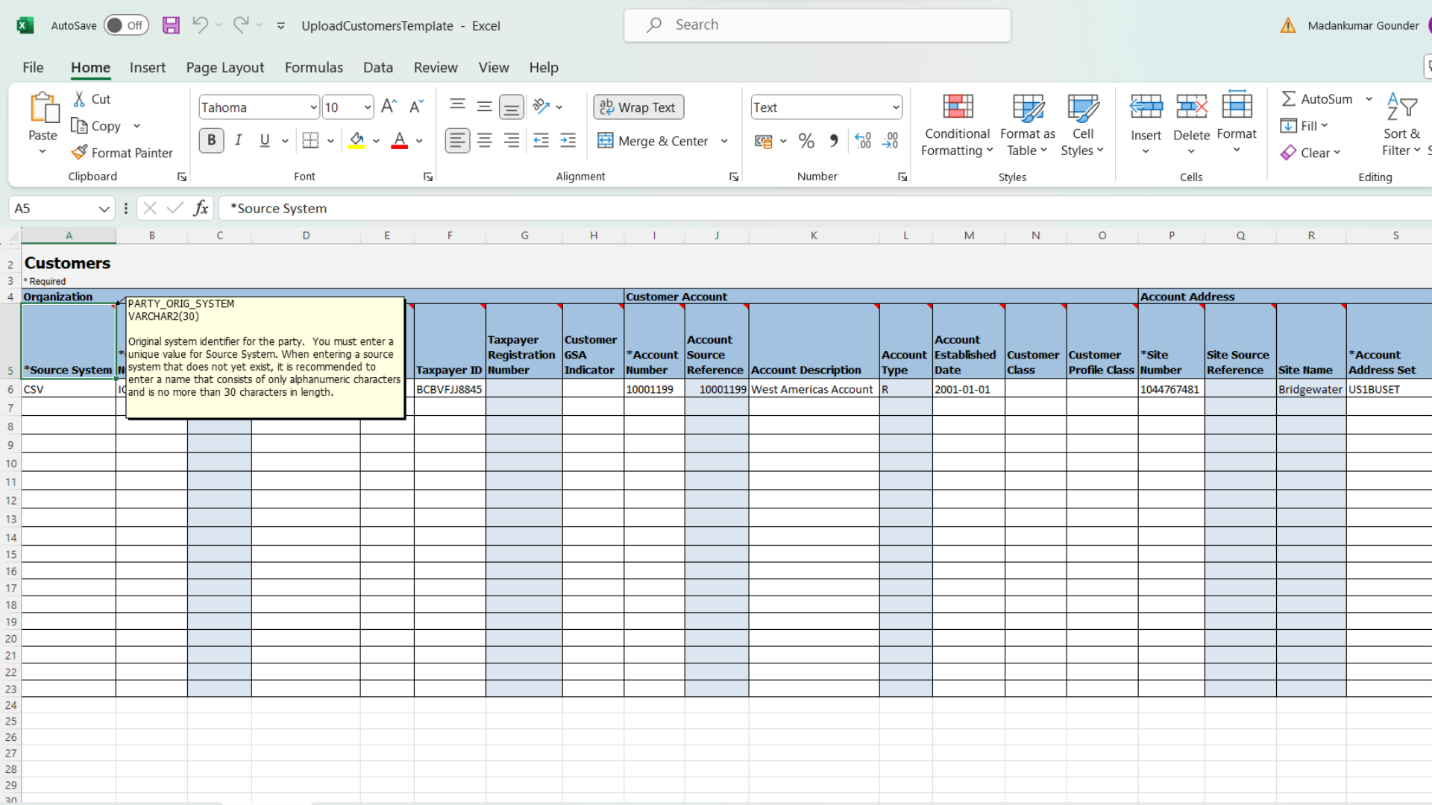
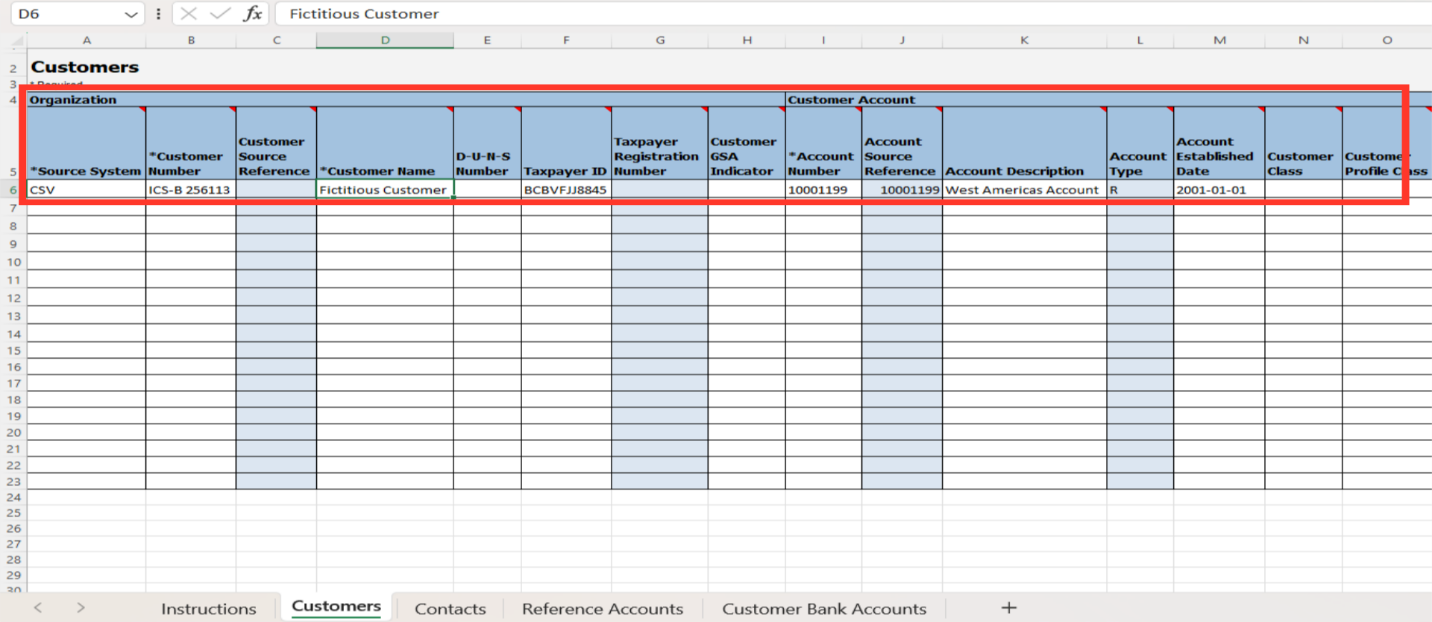
Navigate to the Source system to find out where the customer is imported from. Subsequently, enter the Customer Account details (account number, account description, and account establishment date) and the Organization details (customer number, name, and taxpayer ID). Choose Account type I for customers who generate revenue internally and Account type R for customers who generate revenue externally.
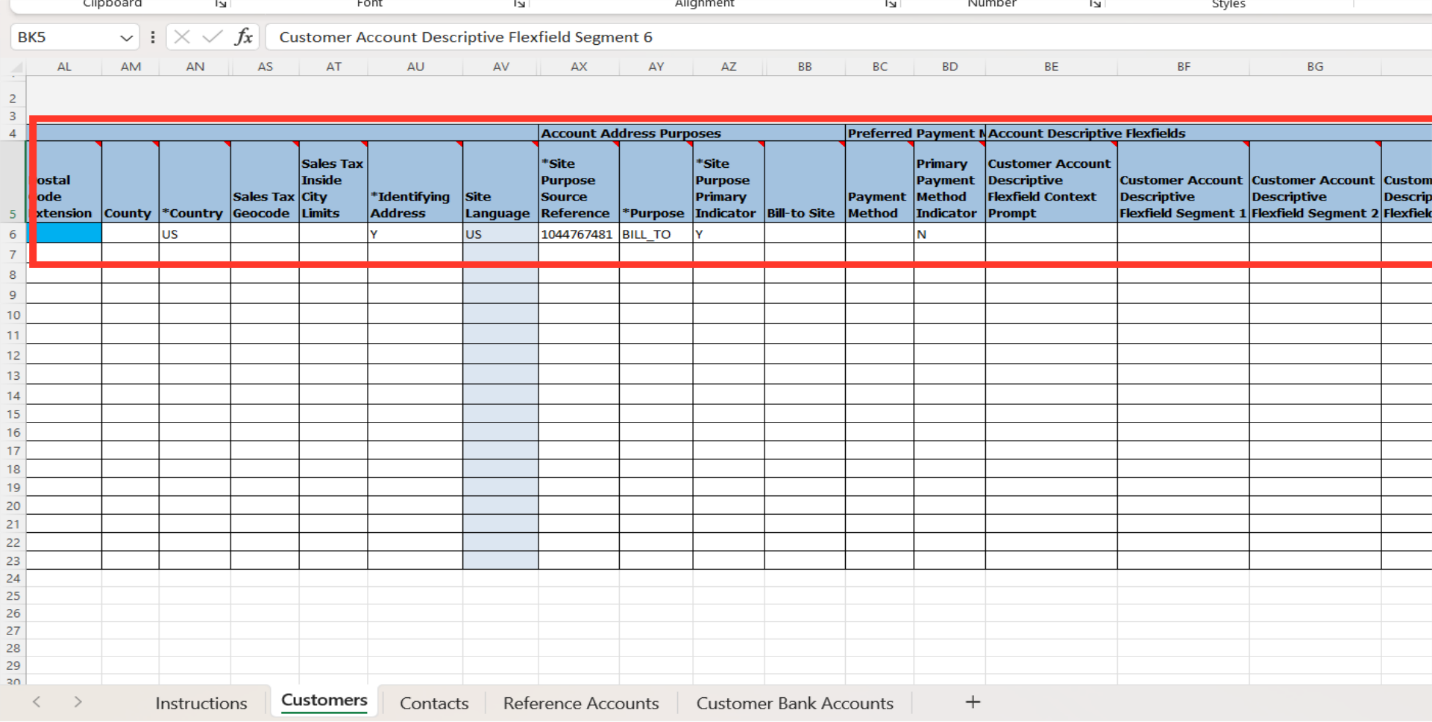
Enter the Customer site number, site name, and site address details. Account address set identifies a set of reference data shared across business units and other entities. Also known as Reference Data Sets, they are used to filter reference data in transactional user interfaces. In the Location Source reference column enter the Original system reference for the party site address.
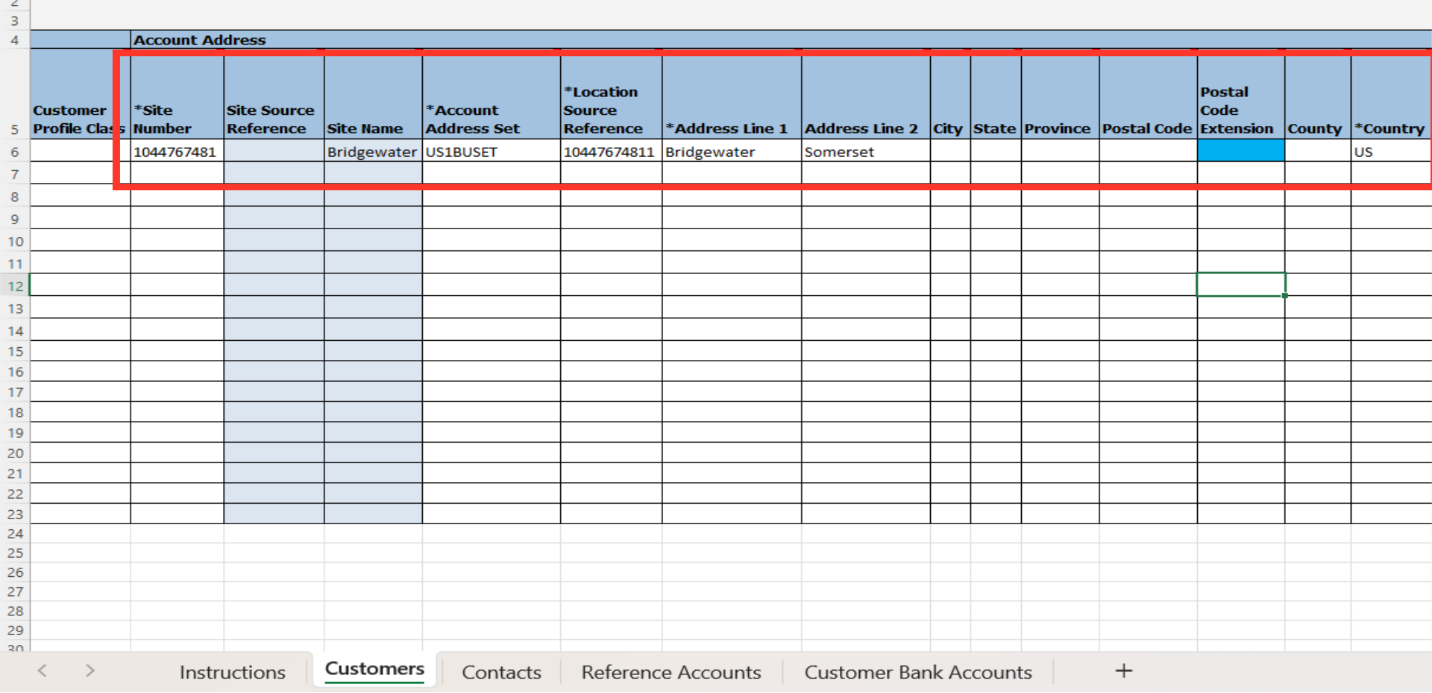
Identifying Address Indicates whether the customer site address is the identifying address for the customer organization. Valid values are Y and N. In Site purpose source reference enter Original system reference for the customer account site. In the purpose column select the site purpose such as bill-to, ship-to, or sold-to. Site Purpose Primary Indicator: Indicates whether the business purpose assigned to the customer site is the primary business purpose. Valid values are Y and N.
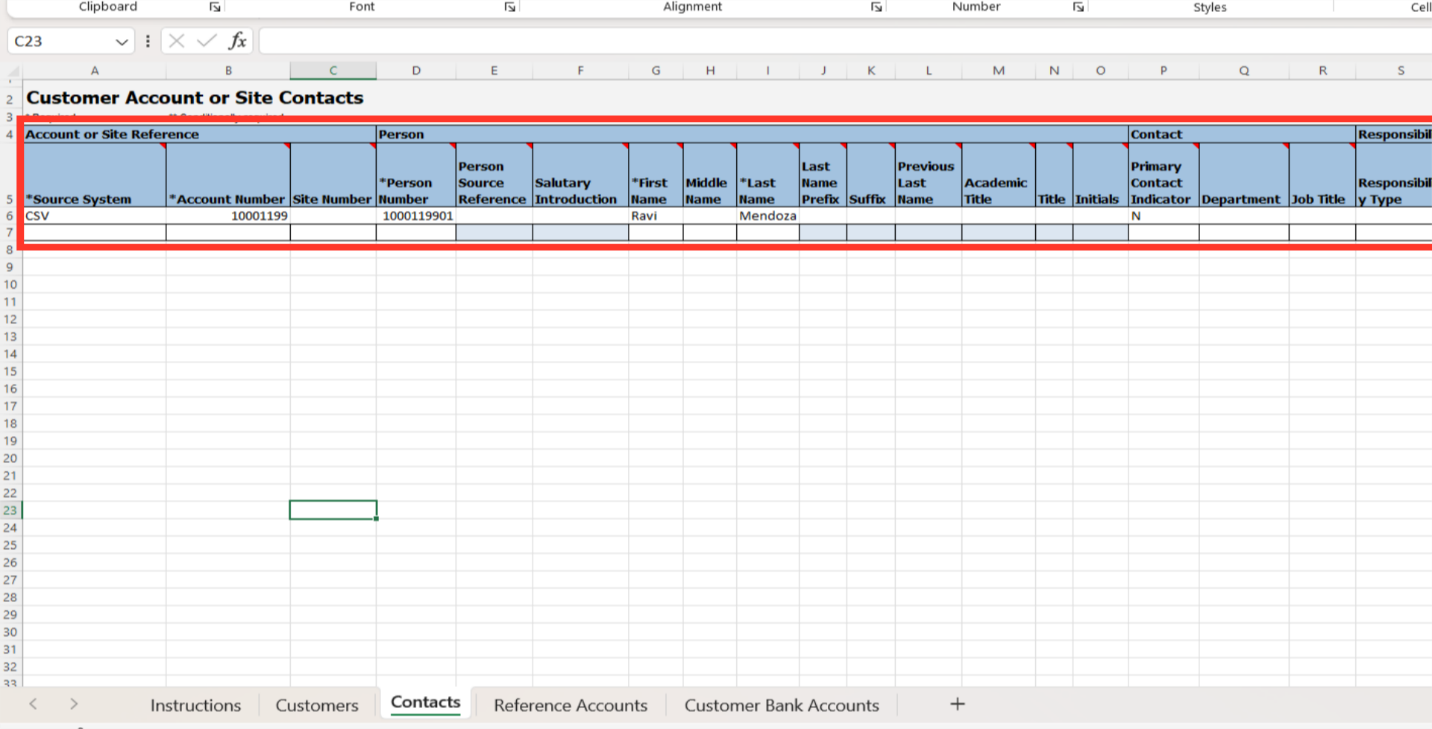
To enter the contact details of the customer, click on the Contacts sheet. Enter the person number which is the unique identifier of the contact person. Further, enter the Person’s first name and last name details.
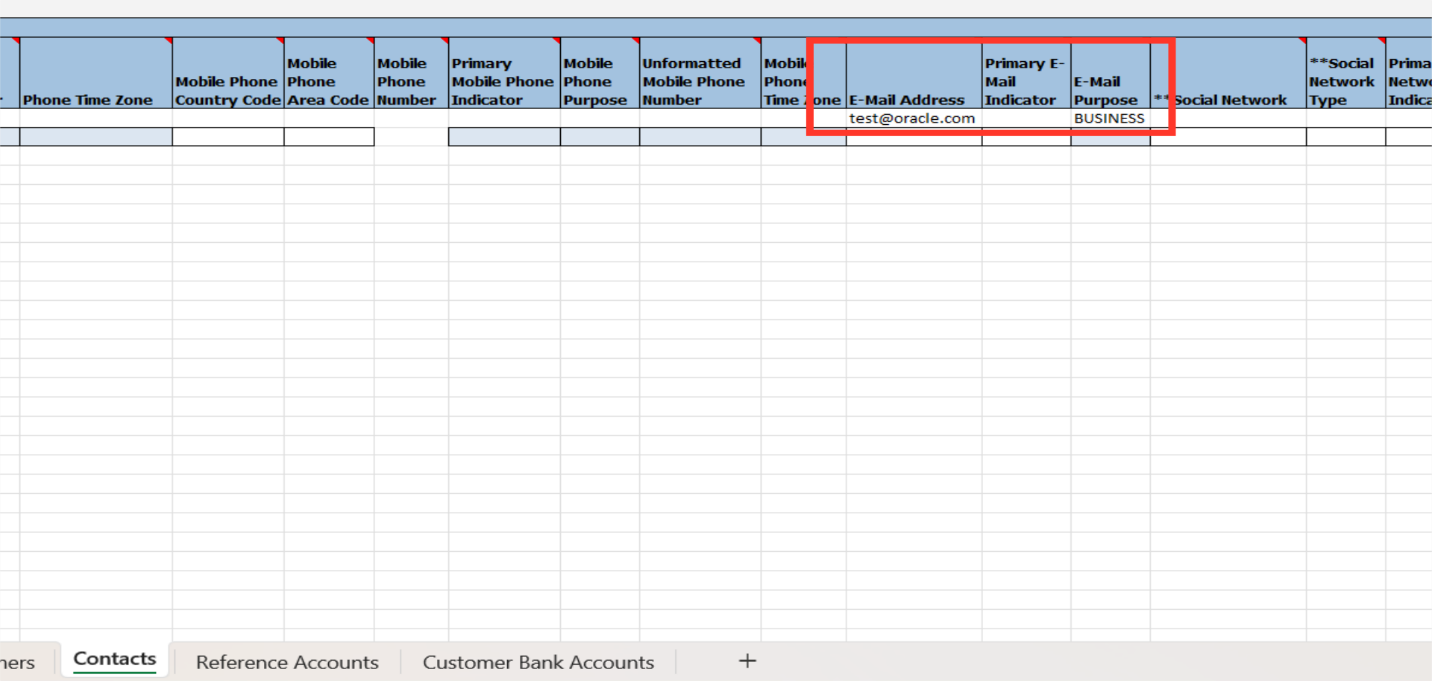
Enter the email ID of the person to whom invoices, dunning letters, etc can be sent from Oracle Fusion to this email ID. Enter E-mail purpose, such as business or personal.
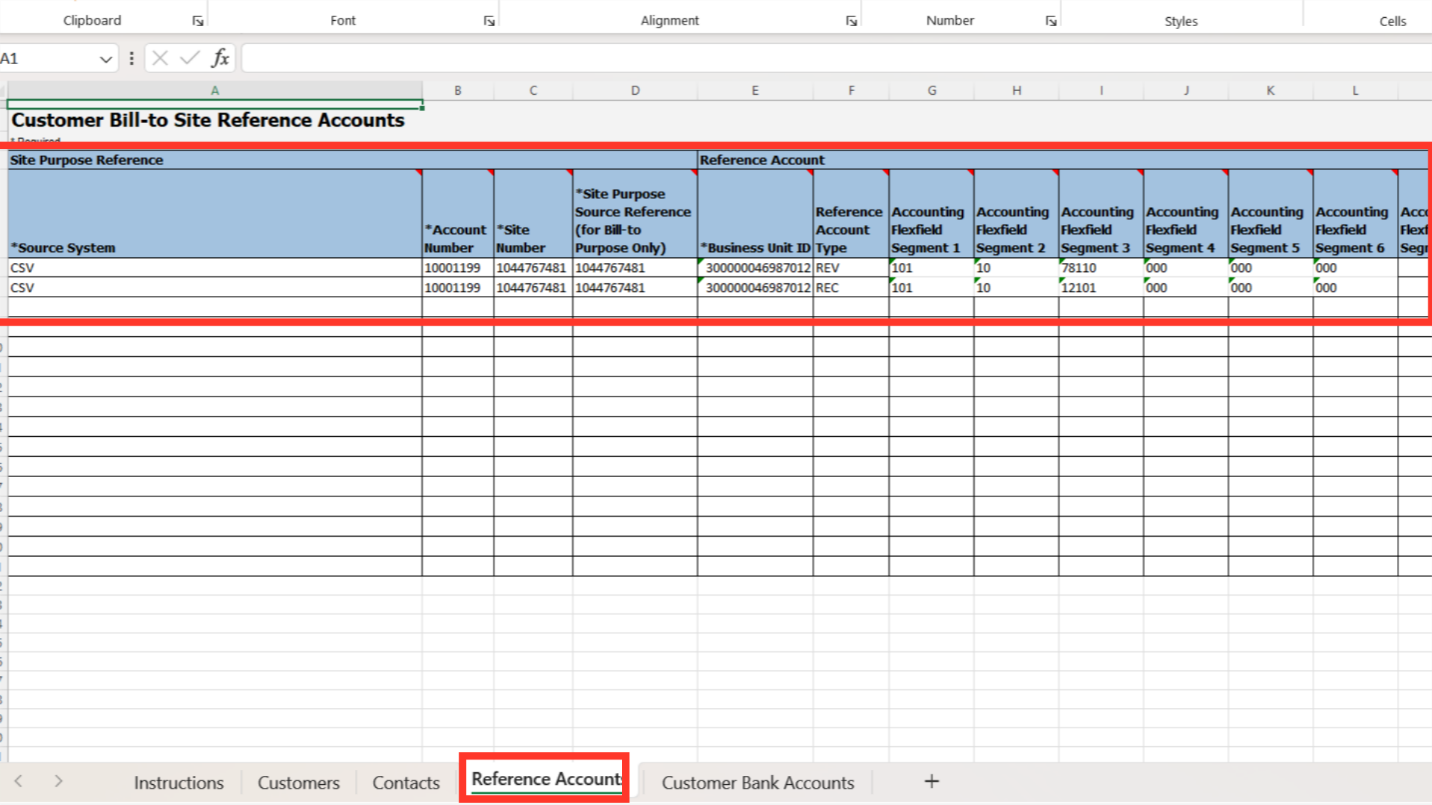
In case account combinations are to be defaulted from the customer master, enter the account segments in the Reference accounts sheet.
Using the Customer Bank Accounts sheet, the details of the bank account related to the customer can be entered.
After the Data is prepared, Go to the Instructions and CSV Generation sheet and click on the Generate CSV File button.
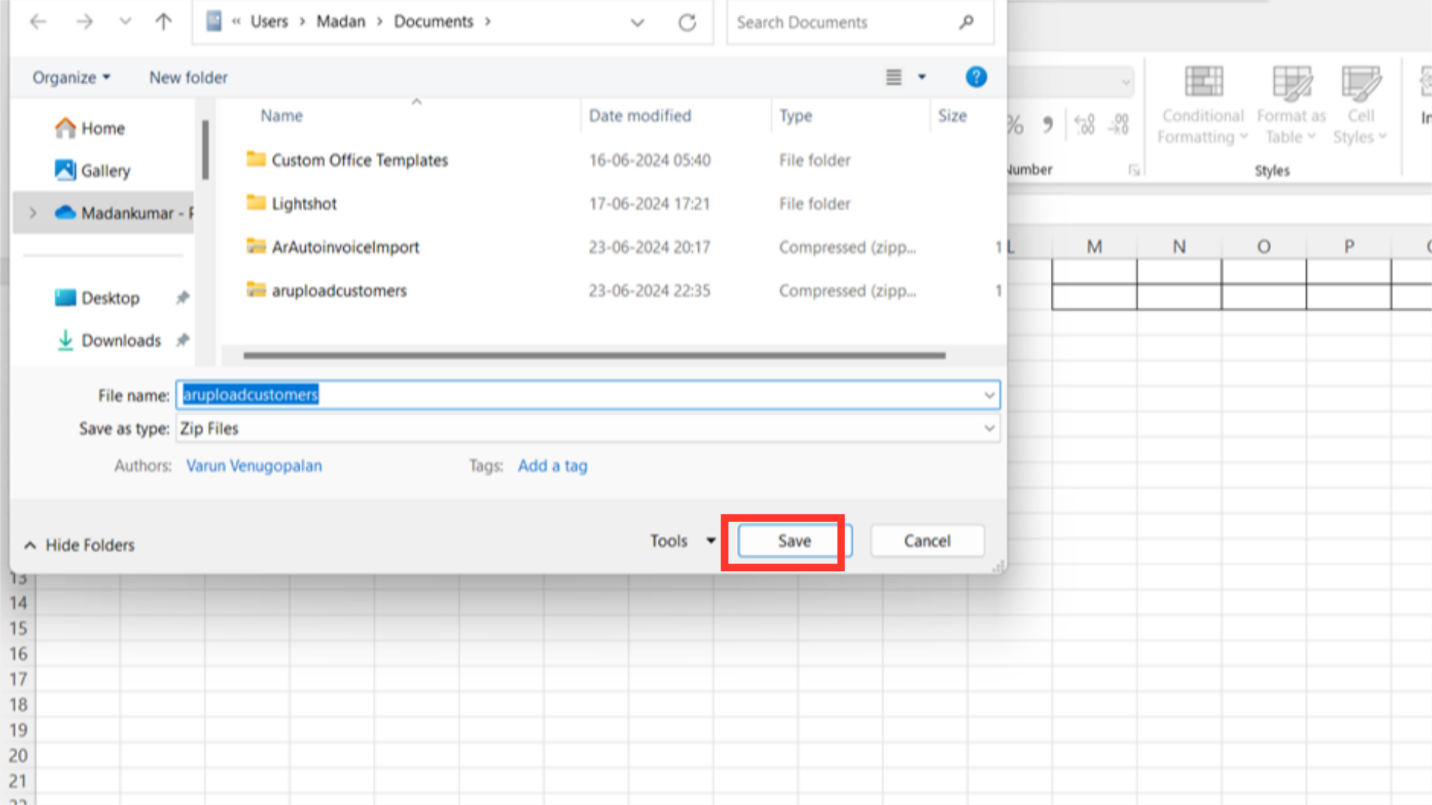
The system will prompt to ask for the location to save the Zip file that would be generated. Store the Zip file in your local system.
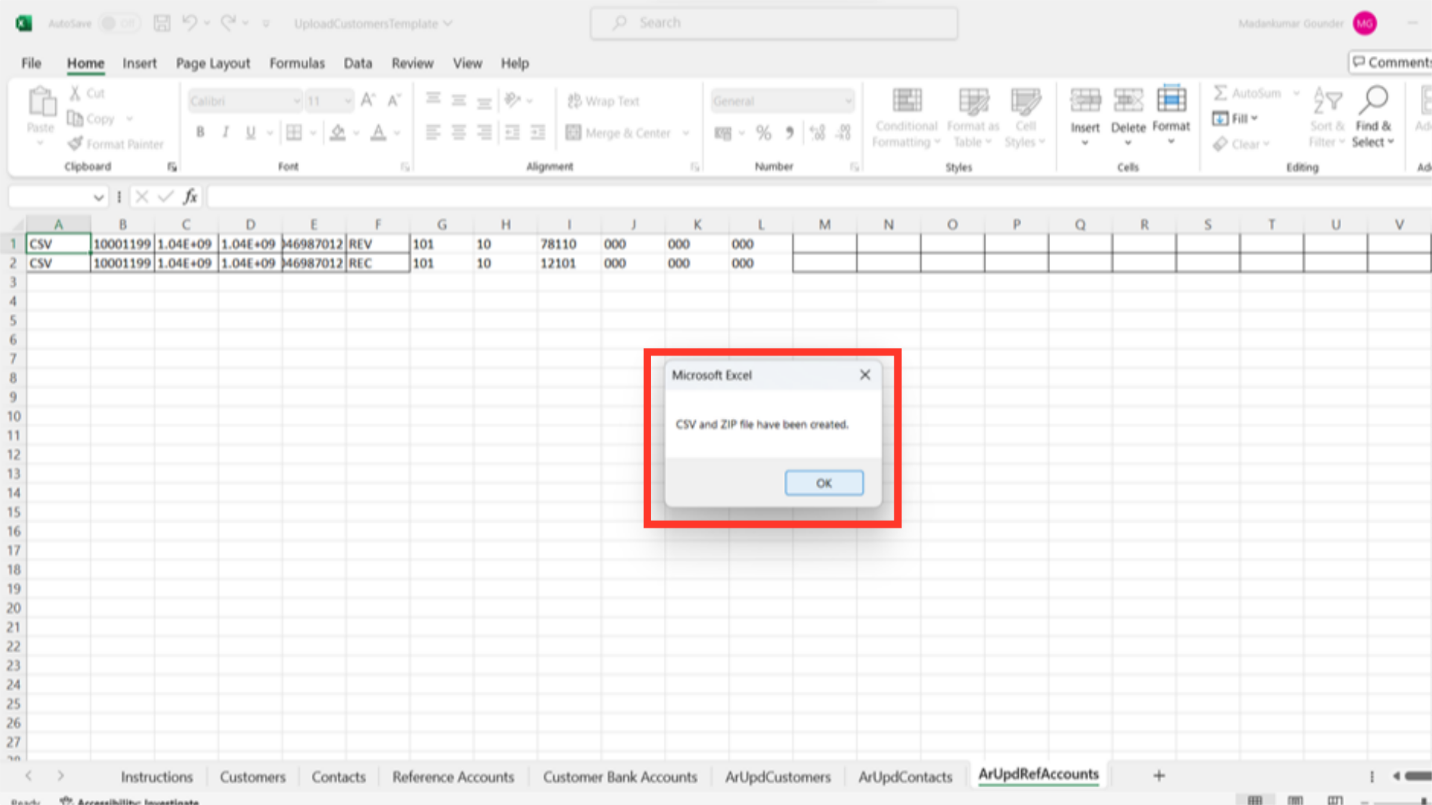
Once the Zip file is generated successfully excel will display the below message. Click on OK.
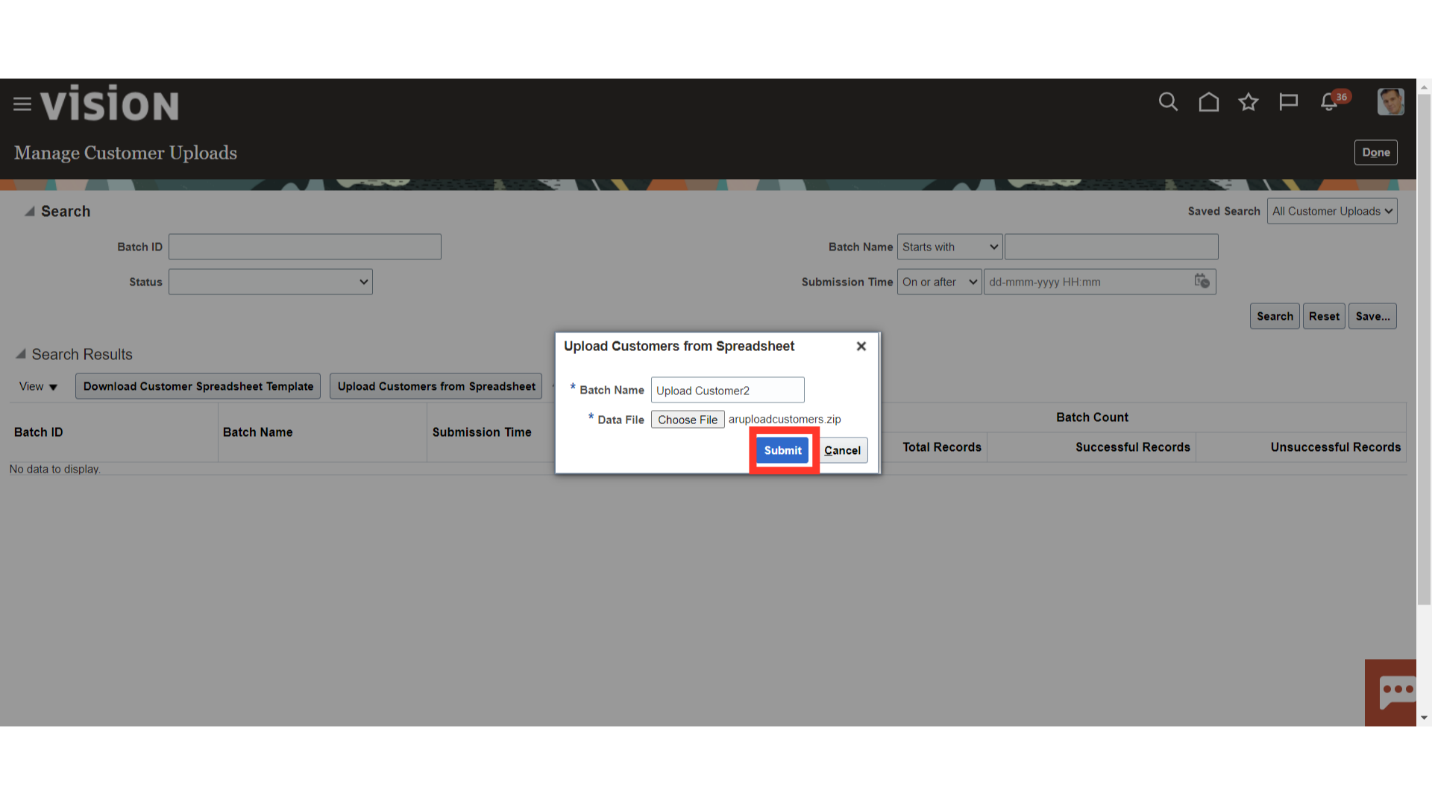
To upload the zip file into the system, click on the “Upload Customers from Spreadsheet” button.
Once the Batch name is enter and Zip File is uploaded, click on the submit button to submit the process.
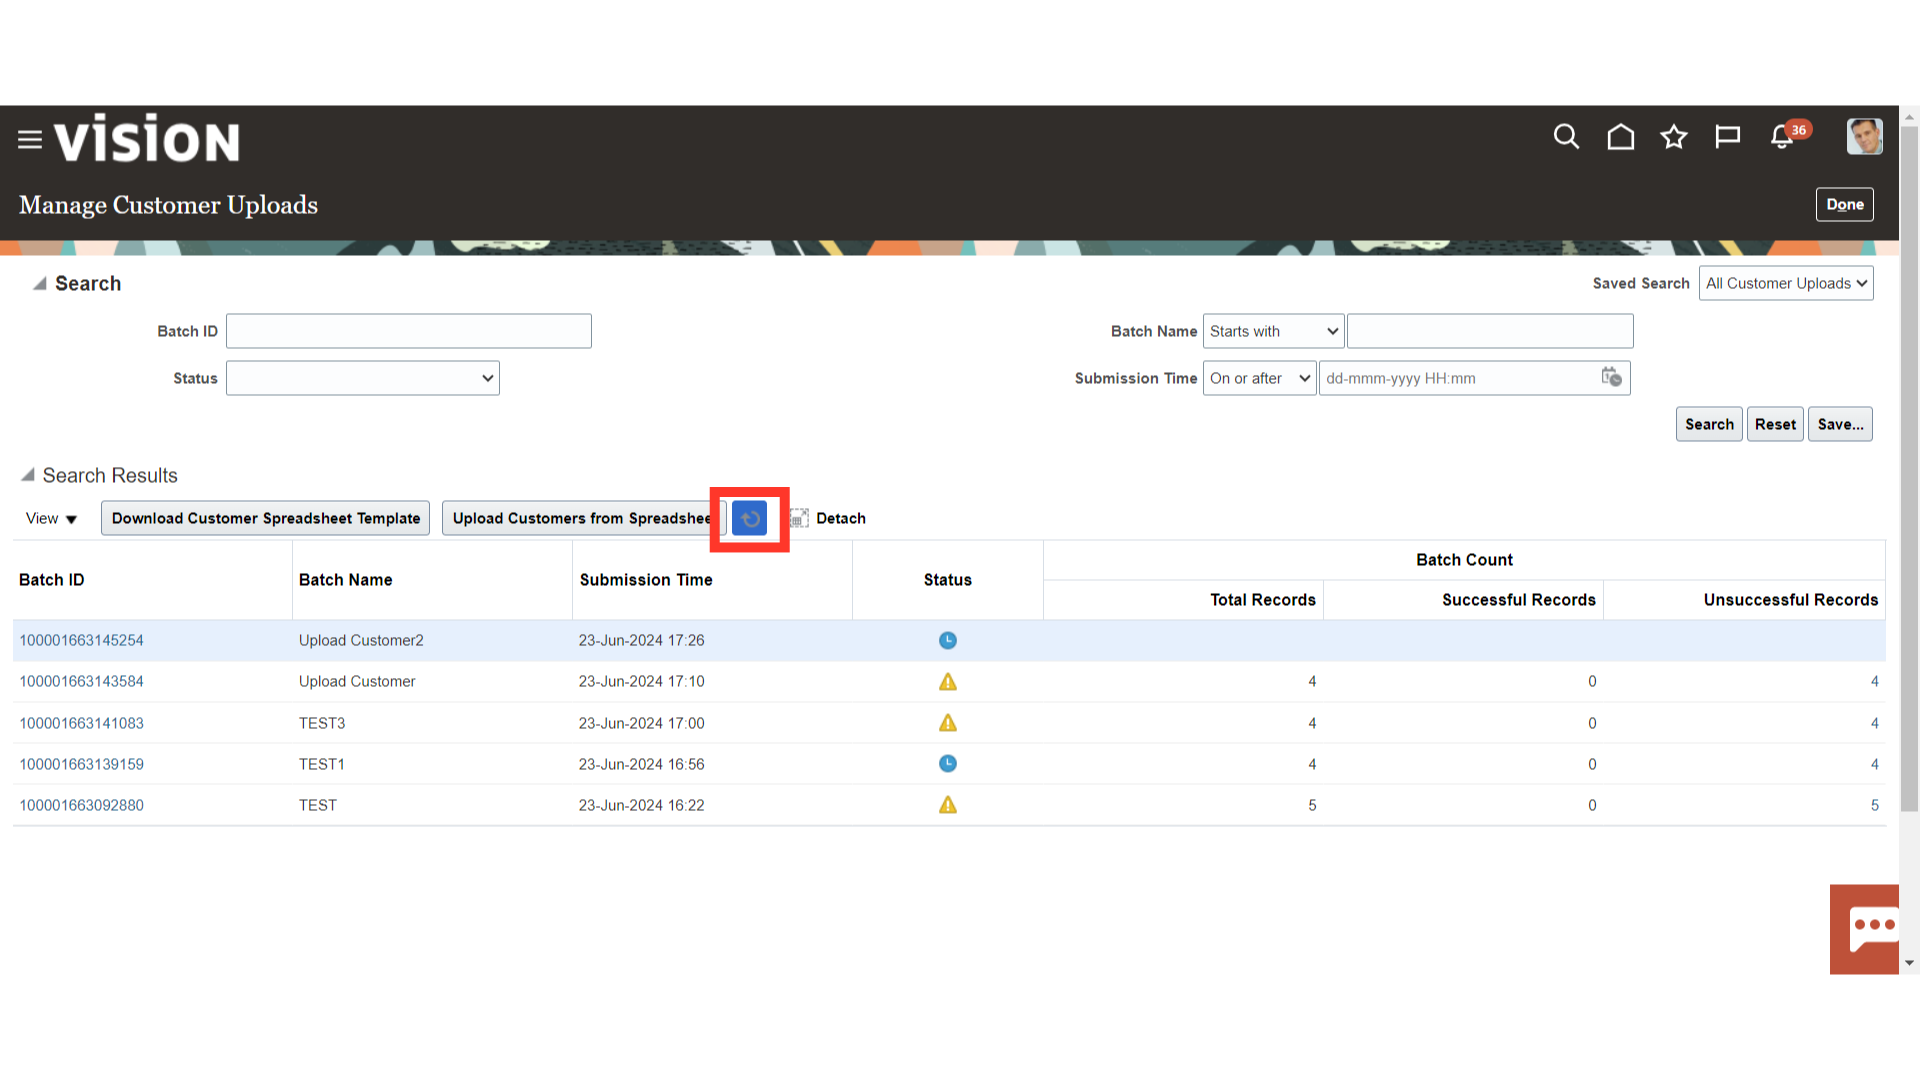
Click on the Refresh icon, to update the process status.
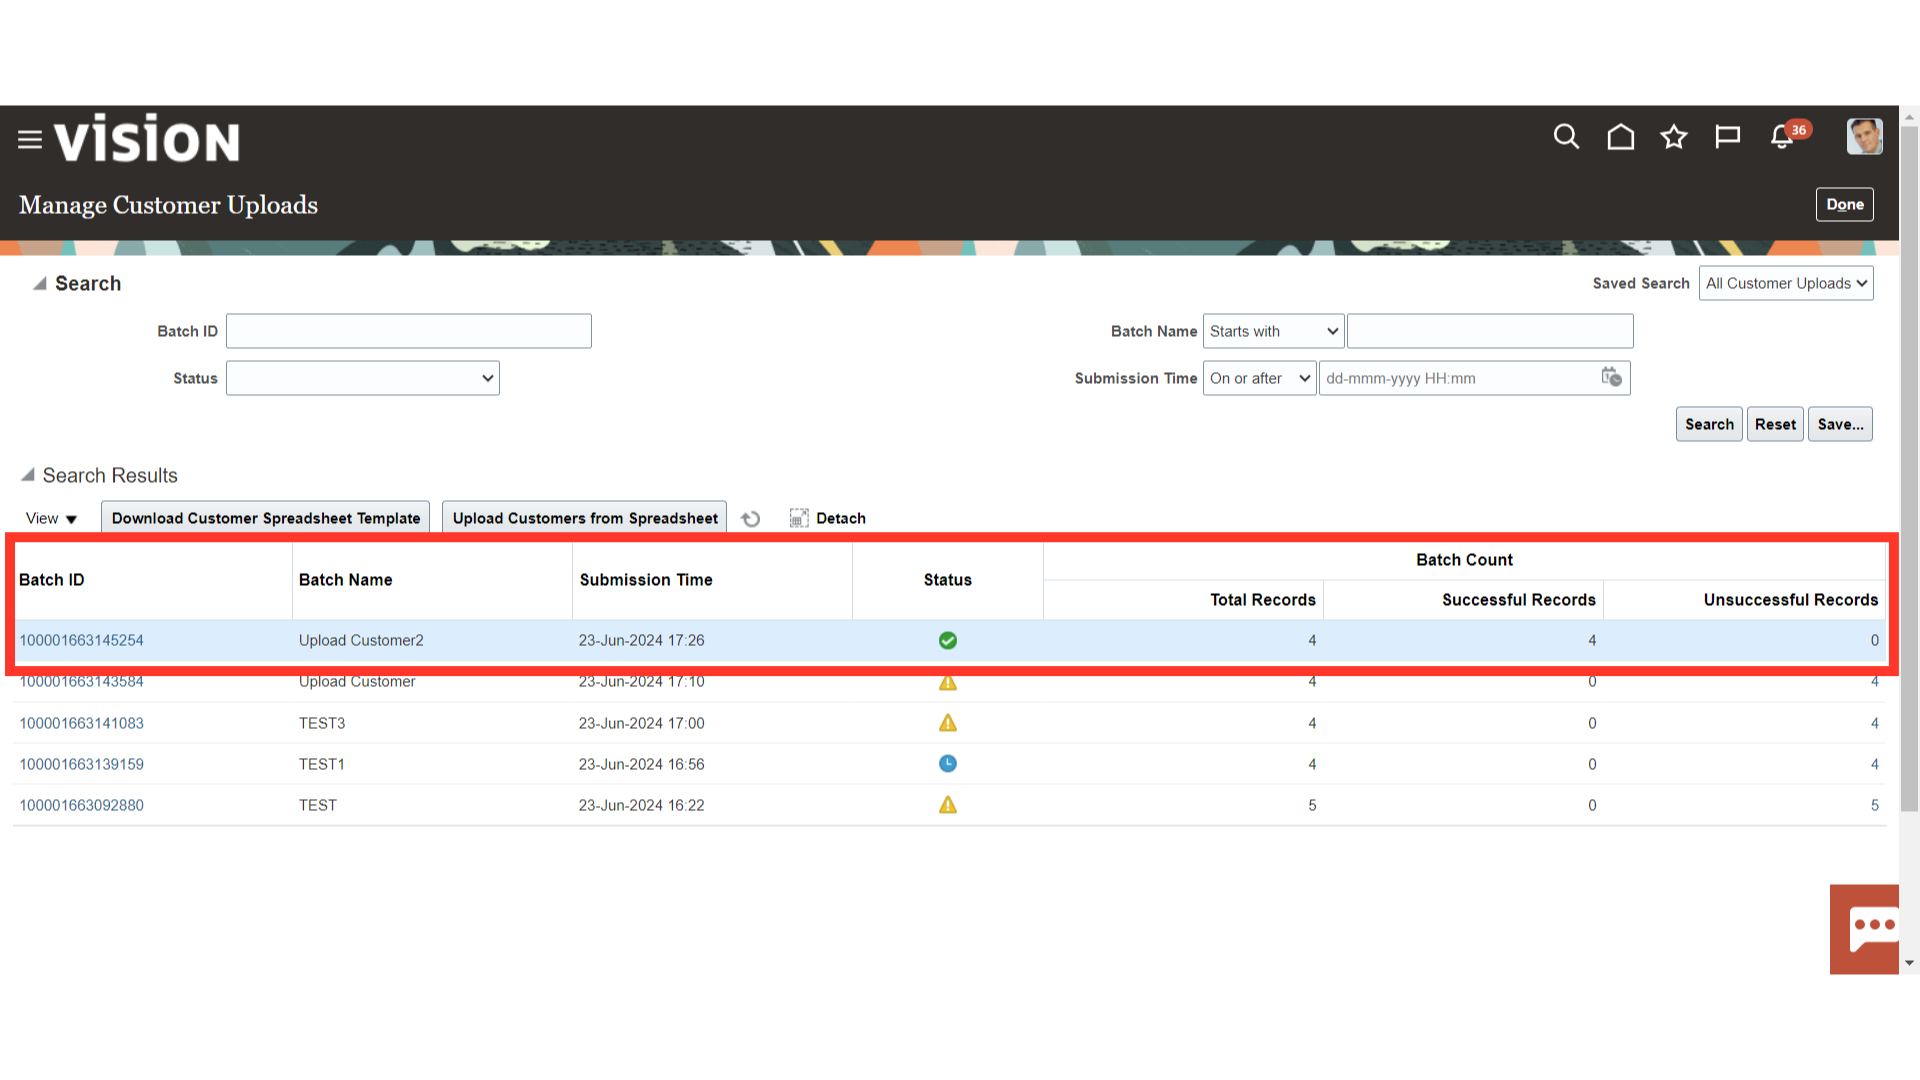
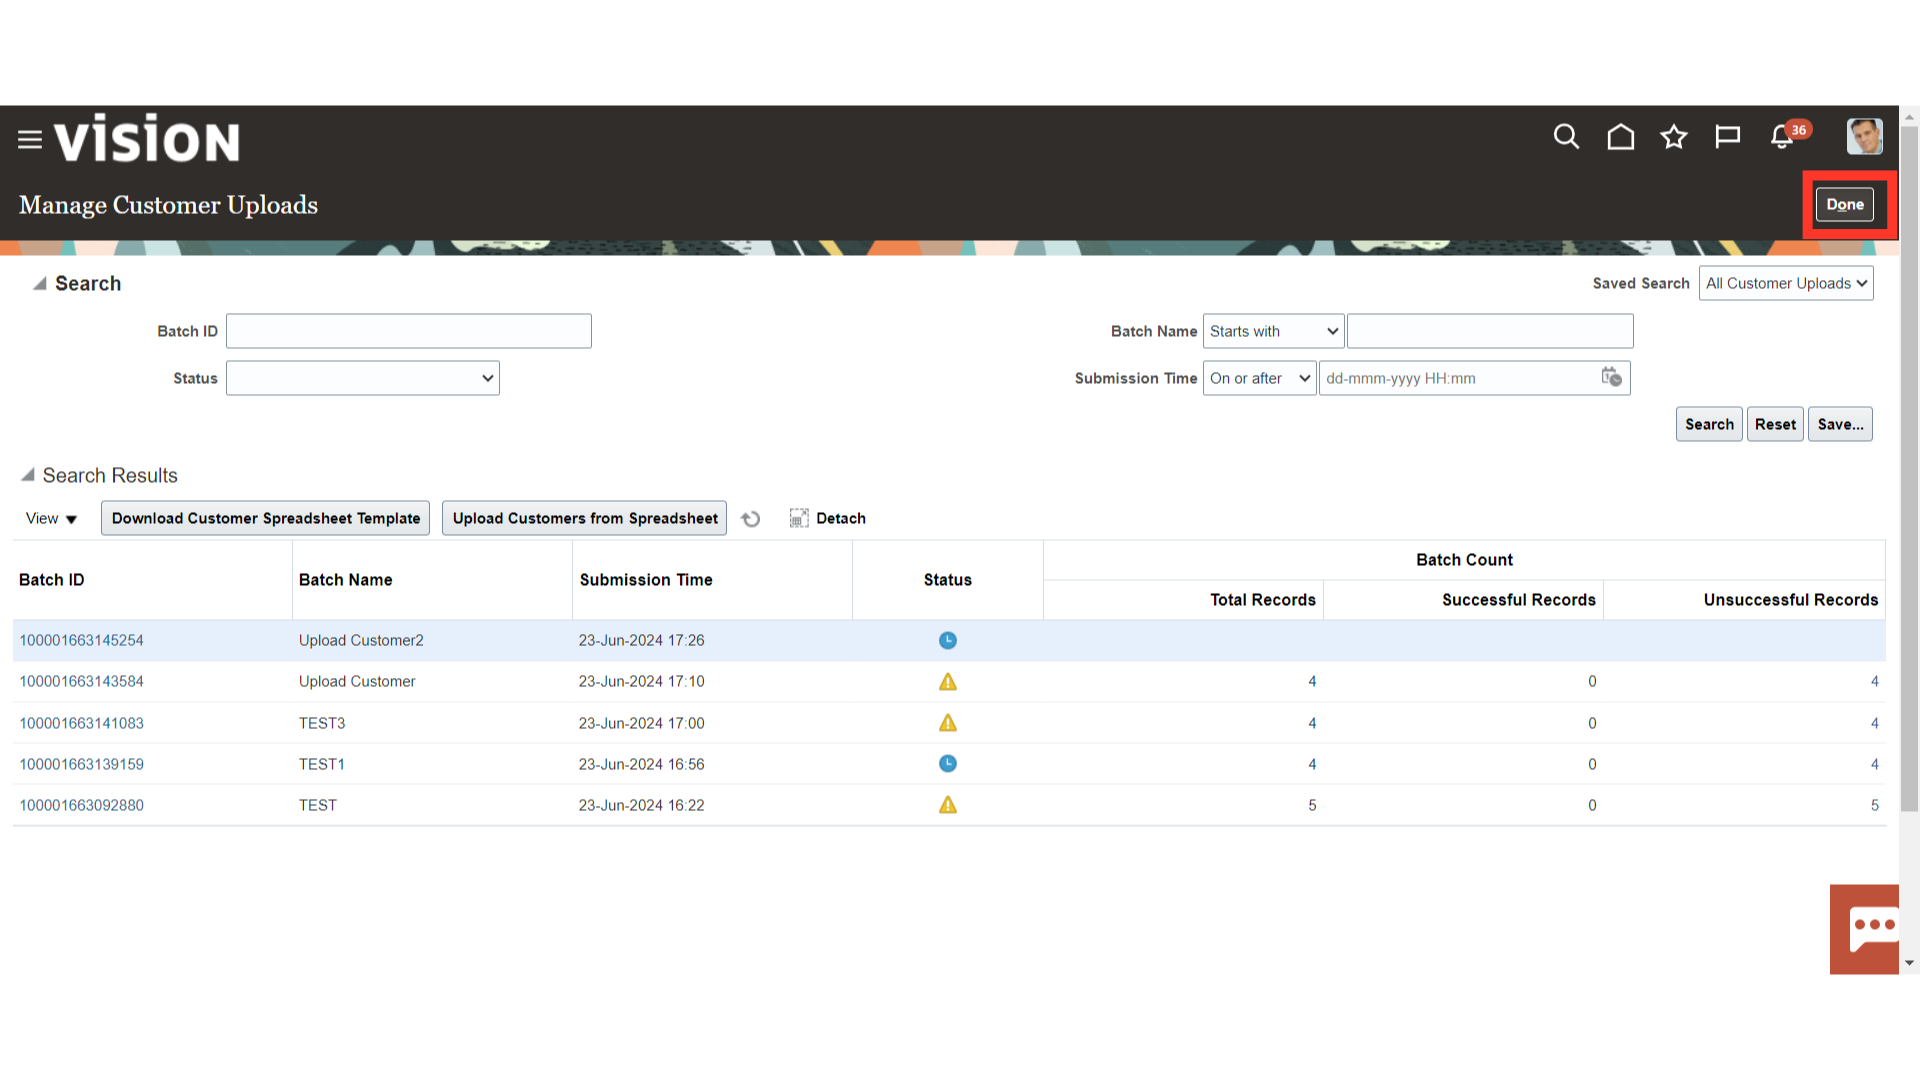
Green tick will be displayed as the status after the import is finished. Additionally, the total number of imported records as well as those that were unsuccessfully created are shown.
Click on the Done button to return to back to Billing work area.
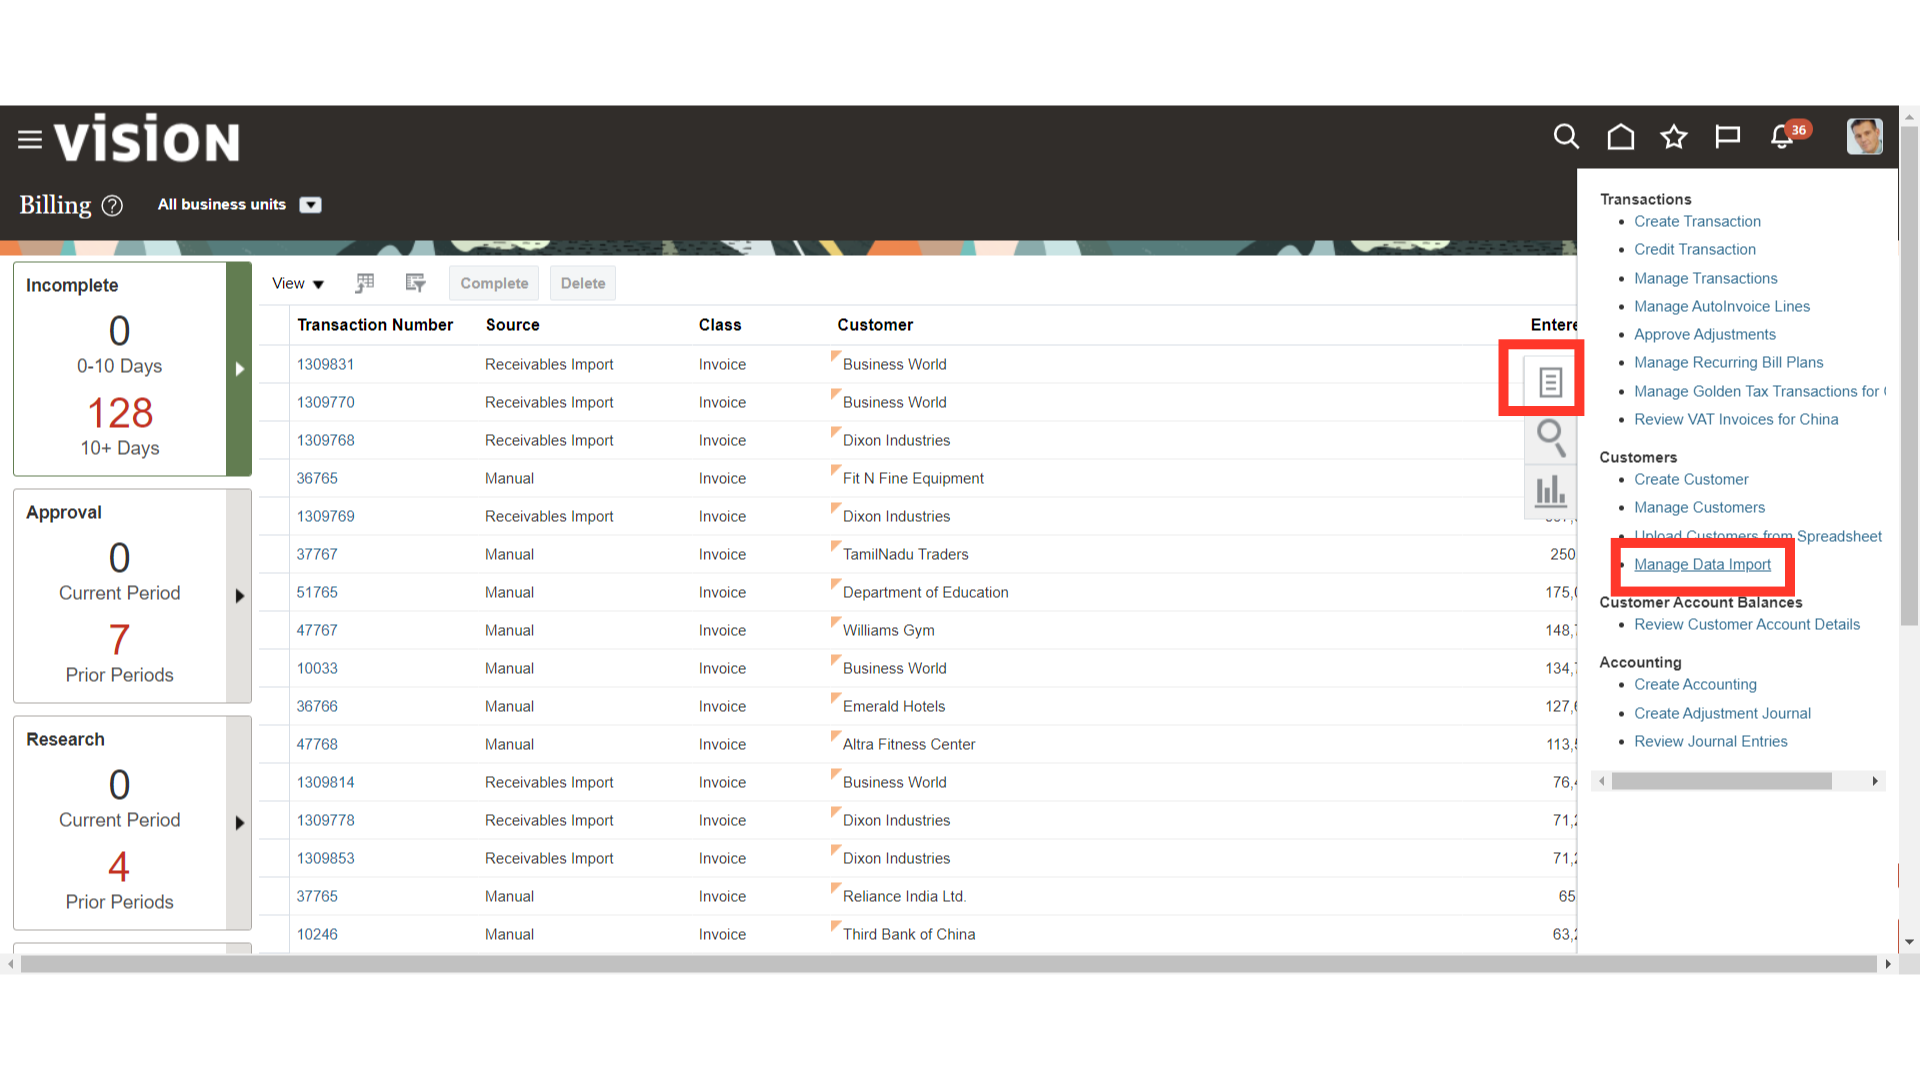
Select the Manage Data import link from the task list to view a detailed report on the upload status for customers.
Again, click on refresh icon to update the customer upload process status.

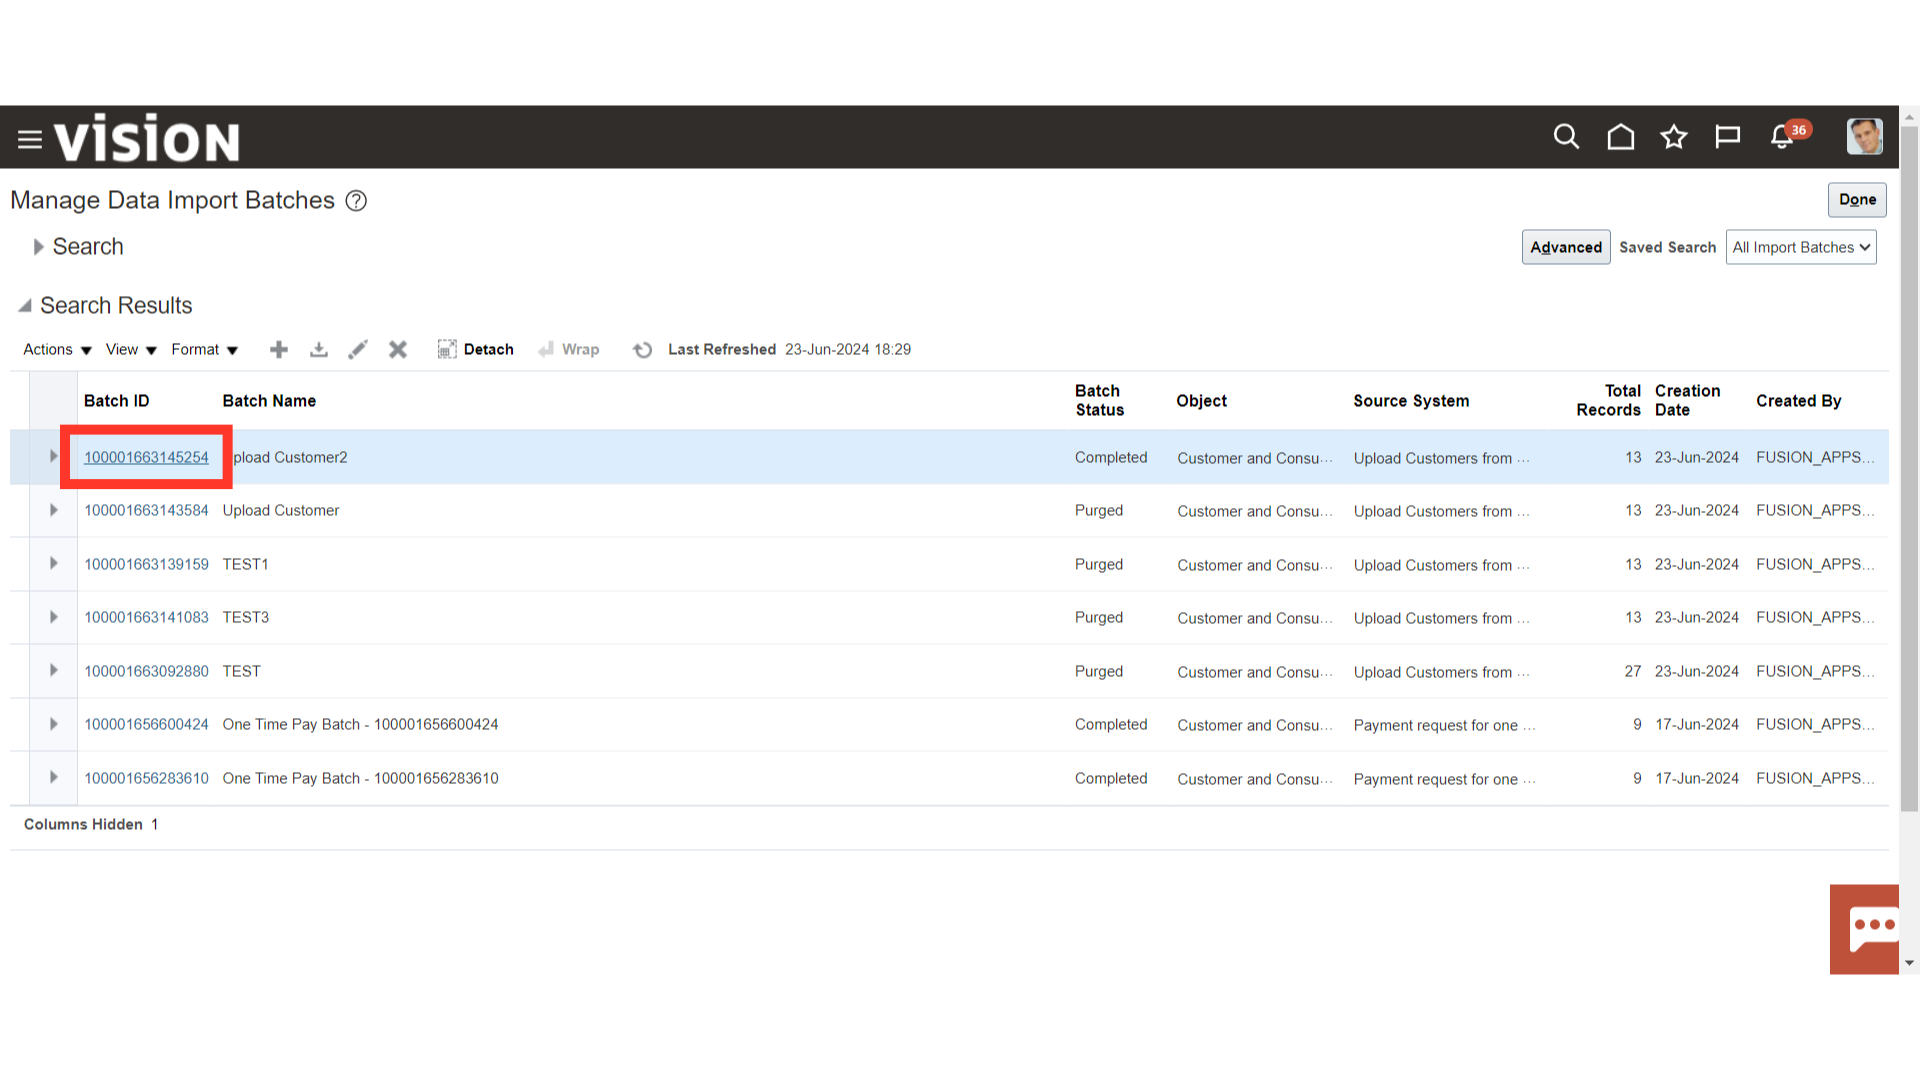
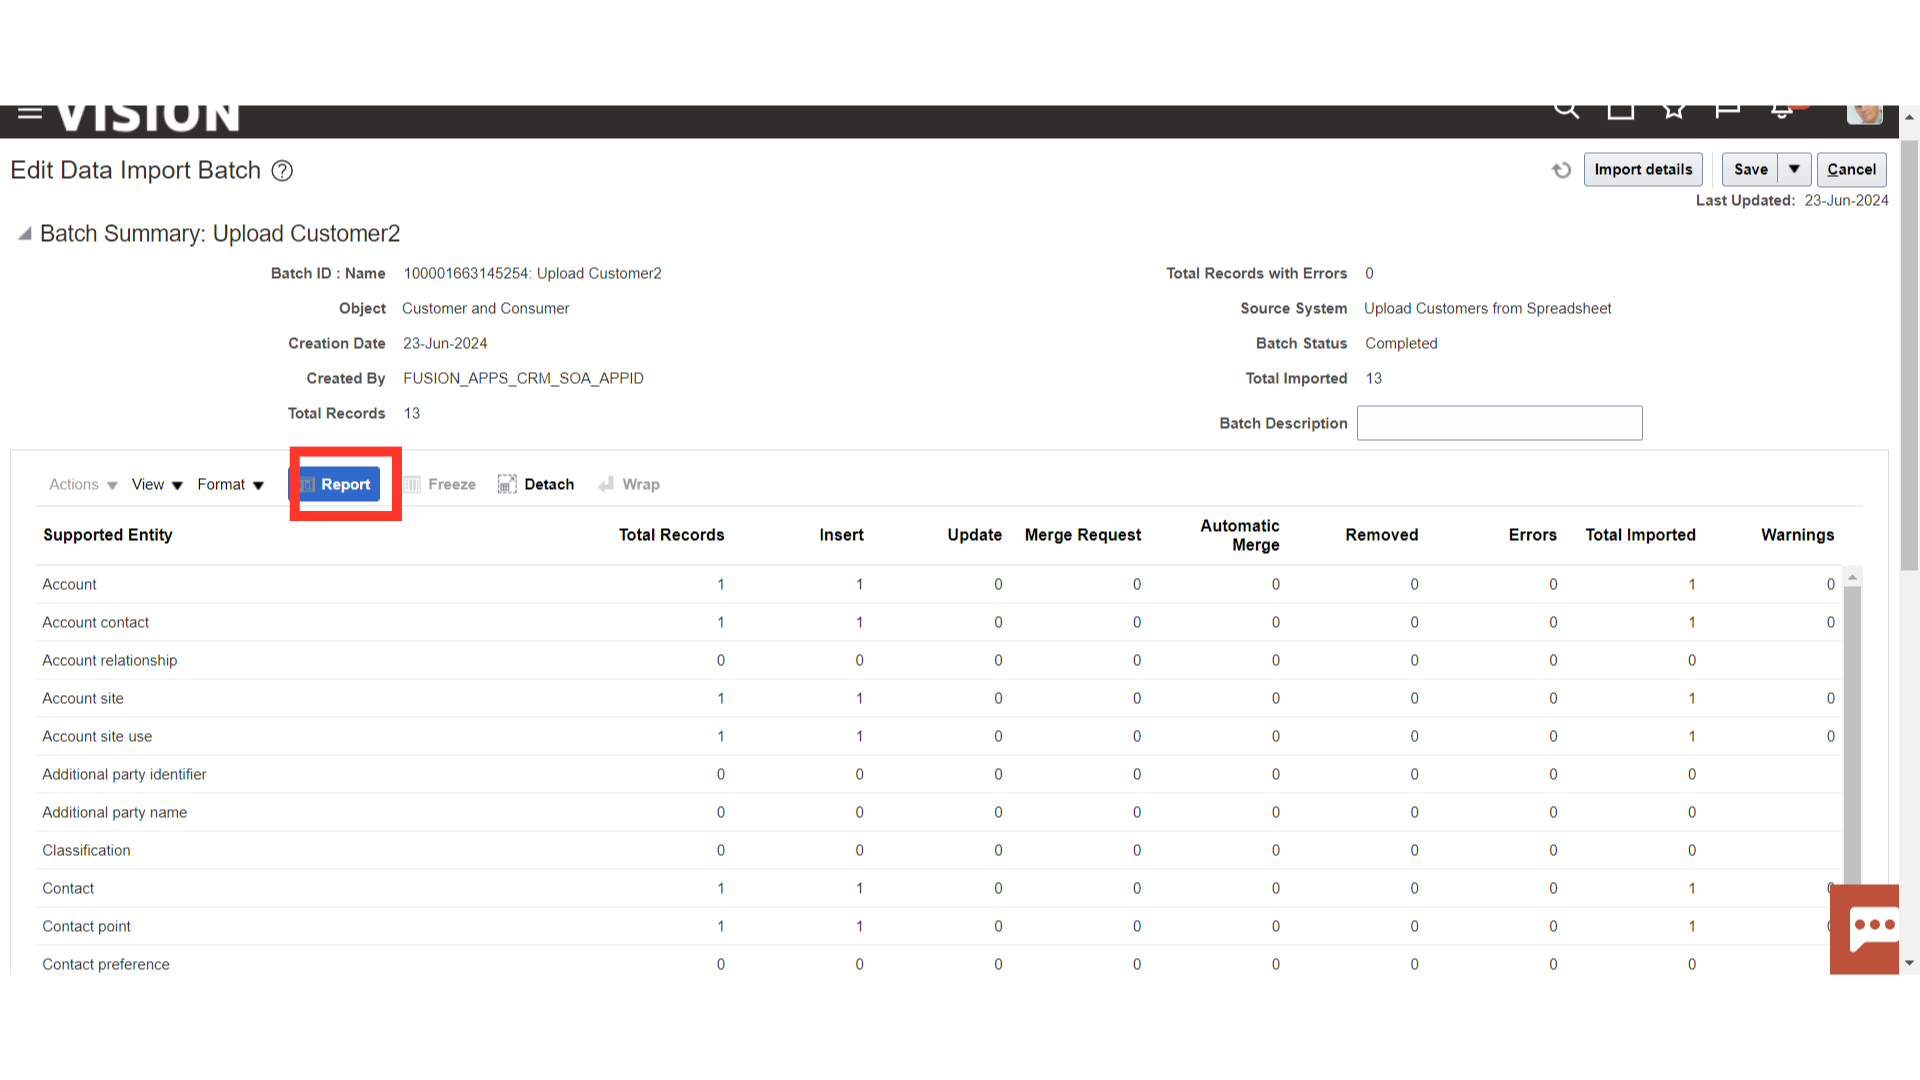
Click on the Batch ID hyperlink, to see more details of customer upload with count summary for each level at customer such as party, account, site, Address, etc.
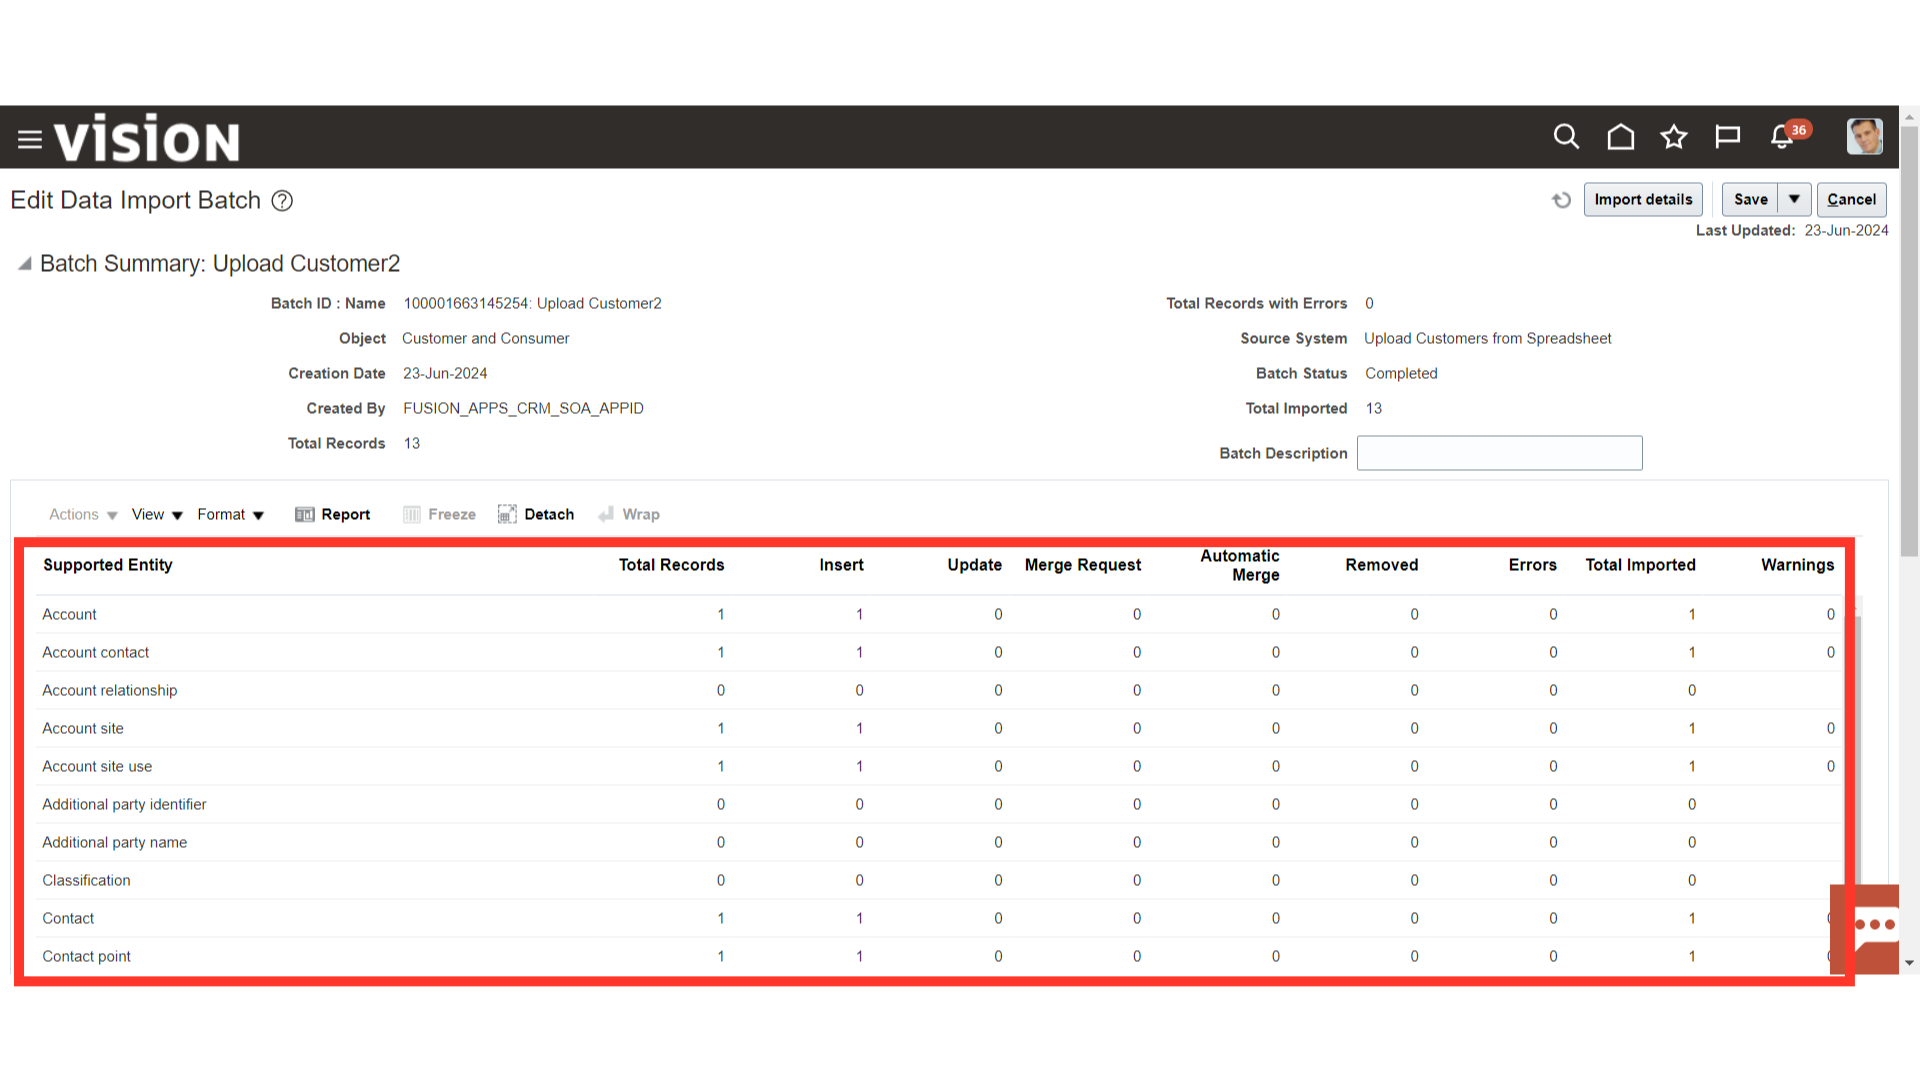
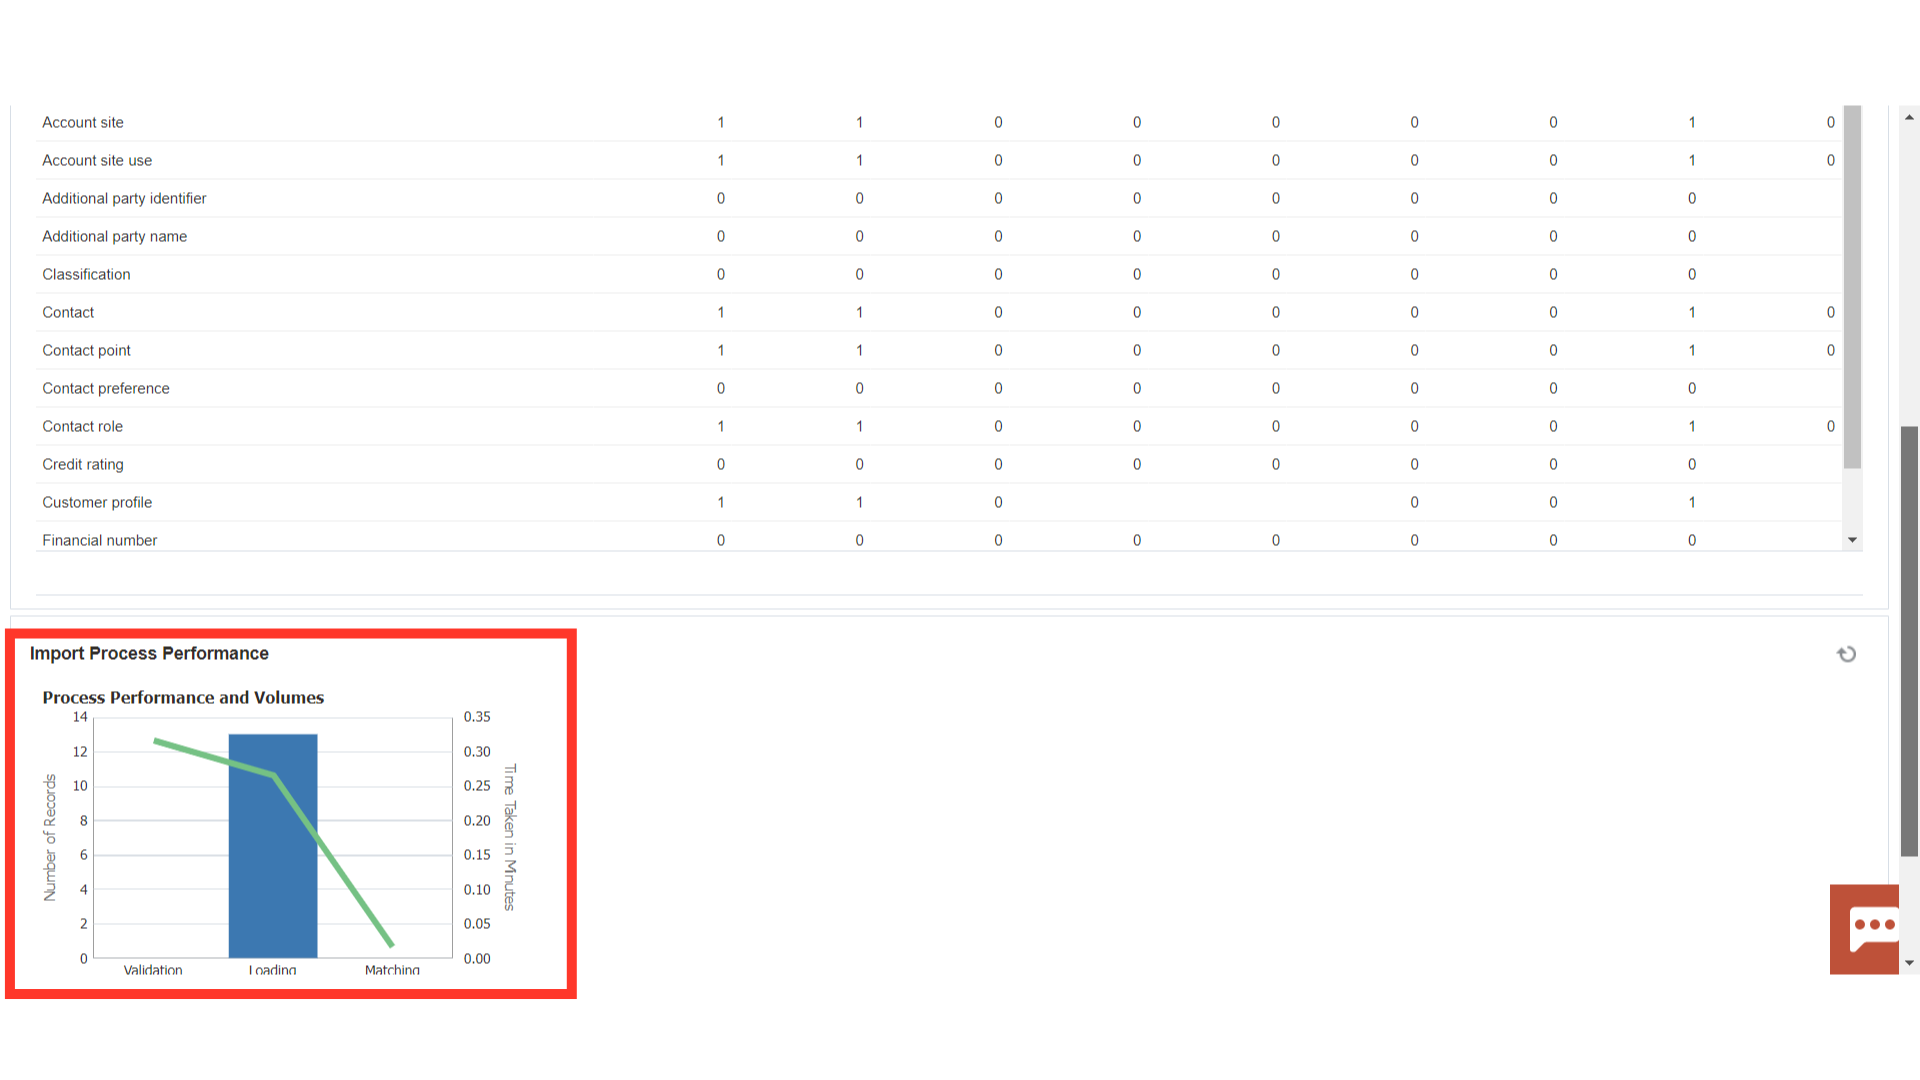
Here, the success or error count of customer details uploaded is shown with detailed bifurcations such as Party, Account, Contact, Site, etc.
At bottom, the graphical presentation of time taken by system for importing and processing the customer data is displayed using which corrective actions can be taken.
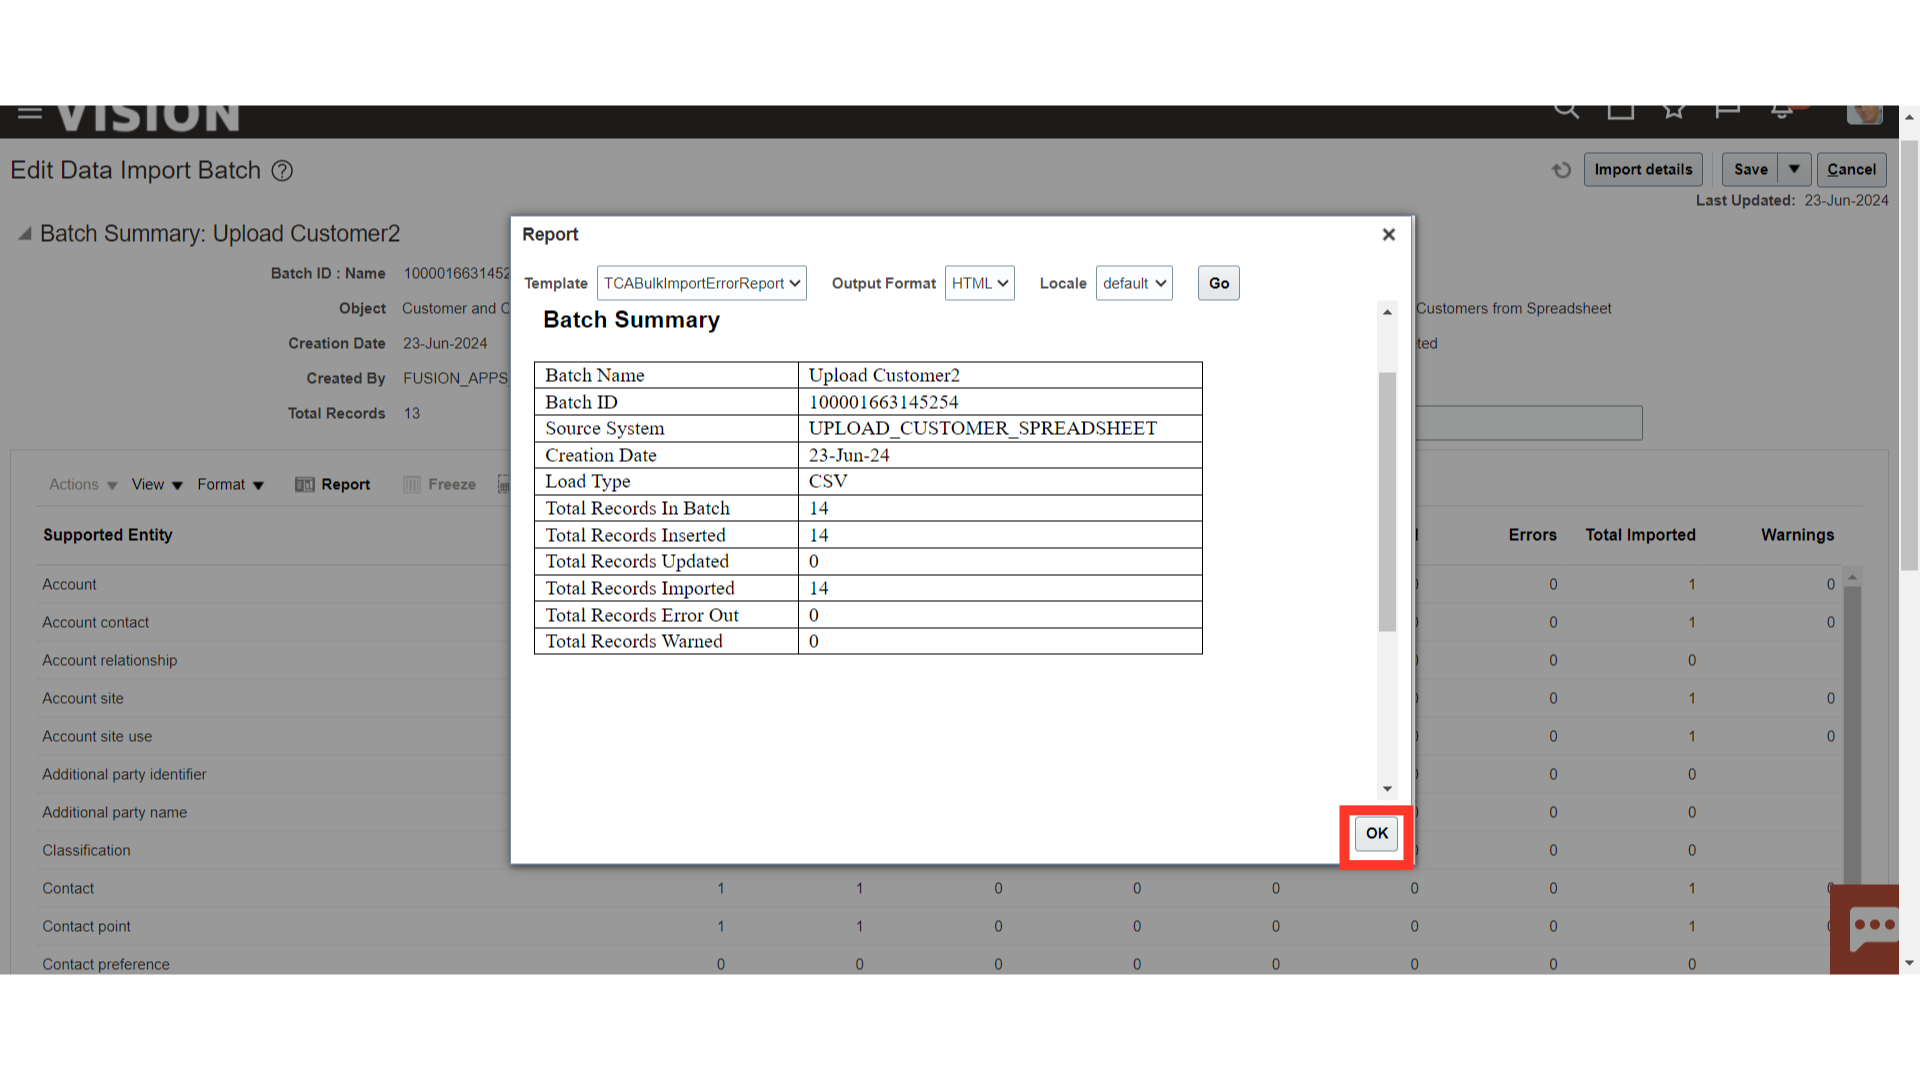
Click on the Report button to see the counts of objects not imported along with the error or warning message.
The total count summary of the customer records processed level-wise is shown. Click on the Ok button to close this window.
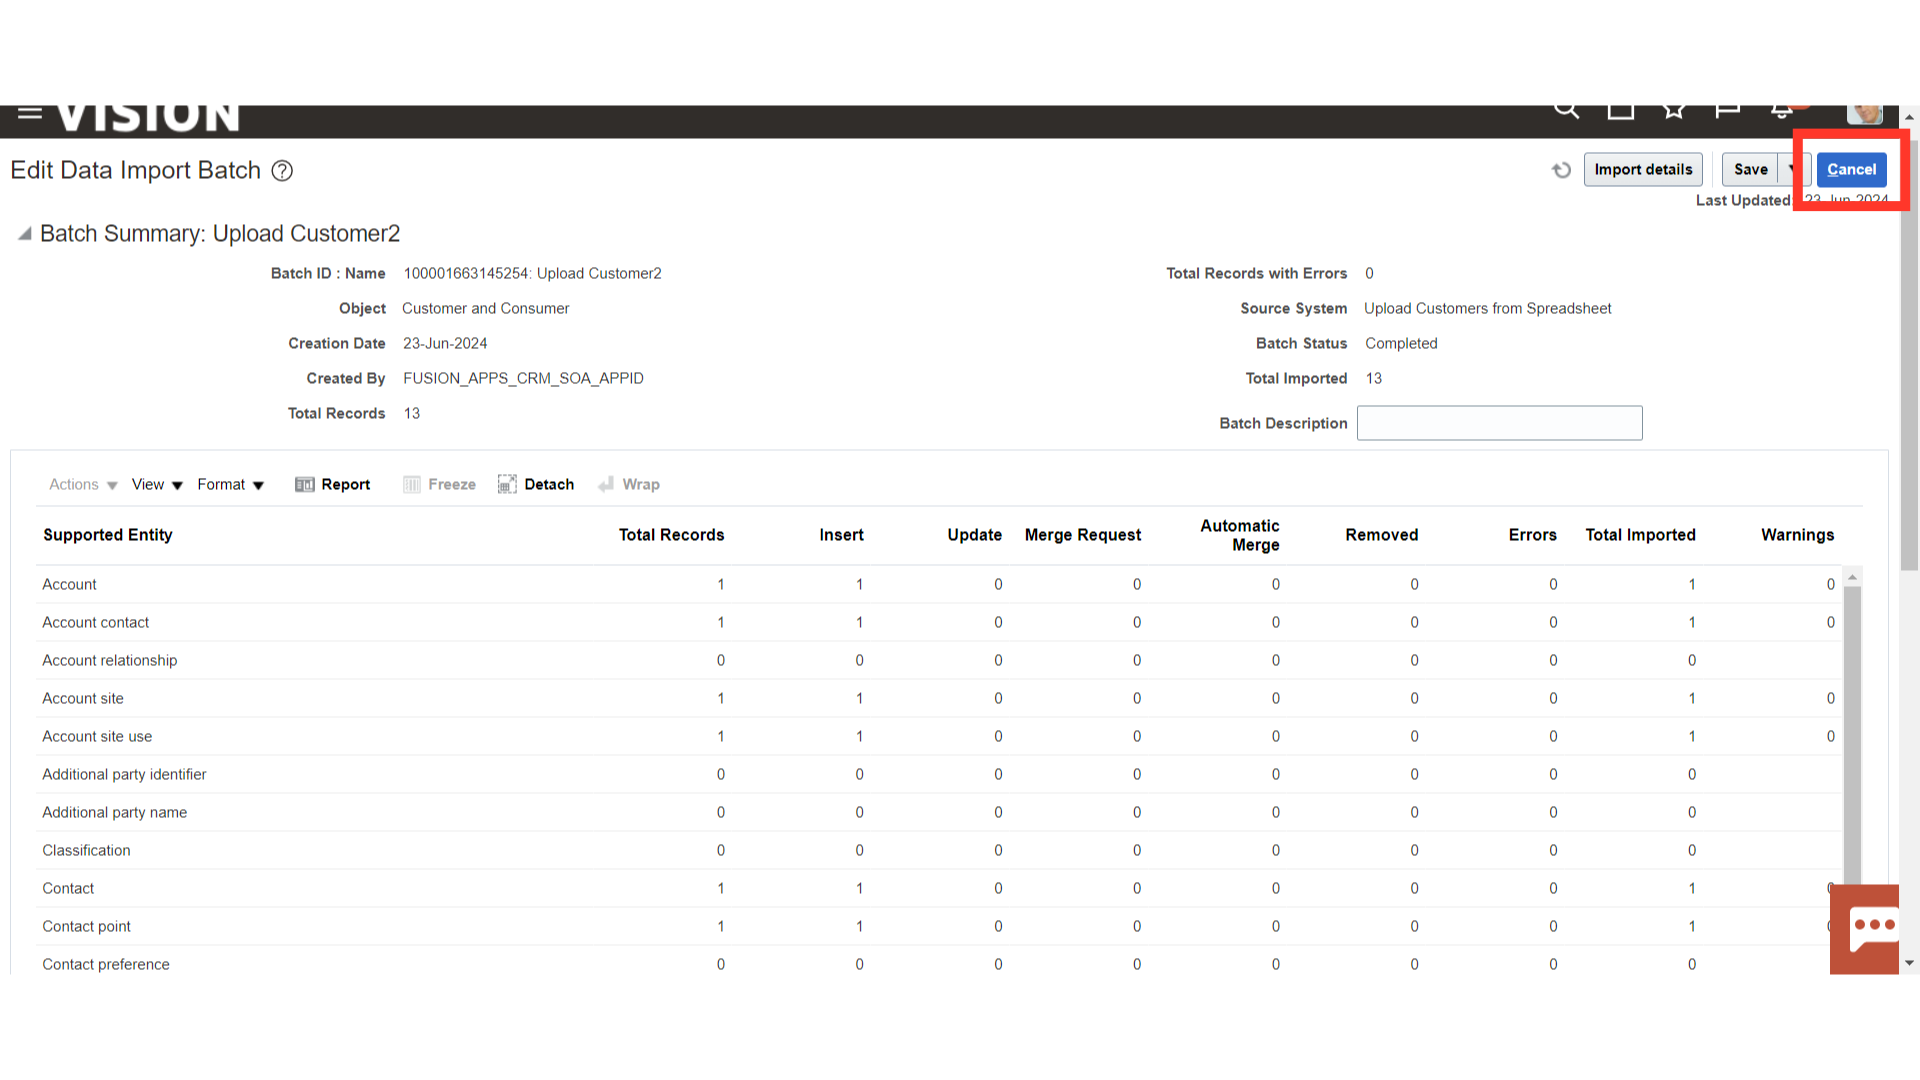
Click on the Cancel button to close this Edit Data Import Batch window.
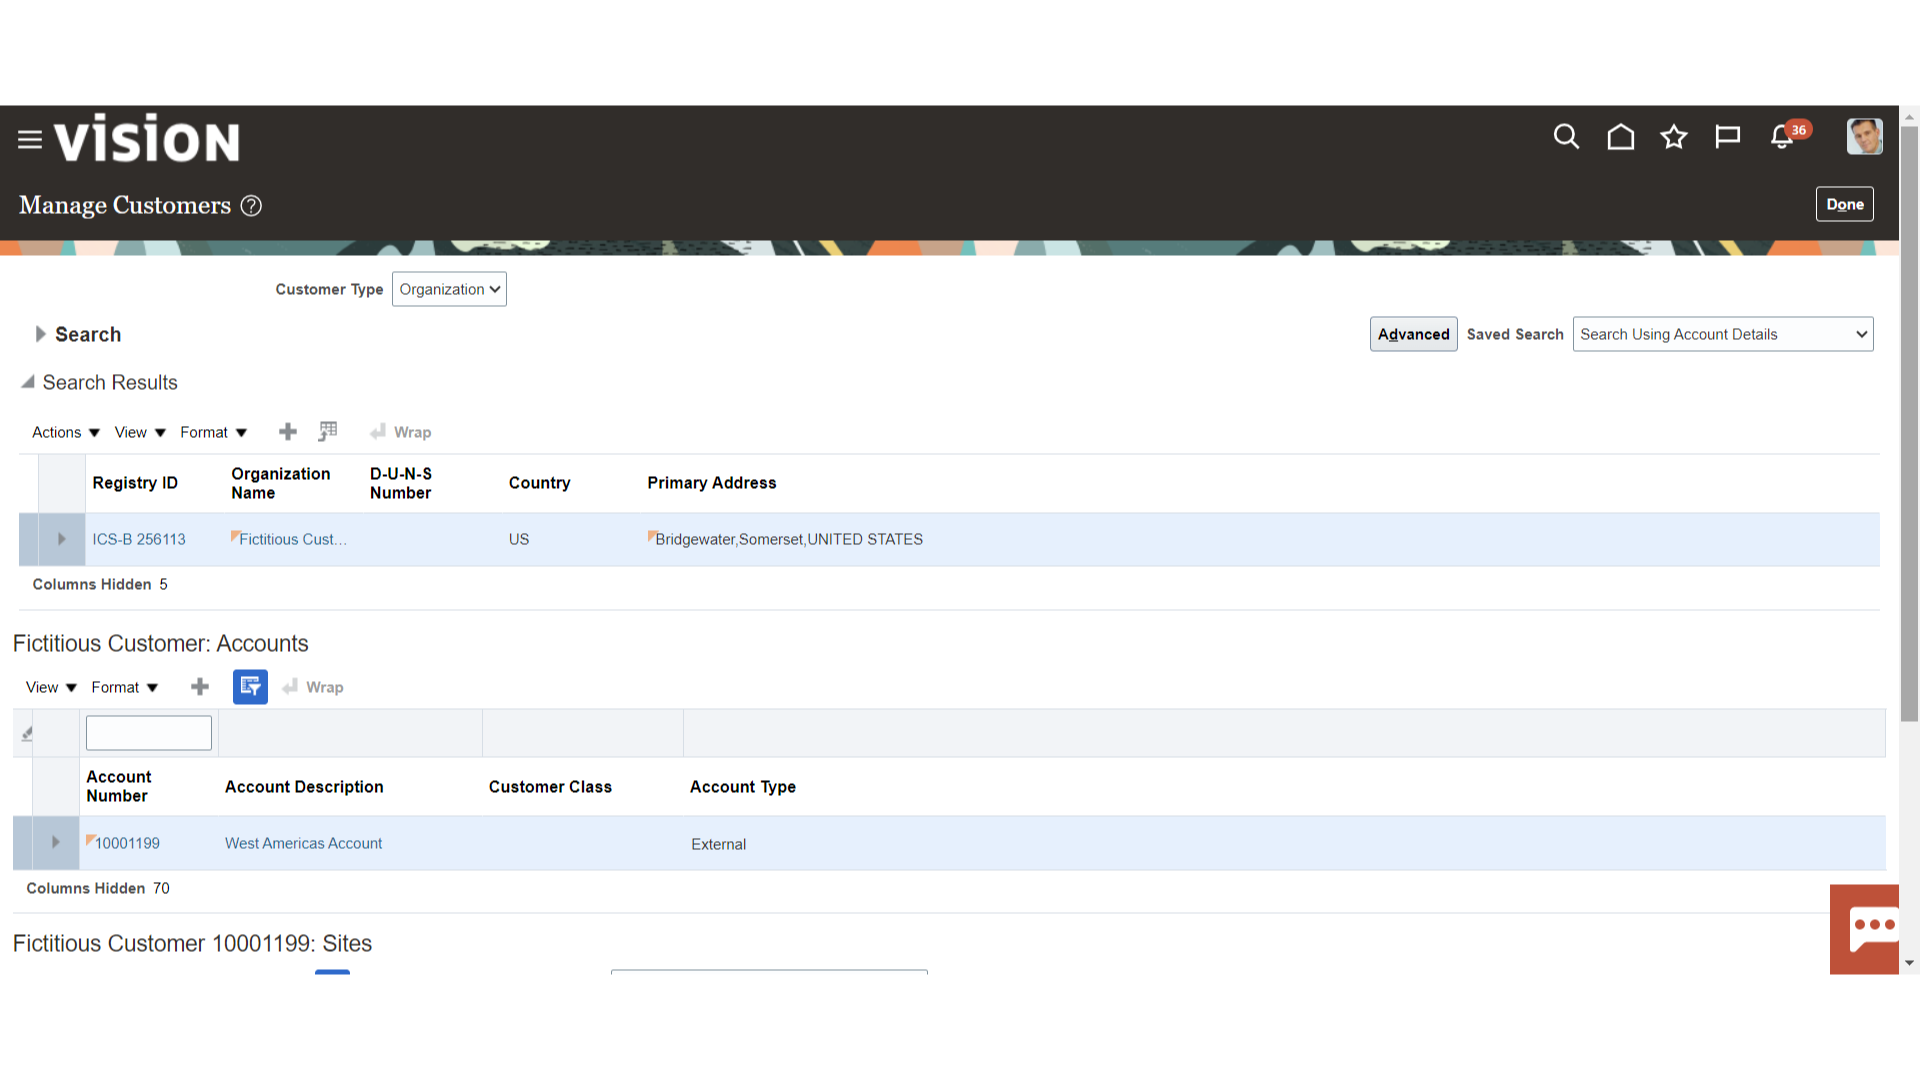
Go to Manage Customers and search the customer records for verification.
This guide has provided a detailed walkthrough of the process of creating the customers through simplified spreadsheet starting from downloading the spreadsheet, filling out data in the same and generating zip file to upload into system. Additionally, the process of verifying the count status of customers uploaded is demonstrated.