Credit Memo Creation
This guide explains how to create the On-Account Credit memo and Standard Credit memo, as well as how to apply and create the accounting entry.
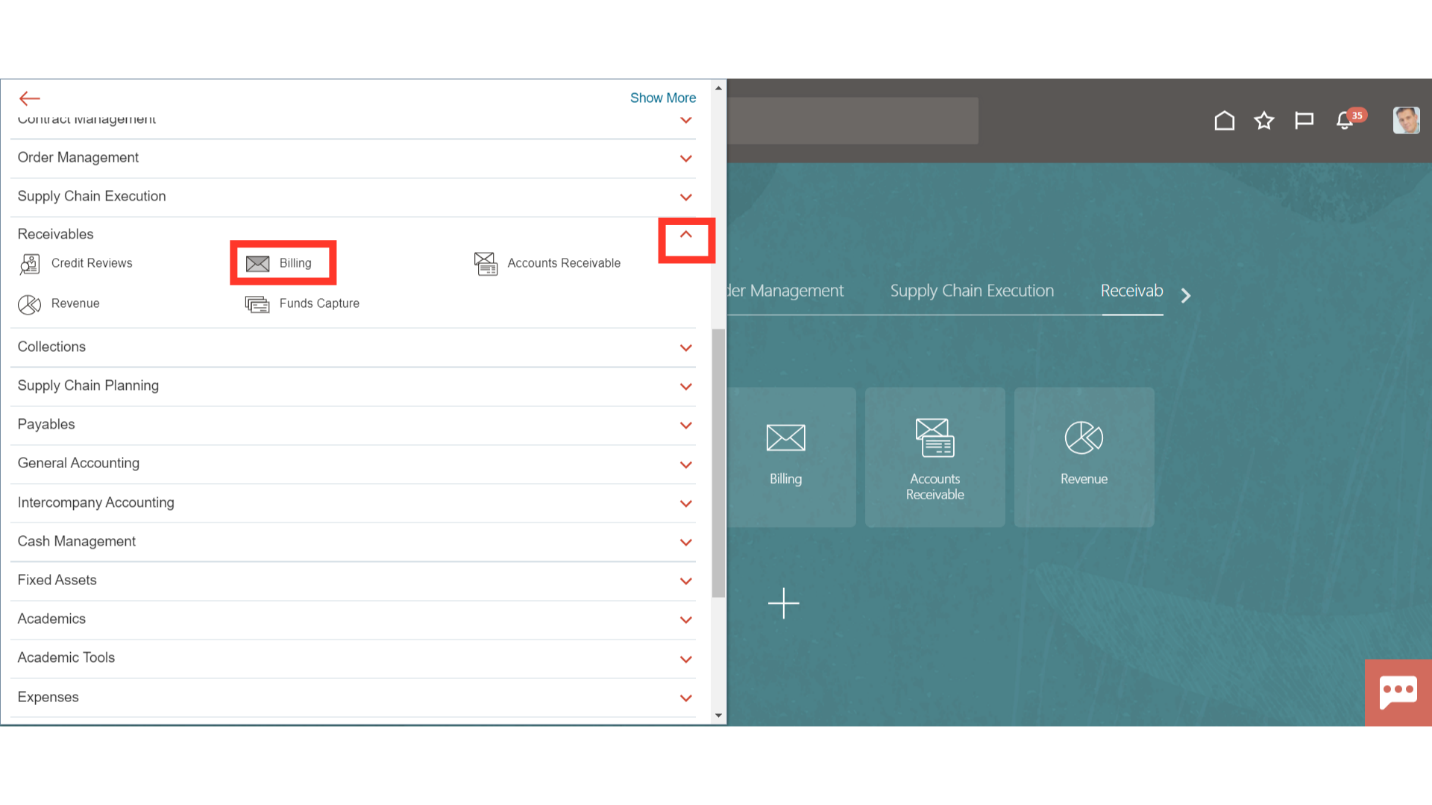
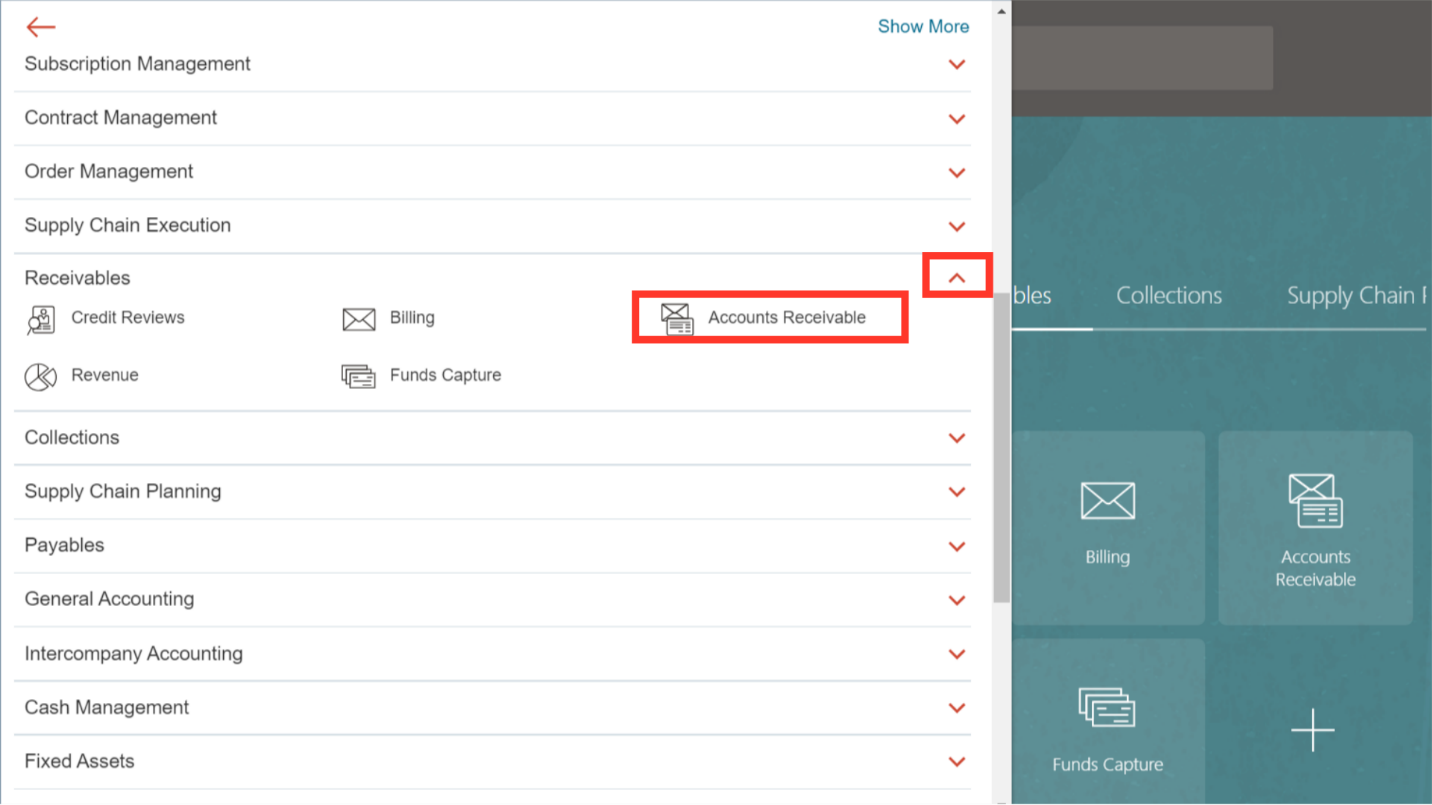
Click on the Navigator icon to access the Receivables menu.

Access the Billing work area by selecting Billing under Receivables from the navigator. Alternatively, on the Home page, you may select the Receivables menu and under that select the Billing submenu.
An On Account Credit Memo is created as a standalone credit memo, without associating it to any invoice. The navigation used is usually Transactions > Create Transactions UI and choosing a Transaction Class = Credit Memo. The user can then apply this CM to invoice(s) of their choice in the Receivables Balances Work Area (Apply Credit Memo UI). Click on the “Create Transaction” hyperlink under Transactions from the task list to create On Account credit memo.

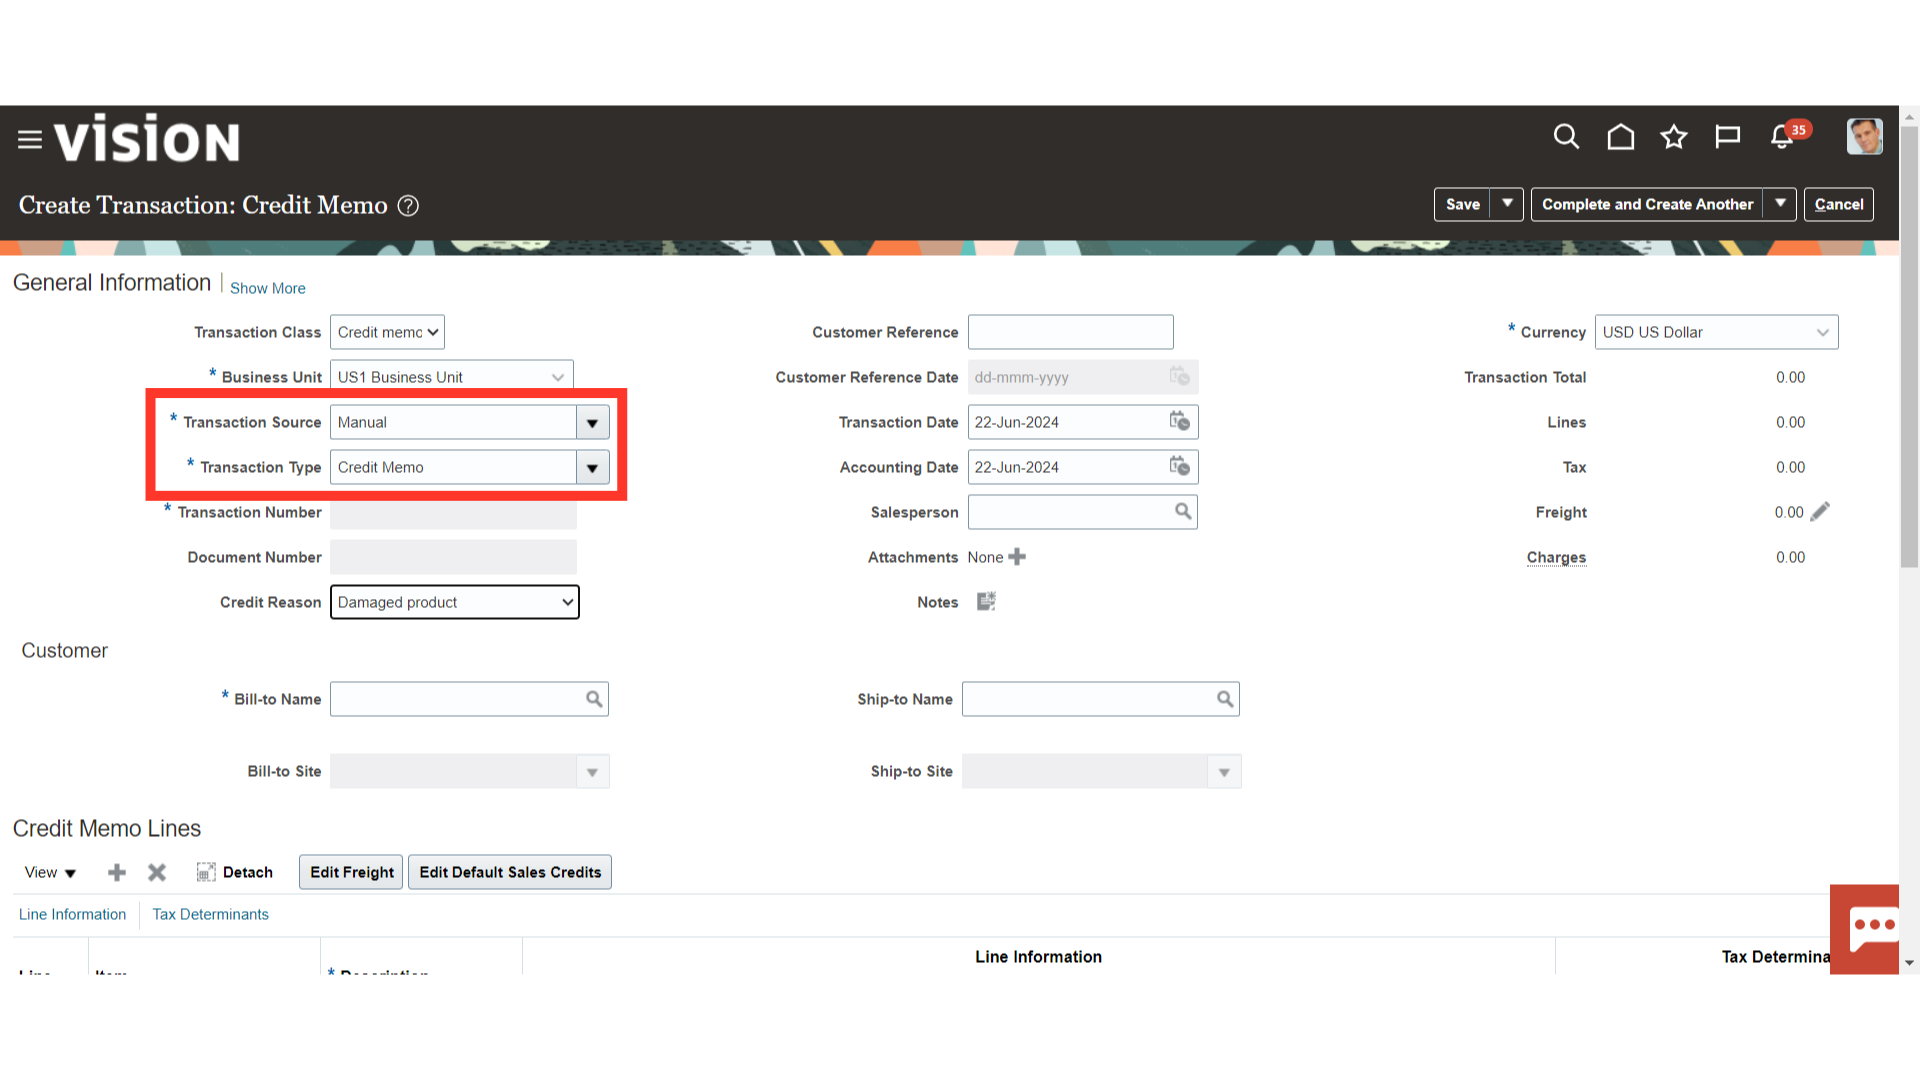
Choose the Credit memo from the list of values next to the Transaction class field to create a On Account Credit memo transaction. Select the business unit under which the Credit memo is to be created from the list of values or enter it manually.
Choose the transaction source from the values list to determine the transaction’s origin. Furthermore, choose the Transaction type to categorize receivables transactions, through which accounting can also be managed.
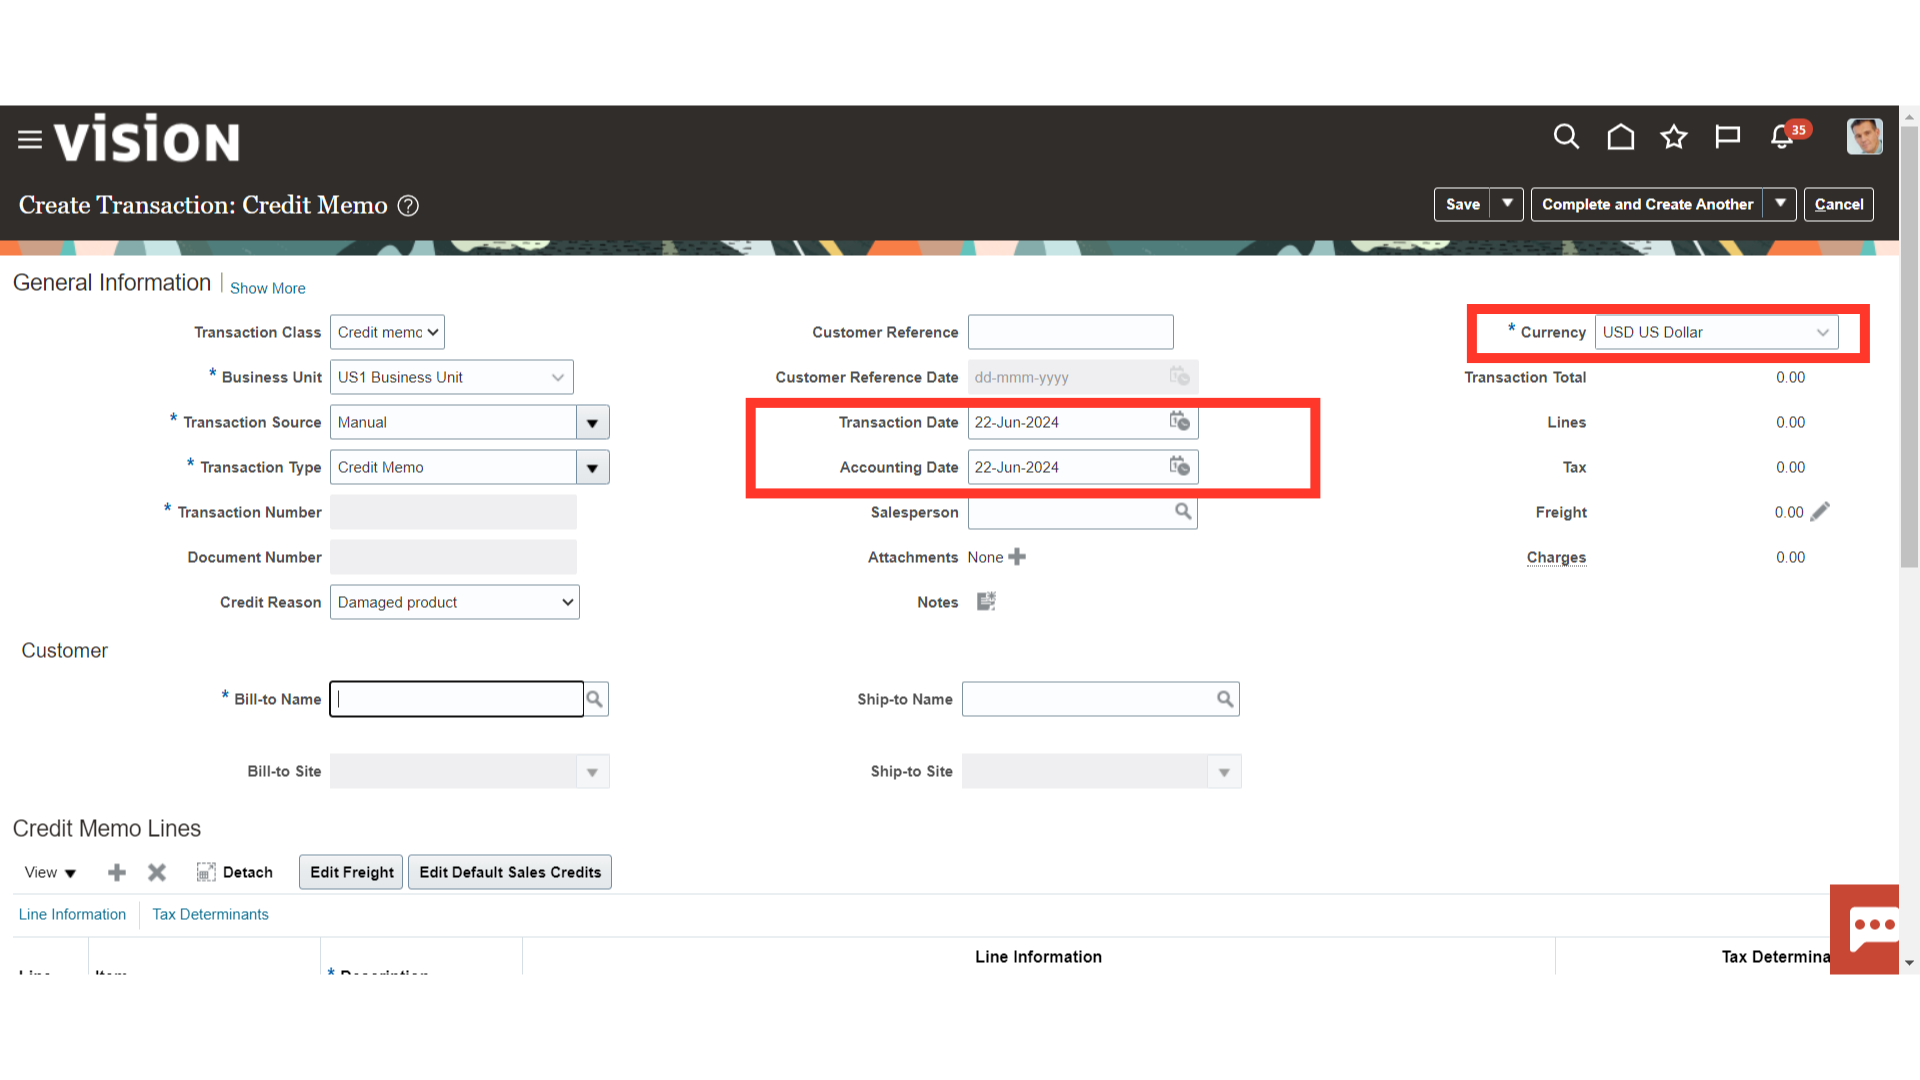
Enter the date on which sales were made in the Transaction date field. Select the Accounting Date on which the journal entry is to be generated for the transaction. Select the currency in which the transaction is to be recorded from the list of values.
Enter the Bill to Name manually or by clicking on the magnifying lens to search and select the customer’s name. The details such as Bill to site and Ship to site which is set as primary in the customer are defaulted automatically.
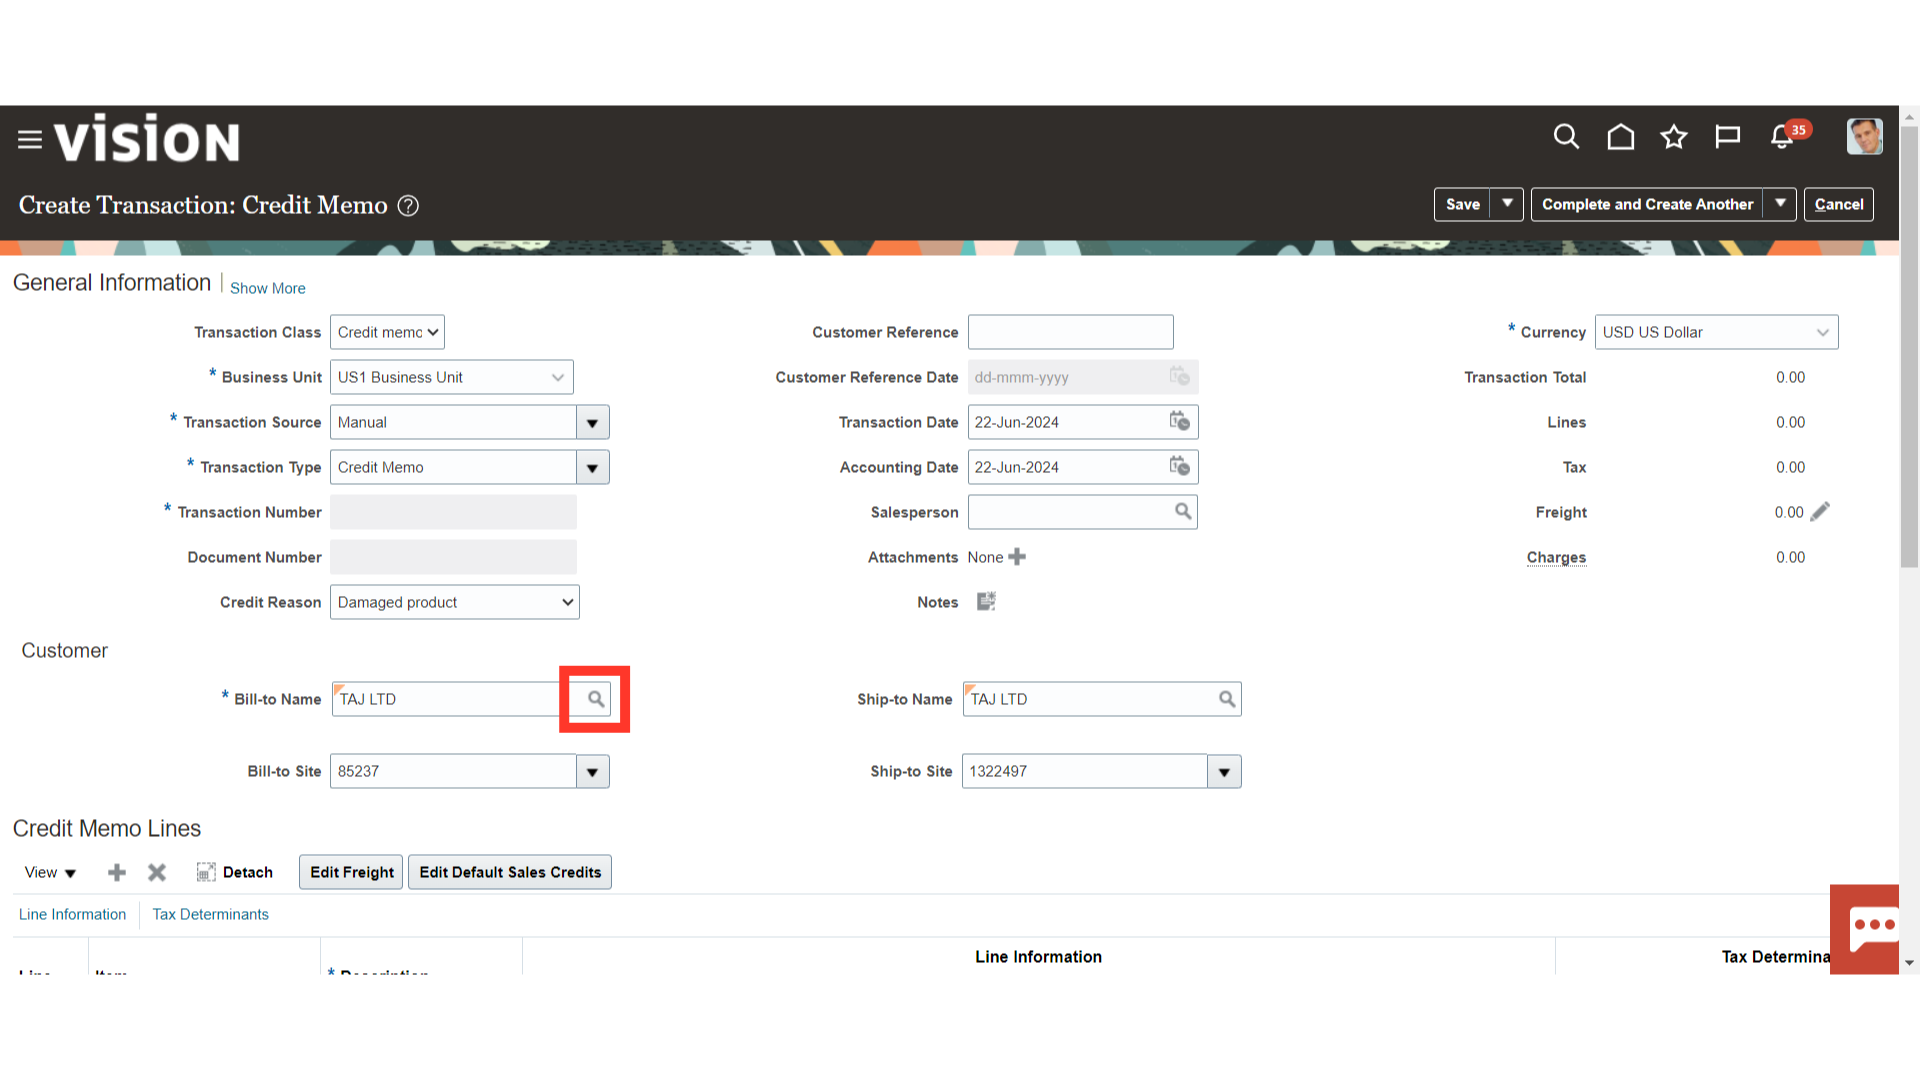
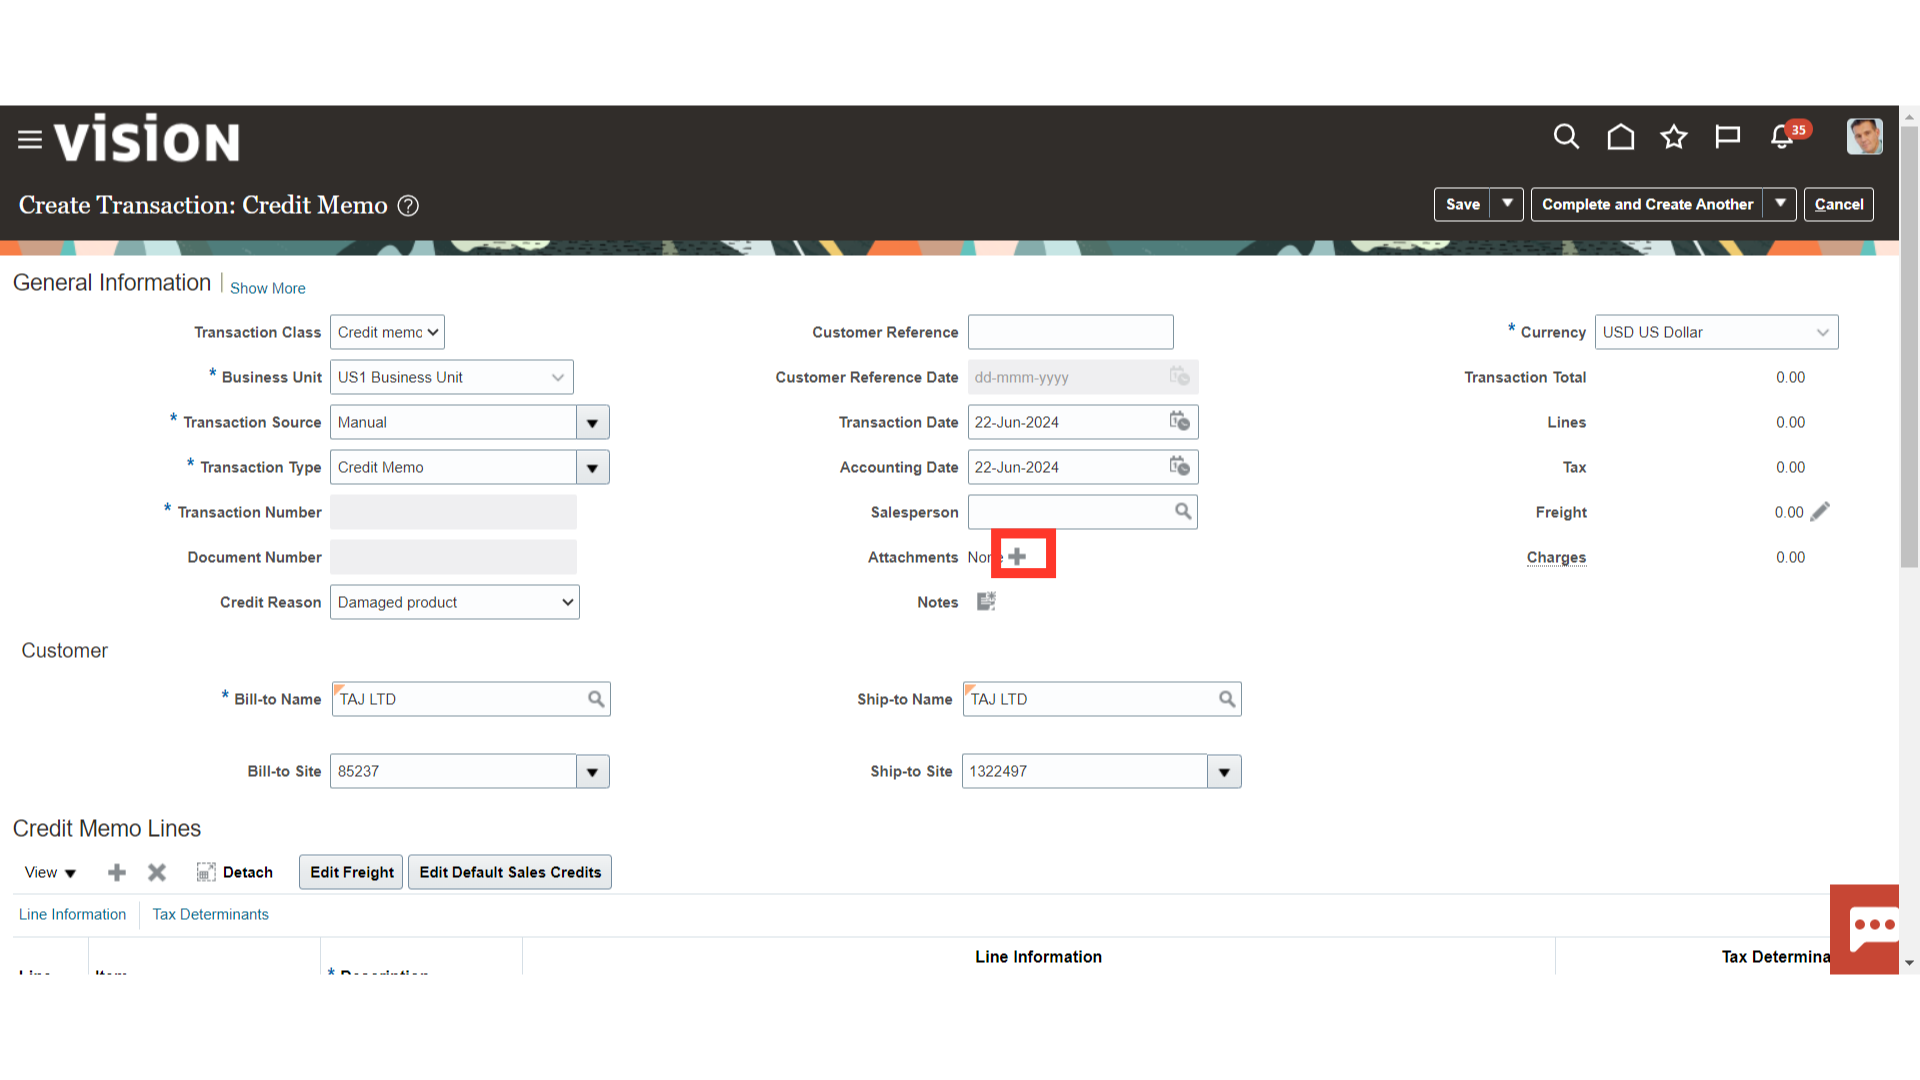
Click on the Plus Icon to upload the attachments to the credit memo transaction.
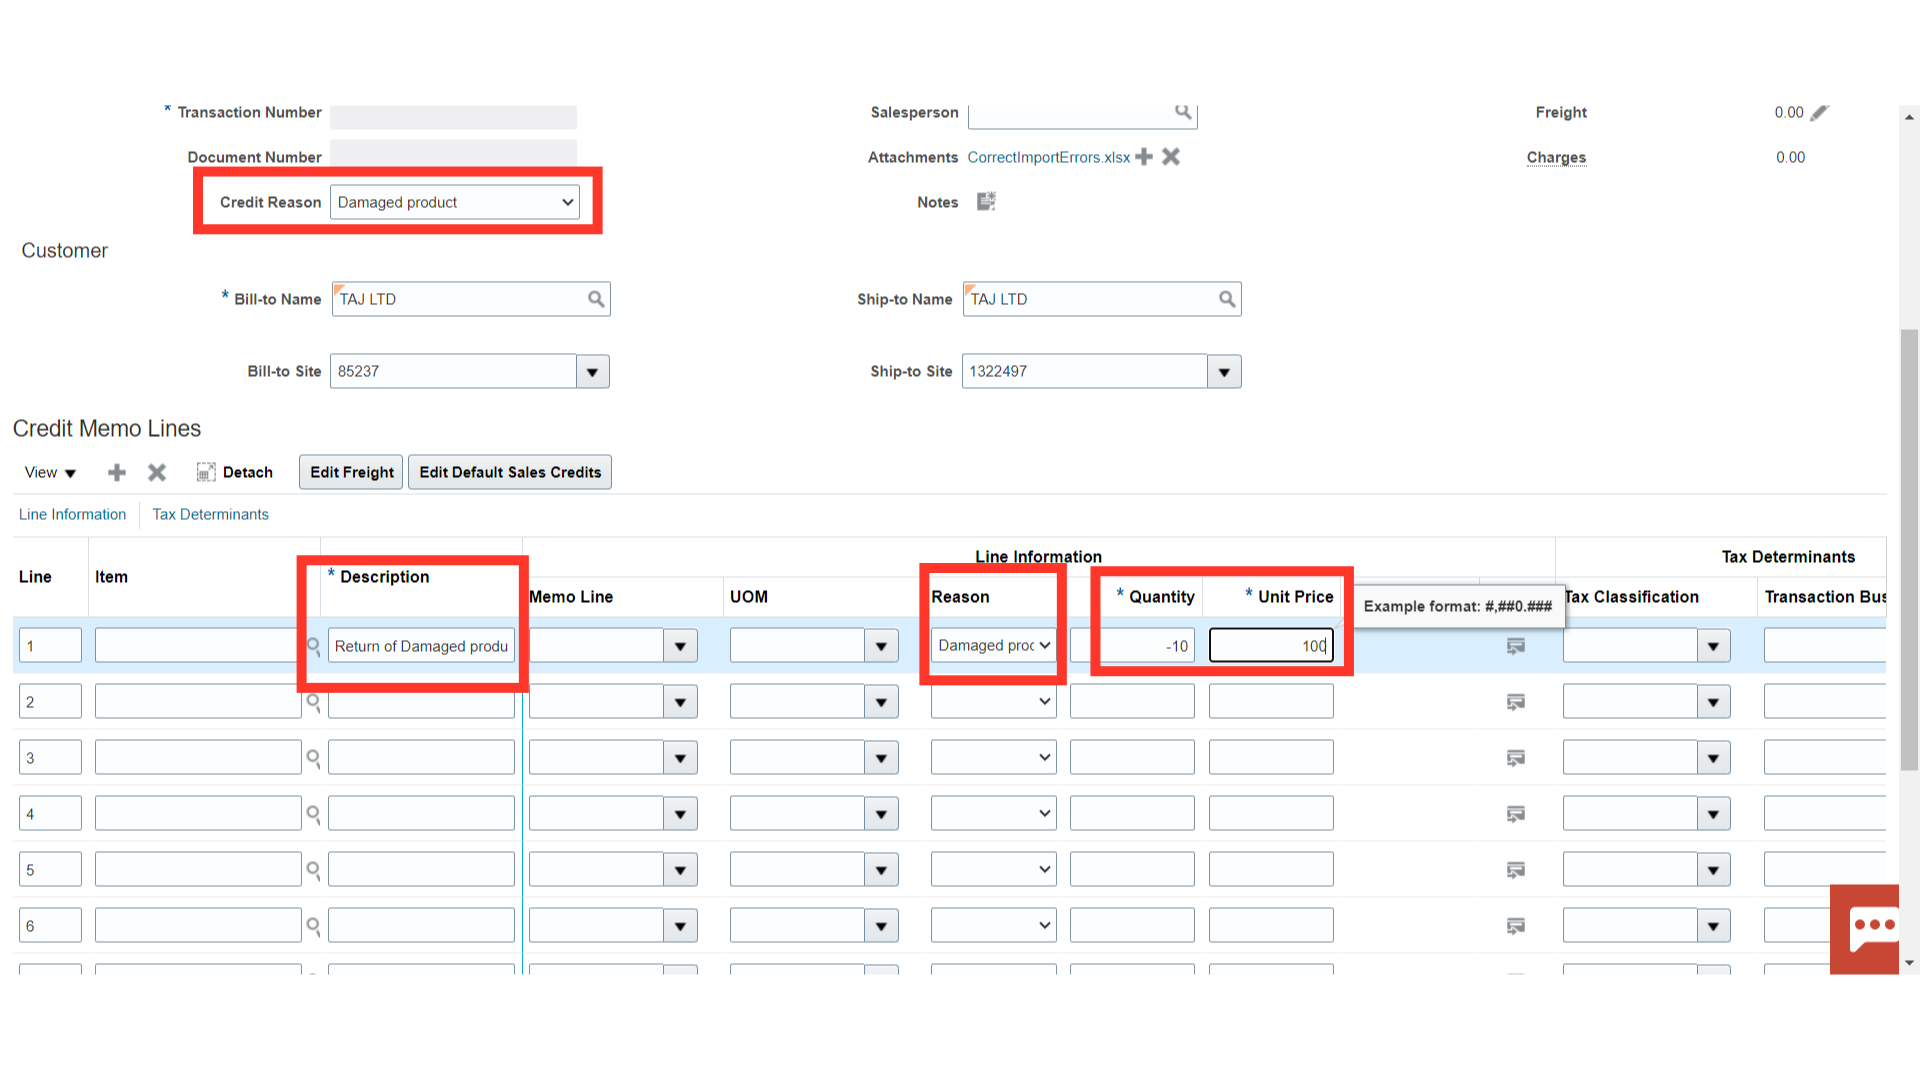
Enter any additional information in the description field. Enter either Quantity or Unit Price in the negative sign based on the type of adjustment required. Additionally, the reason for creating a credit memo can be selected either at the header level or line level from the list of values.
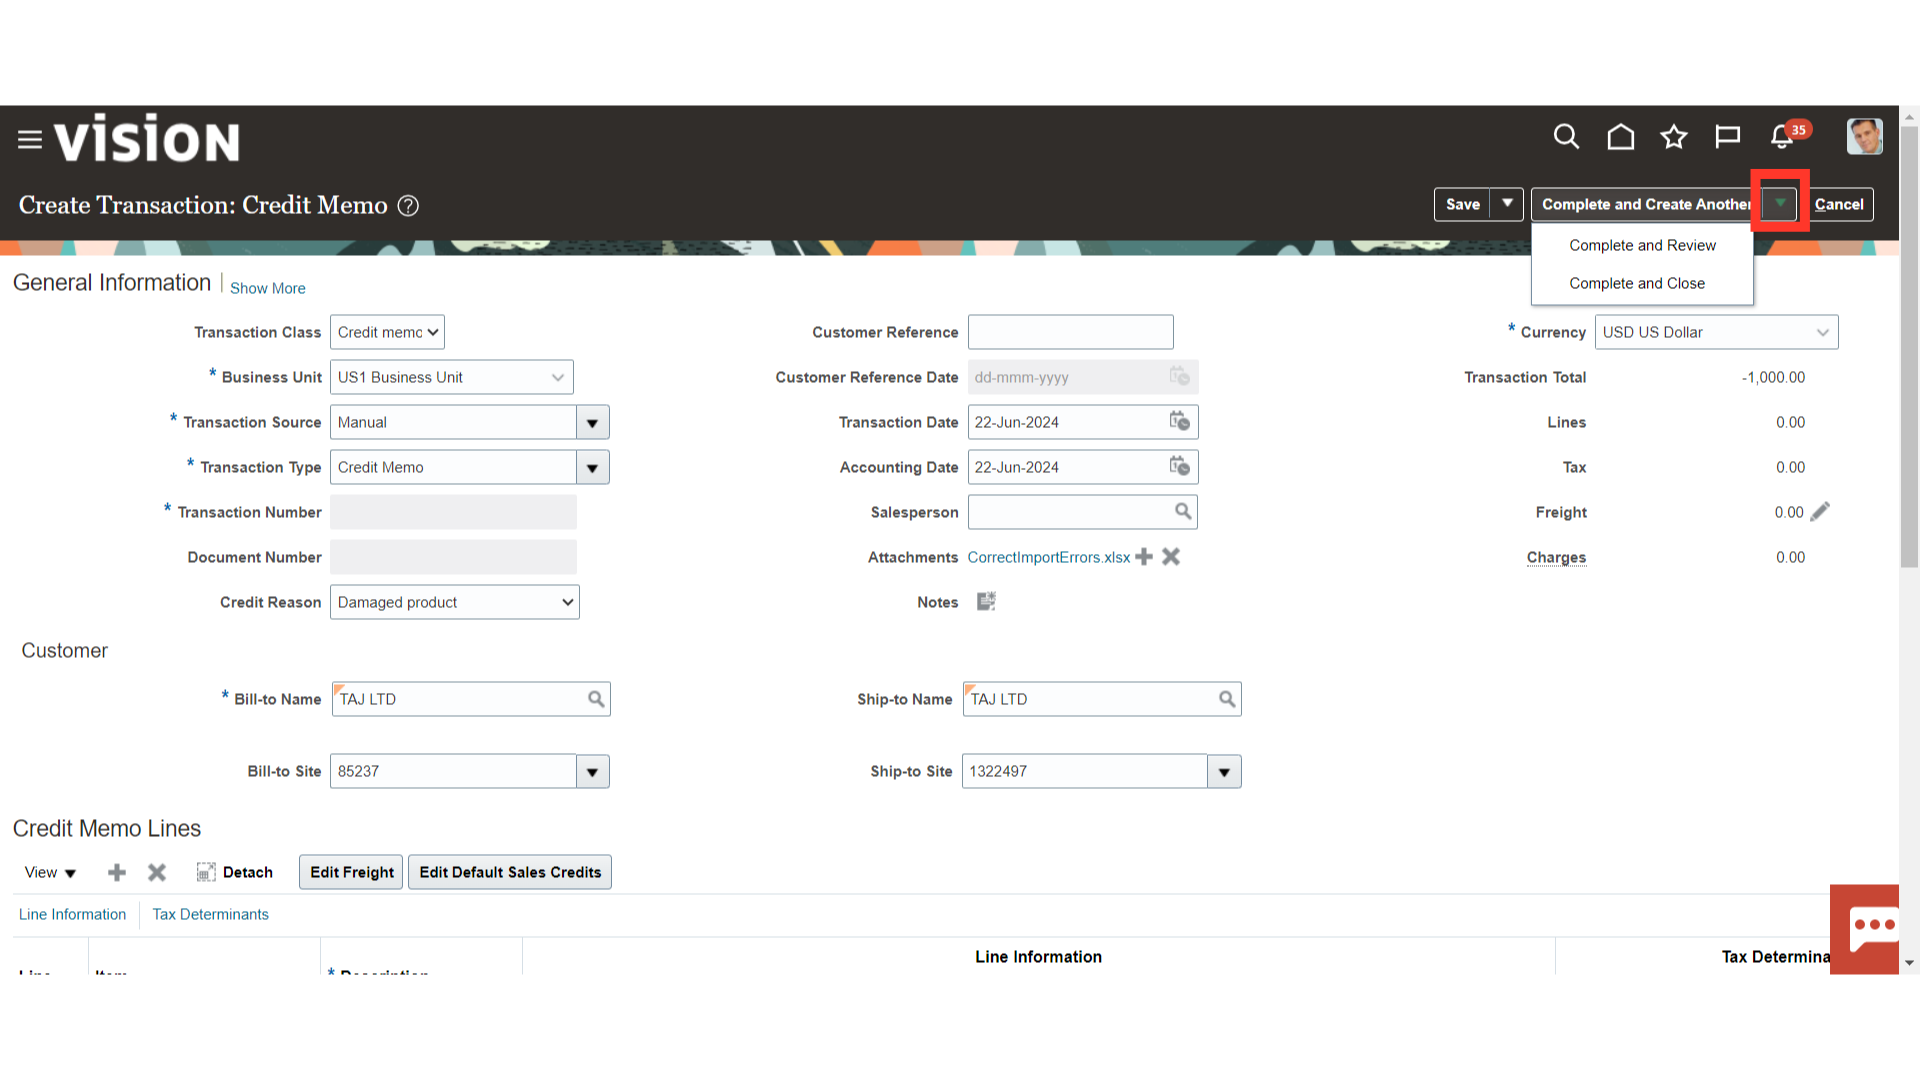
To enter transaction details, click Complete and Create another. As an alternative, click the drop-down menu and choose Complete and Review to mark the transaction as complete. From there, it is possible to review the transaction or choose Complete and Close to finish it and close it. Here for demo purpose, Complete and Review is selected.
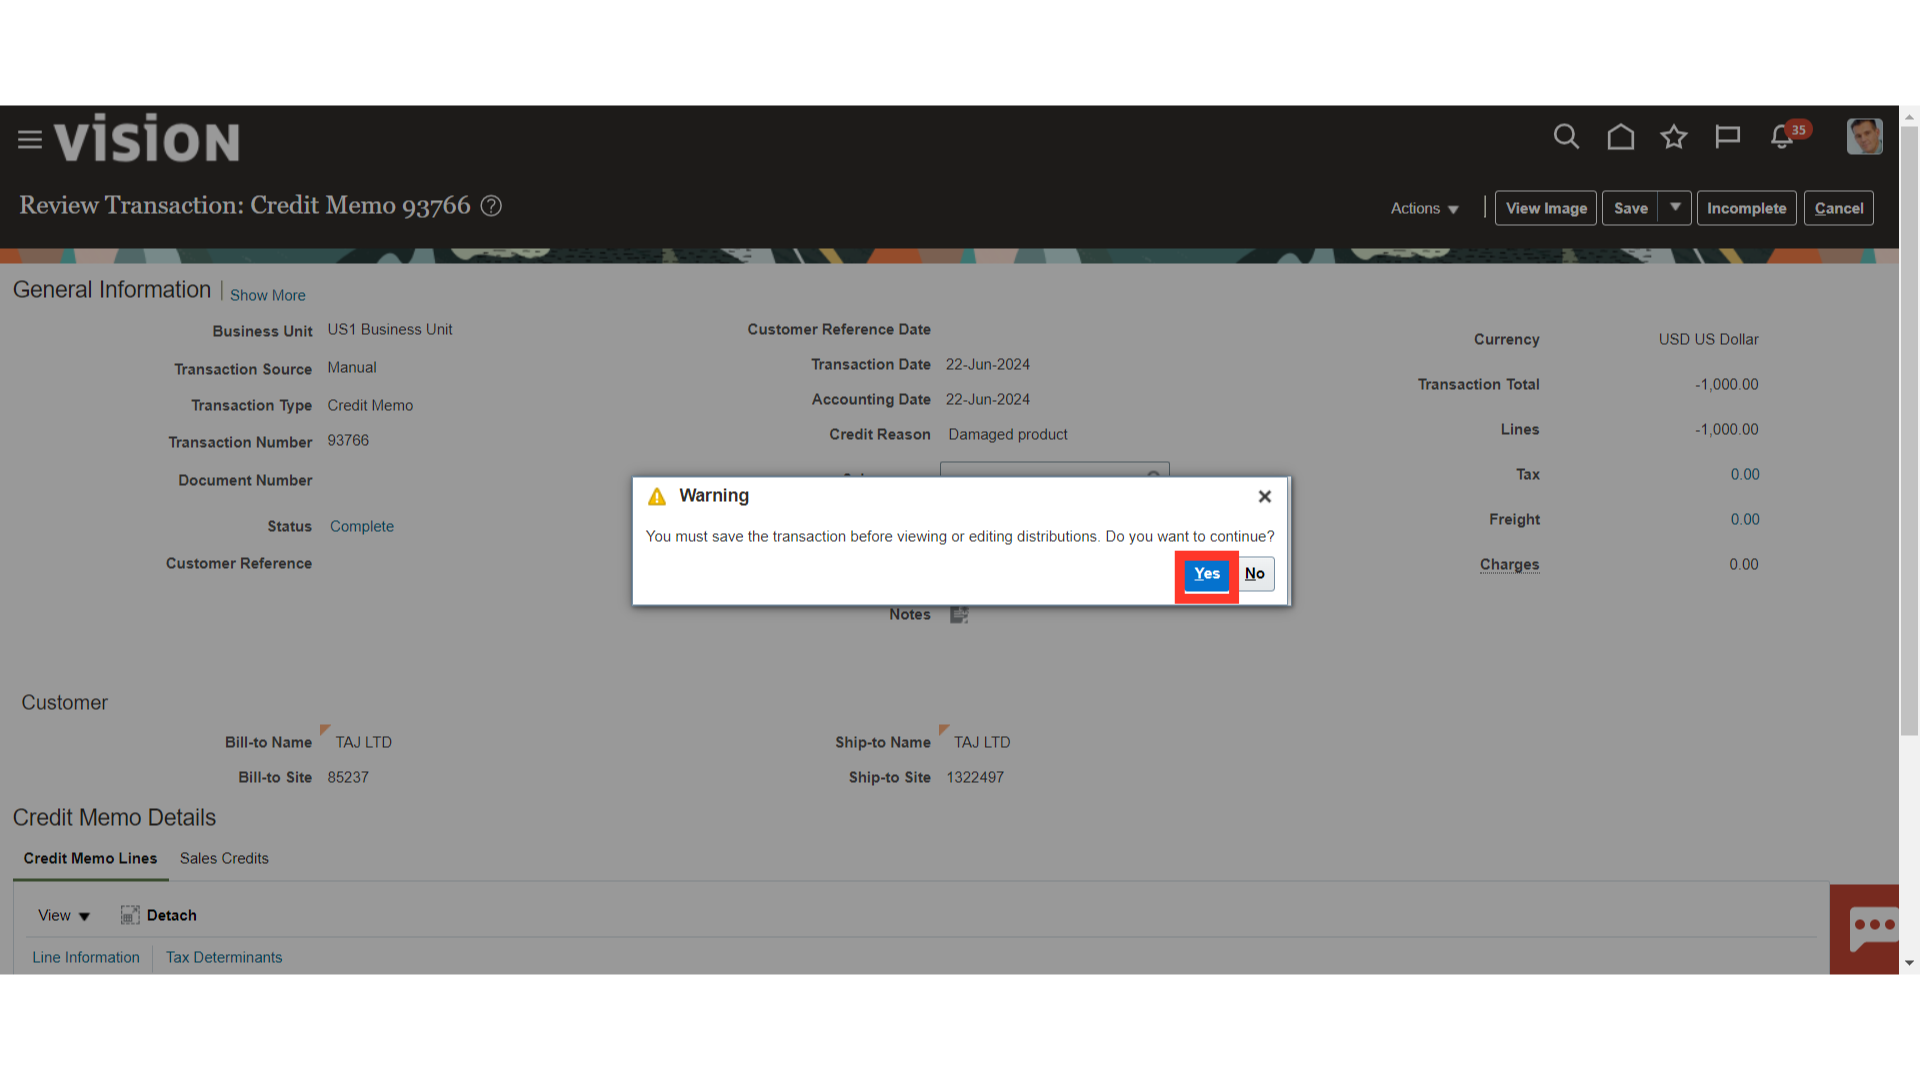
To view the distributions, click on Review Distributions under the Actions tab.

A warning message is displayed for saving the transaction, click on the Yes button to continue.
Click the distribution icon to change the account segment details for each accounting class. Click the Save and Close button to save the details, or click the Cancel button if you would rather not.

To generate the accounting entry, click on the Post to Ledger under the Actions

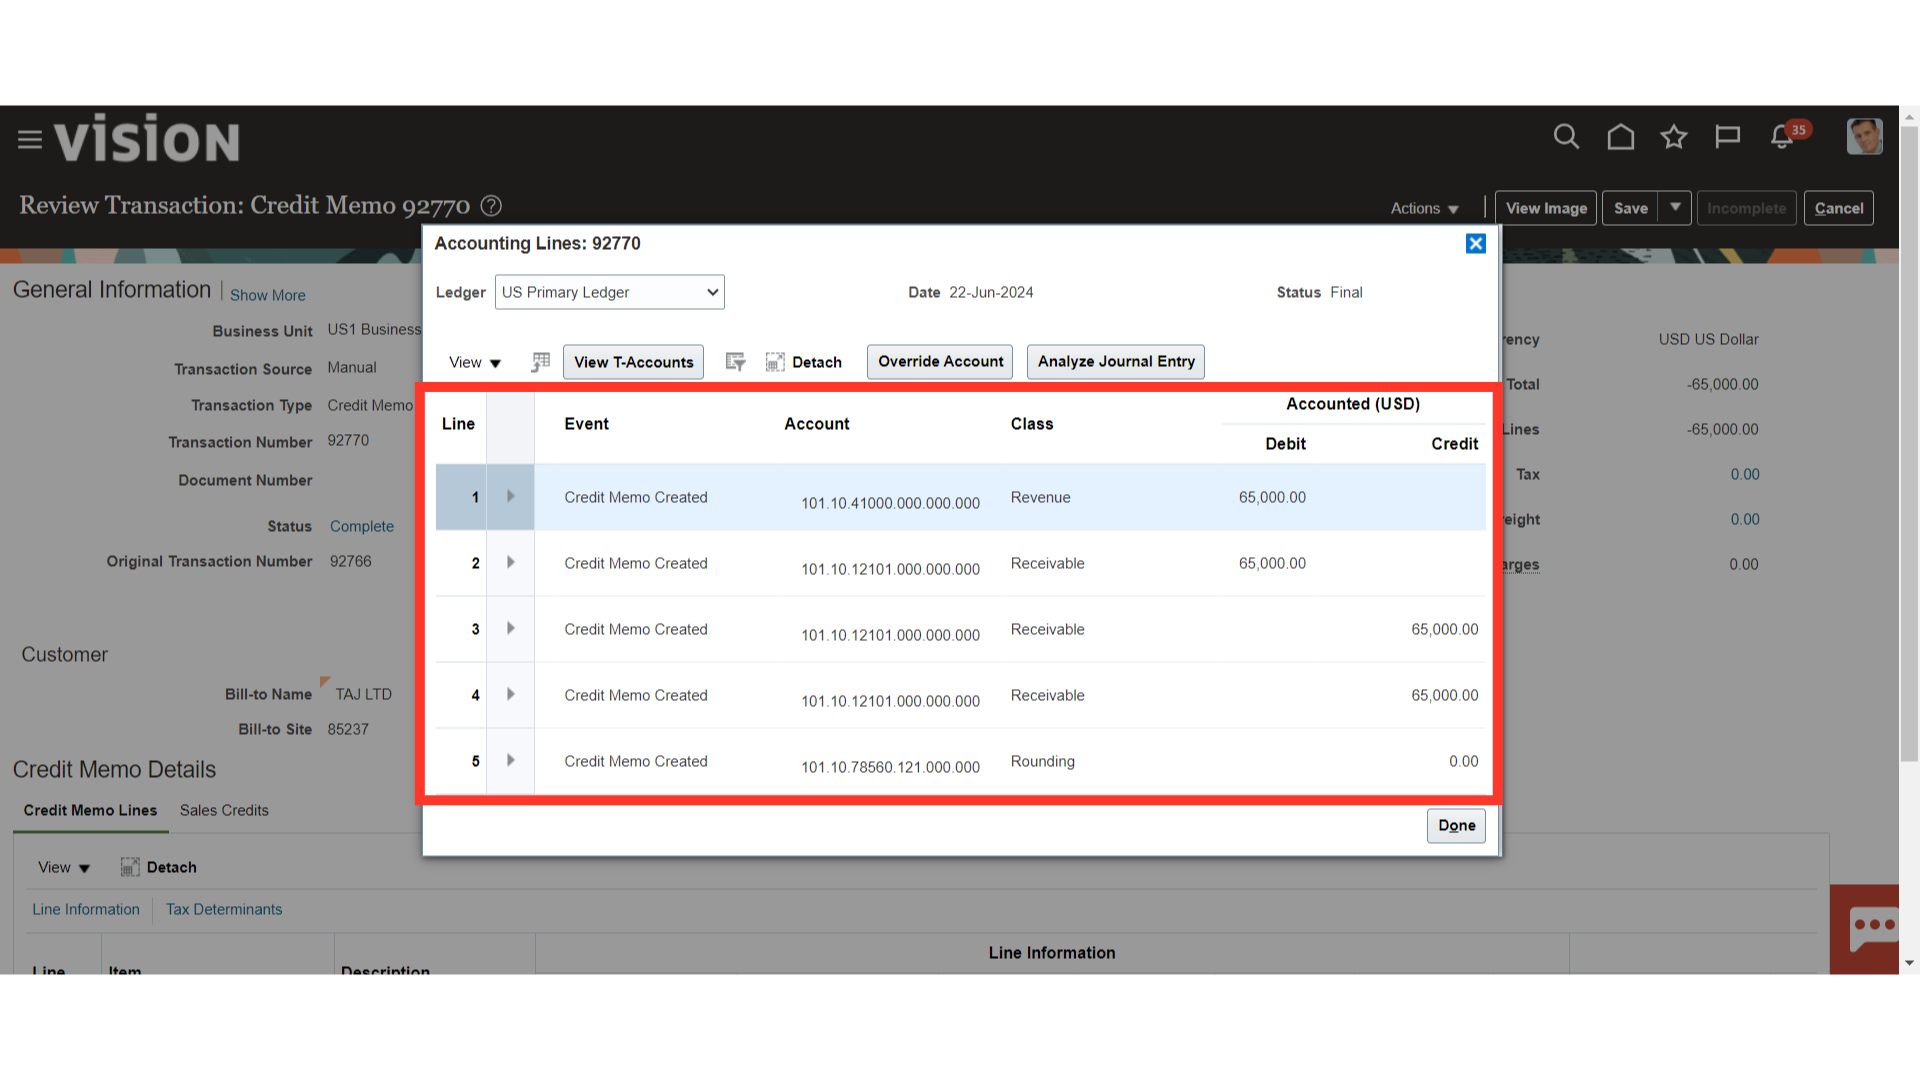
Click on the “View Accounting” button to see more details of the accounting entry.
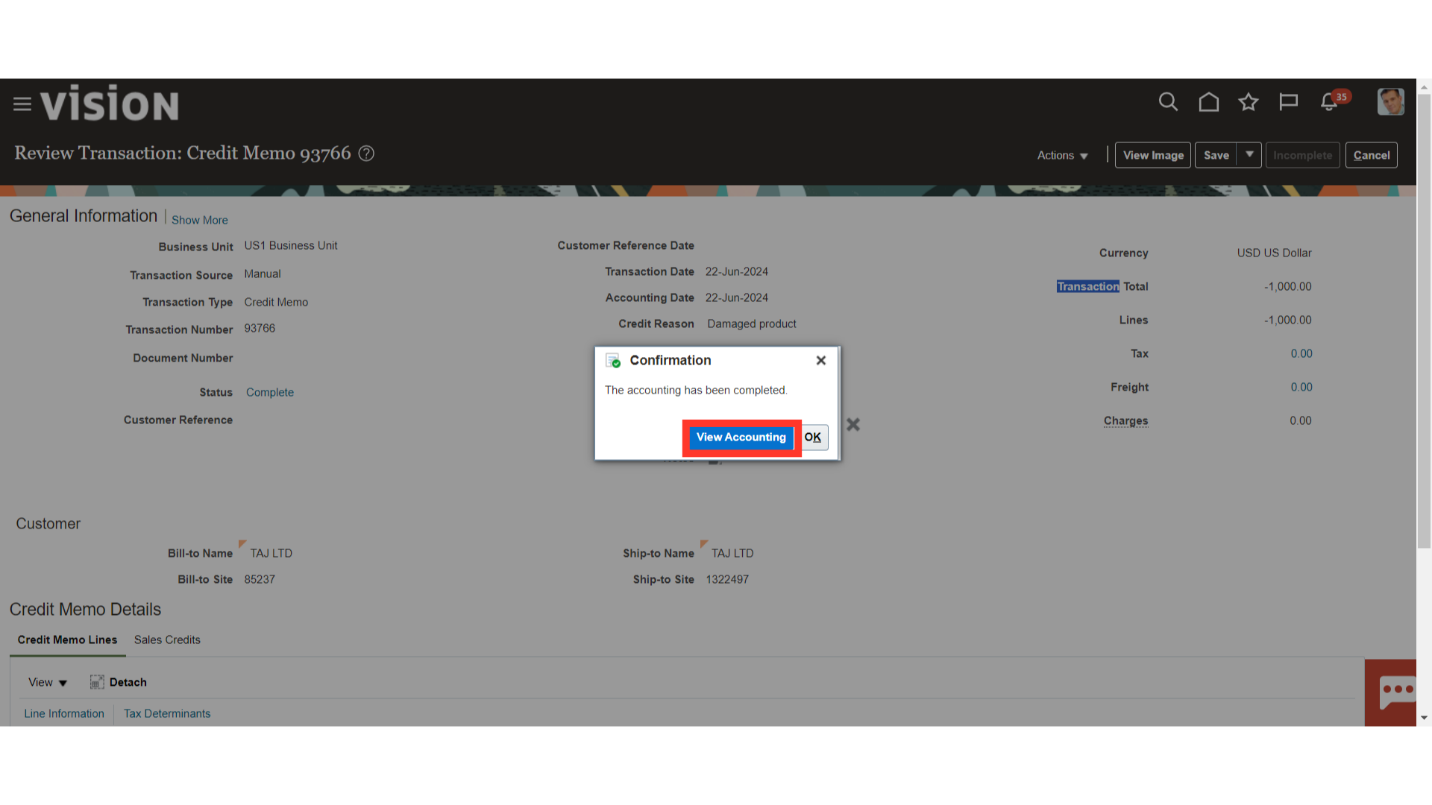
This is the accounting entry generated for the credit memo booked in which revenue and receivable is reversed by debiting and crediting respectively.

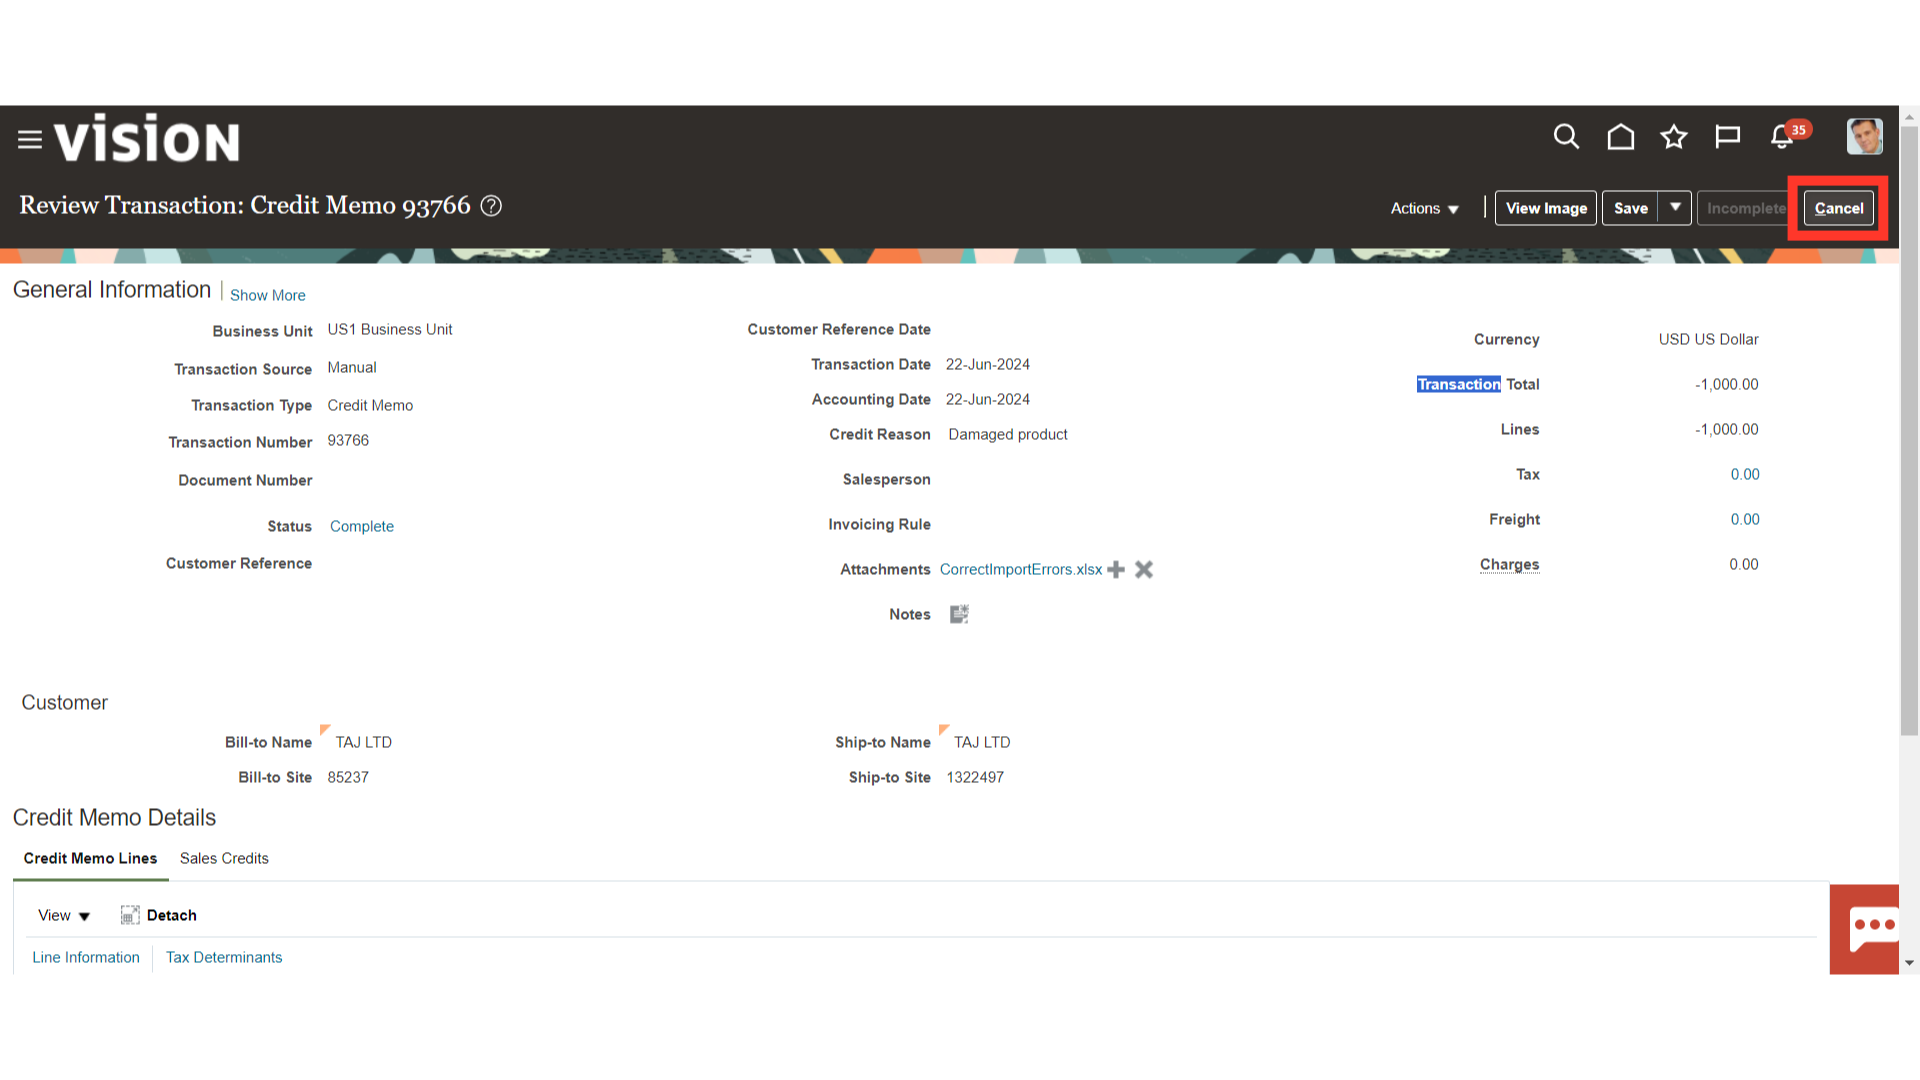
Click on the Cancel button to return to the Billing work area.
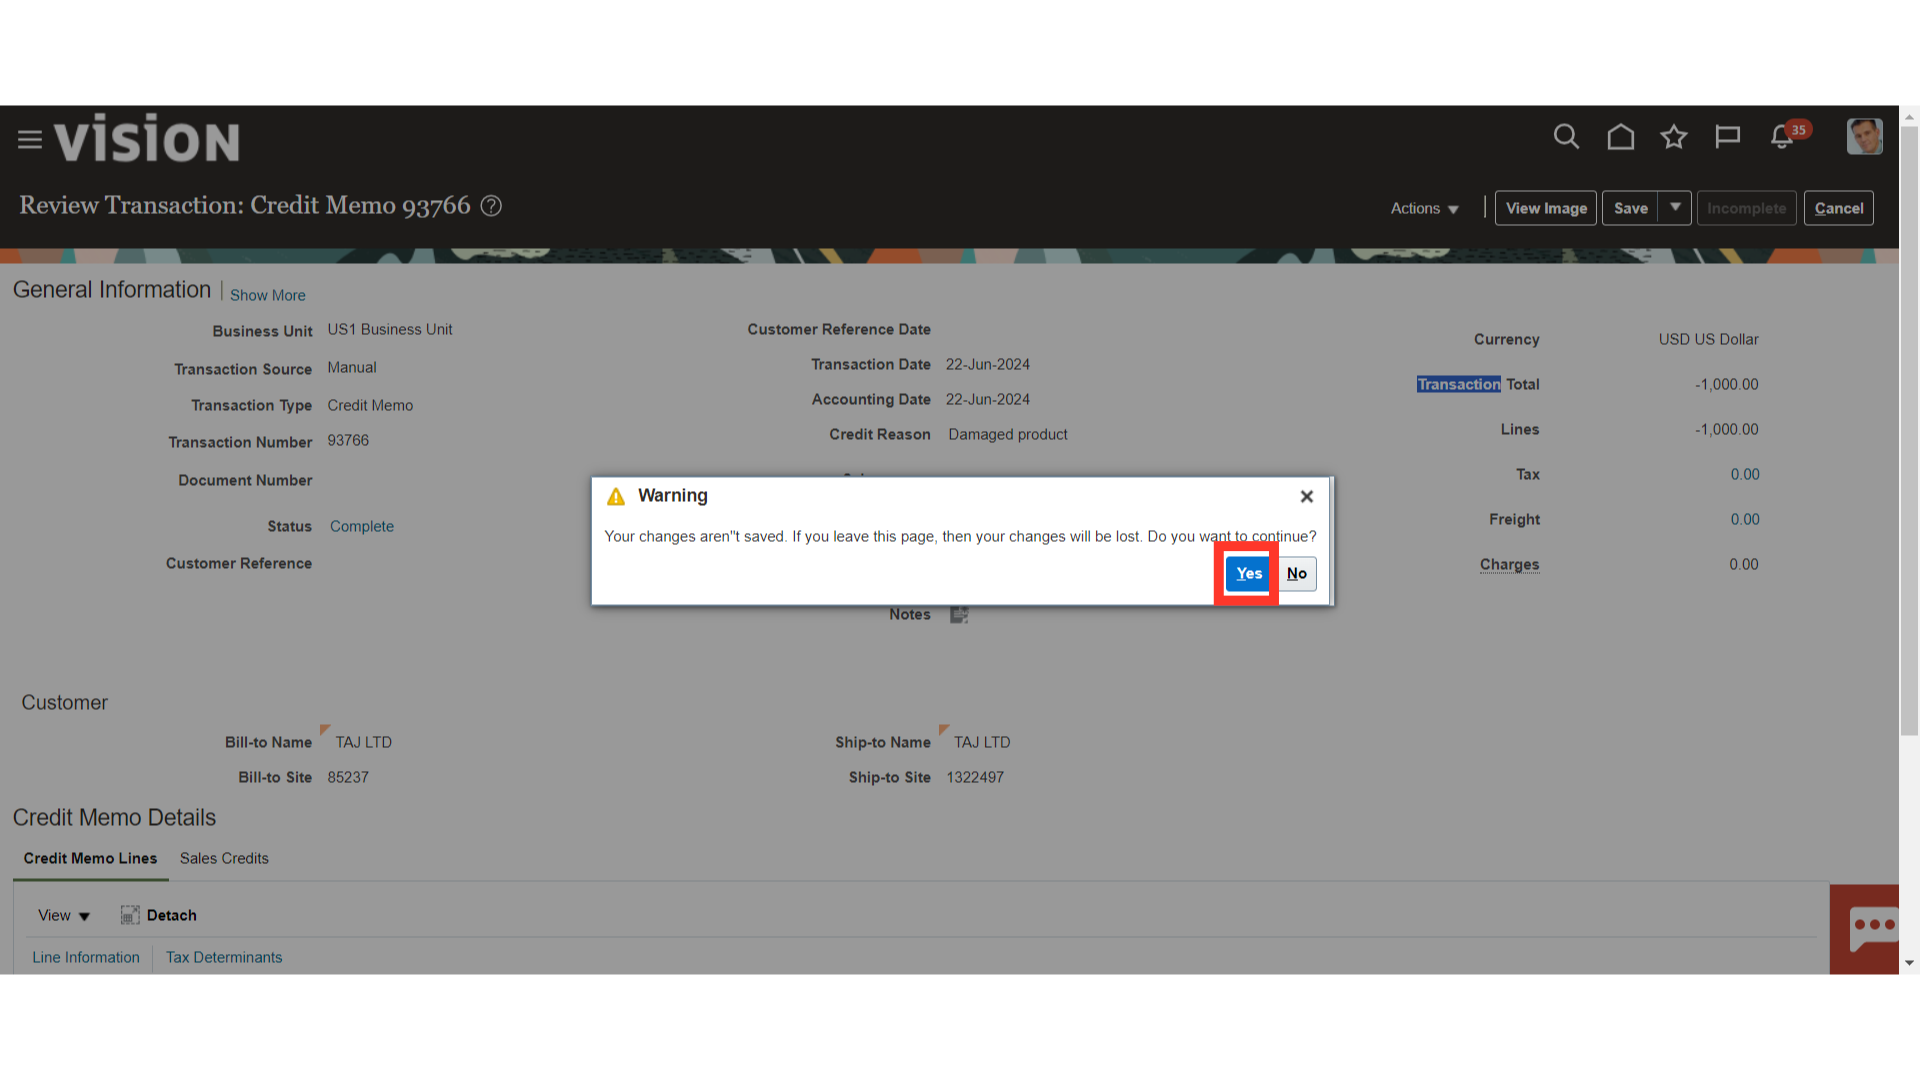
Click on the Yes button to proceed further.
To apply the standalone credit memo, click on the Accounts Receivable submenu under the Receivables menu.
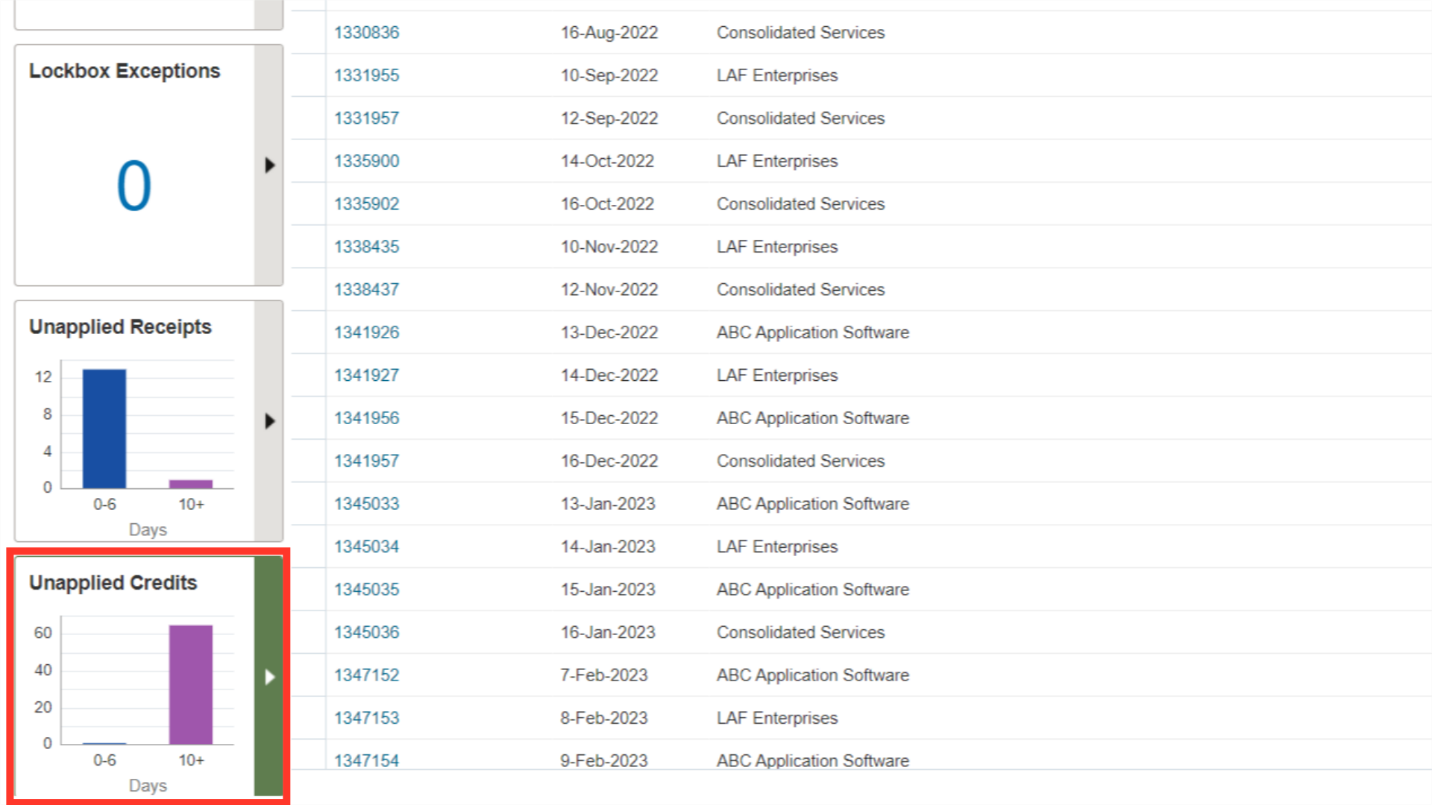
Use the Unapplied credits Infotile to review summarized credit memos counts of your open credits displayed in graphical representation and categorized into date-range buckets: 0-6 days old, and >10 days old. Click on a specific date range bar on the graph, and the detail table filters the credit memo data accordingly.
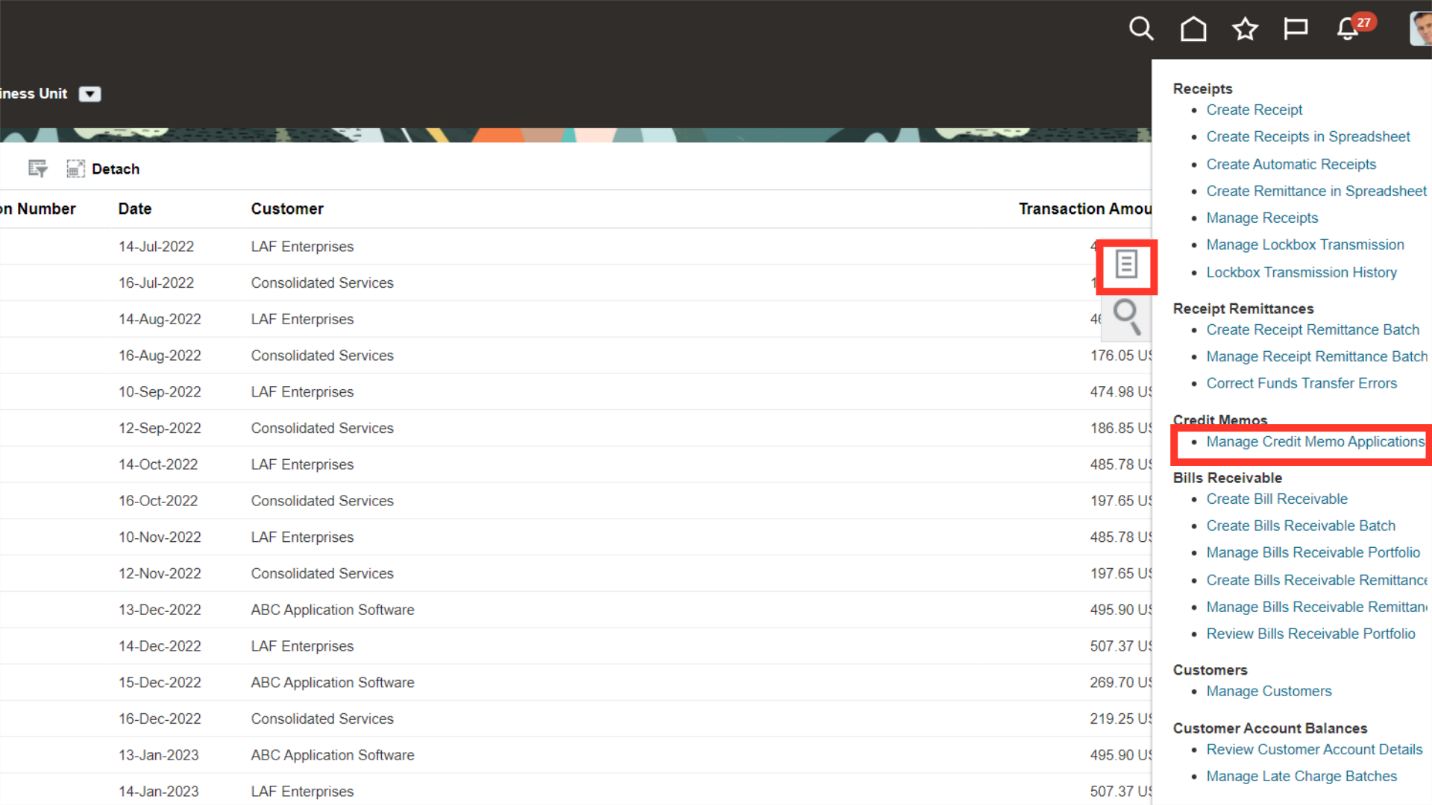
Click on Manage Credit Memo Application form the task list for searching the credit memo created for application against the transaction.
To search the credit memo for an application, enter the credit memo number and then click the search button. Open the Credit memo, by clicking on the Transaction number hyperlink.

Click on the Add Open Receivables button to search the transactions for the application.
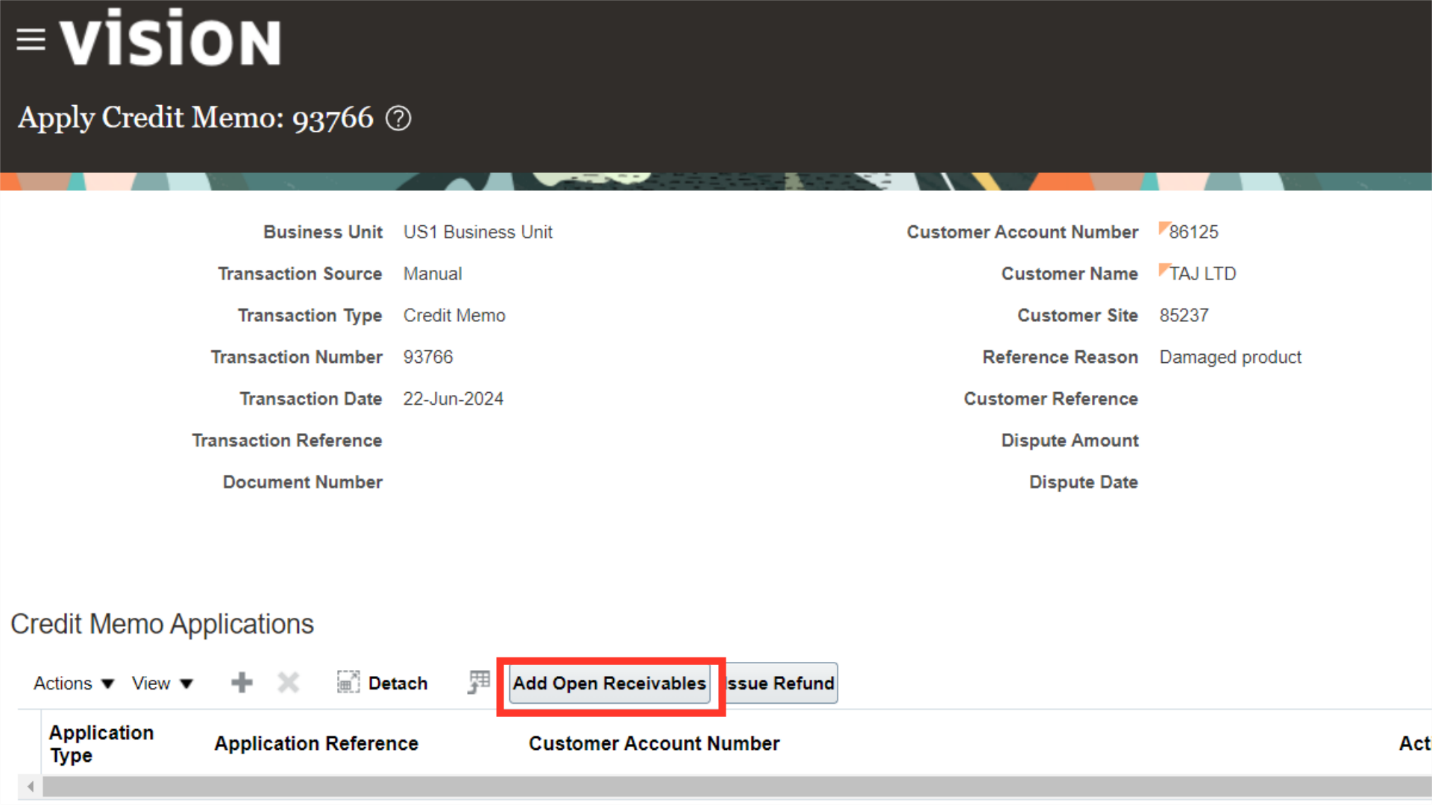
Enter the search parameters and click on the search button to search the transaction. The Transactions can be added individually by selecting the transaction name and clicking the Add button. After that, click on the Done button to close this window.
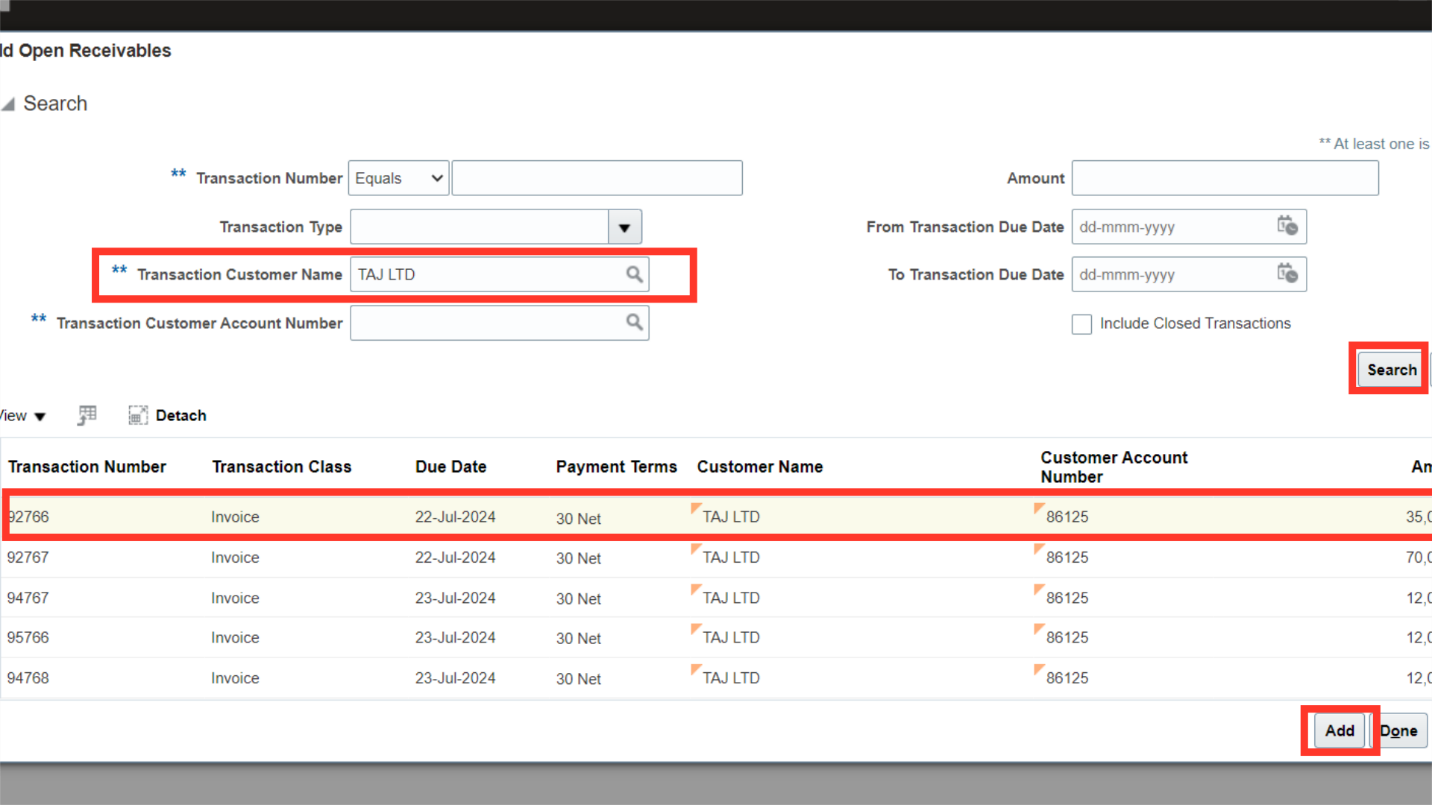
The application date and accounting date can be manually updated or chosen from the calendar, although they are set as the current system date by default. Click on Cancel button to close this window.
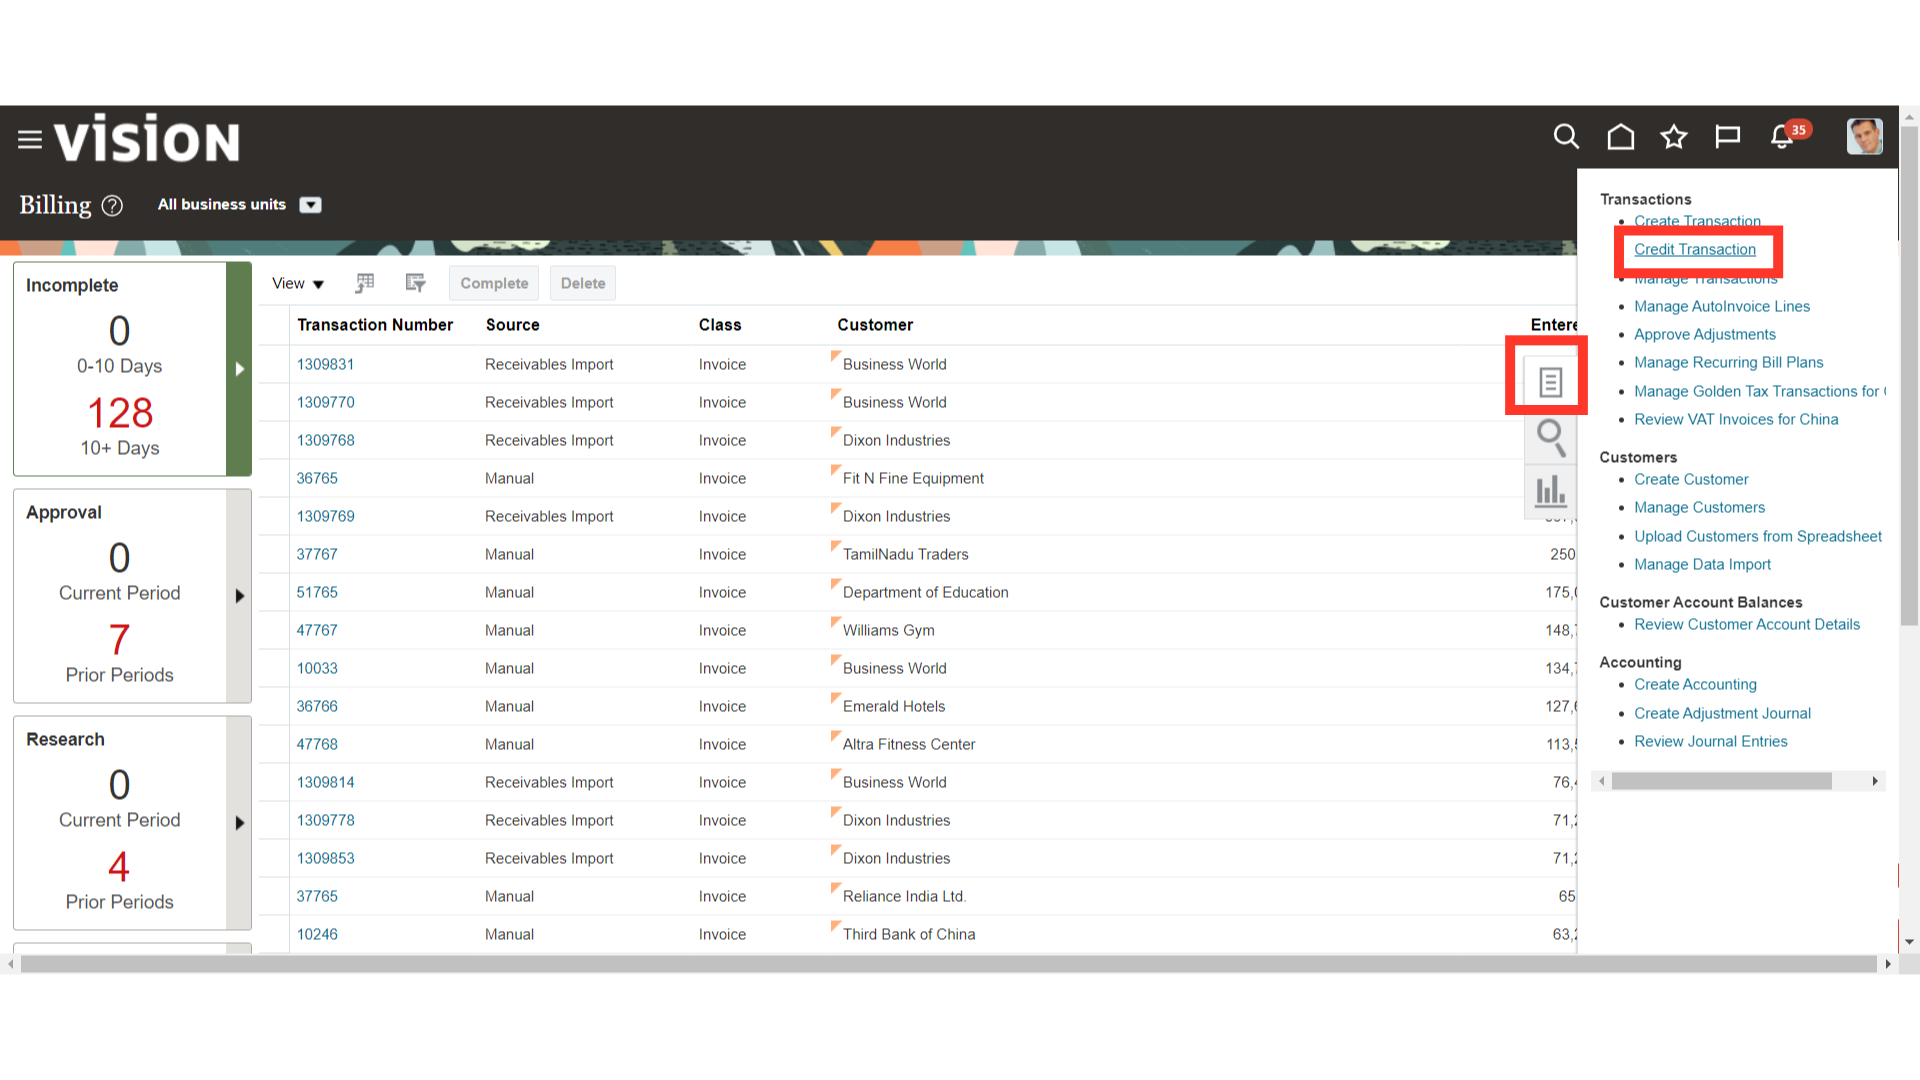
By selecting the Credit transaction from the Task list, the on Account Credit memos can be created. As an alternative, it can be made by opening the invoice and going to Invoice Actions > Credit Transaction.
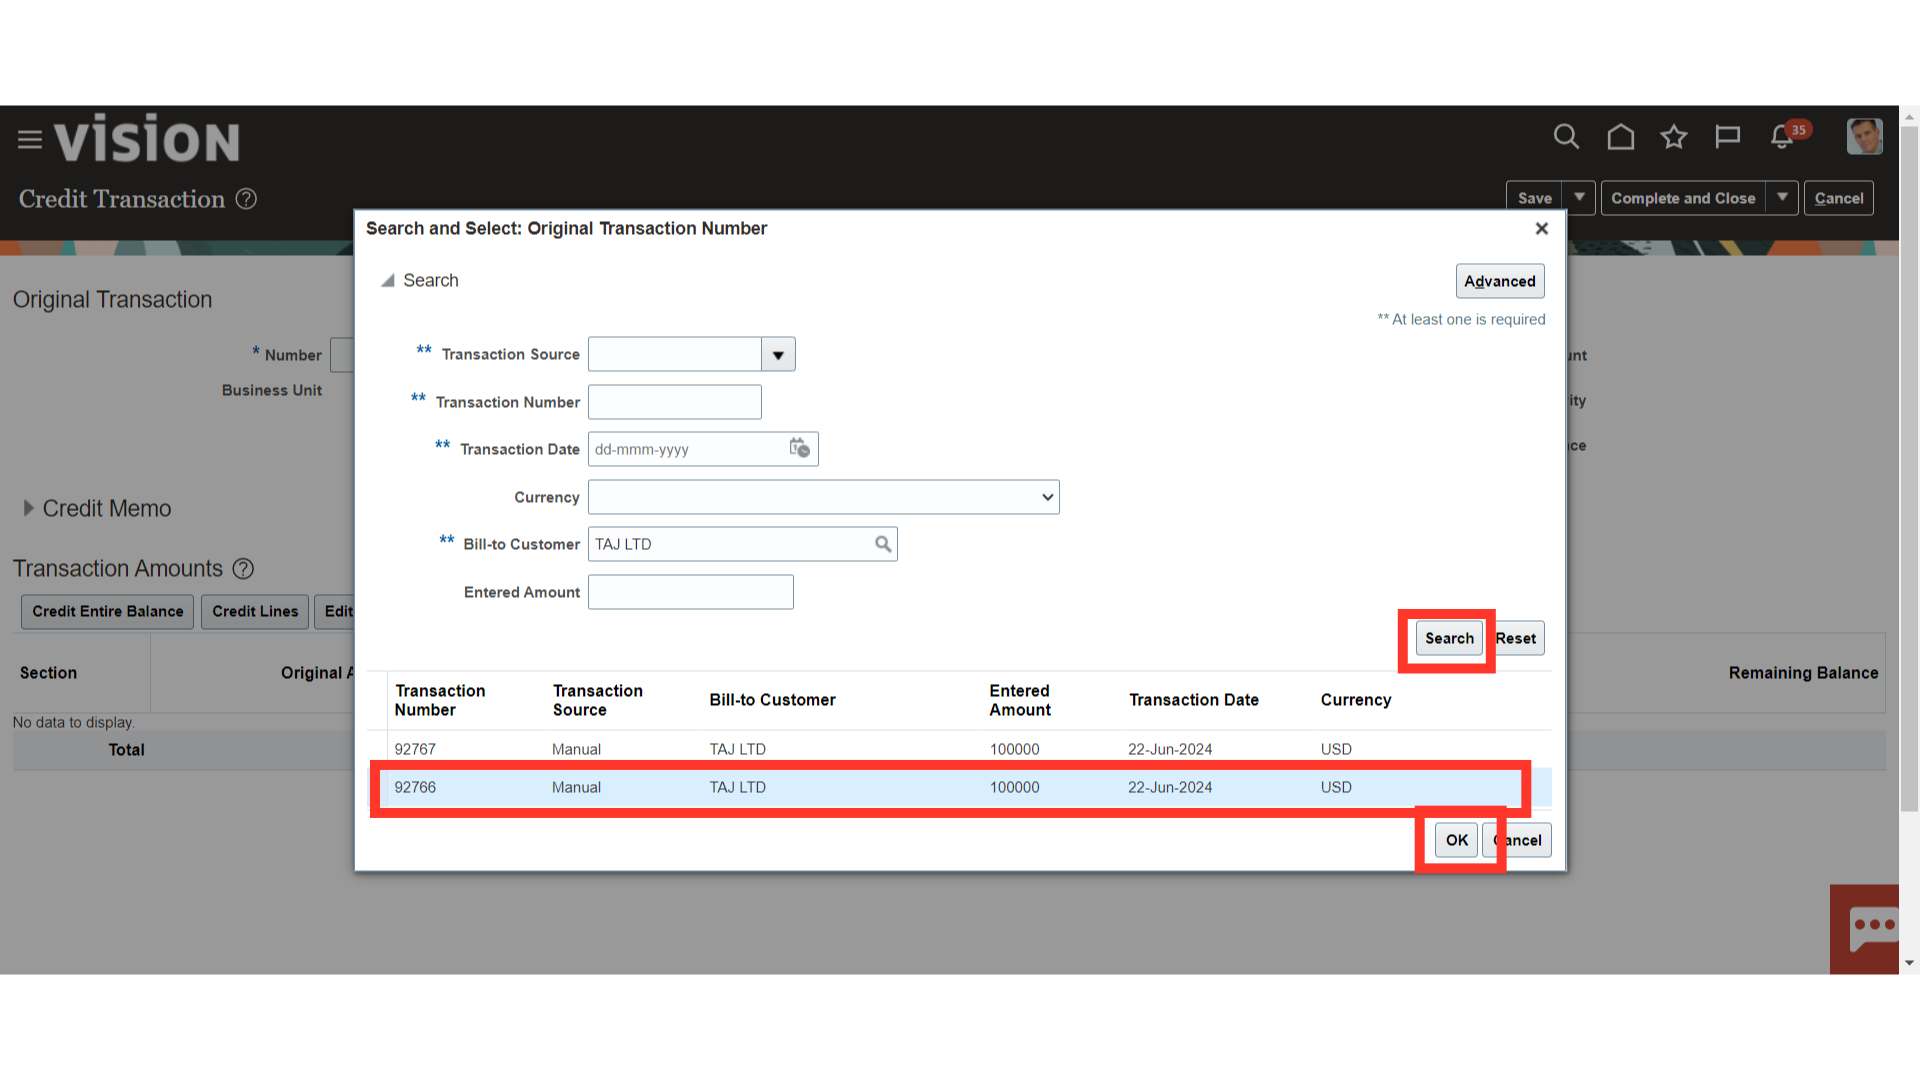
Enter the Original transaction against which the credit memo is to be created by entering the number manually or by clicking on the magnifying lens.
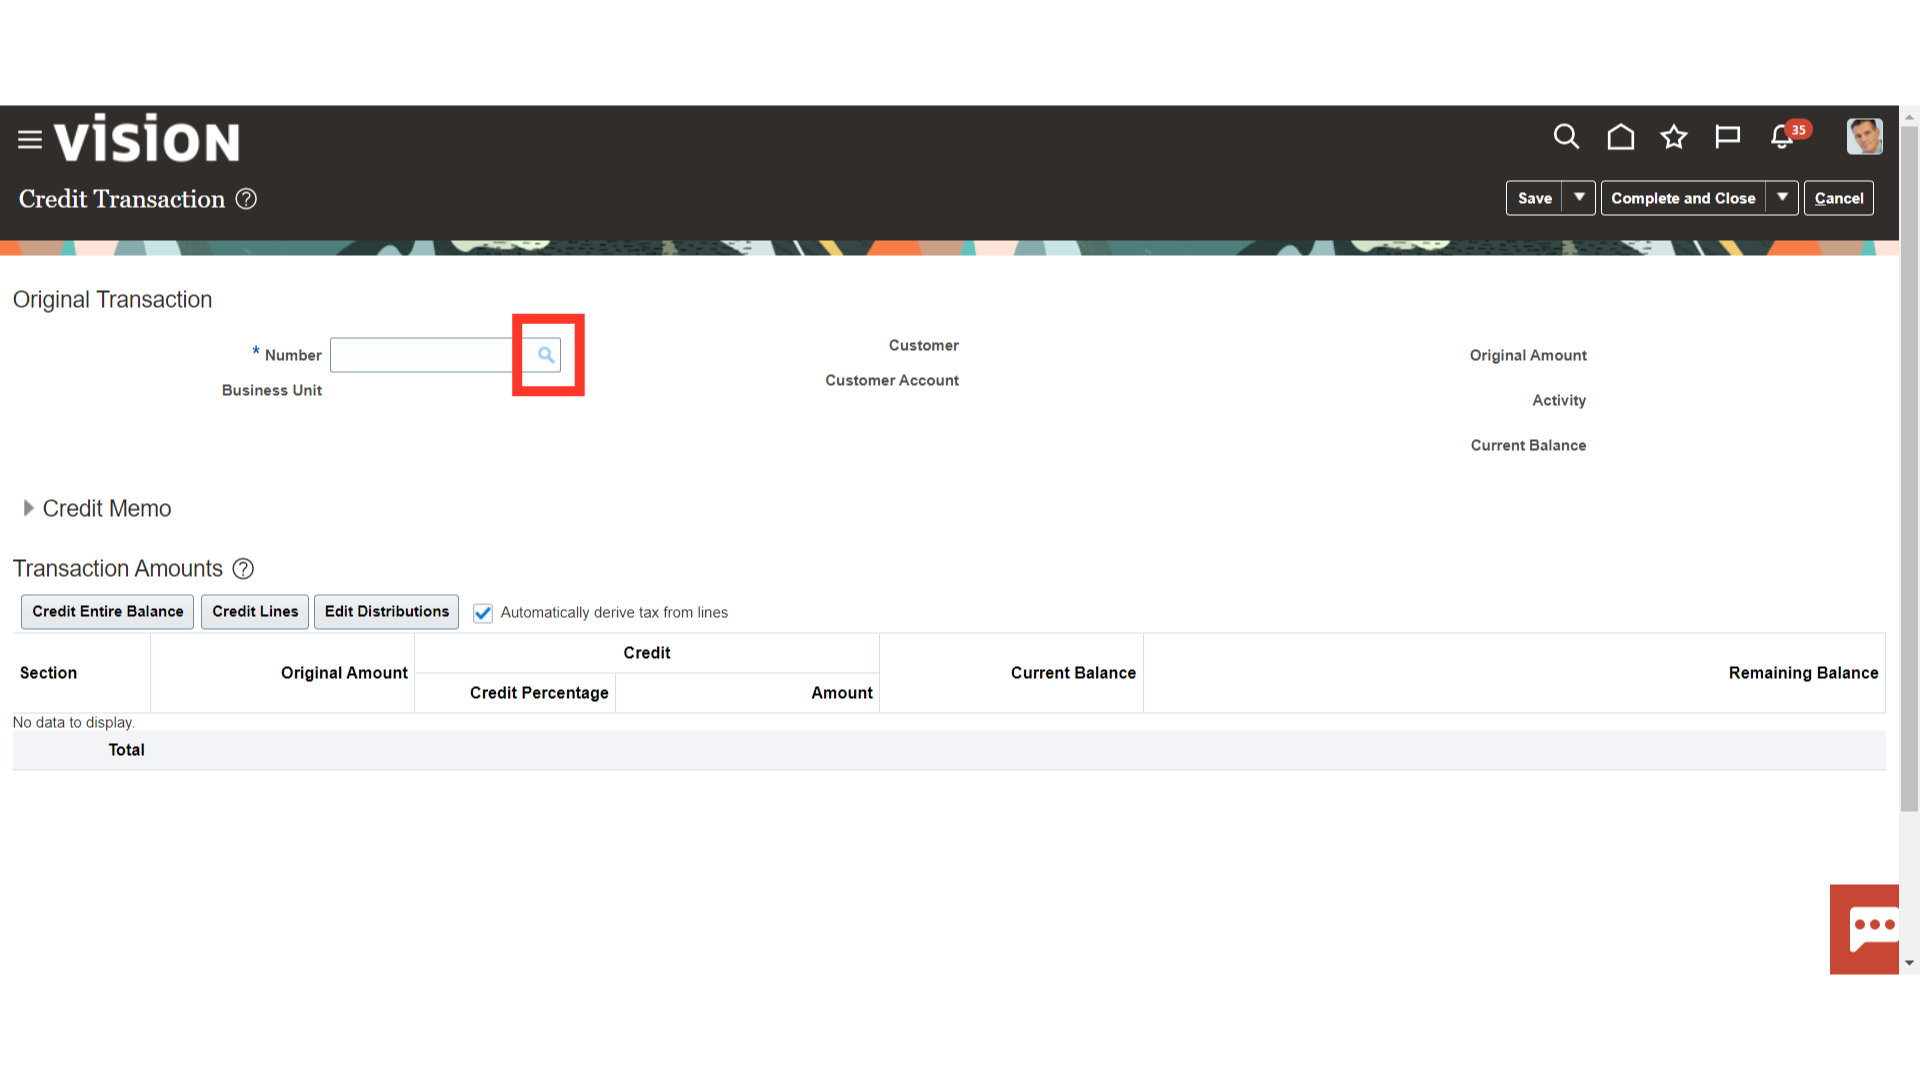
After inputting the desired search parameters—Transaction source, number, date, customer name, etc.—click the Search button. Next, choose the Transaction and press the OK button to proceed.
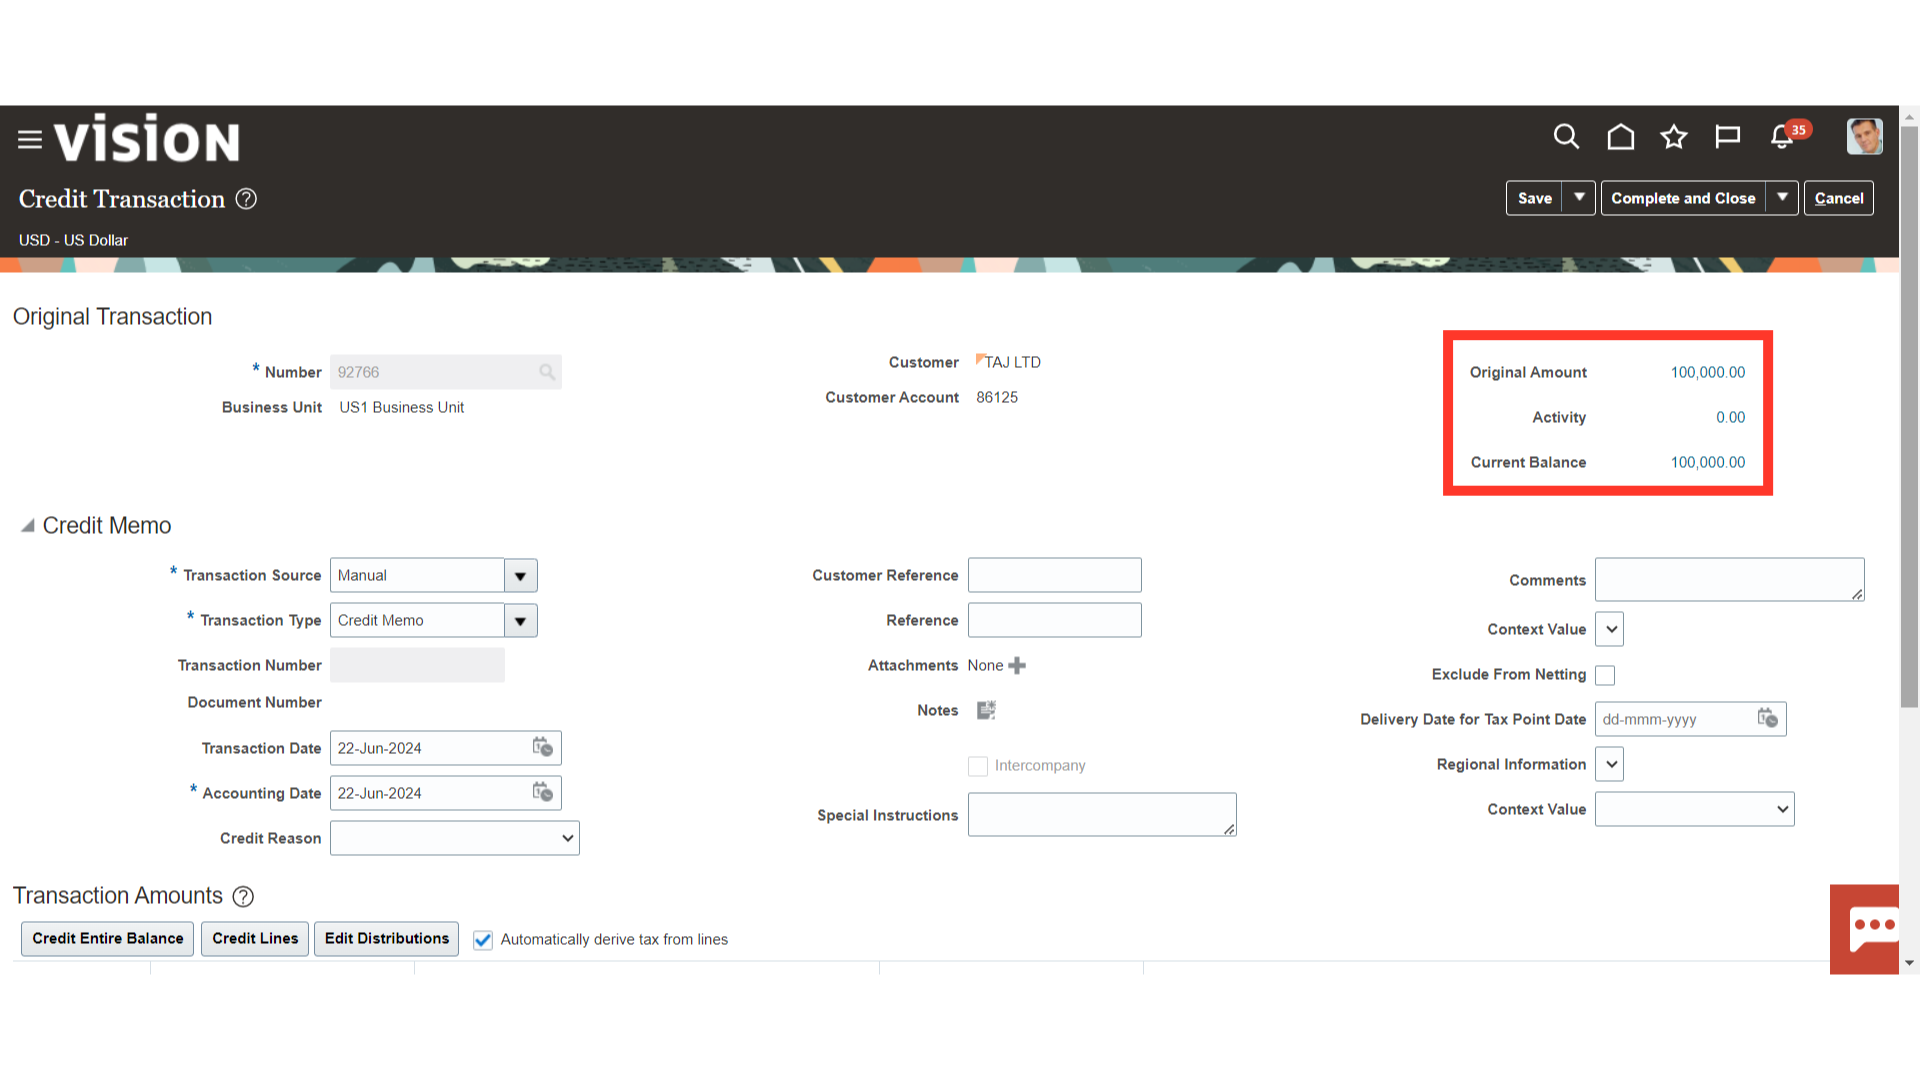
The Original amount would be defaulted automatically from the transaction selected. And, closing balance would be calculated based on the credit memo amount created.
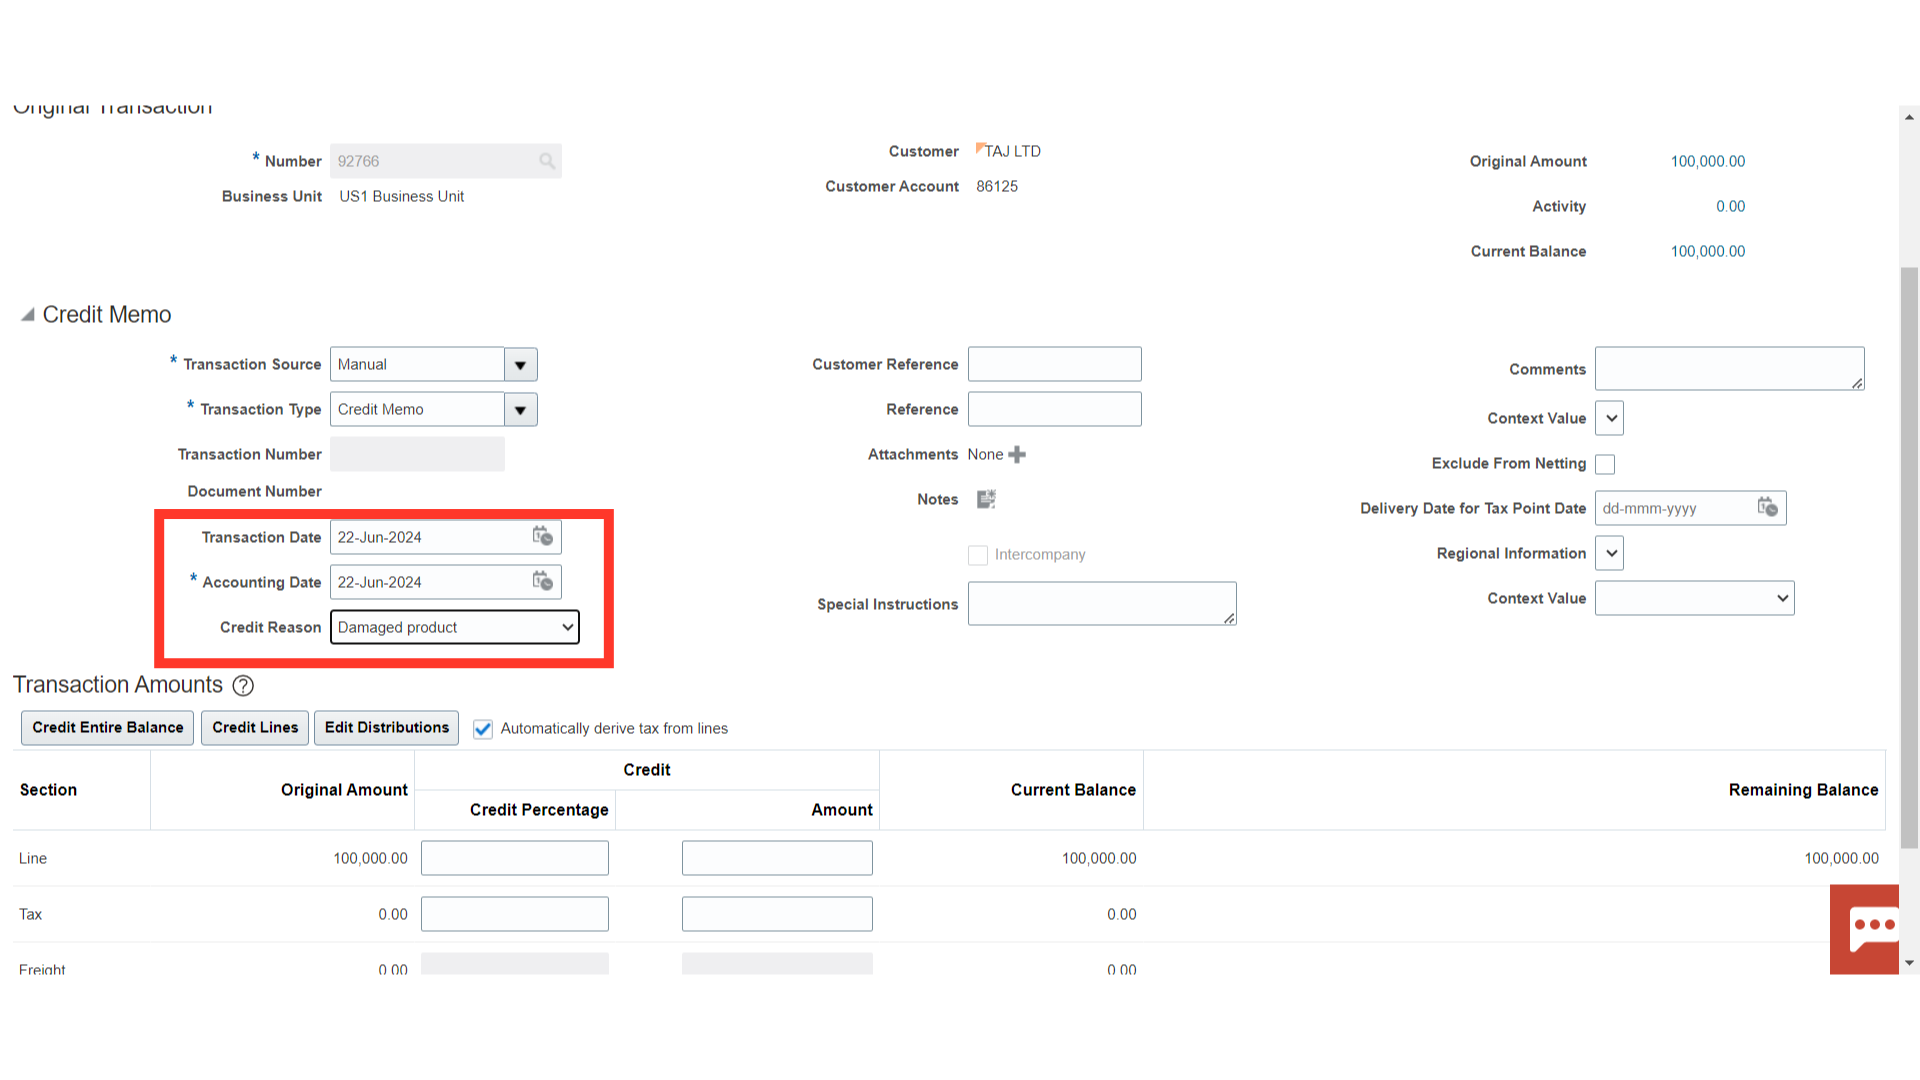
Enter the date on which sales were made in the Transaction date field. Select the Accounting Date on which the journal entry is to be generated for the transaction. Additionally, select the reason for creating a credit memo from the list of values in the Credit Reason field.
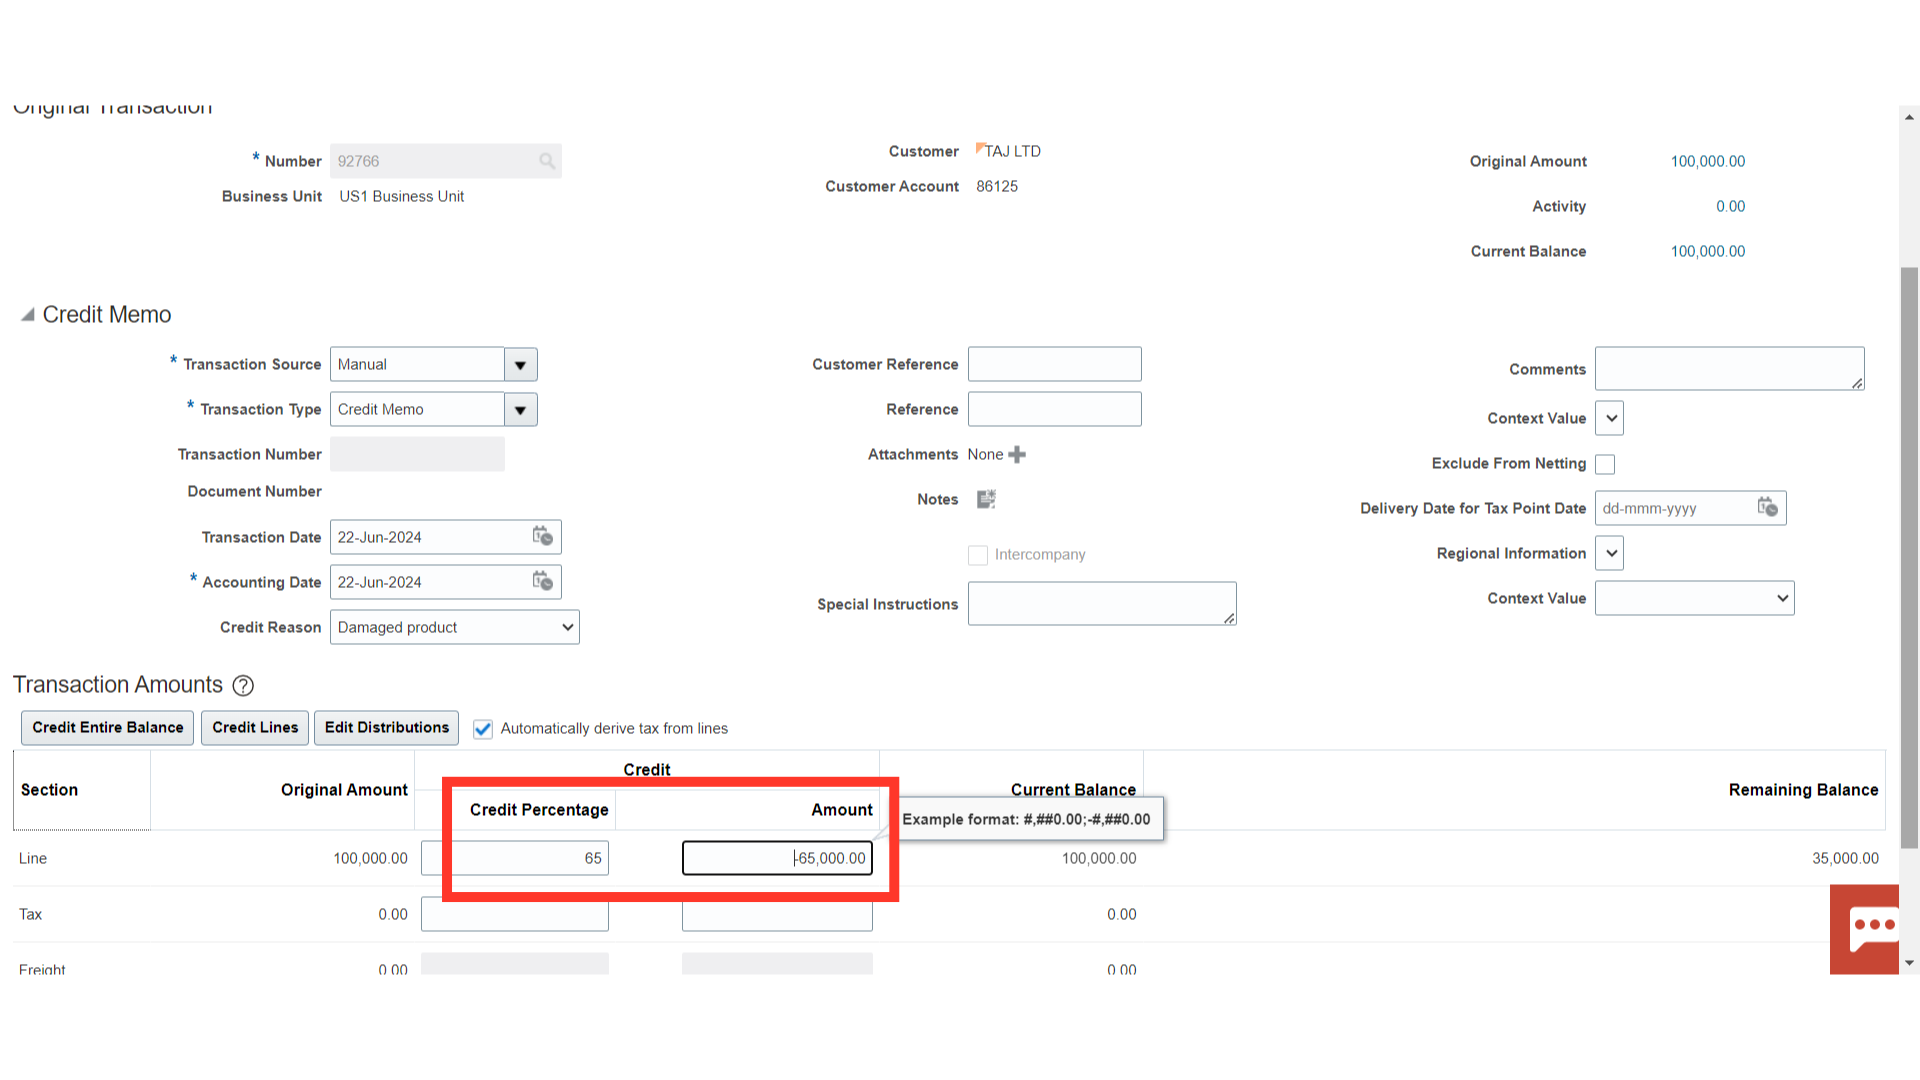
Enter the credit amount based on which percentage would be computed, or the credit percentage based on which amount would be calculated.
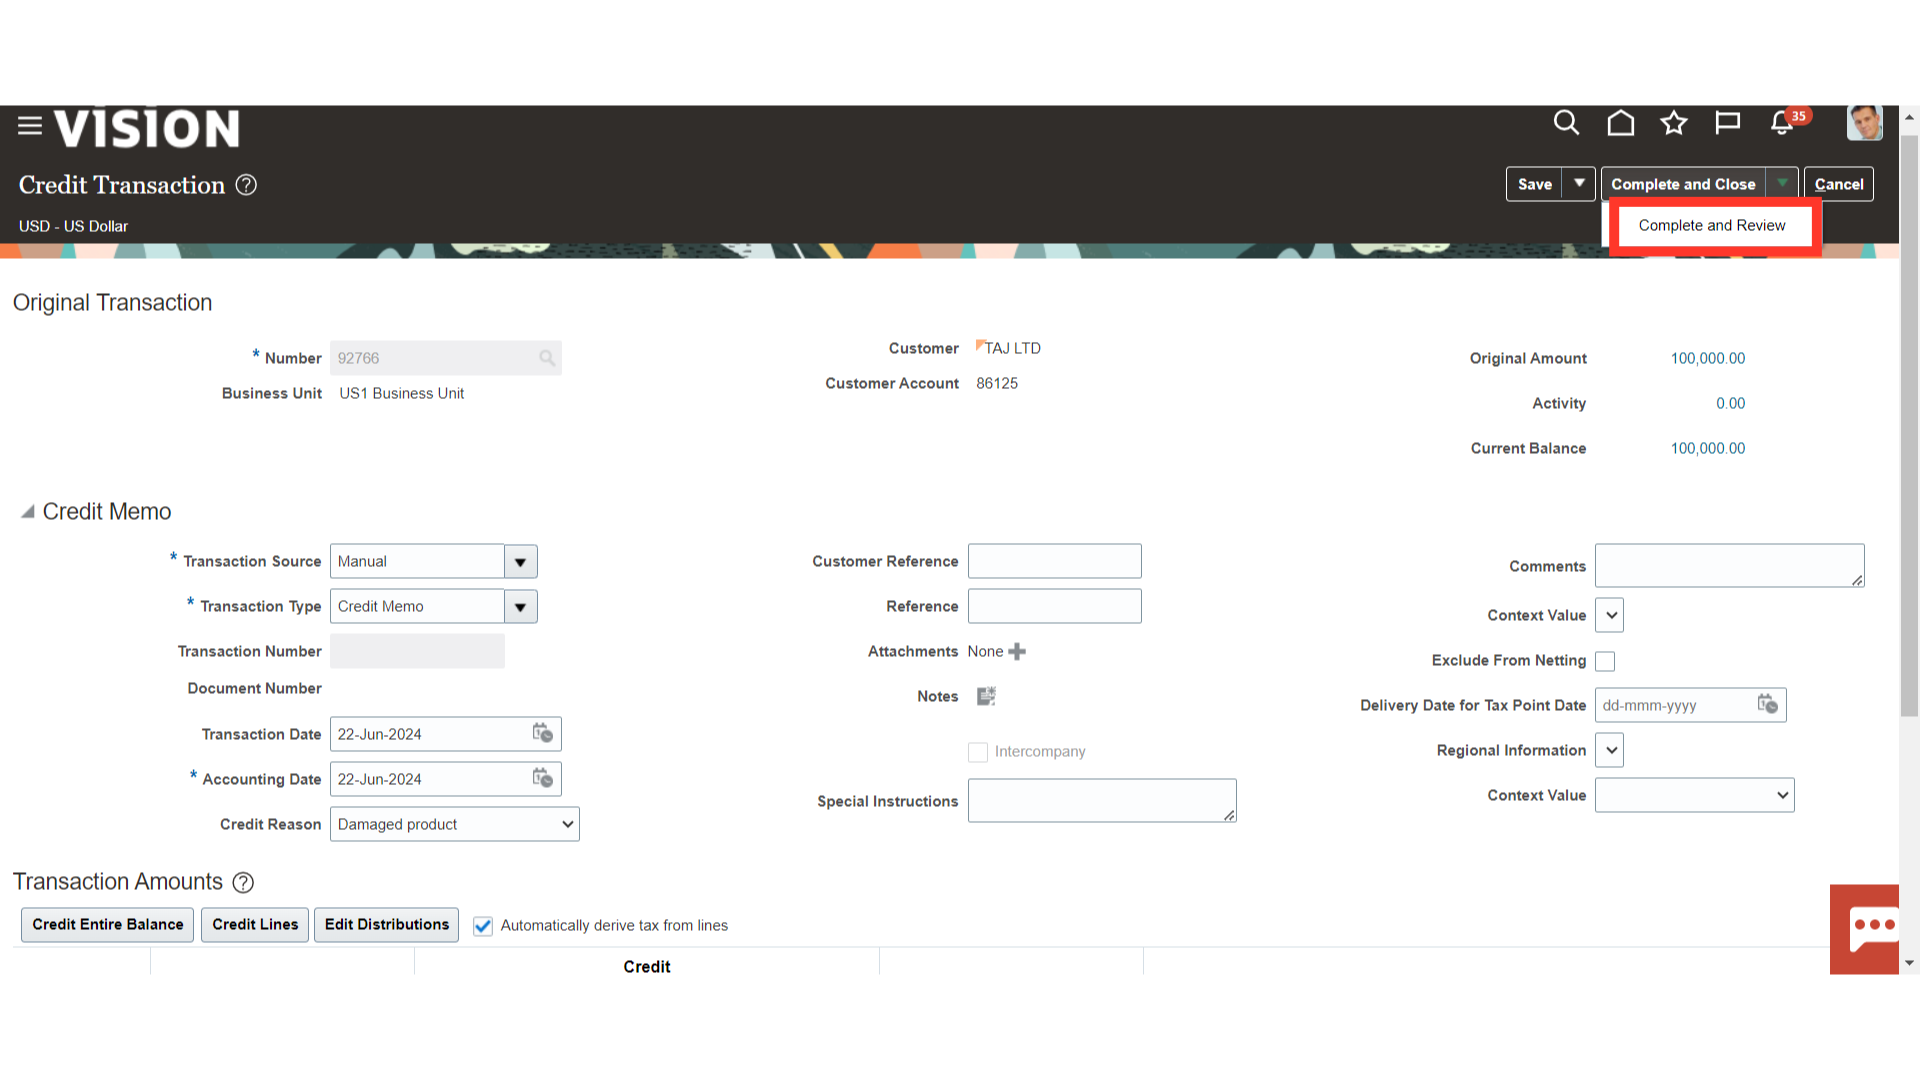
Select “Complete and Review”, to mark the transaction as status Complete and to review it.
After selecting the Post to ledger option under actions, the accounting entry is generated. Both the creation and application of credit memo accounting entries are done in this.
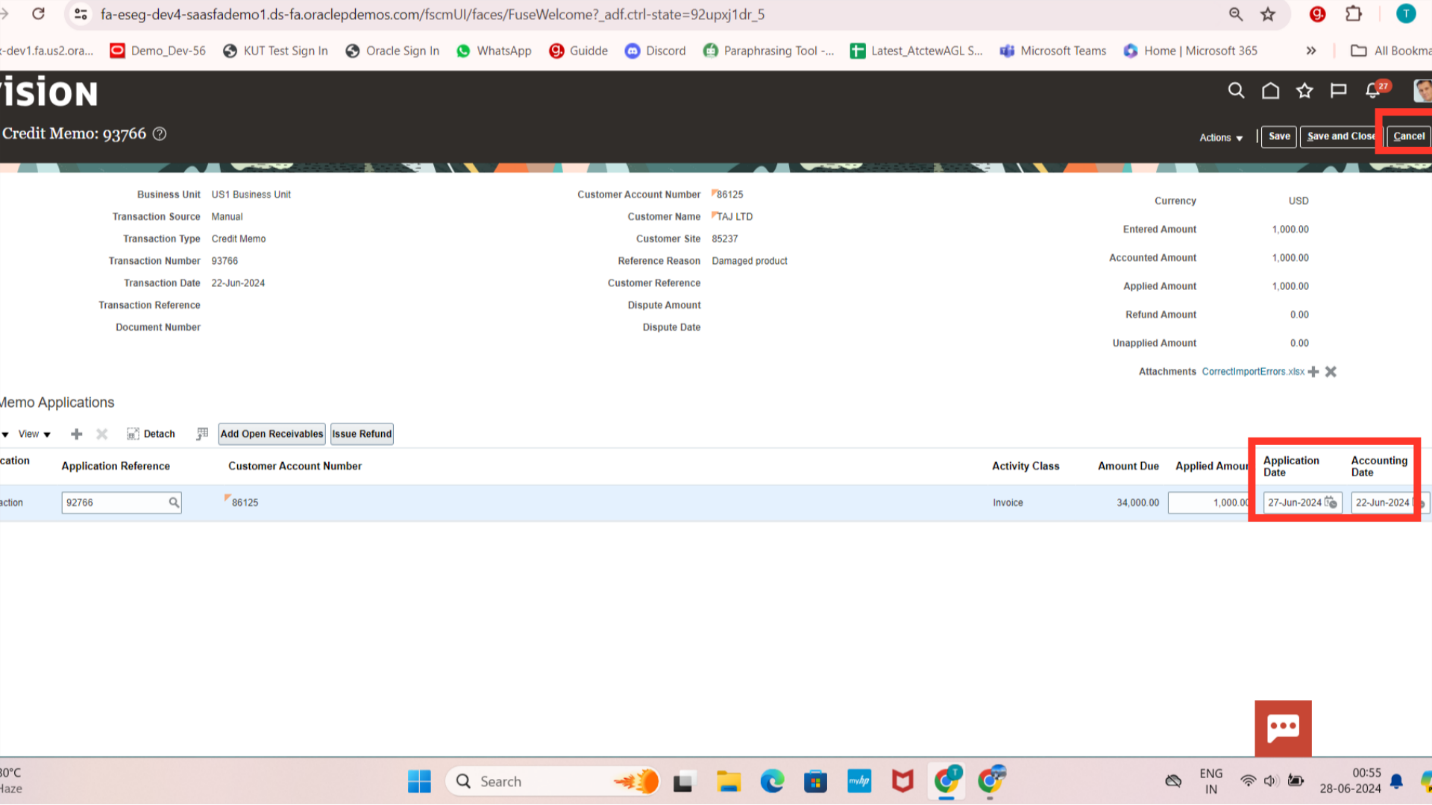
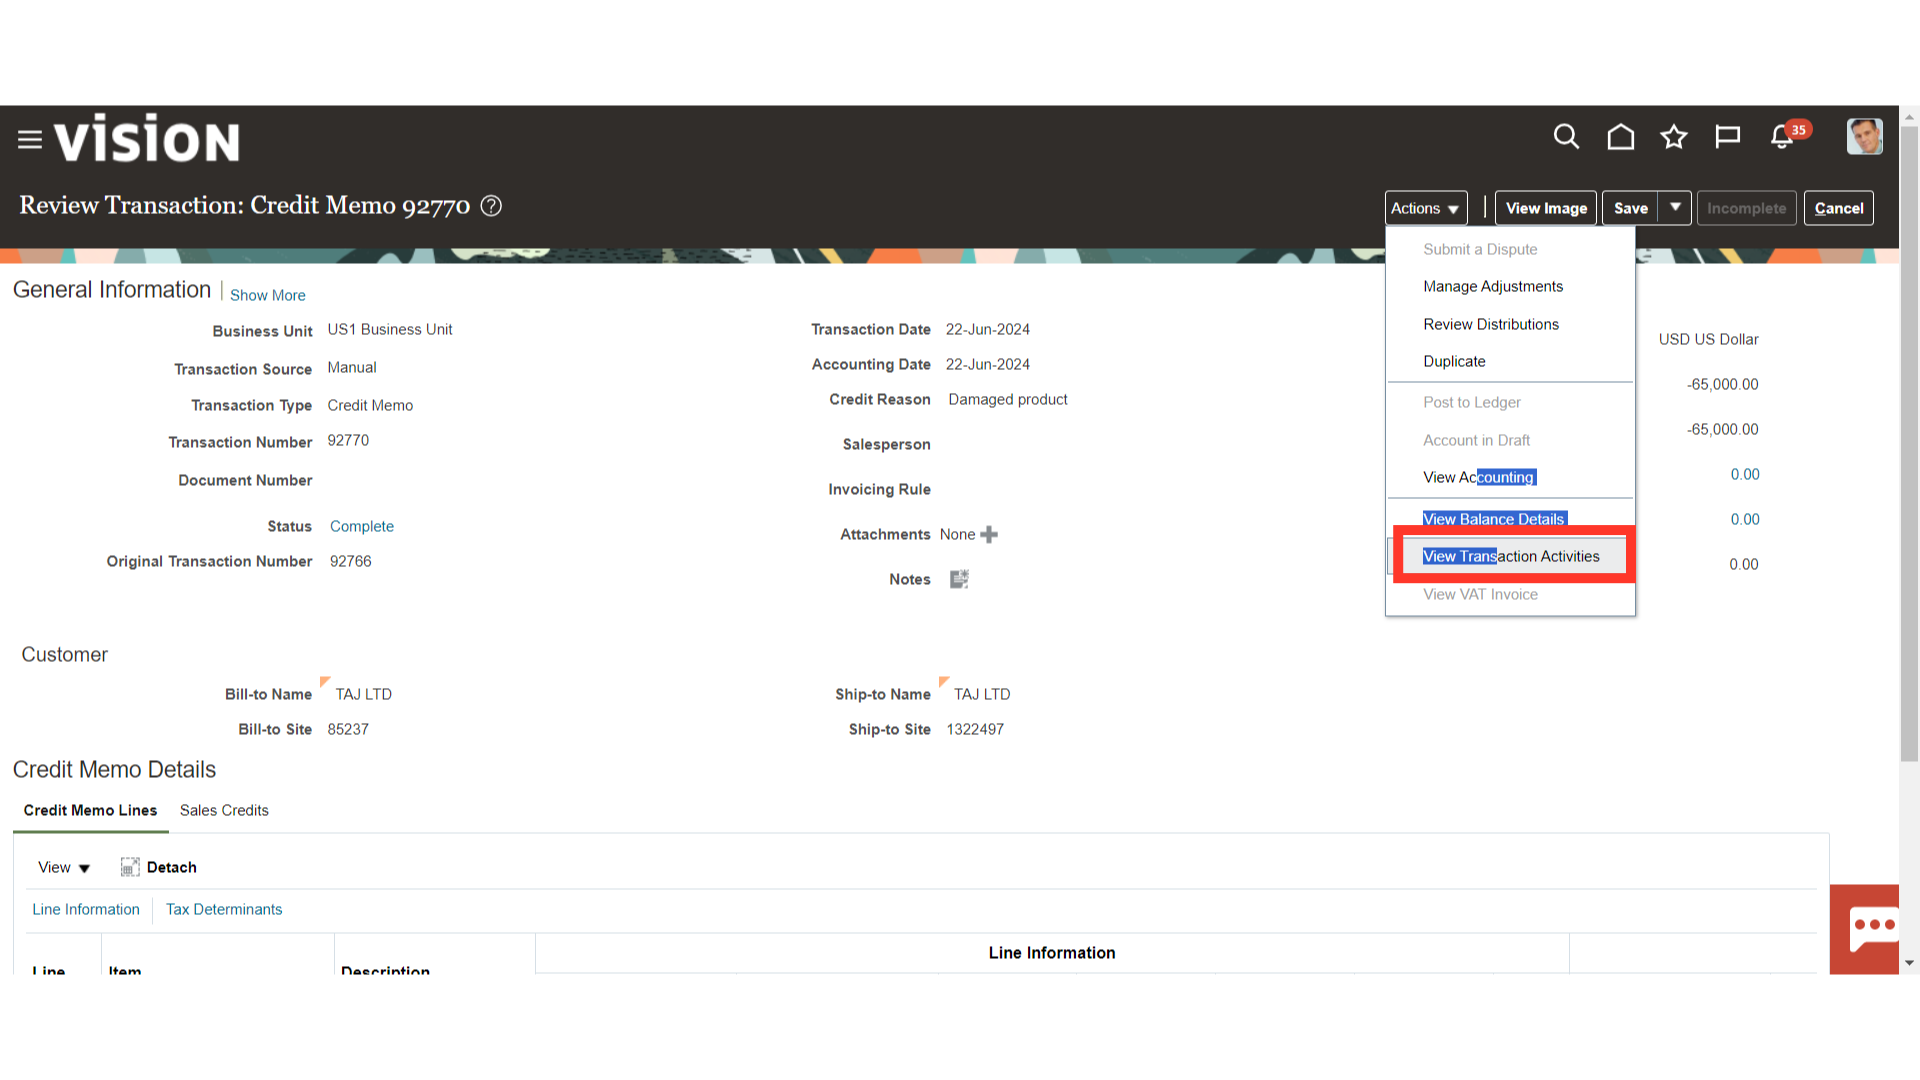
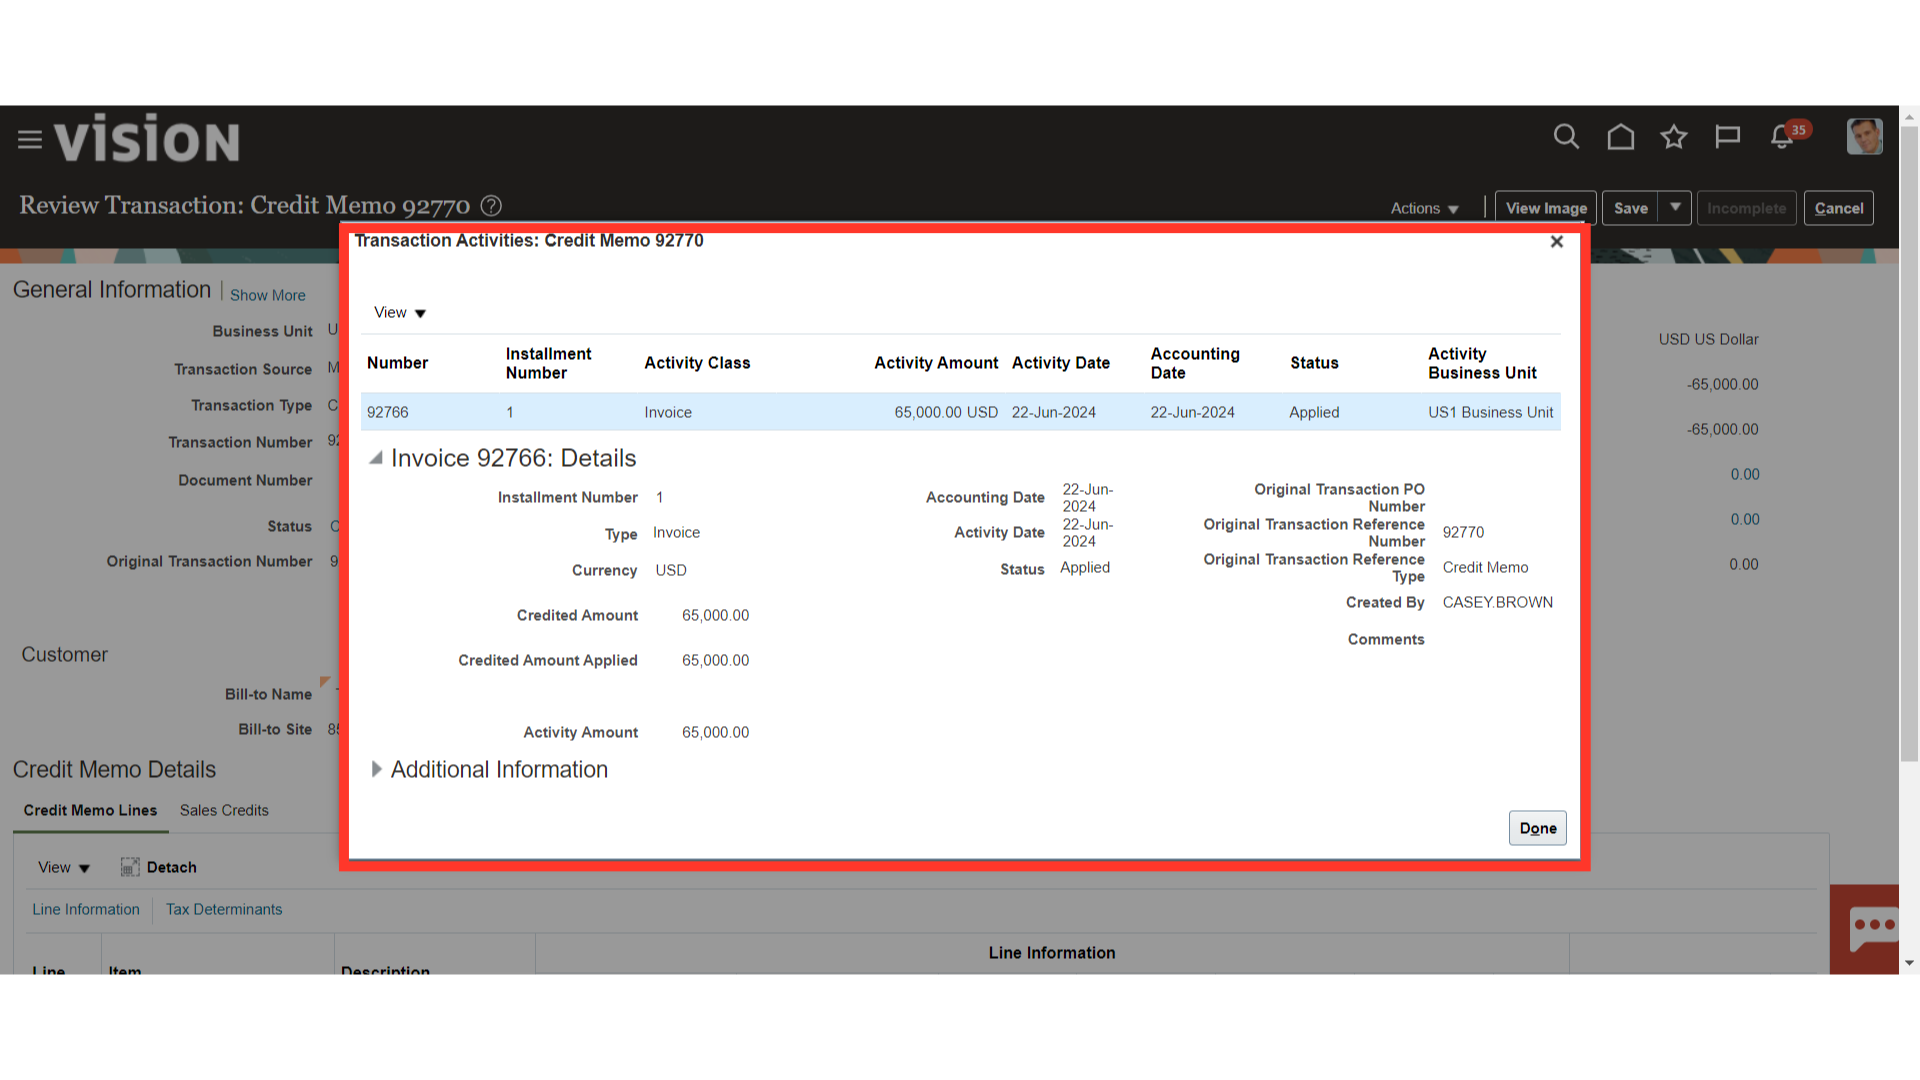
Click on View Transaction Activities under the Actions tab to view the details of the applied transaction.
All the details of the applied transaction such as transaction number, date, amount, etc are displayed. Click on the Done button to close this window.
To close this window and go back to the billing work area, click the Cancel button.

This guide has demonstrated the process of creating both On Account and Standard credit memo in Oracle Fusion along with the process of application of On Account type credit memos. Additionally, the process of generating accounting entries have been covered in detail.