Customer Receipt Remittance
This guide will provide a detailed step-by-step explanation of creating a Remittance batch process and generating the accounting entries for the same.
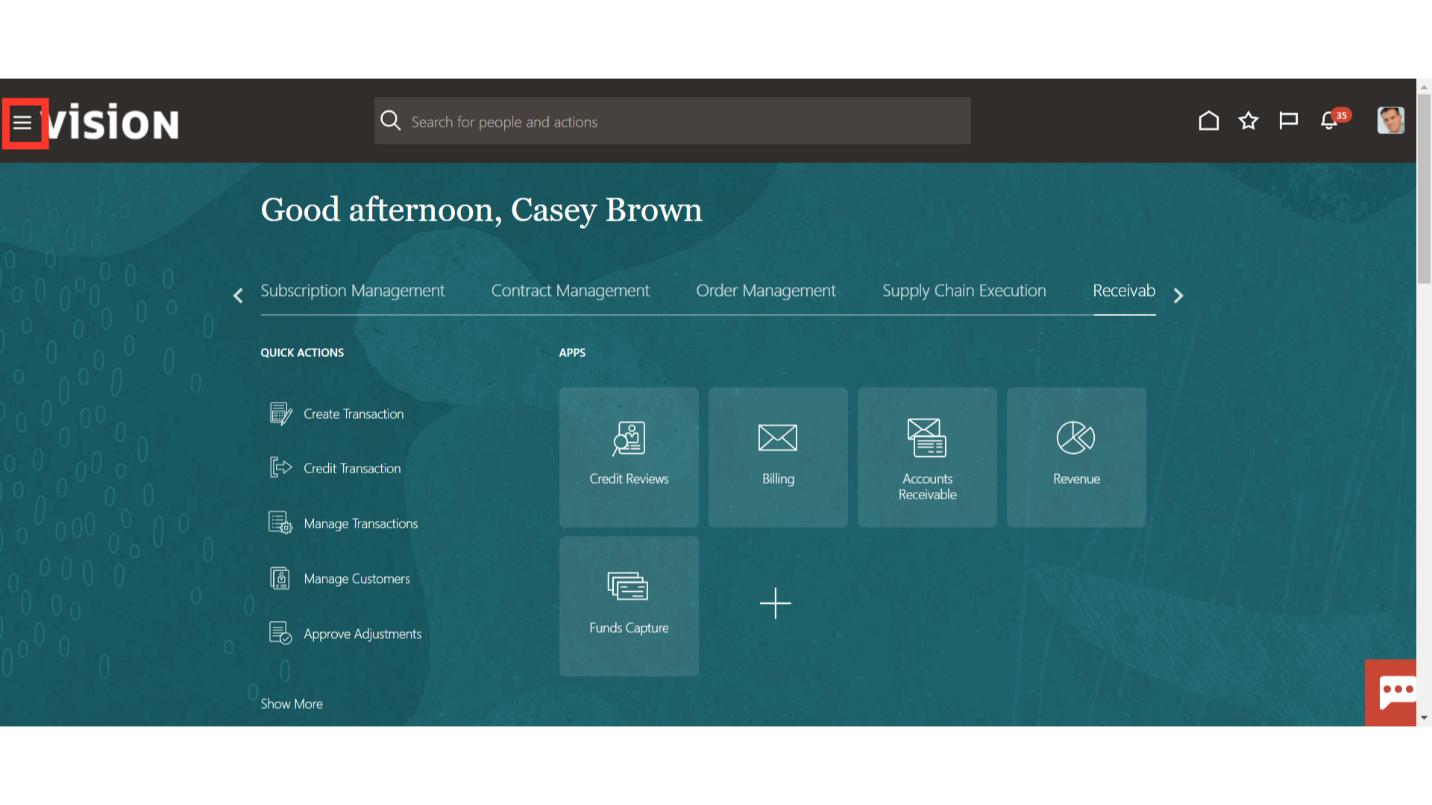
Click on the Navigator icon to access the Receivables menu.
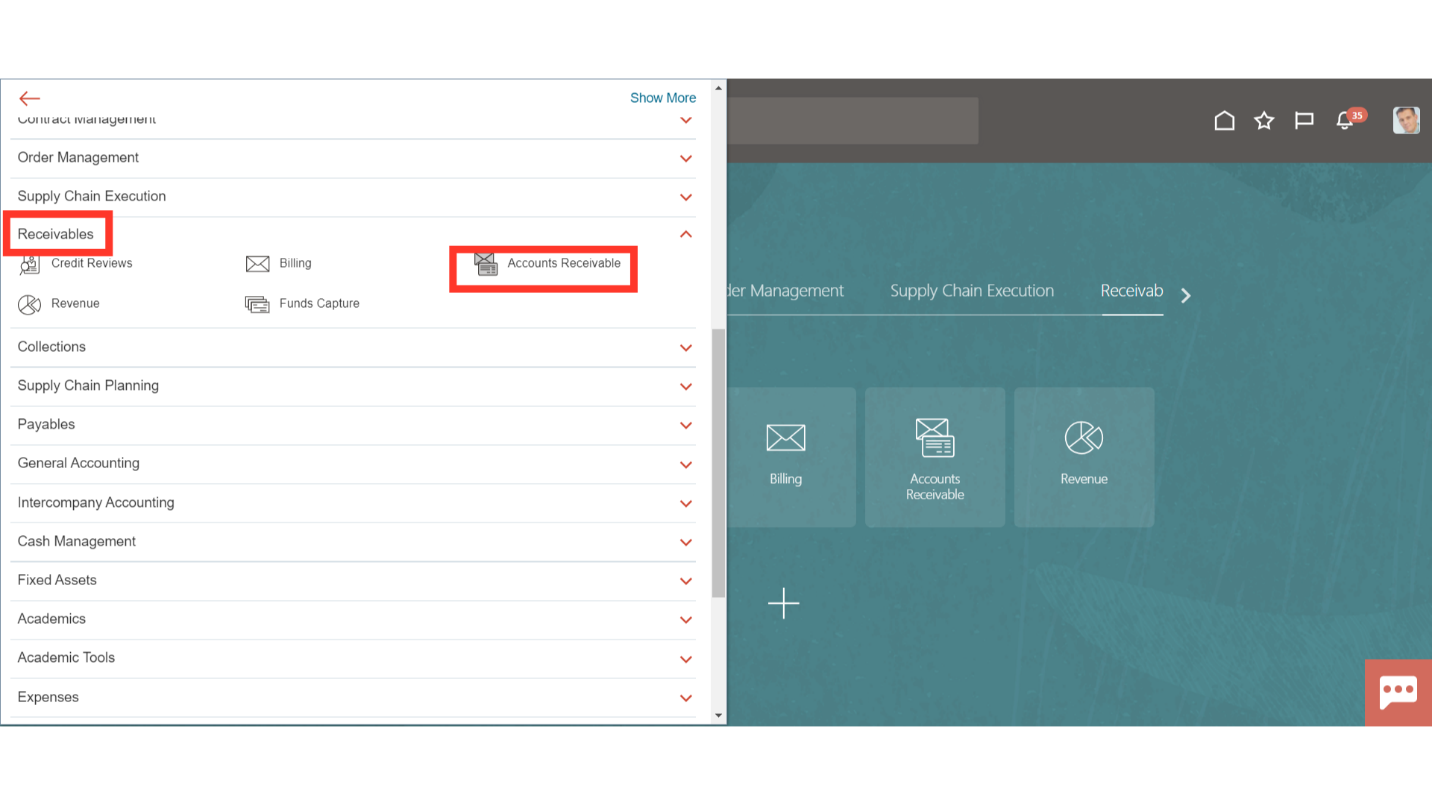
Access the Accounts Receivable work area by selecting Accounts Receivables under Receivables from the navigator. Alternatively, on the Home page, you may select the Receivables menu and under that select the Accounts Receivable submenu.
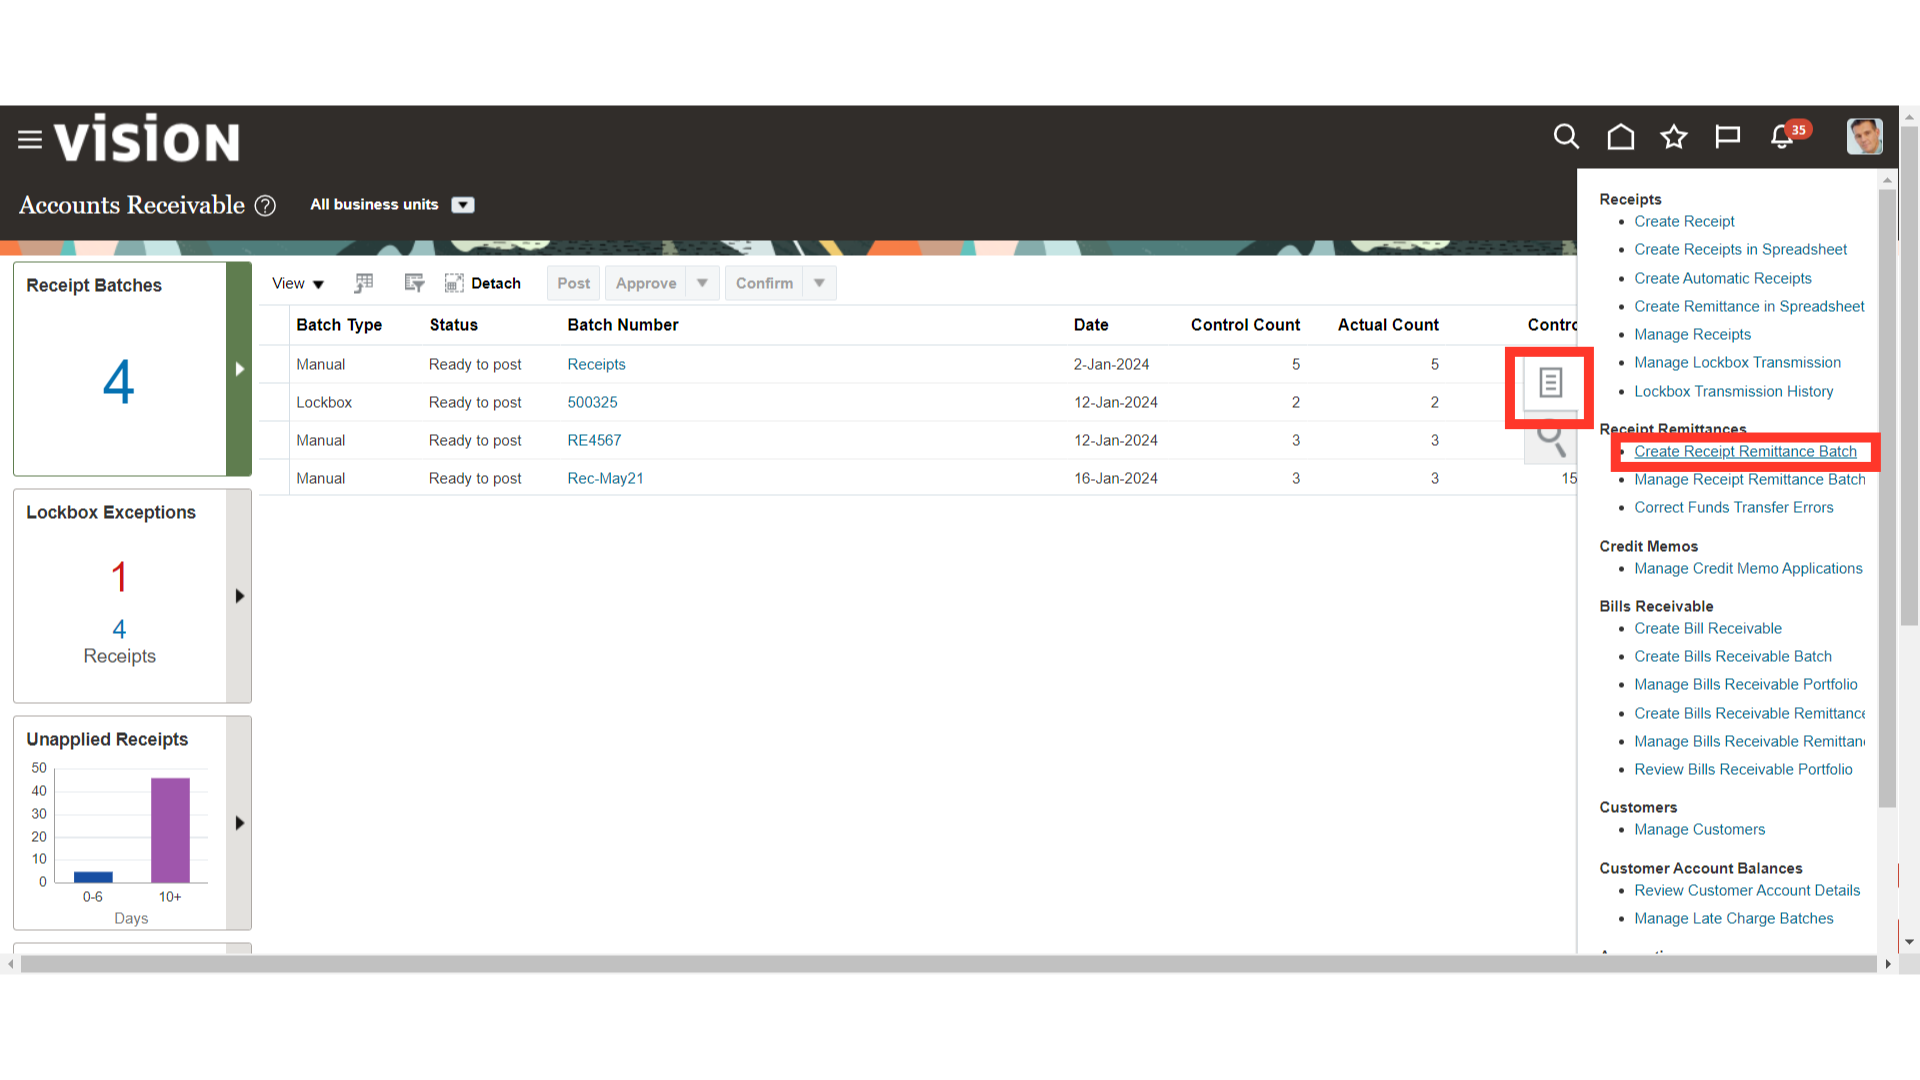
Select the Create Receipt Remittance batch hyperlink from the task list for creating remittance batch.
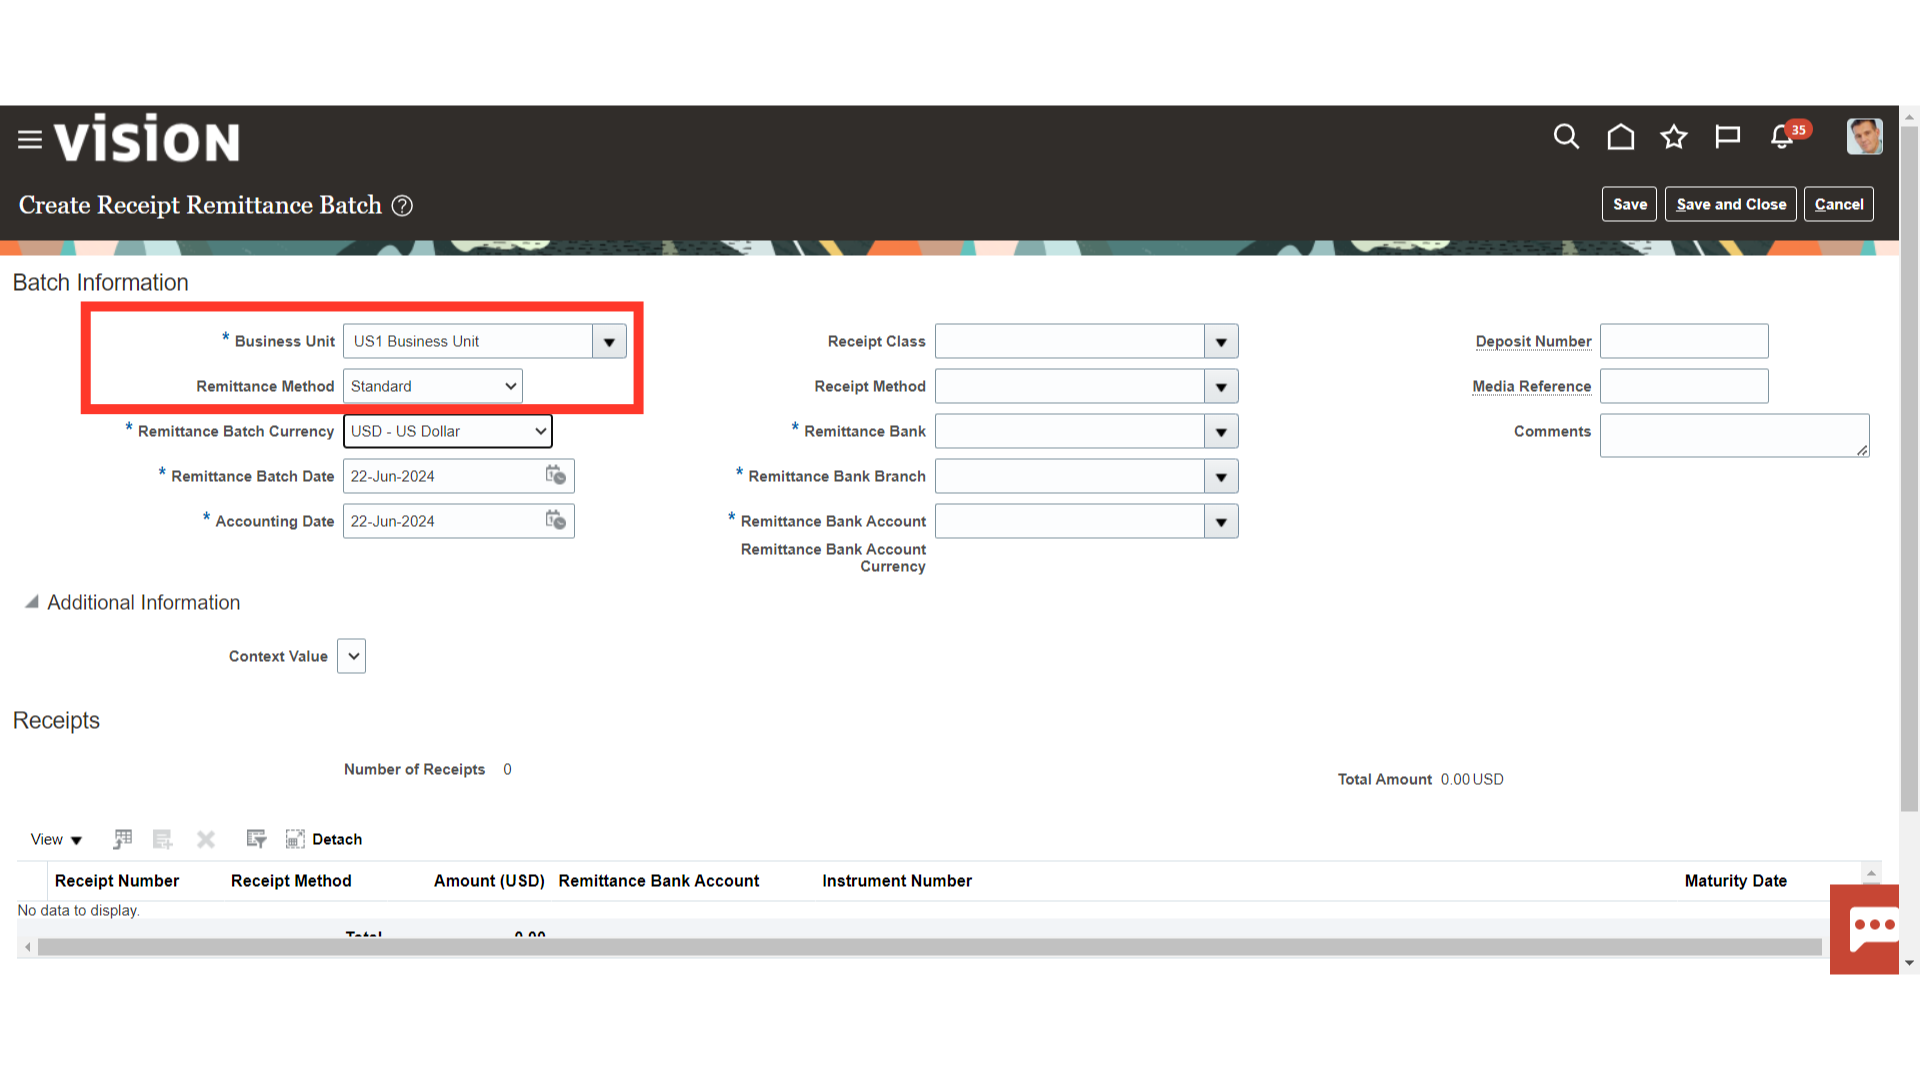
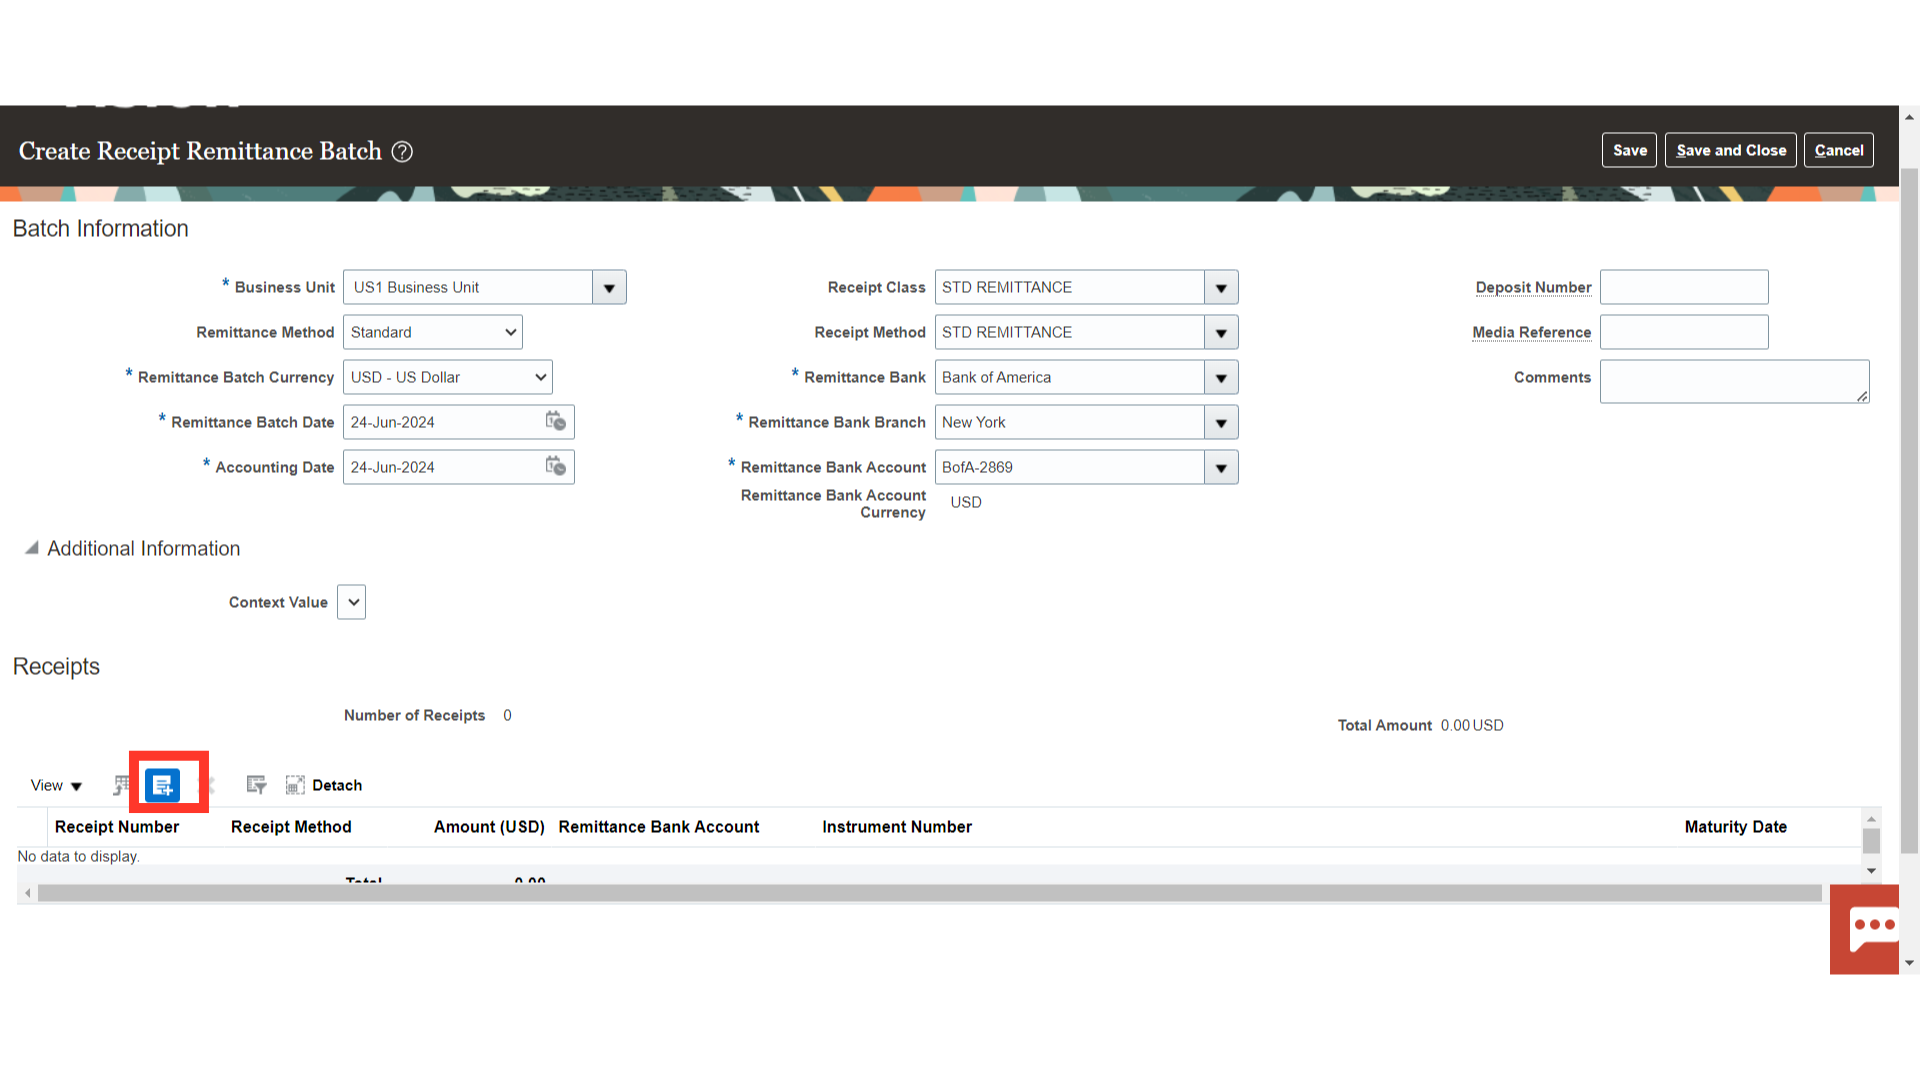
Fill the data in fields under the Batch Information section. Please note that the fields marked with a single asterisk must be filled out and selected.
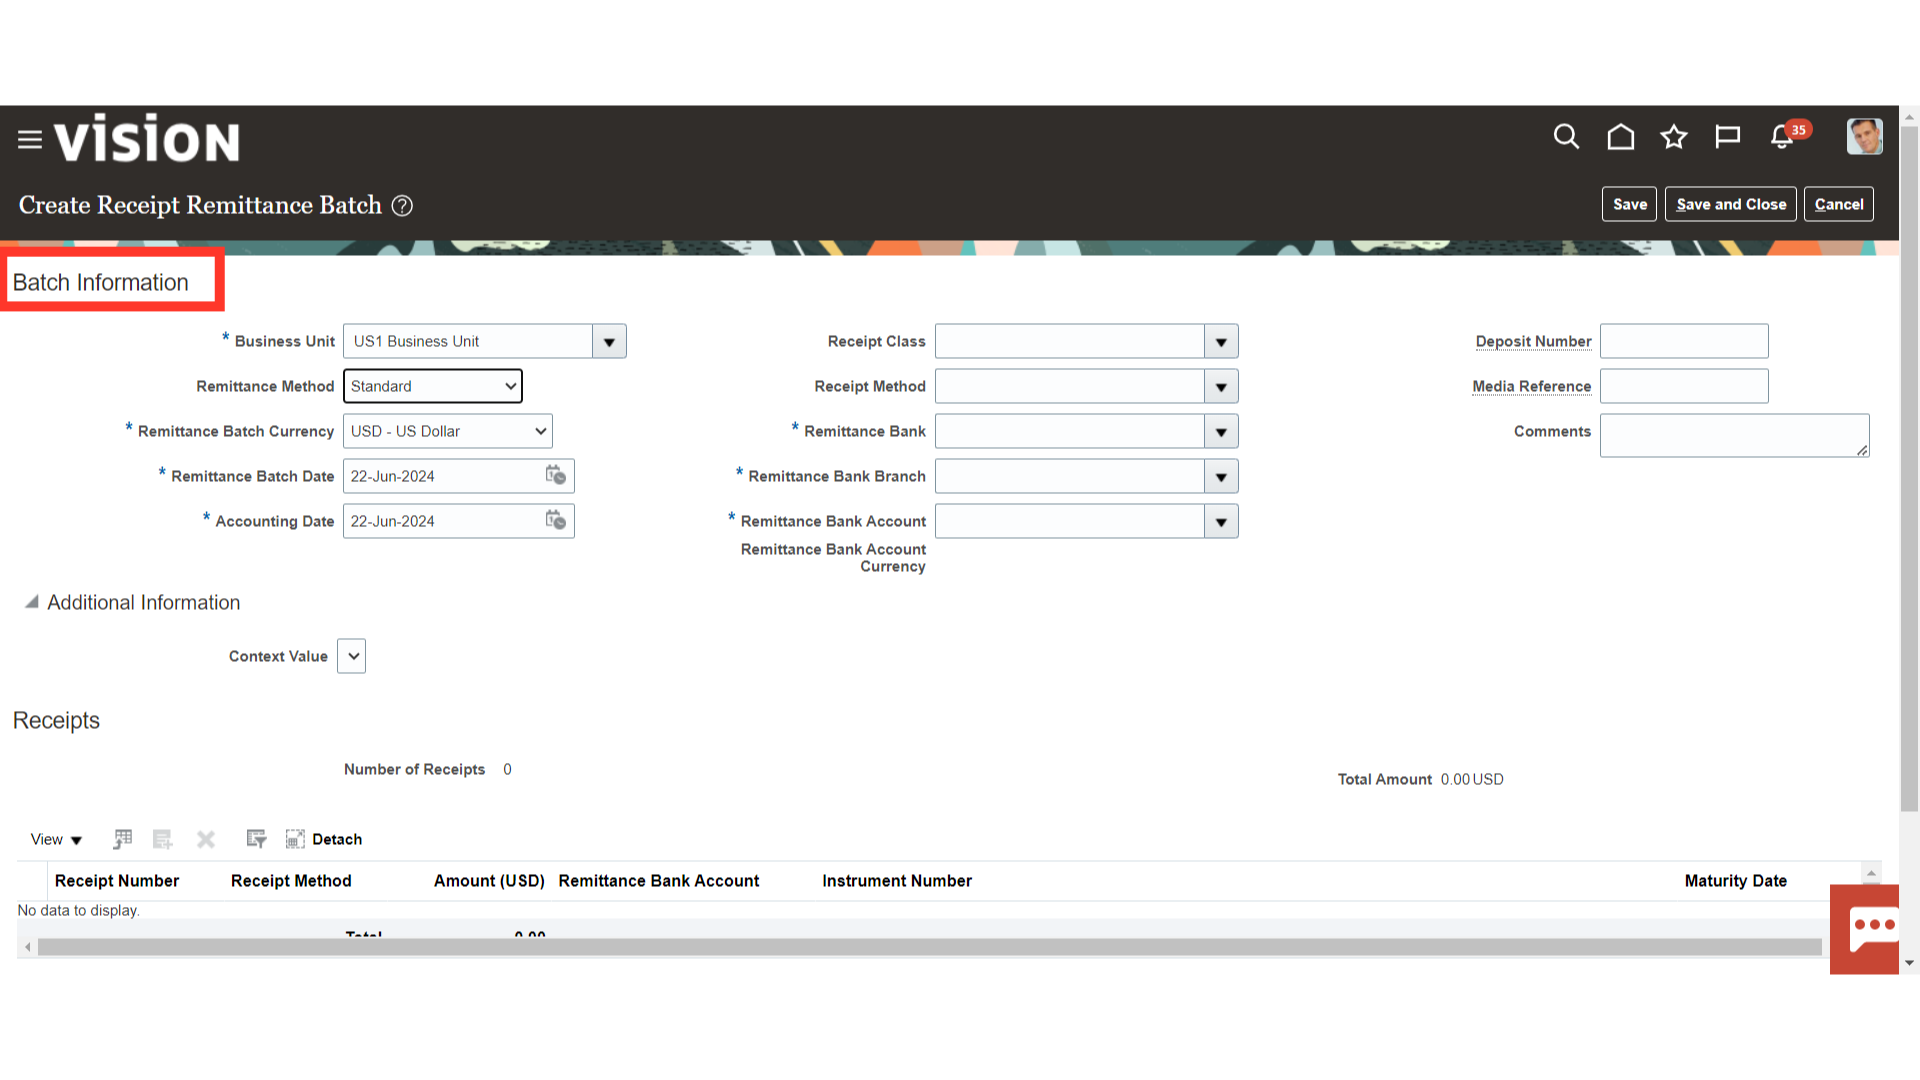
From the list of values under which the remittance batch is to be created, choose the business unit and remittance method.
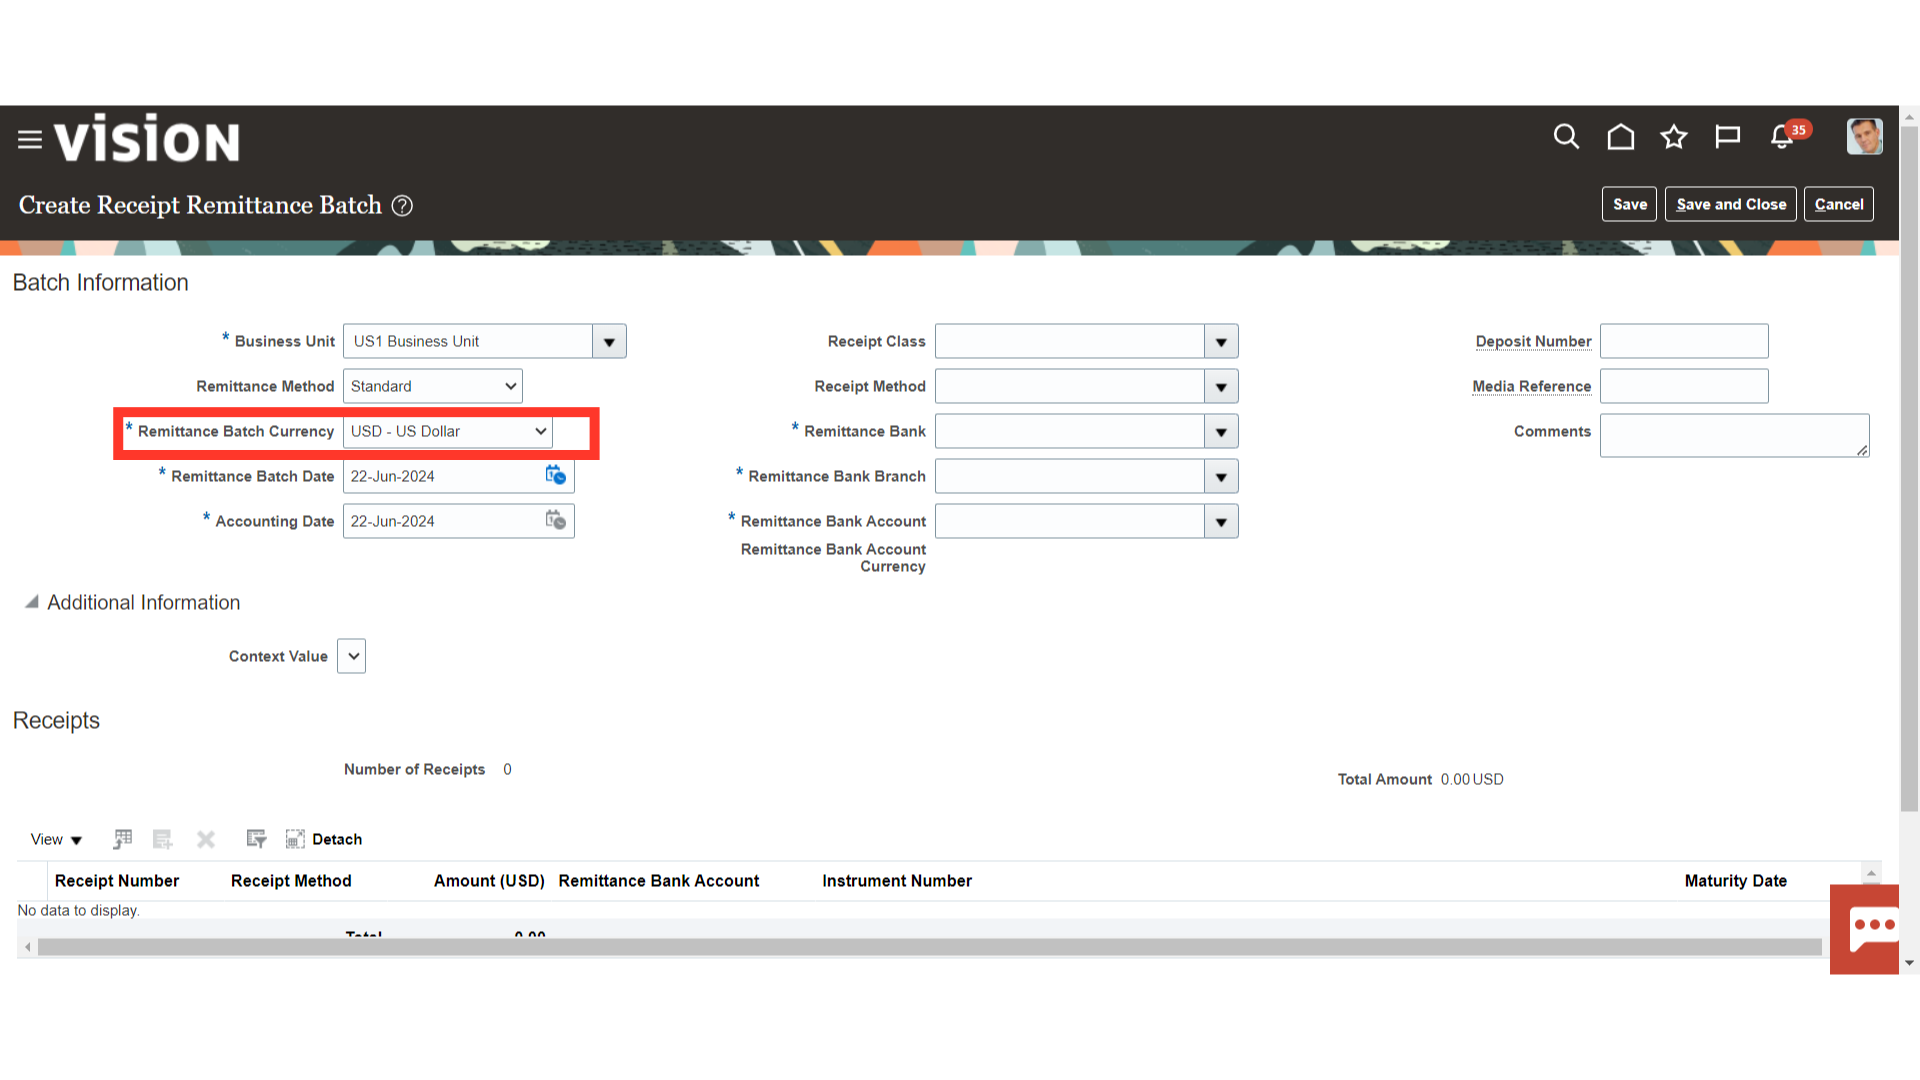
Select the Currency for this Remittance batch from the list of values. The default is your functional currency, but you can change it.
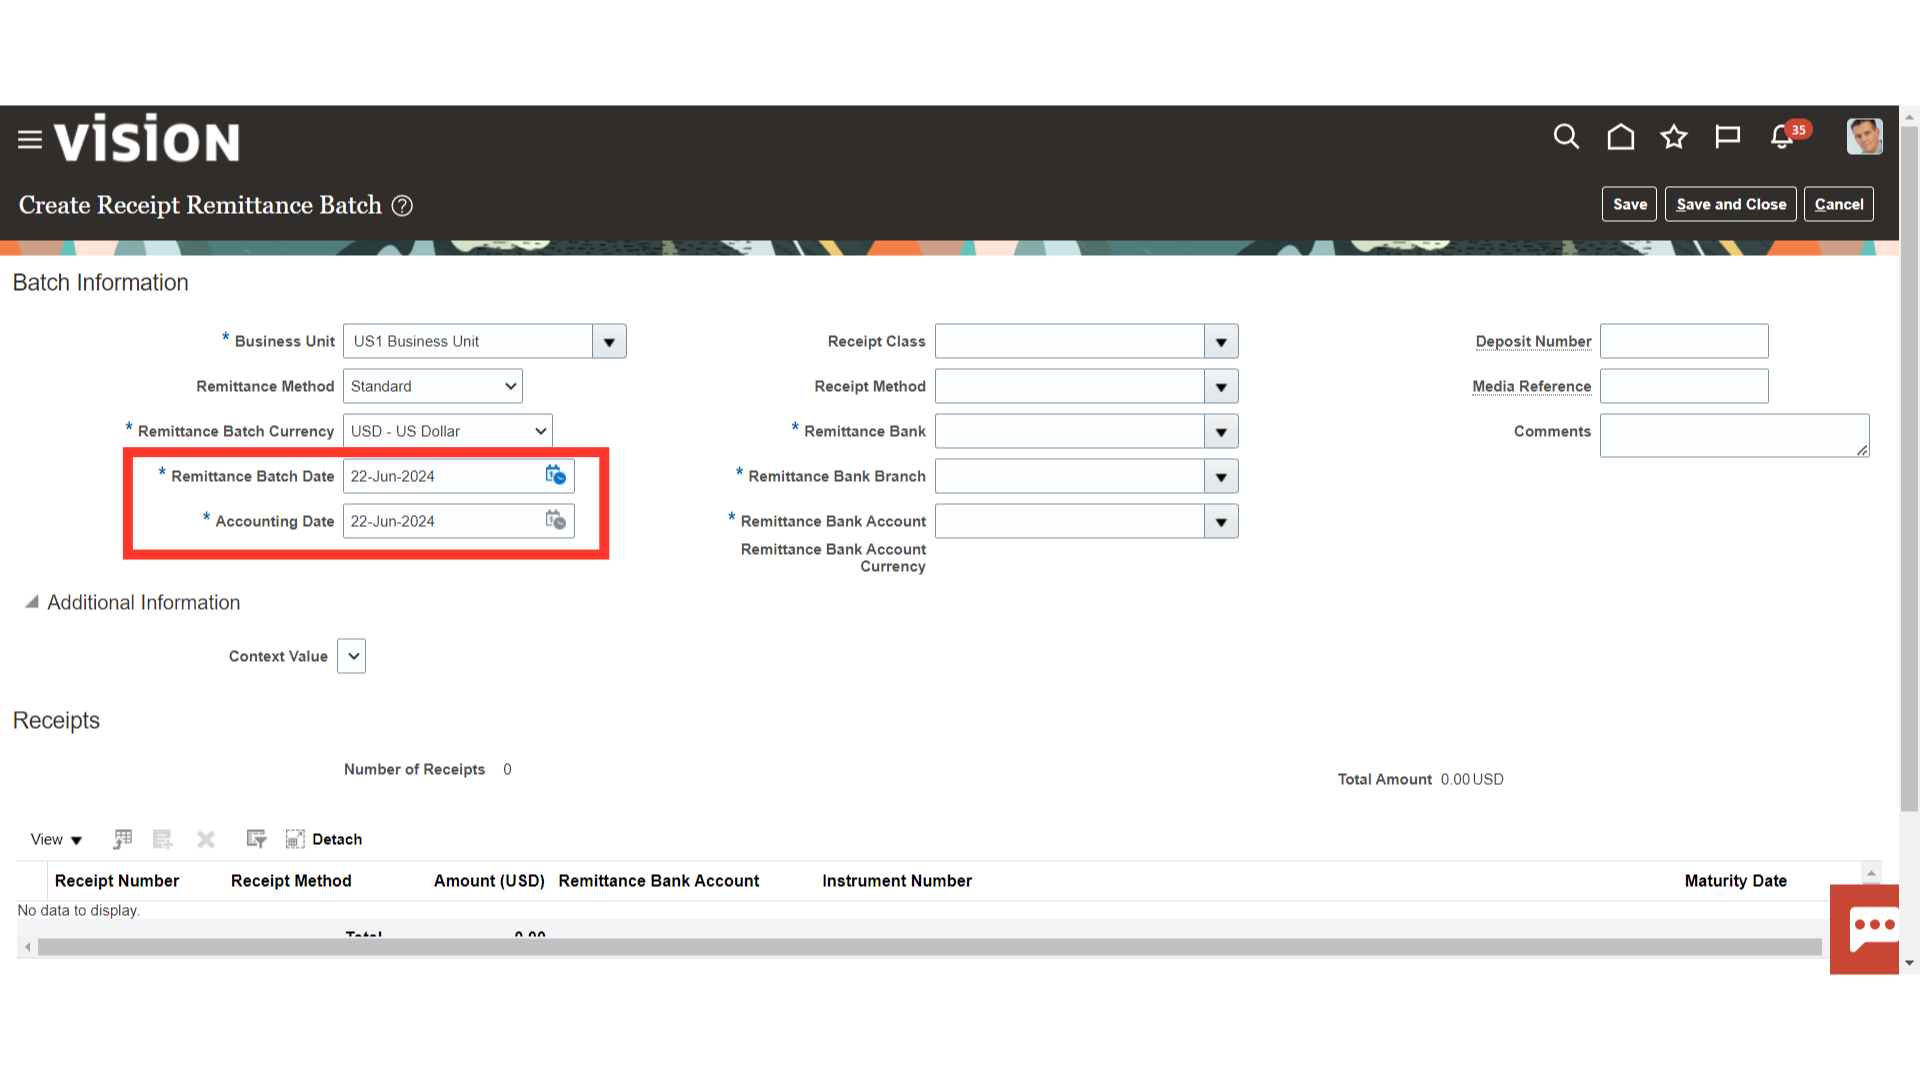
Enter the Batch and GL Date. The default Batch Date is the current date, but you can change it. The GL date must be in an open accounting period. Receivables use the GL Date to determine when to post this remittance batch to your general ledger.
Enter the Receipt Class, Receipt Method, and Remittance Bank information for this batch, or select from the list of values. You must select a remittance bank that has accounts assigned to the receipt method you entered.
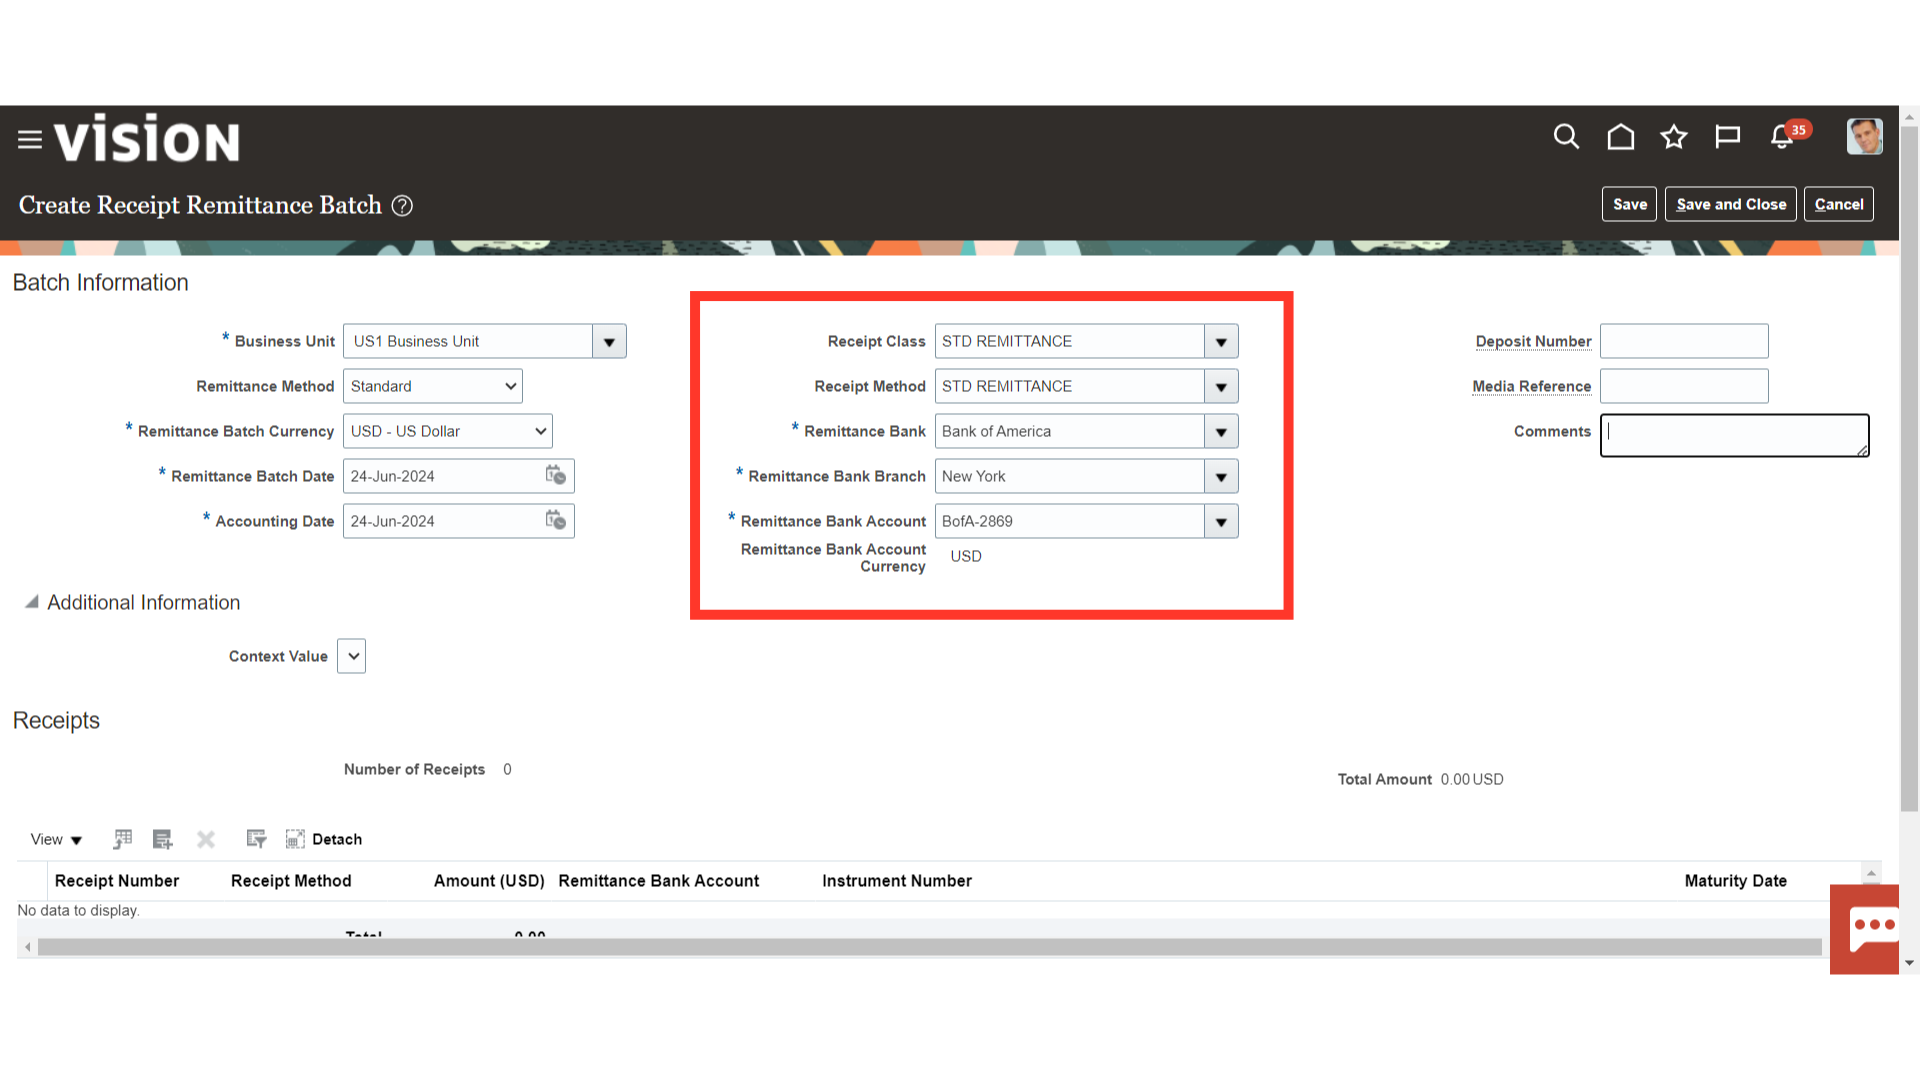
Enter any additional information in the comments window.

Click on Search and Select receipt icon, to open the search window using which receipts can be selected.
To create this remittance batch, enter the selection criteria (optional). To choose just those receipts for this batch, for instance, enter the low and high values of the Maturity and Receipt Dates, Receipt and Document Numbers, and Customer Names or Numbers. If you do not want to restrict the search to transactions that meet those criteria, leave that field empty. After entering all the parameter details click on the search button.
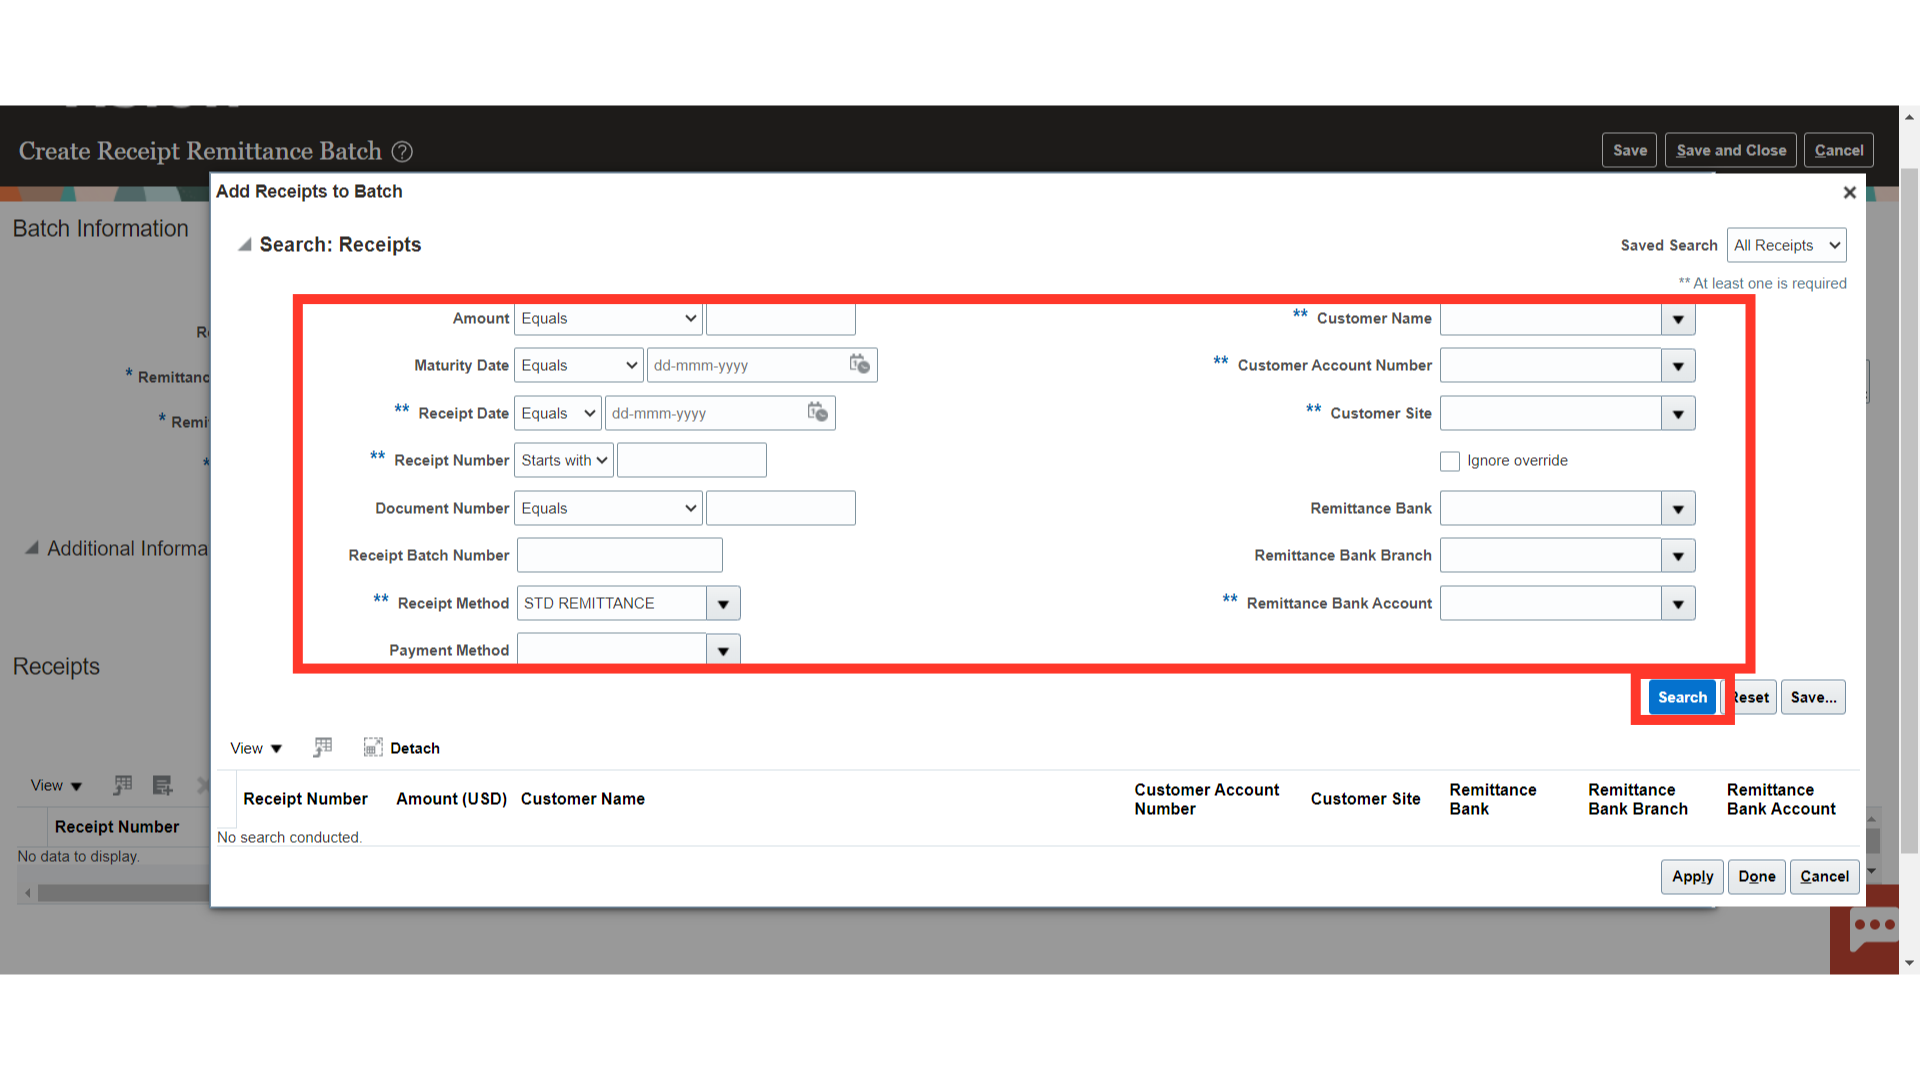
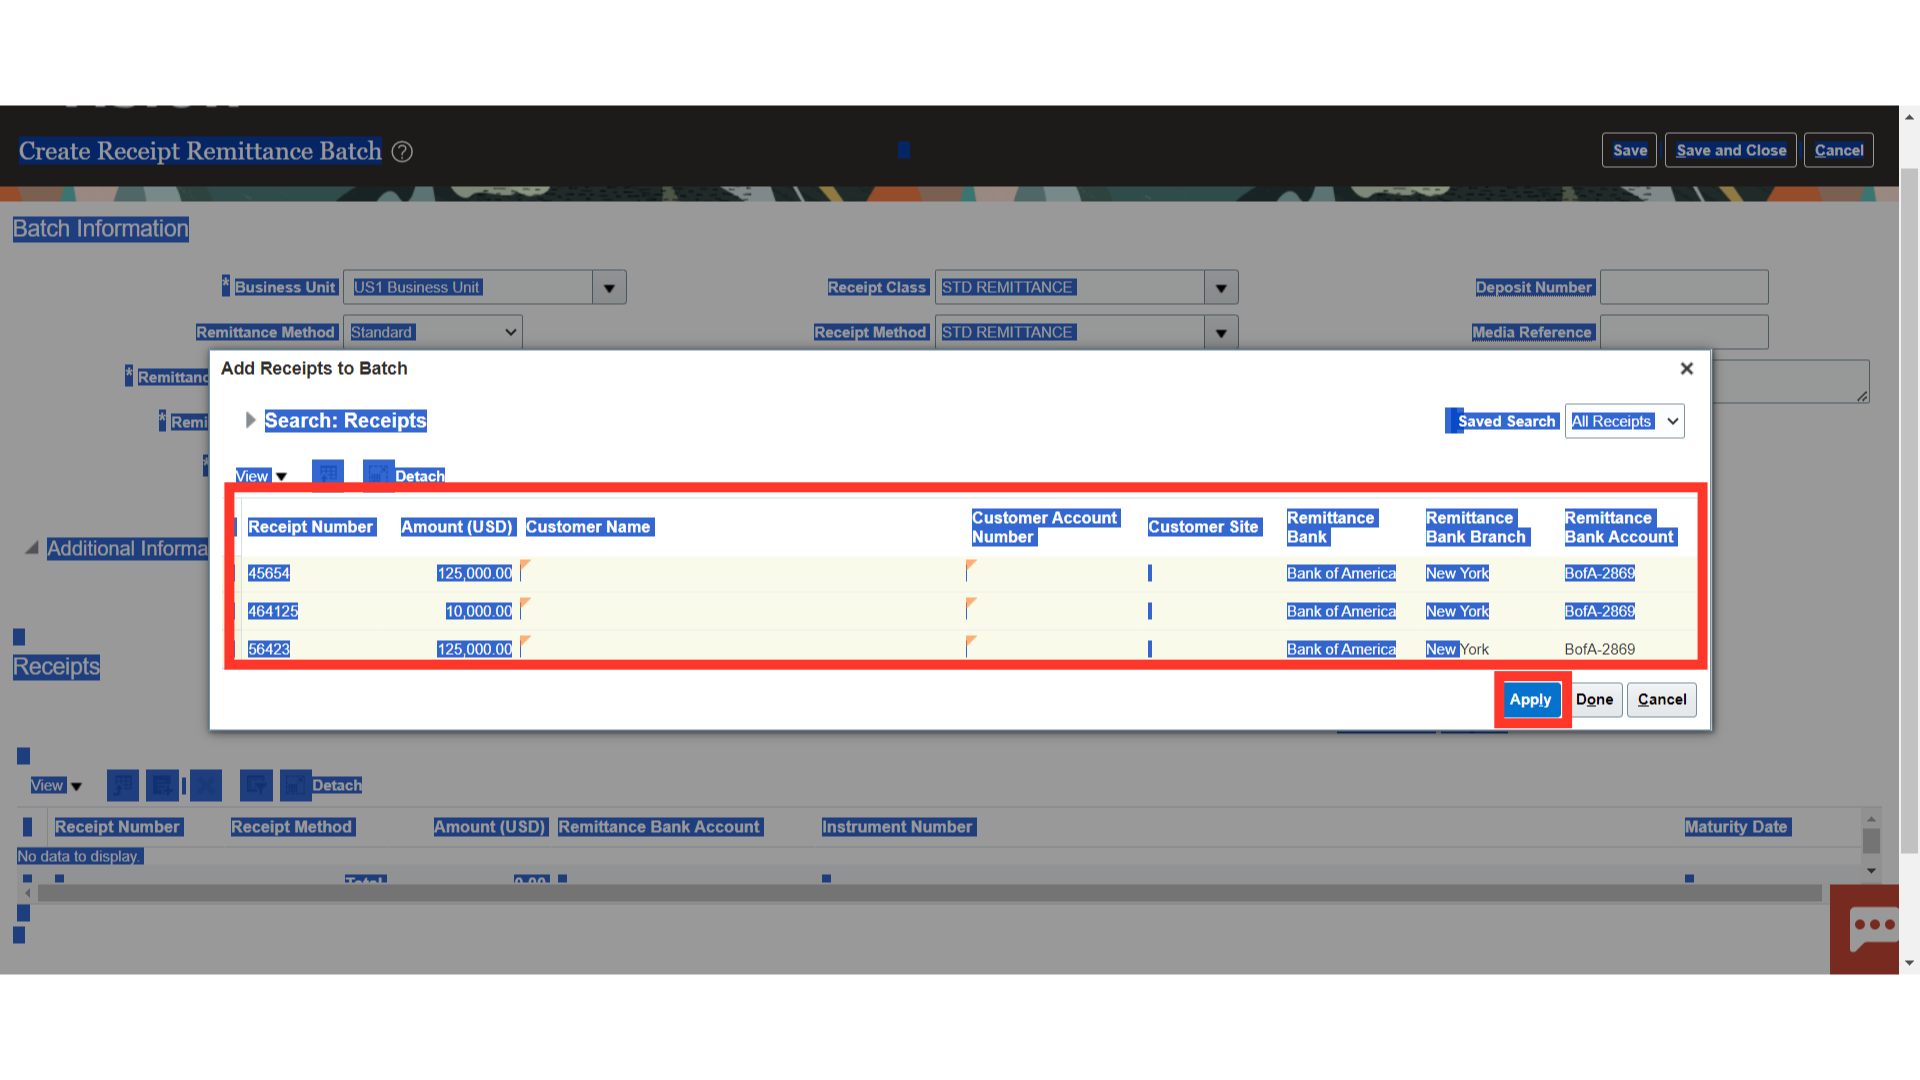
The available receipts based on the search parameters you entered will be shown after you click the search button.
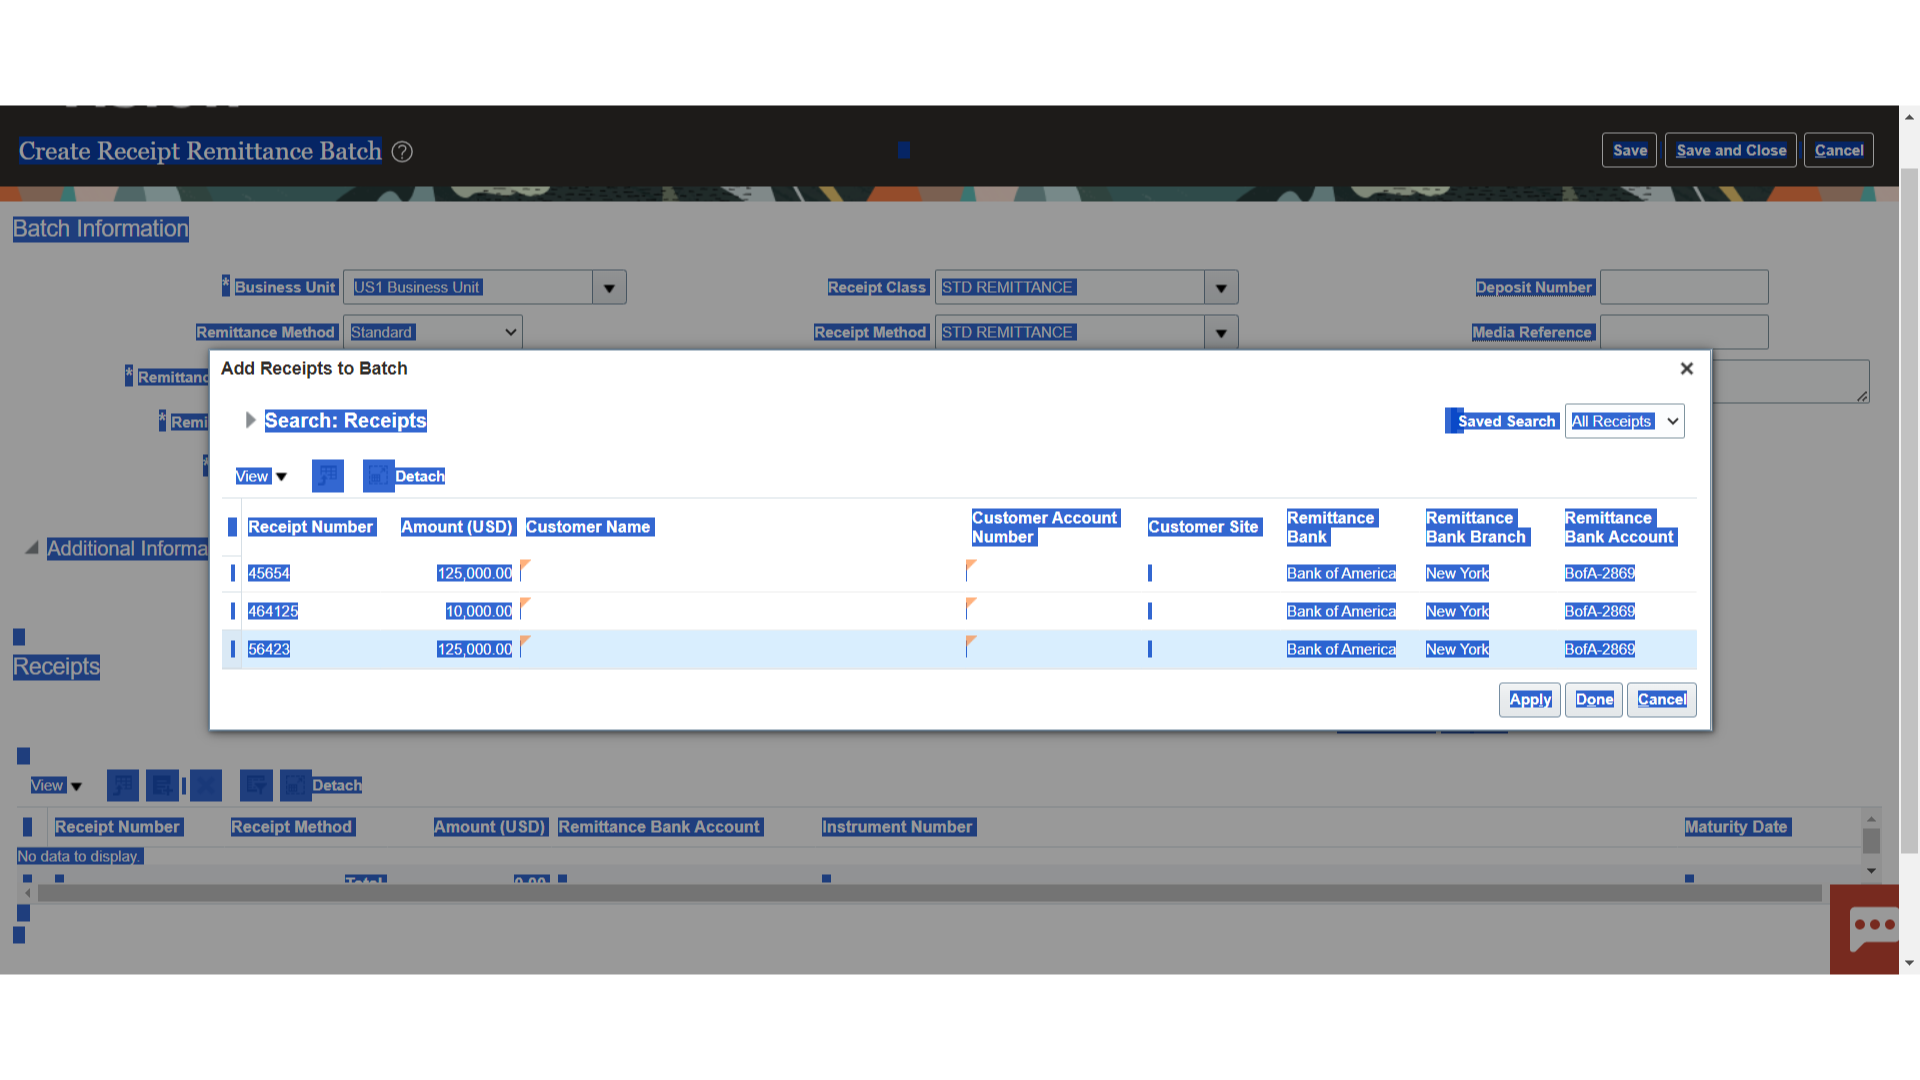
To add the receipts one by one, select the receipt and click on the Apply button.
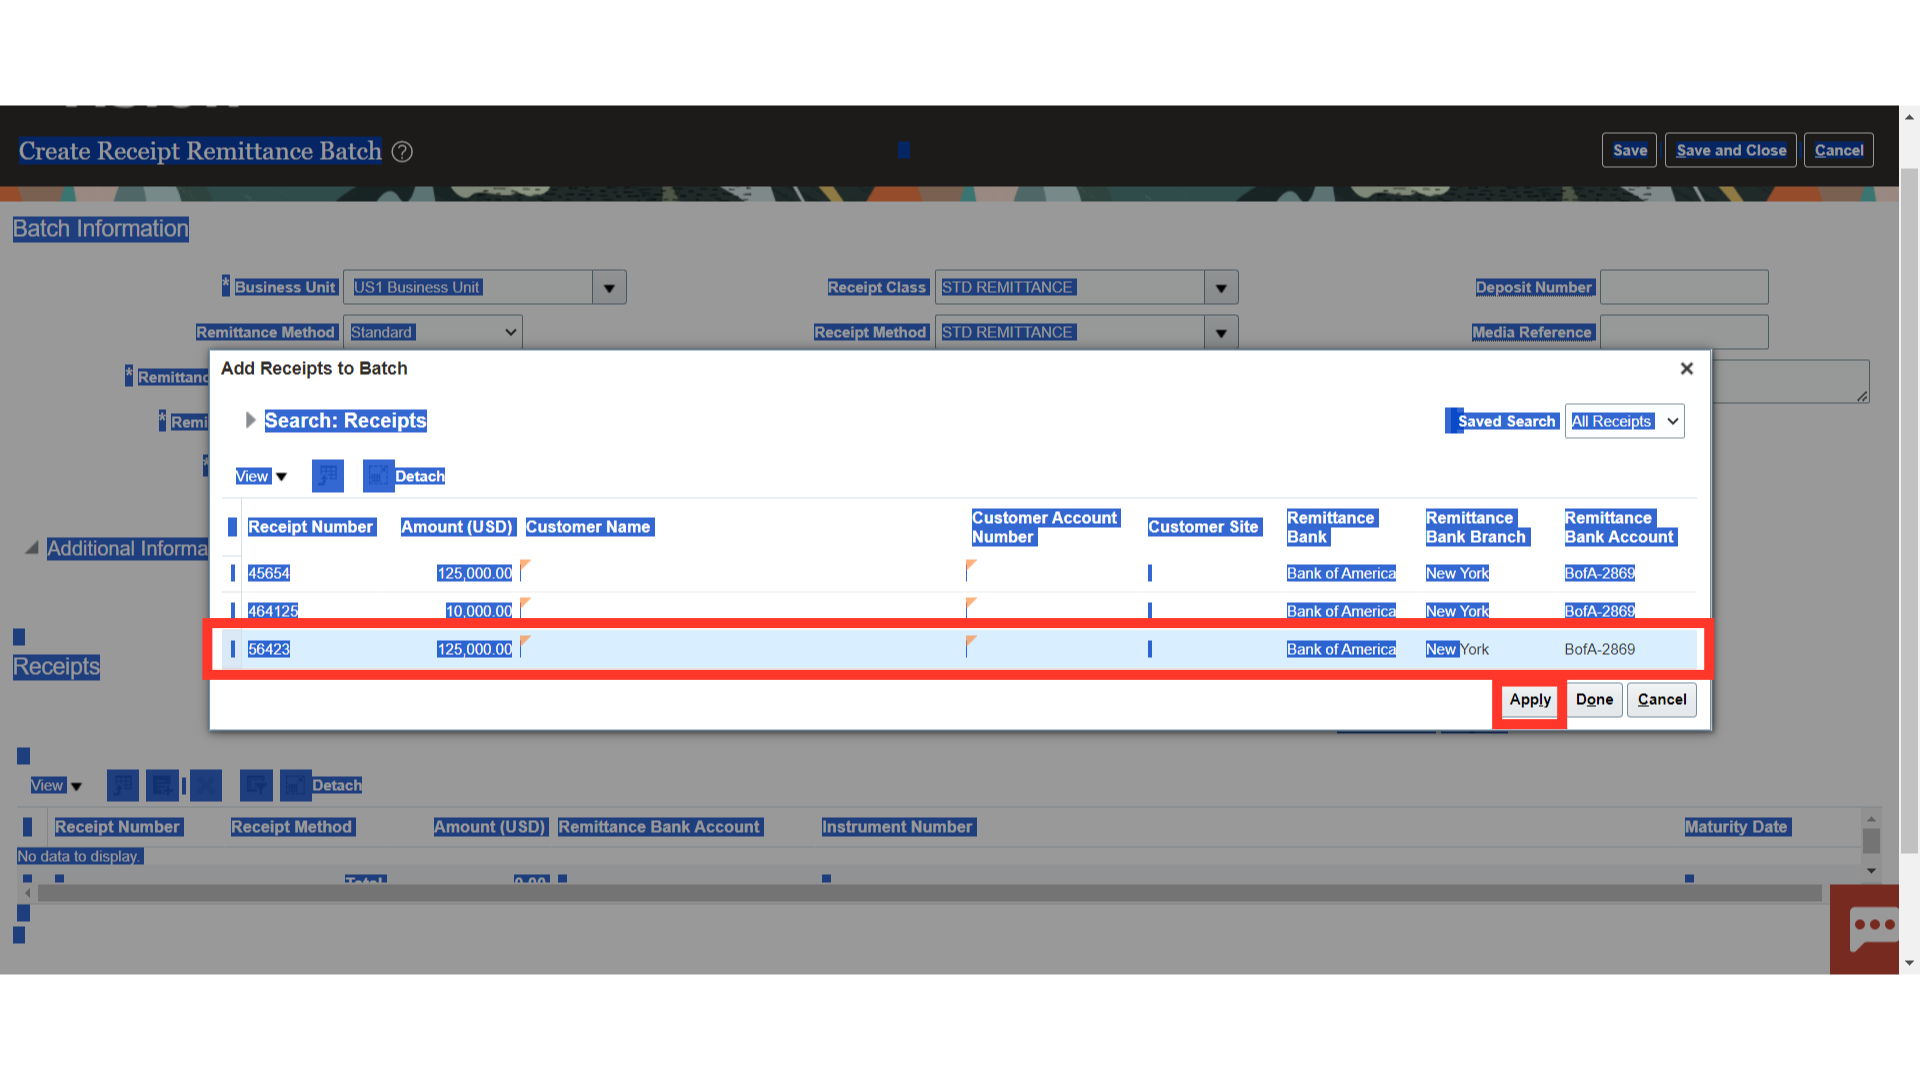
To add all the receipts to the Remittance batch process, press Control + A and click on the Apply button.
Click on Done button to close this Add Receipts to batch search window.
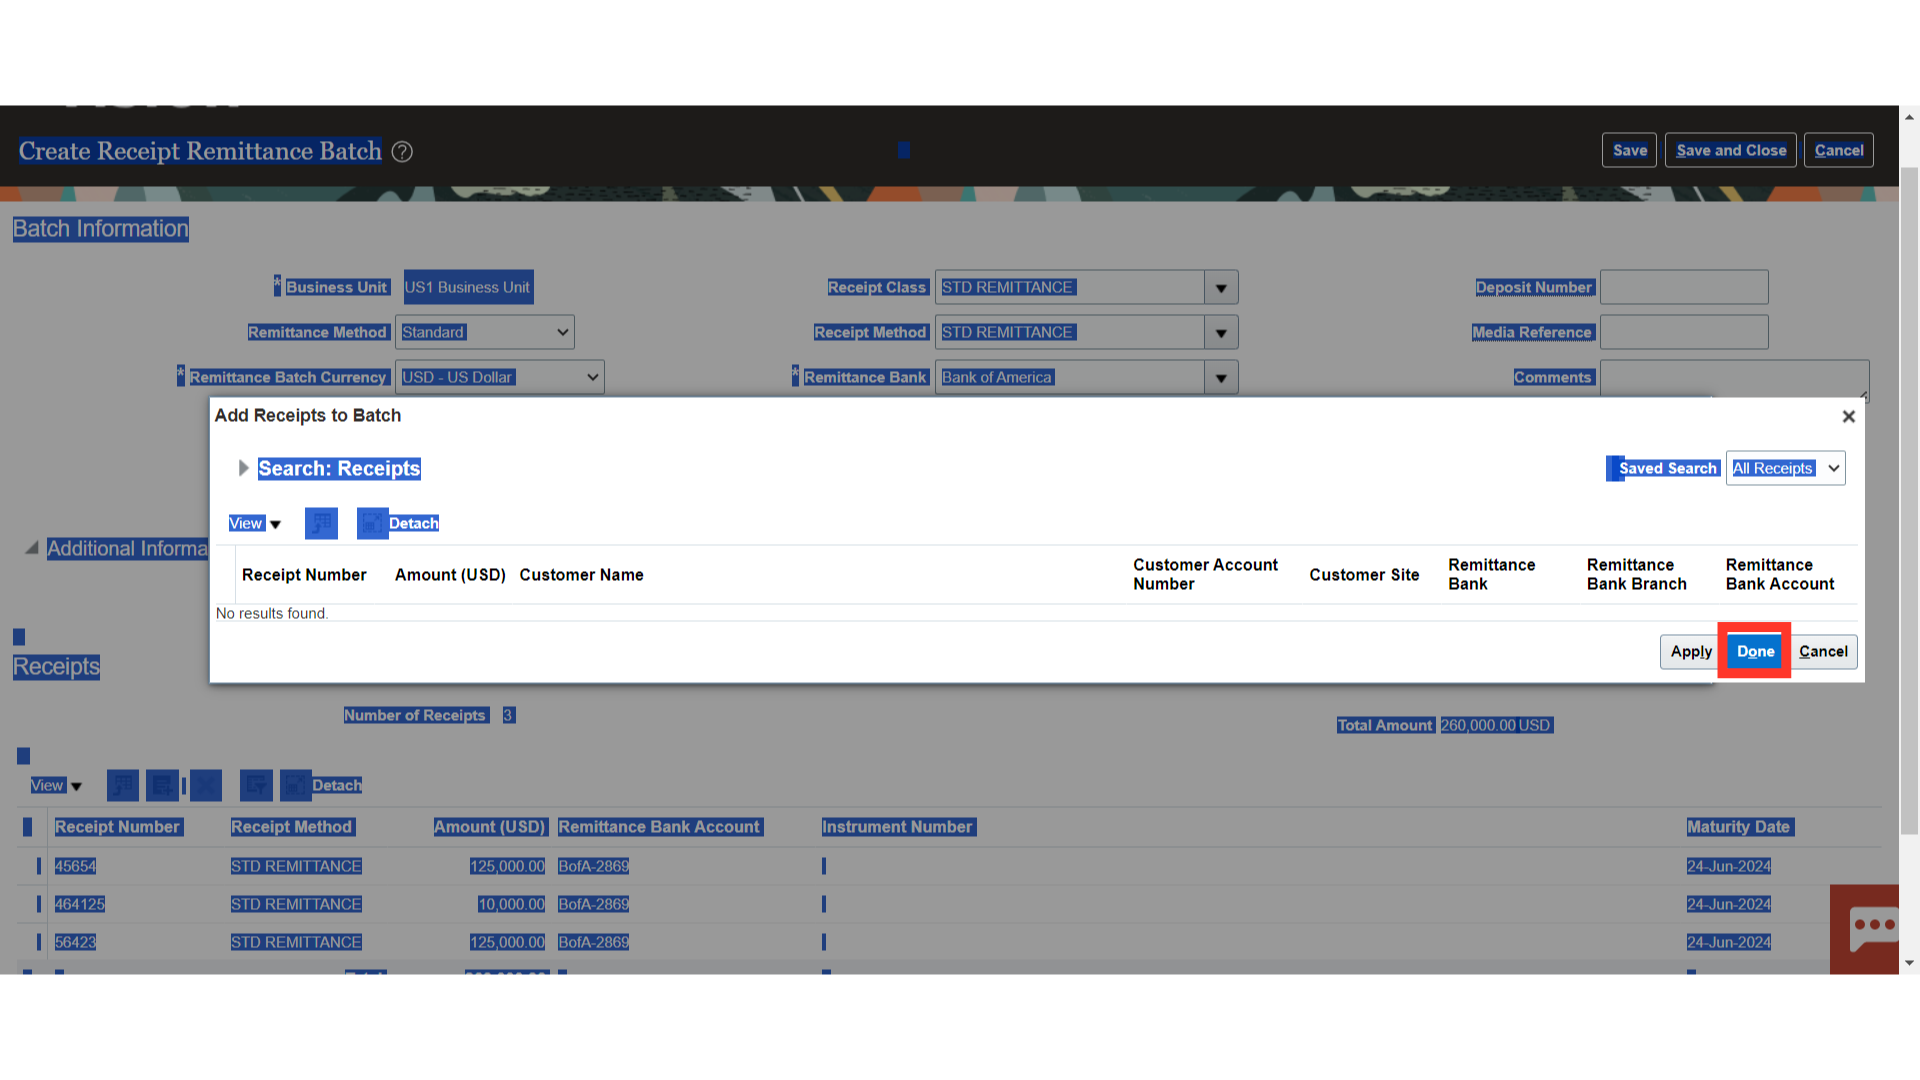
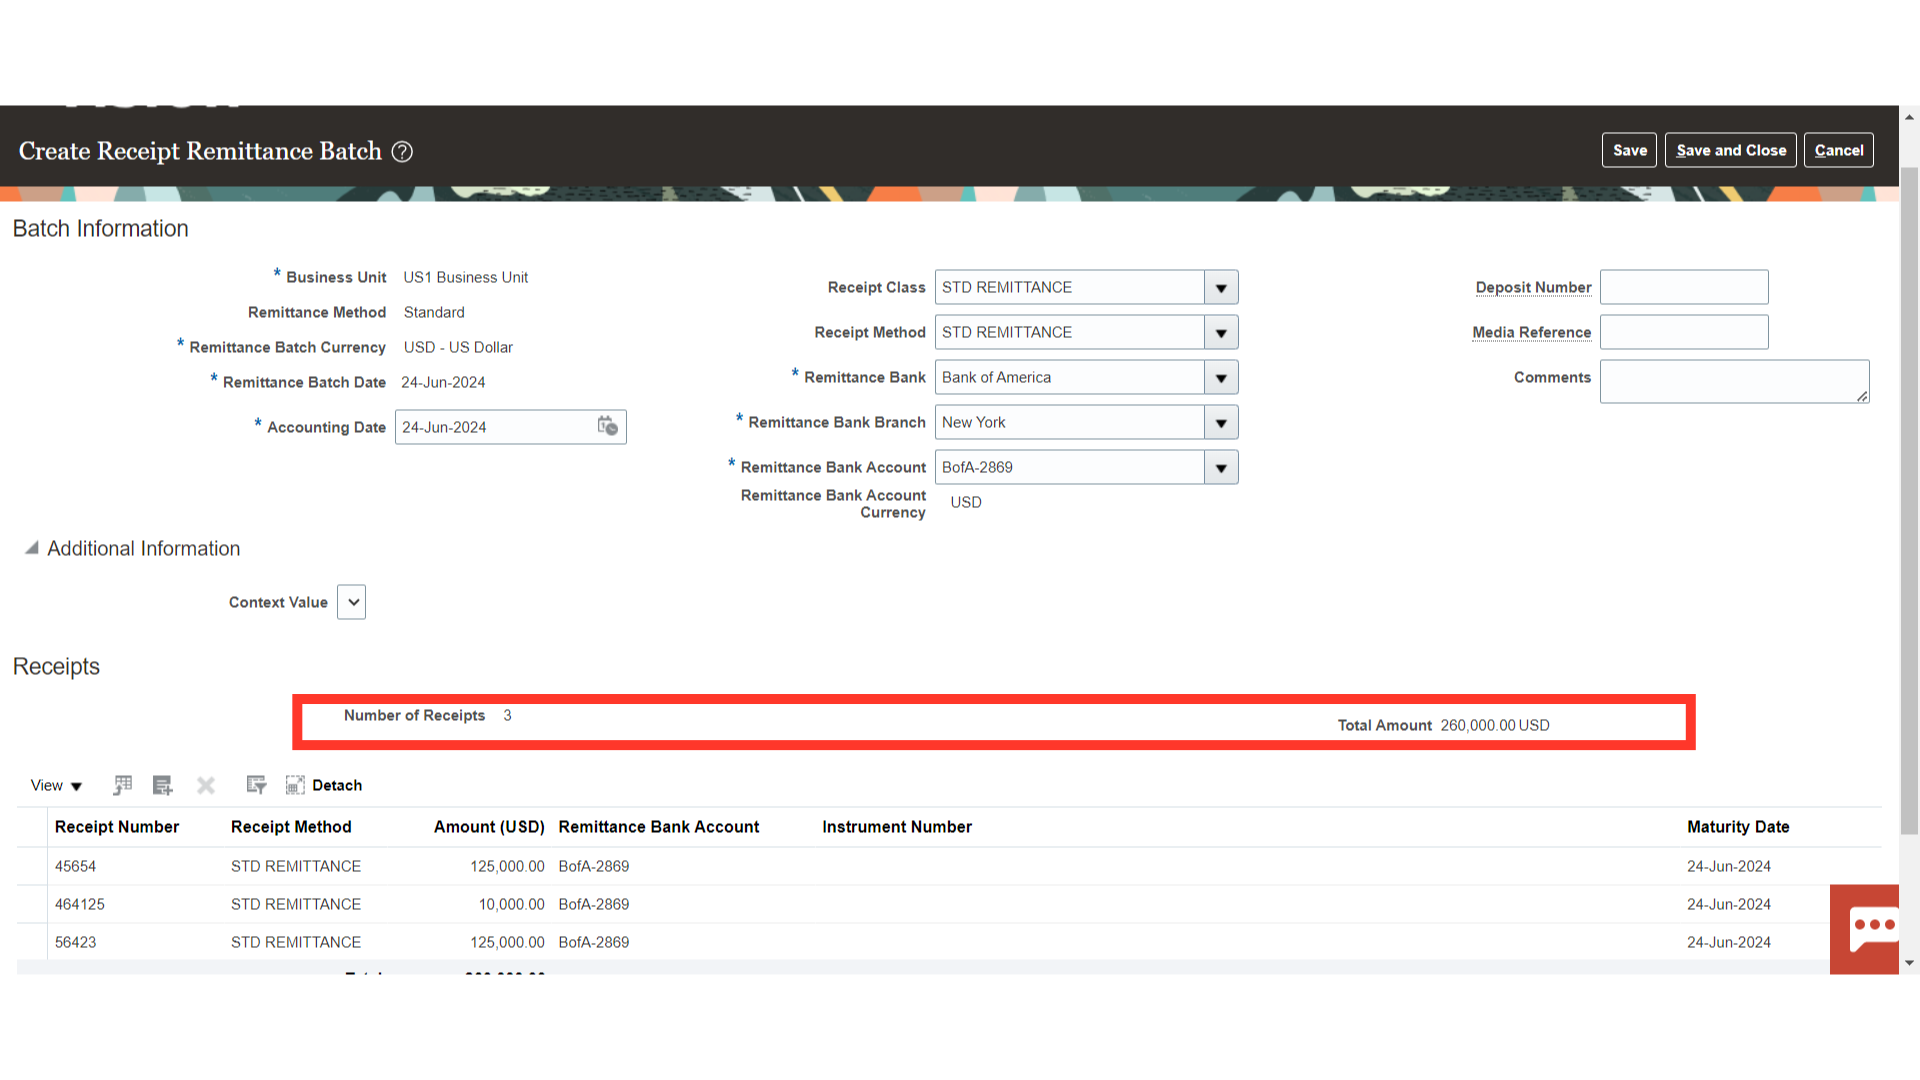
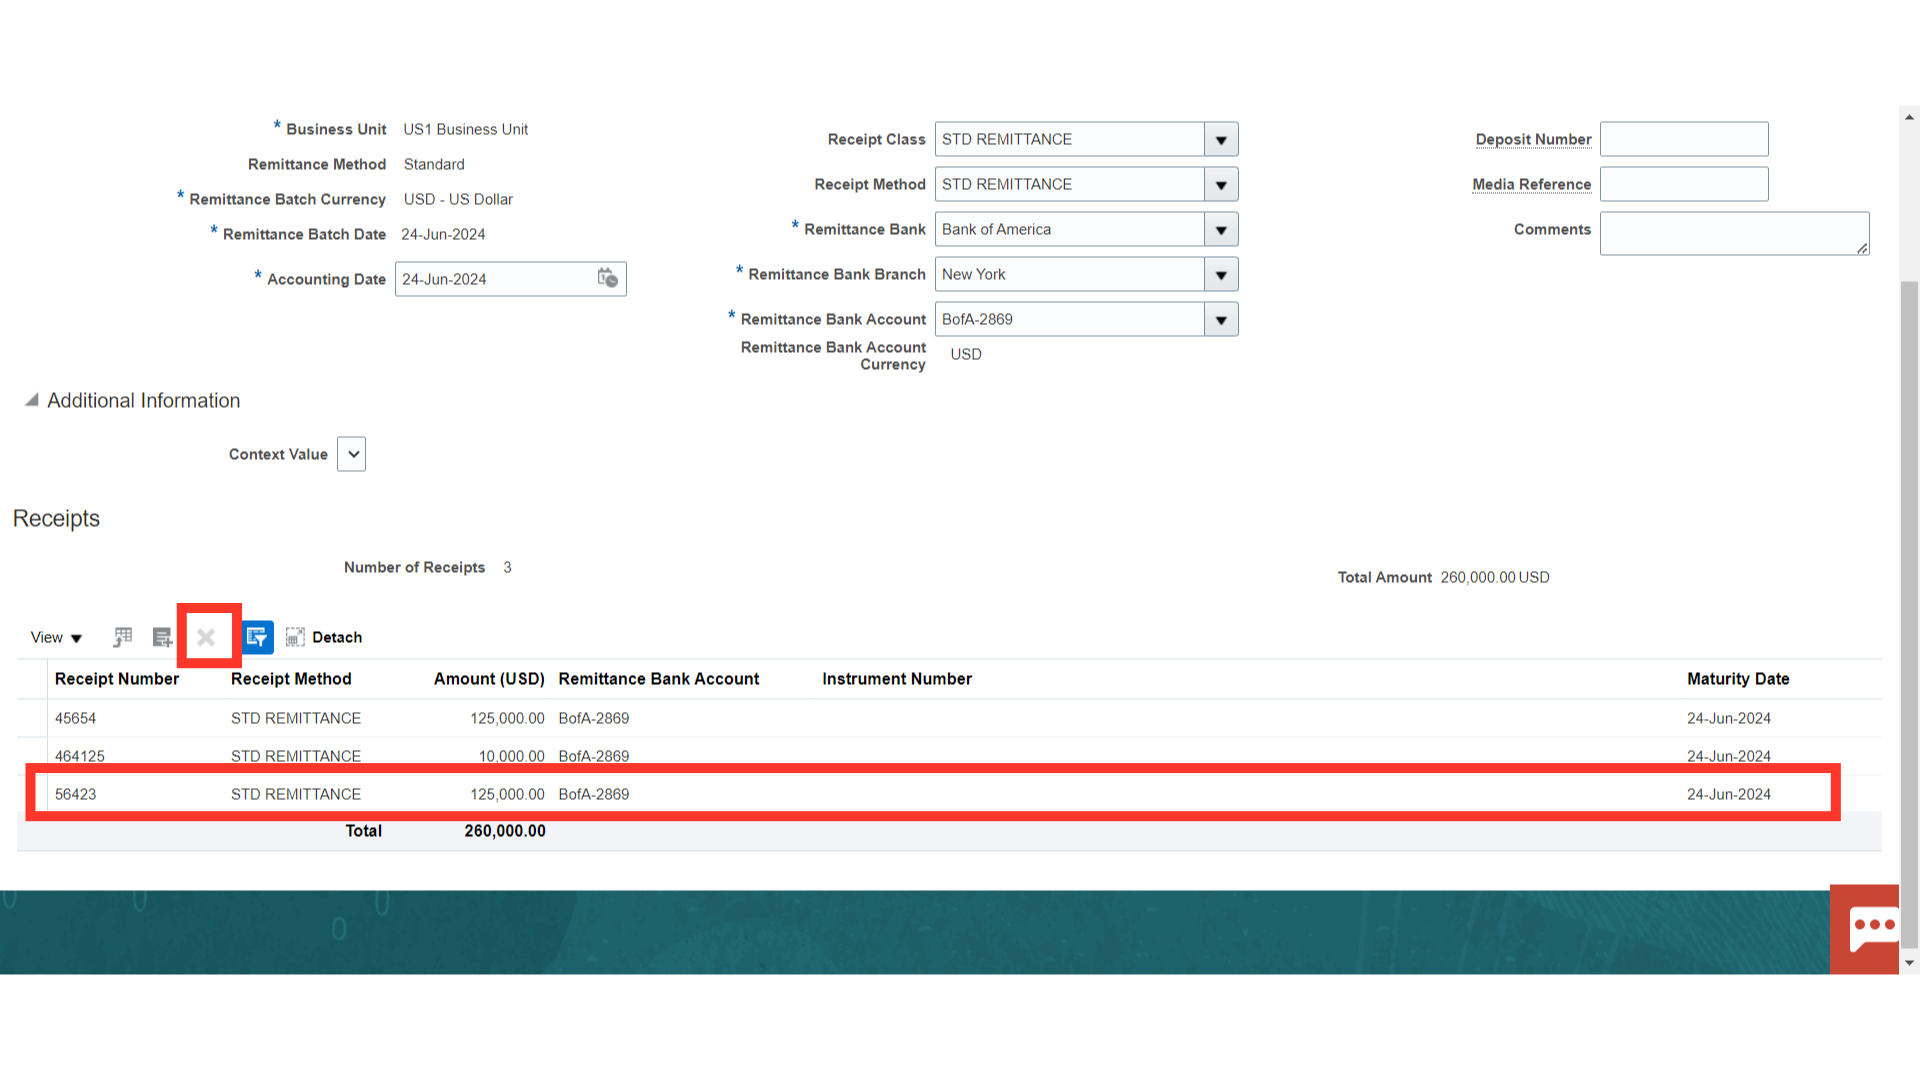
In the highlighted section, the total number of receipts and its amount selected under this remittance batch is displayed.
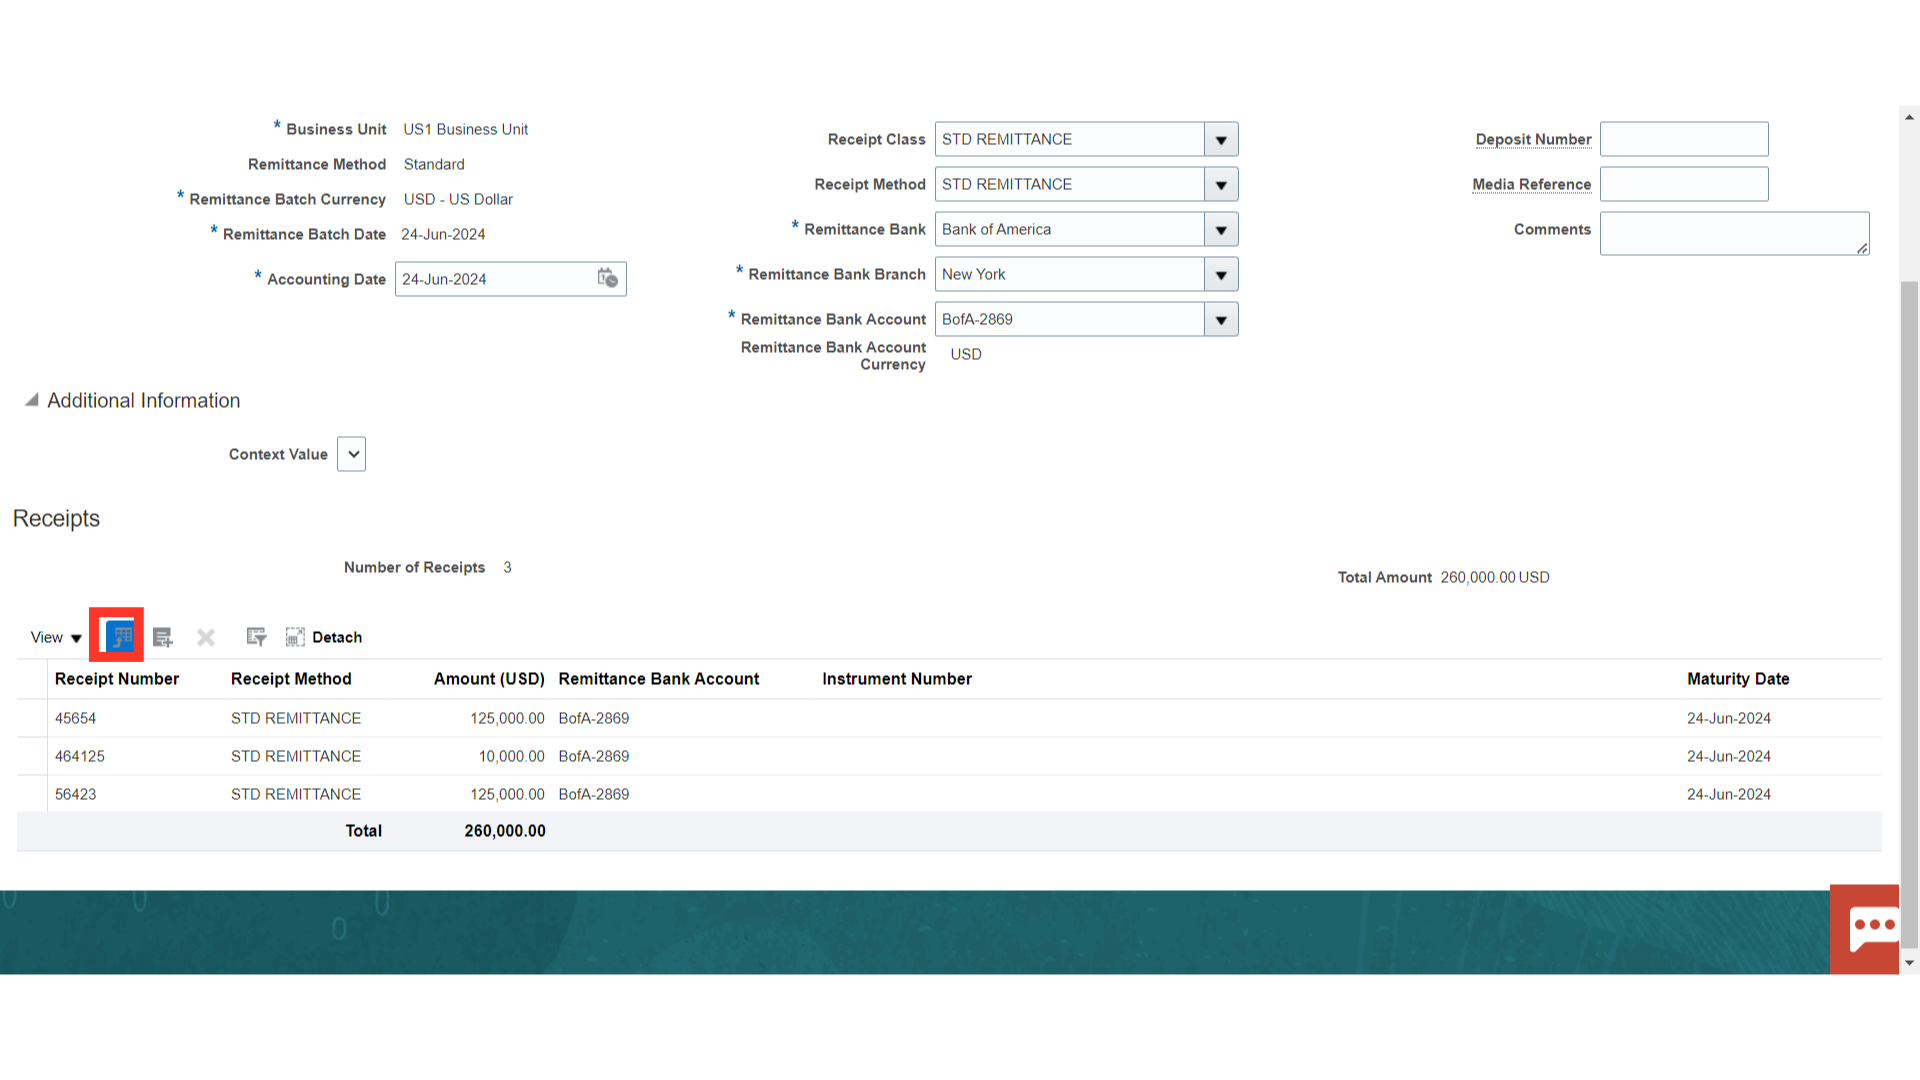
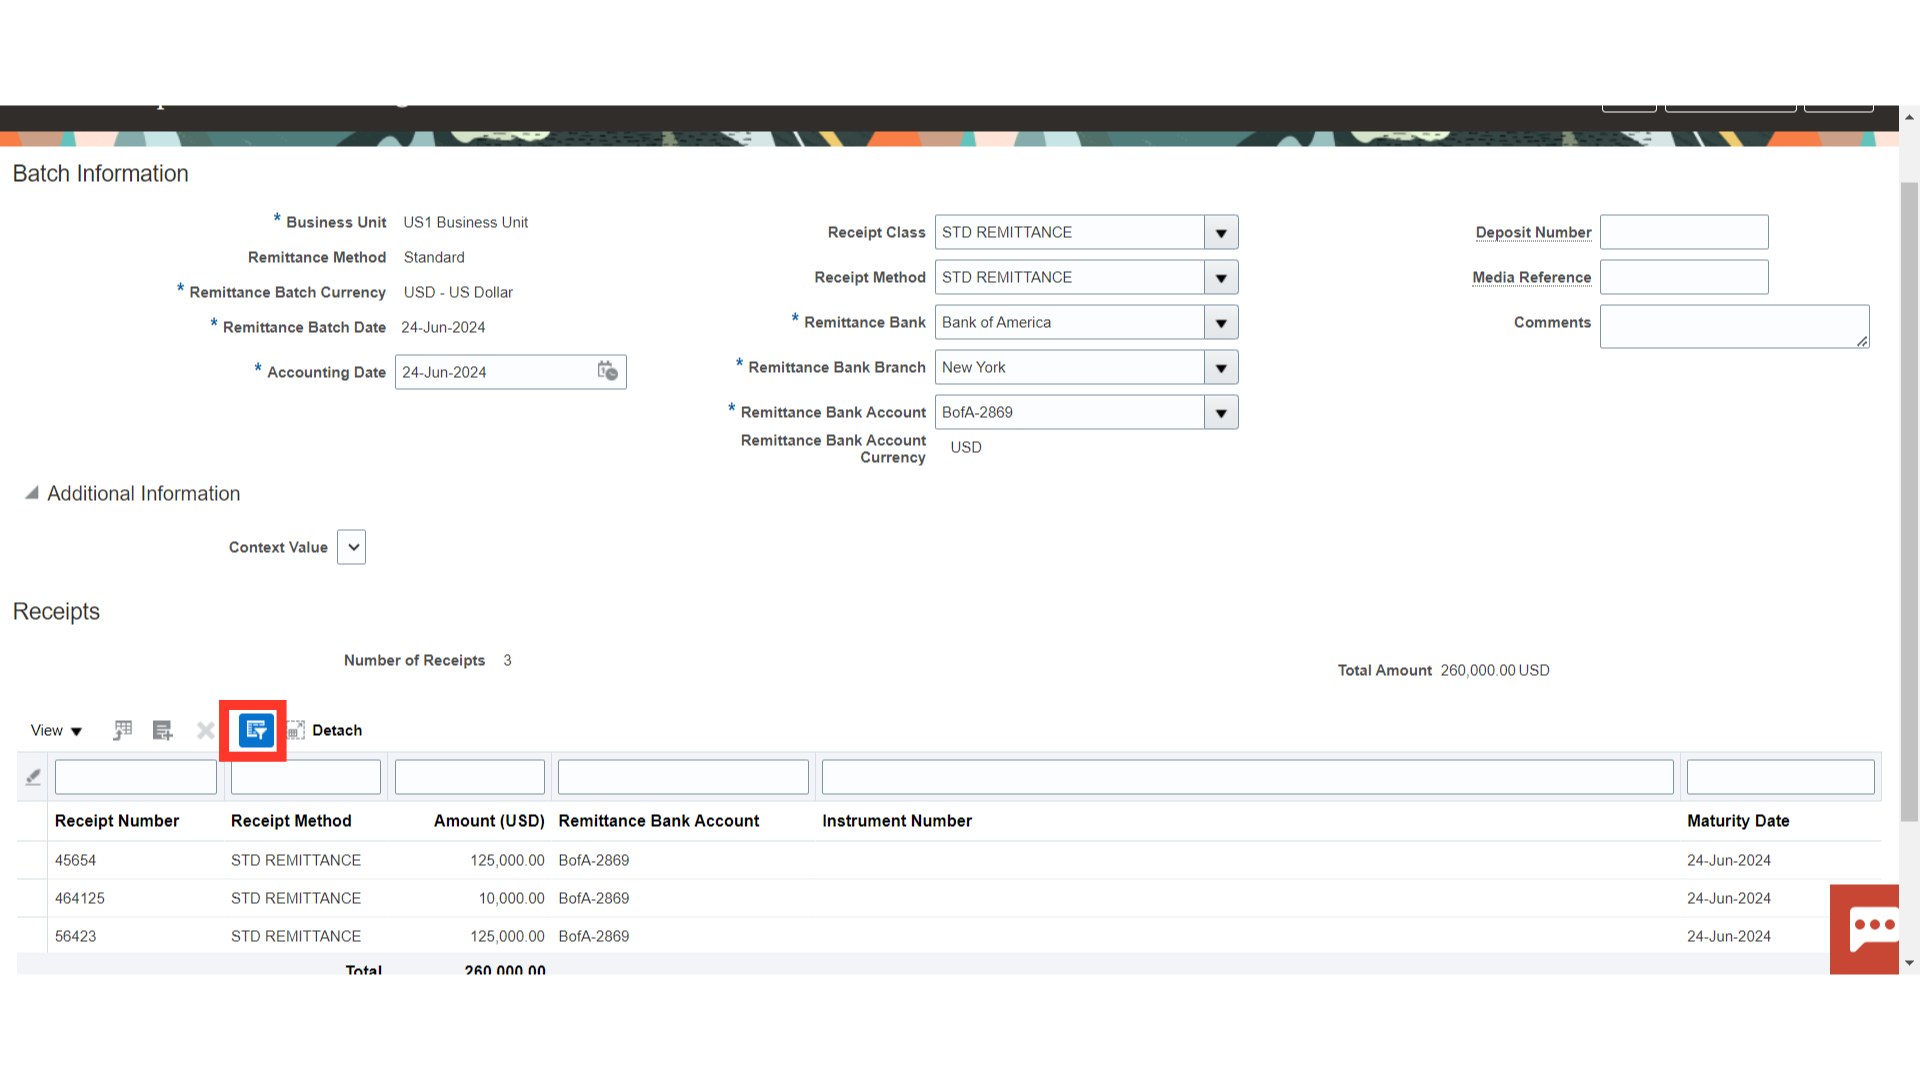
To export the selected receipts’ details into an Excel file, click the “Export to Excel” icon.
To remove any receipts from this batch, select the Receipt and click on the cross icon.
The row of fields called Query By Example, which comes before the table’s column headers, is where you can filter the data in the table. After selecting the Query by Example icon, type the search parameters above the column and hit Enter.
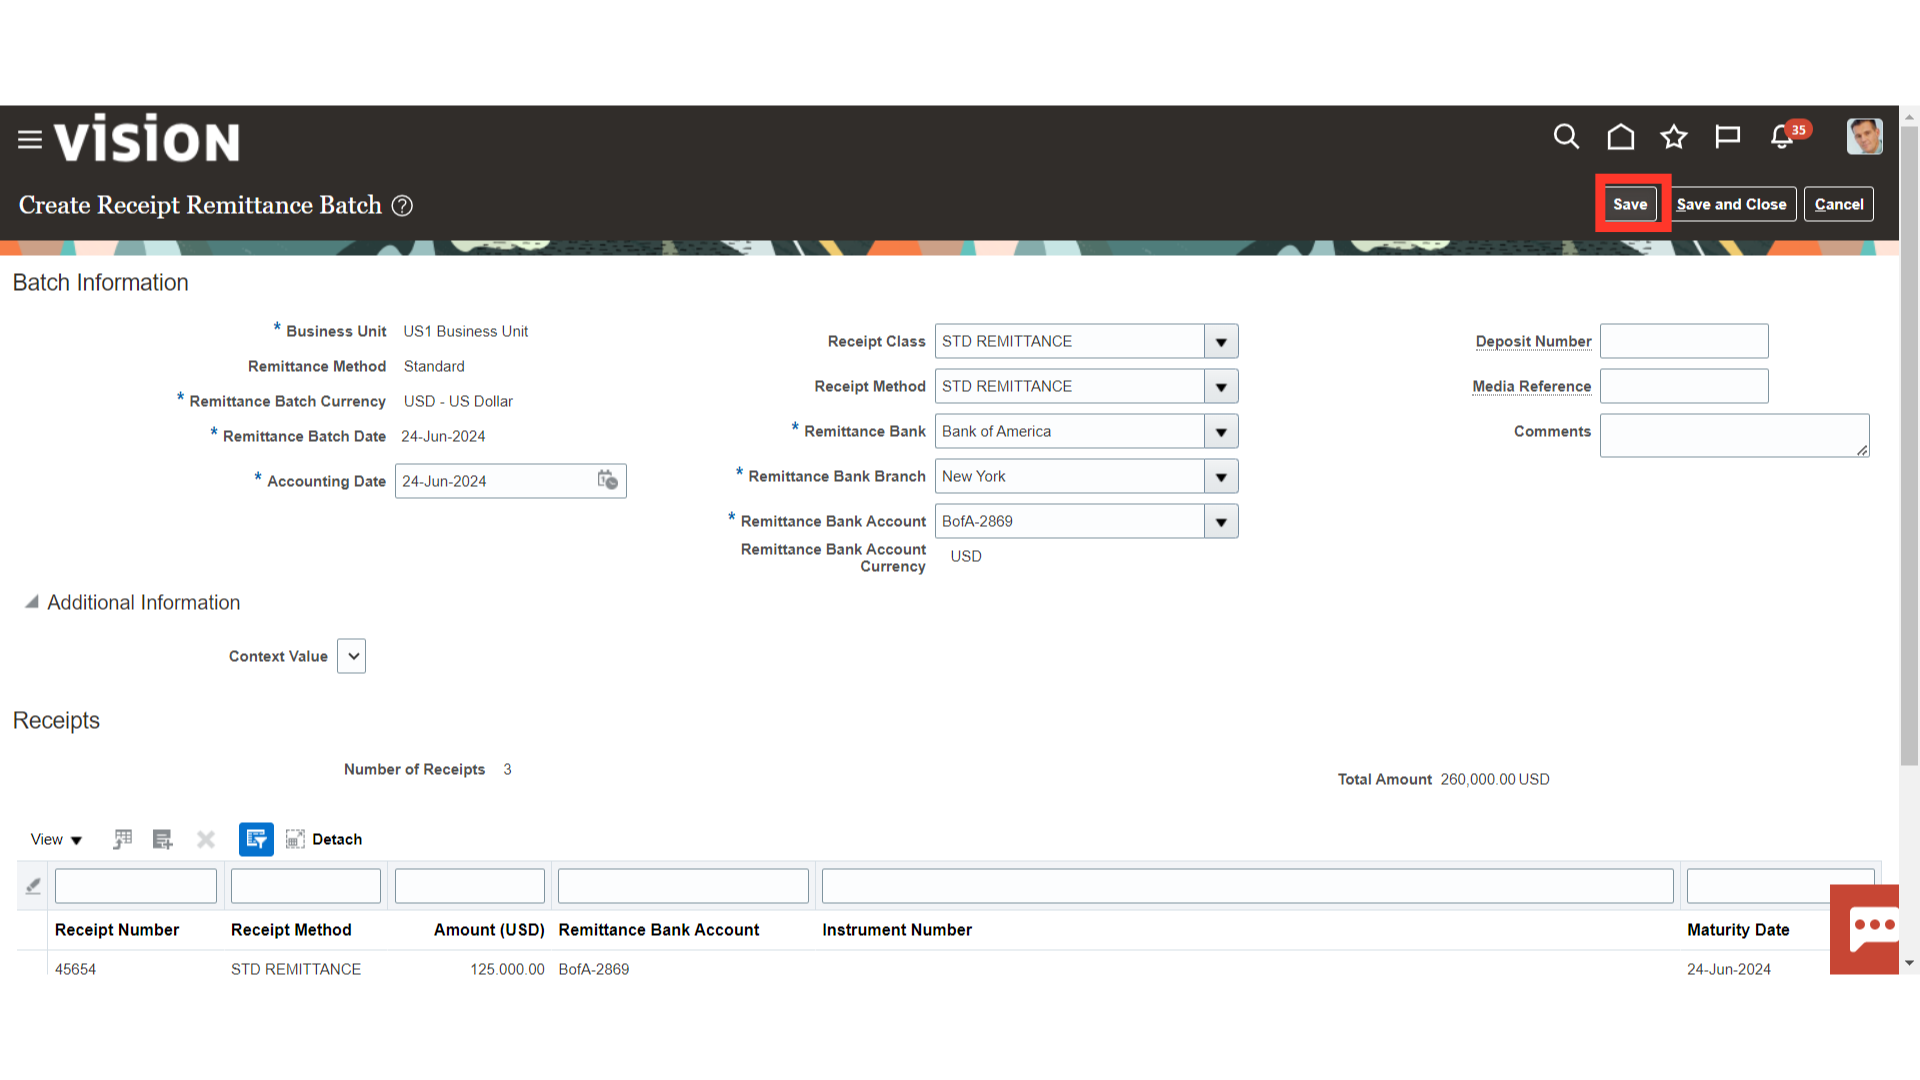
After verifying all the details, click on the Save button.
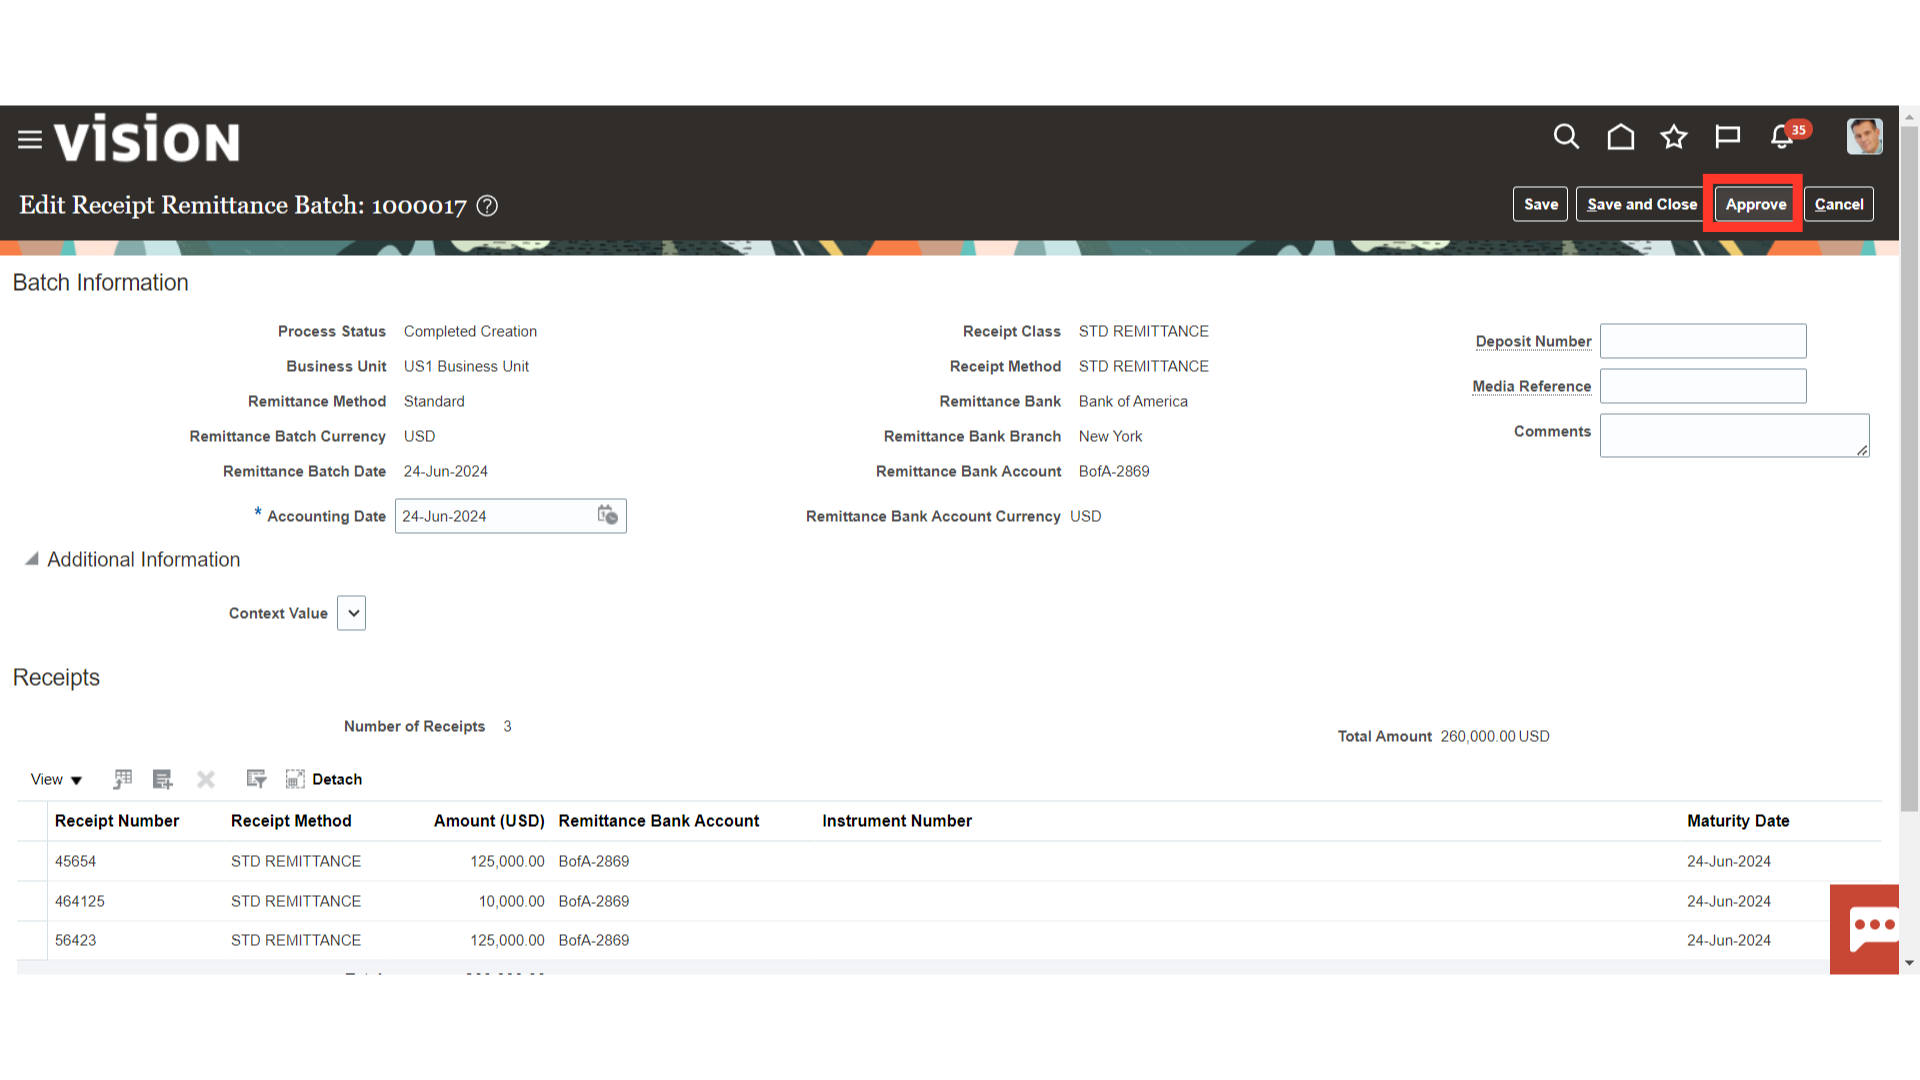
Once the save button has been clicked, the approve button will become active. Click it to approve the batch. Please be aware that the receipts you choose will be permanently added to the remittance process once the remittance batch is approved. If you want to remove the receipt from the remittance process it cannot be performed, the receipt needs to be reversed and a new receipt to be created.
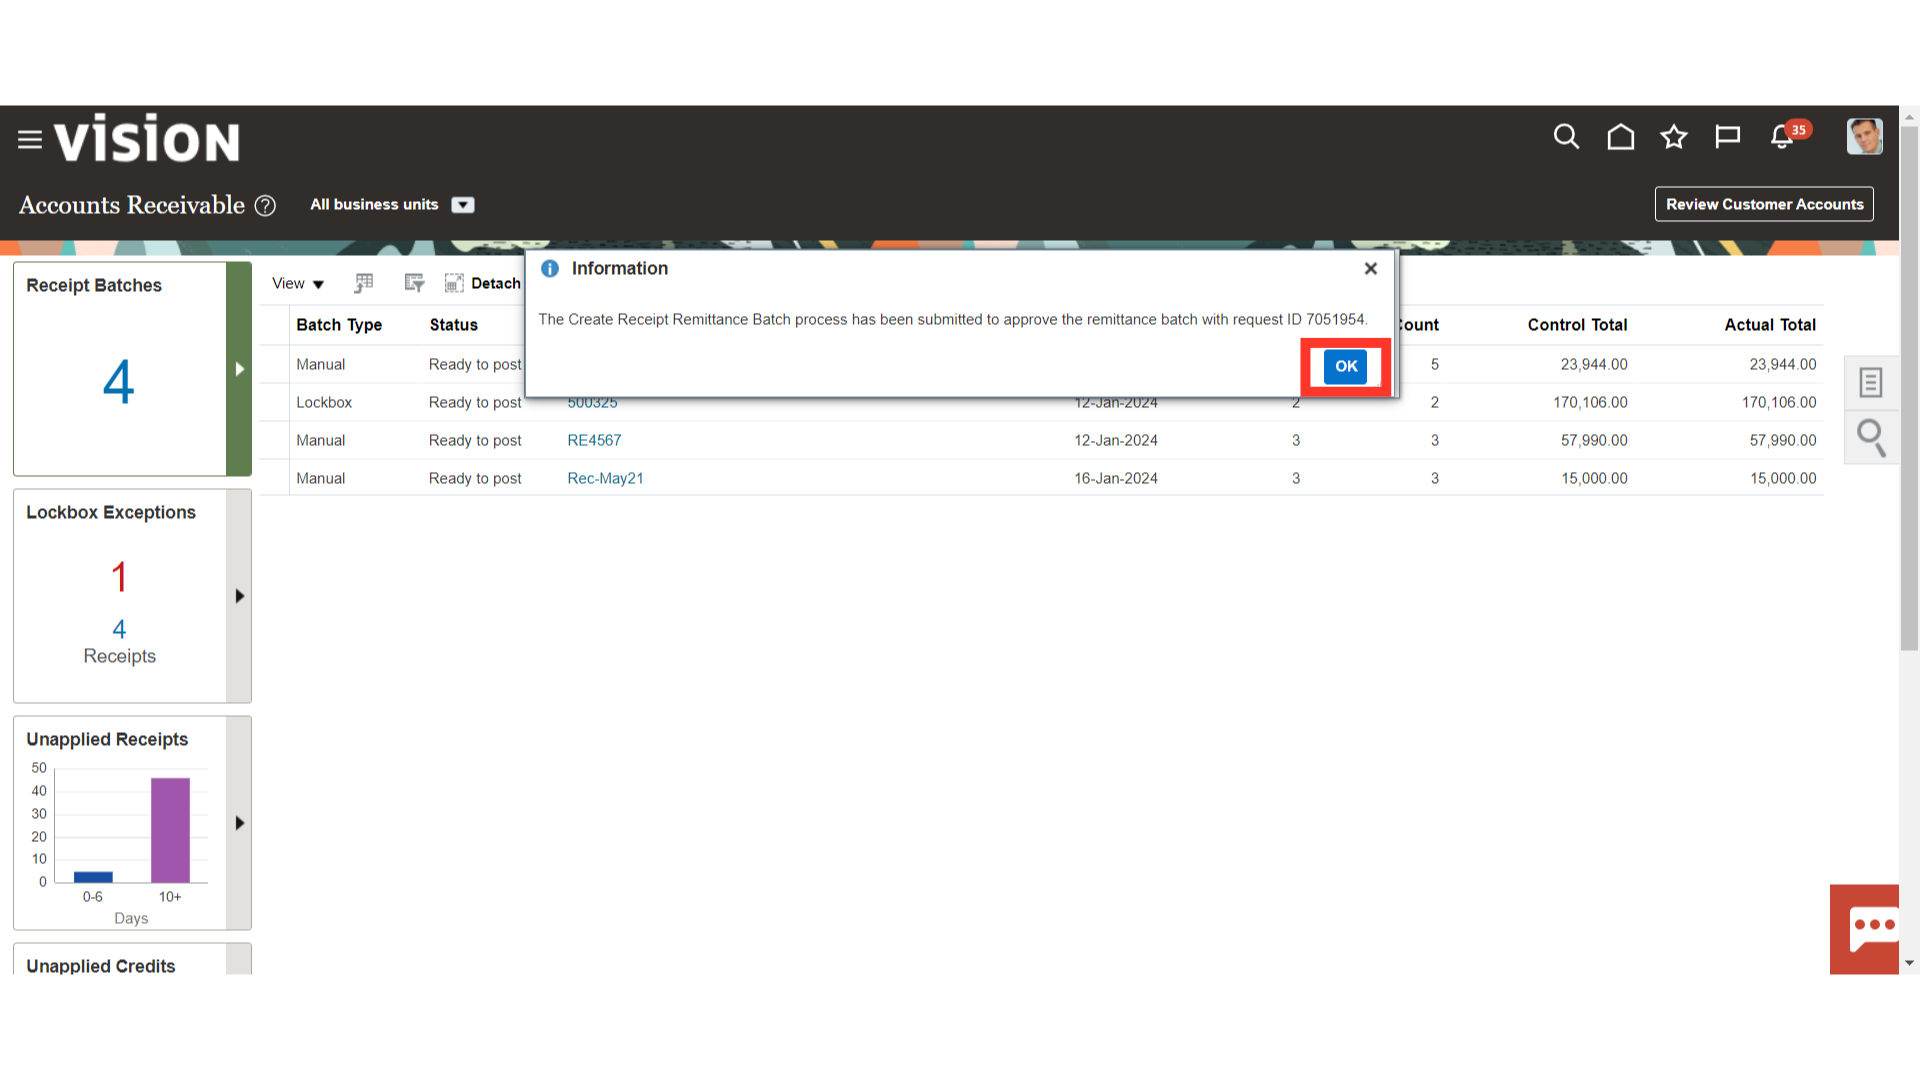
A confirmation message of the Remittance batch created would be displayed along with the Batch ID details. Click on OK to continue.
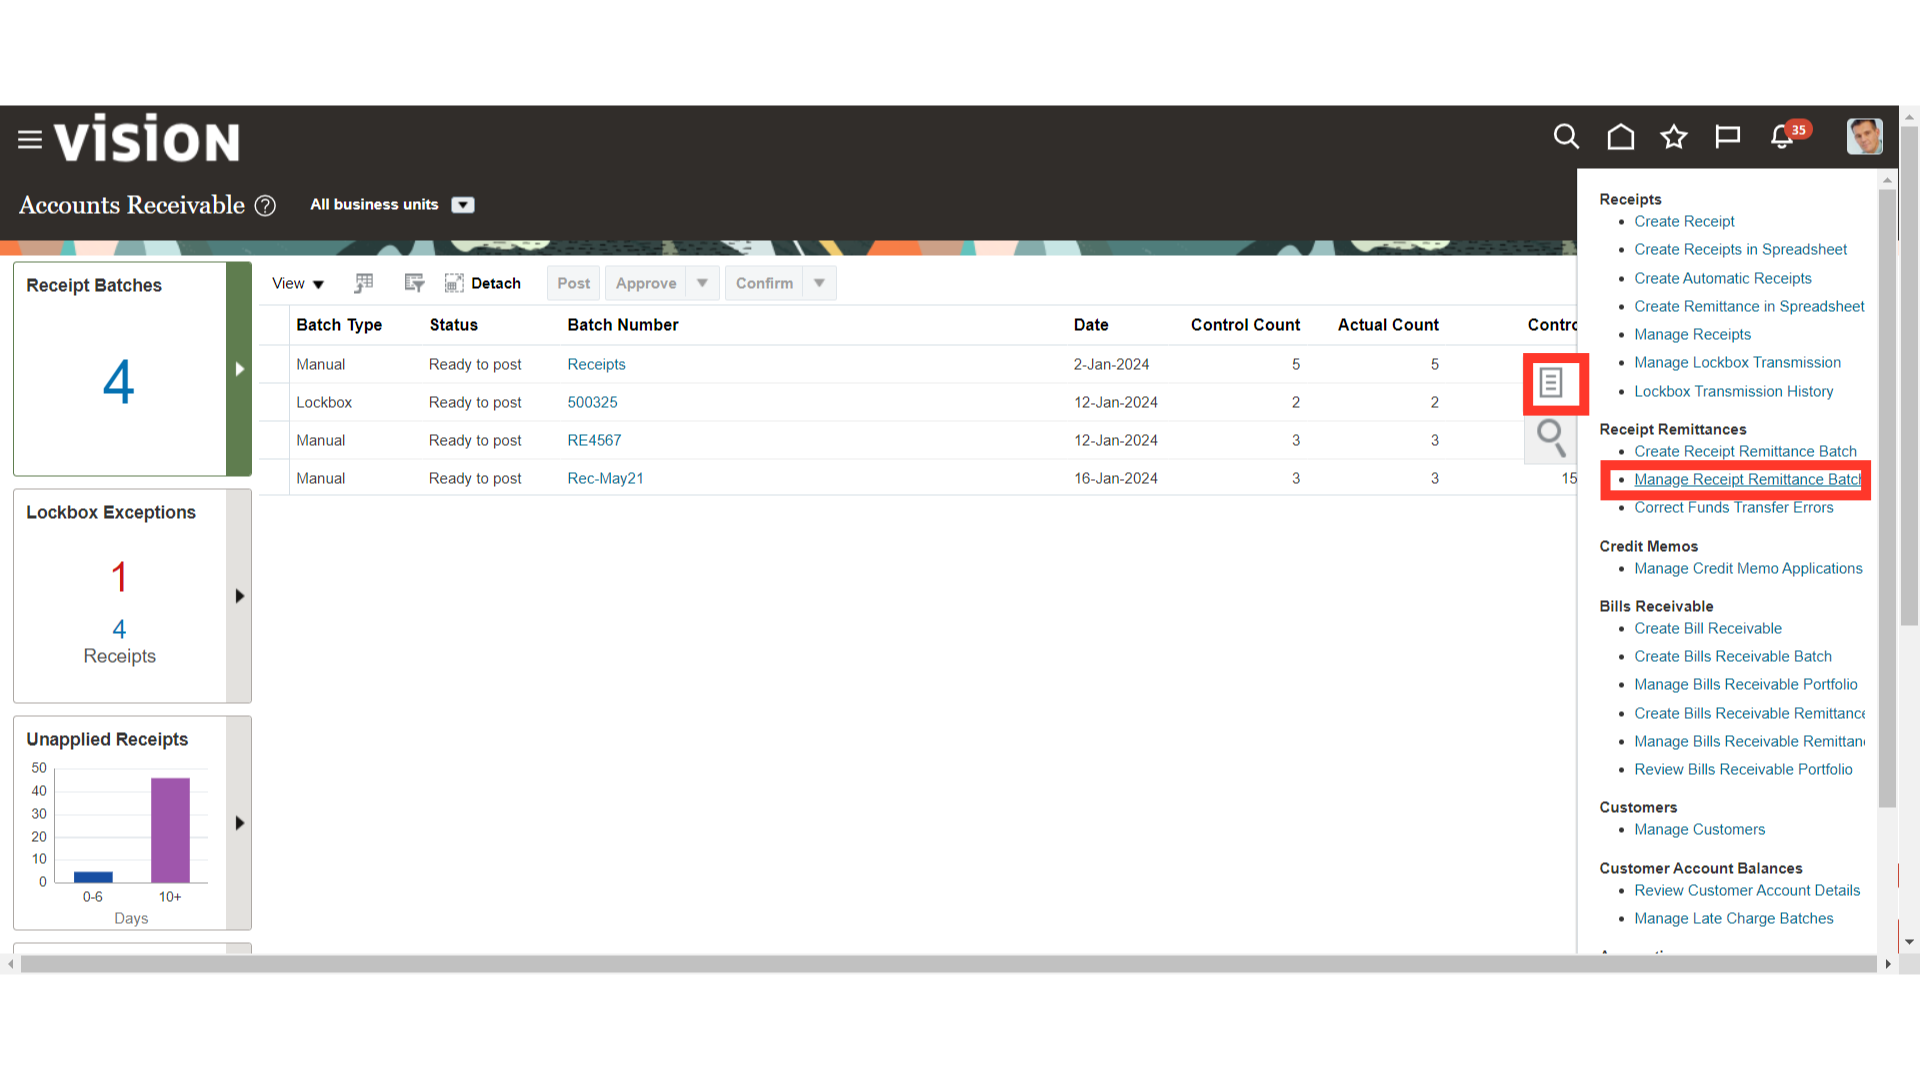
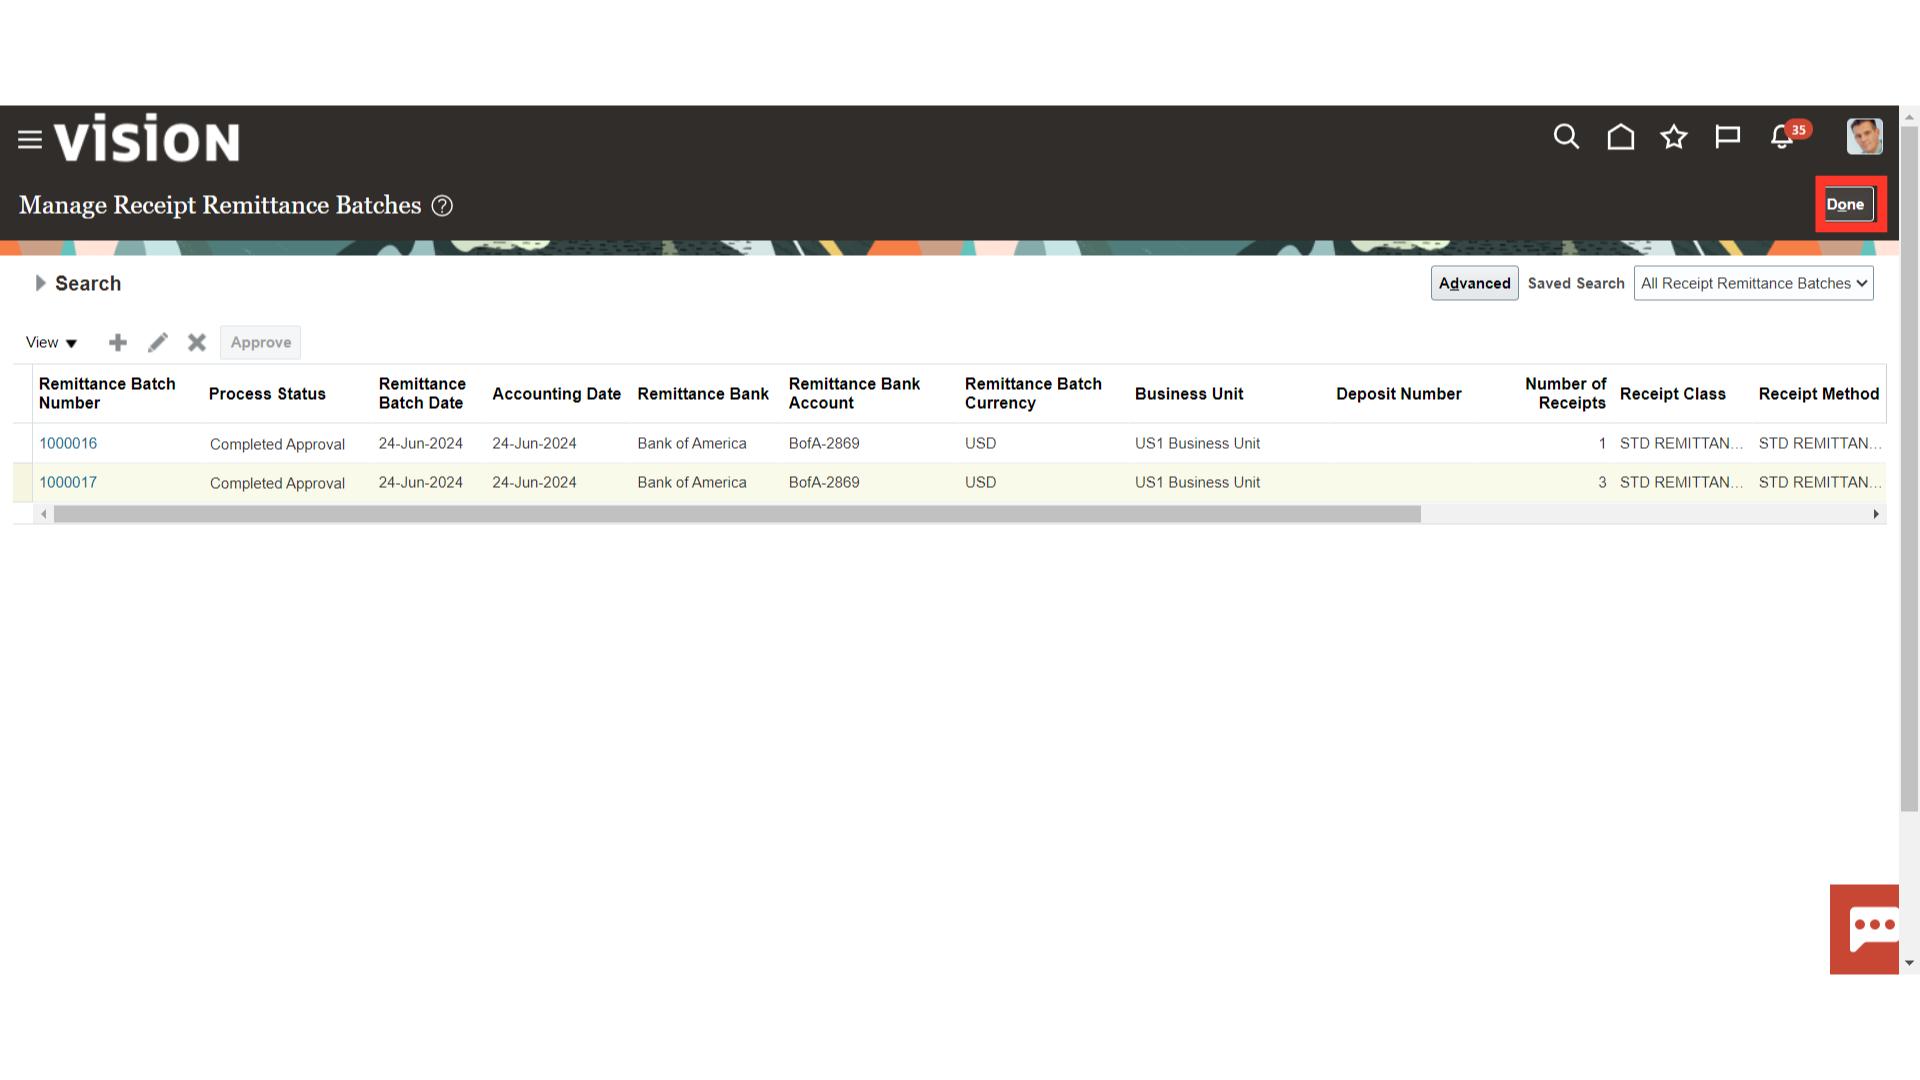
Select the Manage Receipt Remittance batch hyperlink to search the batches created.
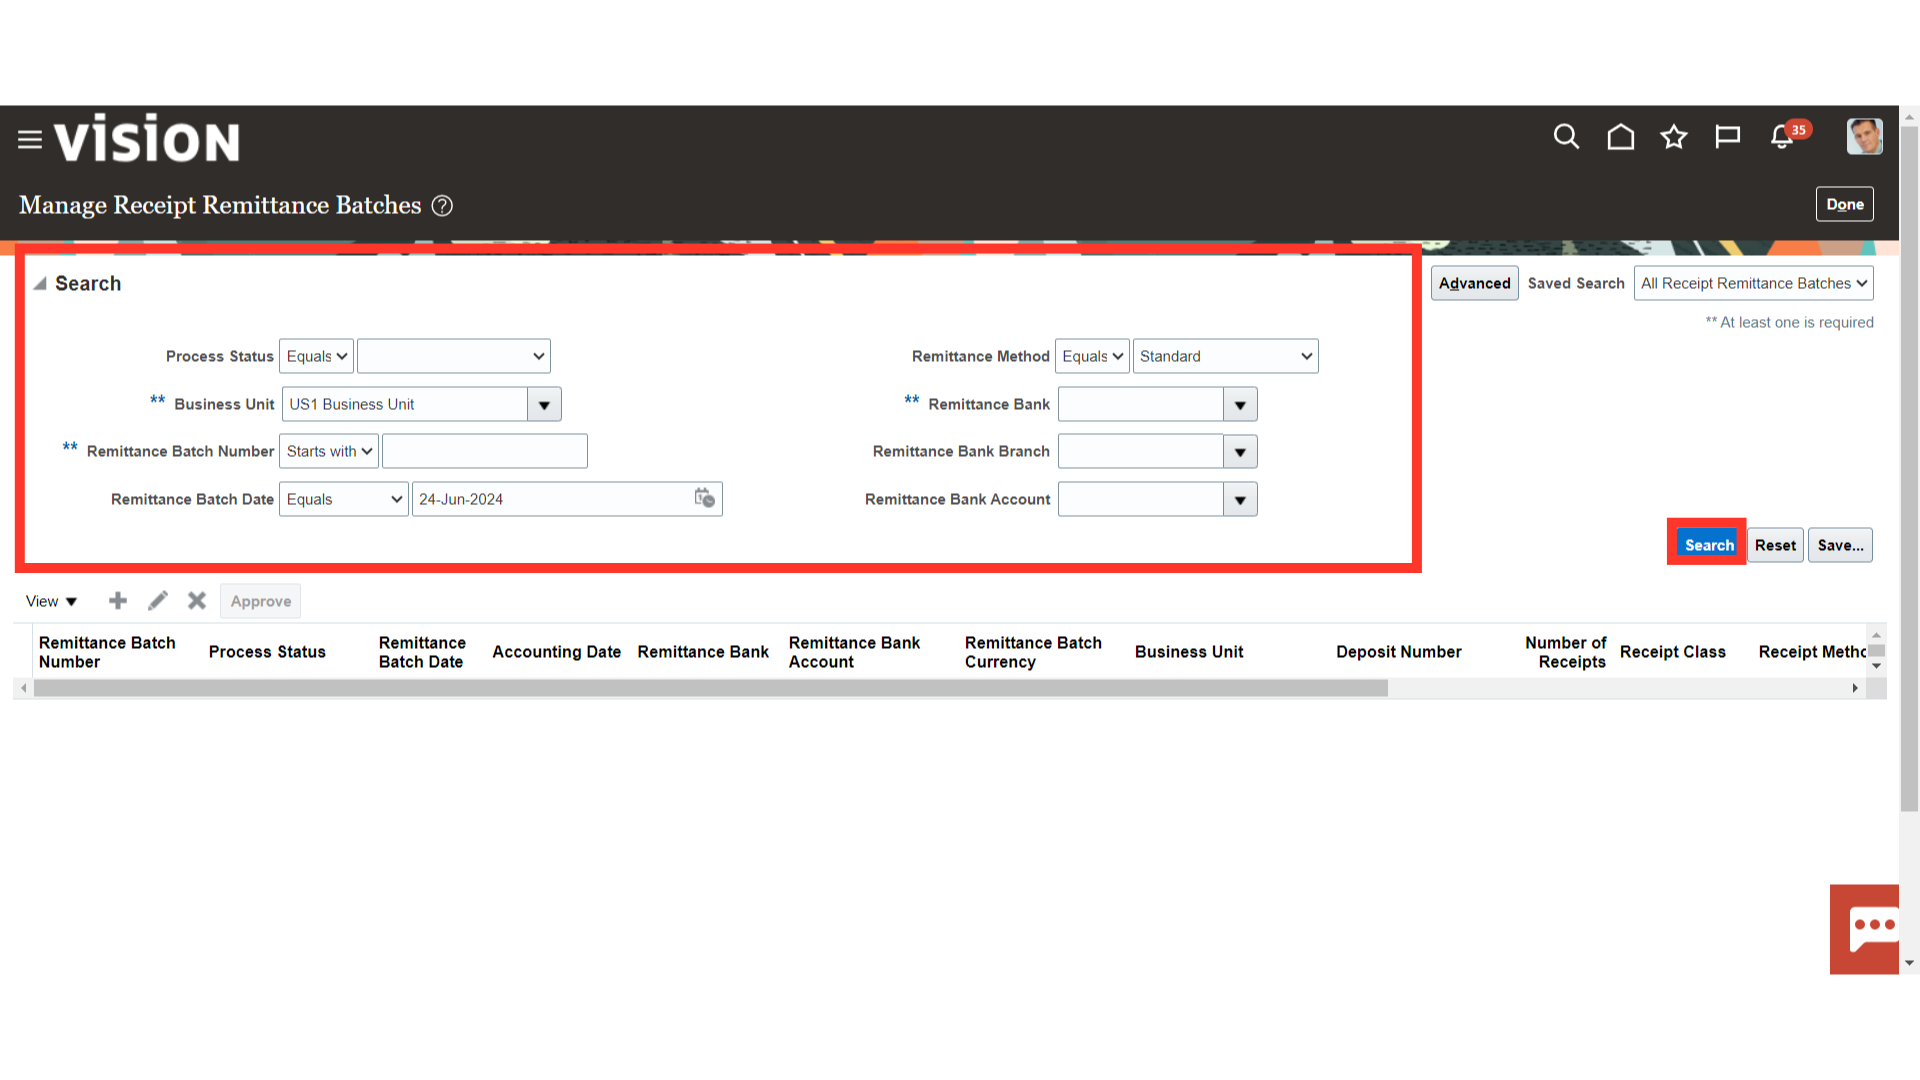
To search the remittance batch, enter the pertinent search parameters and then click the search button.
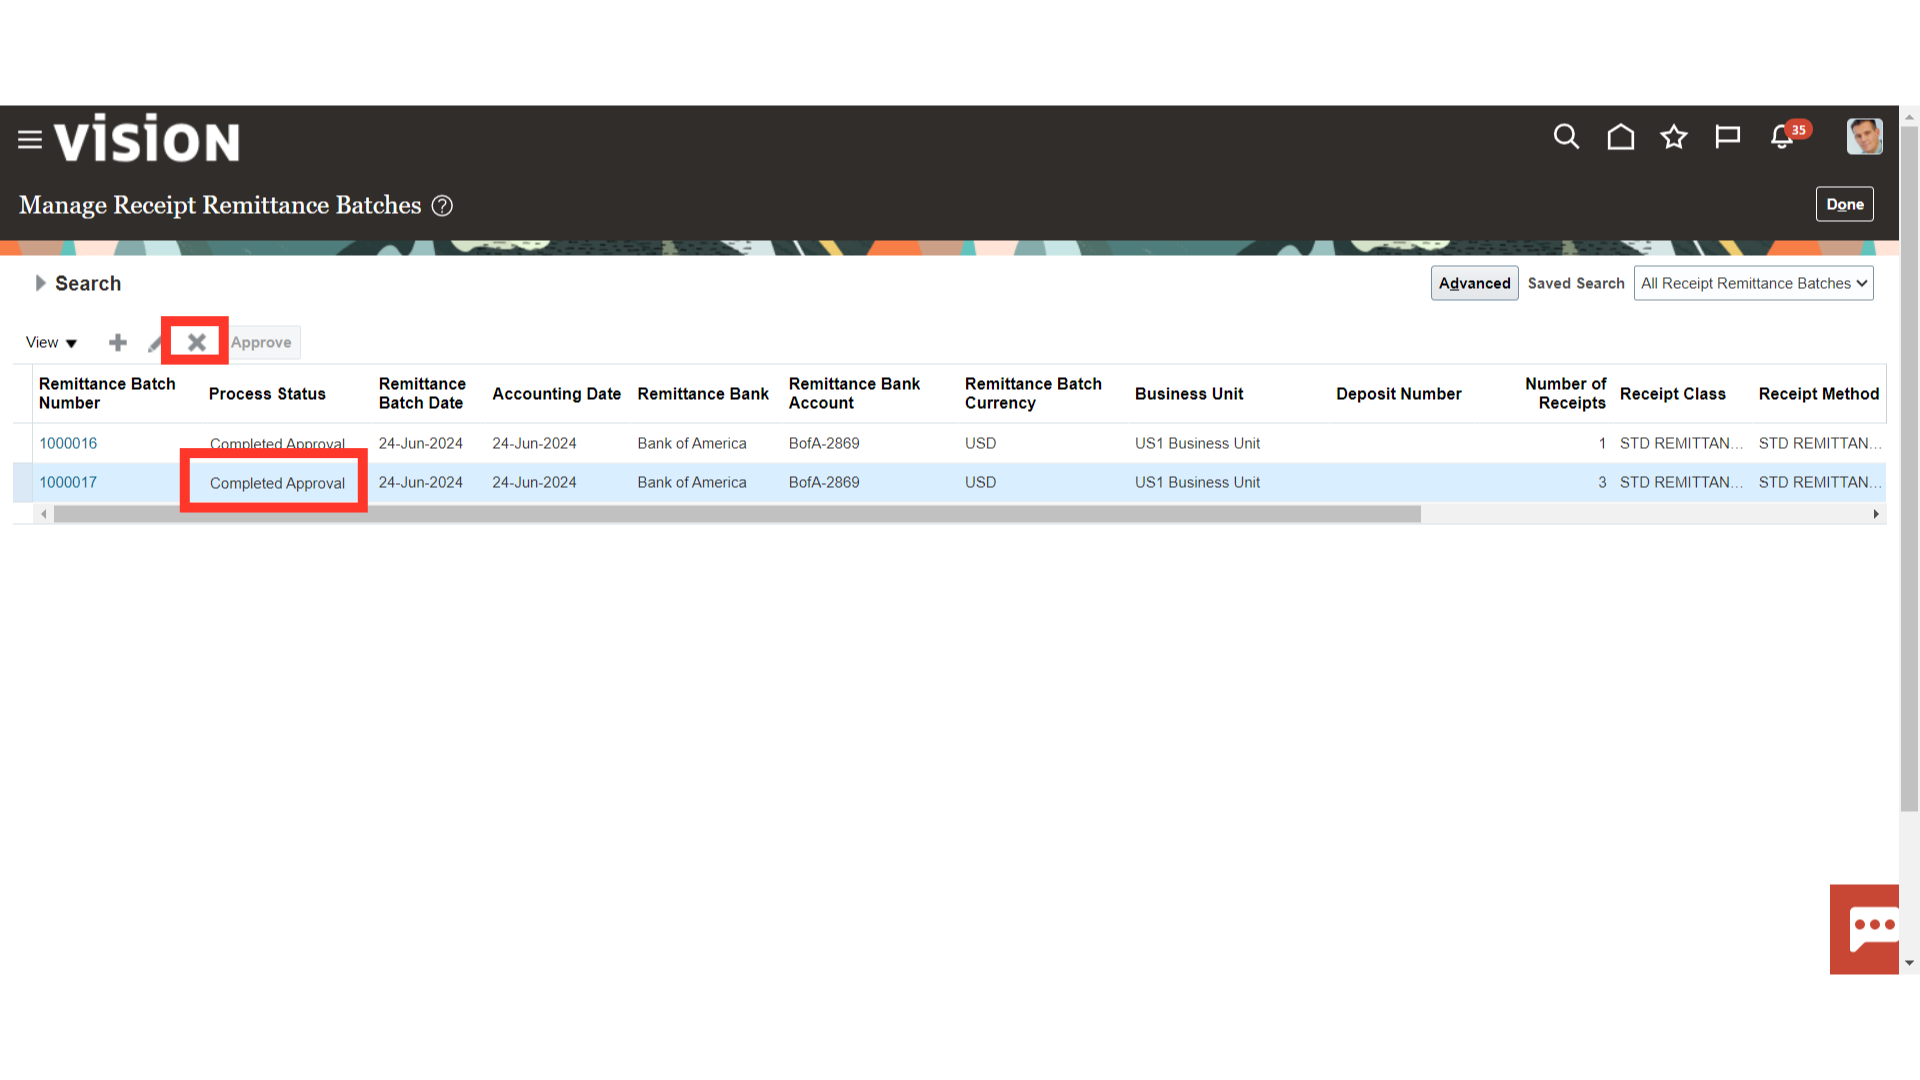
Once the batch is approved, the remittance batch status will be changed to Completed Approval. In case the batch is required to be deleted, select the batch and click on the cross icon. Please note that the batch can be deleted only if it is not in approved status.
Click on the Done button to return to the Accounts Receivable work area.
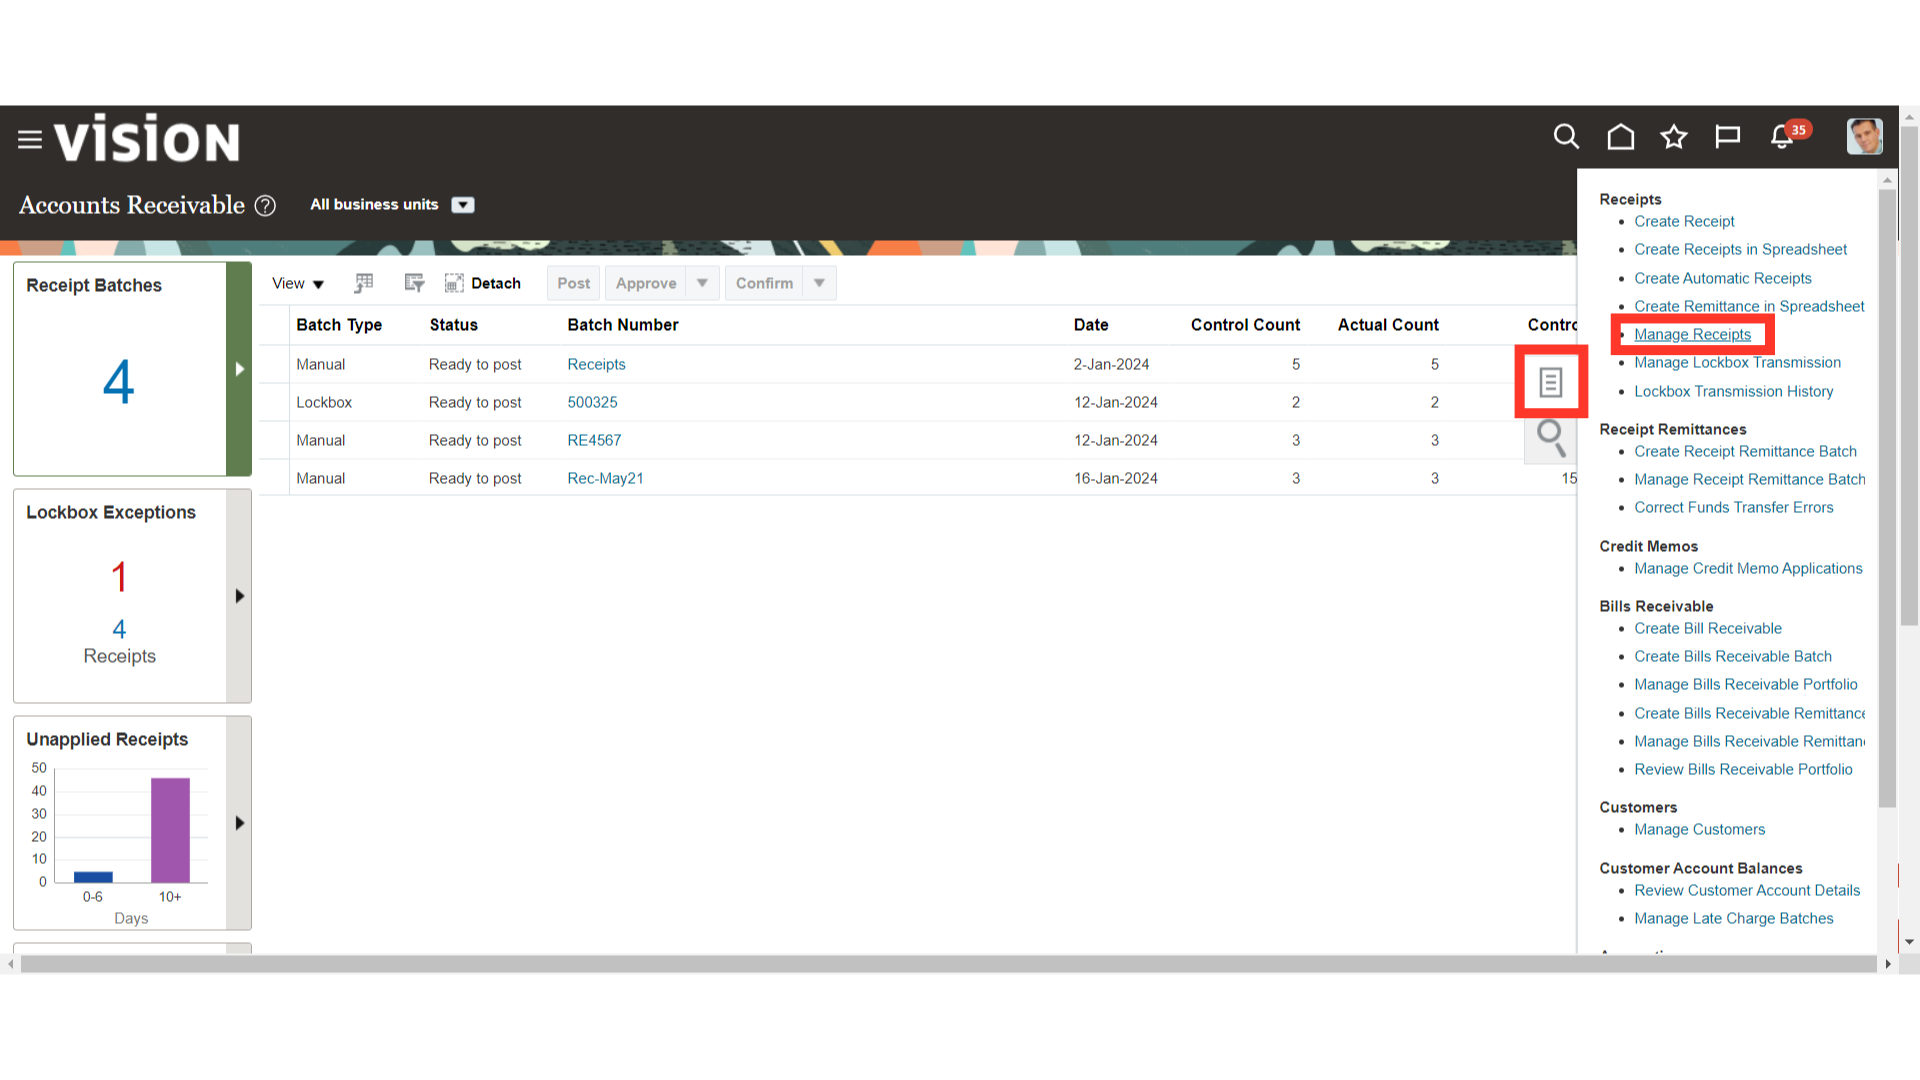
Click on the Manage Receipts hyperlink from the task list to search for the receipts.
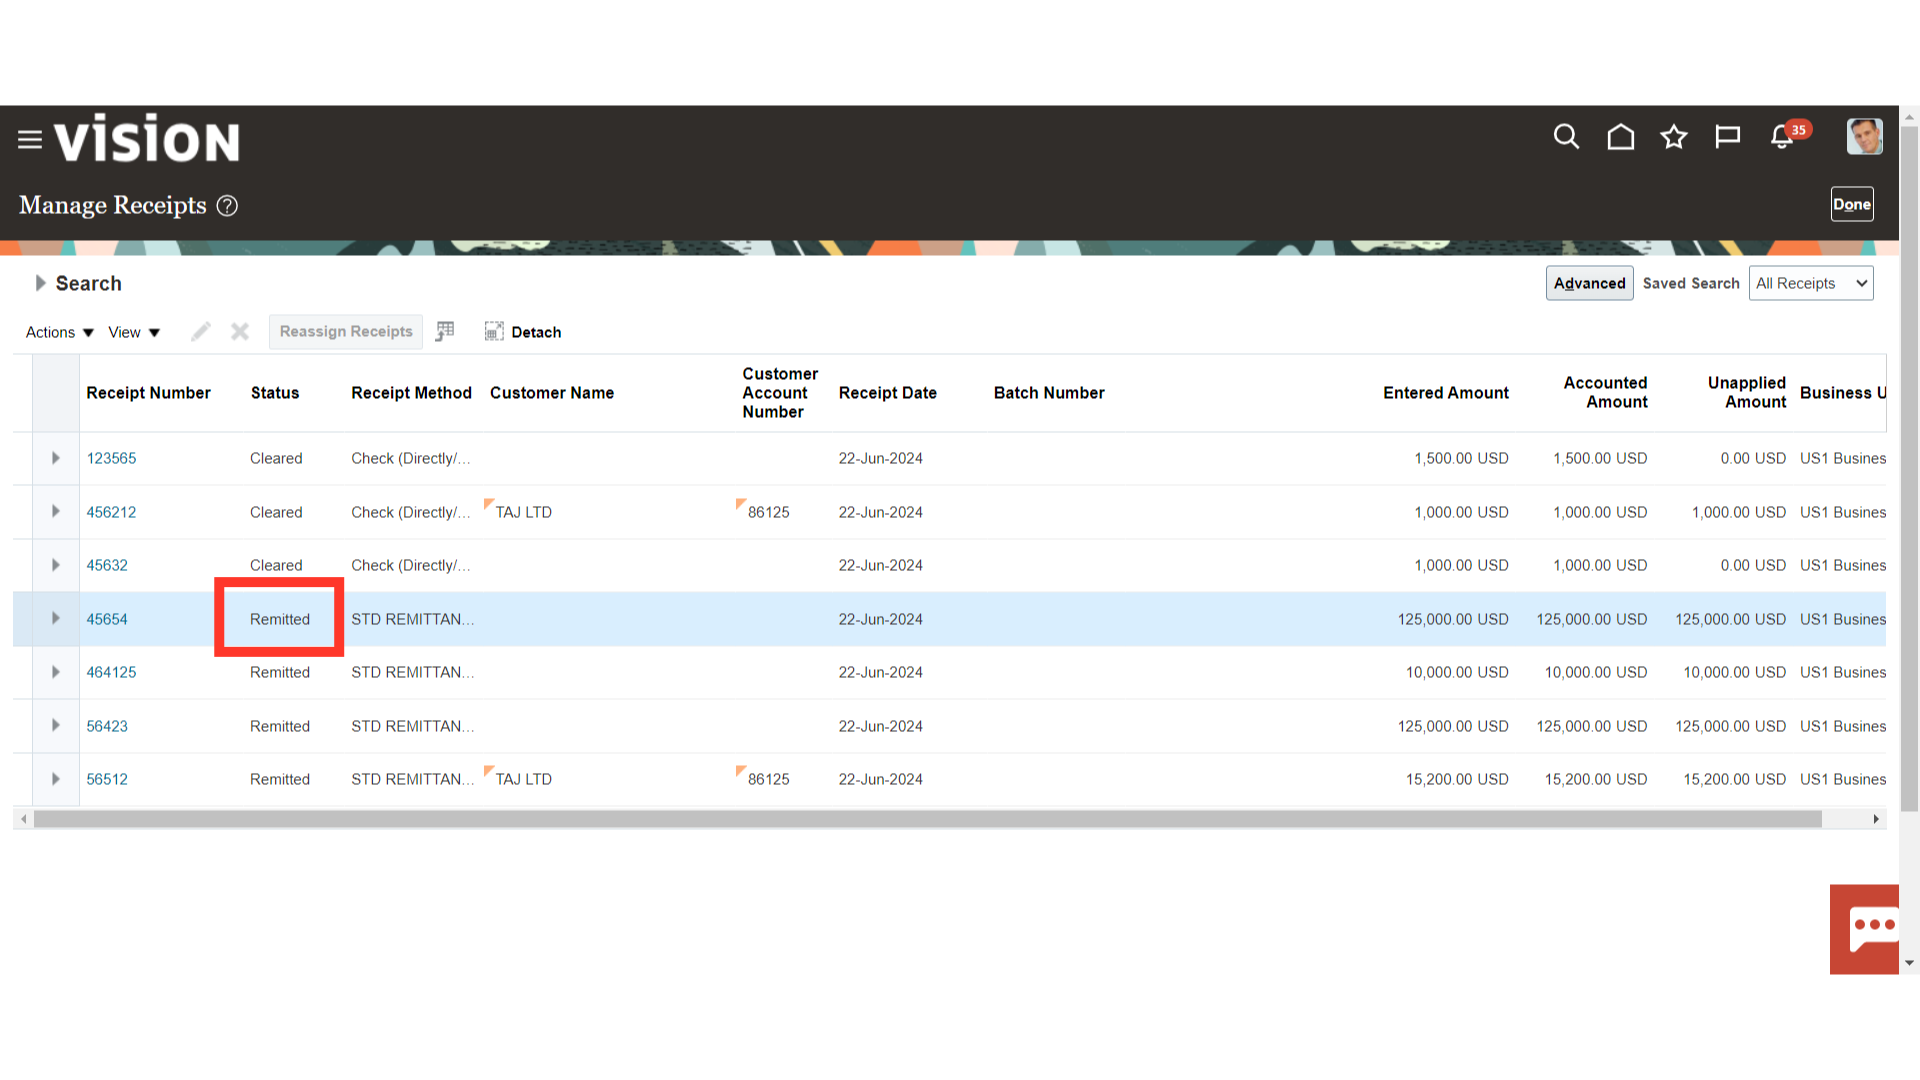
To search the receipt, enter the pertinent search parameters and then click the search button.

The status of the receipt would be changed to Remitted status after creating the Remittance batch.
To generate accounting entries, select the receipt and click on Post to Ledger under the Actions
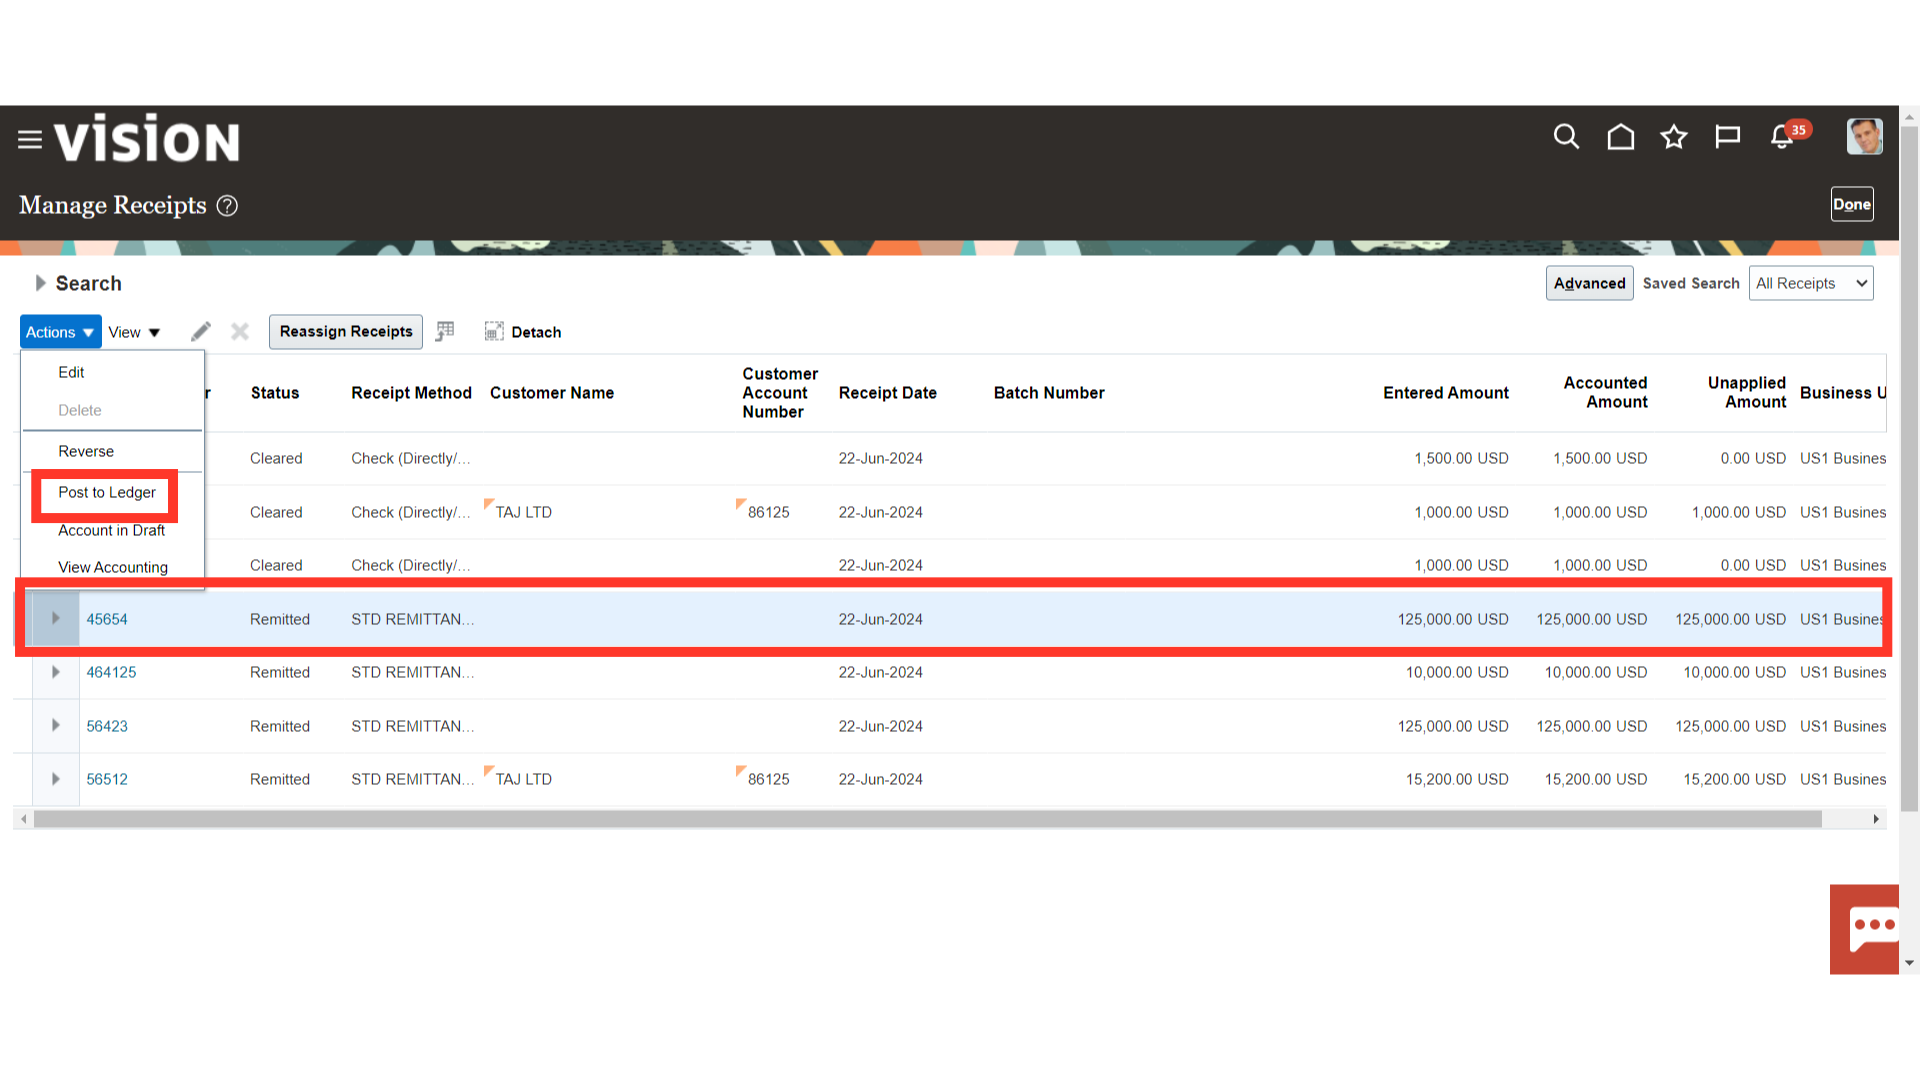
To see more details of the accounting, click on View Accounting tab.
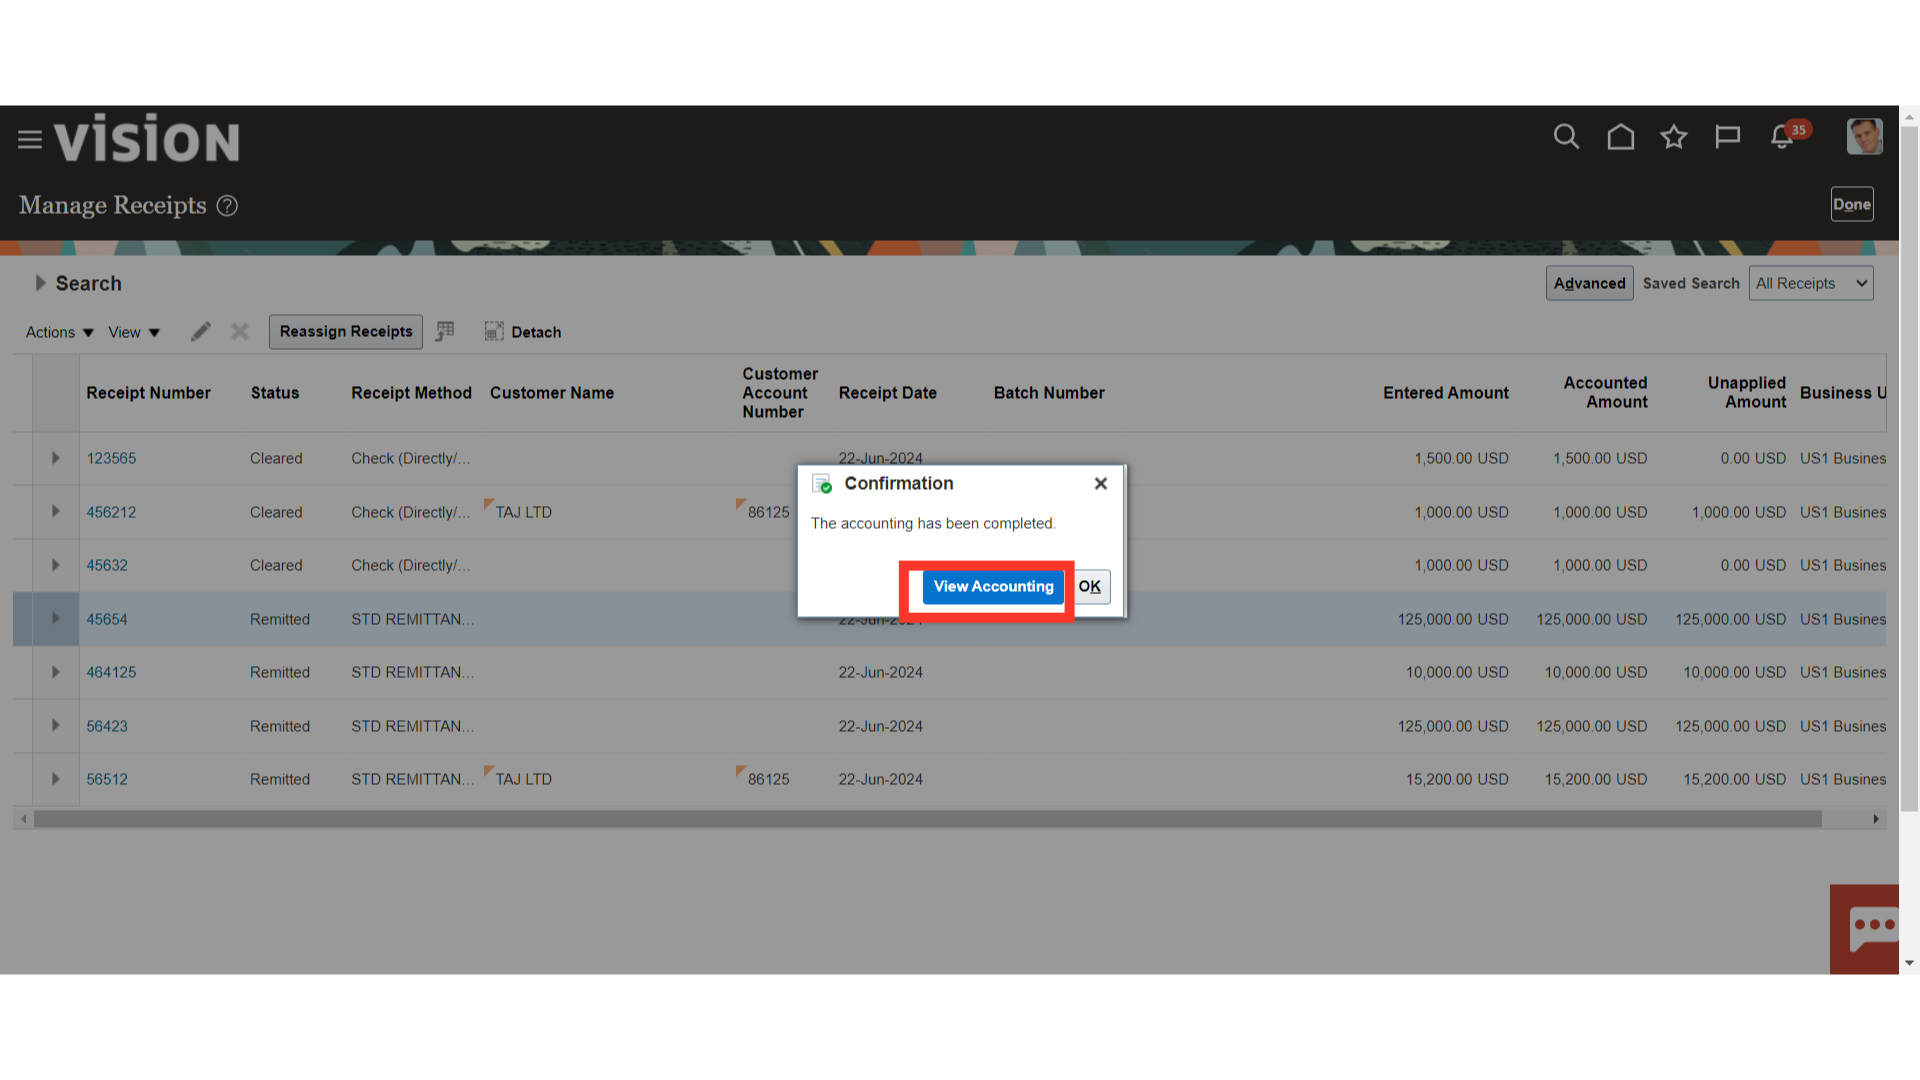
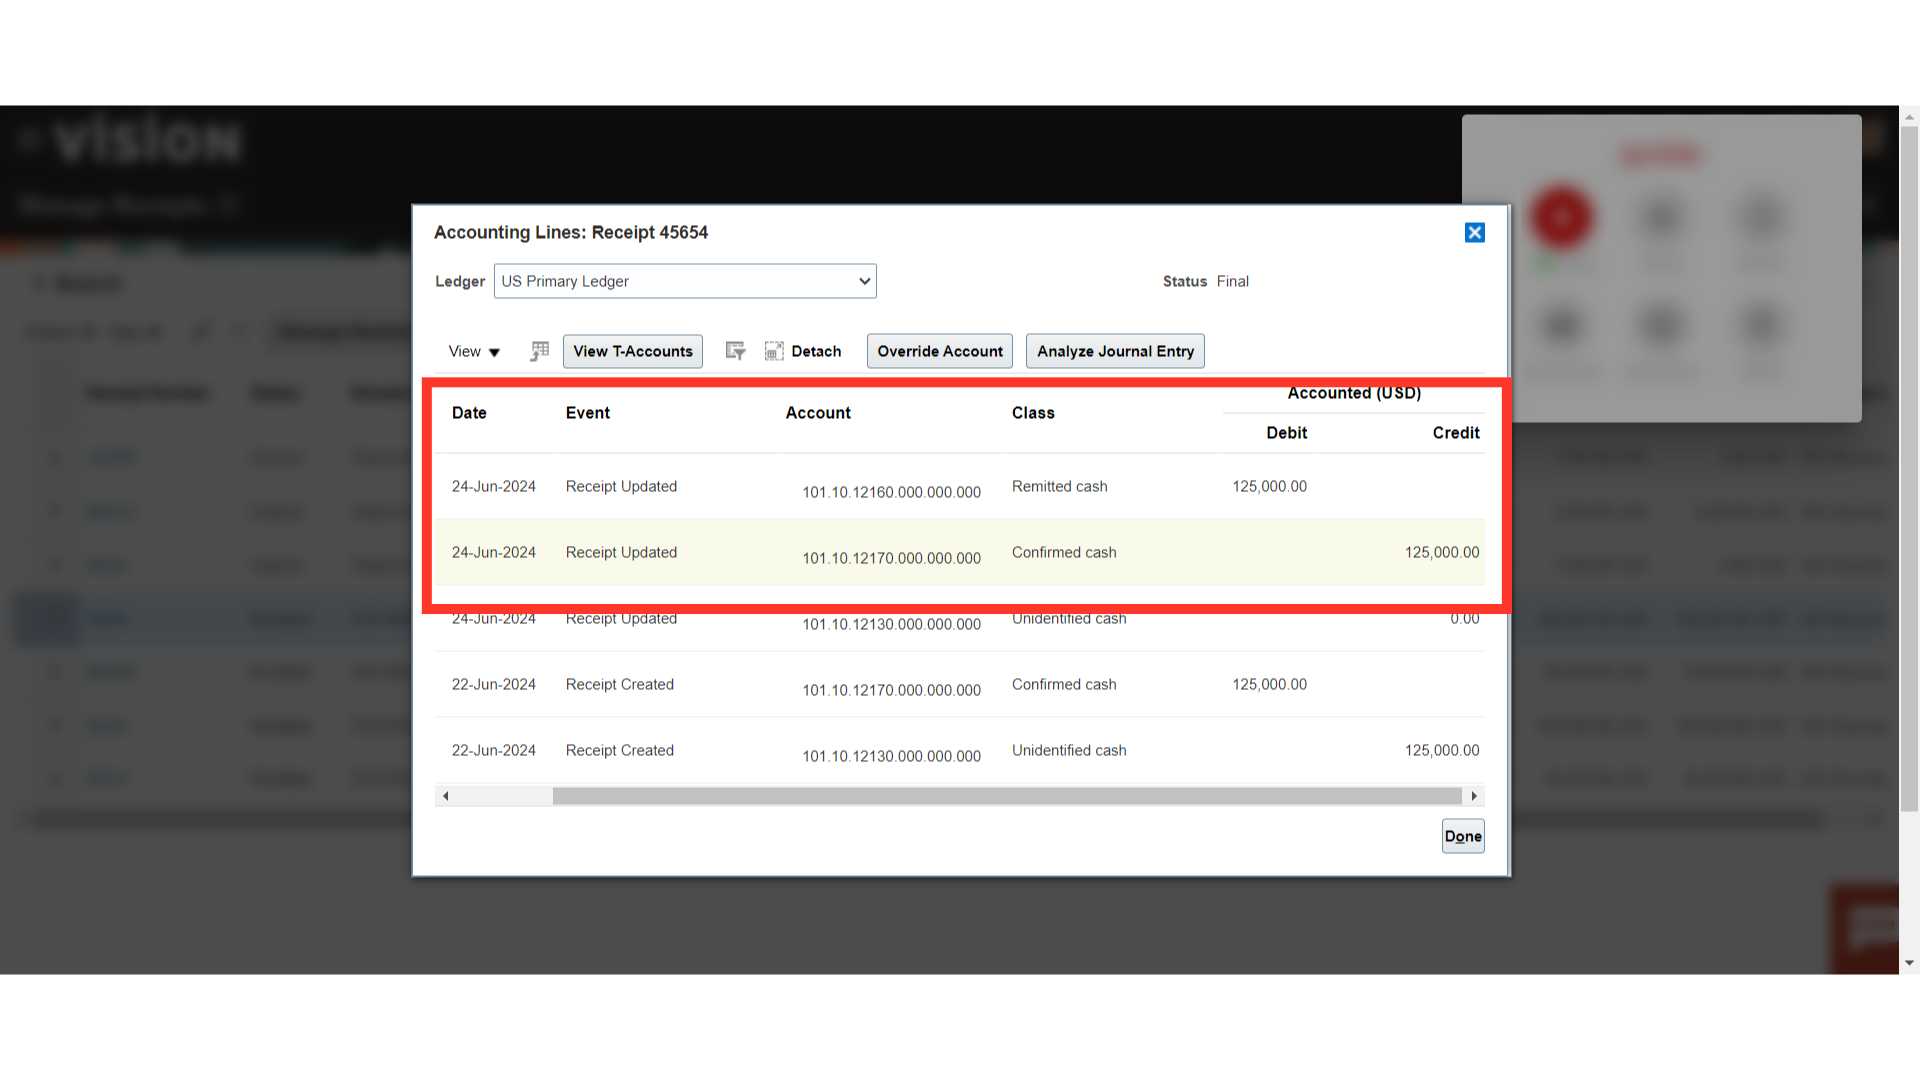
This is an accounting entry generated for recording the remittance process. Click on Done button to close this window.
This guide included step-by-step instructions for creating the remittance batch, which included producing the accounting entry, entering the batch information, and searching for receipts to add to the batch process.