Invoice Creation from Order Management
Invoicing in Oracle Order Management is the process by which data from Orders and Returns is communicated to Oracle Receivables to create invoices, credit memos, and credits on account, recognize revenue, and manage sales credits. This guide will provide a detailed step-by-step process for creating the Receivable Transactions through Order Management by running the Import Autoinvoice process.
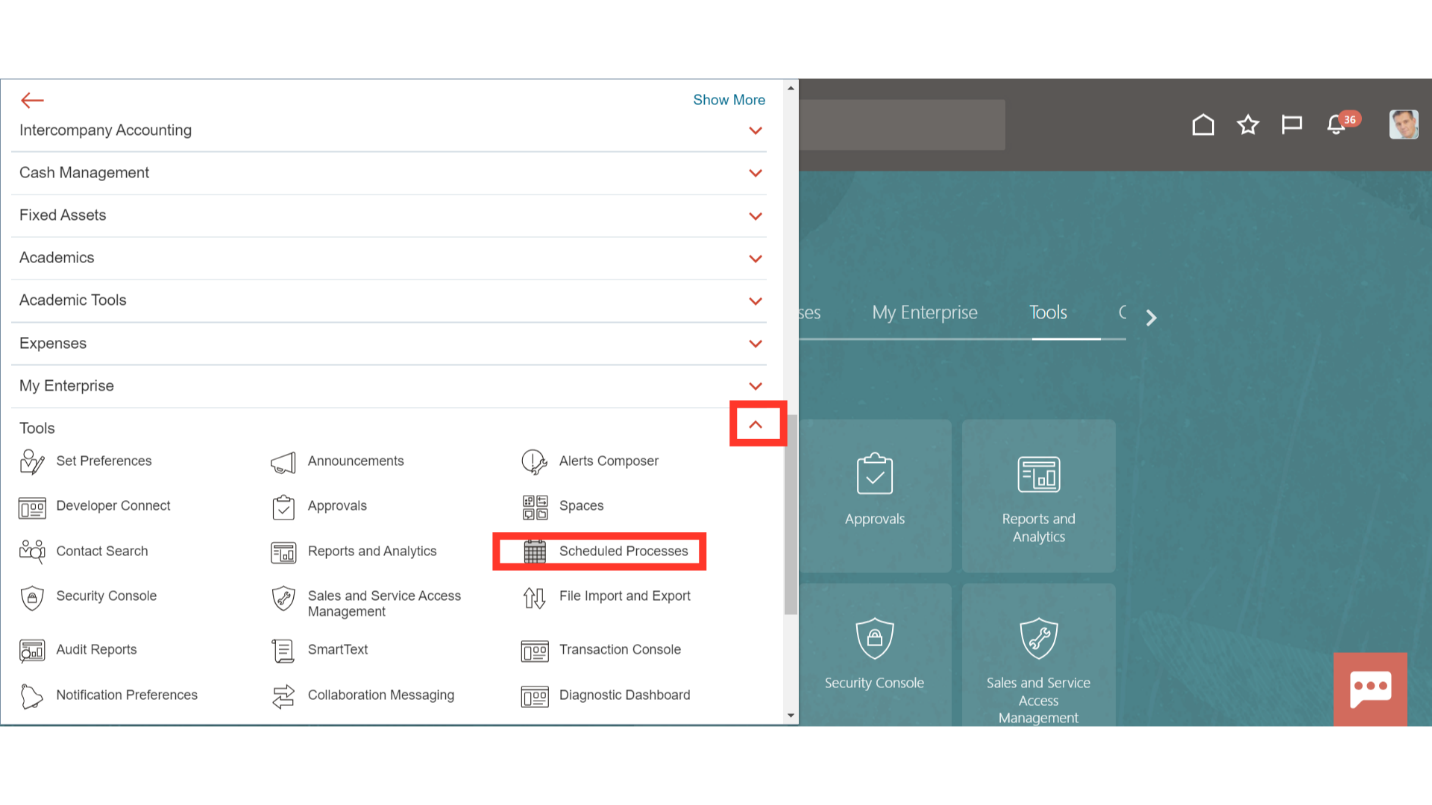
To import the Invoices from Order Management, Login into Oracle Cloud Application. On the Home page click on Navigator.

Navigate to Tools section, expand it and select Scheduled Processes.
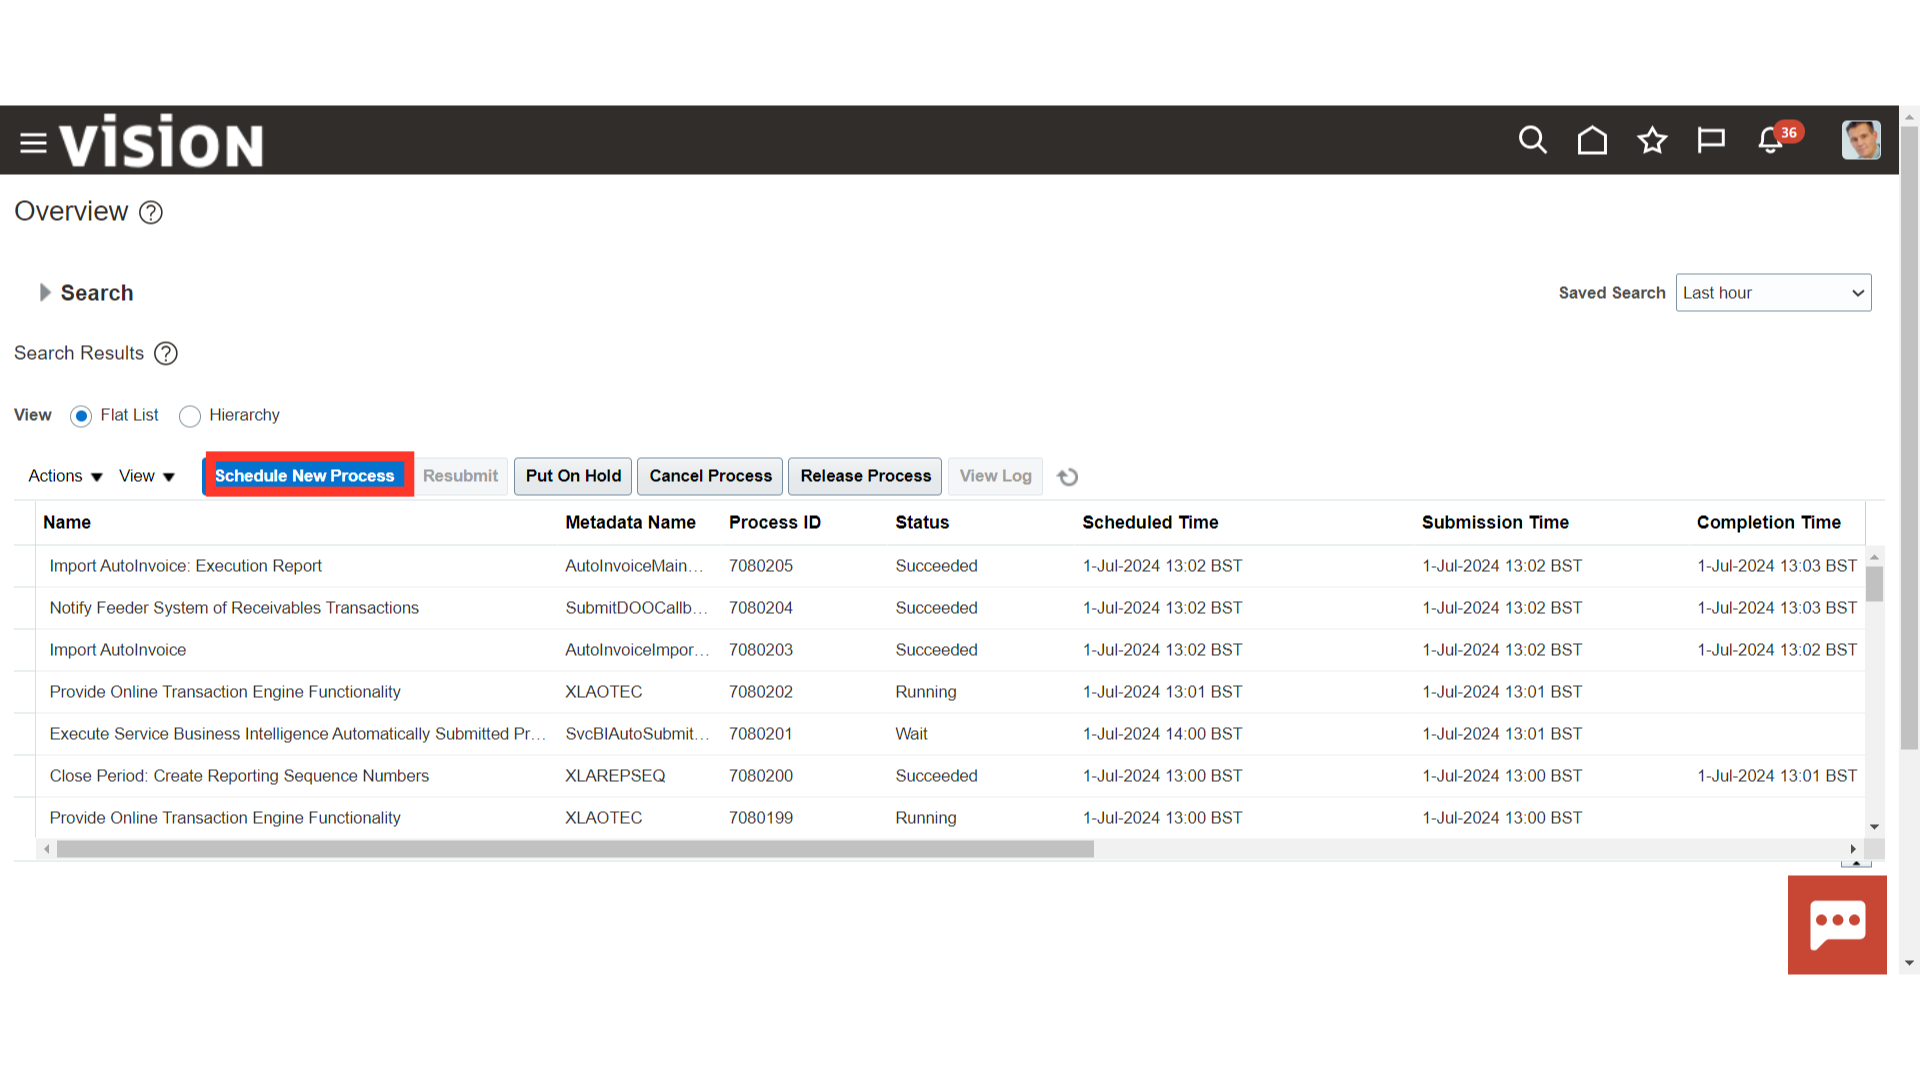
Click on the Schedule New Process button.
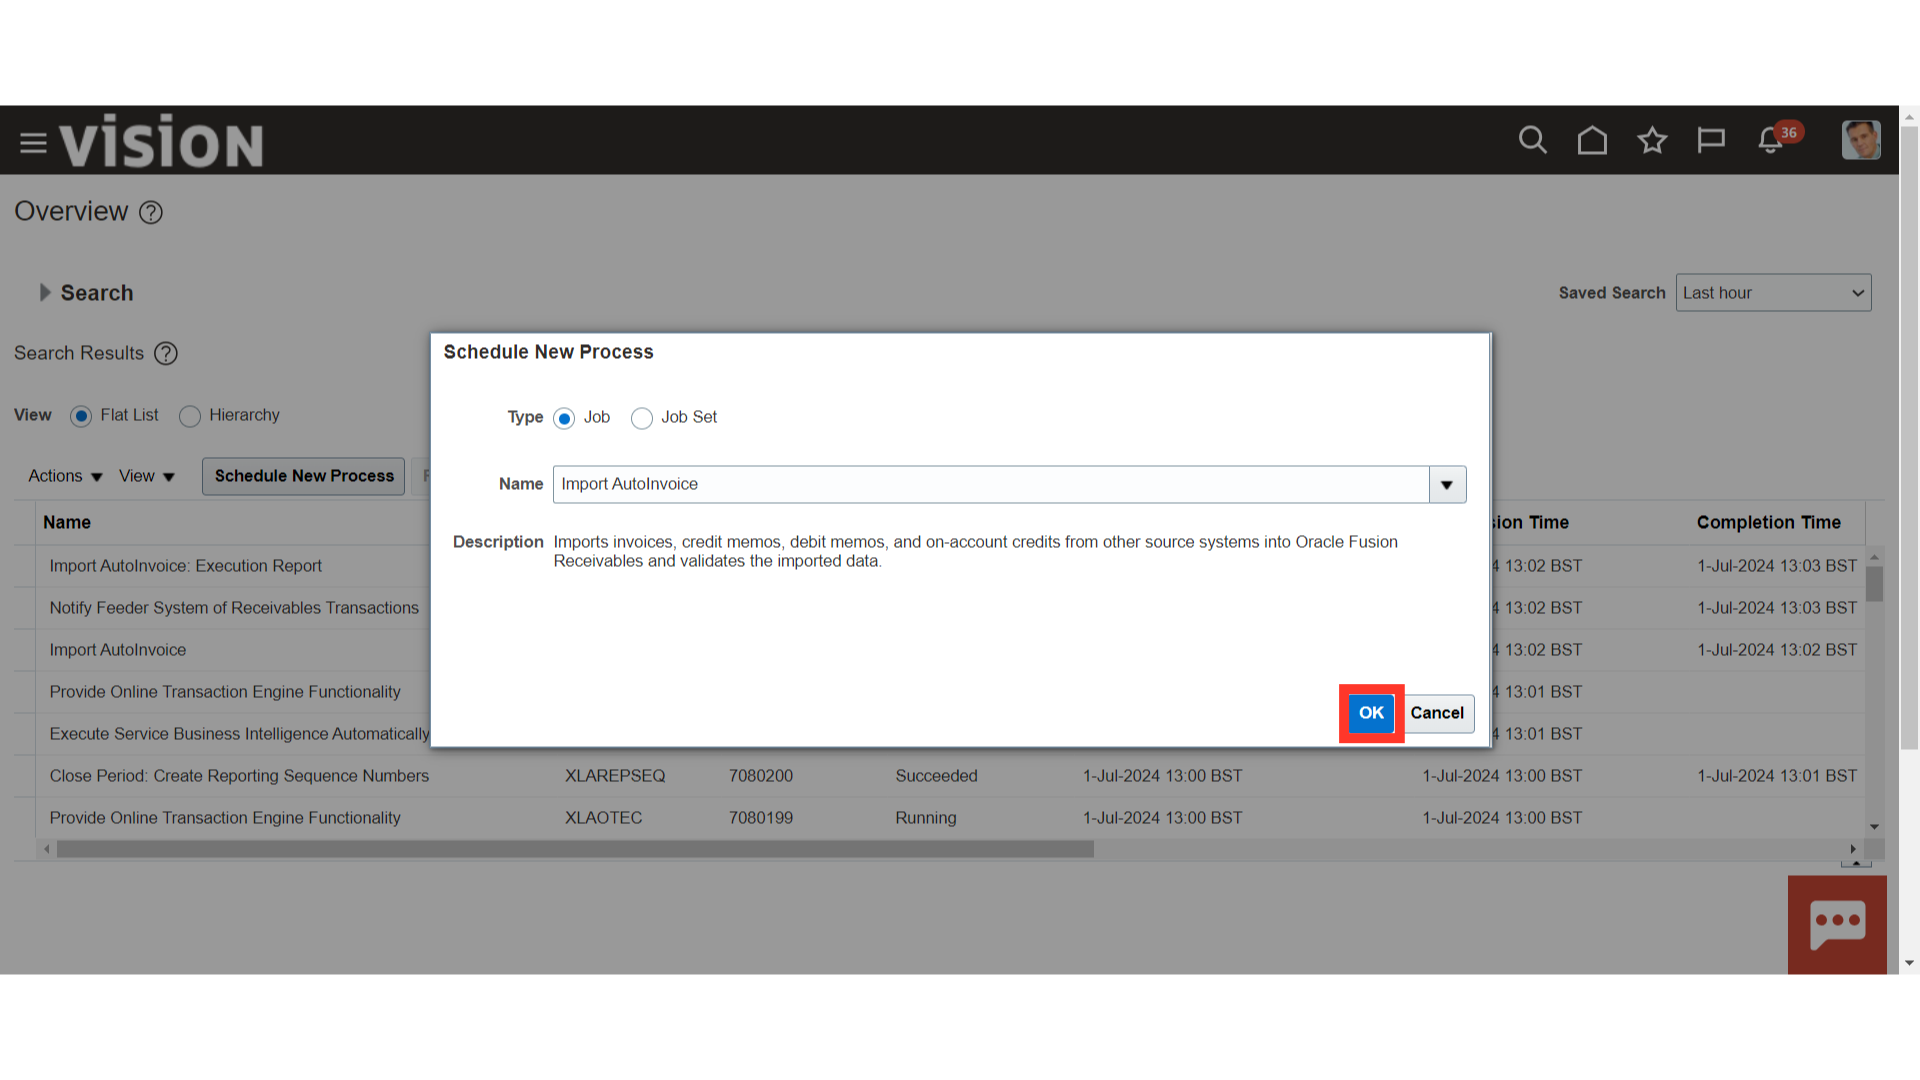
Select the Type as Job. In the Name enter “Import AutoInvoice”, click enter and once the description appears below click on the OK button. This process will bring the data to the Interface Tables.
Select a Business unit from the list of values for whose transactions are to be imported. Enter a Transaction Source and Default Date for this submission. These parameters are required. The Default Date must be in an open or future enterable period. Depending on the transaction batch source setup and if the invoice uses rules, AutoInvoice uses the Default Date if the GL date is not provided or if the date provided is in a closed period.
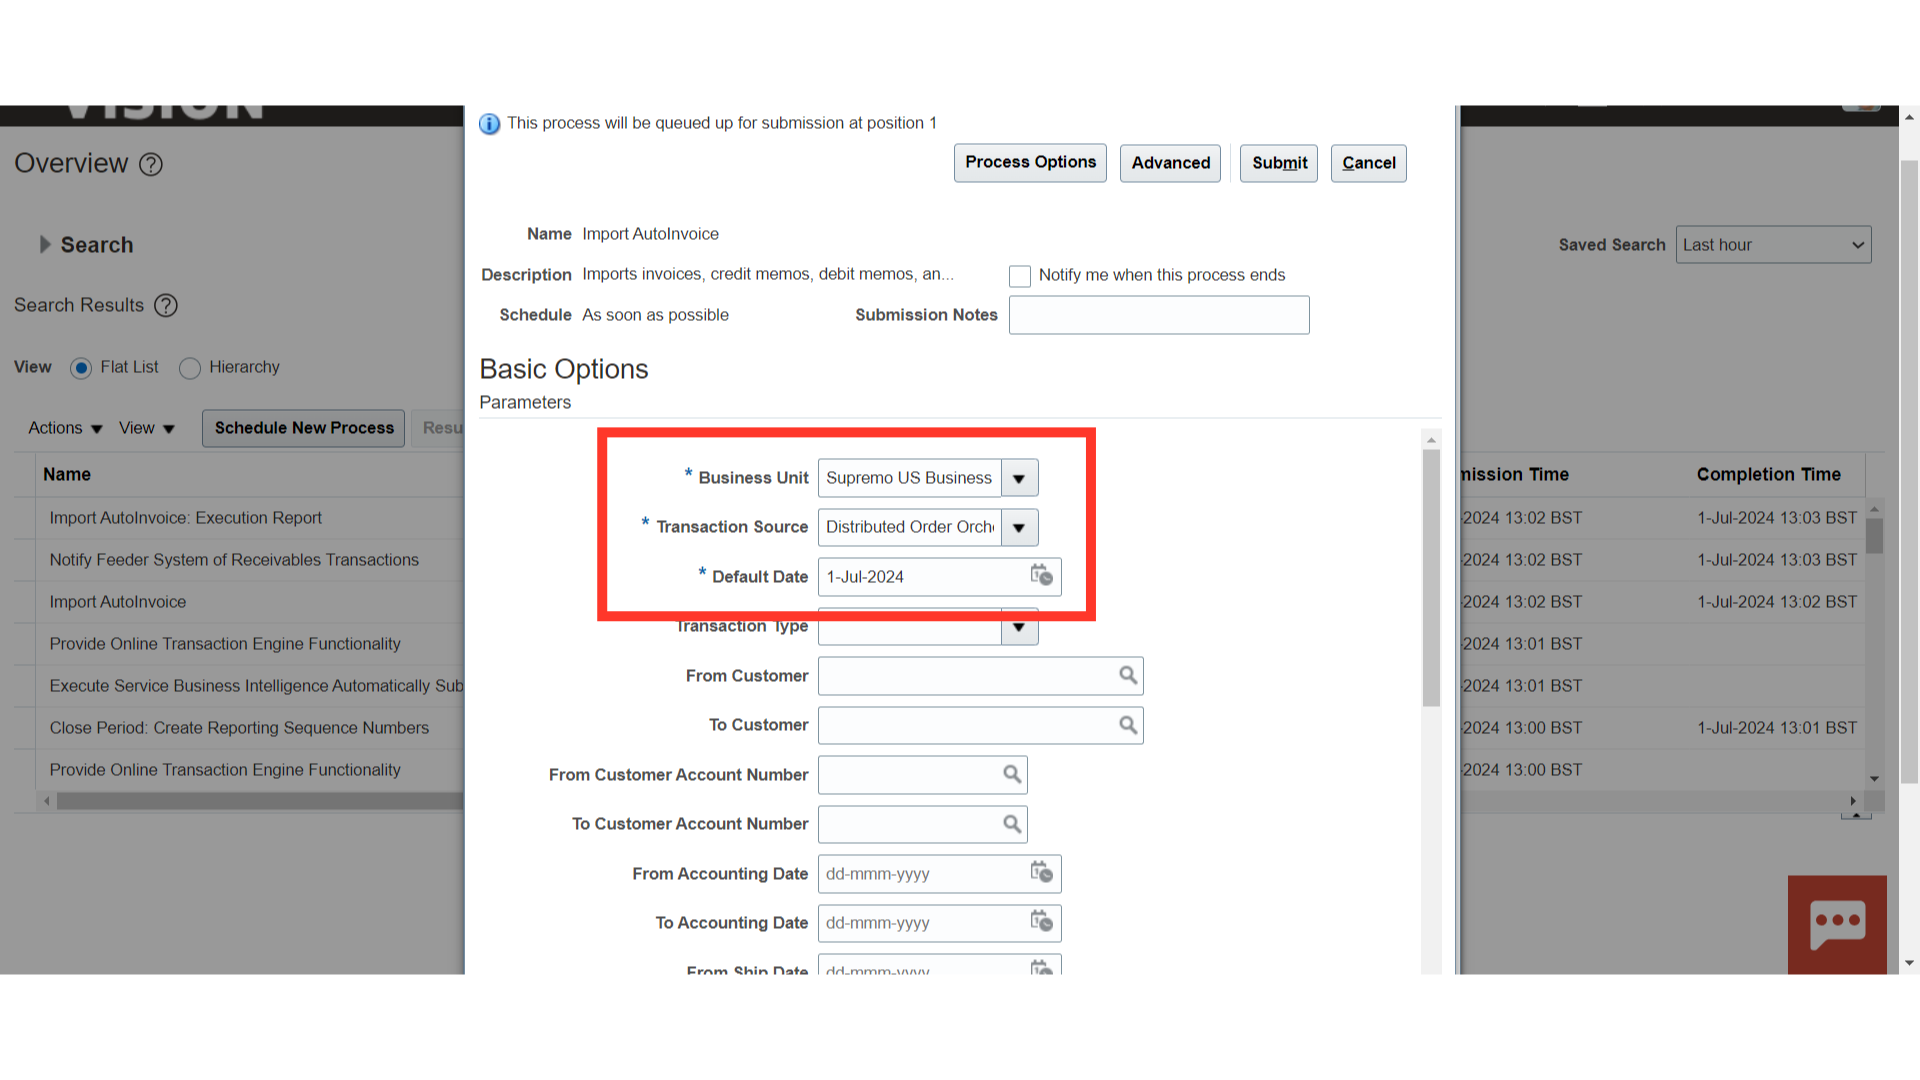
To limit the transactions AutoInvoice imports, enter selection criteria. For example, enter a Transaction Type, range of Bill to Customer Names, GL Dates, or Transaction Numbers to import only those transactions. Leave a field blank if do not want to limit this submission to transactions matching those criteria.
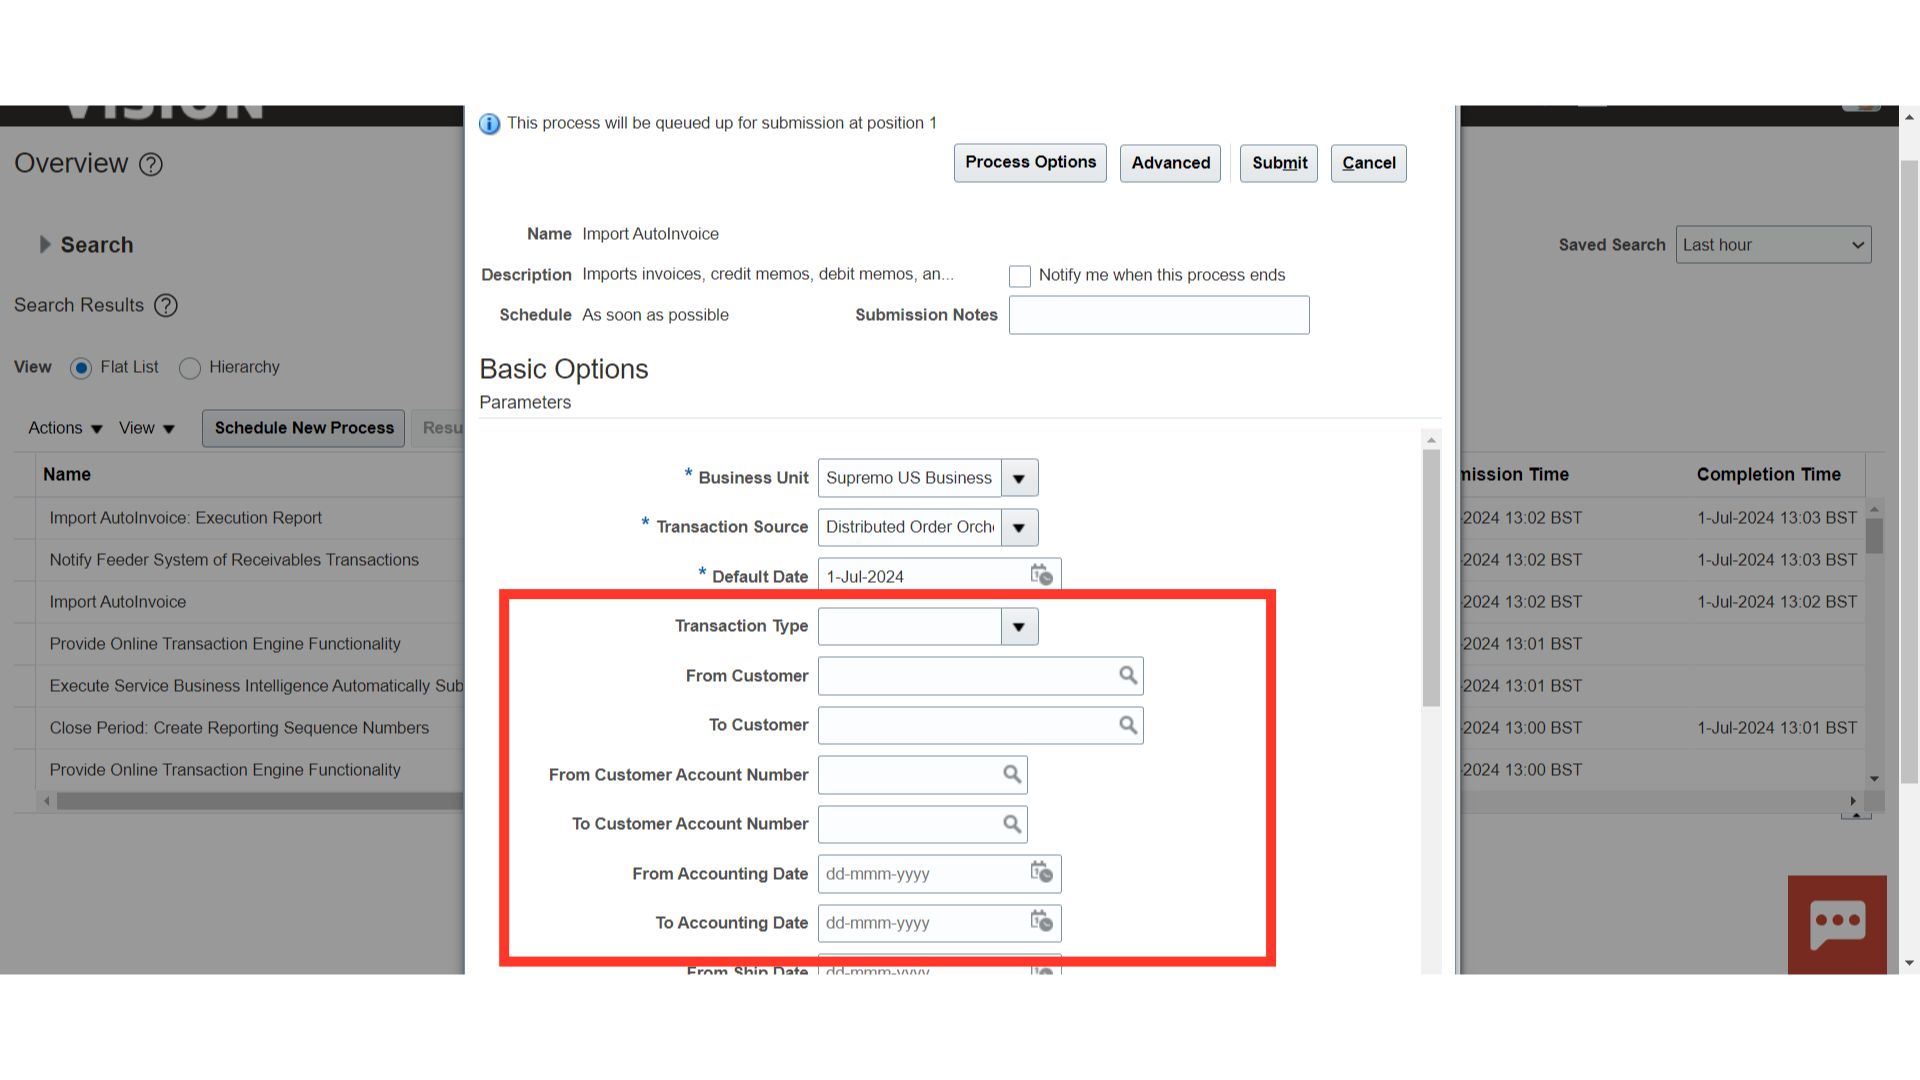
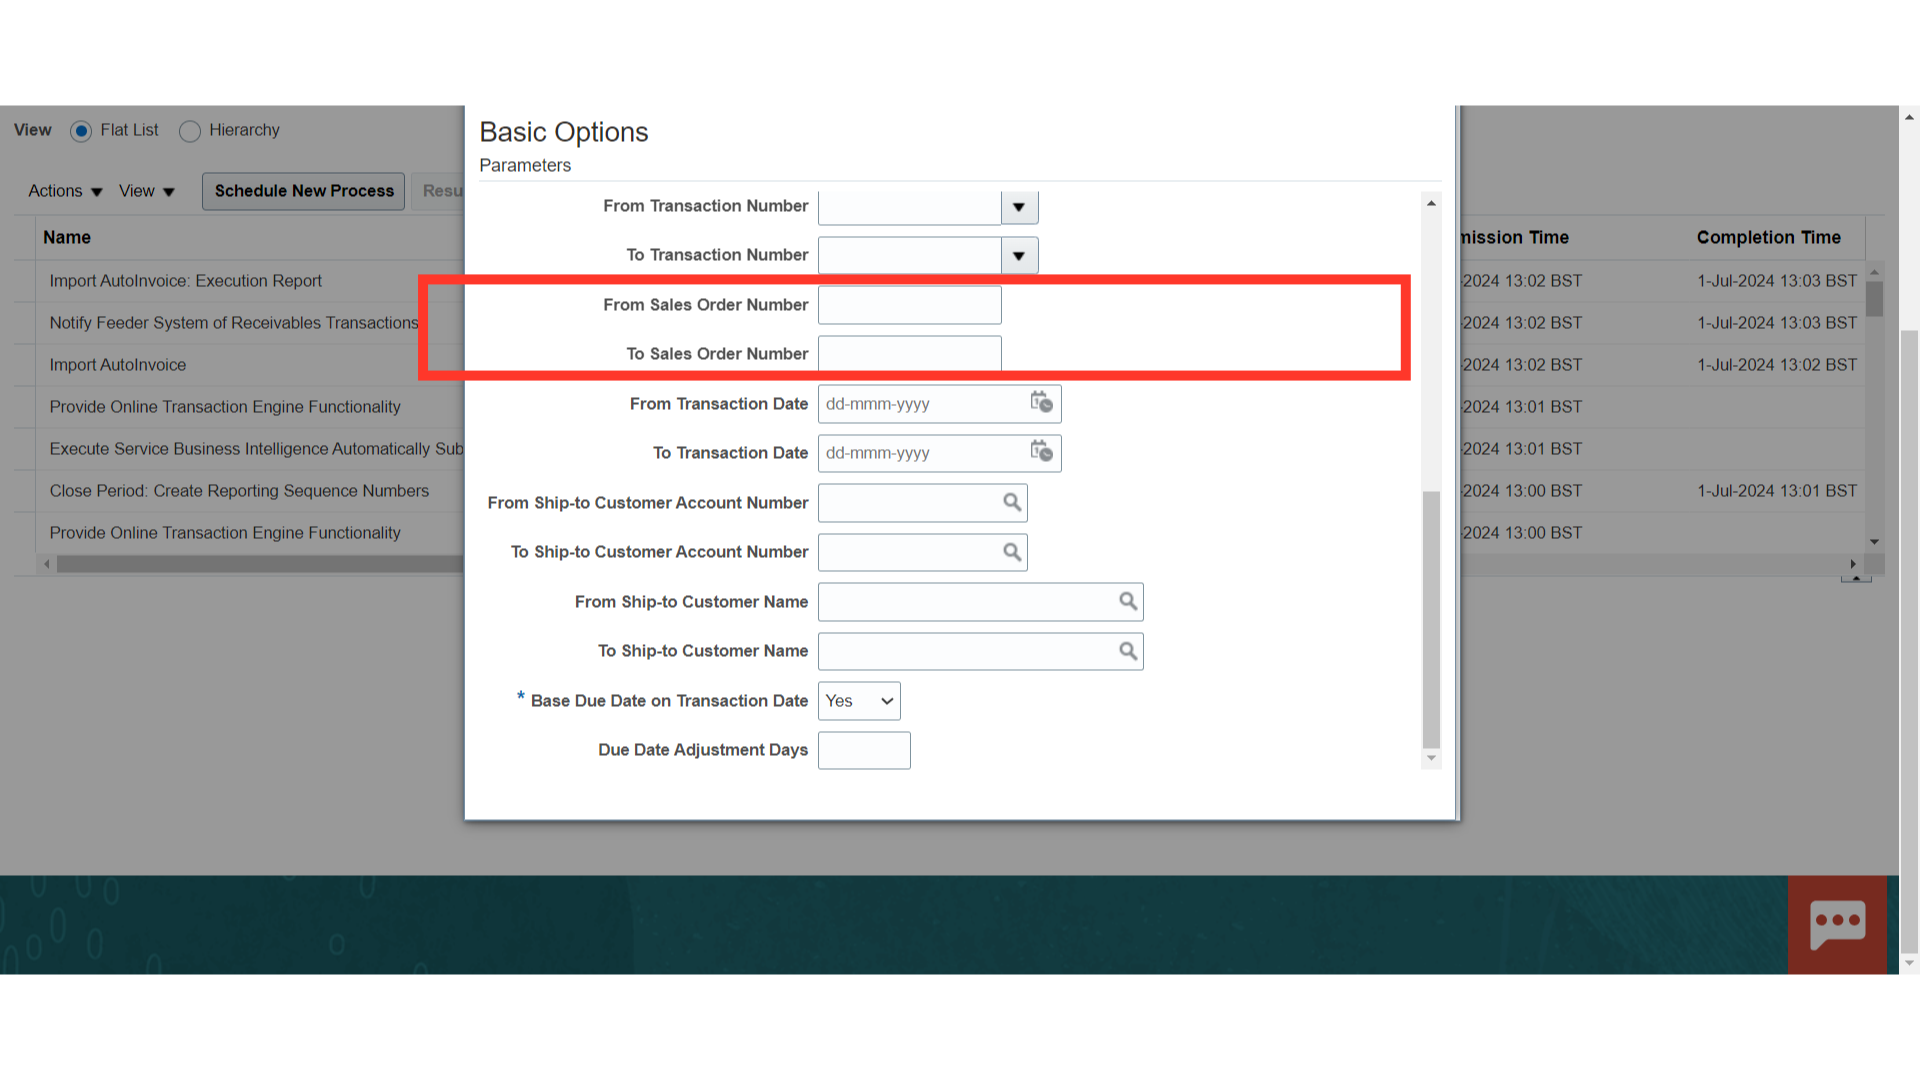
Scroll down, The Sales order number range can be entered to create the Transactions against specific sales orders.
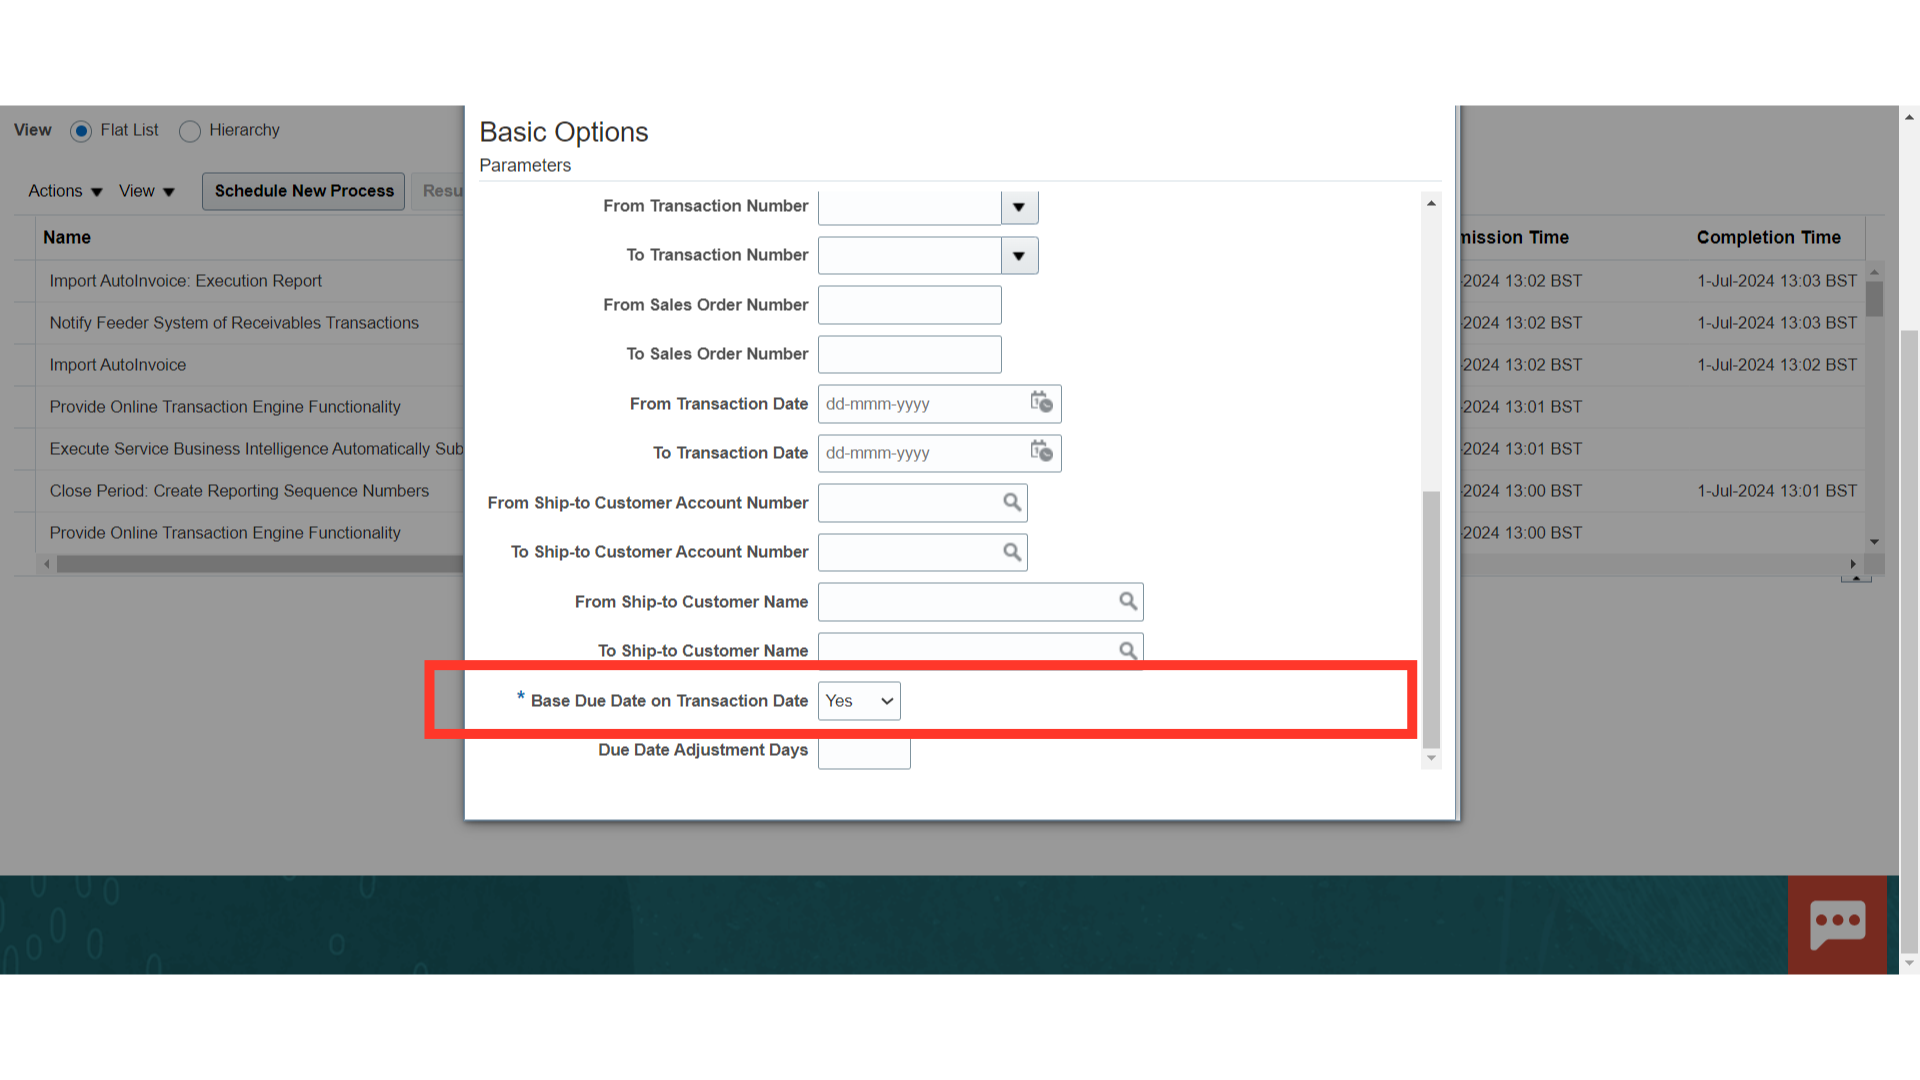
Choose whether to Base the Due Date on the Transaction Date. If Selected as Yes, then AutoInvoice derives the due date for each transaction based on the transaction date. If Selected No, then AutoInvoice looks at the setting of the Derive Date option for the transaction’s batch source to derive the due date: If Derive Date is No, then AutoInvoice uses either the rule start date, the transaction date, or the Default Date that you specified for this submission. If Derive Date is Yes, then AutoInvoice uses the same derivation logic that it uses to determine the GL date.
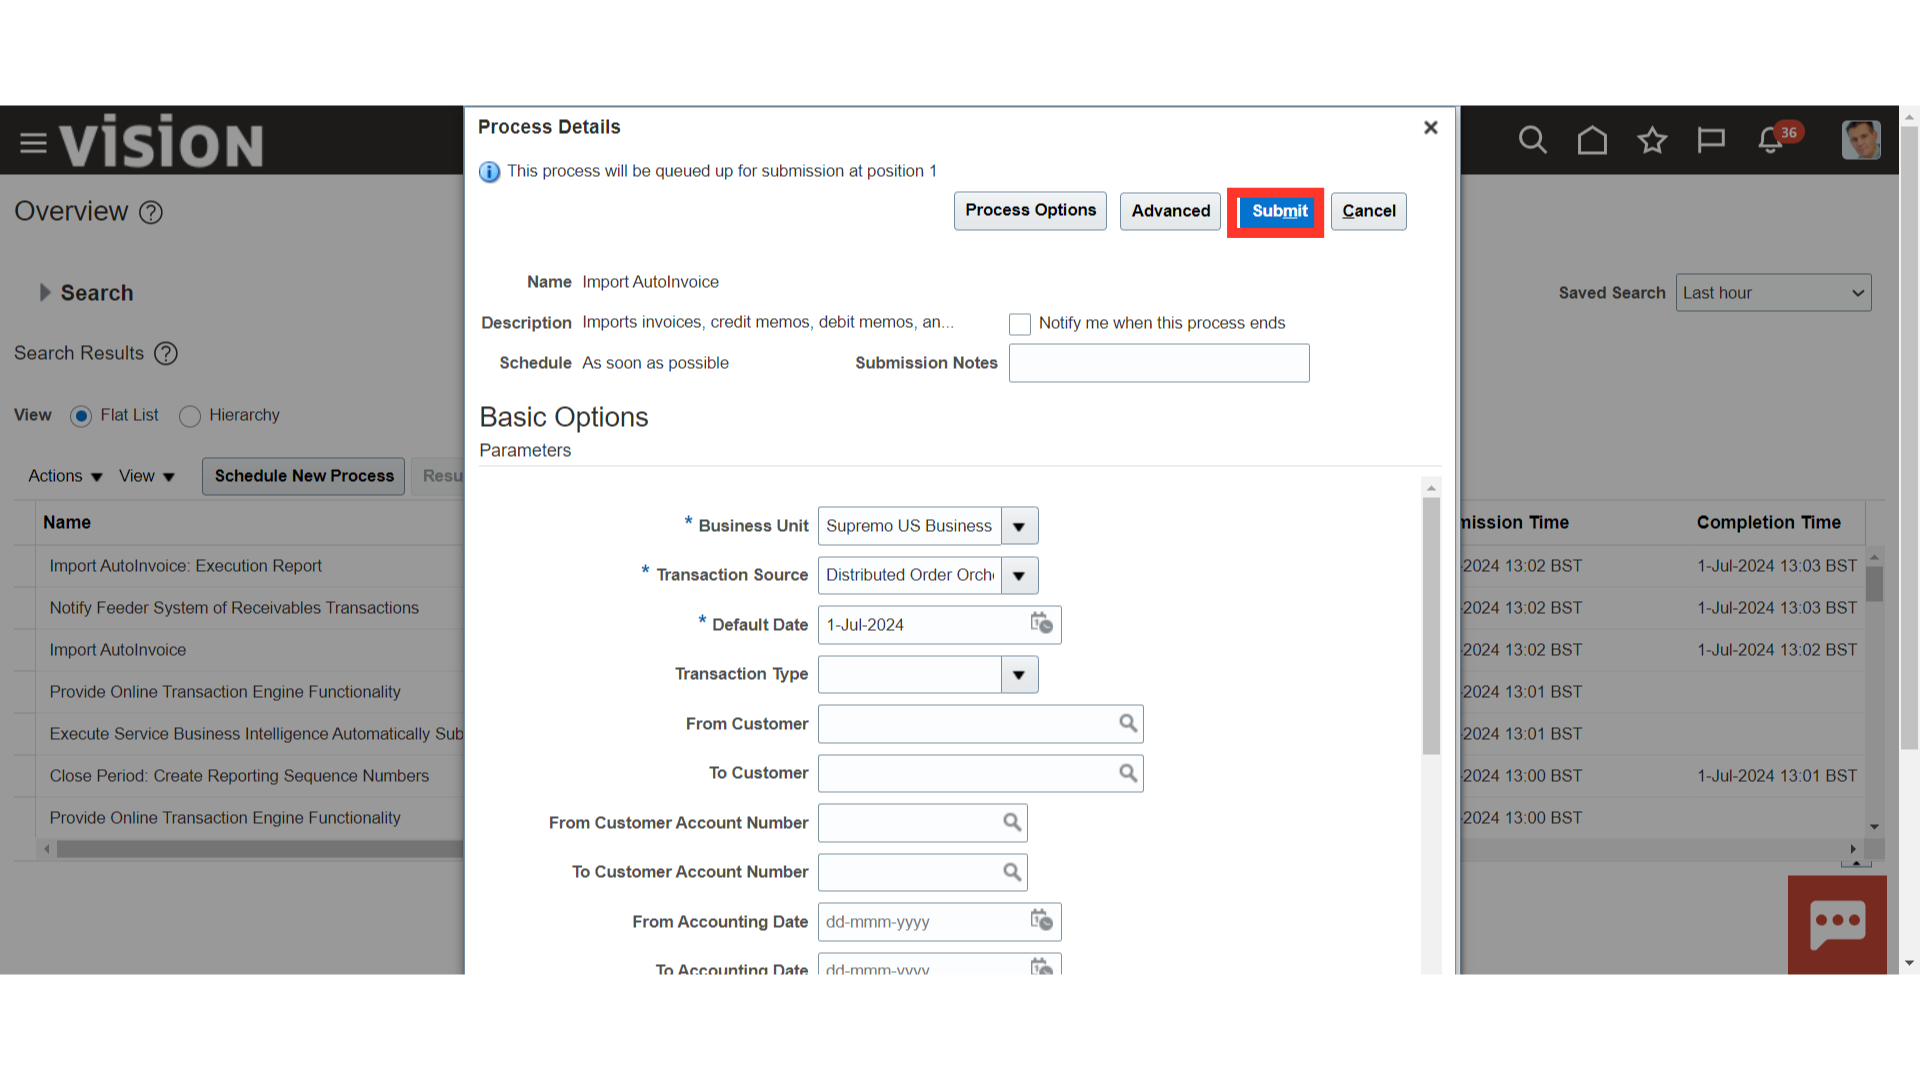
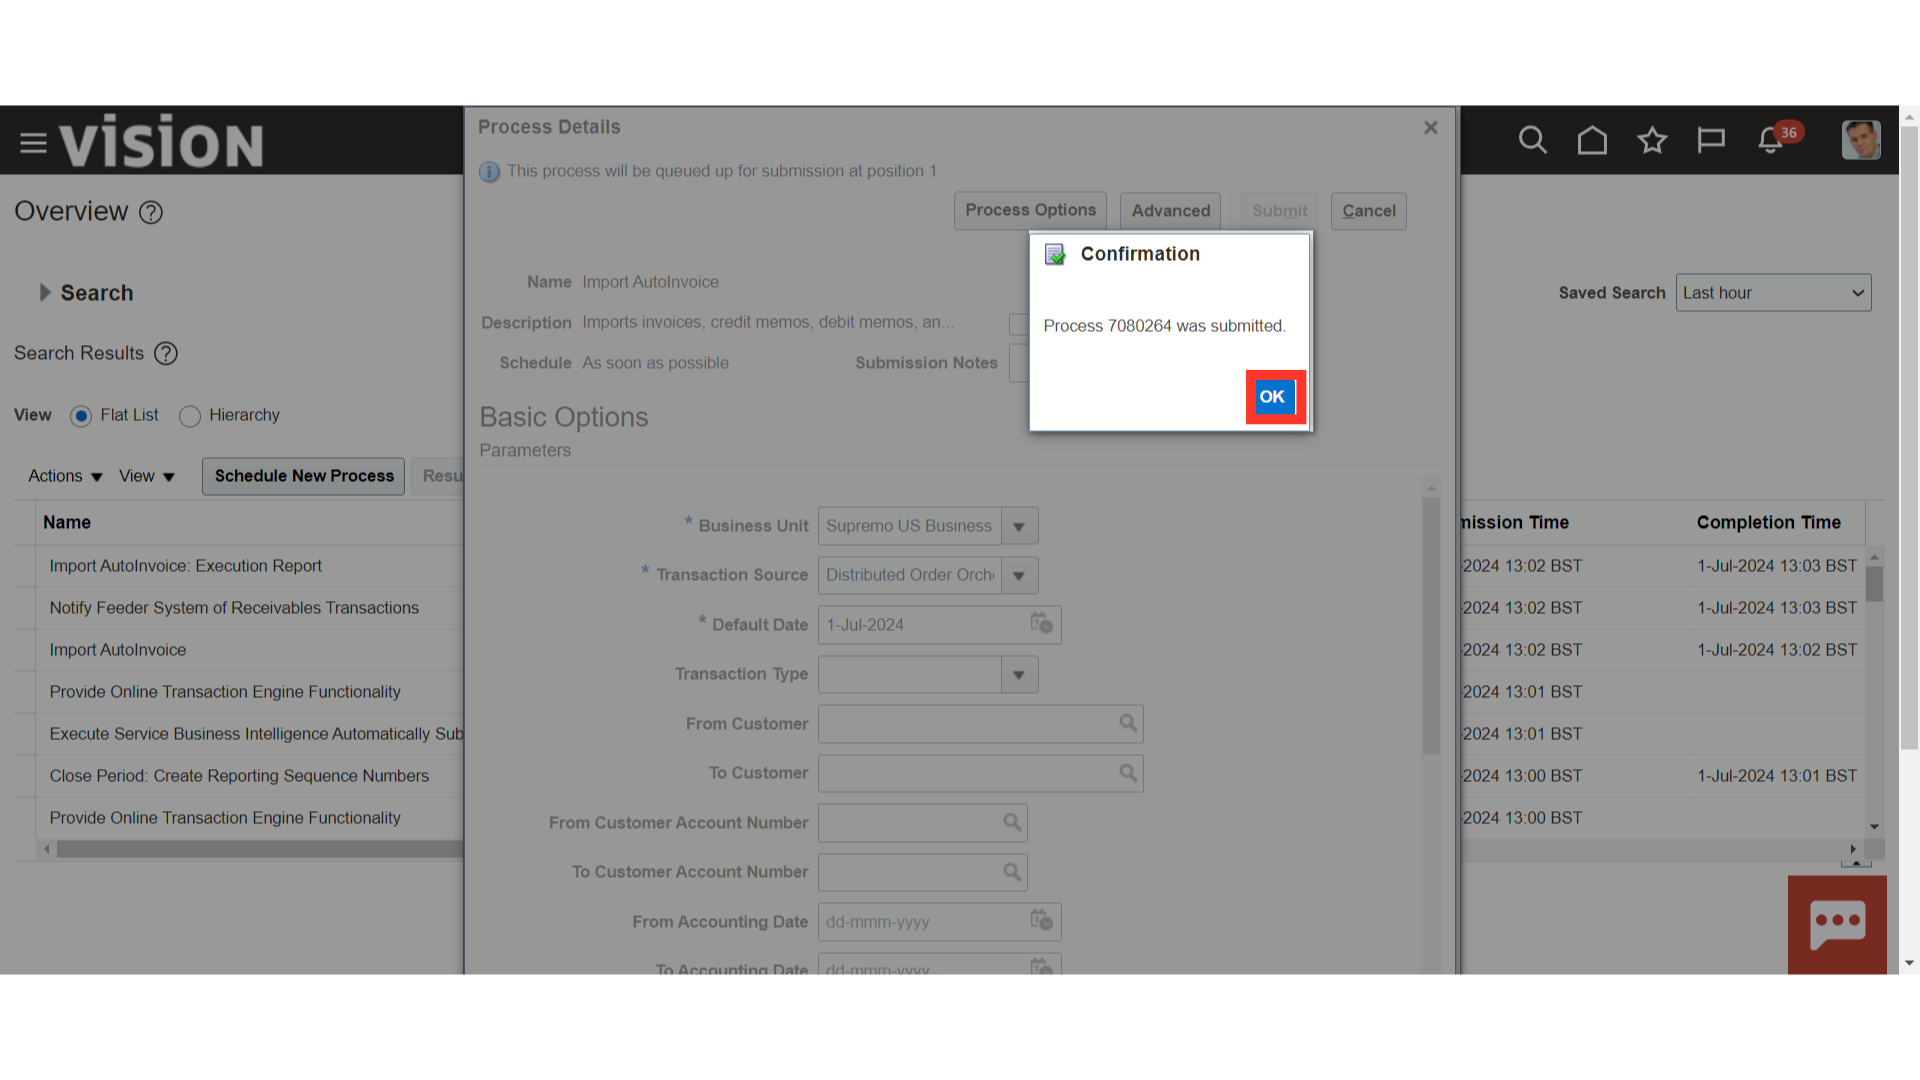
Once all the parameters verified, click on the Submit to run the process.
A confirmation message is displayed along with the Process ID, click on the OK button to continue.
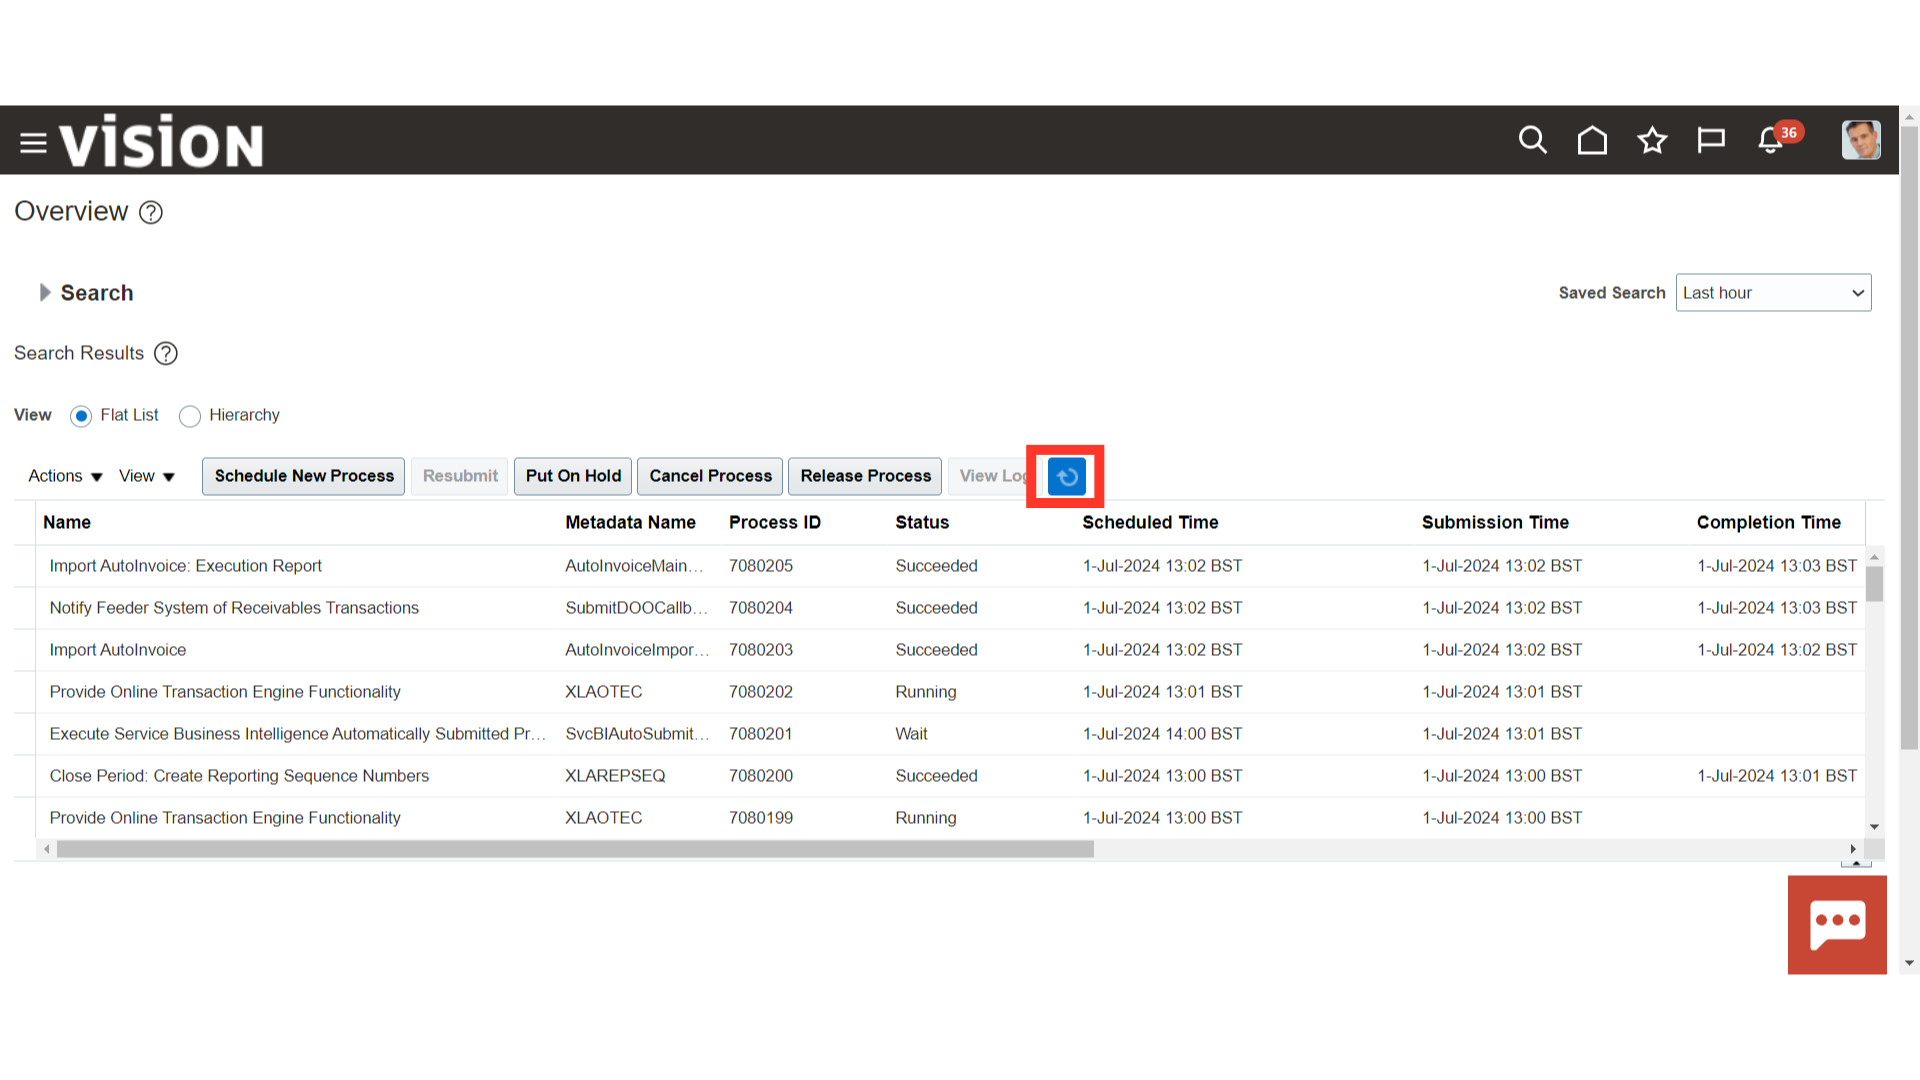
Check the status of the process and its child process. It should be Succeeded.
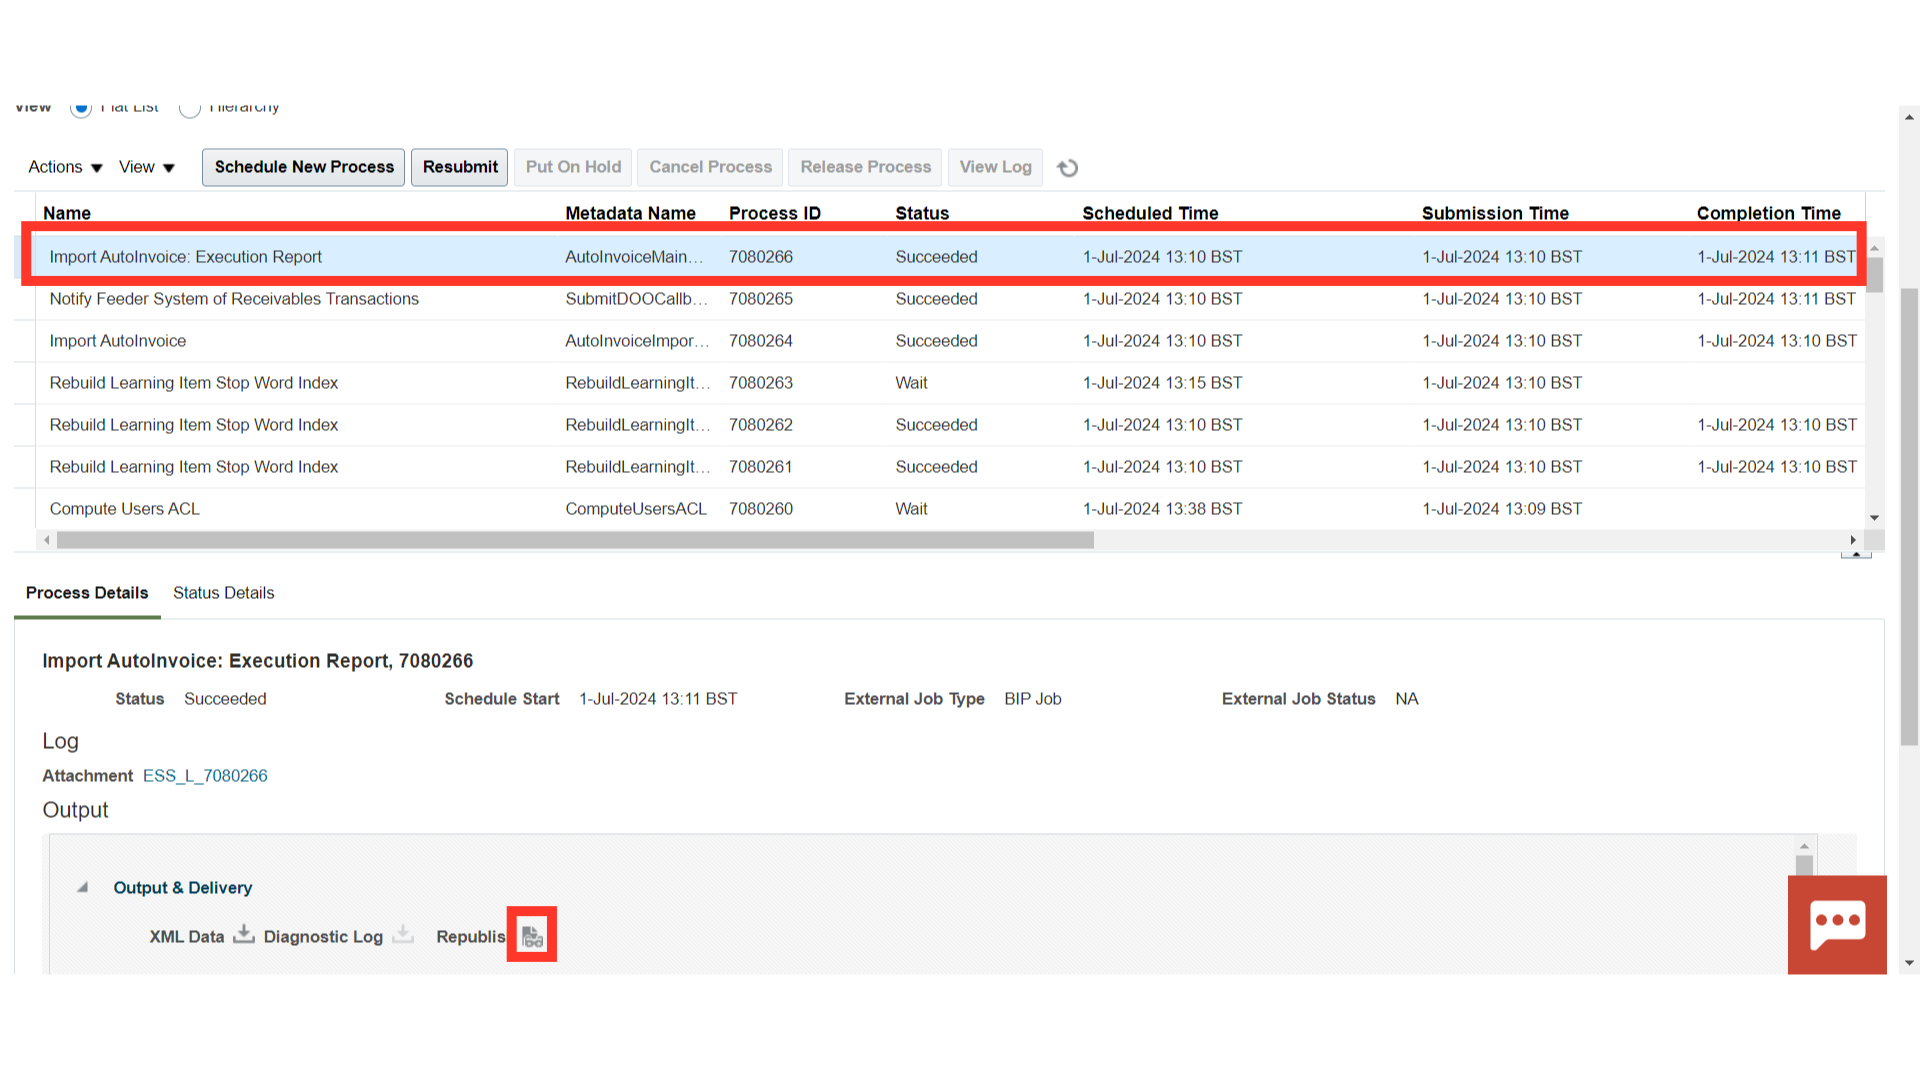
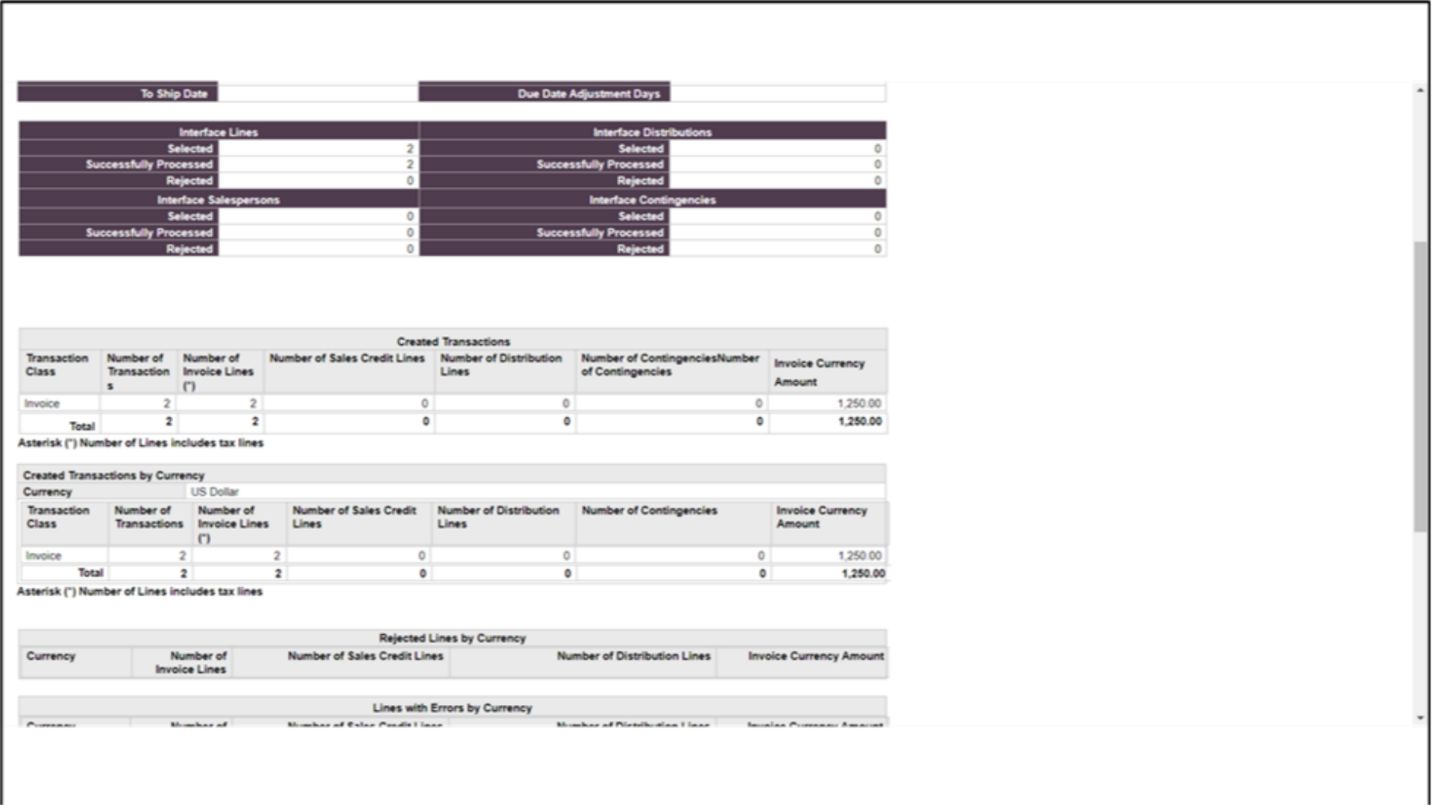
After the Import AutoInvoice process is completed successfully, there will be a process that would have run which is the ‘Import AutoInvoice Execution Report’ process. Select that row. Below under the Output Section click on the Republish button as highlighted.
Click on Setting icon > Export > Select the format in which you want to review the data. For Demo purpose HTML is selected.
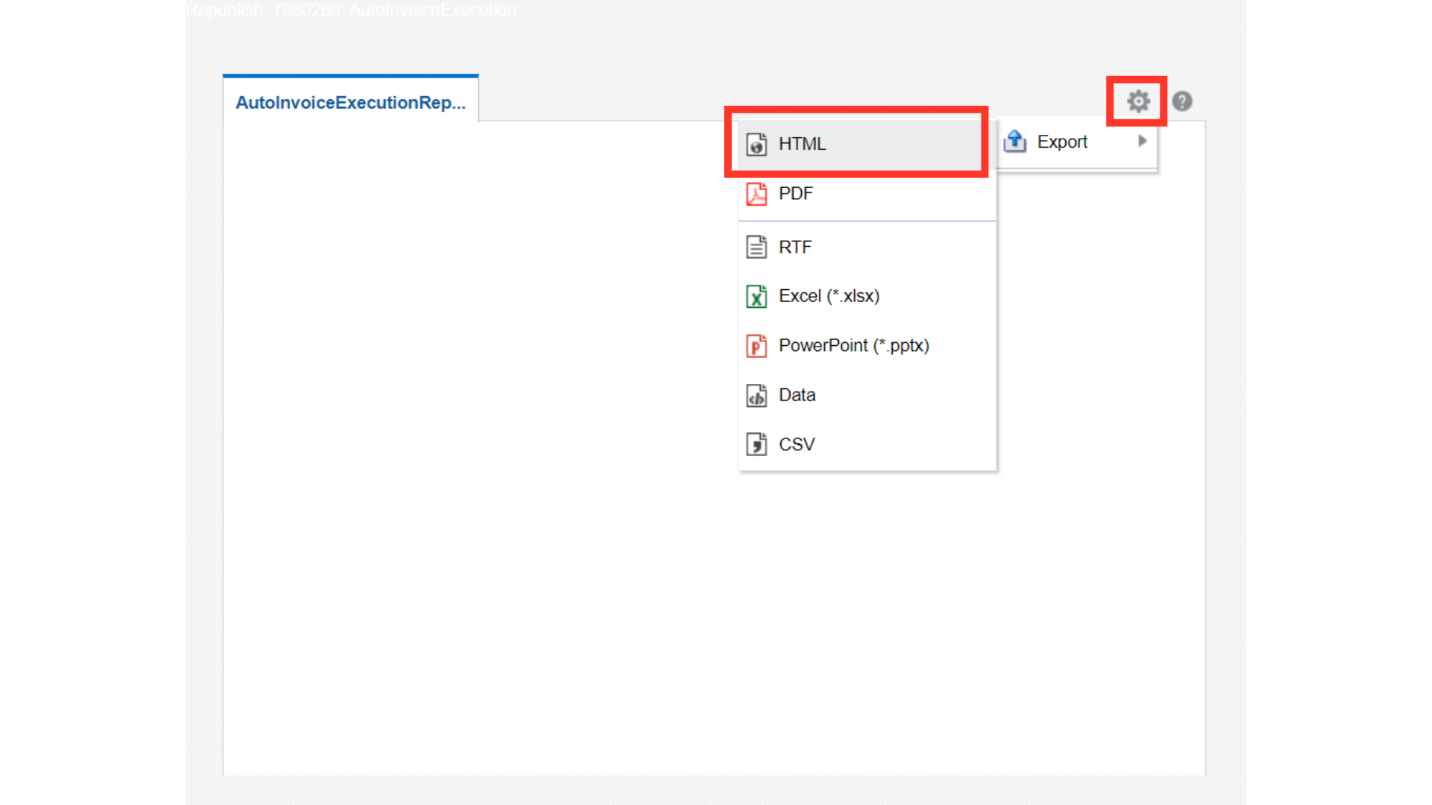
The report will contain all the details of the transaction as to how many got imported successfully and how many of them failed due to various errors.
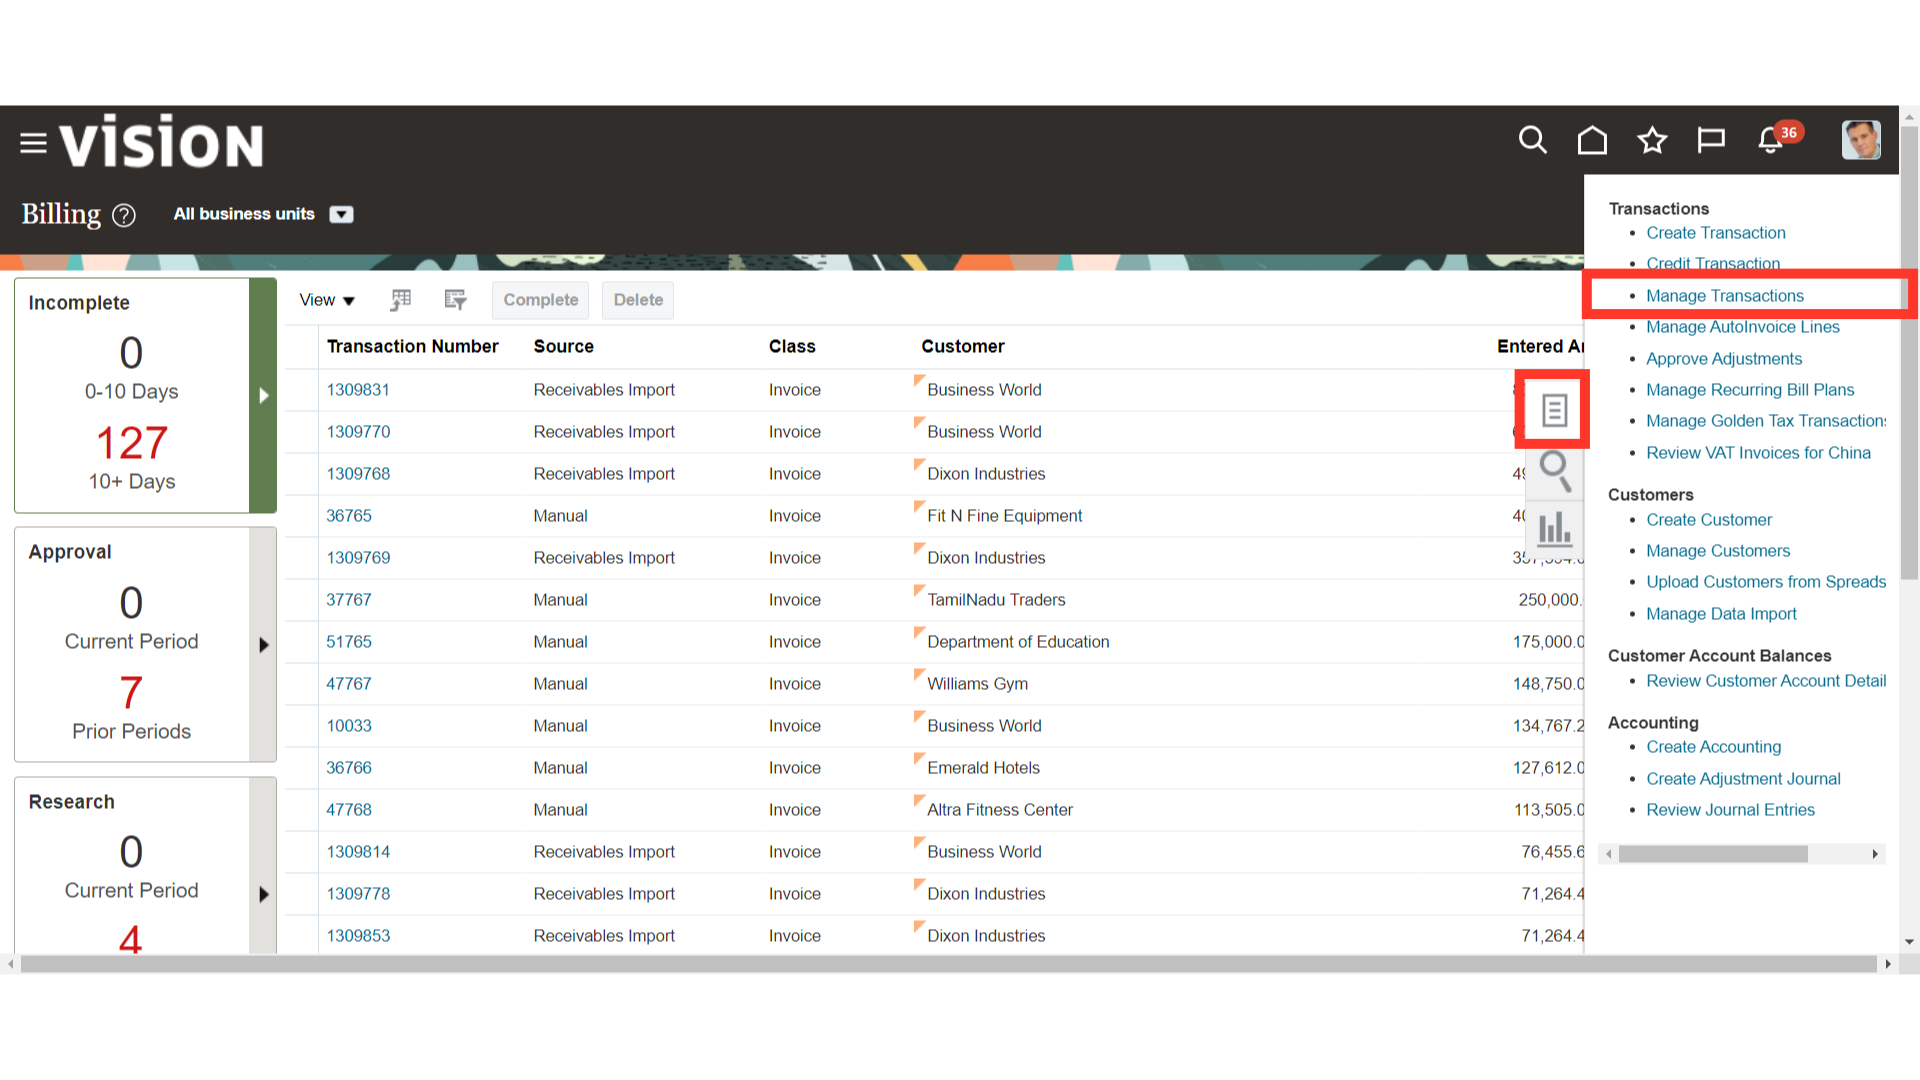
On the Billing work area, click on task > select Manage Transactions from the list.
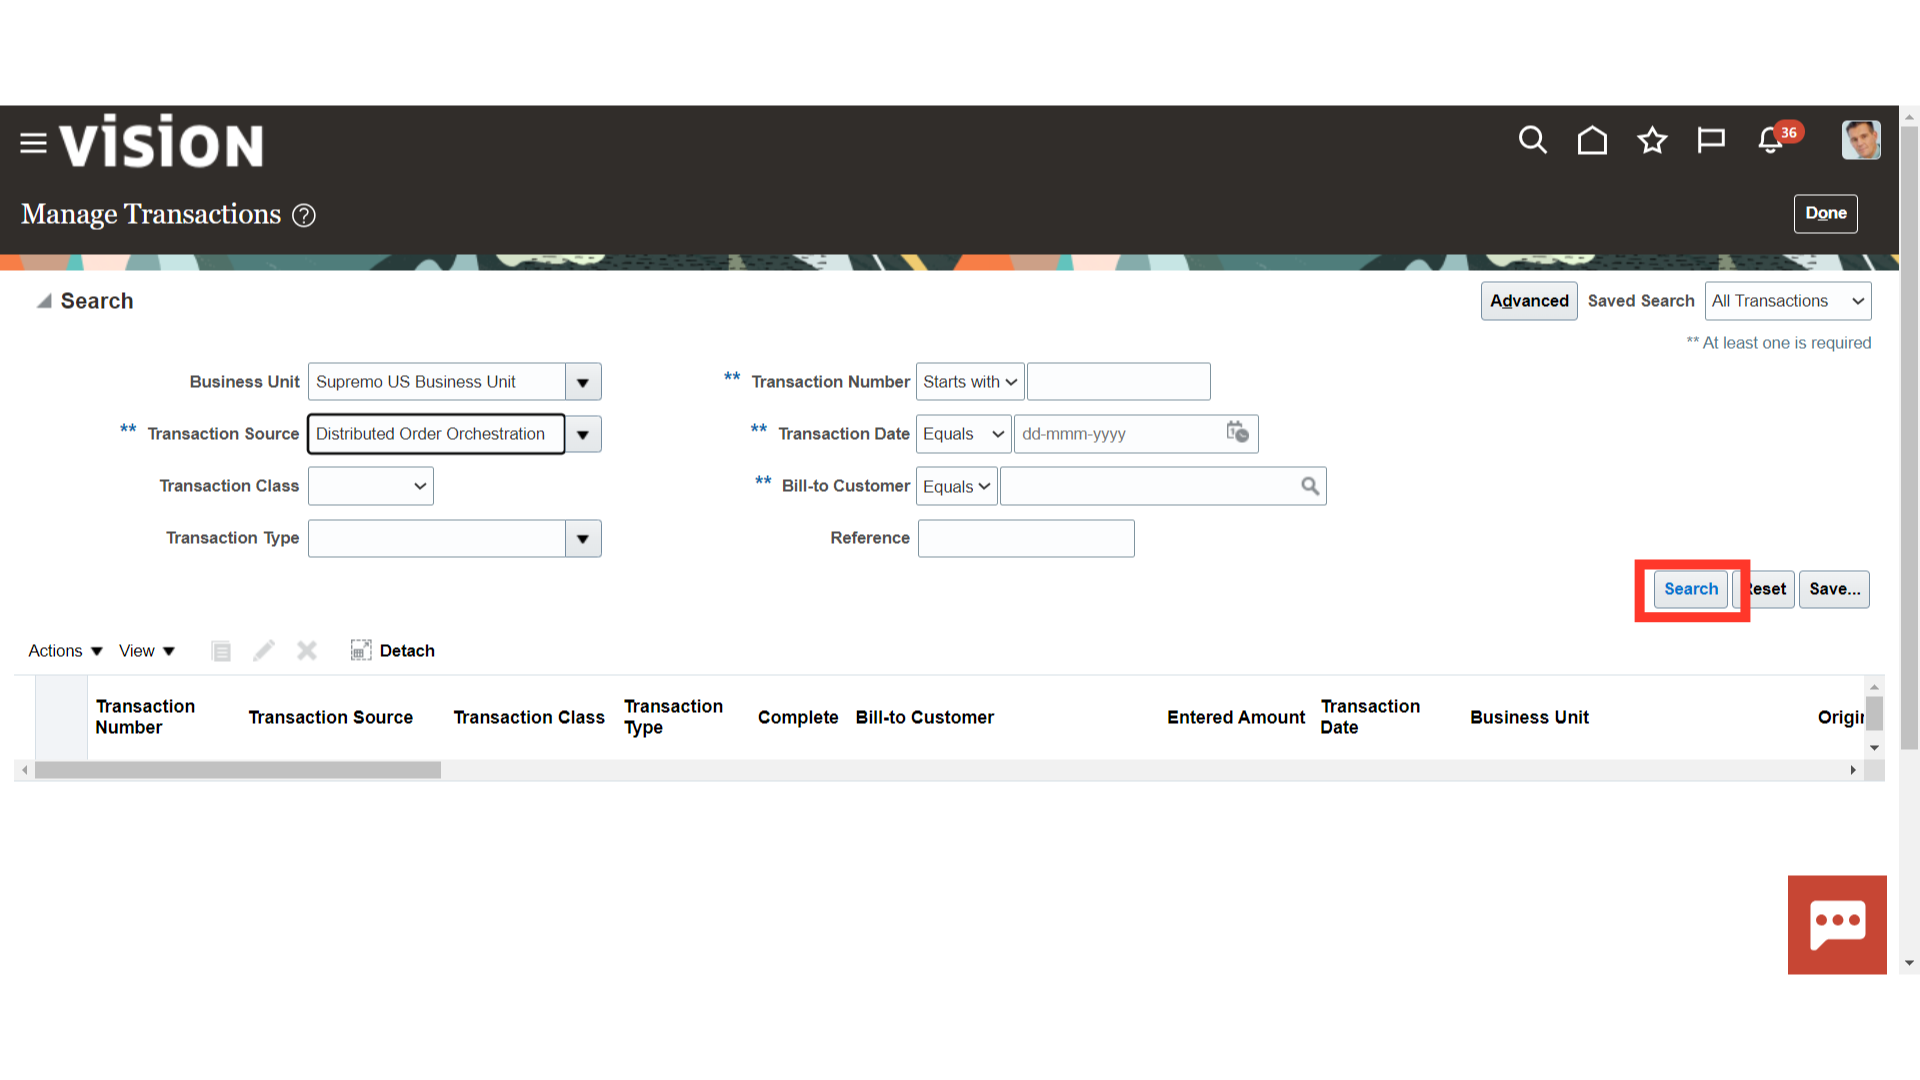
After entering the required search parameters, click on the Search button.
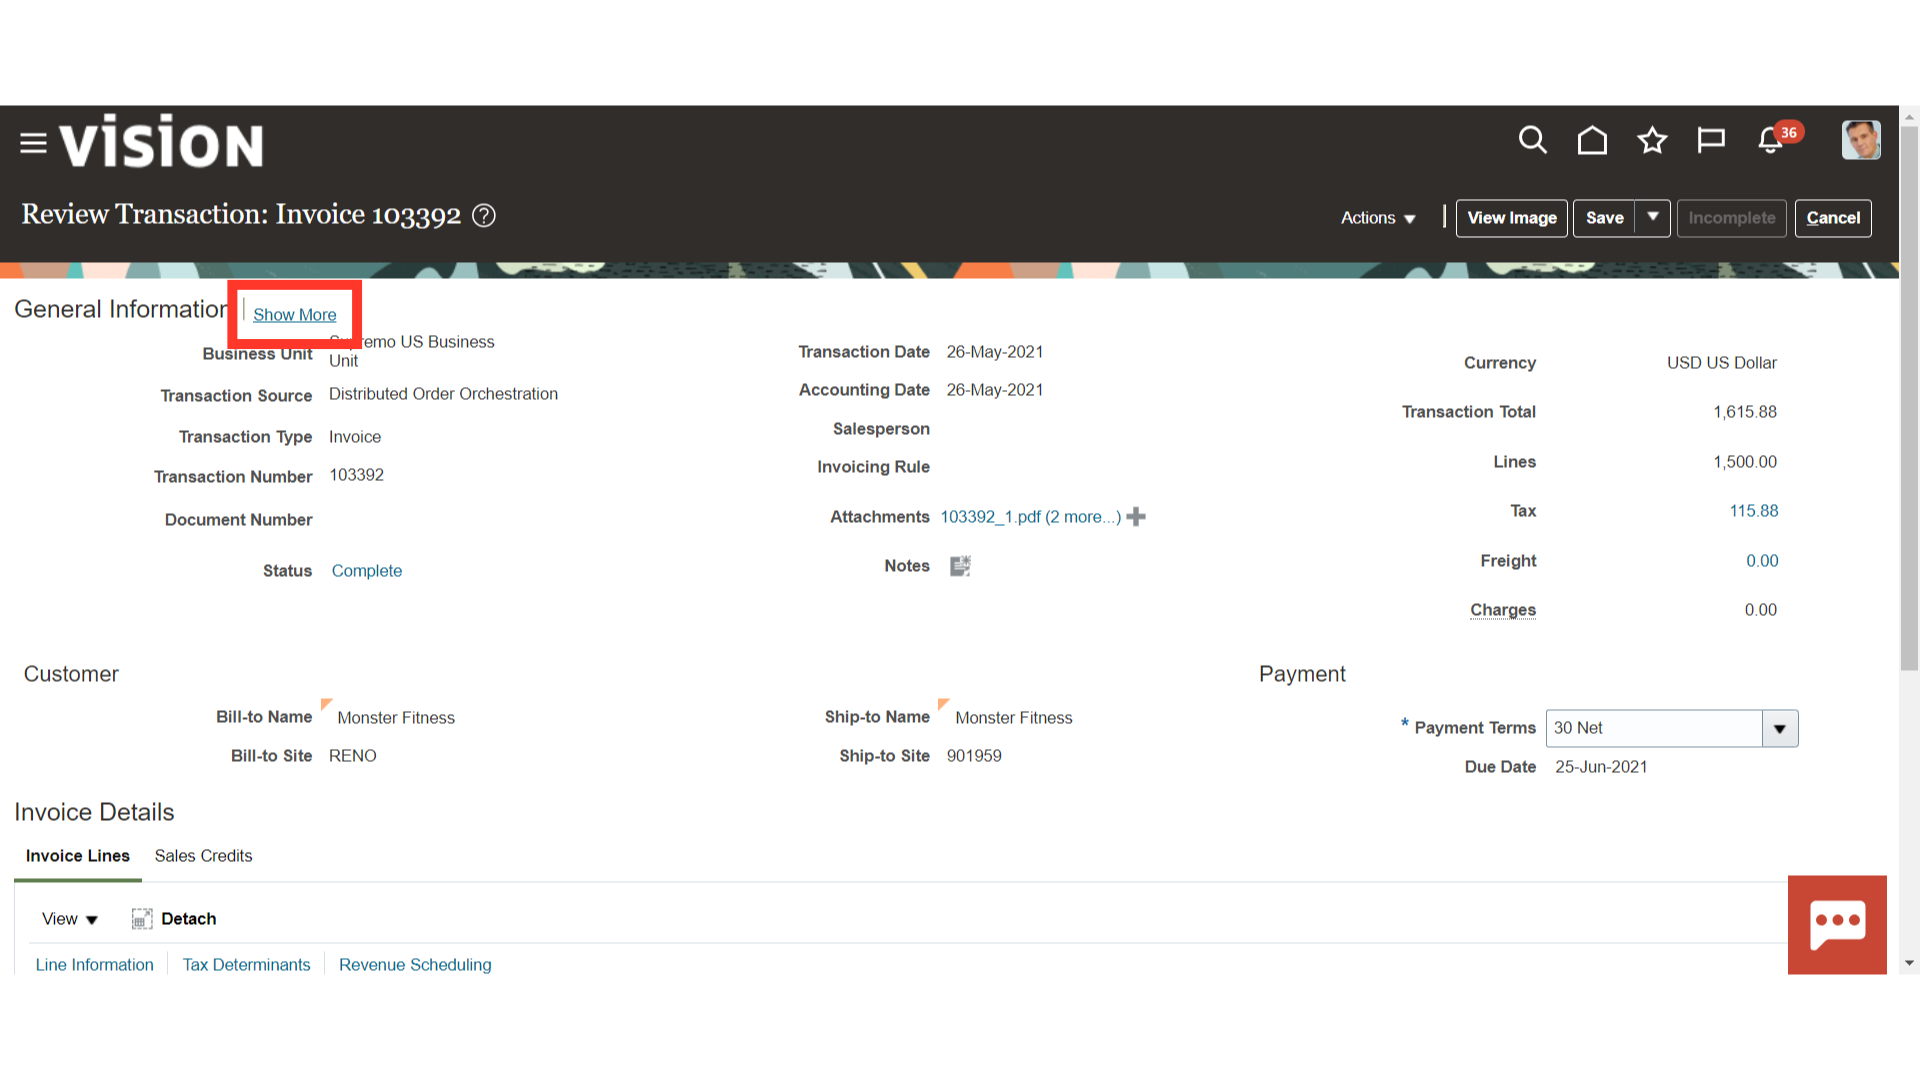
To open the transaction, click on the Transaction number hyperlink.

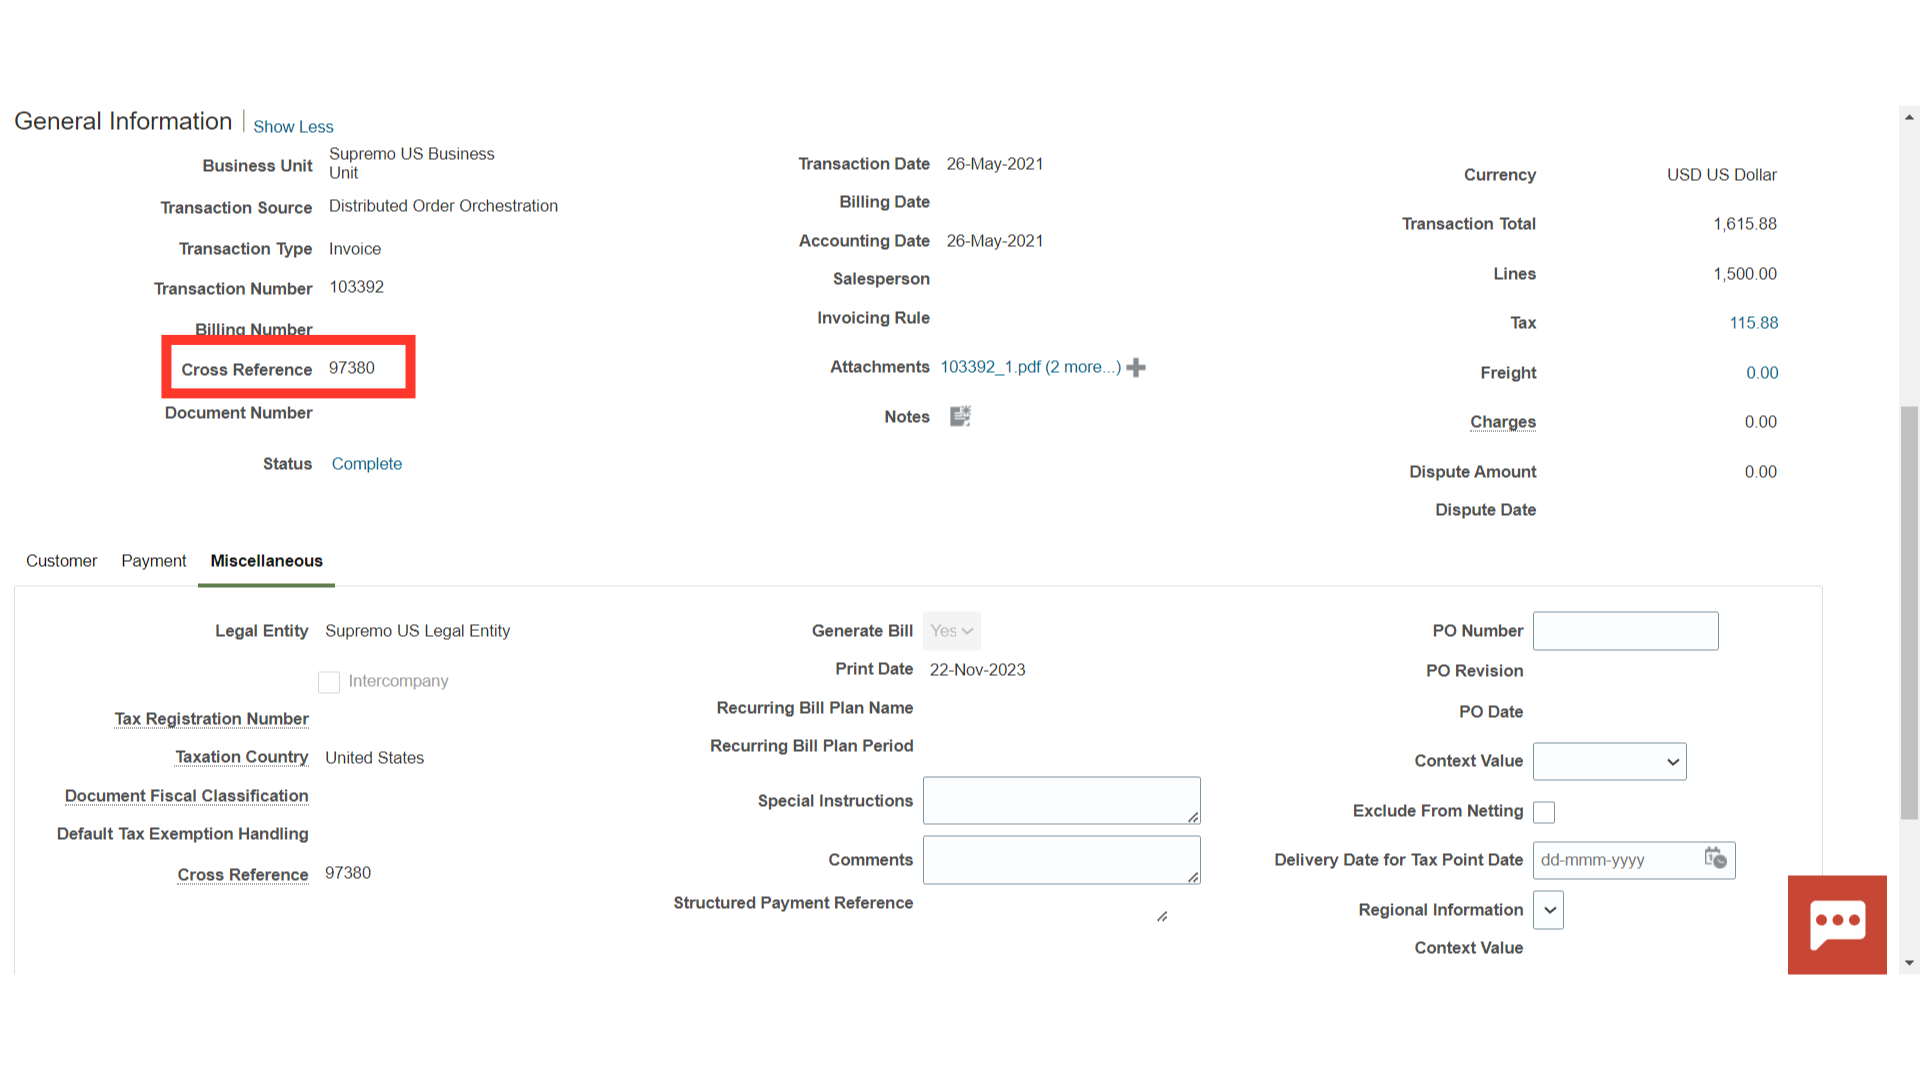
Click on the Show More hyperlink, to see the sales order details at the Transaction header level.
In the Cross Reference field, the sales order number is stored.
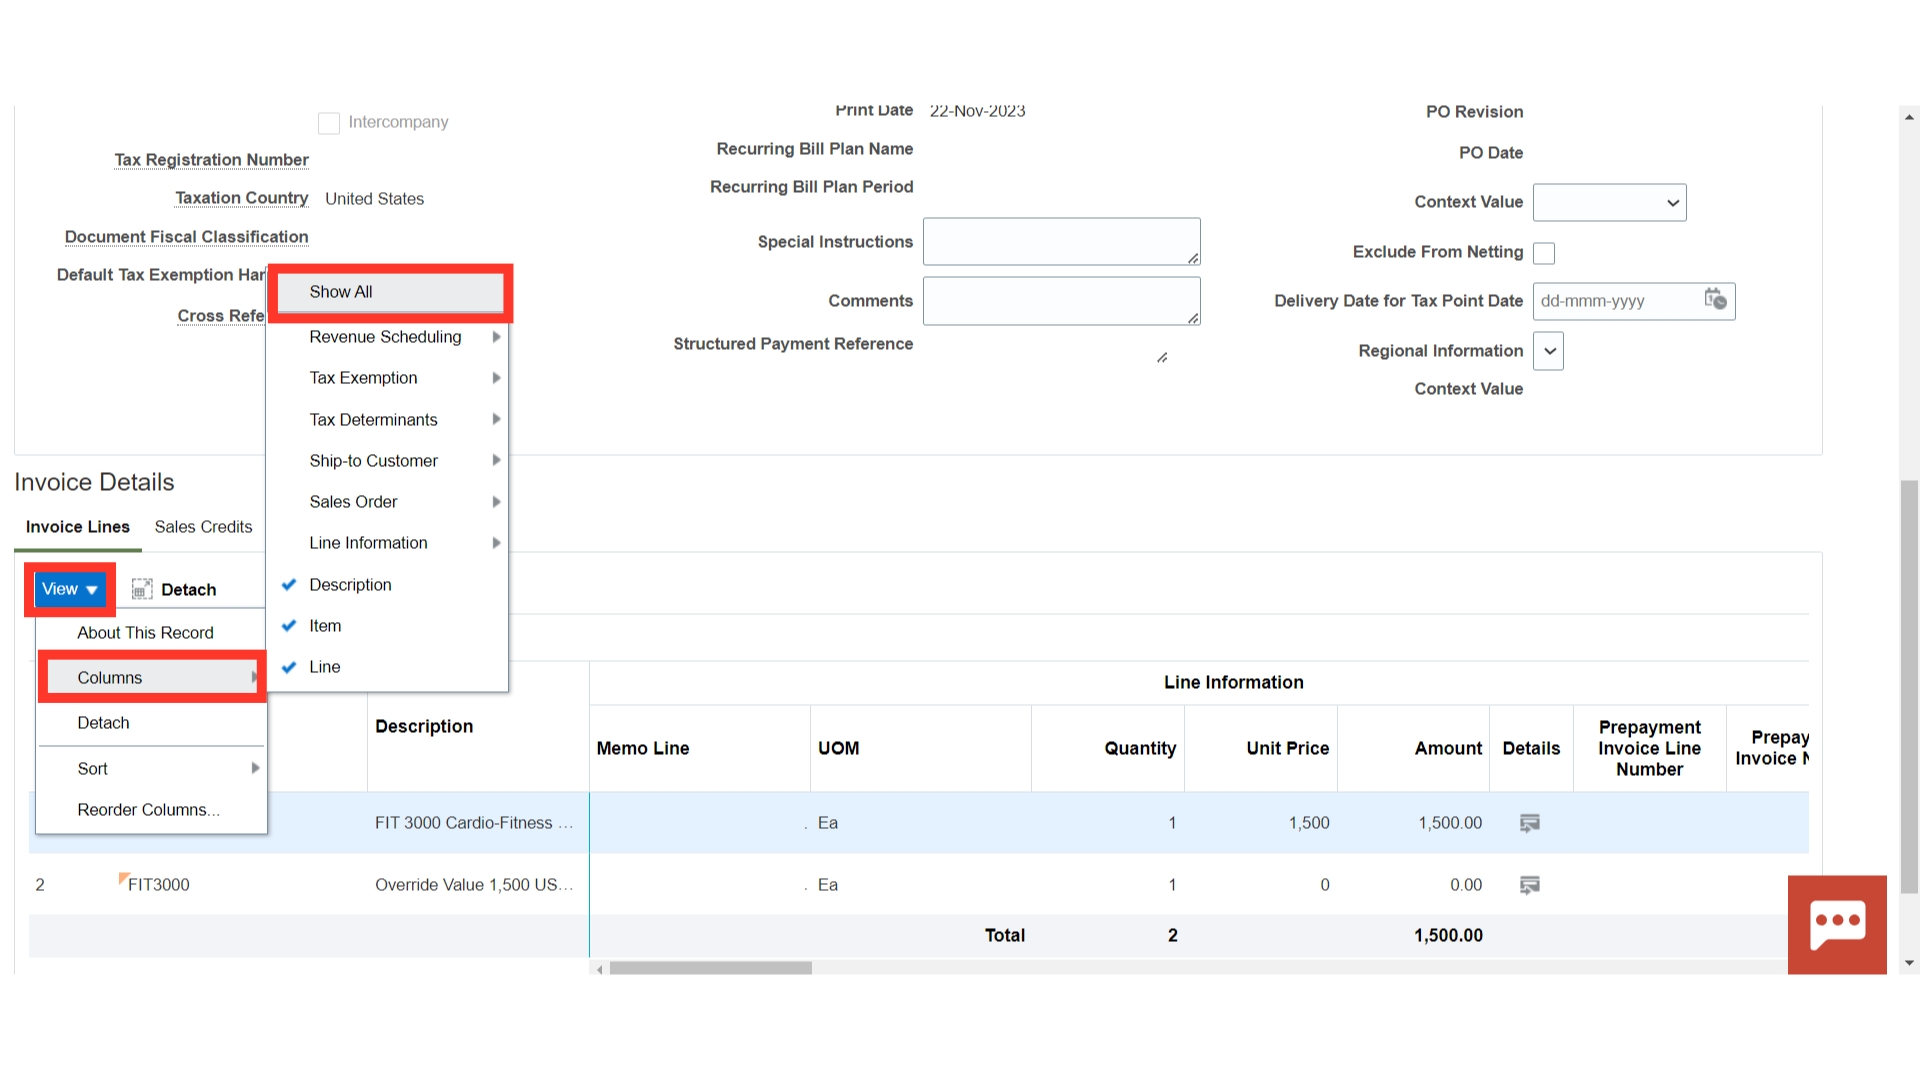
Select “Show All” by expanding the Column under View tab to show all the column details.
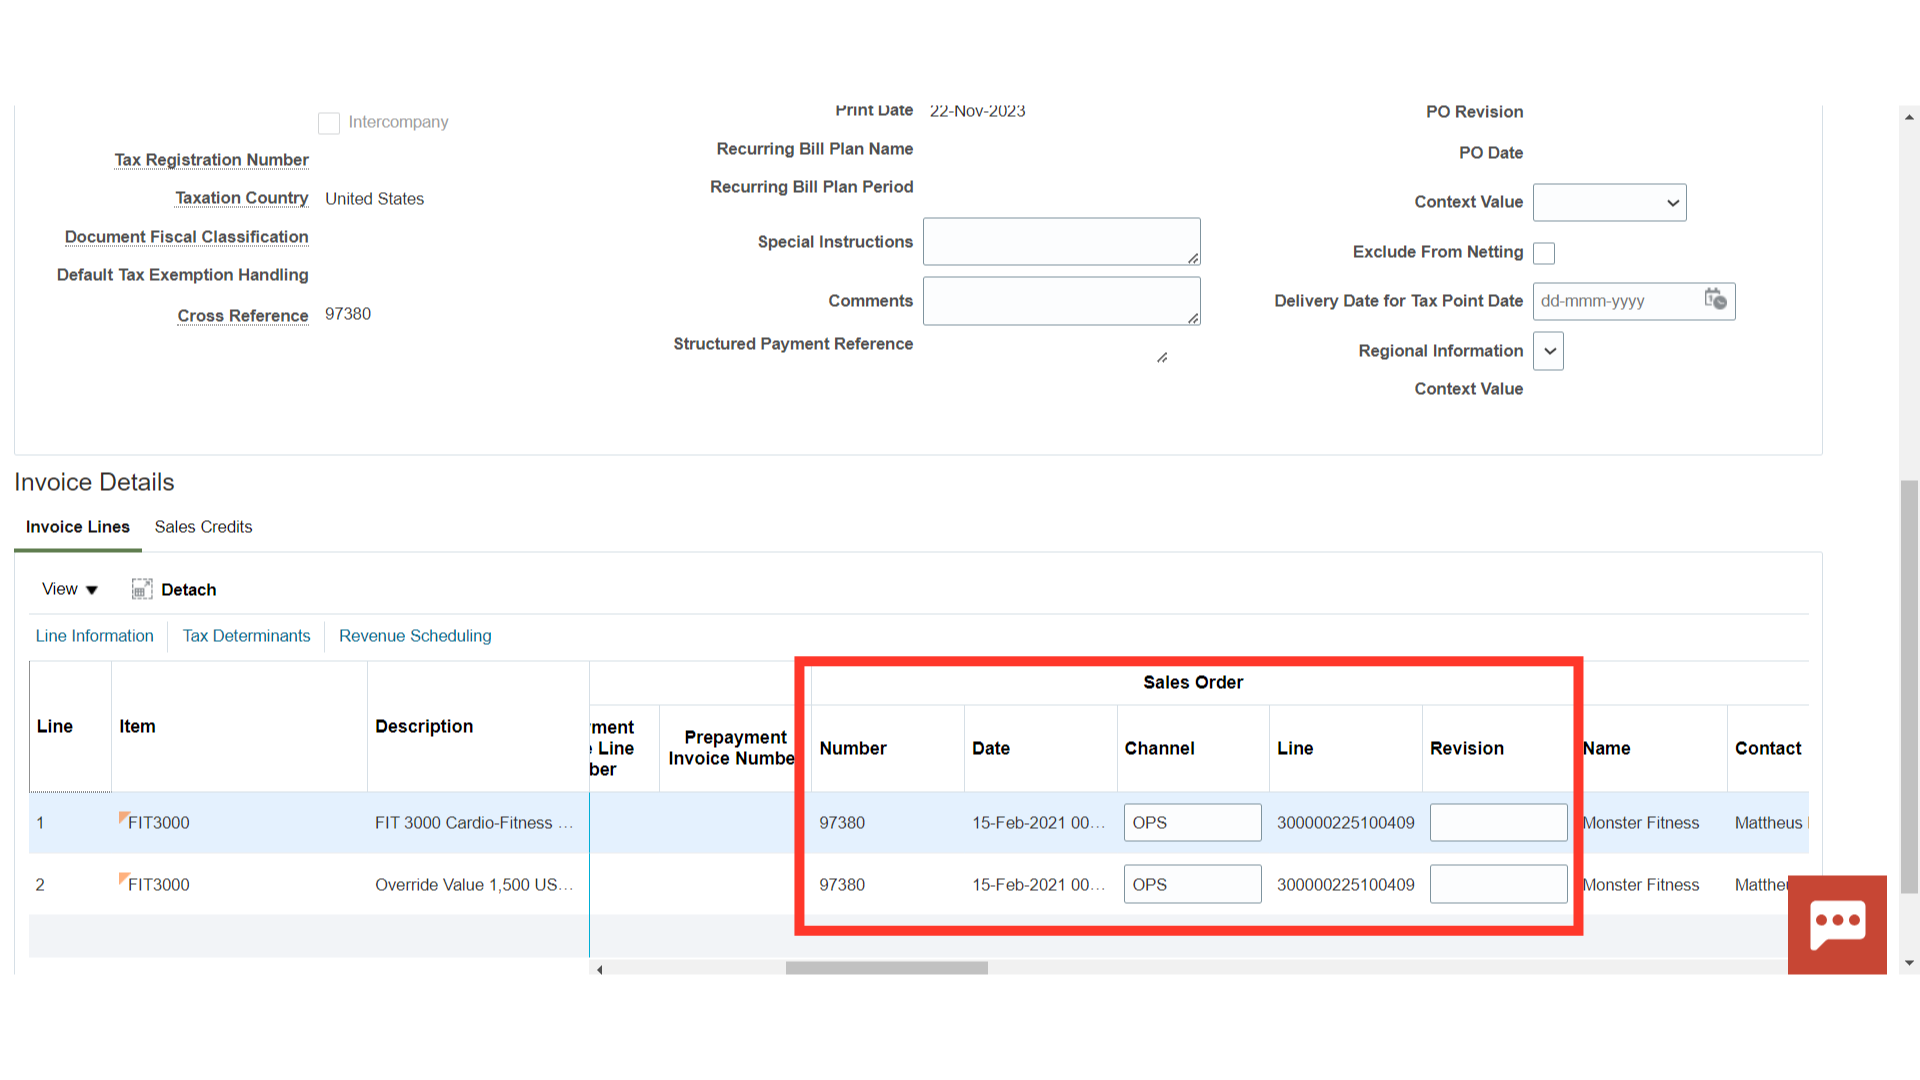
Under the Sales order section, all the details such as order number, order date, line details, etc are displayed. After verifying all the details, click on the Cancel button at the invoice header level to close this window.
In order to import Receivables Transactions from Order Management, follow the comprehensive instructions in this guide. First, run the Import Autoinvoice process, then check the report to see which transactions were imported successfully and which ones were not. There has also been a demonstration of how to review the transactions from Manage Transactions from Receivables.