Internal Contracts – Add Internal Party Details
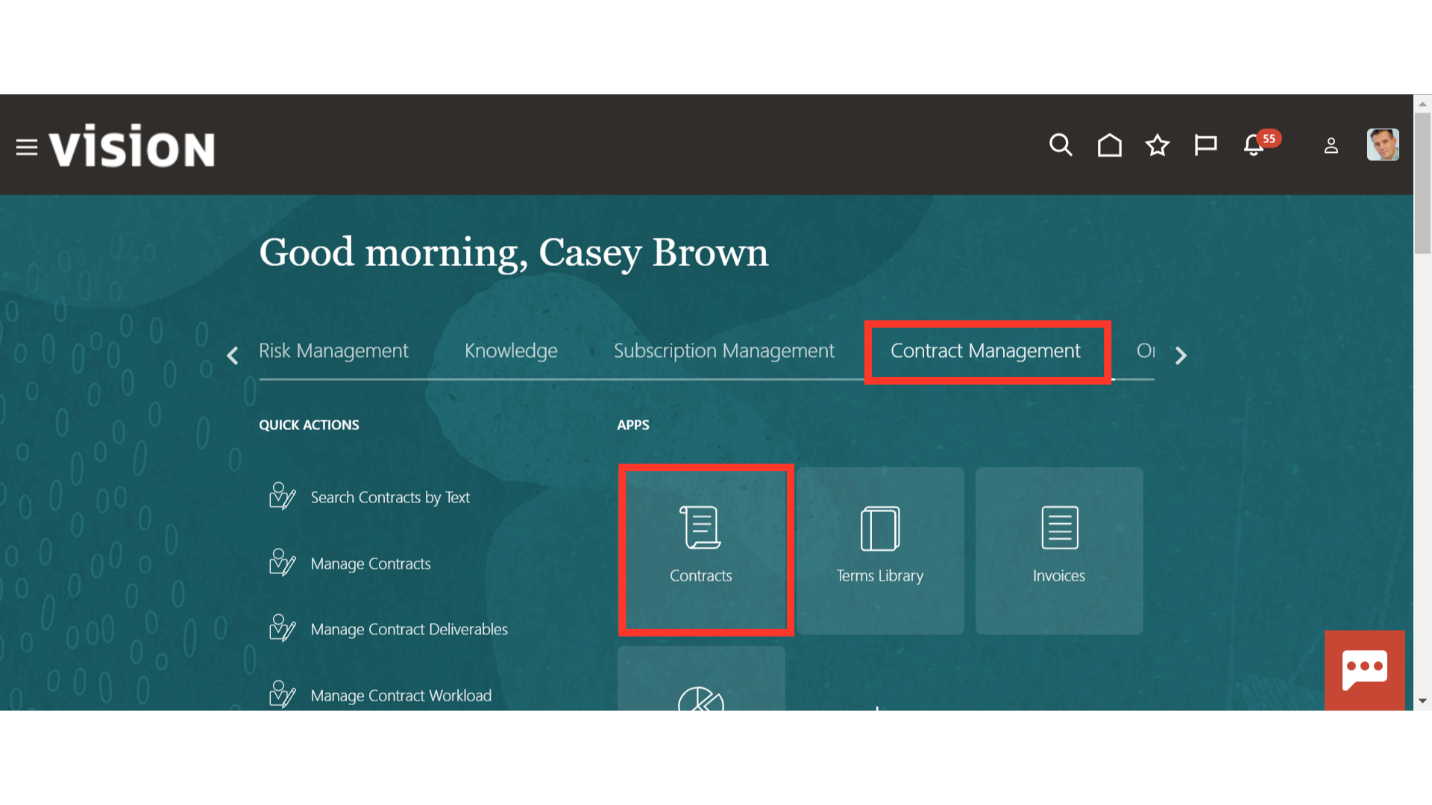
Click on the ‘Contracts’ sub-menu under the ‘Contract Management’ menu from the Oracle home page.
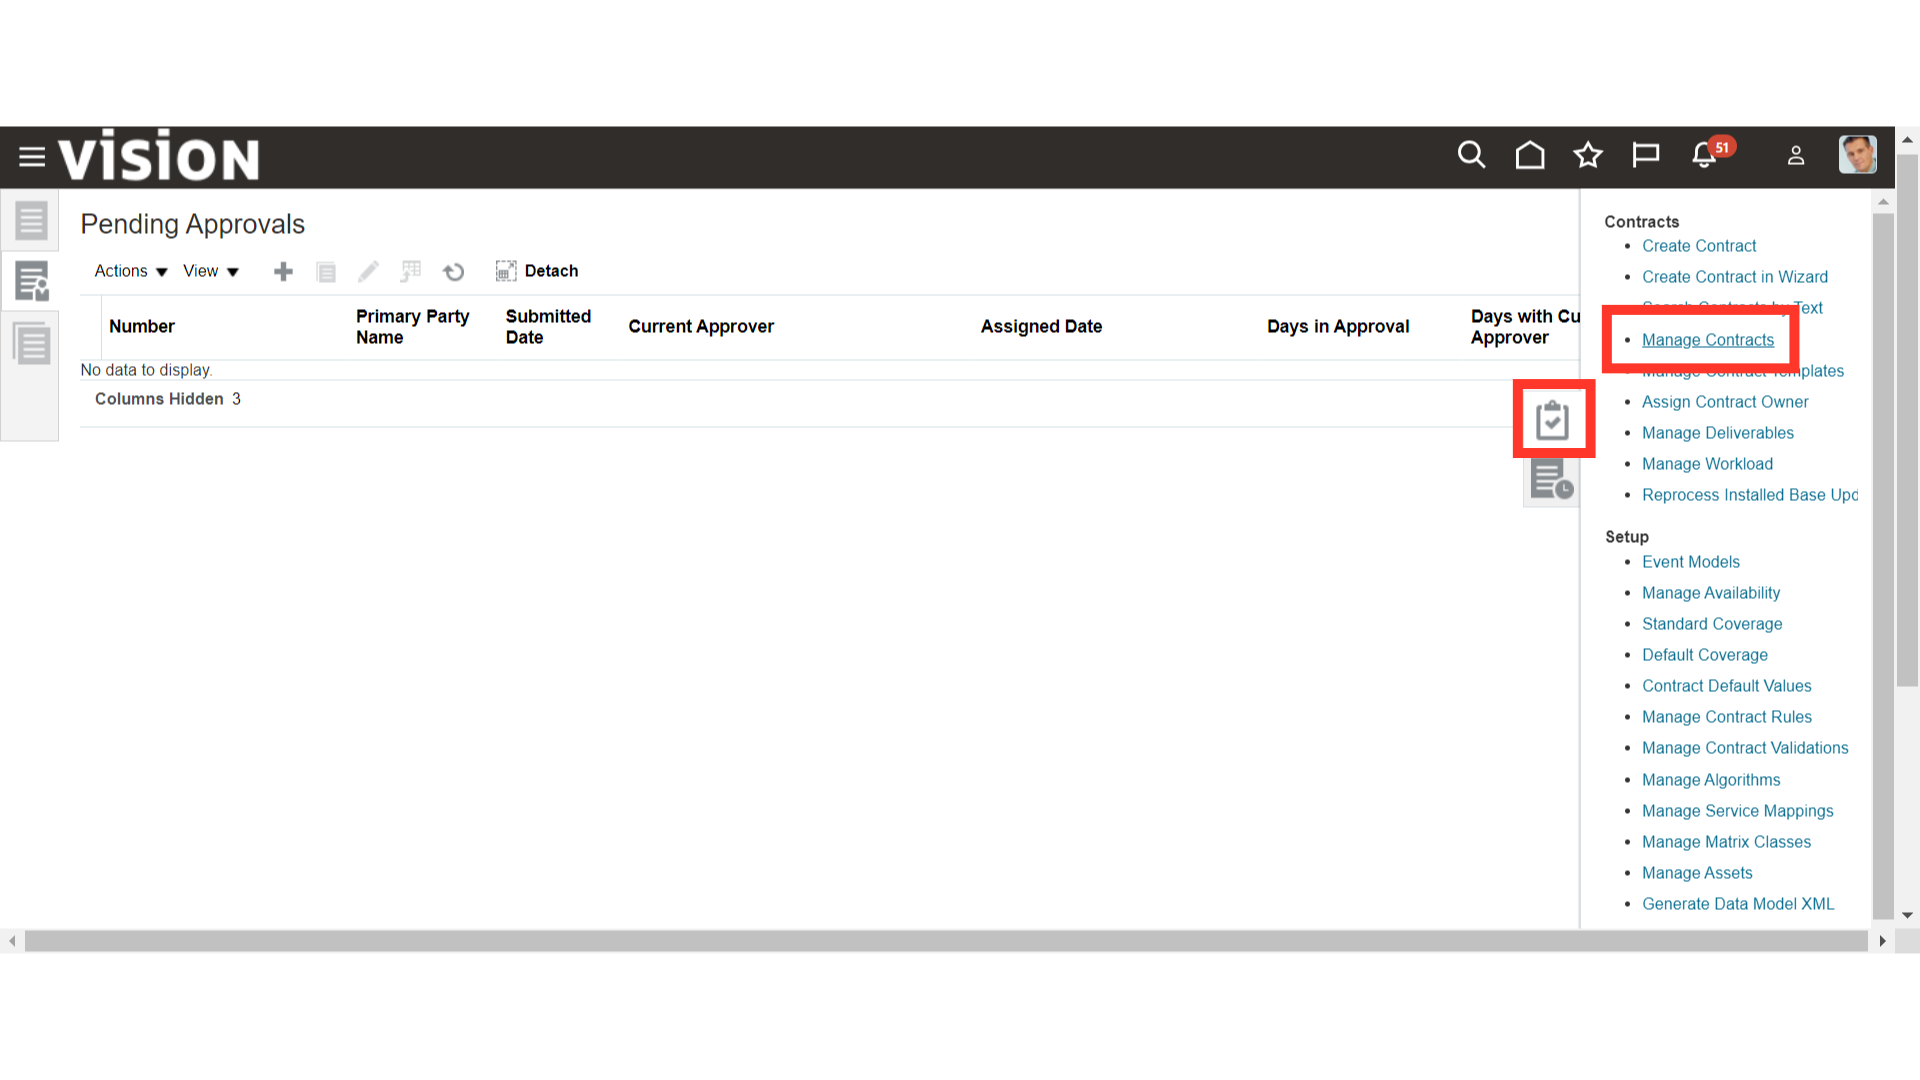
Navigate to ‘Manage Contracts’ from the Task list to enquire about the existing contracts.
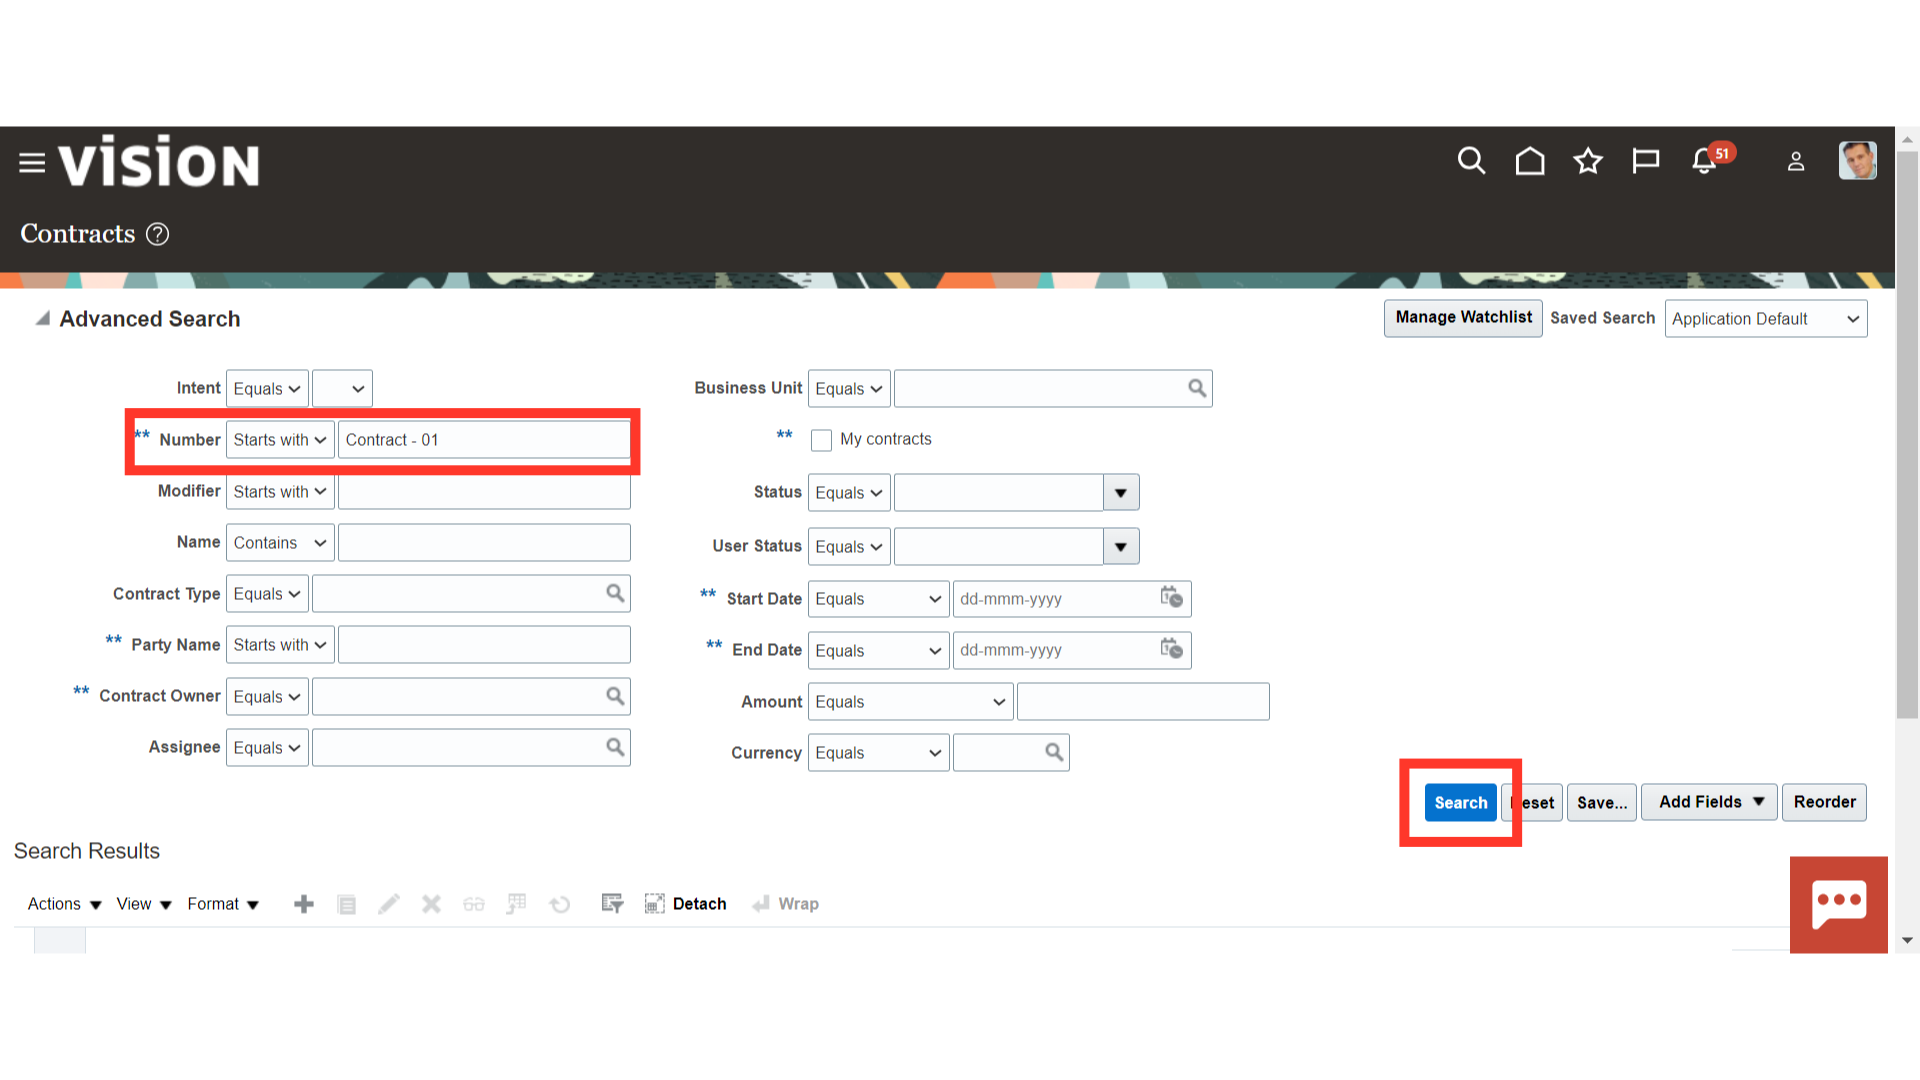
Enter the values like Name, Number, Party Name, Contract Owner, Business Unit, Start Date, End Date etc. in the search parameter and click on ‘Search’.
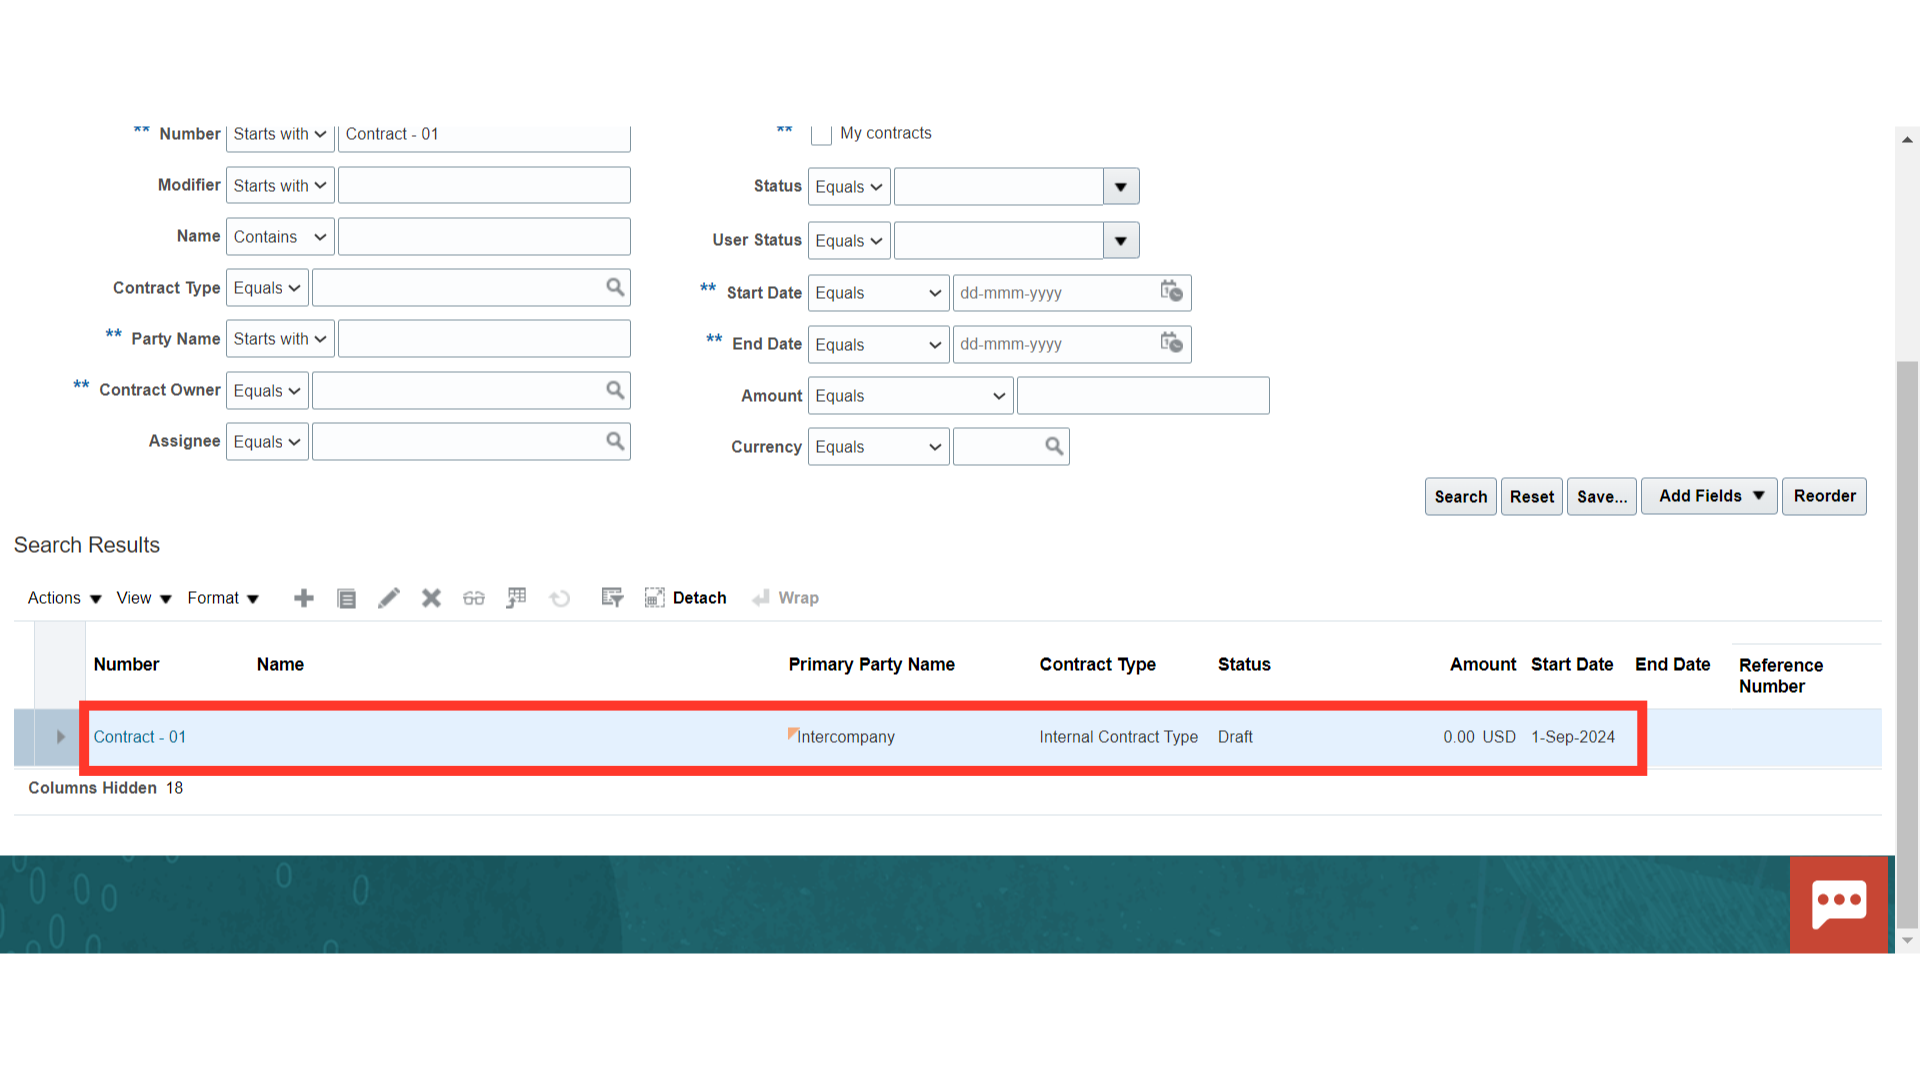
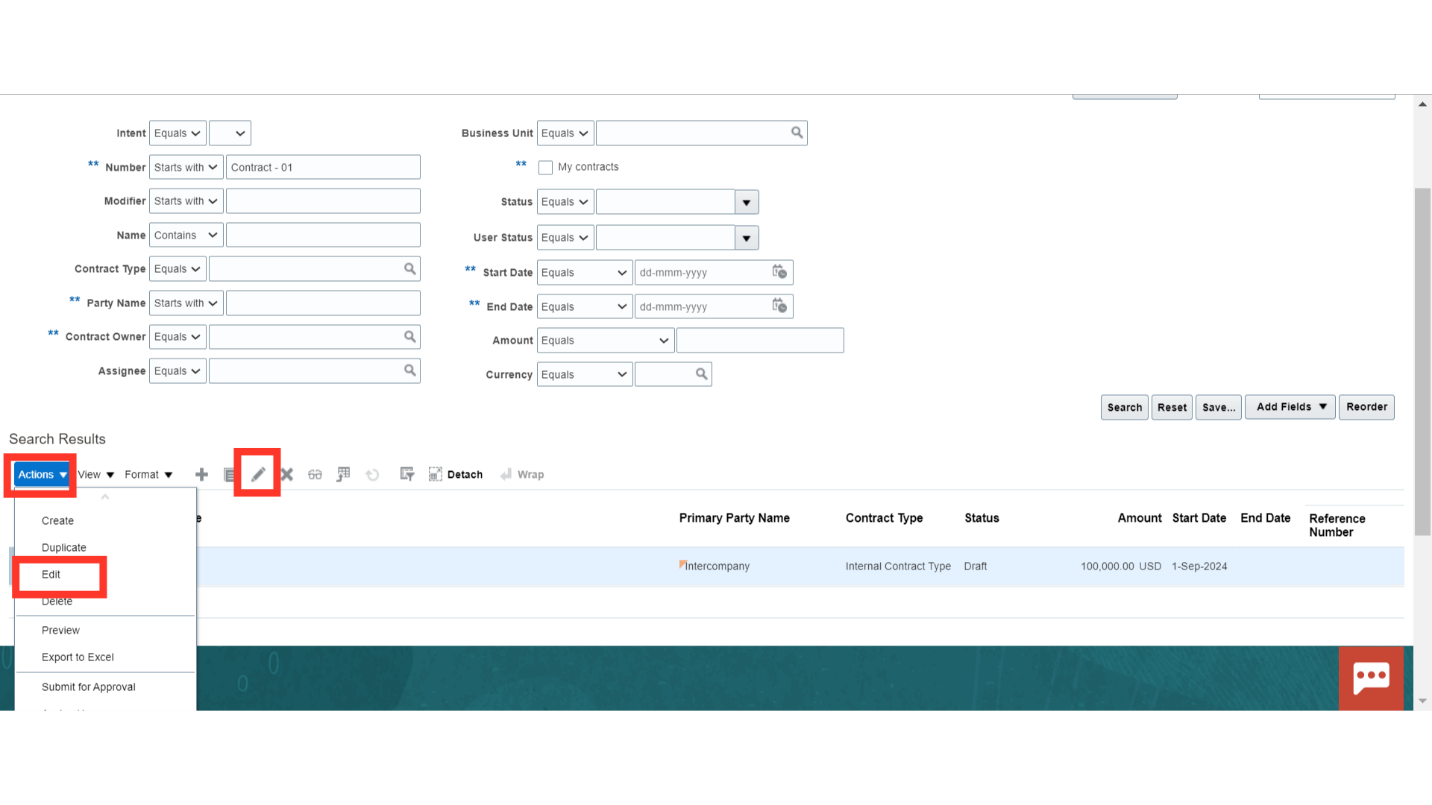
Oracle Cloud will show the result based on the values entered in the search parameters. Select the Contract in which you want to add internal party details and click on the Contract number hyperlink.
Another way to edit the existing contract is to click on the ‘Edit button from the ‘Actions’ button LoV or Click on the pencil icon to edit.
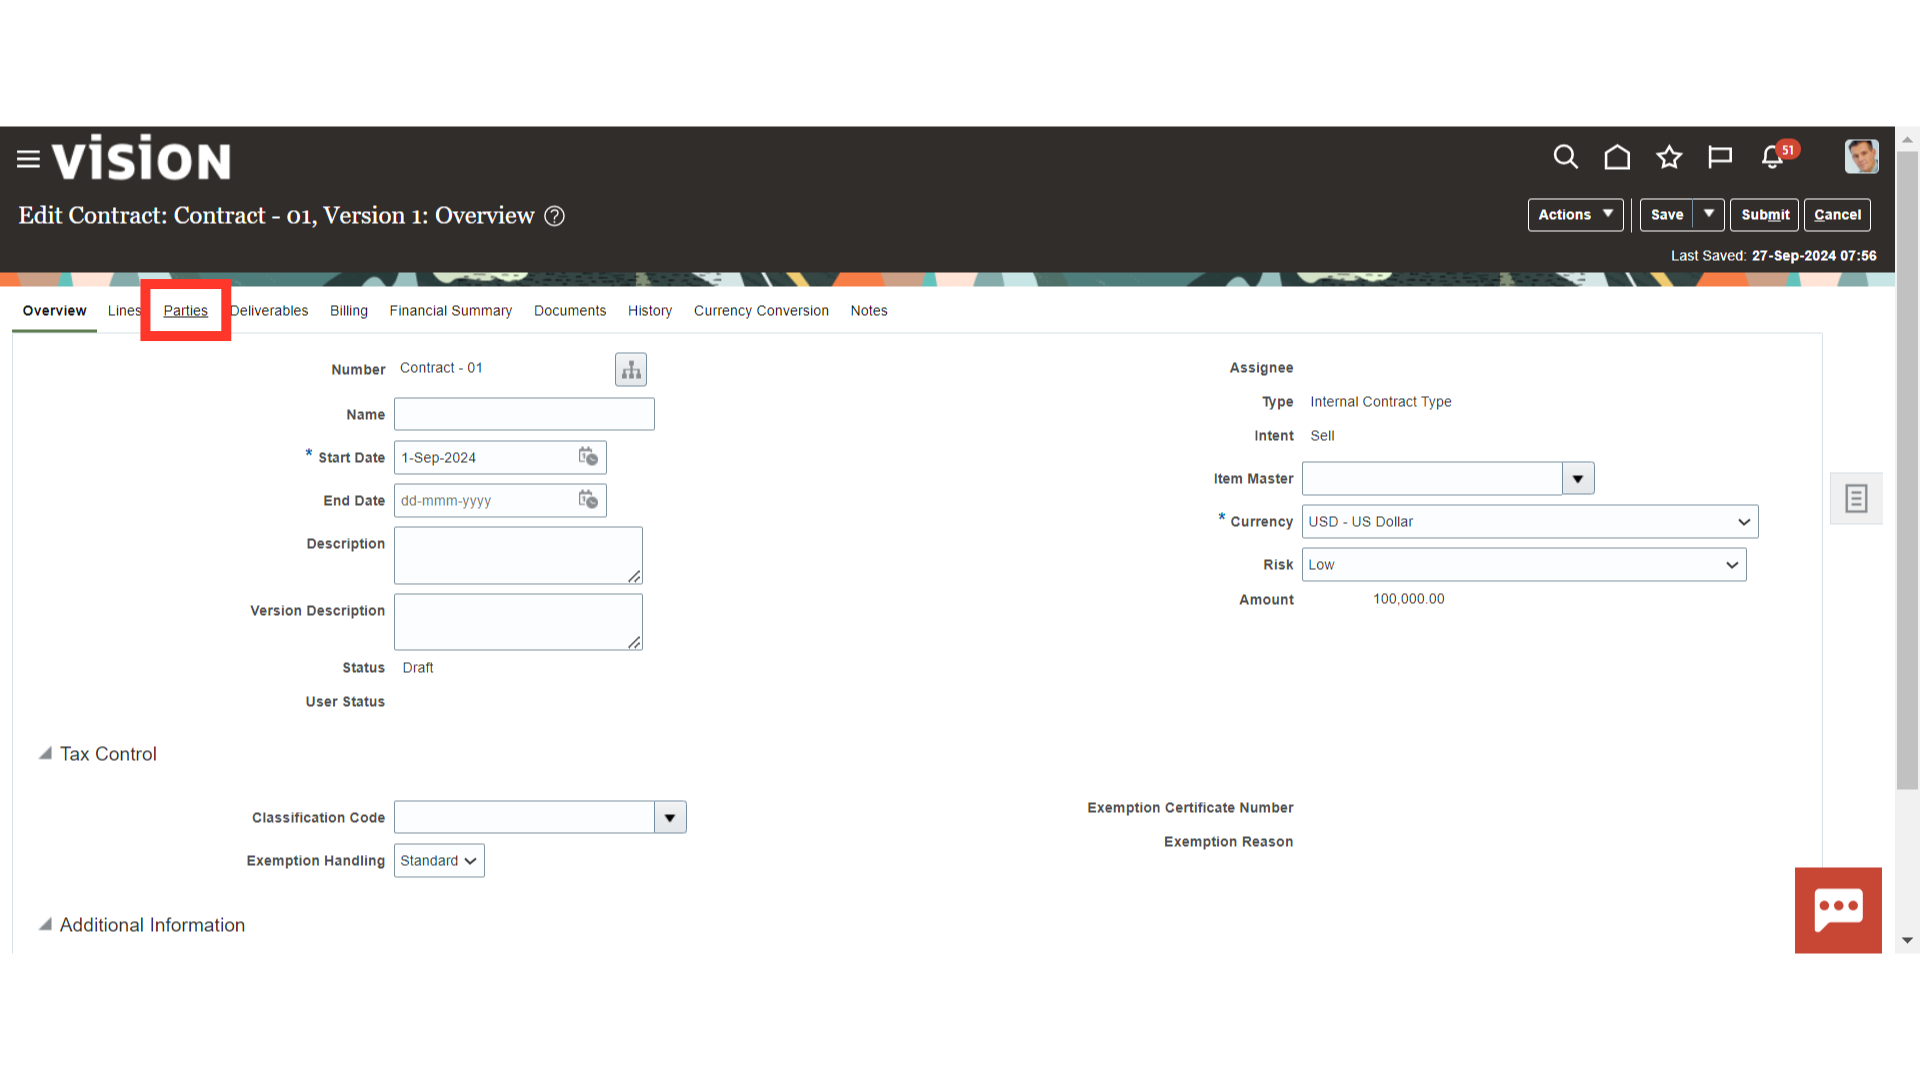
Navigate to the ‘Parties’ section to add its details.
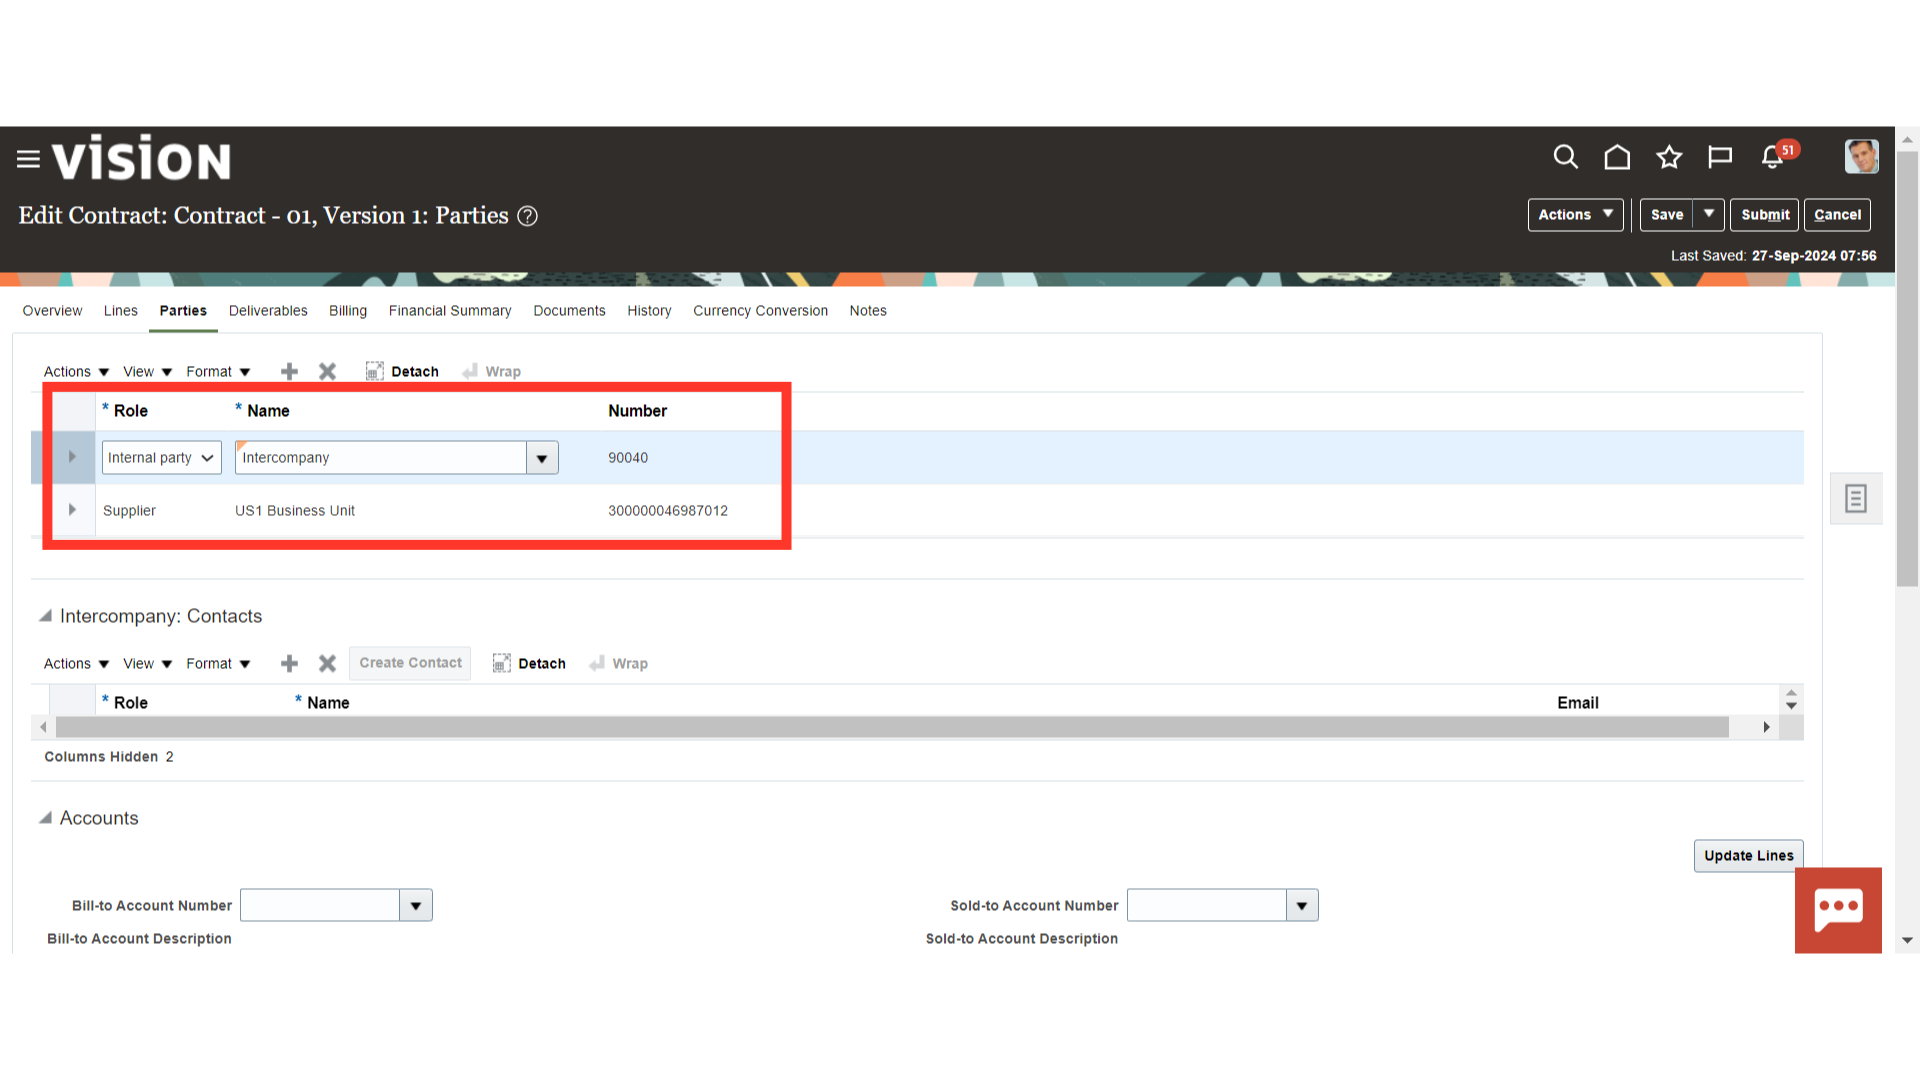
You can see that the party role is an ‘Internal Party’ as it is an internal contract. And our legal entity will be acting as a Supplier in this contract.
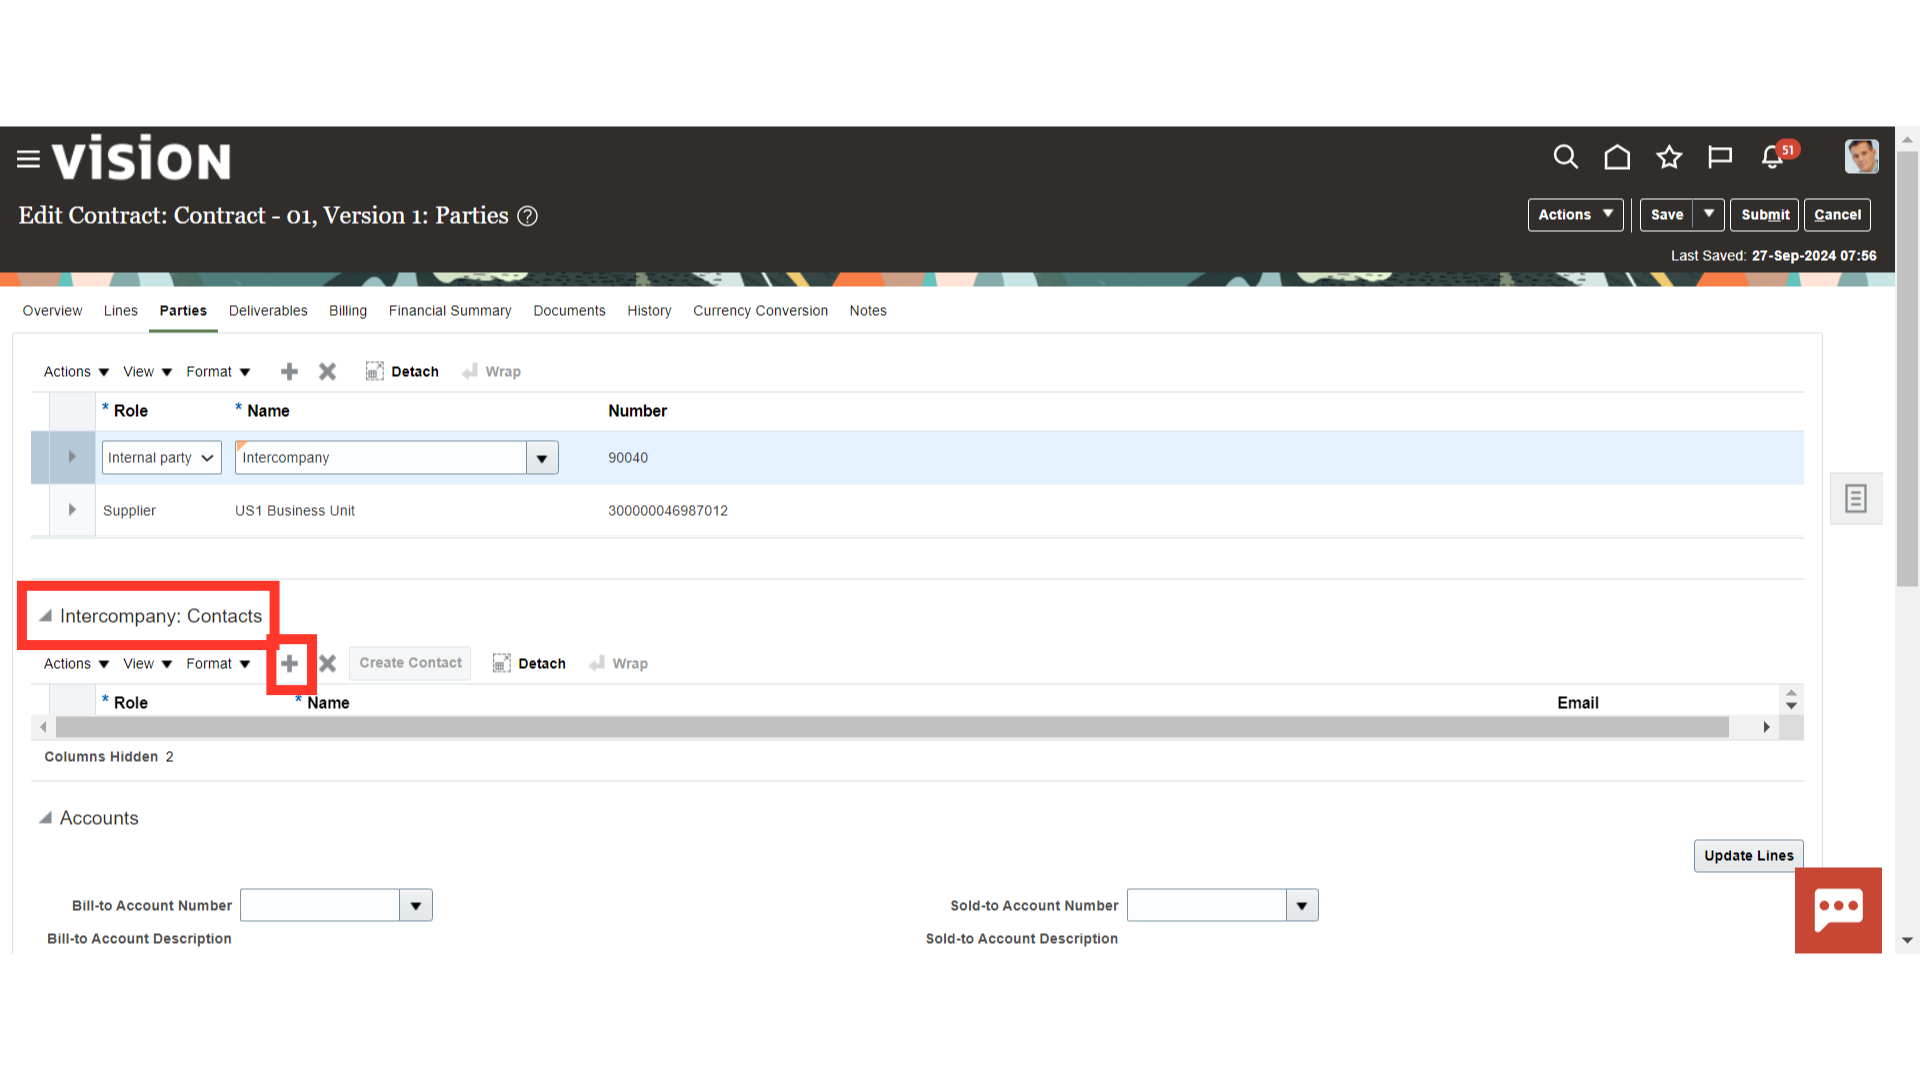
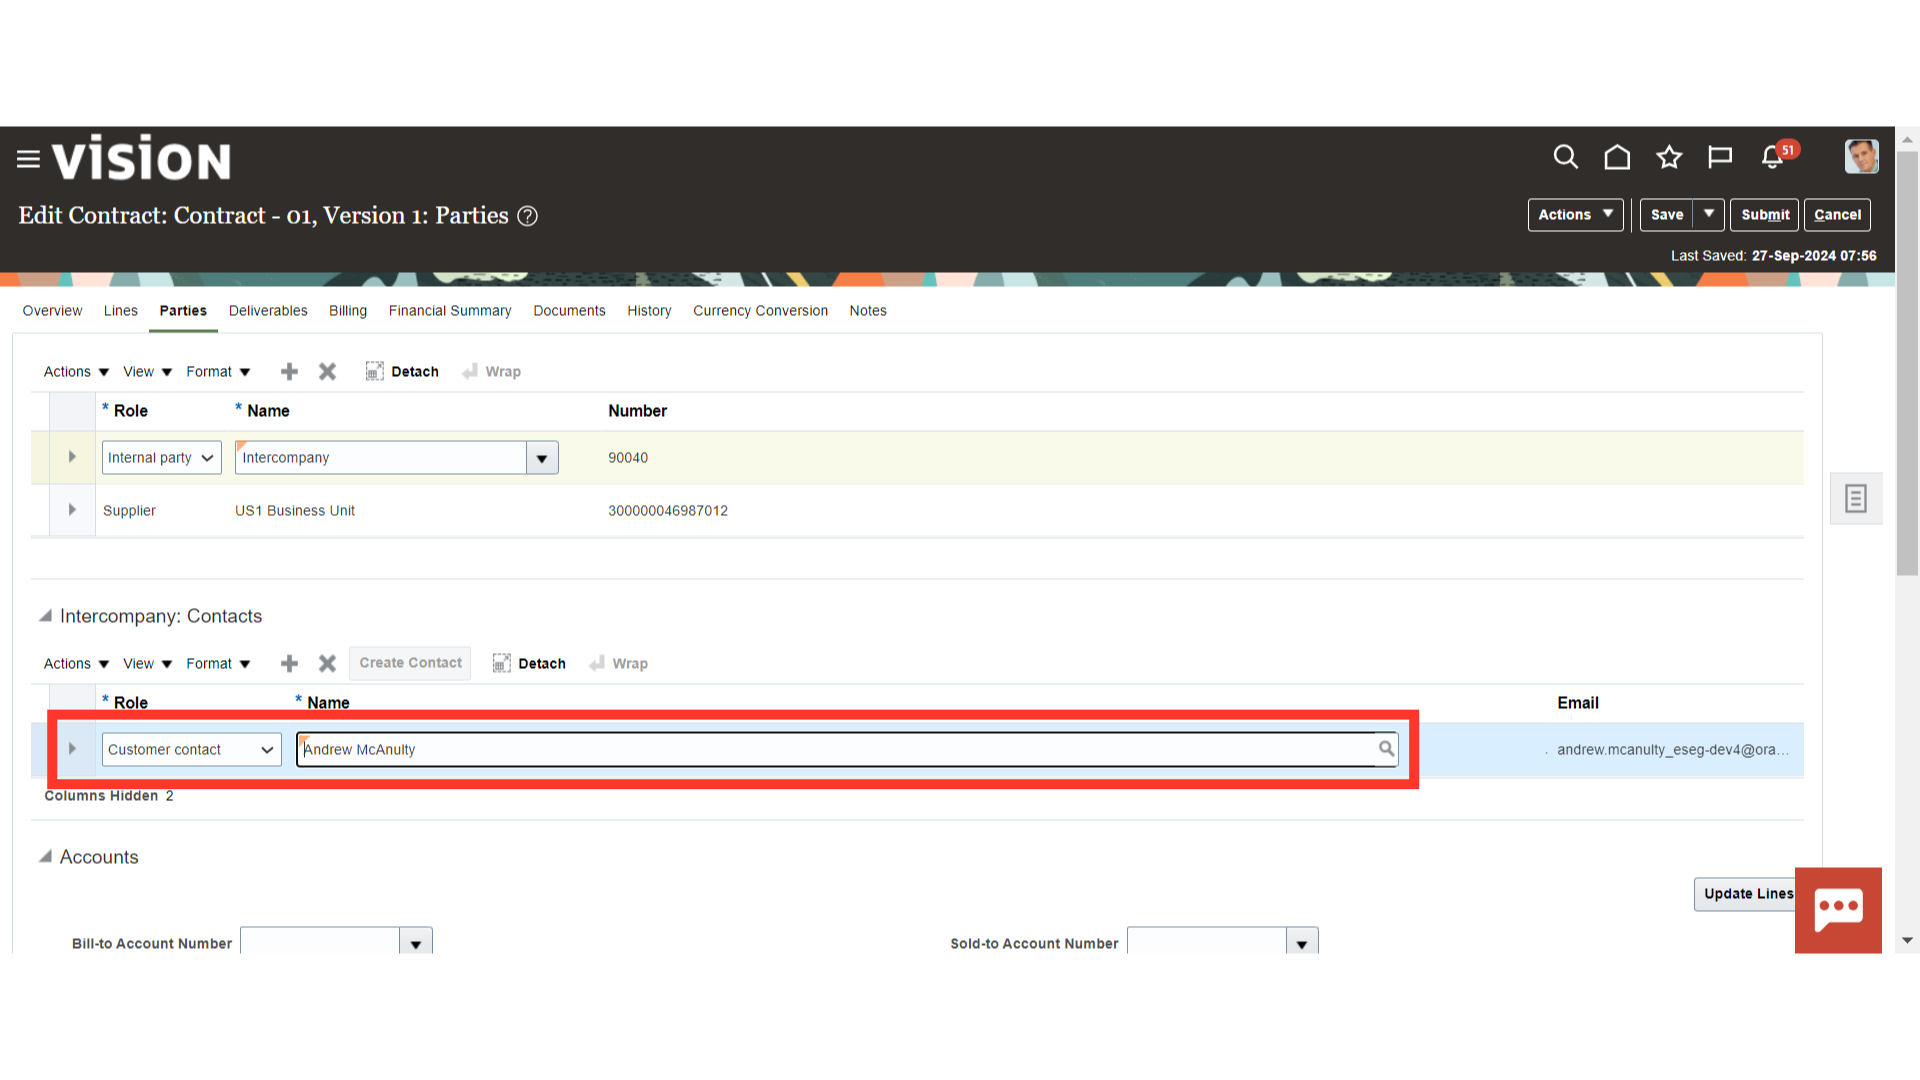
Scroll down to the Internal Party Contact section and click on the plus (+) icon to associate a contact person’s details.
Select ‘Customer Contact’ as a Role. Search and select the contact person’s name in the Name field. The email ID of that contact will come automatically from the Customer database stored in the AR Module.
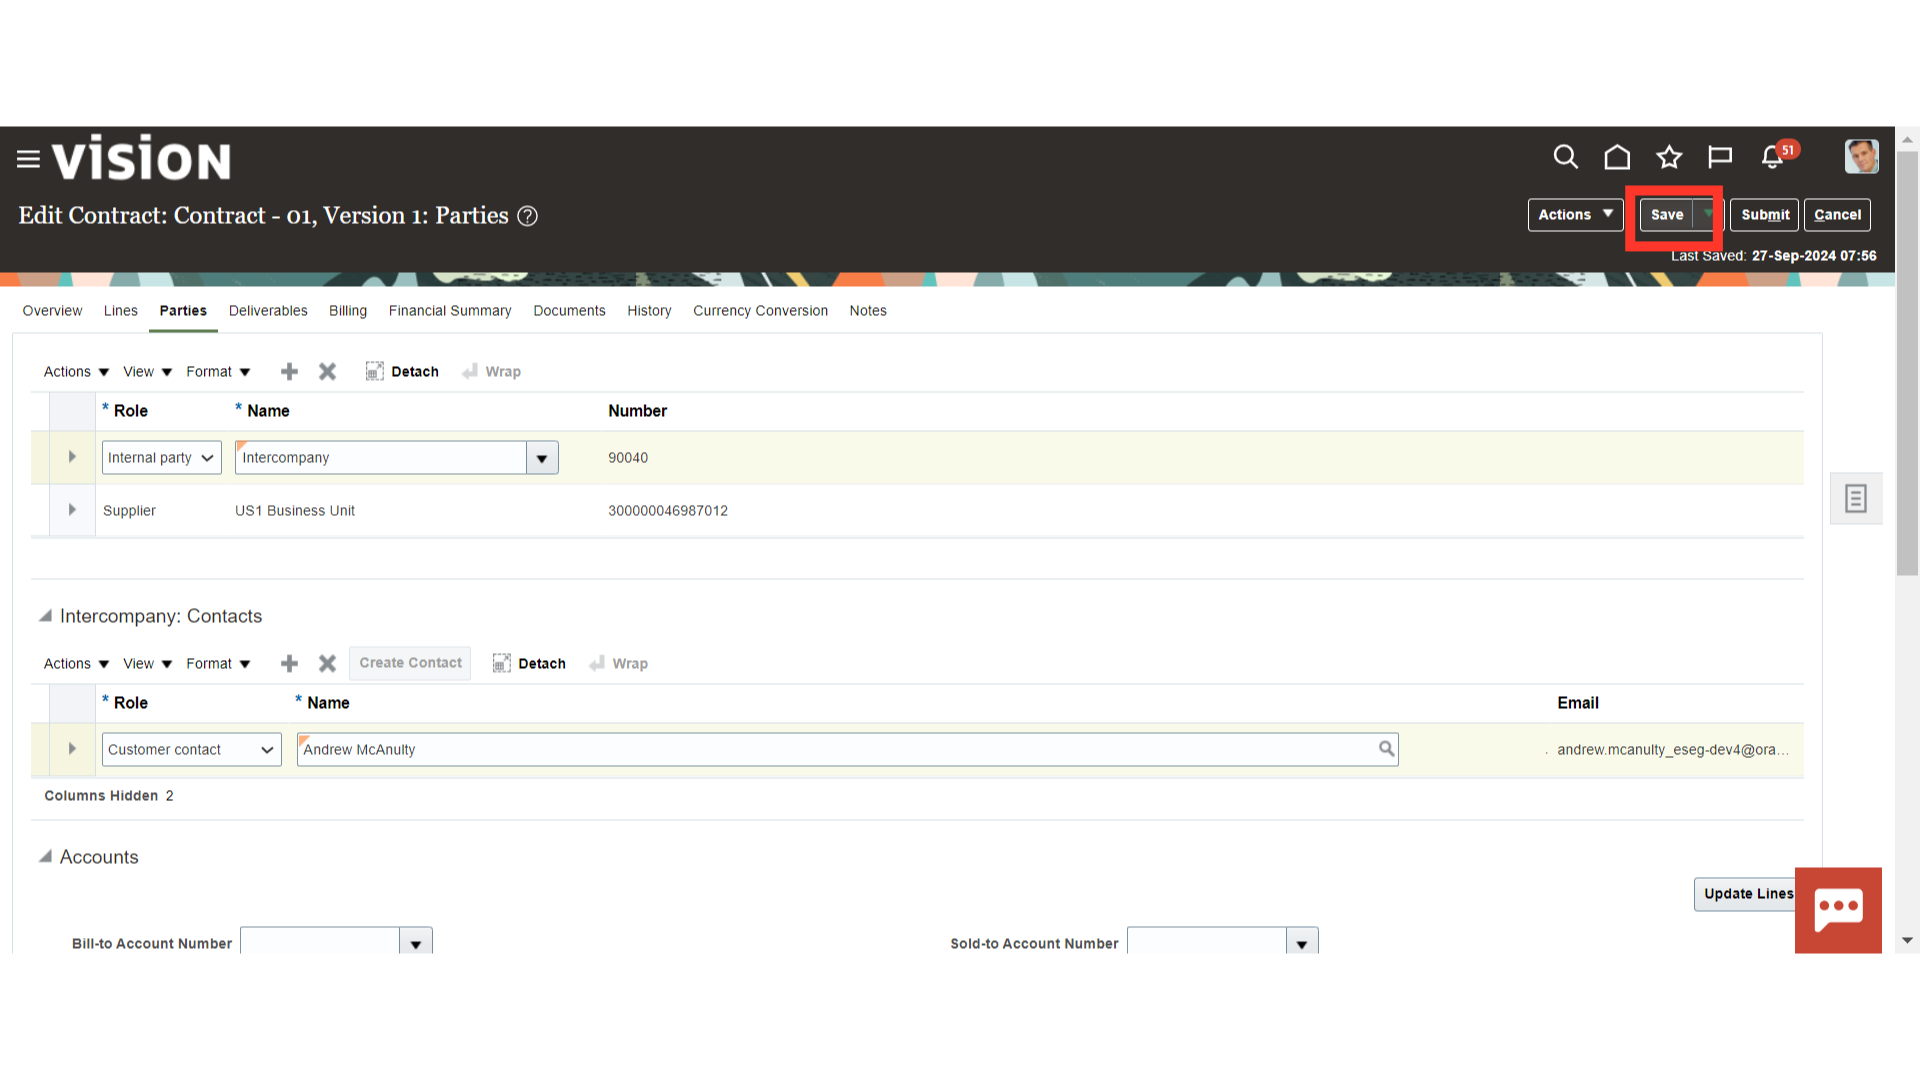
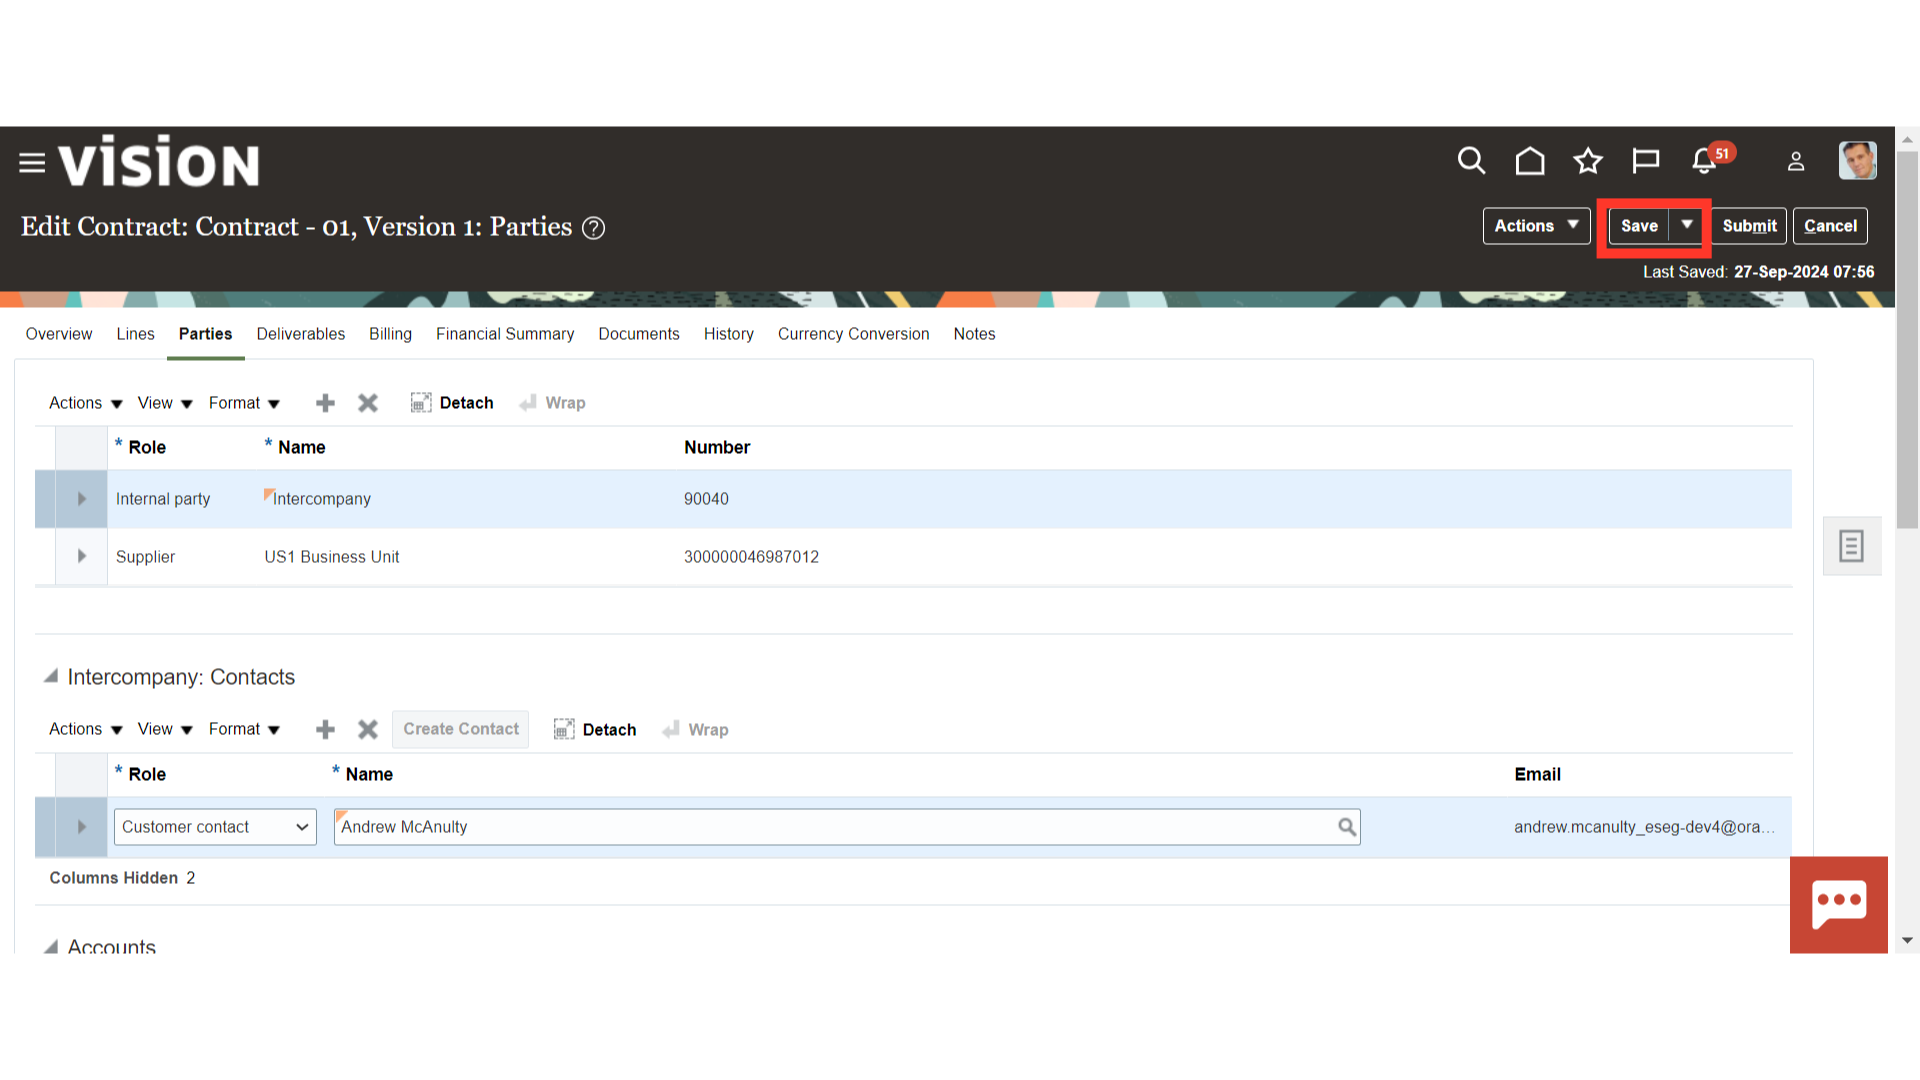
Once the party’s details are updated, click on the ‘Save’ button to save the changes.
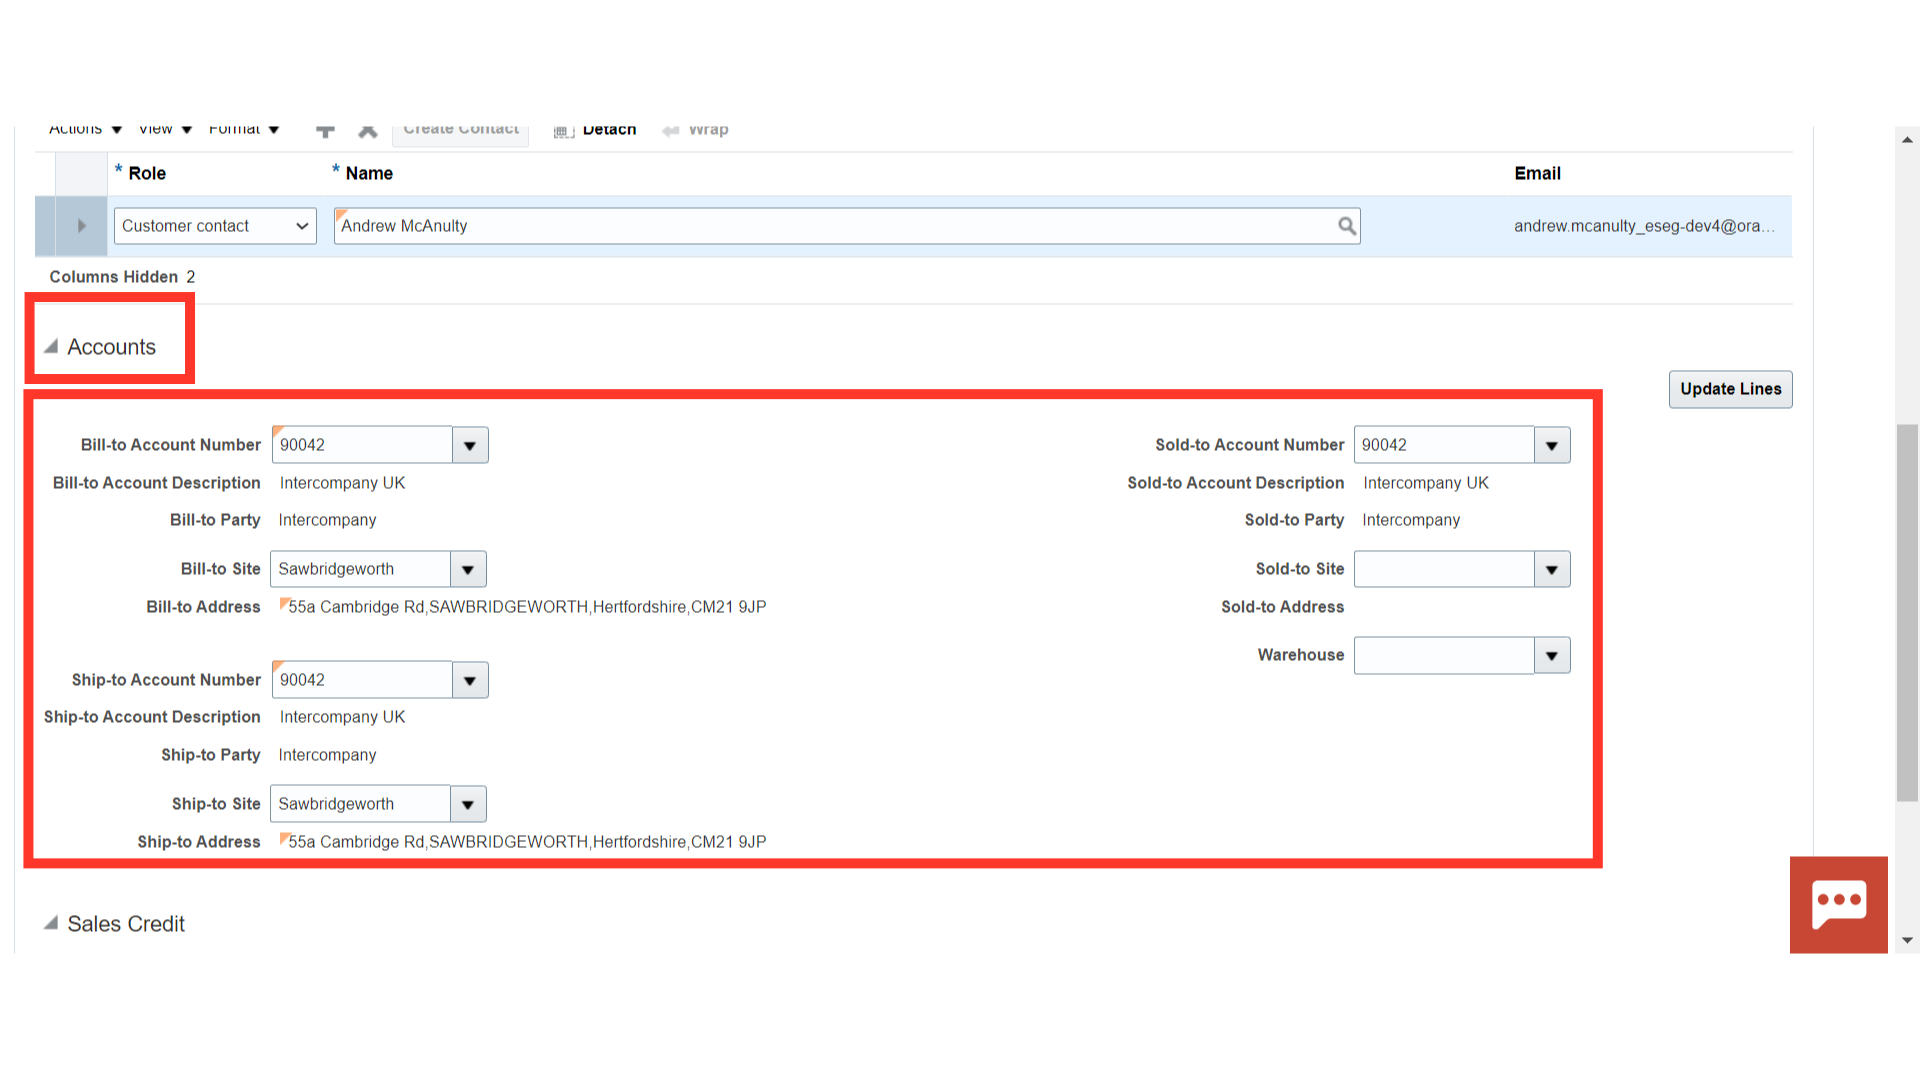
Scroll down to the ‘Accounts’ tab under the ‘Parties’ section and select the appropriate Bill-to Account Number, Bill-to Site Number, Ship-to Account Number, Ship-to Site, etc., from the available dropdown options.
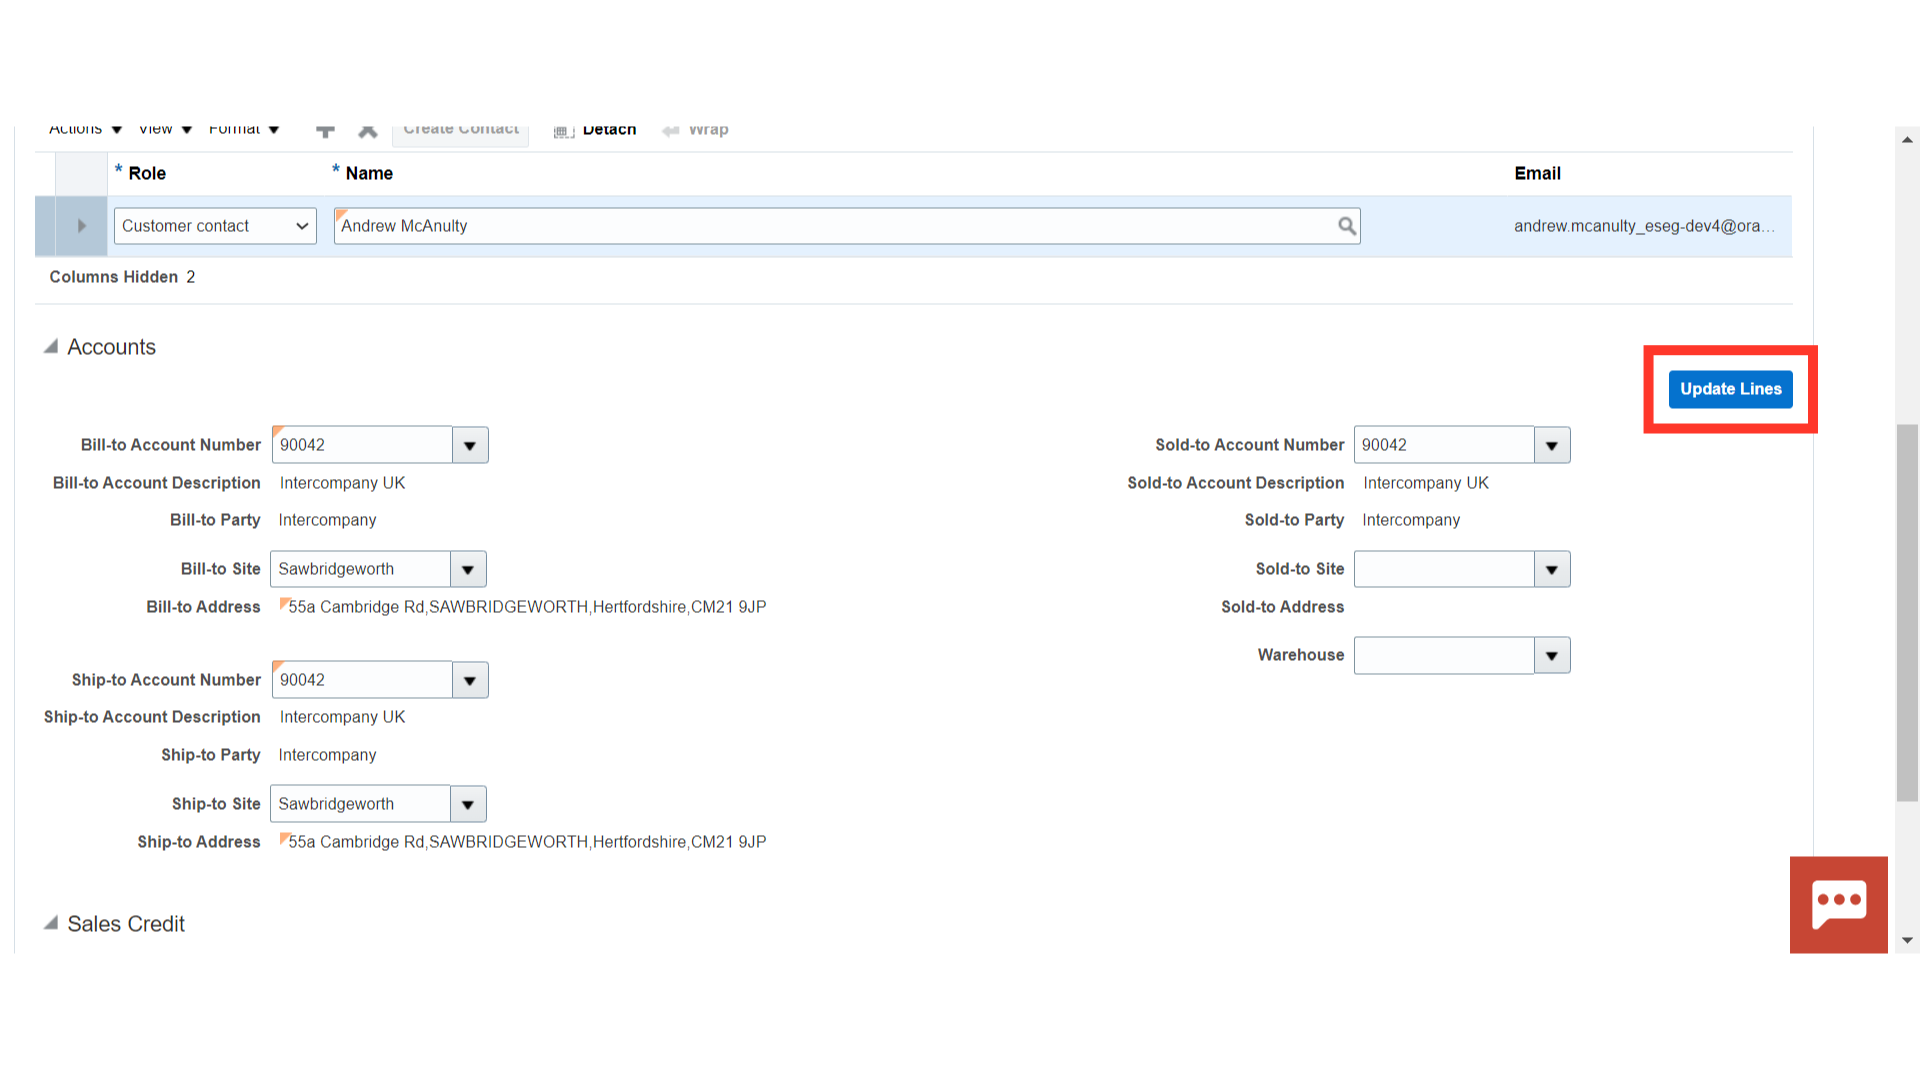
After selecting all the required customer account details, click ‘Update Lines’ to apply the customer account information to all the contract lines.
Select the contract lines for which you want to update the customer account details and click on ‘Update’.
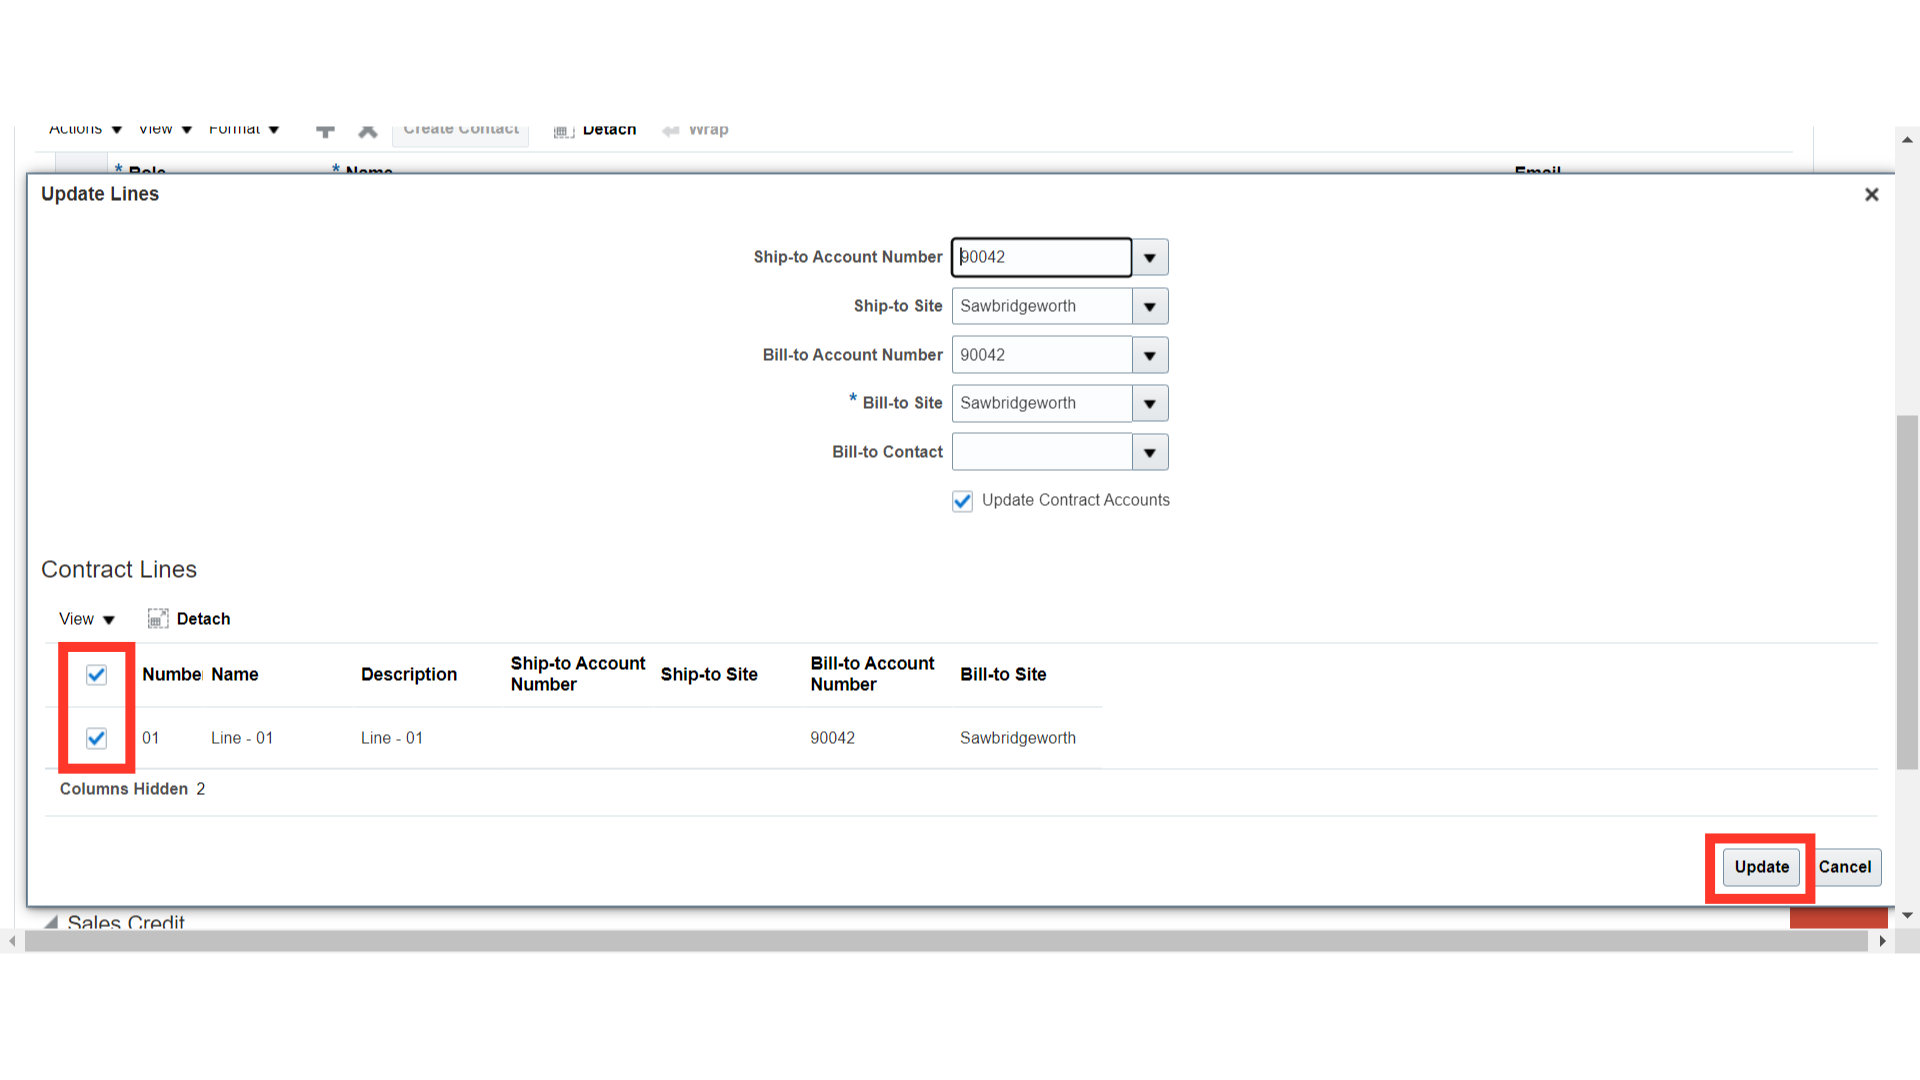
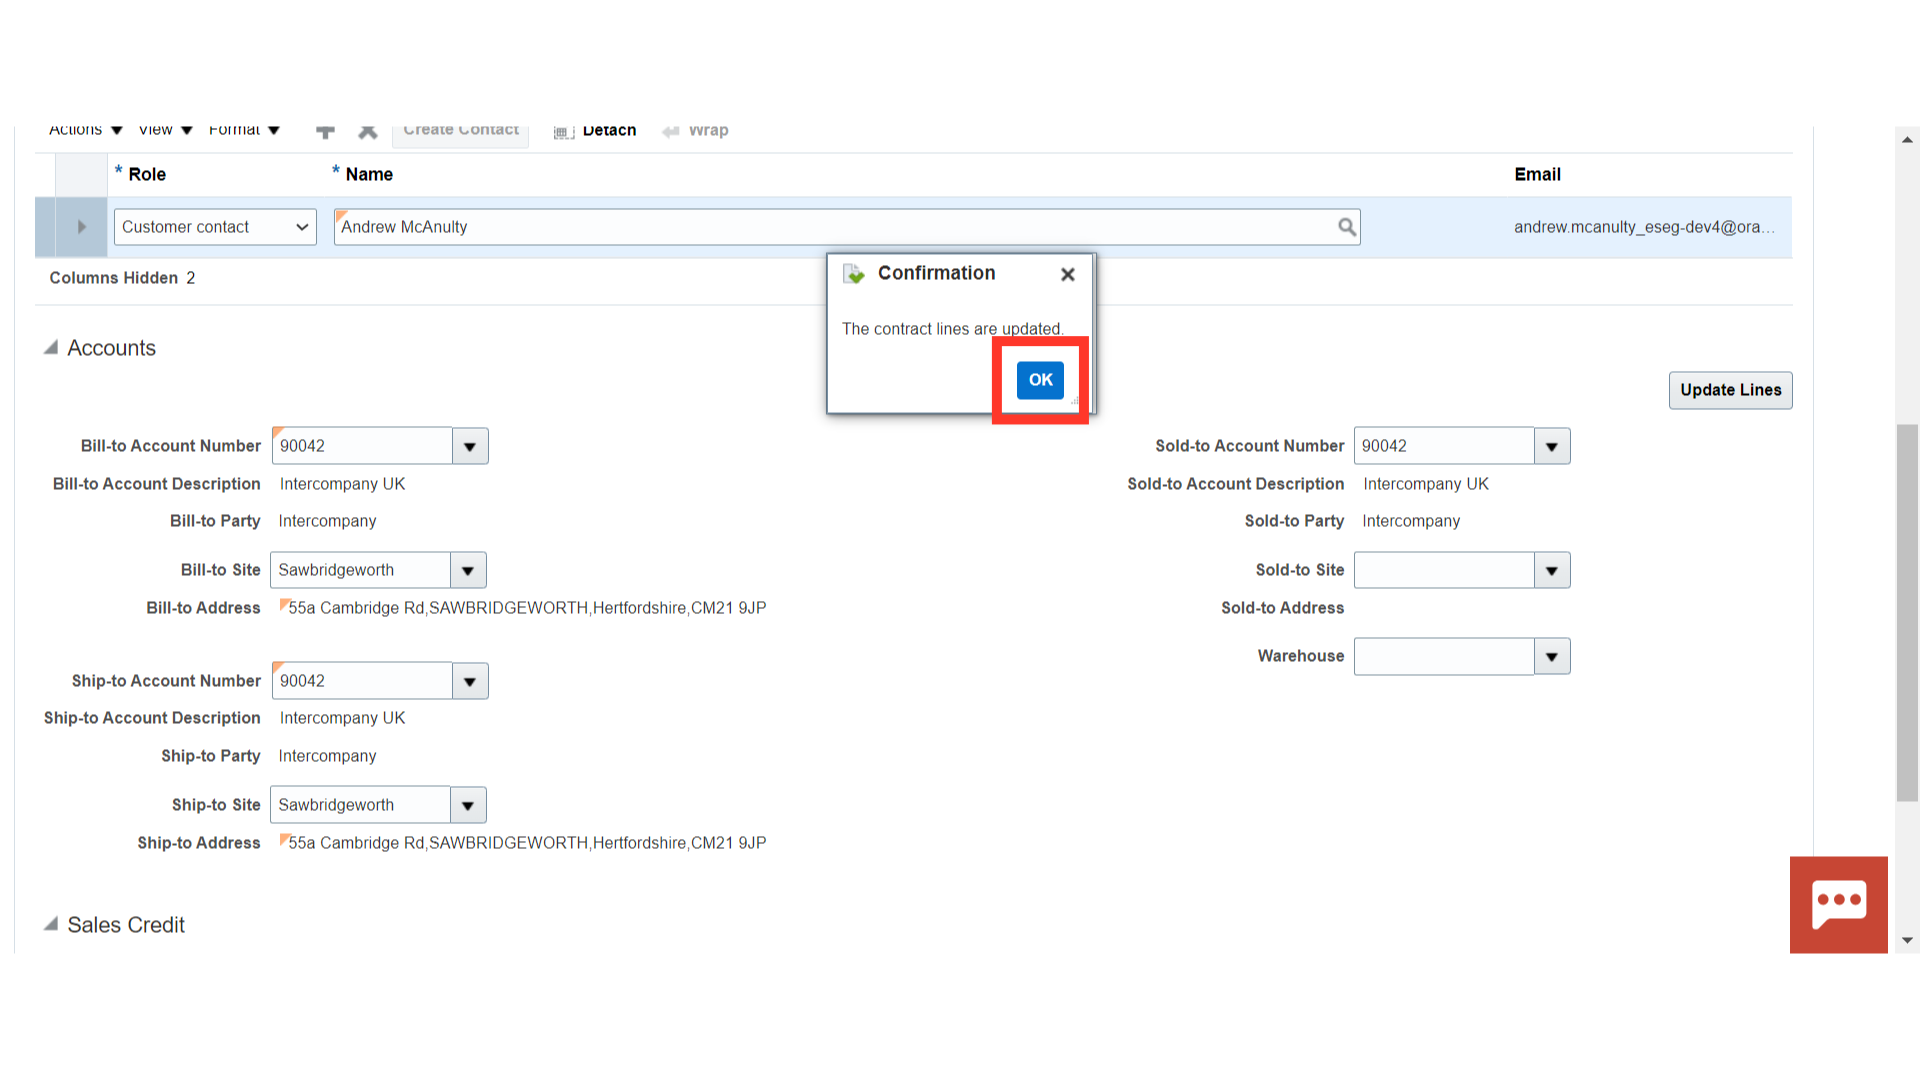
After clicking Update, a confirmation message will appear. Click ‘OK’ to proceed.
Once done, click on the ‘Save’ button to save the changes.
 Thank you for reviewing and using our guide; we hope you have found it helpful. If you have any questions on the content included in this guide, please contact our Training & Learning team at learn@camptratech.com