How to Internal Contracts – Billing – Approve and Release Invoice
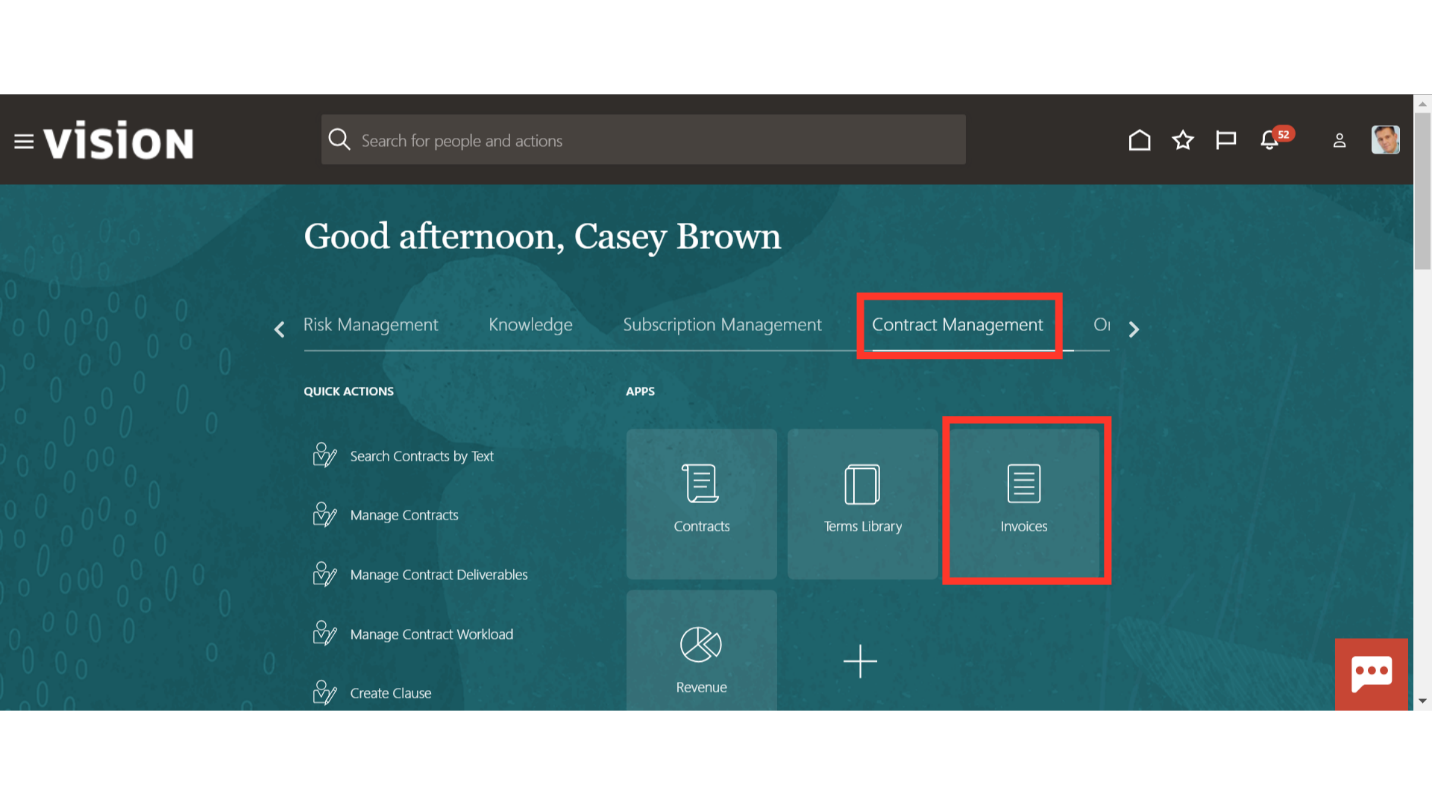
Click on the ‘Invoices’ sub-menu under the ‘Contract Management’ menu from the Oracle home page.
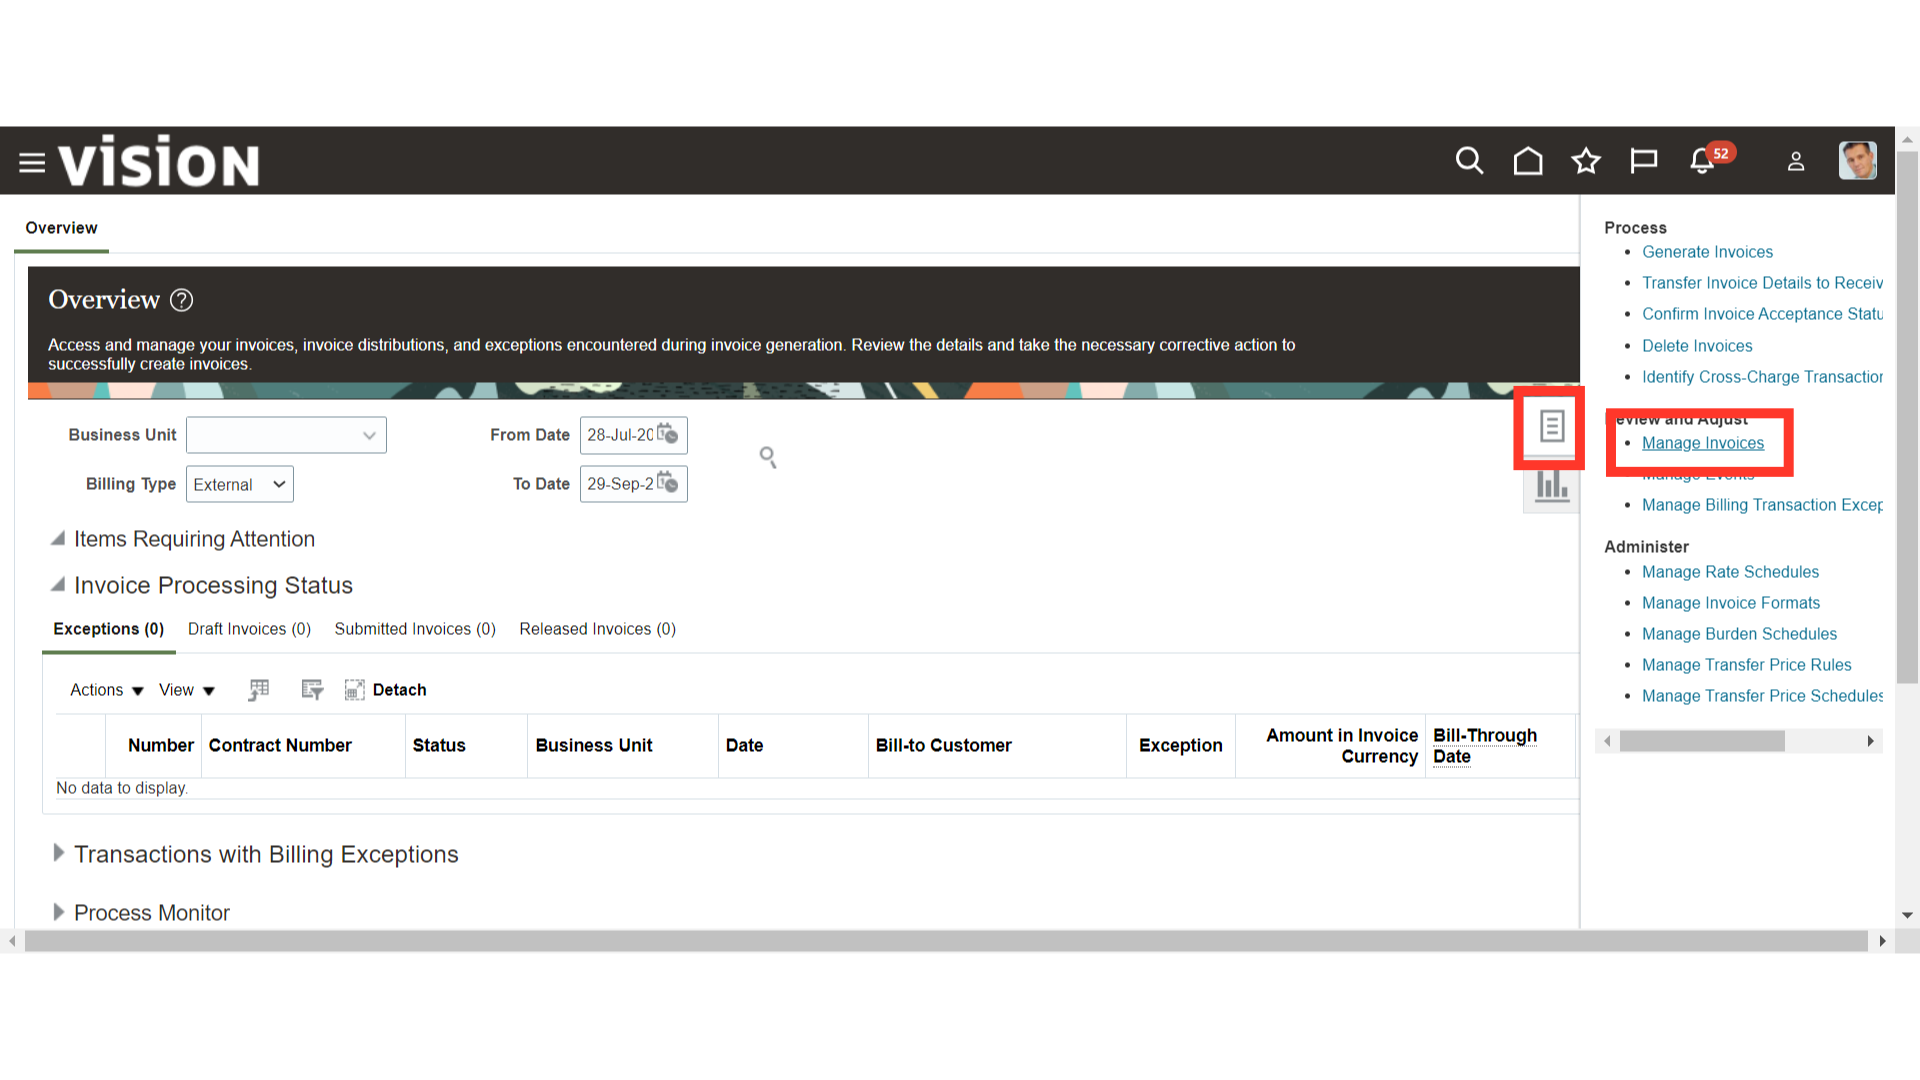
Navigate to the ‘Manage Invoices’ from the Task list.
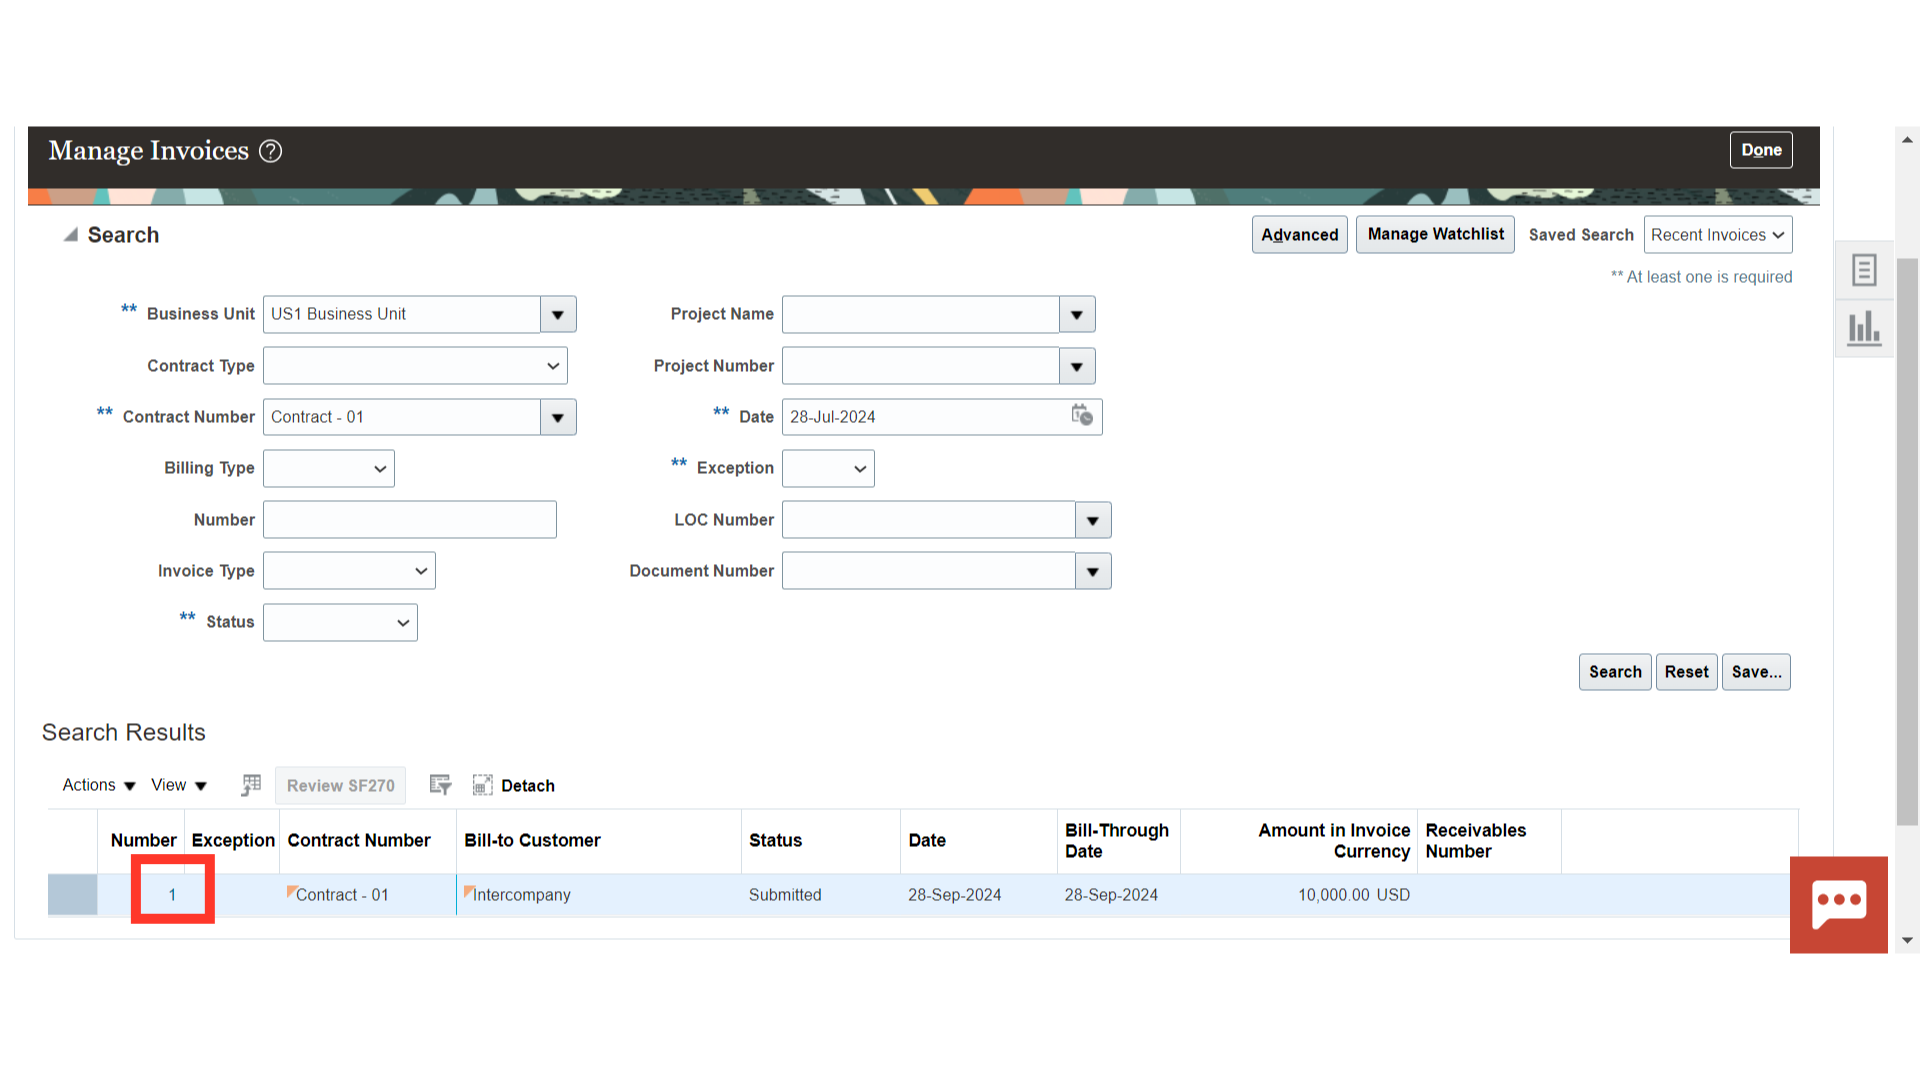
You can search and enquire about the existing invoices from these many parameters.
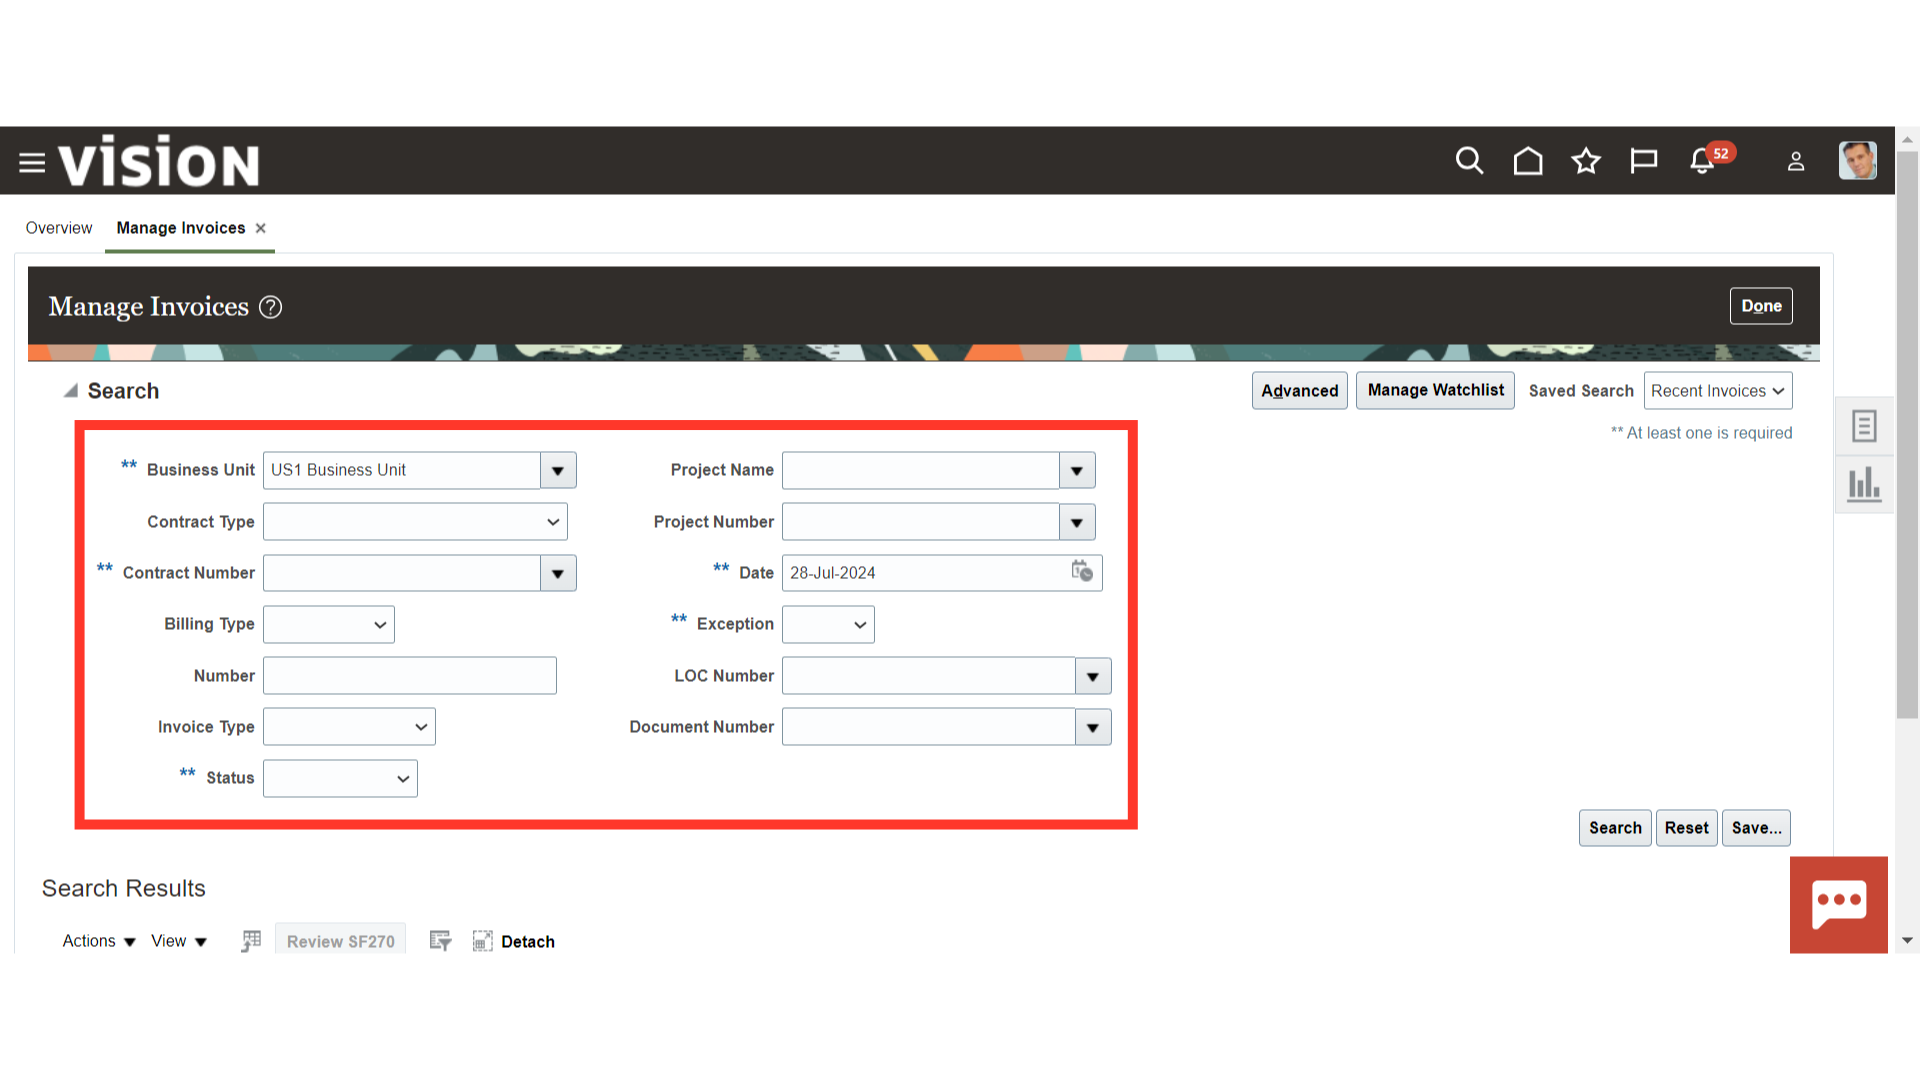
Enter the specific details in the search parameter and click on ‘Search’.

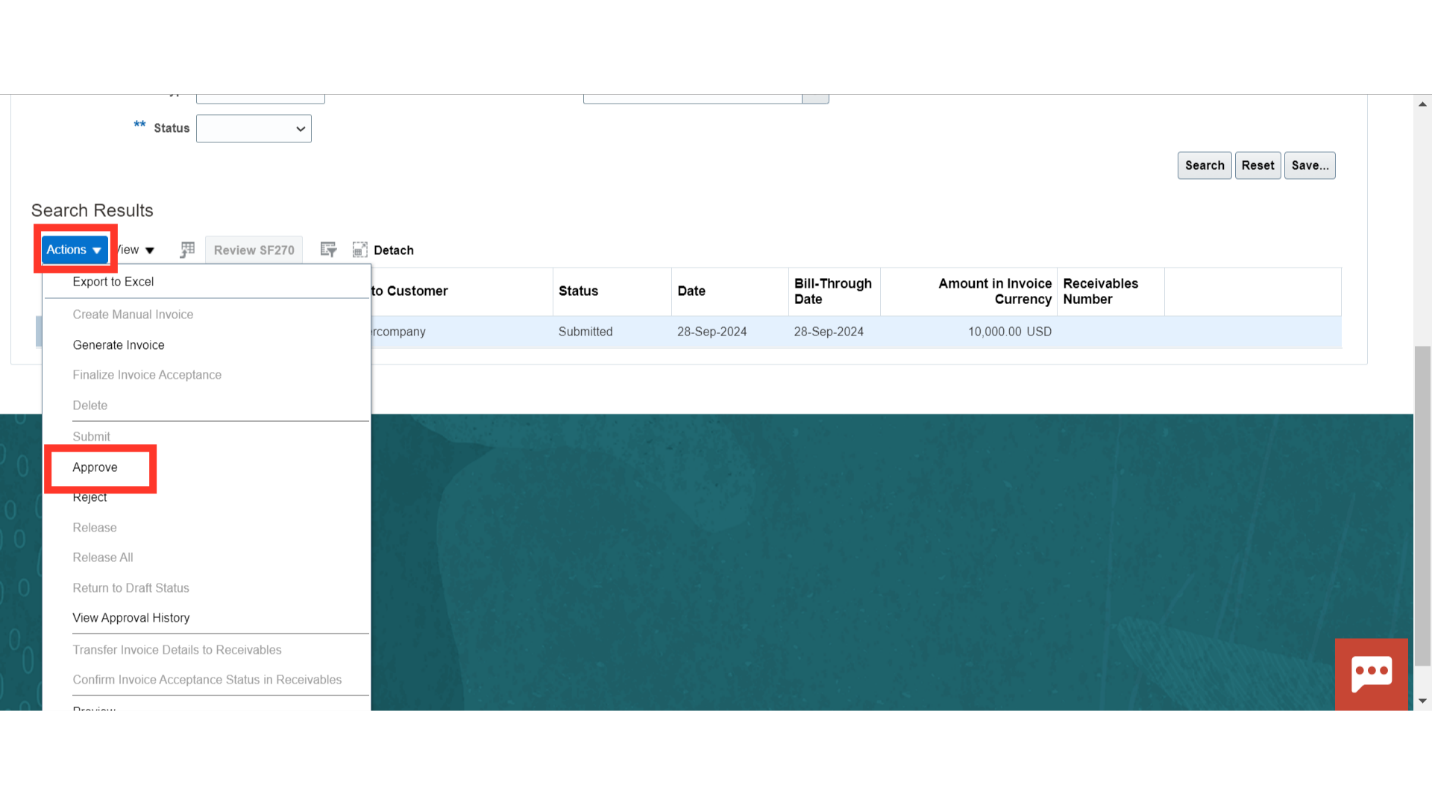
There are two ways to approve an invoice in the Oracle Cloud. Scroll down and select the Invoice that you want to Approve. The first option is to click ‘Approve’ from the ‘Actions’ button, and Oracle Cloud will approve the invoice.
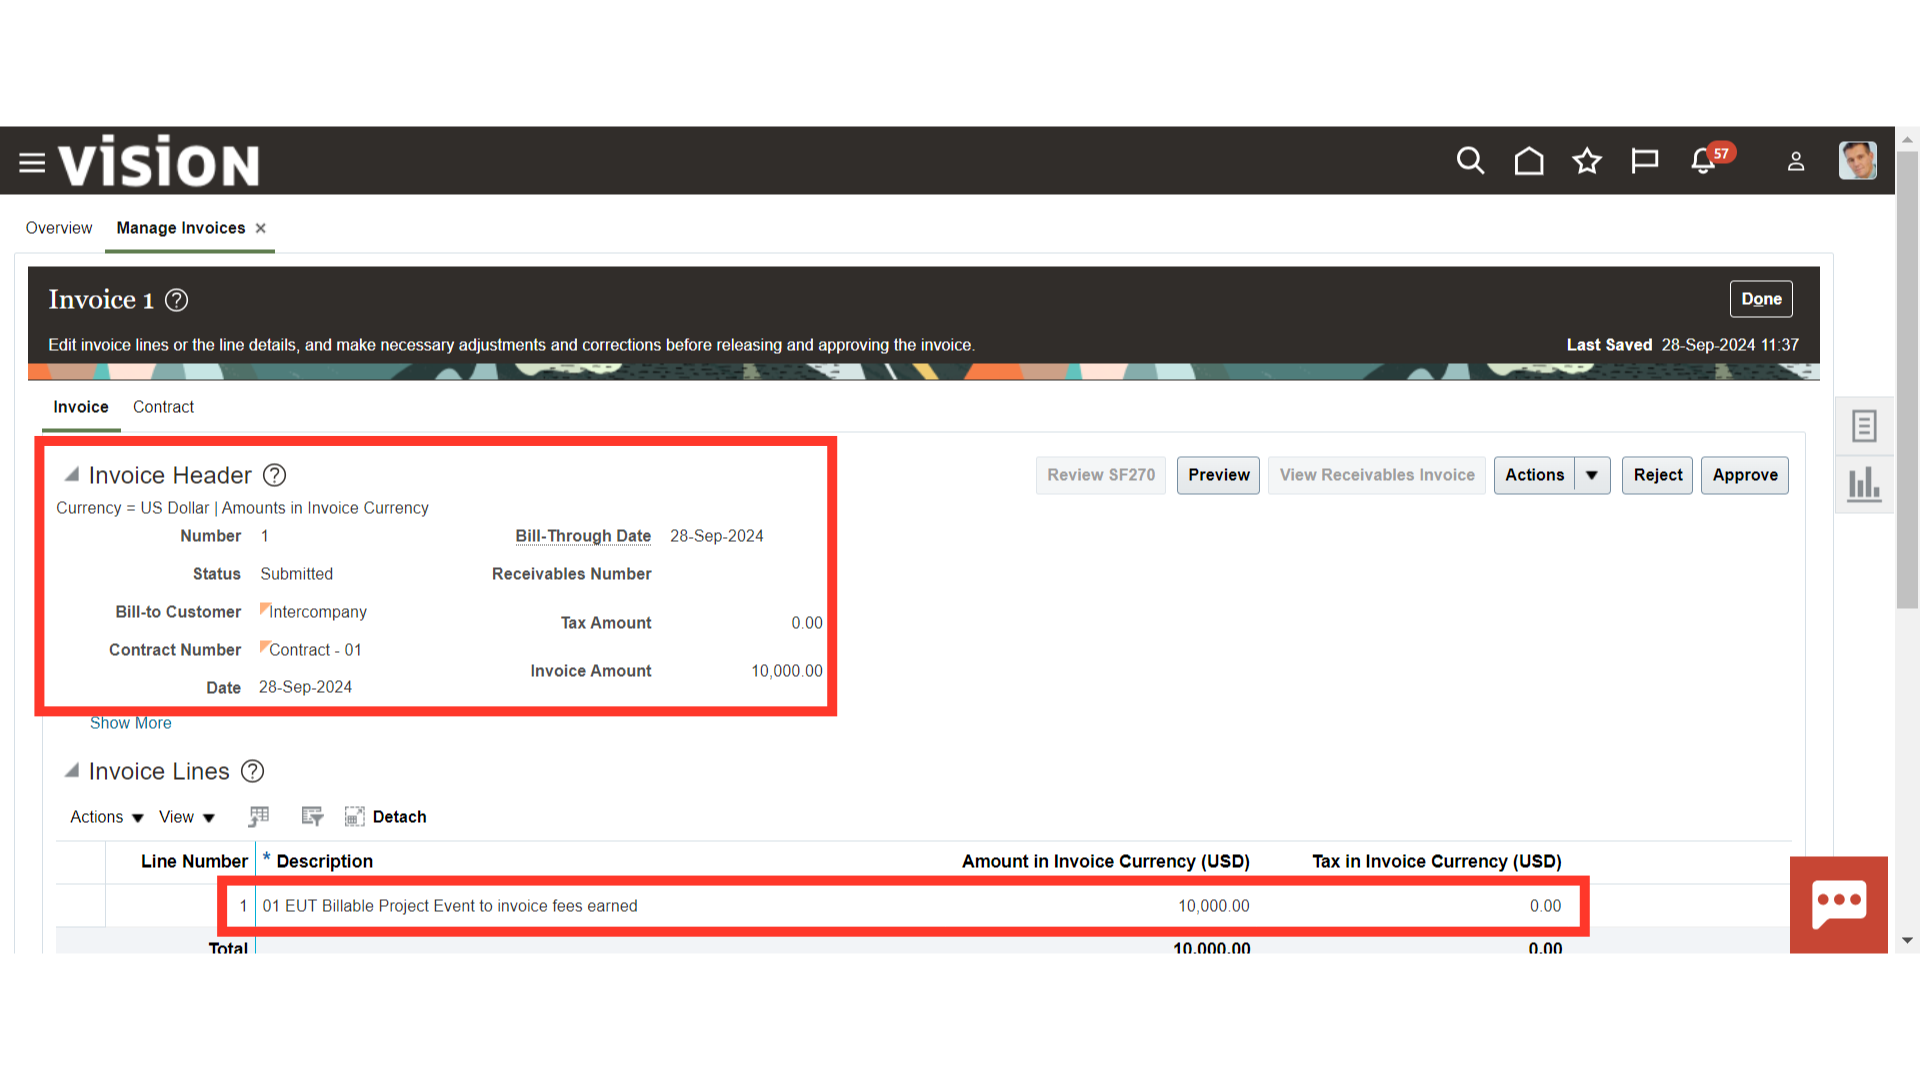
Another option to approve the invoice is to select the invoice you want to approve. Click the invoice number hyperlink to open the invoice.
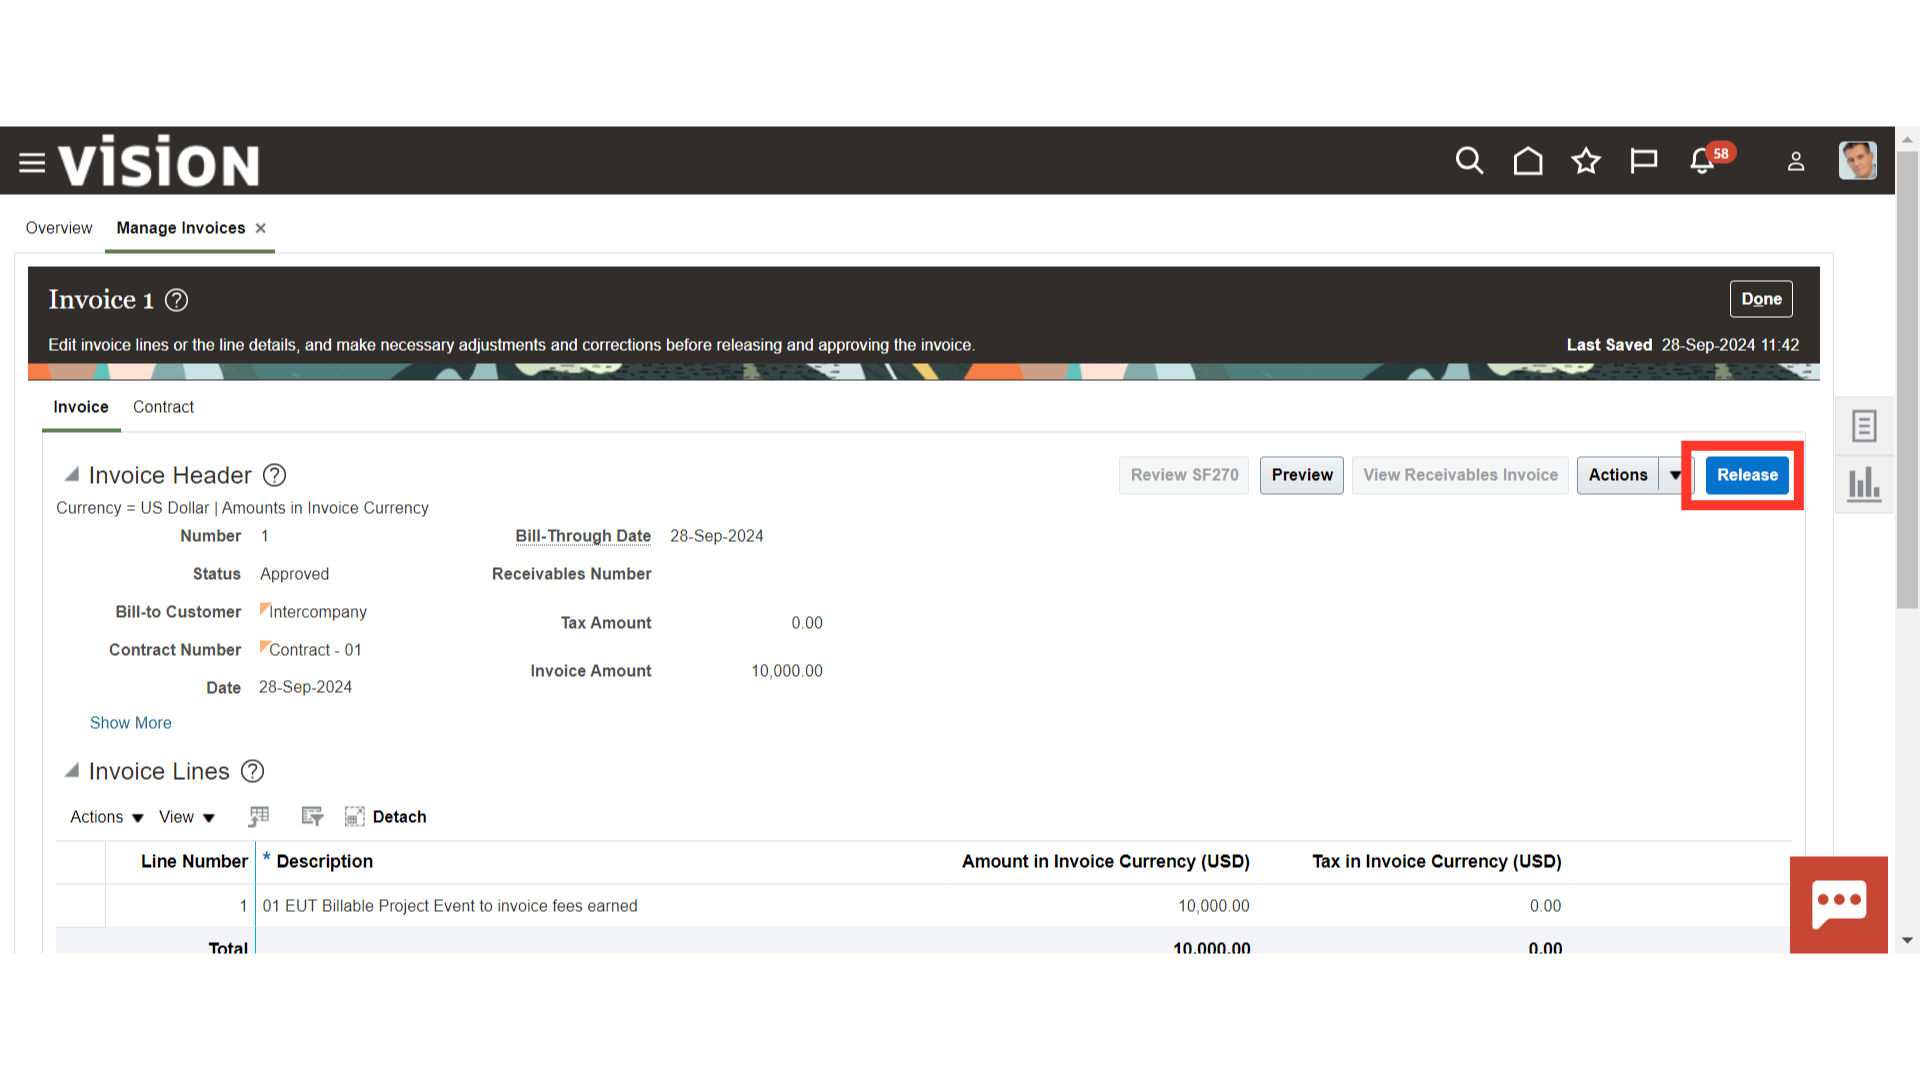
You can review the invoice header and line details like status, date, invoice amount, tax amount, description etc.
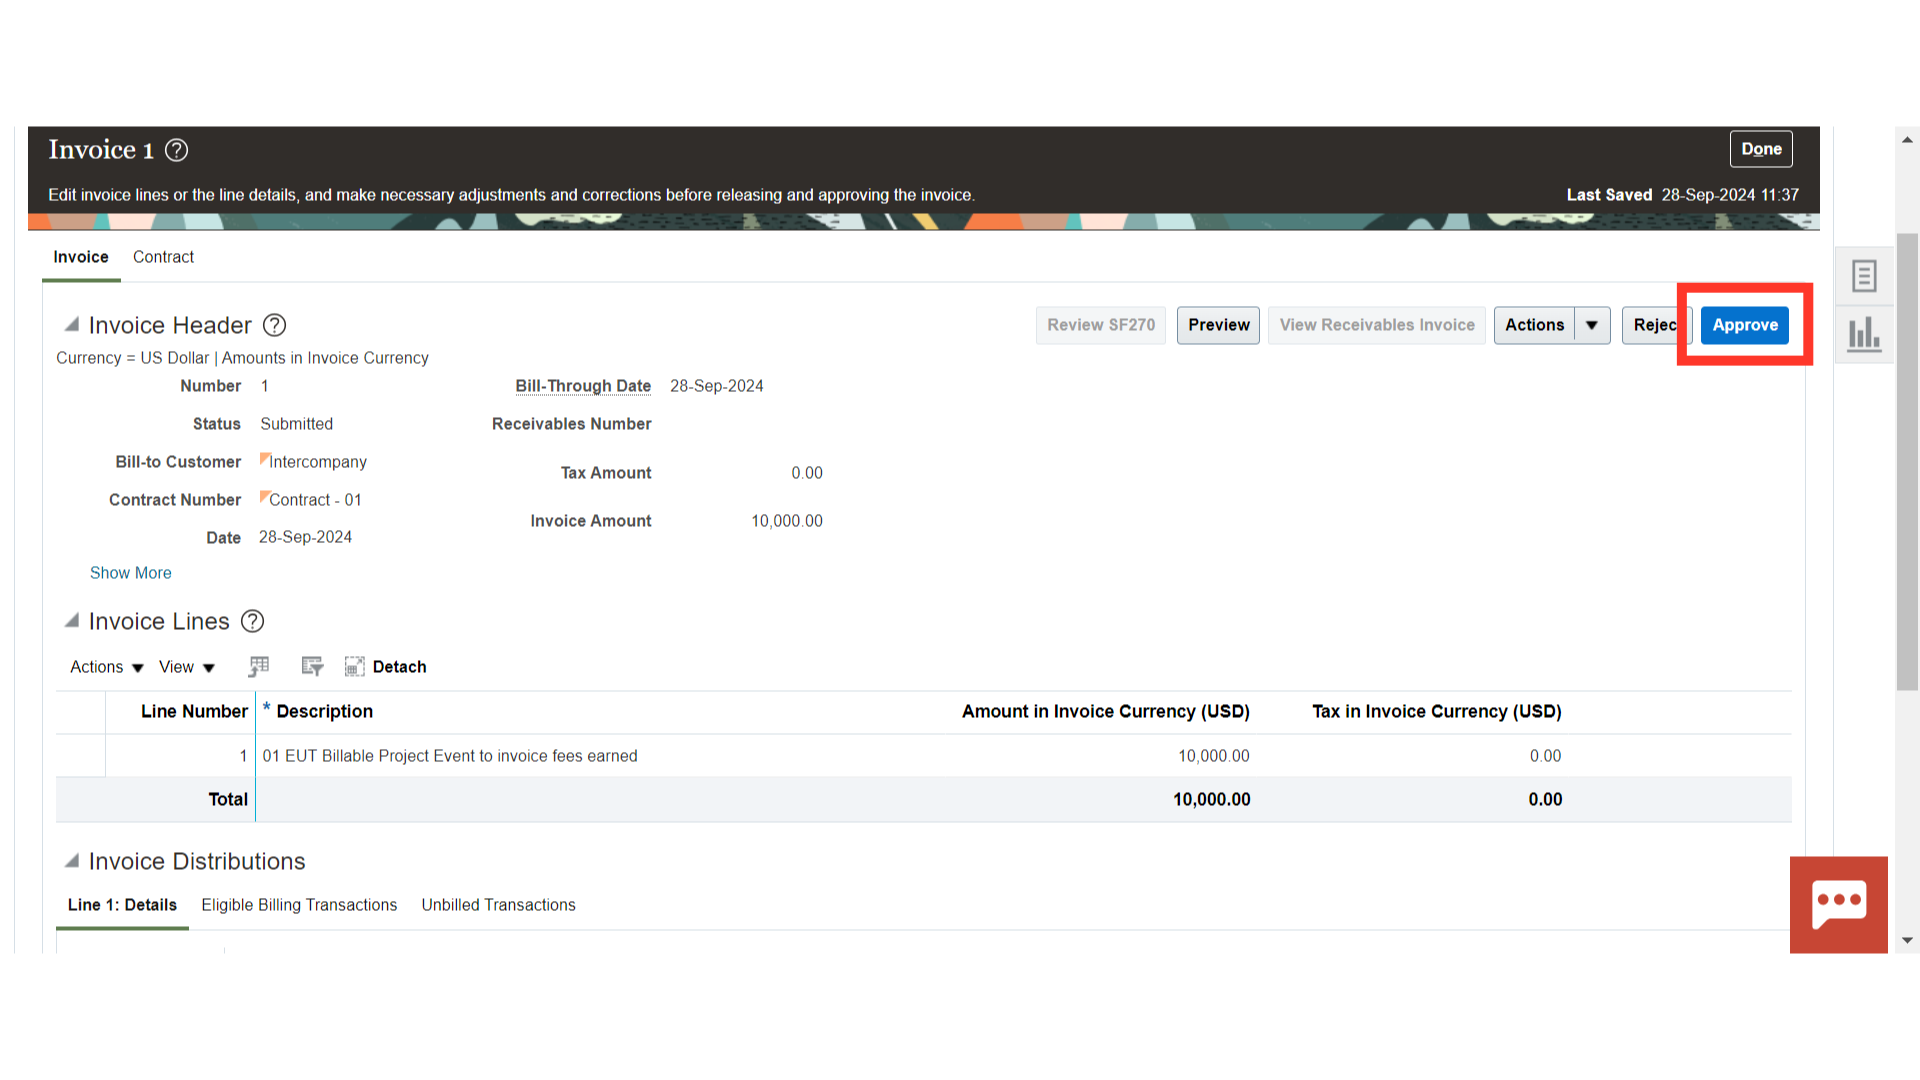
Once invoice details are reviewed, you can click on “Approve” to proceed.
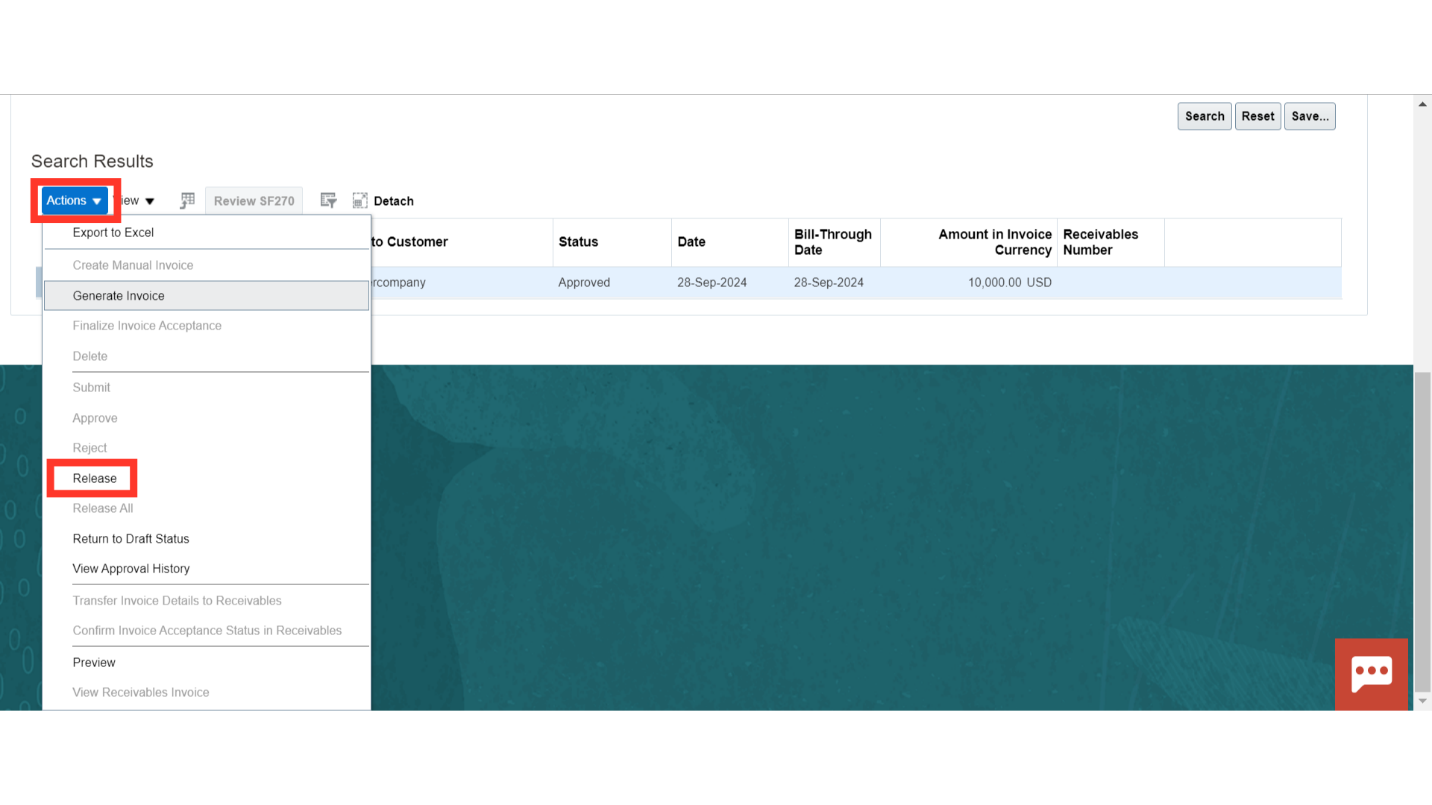
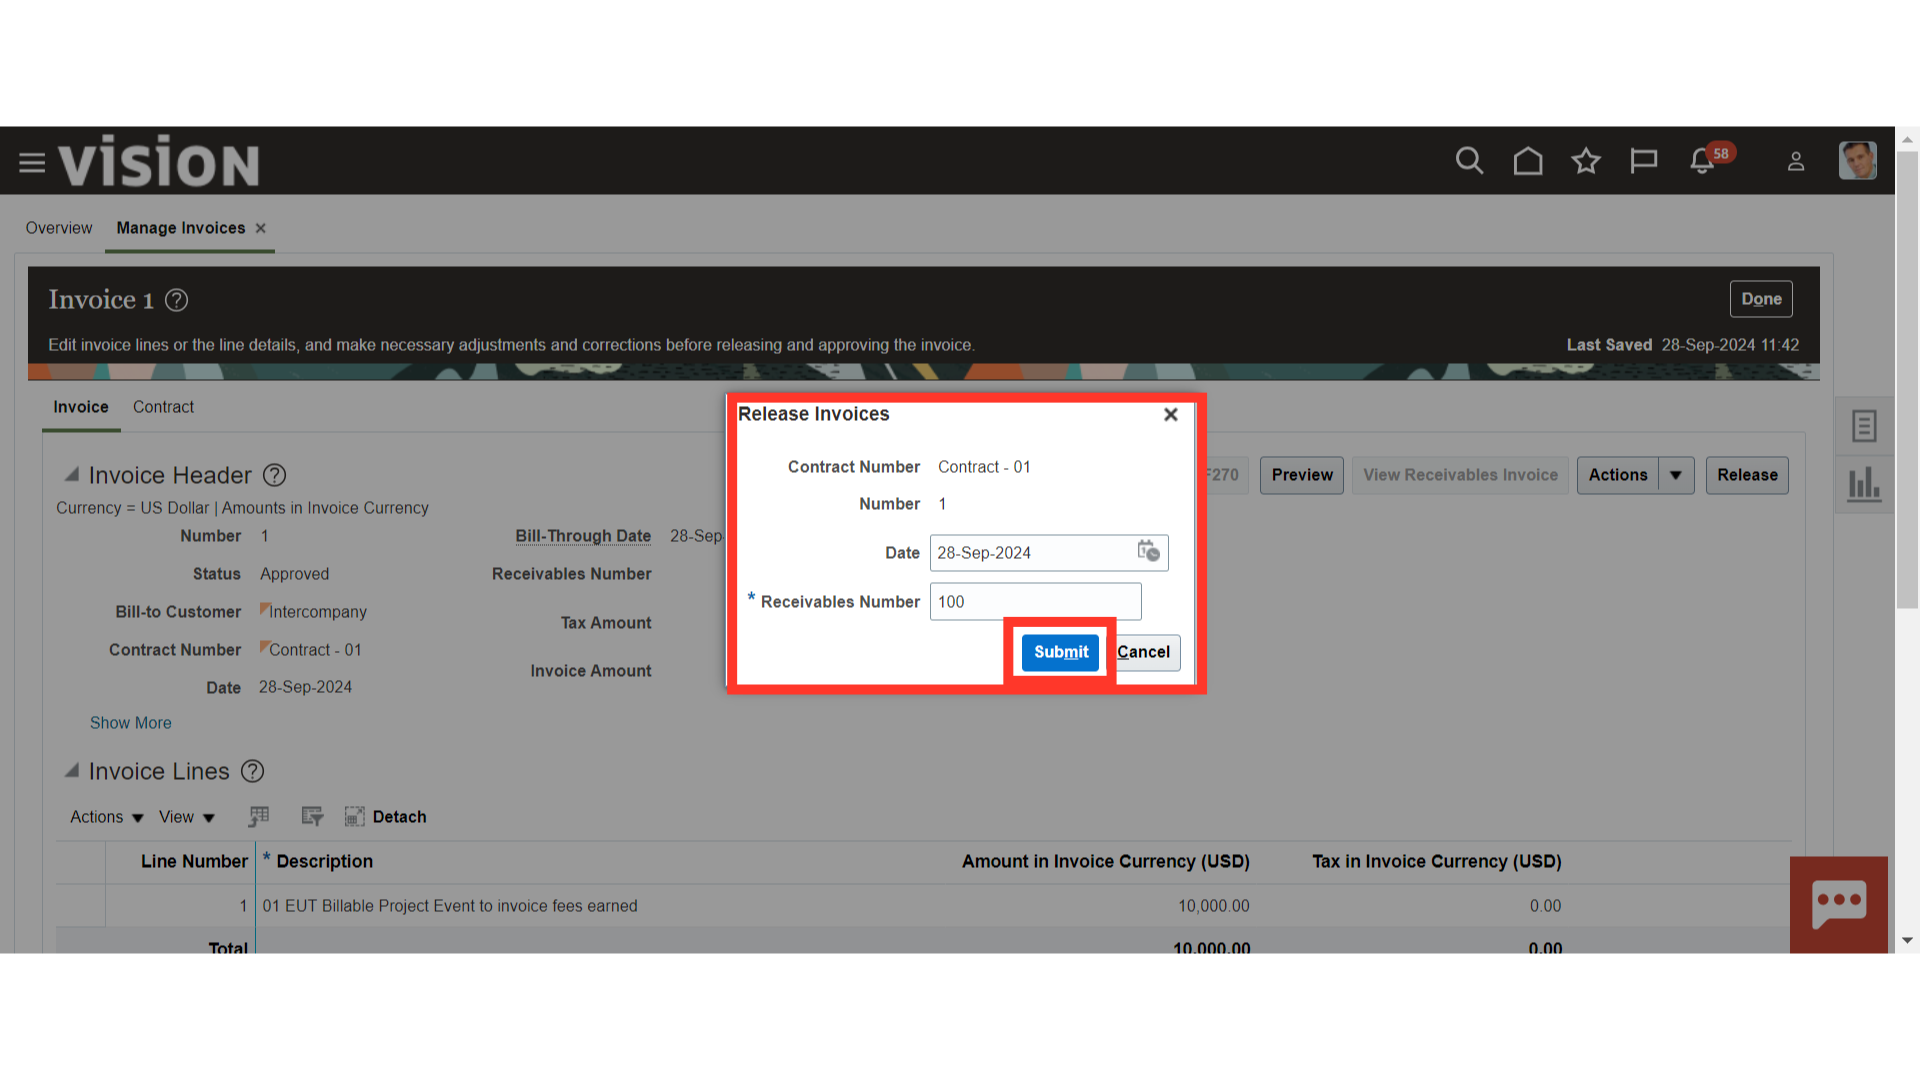
Once the invoice is approved, there are two (2) ways to release the invoice in the Oracle Cloud. Scroll down and select the invoice you want to release. Click ‘Release’ from the ‘Actions’ button, and Oracle Cloud will release the invoice.
Another way is to open the invoice and click on the “Release” button to proceed.
Enter the receivable number. If required, update the date, then click on ‘Submit’.
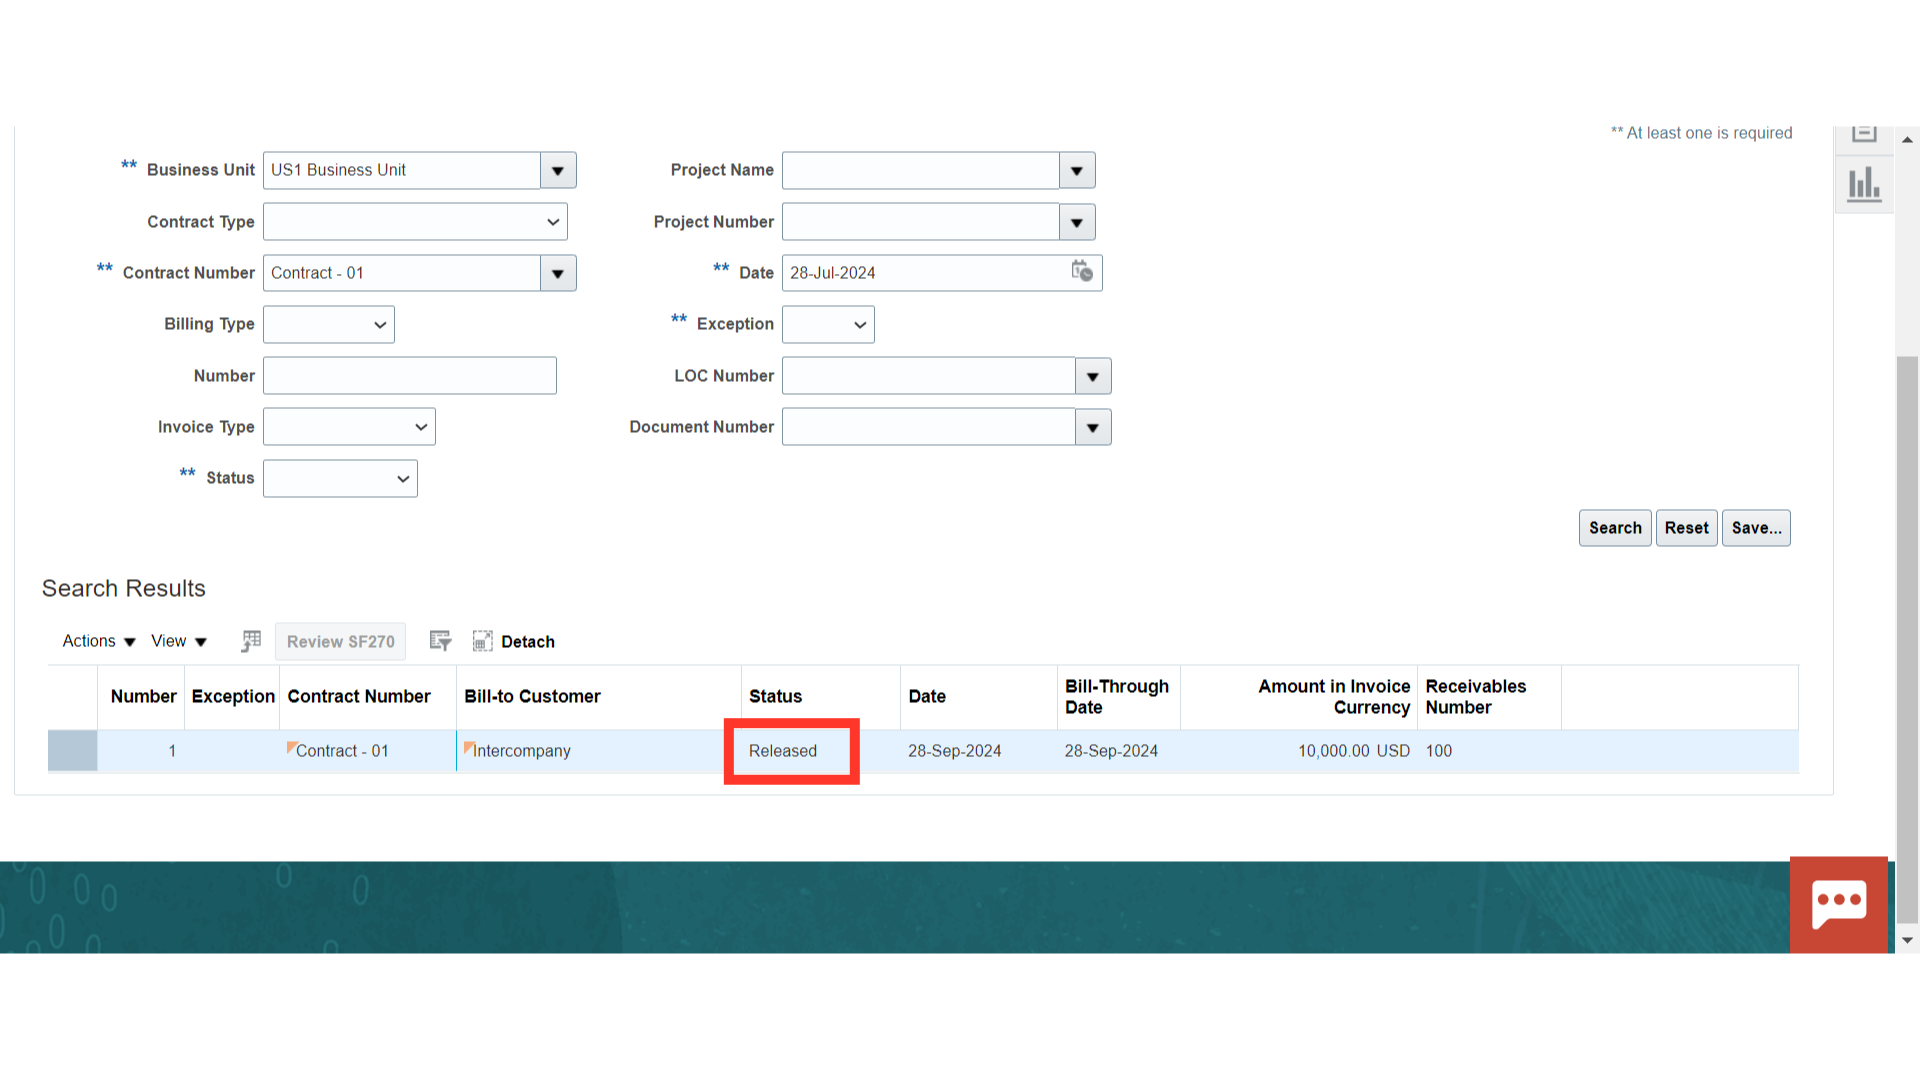
The invoice status will be changed to “Released”. Click on the Oracle Home page to complete the process.
 Thank you for reviewing and using our guide; we hope you have found it helpful. If you have any questions on the content included in this guide, please contact our Training & Learning team at learn@camptratech.com