Correct Import Errors
This guide will provide detailed step by step process of rectifying the journals in import error status and posting them to General Ledger in Oracle Fusion.
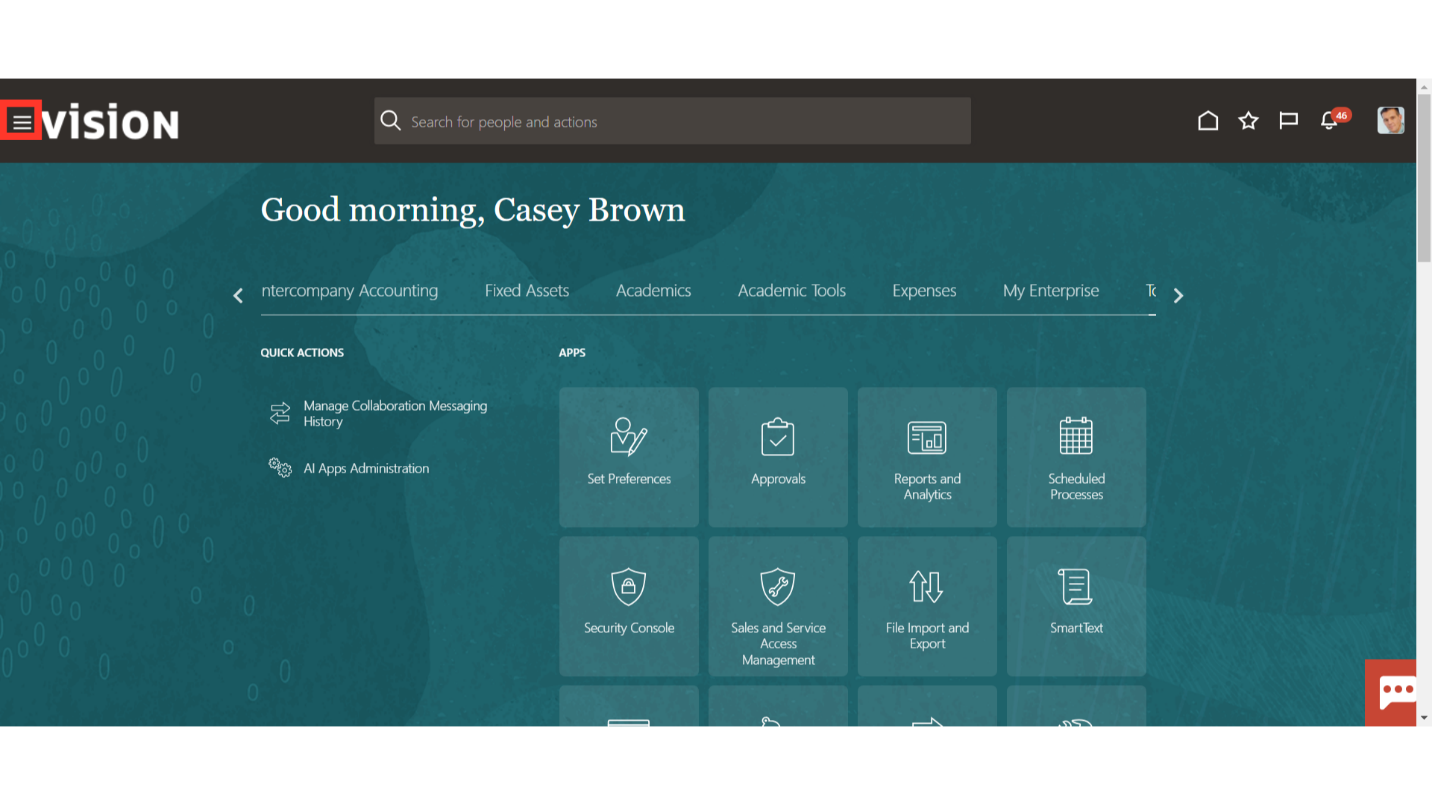
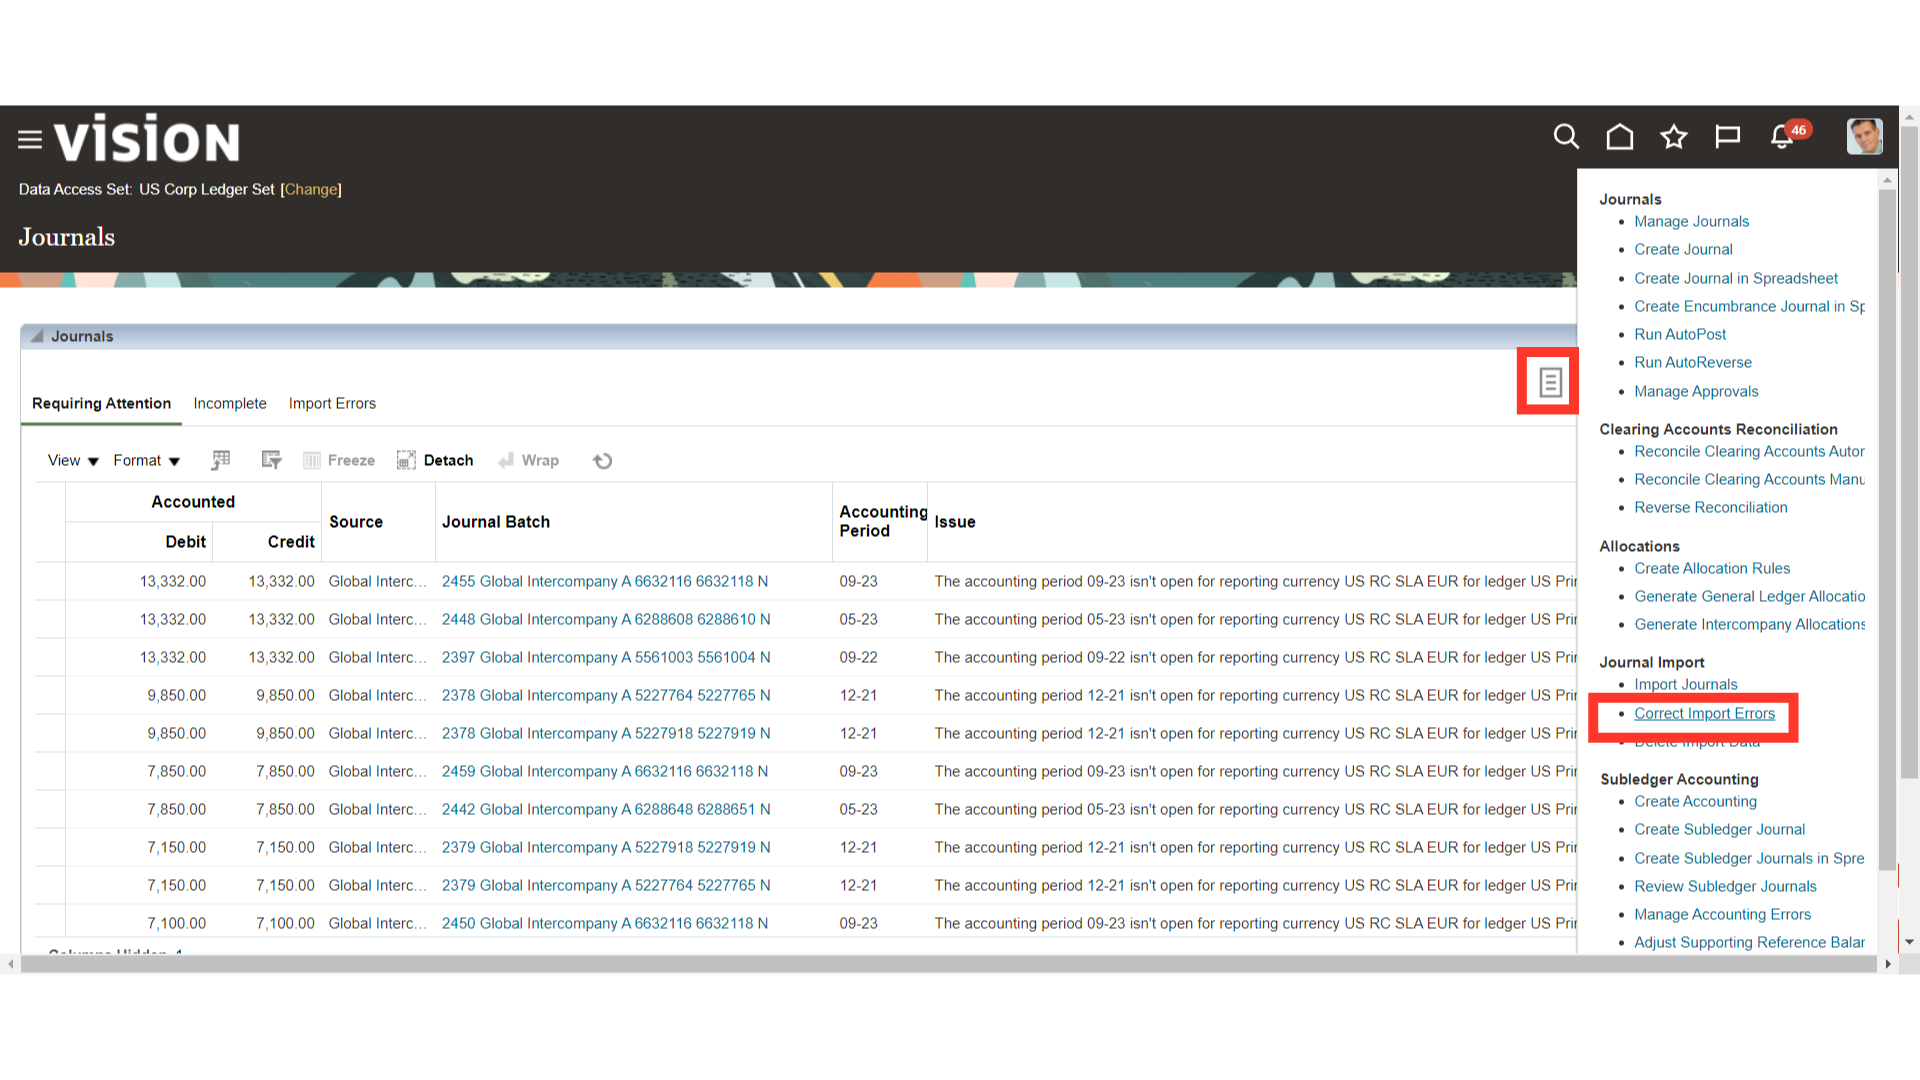
Click on Navigator Icon to access the General Accounting menu.
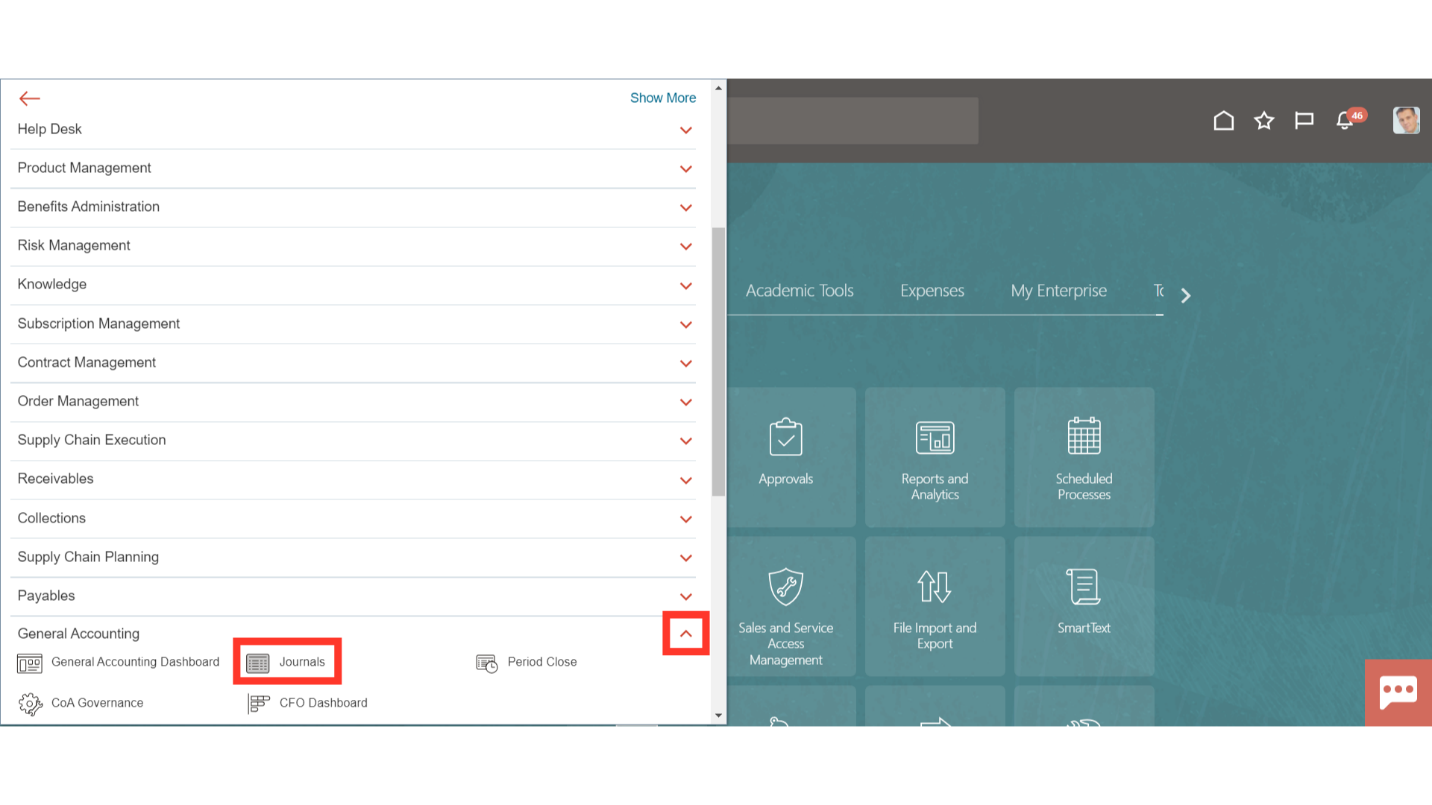
 Click on the Journals submenu by expanding the General Accounting menu.
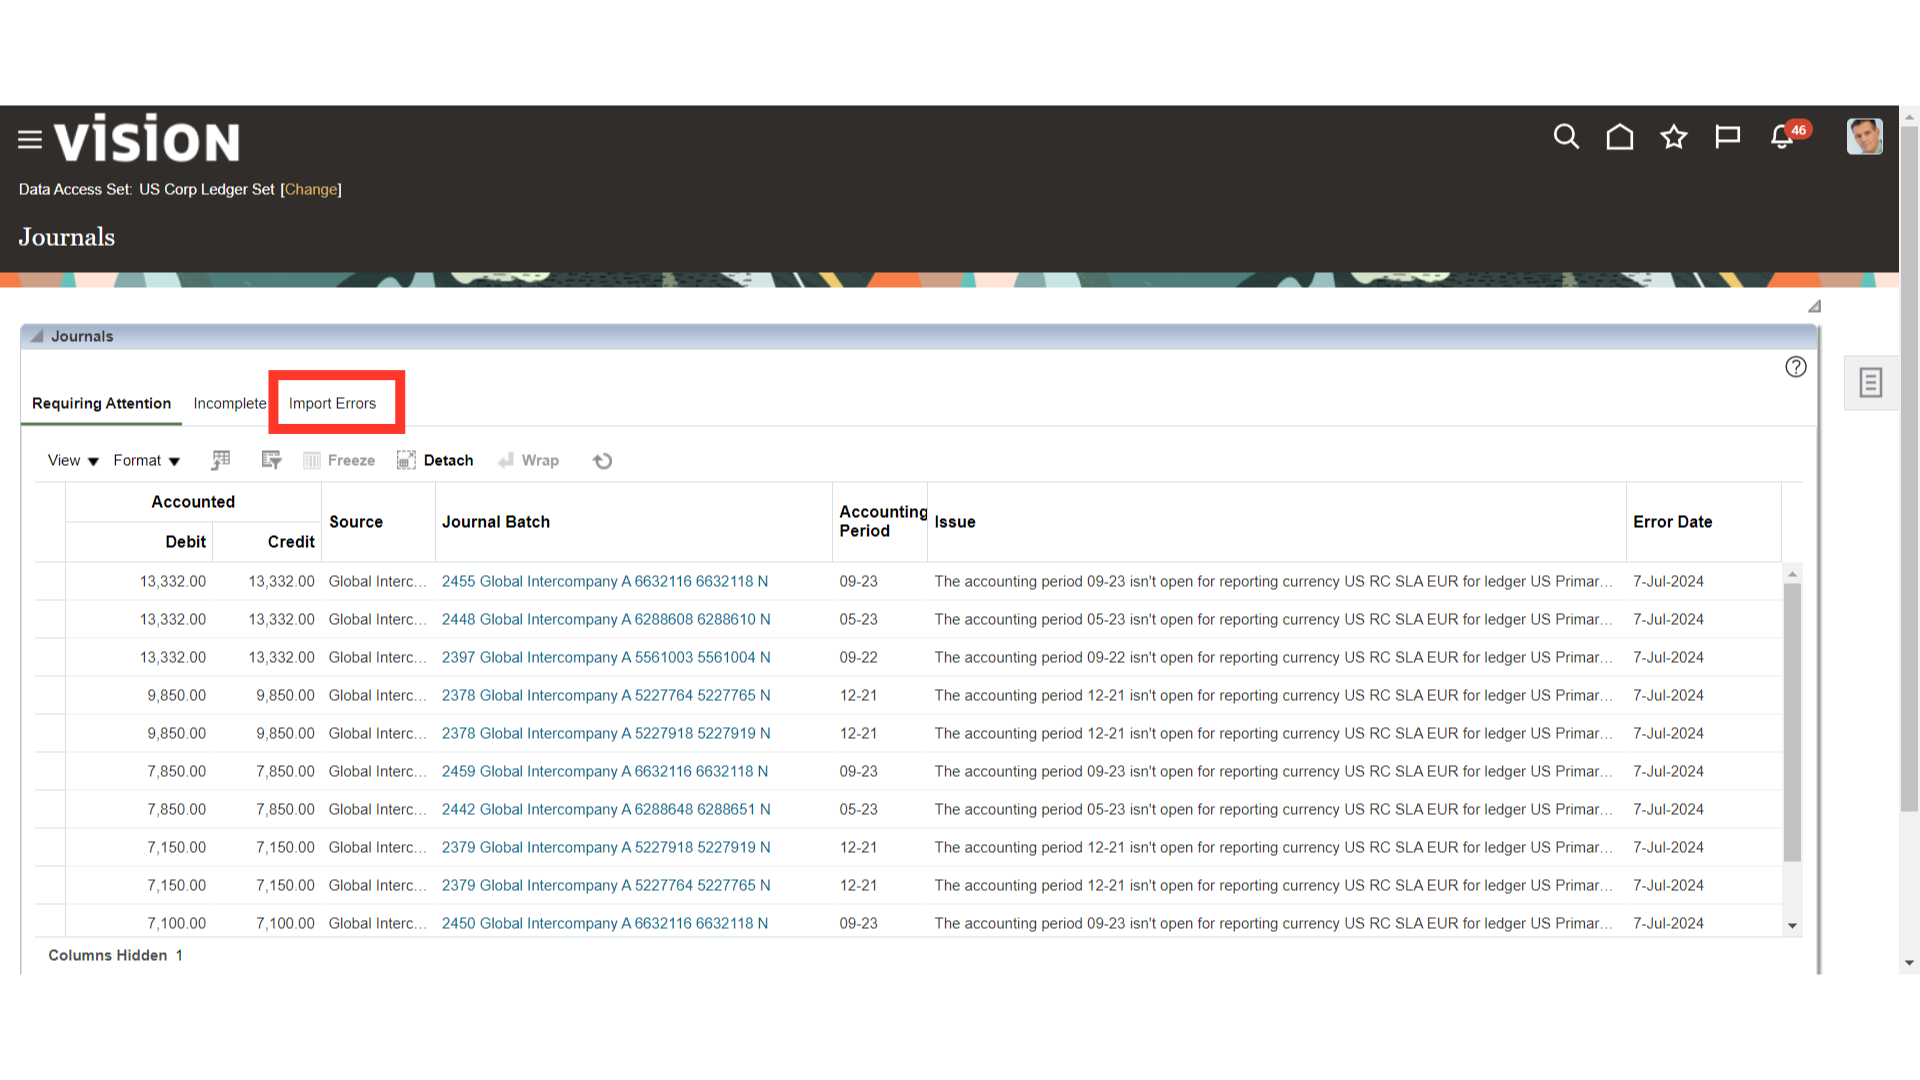
Once you land into the Journals workarea, click on the Import Errors tab to see details related to journals imported pending in error status.
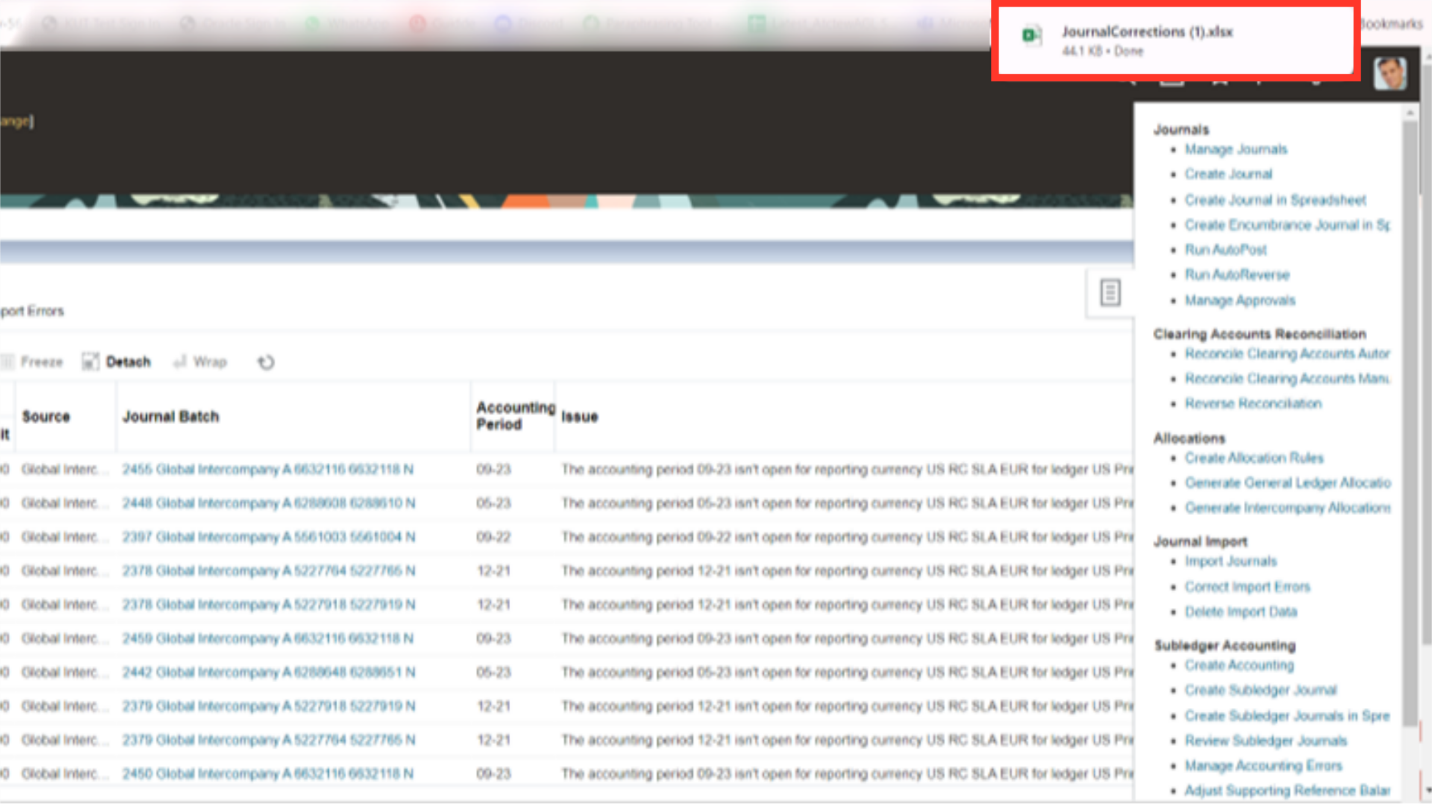
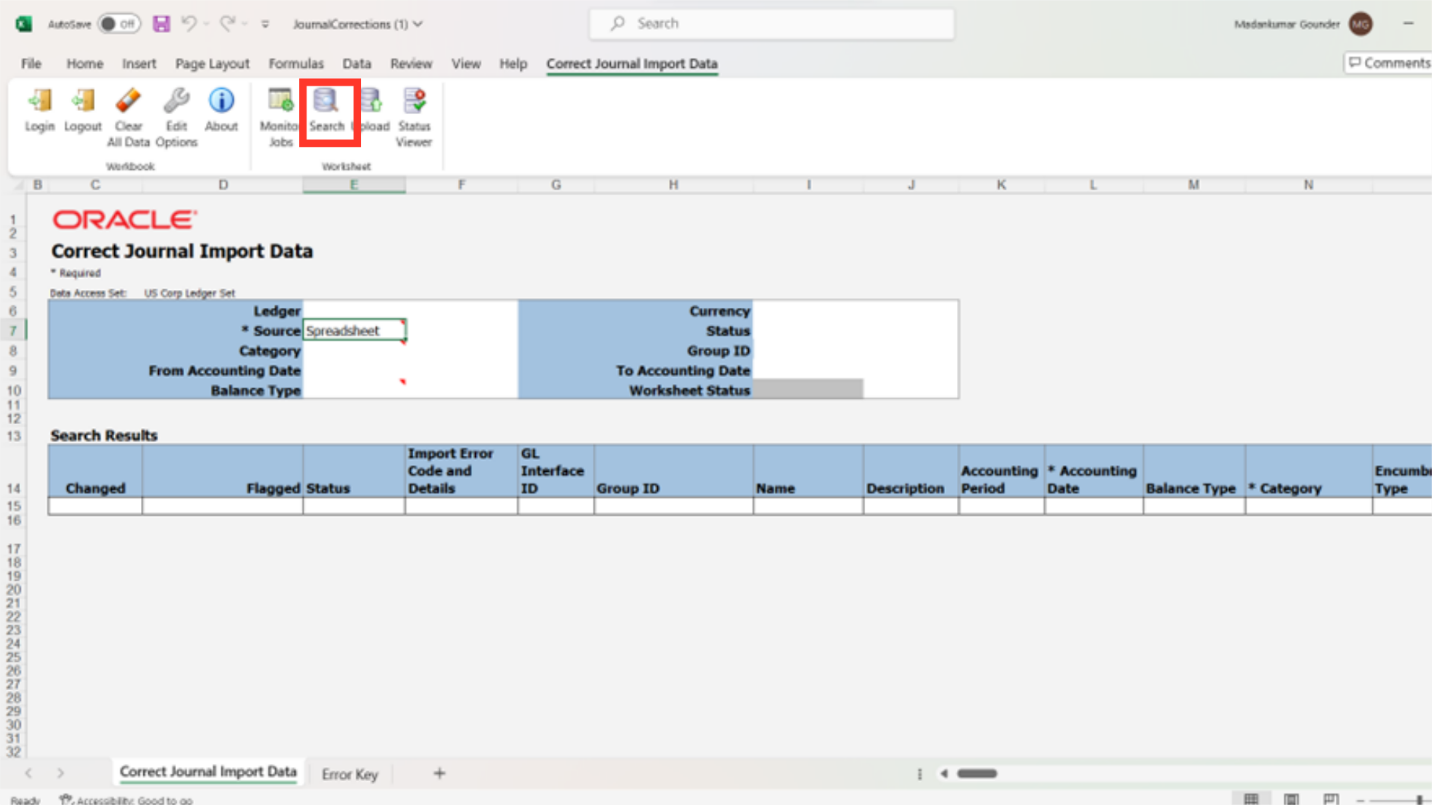
To download the Correct Import Errors Spreadsheet, click on the Correct Import Errors from the task list.
Open the downloaded ADFDI spreadsheet from your local desktop to rectify and import the journal entry details.
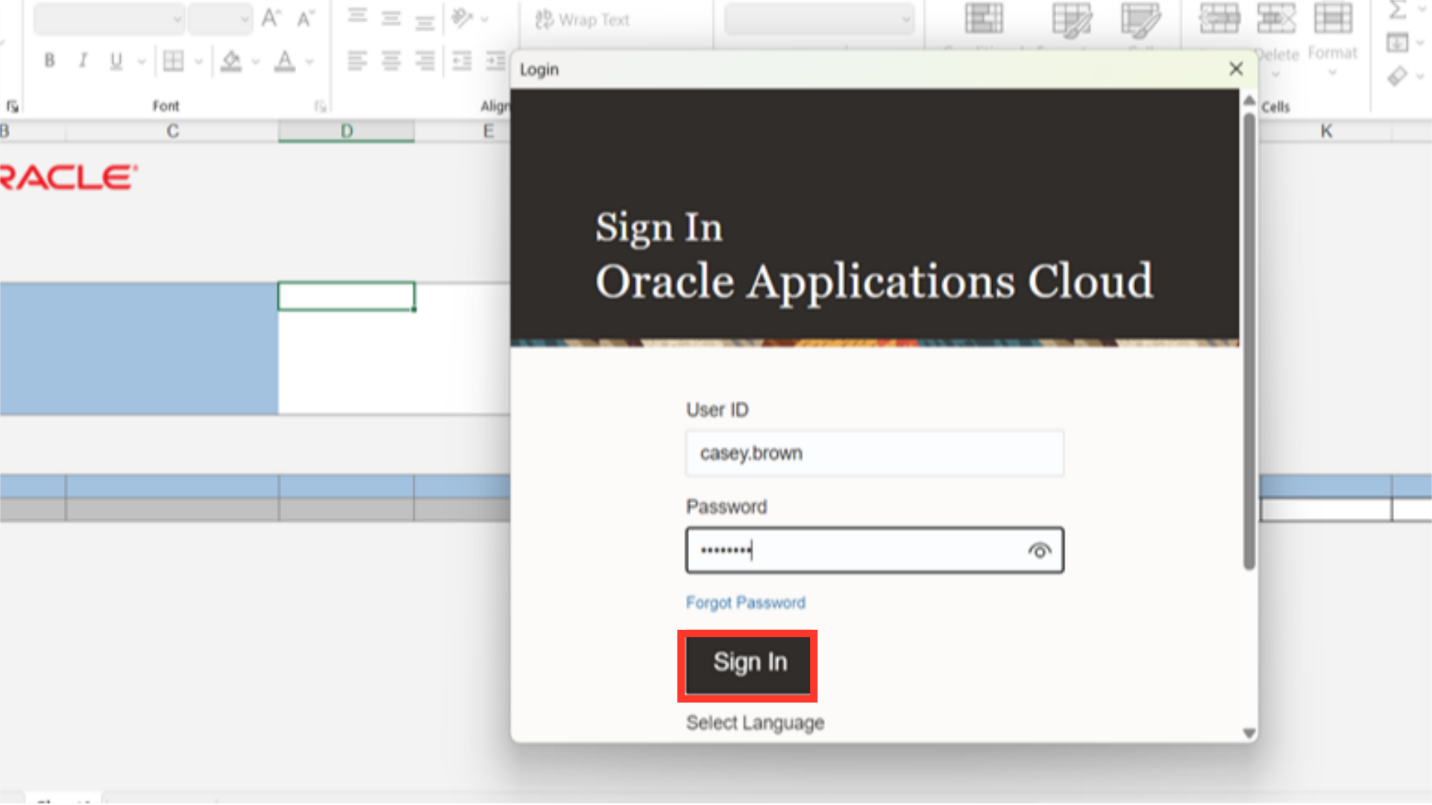
Click on the “Yes” button to log into the ADFDI spreadsheet.

After entering the user credentials same as oracle fusion click on the Sign in button.
The Pop up menu will open when you double-click on the row next to the Source field, and it will pull data straight from the Oracle Fusion. Click the OK button to proceed after searching for the Source name.
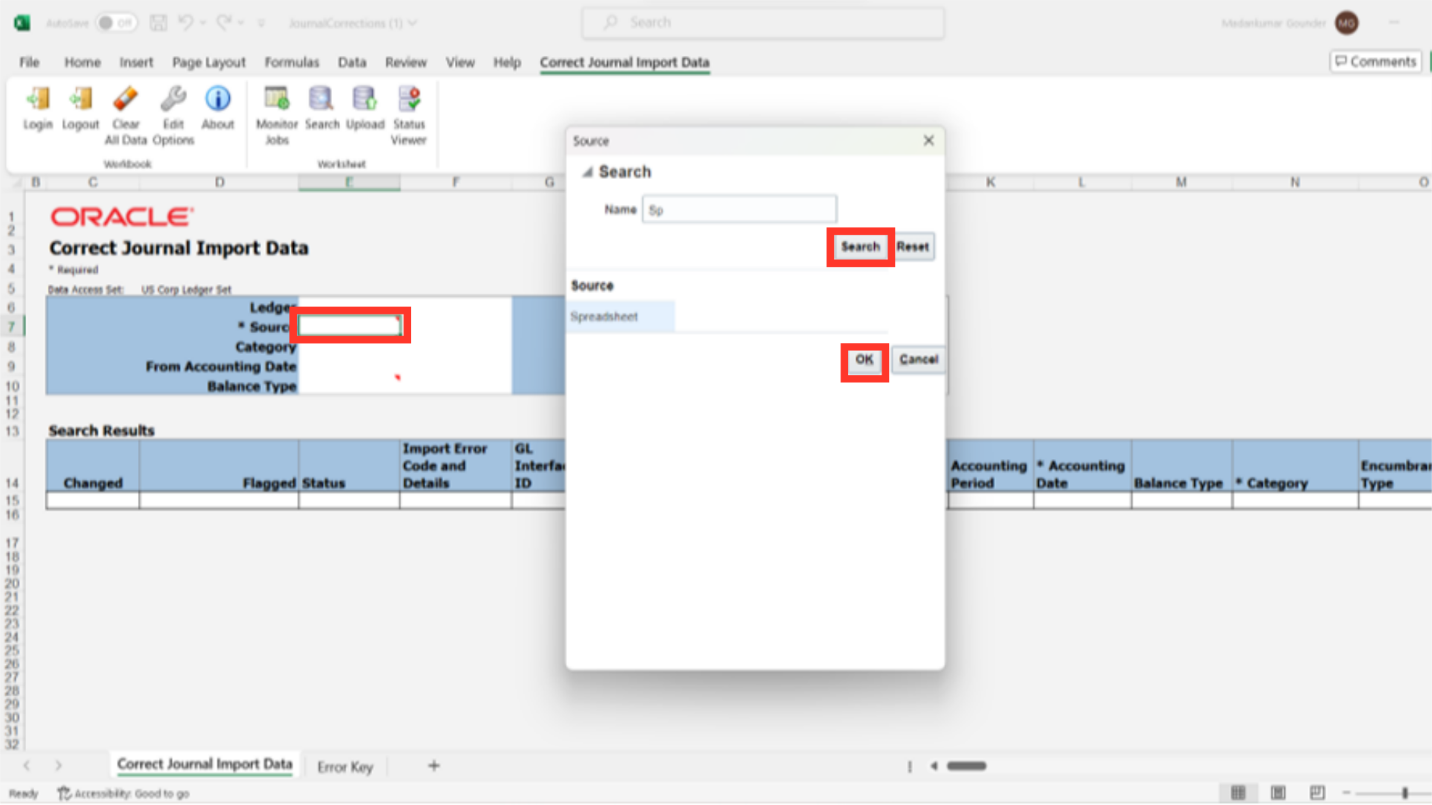
To locate the journal entries that were incorrectly imported during the process for a particular source, click the Search button.
The Error details are displayed under the Import Error Code and details column.
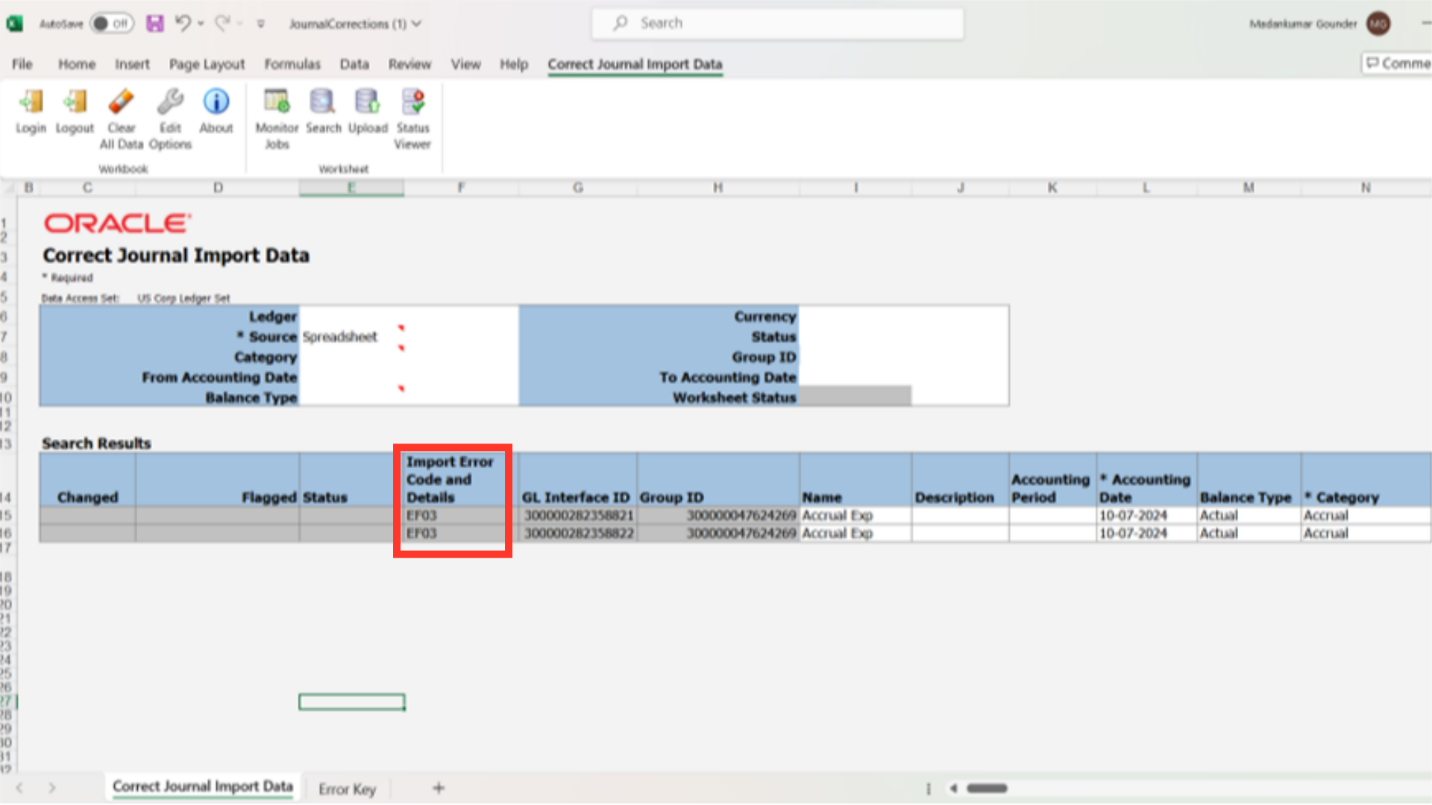
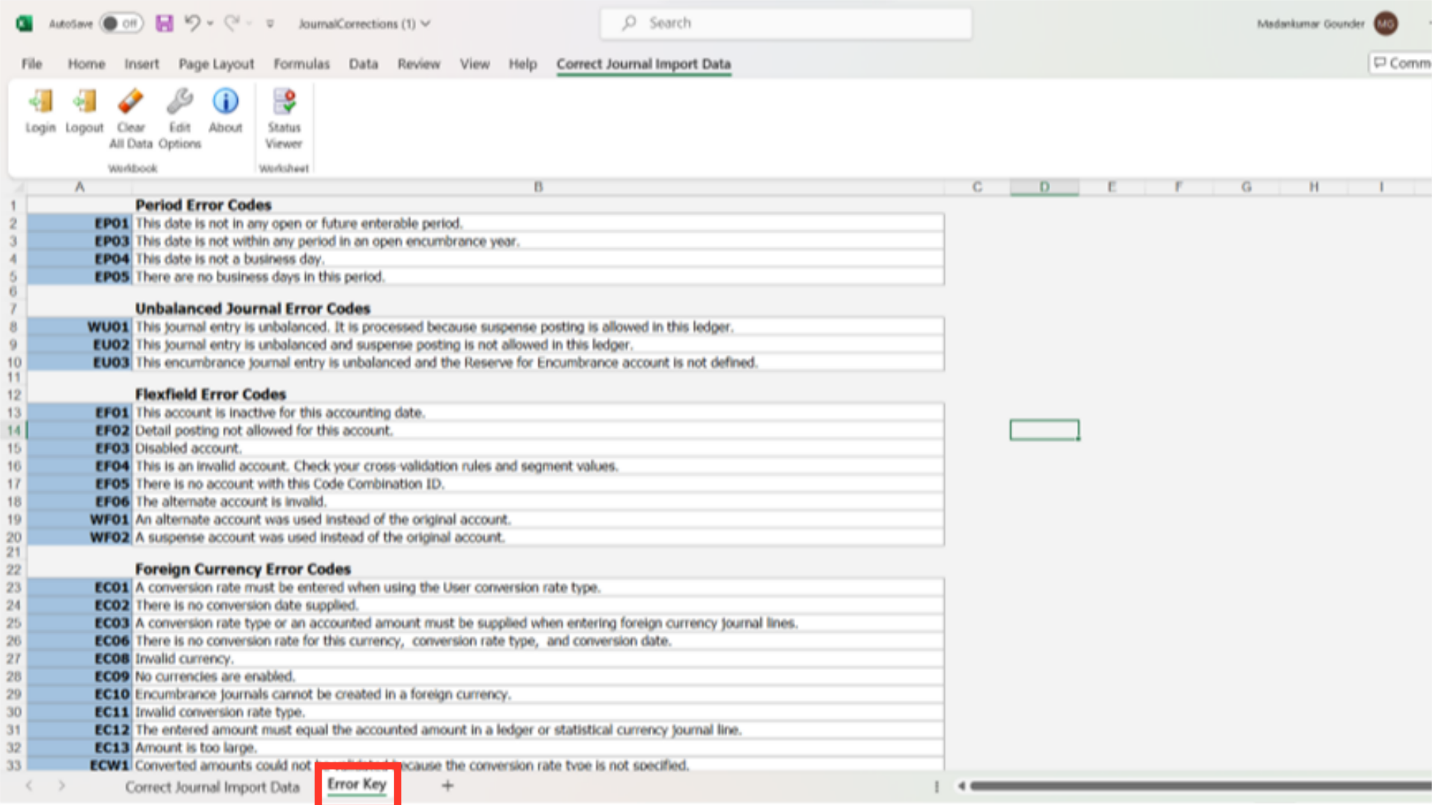
Click on the Error key sheet to see the description of Error code sign which corrective action can be taken.
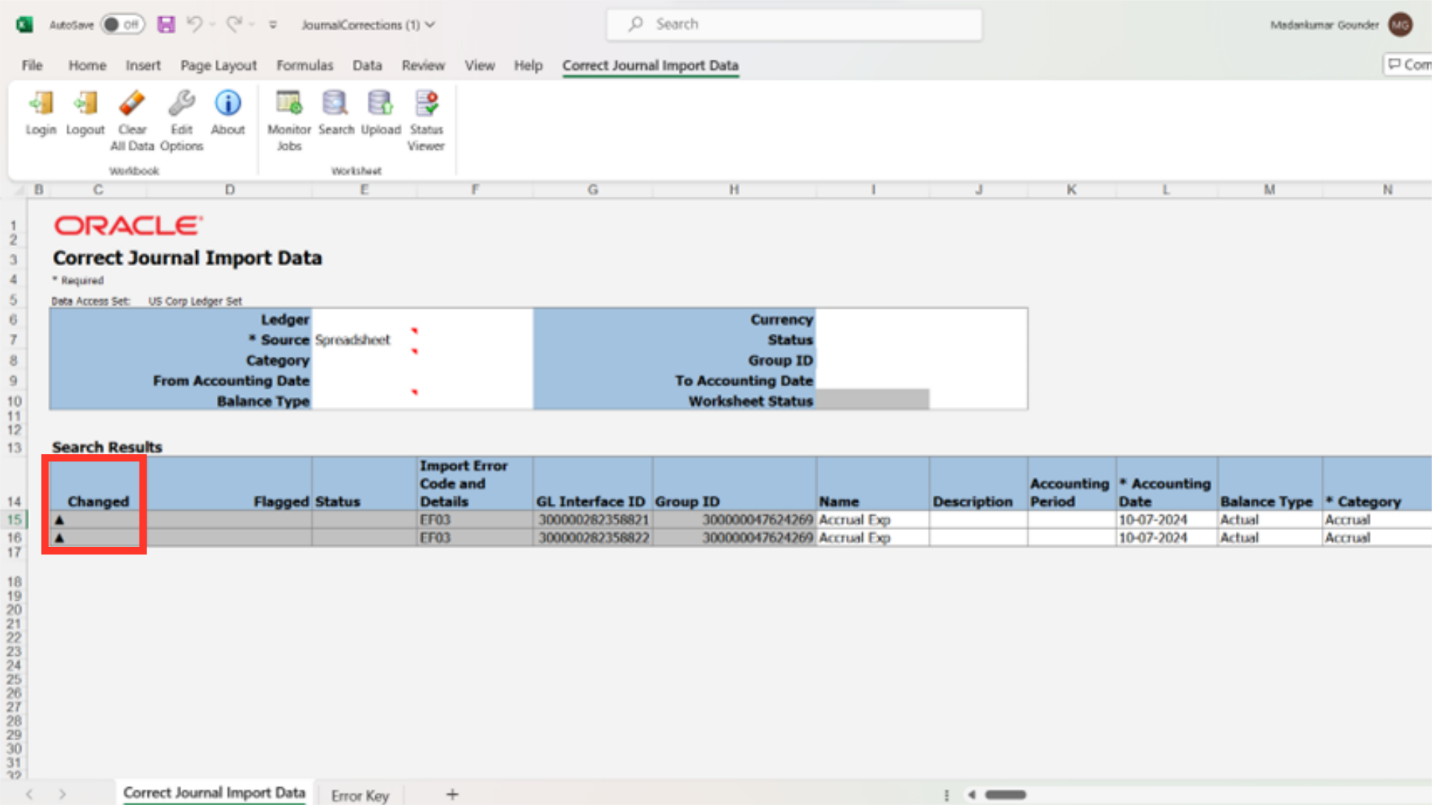
After rectifying the error, double click on the changed column to display Triangle Icon, and these are the ones that will be chosen to be uploaded.
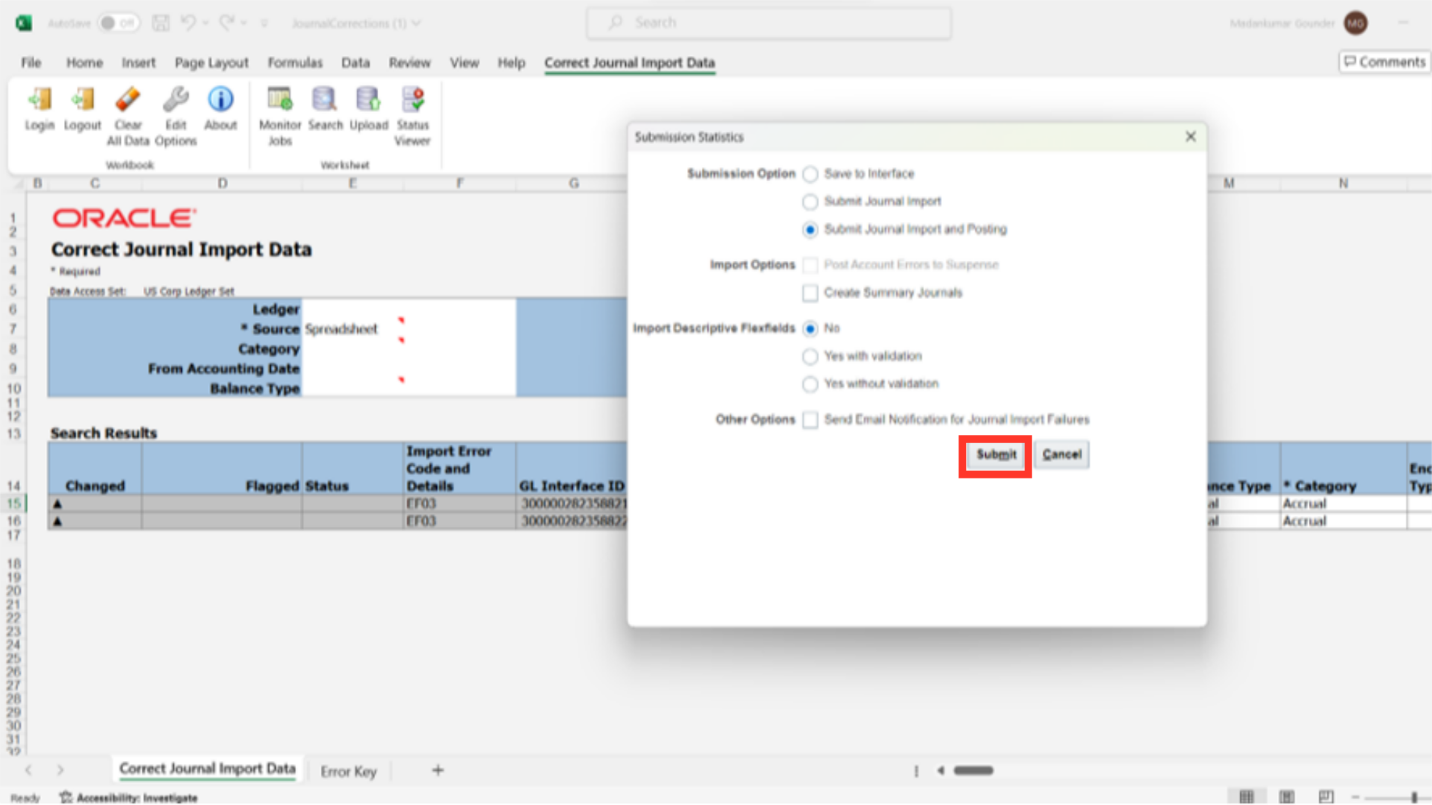
To import entries into an interface table for later import, select Save to Interface under the Submission option. Alternatively, you can select Submit Journal import to import journals into the General Ledger, but posting will be done from the system. As though To import the journal and post it into the general ledger, select the Submit Journal Import and Posting option. To proceed, click the Submit button.
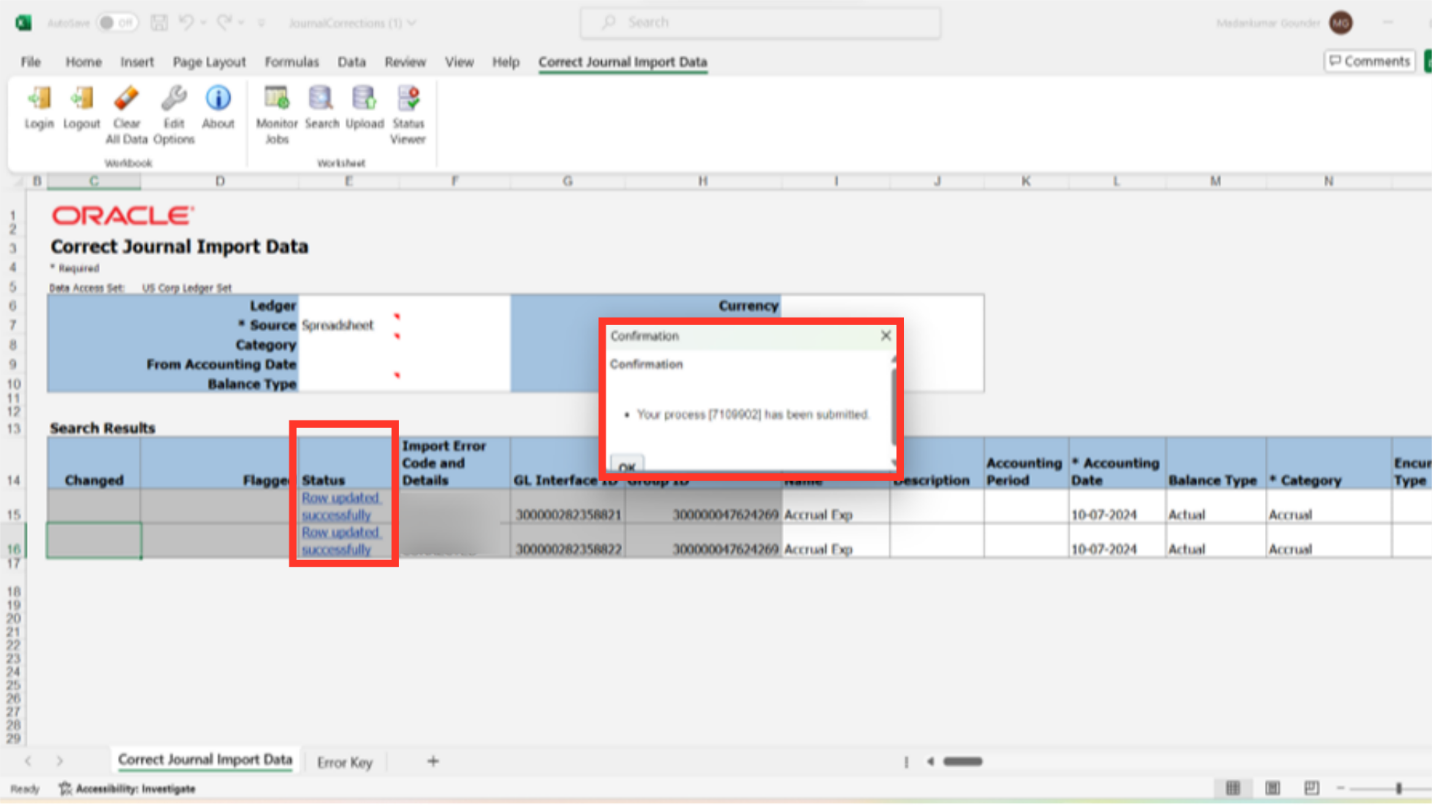
As the line get uploaded successfully, the Raw Status changes to ‘Raw Inserted successfully’. Additionally, a confirmation message is displayed along with the Process ID.
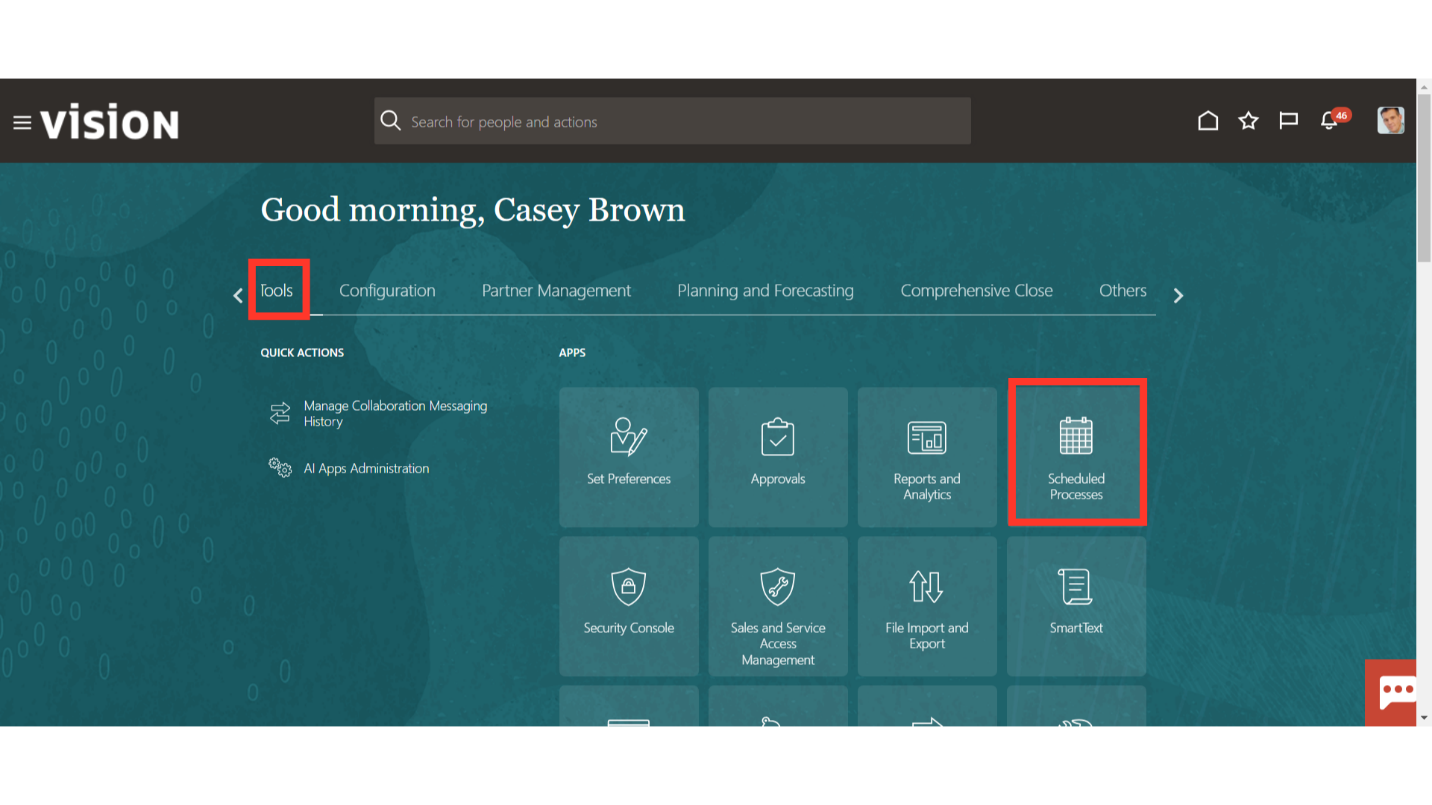
Click on the Scheduled Processes submenu under the Tools menu.
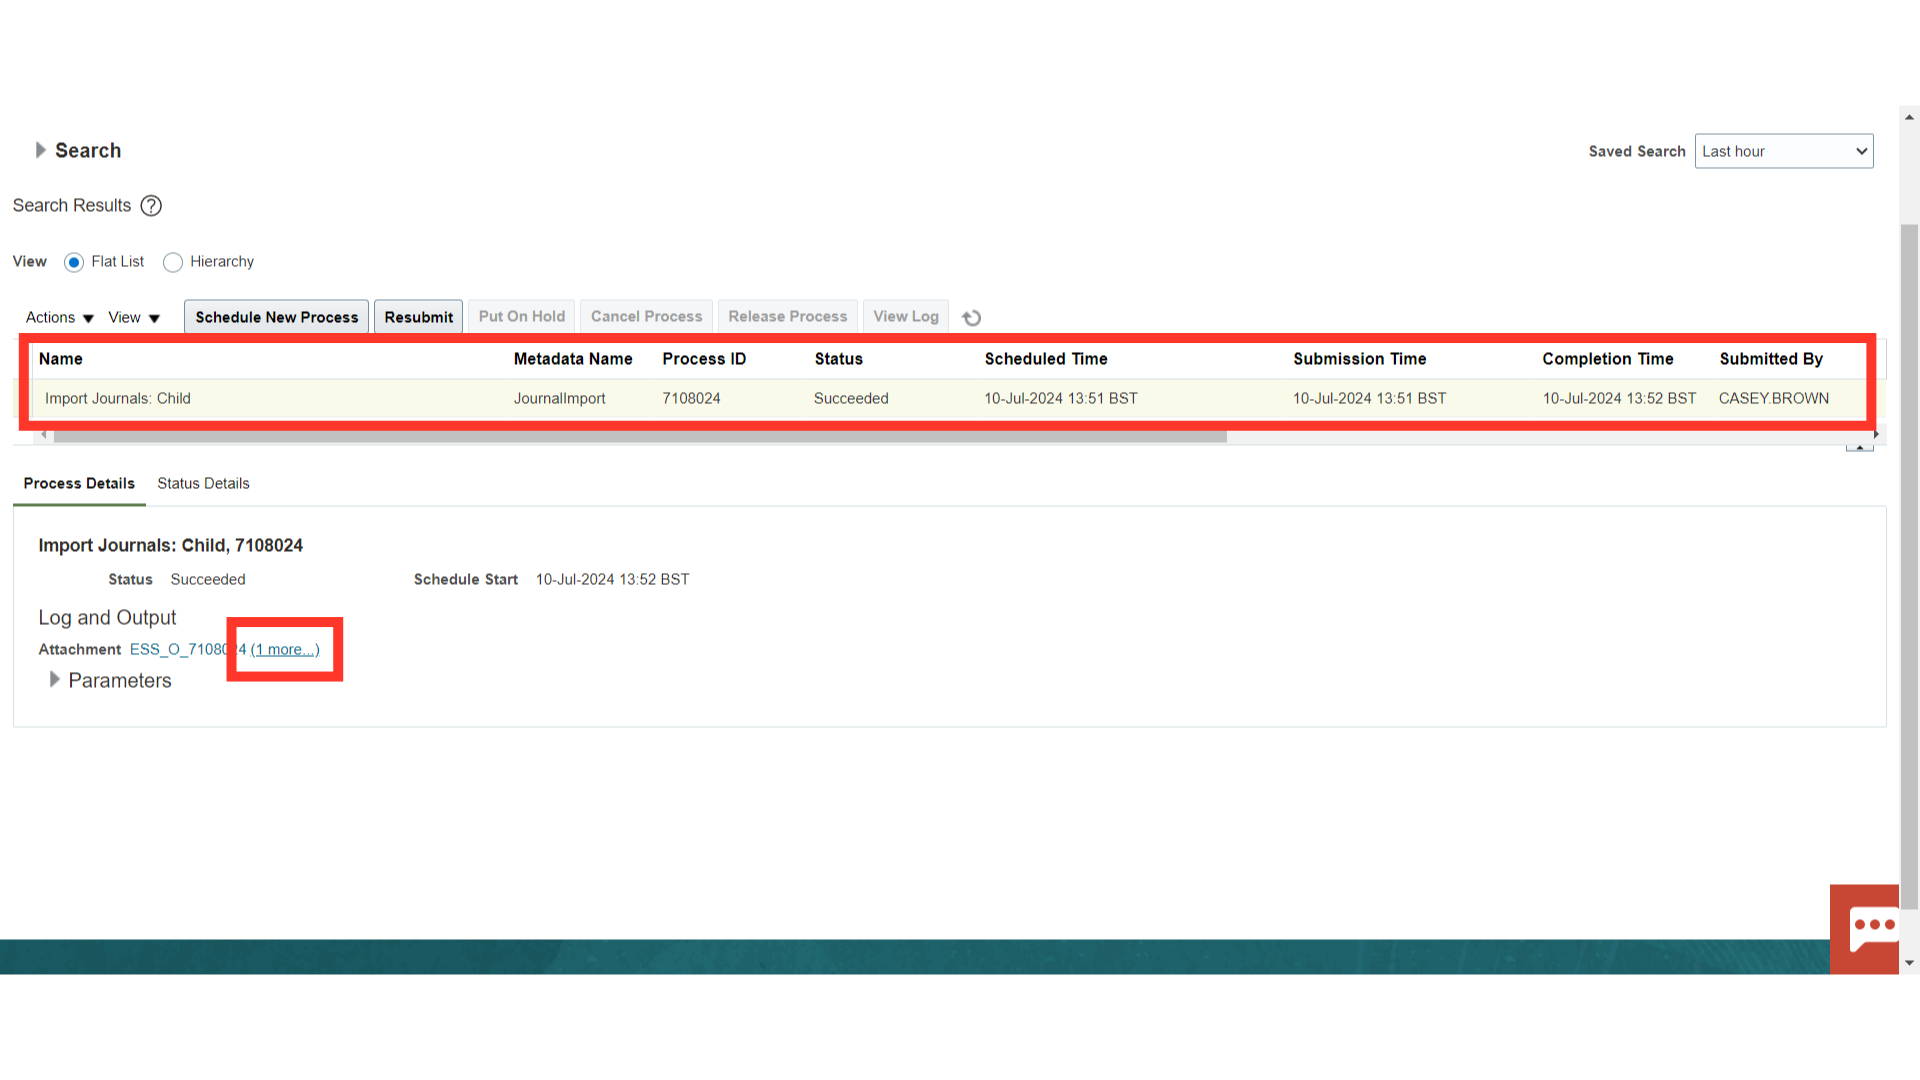
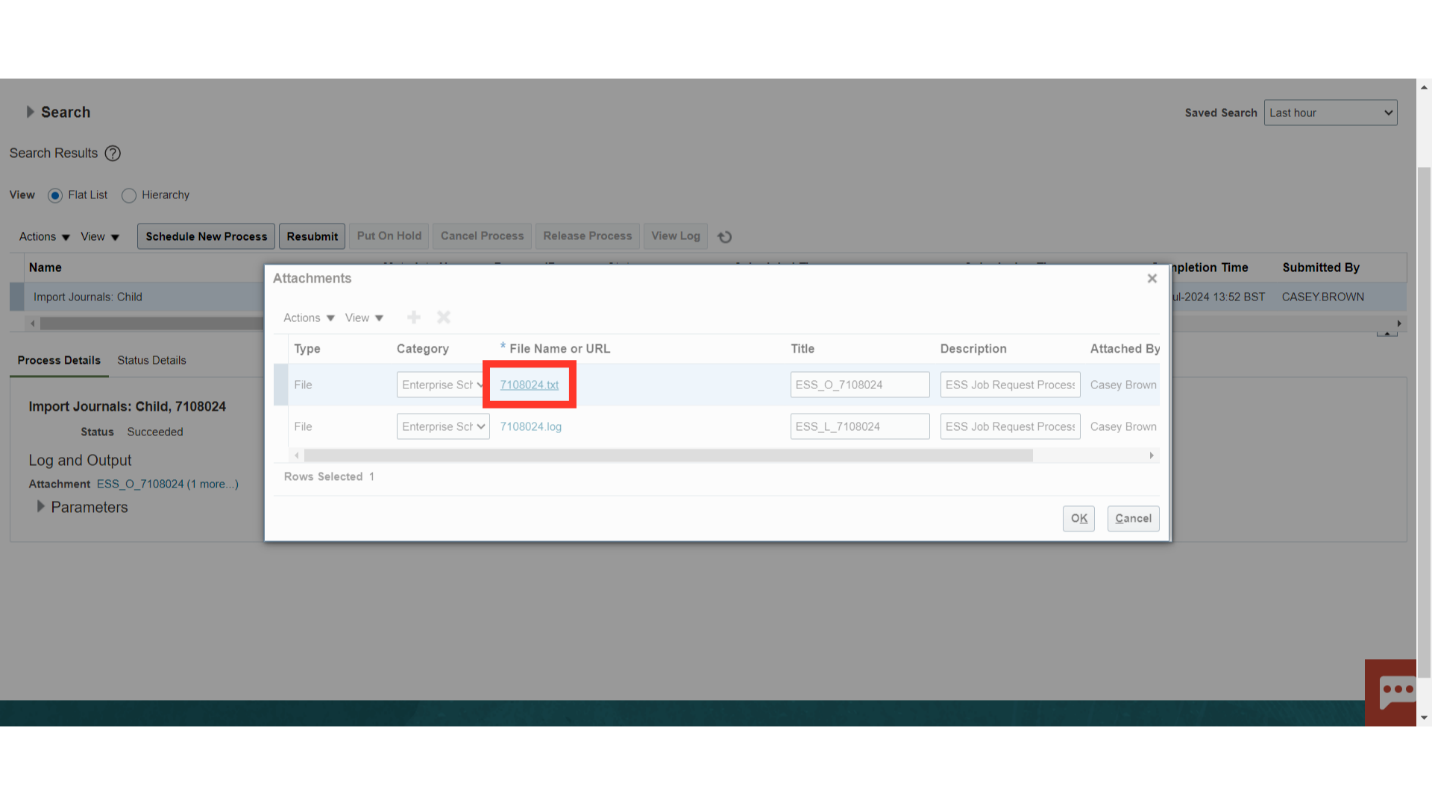
 Once Import Journals: Child process is succeeded, click on the 1 more hyperlink against the attachment to download the report.
Click on the file name hyperlink with .txt extension to download the report.
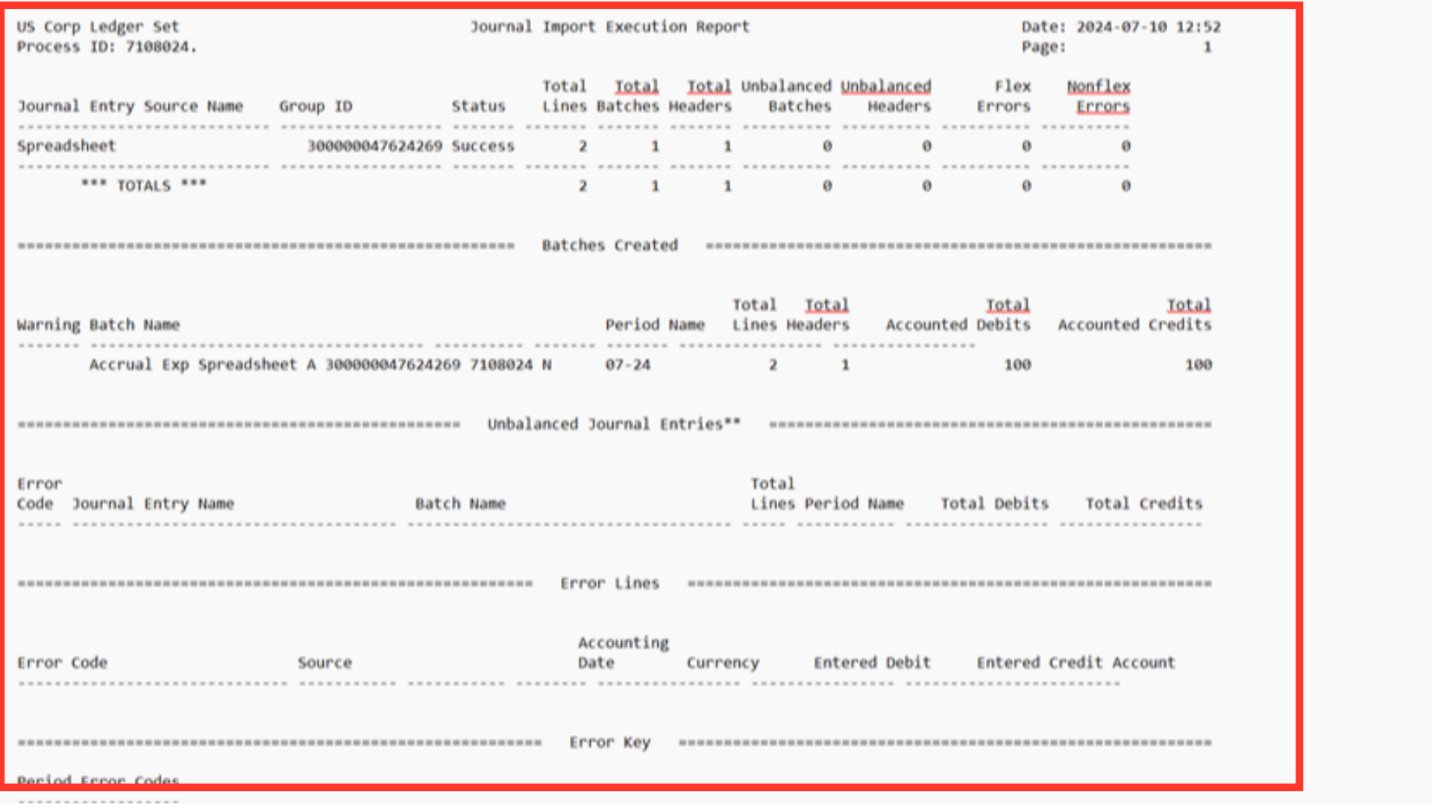
The details of the batch posted is displayed along with Batch name and Period name.
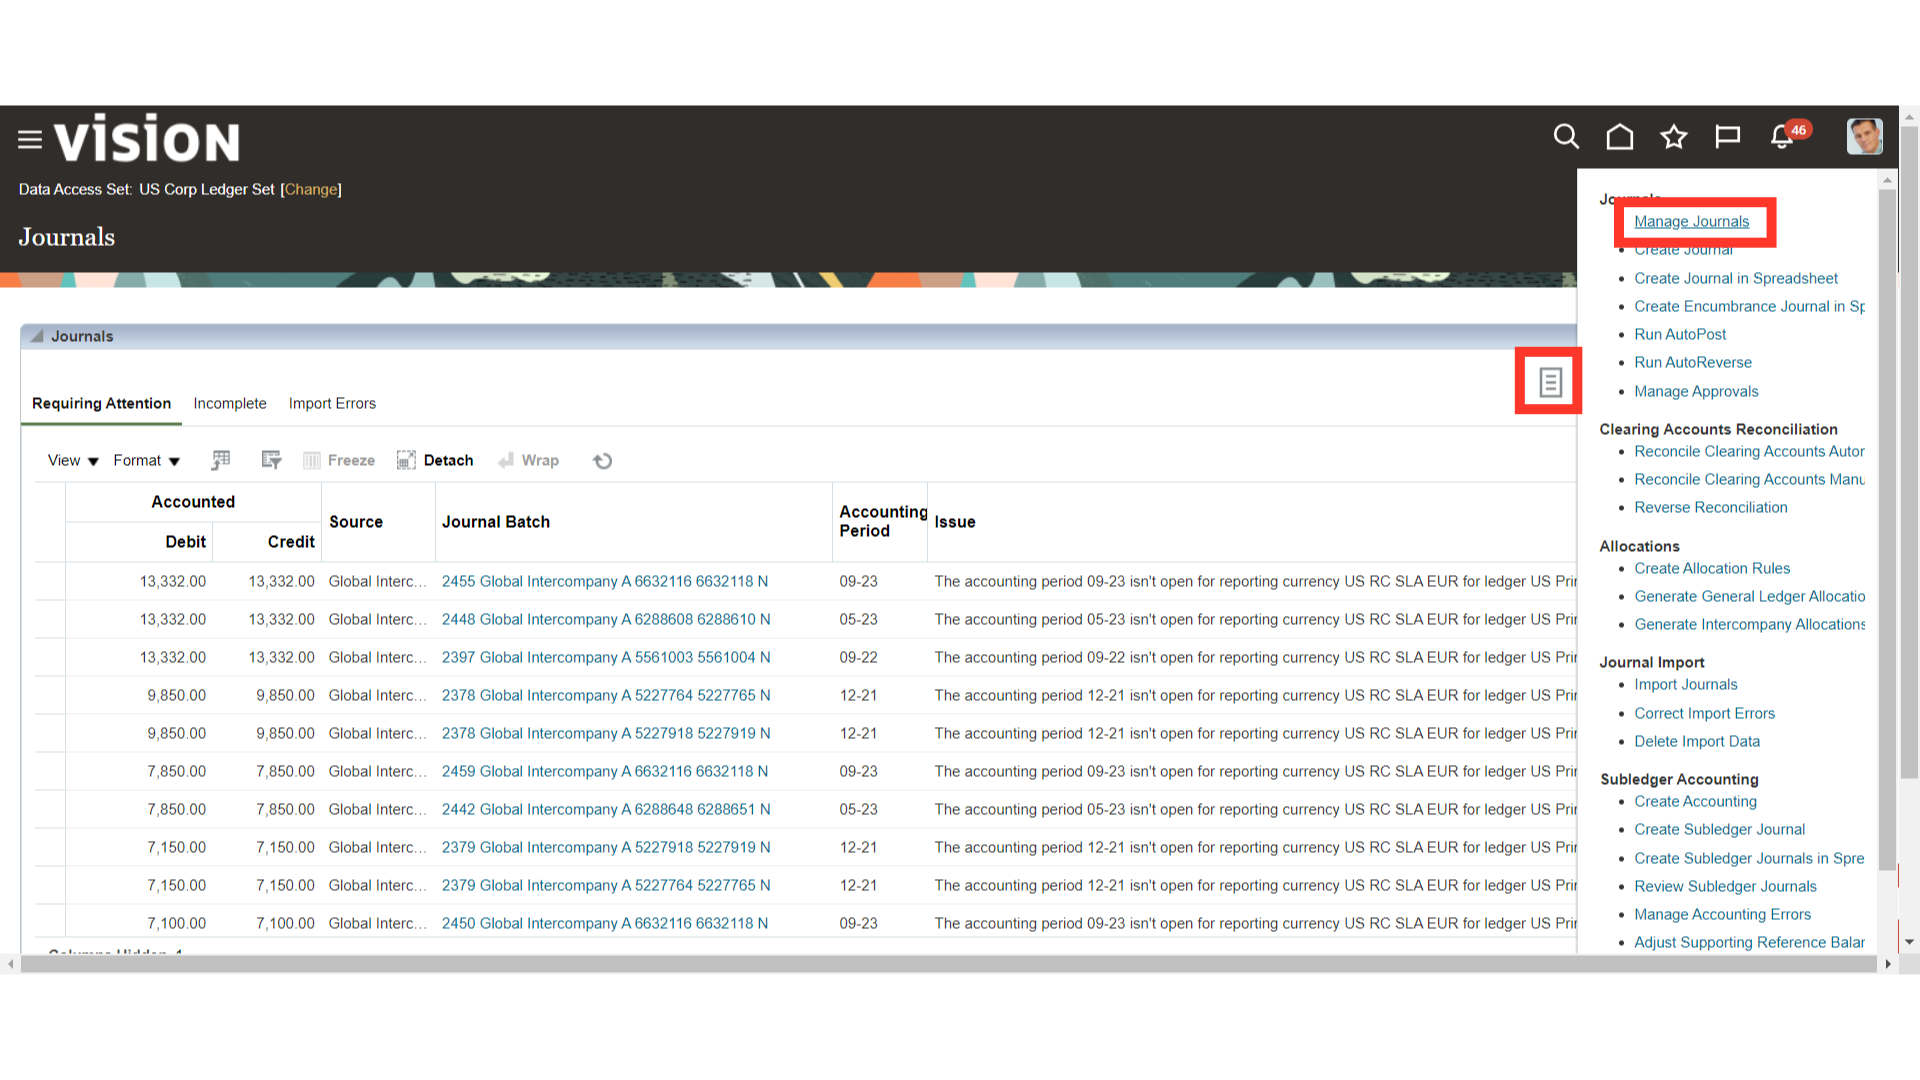
Click on the Manage Journals from the Task list to search the journals.
Click on the search button after entering the relevant parameters.
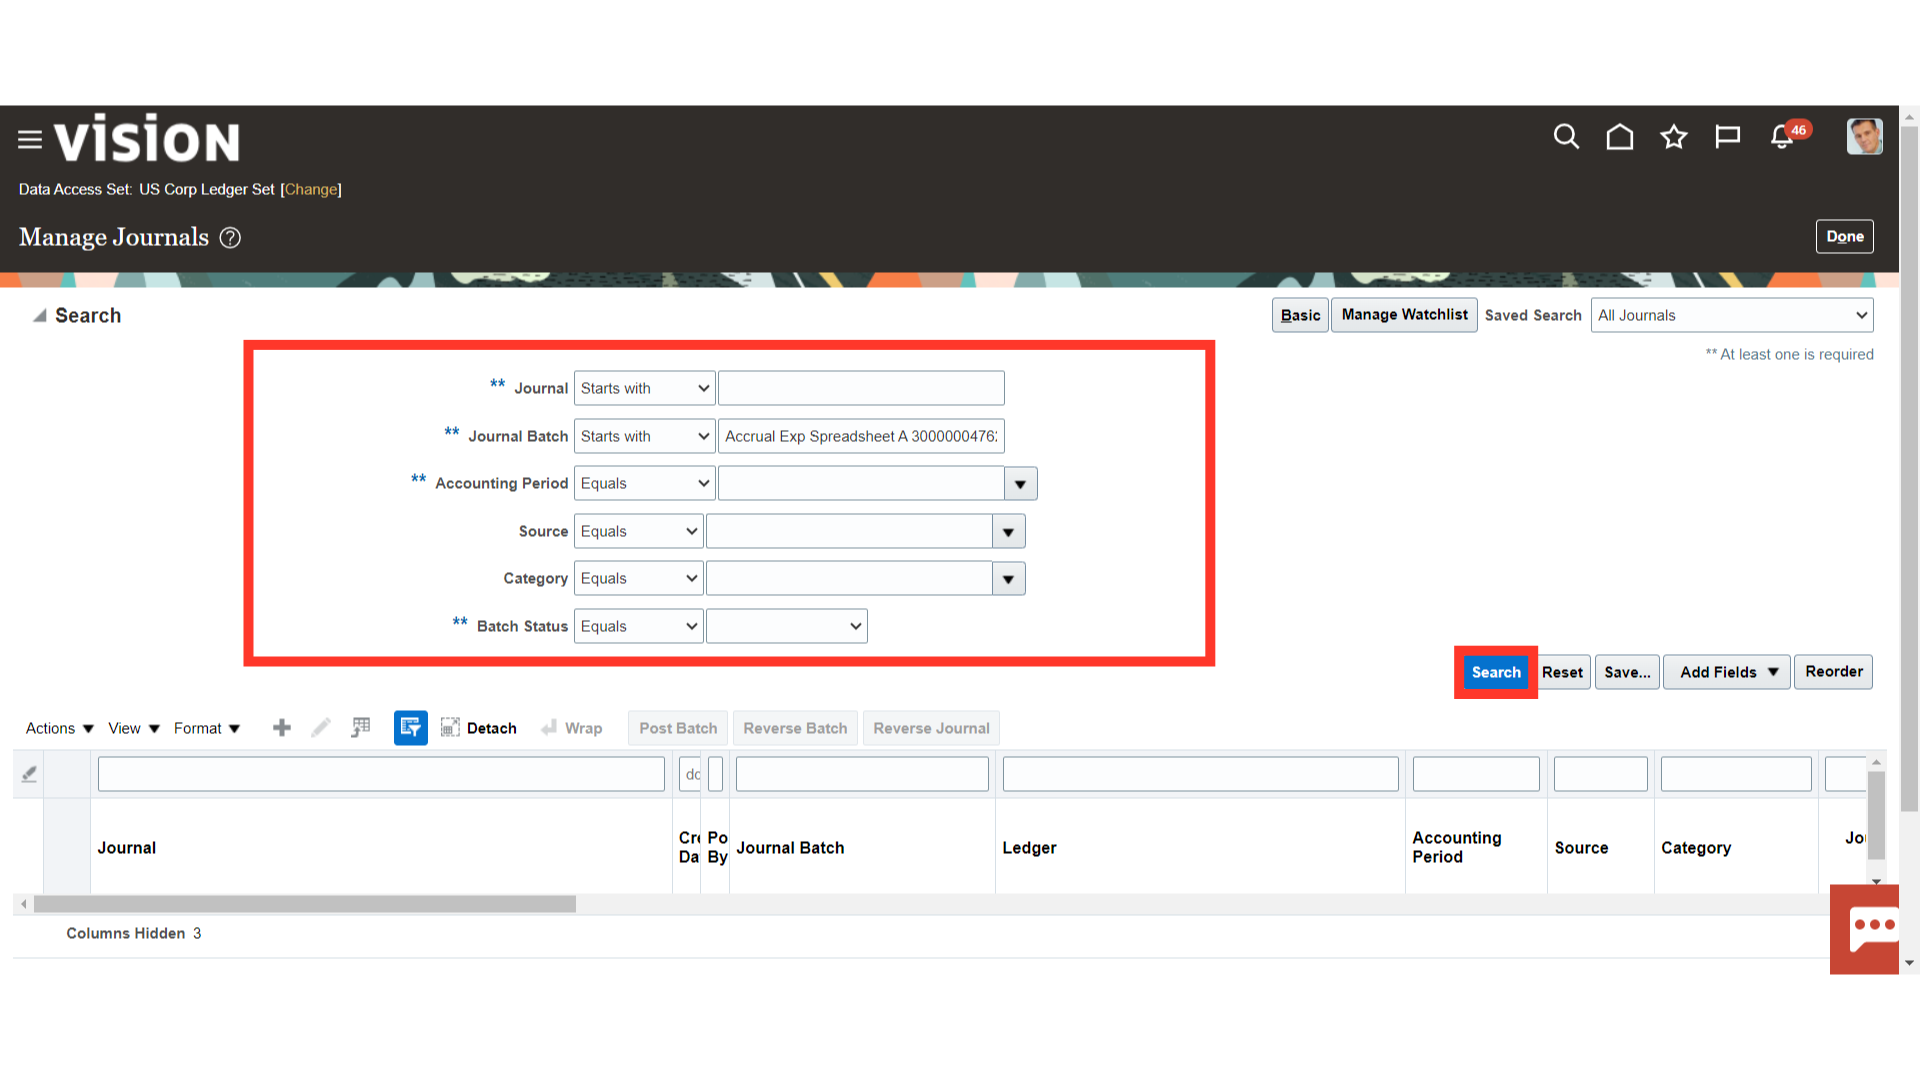
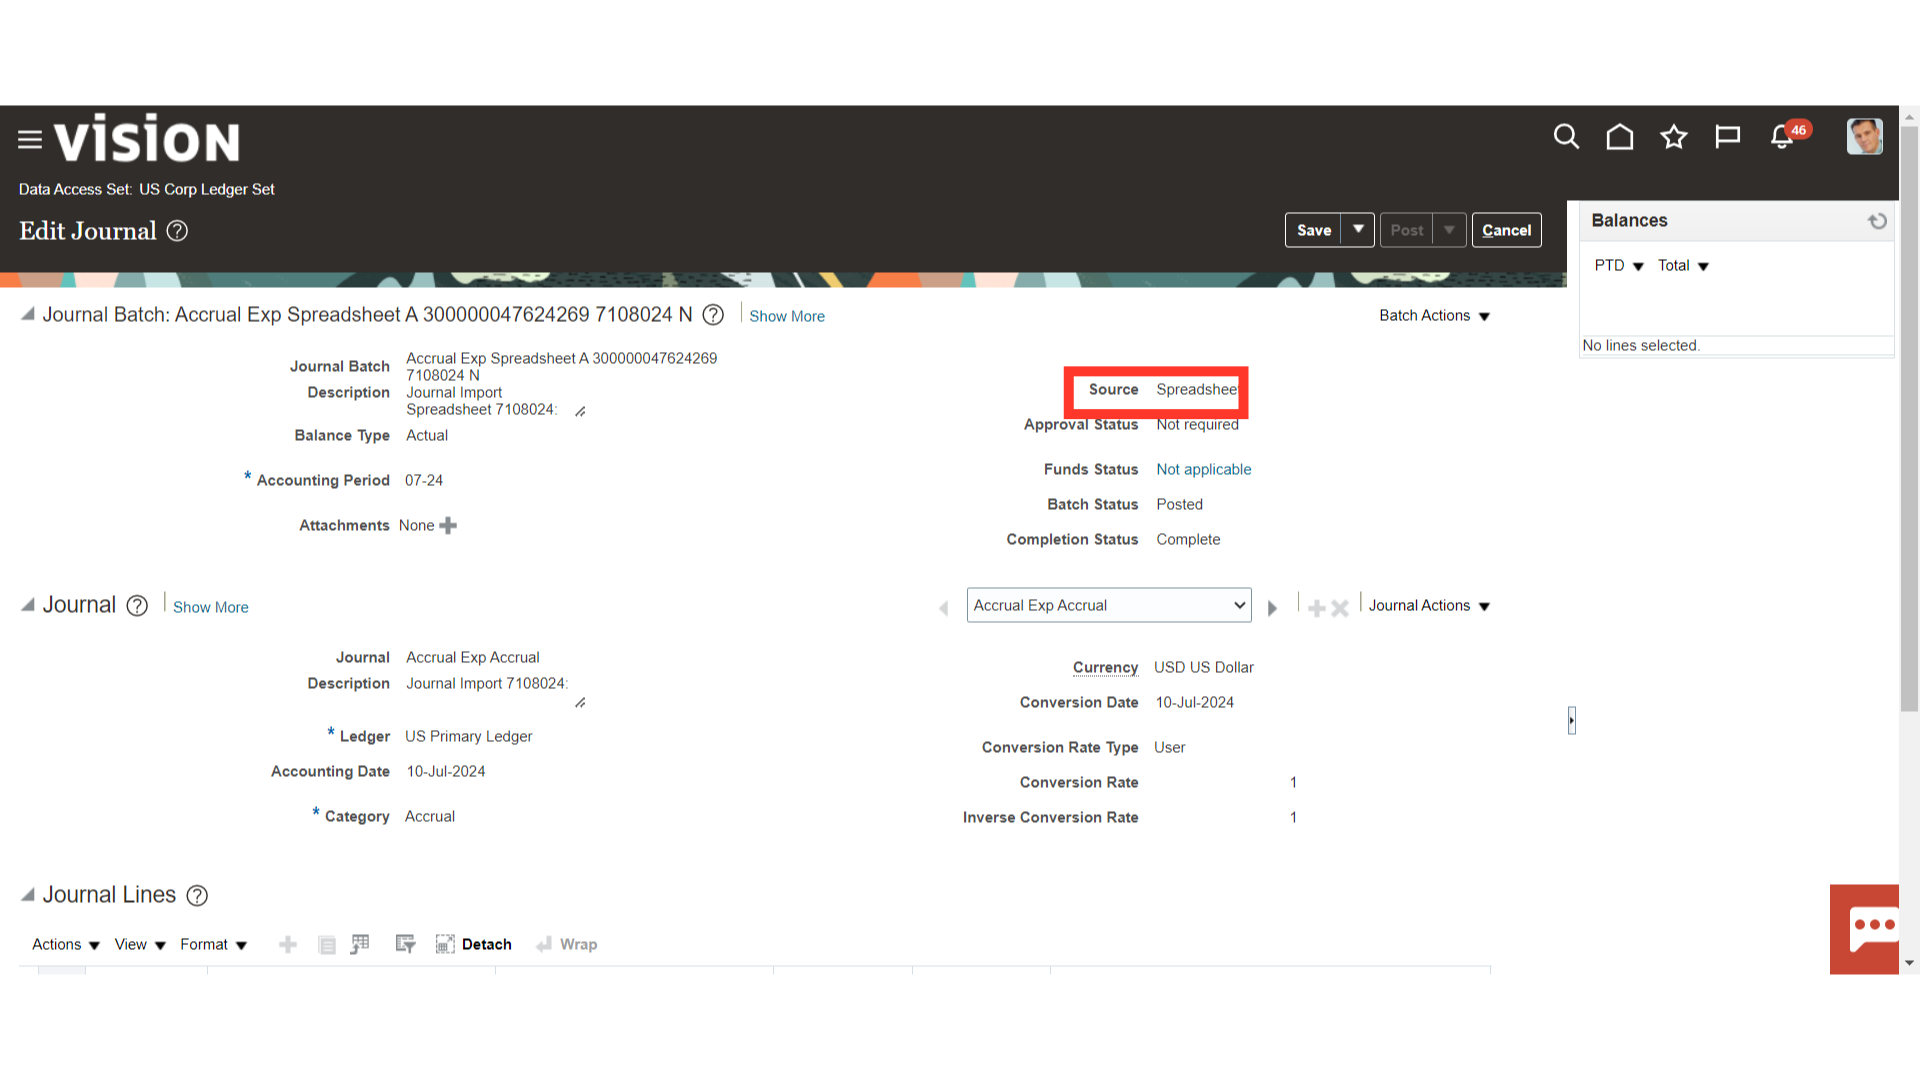
Open the Journal batch, by clicking on the Journal Name.
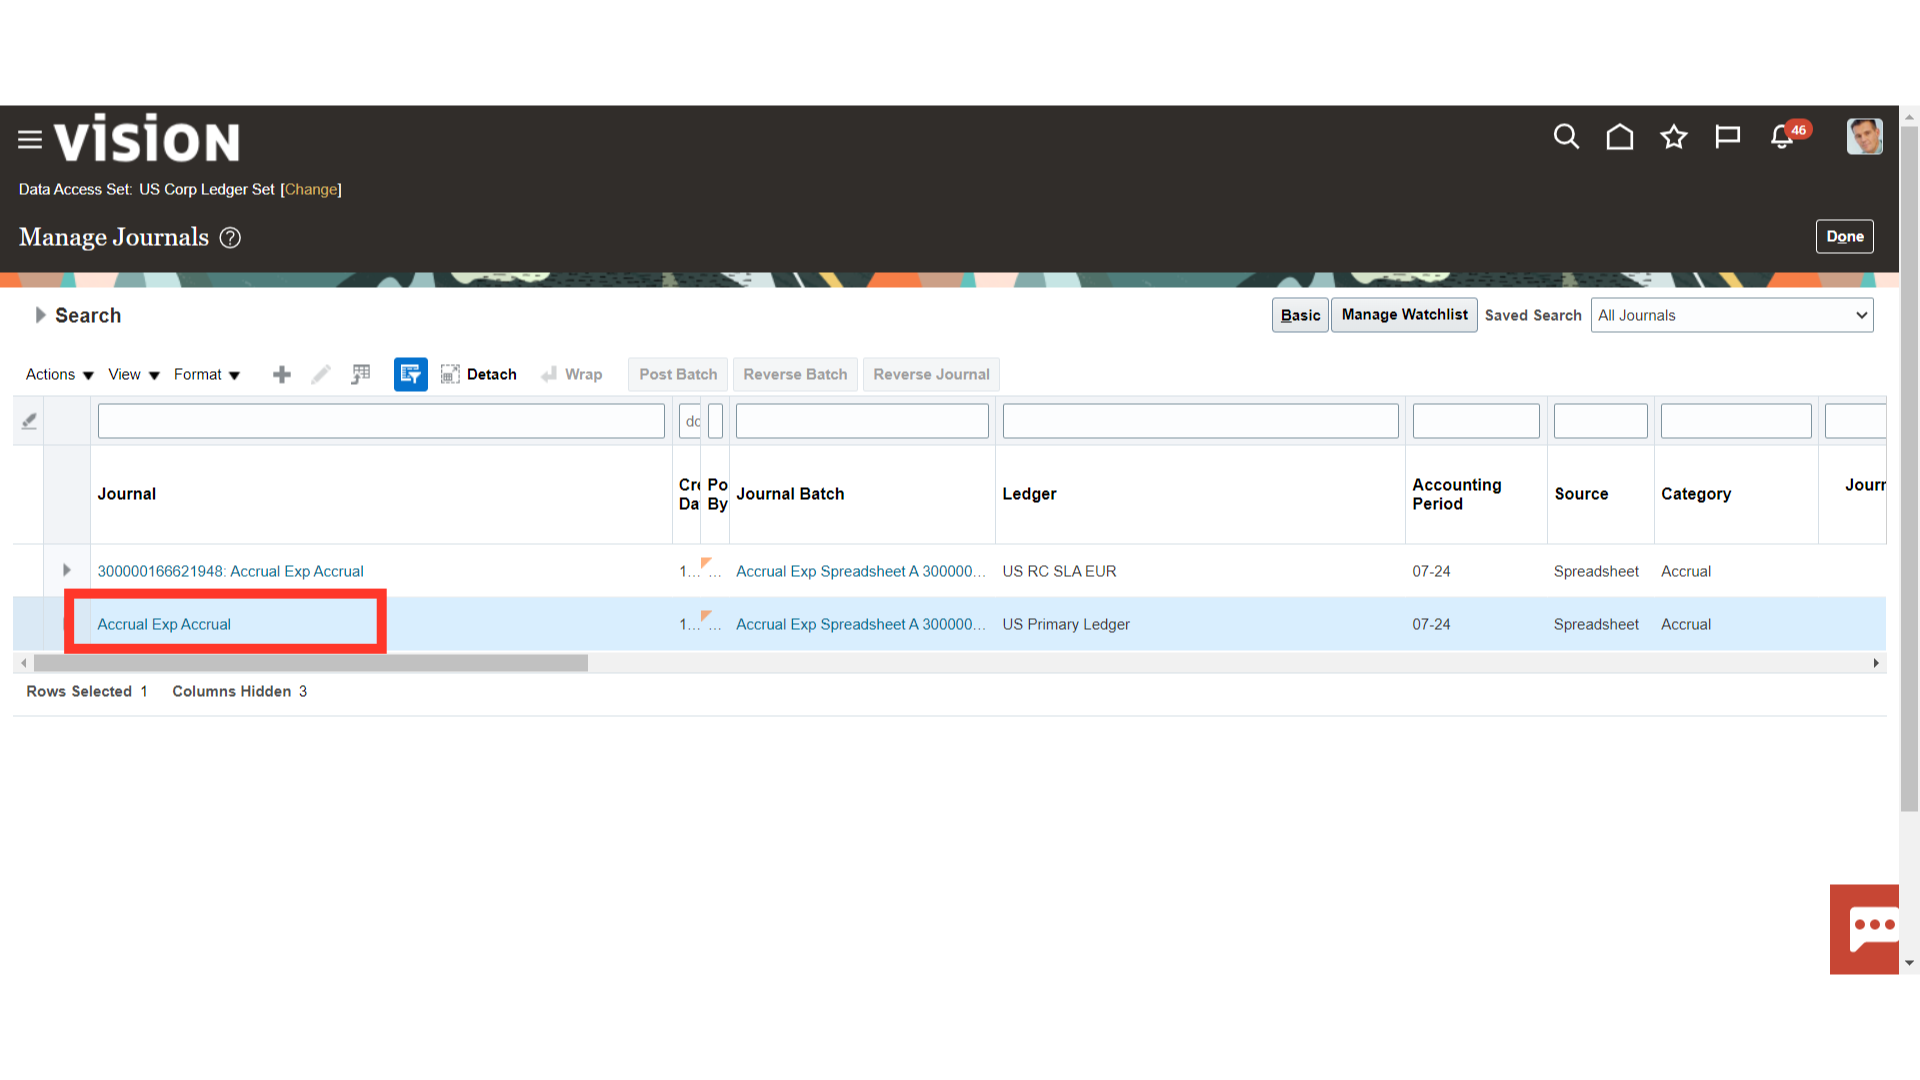 Source of the Journal batch is Spreadsheet.