Intercompany Batch Approvals
This guide will walk you through each step of the process in detail for approving the Intercompany batch in Oracle Fusion and entering the receiver distribution from the approval notification.
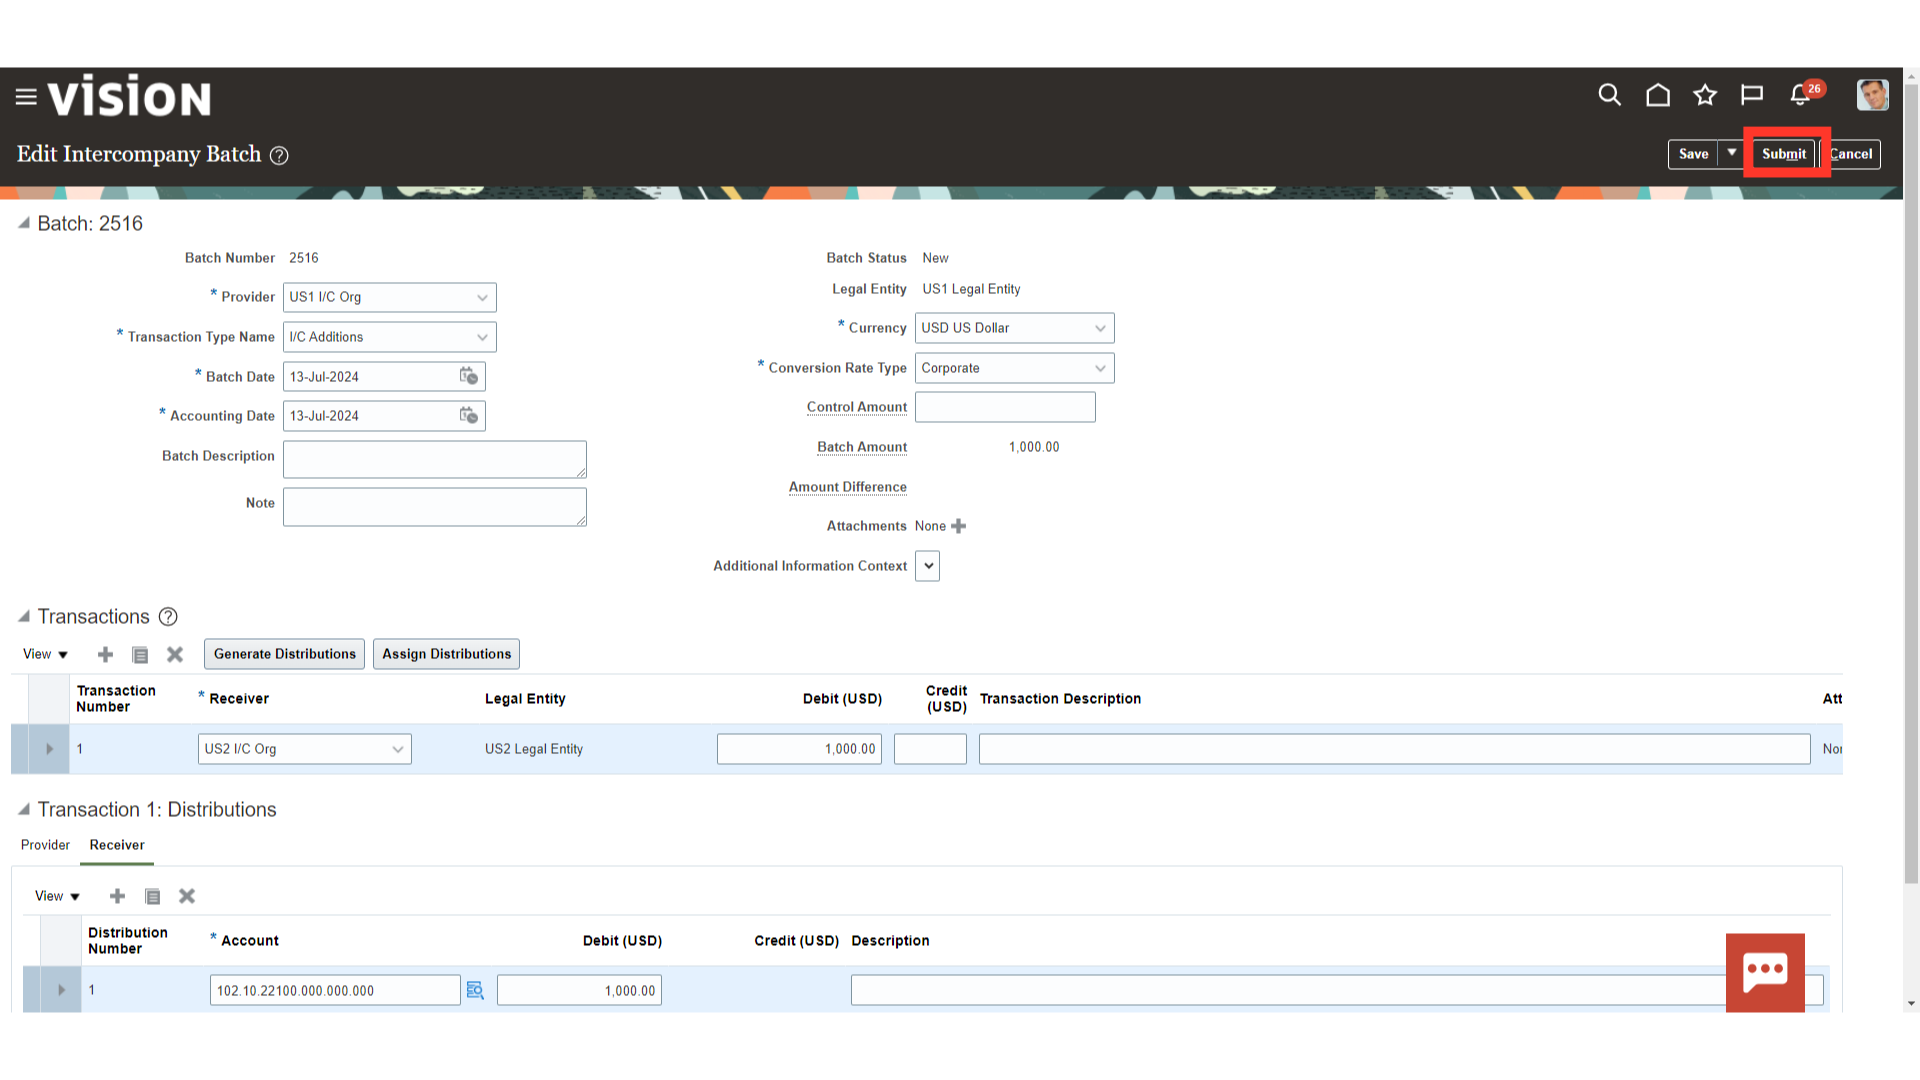
Click the Submit button to send the transaction to the recipient organization so they can enter the receiver distributions.
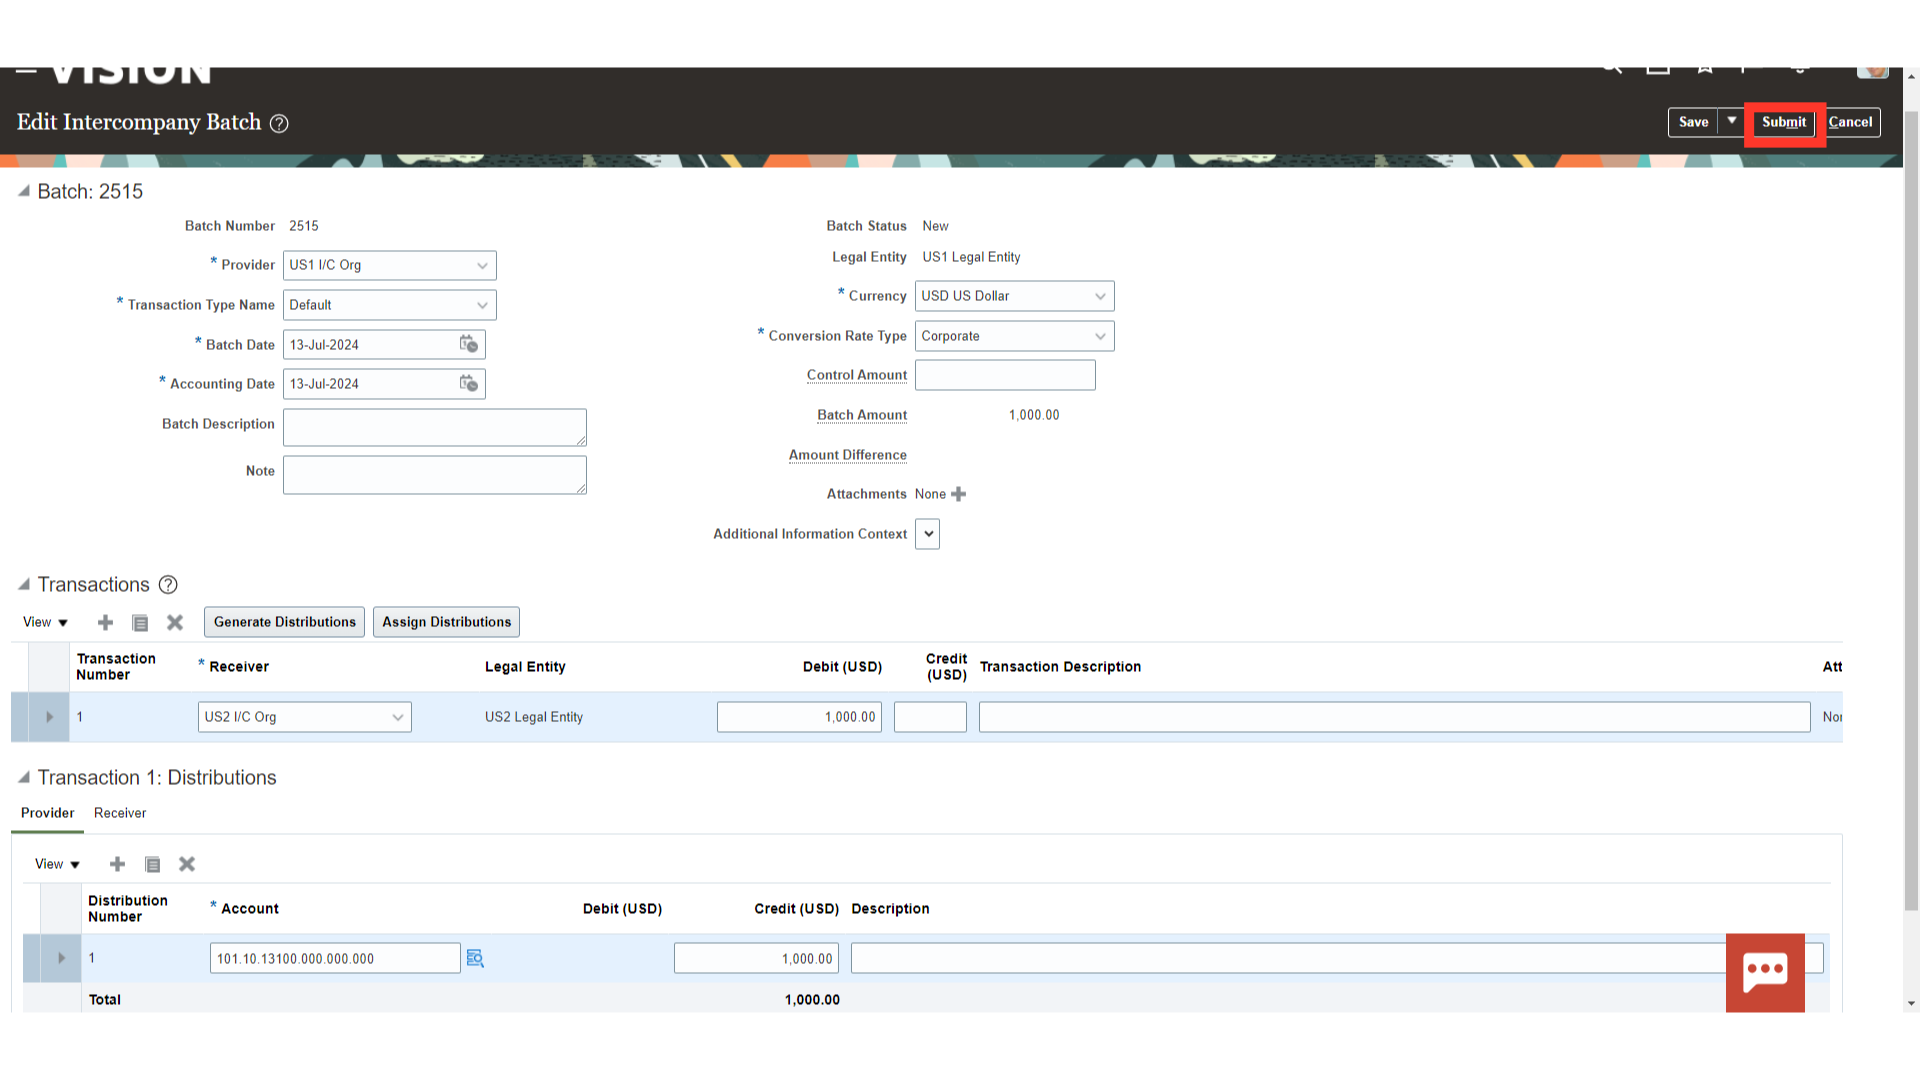
Batch submission is indicated by a confirmation message that appears. Press the OK button to proceed. It is now time to log out of the Provider organization details and log in to the Recipient Organization.

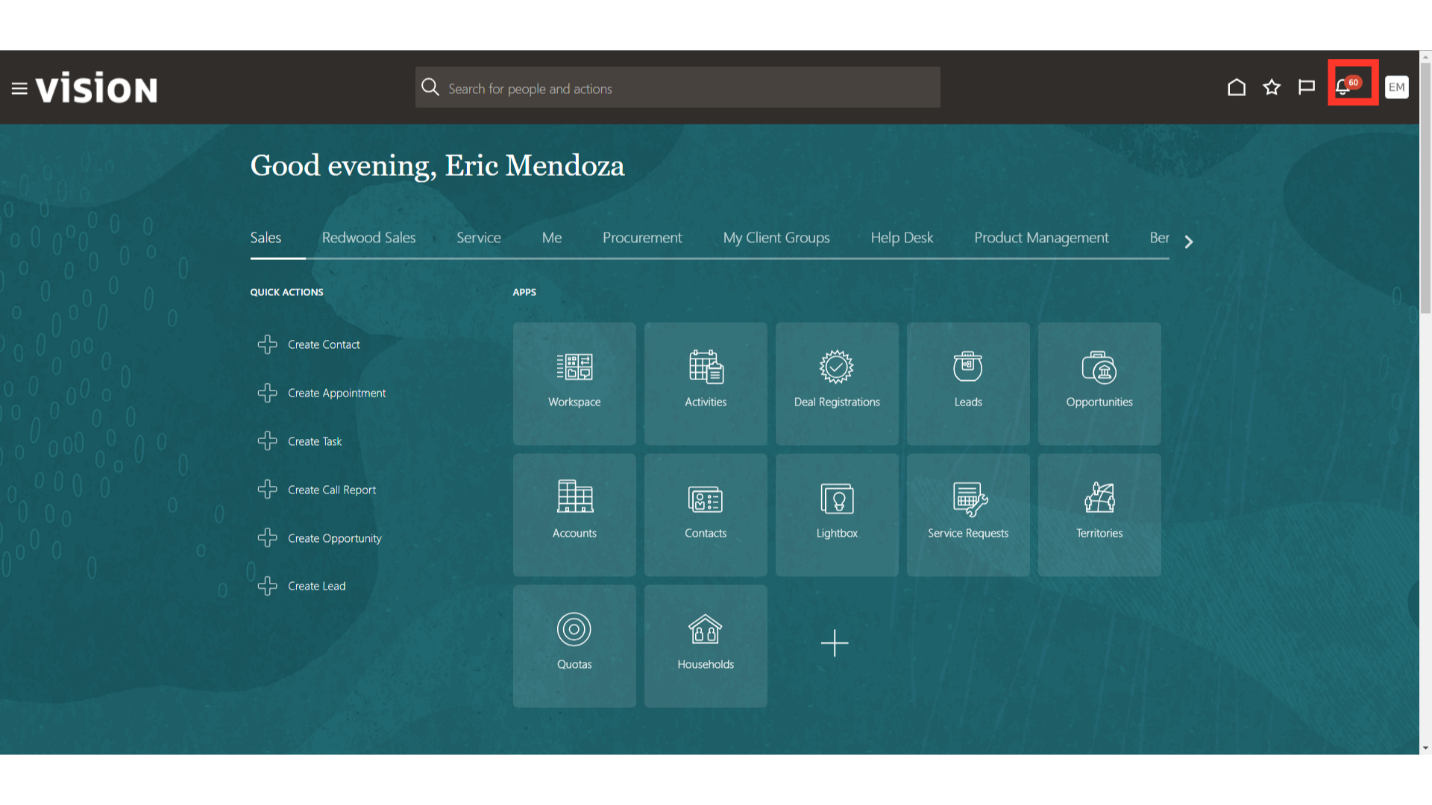
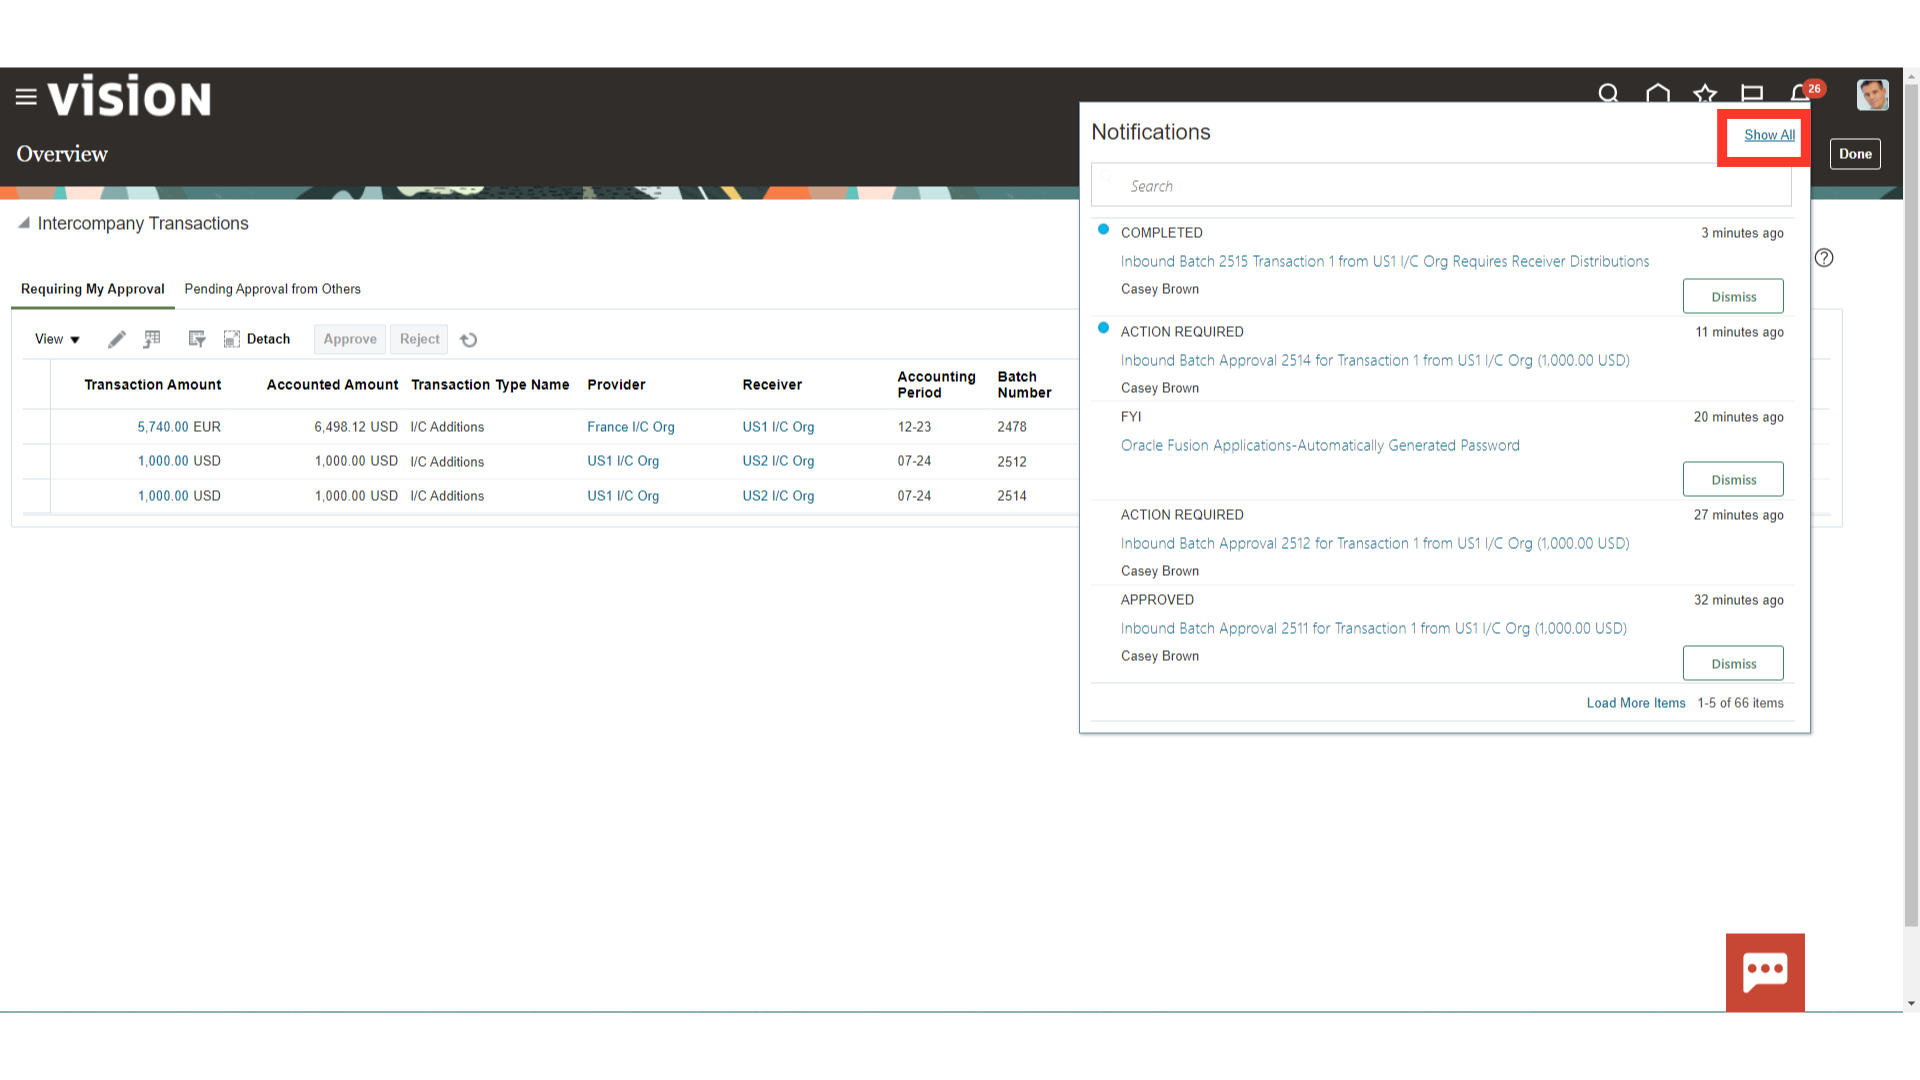
After logging into the recipient organization, click on the Bell notification.
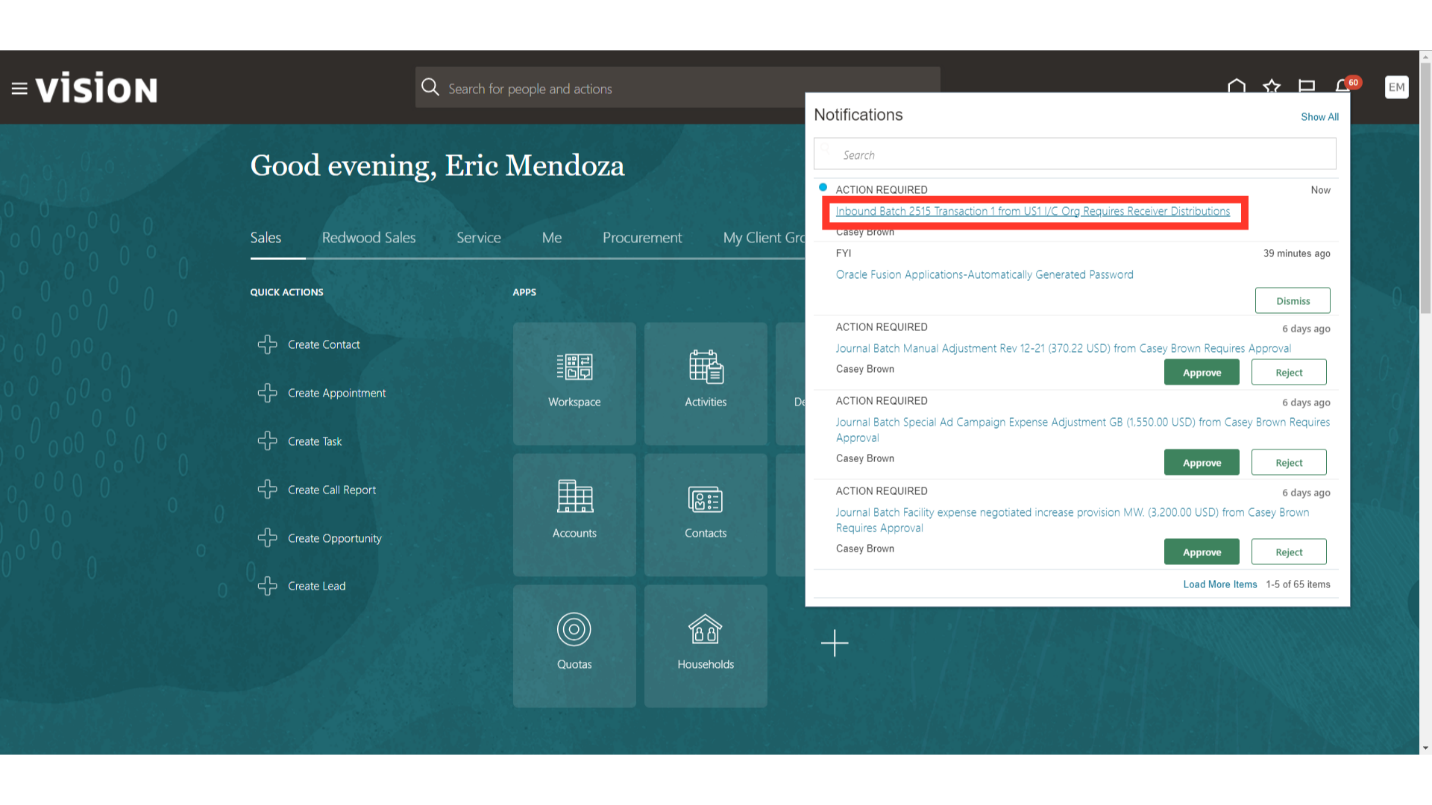
Open the notification by clicking on the Notification name hyperlink.
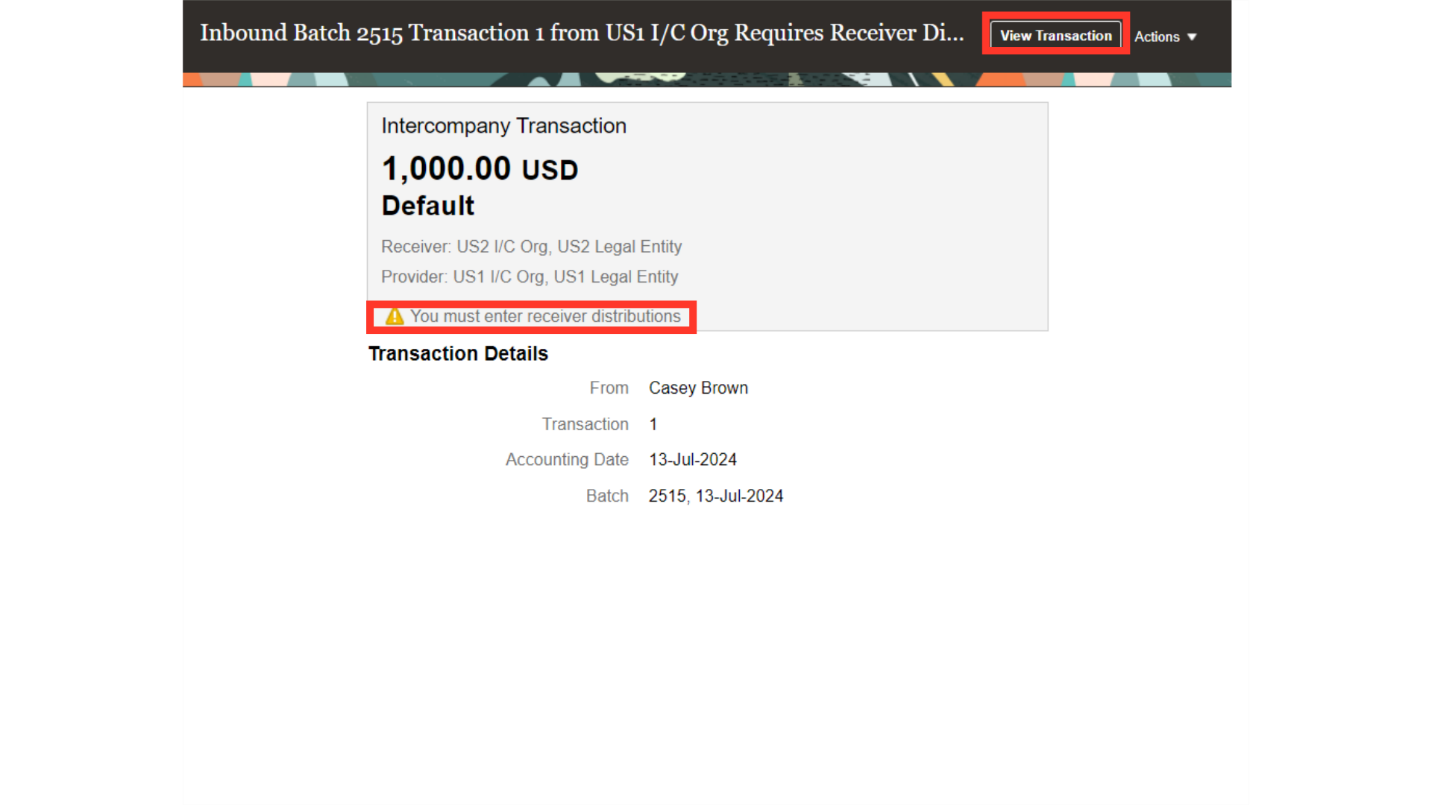
A warning message is displayed indicate to enter receiver distributions. The Distributions can be entered by clicking on the View Transaction button.
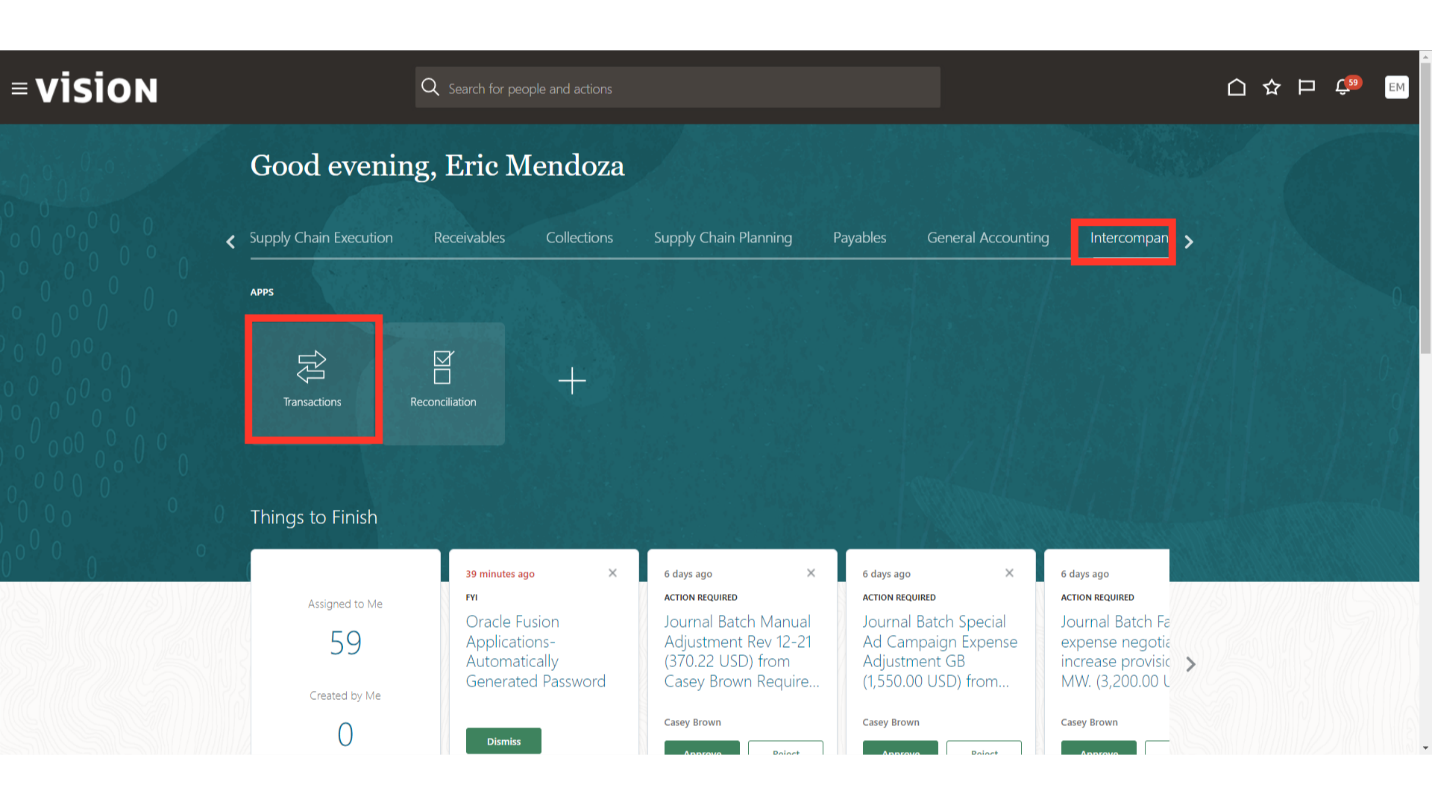
Alternatively, distributions can be entered from the Intercompany module. Click on the Transactions submenu under the Intercompany menu.
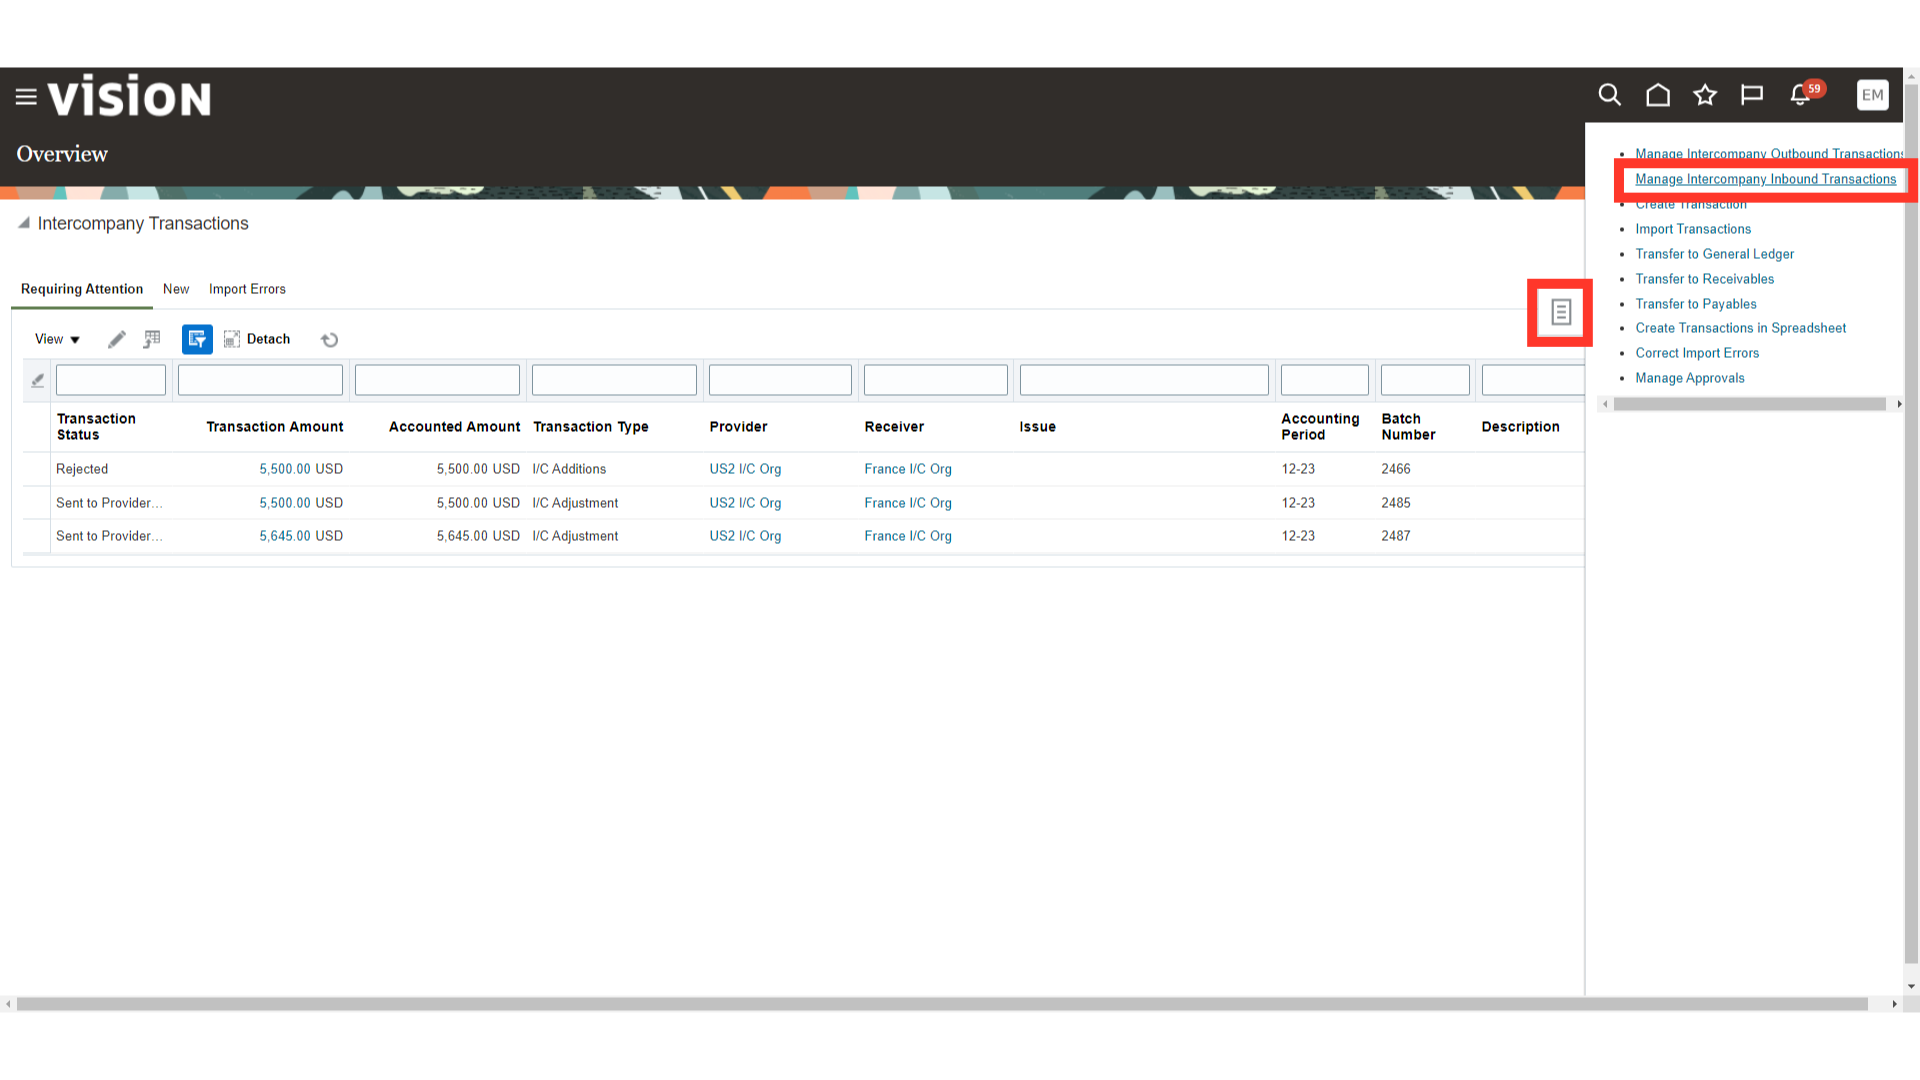
Click on the “Manage Intercompany Inbound Transactions” from the task list.
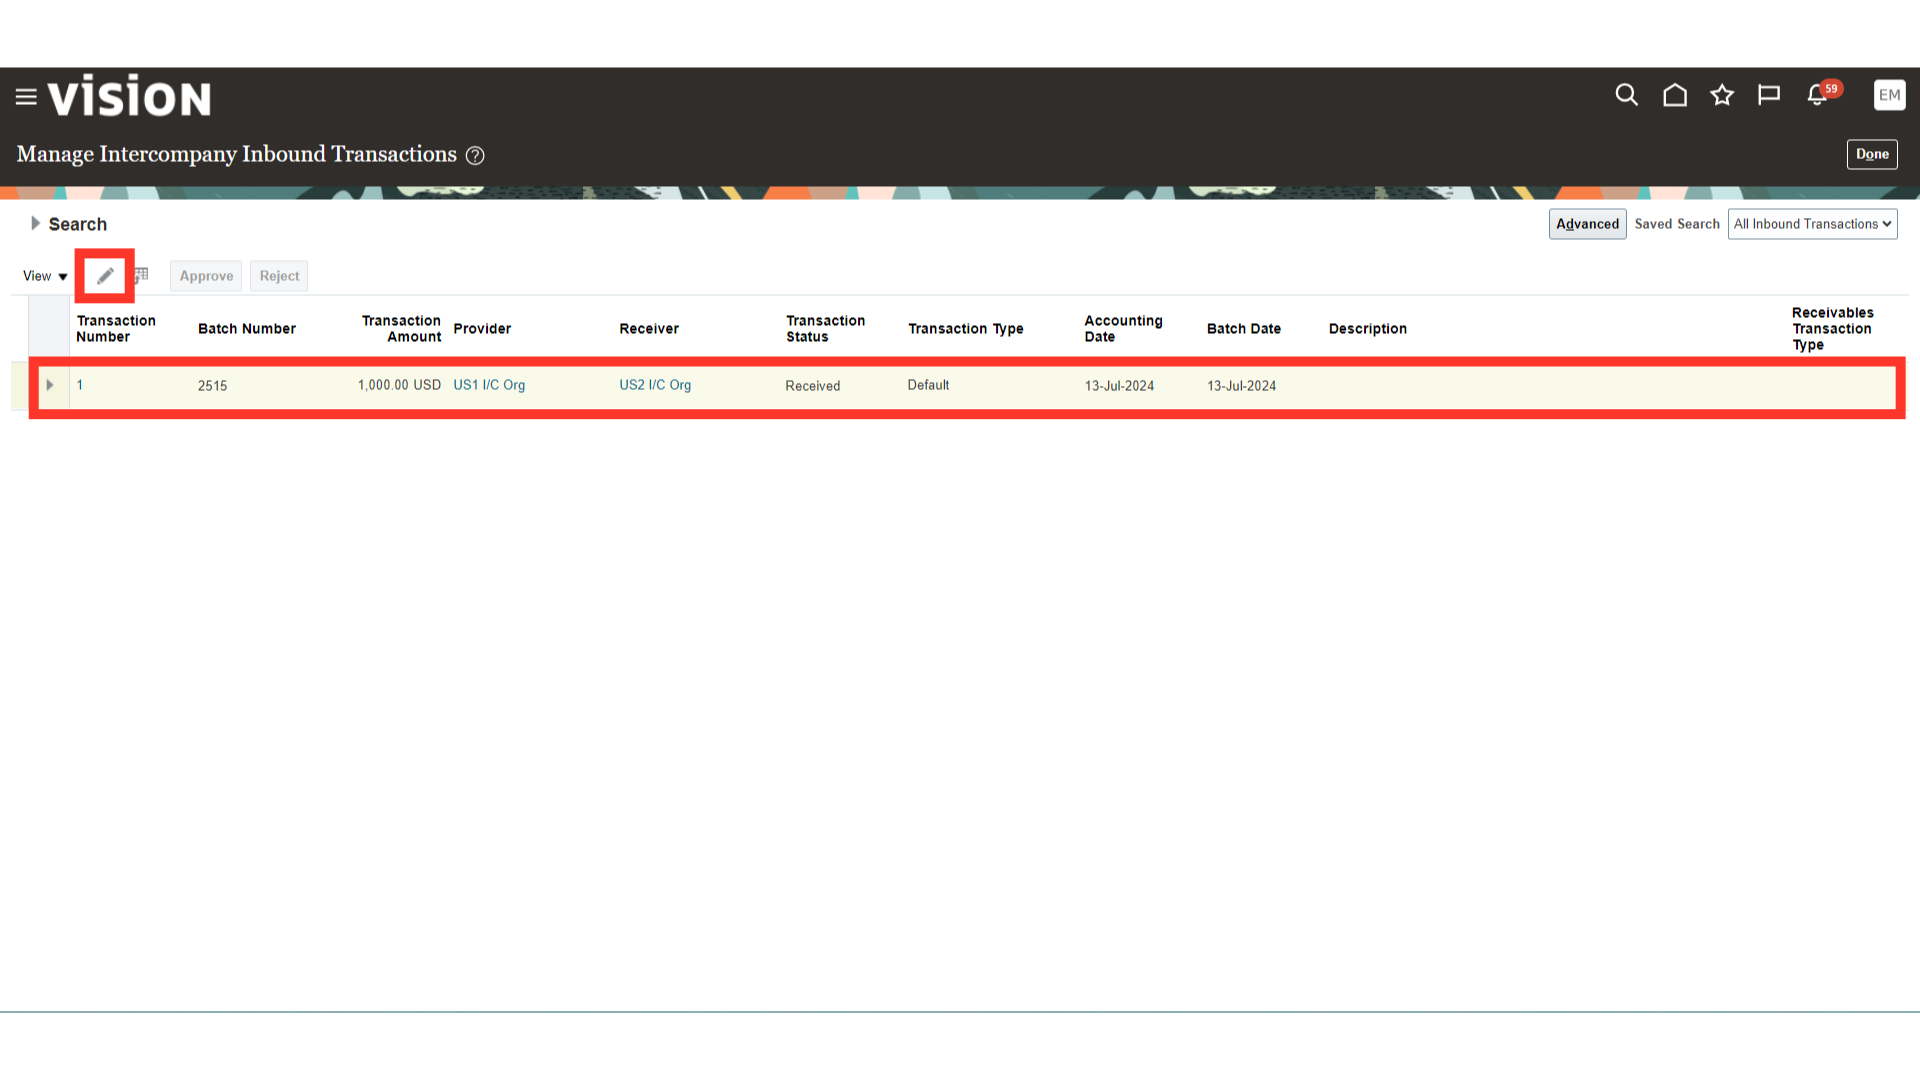
Select the Intercompany transaction, and click on the Edit button.
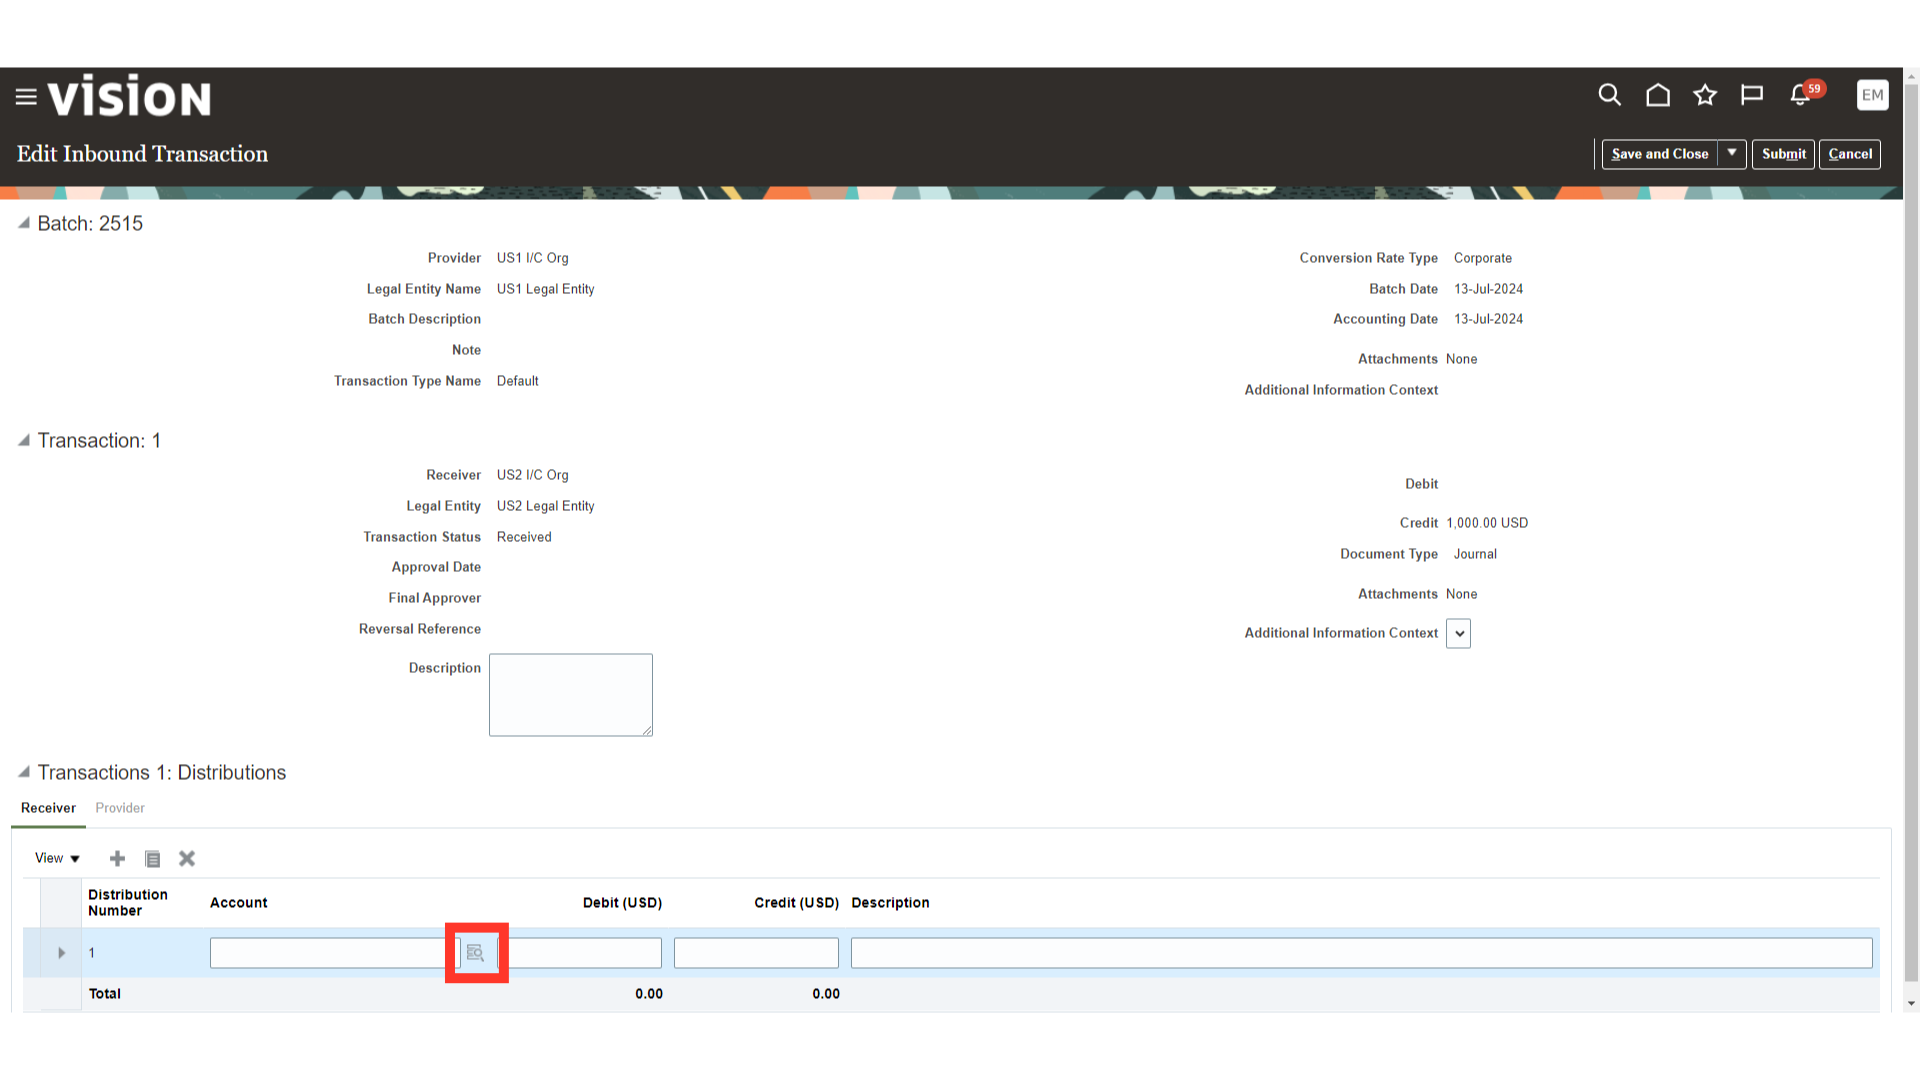
Click on the highlighted Icon to enter the receiver distributions.
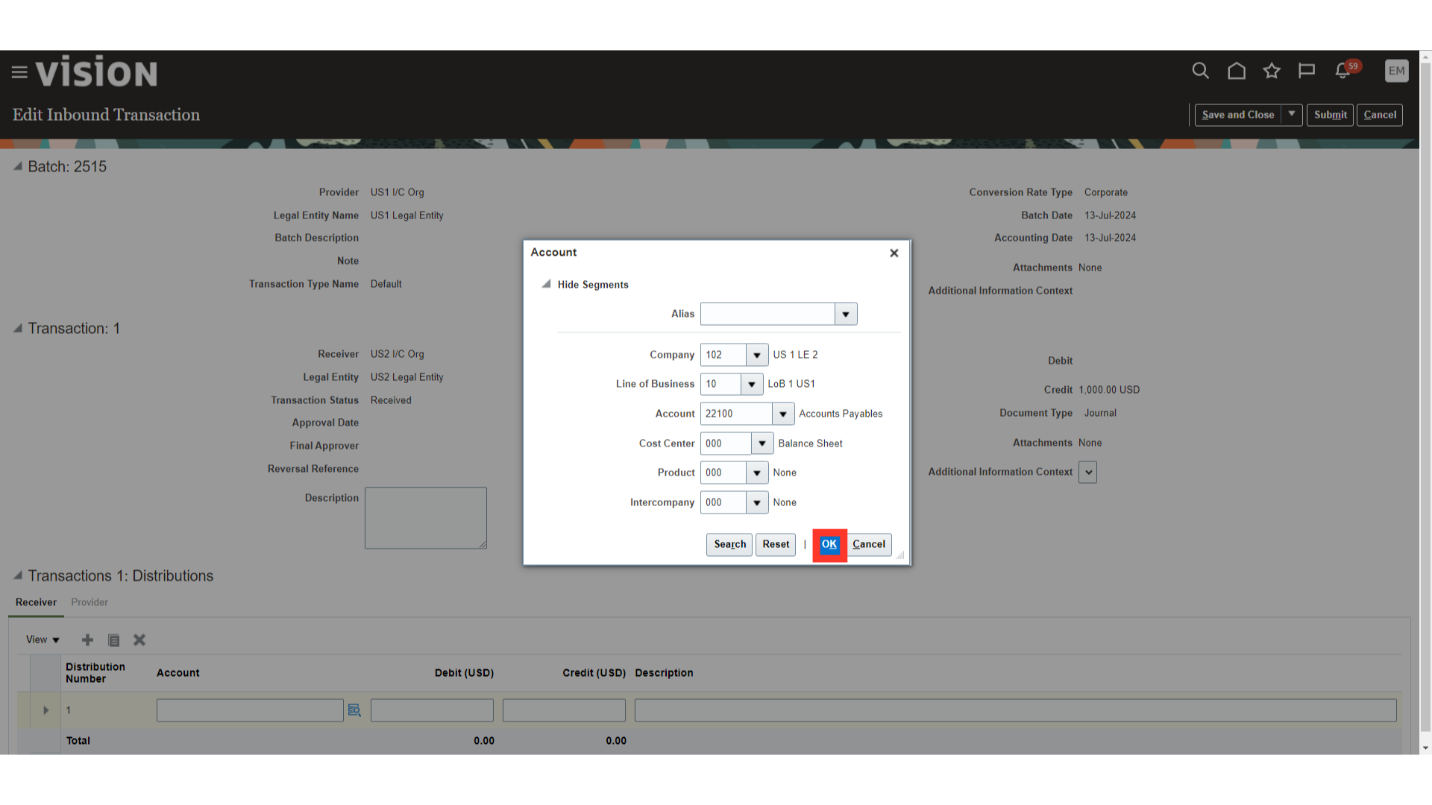
Enter the chart of account values by entering manually or by selecting from the list of values. Click on the OK button.
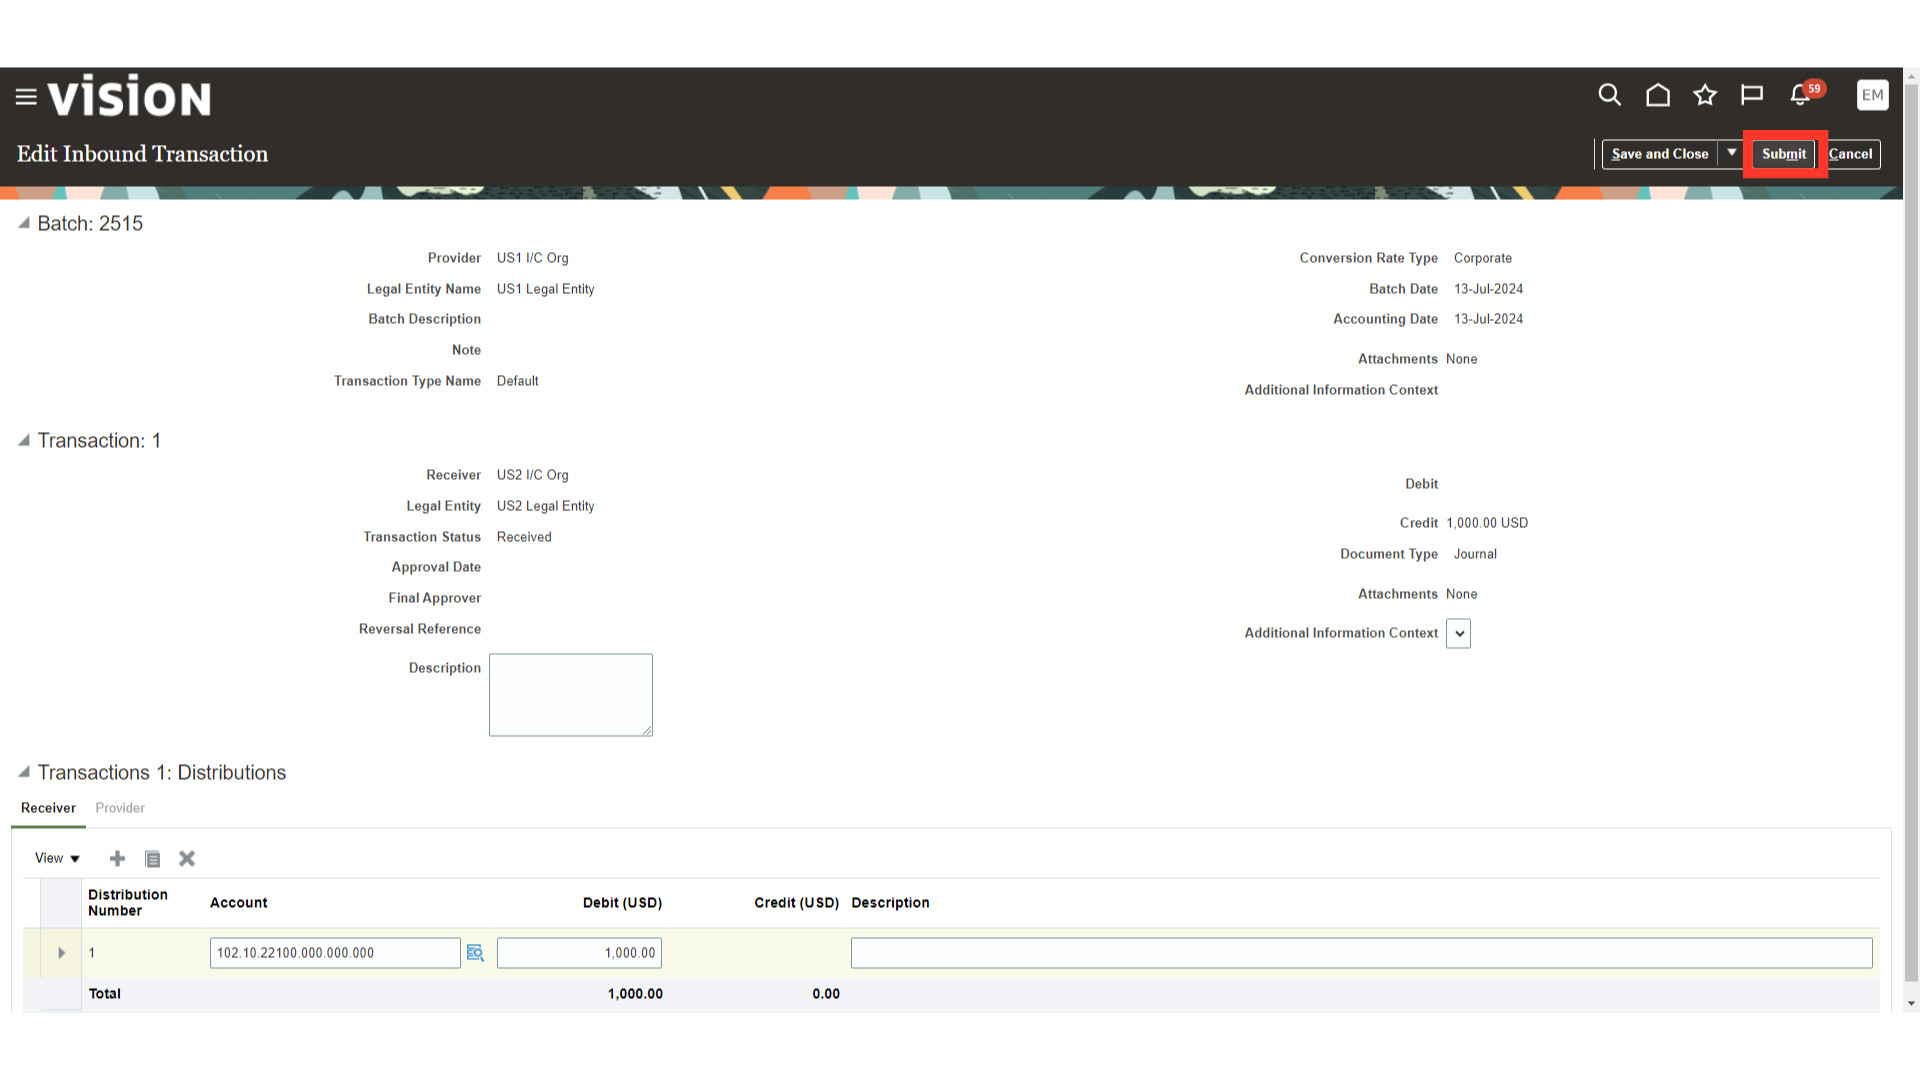
After entering the distribution amount, click on the Submit button.
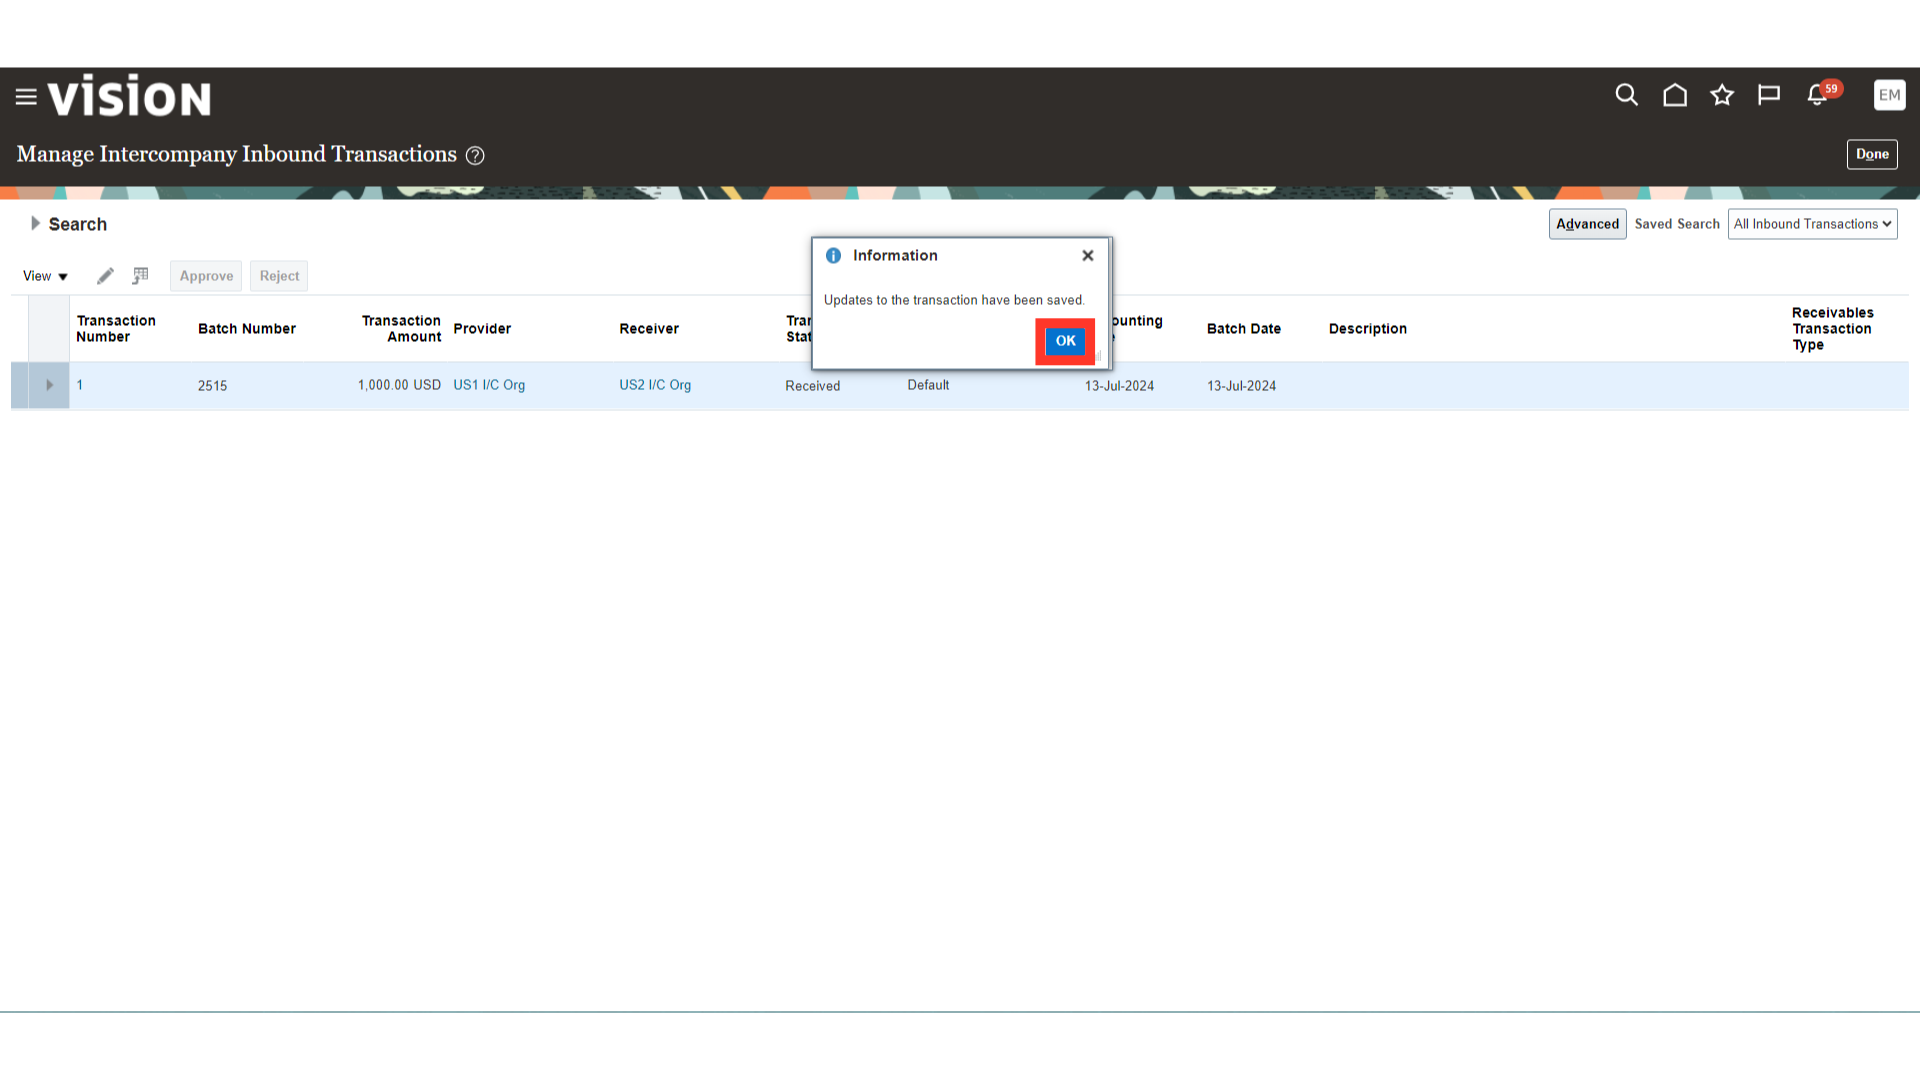
Click on the OK button to proceed further.
Now, in this batch the provider organization will enter both Provider and Recipient organization distribution details.
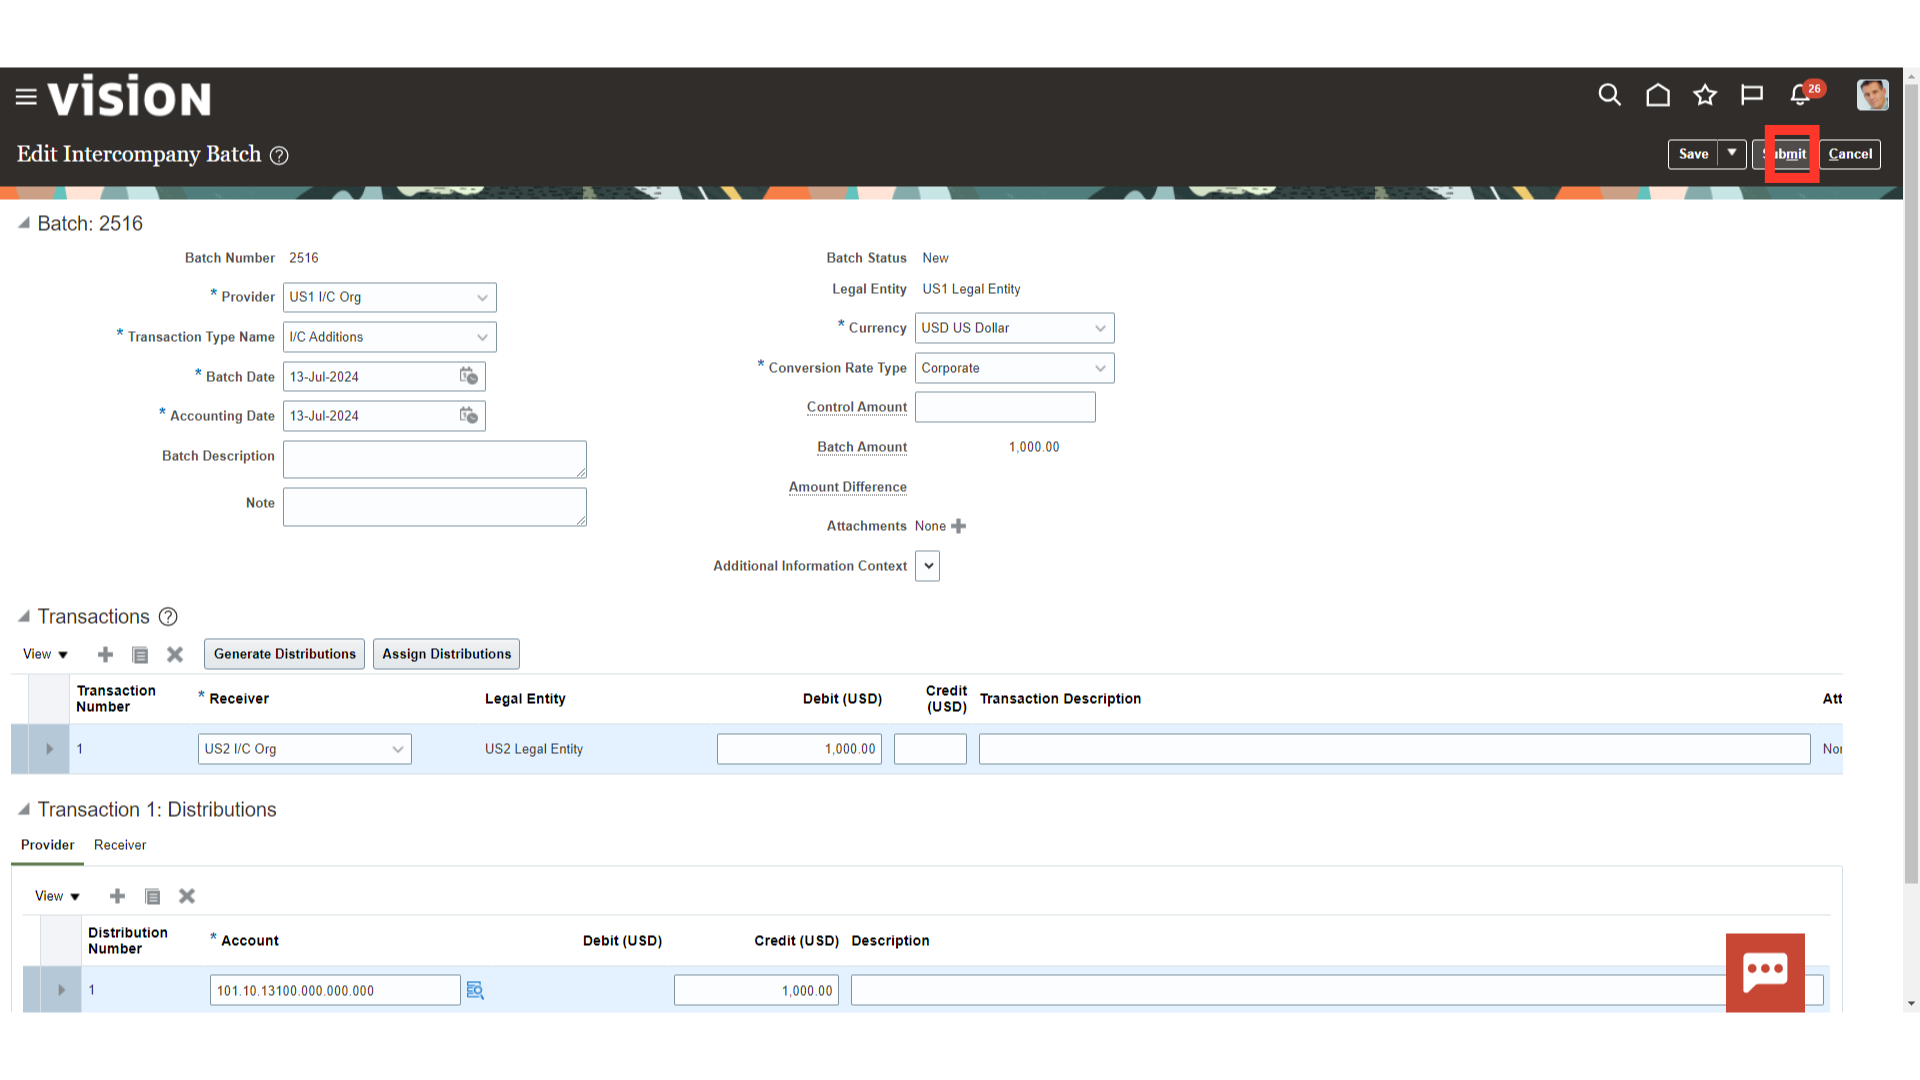
Click on the Submit button after entering the receiver distribution details.
To see all the pending notifications, click on the Show All hyperlink under bell notification.
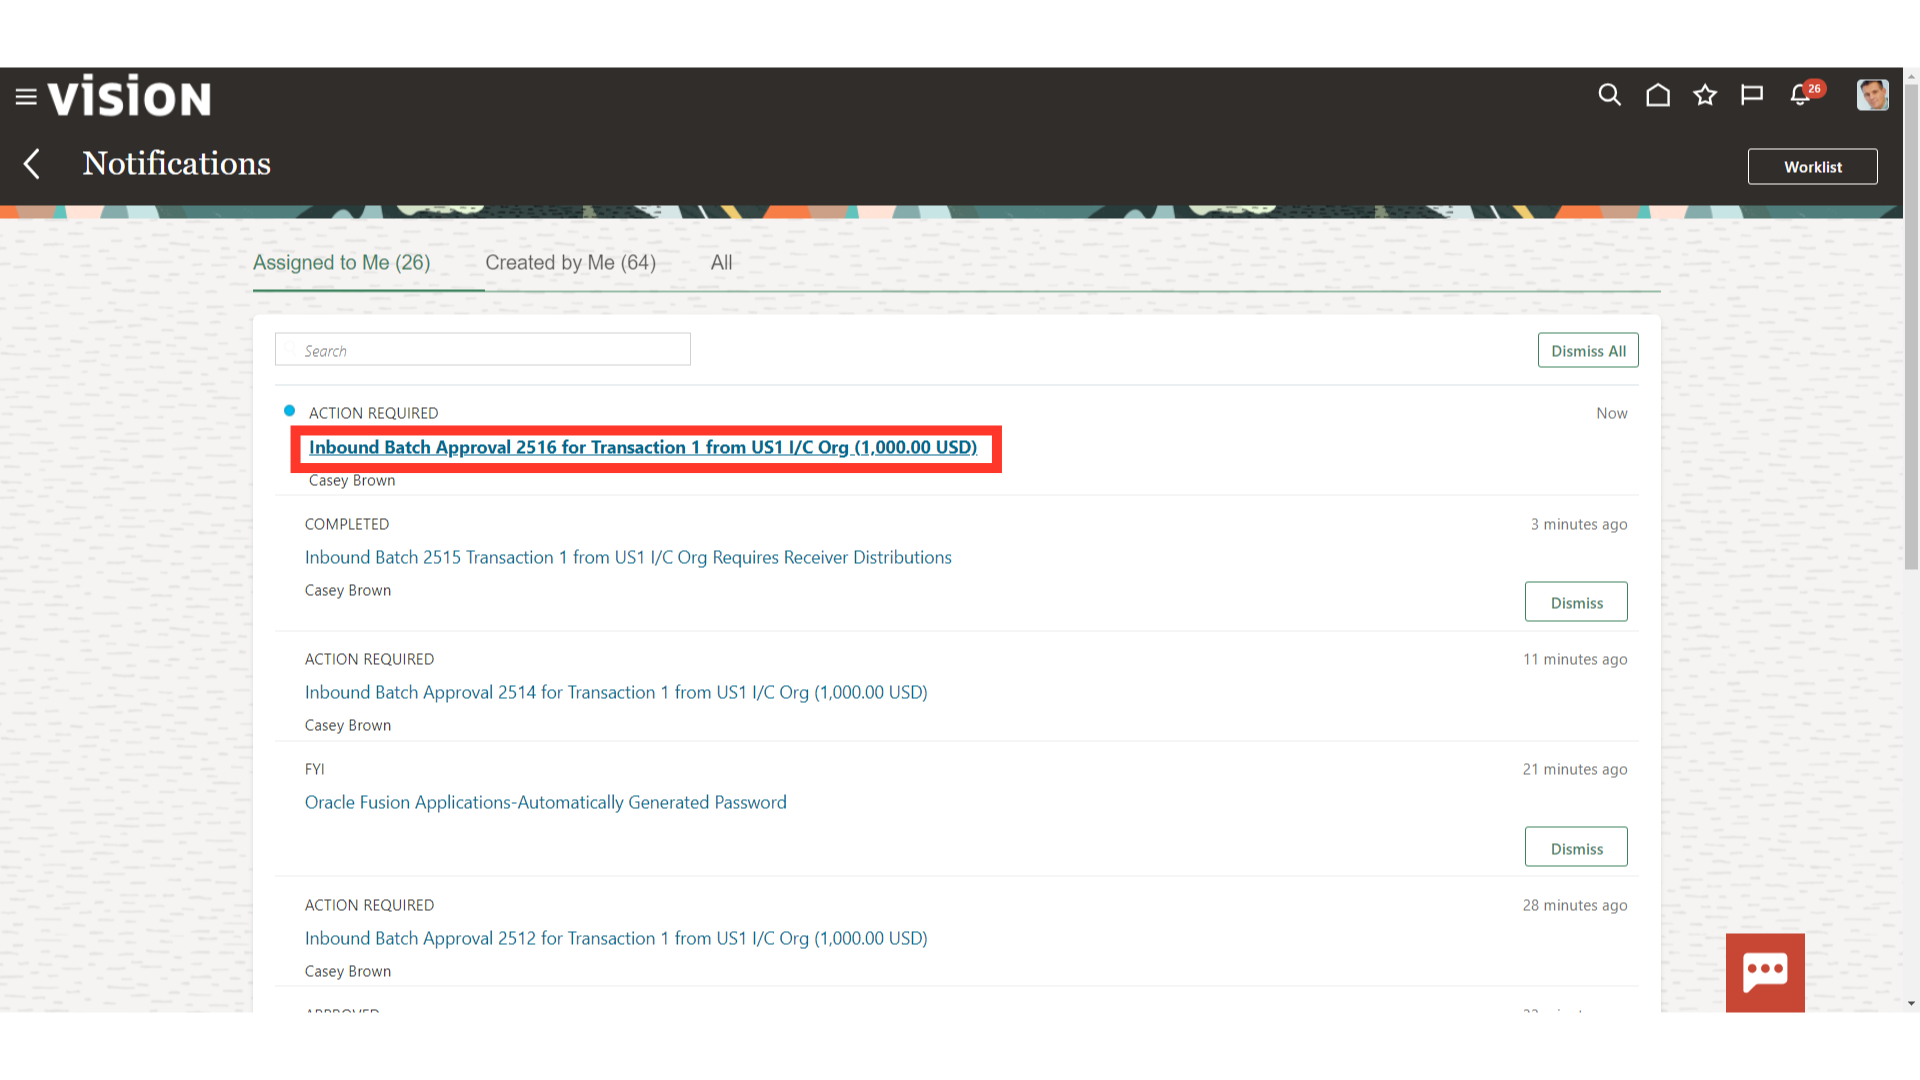
Open the Approval notification, by clicking on the intercompany batch approval notification.
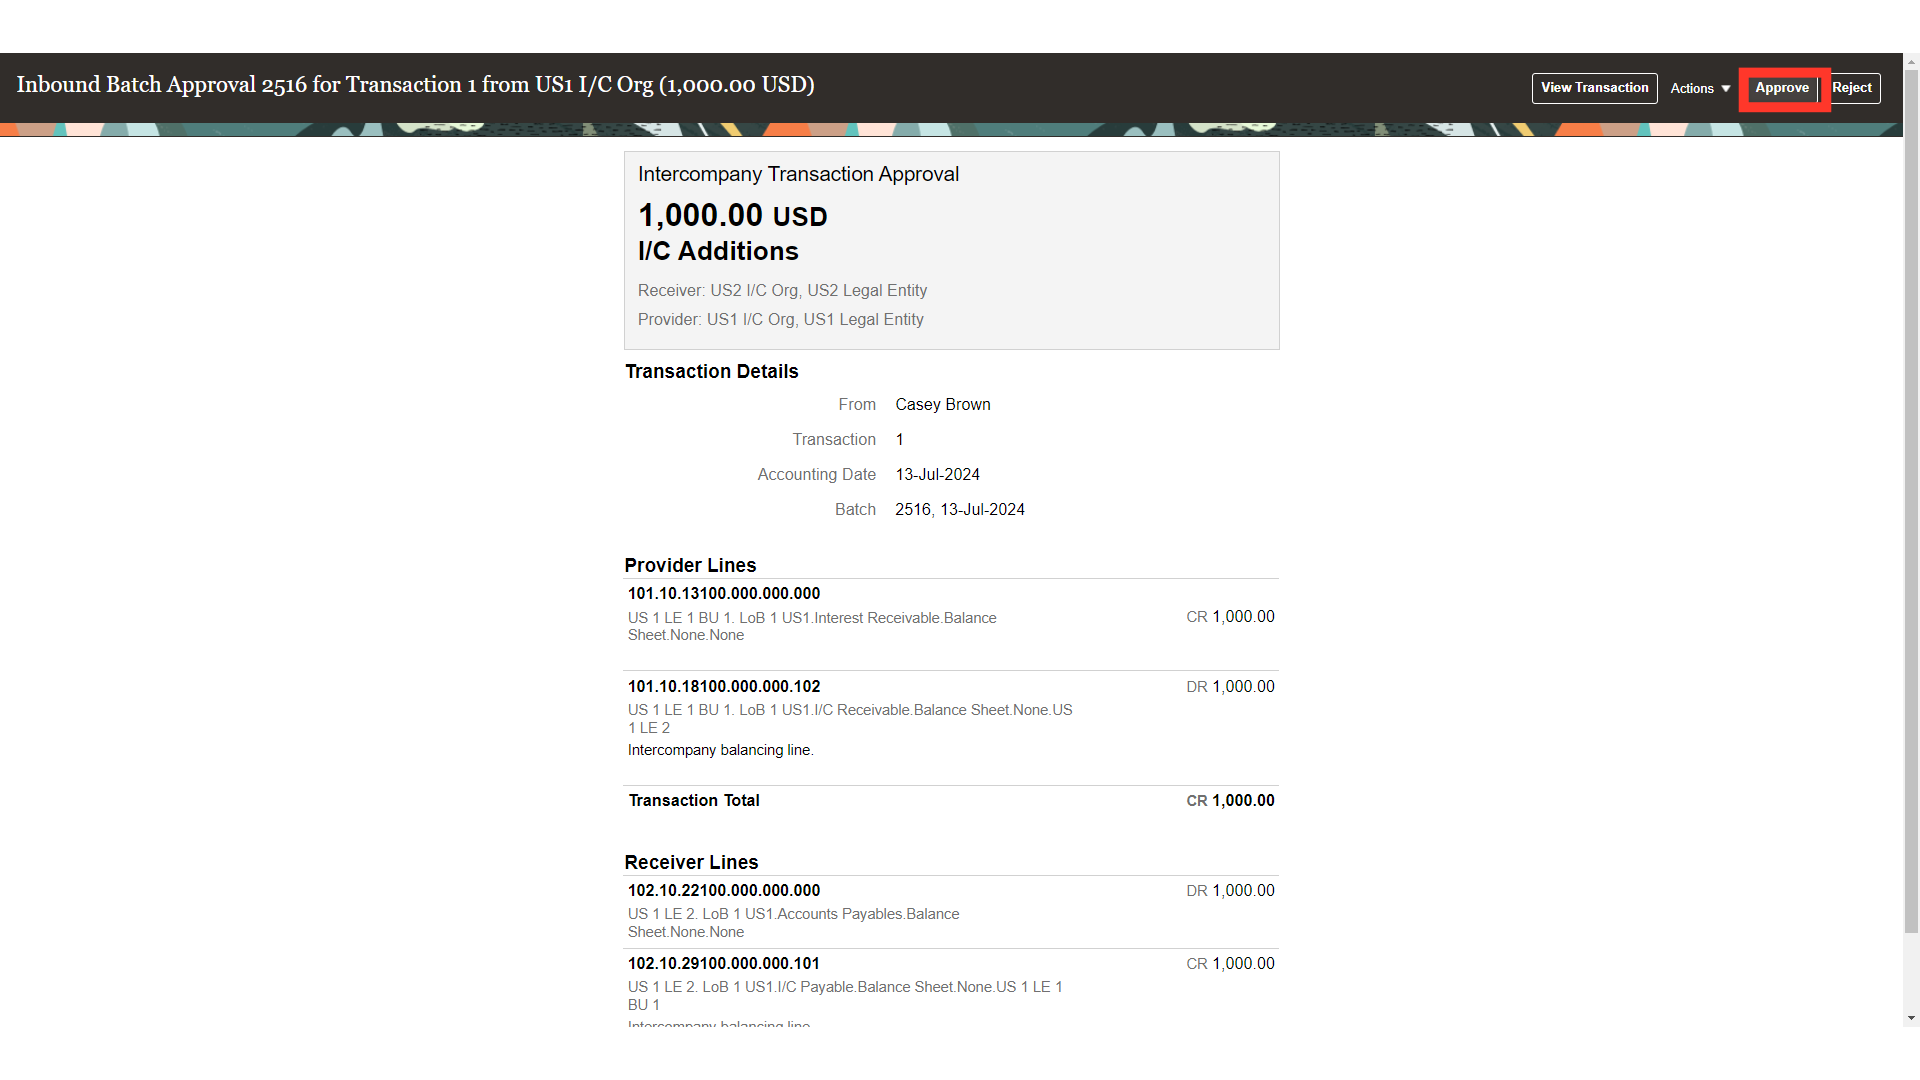
The Details of the intercompany batch such as Batch Number, Transaction type, distribution details, Accounting date etc are displayed. Click on the View Transaction button to see the transaction details.
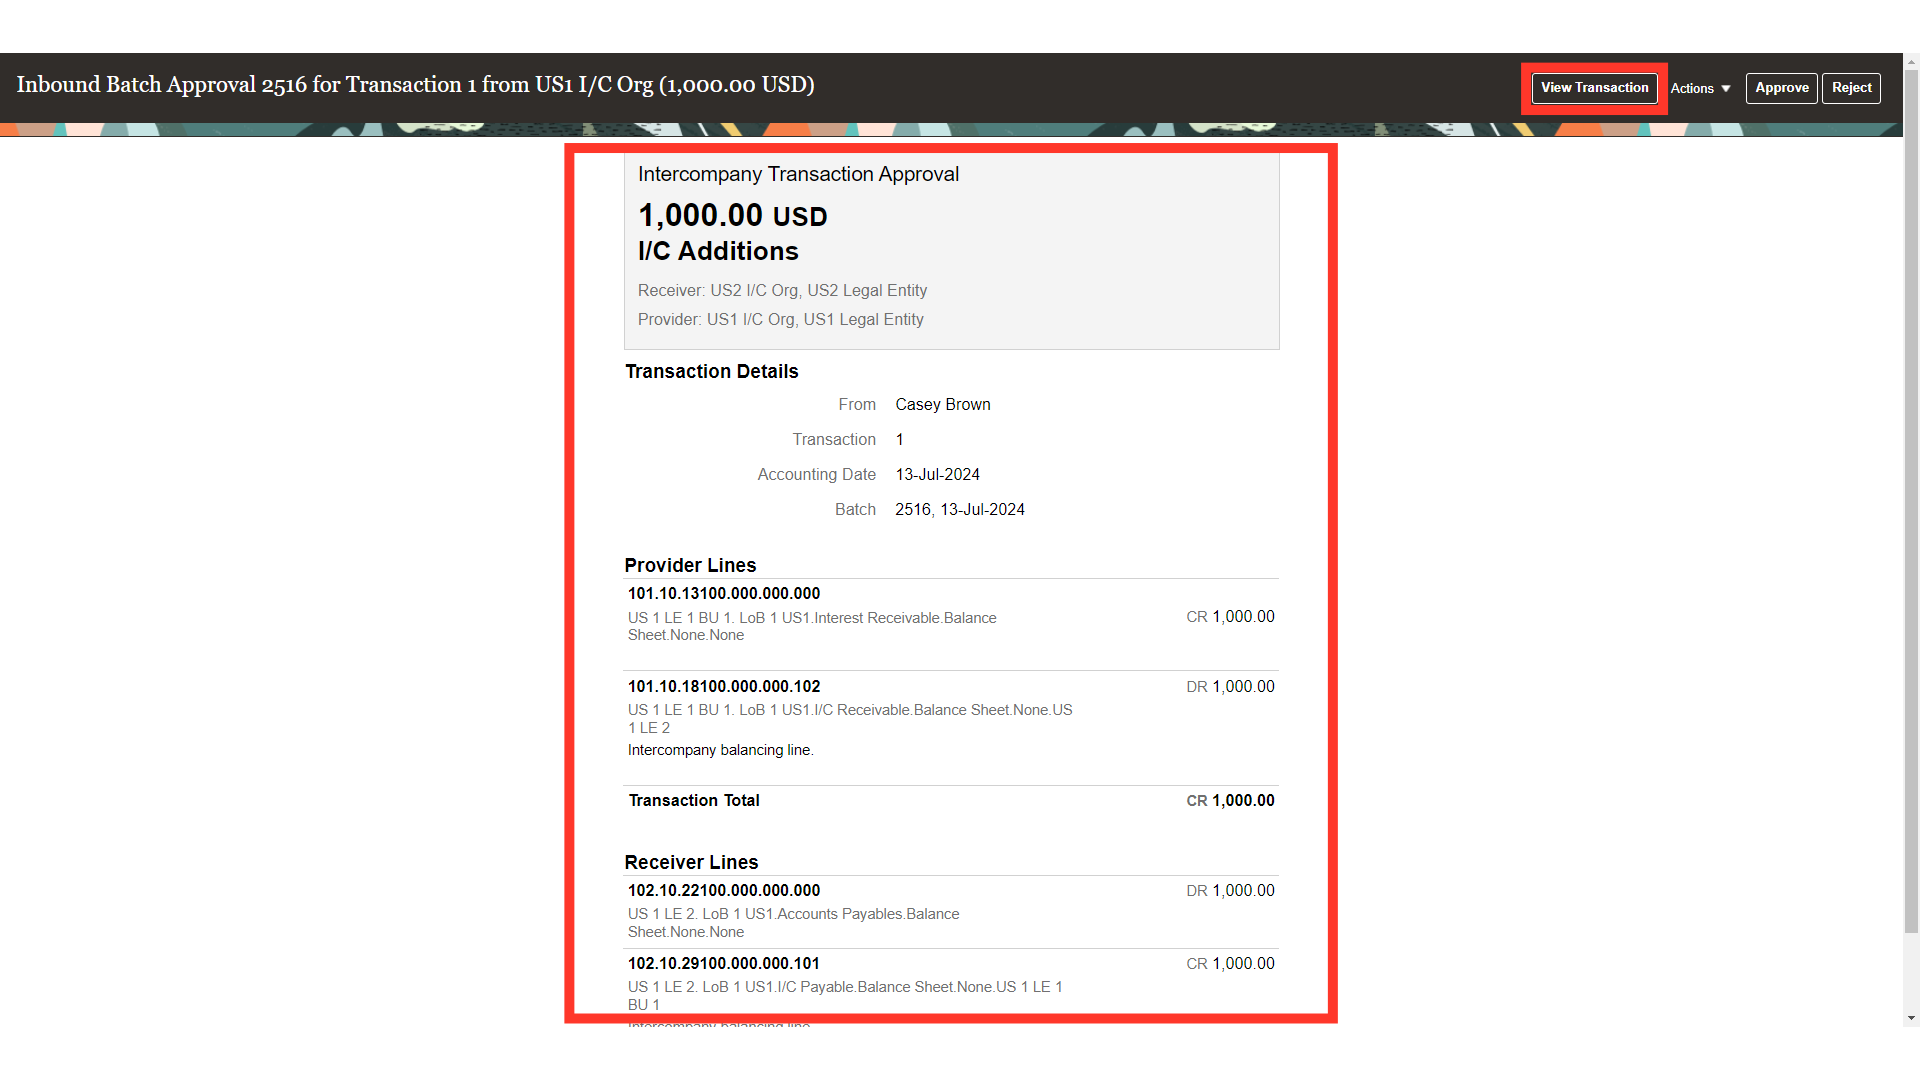
Review all the details. Then click on the ‘Actions’ button and take the action as necessary.
Select Request Information if further details/clarifications are required from the submitter.
Select Reassign to reassign the approval request to another approver.
Select Suspend which would suspend the notification that is currently pending approvals. It will no longer show up as an item for the assignee of the notification and approvals will be suspended. Once a task has been suspended, the menu will start showing a resume action. The resume will put the notification back into the assigned status to be updated.
Select Withdraw to withdraw the request from the approval process.
Select Skip current assignment which will proceed the request to the next approver in line as per the defined workflow.
For viewing the approval hierarchy, click on the View Approvals tab.

After verifying all the details, to approve the transaction click on the Approve button. Otherwise click on the Reject button.
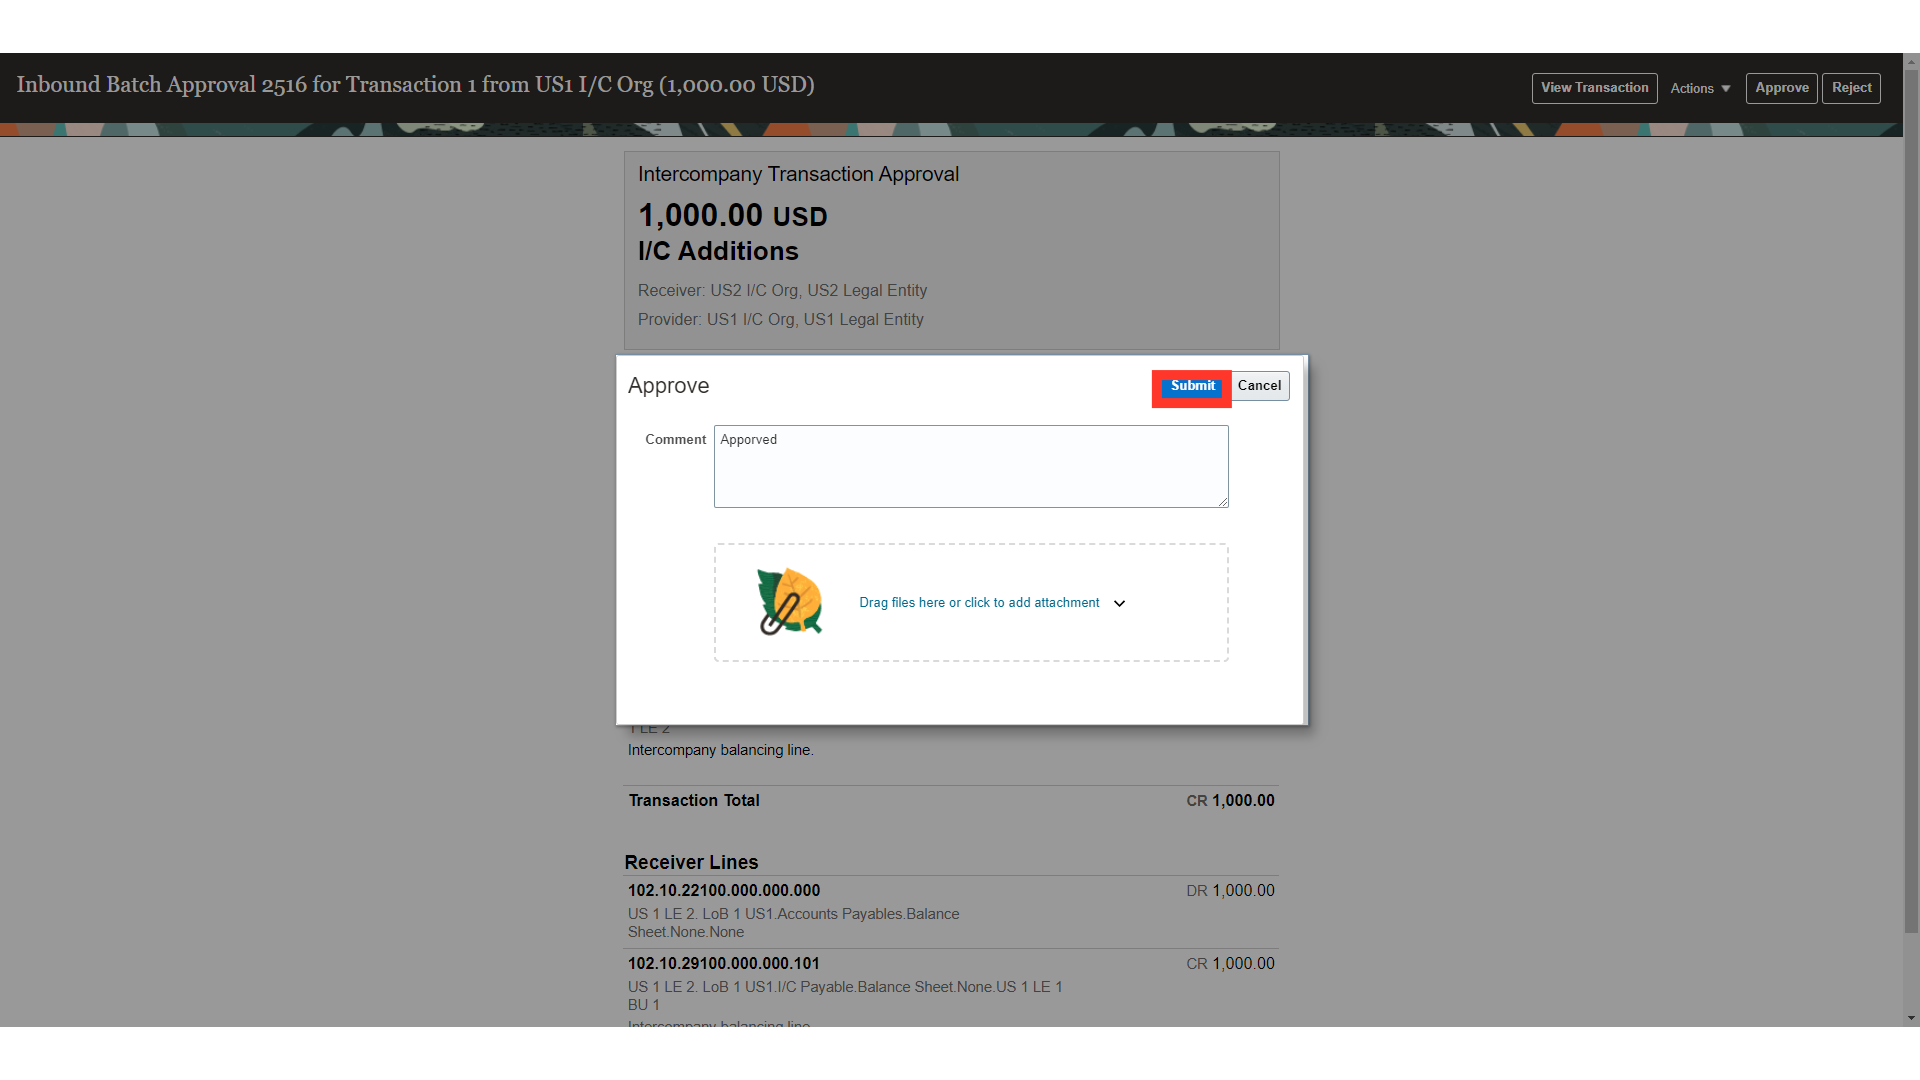
After entering the comments, click on the Submit button.
Once, the intercompany batch is approved the intercompany balancing line is automatically defaulted from the intercompany setup.
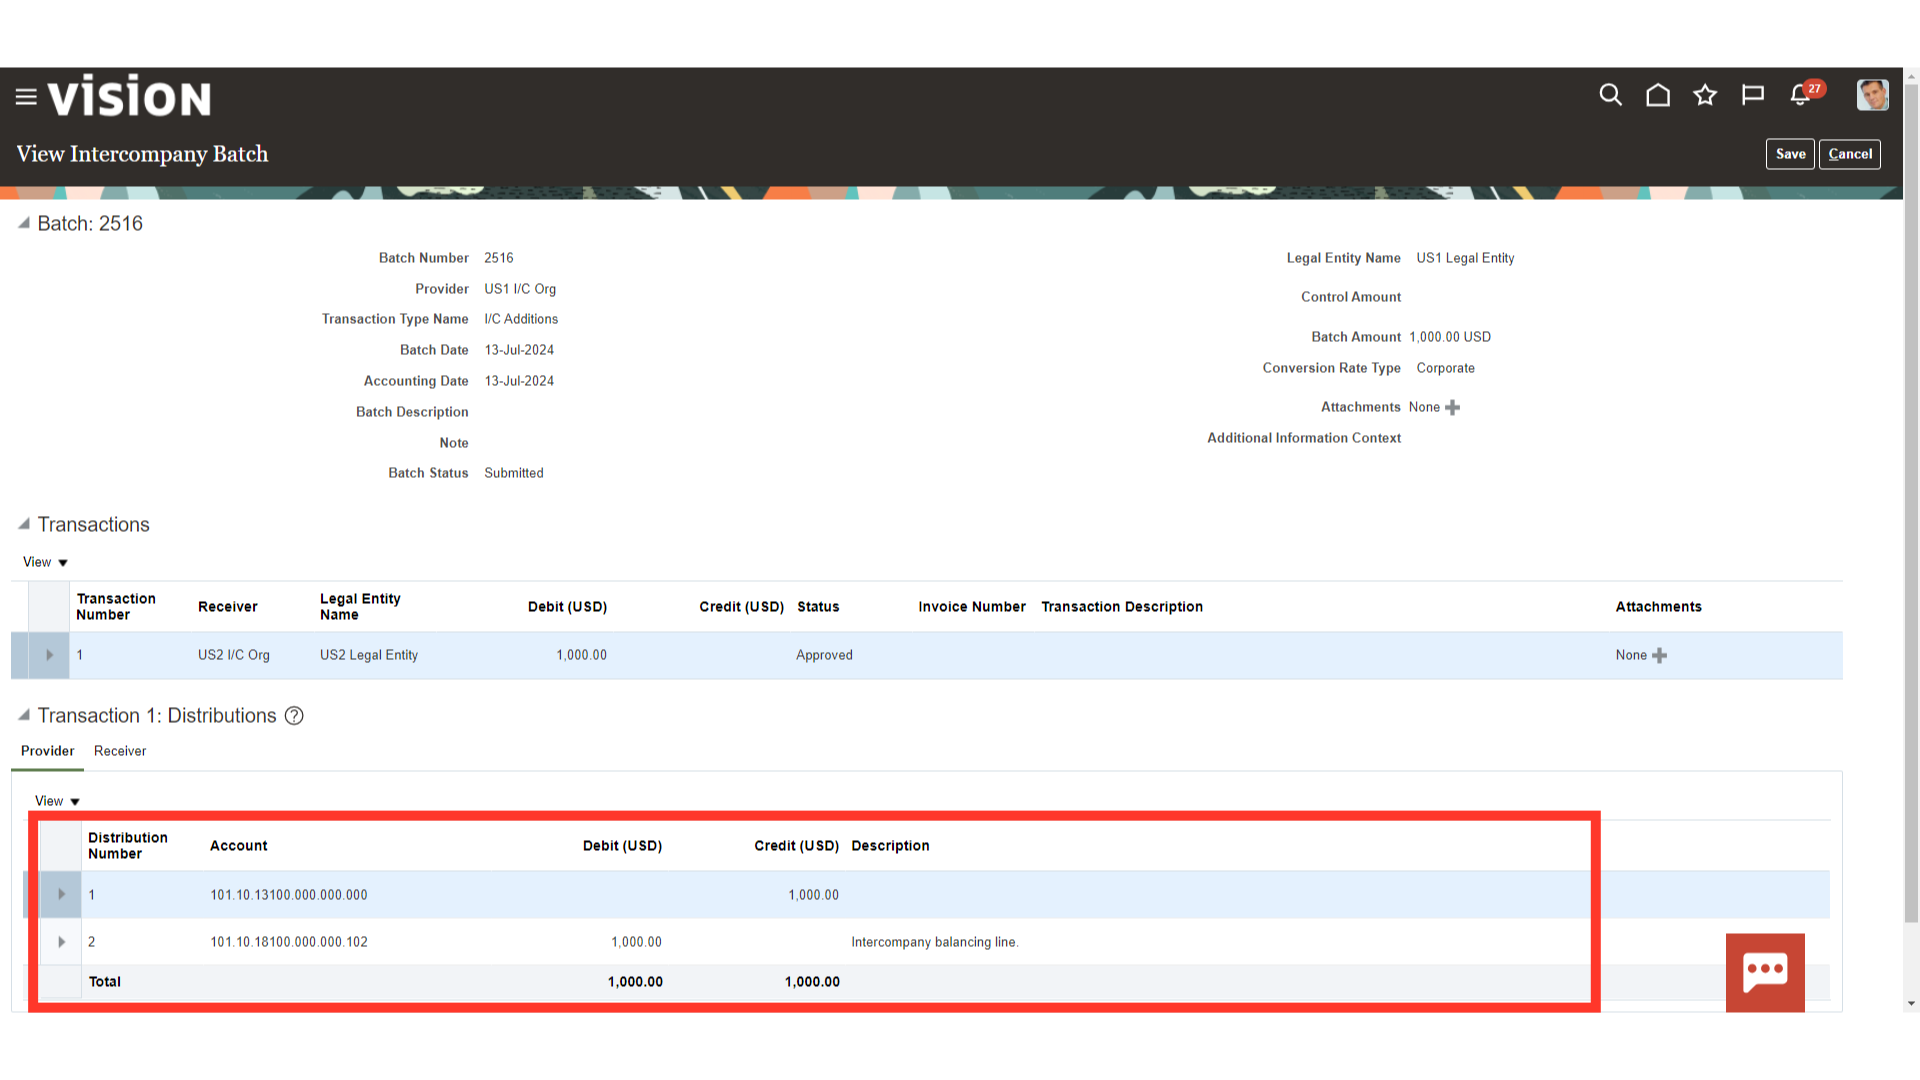
In similar way, intercompany balancing lines is defaulted automatically from the intercompany setup.
