Create Grade Ladder (With or Without Steps)
Navigation: Home>My Client Groups>Show More from the Quick Actions>Manage Grade Ladders>Create>Enter Information>Submit
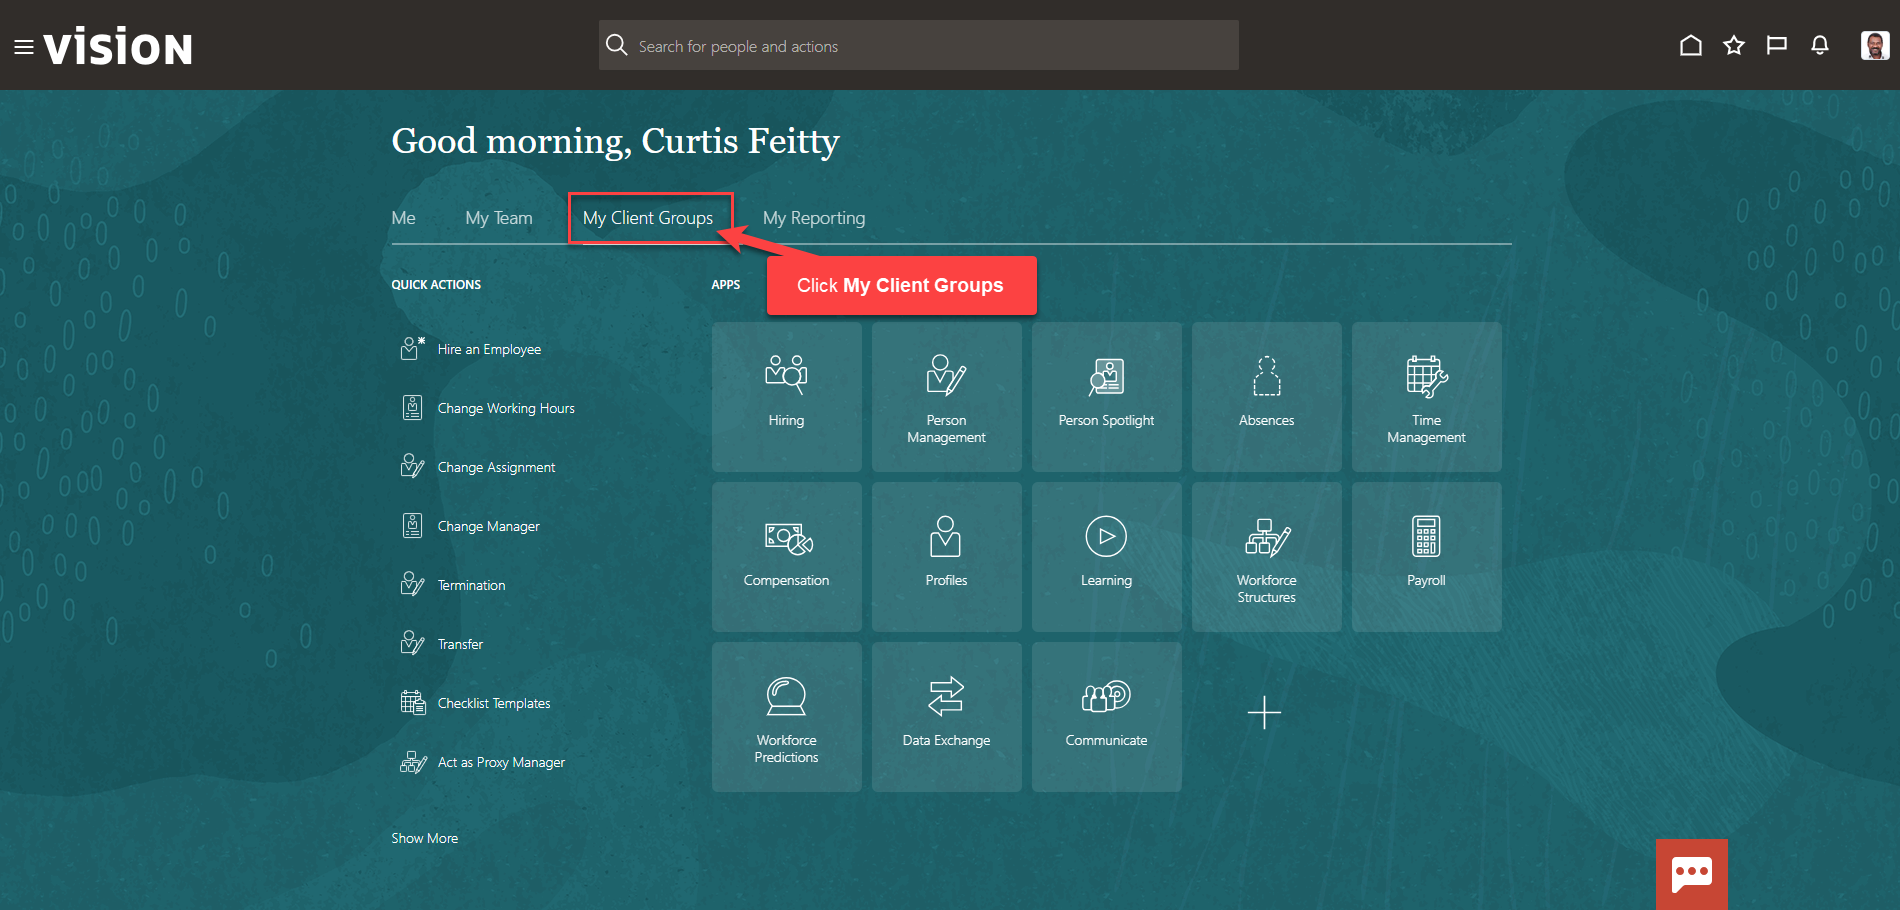
From the home screen, click My Client Groups
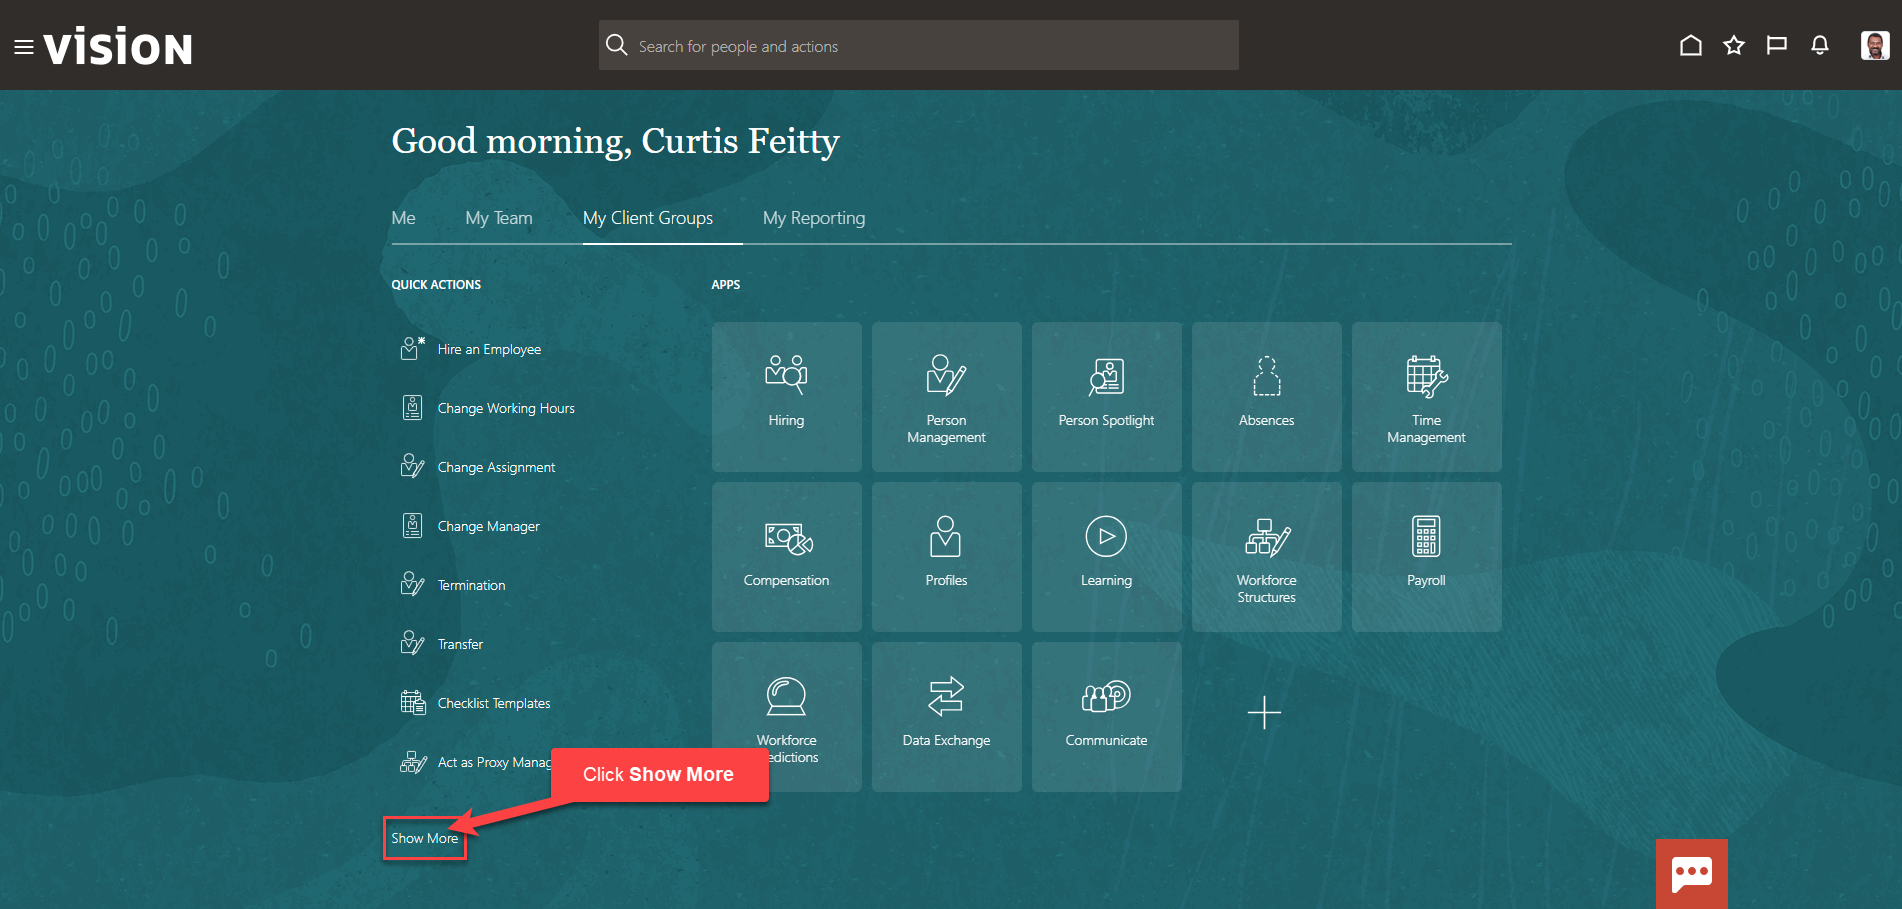
Next, click Show More
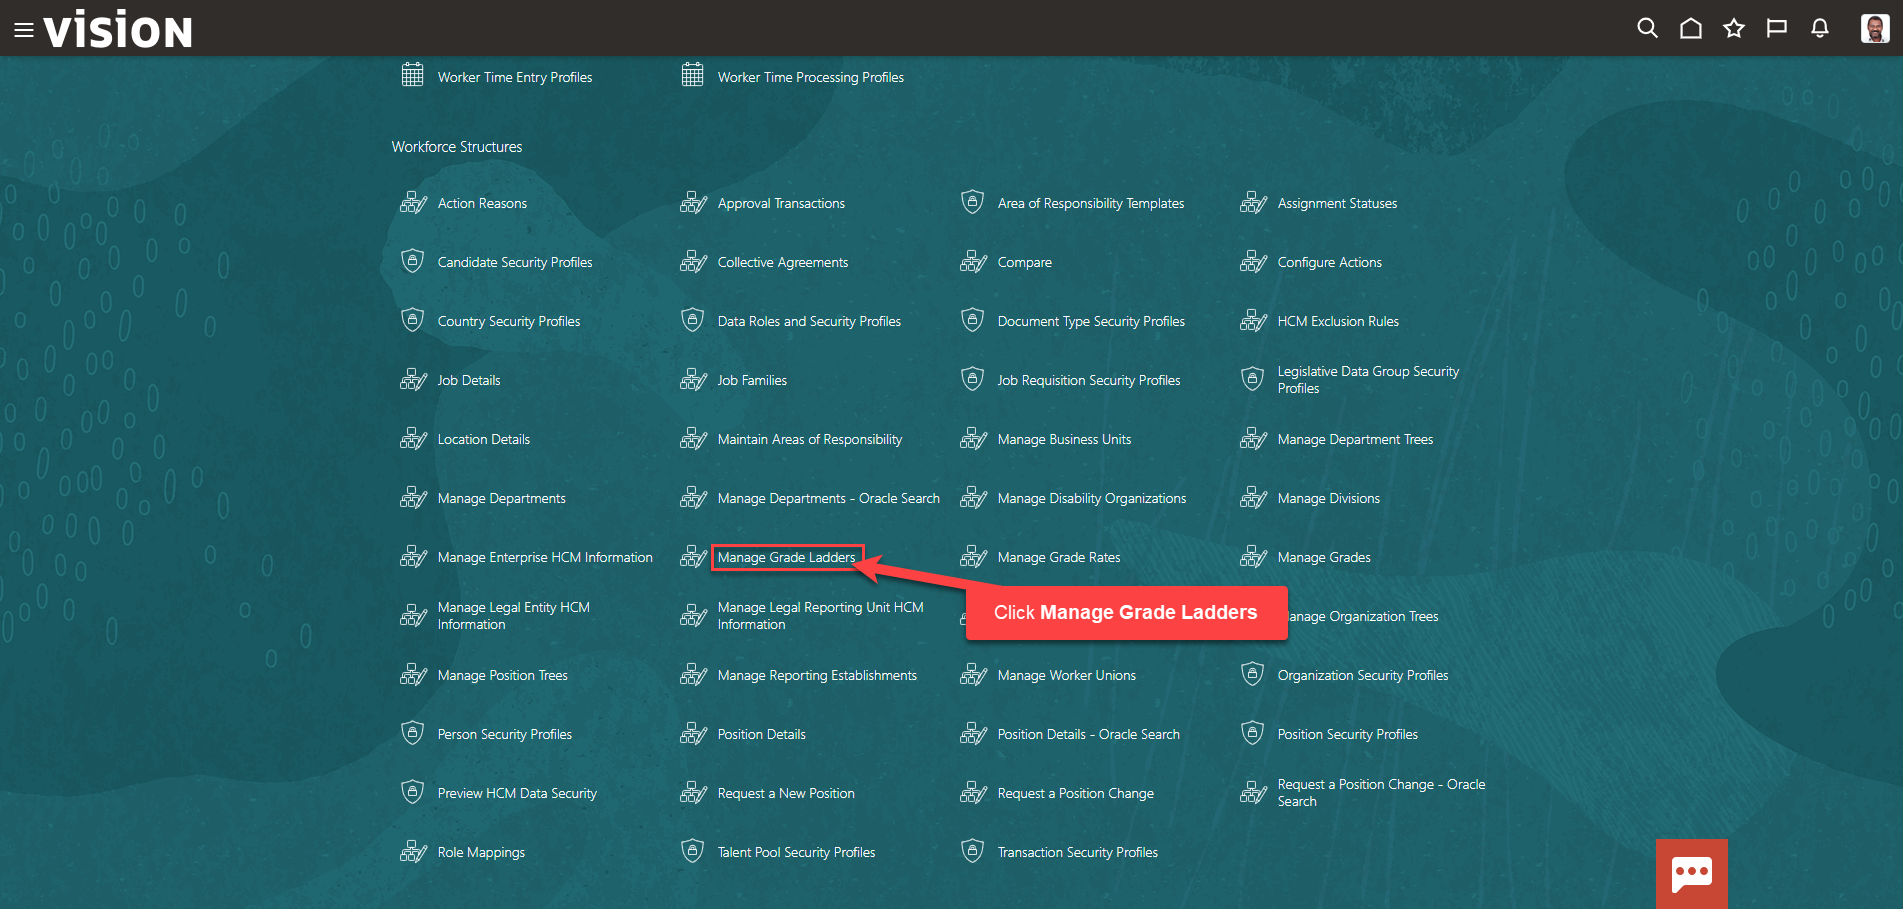
Scroll down and under Workforce Structures, click Manage Grade Ladders. As a note, we can search Manage Grade Ladders by clicking Ctrl F
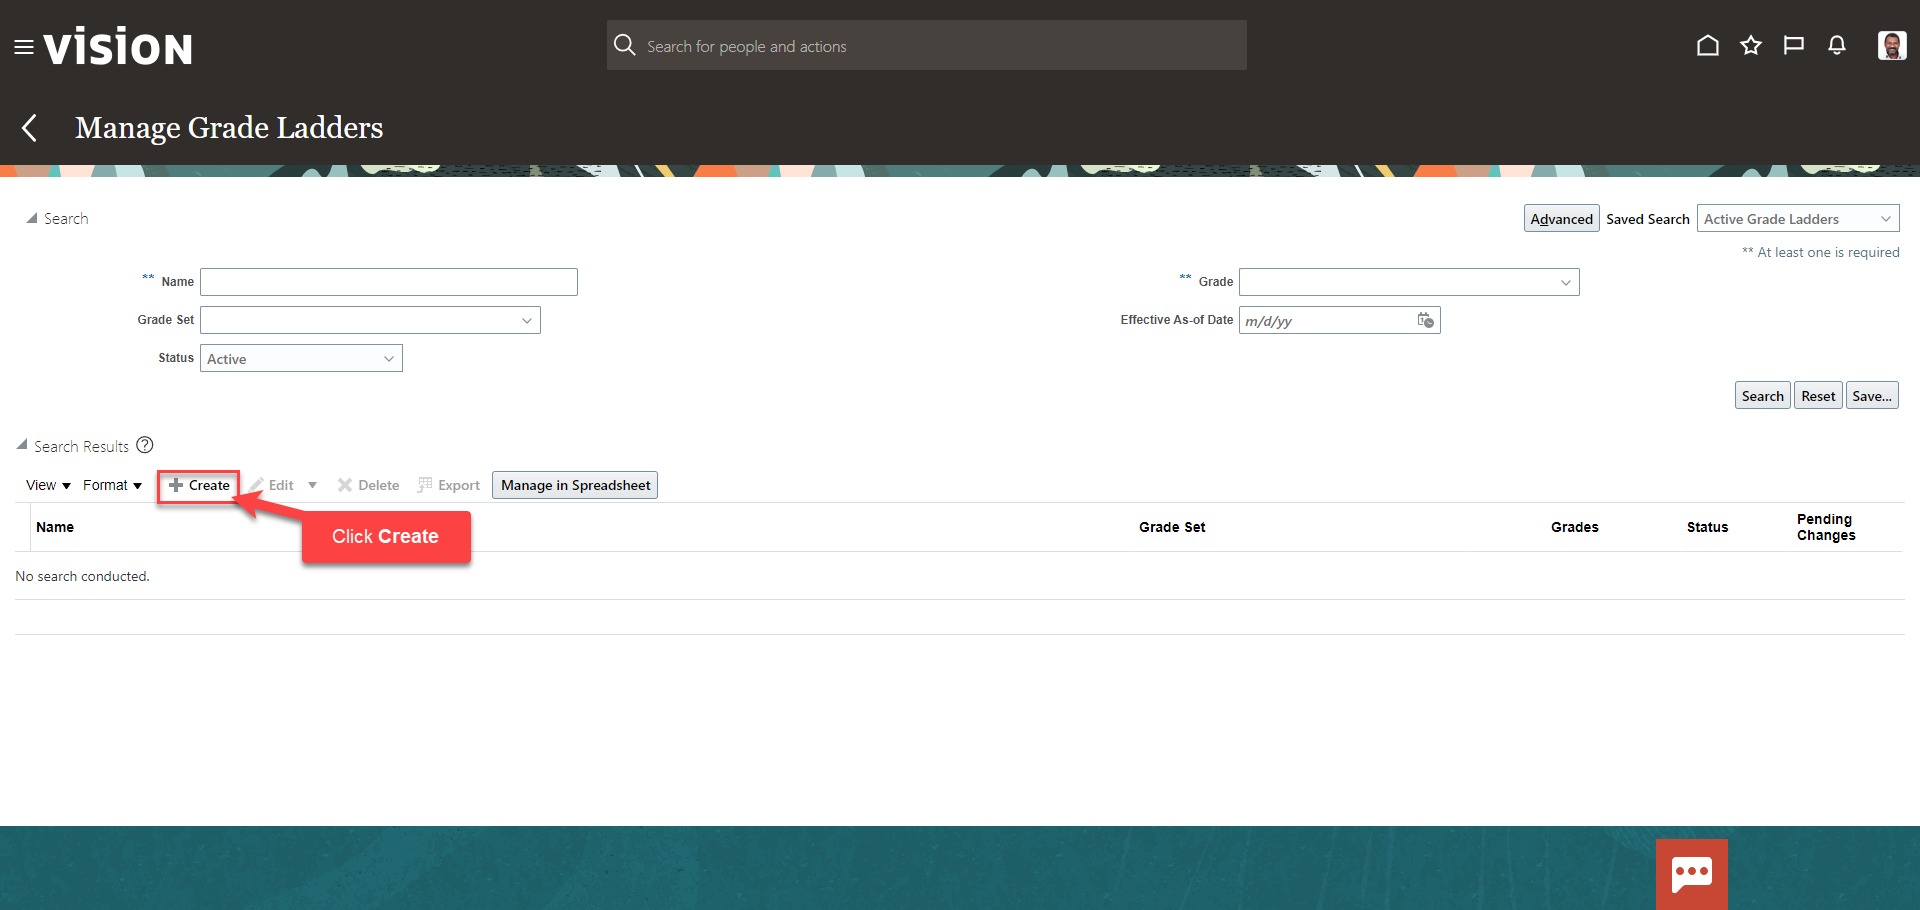
Next, click Create
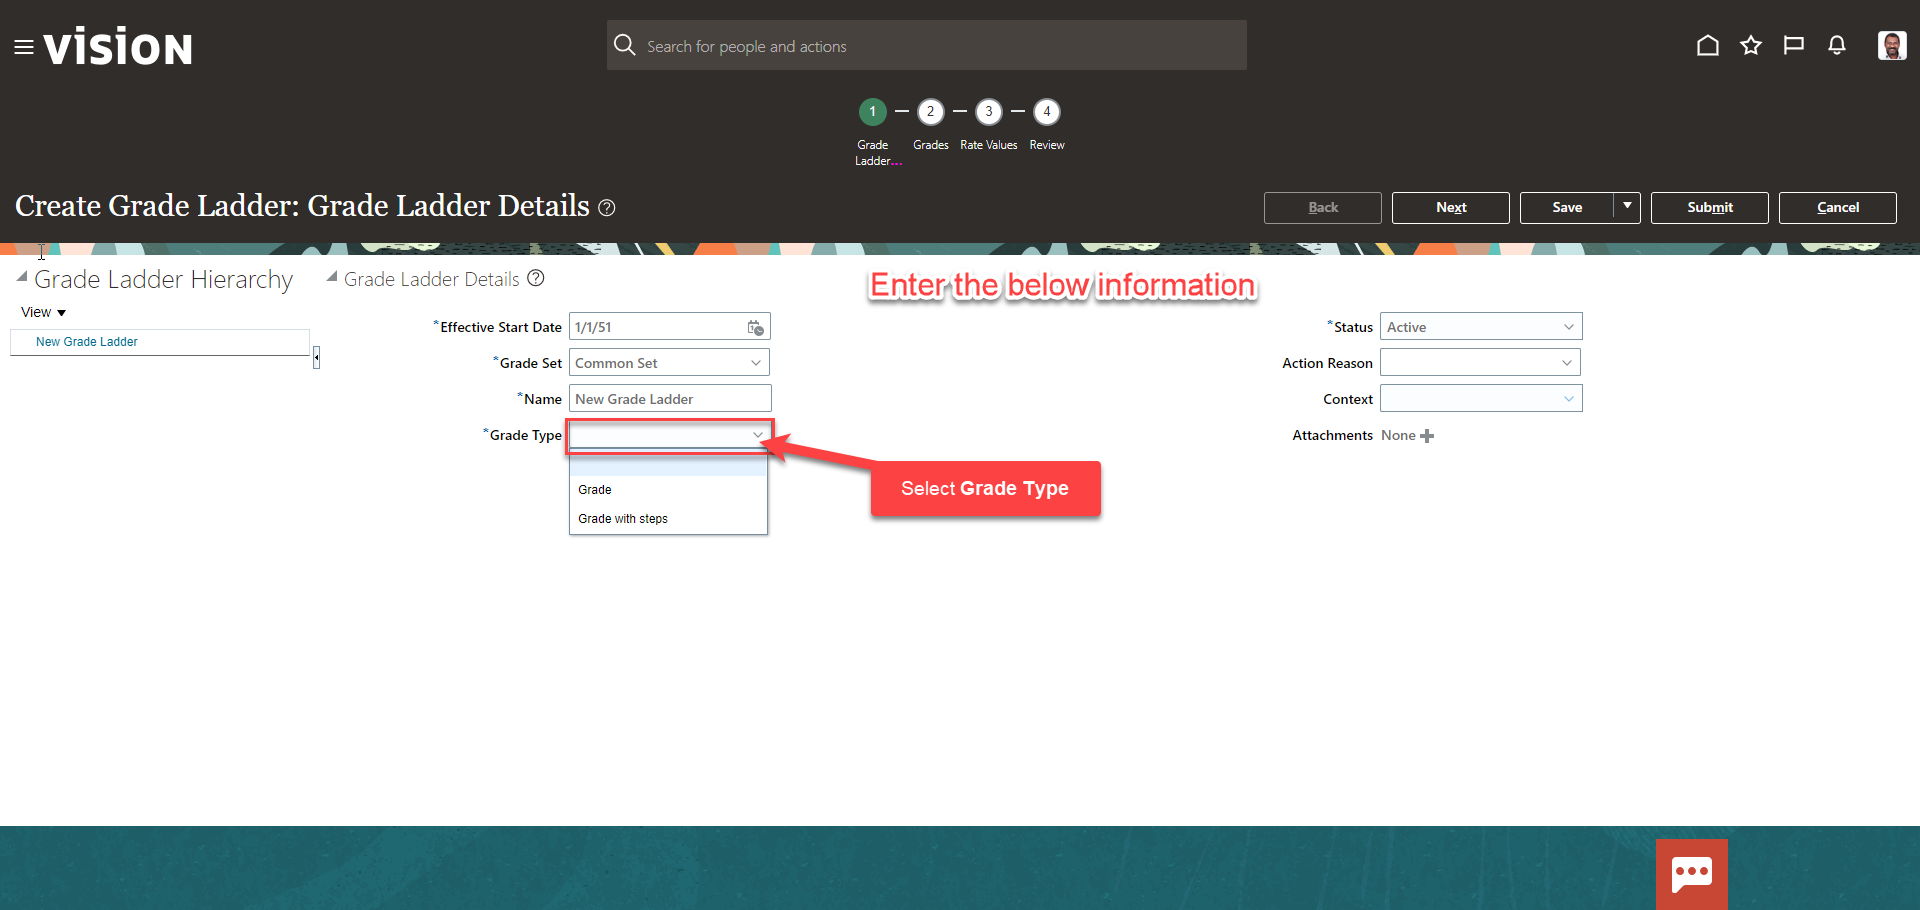
Next, enter the Grade Ladder Details. If we have multiple Grade Sets, we’ll need to select the appropriate Grade Set. Under Grade Type, we can select to attach Grades or Grades with Steps; depending on what we select here will determine the information we will need to enter on the next page
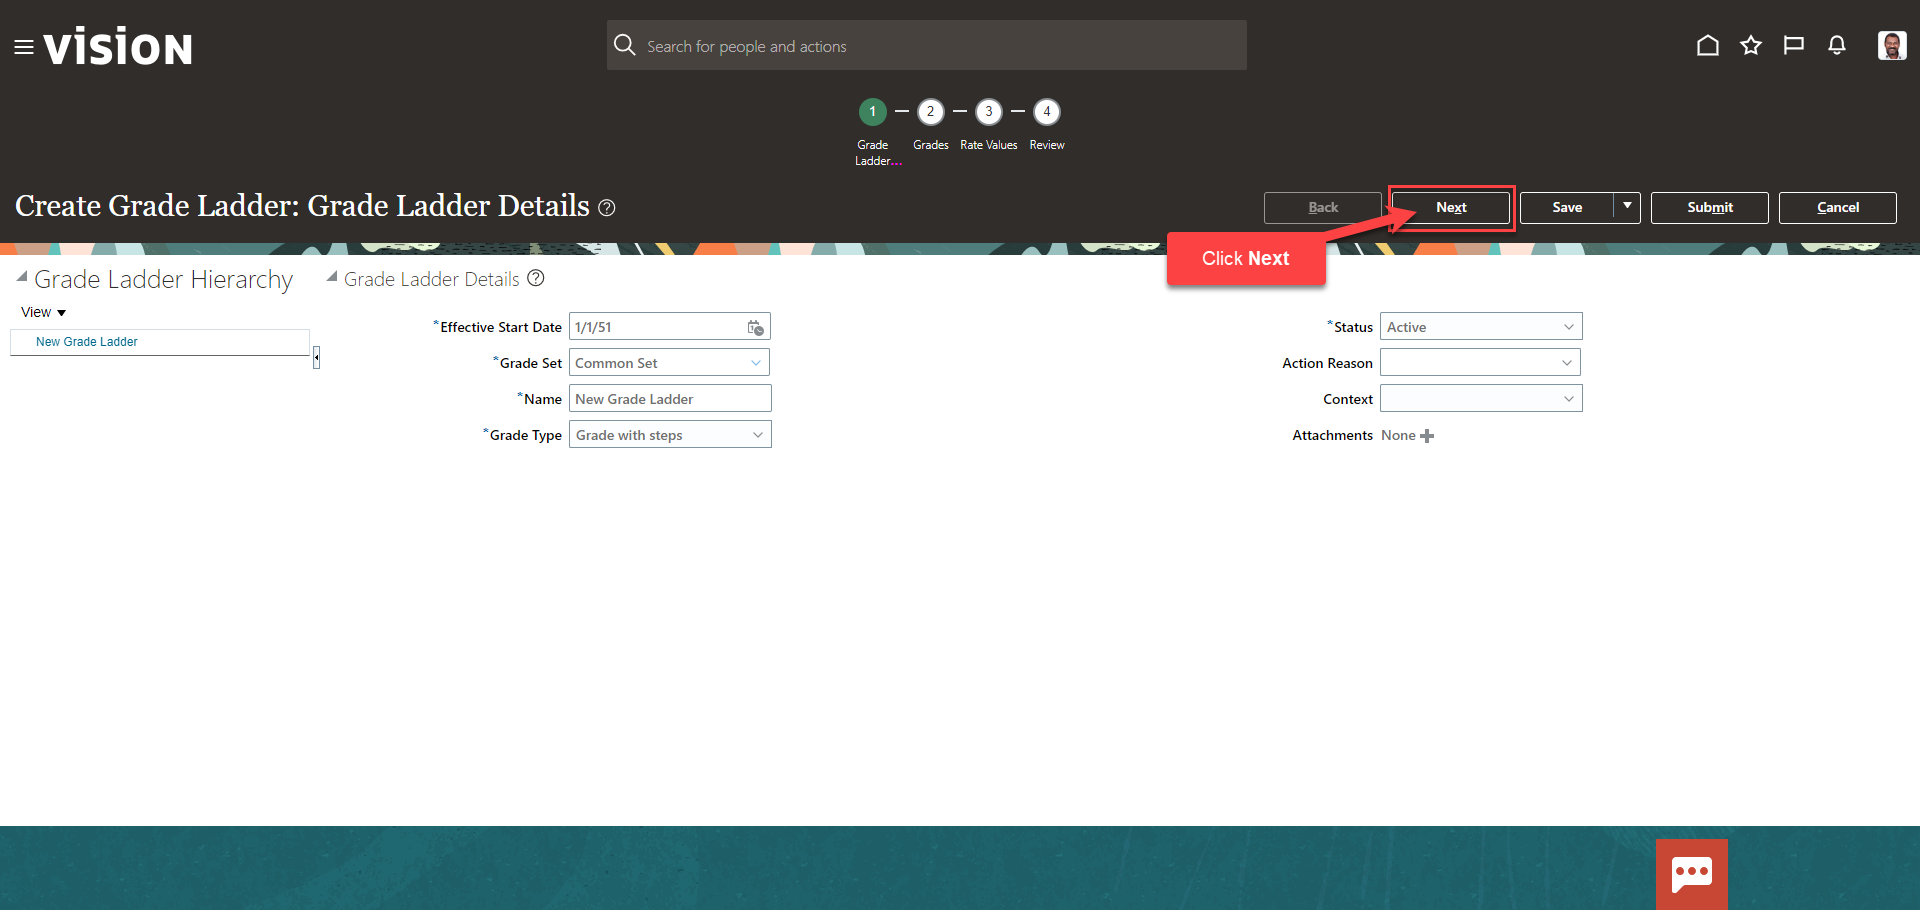
Once the information is entered, click Next
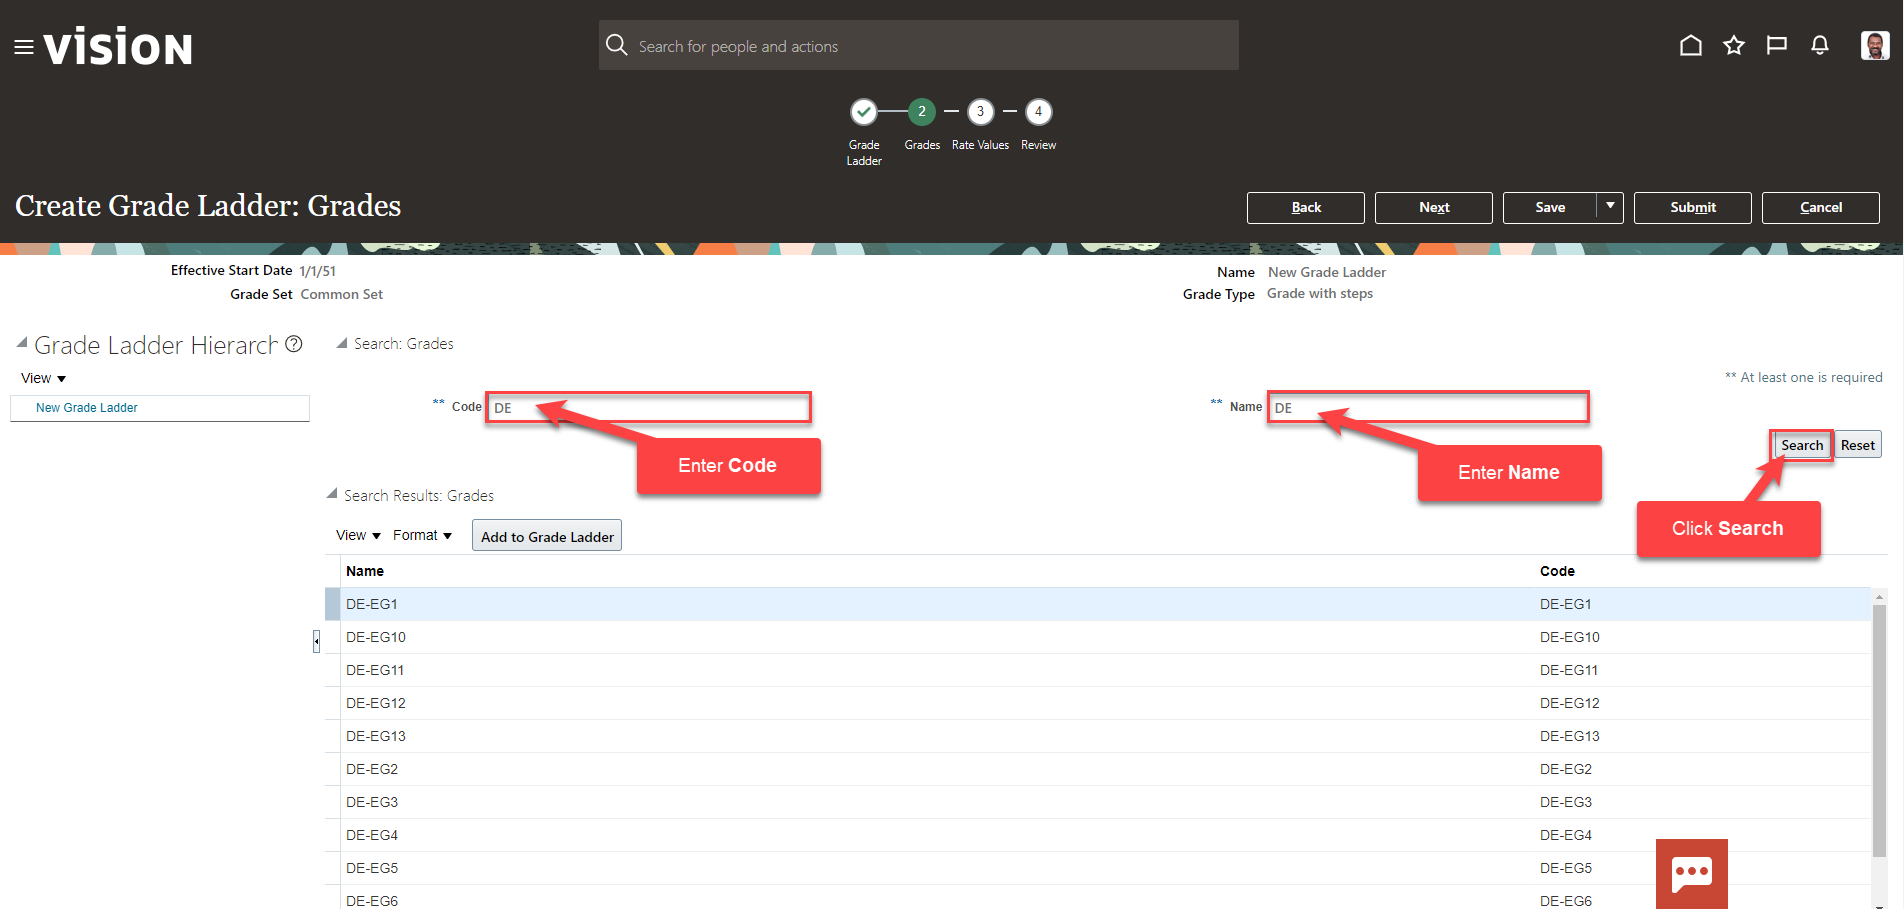
Now we’ll enter the grade information. Enter the Code and Name and click Search
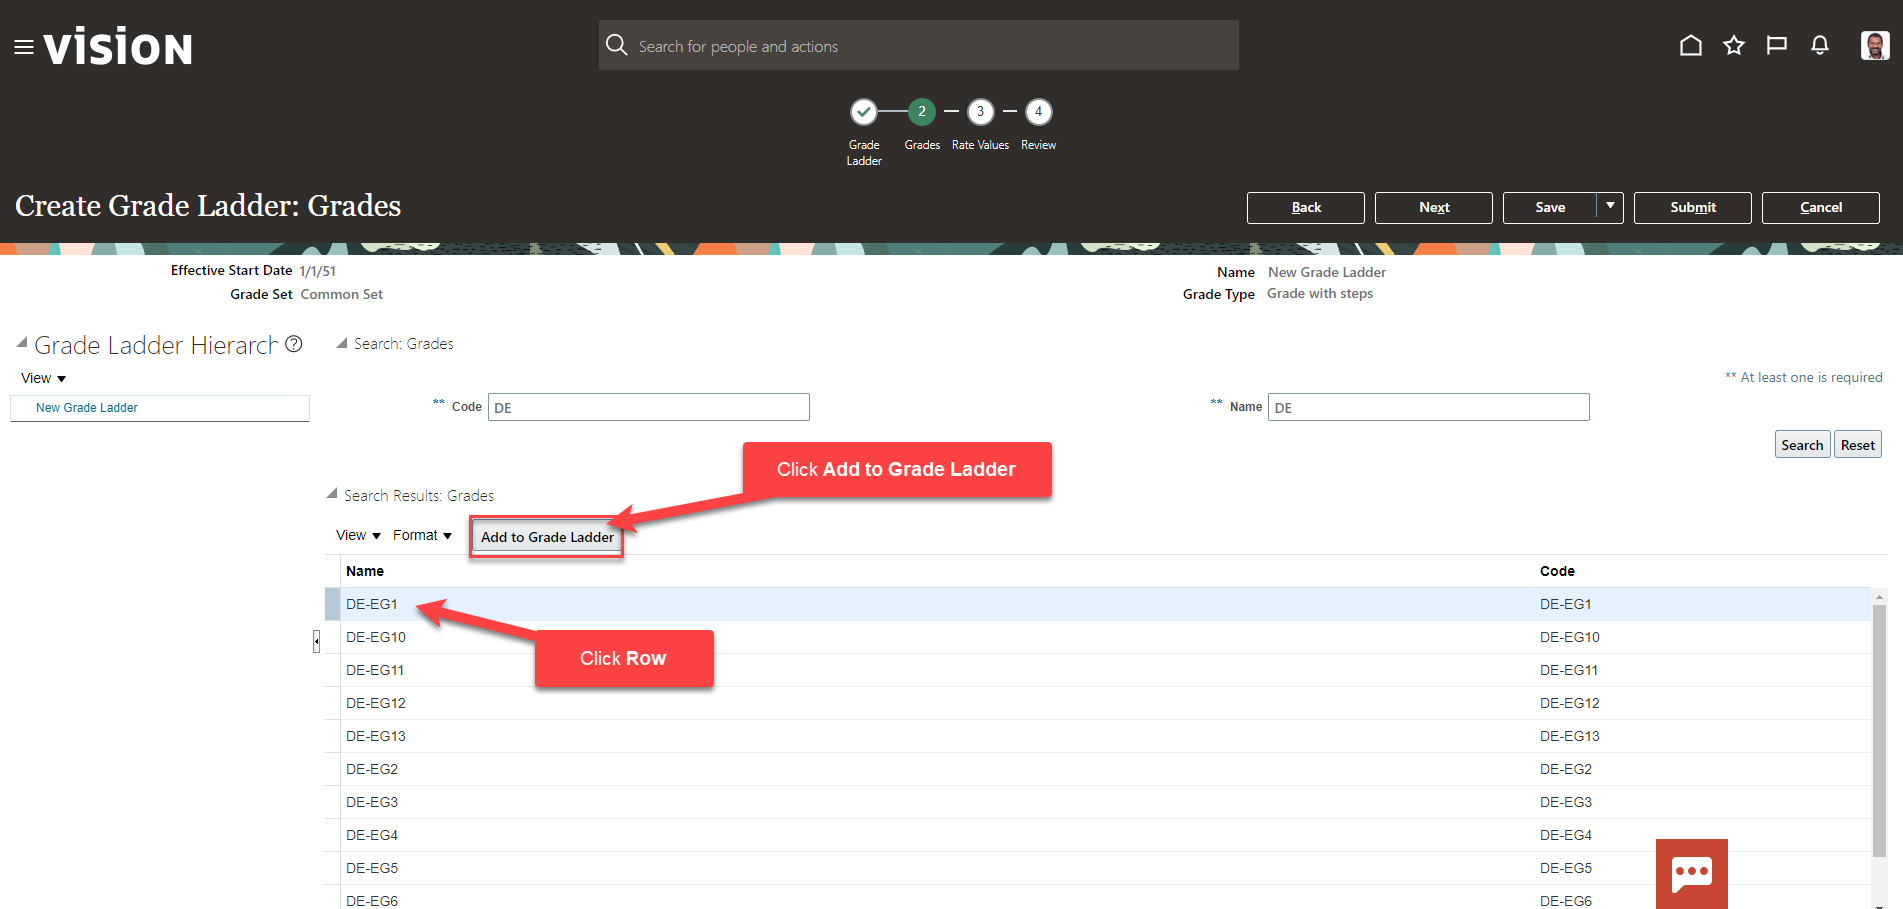
Highlight the row of the Grade we wish to add to the Ladder and click Add to Grade Ladder. The Steps associated to the grades will also be added. We can add multiple Grades to the Ladder
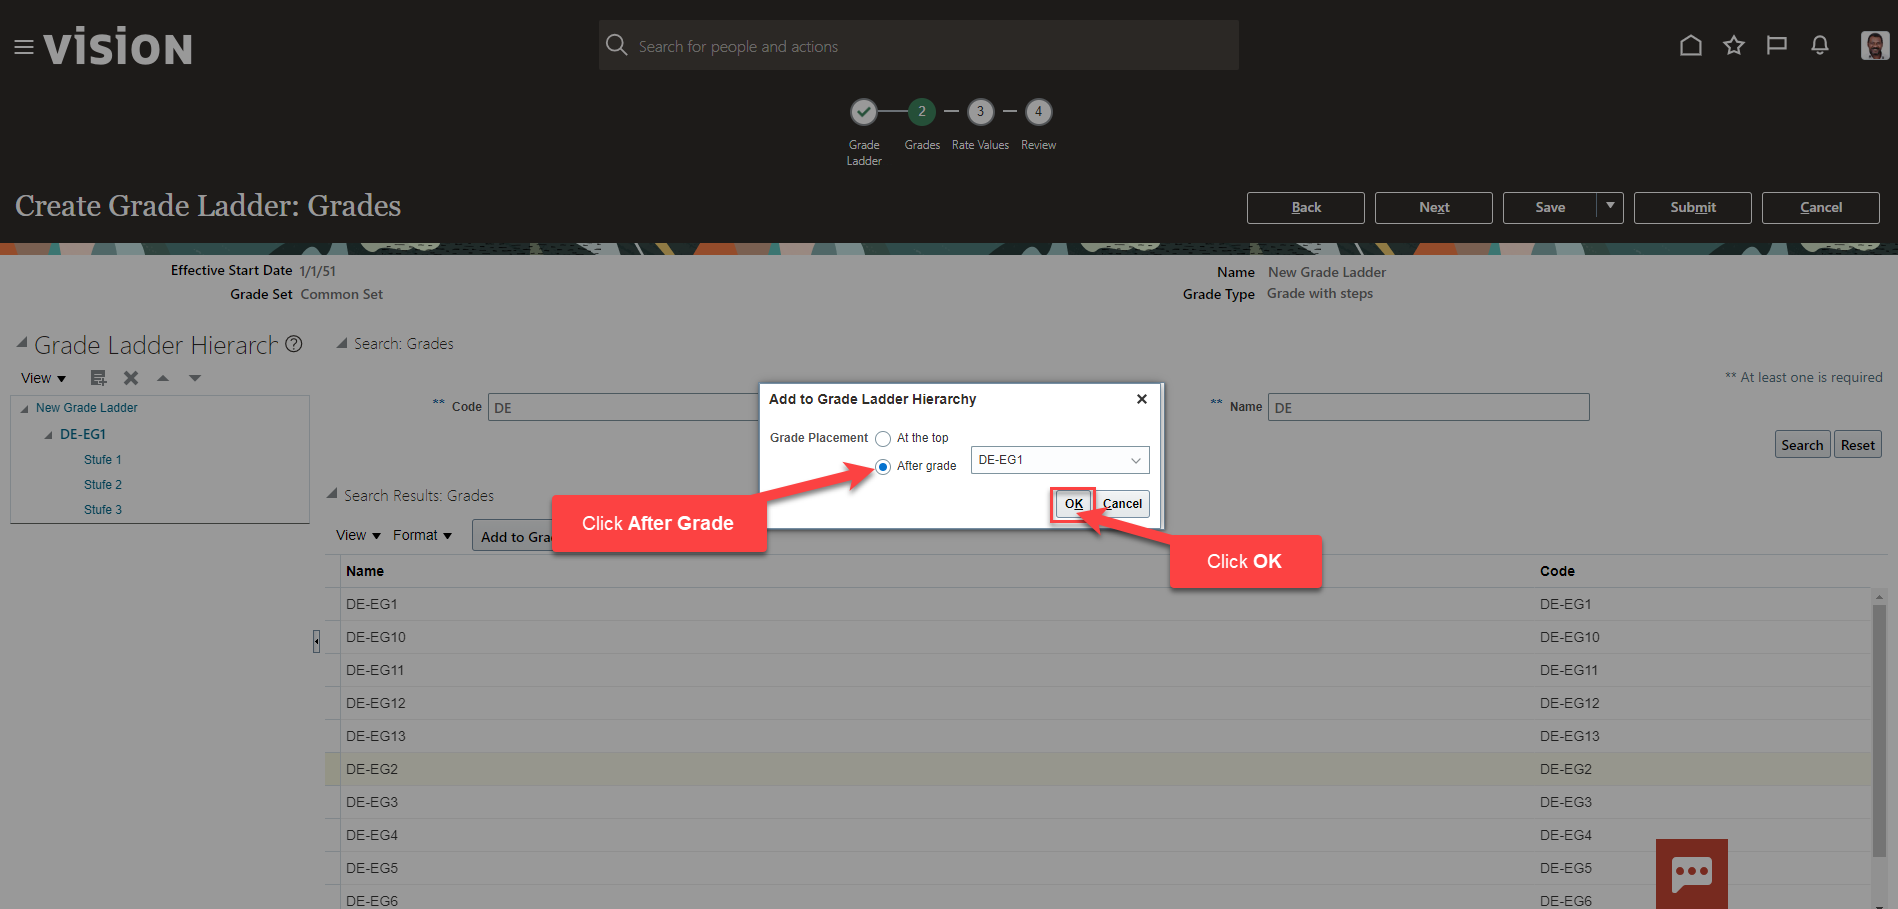
After we add the first Grade, we will be asked where we want to place the second grade. We will select After Grade 1. We will follow this process to add additional grades. Click OK
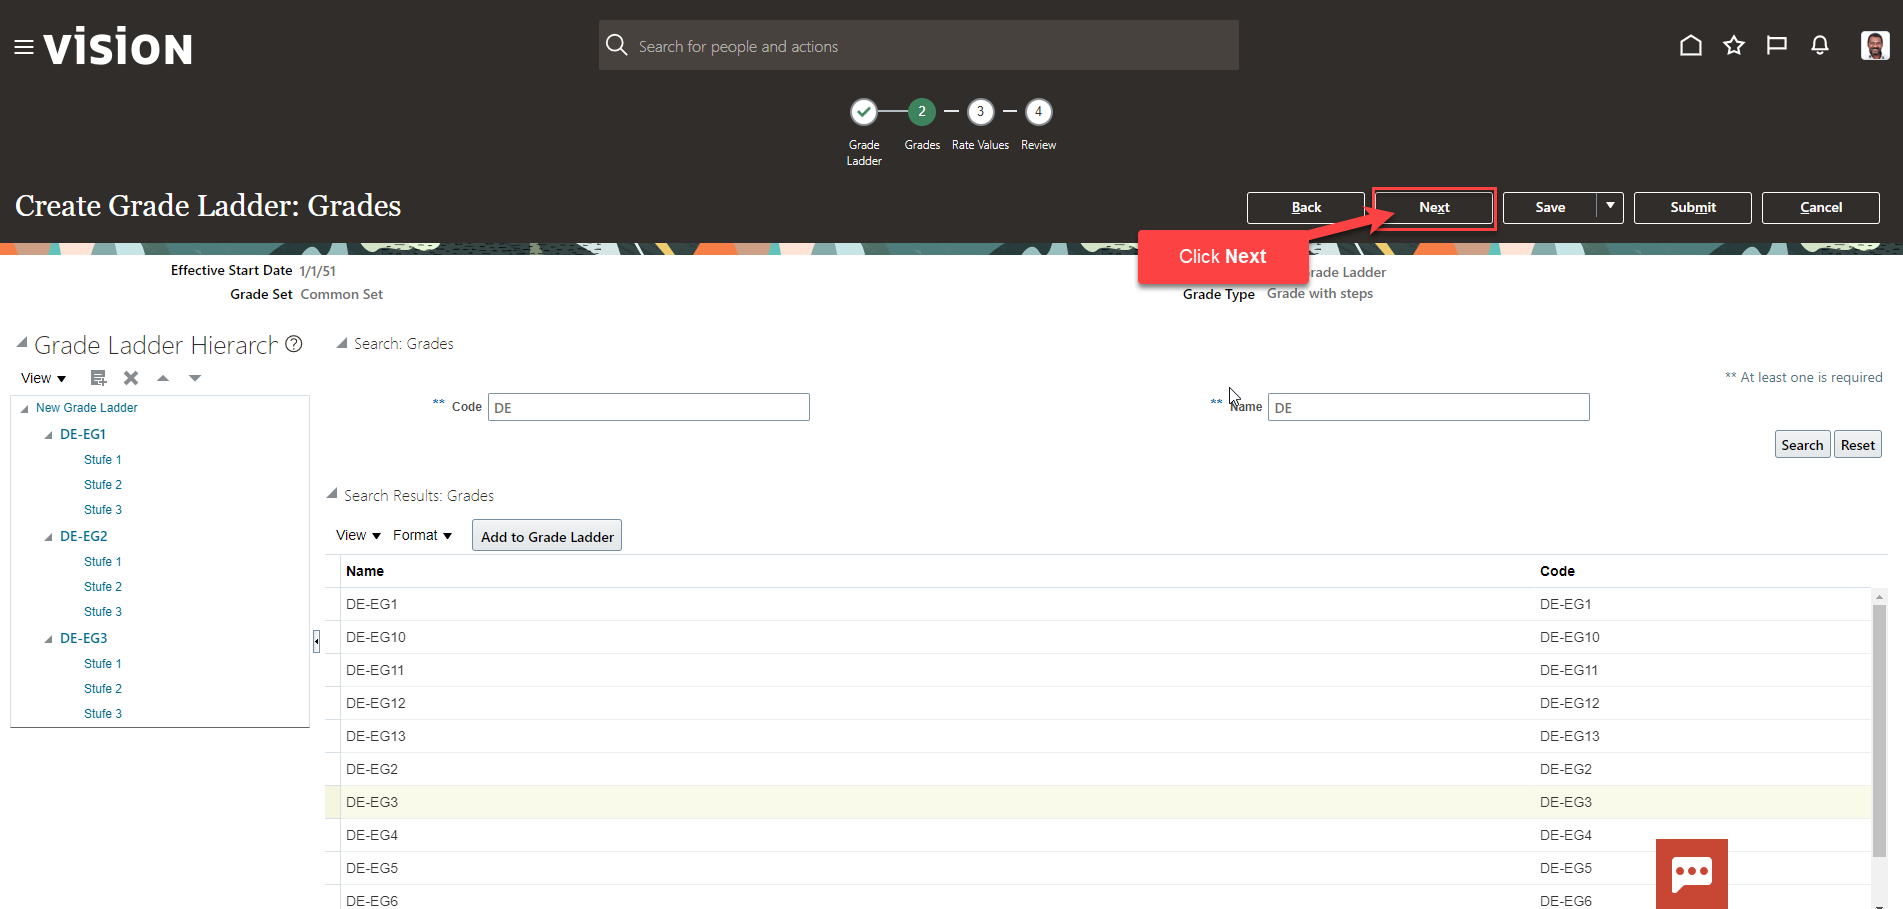
Once all the Grades have been added, click Next
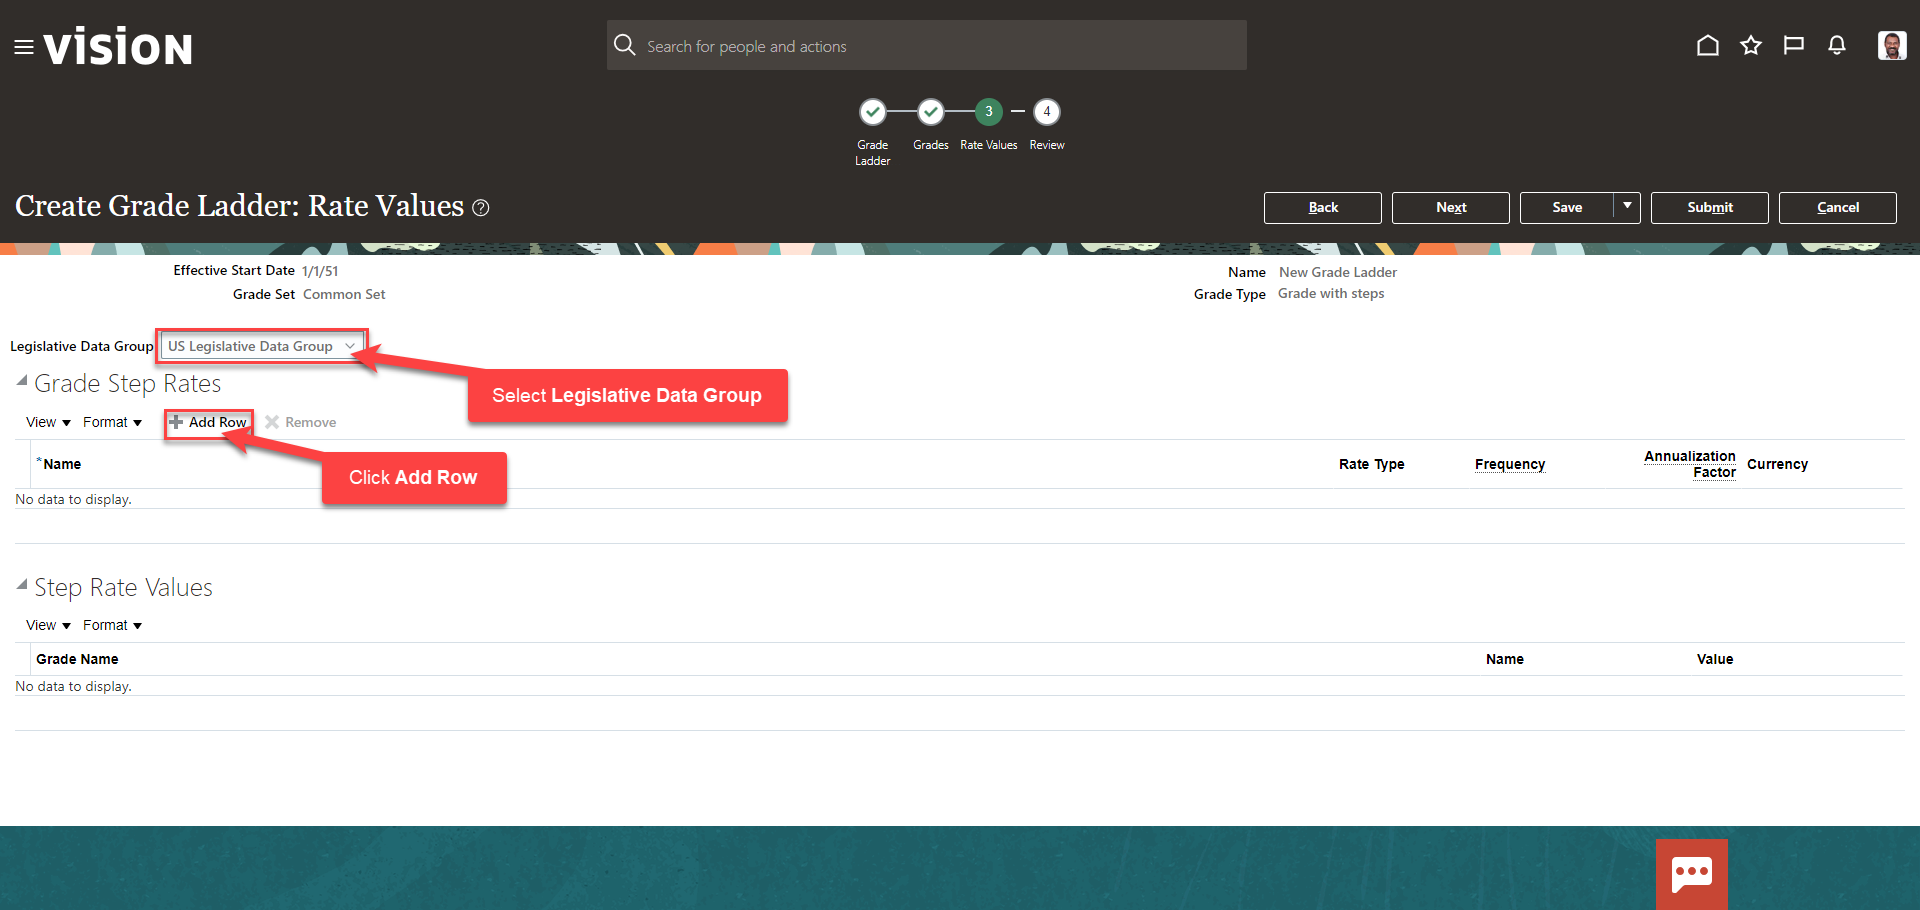
Here we can enter the Grade Step Rates, if applicable. It is recommended we add the Grade Rates through the Manage Grade Rates task prior to the creation of the Ladder but, we can add them here. Select the Legislative Data Group. Next, click Add Row
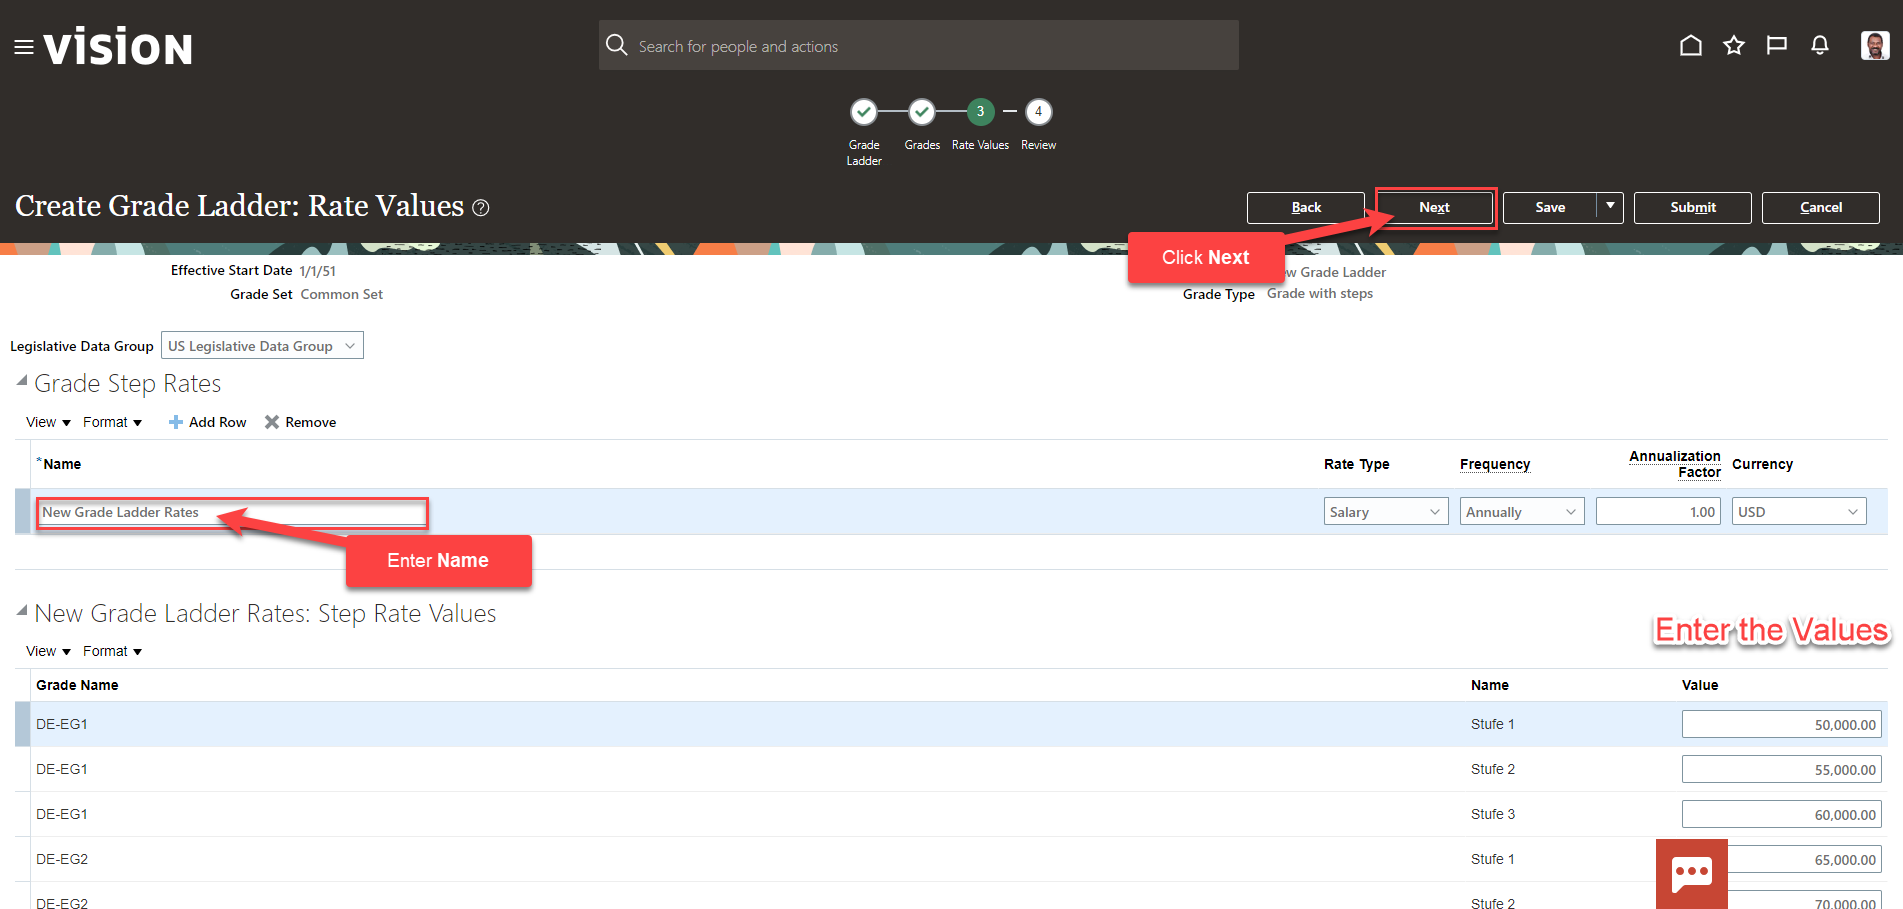
Next, enter the Values and once complete, click Next
Lastly, we’ll review the Ladder information and once our review is complete, click Submit
