Create Mass Update
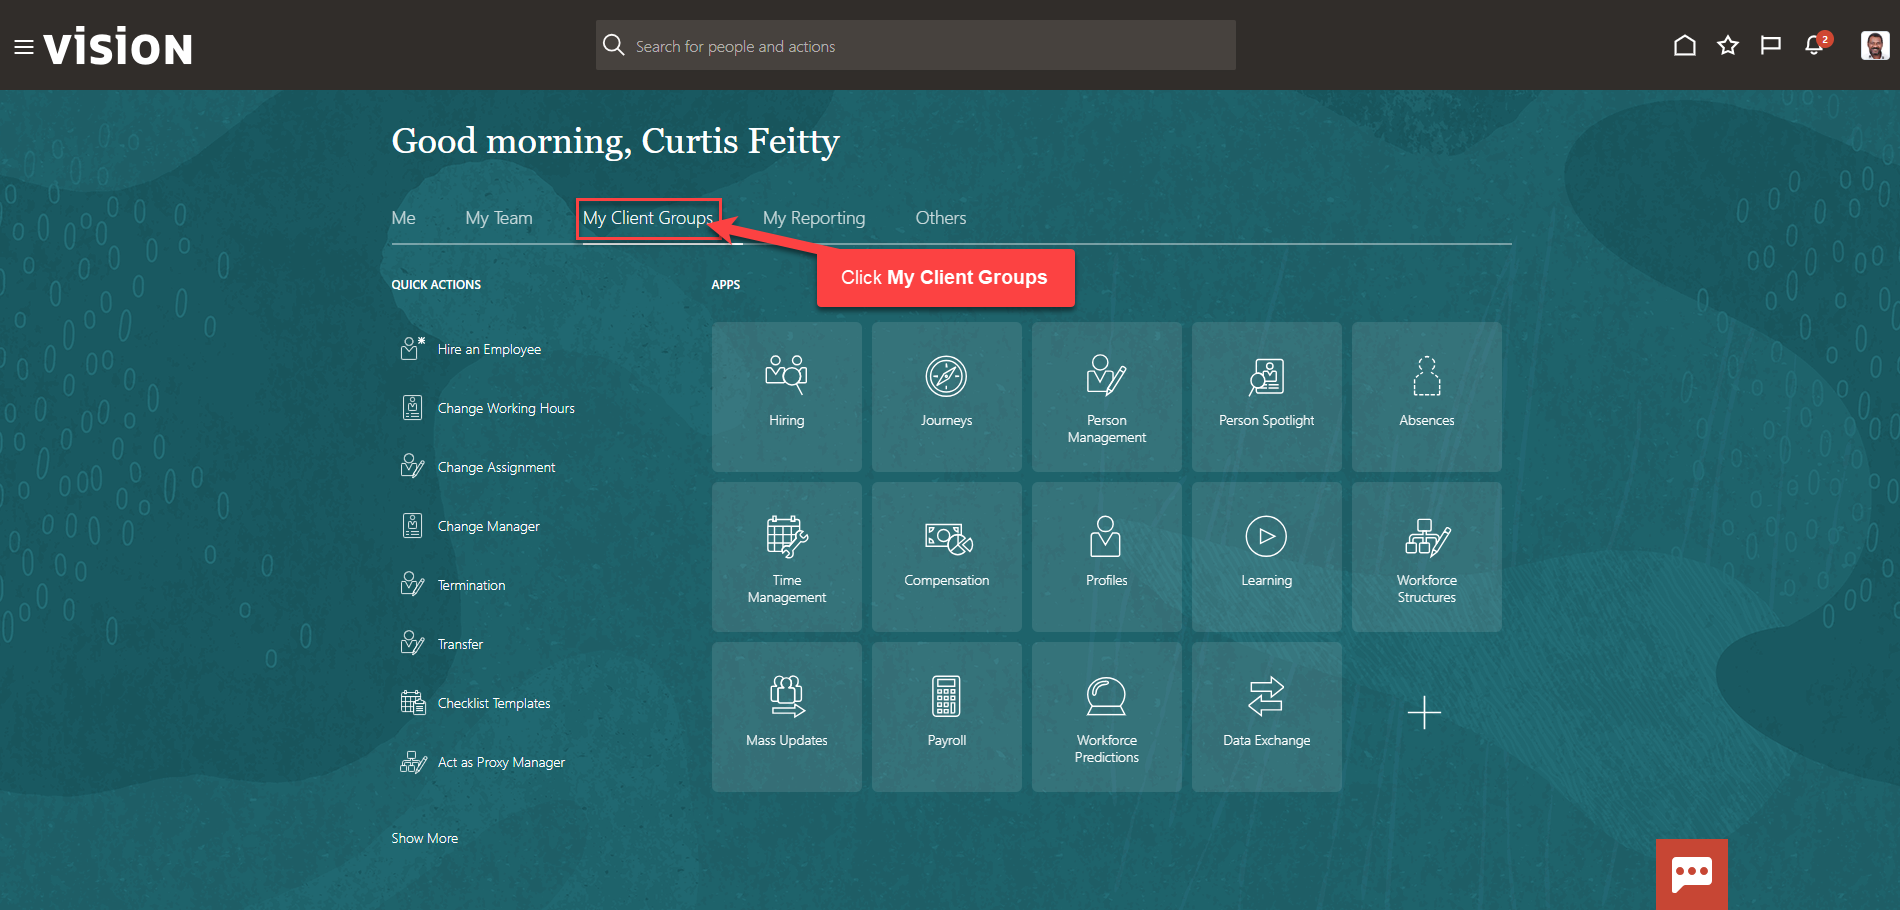
Navigation: Home>My Client Groups>Mass Updates>Create Mass Assignment Change>Enter Criteria>Submit
From the home screen, click My Client Groups
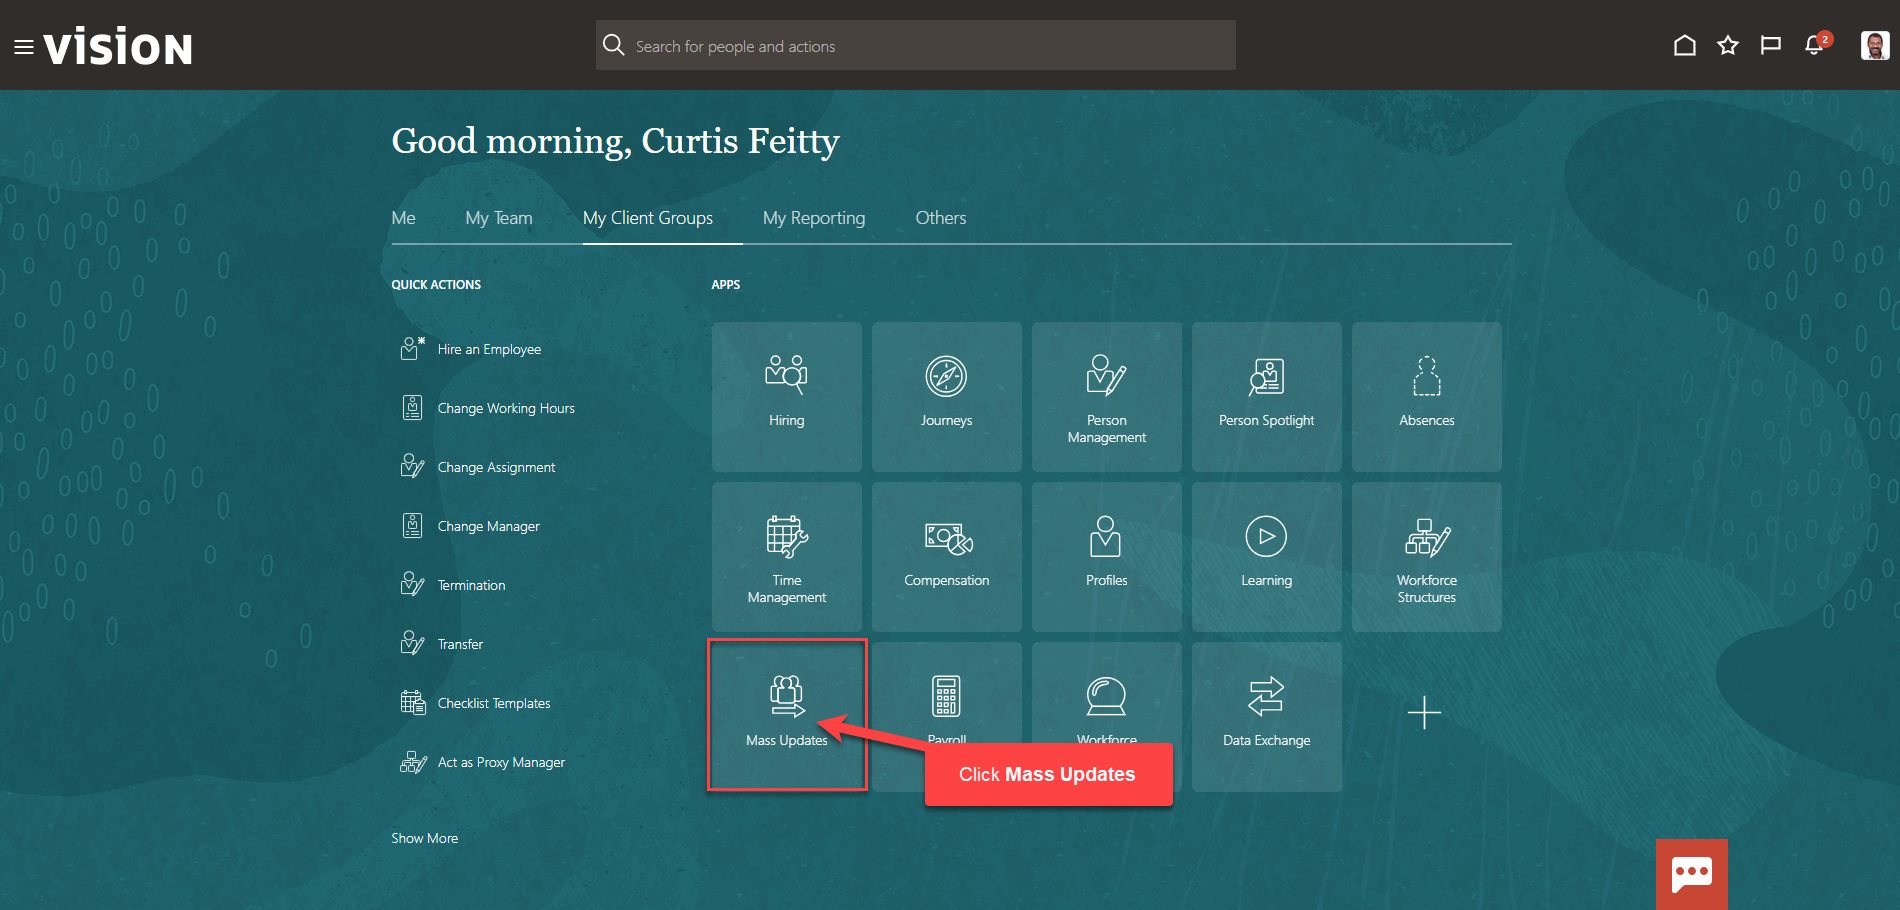
Click Mass Updates
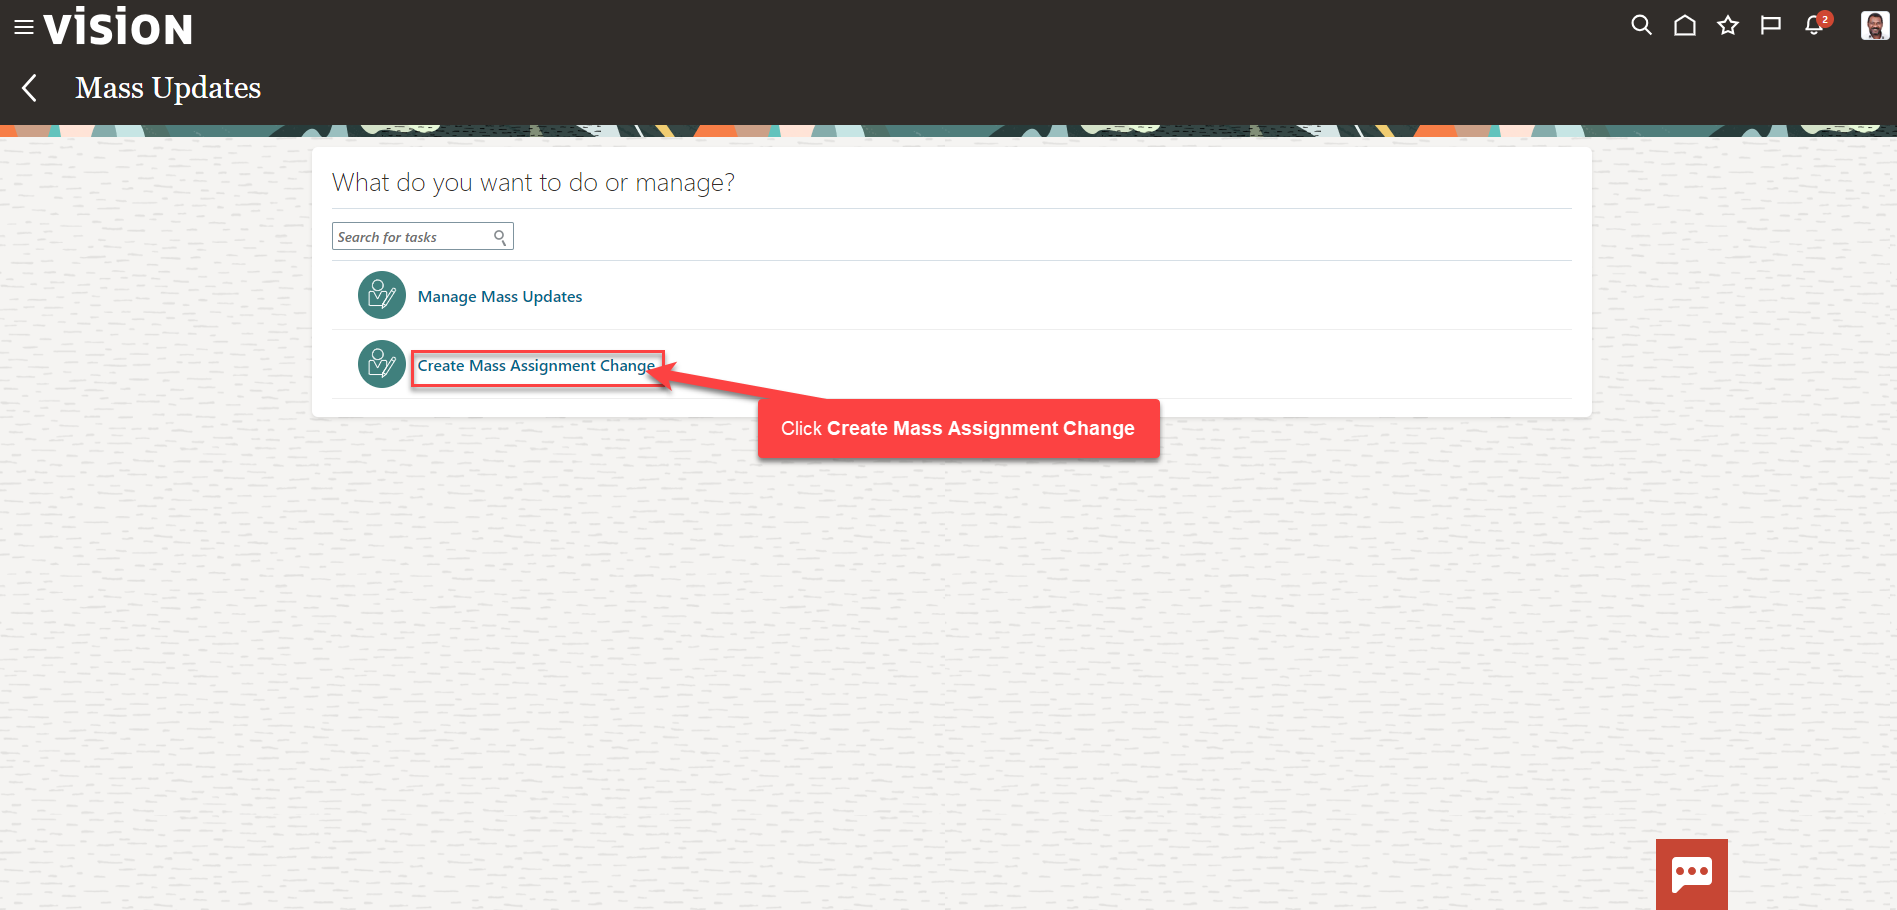
From the Mass Updates screen, click Create Mass Assignment Change
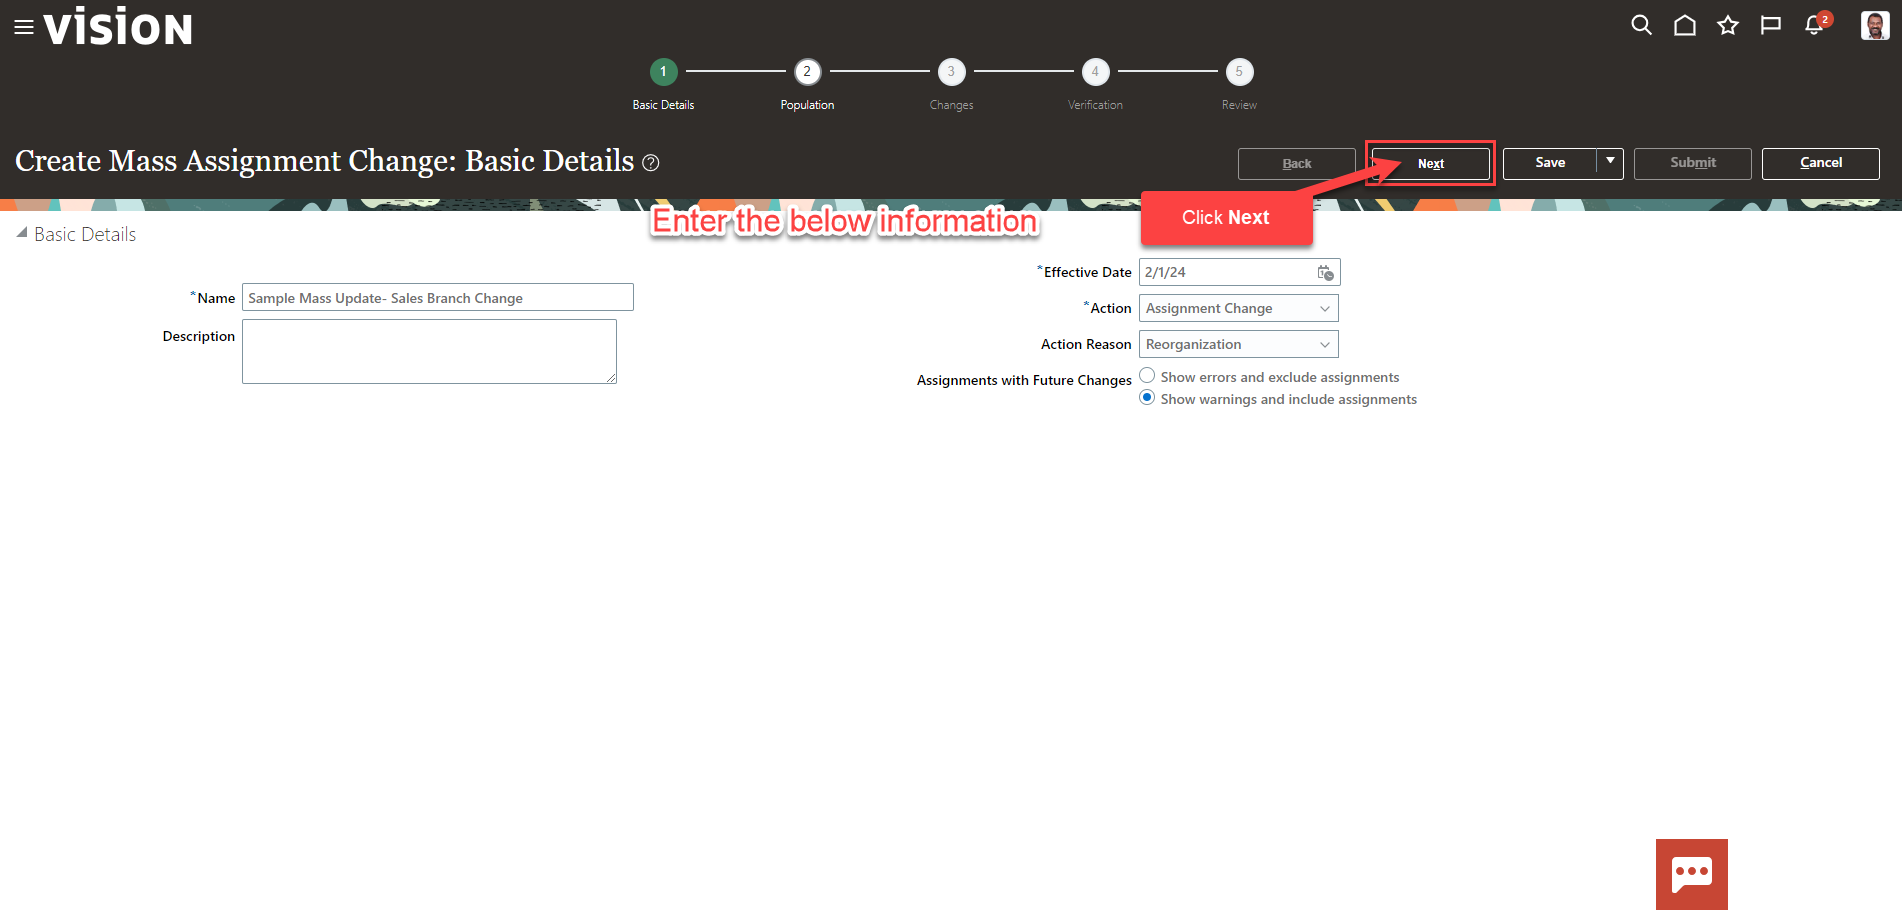
Enter the Effective Date. Next, enter the remaining Basic Details and click Next
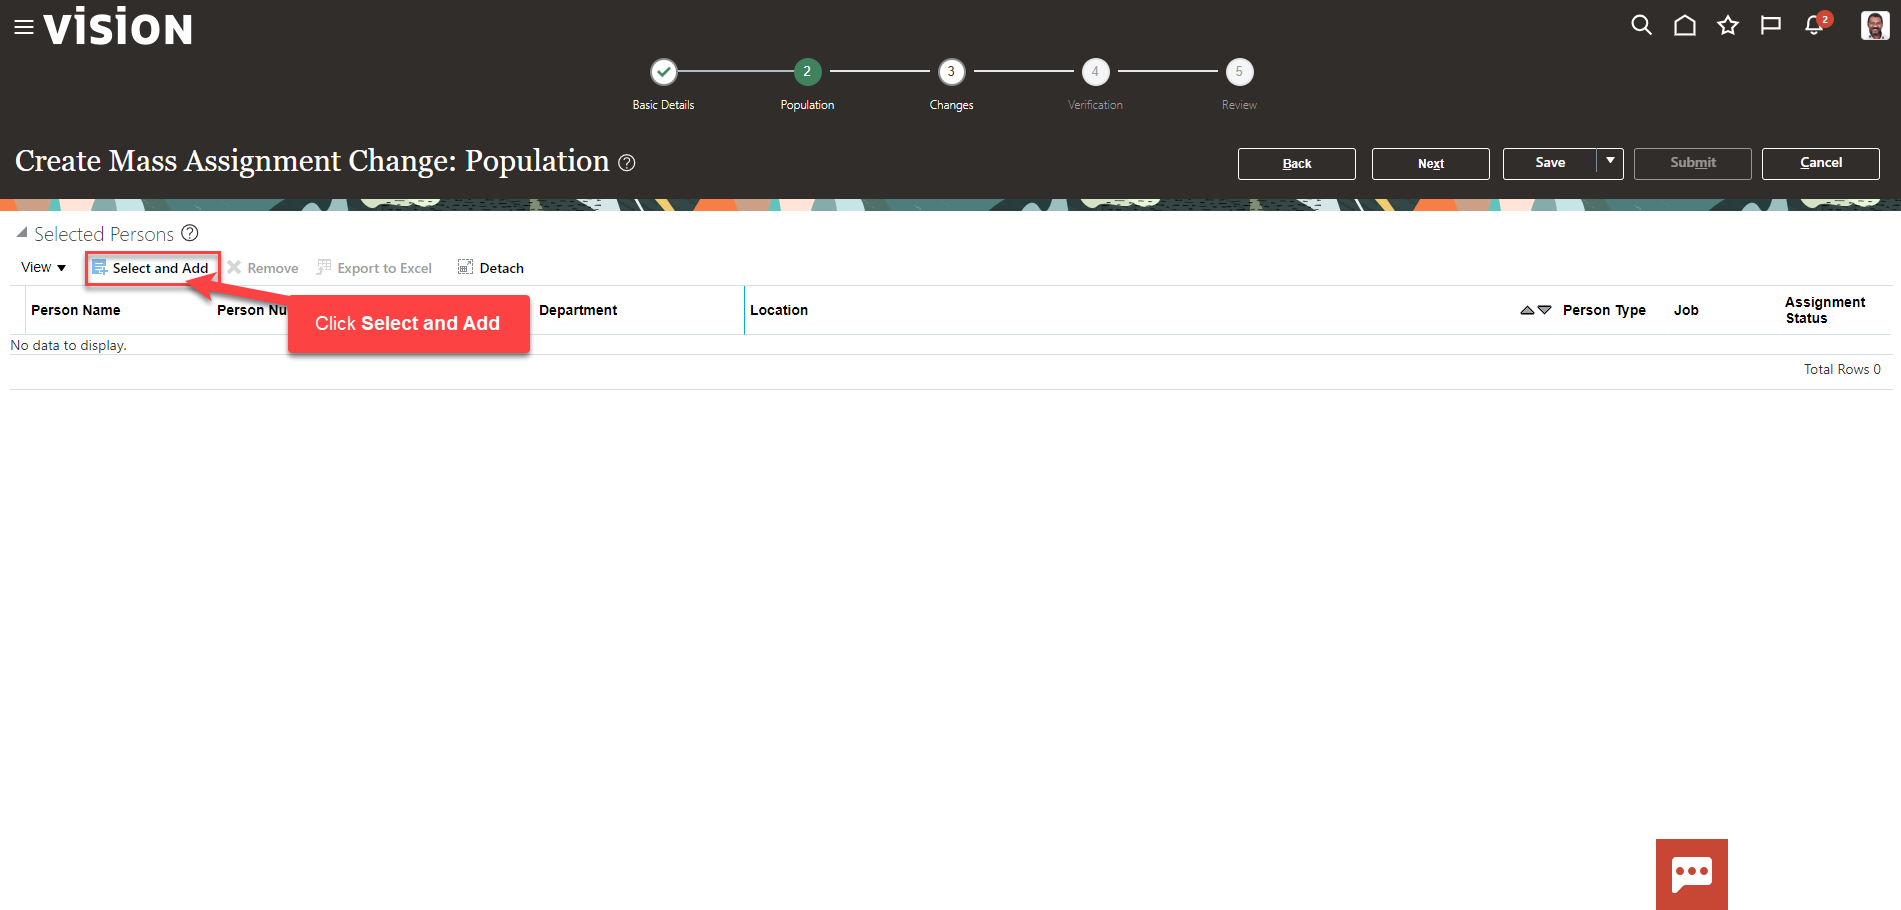
Next, we’ll select the employees who will be included in this Mass Assignment Change. This functionality will be used to update Assignment Details, Job Details, Location Details, and Manager Details that have the same effective date. Click Select and Add
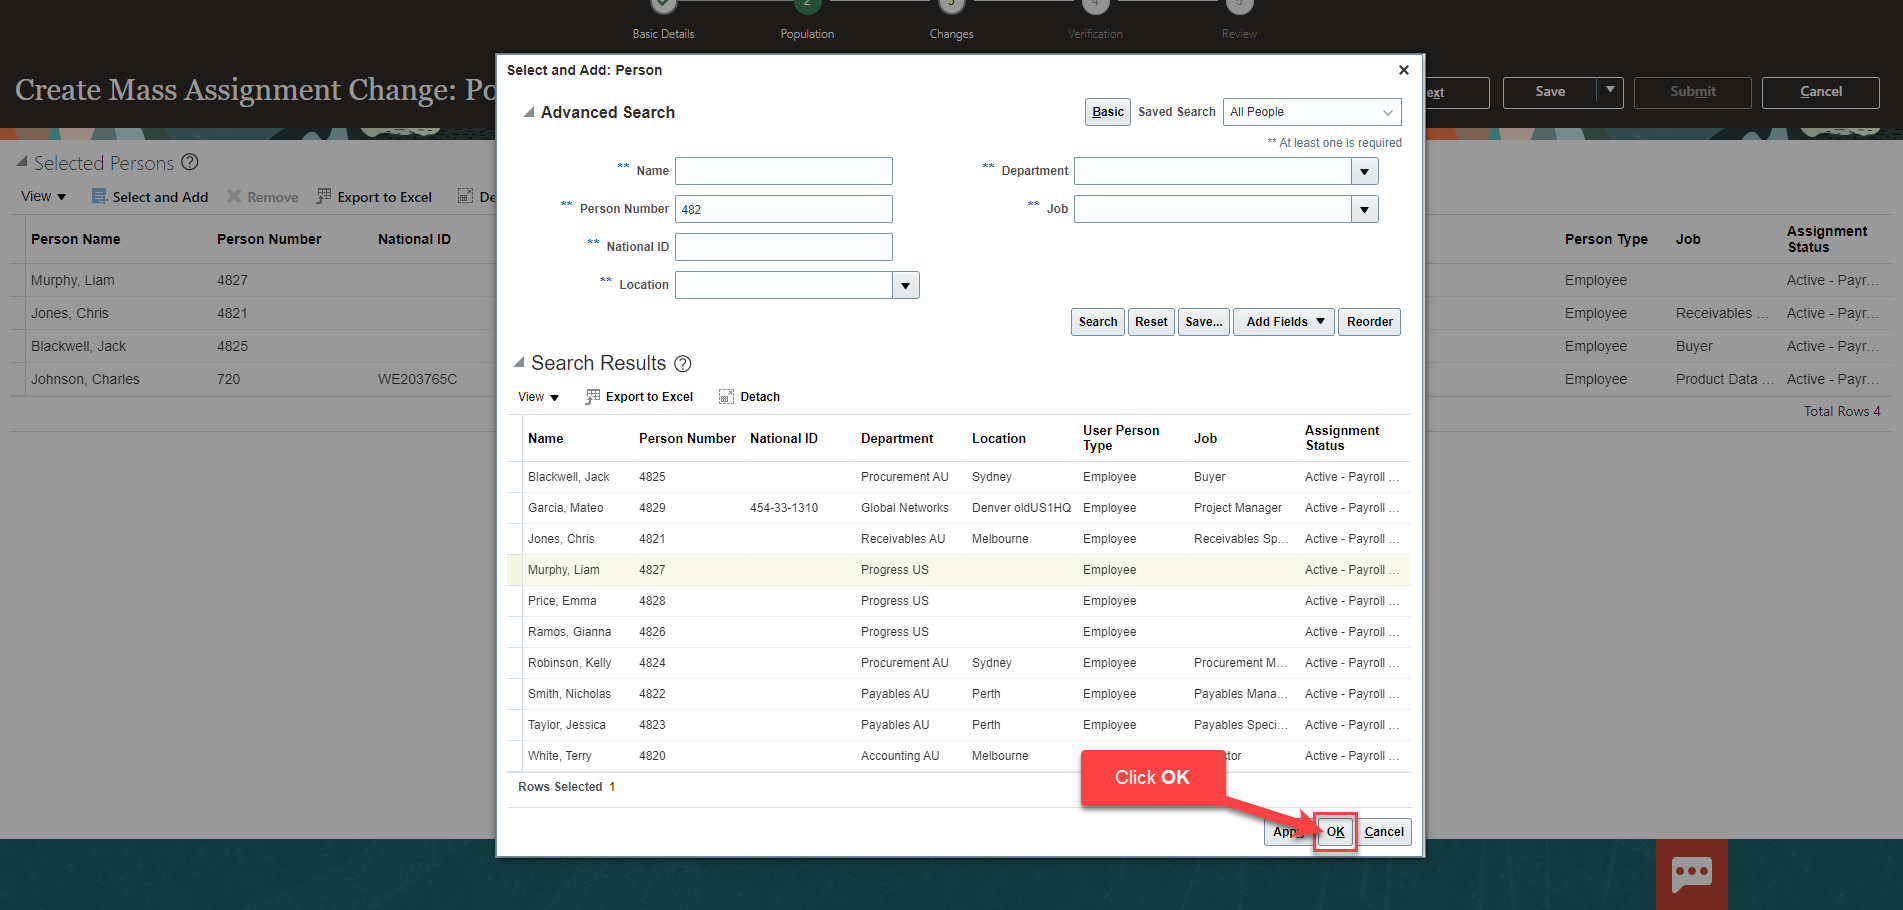
Enter the Employees Name or Person Number and click Search. Highlight the row of the employee in the results and click Apply to add this employee to the Mass Update Population

Follow this process to add additional employees. Once complete, click OK
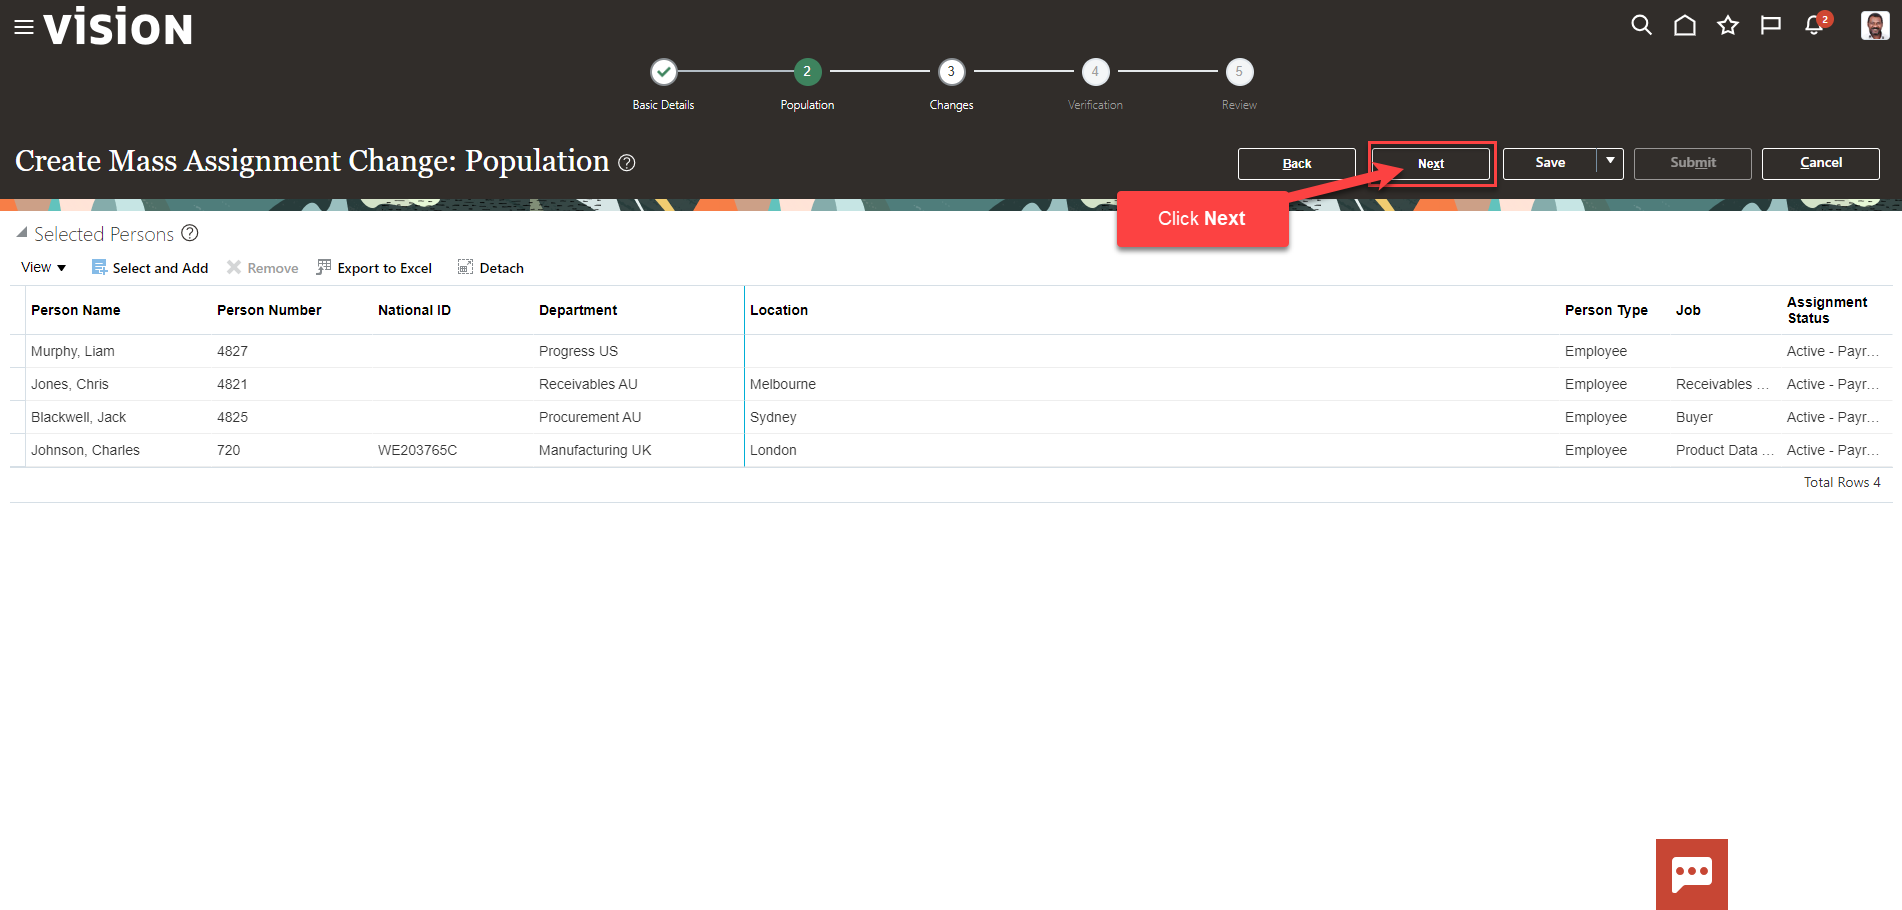
Click Next
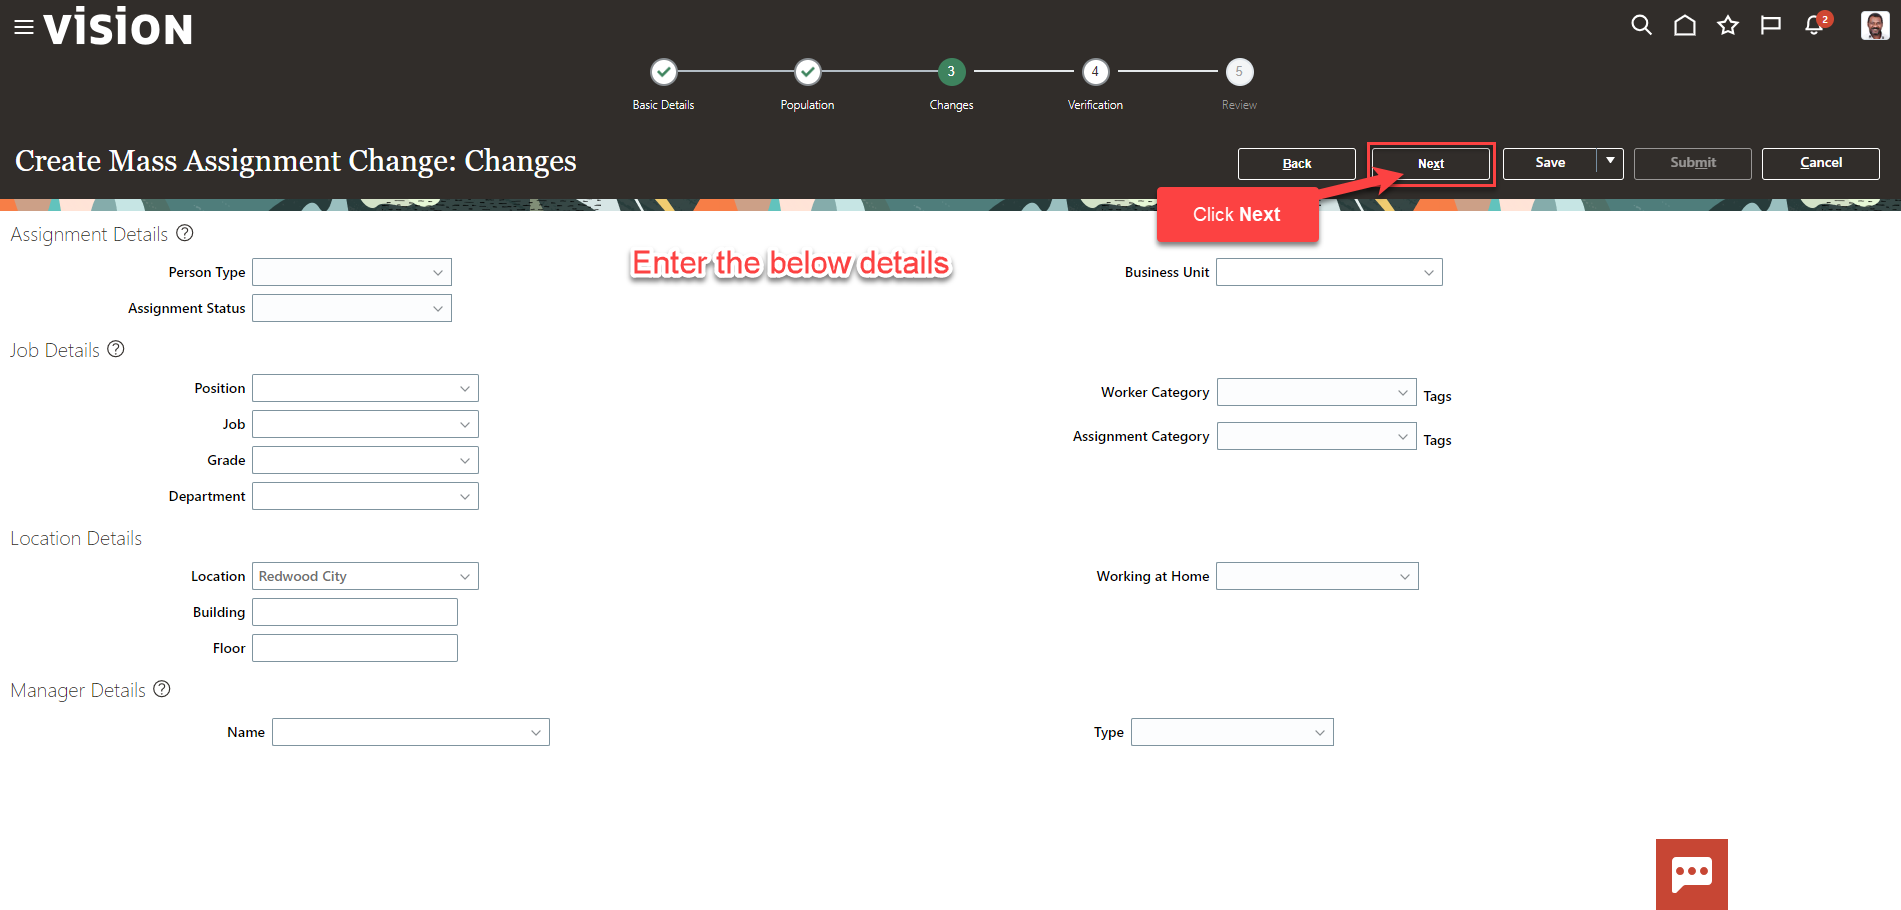
Enter the Mass Assignment Changes. For example, the new work Location. Click Next
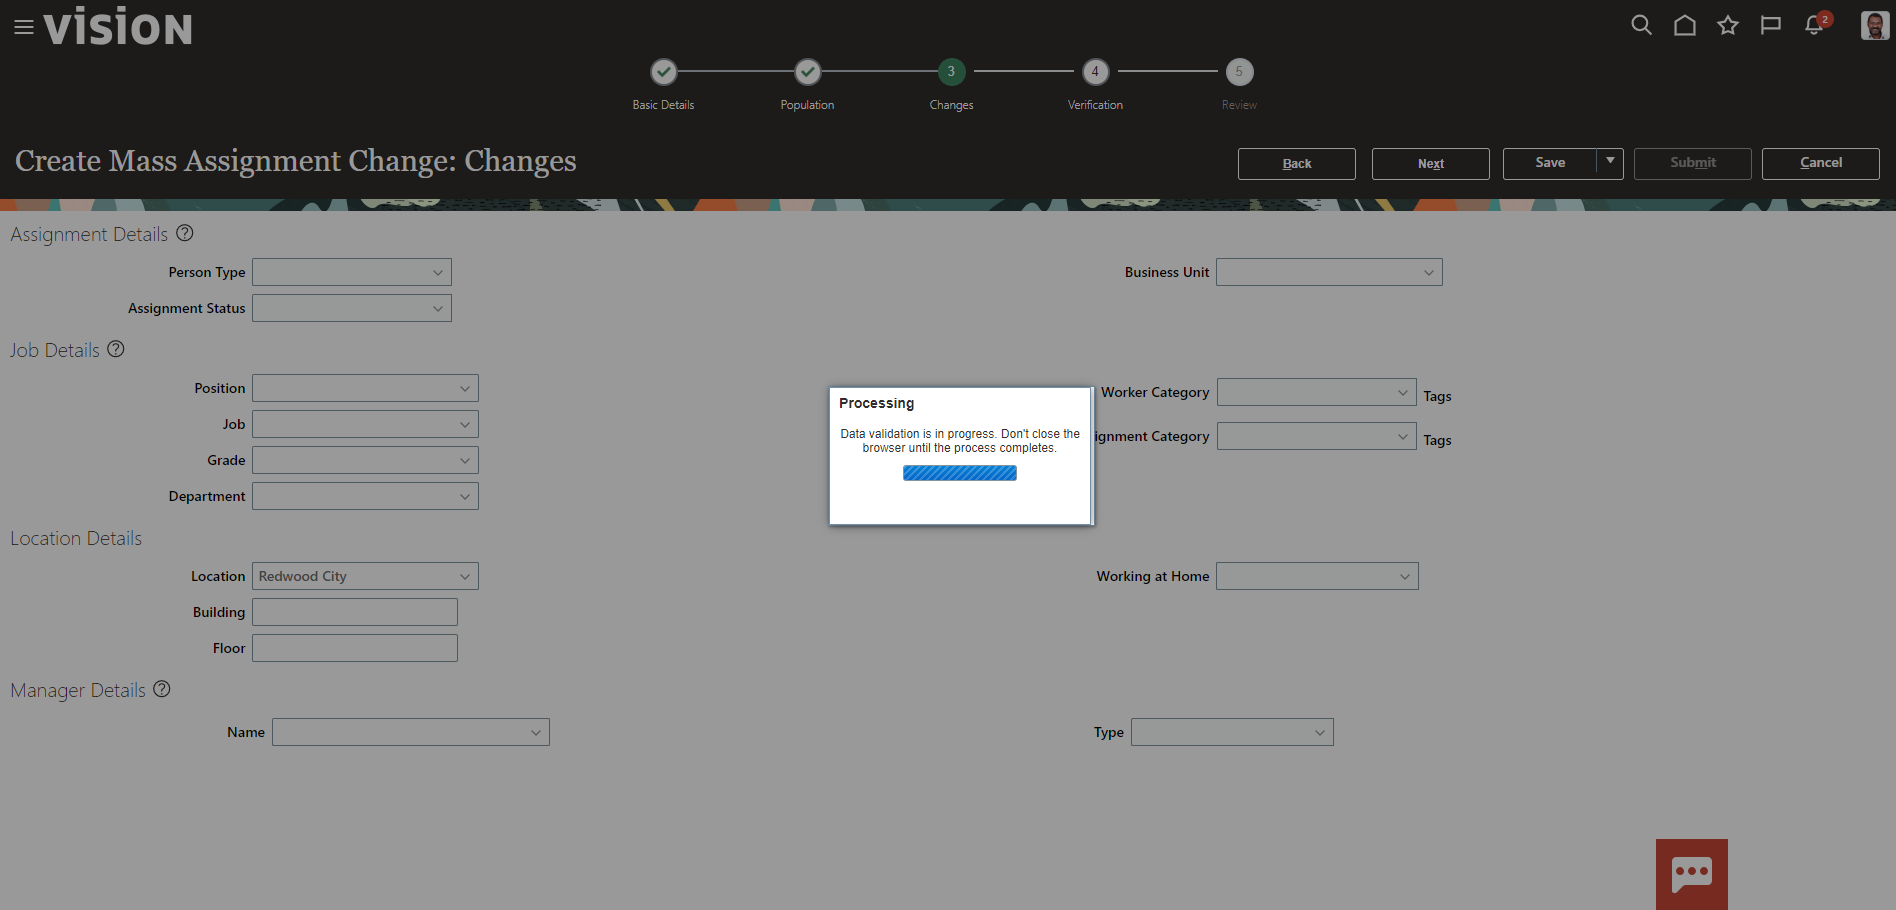
A Data Validation message will appear
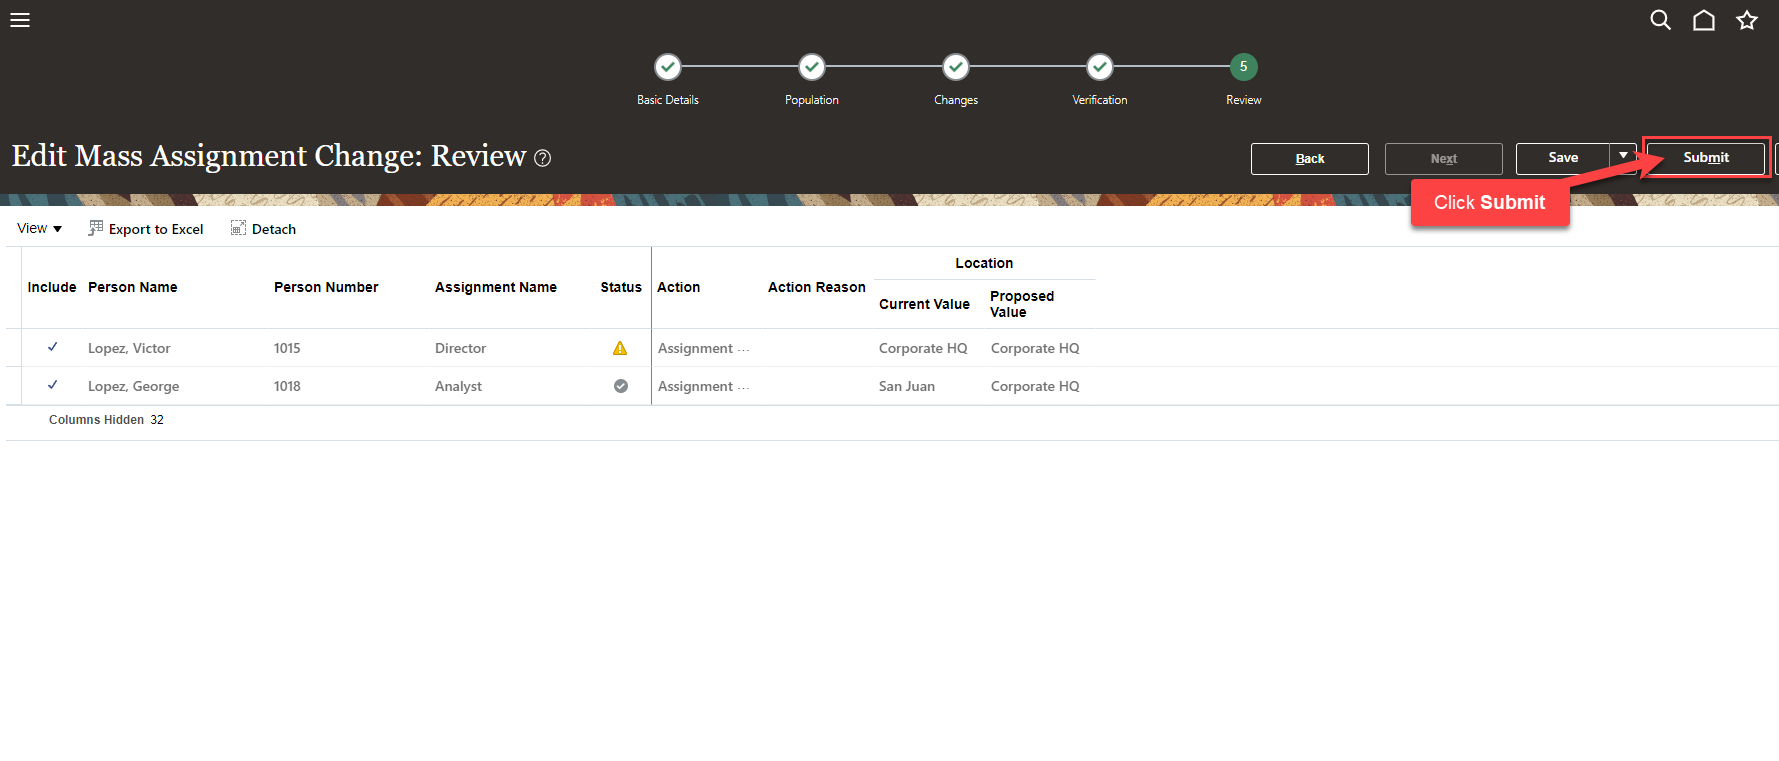
Next, Verify the updated information. Review the Status Column messages by hovering over the Icon and click Next and click Submit