How to create a receipt
In this guide, we are going to explore the functionality of creating receipts in Oracle Self-Service Procurement Cloud. Create receipt will be useful in creating a receipt against your purchase orders. Please follow the detailed steps shown below to utilise the Create Receipt functionality.
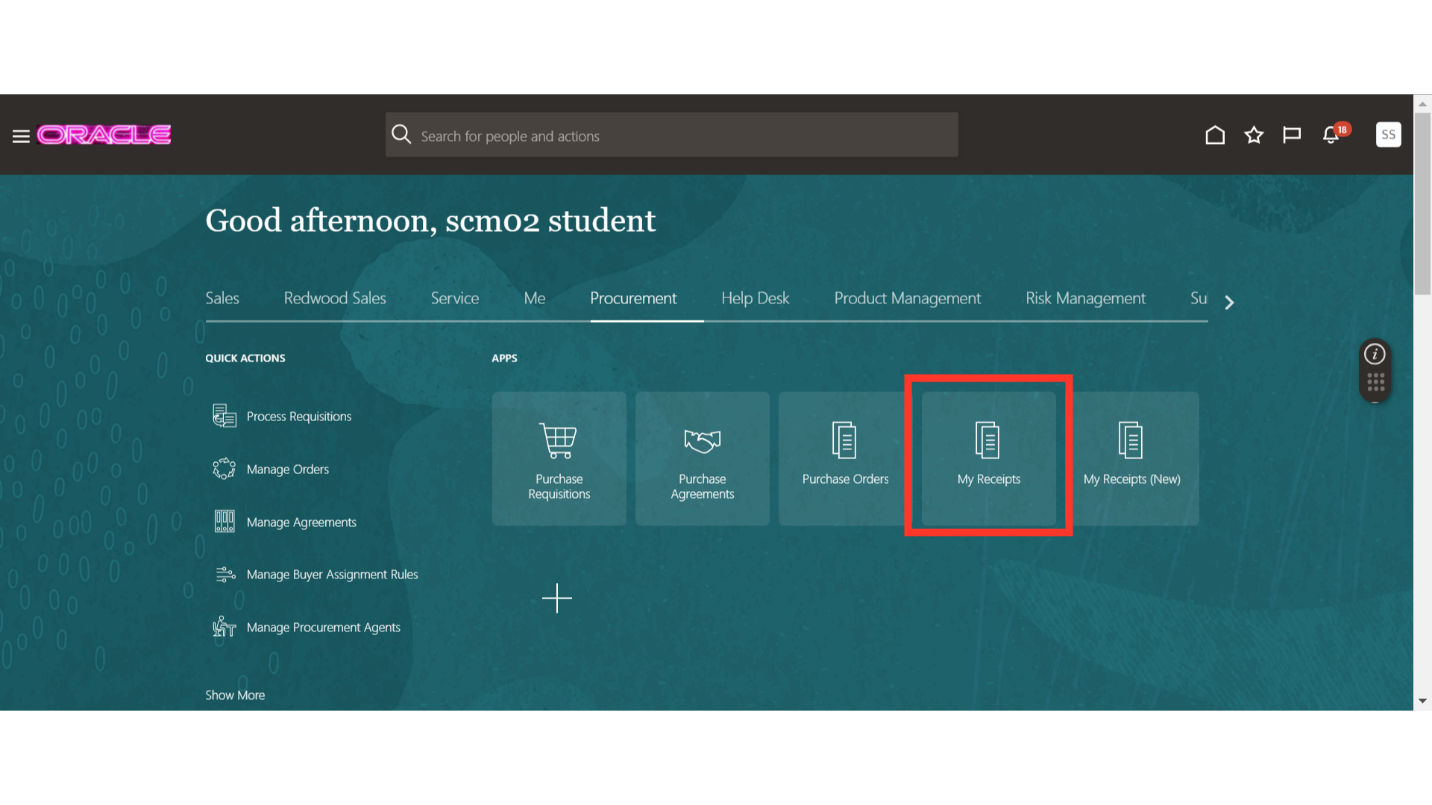
After logging on to the Oracle Cloud Fusion home page, navigate to the Procurement tab and click on the My Receipts app.
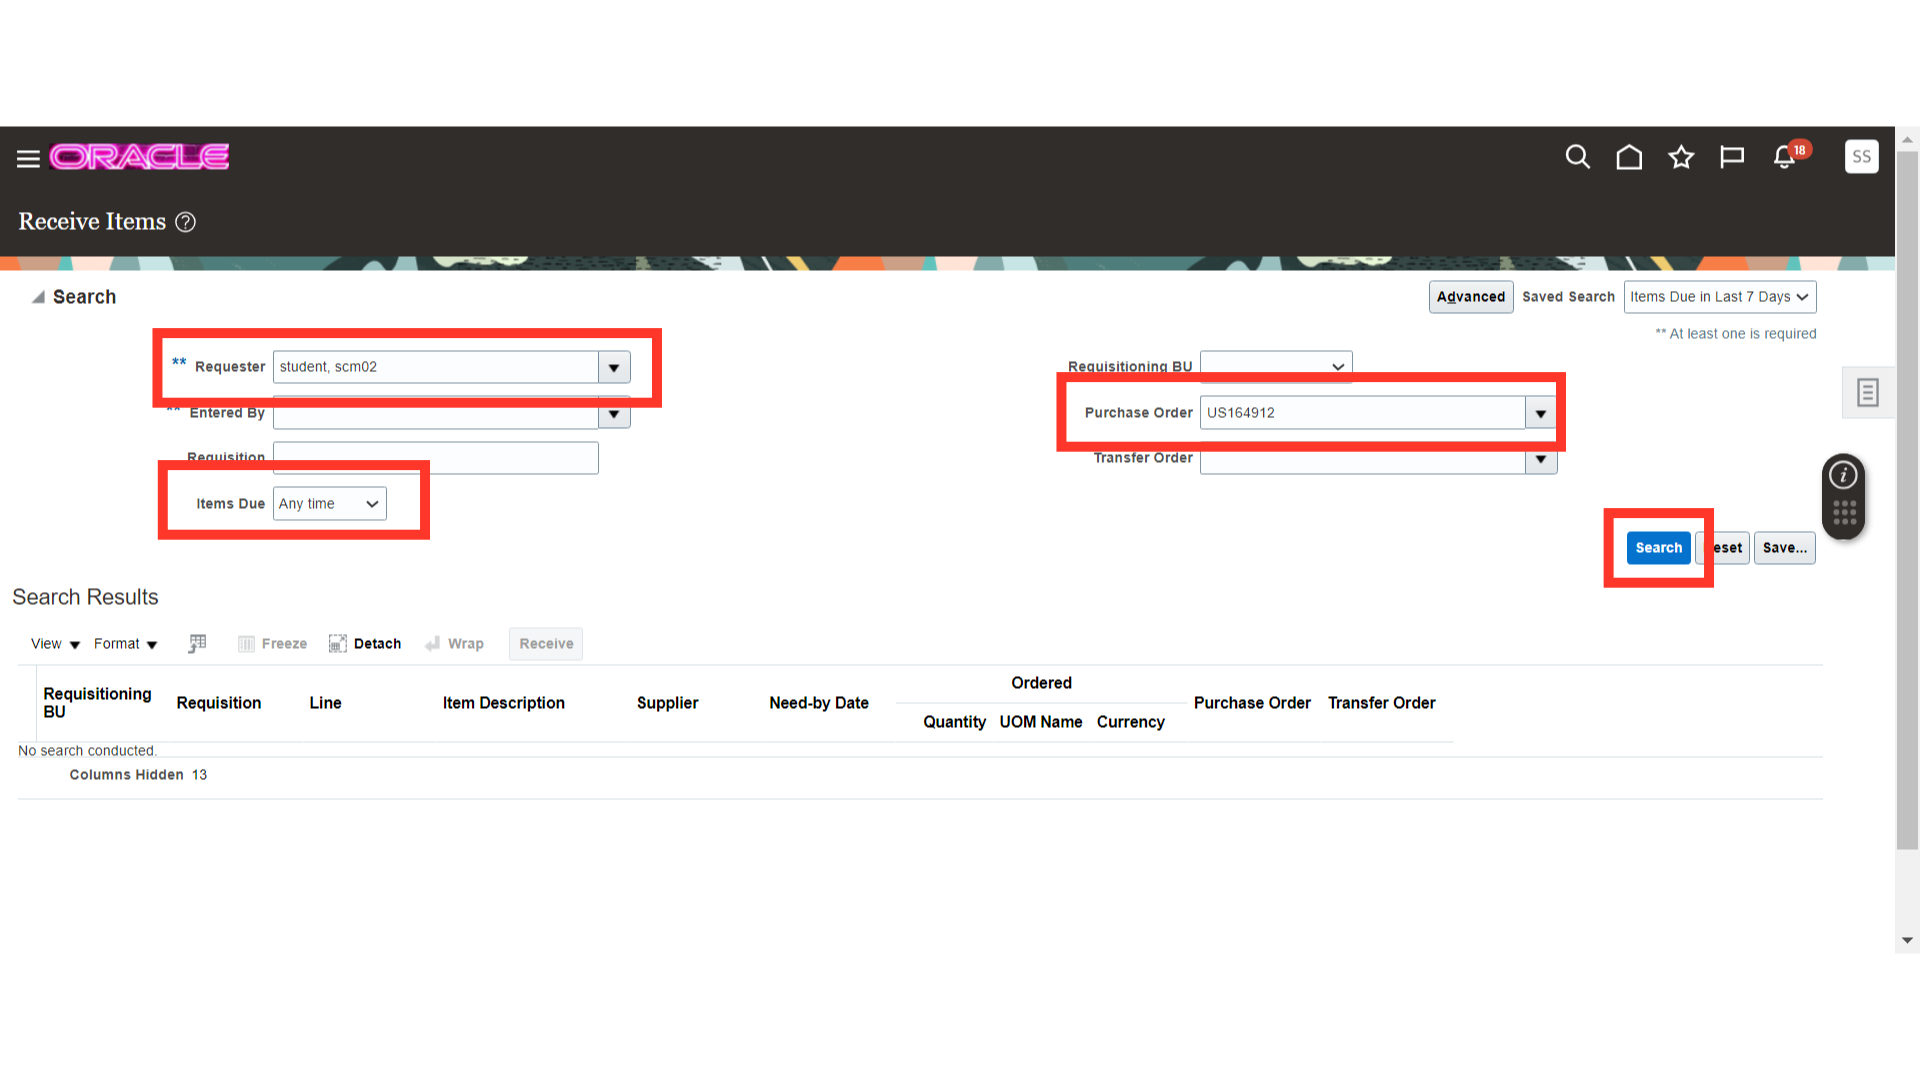
On the Receive Items screen, provide the relevant search criteria to search for your PO such as requester, purchase order number and the time frame when the items were due. Once the required criteria are selected, click on the Search button.
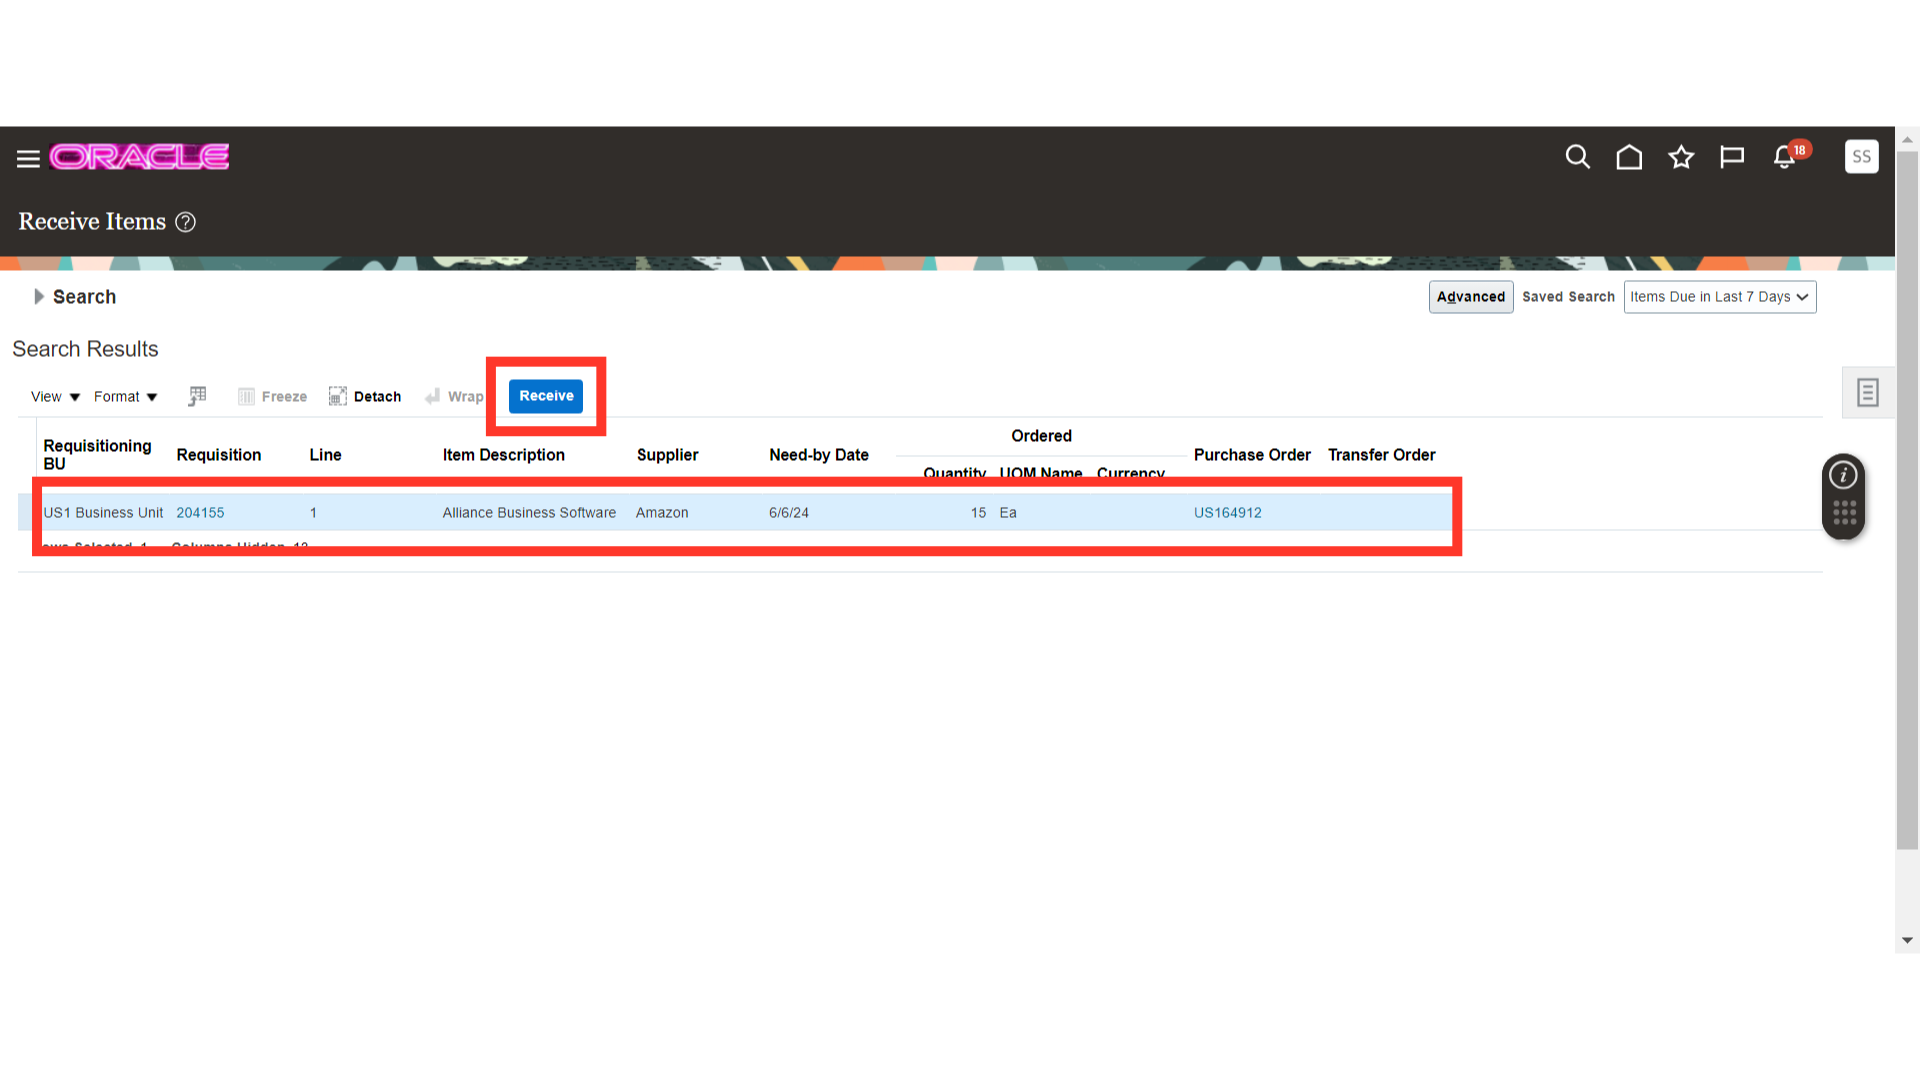
System will populate all the lines against your PO. Select the line which you want to receive and then click on the Receive button.
On the Create Receipts screen, the line will be available to you for receiving. Click on the Show Receipt Quantity button, this will populate the eligible quantity against the line.
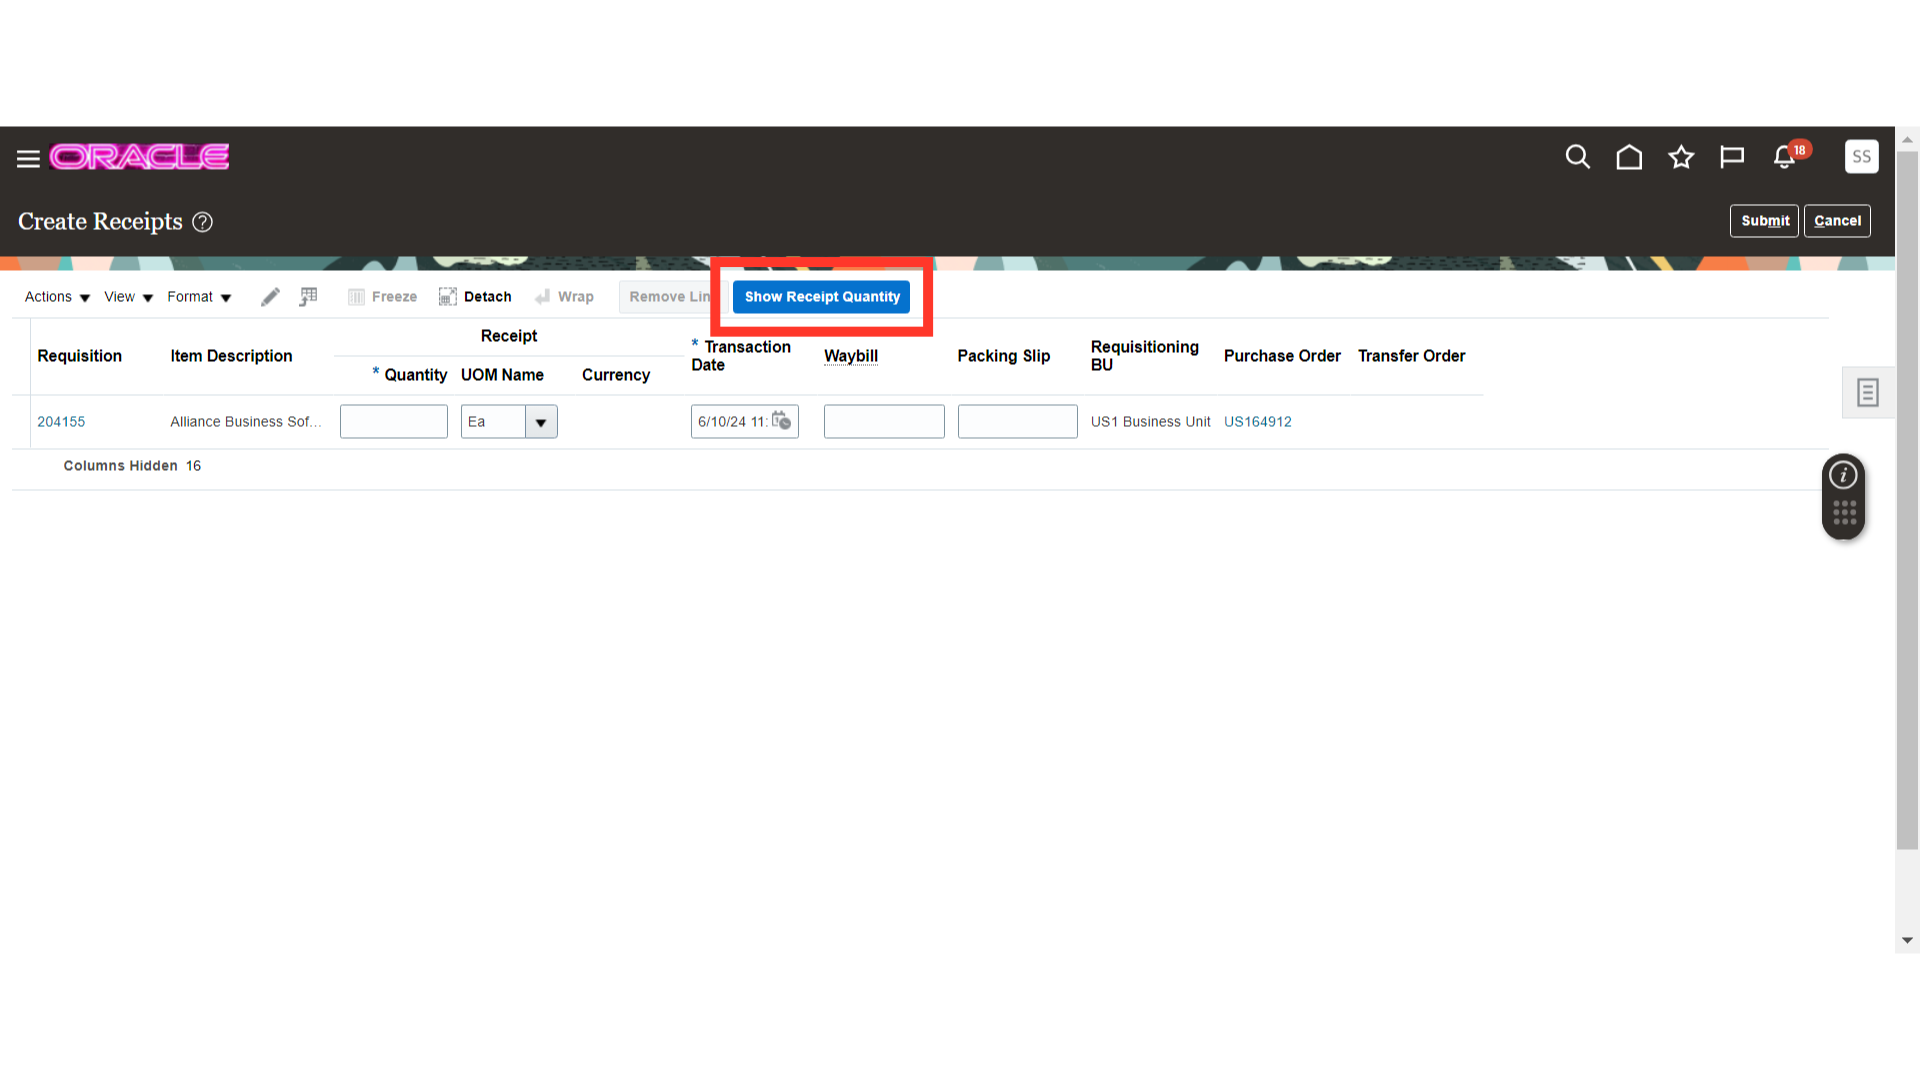
You can also type in the quantity which you want to receive.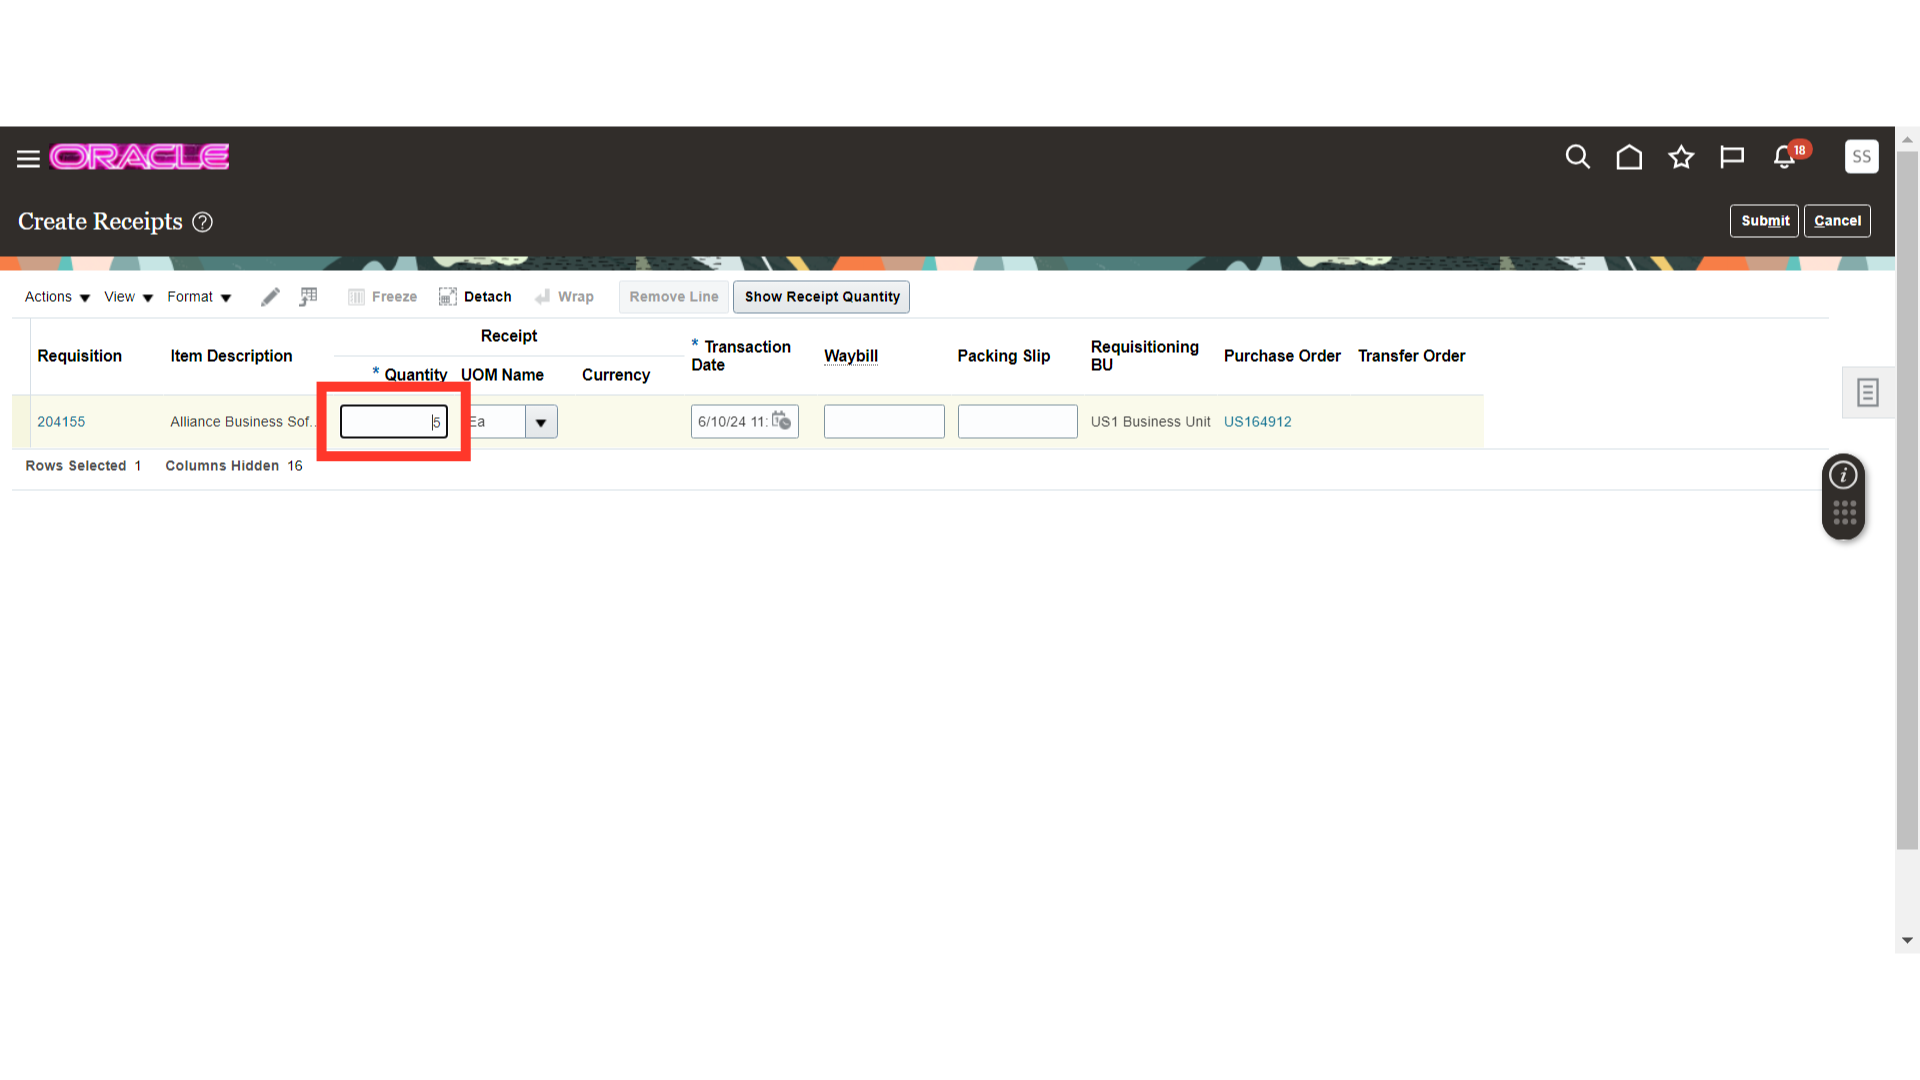
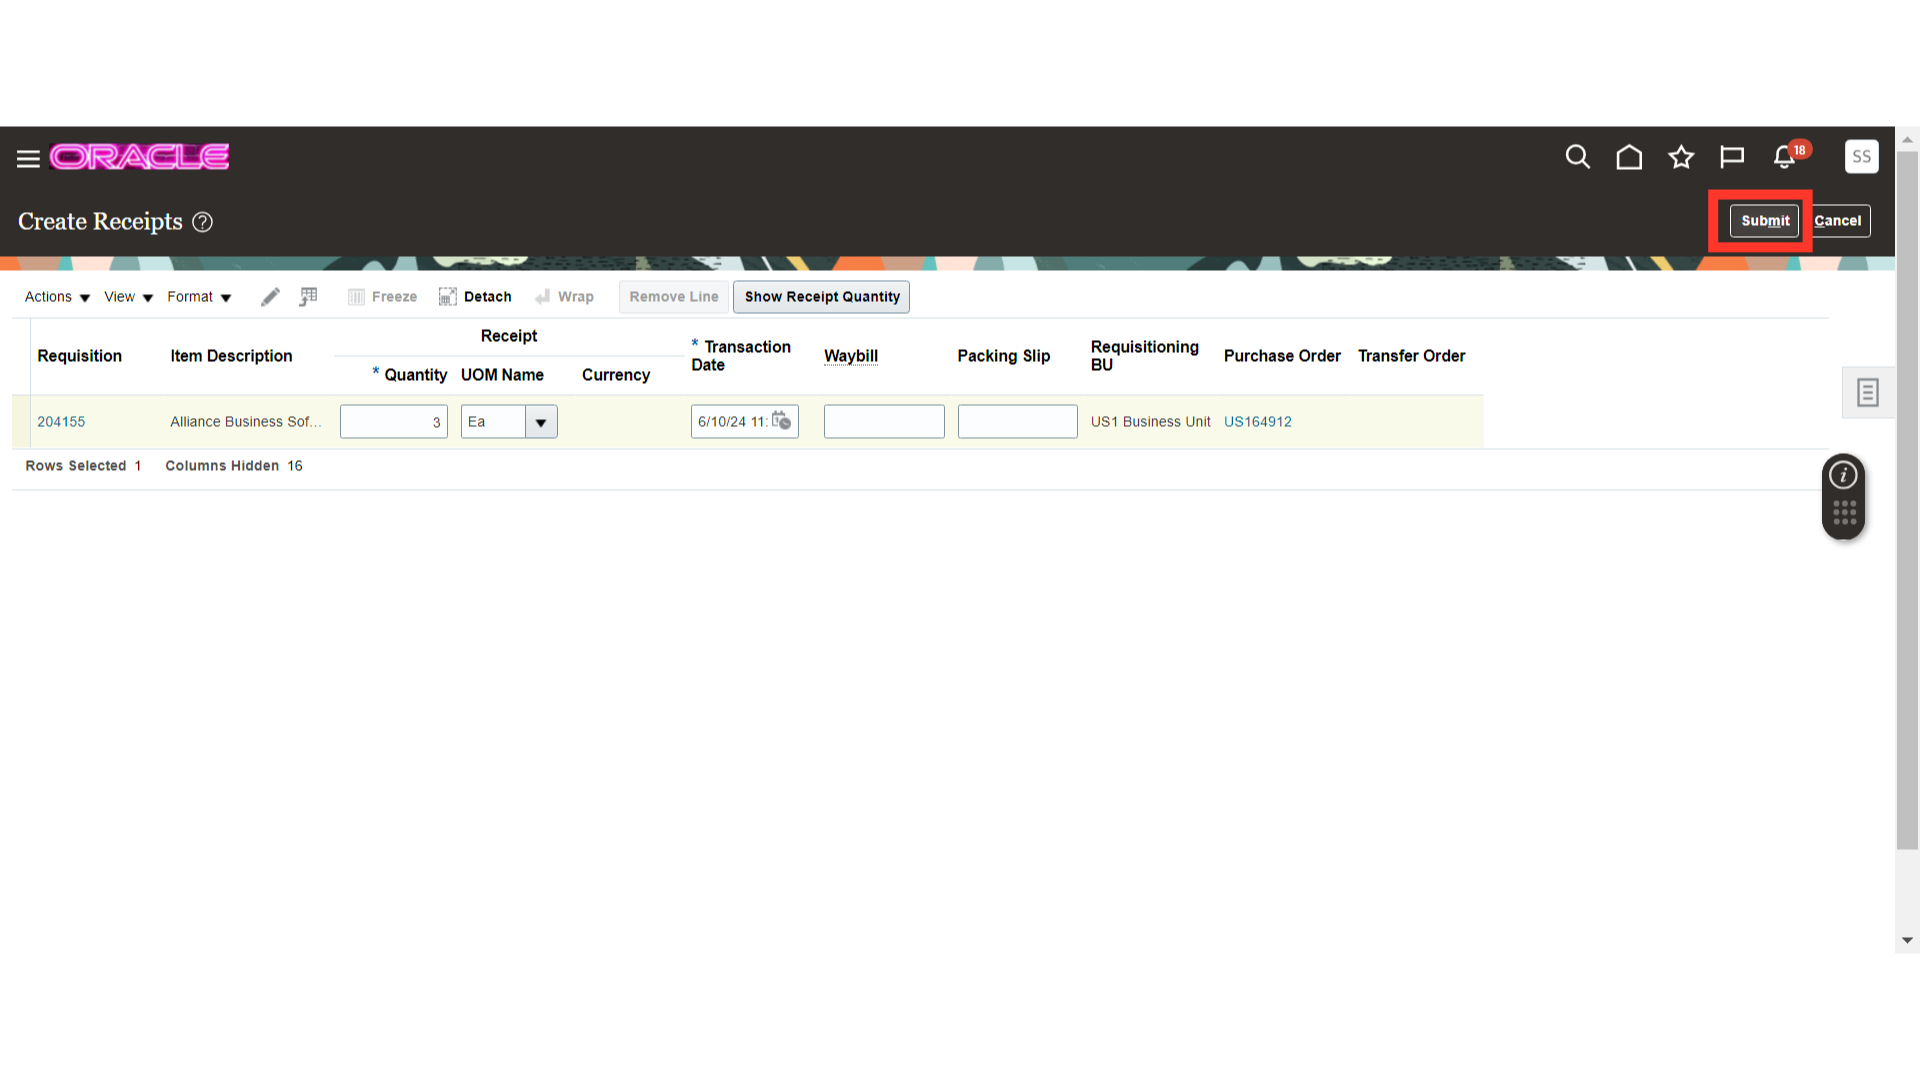
After entering the quantity and verifying other details, click on the Submit button.
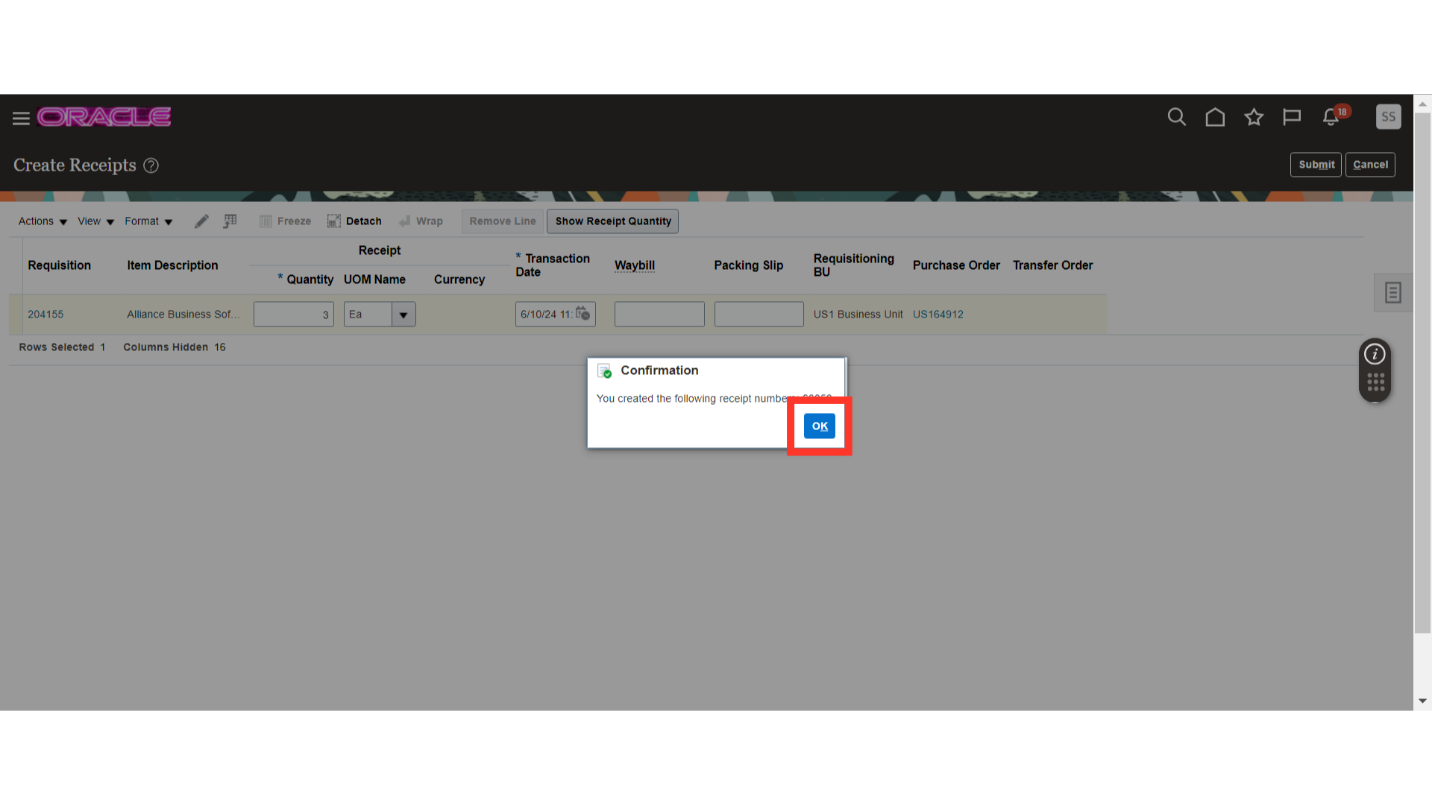
After your submission, the system will show you a popup of confirmation. Click on OK to proceed.
This guide walks you through the process of creating a receipt in oracle fusion. Please follow the detailed steps to utilise the create receipt functionality for PO receiving.