Ad-Hoc Payments
The Oracle Fusion provides an option to users to initiate Adhoc Payments. Using an Adhoc payment transaction, users can initiate payments without maintaining payees. The user is expected to enter the payee details manually along with the payment details to initiate a payment. This guide will provide a detailed step-by-step explanation for creating the Adhoc payments in Oracle Fusion cash management.
Click on the Navigator icon to access the Cash Management menu.
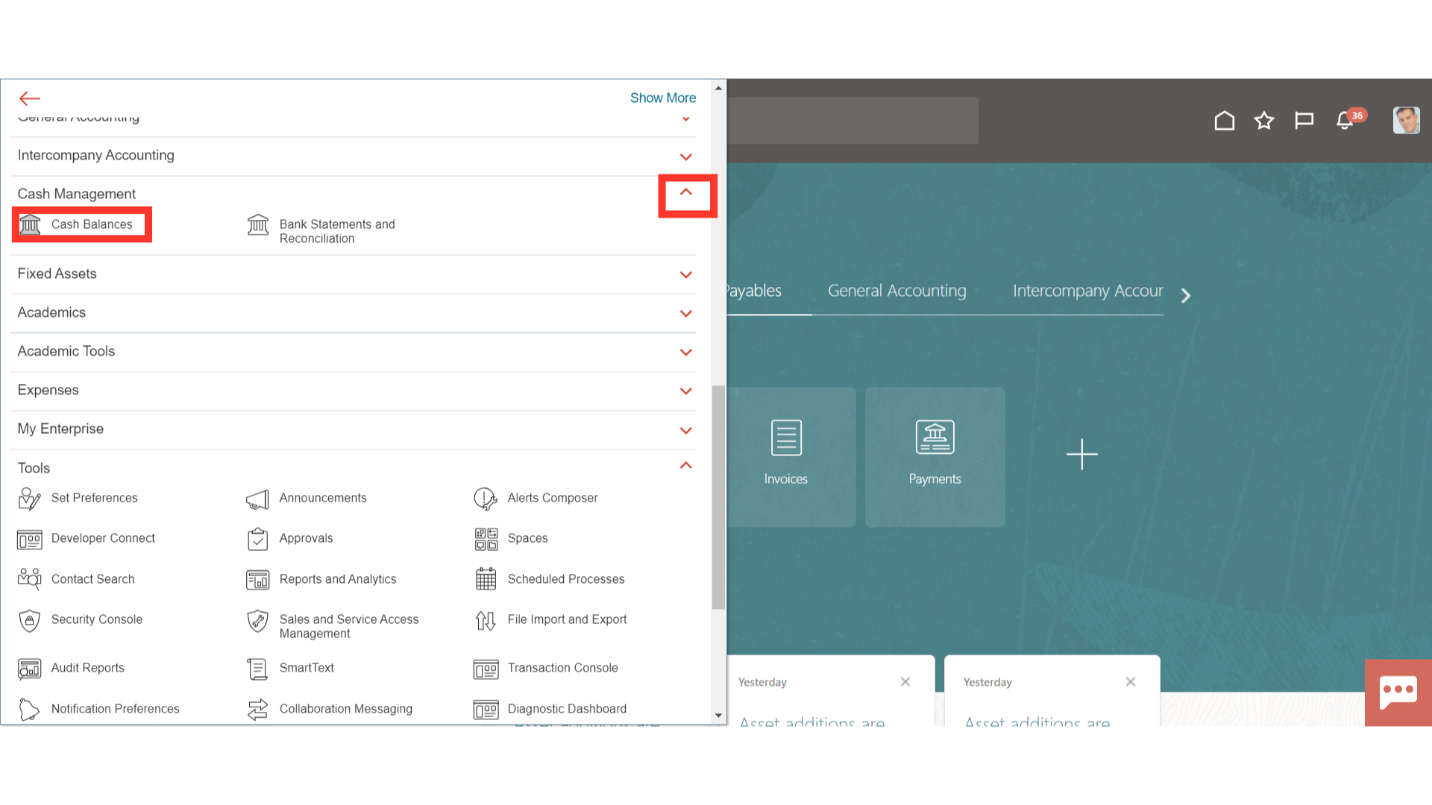
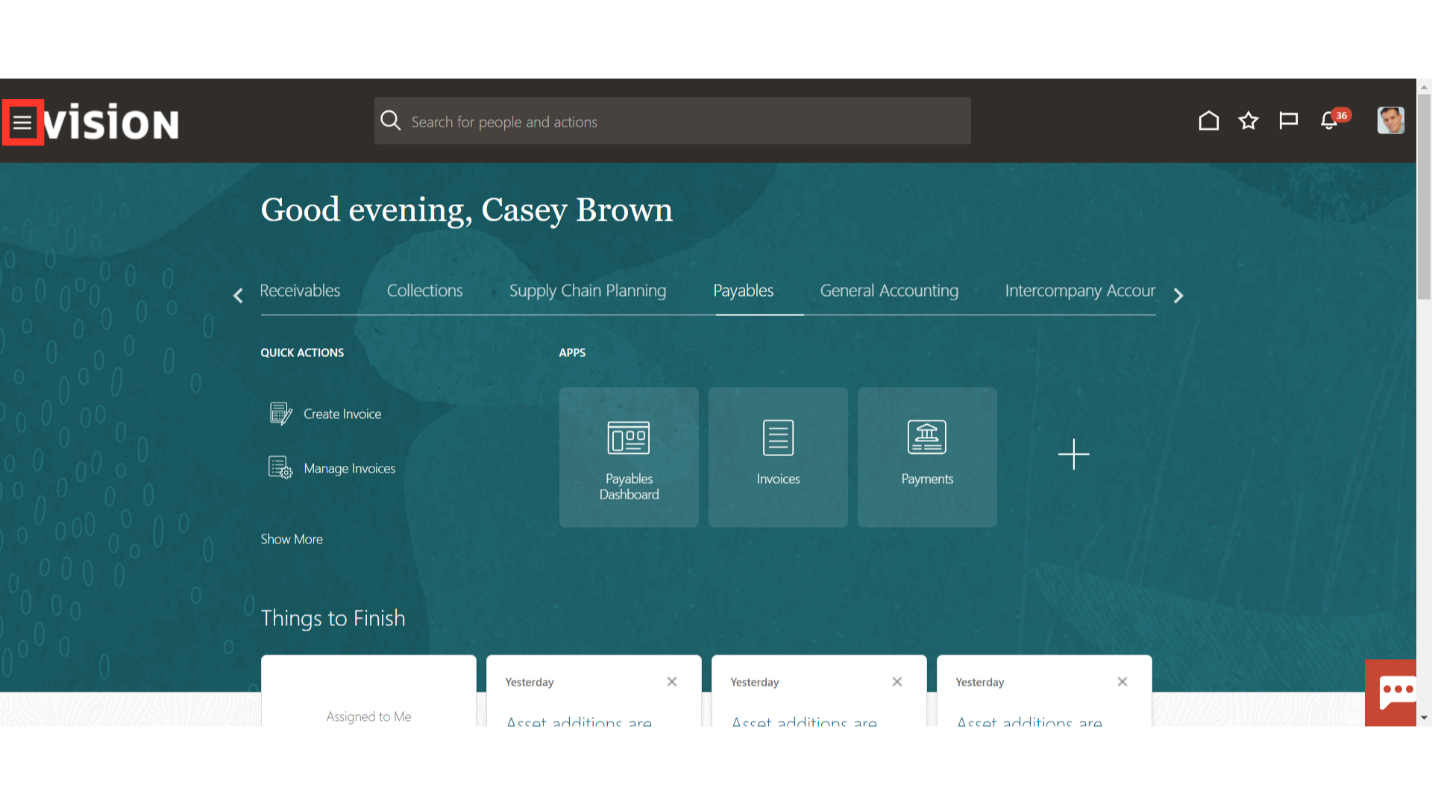 Select the “Cash Balances” submenu by expanding the Cash Management menu.
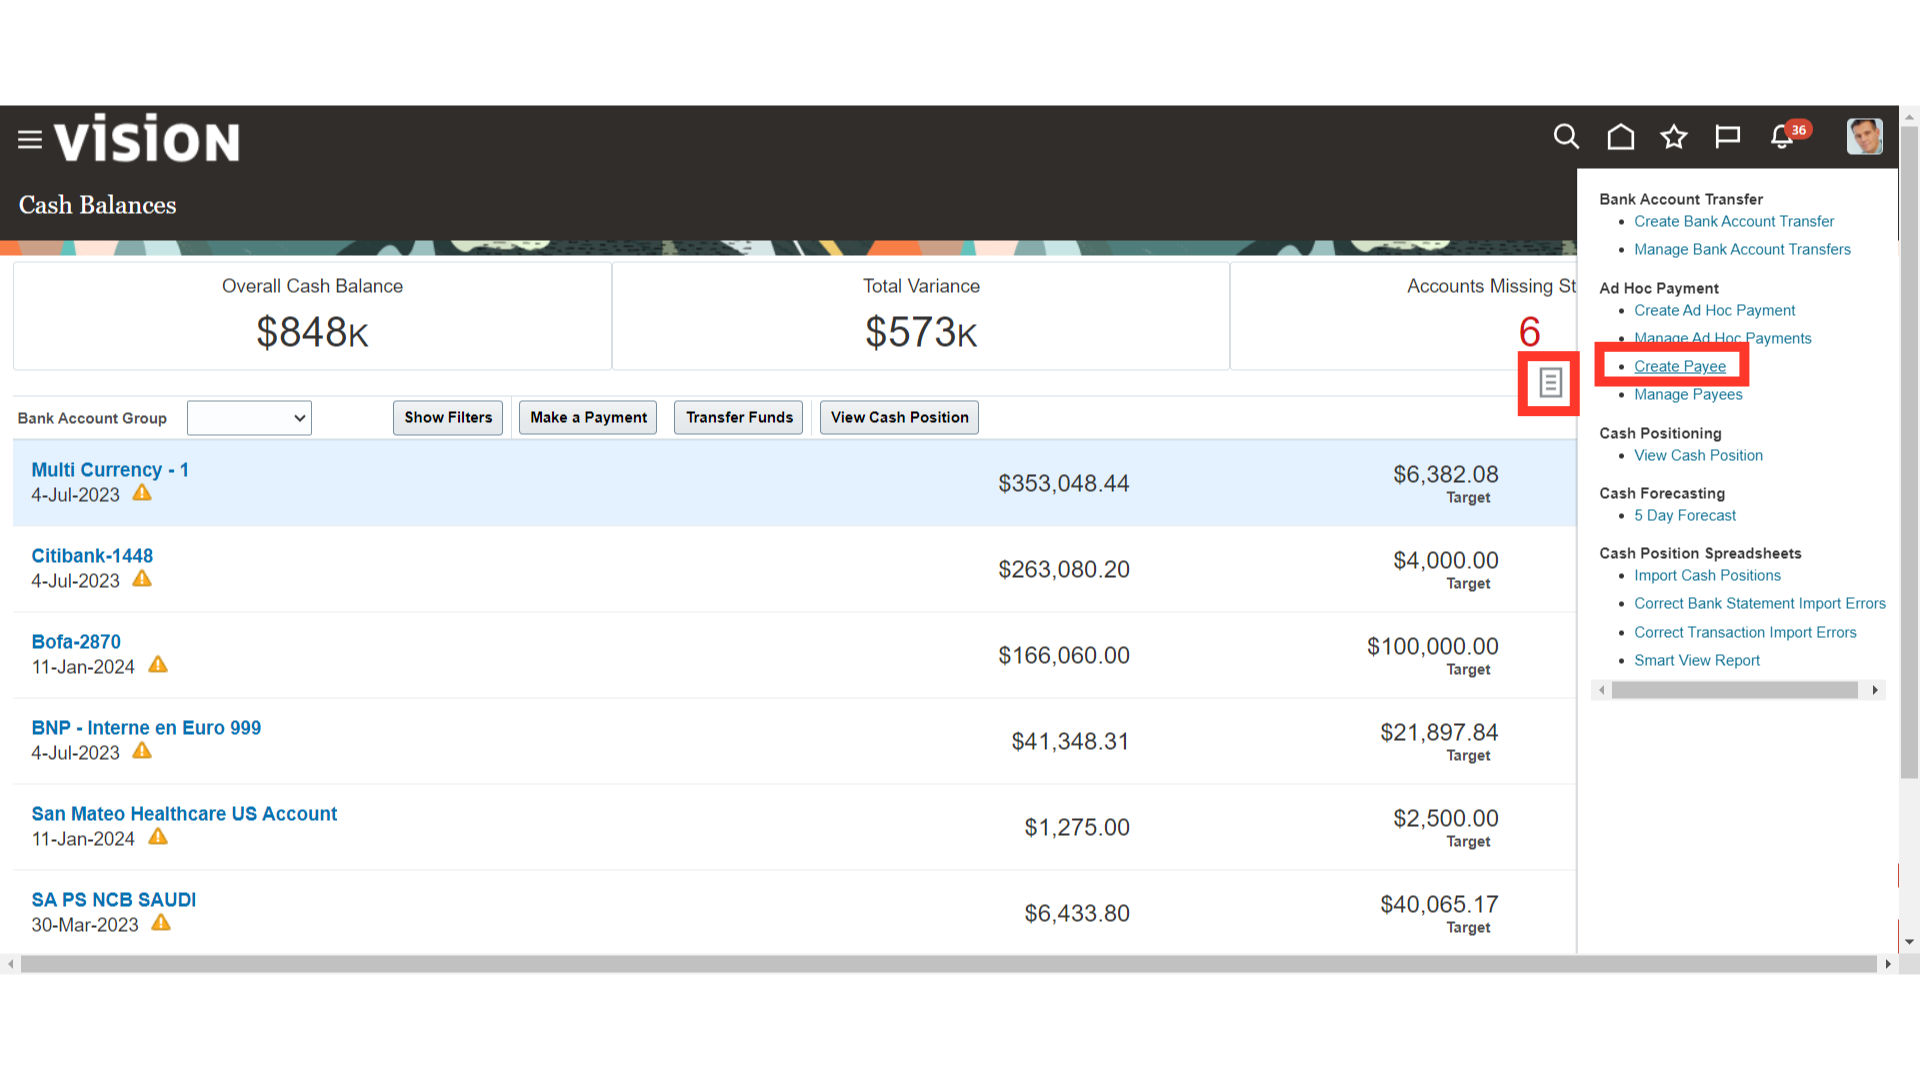
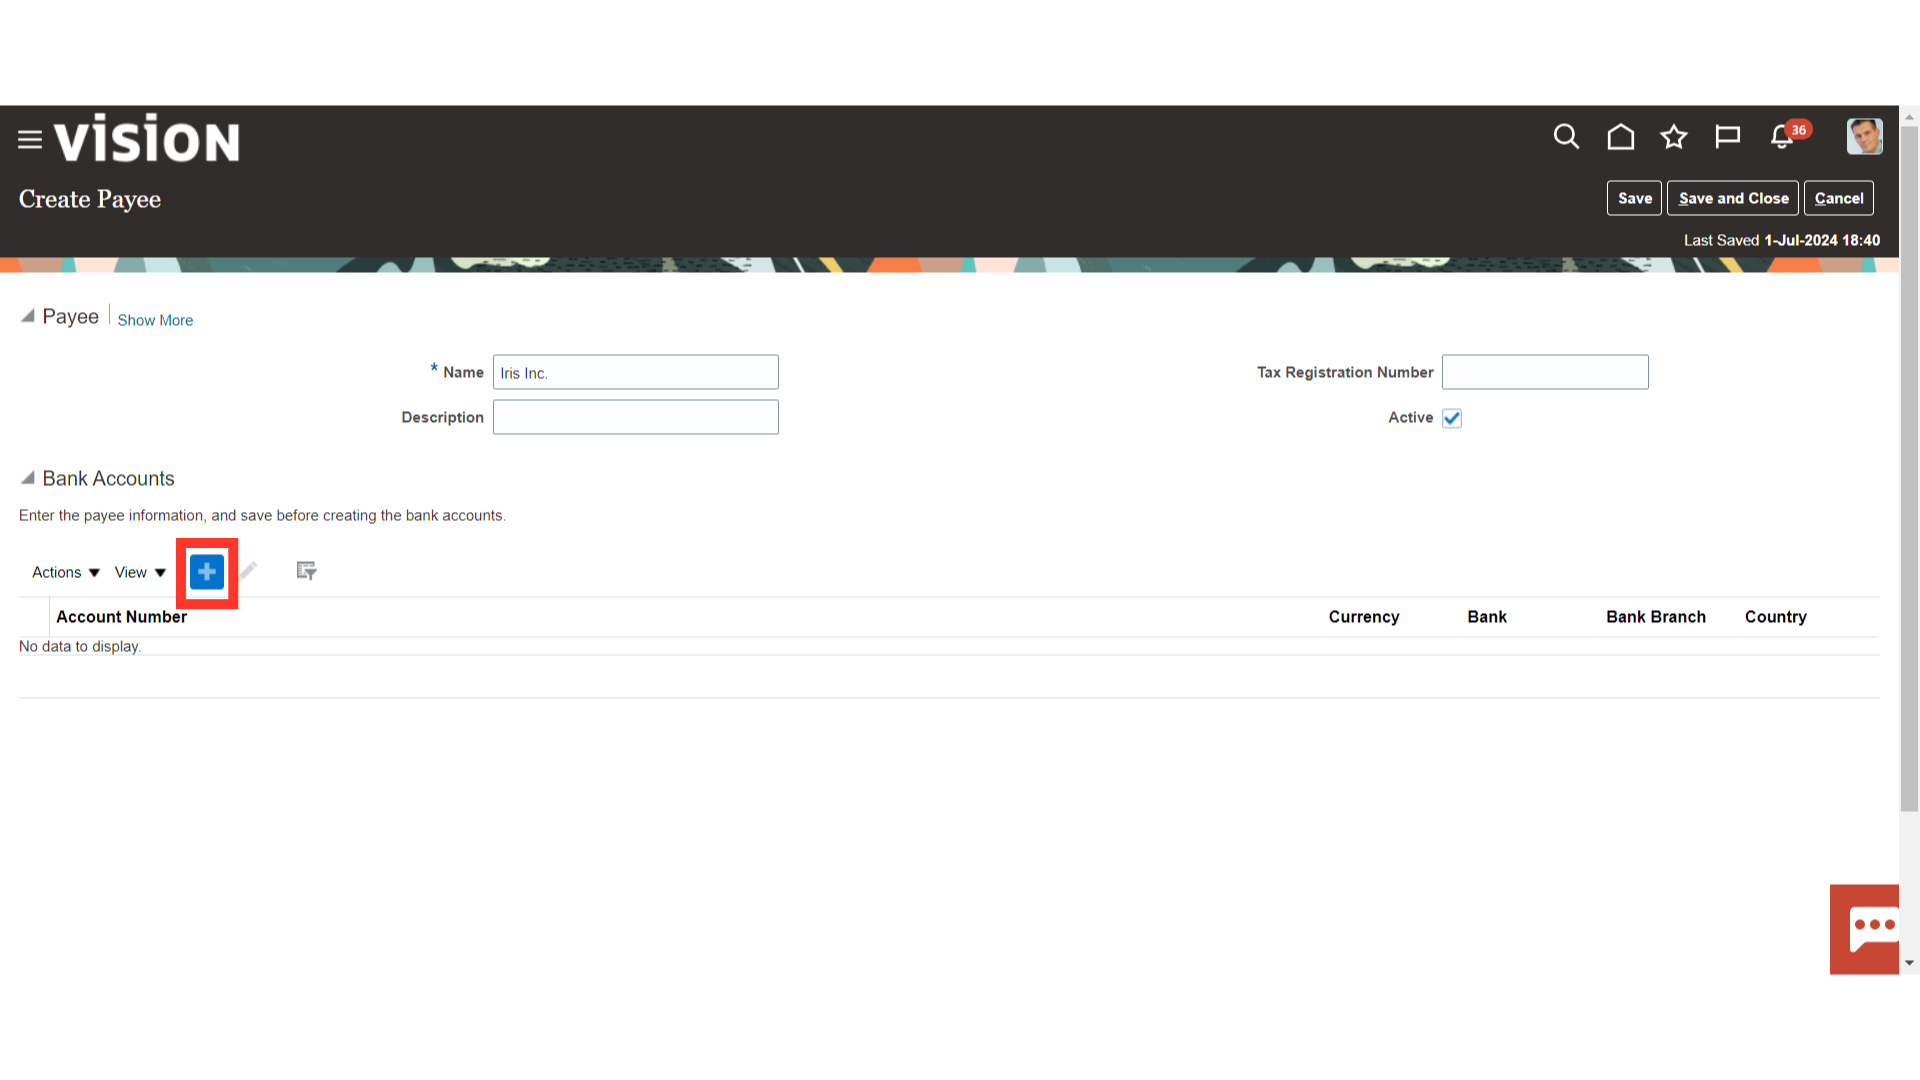
To add the payee to whom payment is to be made by Clicking on the Create Payee from the task list.
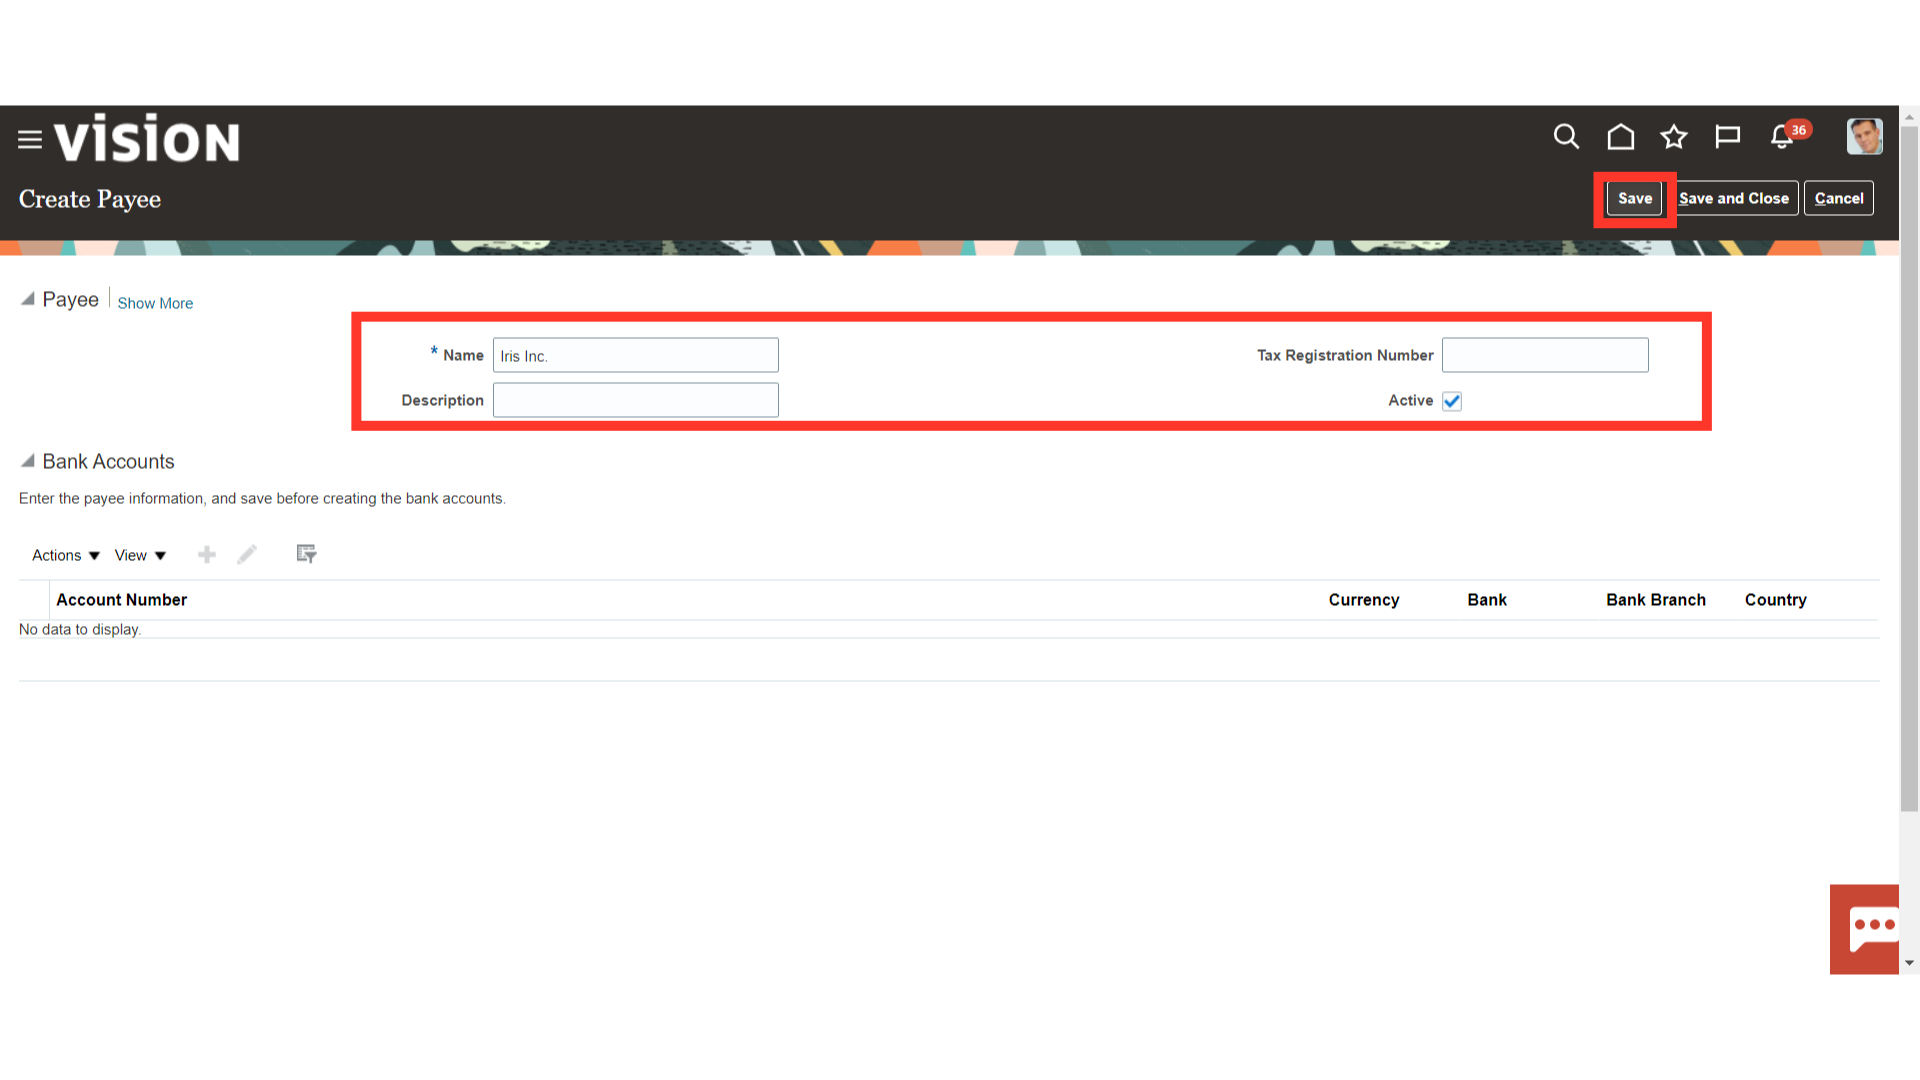
In the corresponding field, enter the payee’s name and tax registration number. For making payment to the payee, a checkbox next to the Active should be selected. Click on the Save button for entering the bank account details of the payee.
Click on the Plus icon to add the bank account details of the Payee.
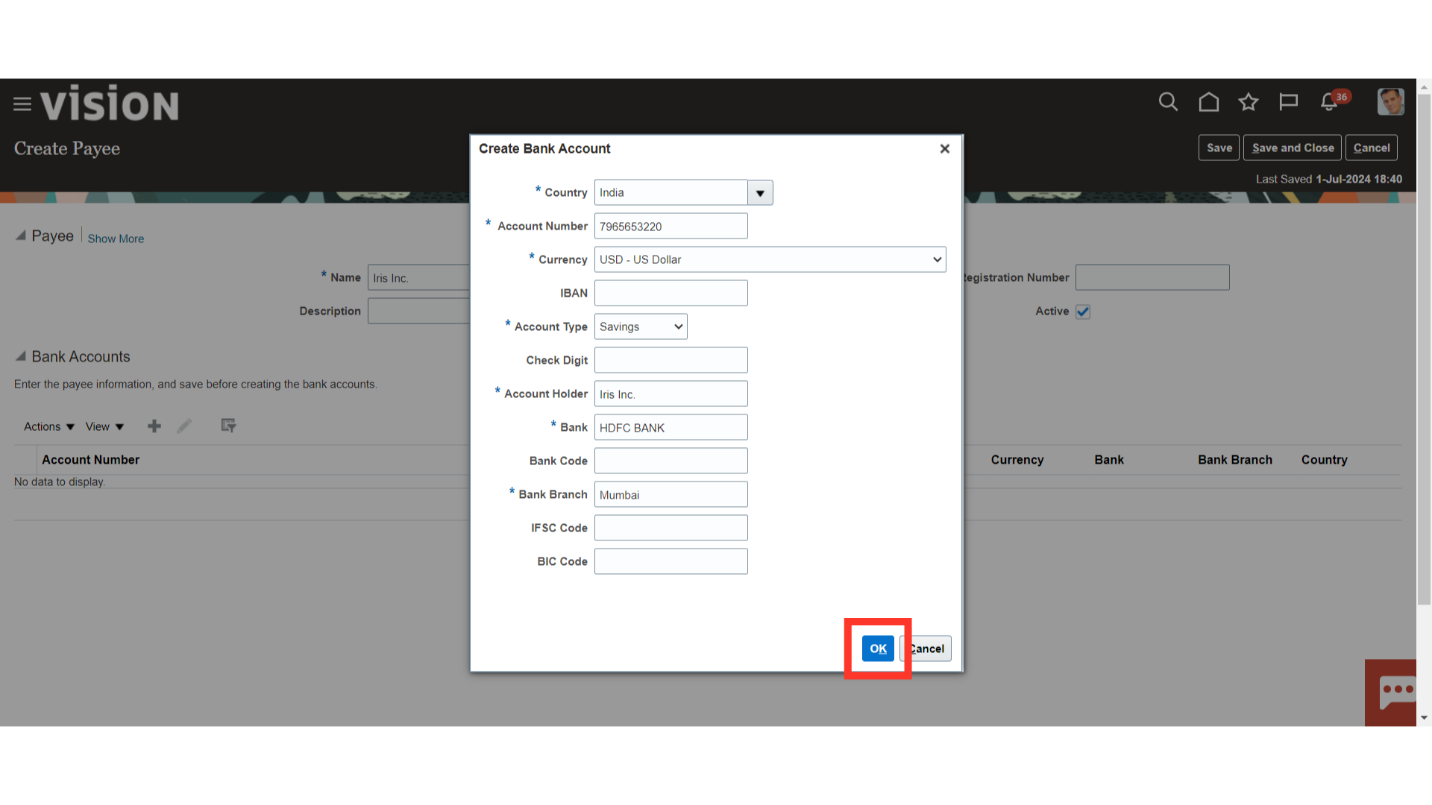
Input the account information, including the account number, currency, country, and other bank details. Press the OK button to proceed.
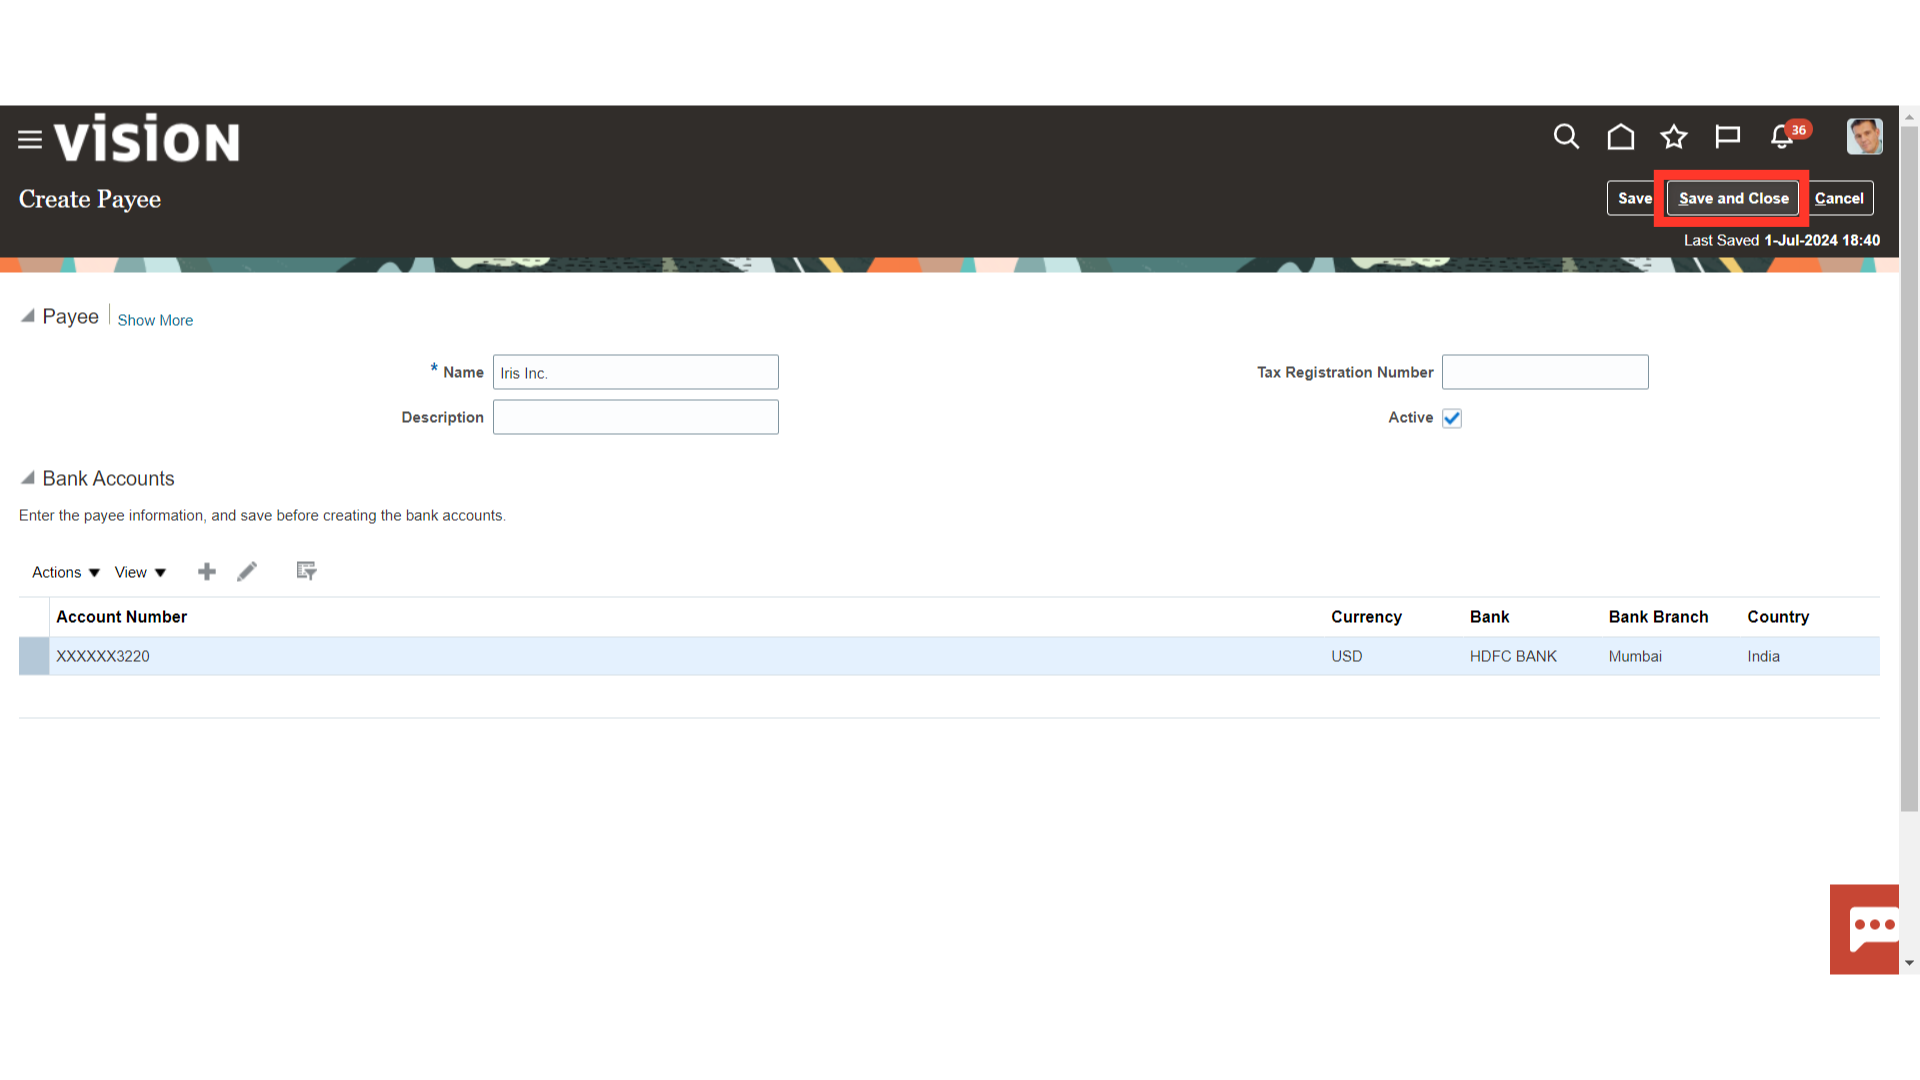
Click on the Save and Close button to save the new payee details entered.
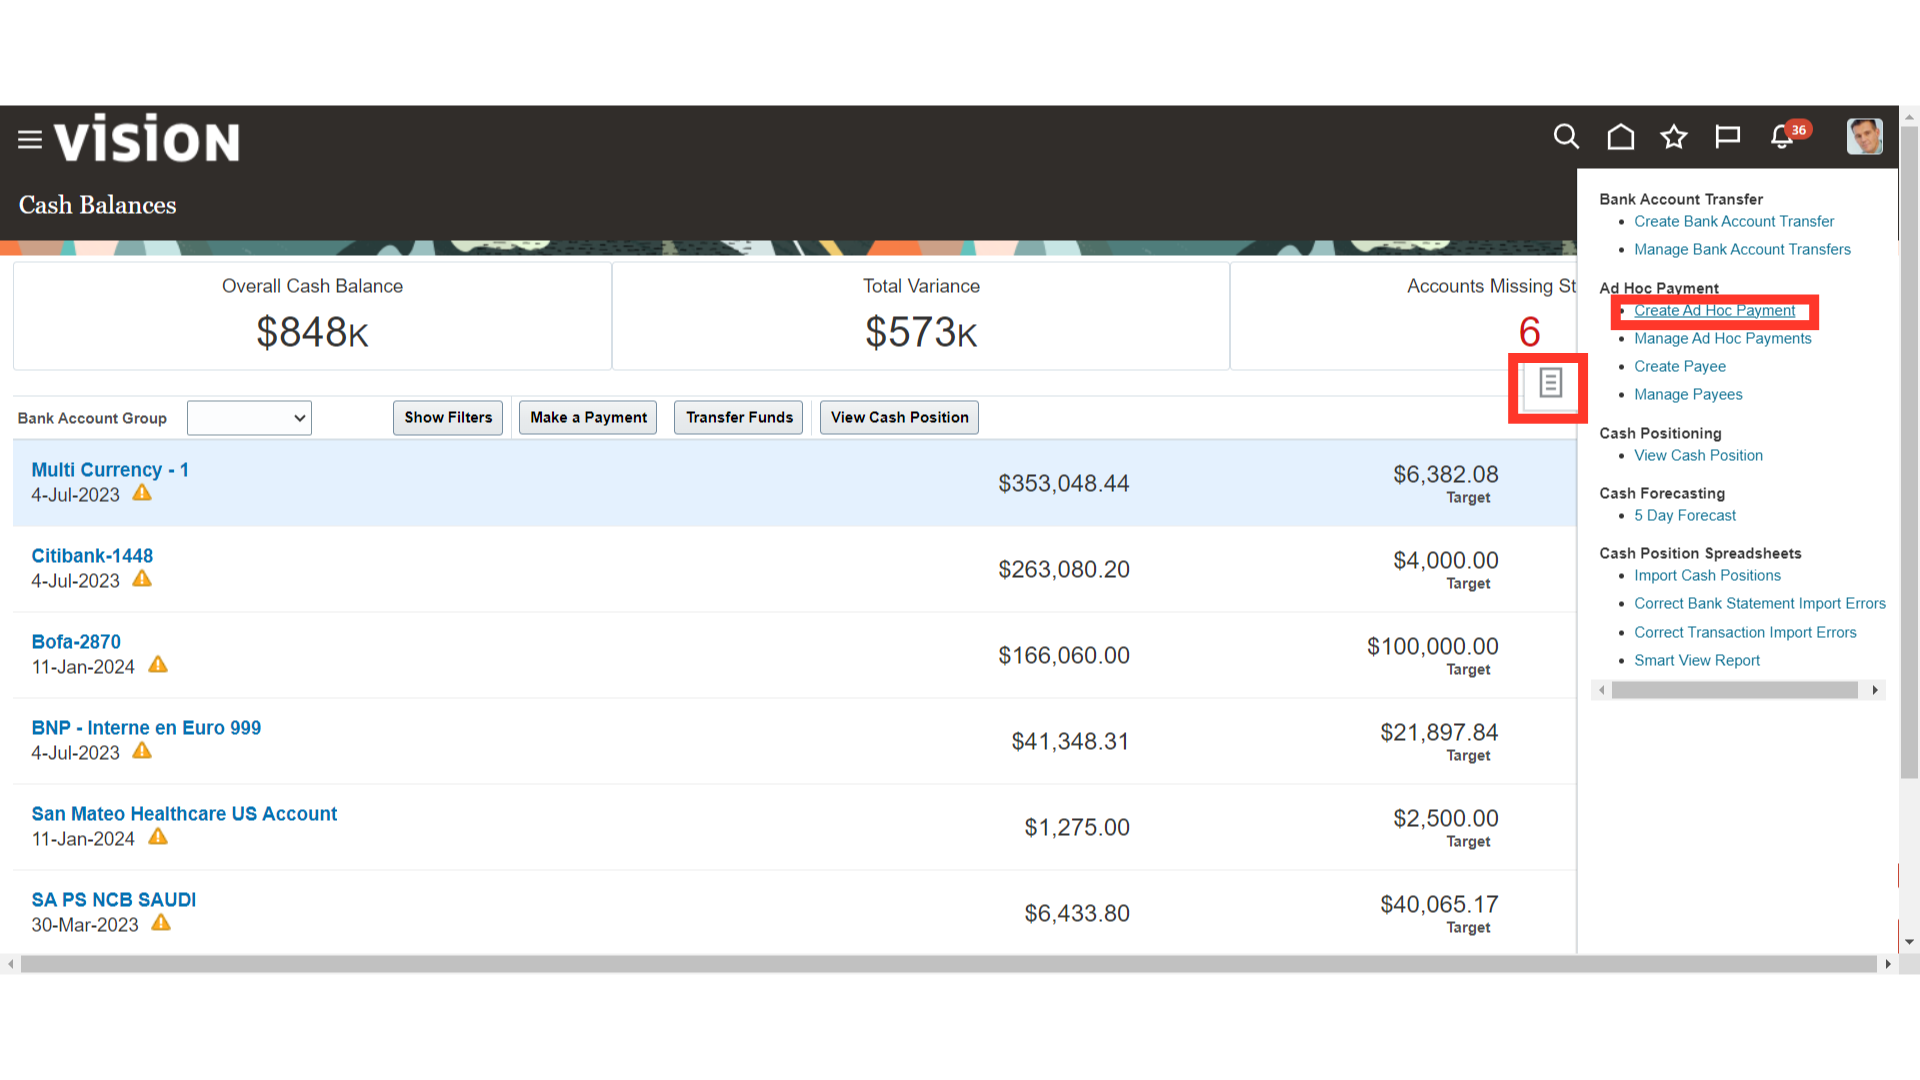
Click on the “Create Ad Hoc Payment” from the task list for making the Adhoc payments.
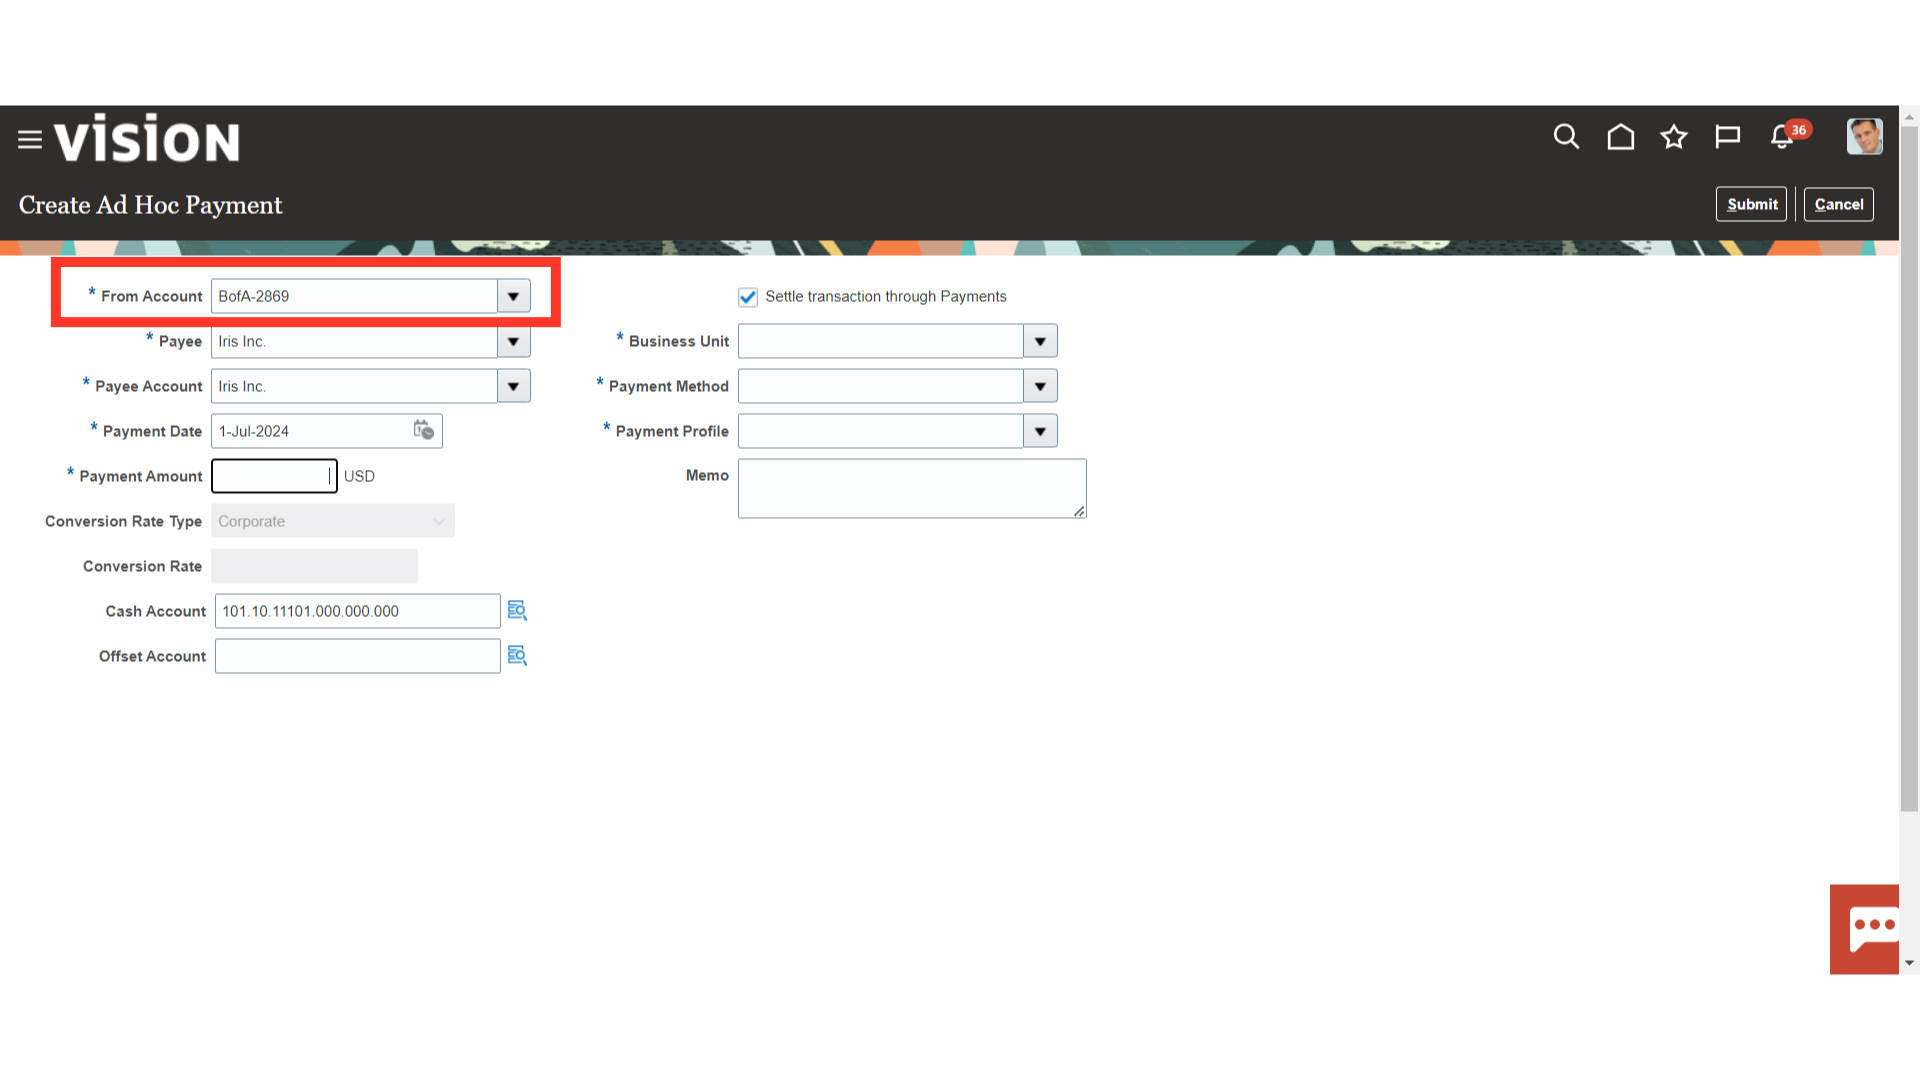
Select the Bank account from which the payment is to be created.
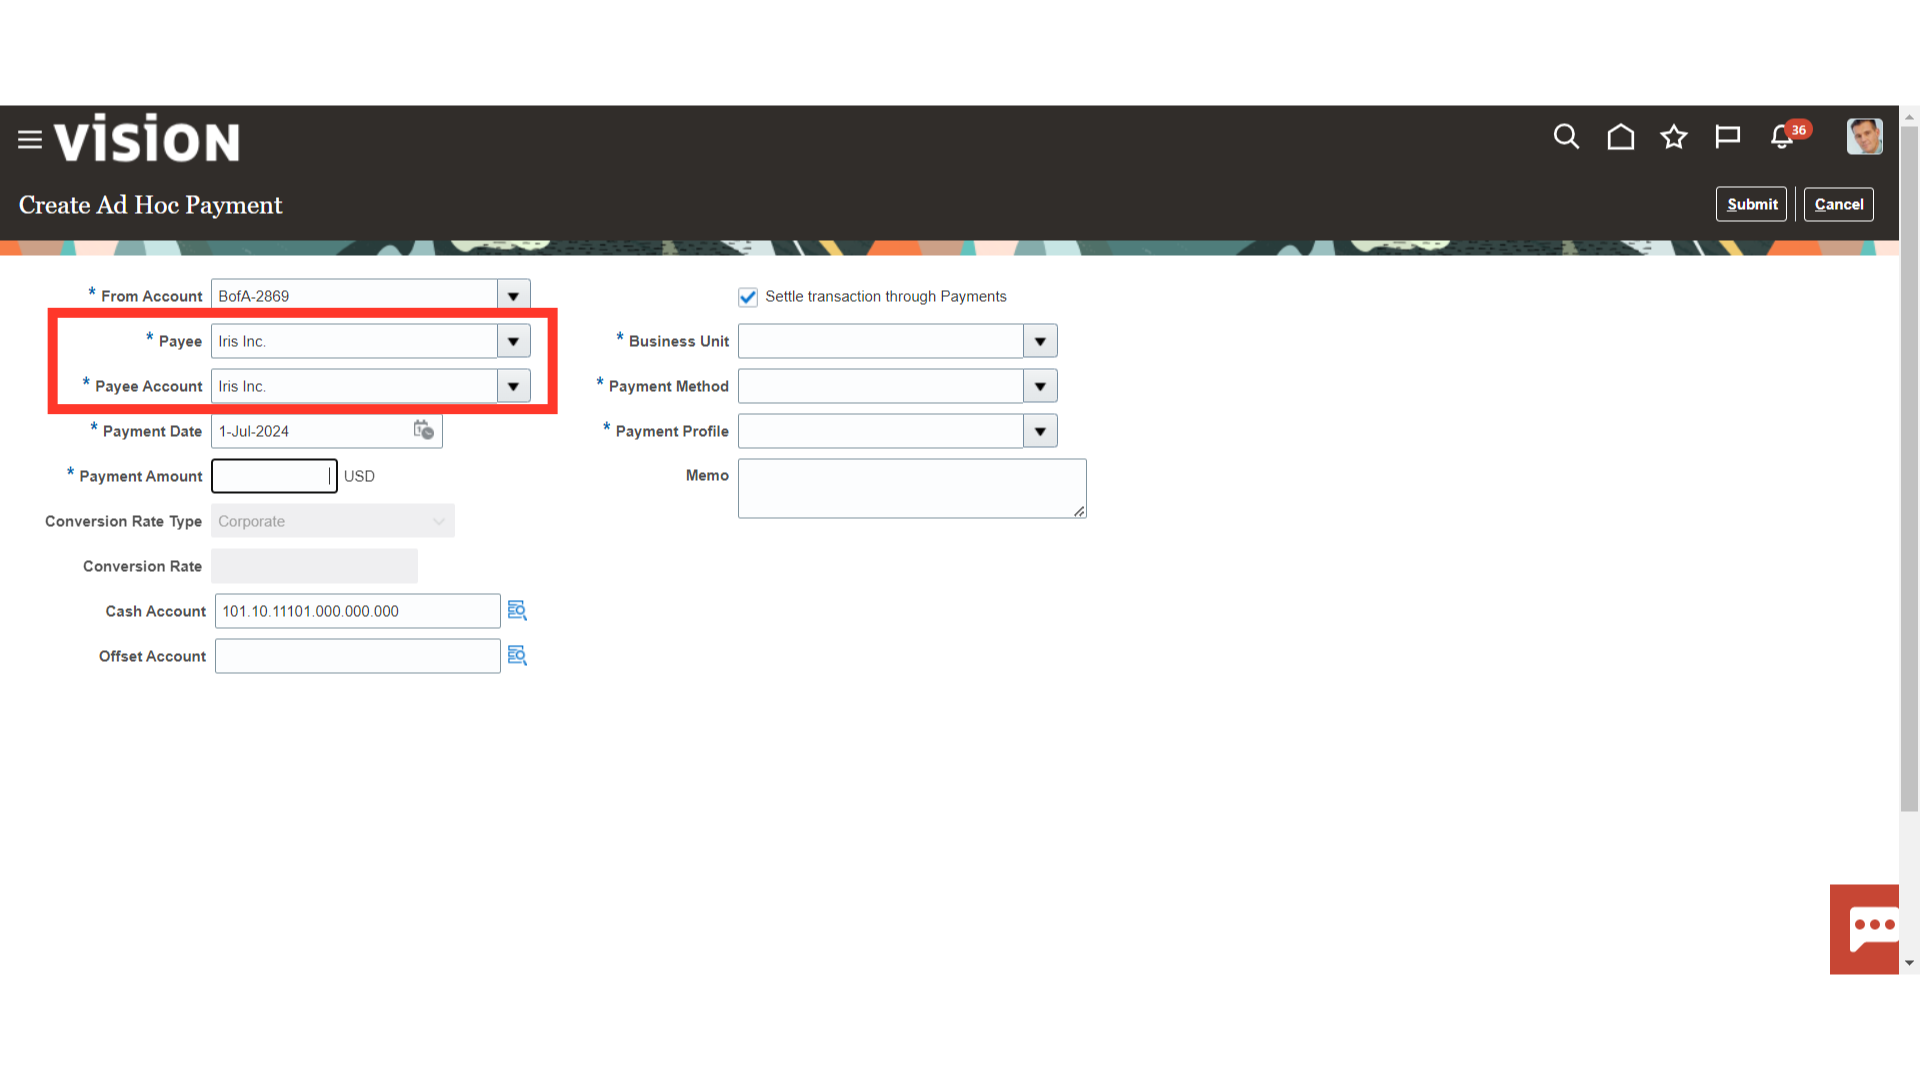
Select the Payee and Payee’s Bank Account from the list of values to whom the payment is to be initiated.
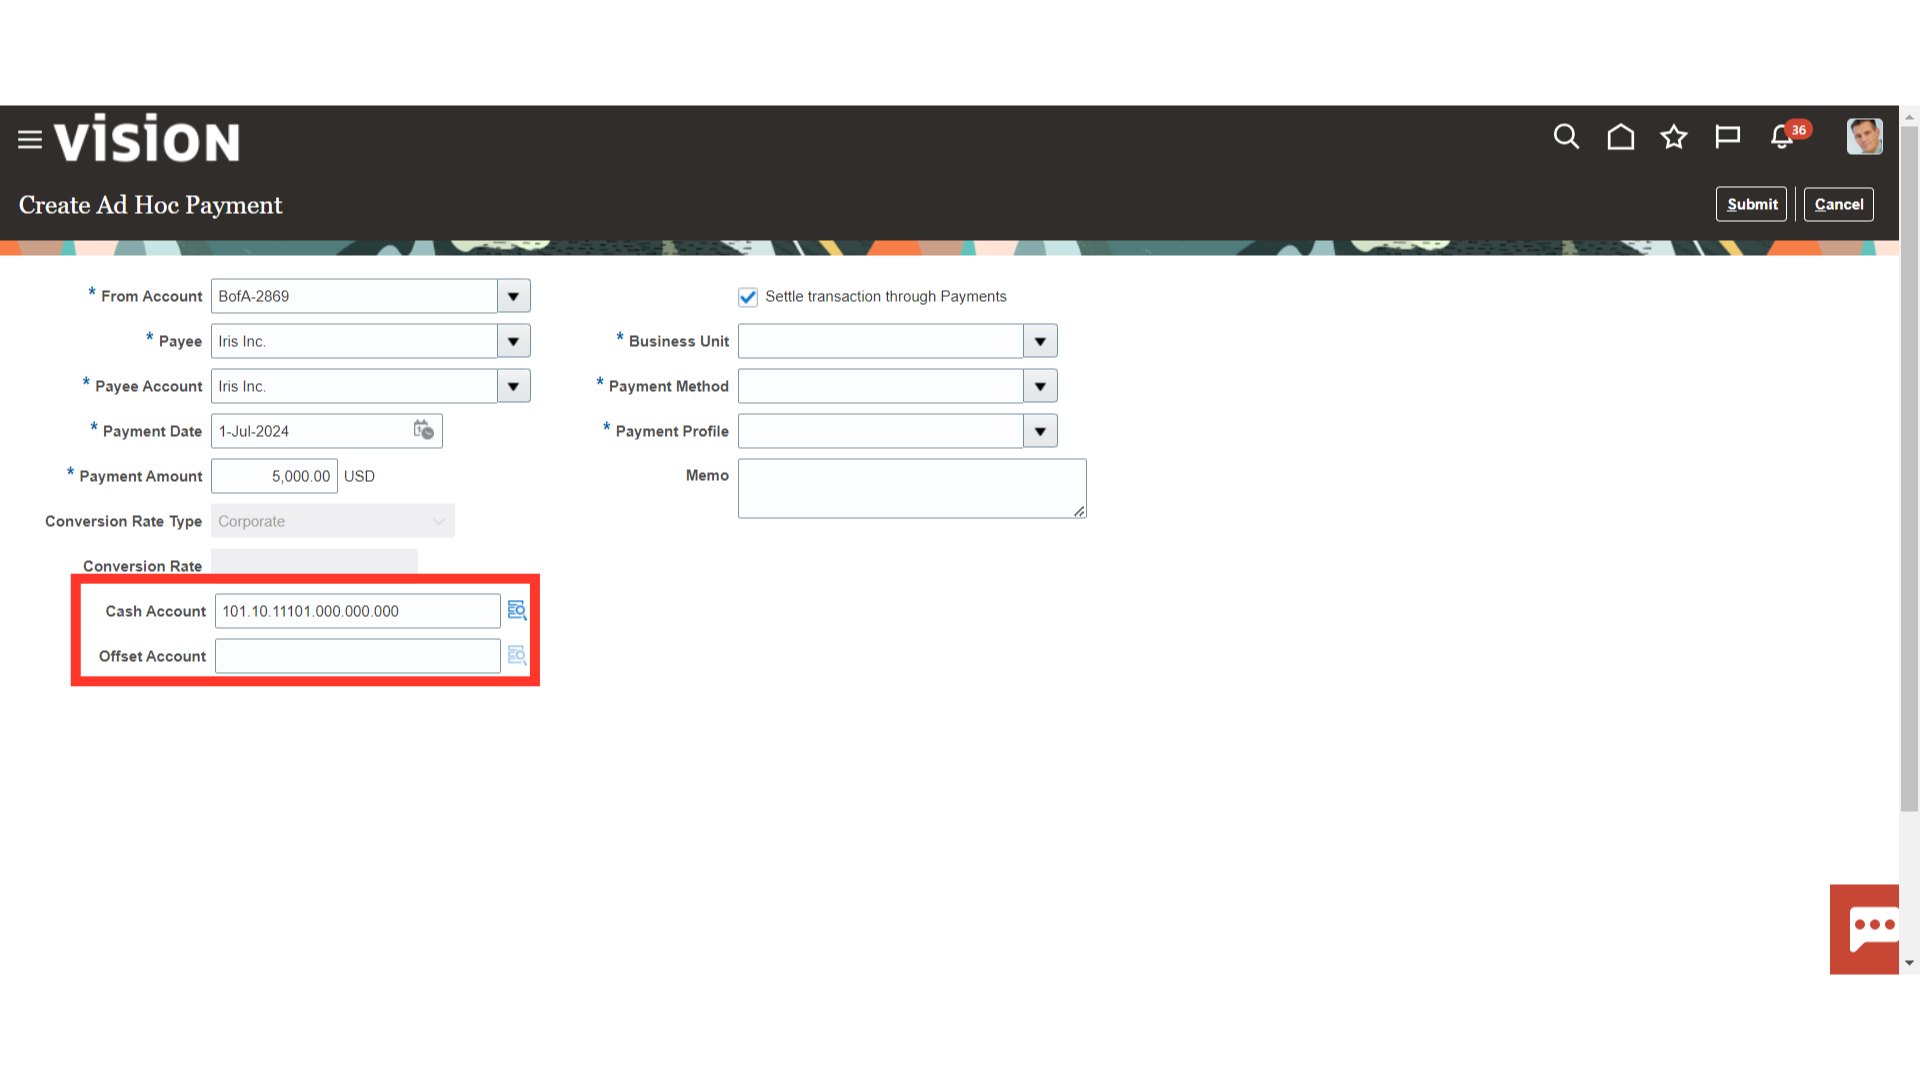
Enter the date on which payment is to be recorded in the payment date field. Enter the amount to be made in the payment amount field.

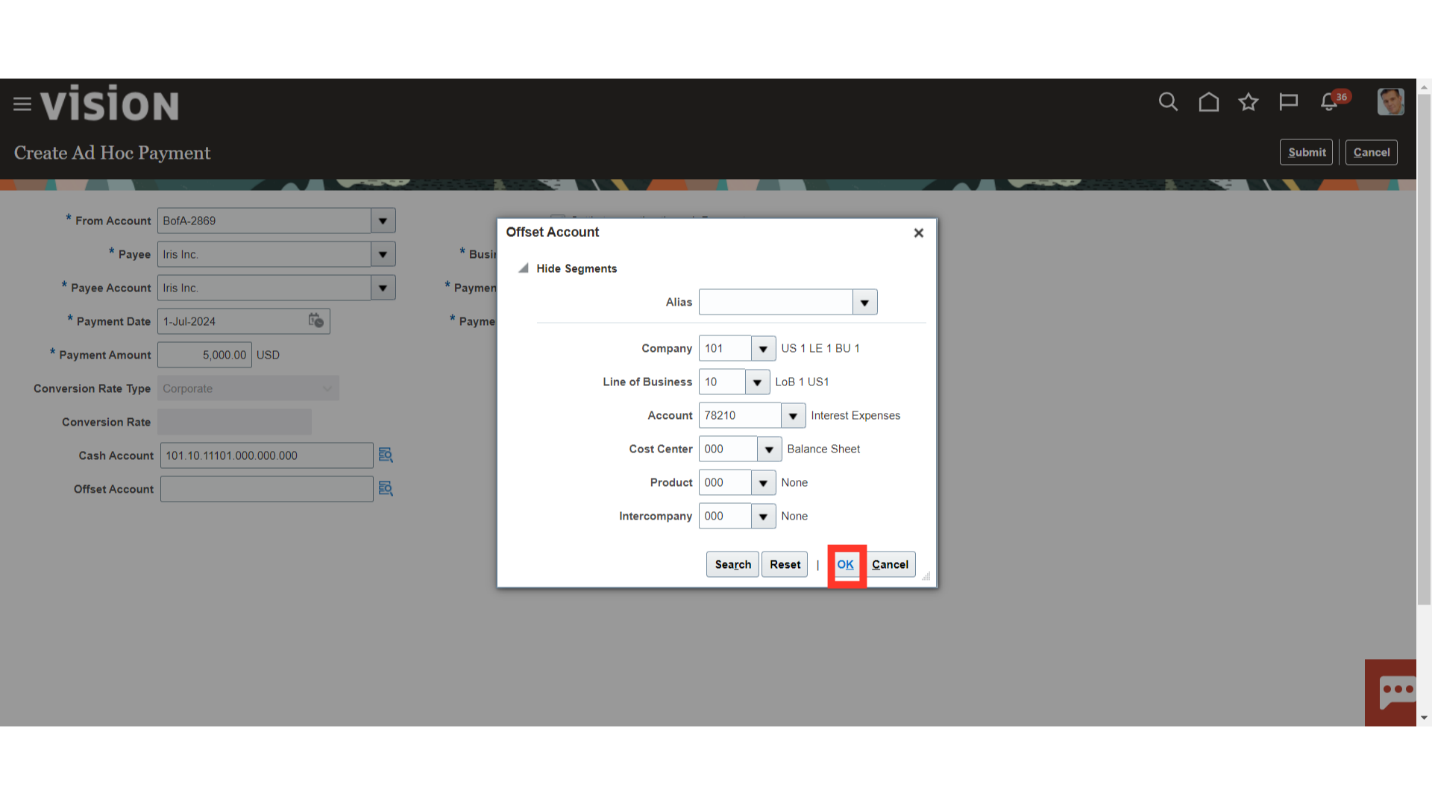
Cash Account combinations would be defaulted from the Bank account setups. By selecting the Distribution combination icon, the offset account combinations can be entered manually.
After entering all the account segment values manually or by selecting from the list of values, click on Ok button to continue.
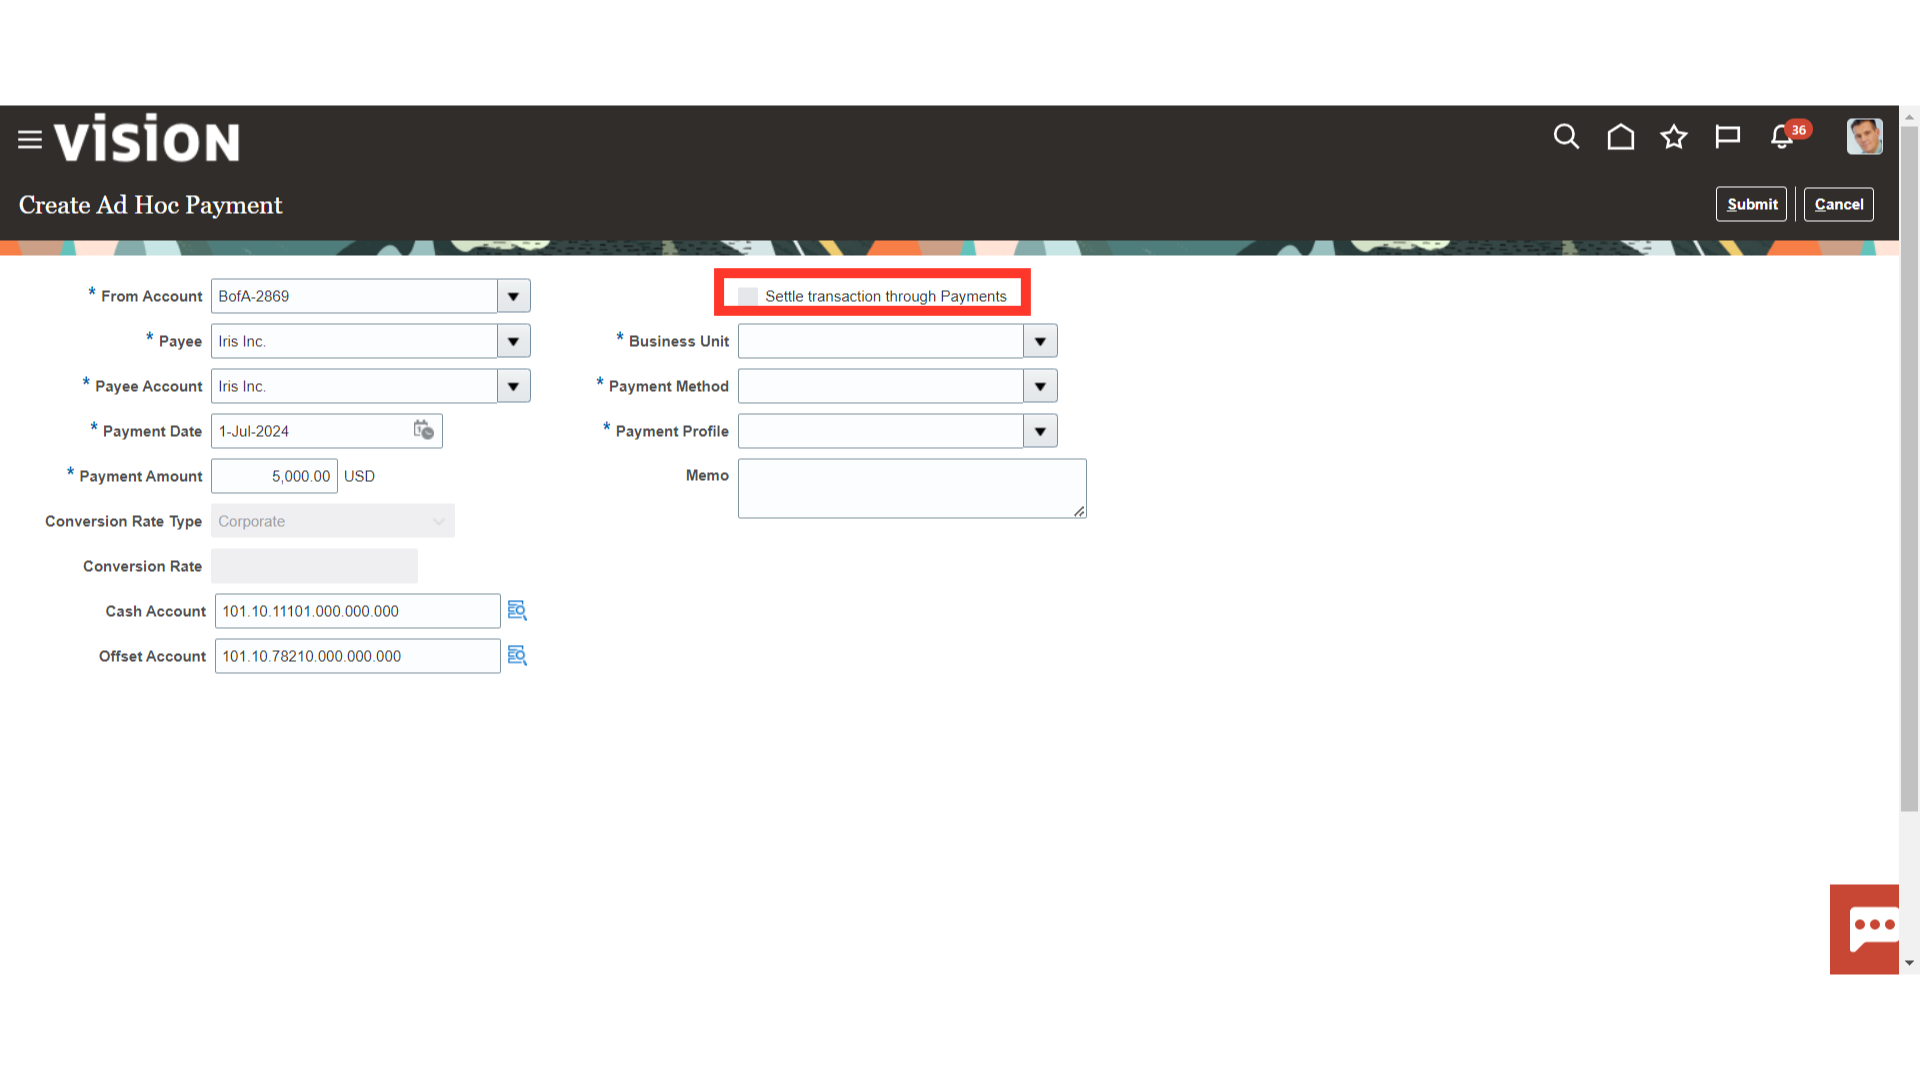
If the ad-hoc payment is to be routed through payables enable the checkbox against the Settle transaction through Payments, and enter the other details such as Business unit, payment method, and Payment process profile.
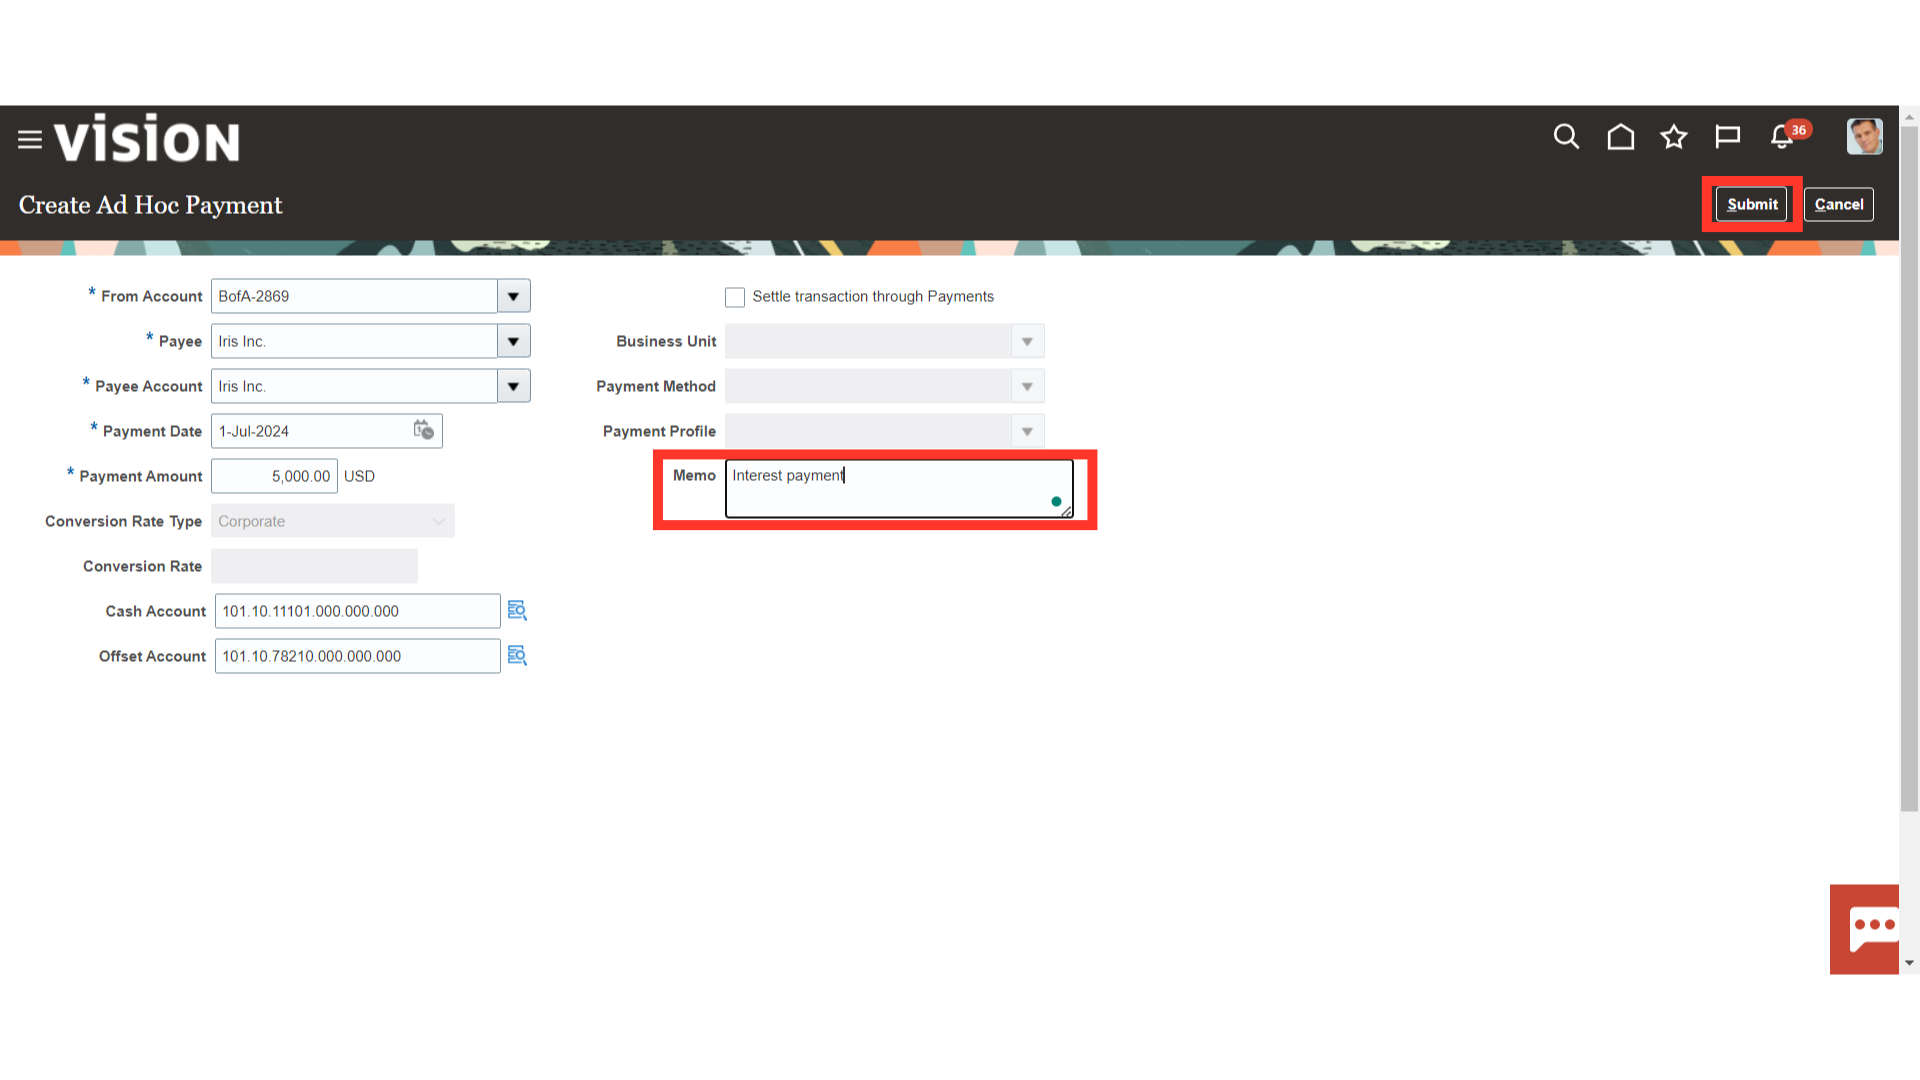
You can add information in the Memo field and press the Submit button.
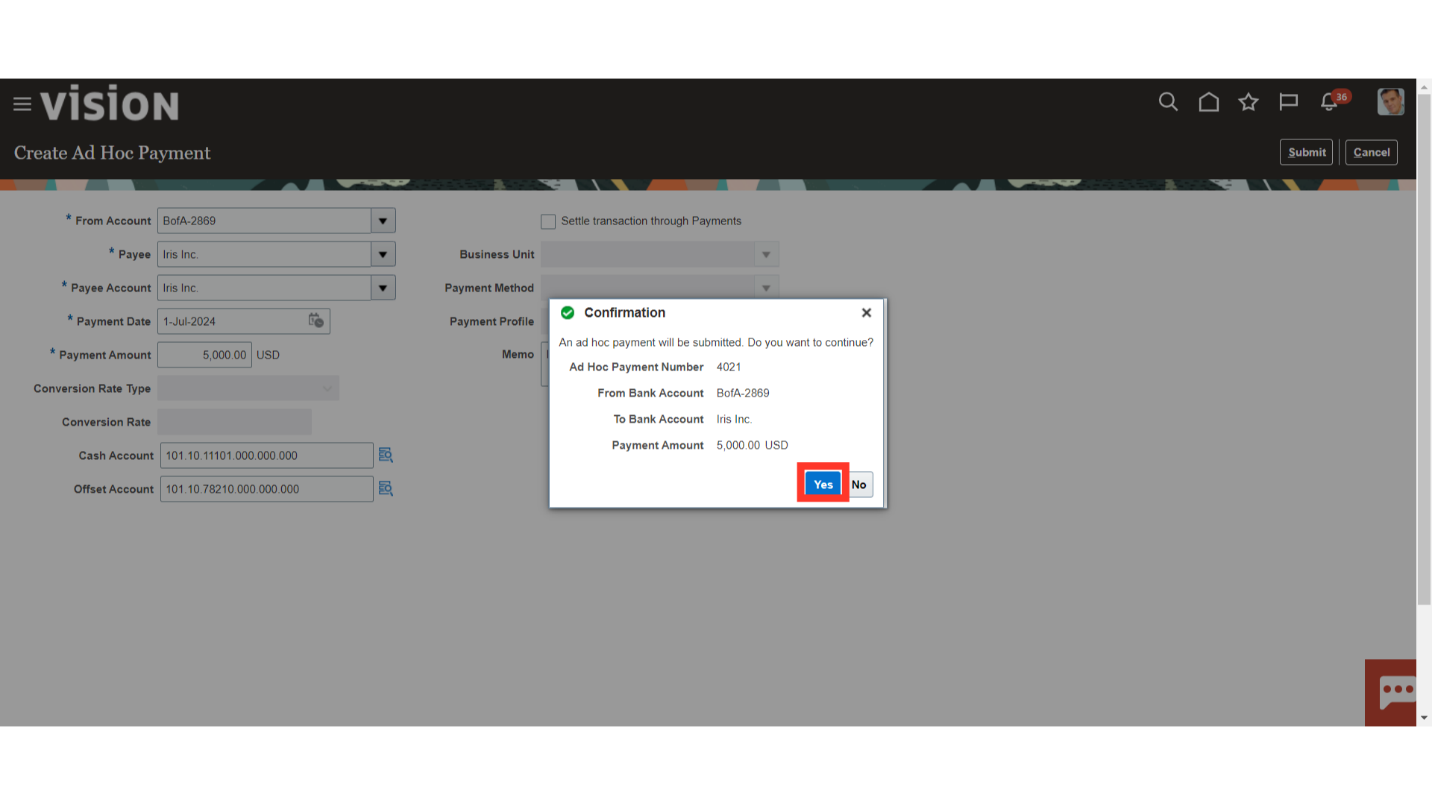
Before the payment is made, a summary of the payment details is shown for confirmation. To make the payment, click the Yes button.
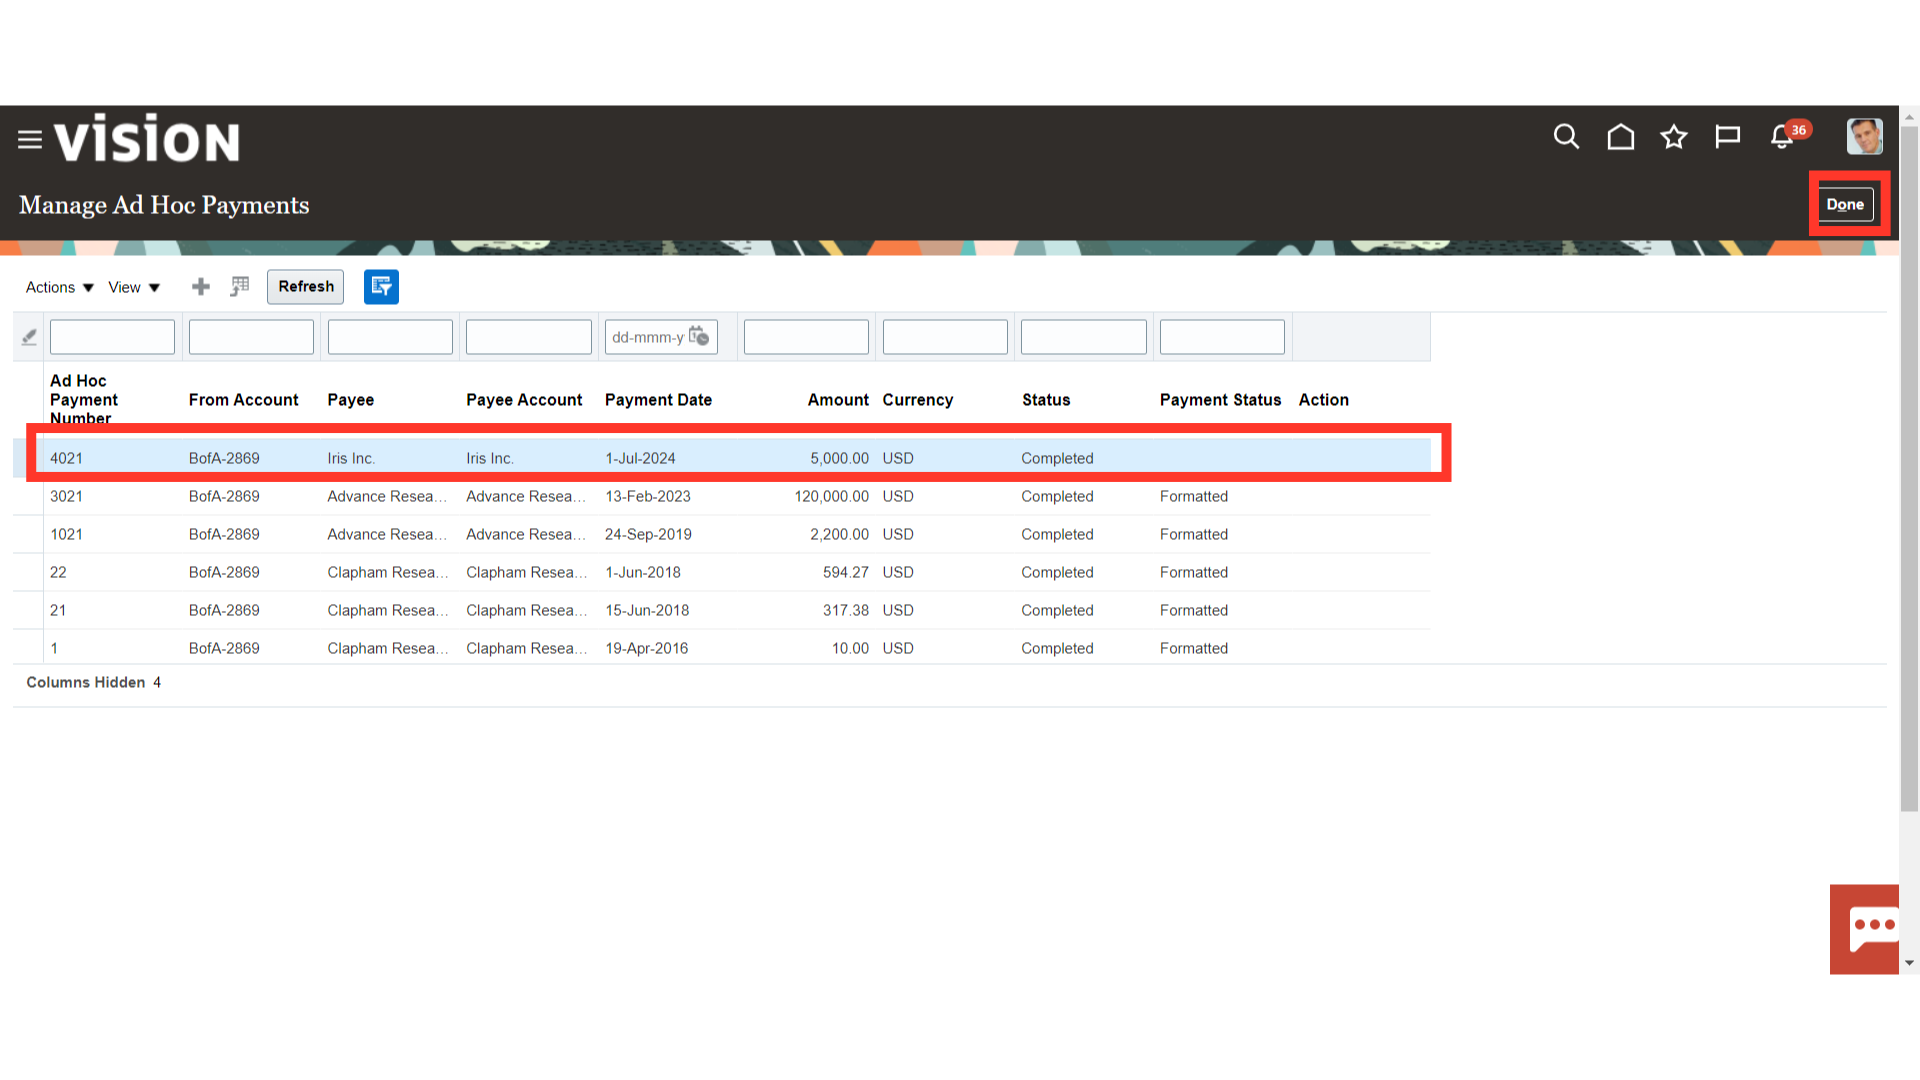
Click on the “Manage Ad Hoc Payments” from the task list for verifying the Ad hoc payments created.

After verifying the Ad Hoc payment details, click on the Done button.
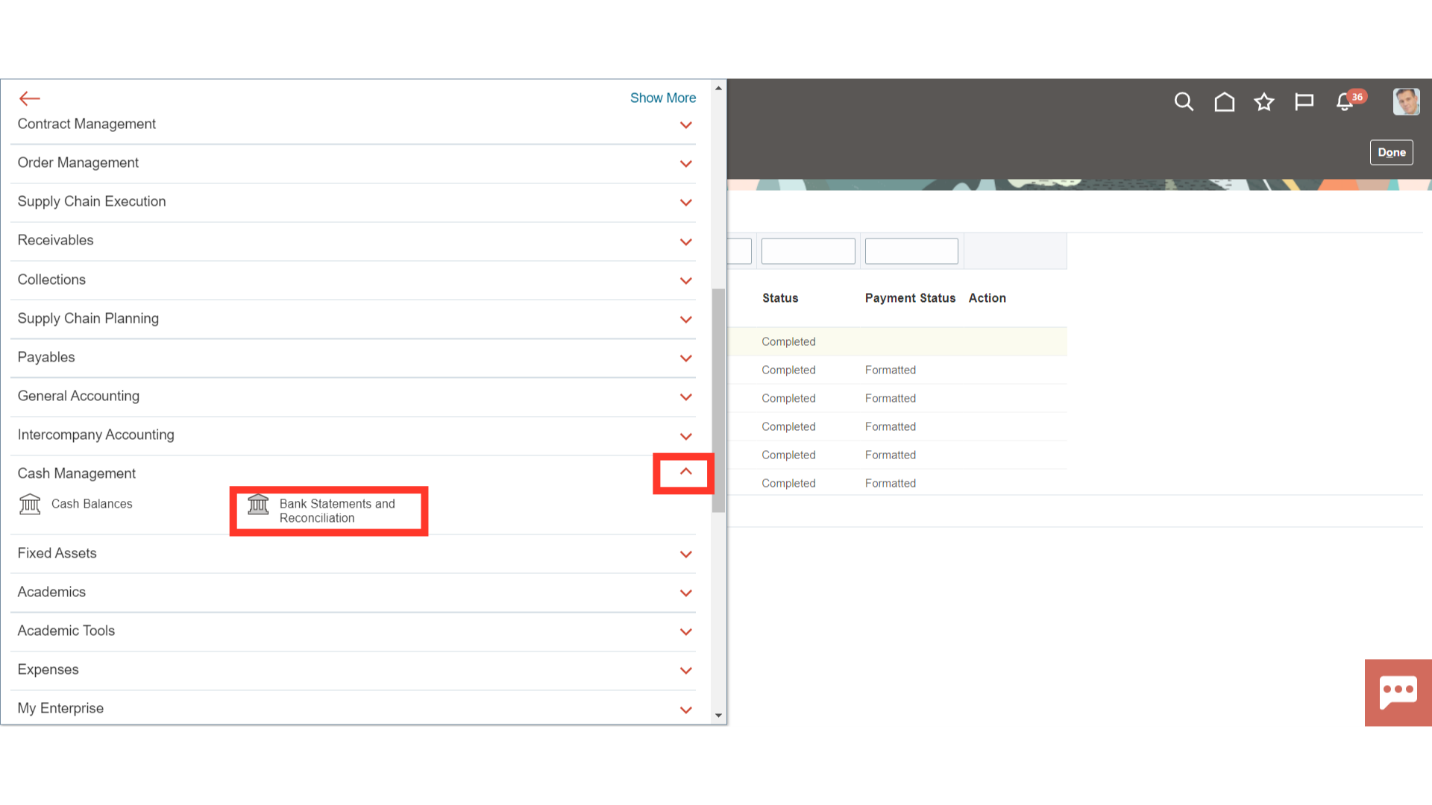
Select the “Bank Statements and Reconciliation” submenu by expanding the Cash Management menu after clicking the Navigator icon.
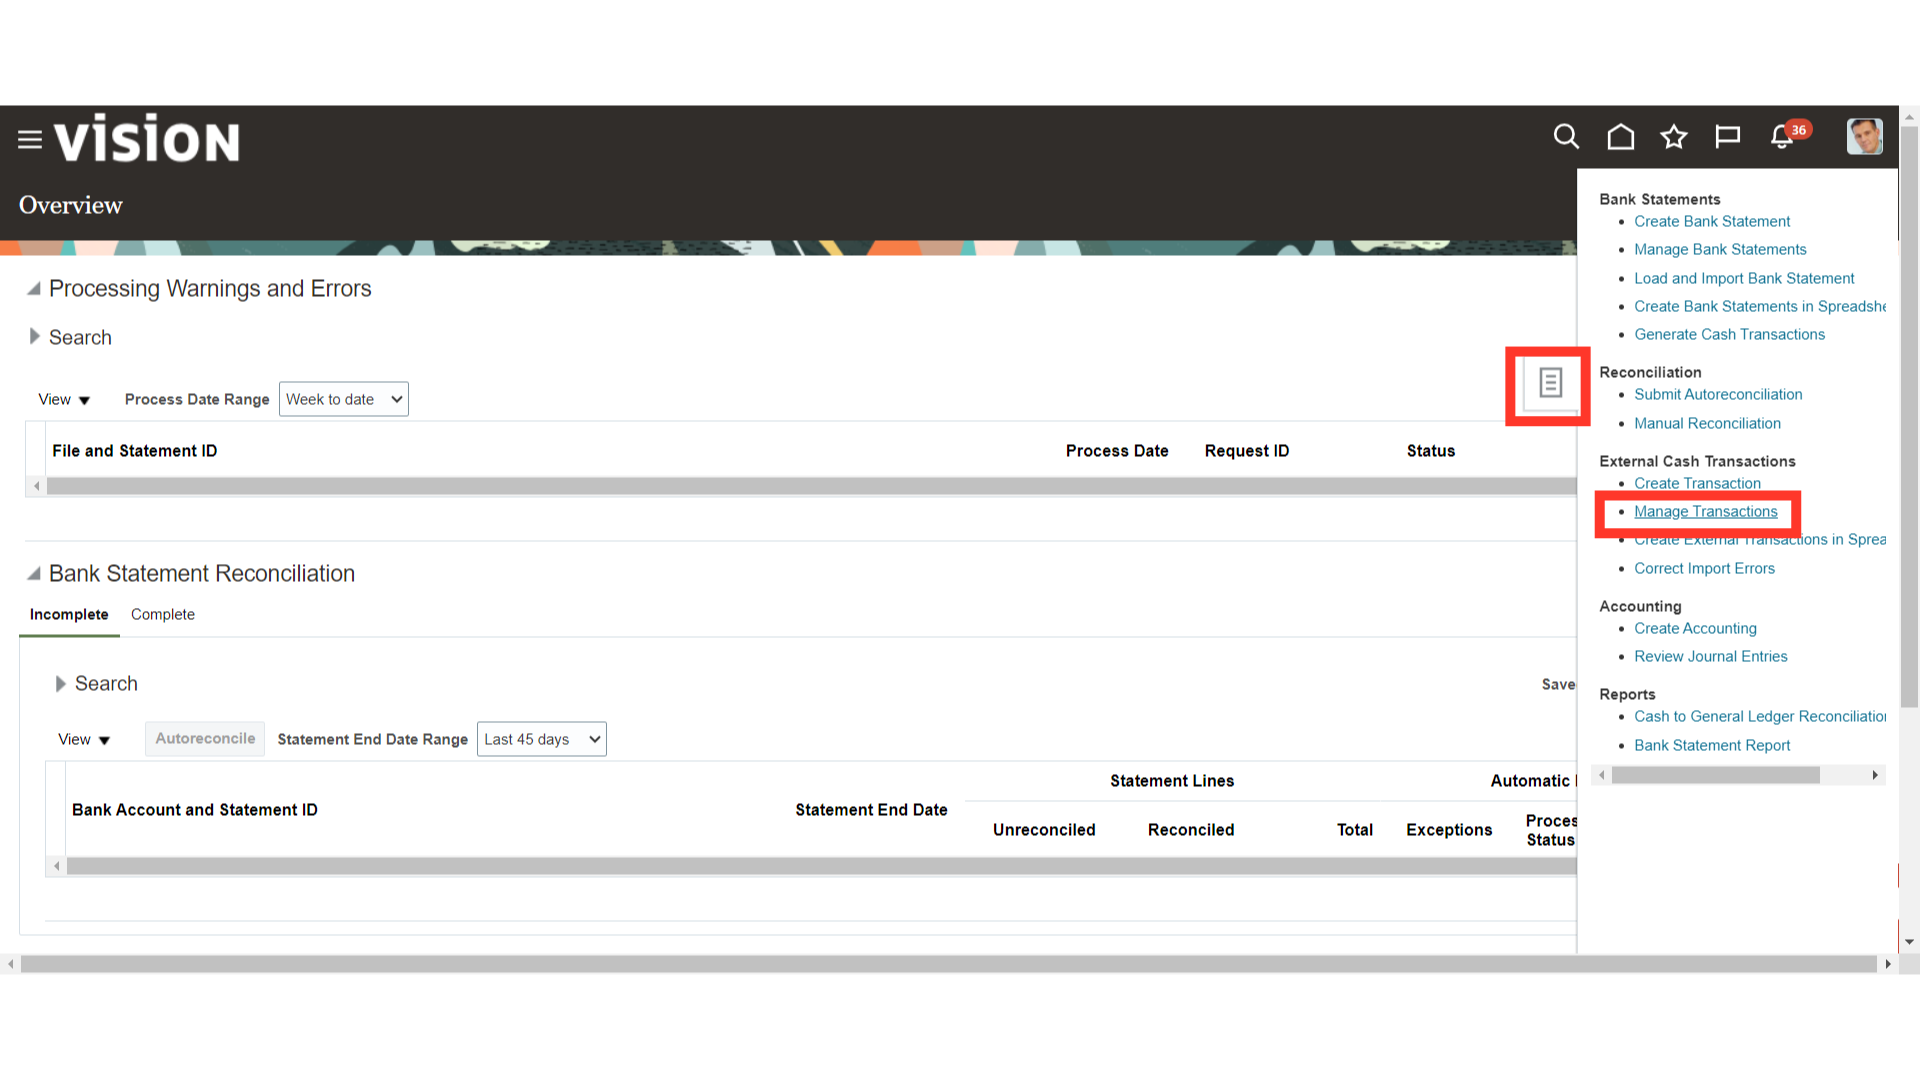
Click on the Manage Transaction from the task list to search external transactions created for making Adhoc Payment.
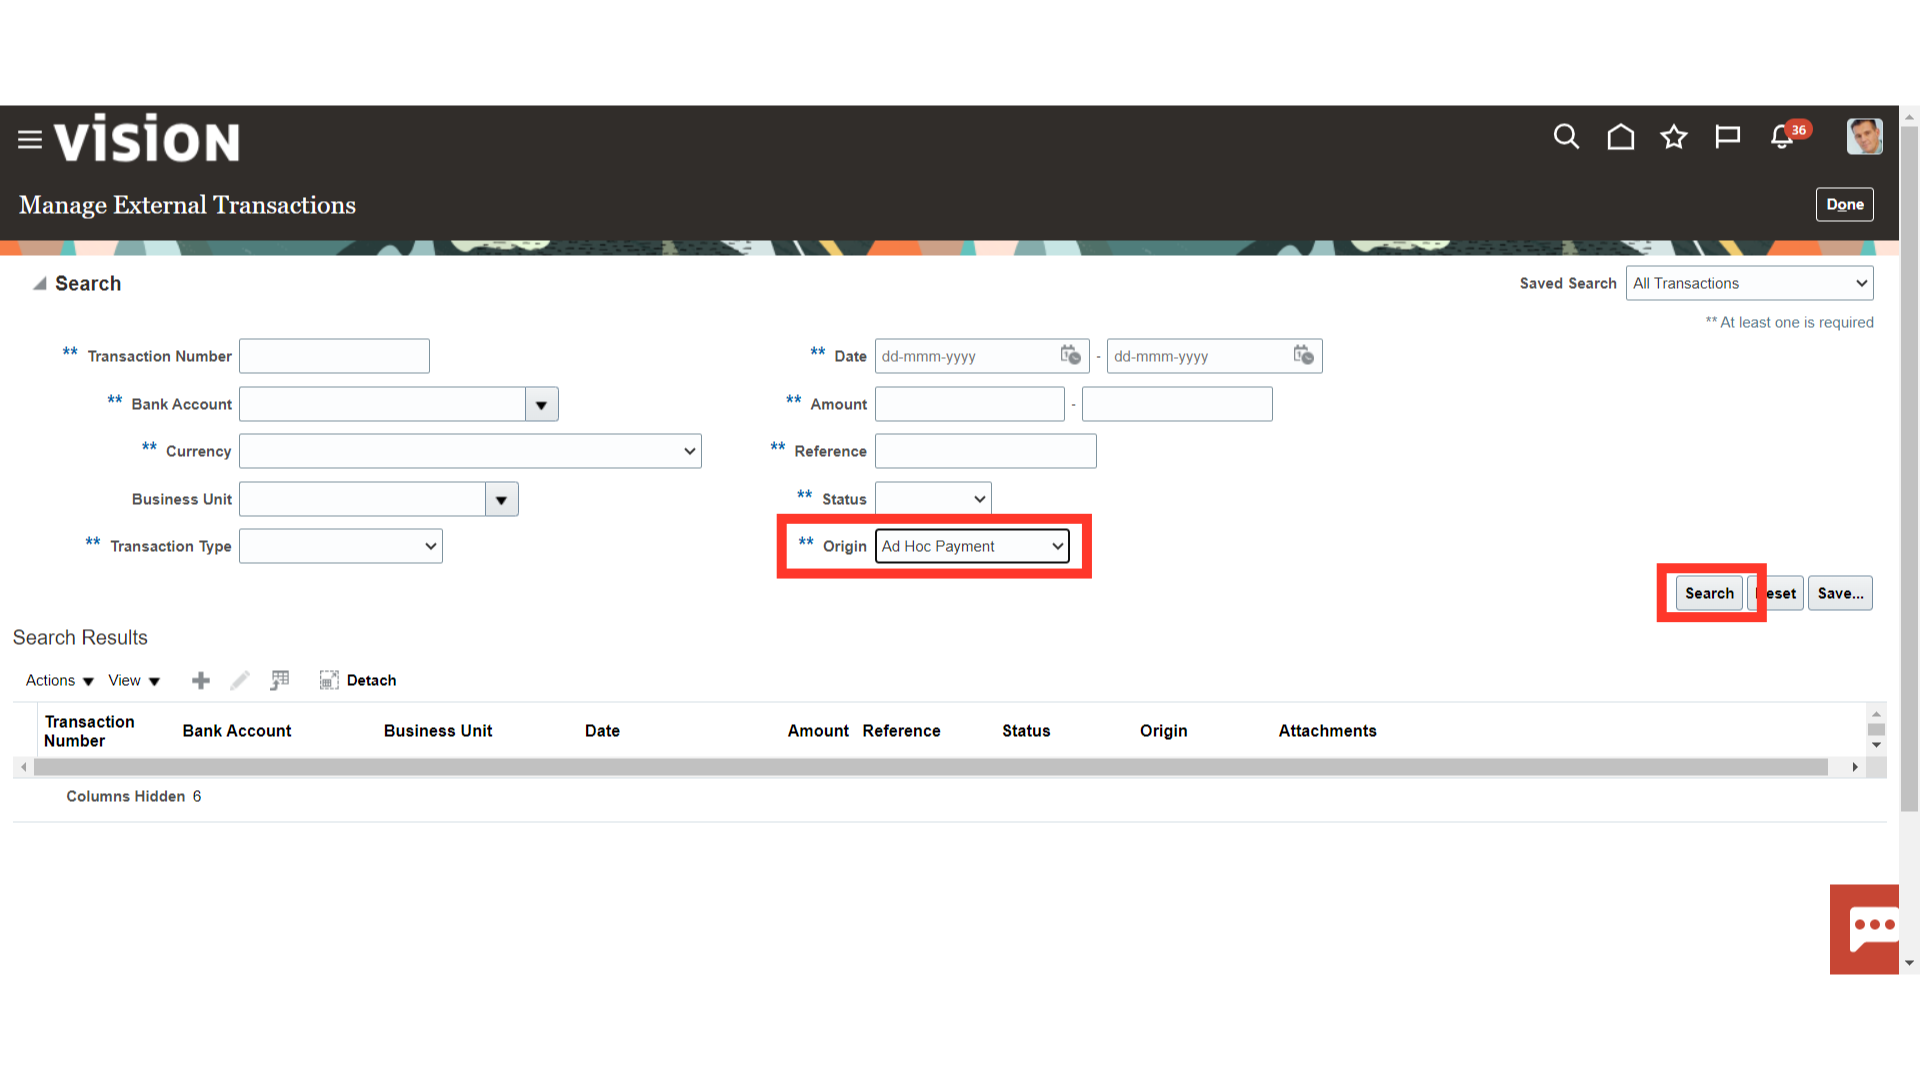
Select the Origin as an Ad Hoc payment from the list of values. and then click on the search button.
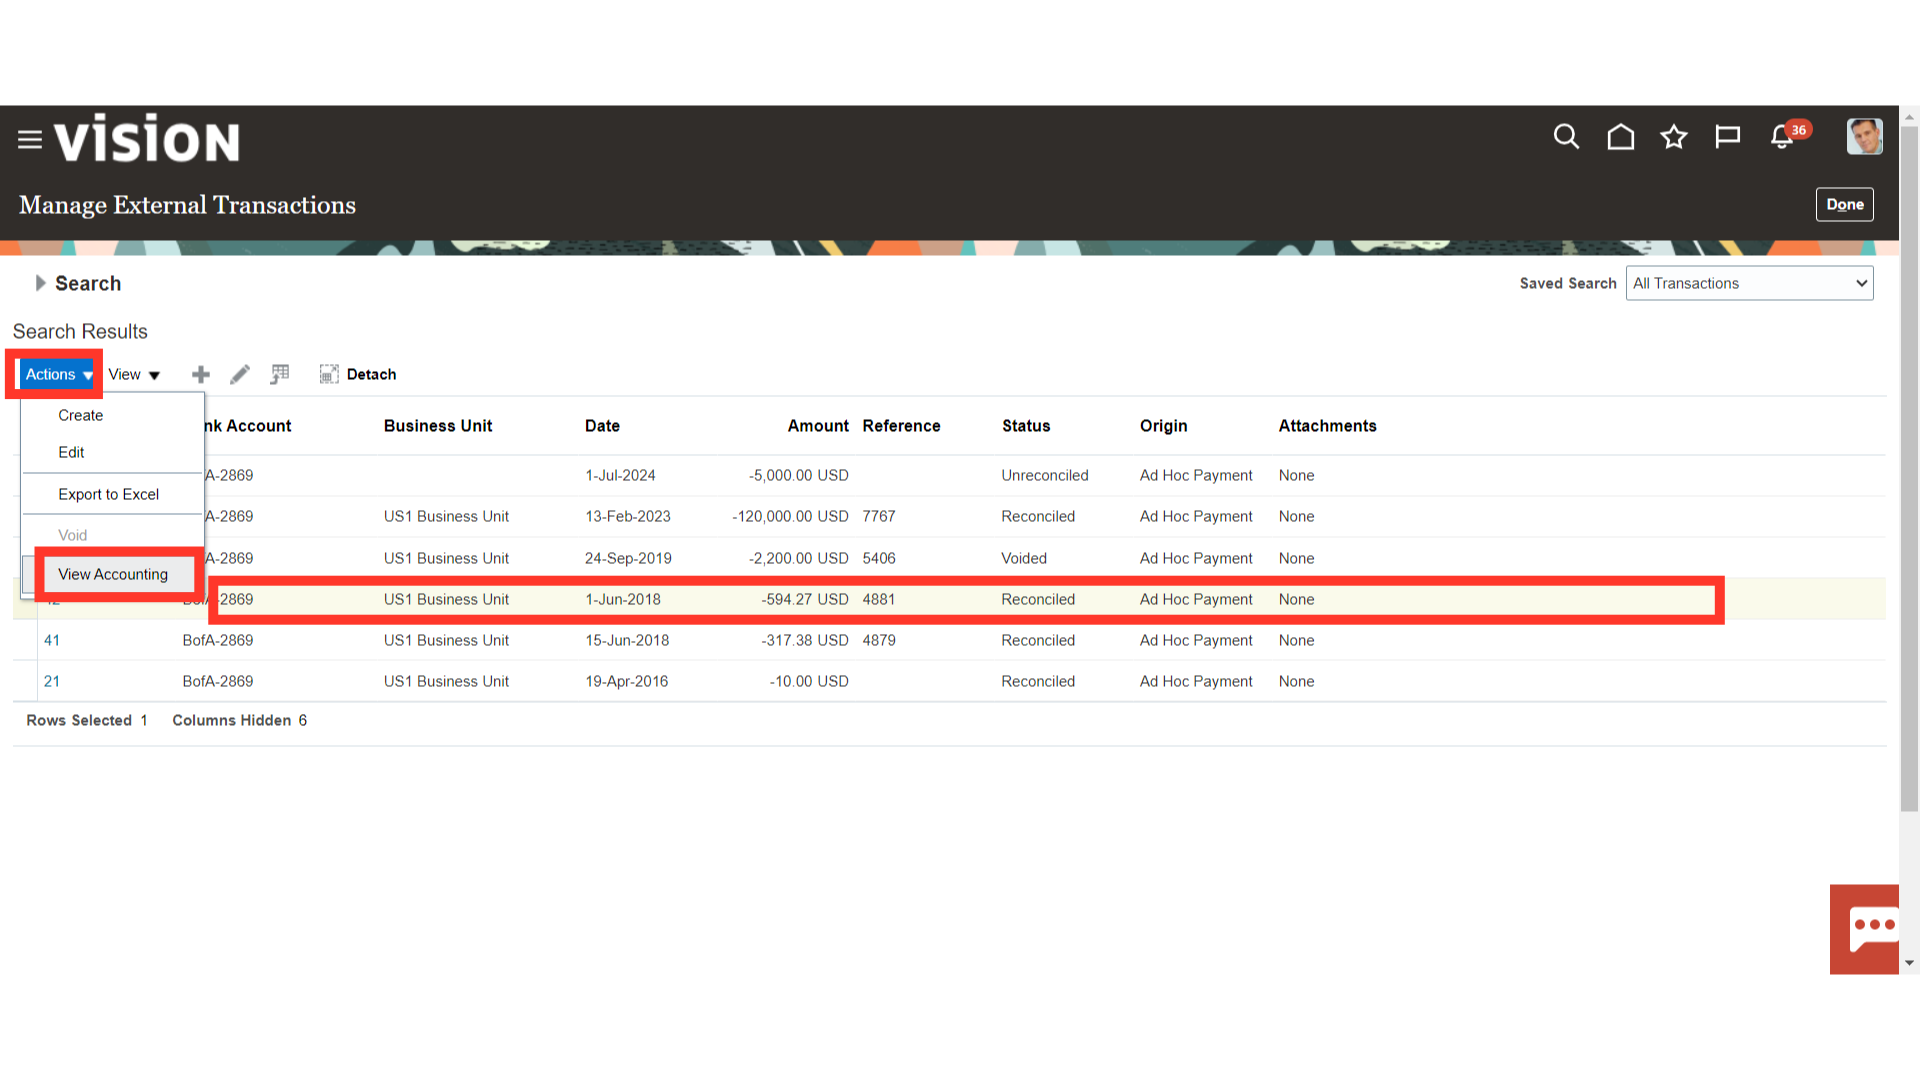
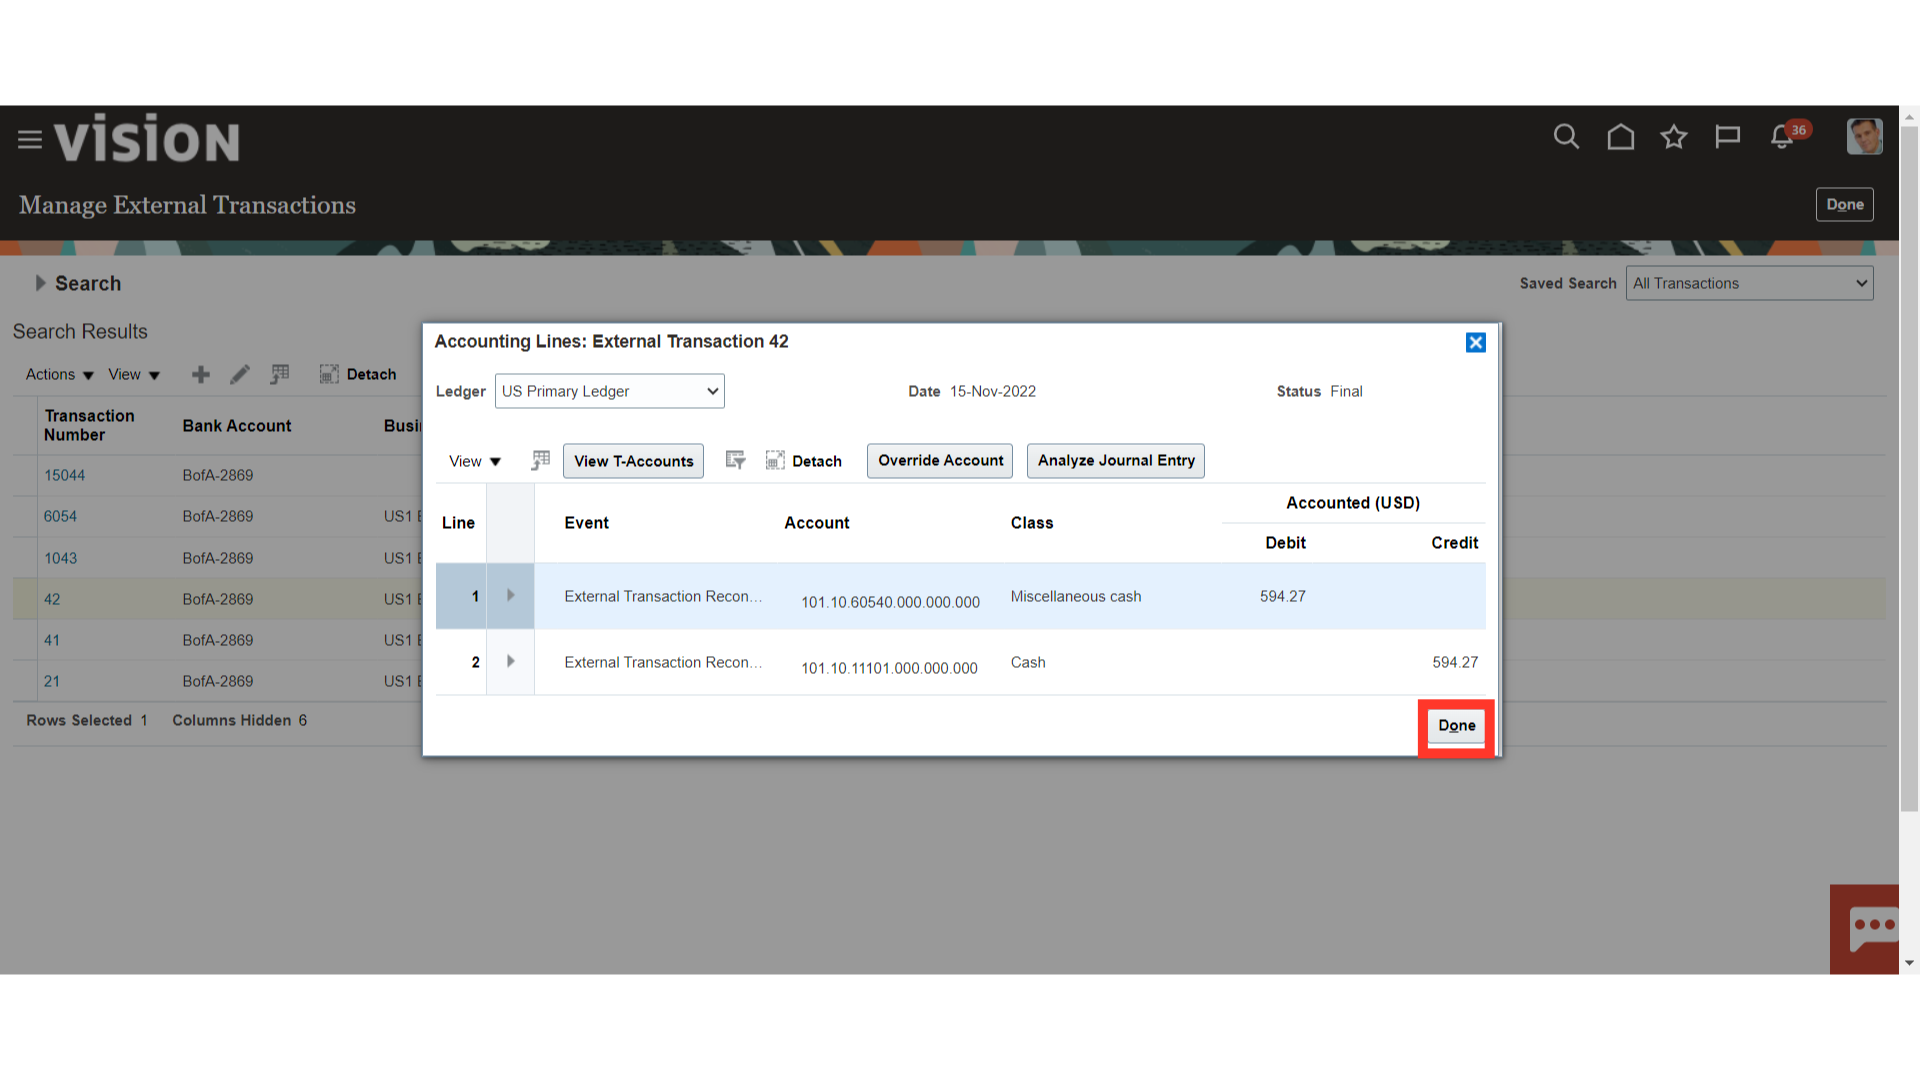
Accounting entry for the external transaction is generated only for the reconciled transaction. To view the Accounting entry, click on the View Accounting under the Actions after selecting the transaction.
This is the accounting entry generated for the Ad Hoc payments created. Click on the Done button to close this window.
The process of setting up the payee in Oracle Fusion for ad hoc payments has been illustrated in this guide. It has also been covered how to view the accounting entry for ad hoc payments from Manage Transactions.