Asset Transfer Processing within and across Vertical (Asset Book)
Enhance your skills in managing asset transfers with precision. Follow these detailed instructions to transfer assets between employees, depreciation expense accounts, and locations.
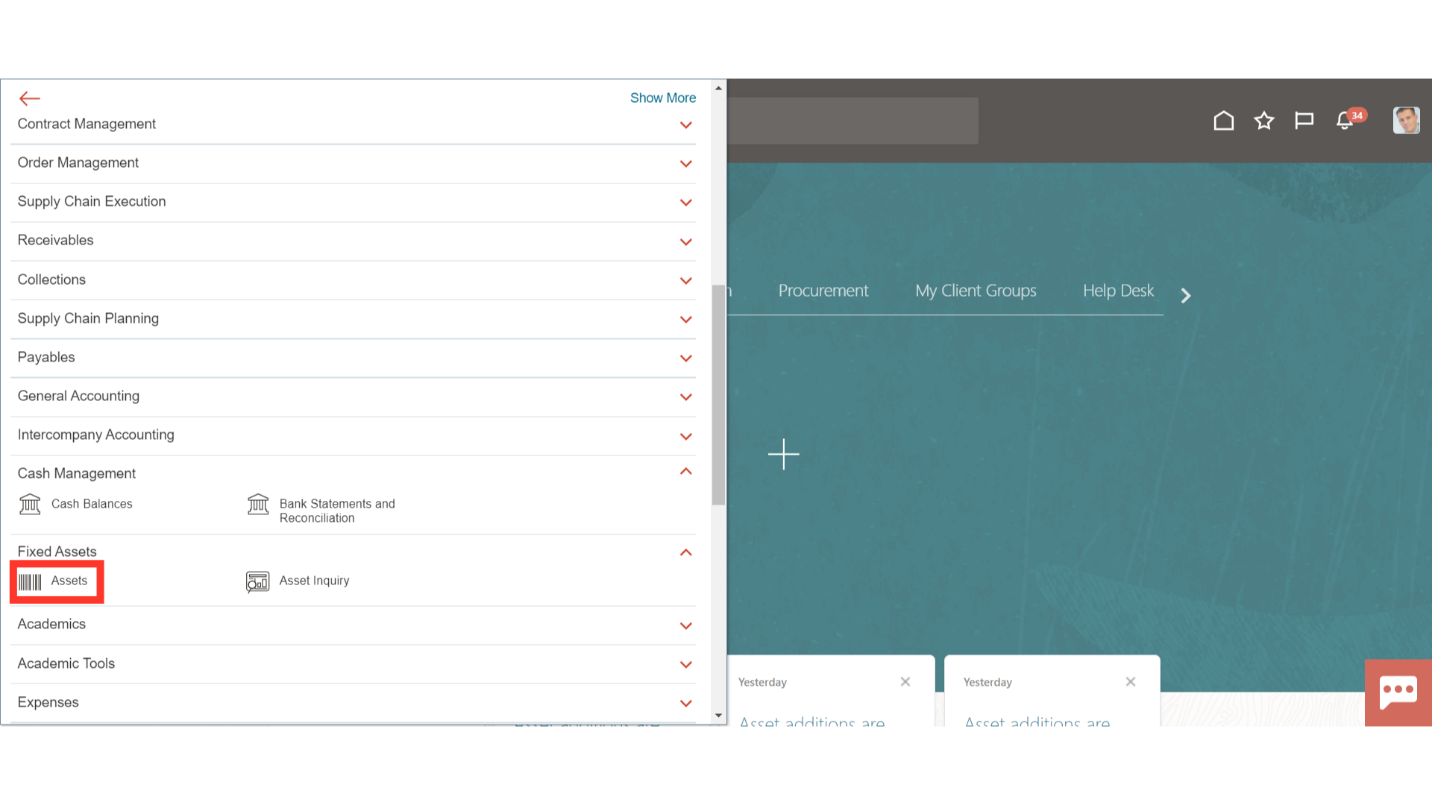
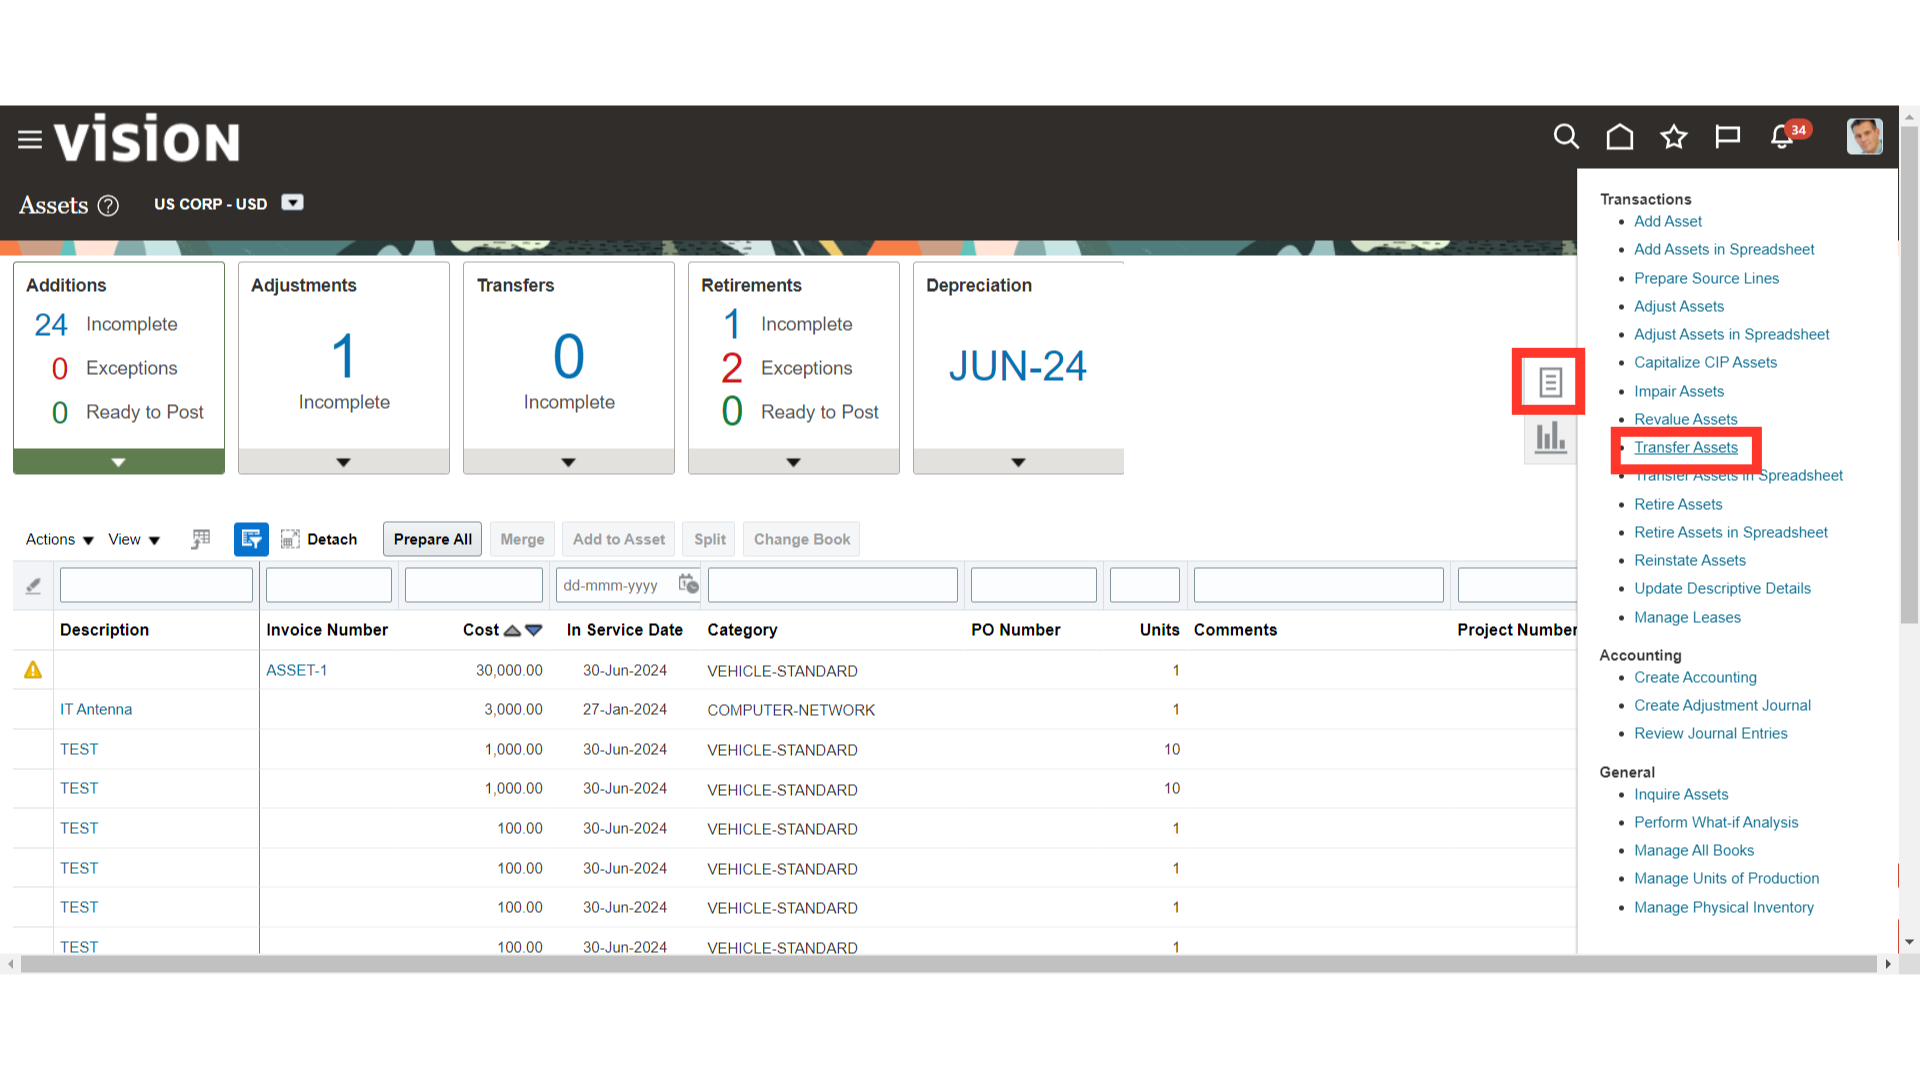
To transfer assets, navigate to the Assets work area by clicking on Navigator, expand the Fixed Assets menu, and then select the Assets submenu.
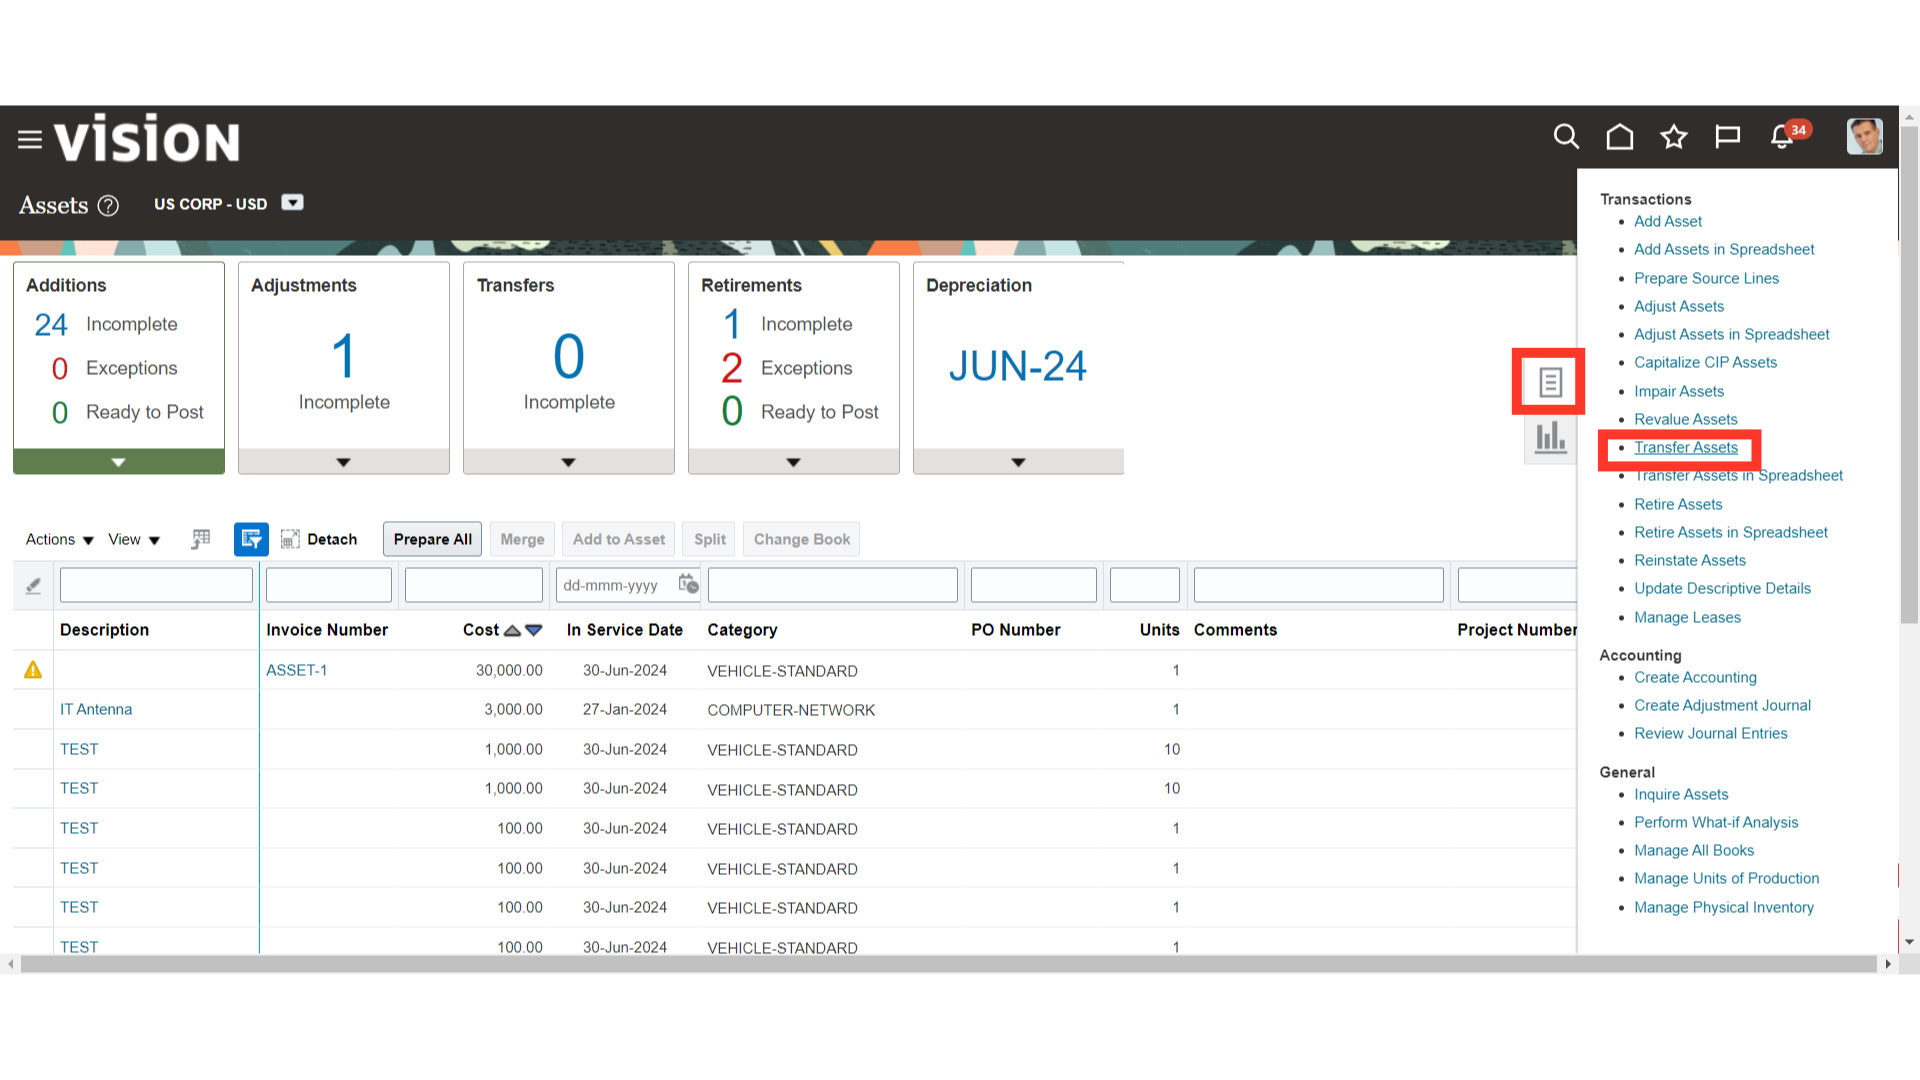
On the Assets work area, expand the tasks icon and then select ‘Transfer Assets’ from the list available.
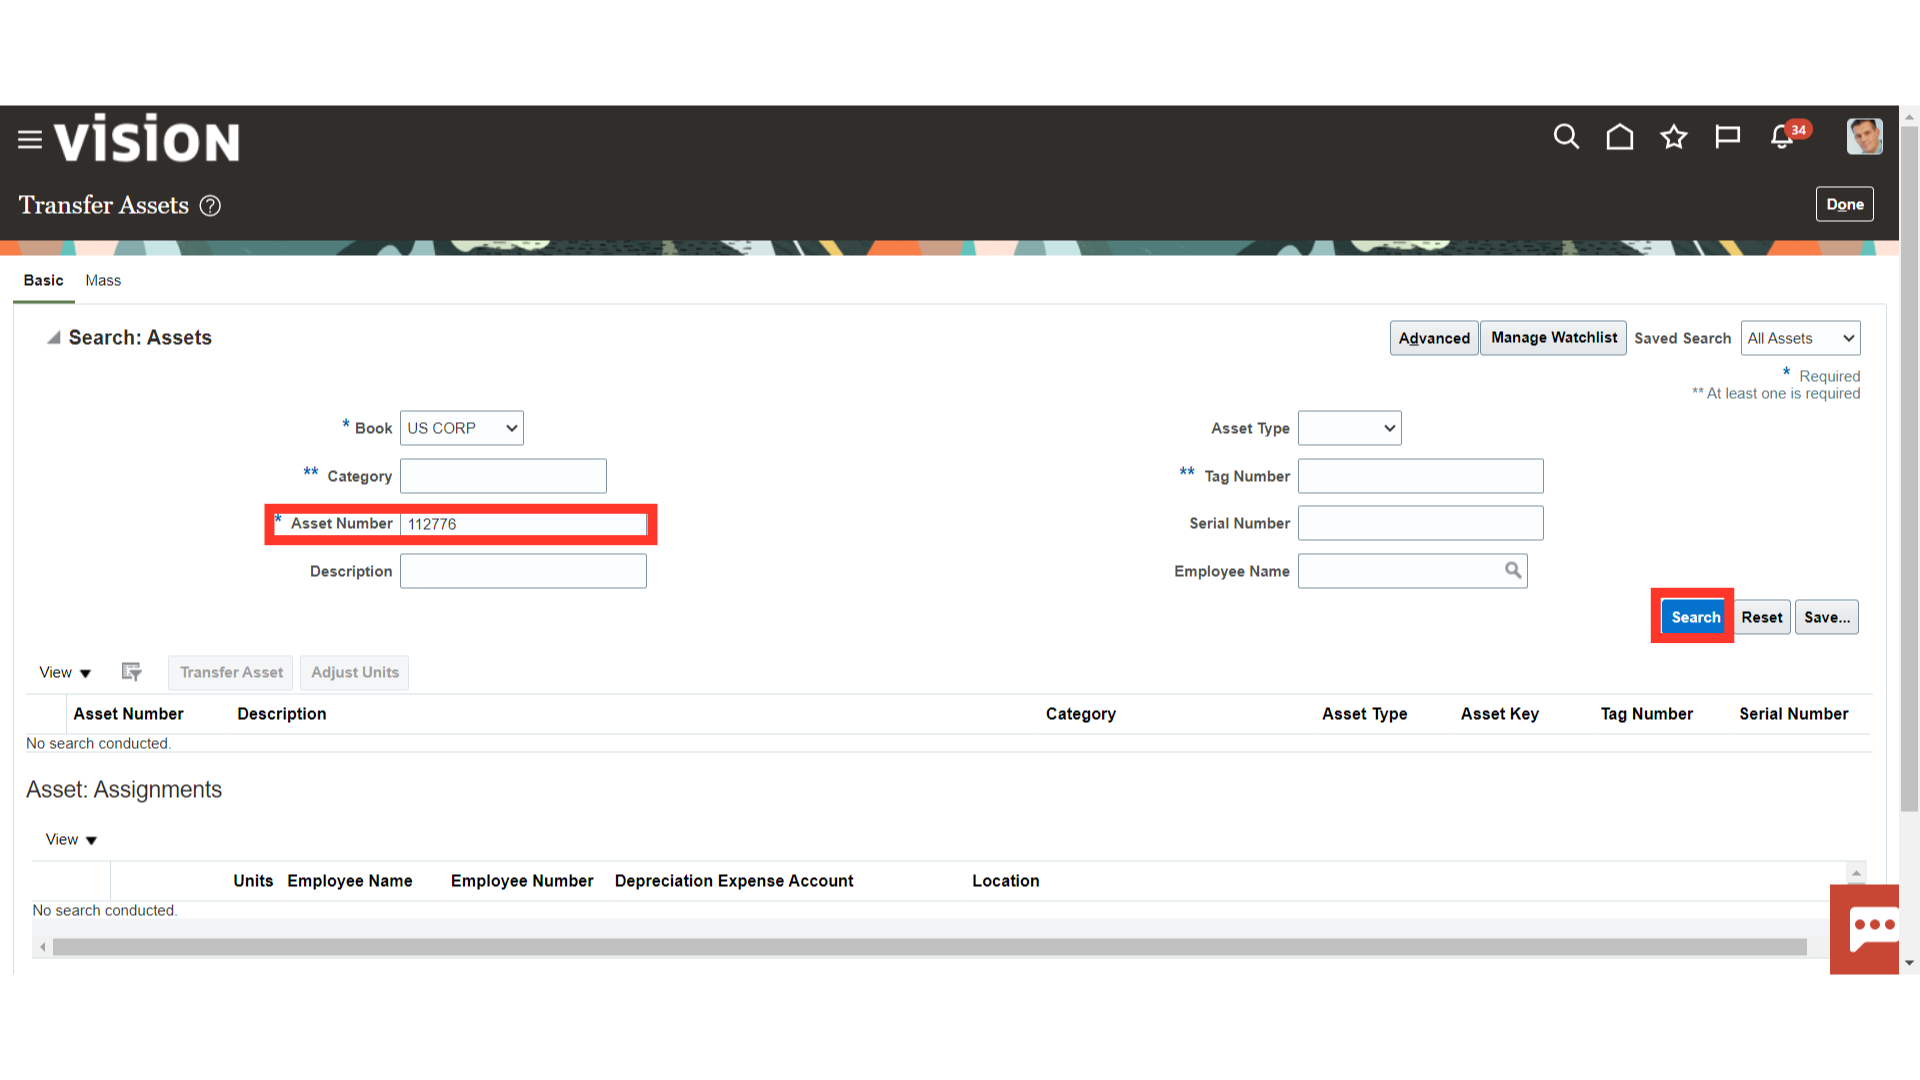
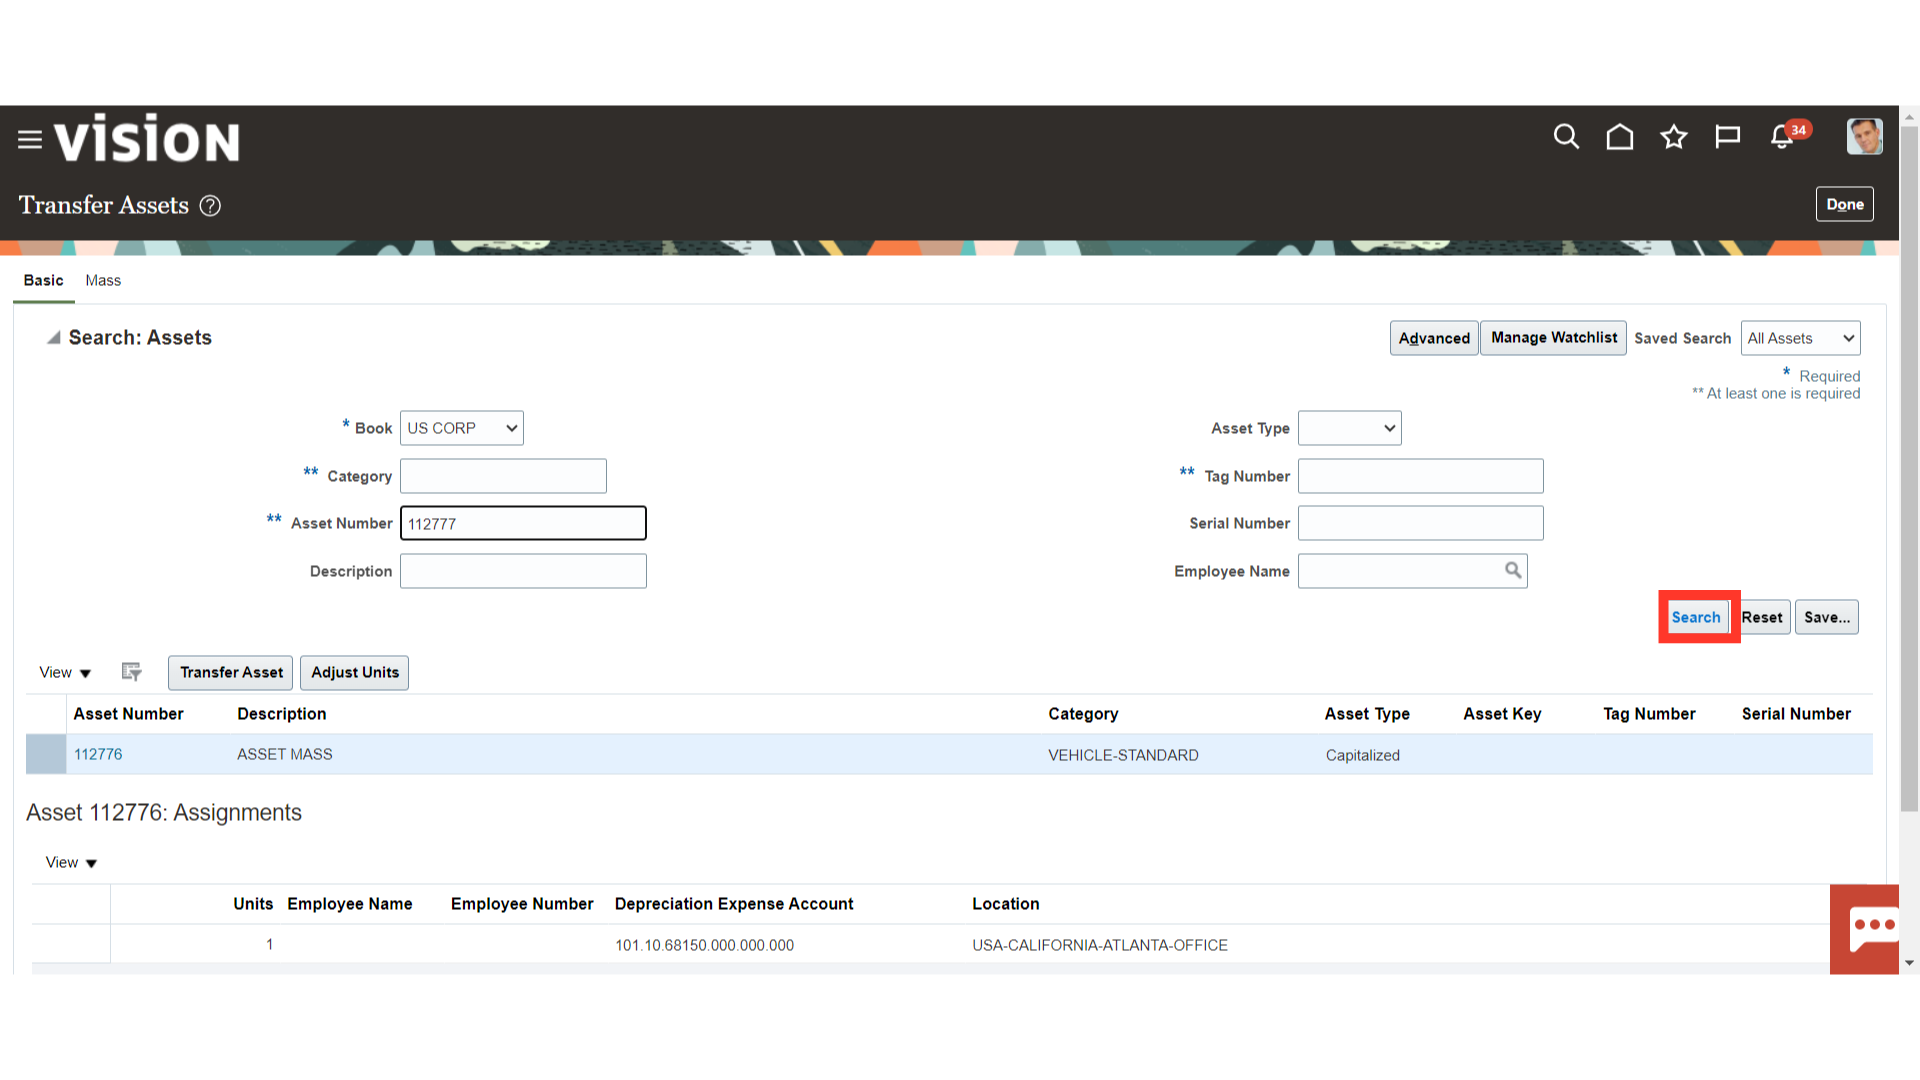
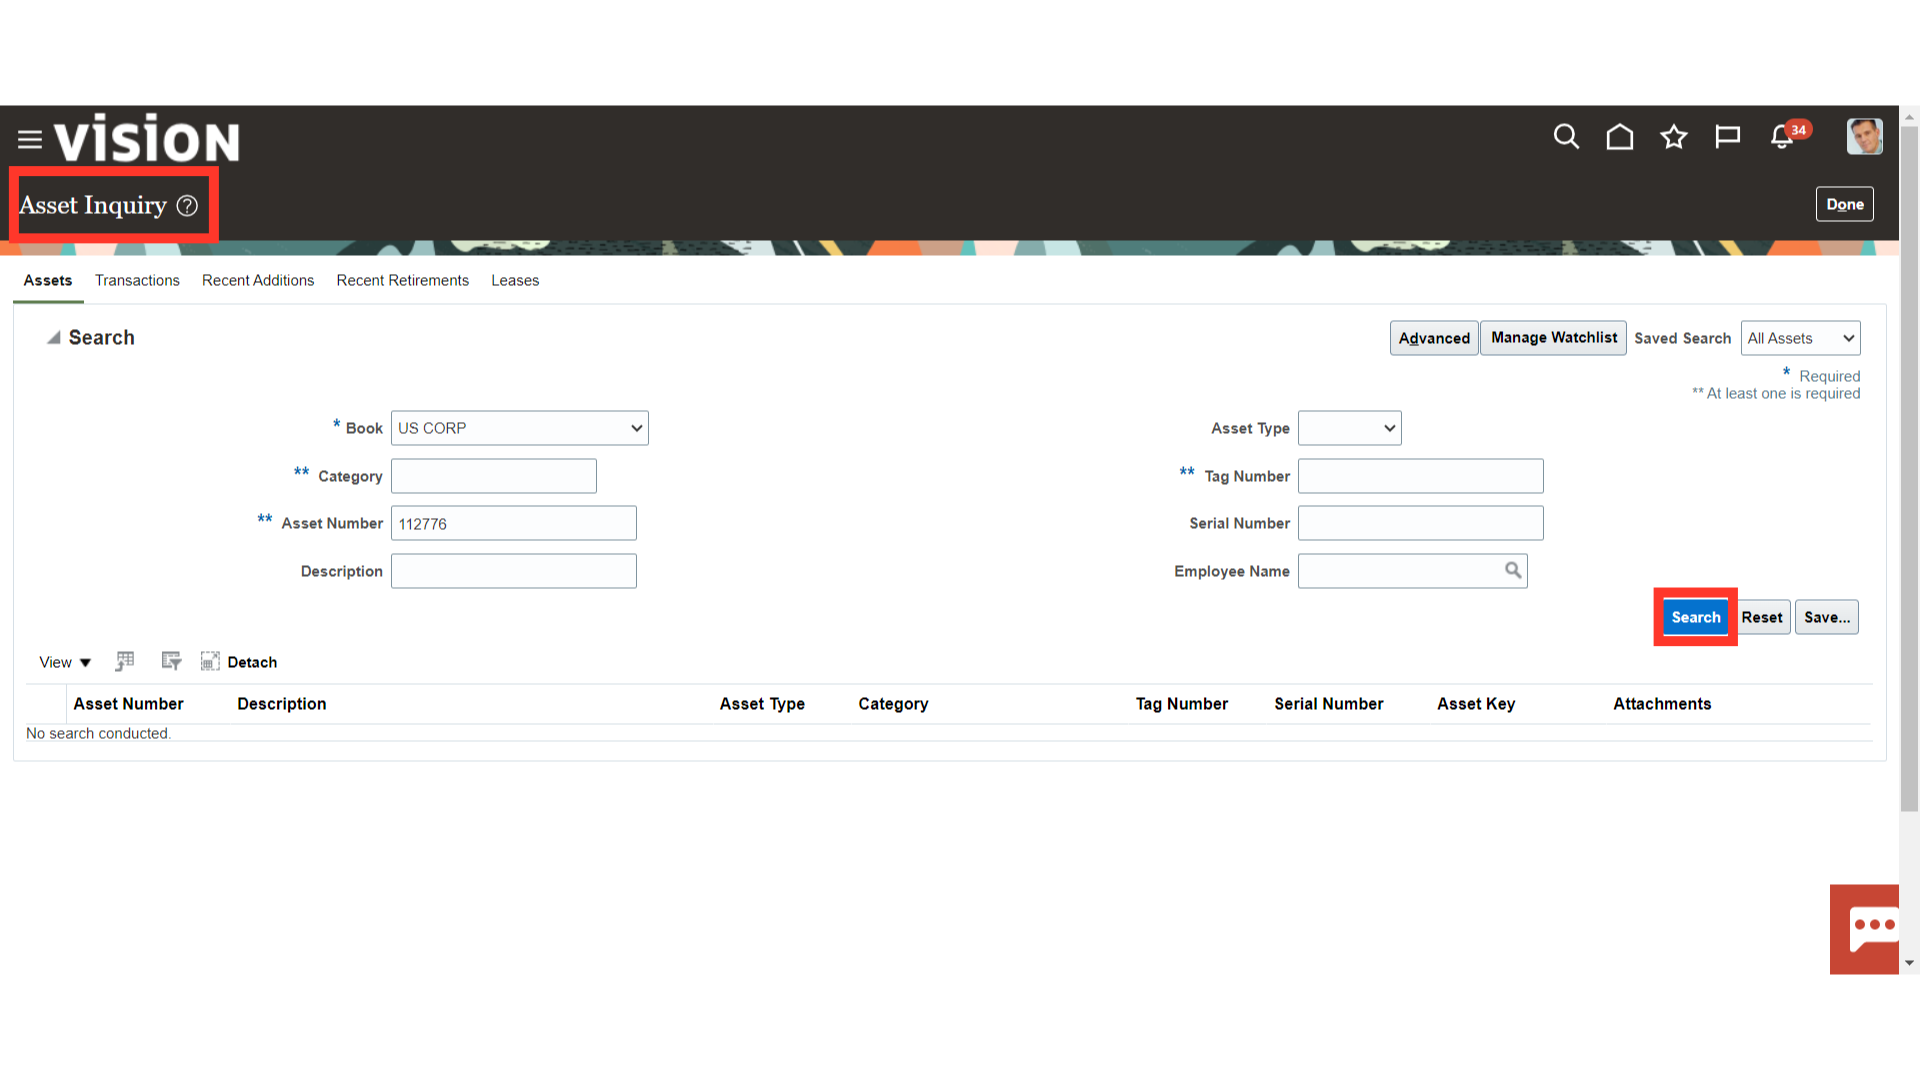
Search for the asset in which the Transfer is to be done. Enter the asset number or other identifying criteria and click on Search.
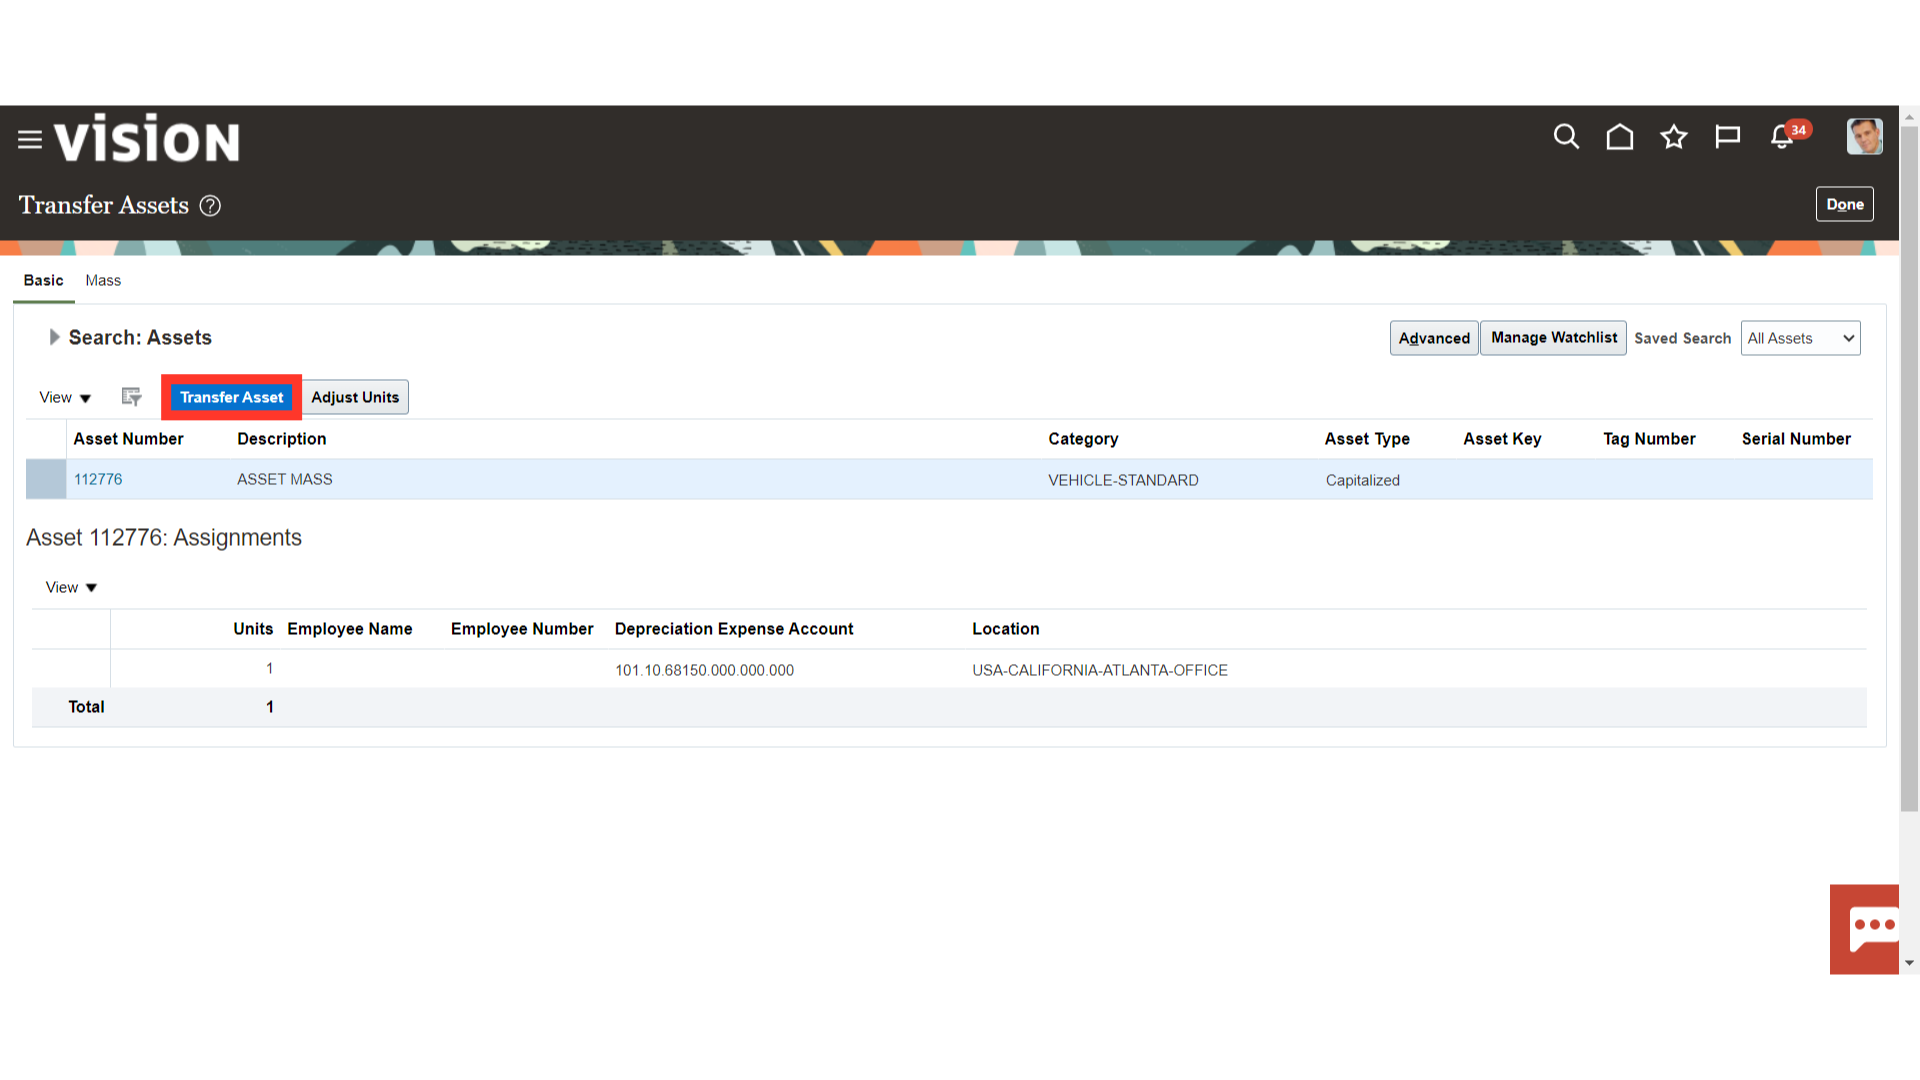
Select the asset row and click on Transfer Assets button.
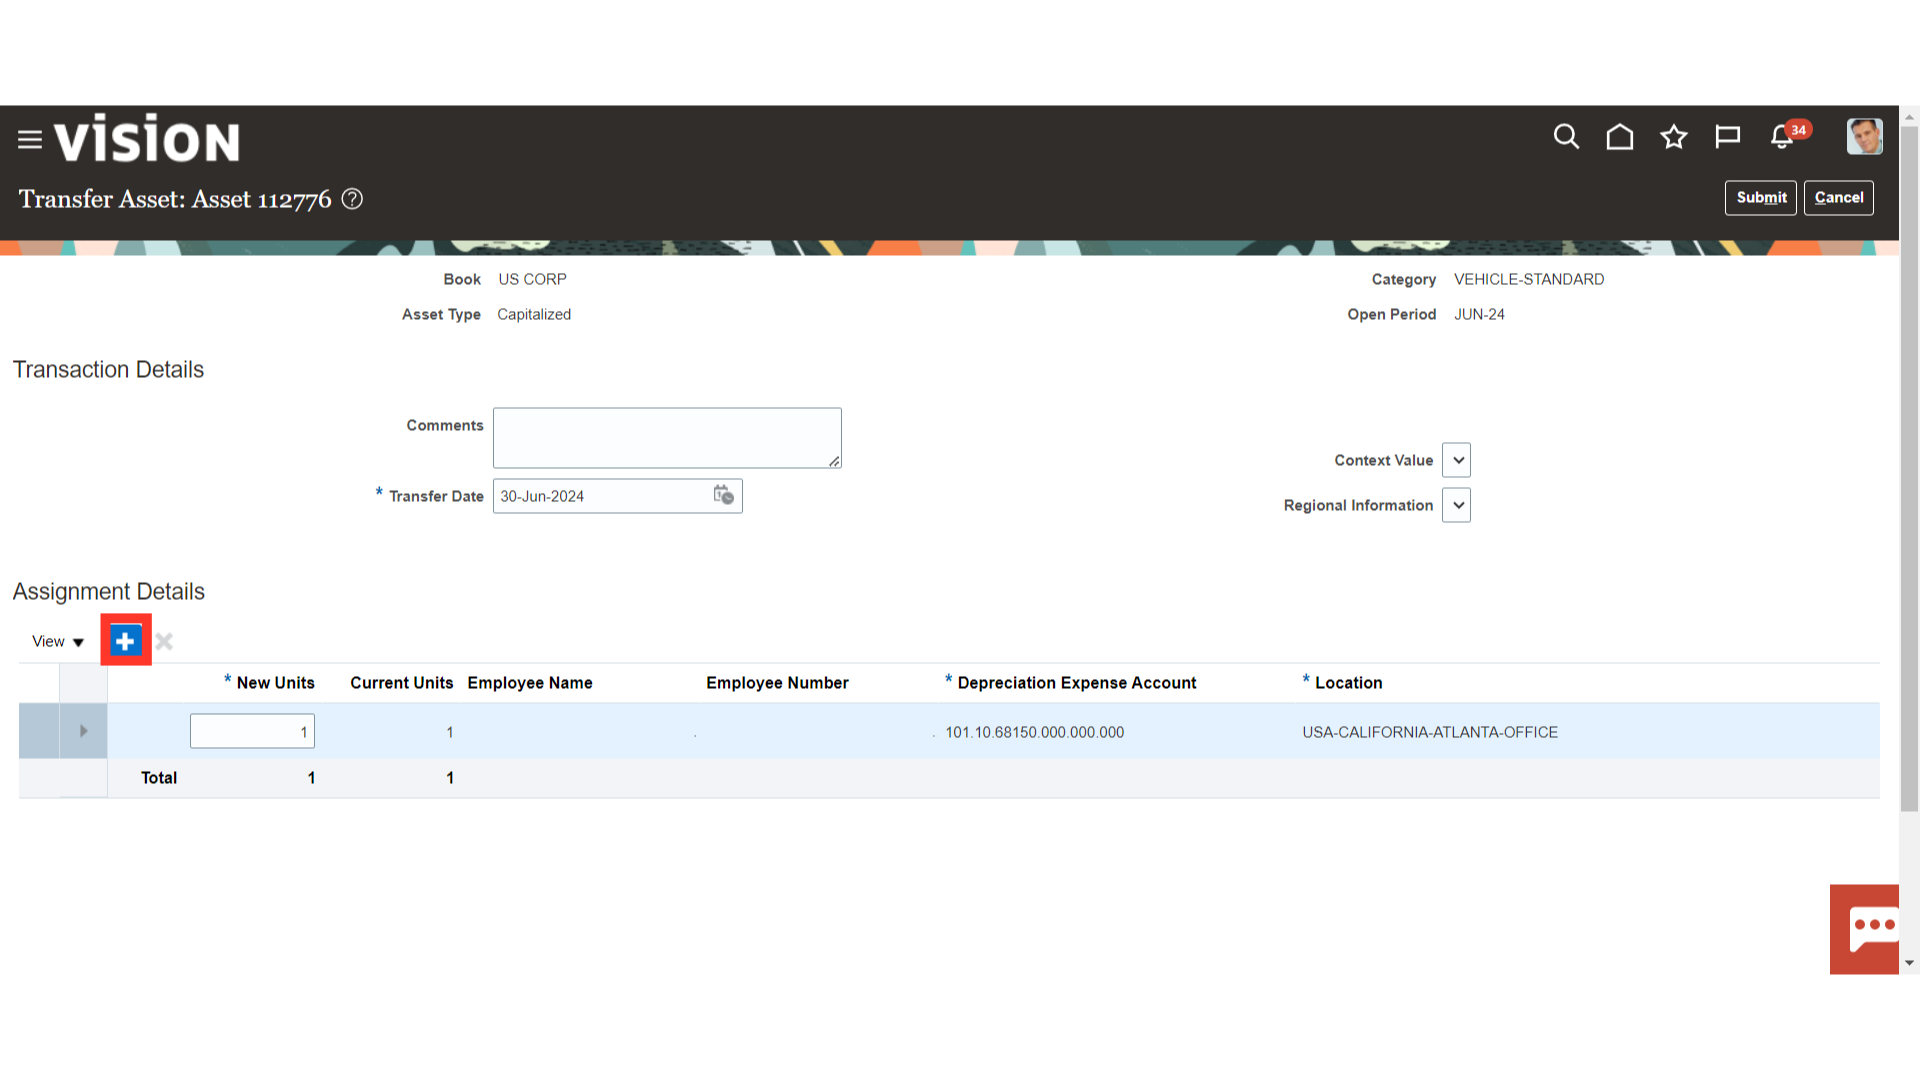
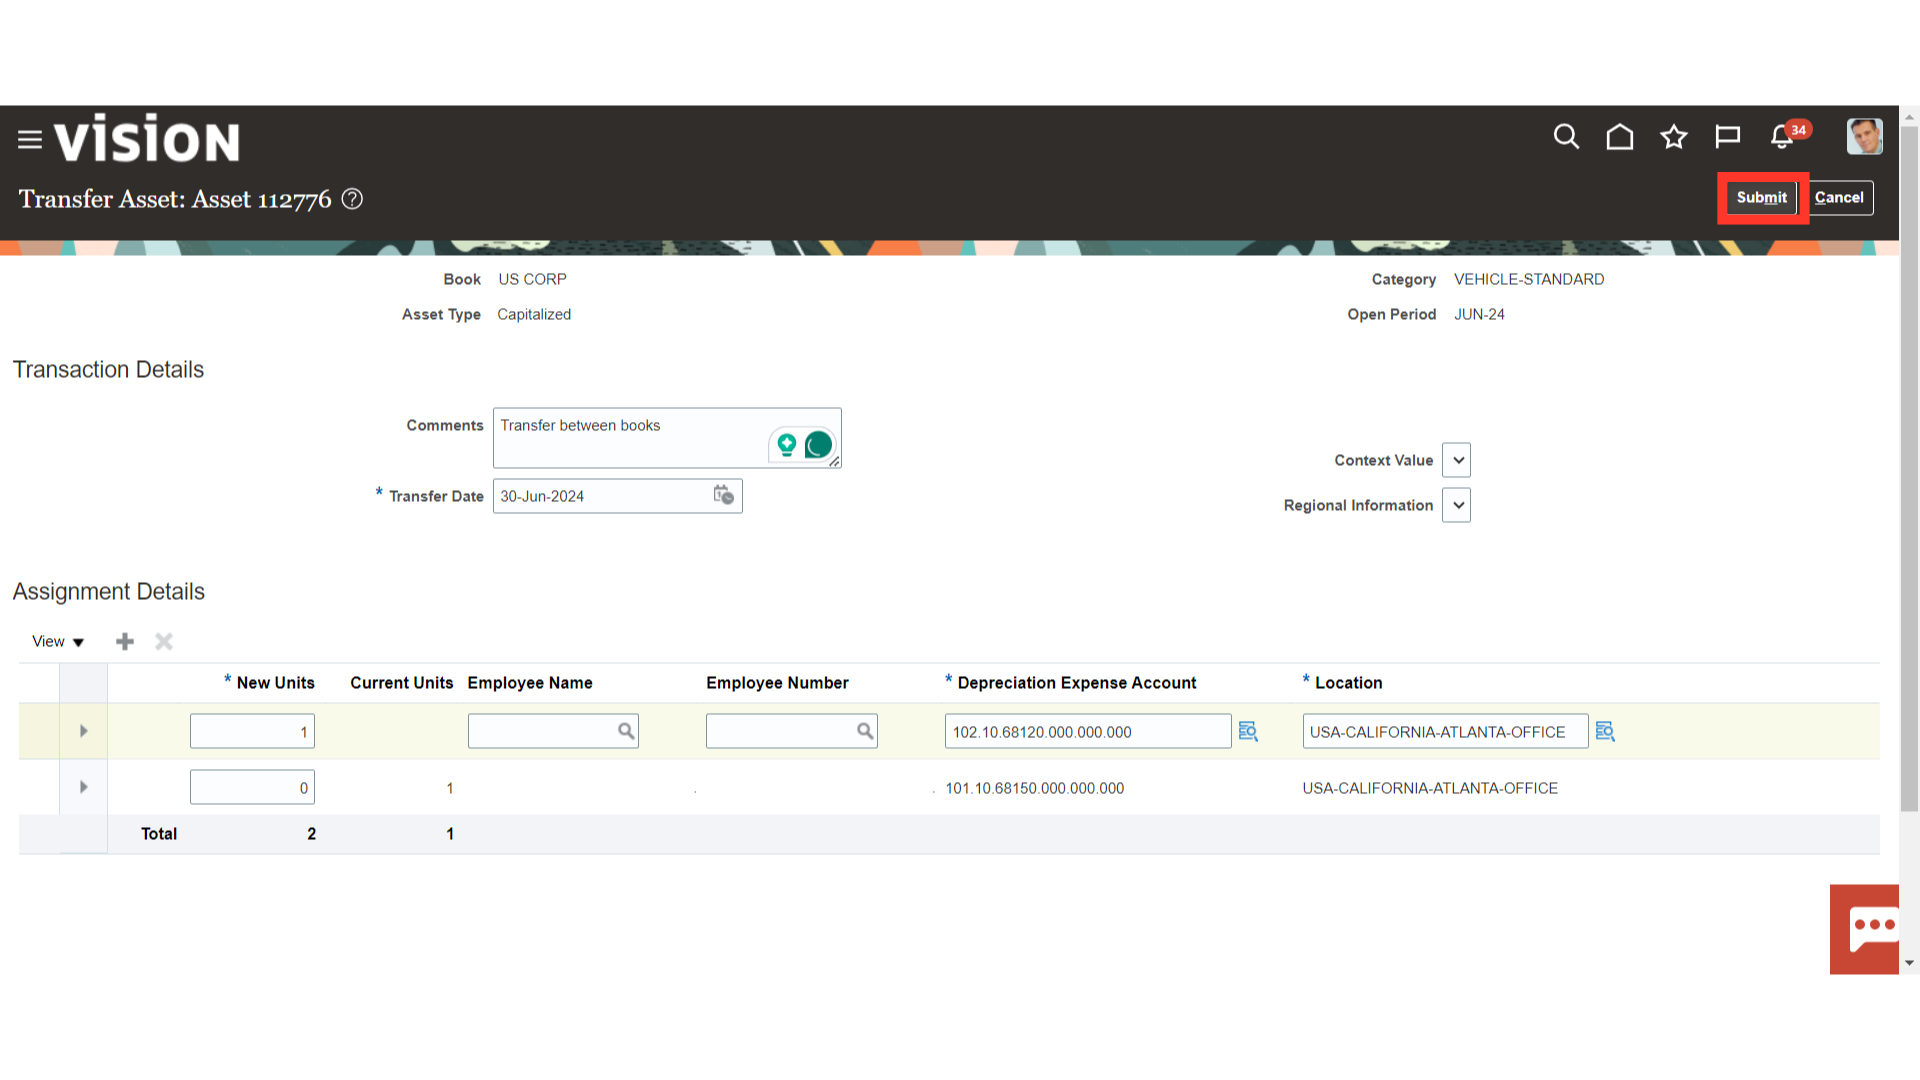
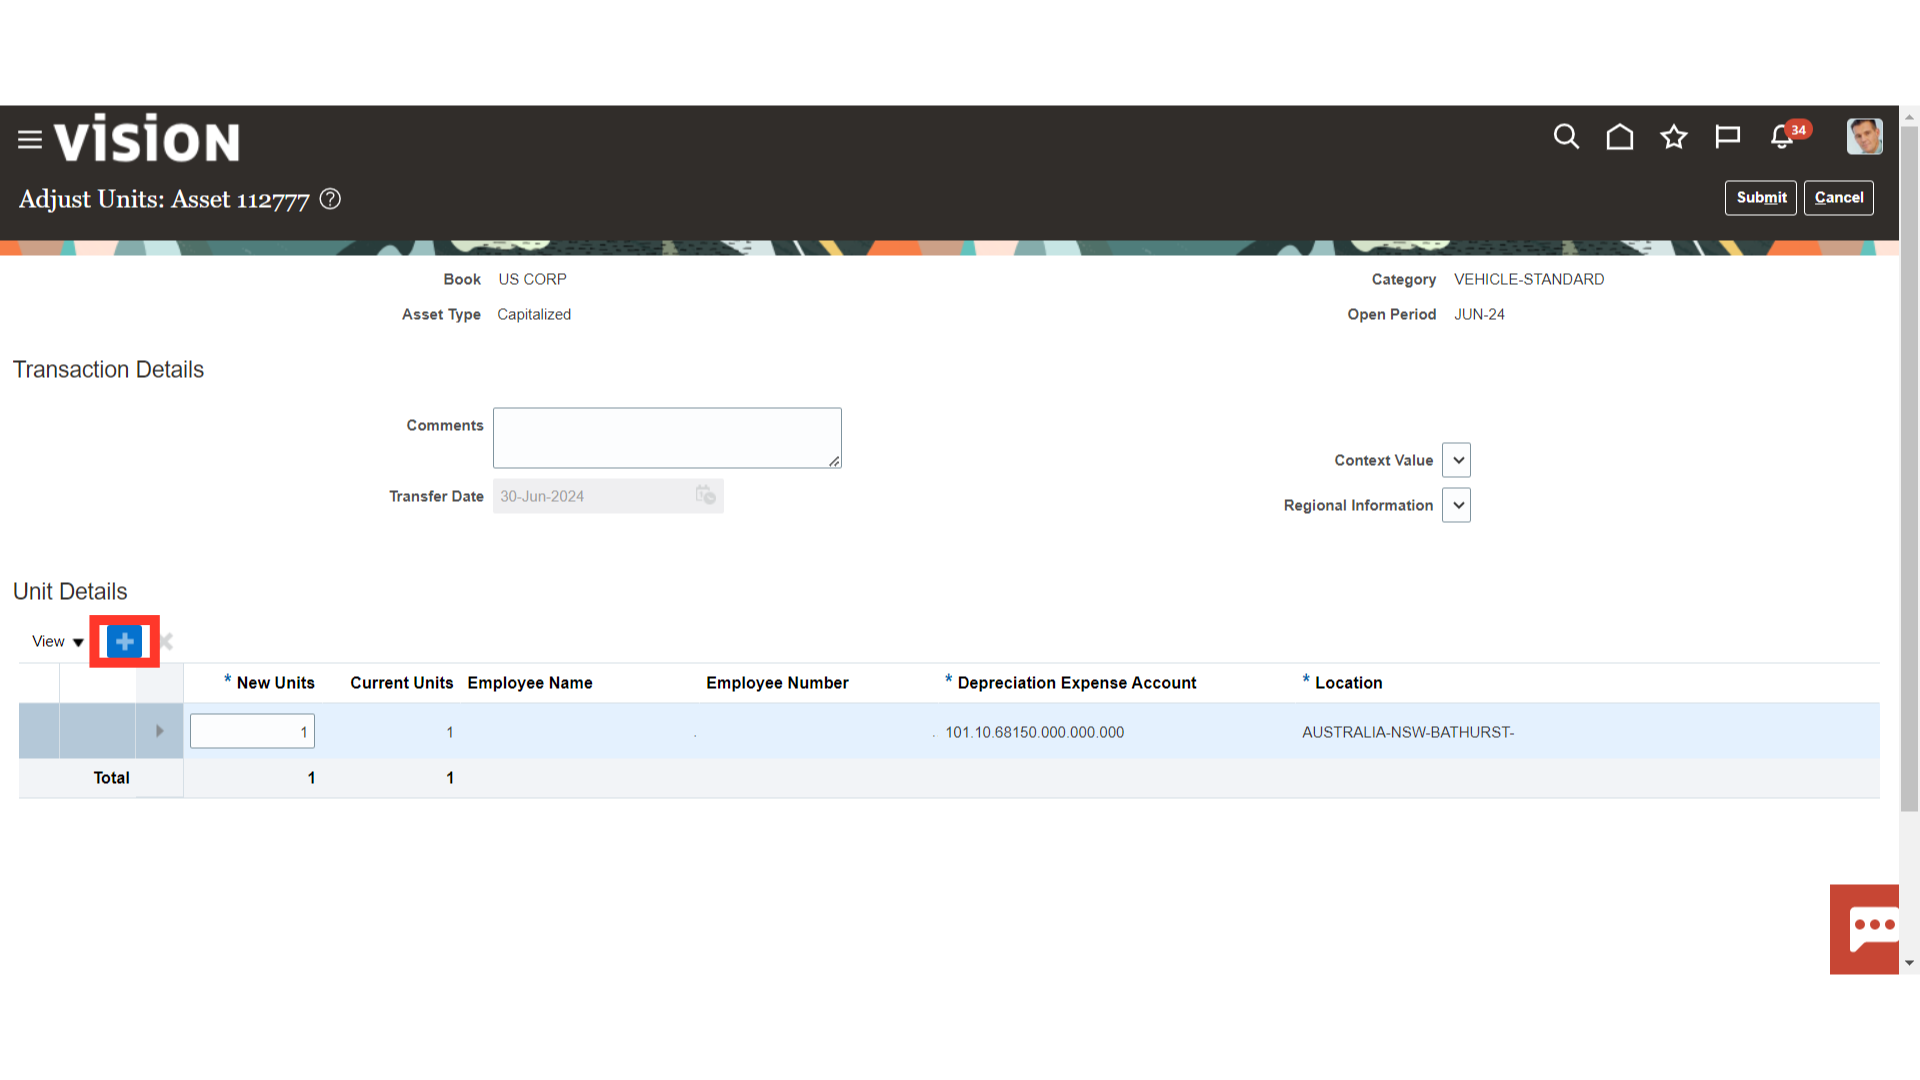
One row will already be available which will contain the details of the current assignment. To add a new assignment click on Plus icon.
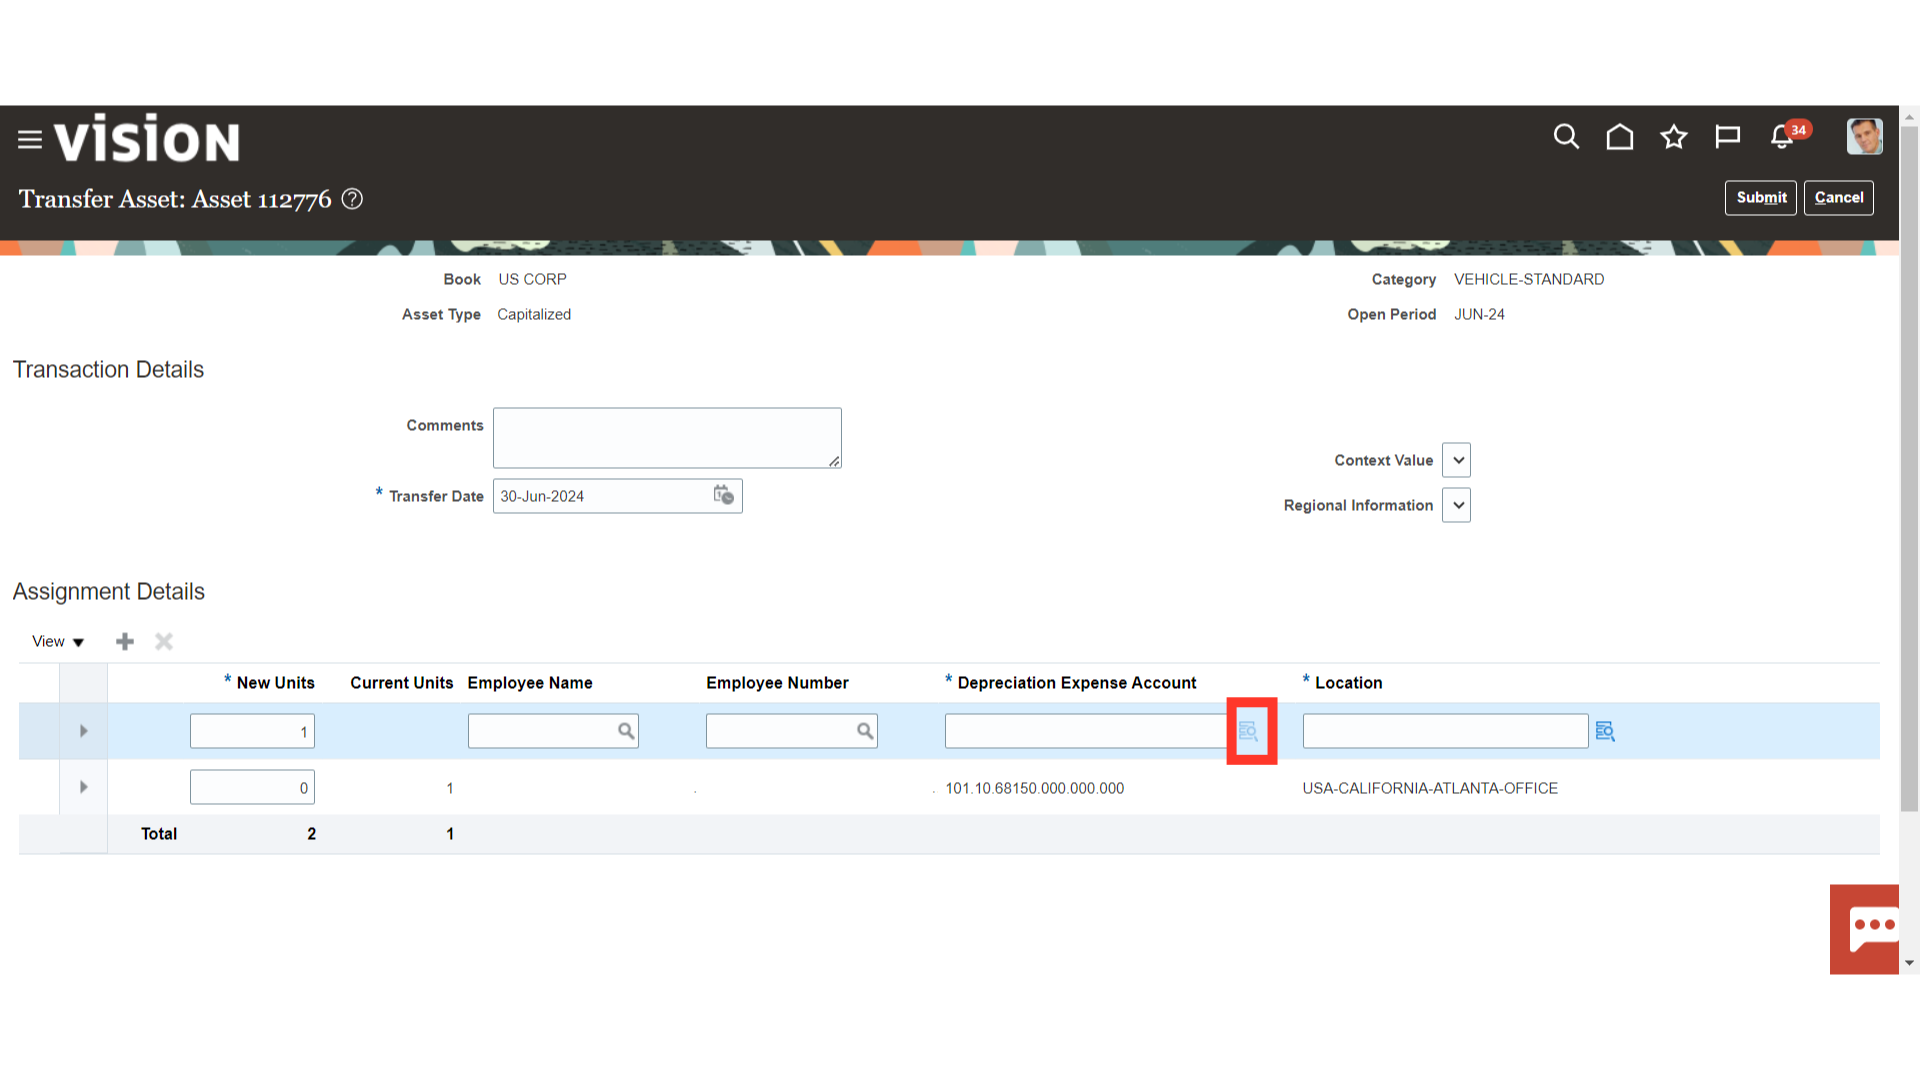
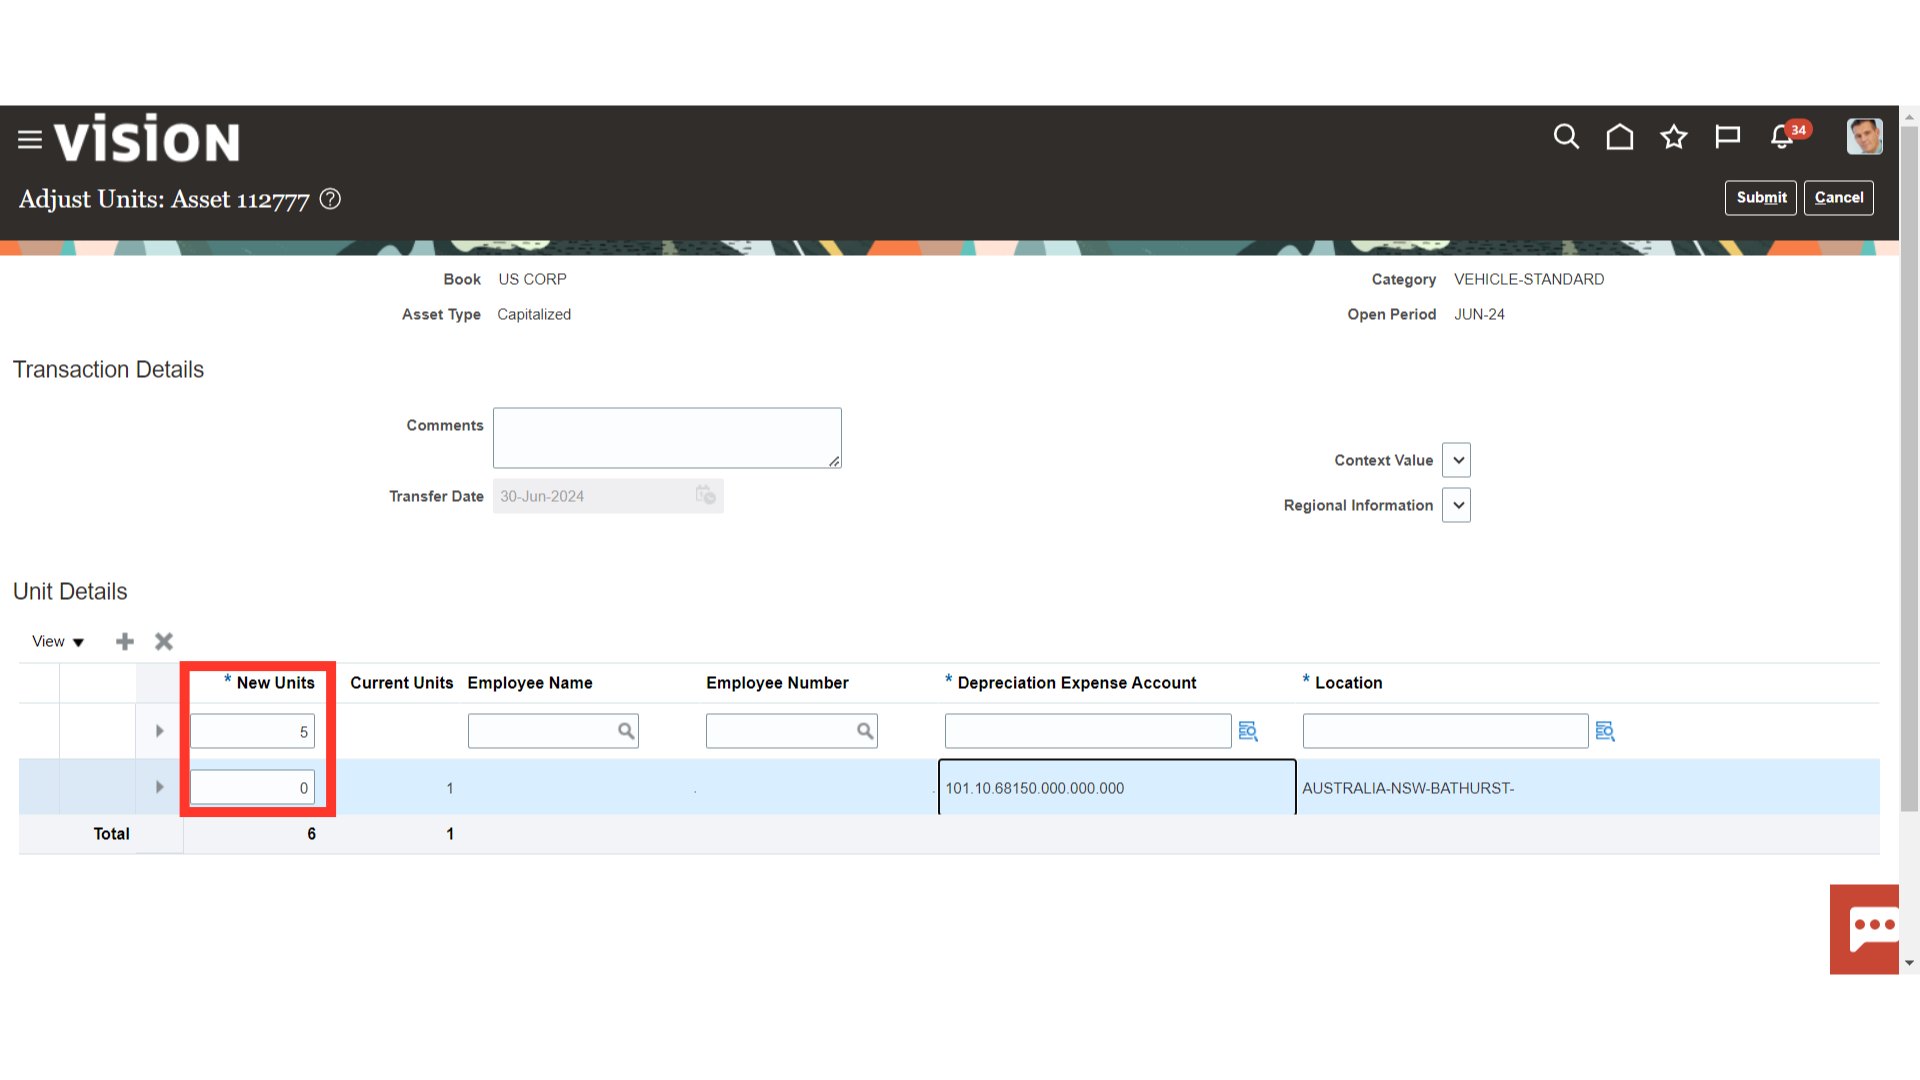
In the New Units enter the number of units for the new assignment. For the old assignment enter ‘0’.

To enter and select the Depreciation Expense Account click on the Select icon.
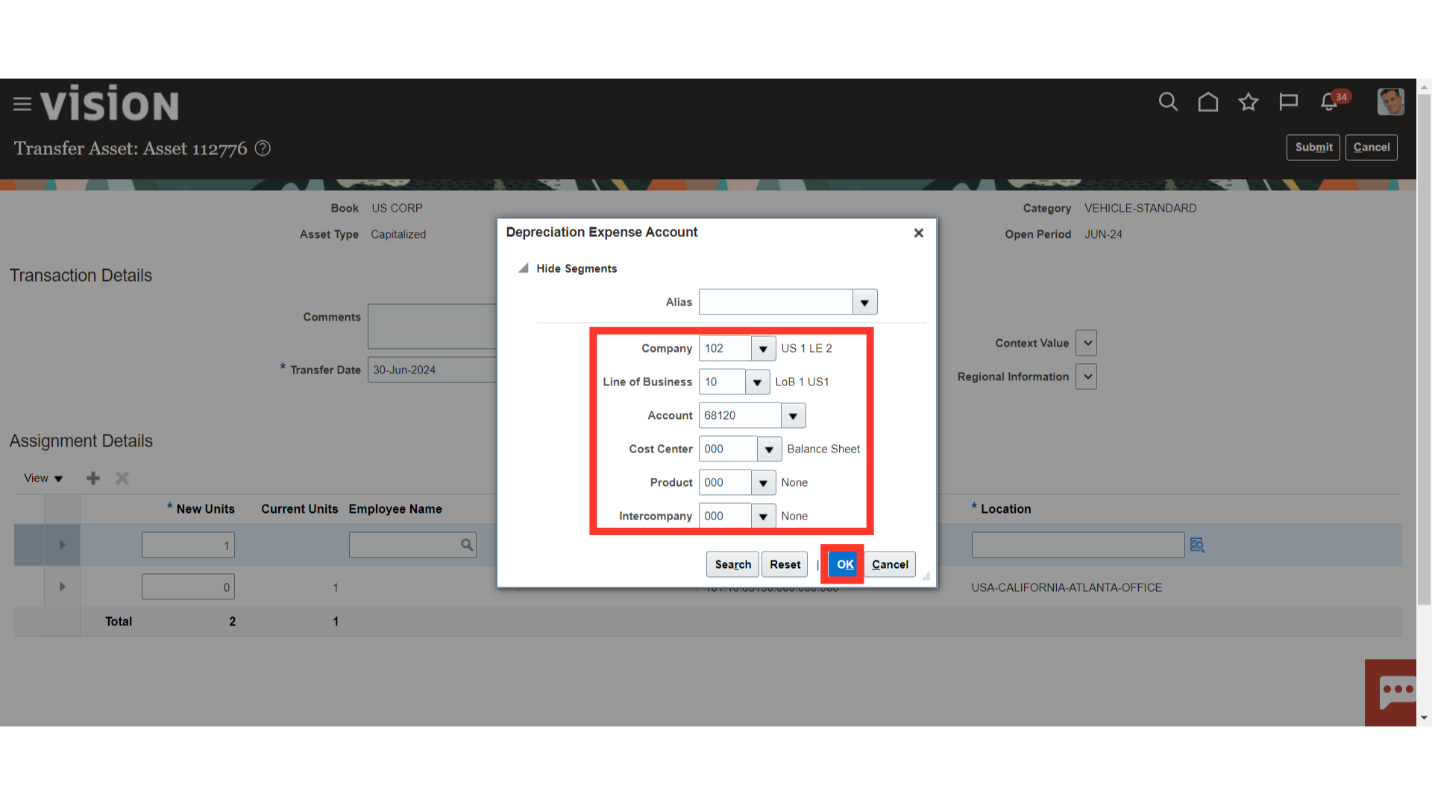
Enter the new required account combination if the change is required. If no change is needed then you may enter the existing combination. Click on OK. This is a mandatory field and should not be left blank.
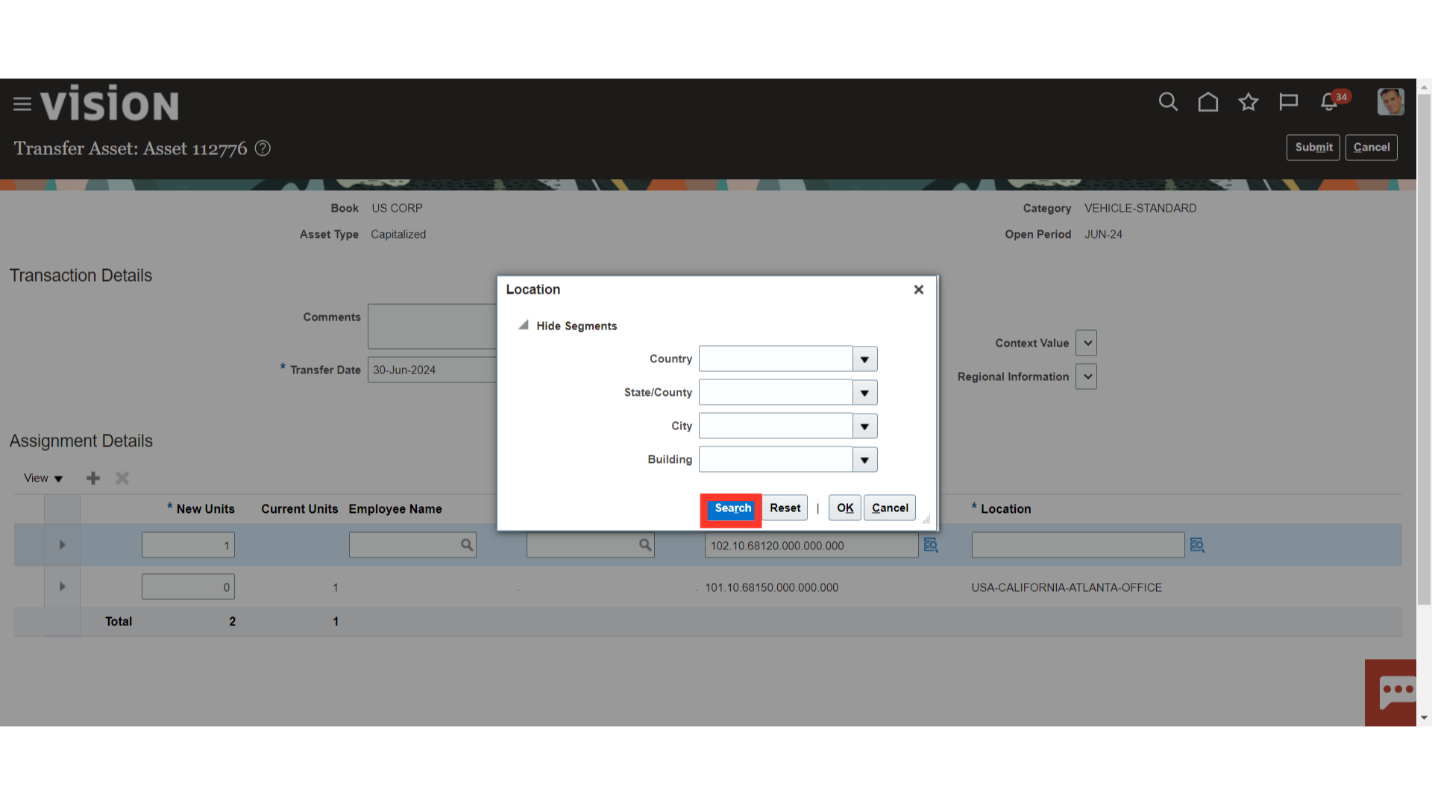
To enter and select the location segments click on the Select icon.
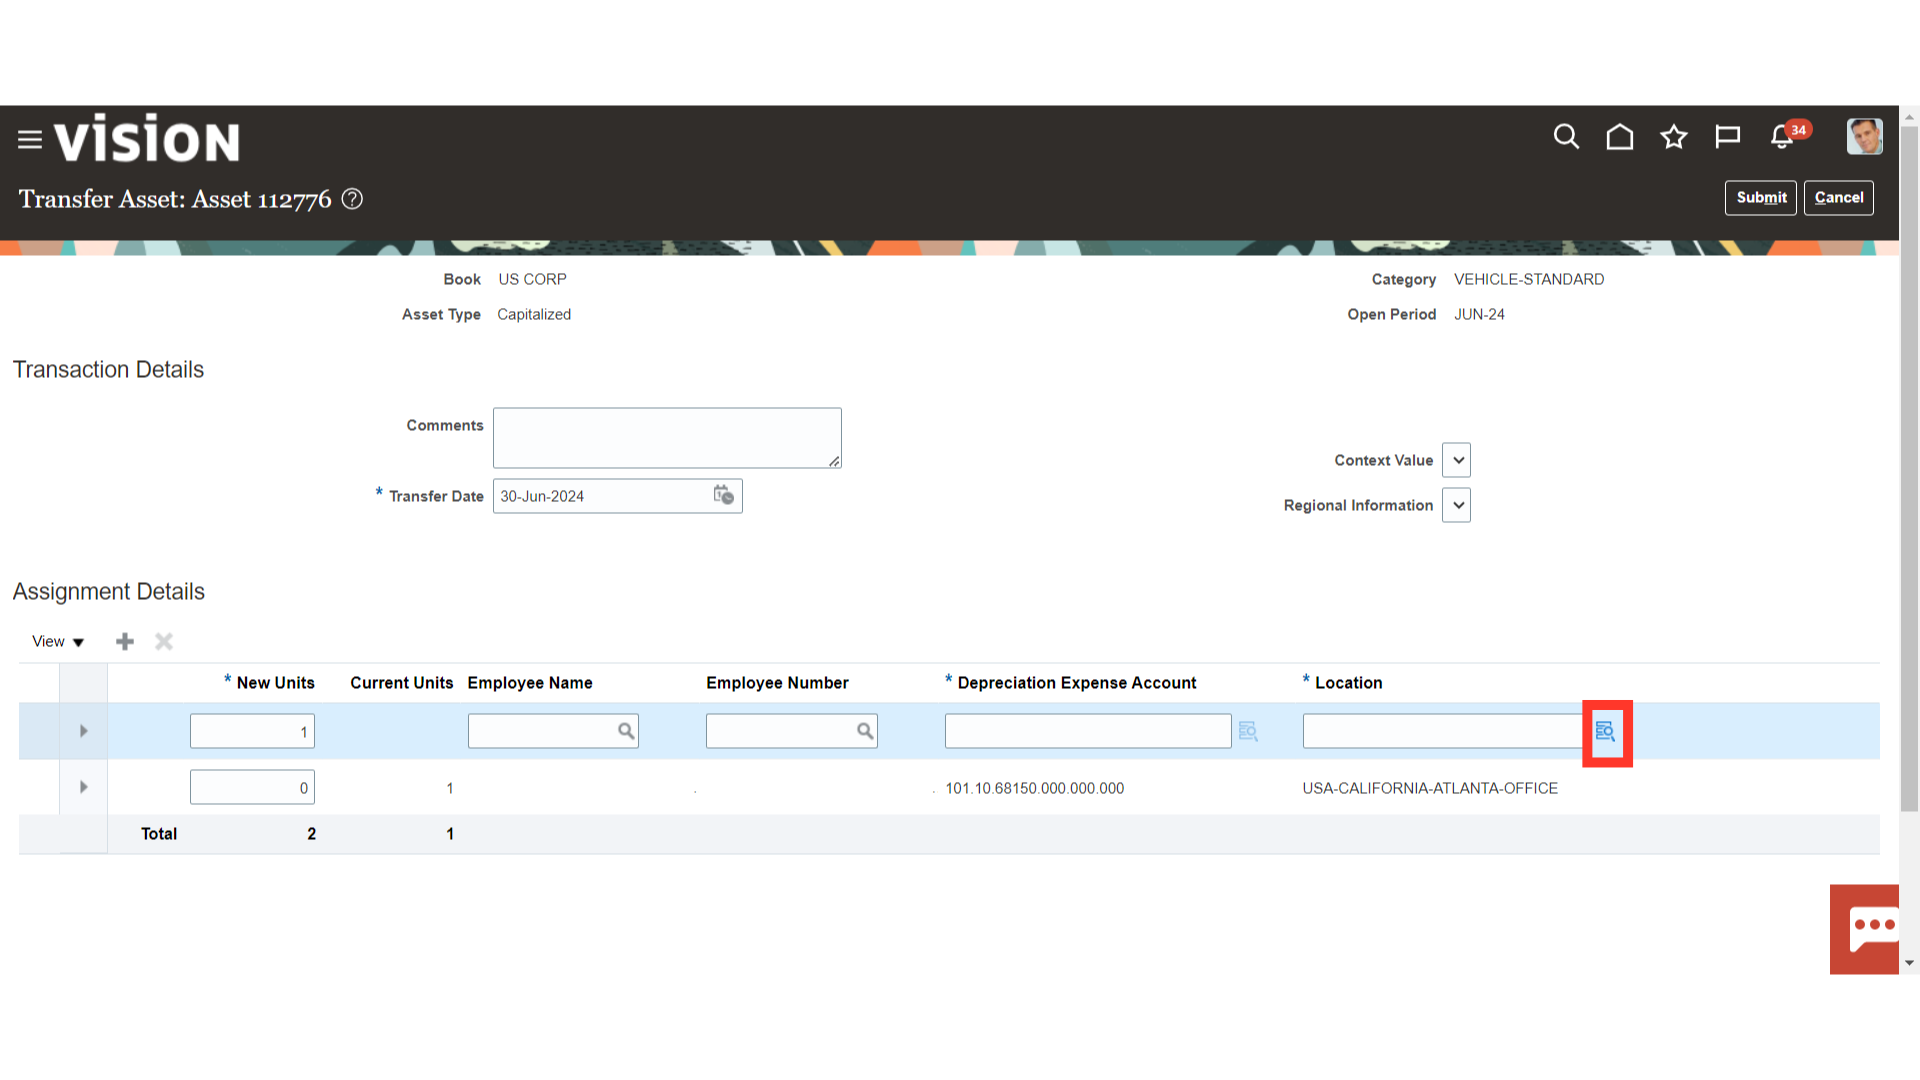
Similar to Depreciation expense you may enter individual segments or if you would want to select from the list of combinations already existing click on Search button.
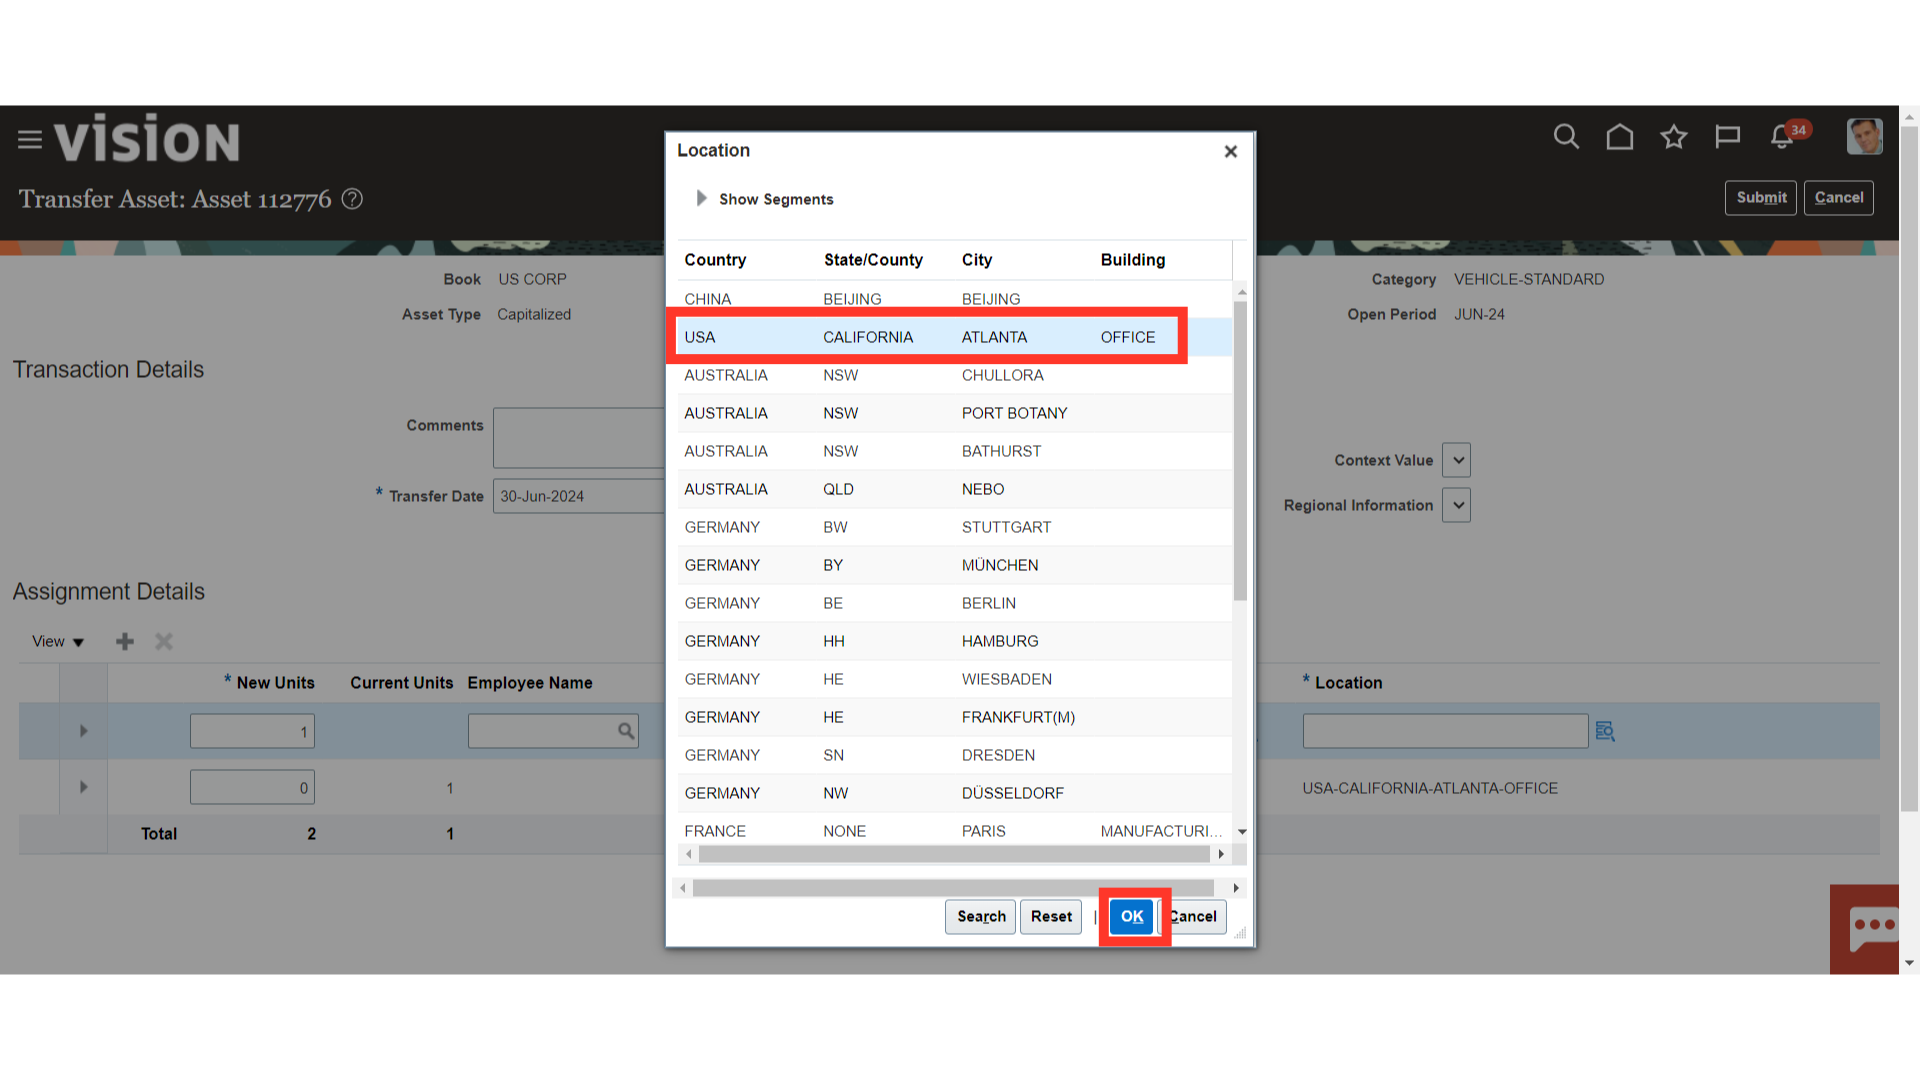
Select from the available list of combinations and click on OK.
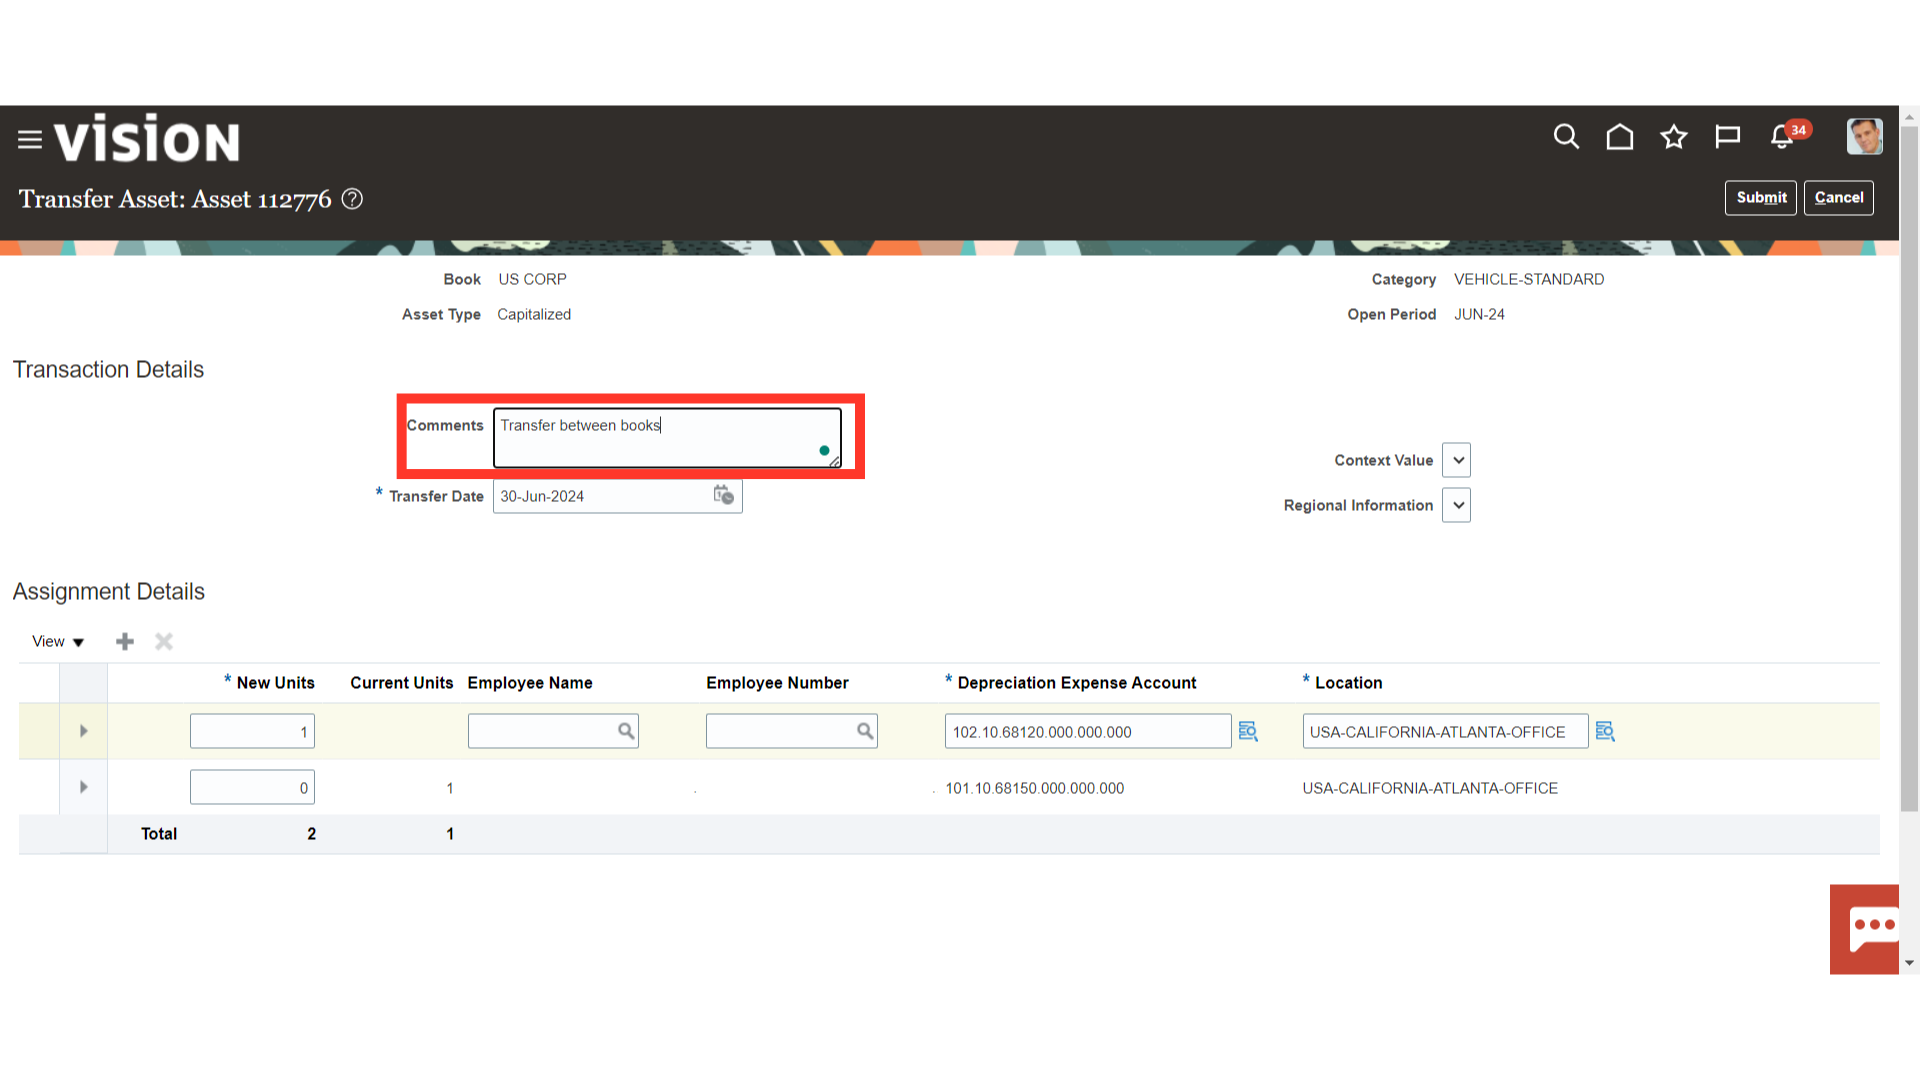
If any notes or comments are required enter in the comments field highlighted.
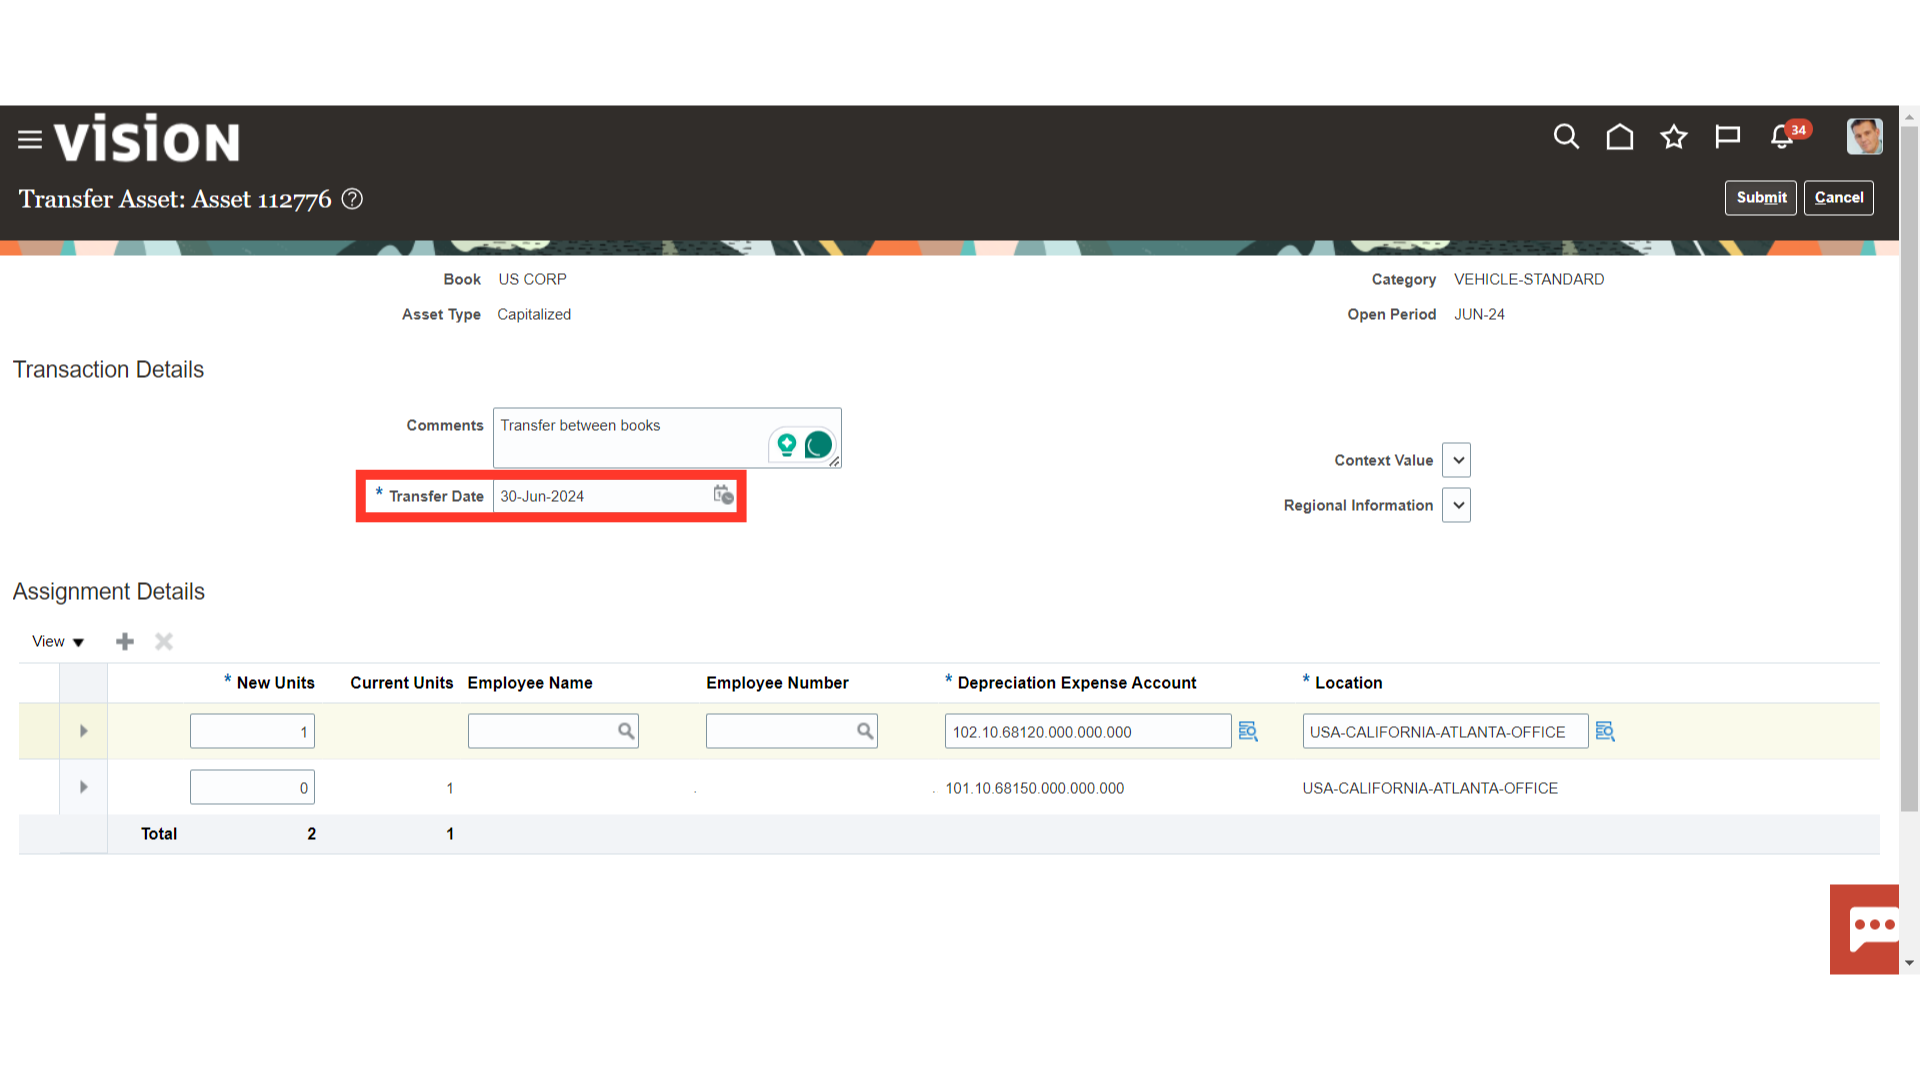
The transfer date will be by default the current system date. You may edit it to another date of the current open period.
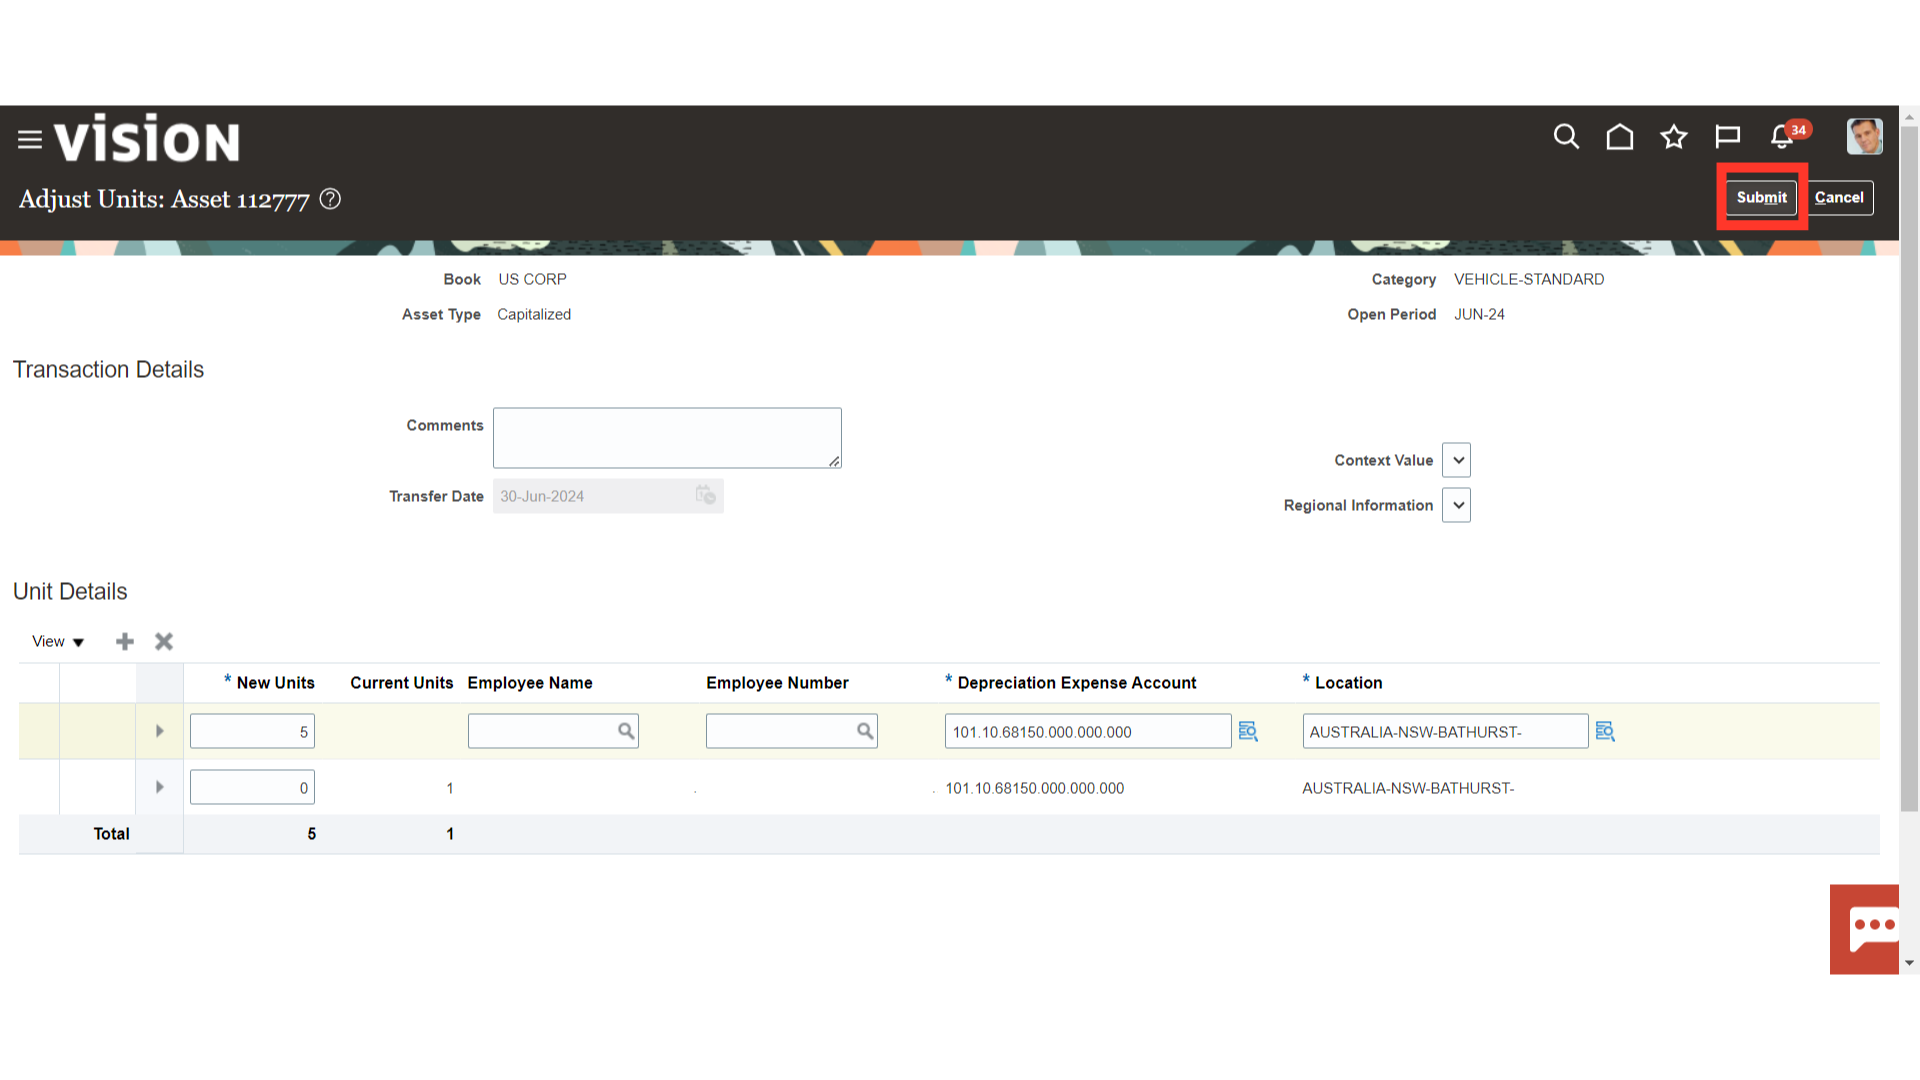
After the assignments are entered click on Submit.
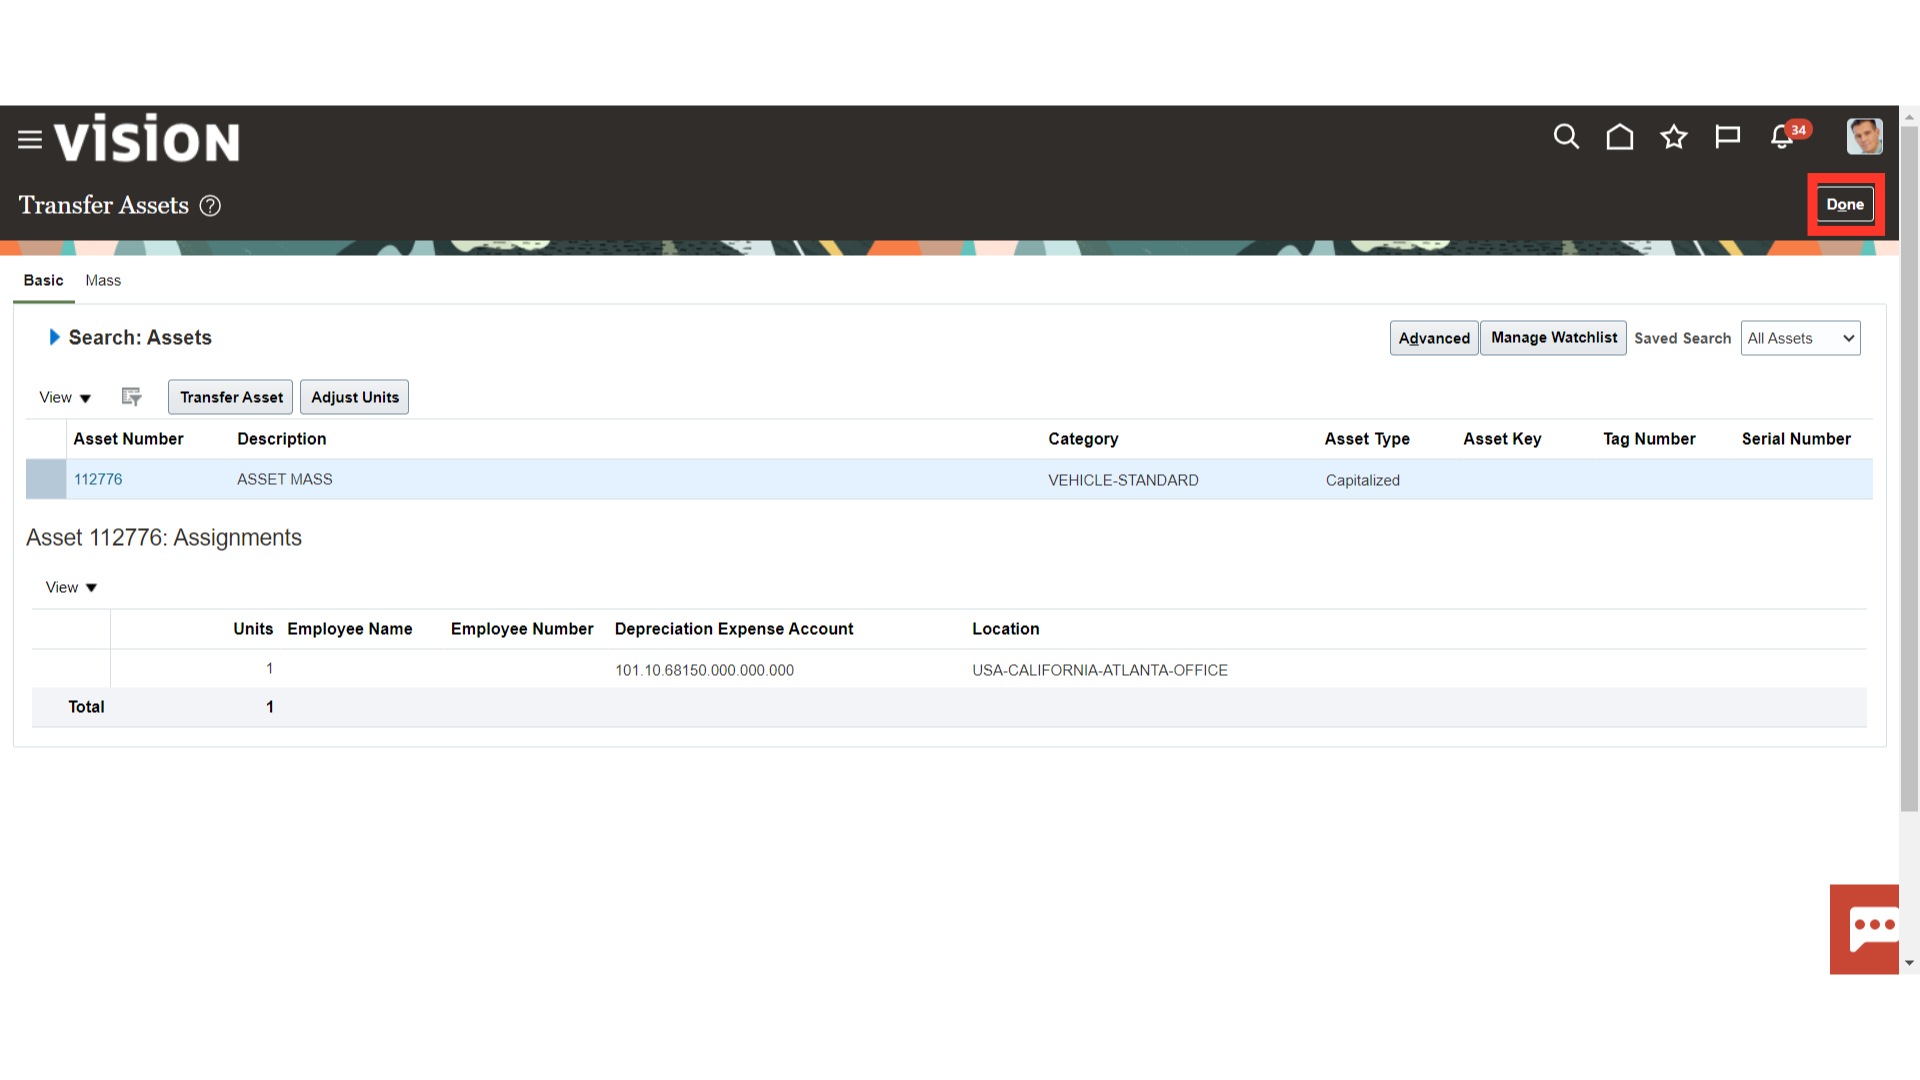
Click on Done.
To change the number of units for a particular asset and its assignment, navigate to Transfer Assets. On the Assets work area, expand the tasks icon and then select ‘Transfer Assets’ from the list available.
Search for the asset for which the number of units are to be adjusted enter the asset number or other identifying criteria and click on Search.
Select the assets row and click on Adjust Units.

One row will already be available which will contain the details of the current assignment and the respective current no of units. To edit the number of units for a particular assignment click on Plus icon.
In the New units column, enter the new number of units for a particular assignment (old and new both). It may be more or less than current number of units.
The Employee name, Depreciation Expense Account and Location segments have to be same as the current assignment. Any new value in these fields will not be accepted.

Submit the form.
Click on Done.

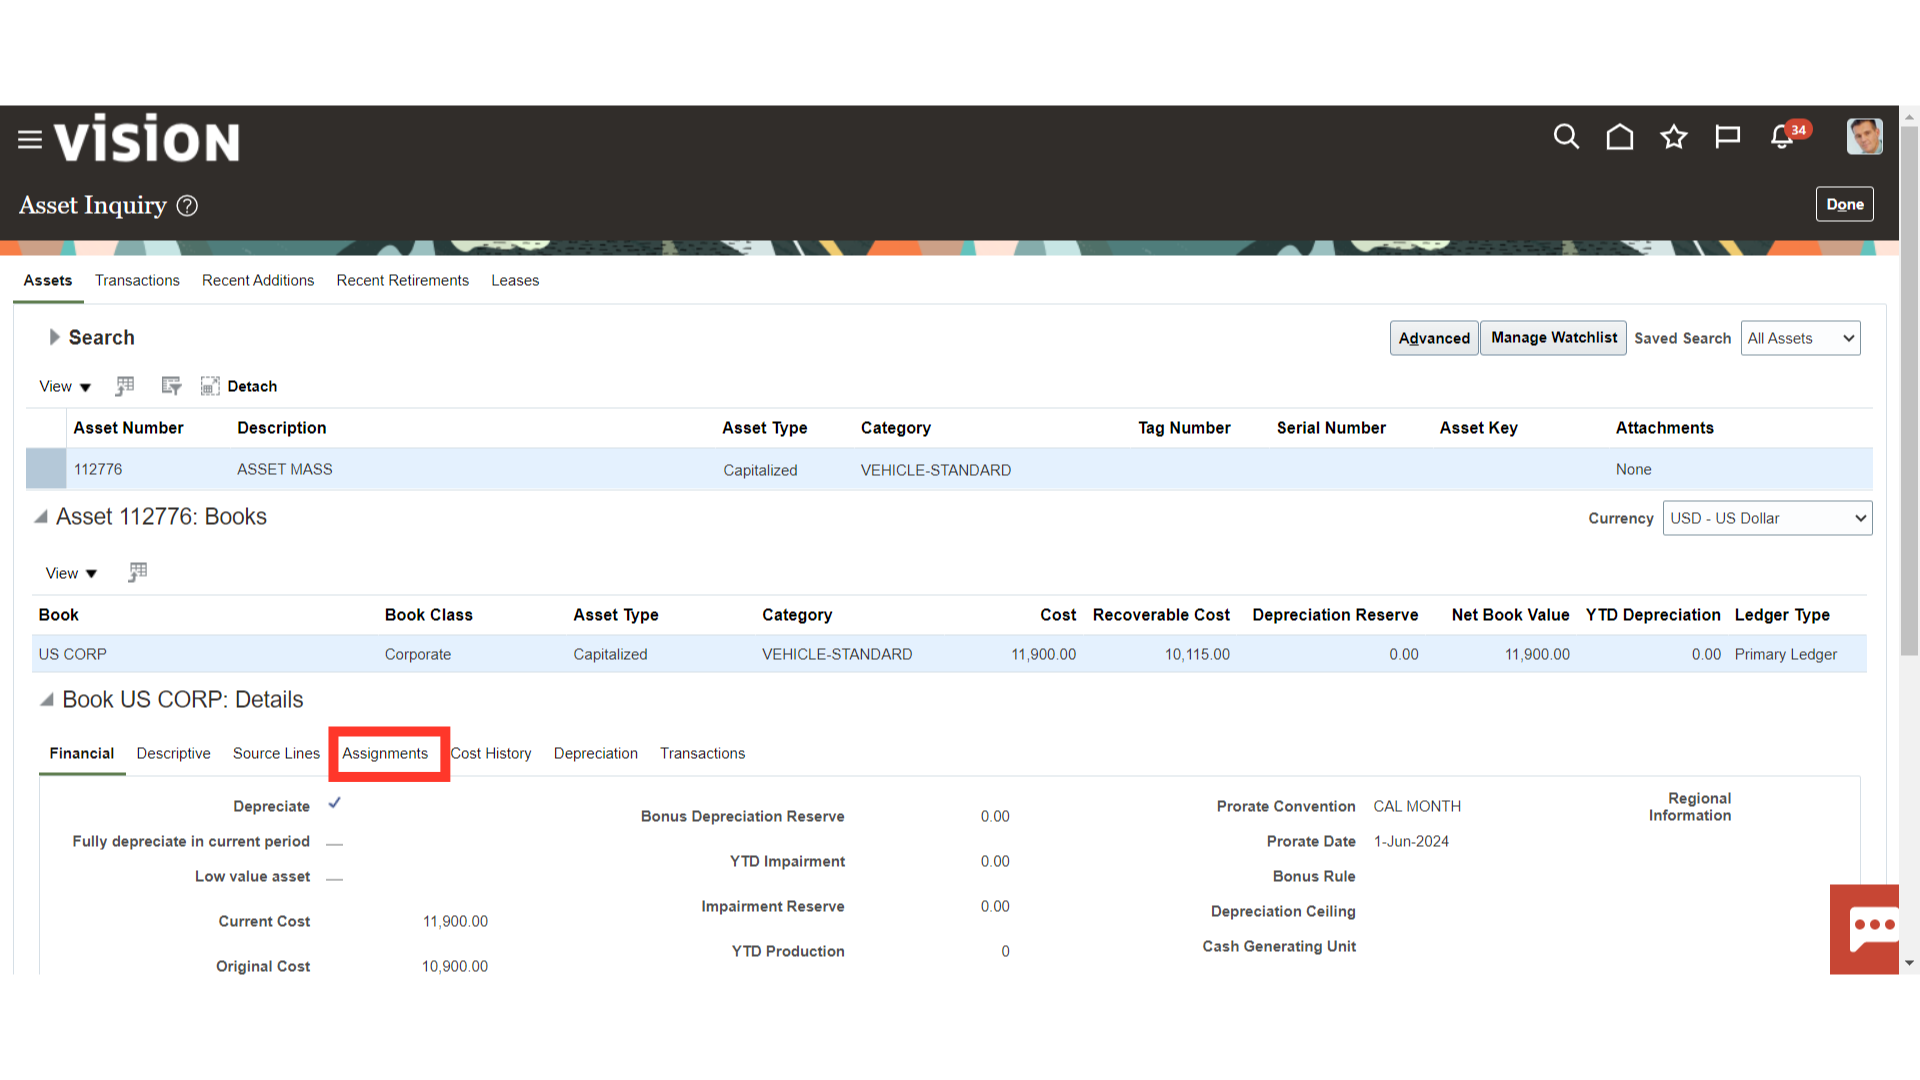
To check the transactions submitted, navigate to Inquire Assets page and search for the asset.
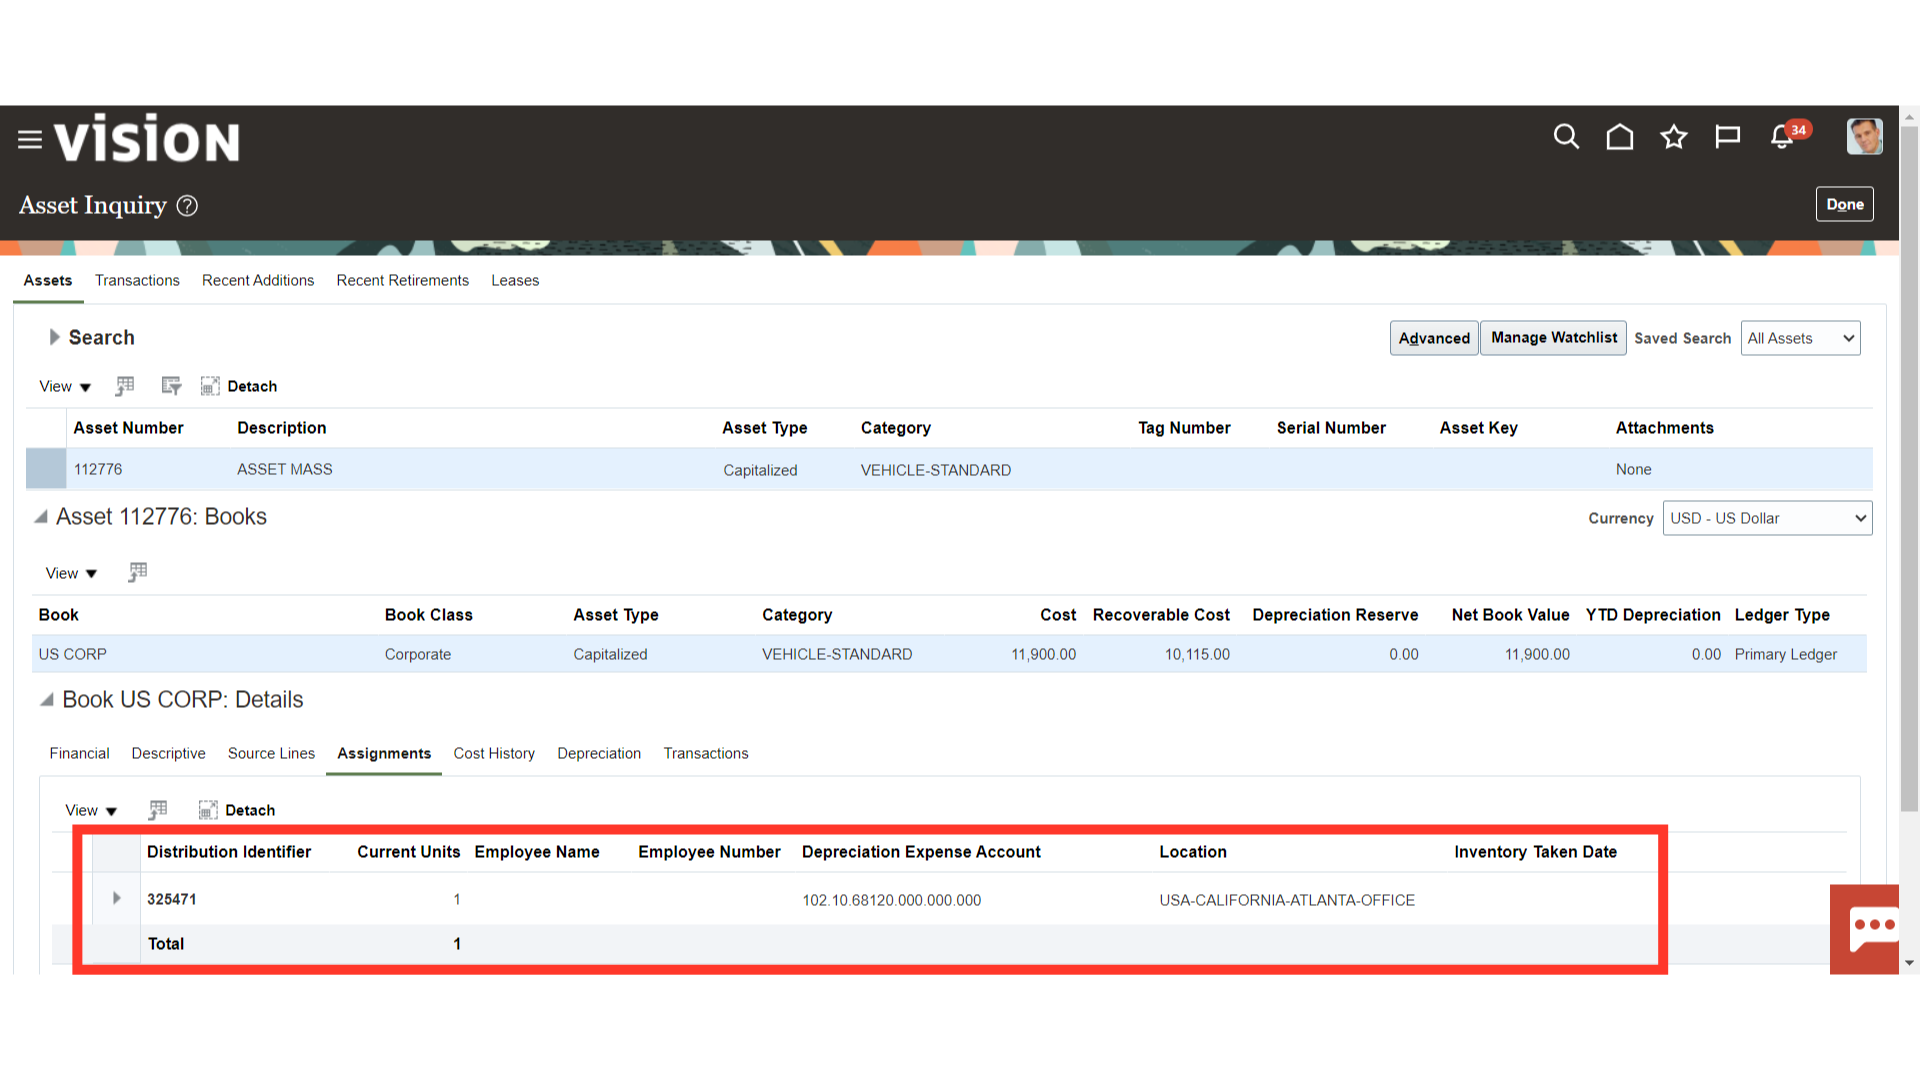
Click on The Assignments tab to check the assignment details.
The update to the assignments will be reflected here.
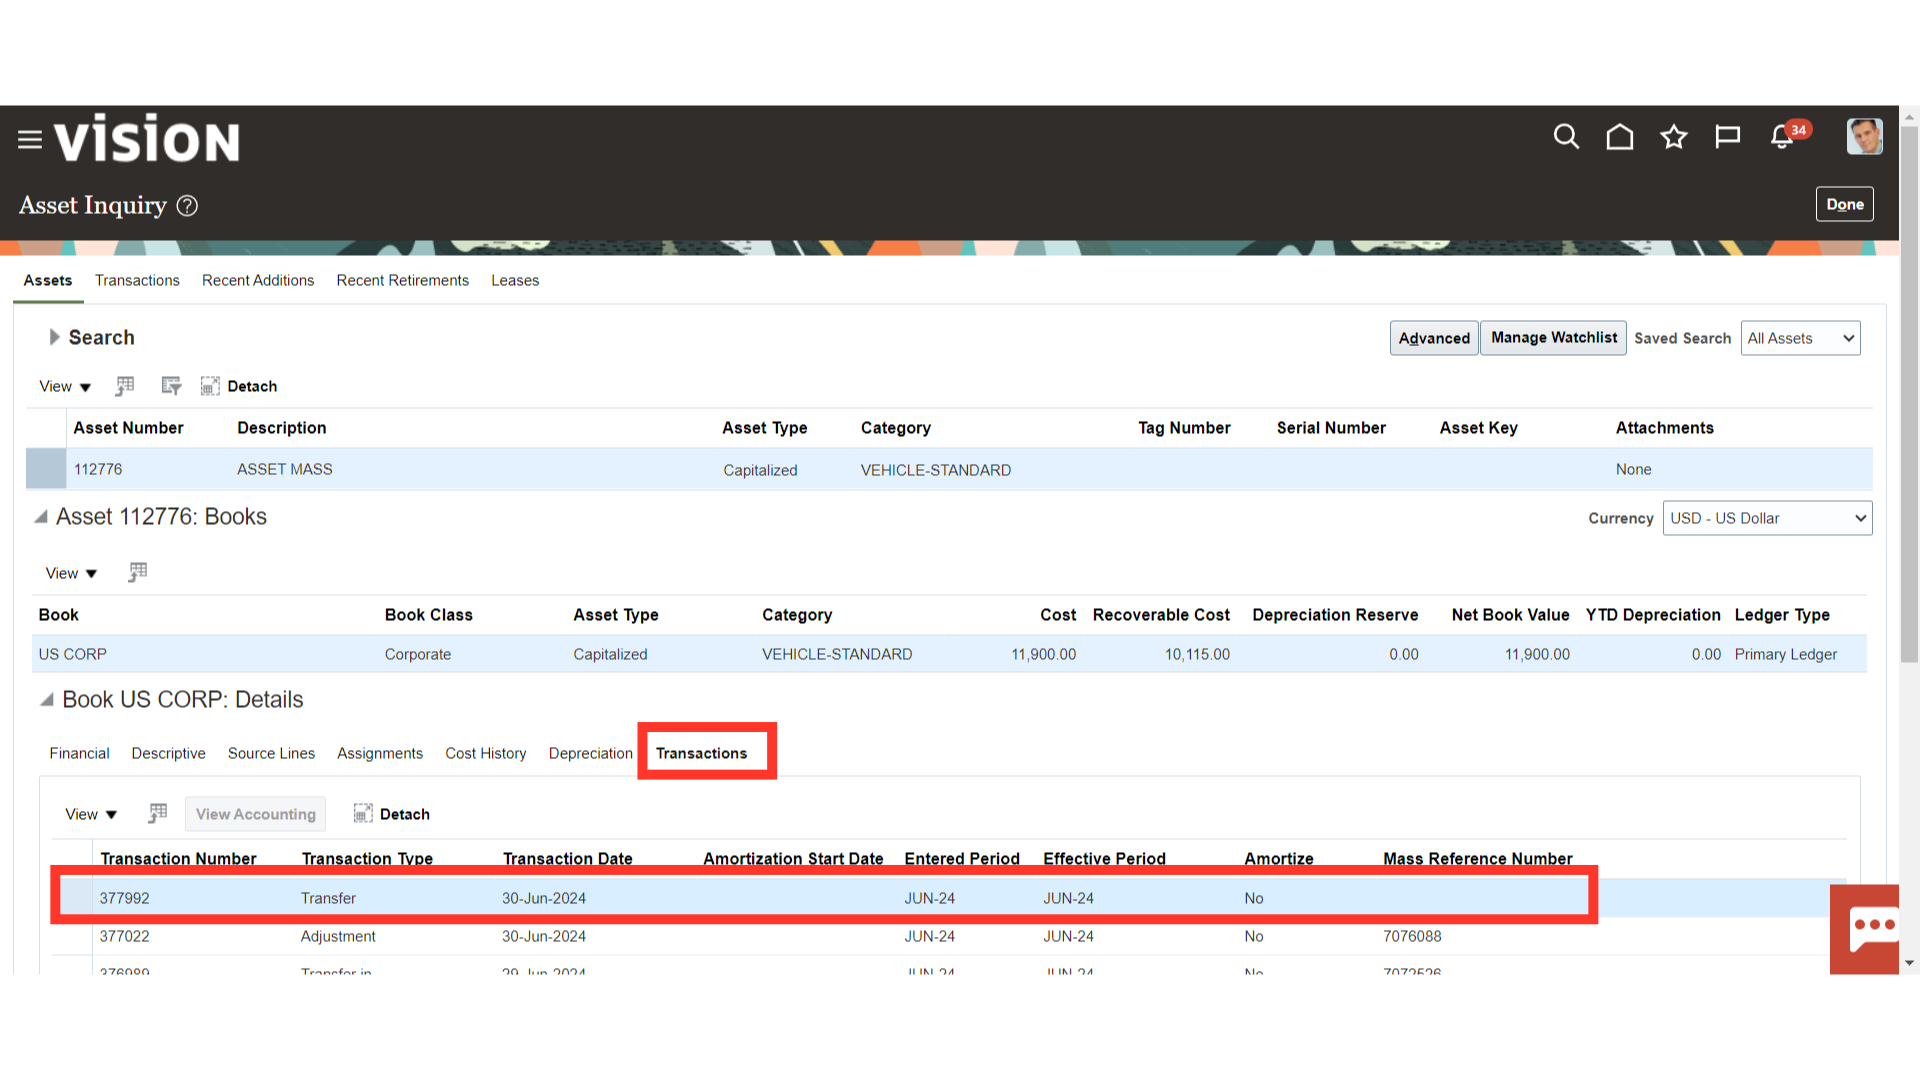
To check the details of the change go to Transactions. A transaction line would be generated with the Transaction Type as ‘Transfer’. Select that row.
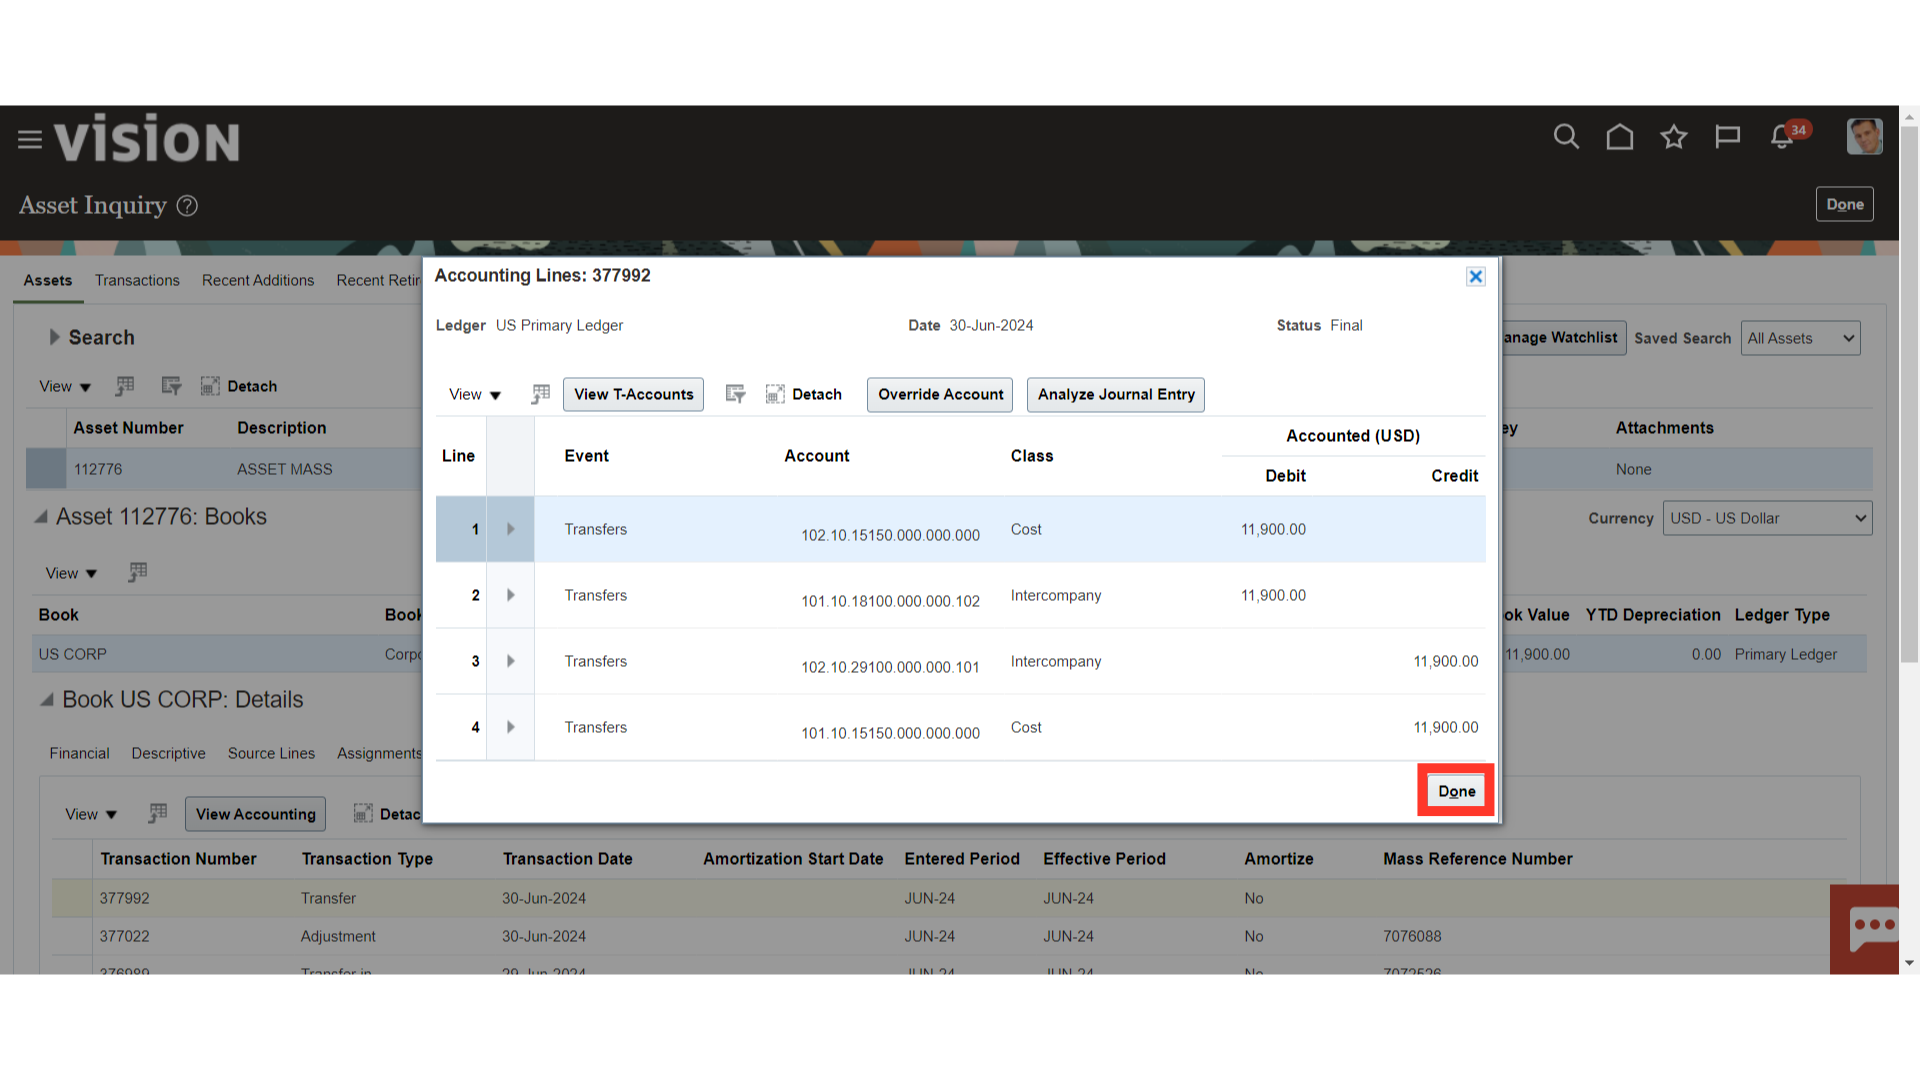
Once the Create Accounting process is completed successfully, the accounting for the Transfer transaction will be available. Click on the View Accounting button to check the accounting.
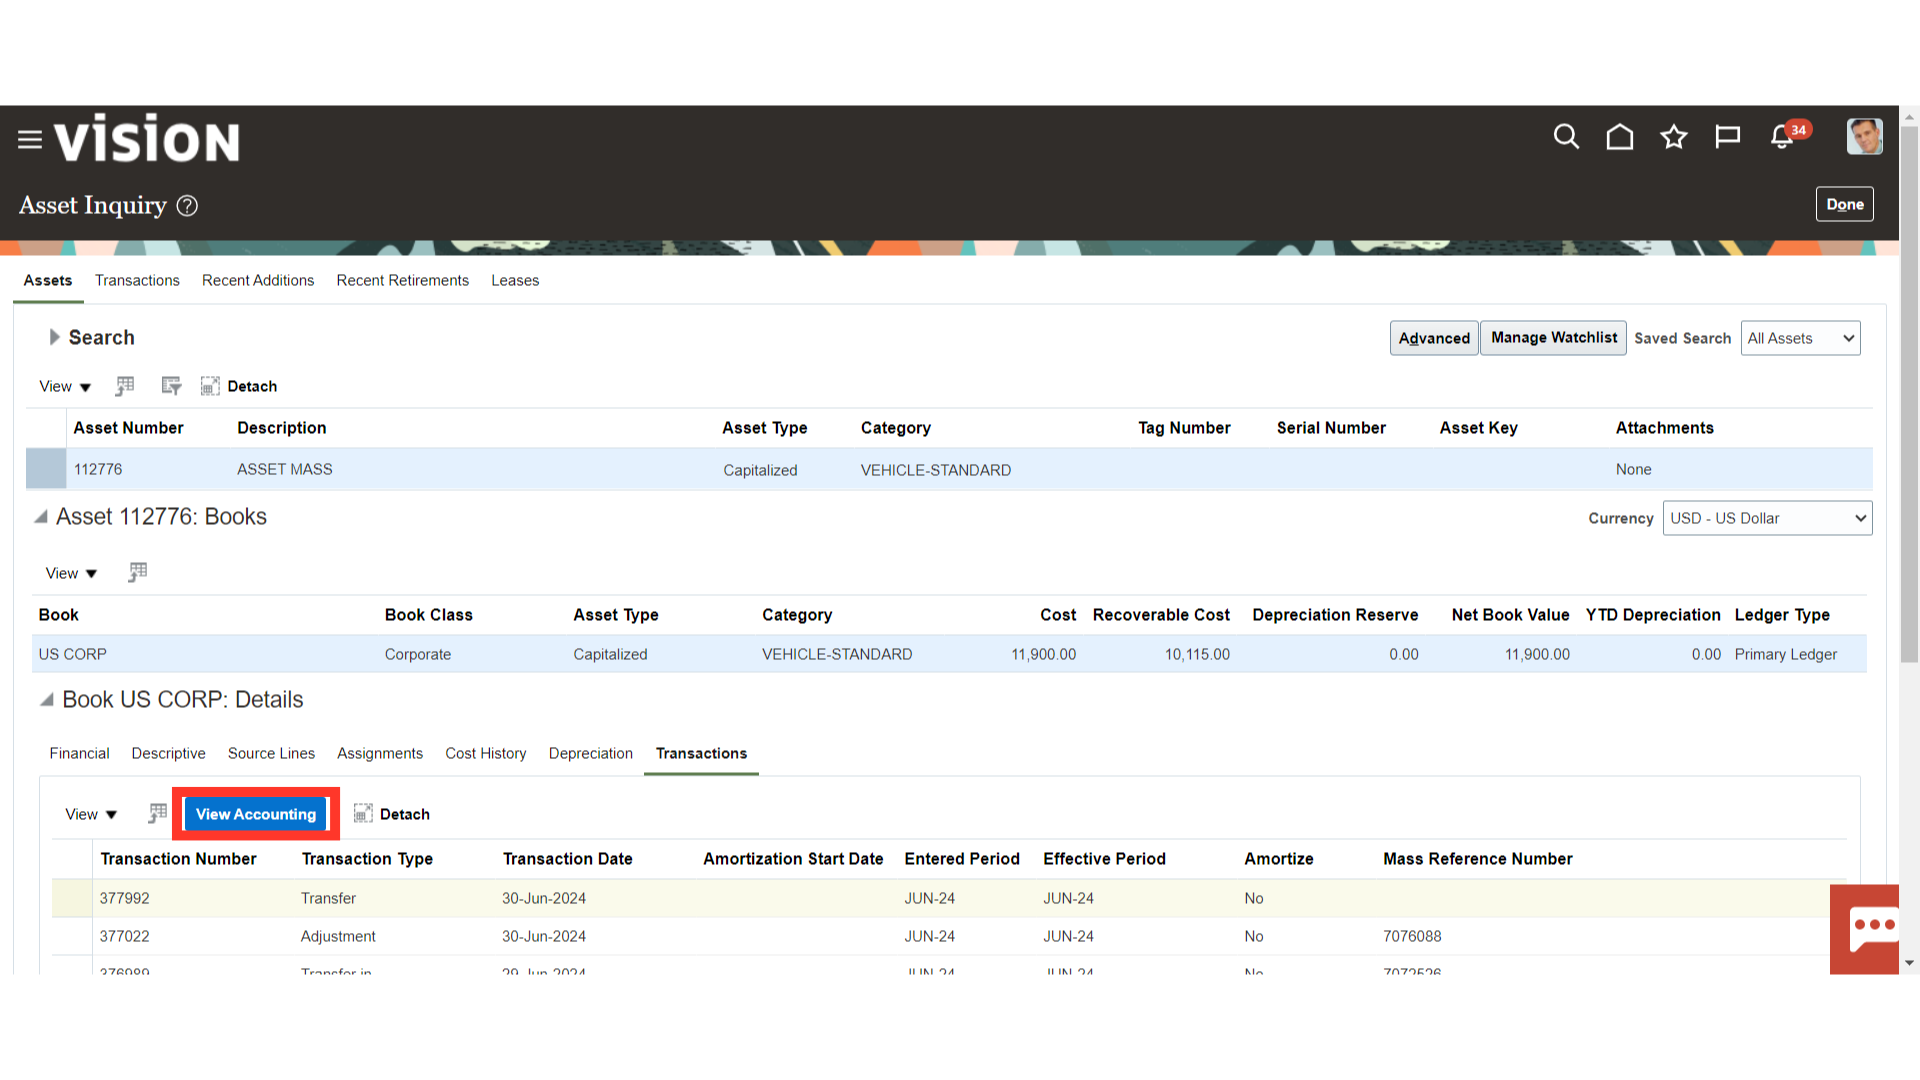
After reviewing the accounting click on Done.
Thus in this guide, the process of transferring assets amongst employees or transfer between location and depreciation expense account is covered along with modifying the number of assets to track the asset efficiently and effortlessly.