Asset Addition Processing with Asset Split Merge Option
This guide will walk you through the entire process of creating assets with the merge functionality and the mass addition lines split feature.
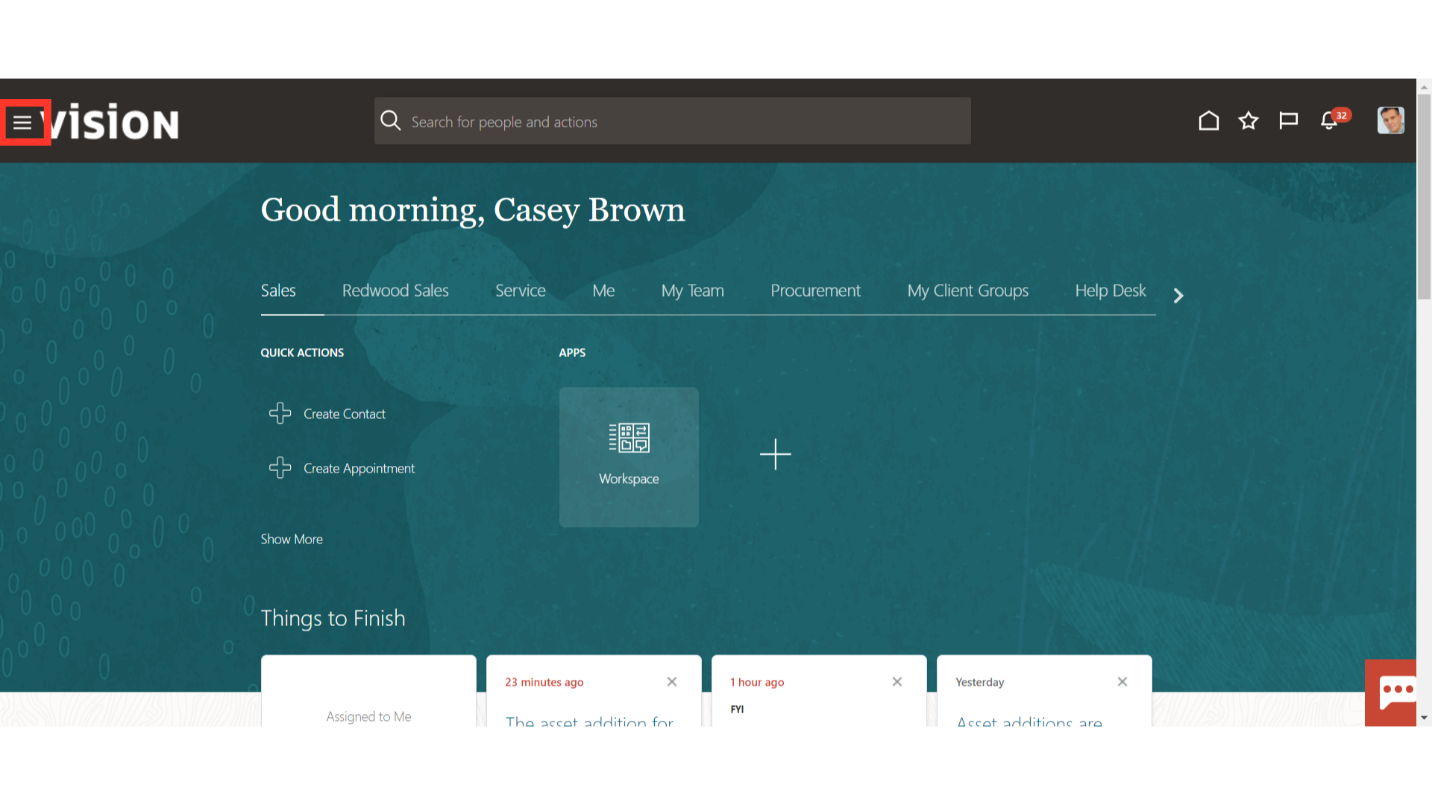
Click on Navigator Icon to access the Fixed Assets module
Click on the Assets submenu by expanding the Fixed Assets menu.

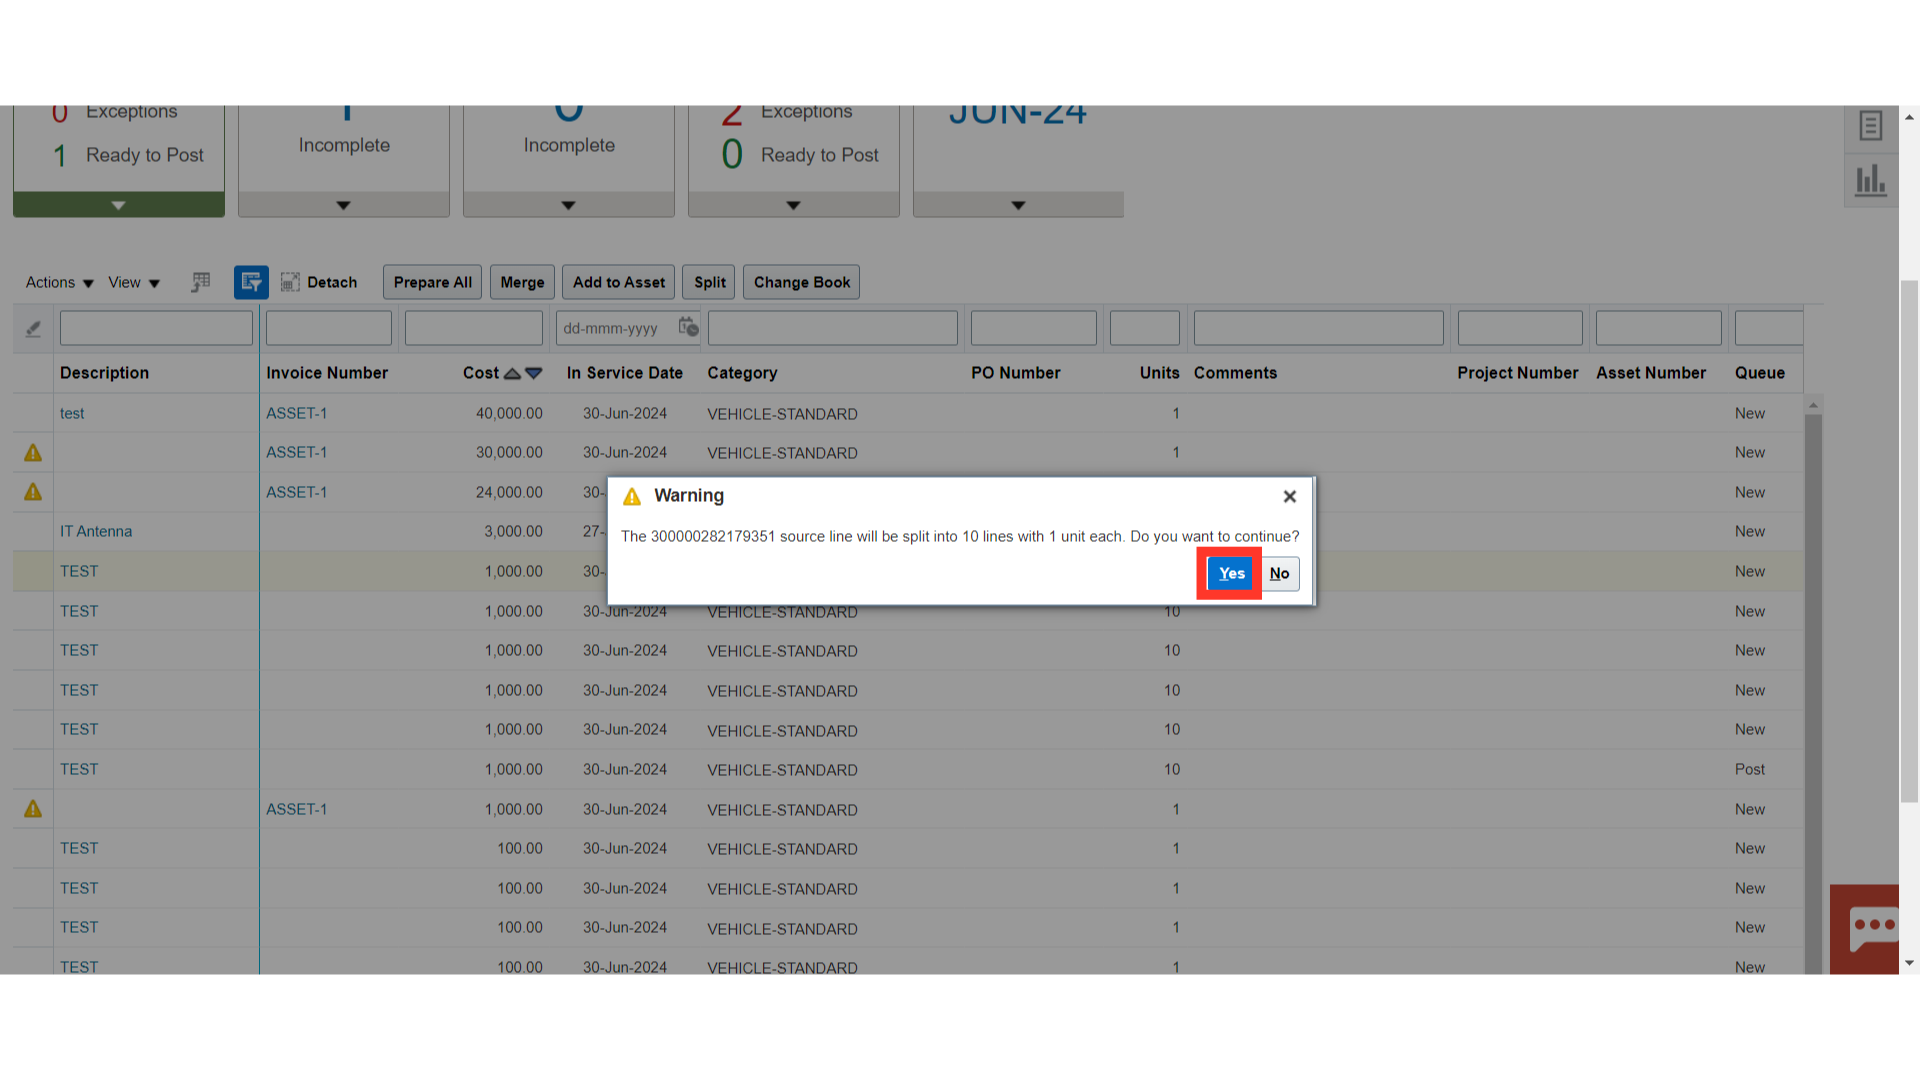
Mass addition lines can be split into multiple lines by clicking on the Split button or selecting Split under the Actions tab after selecting the Asset to be splited.

A confirmation message is displayed mentioning the number of mass addition lines that would be generated based on units. Click on the Yes button to continue.
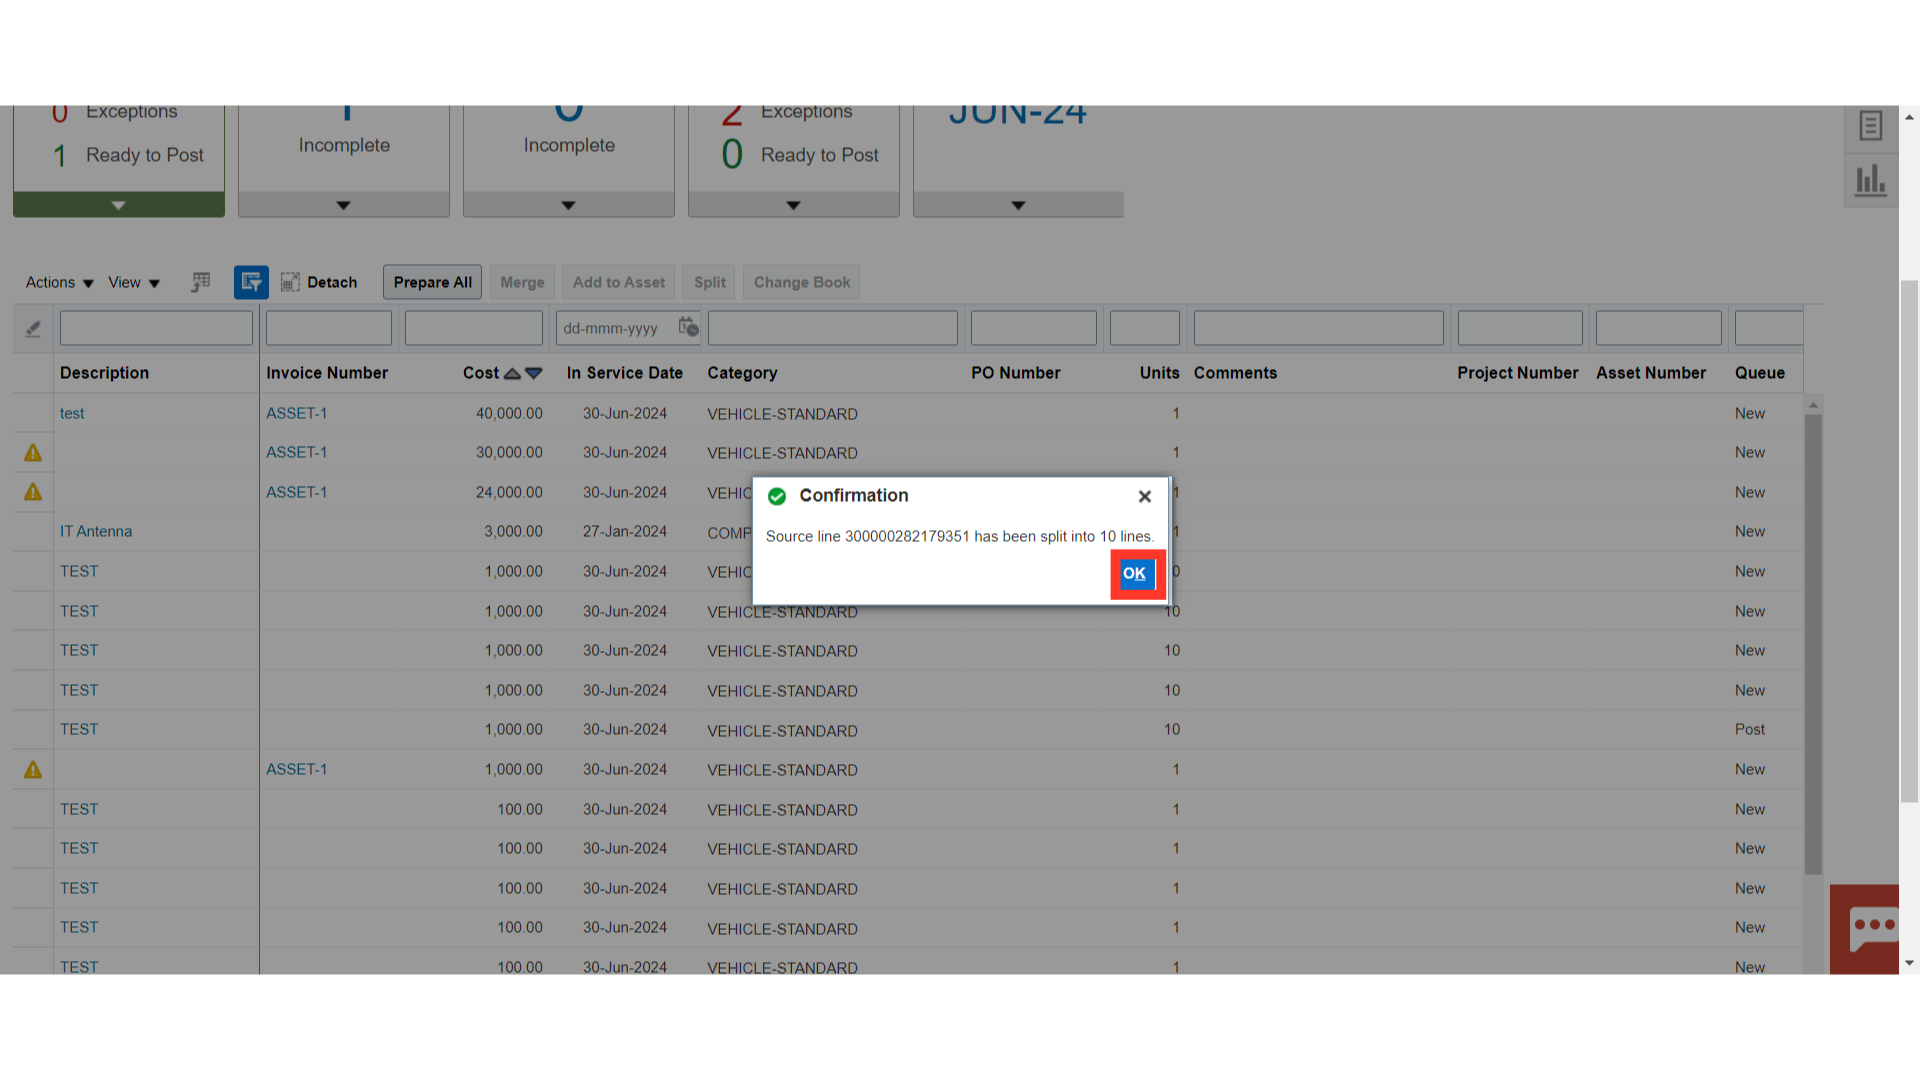
A confirmation message is displayed regarding the process of the split asset submitted.
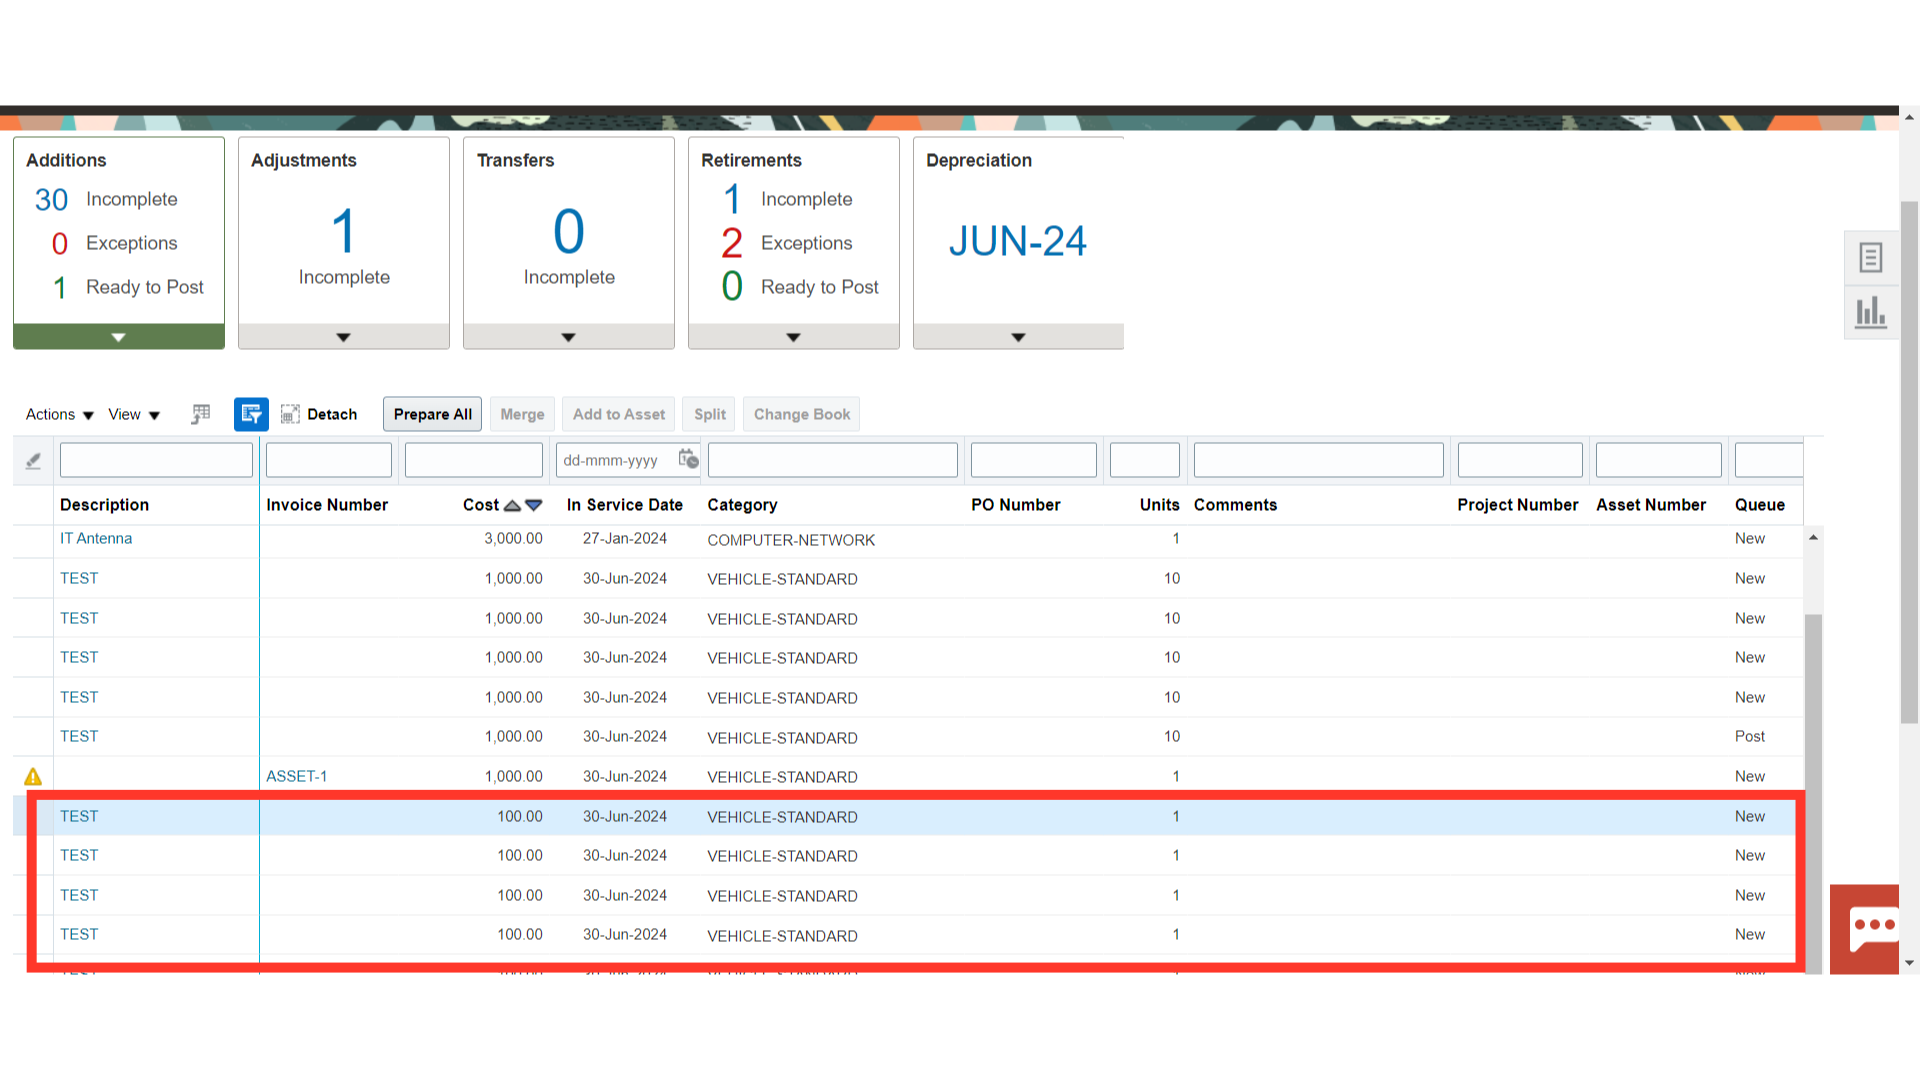
These are the lines of mass addition that were divided into several lines of mass addition.
Click on the description link to view the divided assets.
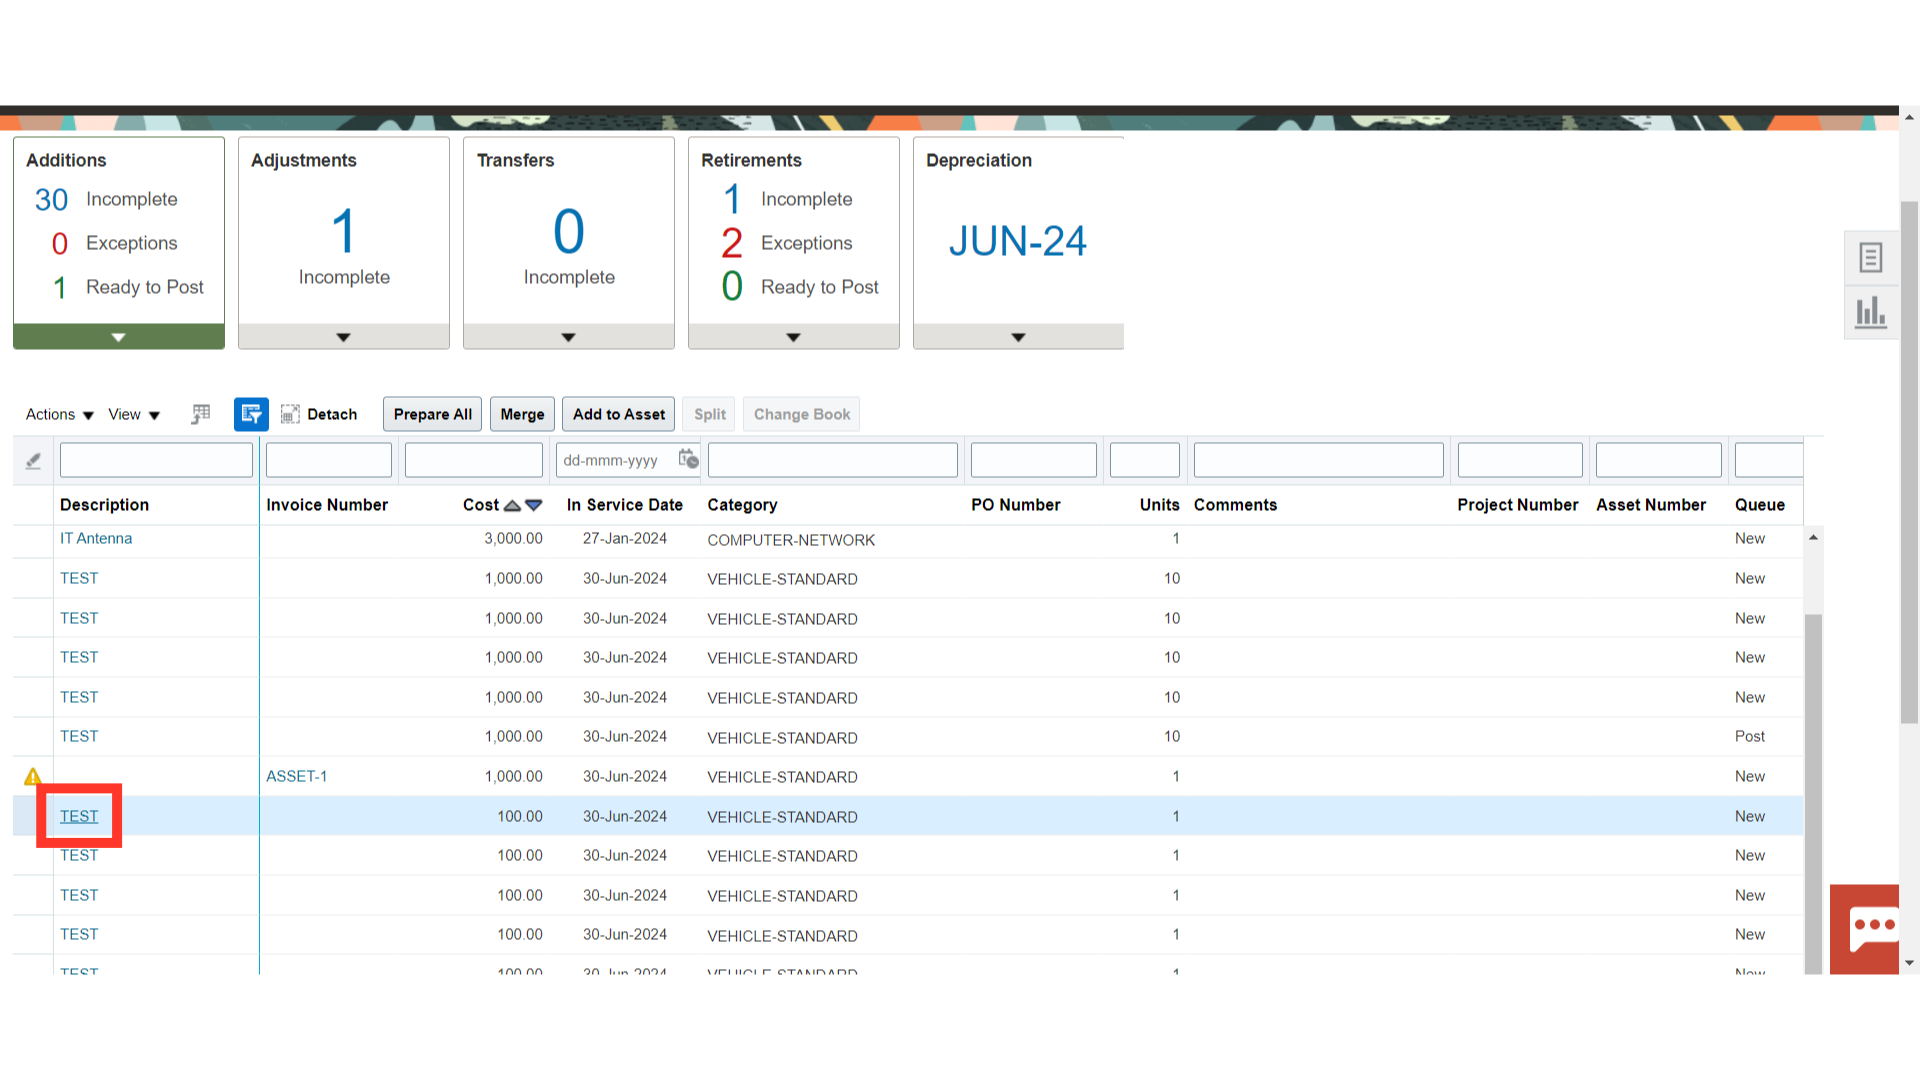
Depending on the Units, the Asset cost is divided and allocated to every mass addition line. Enter all the asset’s required fields, including those for asset type, asset category, and asset assignment details.
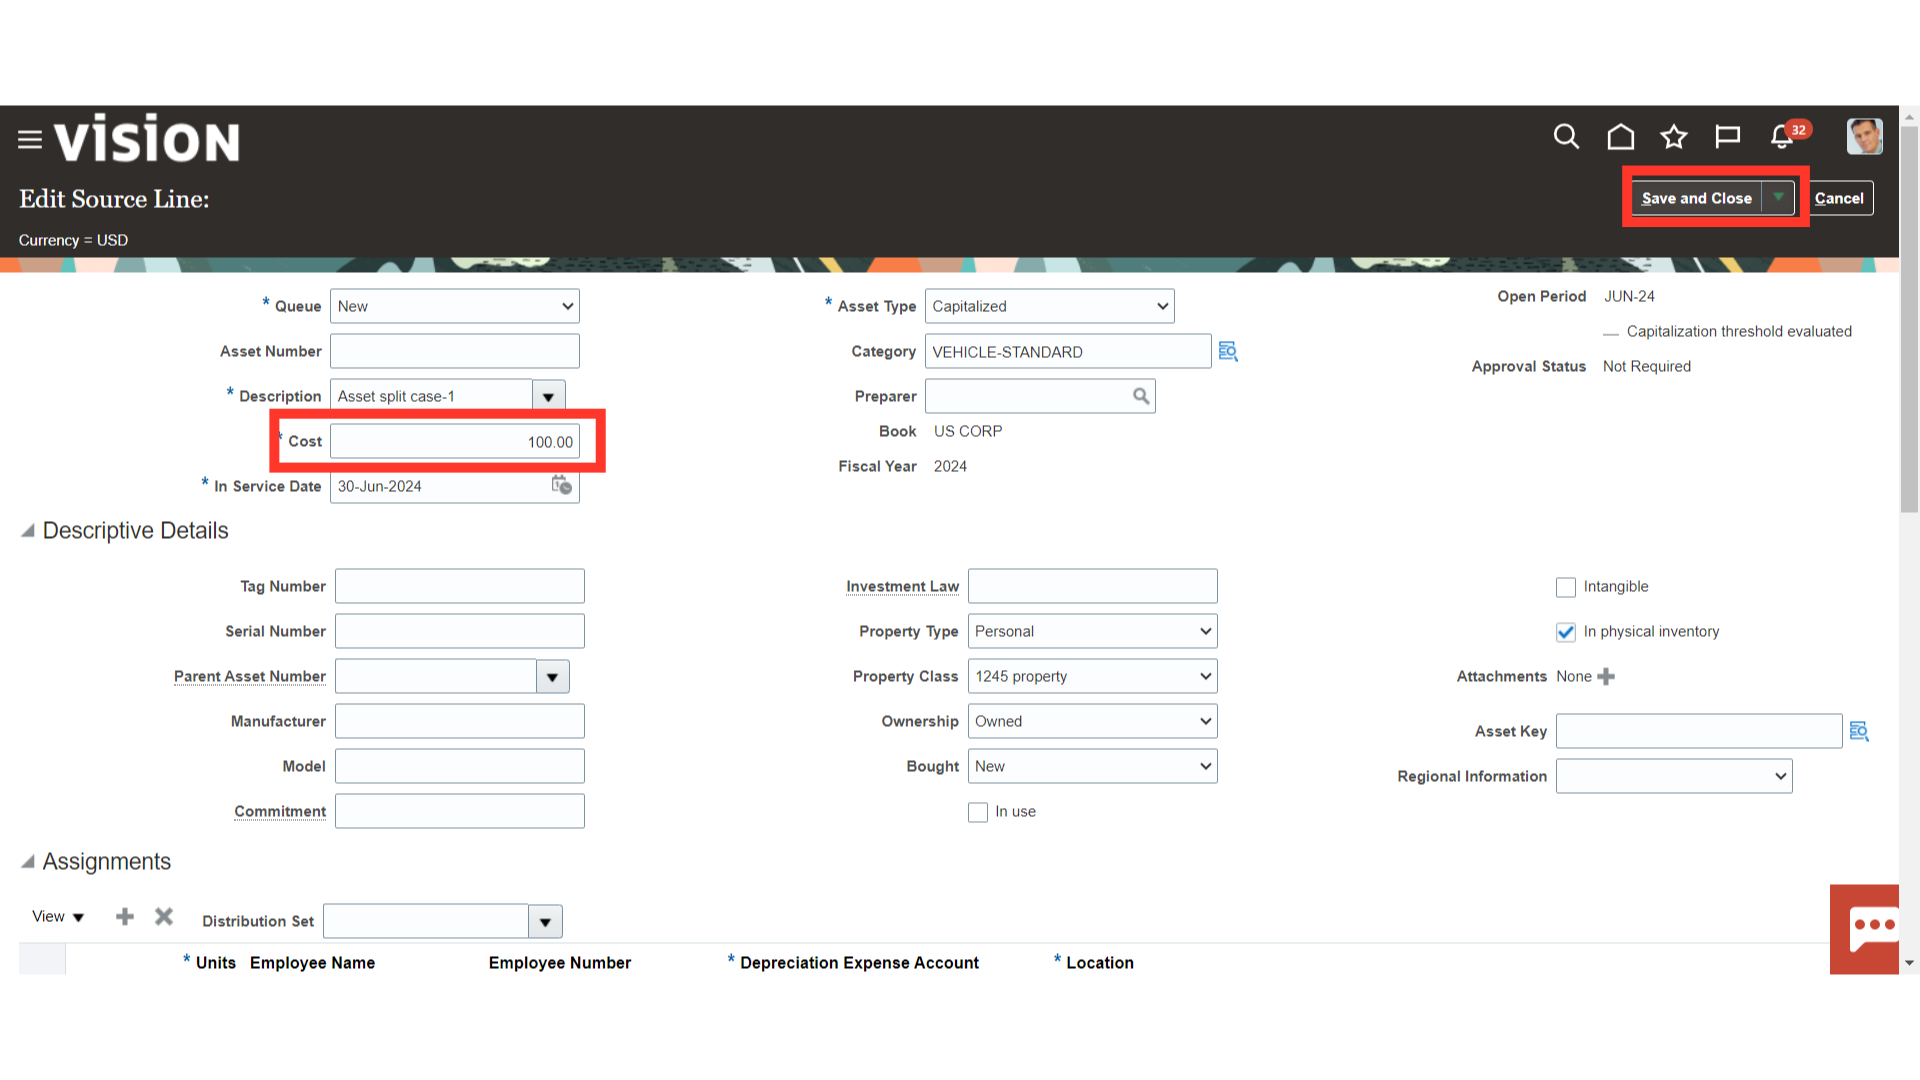
To post the mass addition lines to the asset register select the Queue status as Post from the list of values. While, to return go back to the fixed asset workbench, select the Save and Close button.

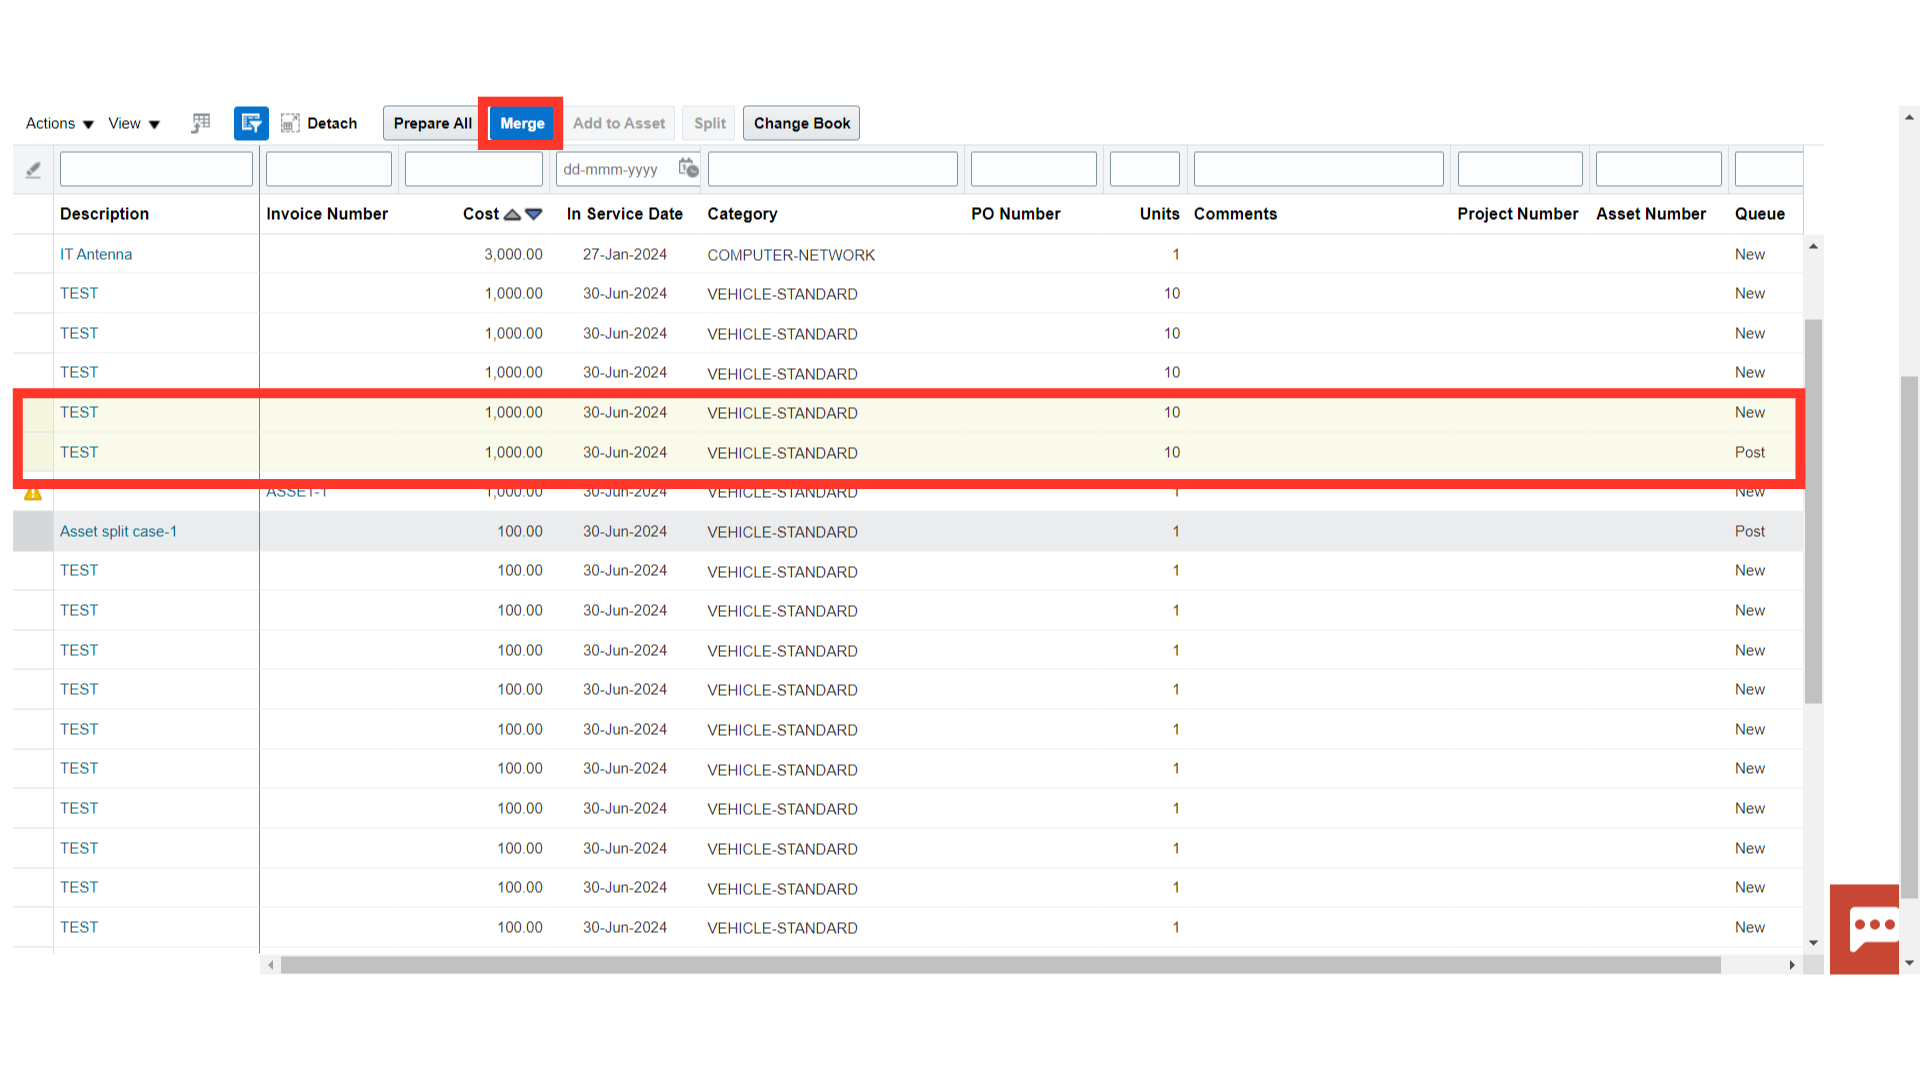
Once the multiple mass addition lines have been selected, click the Merge button to combine them into a single line.
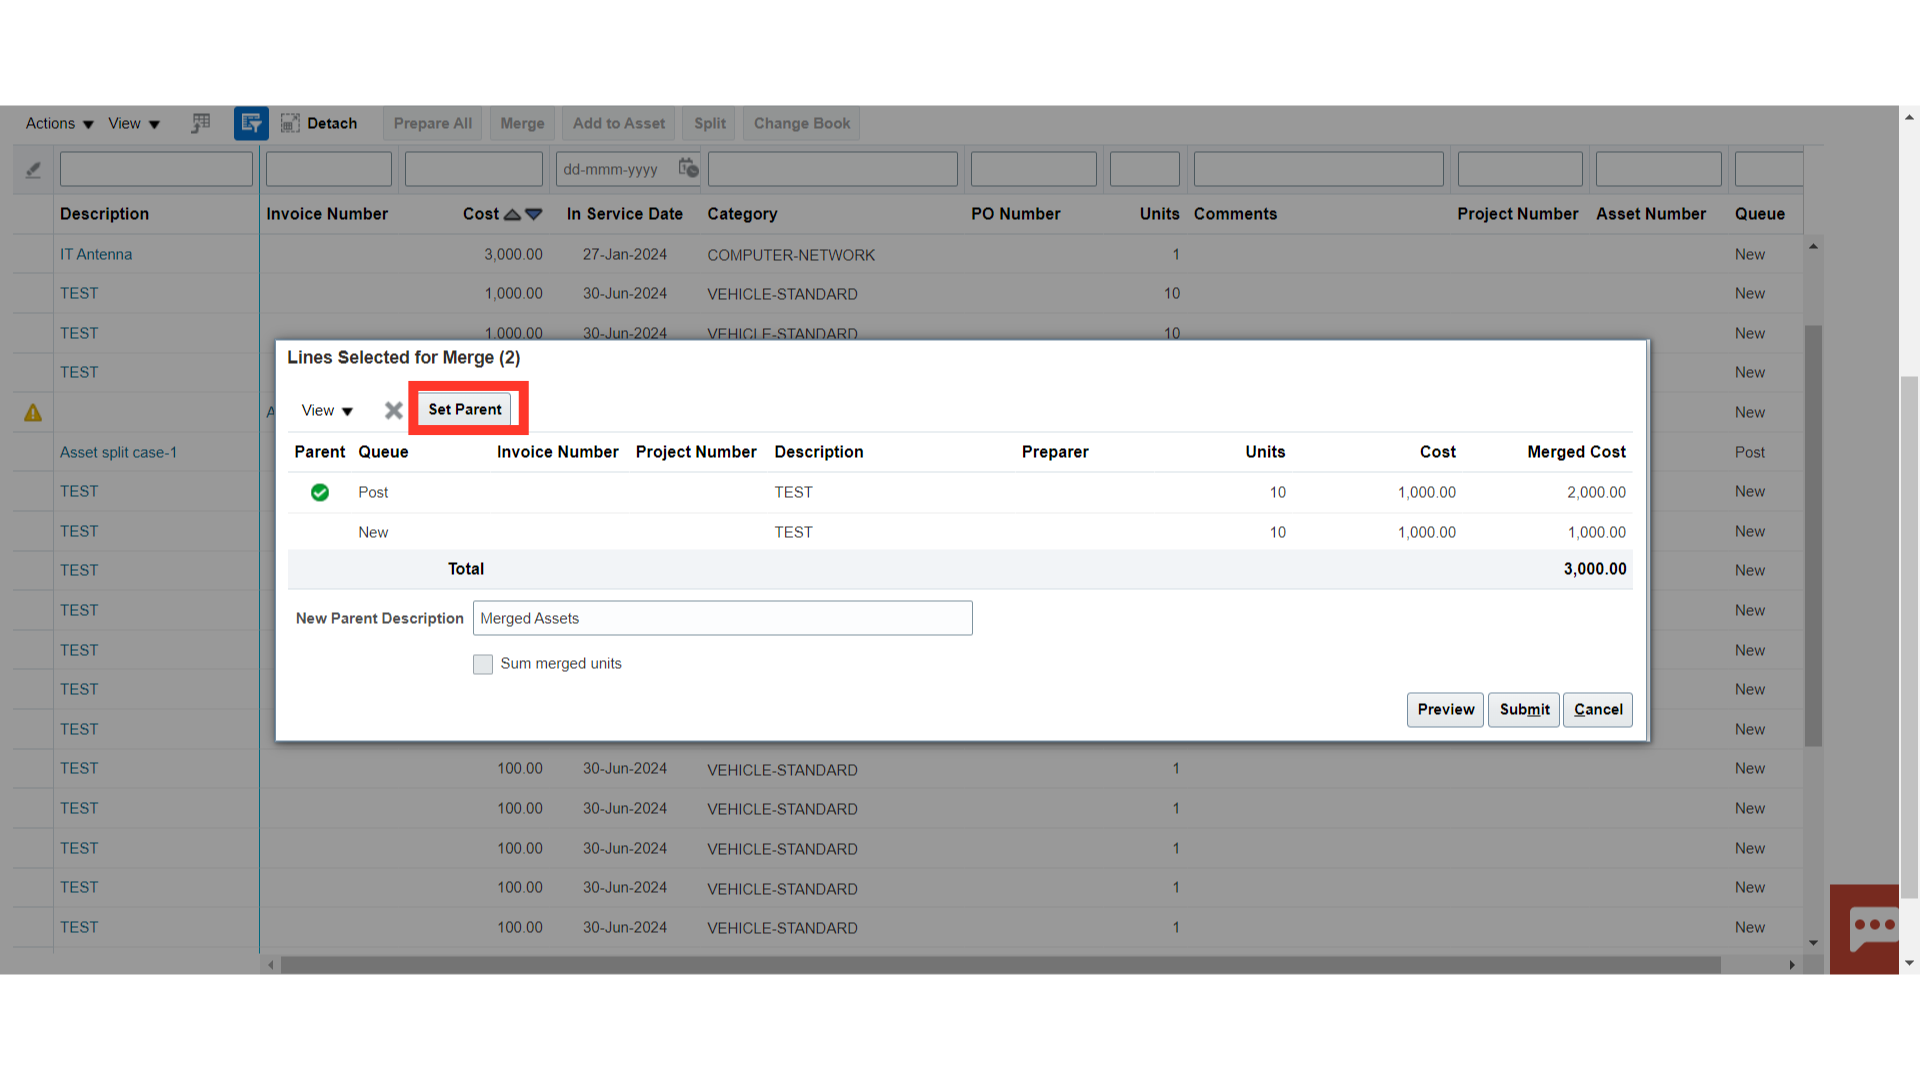
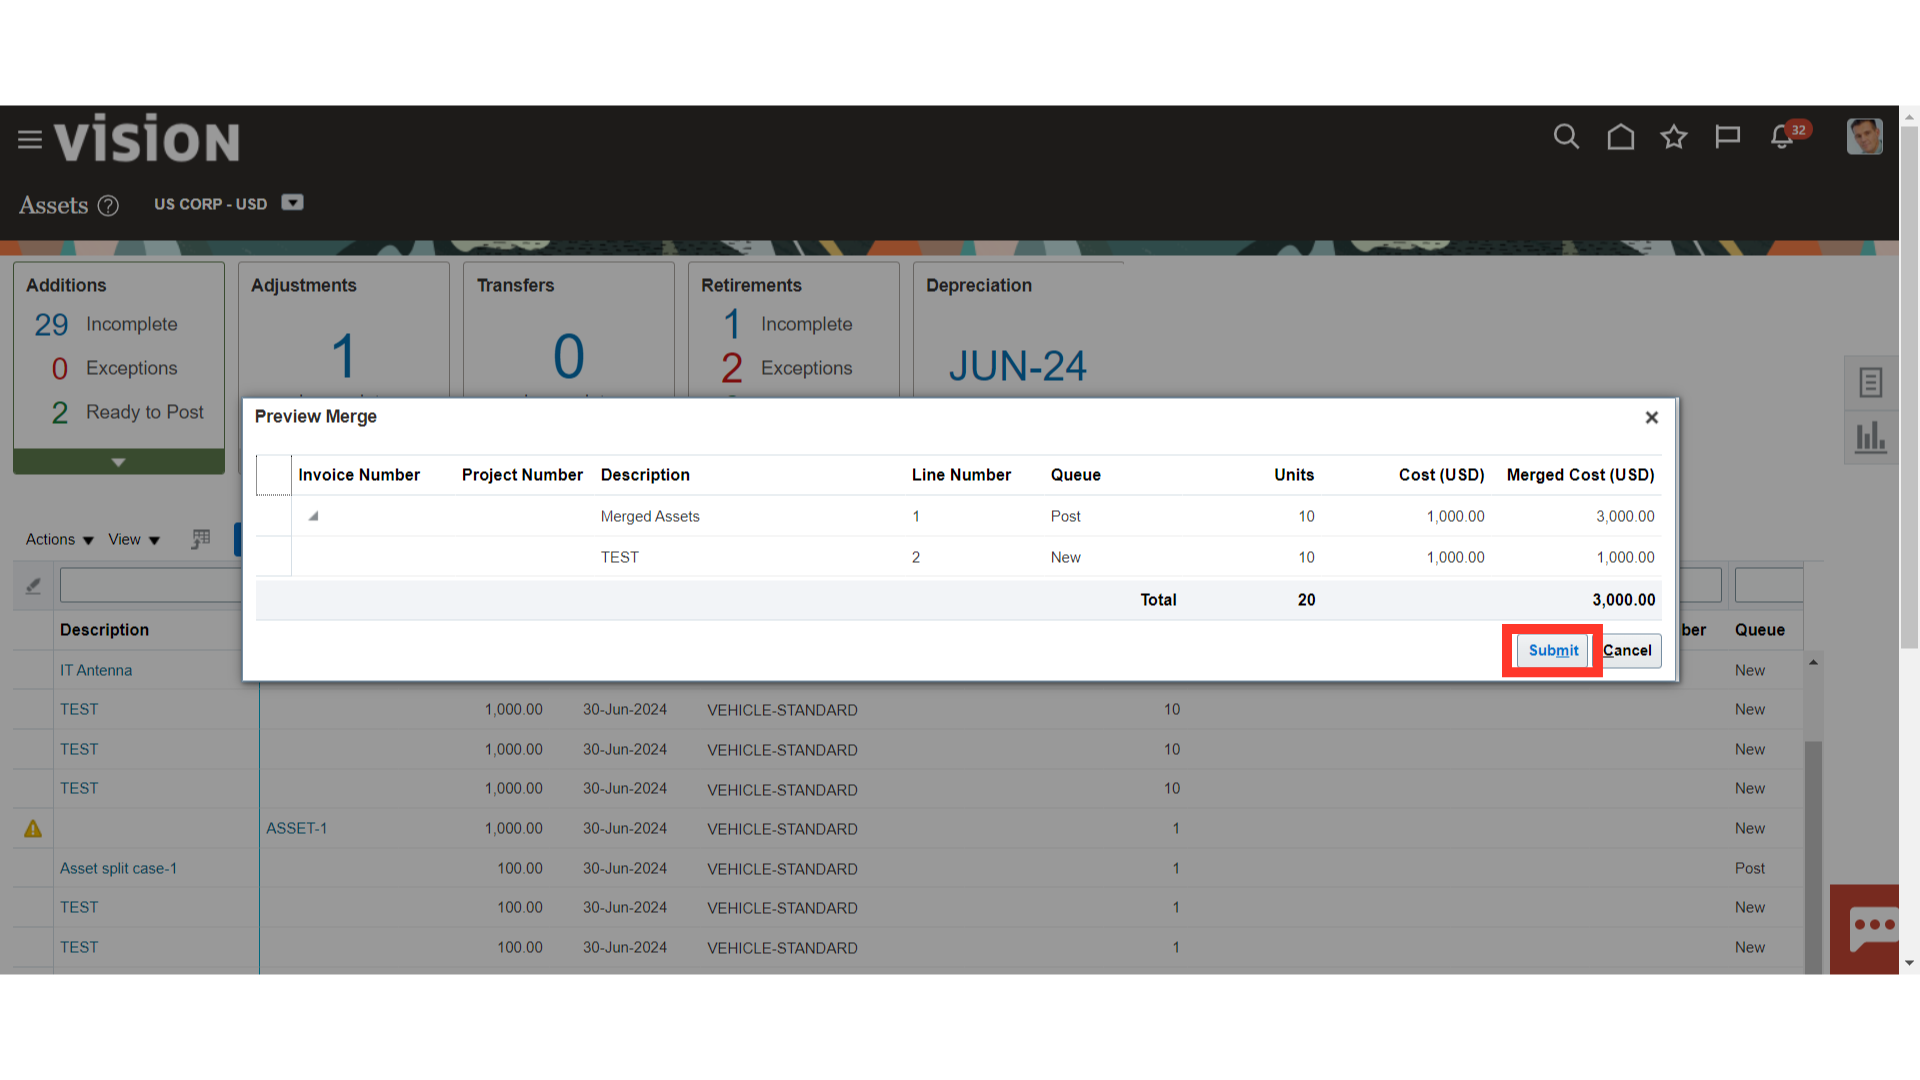
Once the lines are merged together, users can either Preview or Submit. This will also allow users to set the Parent Record. If another source line needs to be added, there is an option to undo the selection. Then select all lines again for the merge.
After verifying all the details, click on the Submit button.
Once the mass addition lines are merged the Queue status of the line will be changed to On Hold.
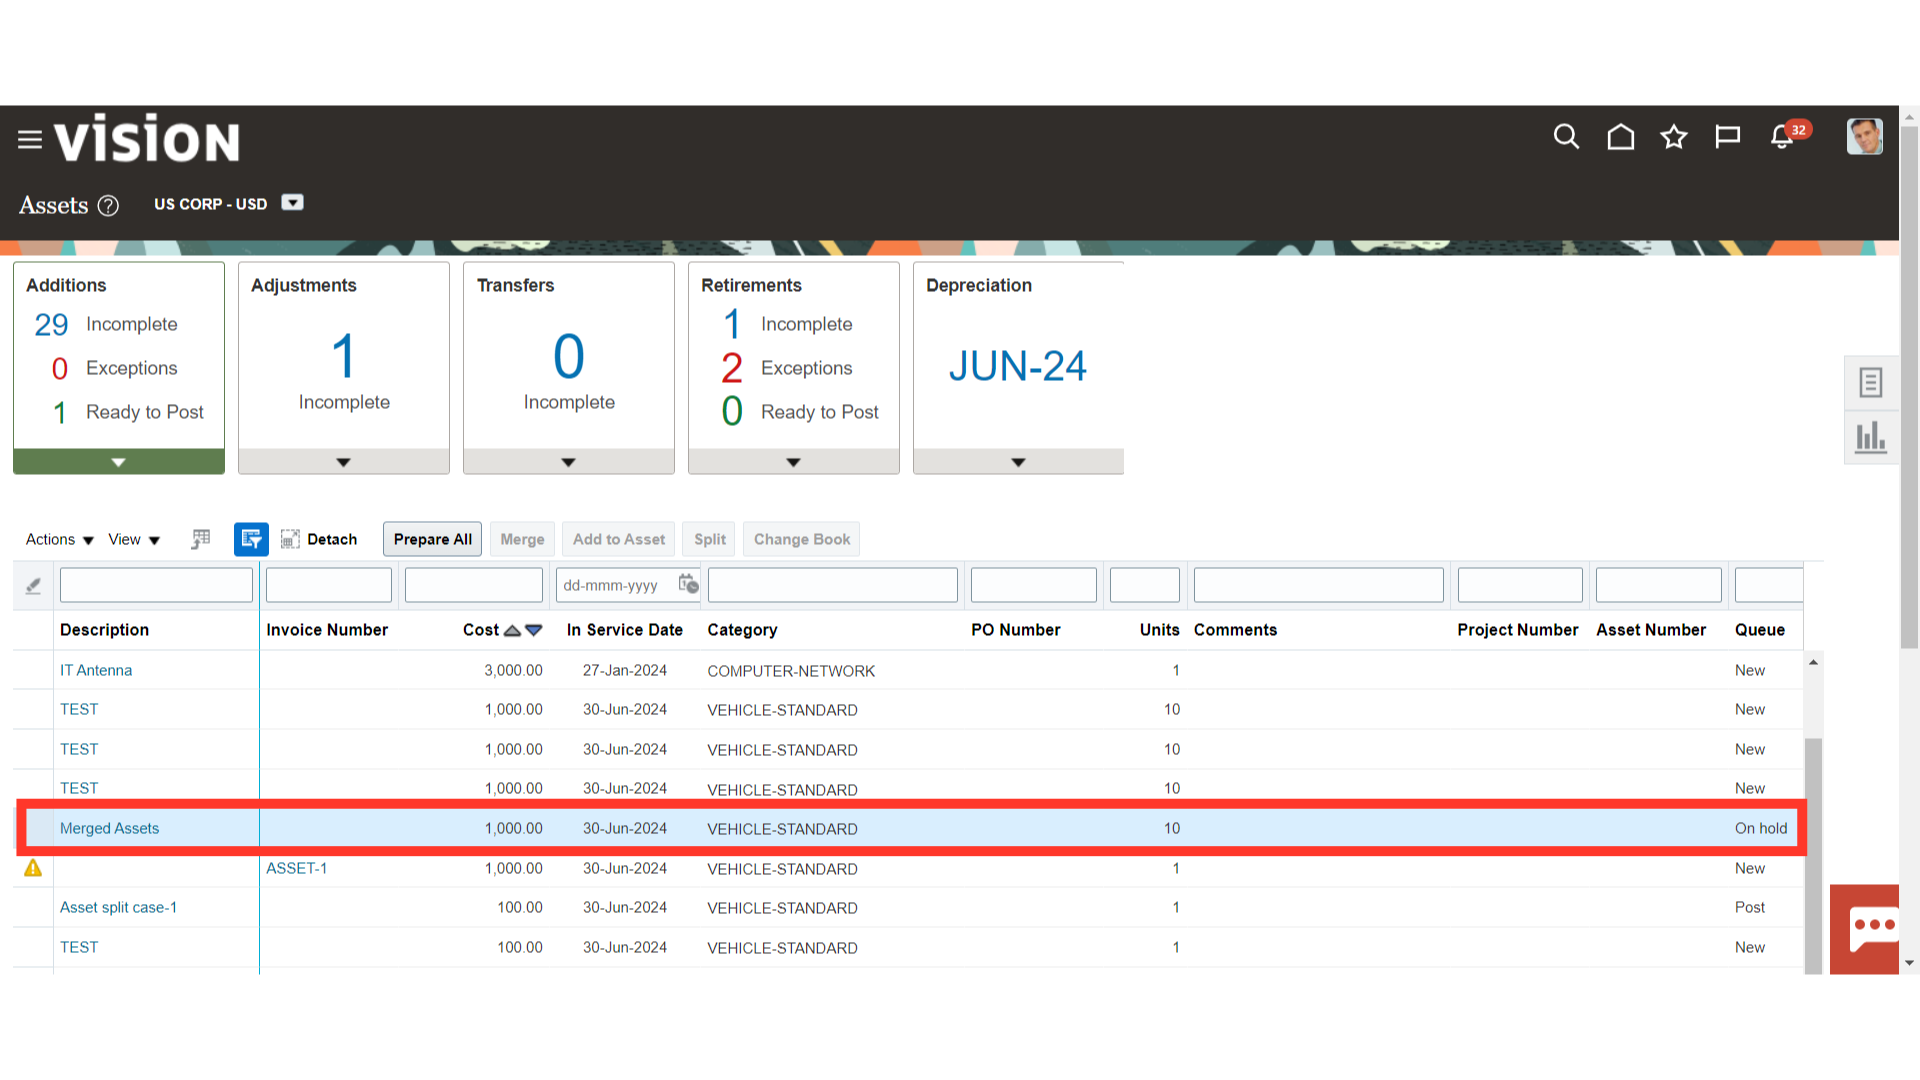
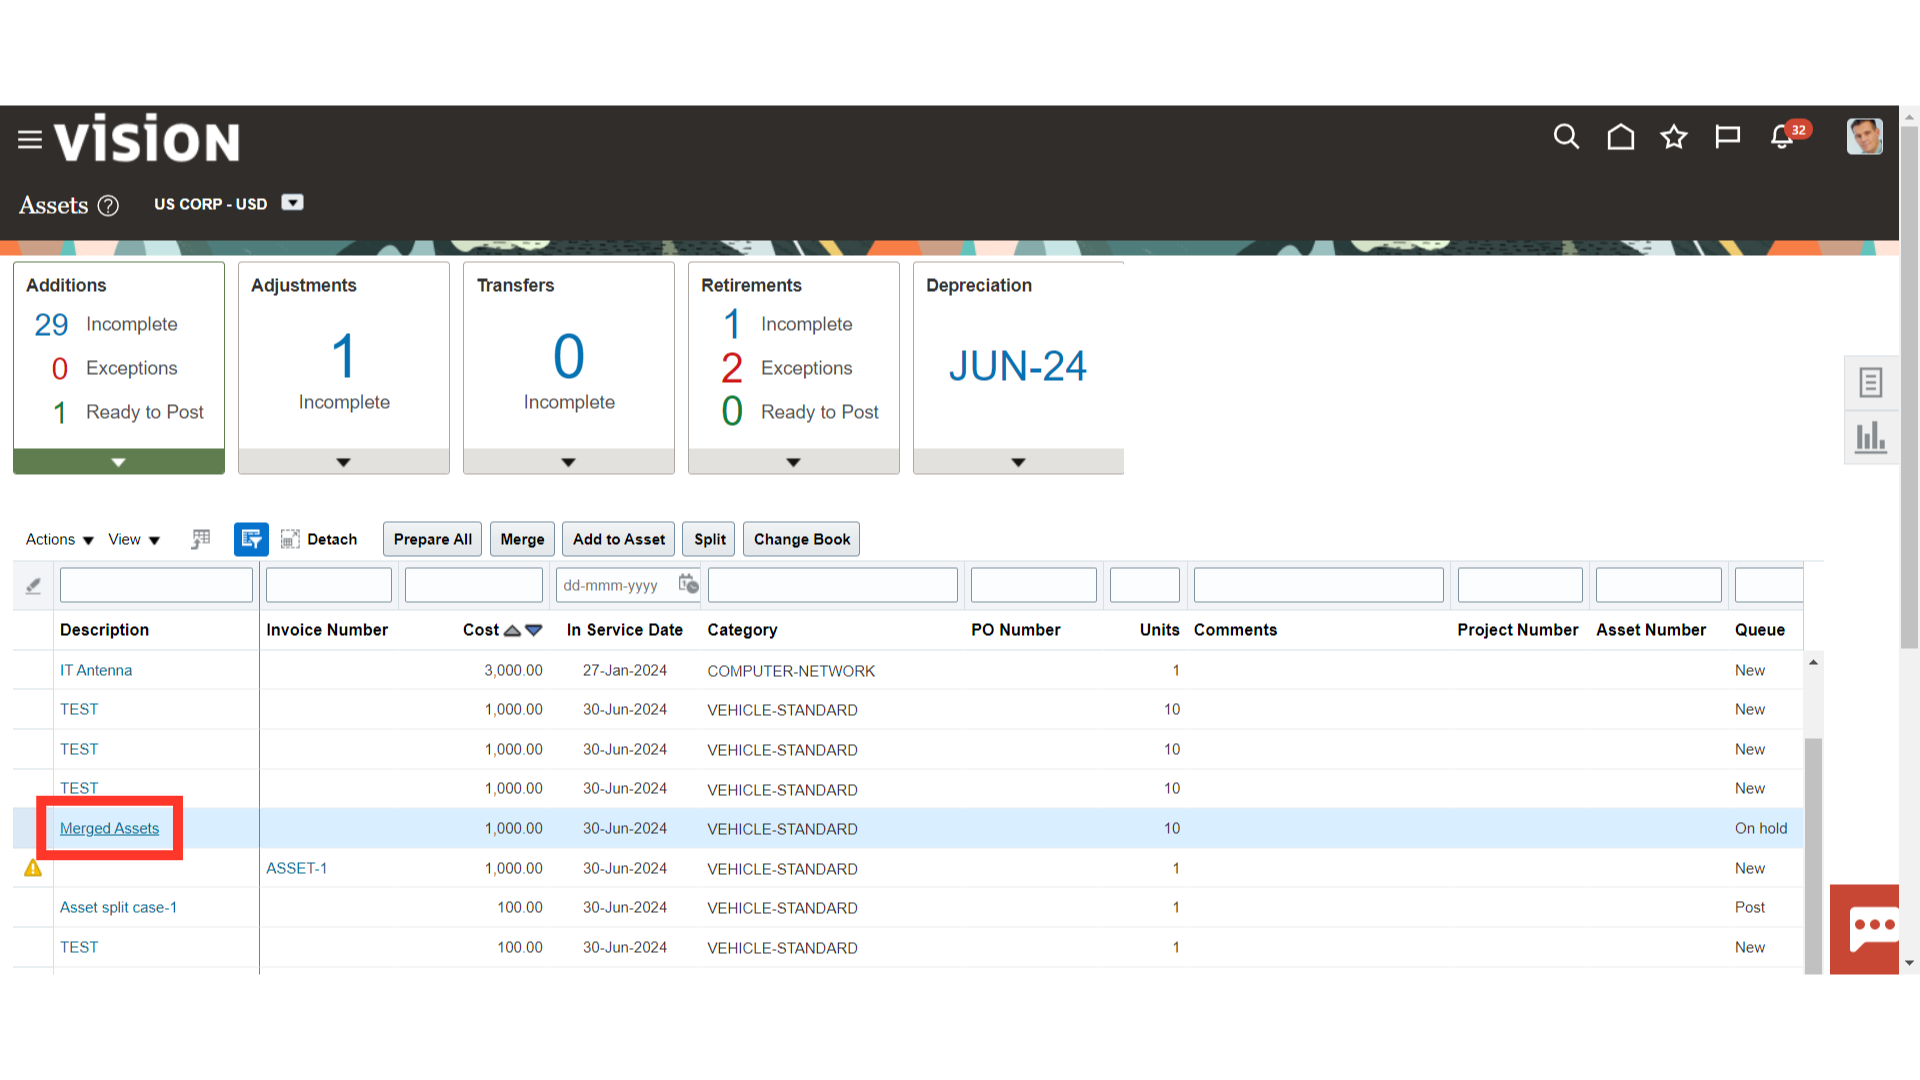
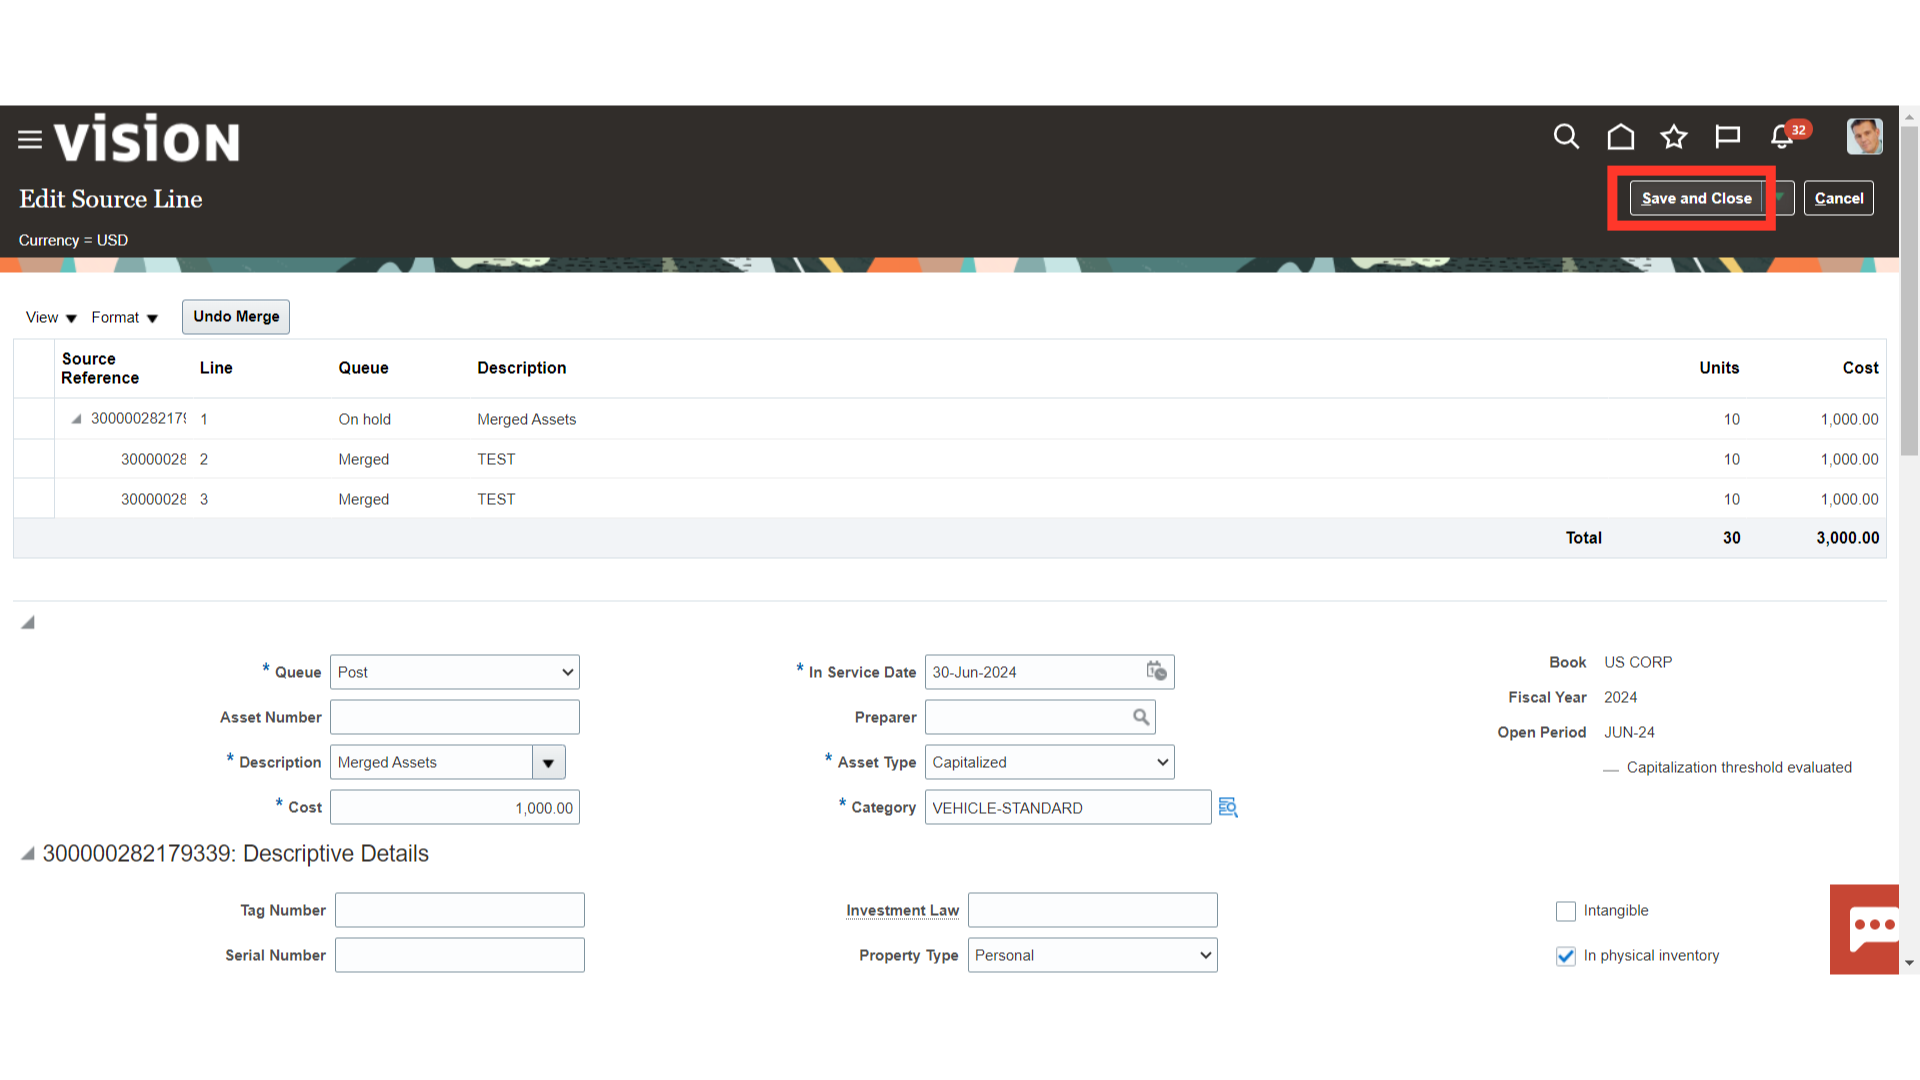
Open the merged mass addition line by clicking on the description hyperlink.
The information will be on the top of the page with the Parent Line consisting of asset cost and unit information.
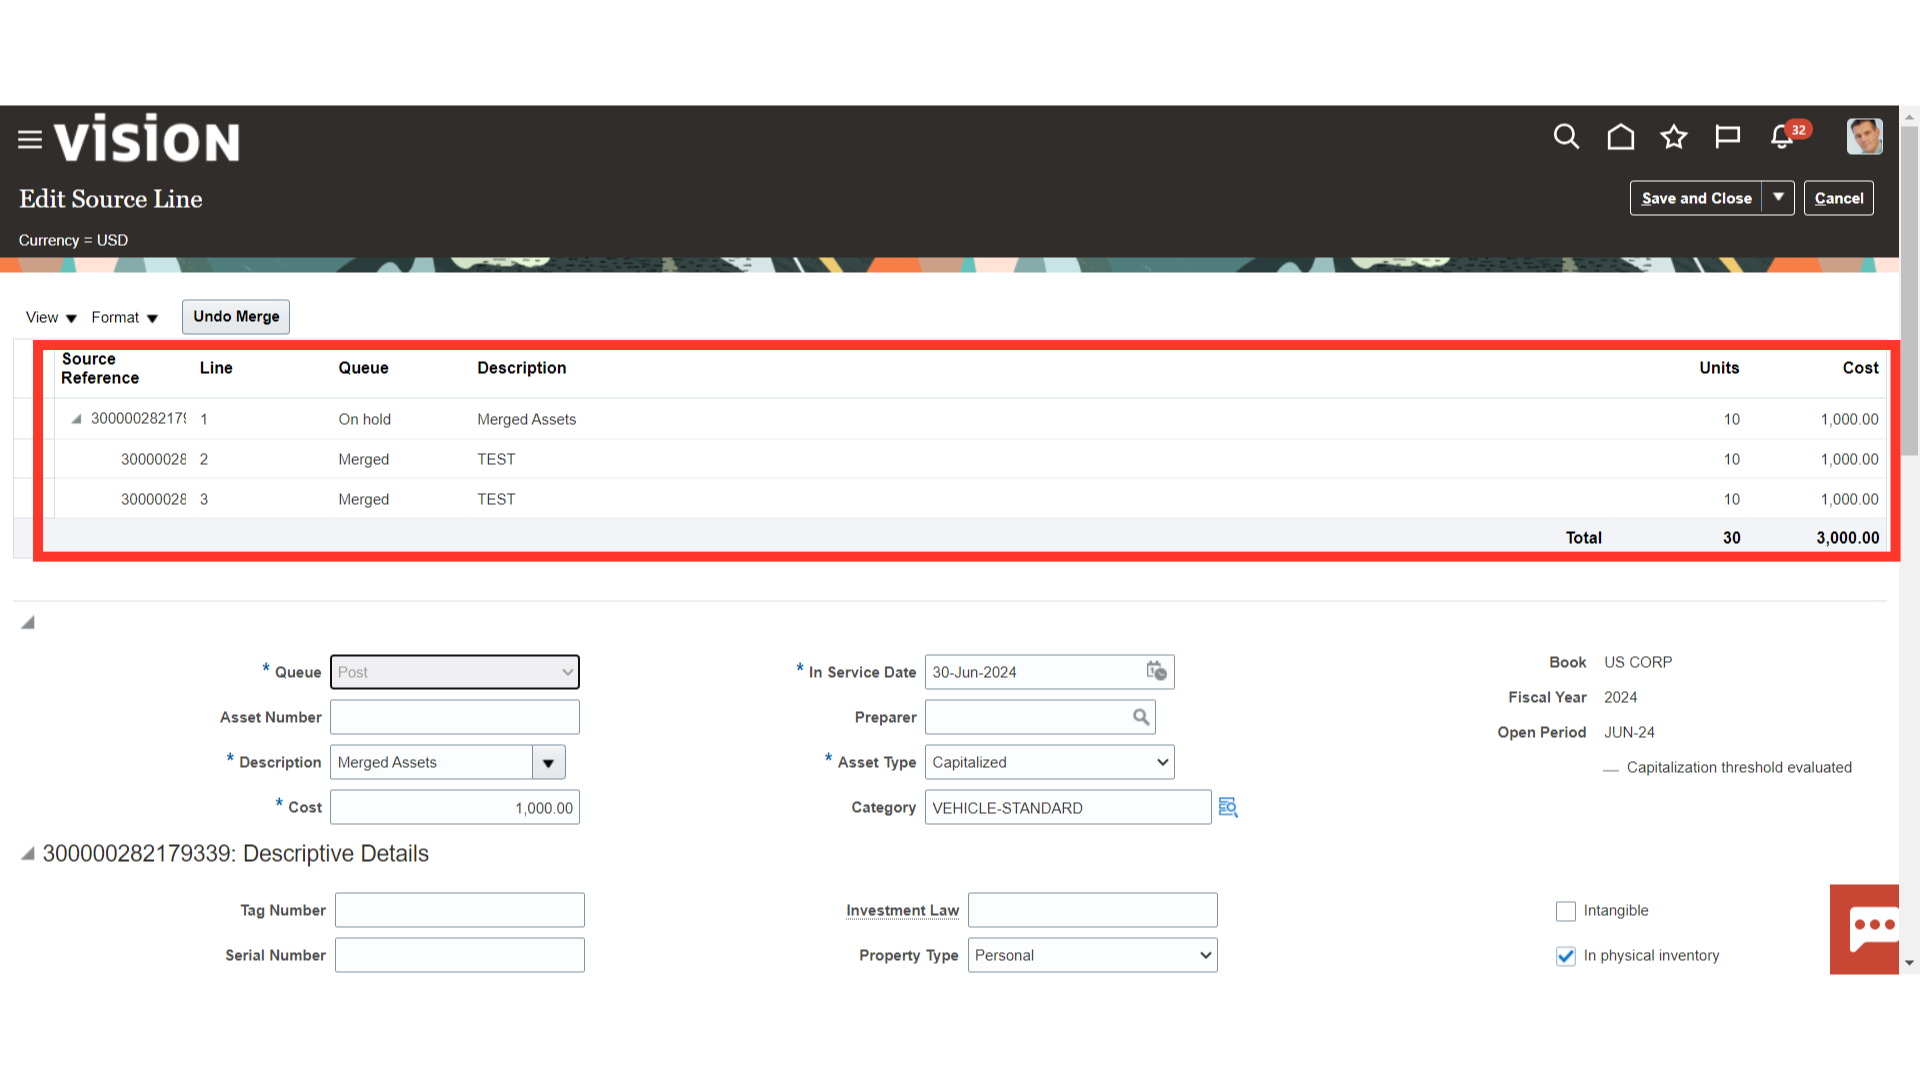
To post the mass addition lines to the asset register select the Queue status as Post from the list of values. While, to return go back to the fixed asset workbench, select the Save and Close button.
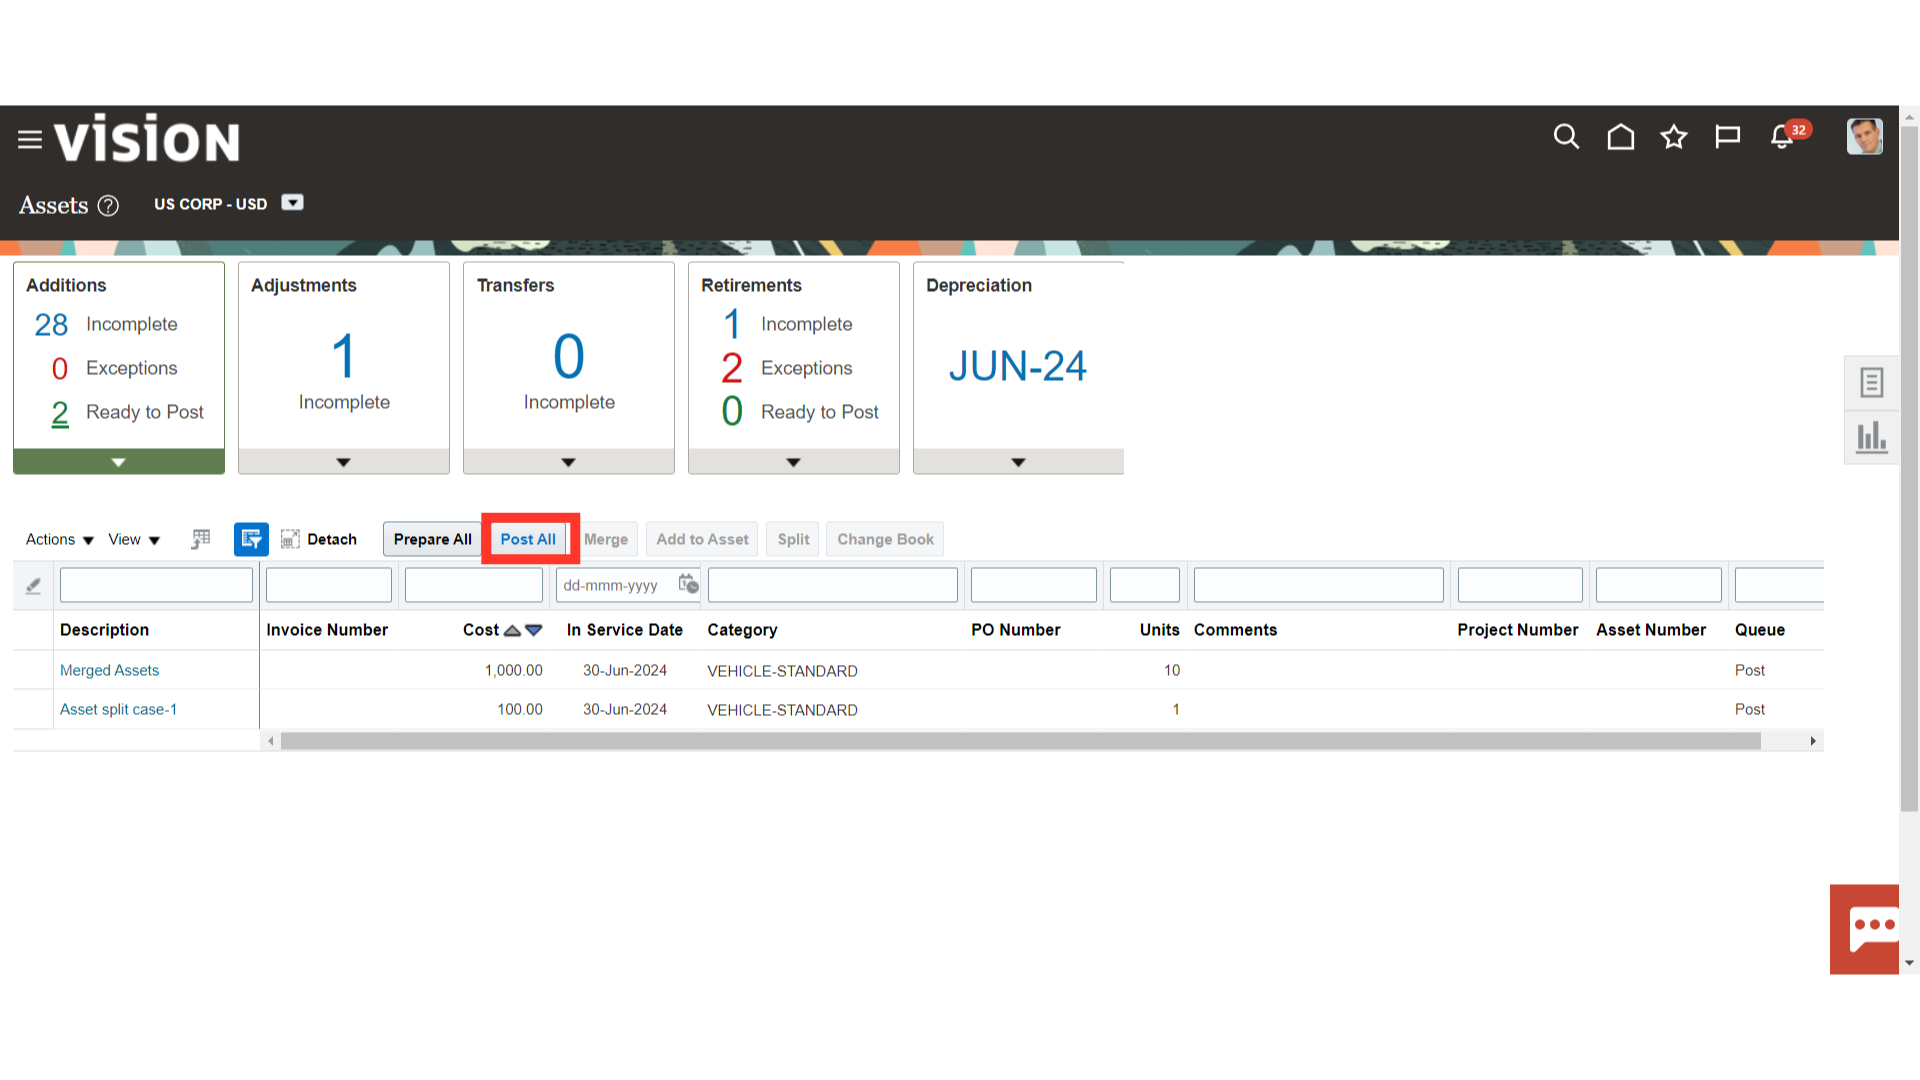
To post the mass addition lines which were splited and merged, click on the Post All button under Ready to Post section.
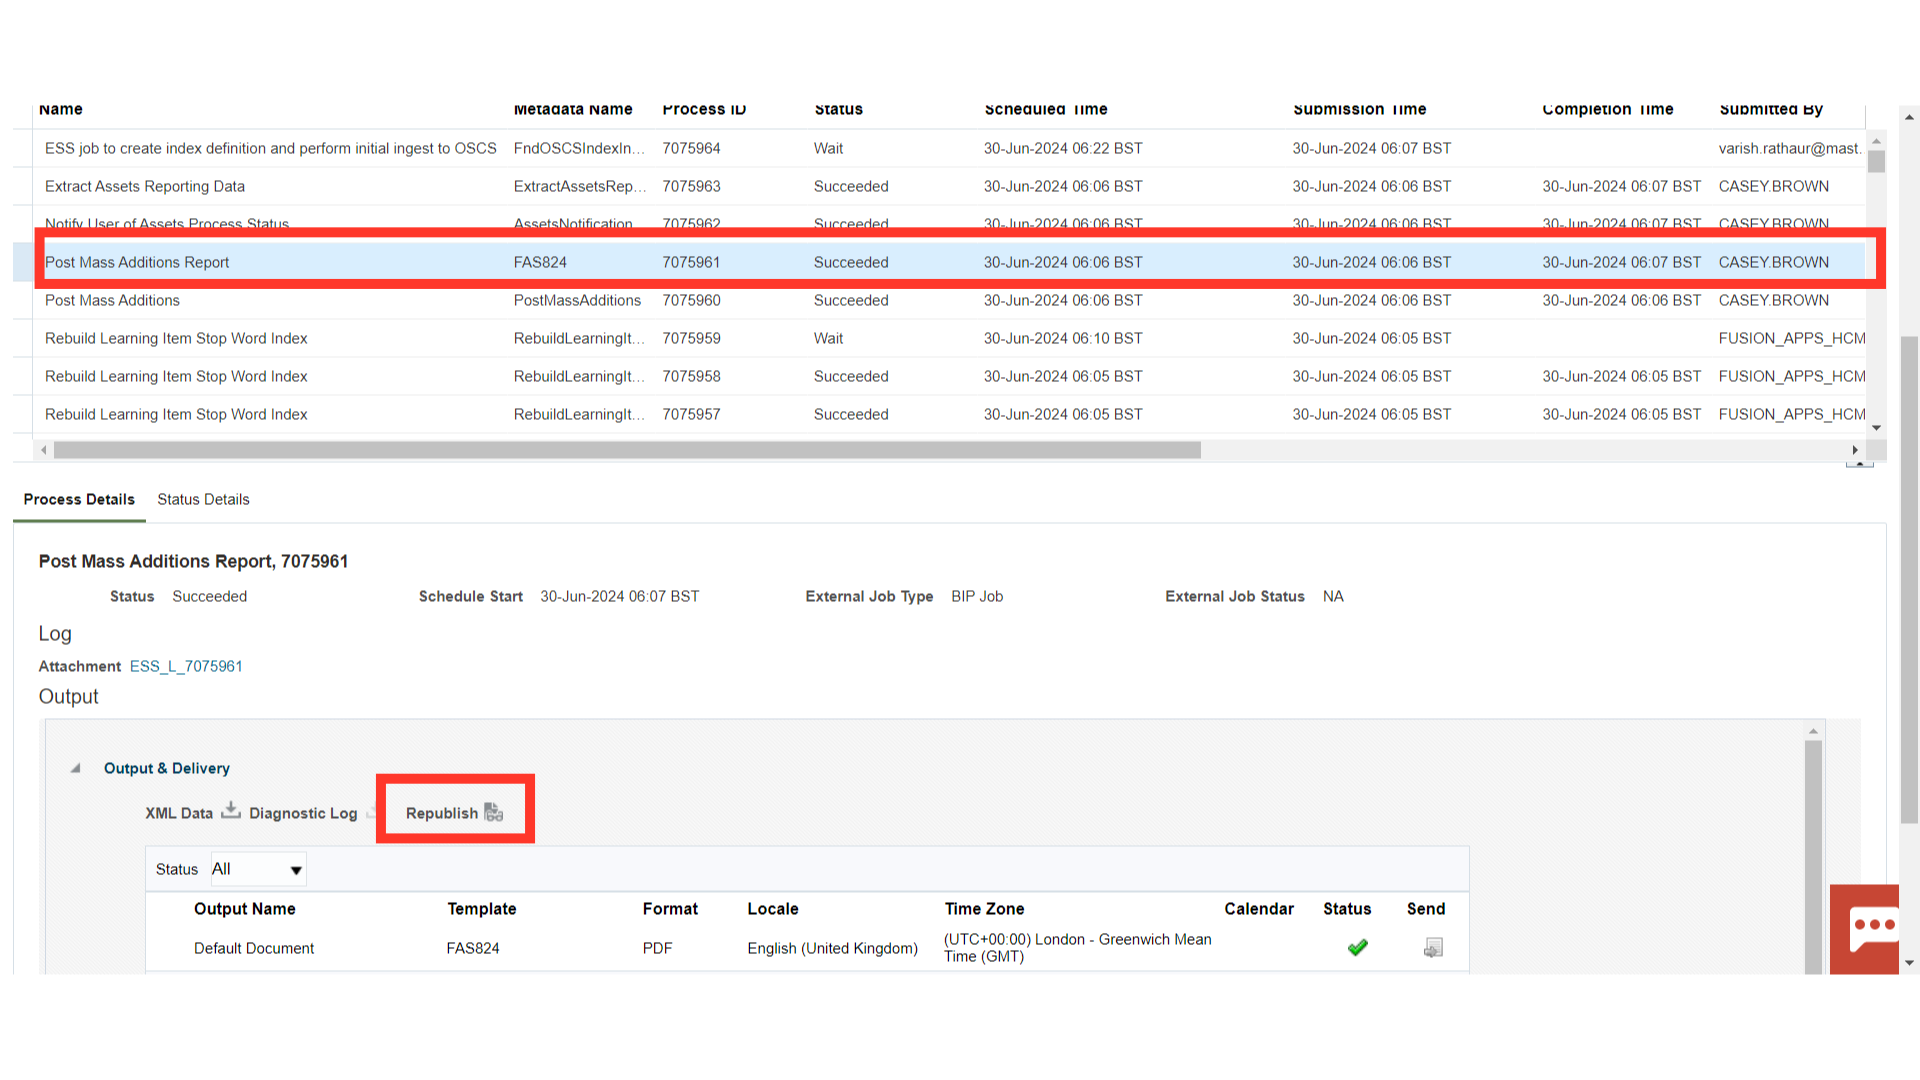
To find out how the Post Mass Addition process is progressing, navigate to Schedule Processes. Click the Republish button to download the Post Mass Additions Report from the scheduled process.
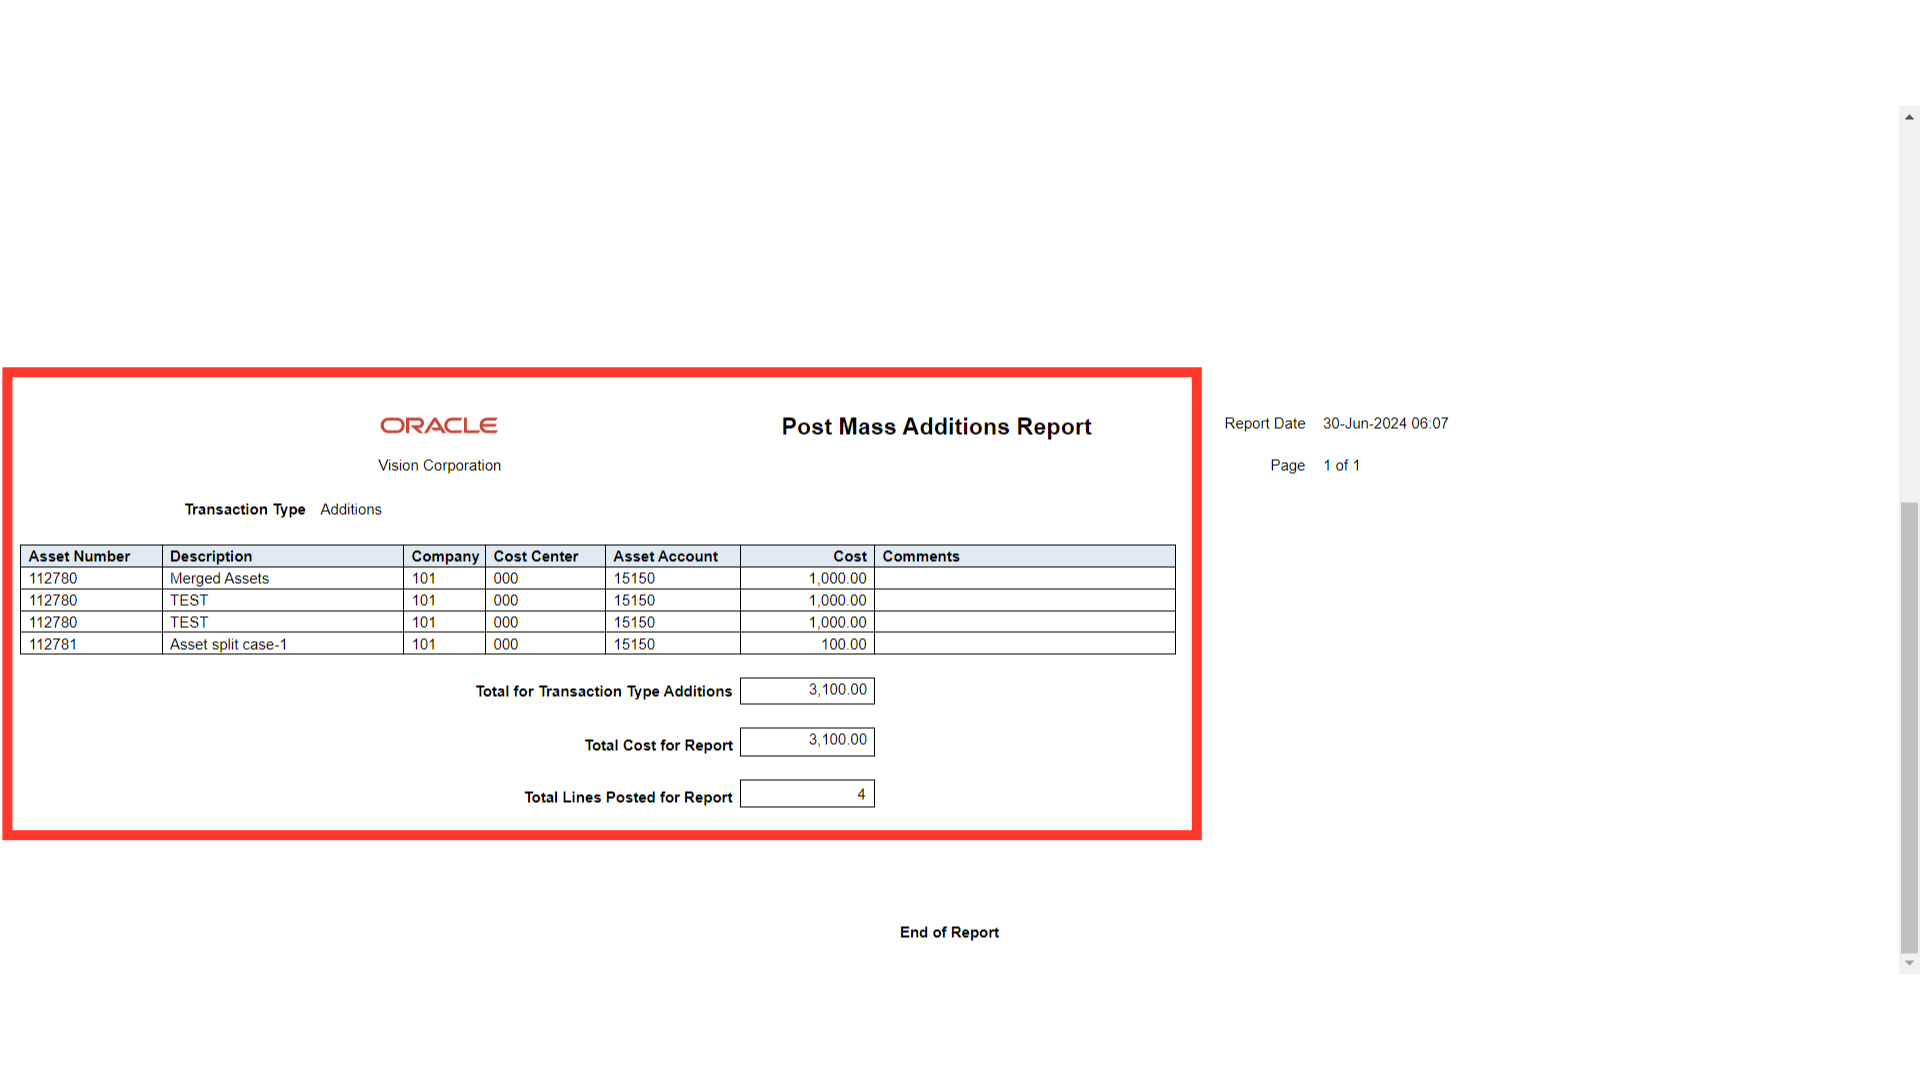
Lists all the asset additions and cost adjustments processed by the Post Mass Additions process. The report is sorted by transaction type.
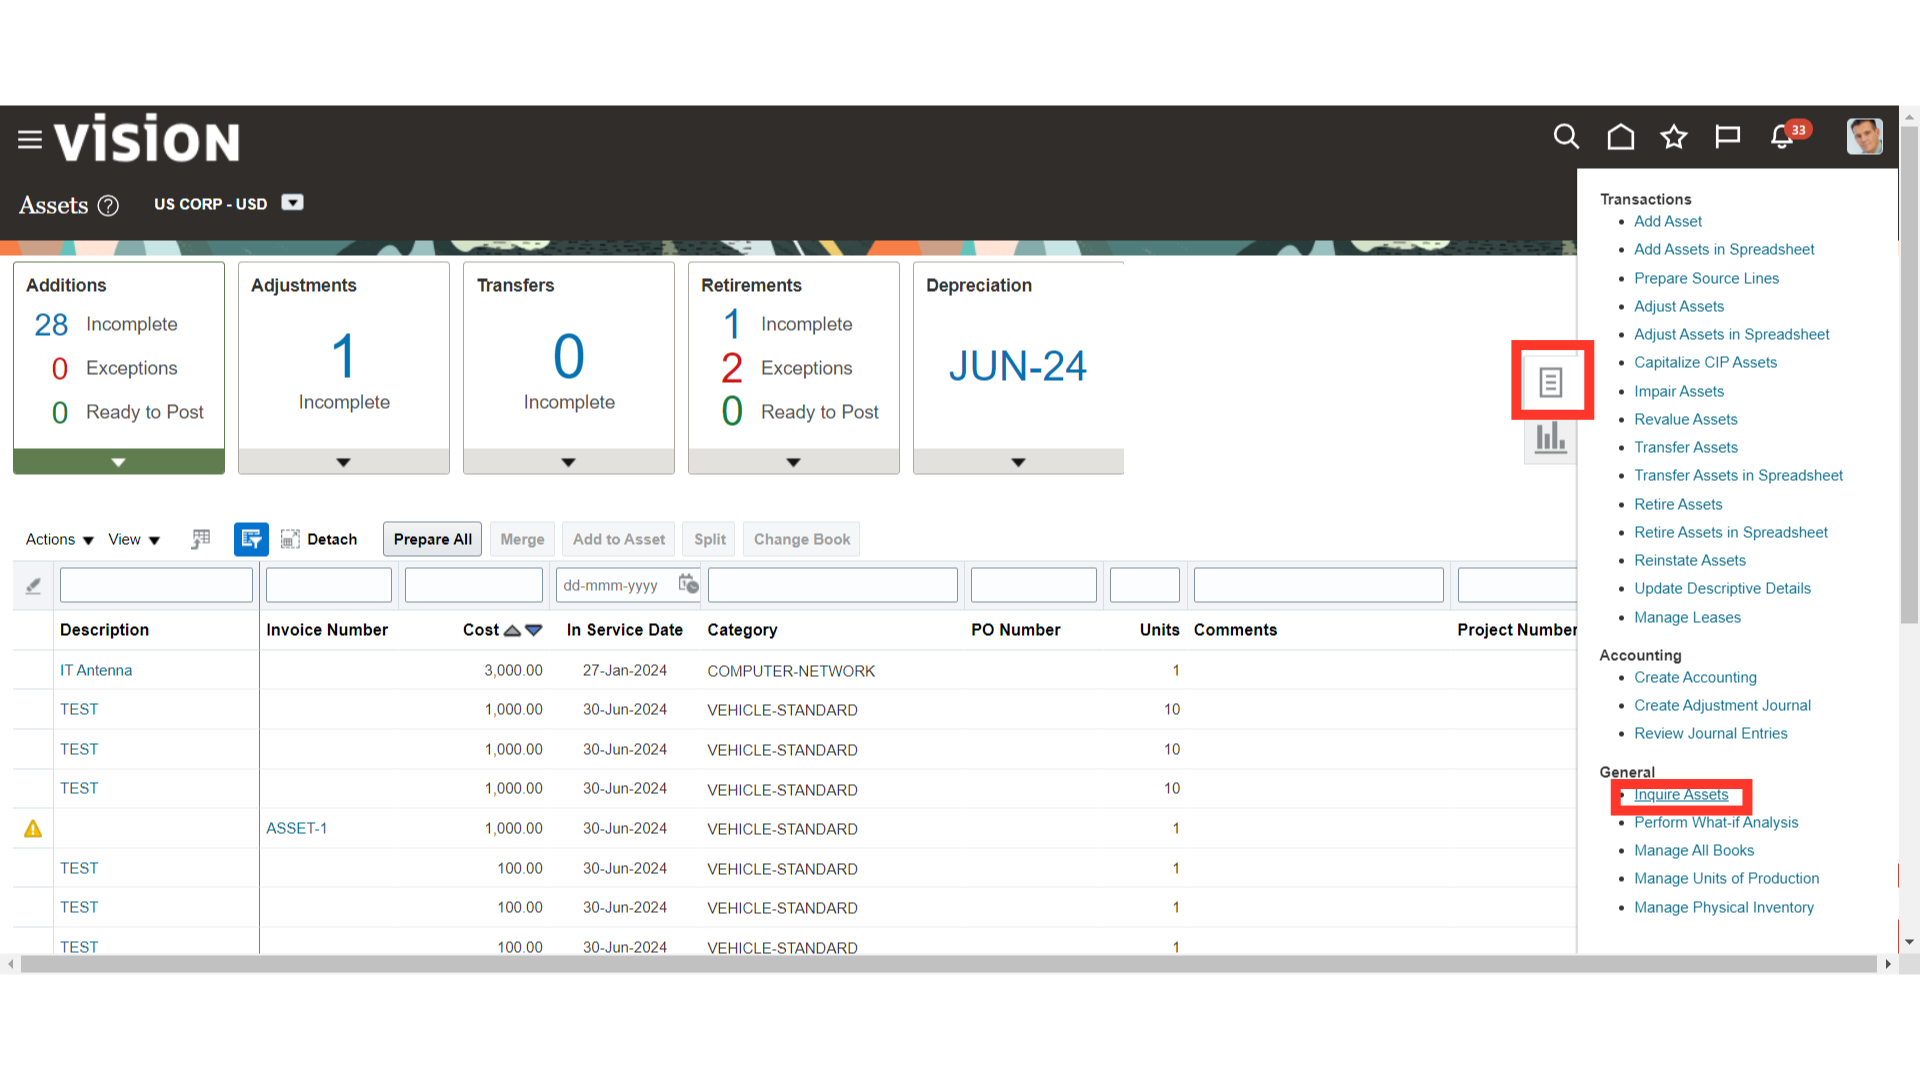
Click on the Inquire Assets from the task list to search the assets created.
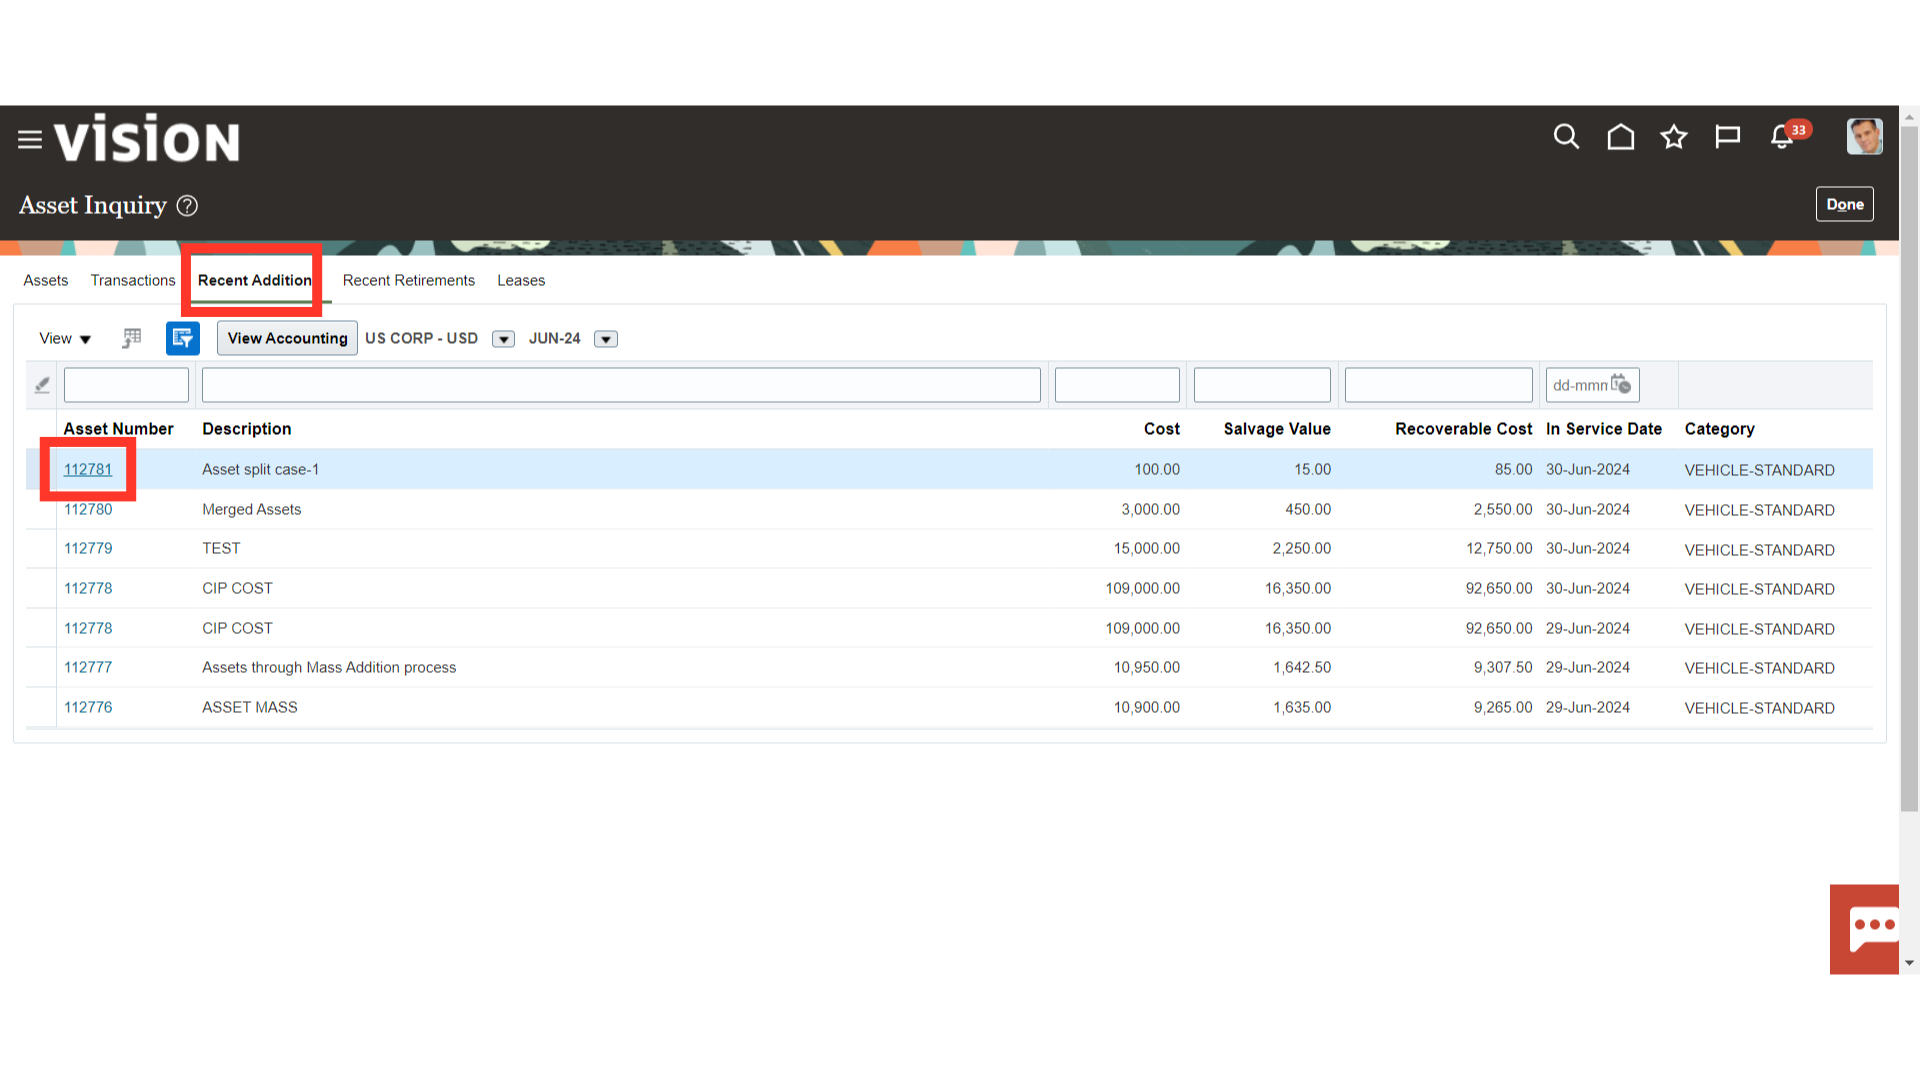
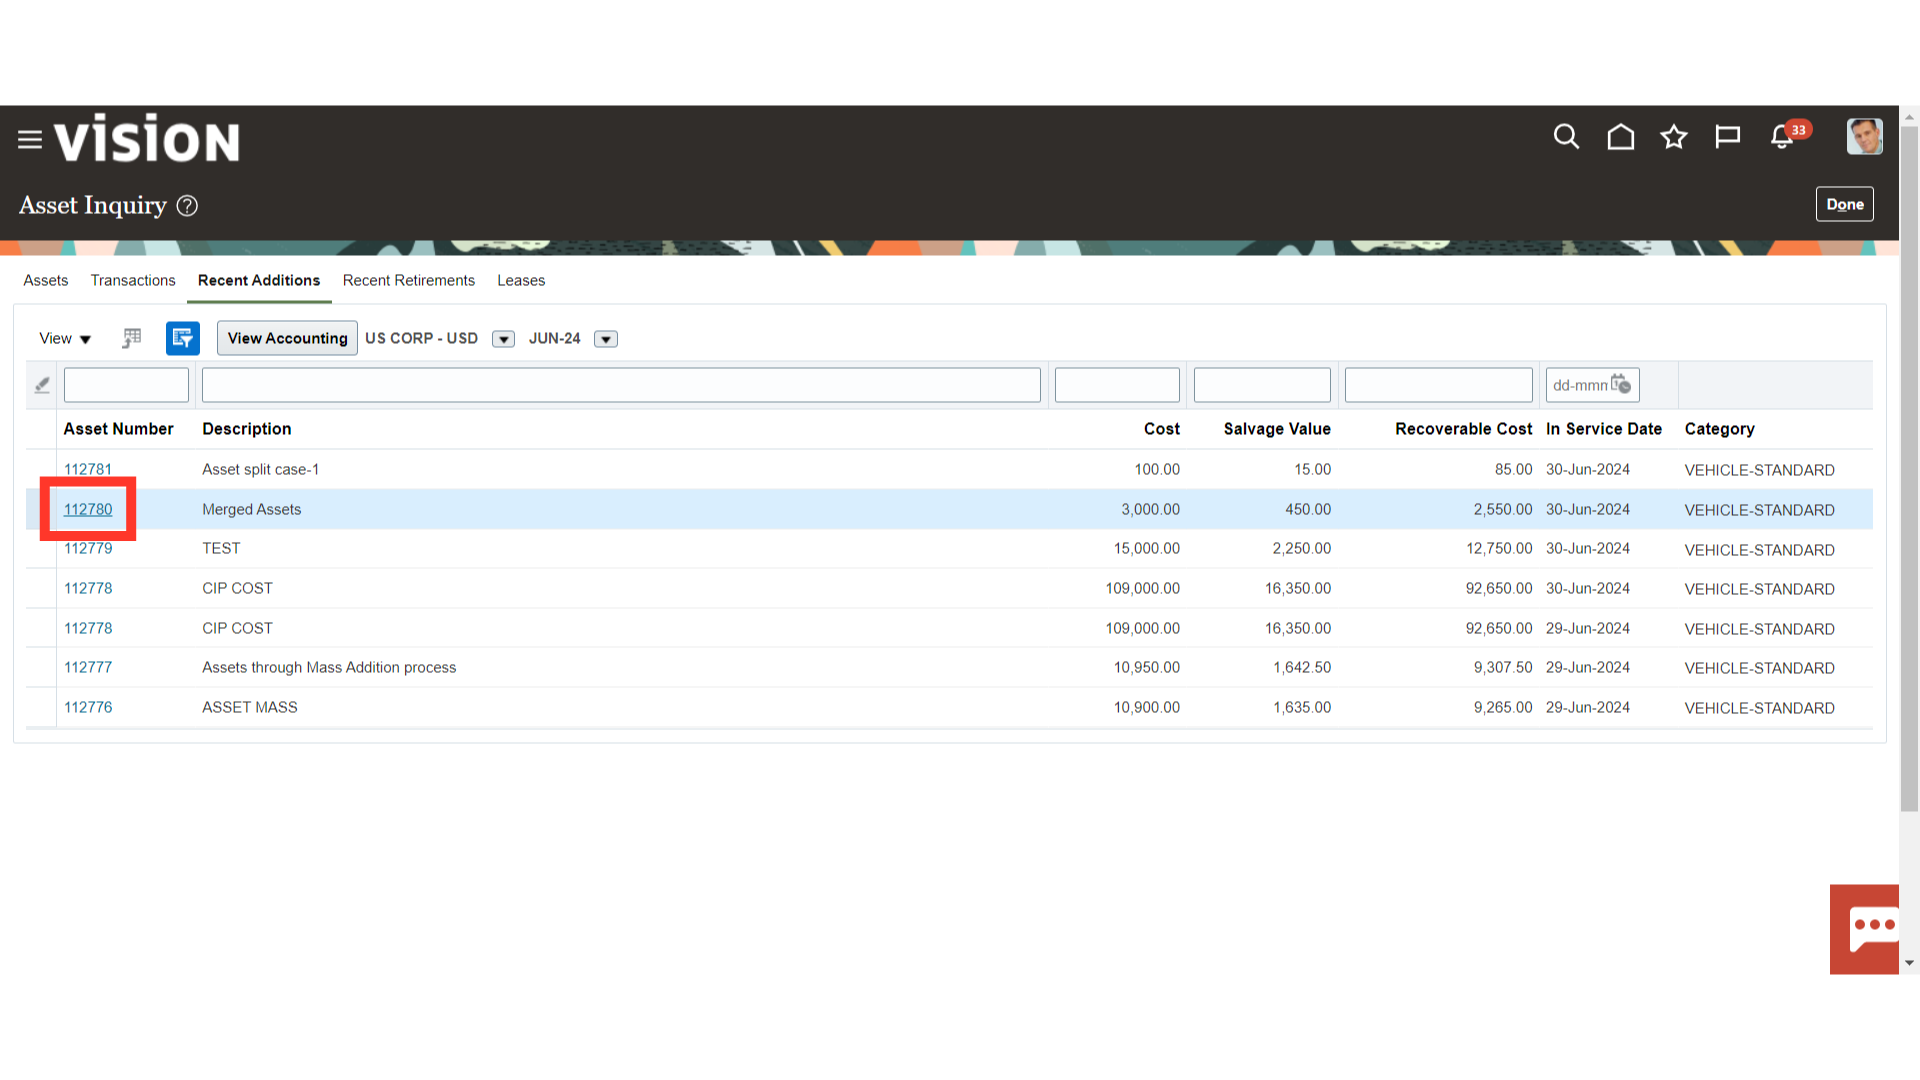
Click the Asset number hyperlink under Recent Additions to open the Asset created with the Split feature.
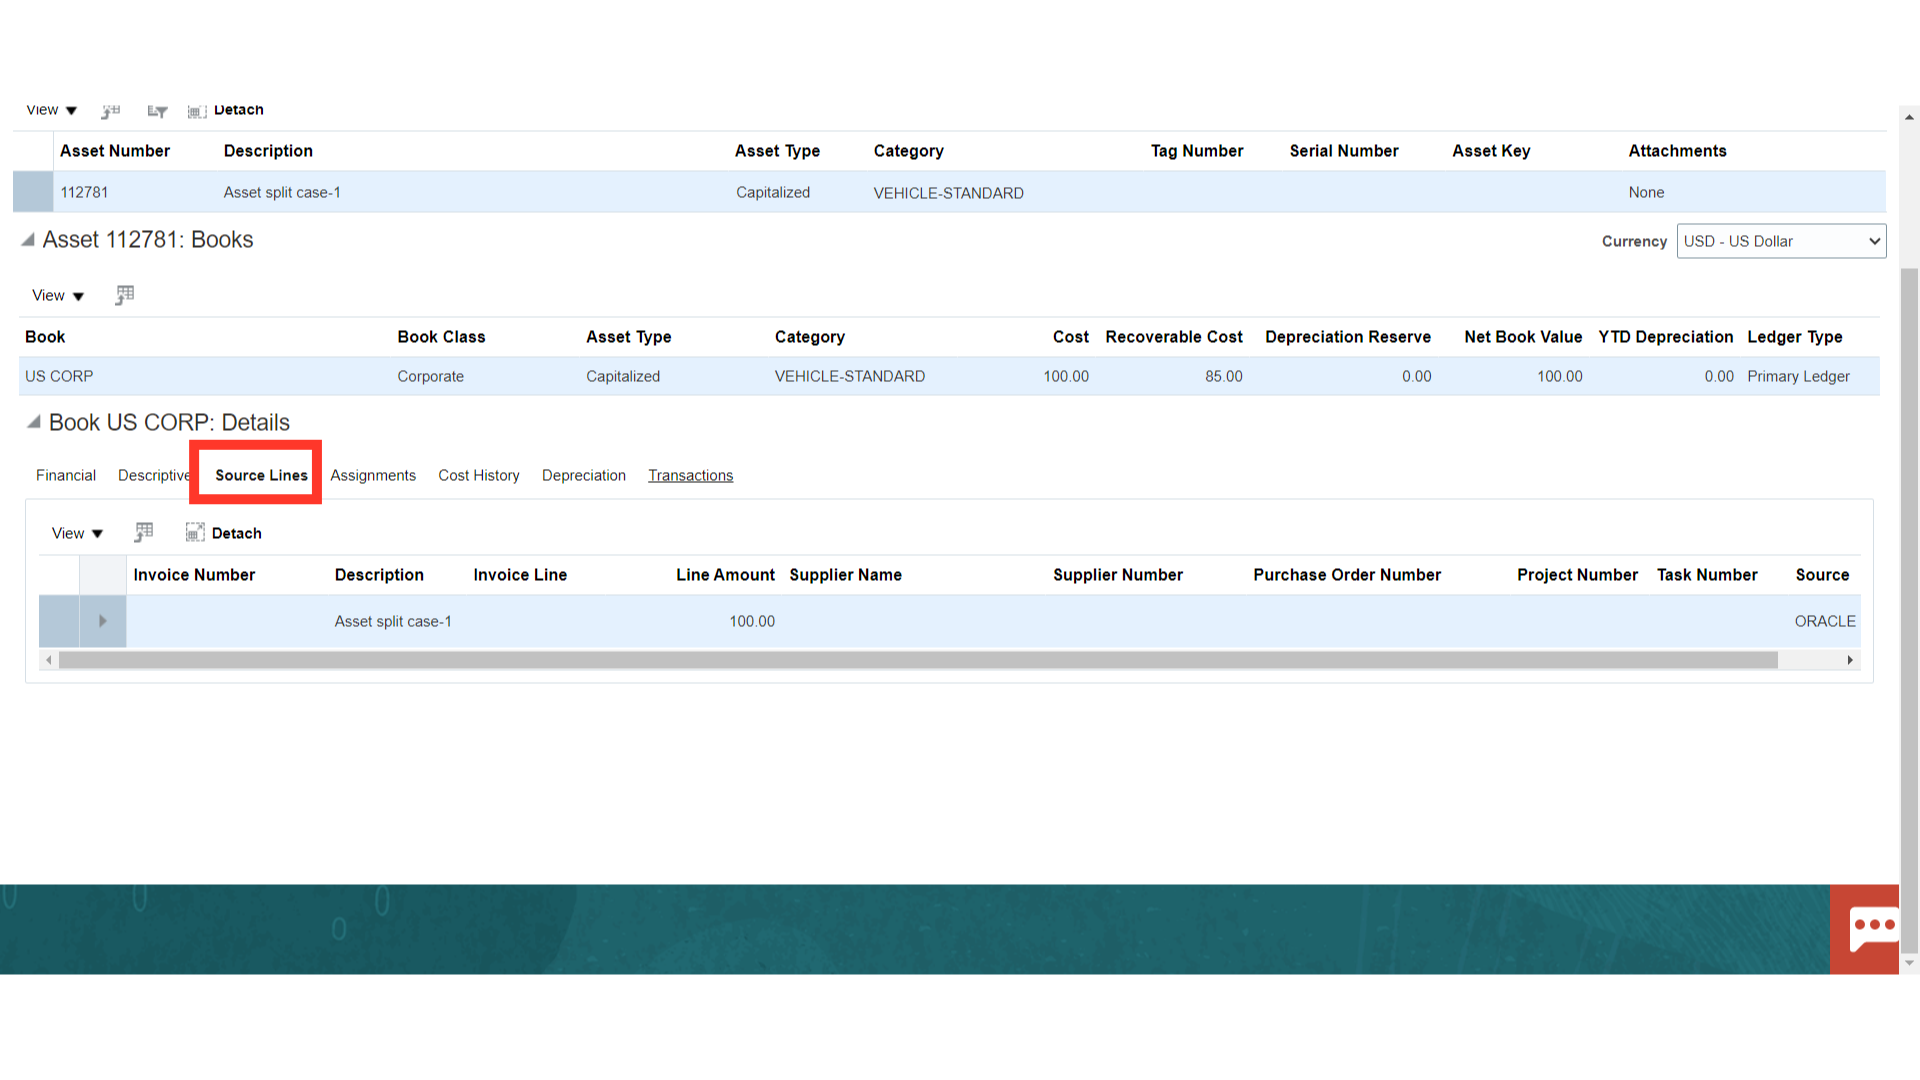
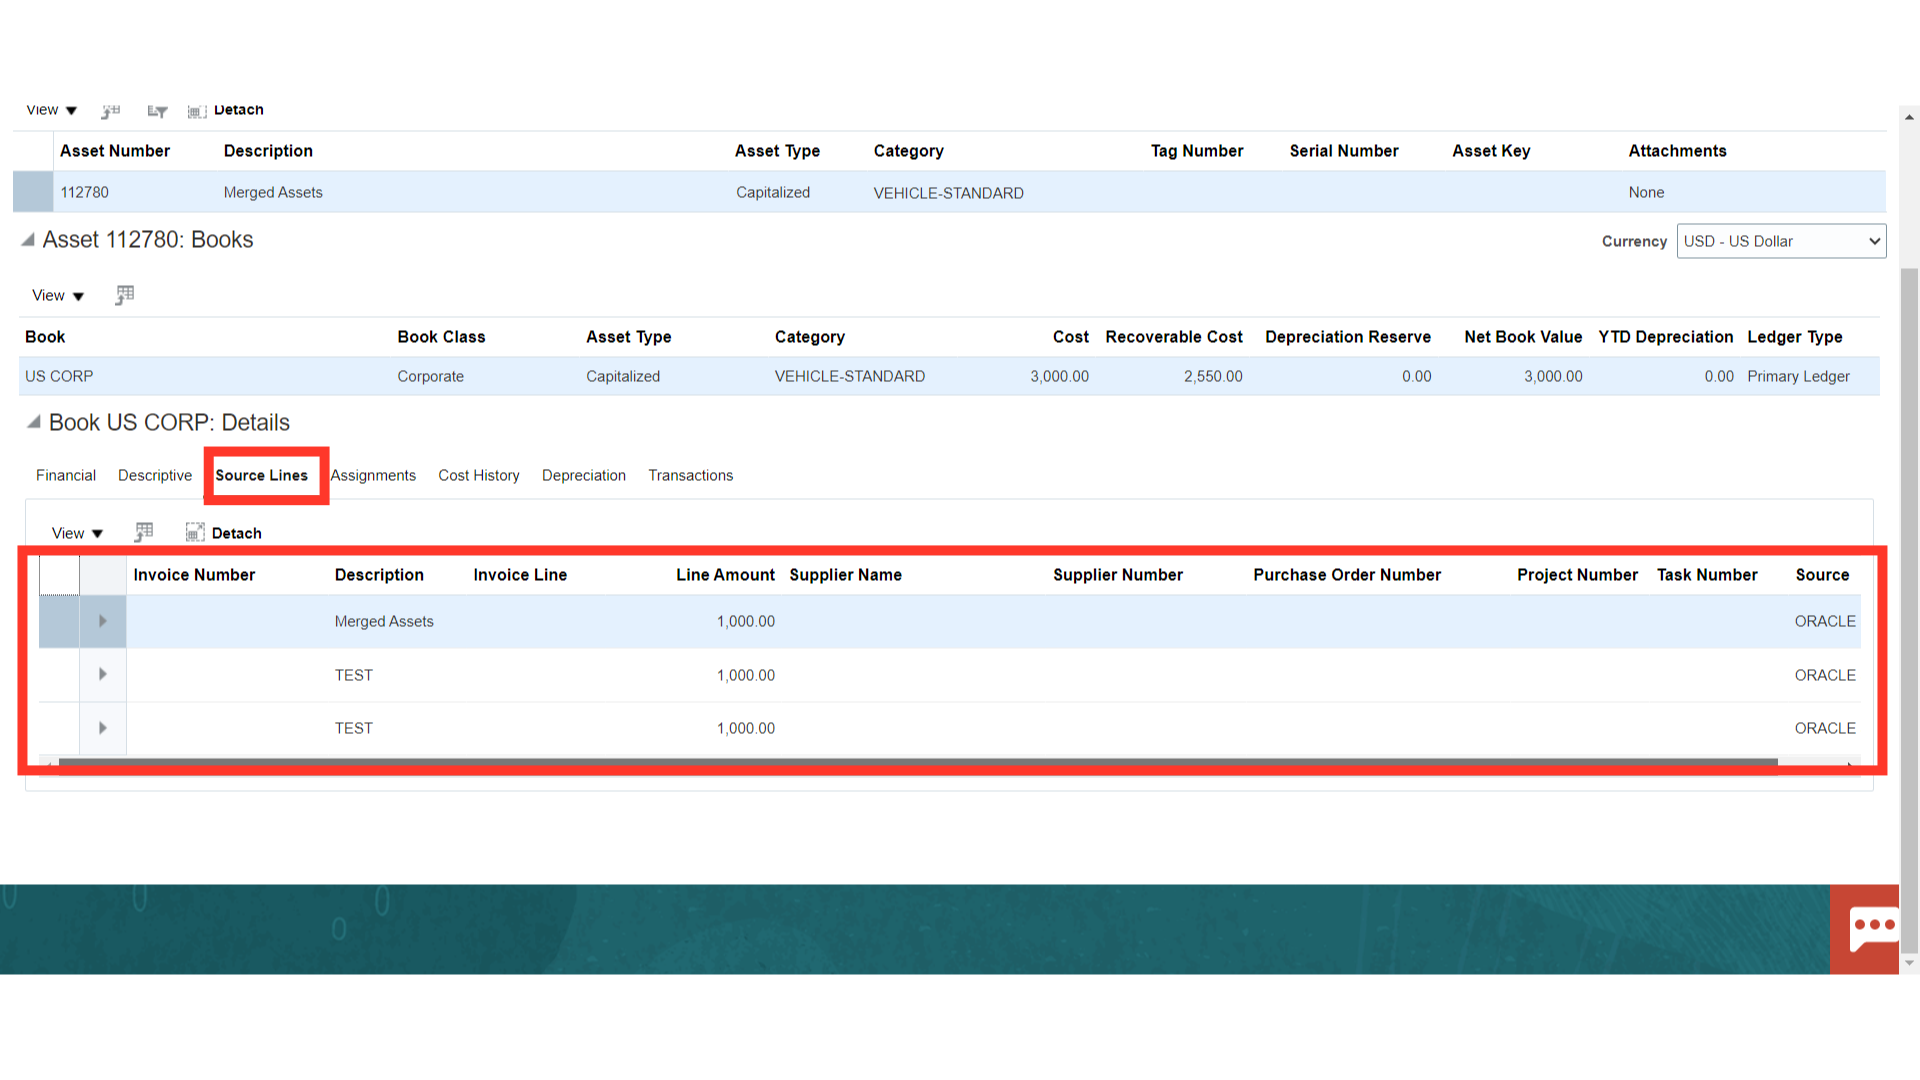
Click on the Source Lines tab to see more details about the source from which the asset was created.
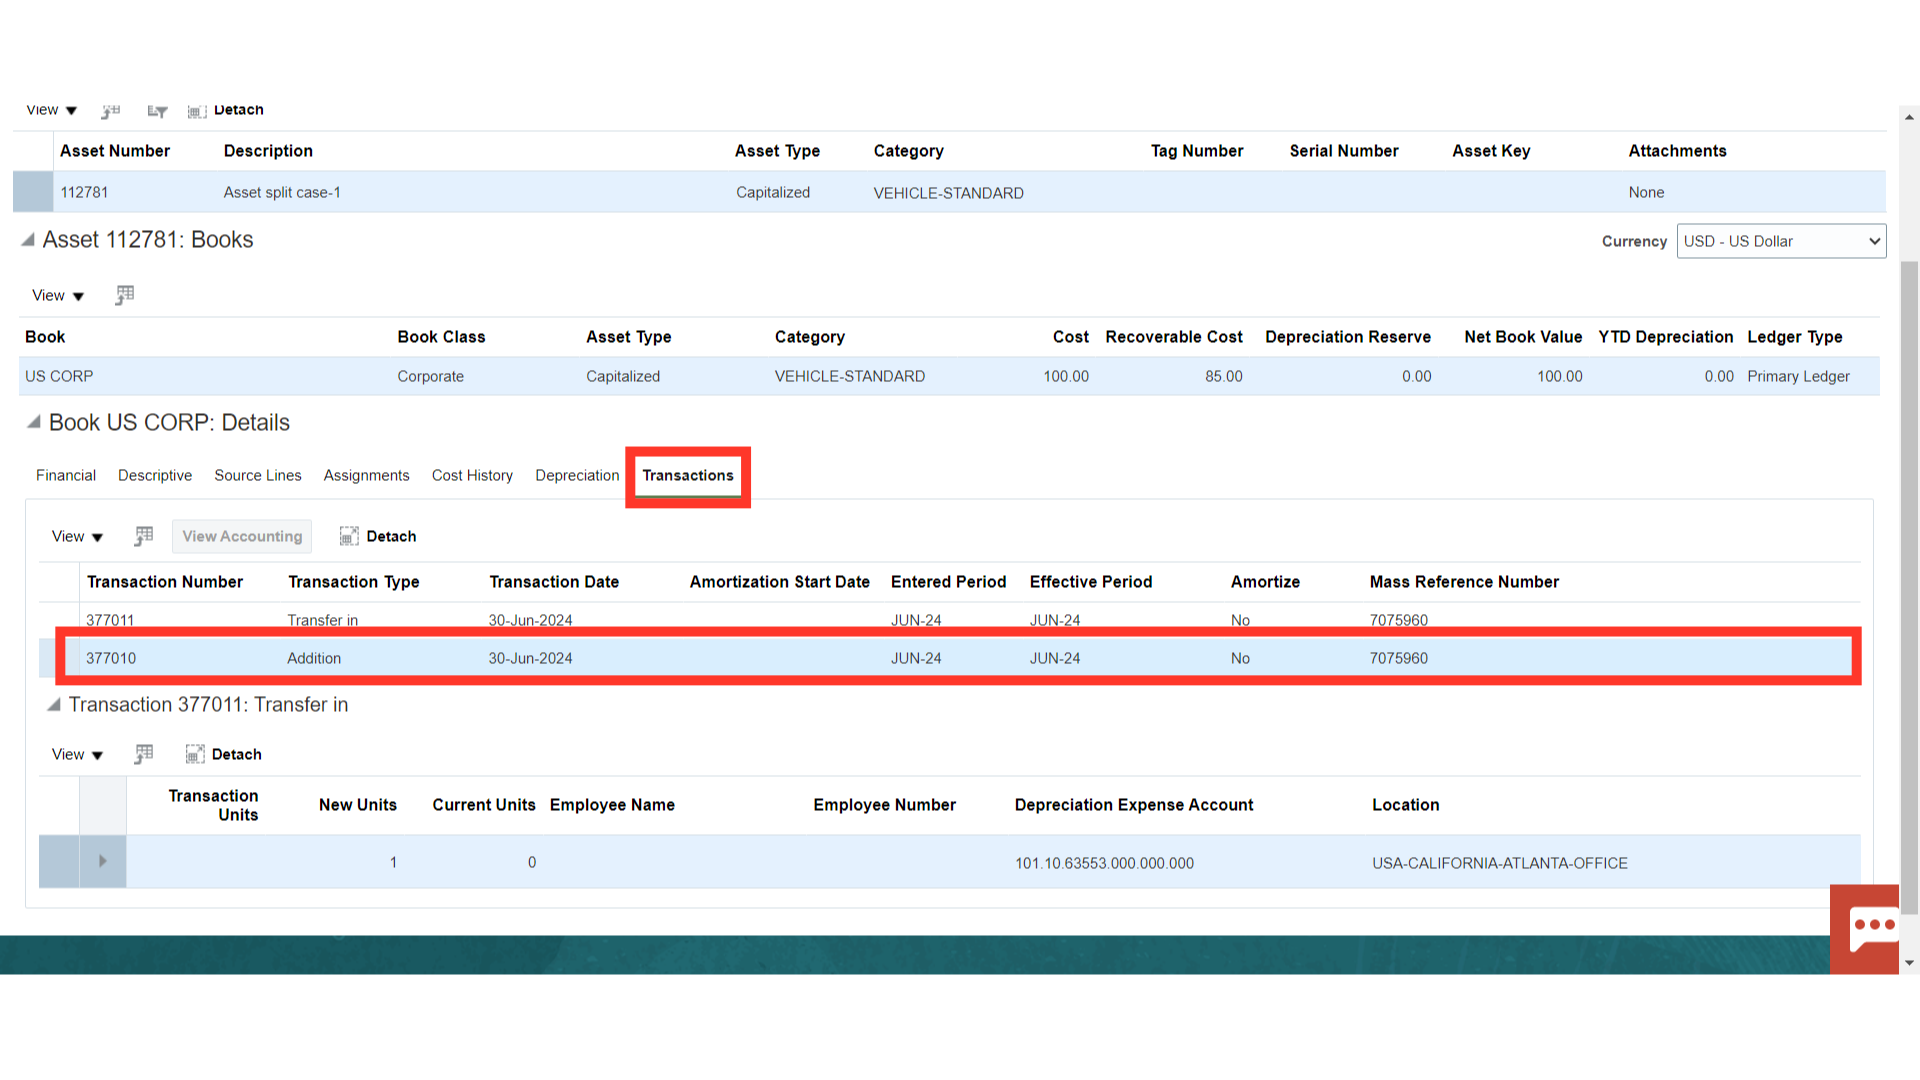
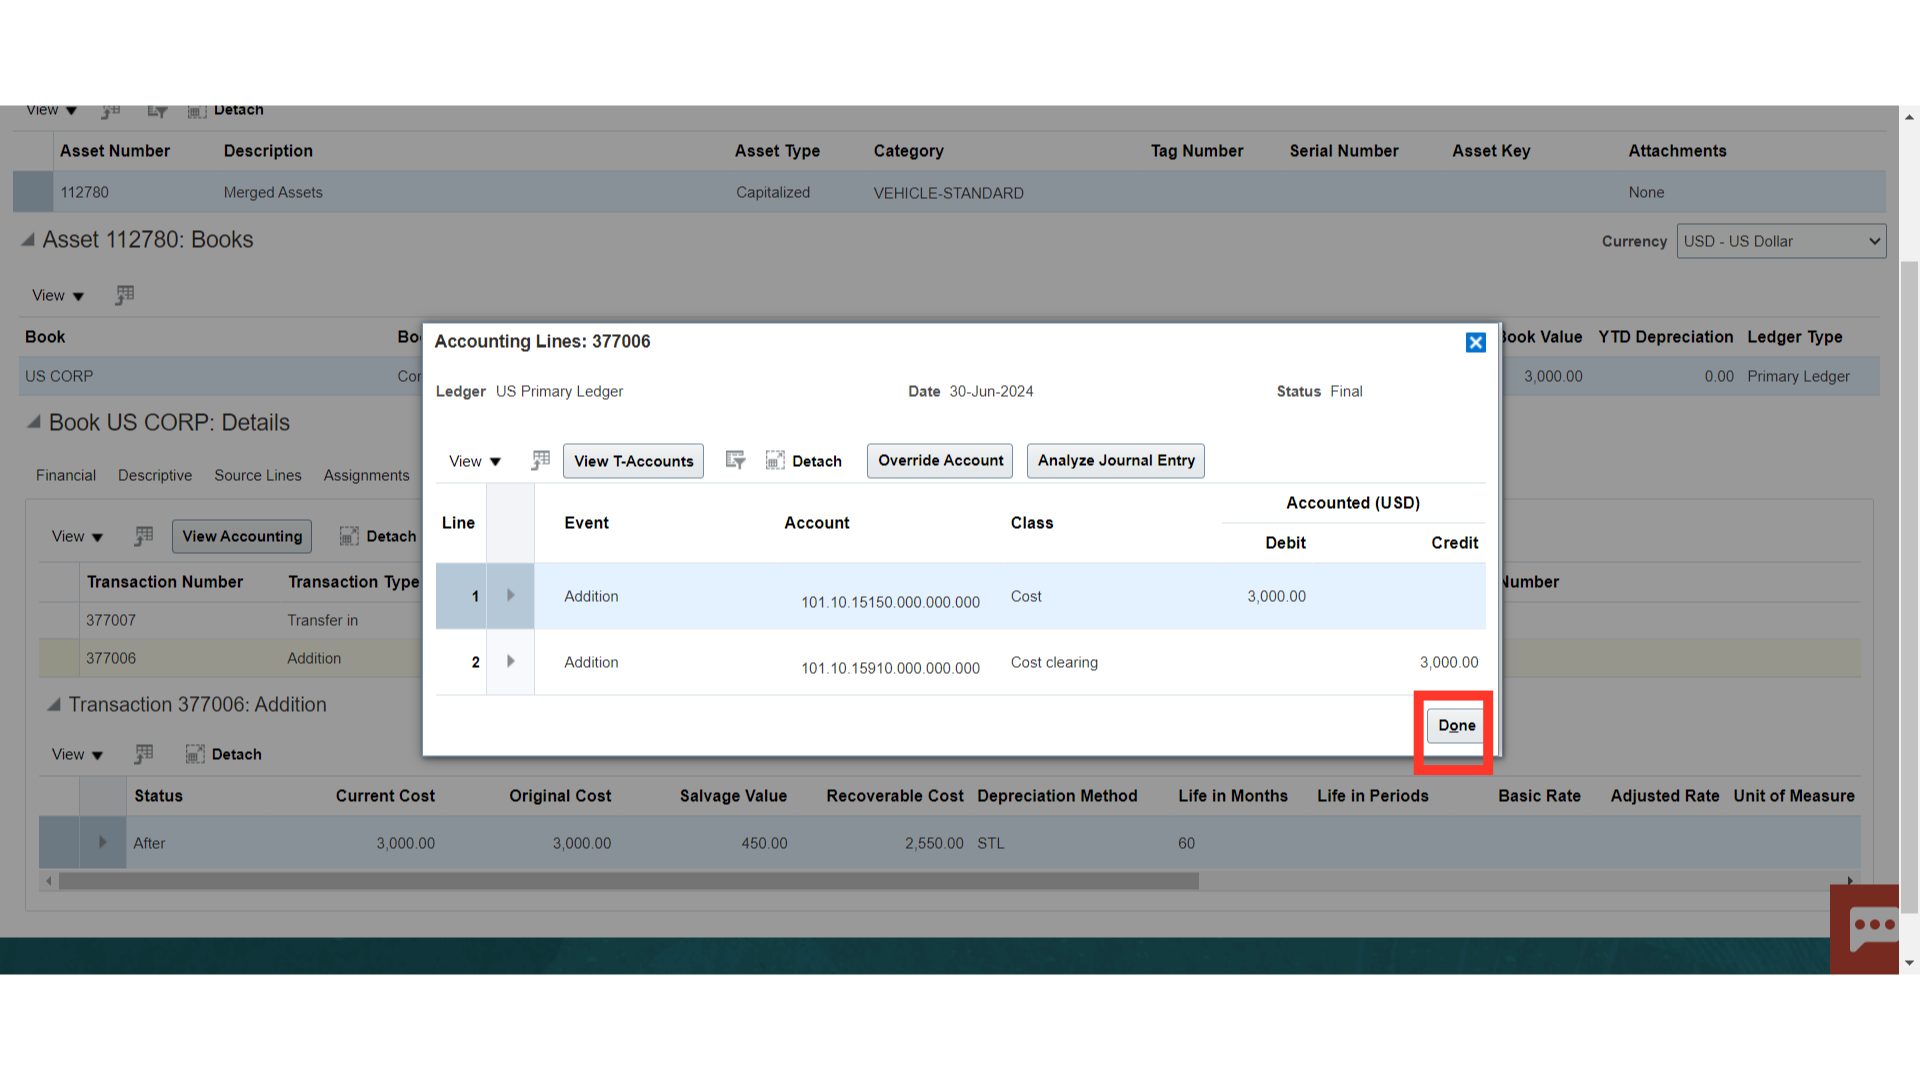
Under the Transactions tab, the accounting entry of asset additions is displayed. Click on the Addition Transaction type, and select the View Accounting button to see the details of the accounting entry.
This is the accounting entry generated for the Asset creation in which the asset cost is debited and Cost clearing is credited. Click on the Done button to close this window.

Click on the Asset number hyperlink to open the assets created through the merge feature.
Click on the Source Lines tab to see more details about the source from which the asset was created.
A similar accounting entry is generated for assets created by merging multiple mass addition lines.
This guide has shown how to create the asset from the mass addition lines and how to split and merge them. Furthermore, talked about were the accounting entry and source information for split and merge assets.