Recurring Bill Plans
Use Recurring Billing to manage the creation of invoices on a cyclical basis for a fixed period of time, as reflected in the terms of a contract with your customer. This guide will provide a detailed step-by-step process for creating the transactions using the Recurring Bill Plans in oracle fusion.
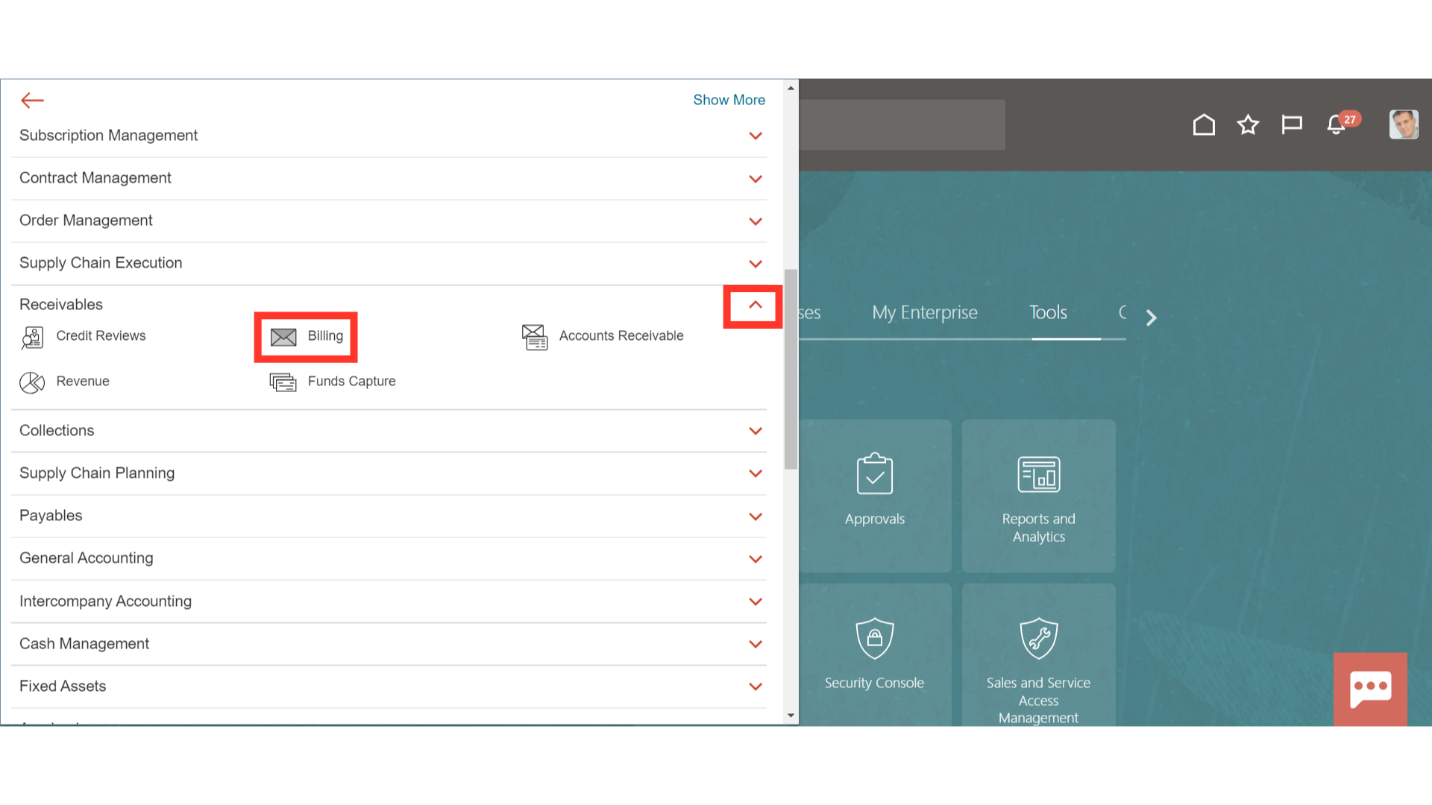
Click on the Navigator icon to access the Receivables menu.

Access the Billing work area by selecting Billing under Receivables from the navigator. Alternatively, on the Home page, you may select the Receivables menu and under that select the Billing submenu.
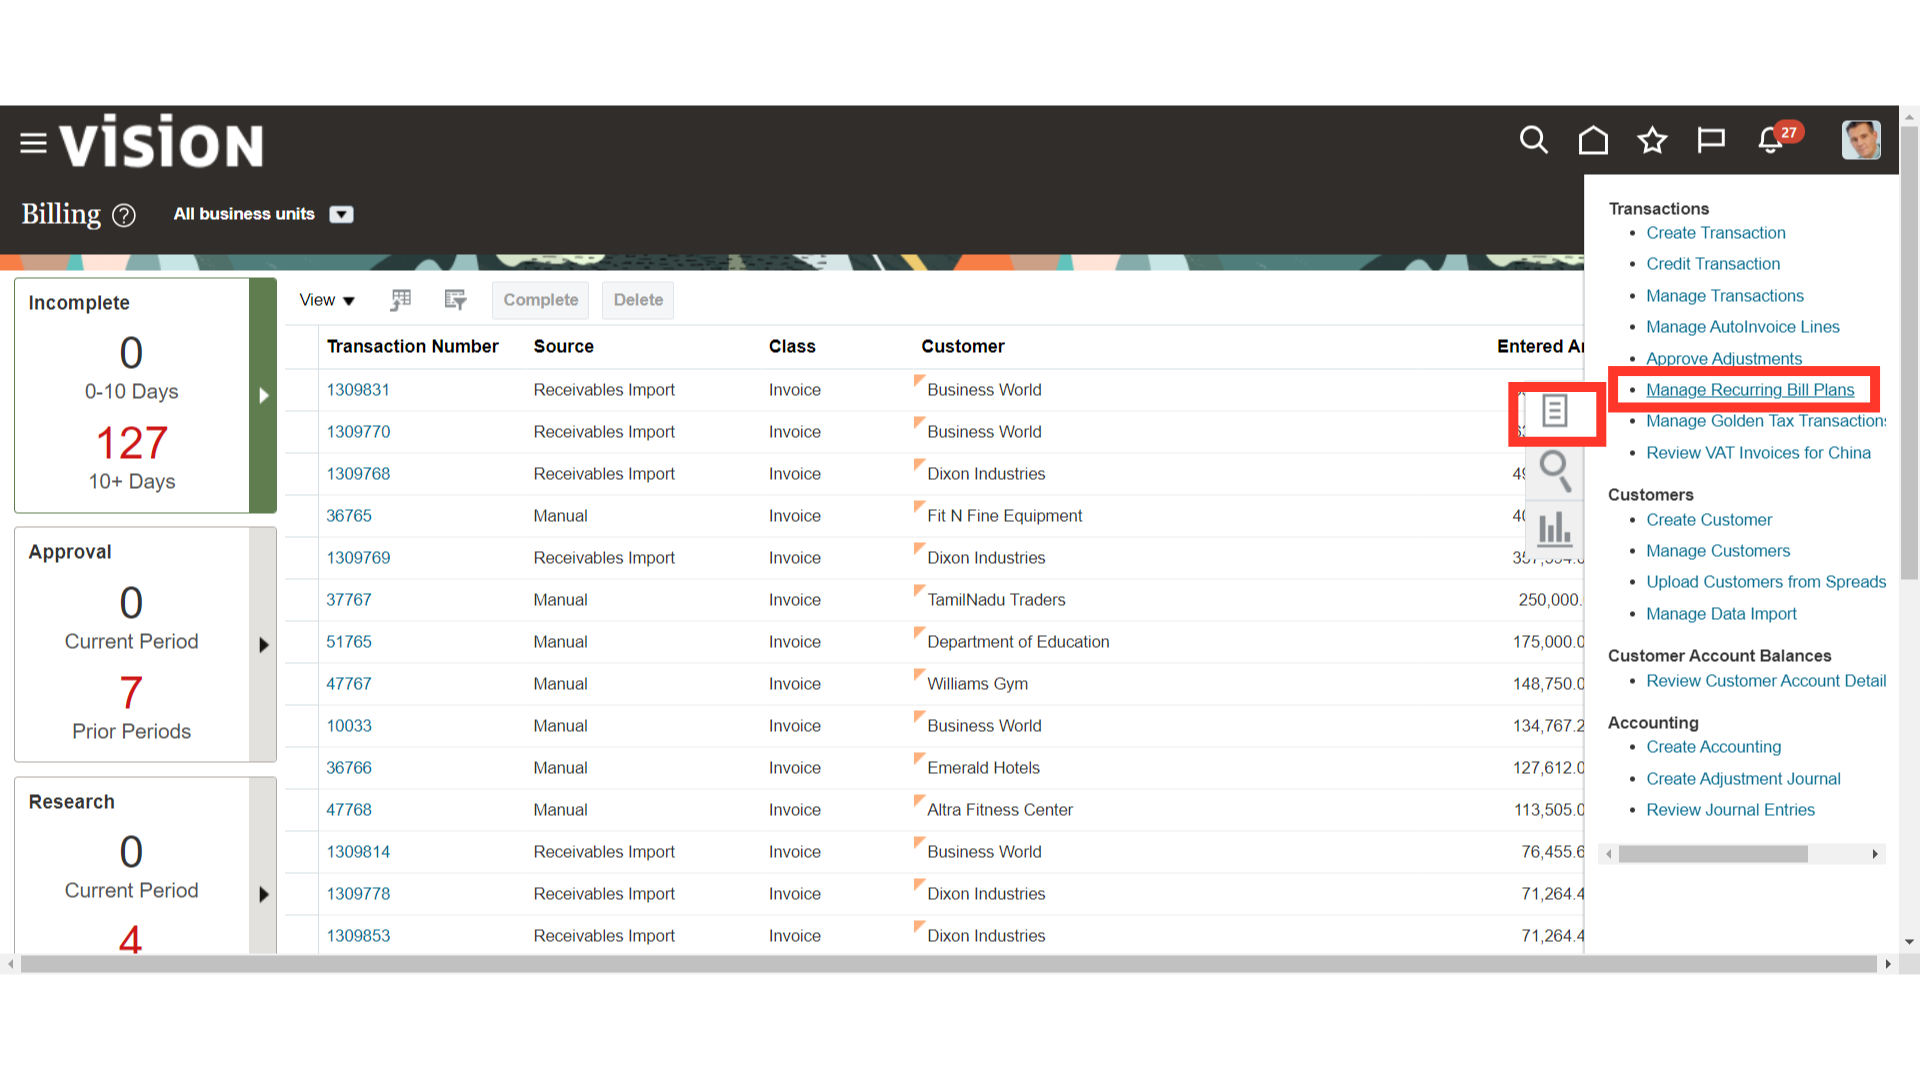
Click on the “Manage Recurring Bill Plans” hyperlink from the task list to create recurring type of invoices.
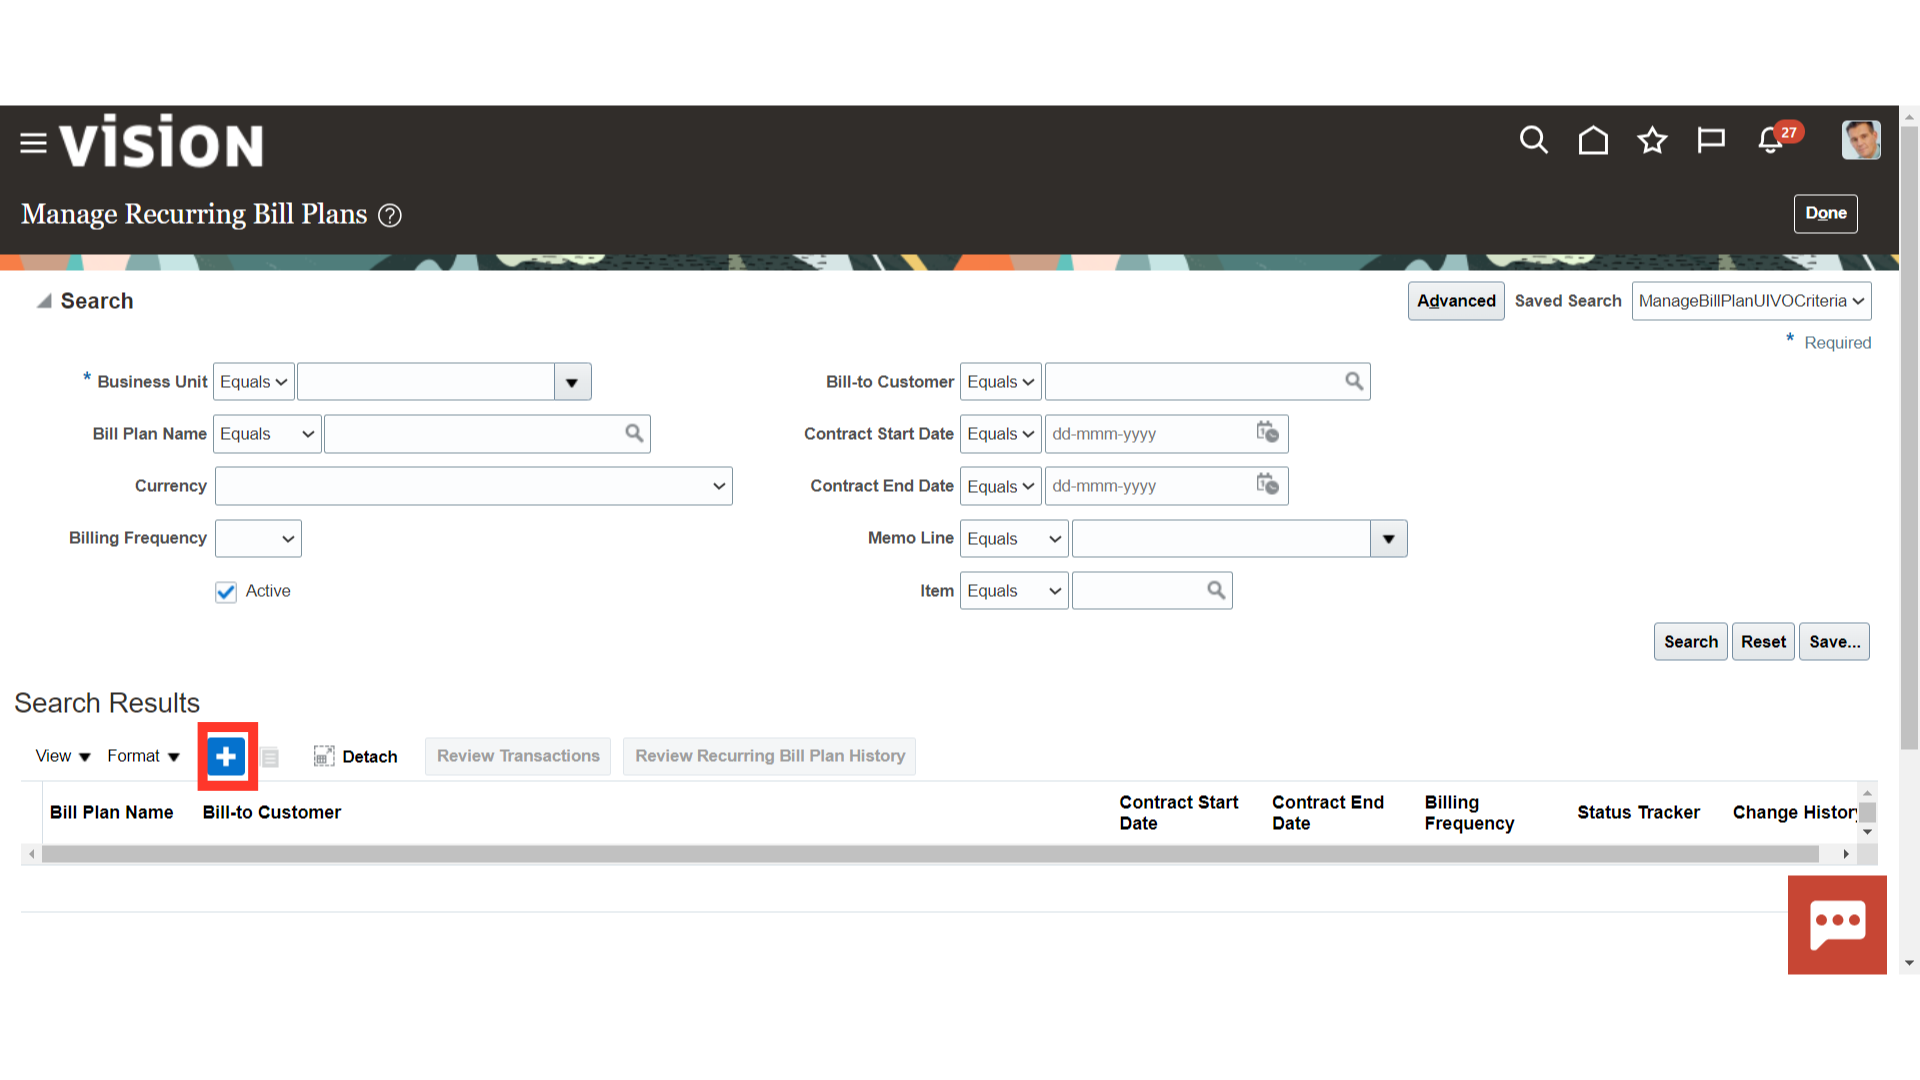
Click on the Plus Icon to create new Recurring Bill Plans.
From the list of values, either choose the business unit to create the recurring bill plan for, or manually enter it. By default, a unique number is included in the Bill Plan name. However, if necessary, meaningful naming conventions can be used to search the transactions.
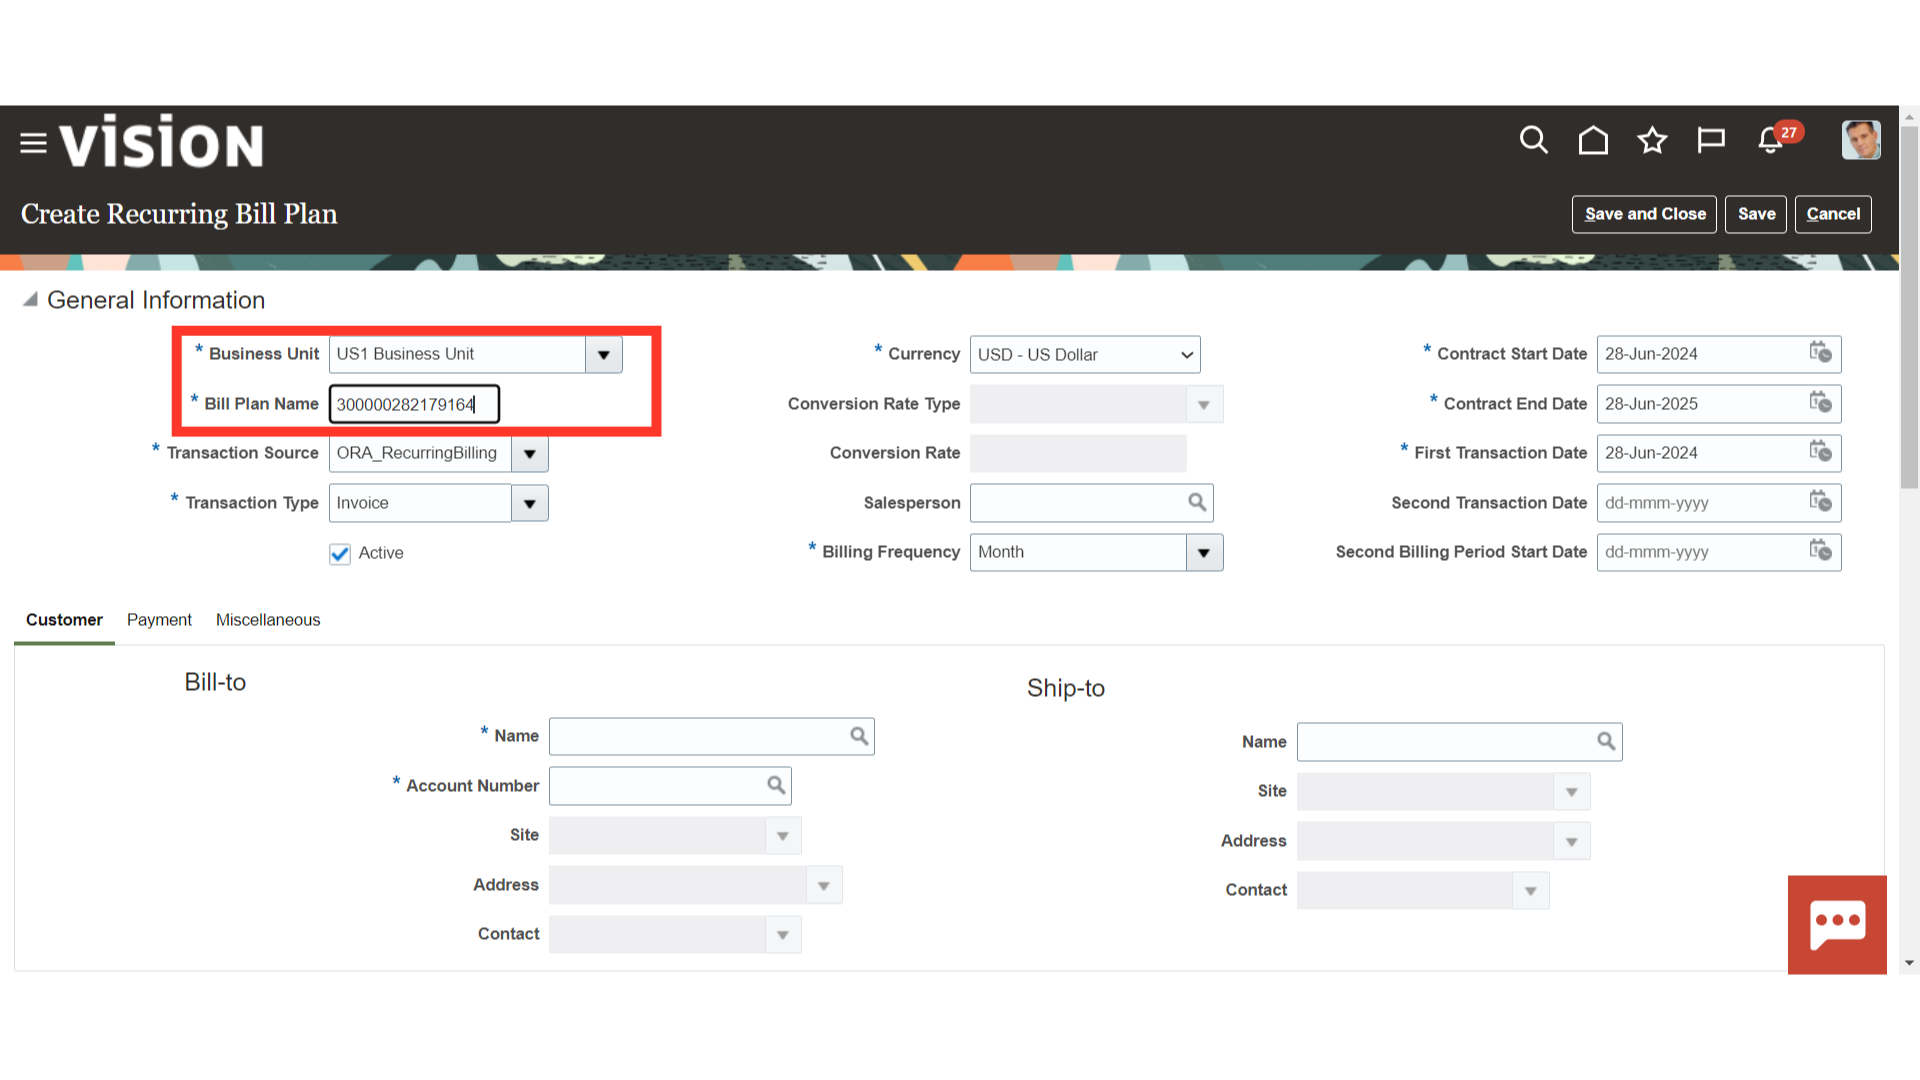
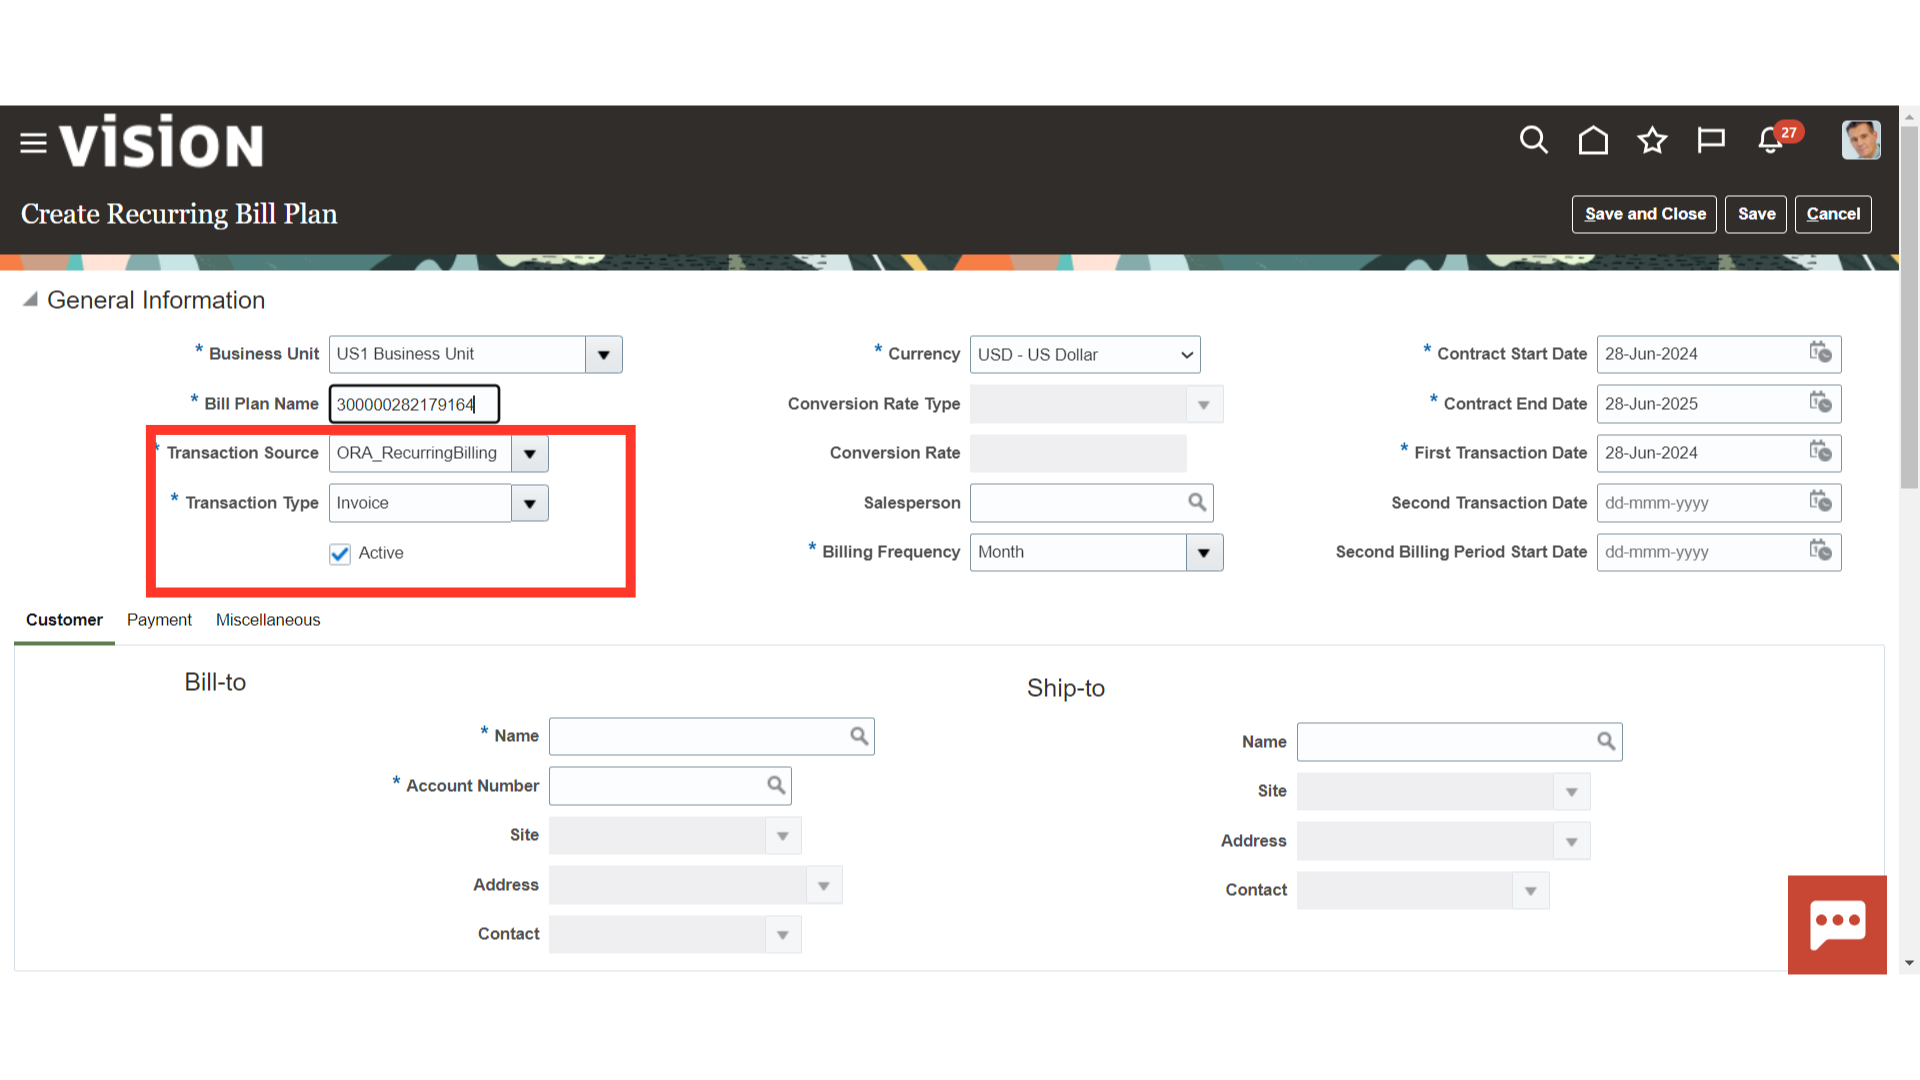
Transaction Source field: Use the predefined transaction source ORA_RecurringBilling or enter an Imported transaction source defined for use with bill plans.
Transaction Type field: Use the predefined transaction type Invoice or enter an Invoice transaction type defined for use with bill plans. Make sure that the checkbox against the Active field is enabled , so that recurring invoices can be created when process is submitted.
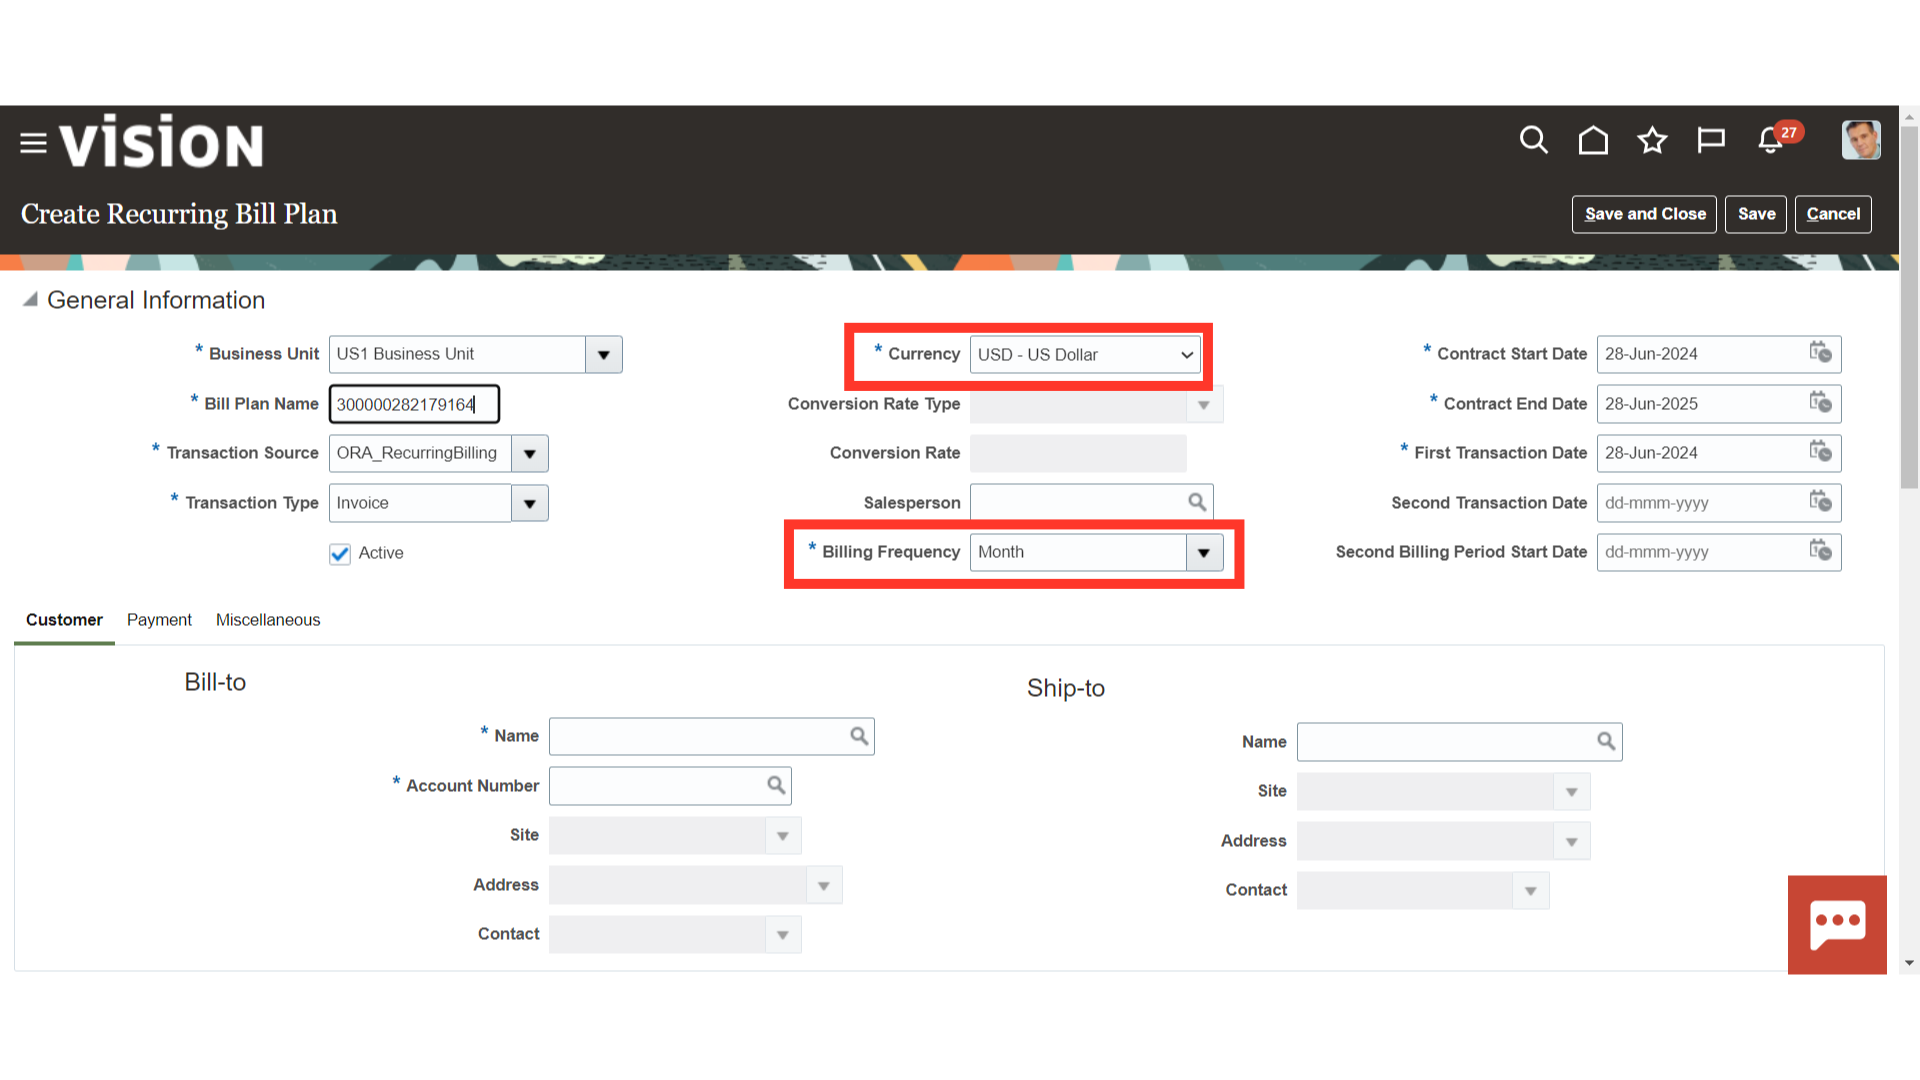
Select the currency using which recurring invoices are to be created by default is USD currency, and if required select other currencies from the list of values.
Billing Frequency field: Select the billing frequency for the bill plan. Receivables generate invoices based on the billing frequency and the transaction and billing period dates.
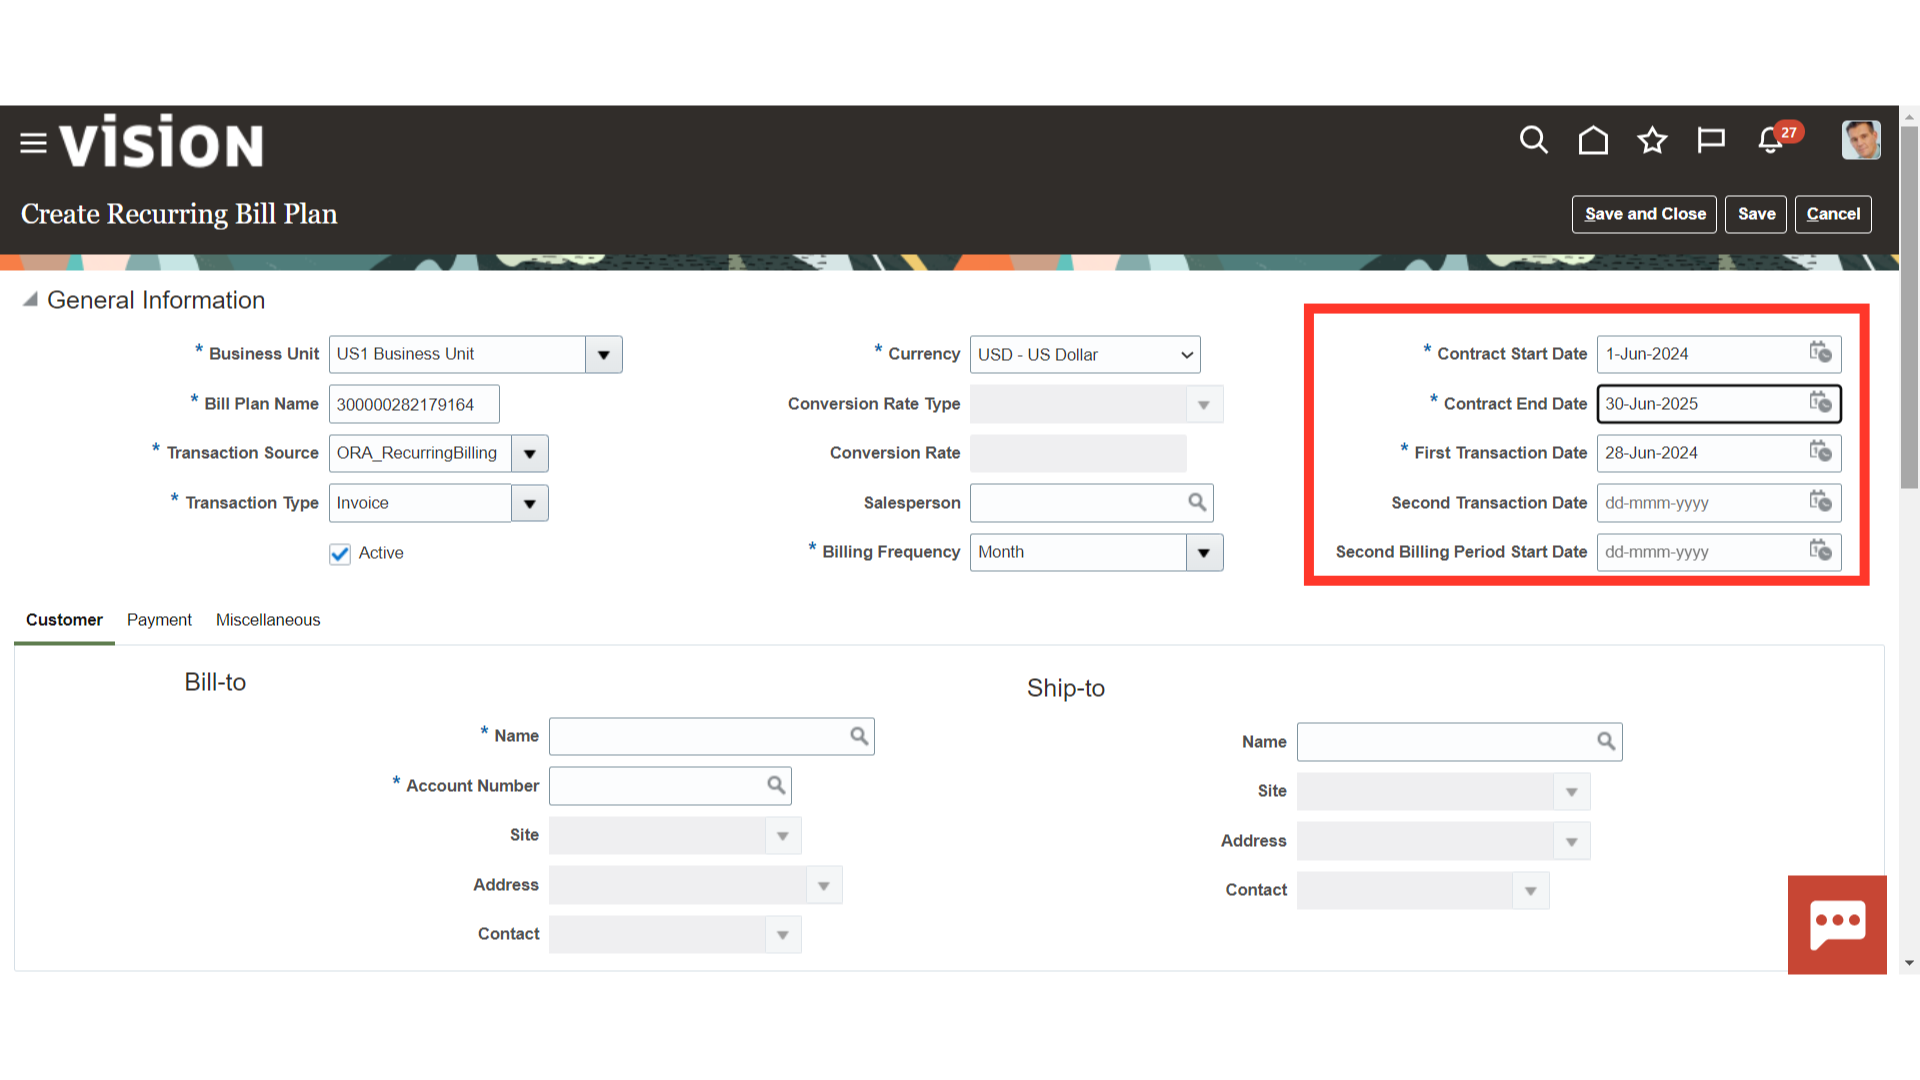
Contract date fields: Enter the start and end dates of the contract. The contract start date is the date of the first billing period. The contract end date indicates the end of the contract and therefore the bill plan. You can’t generate invoices after the contract end date.
First Transaction Date field: Enter the date of the first transaction created by the bill plan. This date must be within the first billing period. The remaining transactions are generated and dated according to this date plus billing frequency unless you use the Second Transaction Date and Second Billing Period Start Date fields.
Second Transaction Date field: If necessary, enter a date for the second and all subsequent transactions created by the bill plan. The remaining transactions are generated and dated according to this date plus billing frequency.
Second Billing Period Start Date field: If necessary, enter a date for the remaining billing periods in the bill plan. The remaining billing periods are dated according to this date plus billing frequency.
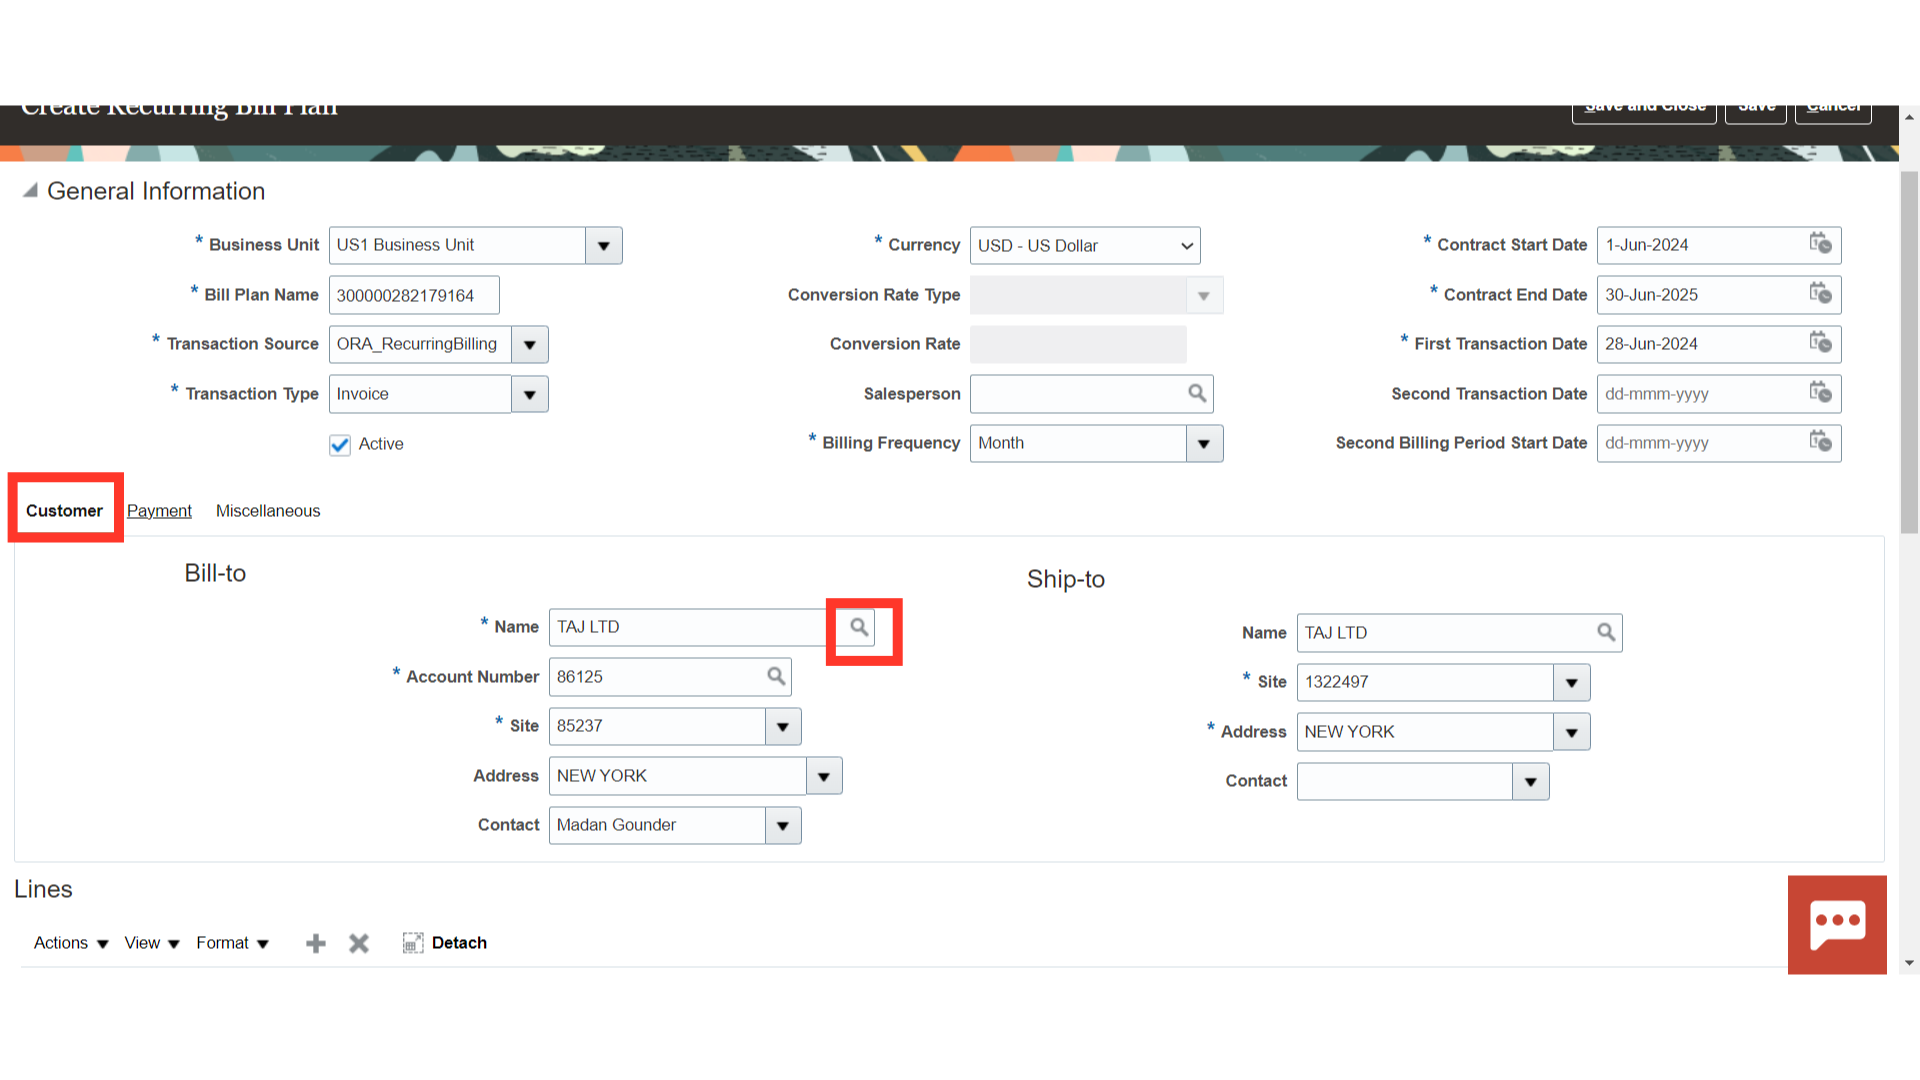
Click on the Customer tab to enter the details of the customer. Enter the bill-to customer for the bill plan. If necessary, enter a different ship-to-customer.
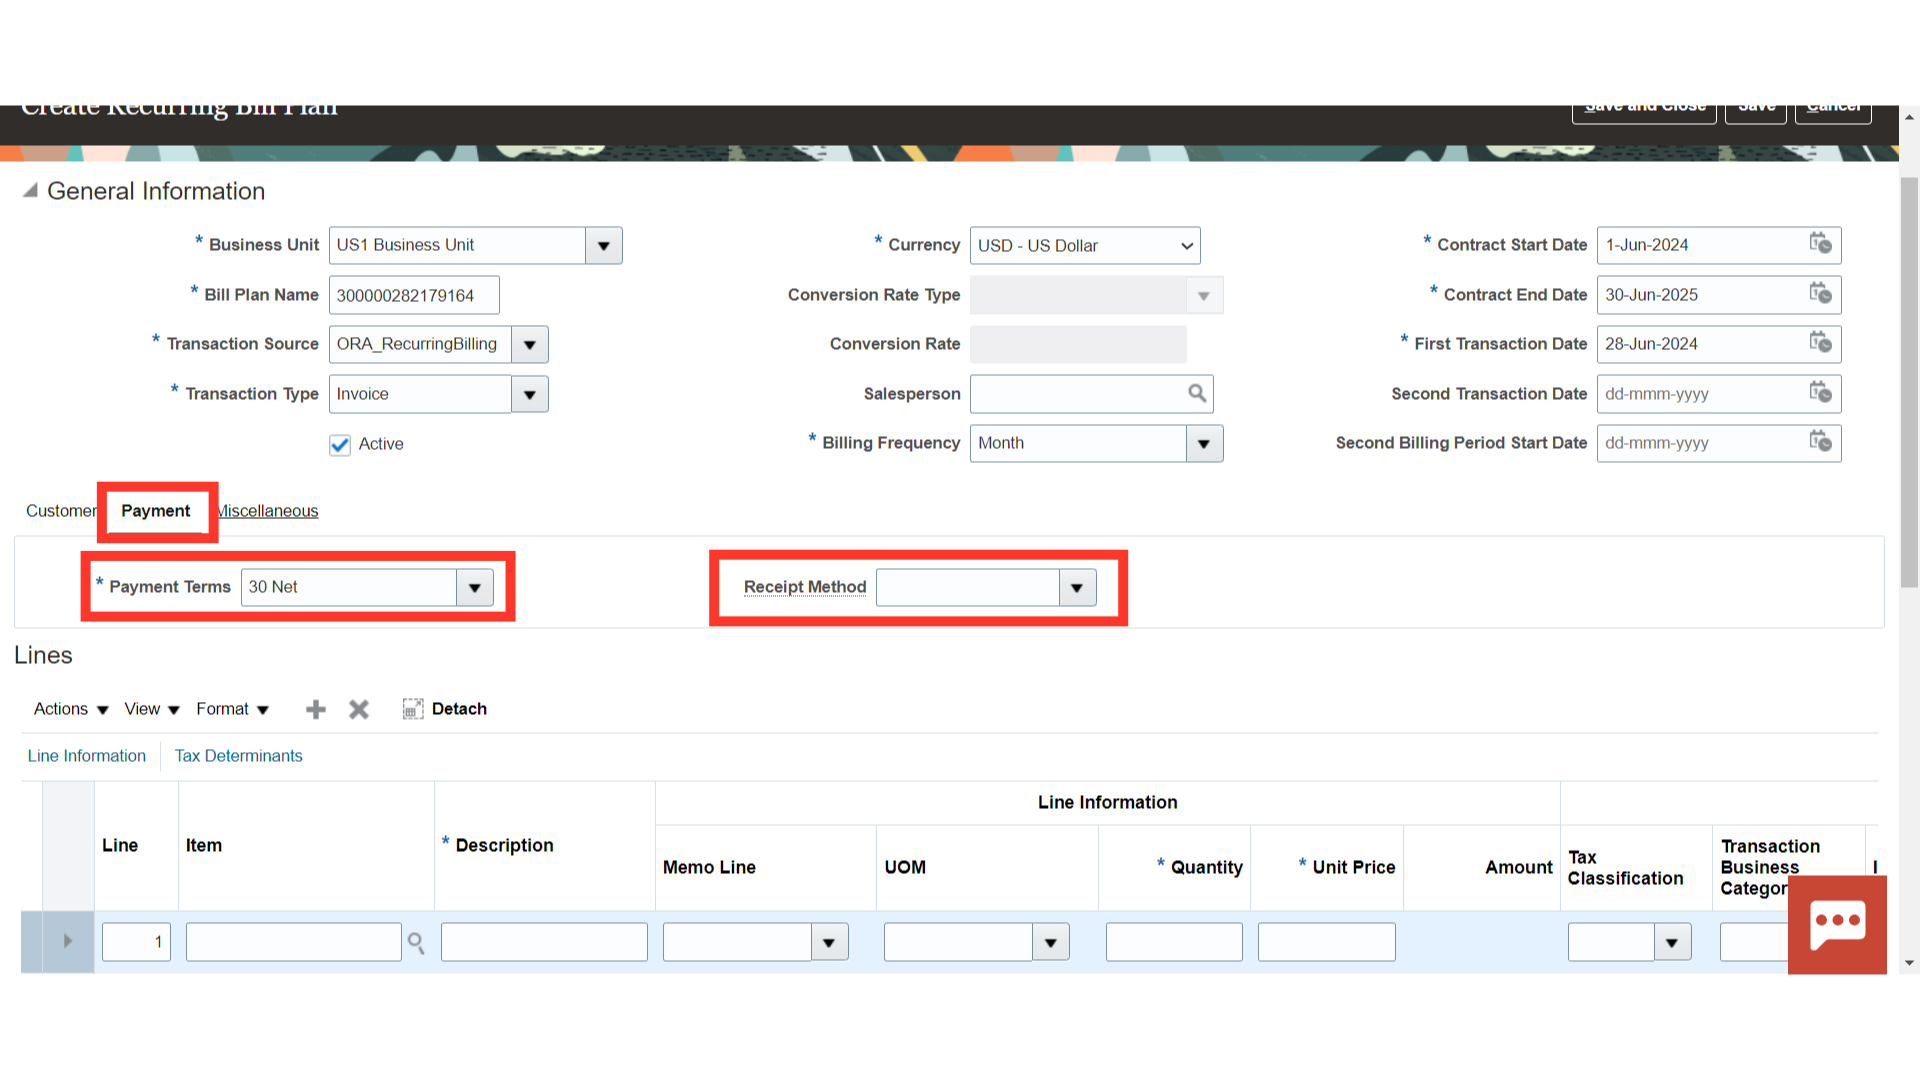
Payment Terms field: Enter the payment terms for the bill plan, if not already populated when you selected the bill-to customer. Receipt Method field: Enter the receipt method to use to apply receipts to invoices generated by the bill plan.
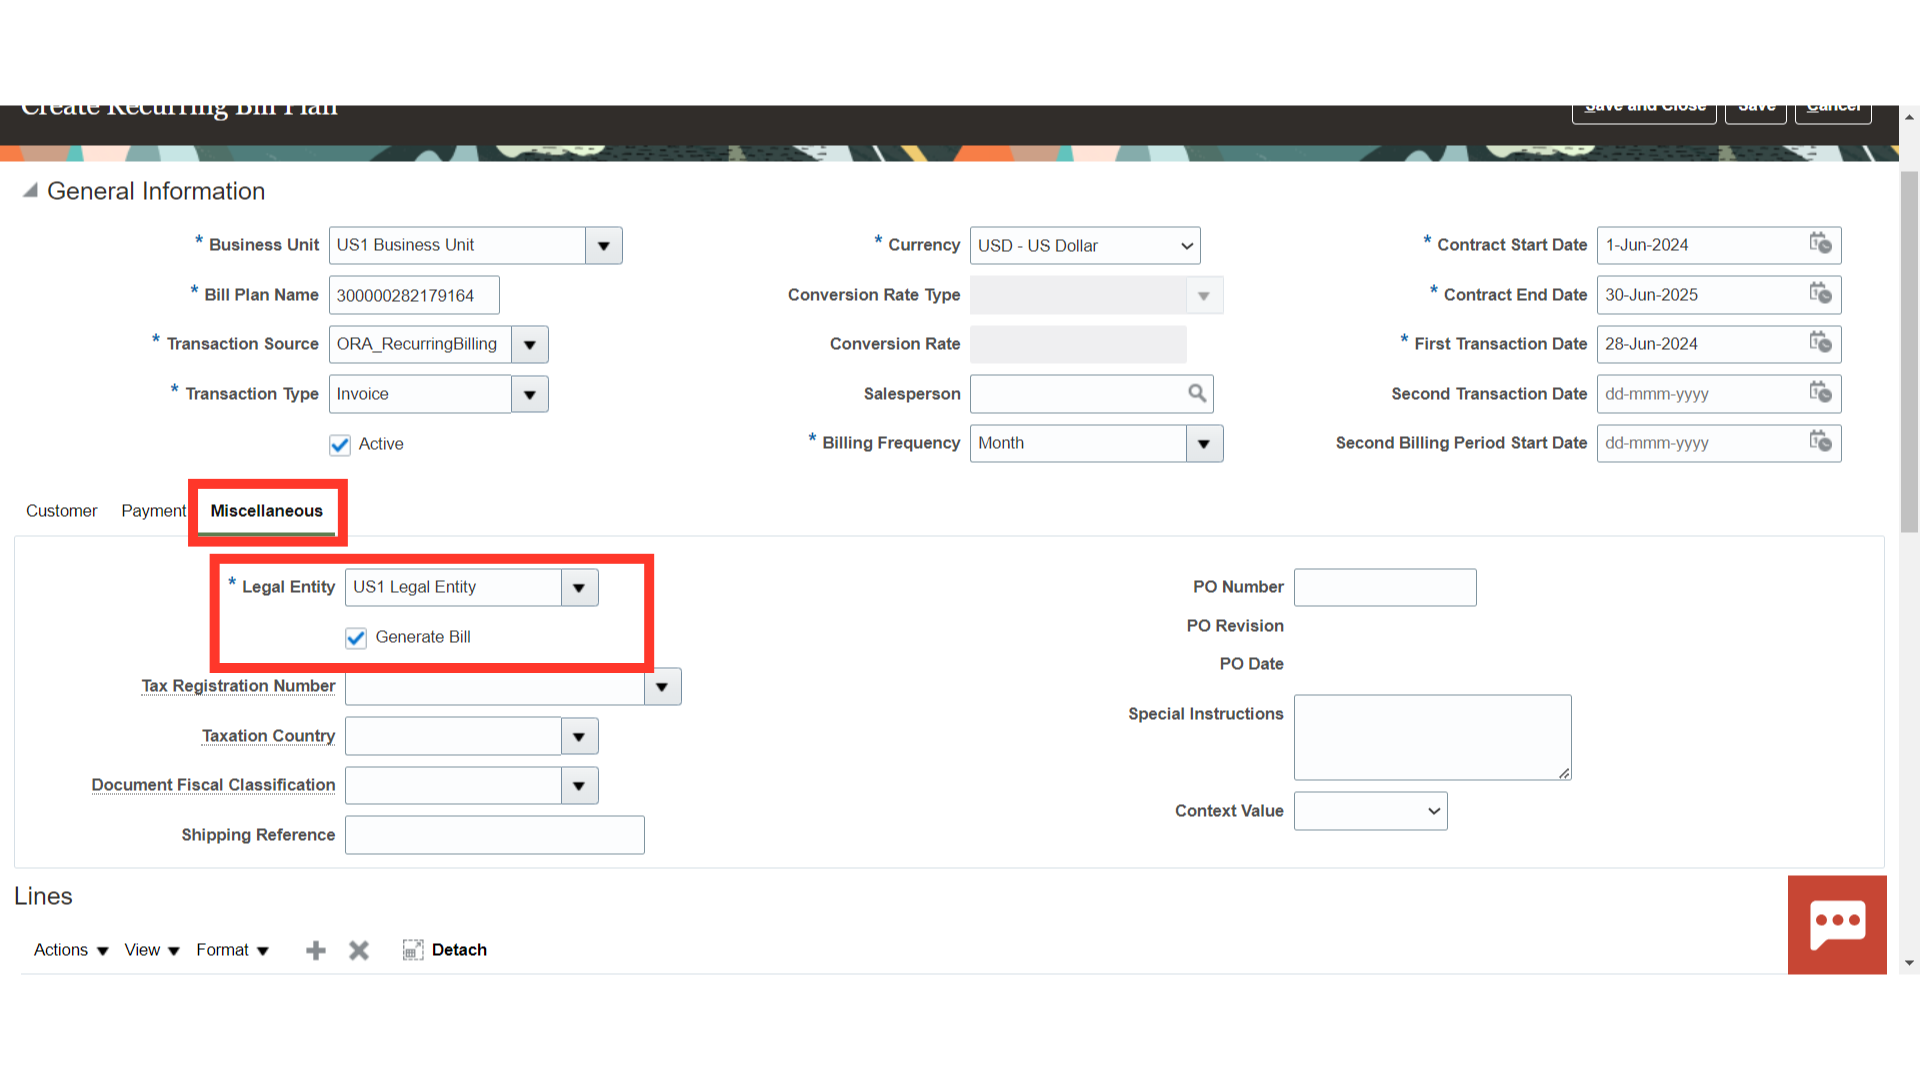
Legal Entity field: If necessary, enter the legal entity for this bill plan.
Generate Bill option: Ensure that the Generate Bill option is enabled.
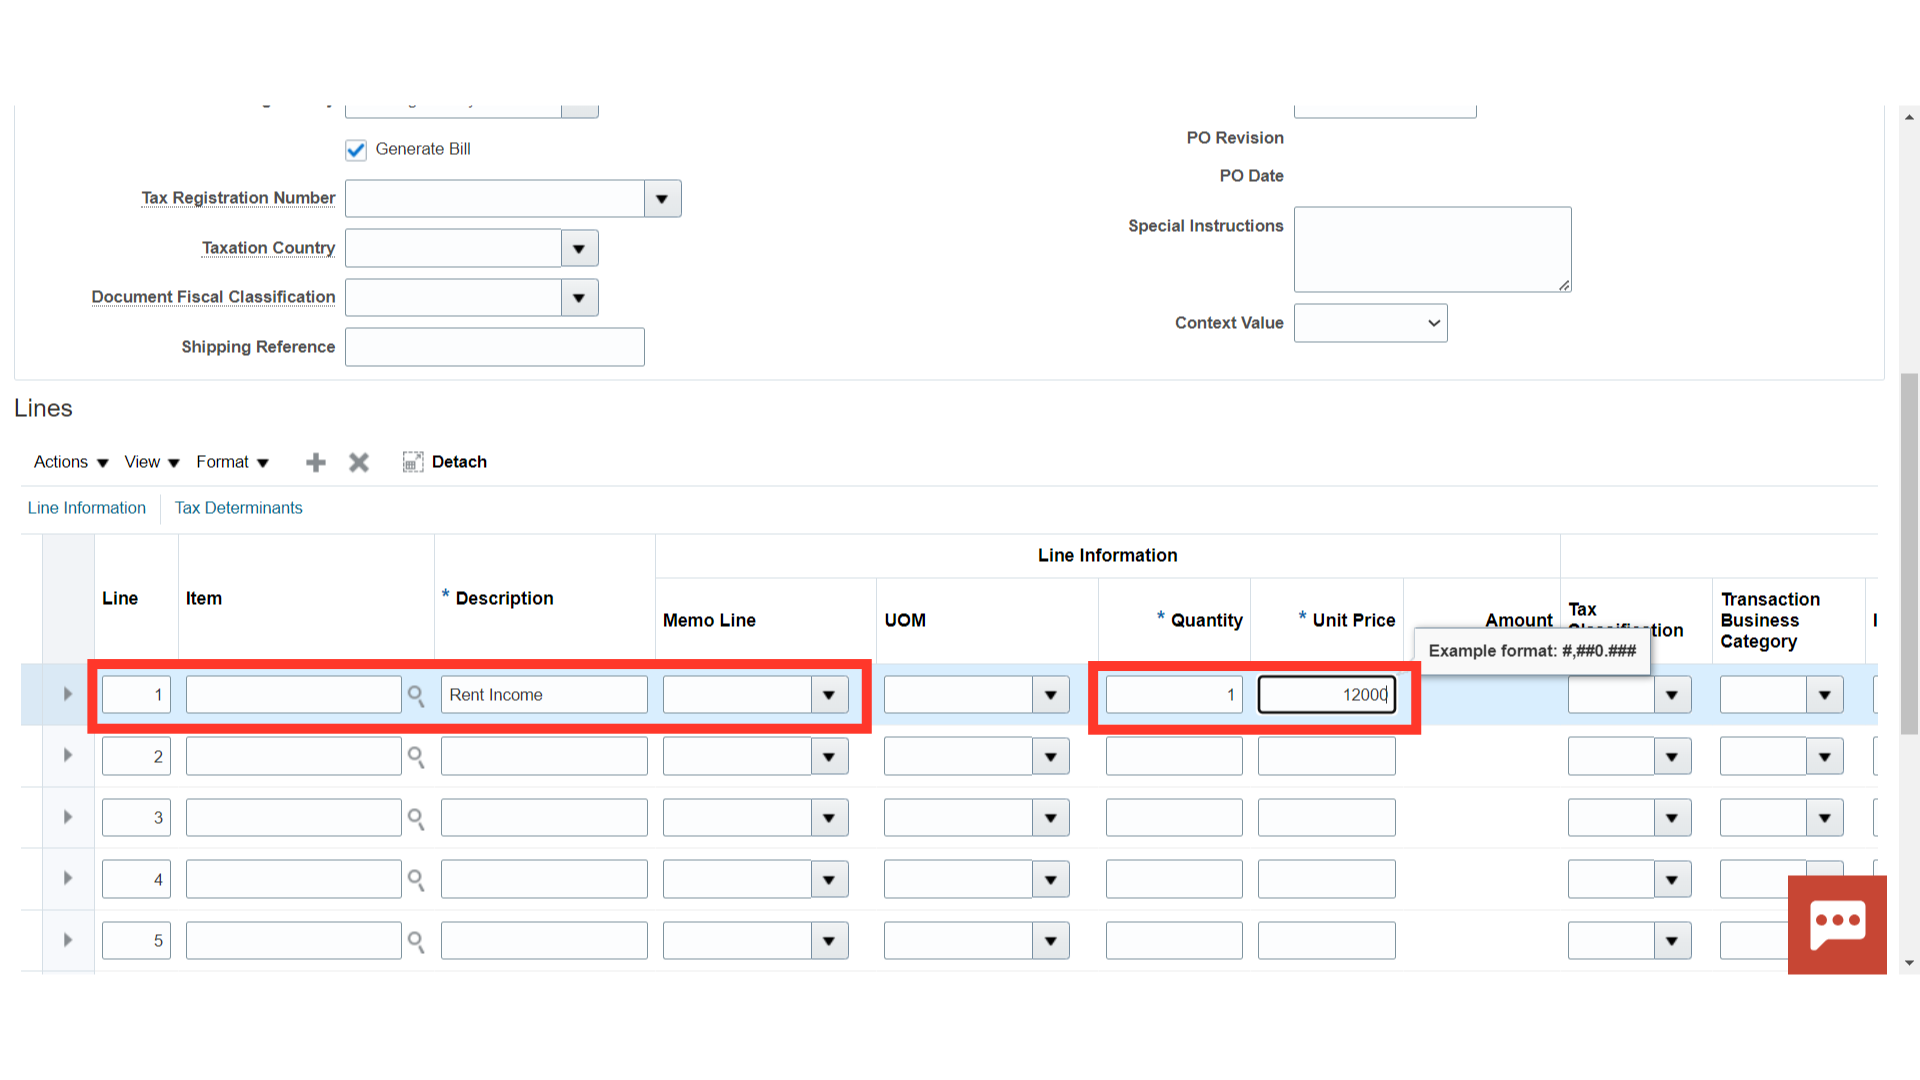
To access the line details, scroll down to the section of the line. If necessary, click the magnifying lens to select the item. Don’t forget to fill in the Description Field with pertinent details. In addition, choose the Memo line if the revenue part’s accounting is to be defaulted from it. Enter the sales quantity and price per unit in the Quantity and Unit Price field based on which Amount will be calculated automatically.
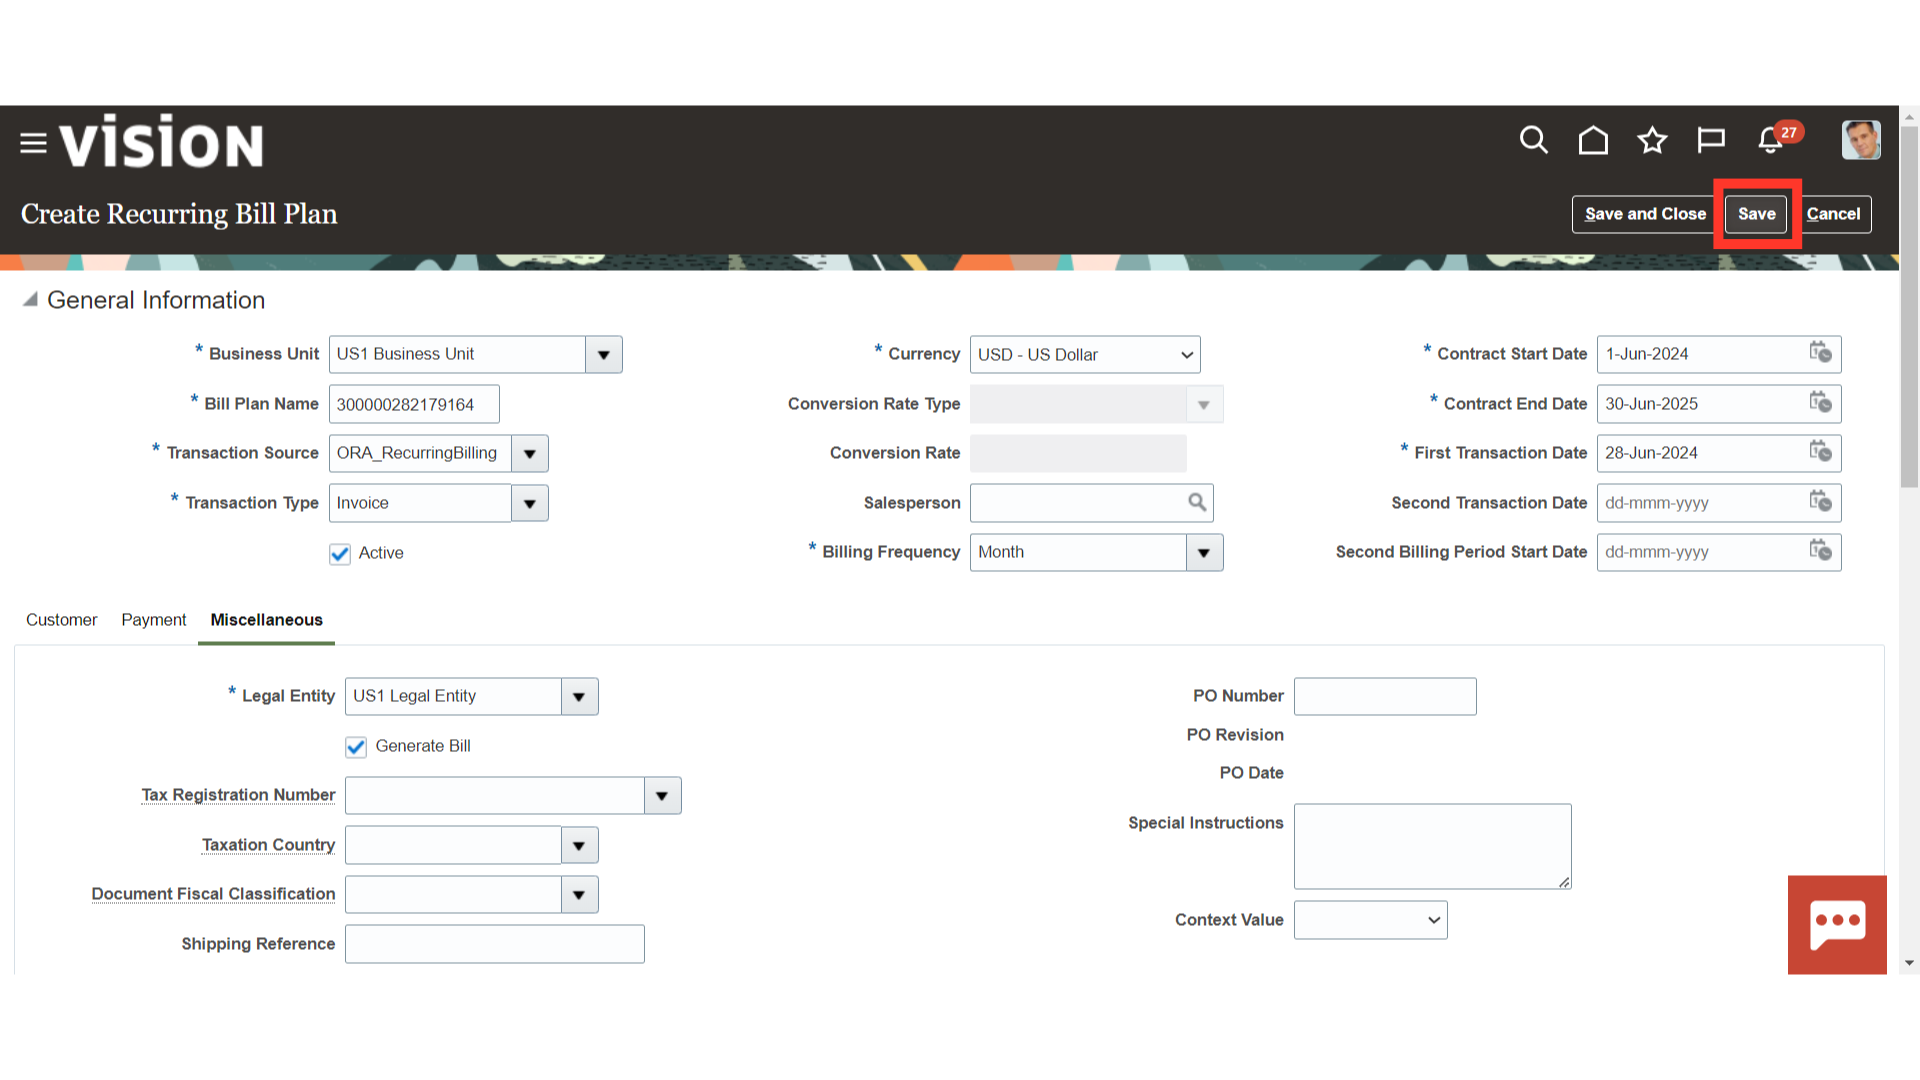
 After entering all the line details, click on the Save button.
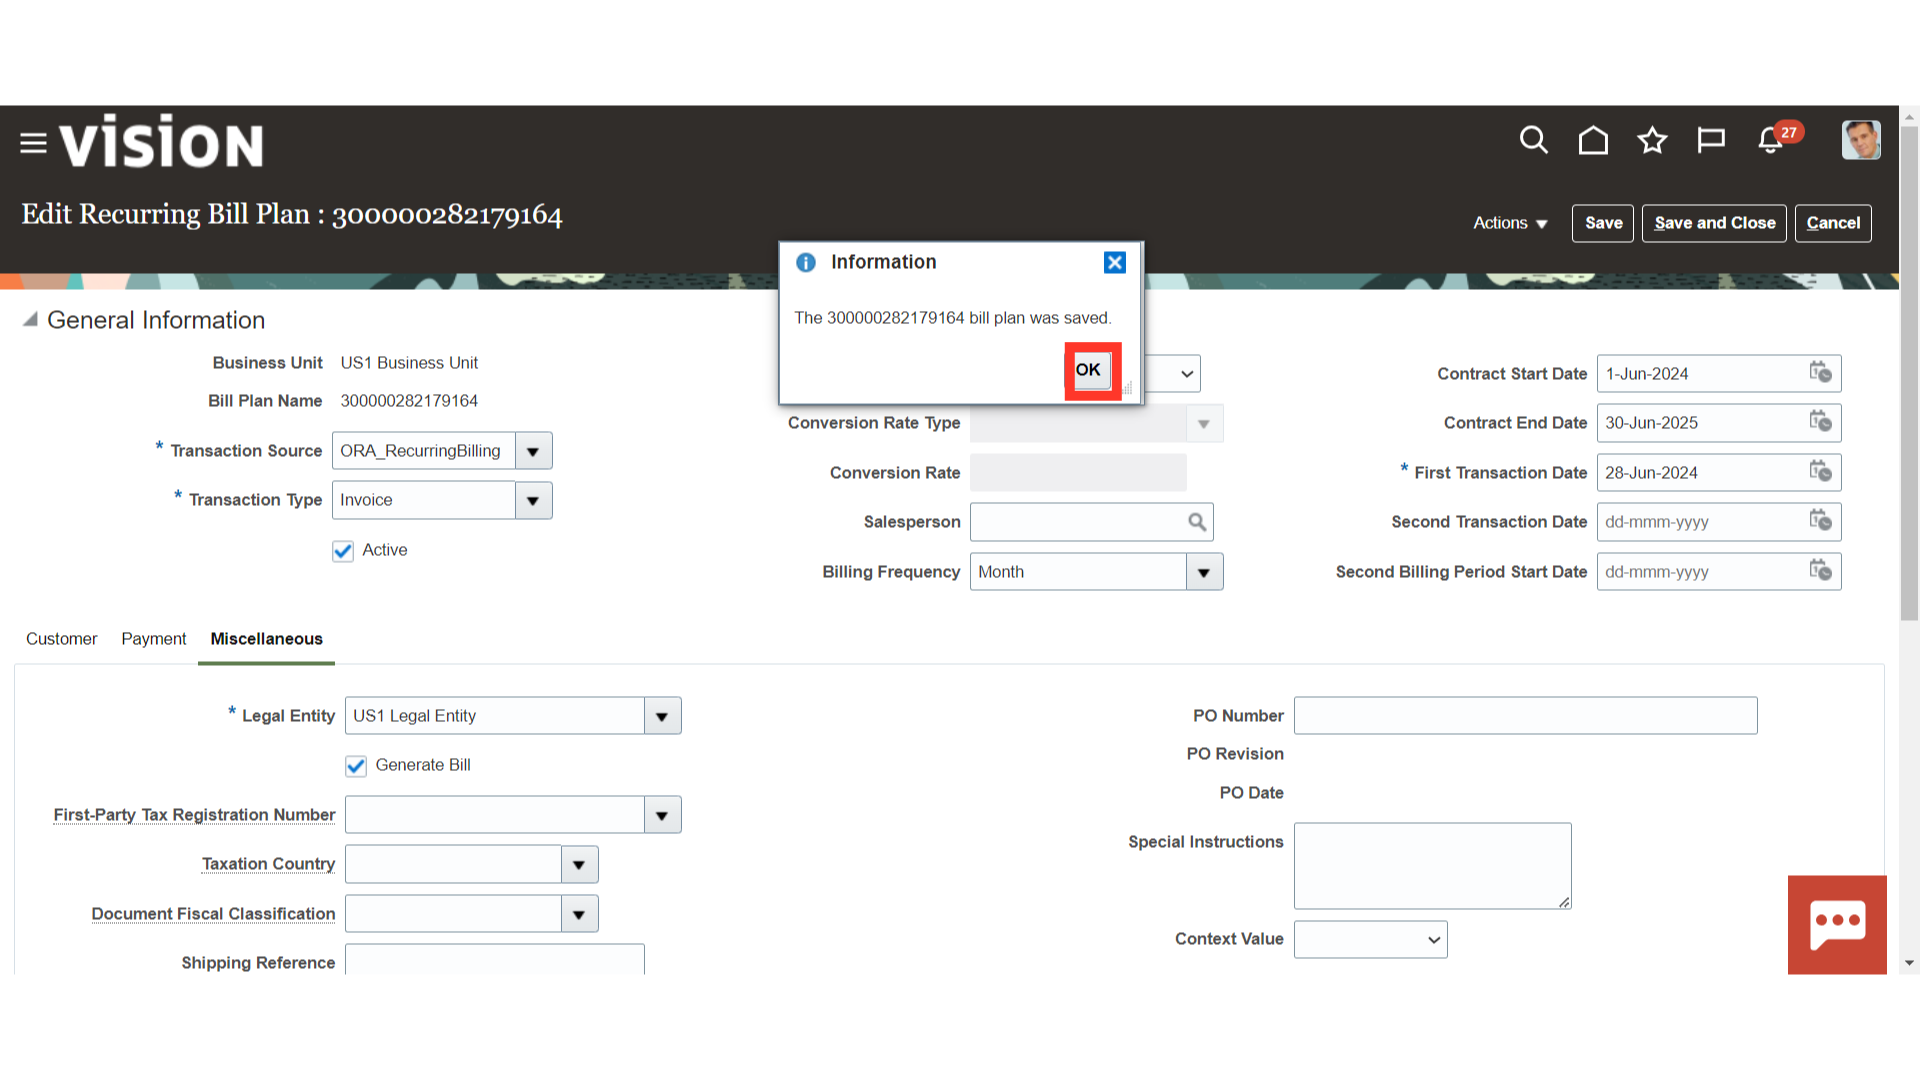
A confirmation message is displayed indicating the bill pan saved, click on the OK button to continue.
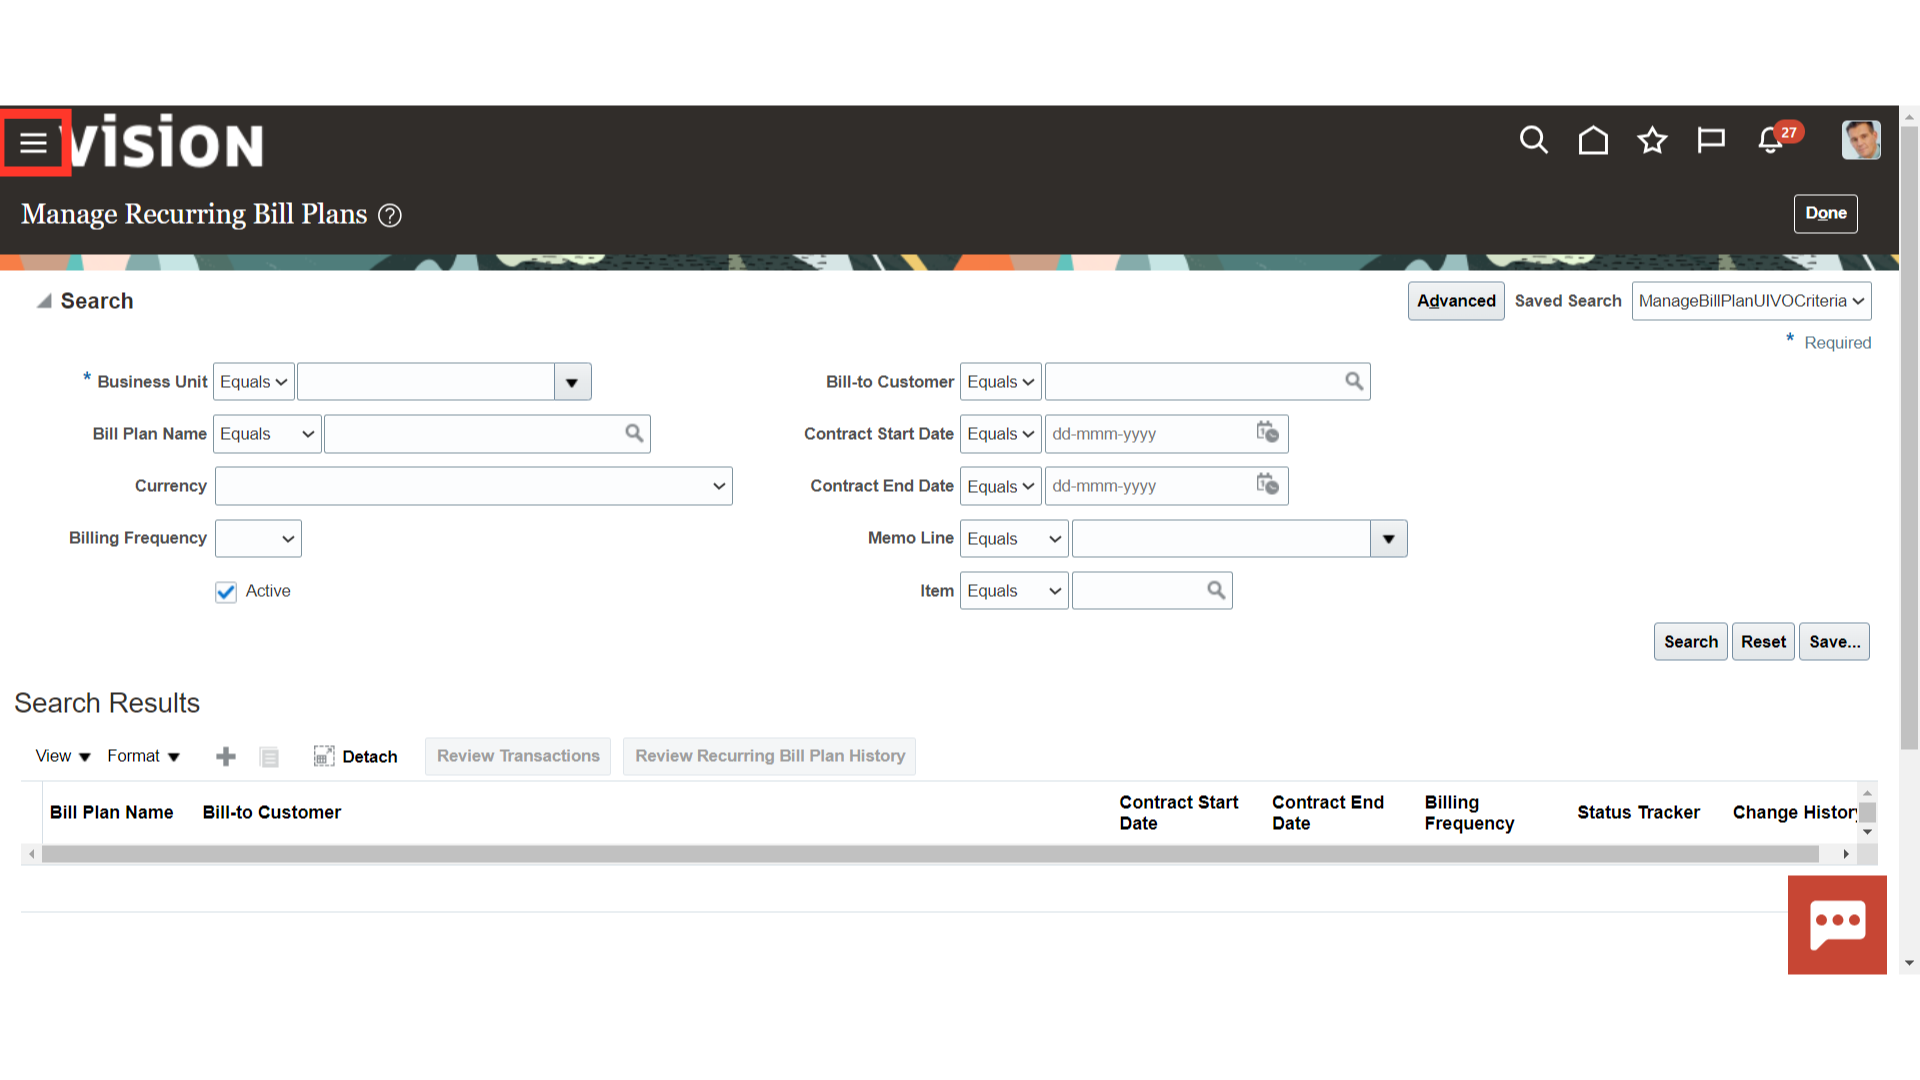
Click on the Navigator Icon to access the Tools menu.
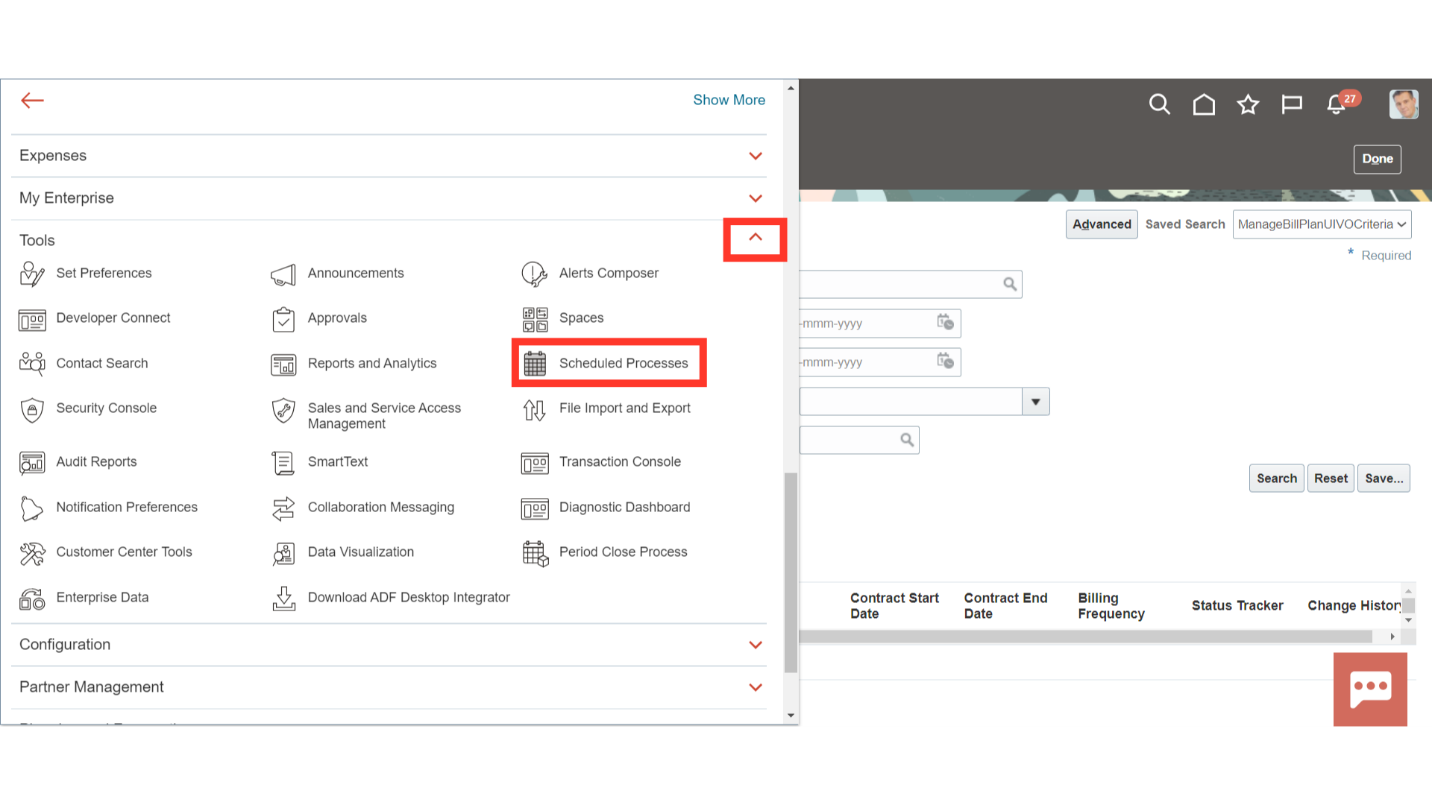
Select the Scheduled Processes sub-menu by expanding the Tools menu.
To run the new process, click on the Schedule New Process icon.
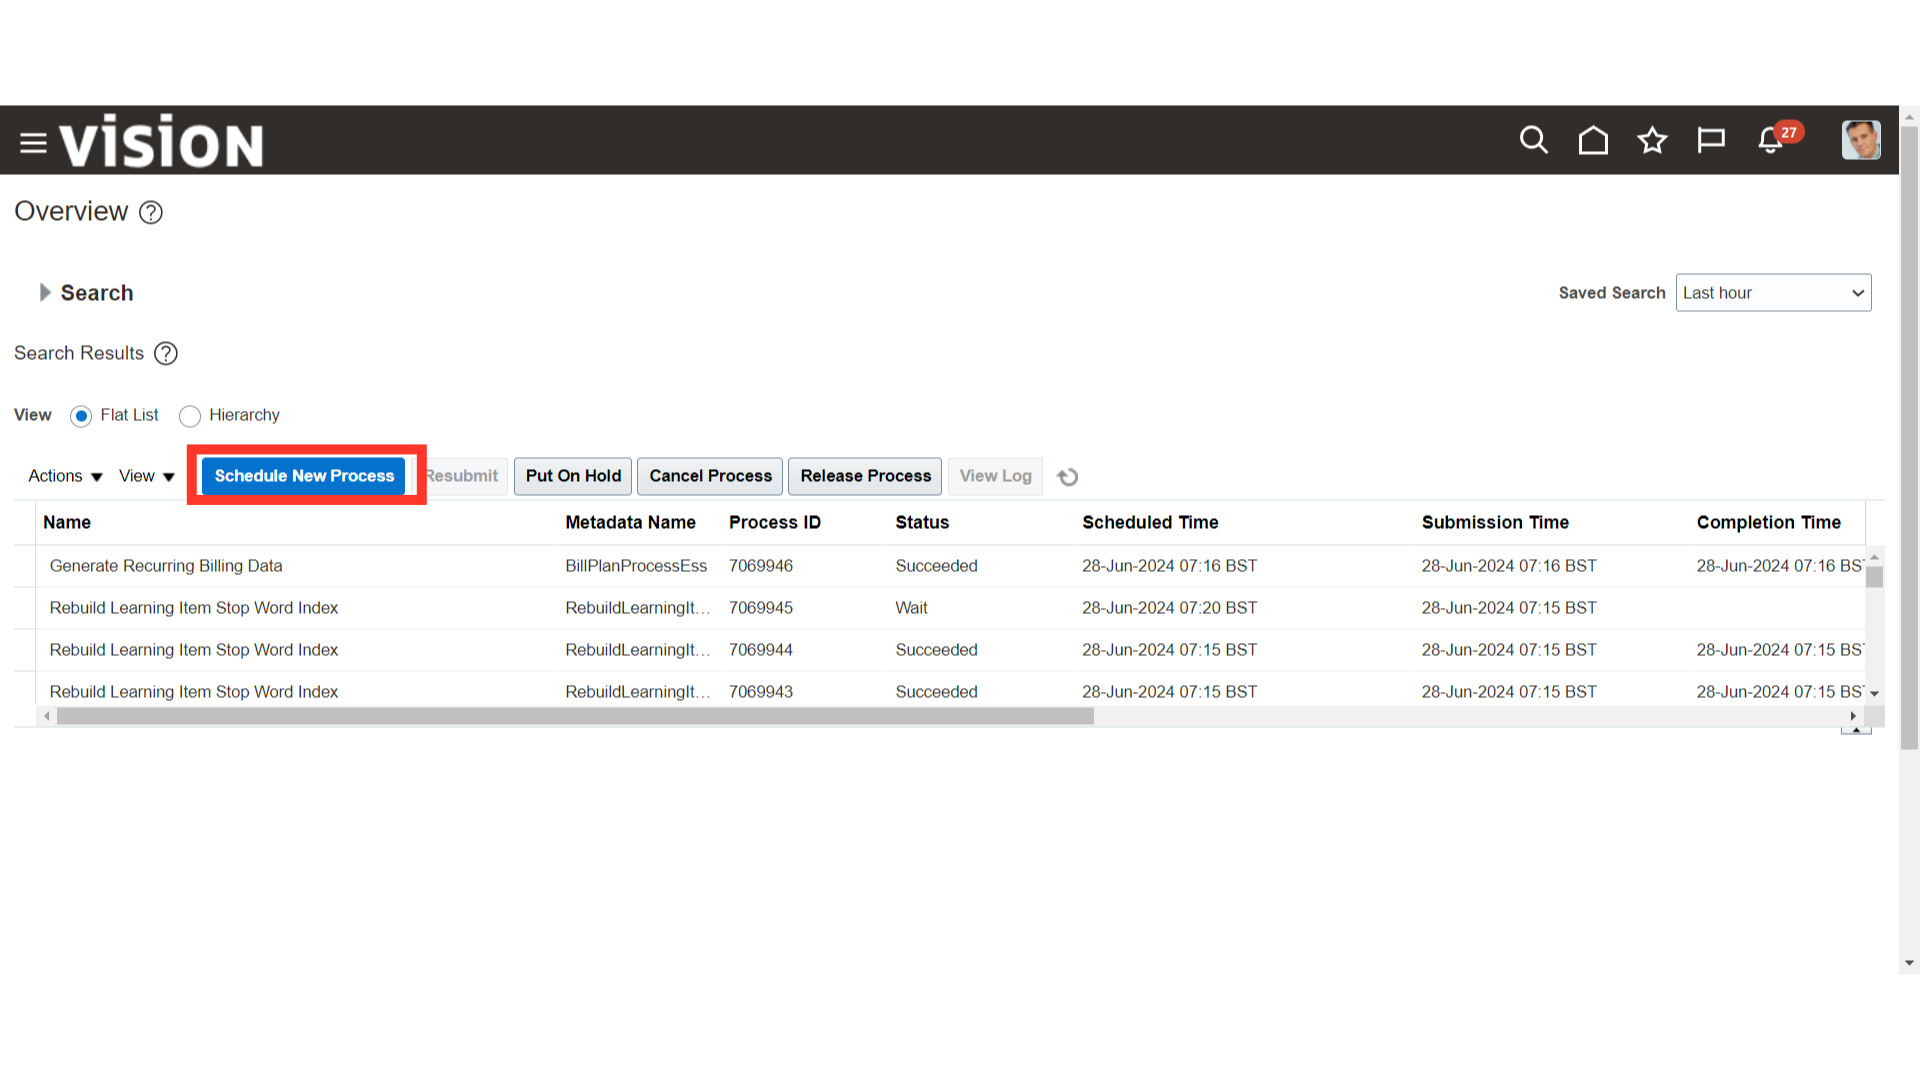
Generate invoices for a bill plan by running the Generate Recurring Billing Data program. This program loads invoice lines into the AutoInvoice interface tables. You then run Import AutoInvoice to group invoice lines into invoices per bill plan and bill plan period, and import the invoices into Receivables.
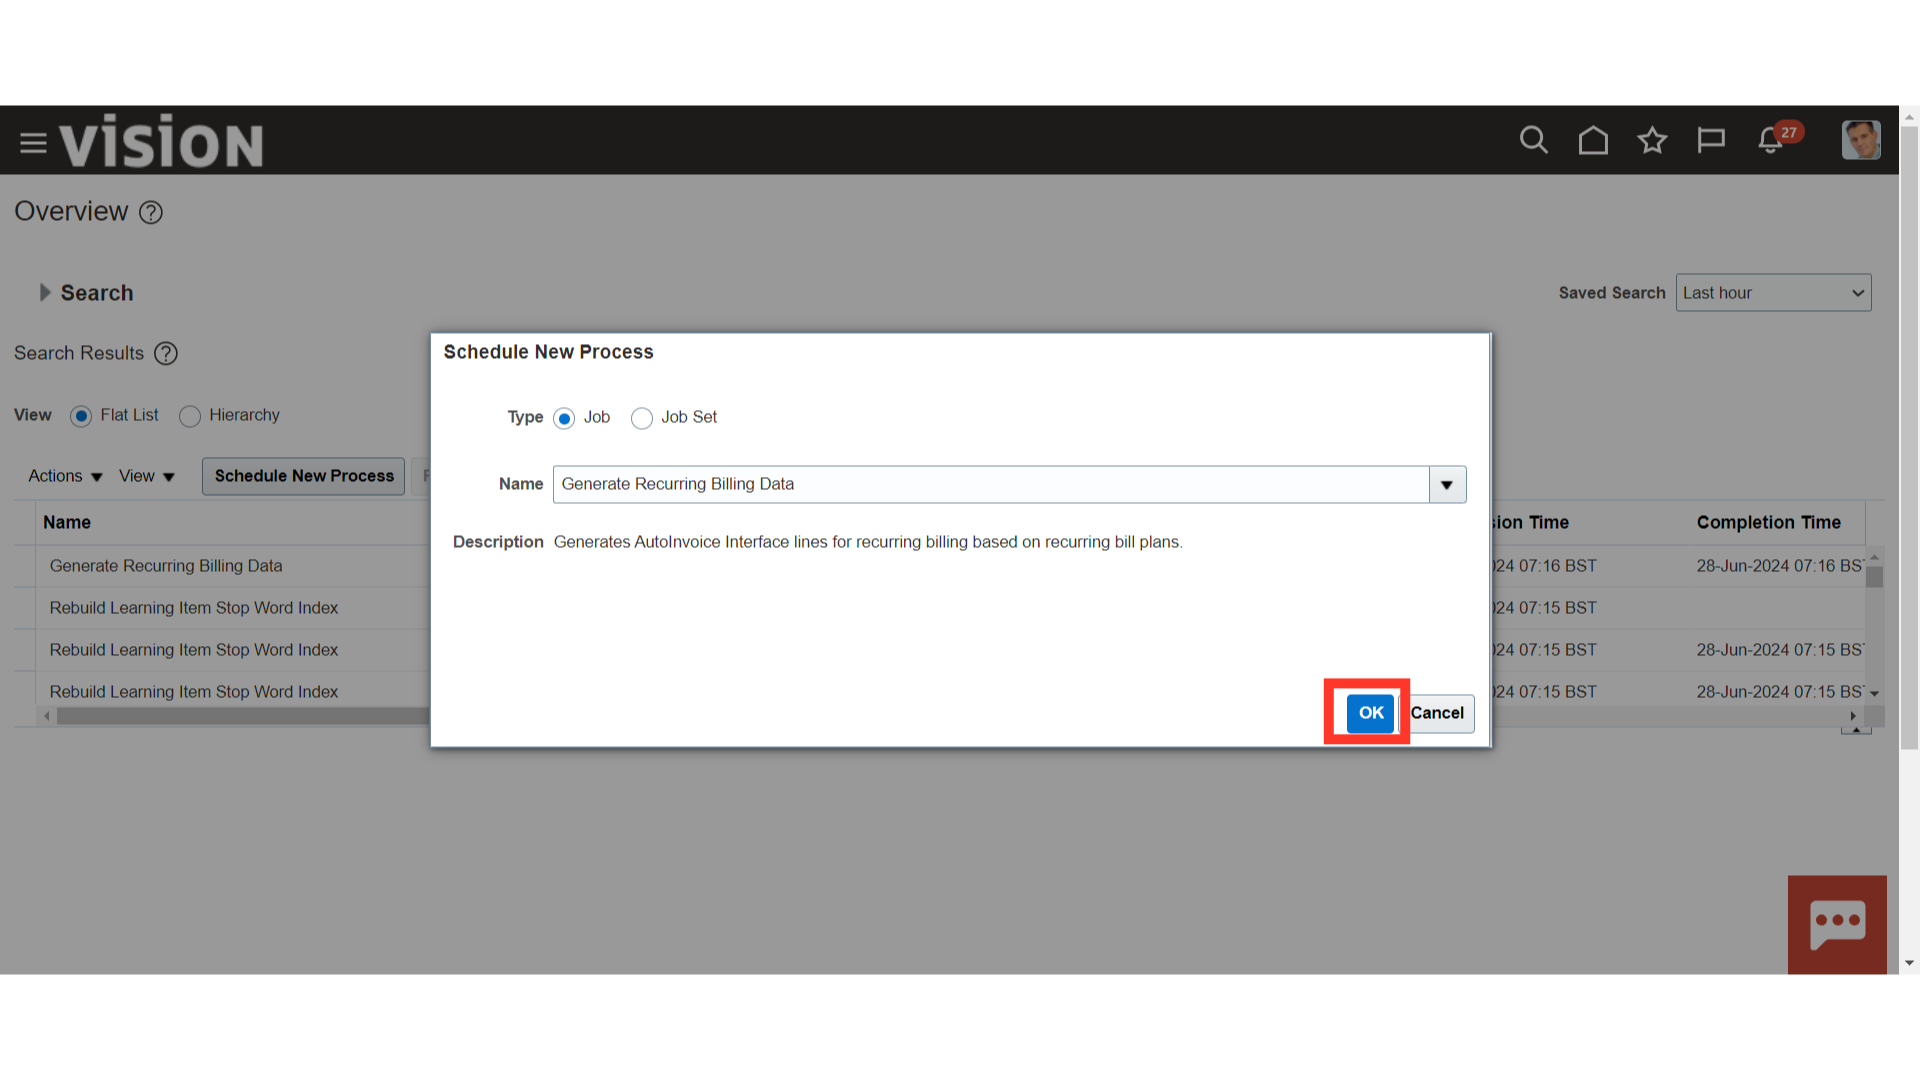
Enter the process name Generate Recurring Billing Data manually or select it from the list of values, and then click on the OK button to submit the process.
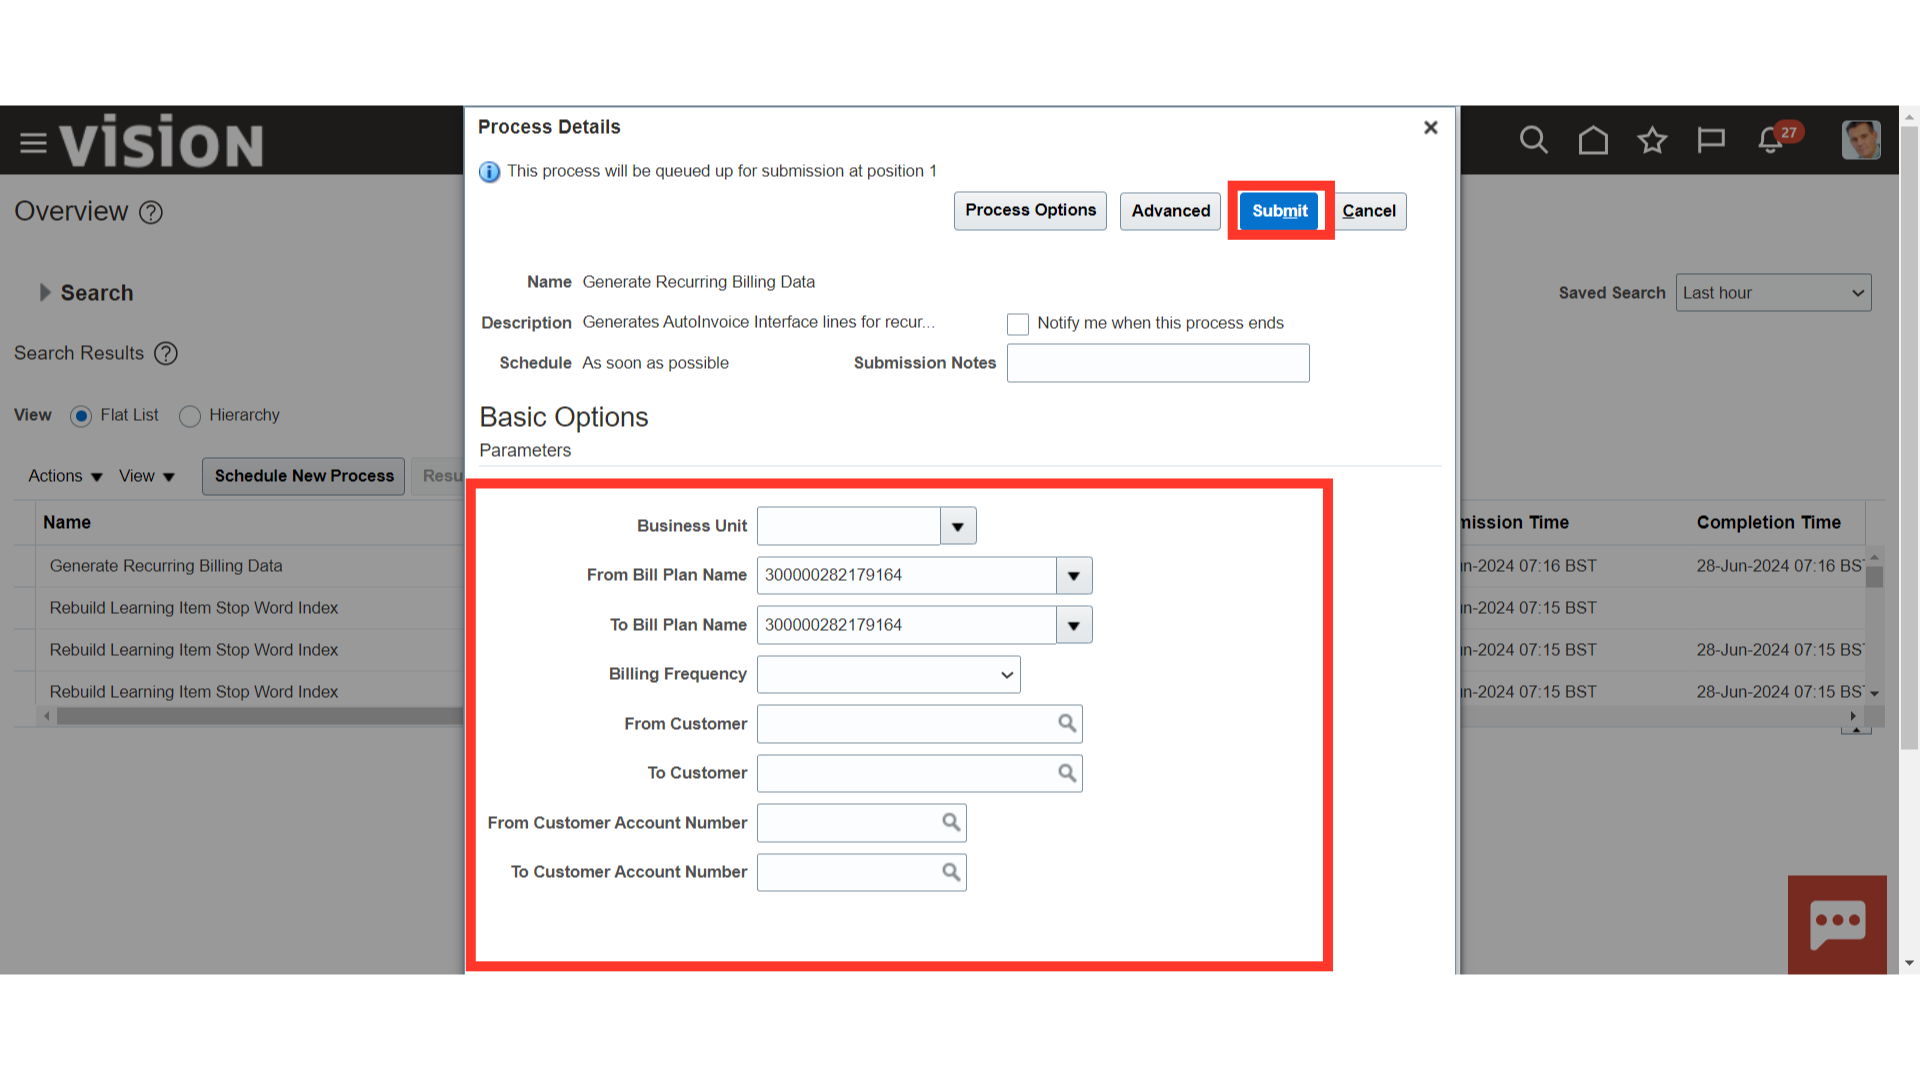
Enter the parameters for which recurring invoices are to be generated such as Business unit, Bill Plan Name, Billing Frequency, and Customer details. After that, click on the Submit button
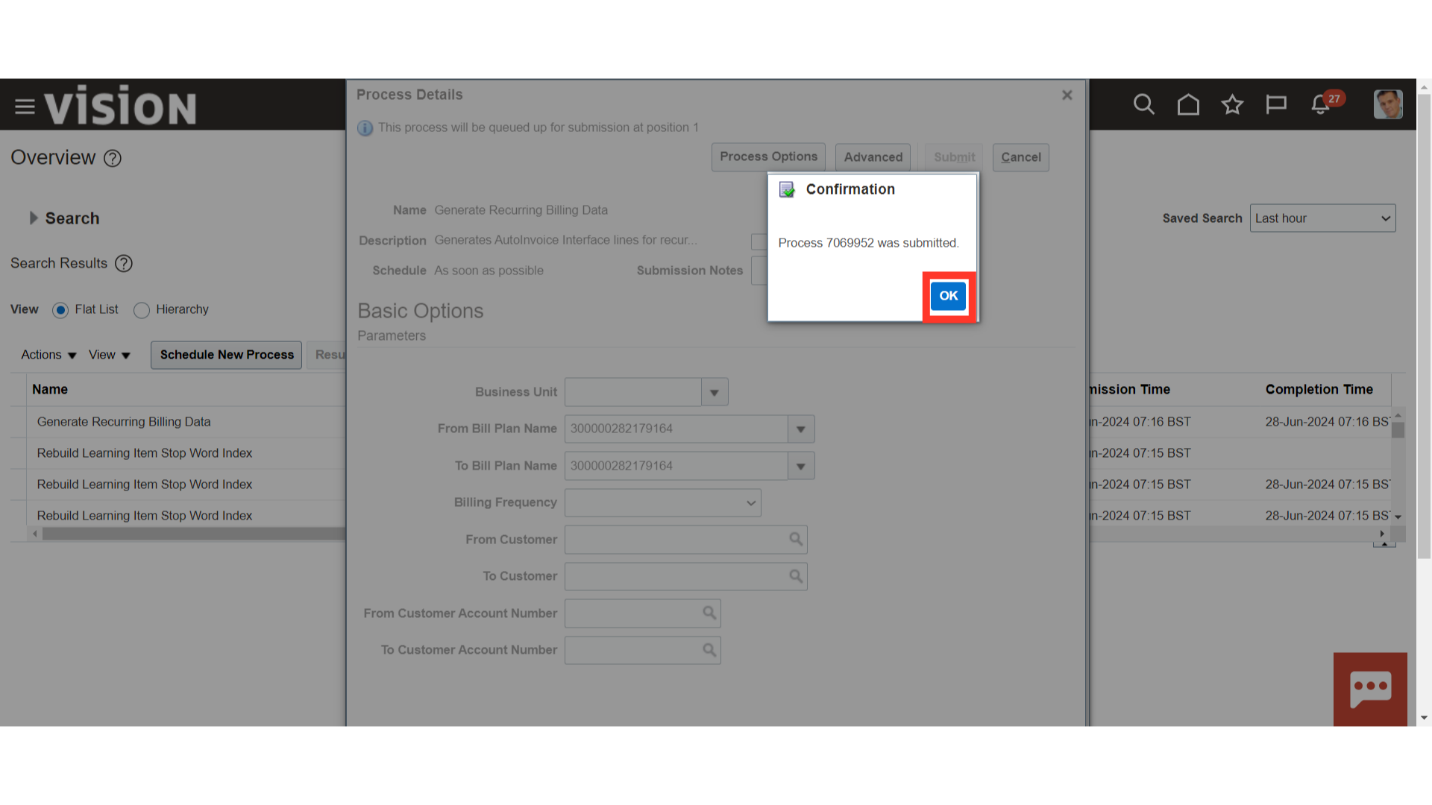
A confirmation message is displayed along with the Process ID.
Click on the “Refresh” Icon to update the process status.

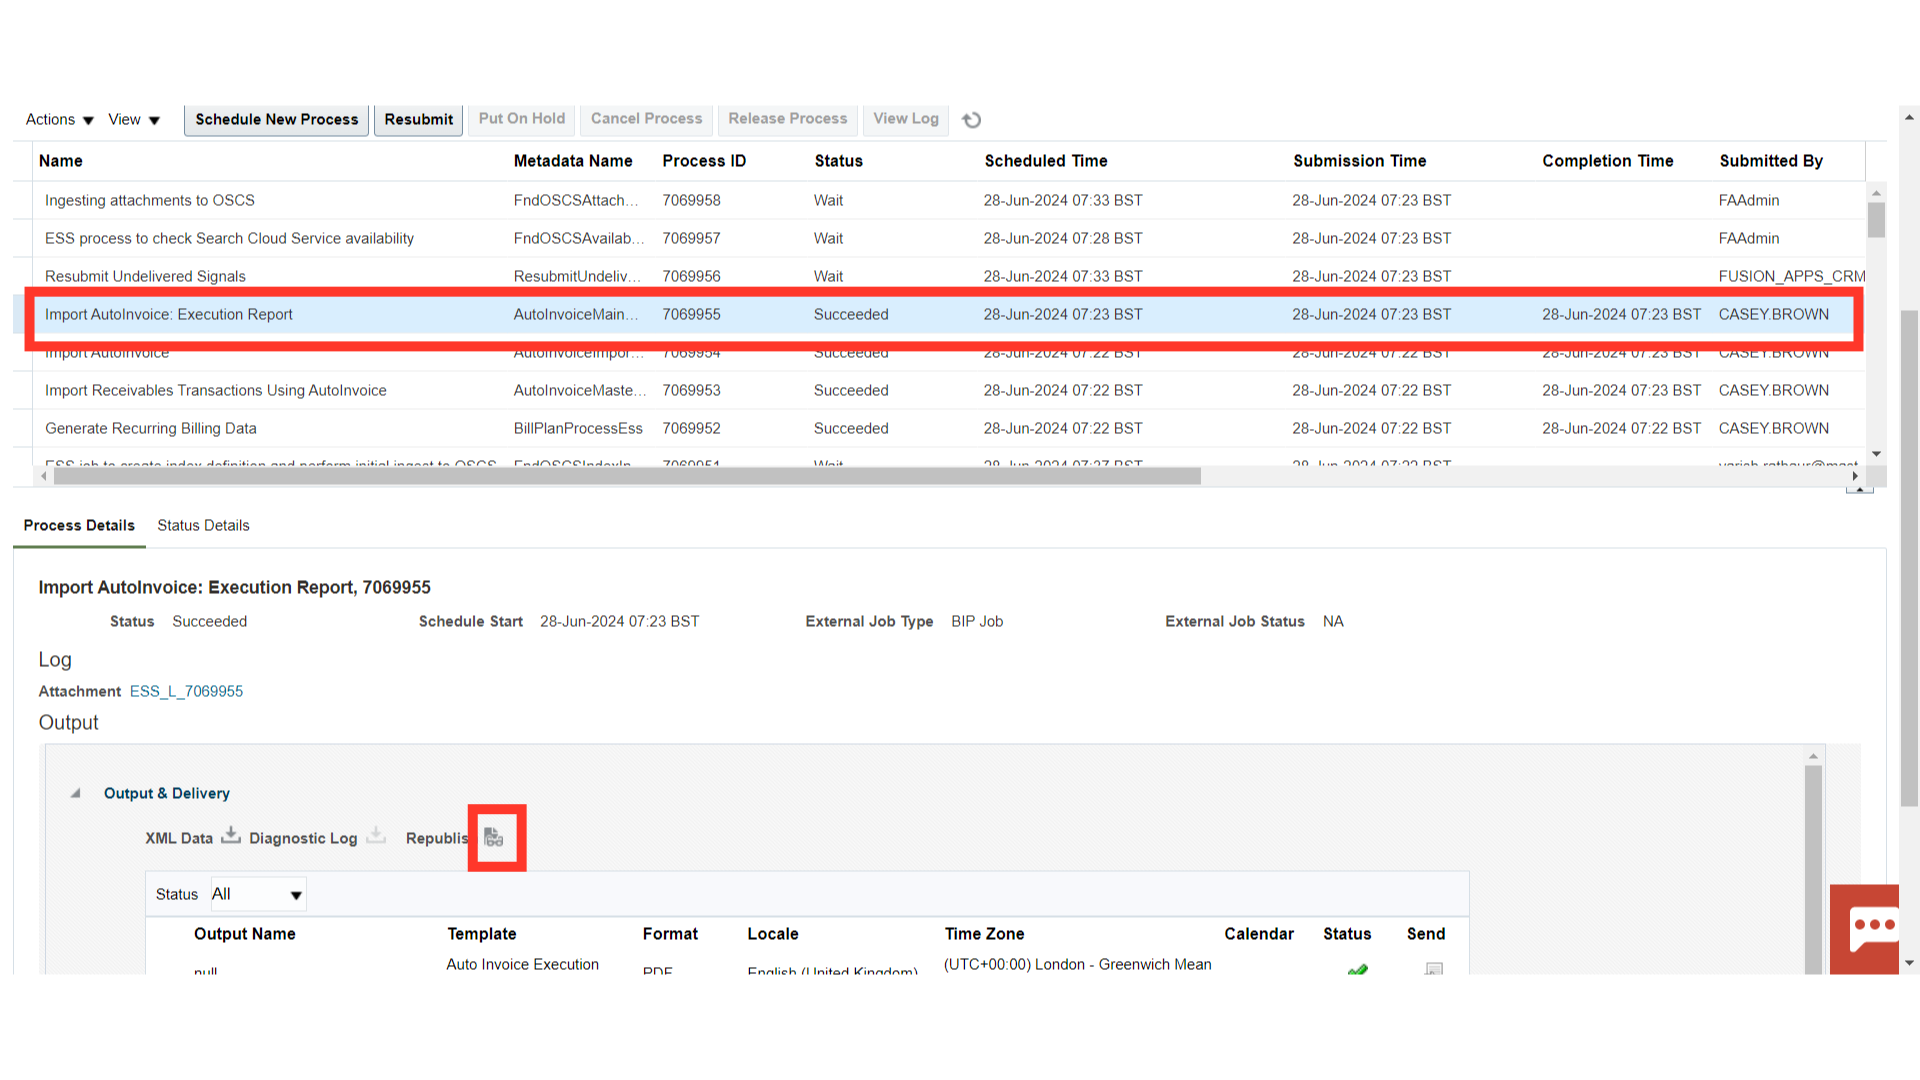
Along with the Generate Recurring Billing data process, the Import Autoinvoice process and Import AutoInvoice Execution Process are submitted automatically by the system. To download the report, select the process name and click on the republish button.
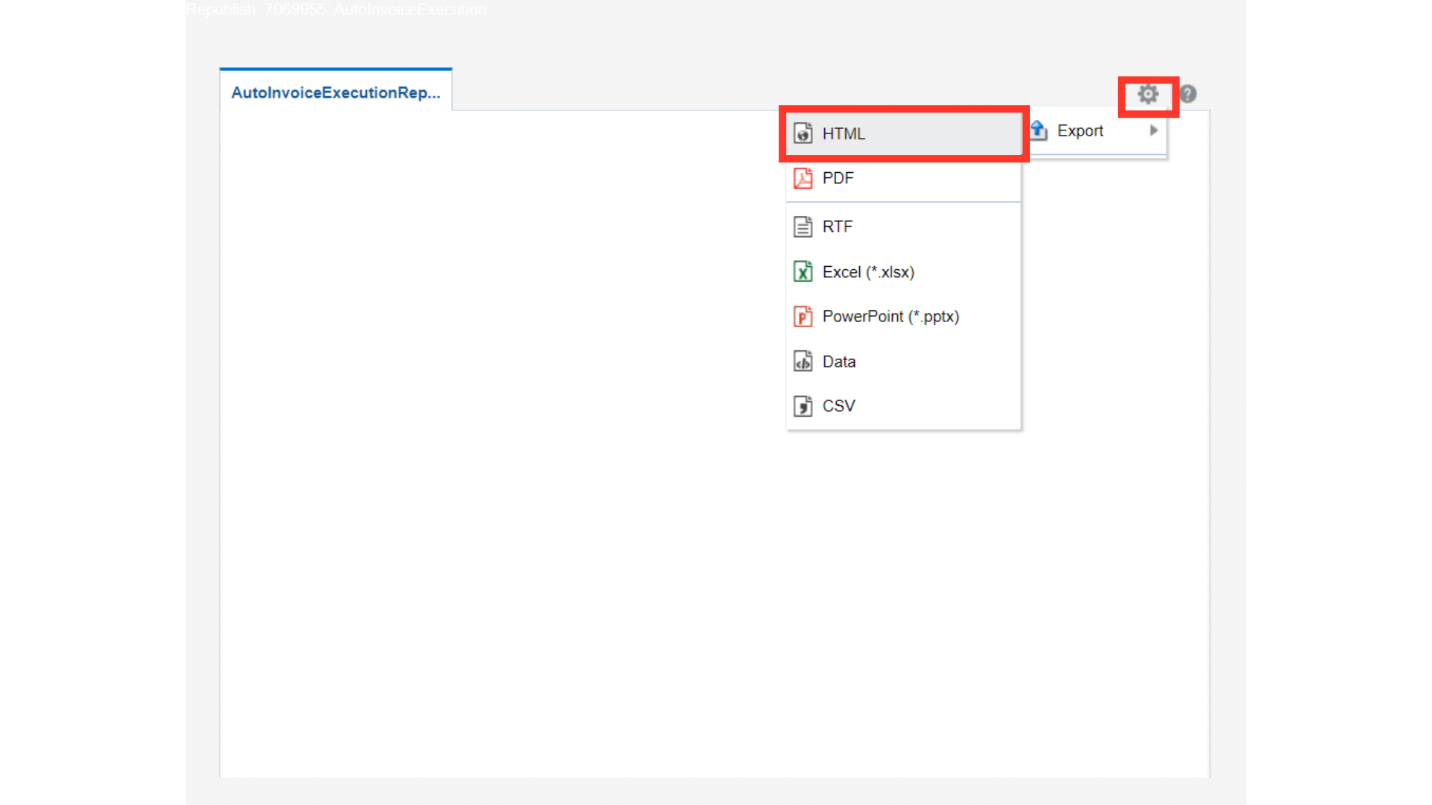
Click on the Gear icon, and then click on the HTML view option under Export.
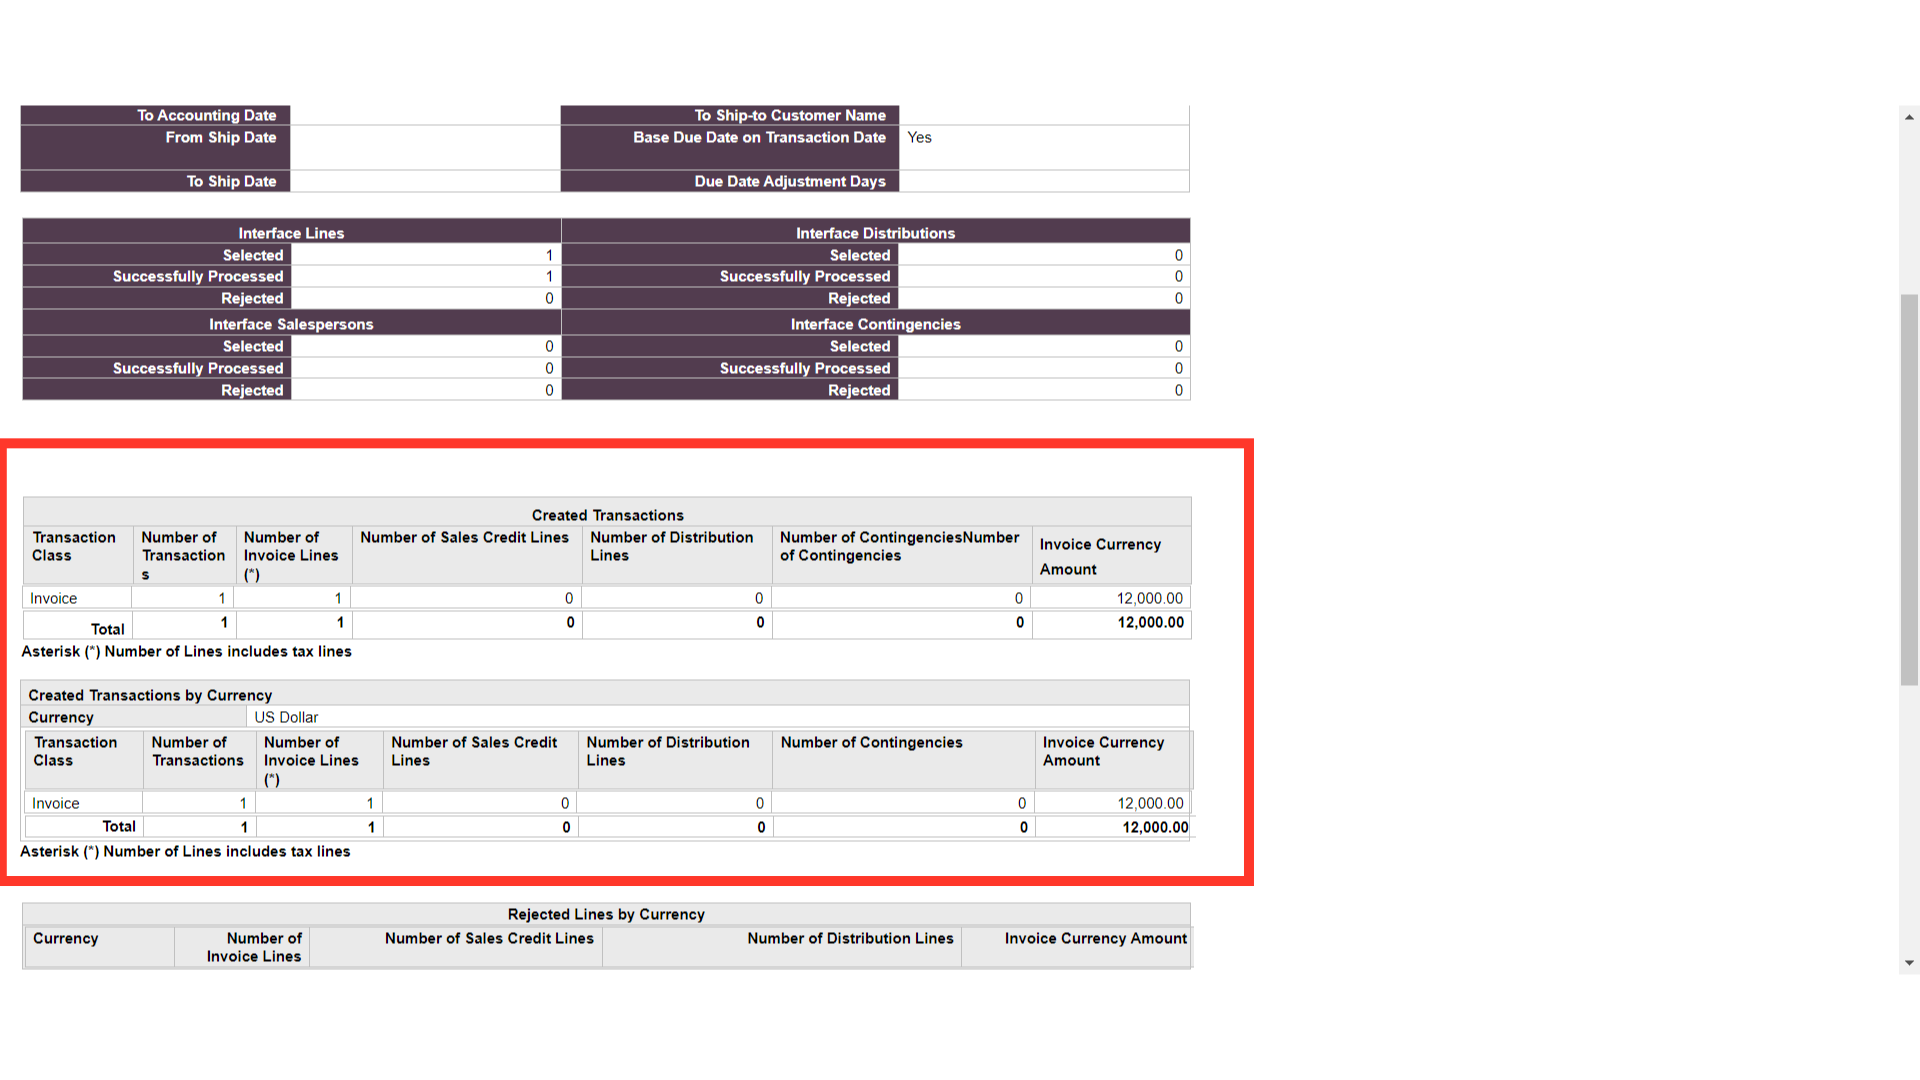
This is the report layout, which displays the details of the created transactions, and the error message for transactions rejected by the system.
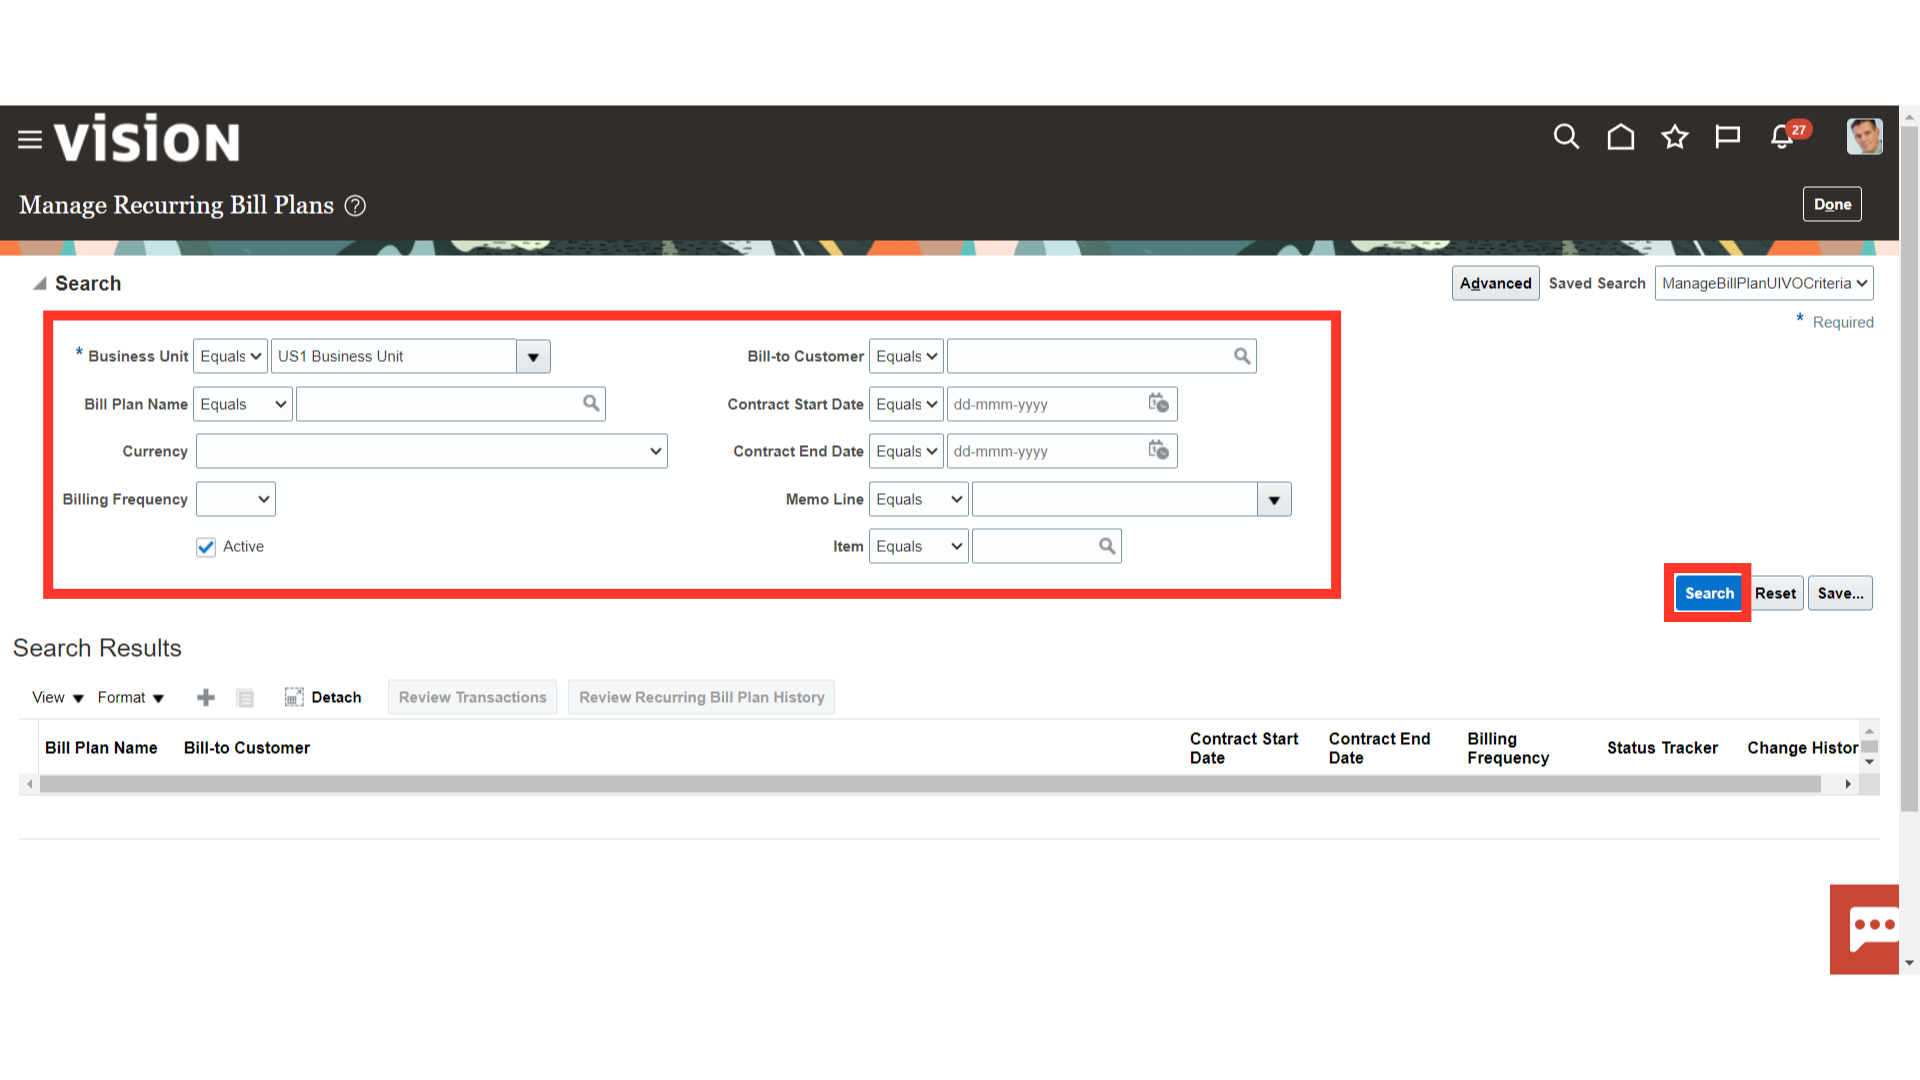
Go to Manage Recurring Bill Plans to view the generated transaction details. Click the “Search” button once you have entered all the necessary information.
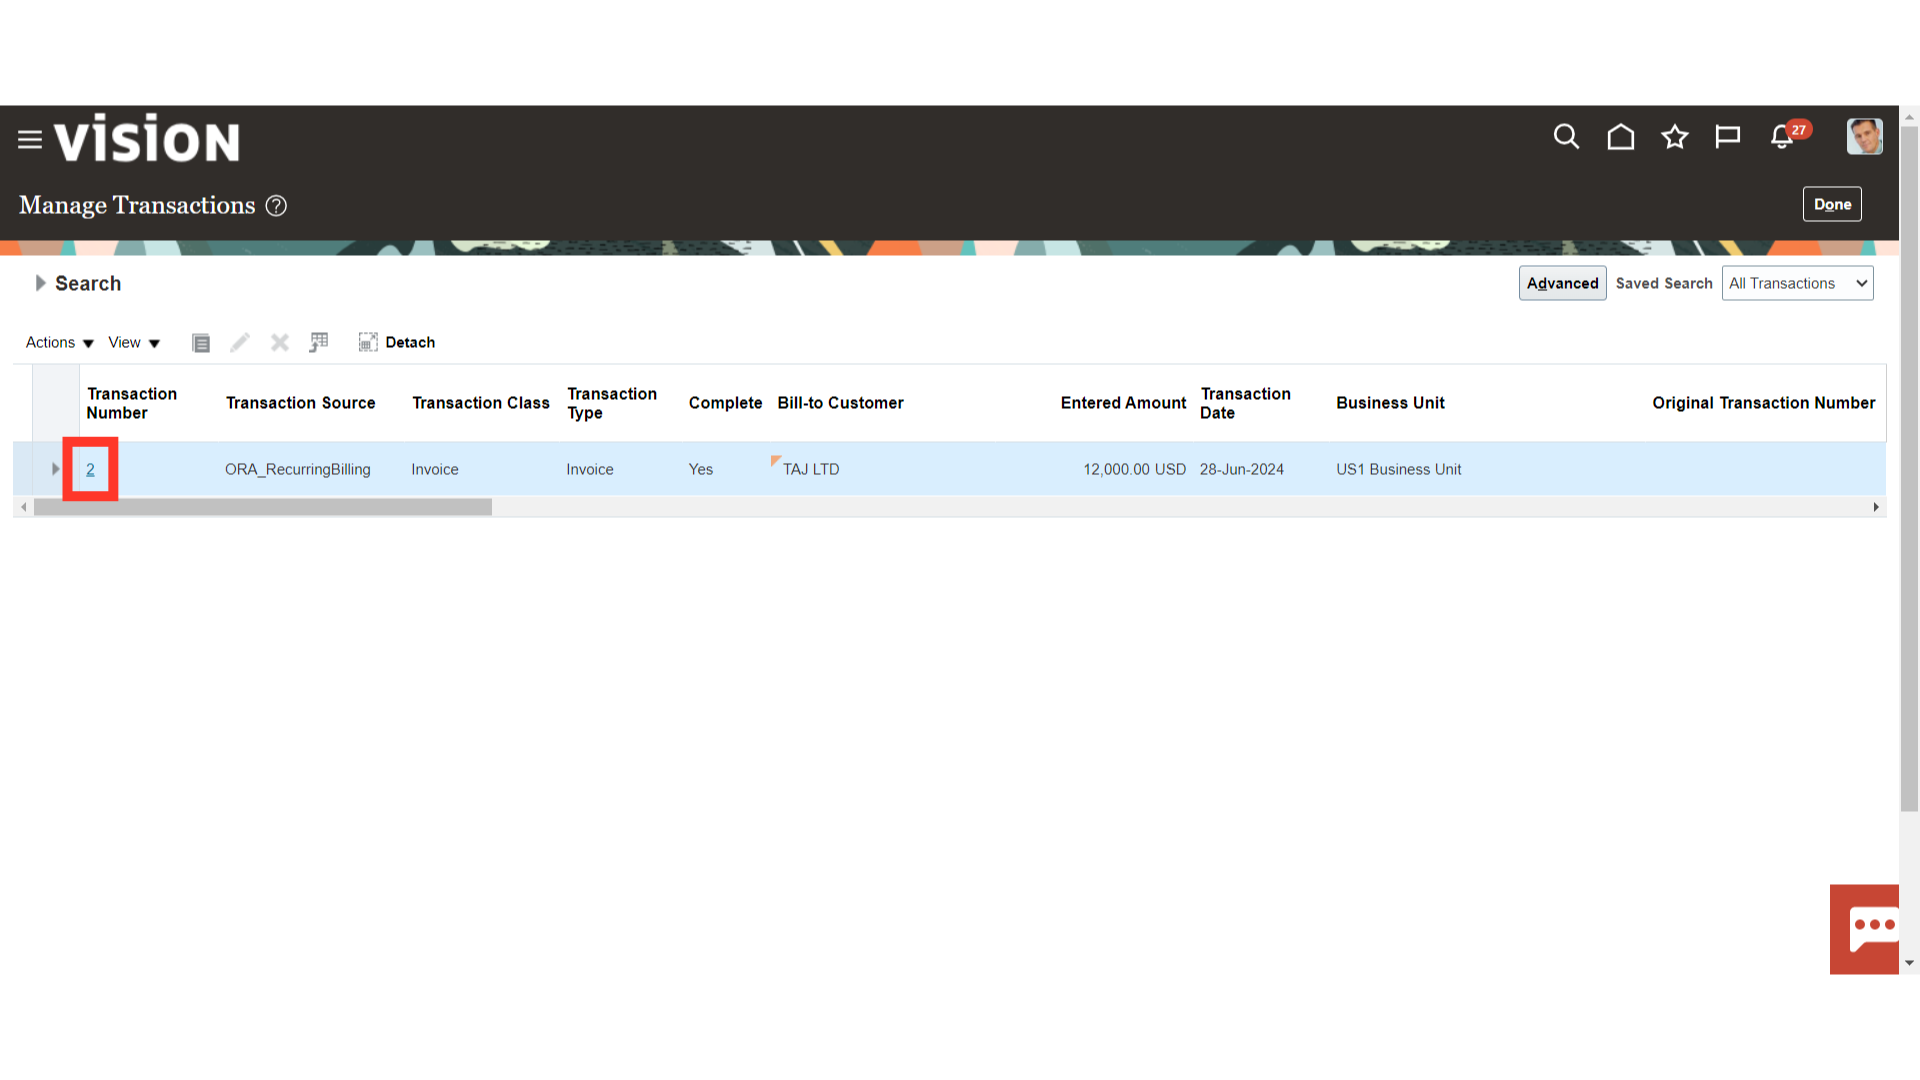
Choose the Bill Plan and click on Review Transactions to search the transactions created under it.

Click on the Transaction number hyperlink to open it.
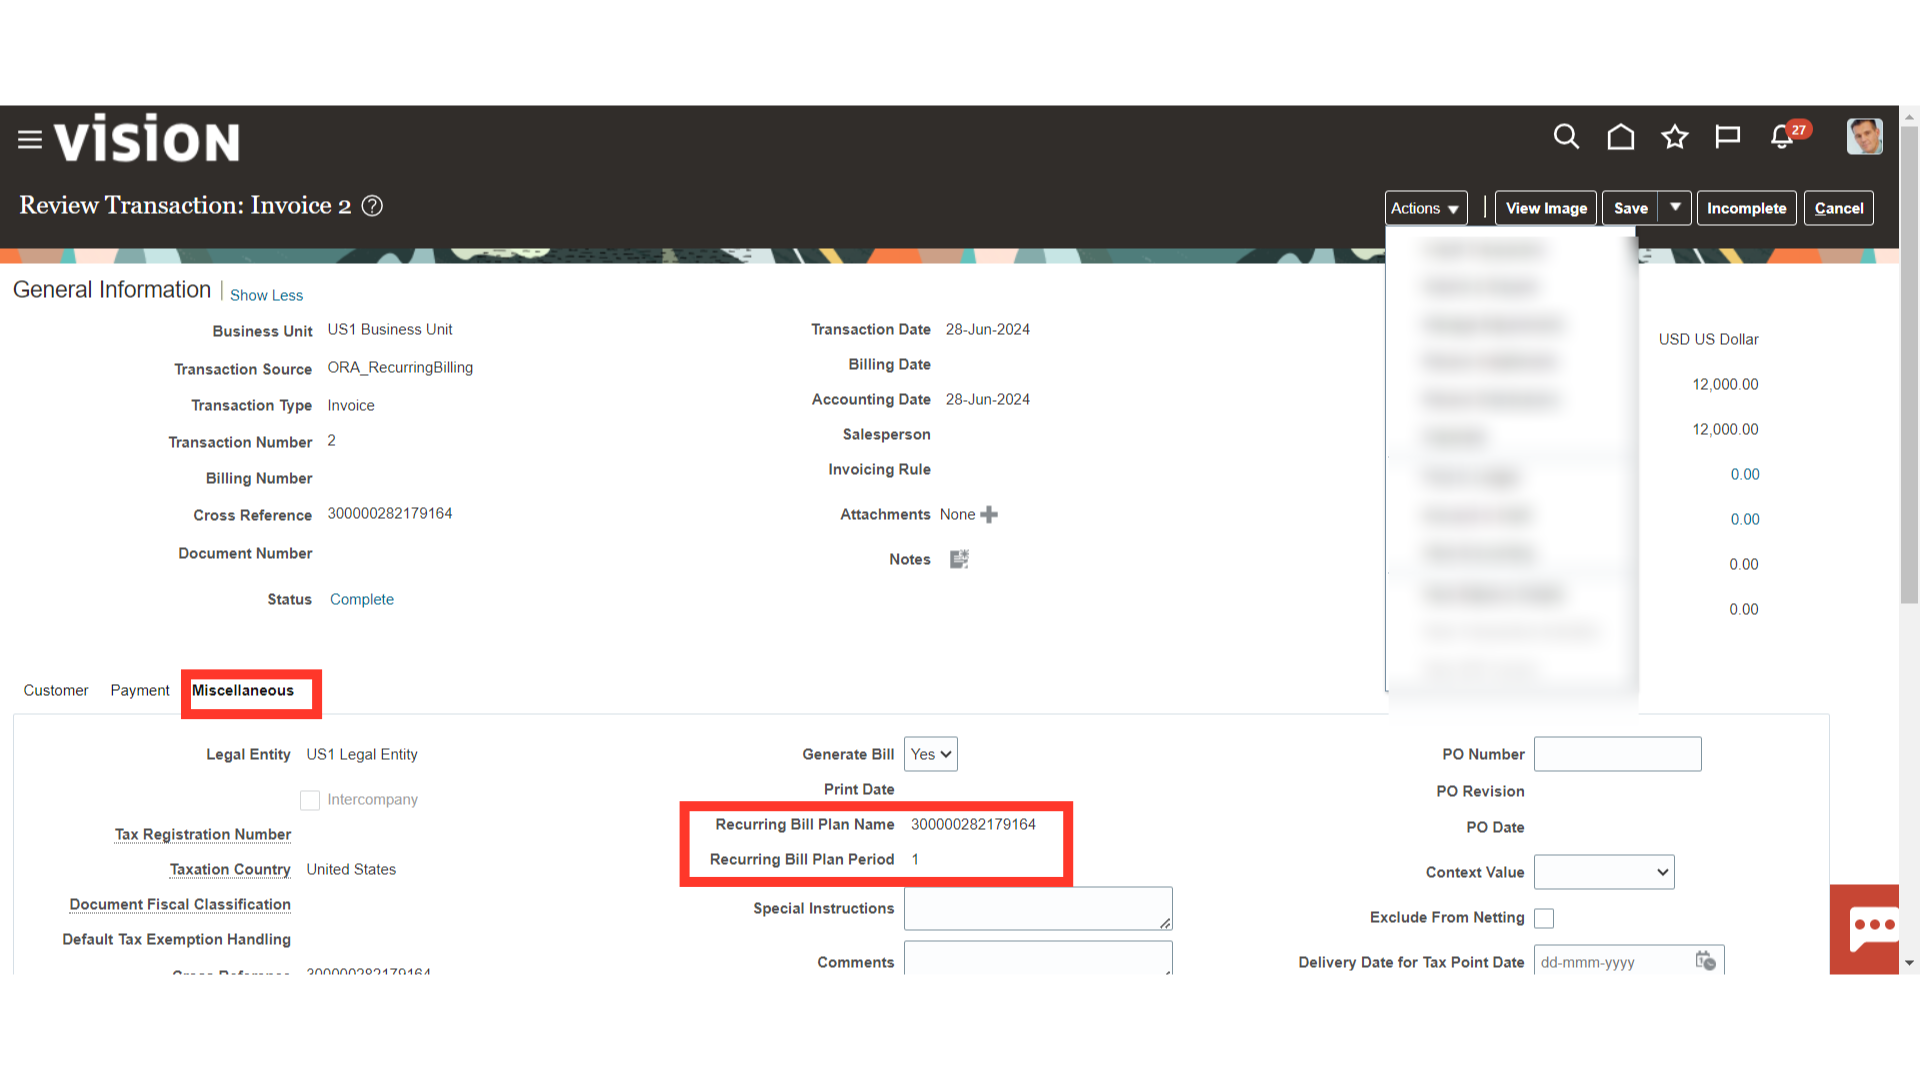
The Recurring Bill Plan Name and Bill Period are shown in the Miscellaneous tab at the transactions header level.
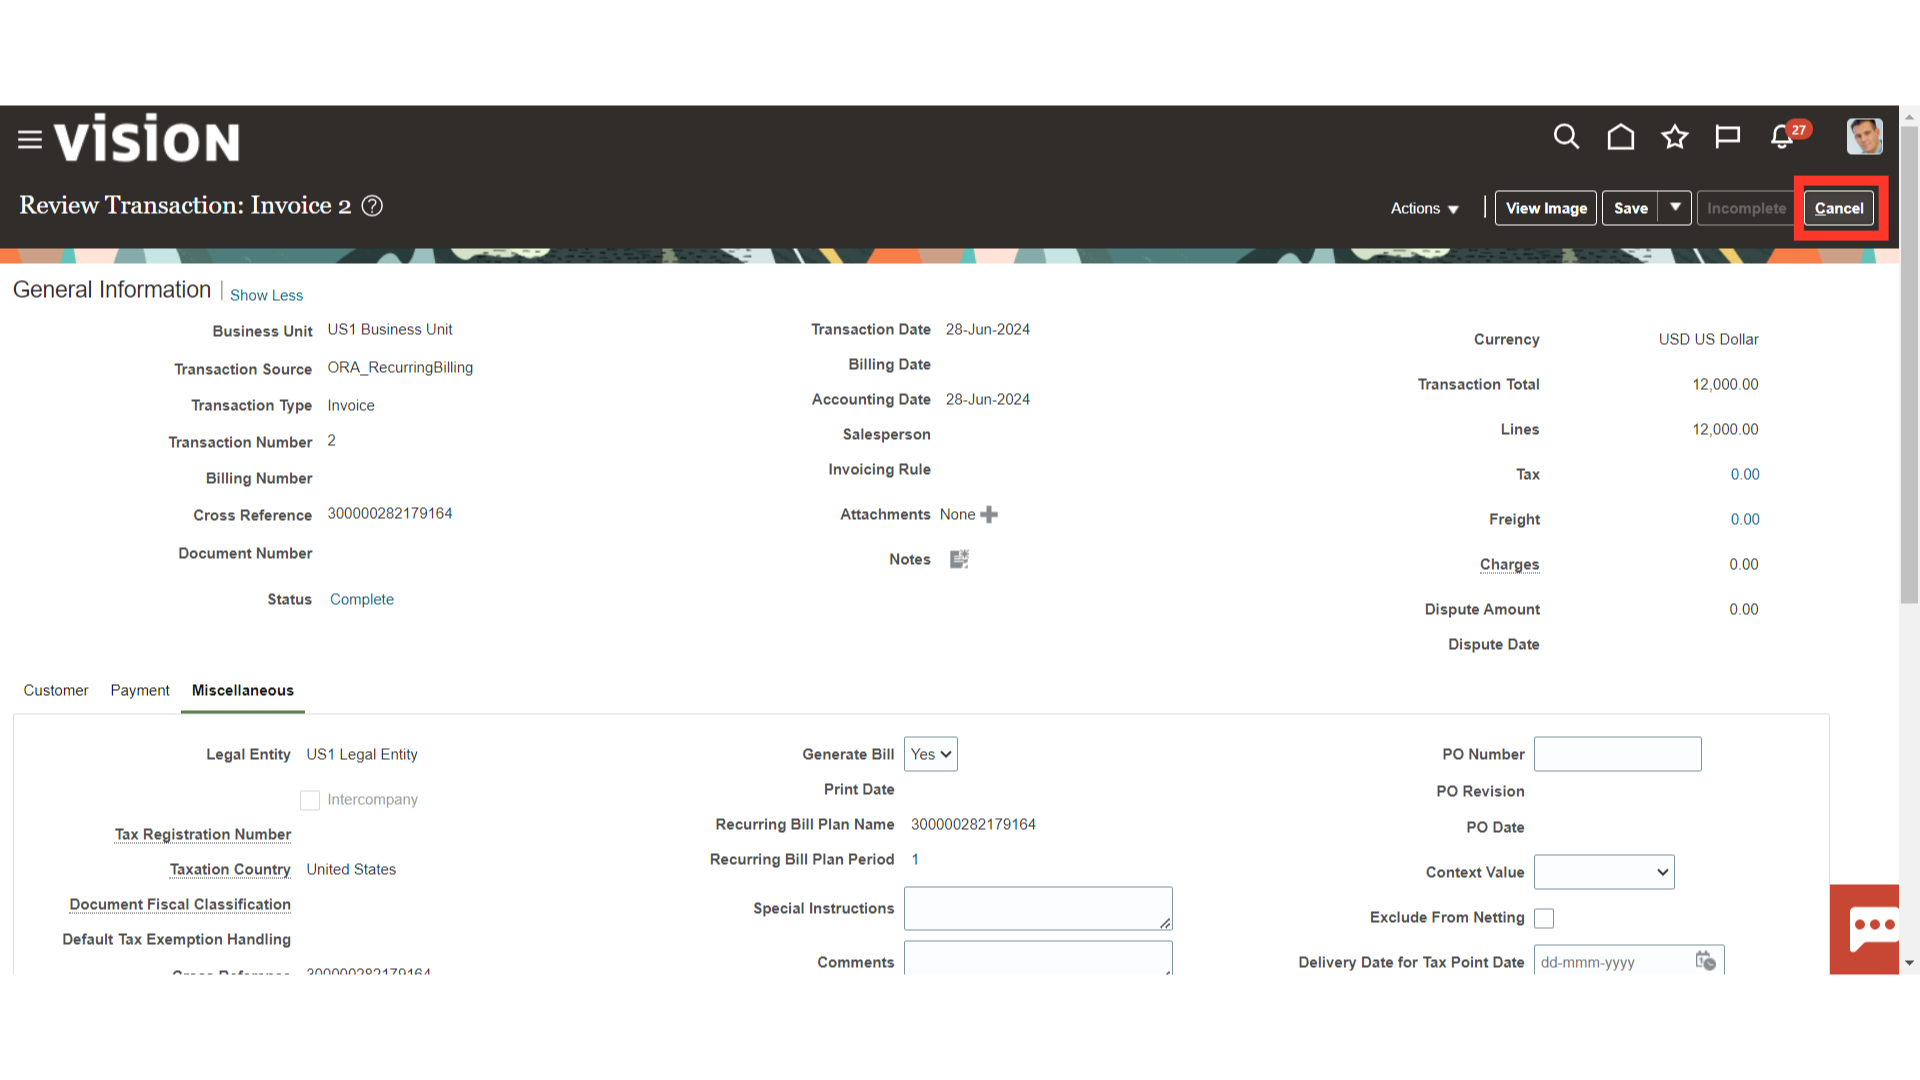
Click on the Cancel button, to close this Transaction window.
This guide offers a thorough explanation of how to generate transactions with the Recurring Bill Plan, beginning with setting up the plan and proceeding with the Generate Recurring Bill data process to produce the invoices.