How to create a Negotiation Template
This guide will walk you through setting up a Negotiation Template in Oracle Fusion. A Negotiation Template helps default values for similar types of negotiations, so when creating a new negotiation, the details will automatically populate from the template, saving you from having to fill in the same details repeatedly. Follow the engaging instructions below to efficiently create a Negotiation Template.
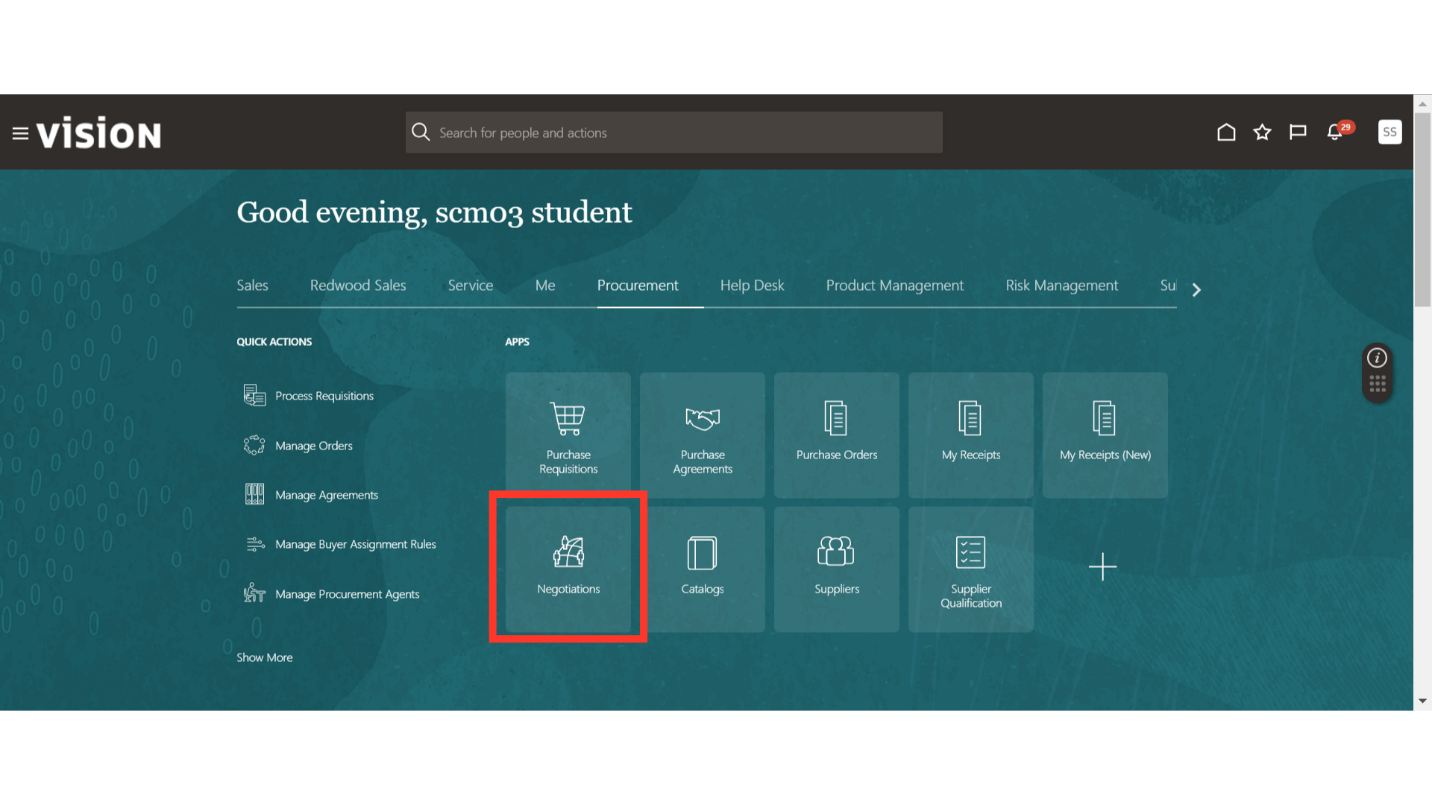
After logging on to Oracle Fusion, navigate to the Procurement tab and click on the Negotiations infolet.
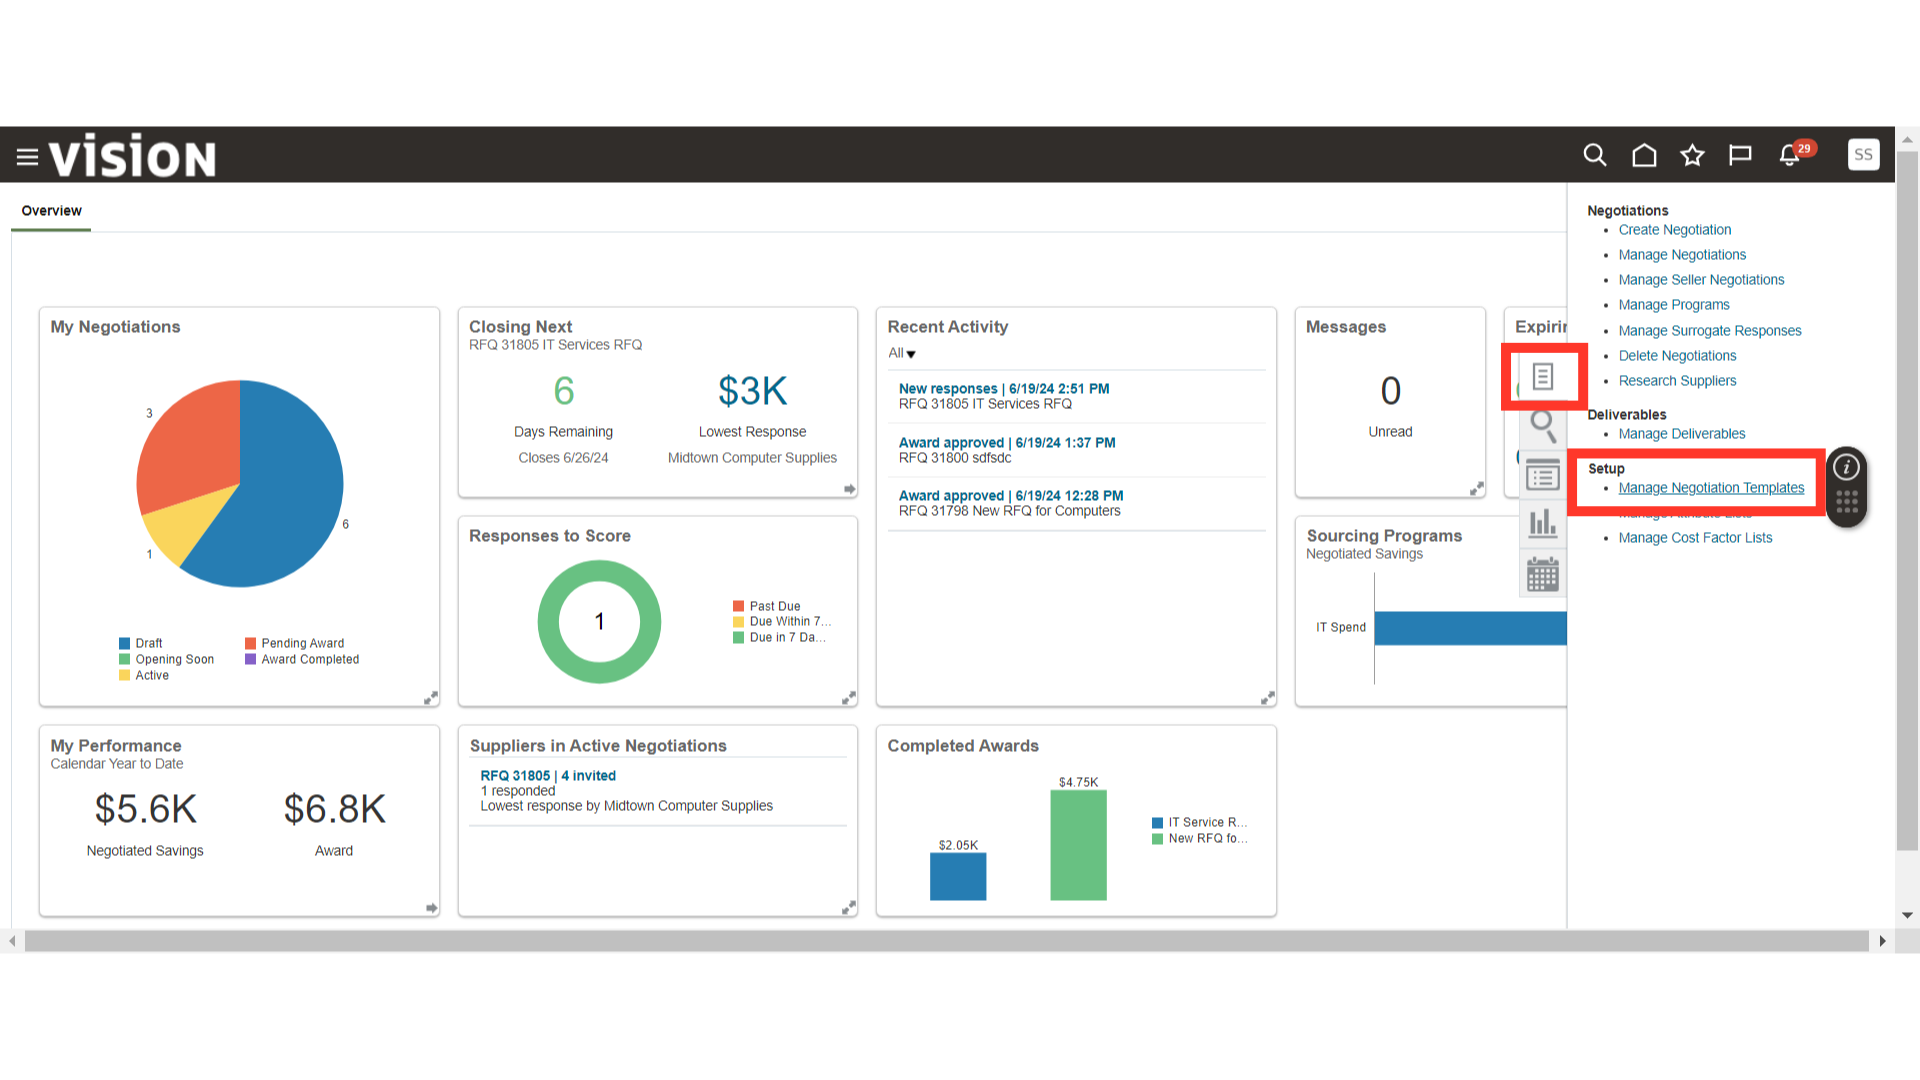
In the Negotiation work area, click on the Tasks button and select Manage Negotiation Templates under the Setup section.
In Manage Negotiation Templates, click on the Plus icon to add a new negotiation template.

In the Create Negotiation Template window, select the following criteria:
- Procurement BU
- Negotiation Template: RFQ
- Negotiation Style: Standard
- Template Outcome: Purchase Order
- Currency: USD
Once all the details are filled in, click on the Create button.
(Note: You can adjust the criteria as needed.)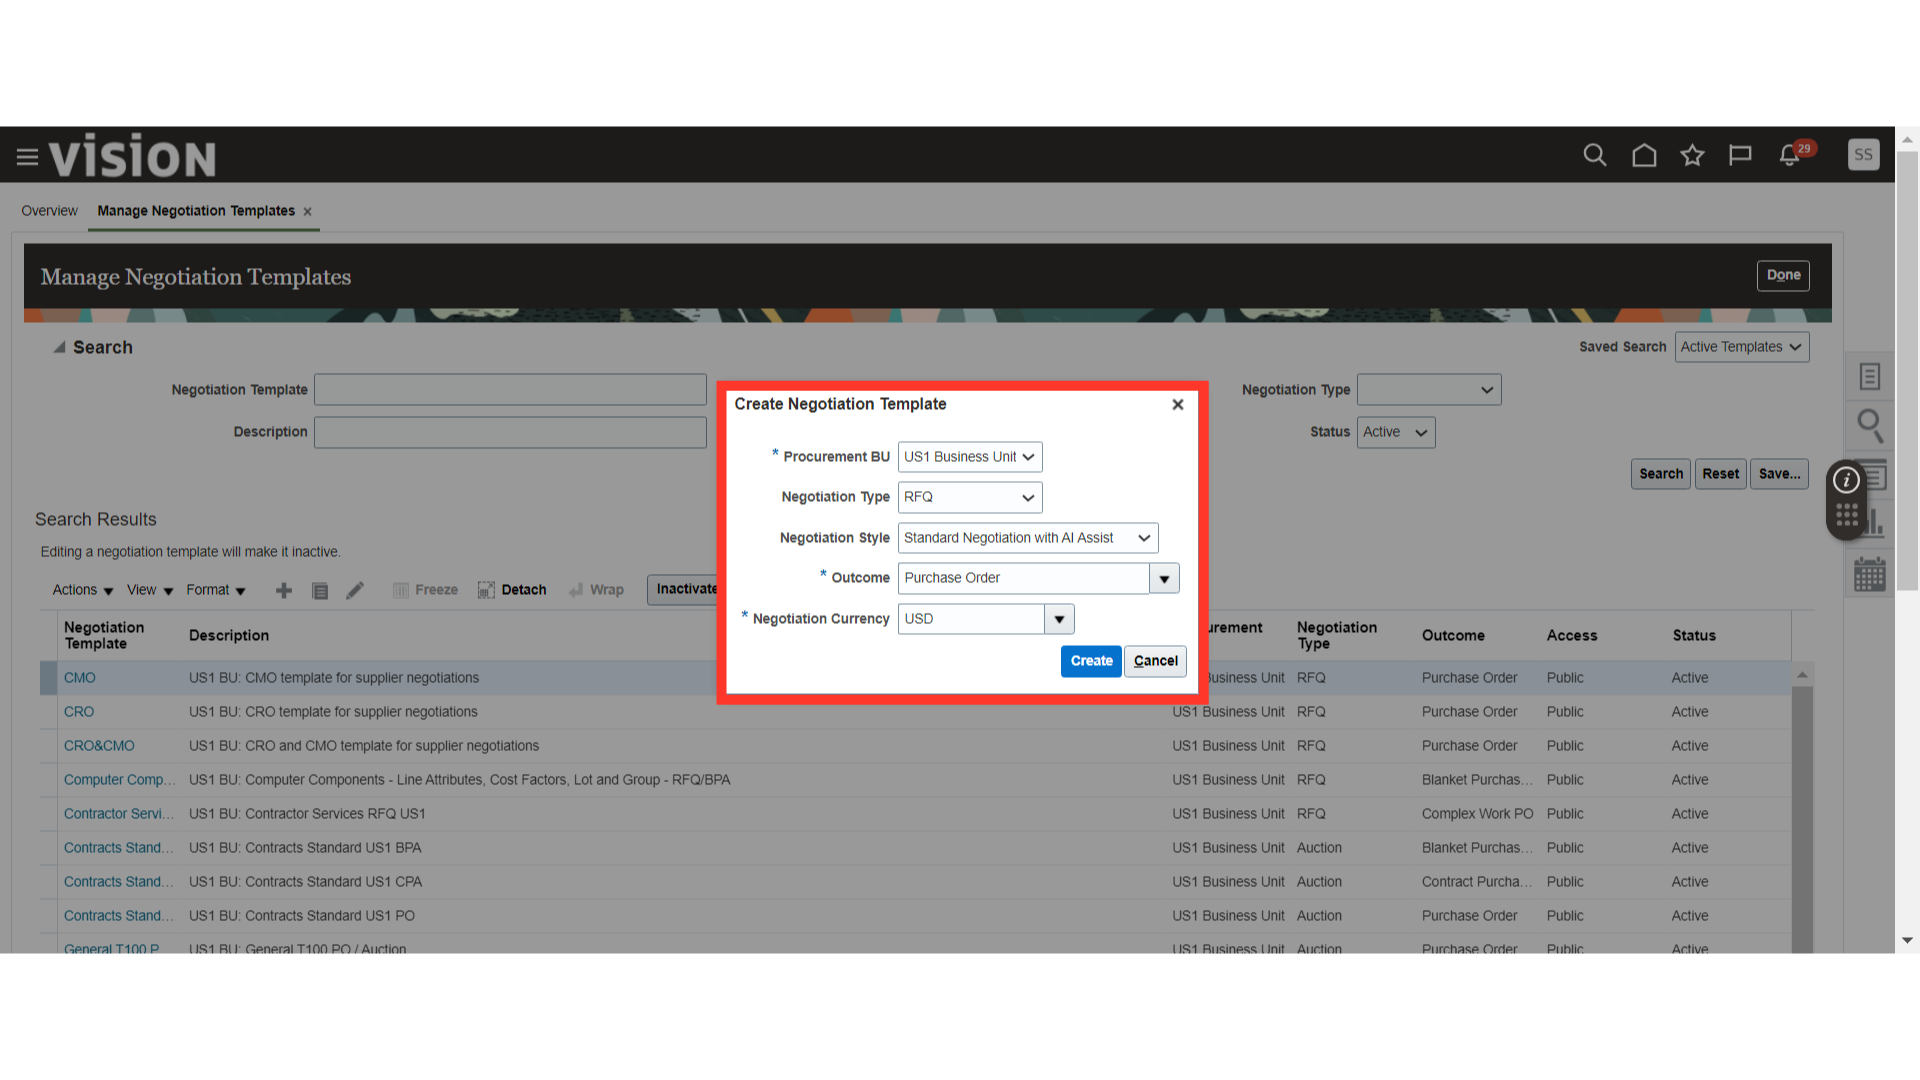
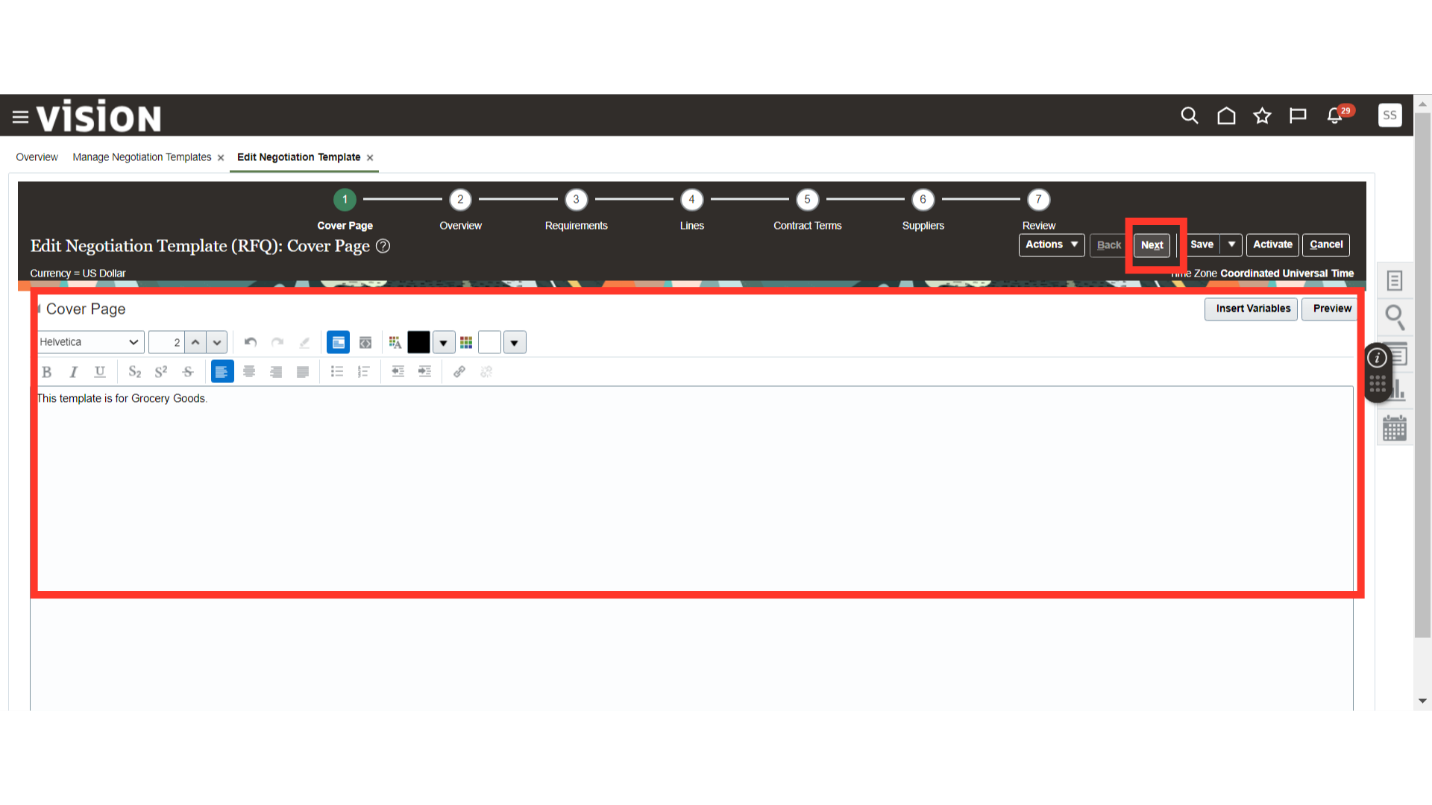
After submission, the Negotiation Template will open in Edit mode.
In the Cover Page of Edit Negotiation, provide the purpose and information about the Negotiation Template. Click on the Next button once the details are filled in.
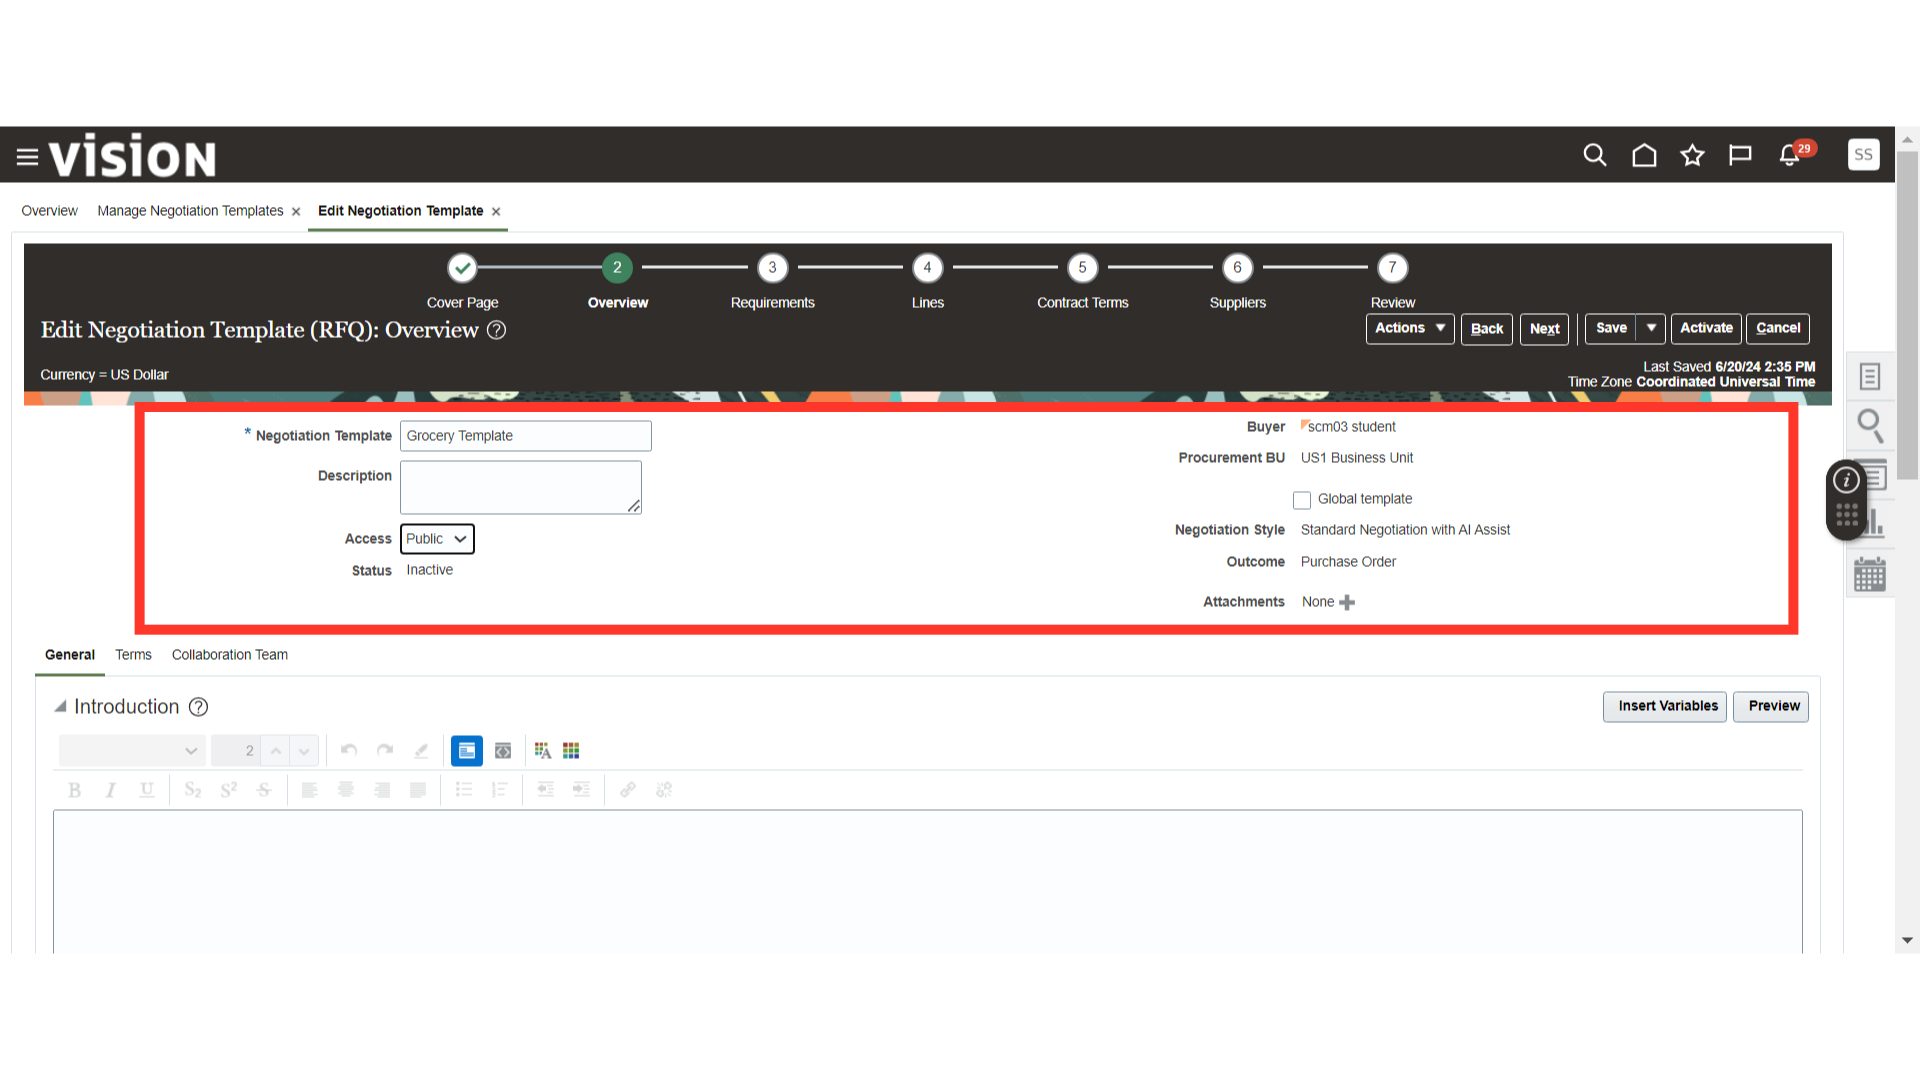
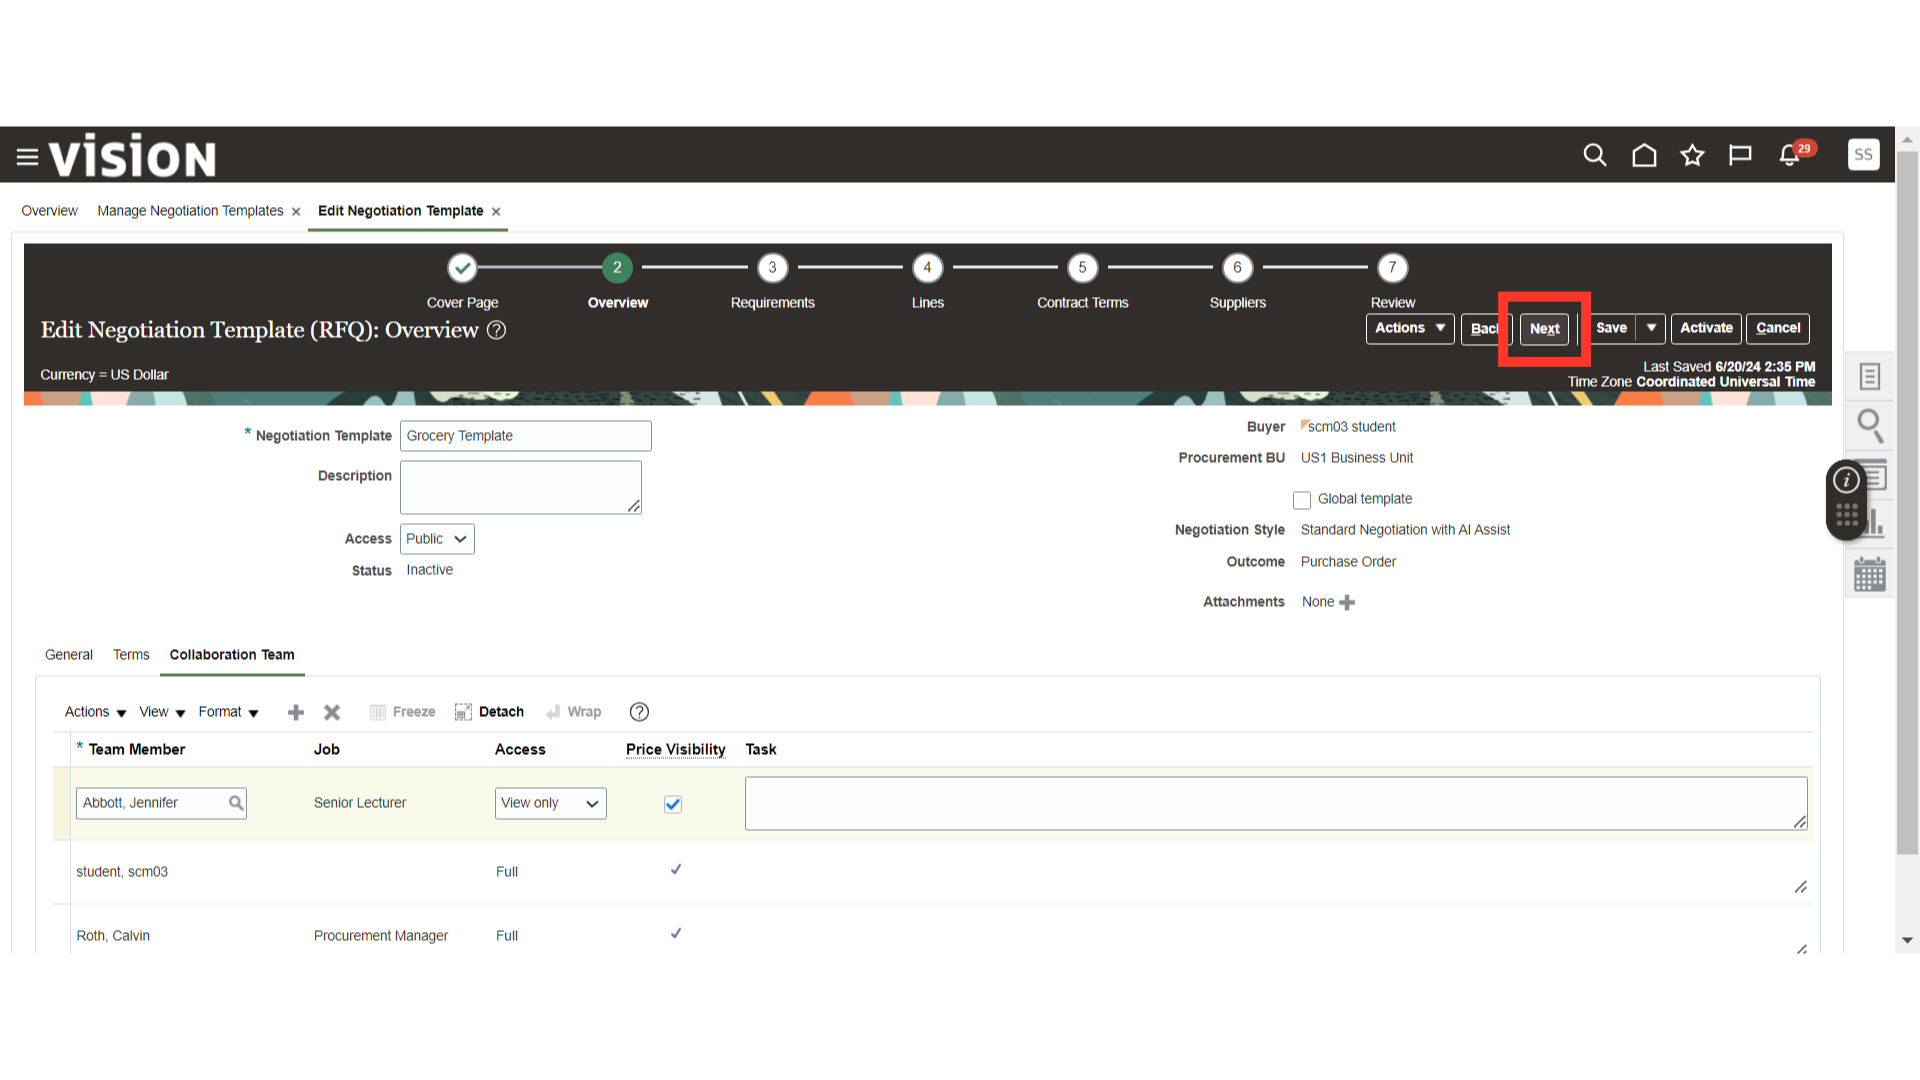
In the Overview section, provide the Negotiation Template Name, Description, Access, and add any attachments (if needed).
Verify other details such as Buyer, Procurement BU, Negotiation Style, and Outcome.
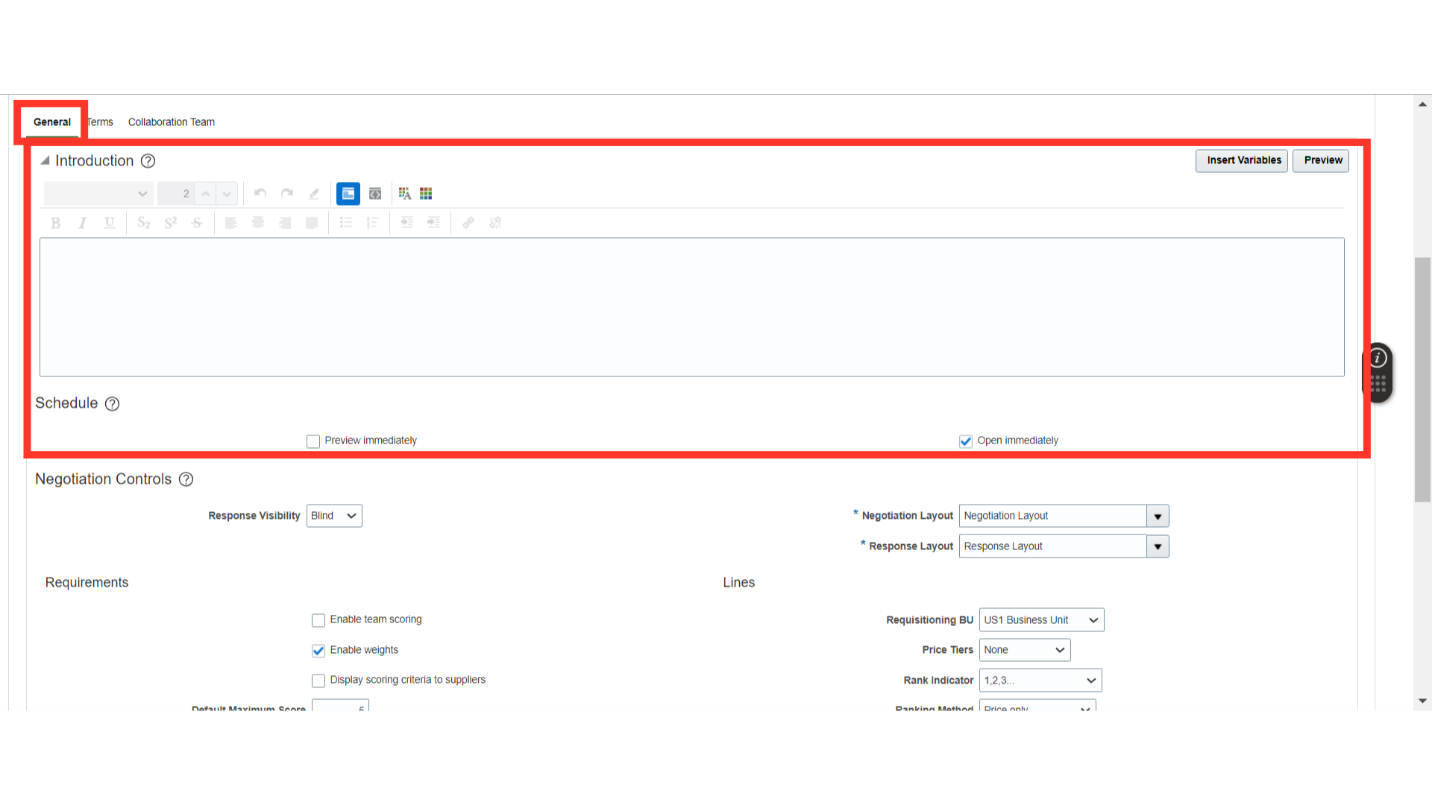
In the General section under Overview, provide an Introduction to your Negotiation and define the Preview and Open schedules of the Negotiation Template.
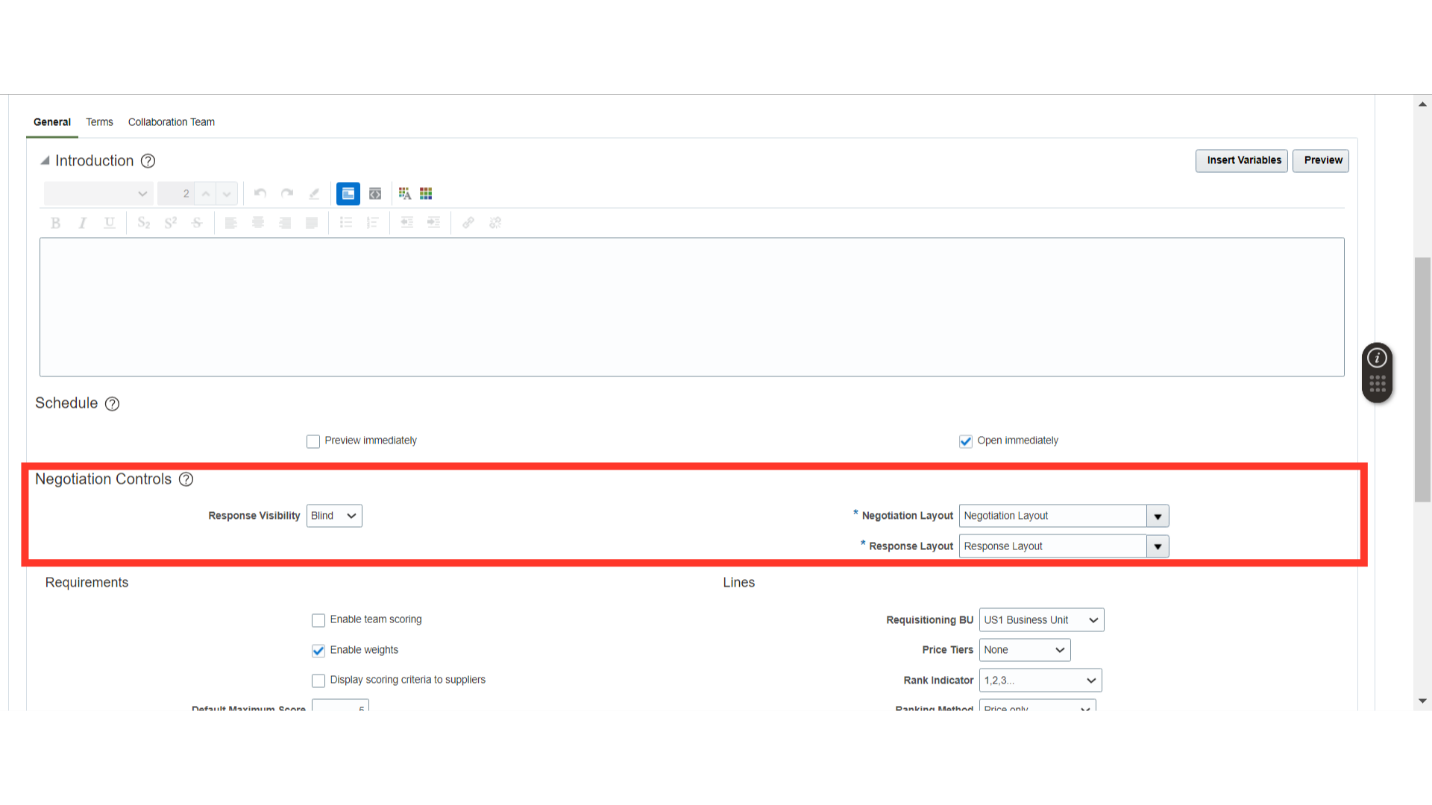
In Negotiations Controls under the General section, define the Response Visibility type for your Negotiation Template and select the default Negotiation Layout and Response Layout.
Bling: Only Buyer will be able to see response from suppliers.
Sealed: Noone will be able to see responses until the negotiation closes.
In the Requirements under the General section, you can enable functions related to the Negotiation Template such as Enable Team Scoring, Enable Weights, and Display Scoring Criteria to the Supplier. Also, if you enable scoring, you need to define the Default Maximum Score.
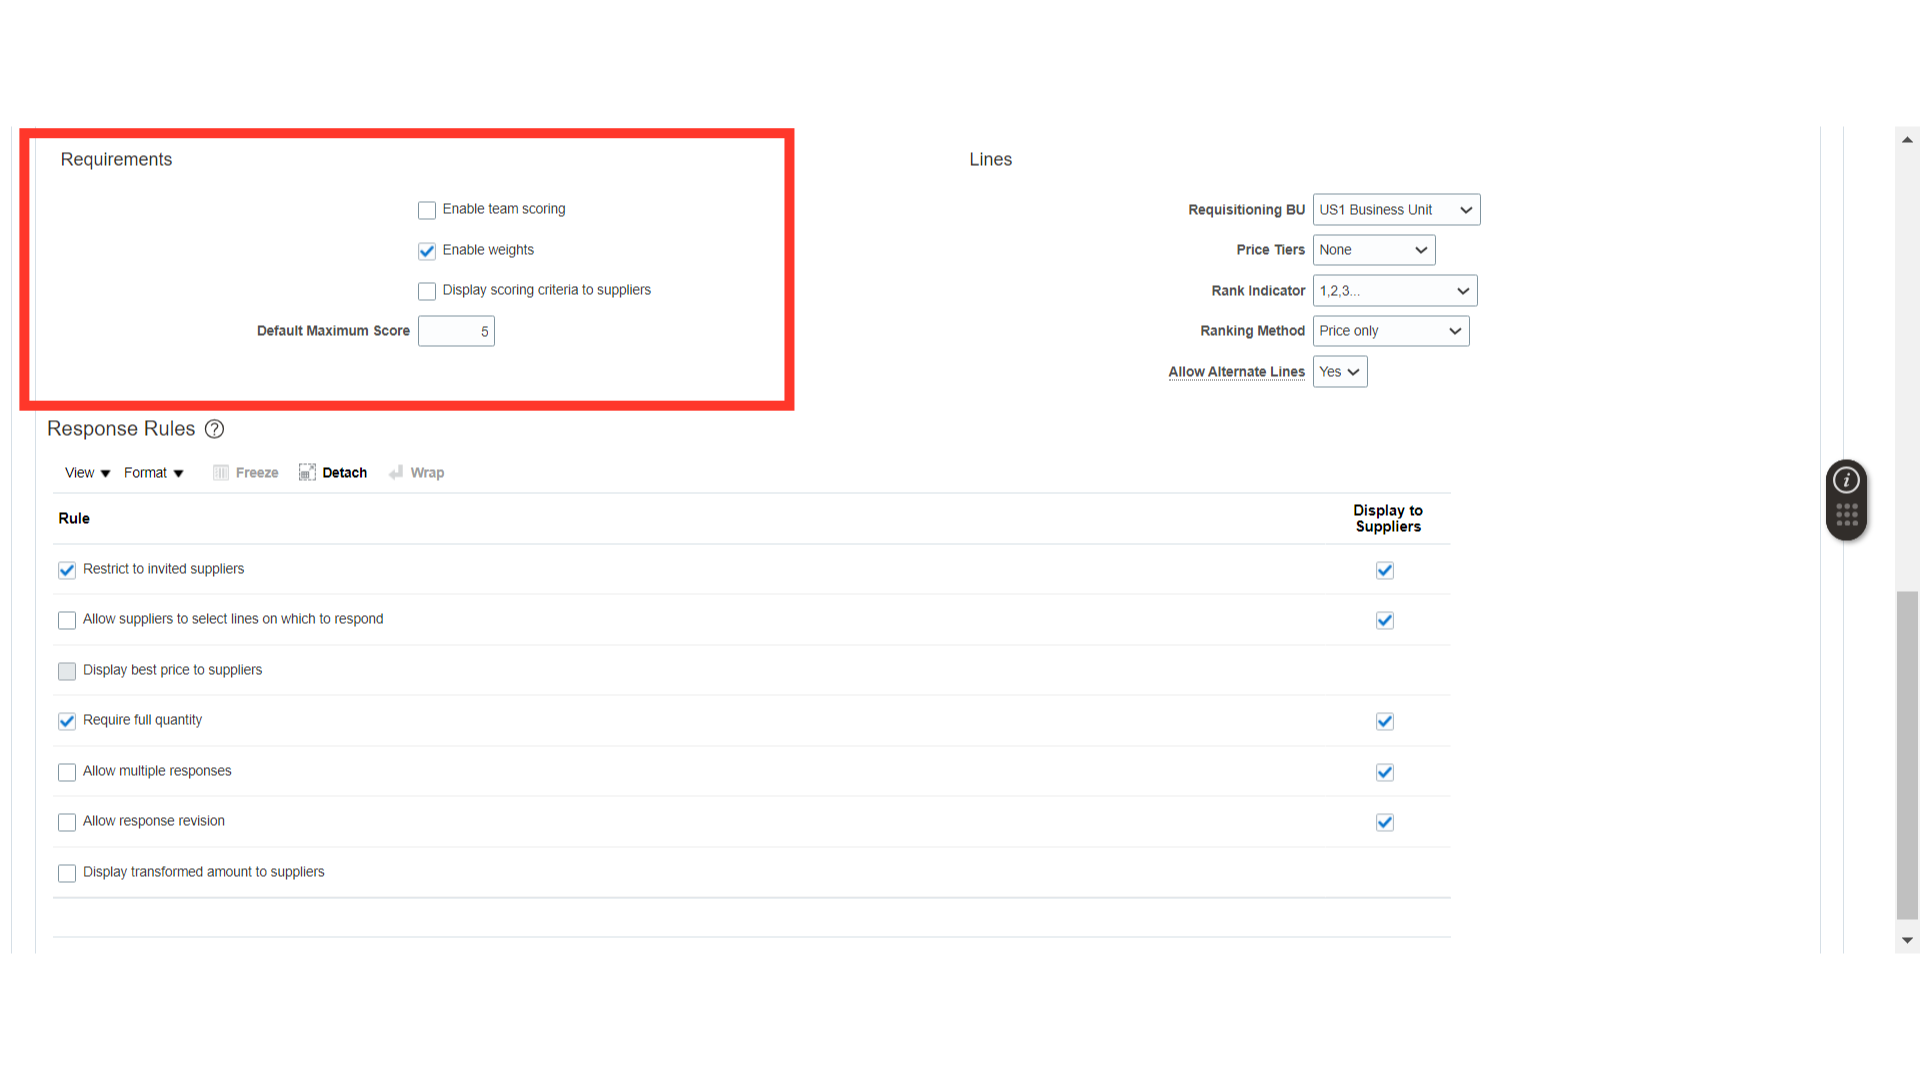
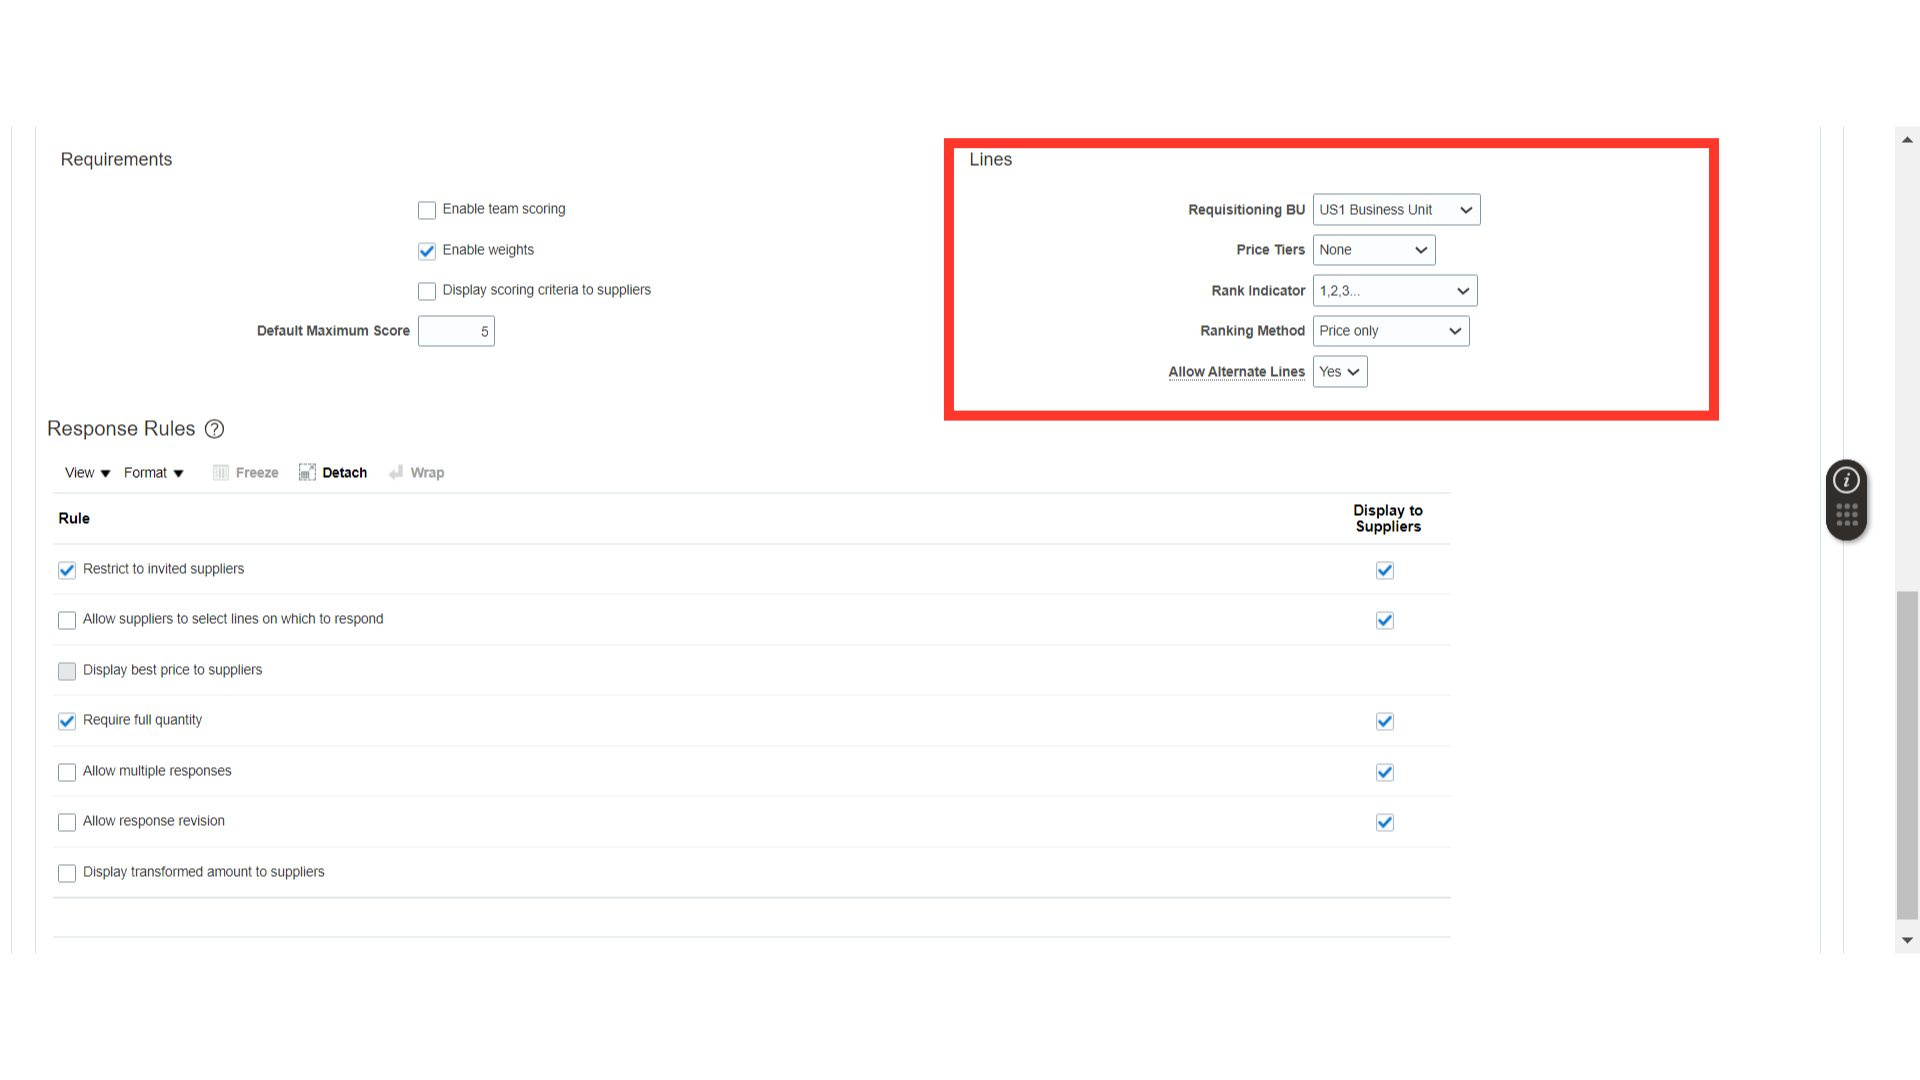
In the Lines under the General section, set up line functions for your Negotiation Template such as Requisitioning BU, Price Tiers, Rank Indicator, Ranking Method, and Allow Alternate Lines.
In the Response Rules, enable different rules for your Negotiation Template and check Display to Suppliers if you want to make these visible to the suppliers.

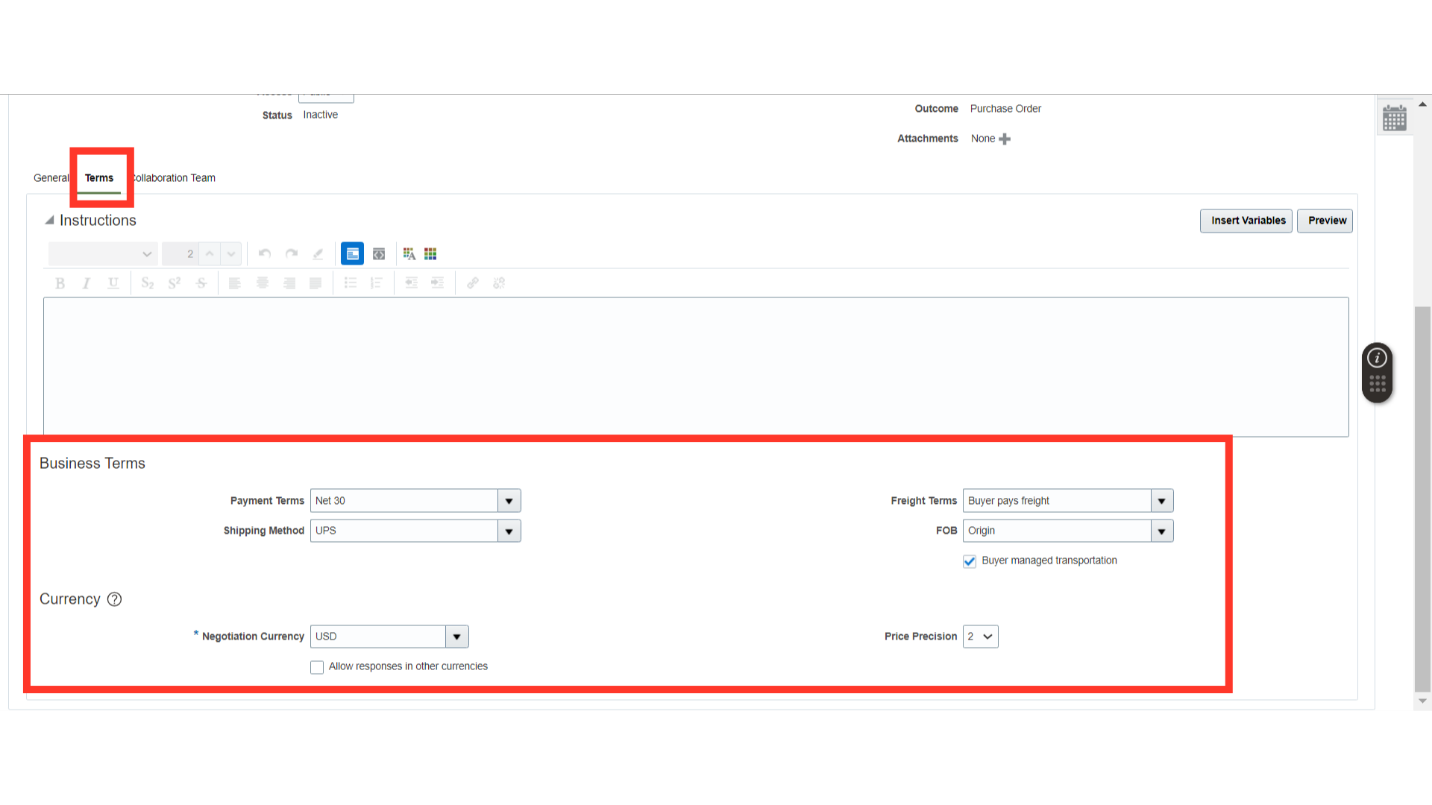
In the Terms section under the Overview page, define the business terms such as Payment Terms, Shipping Method, Freight Terms, FOB, and Buyer Managed Transport. Define currency details such as Negotiation Currency, Allowing Other Currencies, and Price Precision.
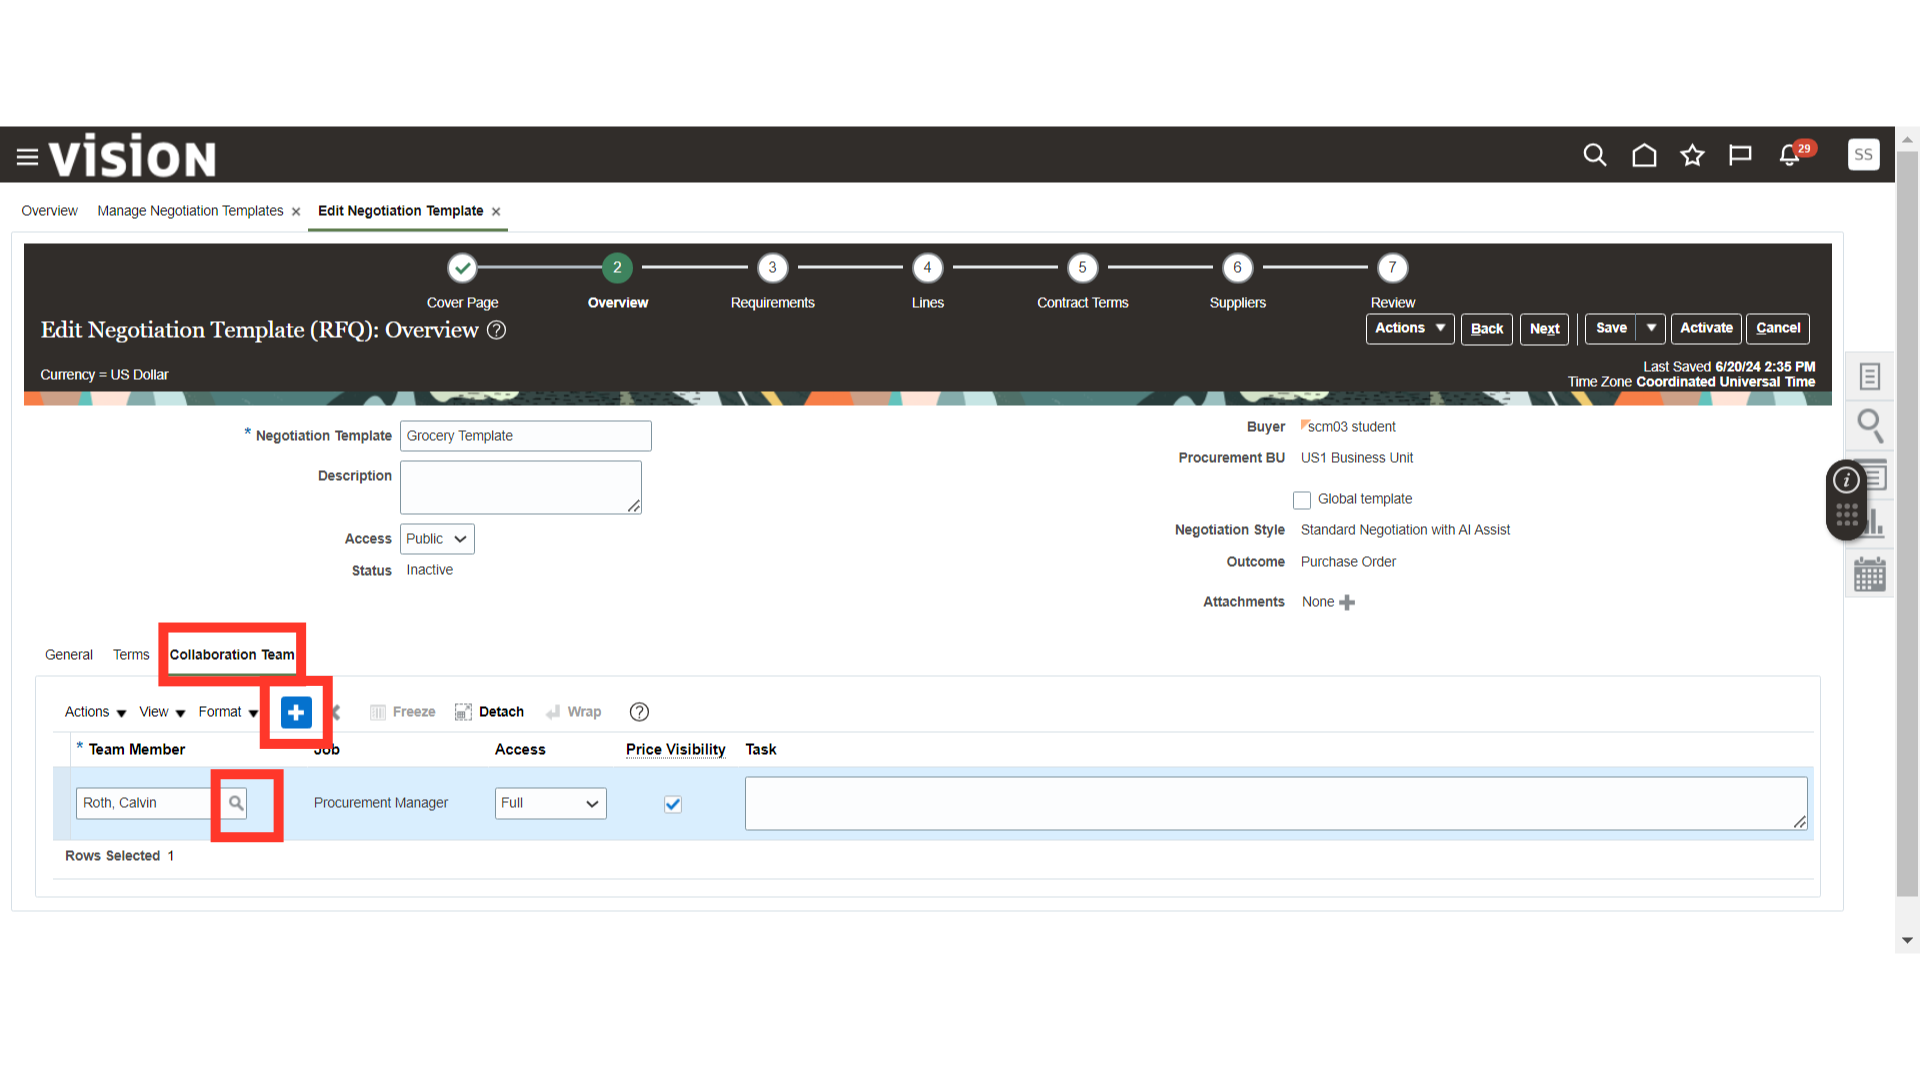
In the Collaboration Team under the Overview, click on the Plus icon to search and add the default team members for the Negotiation Template and define their access levels.
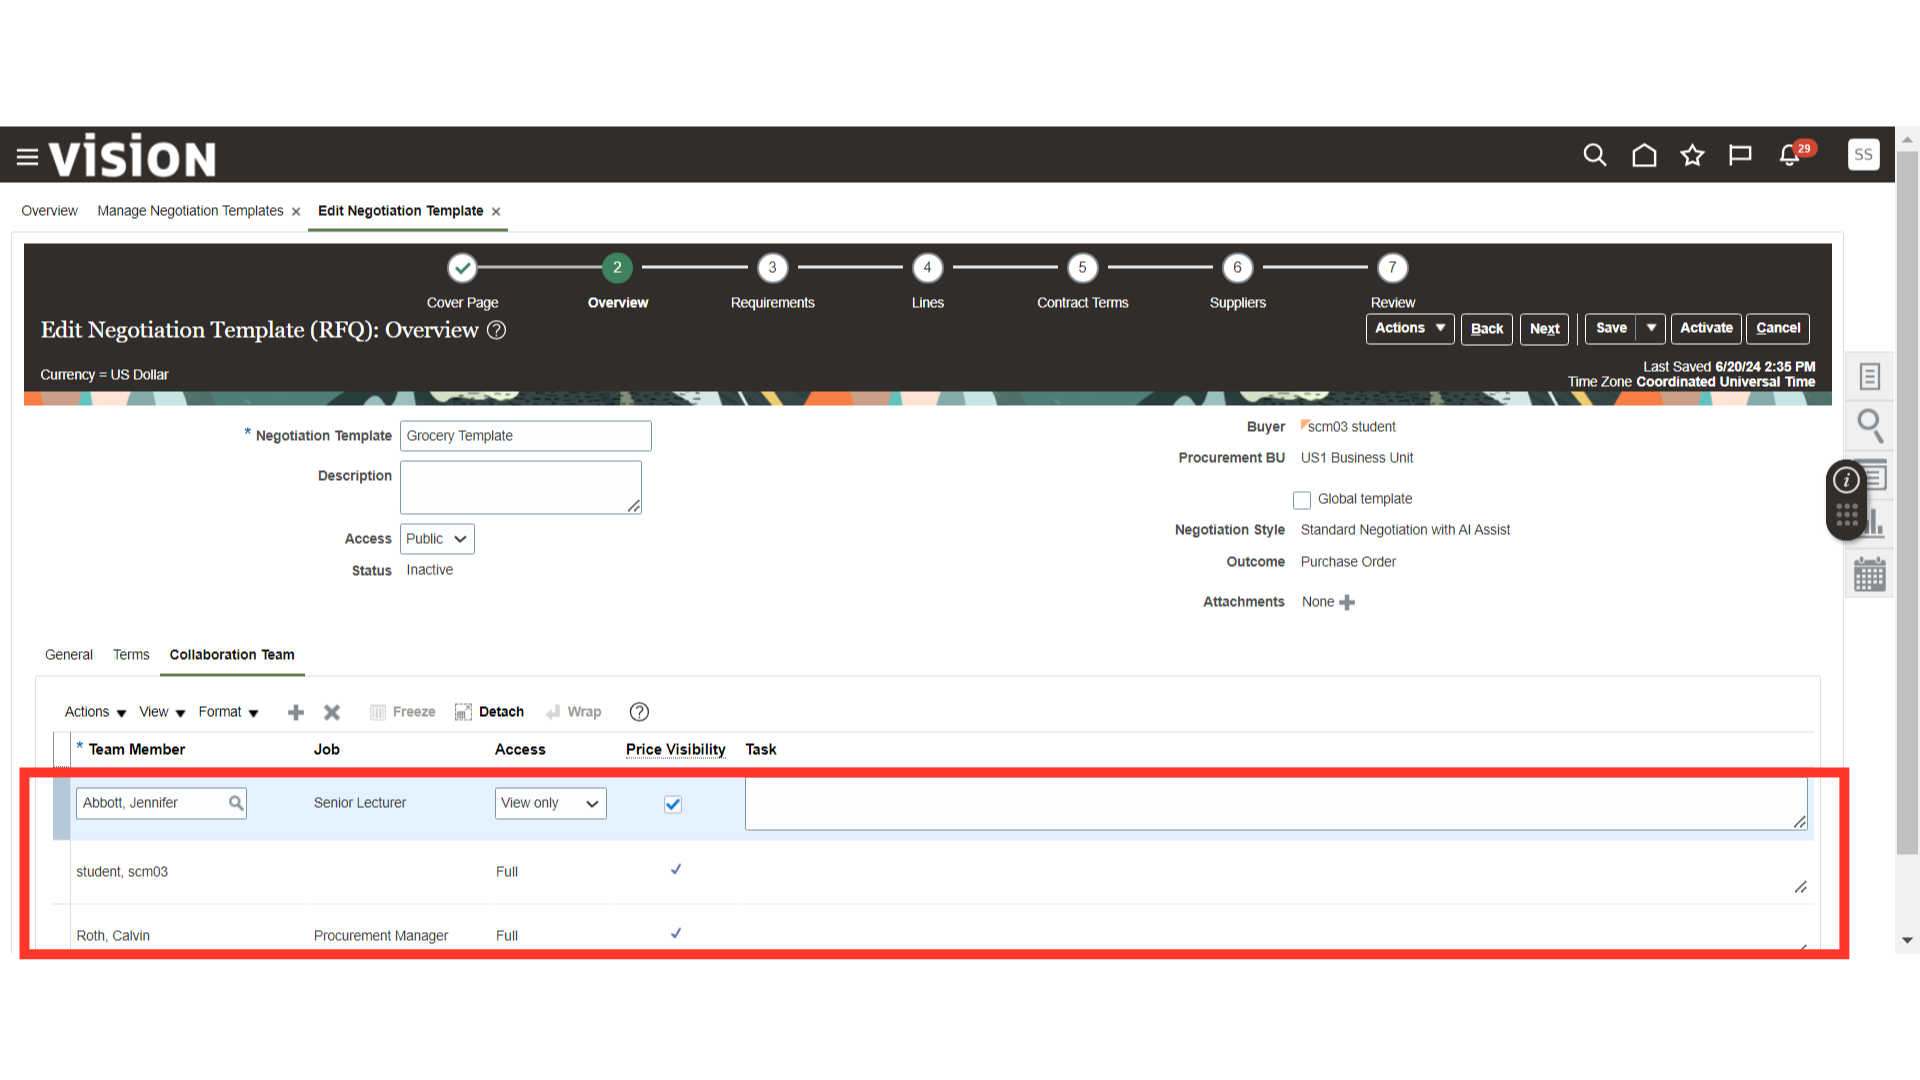
In the Collaboration Team, we have added three default team members for our negotiation template with their access levels.
Once all the details are filled in for the Overview section, click on the Next button.
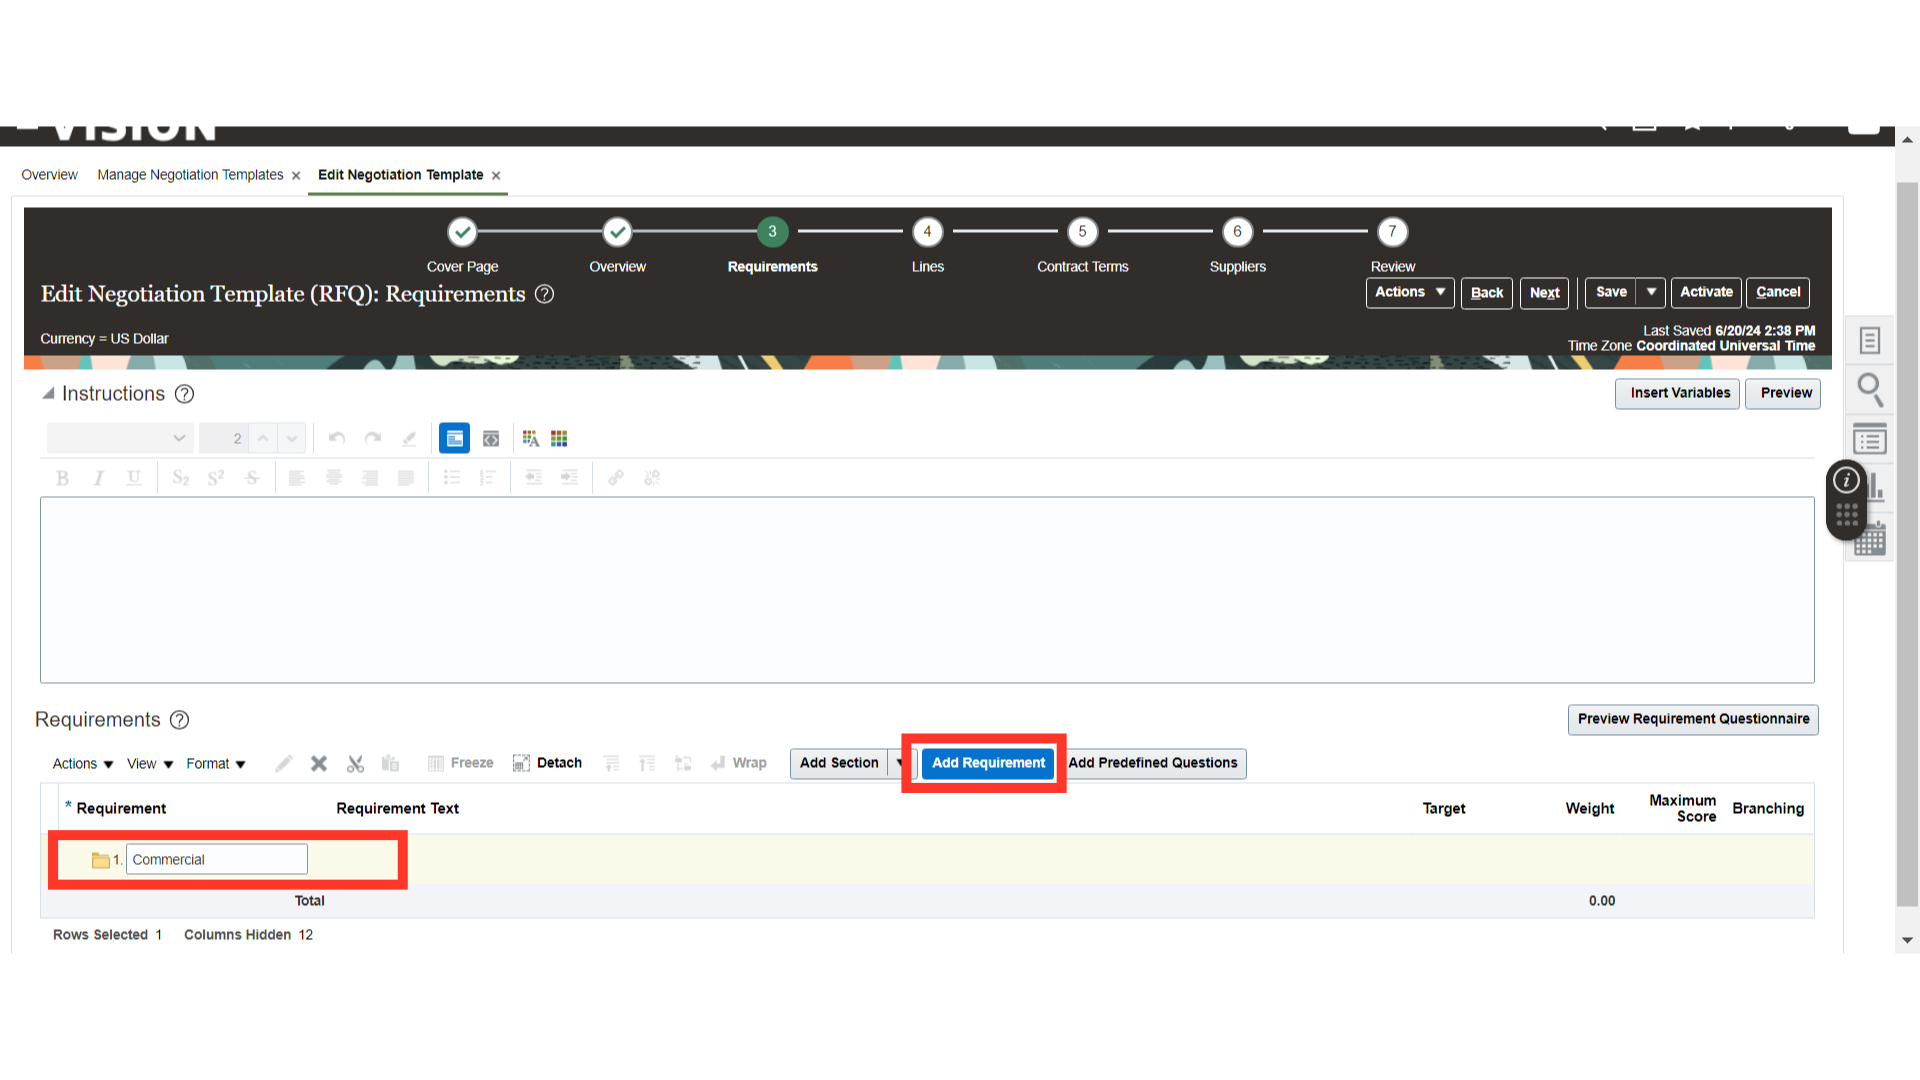
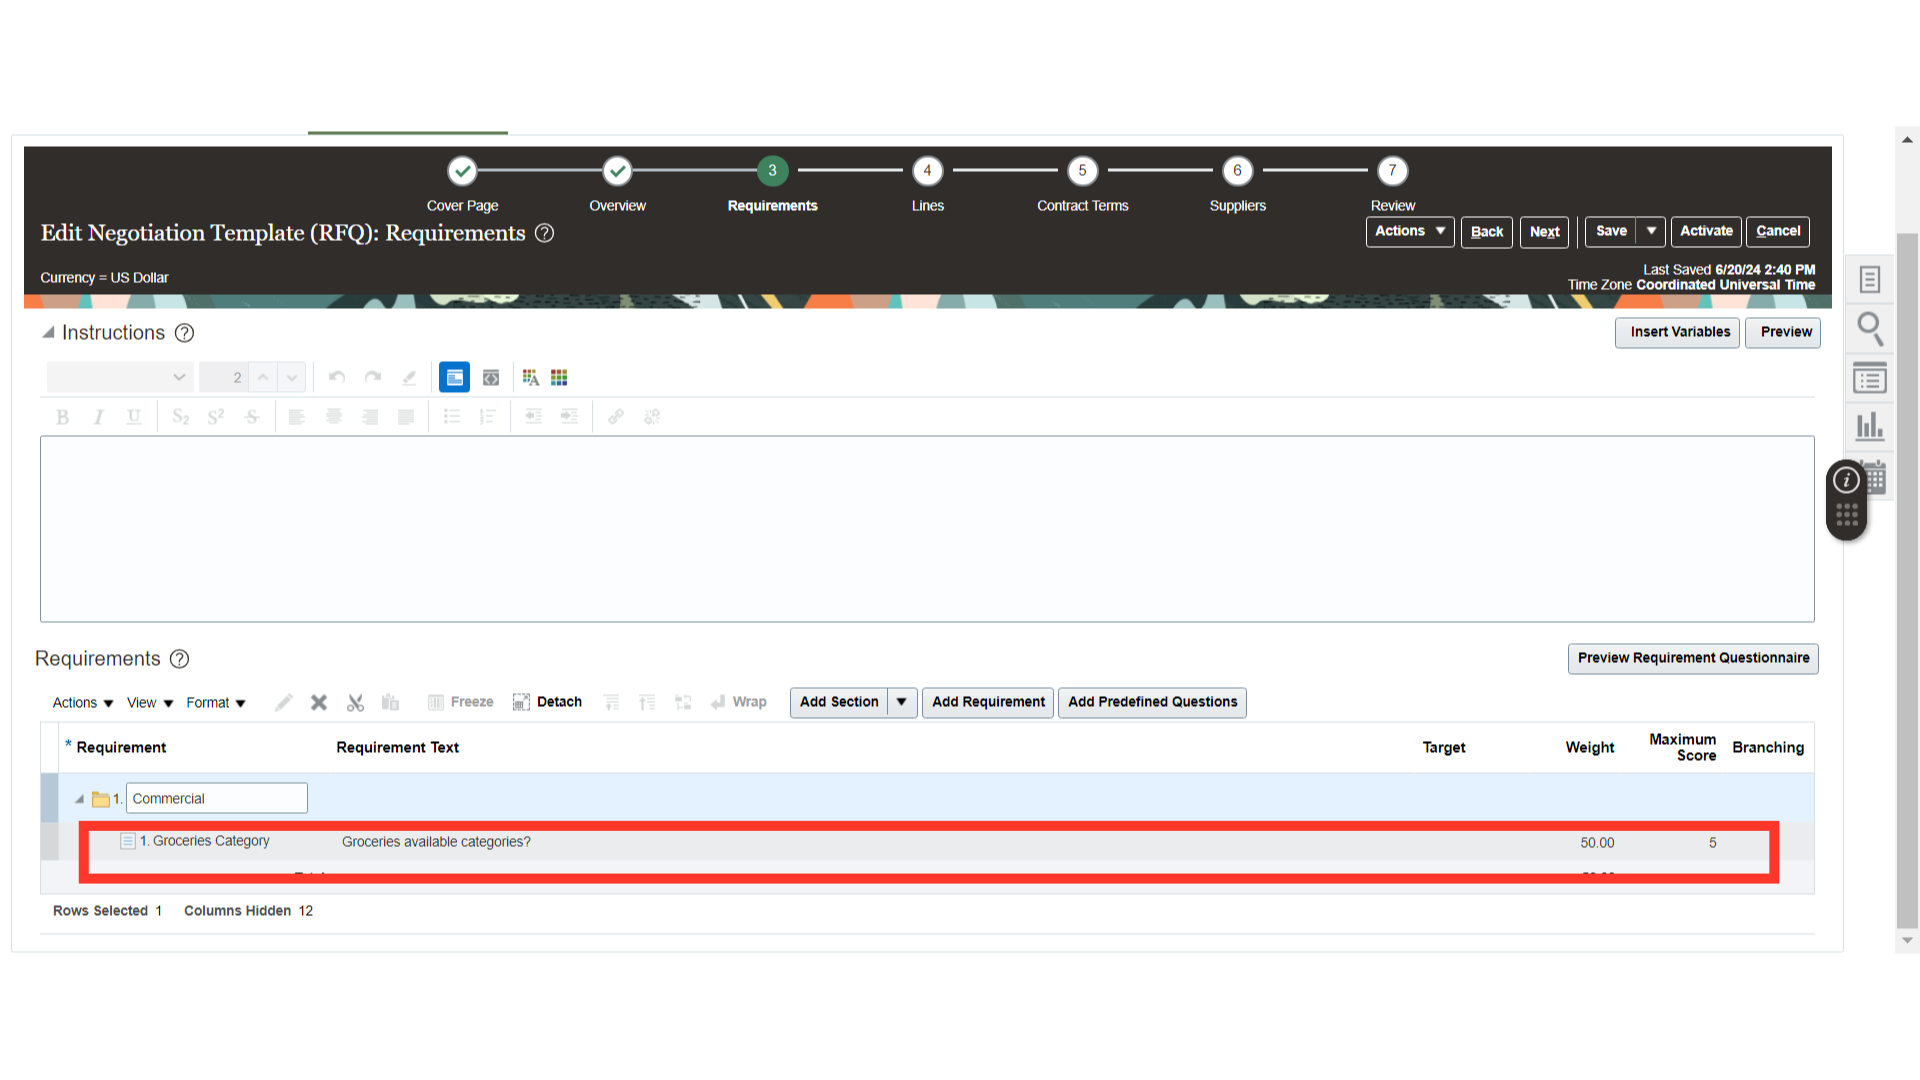
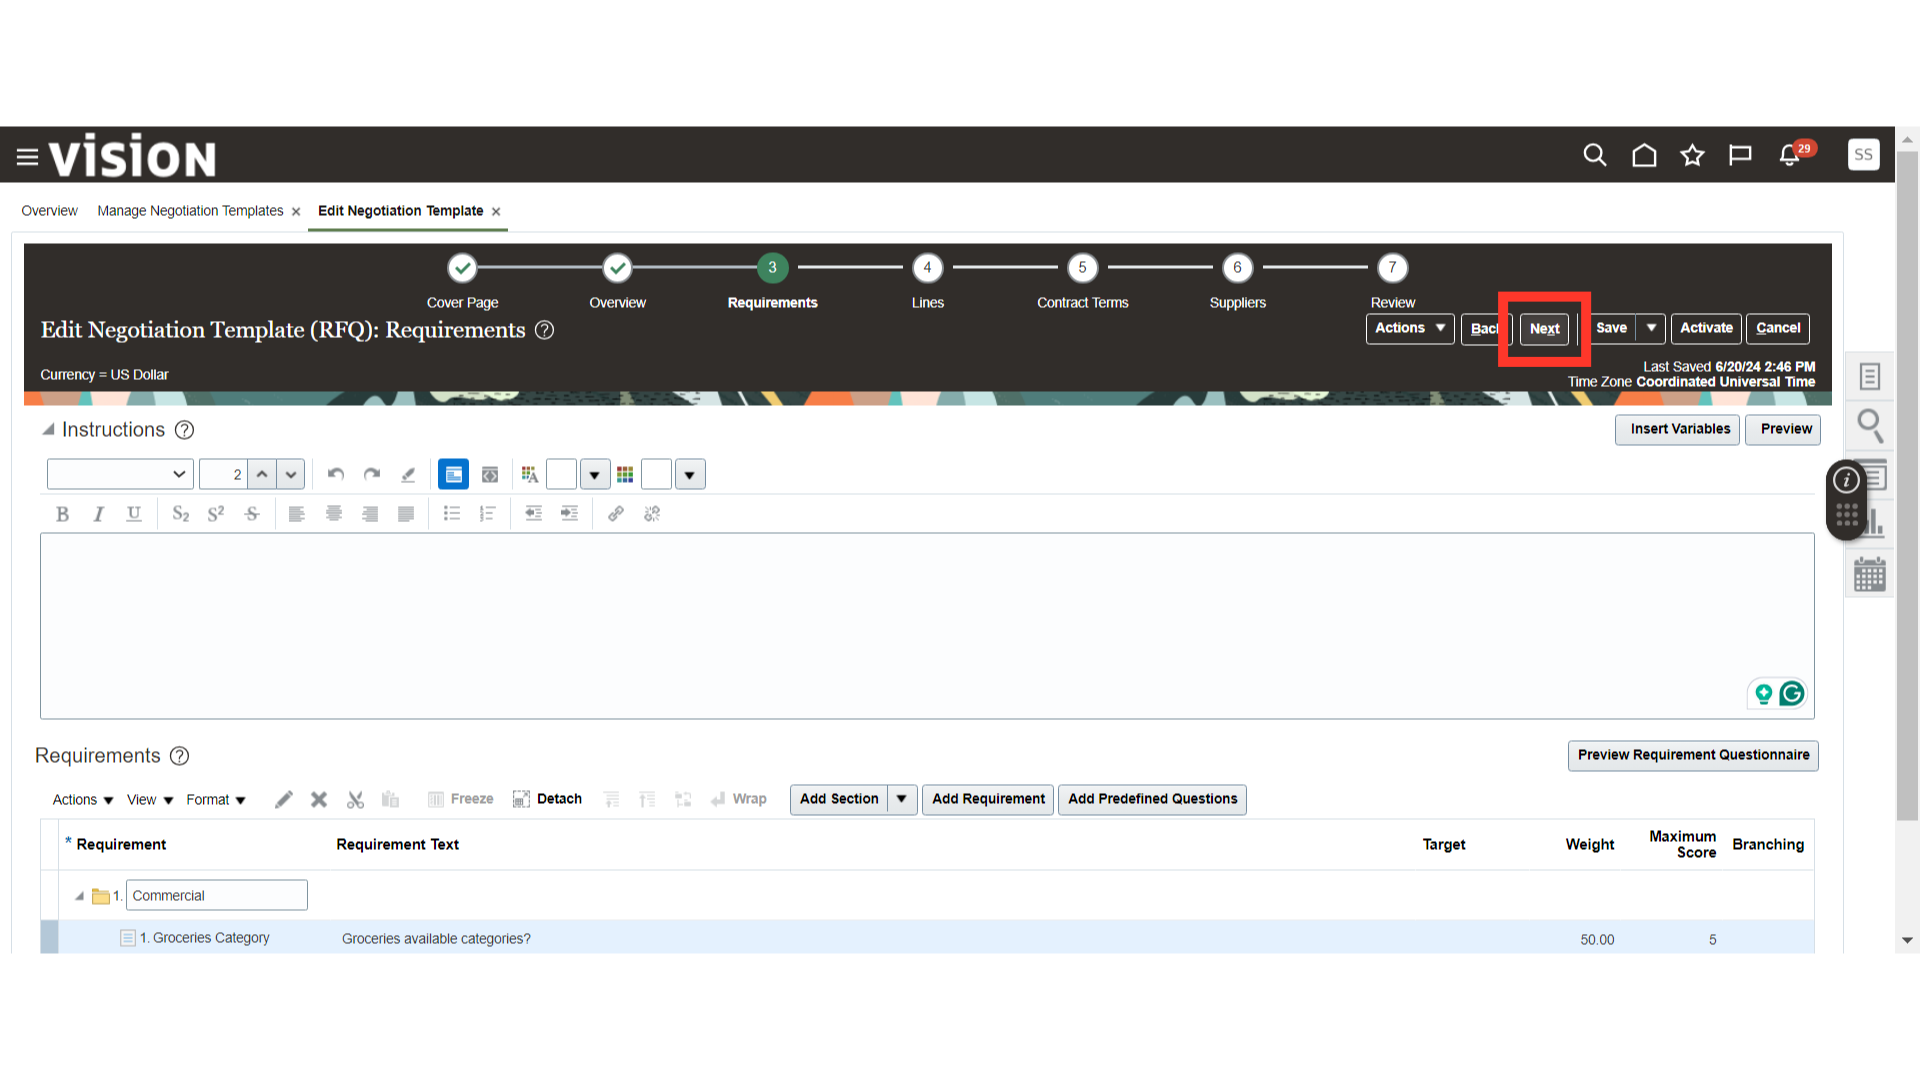
Now, we are in the Negotiation Requirements section. Here, we will add the Requirement Details of Negotiation. Click on the Add Section button.
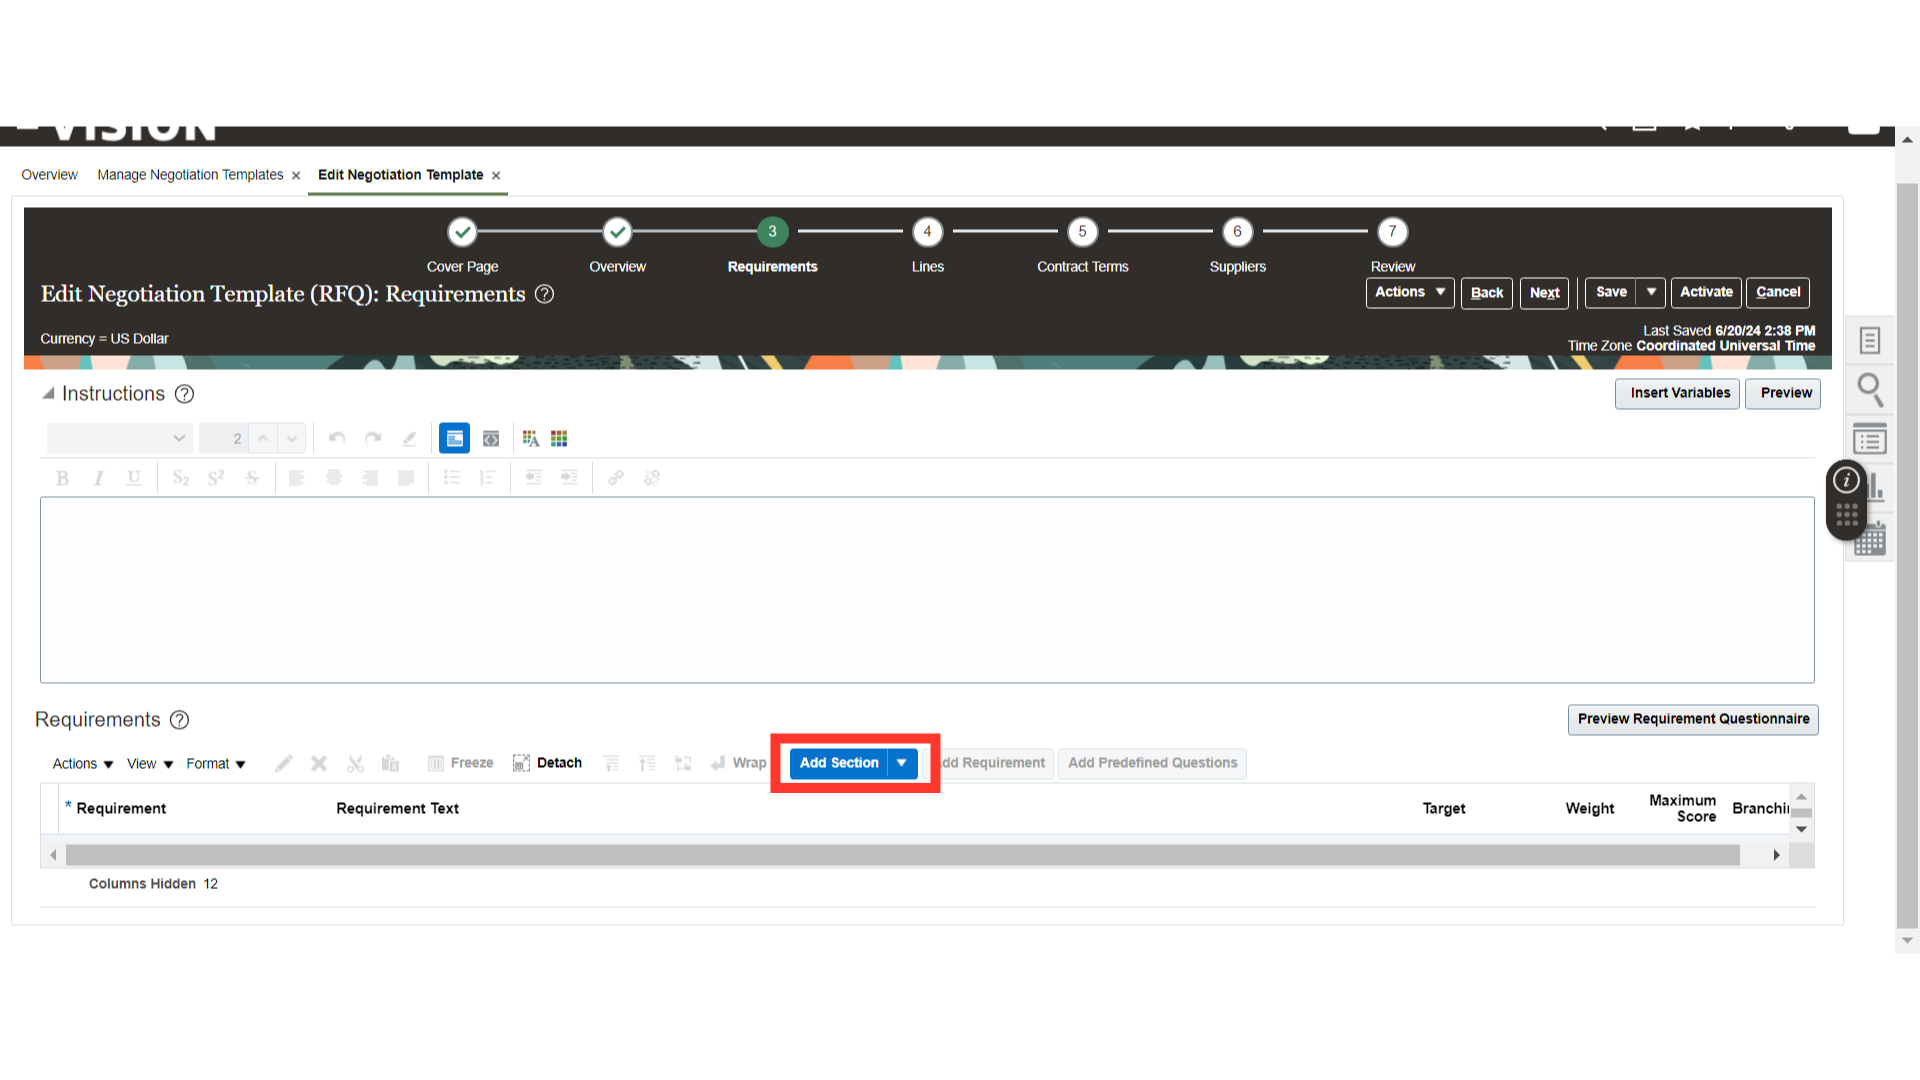
Once the section is added, provide the name of the section and click on the Add Requirement button. Also, you can add predefined questions if those are available in the system.
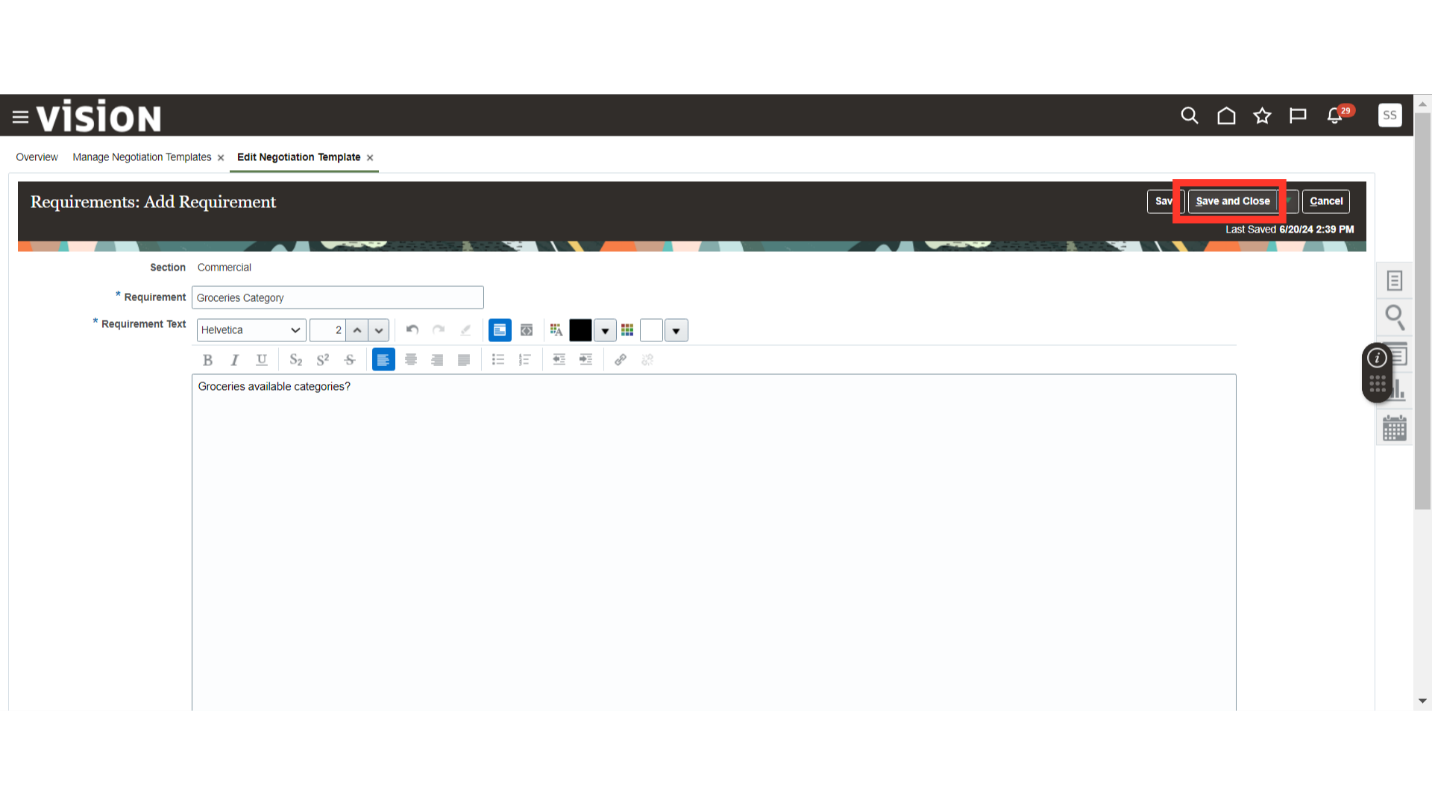
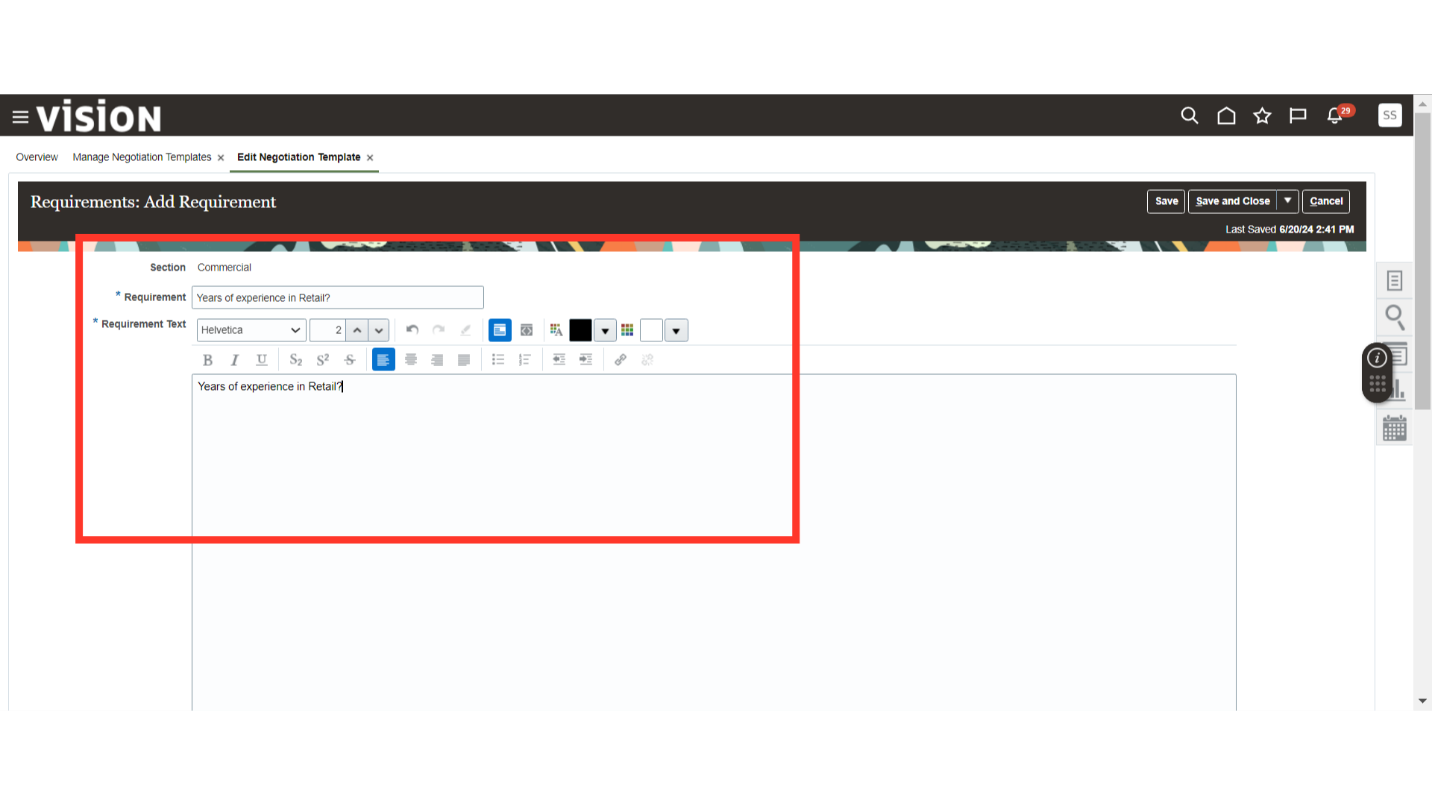
In the Add Requirements section, provide the Requirement Details.
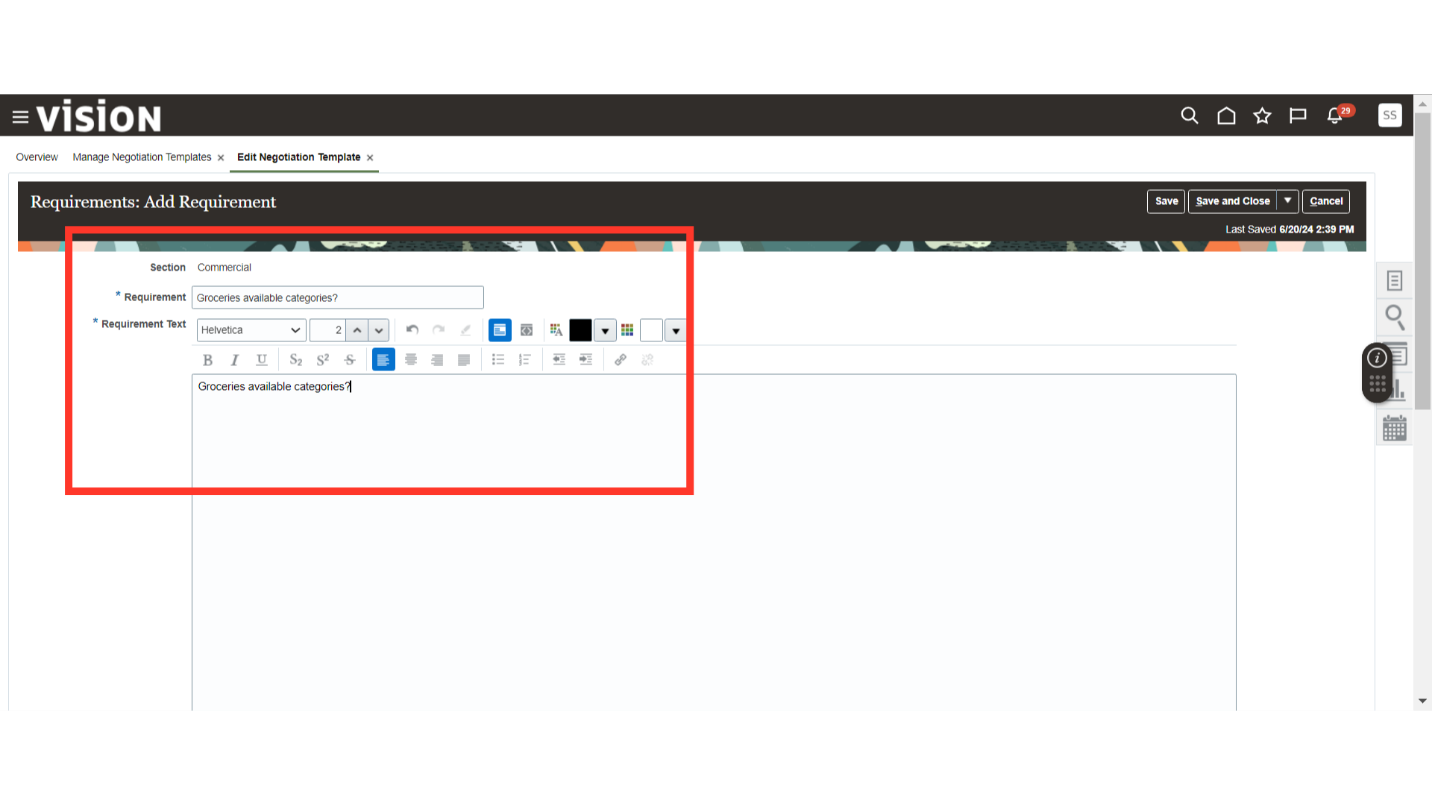
In the Add Requirements section, scroll down to the bottom where you have to define the properties of the requirement such as Level, Required, Requirement Type, Value Type, Target, Attachments from Supplier, Scoring, Weight, Maximum Score, and Knockout Score.
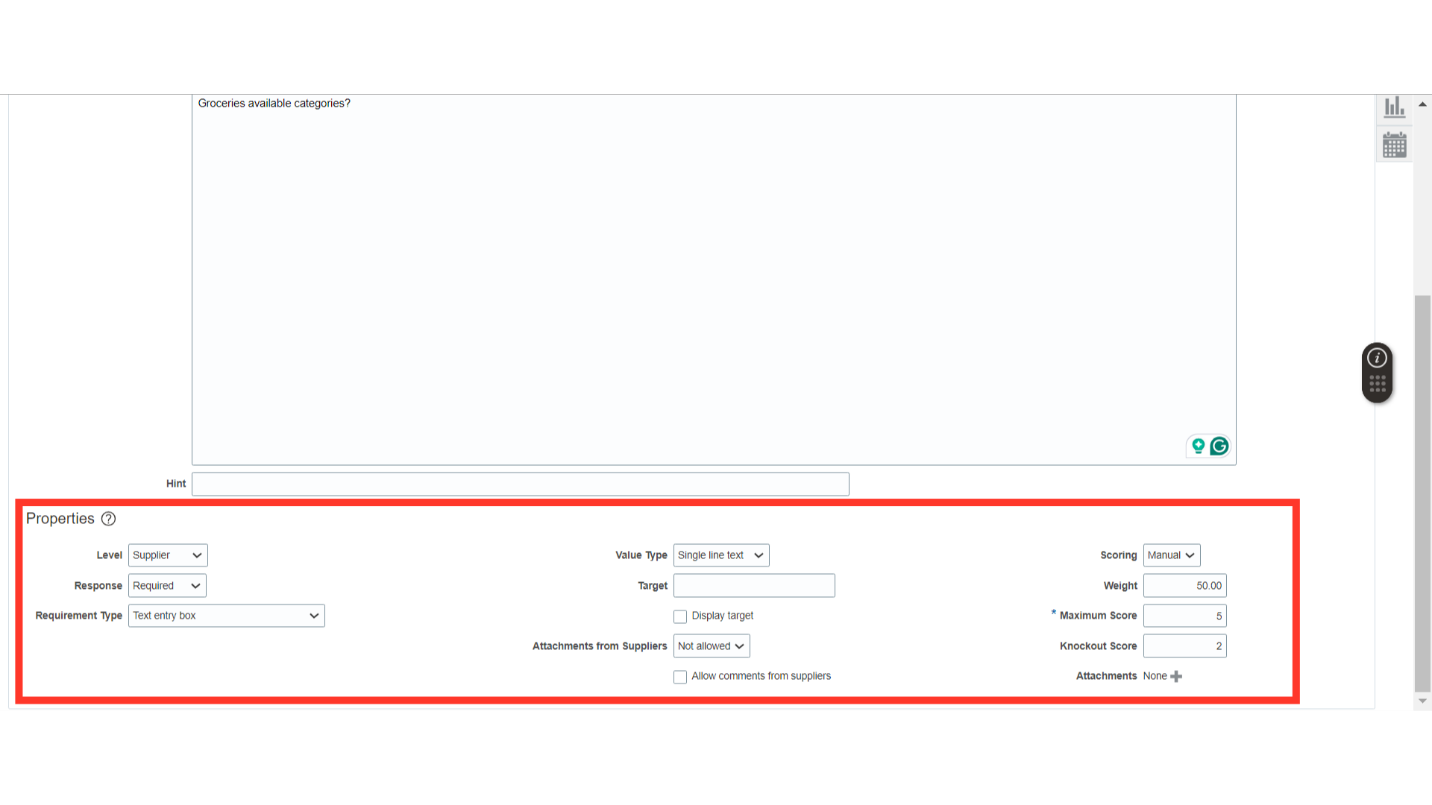
Once all the details are filled in for the requirement, click on the Save and Close button.
The requirement is added under the section with the details that we have provided in the requirement properties.
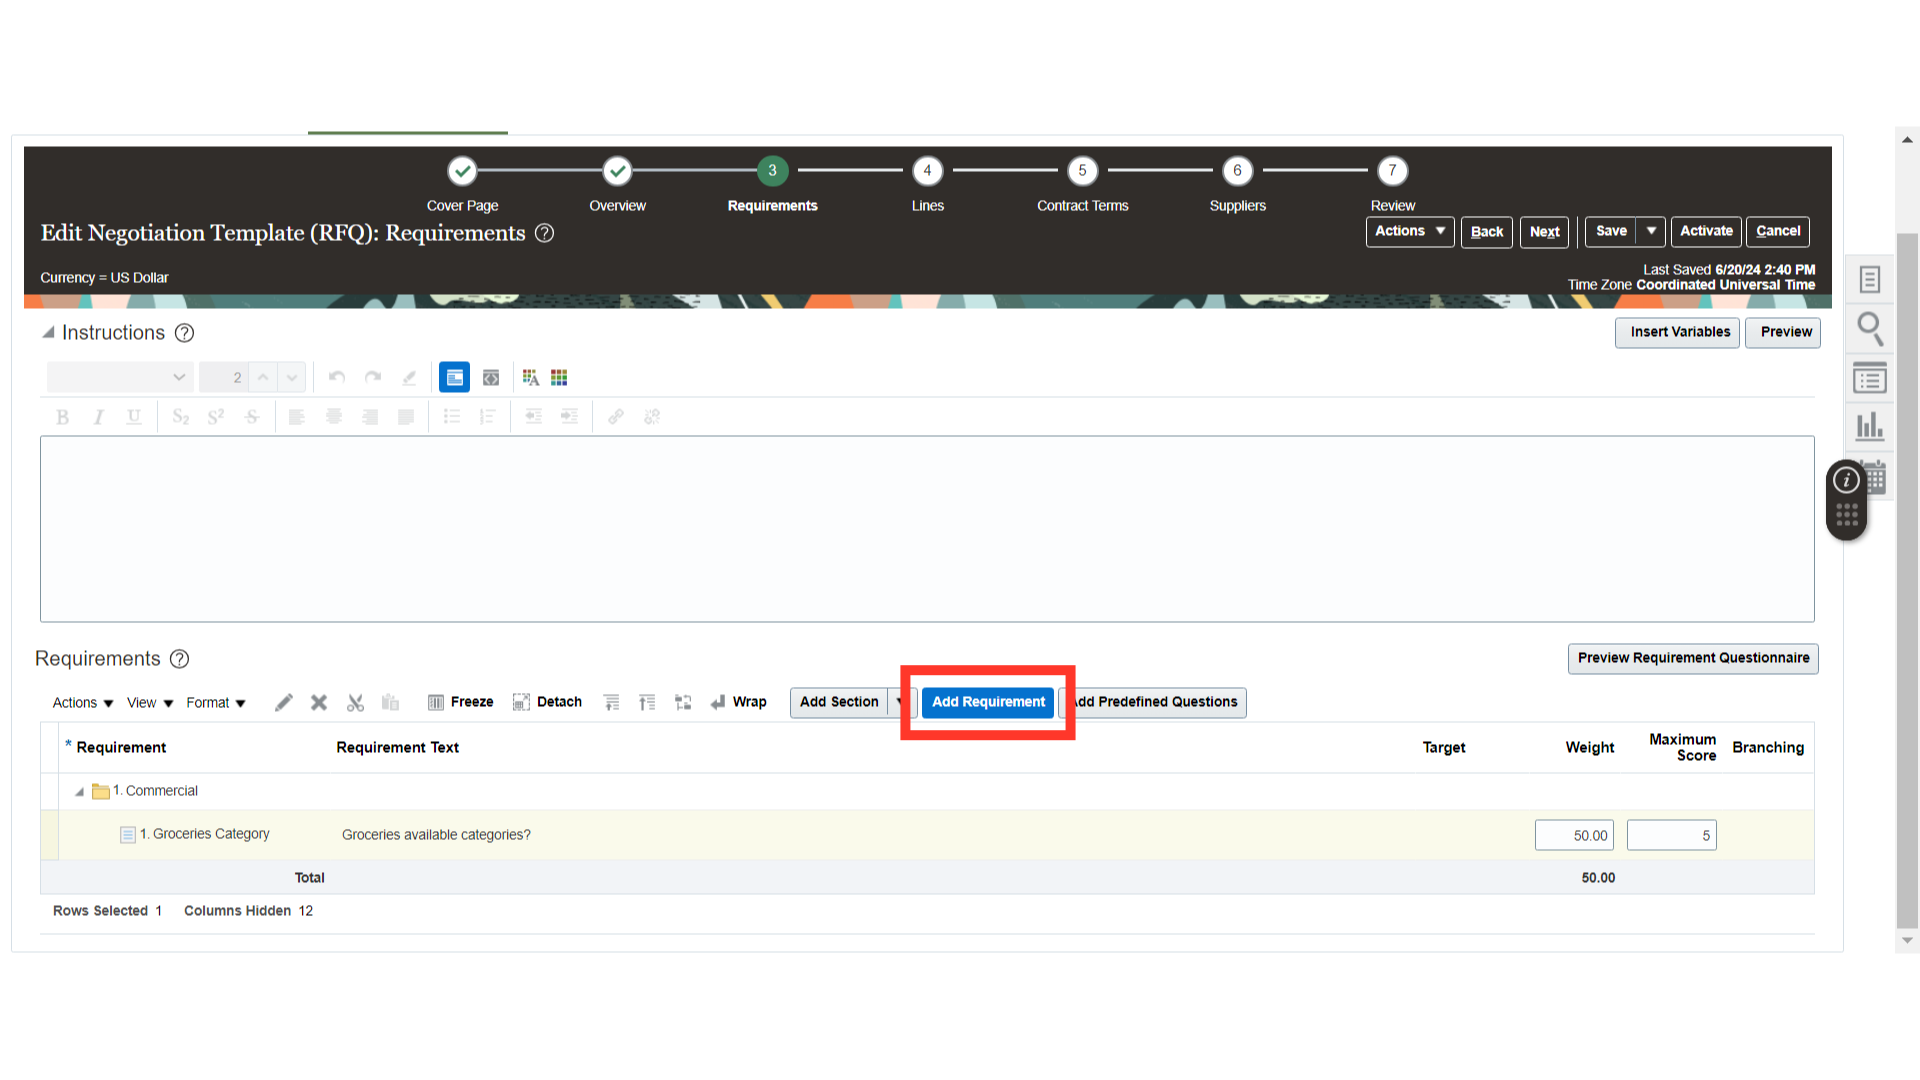
To add the second requirement under the same section, select the section and click on the Add Requirement button.
In the Add Requirements section, provide the Requirement Details.
In the Add Requirements section, scroll down to the bottom where you have to define the properties of the requirement such as Level, Required, Requirement Type, Value Type, Target, Scoring, Weight, and Knockout Score. Here, we have chosen the Requirement Type as Multiple Choice with Single Selection. Click on the Add Acceptable Value button to create options with the score for each choice.
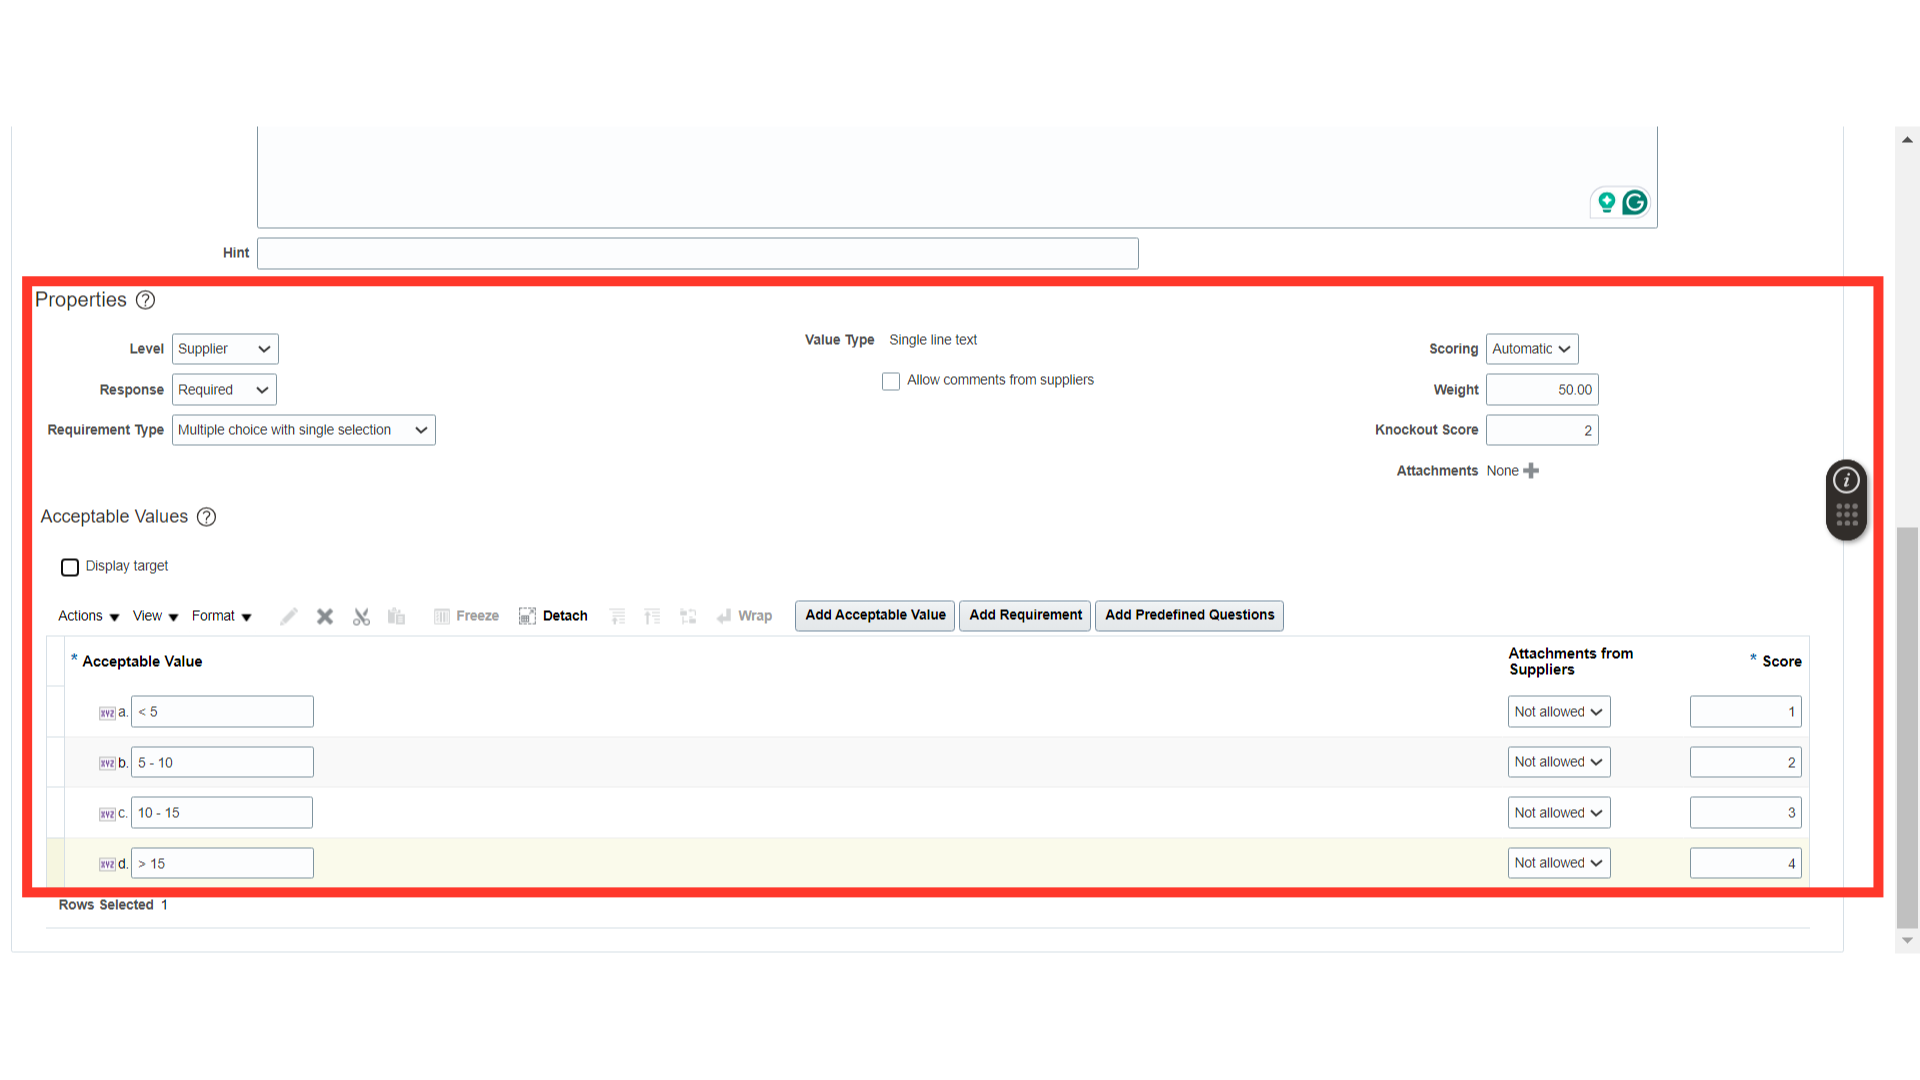
Once all the details are filled in for the requirement, click on the Save and Close button.
Once all the requirement details are filled in, click on the Next button.
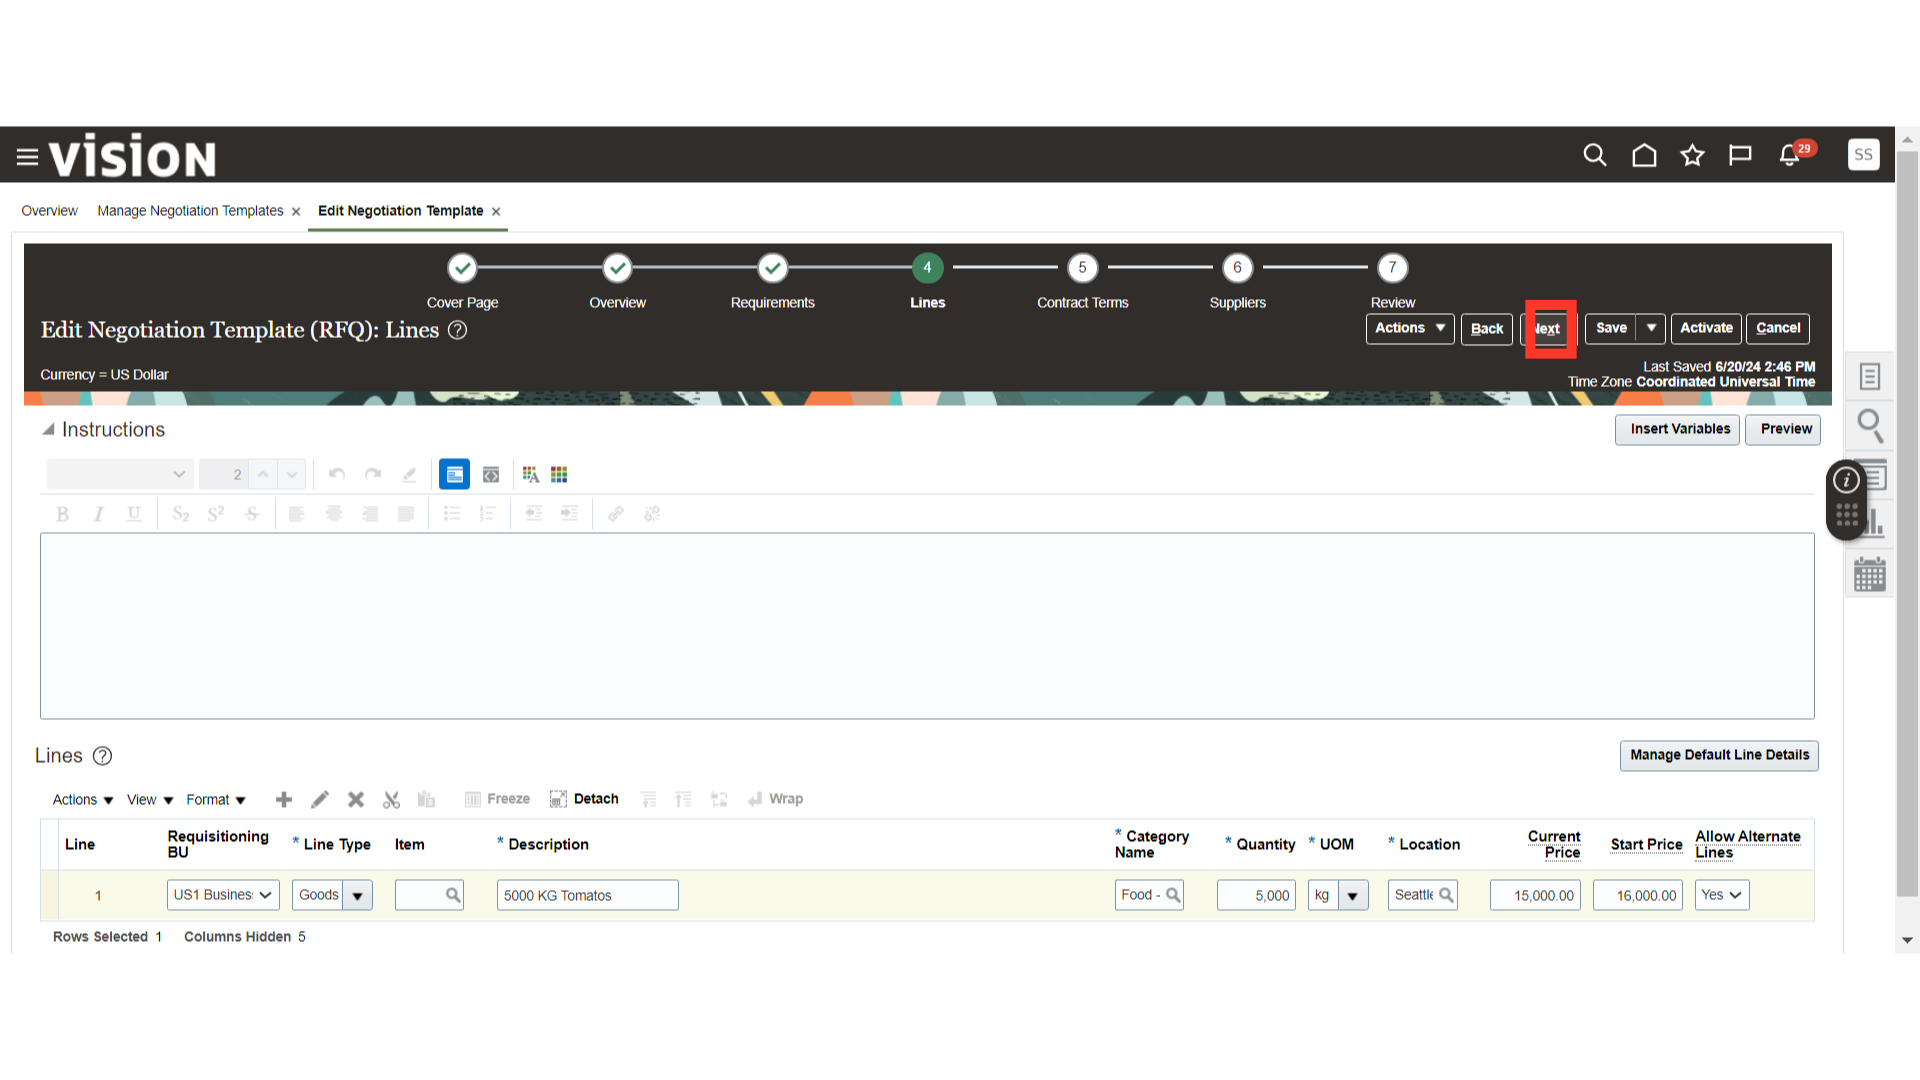
In the Lines section under Edit Negotiation Template, click on the Plus icon to add the line.

Once the line is added, fill in the line details such as Line Type, Requisitioning BU, Item Description, Category, Quantity, UOM, Location, Current Price, and Start Price. If you want to allow alternate lines from the supplier, select Allow Alternate Lines as Yes.
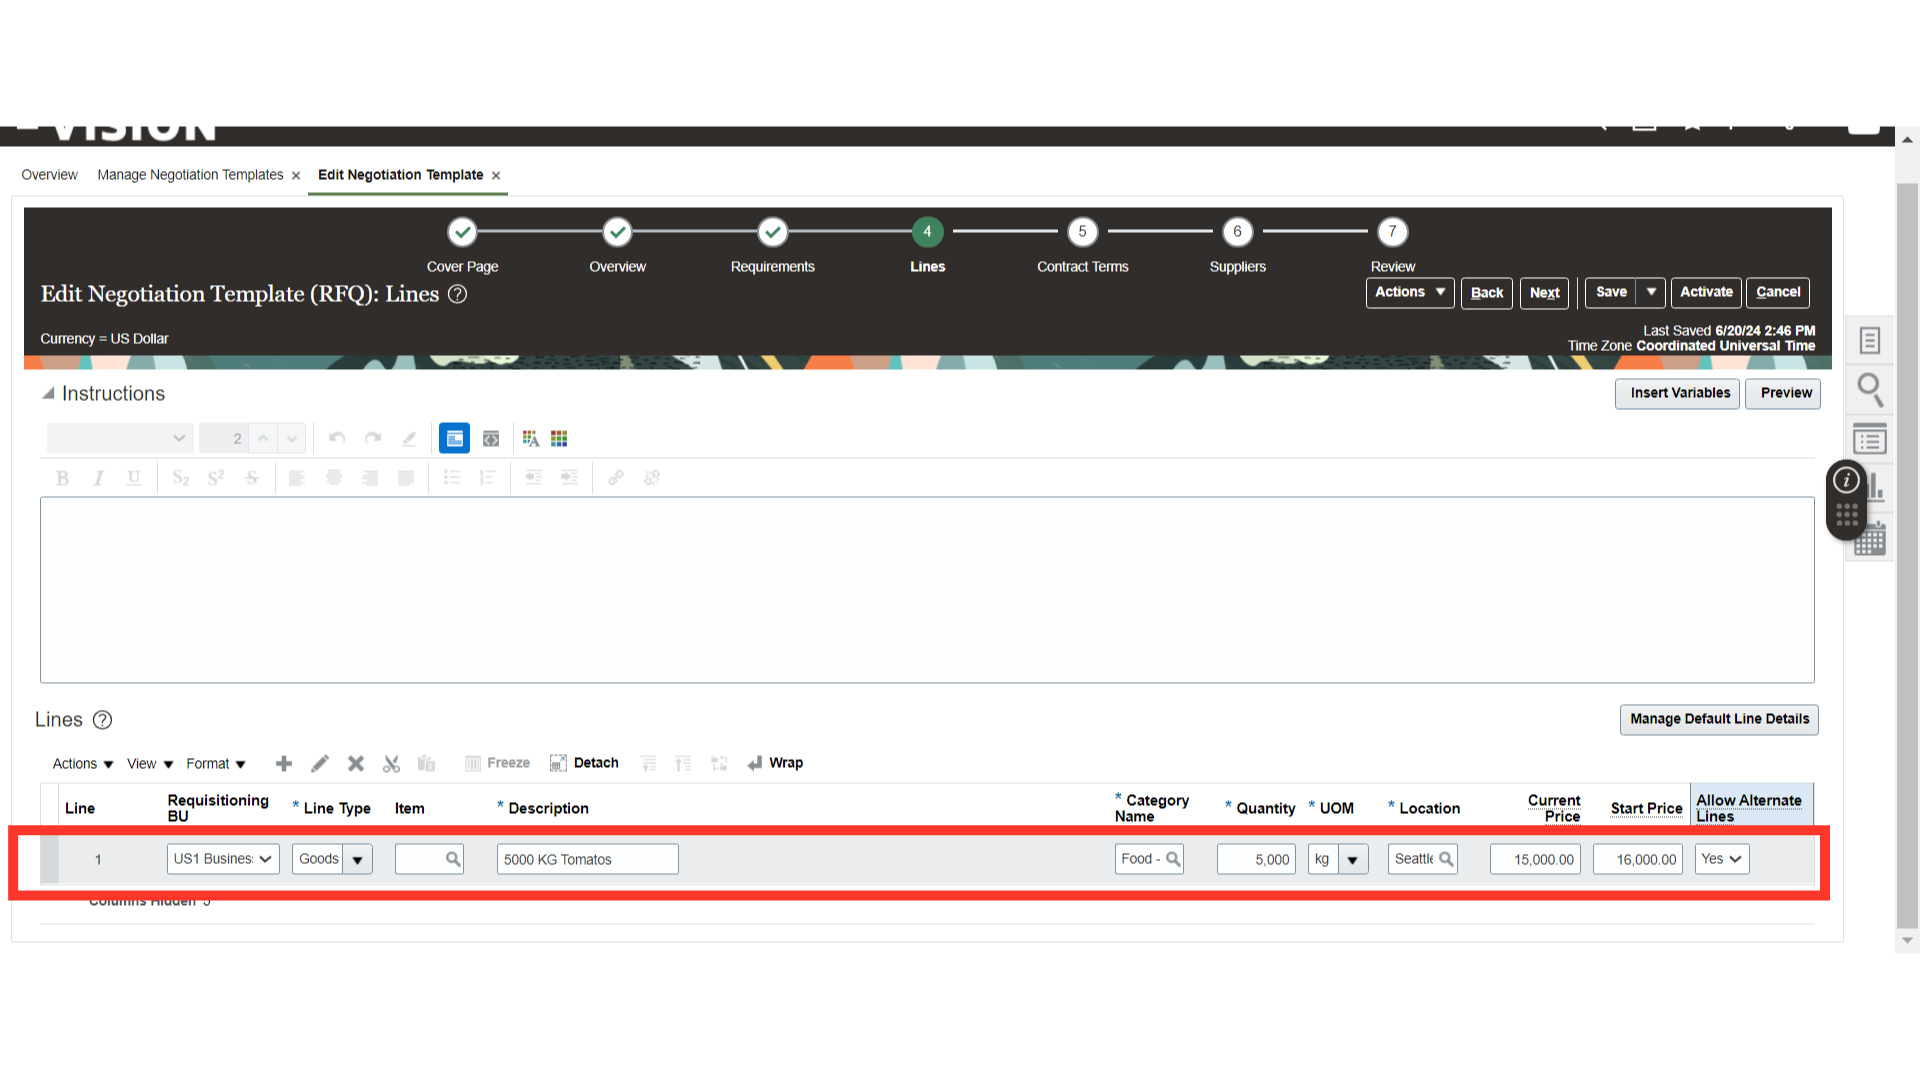
Once all the line details are filled in, click on the Next button.
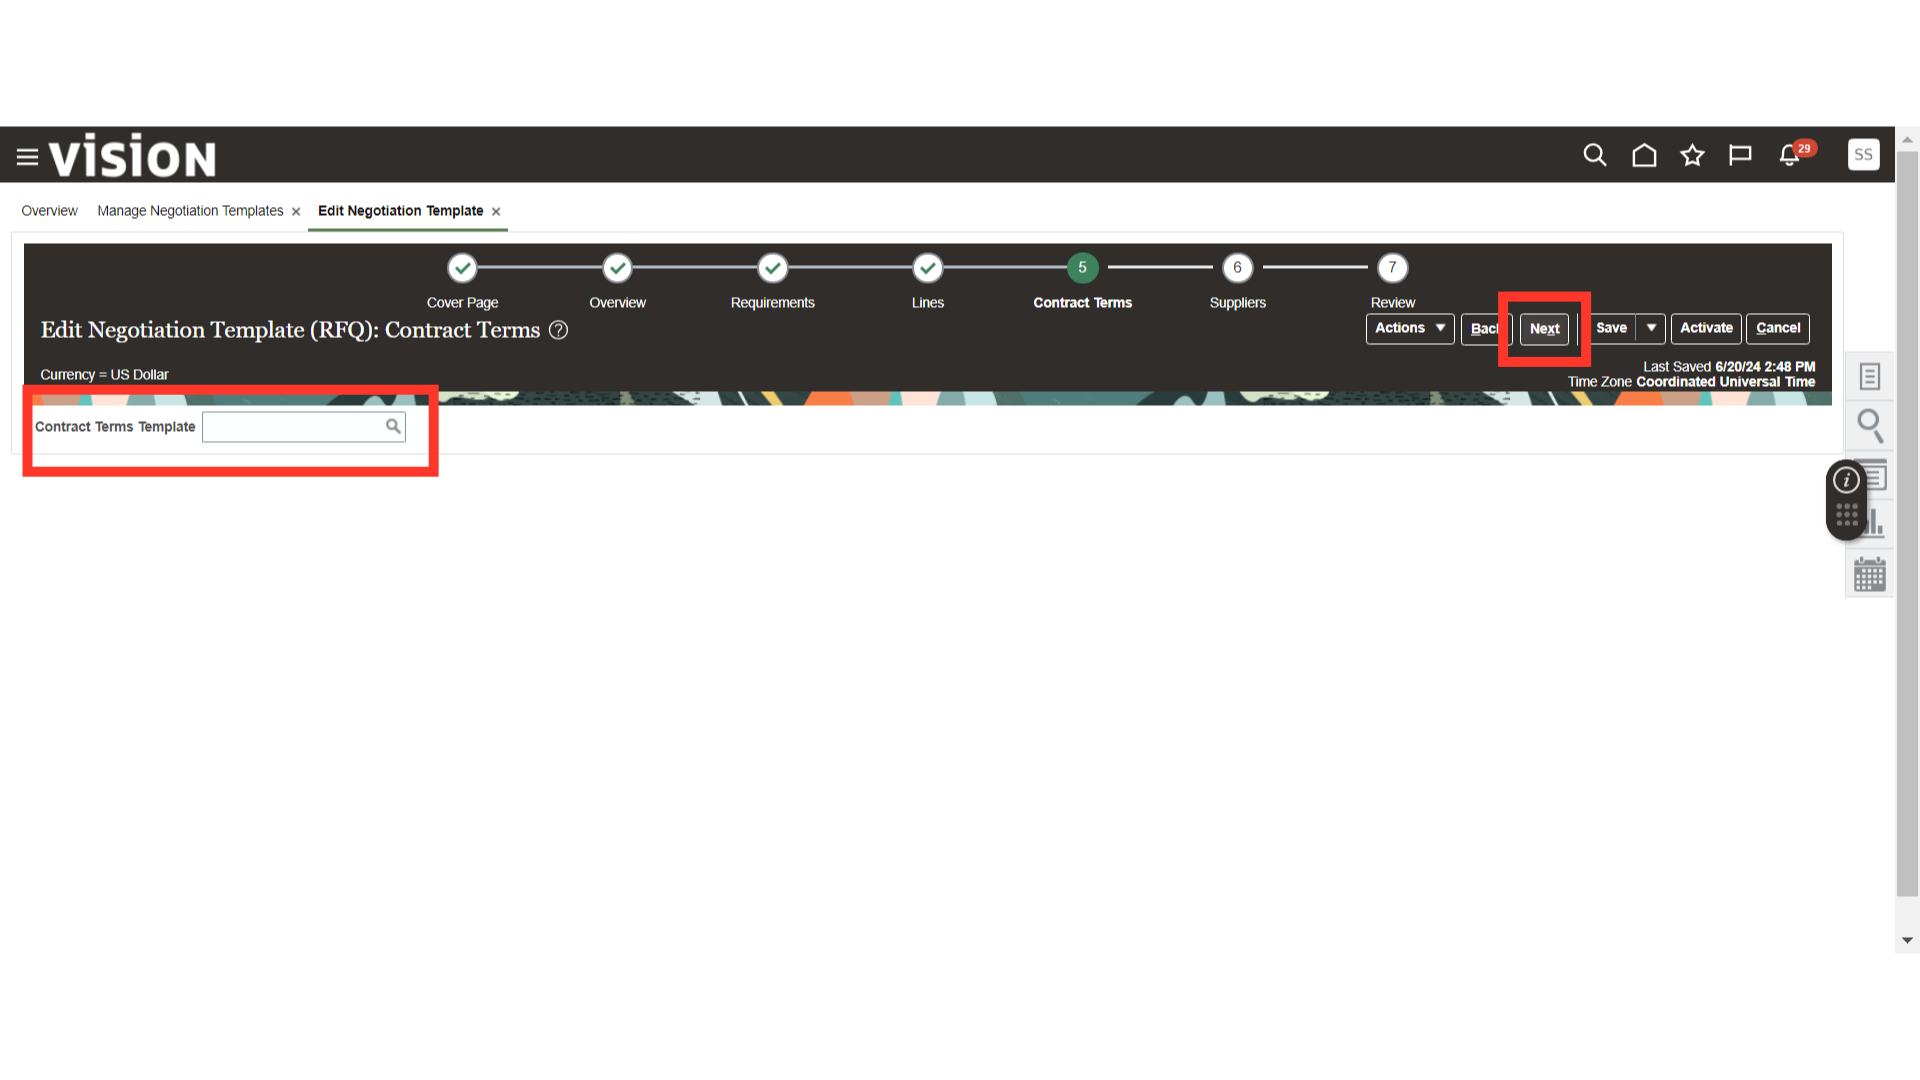
Optionally, if you want to attach a procurement contract with the negotiation, search for the contract number. Once done, click on the Next button.
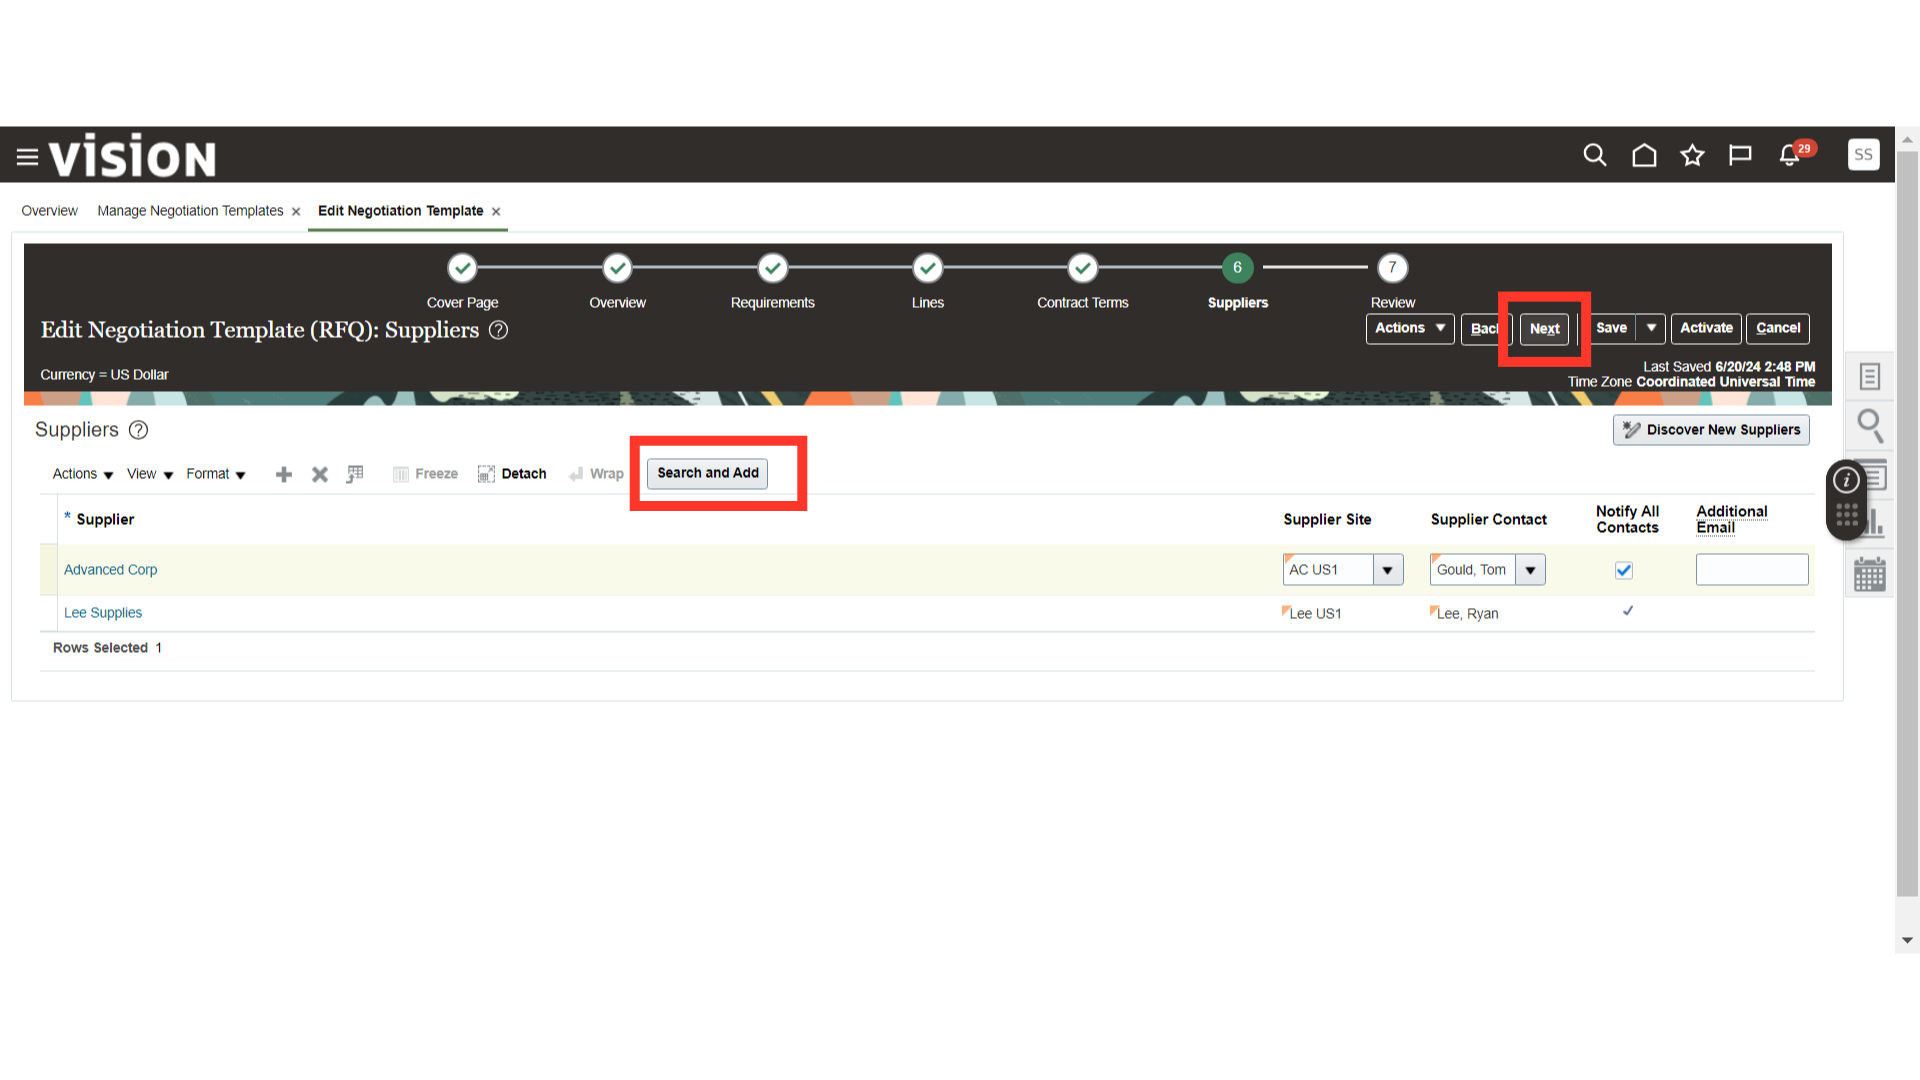
In the Suppliers section, click on the Search and Add button to add suppliers for the negotiation. Once all the suppliers are added, click on the Next button.
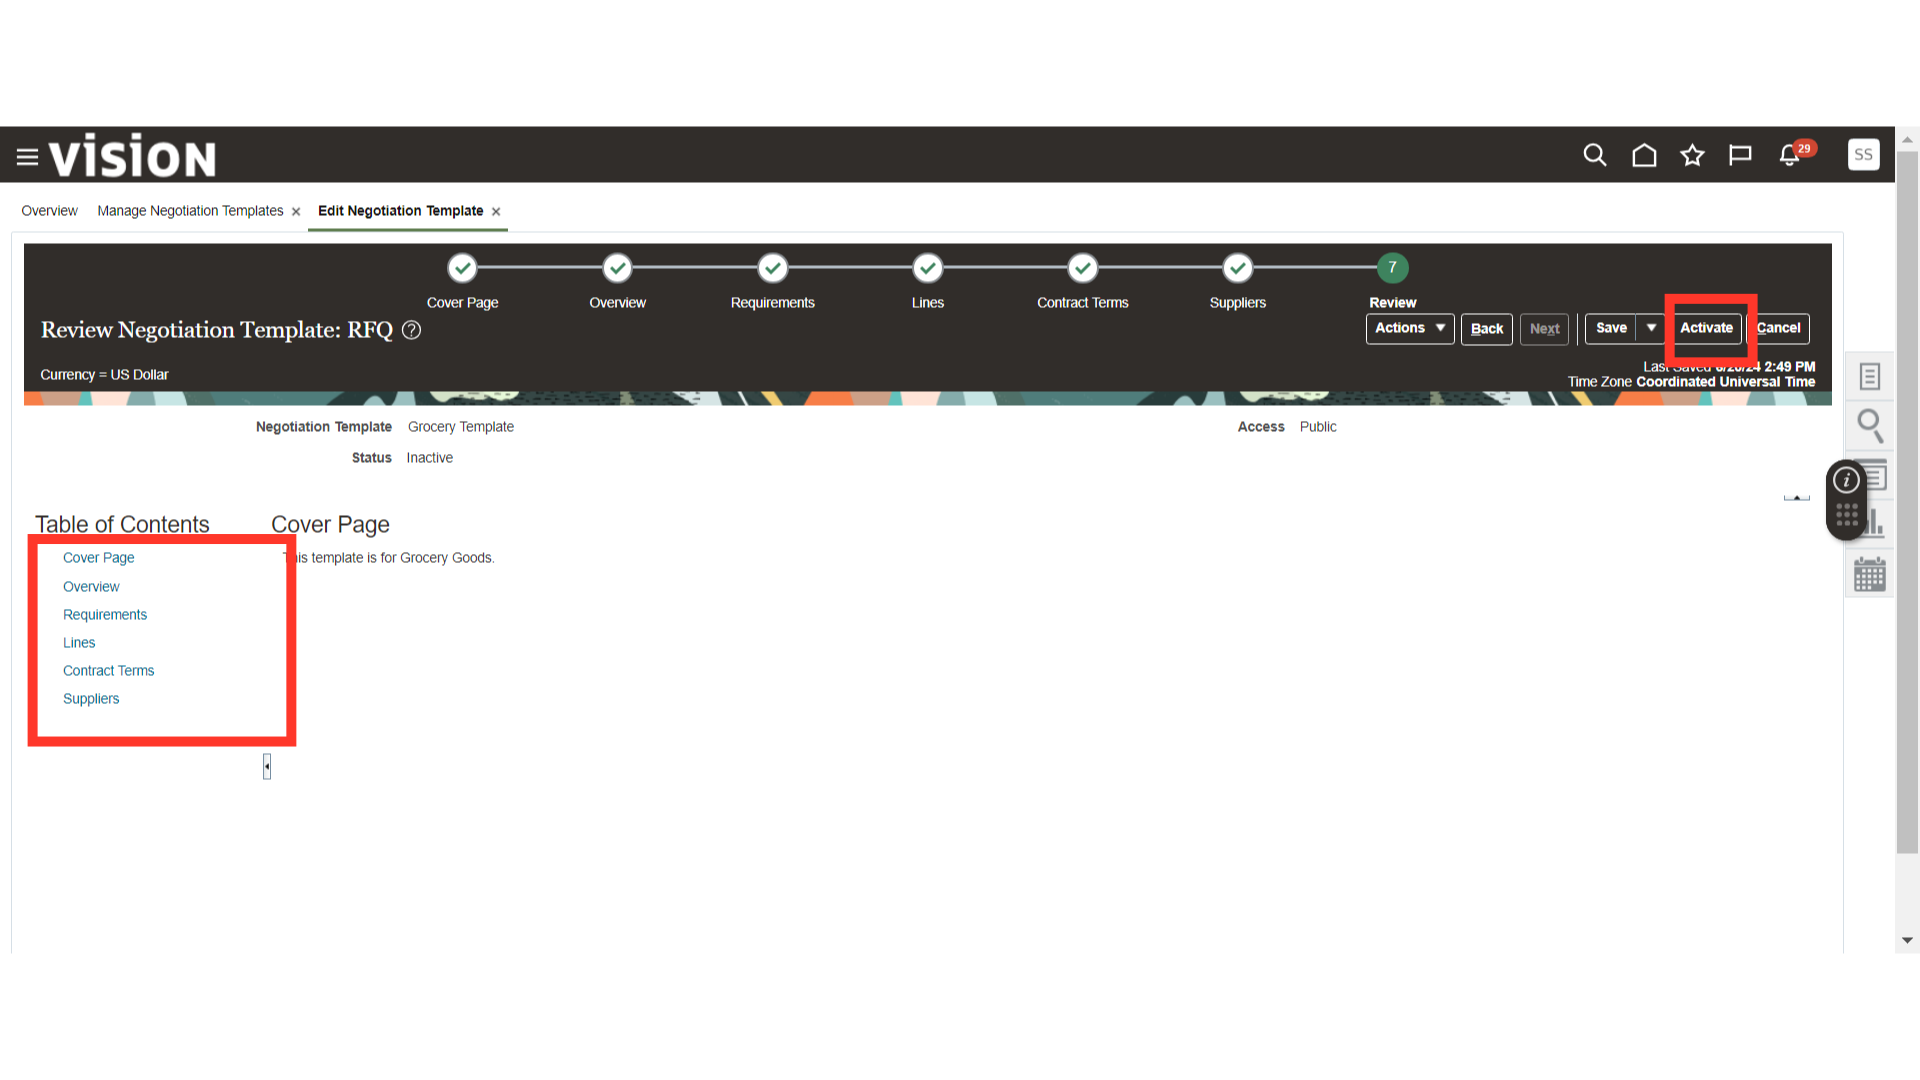
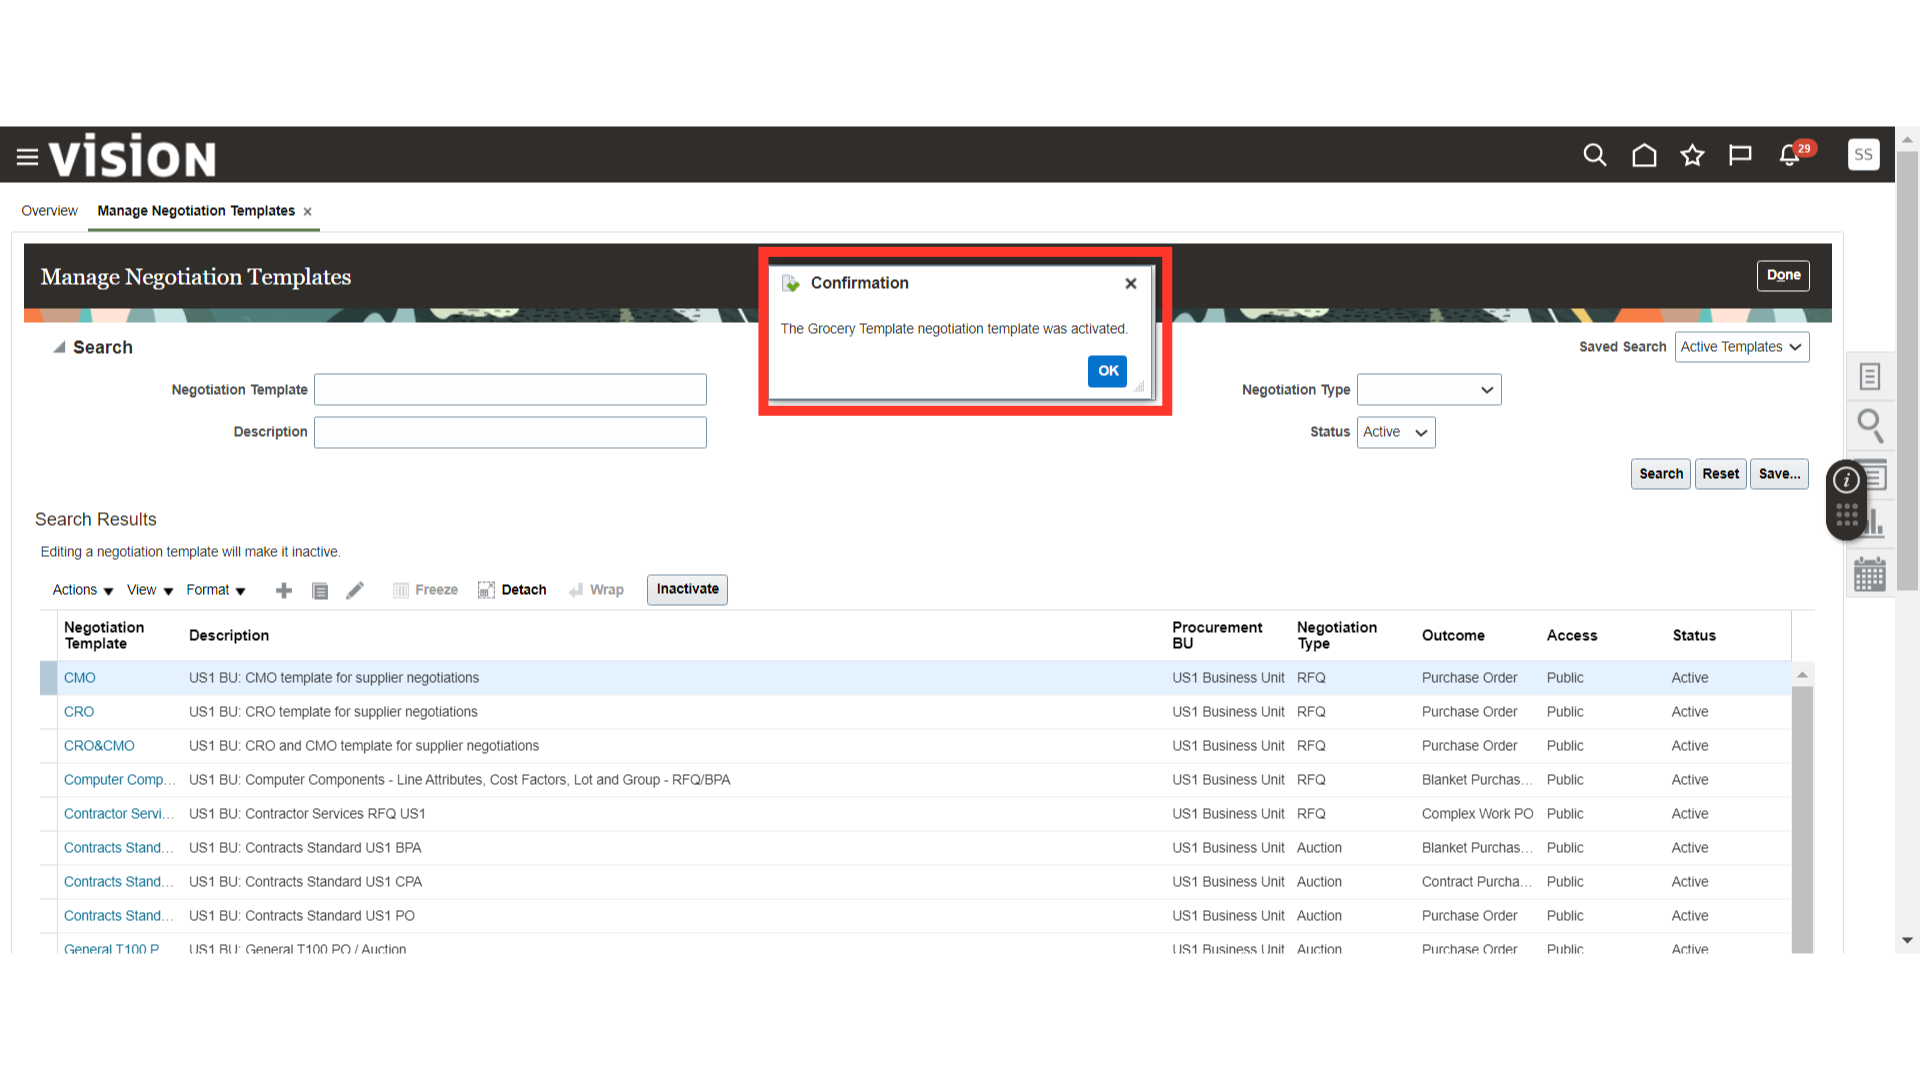
In the Review section, you can review your negotiation template details from each section. Once reviewed, click on the Activate button to enable the Negotiation Template for the creation of new negotiations.
After submission of the Negotiation Template, the system will generate a confirmation popup. Click OK.
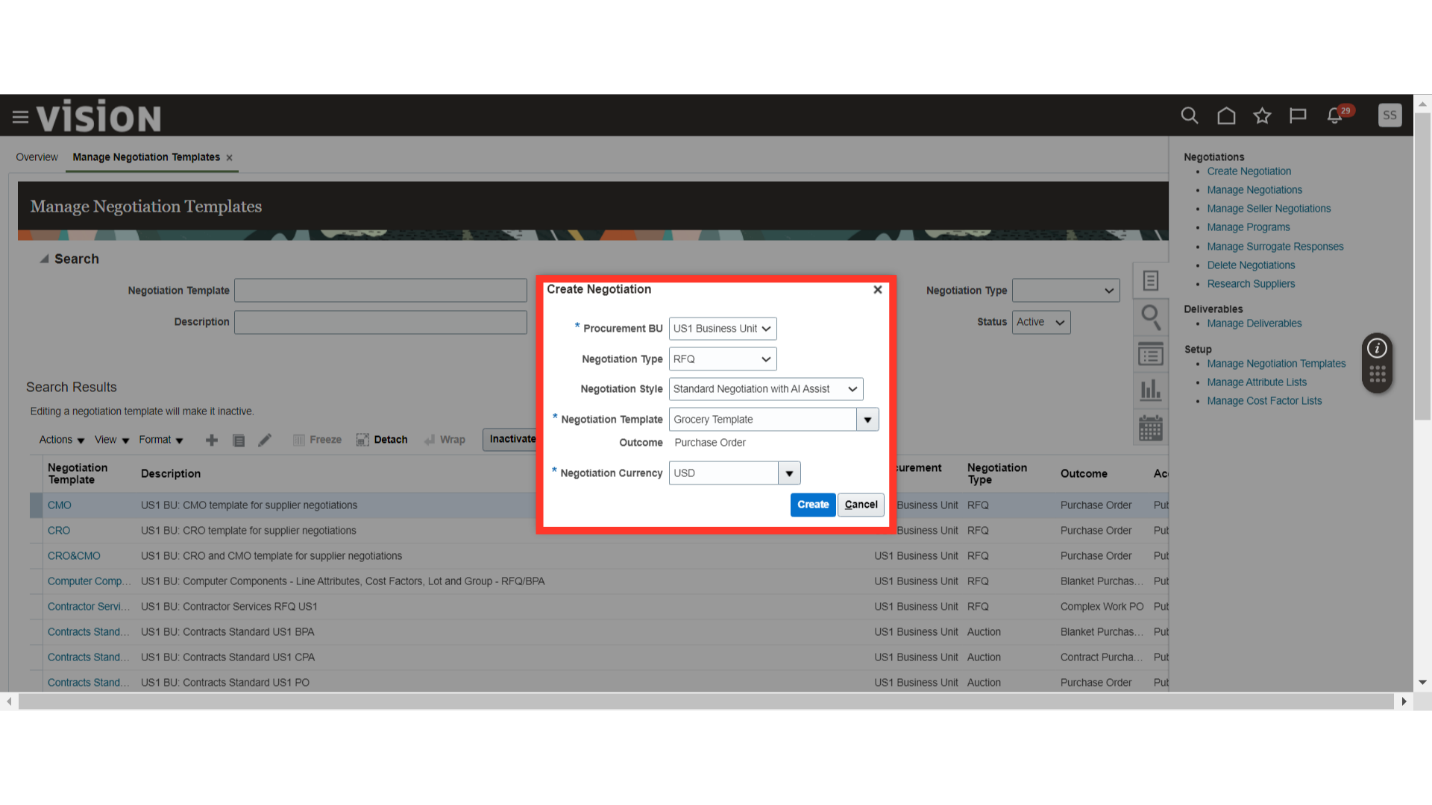
Now, you will be able to search for your newly created template while creating a new negotiation.
The guide covered the creation of a new Negotiation Template, defining sections and requirements, adding lines, and setting parameters like scores and weights. This step-by-step walkthrough ensures a comprehensive understanding of setting up a Negotiation Template in Oracle Fusion
Thank you for reviewing and using our guide; we hope you have found it helpful. If you have any questions on the content included in this guide, please contact our Training & Learning team at learn@camptratech.com