How to create an RFI (Request for Information)
This guide provides detailed instructions on creating an RFI (Request for Information) using the Oracle Fusion application. From initiating negotiations to publishing the final document, each step is outlined to ensure a seamless process. Follow the instructions to create an RFI efficiently.
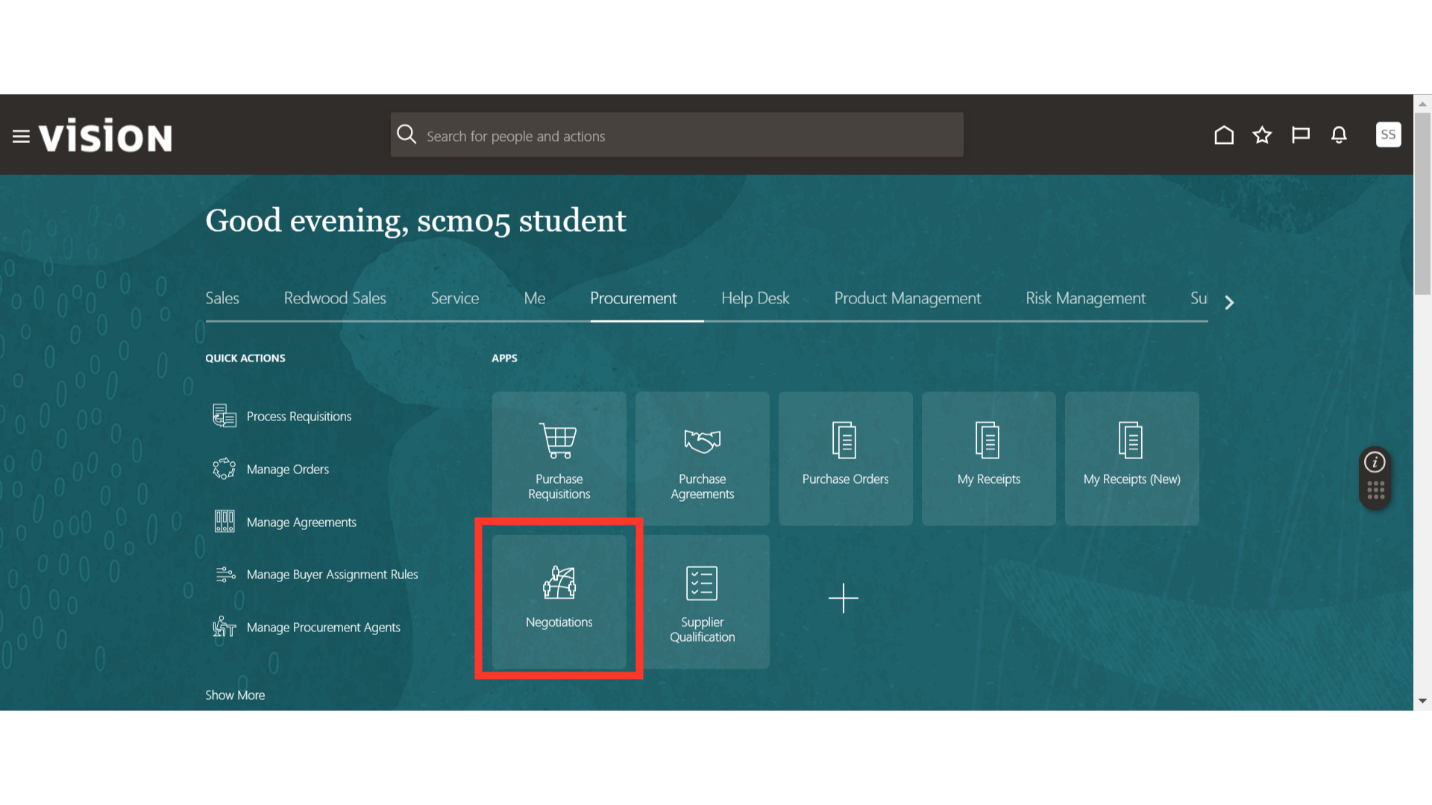
After logging on to Oracle Fusion, navigate to the Procurement tab and click on the Negotiations infotile.
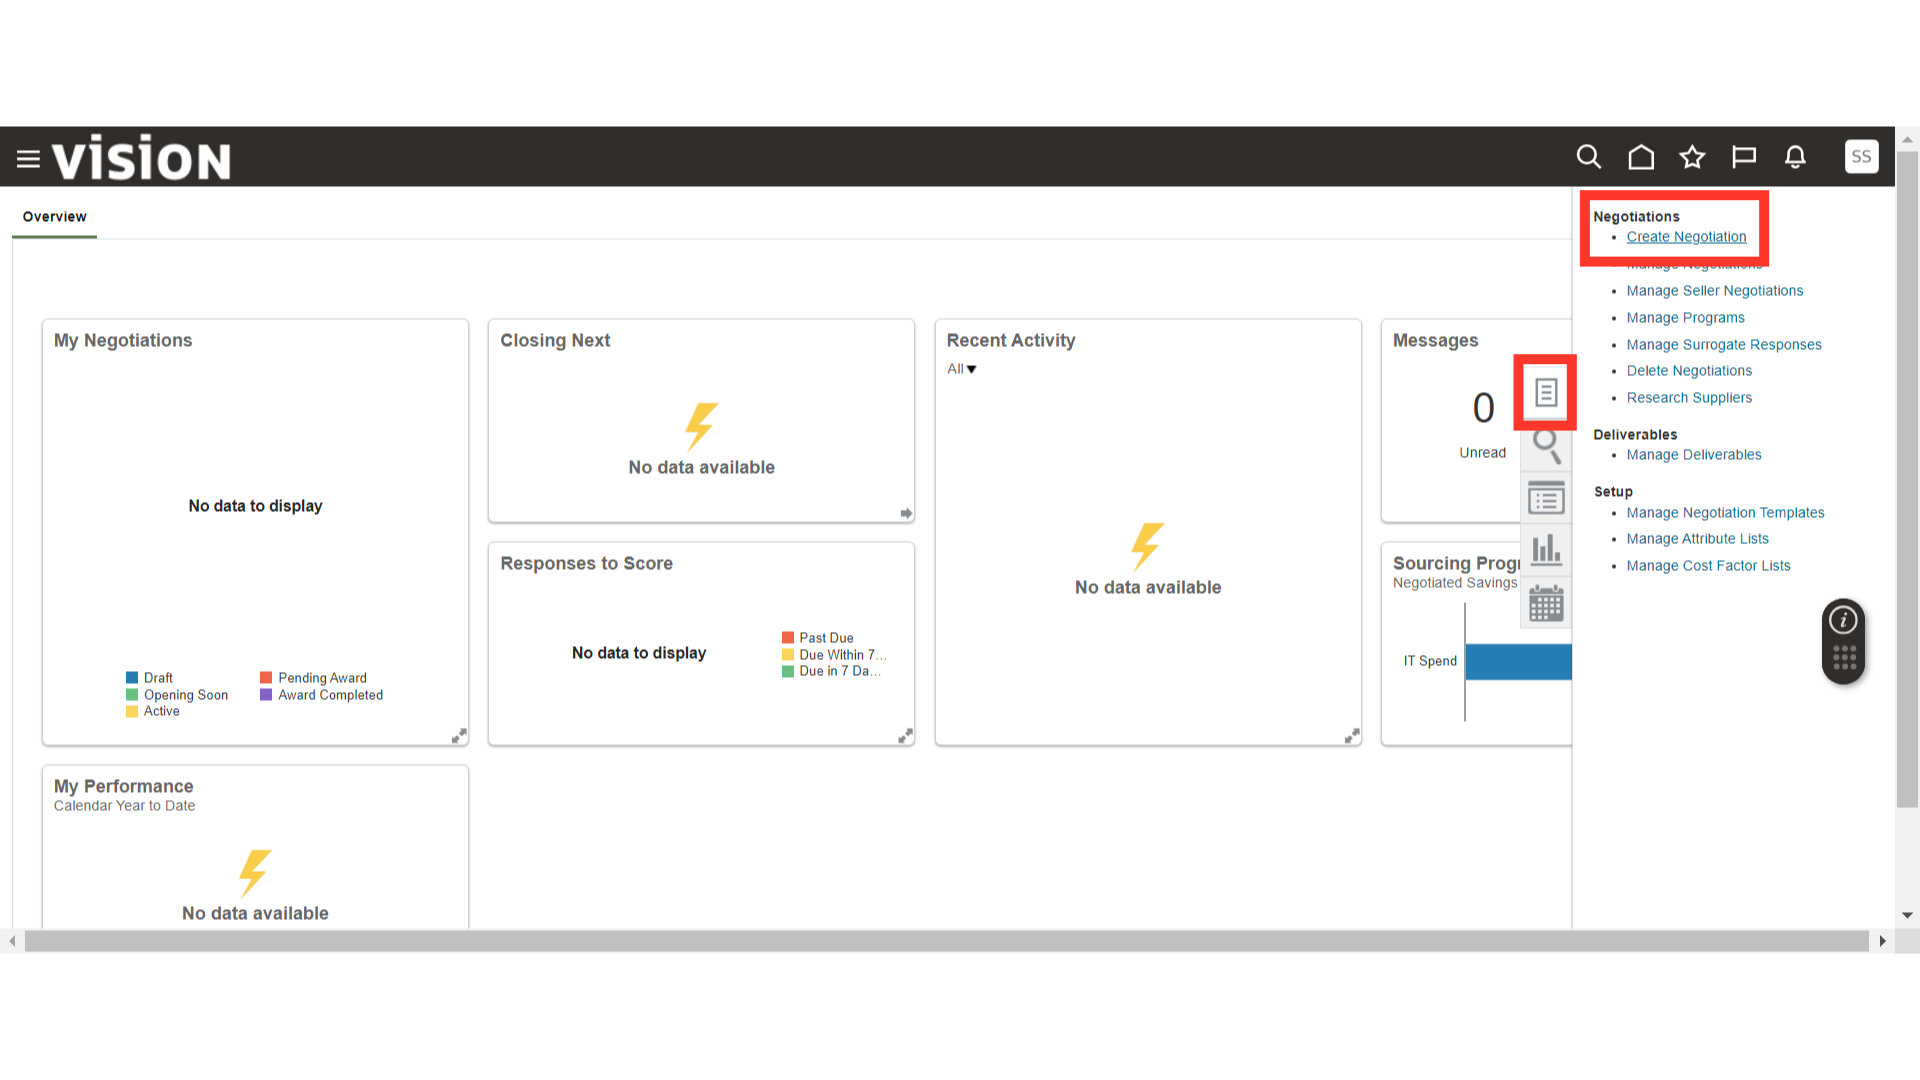
In the Negotiations work area, click on the Tasks button and then click on Create Negotiations.
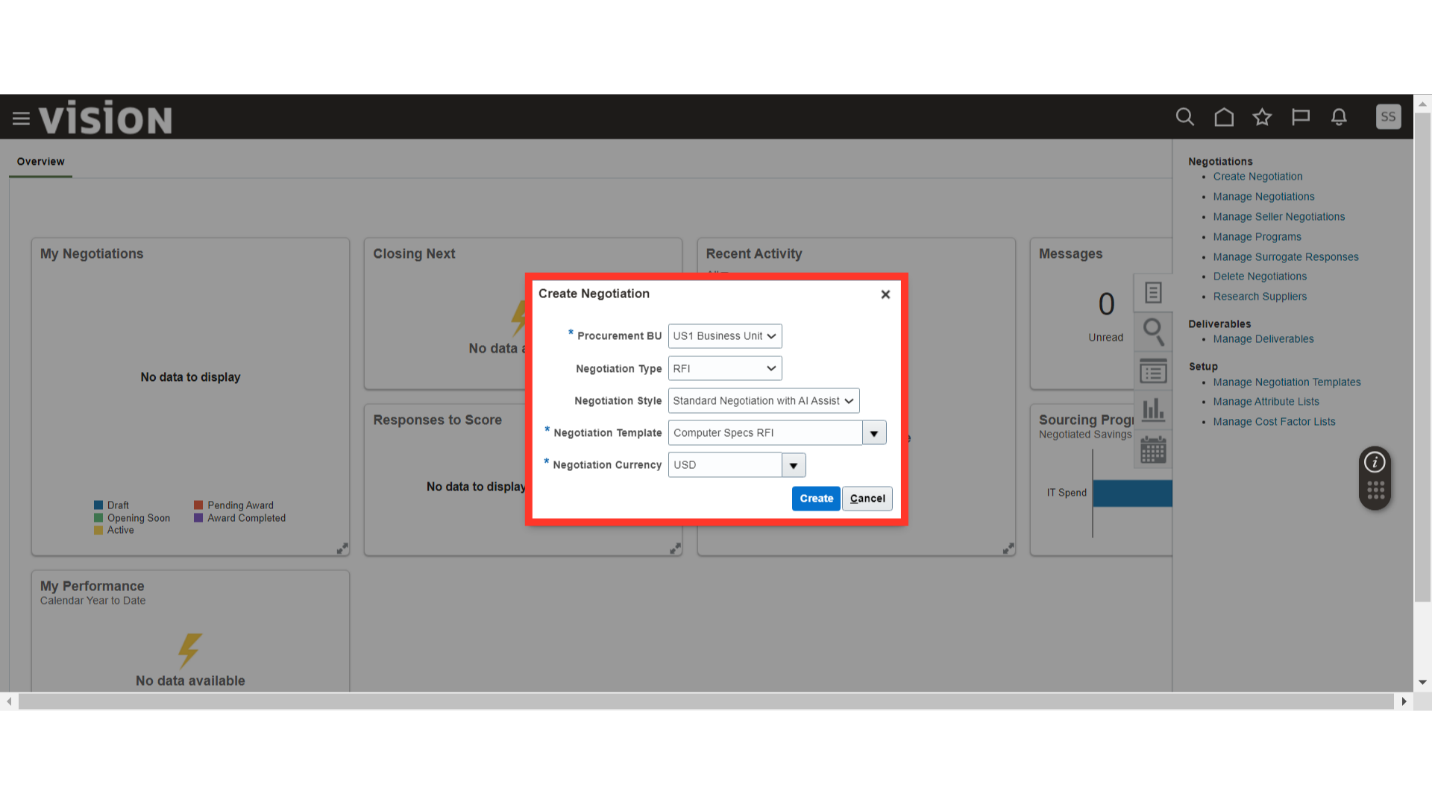
In the Create Negotiations window, provide the following criteria to create a Negotiation:
Procurement BU
Negotiation Type – RFI
Negotiation Style – Standard Negotiation
Negotiation Template – Select RFI template
Negotiation Currency – USD
Once all the criteria are filled in, click on the Create button.
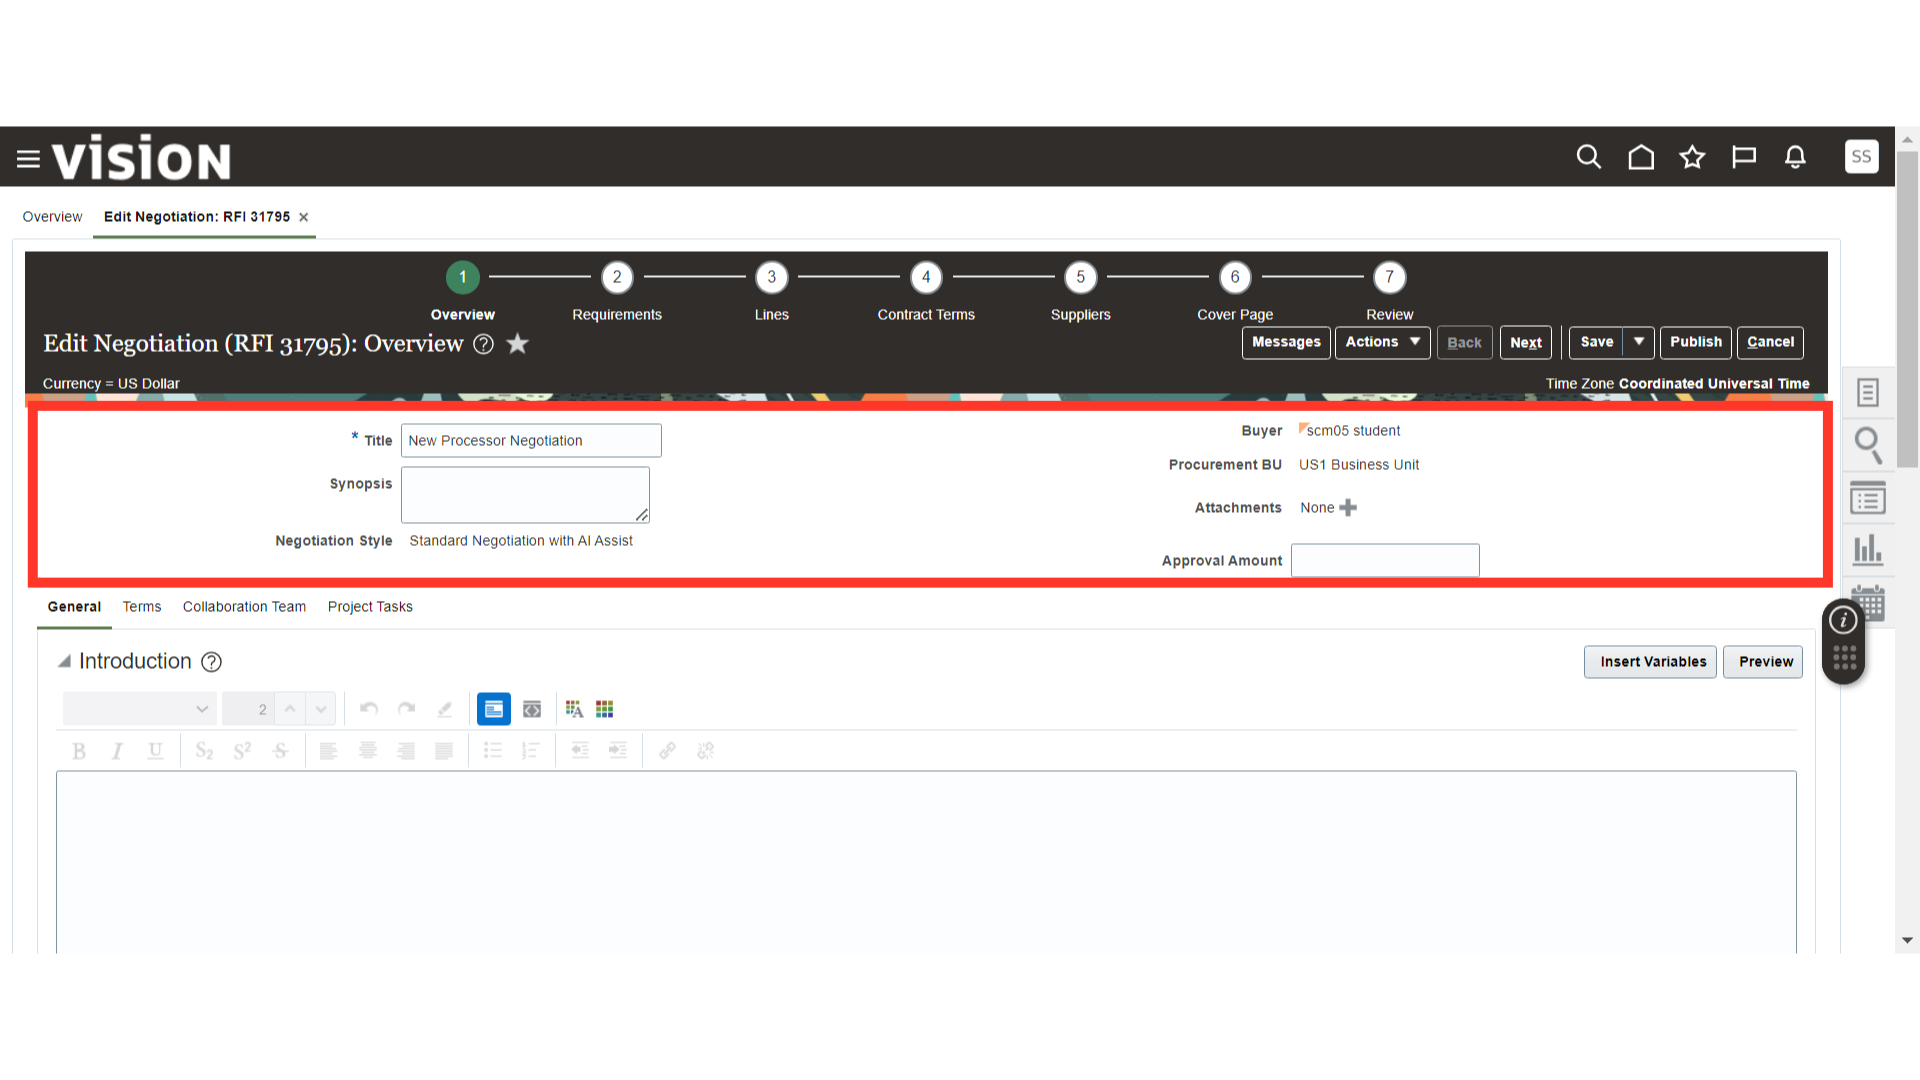
In the Overview section, provide the Title of the Negotiation. Other details such as Negotiation Style, Buyer, and Procurement BU will be automatically populated from the template. Verify these details and enter the approval amount if applicable.
Under Overview in the General Section, provide the Introduction of the Negotiation. Once the introduction is written, click on the Preview button to verify the introduction’s appearance.

In the Schedule under the General section, provide the Preview Date, Open Date, Close Date, and Award Date. You can also select the Open upon Approval option for the Preview Date and Open Date.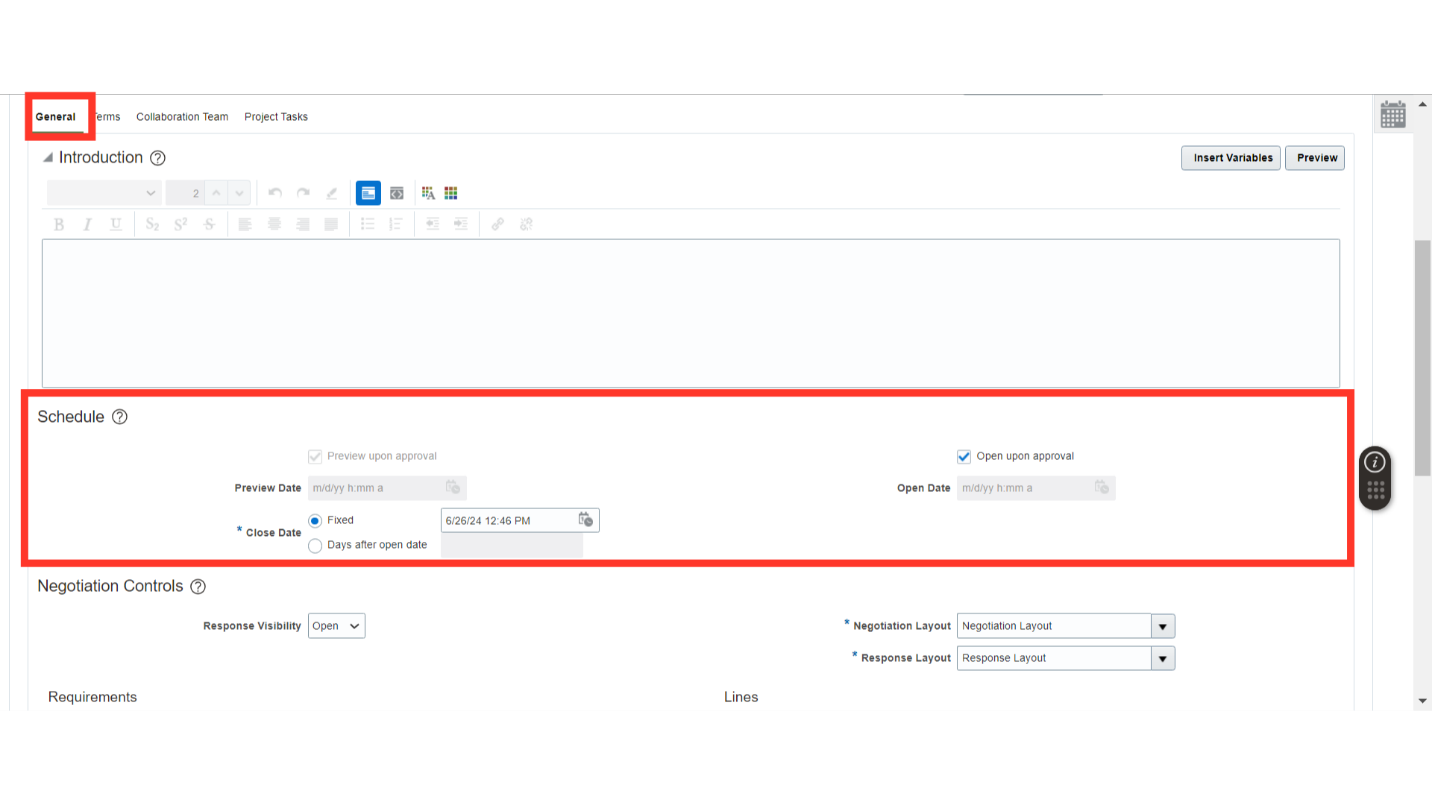
In the Negotiation Controls, Response visibility can be Open, Blind, or Sealed.
Open – Buyer and Supplier both will be able to see the response before closure.
Blind – Only the Buyer will be able to see the response before closure.
Sealed – No one will be able to see the response before closure.
The Negotiation Layout and Response Layout will automatically populate; you can change these by Custom Layouts if needed.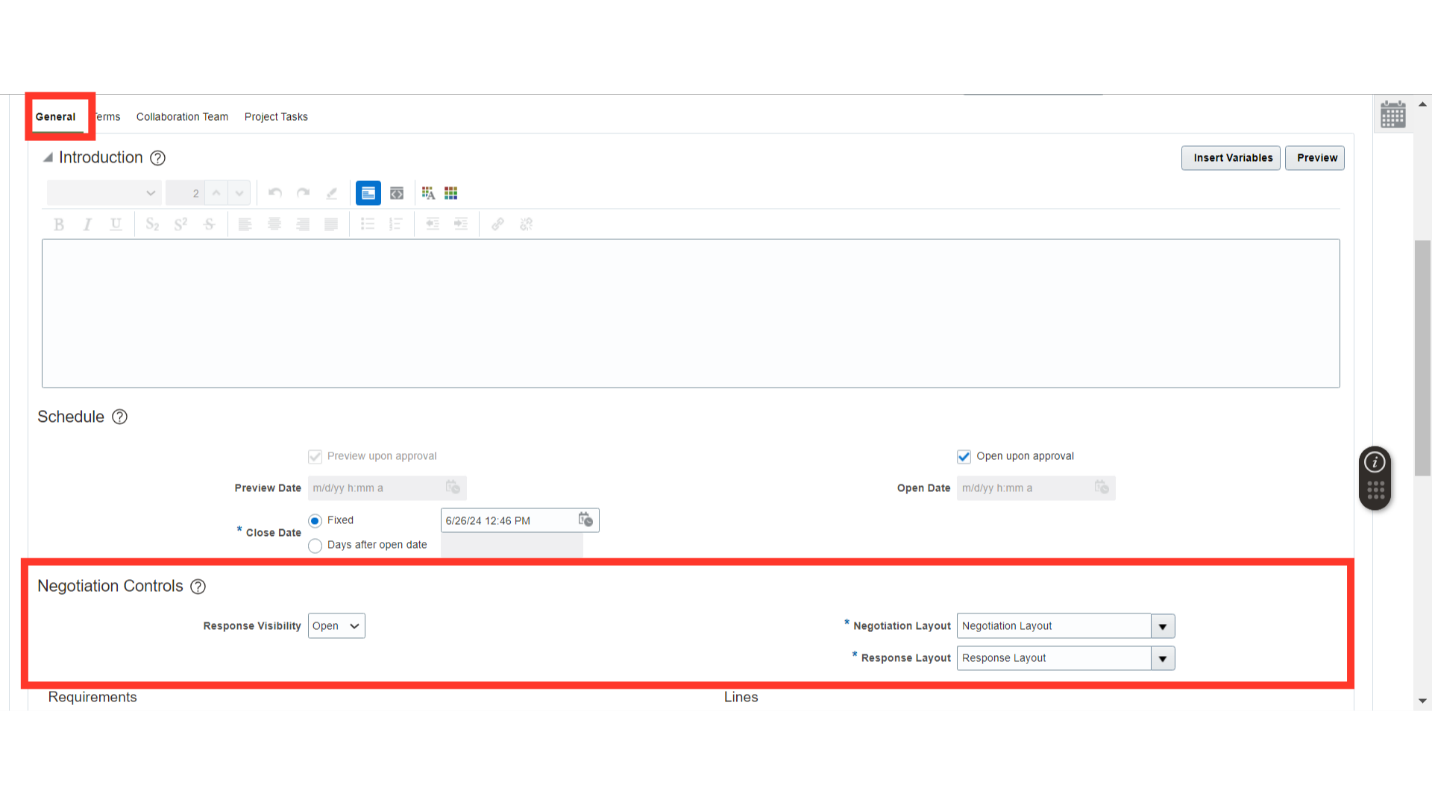
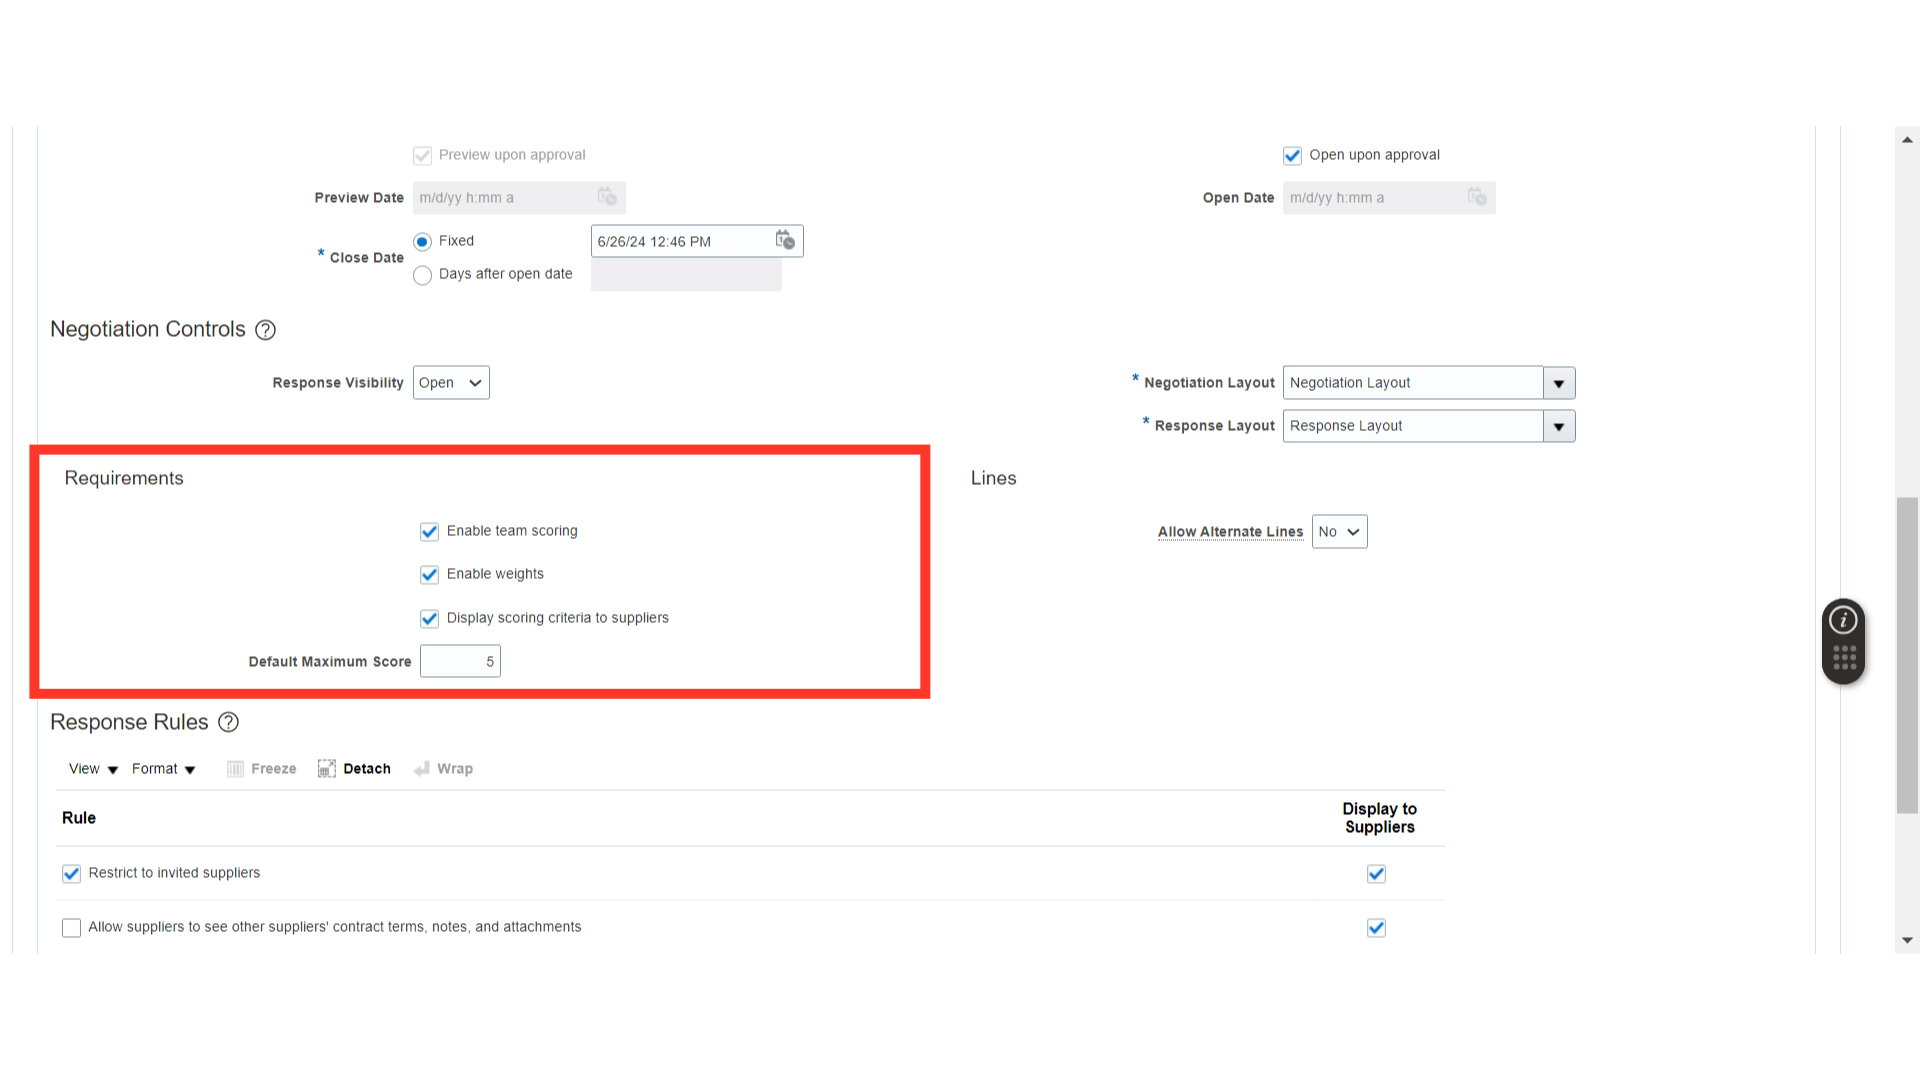
In the Requirements, enable Team Scoring, enable Weights, display Scoring Criteria to Suppliers, and enter Default Maximum Score. You can uncheck these options if not needed.
In the Lines, select Allow Alternate Line as Yes or No. This option determines if you want to allow any substitute item for this negotiation.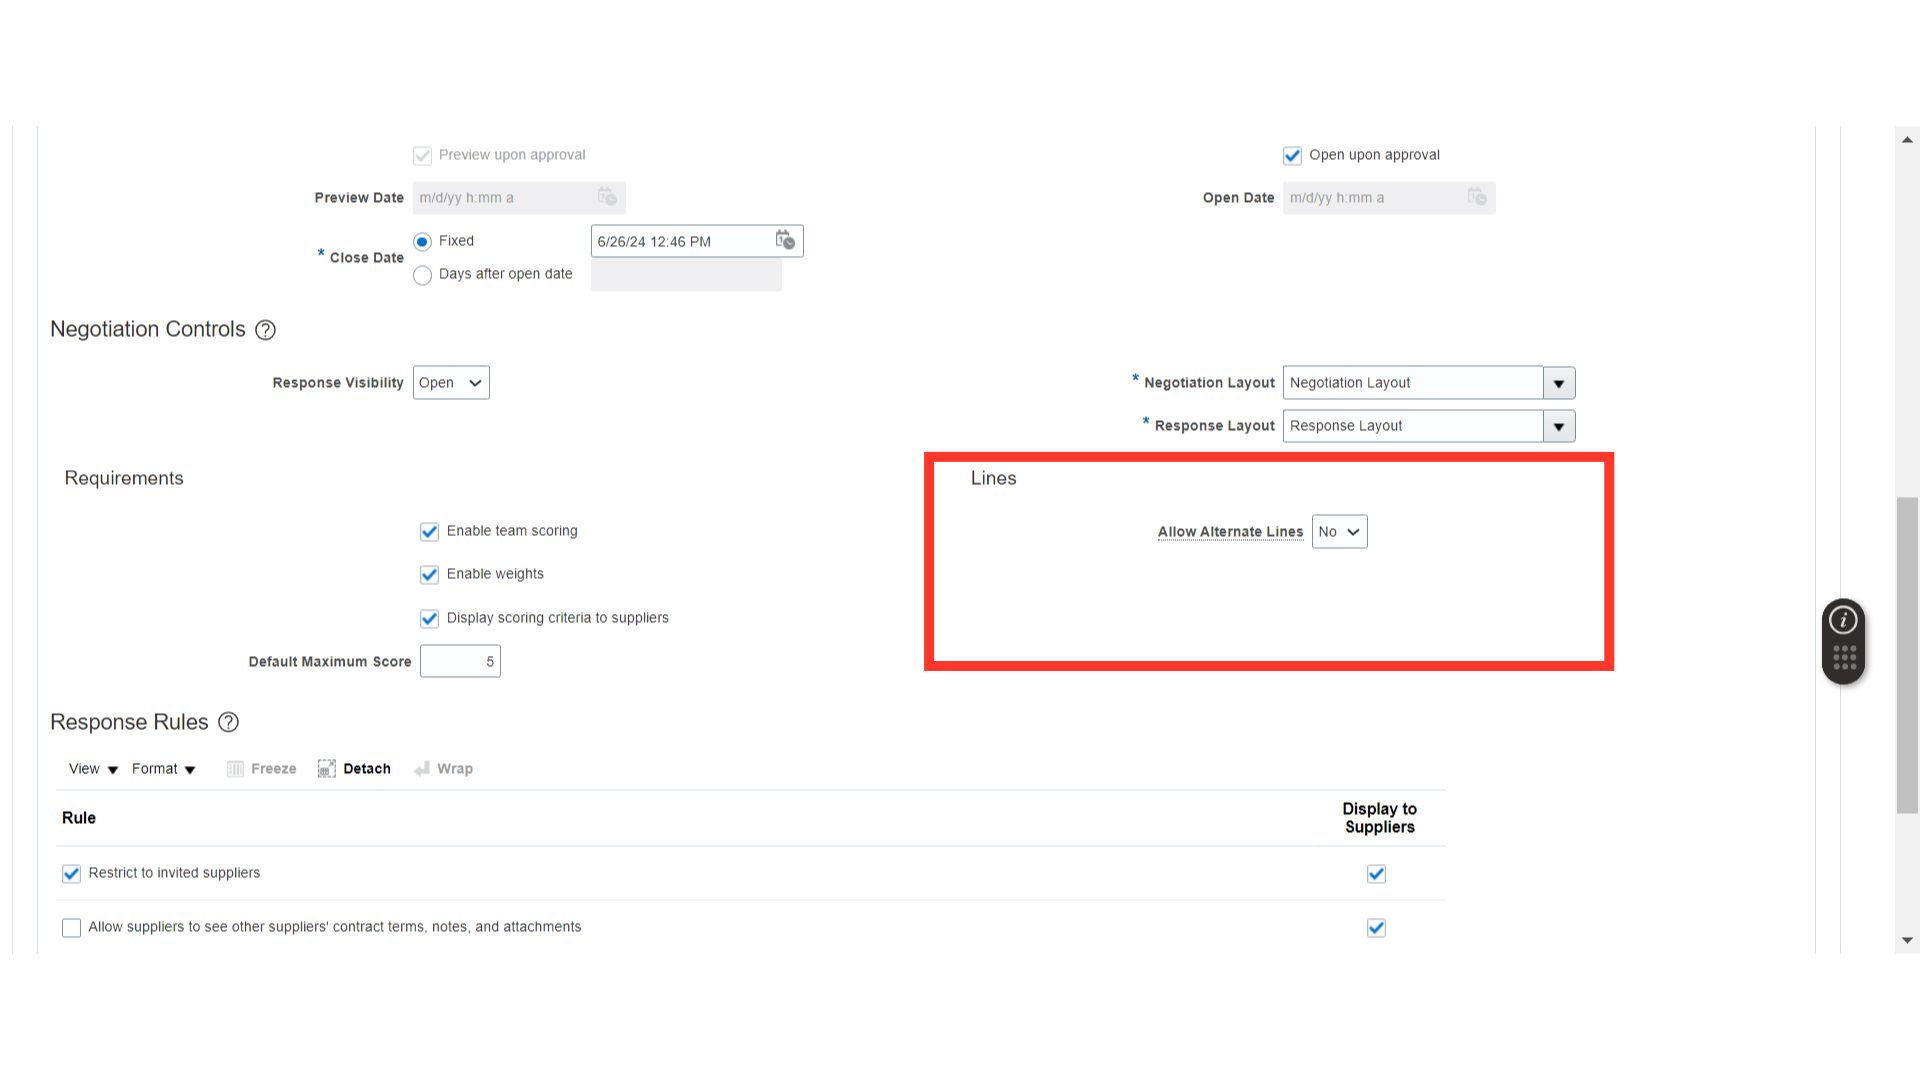
In the Response Rules, you can enable rules of your choice as per the Negotiation Requirements, and if you want to display the same rules to Suppliers, check the Display to Suppliers option.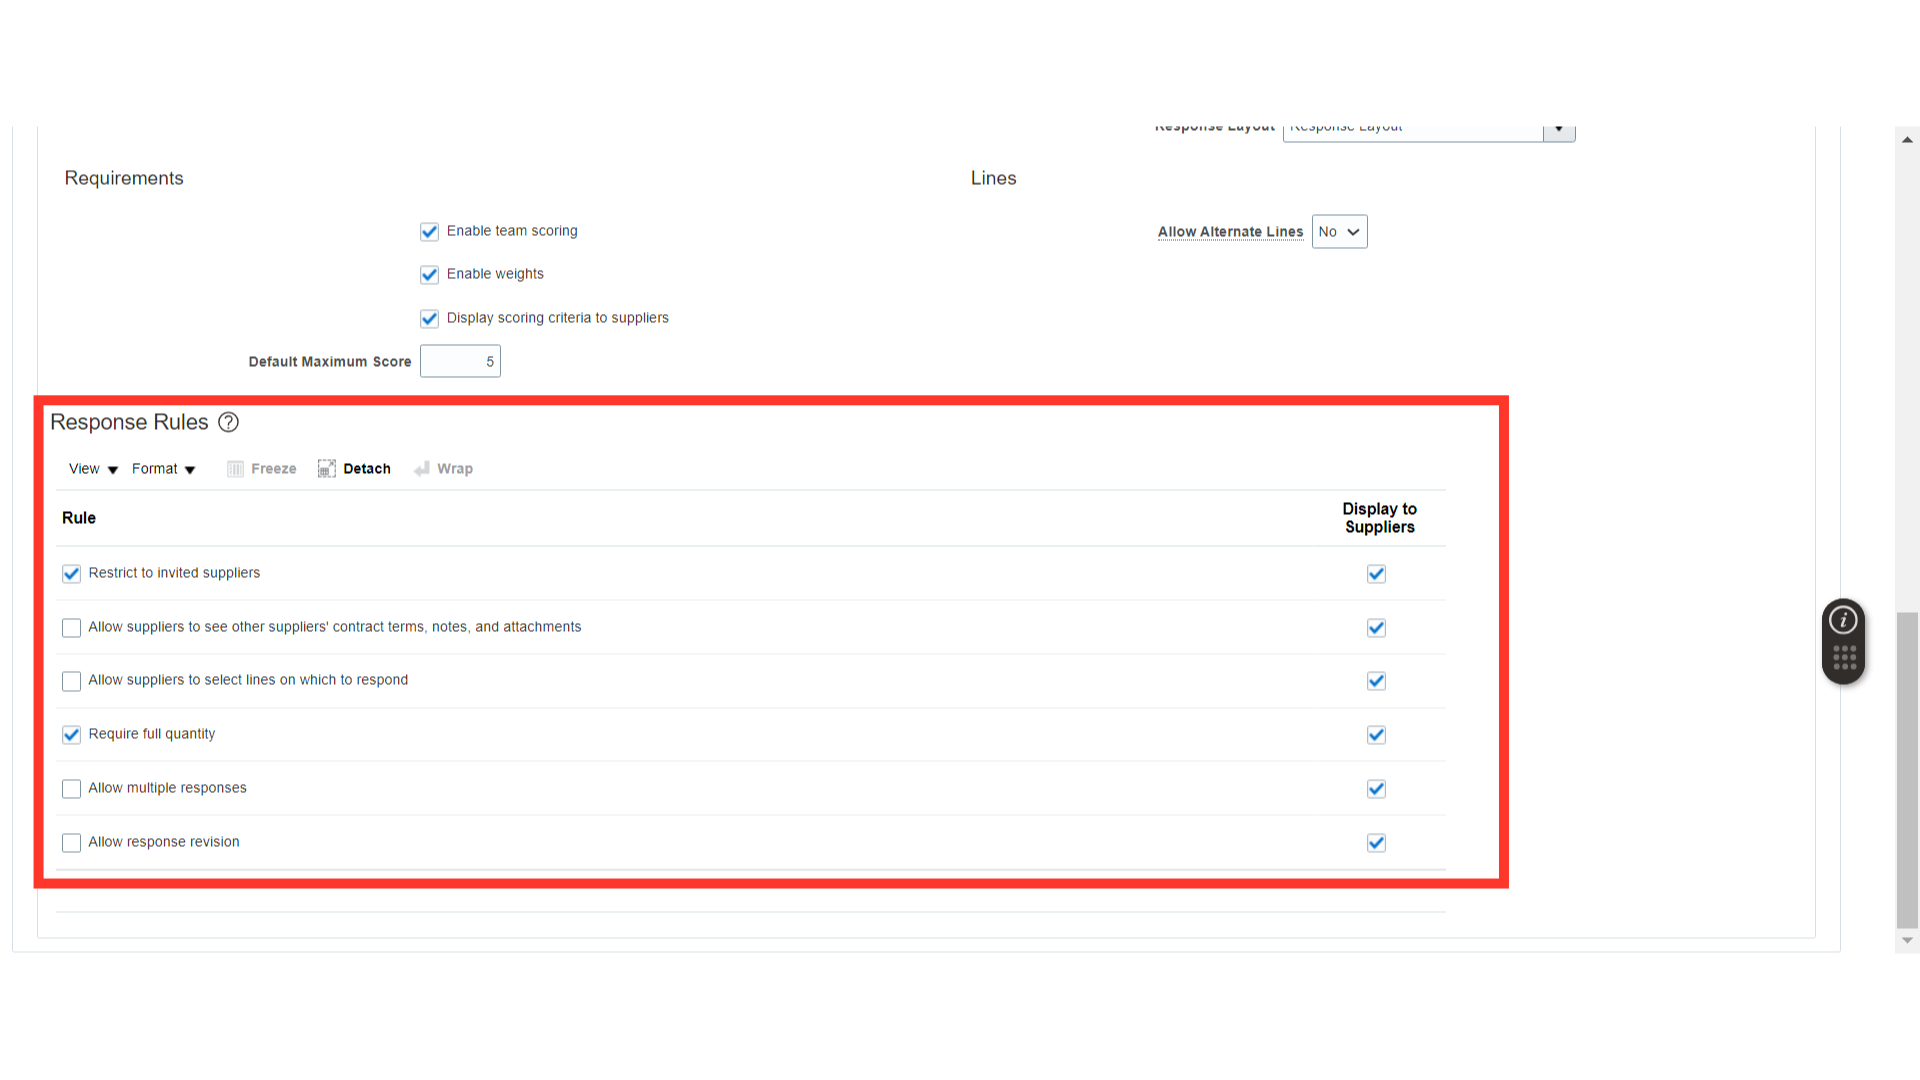
In the Terms section, define the Business Terms such as Payment Terms, Shipping Method, Freight Terms, FOB, and Buyer Managed Transportation. Also, define the Currency details such as Negotiation Currency, Price Precision, and the option of Allowing Response in Other Currencies.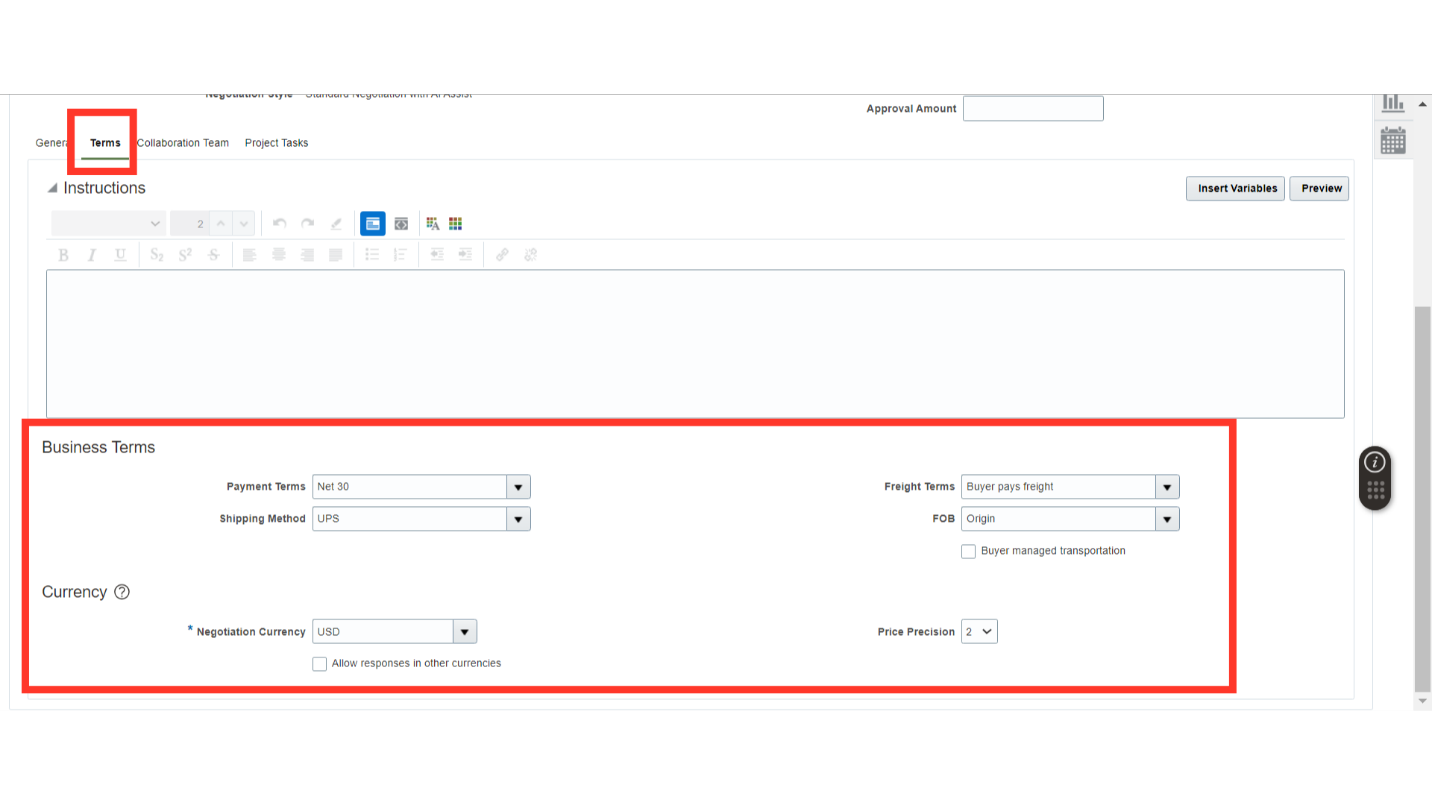
In the Collaboration Team, the members will be automatically defaulted from the Template. If you need to add a new member, click on the Plus icon to add the member with their Access Level for negotiation scoring. Once all the members are added, click on the Manage Scoring button.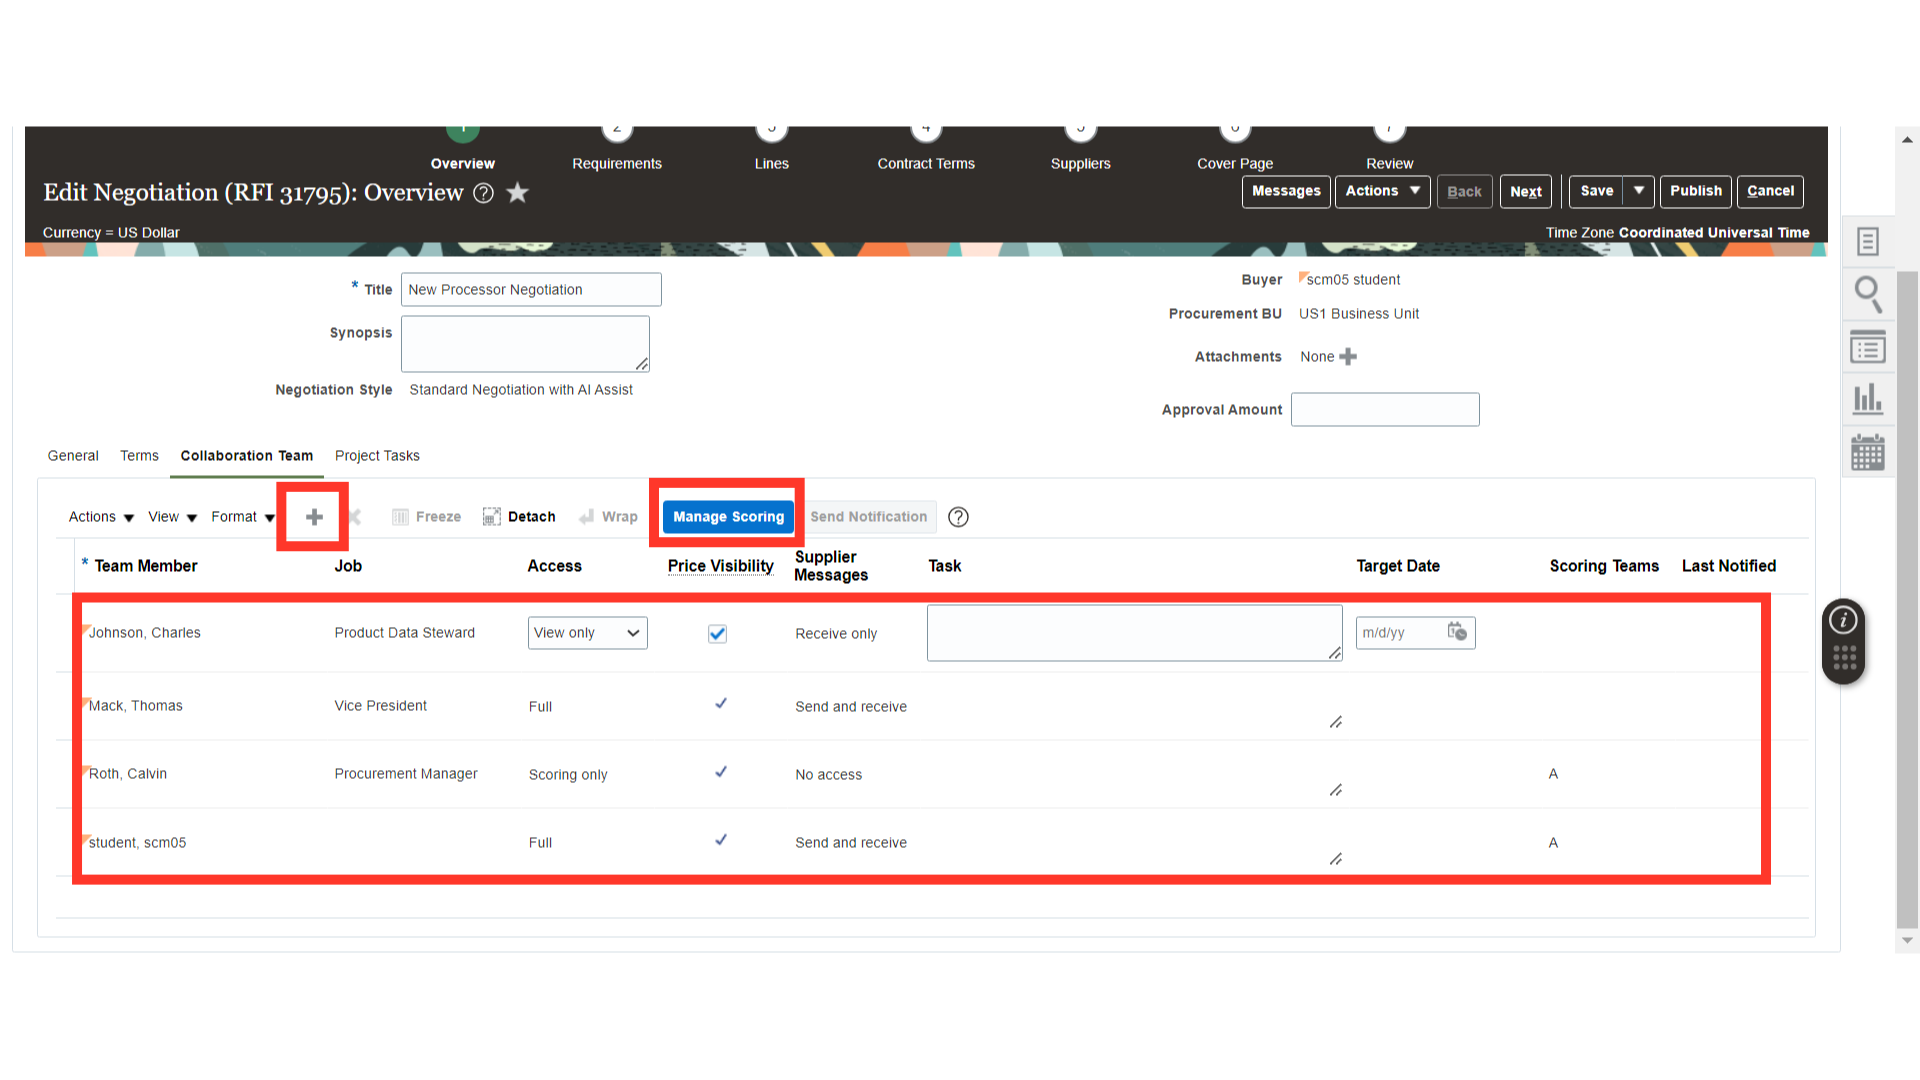
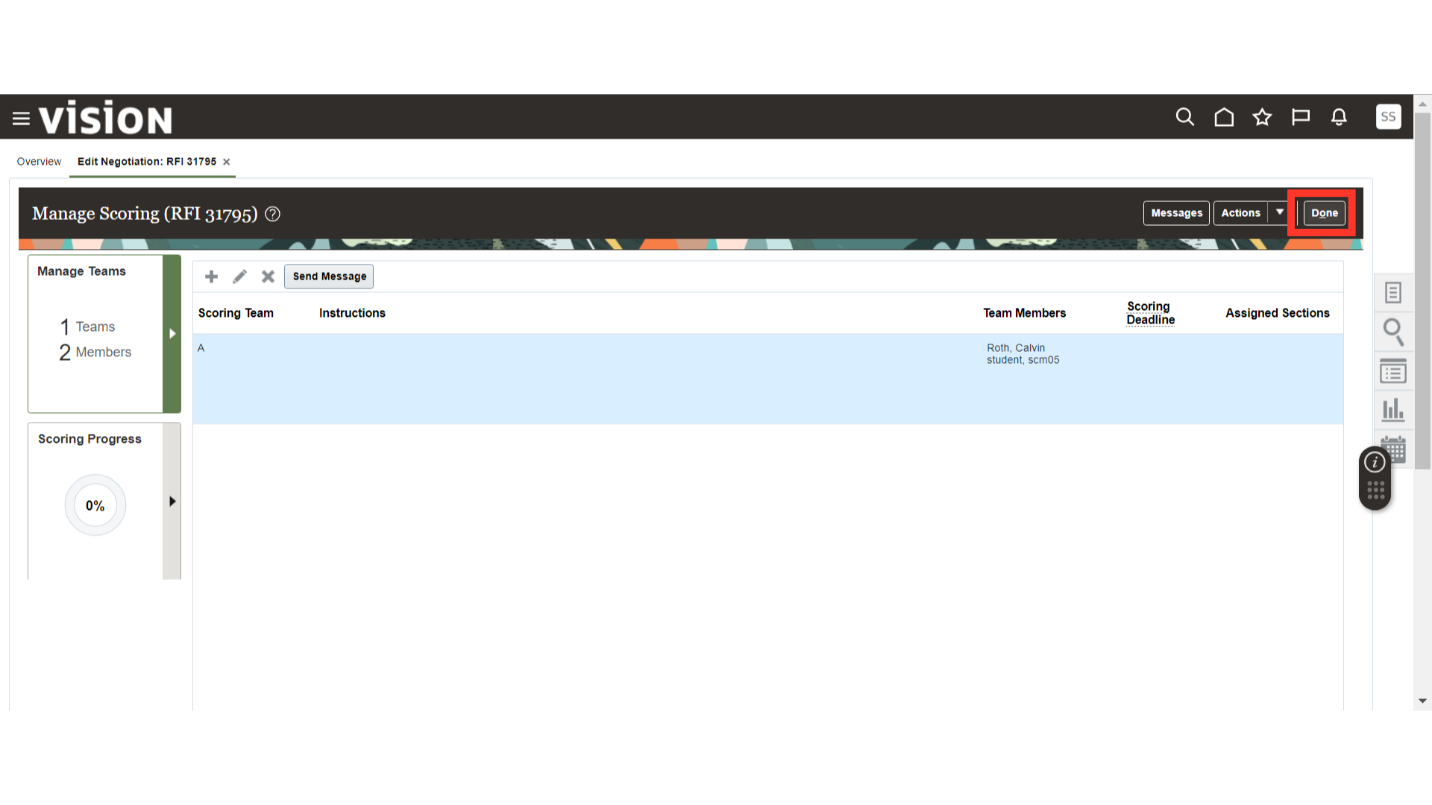
In Manage Scoring, the team will automatically default from the template. If you need to add a new team, click on the Plus icon and create a new team.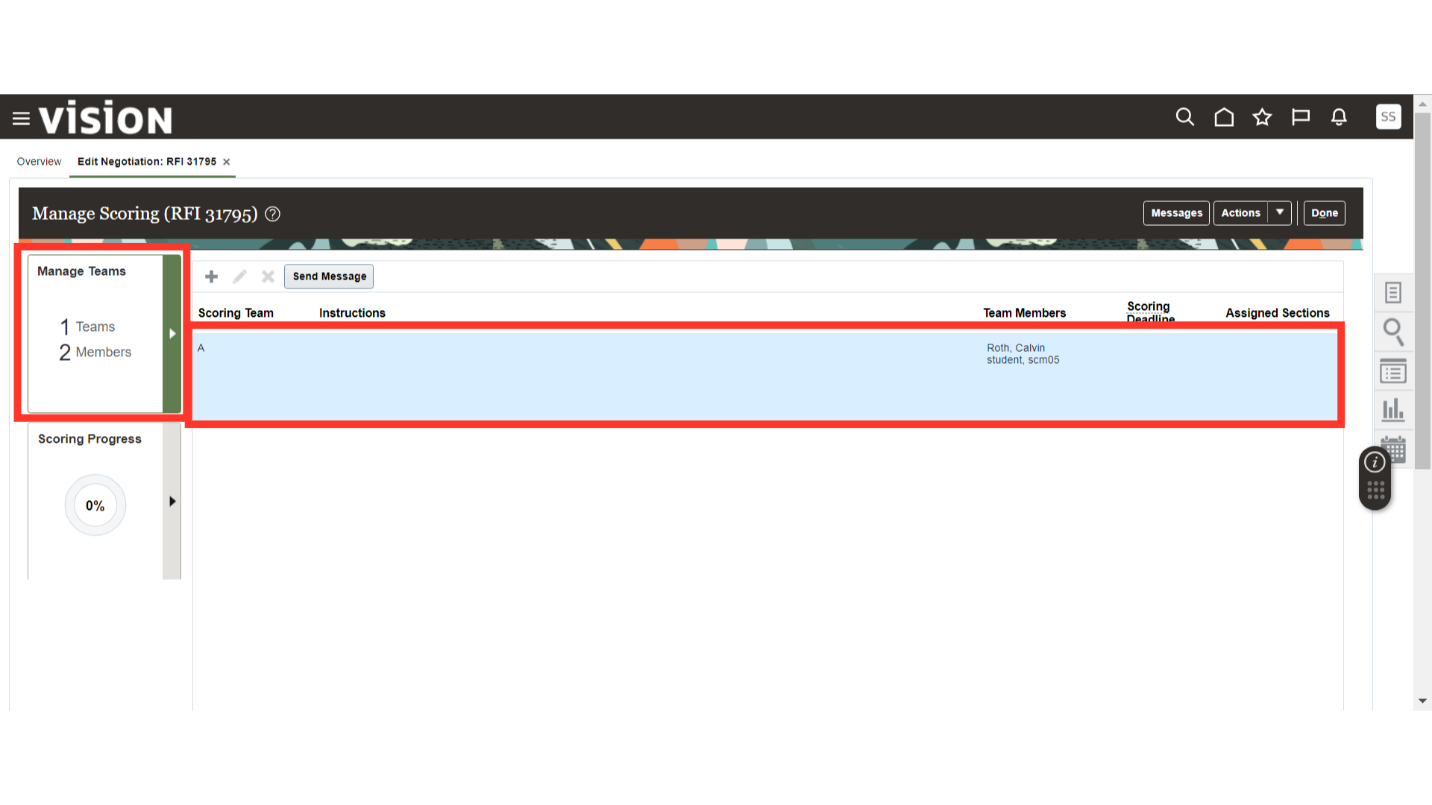
Click on Done to close the Manage Scoring window.
Optionally, if you want to associate a Project with the Negotiation, you can define Project details under Project Tasks.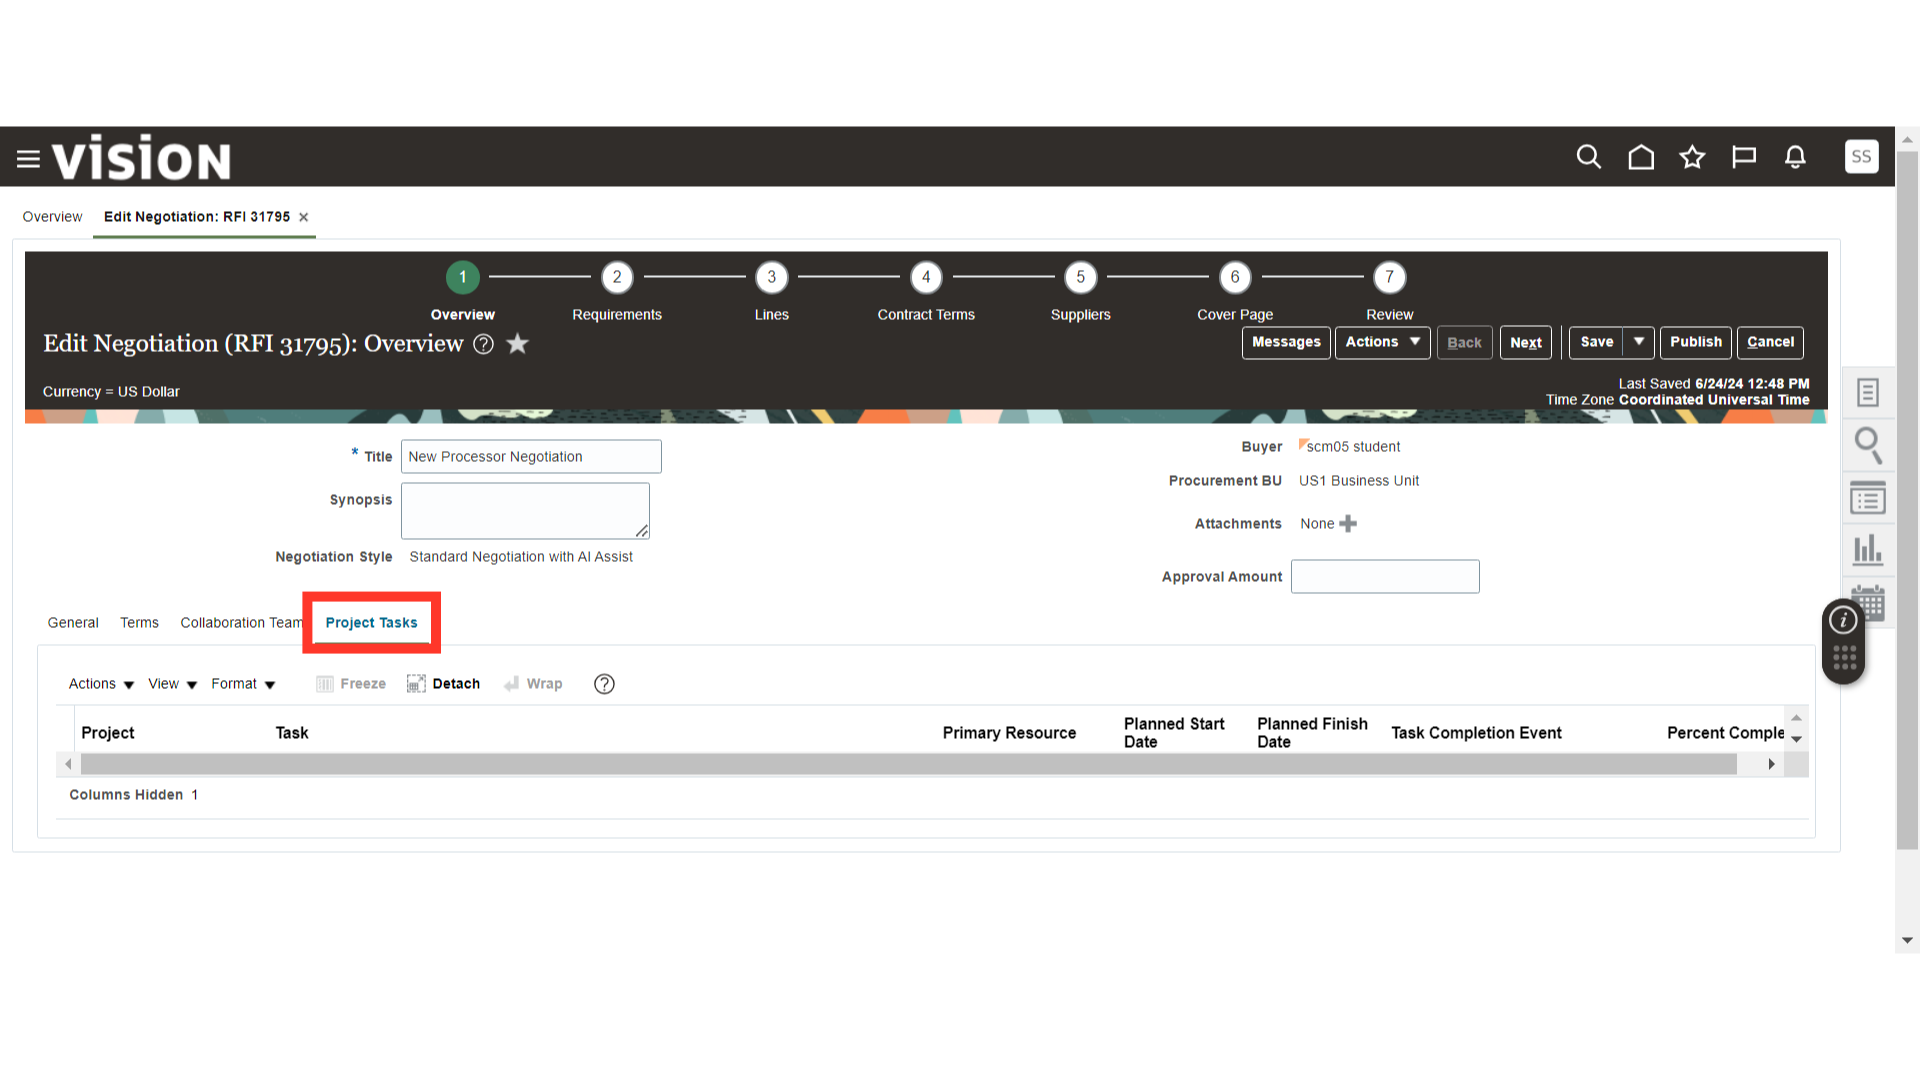
Once all the necessary details are filled in the Overview Section, such as General, Terms, and Collaboration Team, click on the Next button.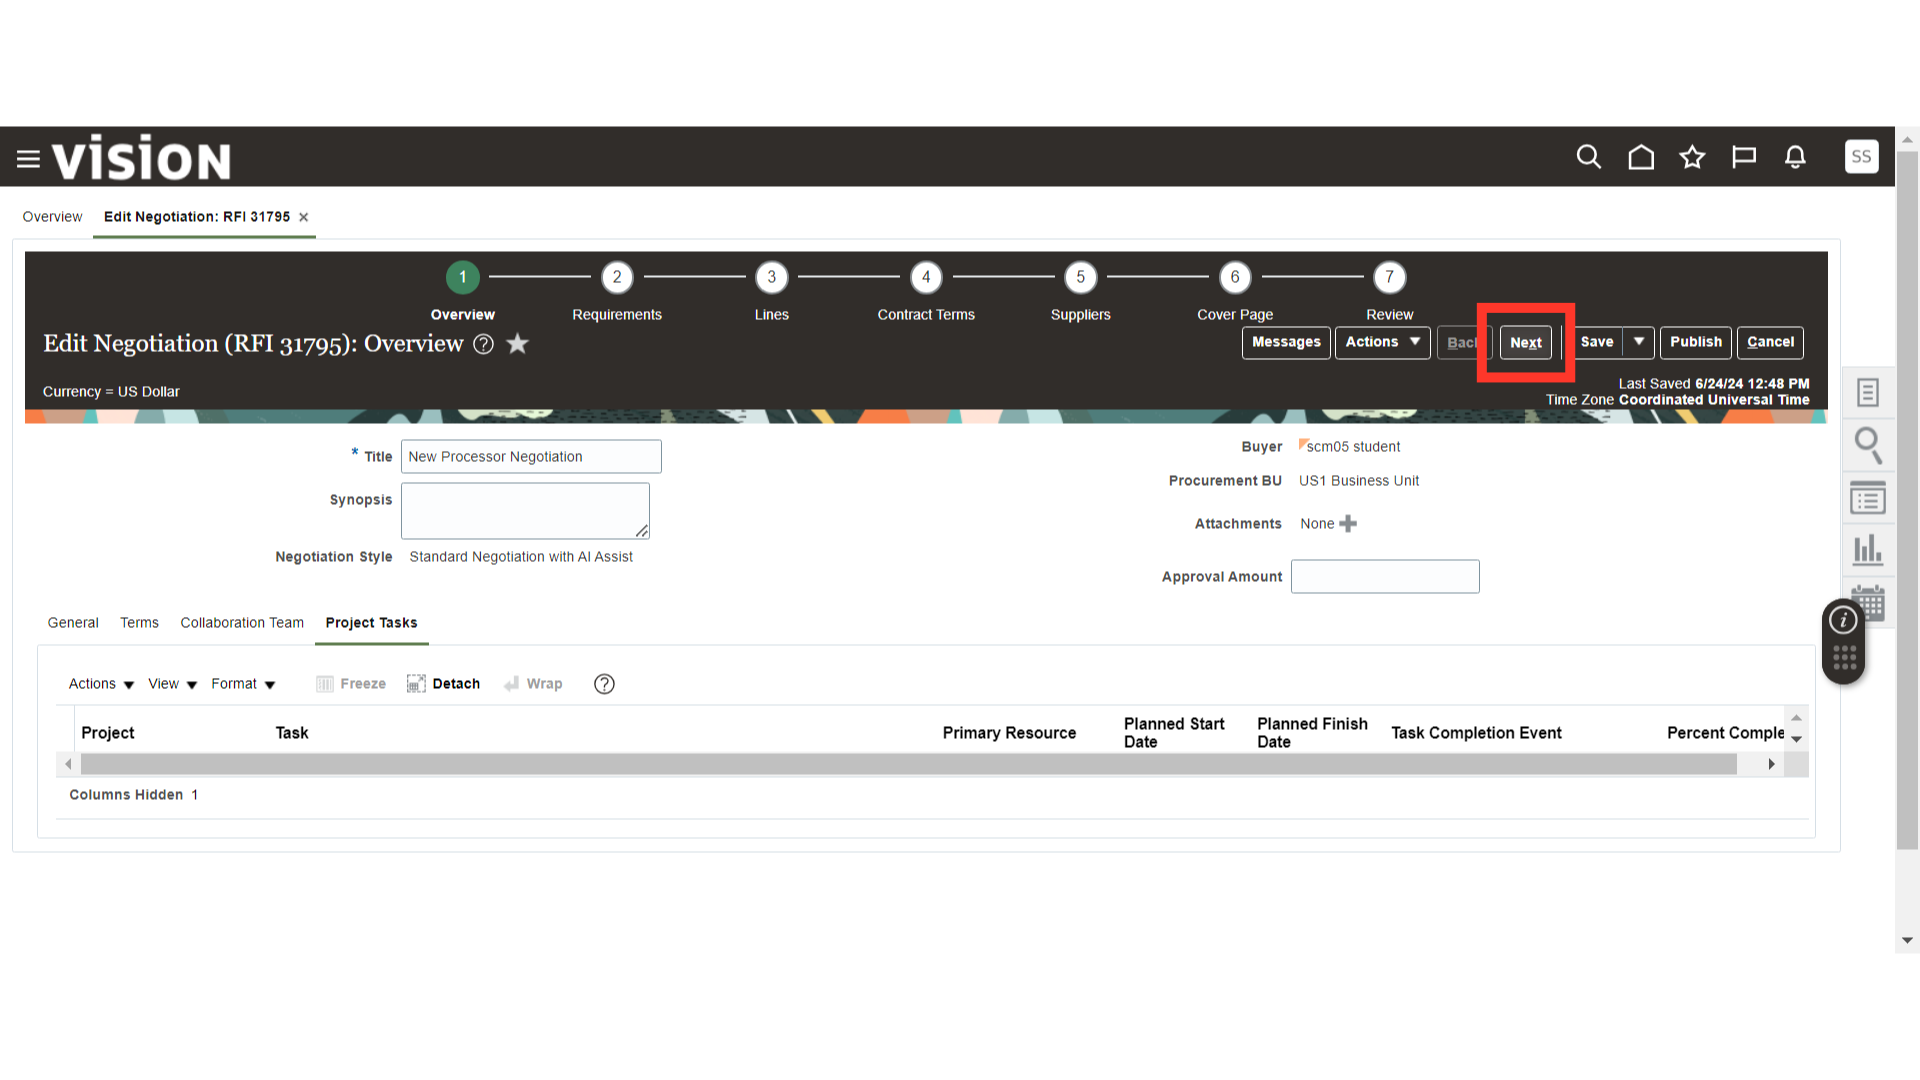
Now we are in the Negotiation Requirements section. Here, we will add the Requirement Details of the Negotiation.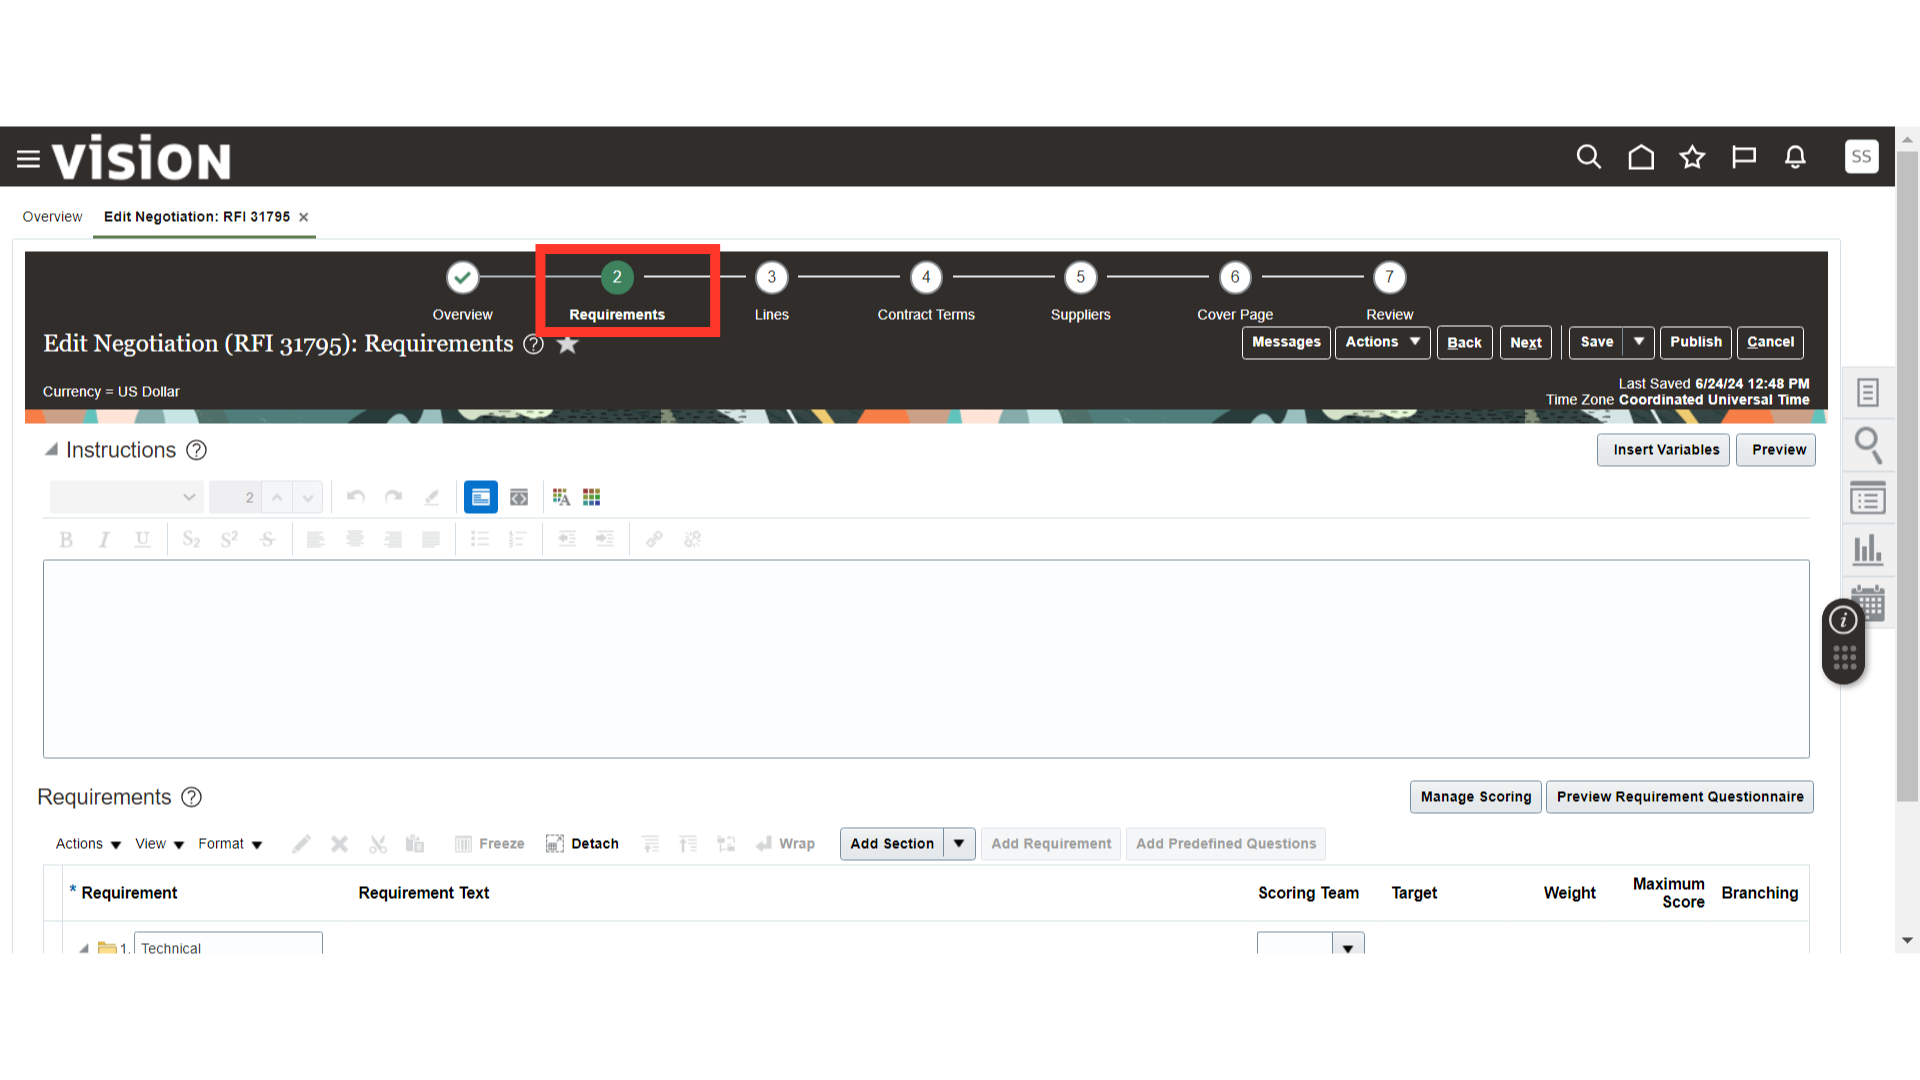
The Requirements will automatically default from your Negotiation Template. If you want to add a new requirement, select a Section and click on Add Requirement, where you will be able to define the new Requirement Details. Also, once all the requirements are added, make sure to add a scoring team in each section. Please refer to the Negotiation Template Creation chapter for more details.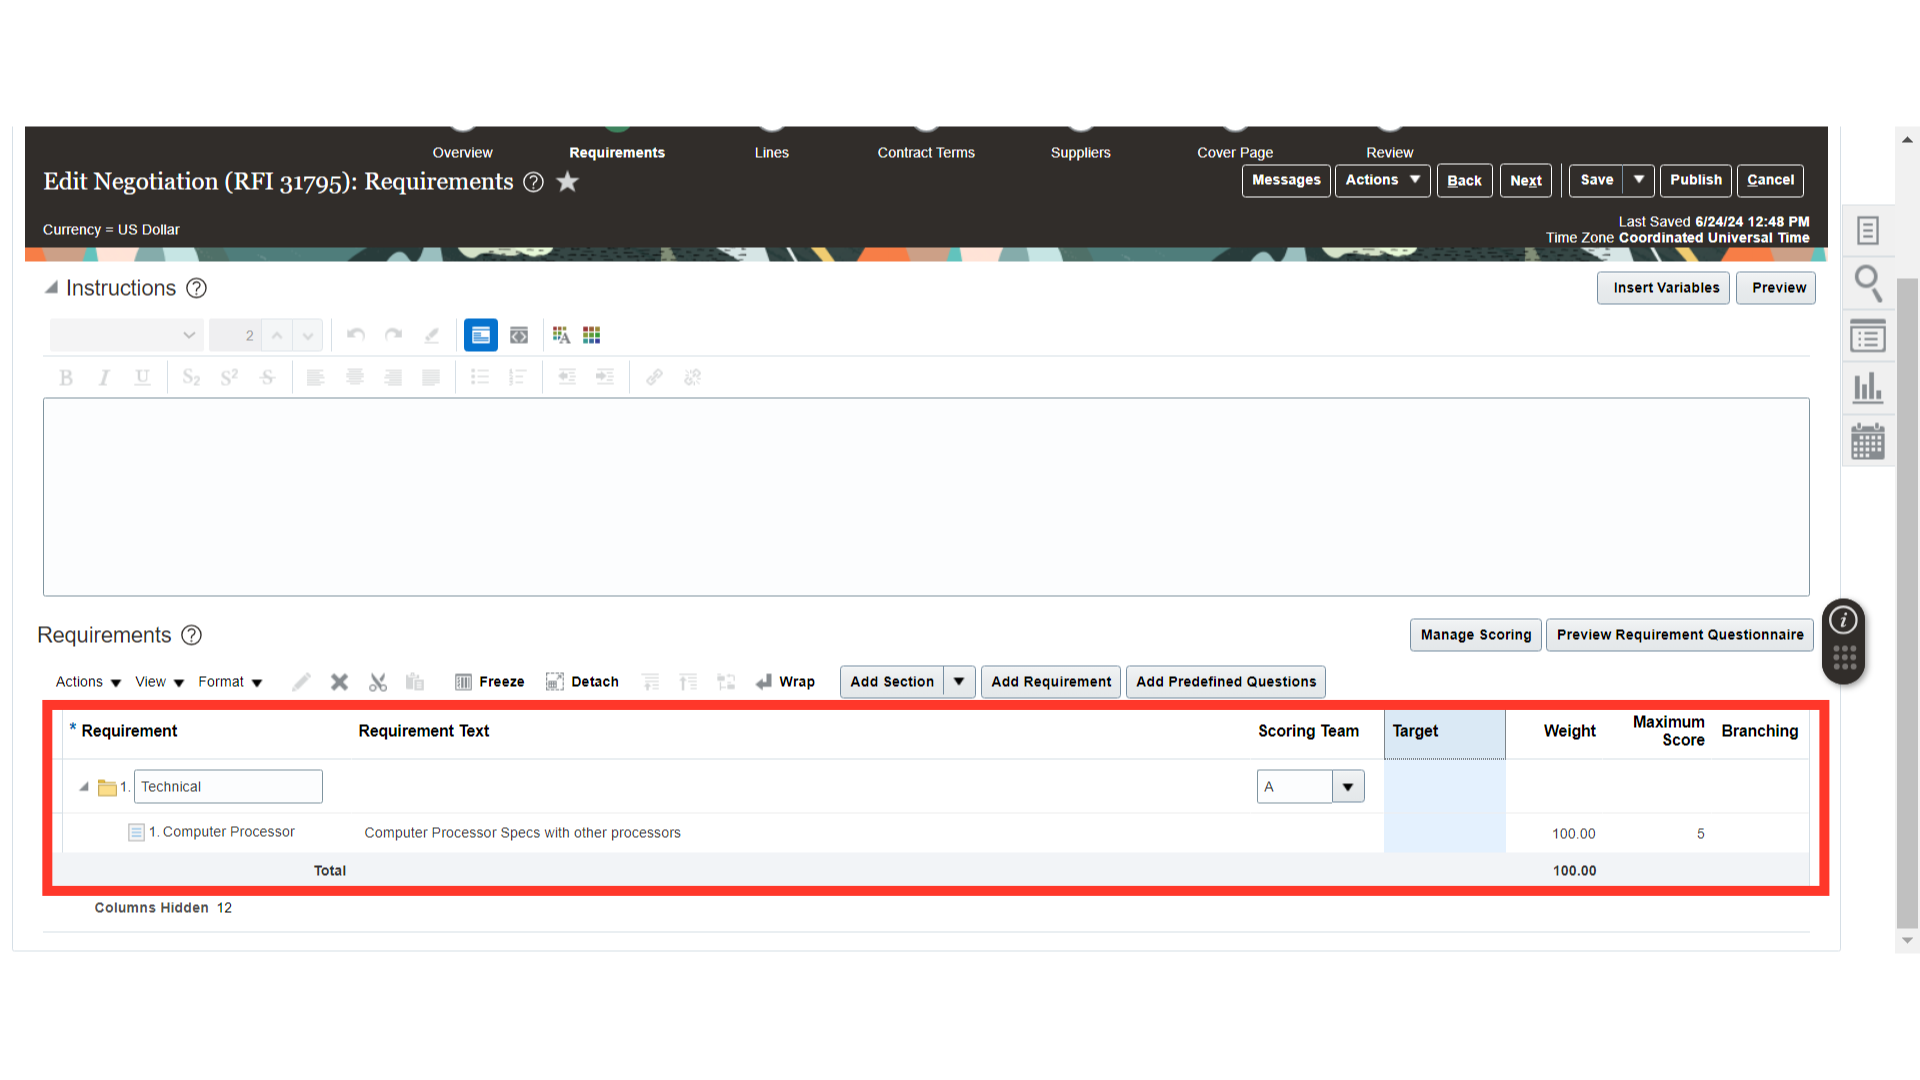
Once all the Sections and Requirements are added, you can click on the Preview Requirement Questionnaire button to view the Supplier’s point of view for the Requirements Questionnaire.
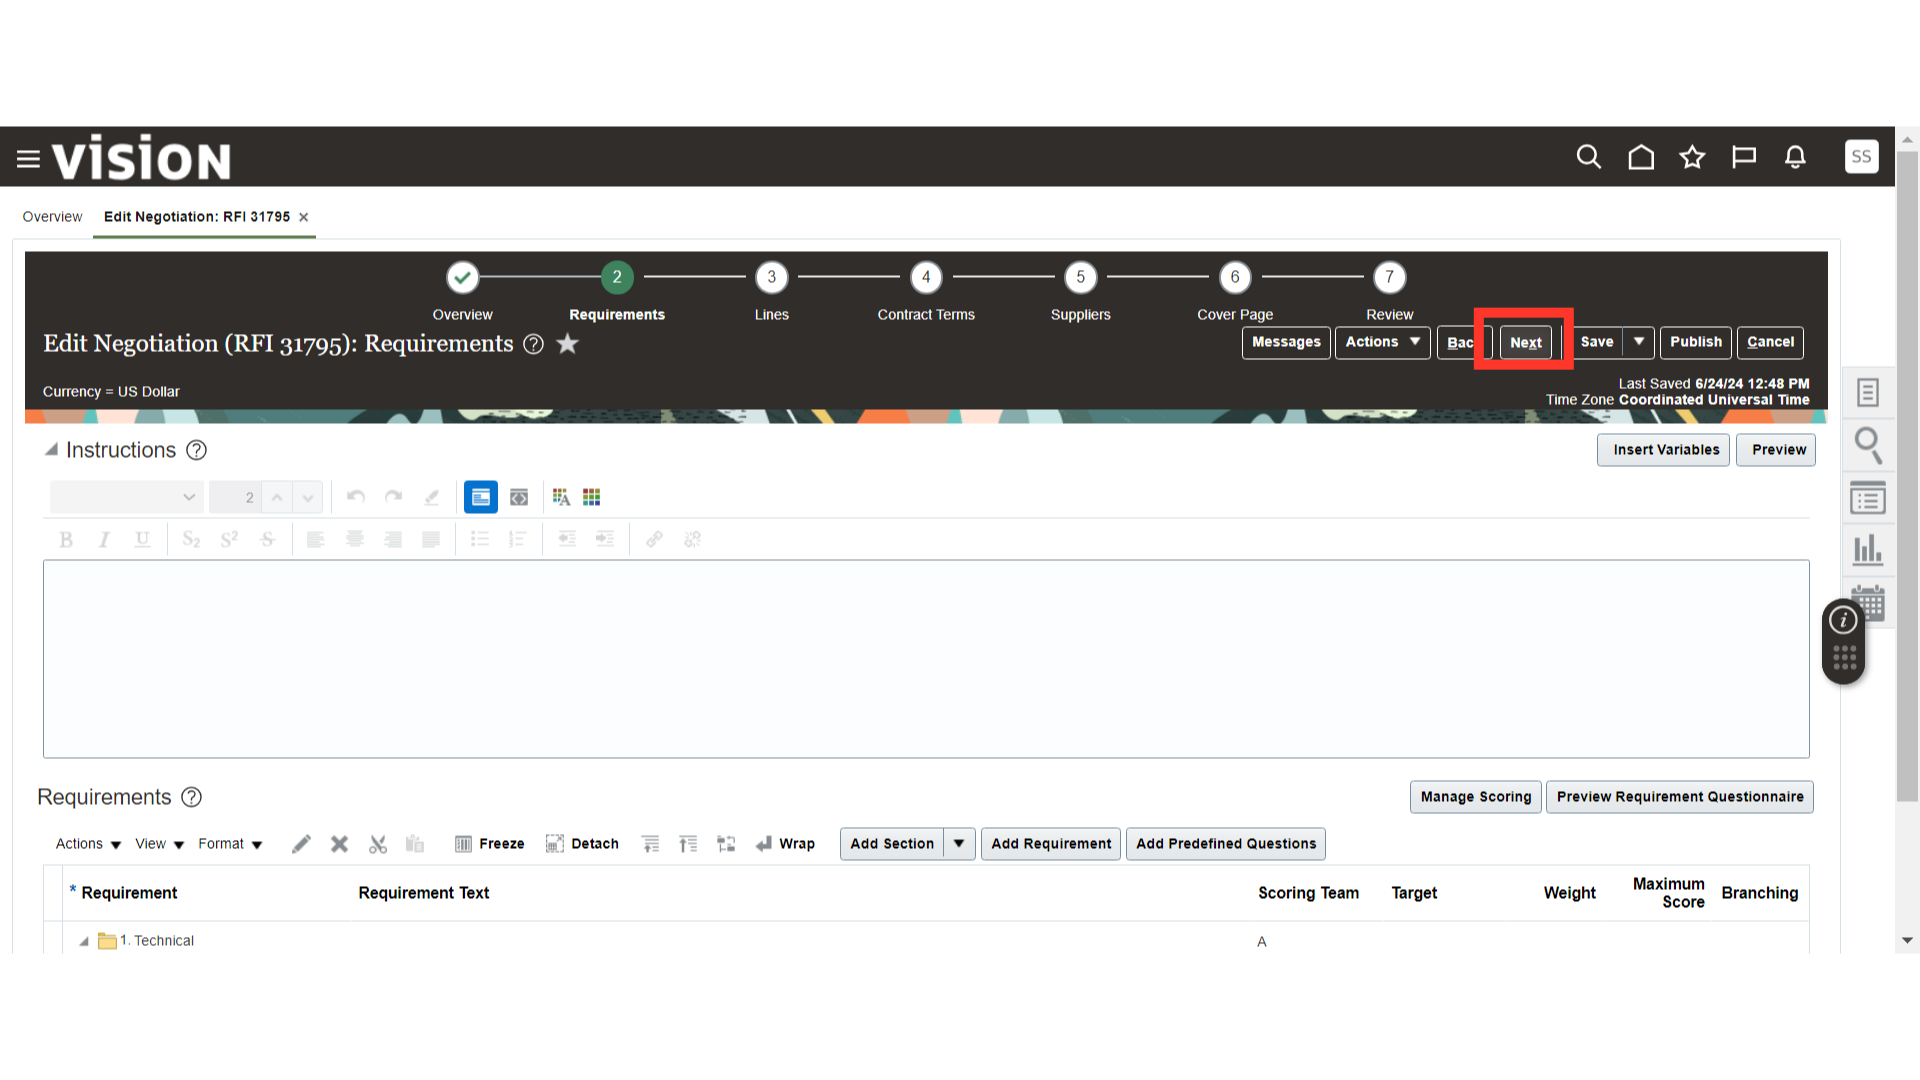
Once the Requirements section is completed, click on the Next button.
Now we are in the Negotiation Lines section. The negotiation line will automatically default from the Negotiation Template. Verify the line details such as Line Type, Item Description, Category, Quantity, UOM, Location, Requested Delivery Date, Current Price, and Start Price. Make changes to the line if needed. Also, if you want to add an additional line, you can do so by clicking on the Plus icon and adding a new line in the Negotiation.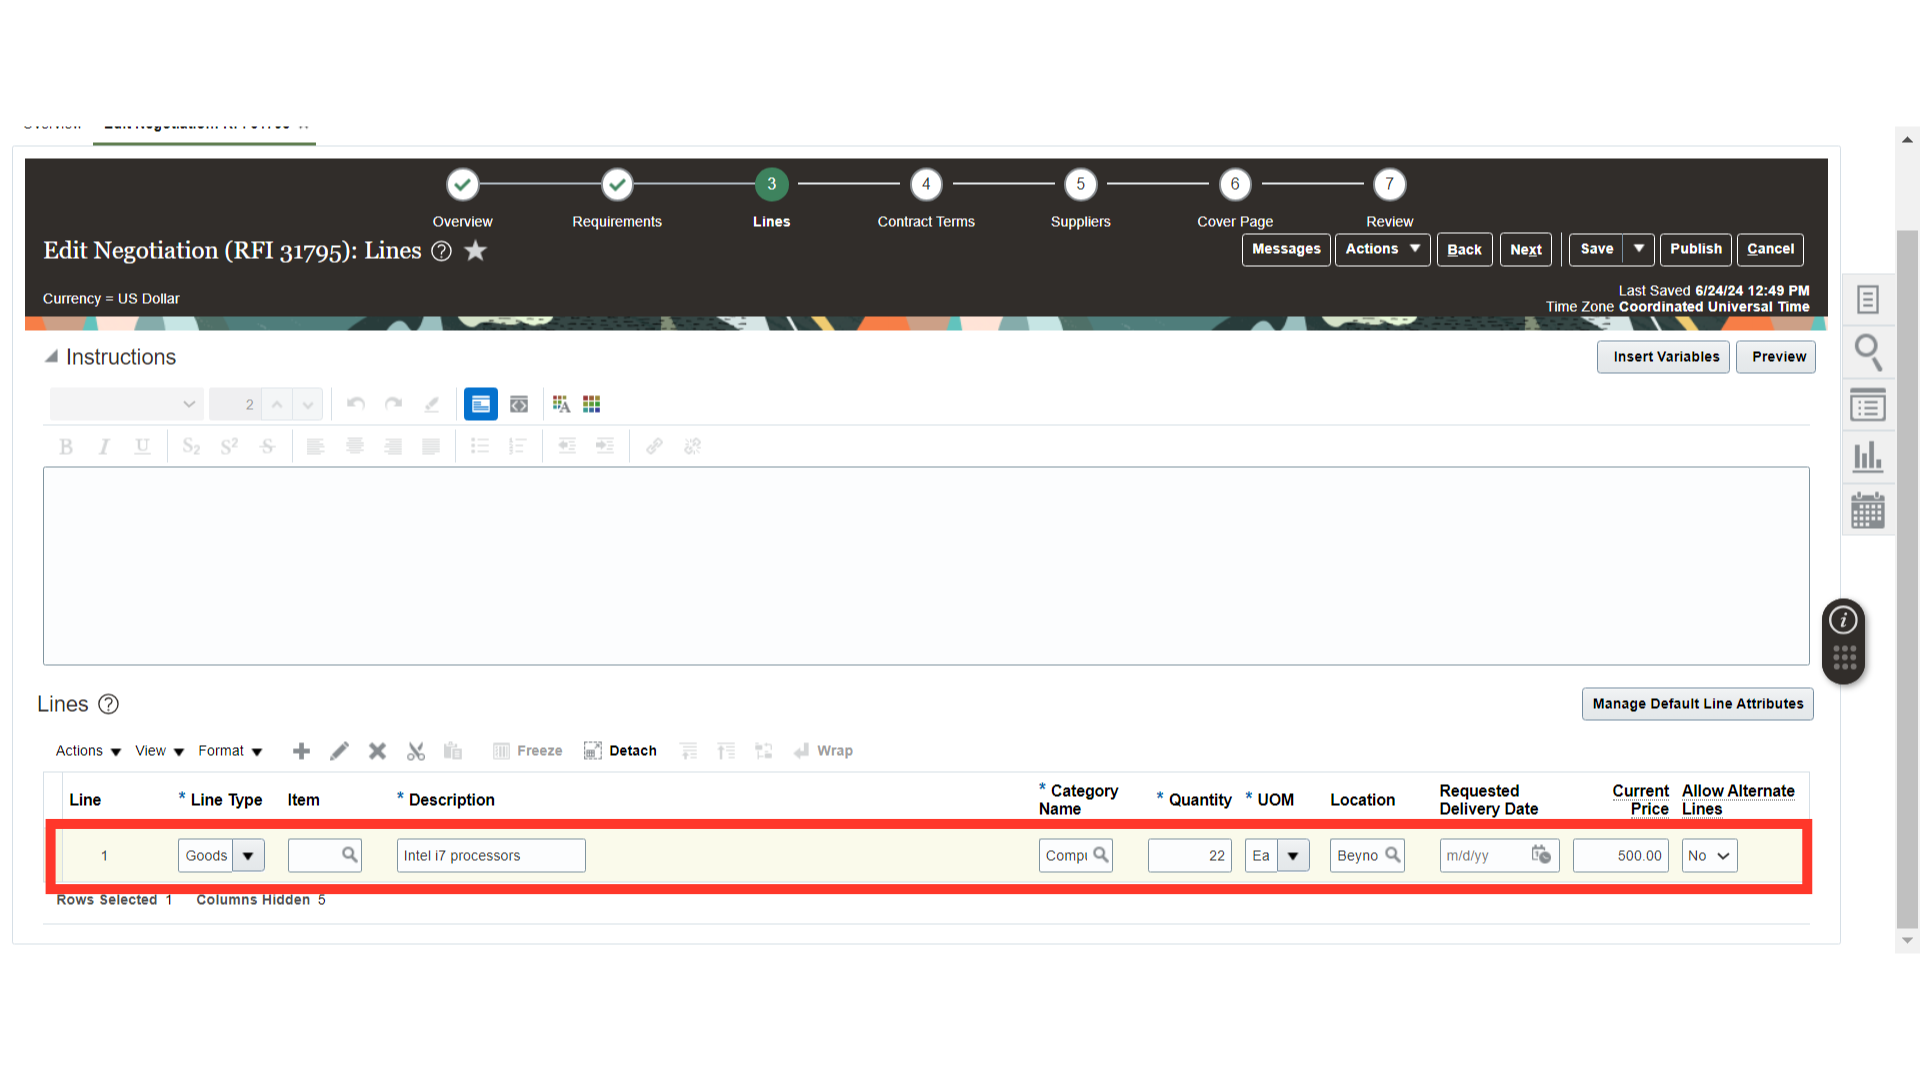
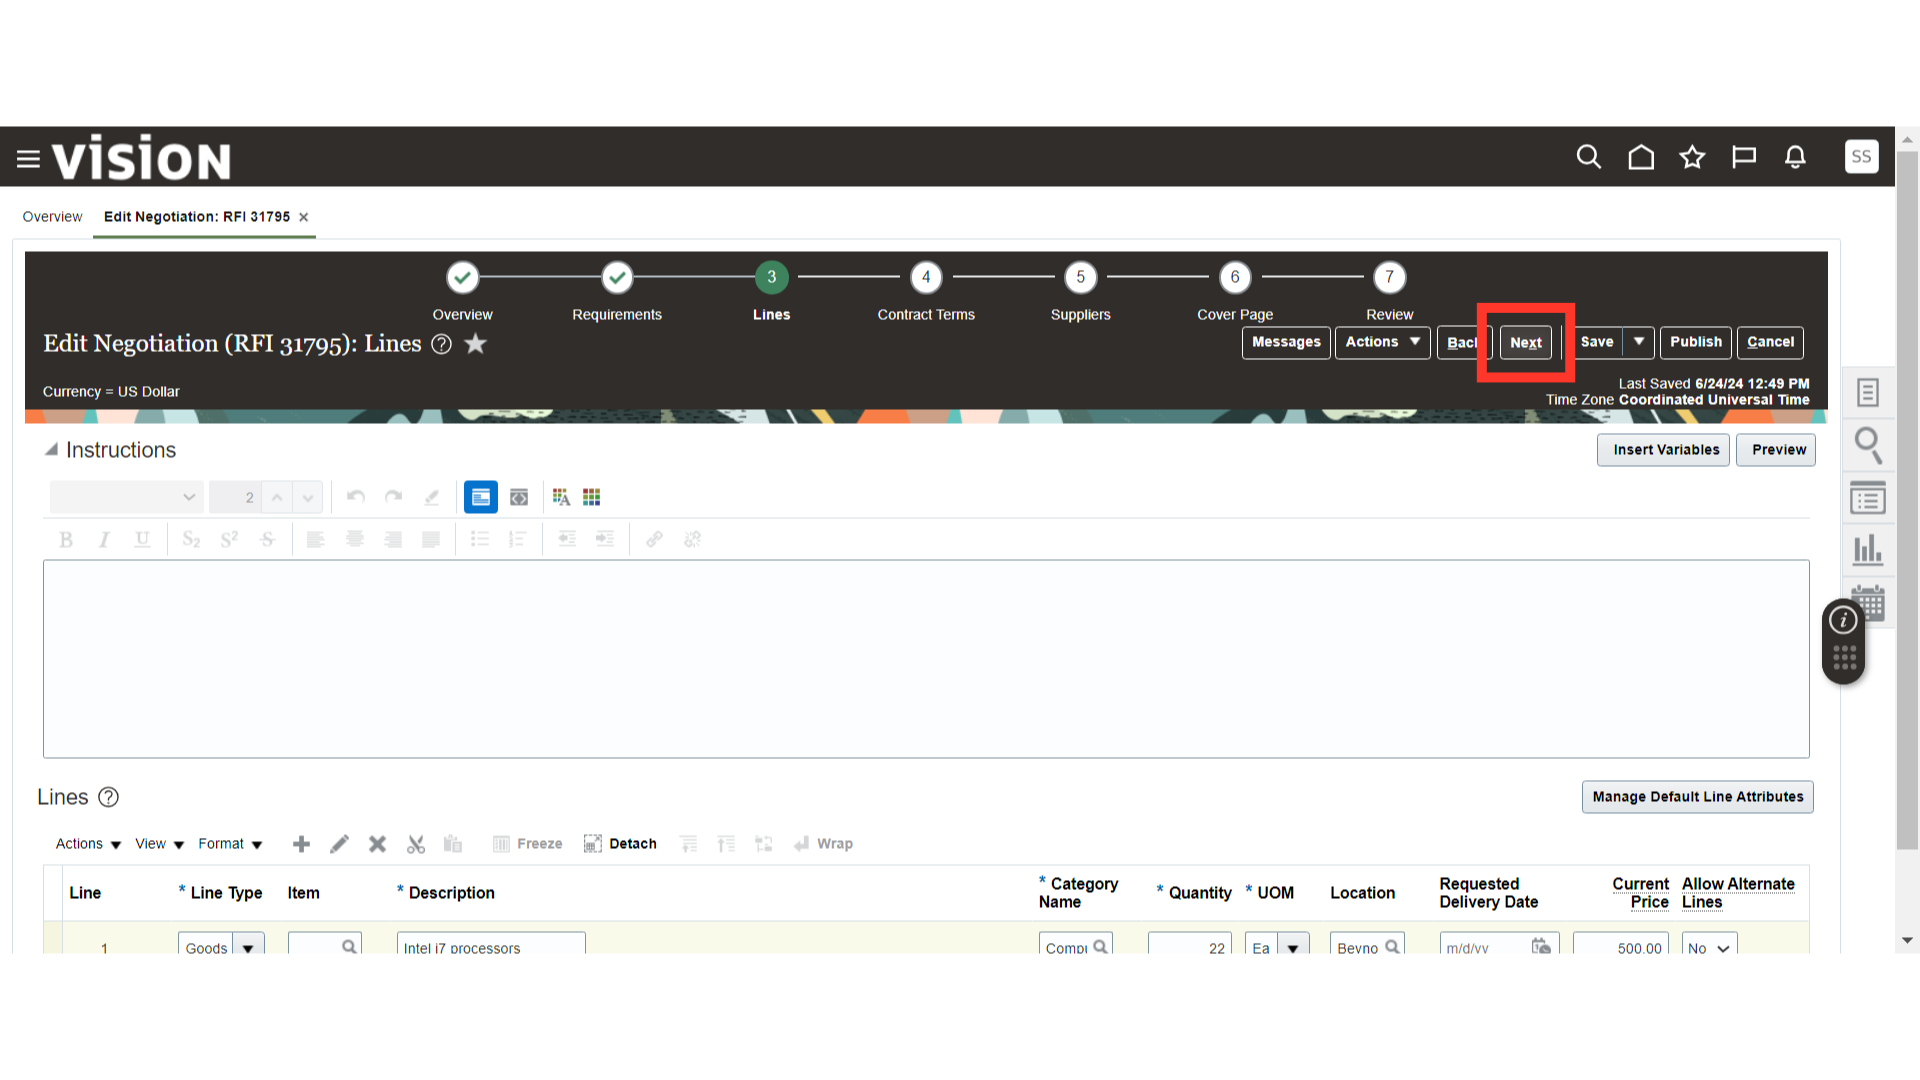
Once the Lines details are filled in, click on the Next button.
Optionally, if you want to create a Procurement Contract from the Negotiation, you can do so by clicking on the Create Contract button. If not, click on the Next button.
In the Suppliers Section, the Suppliers will default from the Negotiation Template. To add a New Supplier in Negotiation, click on the Search and Add button to add Suppliers for the Negotiation. Once all the Suppliers are added, click on the Next button.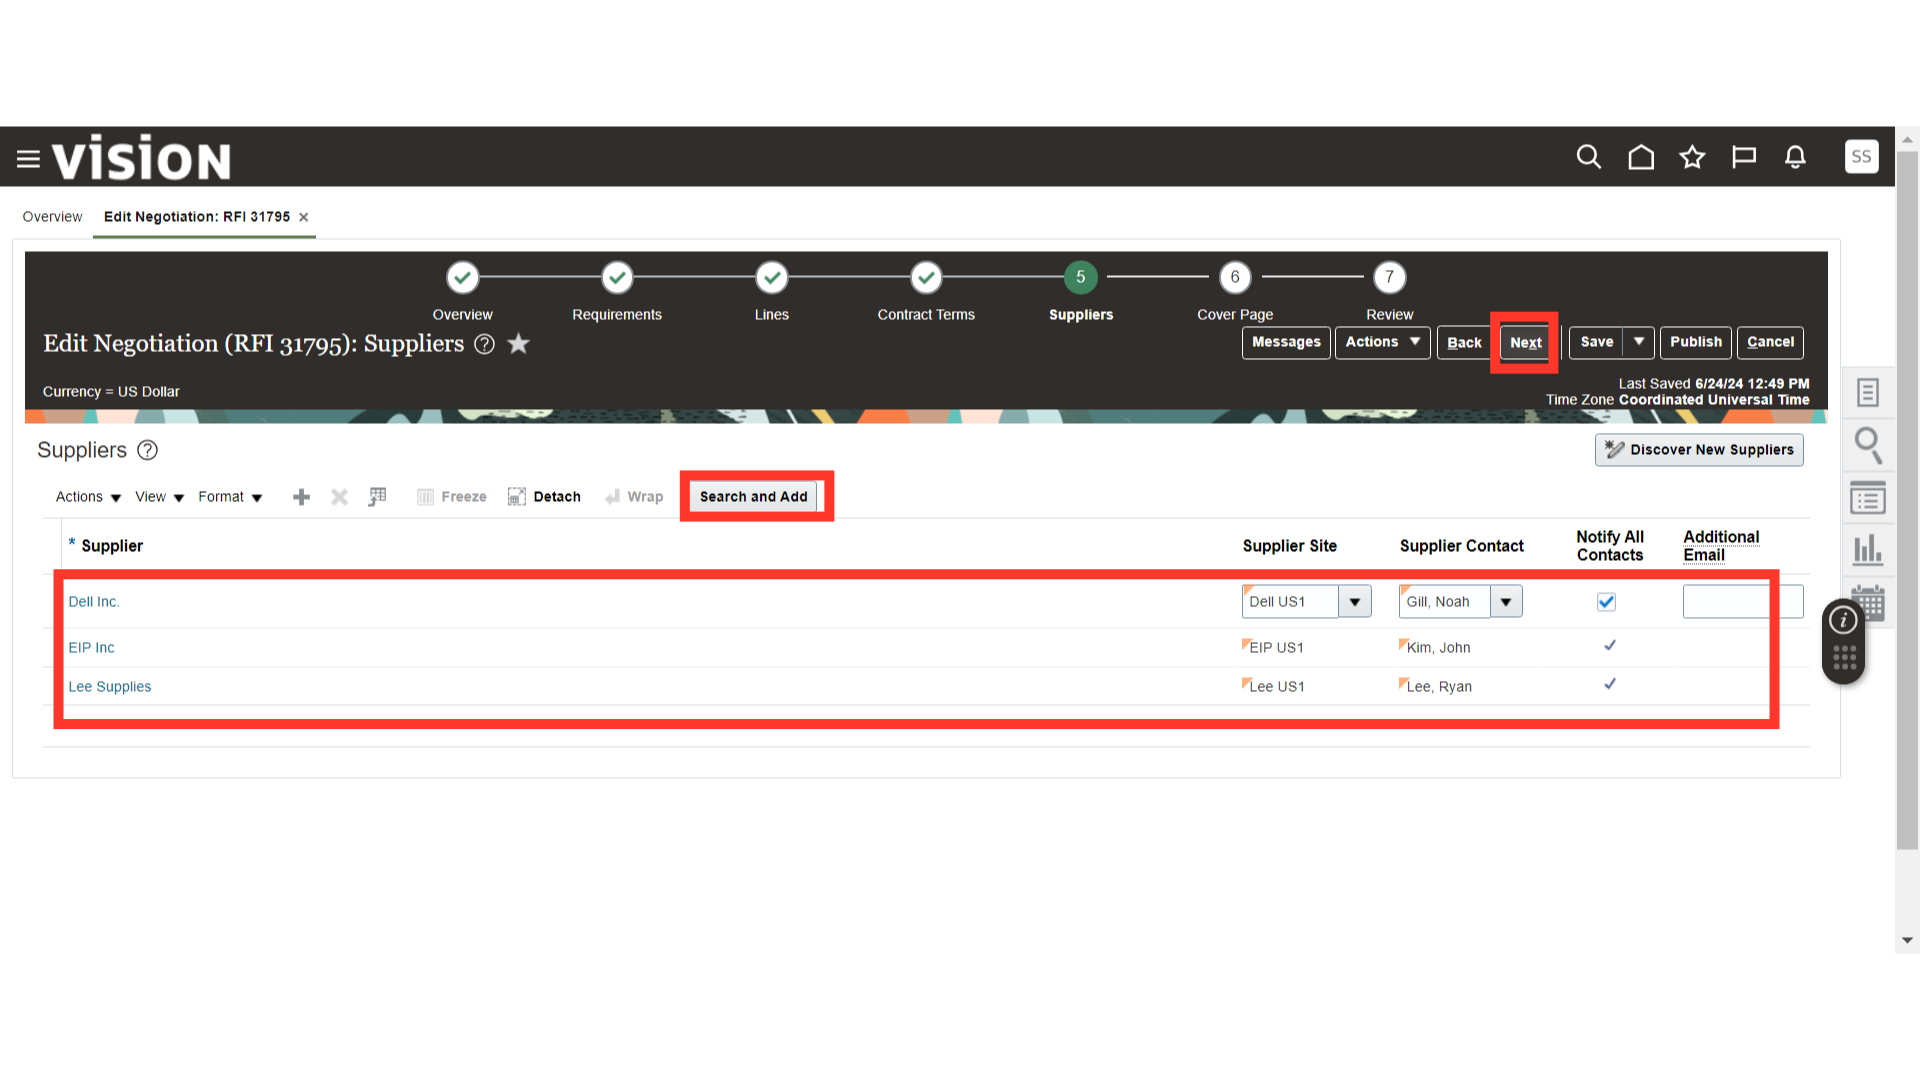
On the Cover Page, describe the purpose and details of the RFI Negotiation. To preview the Cover Page created for the Negotiation, utilize the Preview button. Once all the changes are completed, click on the Next button.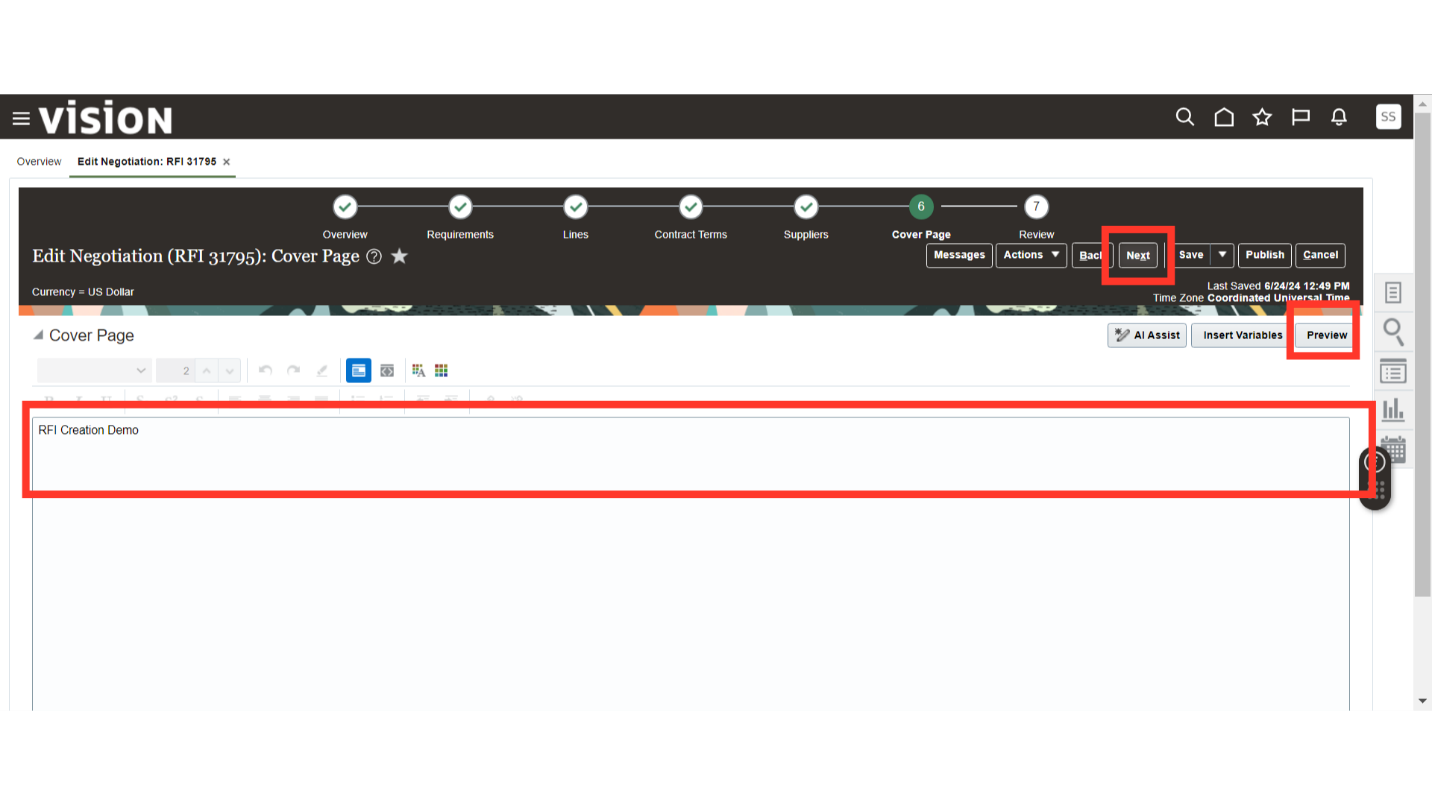
In the Review section, review your Negotiation Details from each section.
Once all the details are reviewed, click on the Publish button to publish your negotiation.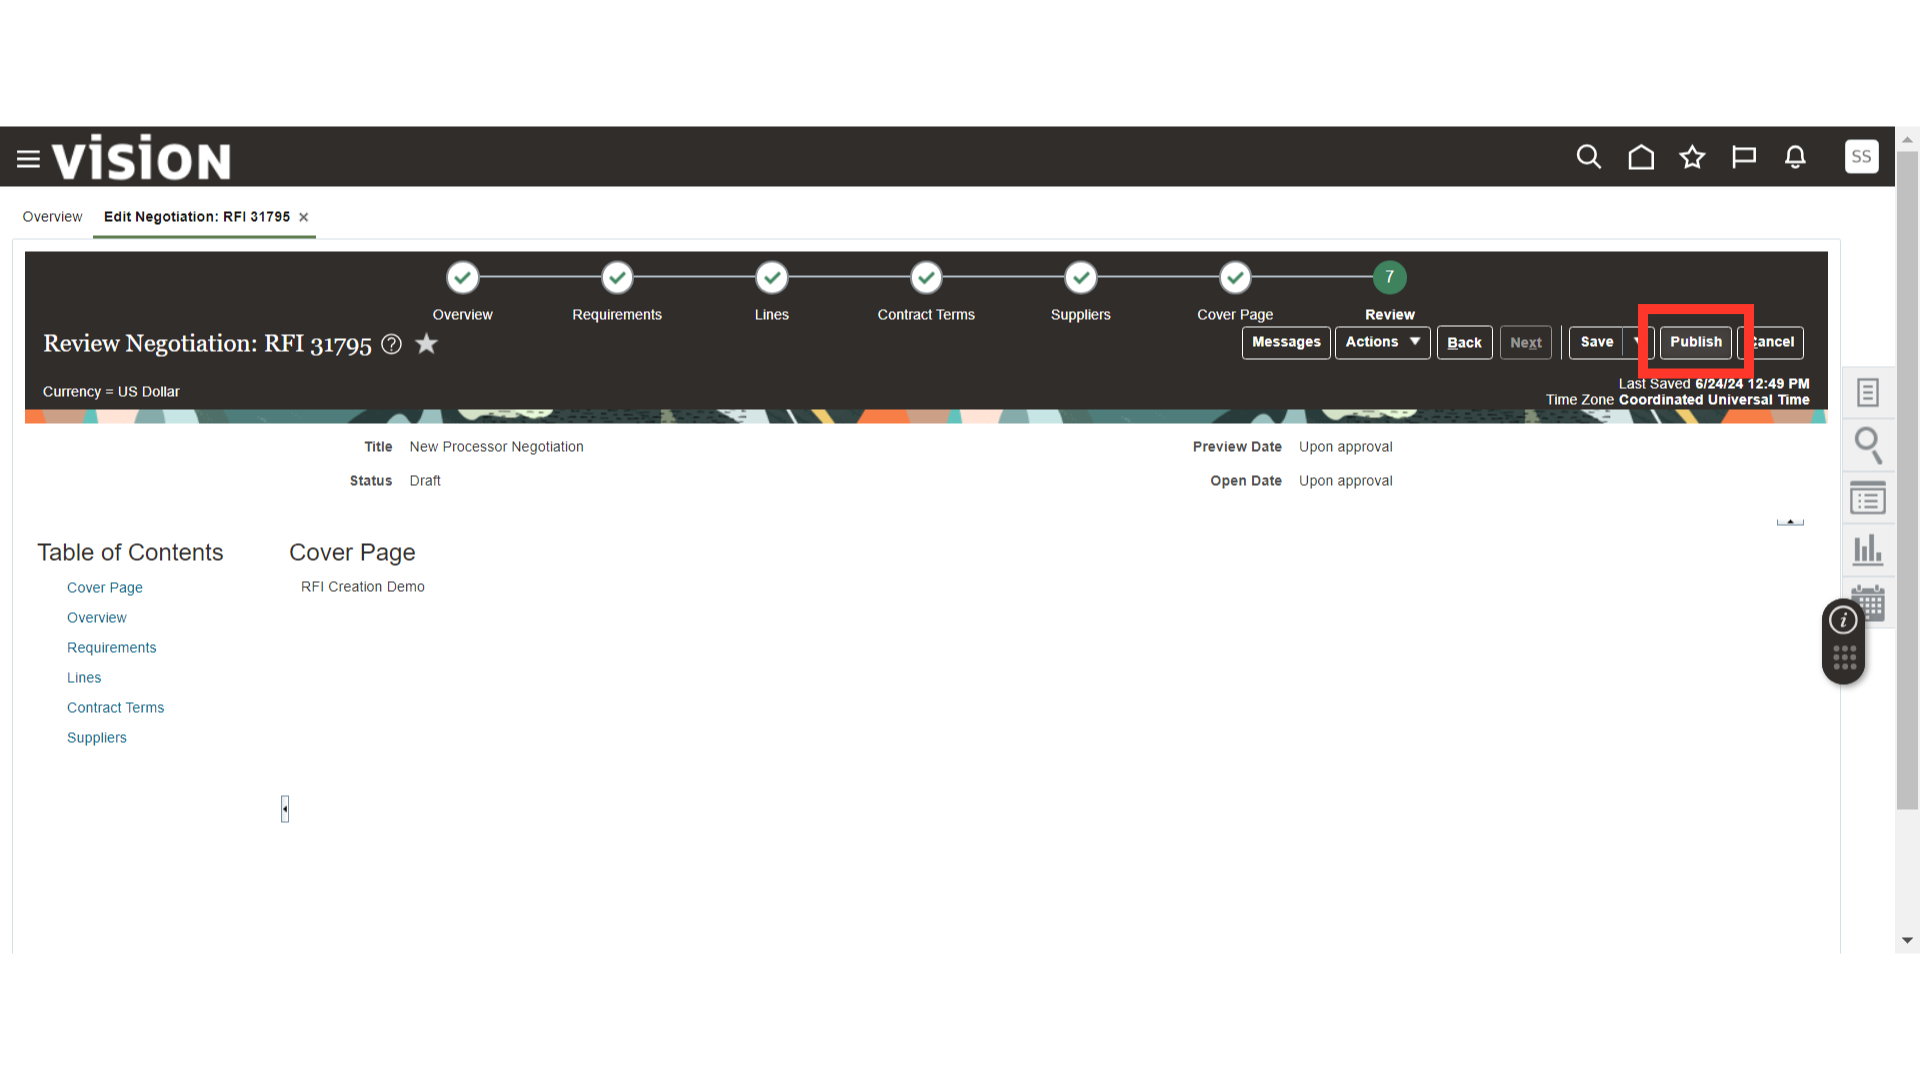
Once the negotiation is published, the system will generate a confirmation message. Click OK. Now, the negotiation will be in Active Status and start accepting responses from the suppliers.
This guide covered the entire process of creating an RFI in the Oracle Fusion application, from setting up negotiations to finalizing and publishing the document. Each step is covered in detail to assist in a successful RFI creation.