How to Create a Two Stage Negotiation
In this guide, we will create a Two-Stage Negotiation in Oracle Fusion. Two-Stage Negotiation is mostly used in the public sector for RFQs from suppliers. The two-stage RFQ process involves the submission by the suppliers of a technical quote and a commercial quote. The technical quotes are opened and evaluated first to determine a list of qualified suppliers, and only then are the commercial quotes of the qualified suppliers opened and evaluated. Please follow the detailed steps to create a Two-Stage Negotiation efficiently in Oracle Cloud.
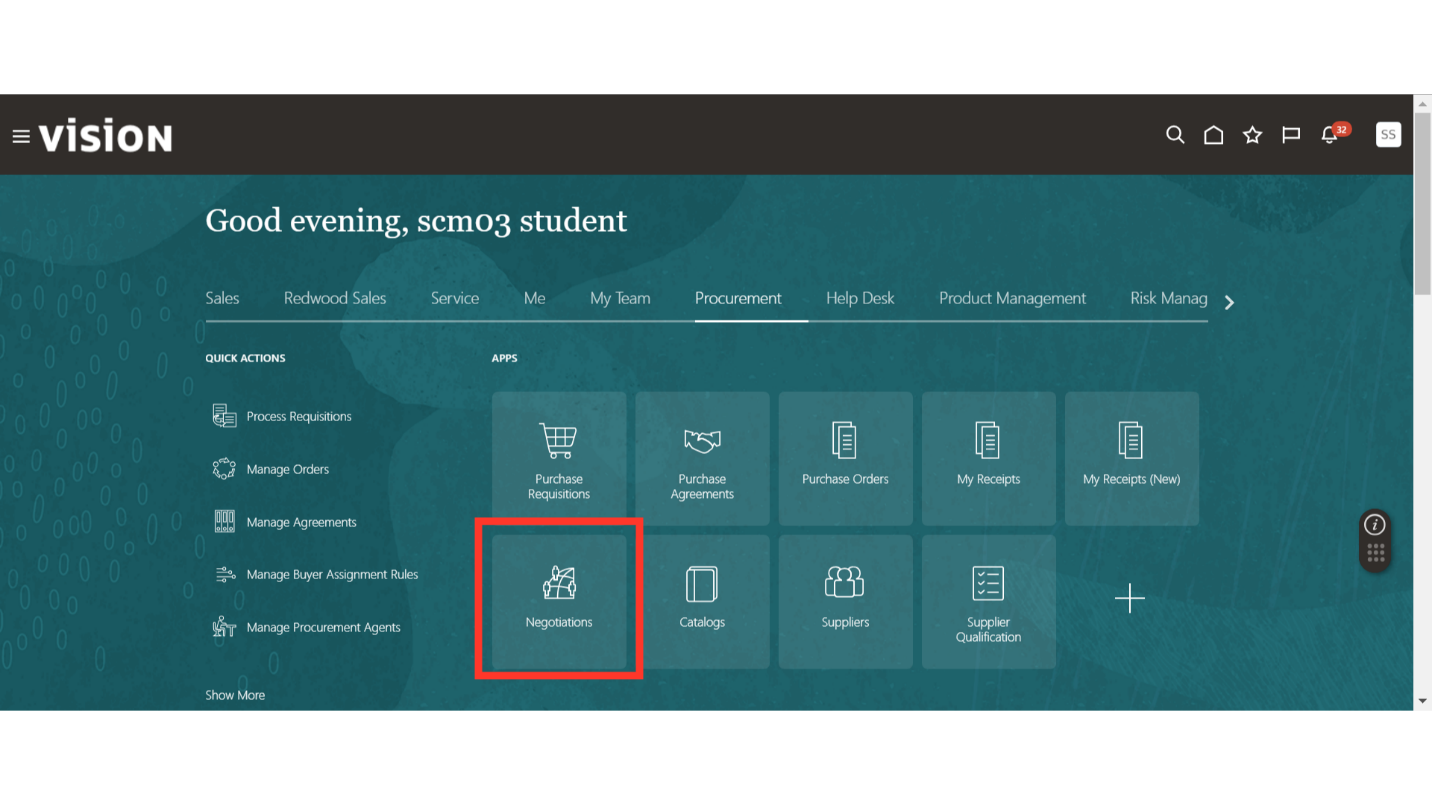
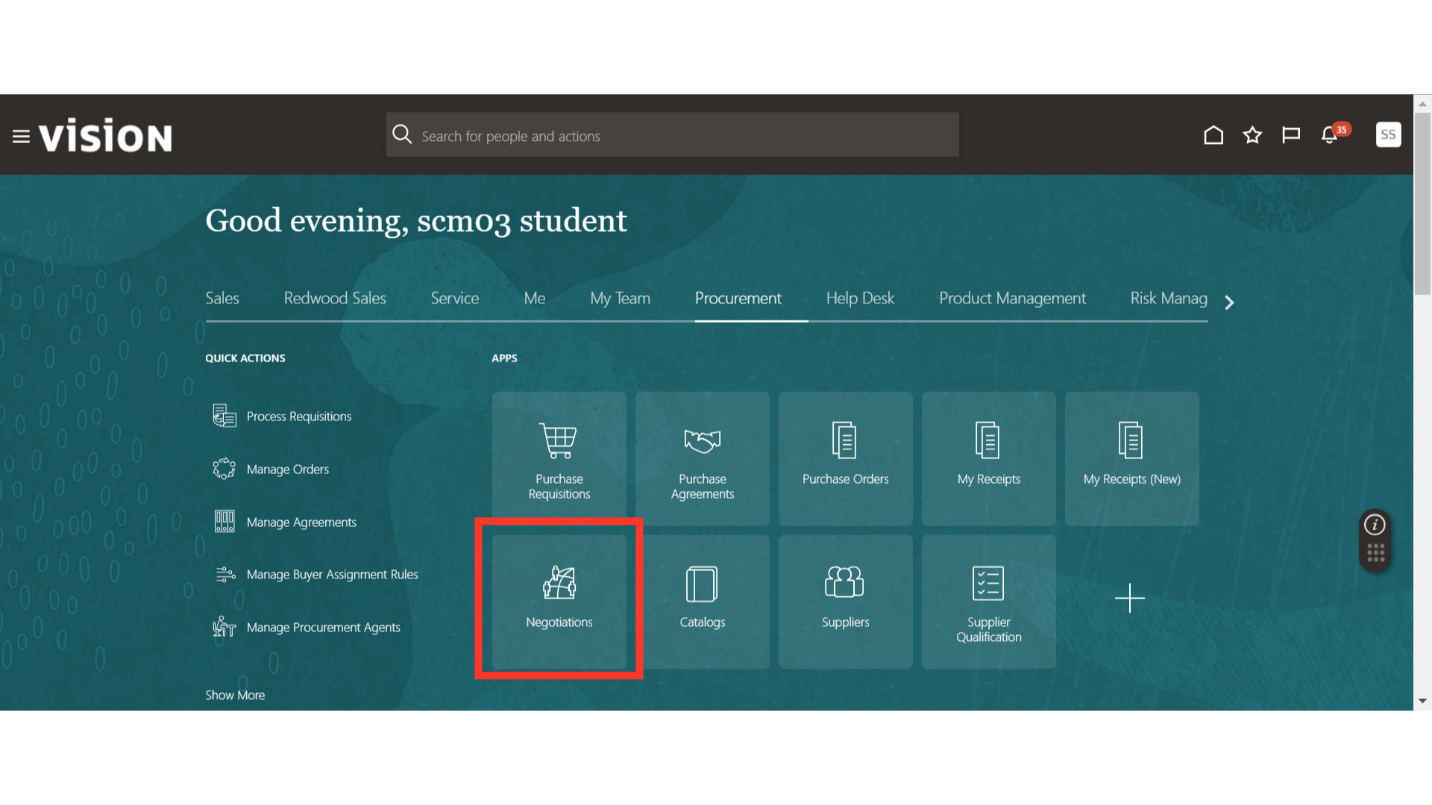
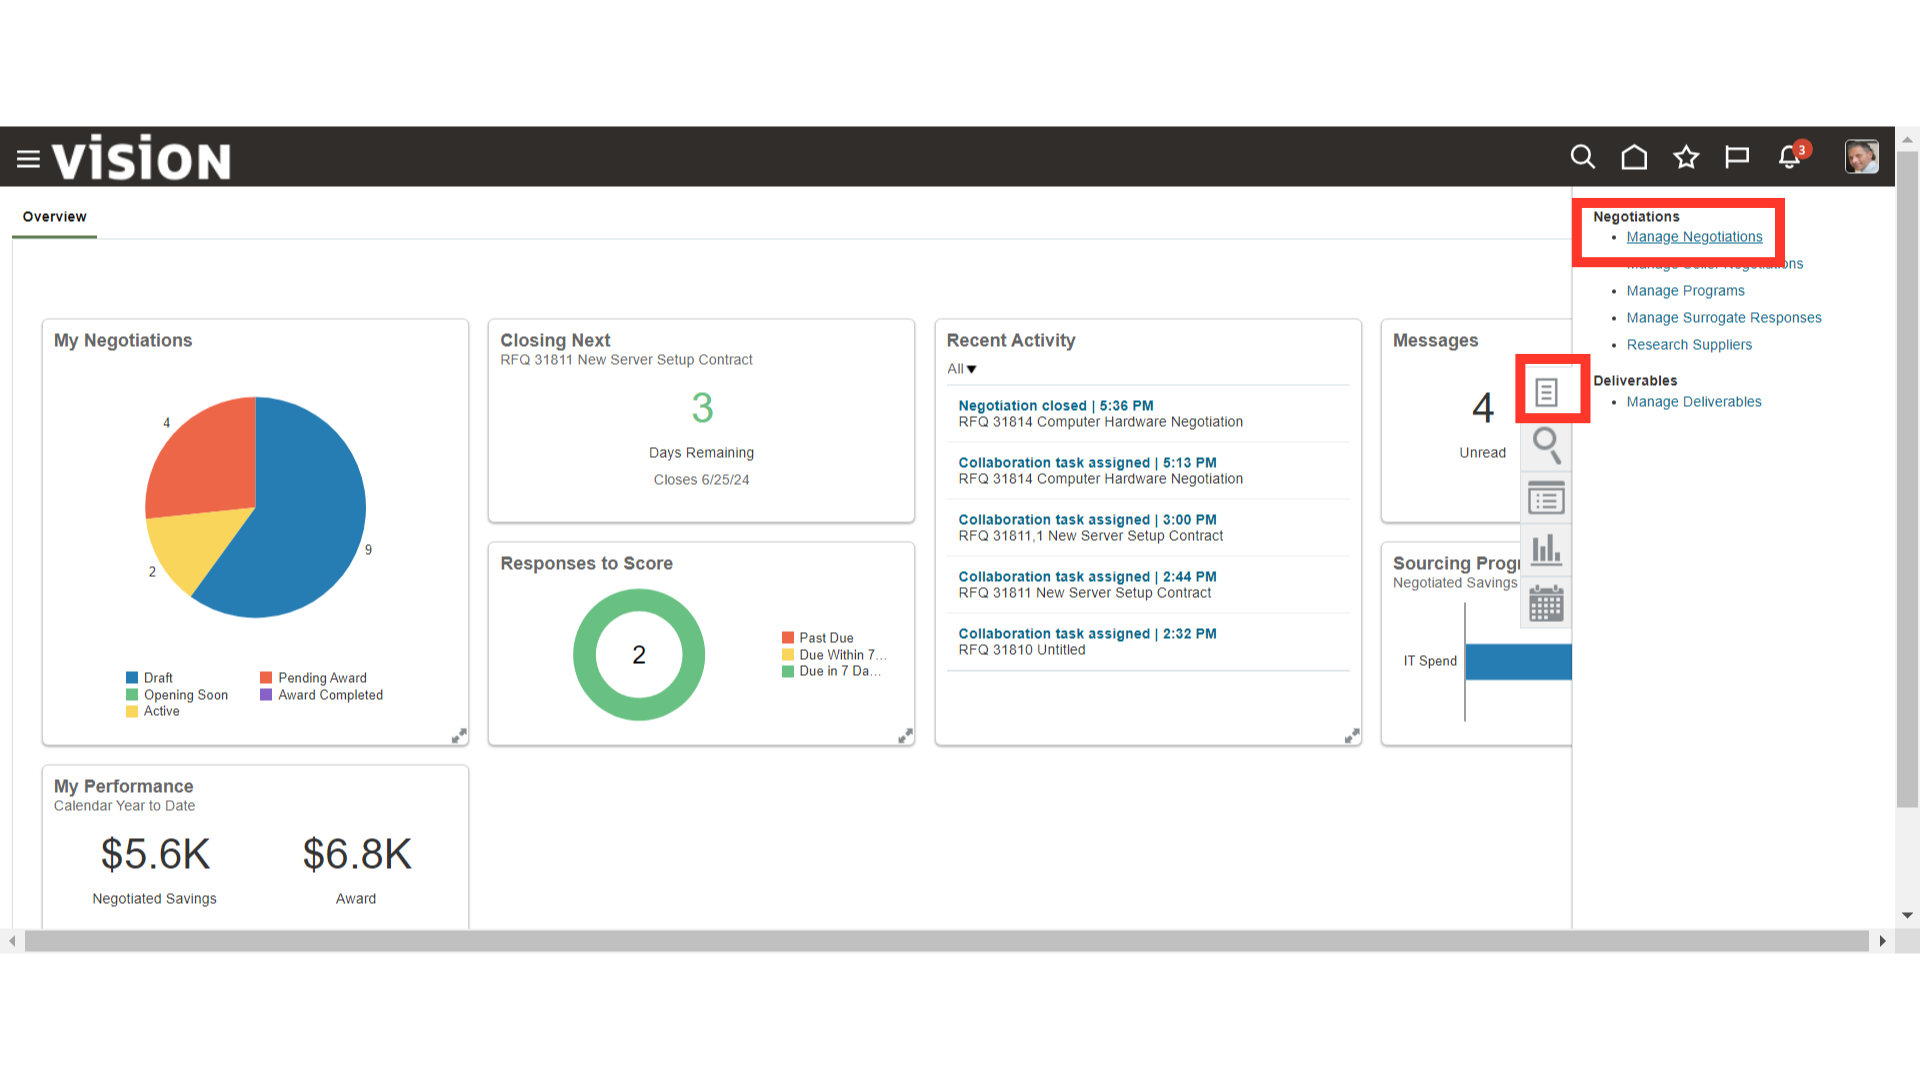
After logging on to Oracle Fusion, navigate to the Procurement tab and click on the Negotiations infotile.
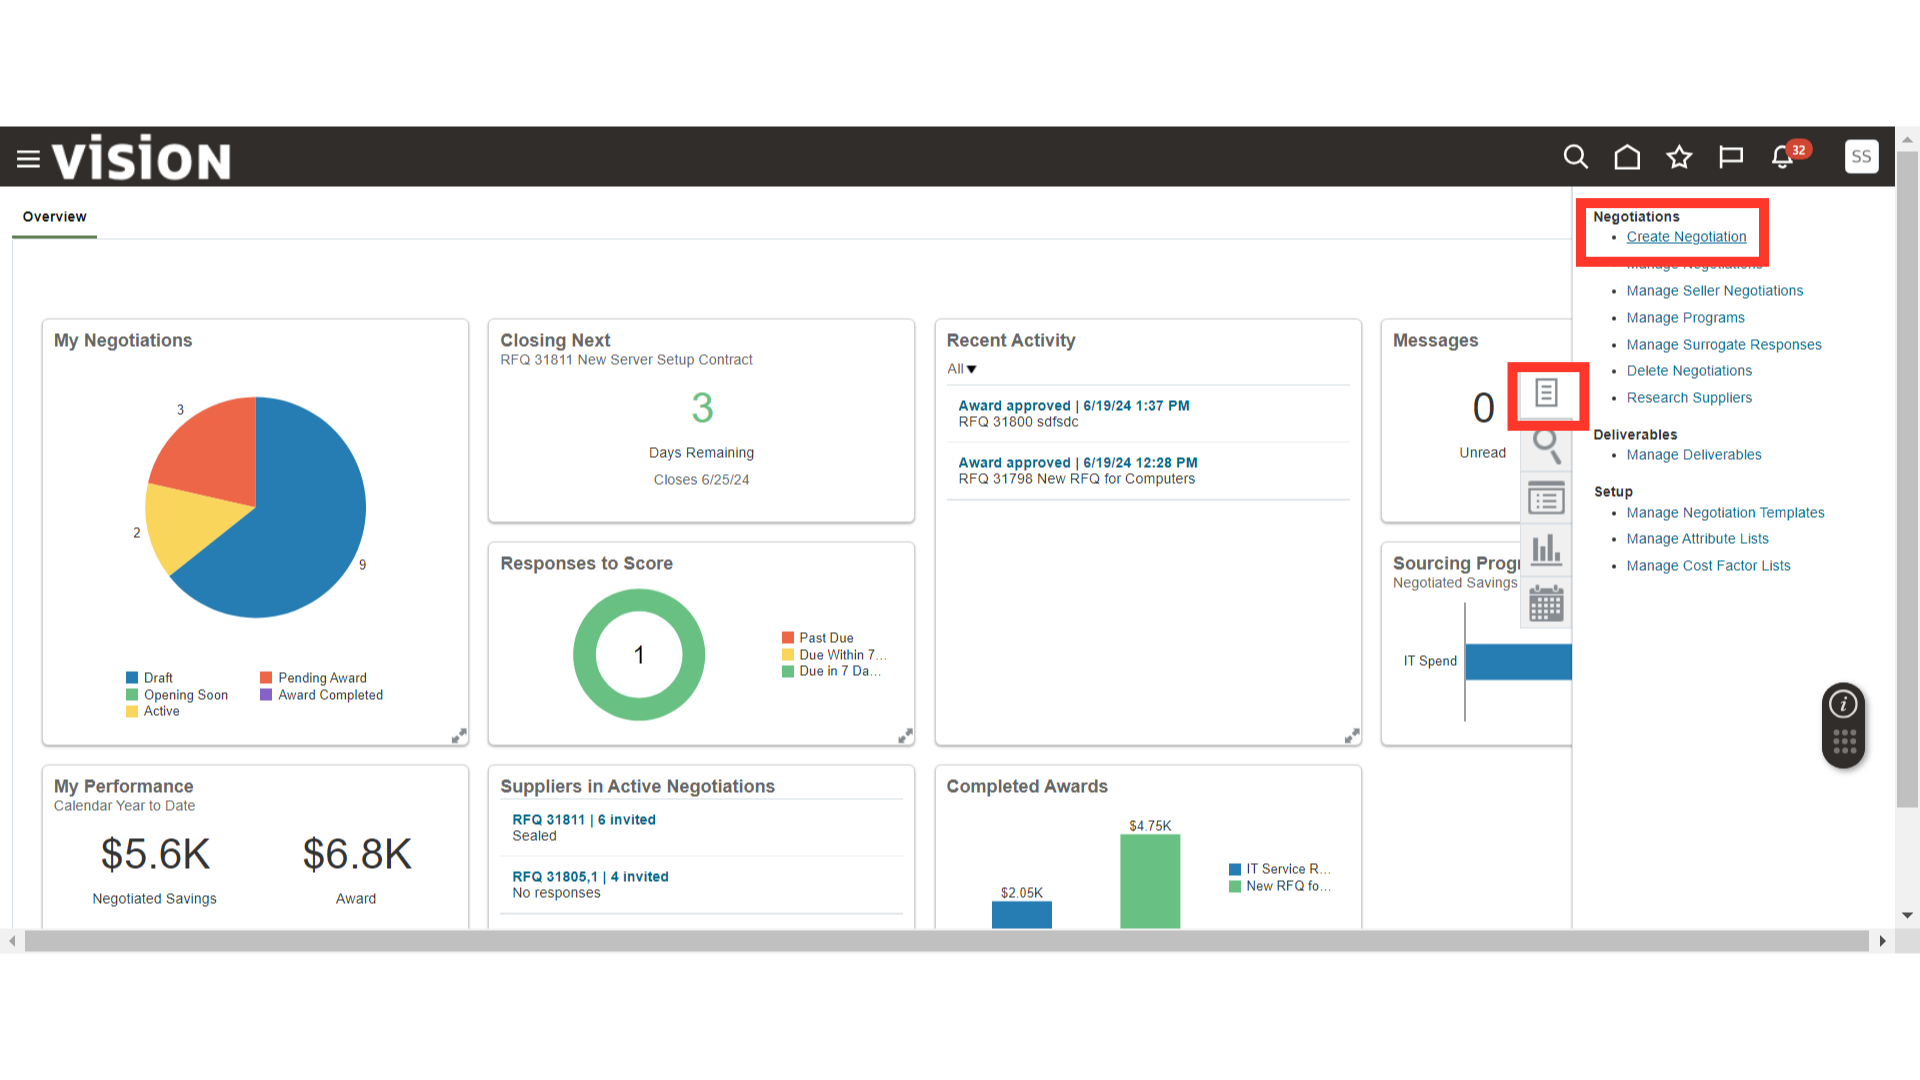
In the Negotiations work area, click on the Tasks button and then click on Create Negotiations.
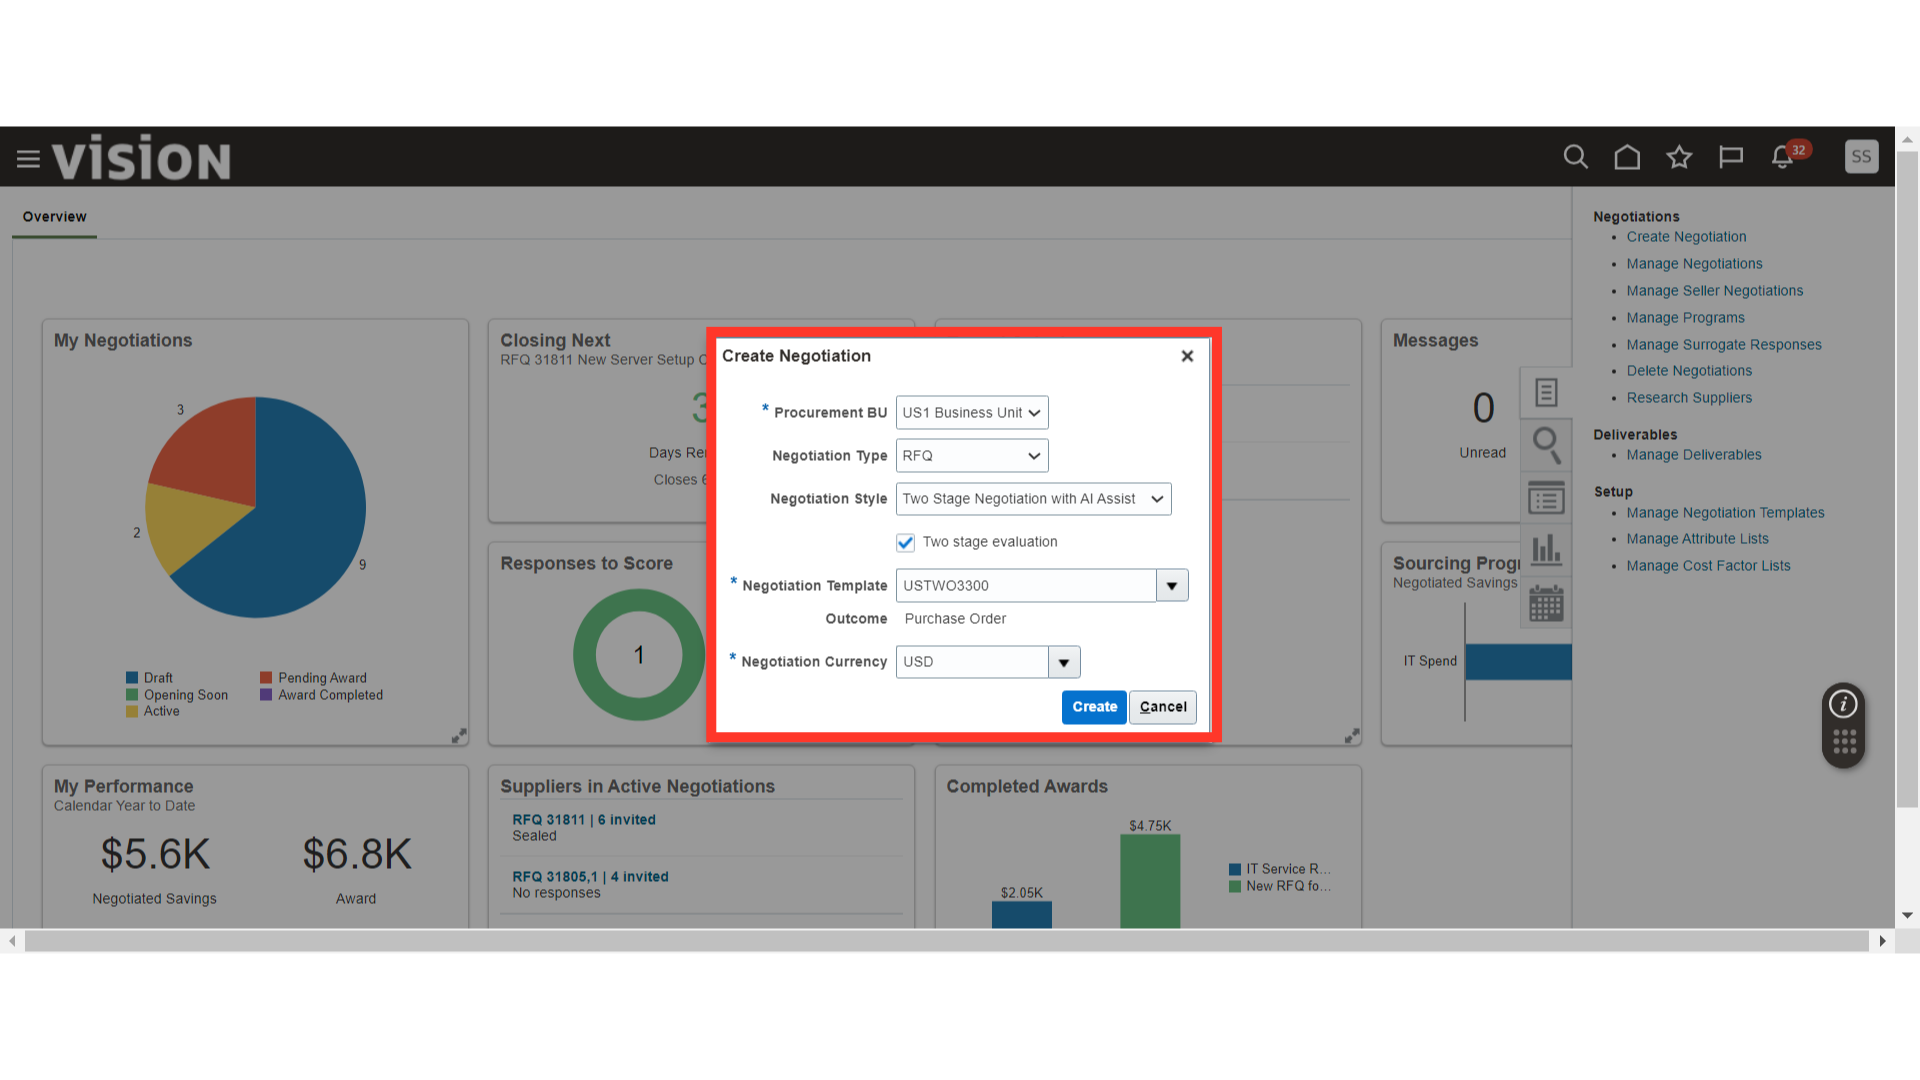
In the Create Negotiations window, provide the criteria as follows to create a negotiation:
– Procurement BU
– Negotiation Type – RFQ
– Negotiation Style – Two-Stage Negotiation (Checkmark Two-stage evaluation)
– Negotiation Template – Select the Two-Stage Template
– Outcome – Purchase Order (You can also create an Agreement)
– Negotiation Currency – USD
Once all the criteria are filled in, click on the Create button.
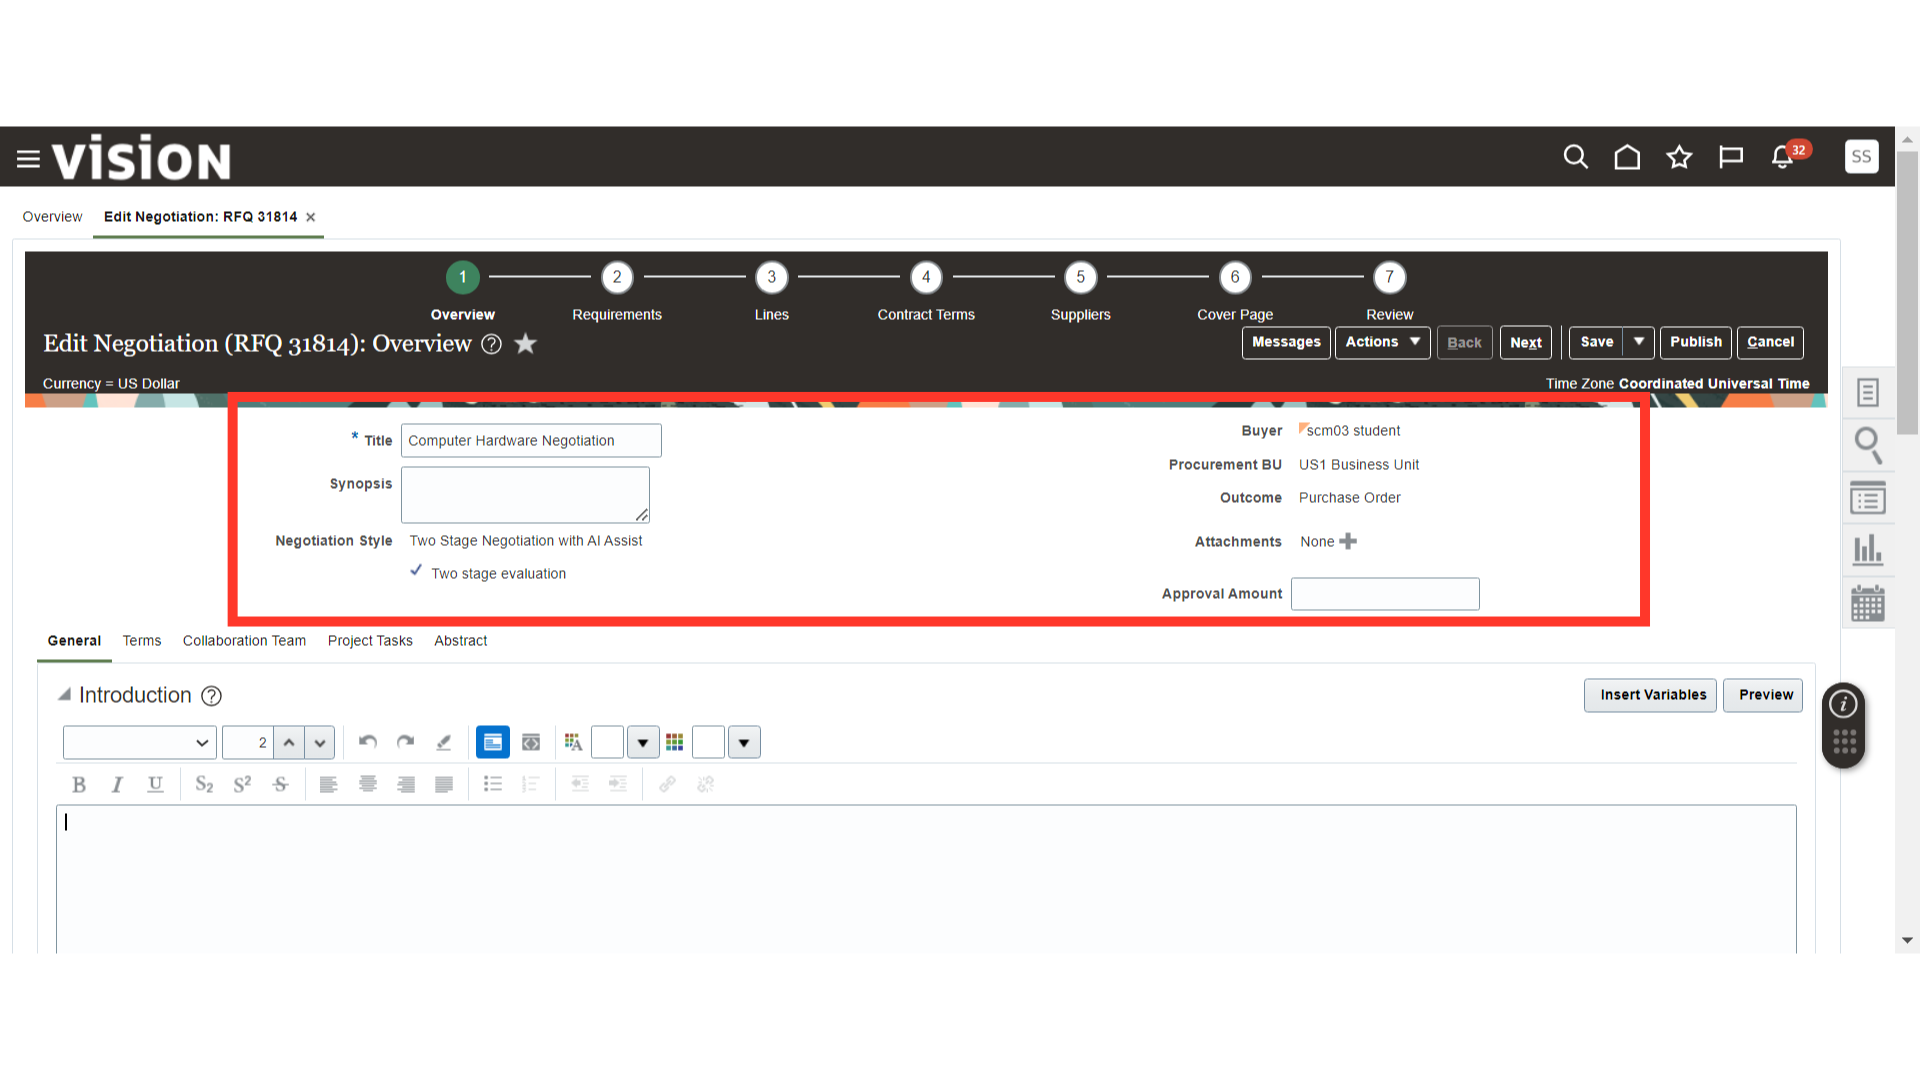
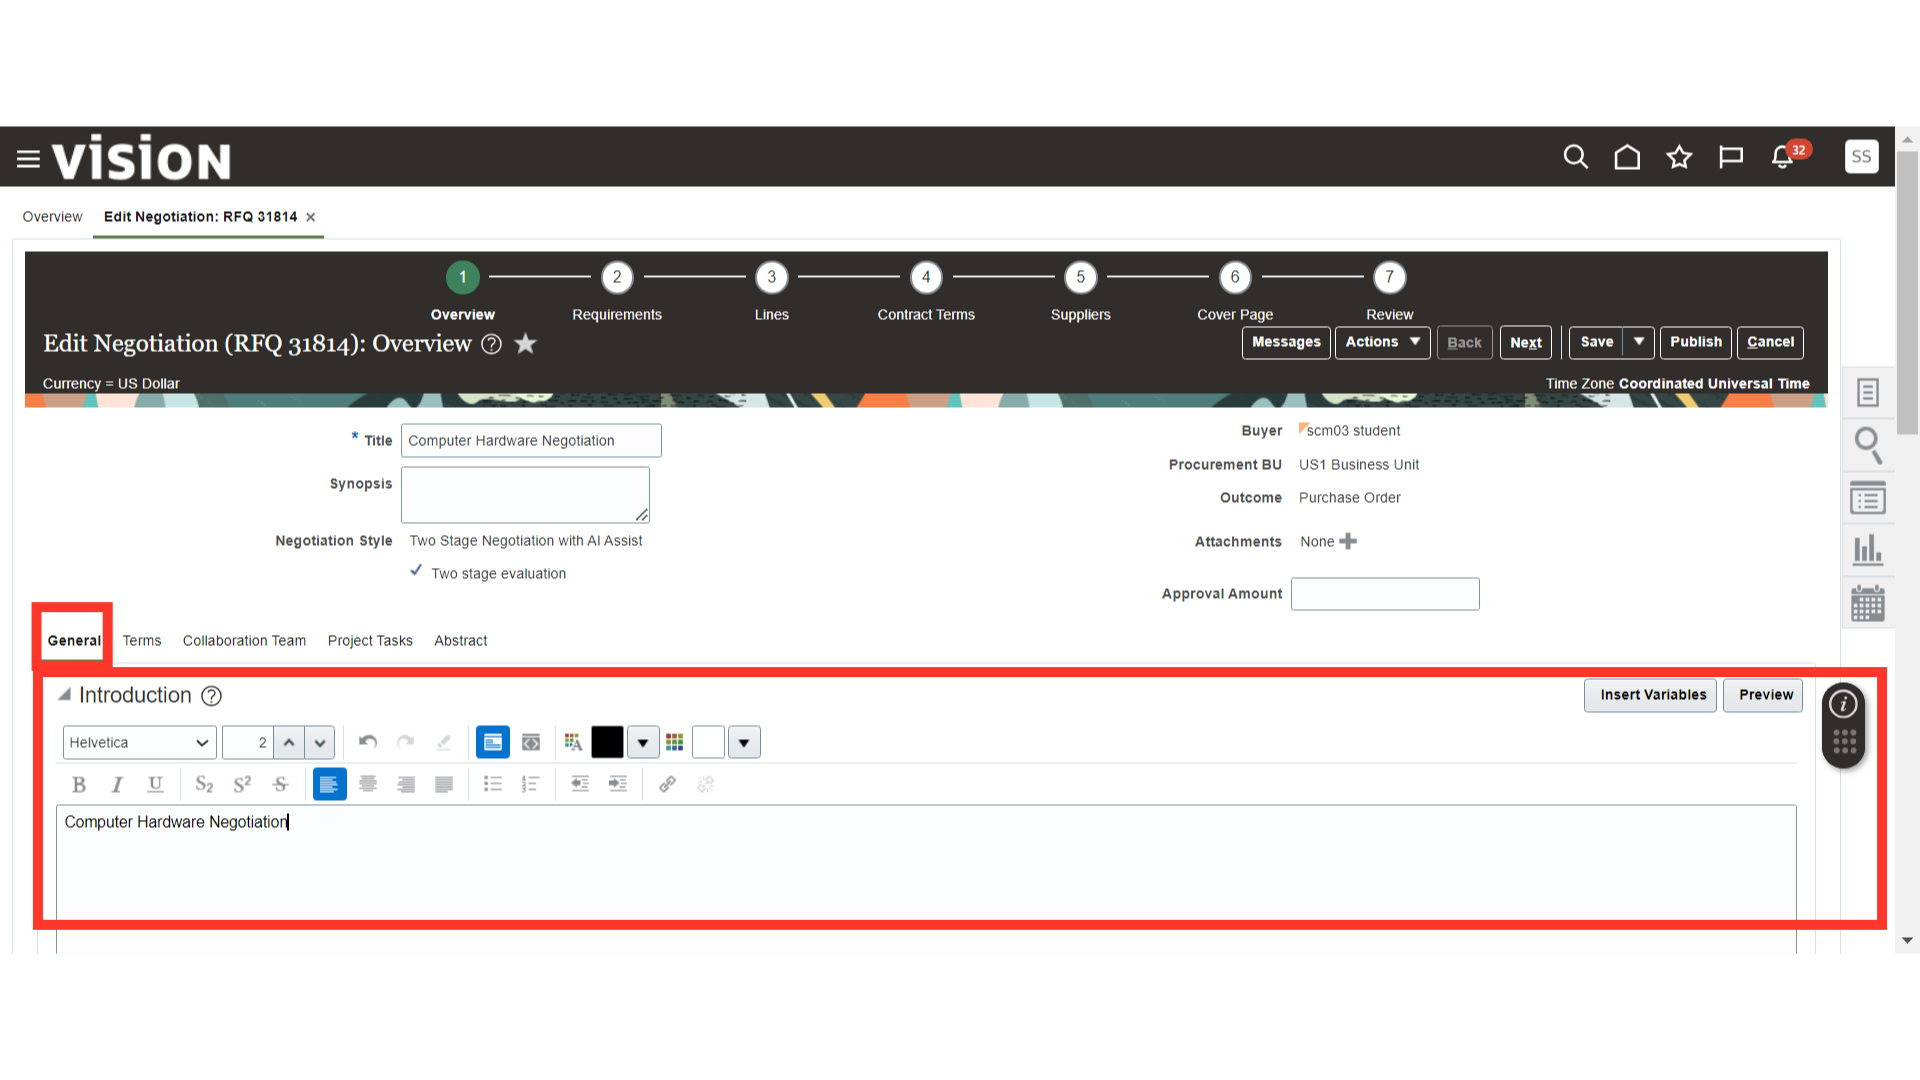
In the Overview section, provide the title of the negotiation. All the other details will be automatically populated, such as Negotiation Style, Buyer, Procurement BU, and Outcome. Verify these details and enter the approval amount if applicable.
Under the Overview section in the General section, provide the introduction of the negotiation. Once the introduction is written, click on the Preview button to view it before publishing.
In the Schedule section under General, provide the Preview Date, Open Date, Close Date, and Award Date. You can also select the Open upon Approval option for the Preview Date and Open Date.
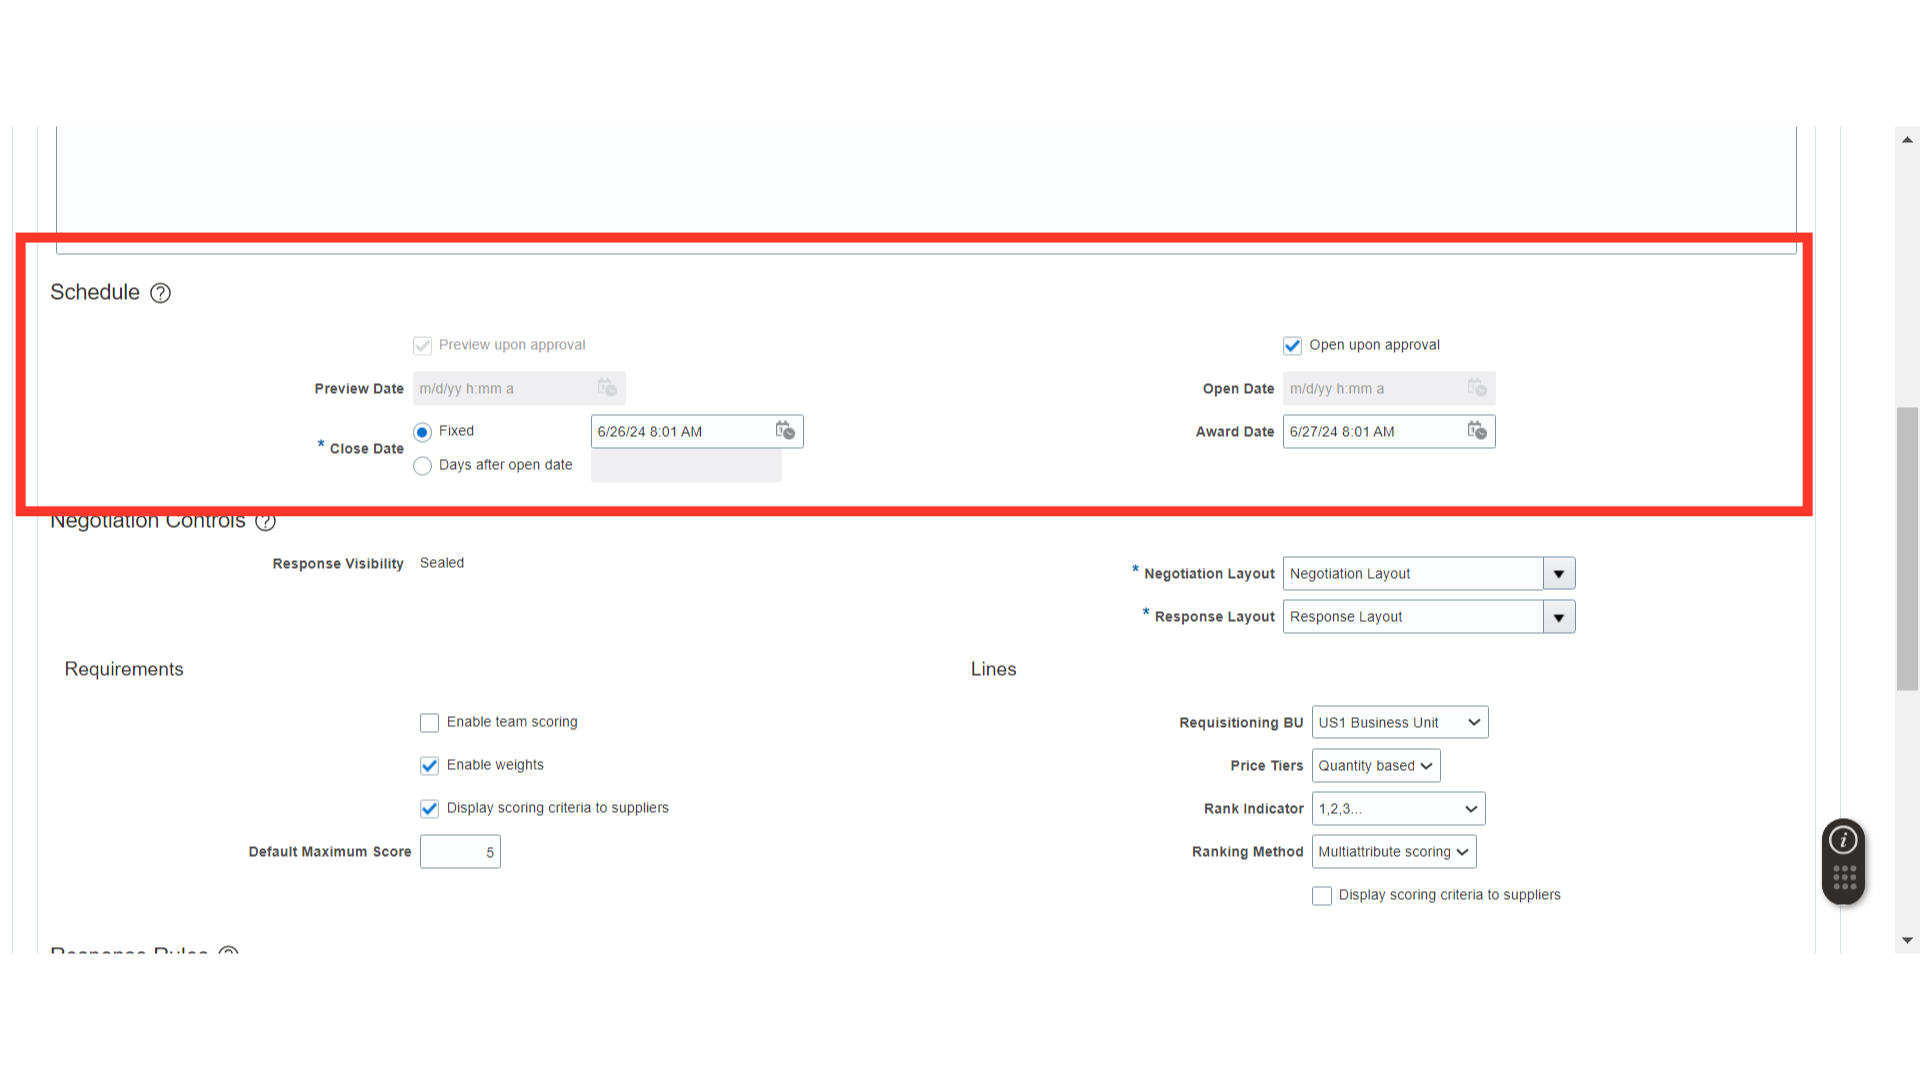
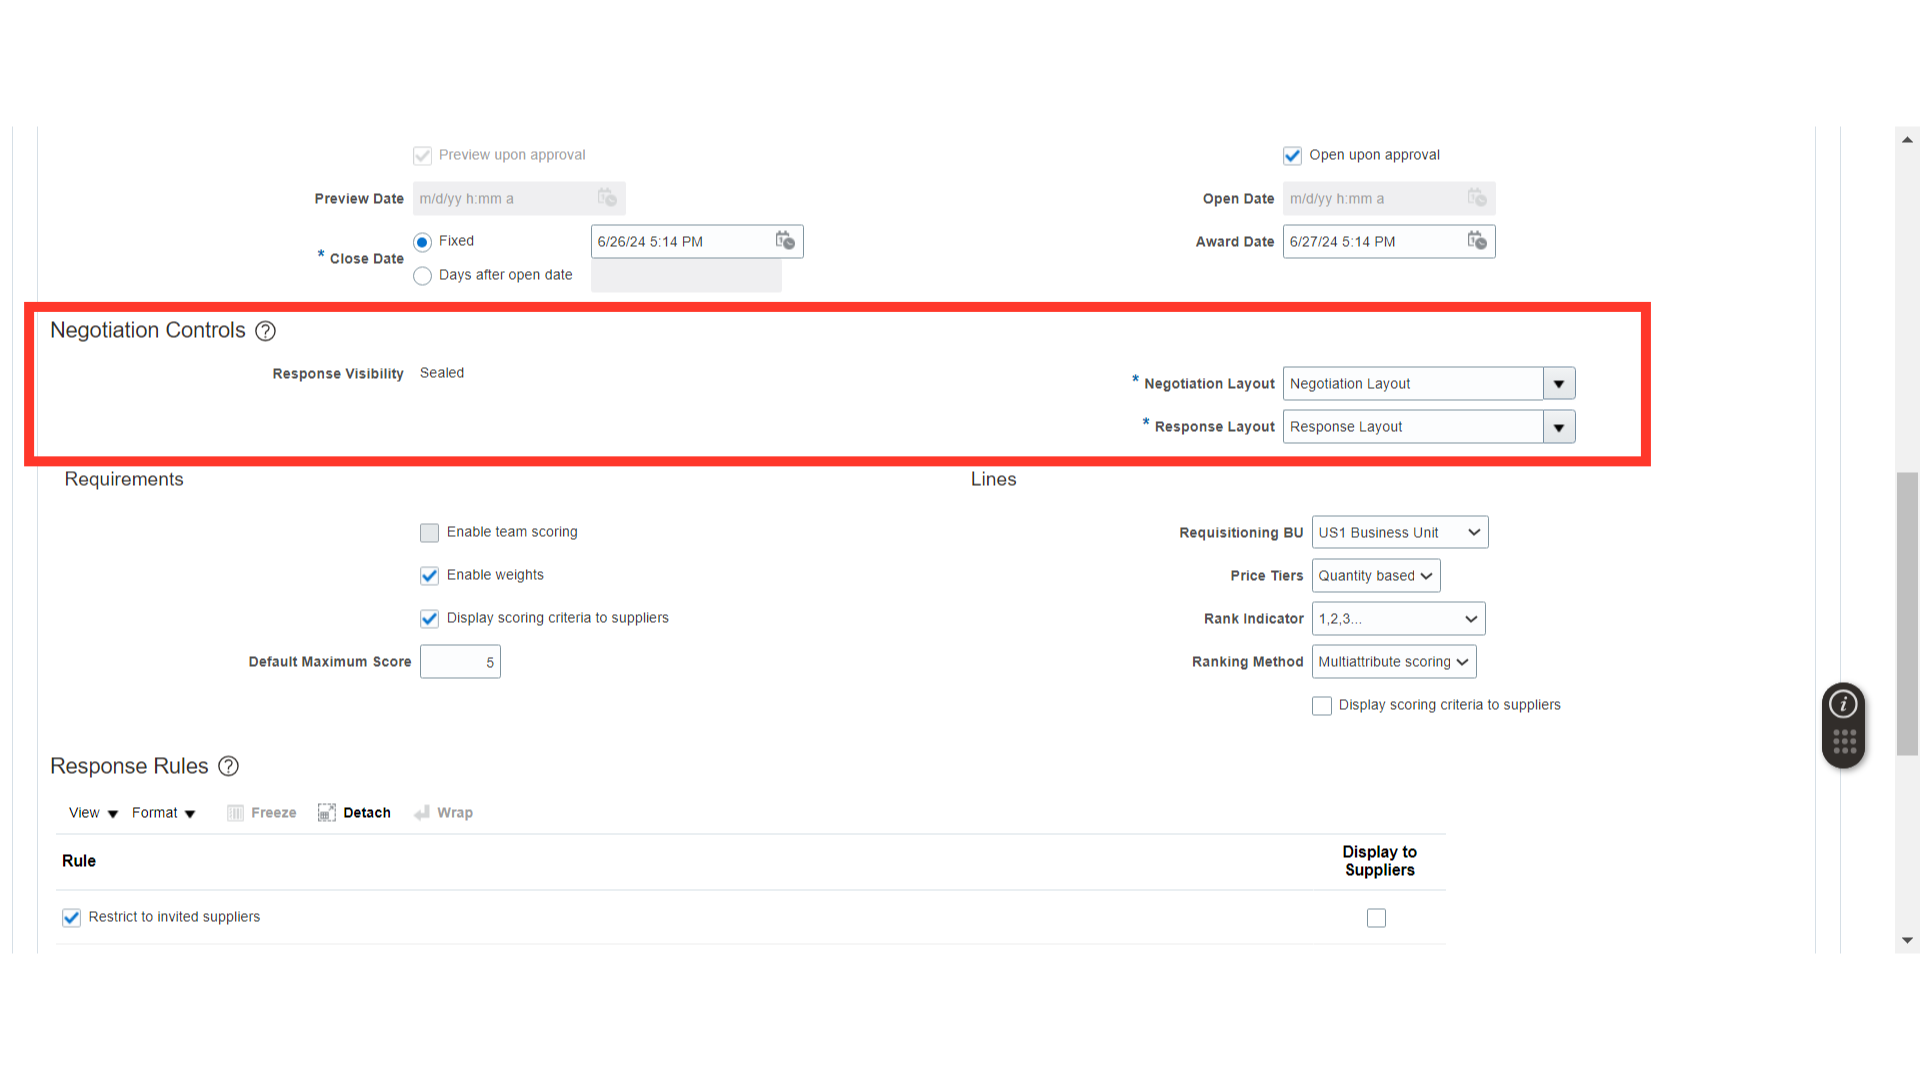
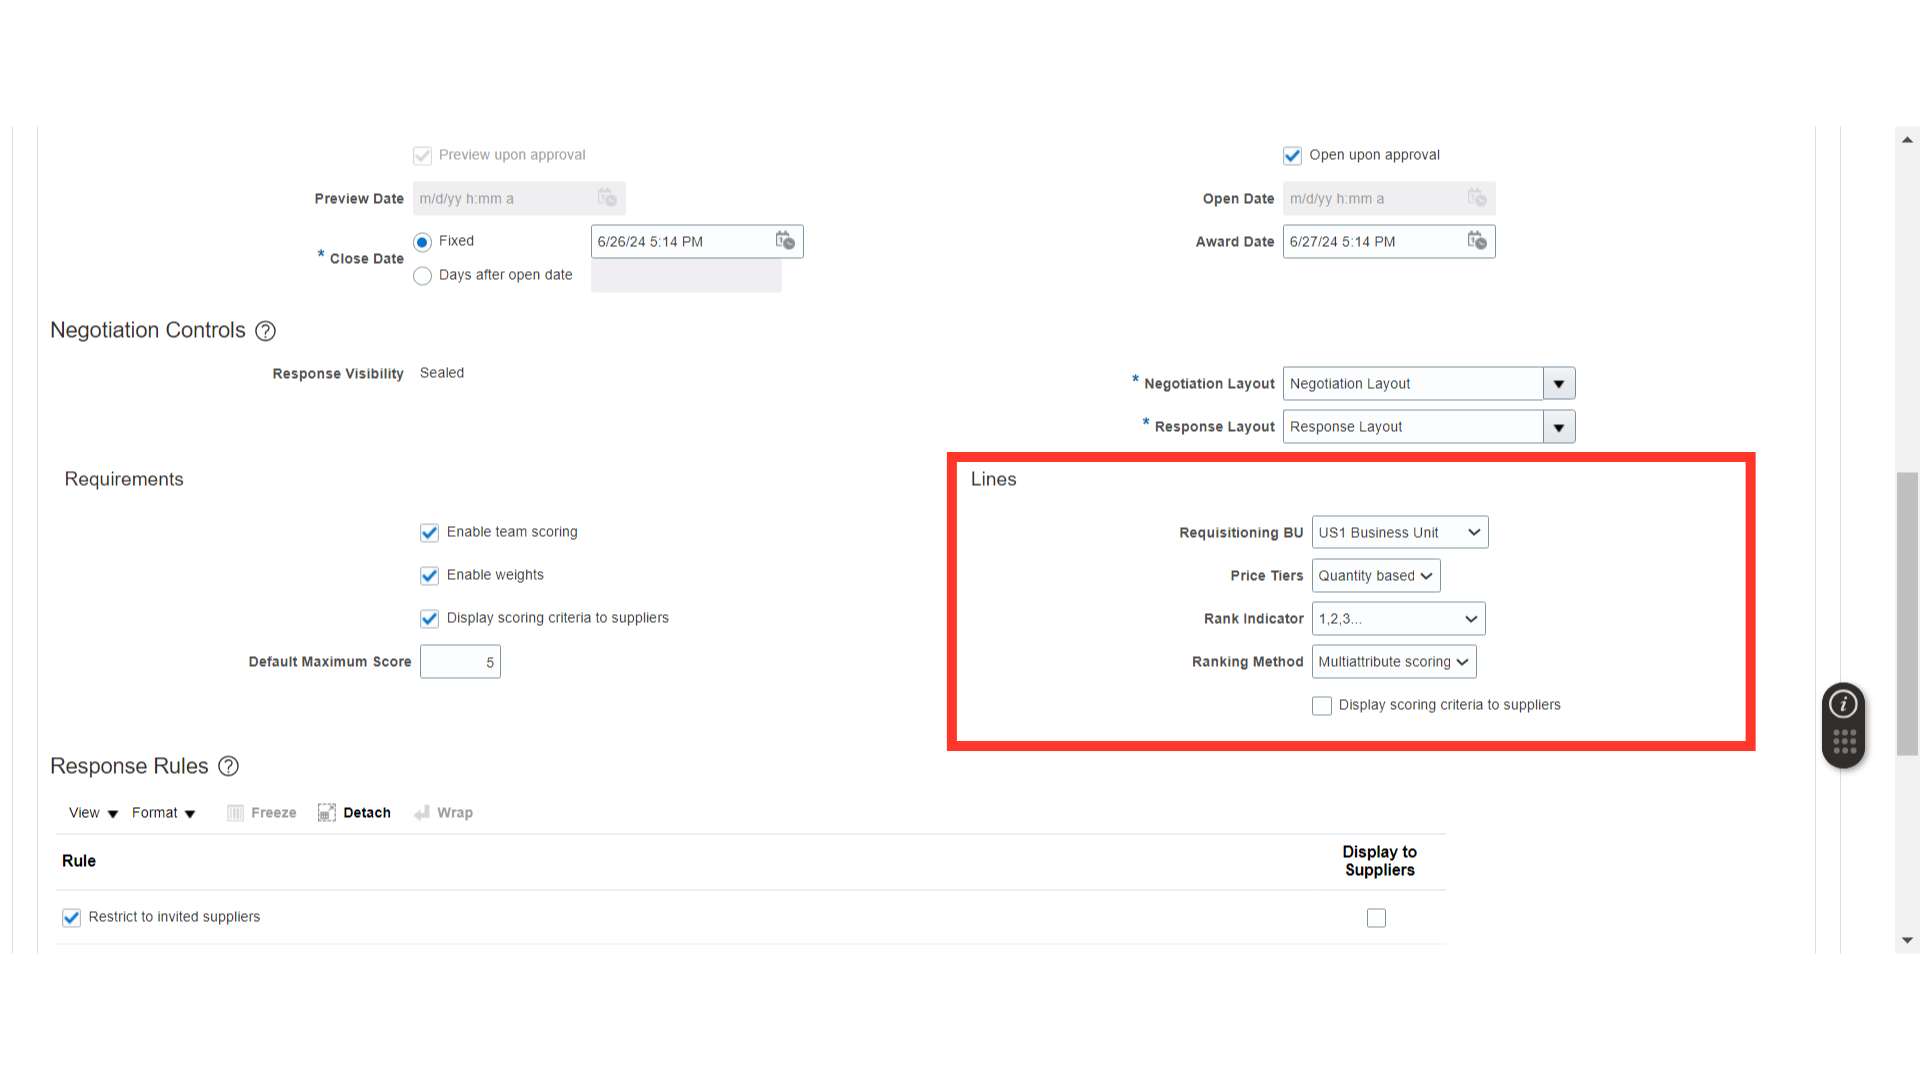
In the Negotiation Controls, response visibility will be sealed because we are creating a Two-Stage Negotiation. The Negotiation Layout and Response Layout will automatically populate; you can change these to Custom Layouts if needed.
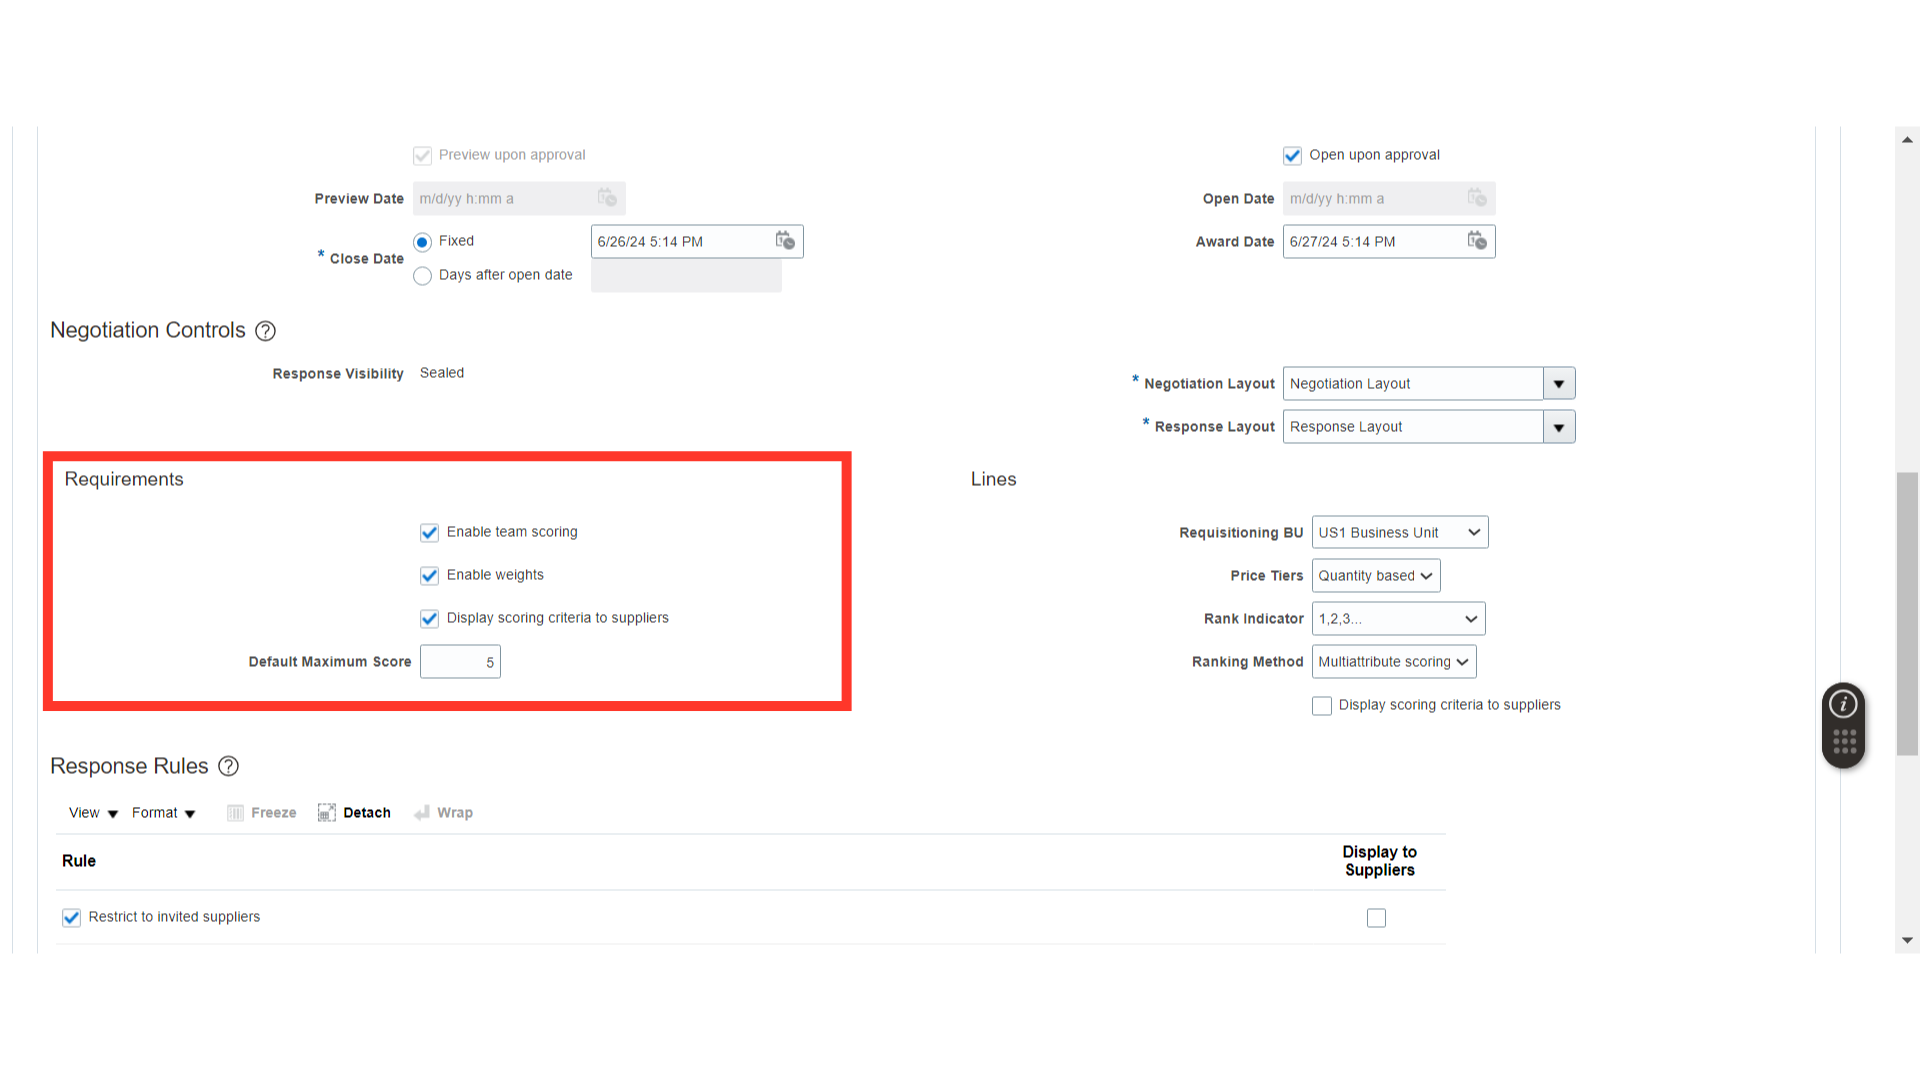
In the Requirements section, enable Team Scoring, Weights, Display Scoring Criteria to Suppliers, and enter the Default Maximum Score. You can uncheck these options if not needed.
For the Negotiation Lines, the details will automatically populate from the template, but if needed you can make changes to the Requisitioning BU, Price Tiers, Rank Indicator, and Ranking Method. To display the Scoring Criteria to the suppliers, enable the checkbox against the option.
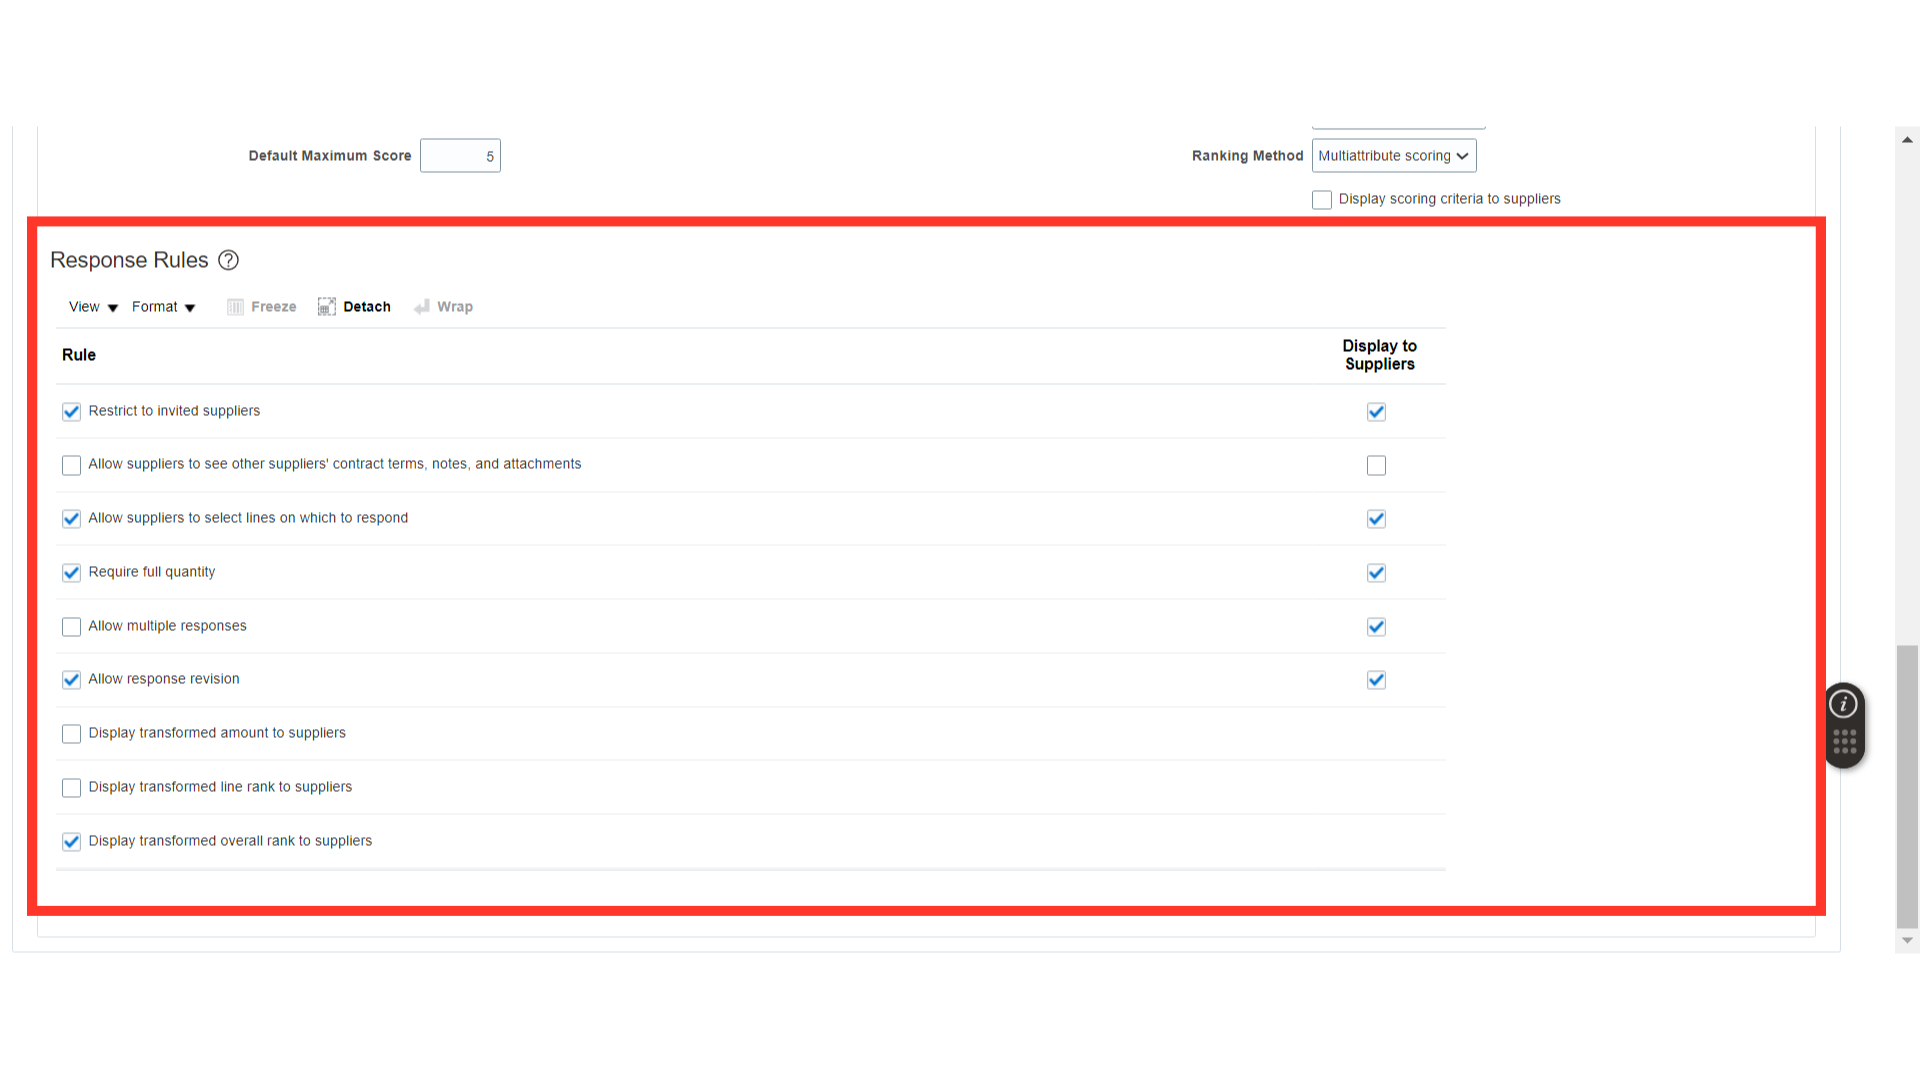
 In the Response Rules section, you can enable rules of your choice as per the negotiation requirements. If you want to display the same rules to suppliers, then check the Display to Suppliers option.
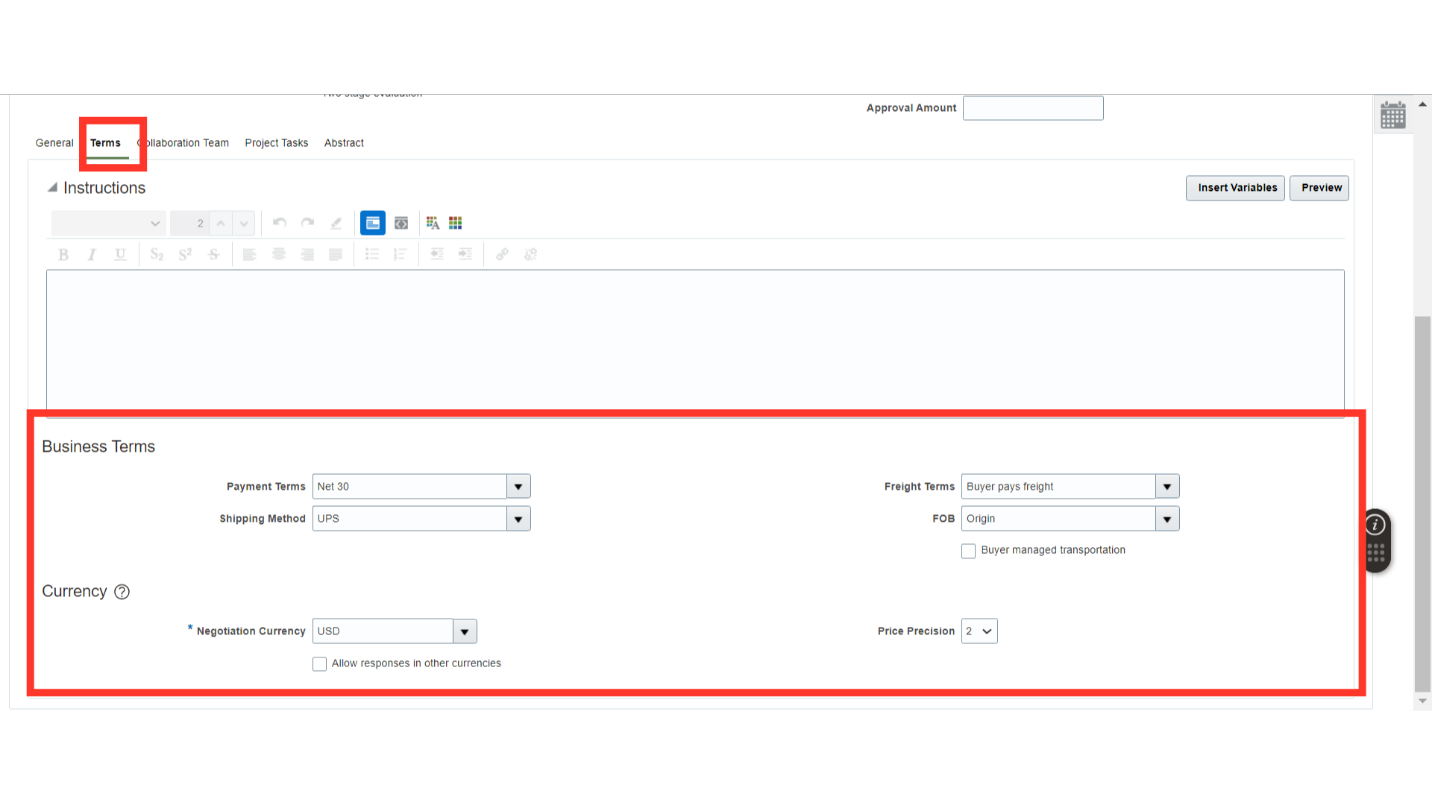
In the Terms section, define the Business Terms such as Payment Terms, Shipping Method, Freight Terms, FOB, and Buyer Managed Transportation. Also, define the currency details such as Negotiation Currency, Price Precision, and the option of Allowing Response in Other Currencies.
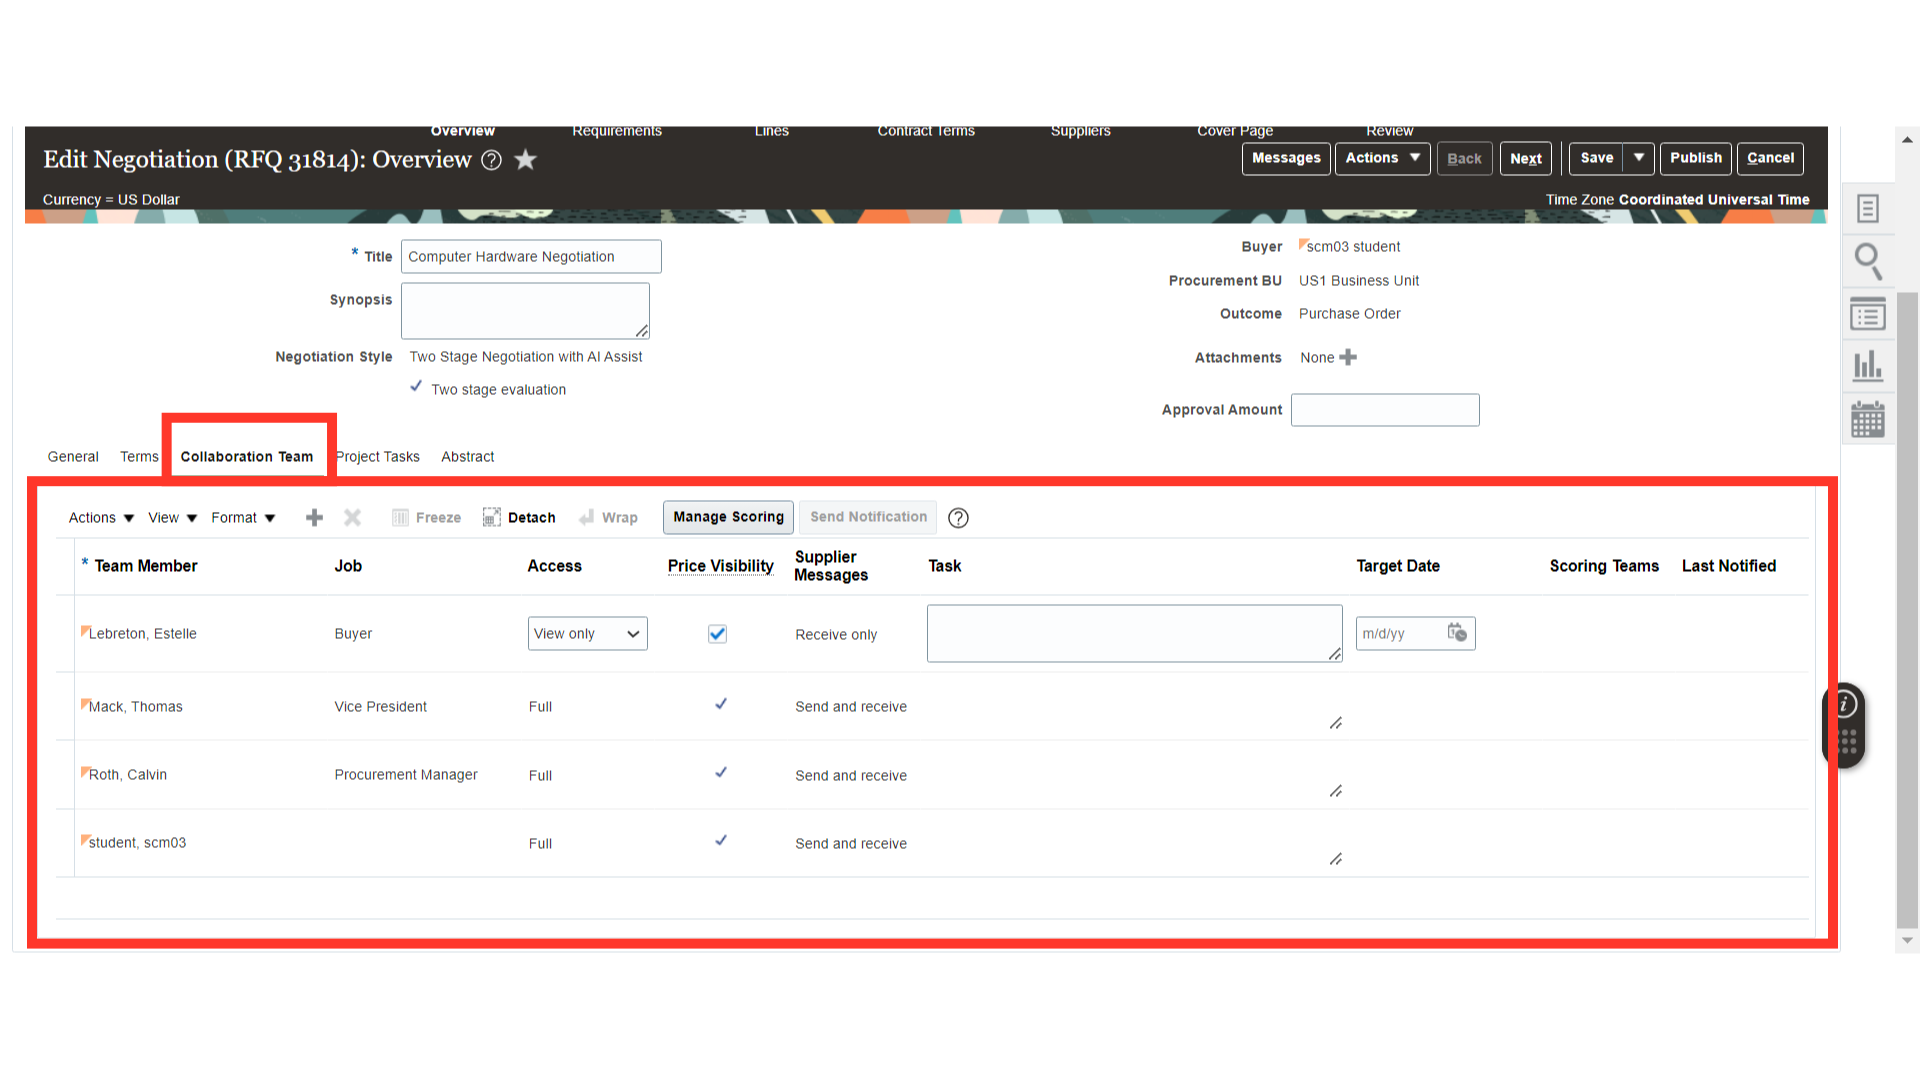
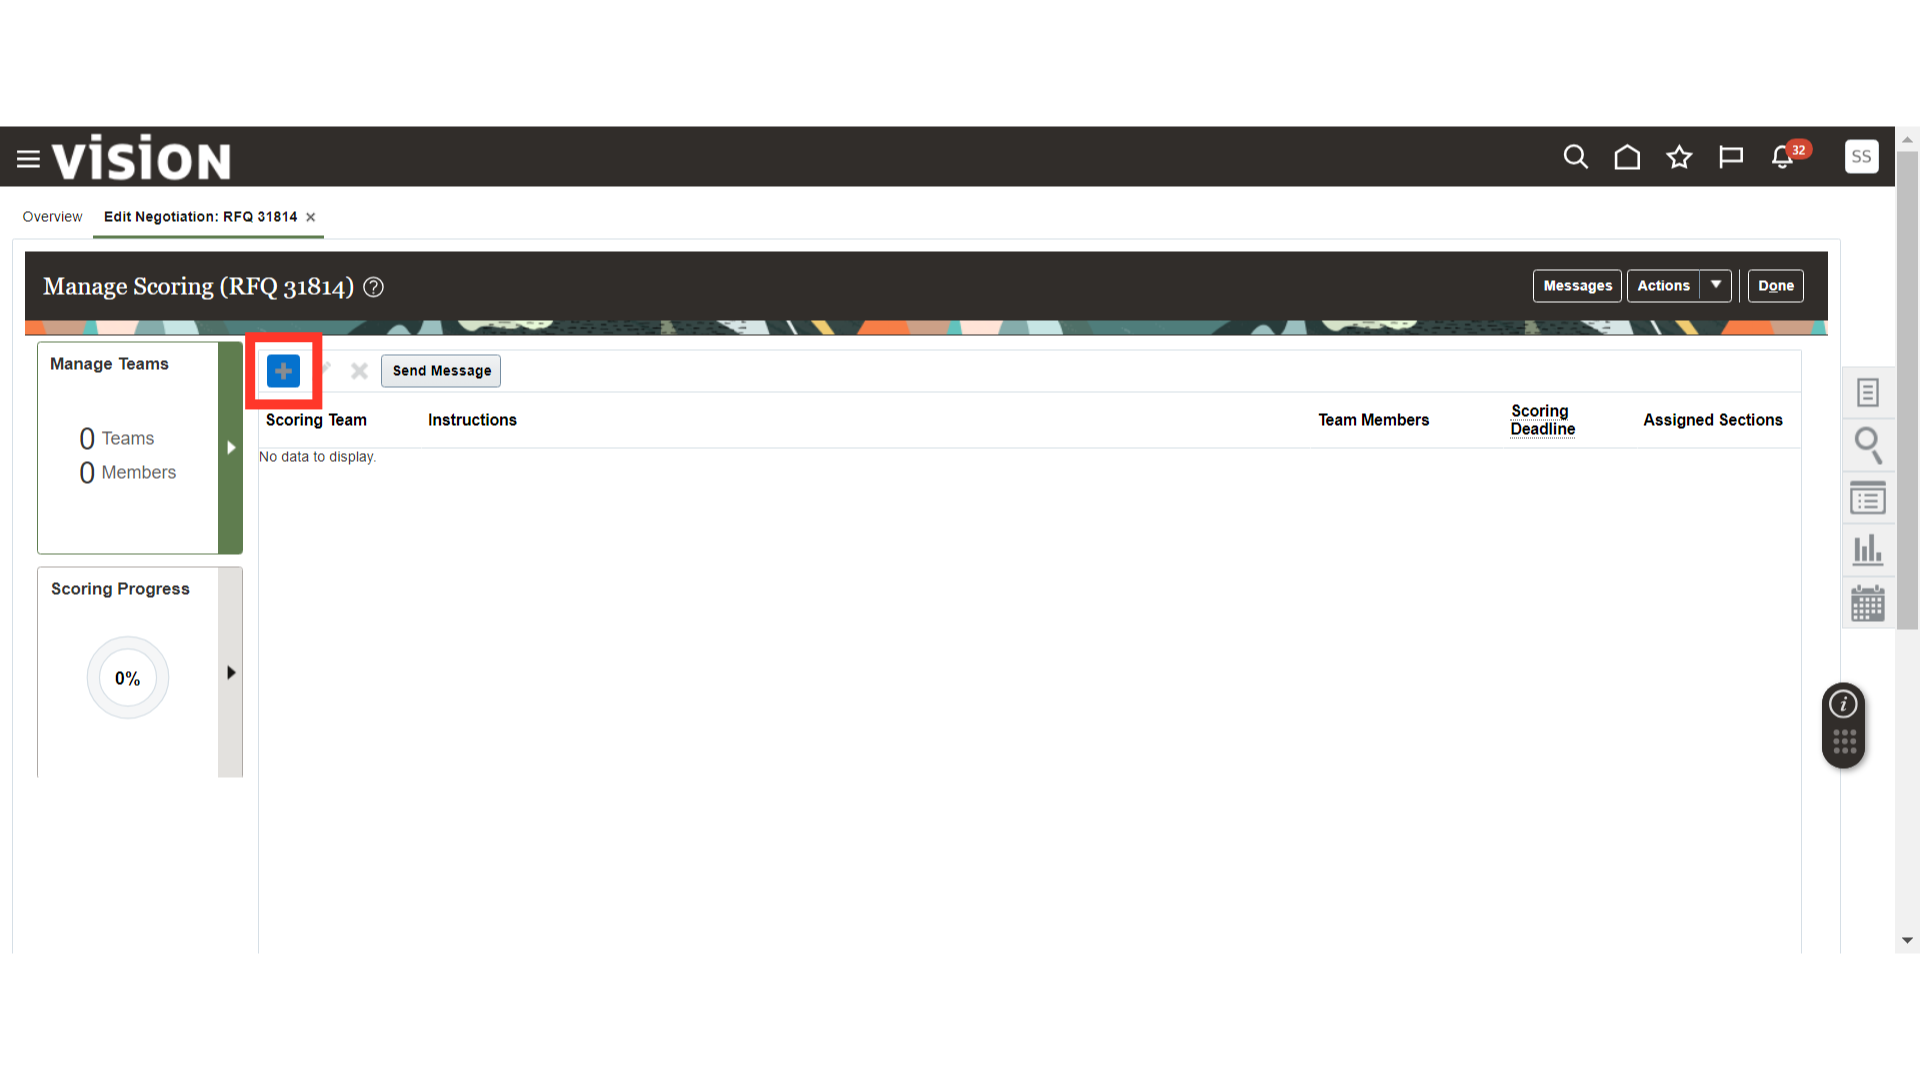
In the Collaboration Team section, click on the Plus icon to add the internal members for Negotiation Scoring with their access level. Once all the members are added, click on the Manage Scoring button.
In Manage Scoring, click on the Plus icon to create a team for the Negotiation Scoring from the members added to the Collaboration Team.
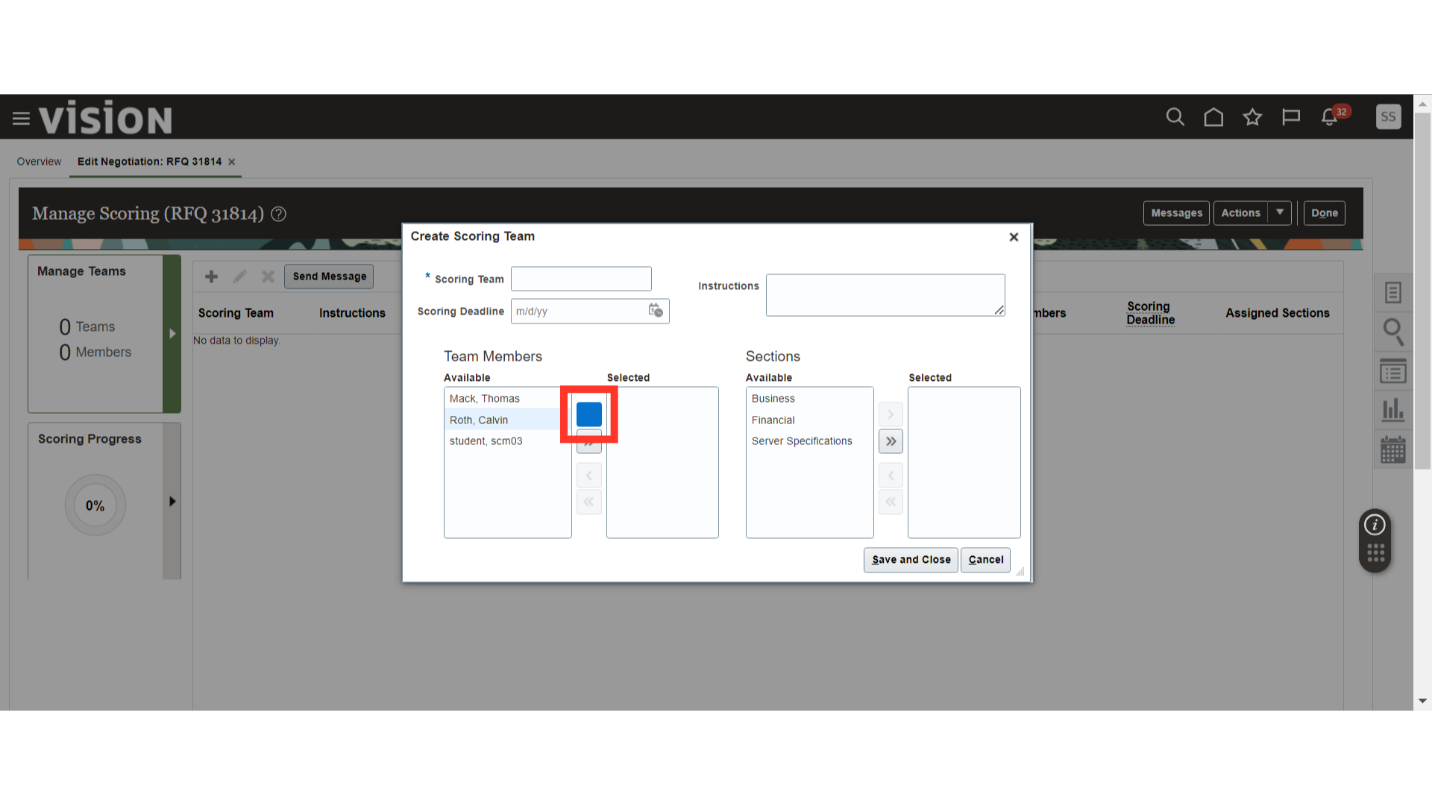
In the Create Scoring Team window, select the members from Available and move them to Selected using the Right-Facing Arrow button.
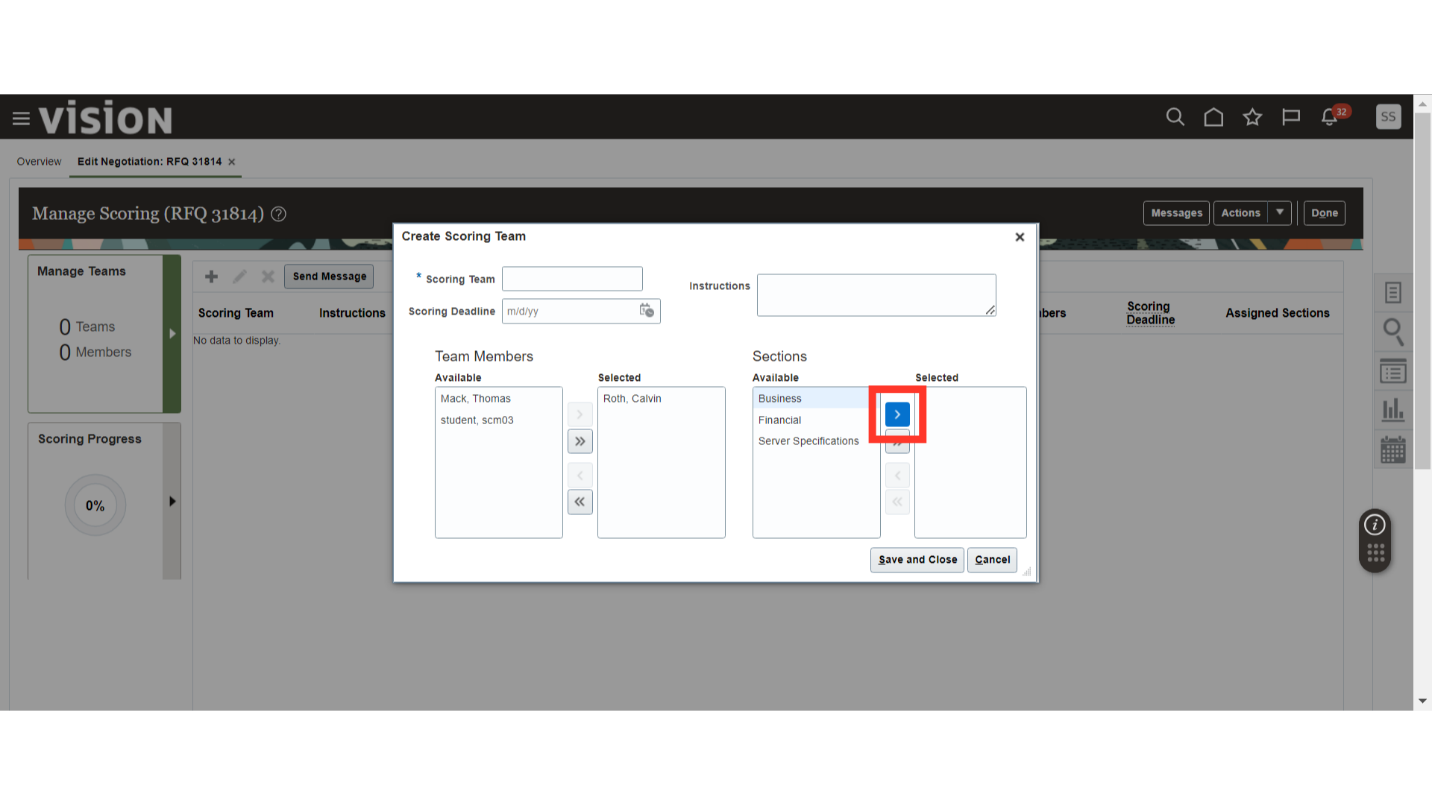
Once the team members are selected, select the section to be scored by the selected team members and move it to the selected column.
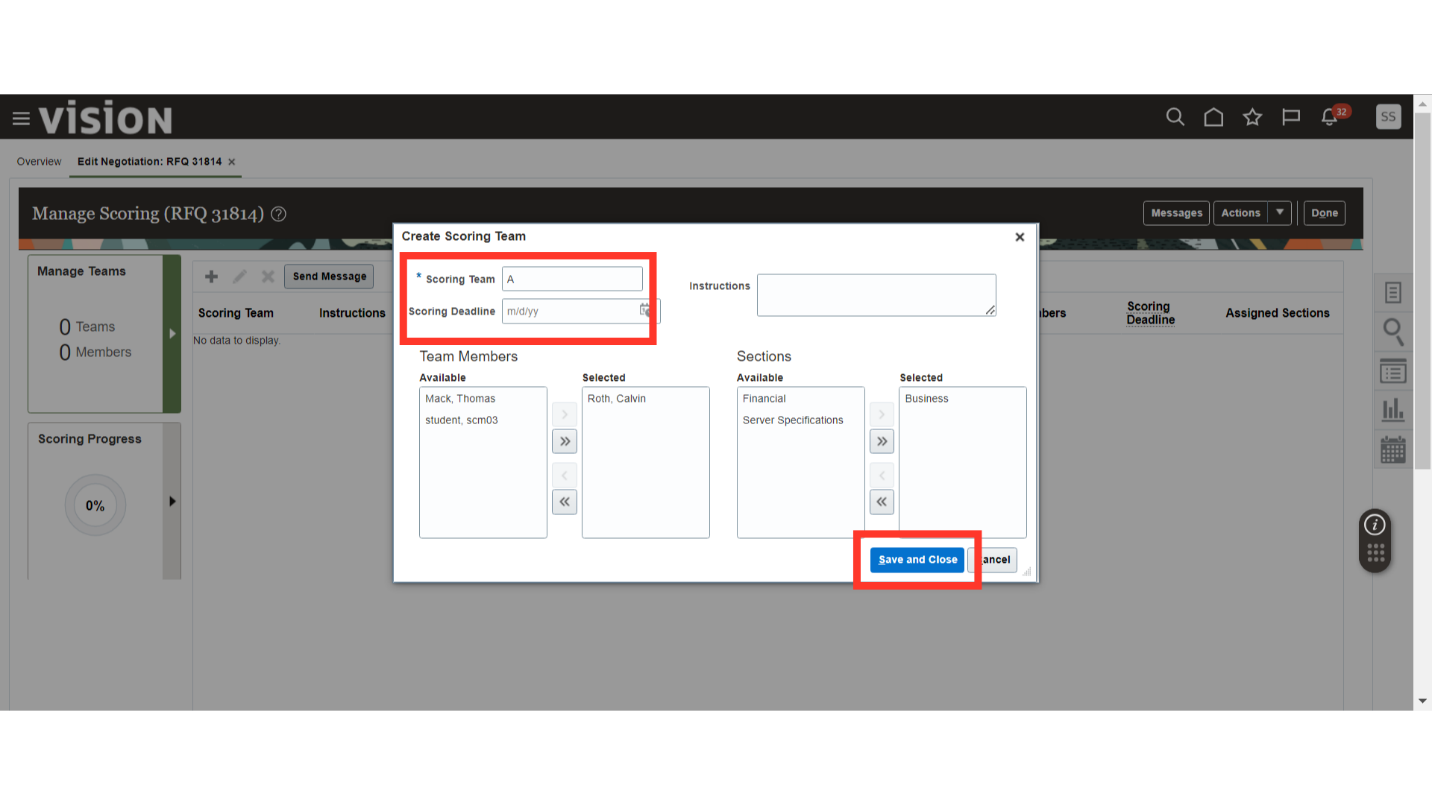
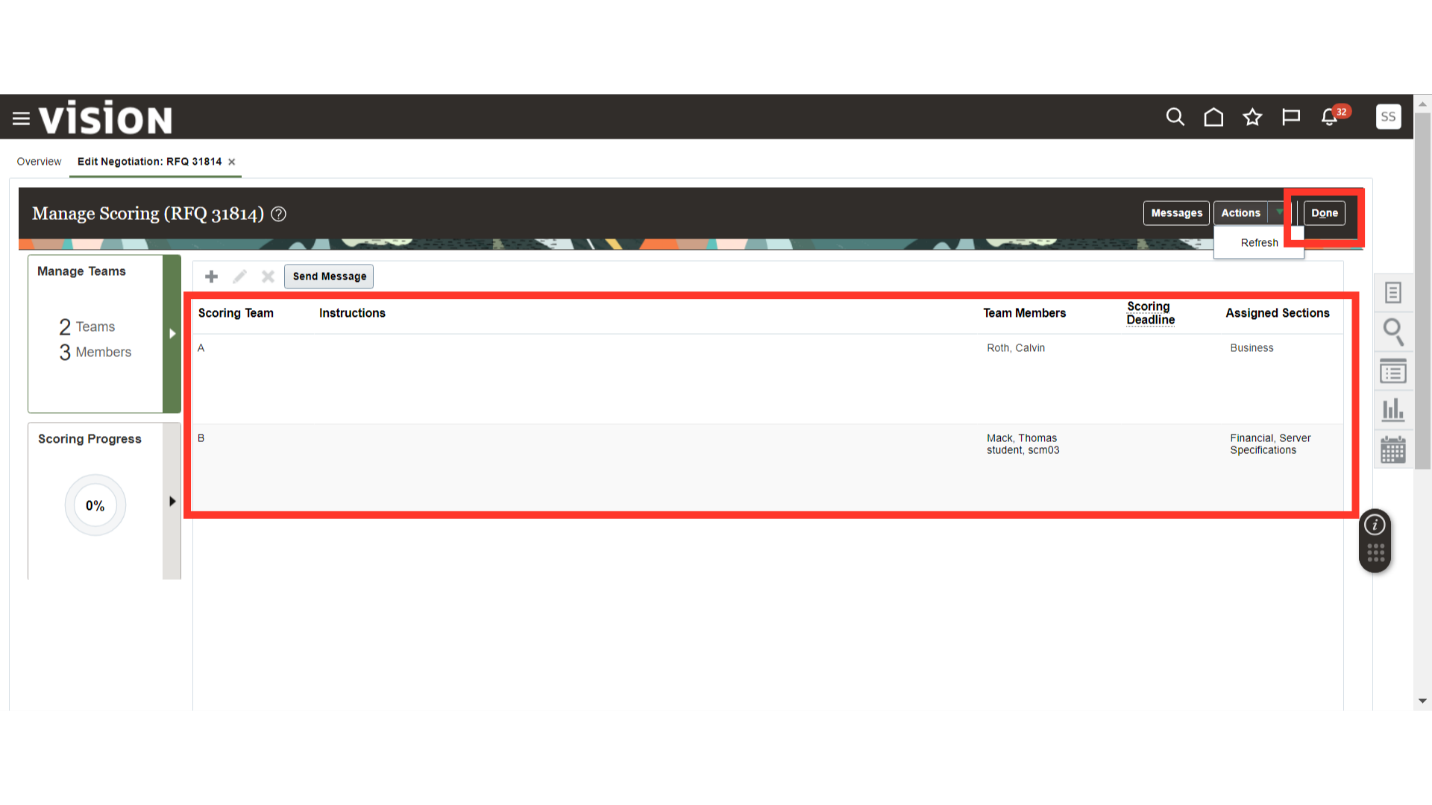
Once the members and sections are added to the selected side, provide the Scoring Team name and define the scoring deadline if required, with instructions. Once all the required details are filled in, click on the Save and Close button.
Following the same steps, you can add another team for other sections. Once all the teams are created, those teams will be visible in the Manage Scoring work area. Next, click on Done to close this tab.
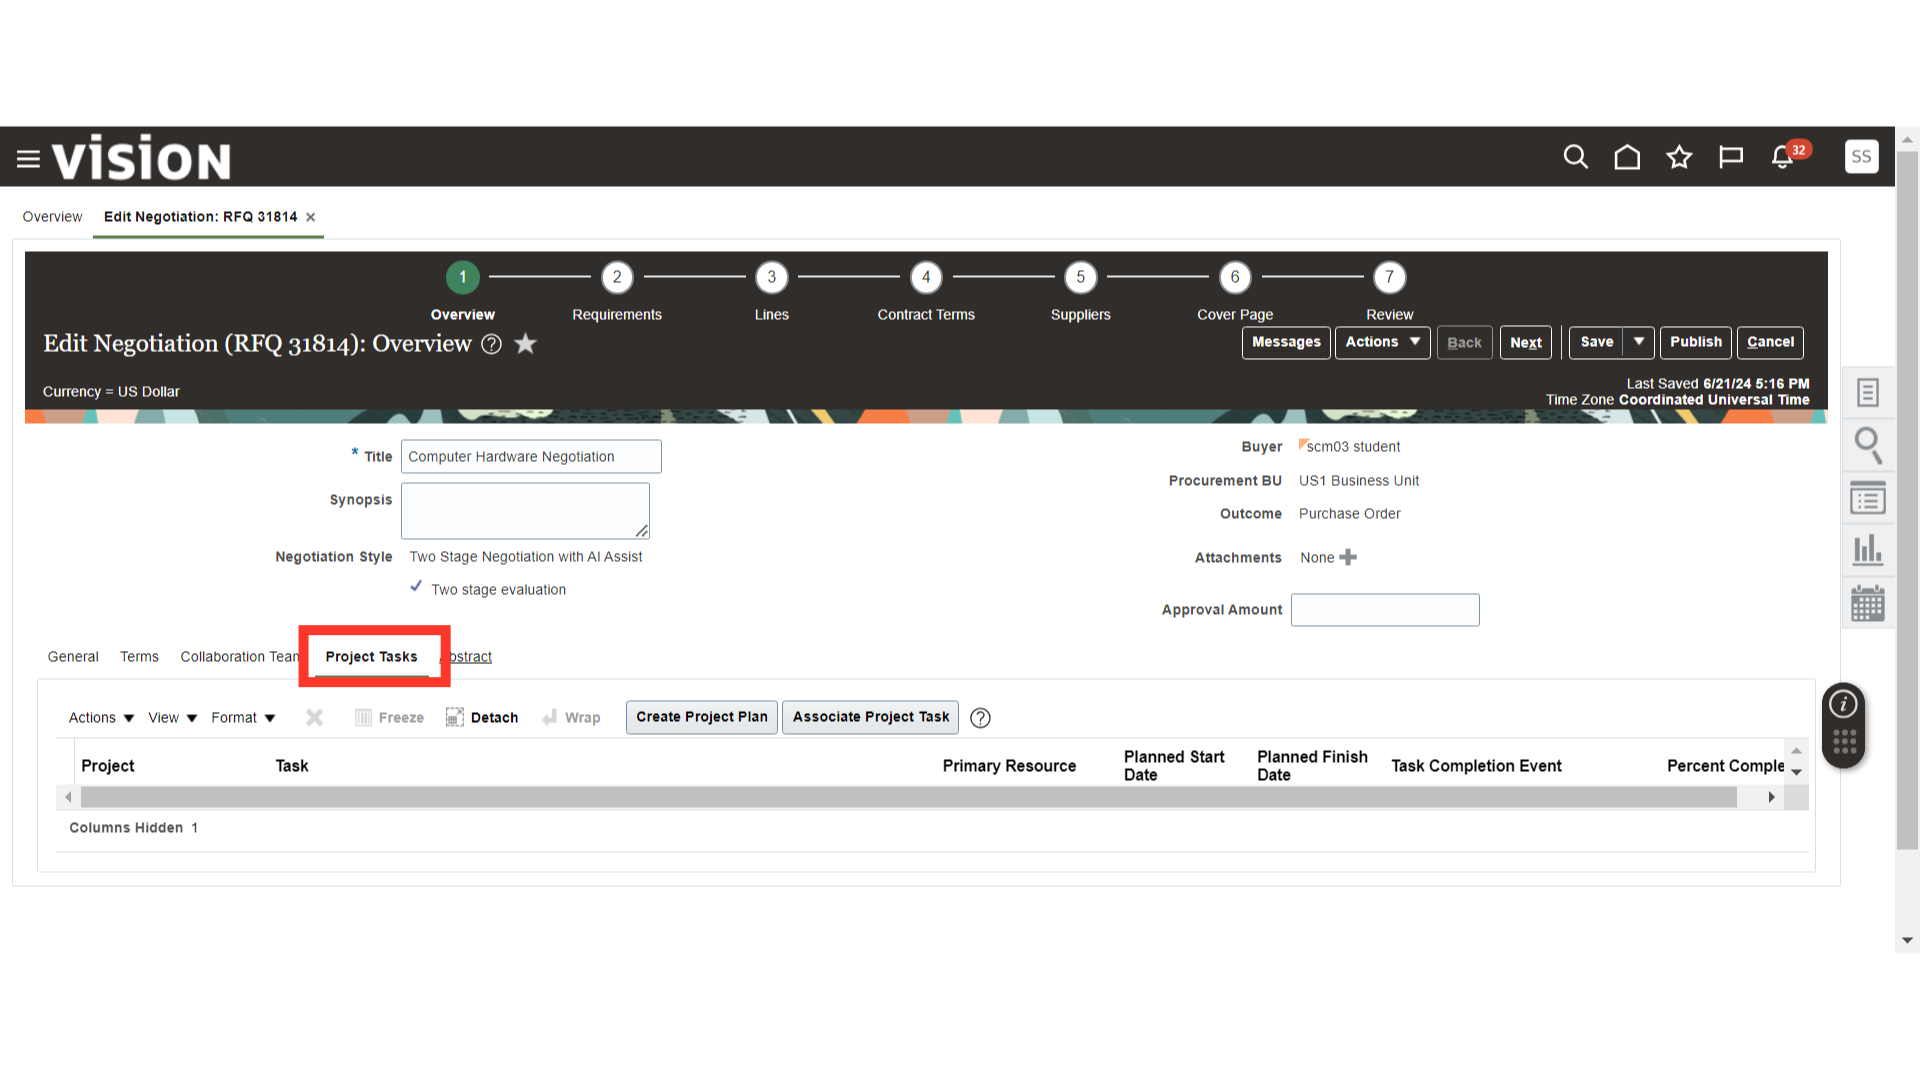
Optionally, if you want to associate a project with negotiation, you can define project details under Project Tasks.
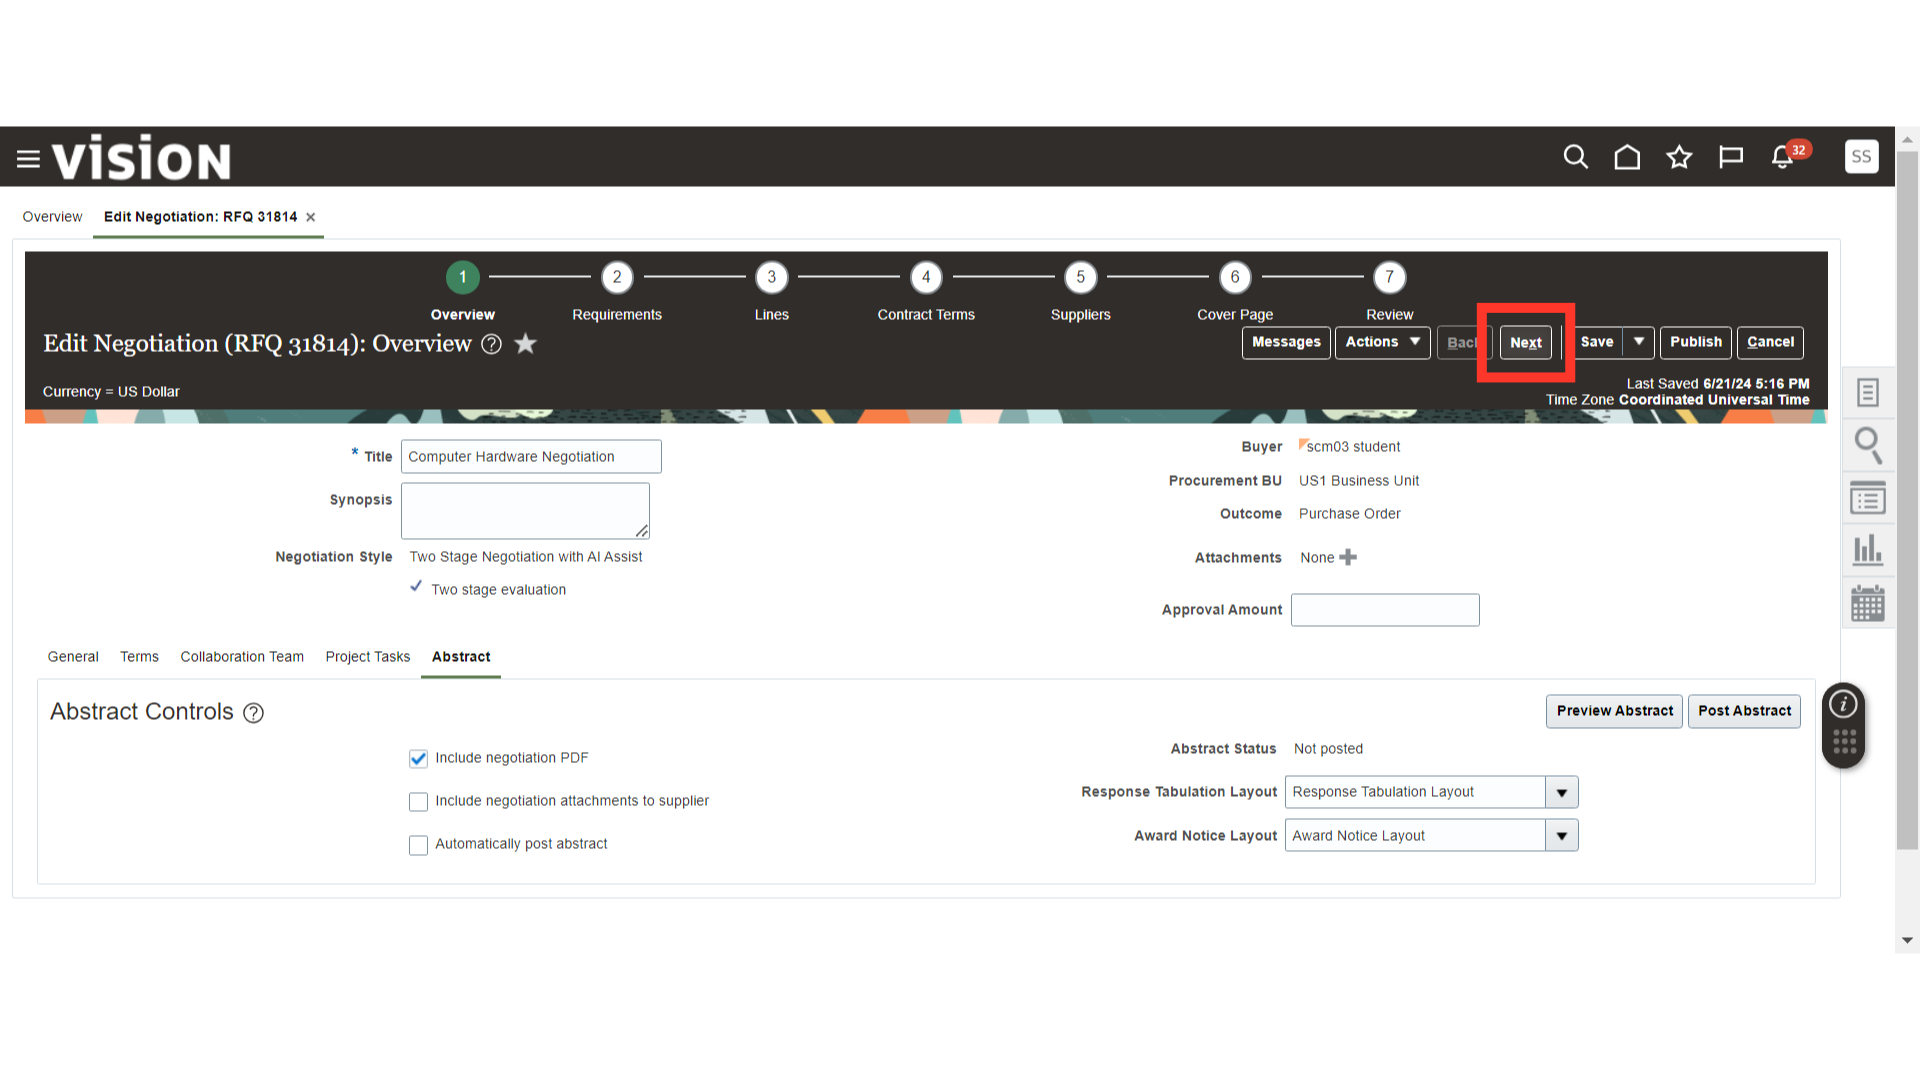
Optionally, you can use Abstracts for the negotiation. Abstracts are negotiation summaries that you post on your external website for suppliers. In the Abstract tab, define the abstract setup for the negotiation and enable the necessary features as required.

Once all the necessary details are filled in the Overview section, such as General, Terms, and Collaboration Team, click on the Next button.
Now, we are in the Negotiation Requirements section. Here, we will add the Requirement details of the negotiation.
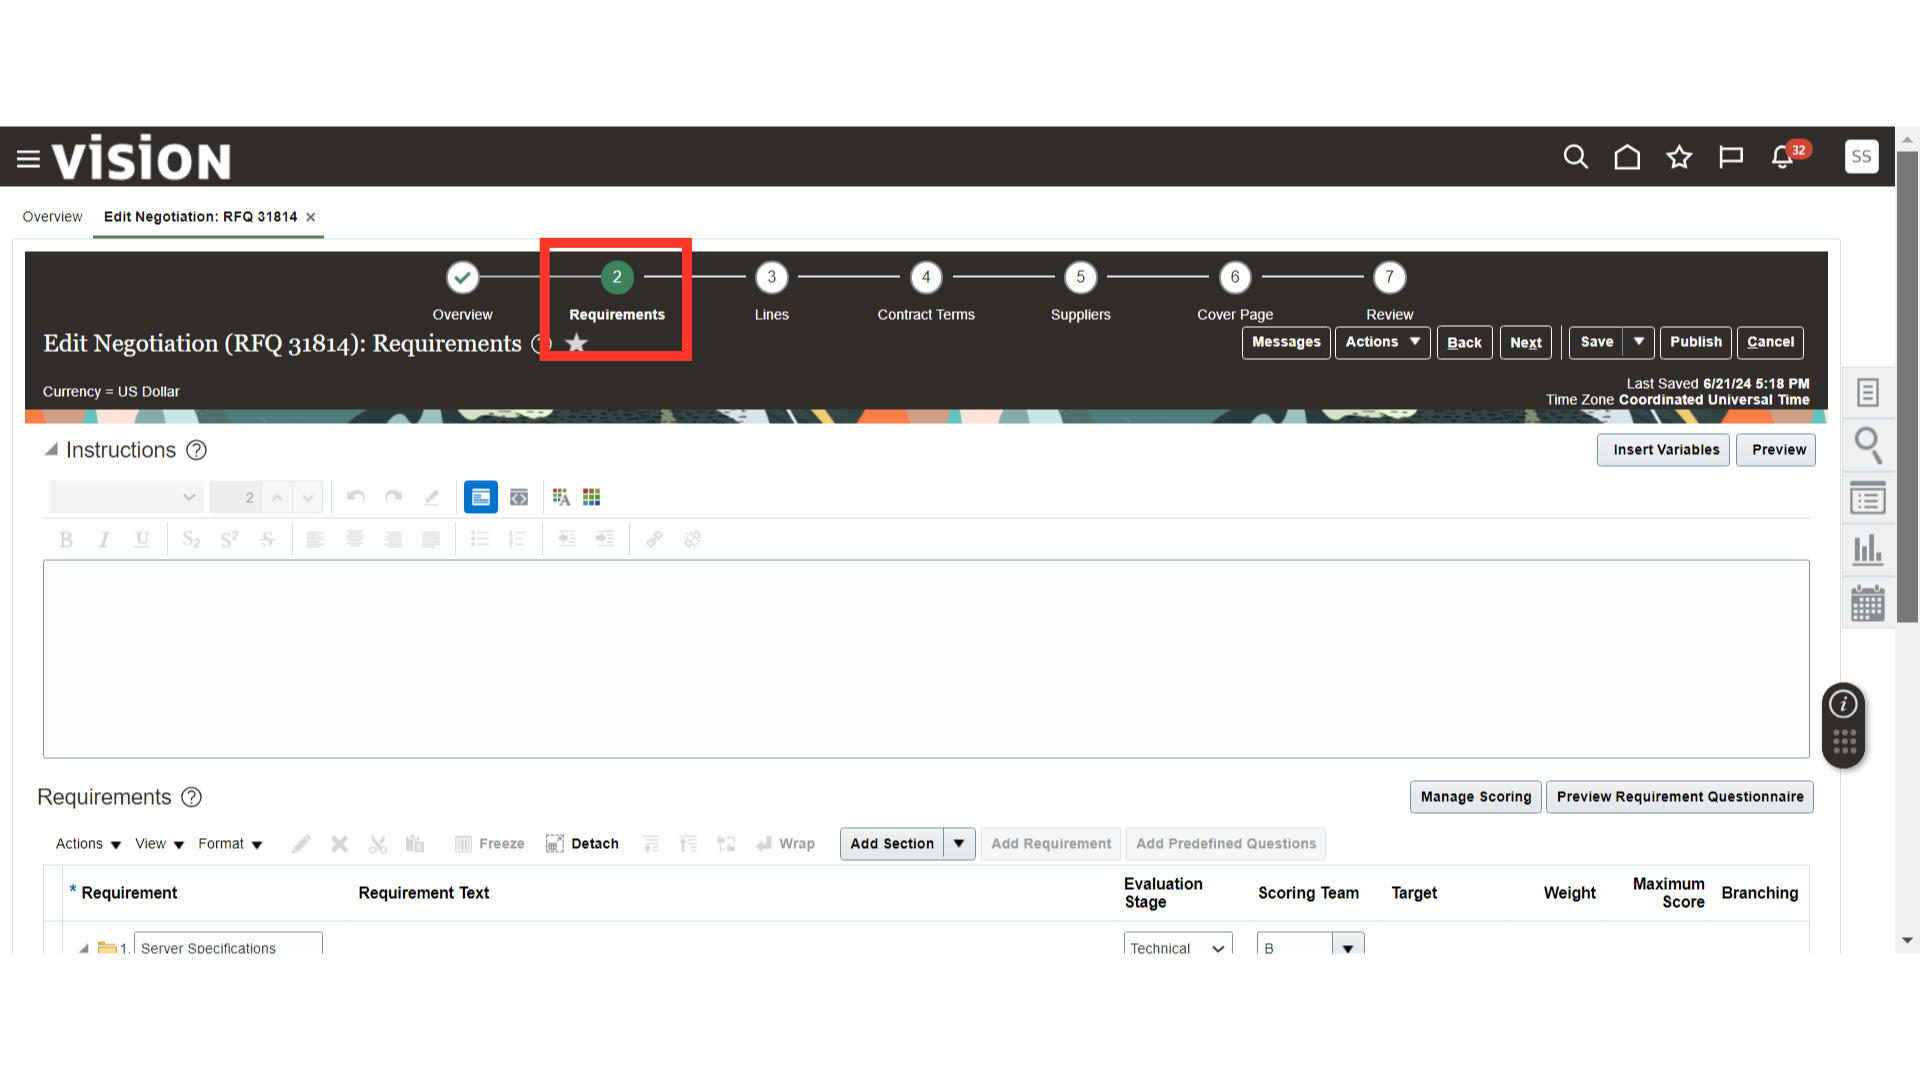
The requirements will automatically default from your negotiation template. Here, we have created three sections: one technical and two commercials for our two-stage negotiation. If you want to add a new requirement, select a section and click on Add Requirement, where you will be able to define the new requirement details. Please refer to the Negotiation Template Creation chapter for more details.
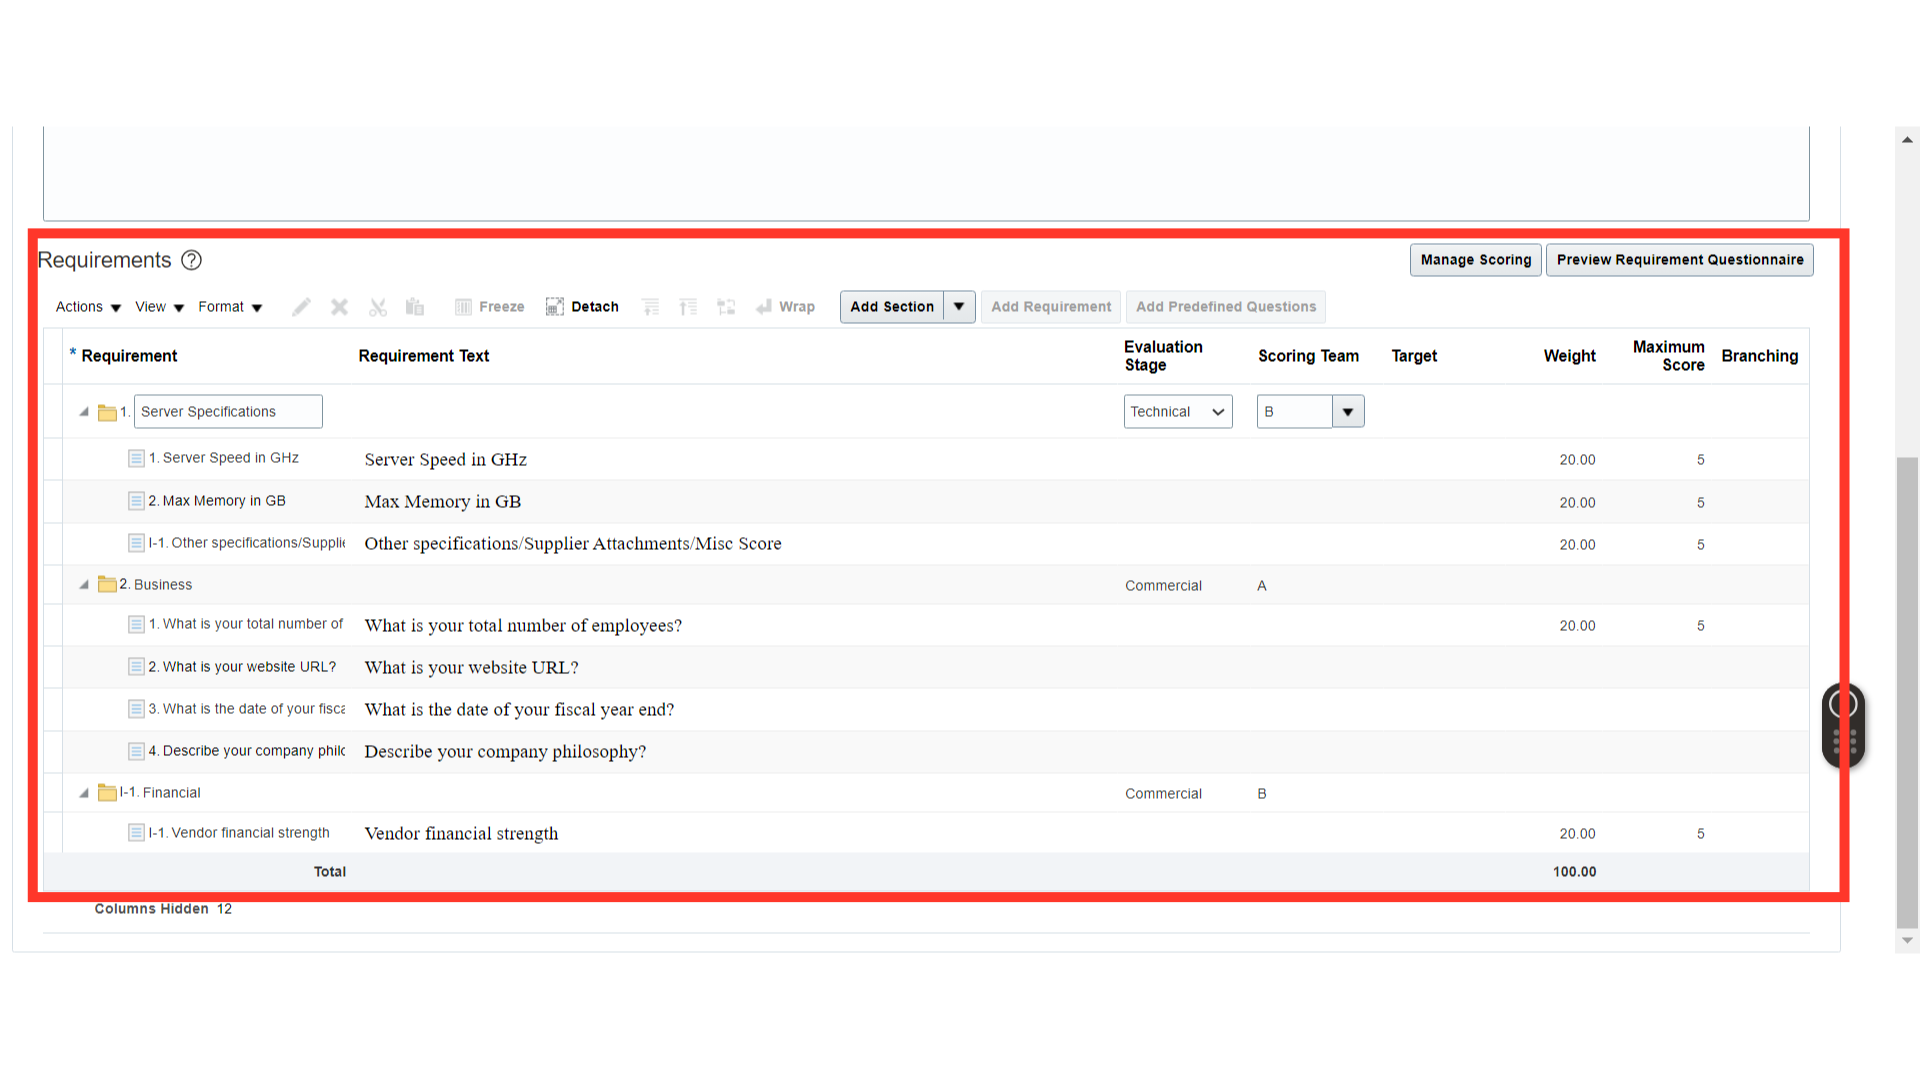
Once all the sections and requirements are added, you can click on the Preview Requirement Questionnaire button to view the supplier’s point of view for the Requirements Questionnaire.
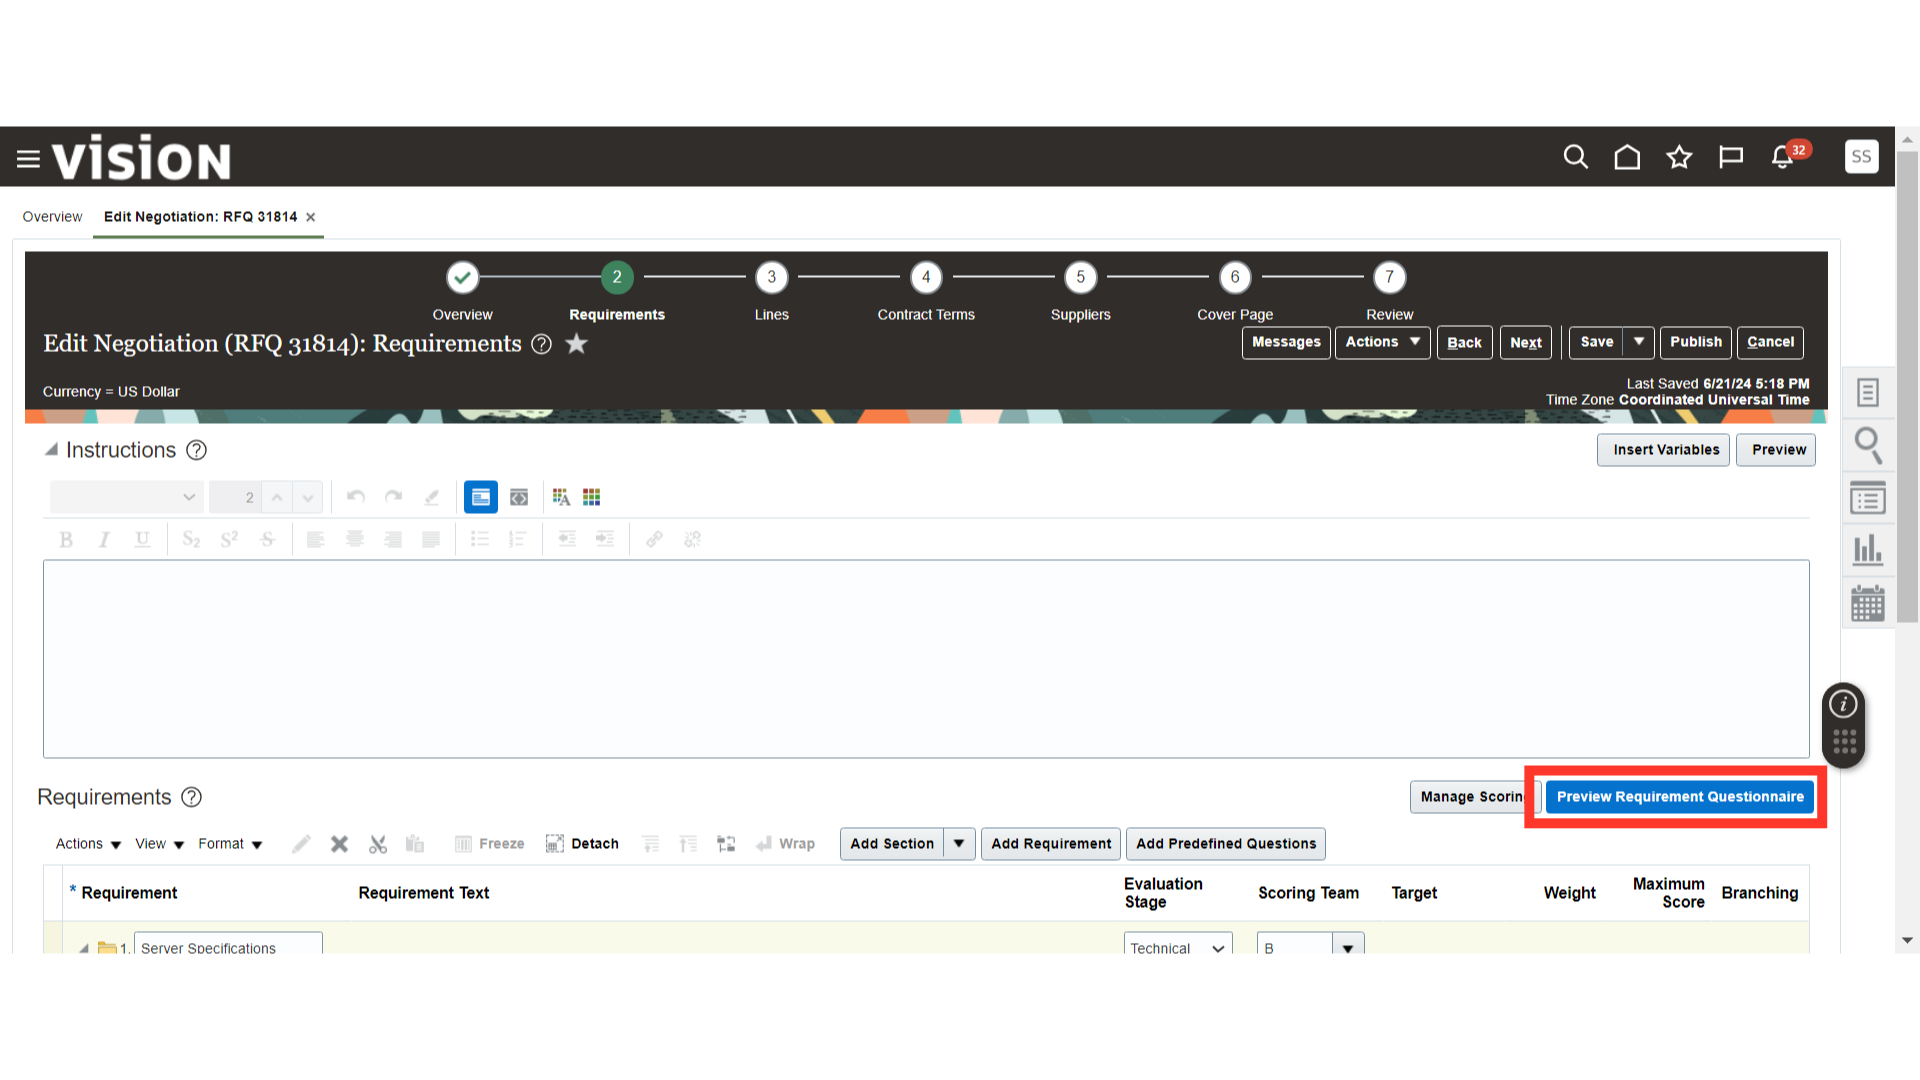
In the Preview Requirement Questionnaire, verify the questions for each section. To change the section, click on the arrow button on the right side. Once the questionnaire is reviewed, click Done.

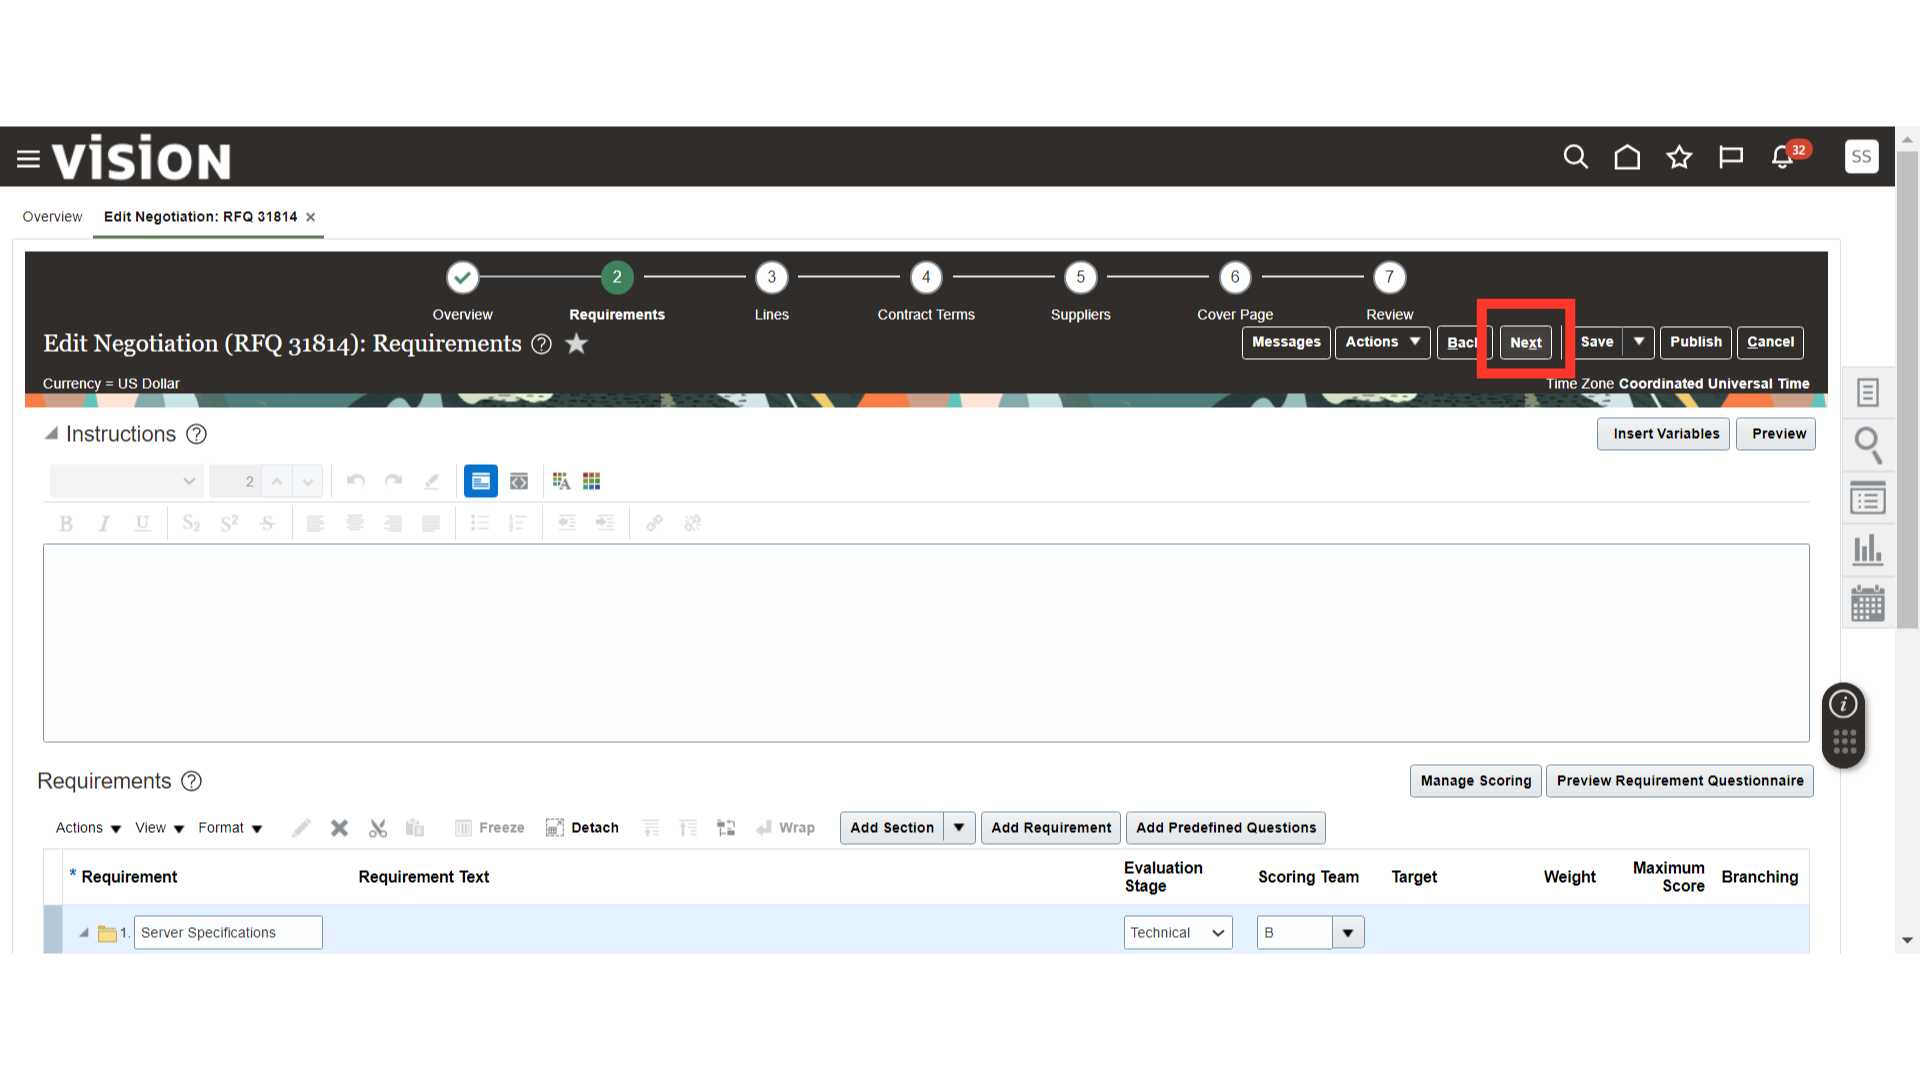
Once the Requirements section is completed, click on the Next button.
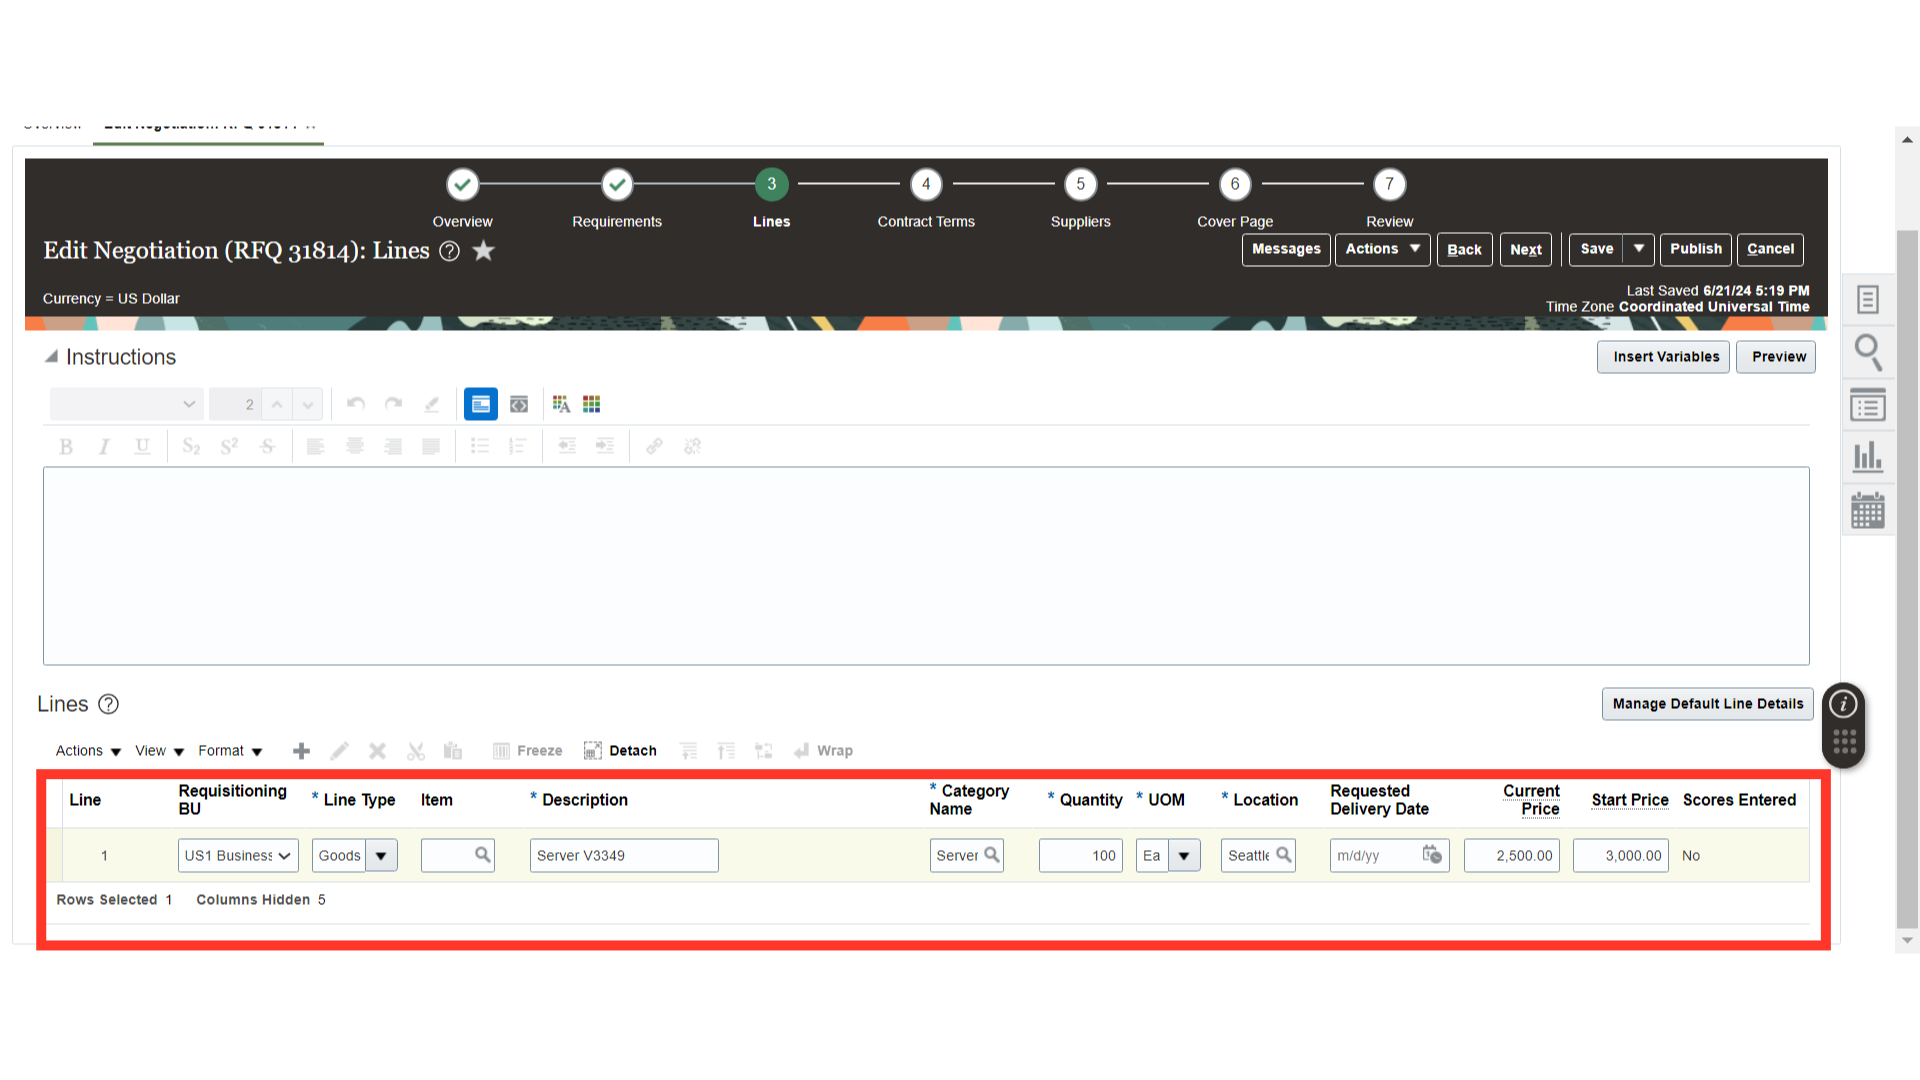
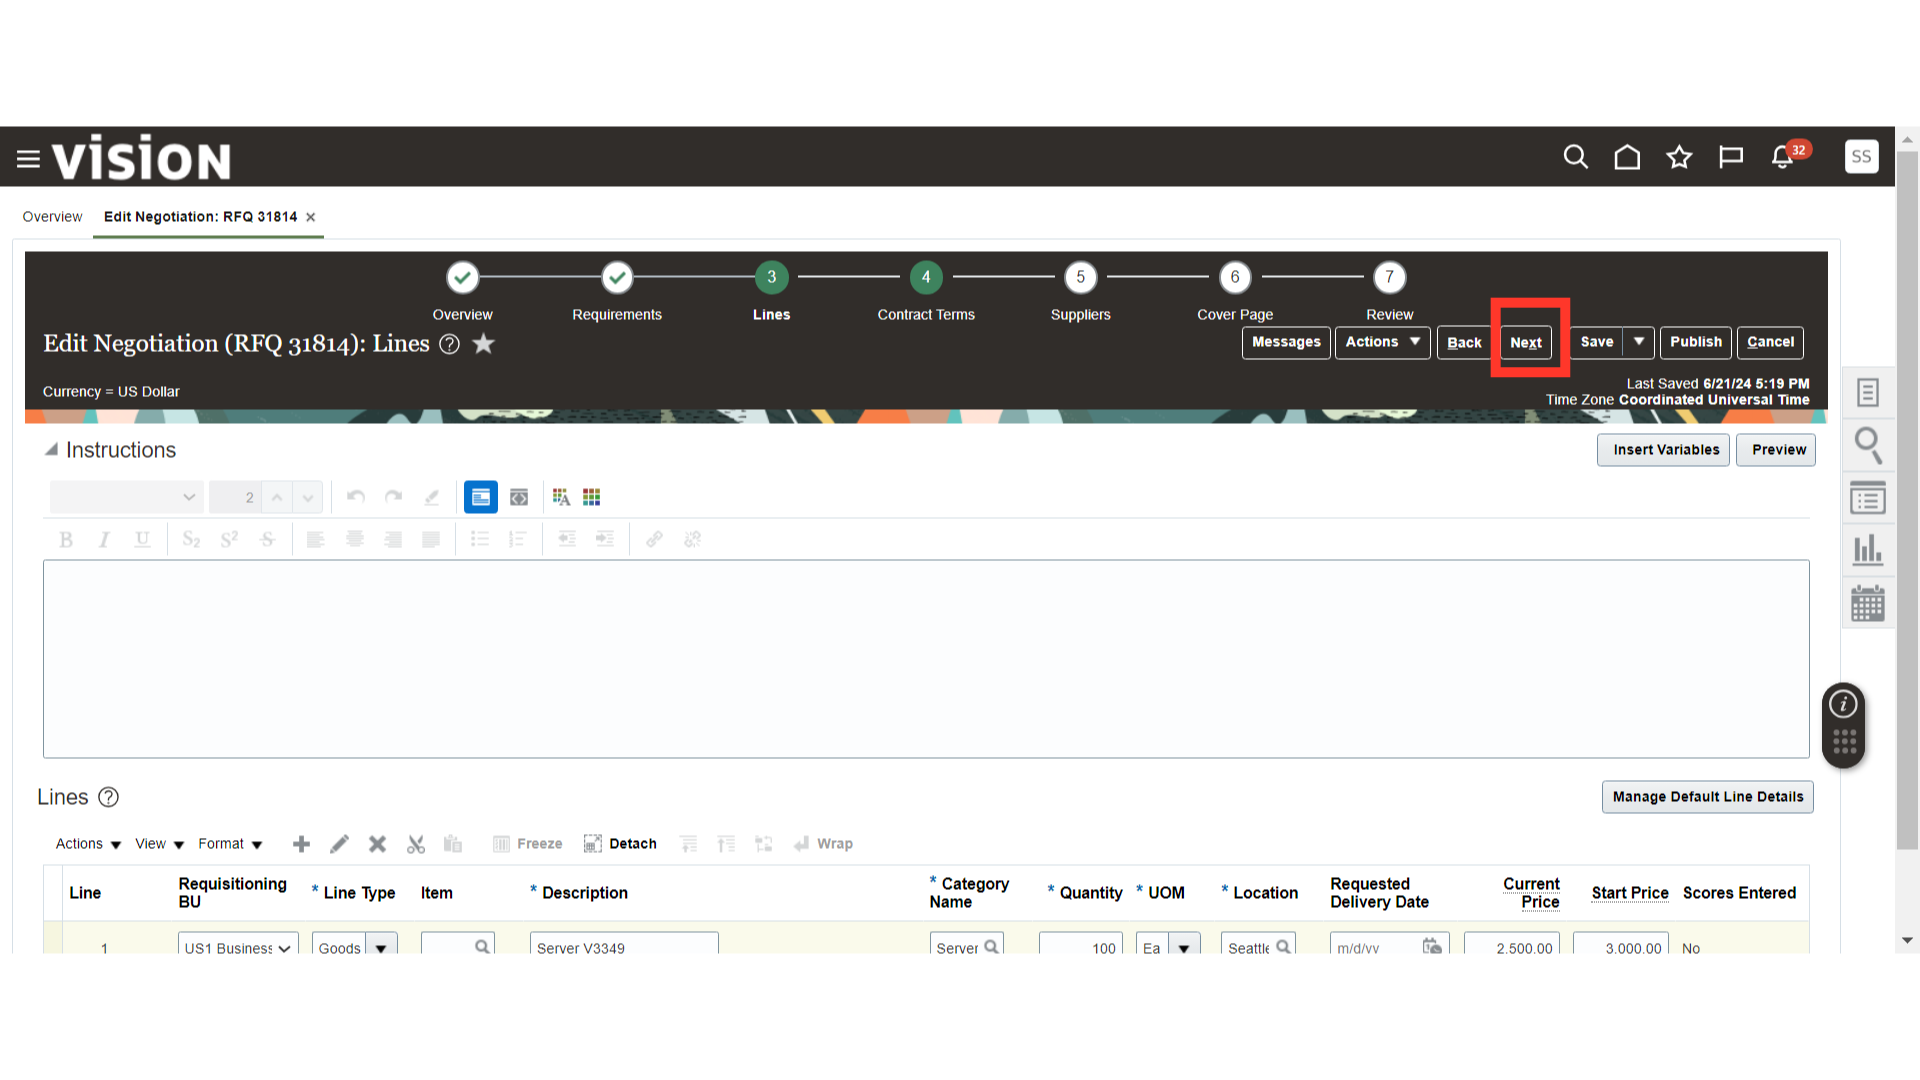
Now we are in the Negotiation Lines section. The negotiation line will automatically default from the negotiation template. Verify the line details such as Line Type, Item Description, Category, Quantity, UOM, Location, Requested Delivery Date, Current Price, and Start Price. Make the changes to the line if needed. Also, if you want to add an additional line, you can do so by clicking on the Plus icon and adding a new line to the negotiation.
Once the line details are filled in, click on the Next button.
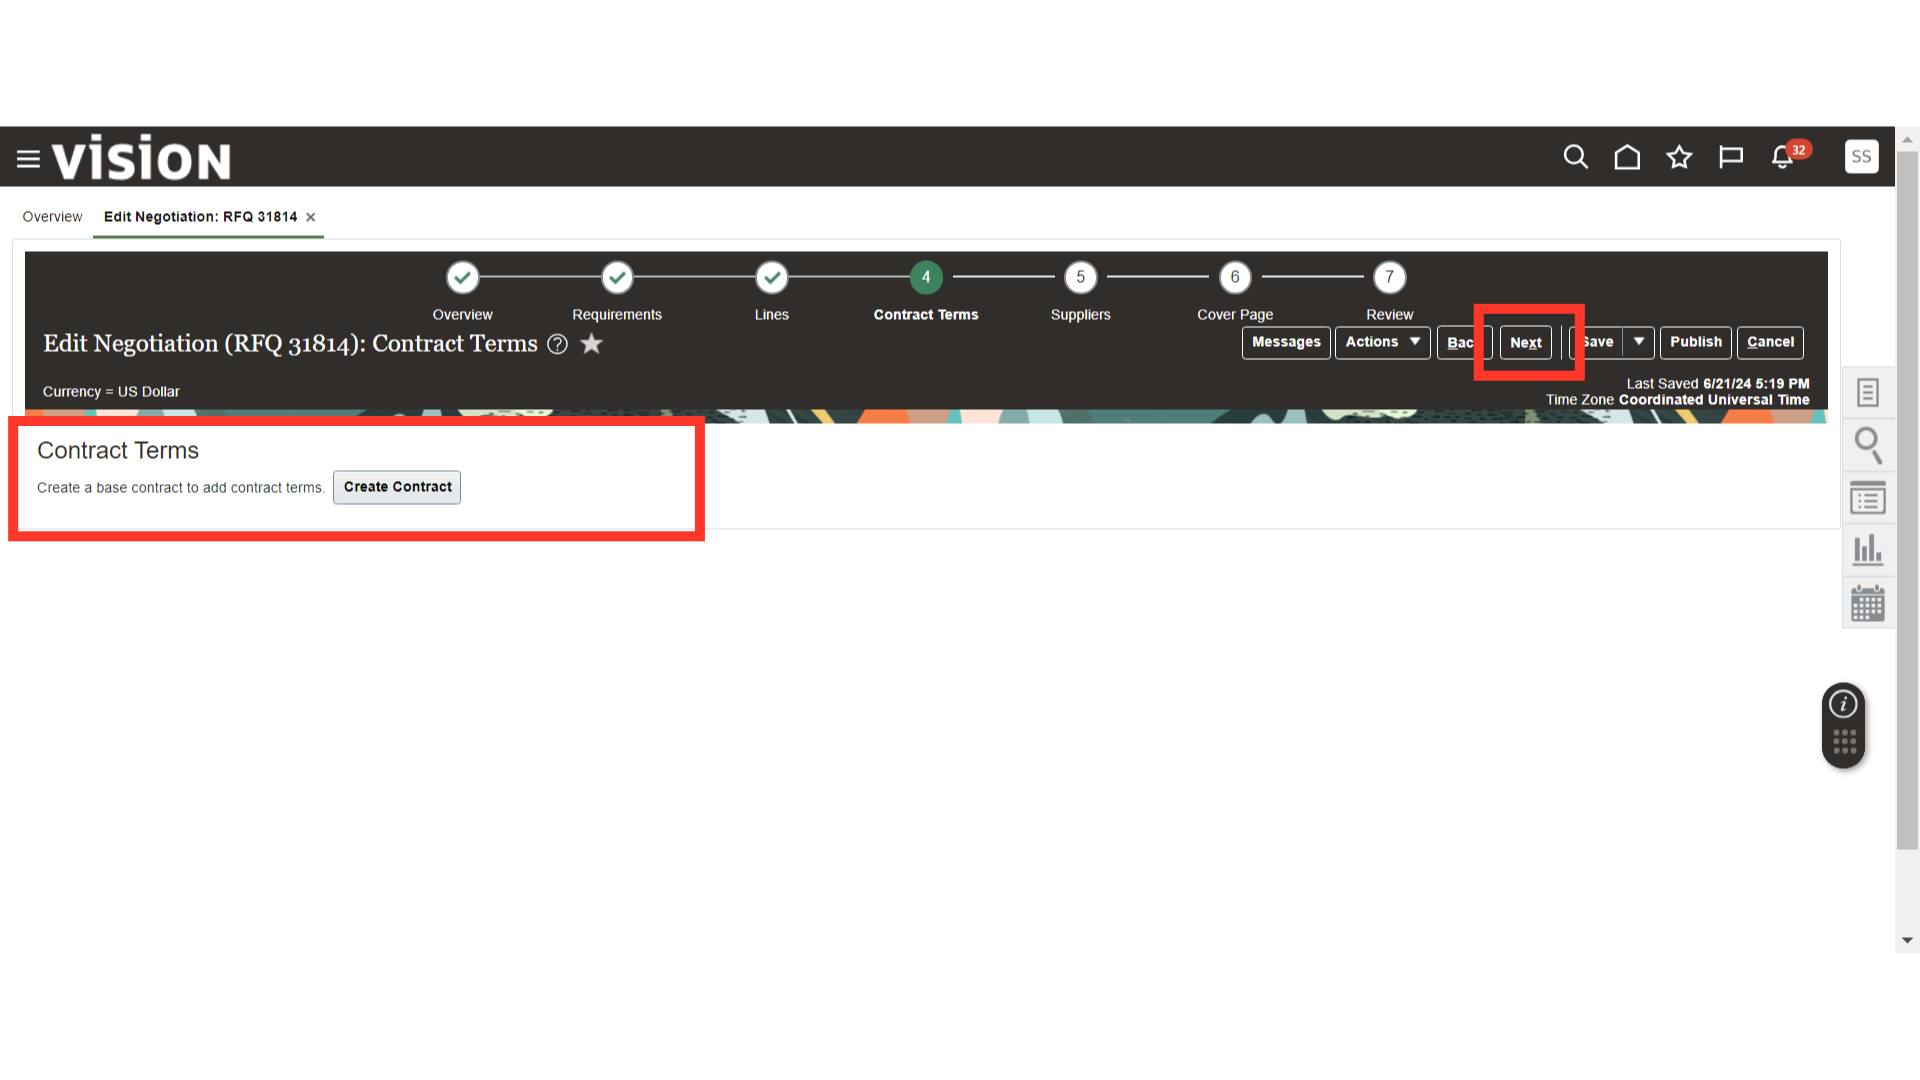
Optionally, if you want to create a procurement contract from the negotiation, you can do so by clicking on the Create Contract button. If not, click on the Next button.
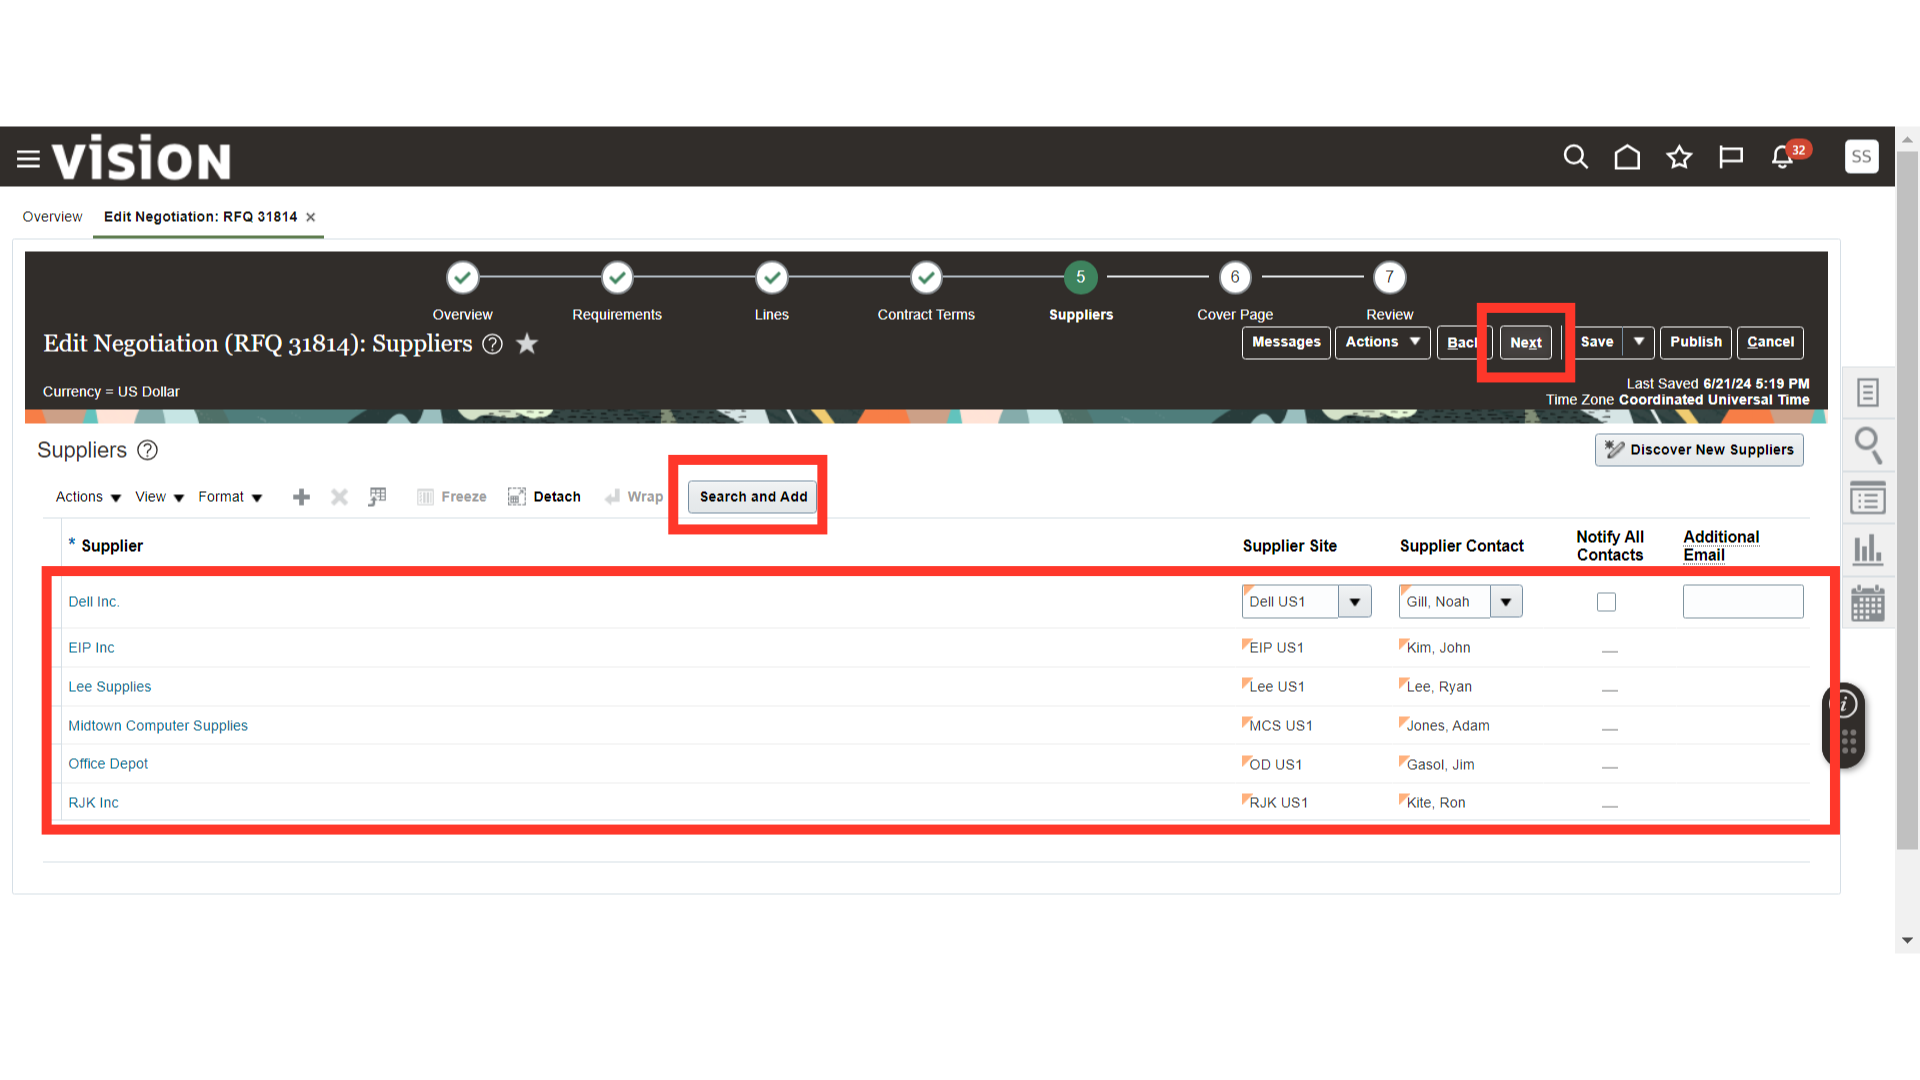
In the Suppliers section, the suppliers will default from the negotiation template. To add a new supplier in the negotiation, click on the Search and Add button to add suppliers for the negotiation. Once all the suppliers are added, click on the Next button.
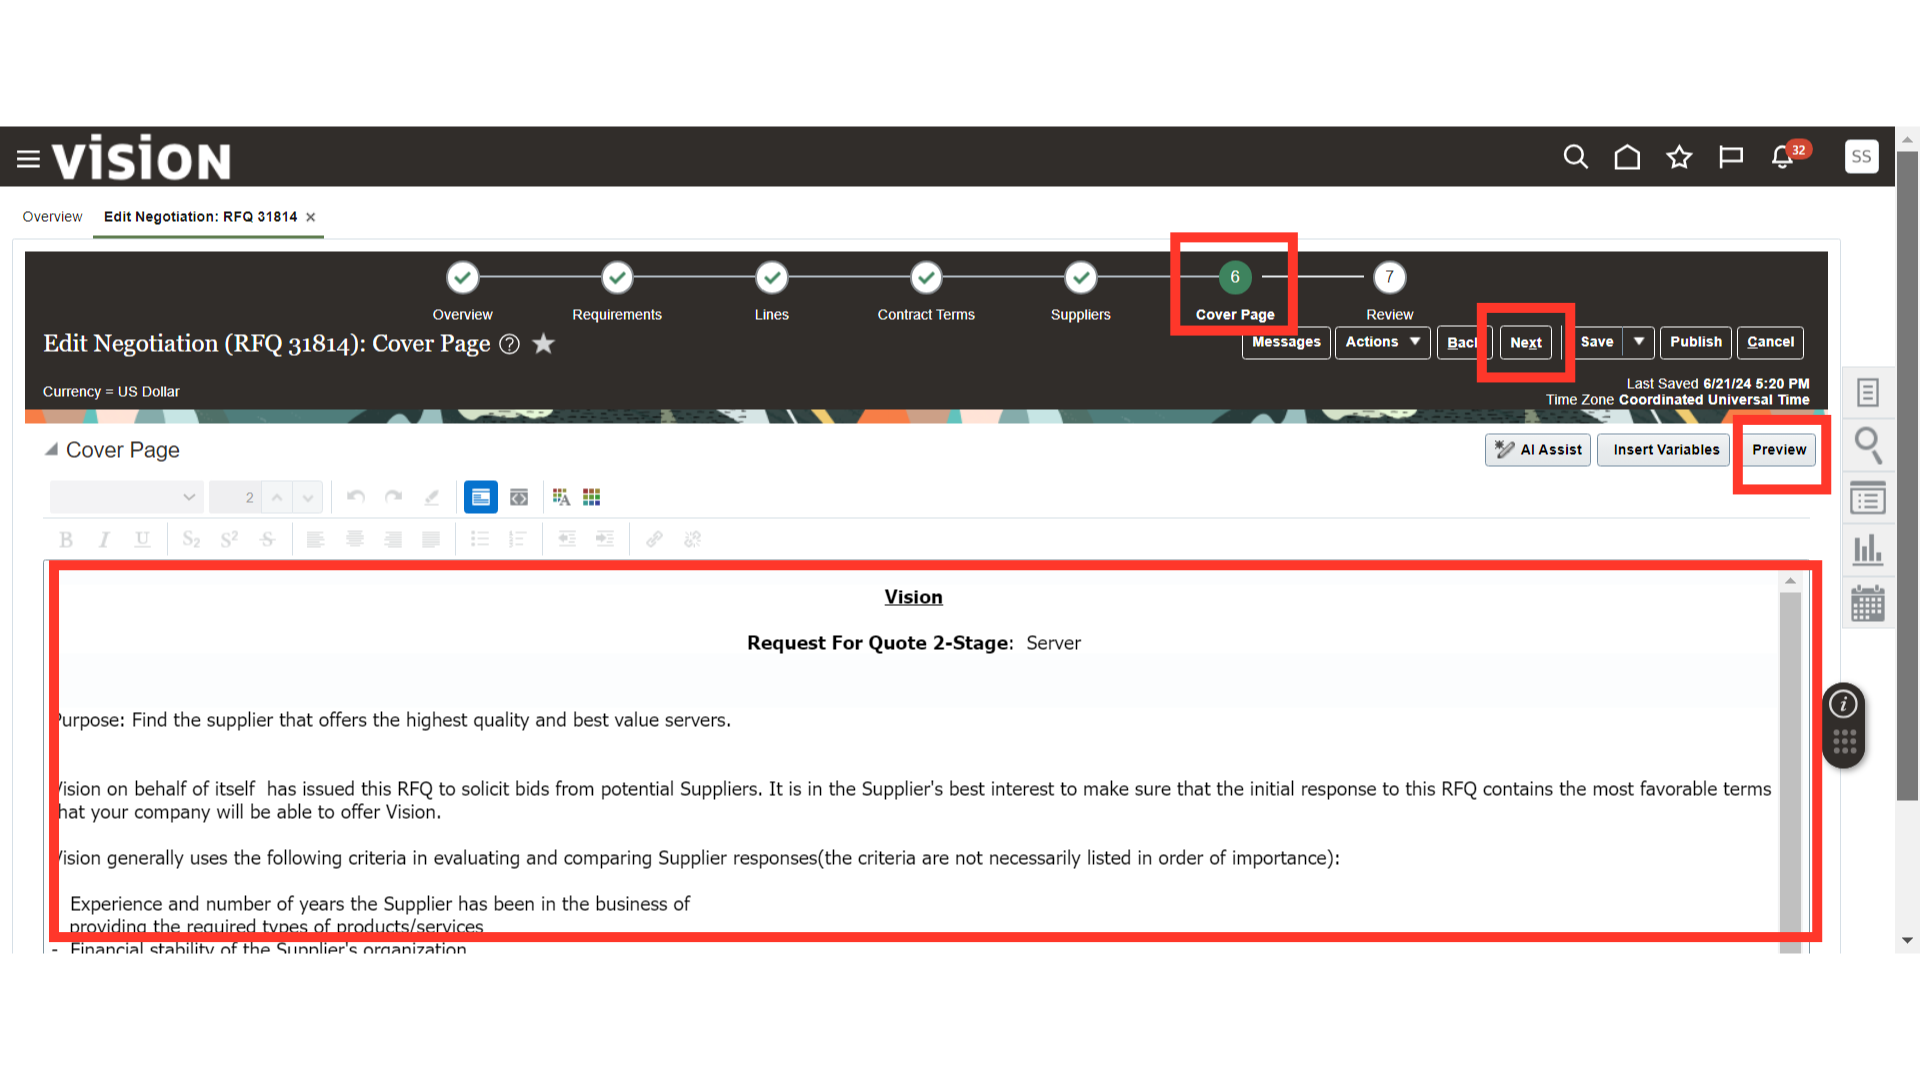
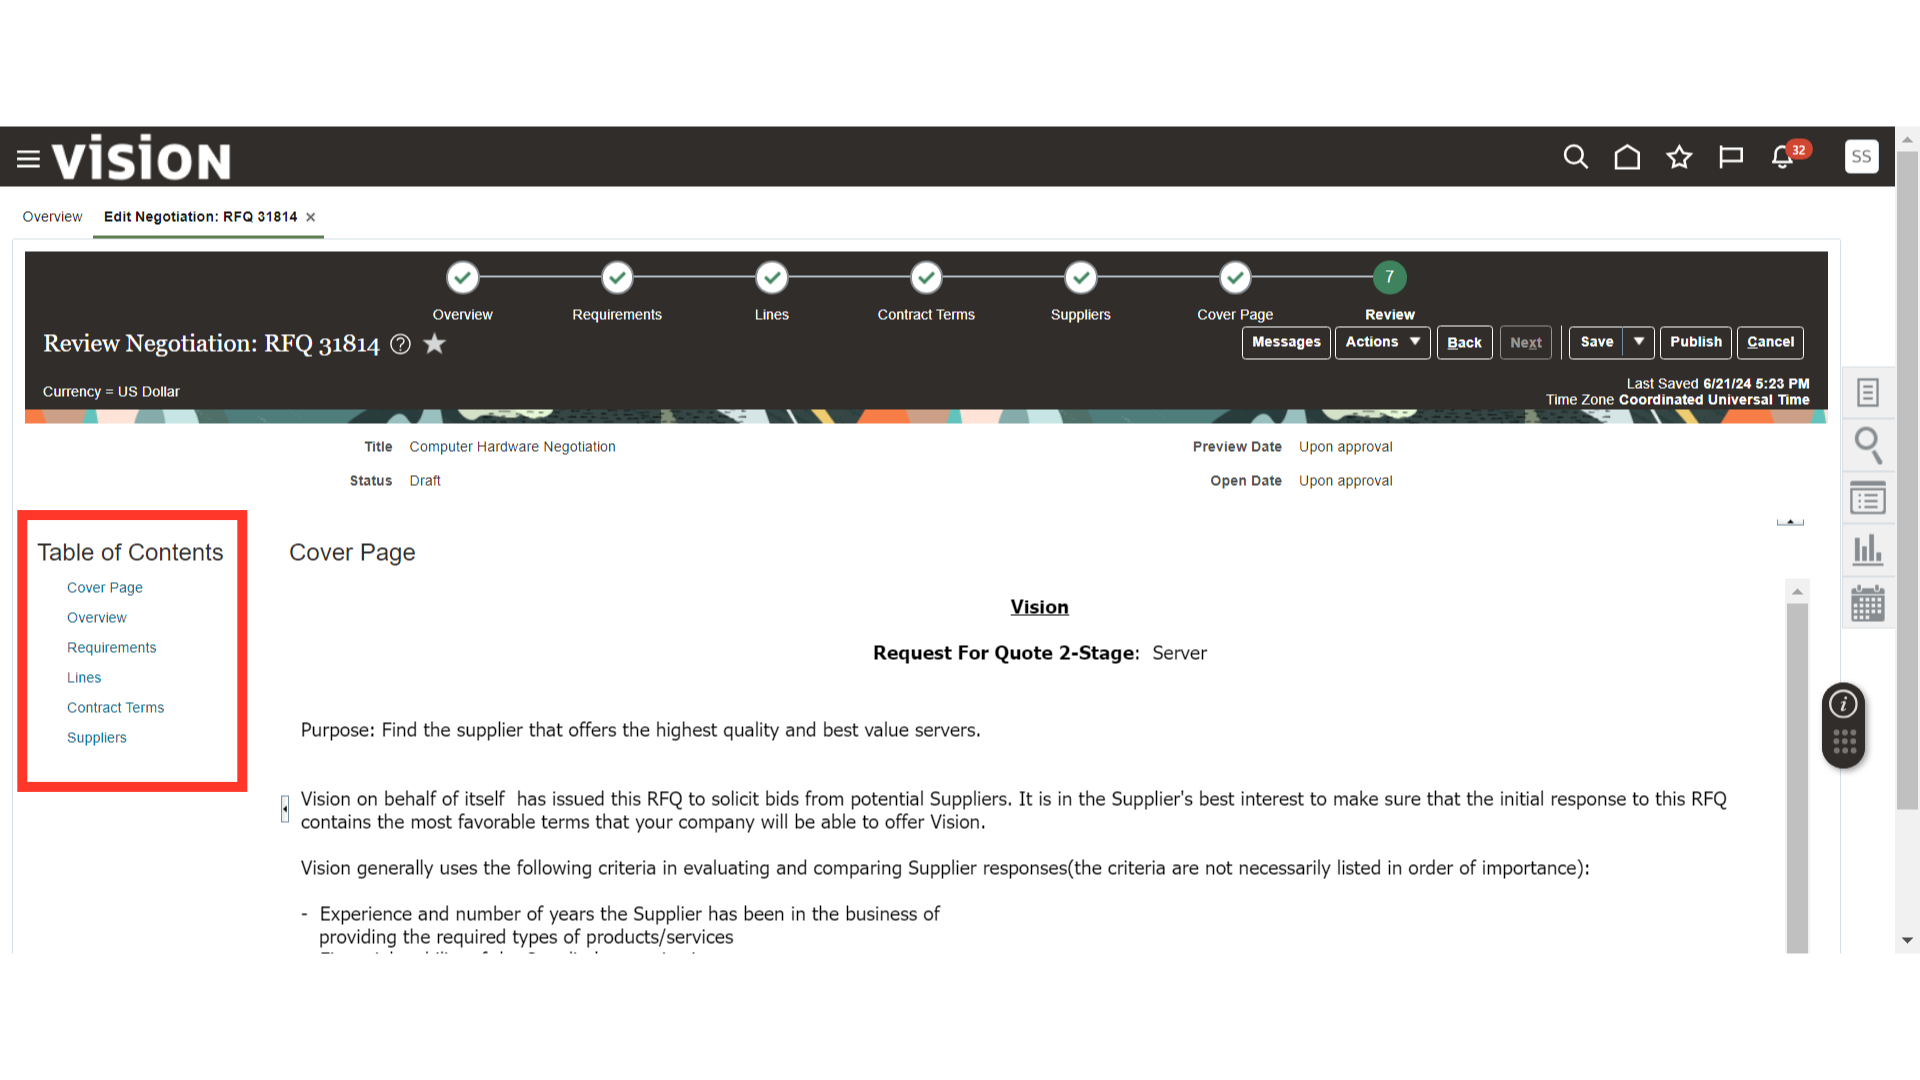
On the Cover Page, describe the purpose and details of the Two-Stage Negotiation RFQ. To preview the cover page created for the negotiation, utilize the Preview button. Once all the changes are completed, click on the Next button.
In the Review section, review your negotiation details from each section.
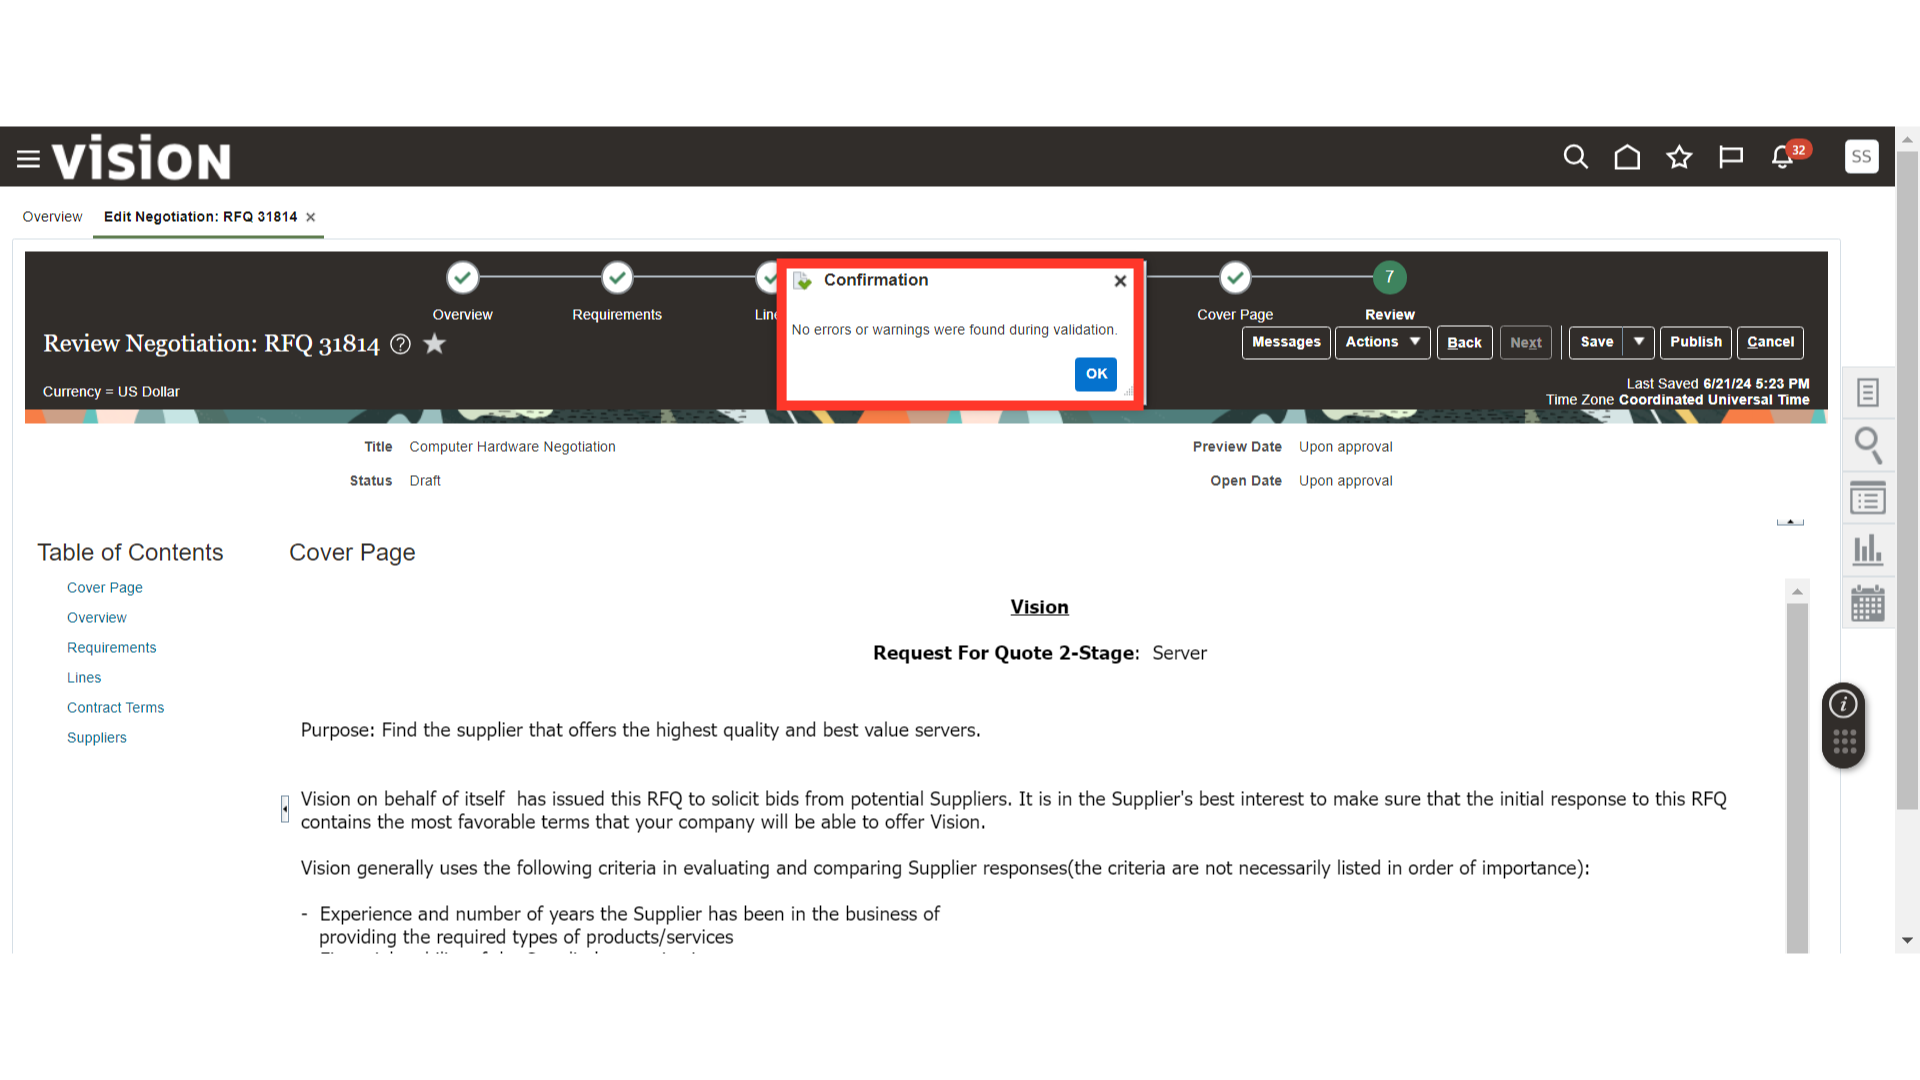
Once reviewed, click on the Actions dropdown button and click on Validate. The system will look for issues in your negotiation. If no issues are found, it will provide a no-error confirmation message.

Click OK on the validation confirmation message.
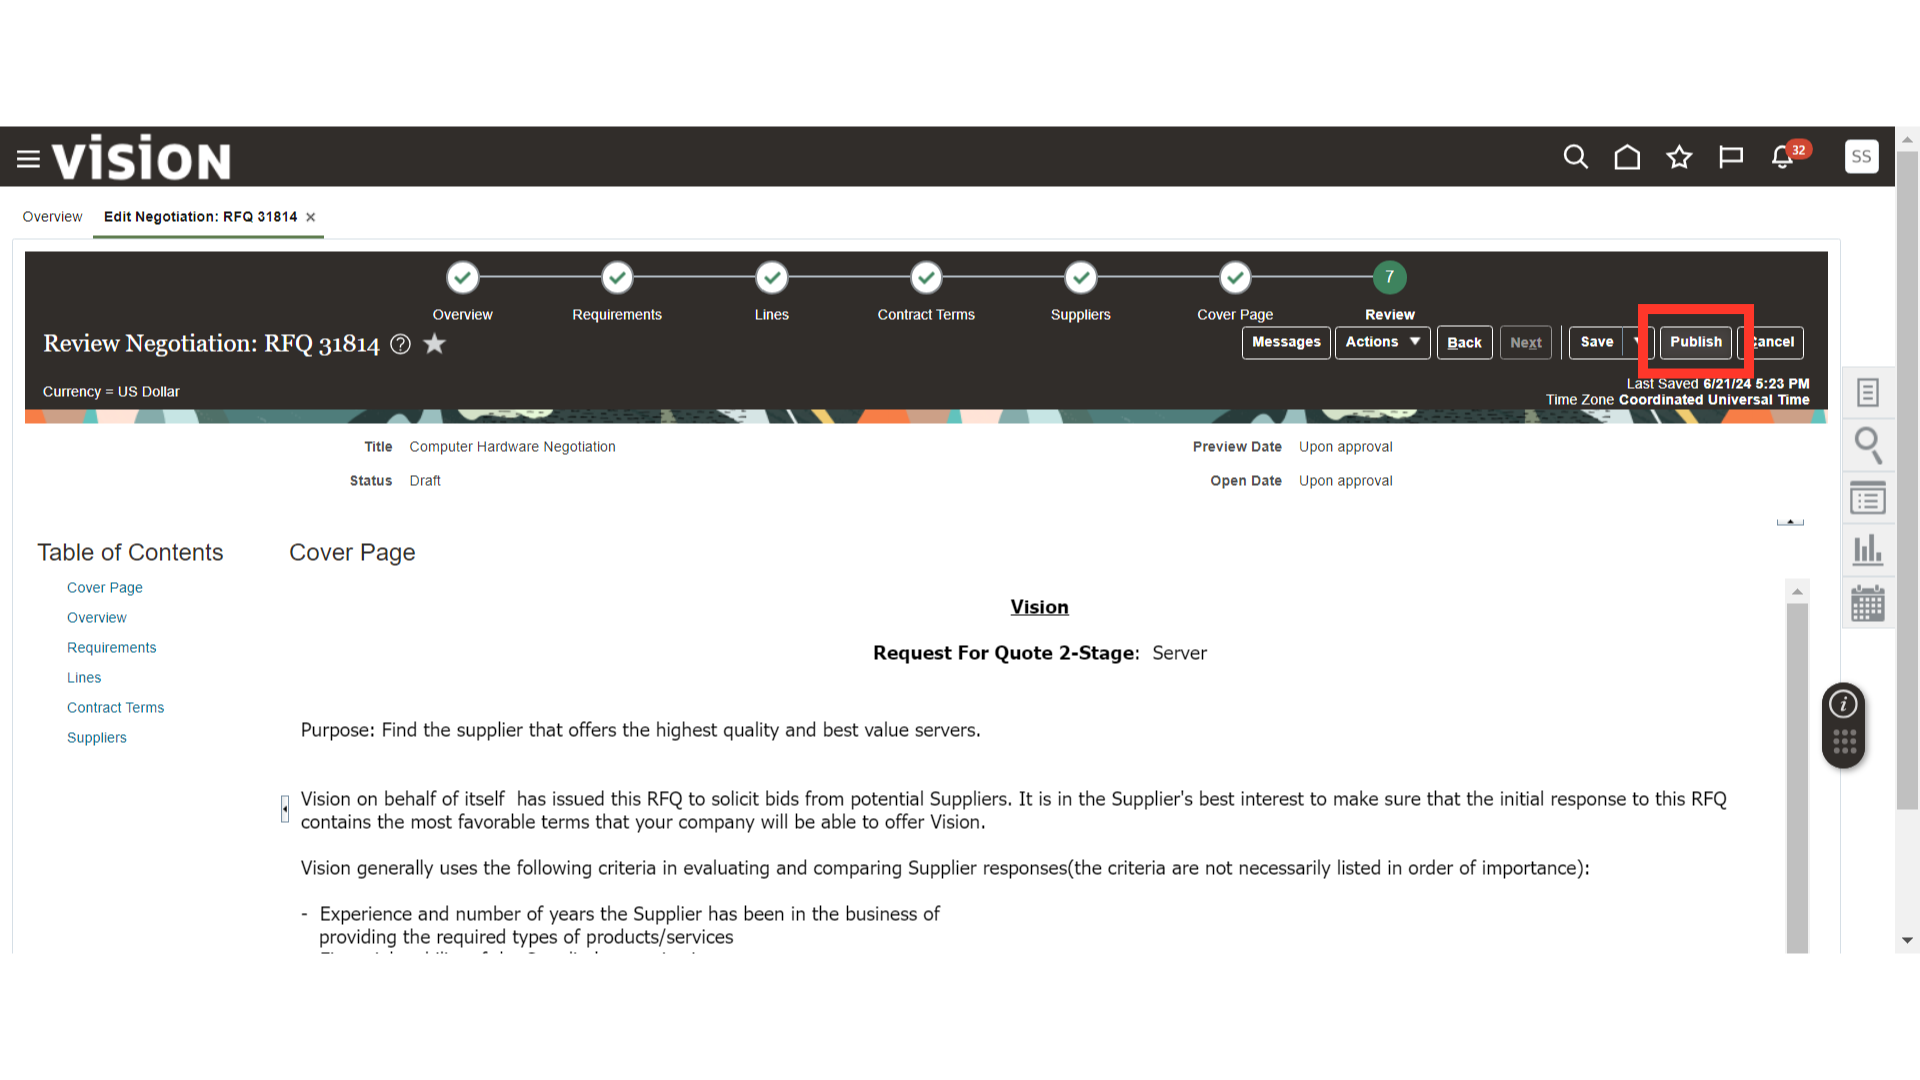
Now, click on the Publish button to publish your negotiation.
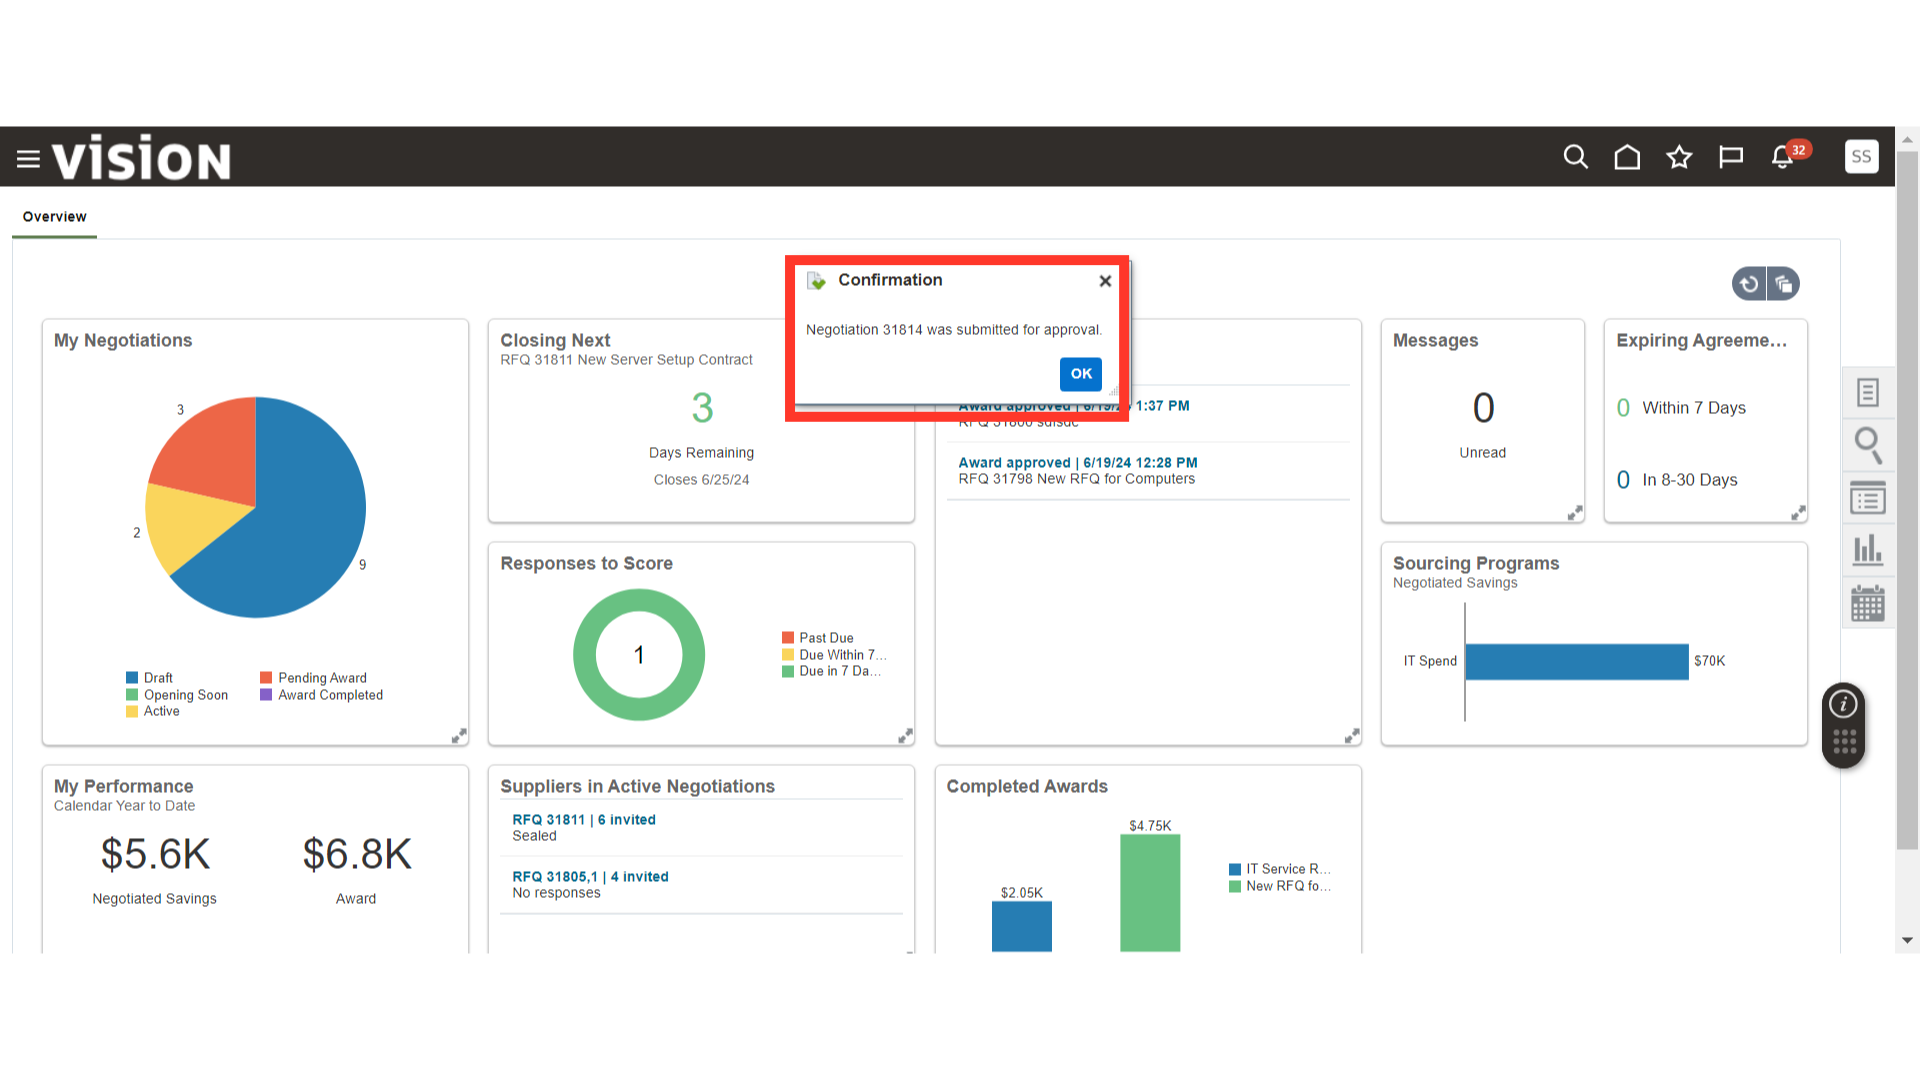
Once the negotiation is published, the system will generate a confirmation message. Click OK. Now, the negotiation will be in Active Status and start accepting responses from suppliers.
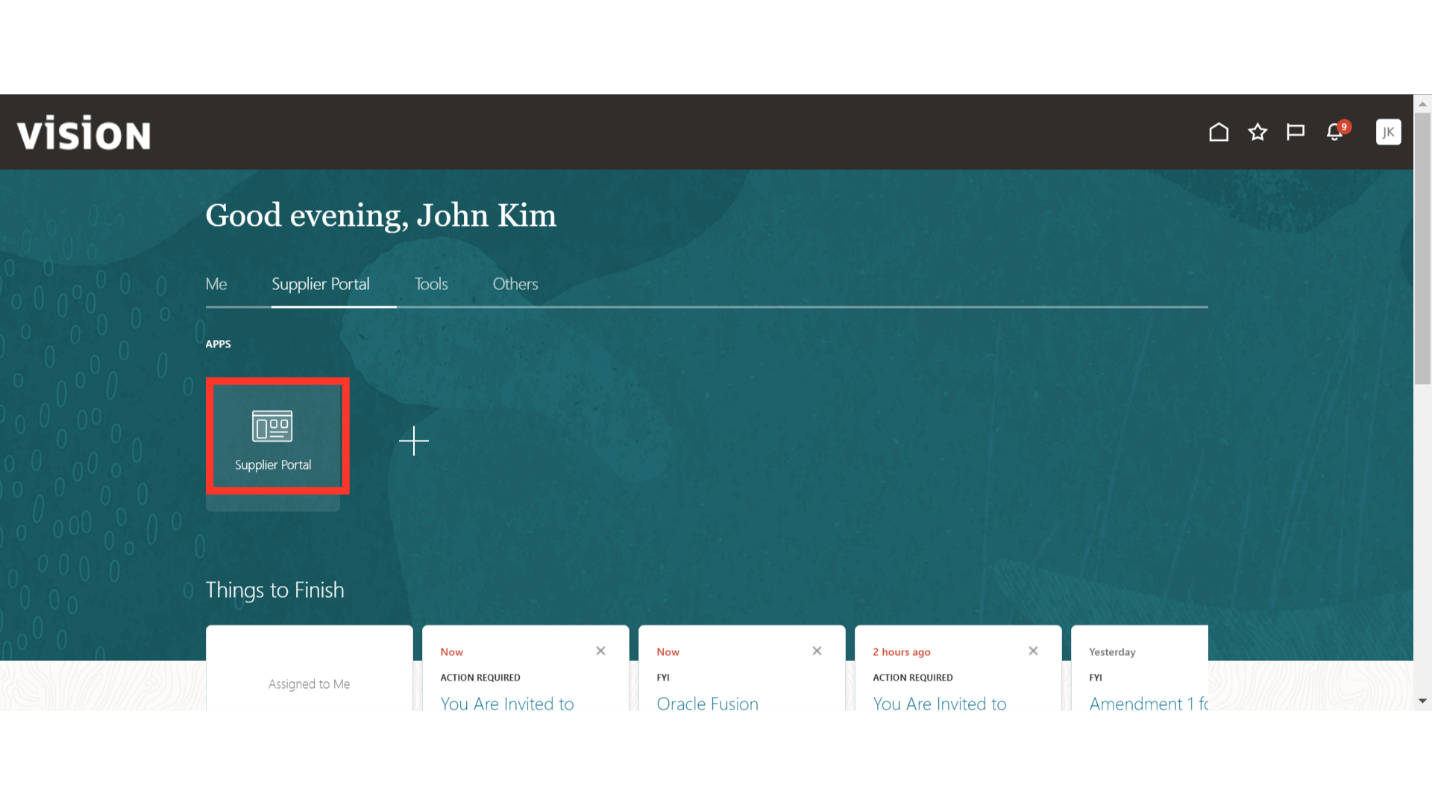
Next, we will look at how a supplier would create a response to our published negotiation. First, the supplier will log in to the Supplier Portal on Oracle Fusion.

In Oracle Fusion, navigate to the Supplier Portal tab and click on the Supplier Portal infotile.
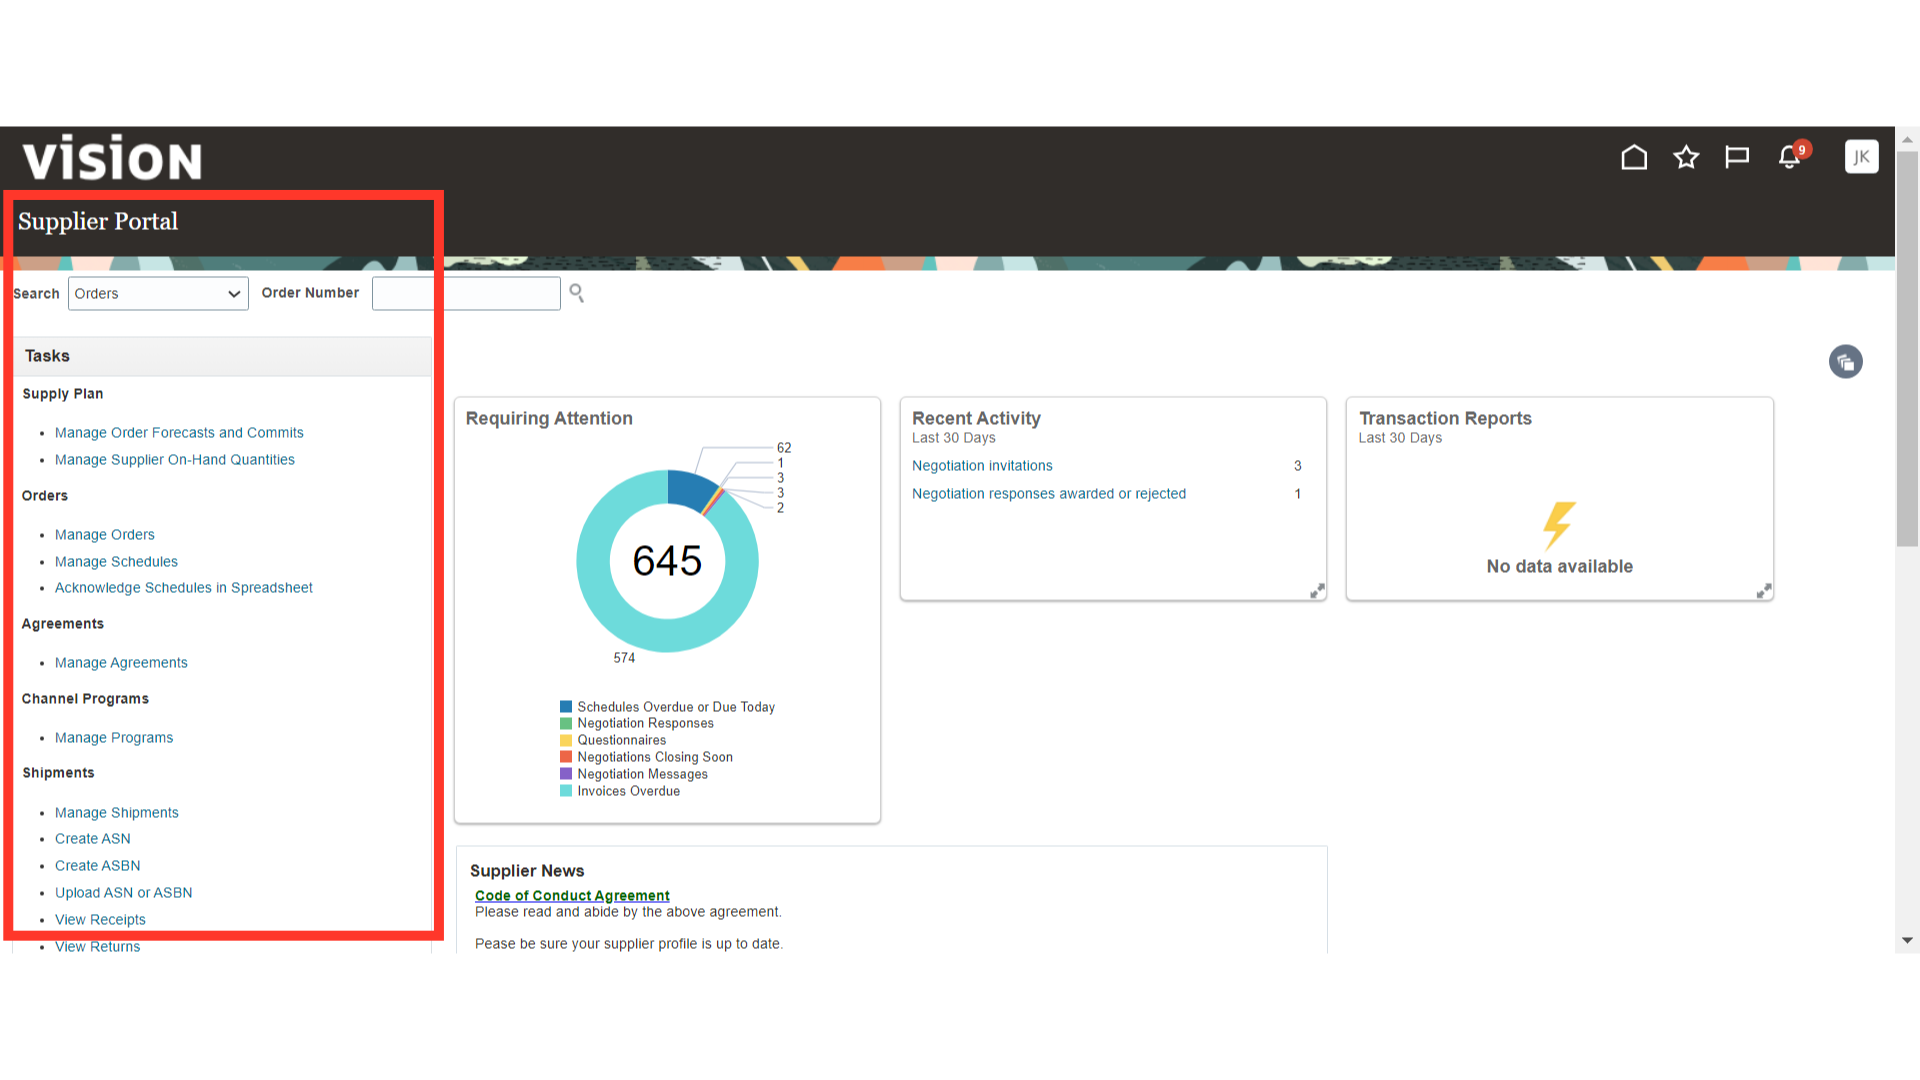
In the Supplier Portal, suppliers will have many tasks available. Scroll down to the Negotiations section in Tasks.
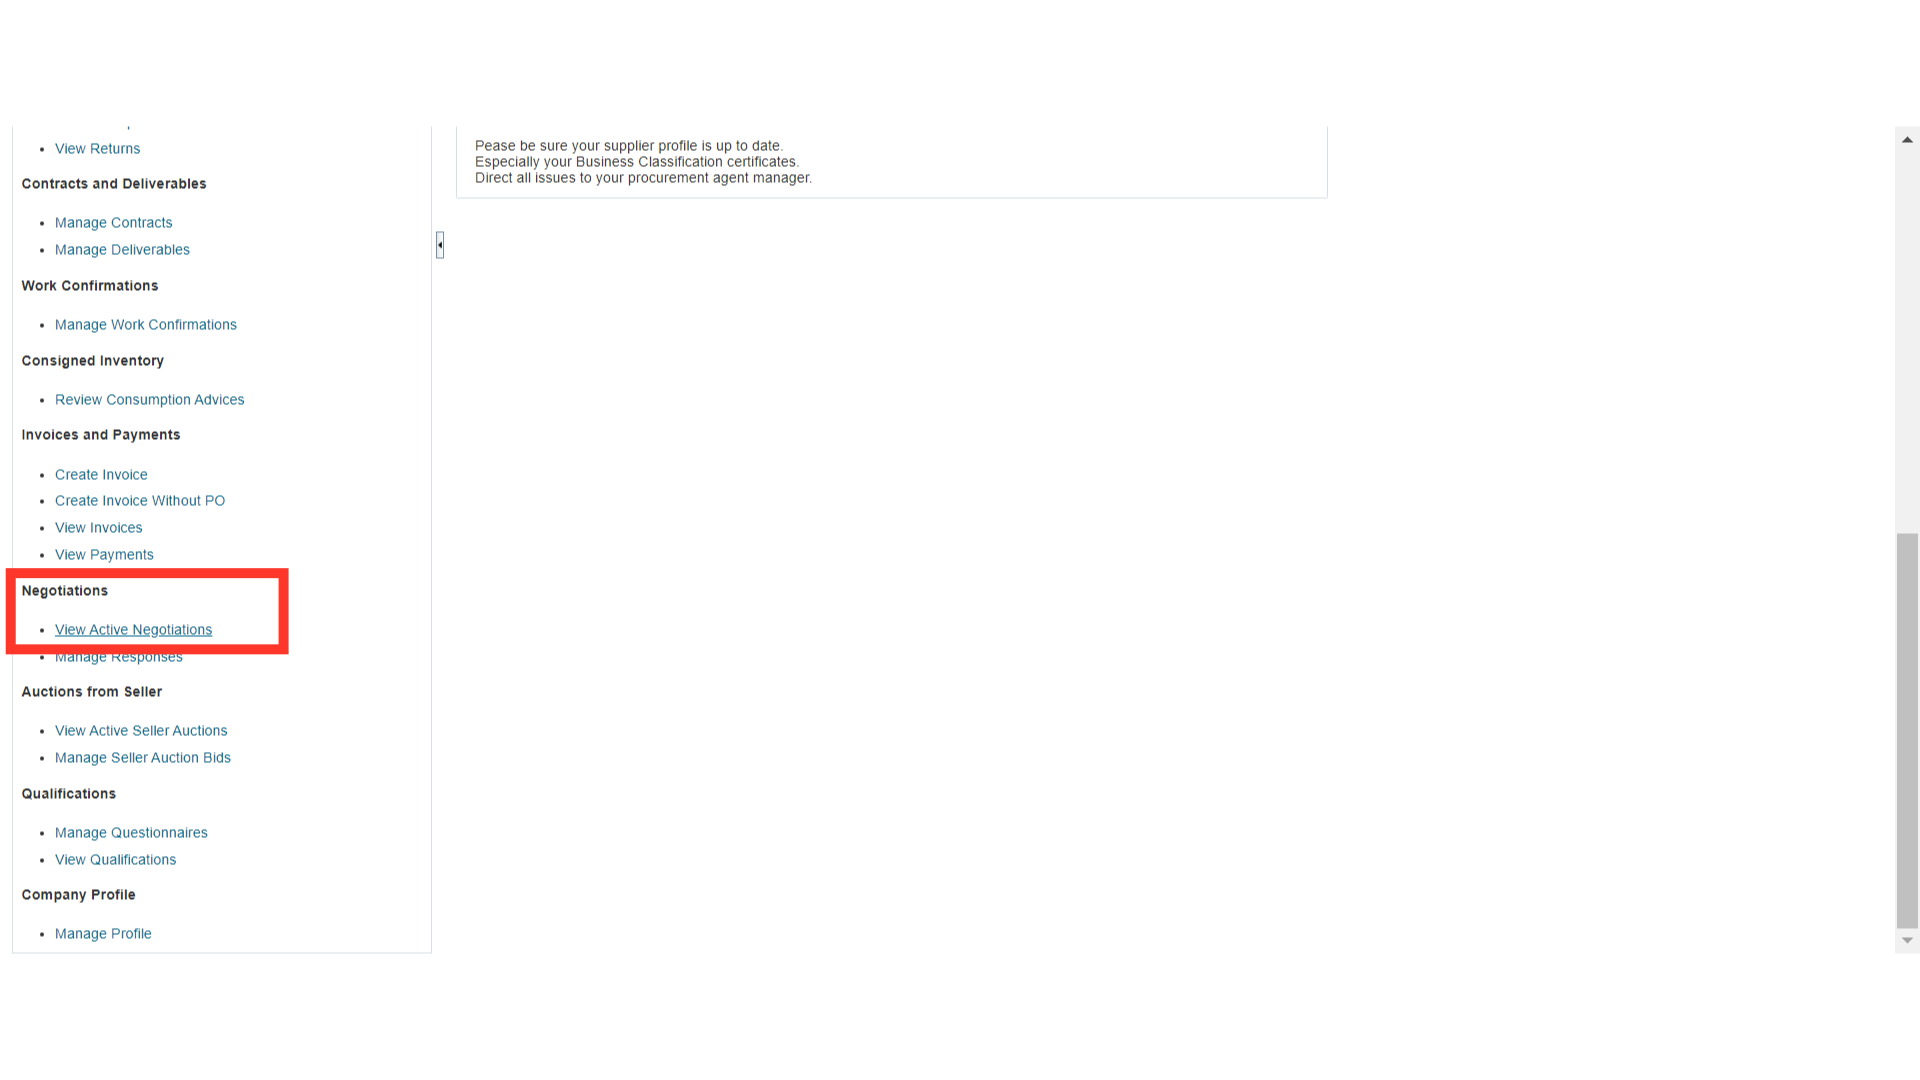
In the Negotiations task, click on View Active Negotiations.
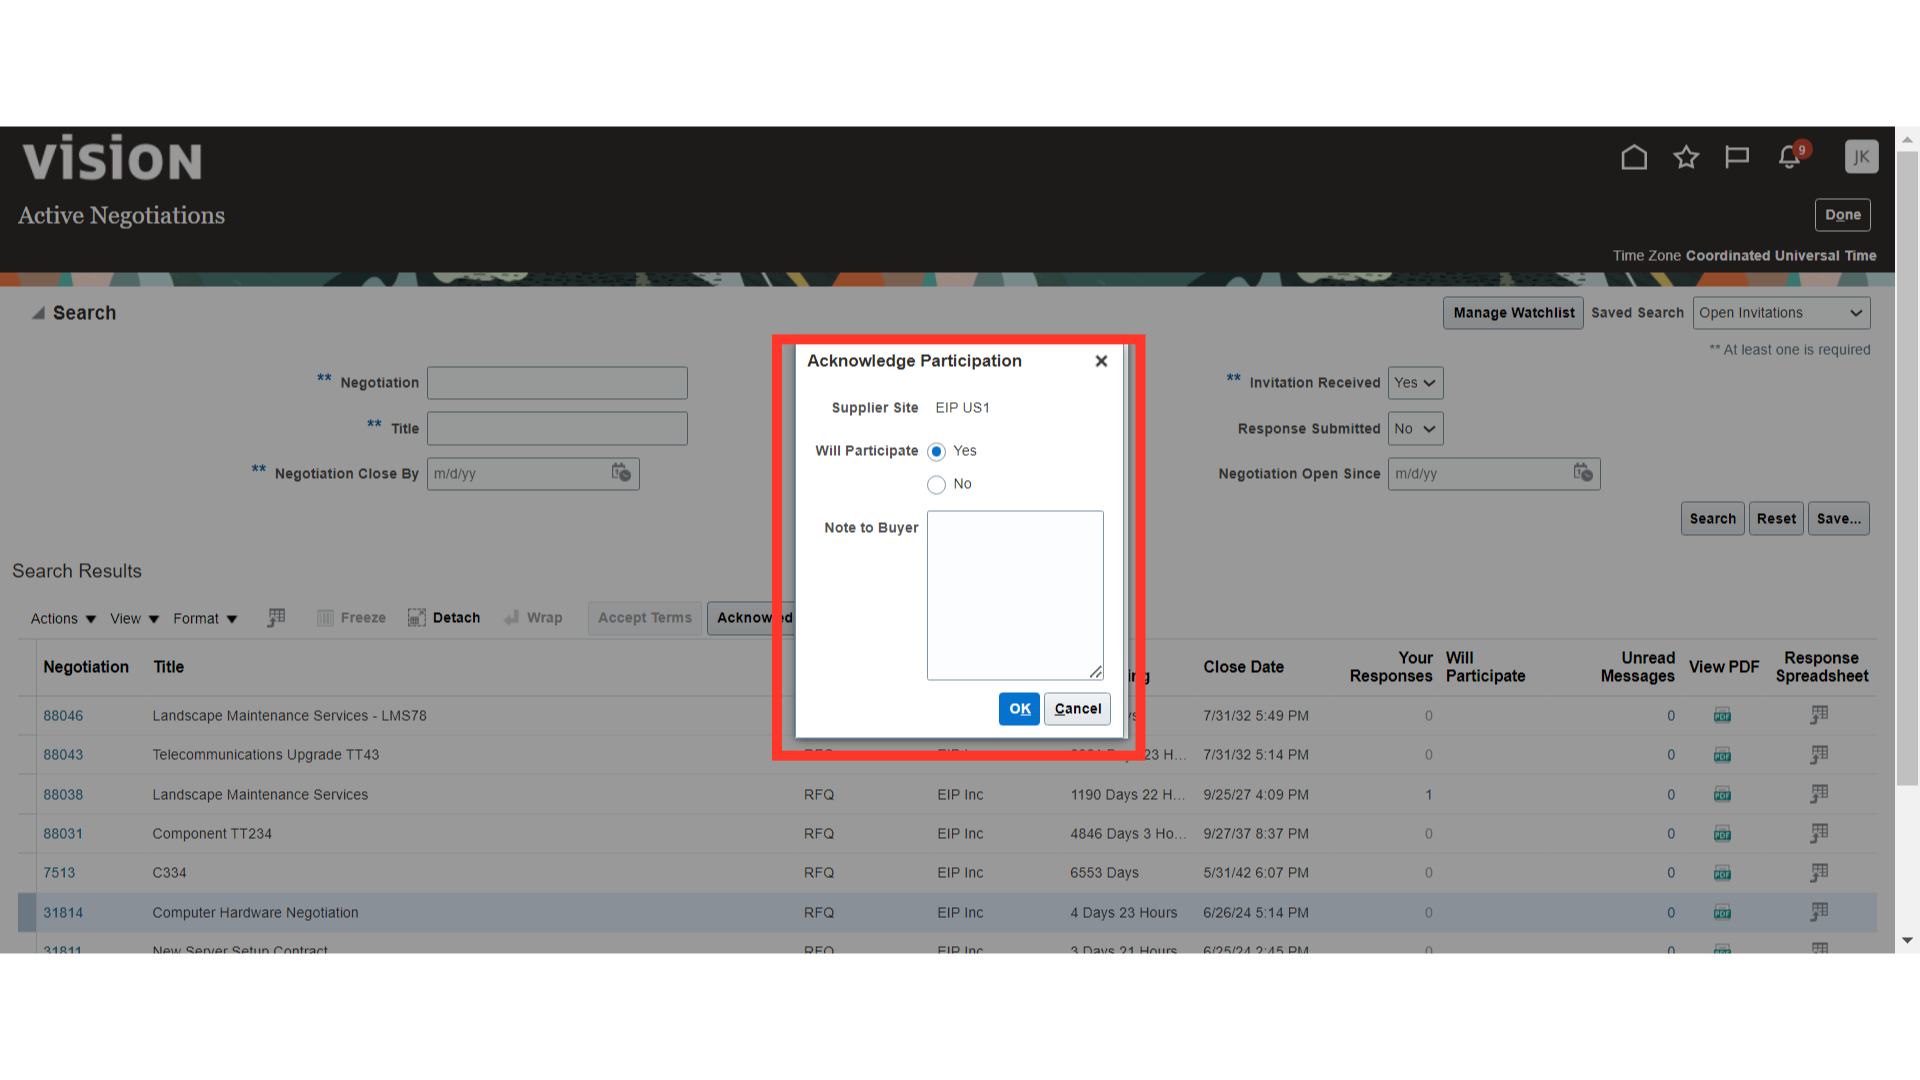
In Active Negotiation, search for the negotiation and select it. Once selected, click on the Acknowledge Participation button.
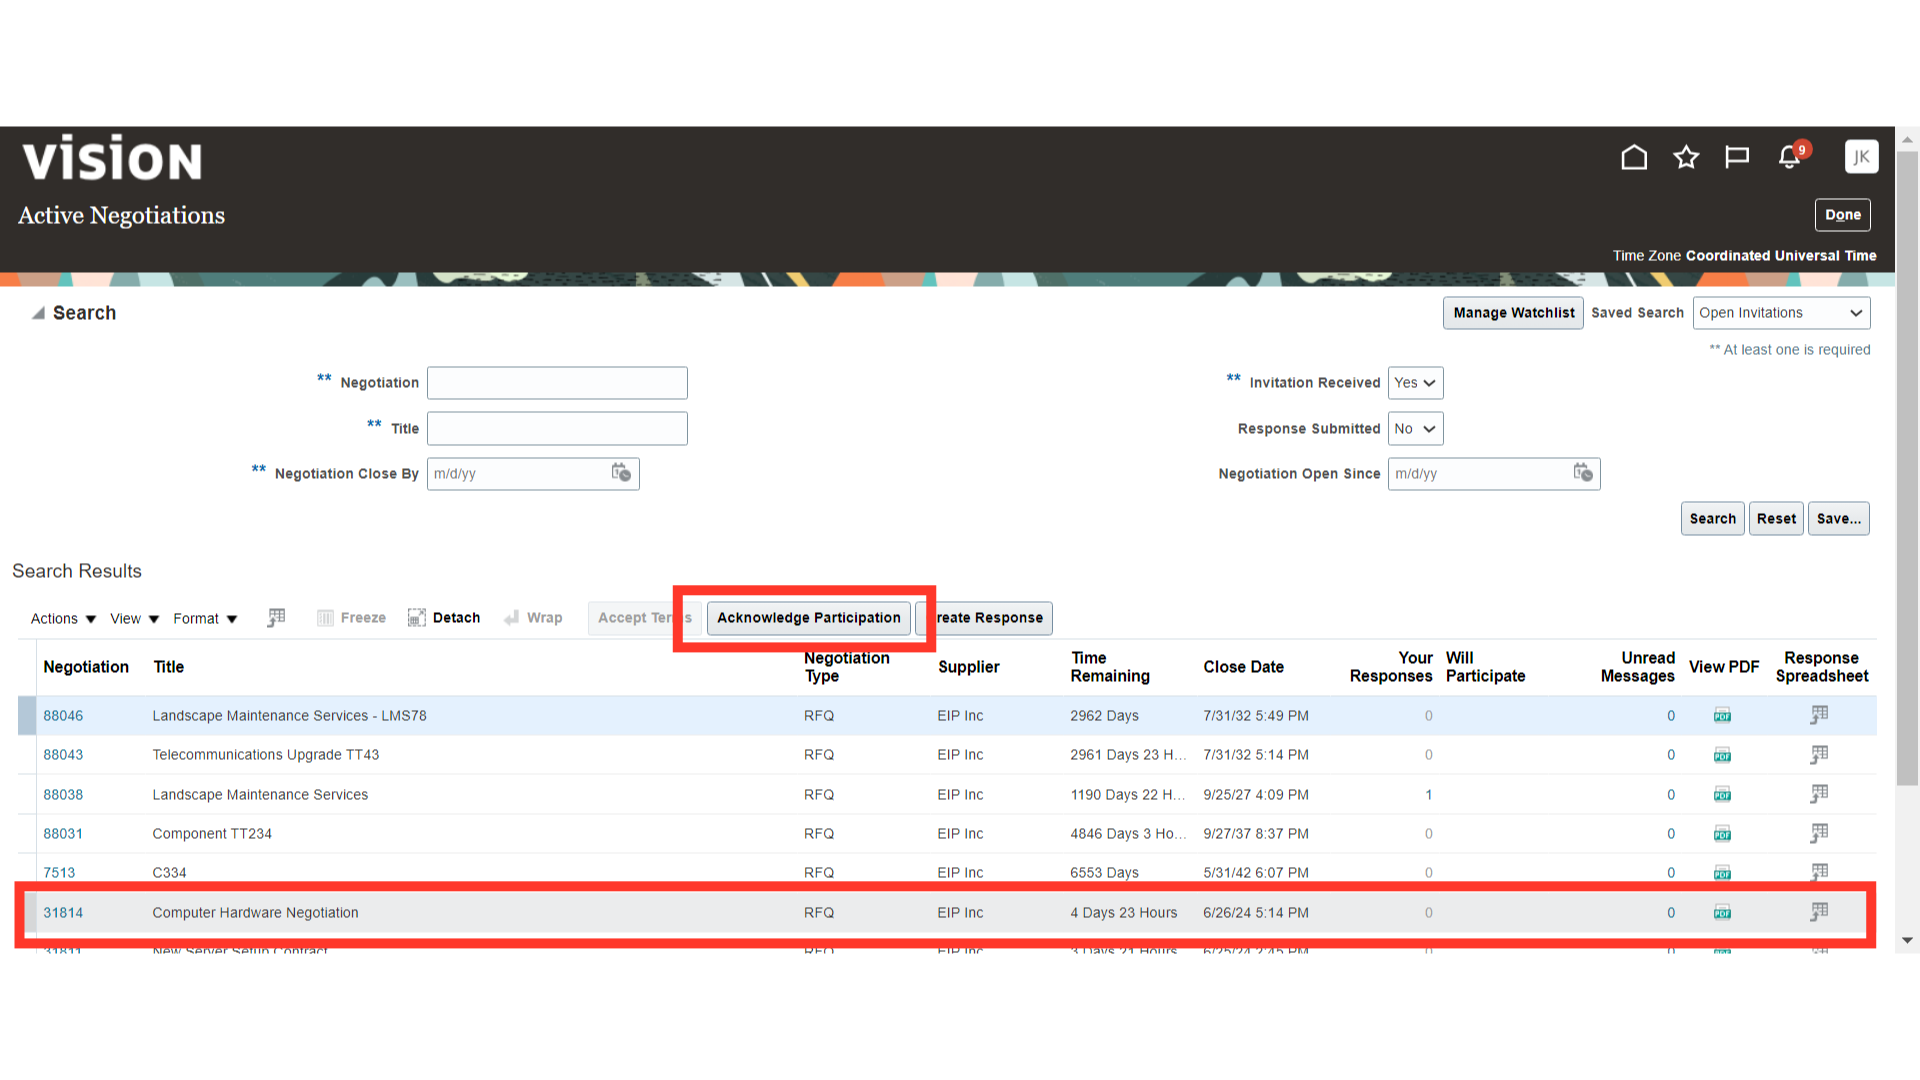
In the Acknowledge Participation window, select “Will Participate” as Yes and click OK.
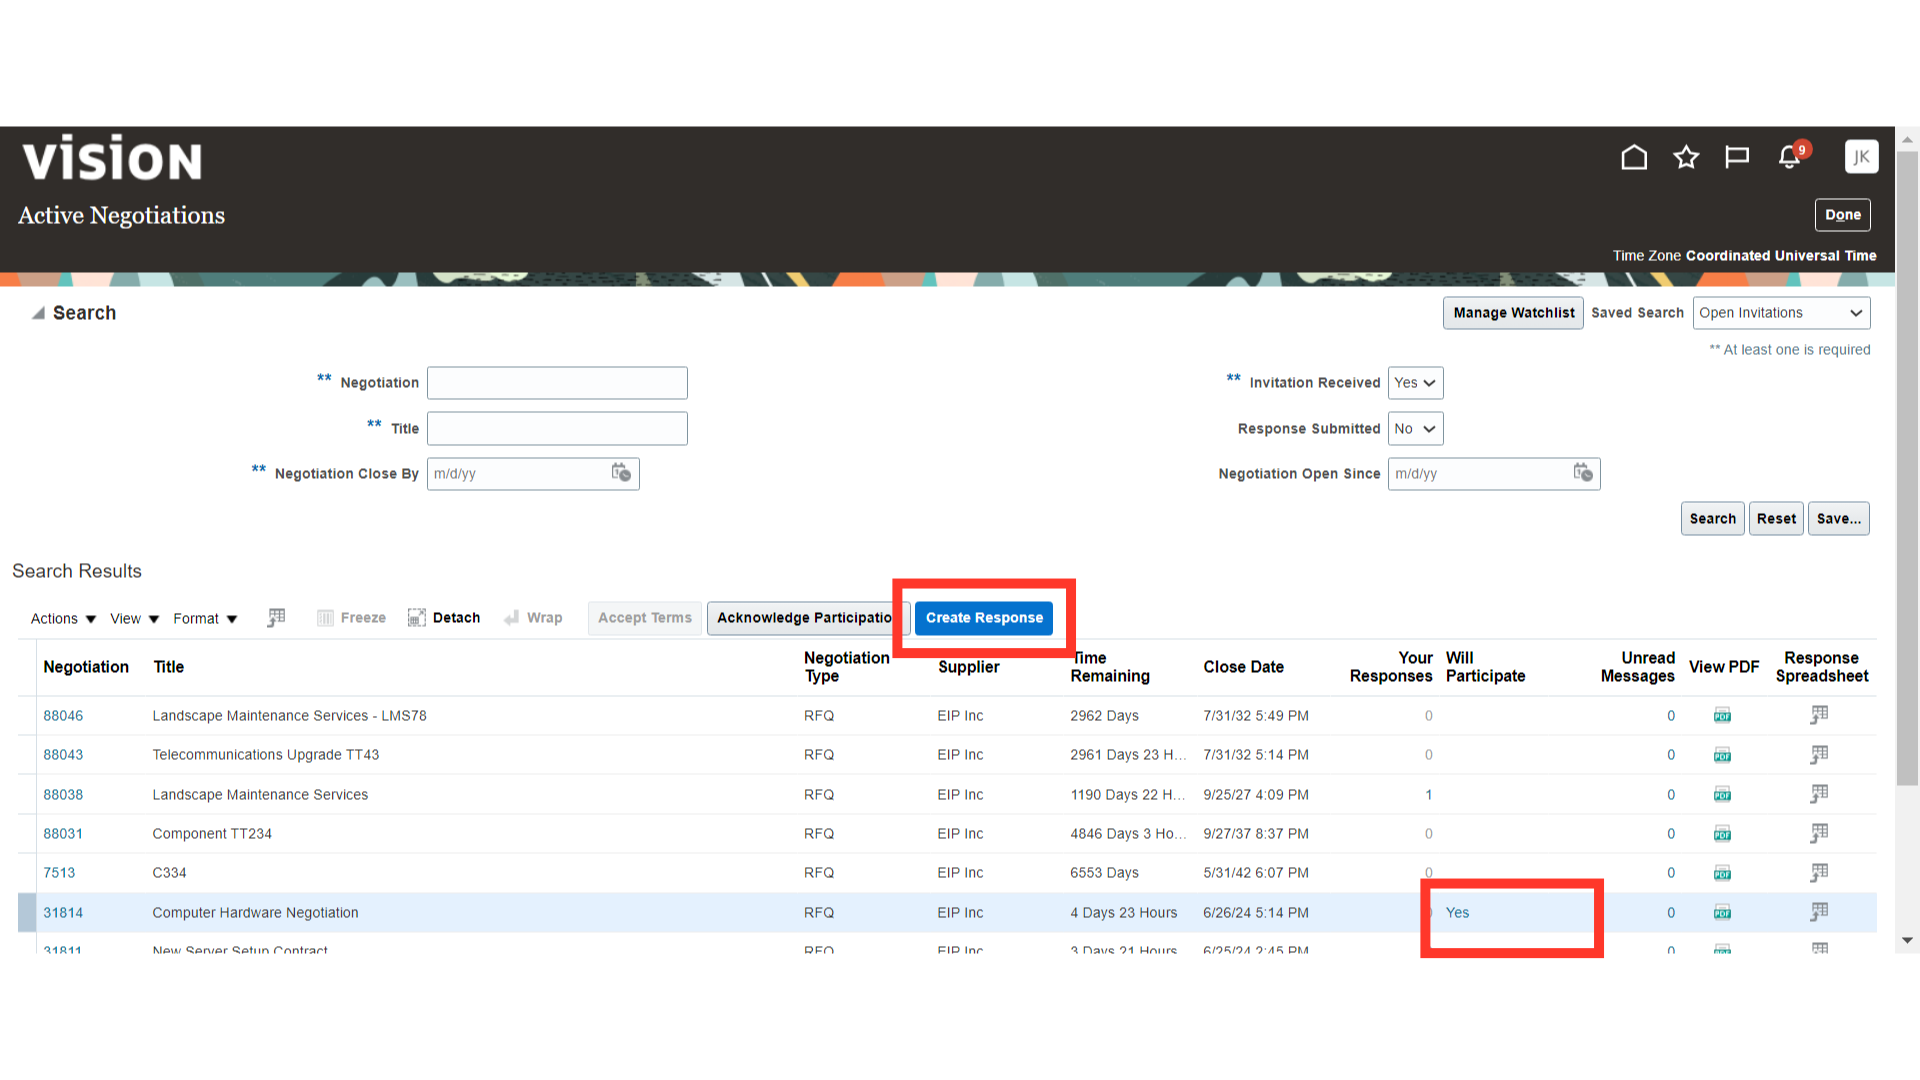
Once the acknowledgment is sent, select the Negotiation Line and click on the Create Response button.
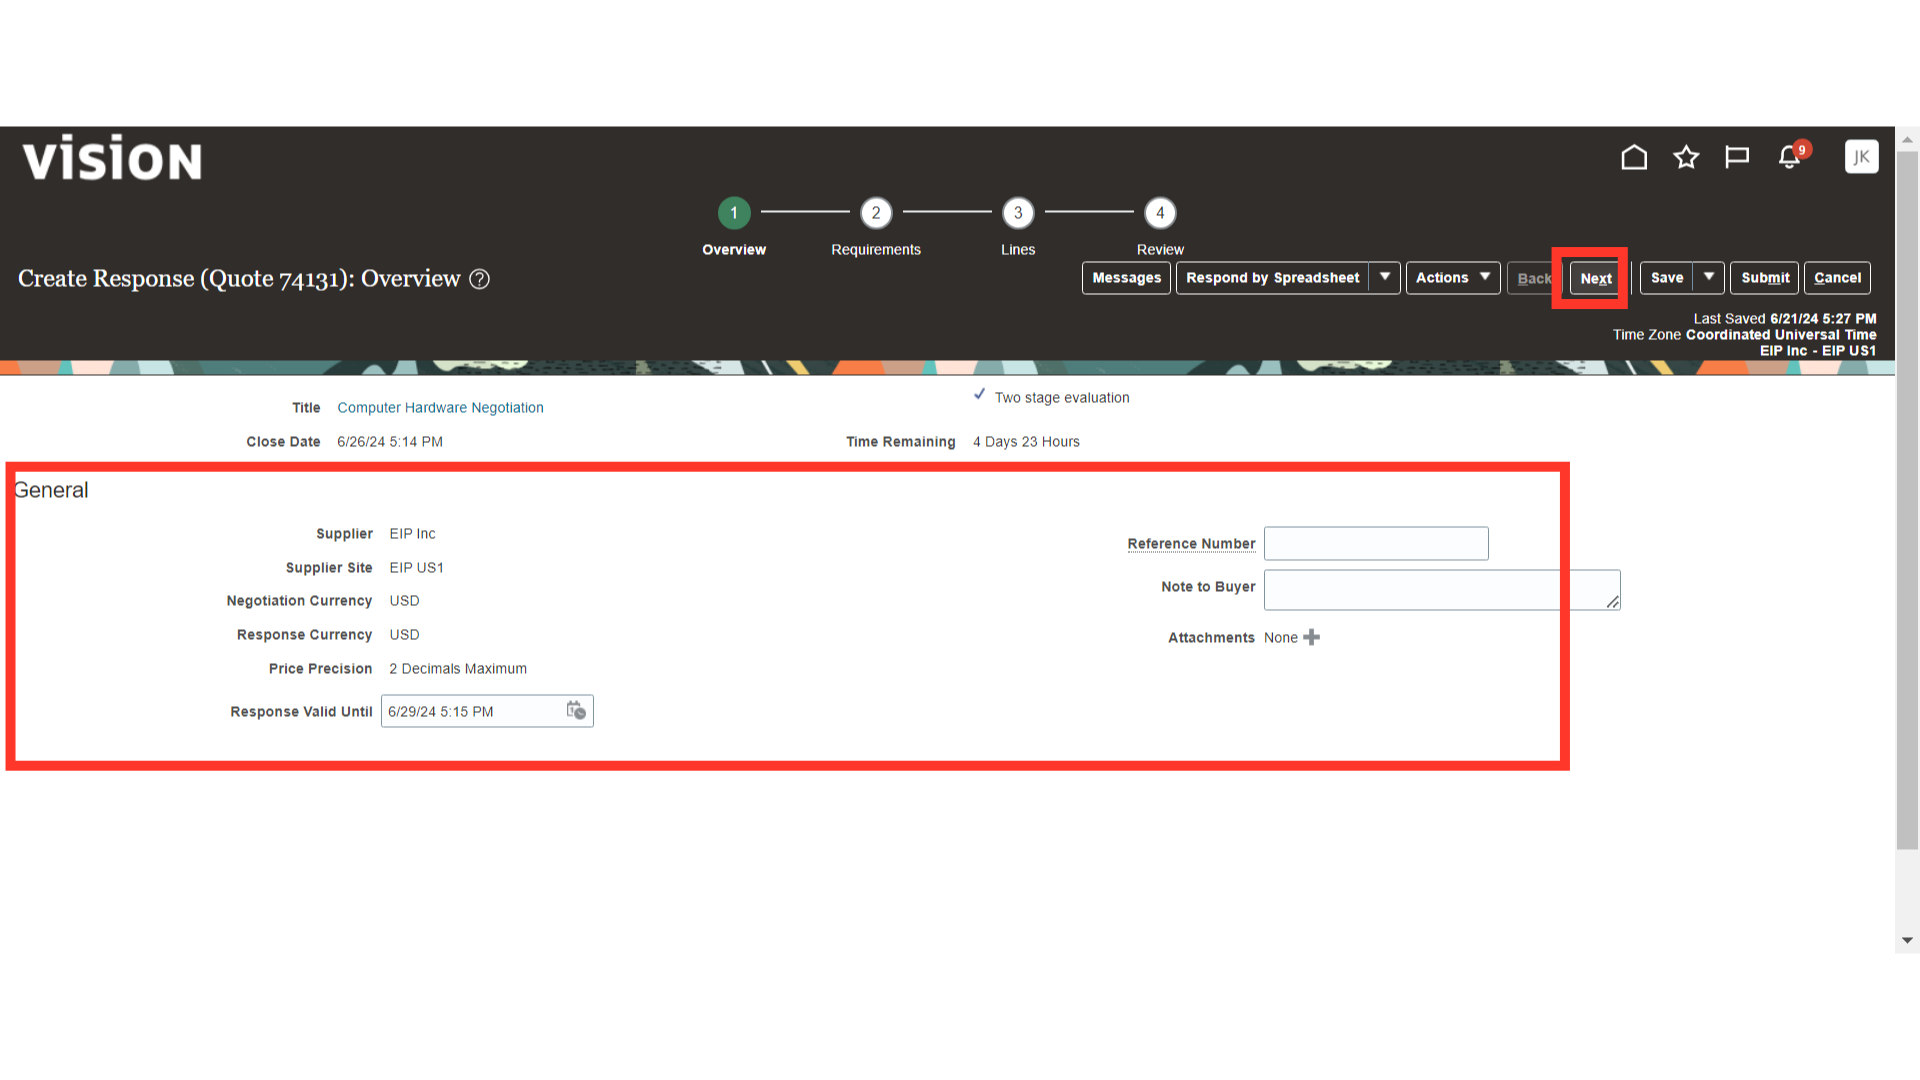
In the Overview section of Create Response, provide the relevant details such as Response Valid Until, Note to Buyer, and Attachments if available. Once the details are filled in, click on the Next button.
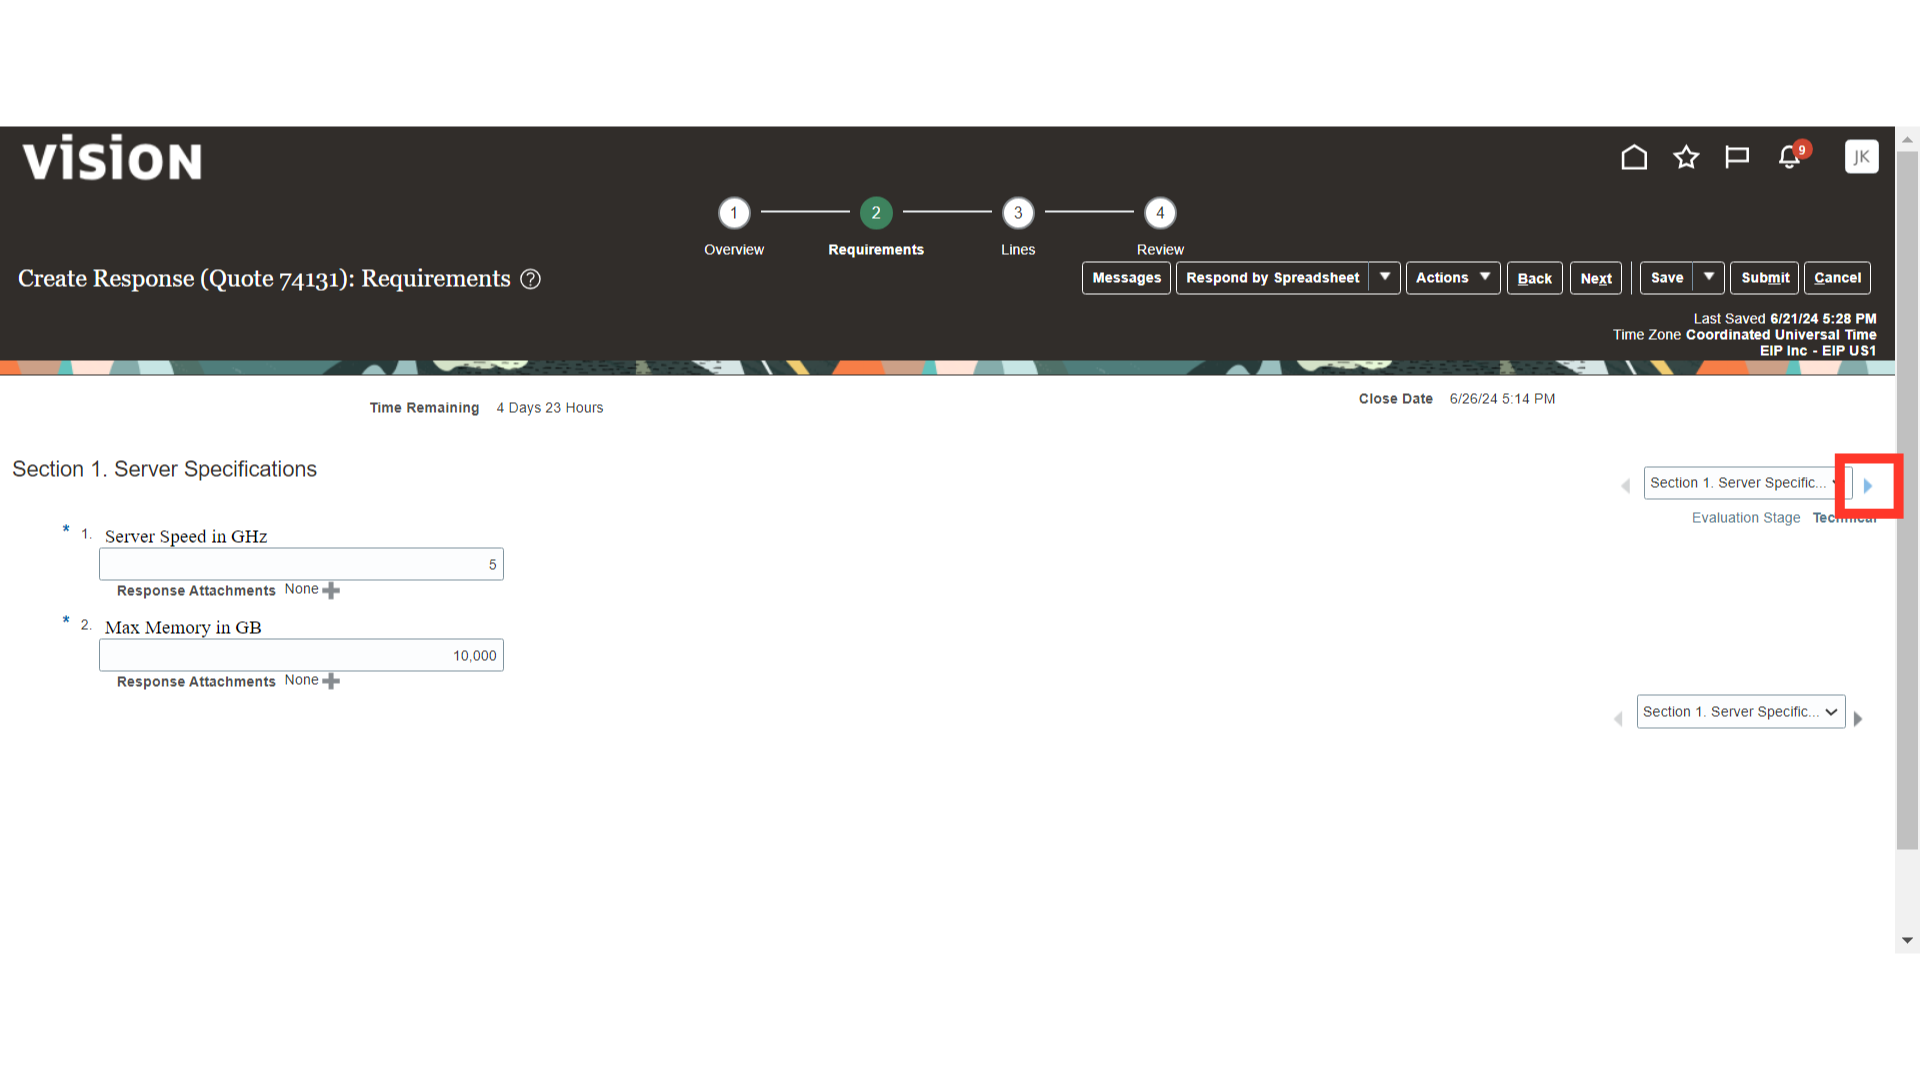
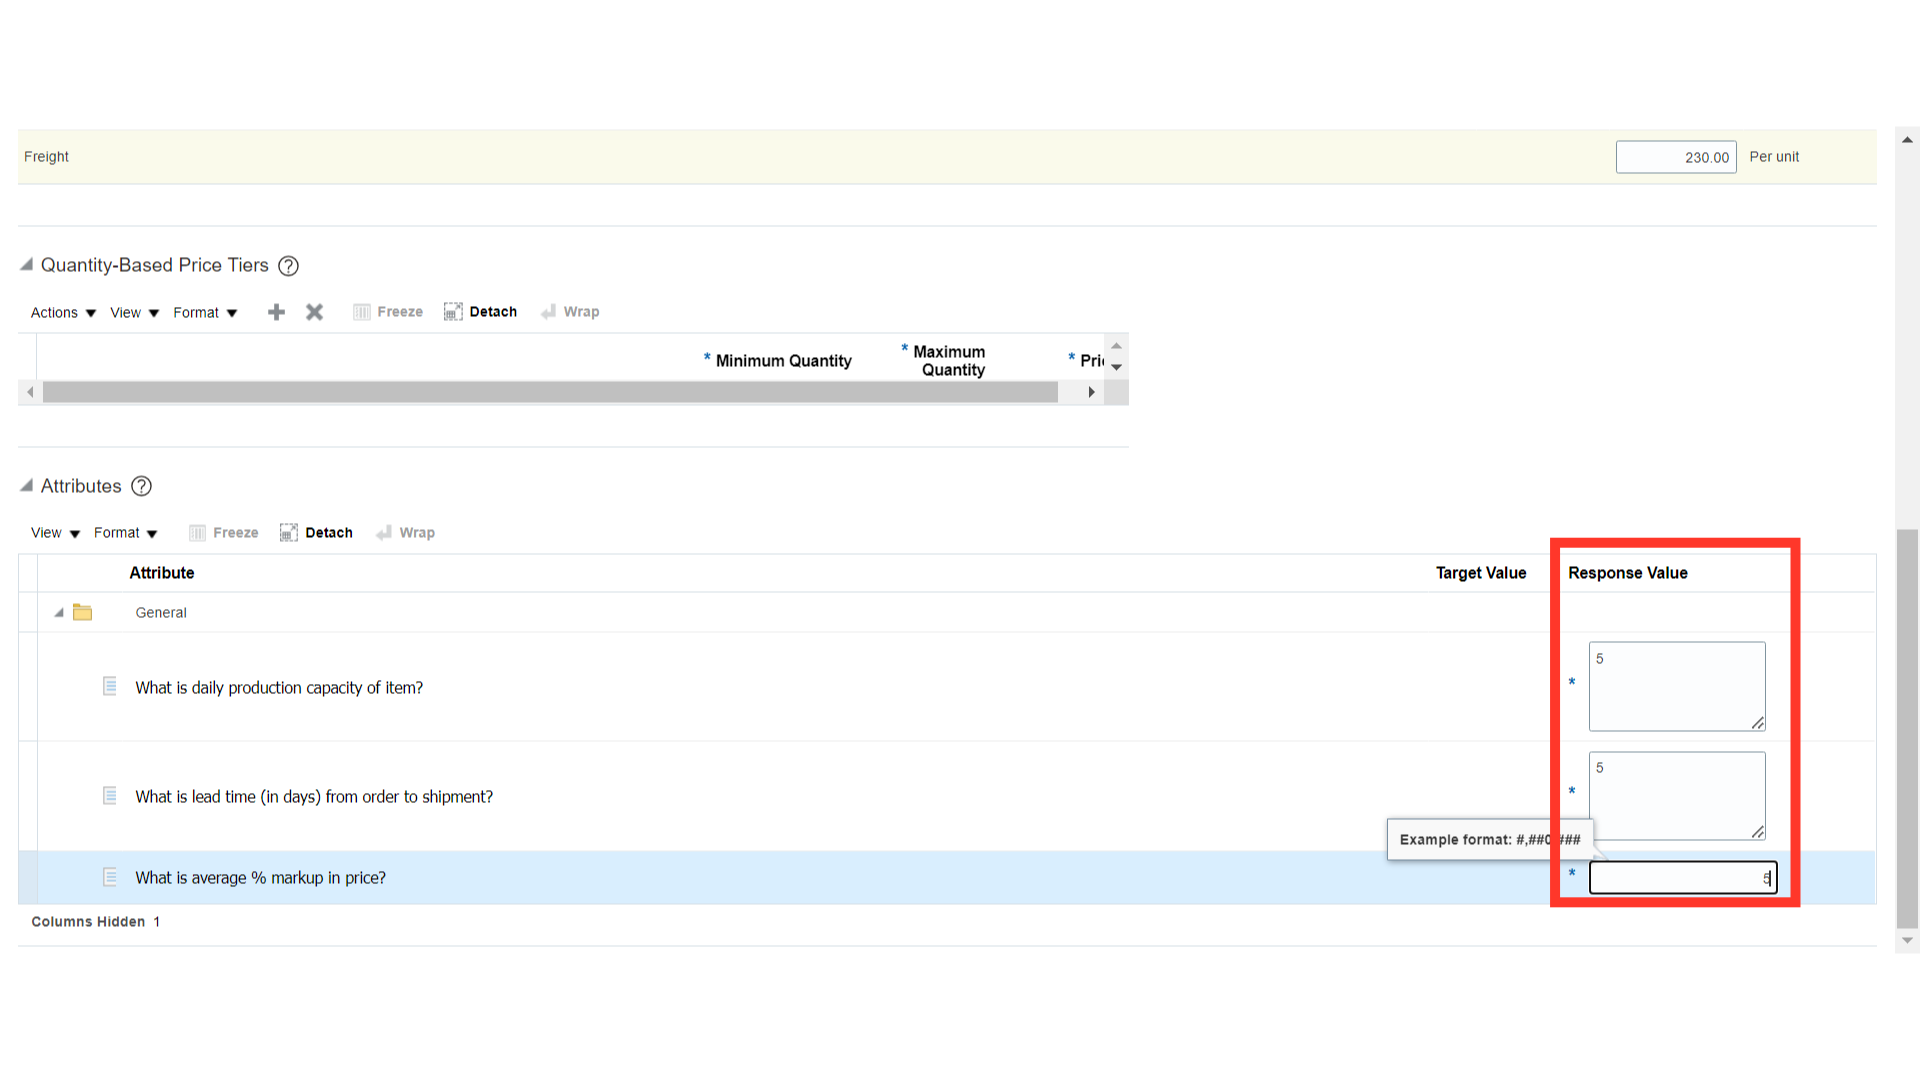
In the Requirements section of Create Response, provide the technical details that are asked by the buyer.
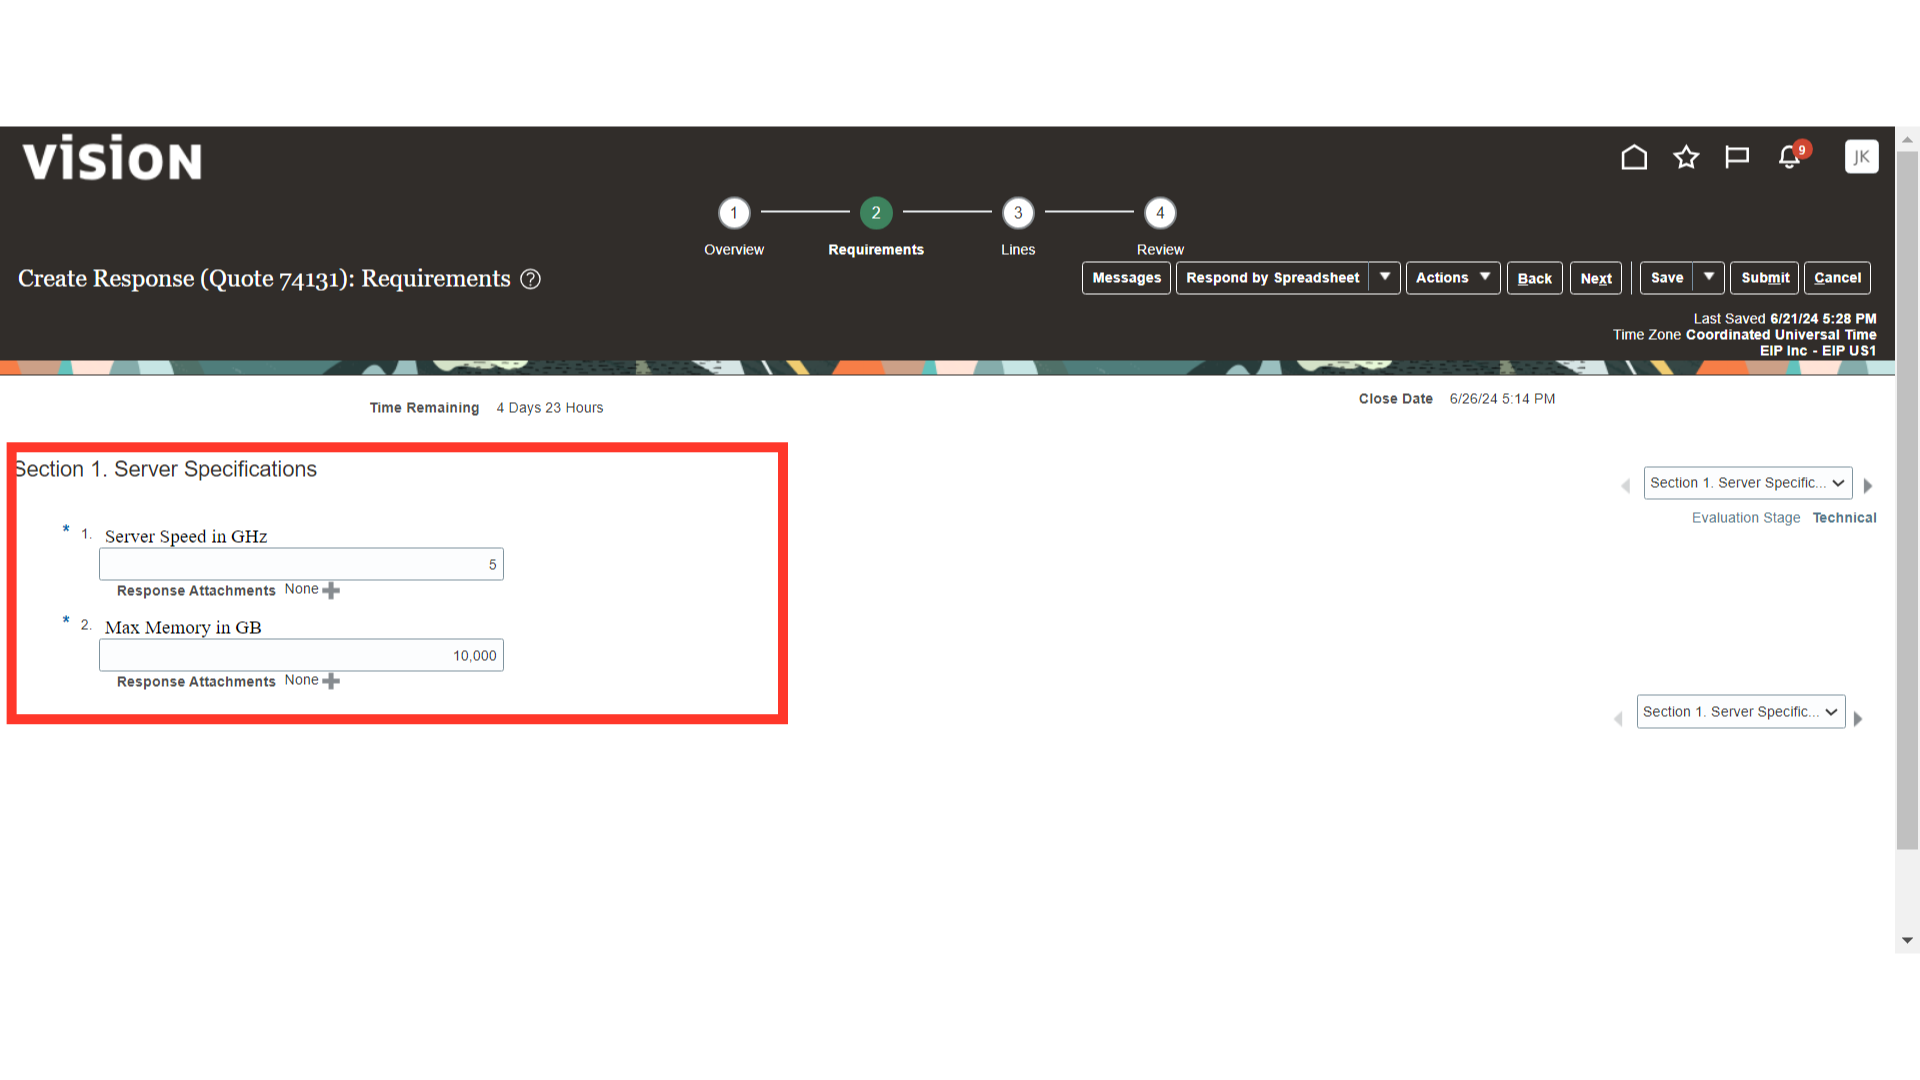
Once the Technical section requirements are filled in, click on the right arrow to change the section.
Now, we are in the Commercial section of the requirement. Provide the commercial details asked by the buyer.
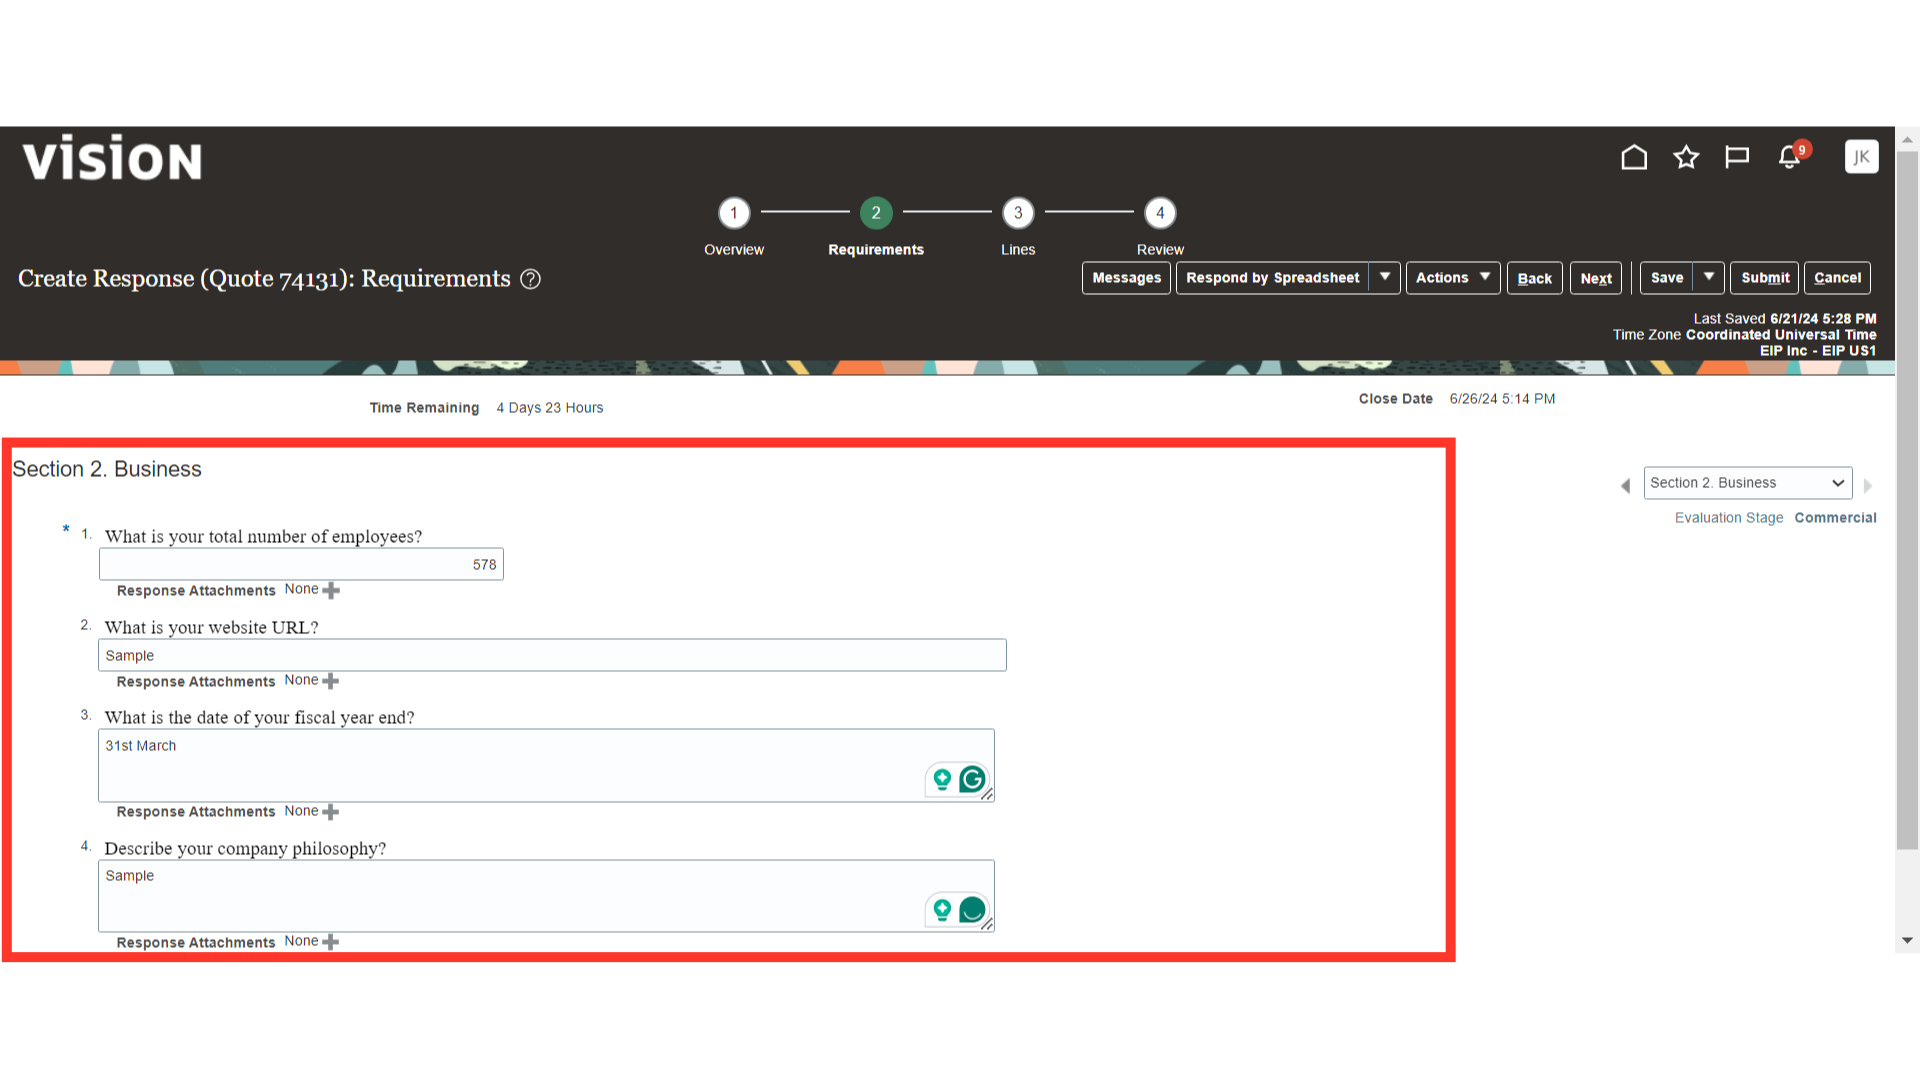
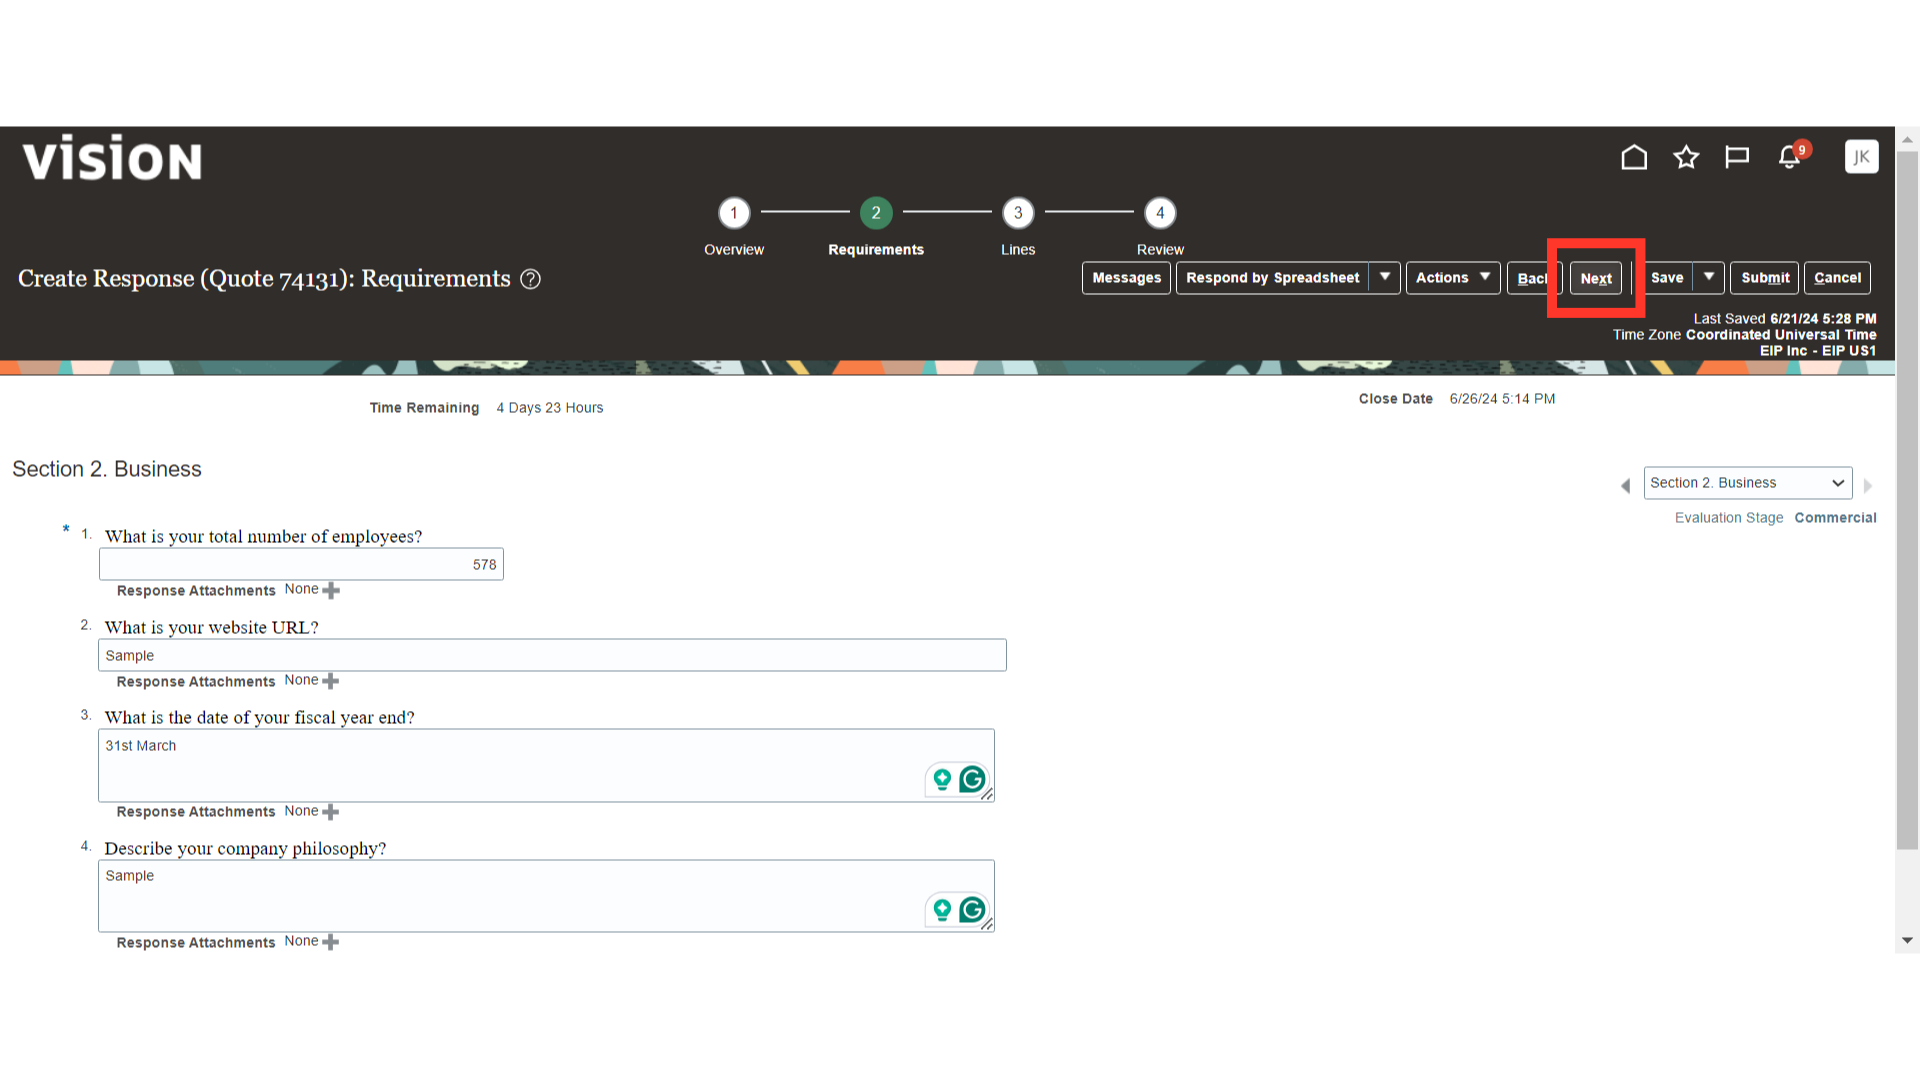
Once the Technical and Commercial requirements are filled in, click on the Next button.
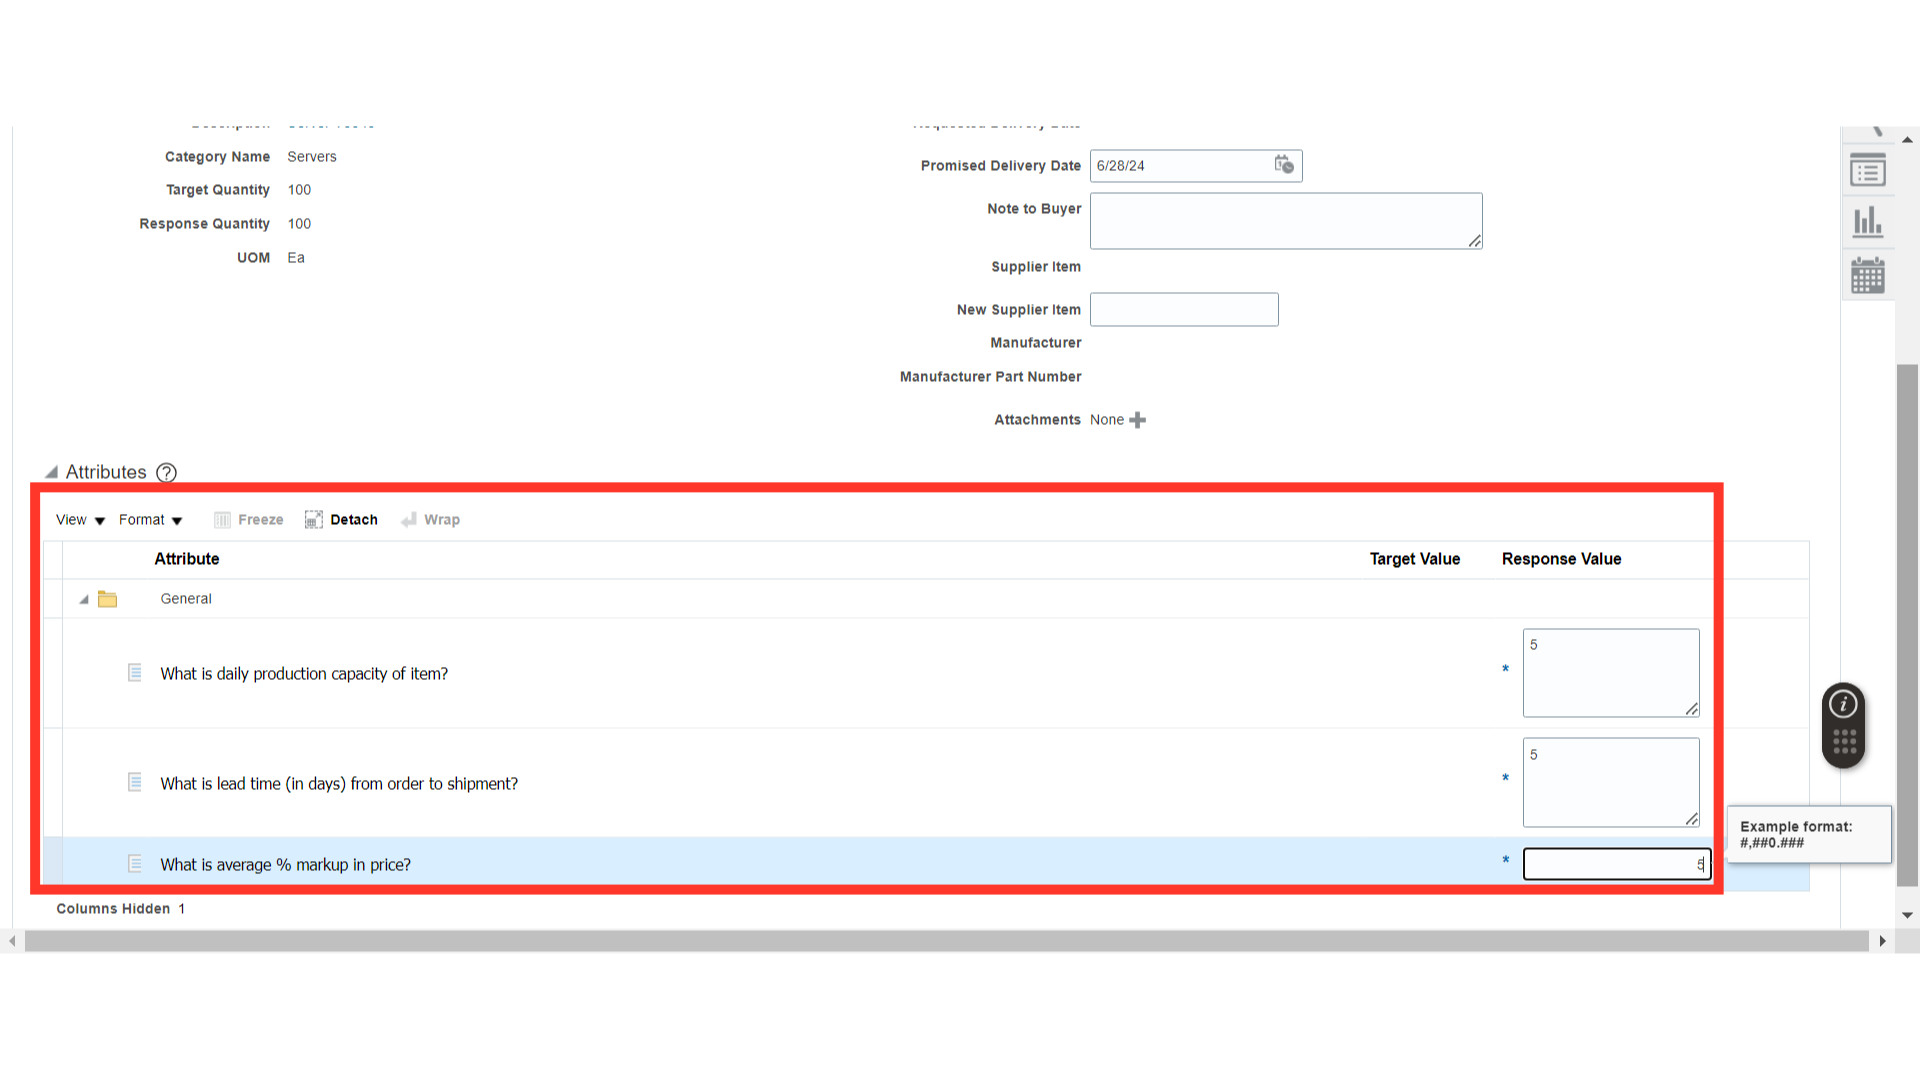
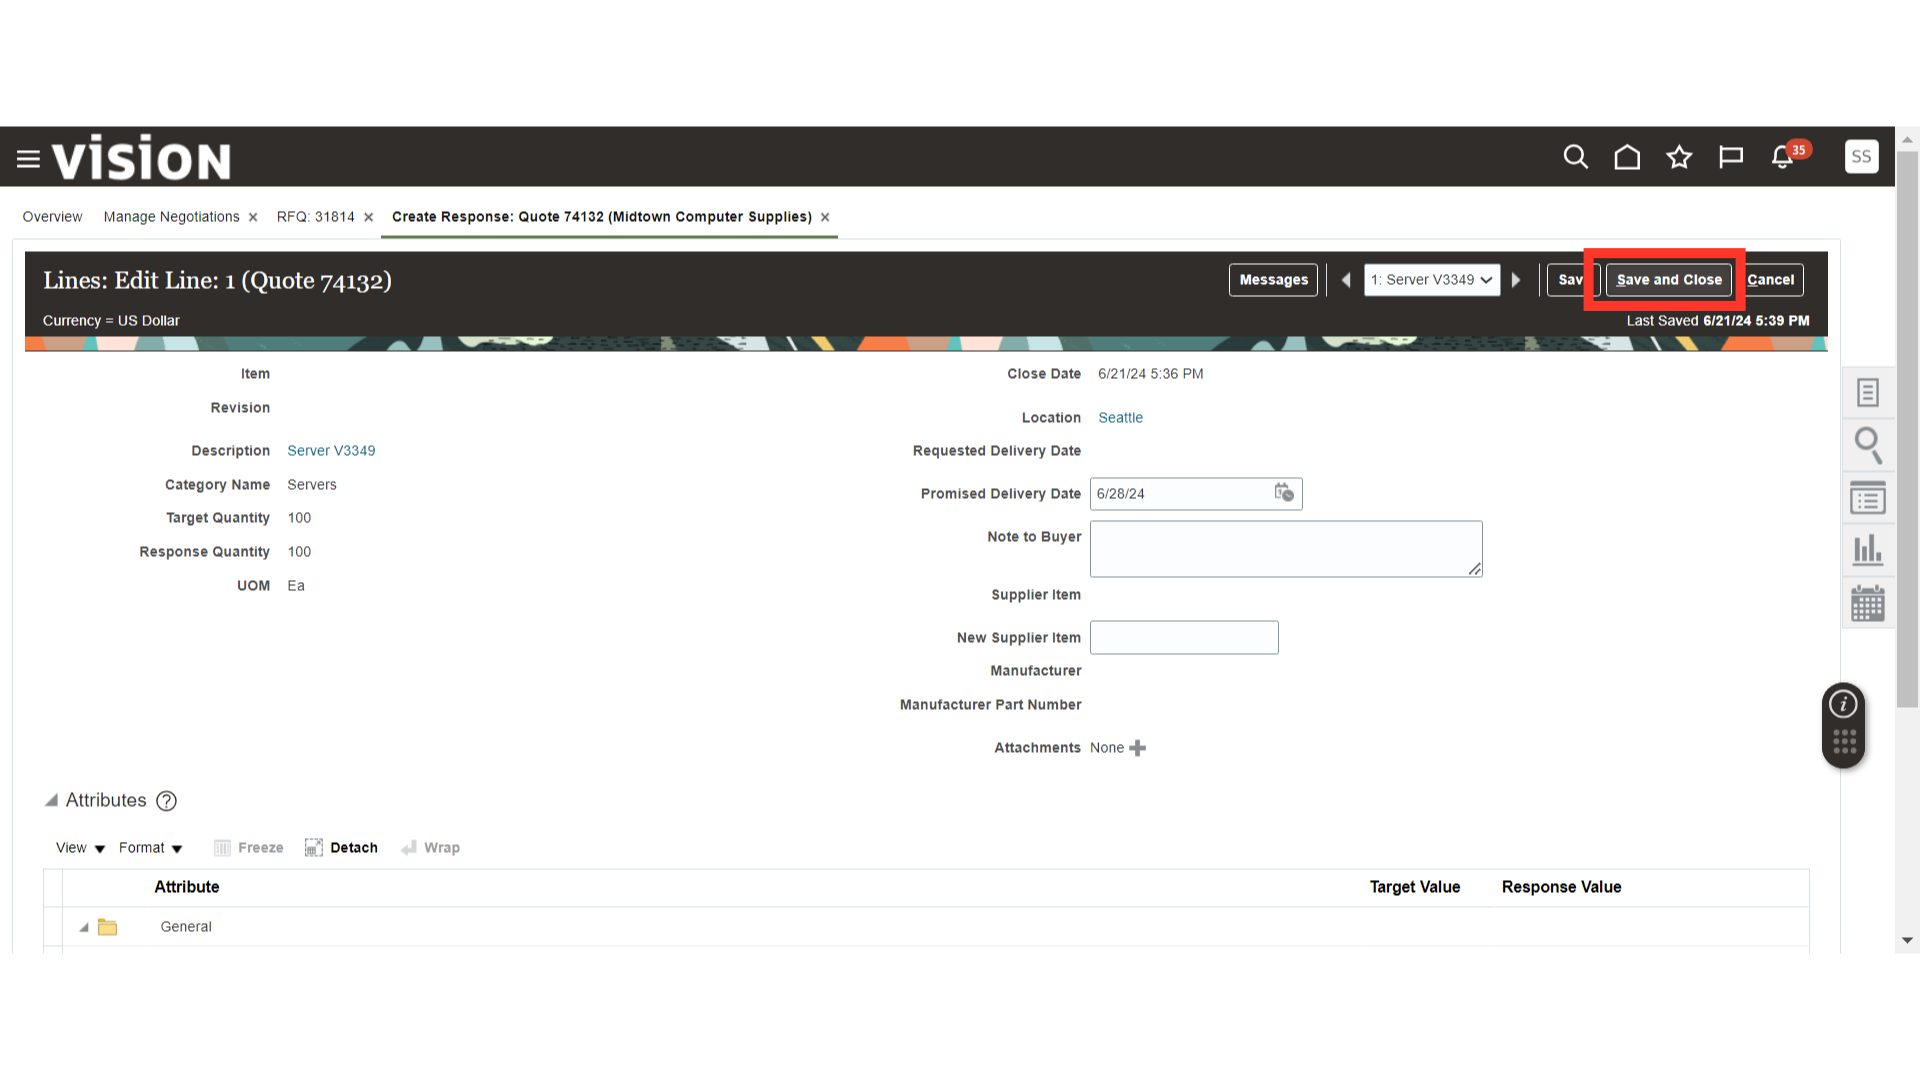
In the Lines section of Create Response, provide the response price and click on the required details. Required details are additional information that is asked by the buyer related to the negotiation line.
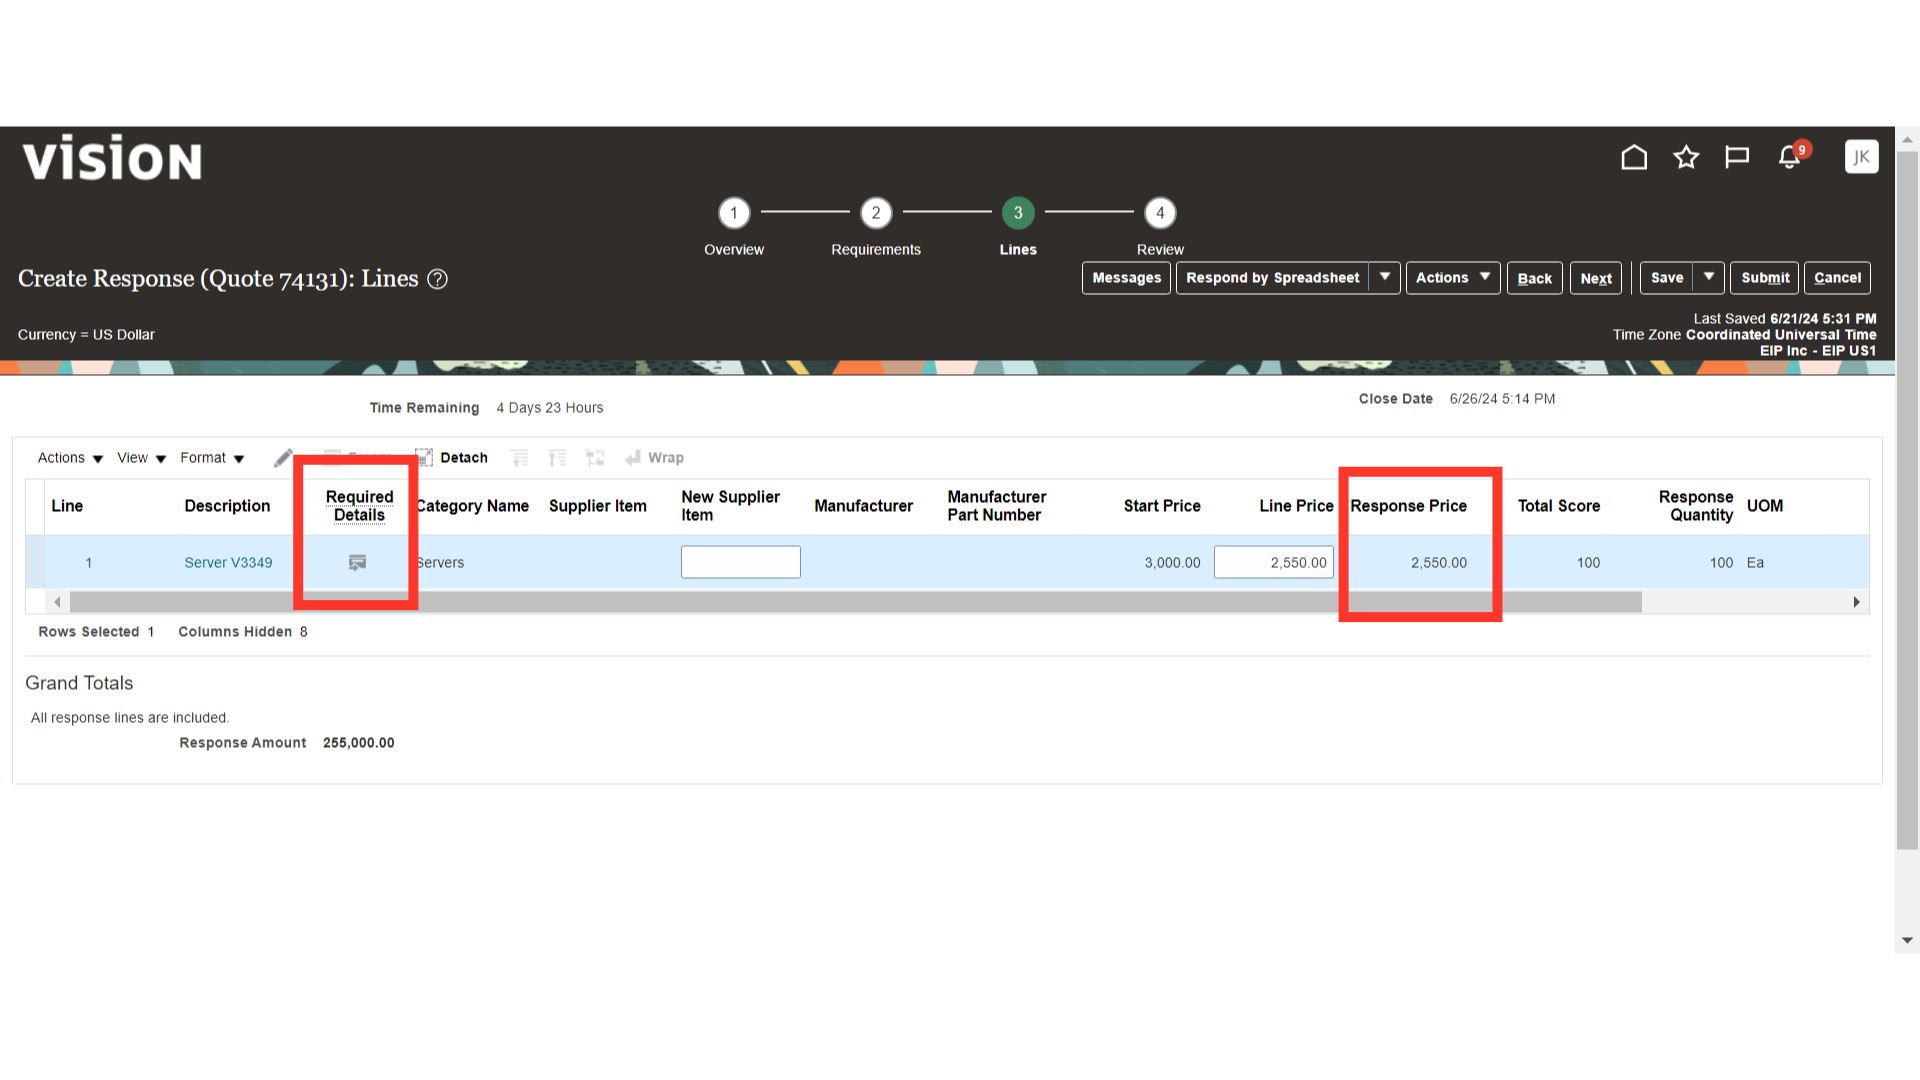
In Lines Required Details, the buyer has asked for the freight charges. Provide the freight charges details.
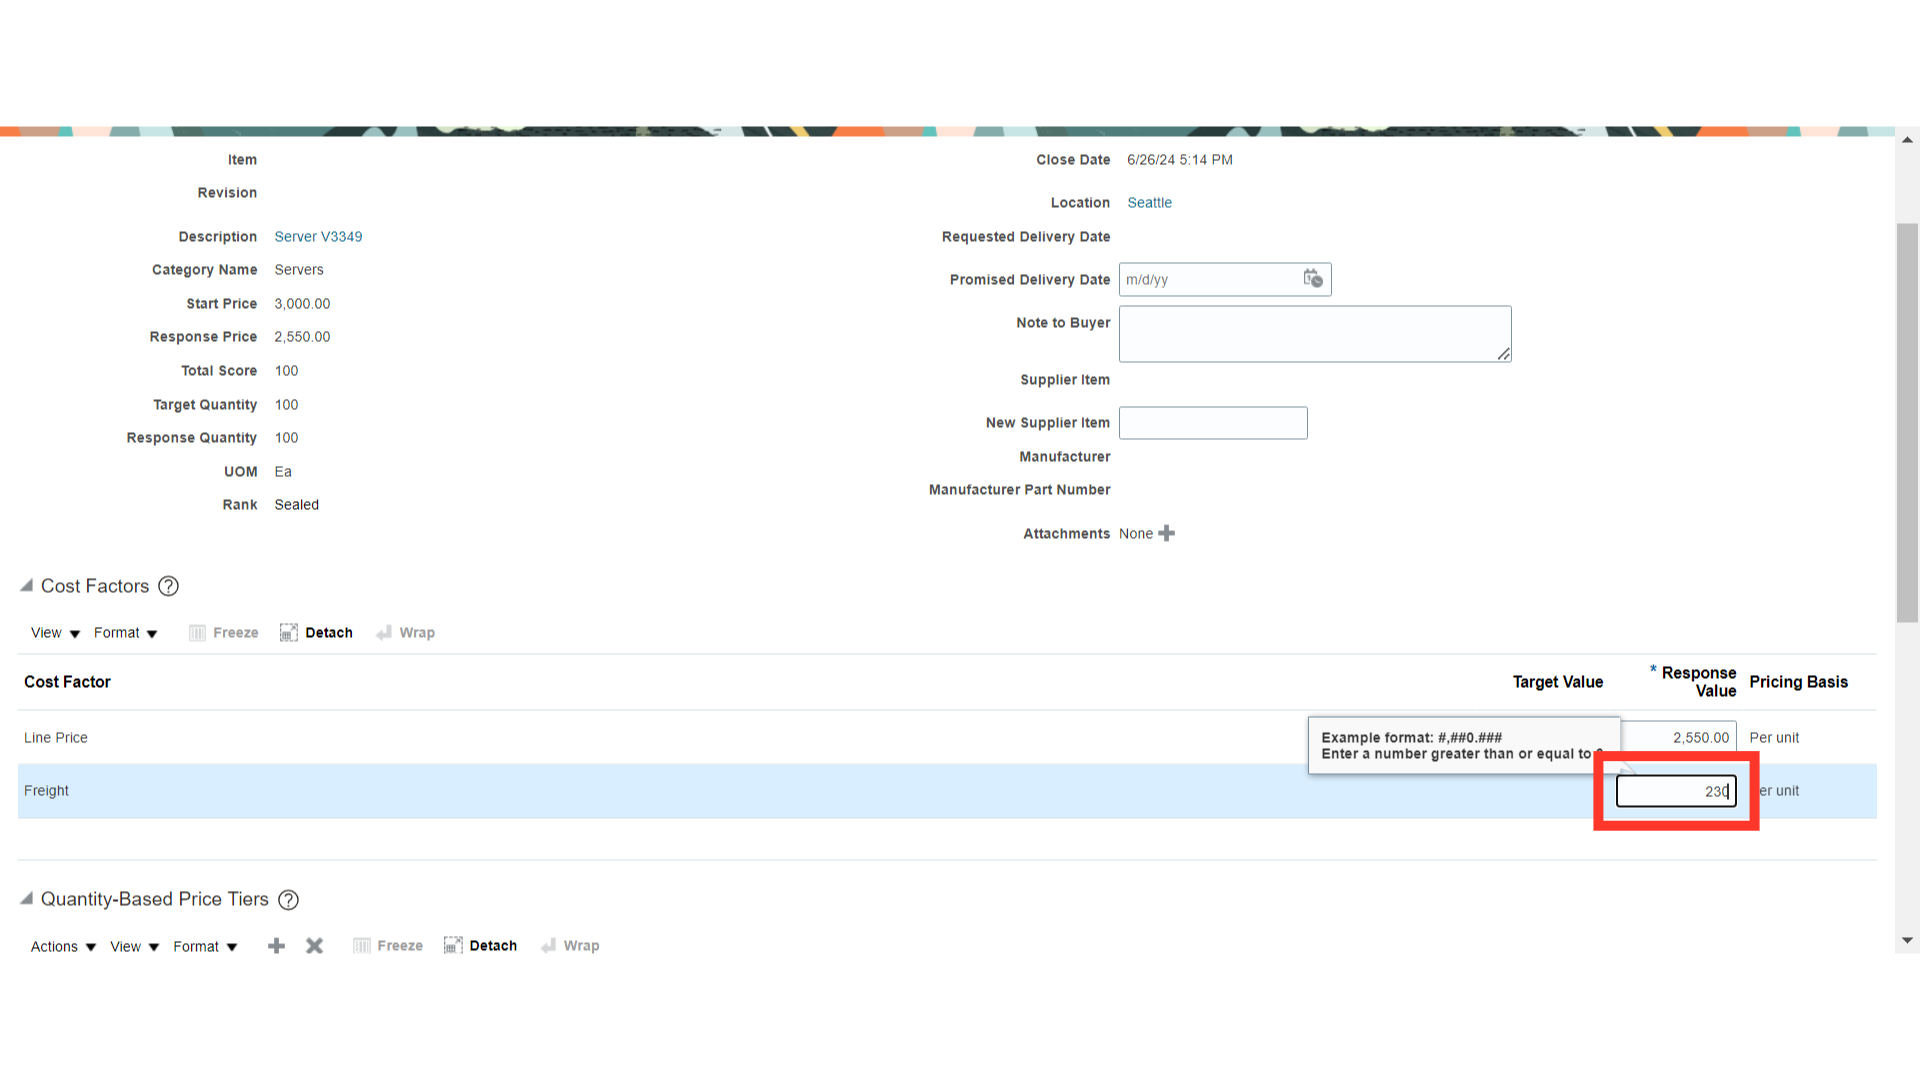
Provide a few other details that are asked by the buying organization about the line.
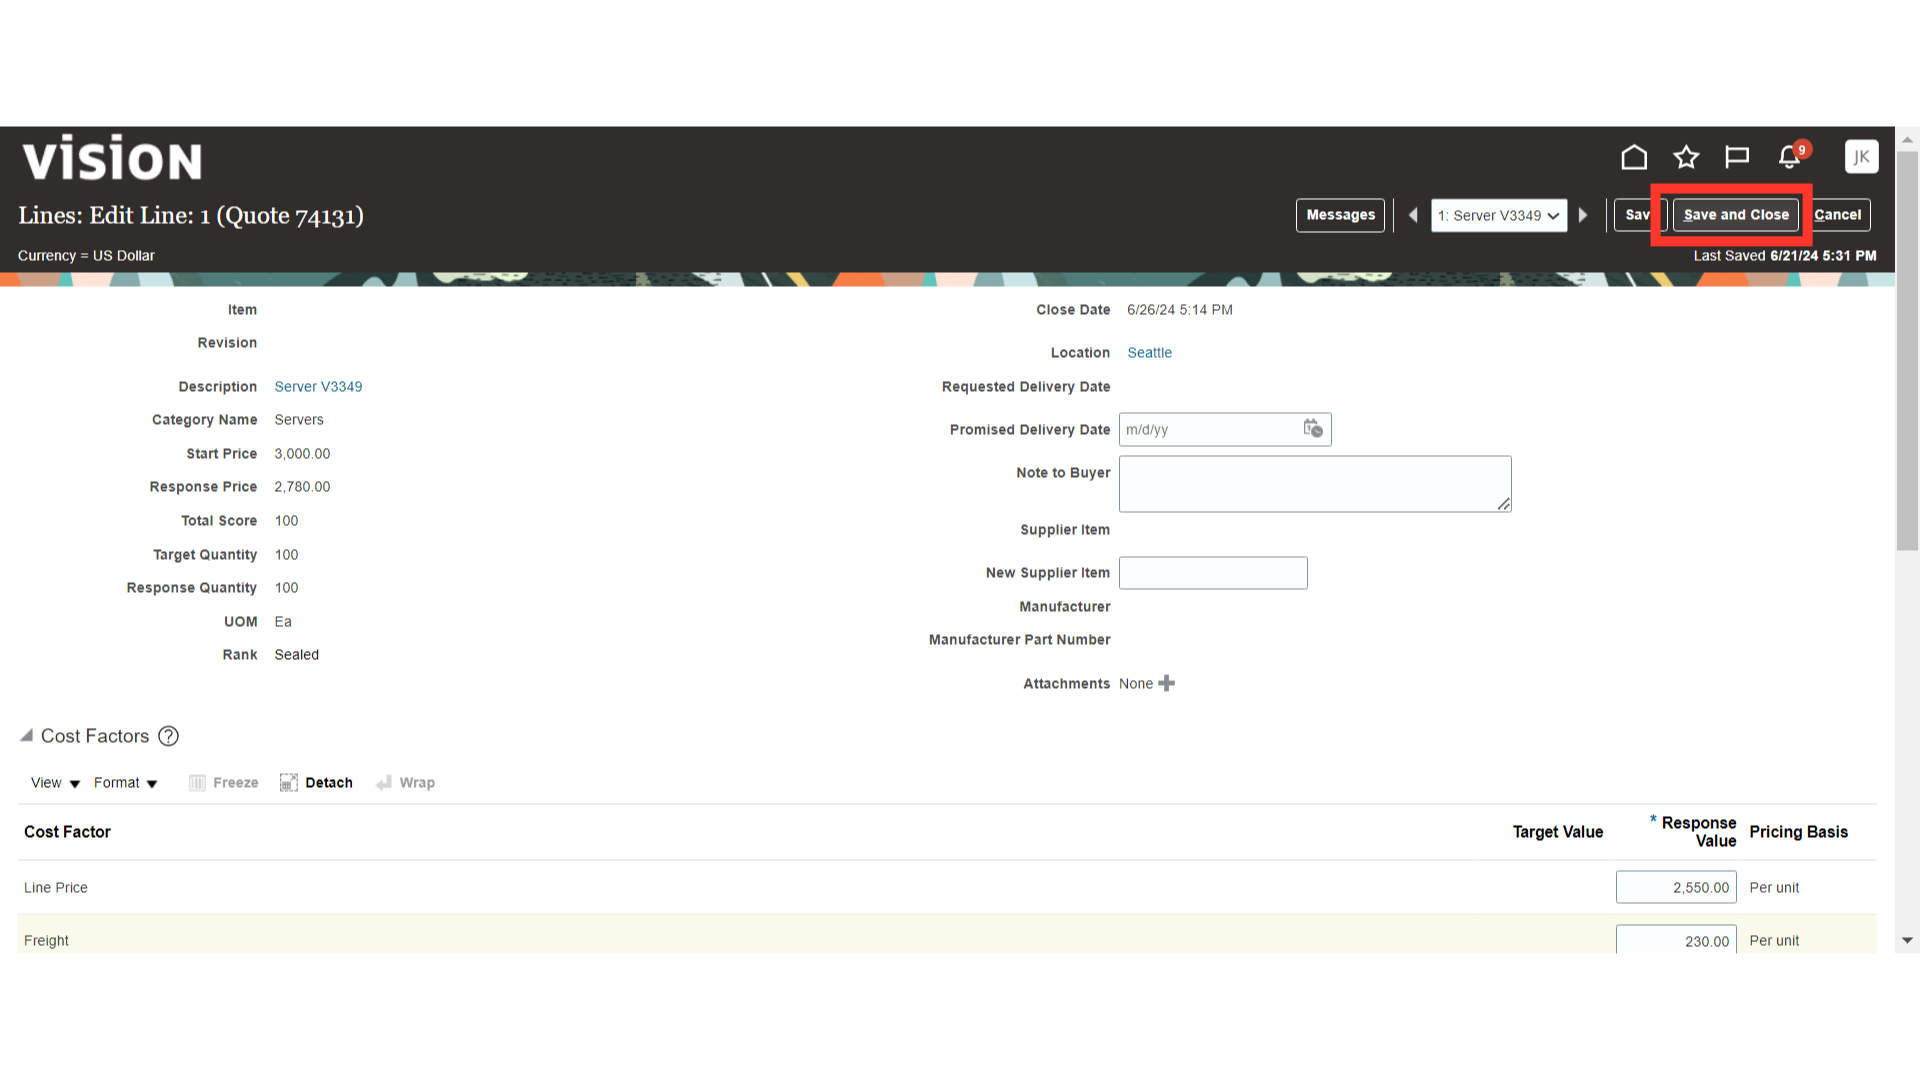
Once all the Line Required Details are filled in, click on the Save and Close button.
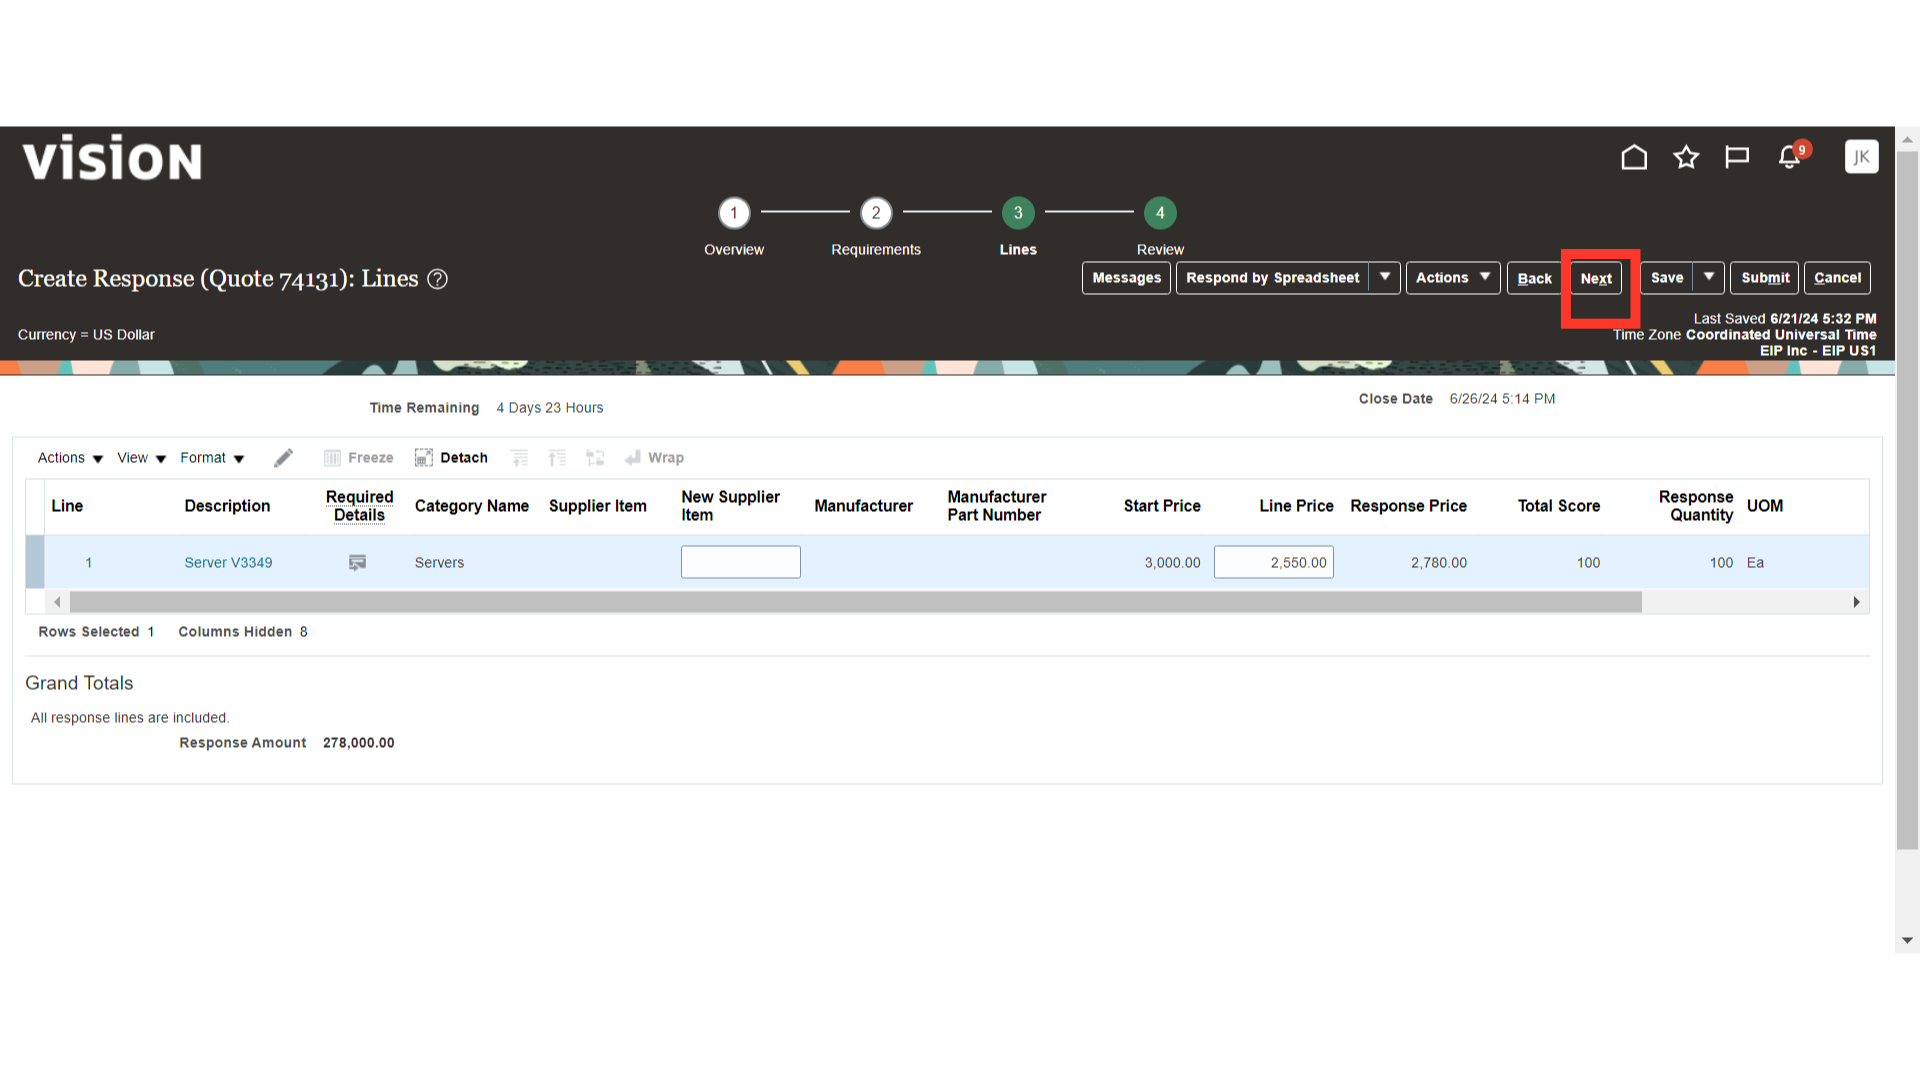
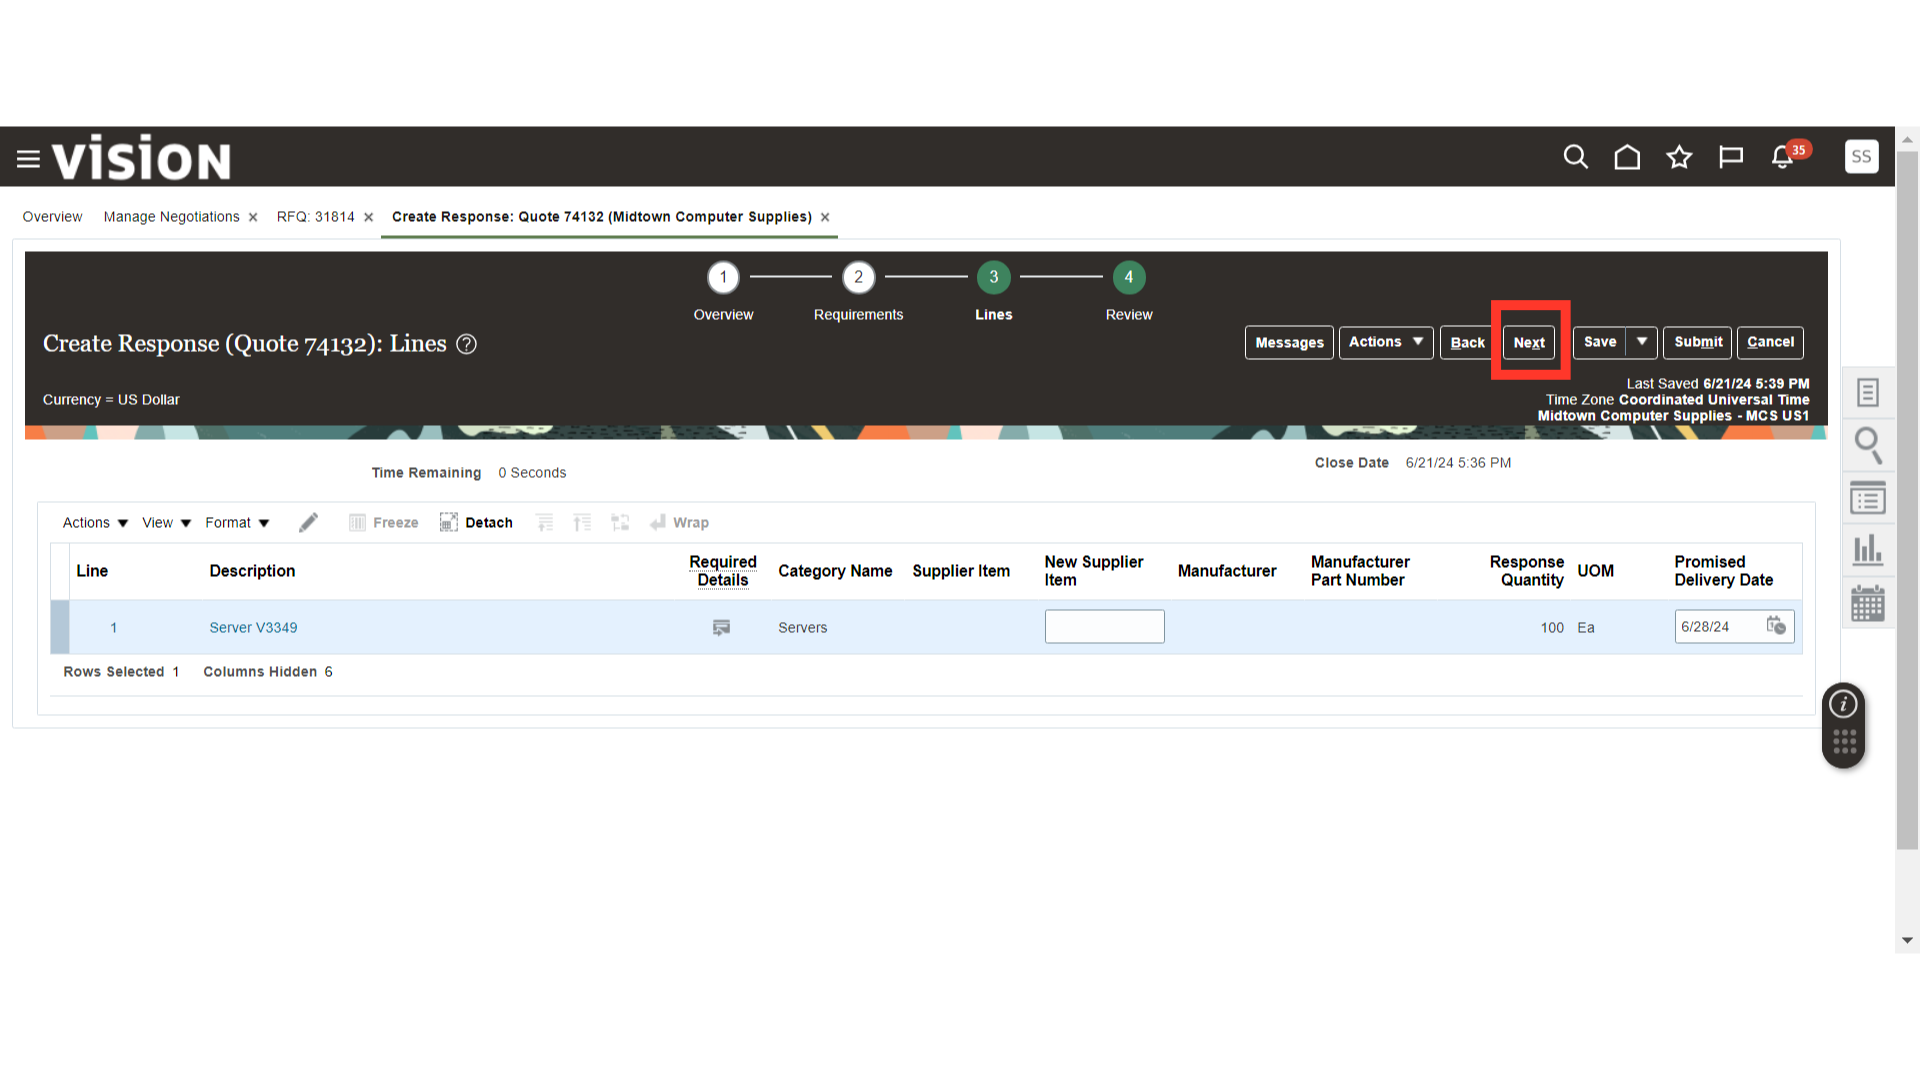
Once all the line details are filled in, click on the Next button.
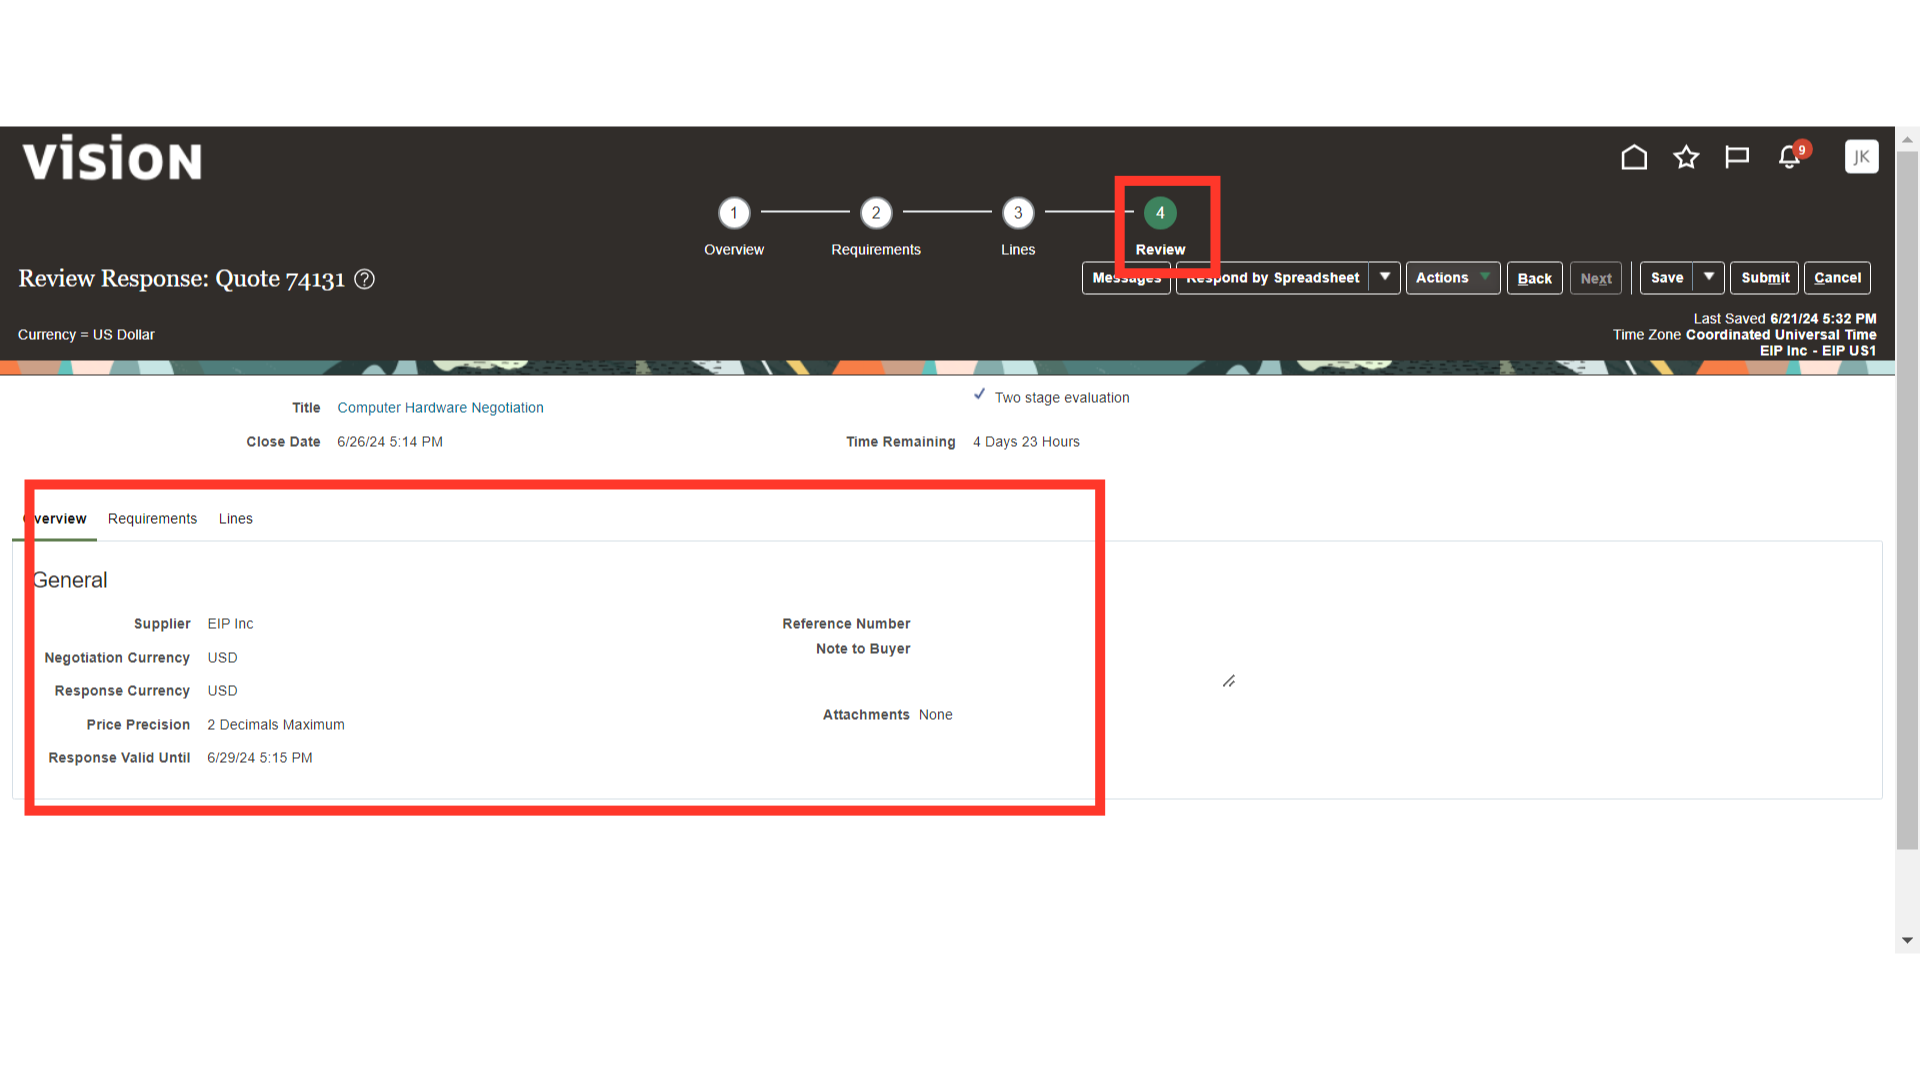
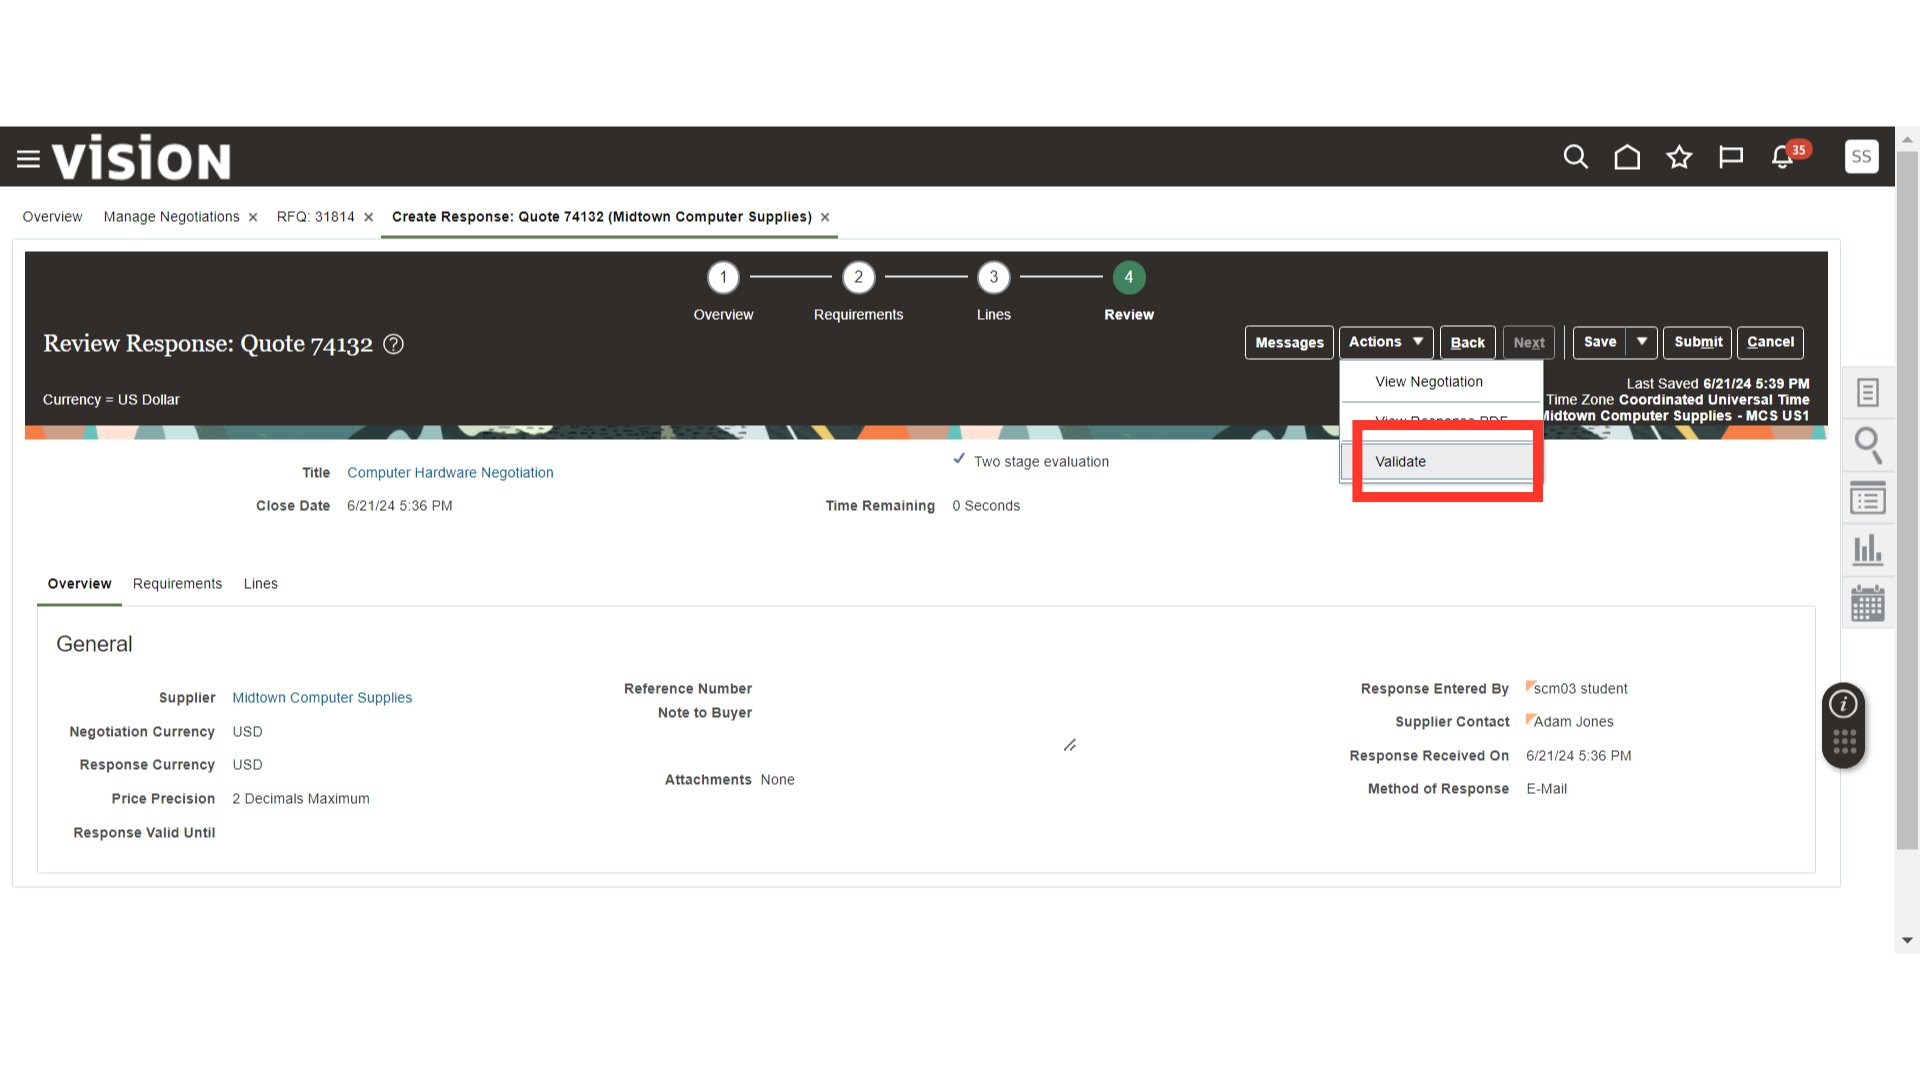
In the Review Response section, review all the sections related to the response, such as Overview, Requirements, and Lines.
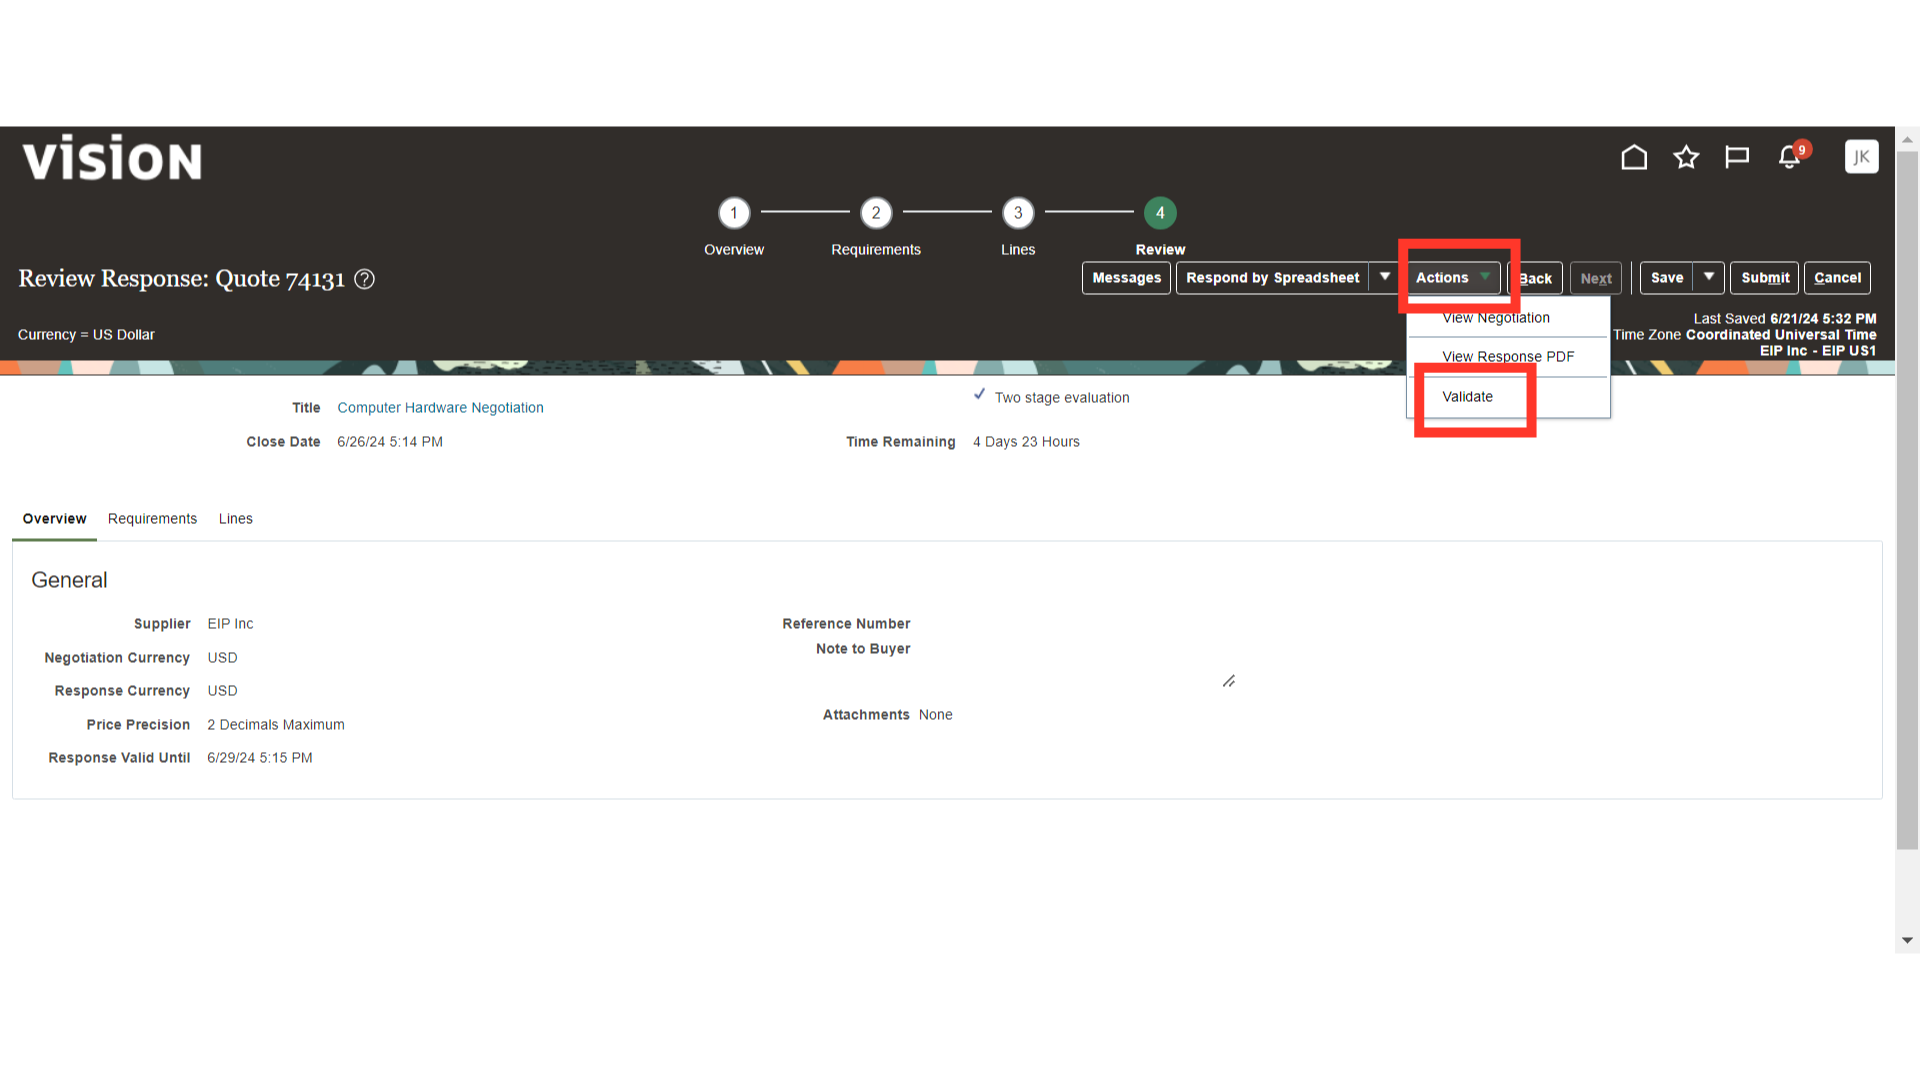
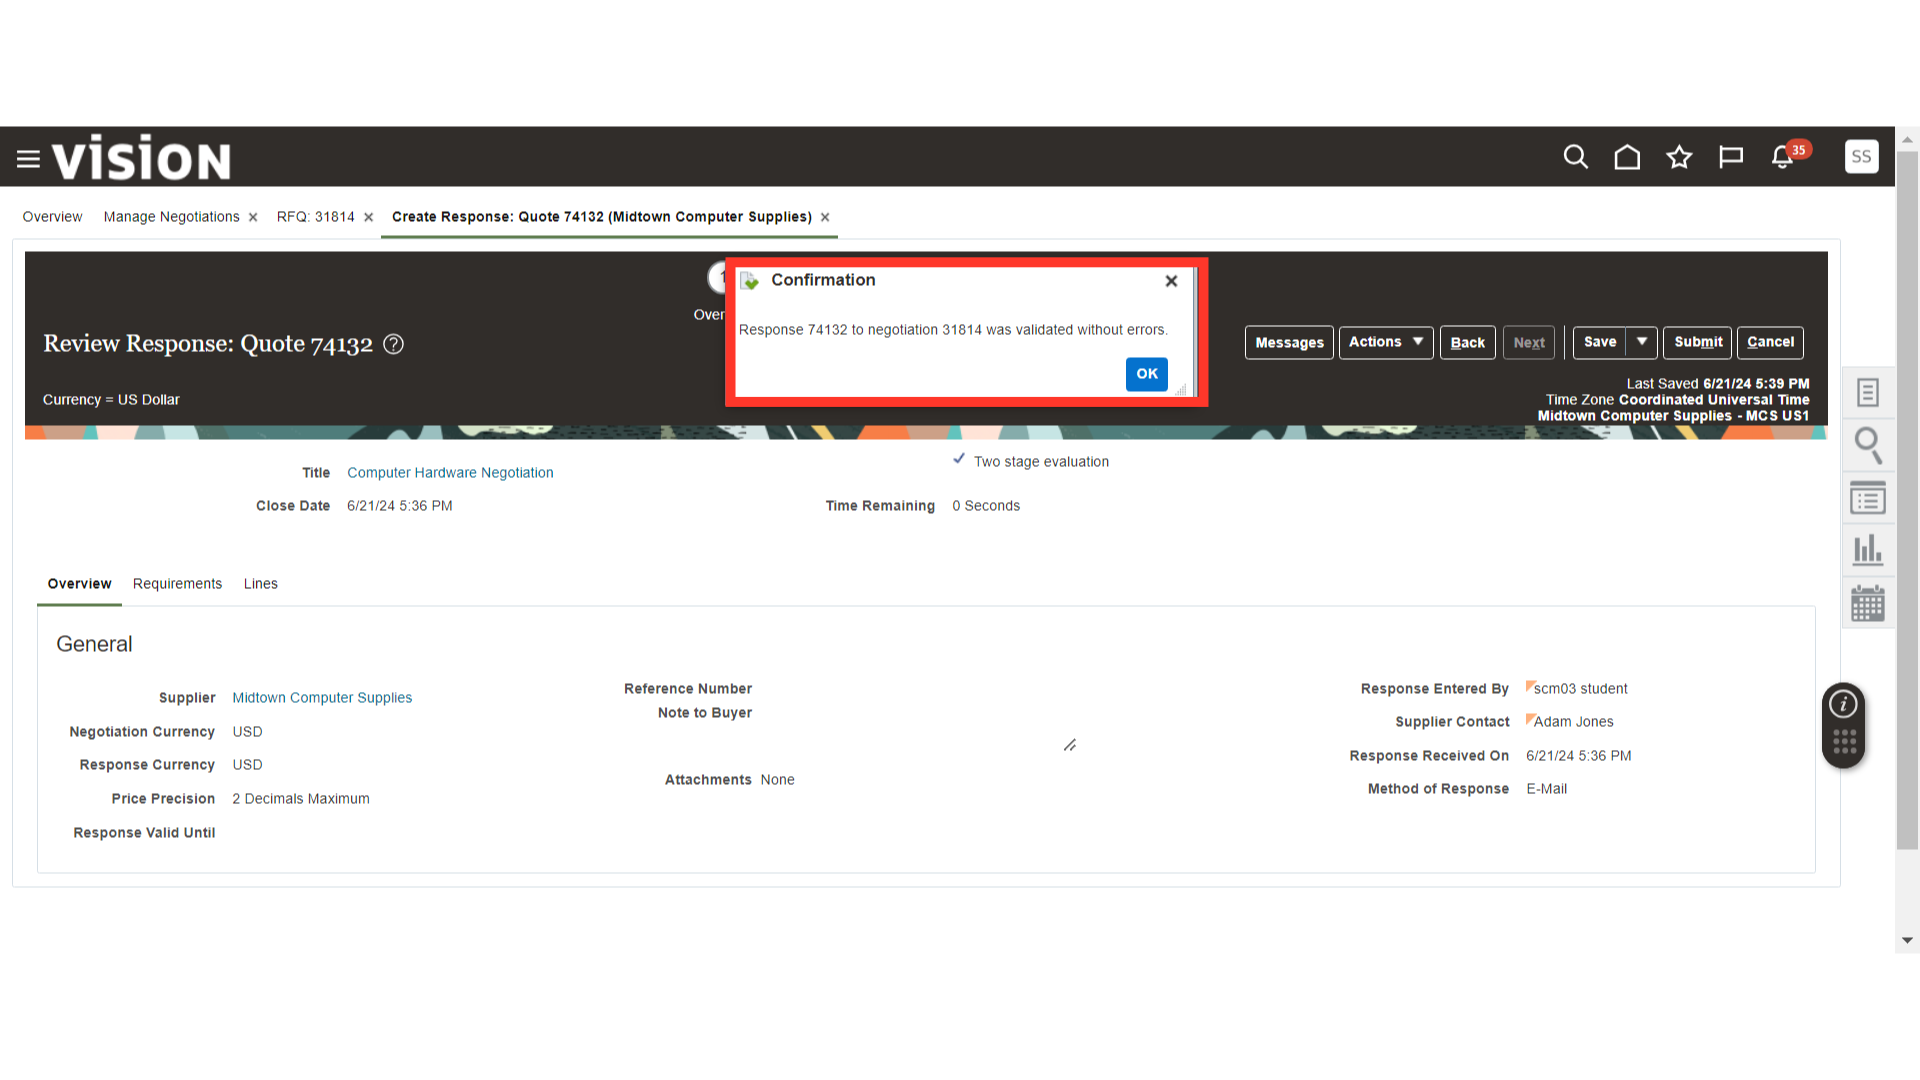
Once all the details are reviewed, click on the Actions dropdown button and click on Validate.
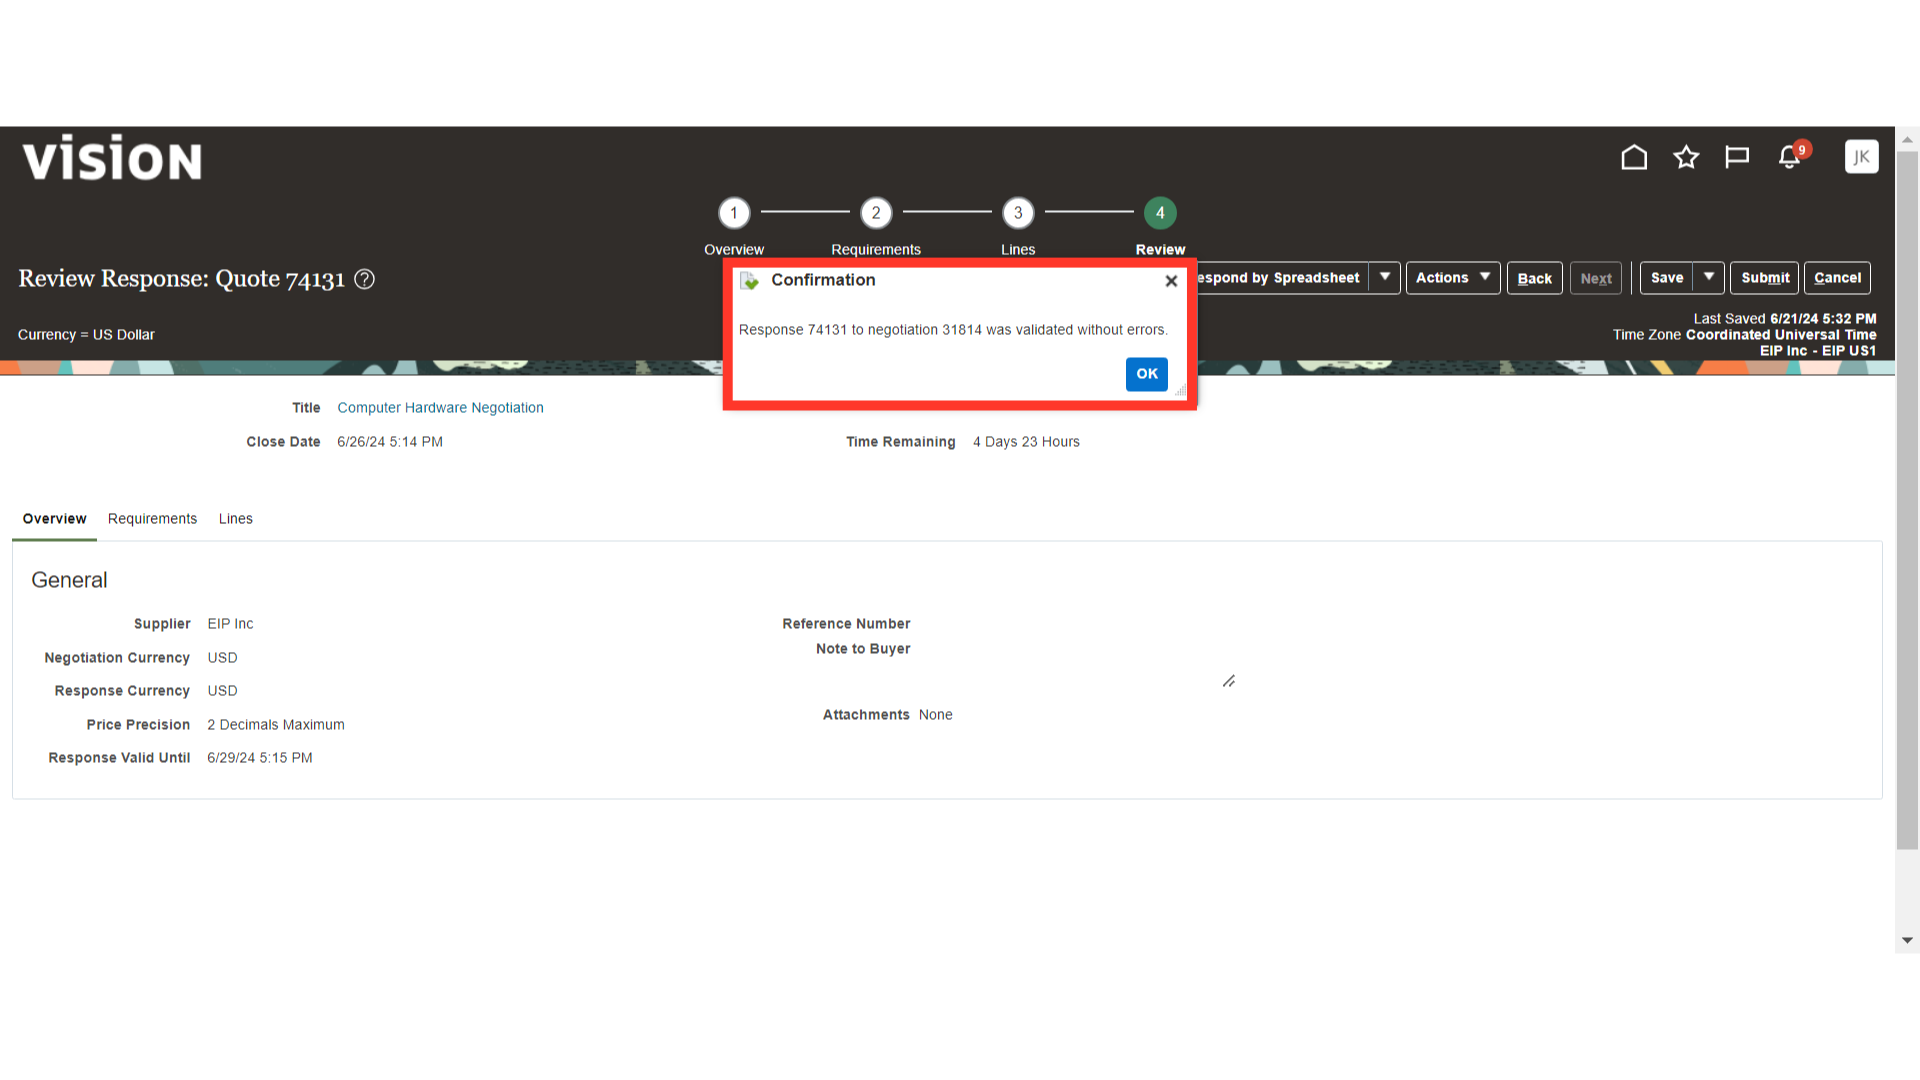
After validation, the system will generate a confirmation message. Click OK. If there is any issue with the response, the validation will fail with an error message.
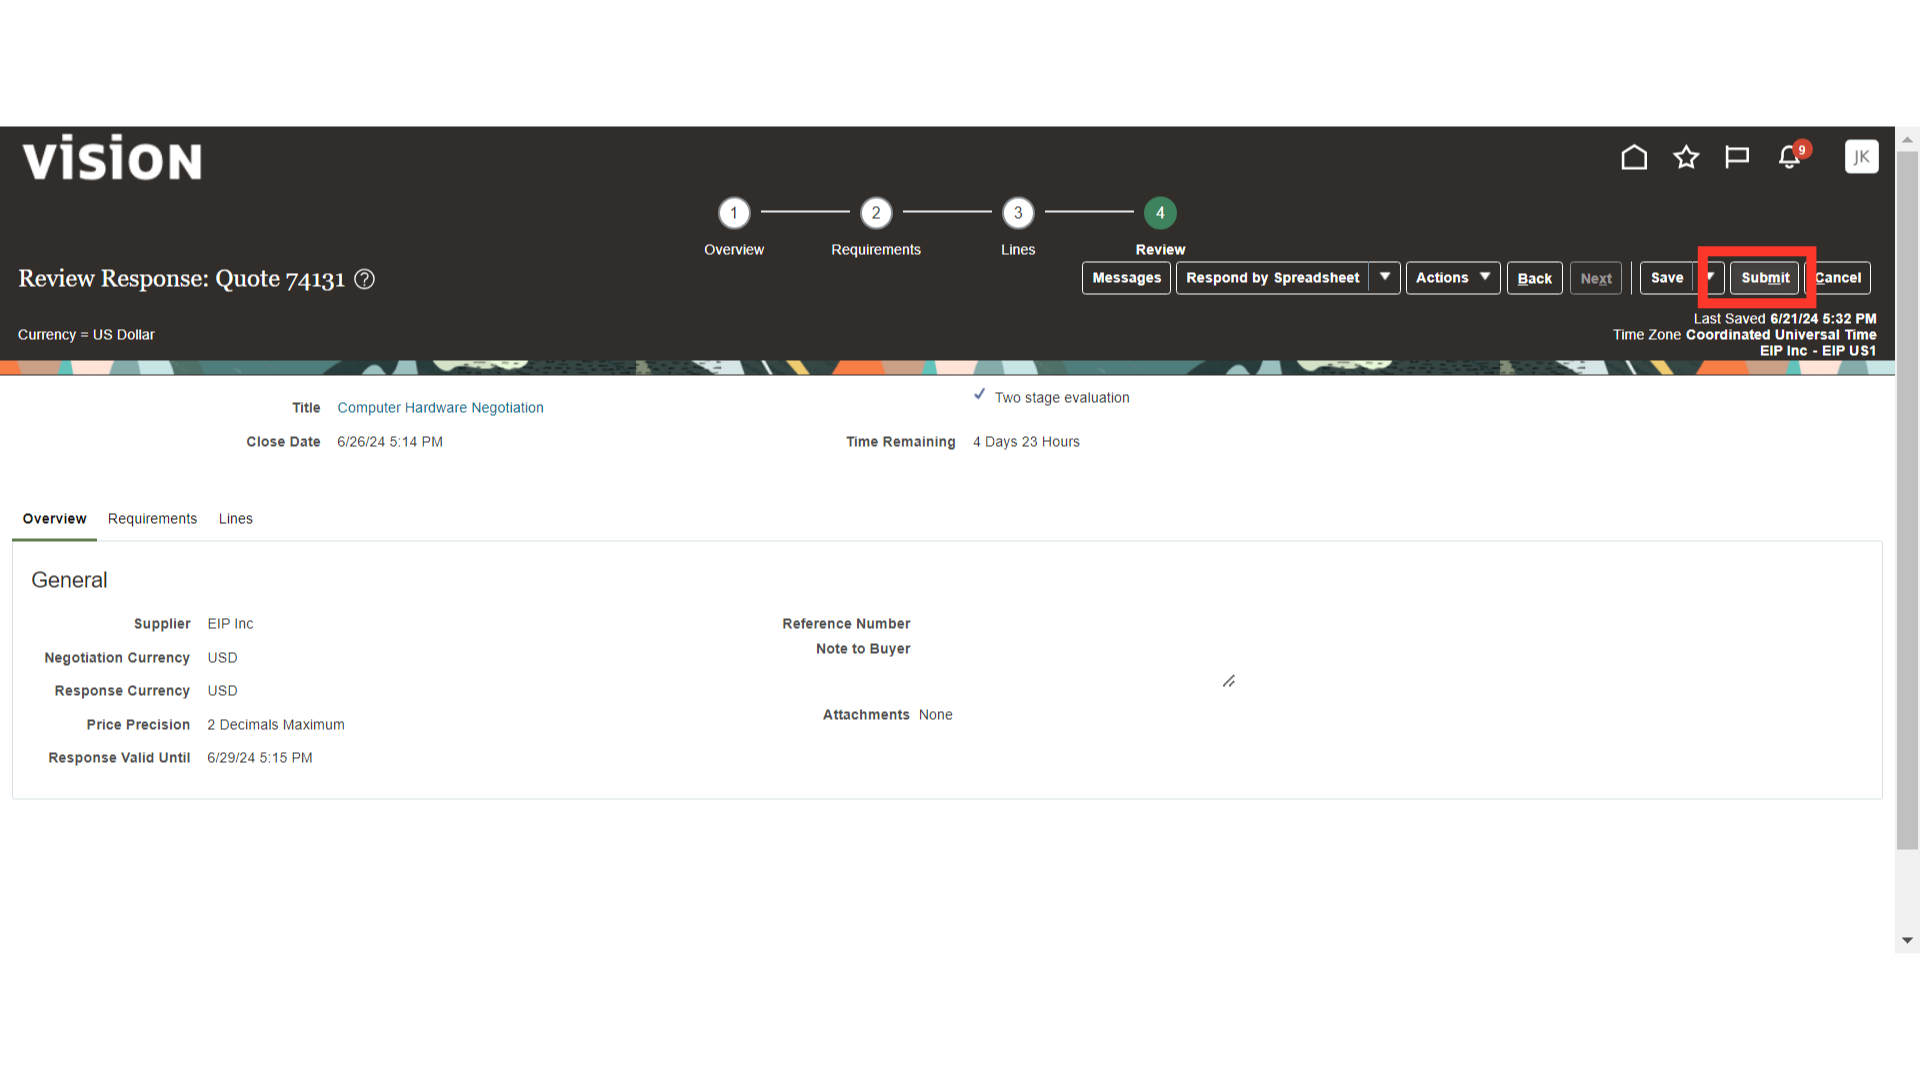
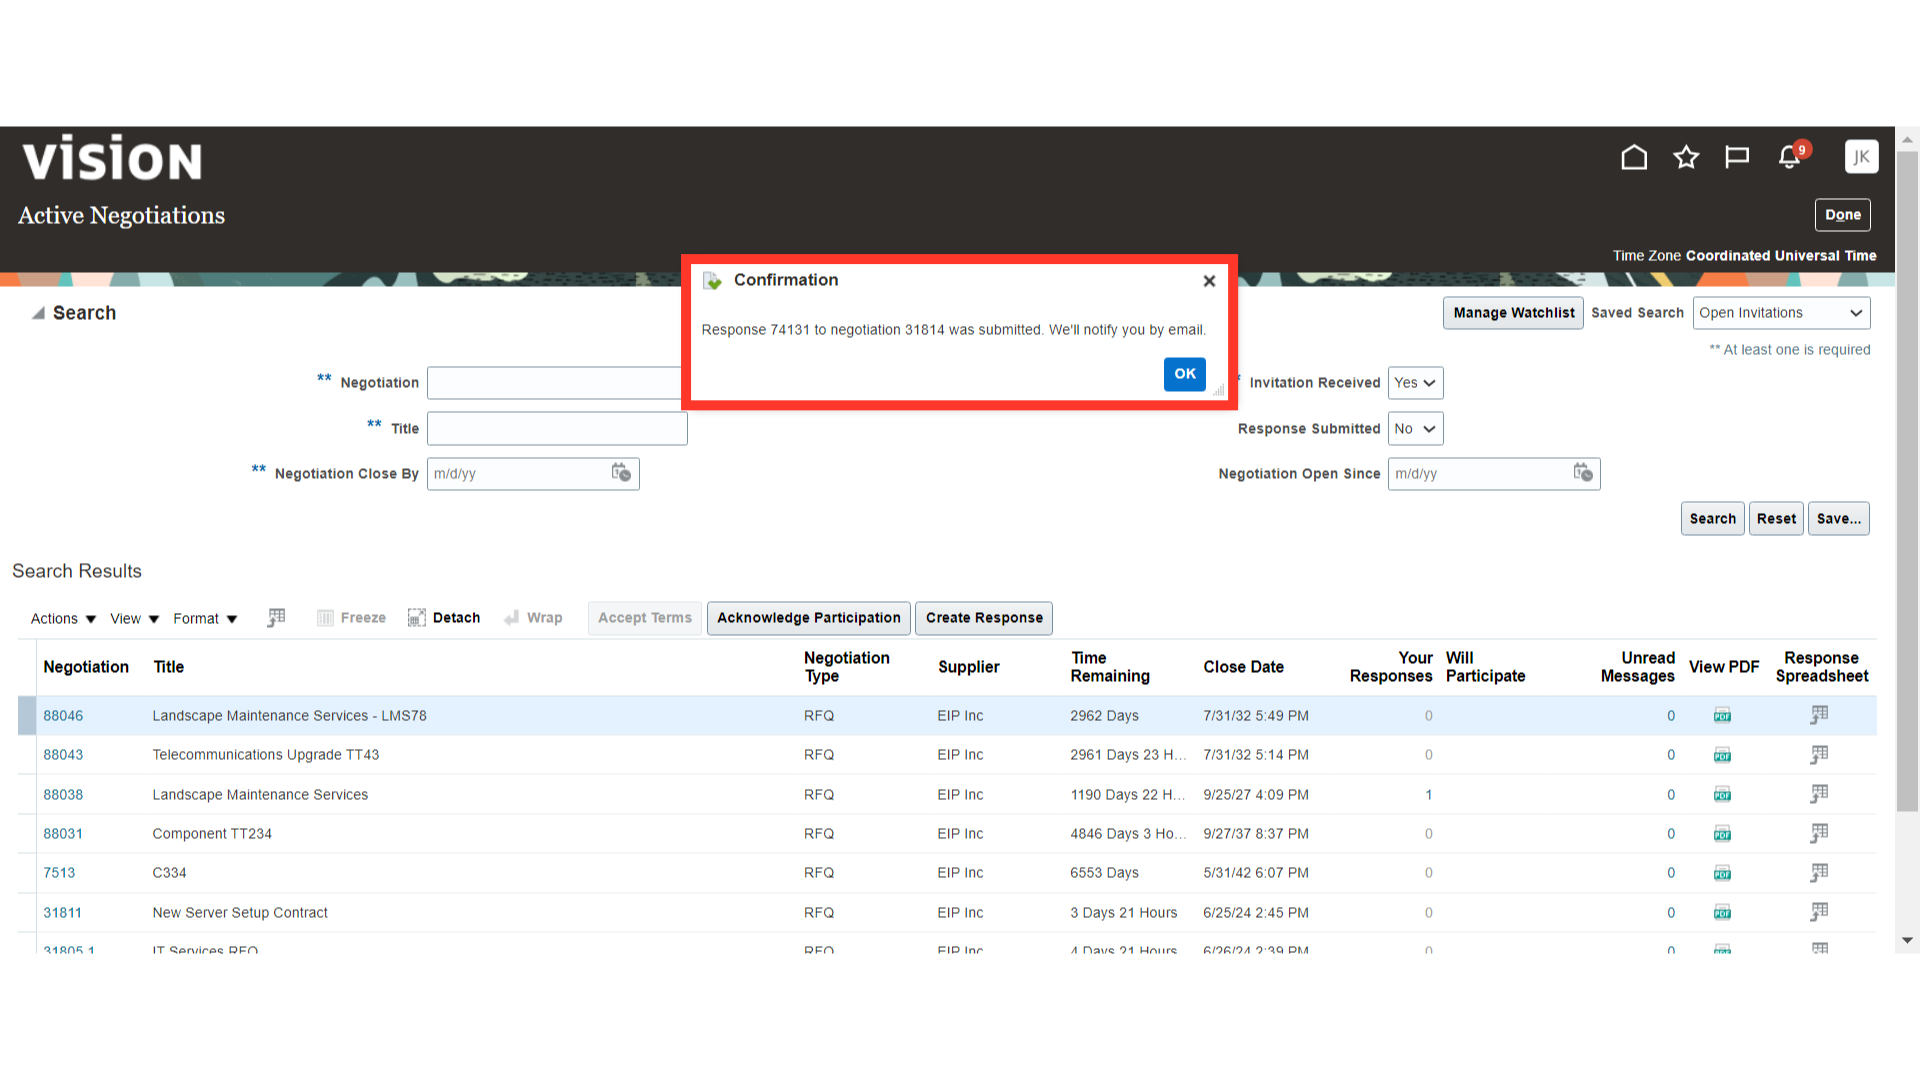
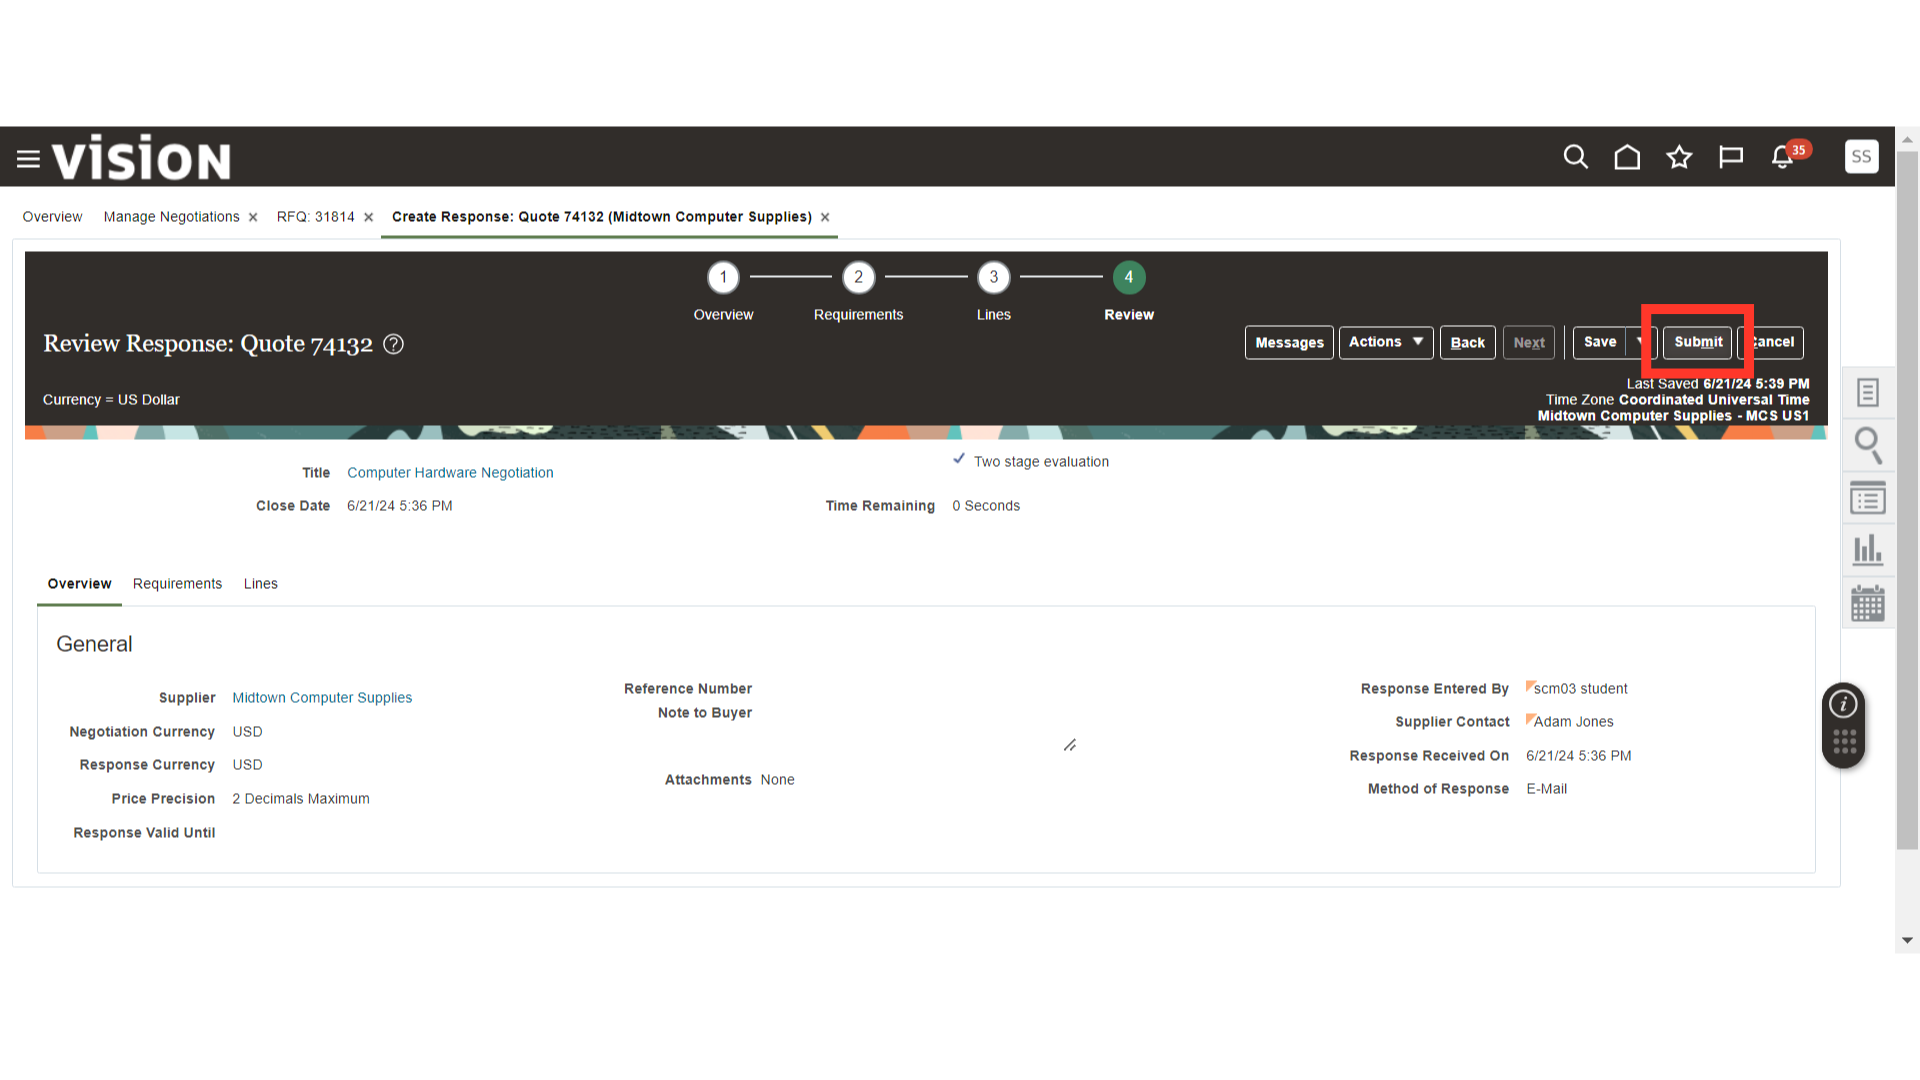
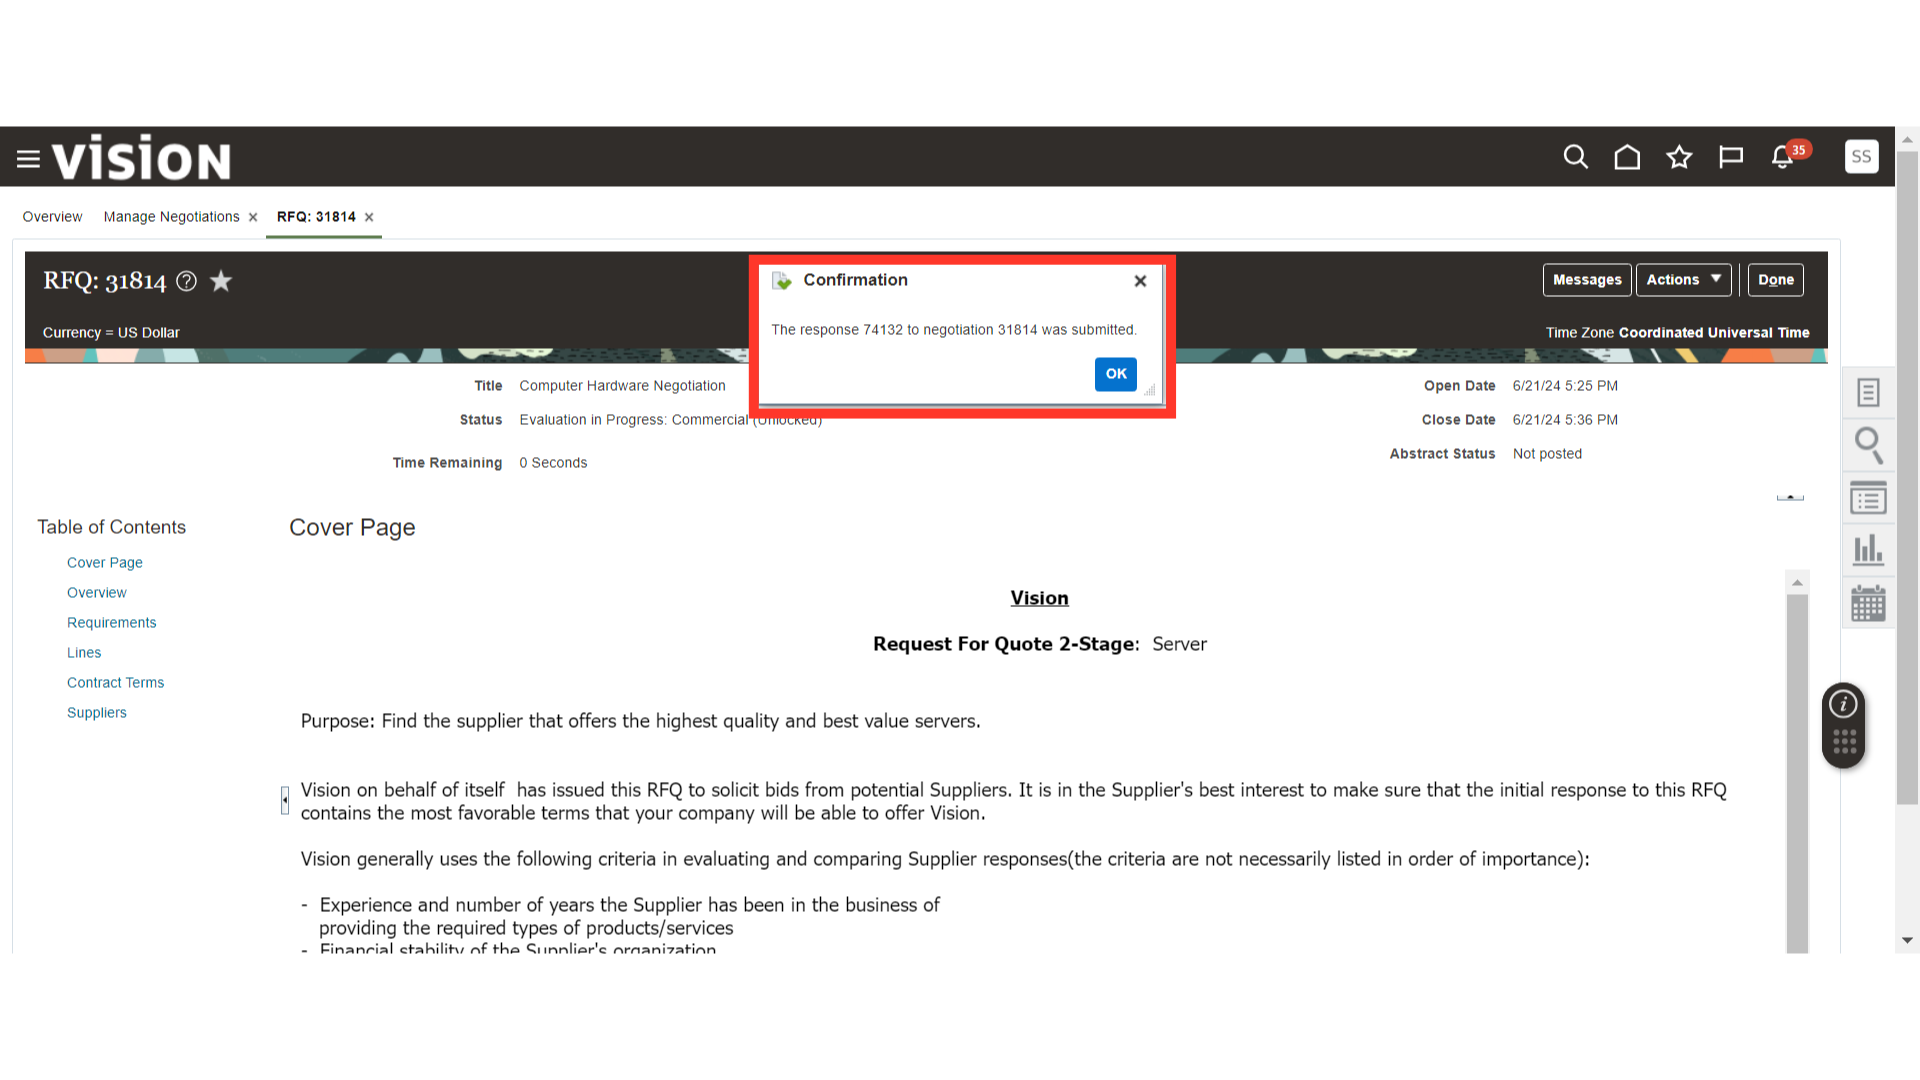
After the validation confirmation, click on the Submit button to submit the response for the negotiation.
After submission of a response, the system will generate a confirmation message. Click OK.
Now, we will log in as Buyer and create a Surrogate Response for the negotiation. Supplier Surrogate Response can be made after the closure of the negotiation for Two-Stage Negotiation. Also, the Technical Response and Commercial Response will only be created after the closure of the respective round in Two-Stage Negotiation. Navigate to the Procurement tab and click on the Negotiations infotile.
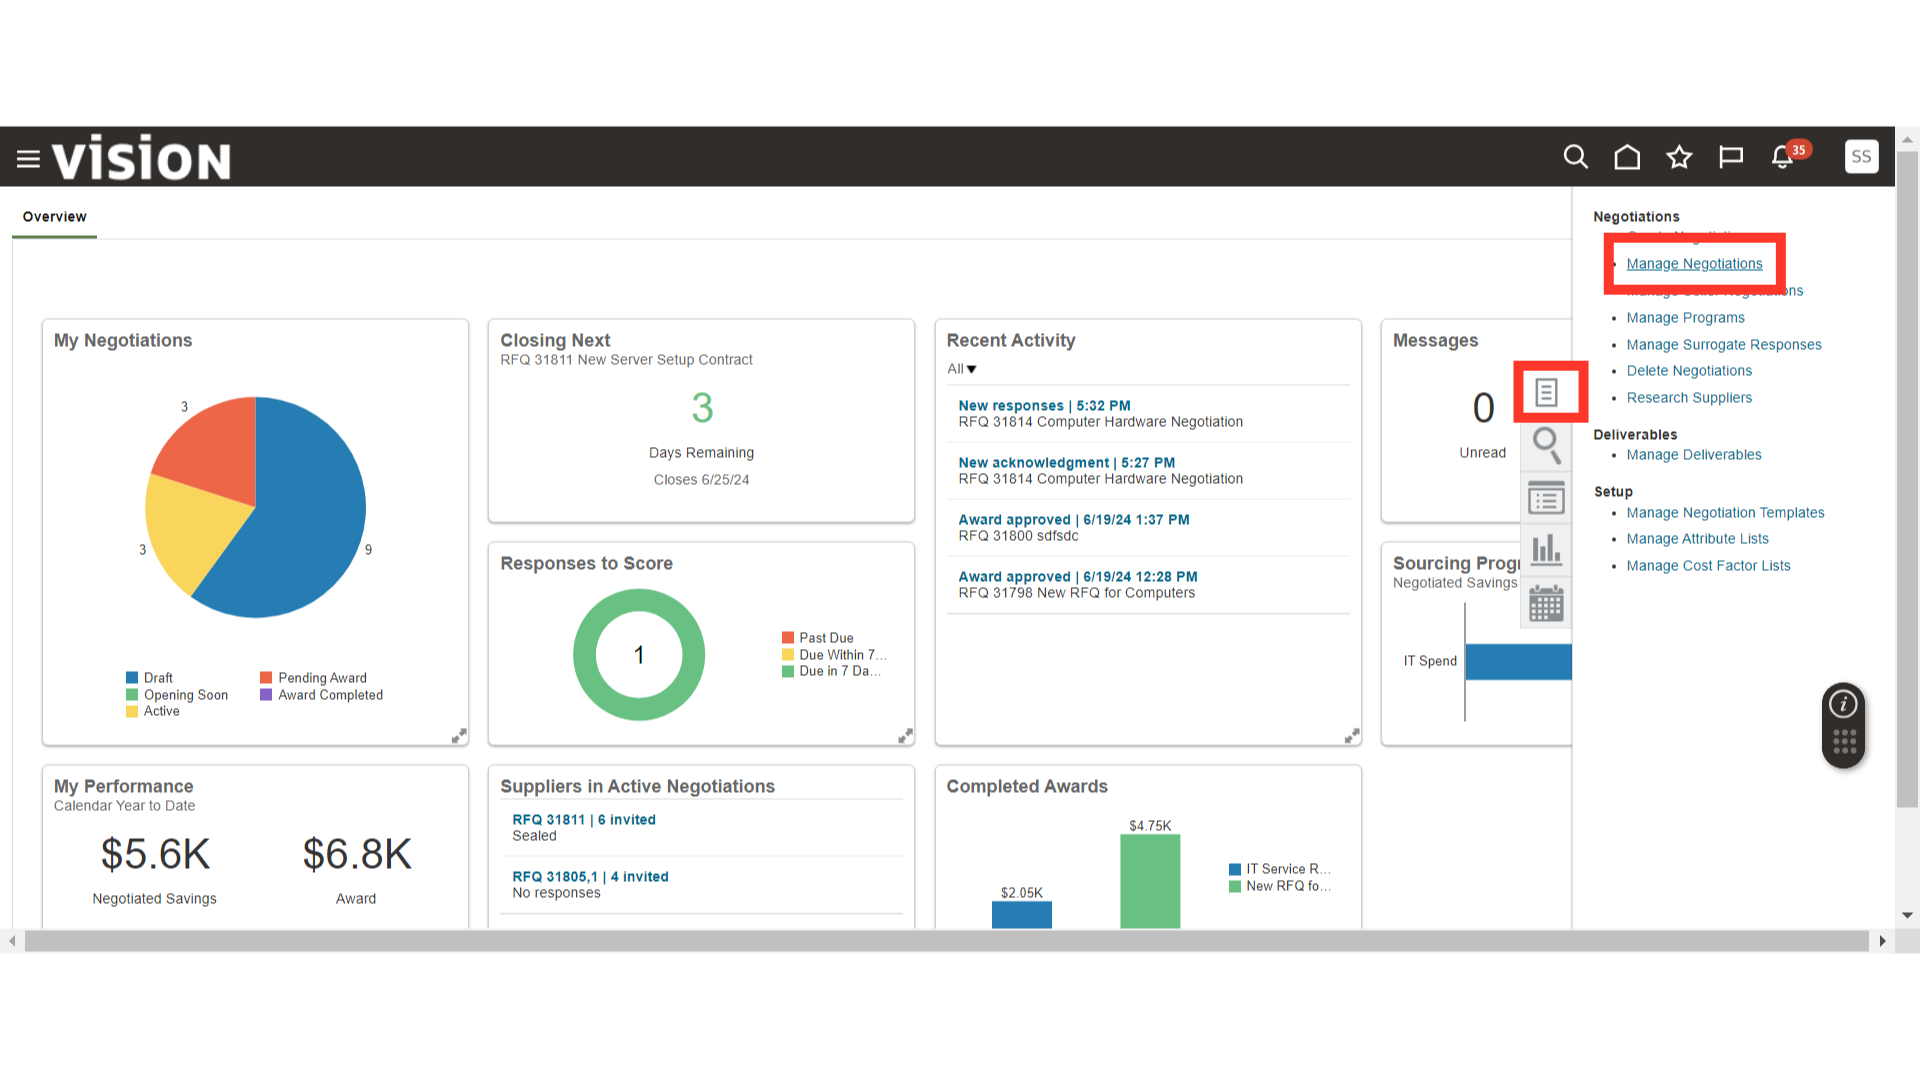
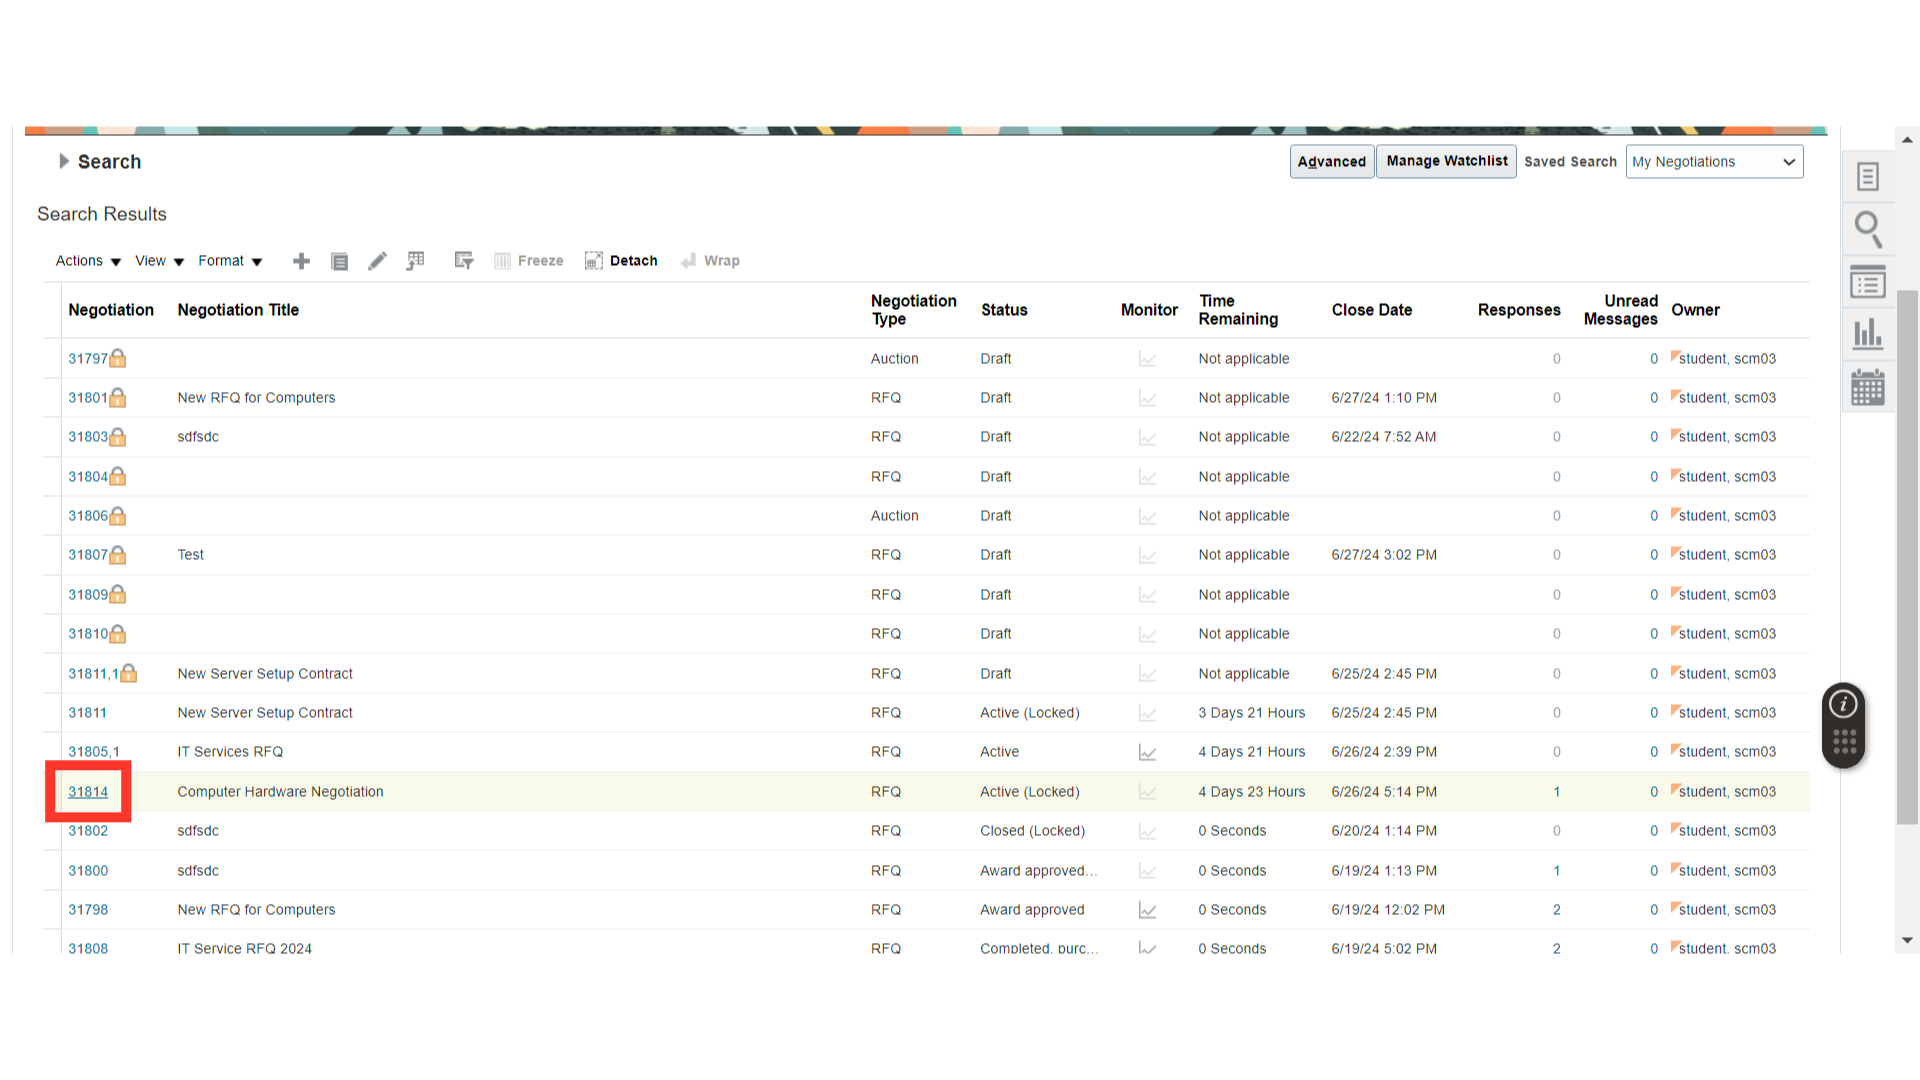
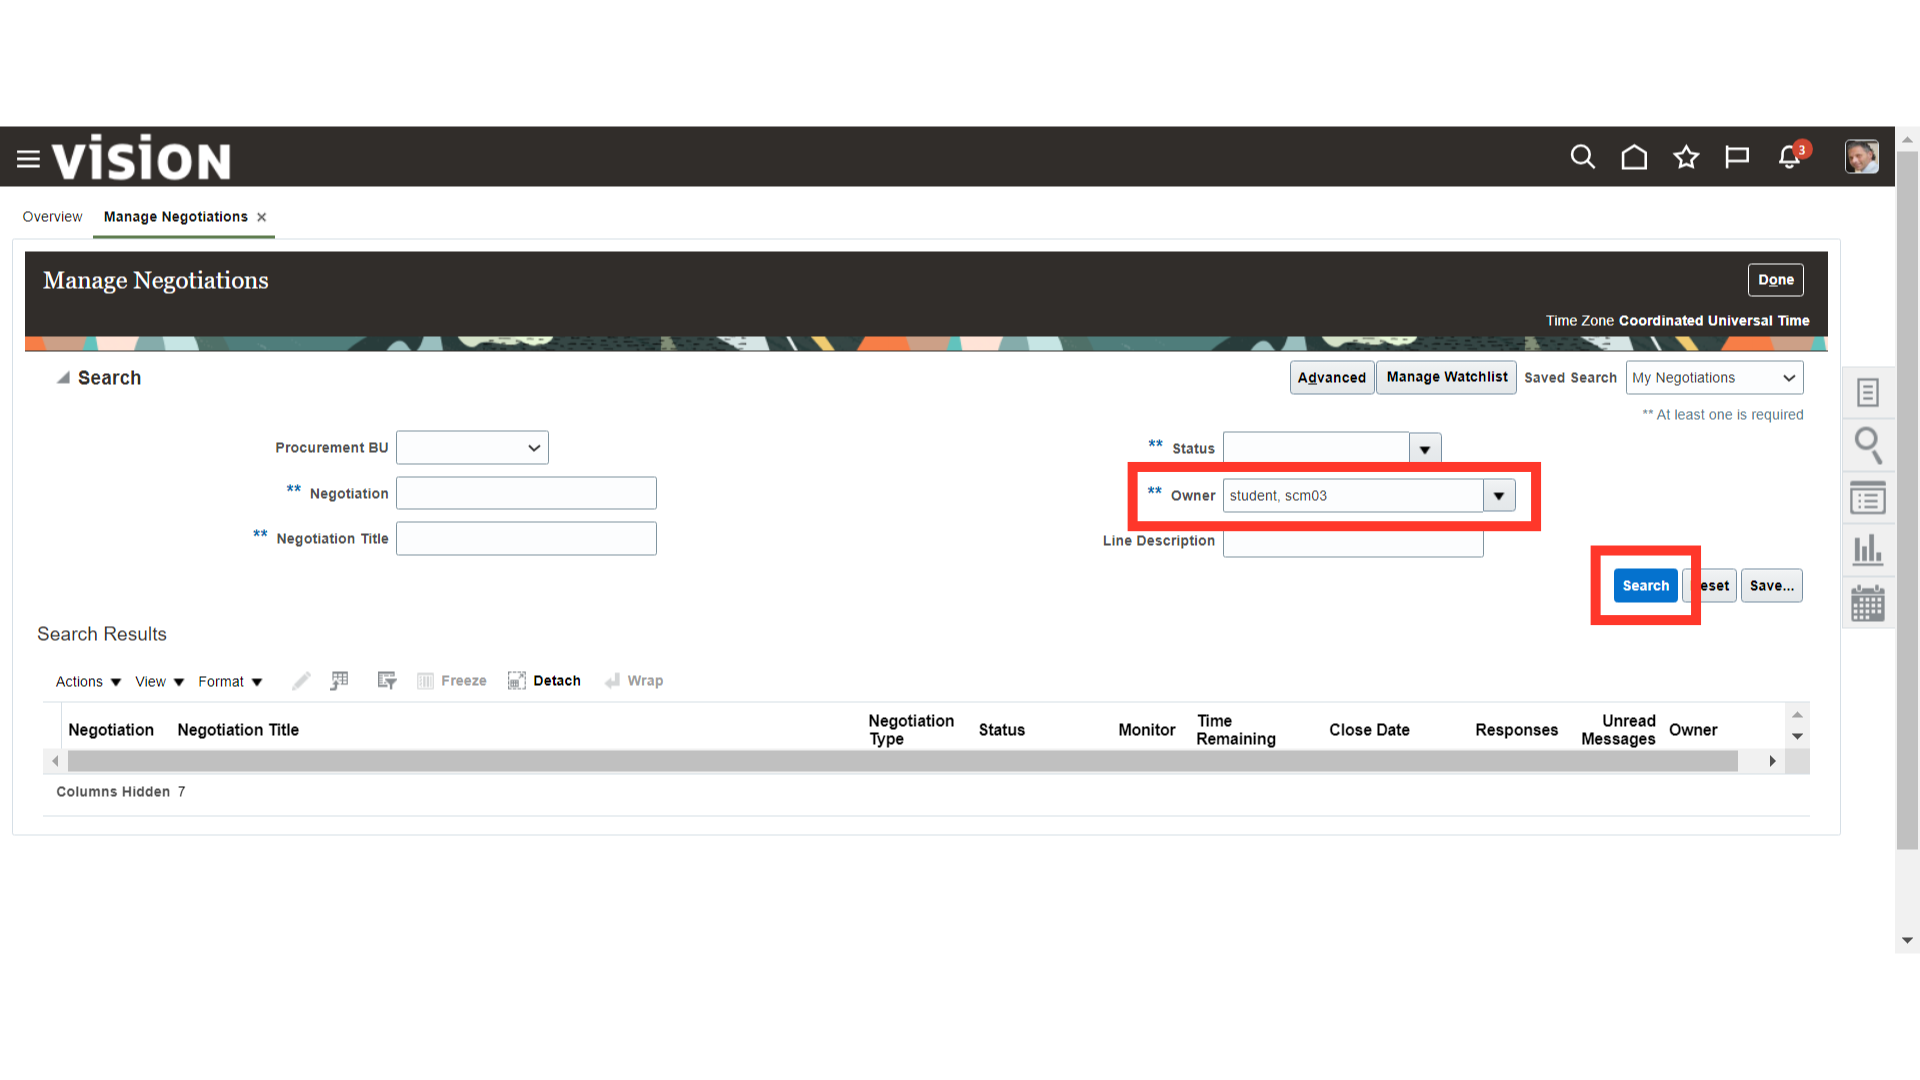
In the Negotiations work area, click on the Tasks button and then click on Manage Negotiations.
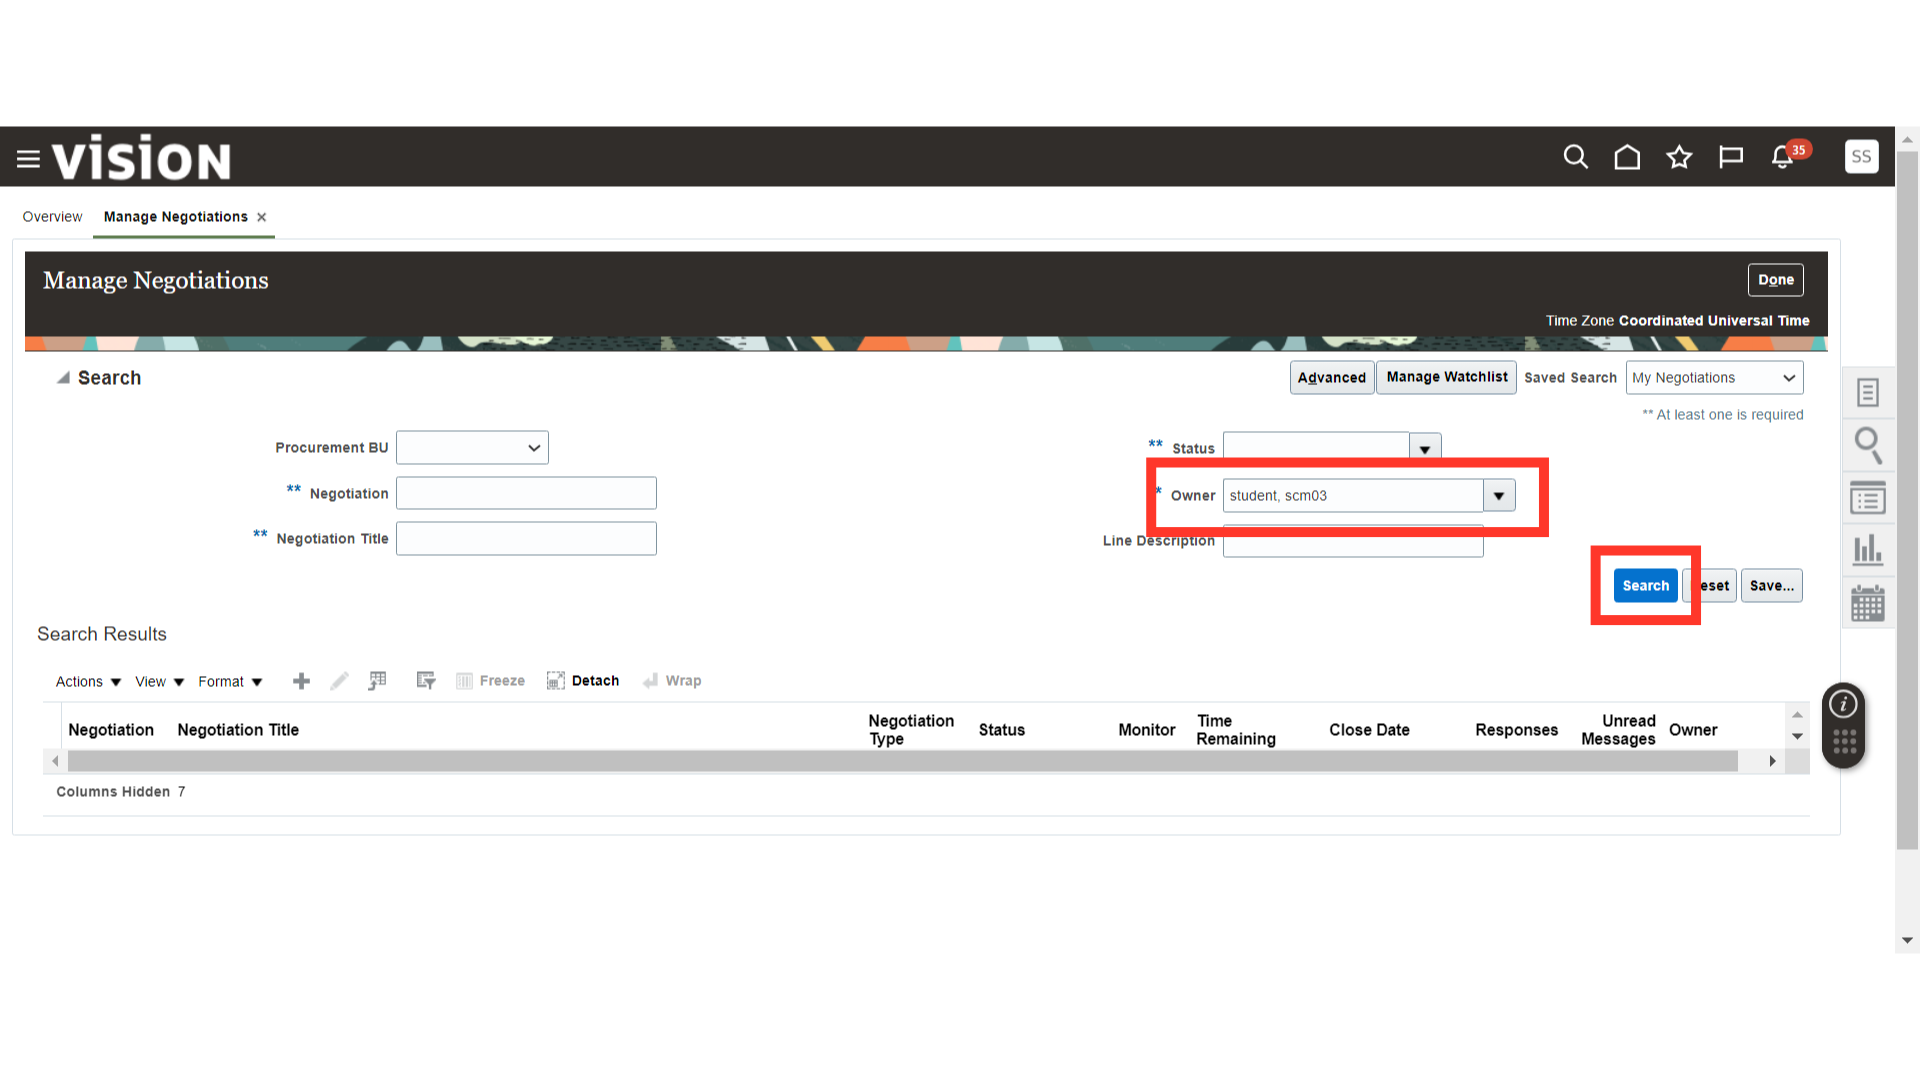
Provide the negotiation’s search parameters and click on the Search button.
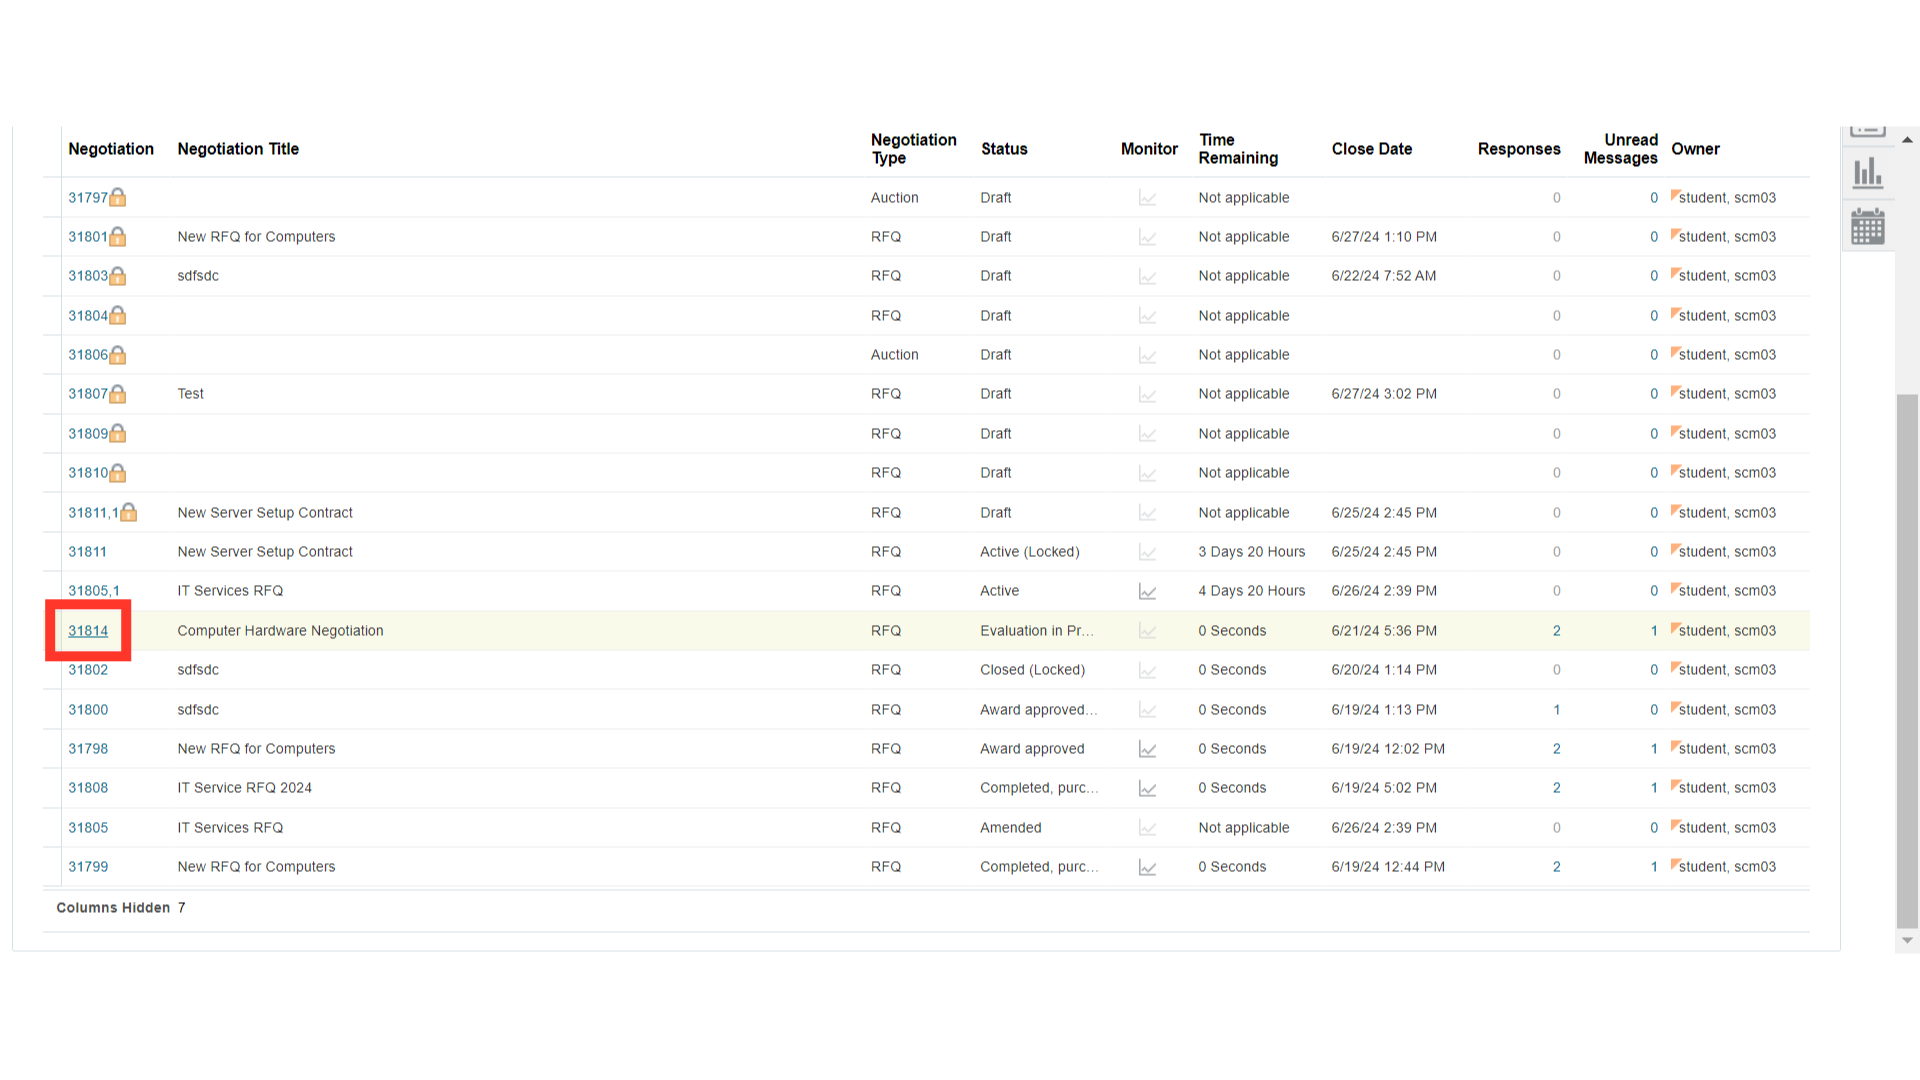
Once the results are populated, click on the negotiation number hyperlink.
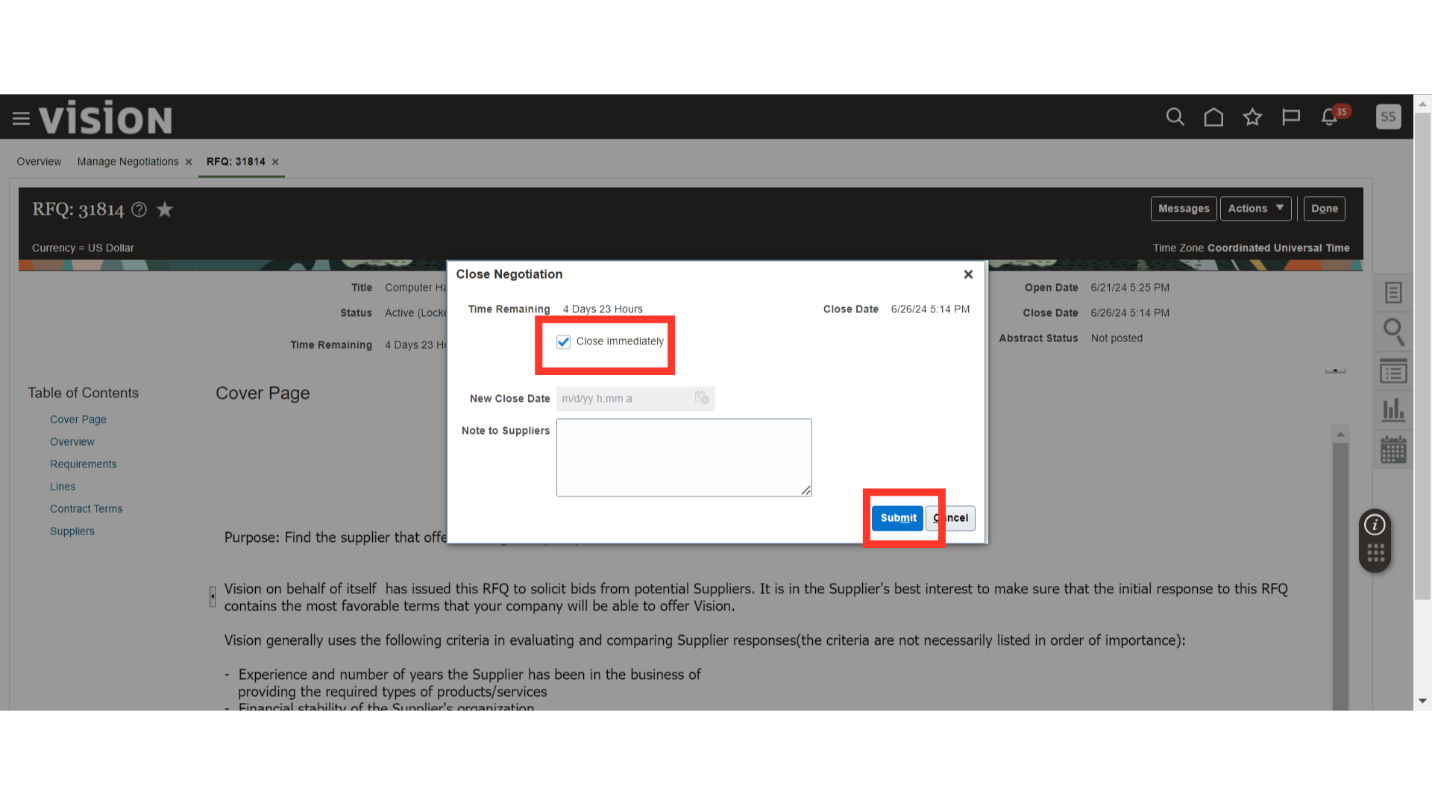
Once all the supplier responses are received, you can wait for the Negotiations Close Date or close it earlier. In the negotiation, click on the Actions dropdown button, click on Manage, and click on Close. This will close the negotiation from accepting further responses.

In the Close Negotiation, check the “Close Immediately” option and click on the Submit button.
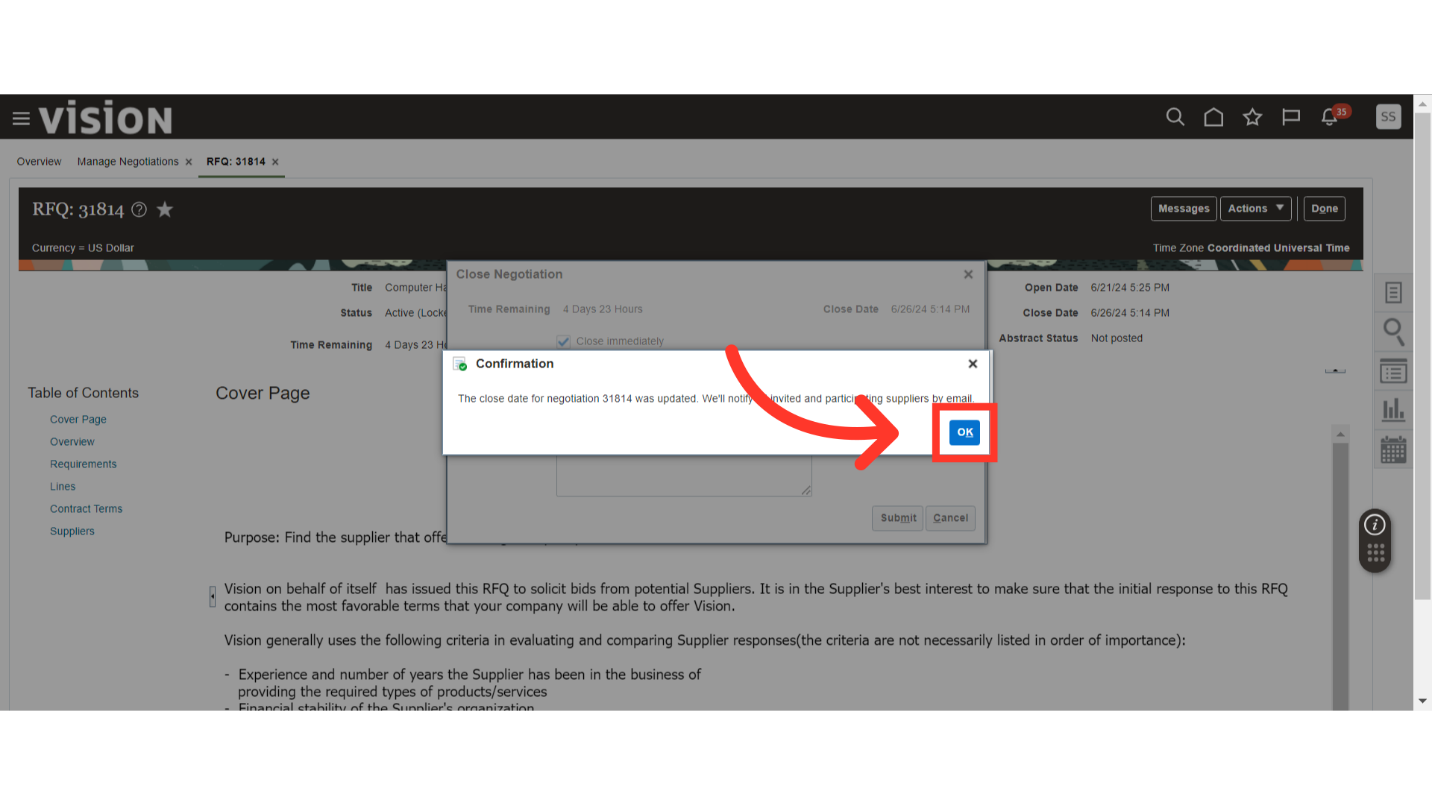
Click OK on the close confirmation message.
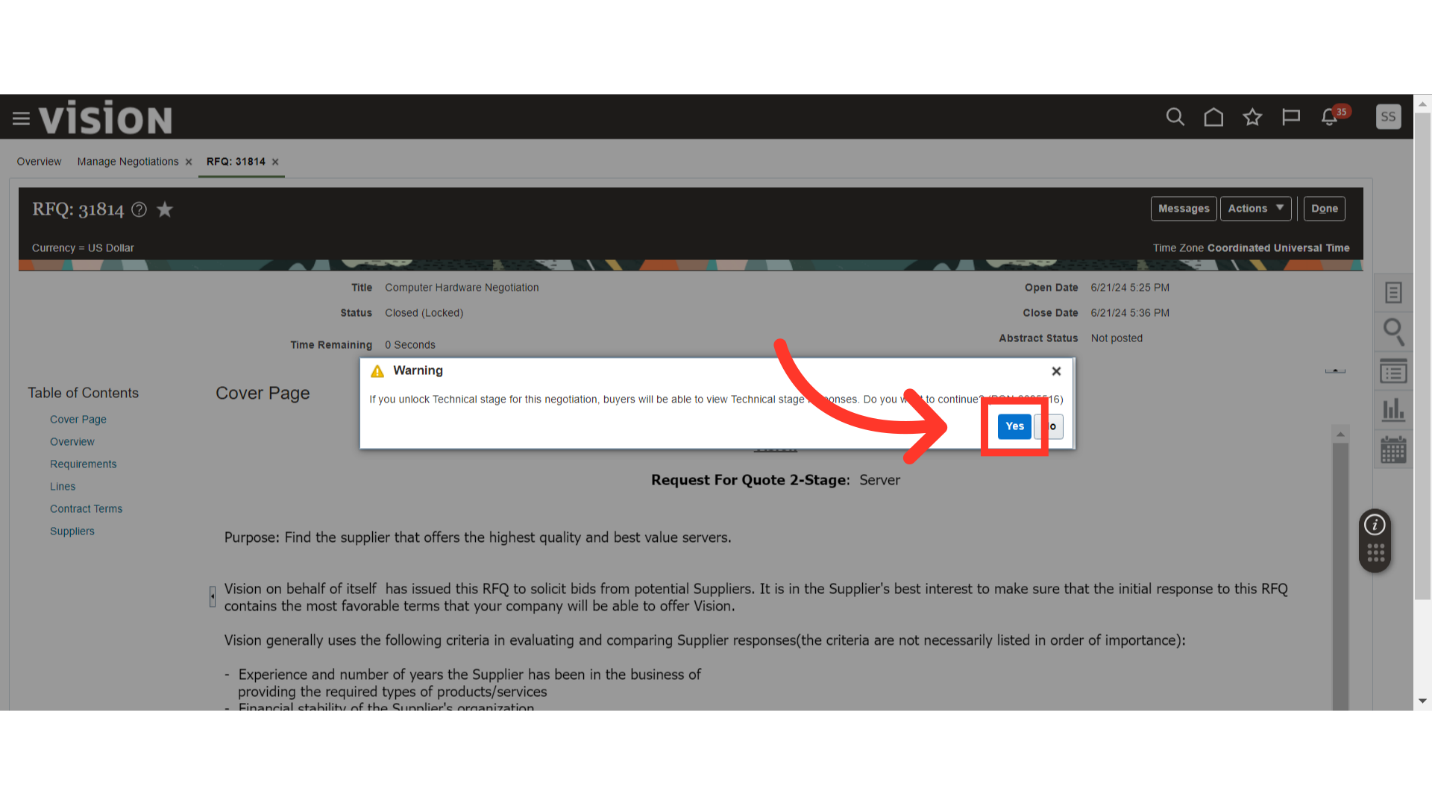
Click on the Actions dropdown button, click on Manage, and click on Unlock Stage: Technical. This will unlock the technical responses from the suppliers, allowing buyers and evaluators to view technical responses and shortlist suppliers.

Click Yes on the warning message about unlocking technical responses.
Click OK on the confirmation message about unlocking technical responses.

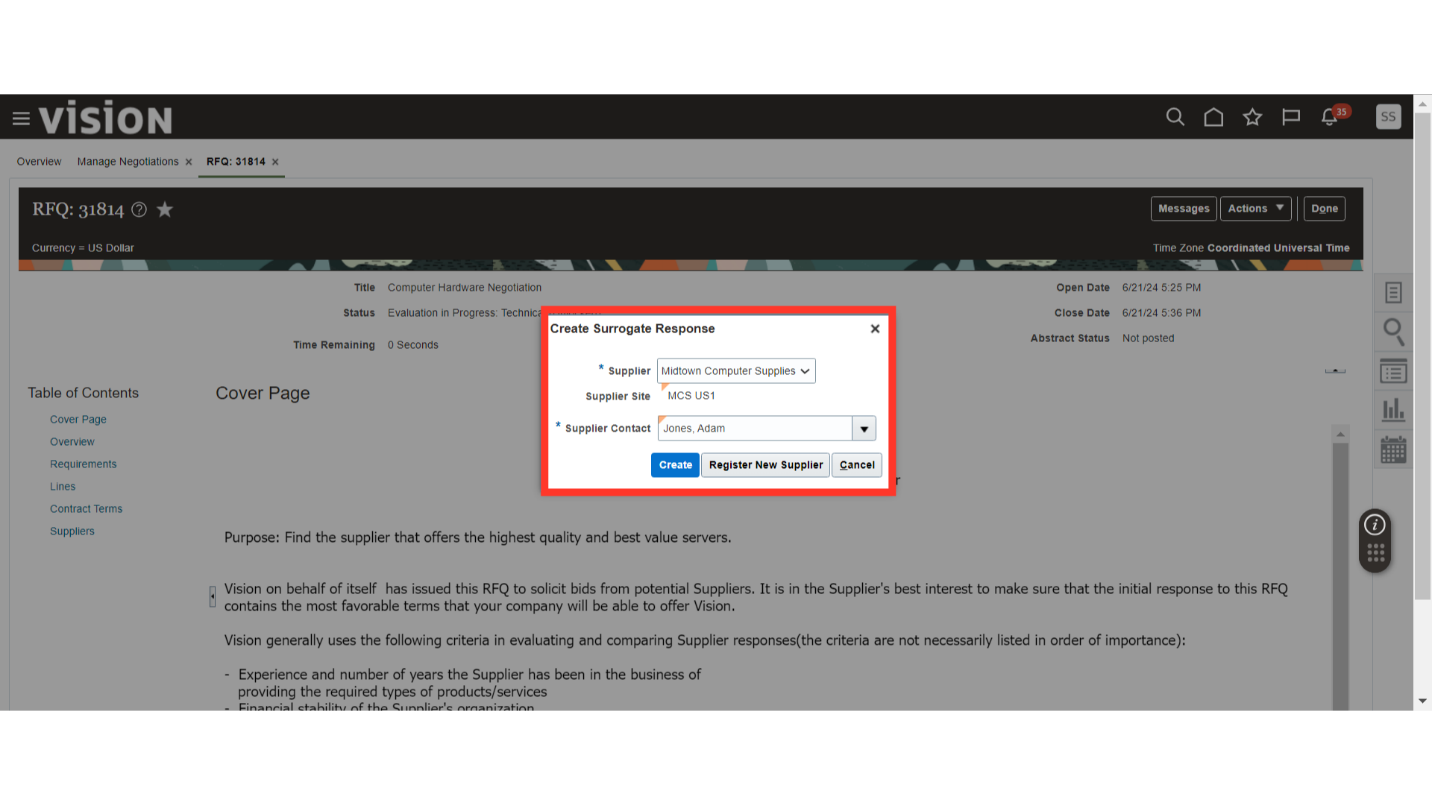
In the negotiation, click on the Actions dropdown button, click on Manage, and click on Create Surrogate Response: Technical.

In the Create Surrogate Response window, provide the Supplier, Supplier Site, and Supplier Contact, then click on the Create button.
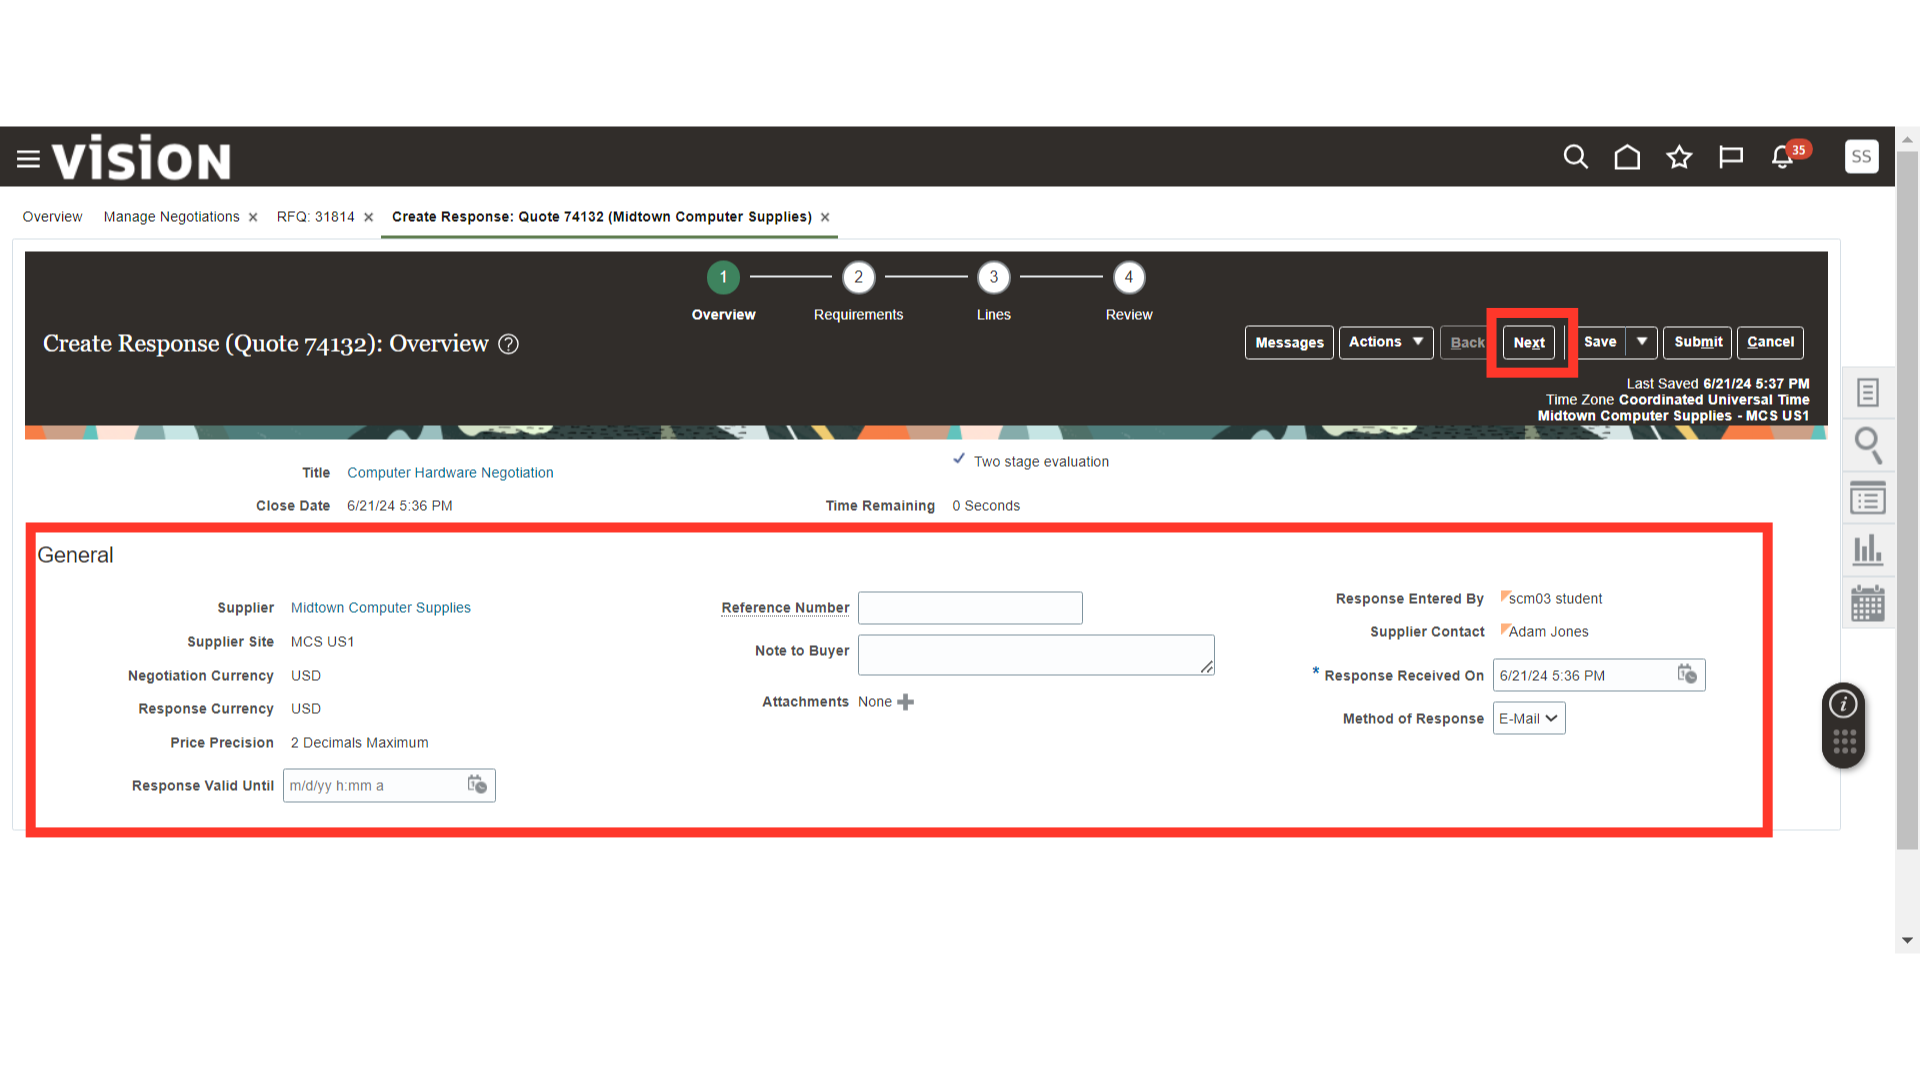
In the Overview section under Create Response, provide the response details such as Response Received On Date, Note to Buyer, Response Valid Until Date, and Attachments if available. Once all the overview details are filled in, click on the Next button.
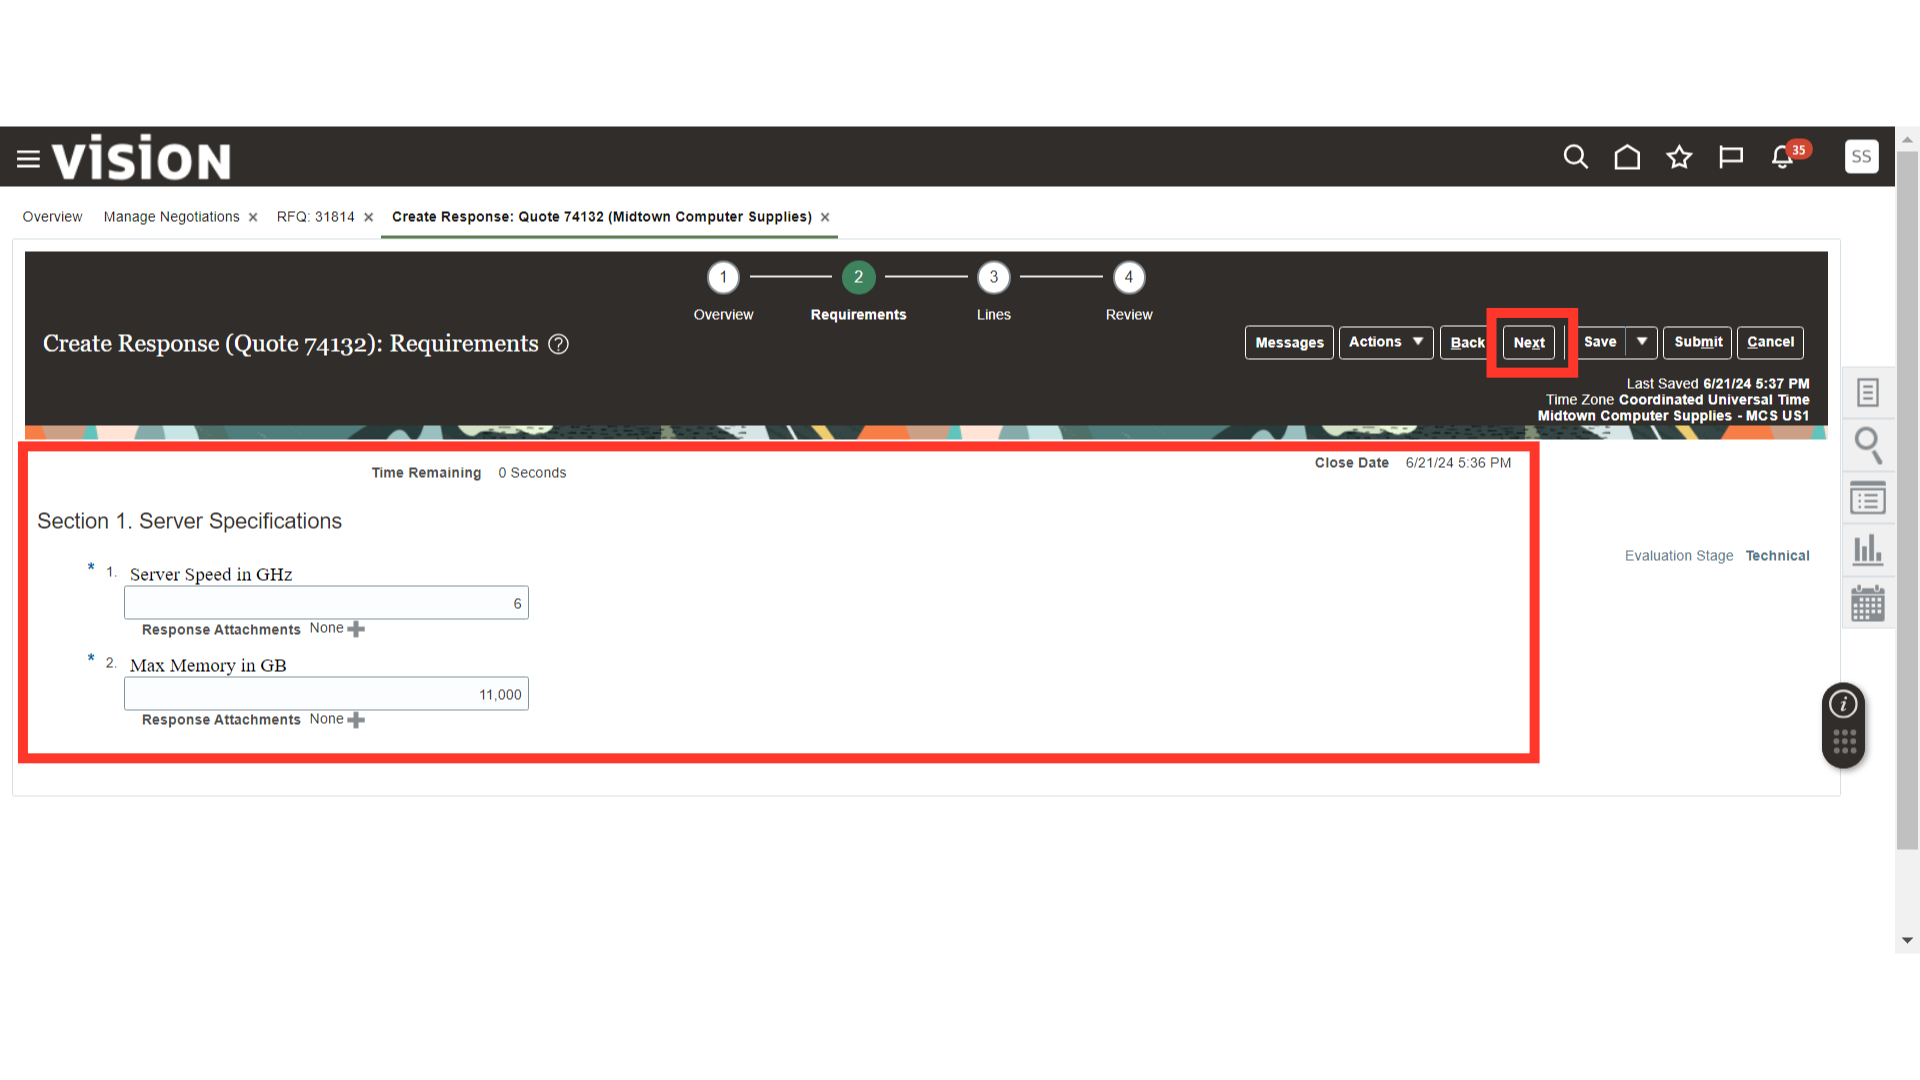
In the Requirements section, provide the technical question details. Once filled in, click on the Next button.
In the Lines section, provide the Promised Delivery Date and Required Details.
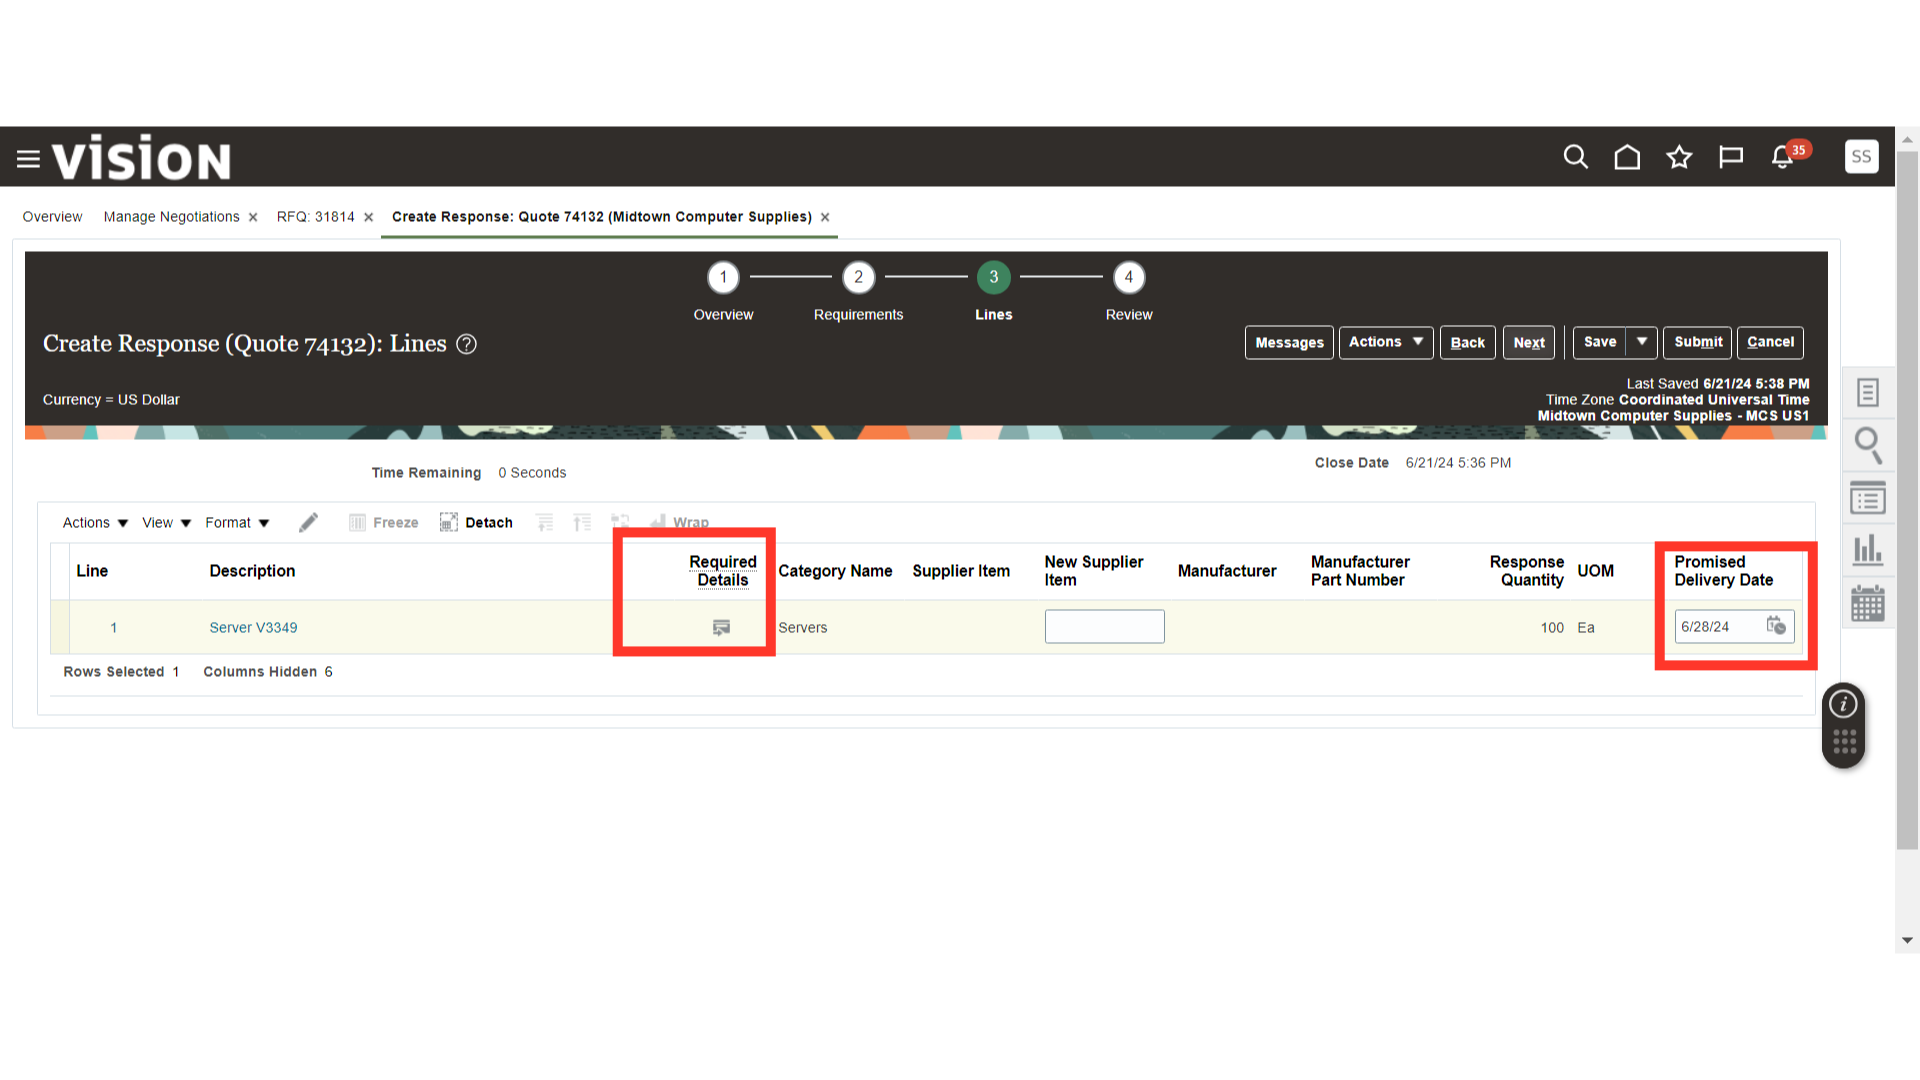
In the Required Details for Lines, provide the details received from the supplier for the negotiation.
Once the required details are filled in, click on the Save and Close button.
Once all the line details are filled in for the Supplier Surrogate Response, click on the Next button.
In the Review Response section, review all the response details such as Overview, Requirements, and Lines. After the review, click on the Actions dropdown button and click on Validate.
Click OK on the validation confirmation message.
Once the response is validated, click on the Submit button to submit the response.
Click OK on the Surrogate Response submission confirmation message.

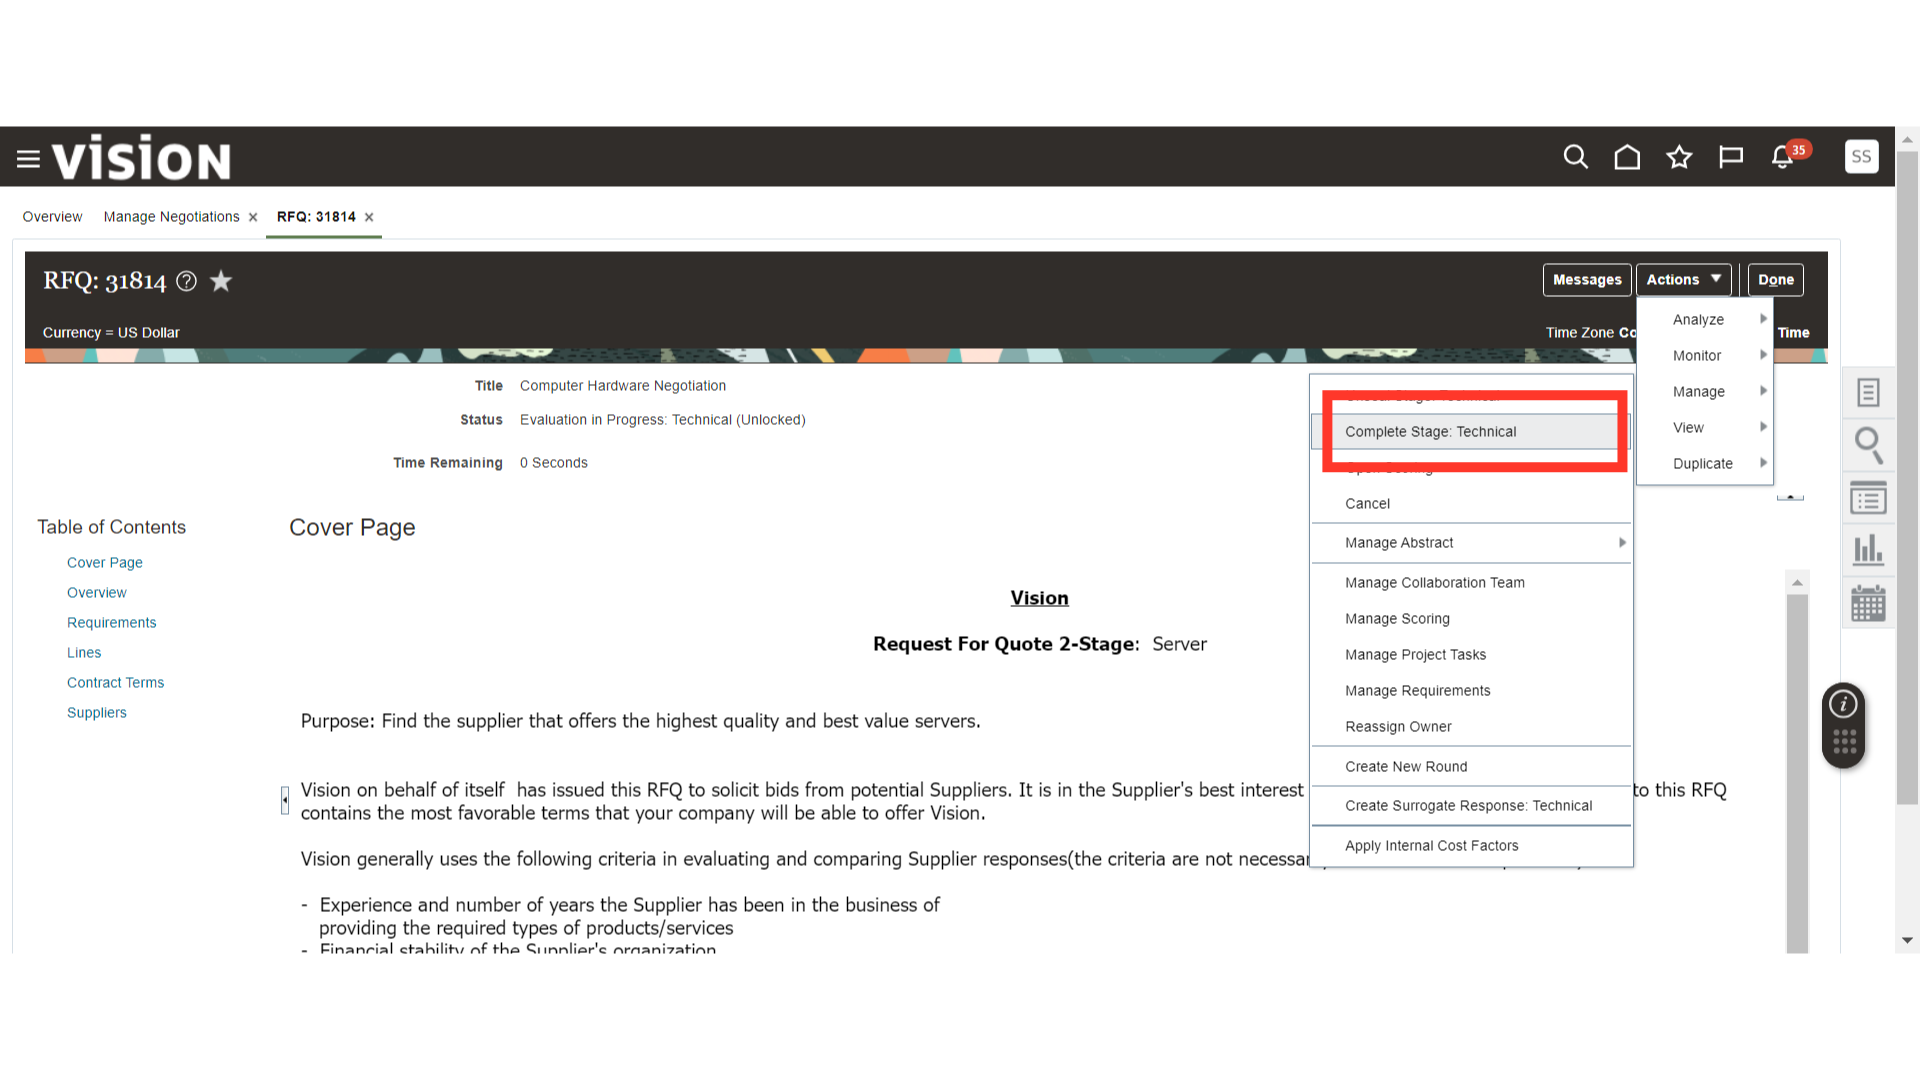
After the surrogate response submission, click on the Actions dropdown button, click on Manage, and click on Complete Stage: Technical. This concludes the technical stage of the negotiation.
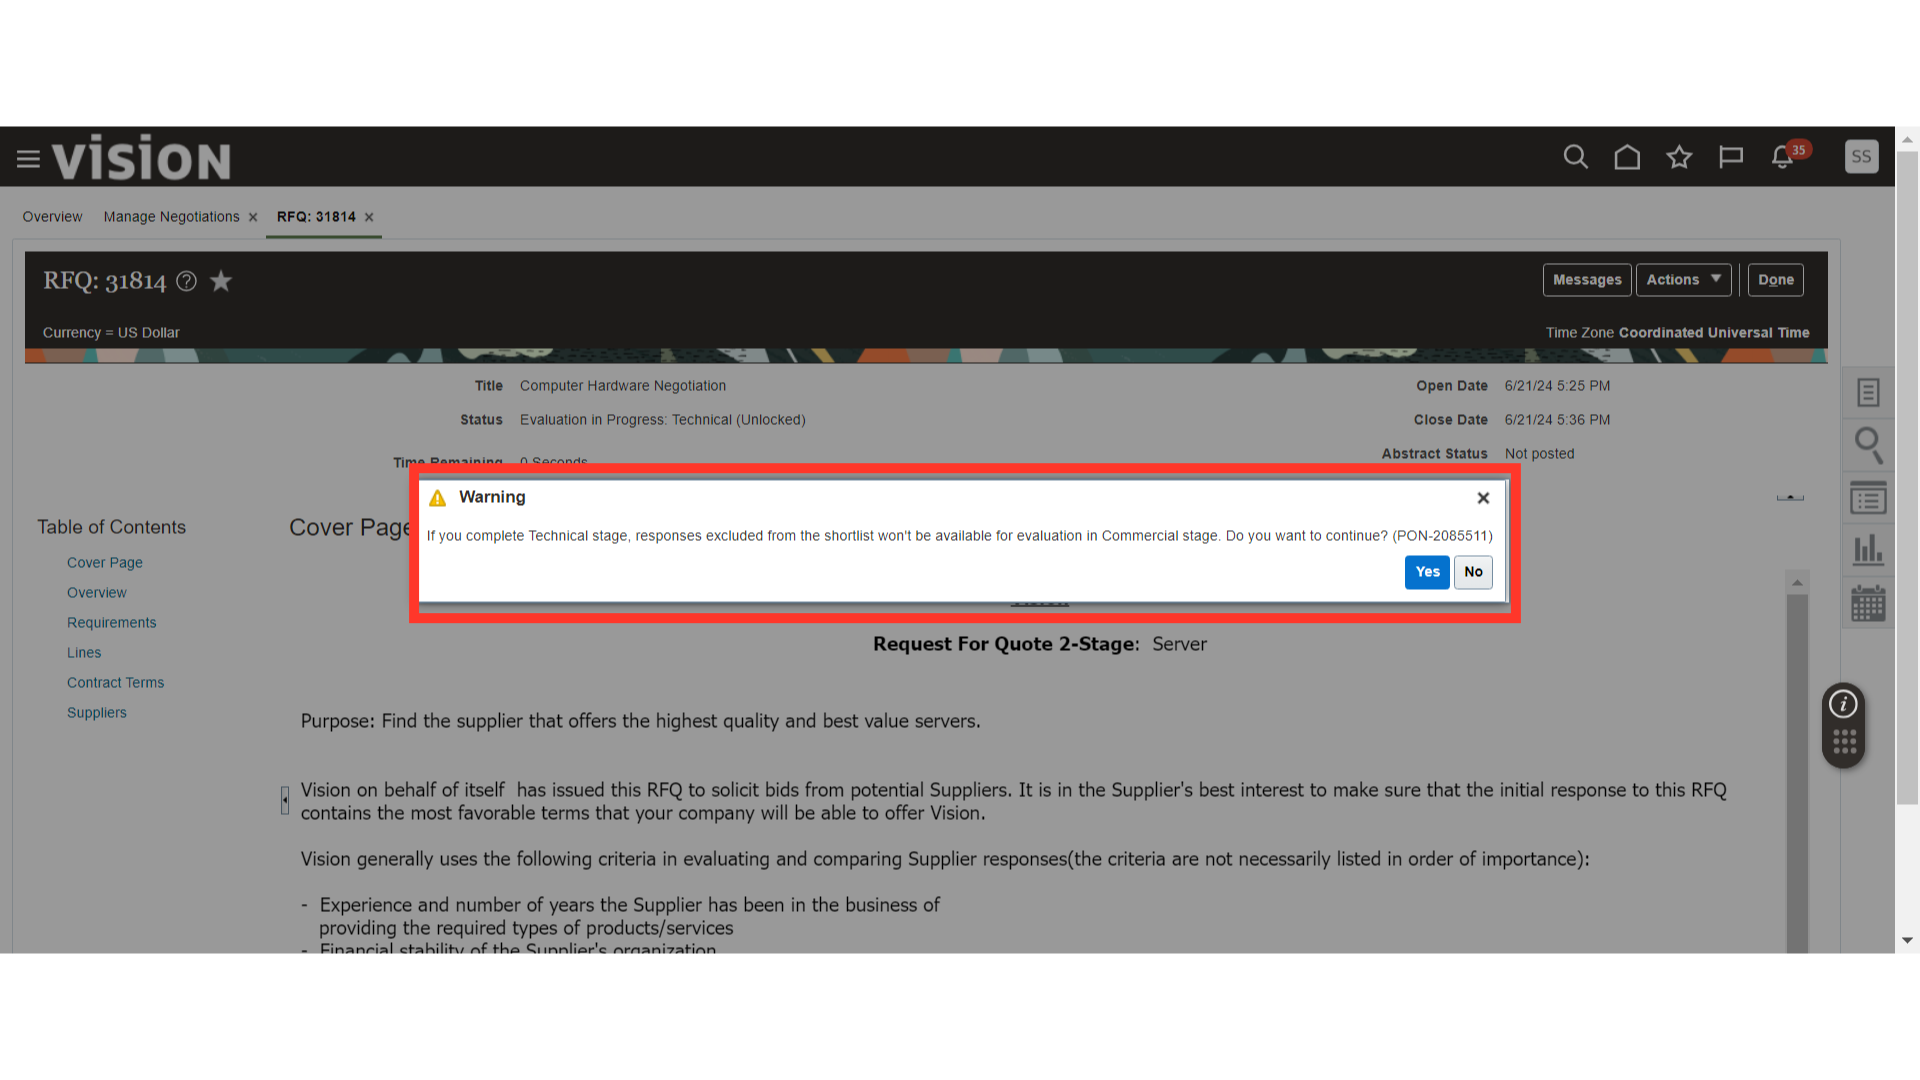
A warning message will appear about the completion of the Technical Stage. Click Yes.
A confirmation message will be generated for the closure of the Technical stage. Click OK.

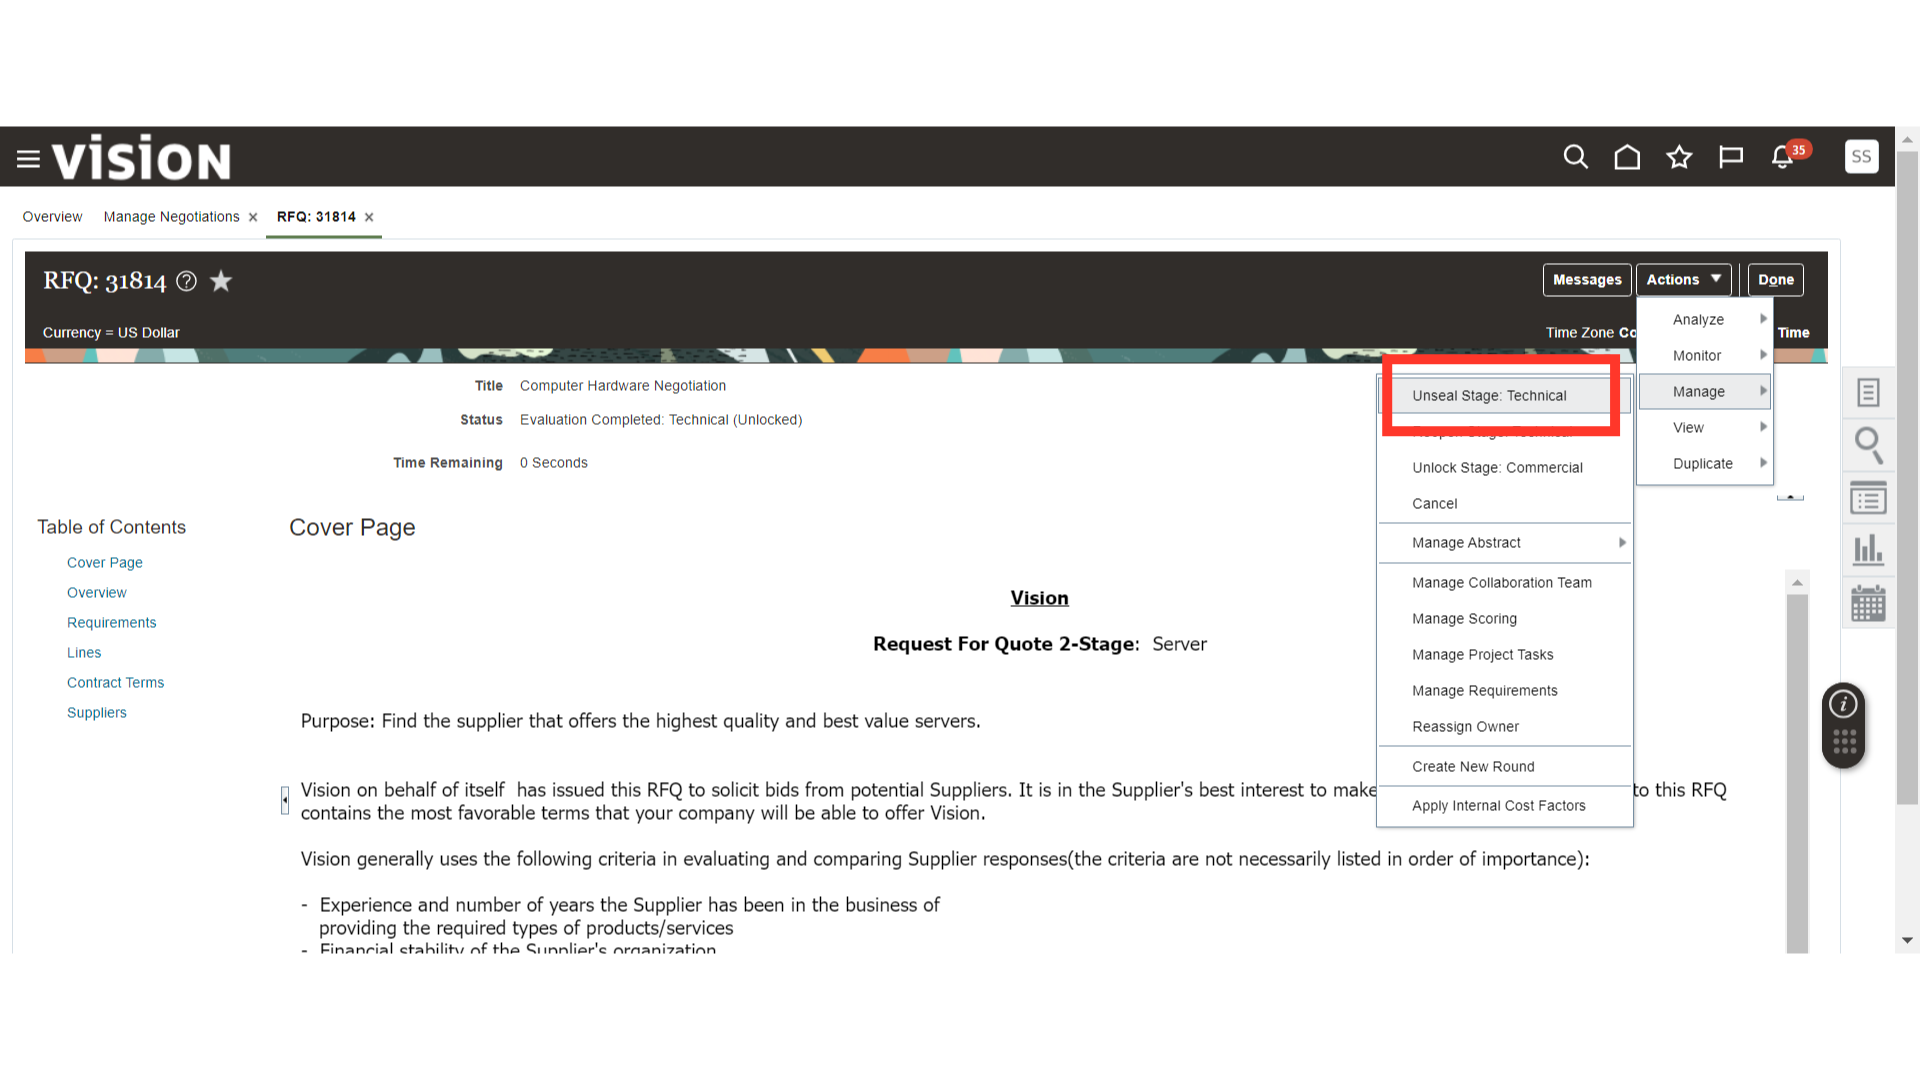
Now, click on the Actions dropdown button, click on Manage, and click on Unseal Stage: Technical. This will allow suppliers to see the technical responses from other suppliers.
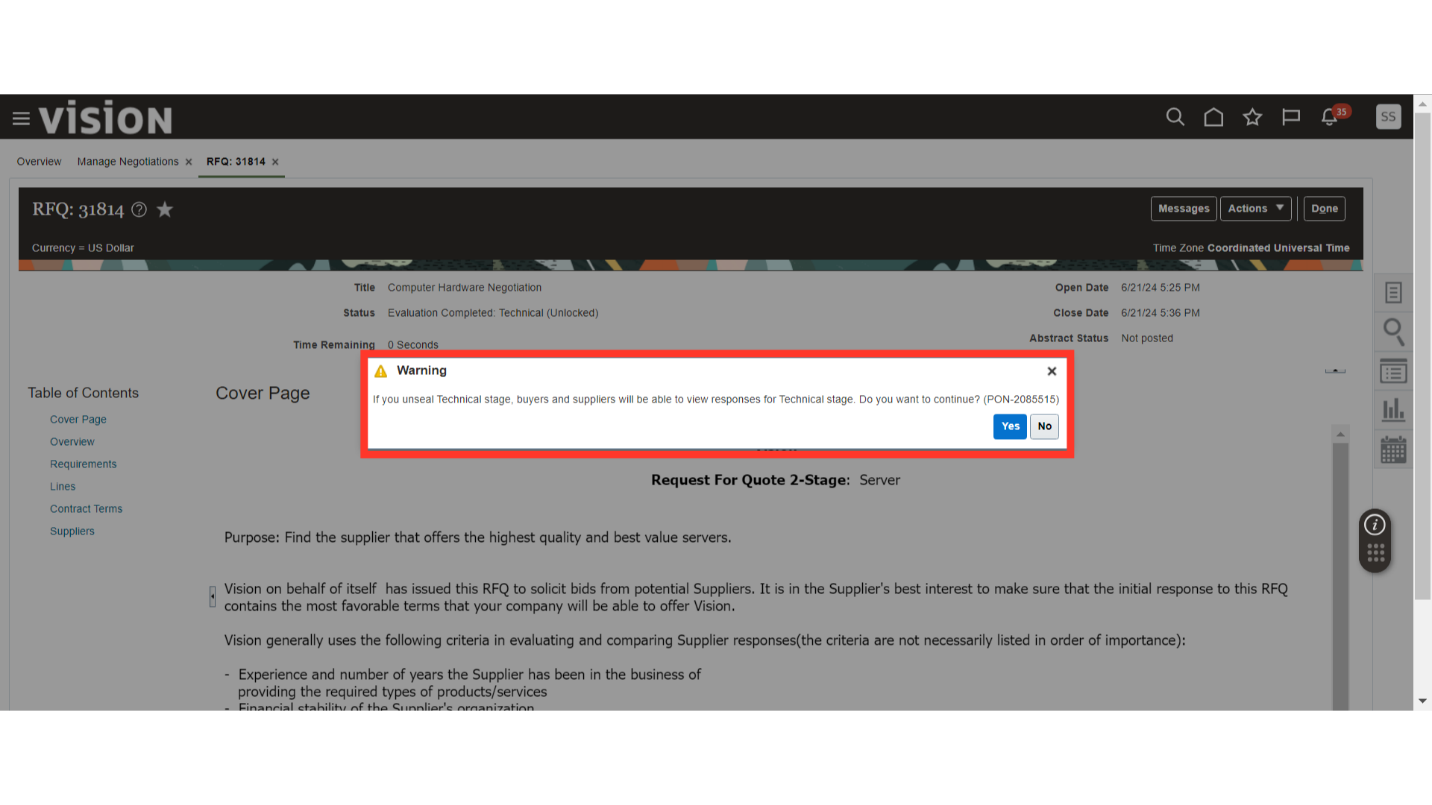
A confirmation message will be generated for the completion of the Technical Stage. Click Yes.
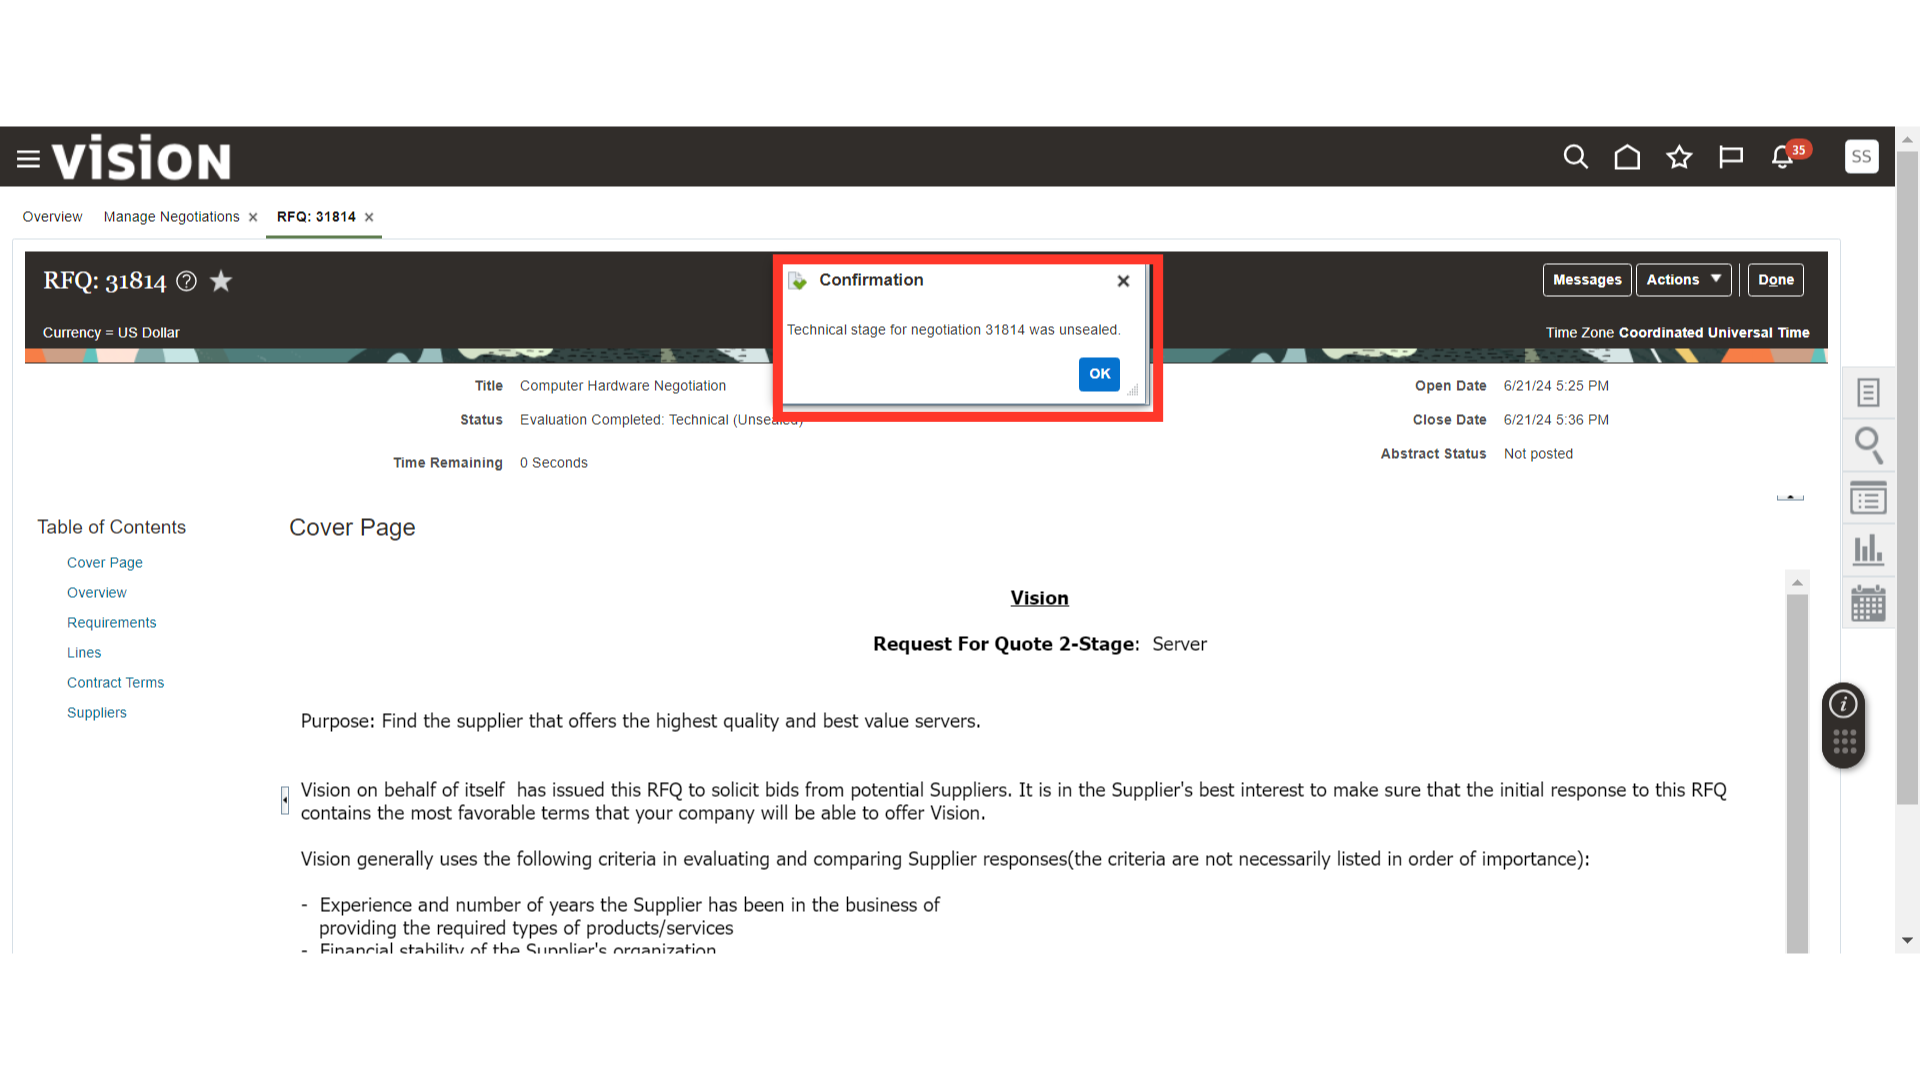
Click OK on the confirmation message about the Technical stage closure.
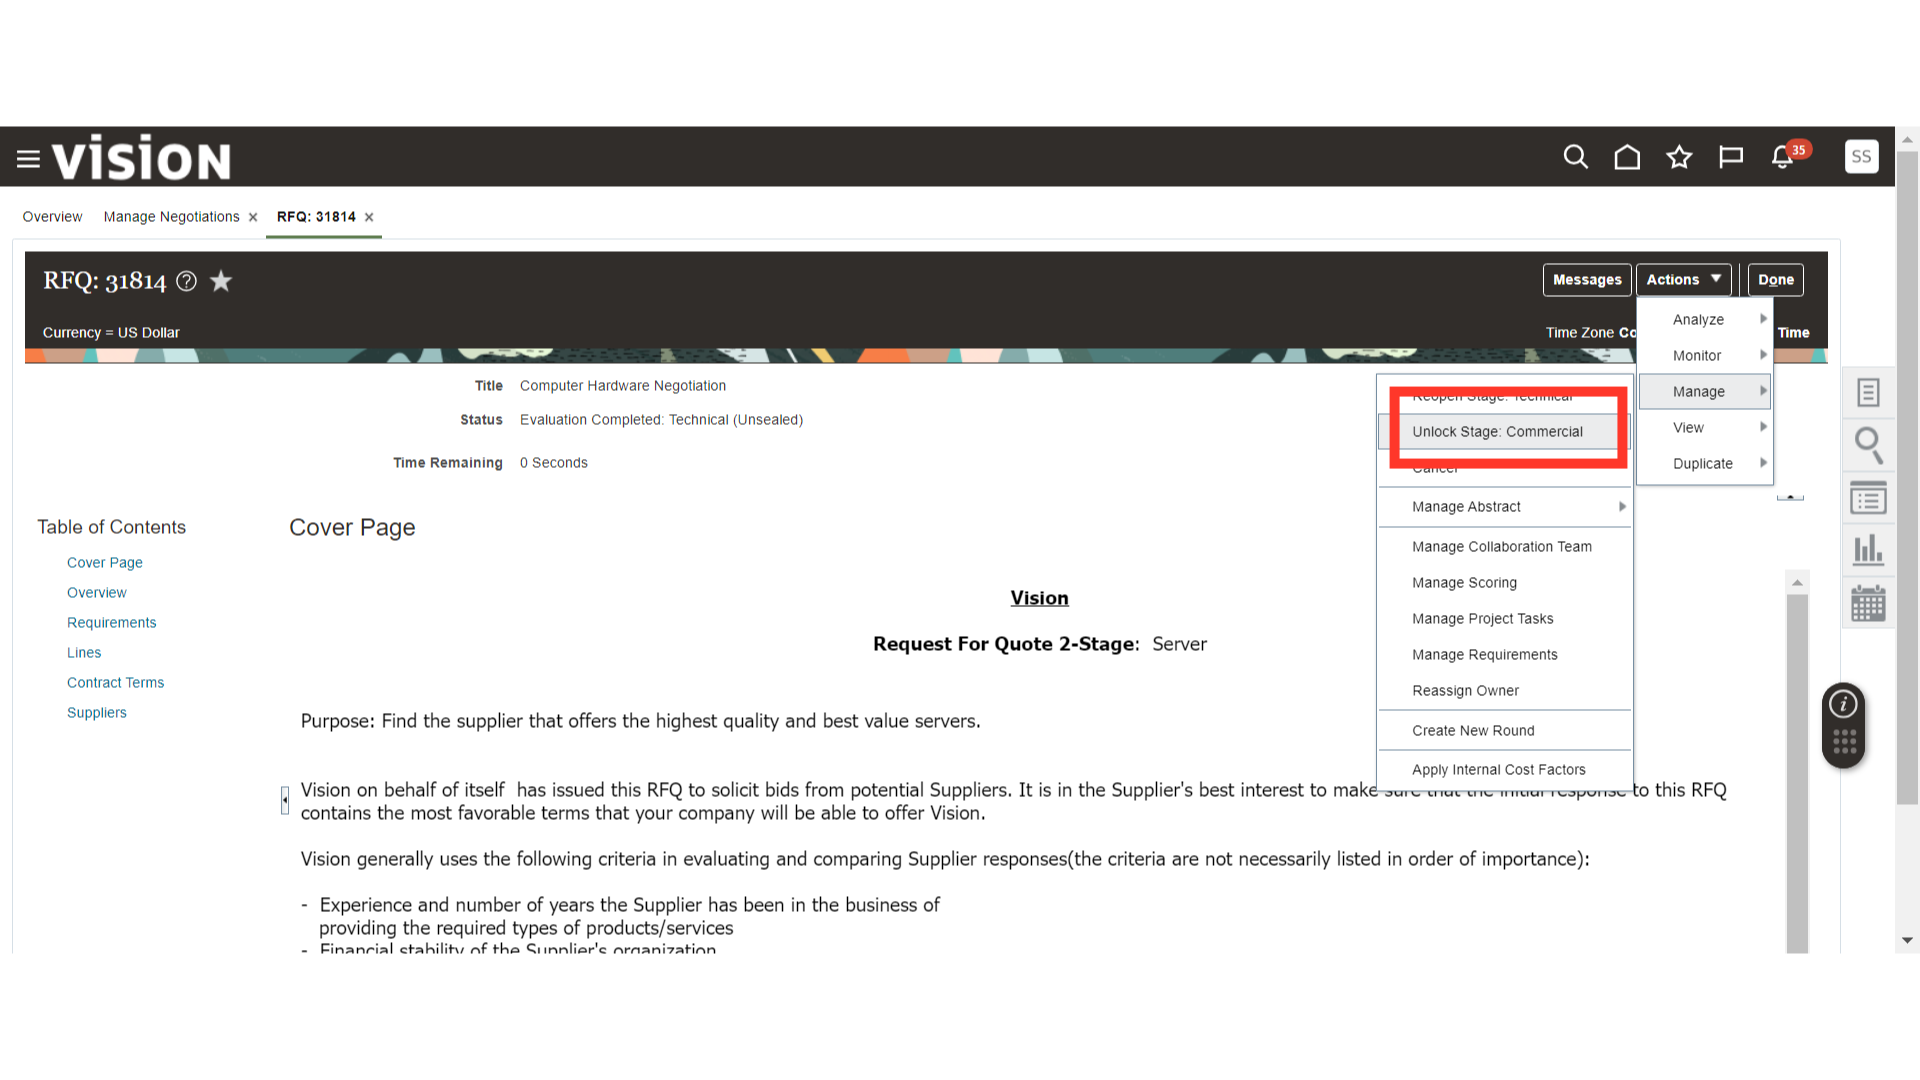
Now, click on the Actions dropdown button, click on Manage, and click on Unlock Stage: Commercial. This will unlock the Commercial stage for Surrogate Response and make the Commercial Responses visible to the Buyer and Evaluators.
A warning message will appear about the unlocking of the Commercial Stage. Click Yes.

Click OK on the confirmation message about unlocking the Commercial Stage.

Now, click on the Actions dropdown button, click on Manage, and click on Create Surrogate Response: Commercial.
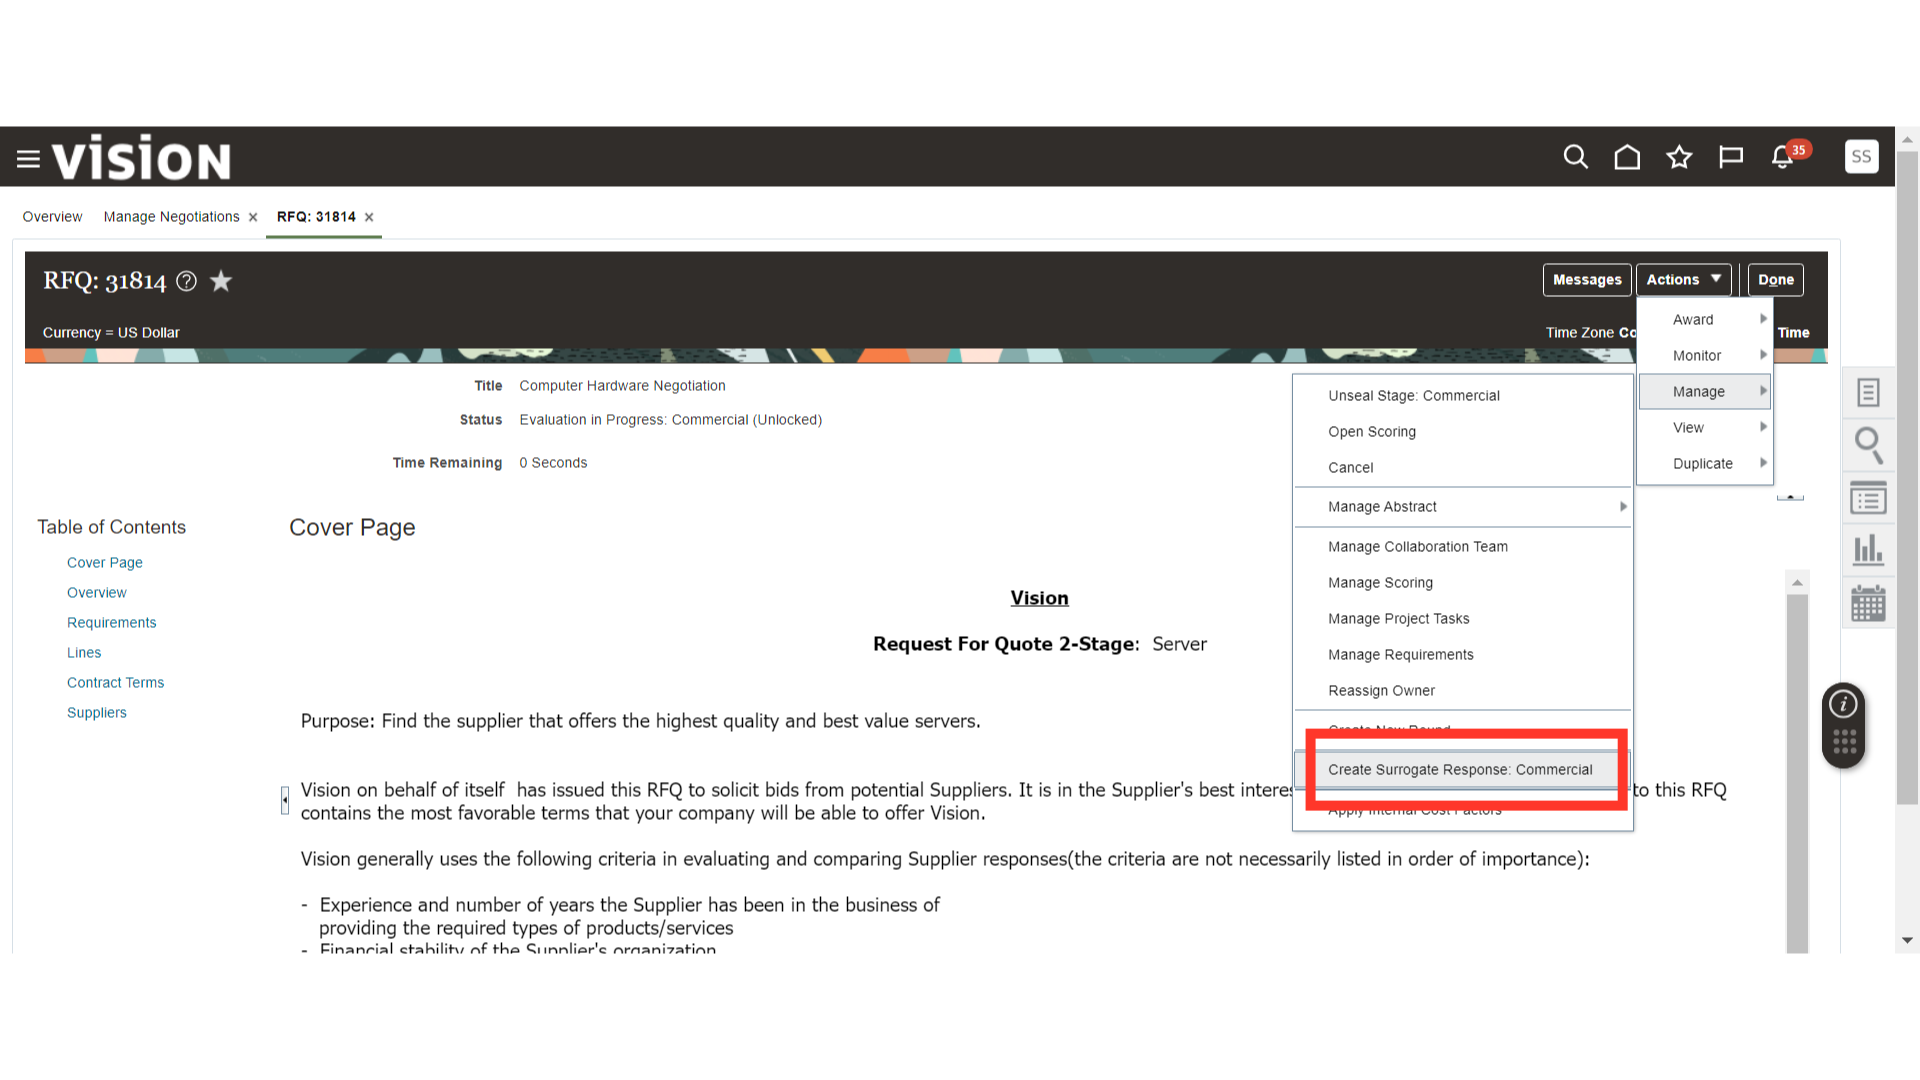
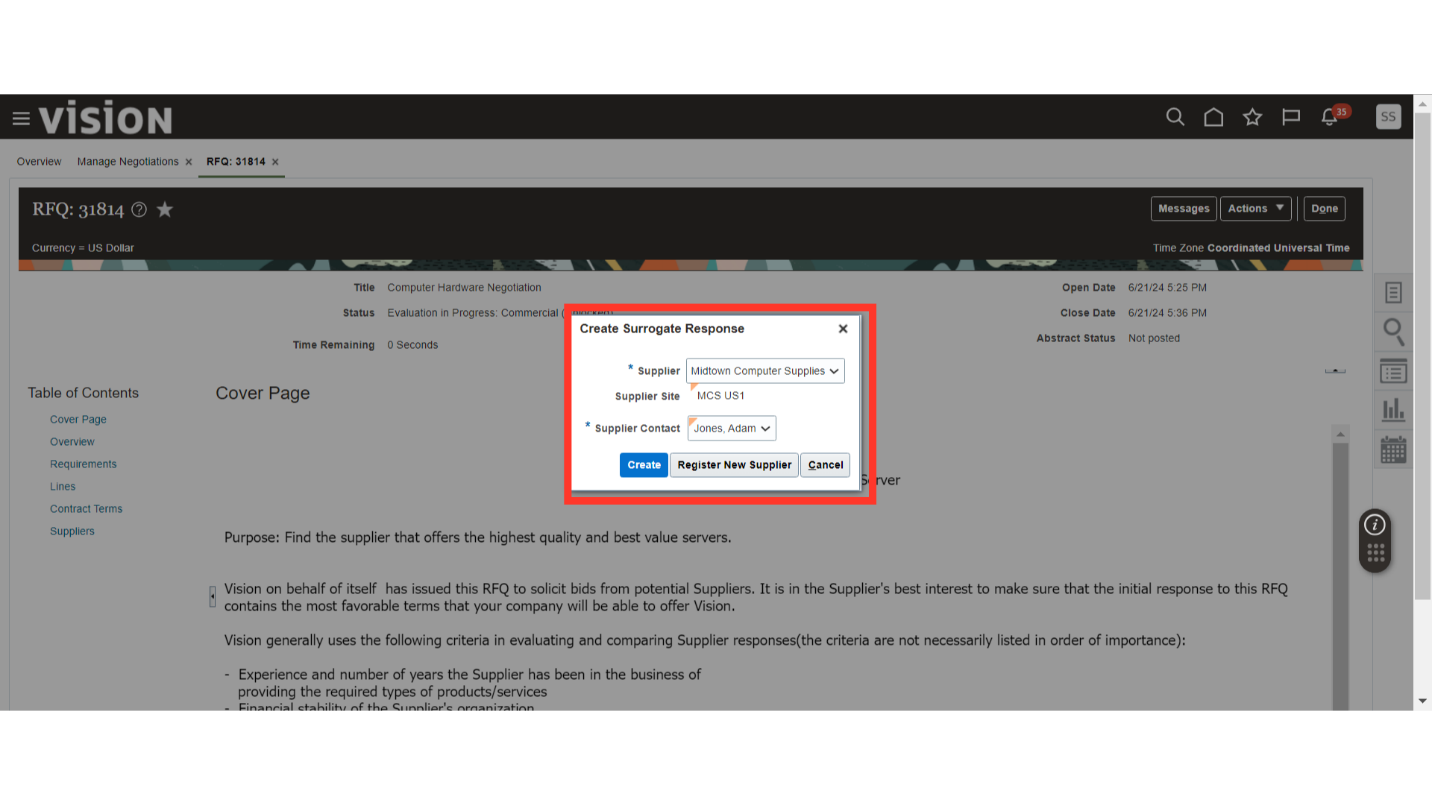
In the Create Surrogate Response window, provide the details such as Supplier, Supplier Site, and Supplier Contact, then click on the Create button.
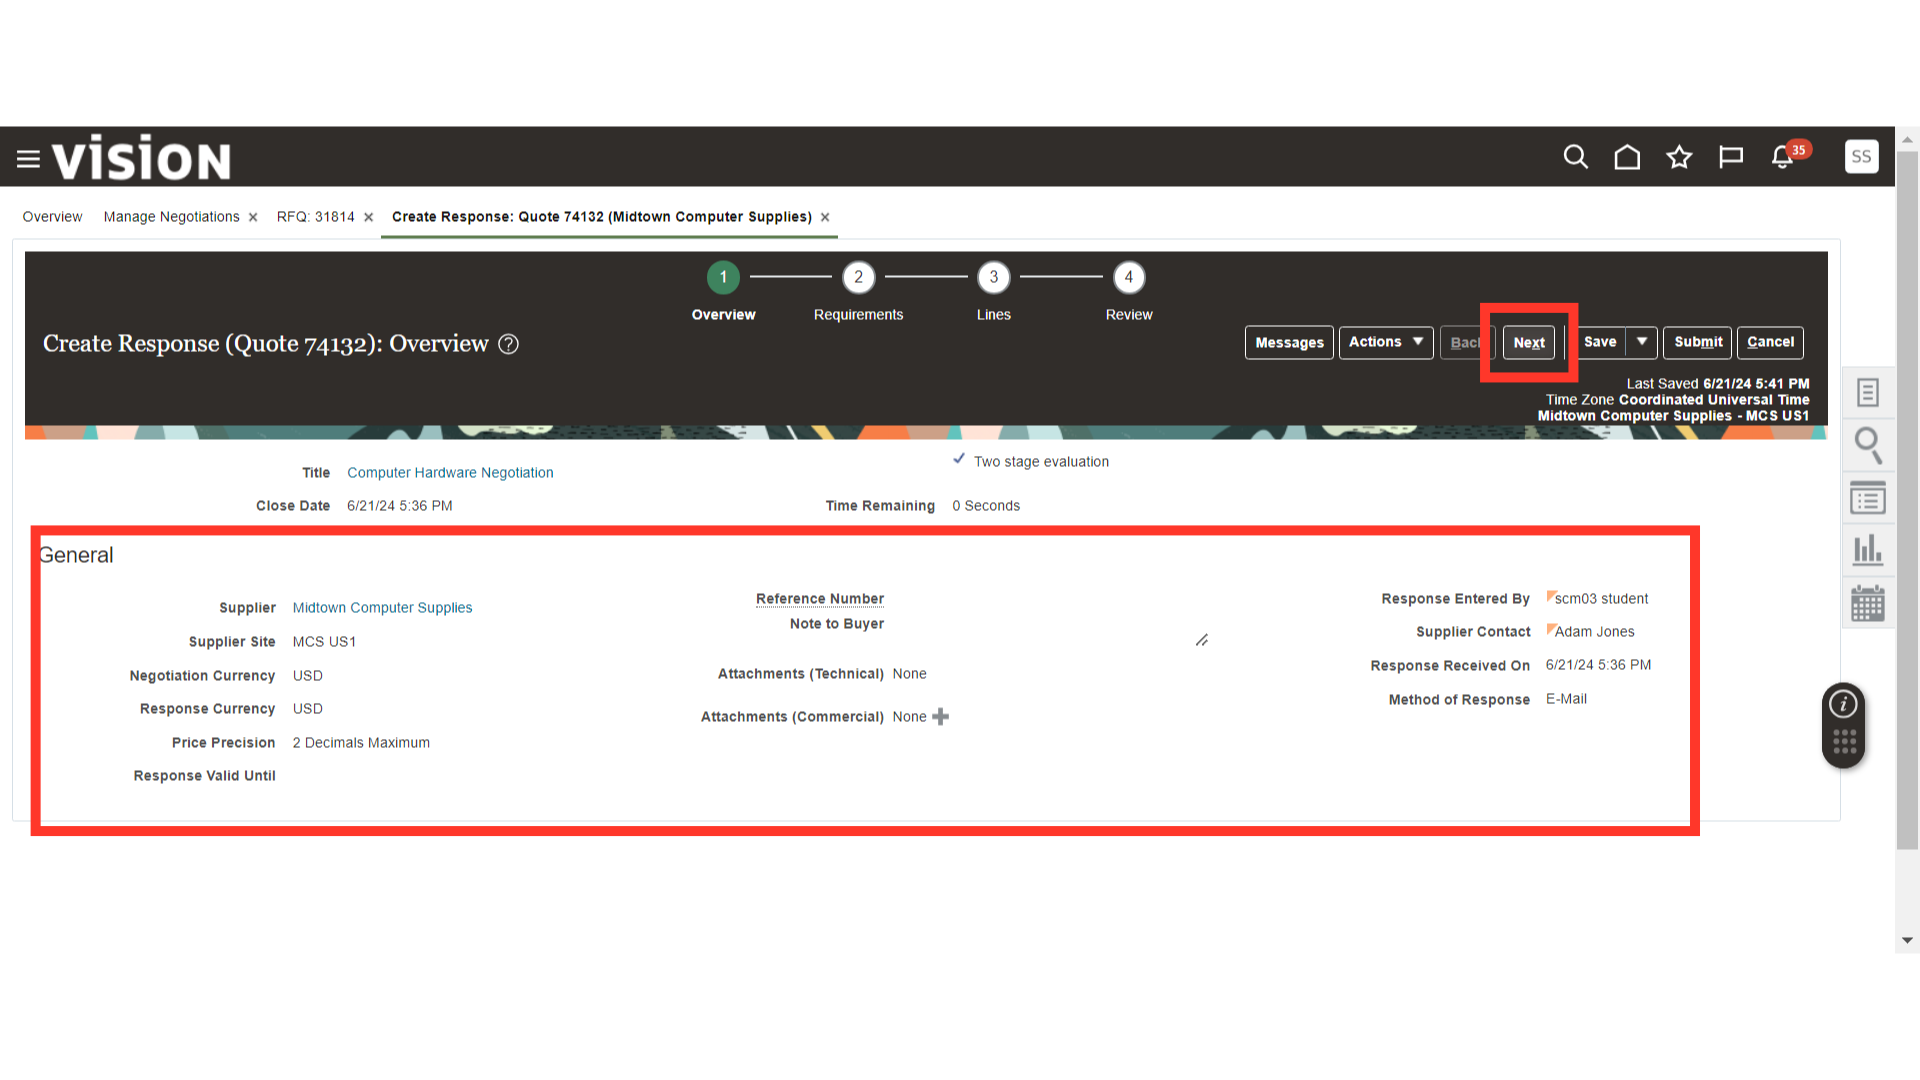
In the Overview section, review the details and click on the Next button.
In the Requirements section, technical details are frozen. Click on the Triangle button to change the section to Commercial.
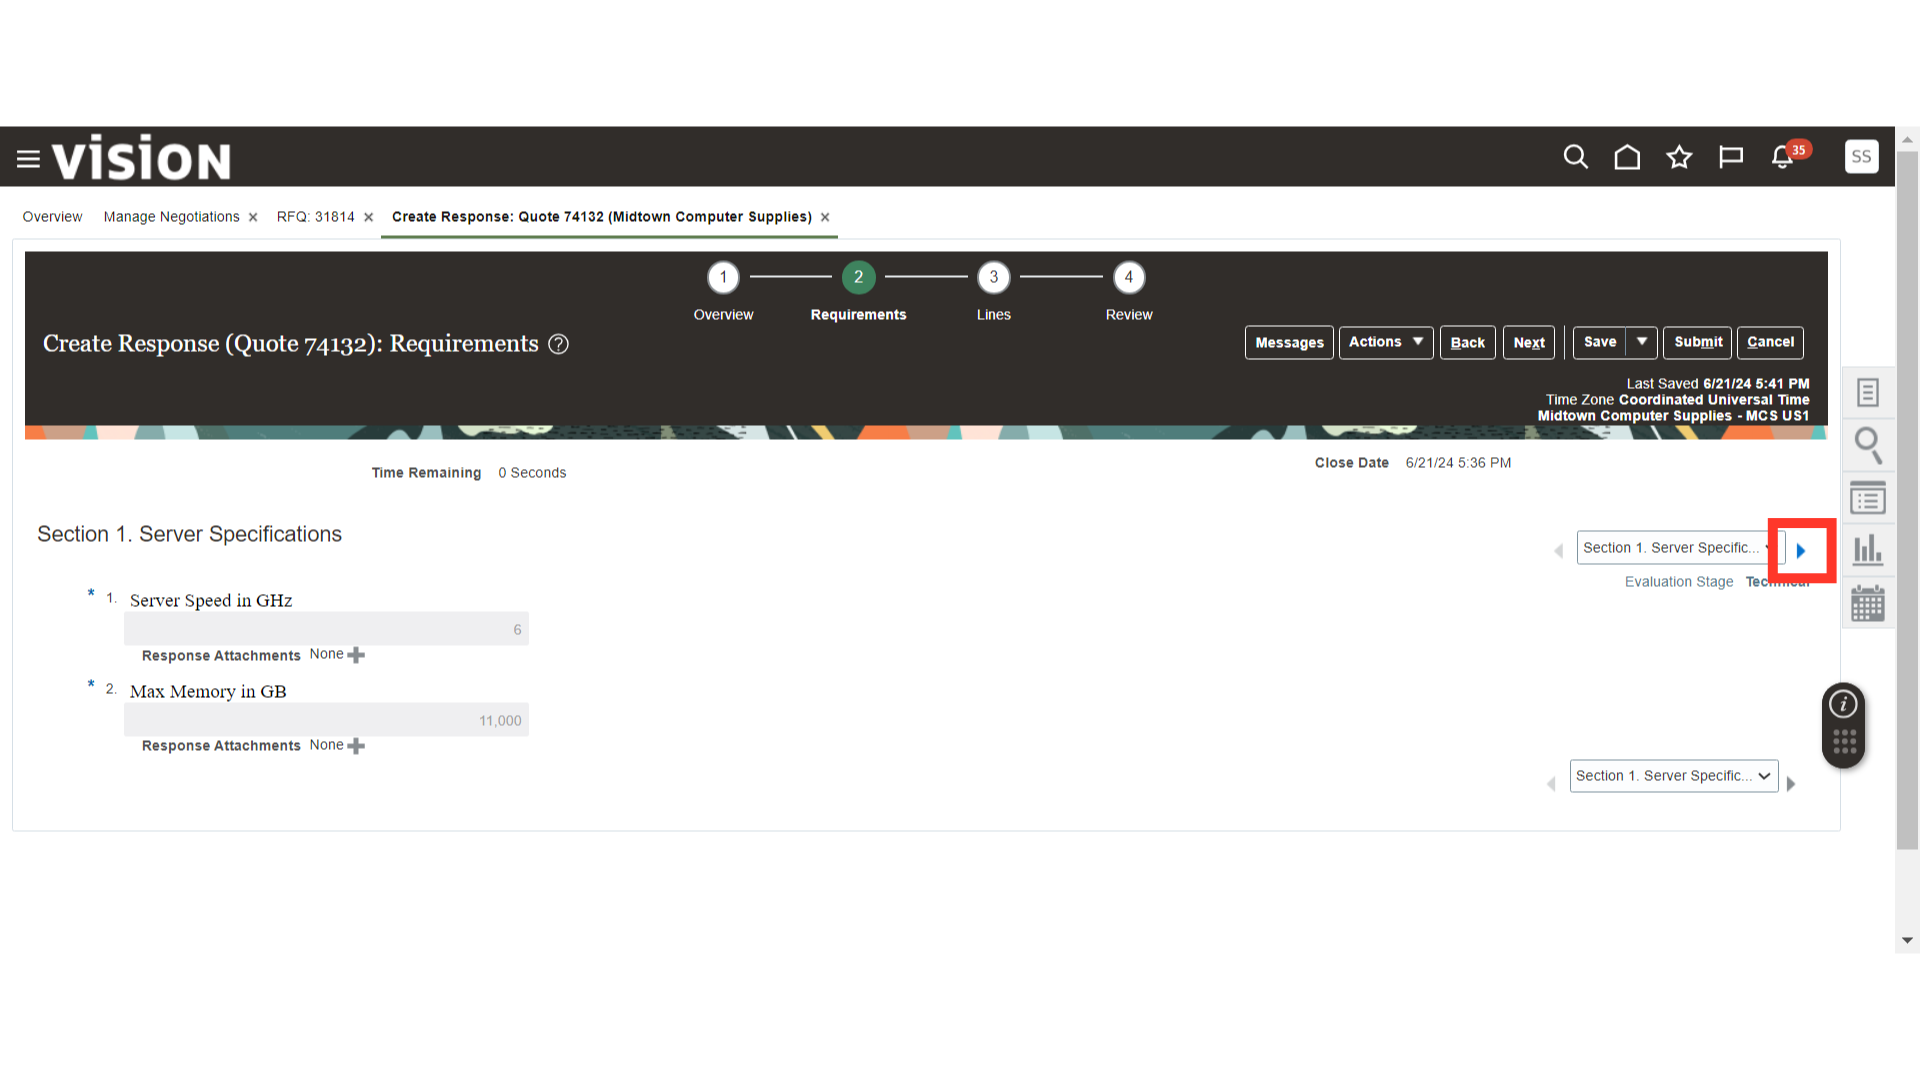
In the Commercial section, provide the details requested by the Buyer. Once filled in, click on the Next button.

In the Lines section, provide the Line Price and Required Details.
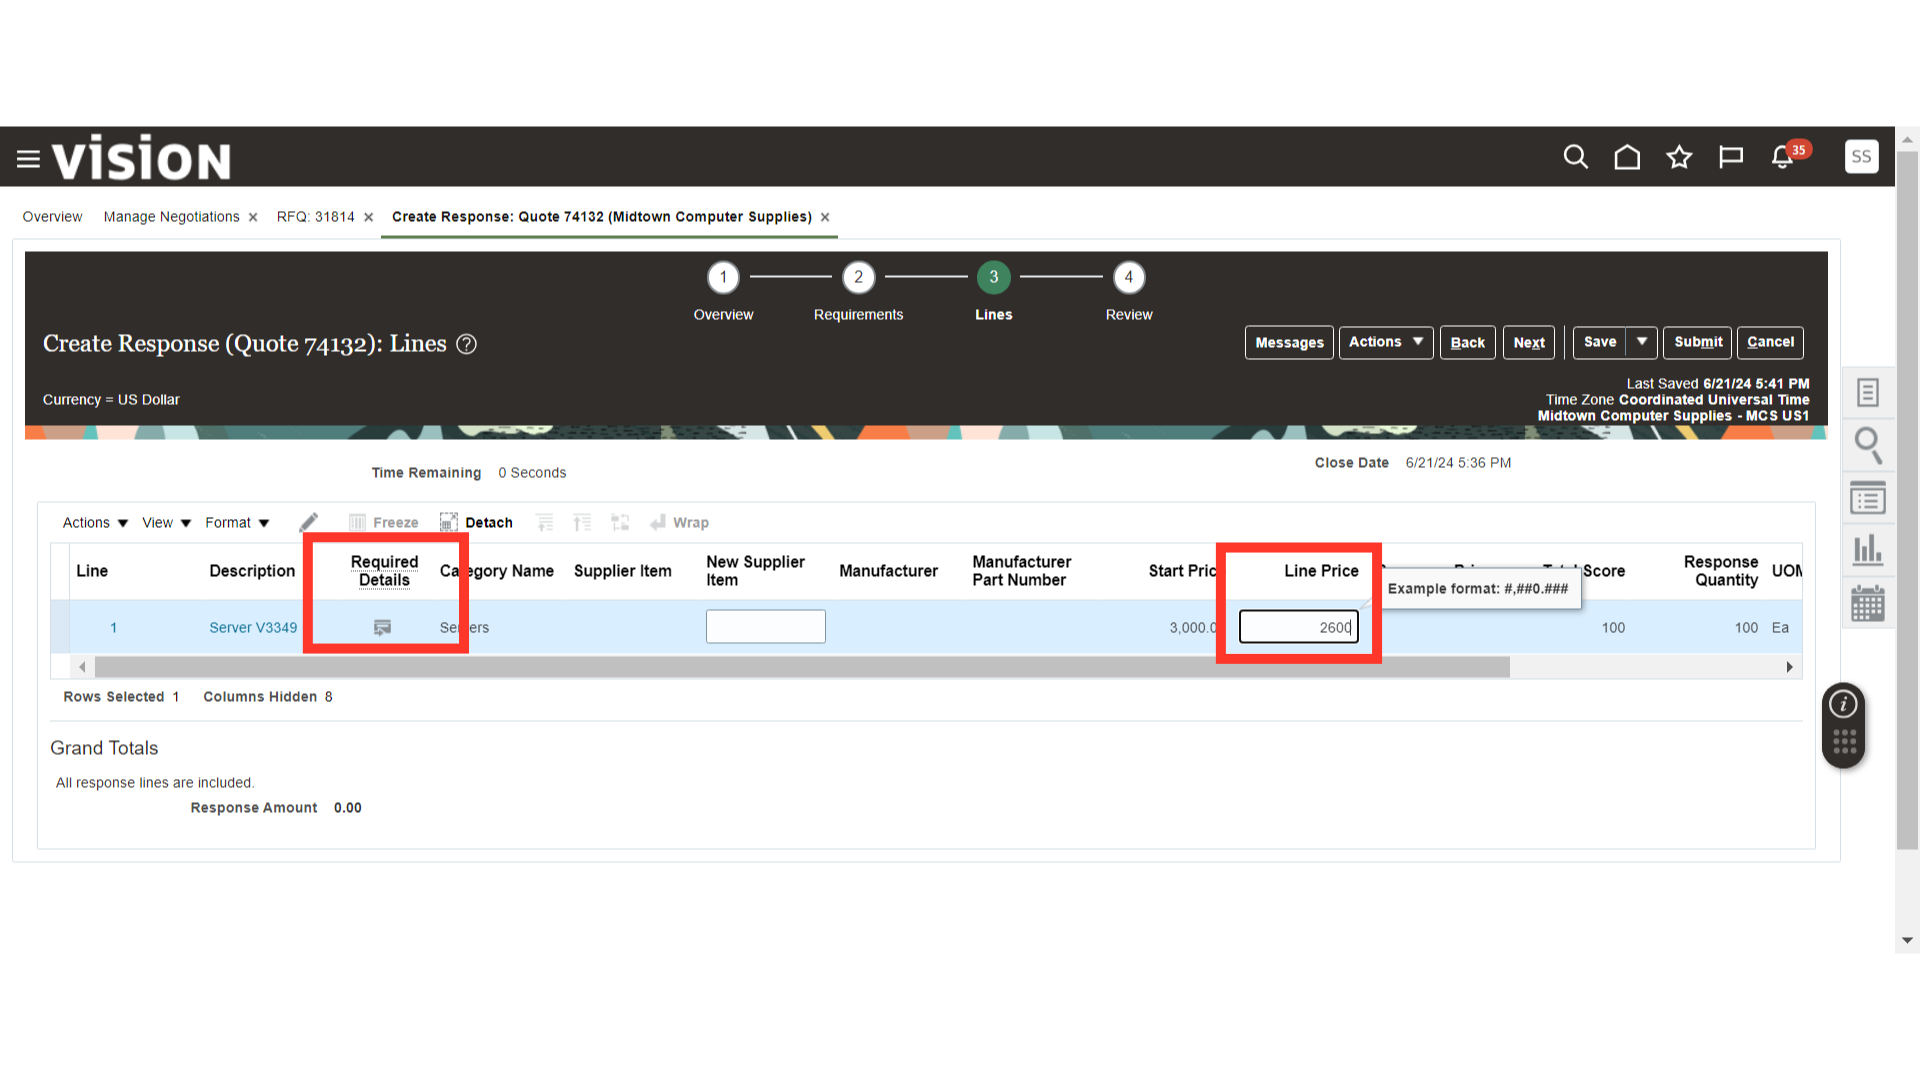
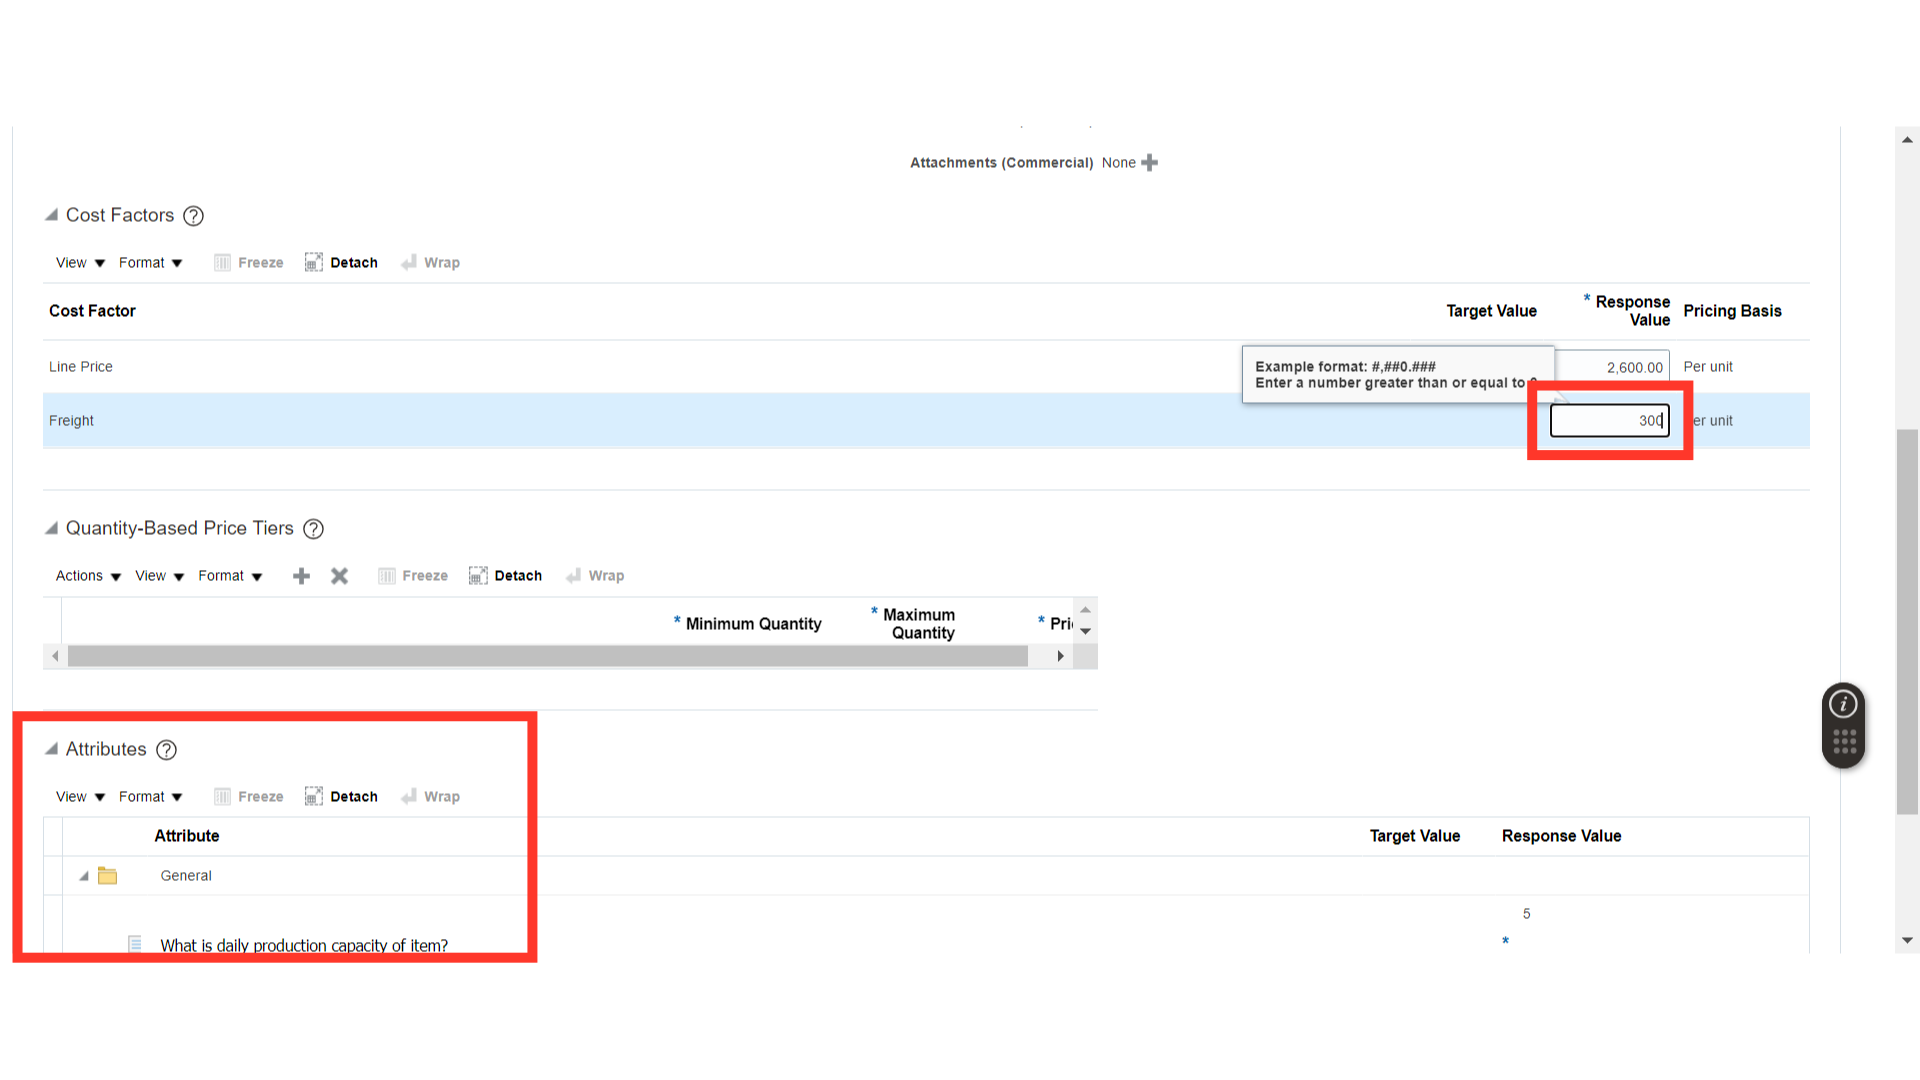
In the Required Details section, provide the details such as Freight Charges and other necessary information. Once done, click on Save and Close.
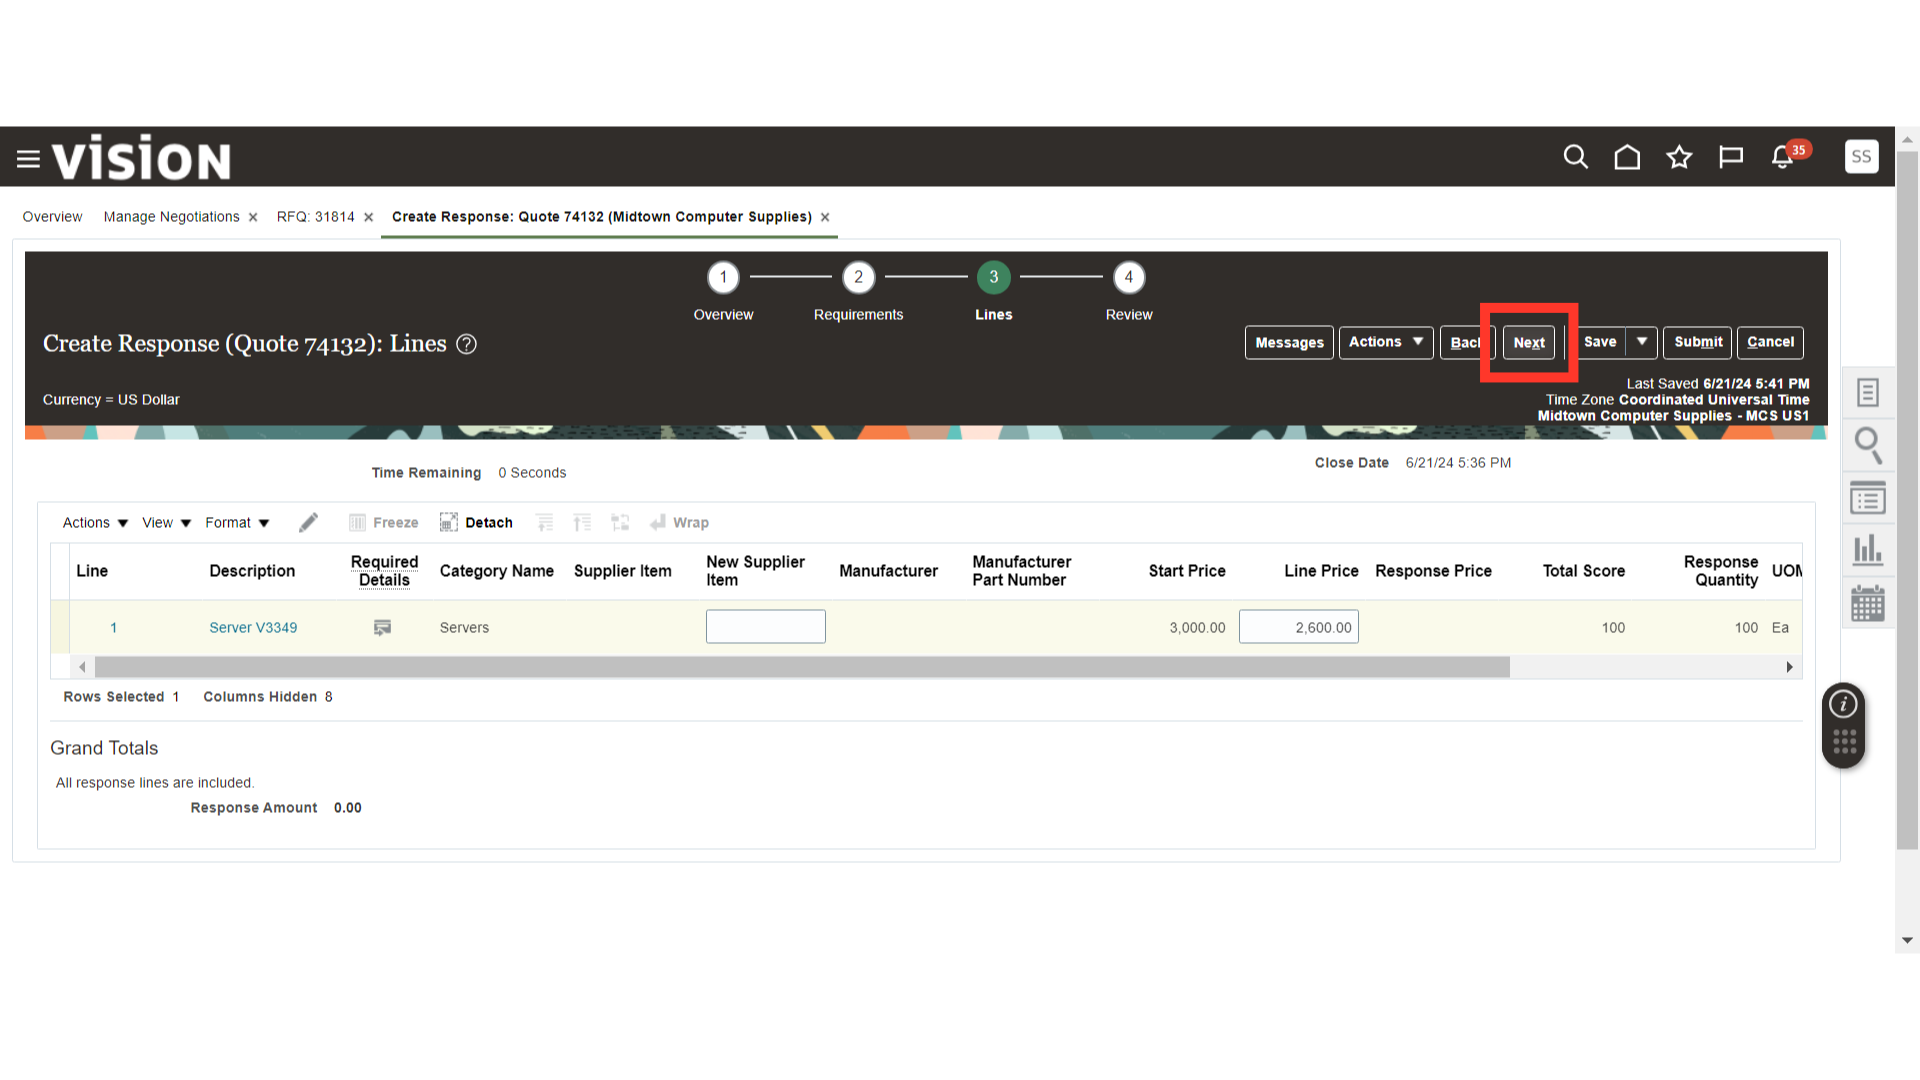
Once all the line details are filled in, click on the Next button.
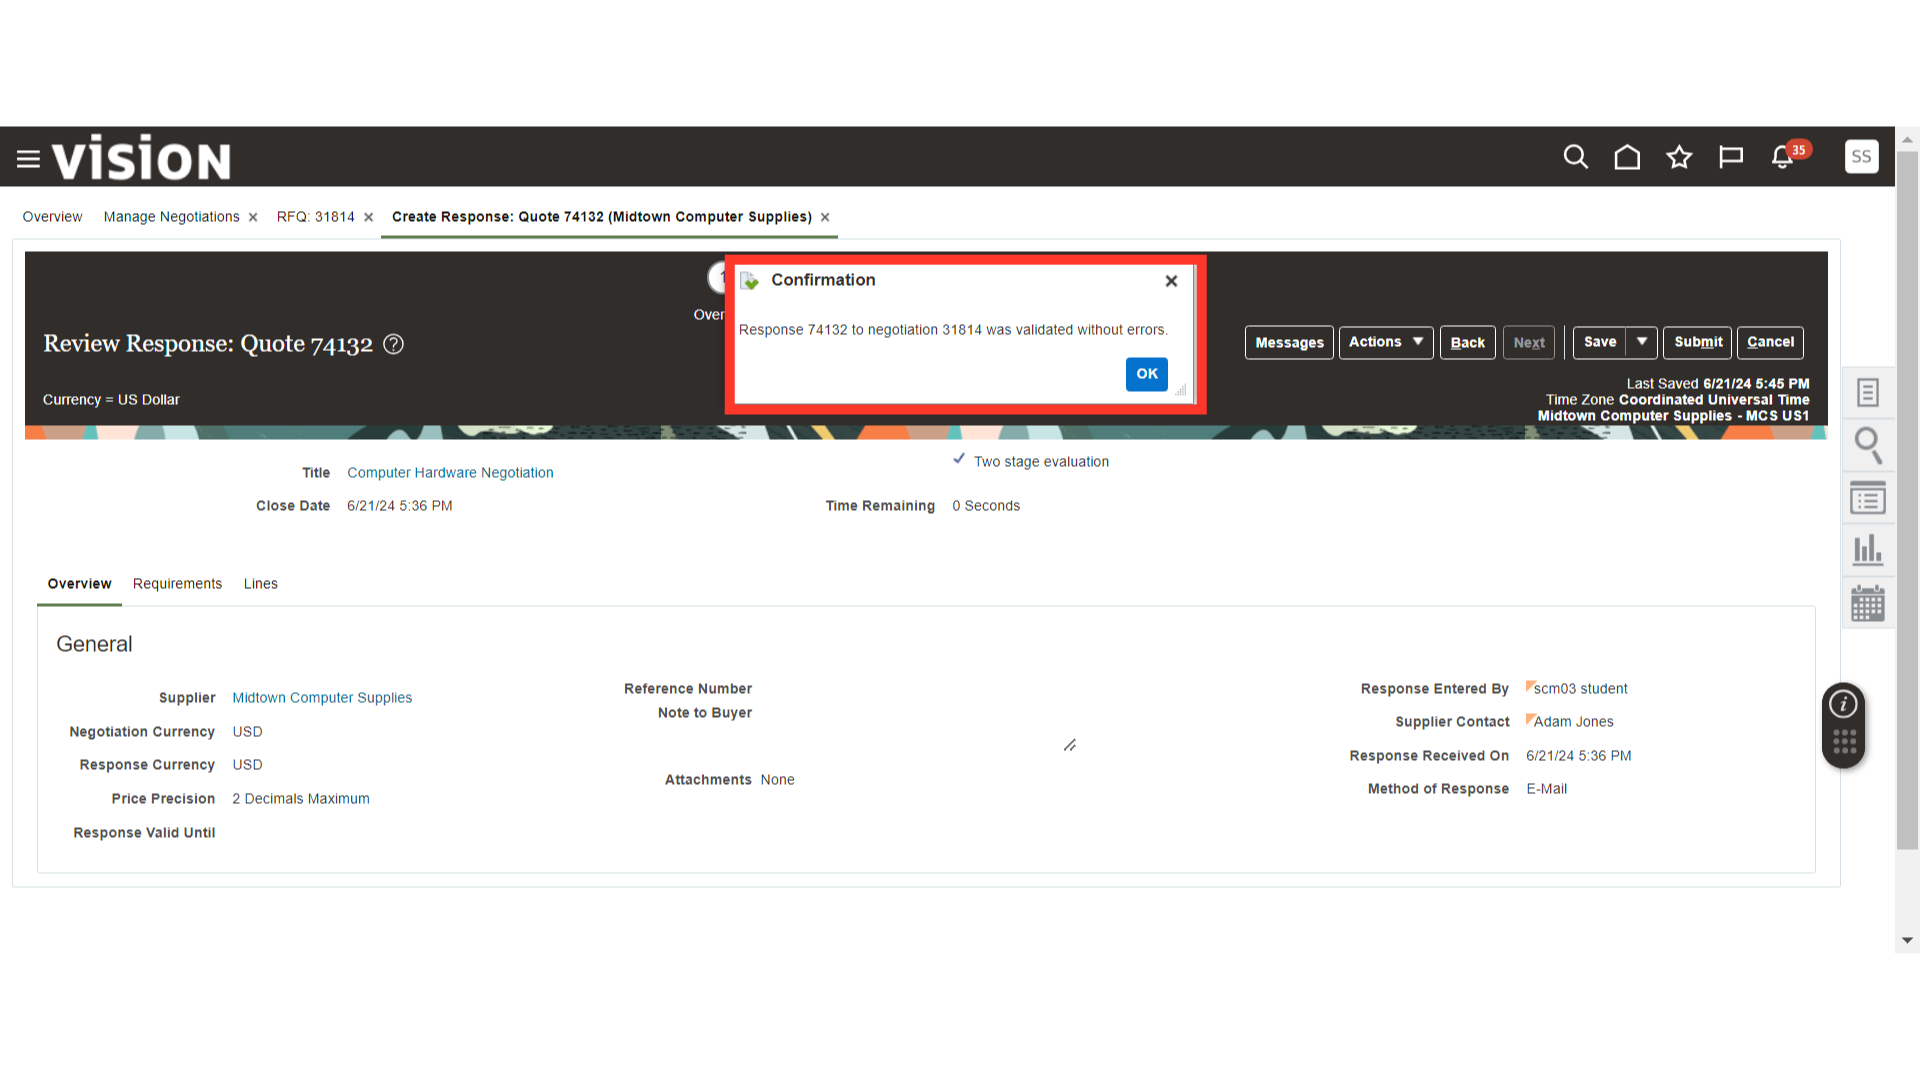
In the Review Response section, after validating all the details such as Overview, Requirements, and Lines, click on the Actions dropdown button and click on Validate.

Once validated, the system will generate a confirmation message. Click OK.
Now, click on the Submit button to submit the Commercial Response.

A confirmation message will be generated for the response submission. Click OK.
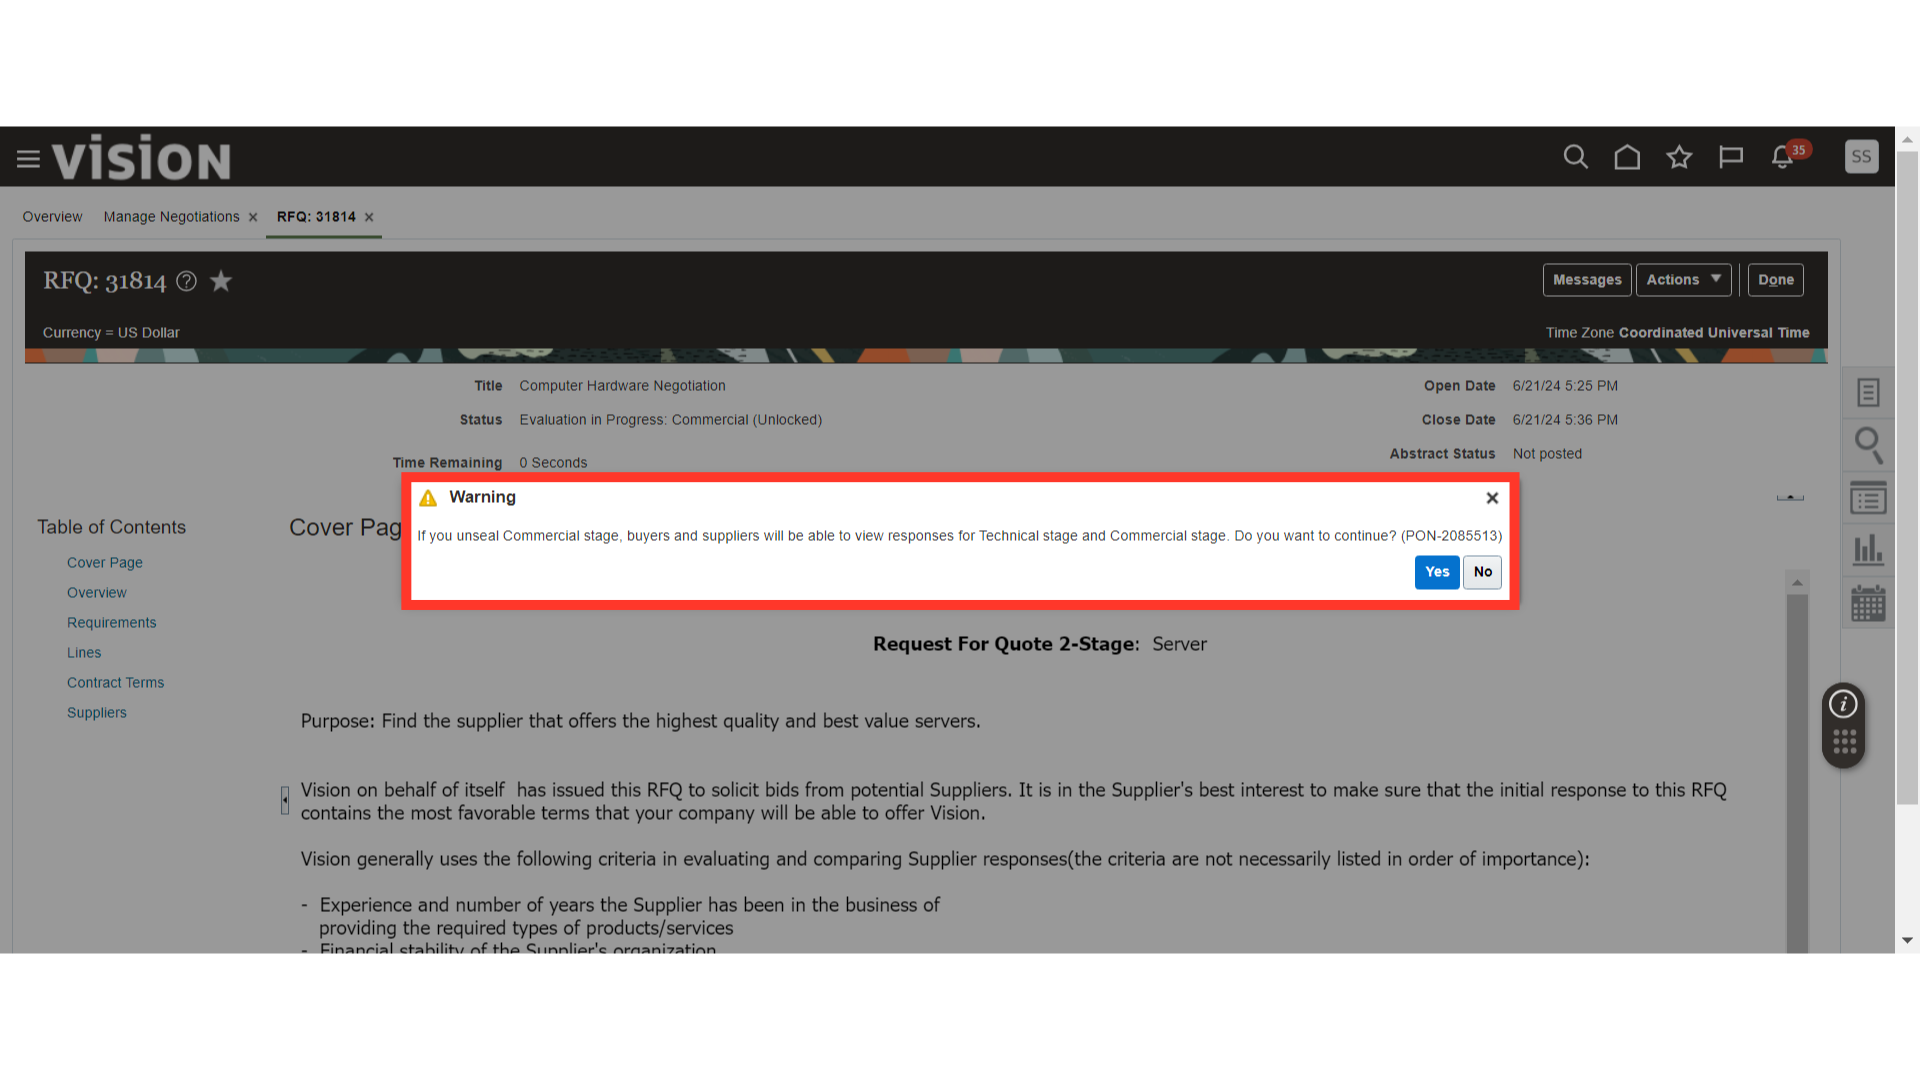
Now, click on the Actions dropdown button, click on Manage, and click on Unseal Stage: Commercial. This will make Commercial responses visible to suppliers.

The system will generate a warning message about unsealing the commercial stage. Click Yes.
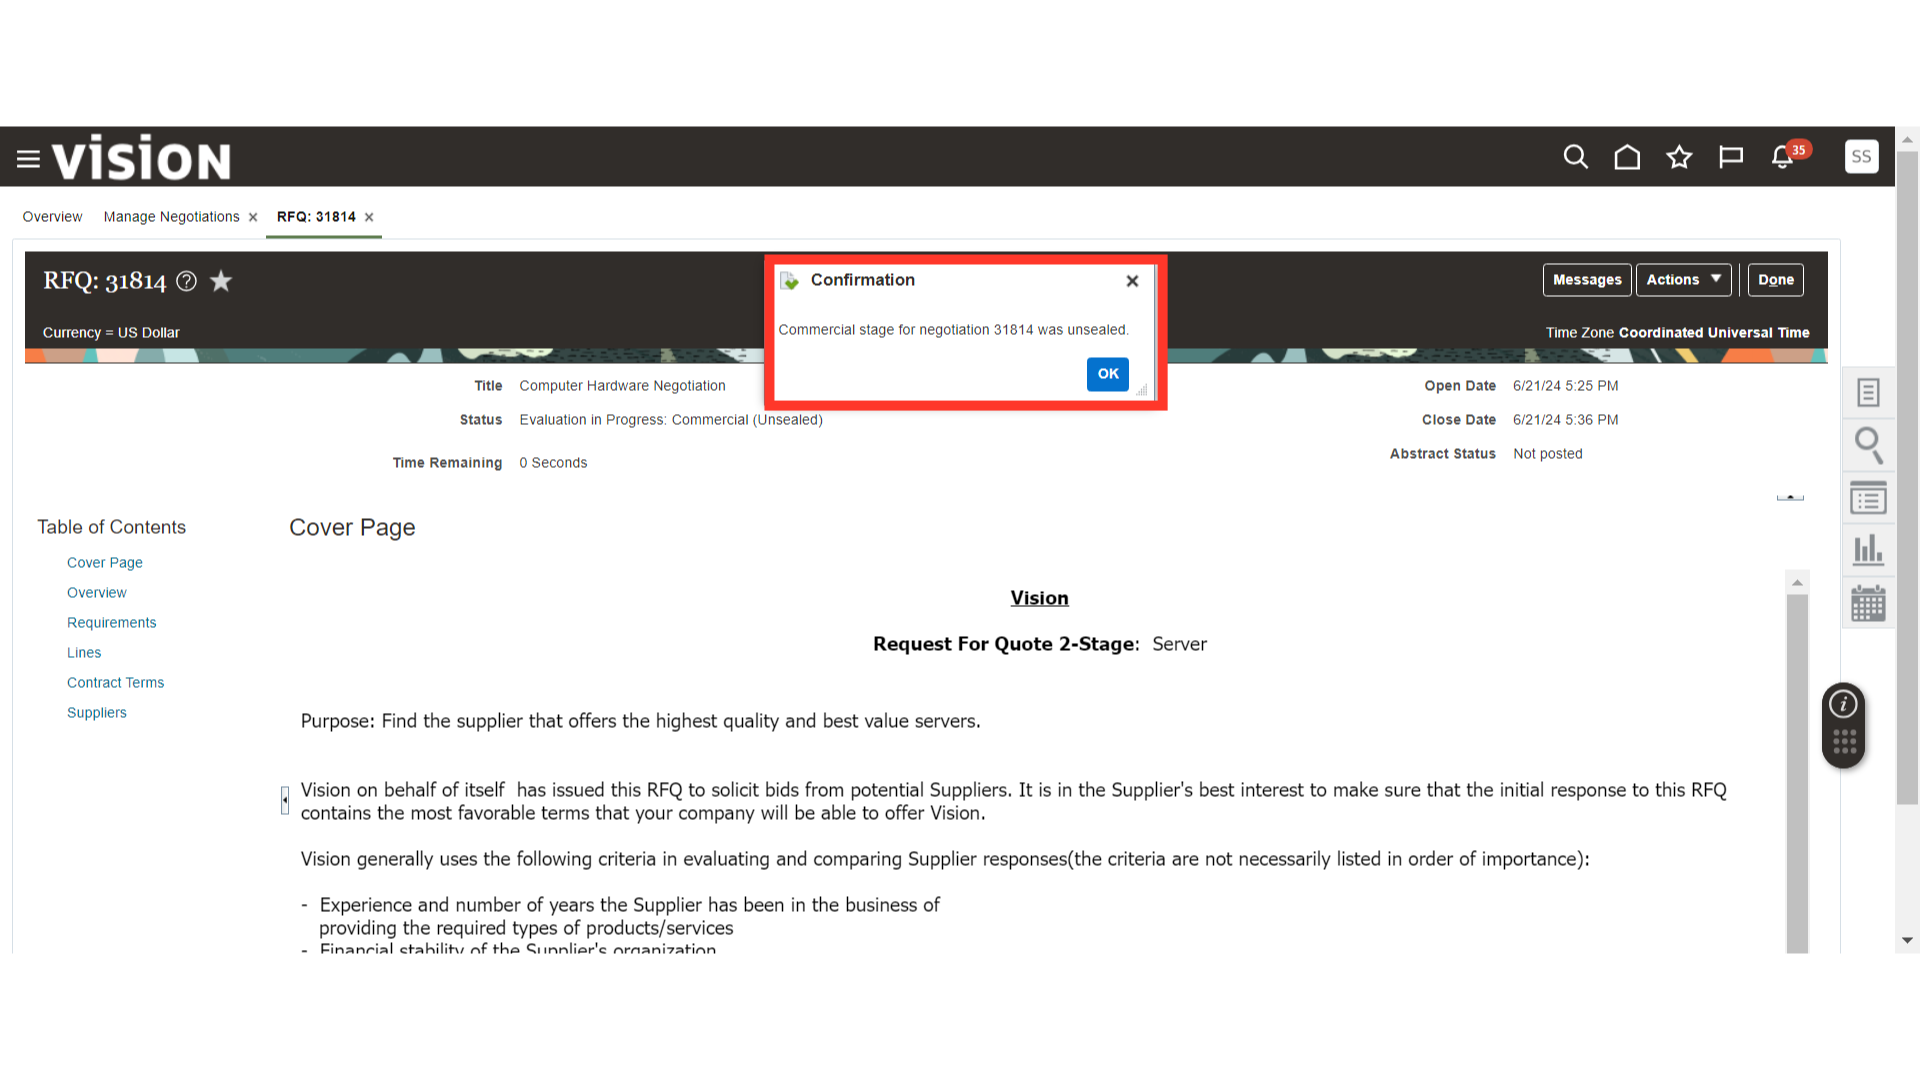
A confirmation message will be generated for the unsealing of the commercial stage. Click OK.
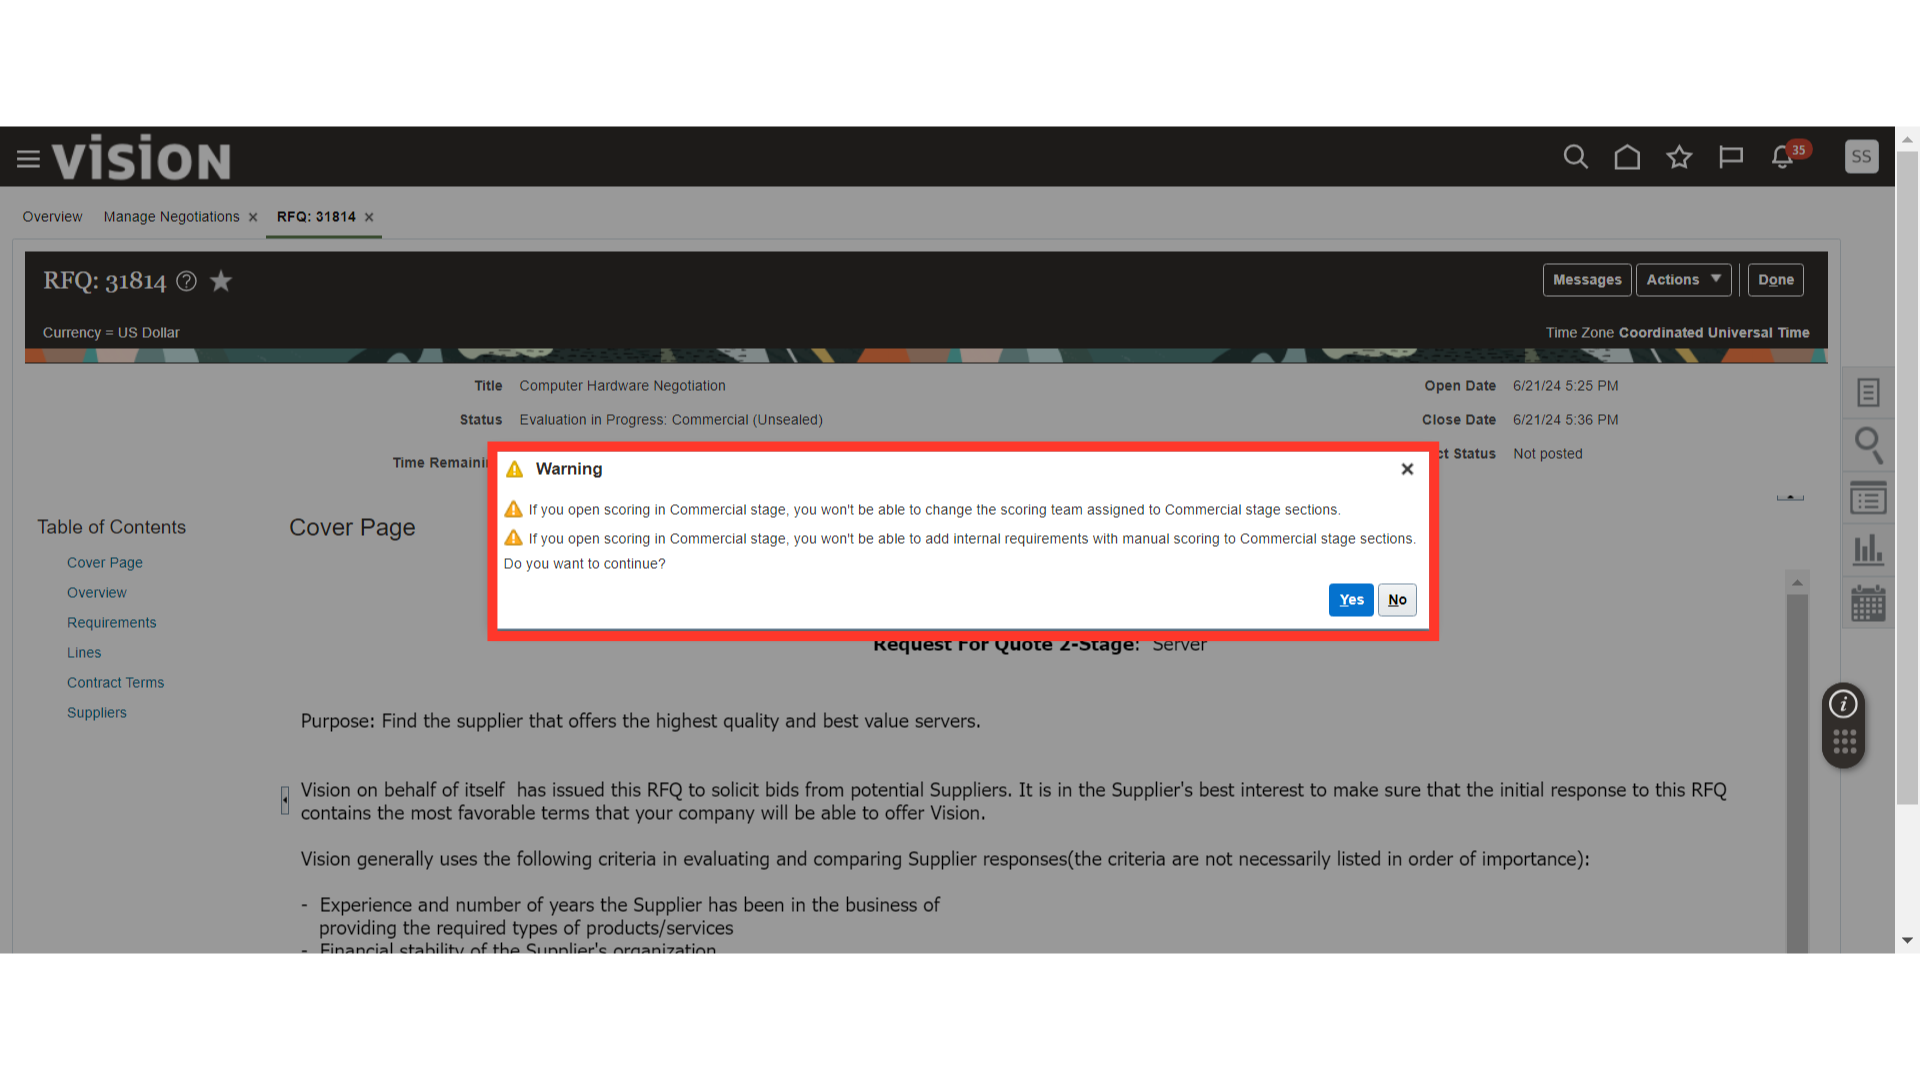
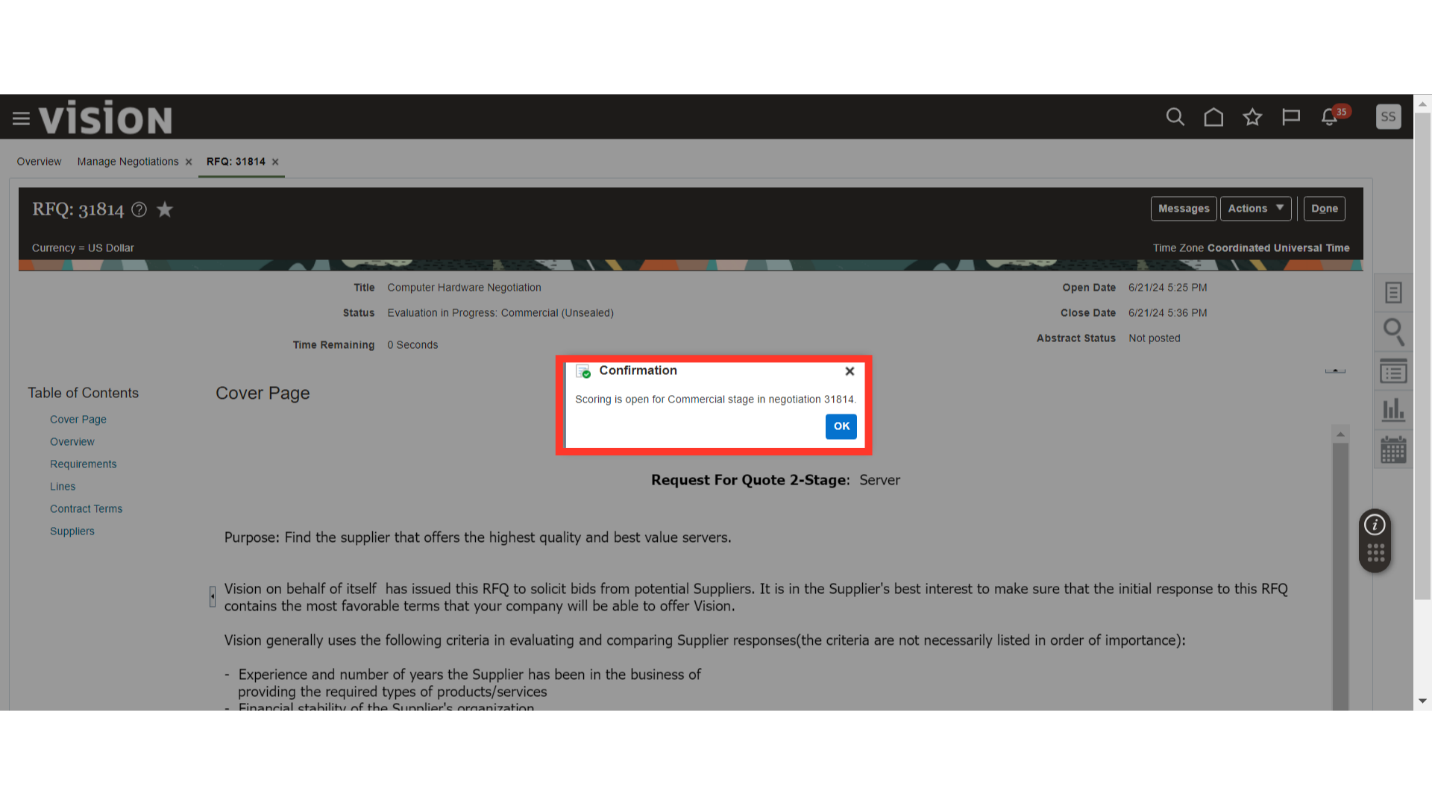
Now, click on the Actions dropdown button, click on Manage, and click on Open Scoring. This will send a message to all the Collaborator Team Members for scoring the Supplier Responses.

A warning message will be generated for open scoring. Click Yes.
A confirmation message will be generated for open scoring. Click OK.
Now, we will log in as a Collaborator Team Member and score the Supplier Responses. Collaborator Team Members will receive a notification about Open Scoring for the Negotiations. Click on the notification hyperlink to get more details about the negotiation.
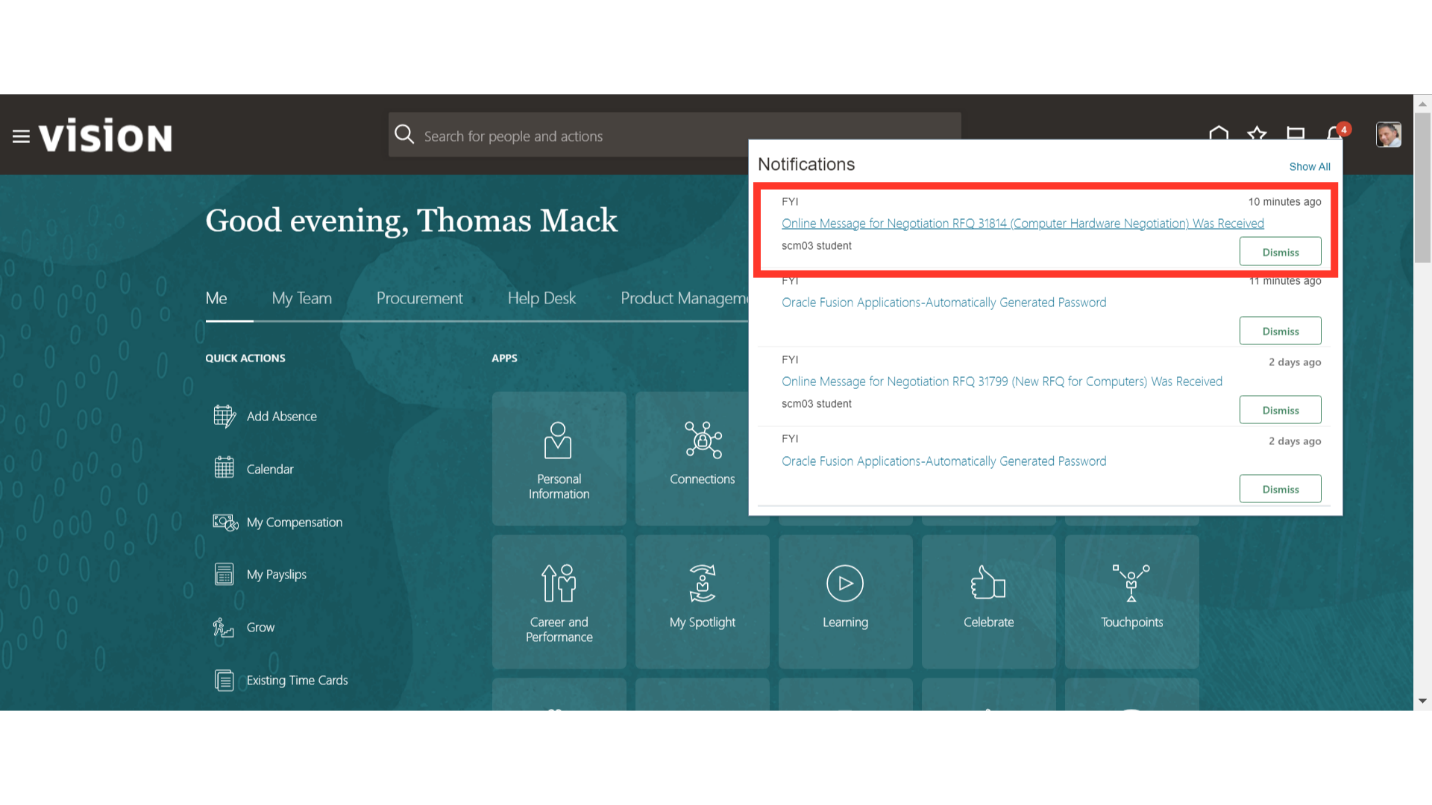
Review message details and click on Dismiss. You can also click on the Negotiation Number hyperlink to be directly routed to the negotiations page.

Navigate to the Procurement tab and click on the Negotiations infolet.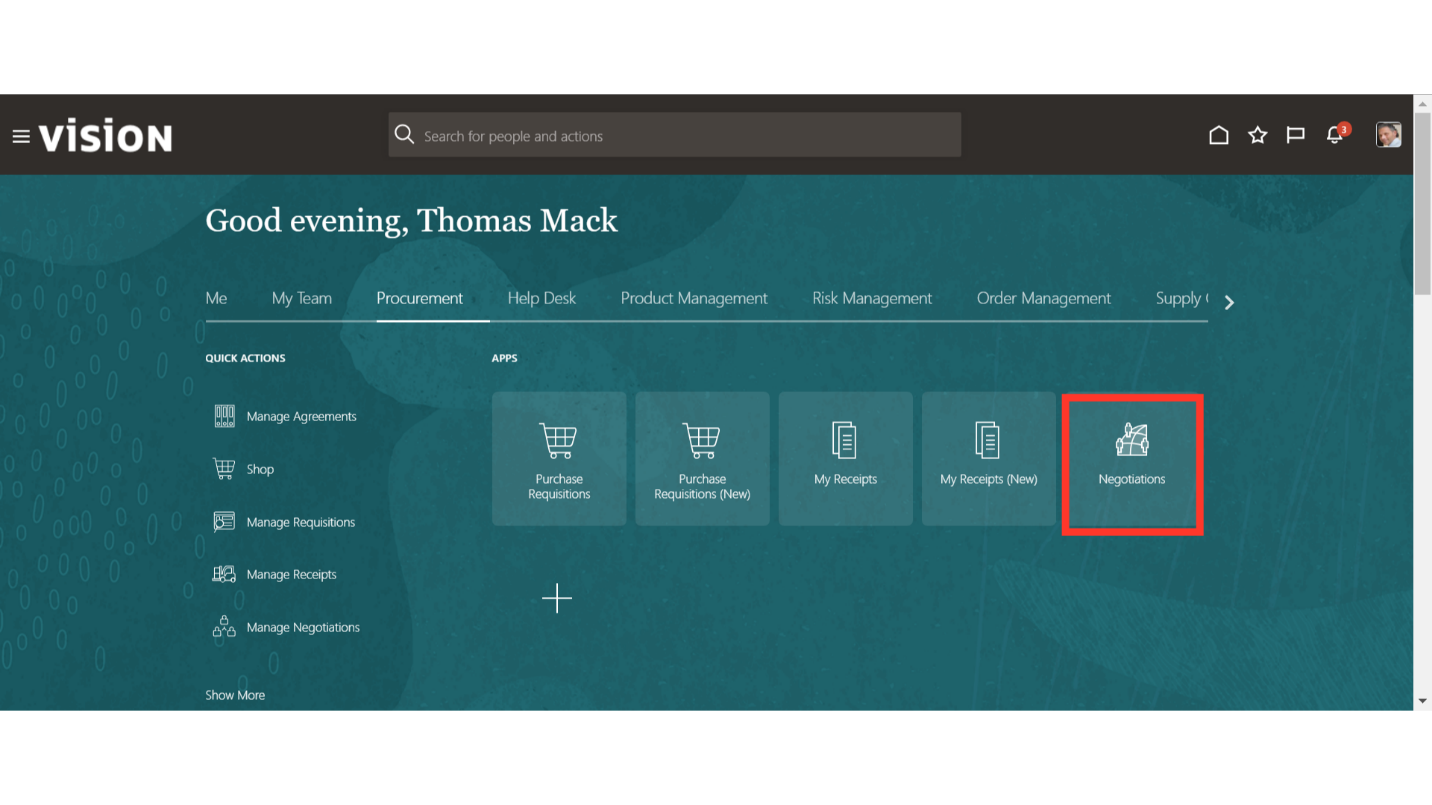
In the Negotiations work area, click on the Task button and click on Manage Negotiations under Negotiations.
In Manage Negotiations, provide the search criteria and click on the Search button.
Once the results are displayed, click on the Negotiation Number hyperlink to open it.
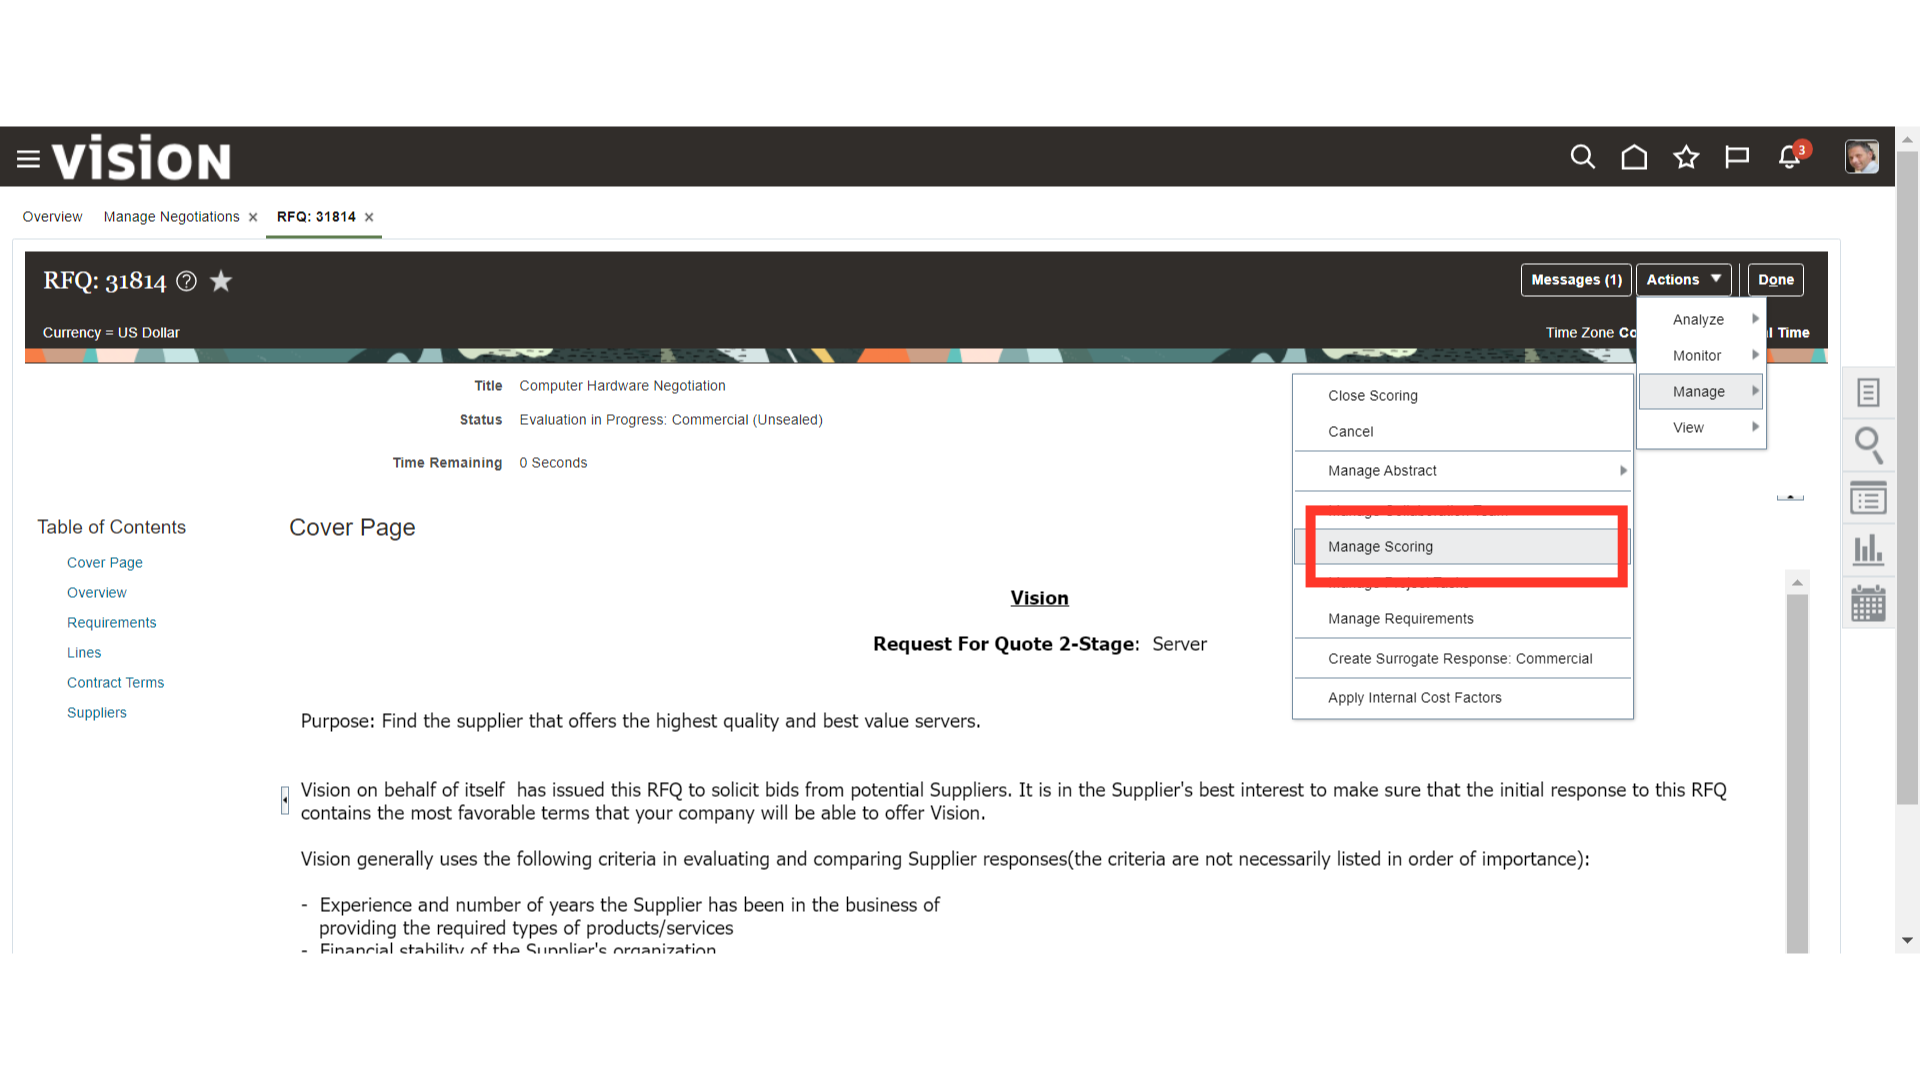
In the negotiation, click on the Actions dropdown button, click on Manage, and click on Manage Scoring.
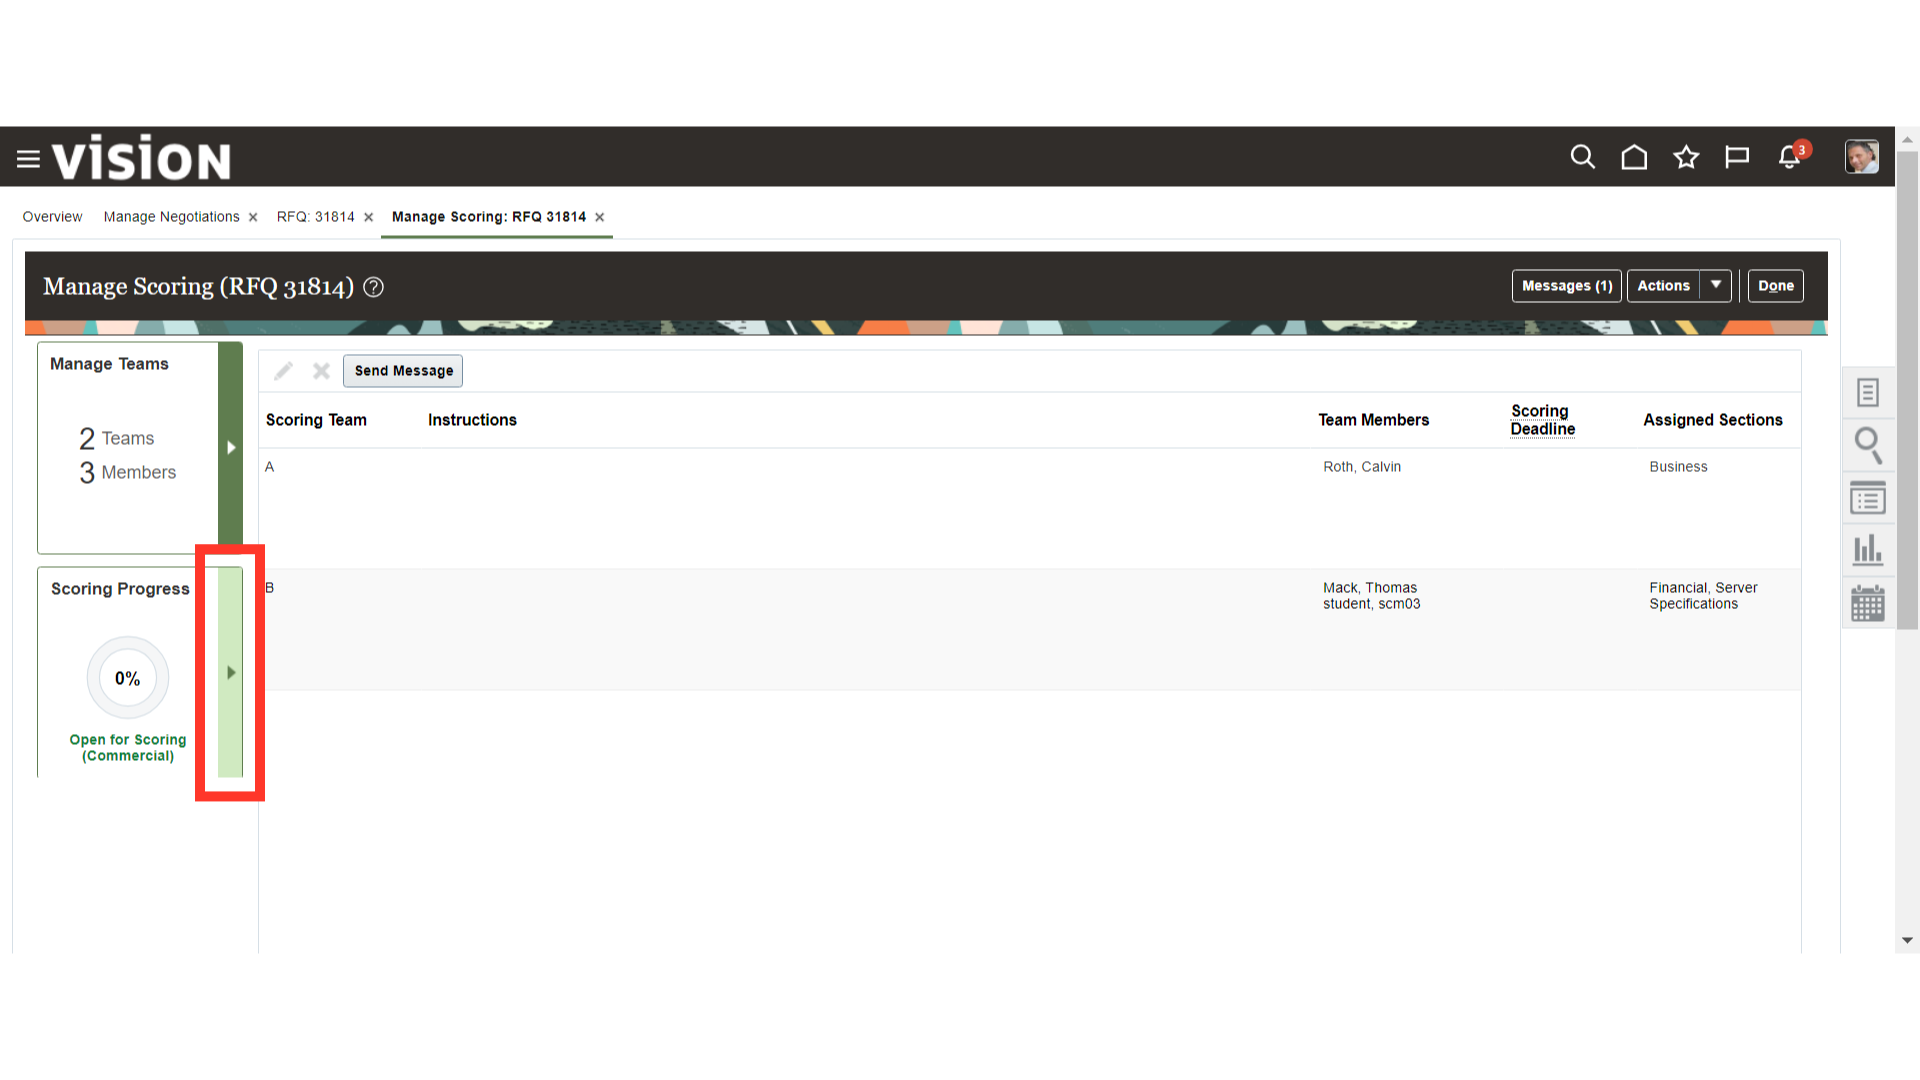
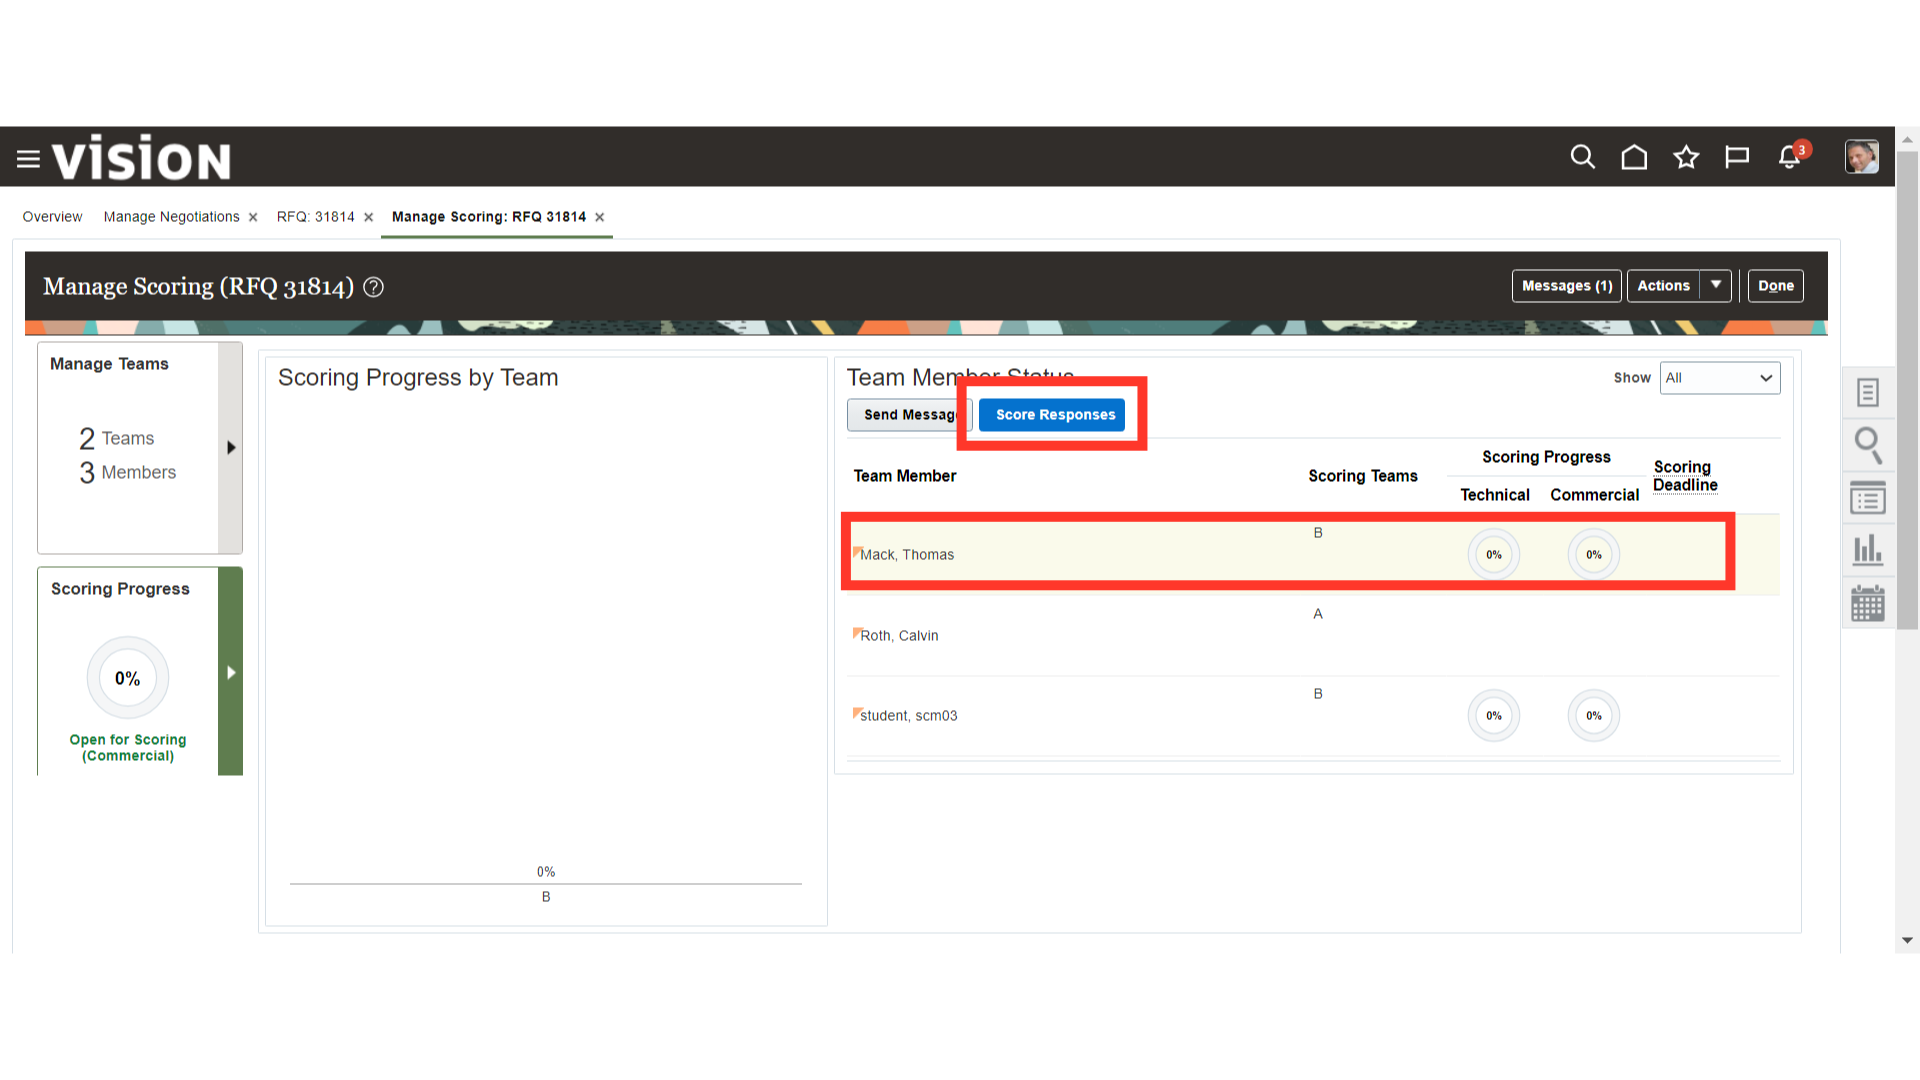
In Manage Scoring, click on the Scoring Progress button.
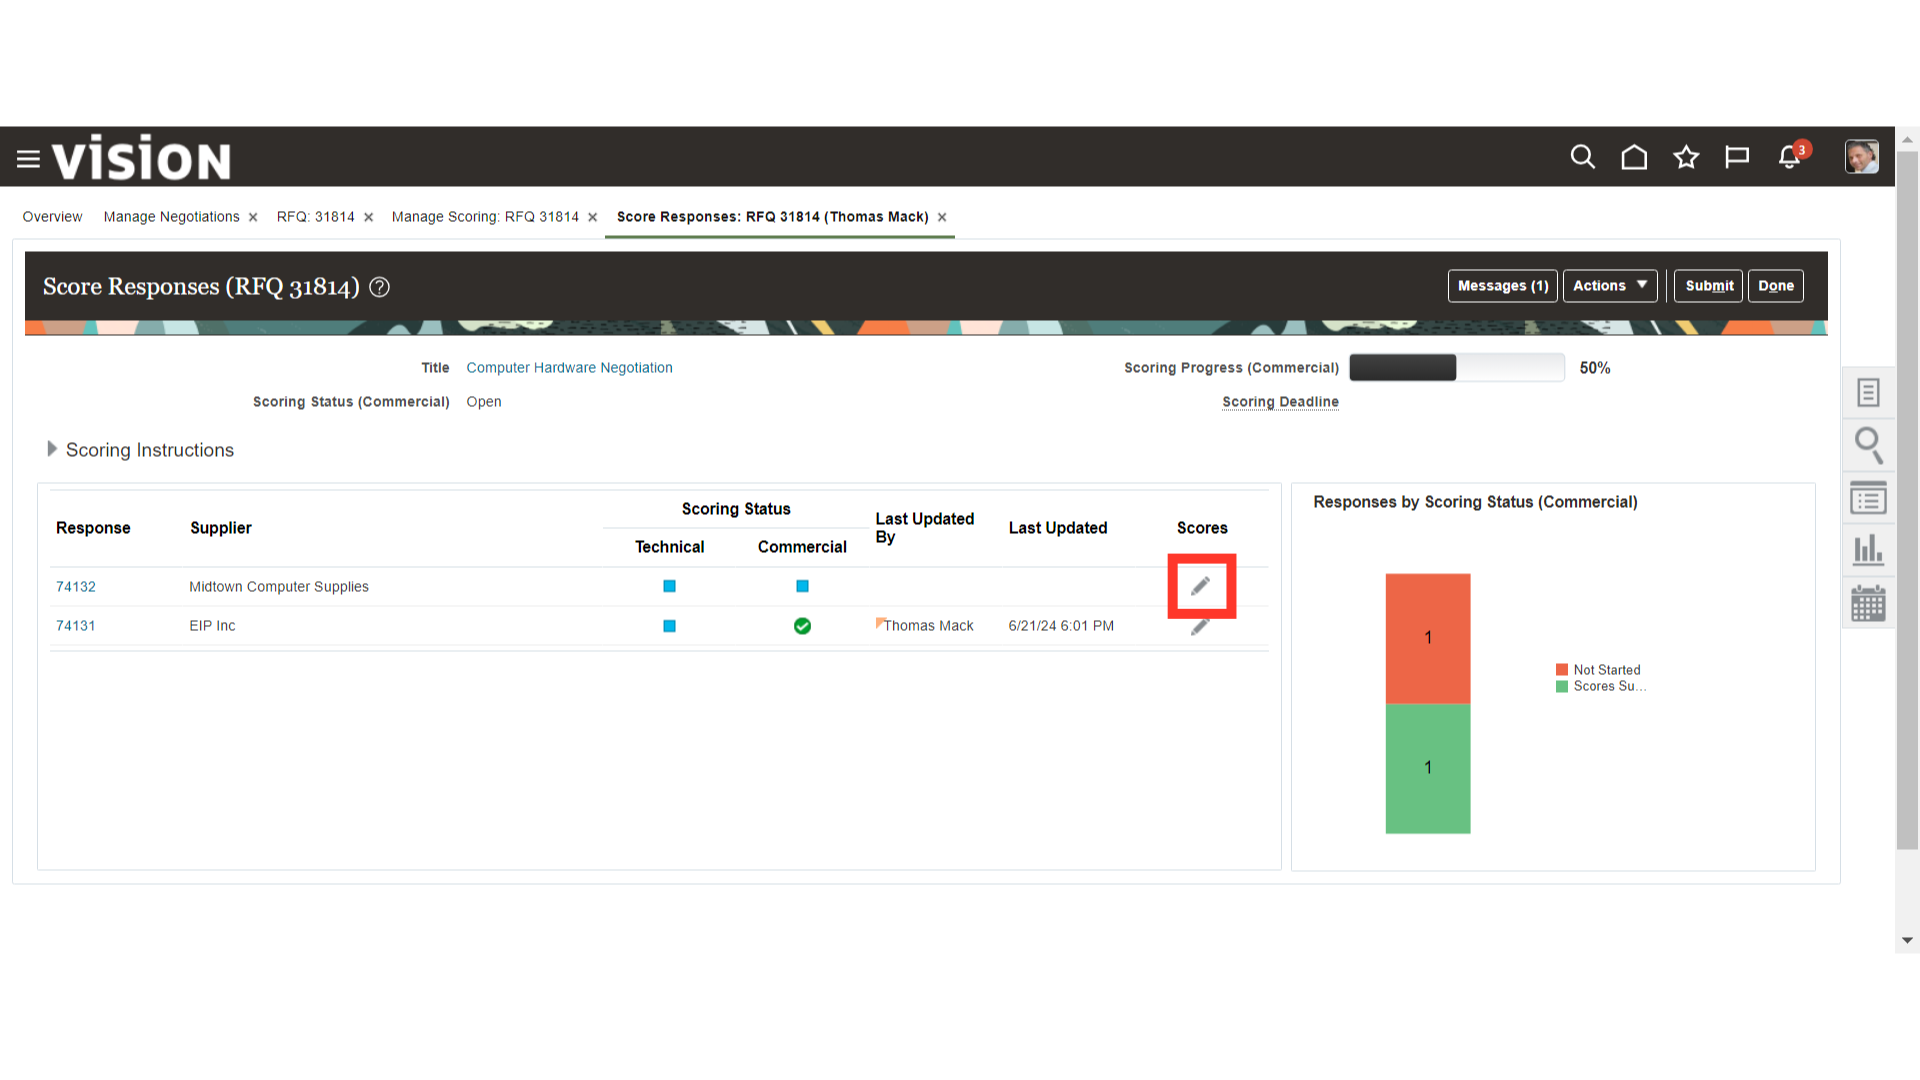
Select your name for the response and click on Score Responses.
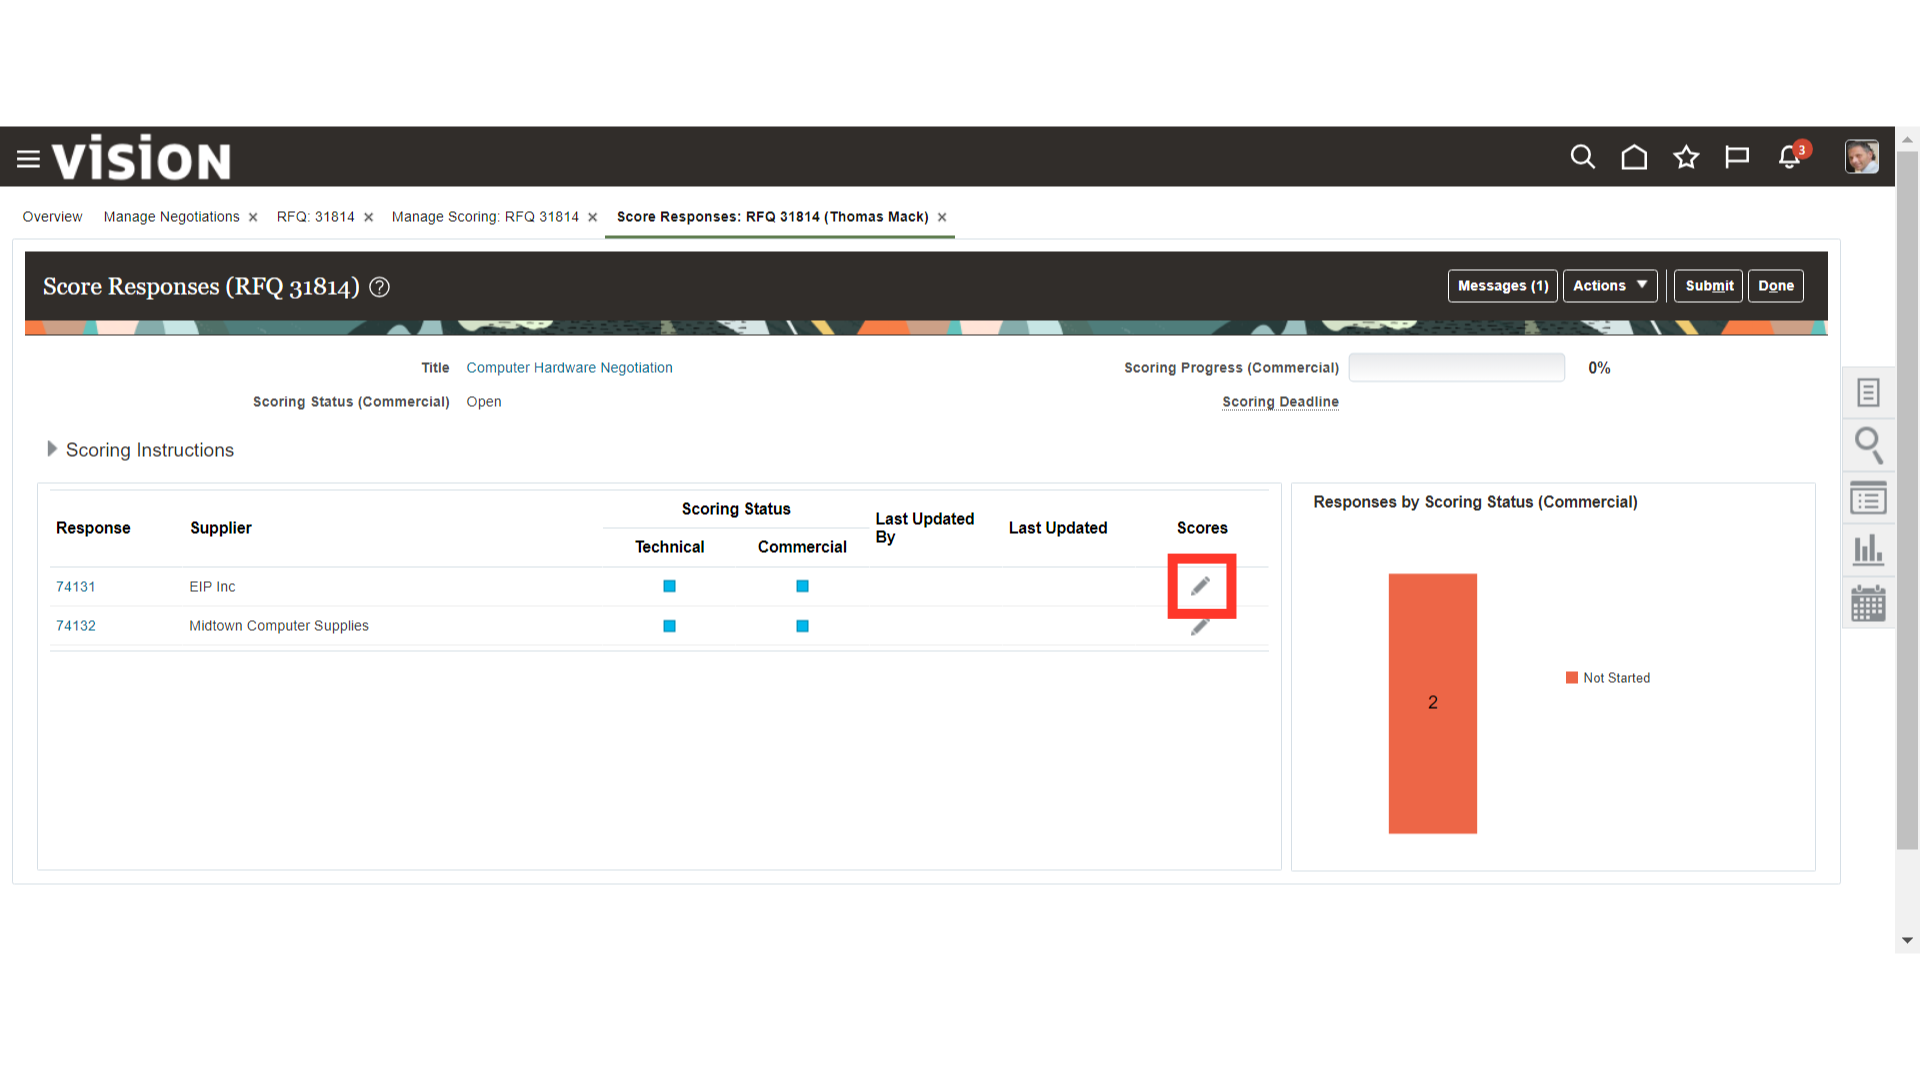
In Score Responses, click on the Pencil icon button next to the supplier name.
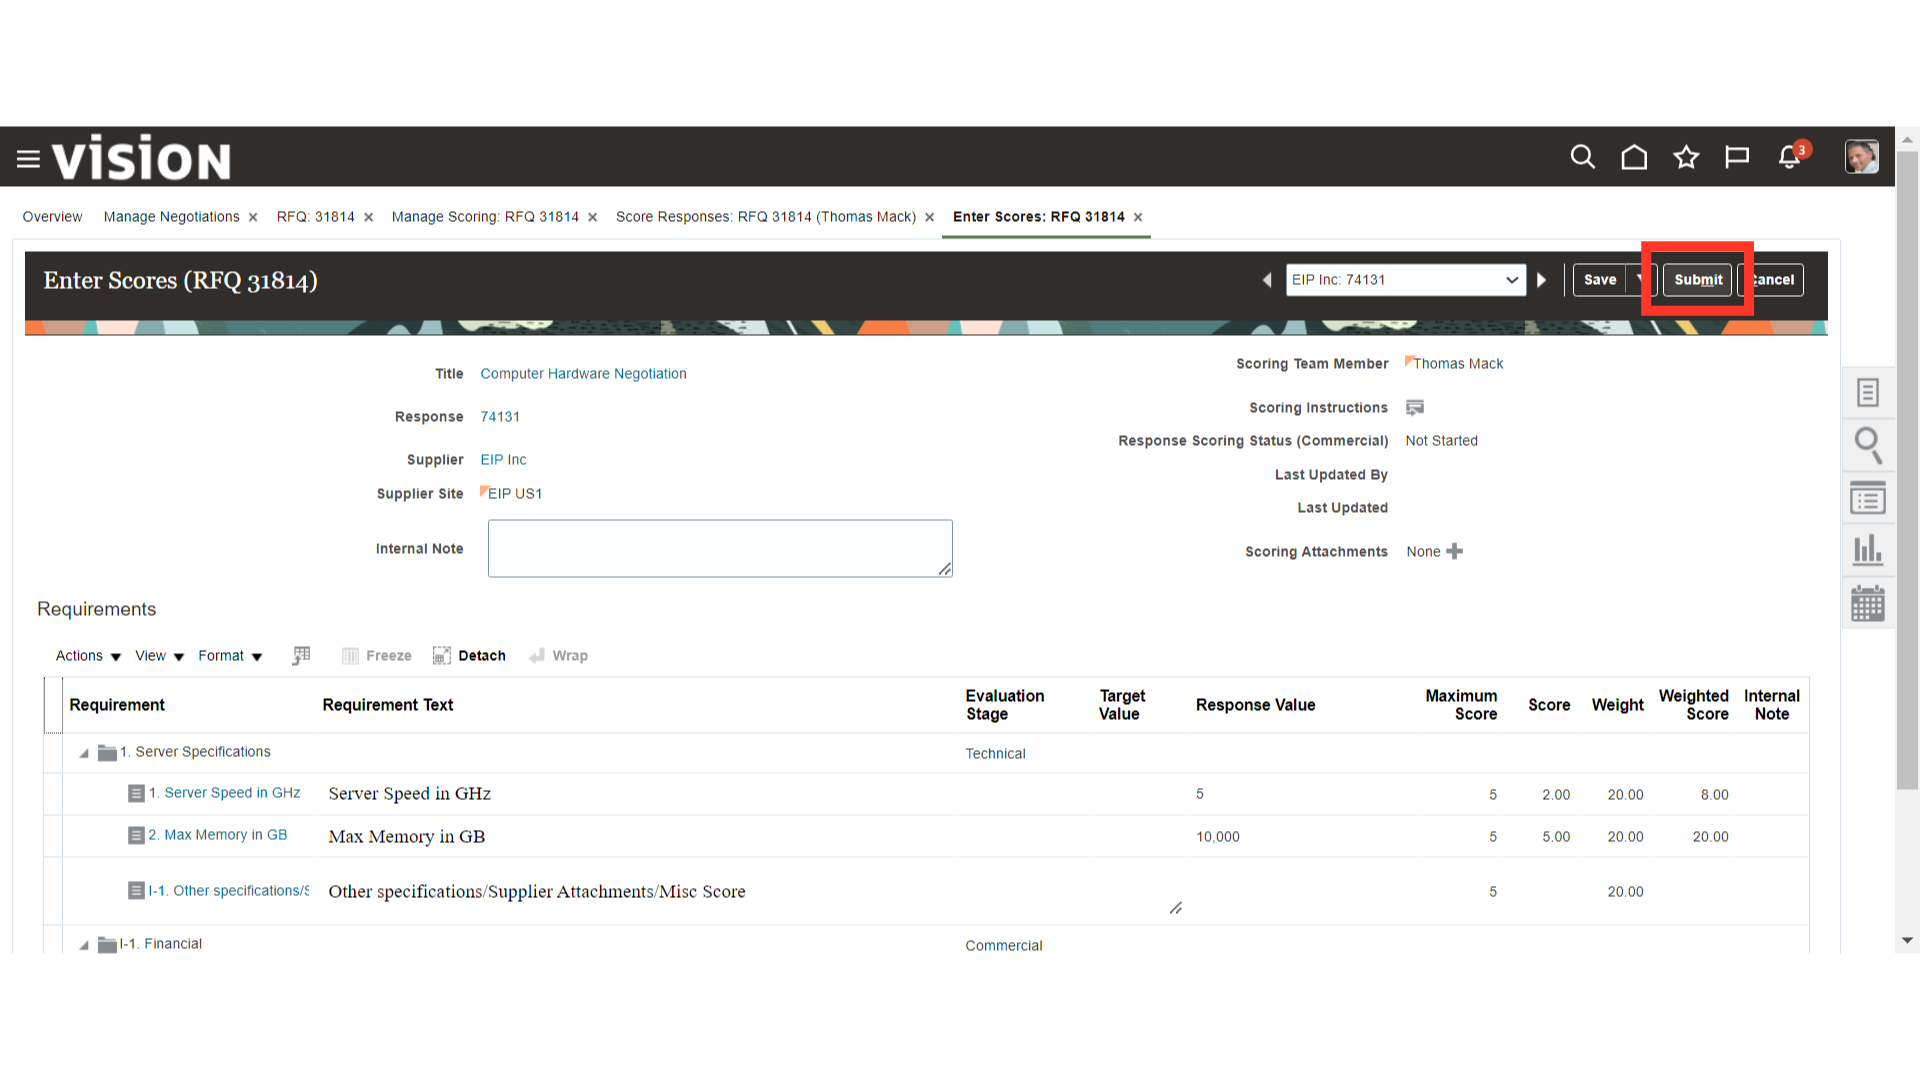
In Enter Scores, scroll down to the Requirements section.
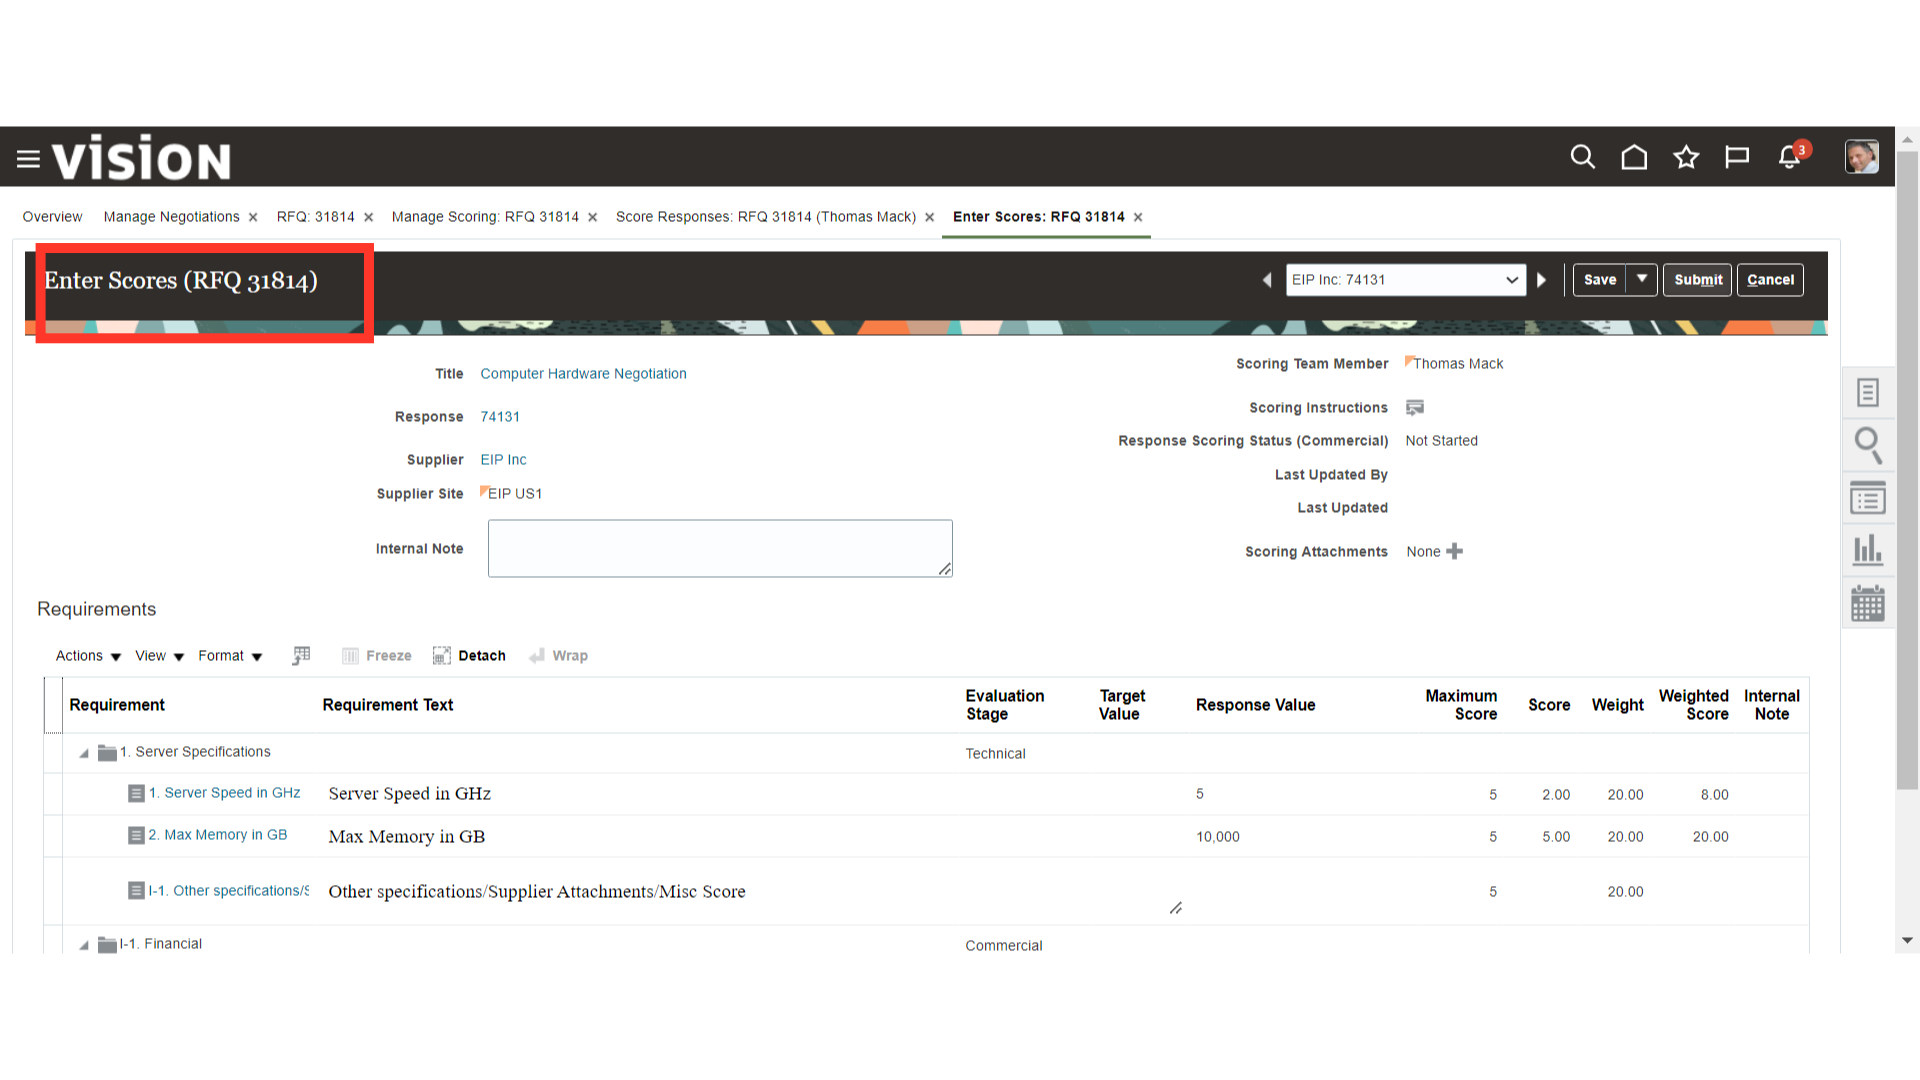
Provide the Score in the Requirements.
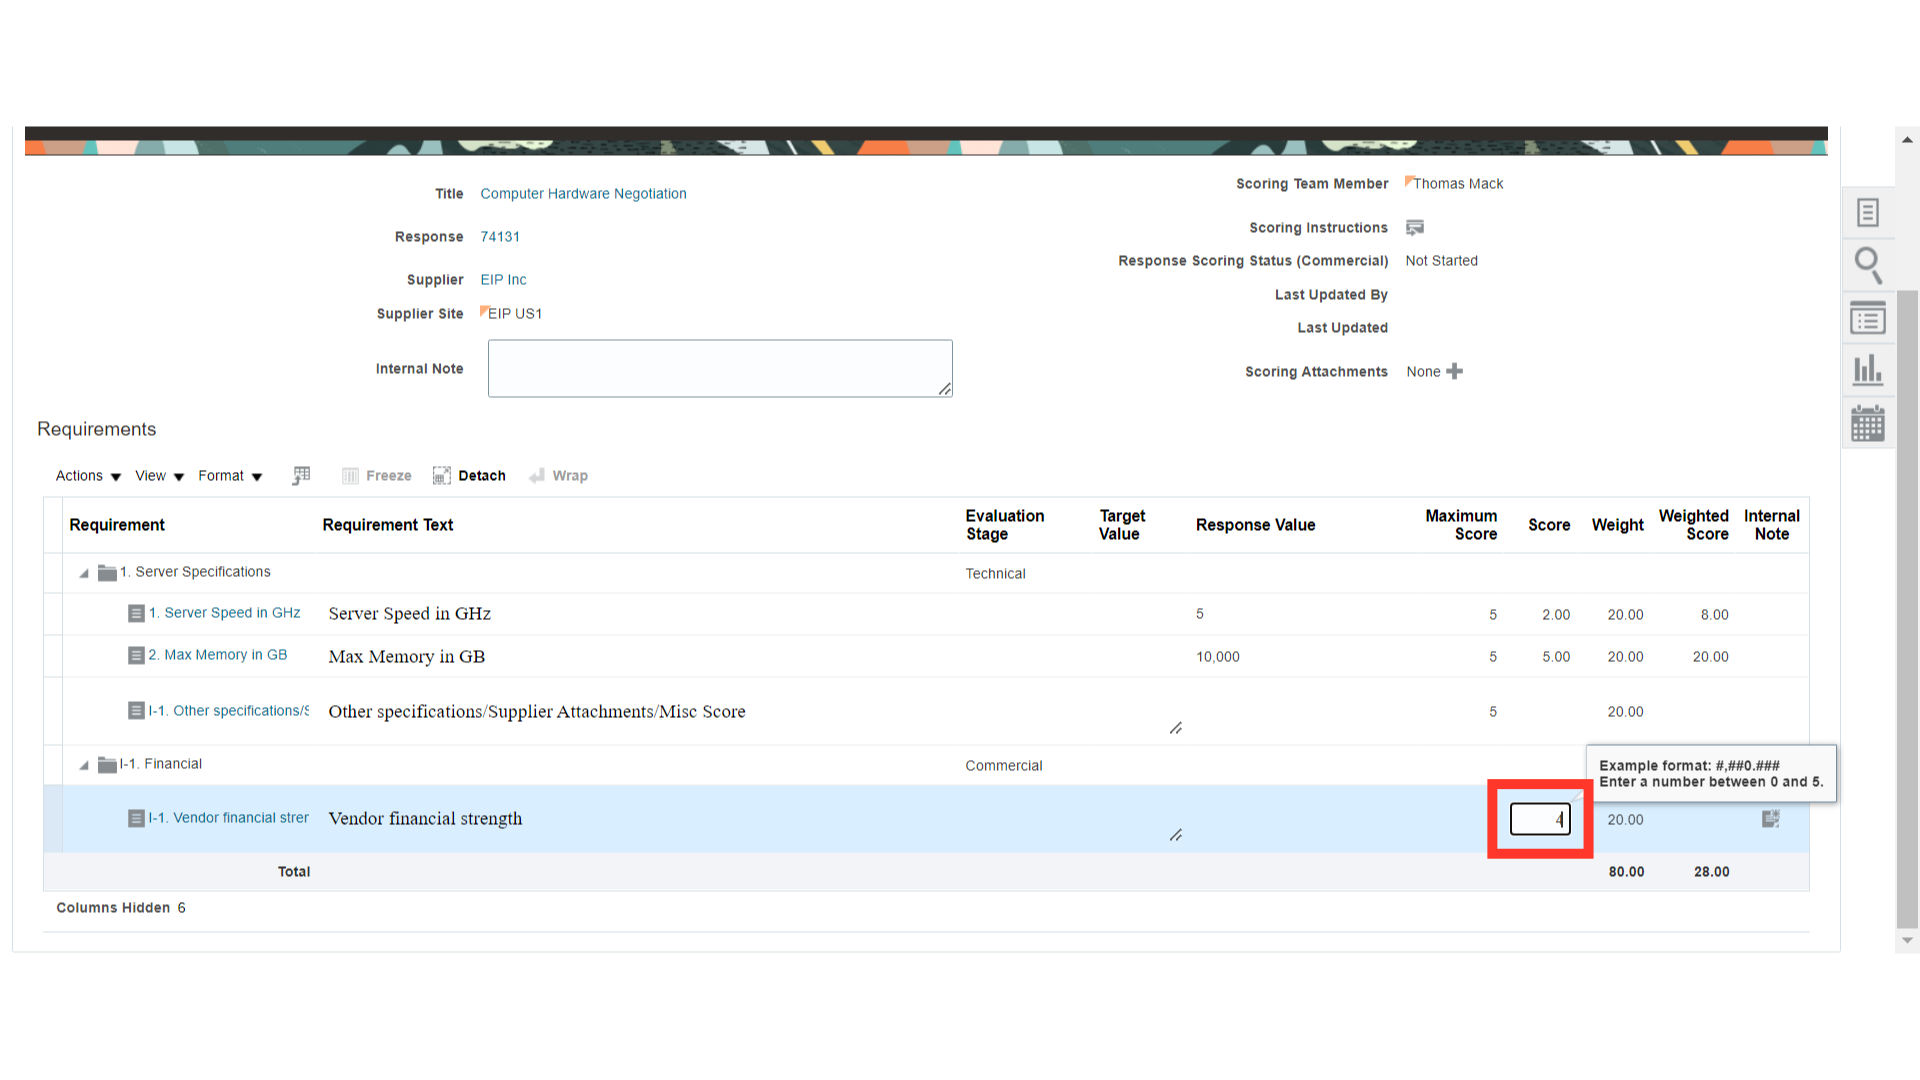
Once the score is entered, click on the Submit button.
Repeat the same process for the other supplier responses. Click on the Pencil icon.
In Enter Scores, provide the score in the Requirements section.

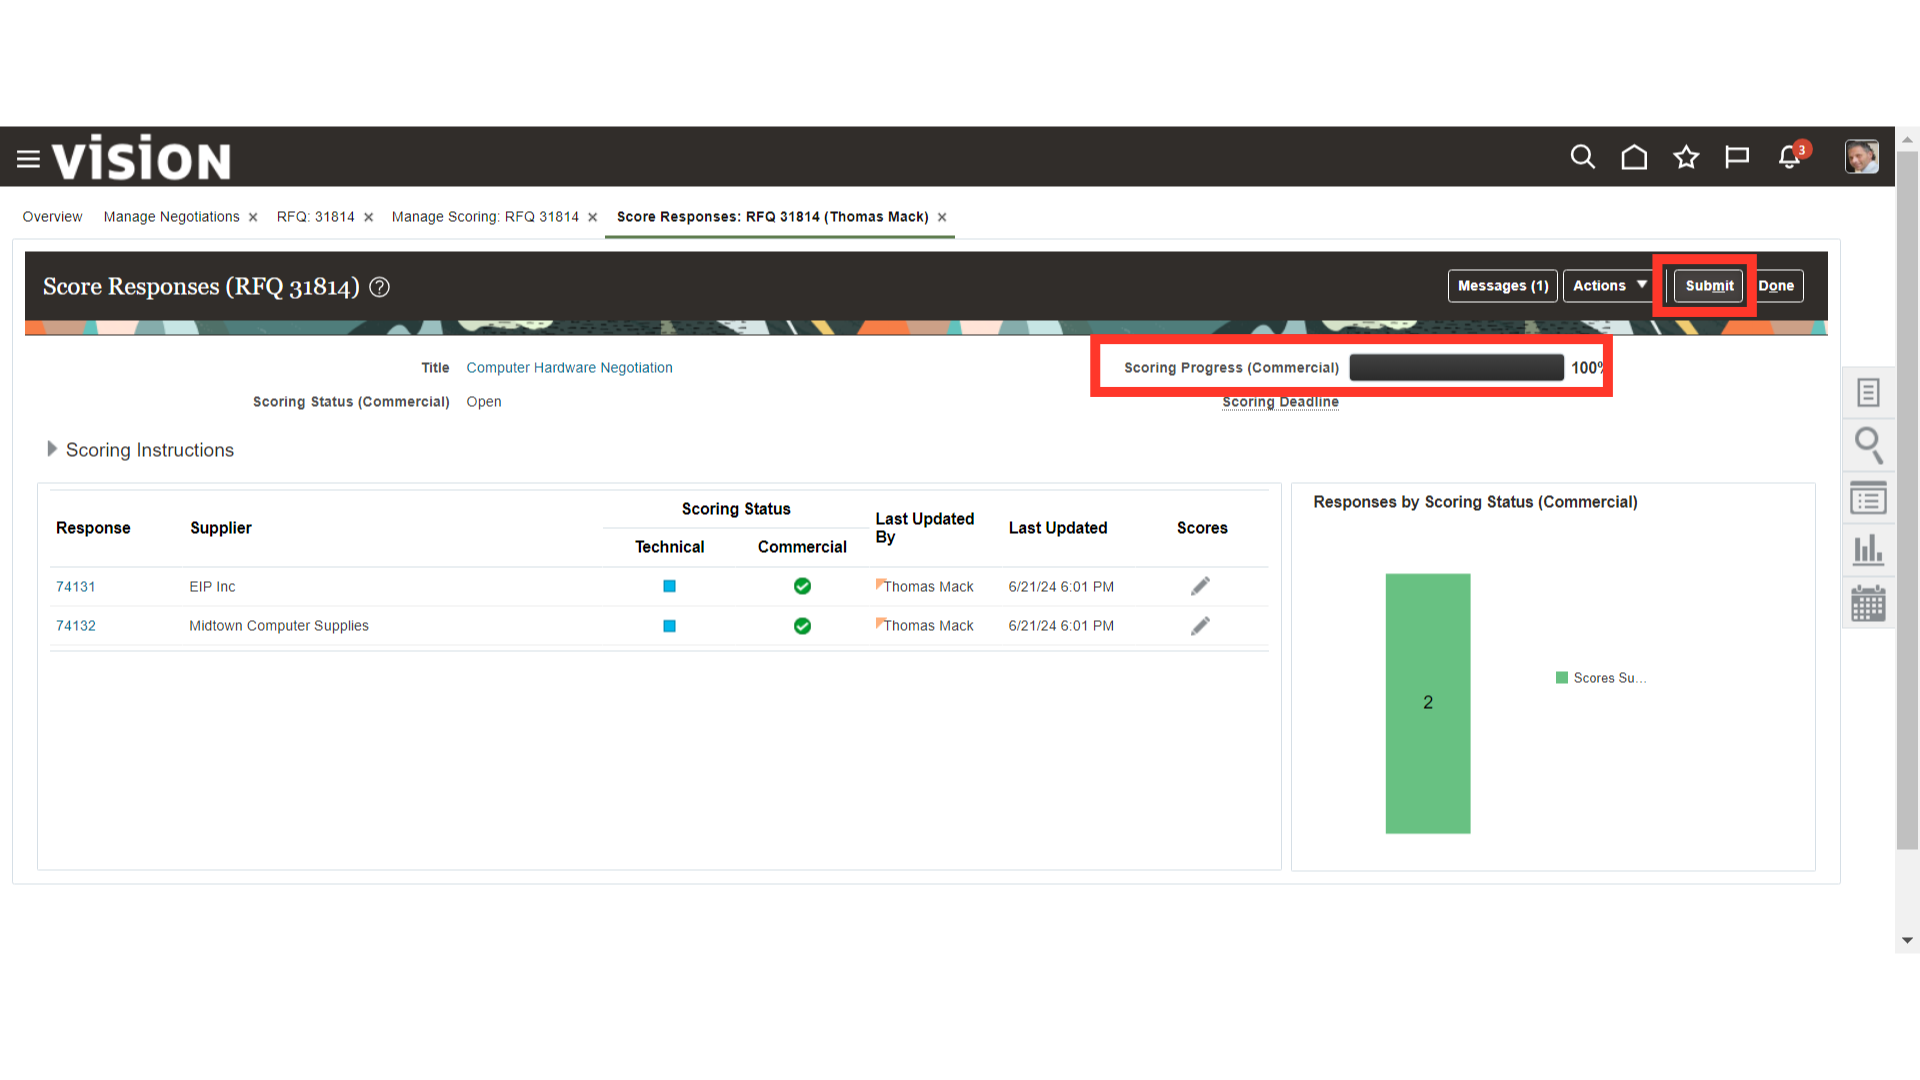
After scoring, click on the Submit button.

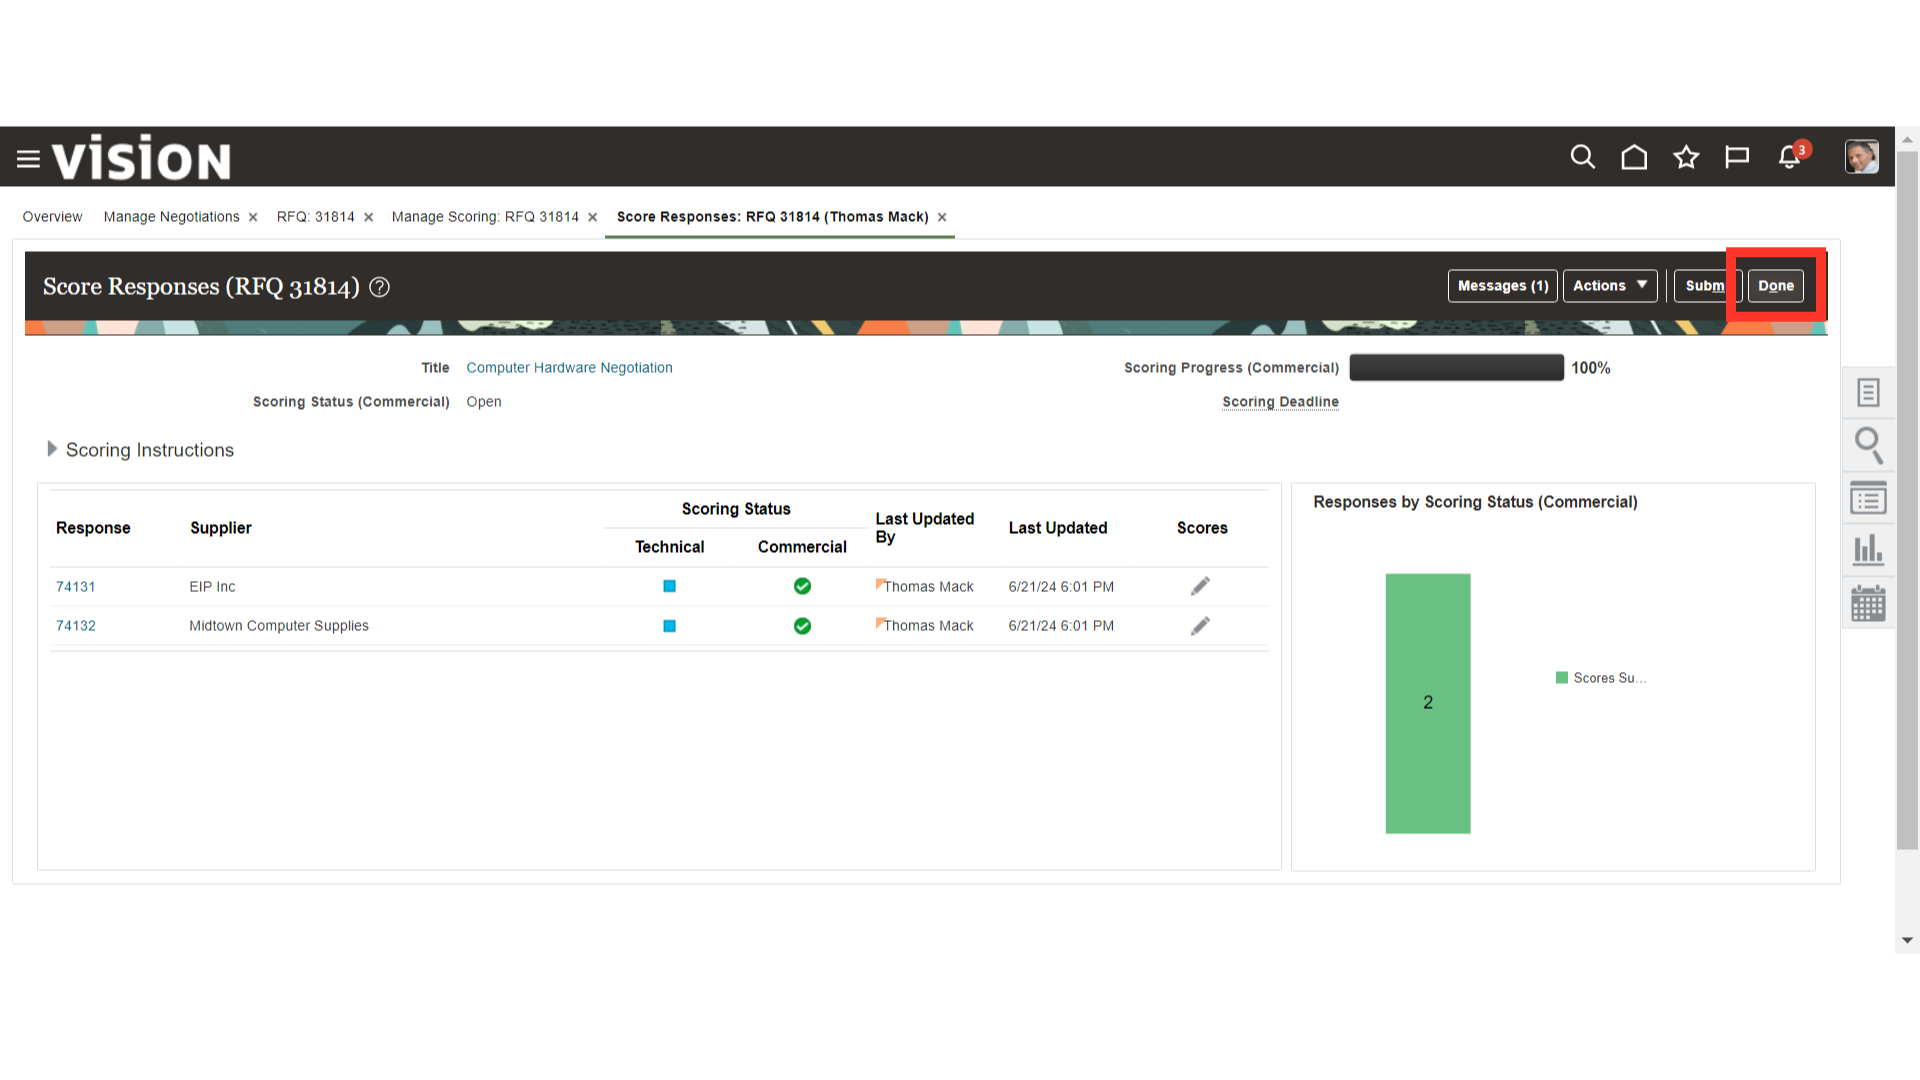
Once the Scoring Progress is 100%, click on the Submit button.
After the score submission, the system will show a confirmation message. Click OK.
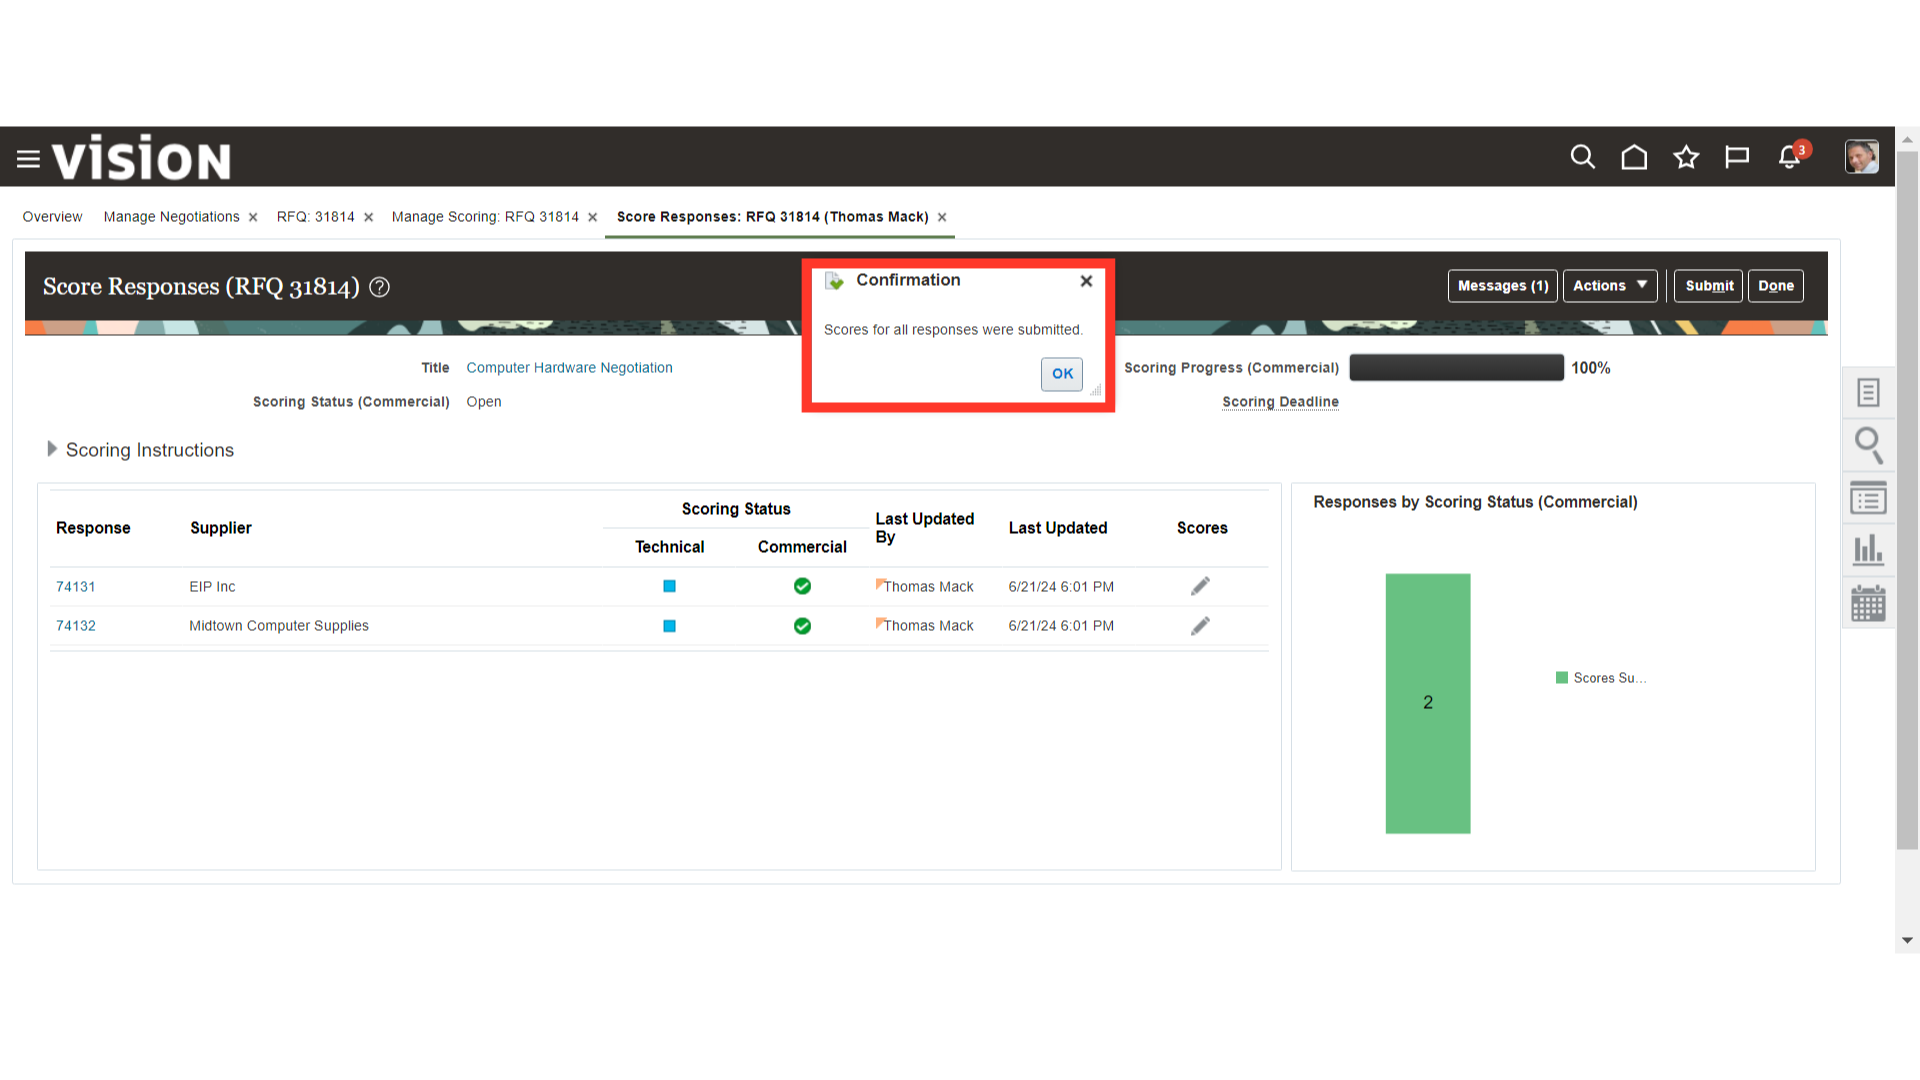
To close the Score Responses tab, click Done.
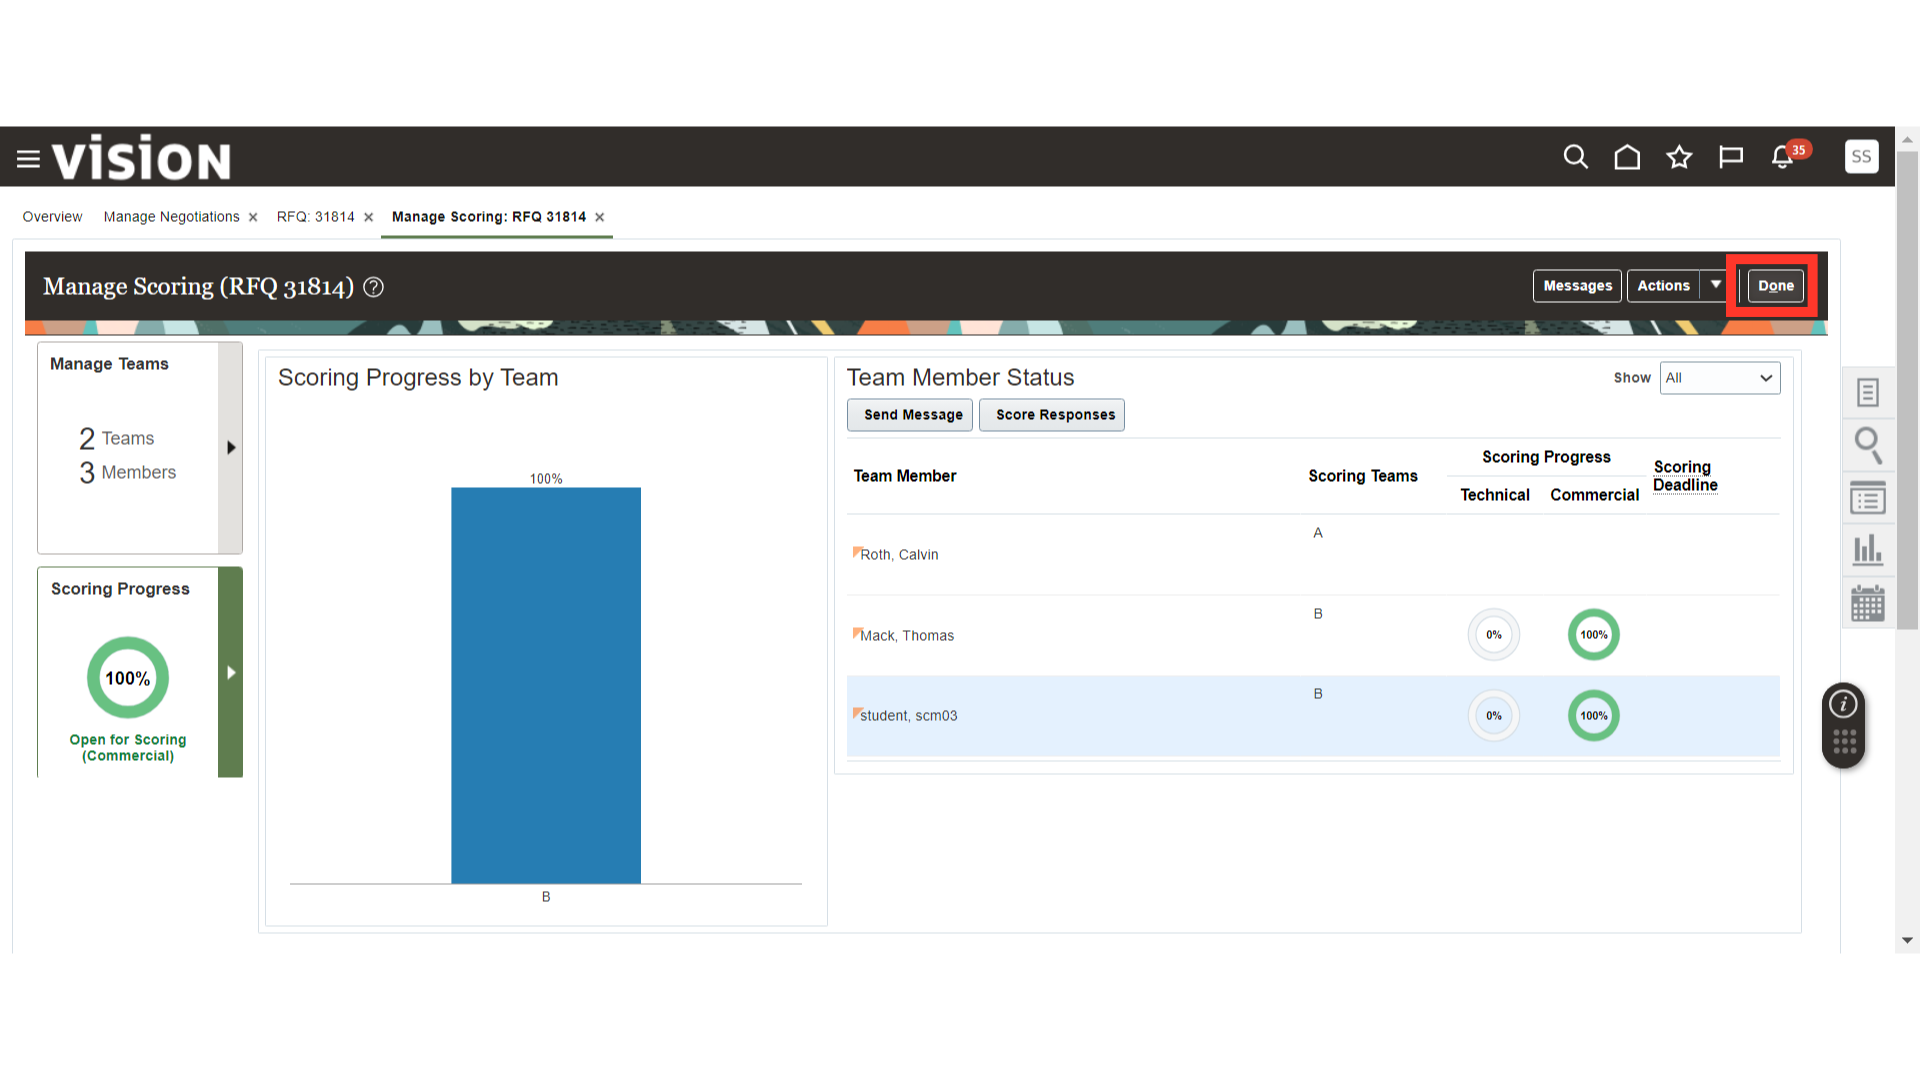
Log in as the Buyer again. Once all the Collaboration teams have scored, the Scoring Progress tab will show 100% progress.

Click Done to close the Manage Scoring tab.
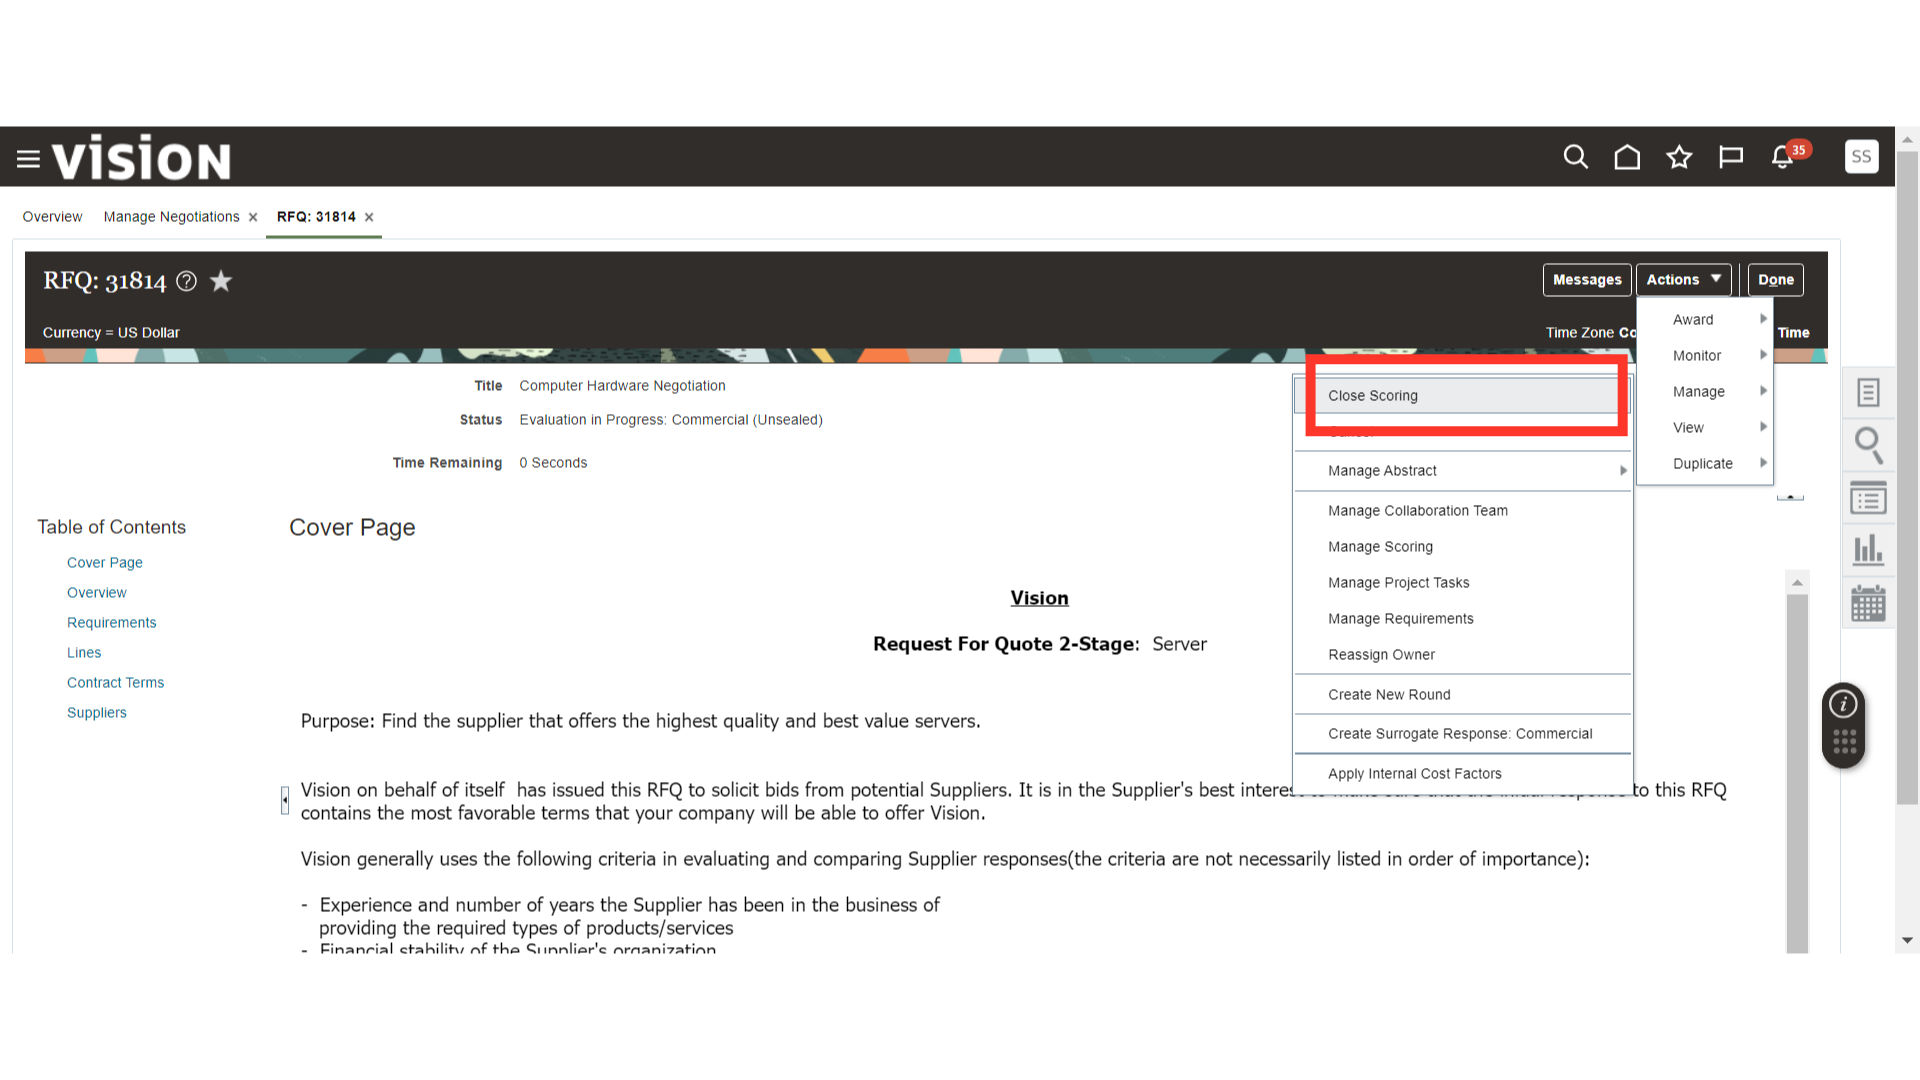
Once the scoring is completed, click on the Actions dropdown button, click on Manage, and click on Close Scoring.
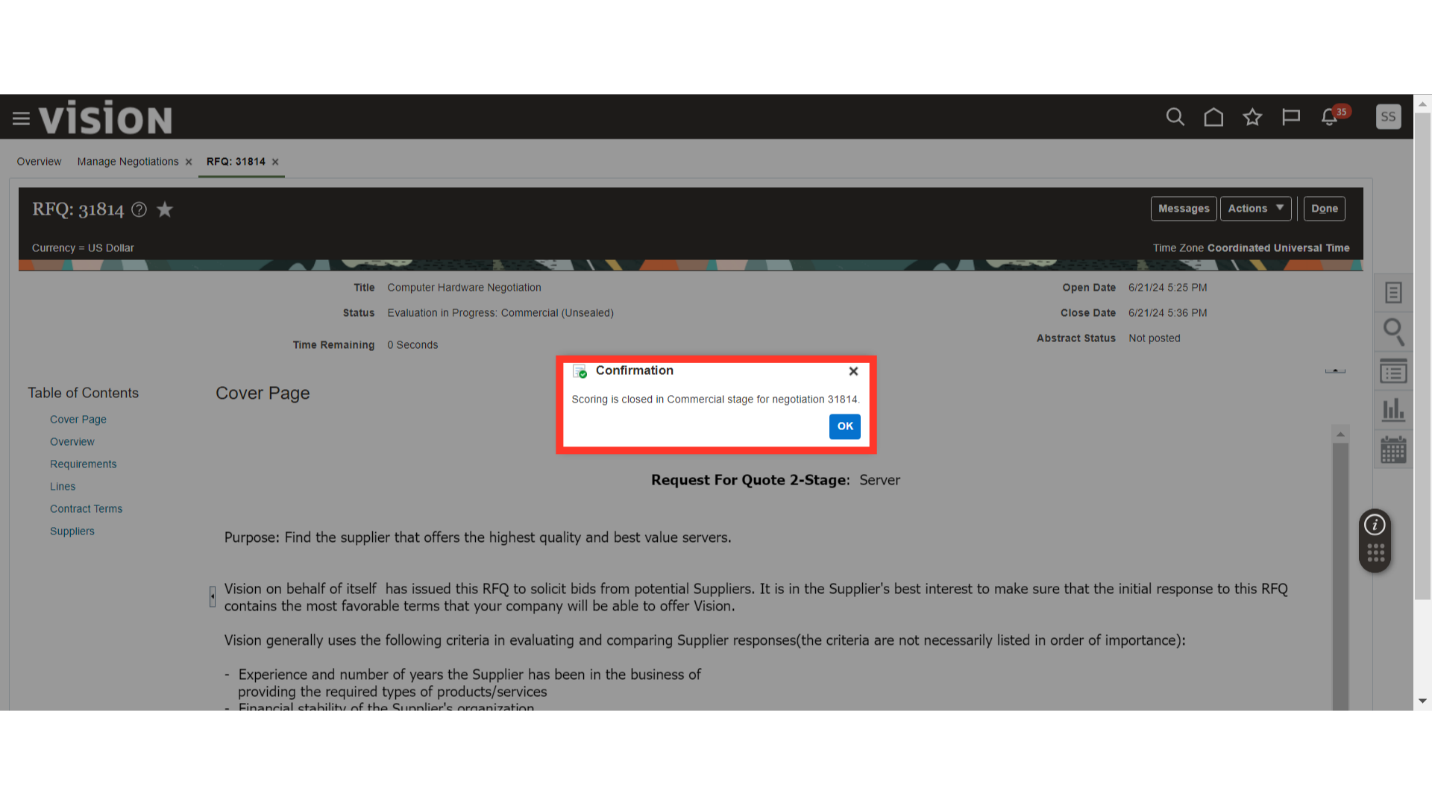
The system will generate a warning message about Close Scoring. Click Yes.

A confirmation message will be generated about the close scoring. Click OK.
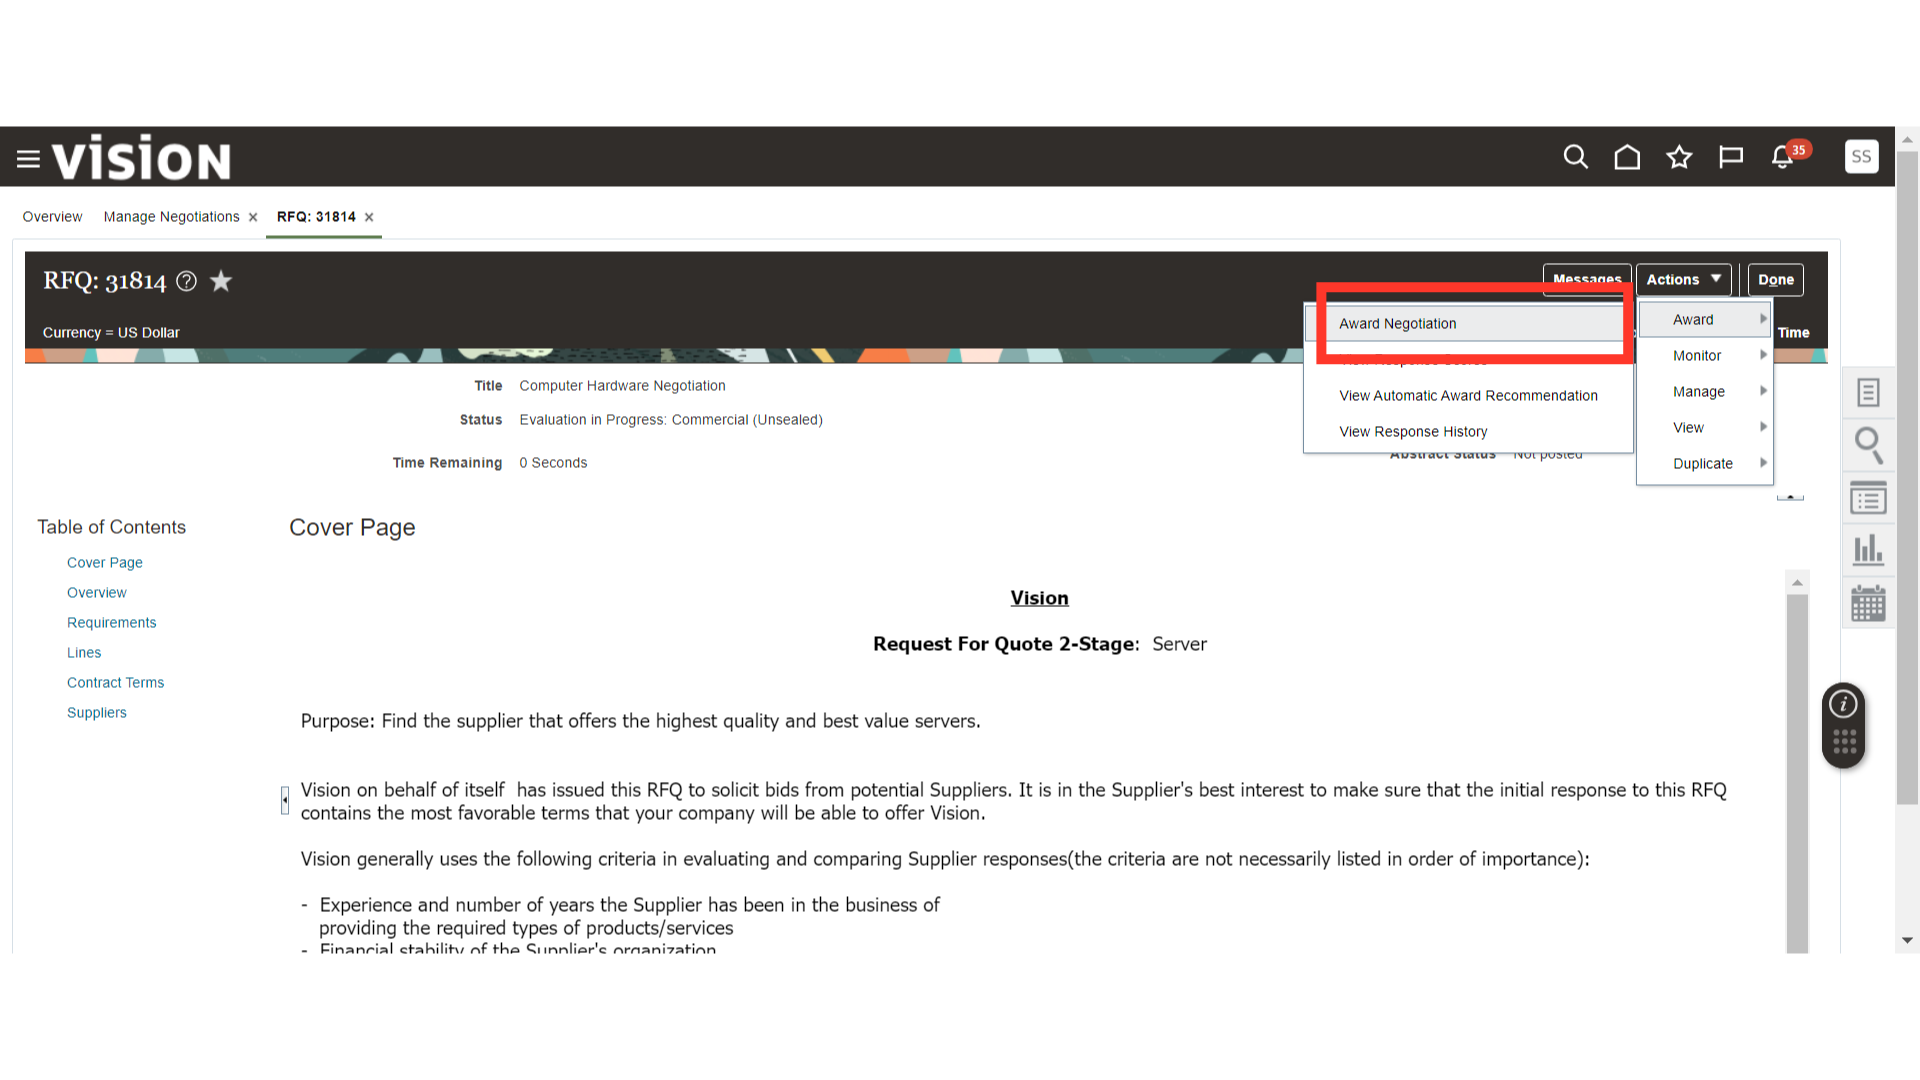
Now, we will initiate the Award Negotiation. Open the negotiation, click on the Actions dropdown, click on Award, and click on Award Negotiation.
In Award Negotiation, select the Supplier based on the Score, Response Amount, Overall Rank, and other factors. After selecting, click on the Award button.
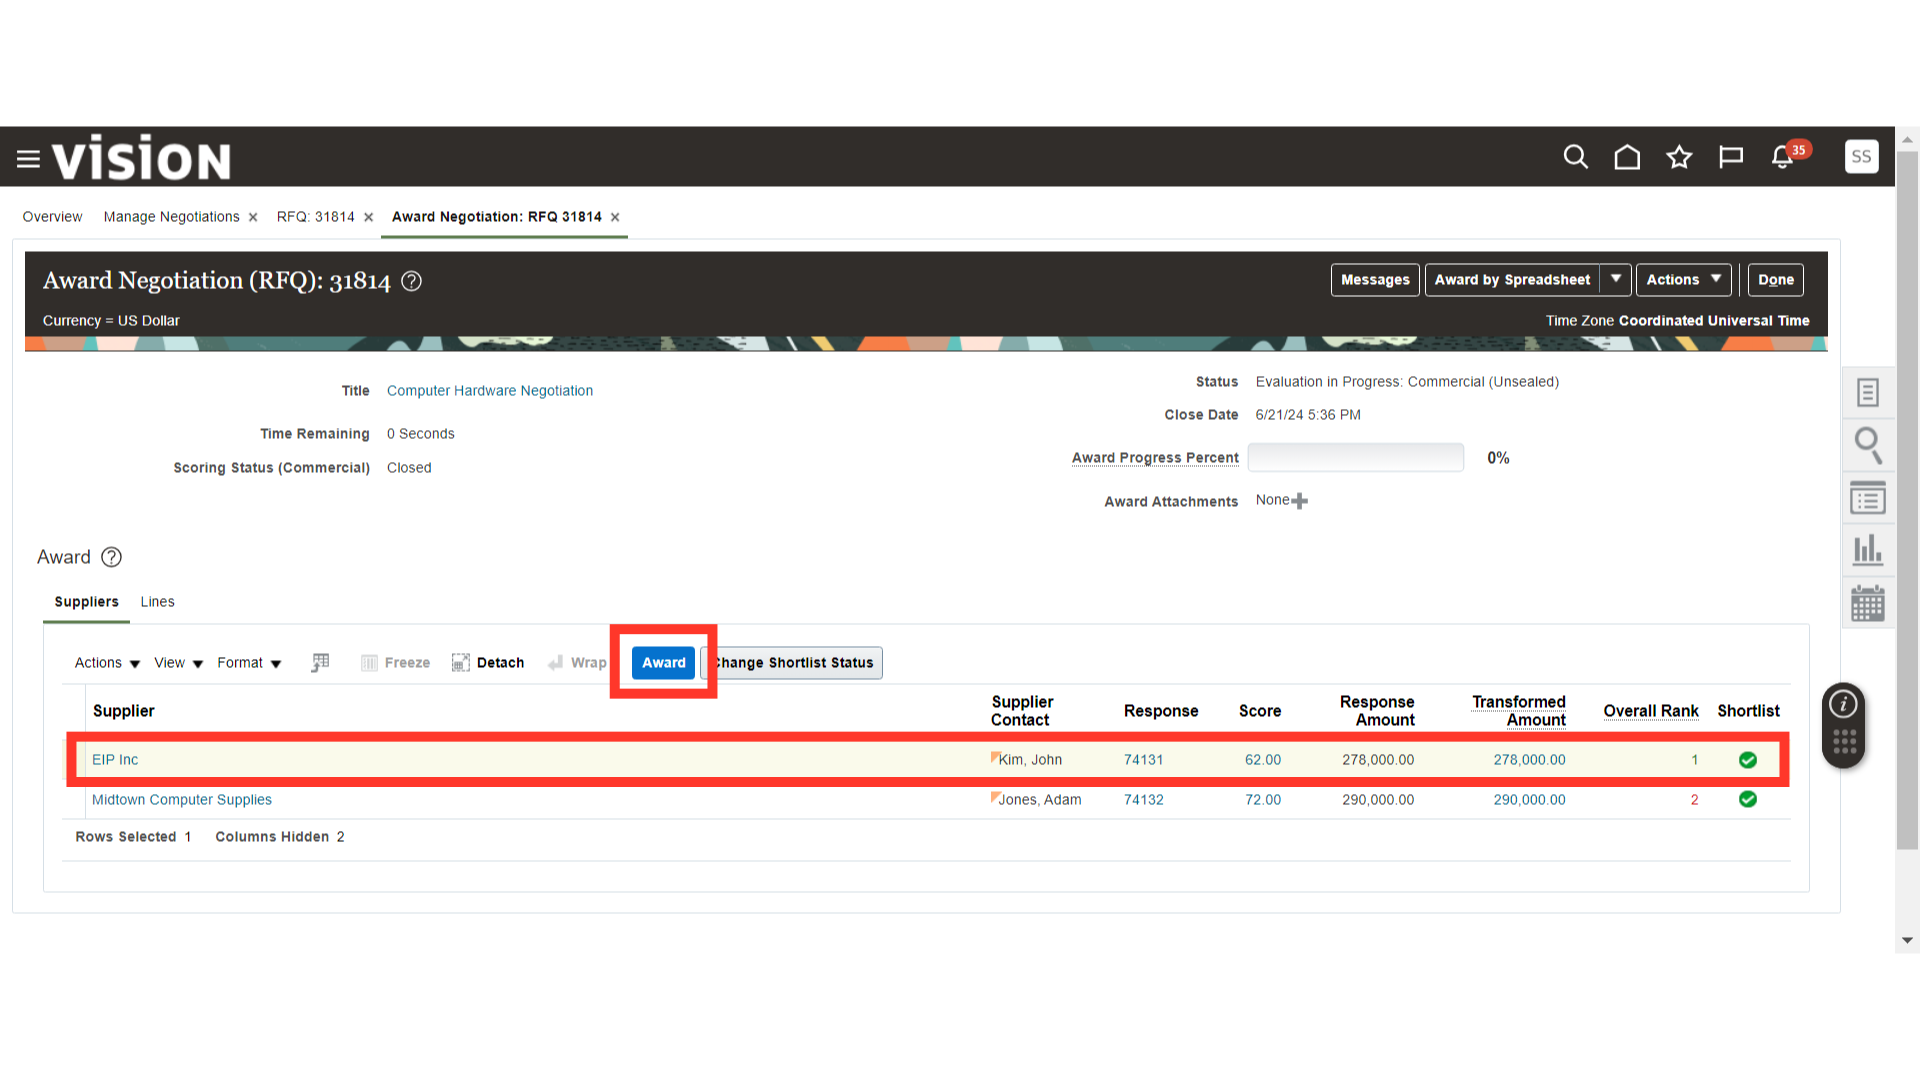
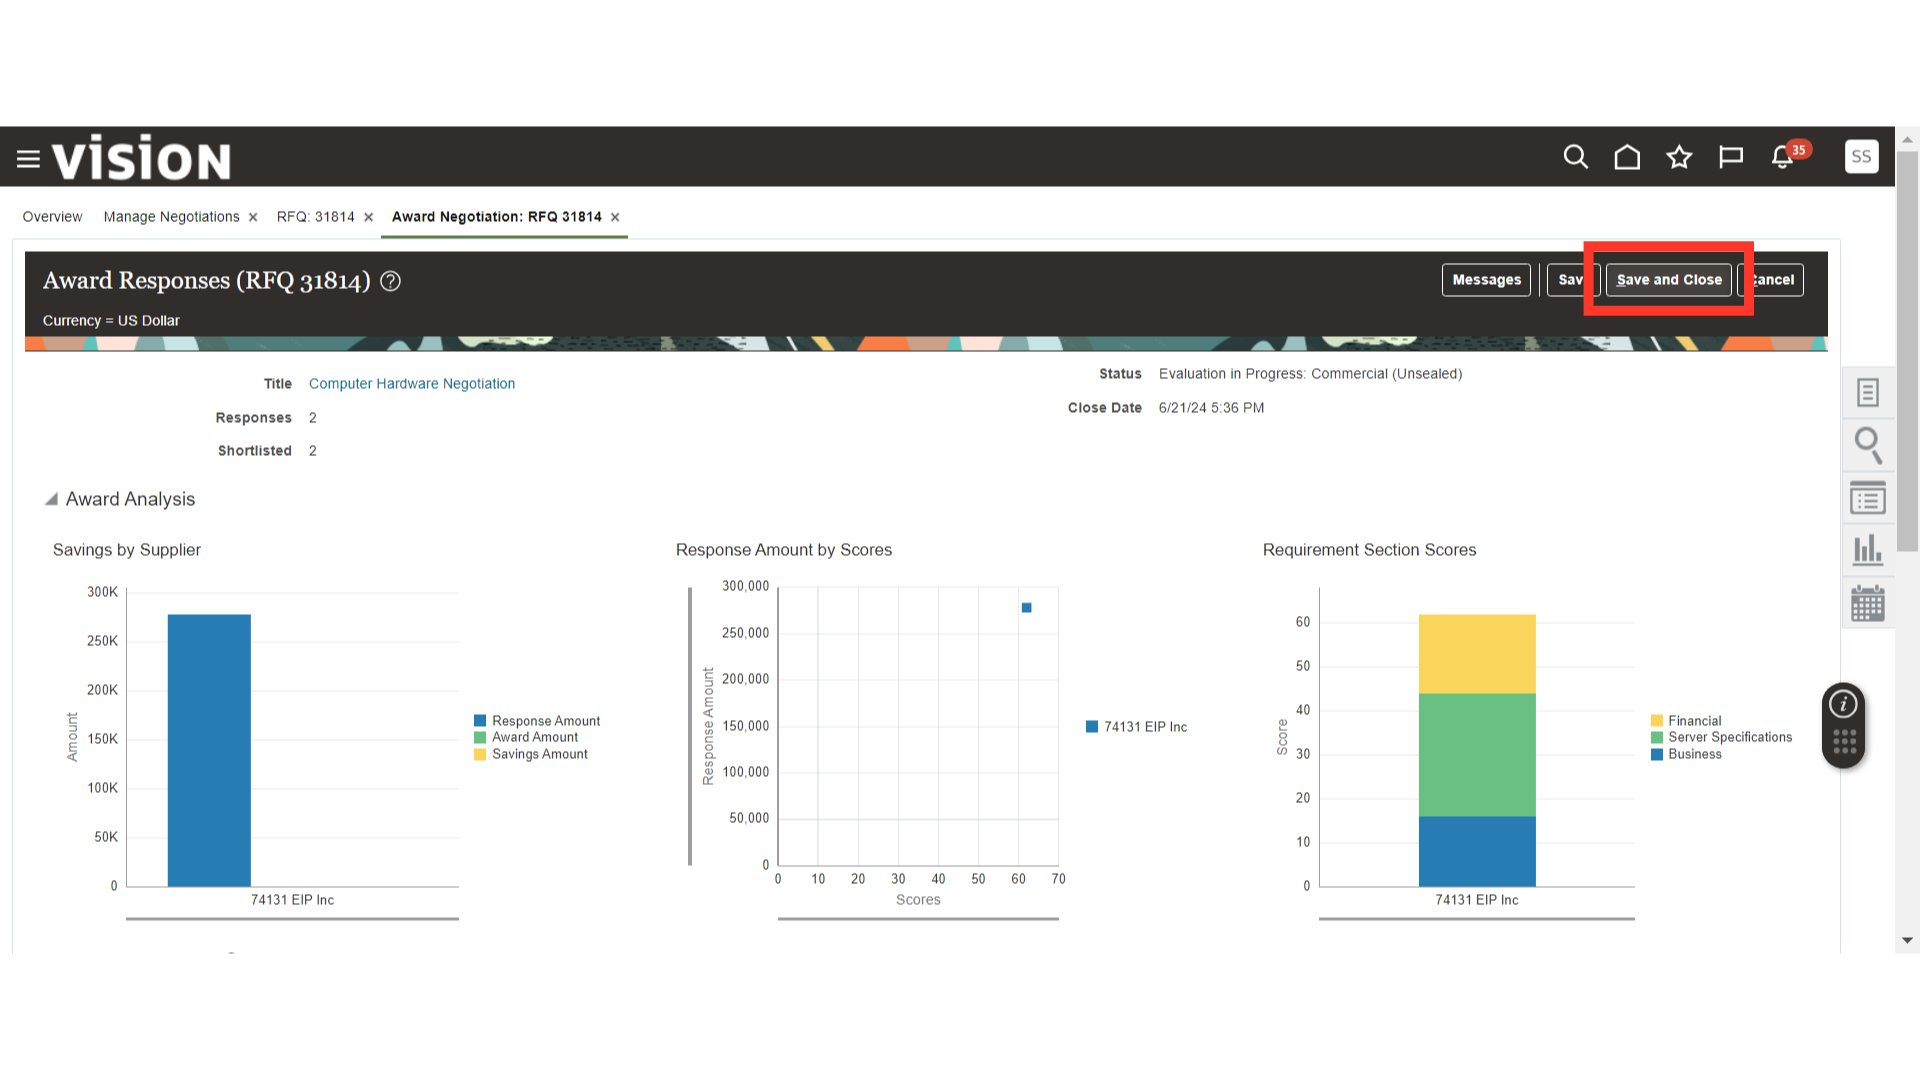
In the Award Response section, scroll down to the bottom.
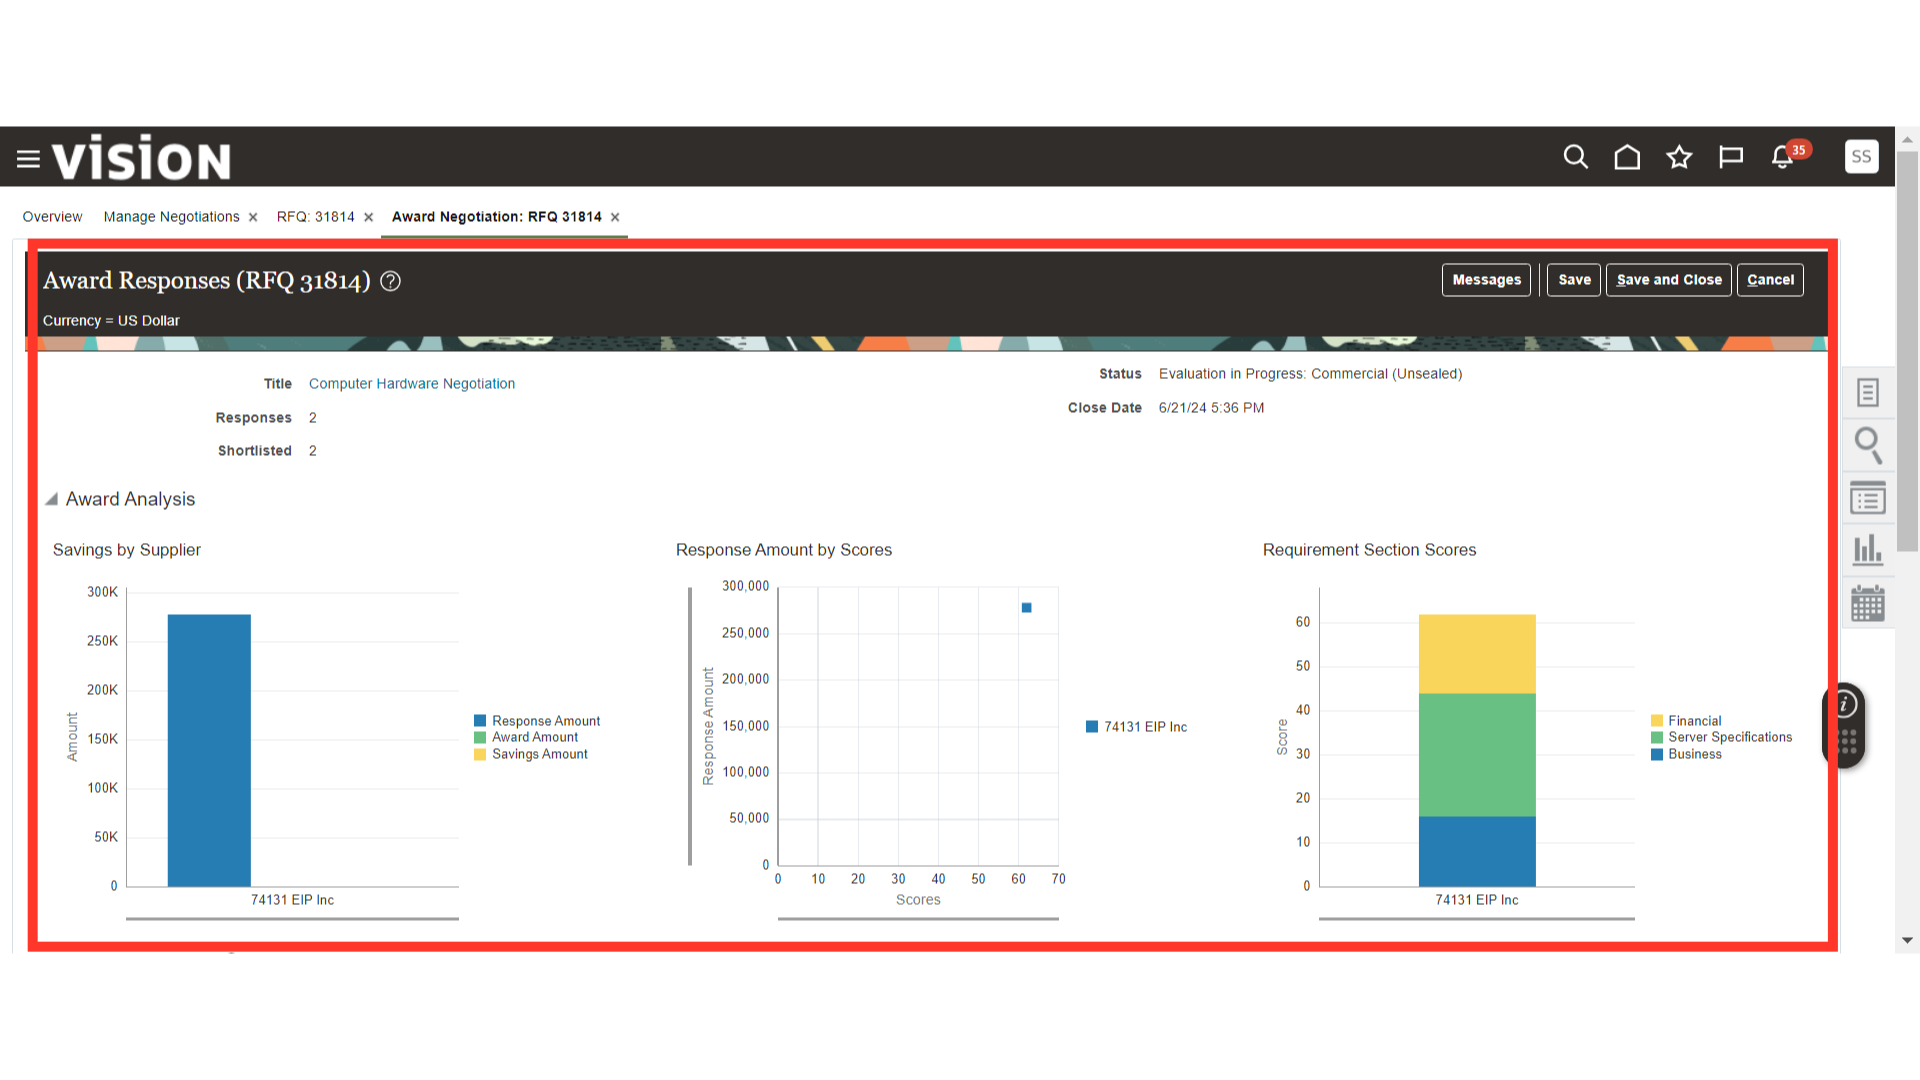
Select the Supplier for Award Decision.
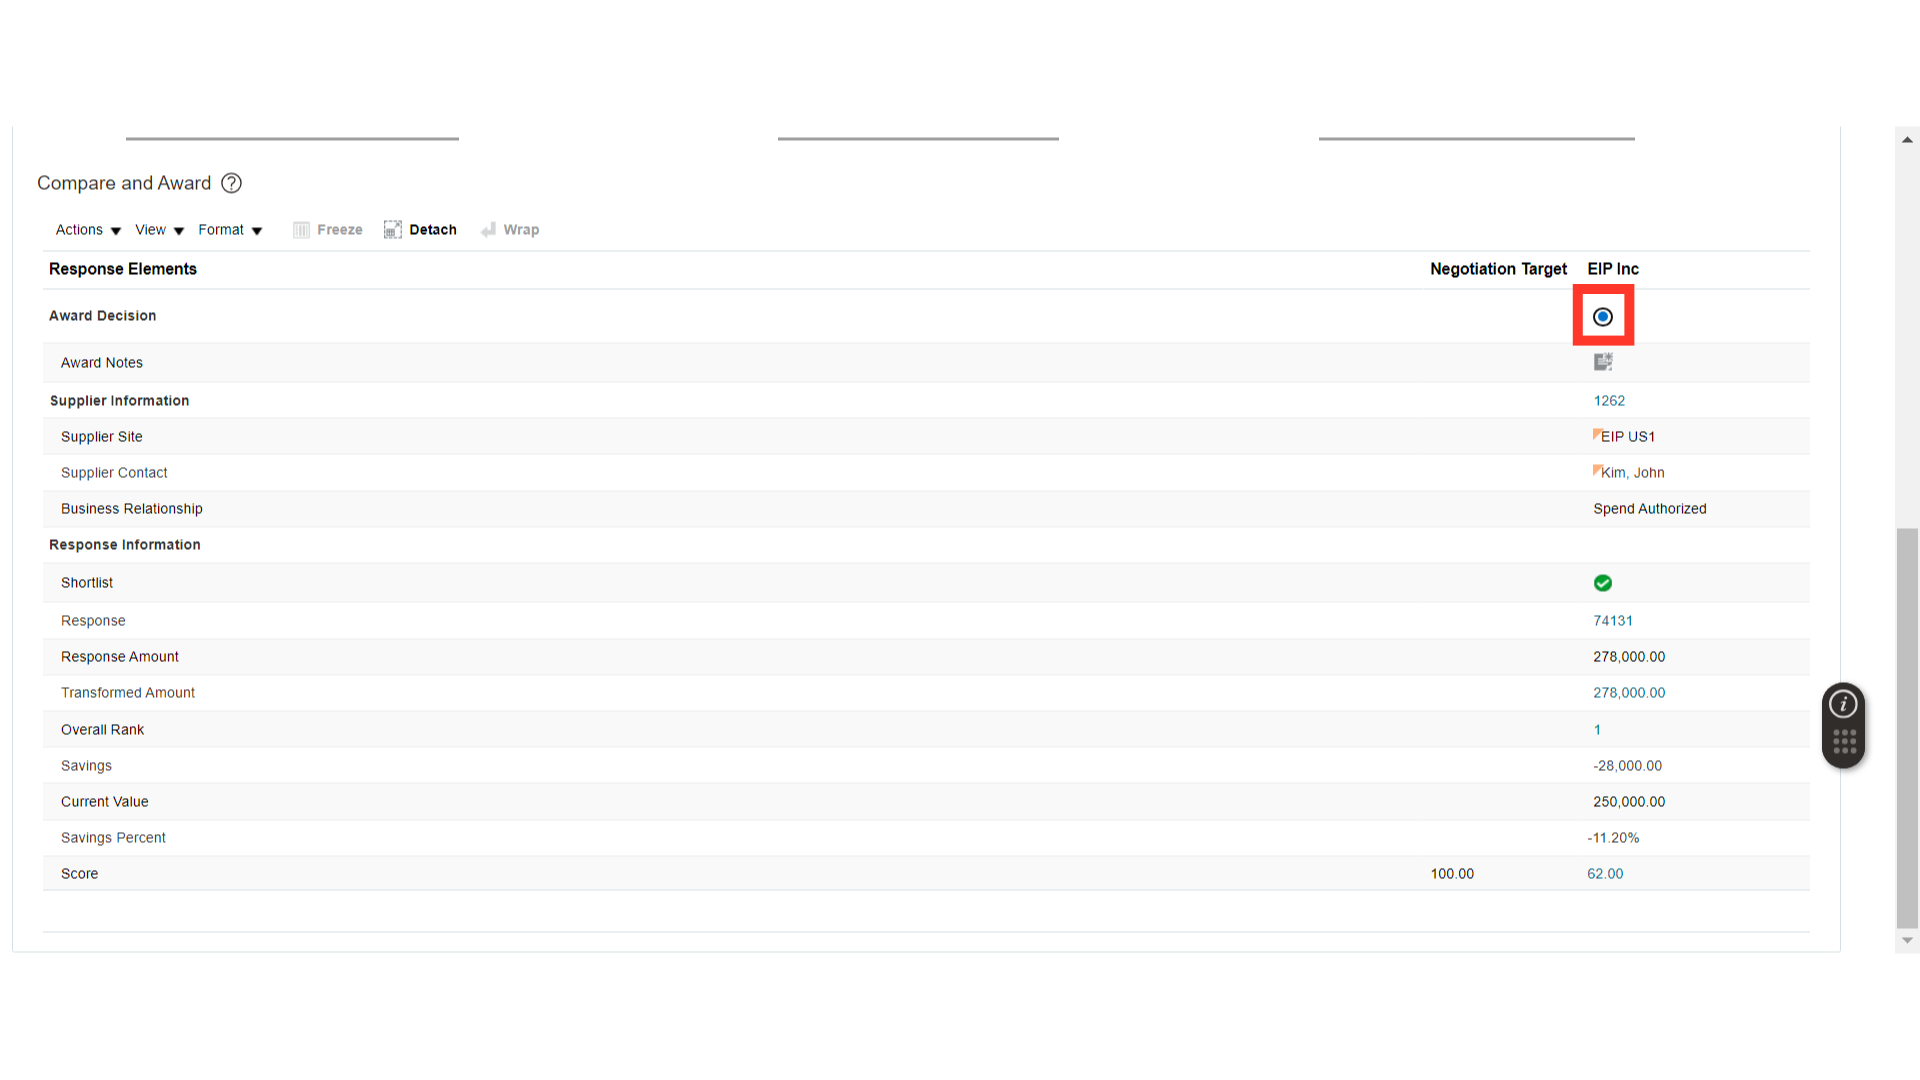
Once the Award Decision is selected, click on the Save and Close button.
The system will generate a confirmation message about the Award Decision. Click OK.
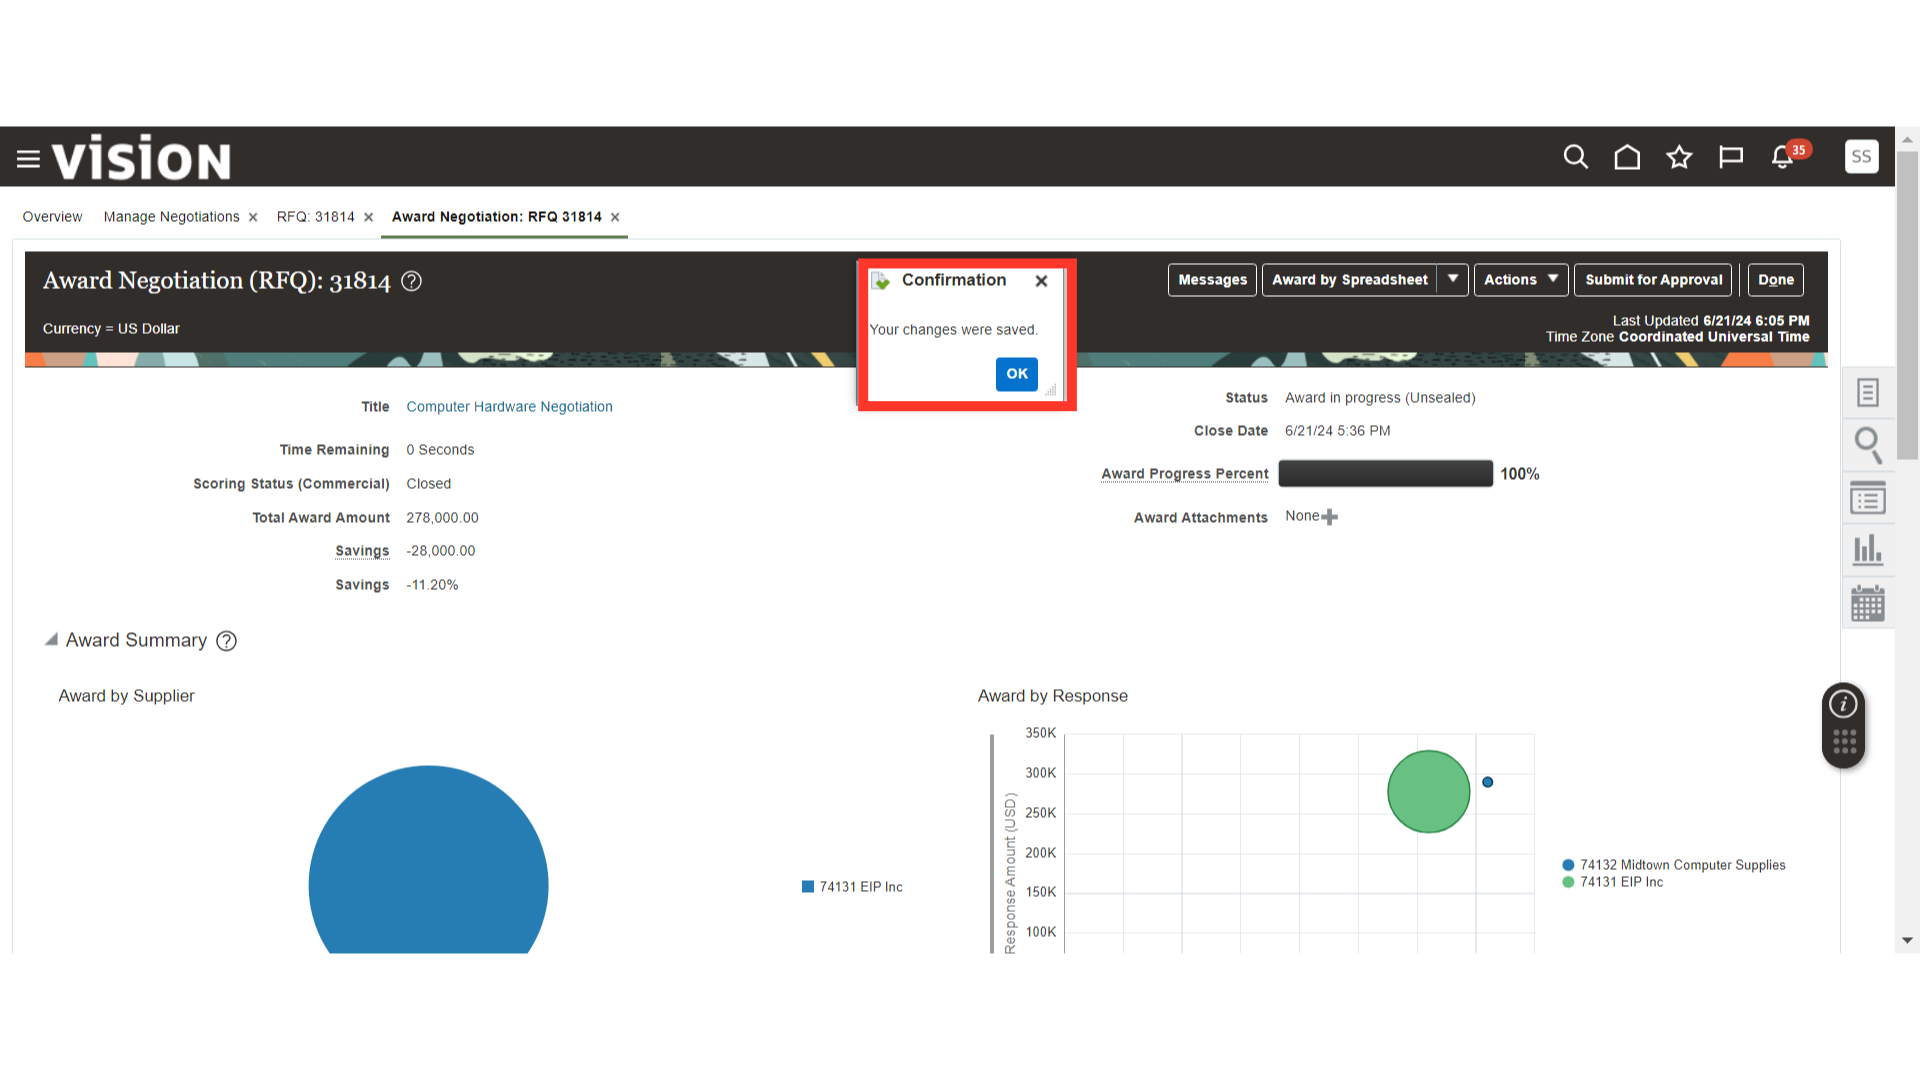
Once the Award Progress Percent is 100%, click on the Submit for Approval button to send the Award Decision for Approval.
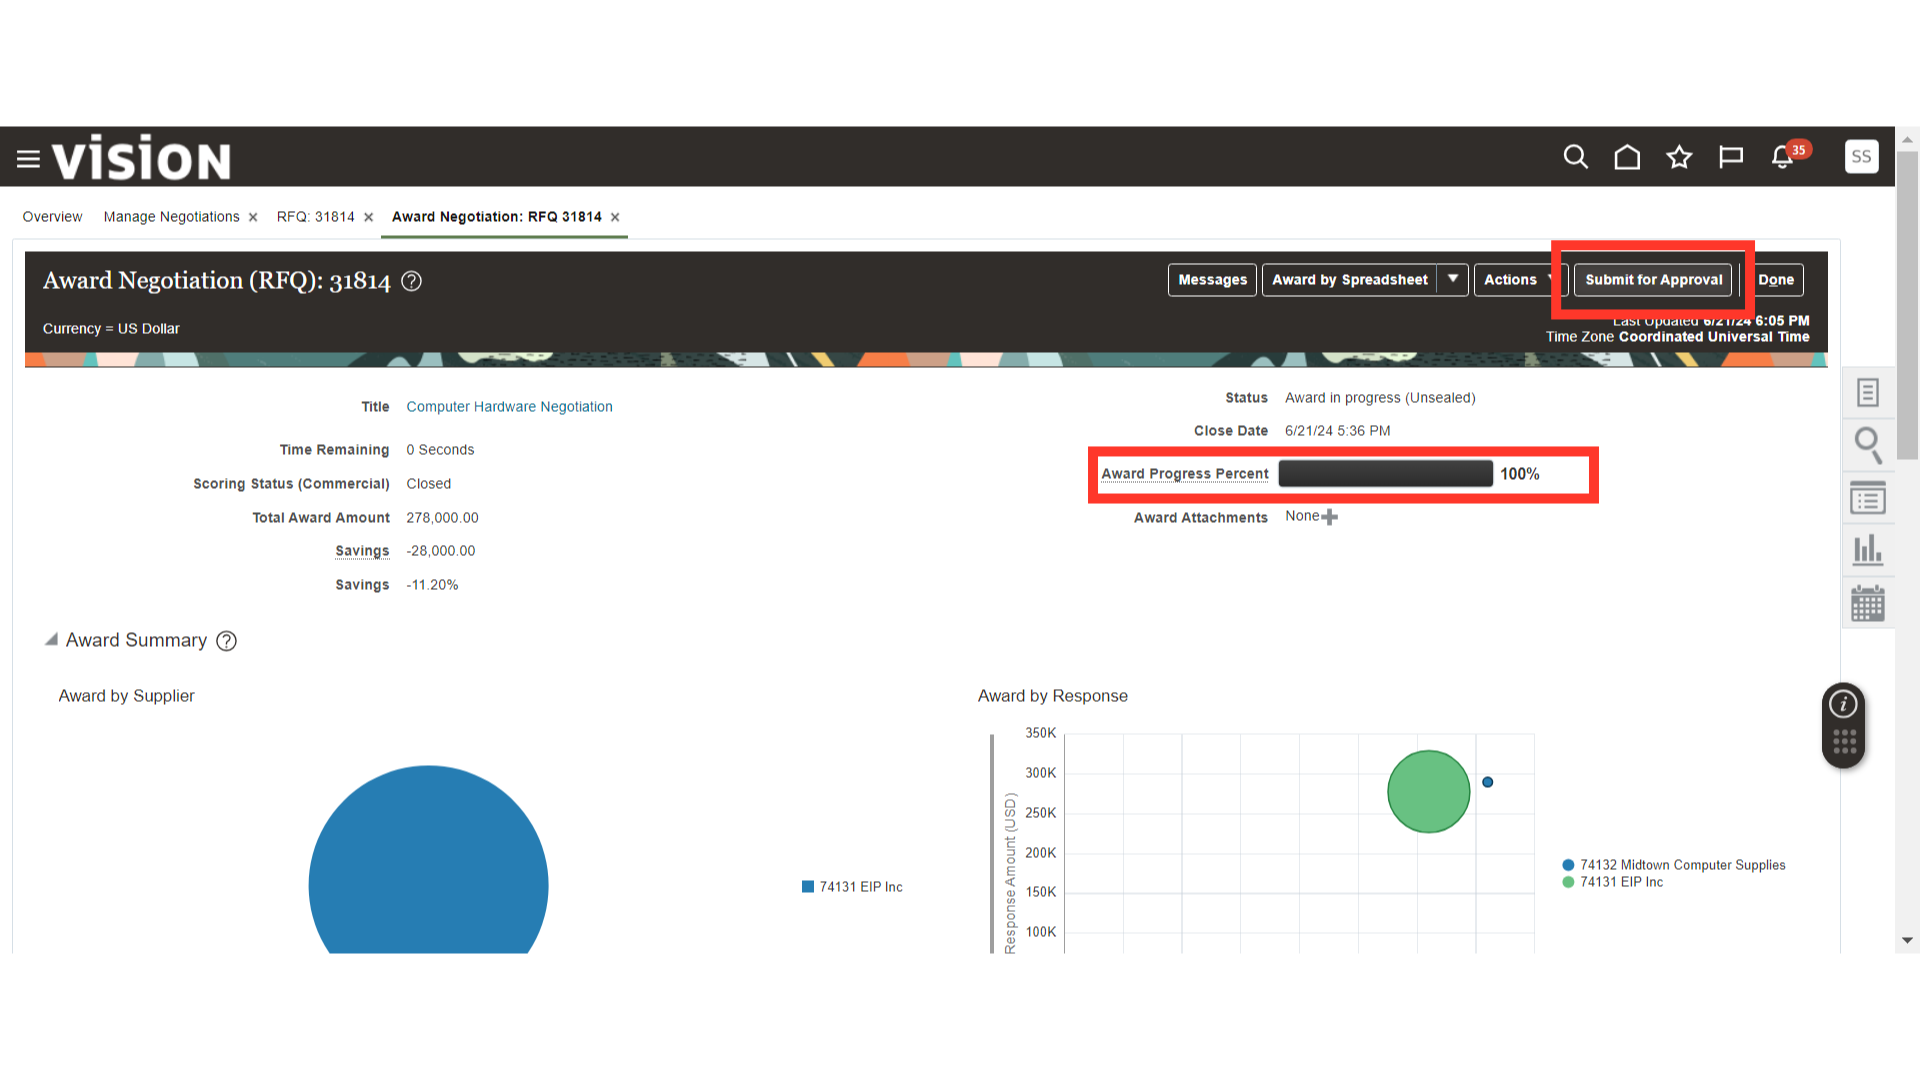
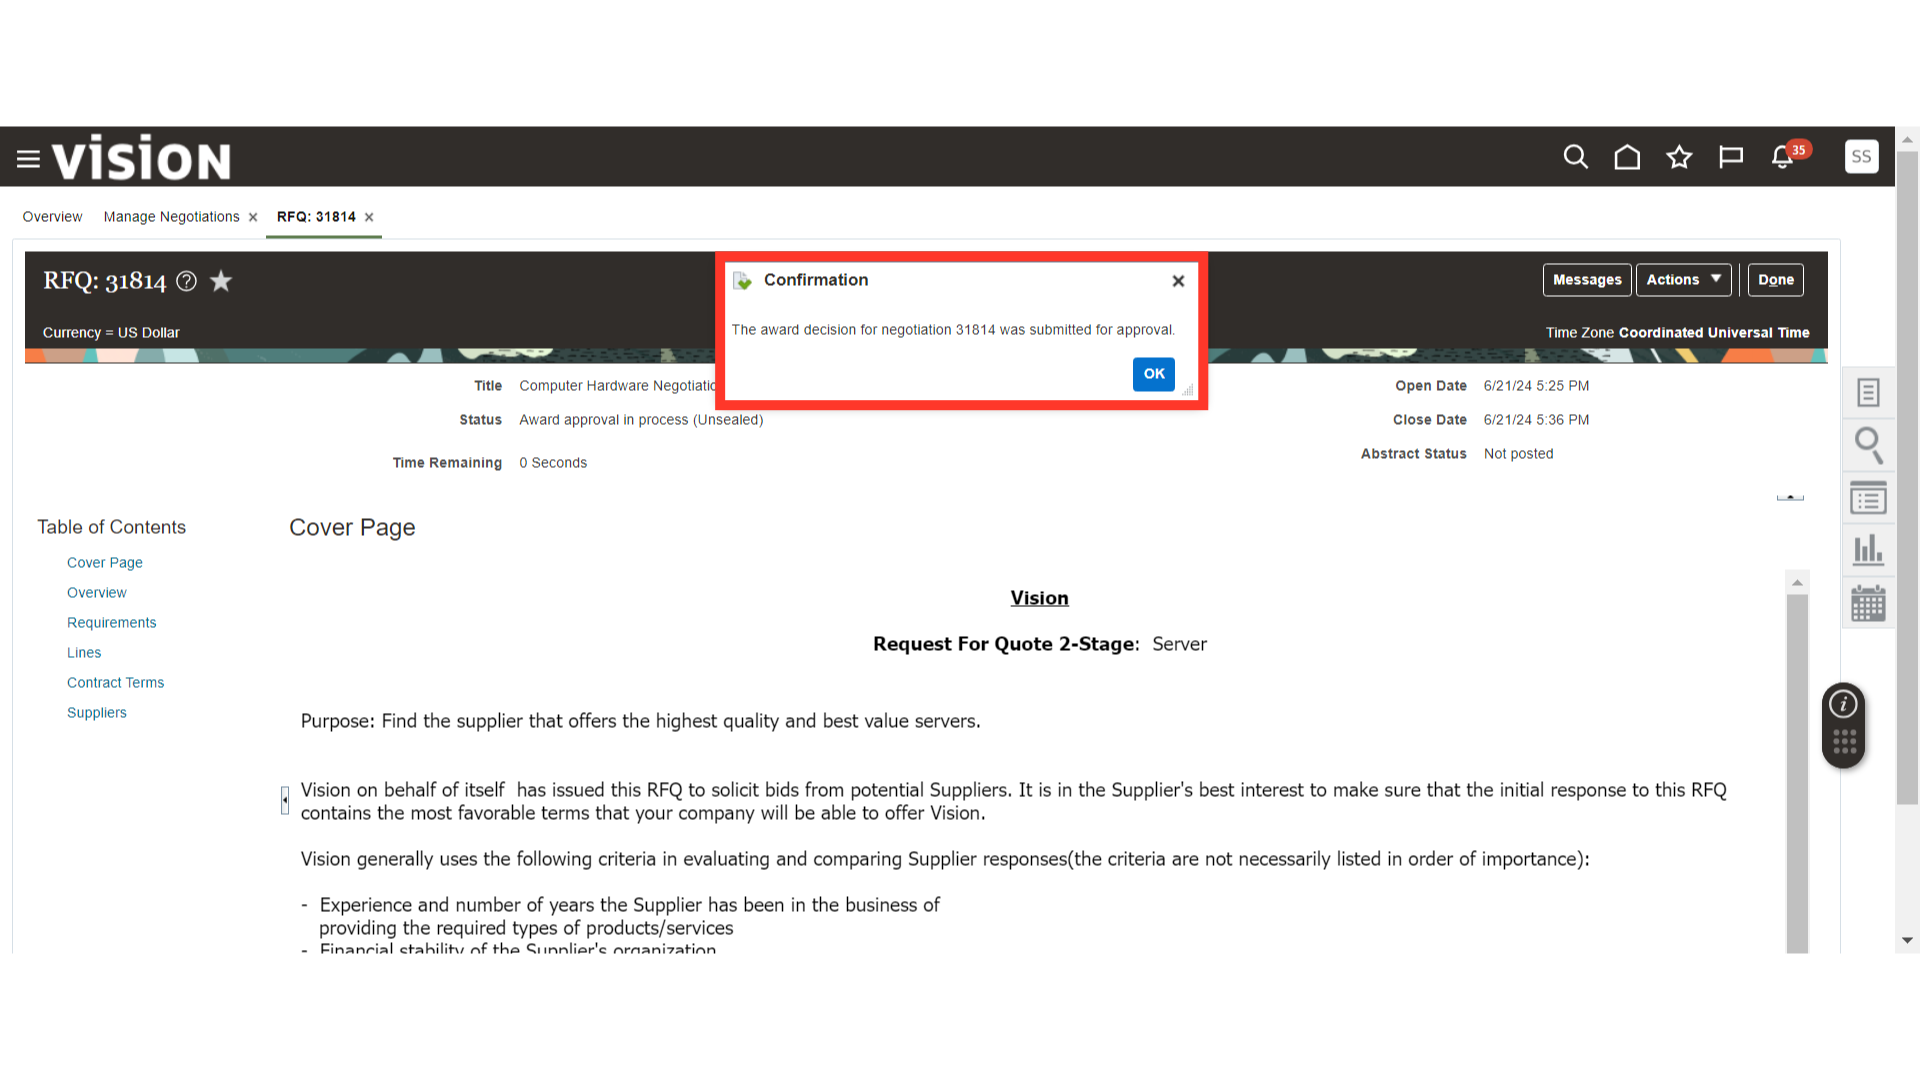
The system will generate a confirmation message once you submit the Award Decision for Approval. Click OK.
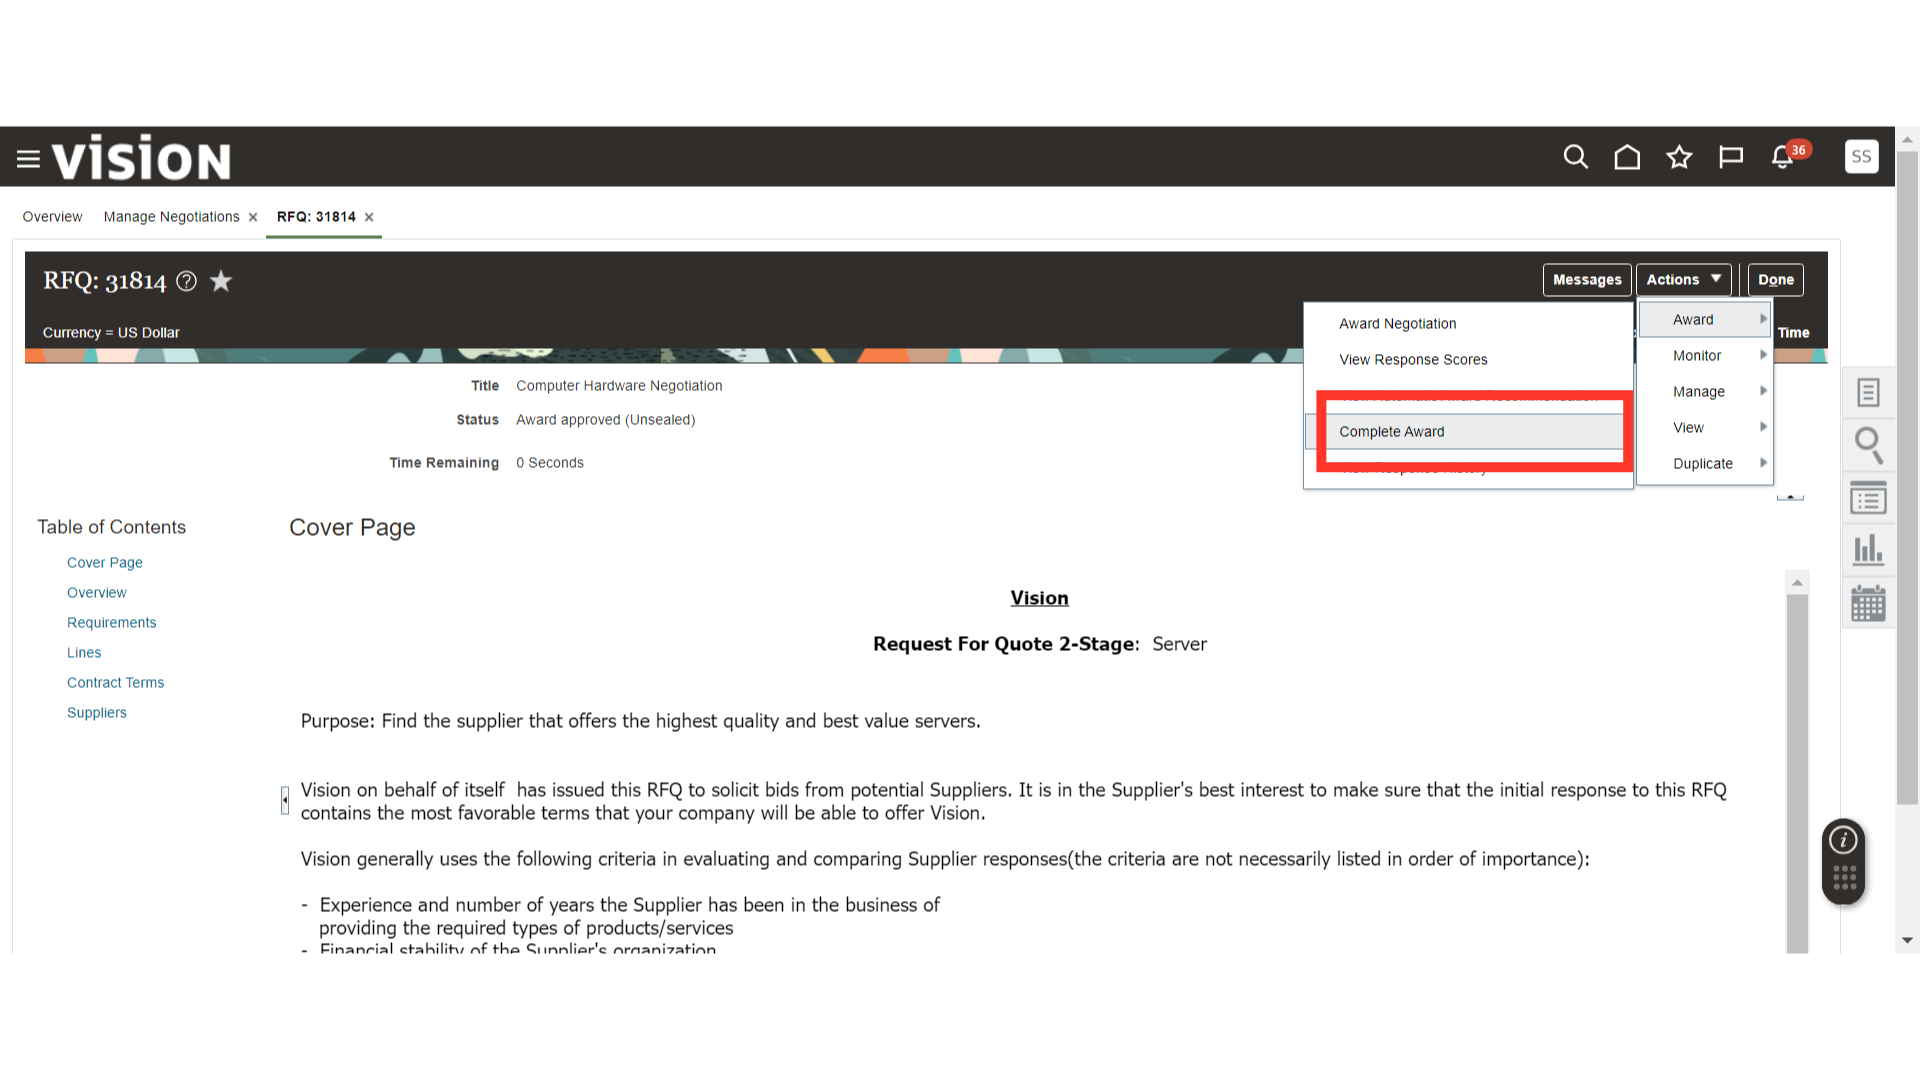
Once the Award Decision is approved and the negotiation status changes to Award Approved, click on Actions, click on Award, and click on Complete Award.
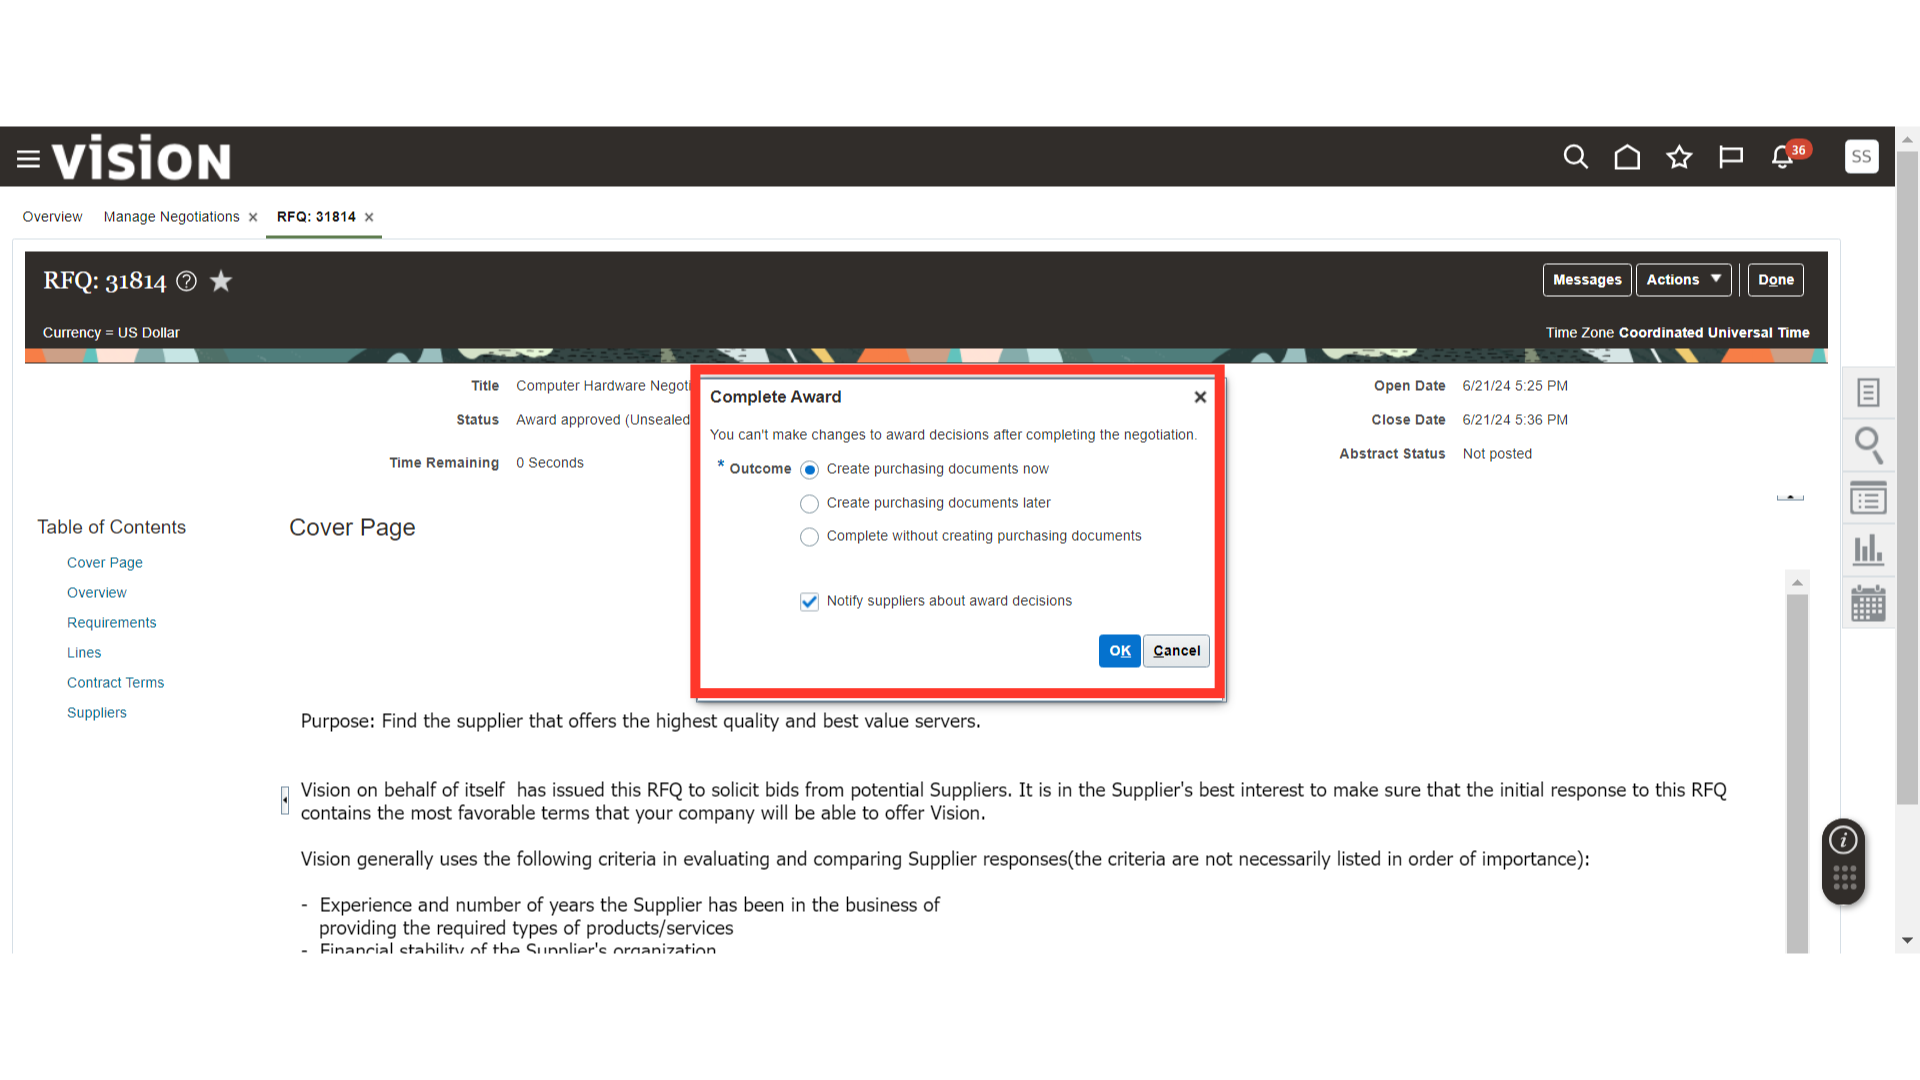
In Complete Award, select the Outcome as Create Purchasing Document Now. Check the “Notify suppliers about award decisions” option and click OK.
The system will generate a confirmation message about the Create Purchasing Documents. Click OK.
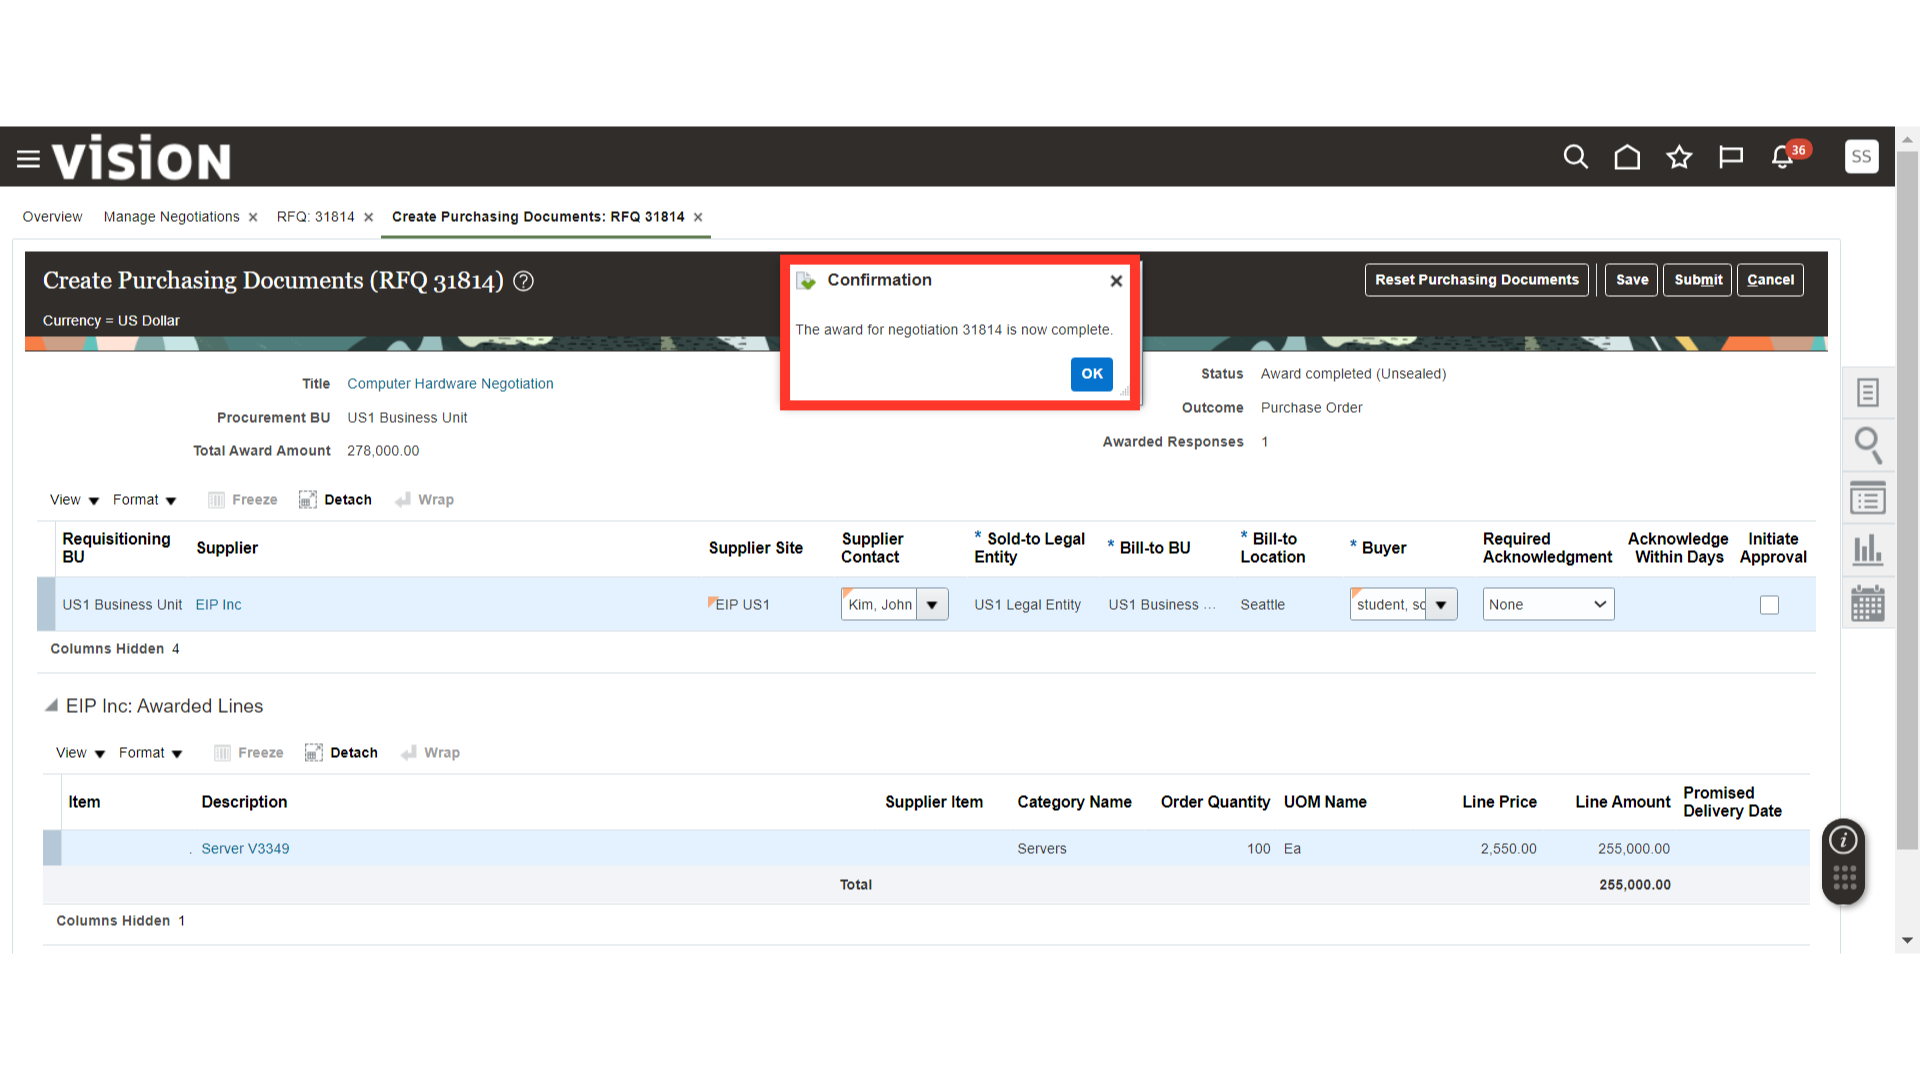
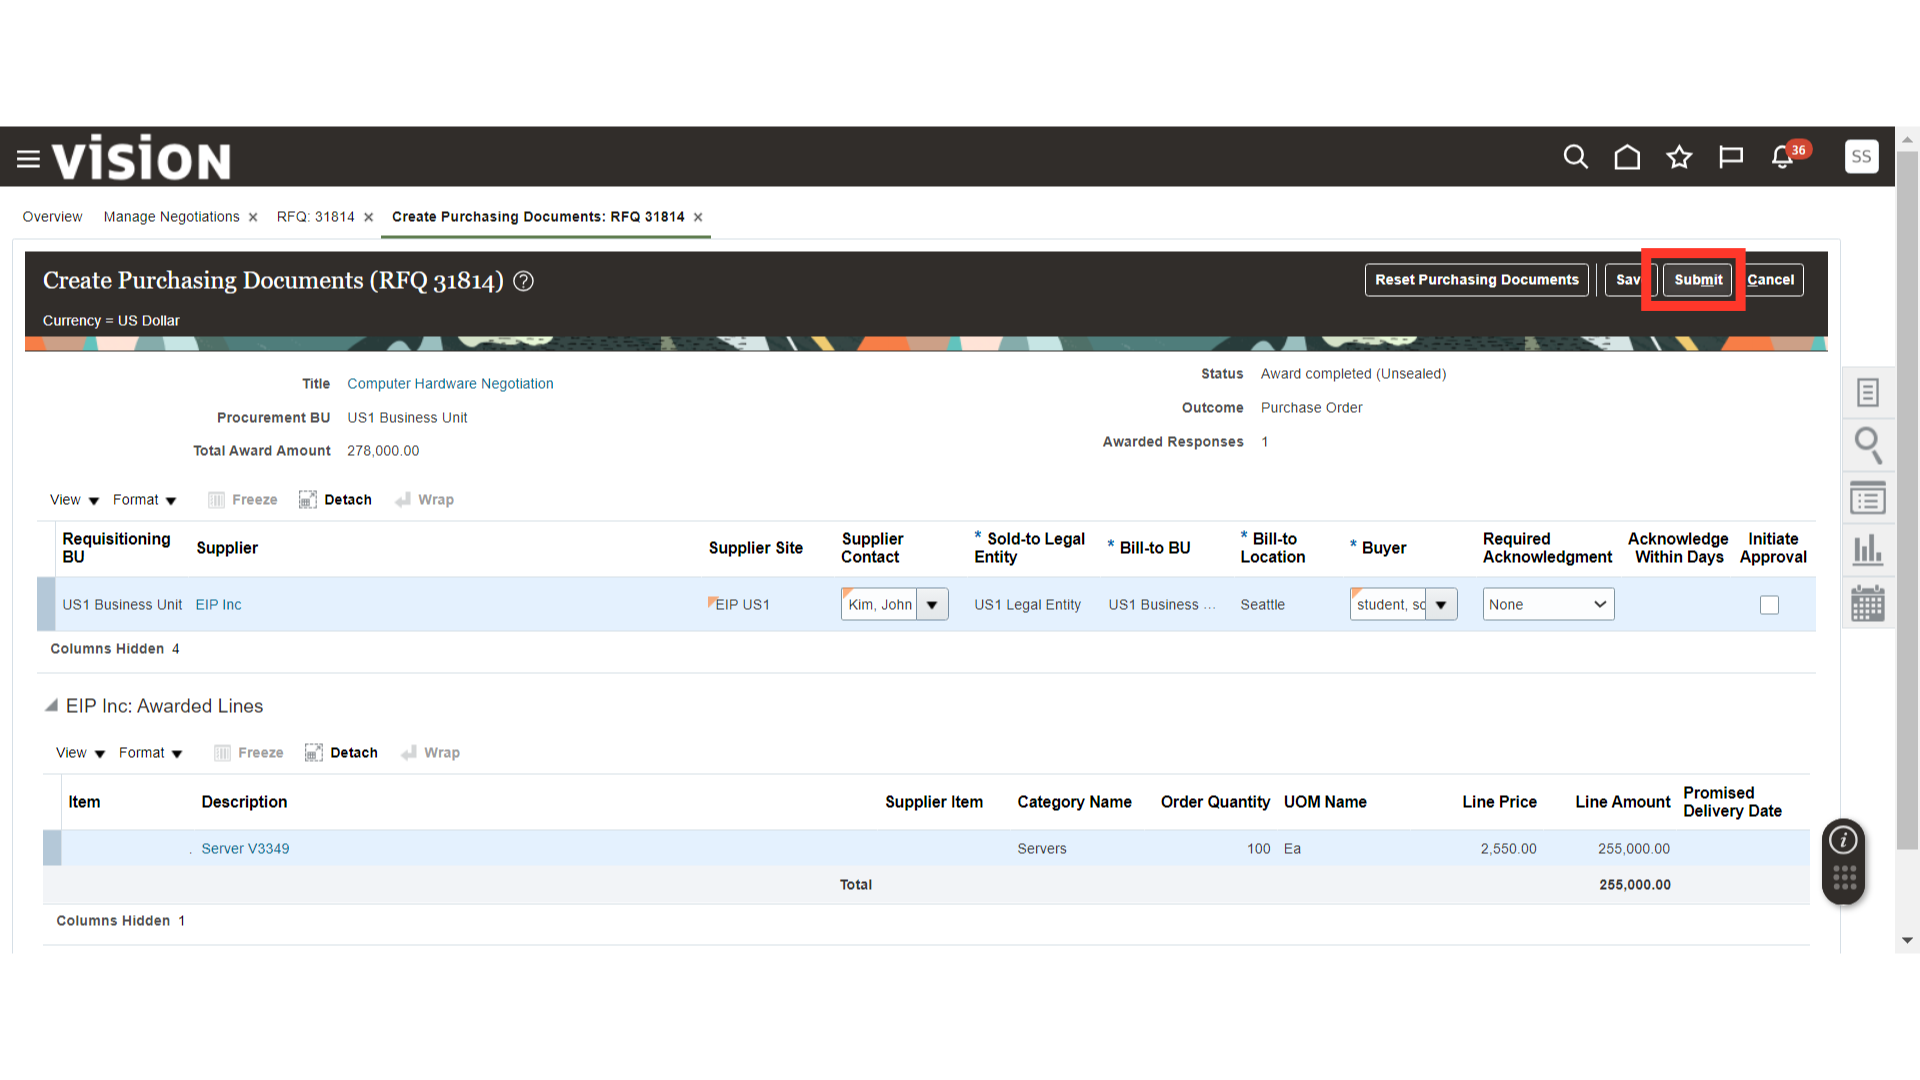
In Create Purchasing Documents, verify all the details related to the purchasing document and click on the Submit button.
After submission, a confirmation message will be generated. Click OK.
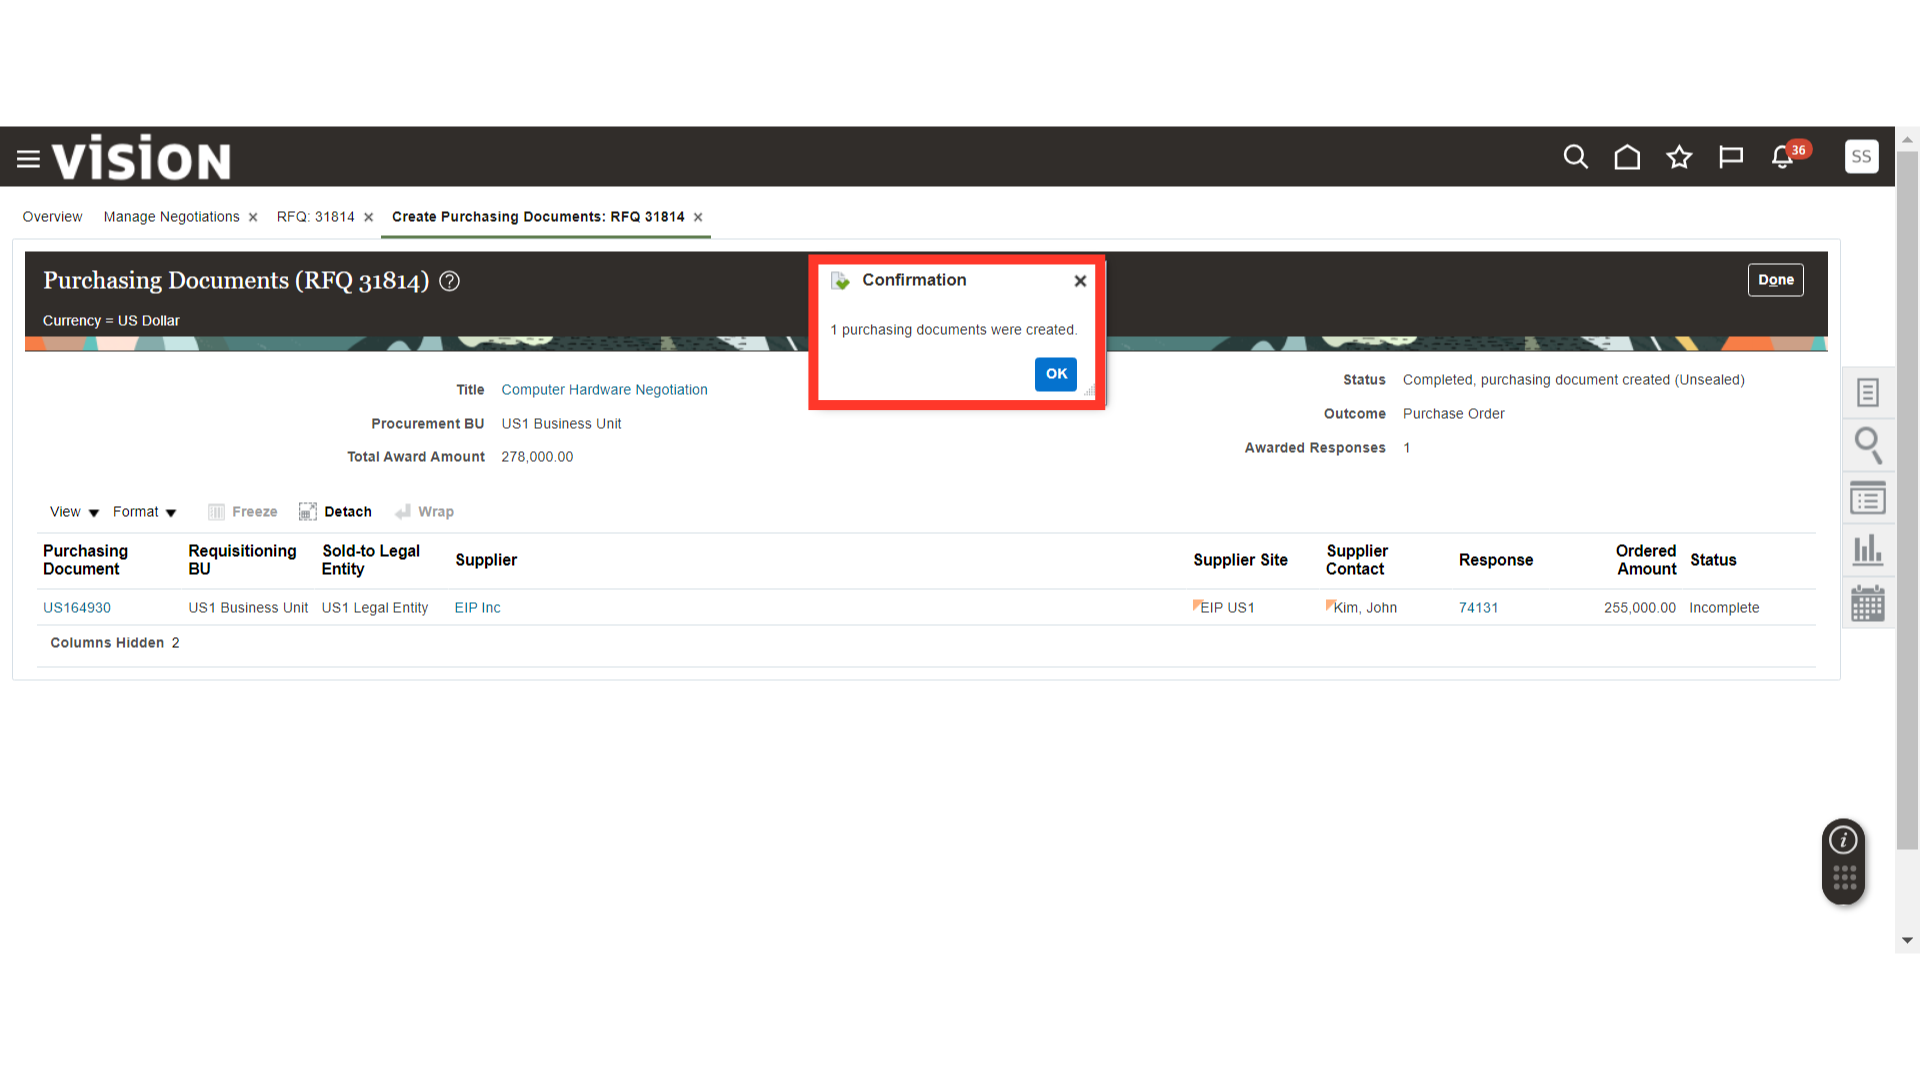
In Purchasing Documents, a Purchase Order has been created using the Two Stage Negotiation. Click on the Purchase Order hyperlink to view details.
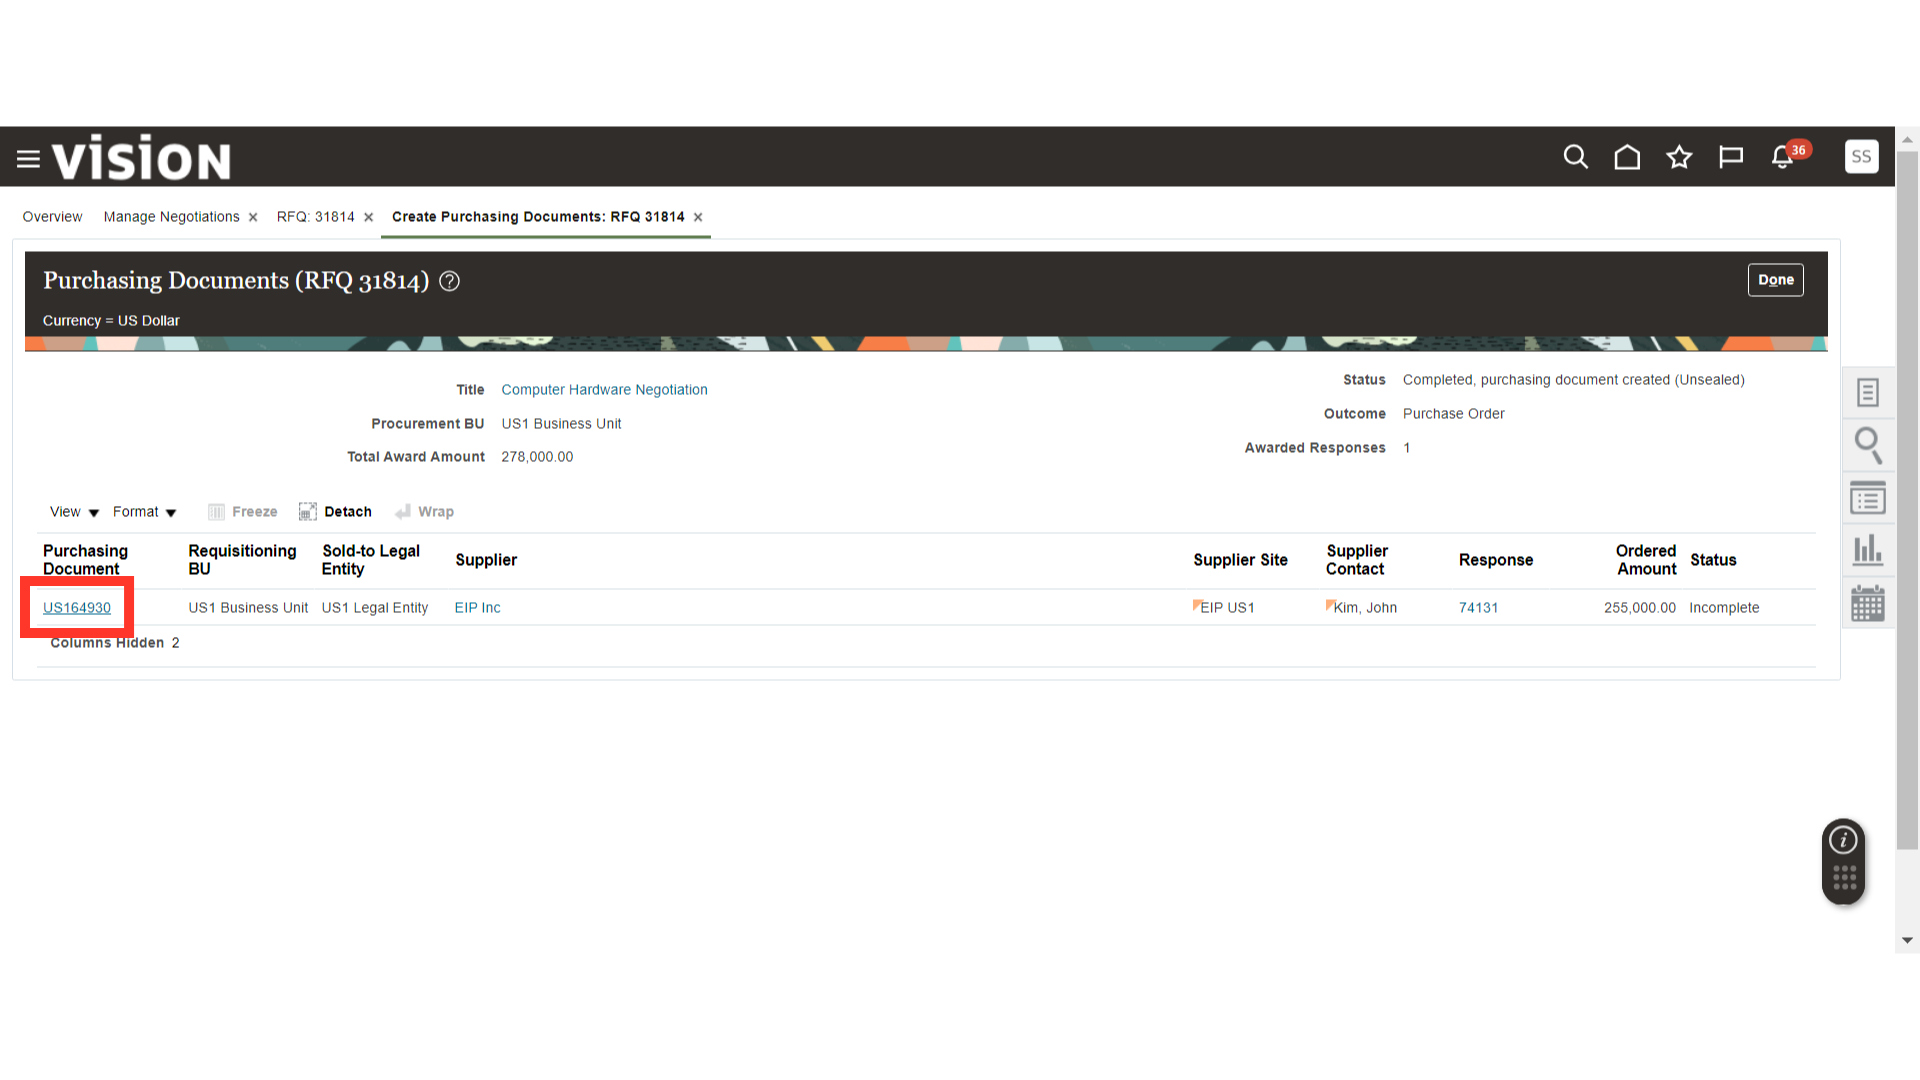
In the Purchase Order, you will be able to see the Negotiation Number from which this PO was created.

In this guide, we have covered the process of creating a Two Stage Negotiation. From creating Overview, Requirements, Lines, Adding Suppliers, Publishing, Surrogate Response, Response, and Scoring to creating a Purchasing Document from Negotiation, this guide covers it all. Please follow the detailed steps to create Two Stage Negotiations seamlessly.