Create A Grade
Navigation: Home>My Client Groups>Show More from the Quick Actions>Manage Grades>Create>Enter Information>Submit
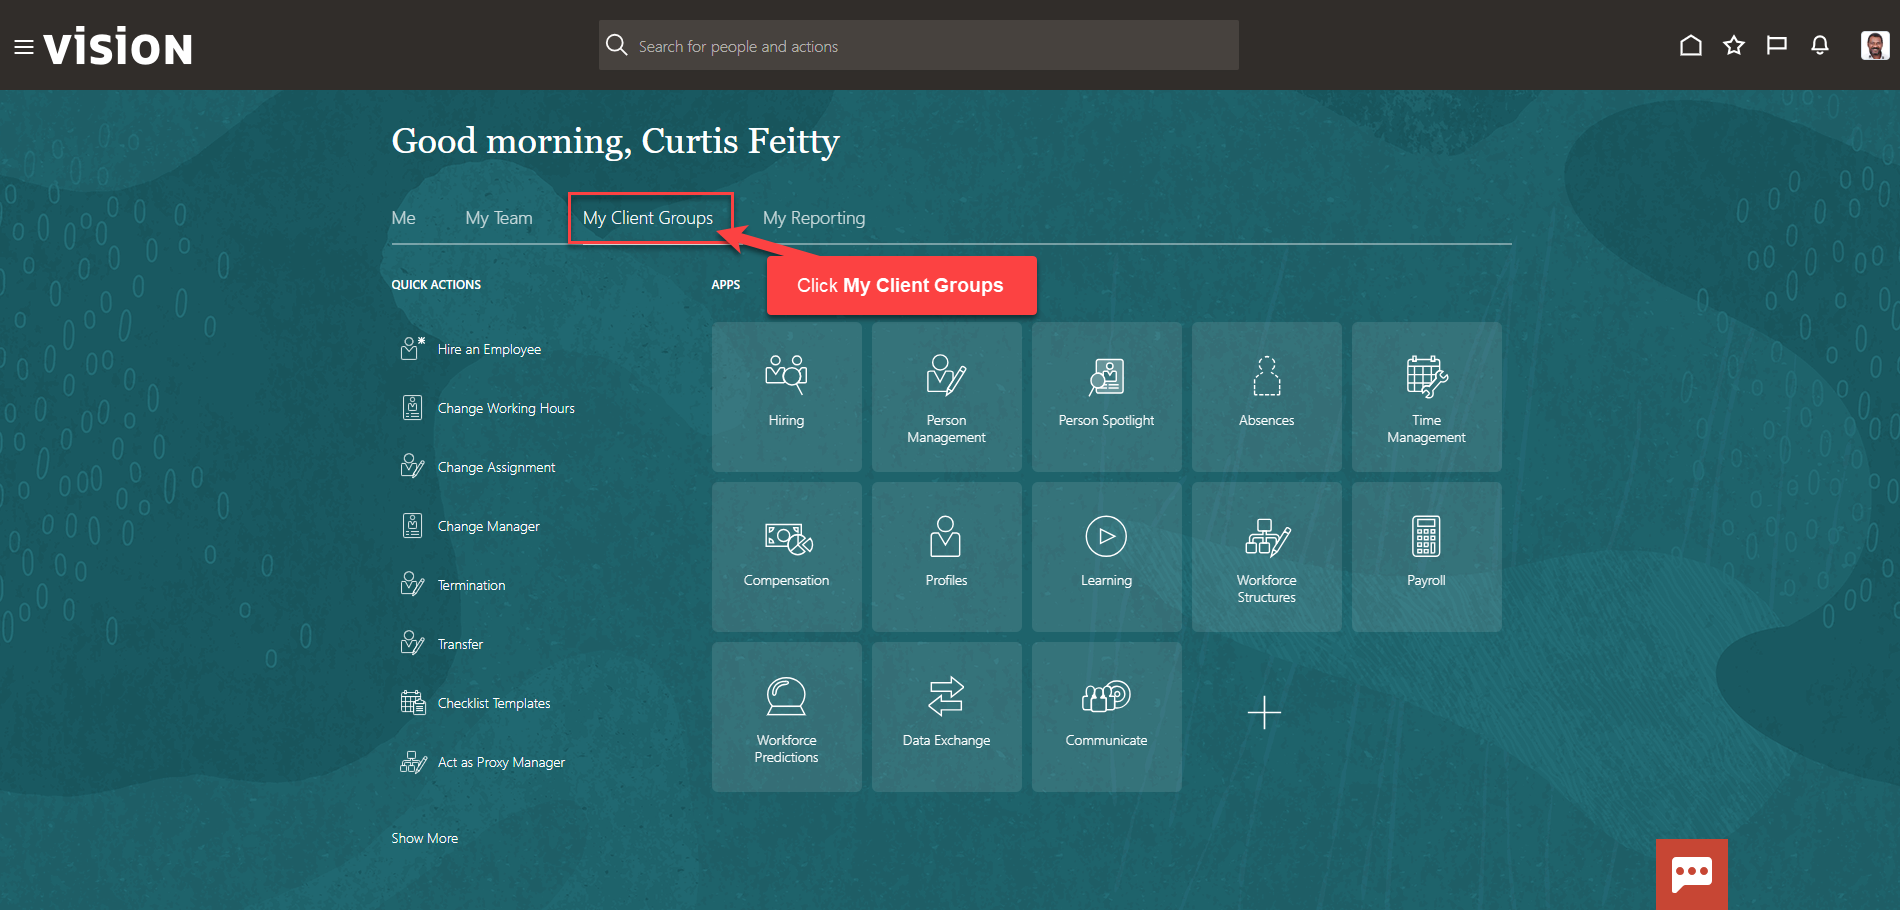
From the home screen, click My Client Groups
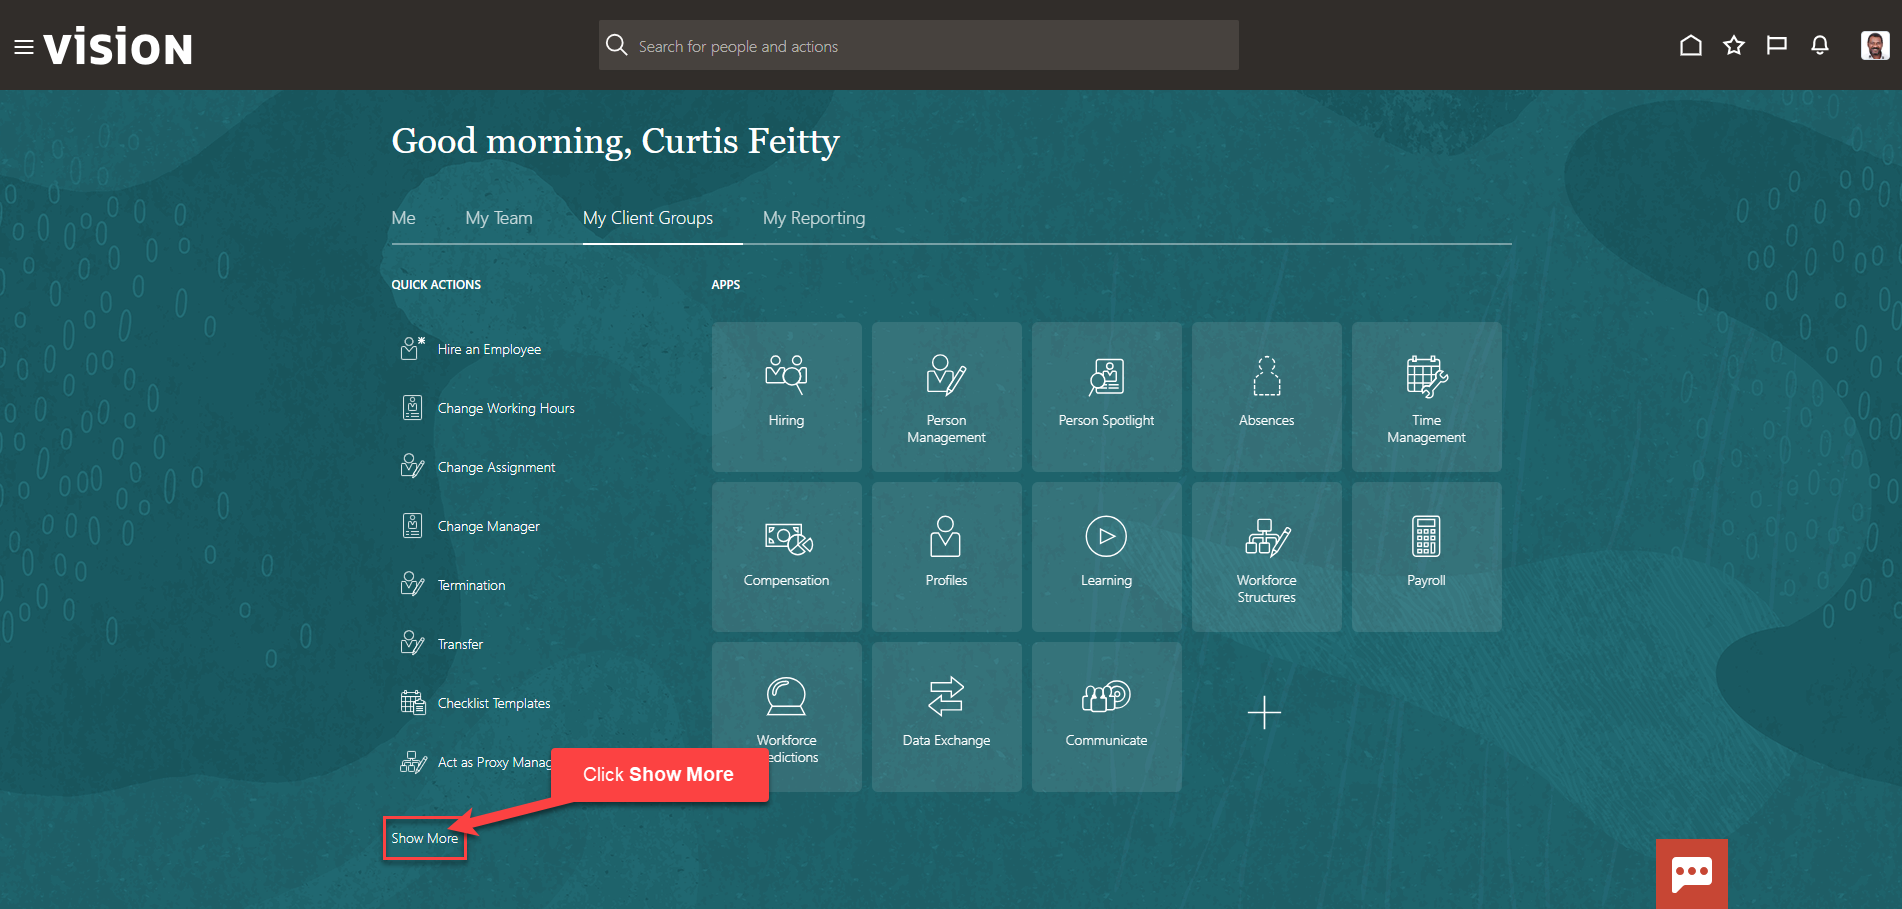
Next, click Show More
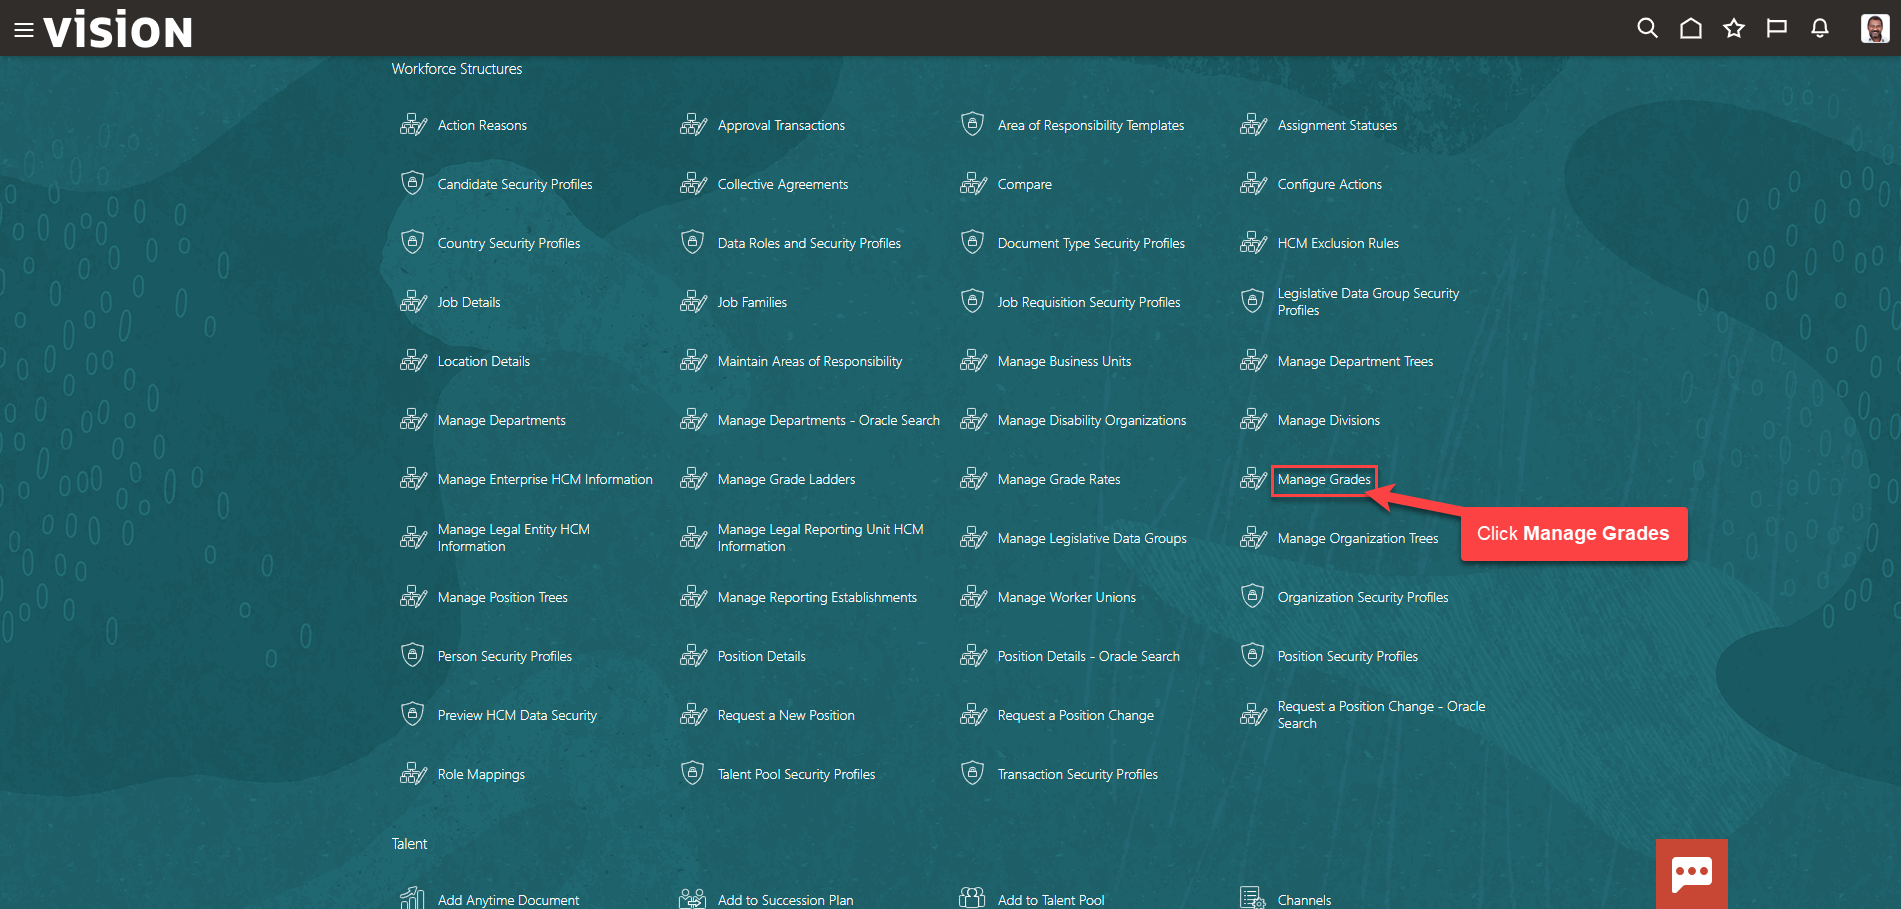
Scroll down and under Workforce Structures, click Manage Grades. As a note, we can search Manage Grades by clicking Ctrl F
To create a Grade, click Create

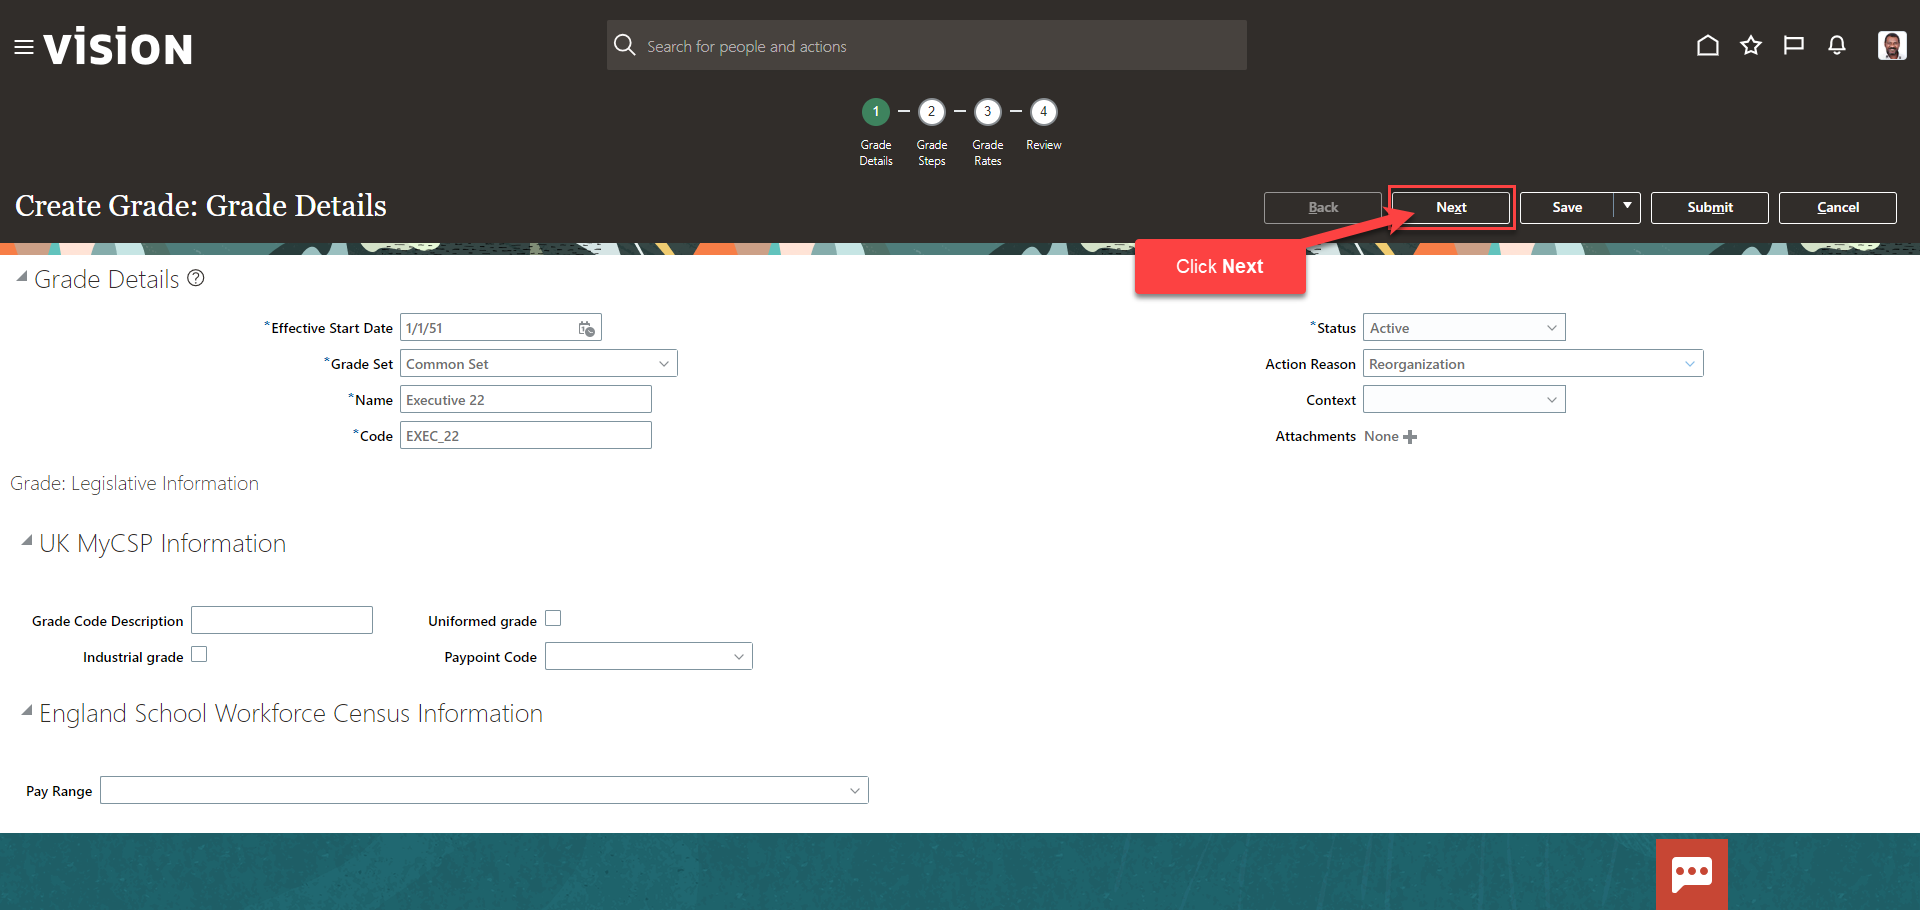
Next, enter the Effective State Date, Grade Set, Name, Code and Status. The effective start date will default to the Oracle recommended start date; it is recommended to use this date. The grade set will default; select the grade set based on our configurations; common set is the most commonly used. Enter the grade name; we recommend following the same naming convention of our other grades. Next, enter the grade code; we recommend following the same naming convention of our other grade codes. The status will default to active. Optionally, we can enter an action reason, and an attachment
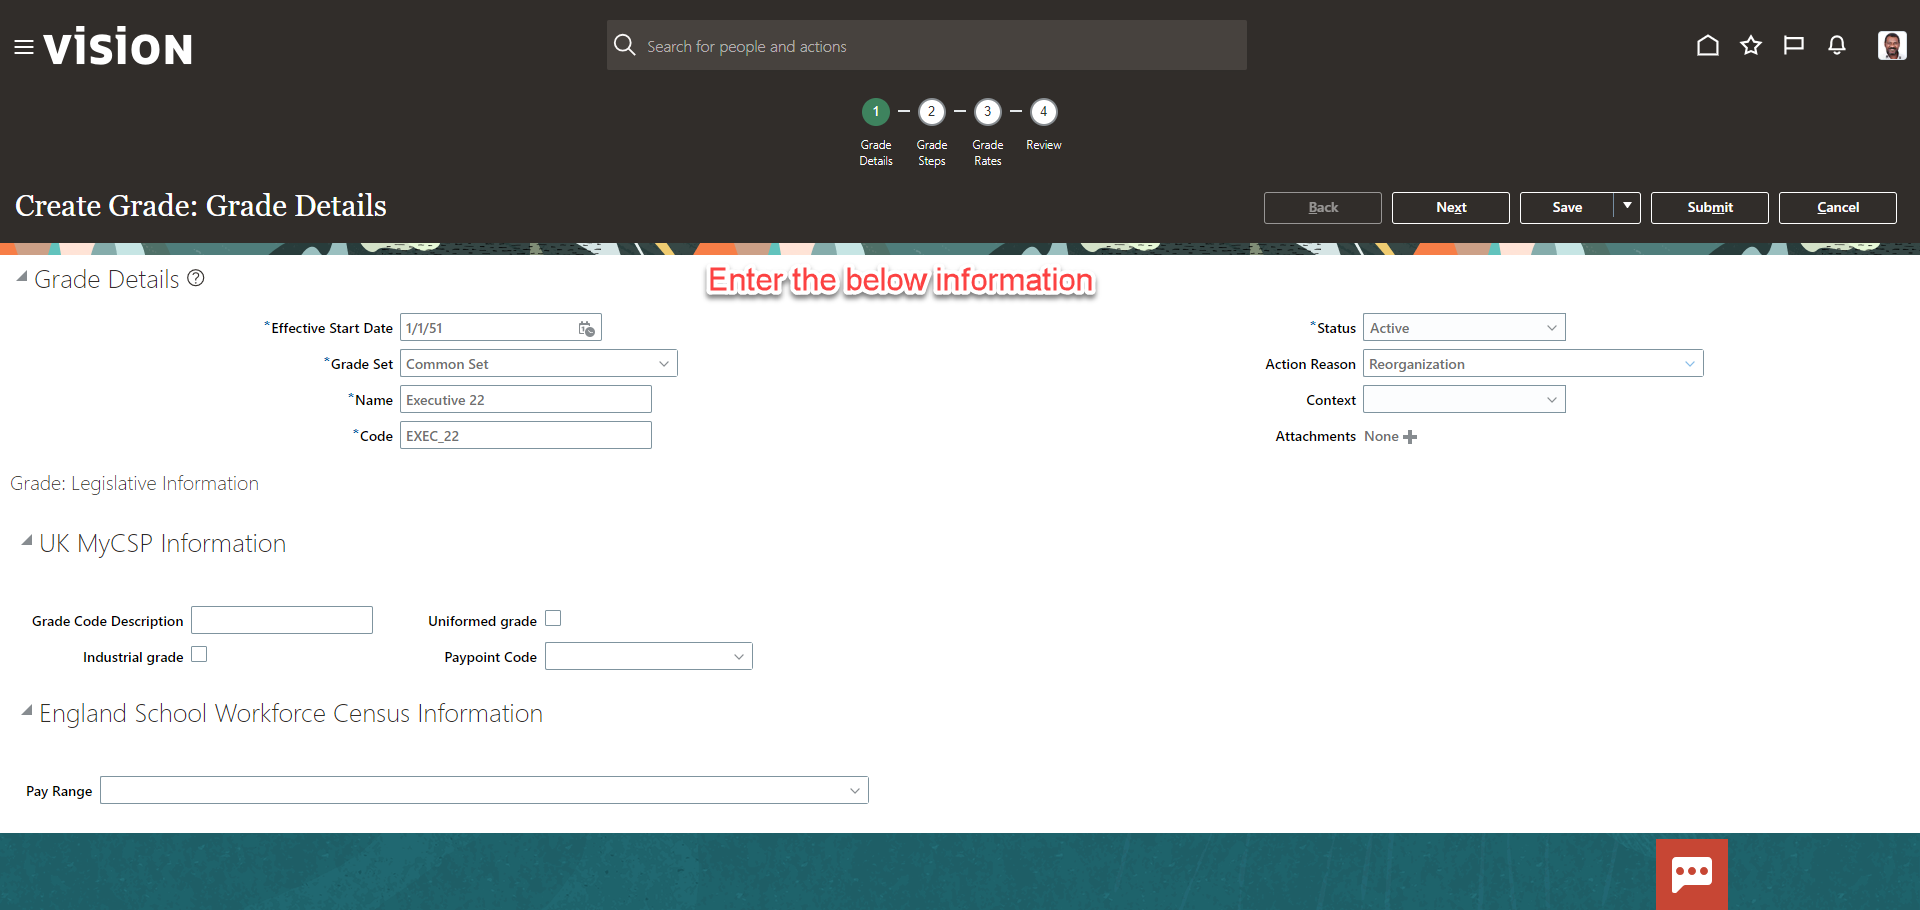
Once the information has been entered, click Next
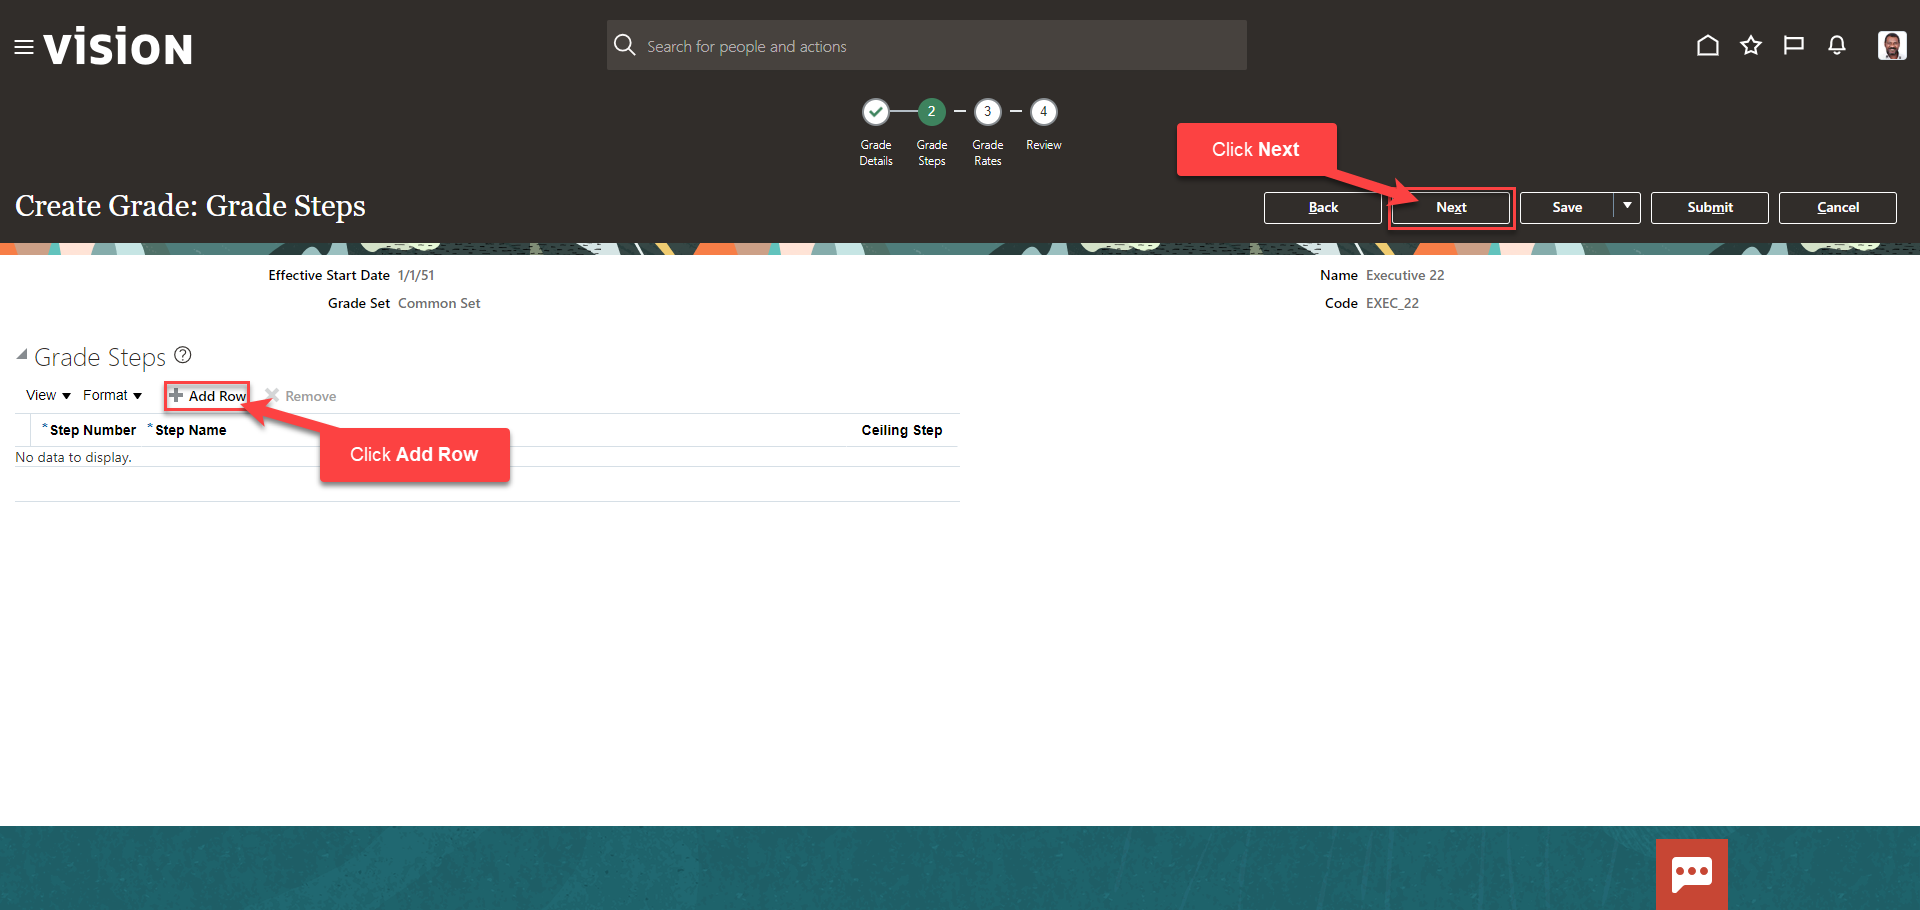
Next, enter the Grade Steps. The information needed on this screen will depend on our setups. If we have steps associated with grades, we can add those here by selecting Add Row, if applicable. If we do not use grade steps, please click Next
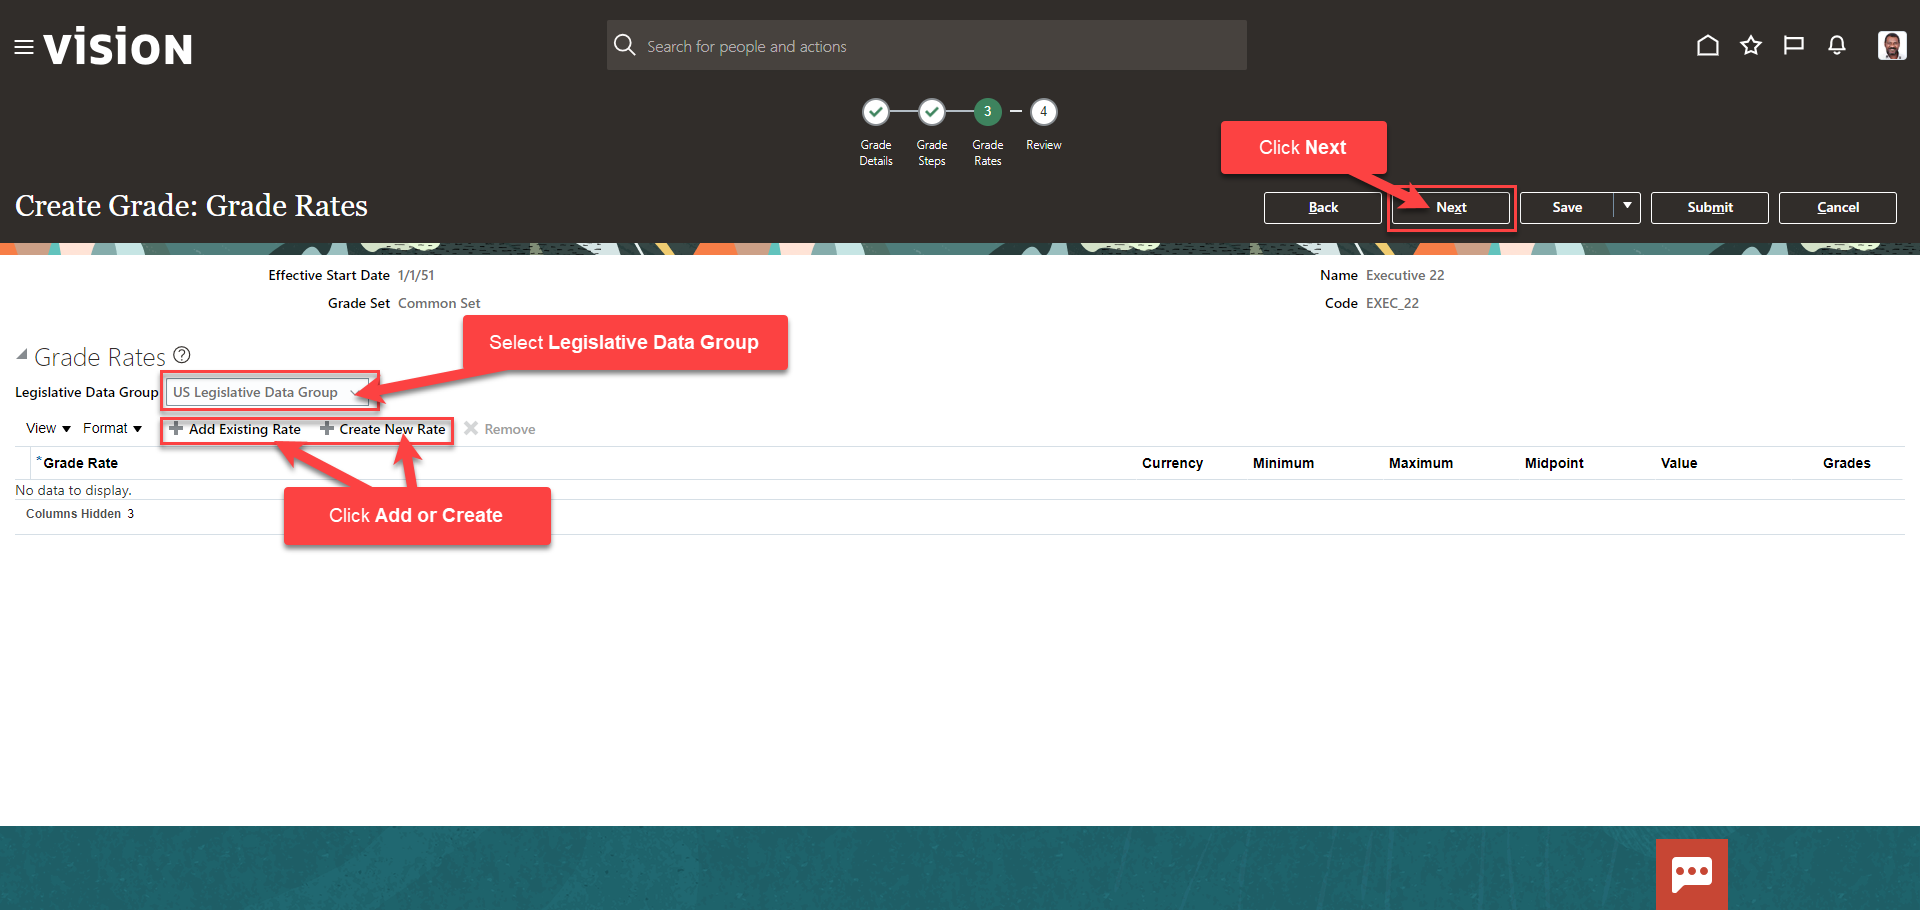
First, ensure the correct Legislative Data Group is displayed; if not, use the drop down to select the correct Legislative Data Group. Next, enter the Grade Rates. The information needed on this screen will depend on our setups. If we have rates created and we’d like to associate those rates with grades, we can add those here by selecting Add Existing Rate. If have not previously created a grade rate, click Create New Rate. If we do not use grade steps, please click Next
On the Review screen, scroll down to review the information entered. If we need to update any information, simply click the applicable section from the top

Once our review is complete, click Submit. The Grade has been created.
