Physical Inventory
Use the physical inventory feature to ensure that the assets in your asset book physically exist and are in use in your business. Record the existence, location, employee assignment, and number of units for each asset of your company. Record physical inventory details for assets manually or by using a barcode scanner. After recording the physical inventory information, compare it with the information in the asset book and reconcile discrepancies, if any.
This guide will provide a detailed process for performing physical verification of fixed assets and taking corrective action in Oracle Fusion.
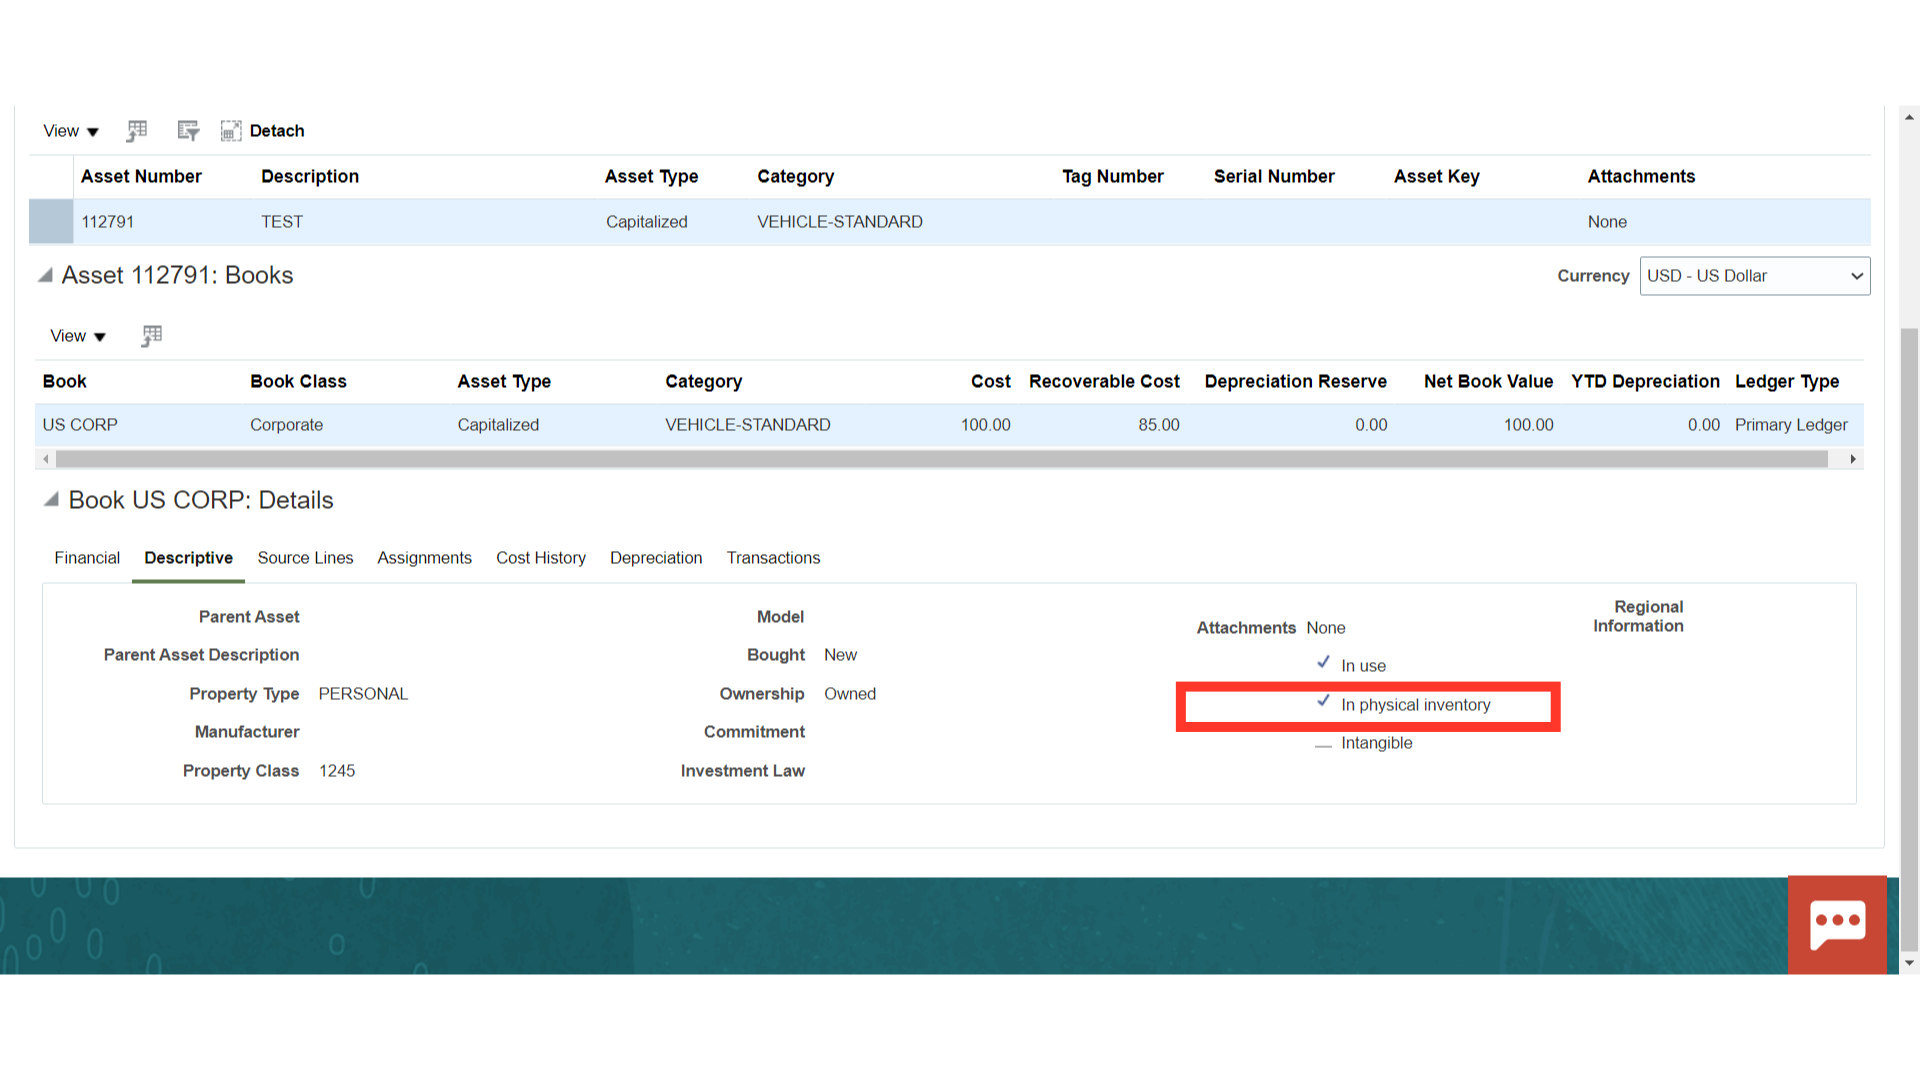
Only when a checkbox next to physical inventory is enabled then only assets be chosen for the physical inventory procedure.
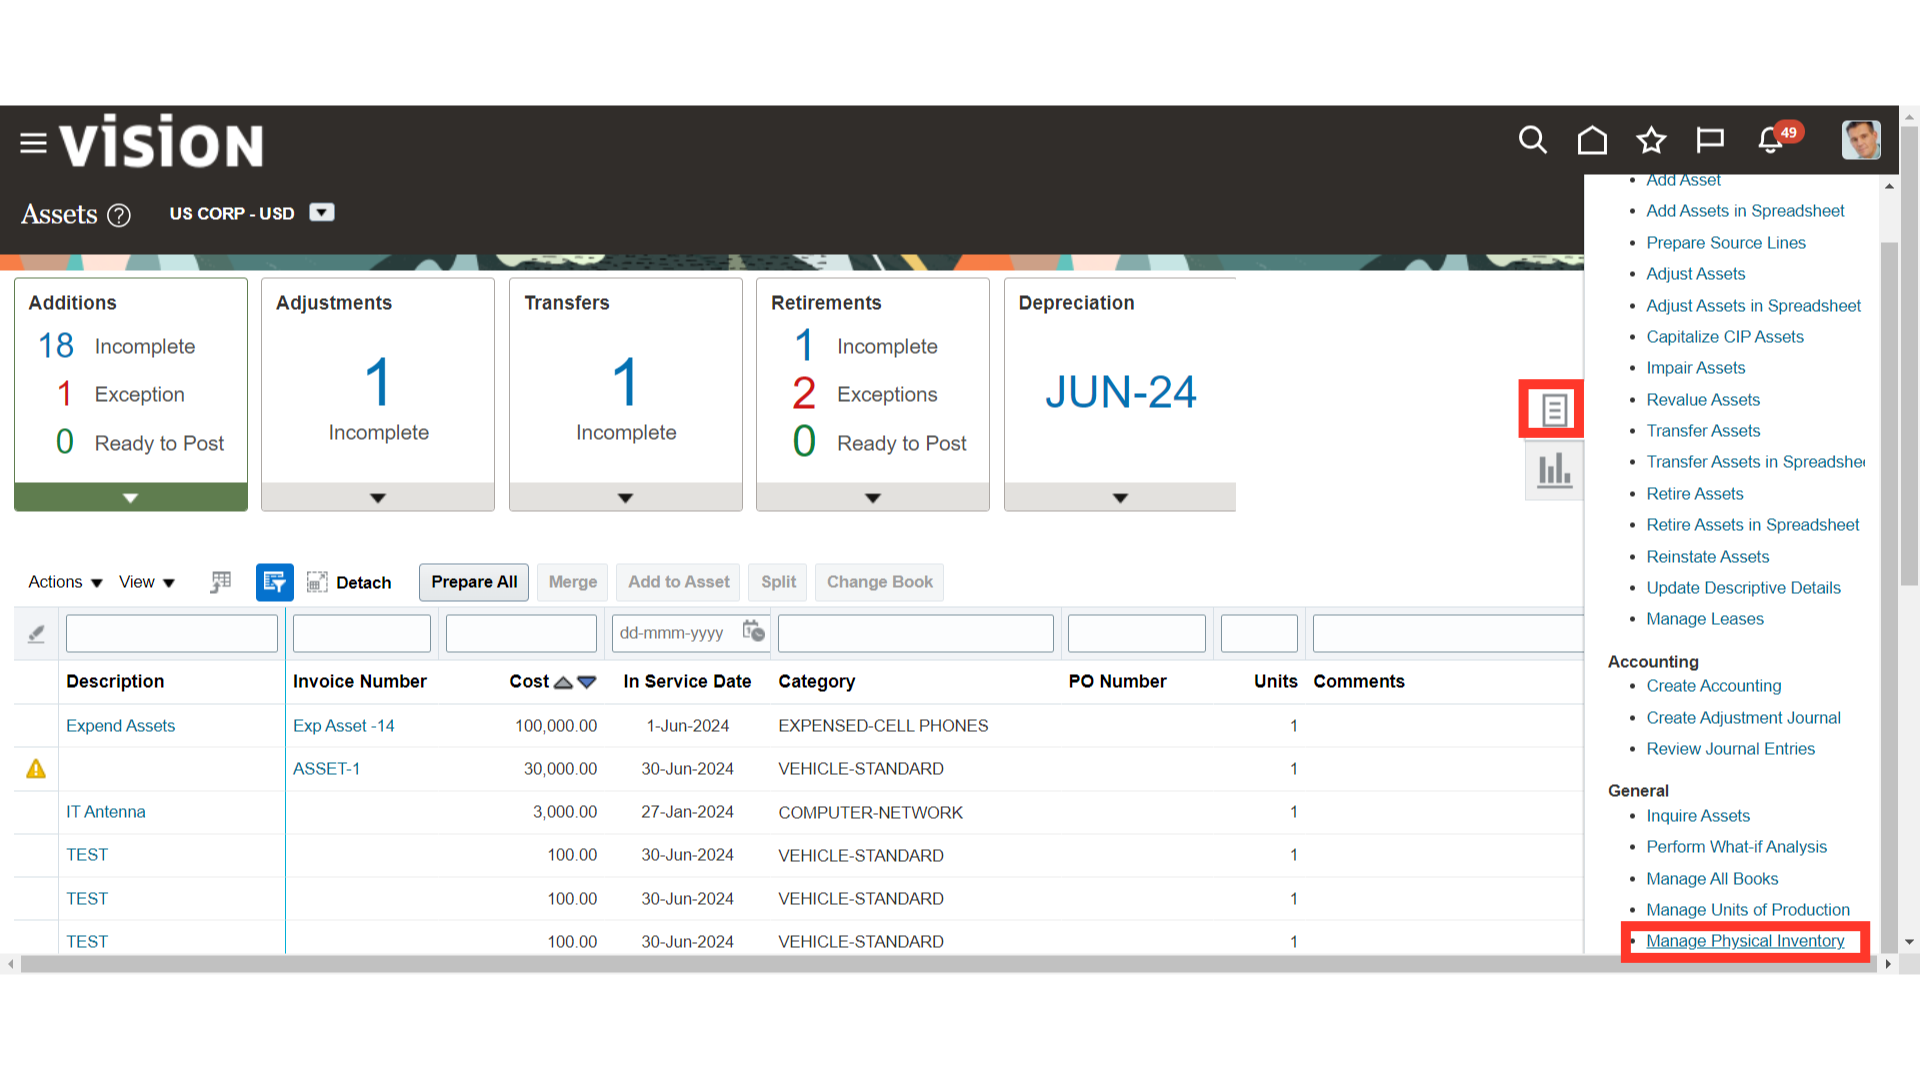
To perform physical verification of assets, click on Manage Physical Inventory under task list.
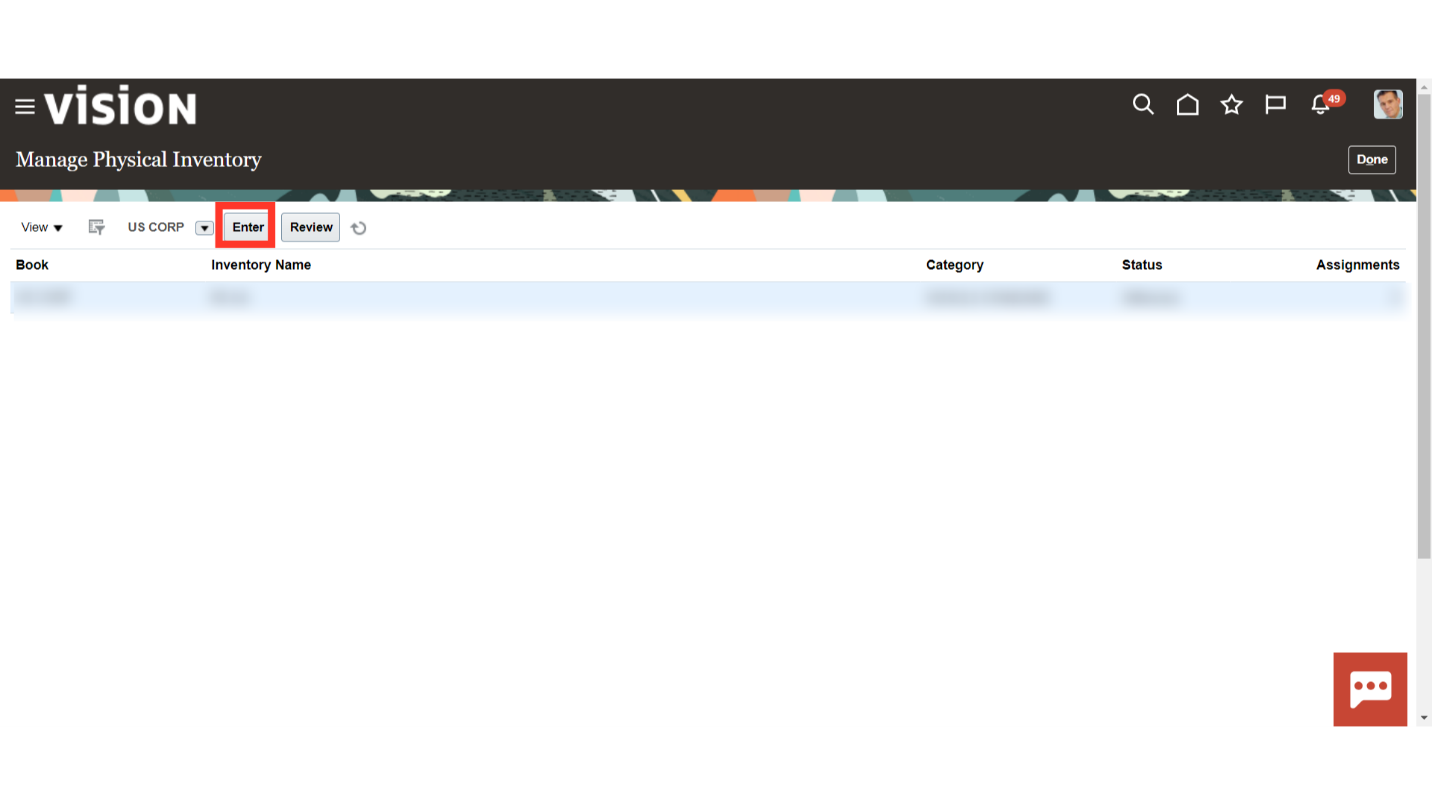
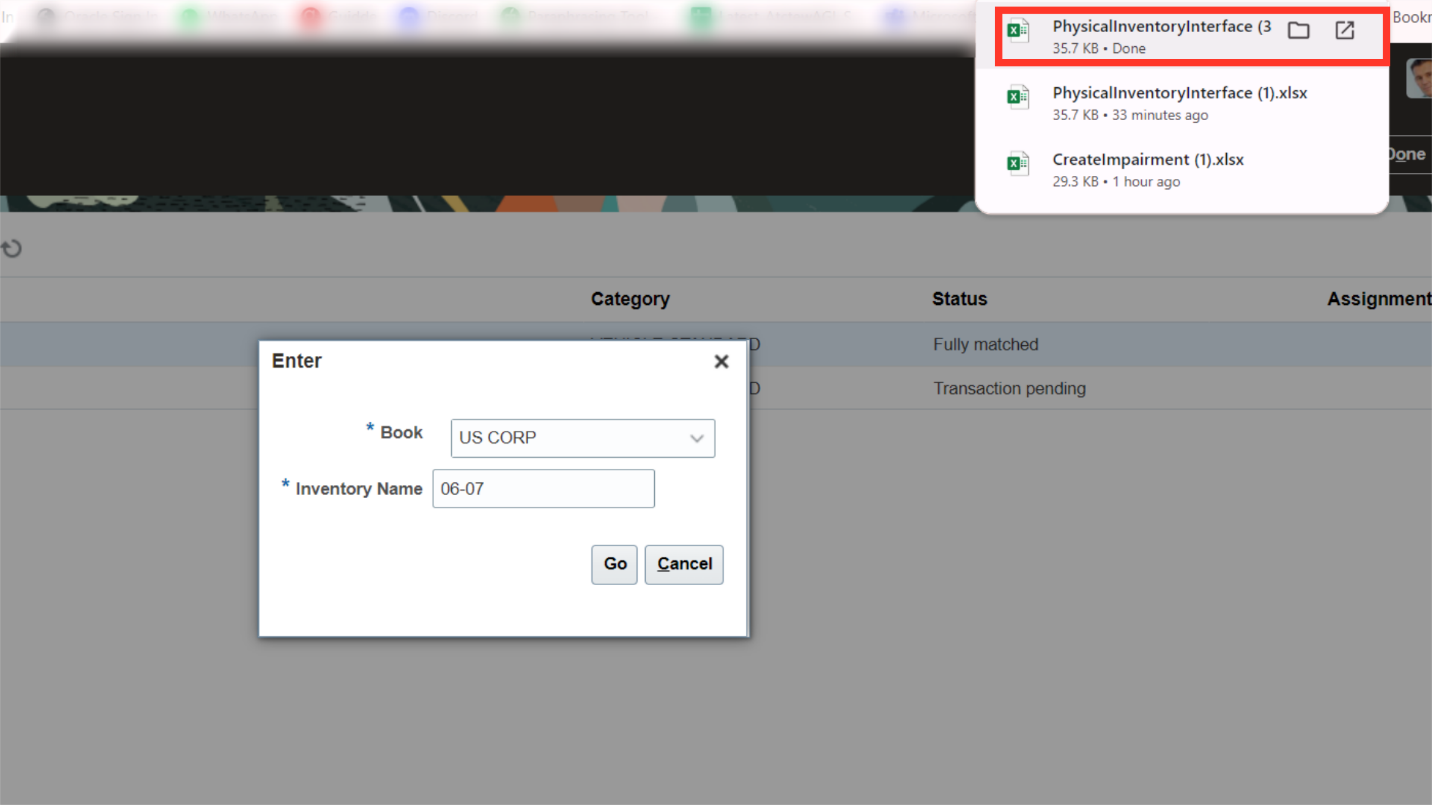
To download the ADFDI spreadsheet and enter data for physical verification, click the Enter button.
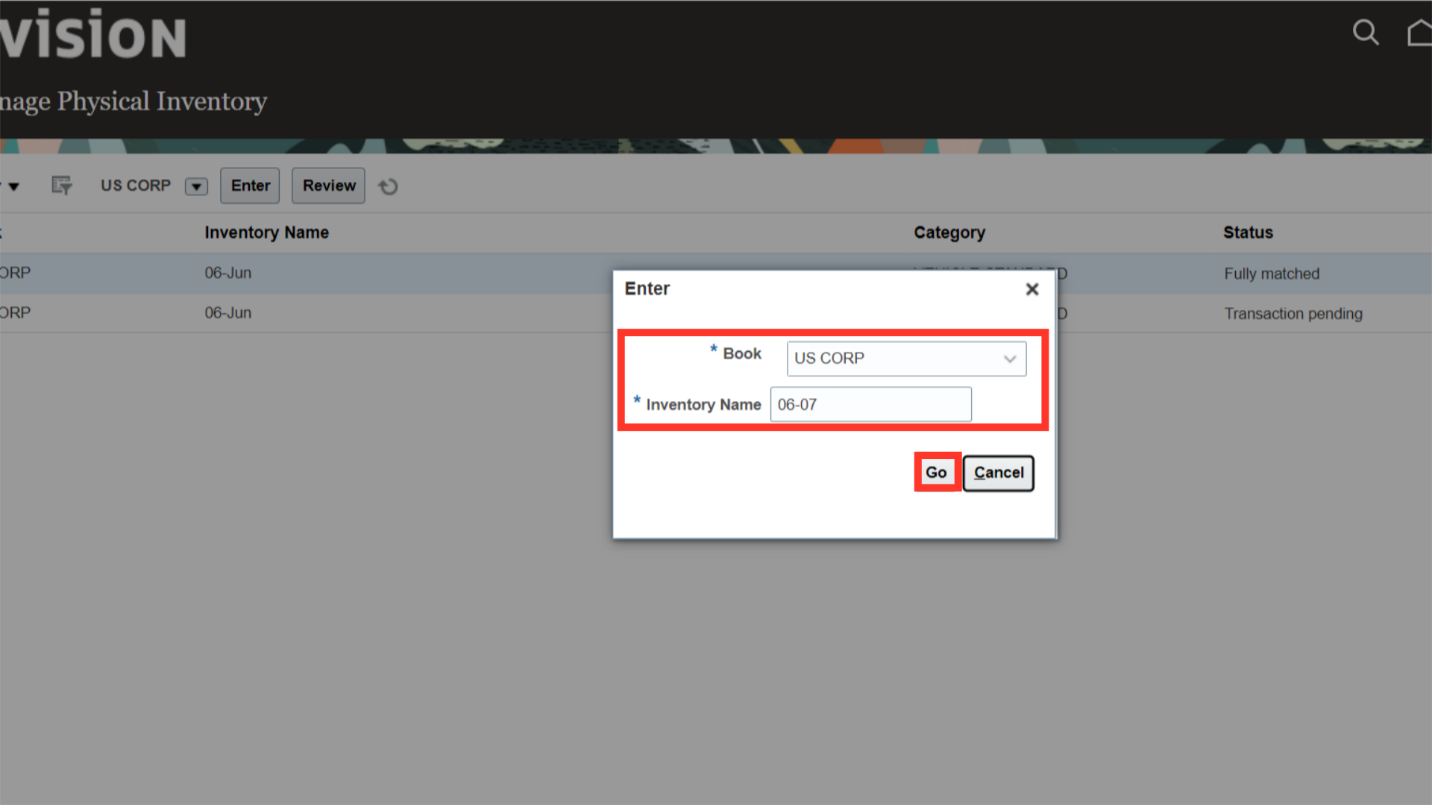
Choose the asset book and fill in the Inventory name field with the batch name. Press the OK button to proceed.
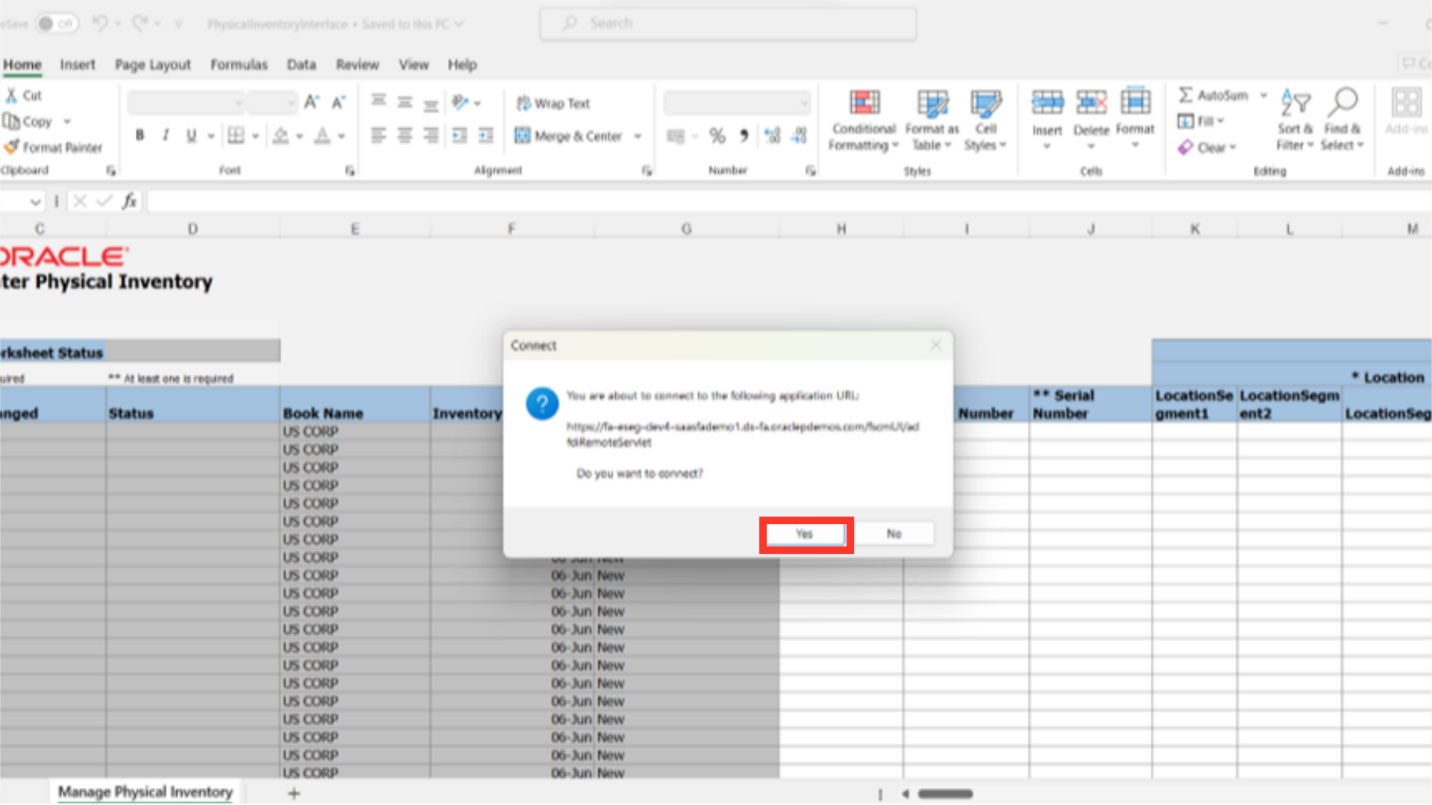
Open the downloaded ADFDI spreadsheet from your local desktop to enter the details related to physical verification.
Click on the “Yes” button to log into the ADFDI spreadsheet.
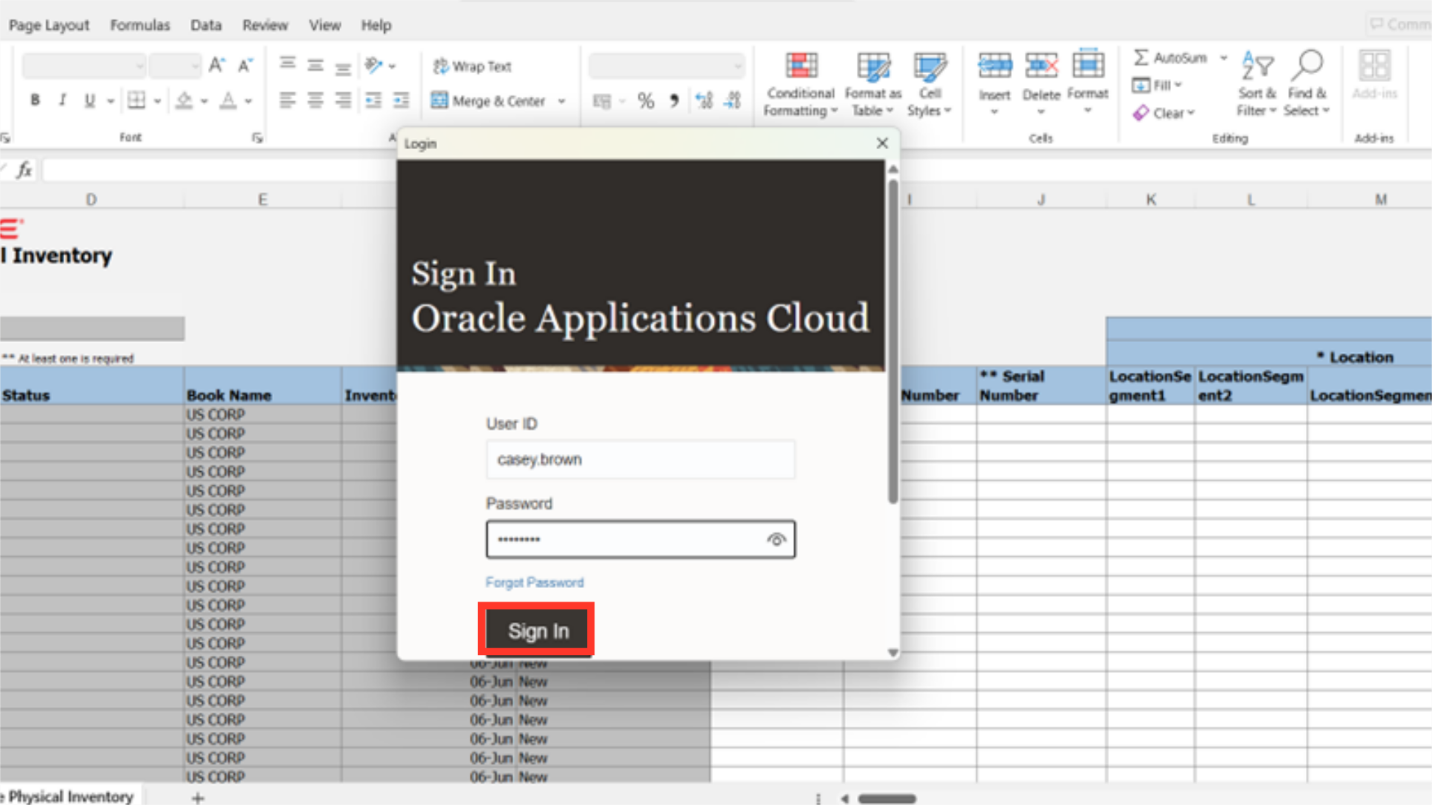
After entering the user credentials same as oracle fusion click on the Sign in button.
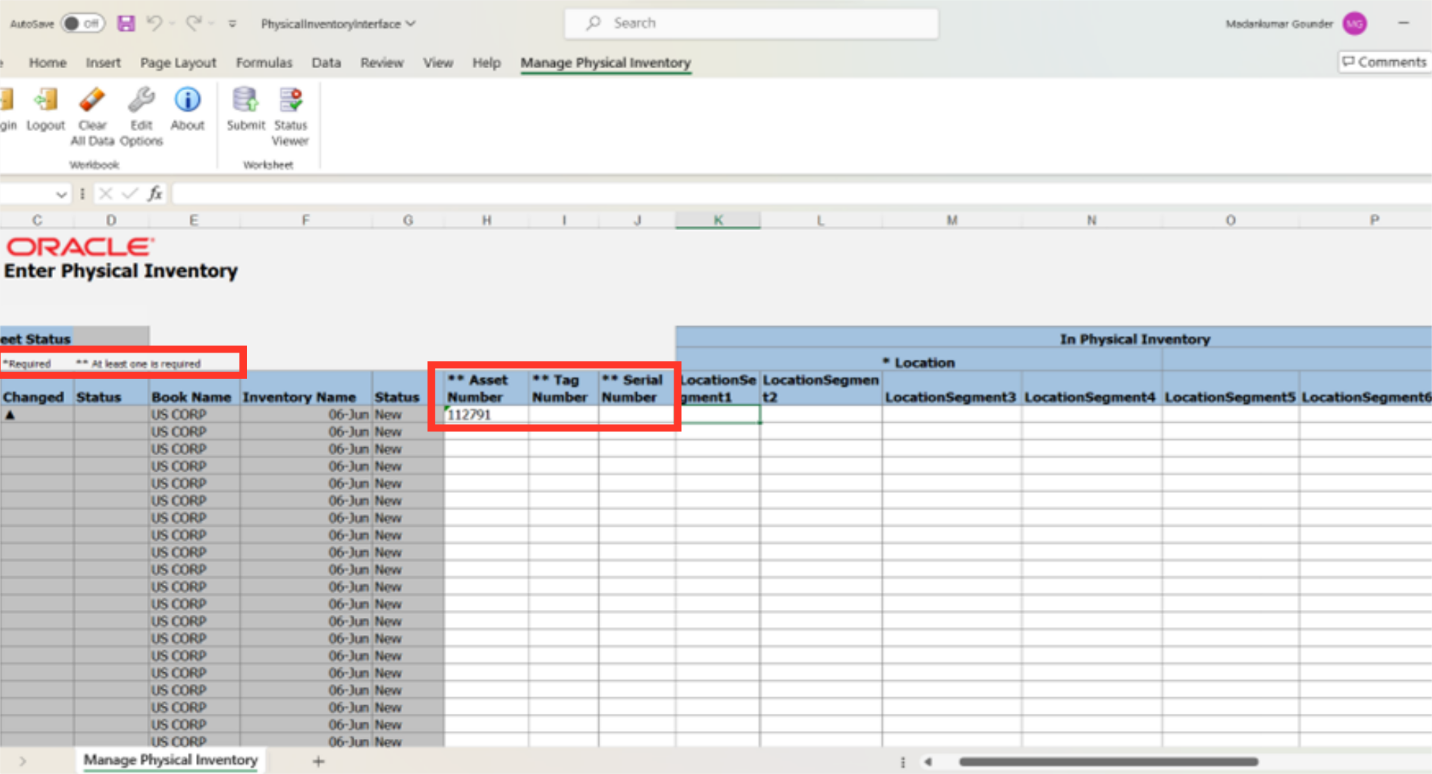
Please take note that a single asterisk in a column indicates that it is required, and a double asterisk indicates that at least one is required. Enter either Asset Number, Tag Number Serial Number, etc.
To quickly retrieve location segment details, double-click on the row under the Location Segment1 name column. This will cause an Oracle Fusion-connected pop-up menu to appear.
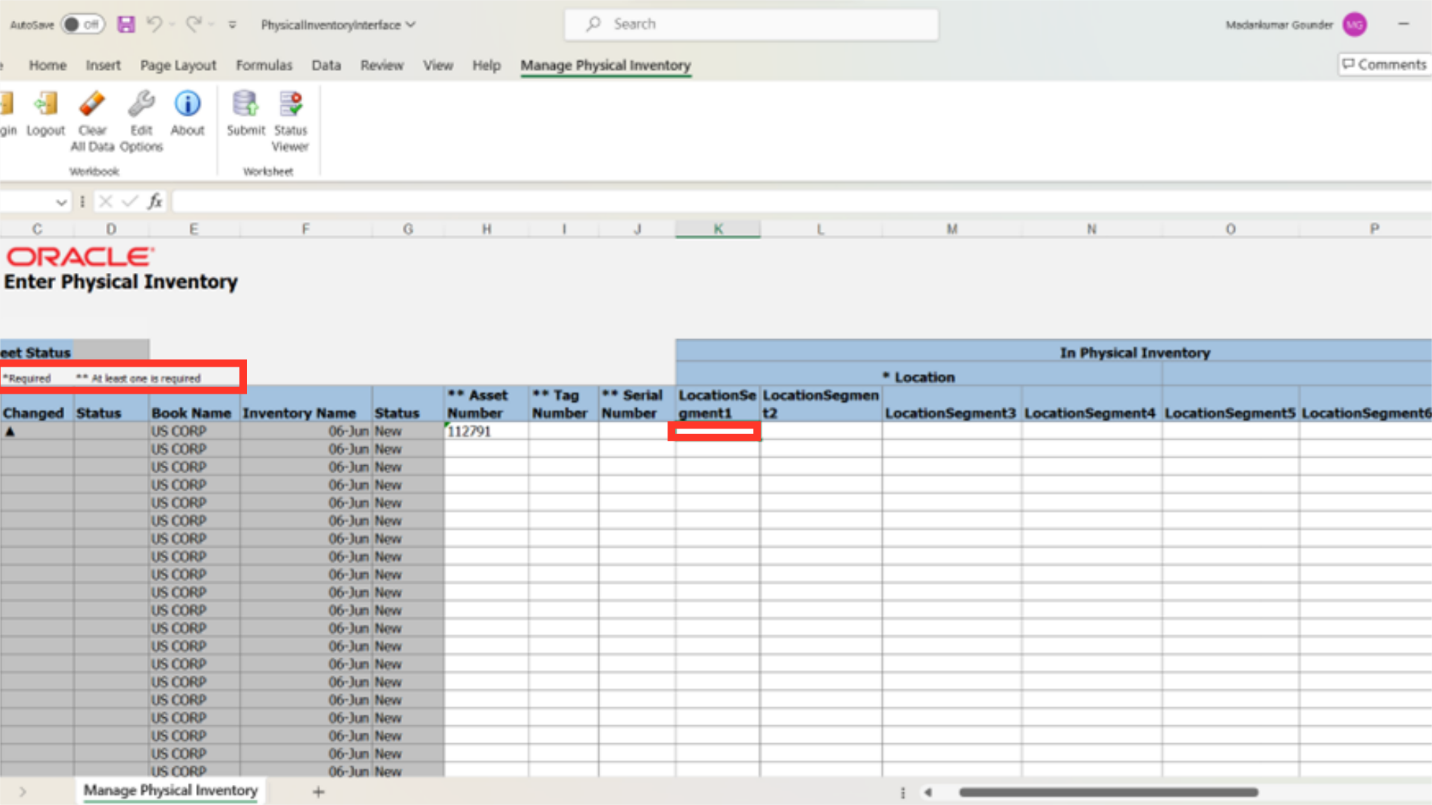
To proceed, click the OK button after manually entering the location segments or choosing from a list of values based on the exact physical location of the asset.

Enter Unit details from the physical verification sheet, and enter the date on which inventory is taken.
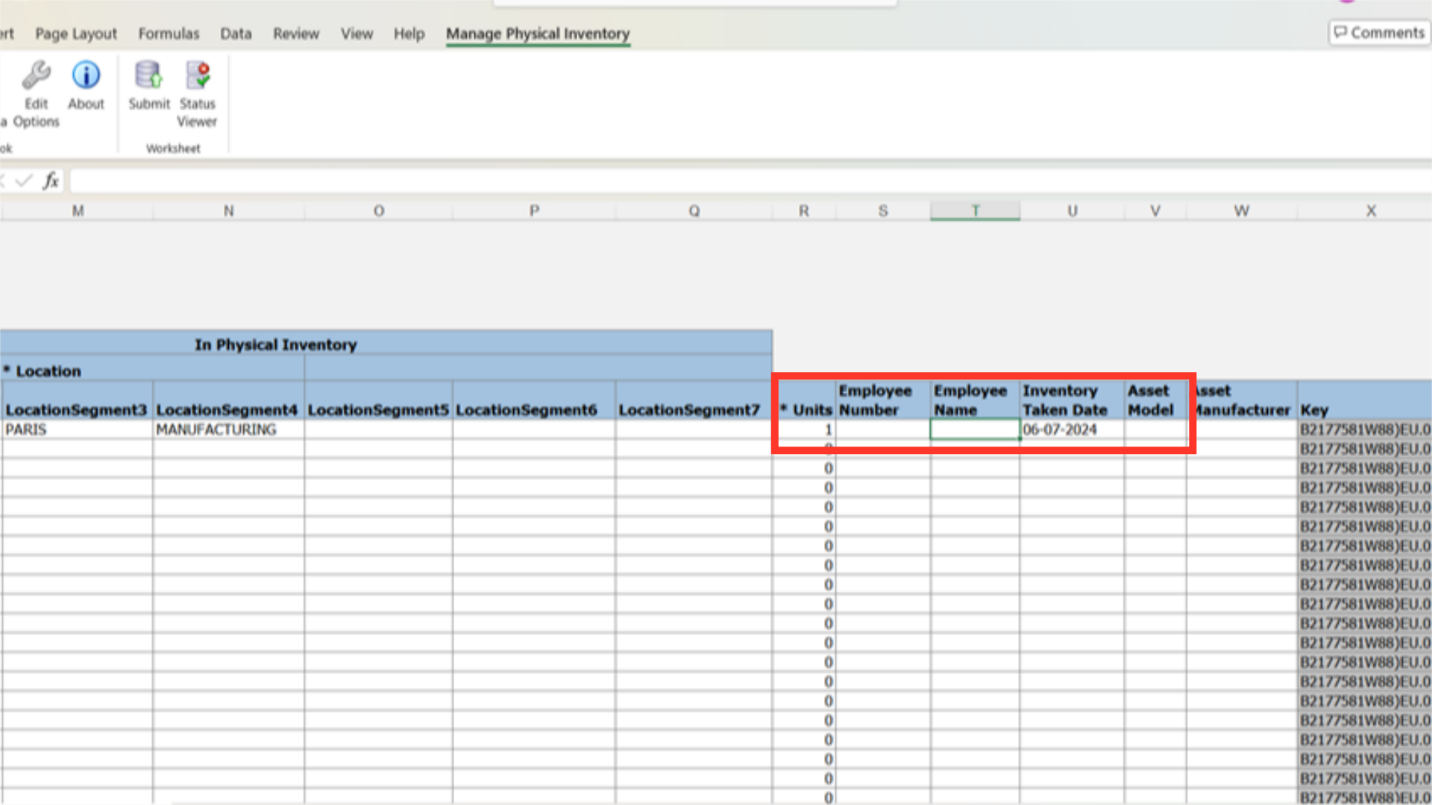
Similarly, enter the subsequent asset details from the physical verification sheet. The rows with the triangle-shaped icons are the ones that will be chosen to be uploaded. The Triangle icon appears in the column that has changed next to the row whenever any rows are updated or new details are added.

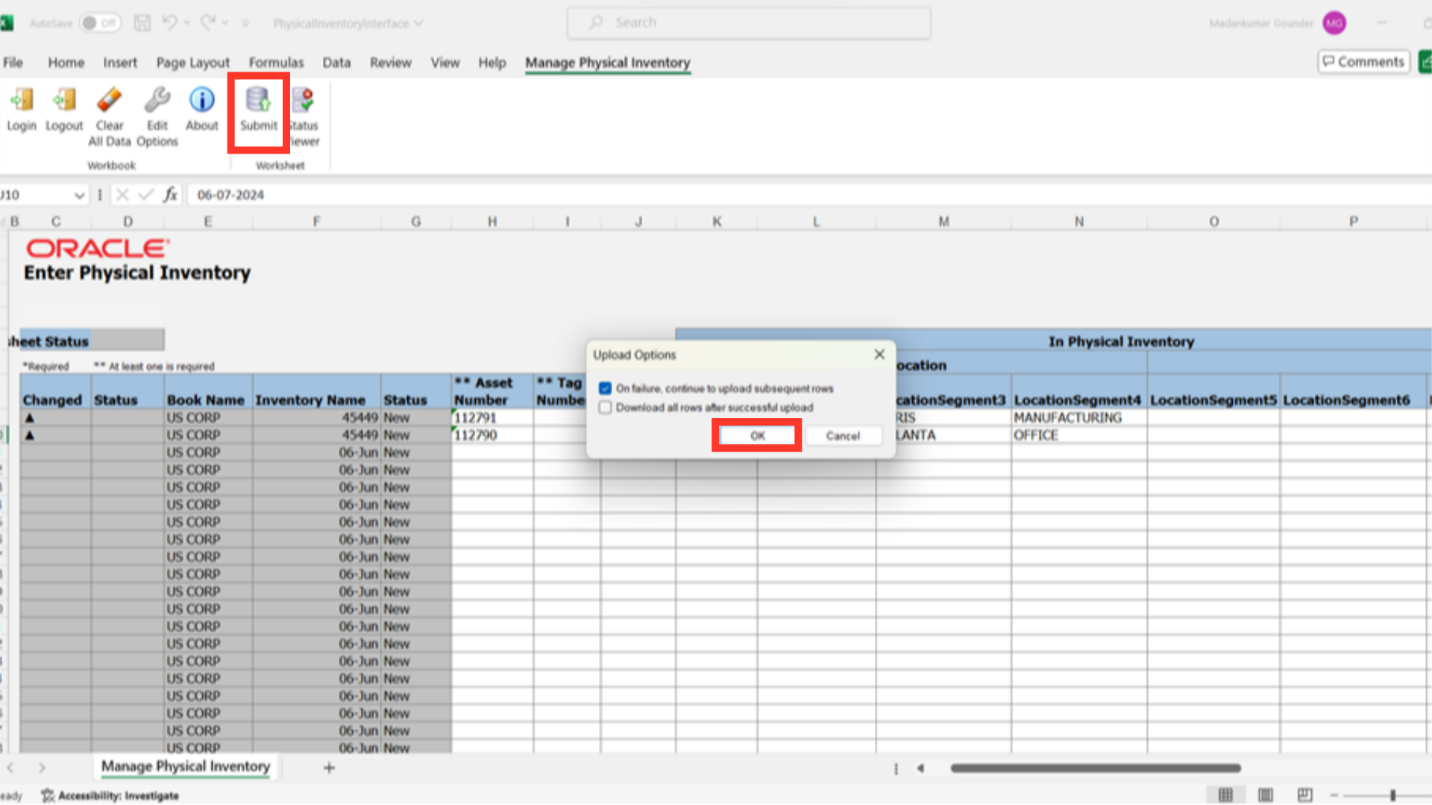
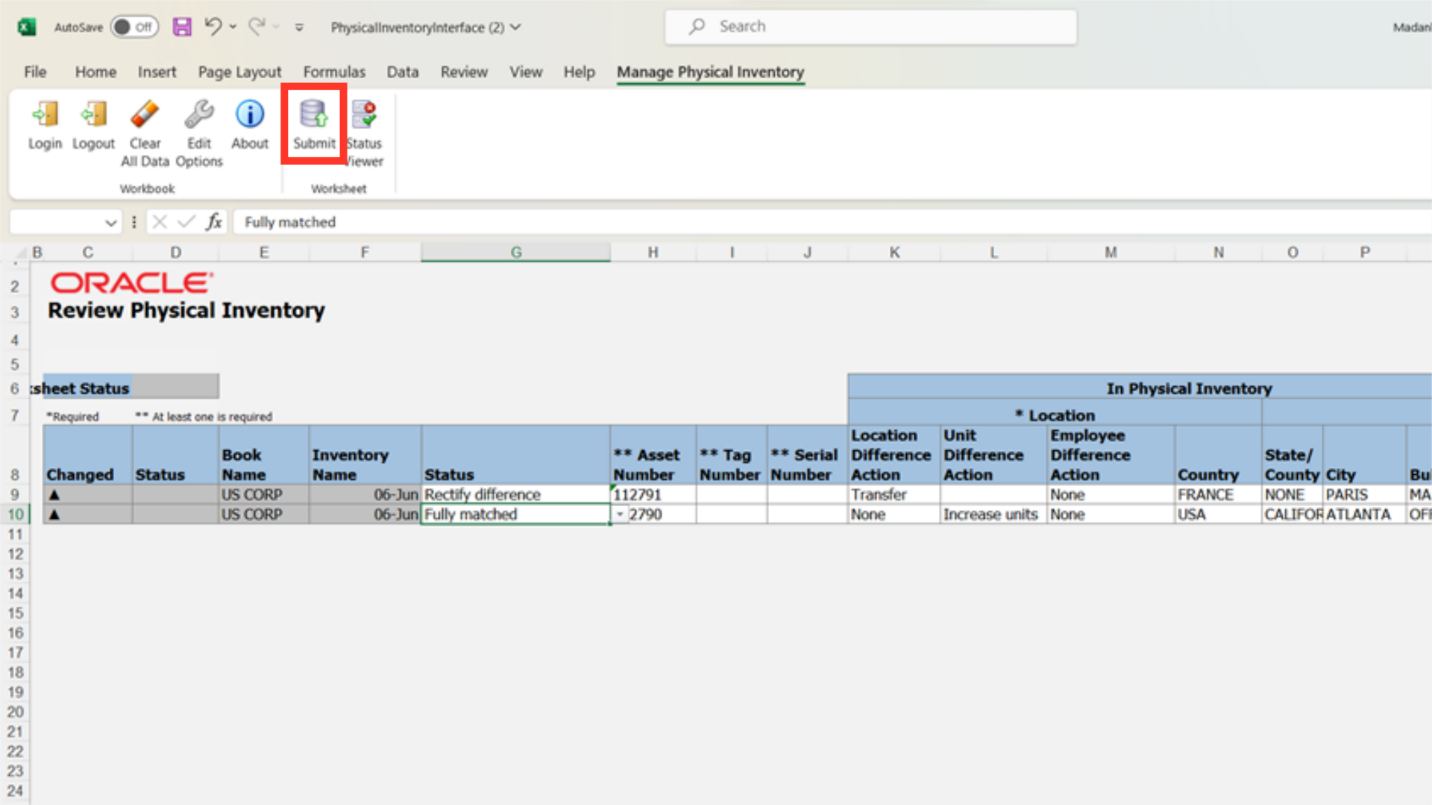
Click on the Submit button to upload the data . There are two options in the upload options pop-up. If we select the first checkbox, the system will upload the invoice details in all subsequent rows—aside from the one that contains an error. The upload status of each submitted row can be downloaded using the second checkbox.
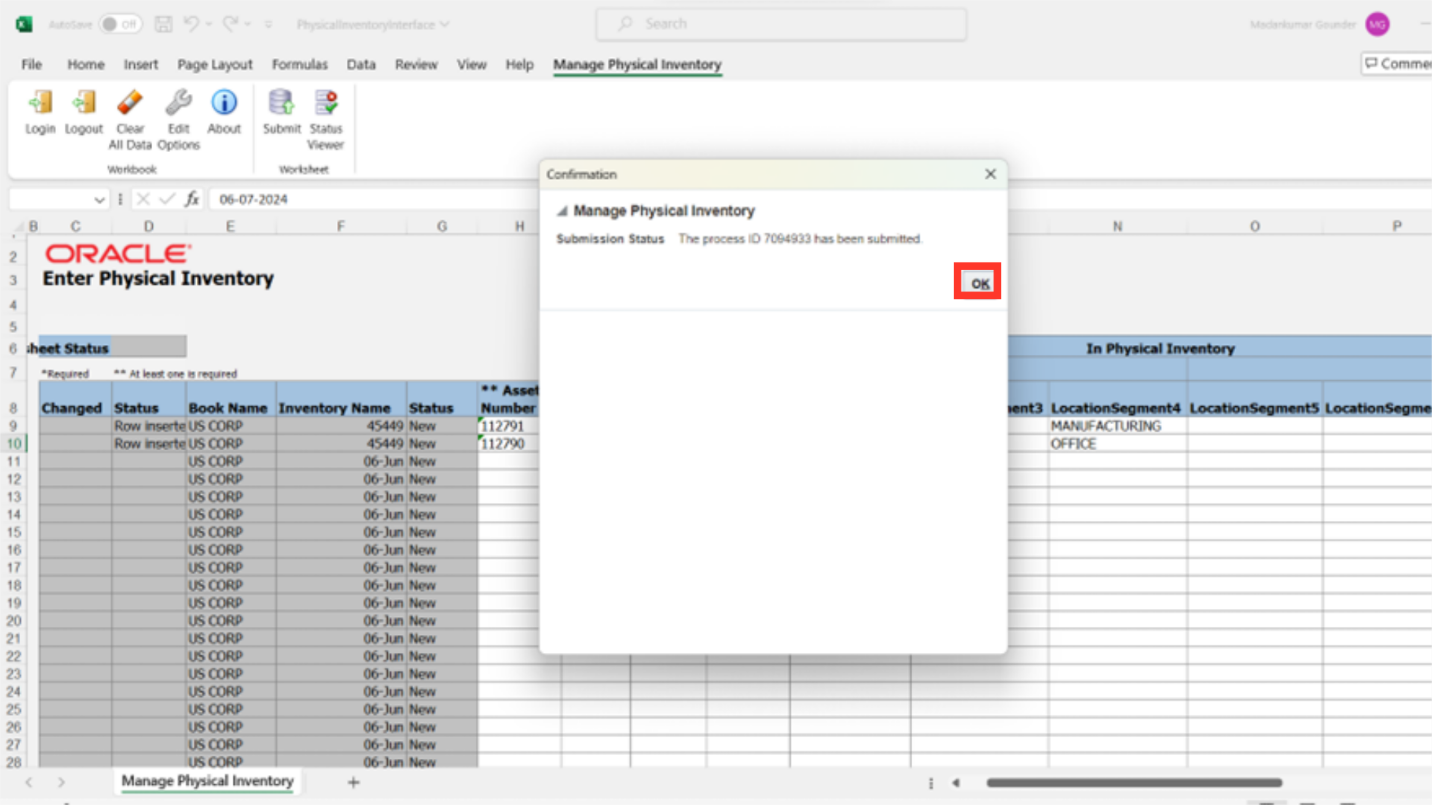
A confirmation message is displayed along with the request ID number. Click on OK to continue.
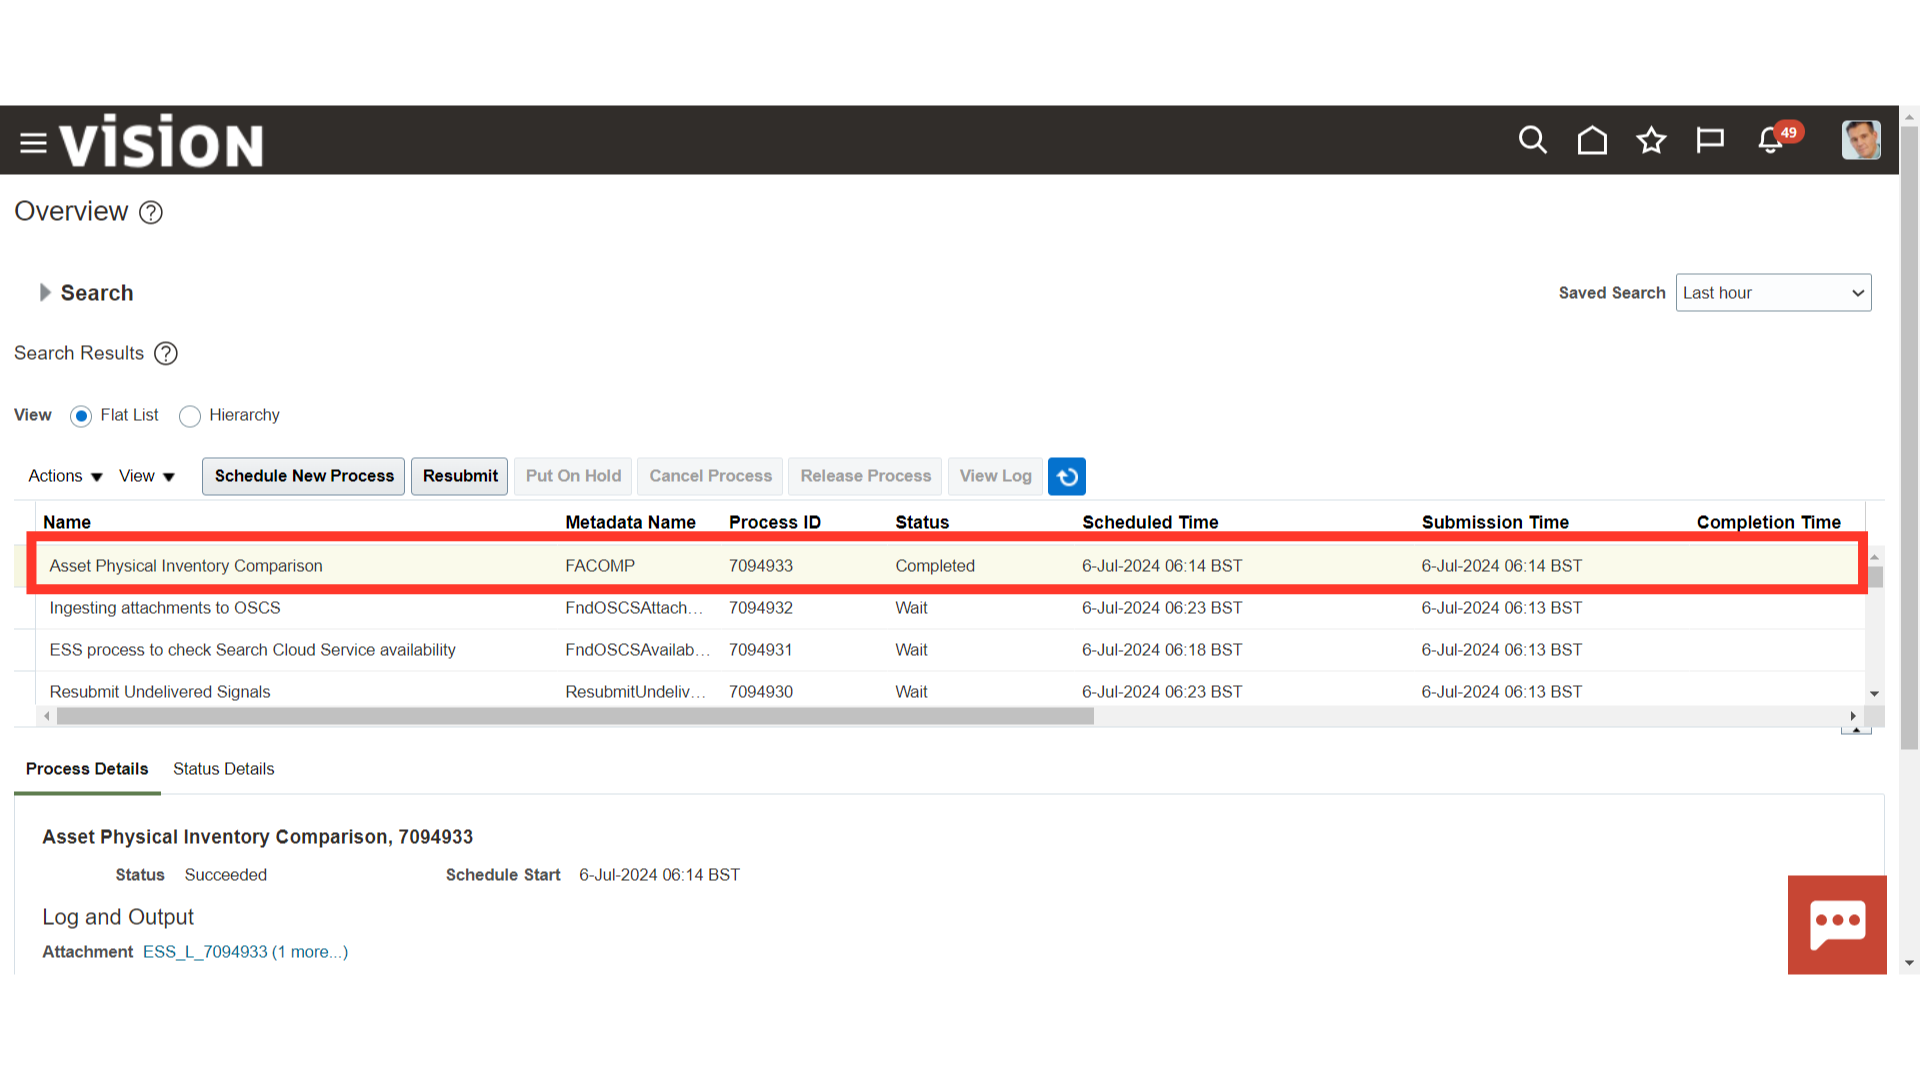
To verify that the asset physical inventory comparison process was successful, navigate to Scheduled Process.
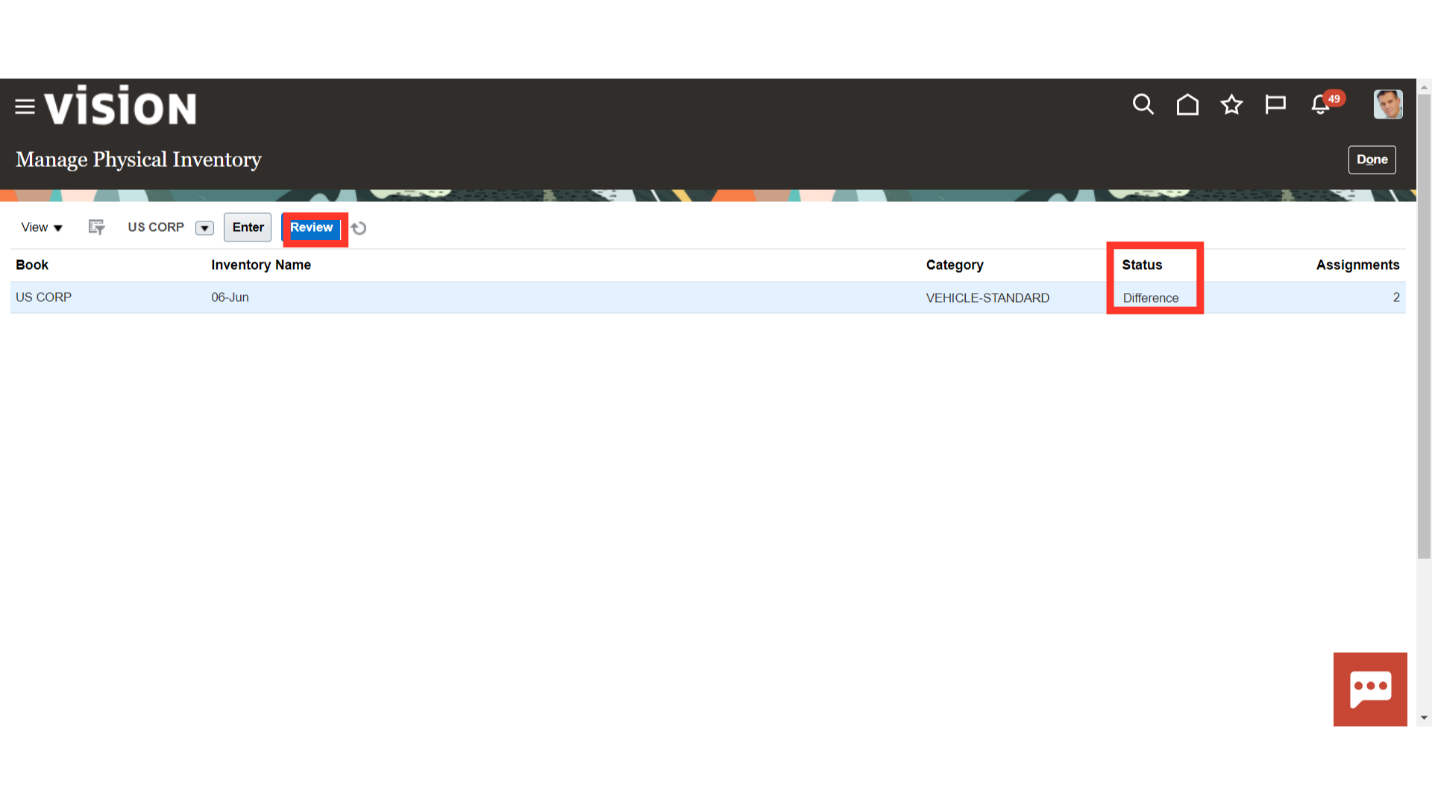
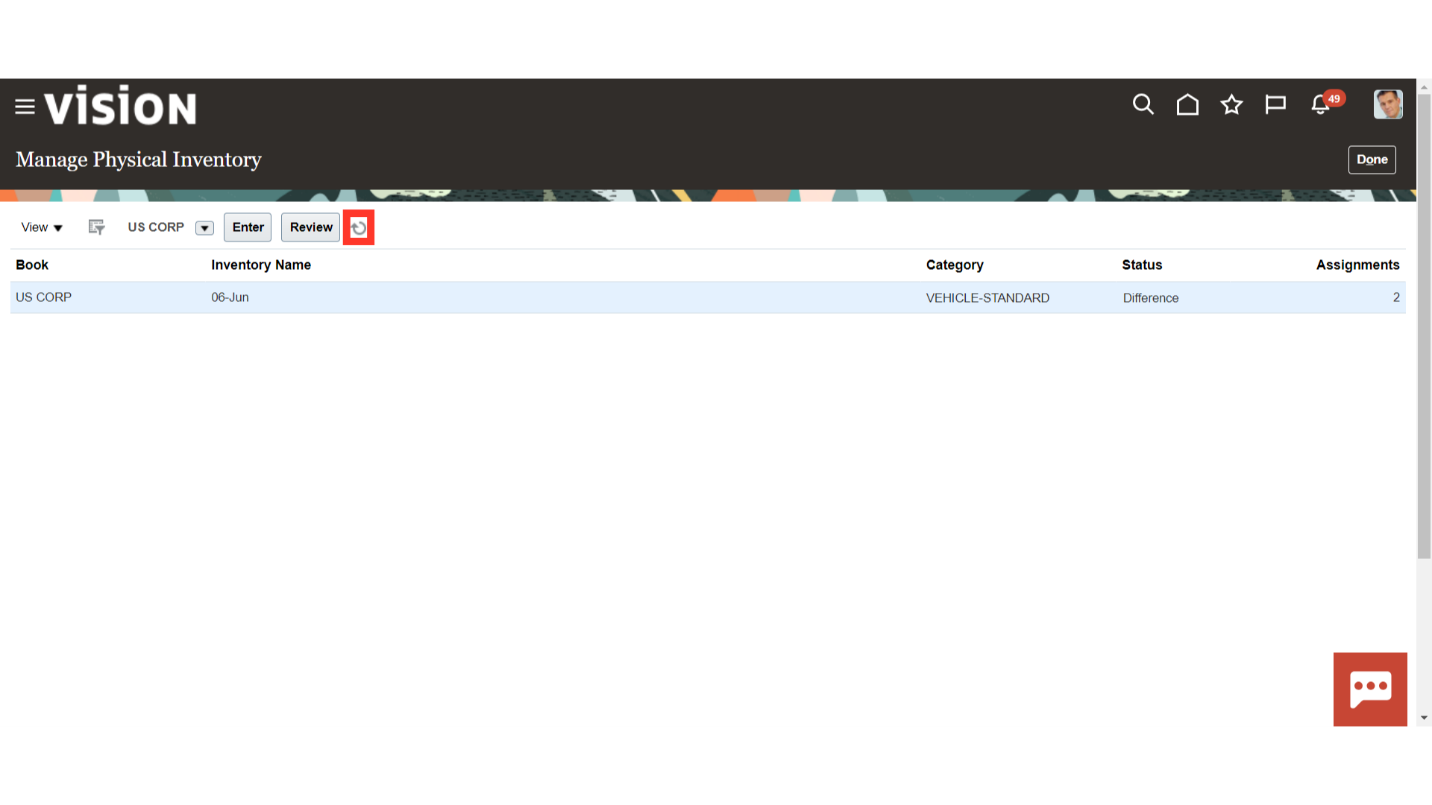
The inventory batch status of Difference indicates that the data in the system and physical verification are not matching. Click the Review button to view more information from the ADFDI Spreadsheet.
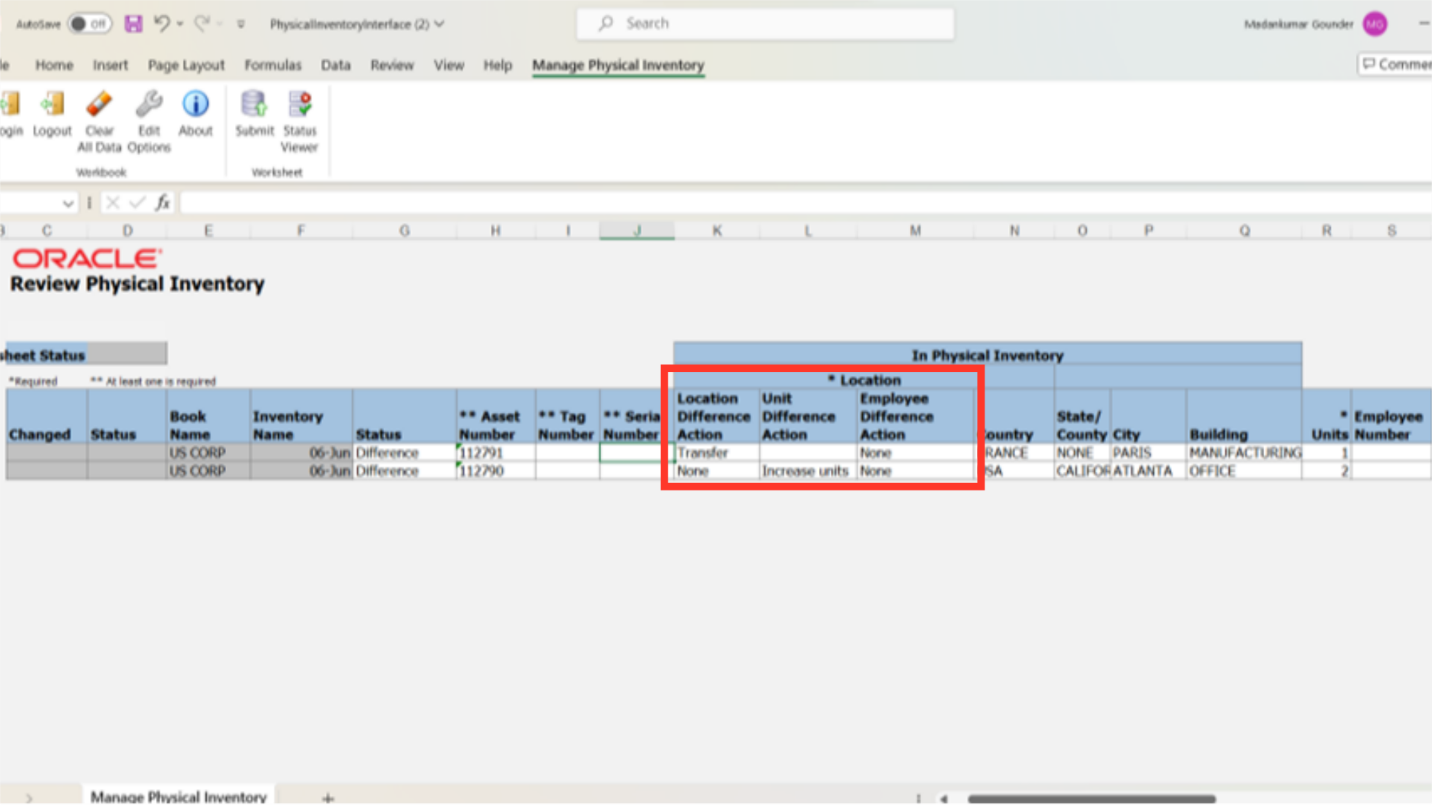
The type of action to be taken in case of Location difference, Unit difference, or mismatch in employment assignment is already mentioned in the spreadsheet.
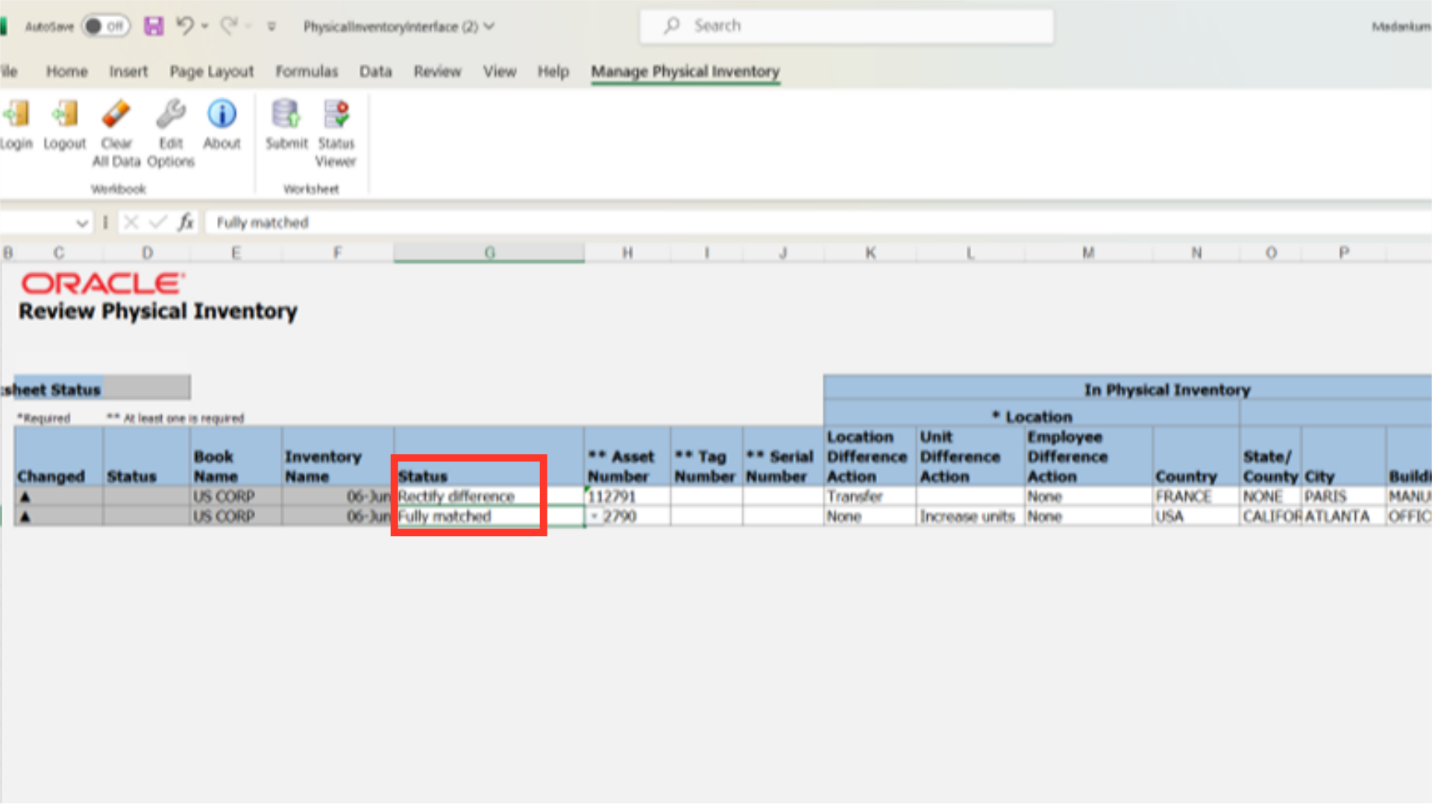
Maintain the process status as Rectify Difference to take corrective action to resolve the difference. If not, choose Fully Matched for the process status if no action is to be taken.
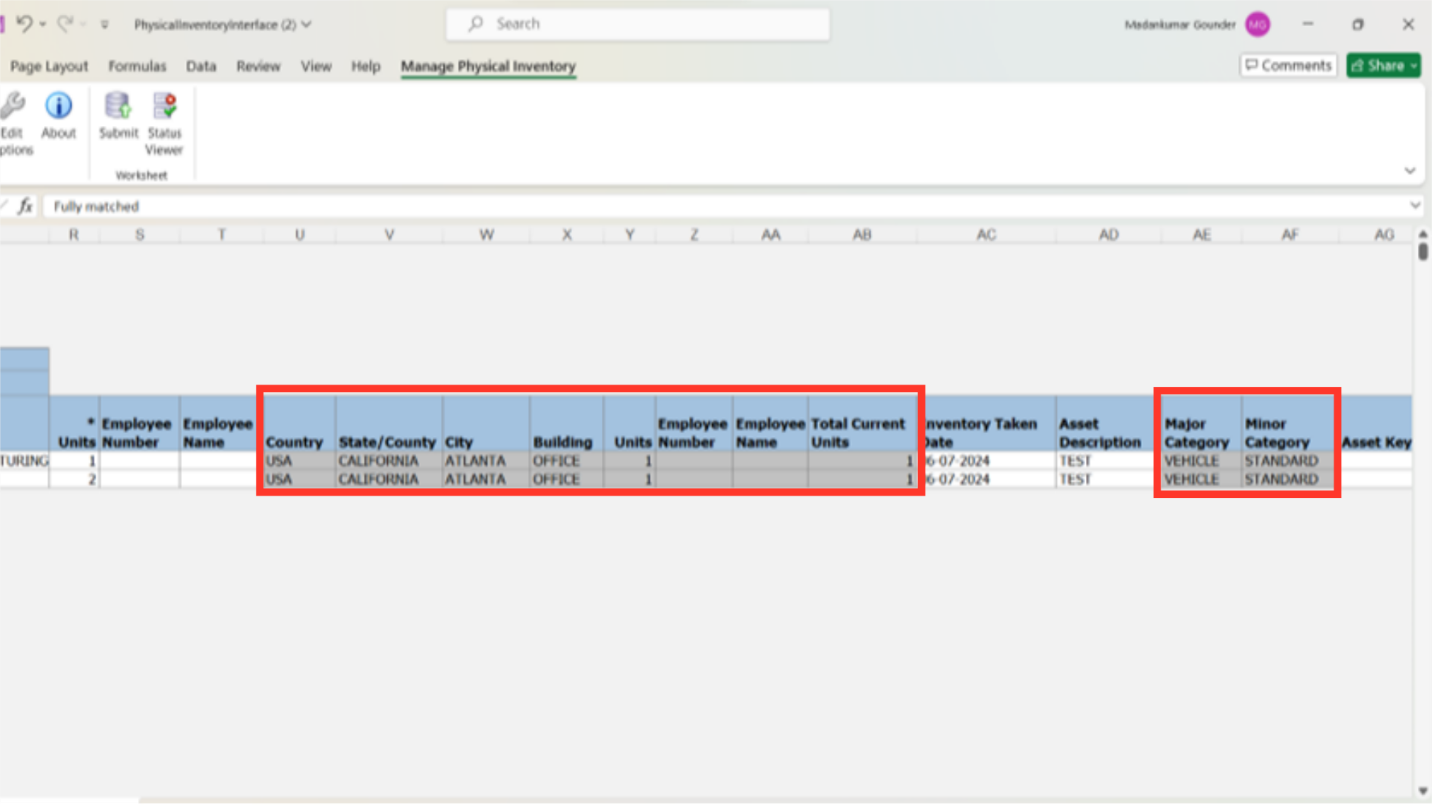
The existing details of the asset such as location, units, and employee assignment are displayed in the greyed column.
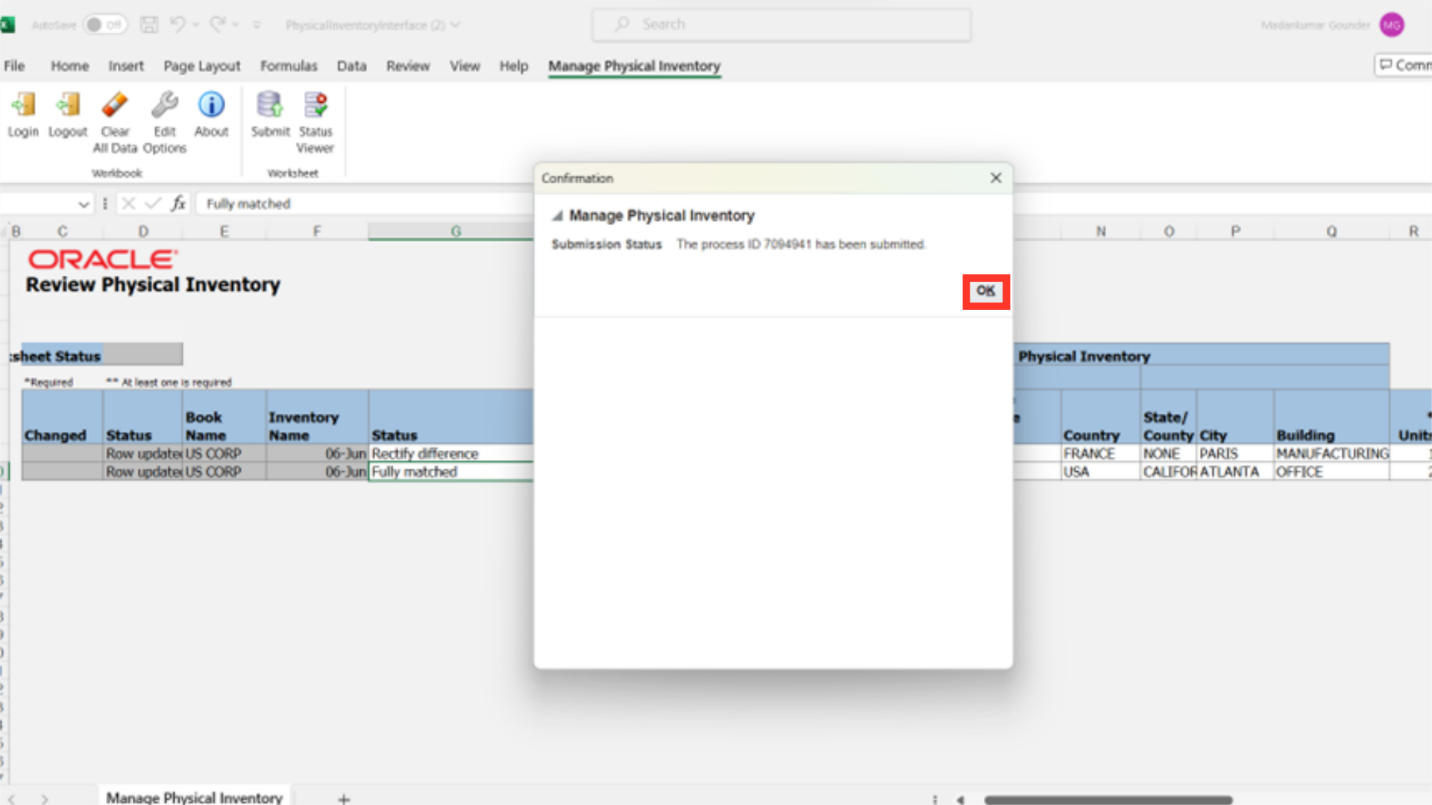
Click on the Submit button to upload the data into Oracle Fusion.
A confirmation message is displayed along with the Process ID.
Click on the Refresh icon to update the physical verification batch status.
The Asset line with Transaction Pending status indicates the corrective action has been taken pending for posting such as Transfer, Adjustment, Retirement, etc.
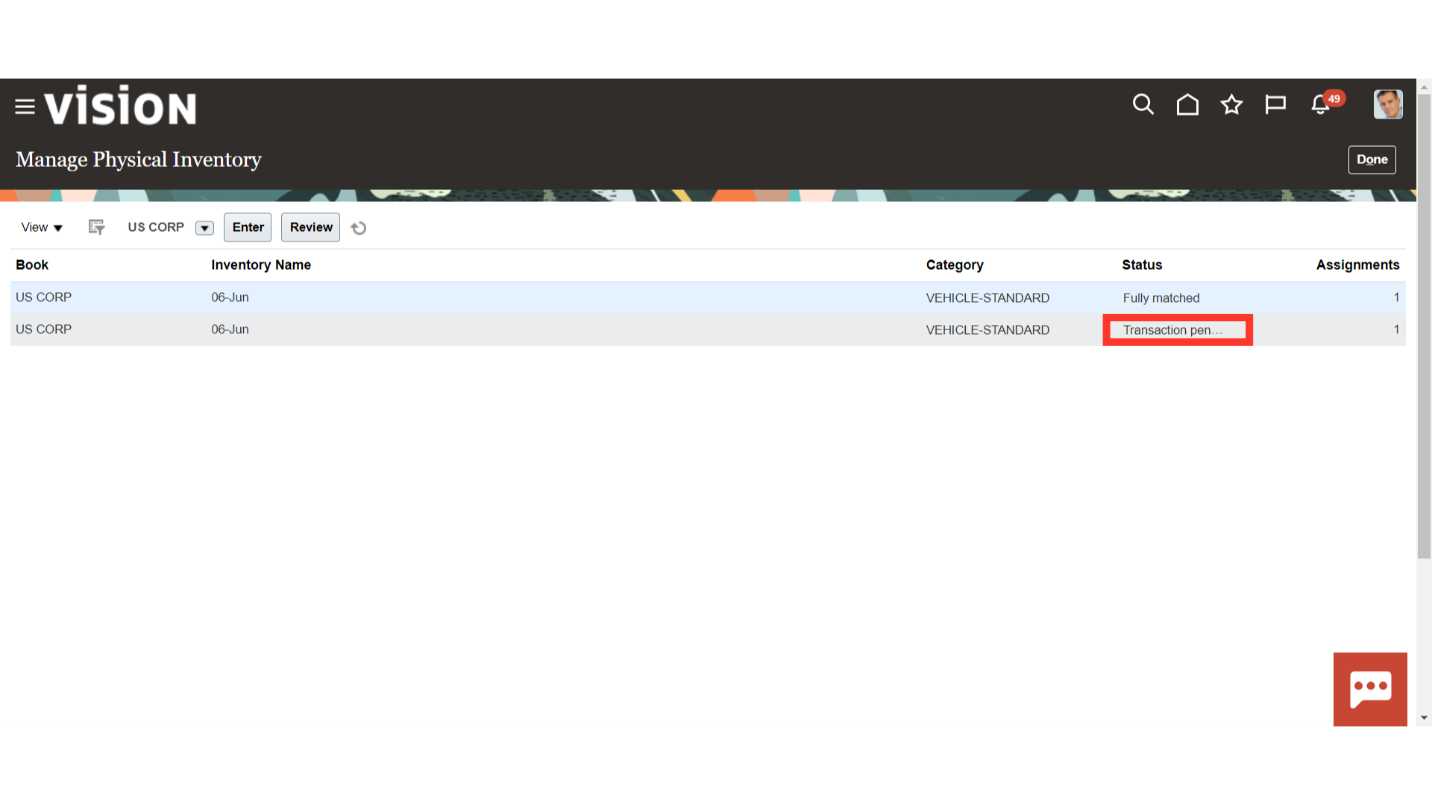
Click on the Done button to return to the Fixed Asset workbench.
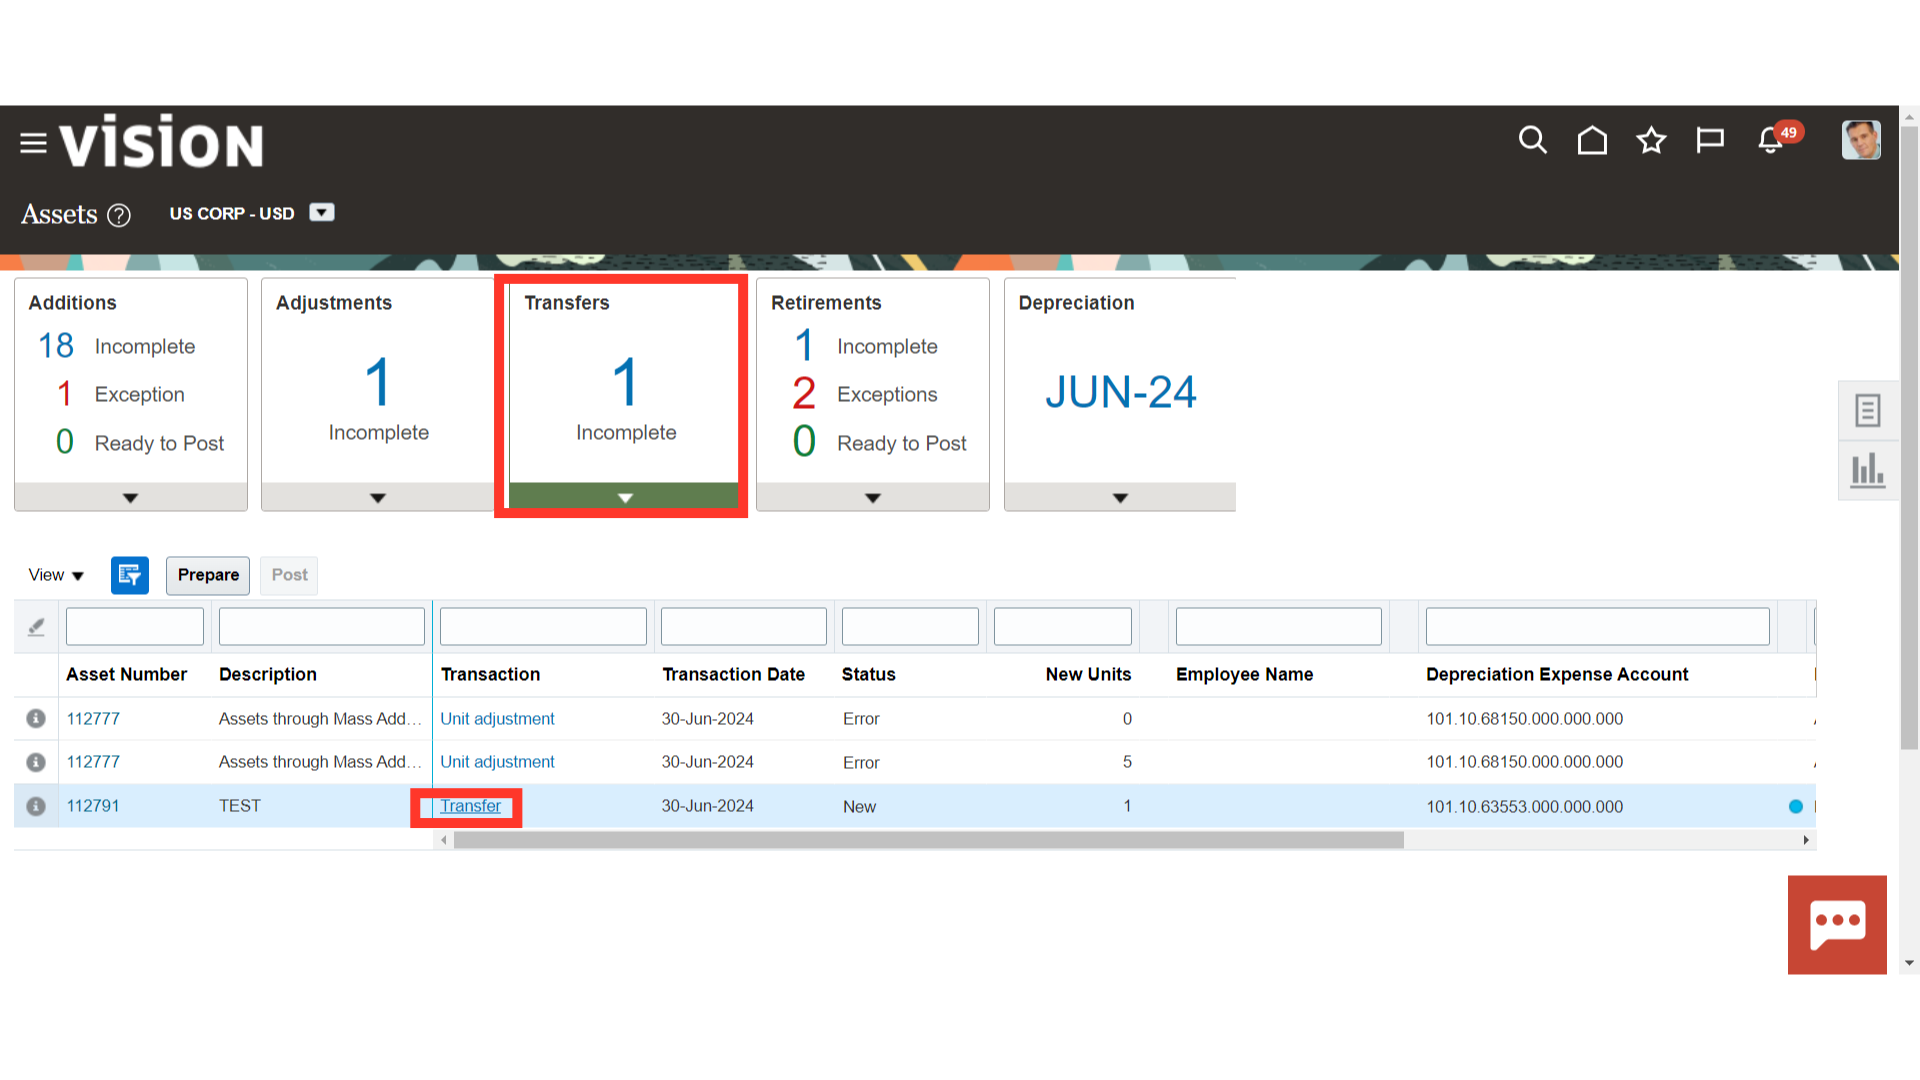
Click on Transfers infotile to see the transactions automatically initiated by the system based on physical verification of assets. Click on the Transaction name hyperlink to open the Transfer Transaction.
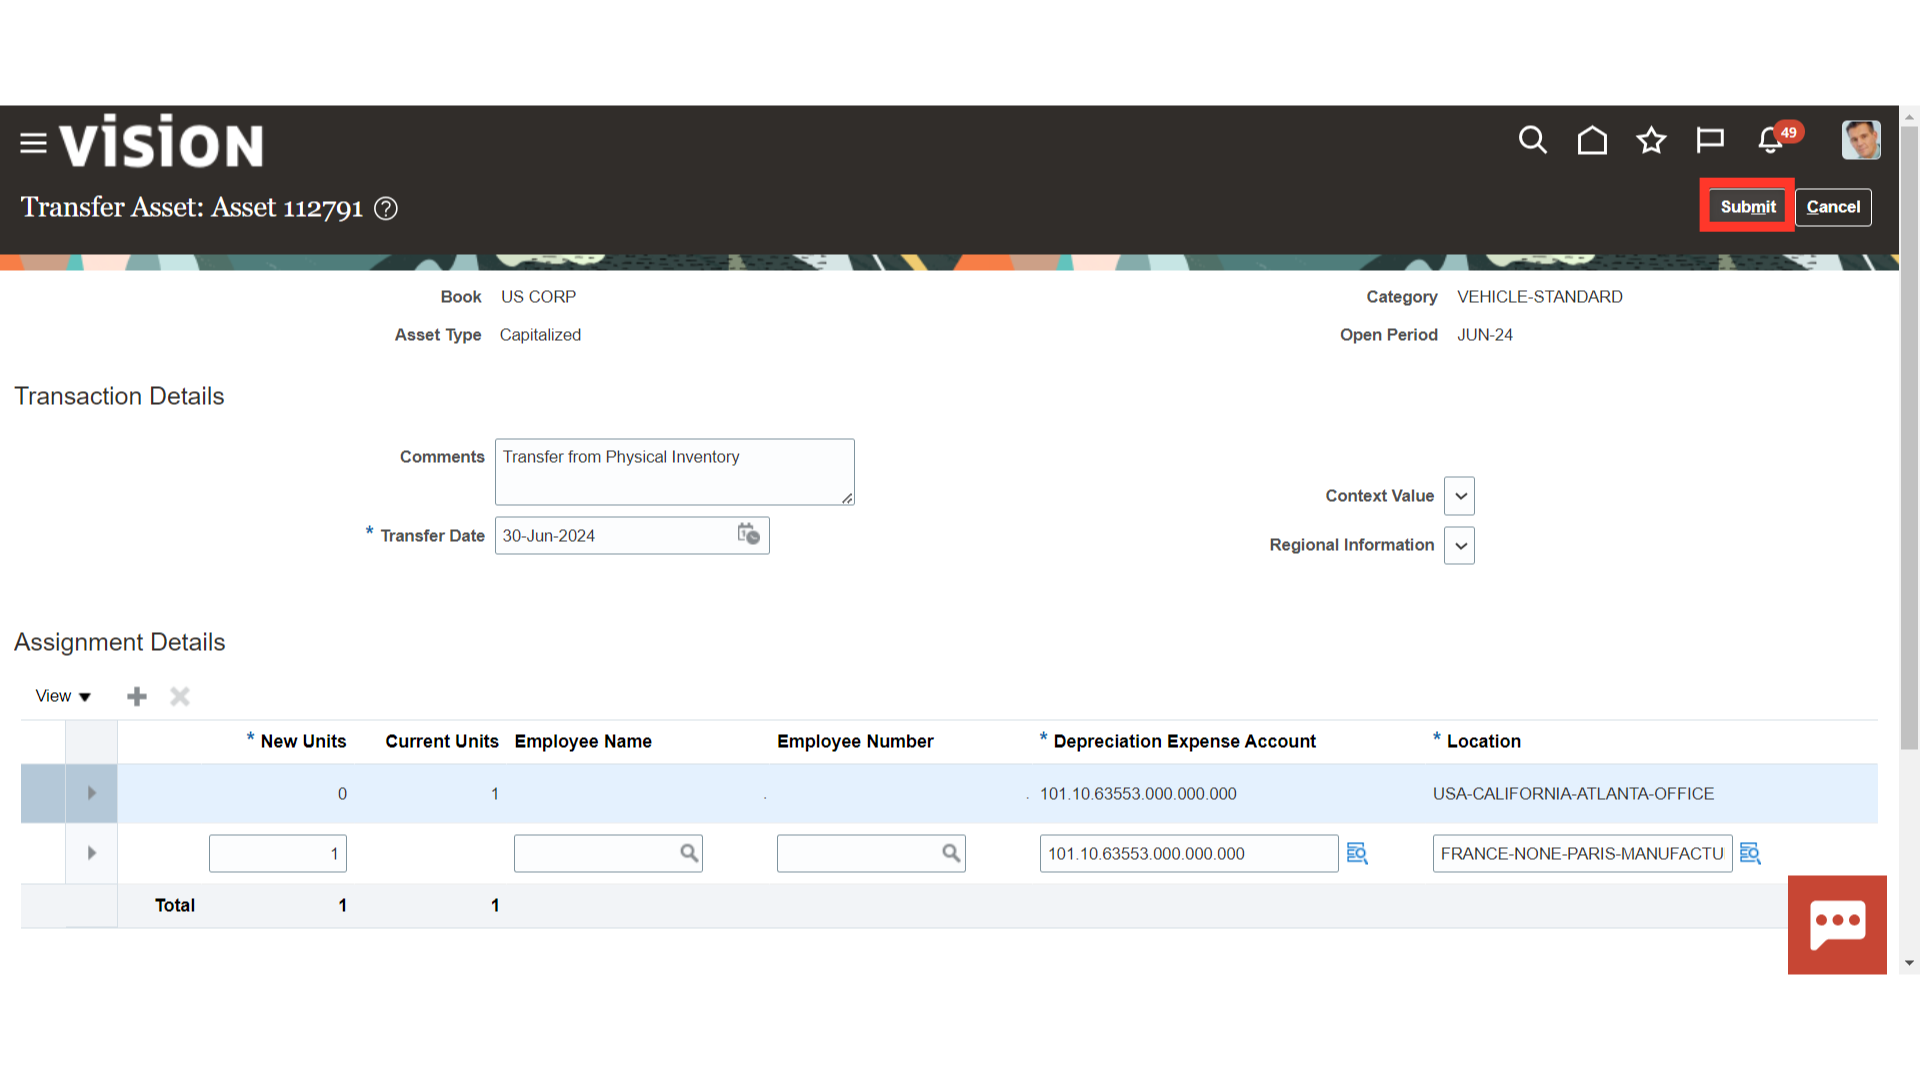
A transfer location is selected based on the physical location entered while uploading the physical verification data. Click on “Submit” to confirm.
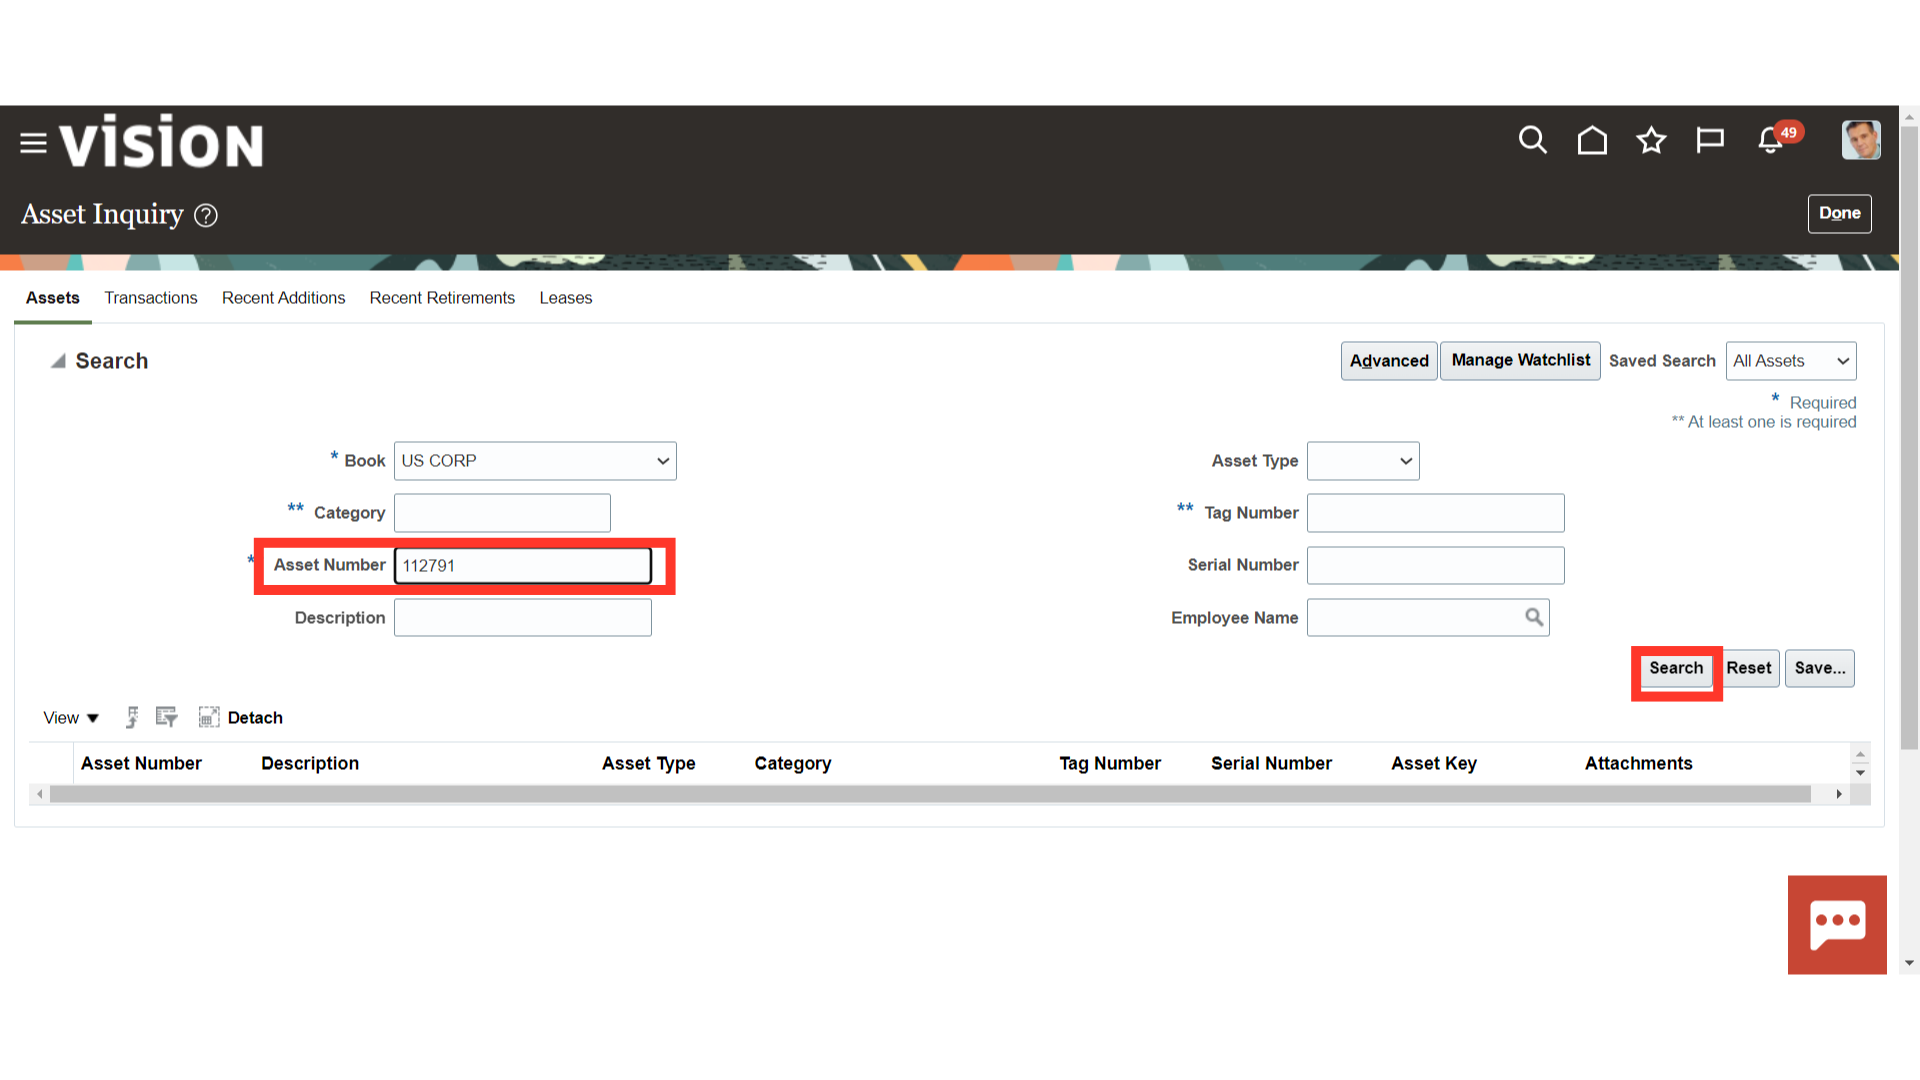
Click on the Inquire Assets from the task list to search the assets created.
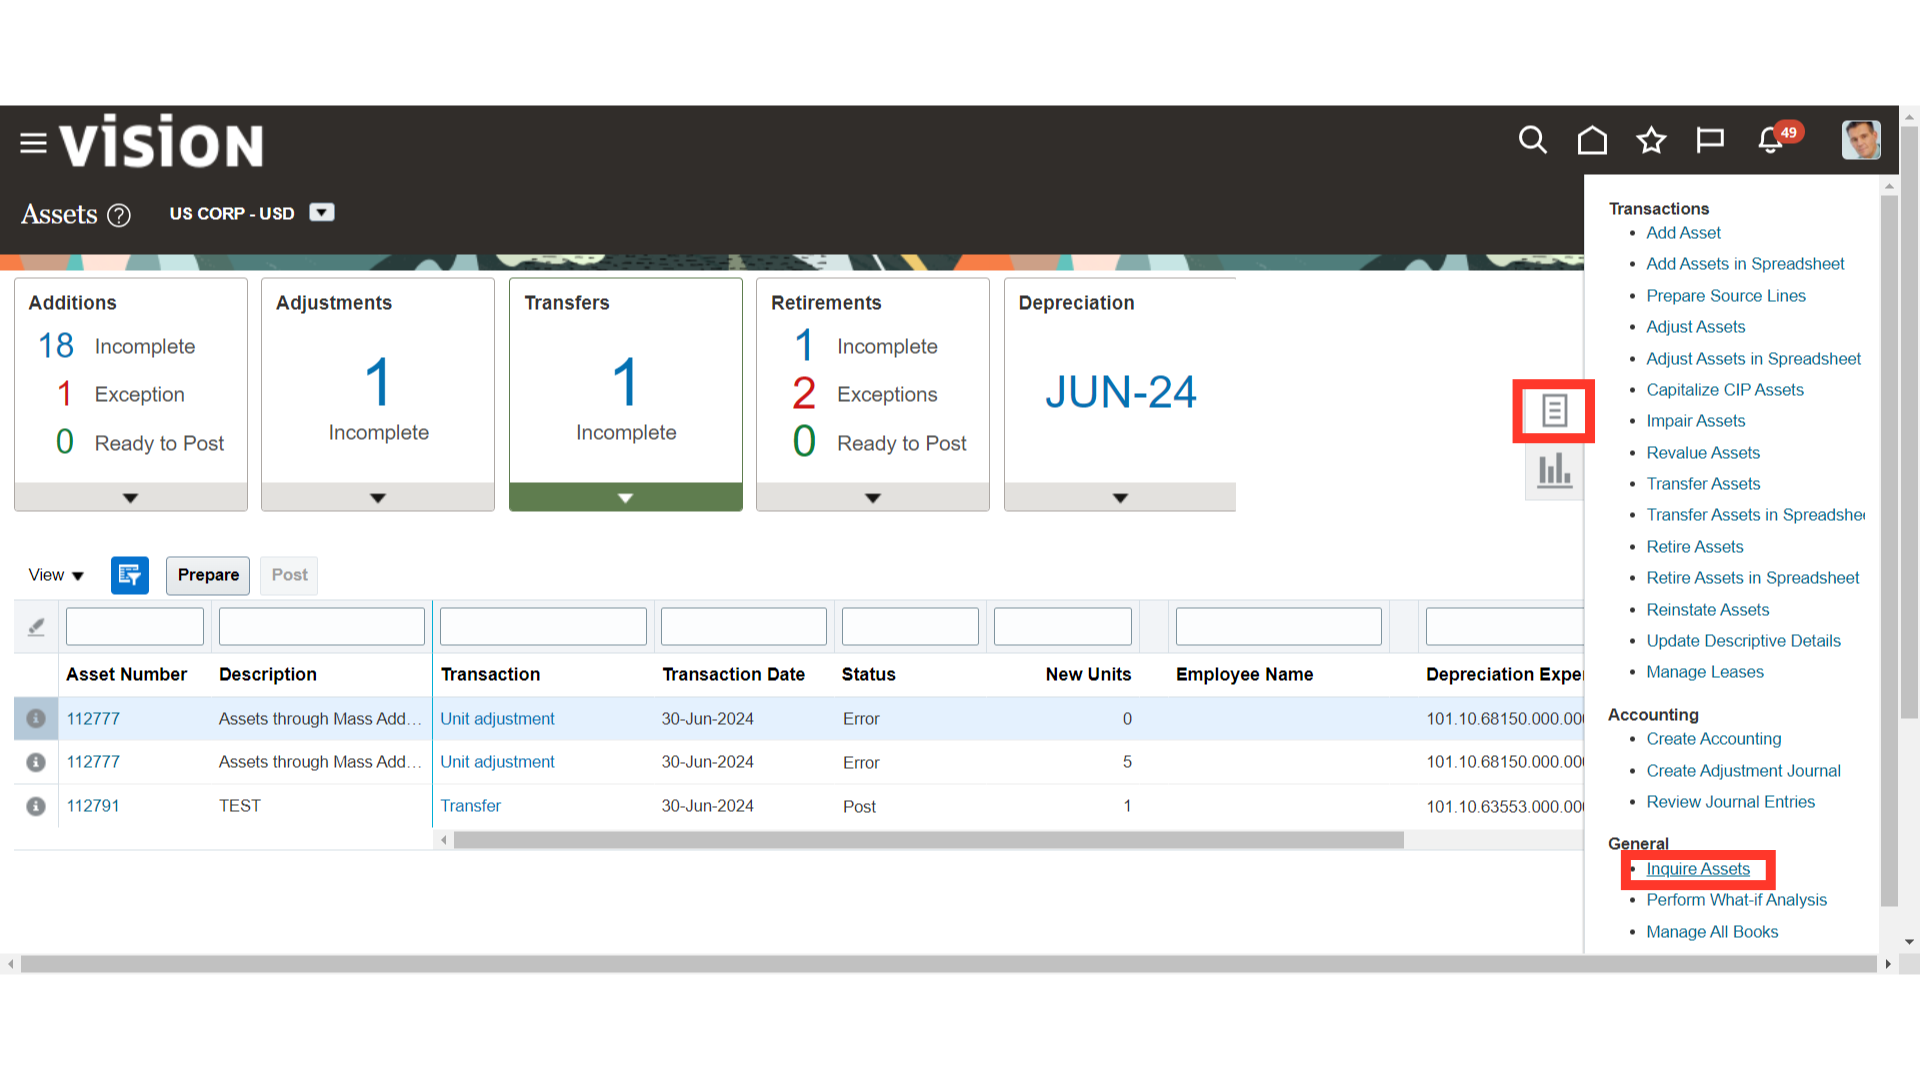
Enter the relevant asset parameter, and then click on the Search button.
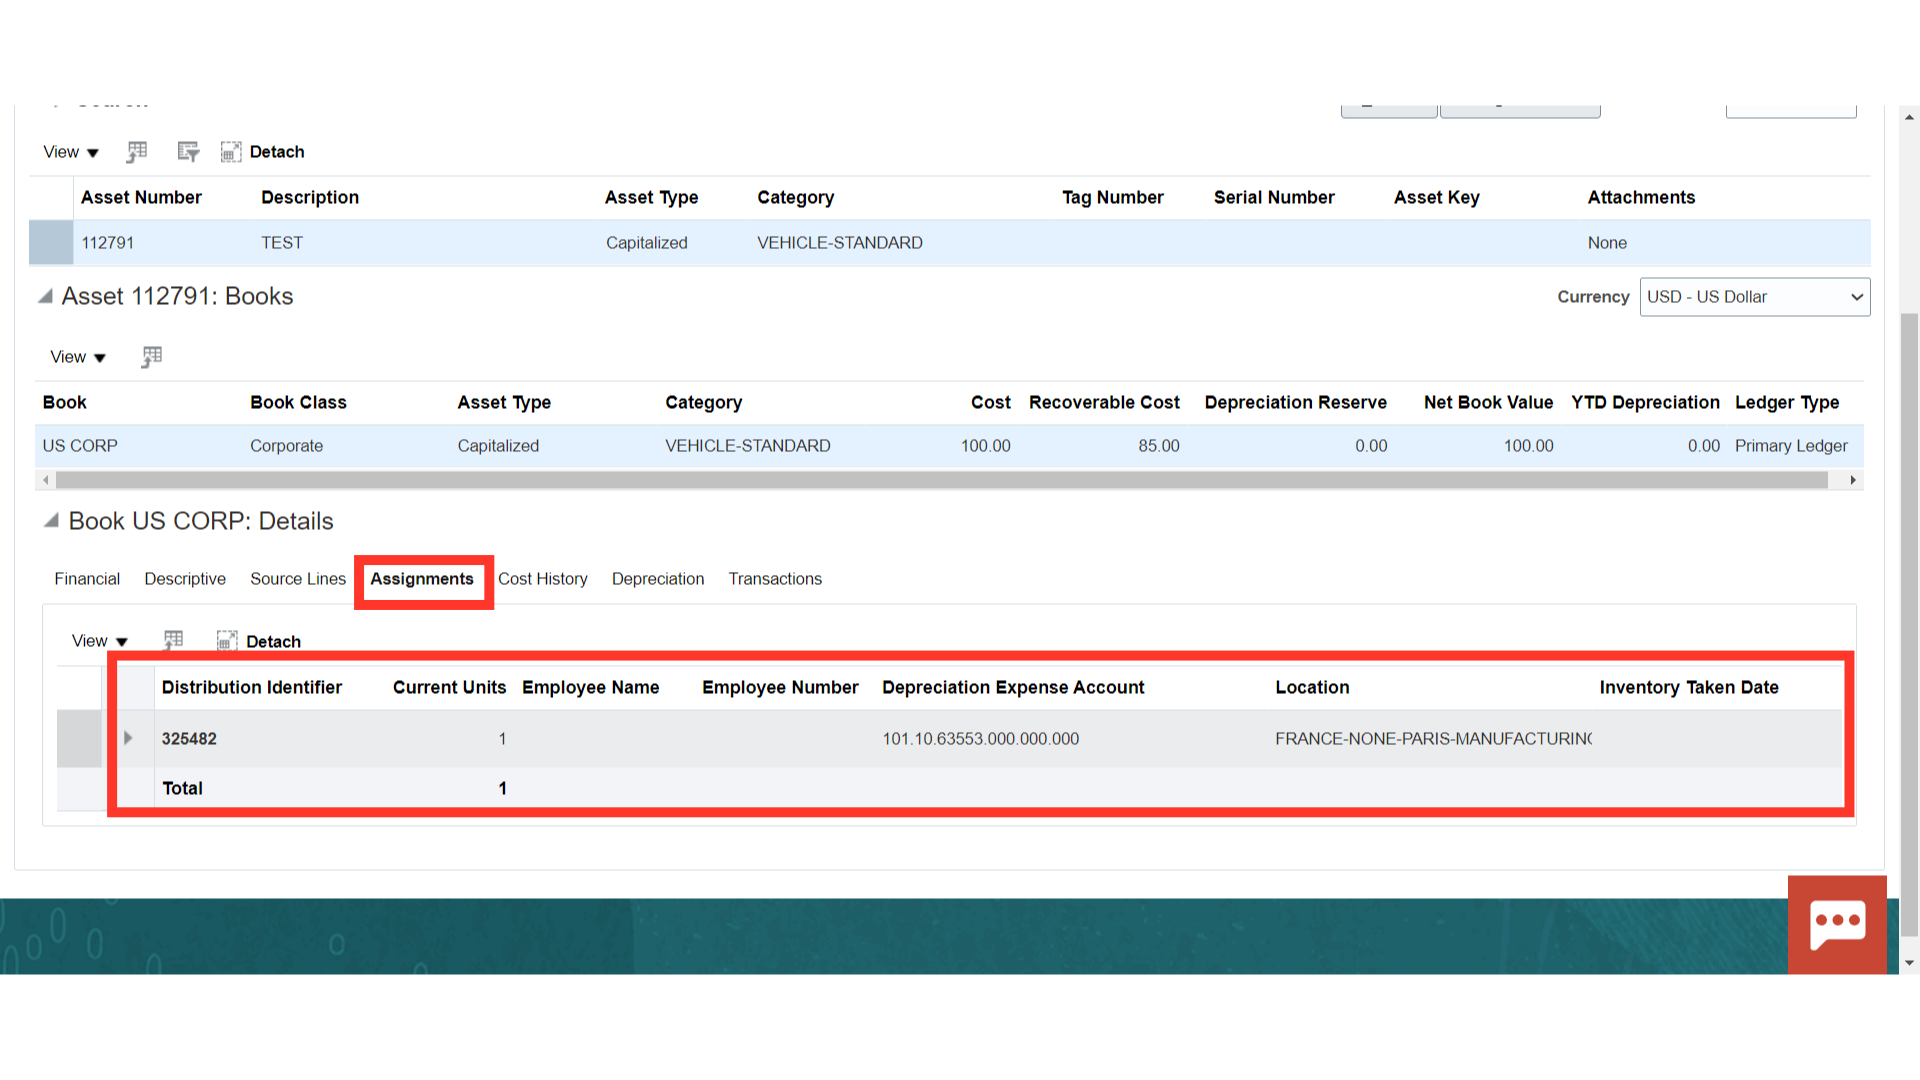
Click on the Assignments tab to see the details of new asset assignment details.
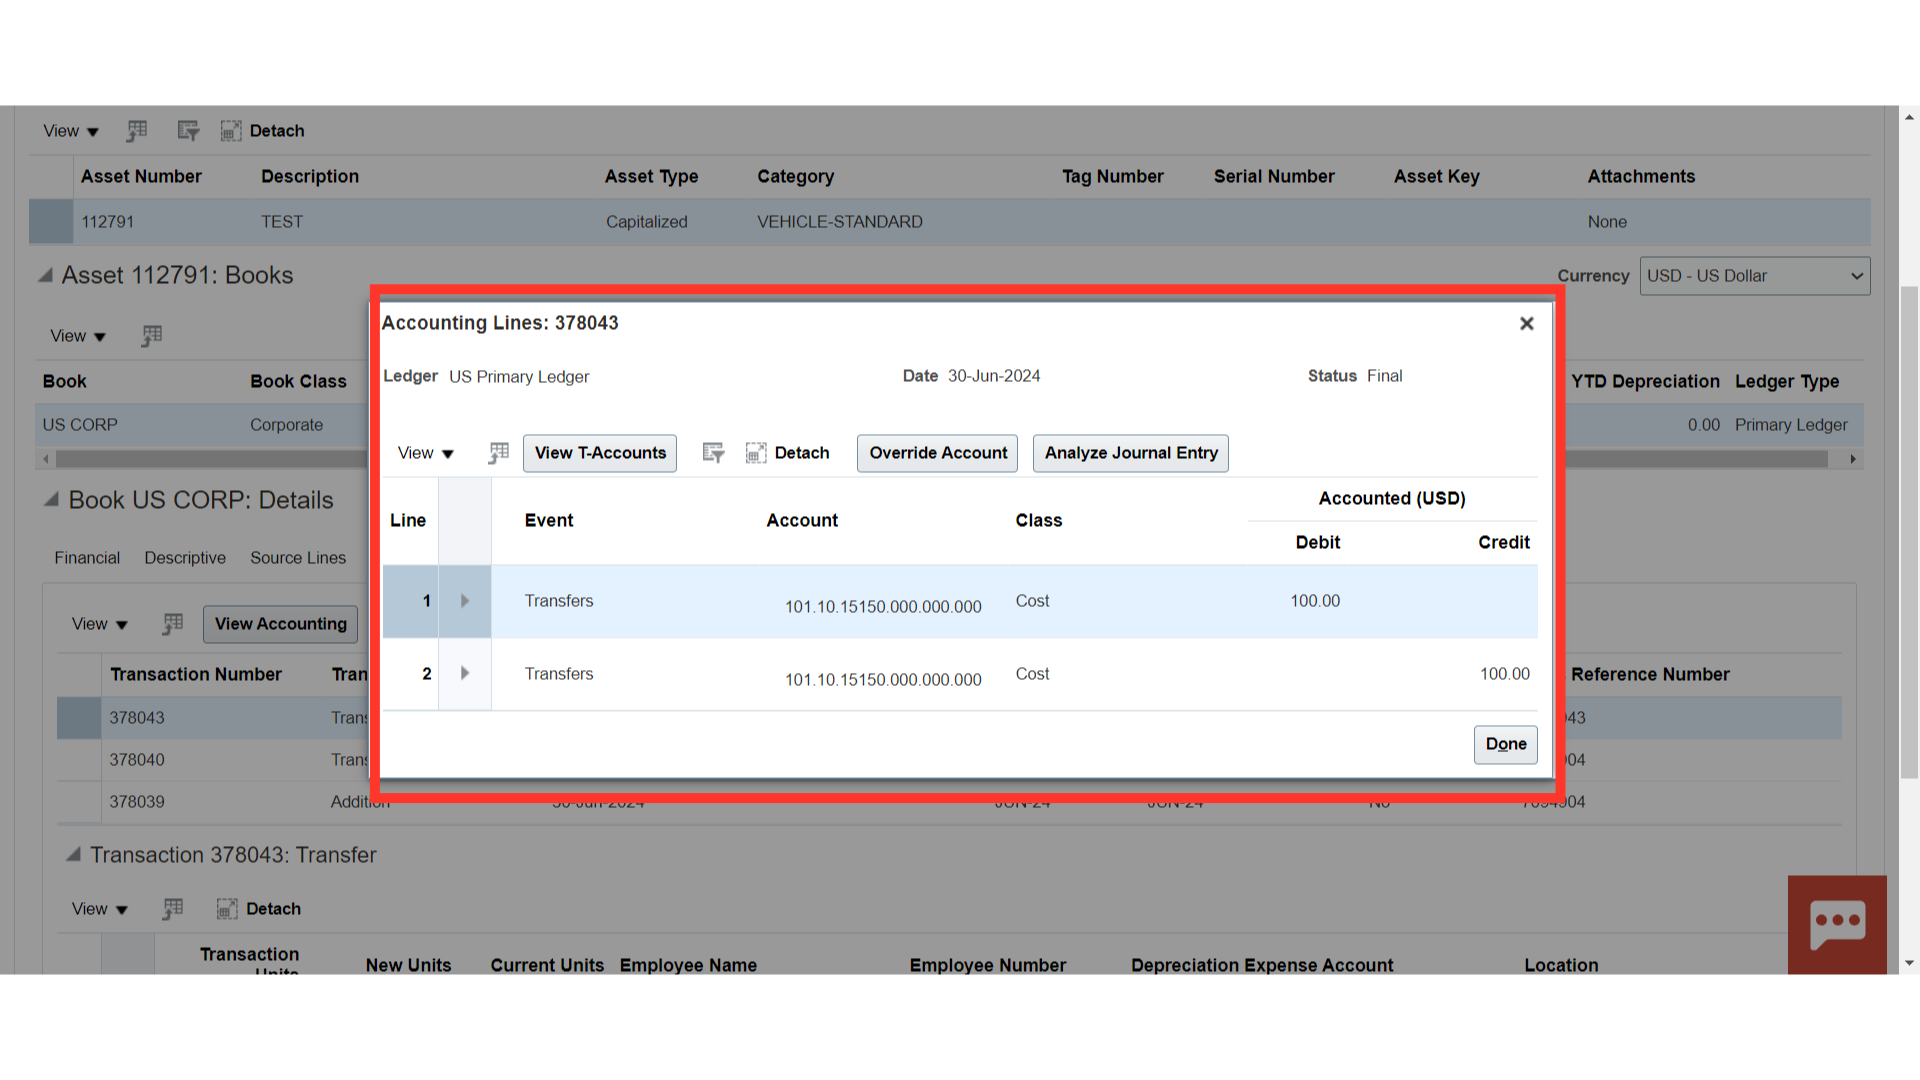
Under the Transactions tab click on the Transfer Transaction type, and select the View Accounting button to see the details of the accounting entry.
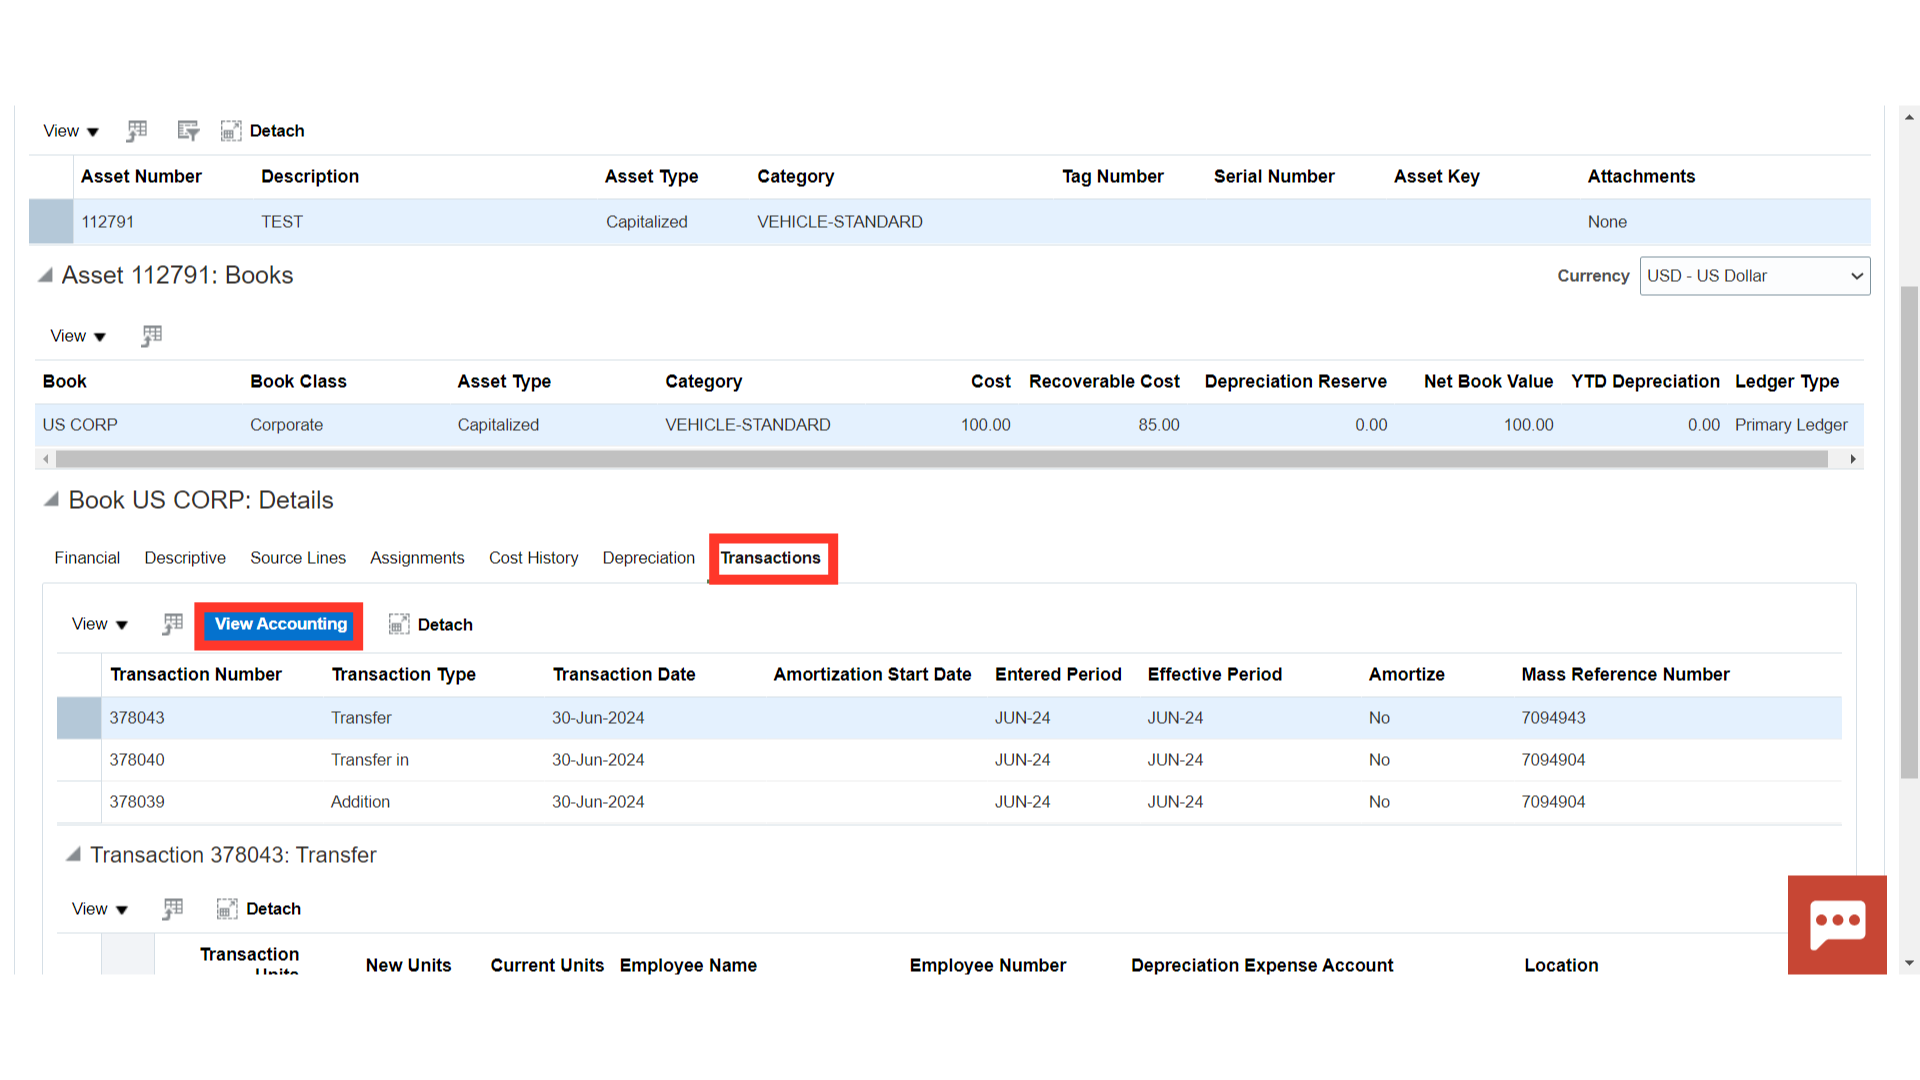
This is the accounting entry generated for the transfer of assets in which debit and credit account combinations are the same. Hence, there is no impact due to this accounting entry.
This guide has demonstrated the process of performing physical verification and taking corrective actions in case of a mismatch between physical verification and system data.