How to upload purchase requisitions using Excel
This guide will walk you through the process of uploading purchase requisitions using Excel in Oracle Fusion. From accessing scheduled processes to submitting data and confirming success messages, each step is detailed to streamline your requisition upload tasks. This process is called Requisitions upload in Oracle Fusion Cloud using FBDI. You can utilise this functionality in order to load bulk requisitions into Oracle Fusion.
First, visit the Oracle FBDI Website (please make sure that you’re on the latest release). From there you can download the latest FBDI sheet for requisitions import.

Once, the file is dowloaded. Prepare the file with the right data of requisitions. You need to enter details related to Requisitions Line, Schedules, and Distributions.
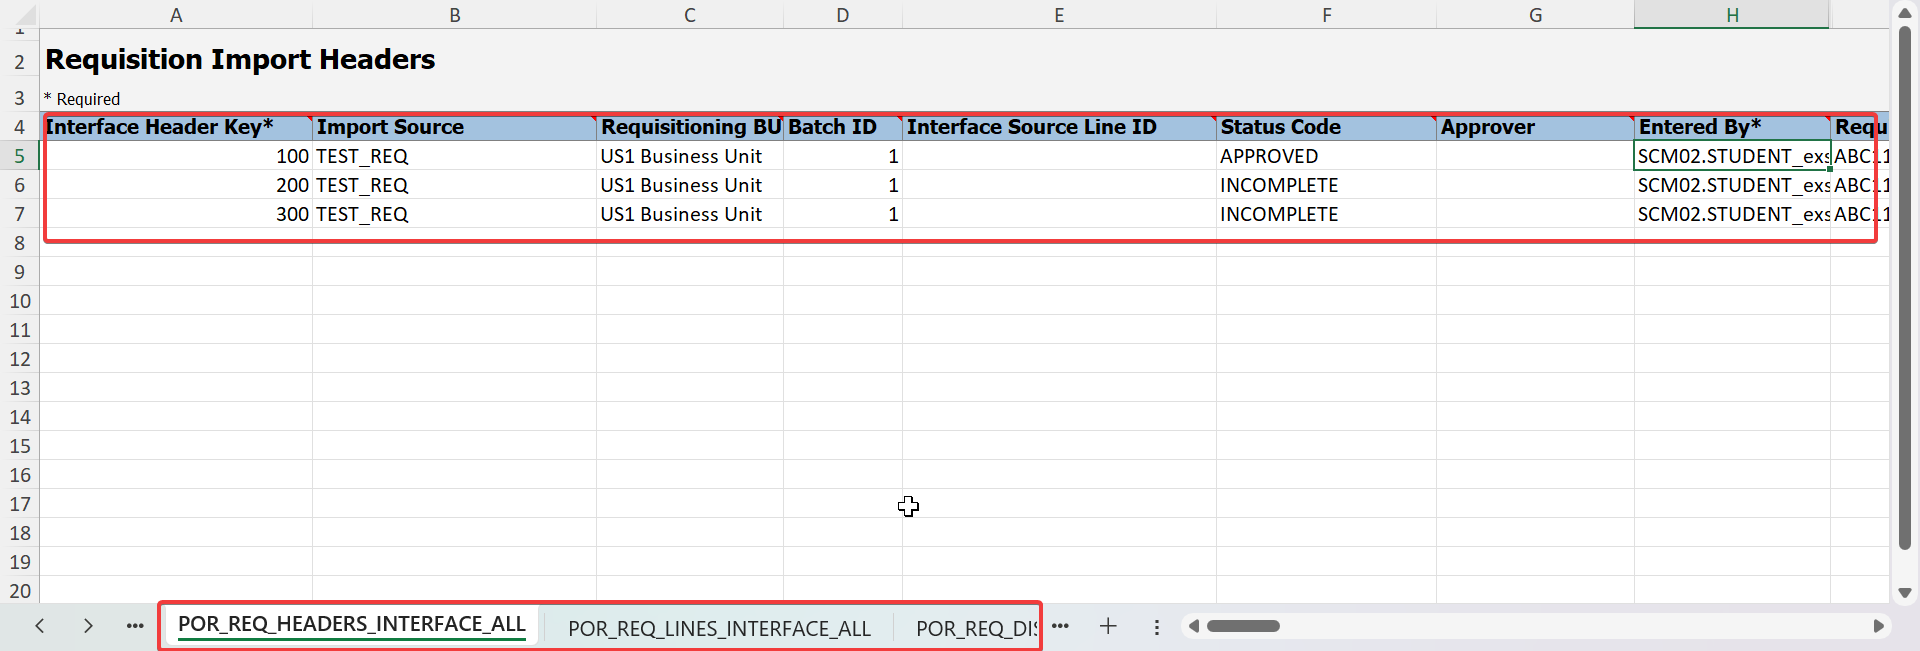
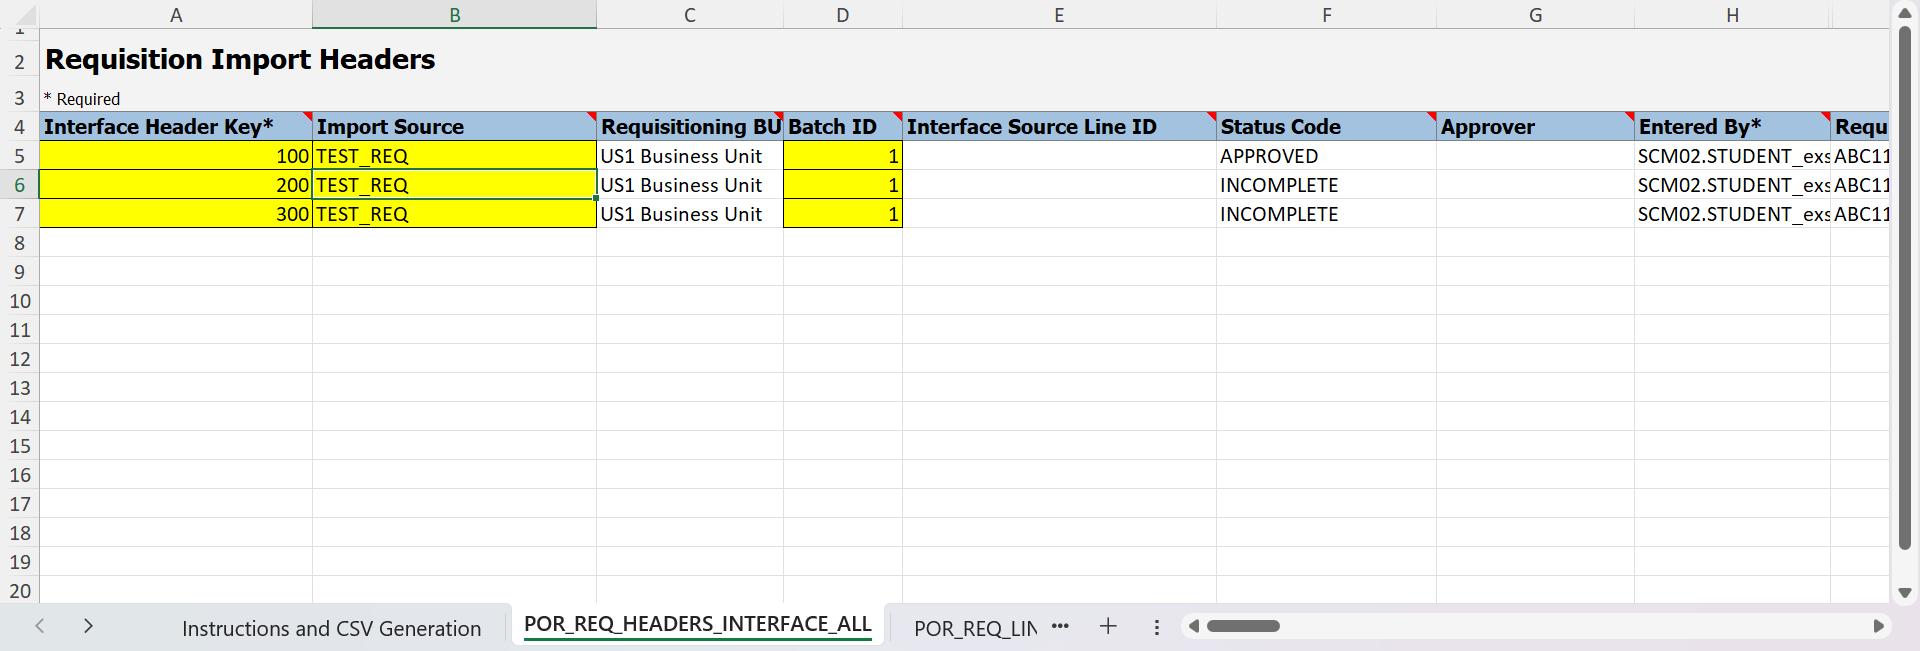
In Requisition Import Headers, there are few fields which are specific to the FBDI template such as Interface Header Key, Import Source and Batch ID. These are important fields which needs to be filled while doing requisitions import.
Interface Header Key: It is a unique identifier for each header of a requisition. Interface Header key will also be linking Interface line Key and Interface Distribution Key. It will be mentioned in the tab of Requisition Import Lines and Requisition Import Distribution.
Import Source: This is an open field where you can mention about the source of the requisition like legacy system, import source, or some other identifier which will segregate these imported requisitions from other requisitions.
Batch ID: You need to provide a batch id for a batch of a load. Like in this case, we are giving it as batch id 1. It will be the same for each line.
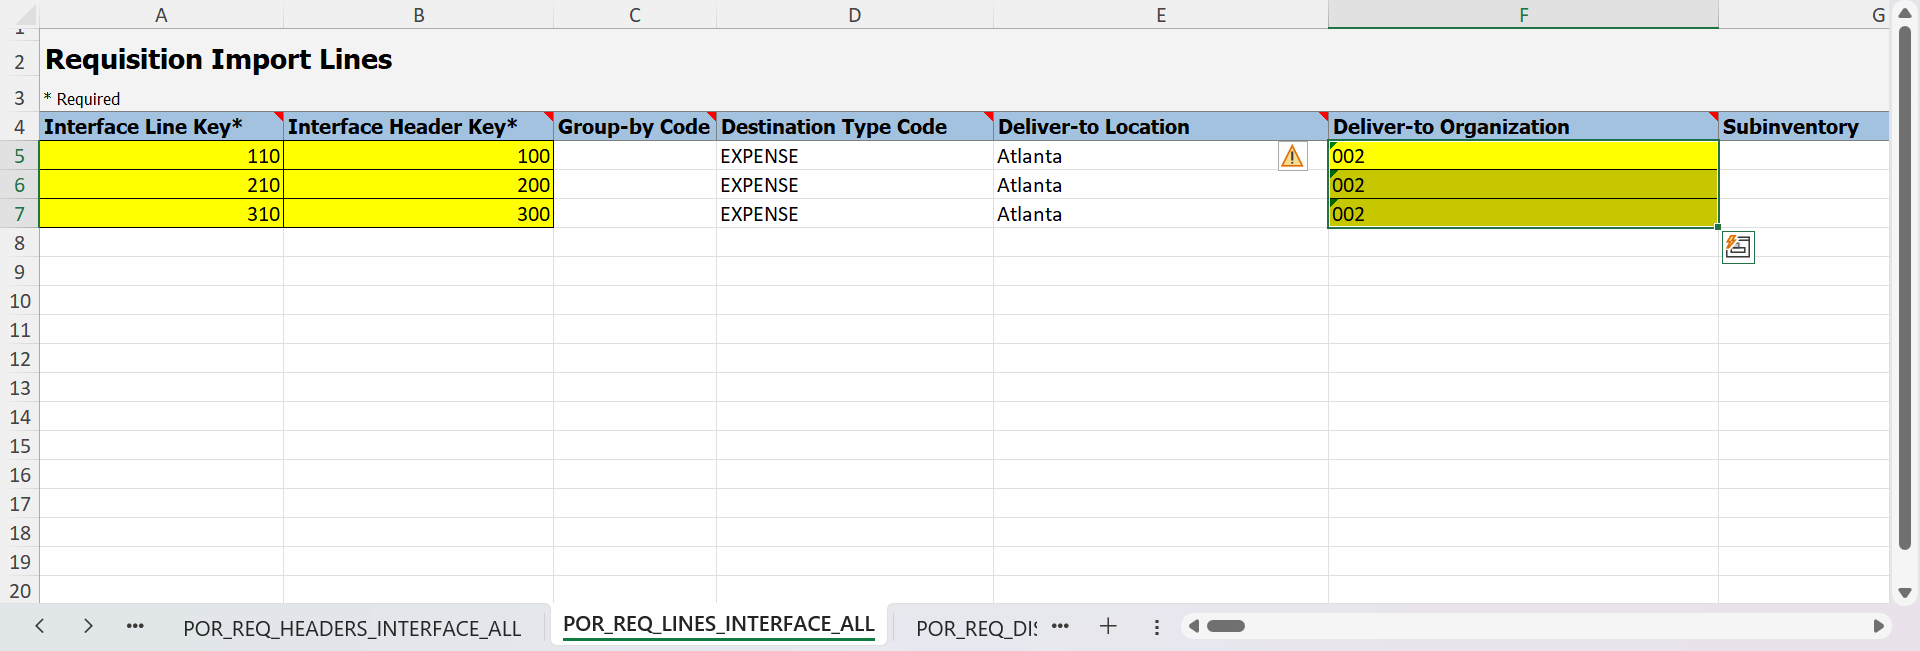
In the Requisition Import Lines tab, the fields which are specific to the FBDI template are Interface Line Key, Interface Header Key and Deliver to Organization.
Interface Line Key: It is a unique identifier for each requisition lines which need to be loaded.
Interface Header Key: It is the same identifier which we have used in Requisition Import Header tab which will link requisition header with the requisition lines. For example, in screenshot 100 header is linking 110 header line.
Deliver to Organization: It is the inventory code, where the item will be received. In case of expense requisition, you need fill the logical inventory code.
In the Requisition Import Distributions, the fields which are specific to the FBDI template are Interface Distribution Key and Interface Line Key.
Interface Distribution Key: It is a unique identifier for each distribution line of a requisition.
Interface Line Key: It is the same identifier which we have used in Requisition Import Lines tab, which will link the requisition lines to its distribution line. For example, 110 is a requisition line which links 111 requisition distribution line.

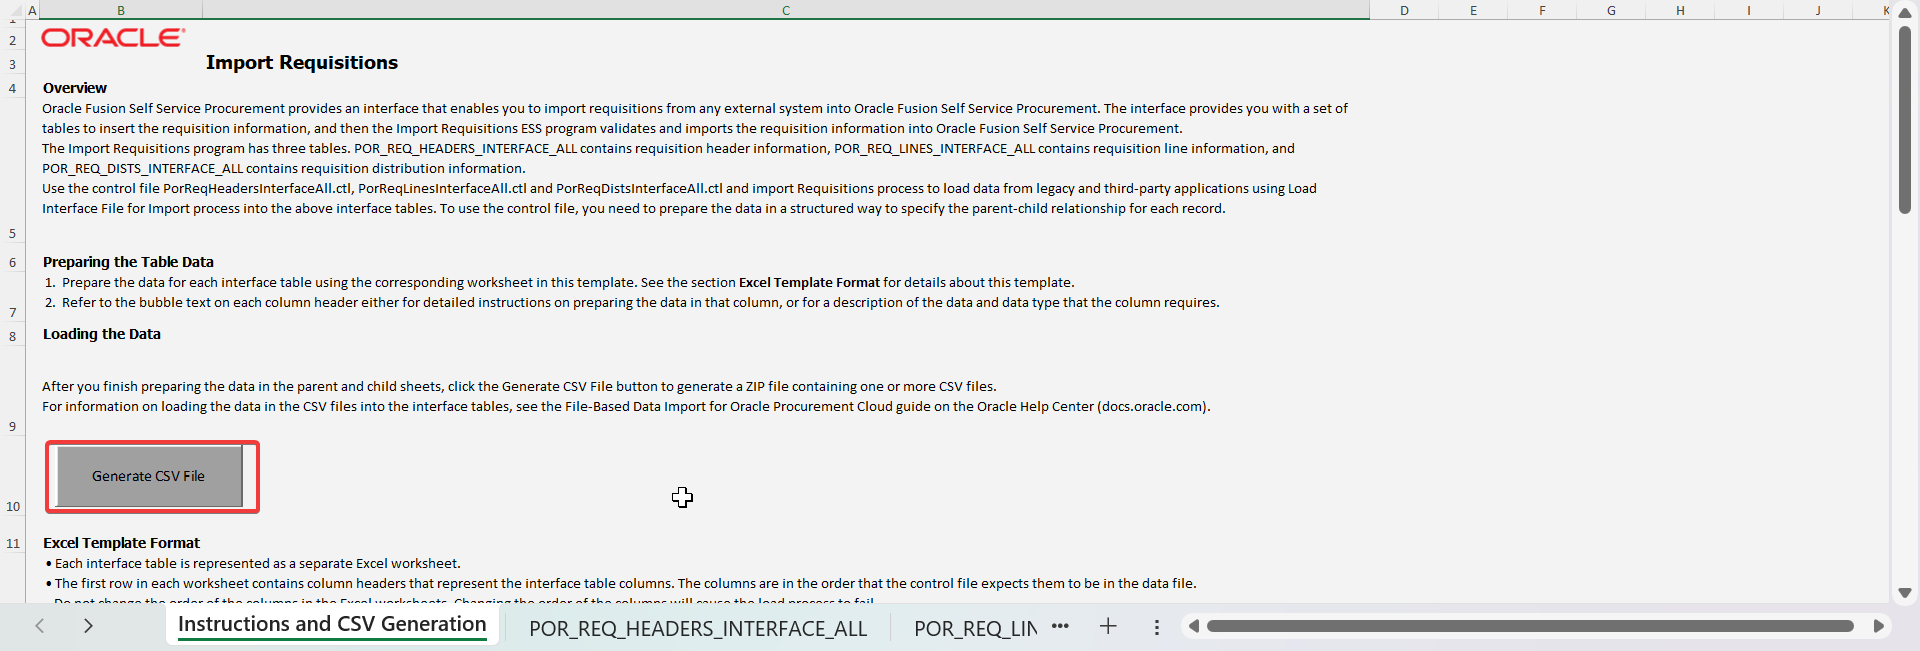
Once all the details are filled and saved in the FBDI sheet, navigate to the first tab where we have the option to generate the CSV file. Click on the “Generate CSV File” button.
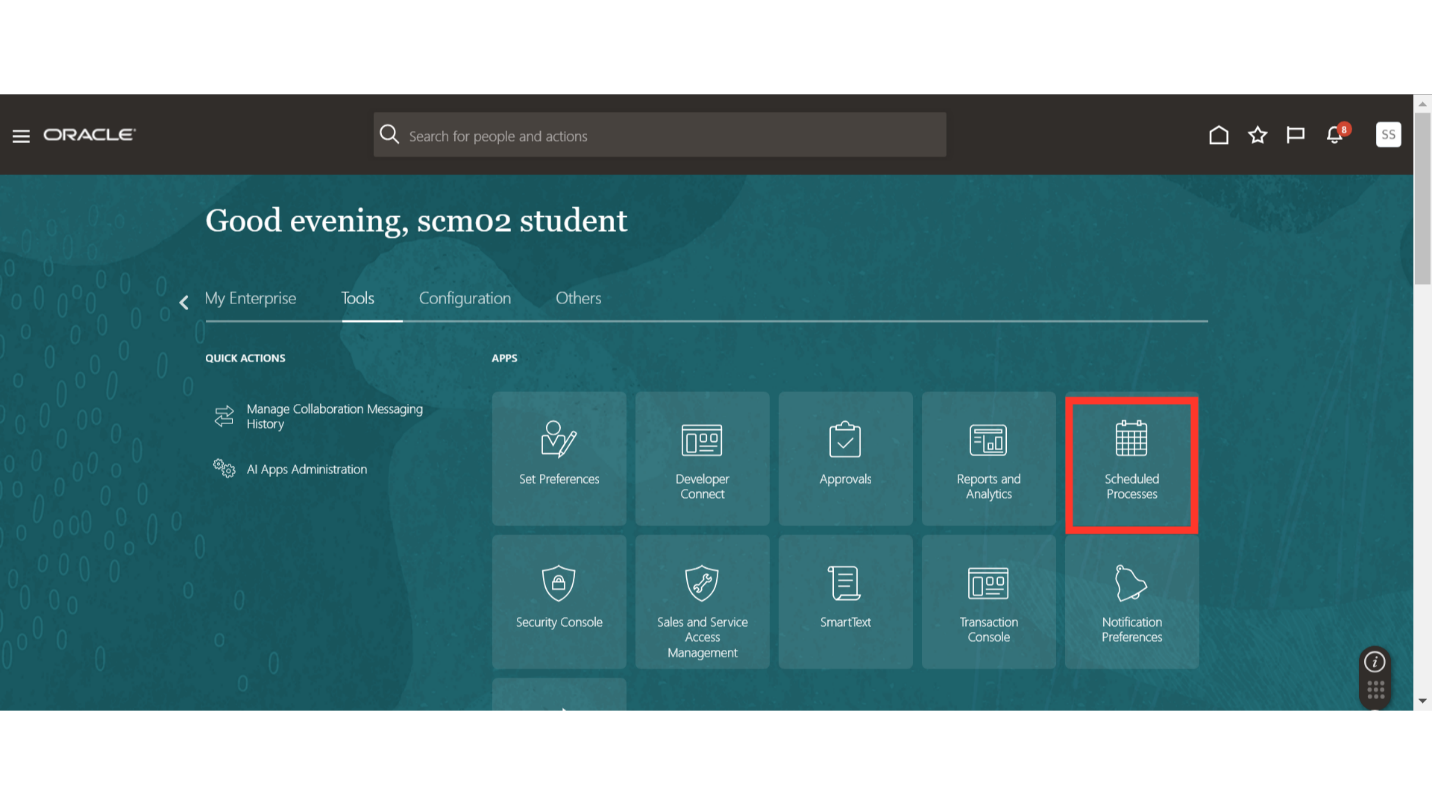
Once the CSV file is created, you can log on to Oracle Fusion, Go to the Tools tab and click on the Scheduled Processes option.
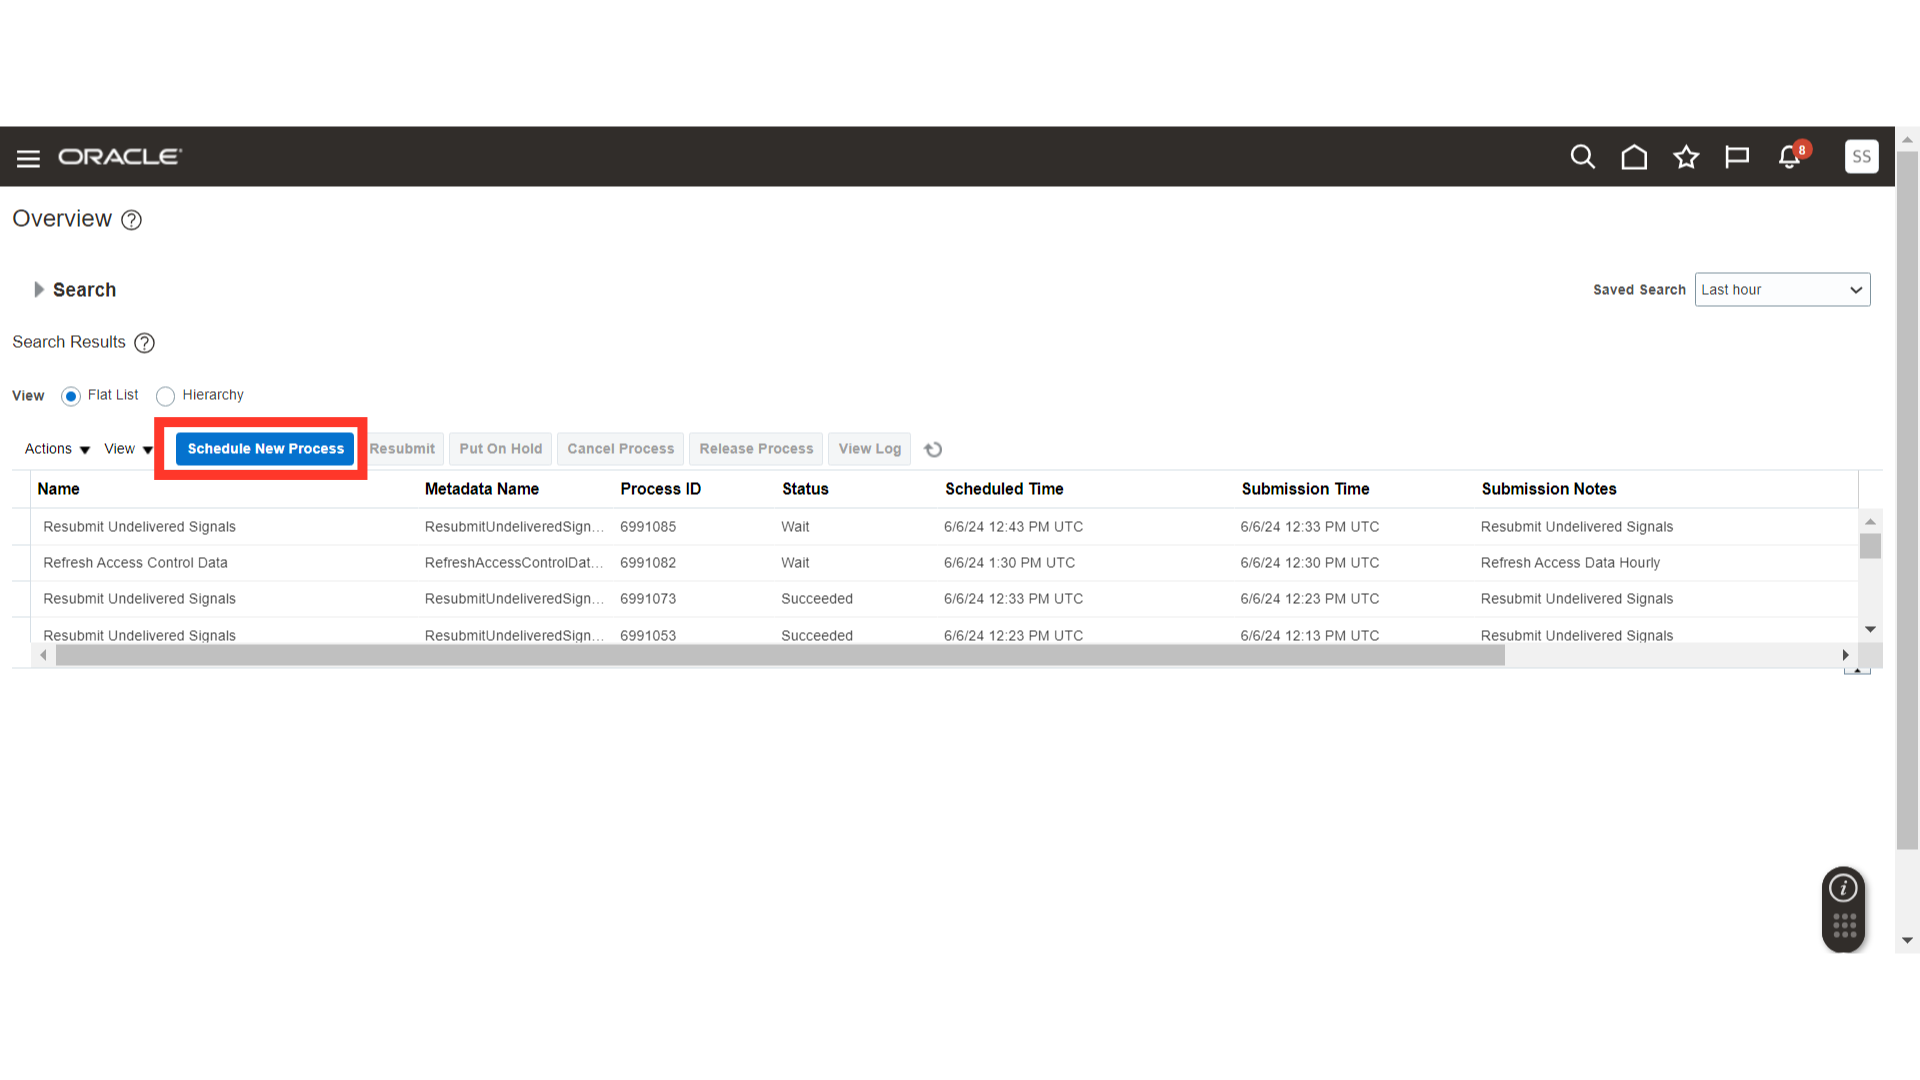
In the Schedule Processes screen, Click on the Schedule New Process button.
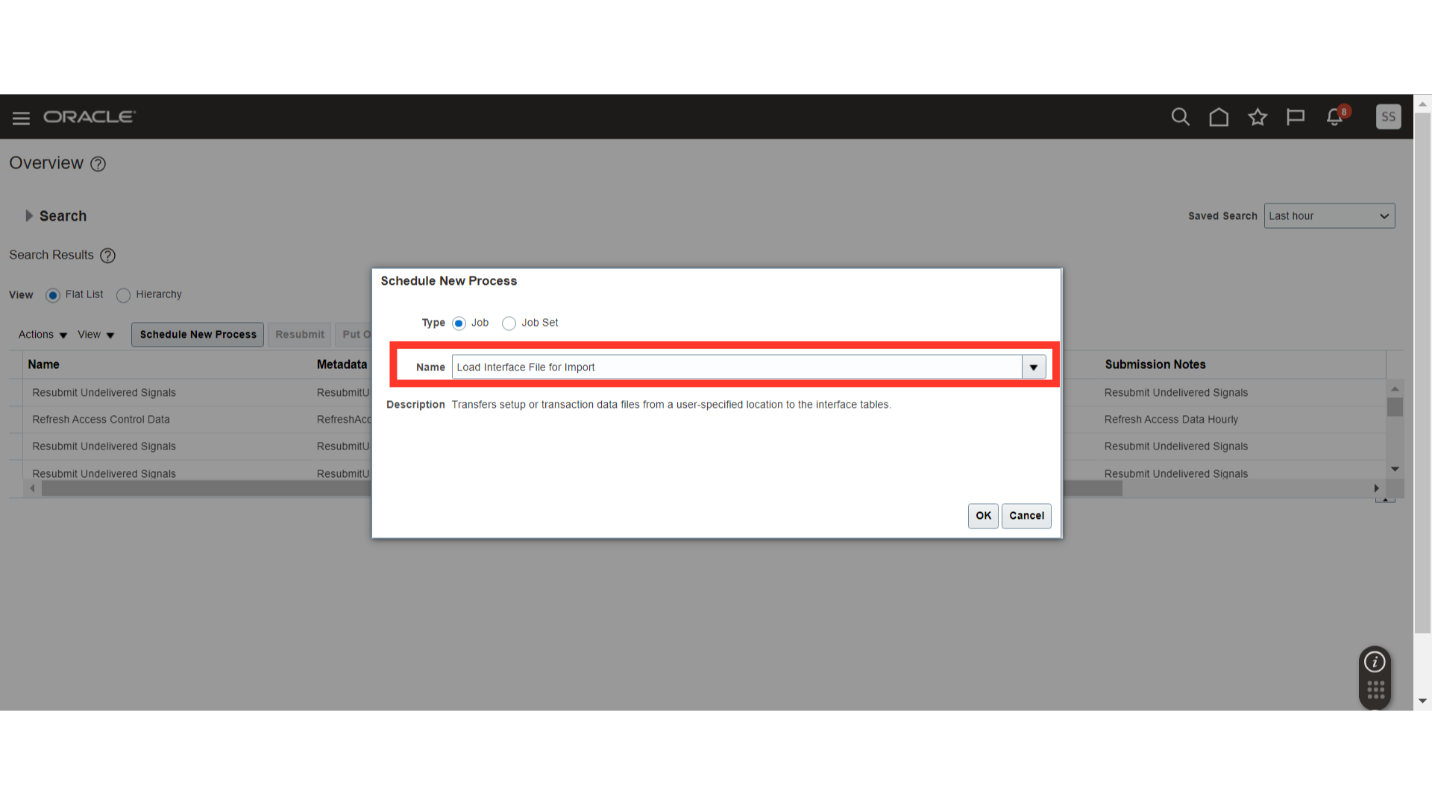
While scheduling the new process, Select the name of the process as “Load Interface File for Import” and click on OK.
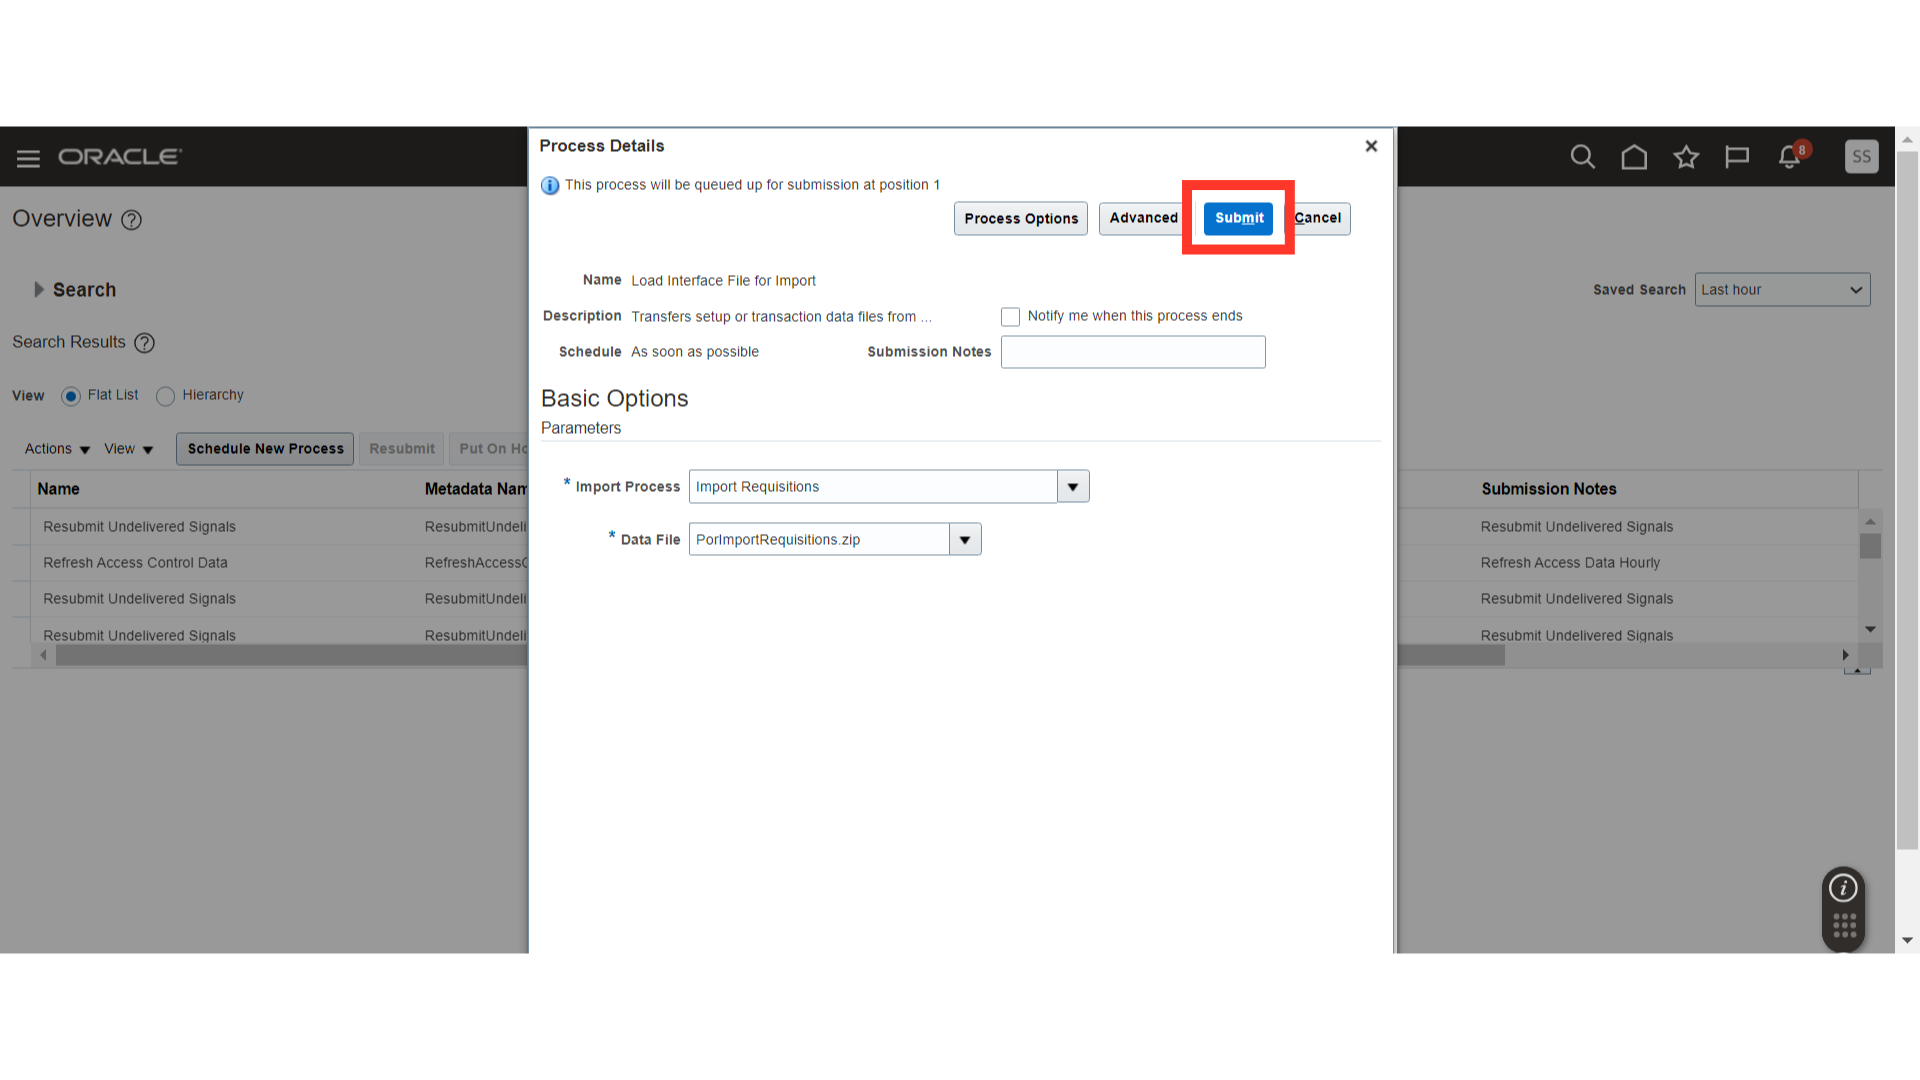
In the Load Interface File for Import, Select the import process as “Import Requisitions”.
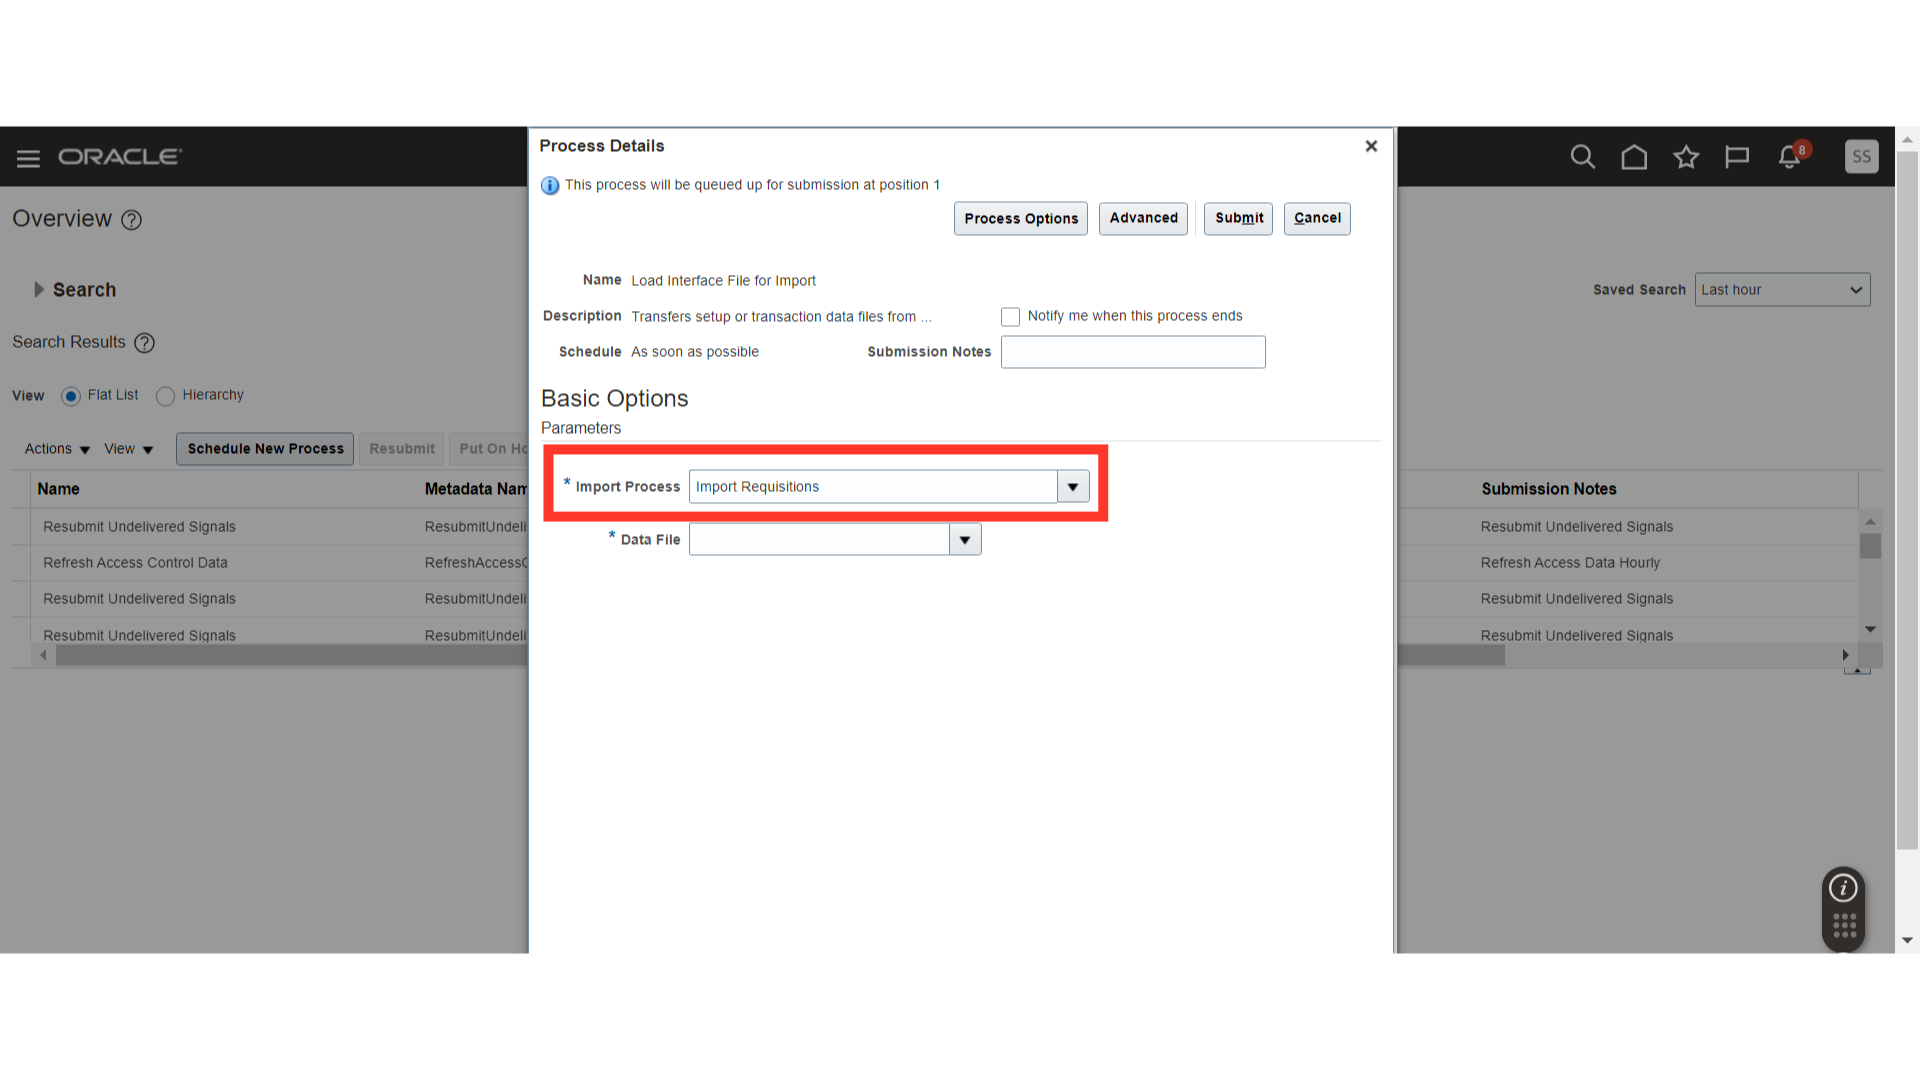
In the data file, choose the CSV data file which you have created from the FBDI template.

Once Import Process and Data File is populated, click on the Submit button.
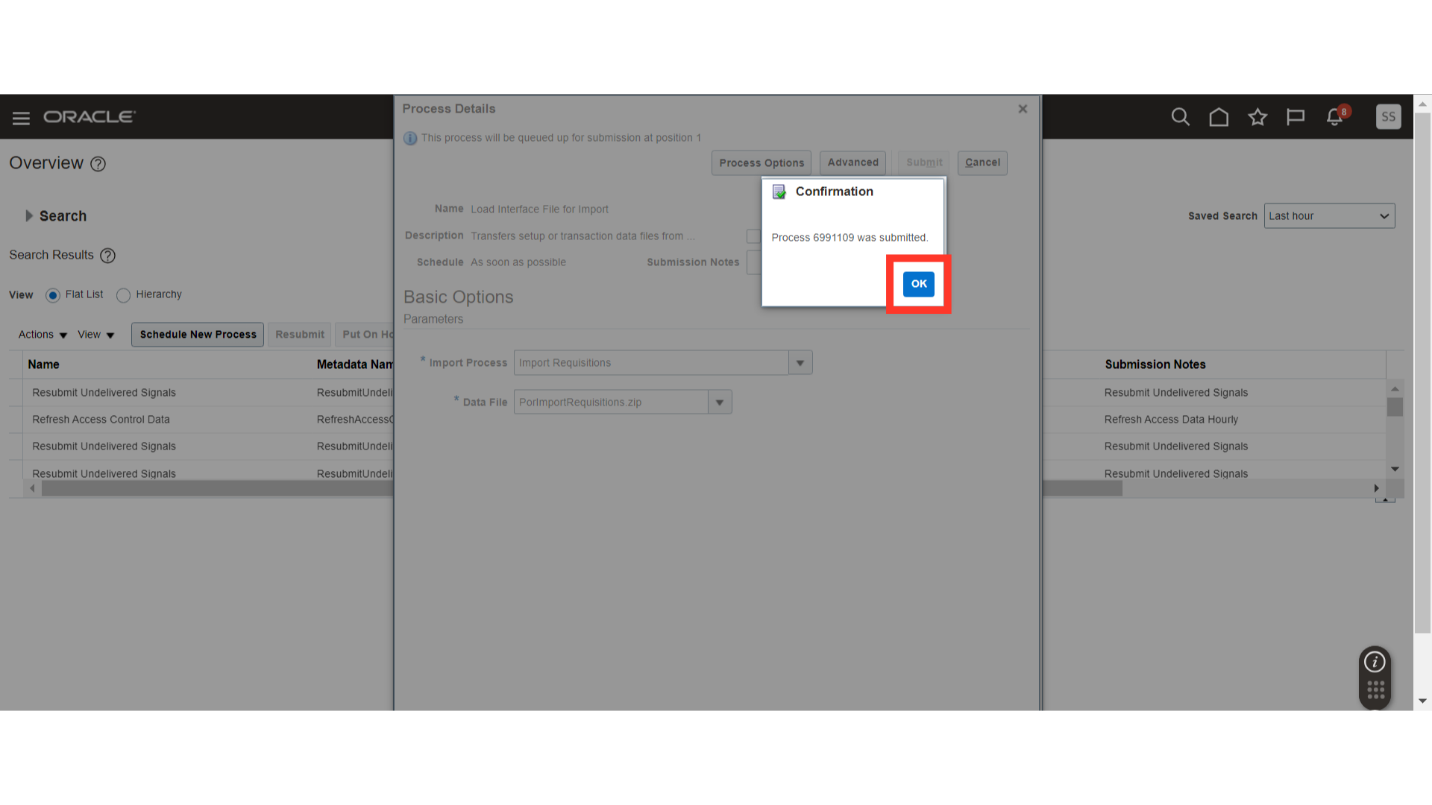
After the submission, you will get a confirmation popup. Click on OK.
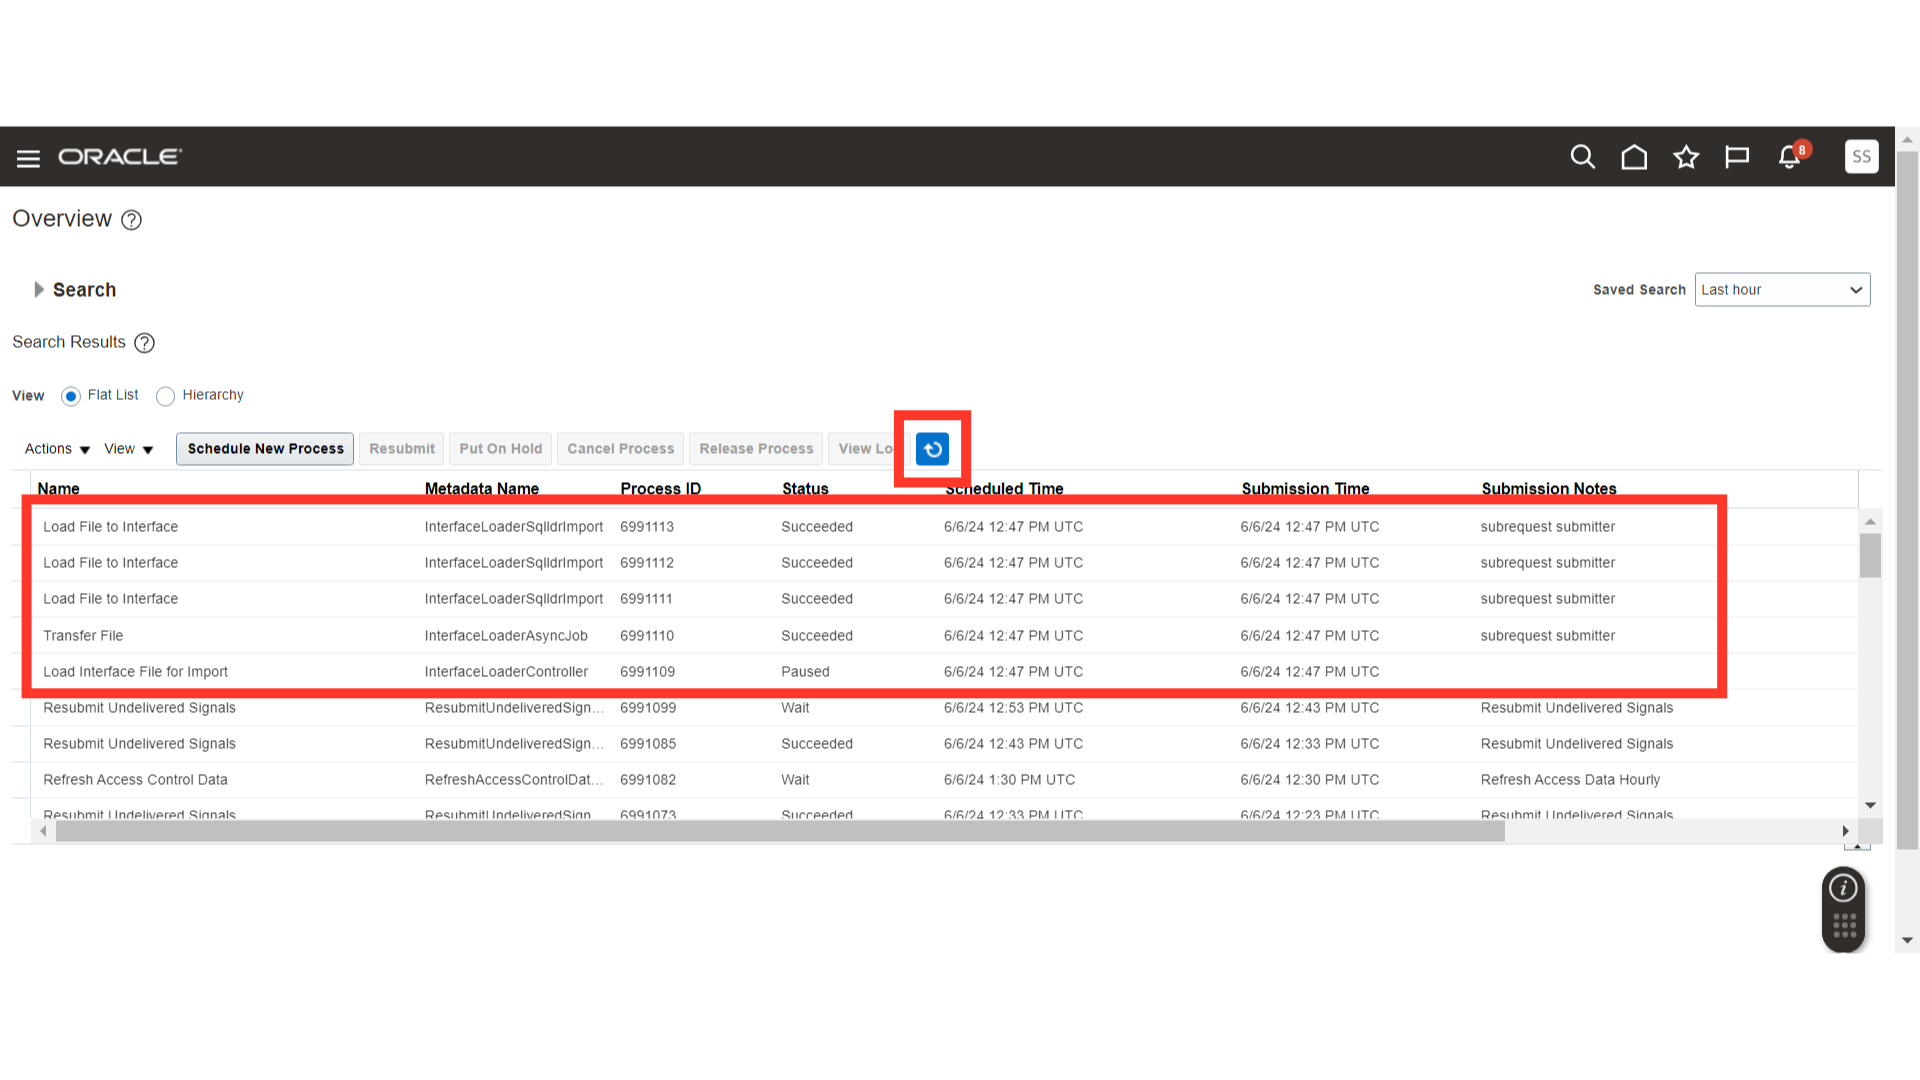
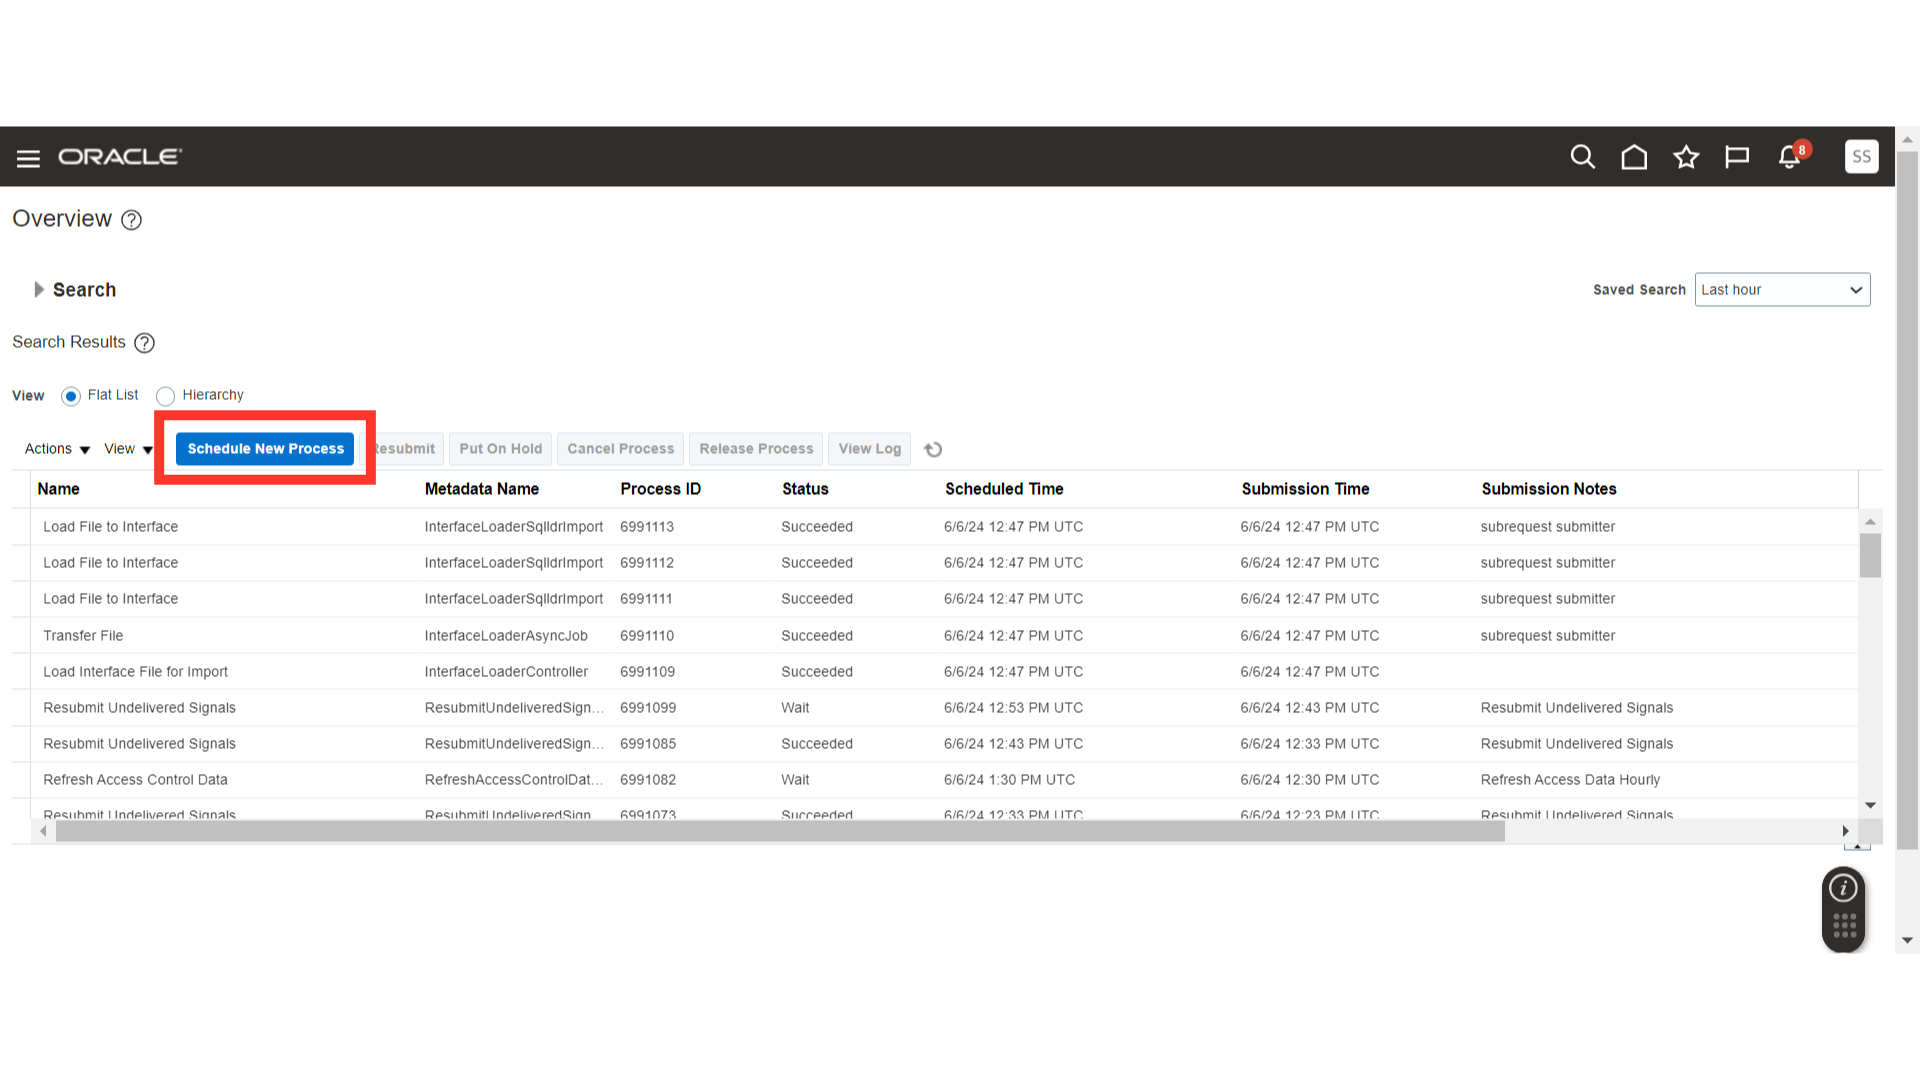
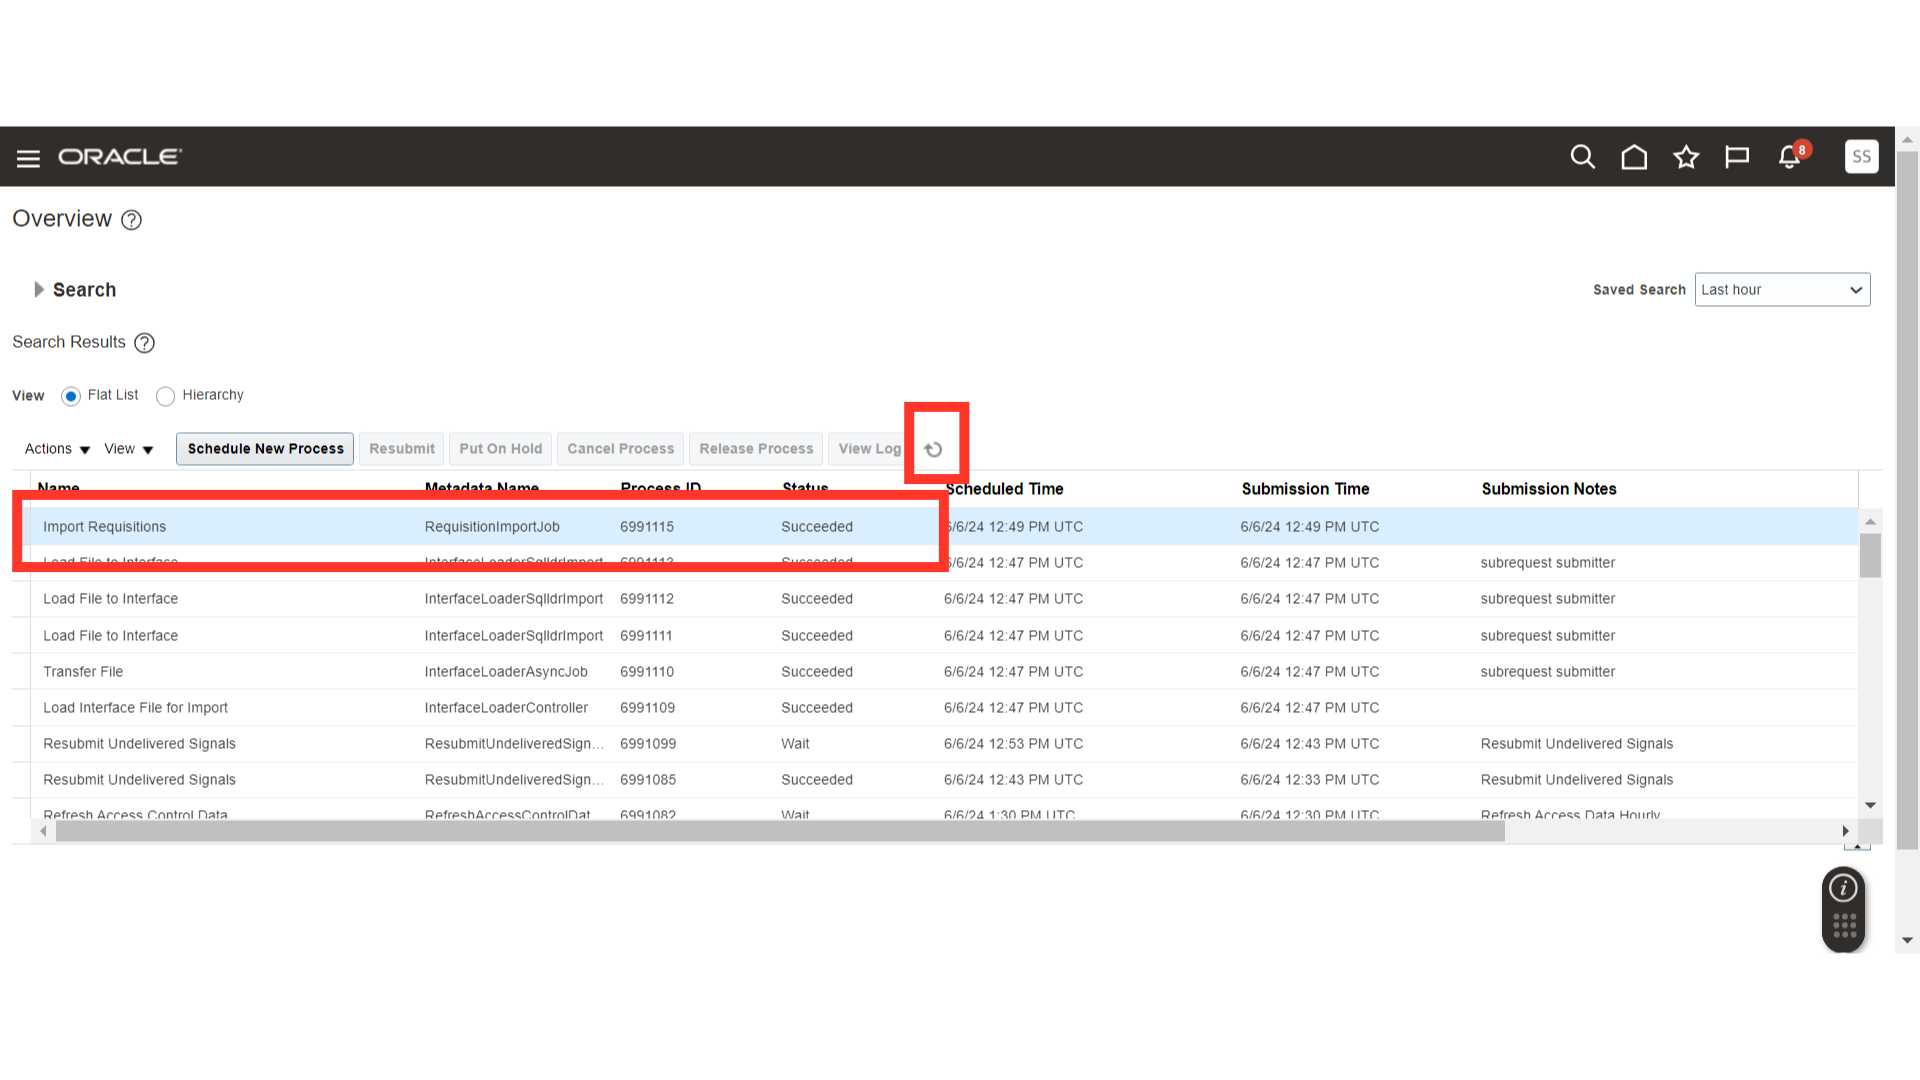
Once the Load Interface File for Import is submitted, you can check the status of the file uploaded. You can click on Refresh icon until all the relevant process of Load Interface File for Import gets in Succeeded status.
Once all the File lines get succeeded, click on the Schedule New Process button again.
Select the process name as “Import Requisitions” and Click on OK.
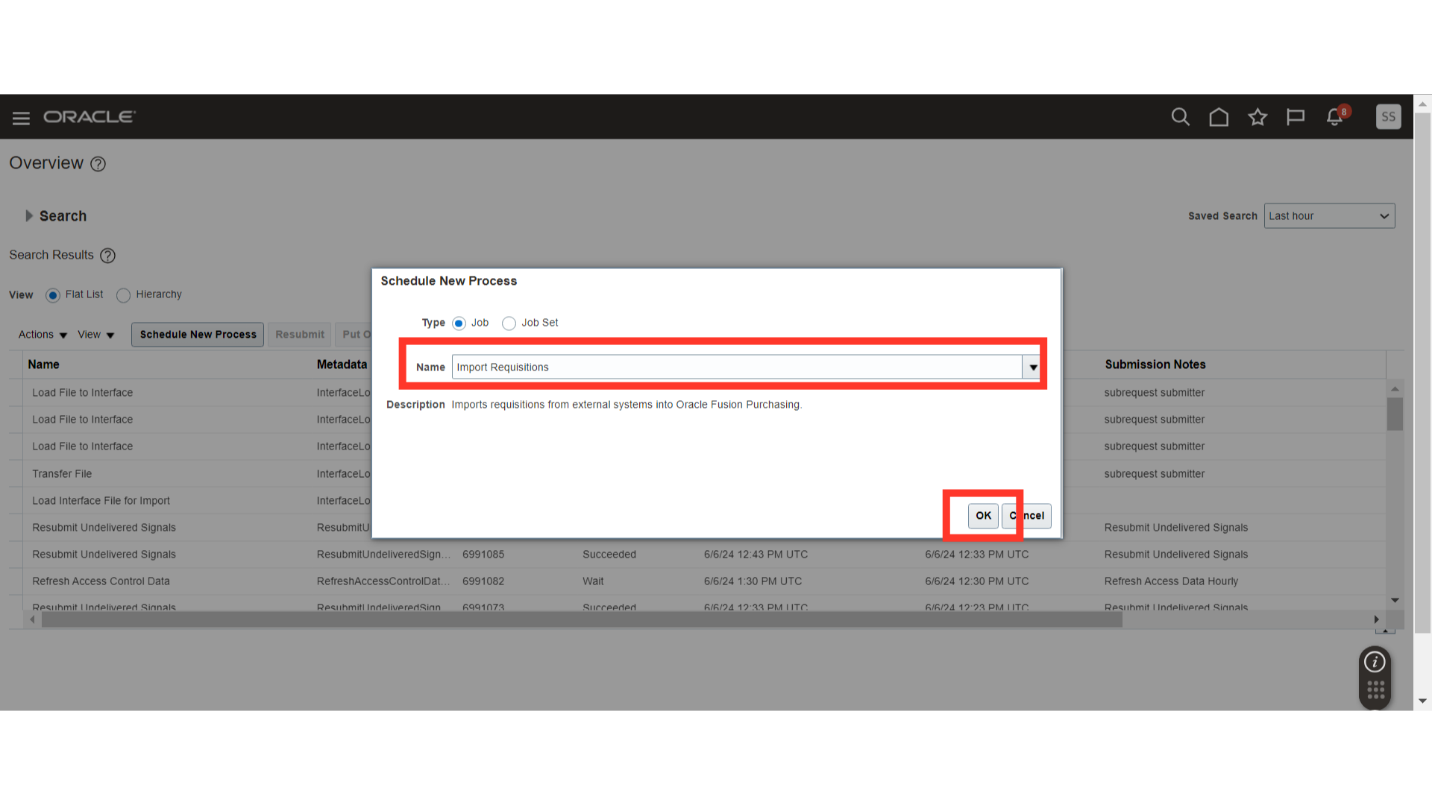
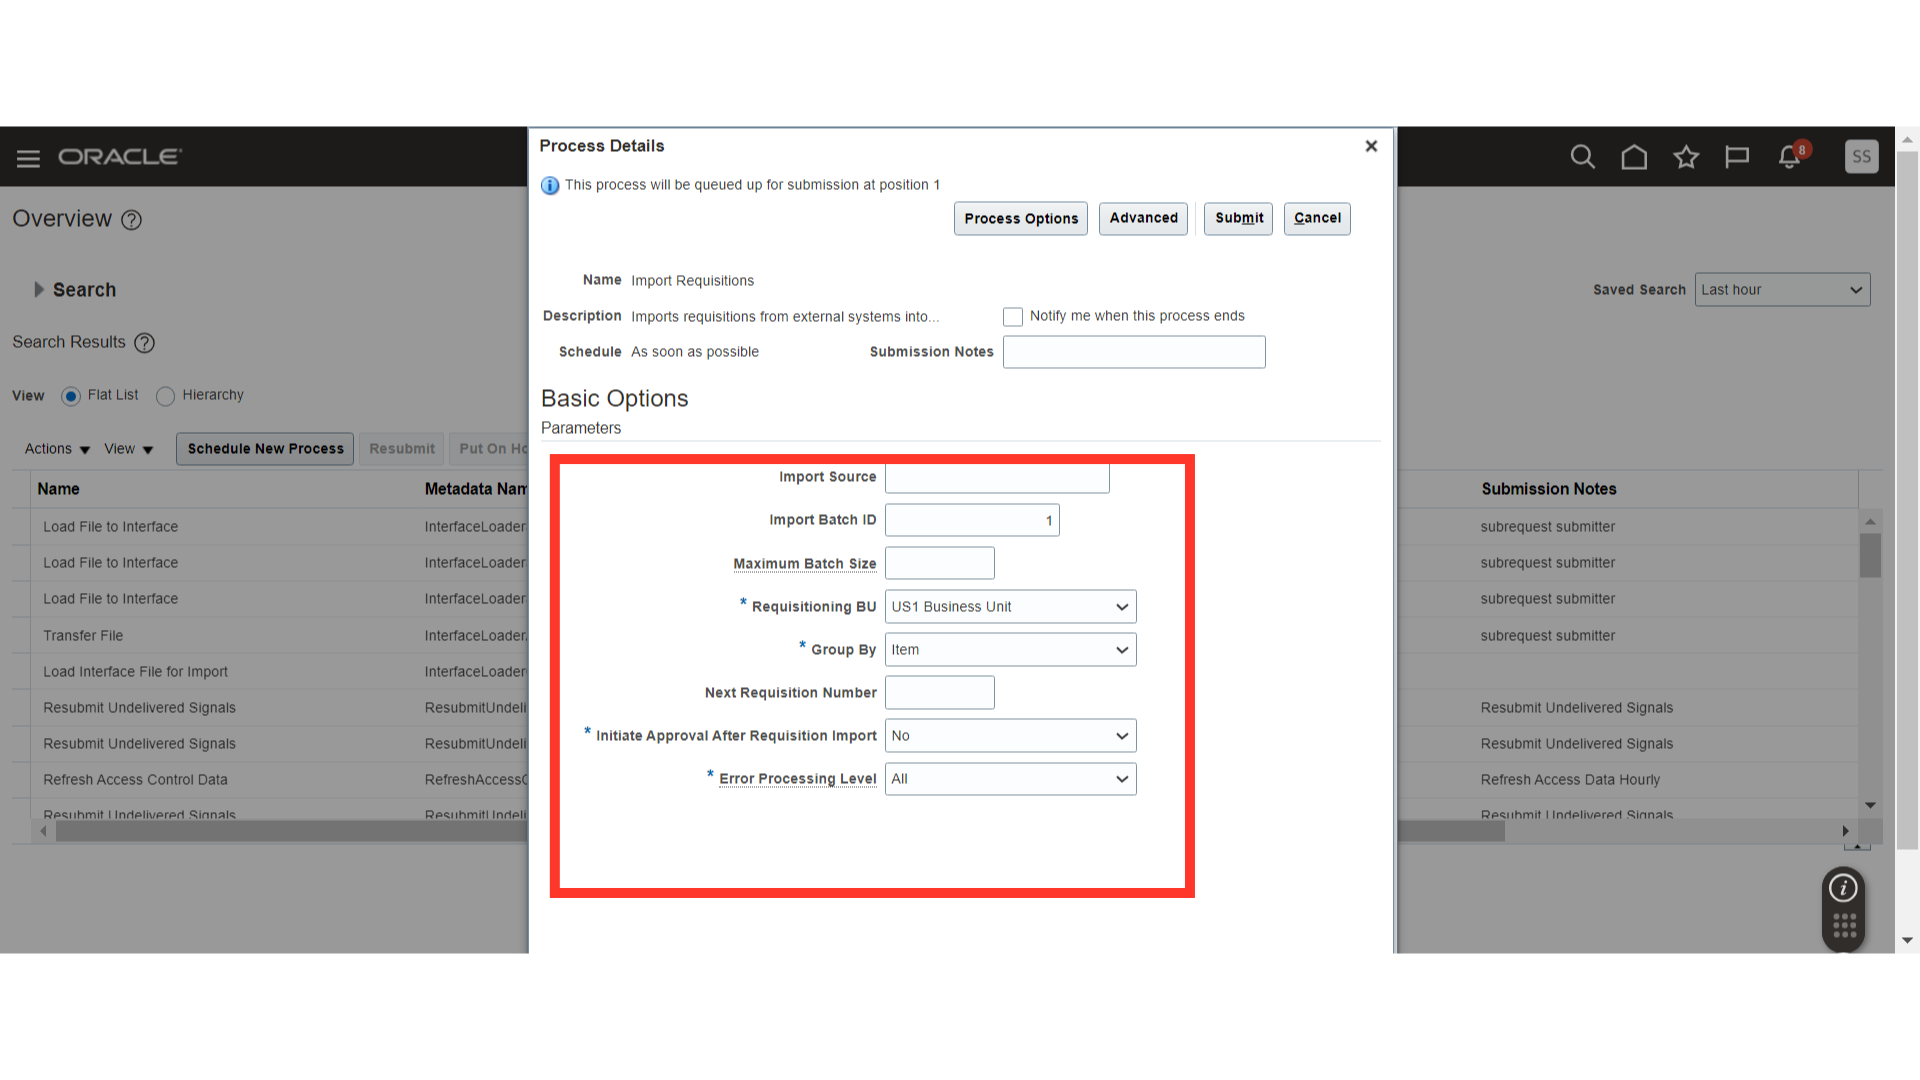
In the Import Requisitions process details, populate details such as Import Batch ID, Requisitioning BU, and Initiate Approval After Requisition Import.
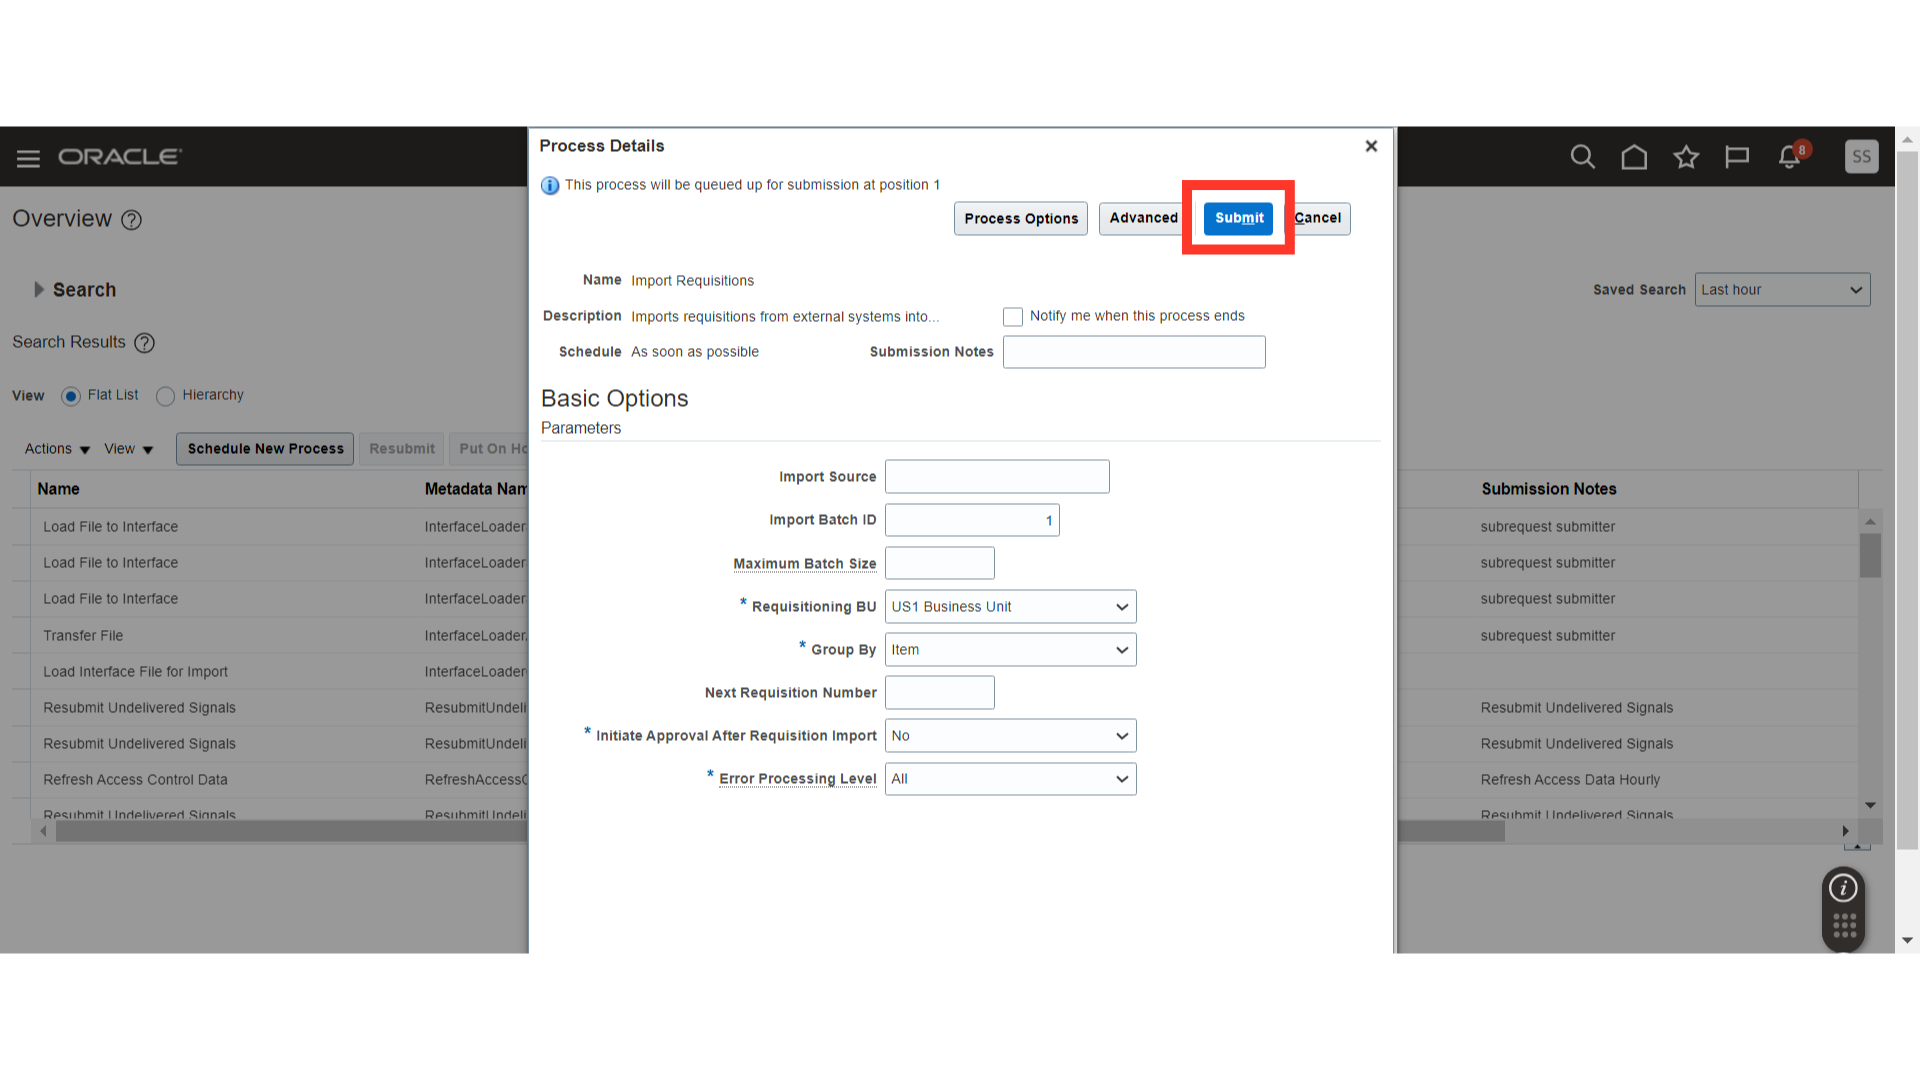
Submit the process by clicking the Submit Button.
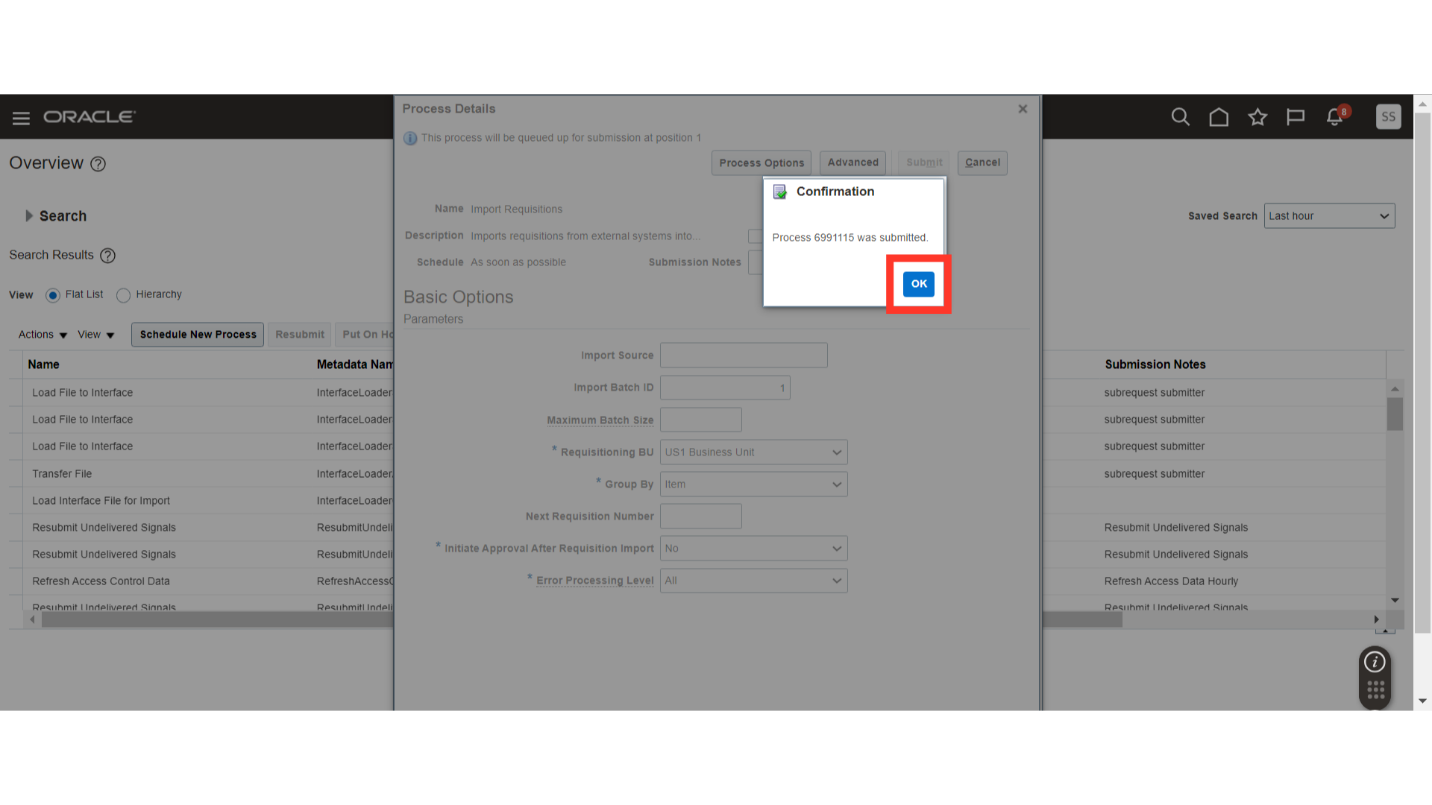
Once the process is submitted, then the system will pop up a confirmation message. Click on the OK button to proceed.
After submission of the process, click on the Refresh button and check for the process status. Wait until the process status gets into succeeded status.
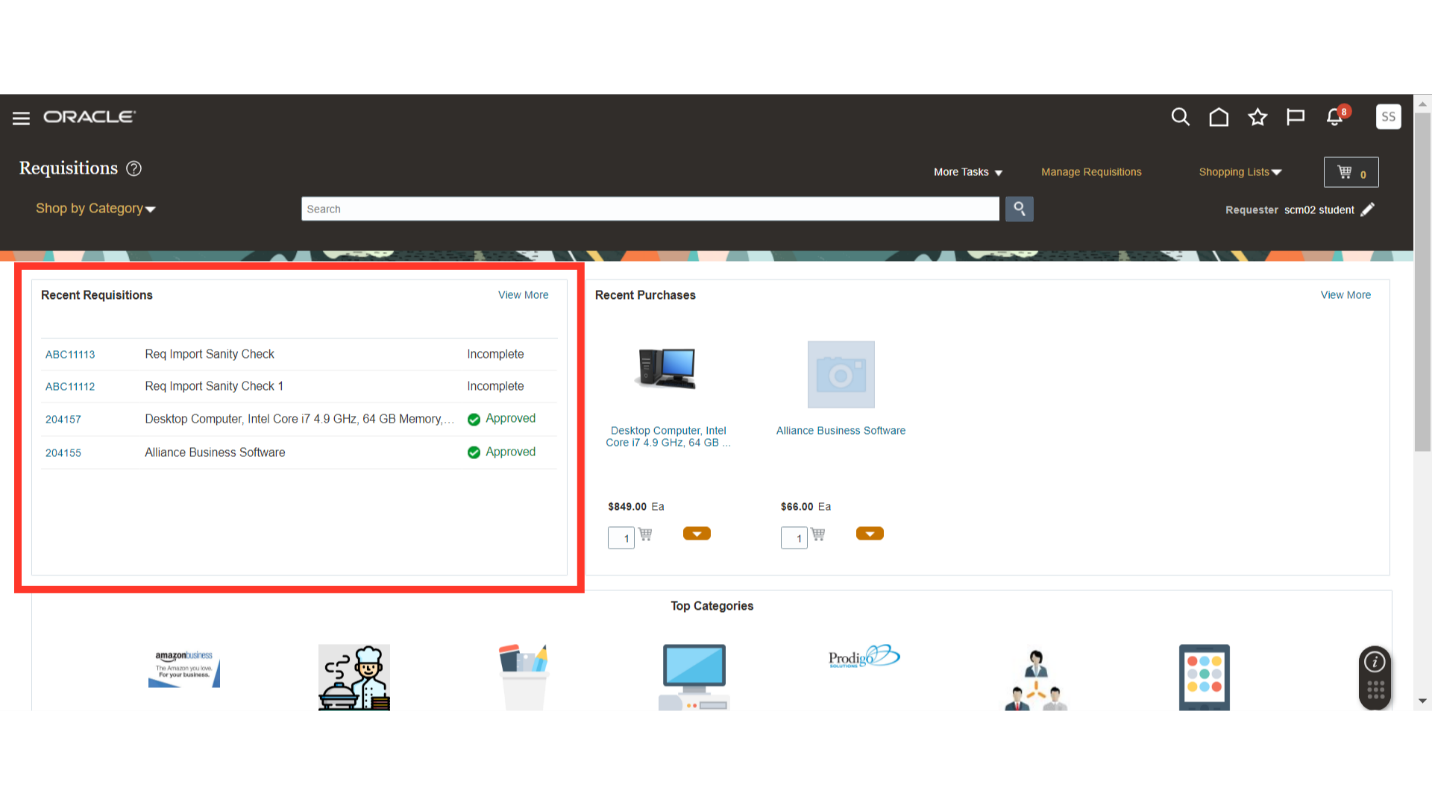
The requester will be able to see the requisitions which are loaded in their name into the Oracle Fusion Cloud. The requisitions will be visible in the requisitions work area and in Manage Requisitions.
The guide covered a detailed walkthrough of uploading purchase requisitions in bulk using FBDI file in Oracle Fusion. We have covered the steps such as preparing a file, loading it into Oracle, running required process, and verifying the requisition upload. Using this functionality, you will be able to load bulk requisitions using FBDI in Oracle Fusion Cloud.