AR Adjustment Processing
An adjustment is a correction to errors in amounts invoiced e.g., an incorrect rate charged for a service, or an incorrect quantity ordered. Receivables let you make either positive or negative adjustments to your invoices, debit memos, chargebacks, on-account credits, deposits, and guarantees. This guide will show you how to create adjustments in transactions both manually and by submitting the Create Automatic Billing Adjustments process in Oracle Fusion Receivables
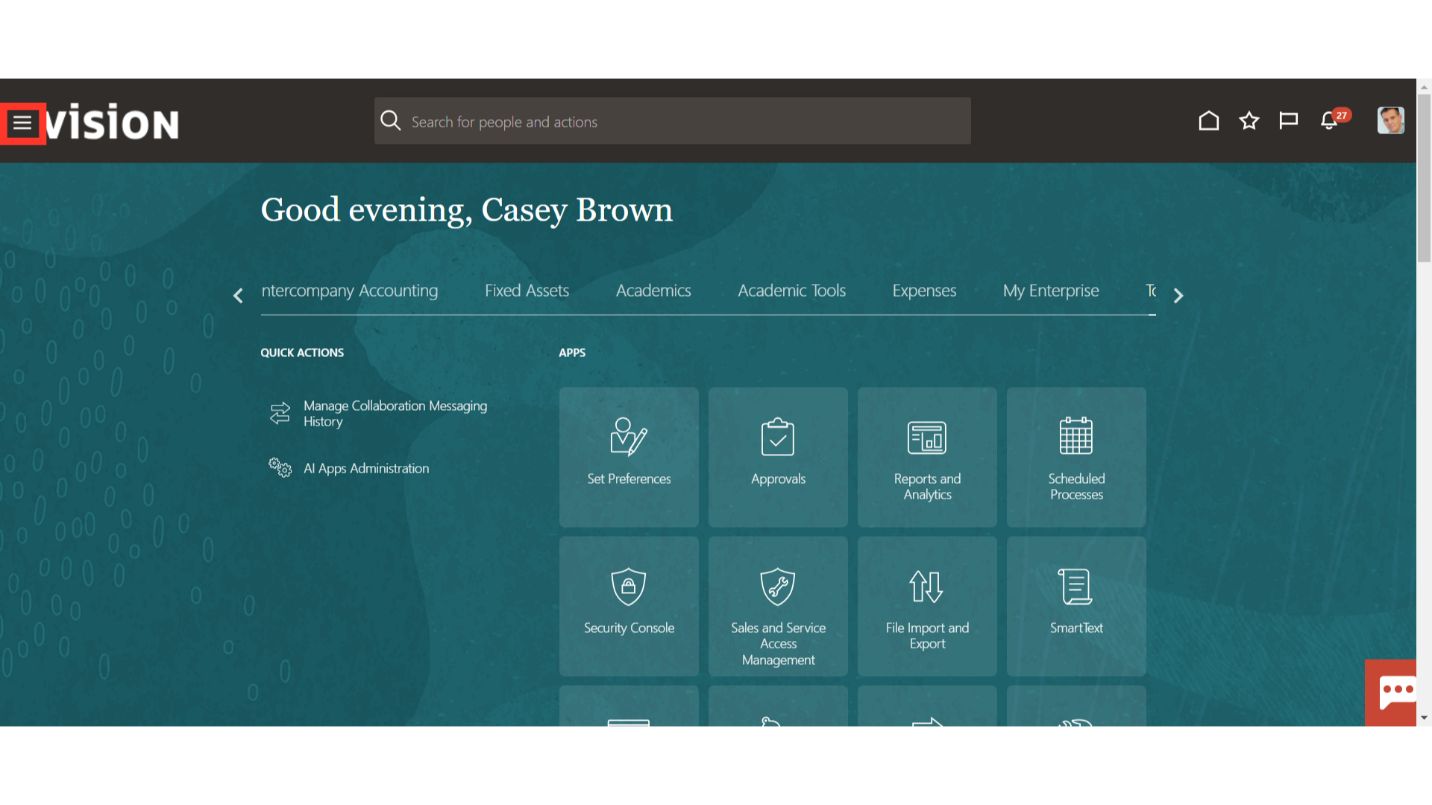
Click on the Navigator icon to access the Receivables menu.
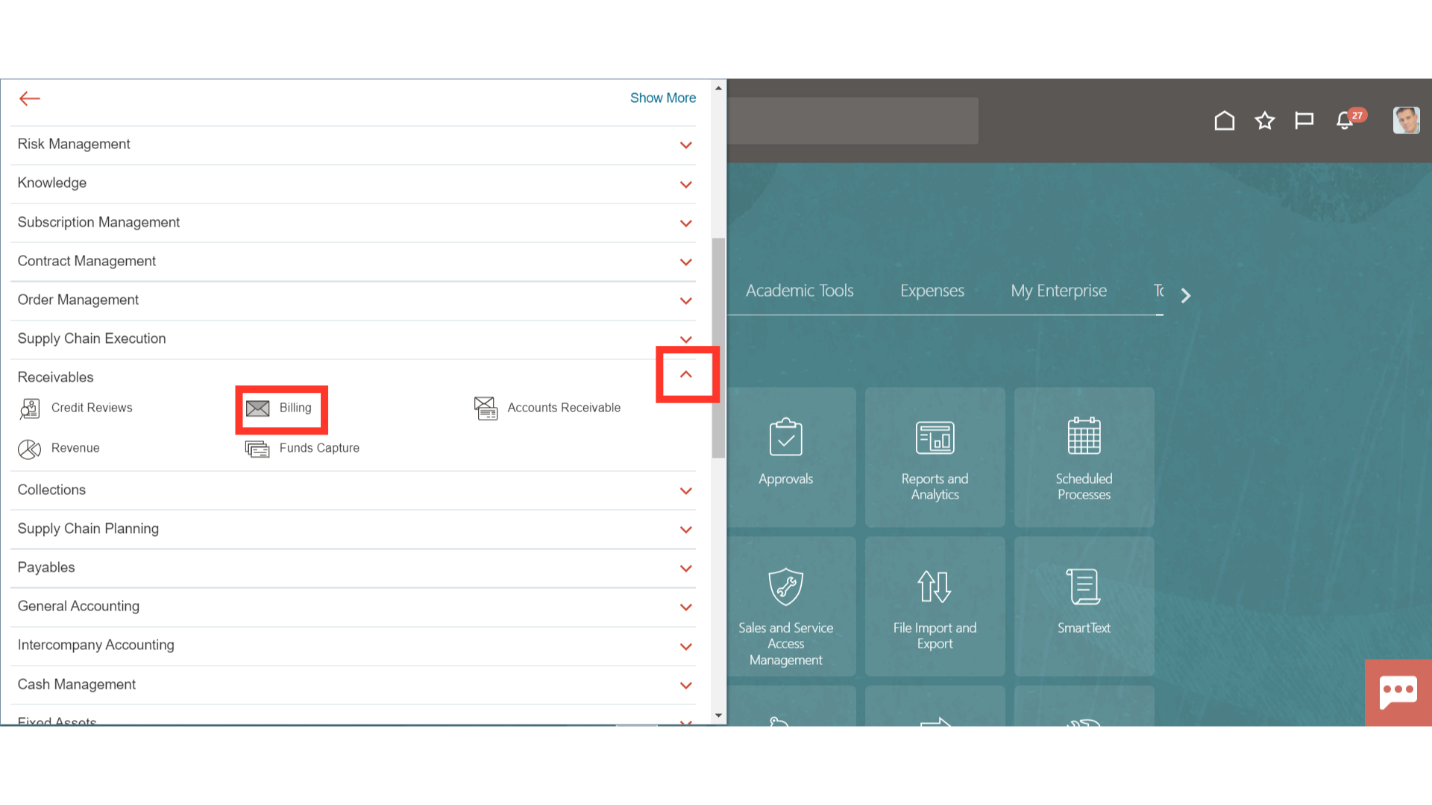
Access the Billing work area by selecting Billing under Receivables from the navigator. Alternatively, on the Home page, you may select the Receivables menu and under that select the Billing submenu.
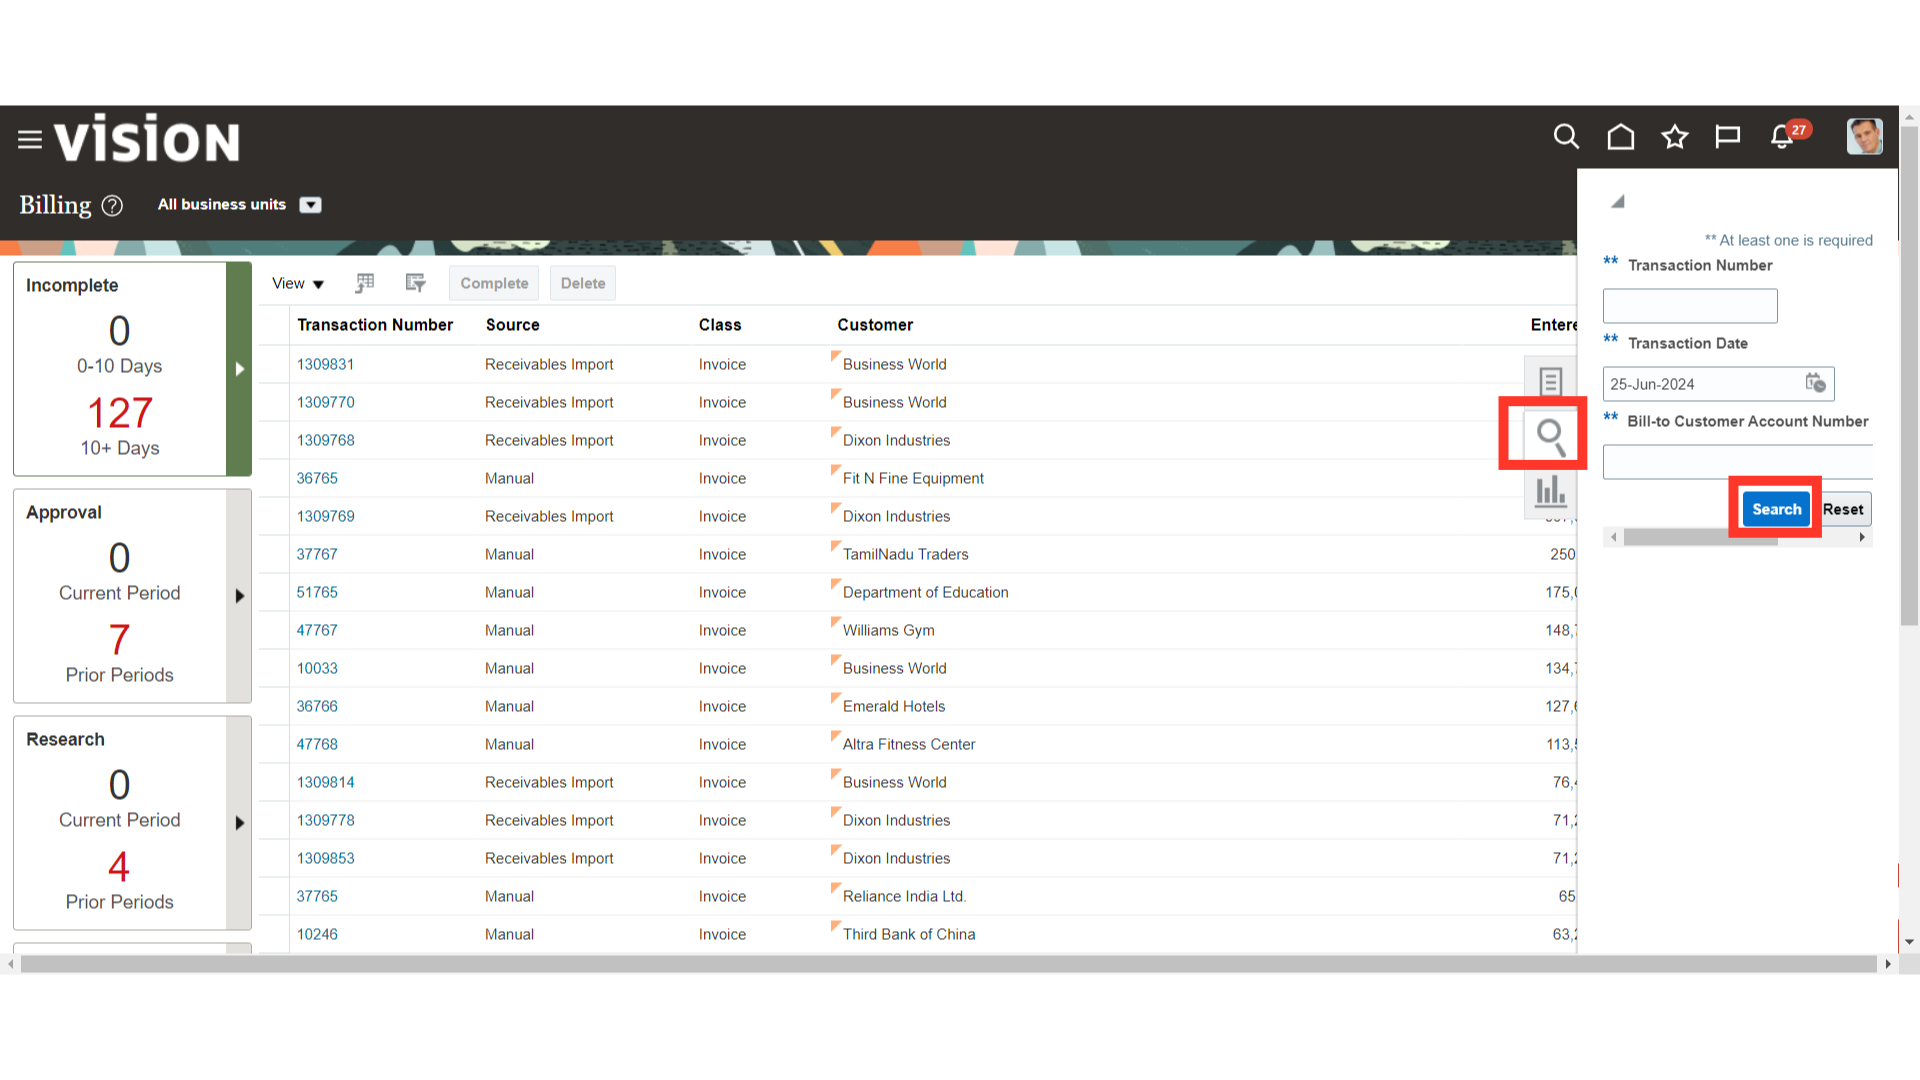
After selecting the magnifying lens, input the transaction date and press the search button to locate the transaction.
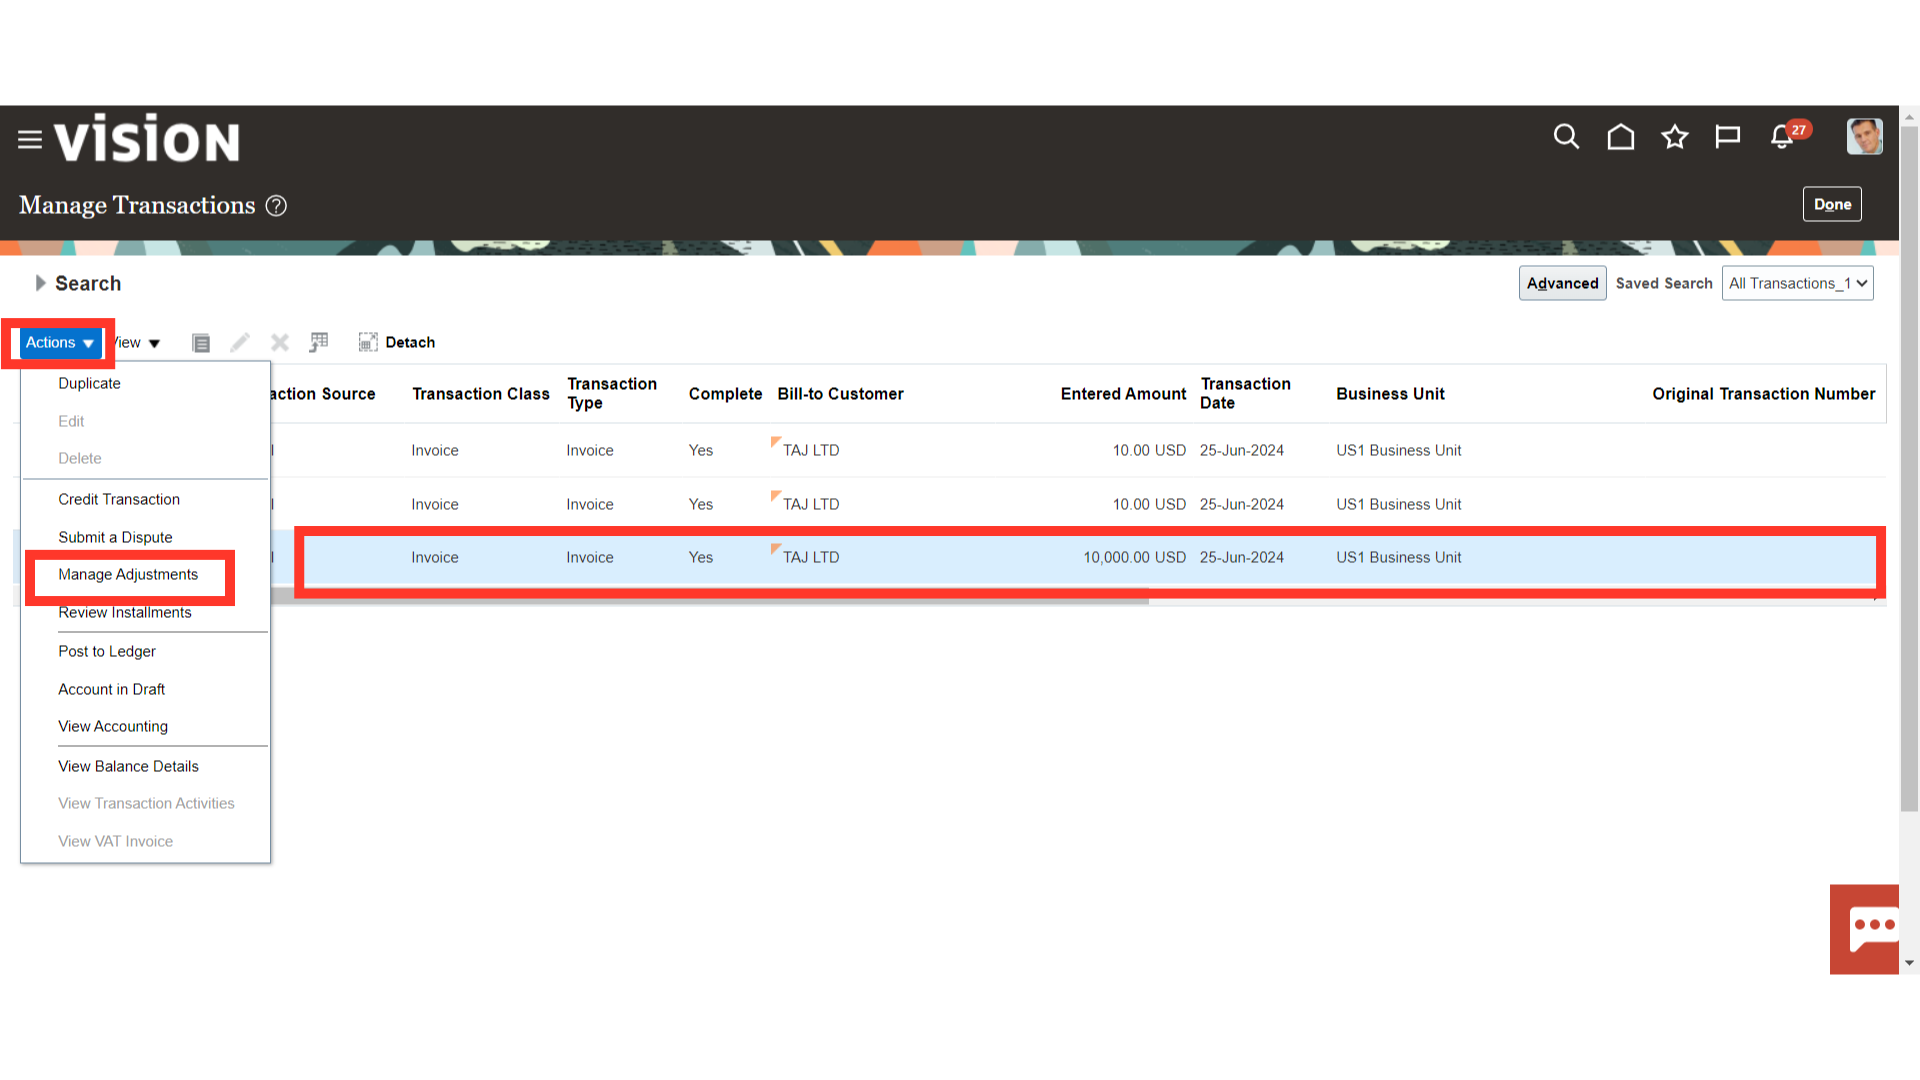
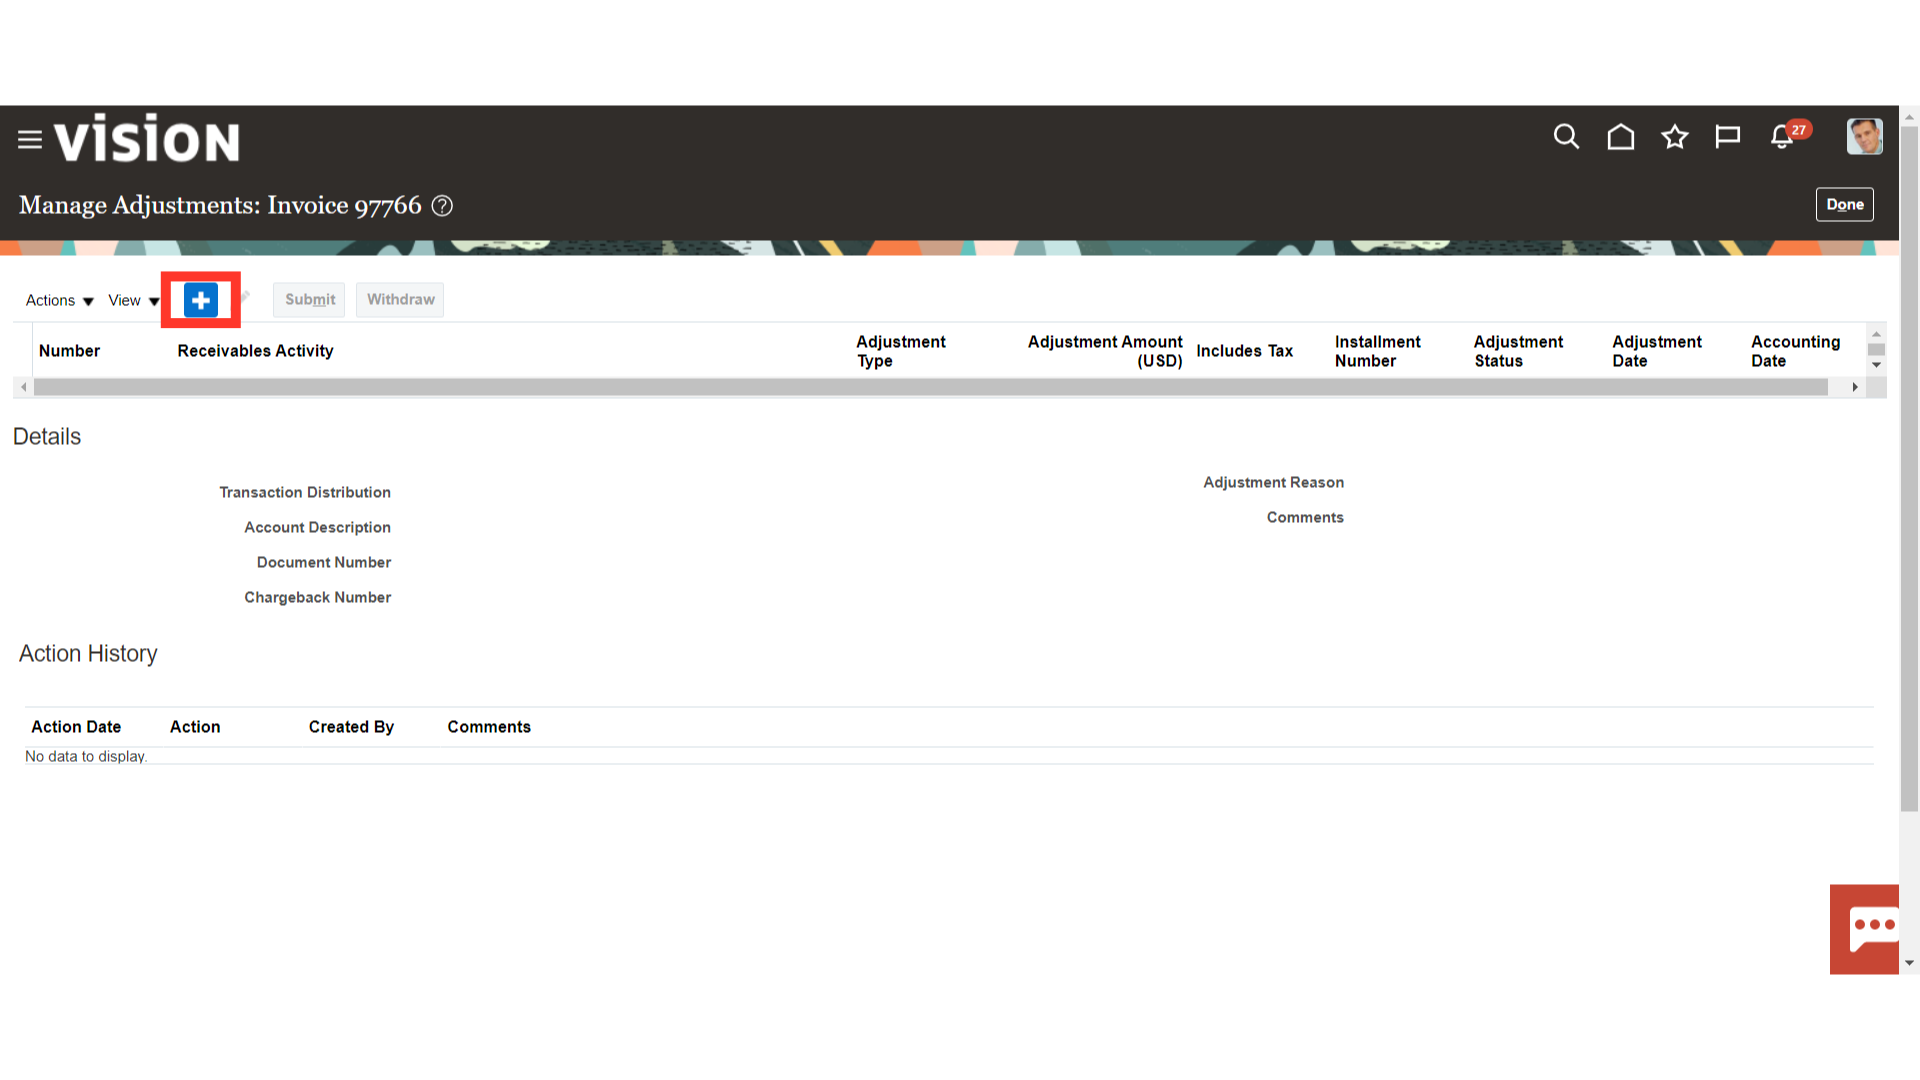
To perform the adjustments, click on Manage Adjustments under Actions after selecting the Transaction.
Click on the Plus Icon to create the adjustments to the transaction.
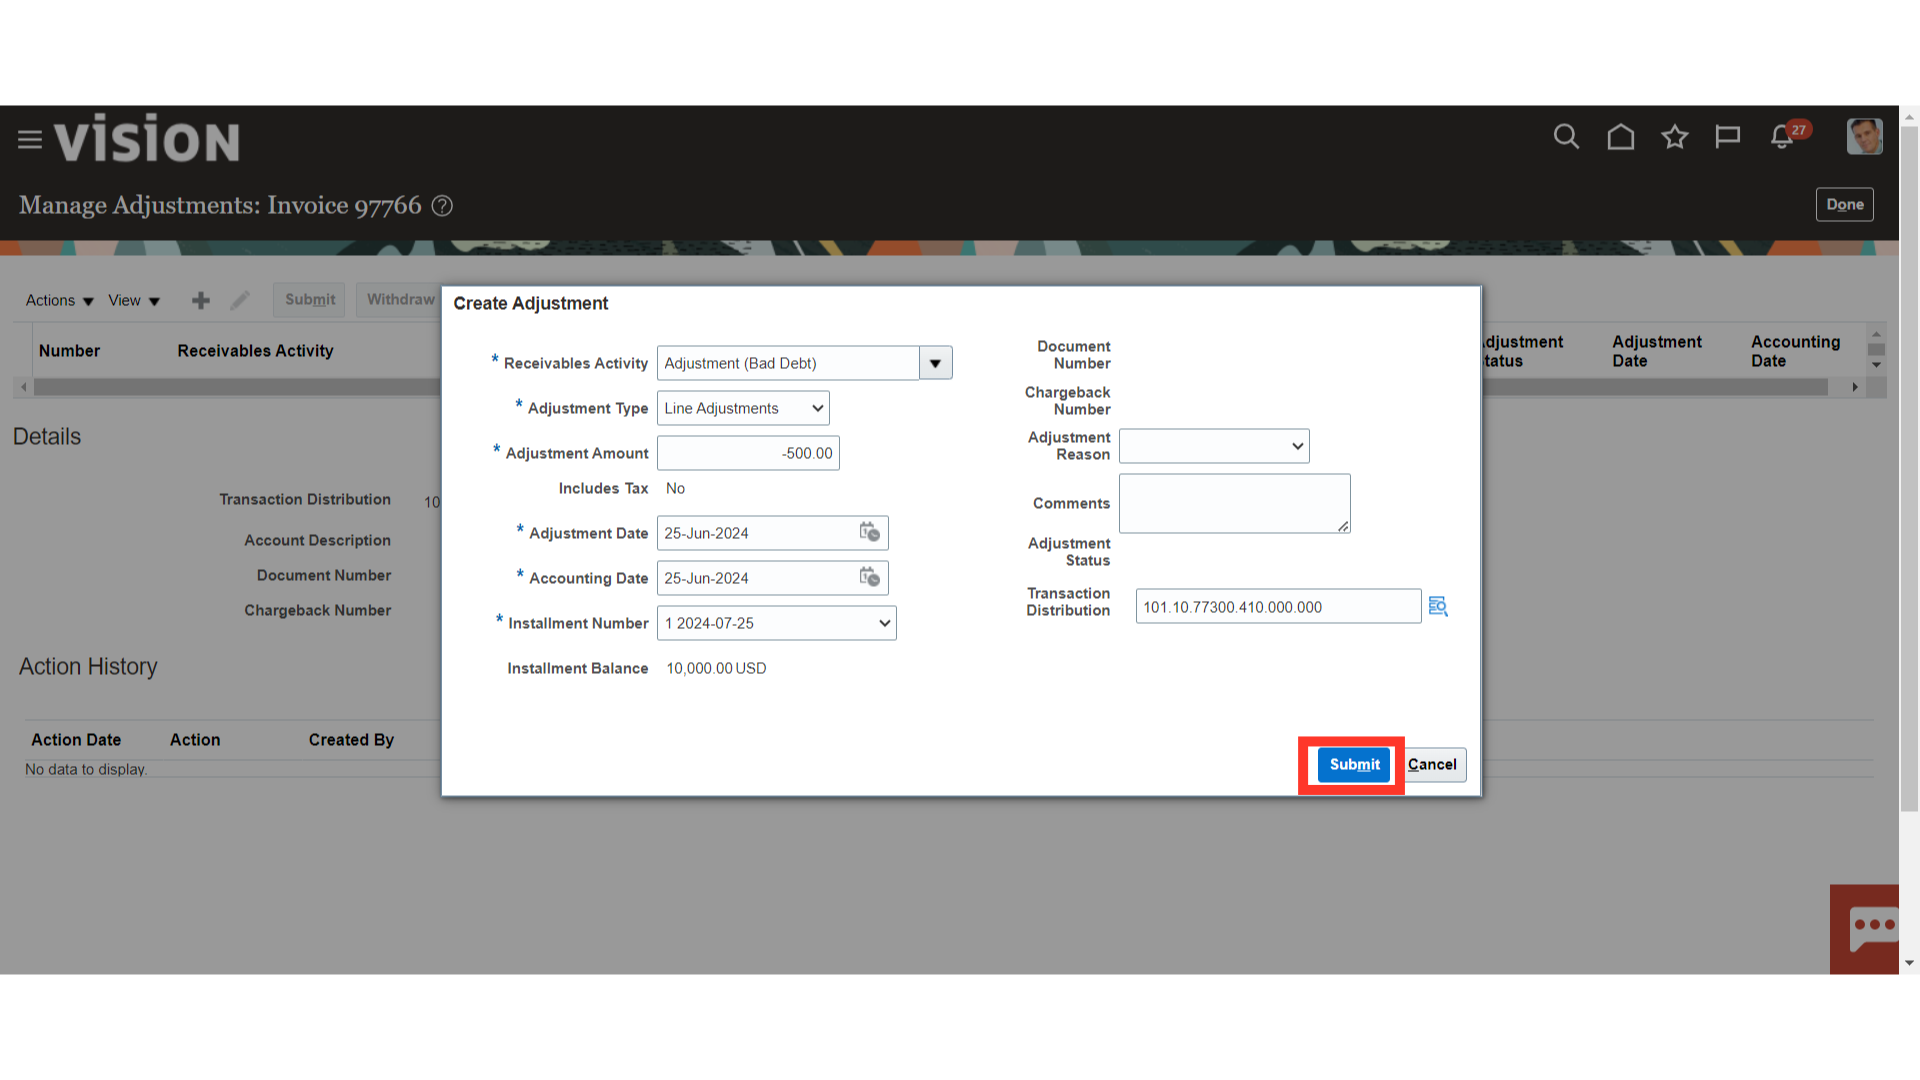
Select the Receivables Activity from the list of values based on which account combination would be defaulted.
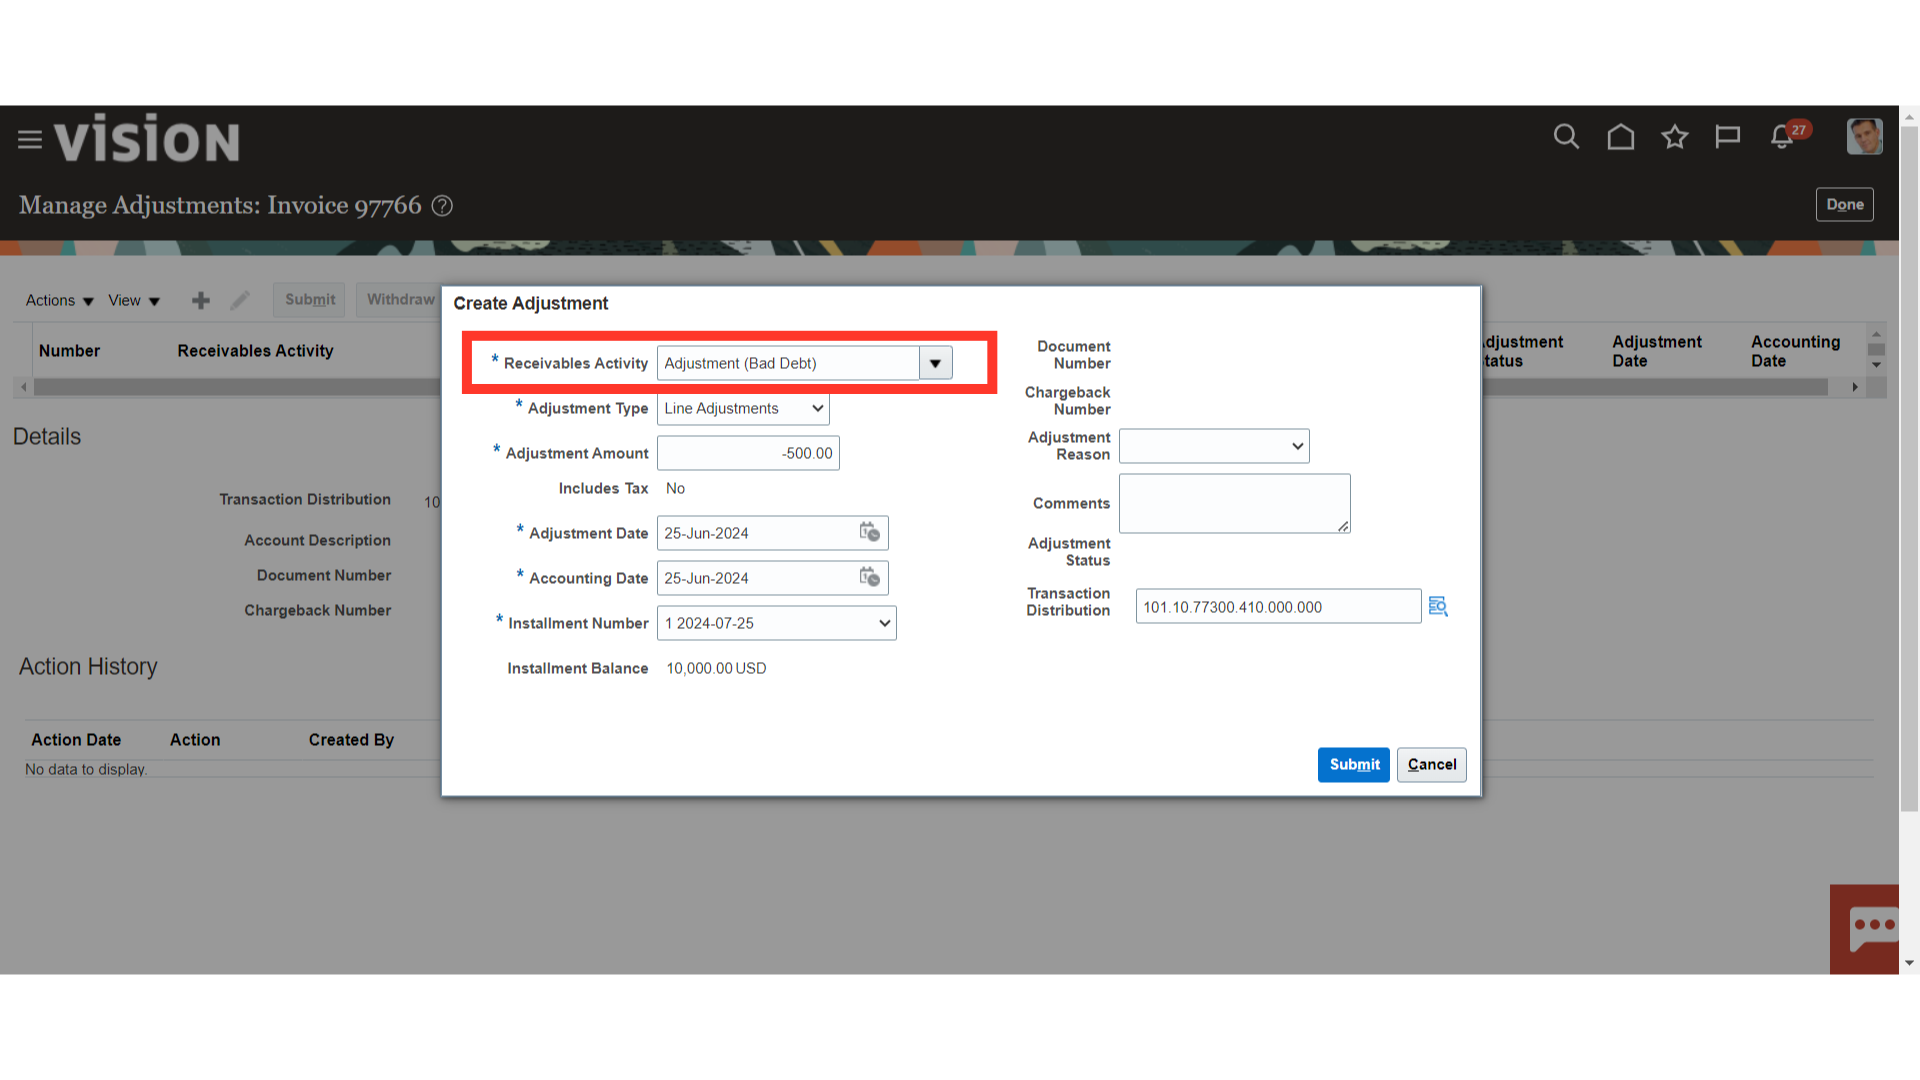
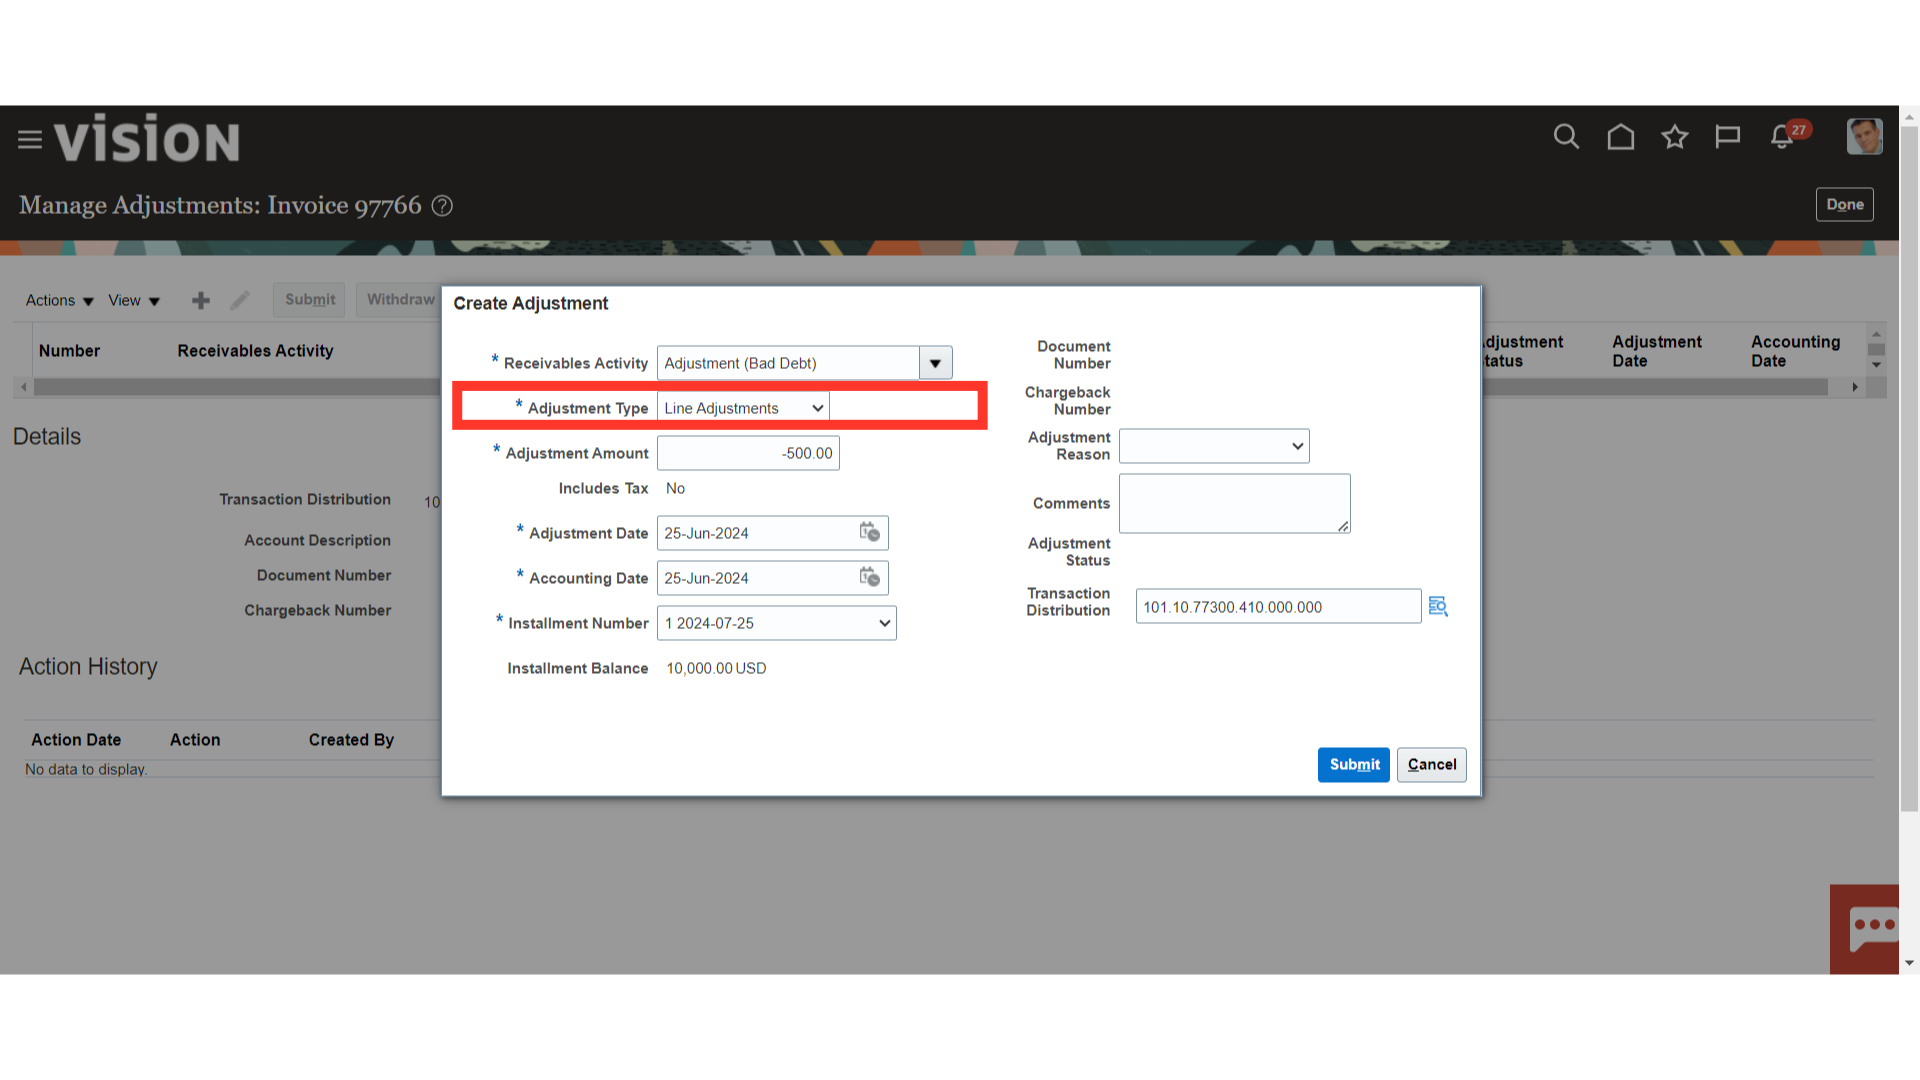
You can create an adjustment at the invoice header level or adjust only specific elements of an invoice, debit memo, credit memo, or chargeback. For example, you can adjust individual invoice lines, or the tax, freight, and finance charges associated with a transaction. To do this, specify an adjustment type of Line, Tax, Freight, Charges, or Invoice when creating your adjustment
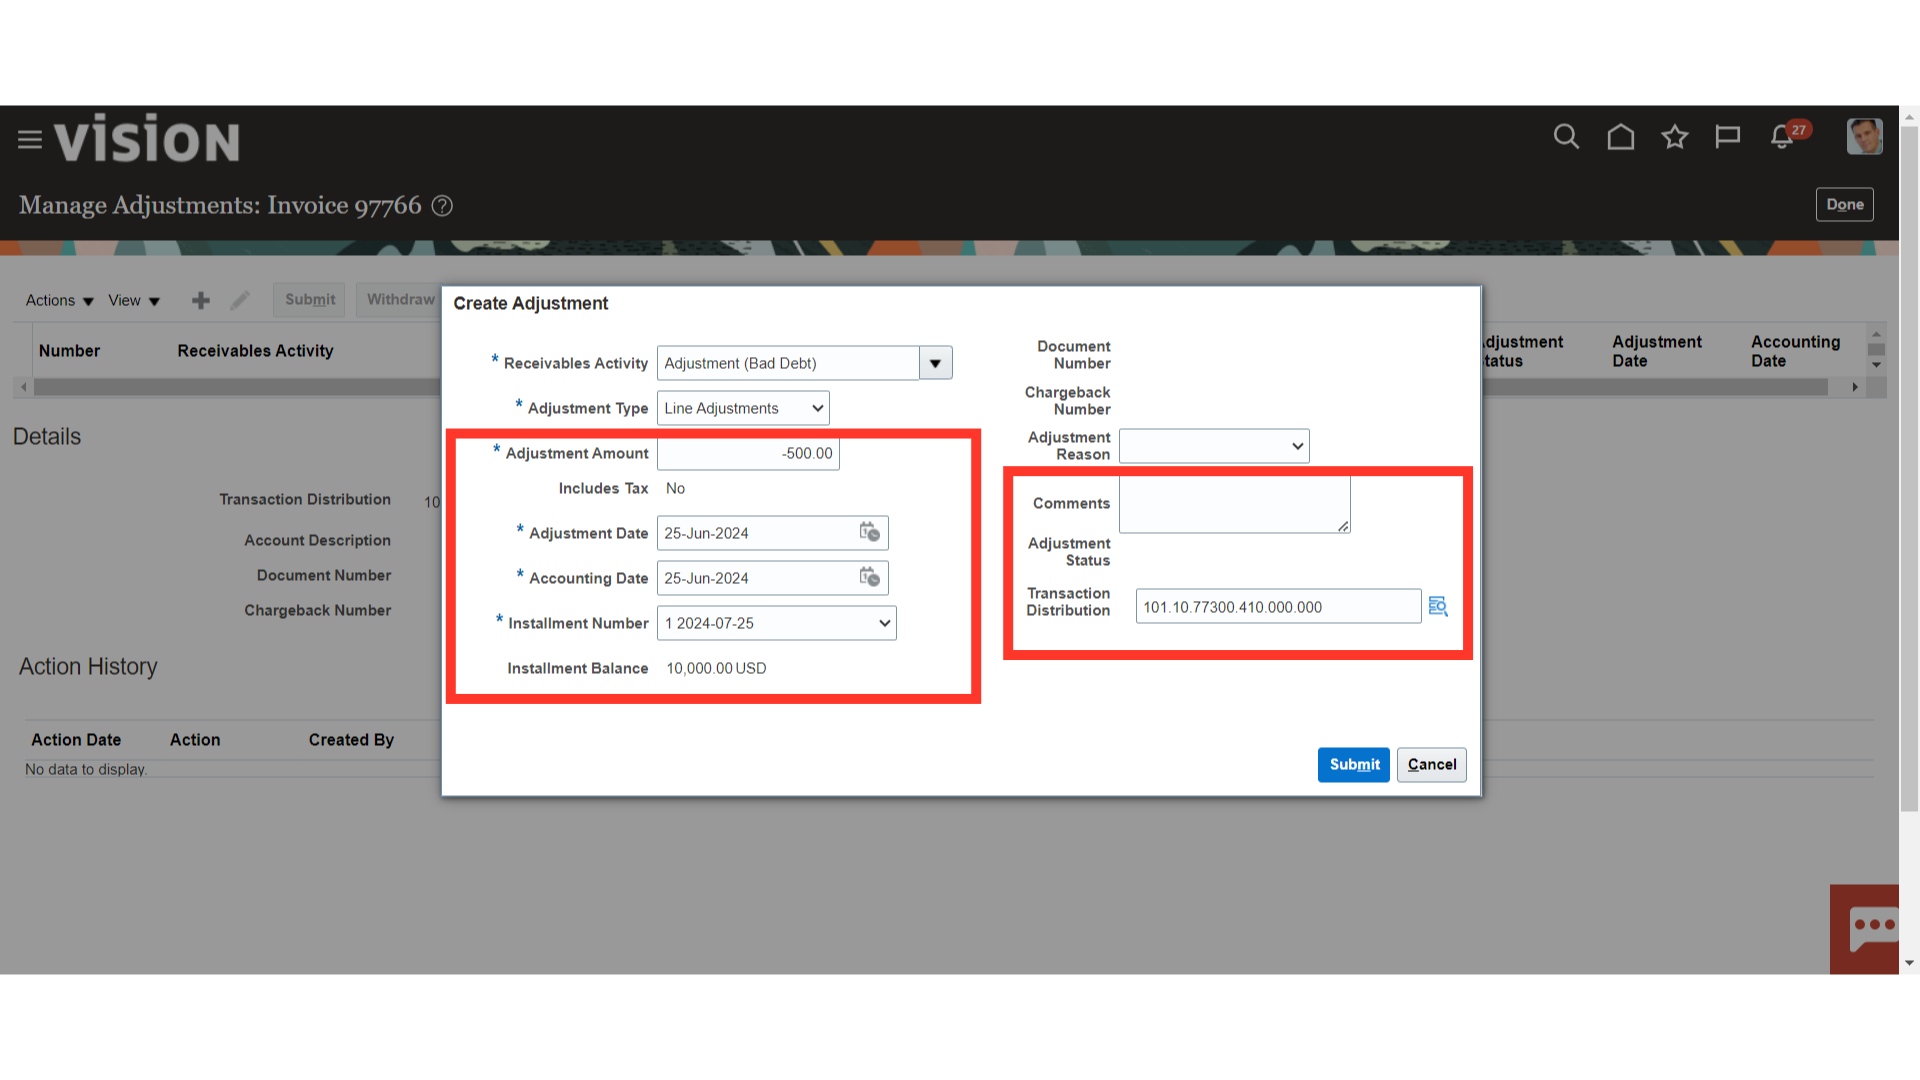
In the Adjustment amount field, enter the amount that needs to be changed. Choose the accounting date as well as the day the adjustment is to be recorded. The receivables activity defaults to transaction distribution. Don’t forget to add any more details in the comments section.
Click on the Submit button, adjustment will be created directly if it’s within your approval limit, Otherwise, approval is required from the user having approval.
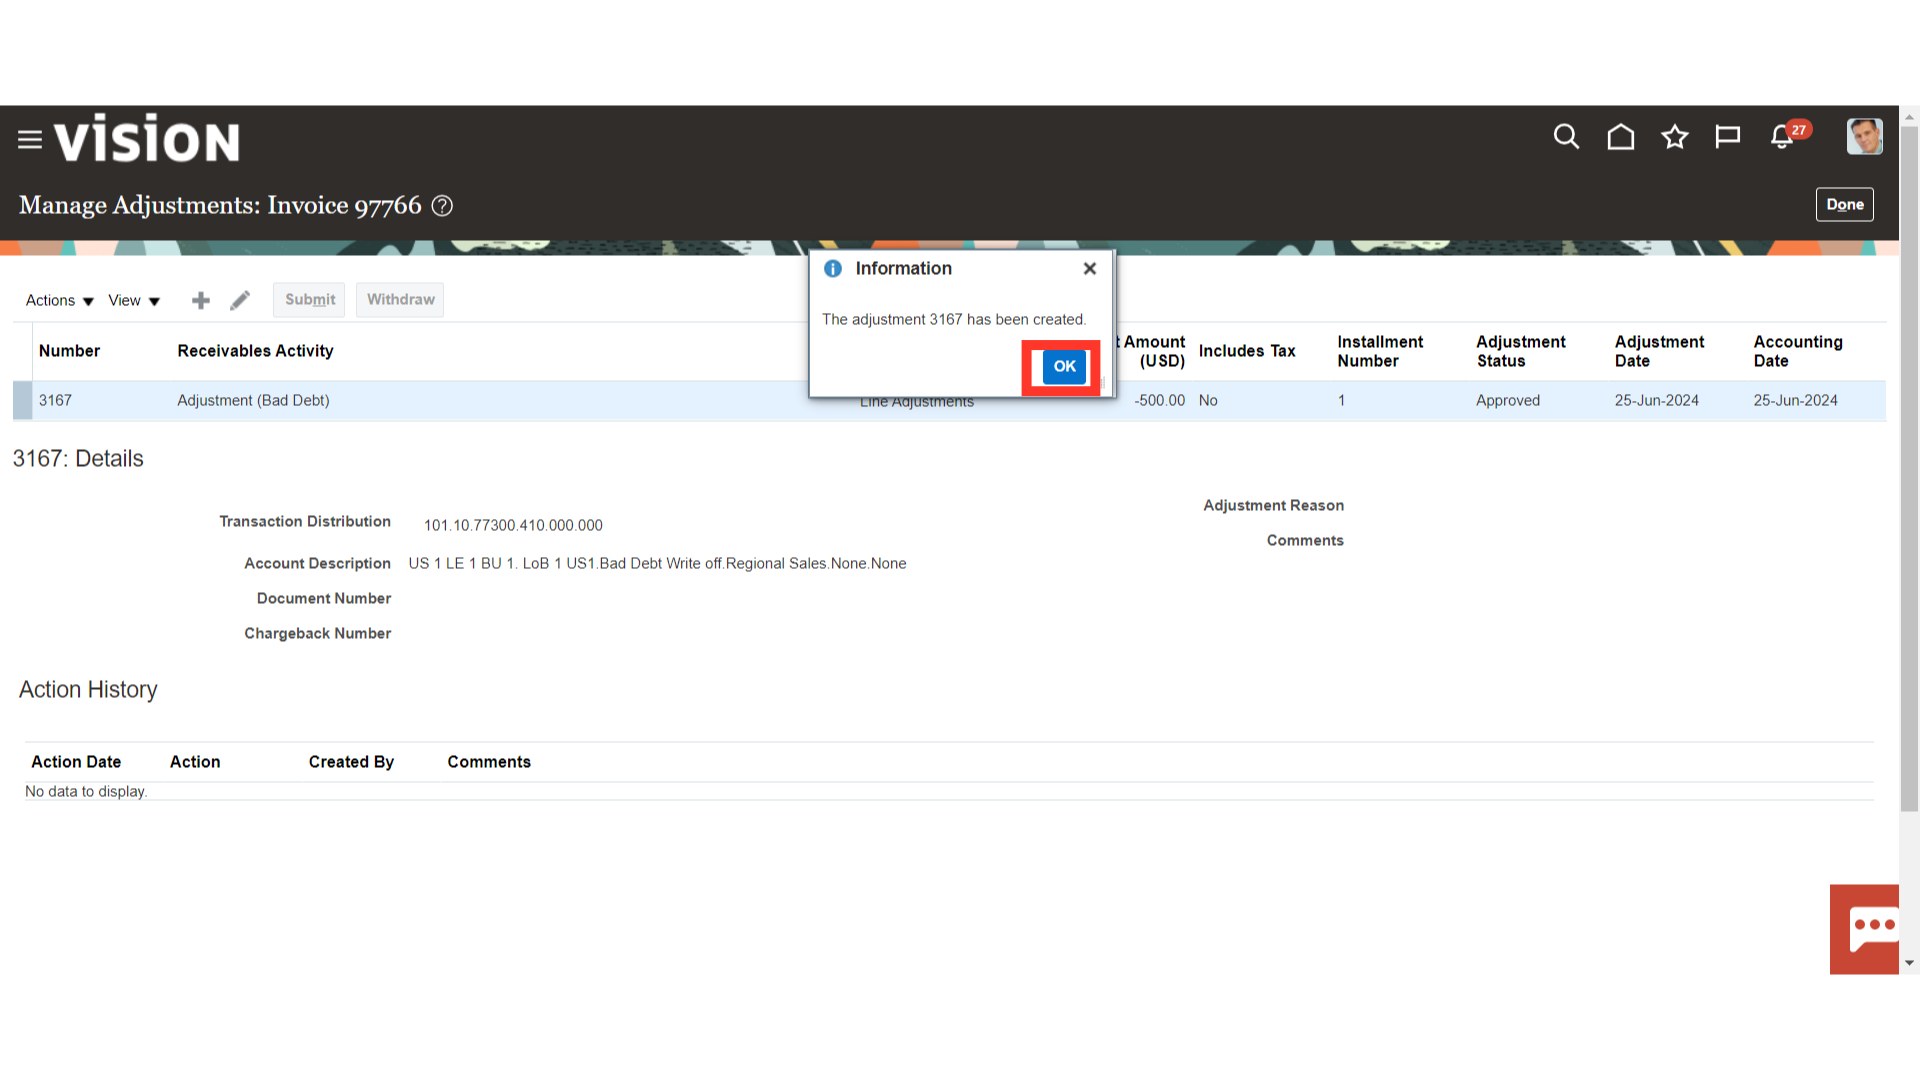
A confirmation message is displayed along with the adjustment number.
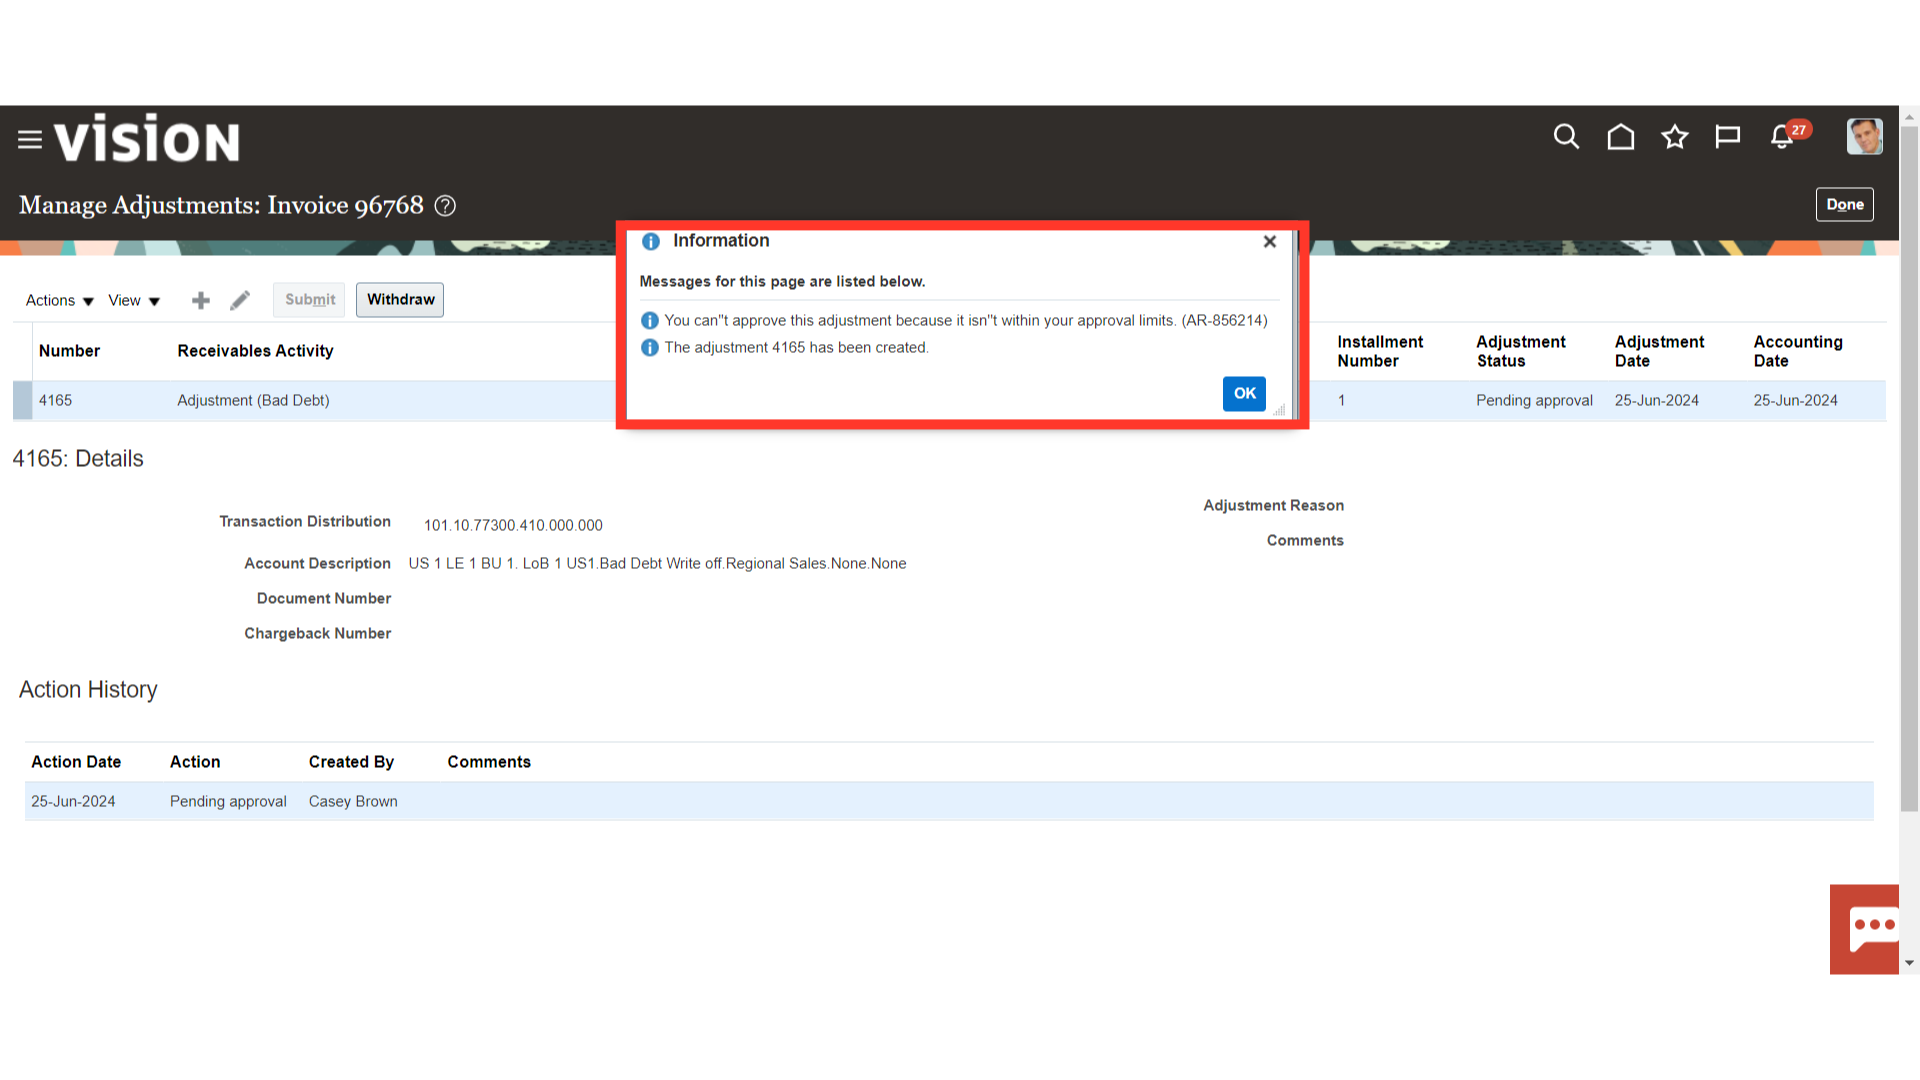
If the adjustments are not within the user’s approval limit then the message will be displayed as highlighted and it will be in the Pending Approval status.
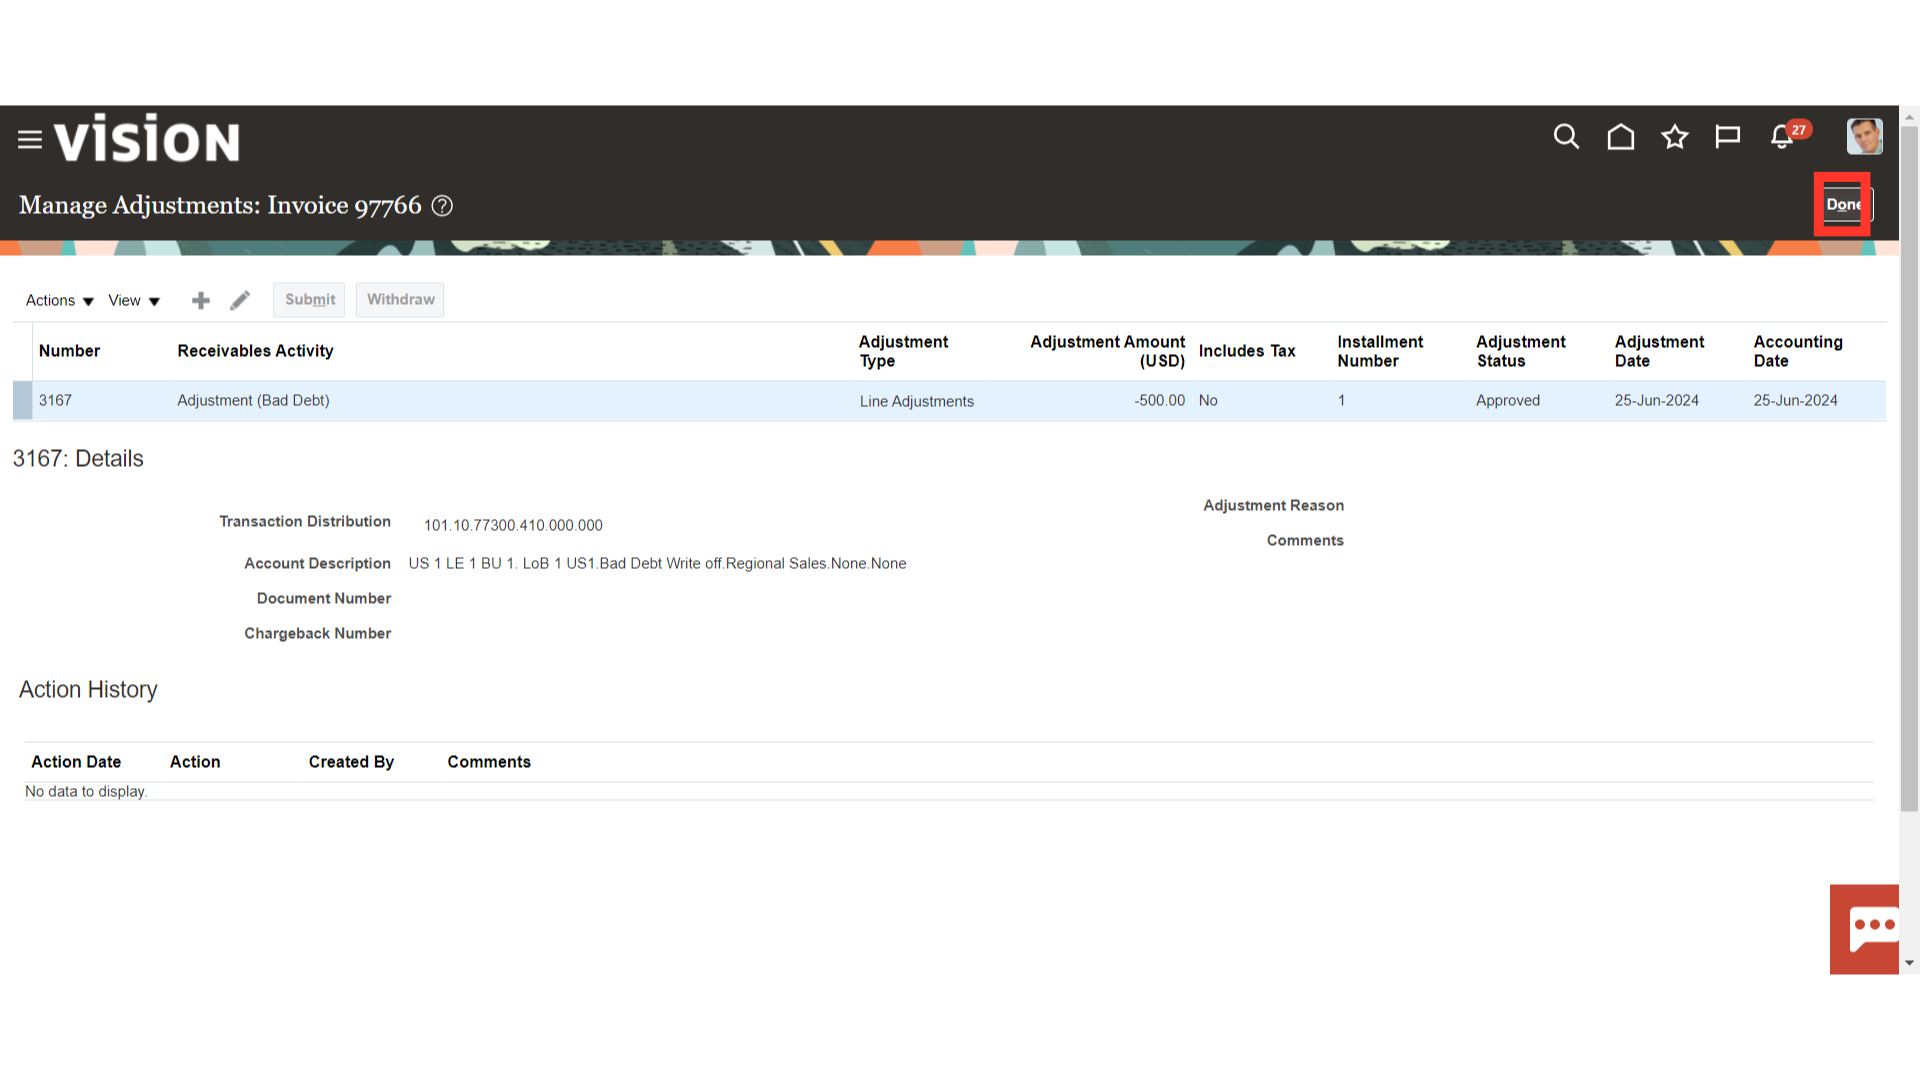
Click on the Done button, to close this window.
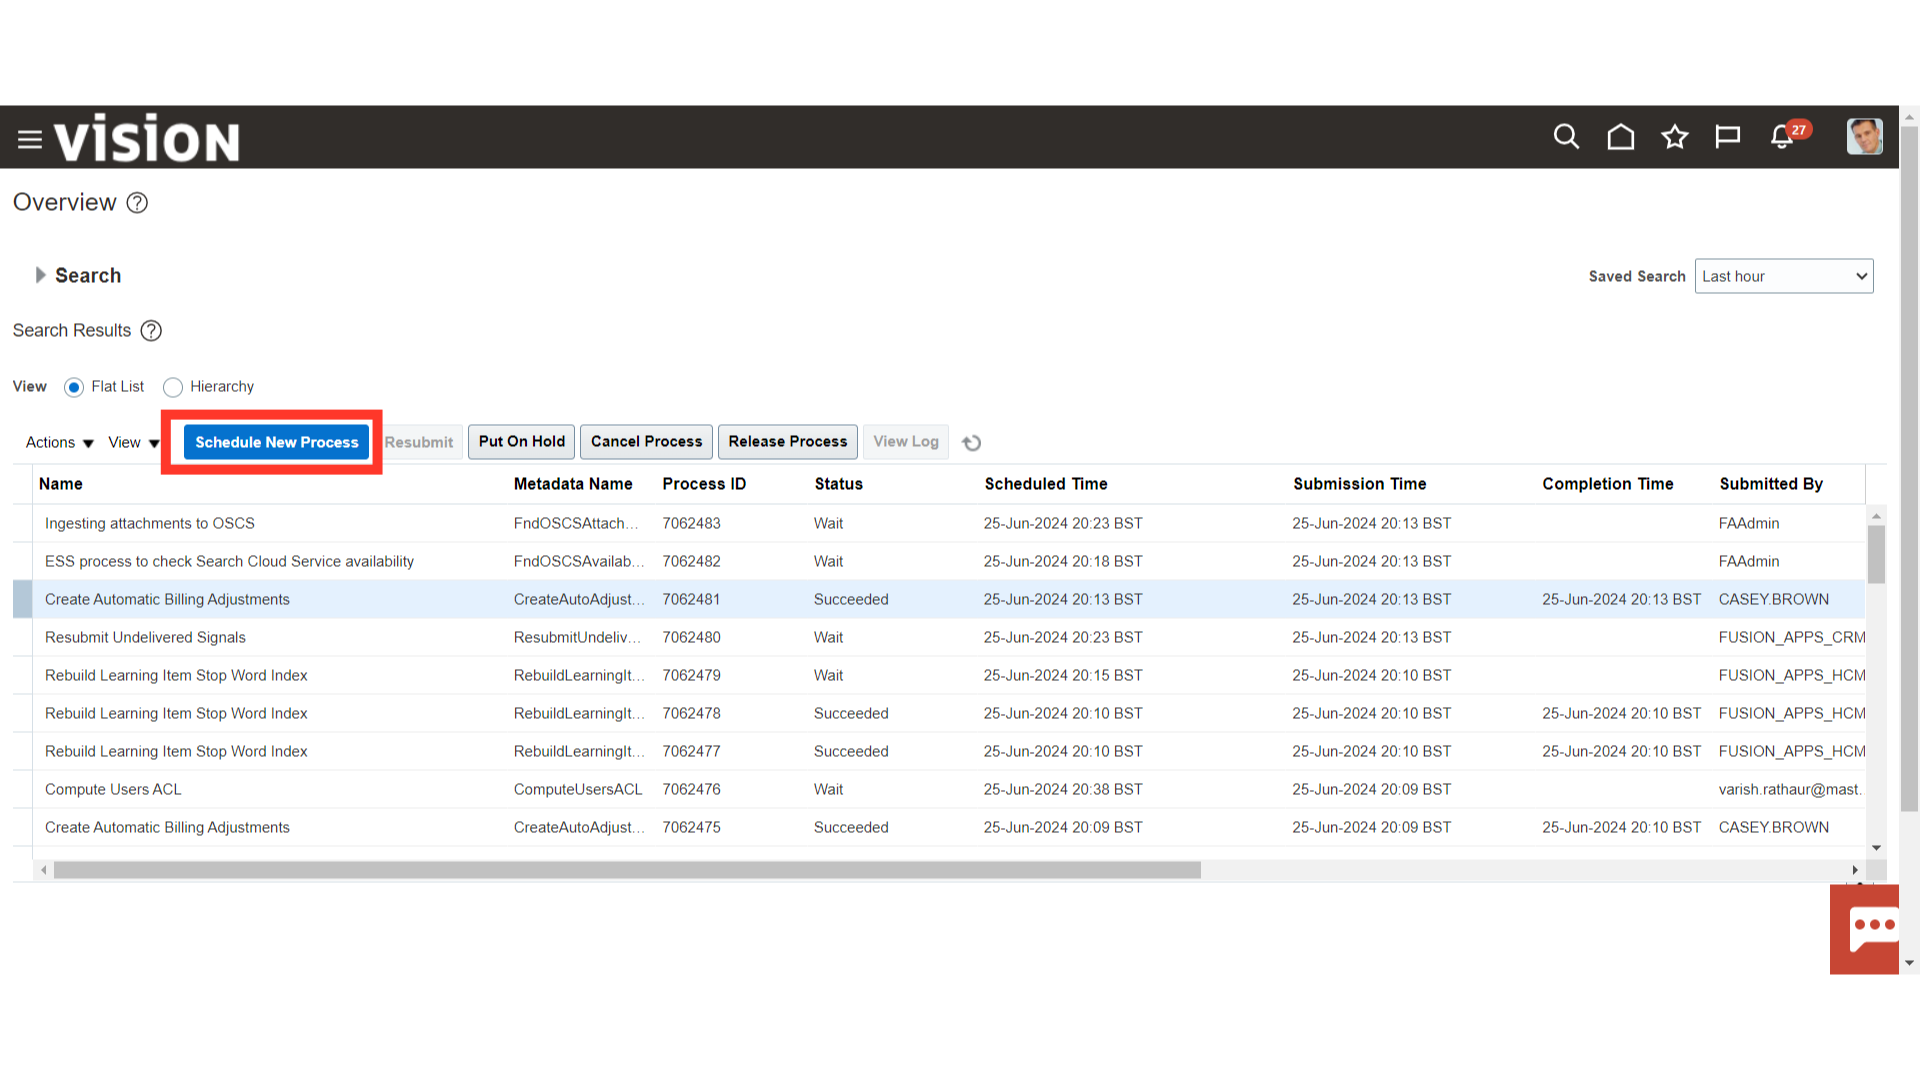
To submit invoice adjustments in bulk, select the Scheduled Processes submenu under the Tools menu

To run the new process, click on the Schedule New Process button.
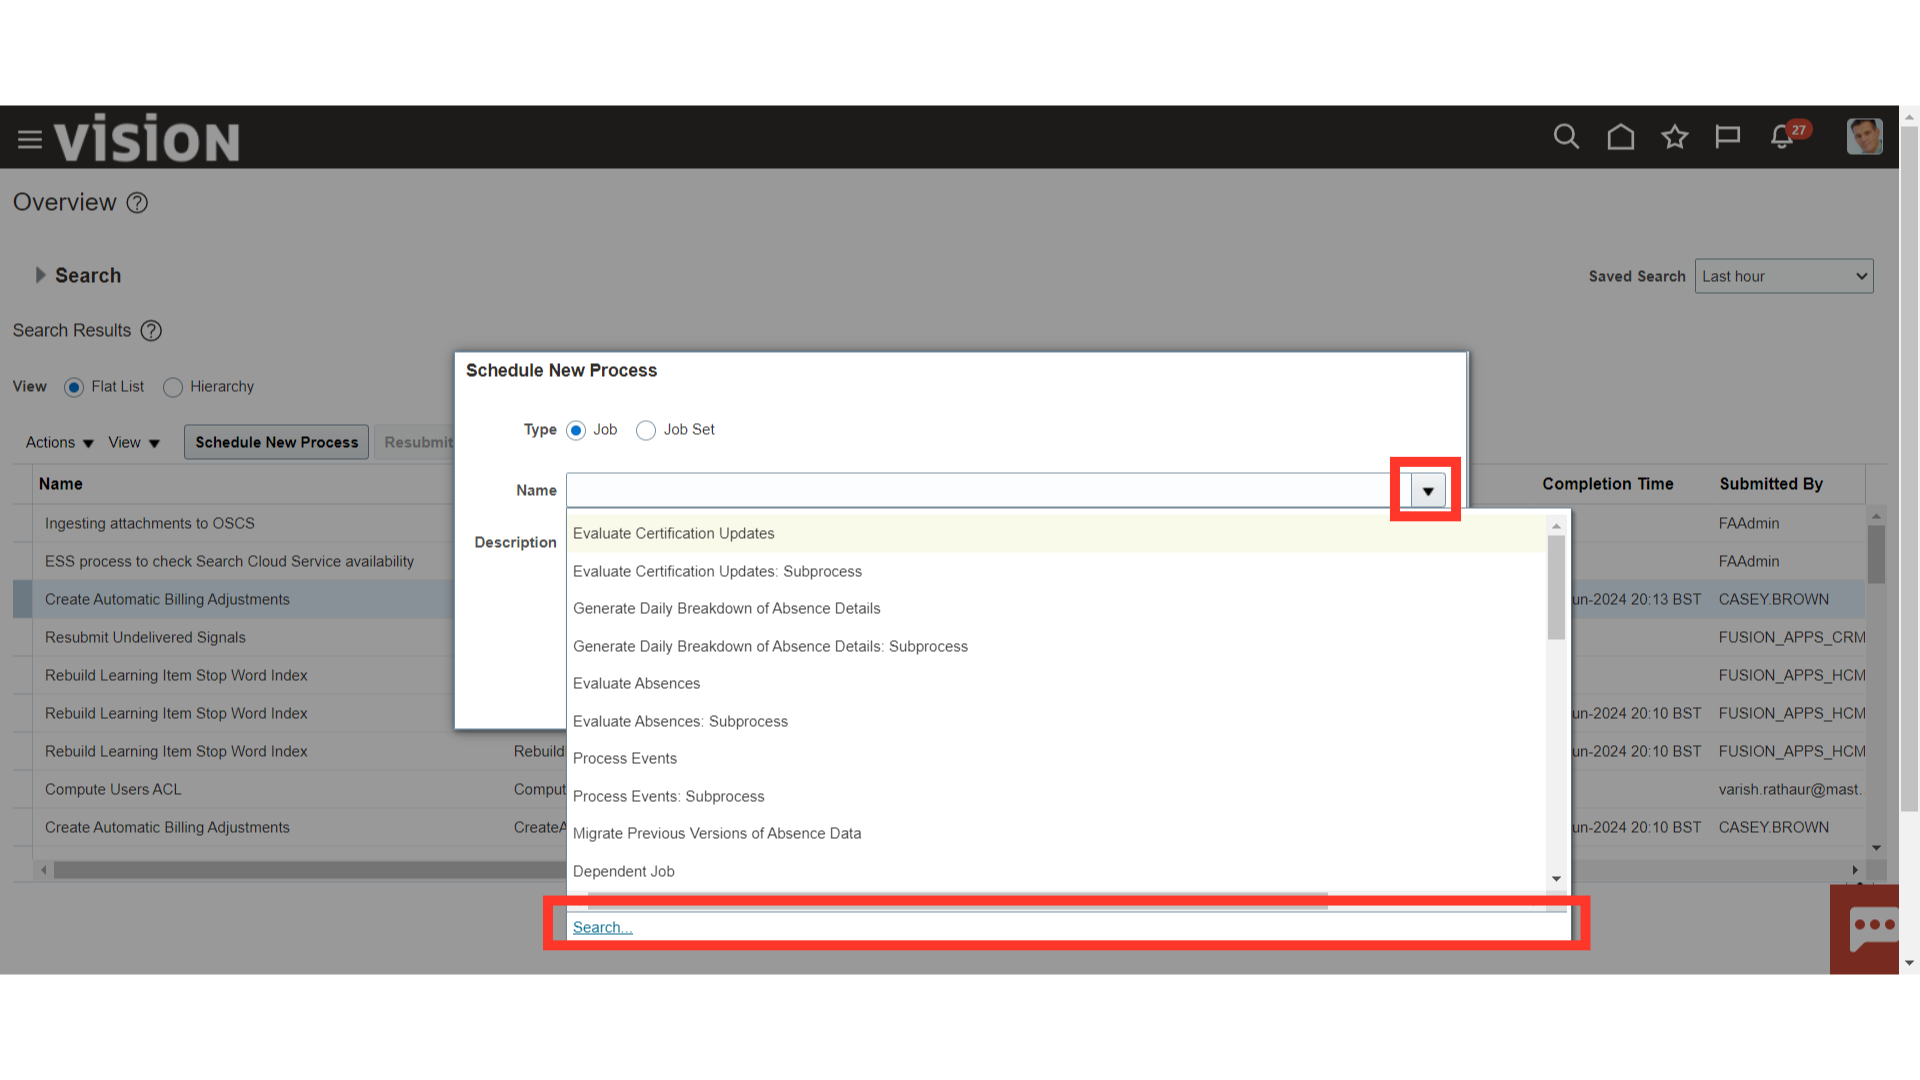
After selecting the Drop-down icon, click the search hyperlink to find the process name.
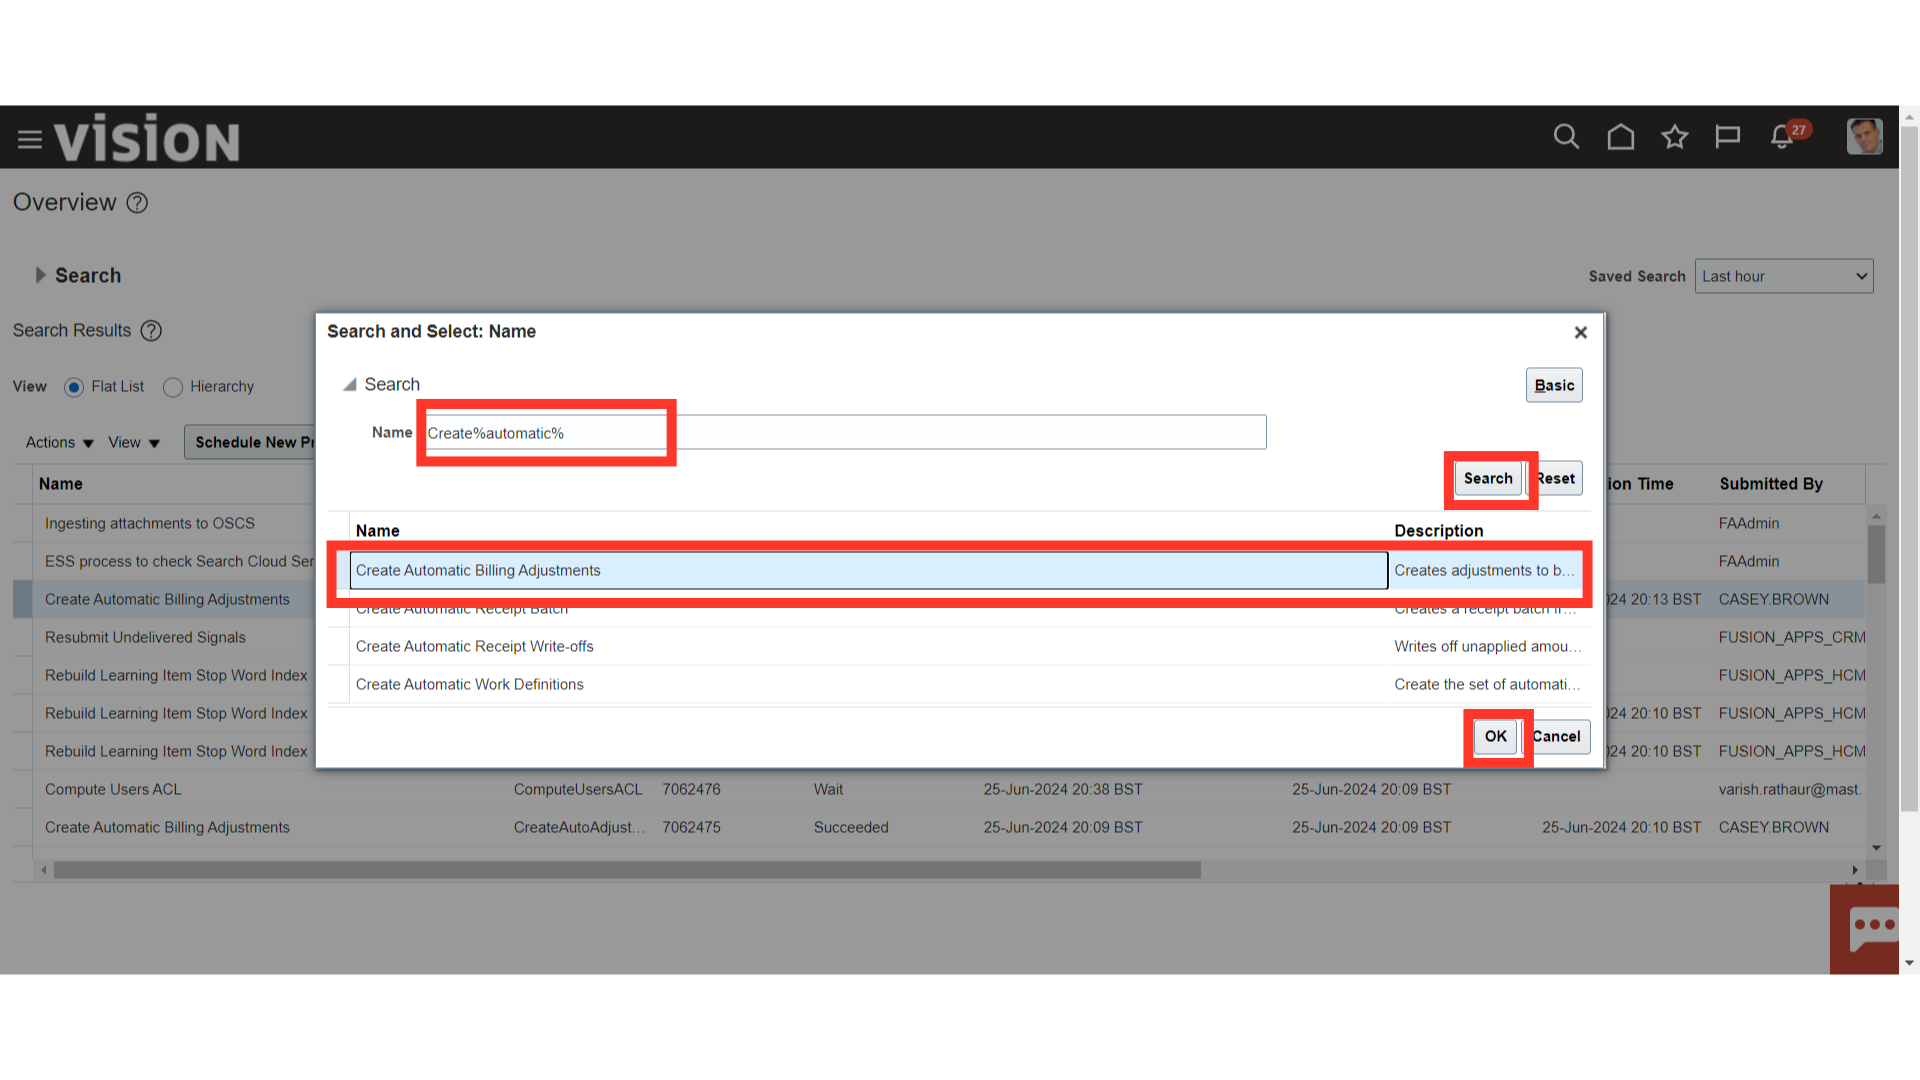
After entering the process name, using wild character search with a percentage sign click on the Search button to search the process name. Select the Create Automatic Billing Adjustments process name, and then click on the OK button to continue.
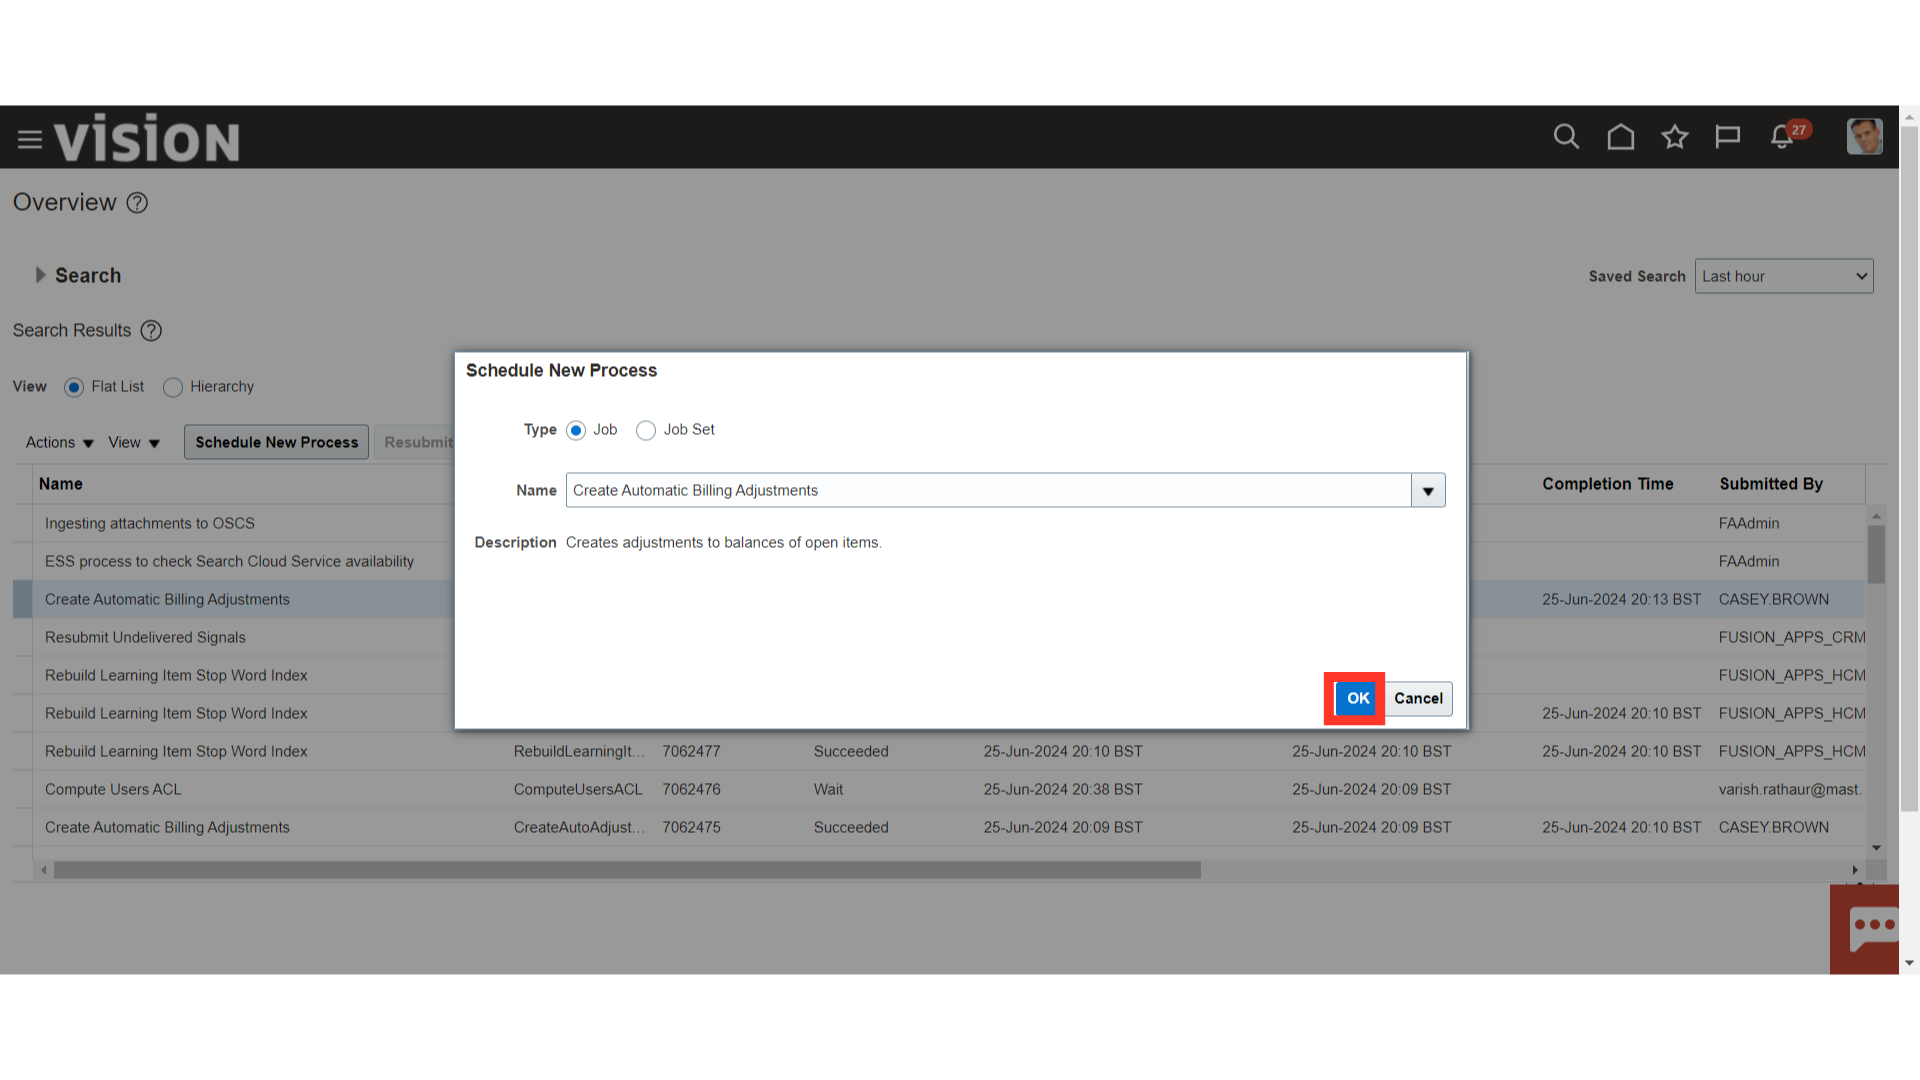
Again, Click on the OK button to run the Automatic Billing Adjustments process.
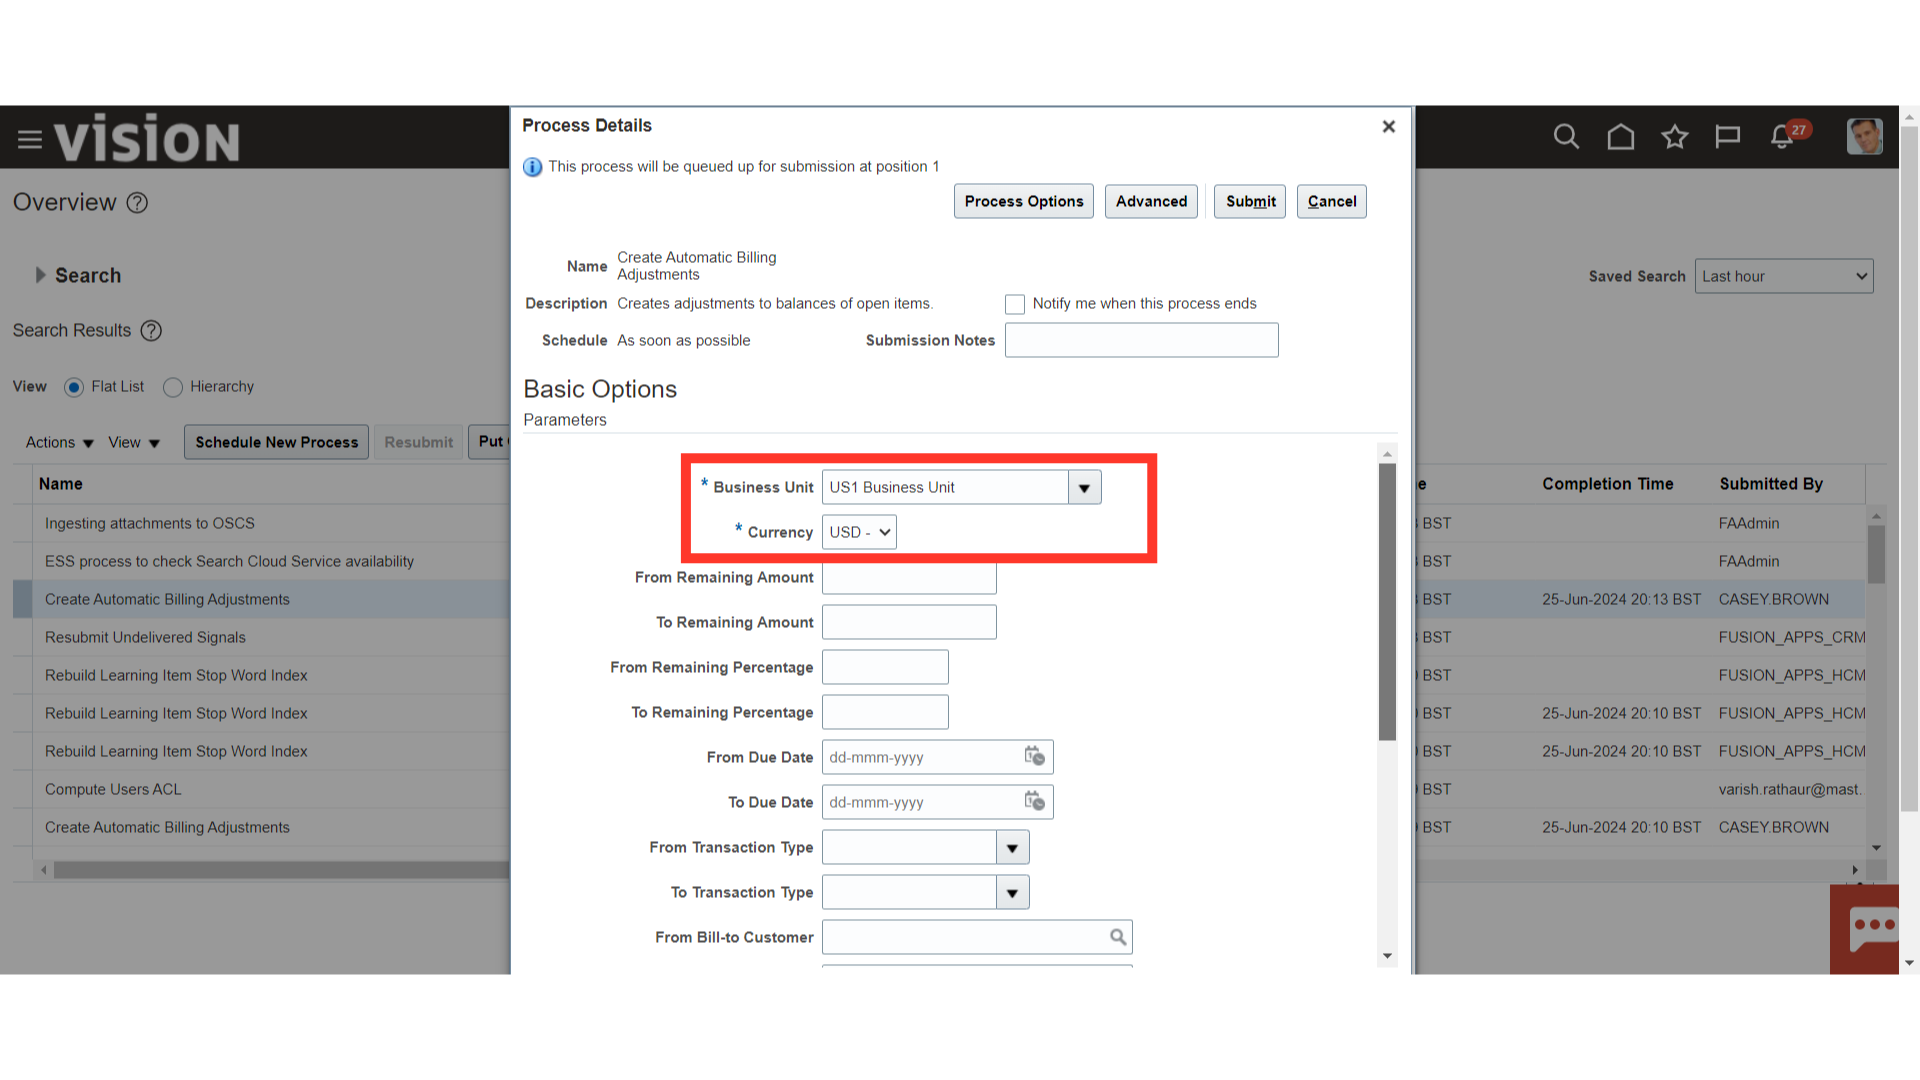
Select the applicable business unit from the list of values for whose transactions are to be adjusted. Enter the Invoice Currency of transactions to adjust. The default is your functional currency, but you can change it.
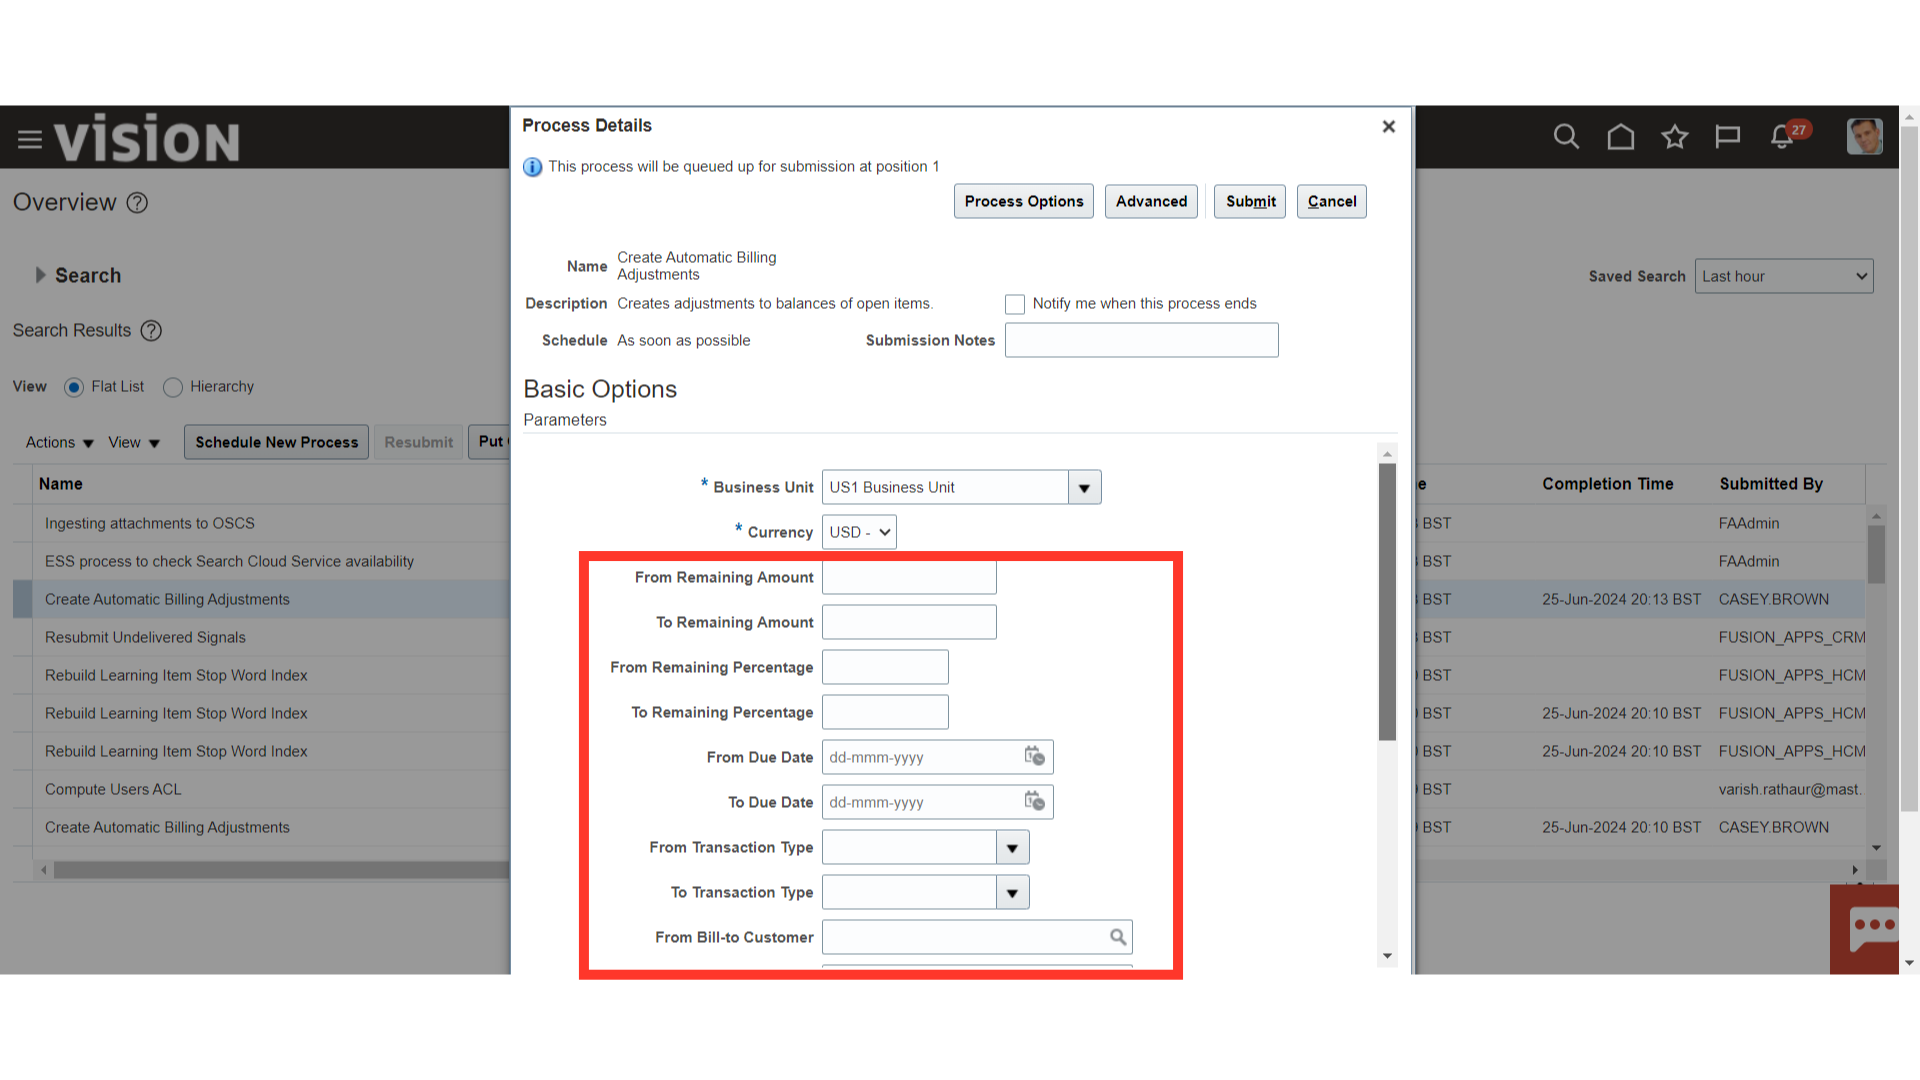
Specify the transactions to adjust by entering selection criteria. Enter the Low and High range of Remaining Amounts or Percentages, Due Dates, Transaction Types, or Customer Names to adjust only transactions matching those criteria. Leave a field blank if you do not want to limit adjustments to transactions matching those criteria.
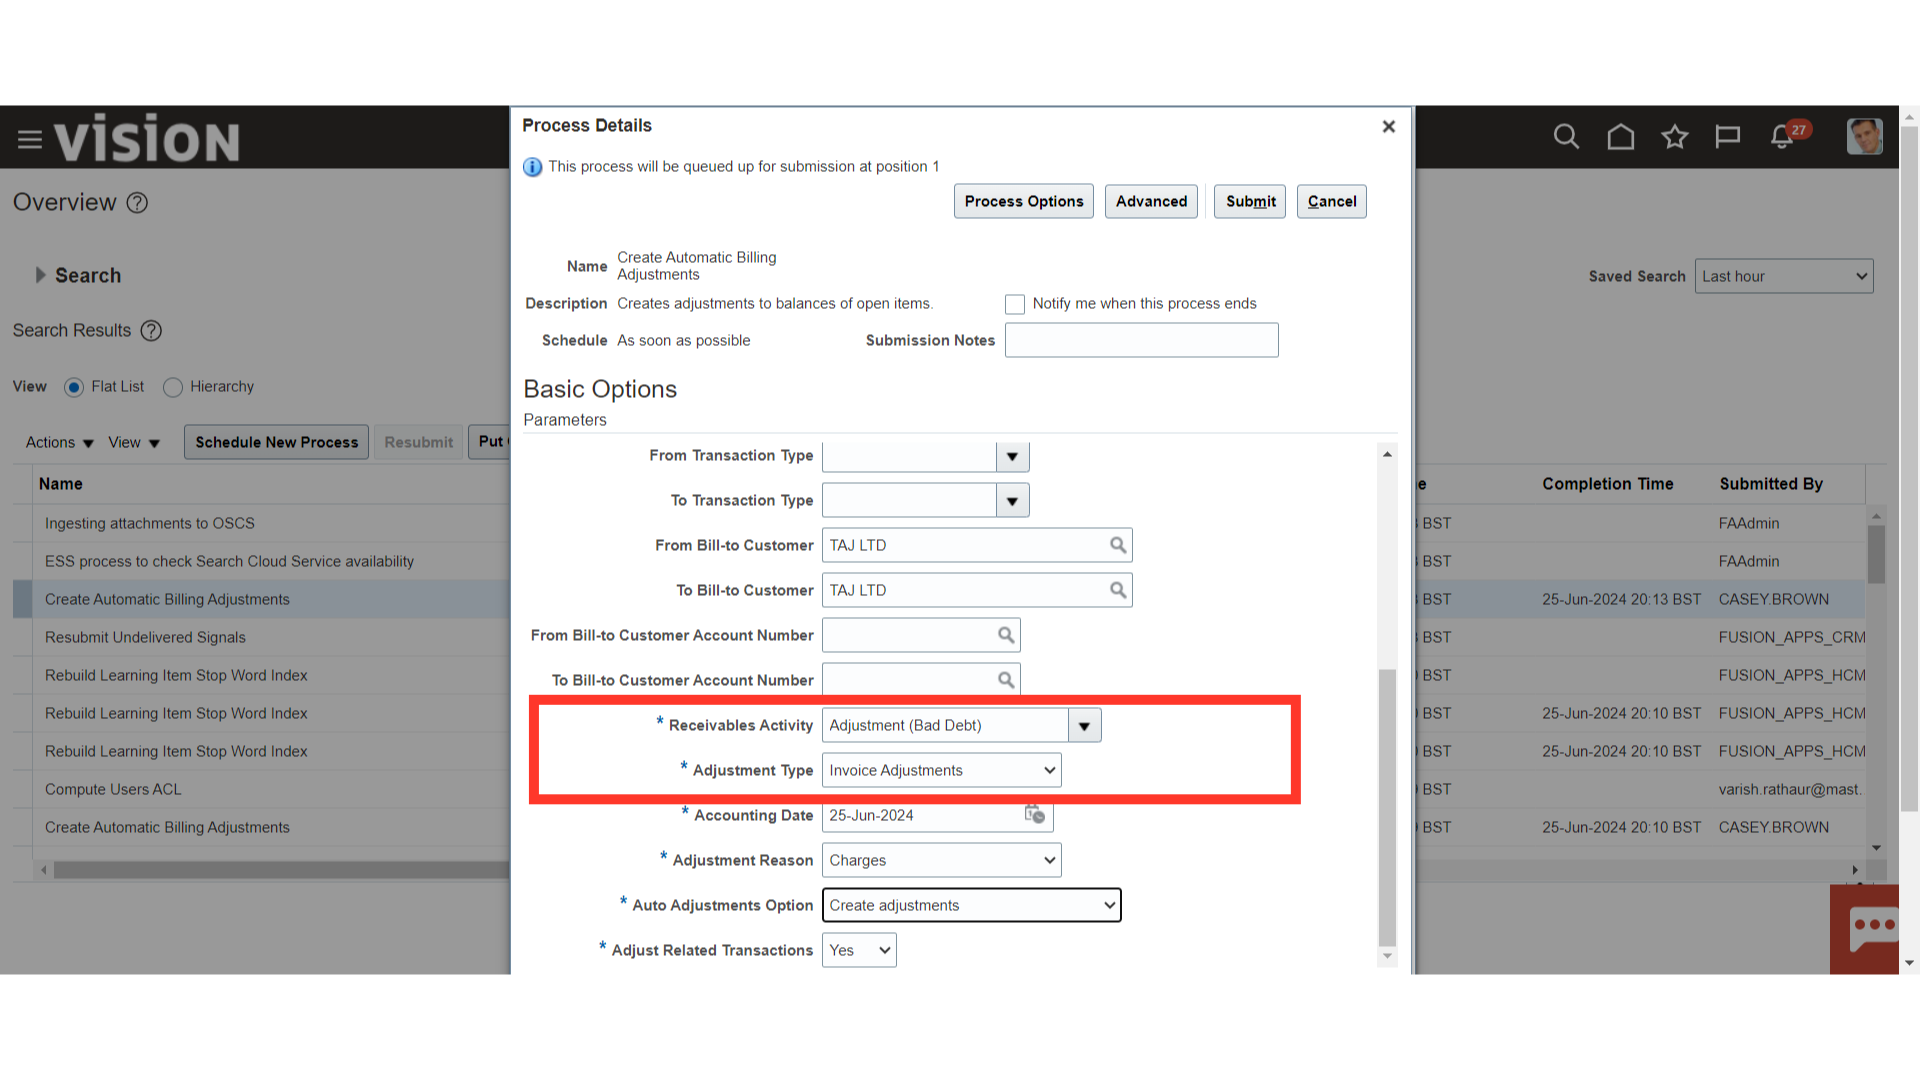
Enter an adjustment Activity, or select from the list of values. The adjustment activity determines which account your adjustment debits. Enter the Type of adjustments to create. You can create adjustments of type Lines, Freight, Charges, Tax, or Invoice.
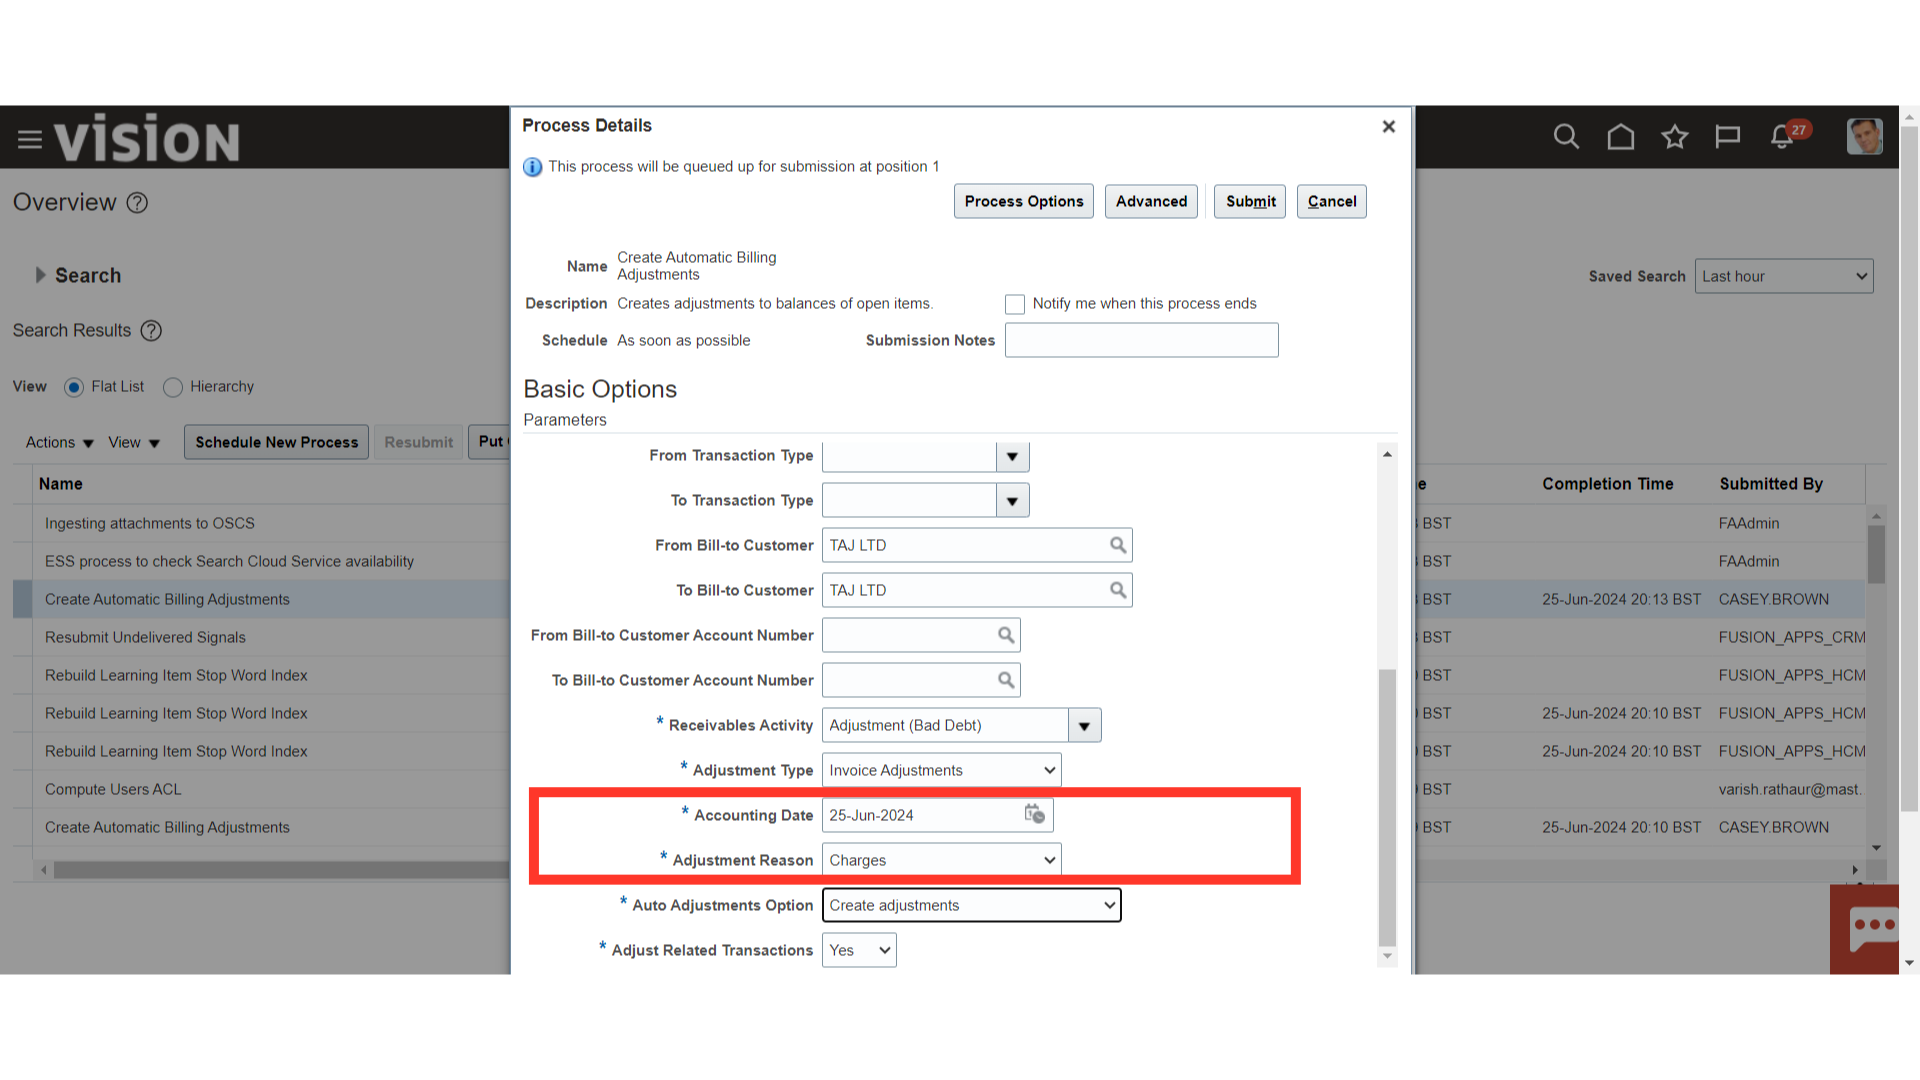
Enter the date to post your adjustments to your general ledger in the GL Date field. The default is the current date, but you can change it. If the current date is not in an open period, the default is the last date of the most recent open period. The GL date must be later than or equal to the GL date of the debit item you are adjusting and must be in an open or future-enterable period. Enter a Reason for creating this adjustment, or select from the list of values.
Choose one of the following Auto adjustment Options:
Generate Report Only: This option prints the Auto Adjustment Preview Report and lets you see the effects of your adjustments without actually updating your items. This option lets you analyze the adjustments that would be created and decide if you want to modify your selection criteria before actually performing the adjustment.
Create Adjustments: This option creates the approved and pending adjustments, closes the appropriate items, and prints the Auto Adjustment Audit Report. If you do not want to adjust the items of related customers, select “NO” against the Adjust Related Transactions.
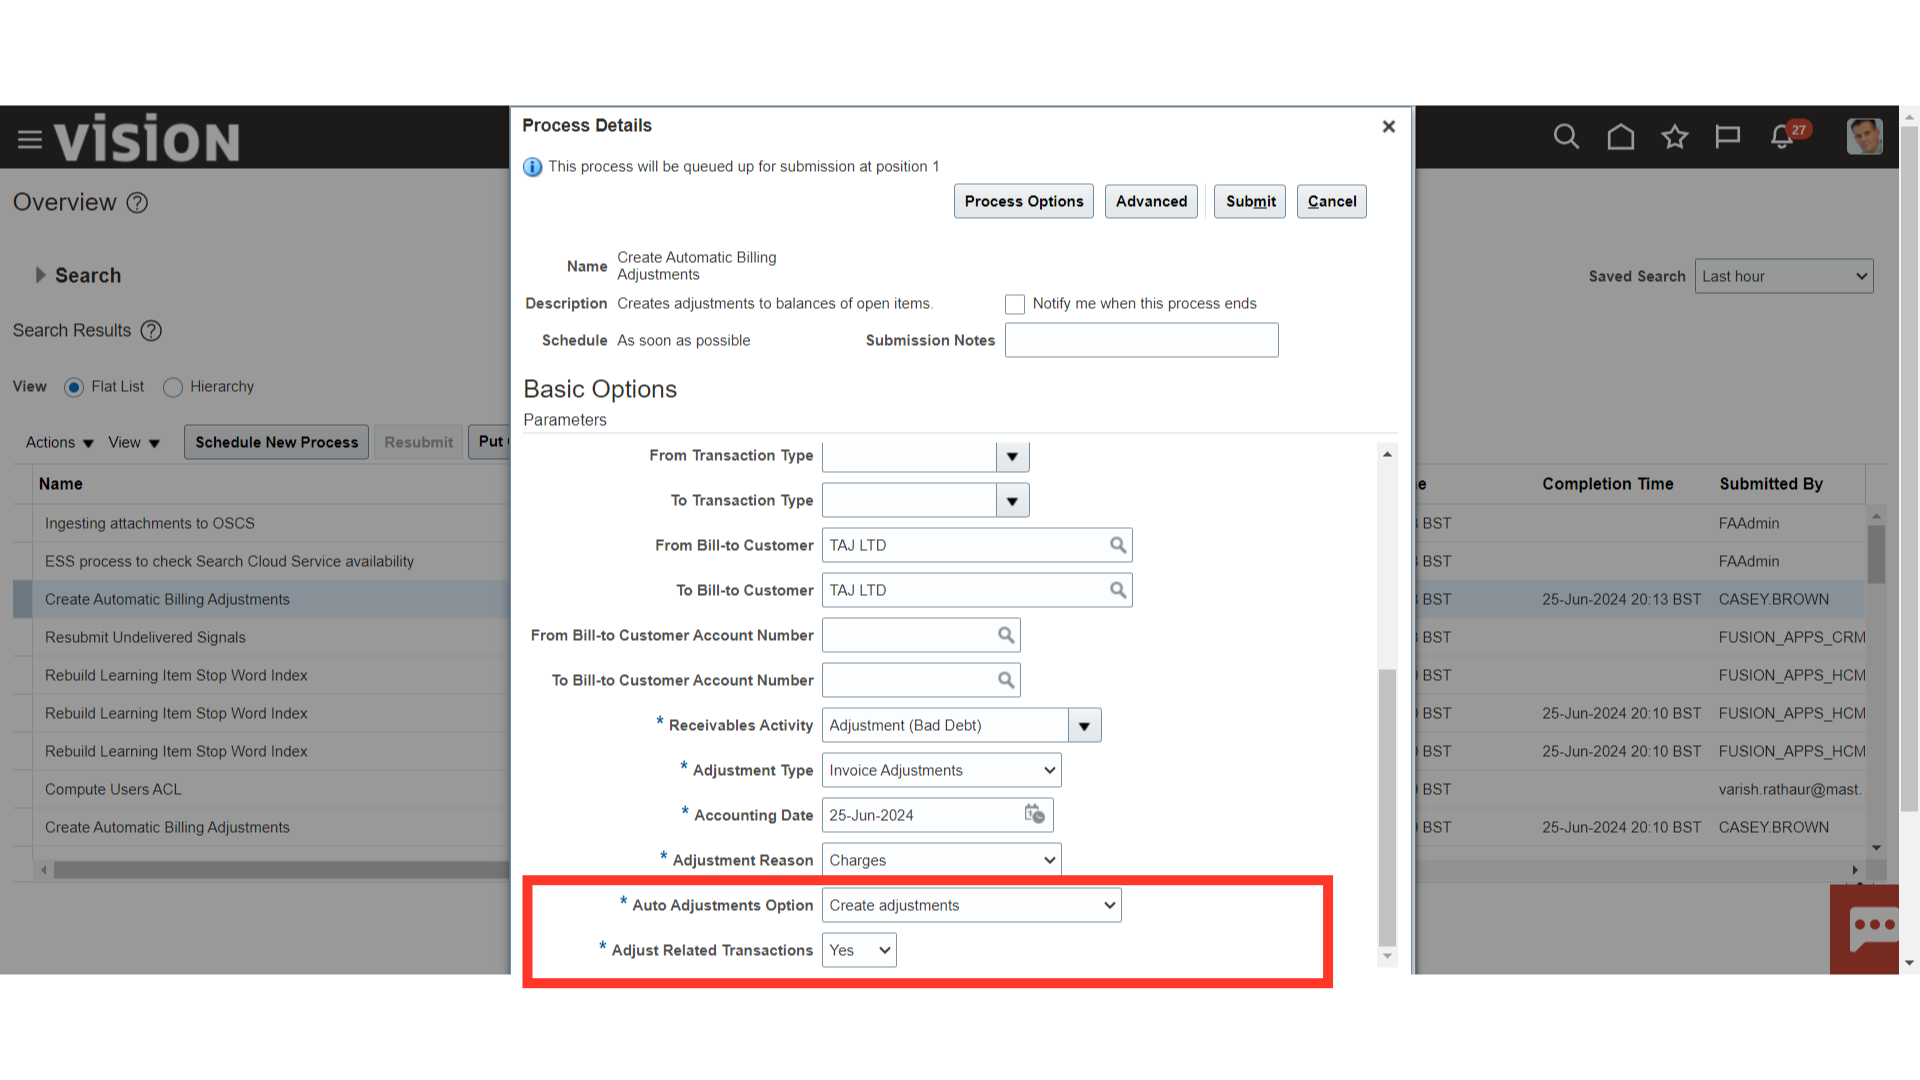 After the details have been confirmed, press the submit button to run the process.
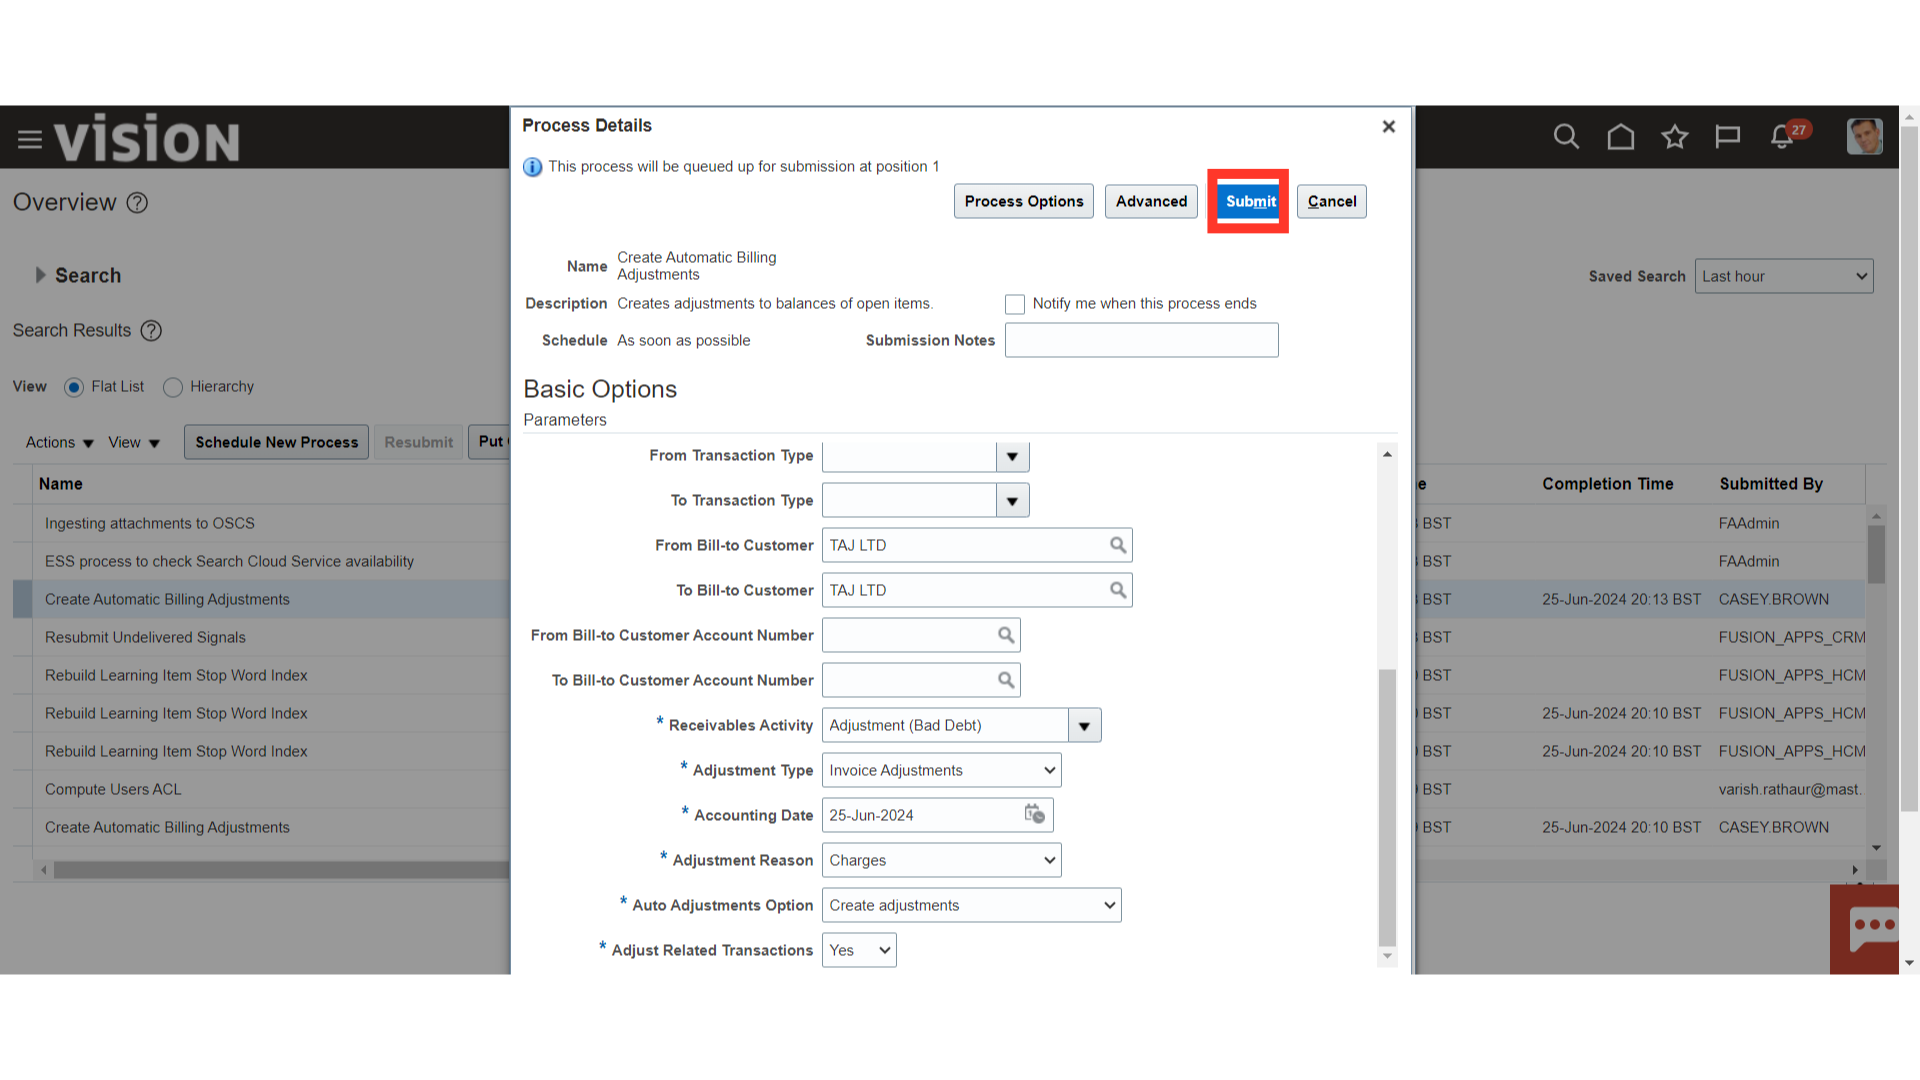
A confirmation message is displayed along with the Process ID , click on the OK button to continue.

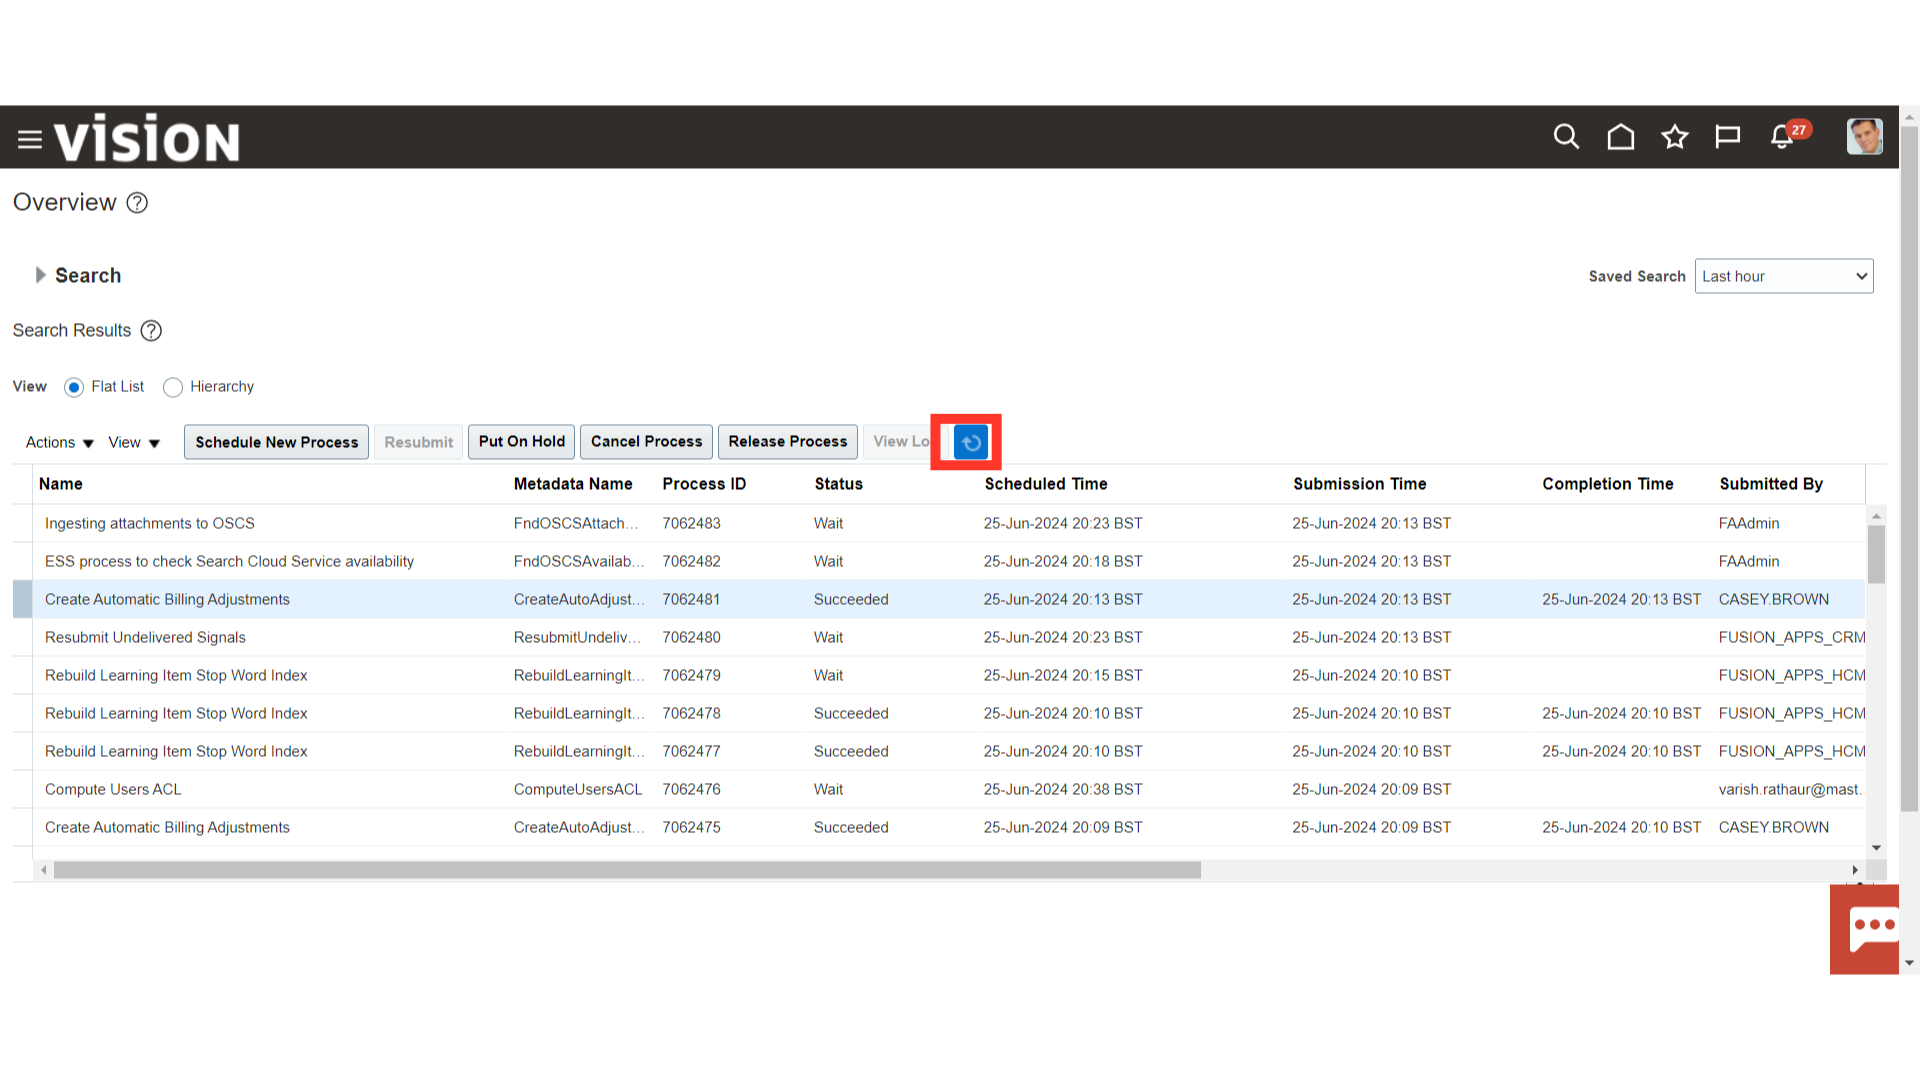
Click on the “Refresh” Icon to refresh the process status.
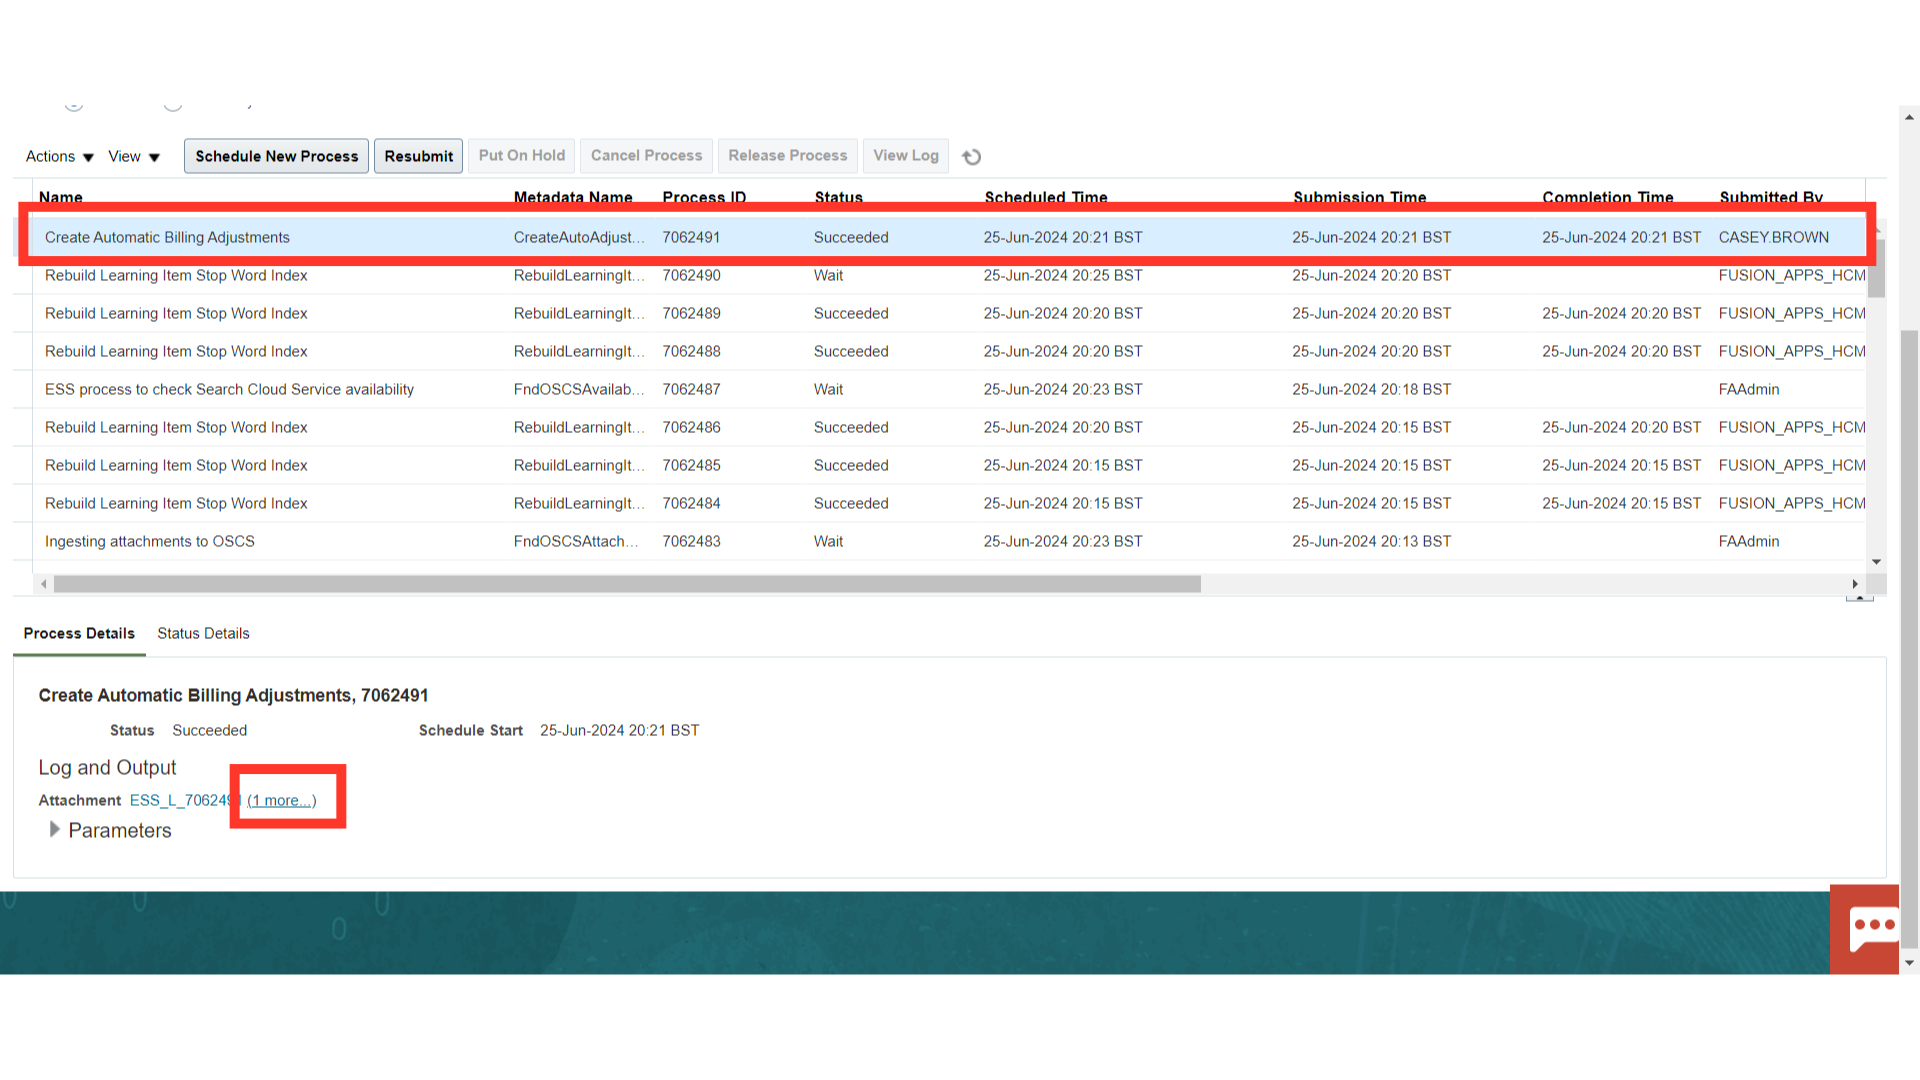
To download the report select the “Create Automatic Billing Adjustments” process, and then click on the 1 more hyperlink against the attachment.
Click on the txt file format, to download the report.
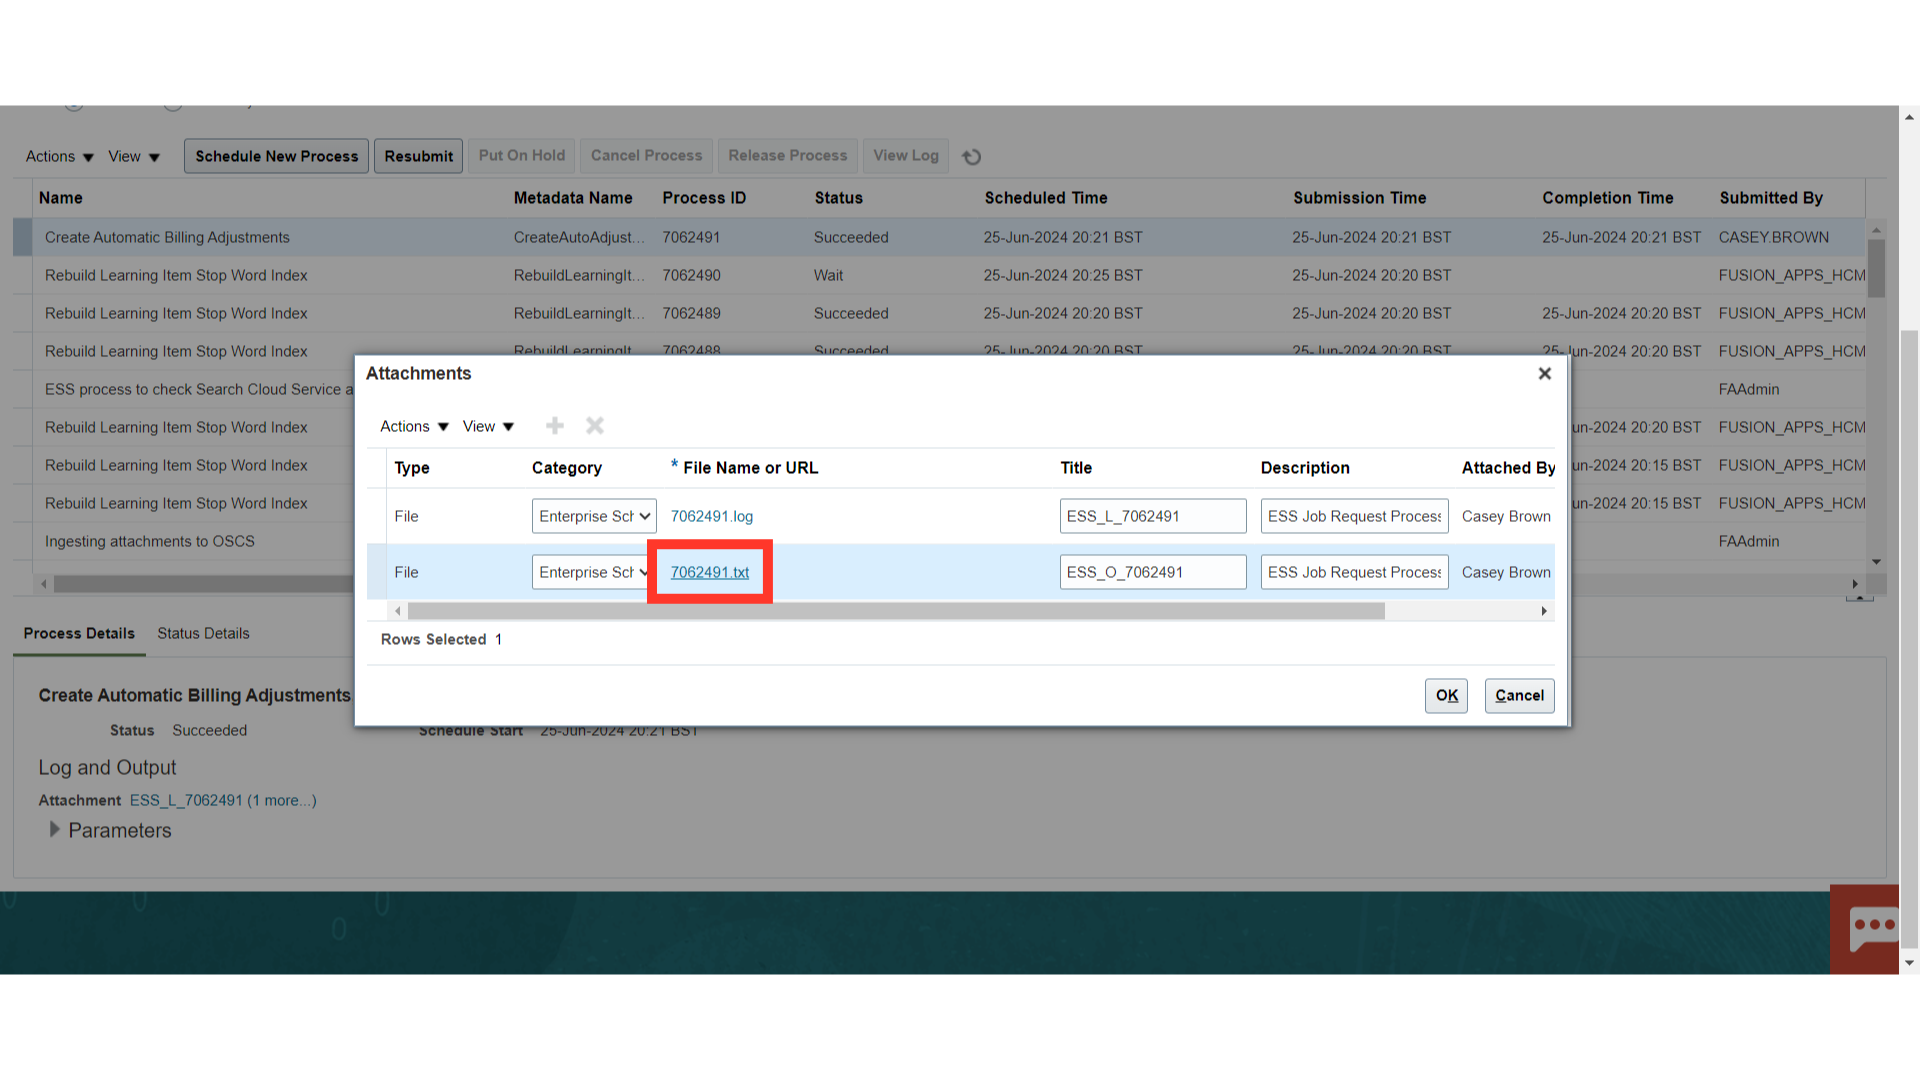
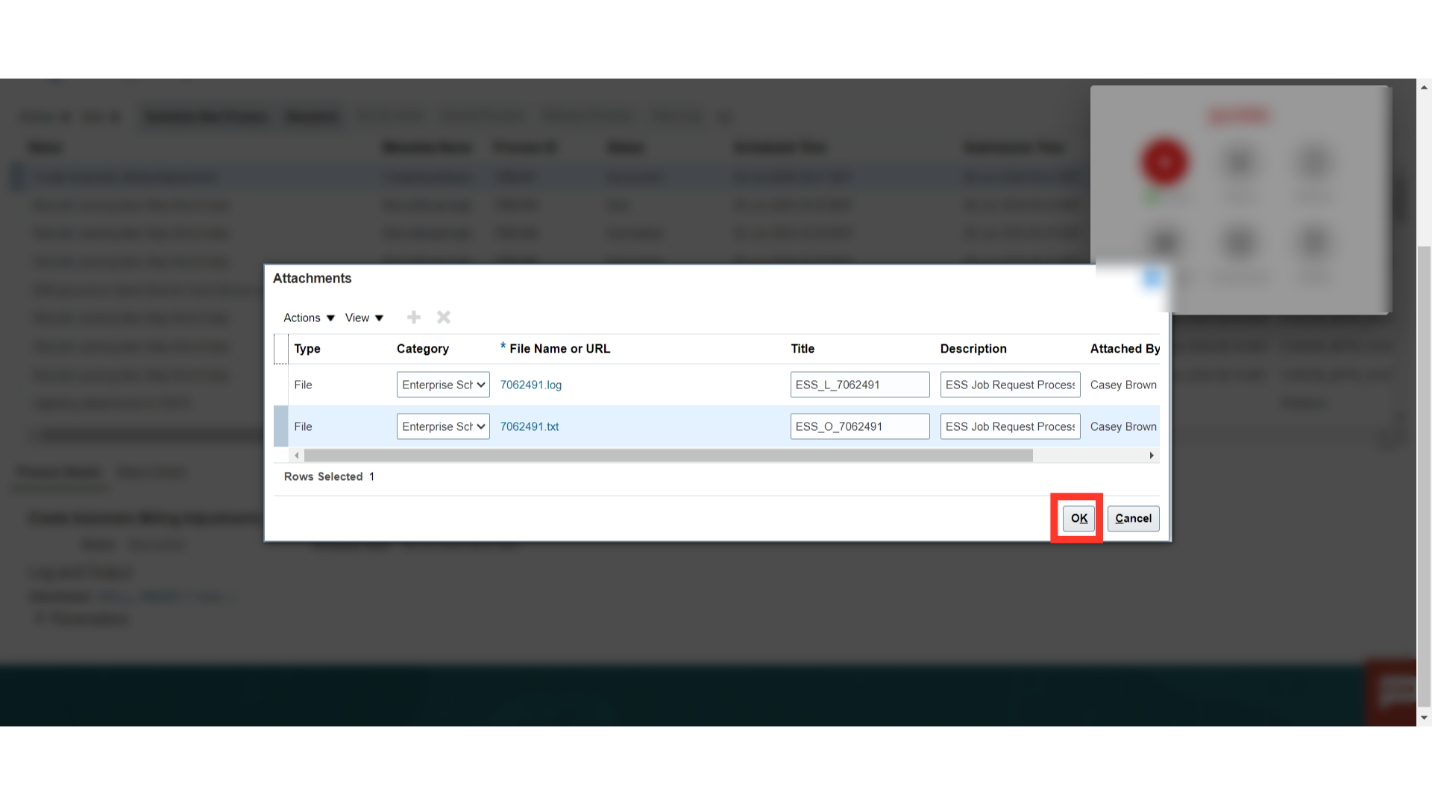
Click on the OK button to close this Attachments window.
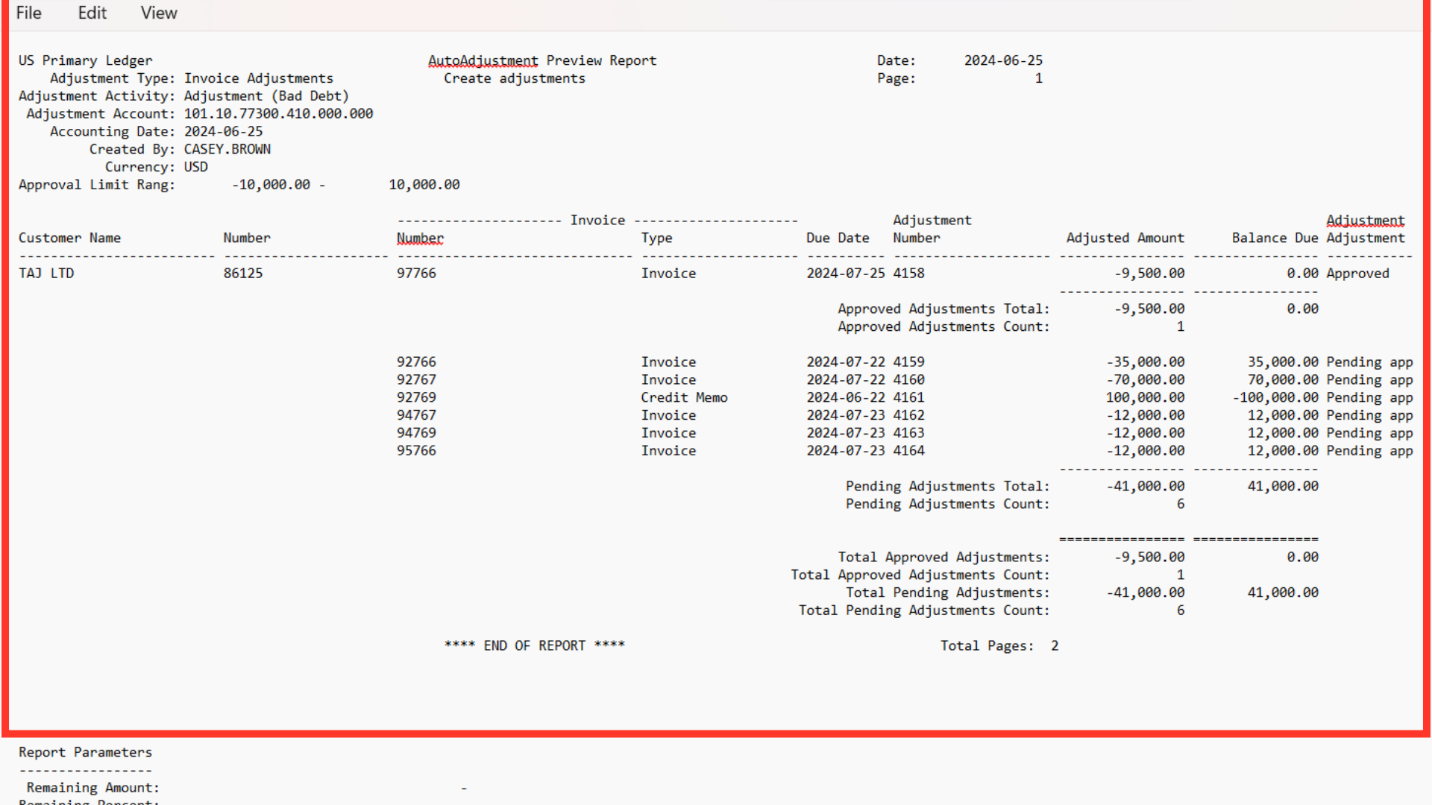
Use the AutoAdjustment Preview or AutoAdjustment Execution report to review the total value of automatic adjustments, the number of debit items adjusted, supporting details on pending and approved adjustments, and final debit item balances.
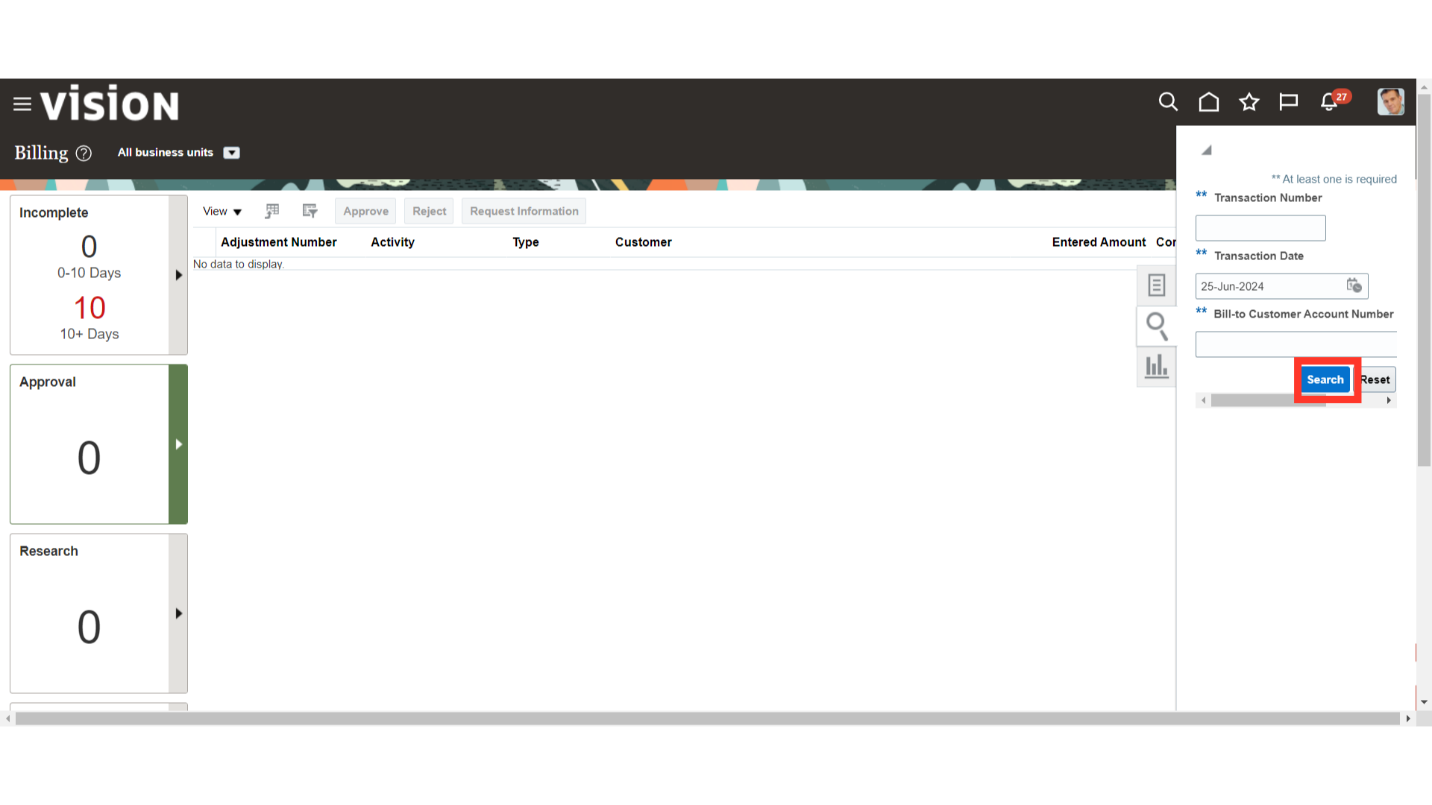
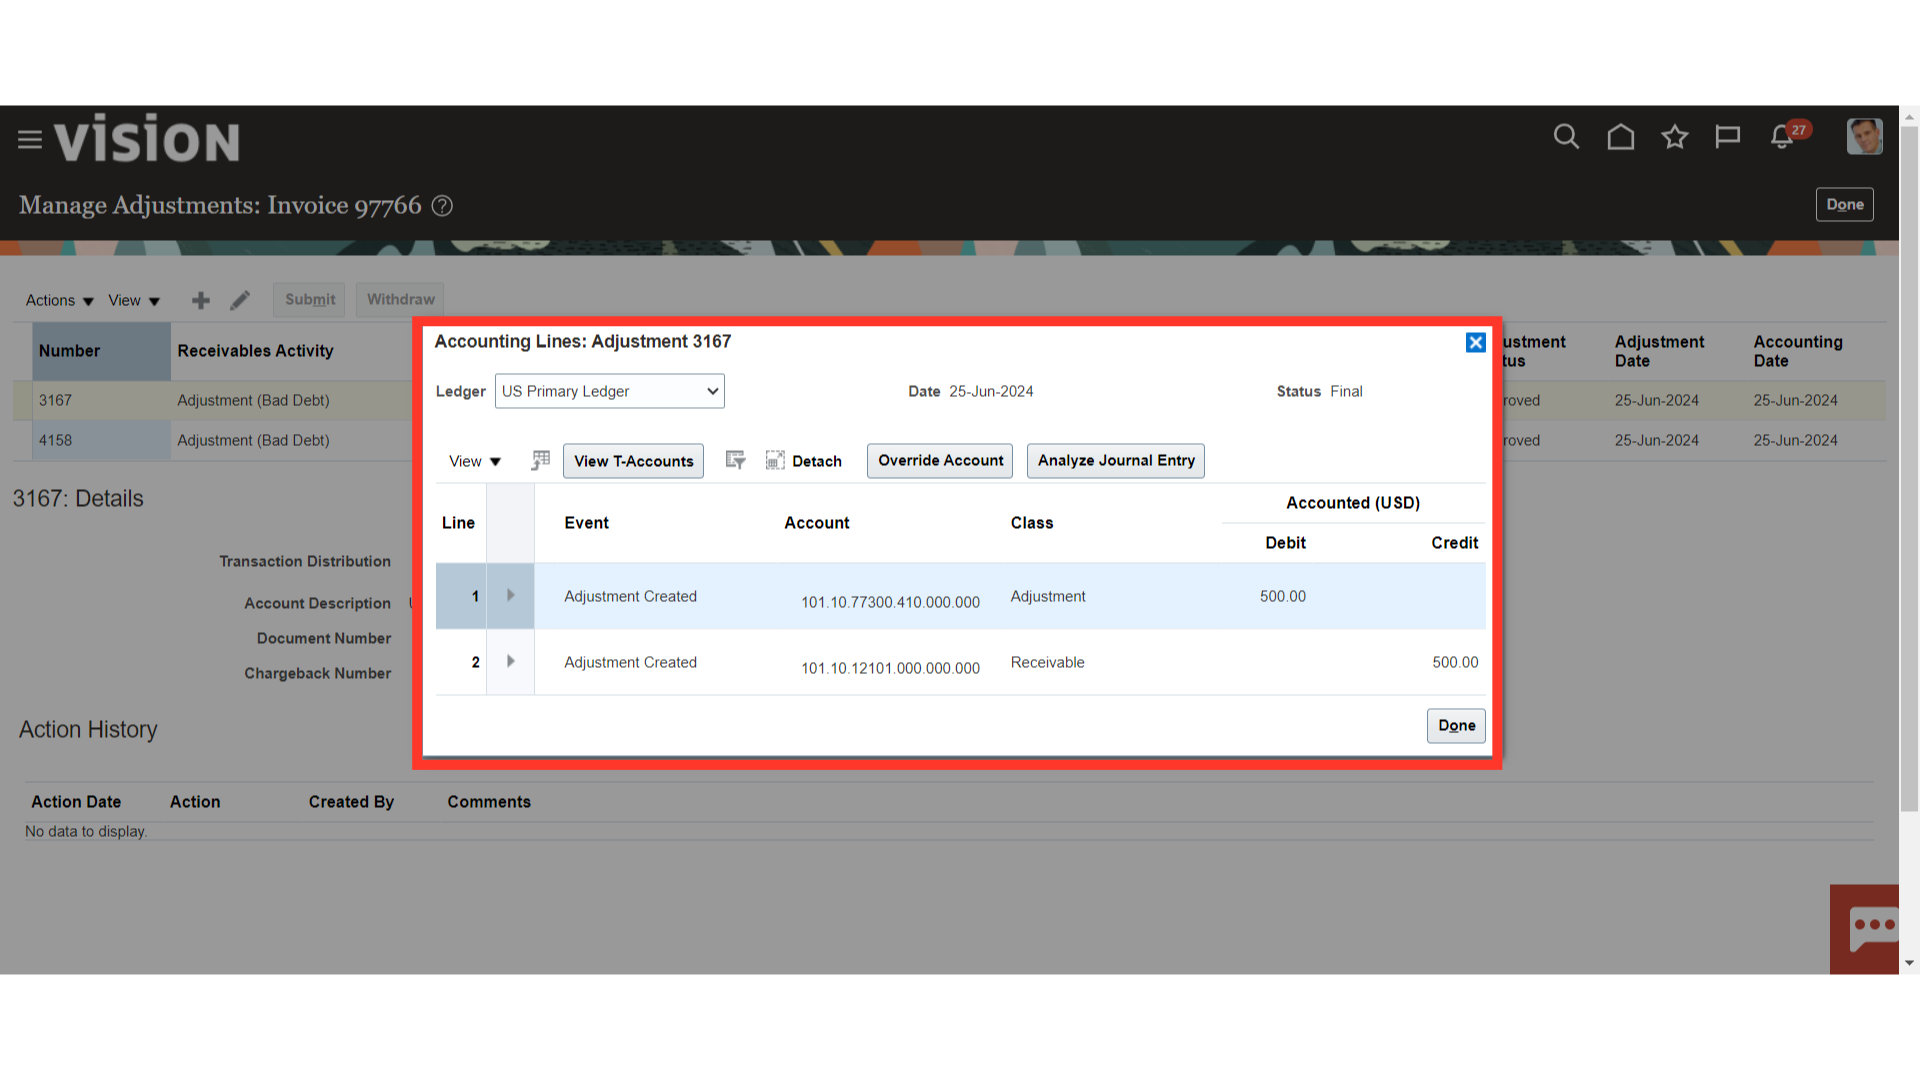
Search the transactions to view the accounting entry for the adjustments performed.
To generate the accounting entry, select the Post to ledger under Actions after selecting the Transaction.

This is the accounting entry generated for the adjustments performed in which account combinations for the adjustments defaulted based on the Receivable Activity. Click on the Done button to close this window.
The process of making adjustments in transactions was explained in detail in this guide, beginning with the creation of manual adjustments and ending with the submission of the procedure to create automatic billing adjustments, which included adjustment accounting entry.