Batch Payments or PPR
A payment process request (PPR) is a group of installments submitted for payment. This guide will walk you through the process of submitting the payment process request by entering the installments selection criteria, and various stages of payment batch.
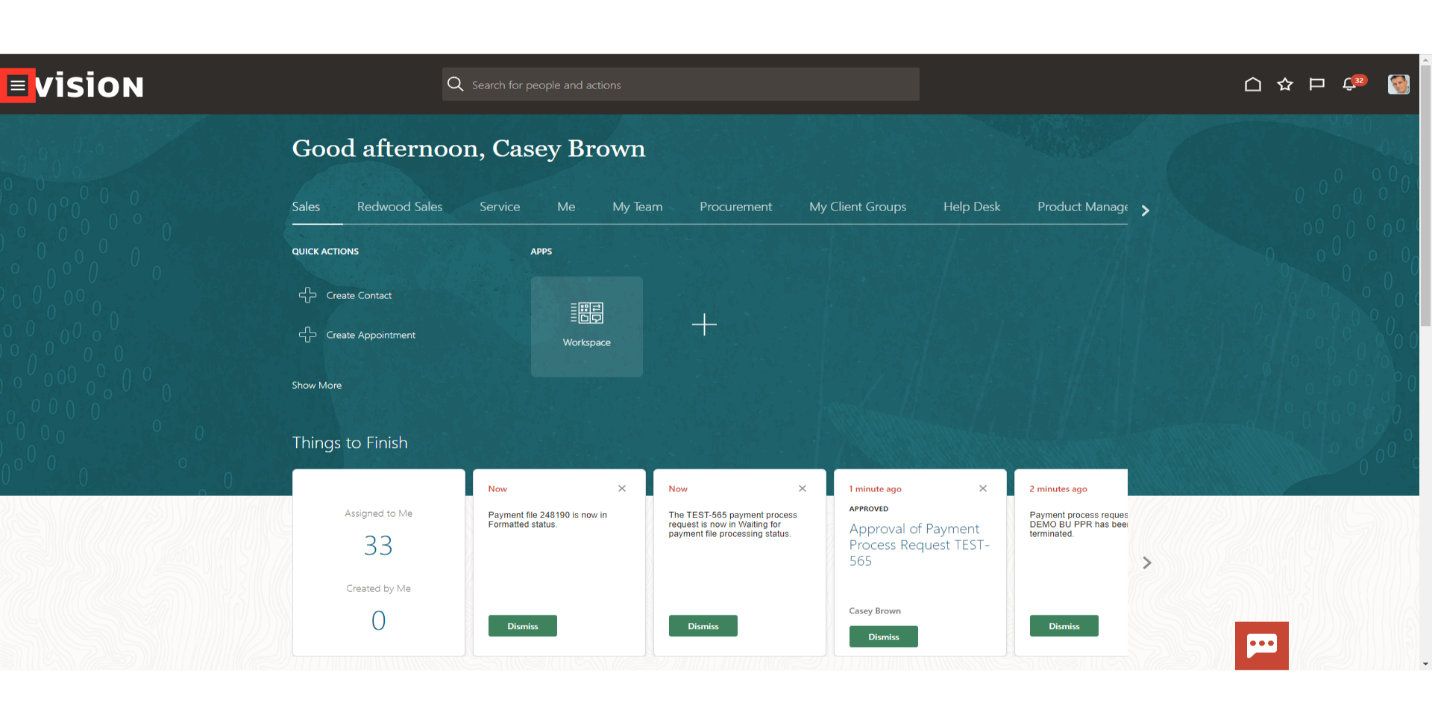
Click on the Navigator icon to access the Payables module.
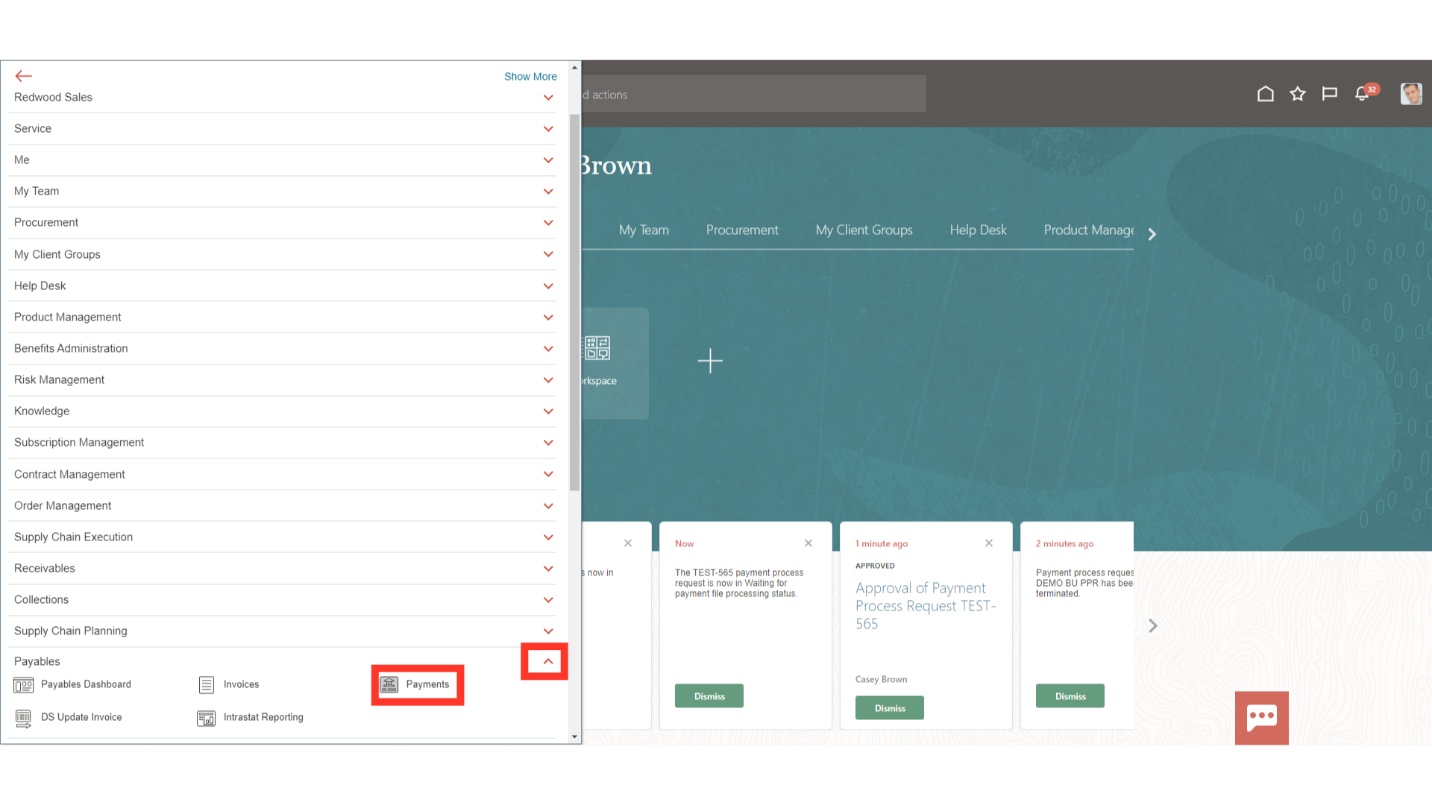
Click on the “Payments” sub module by expanding the “Payables” module.
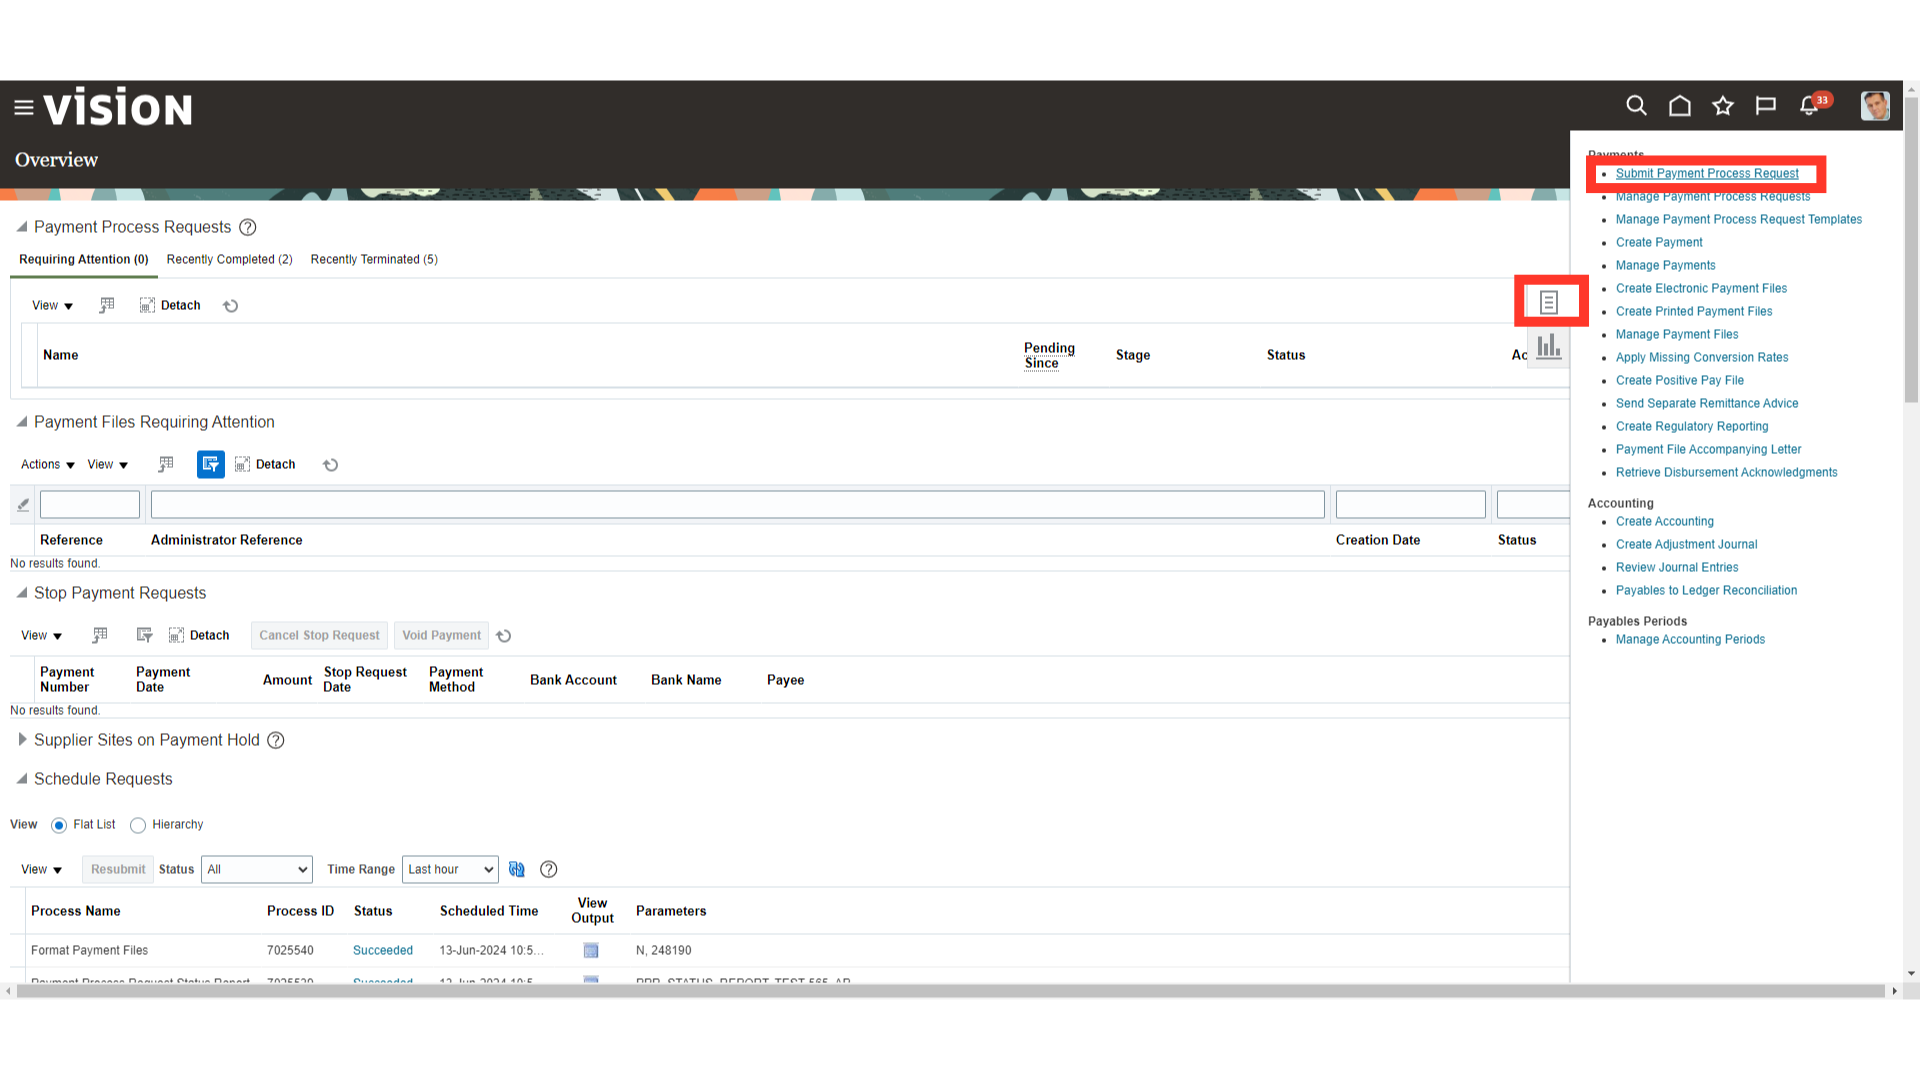
Click on the Submit Payment Process Request hyperlink from the Task list.
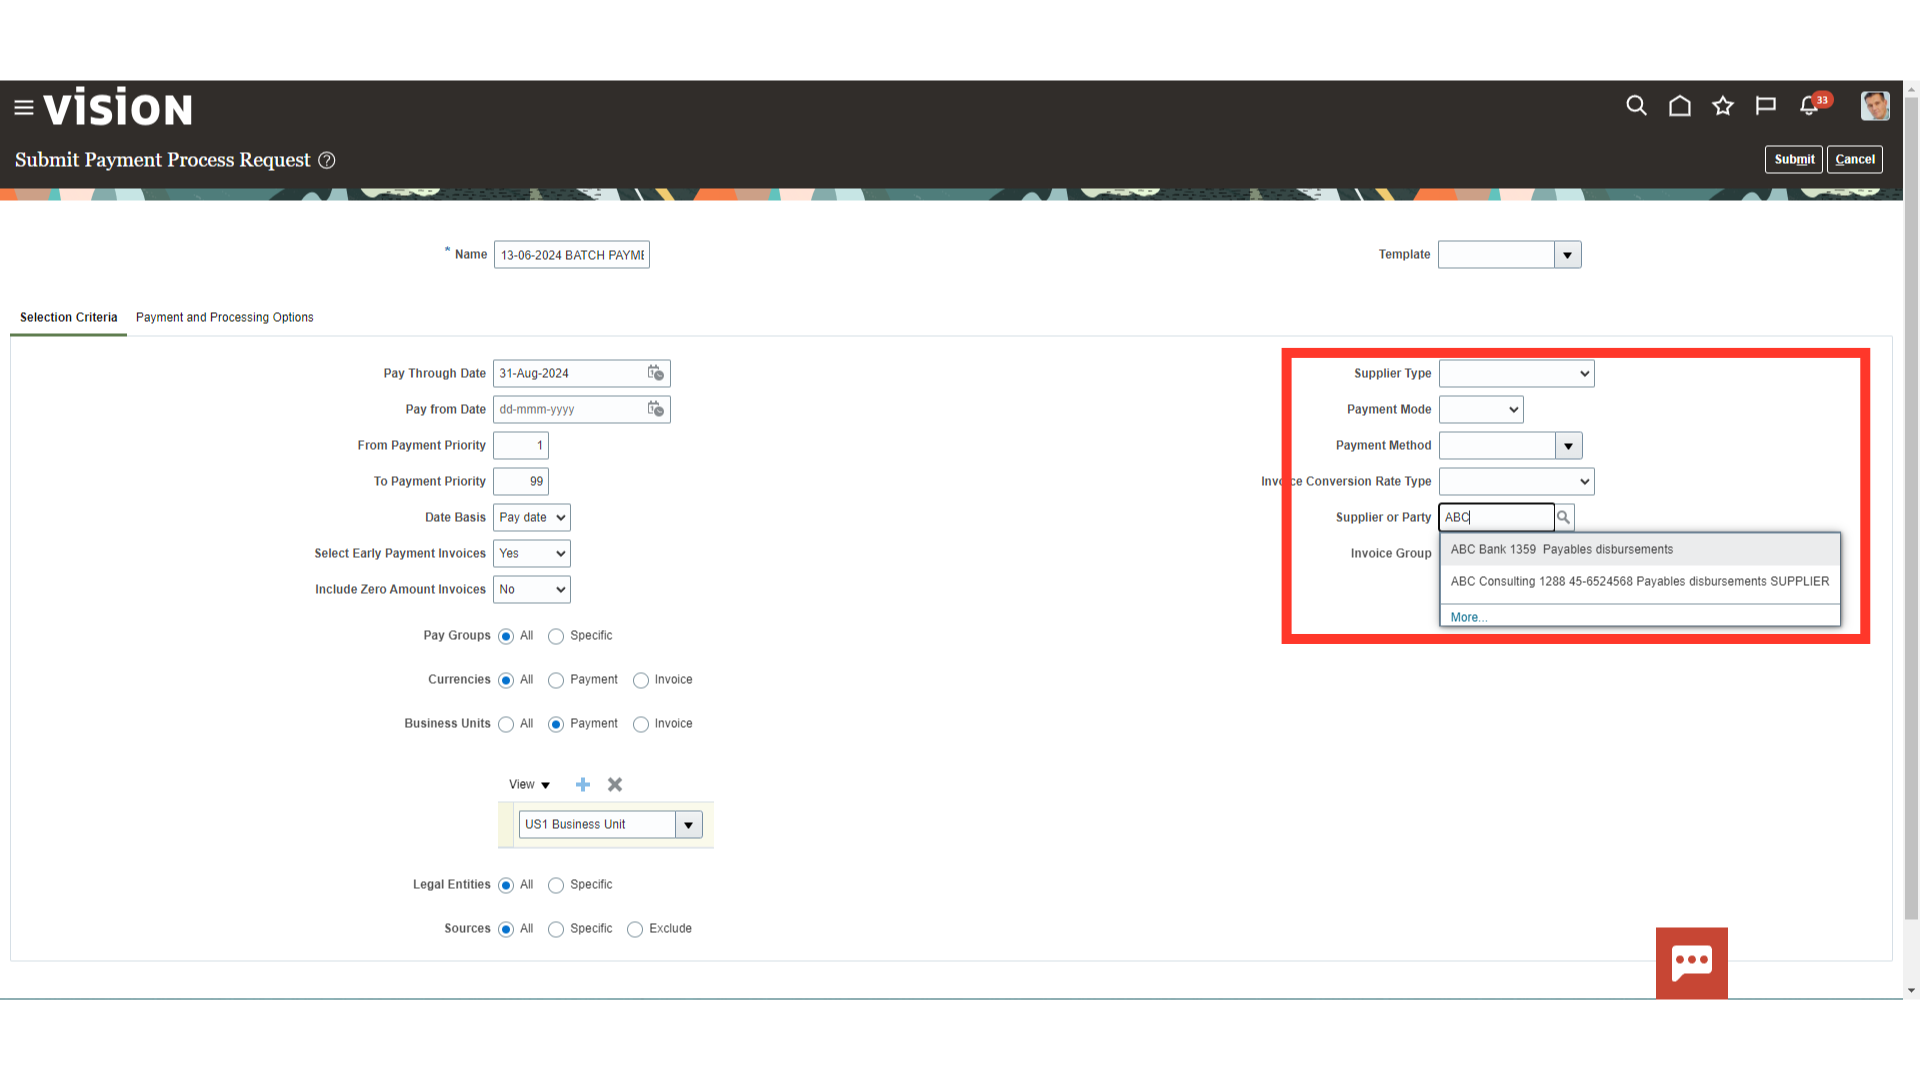
Enter the Payment process request name. This is a free text field and you can enter any name. However, this should be a unique name through which you will be able to identify the PPR in future. Ideally it is recommended to follow a naming convention as fit for business to best identify a PPR.

Selection criteria, such as invoice business unit, payment business unit, and payment priority determine which installments are selected for payment. The processing options for a payment process request determine the level of automation for that request. For example, you can set options that submit the request through to completion without stopping, or you can stop the request to review the selected installments.
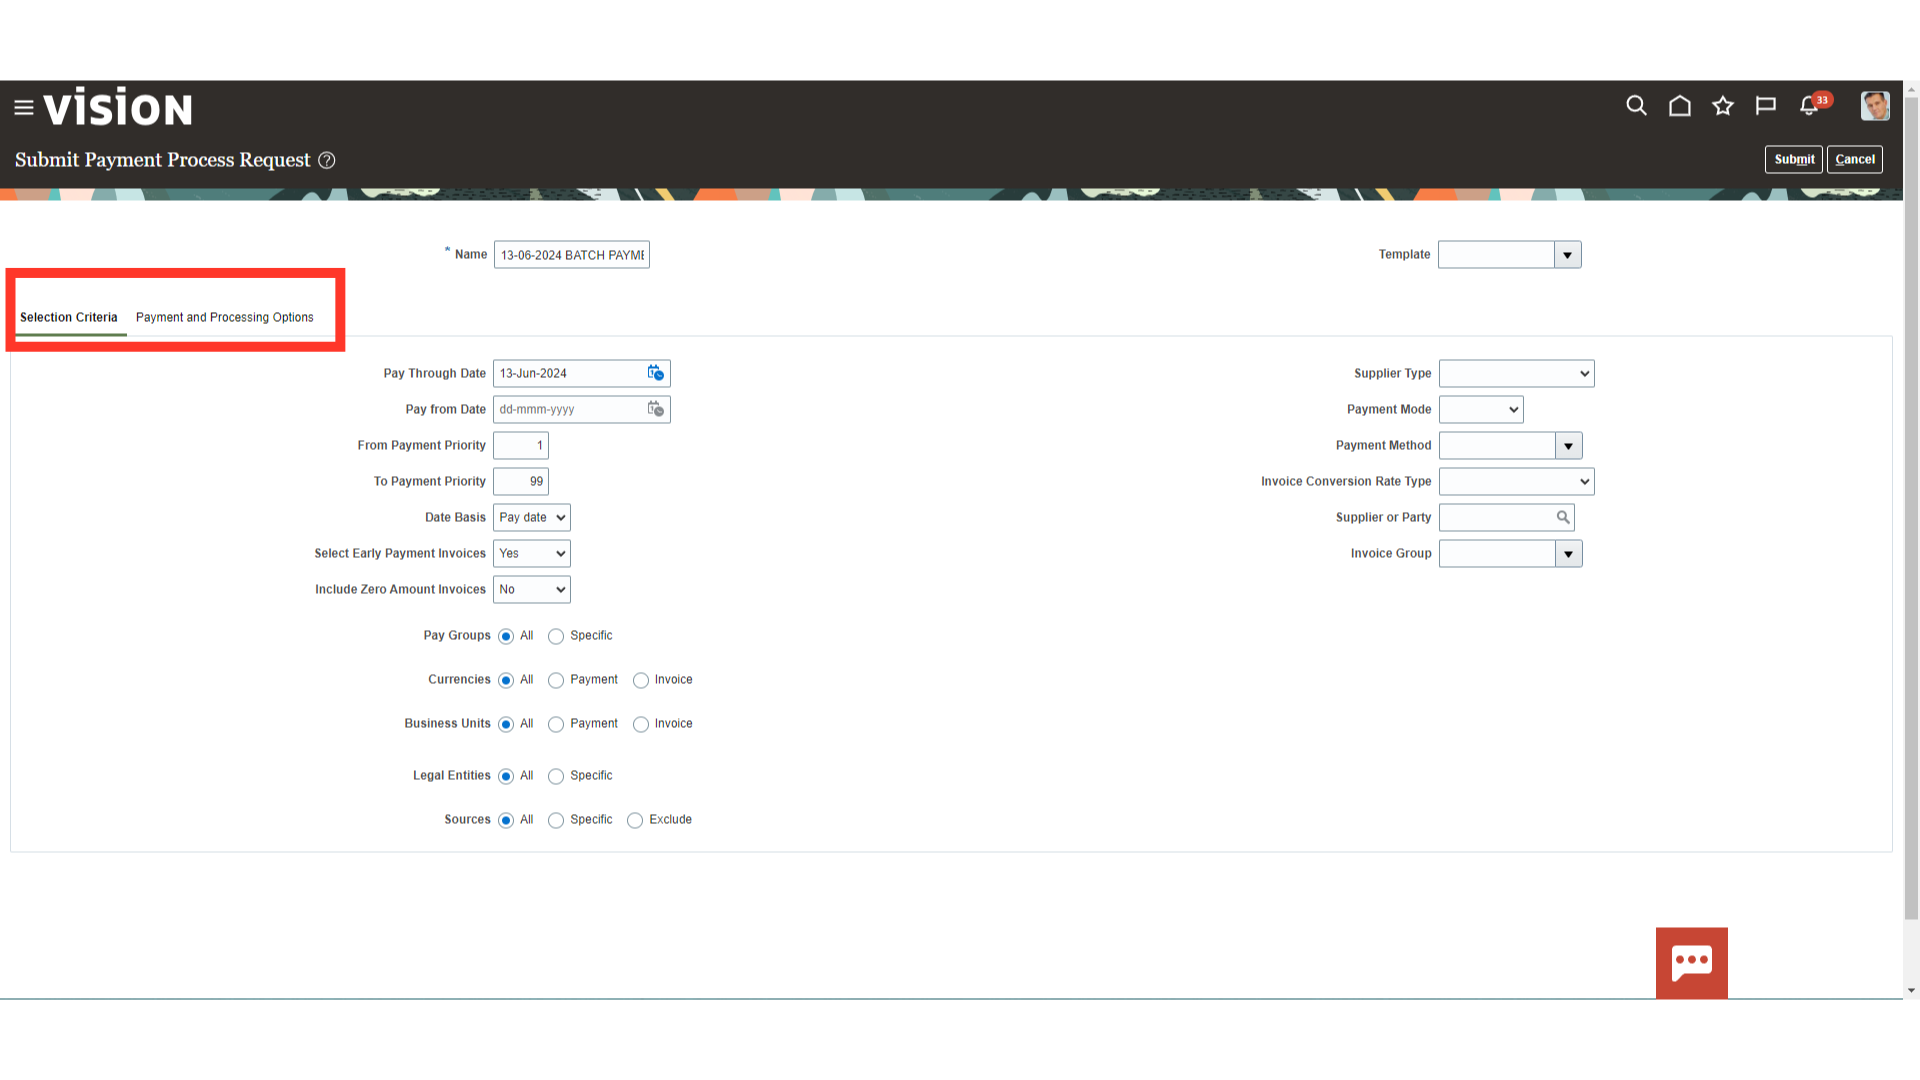
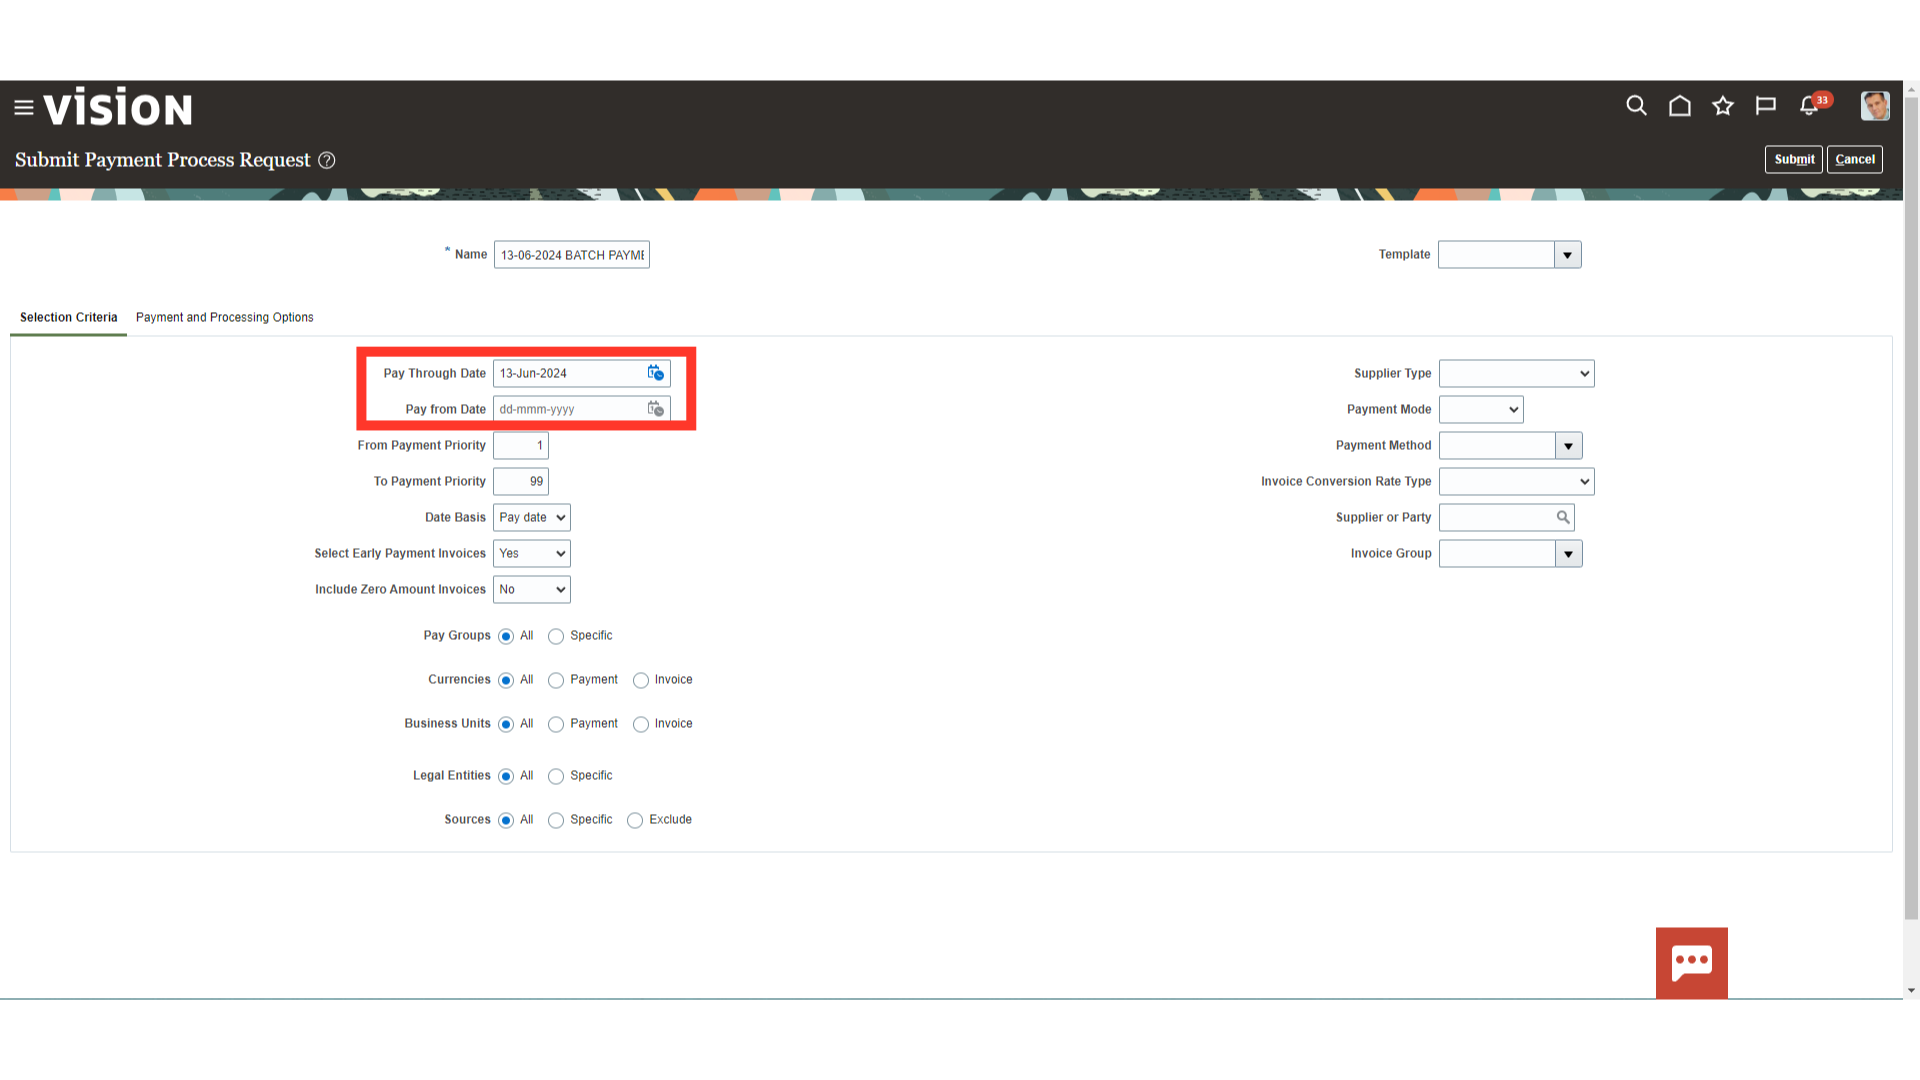
Enter the latest due date for an installments in Pay Through Date field based on which invoices pending up to that date would be selected. Also, you can enter Earliest due date for an installment so that Invoices outstanding from that date would be selected.
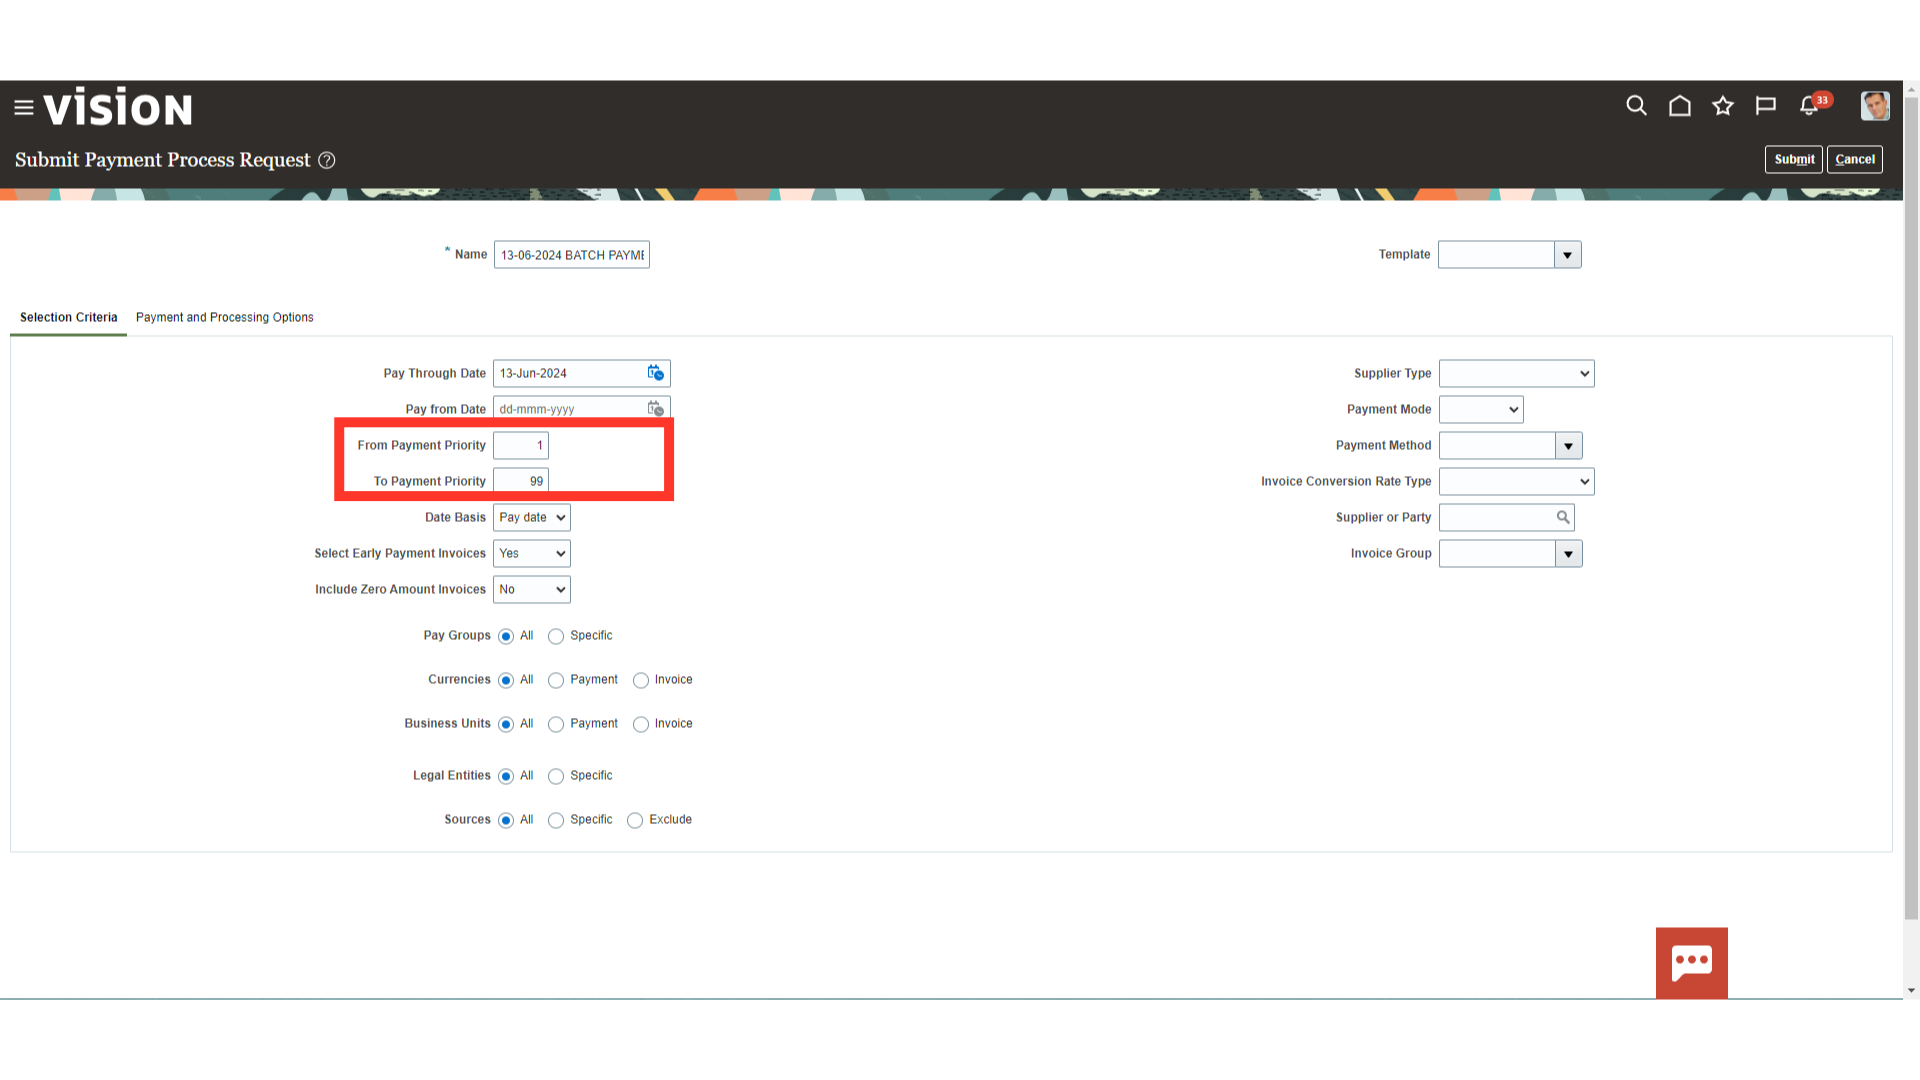
Enter the priority details based on which the invoices would be selected for the payment.
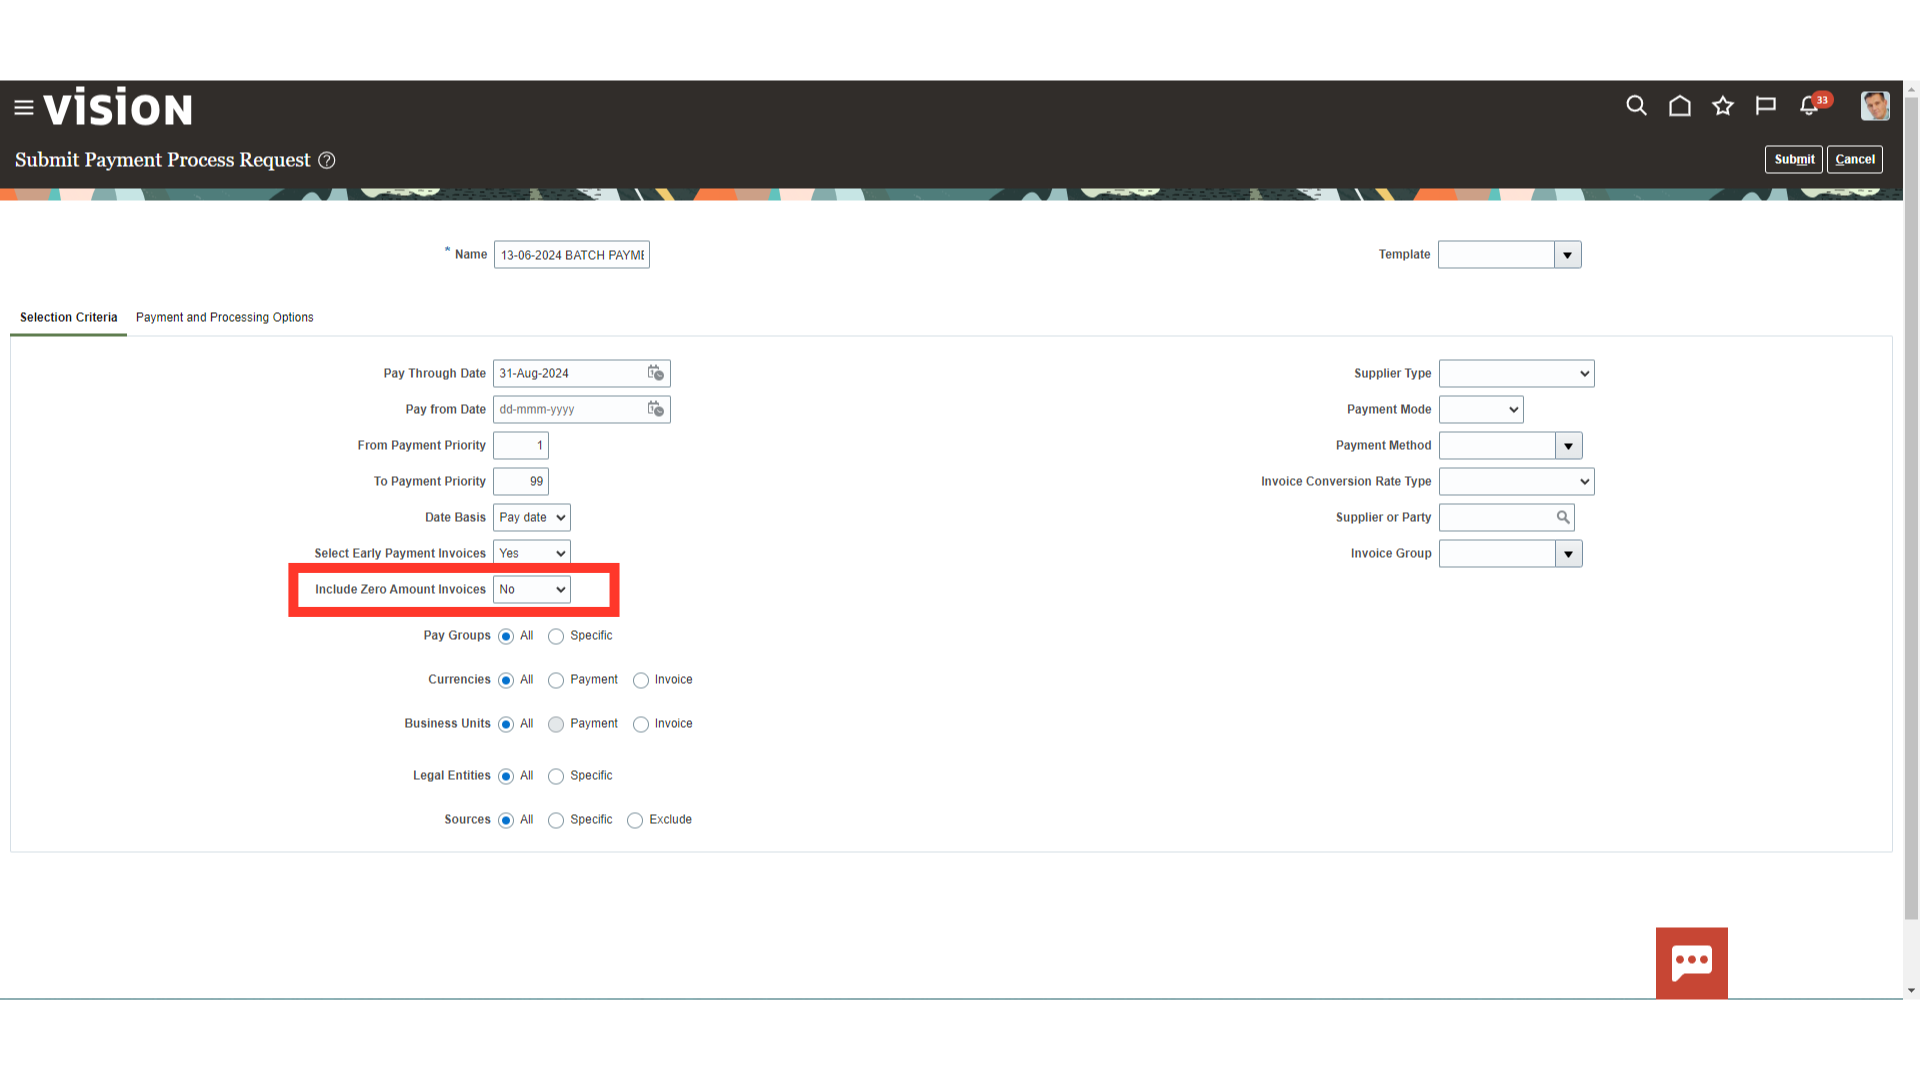
If you want to include invoices having zero amount, select Yes against the Include Zero Amount Invoices option.
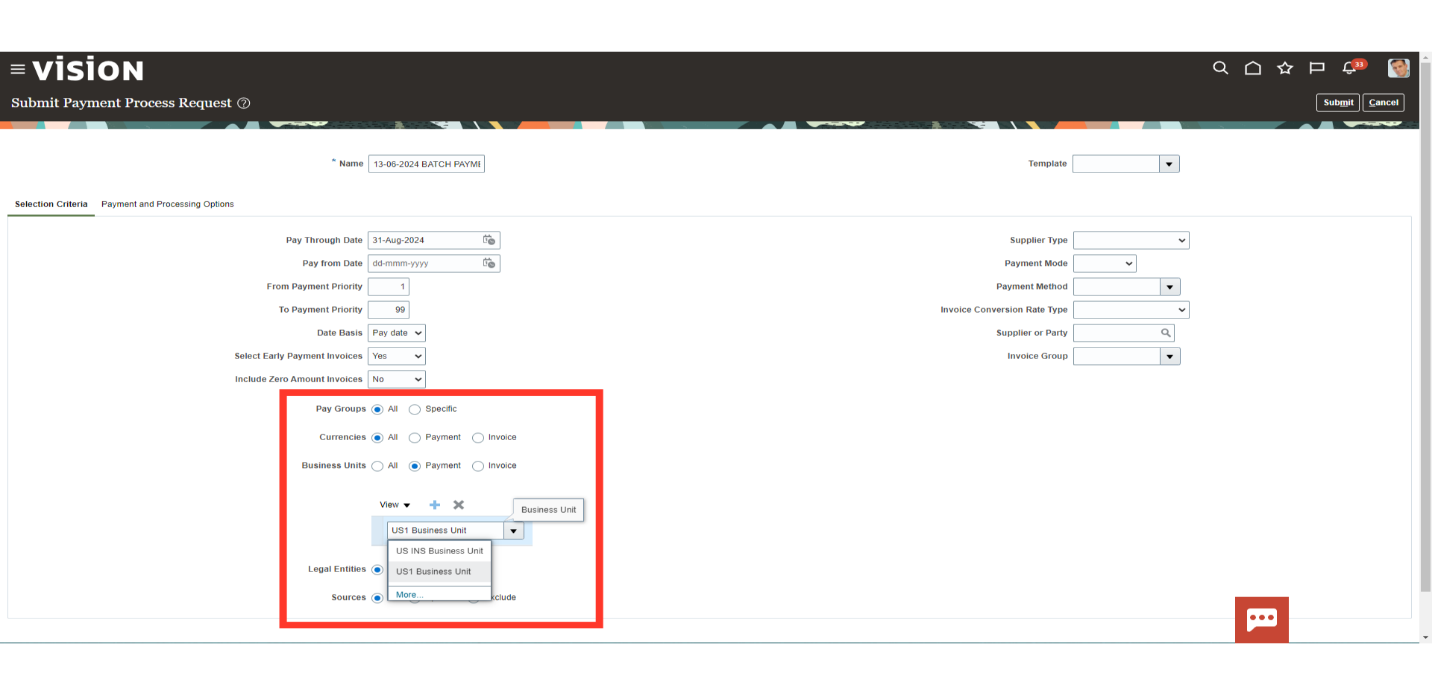
Additional selection criteria, like Pay Groups, Currencies, Business Units, Legal Entities, and Sources, can be used to choose invoices. We have taken “US1 Business unit” here for demo purposes in order to limit the selection to only invoices that are pending to be paid under that business unit.
By mentioning the Supplier type, Supplier, or Party parameters, you can pay a specific supplier. Additionally, you can choose the payment method you want to use, such as check or electronic fund transfer.
Enter the date of the payment which would be the accounting date of the payment journal entry.

Select the bank from which payment is to be made, and then select Payment document based on which payment numbers would be generated.
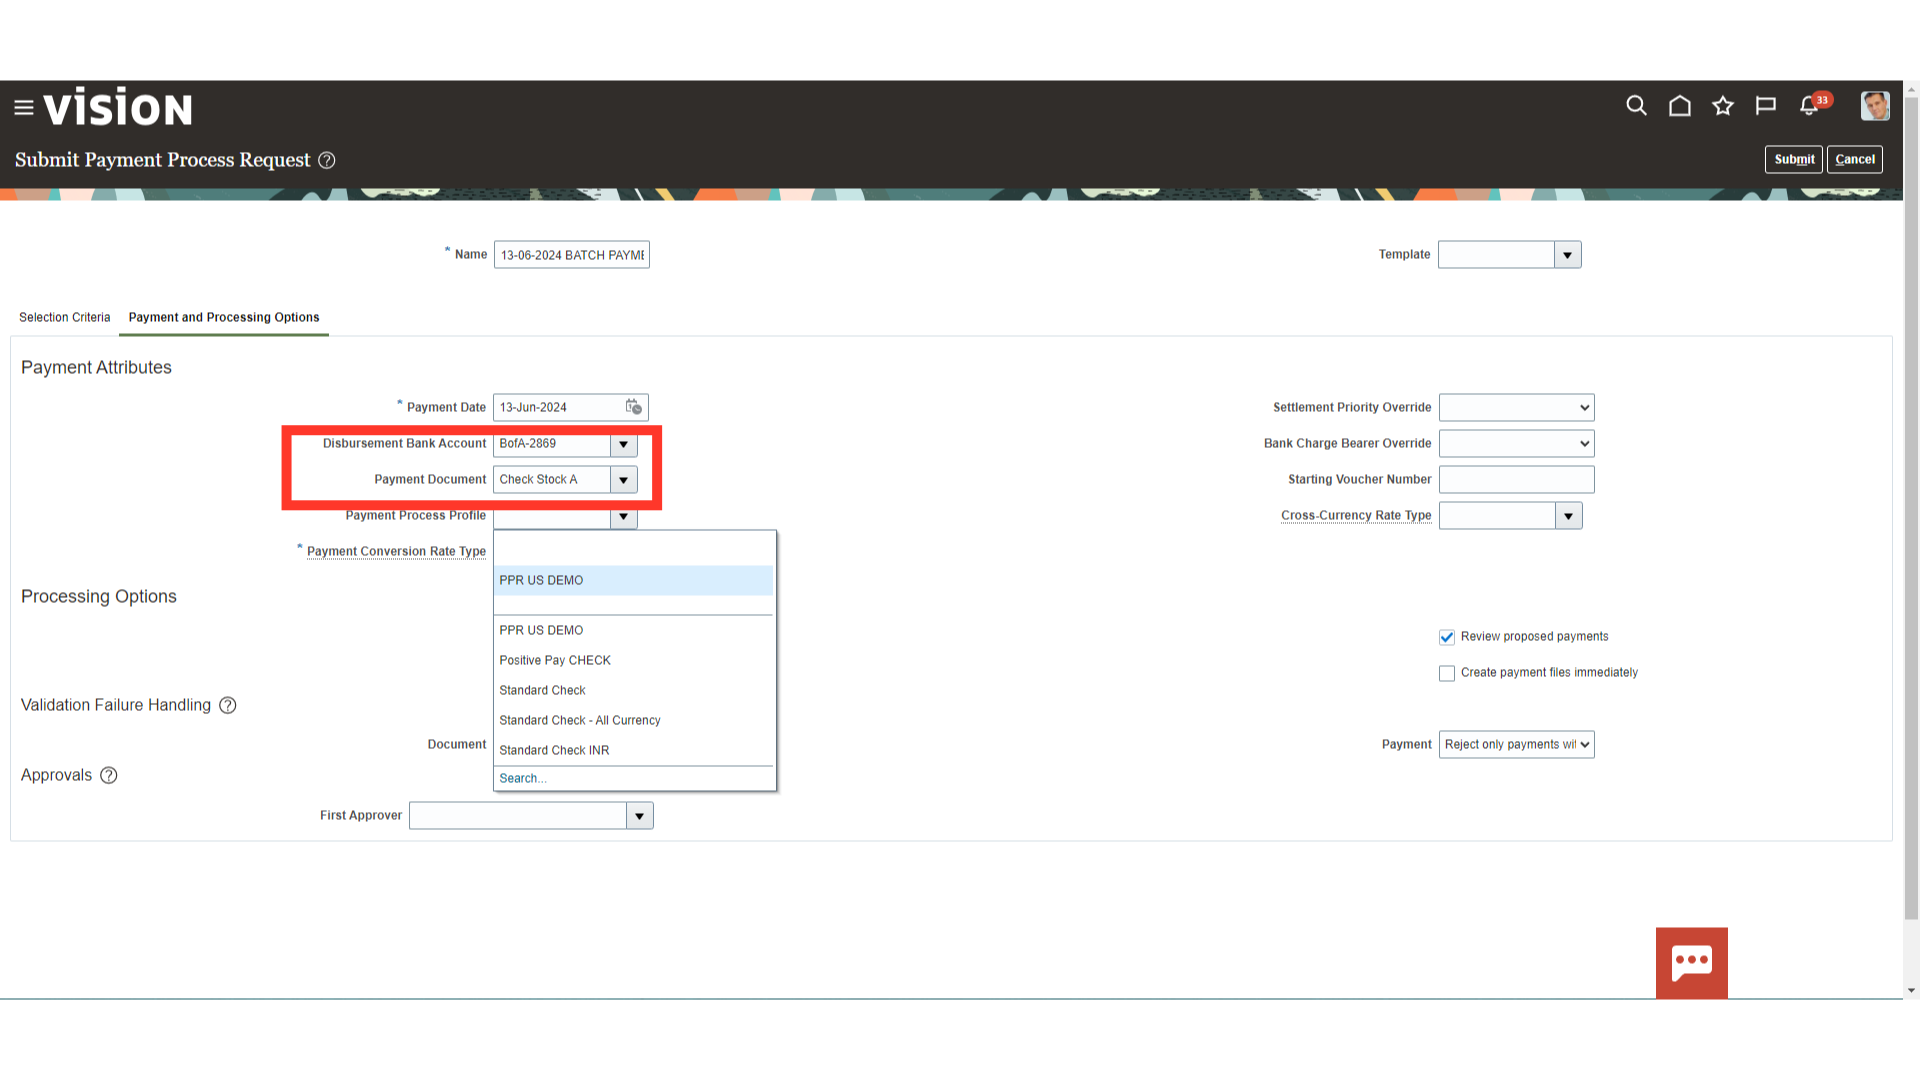
A payment process profile is a setup entity that controls payment processing. Select the relevant payment process profile from the list of values. Here for demo purpose, we have selected “PPR US DEMO “
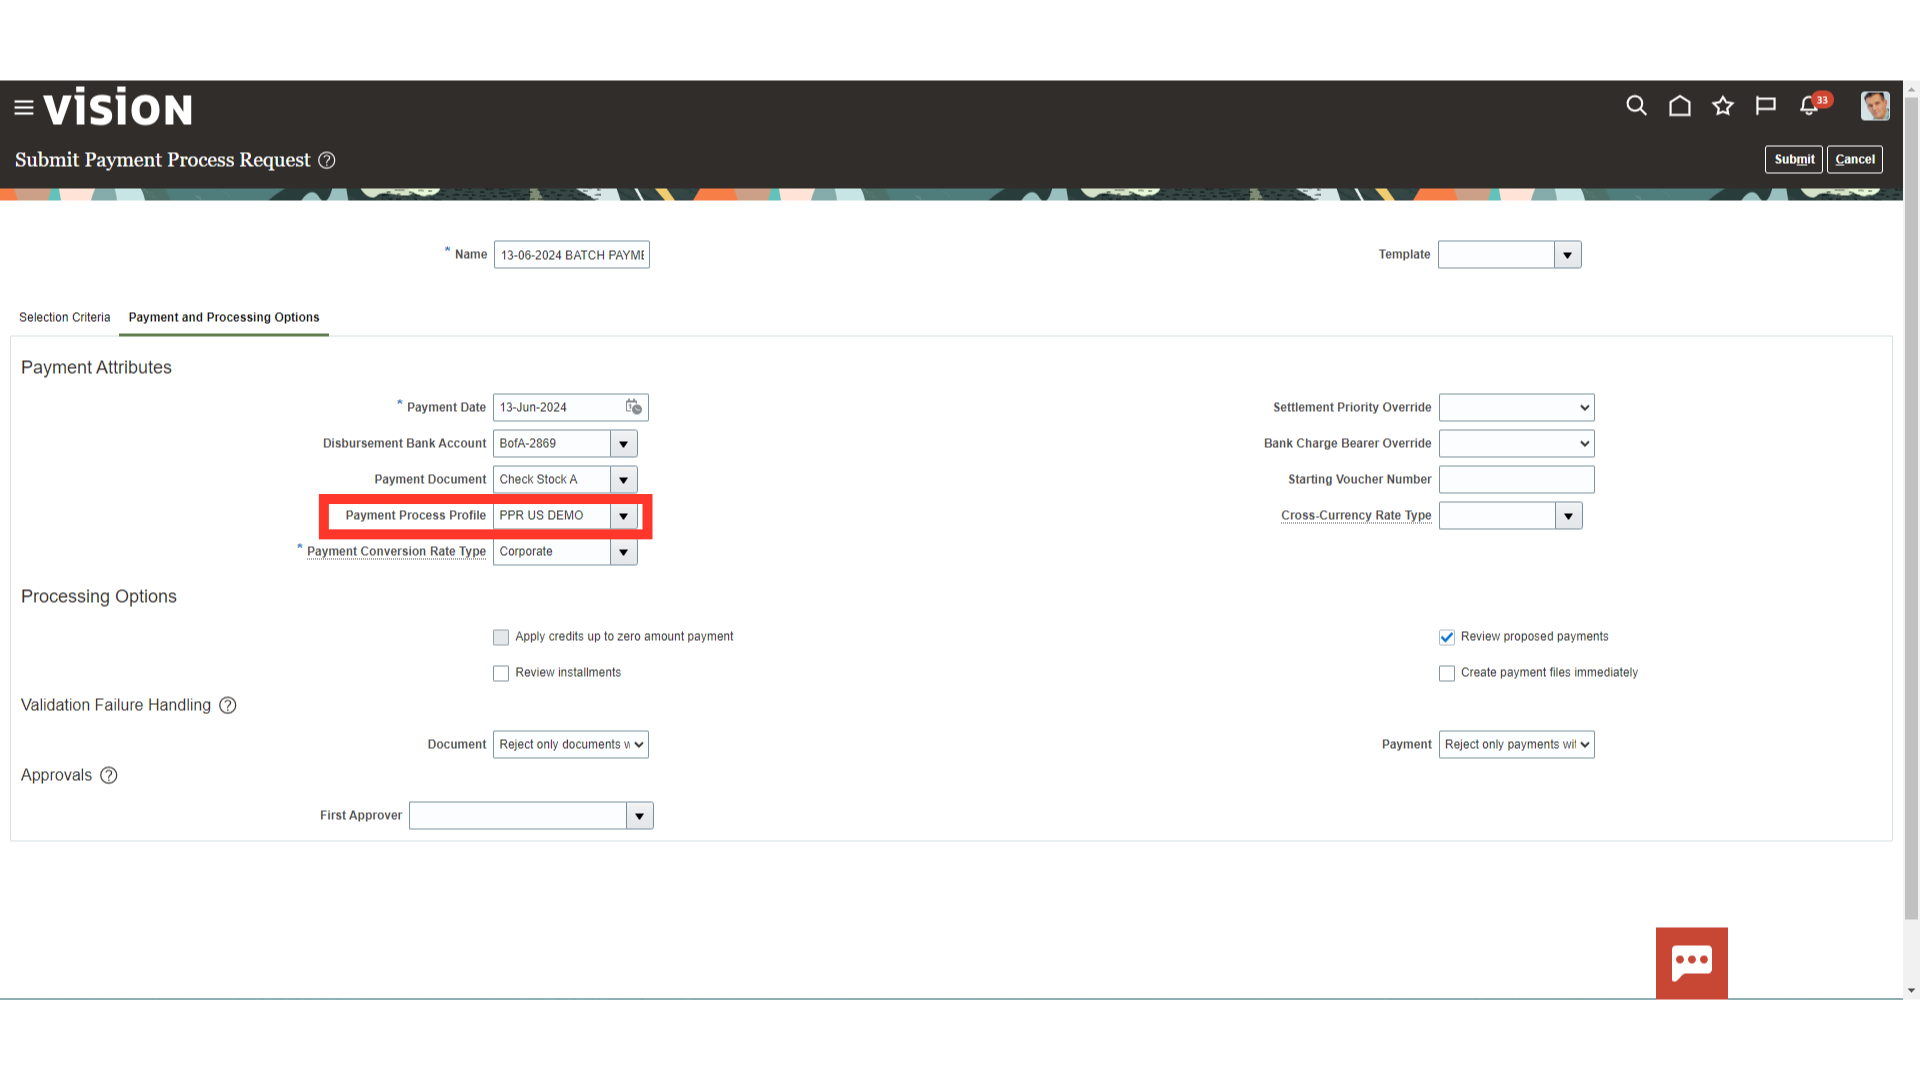
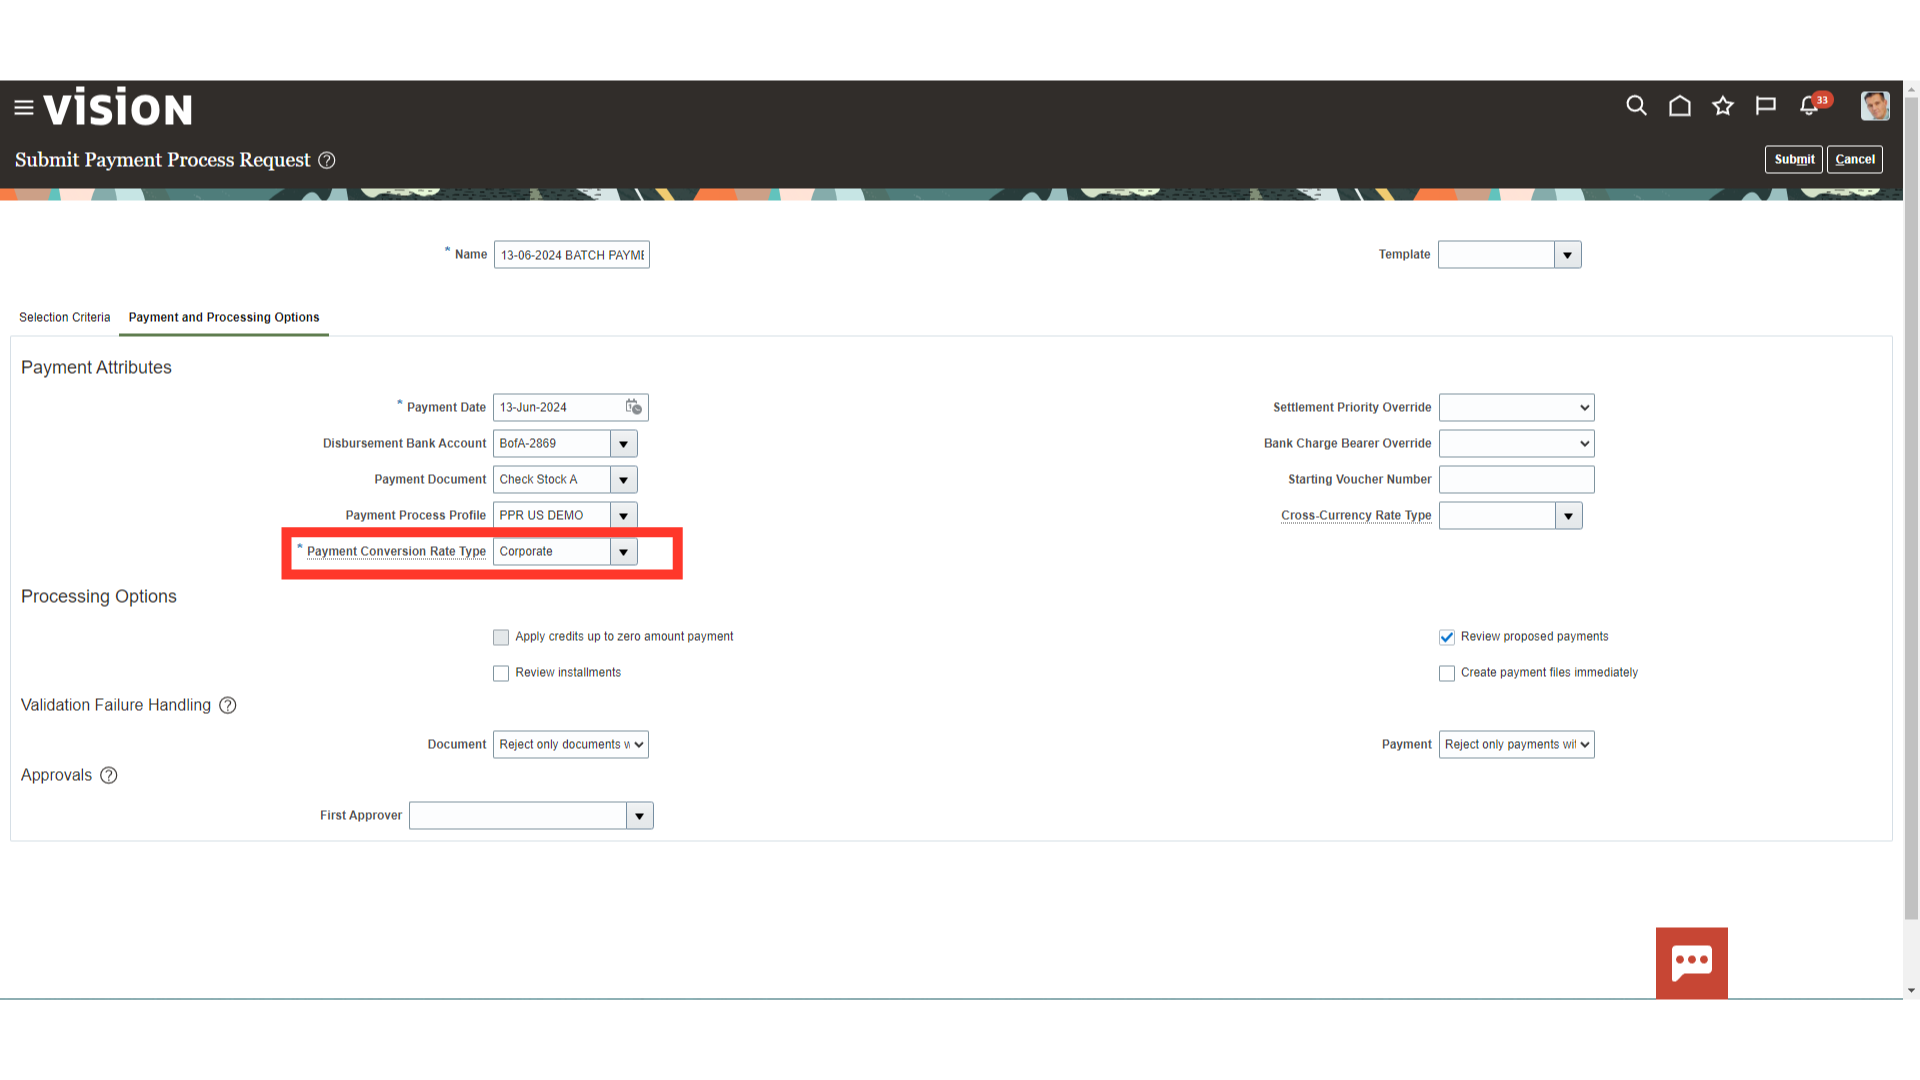
In case of foreign currency payments, select the conversion rate type to be used for recording the payments.
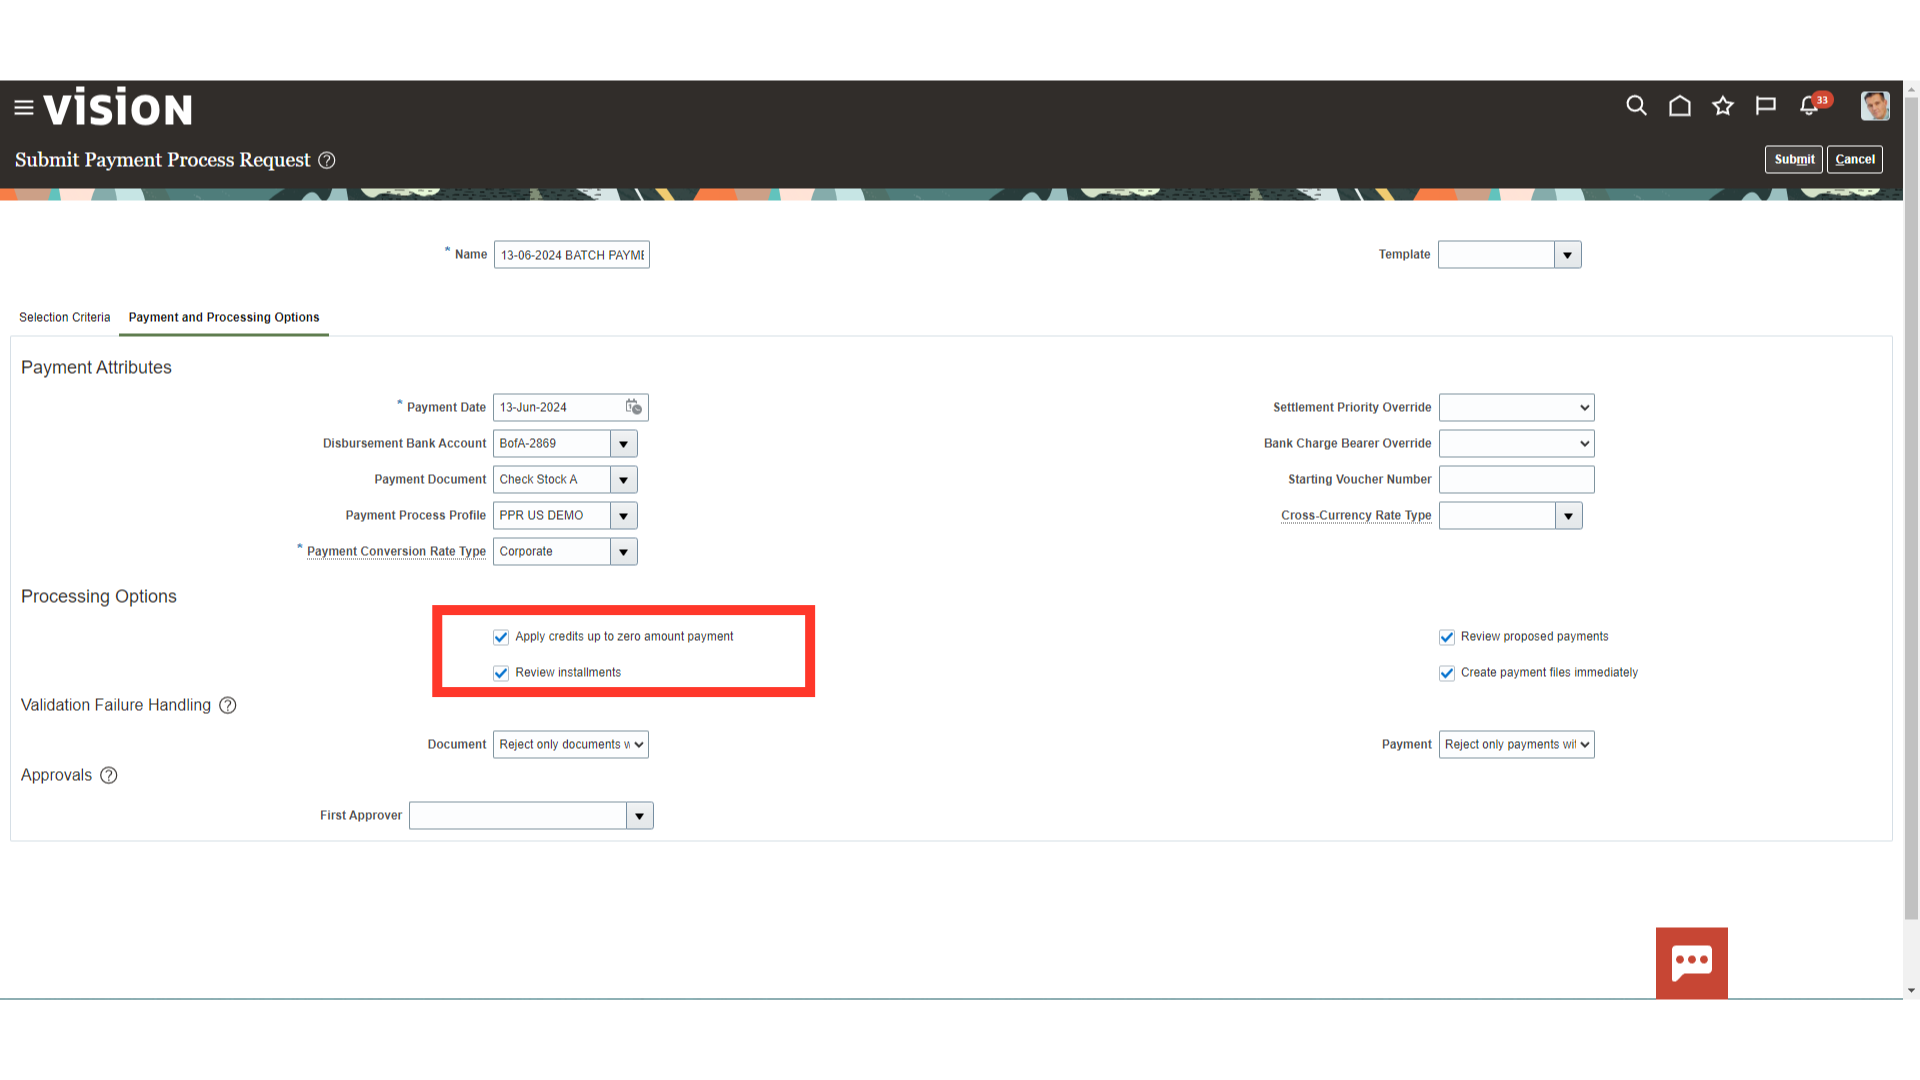
Under the Processing options section, you have different options such as Apply credits up to zero amount payment which means applying credits and creates a zero-amount payment if the sum of the selected installments is negative after the installments are grouped for payment. By enabling the checkbox against Review Installments you can Review installments, Add or remove installments, edit payment and discount amounts, specify user conversion rates and calculate withholding and interest.
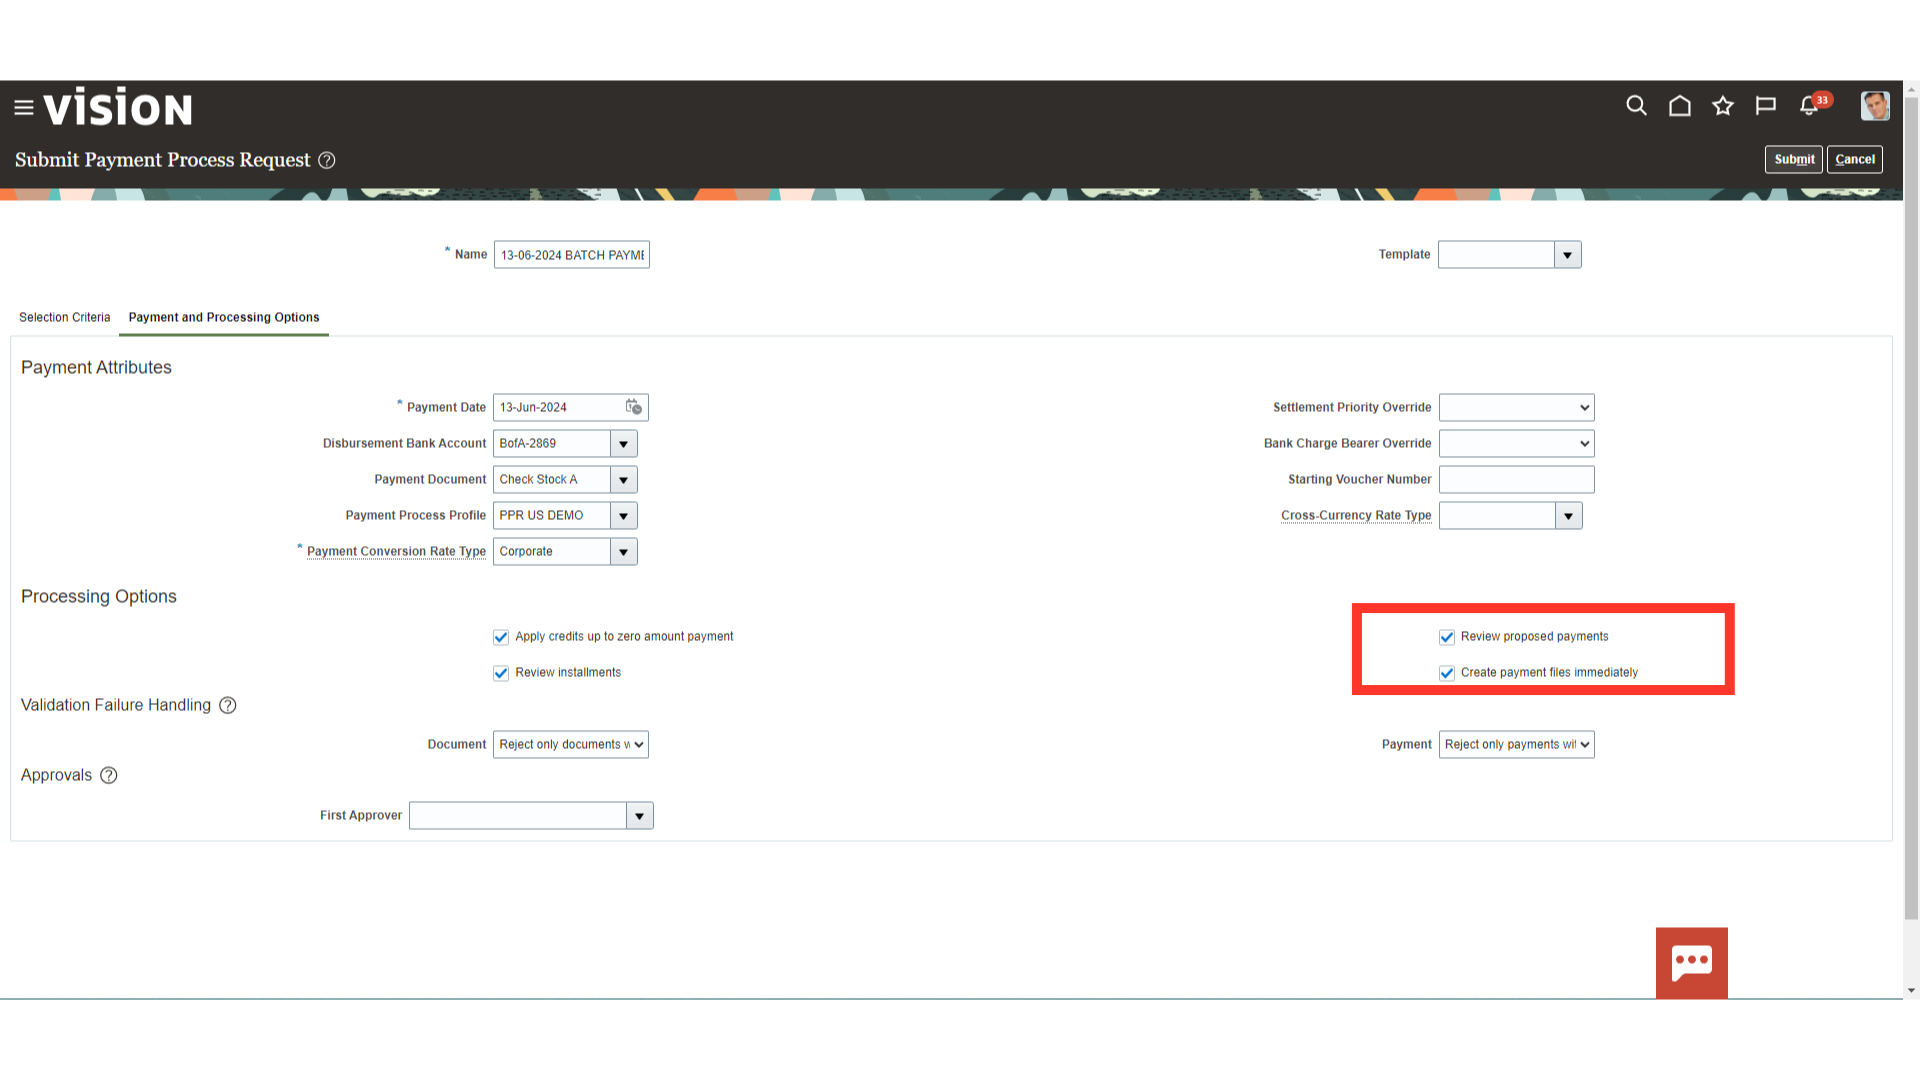
While Review Proposed Payments option stops the payment process request after grouping installments into payments and before building the payments. And the last checkbox against Create payment files immediately option creates the payment files for the submitted request instead of waiting to combine payments from other requests into payment files.
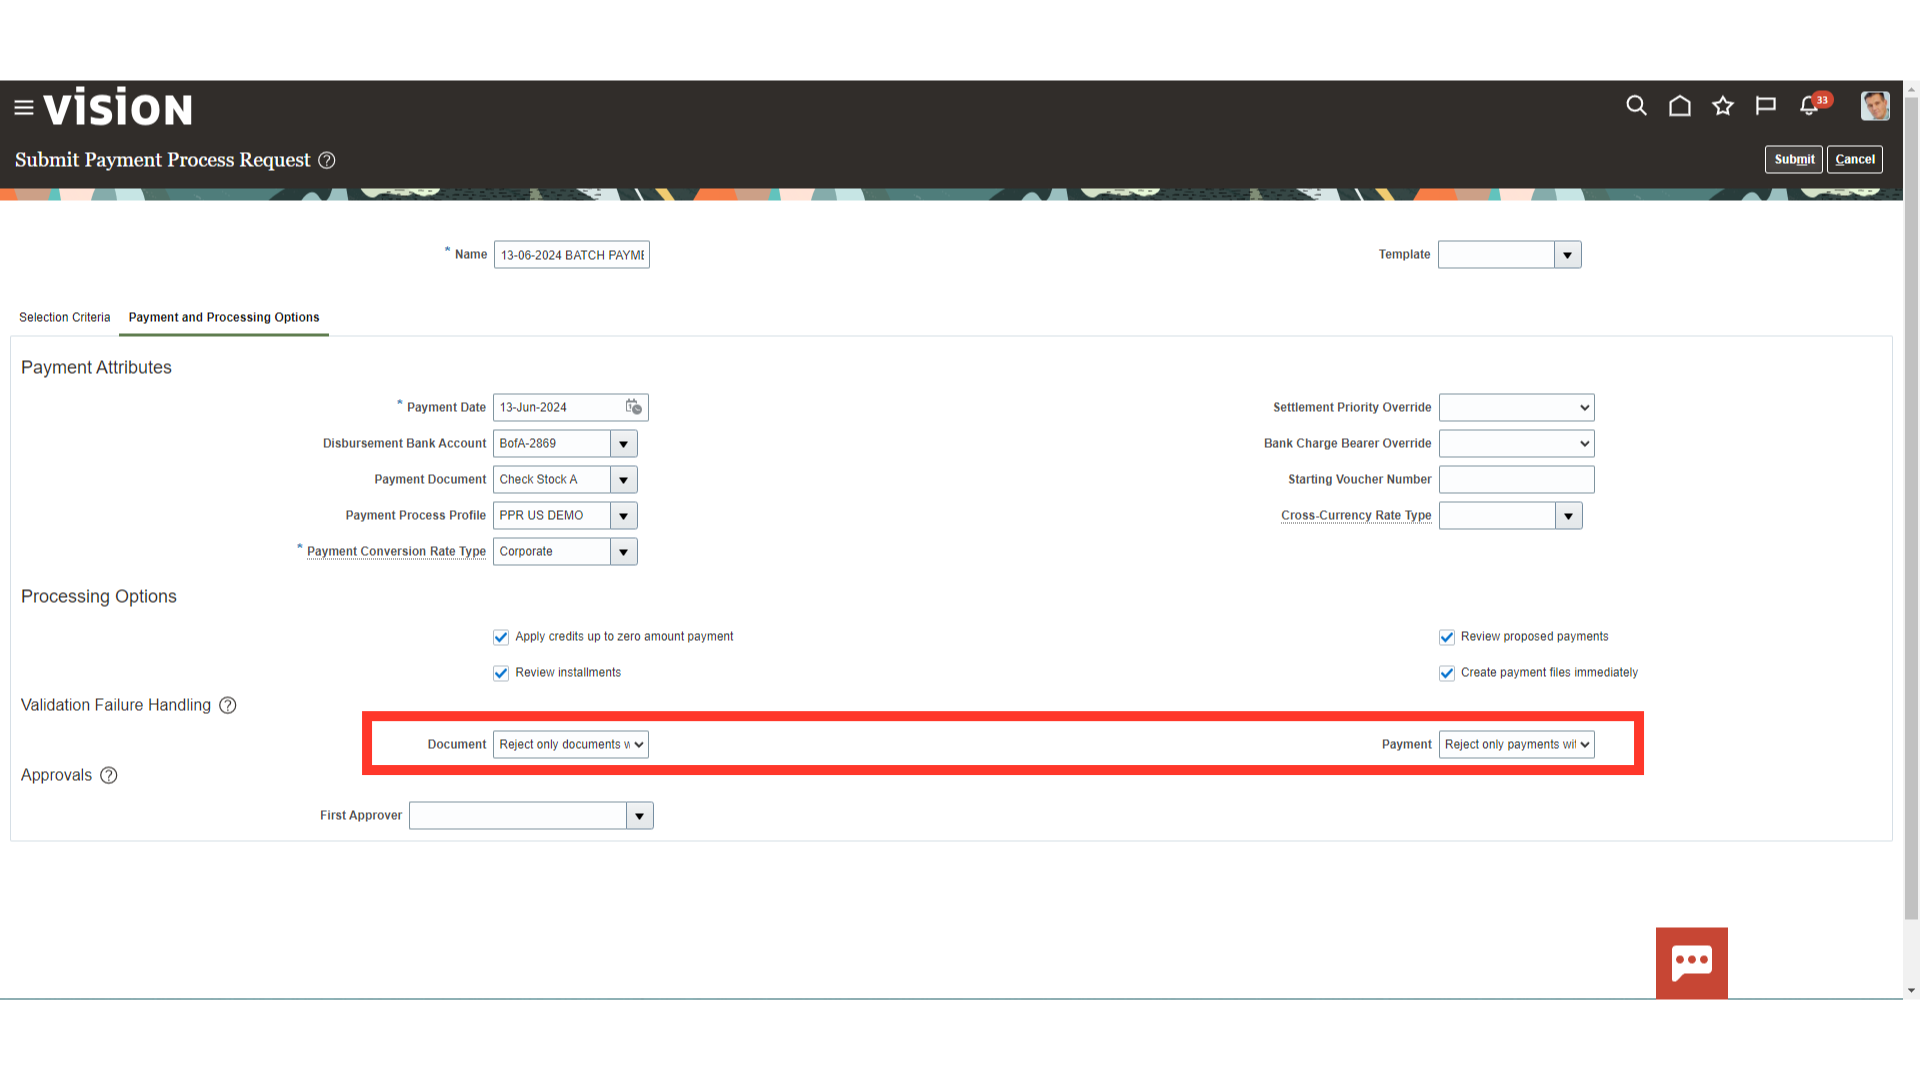
Validation failure handling for documents specifies processing instructions for handling document validation failures.
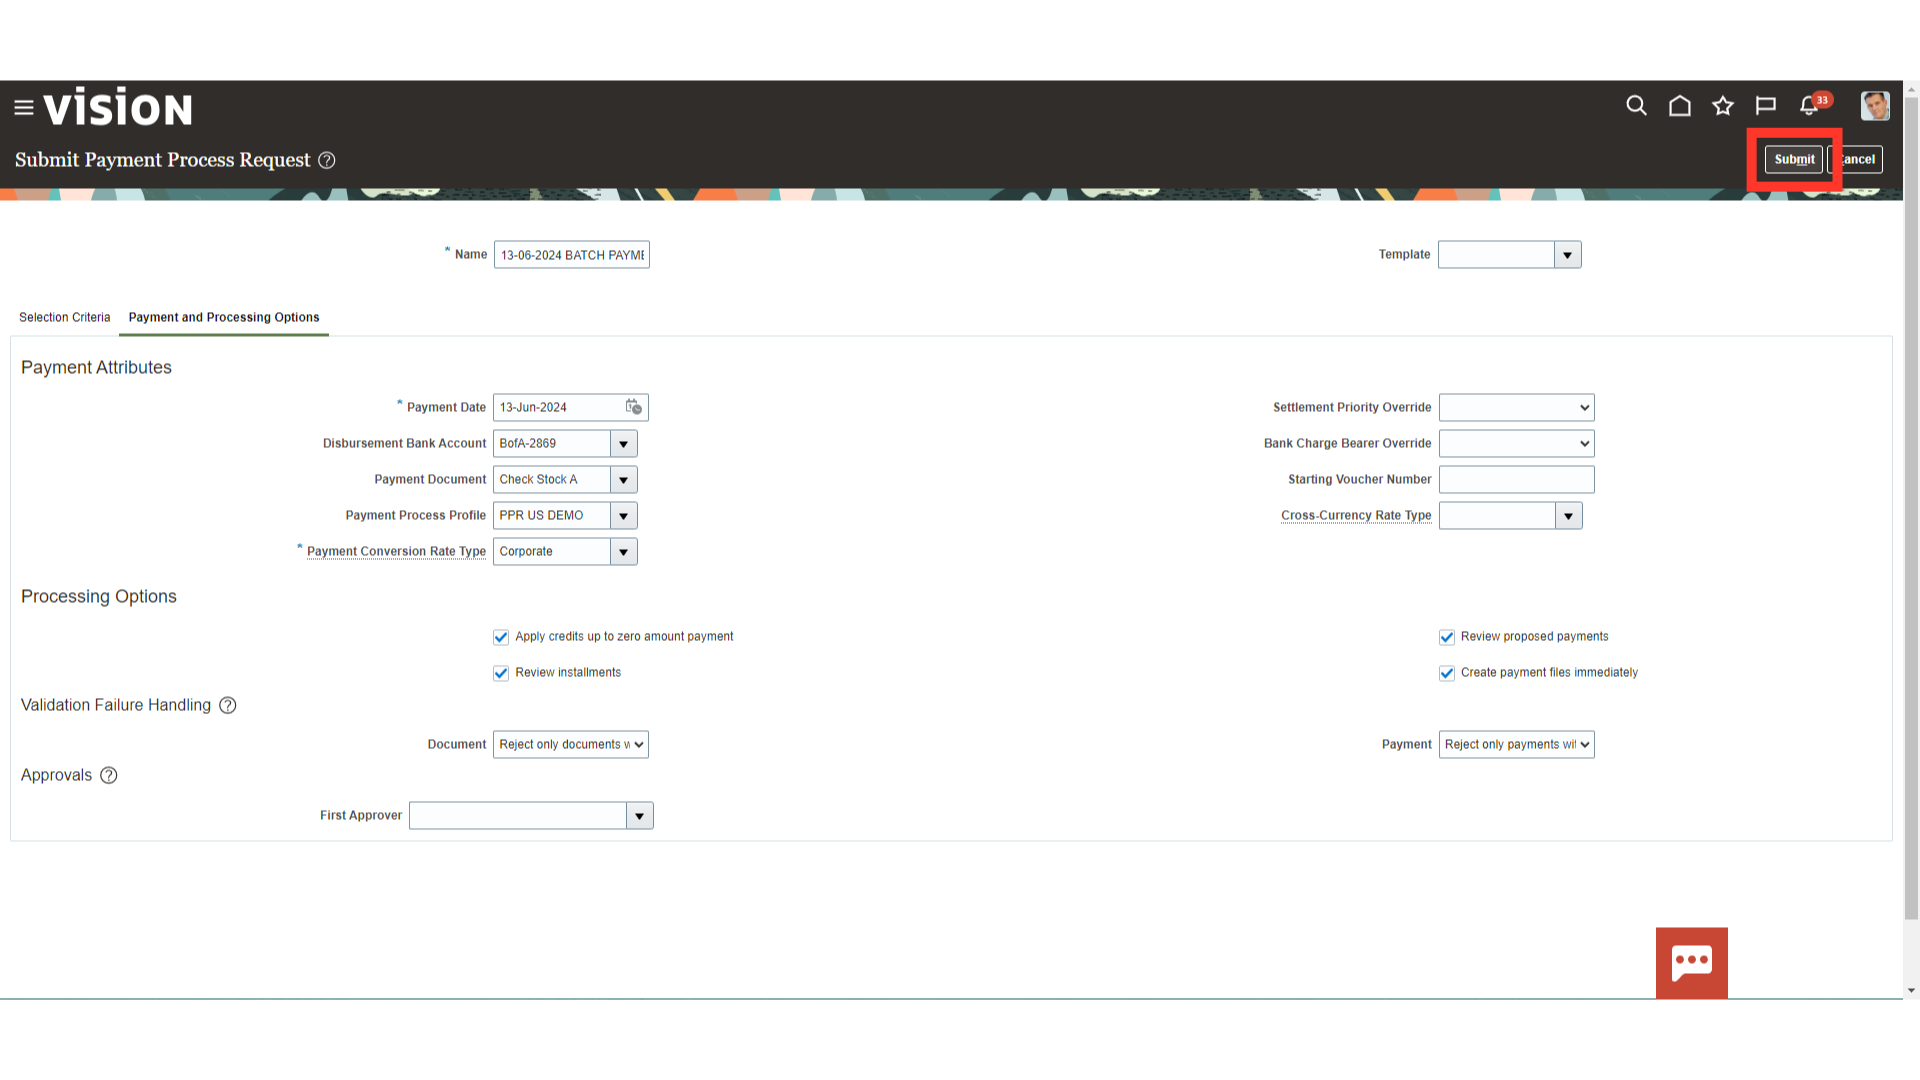
After verifying all the details, click on the Submit button to process the payment process request.
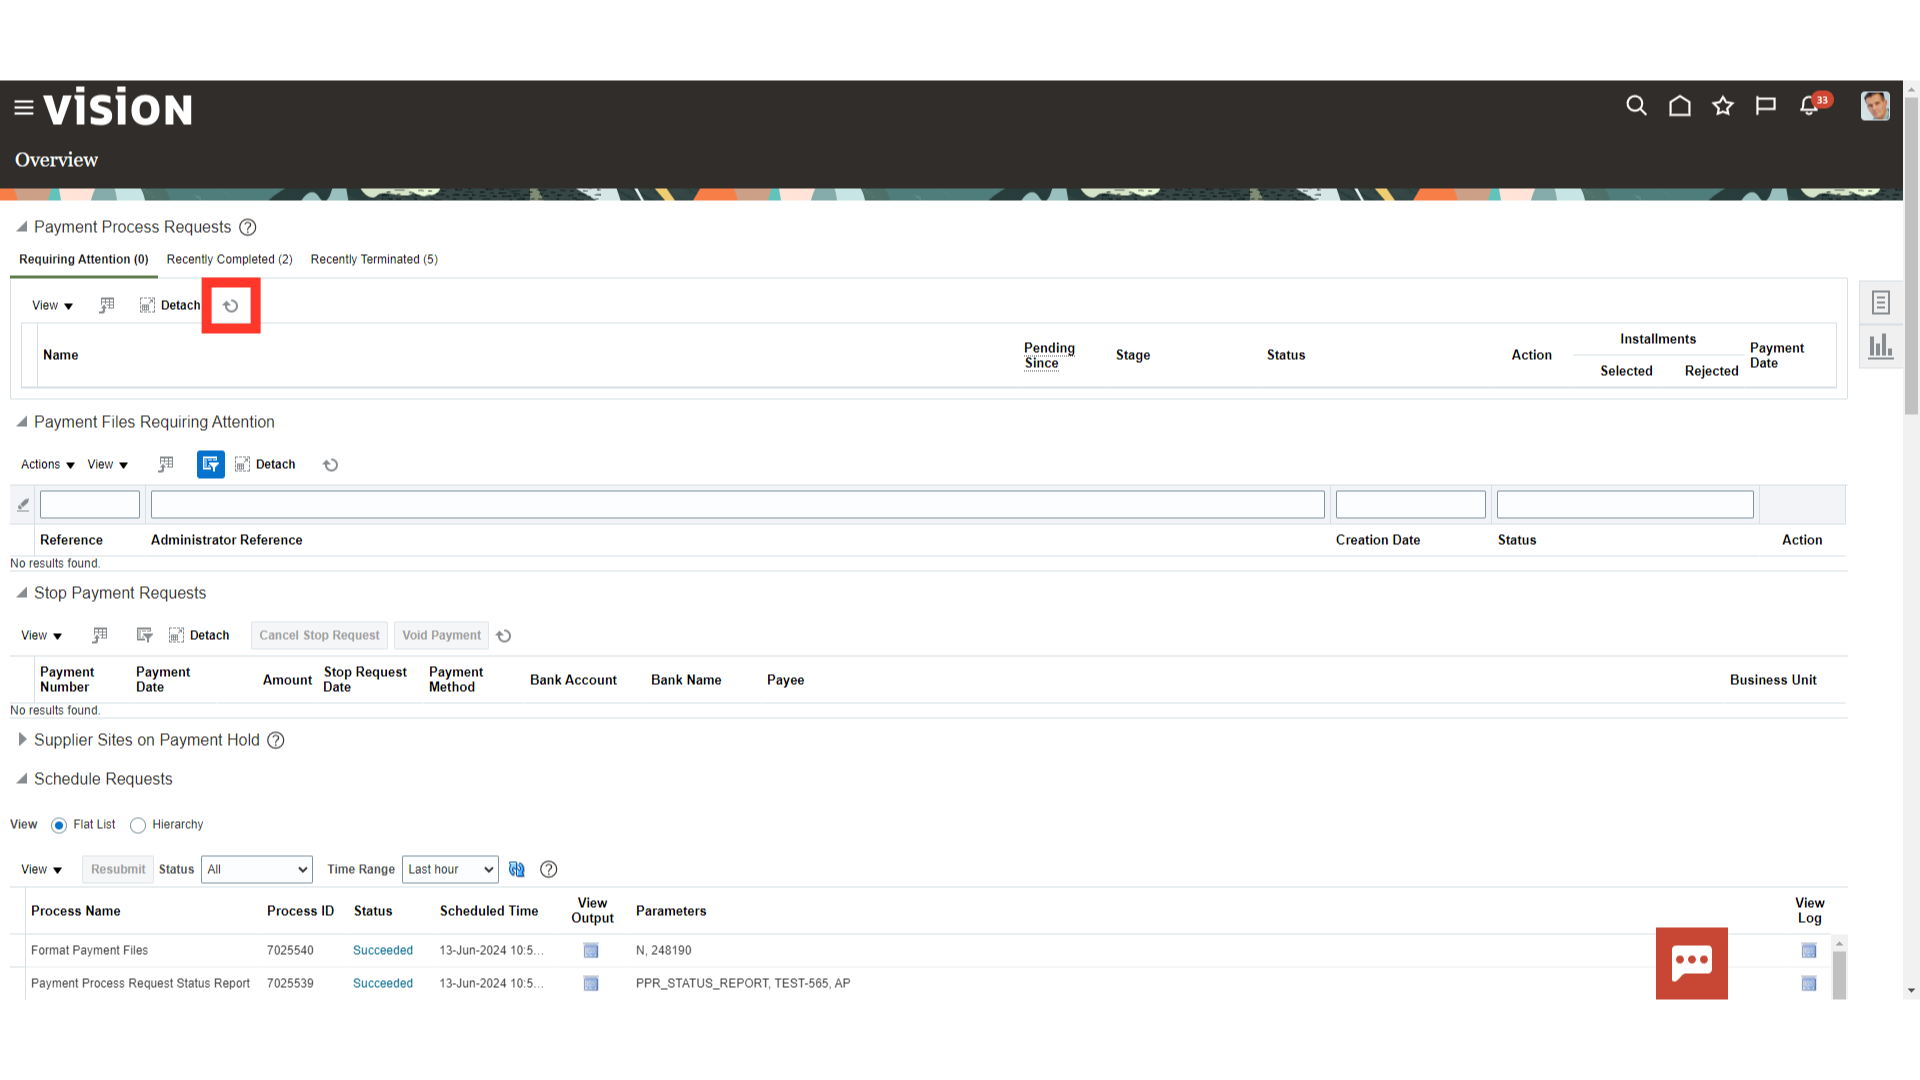
Click on Refresh icon, to refresh the status of the payment batch submitted.
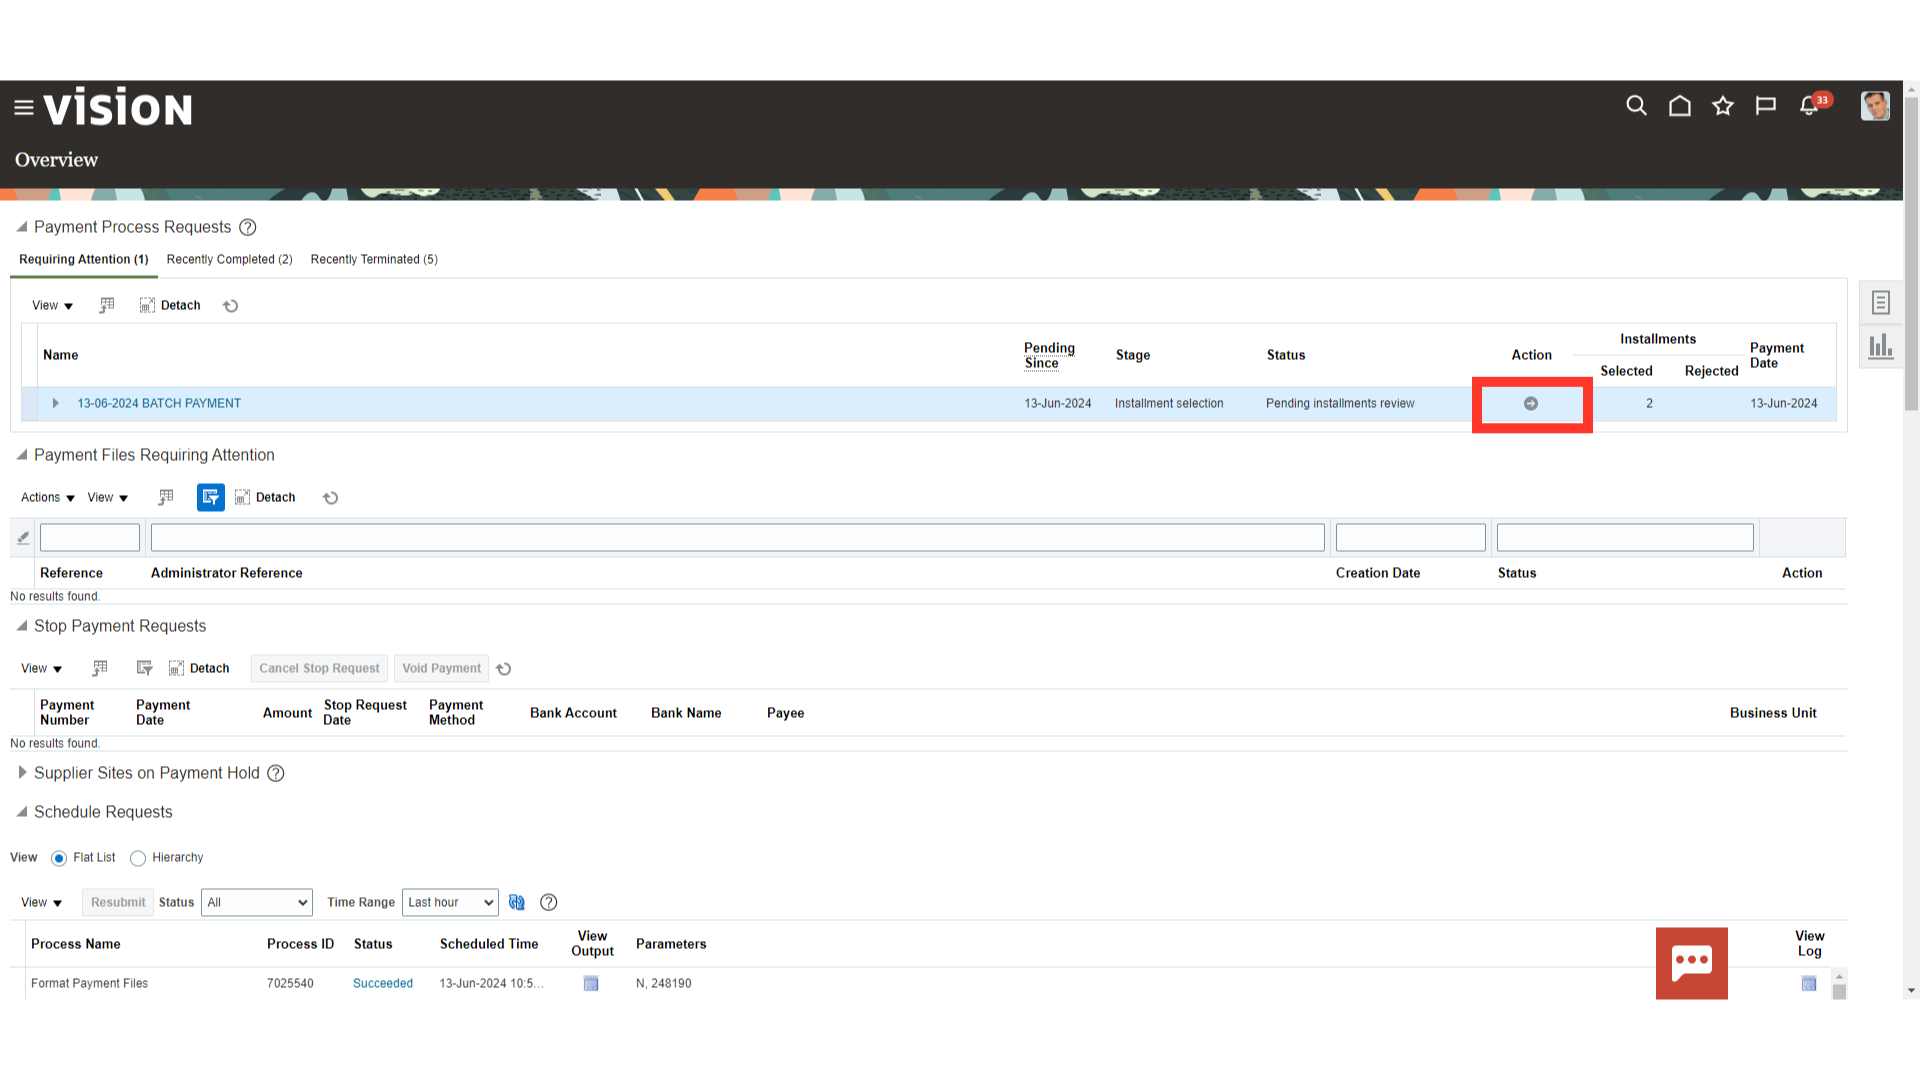
After the above step, payment batch would be in review status. Click on the Action button to see details of the selected installments details.
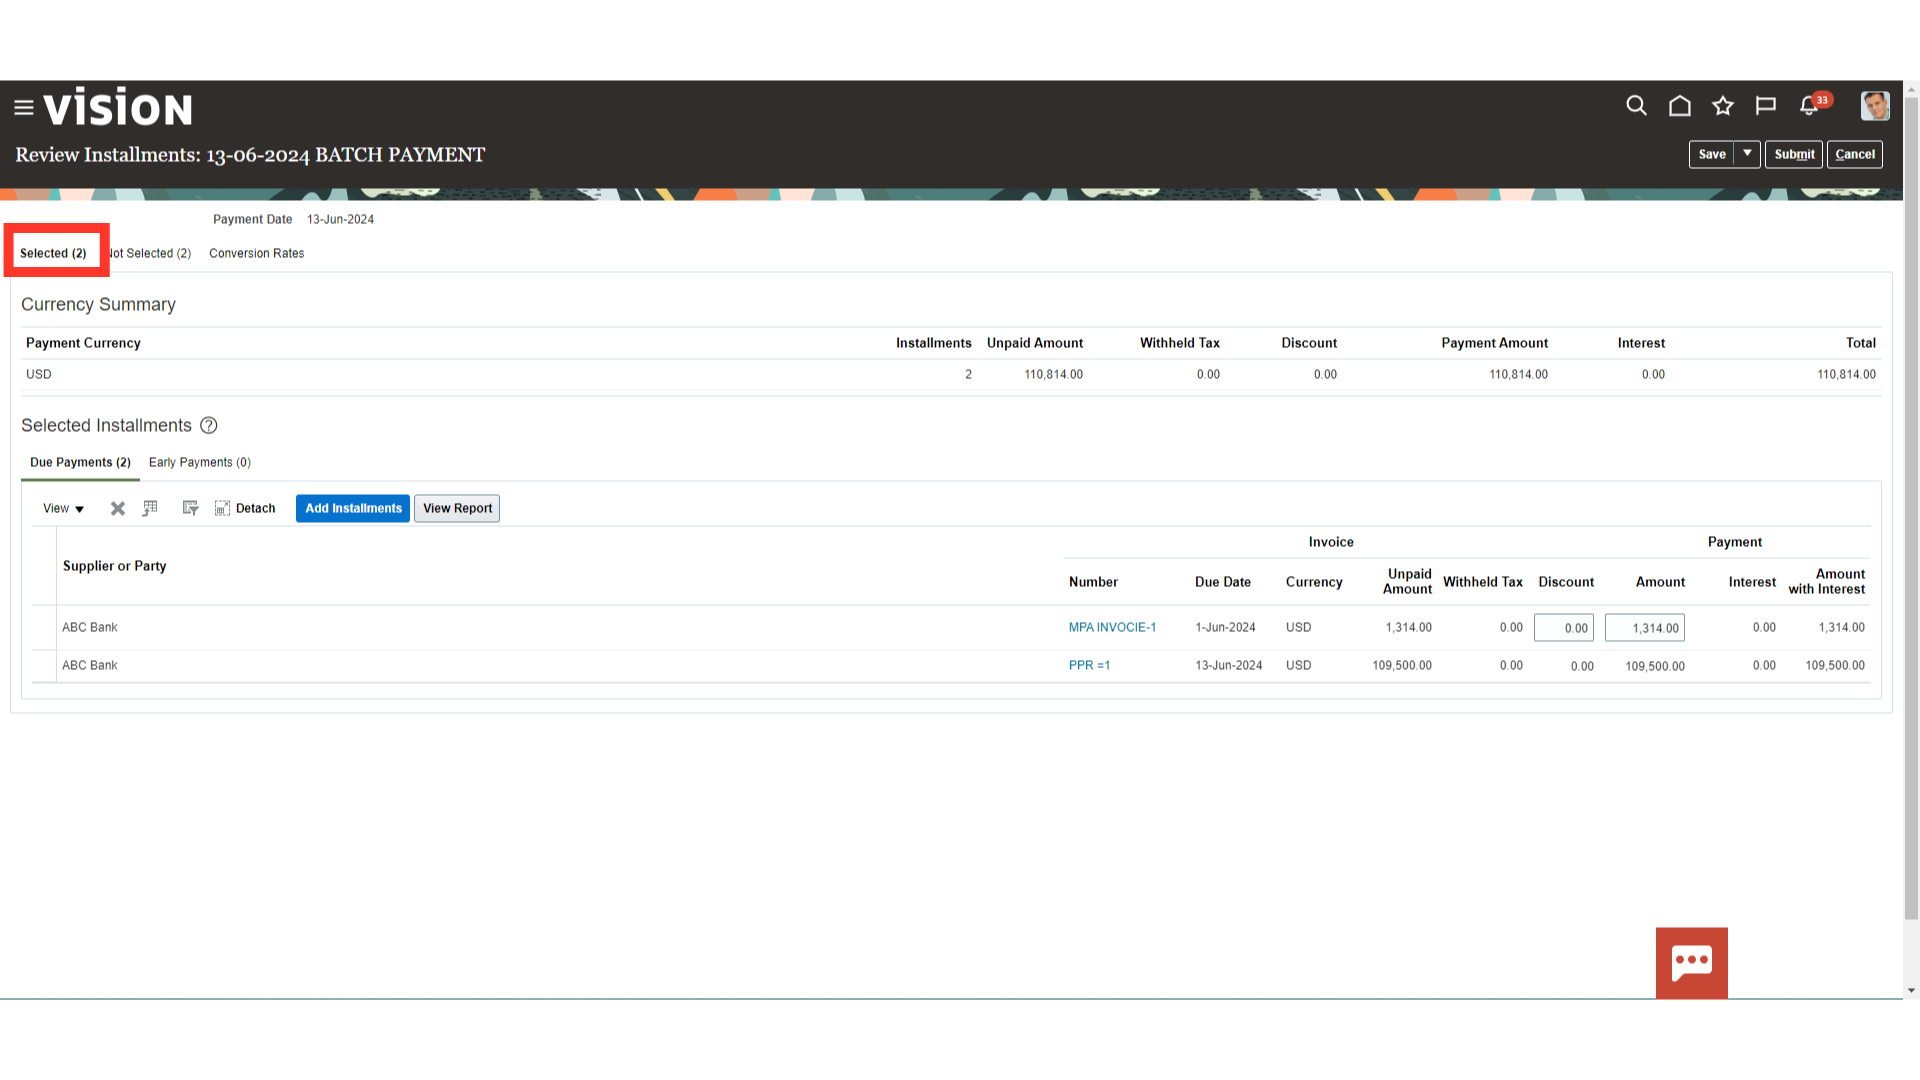
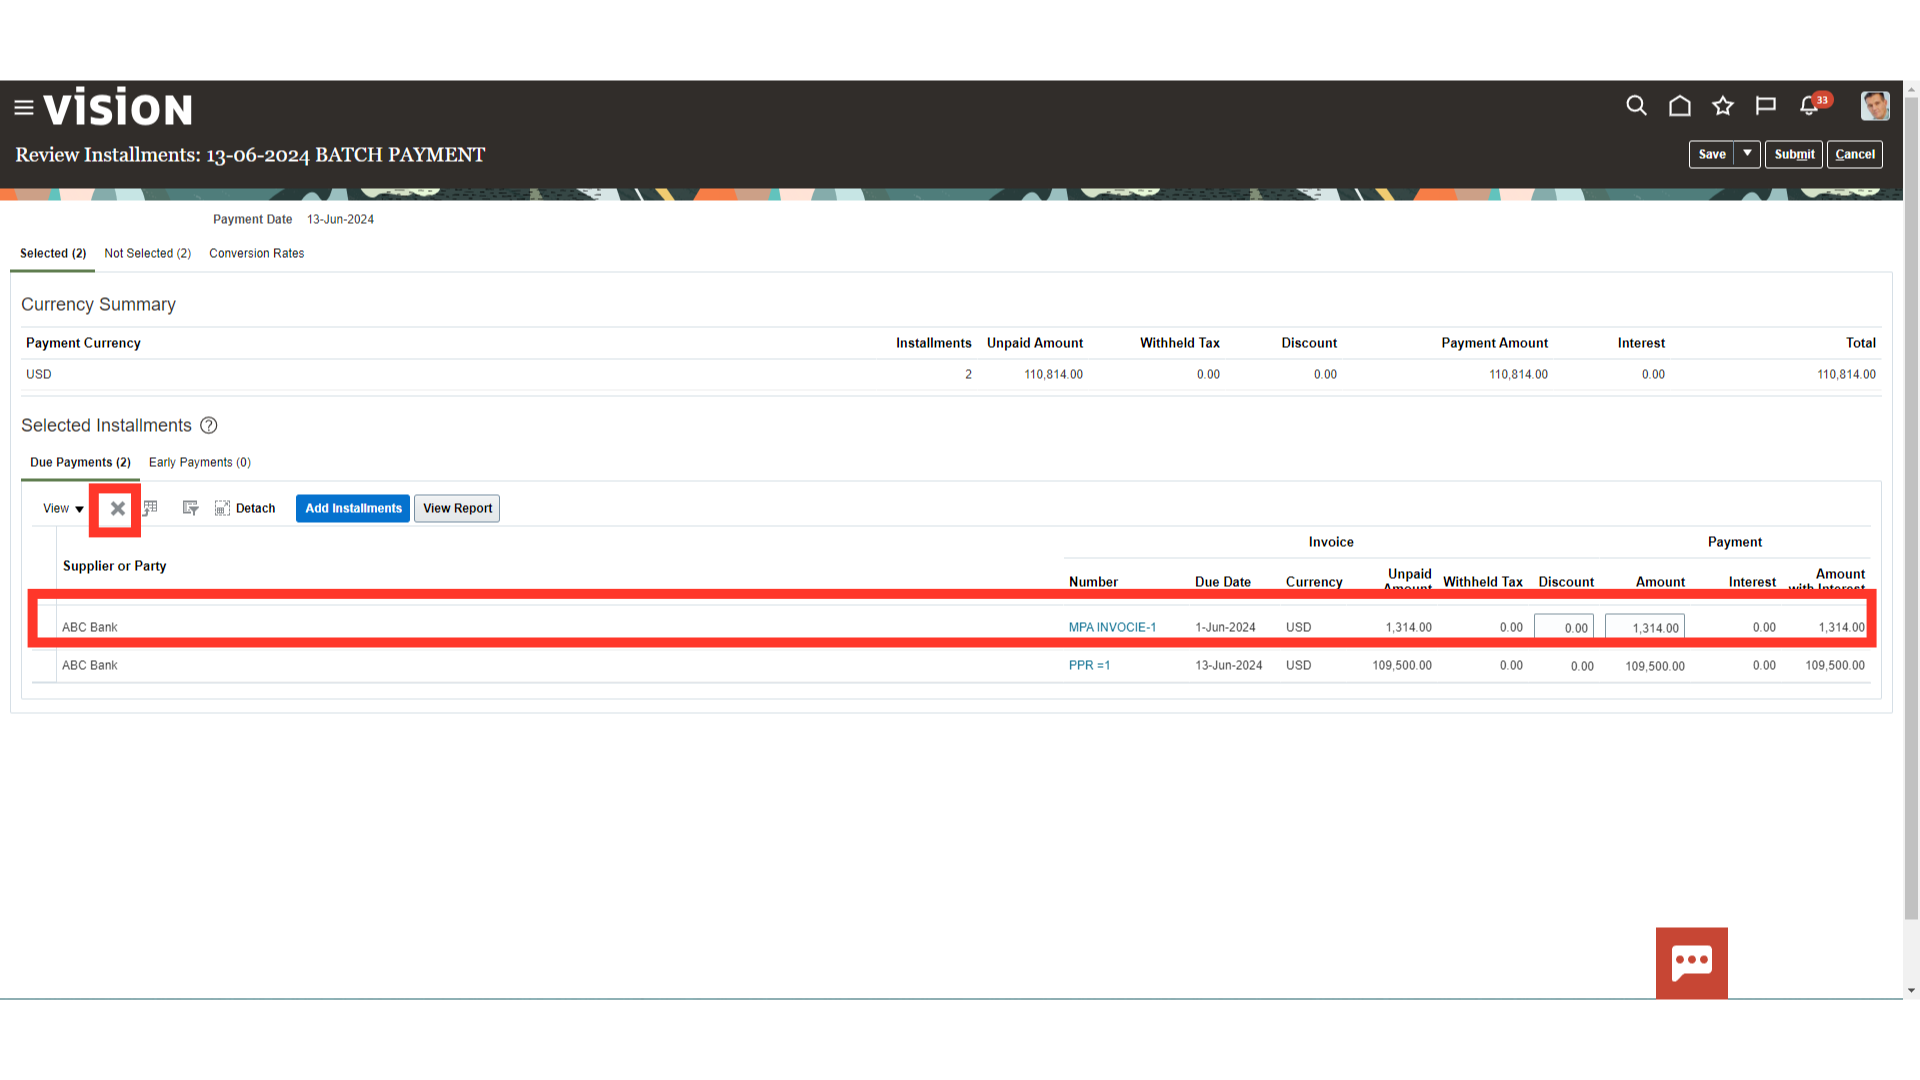
First tab “Selected” – Displays the details of installments selected under this payment process request.
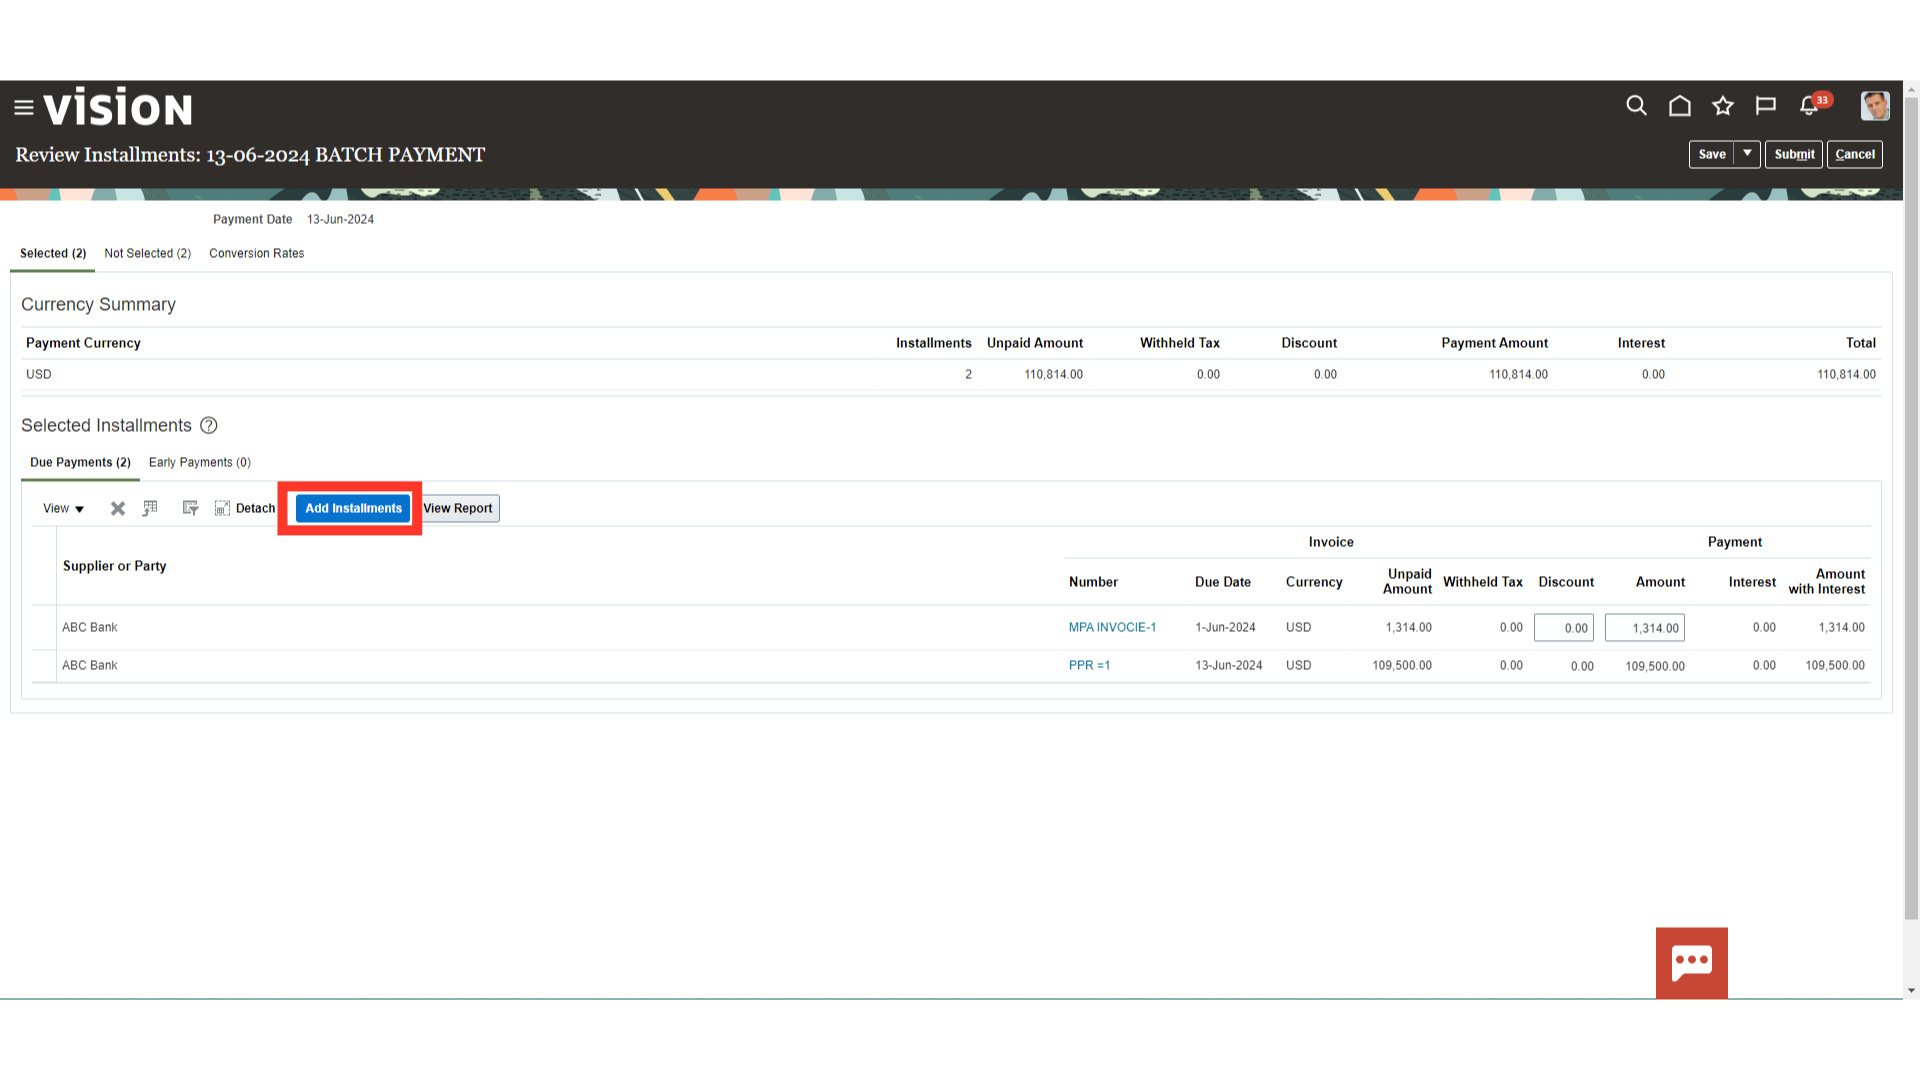
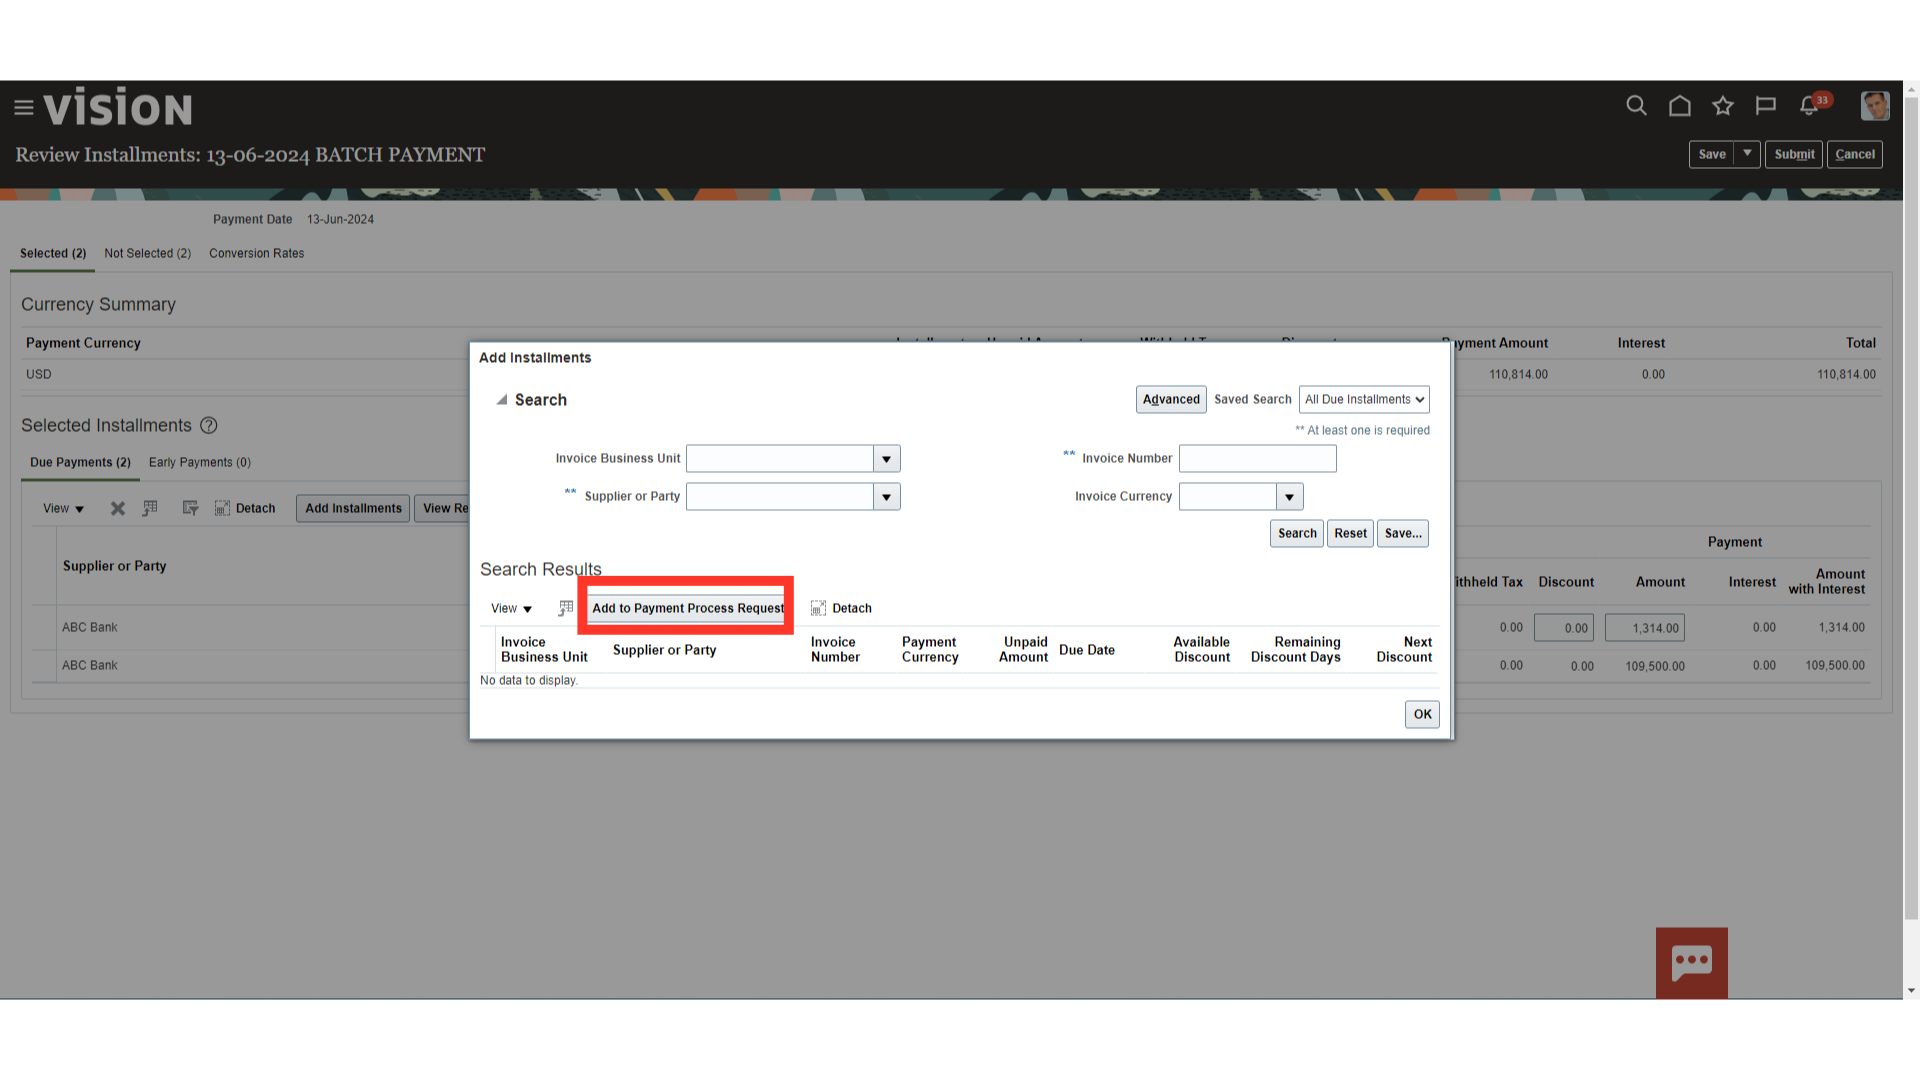
In case you want to add any installments which are not selected, click on the “Add Installments” option.
Search the unpaid invoices and click on the “Add to Payment Process Request” button.
If you want to remove any installments, select the installment, and the click on delete button (the cross icon) .
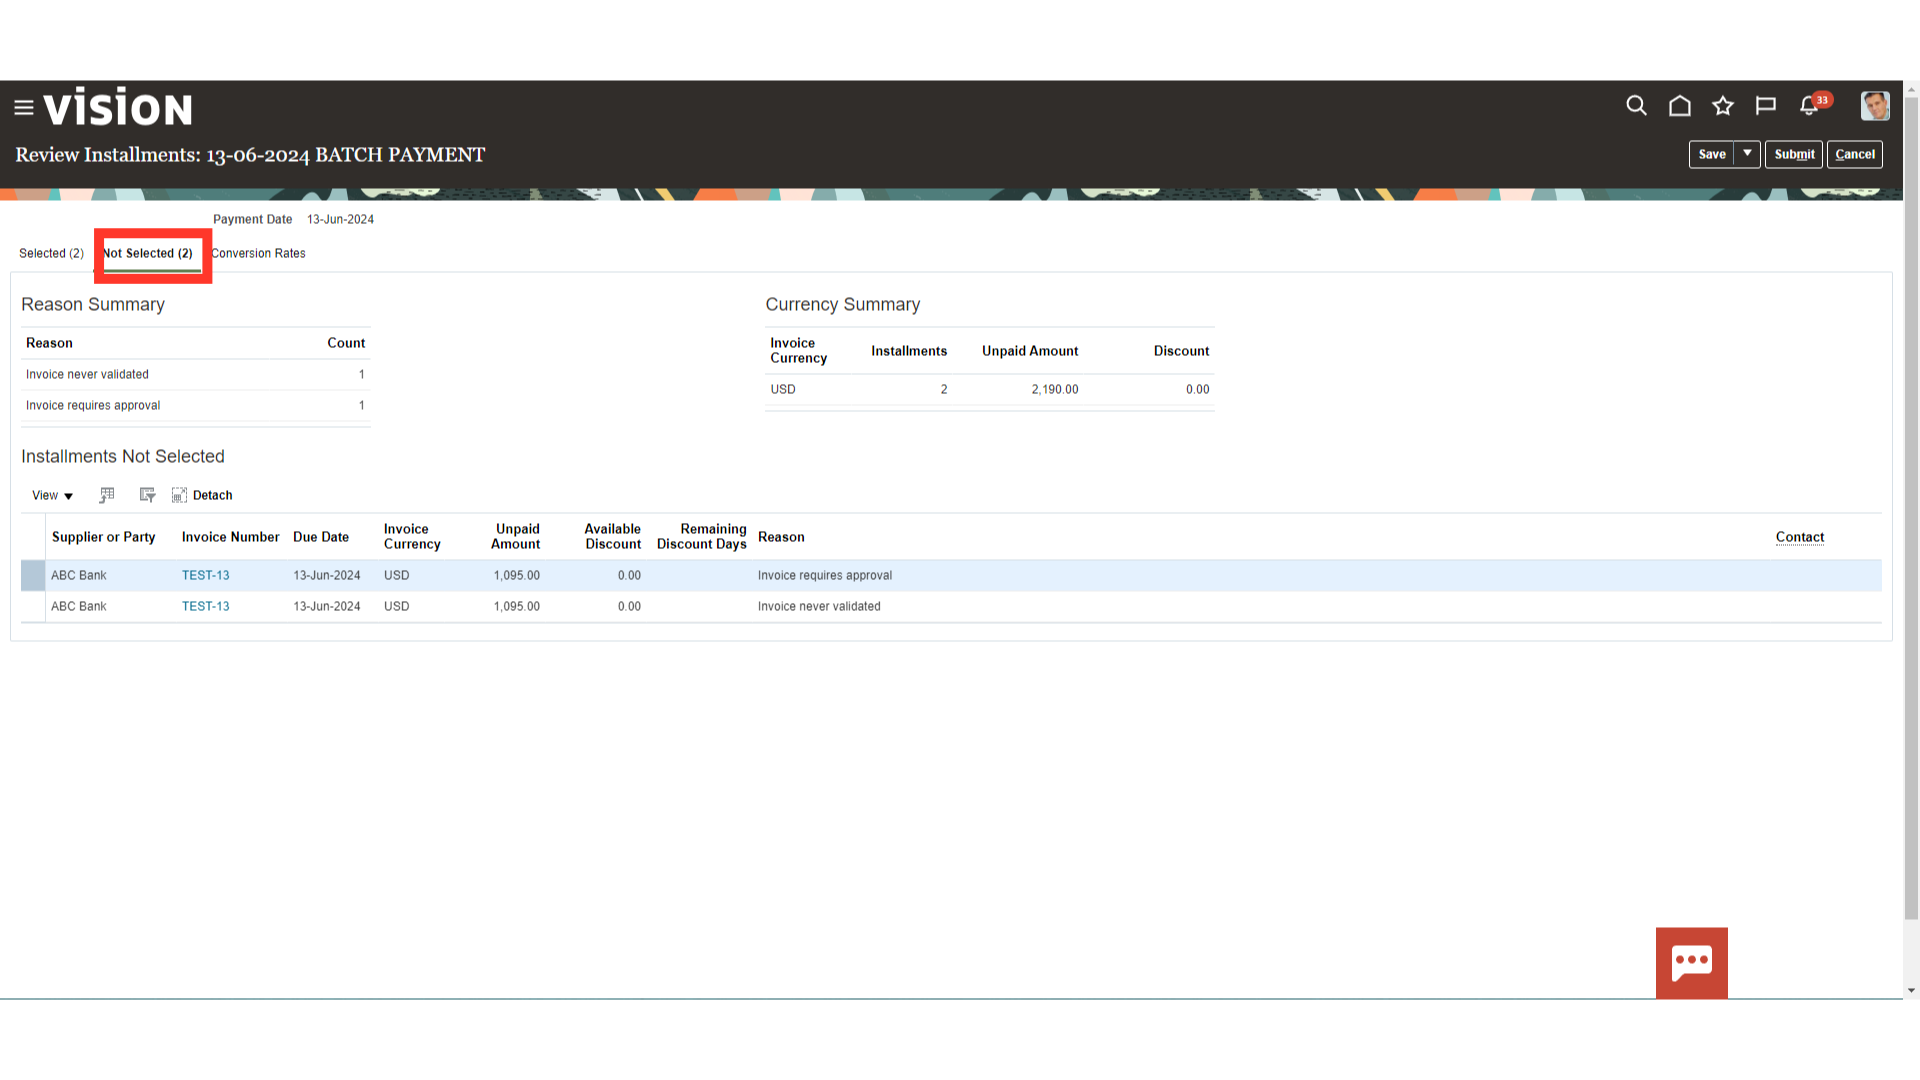
Second tab, shows the number of installments not selected due to various reasons such as Invoice Never Validated, Invoice Requires Approval etc.
While, Under Conversion rates tab, details of the foreign currency exchange rates is displayed, related to the payments selected in the payment batch.

Click on the submit button to process the payment batch for further process.

Now, the payment batch status would be “Pending Proposed Payment Review”. Click on the Action button, to process further.

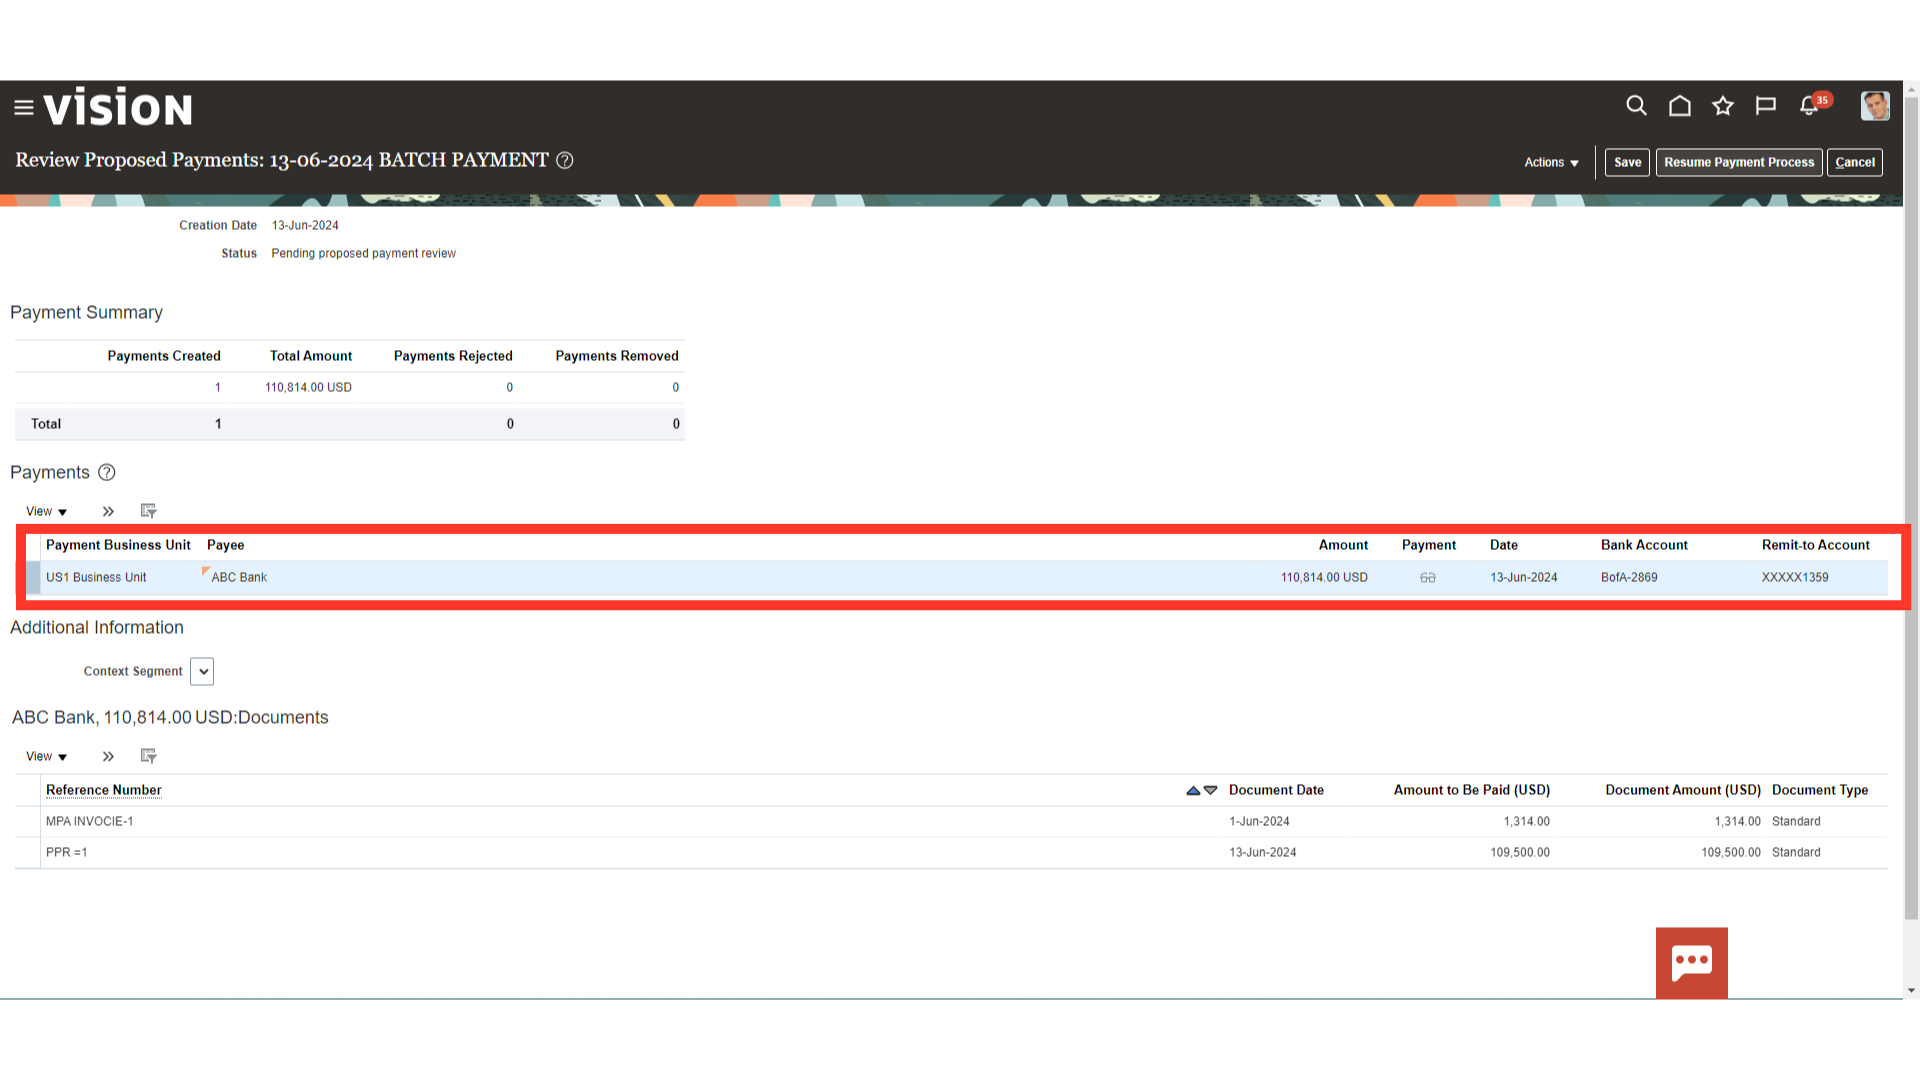
Proposed payment displays payment summary details such as number of payments created, total amount of the payment, Payments rejected, and Payments Removed.
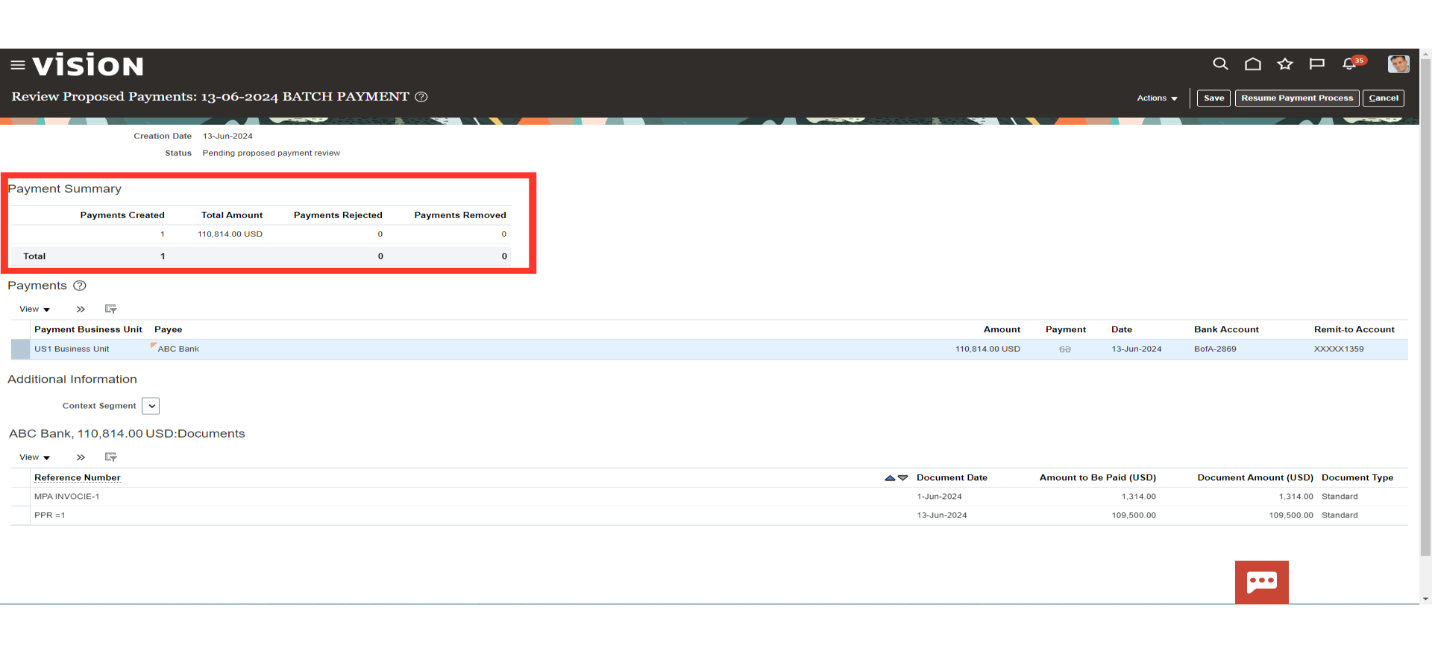
Invoices selected under each payment would be displayed if you select the payment details as highlighted.
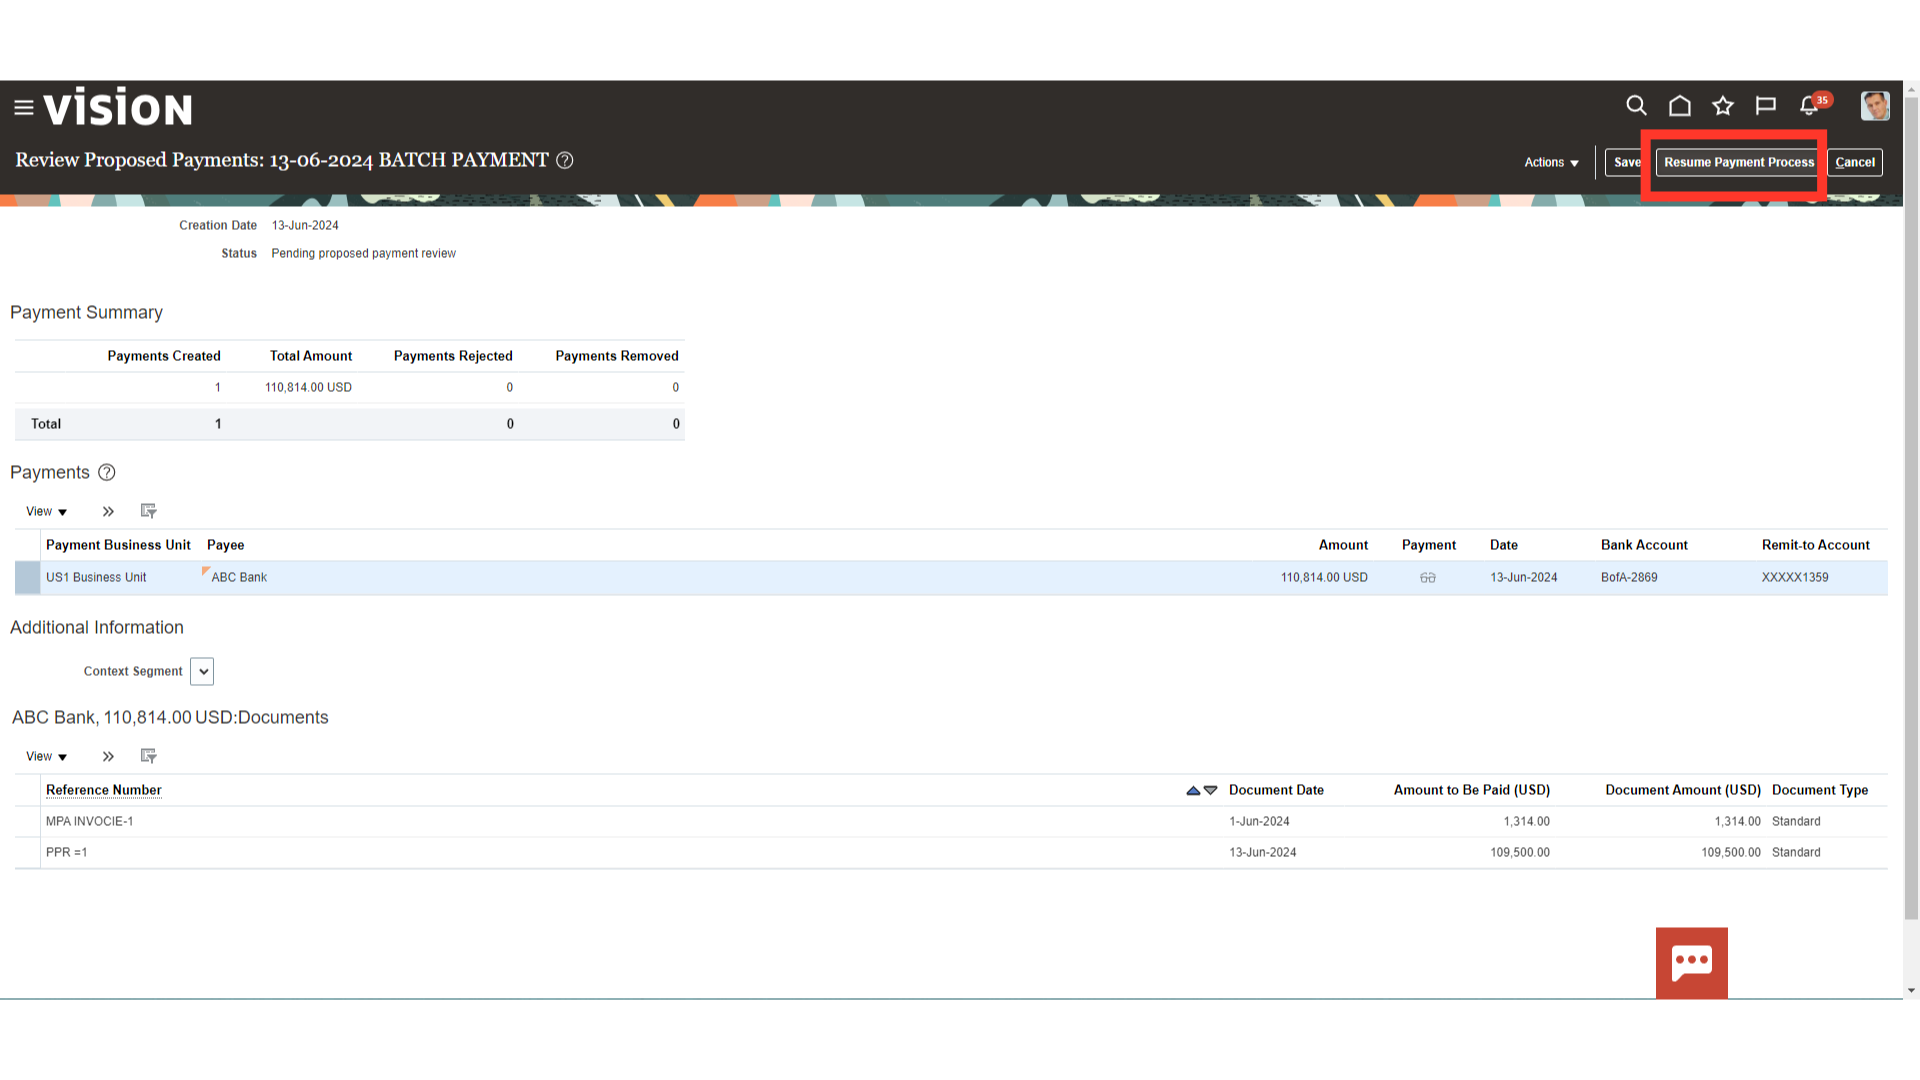
Click on the “Resume Payment process” to initiate the payment batch approval, if applicable.
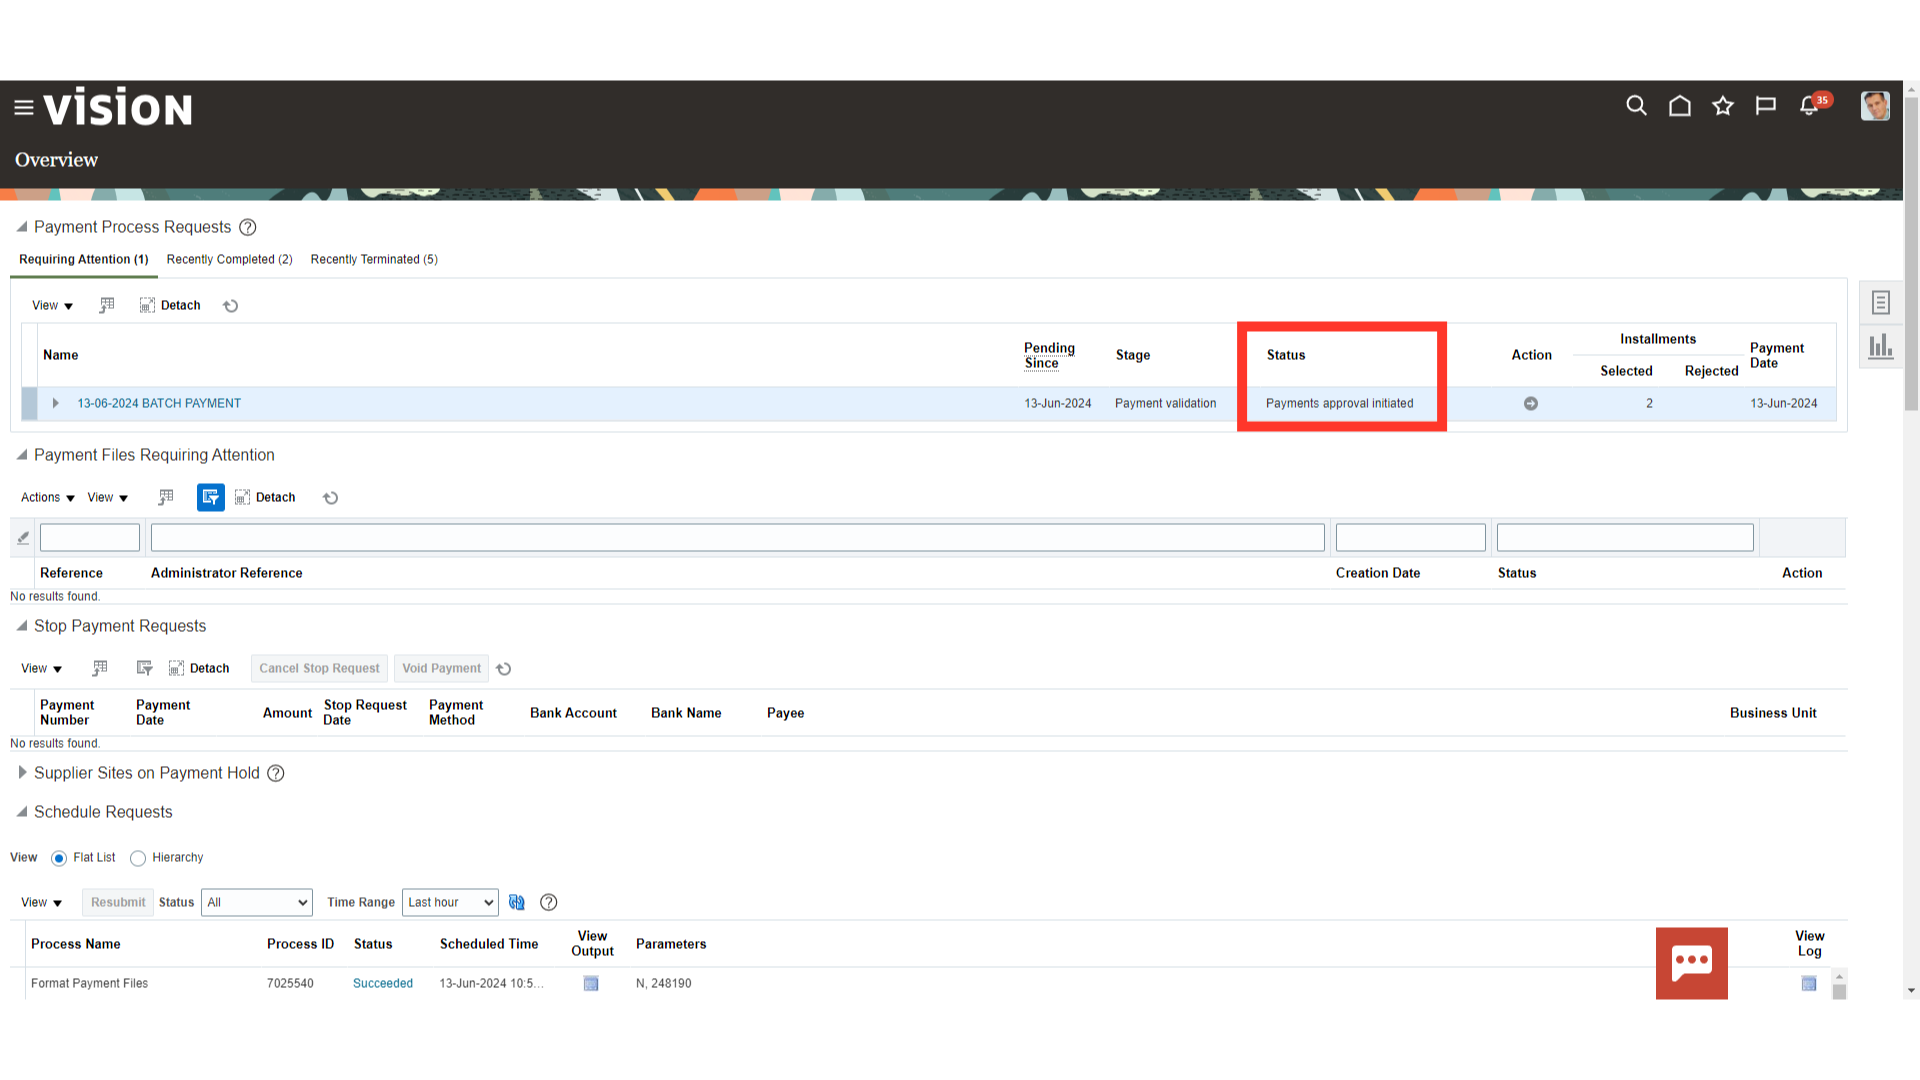
Following submission, the payment batch’s status would change to “Payment Approval Initiated”.
Once the payment batch is approved, the payment file would be automatically generated for transmission to the Bank.
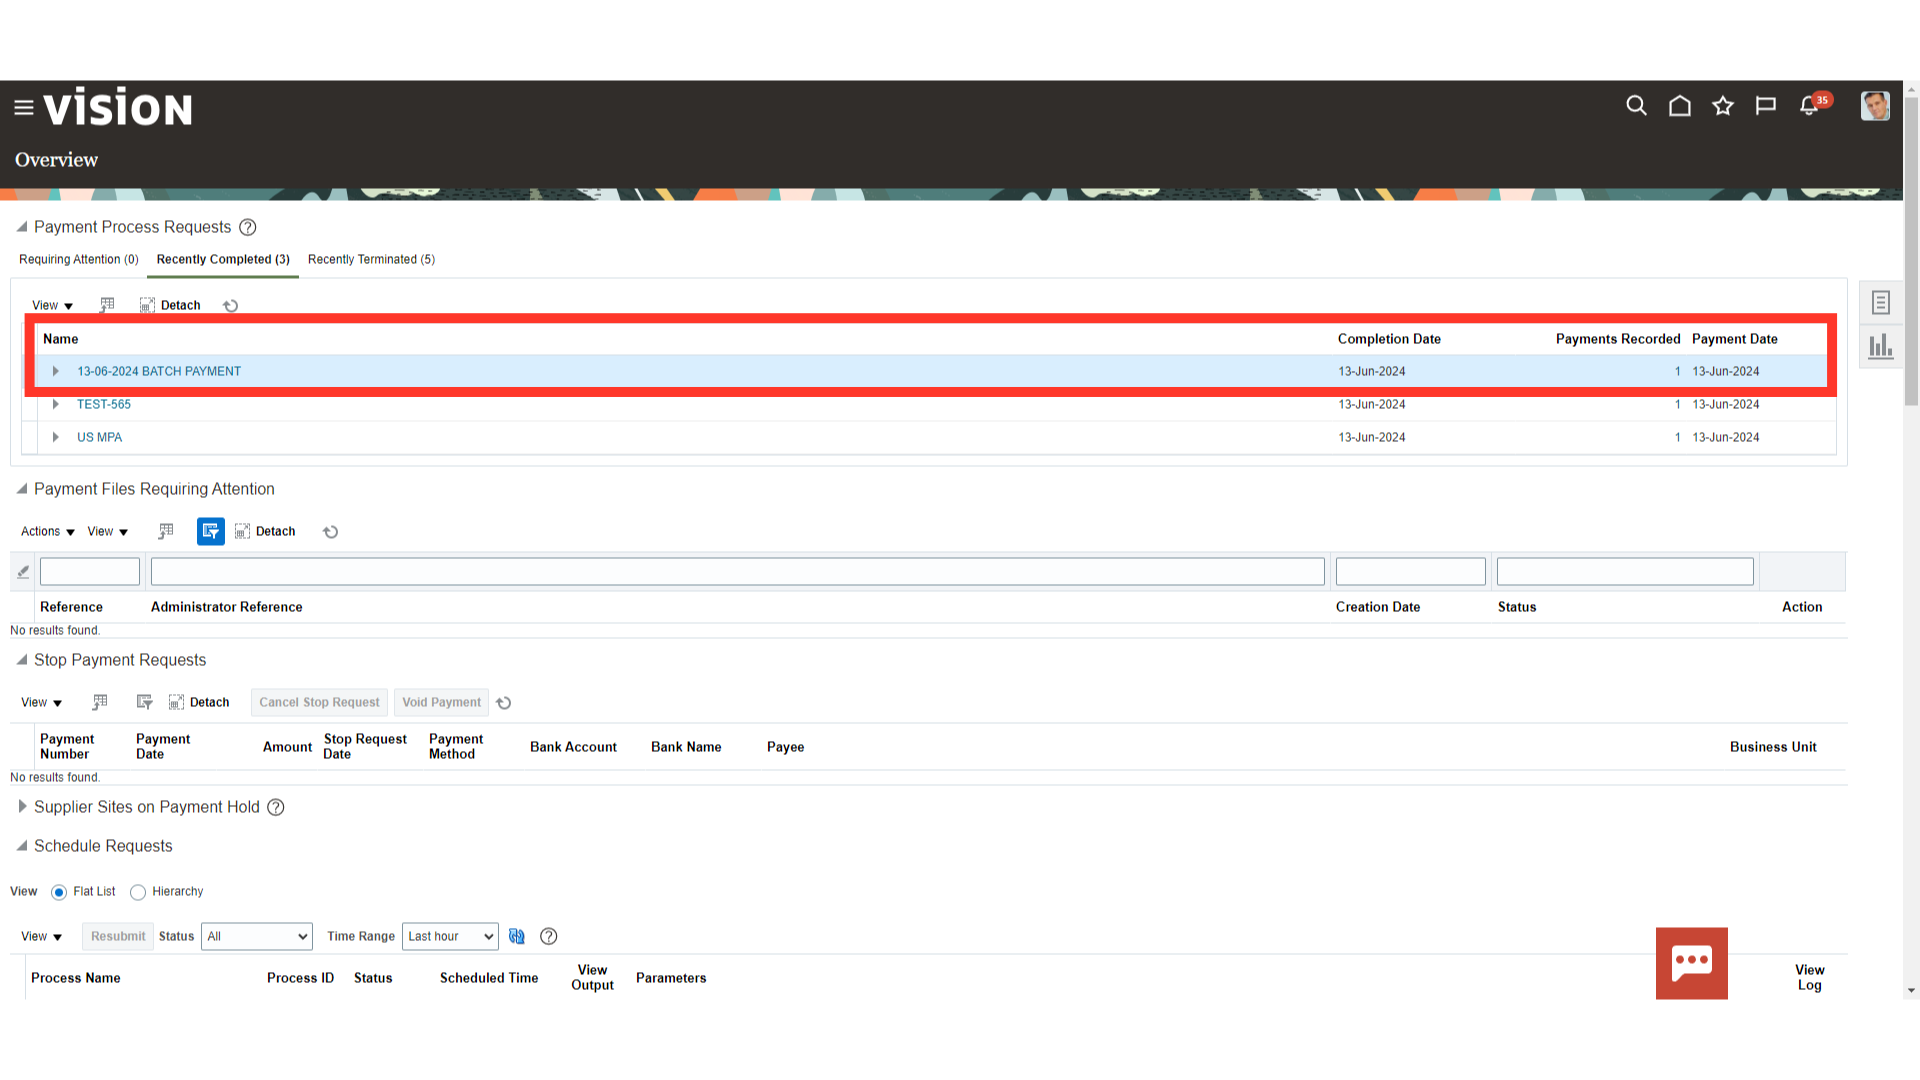
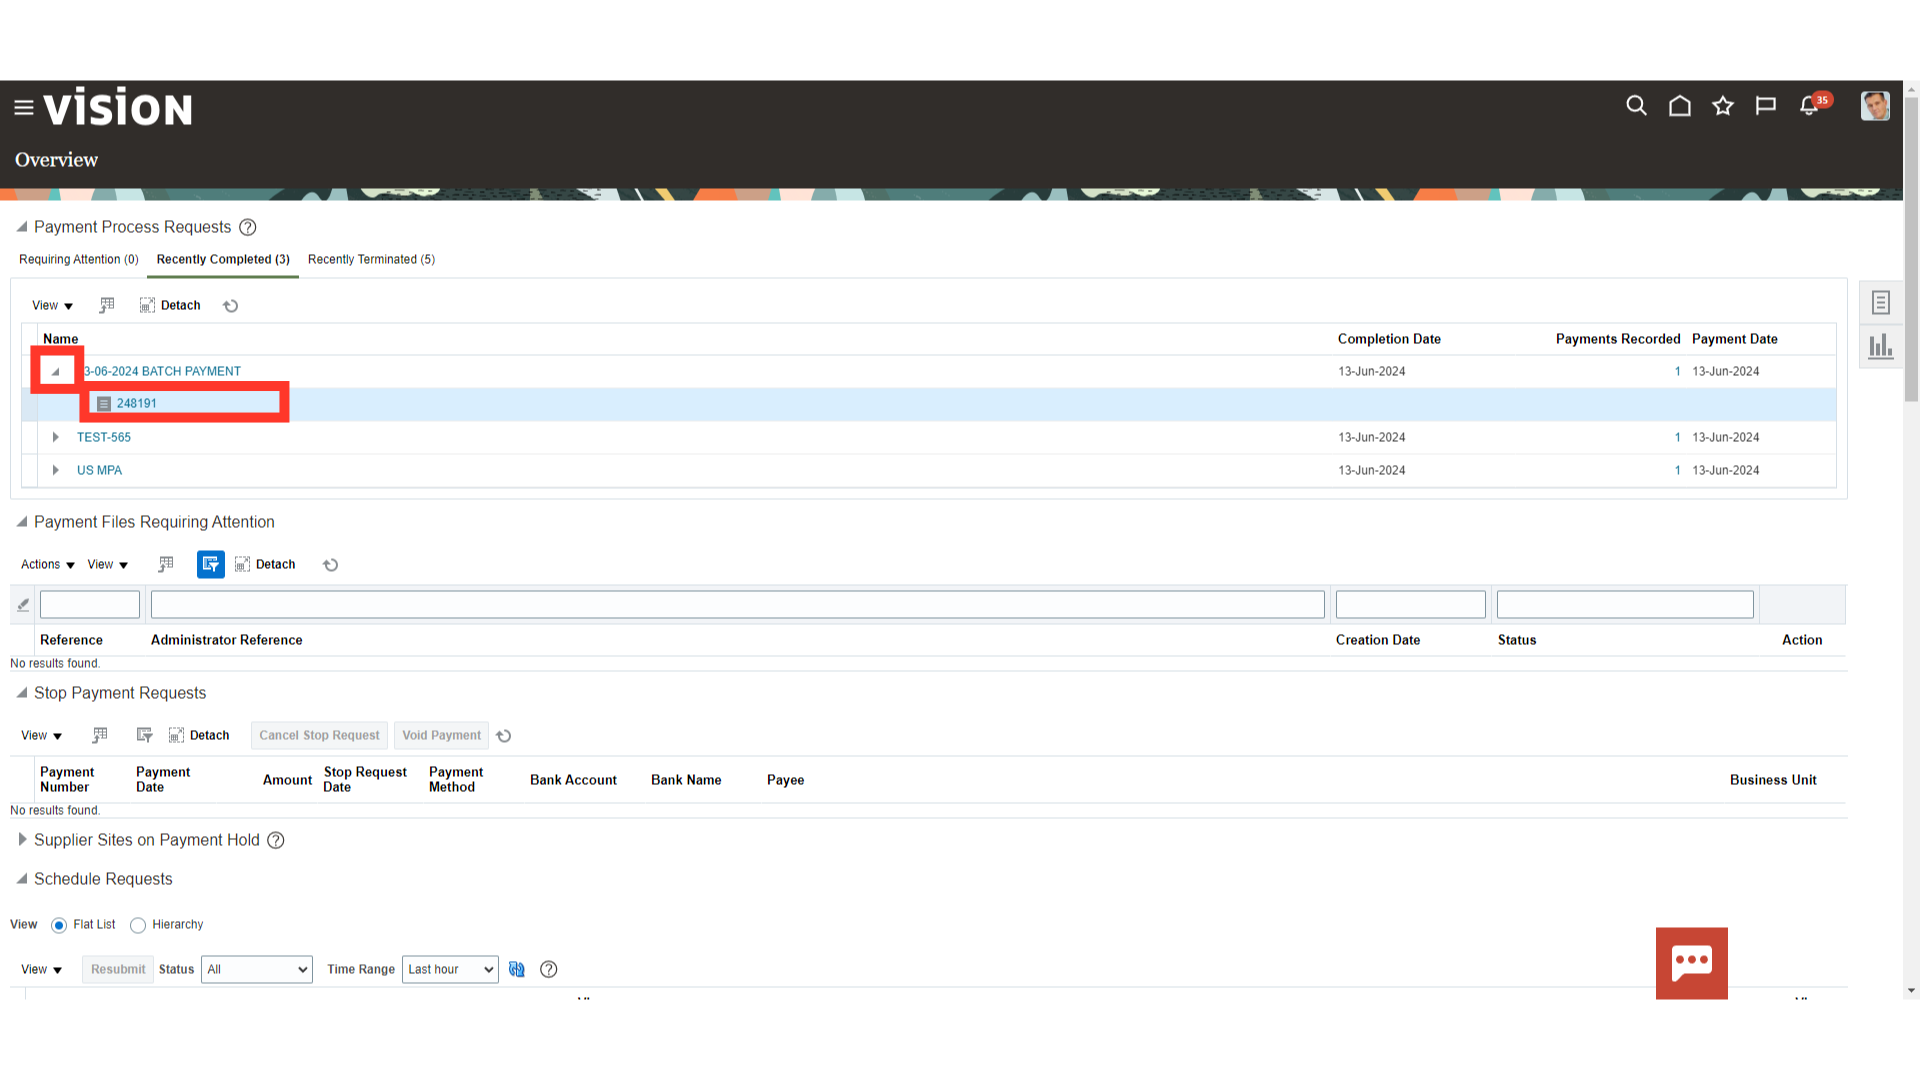
By expanding the Payment batch name, click on the Payment file number hyperlink to see the details of the payments generated.
This guide offers a thorough explanation of the Payment Process Request, including step-by-step instructions for entering the installment selection criteria and choosing different processing options like payment document, payment date, and disbursement bank. The manual addition and removal of installments is also covered.