Credit Memo Processing
This guide will walk you through the detailed process of creating and validating the credit memo along with the process of initiating approval and generating accounting entries.
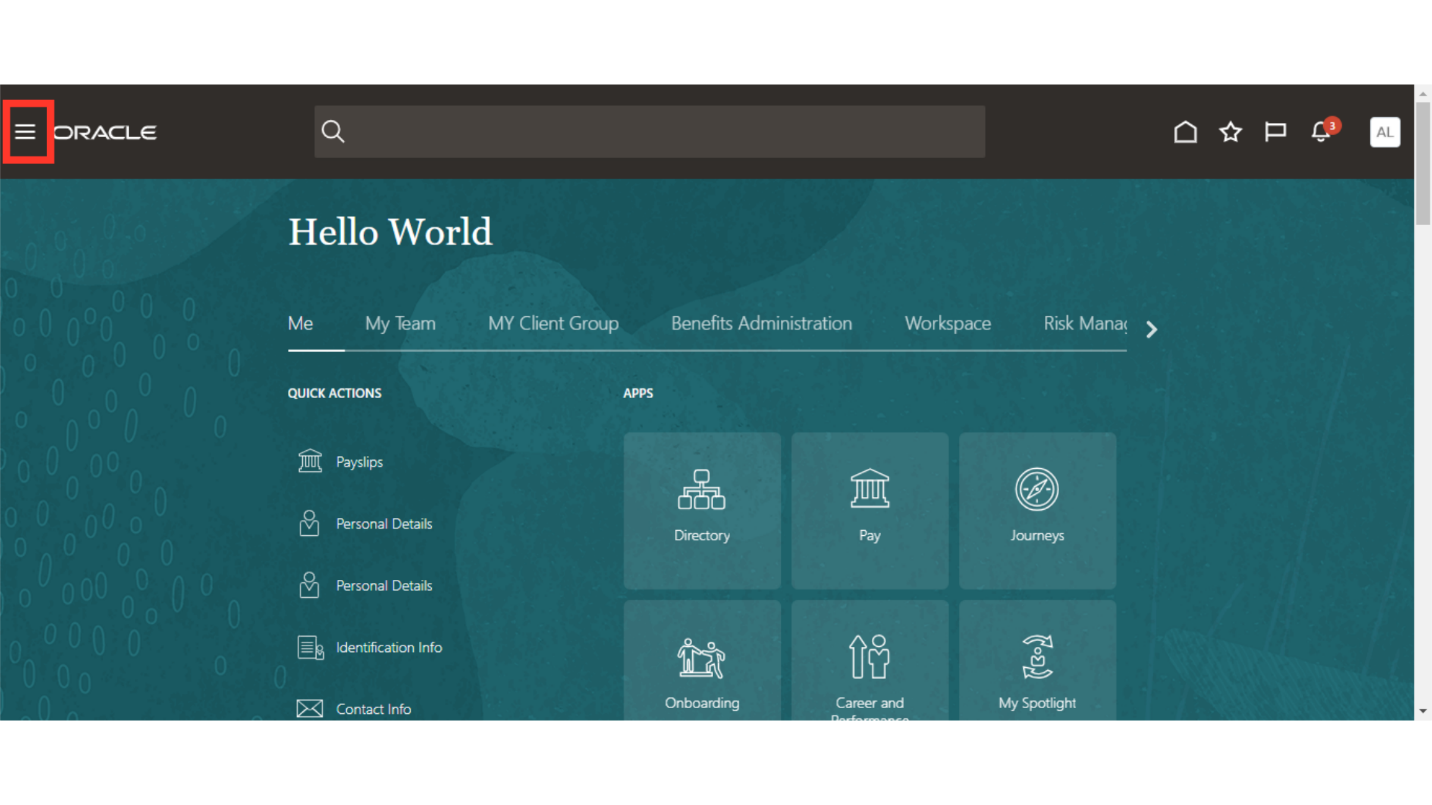
Click on the Navigator icon to access the Payables module.
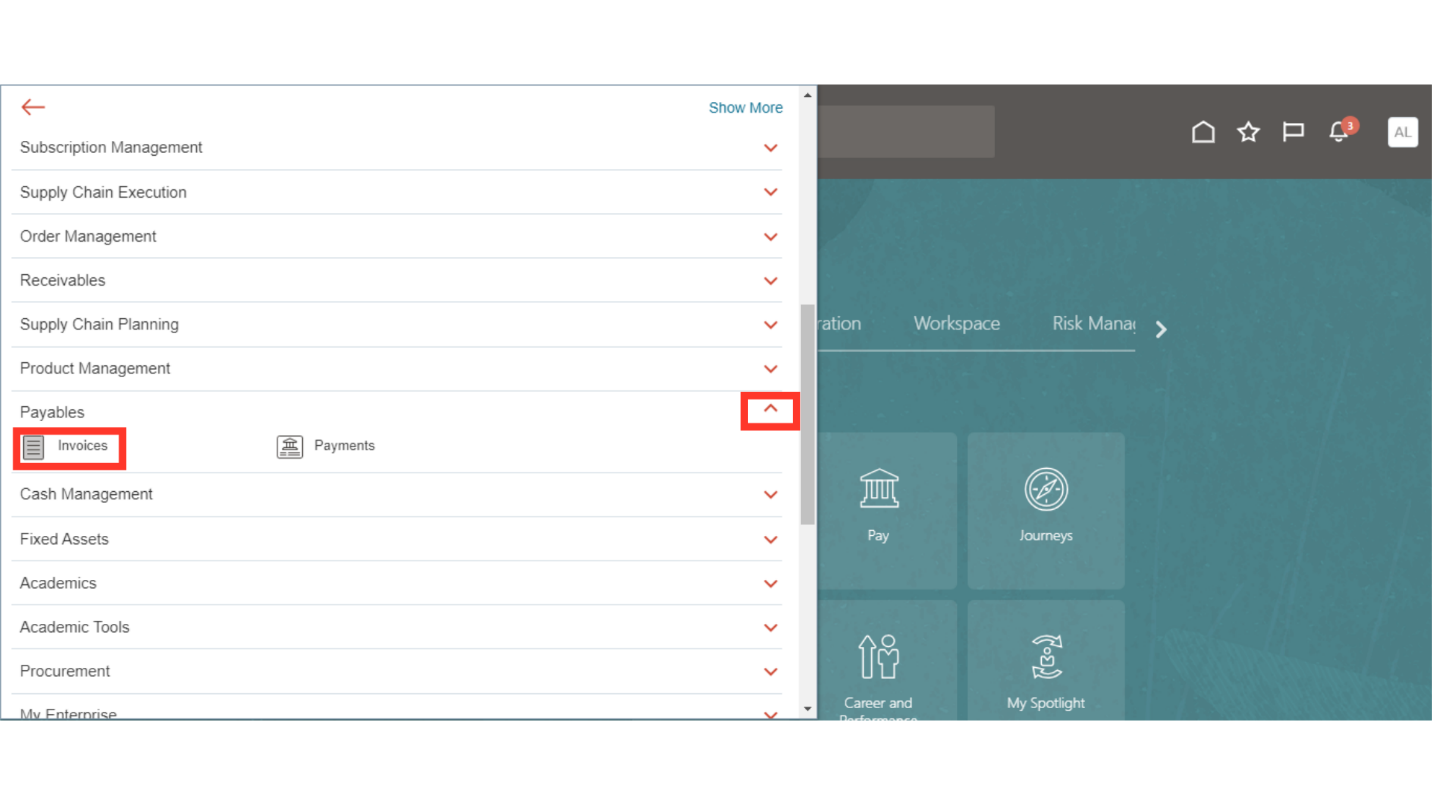
Click on the “Invoices” sub module by expanding the “Payables” module.
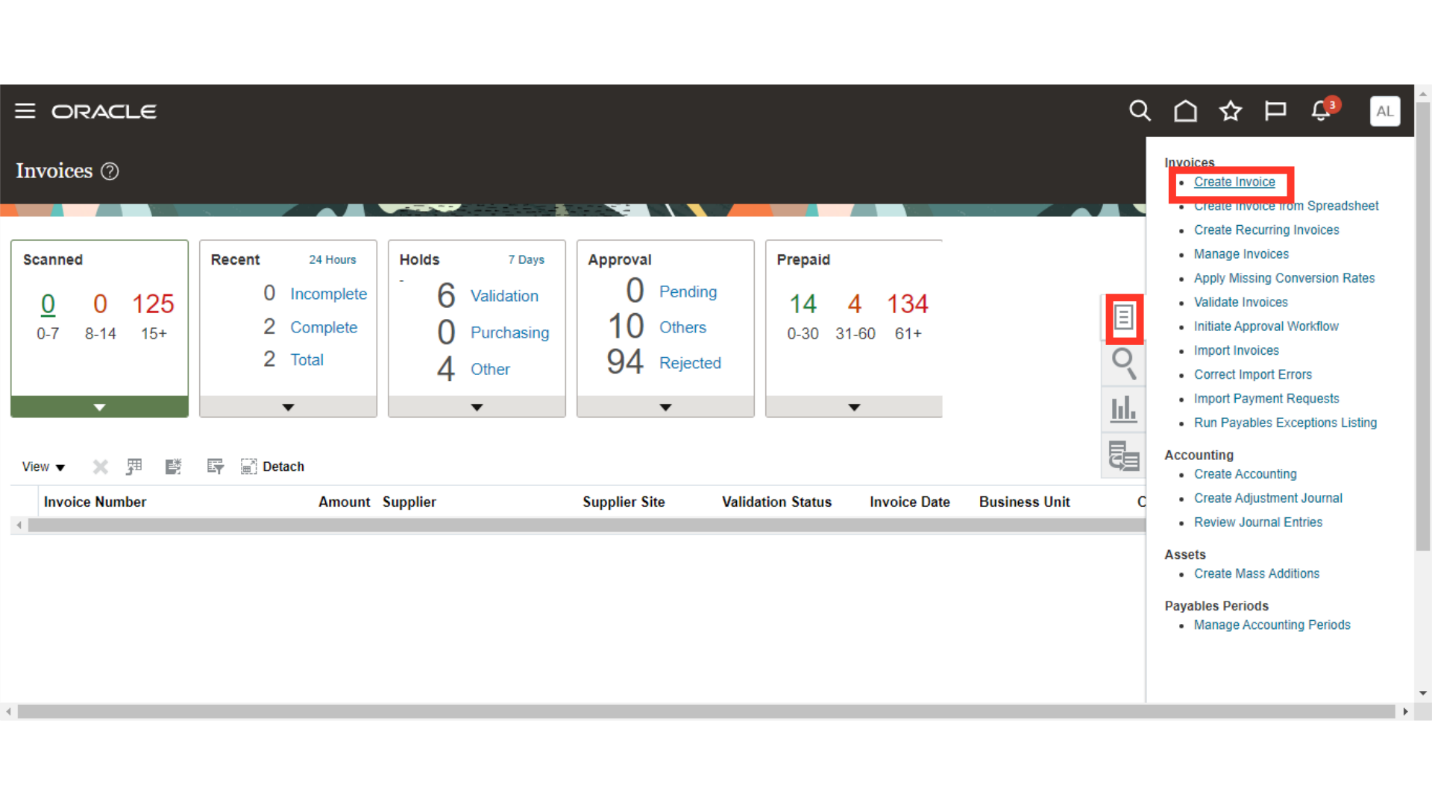
Once you land on to the Invoice work area, select the “Create Invoice” from the Task list for recording the invoice.
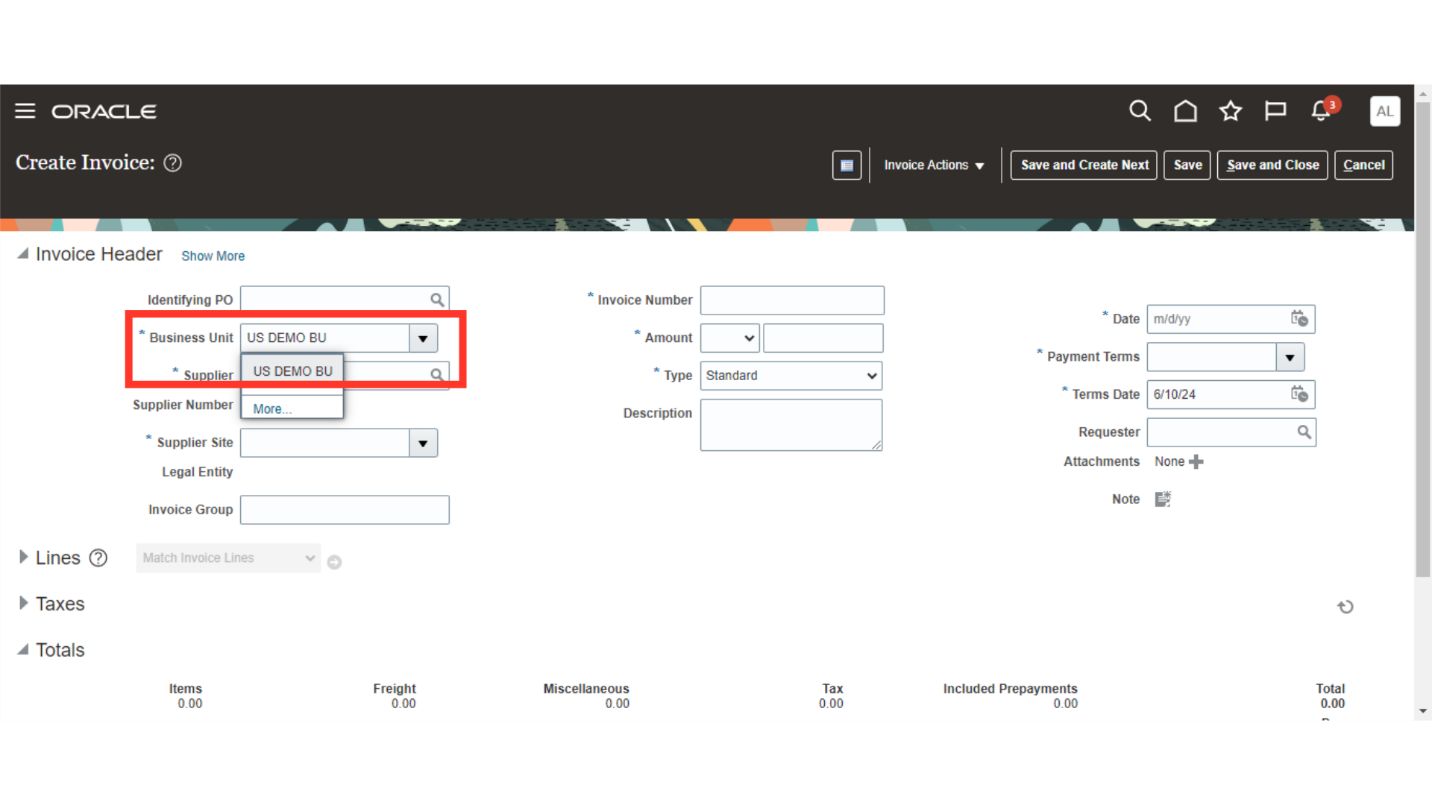
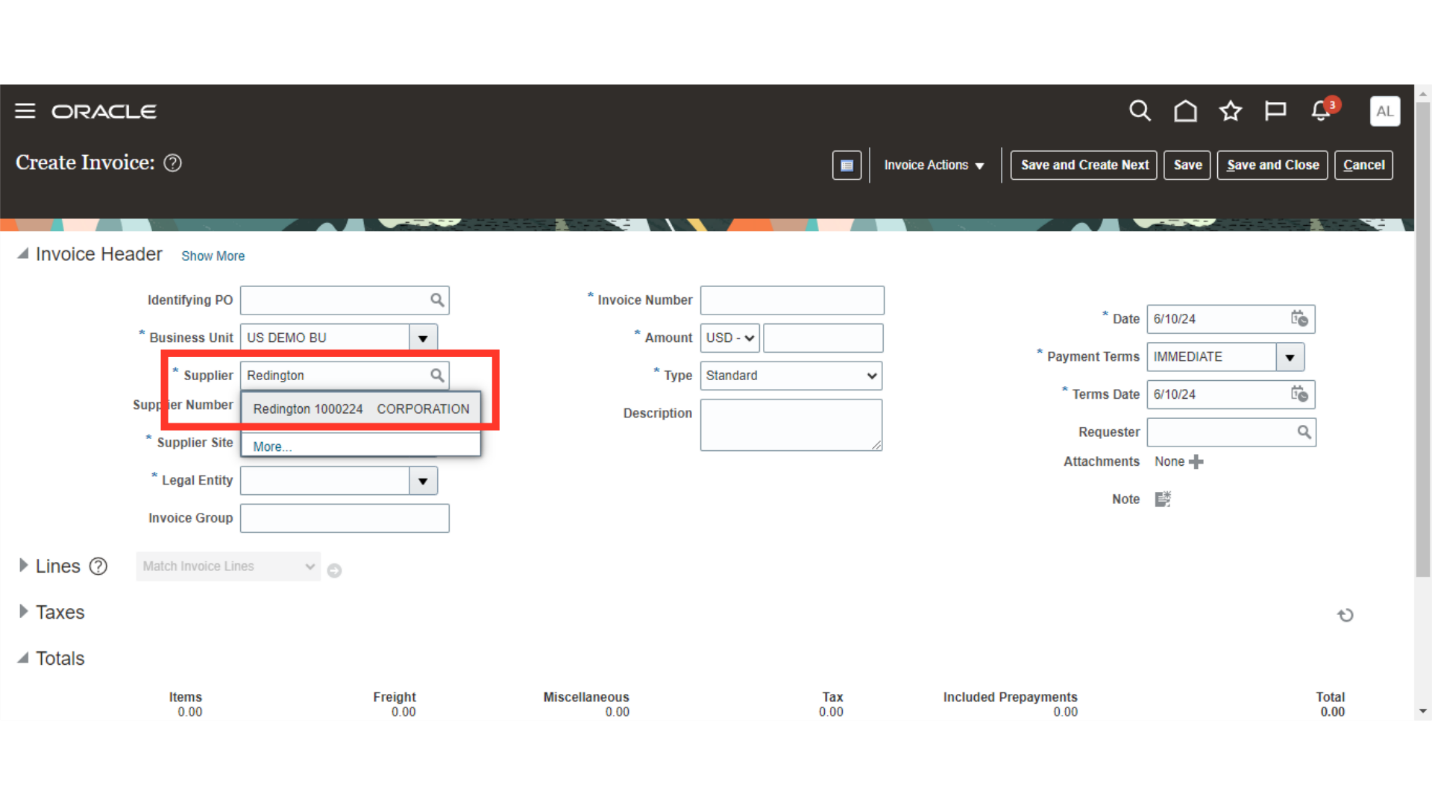
Select the Business unit for which credit memo needs to be created. Here for demo purpose, we have selected US DEMO BU.
After that, enter the Supplier for whom credit memo needs to be created by entering the supplier name ,or by searching and selecting the supplier name by clicking on magnifying lens.
Enter the Invoice number at the invoice header level.
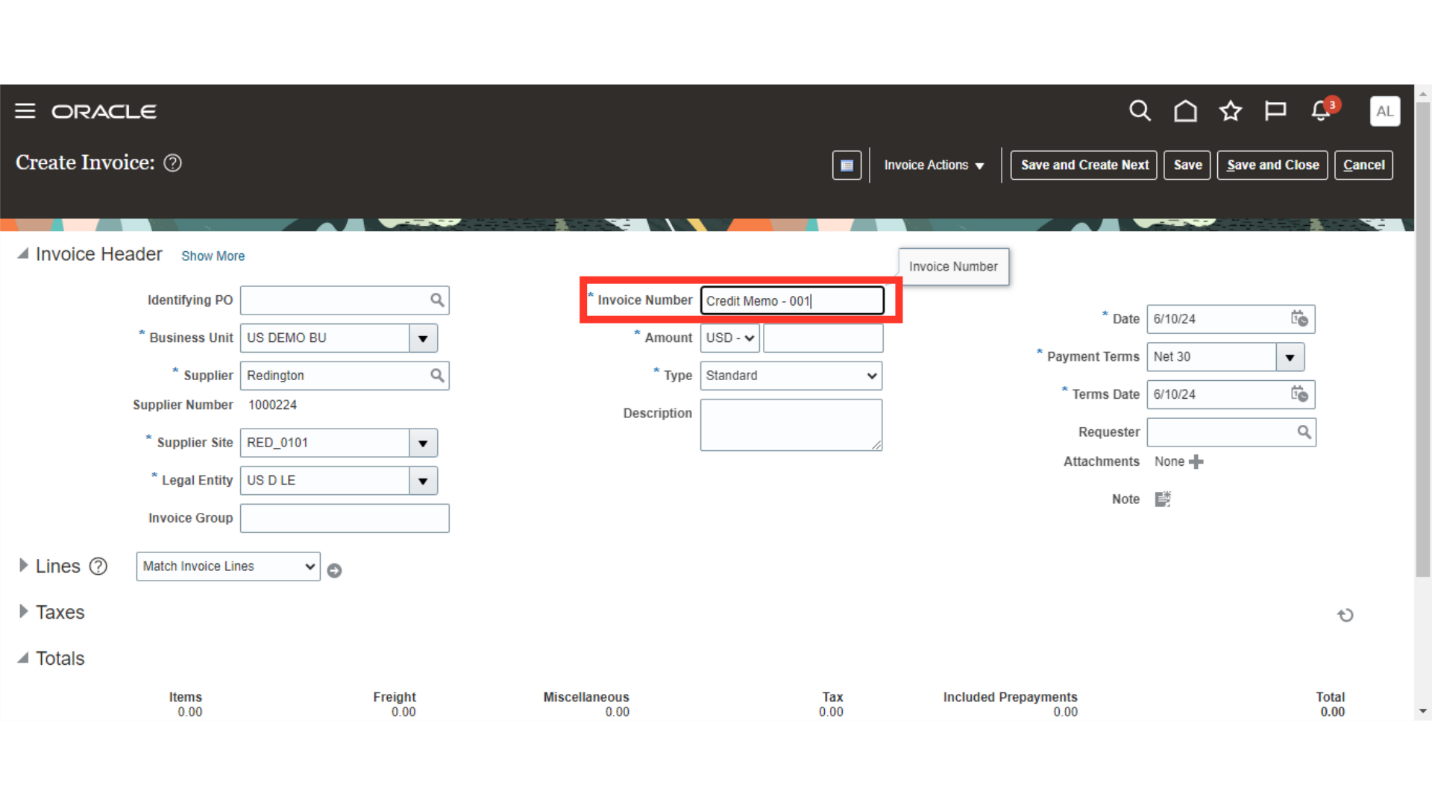
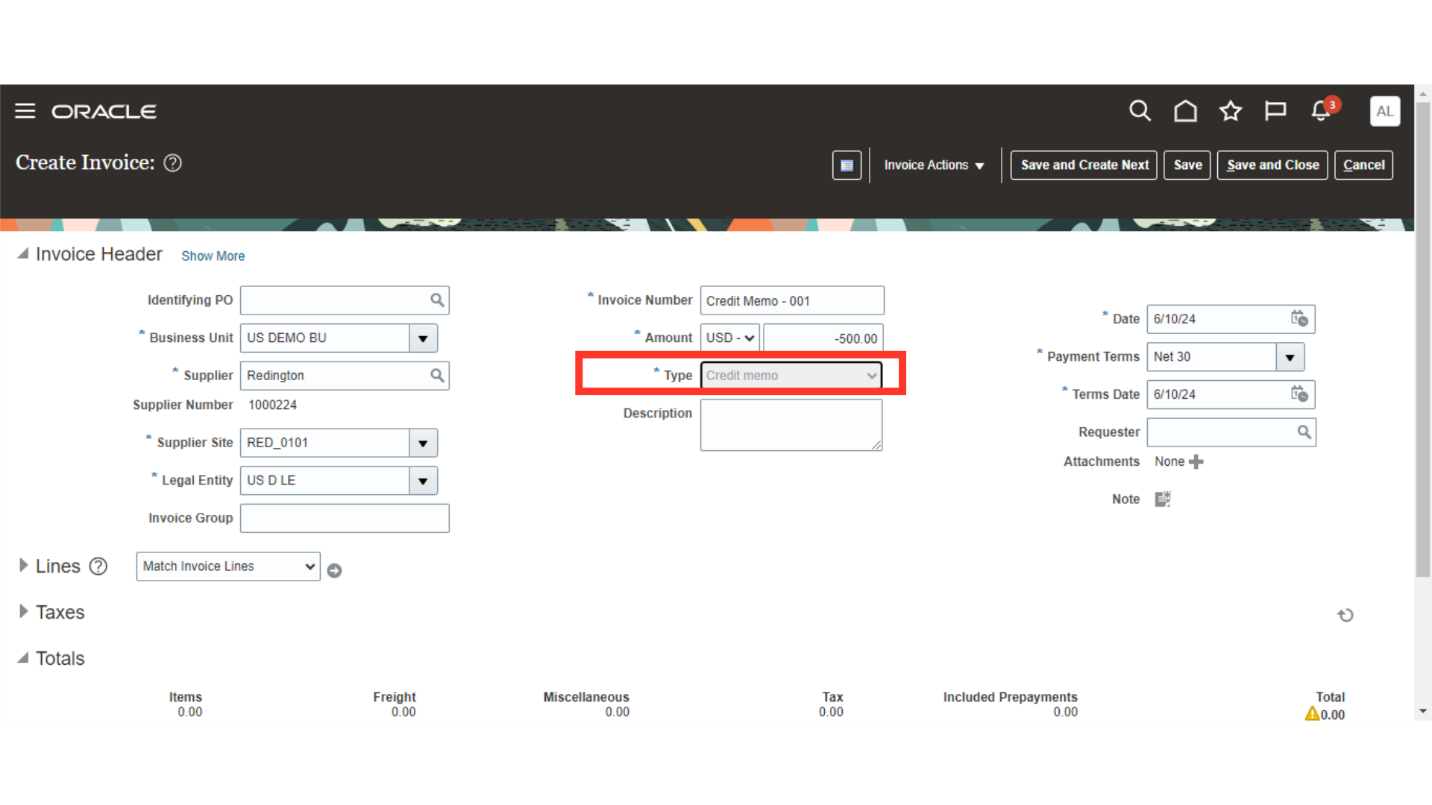
Enter the total invoice amount including tax amount in the Amount field with negative sign. Also, select the currency in which invoice is to be created.

Select the Invoice type as “Credit Memo” to raise the credit memo.
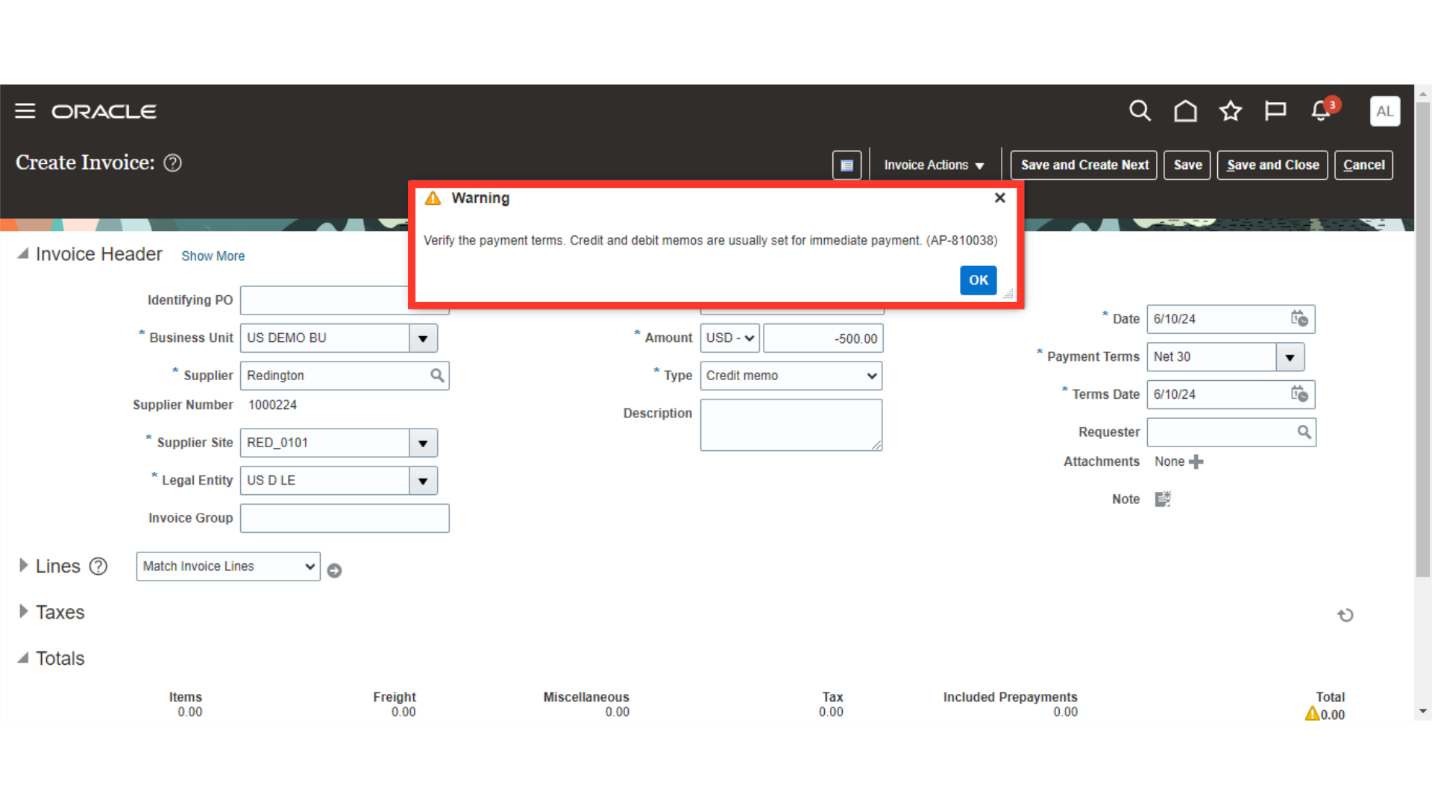
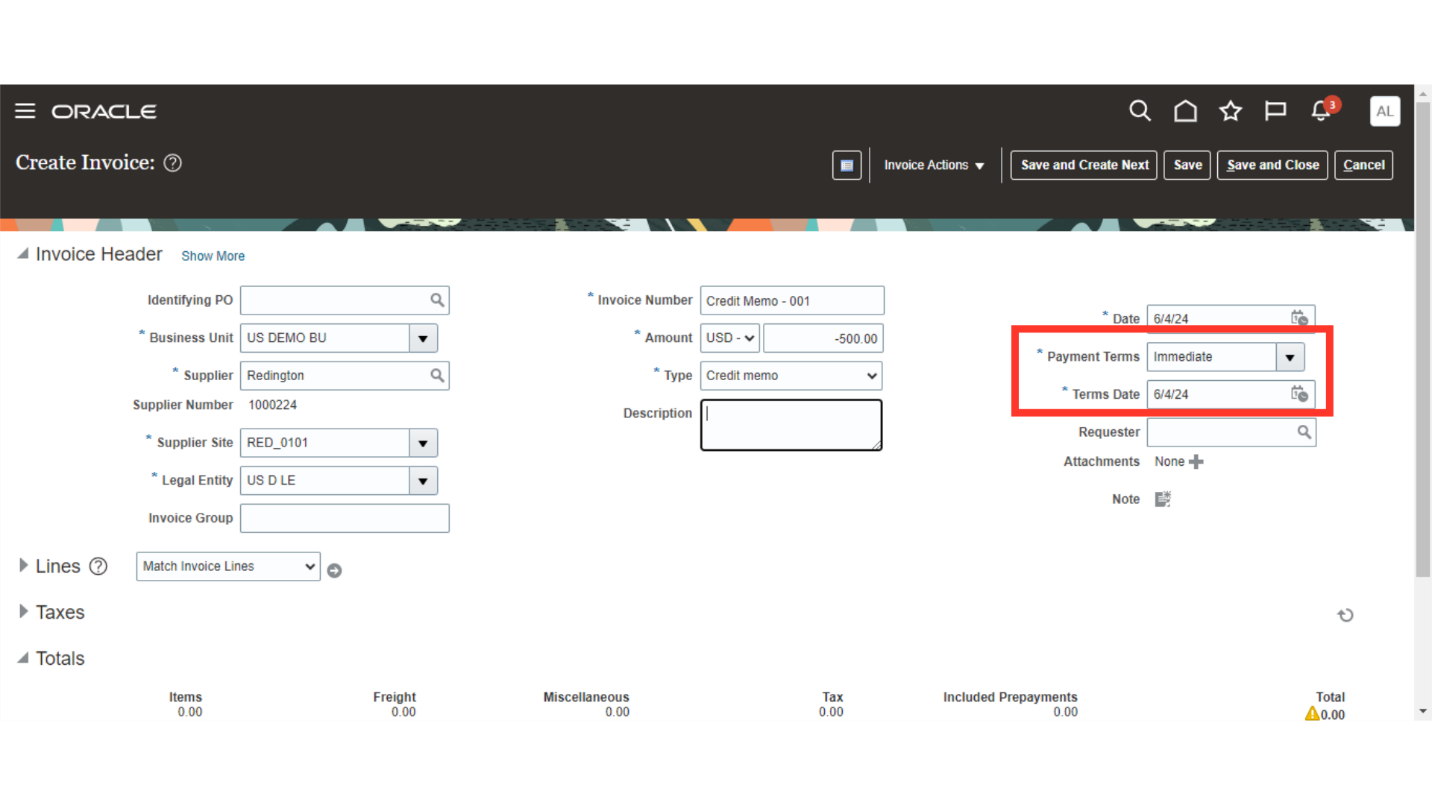
A warning notification message will be displayed that is “Verify the payment terms. Credit and debit memos are usually set for immediate payment”. Click on OK button to continue.
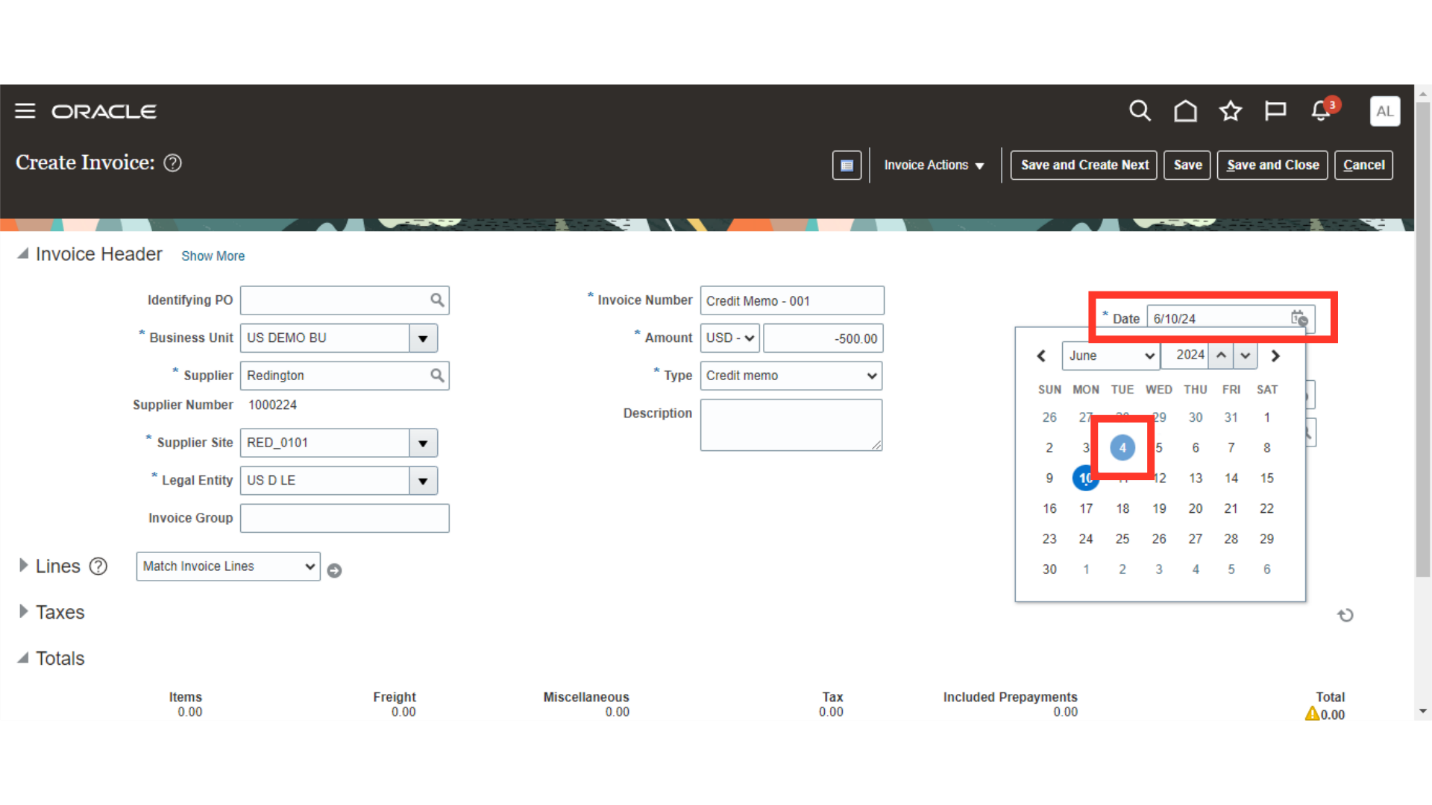
Current system date is defaulted as the “Invoice date”, you can change the date manually or by selecting date from the calendar.
Payment terms is defaulted from the Invoice options if nothing is selected at the supplier level. Whereas the Terms date is calculated based on the Payment terms.
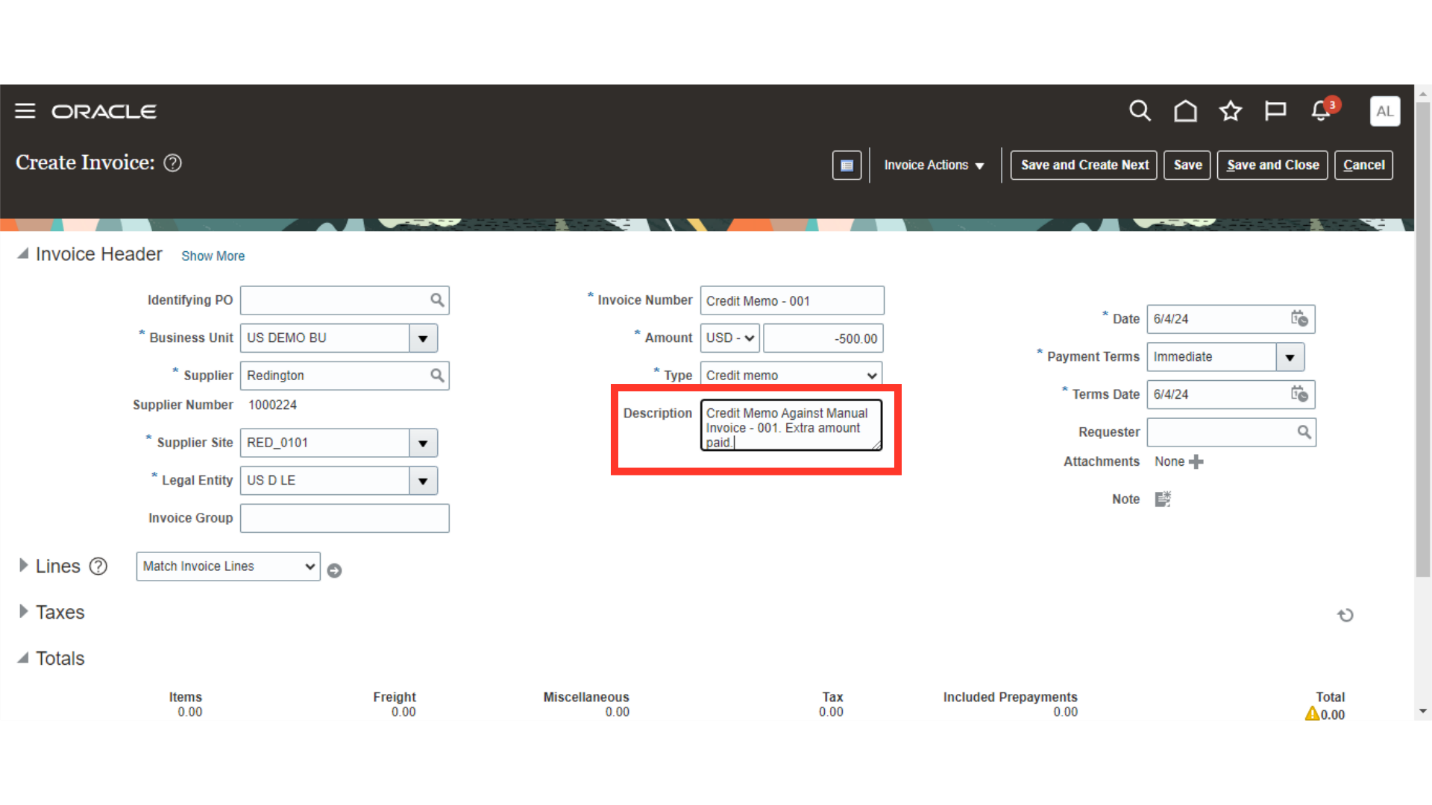
Enter any additional information of the credit memo in the description field.
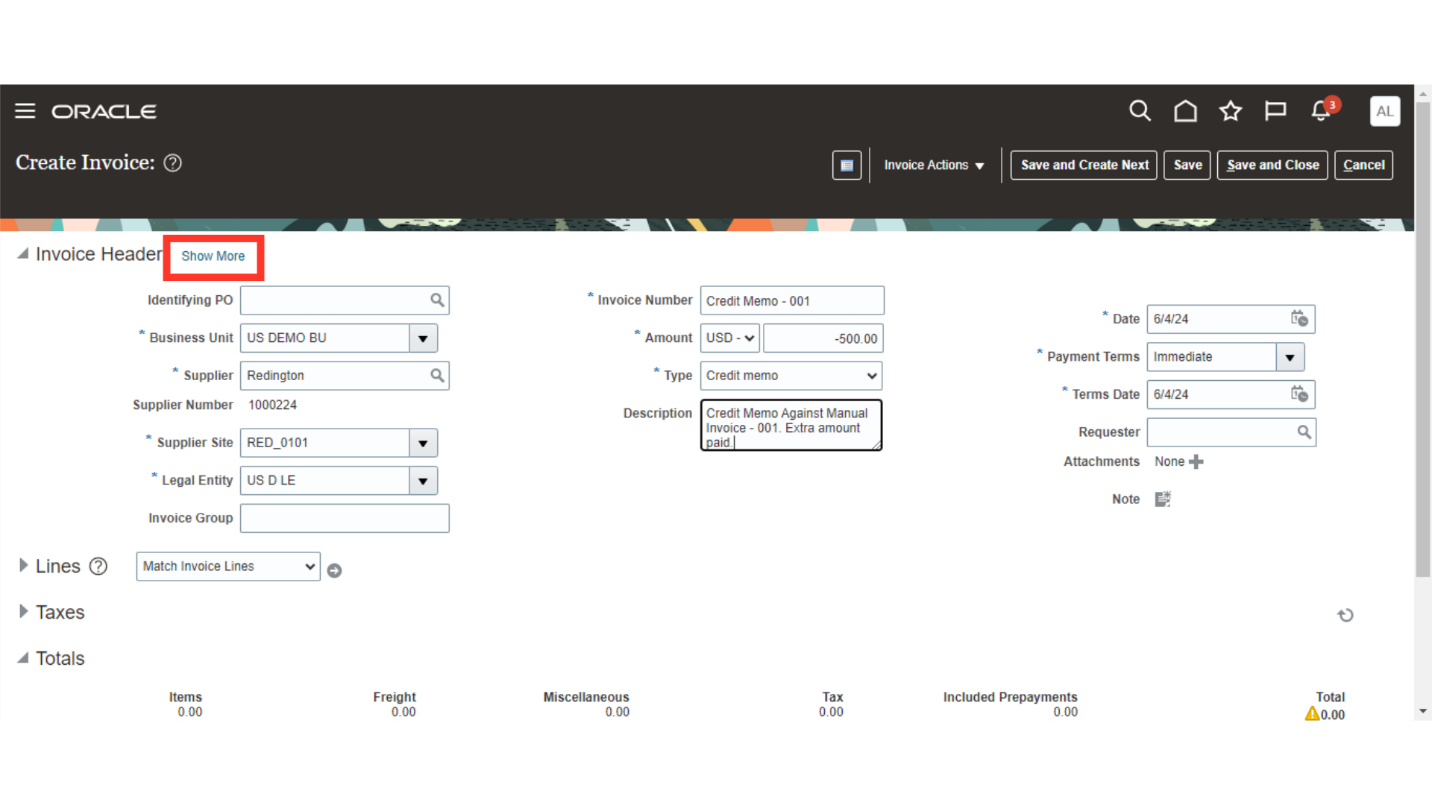
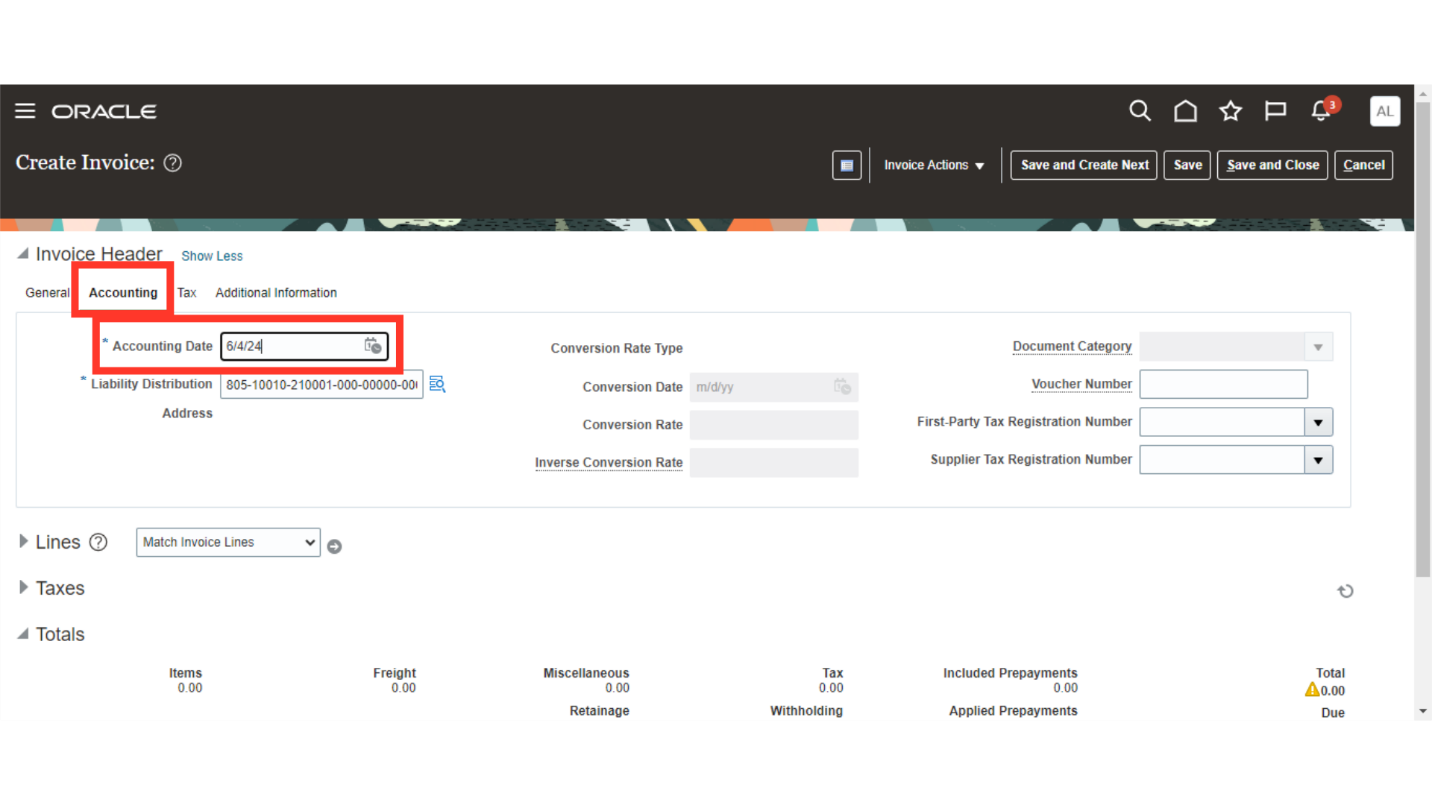
Click on the Show More hyperlink, to see more fields related to the Invoice at header level such as Accounting date, Voucher number etc.
The invoice line and distribution level would be attributed to the accounting date that was chosen at the invoice header. Based on the configuration made, the accounting date is set by default.
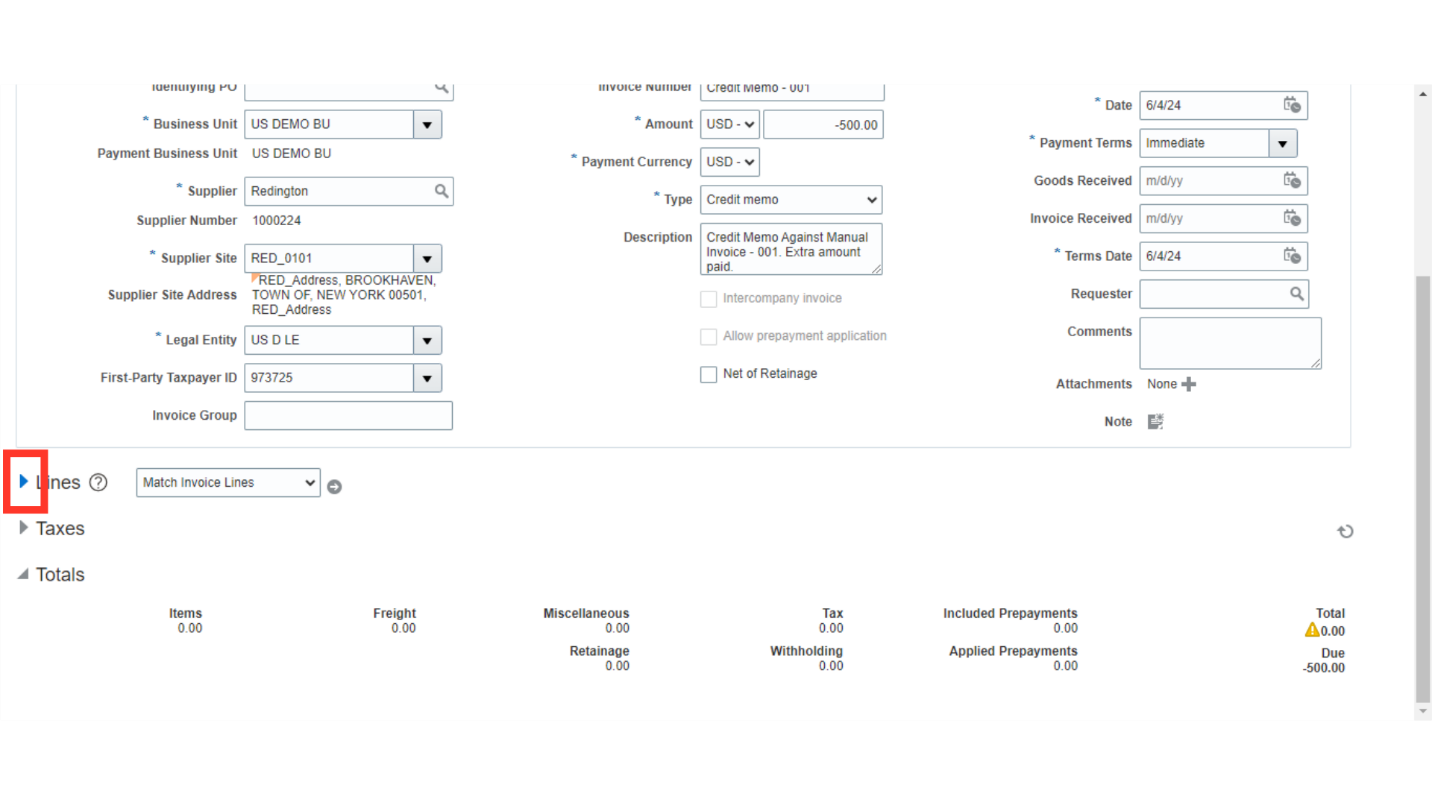
Expand the lines to enter the invoice lines and distribution details.
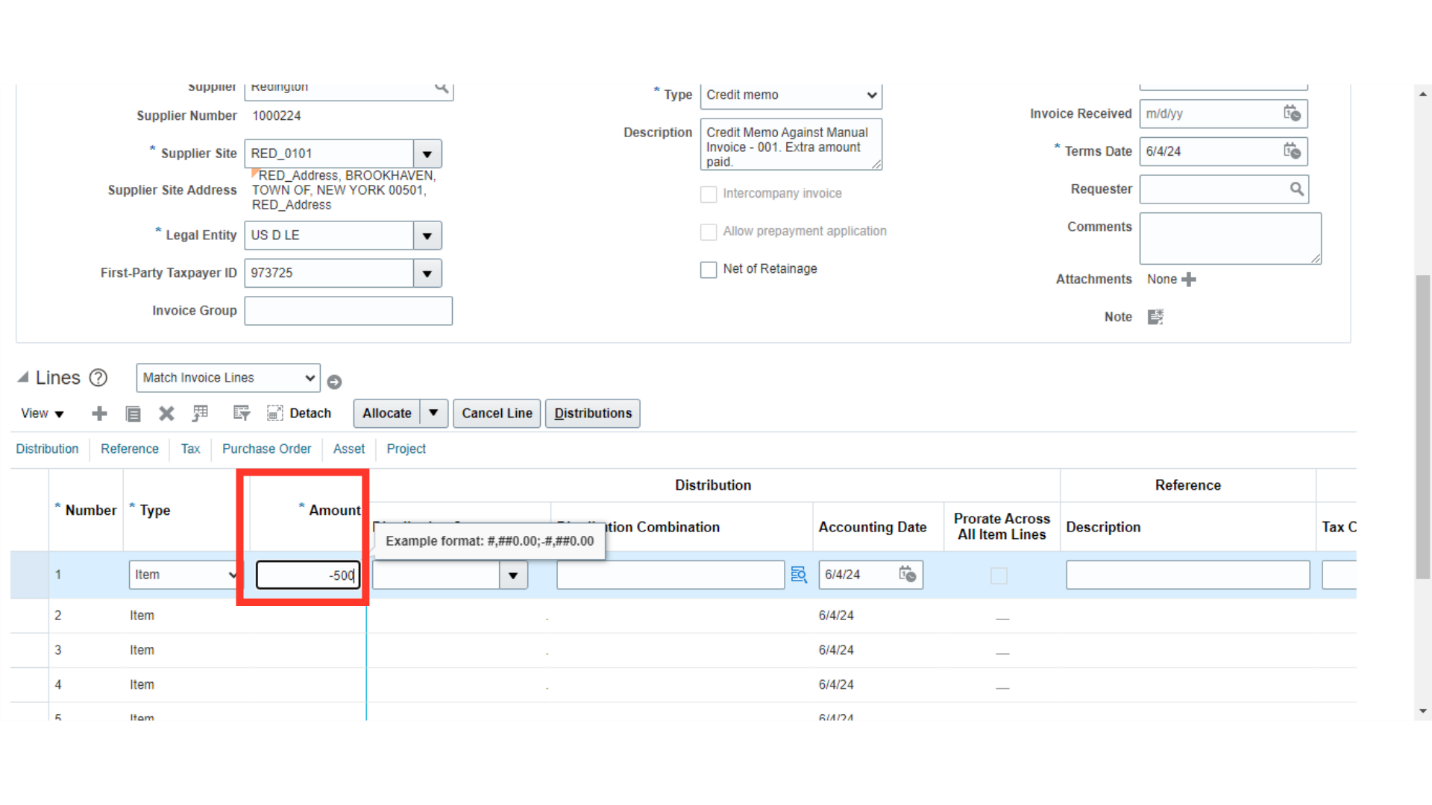
Enter the amount at invoice line level with a negative sign.
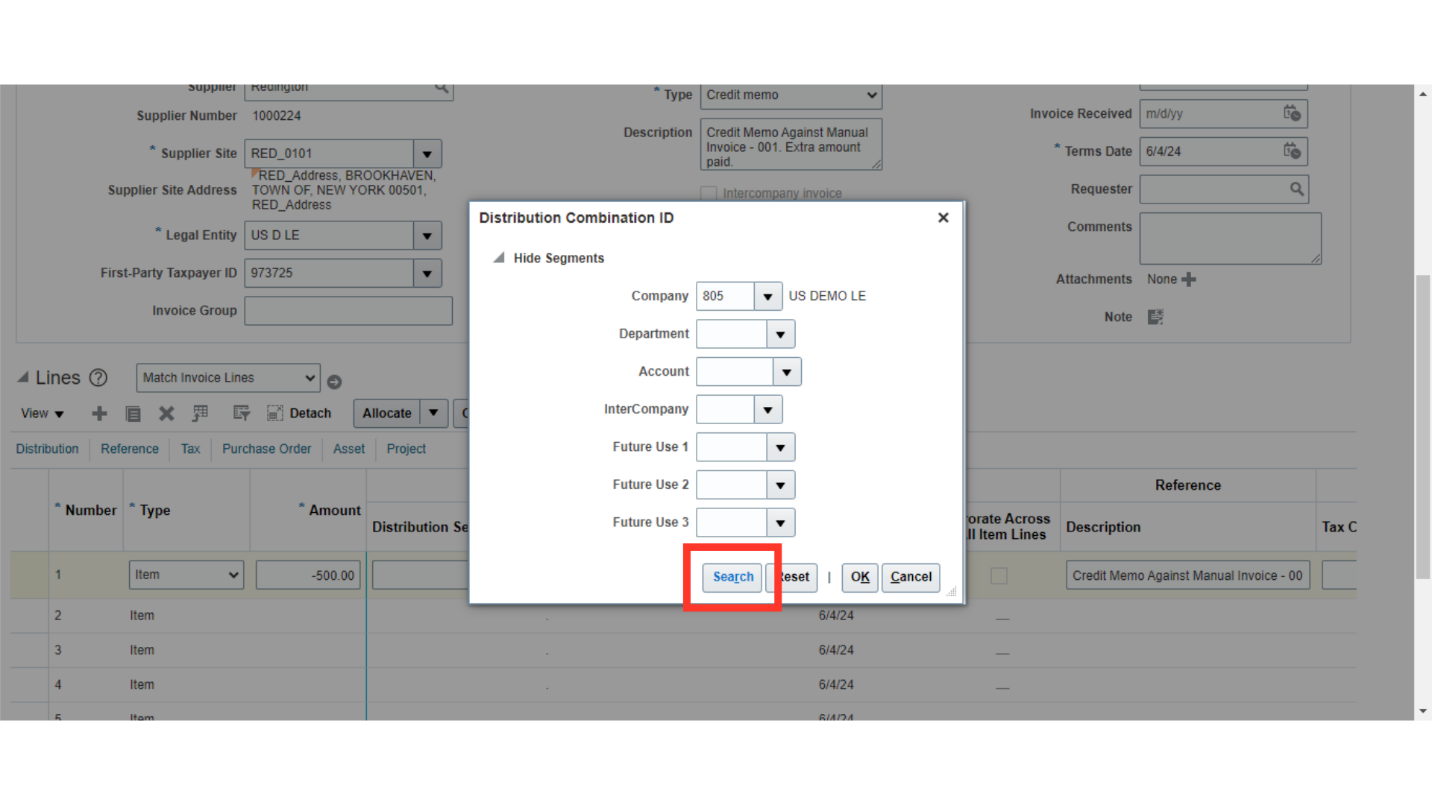
Click on the Account combination icon to enter the distribution combination details.
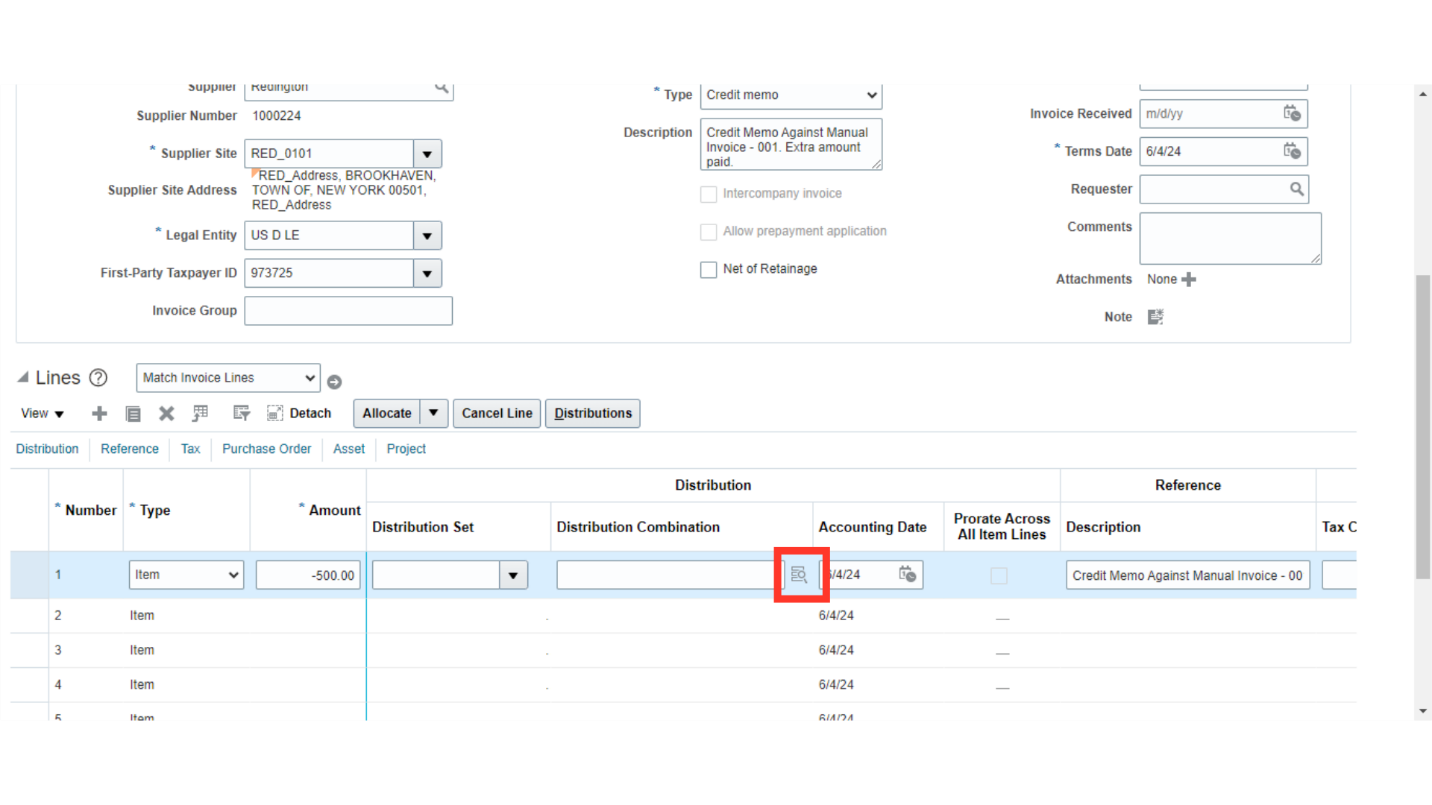
Select the values manually or from the list of values, then click on the Ok button to save the combination.
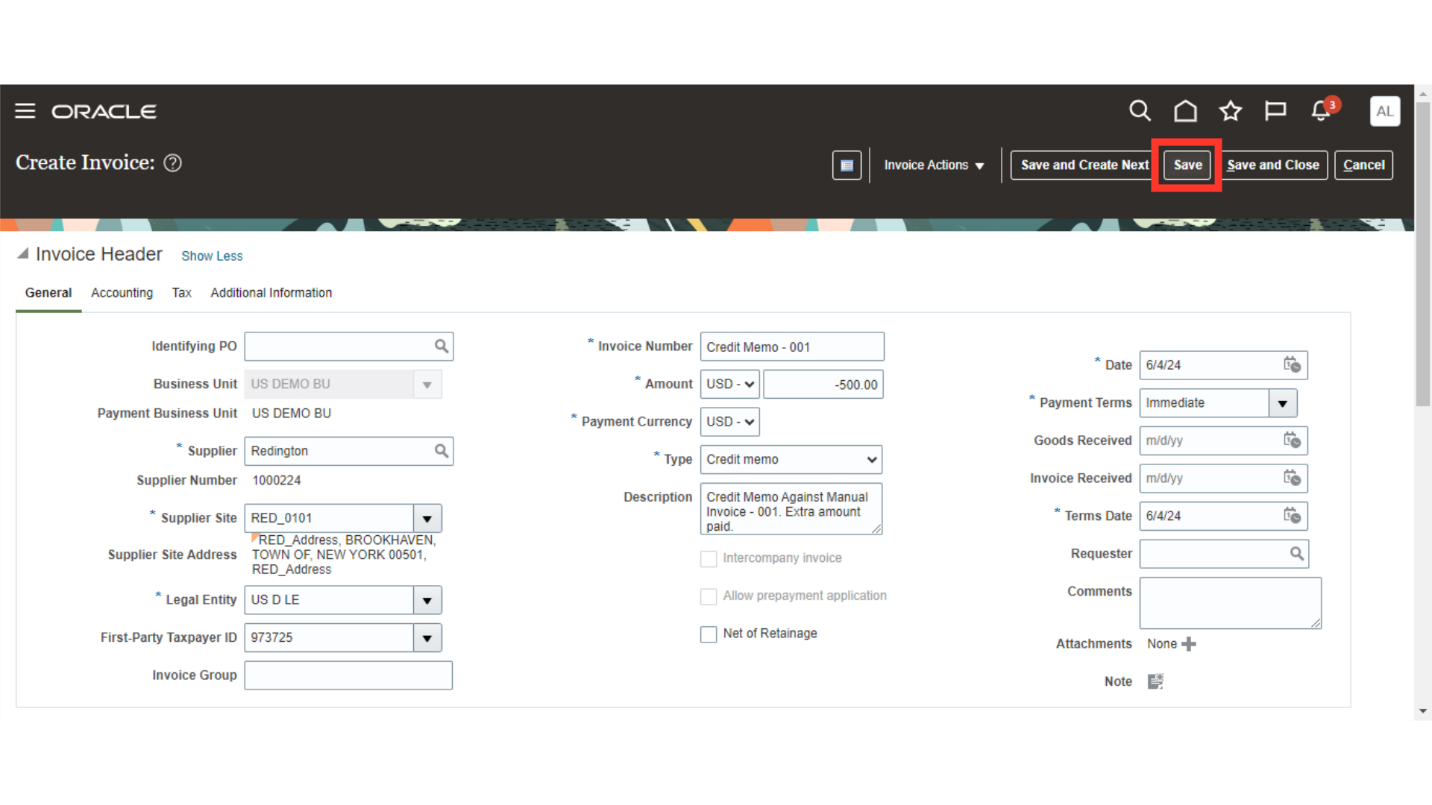
Click on the “Save” button to save the invoice details.
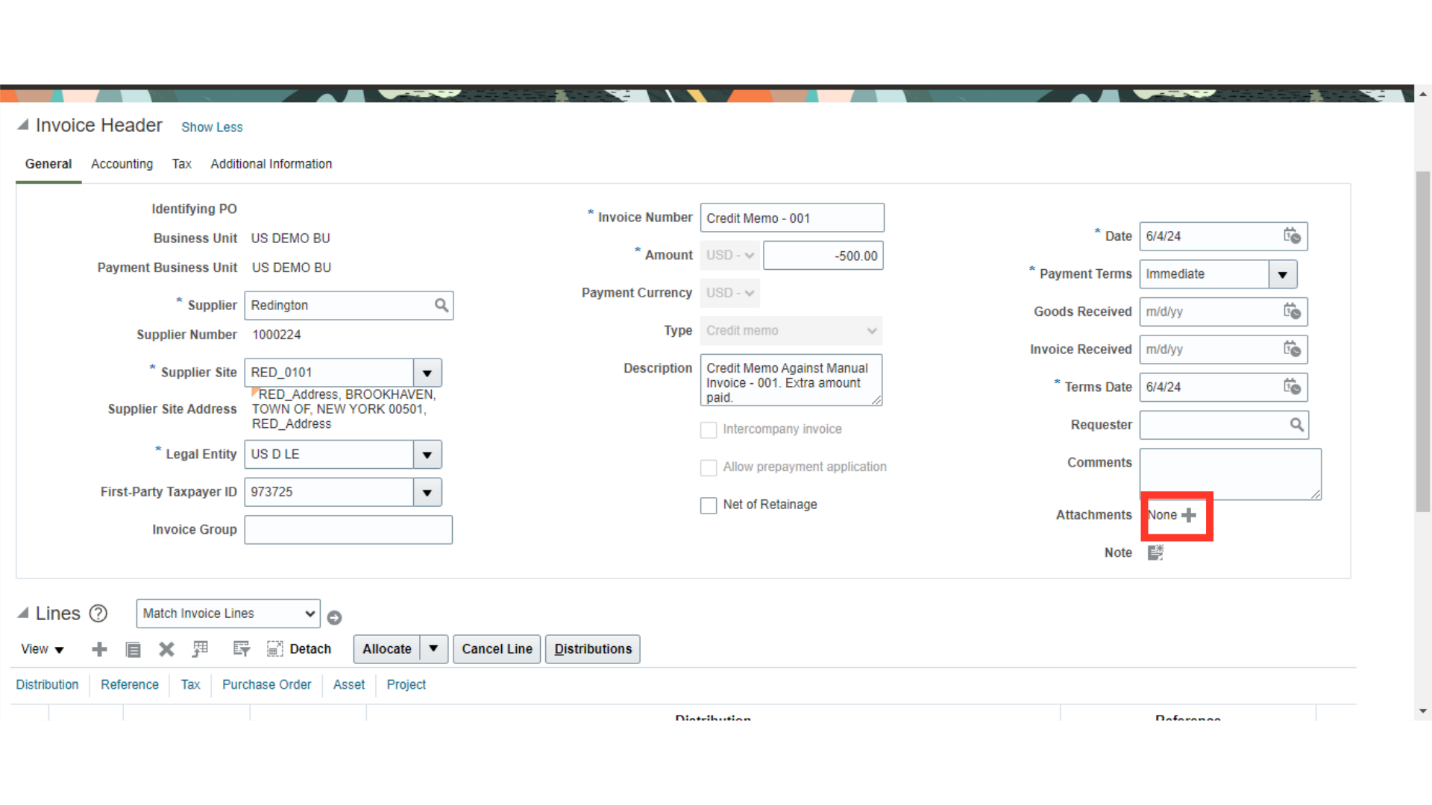
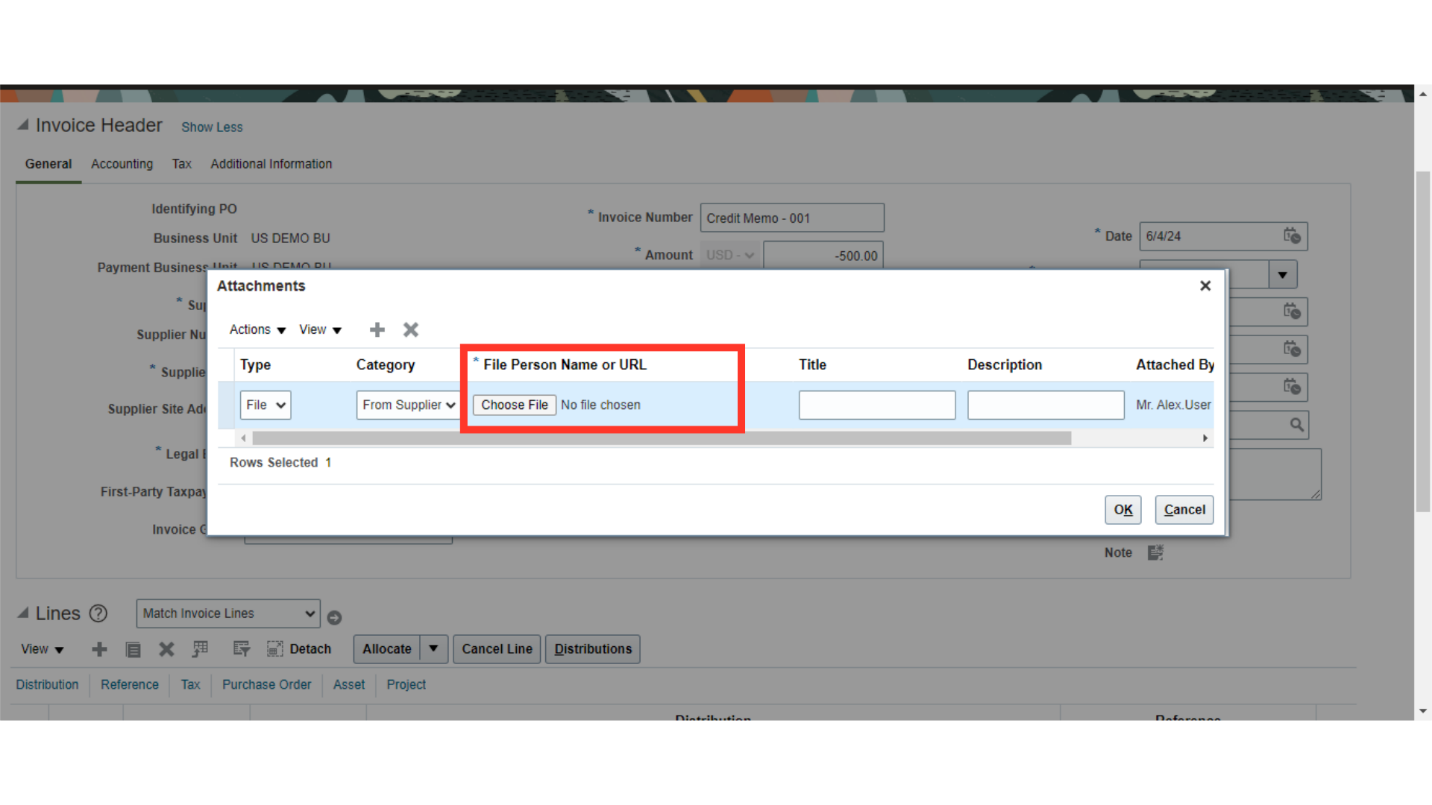
Click on the plus icon to upload the attachment, if required.
Select the type of file to be uploaded such as File, Text and URL.
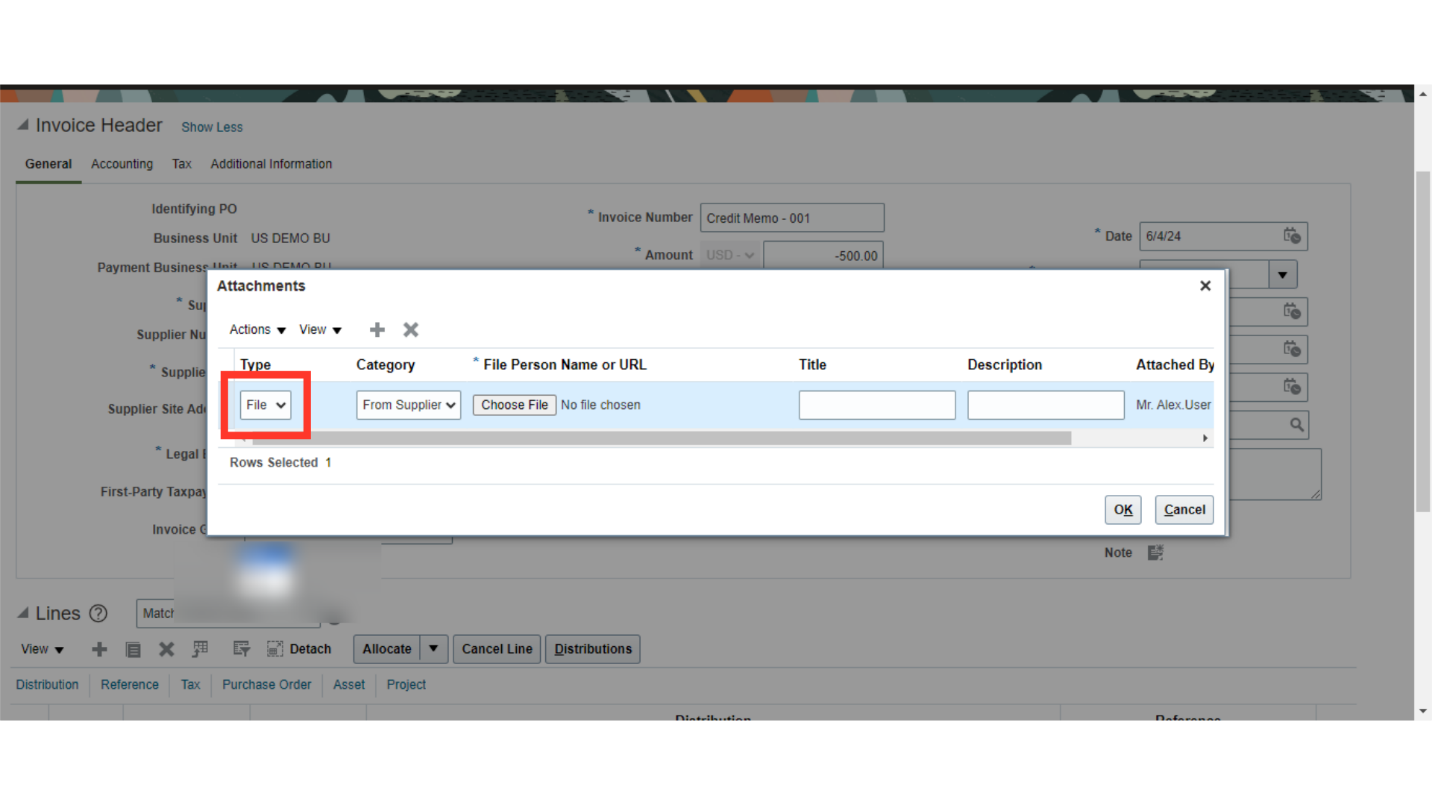
Click on the Choose File option to upload the attachments from our local desktop.
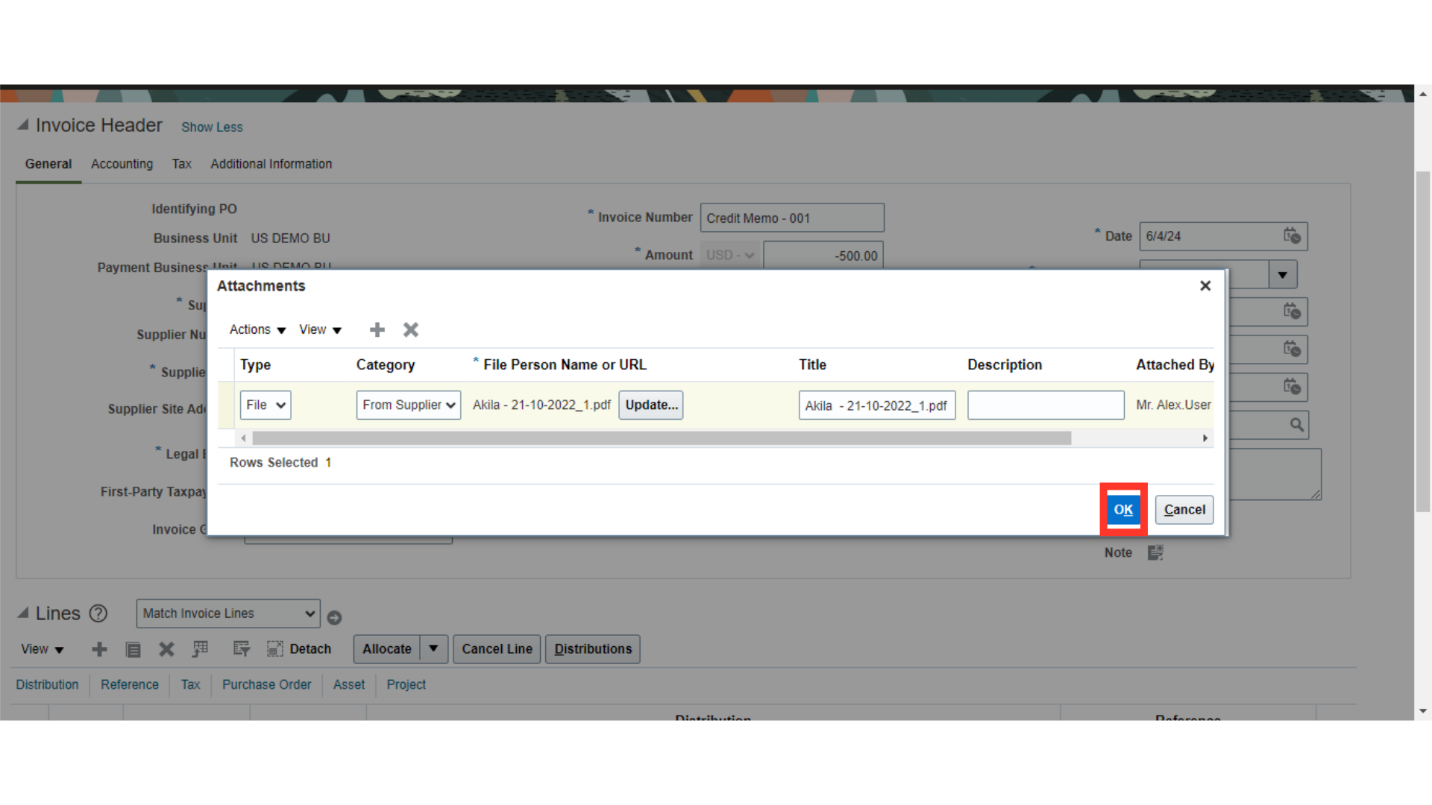
After uploading, Click on OK to continue.
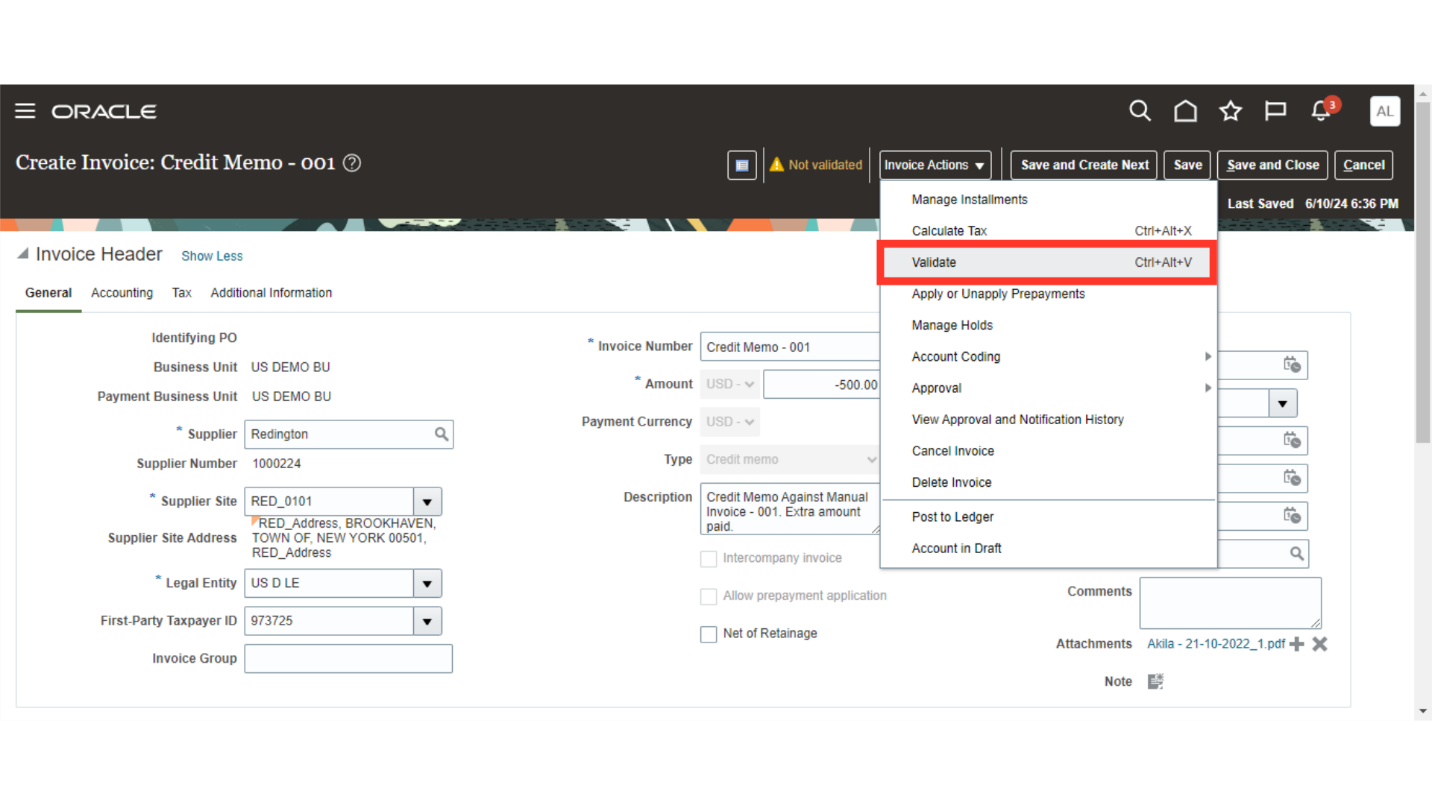
For validating the invoice click on the “Validate” option after clicking on the Invoice Actions.
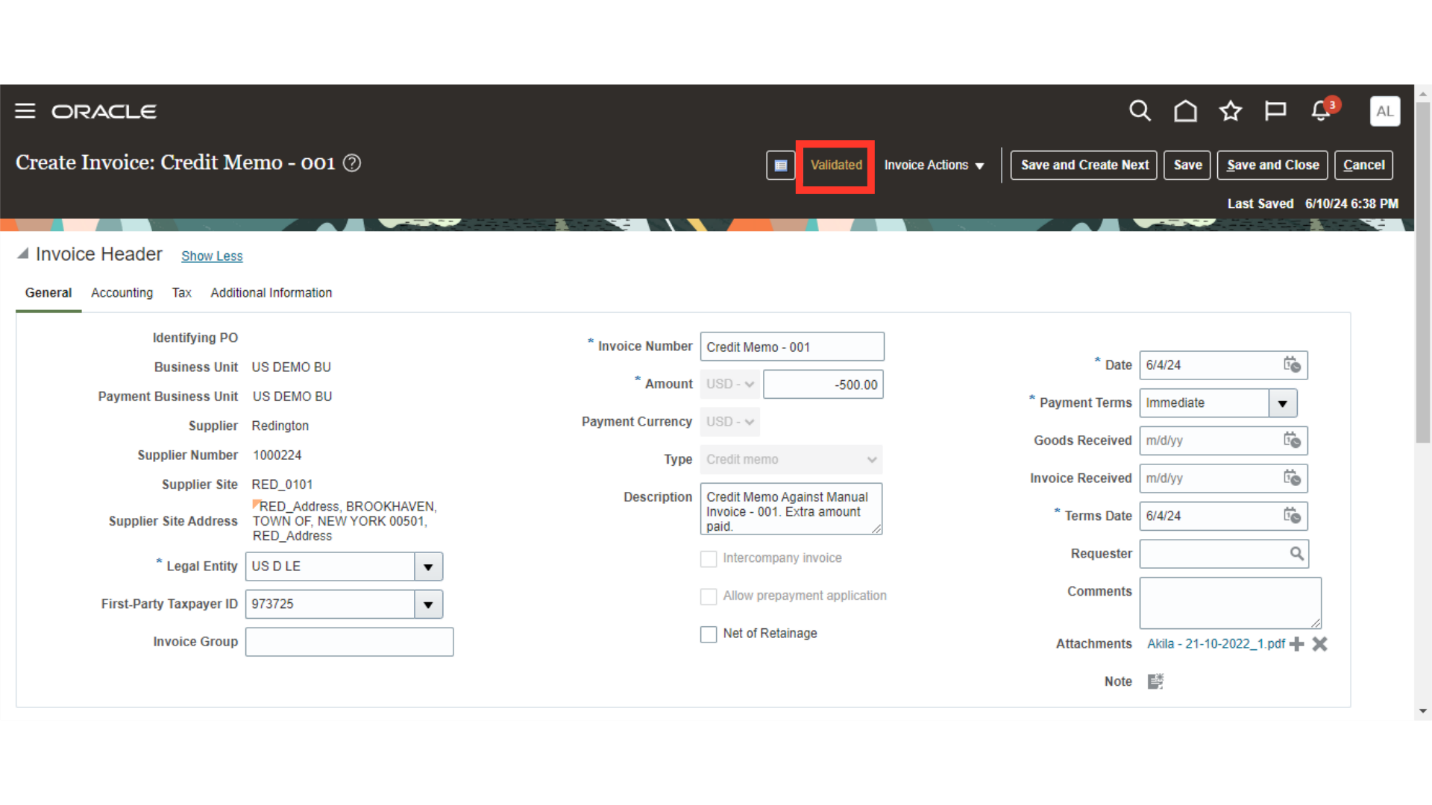
After validation, the status of the invoice would be changed to Validated.
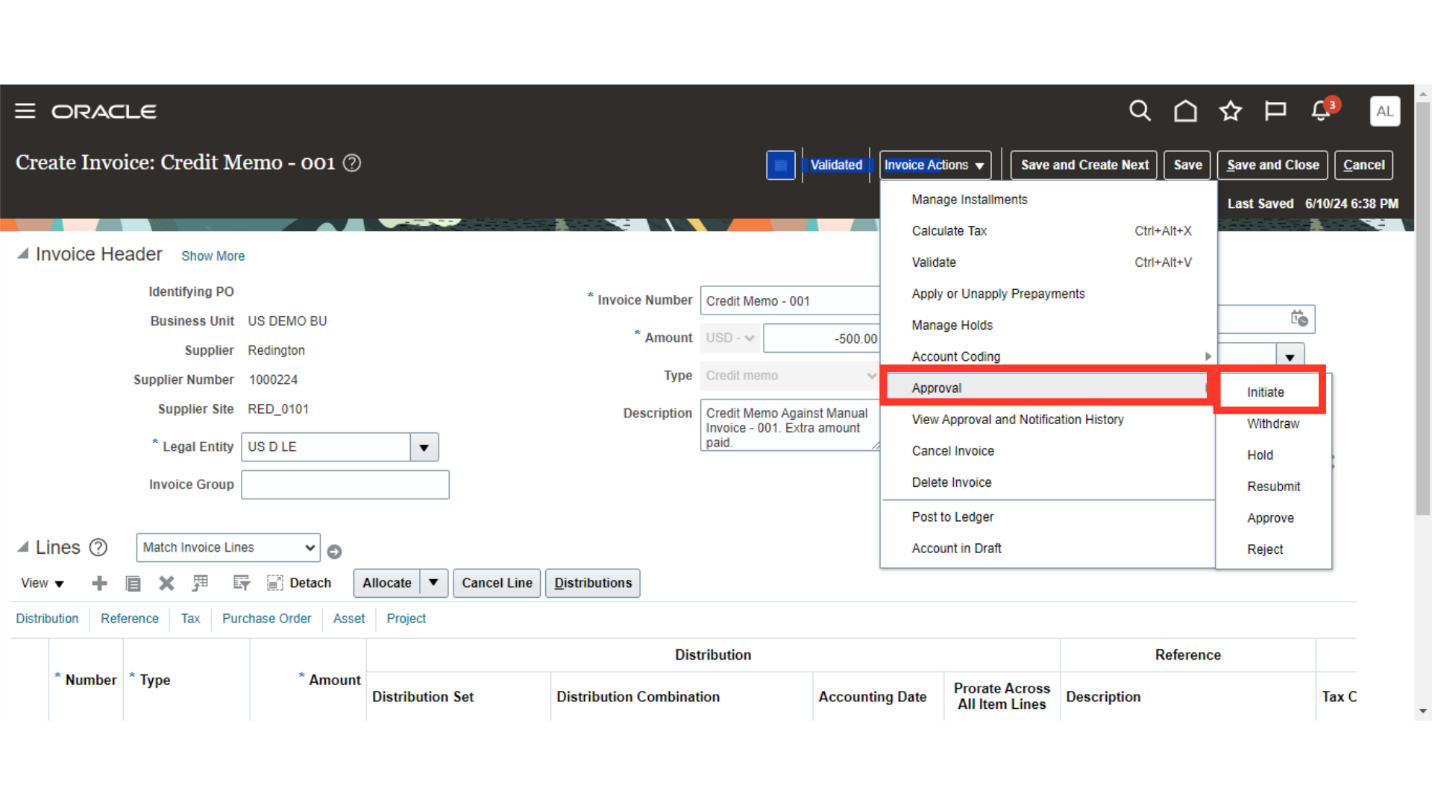
To initiate the invoice approval, select “Initiate” option from the Approval under Invoice Actions. The approval scheduled job can also automatically initiate the approval for validated transactions, as per the frequency it is scheduled for by your organisation.
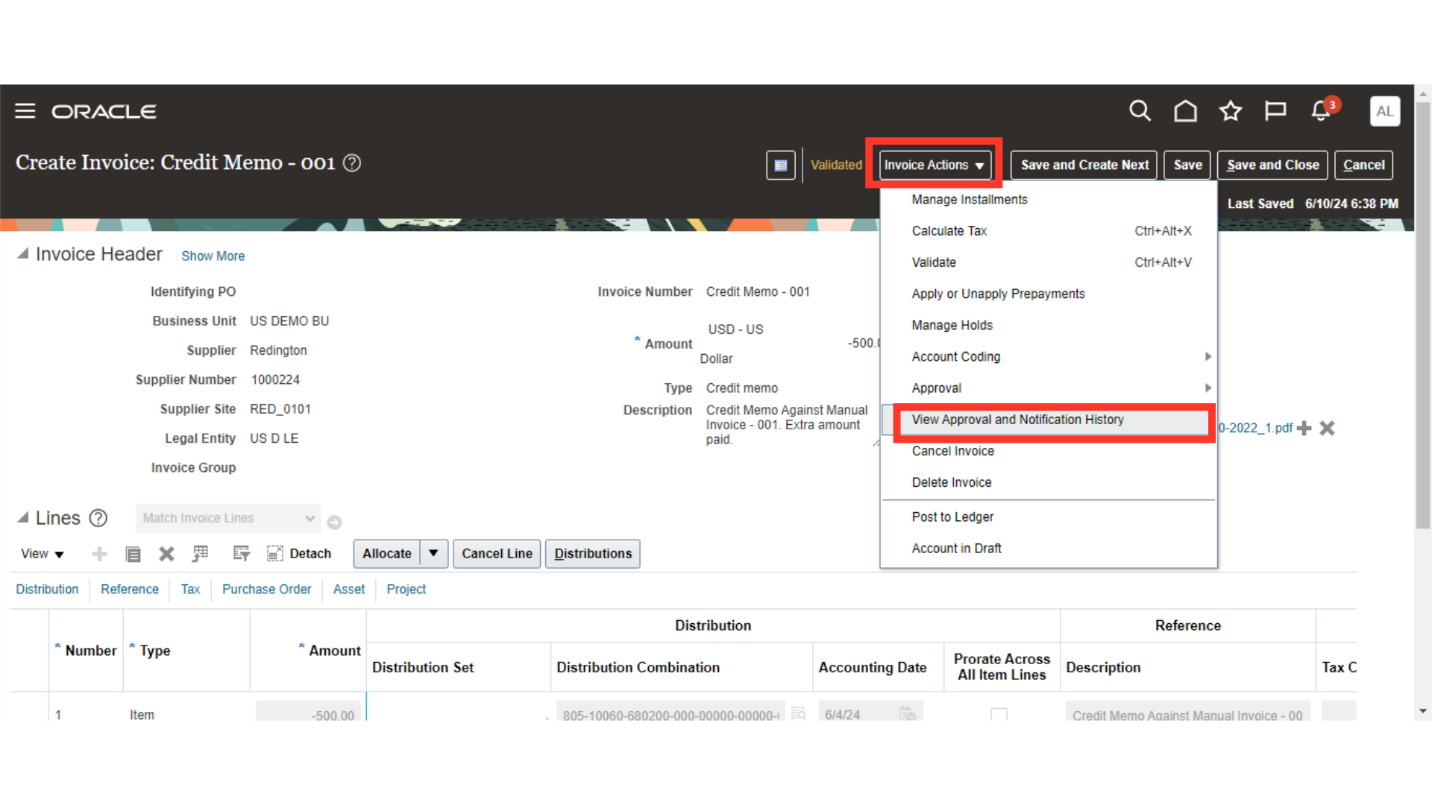
To see to whom the invoice is assigned for approval, click on the “View Approval and Notification History” under the Invoice Actions.
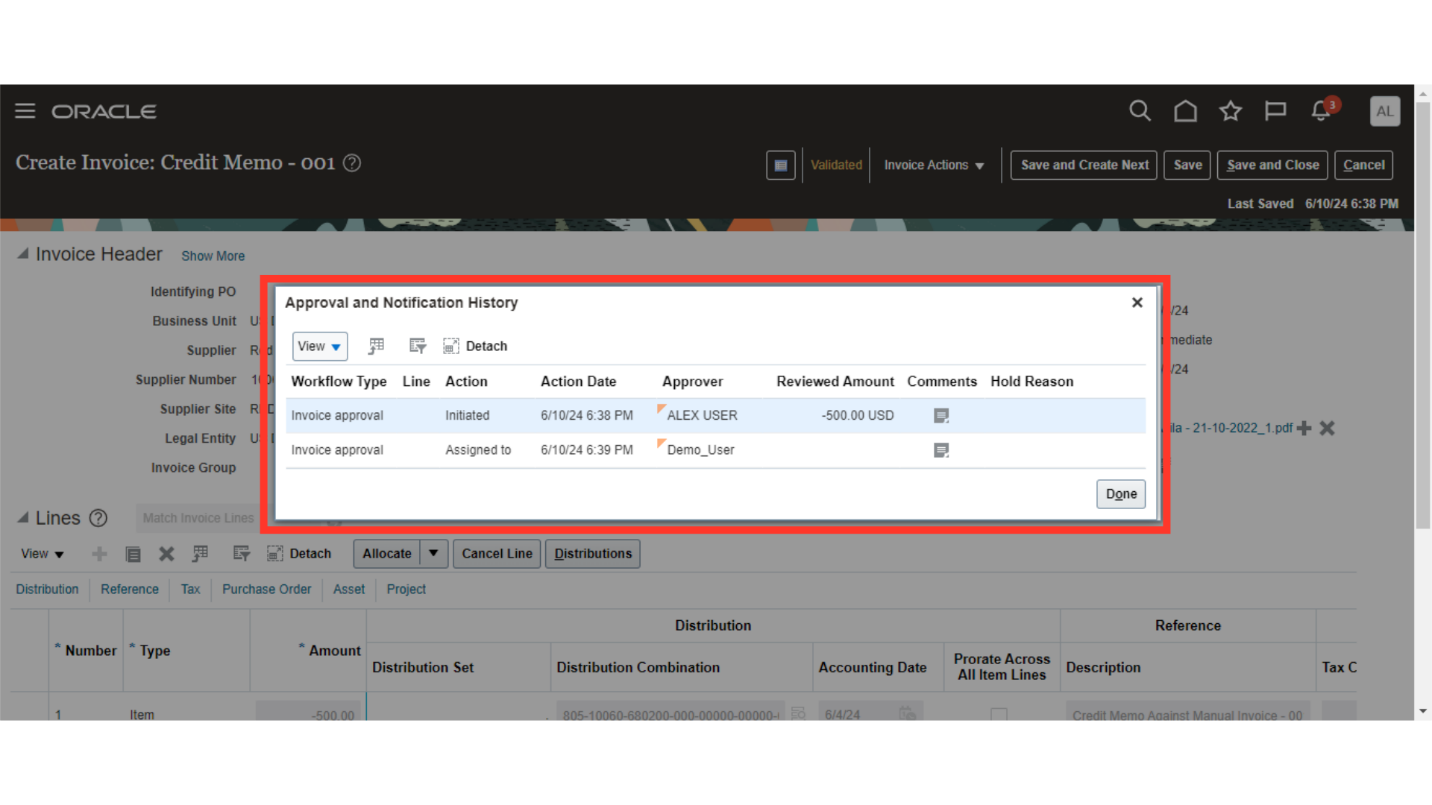
The details of who has submitted the invoice for approval, and to whom its assigned for approval all the details are available in this page.
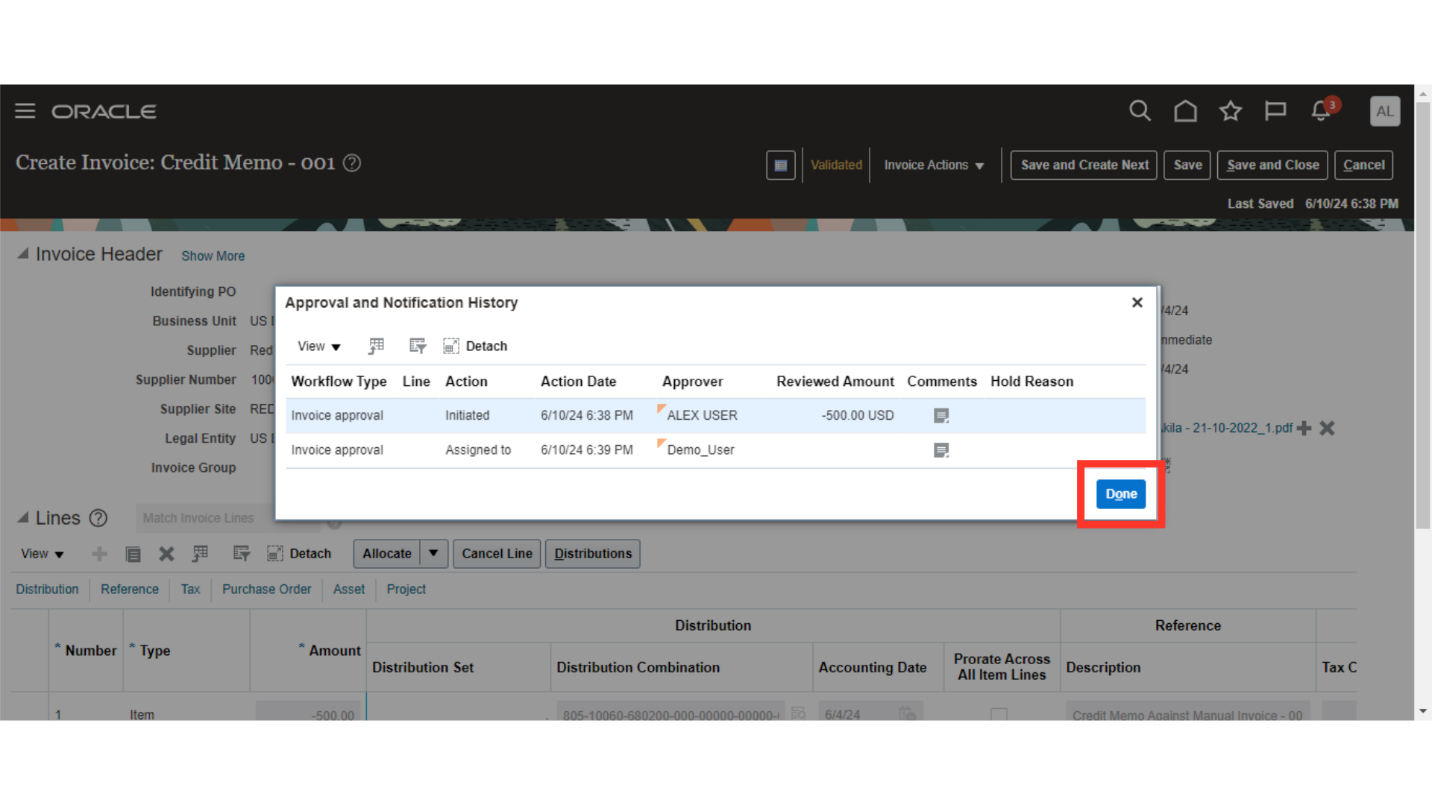
Click on the Done button to close this Approval and Notification History window.
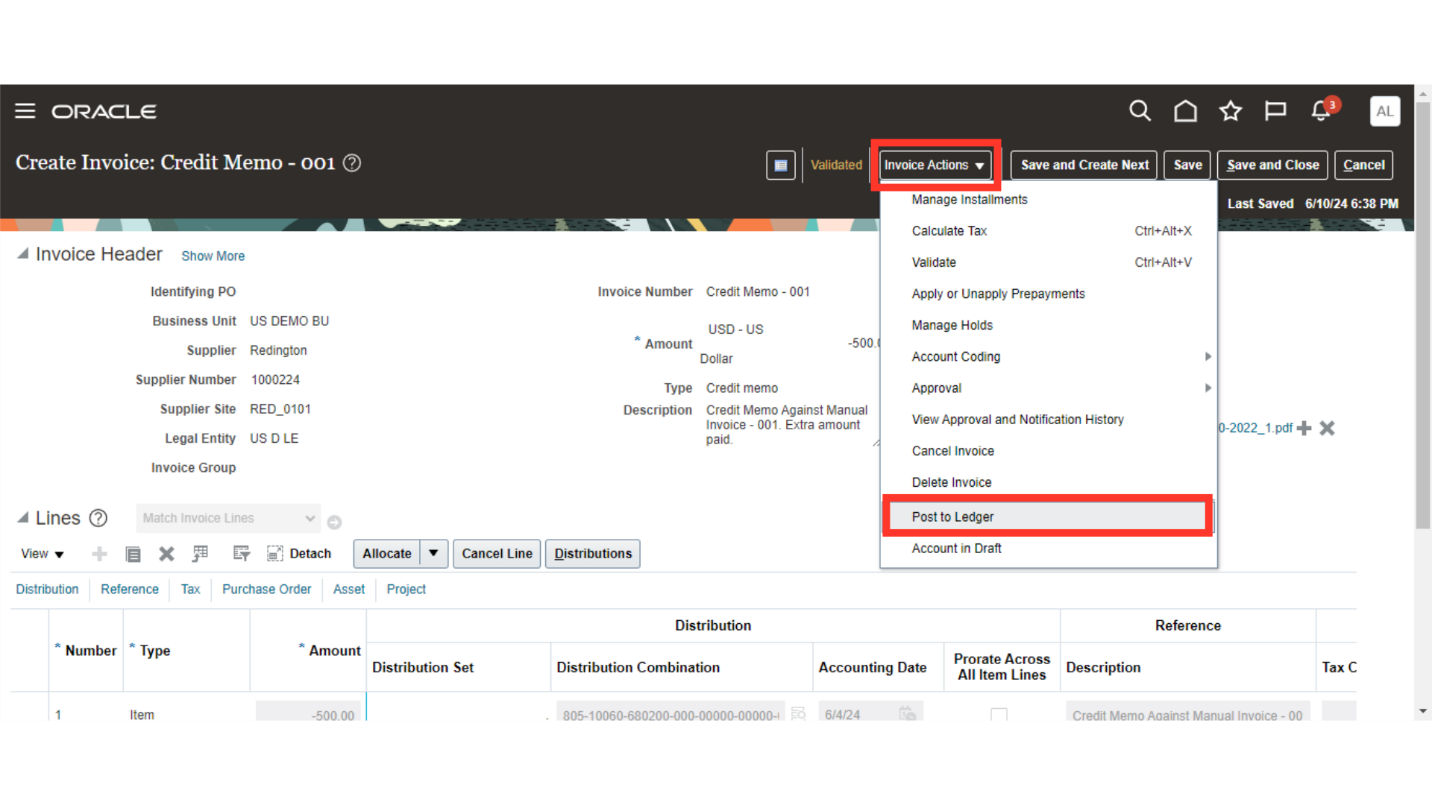
To generate accounting, click on the “Post to ledger” option after clicking on the Invoice Actions.
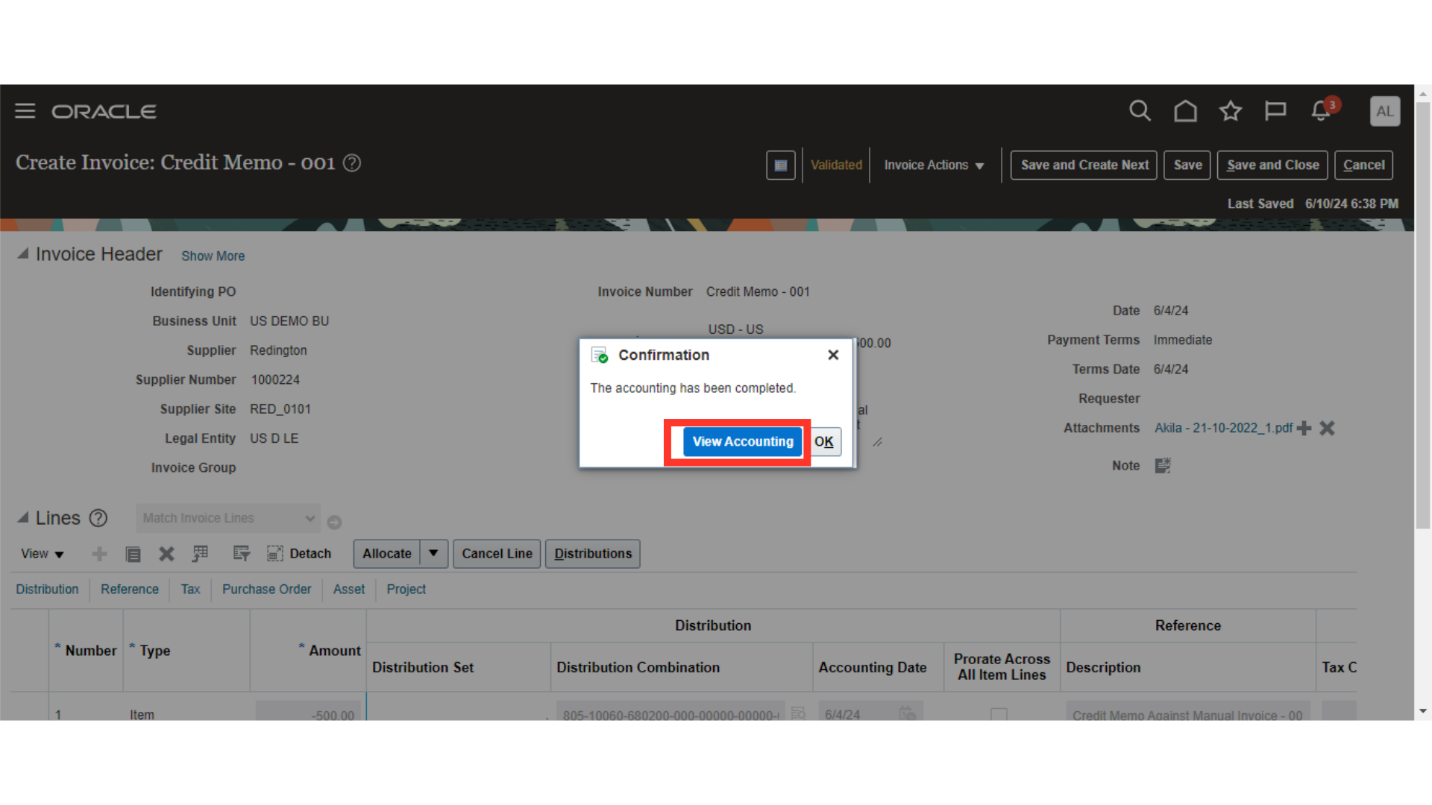
Select the “View Accounting” button to see the details of journal entry.
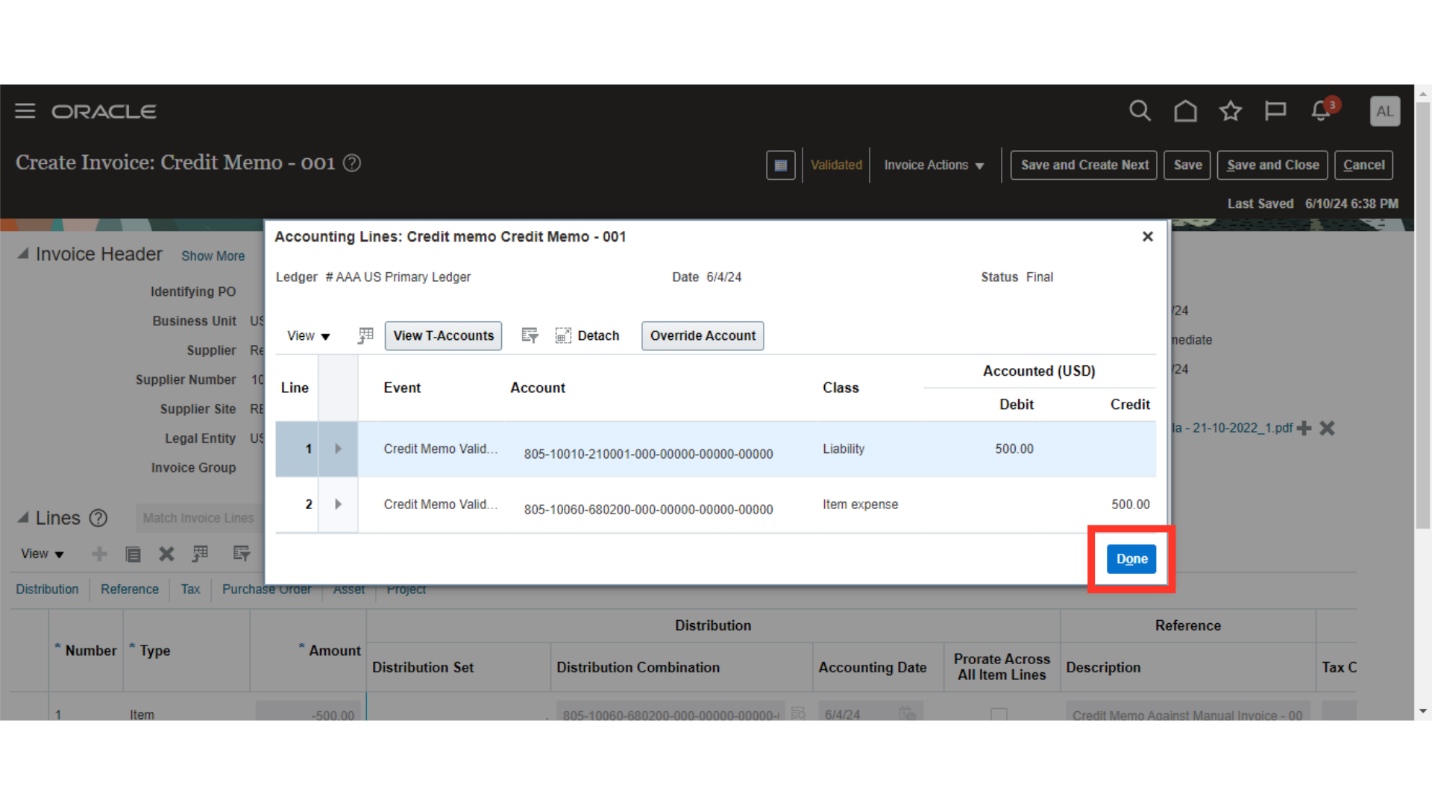
This is the journal entry generated and transferred to the general ledger for the credit memo booked. Click on the Done button to close this window.
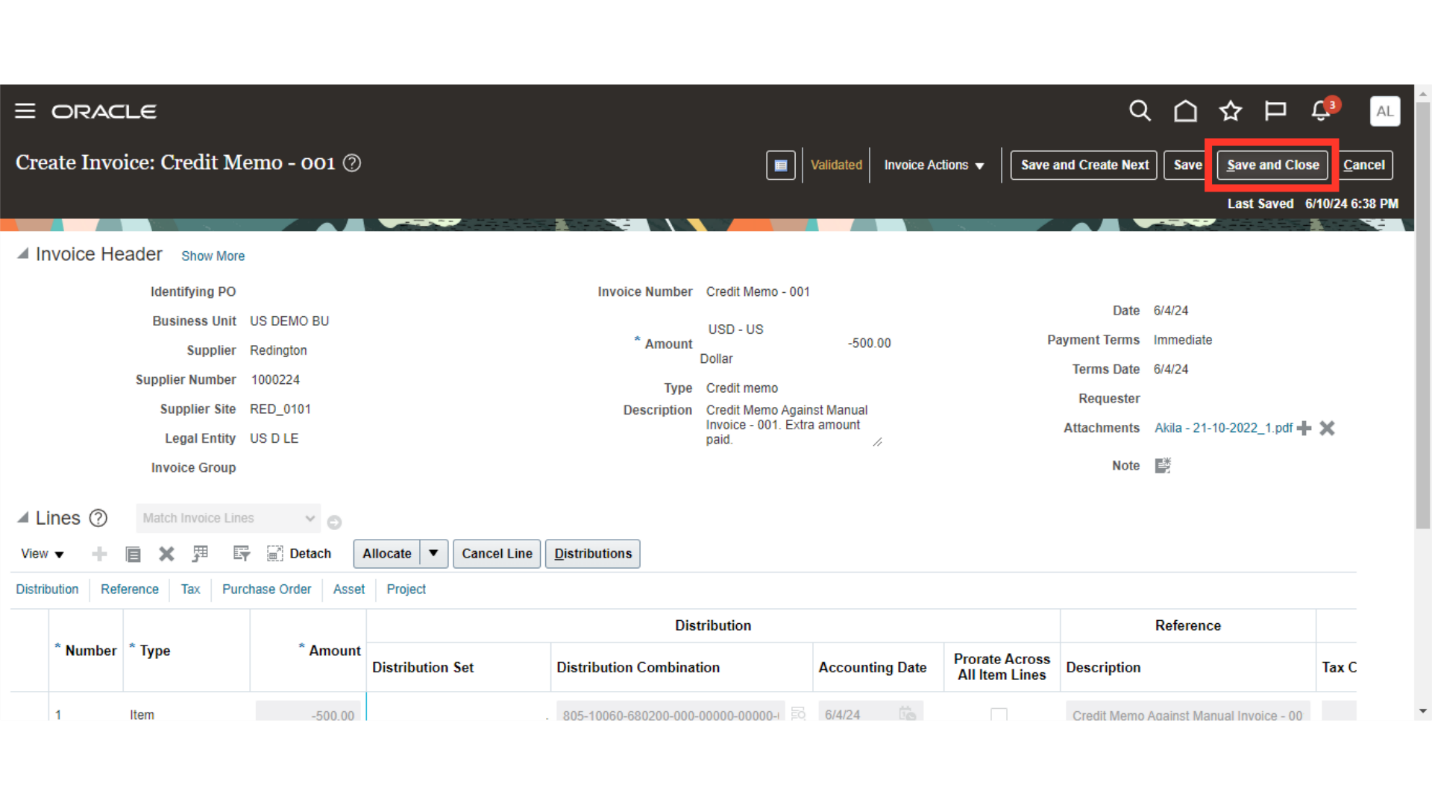
Click on the “Save and close” option to return back to the Invoice workbench.
The process for creating a credit memo invoice, validating it, and submitting it for approval is laid out step-by-step in this guide. You will be able to create Credit memos with more ease and confidence after reading this guide.