Debit Memo Creation
Service to create a document to bill the customer for an open debit in addition to goods and services already received. For example, a customer is issued a debit memo of $10 for the screen protector for a smartphone. This guide navigates the step-by-step process of manually creating a Debit memo-type transaction in Oracle Receivables Cloud.
Click on the Navigator icon to access the Receivables menu.
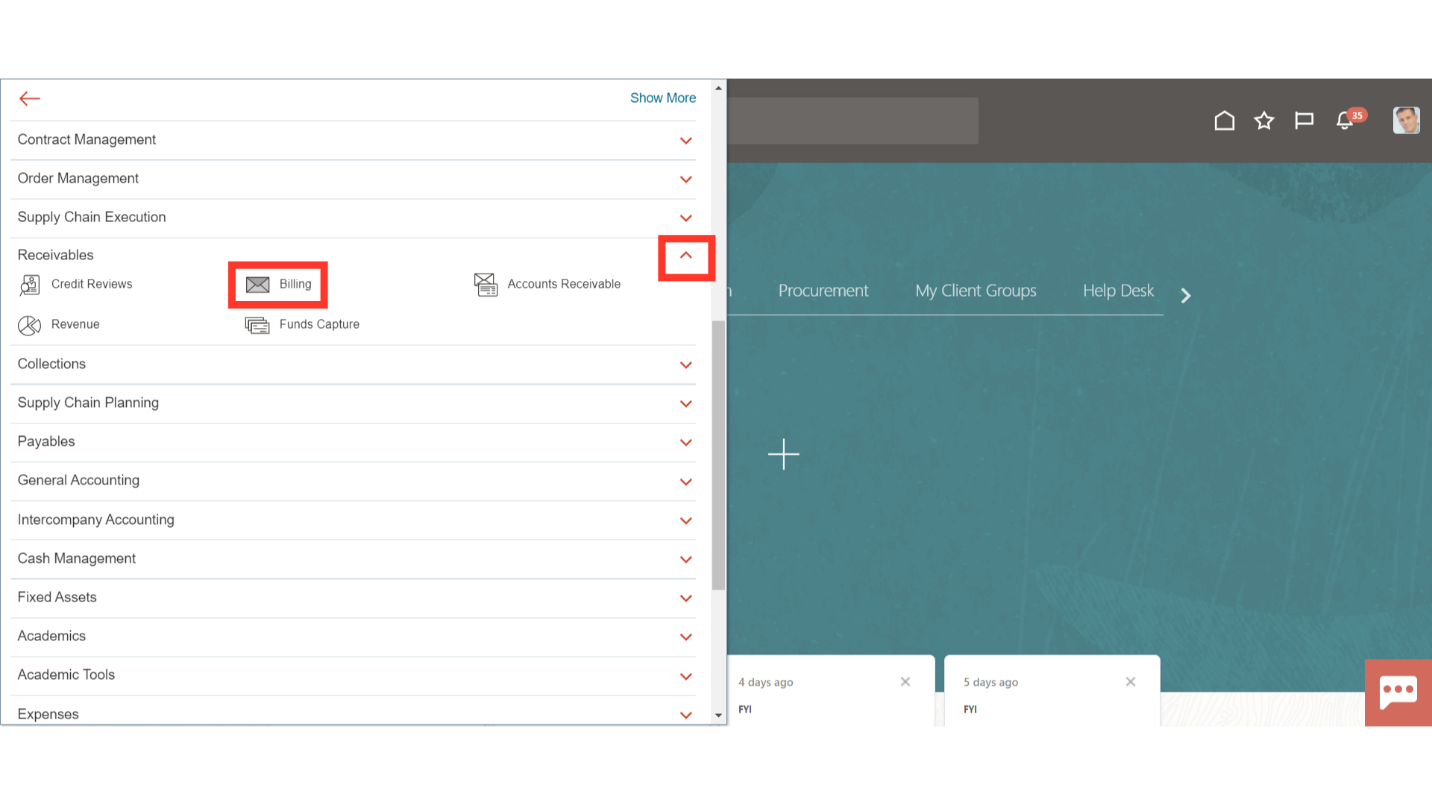
Access the Billing work area by selecting Billing under Receivables from the navigator. Alternatively, on the Home page, you may select the Receivables menu and under that select the Billing submenu.
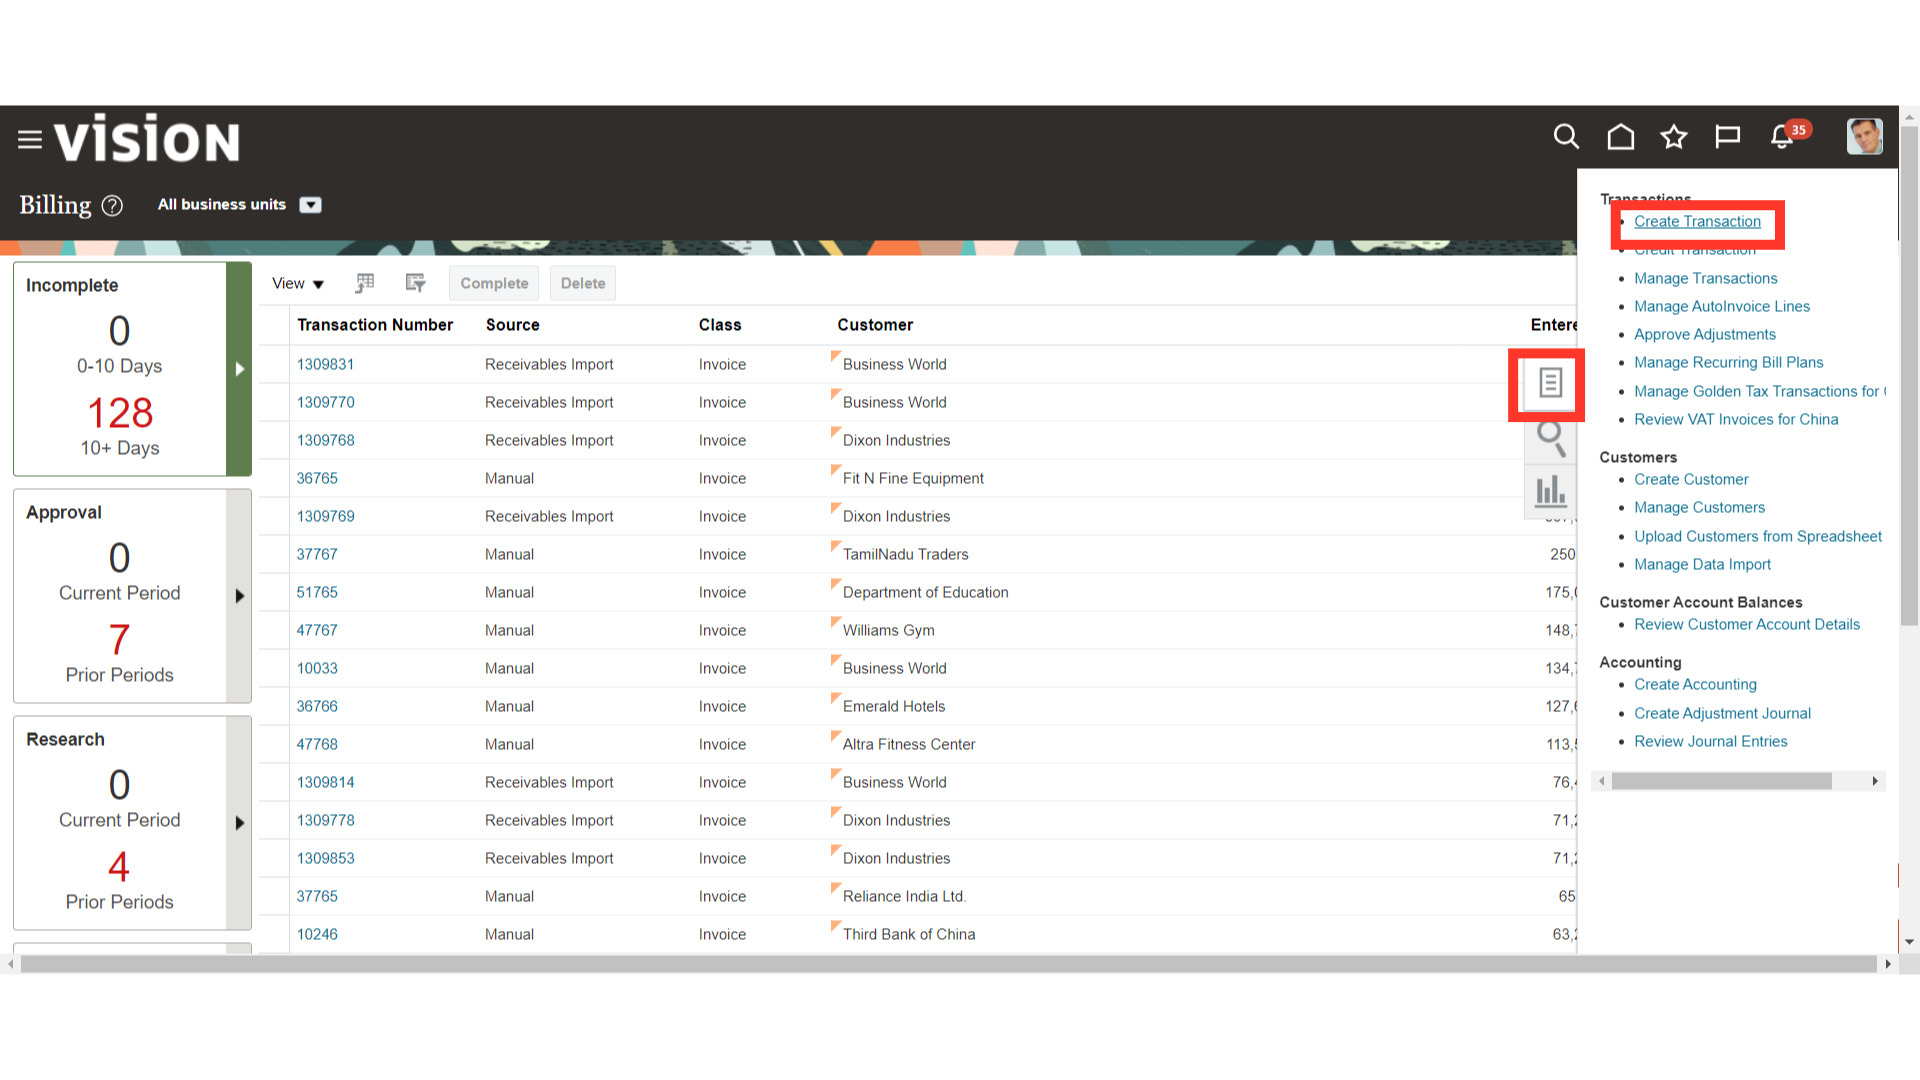
Click on the “Create Transaction” hyperlink under Transactions from the task list.
Choose the Debit memo from the list of values next to the Transaction class field to create a Debit memo transaction.
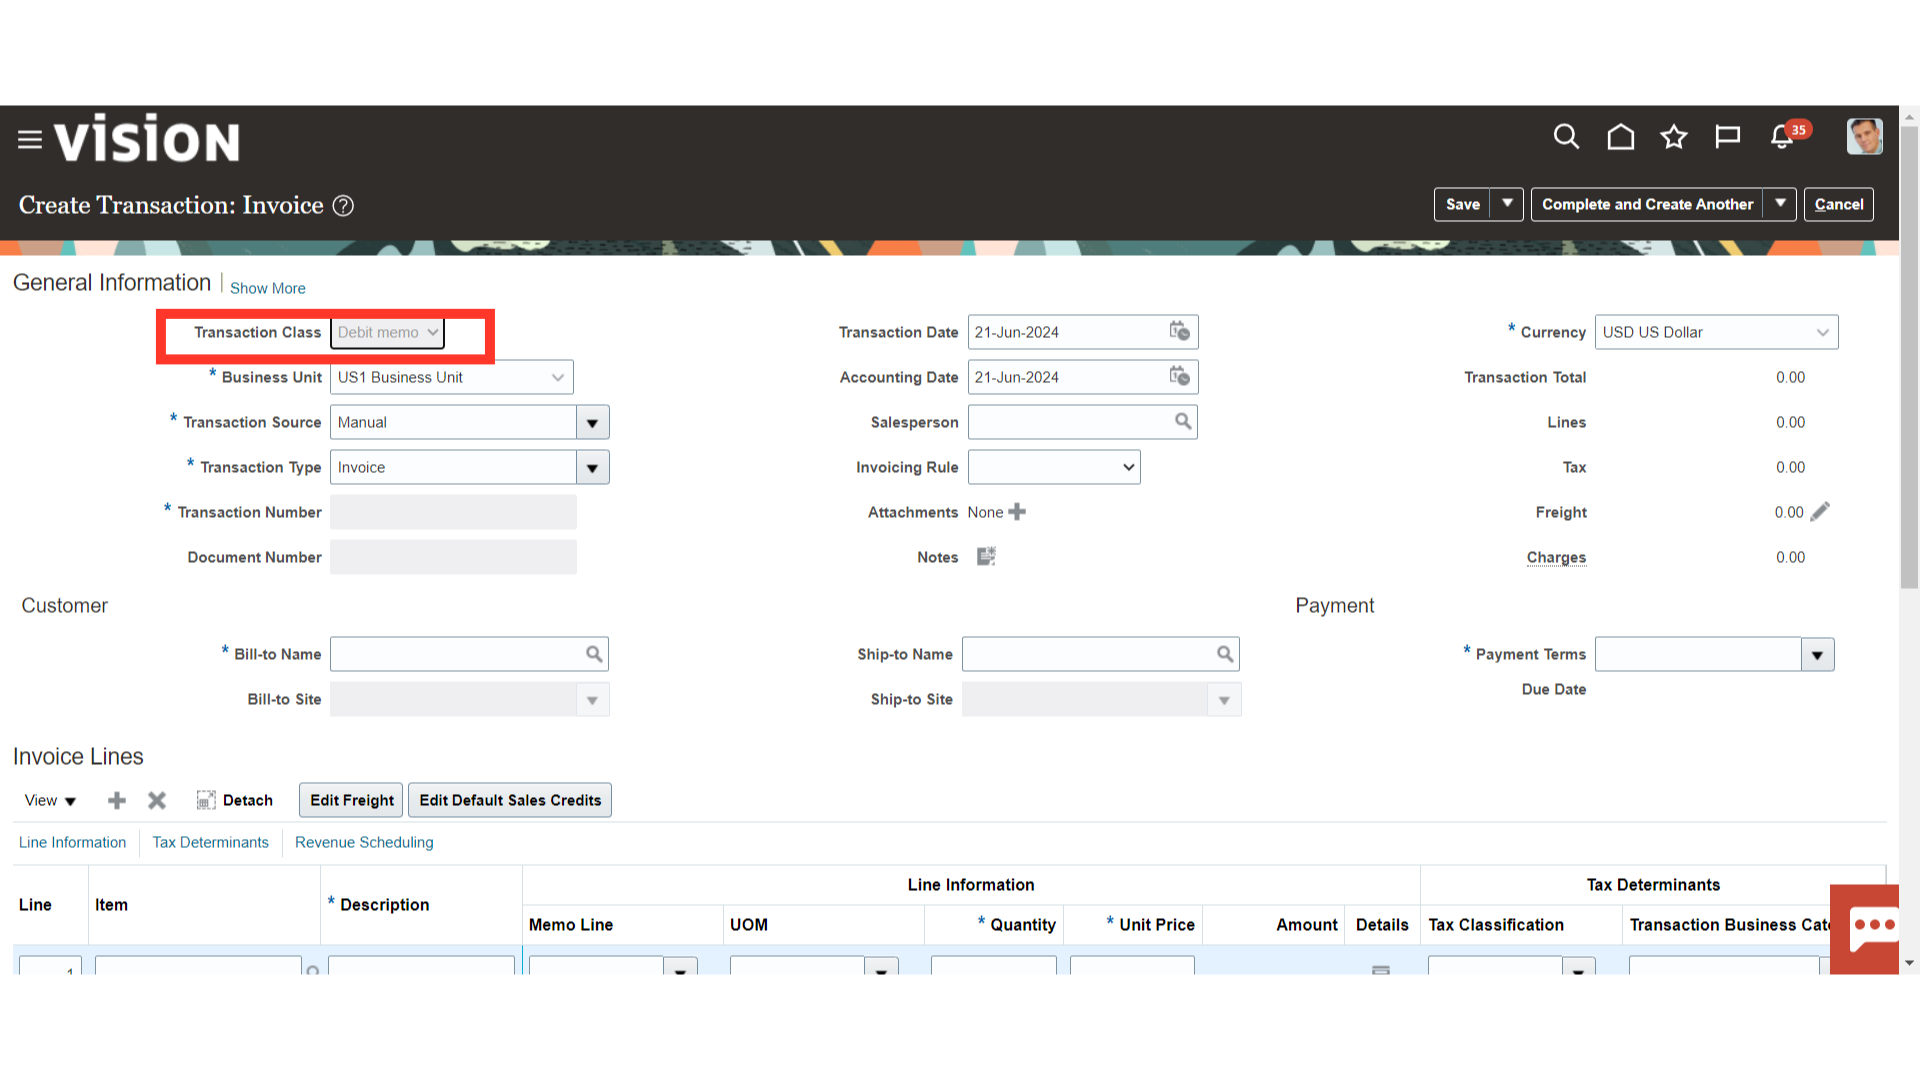
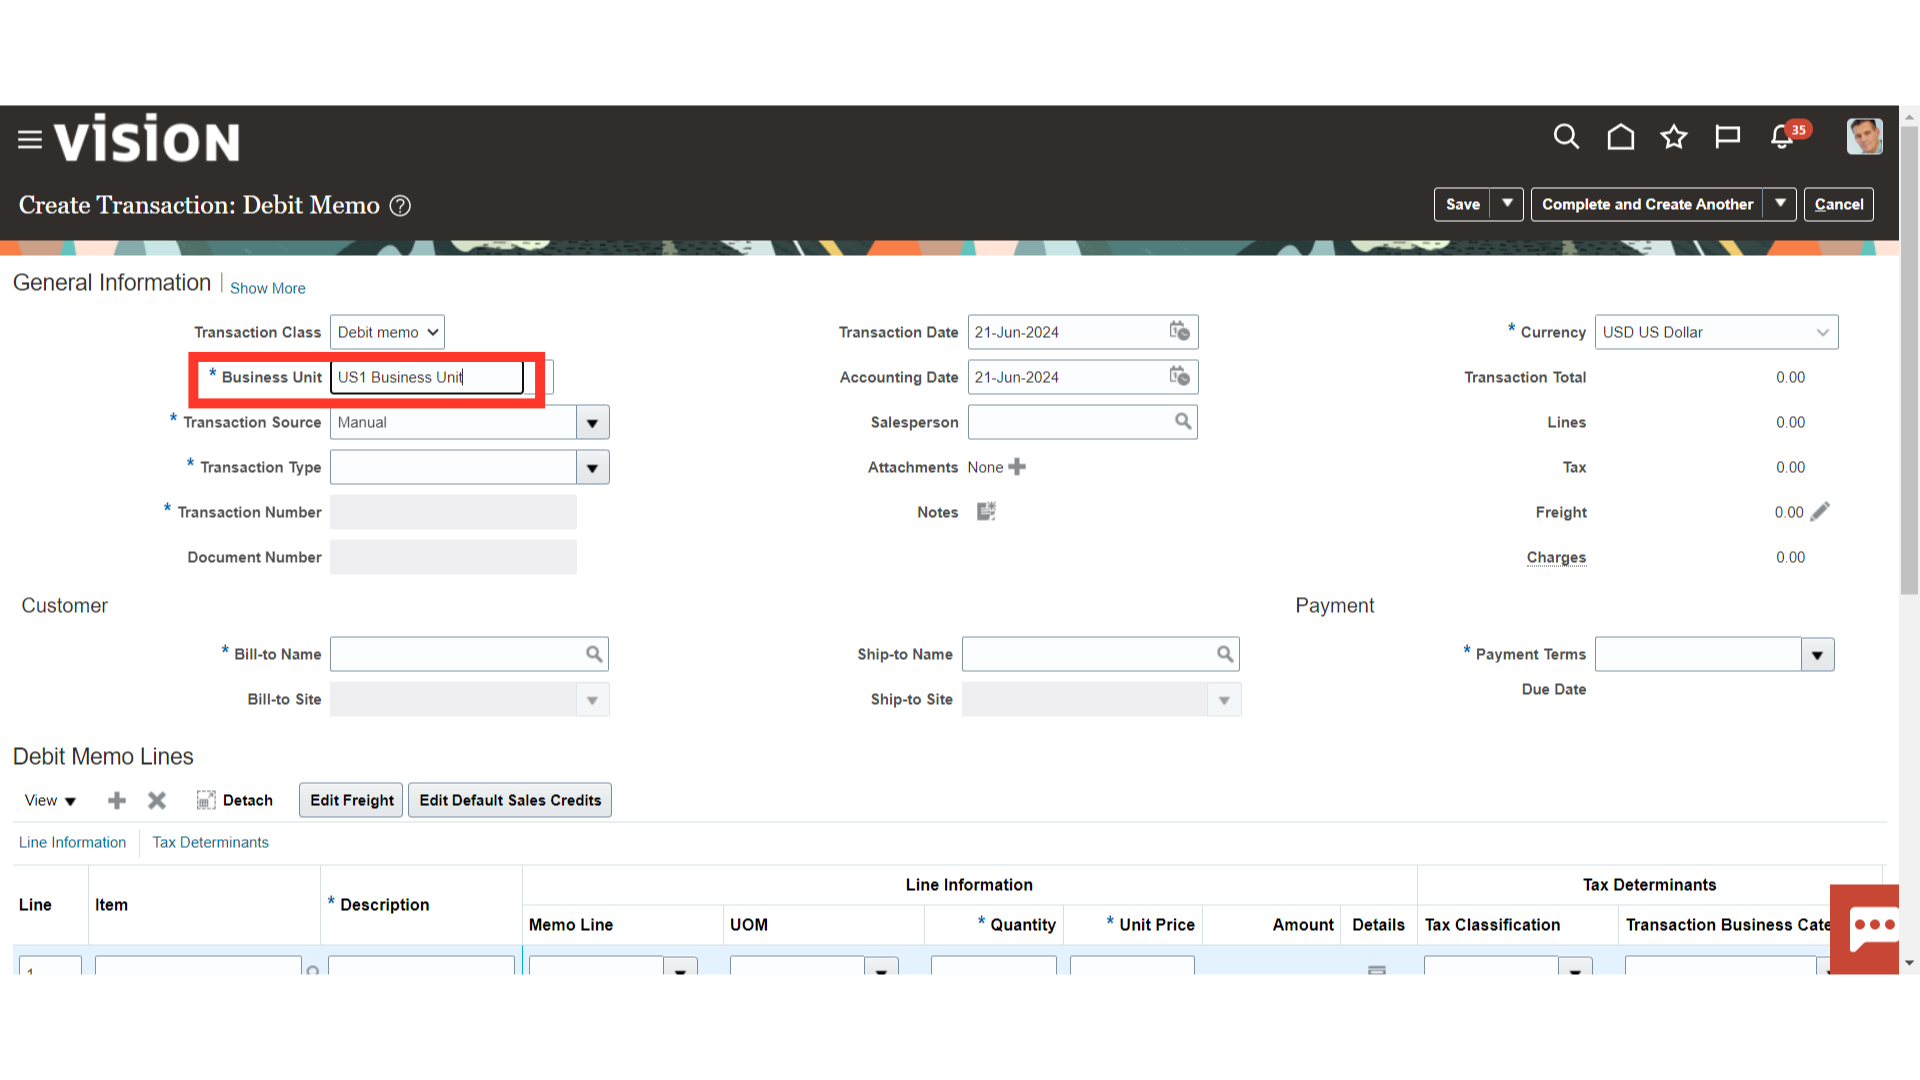
Select the business unit under which the Debit memo is to be created from the list of values or enter it manually.
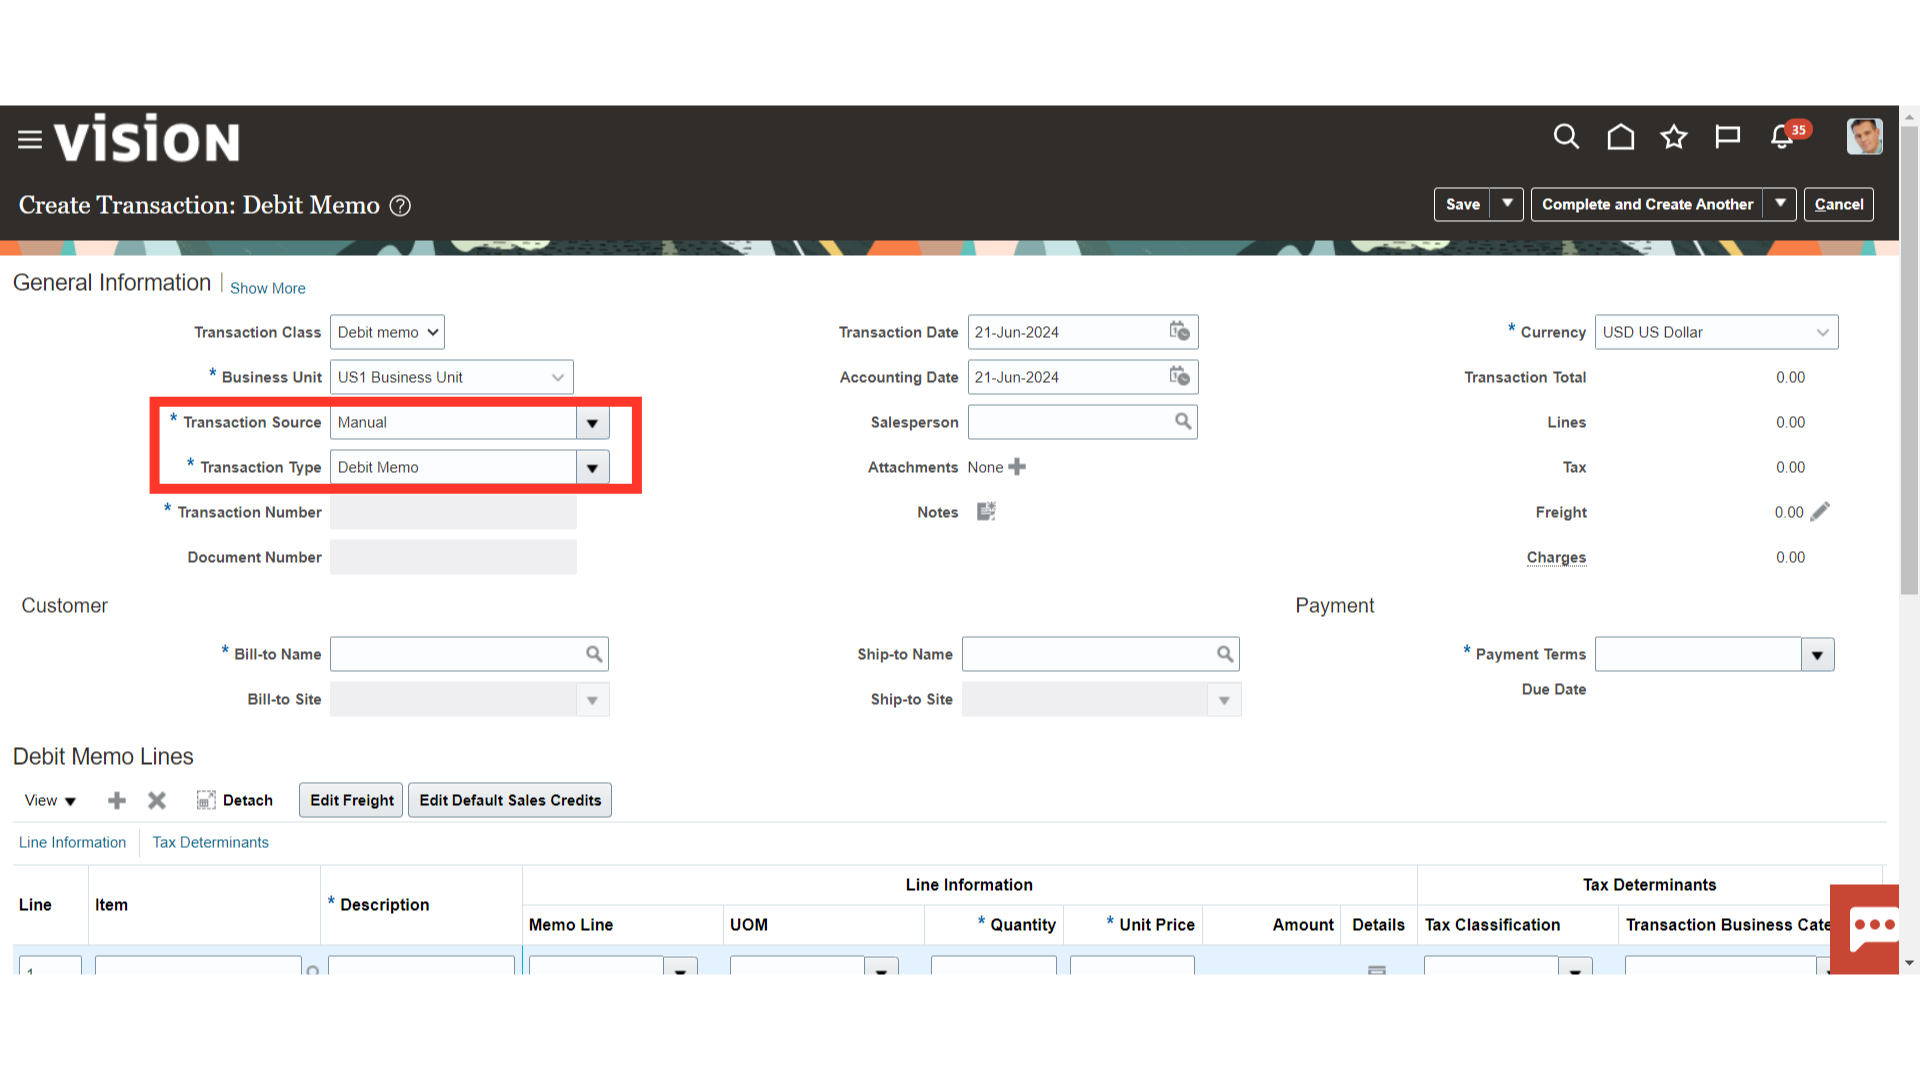
Choose the transaction source from the values list to determine the transaction’s origin. Furthermore, choose the Transaction type to categorize receivables transactions, through which accounting can also be managed.
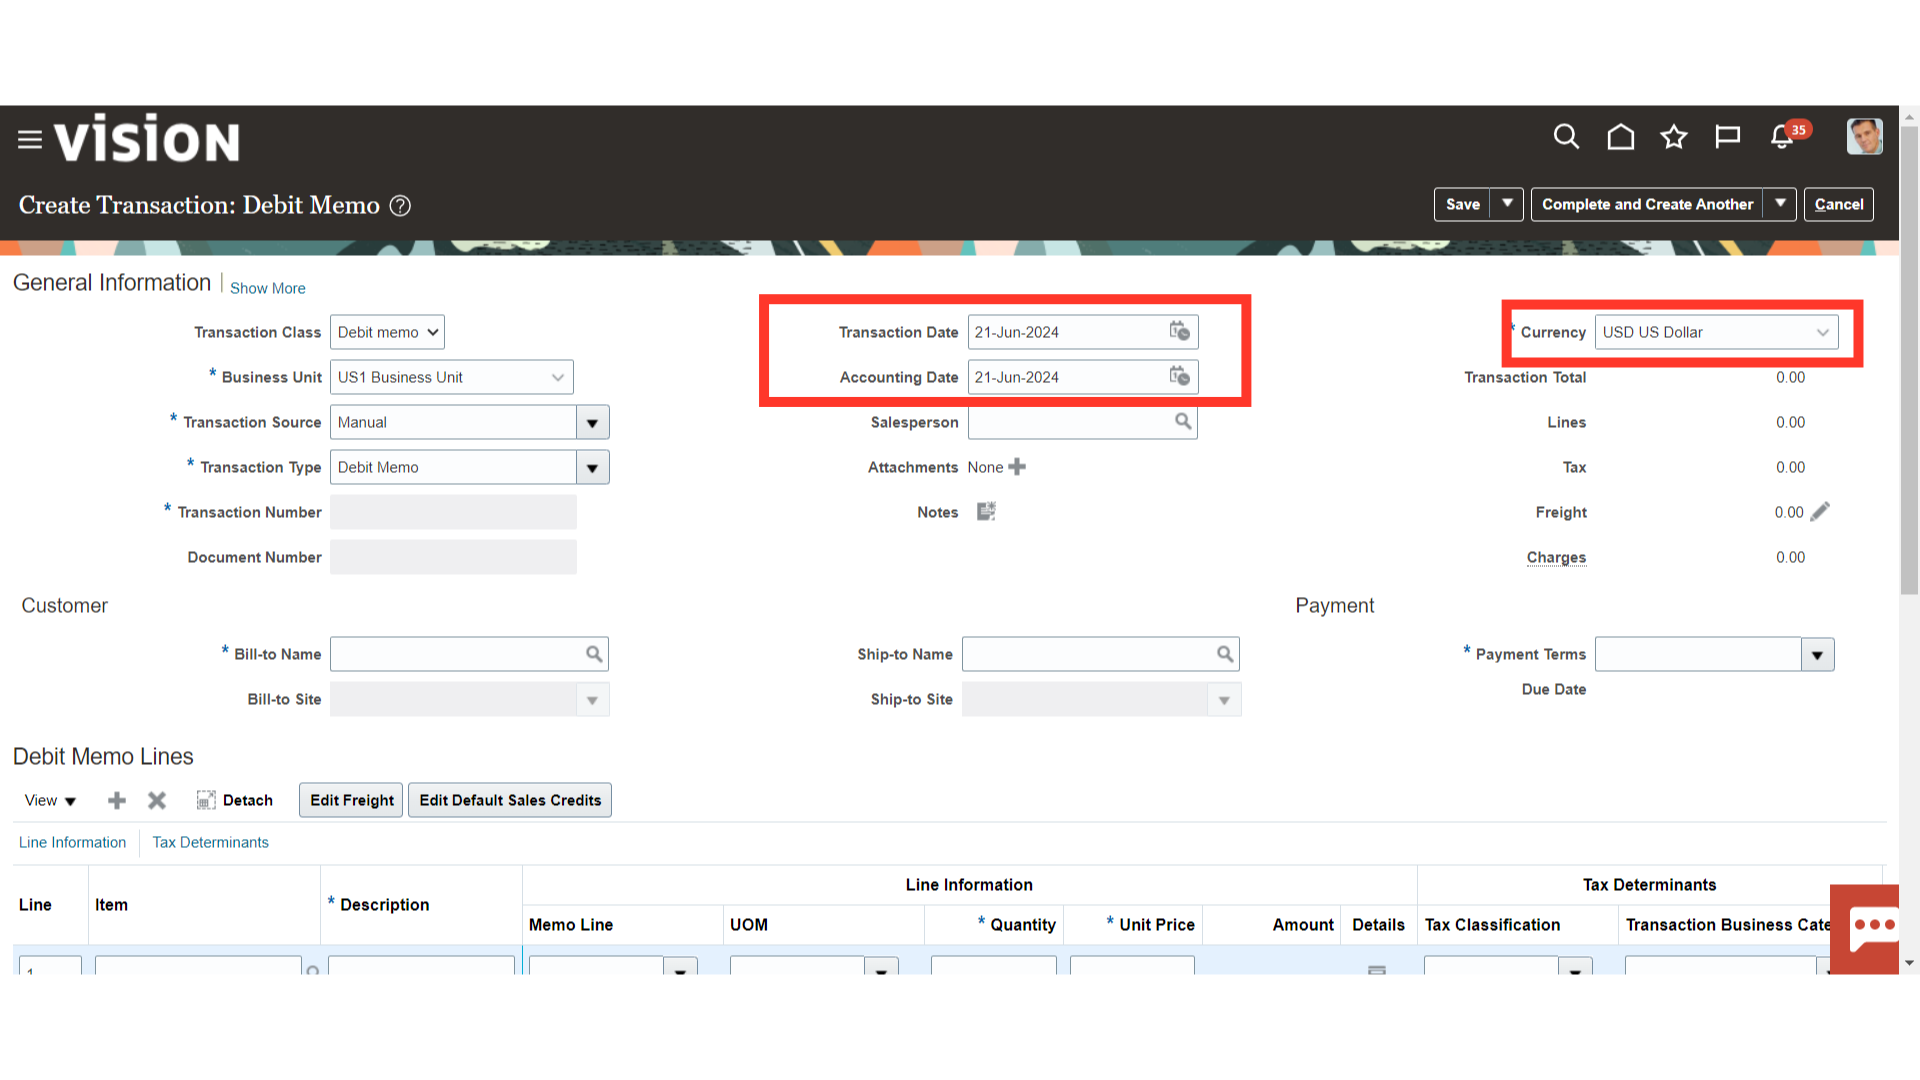
Enter the date on which sales were made in the Transaction date field. Select the Accounting Date on which the journal entry is to be generated for the transaction. Select the currency in which the transaction is to be recorded from the list of values.
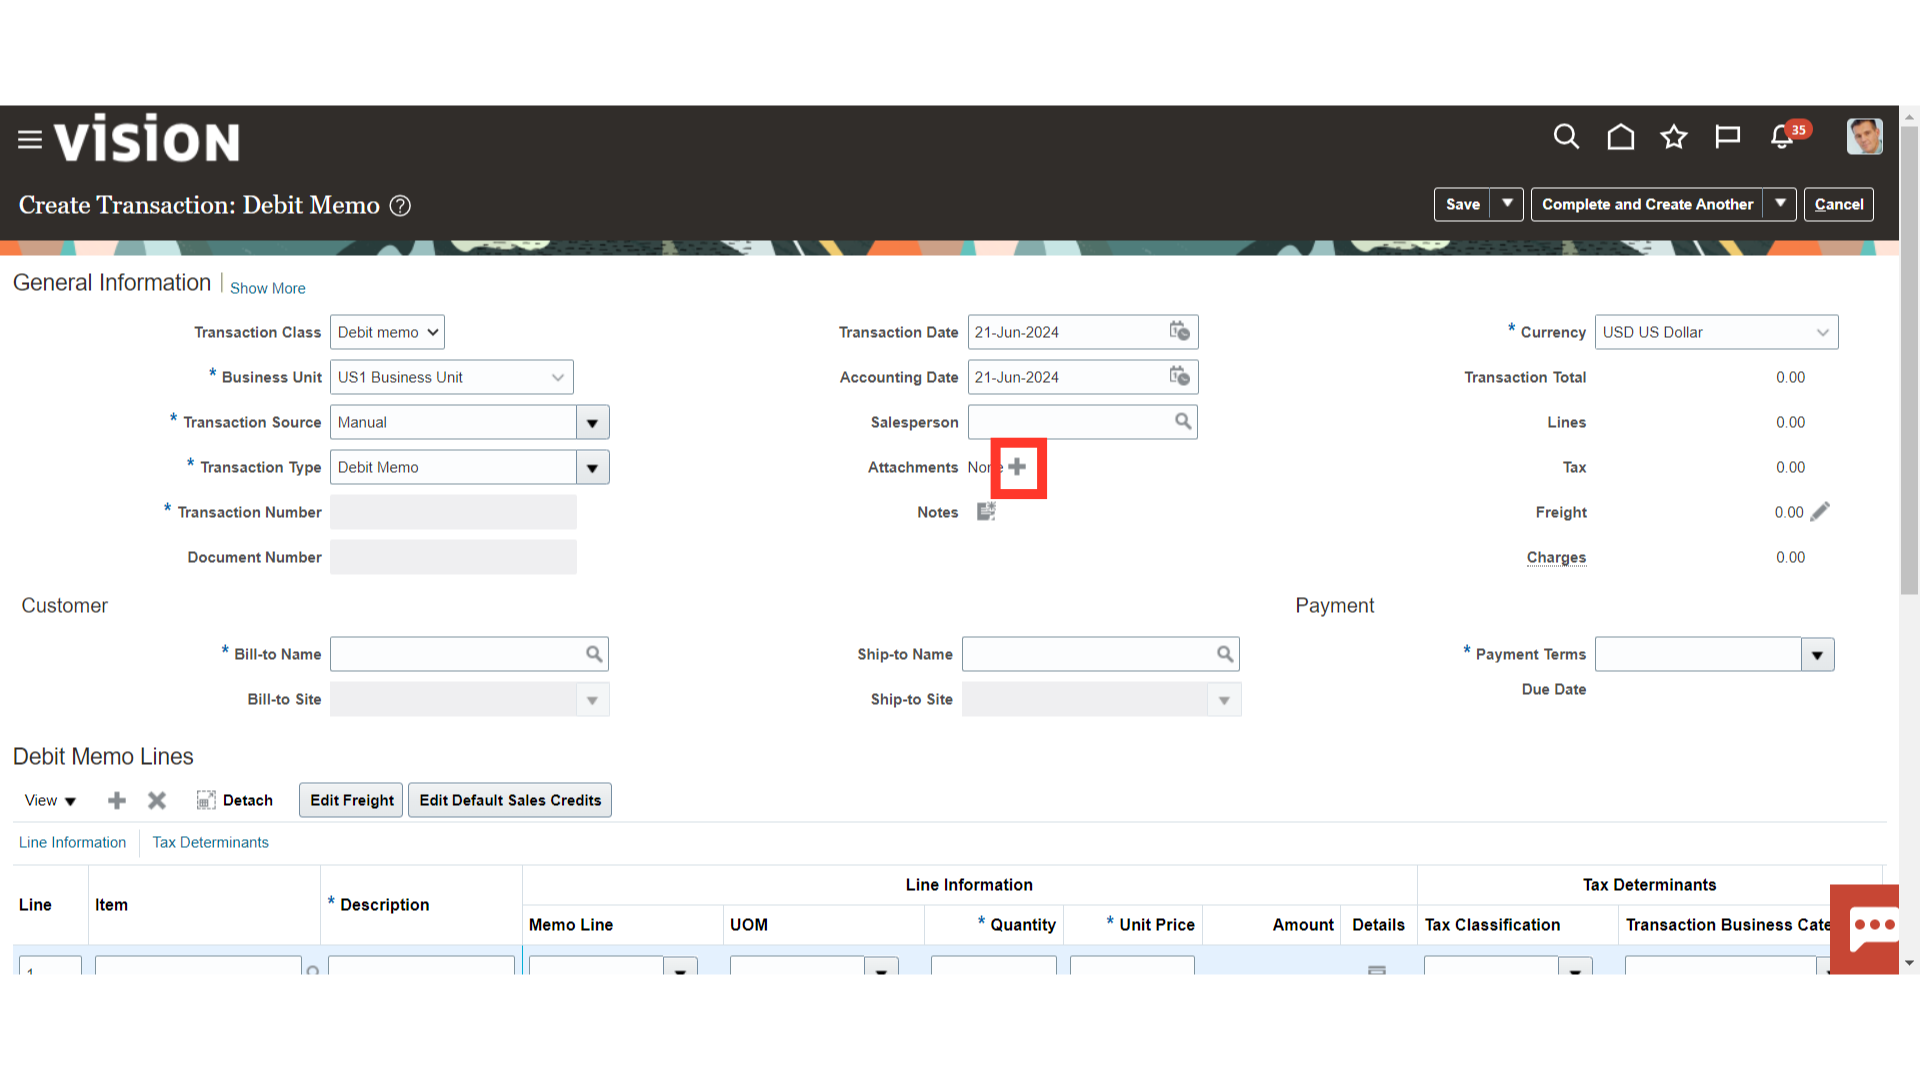
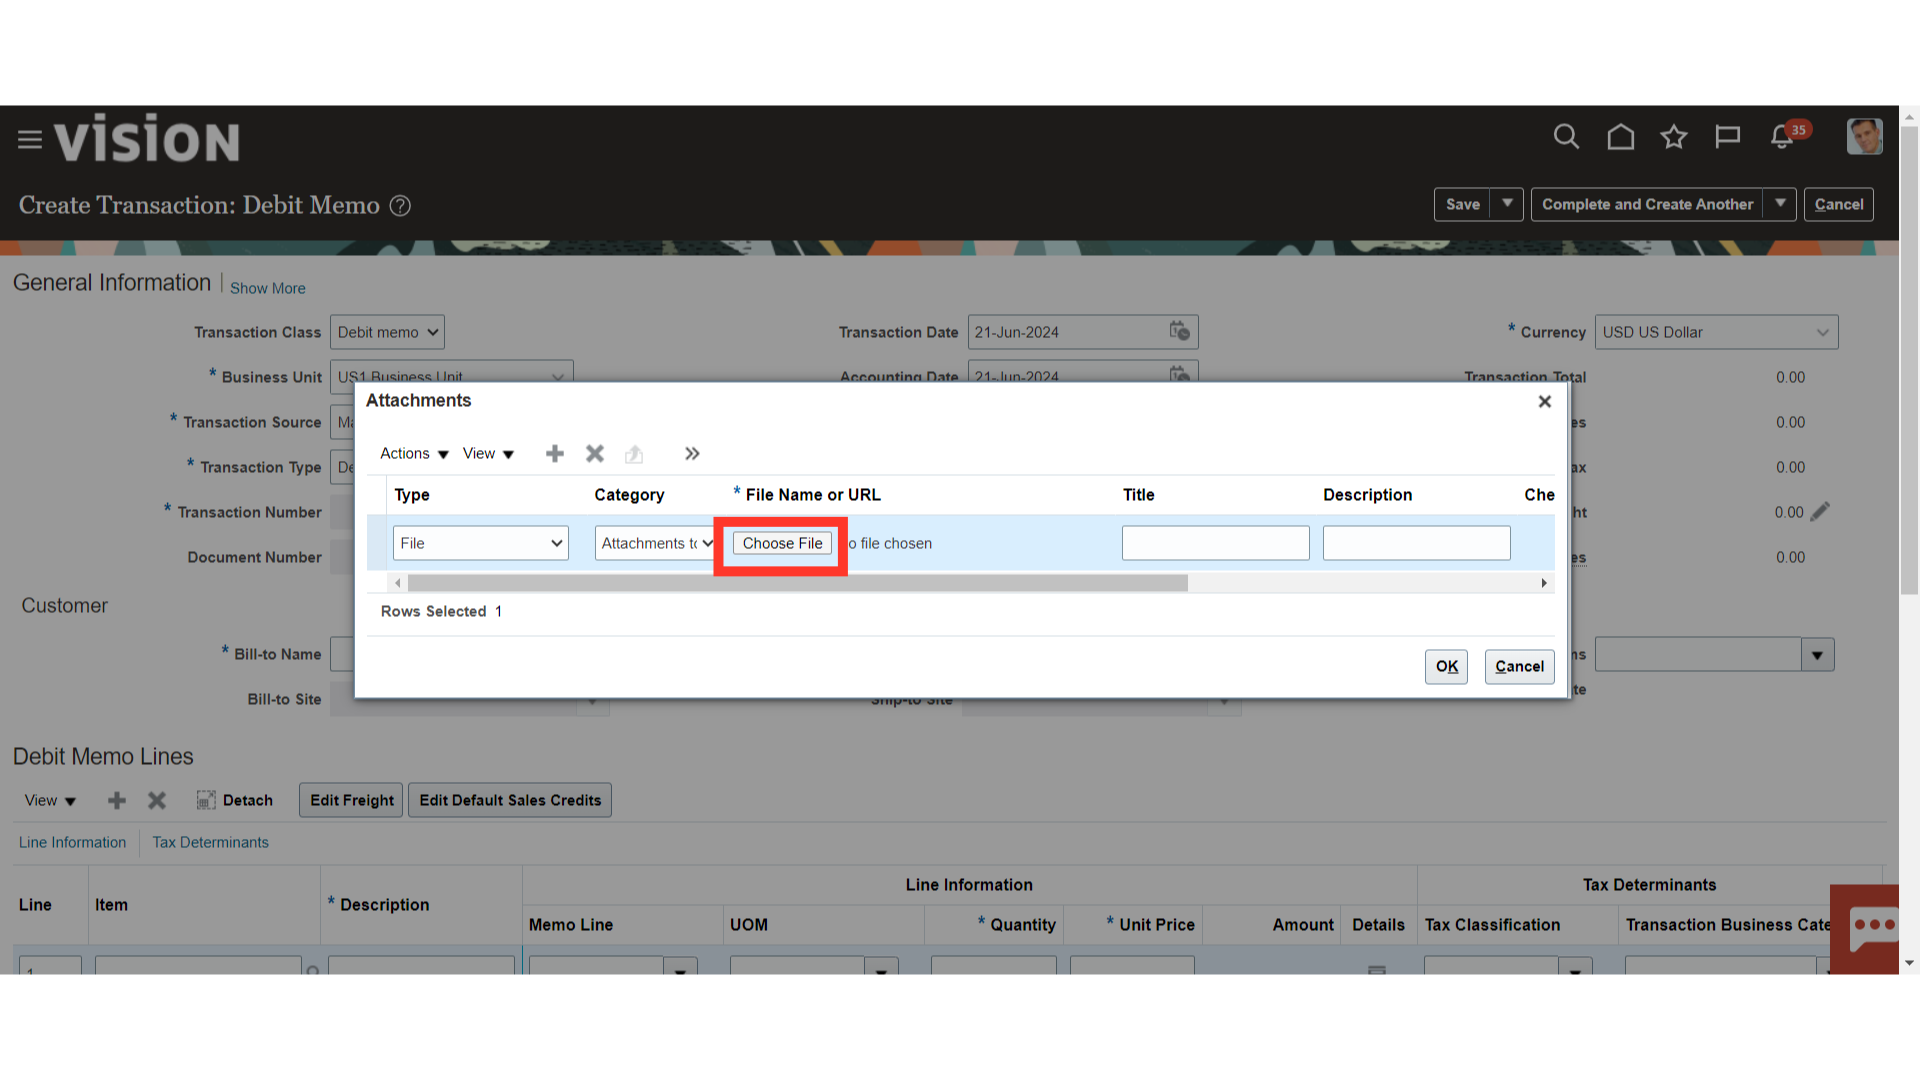
Click on the Plus icon to upload the attachment.
Click on Choose File to upload the attachments from our local desktop.
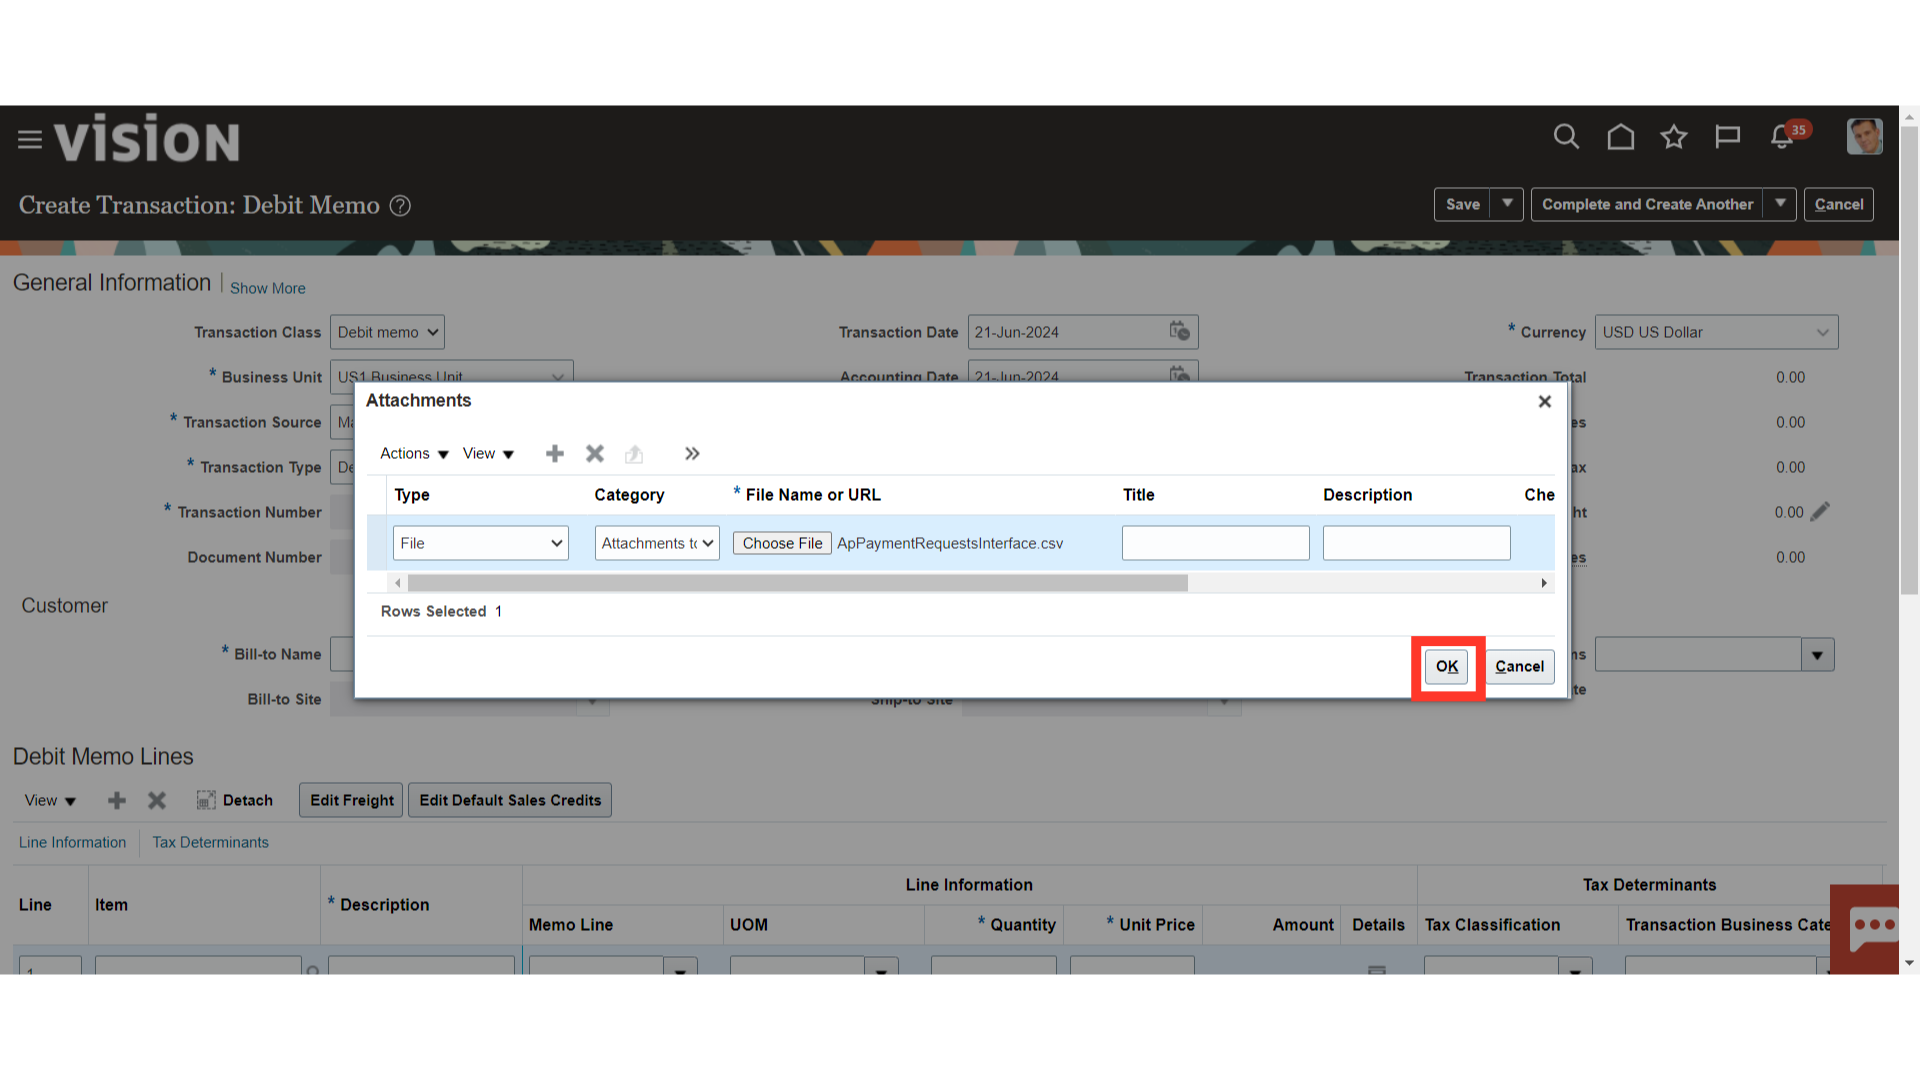
After uploading, Click on OK to continue.
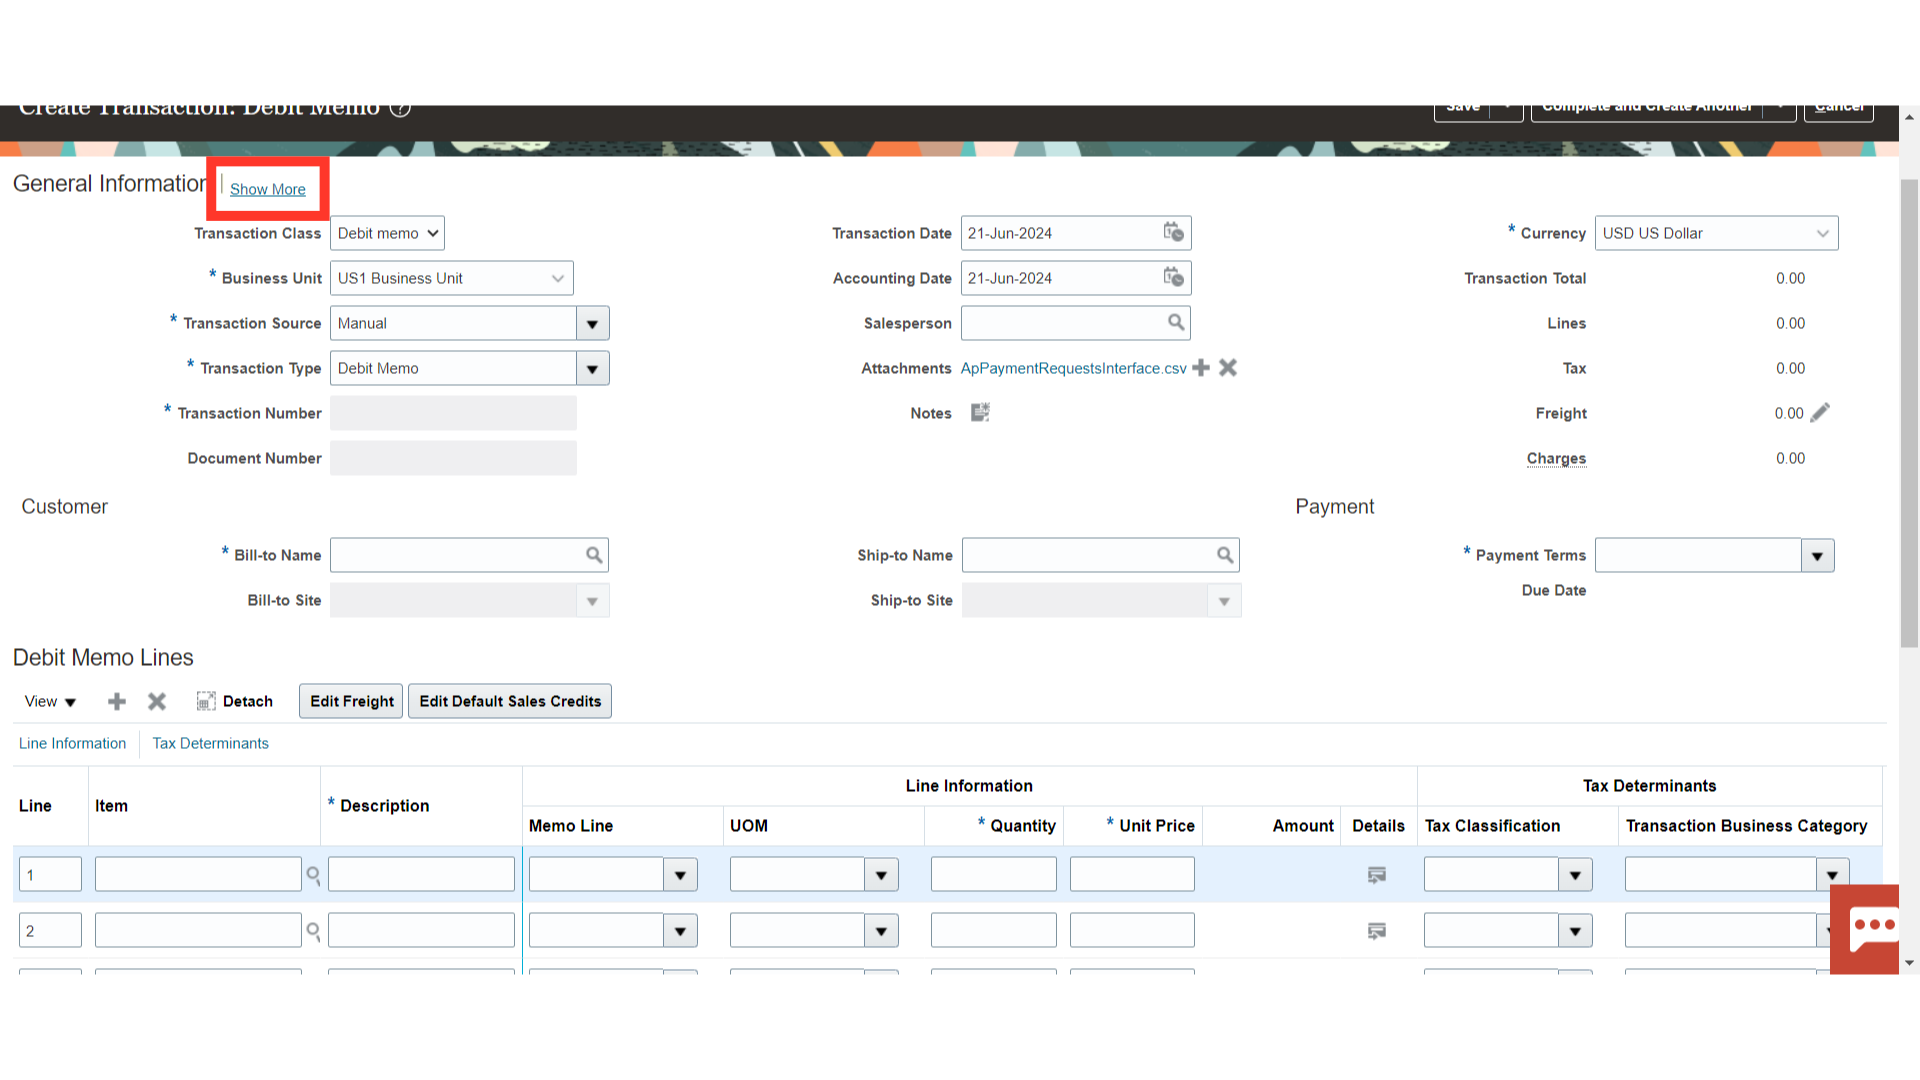
Click on Show More to enter the further details of the transaction.
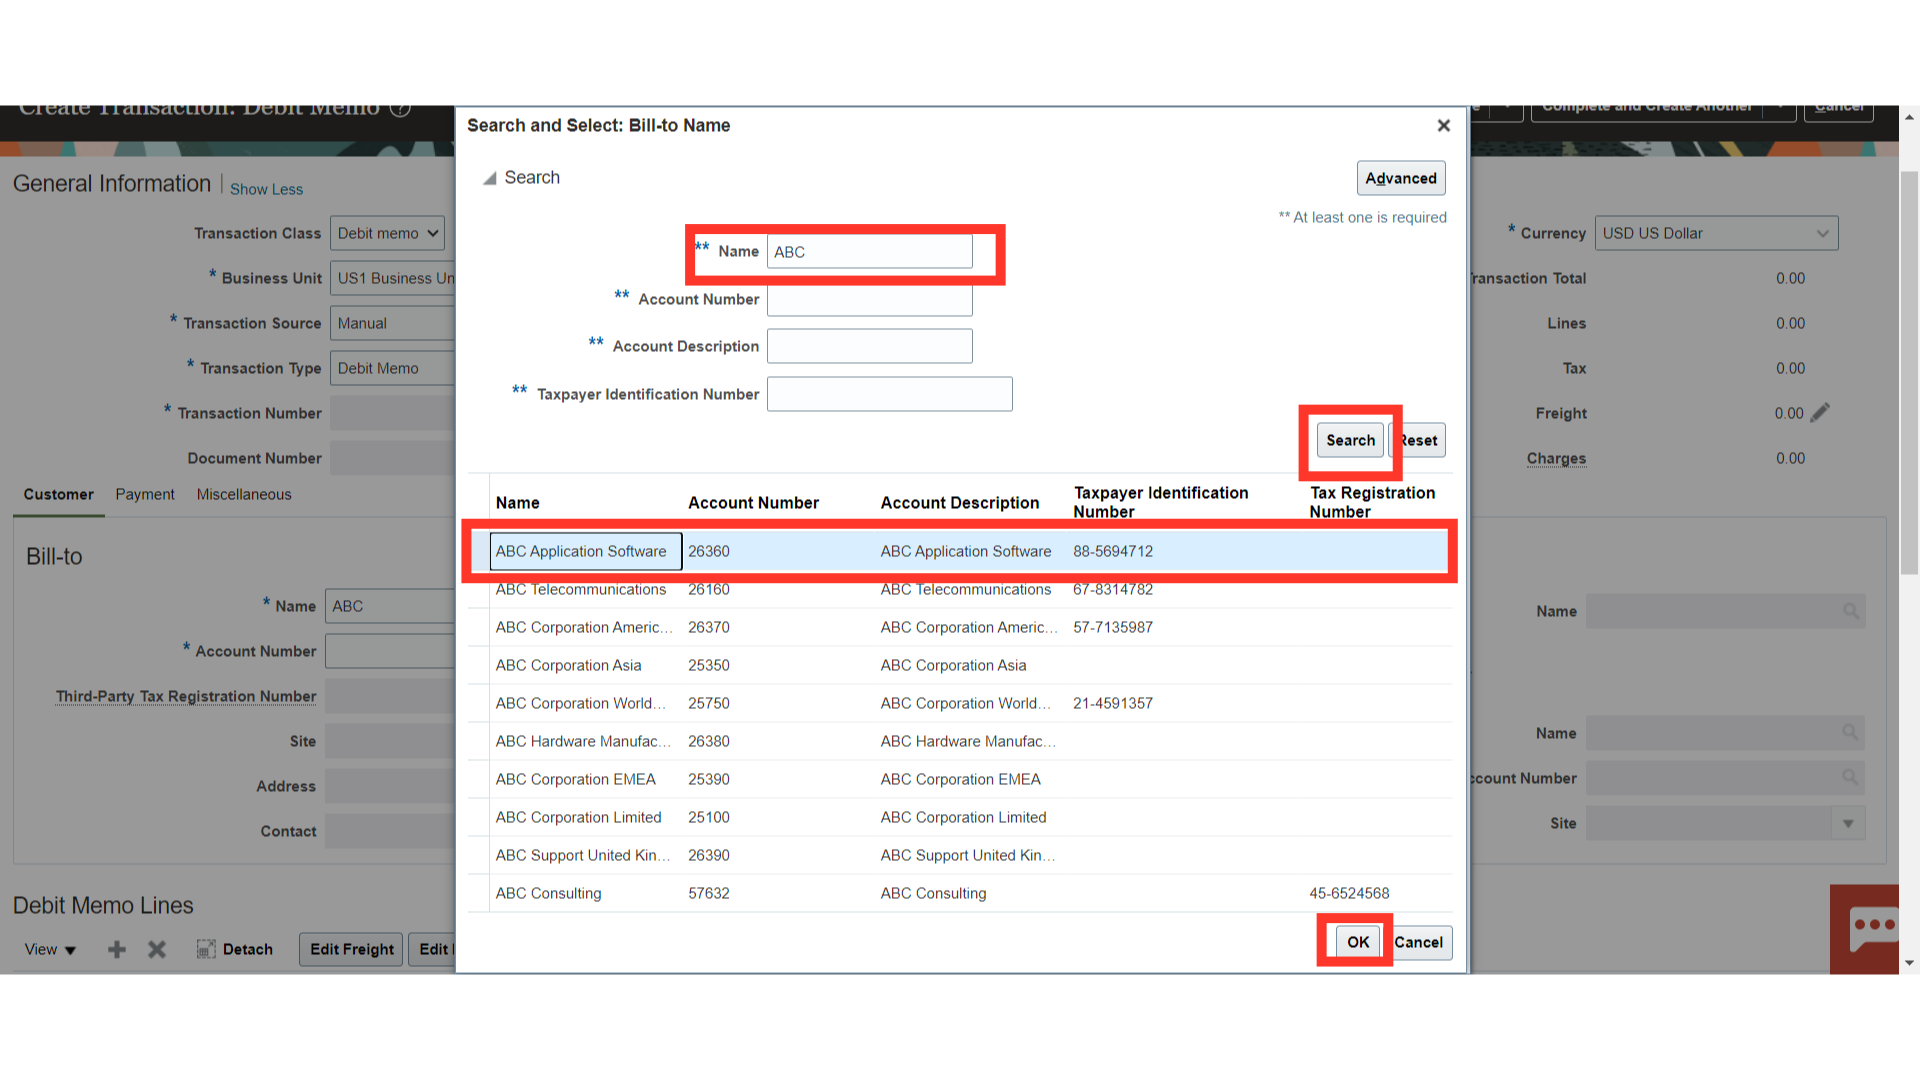
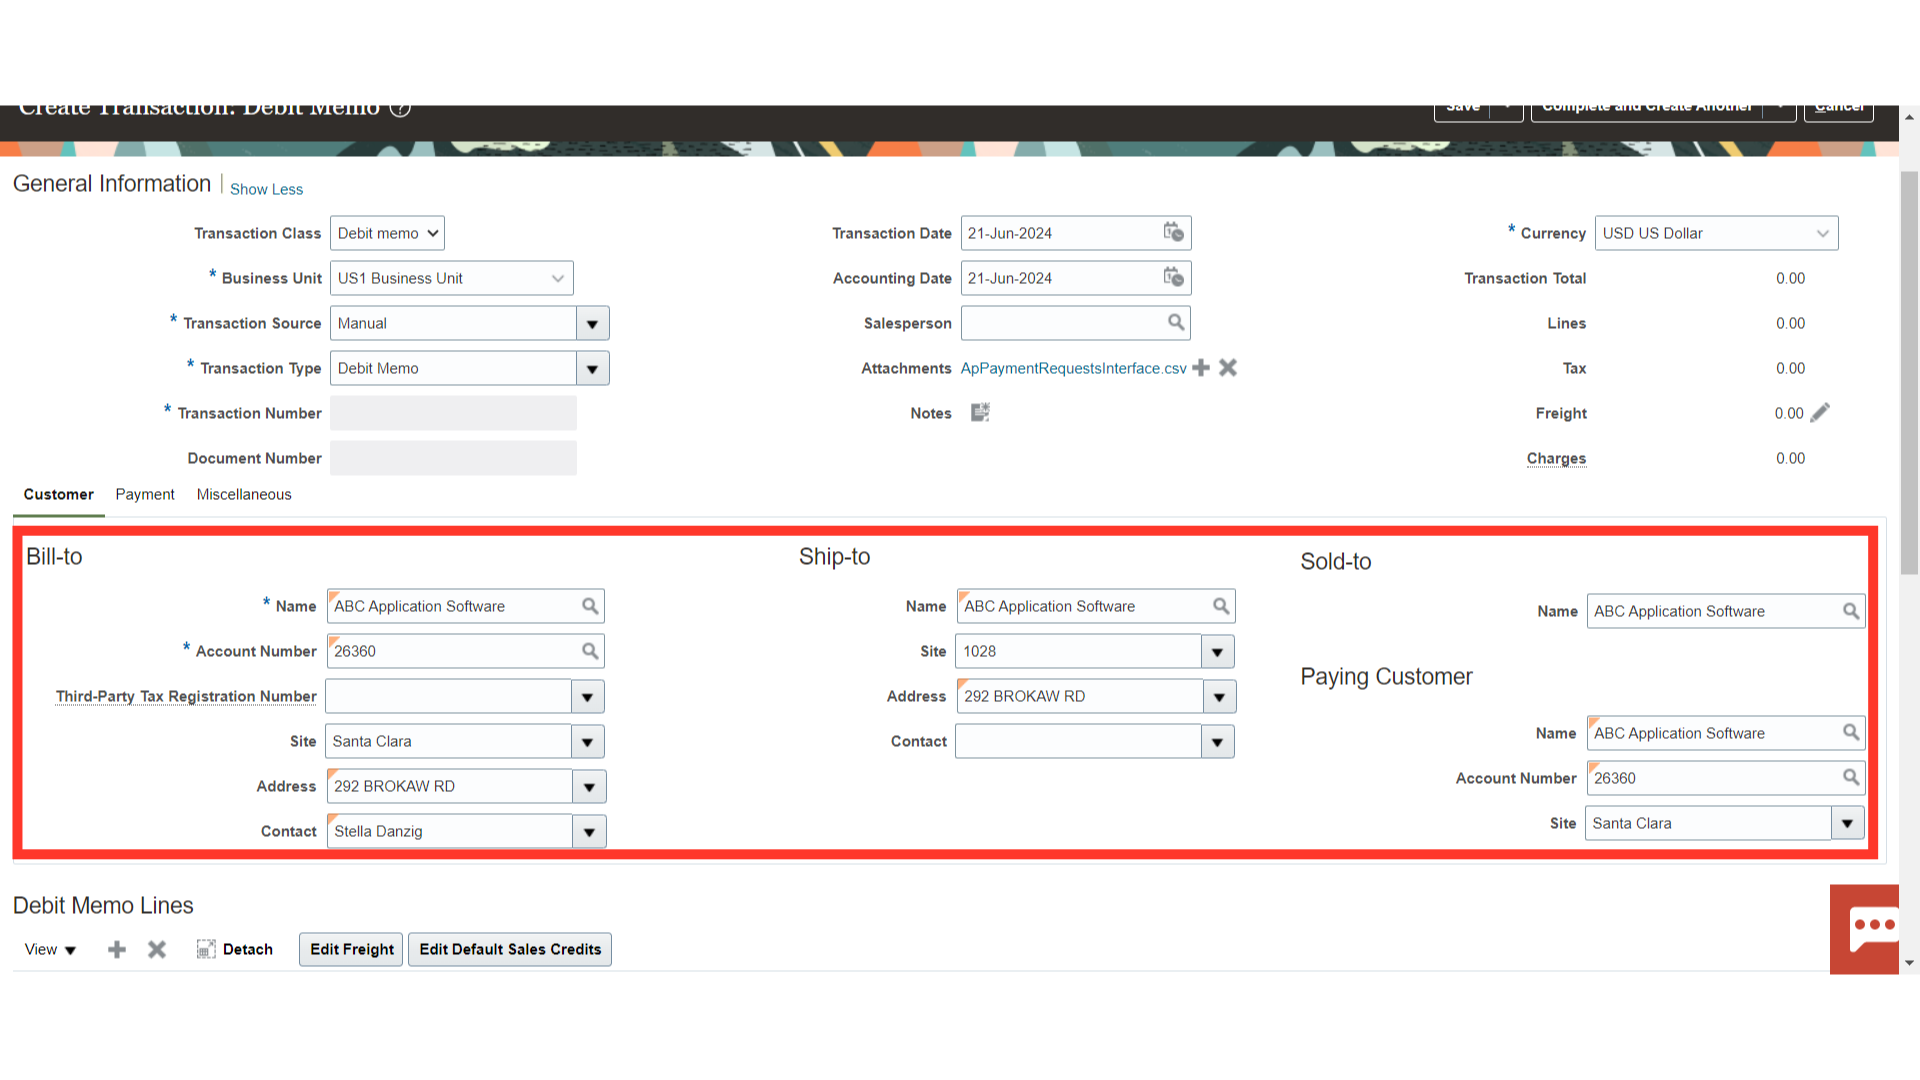
There are 3 tabs, click on the Customer tab to enter the details related to the Customer. Enter the Customer name either manually or select it manually by clicking on the magnifying lens.
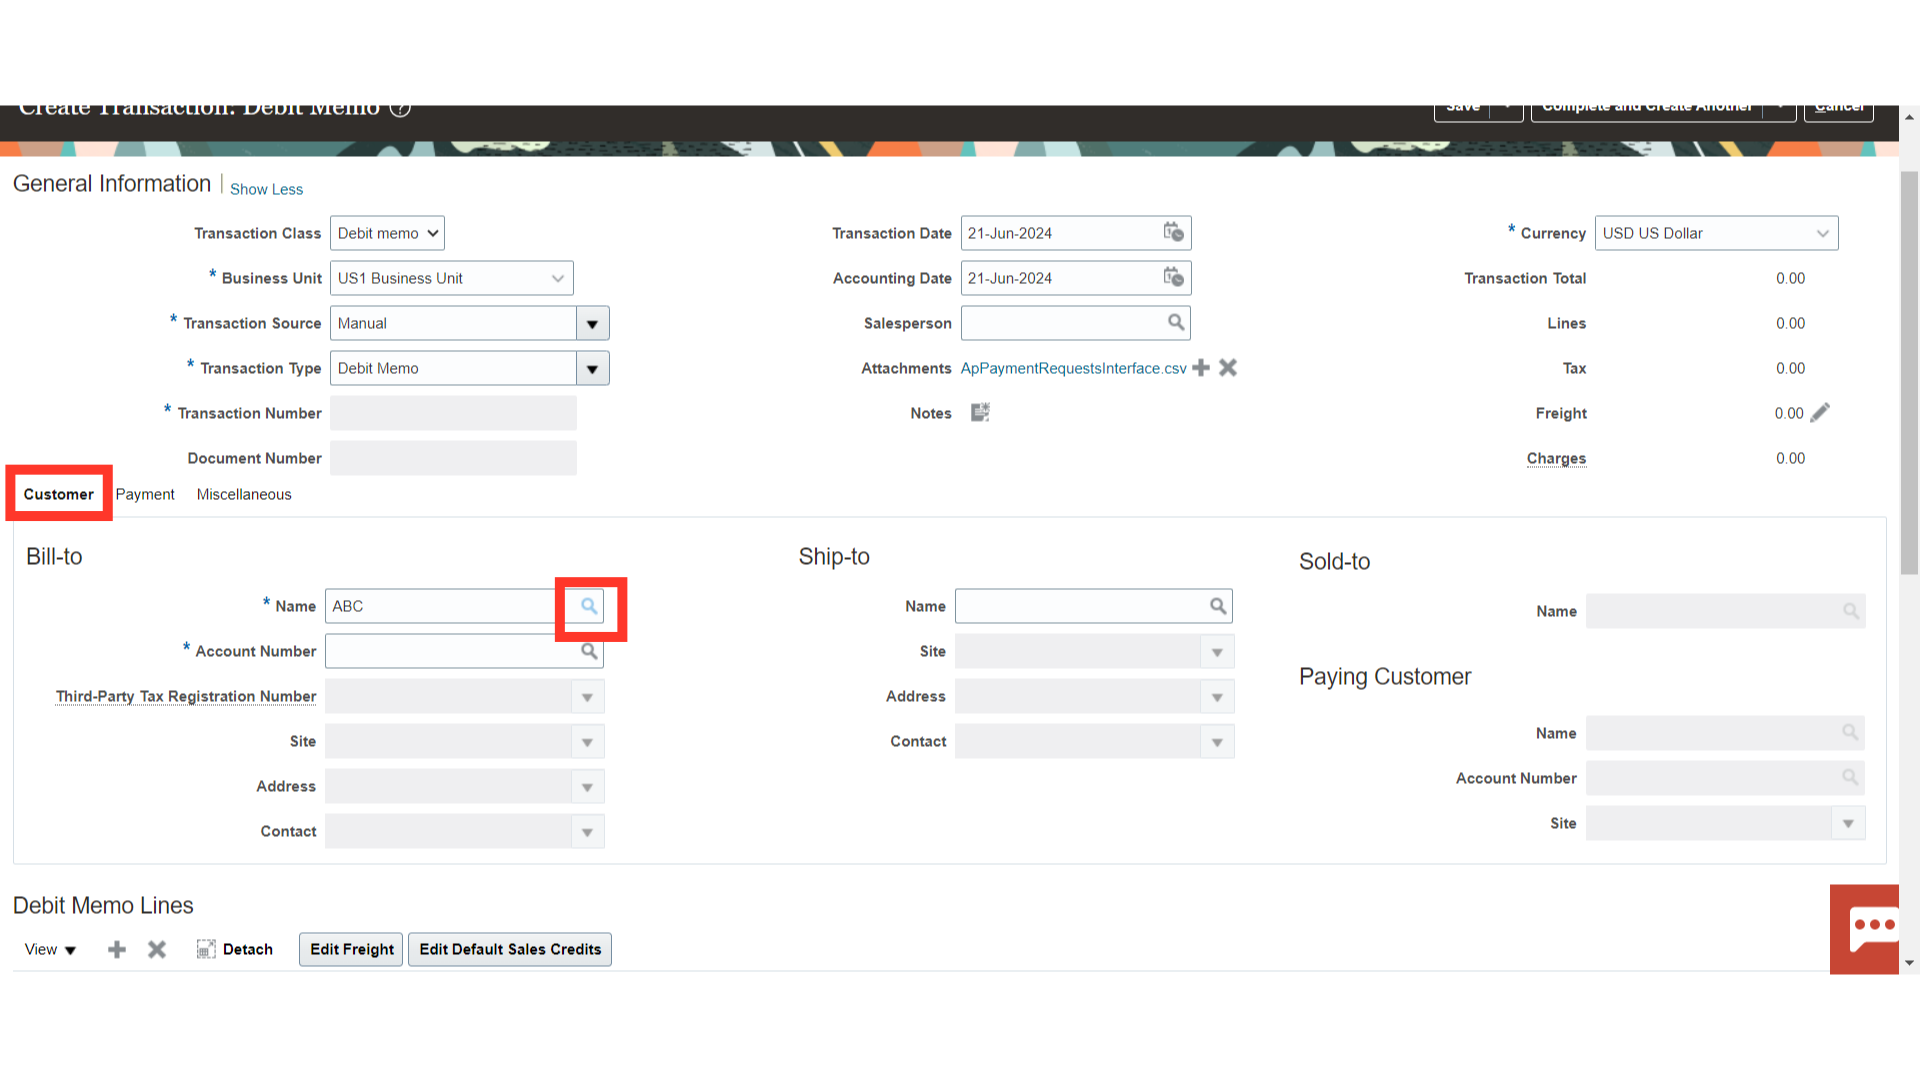
Enter the Customer name, and then click on the Search button. After that select the customer’s name, and then click on the OK button to continue.
The primary customer account number and site will automatically default once the customer is selected. If more than one customer site is created under the same customer, you can modify the customer site from the list of values if necessary.
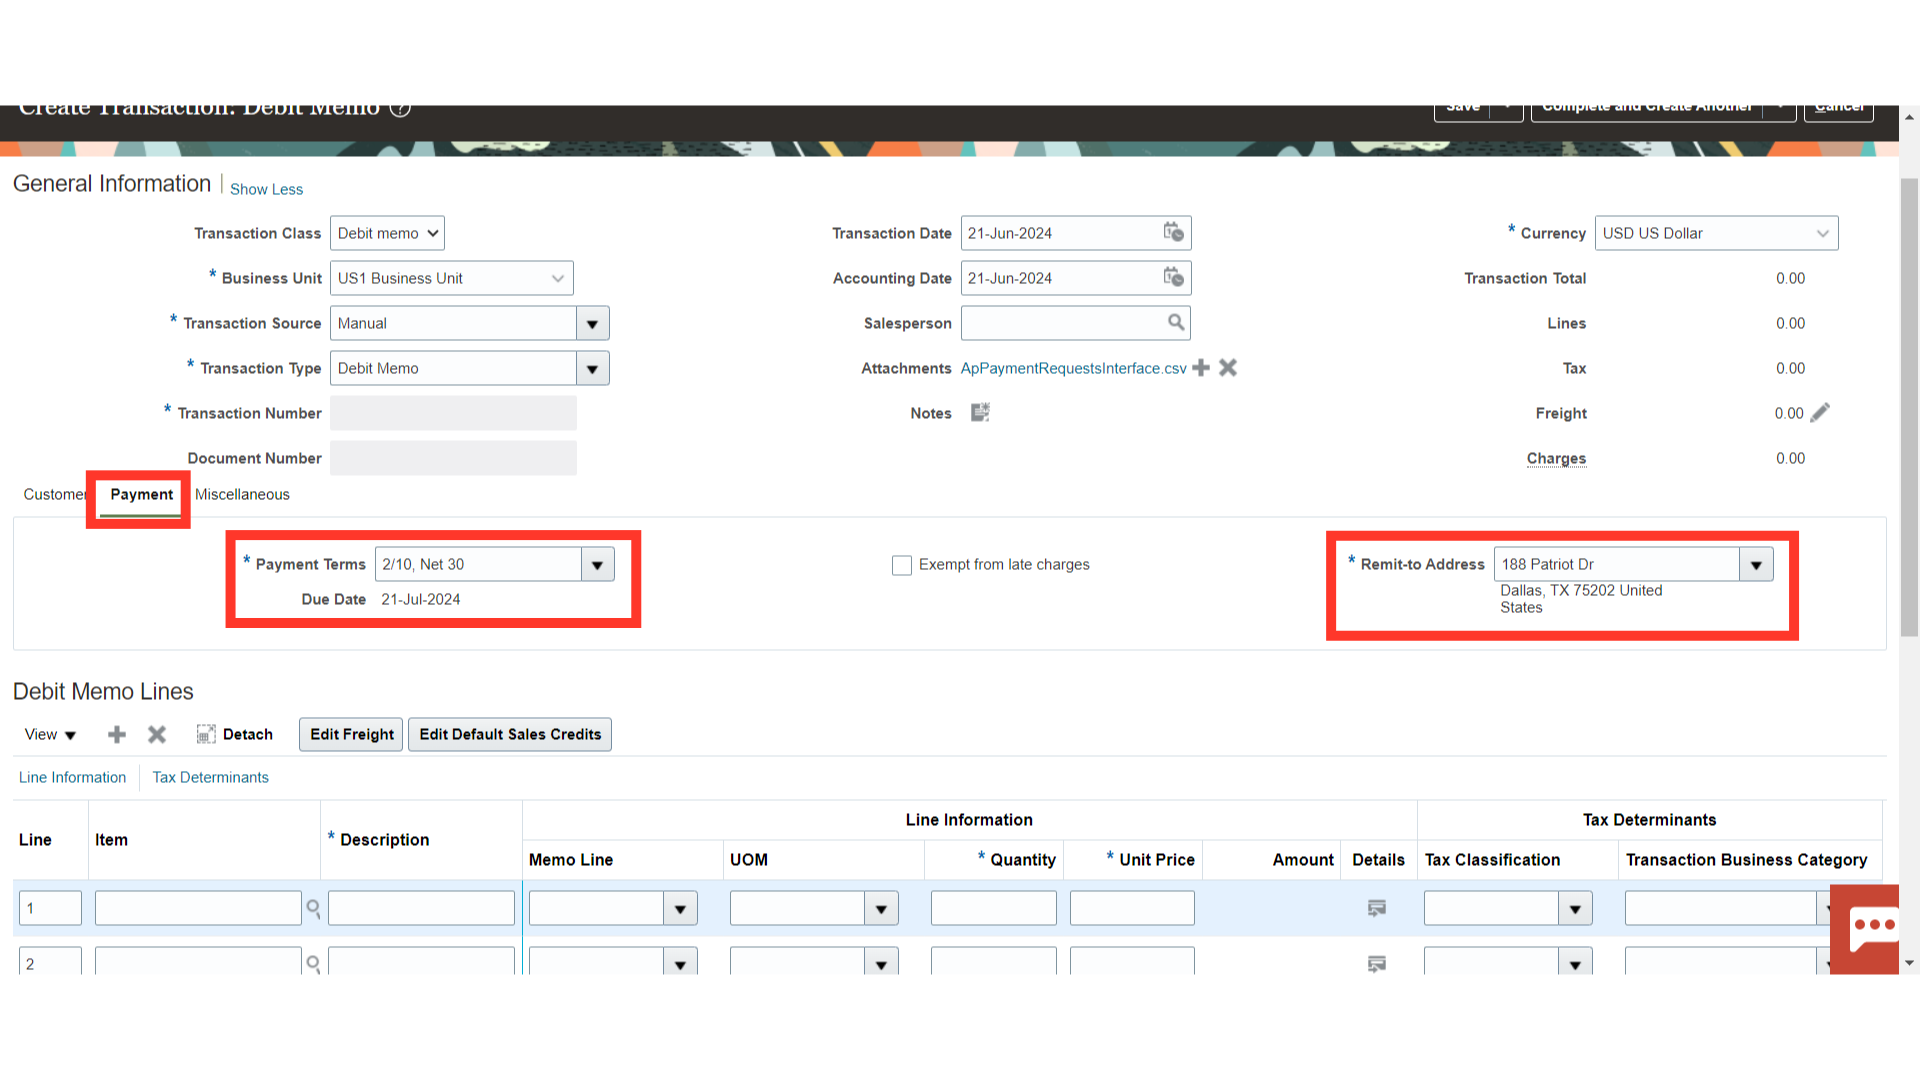
Click on the Payment tab, to enter the details such as Payment terms and Remit to address details.
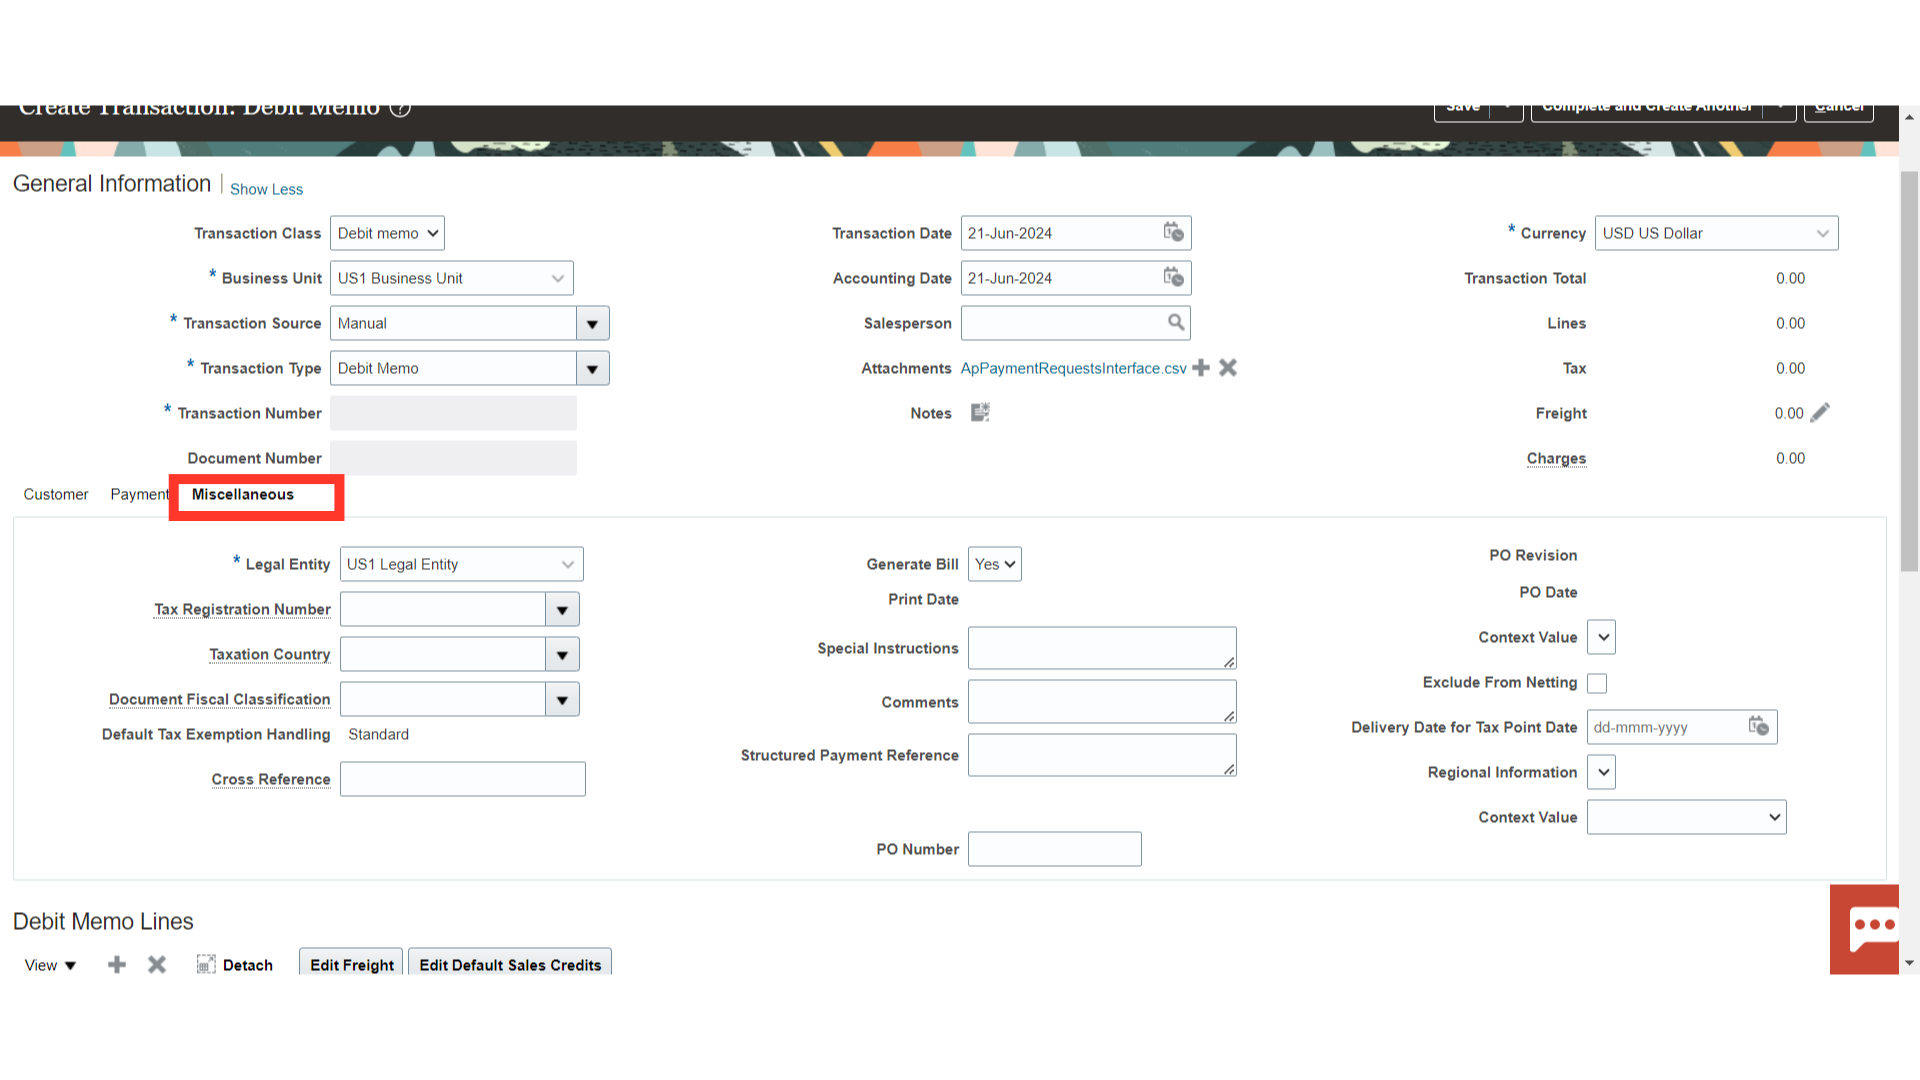
Click on the Miscellaneous tab, to enter further details such as Tax registration number, comments, PO number etc.
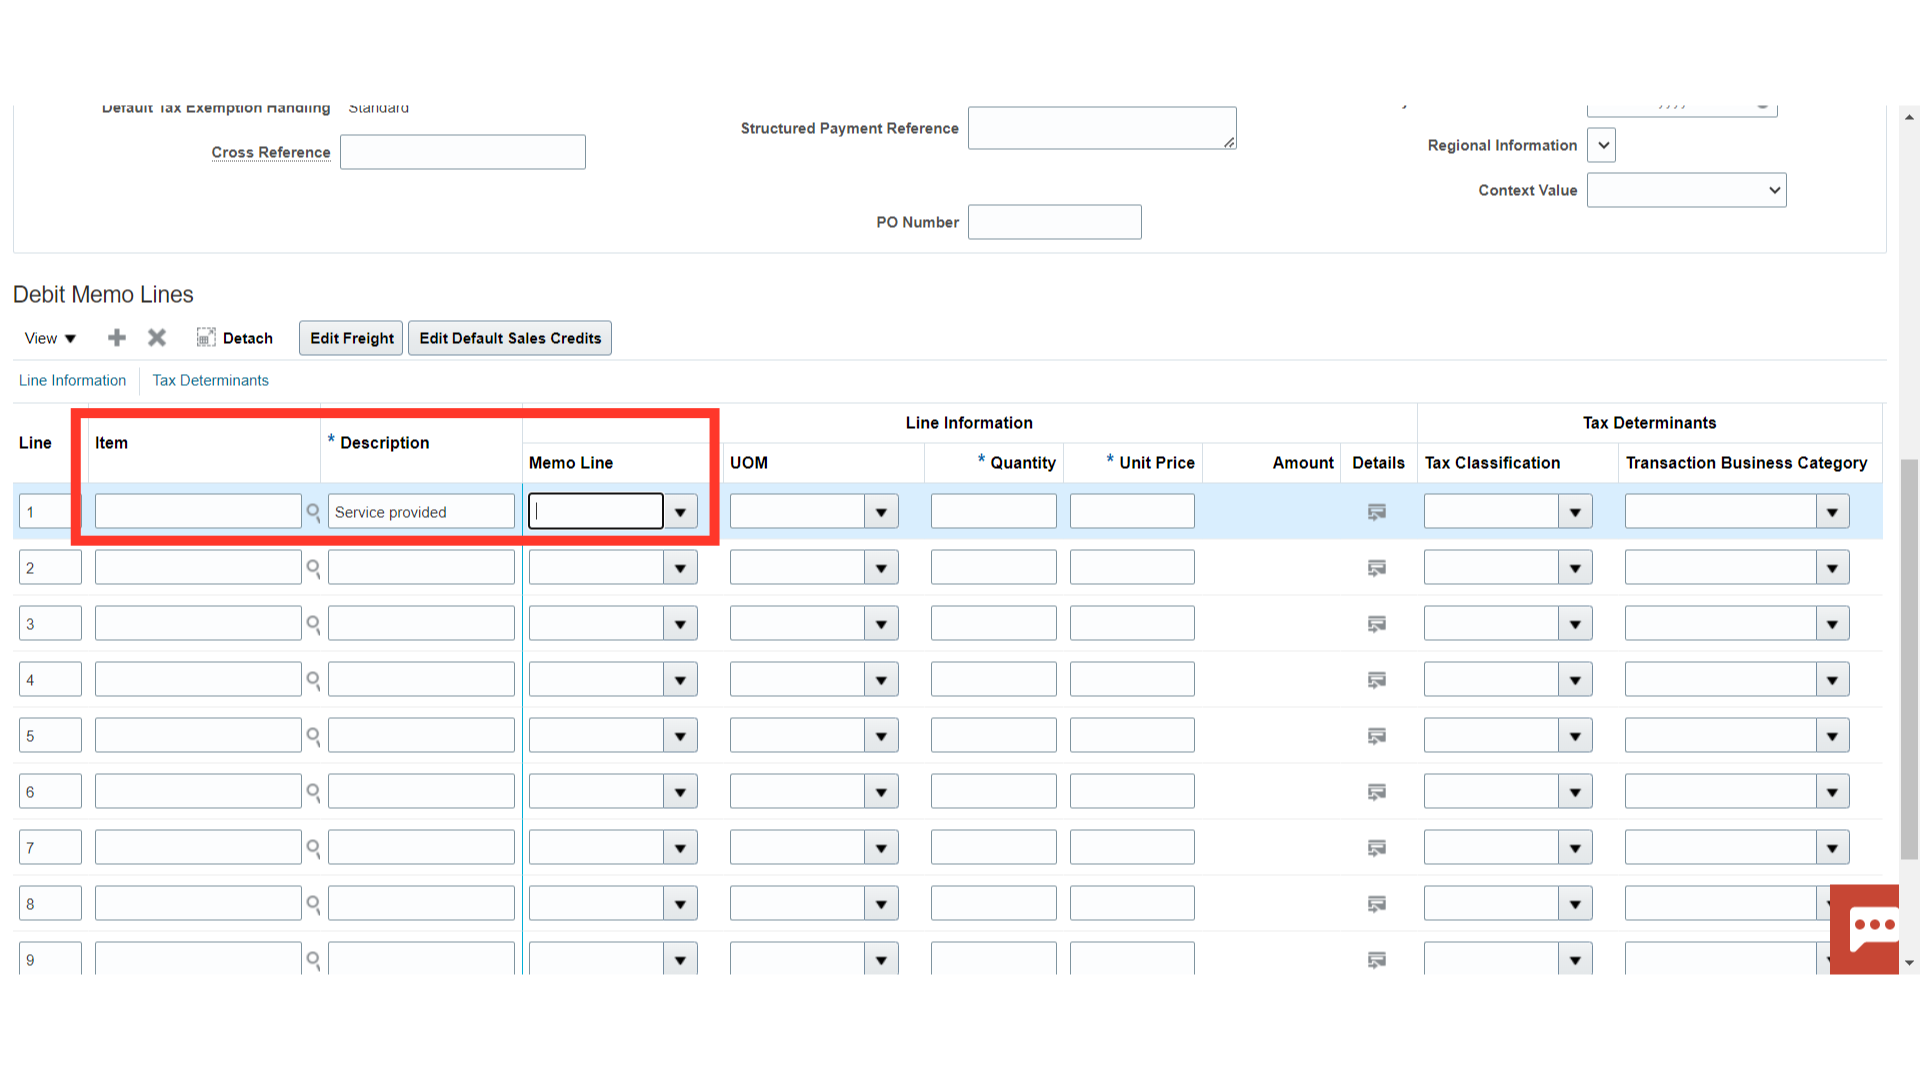
To access the line details, scroll down to the section of the line. If necessary, click the magnifying lens to select the item. Don’t forget to fill in the Description Field with pertinent details. In addition, choose the Memo line if the revenue part’s accounting is to be defaulted from it.
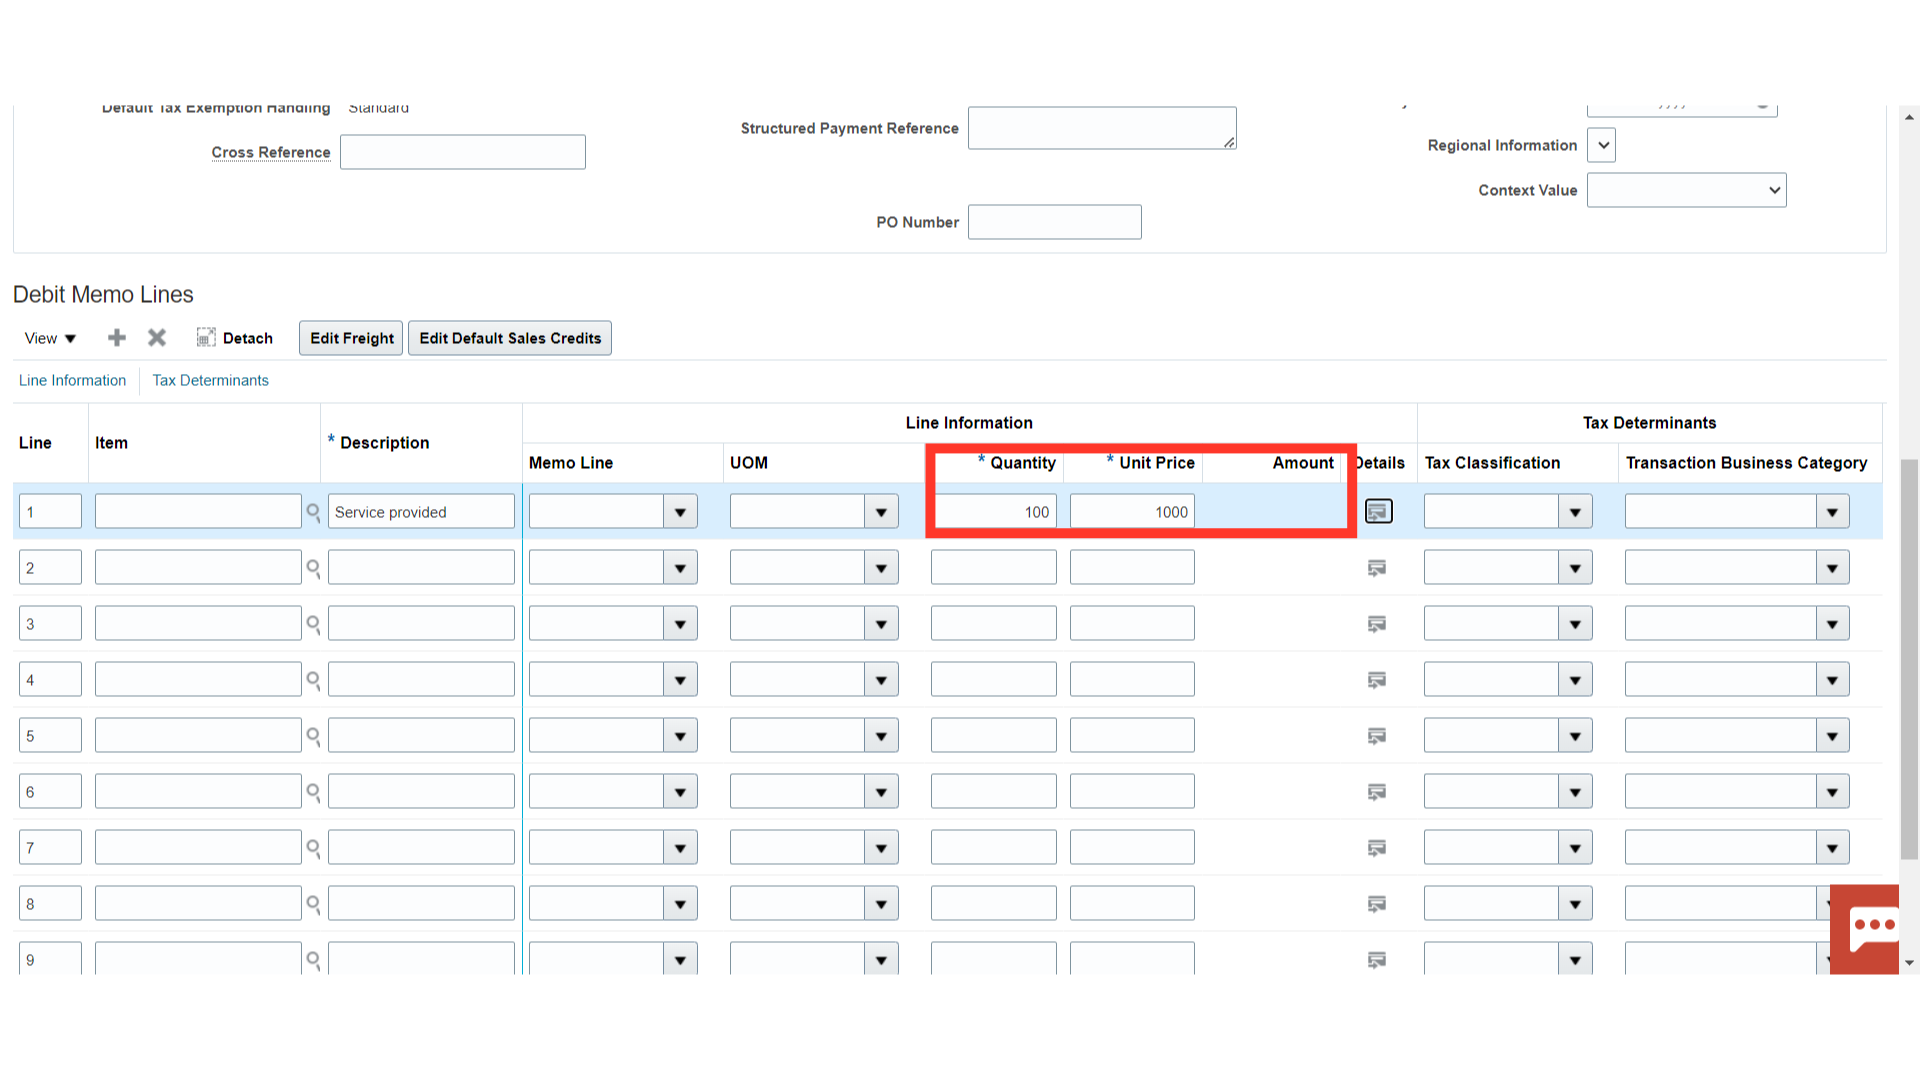
 Enter the sales quantity and price per unit in the Quantity and Unit Price field based on which Amount will be calculated automatically.
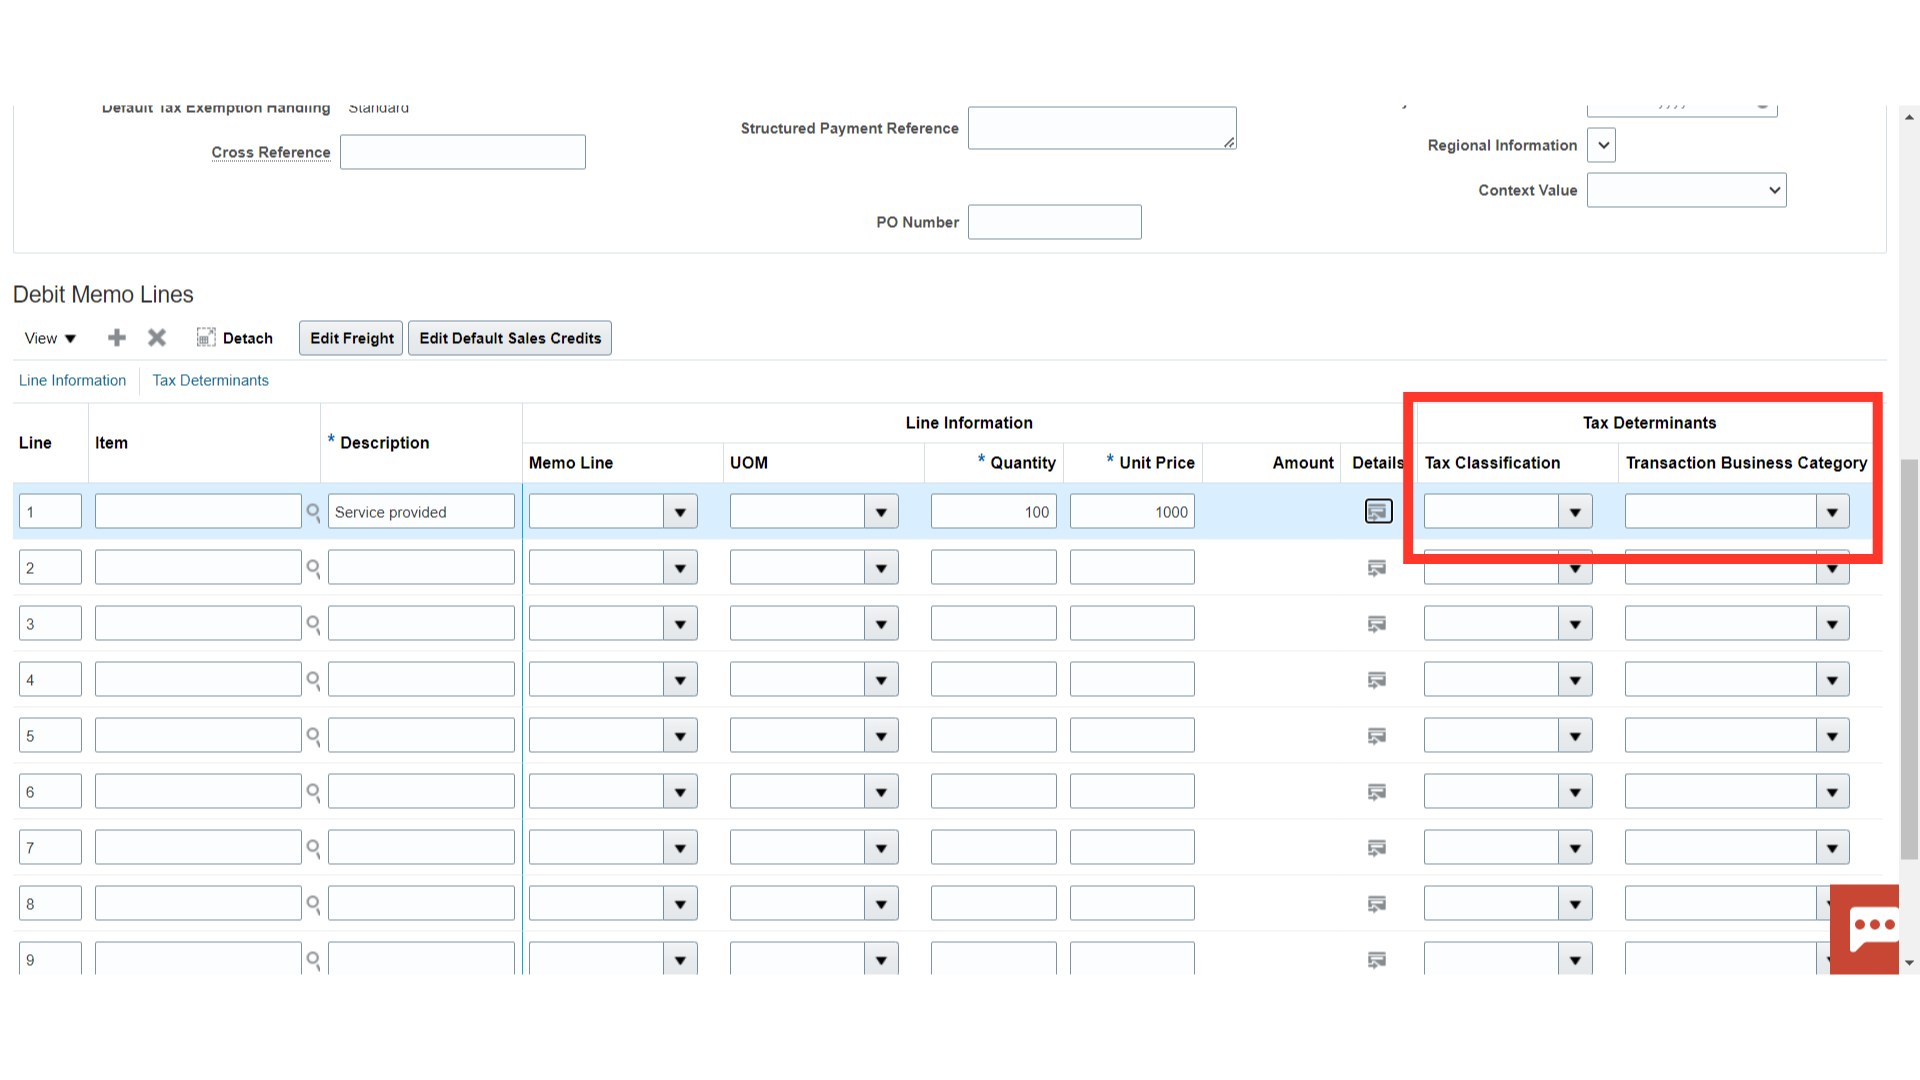
Select the Tax Classification and Transaction Business Category, if applicable from the drop down.
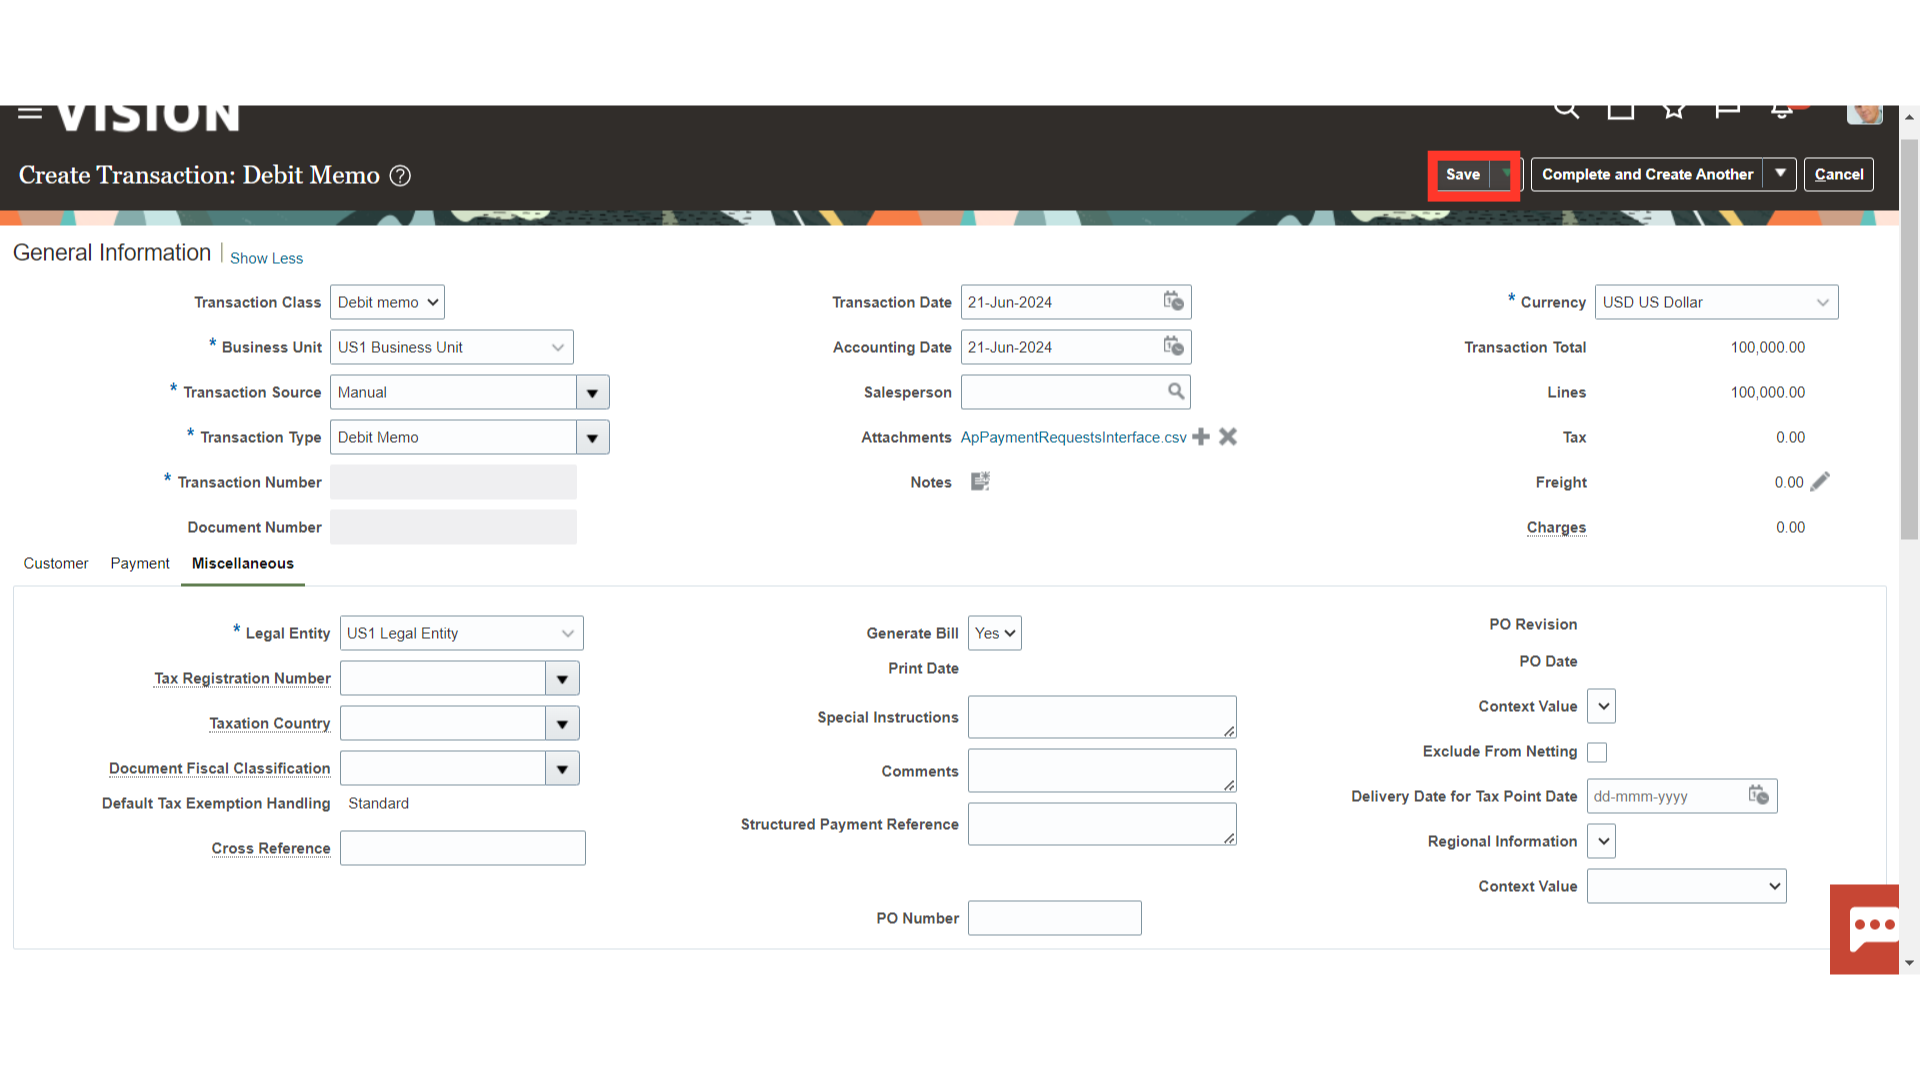
After entering all the line details, click on Save button.
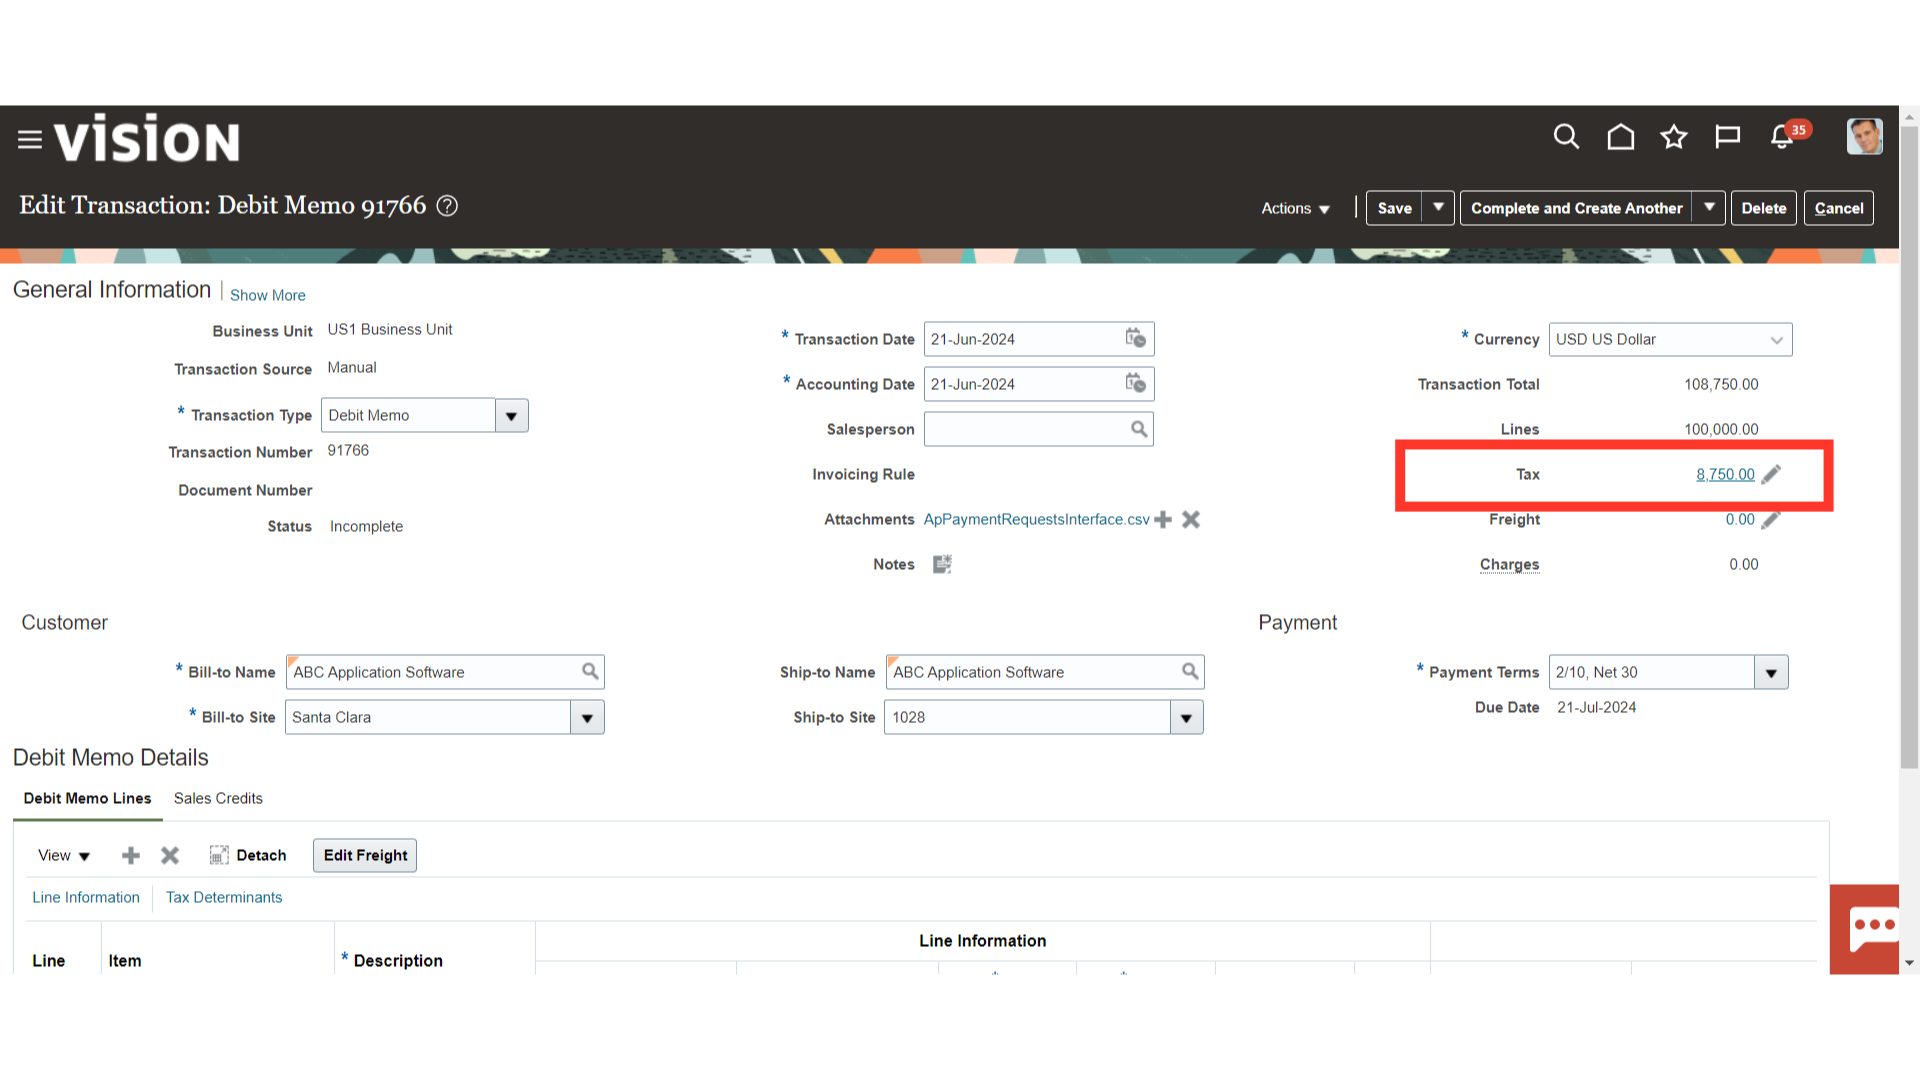
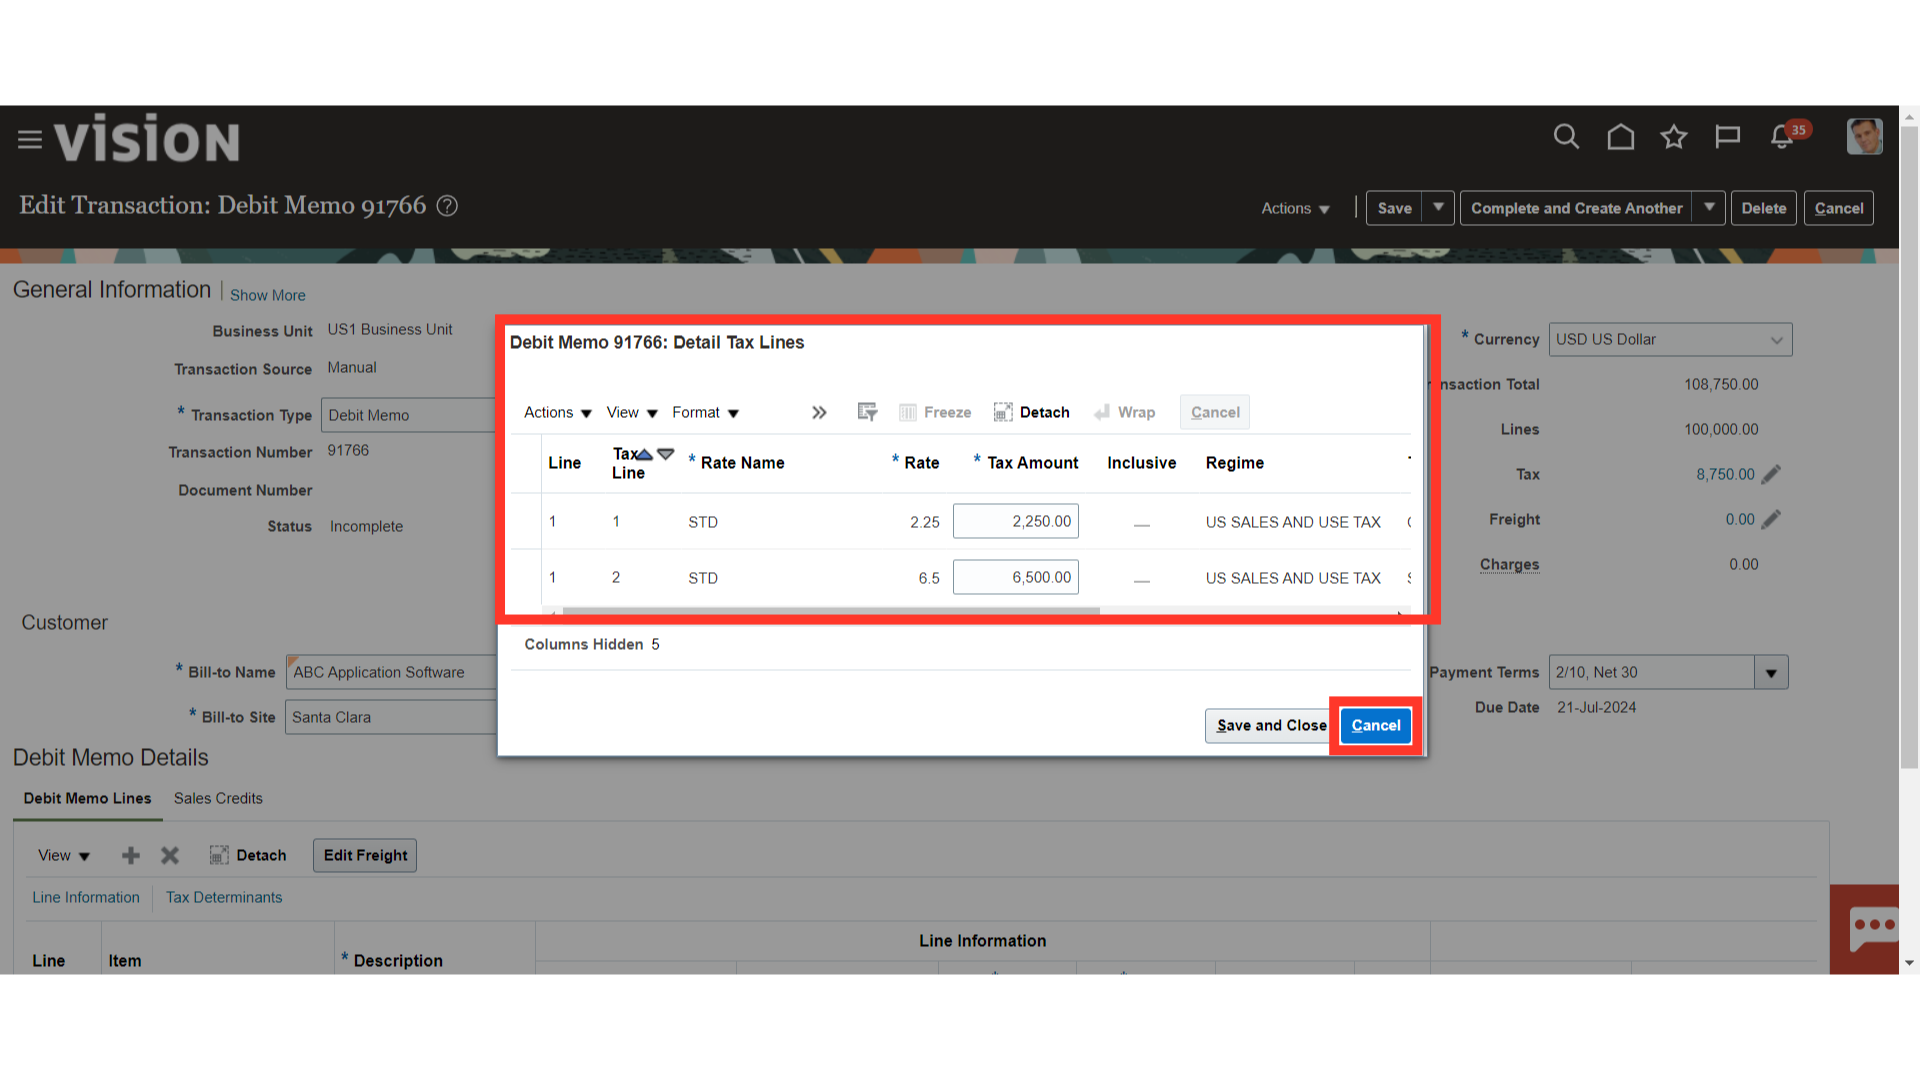
The tax amount is calculated automatically once the transaction is saved, click on the Tax Amount hyperlink to see more details about the tax.
 To close this window if no changes are made, click the Cancel button; if not, click the Save and close button to save the changes.
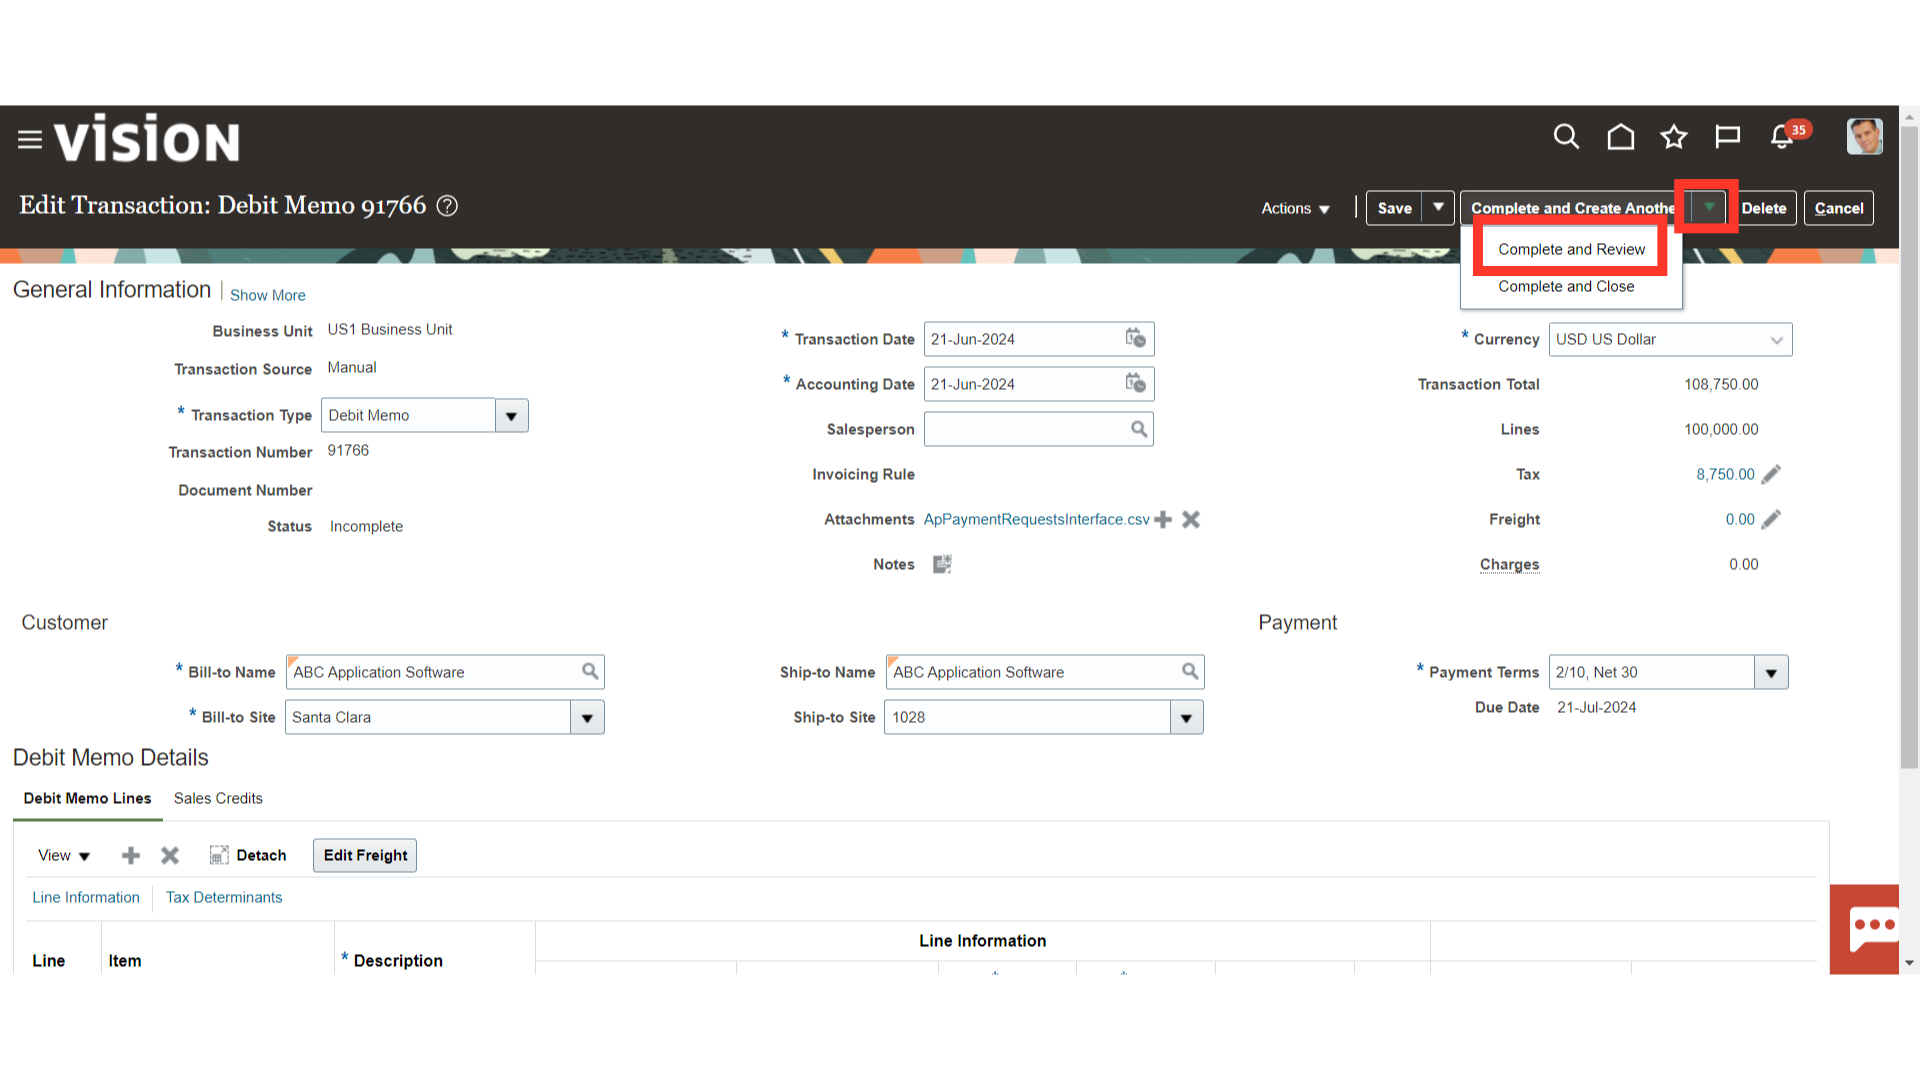
To enter transaction details, click Complete and Create another. As an alternative, click the drop-down menu and choose Complete and Review to mark the transaction as complete. From there, it is possible to review the transaction or choose Complete and Close to finish it and close it. Here for demo purpose, Complete and Review is selected.
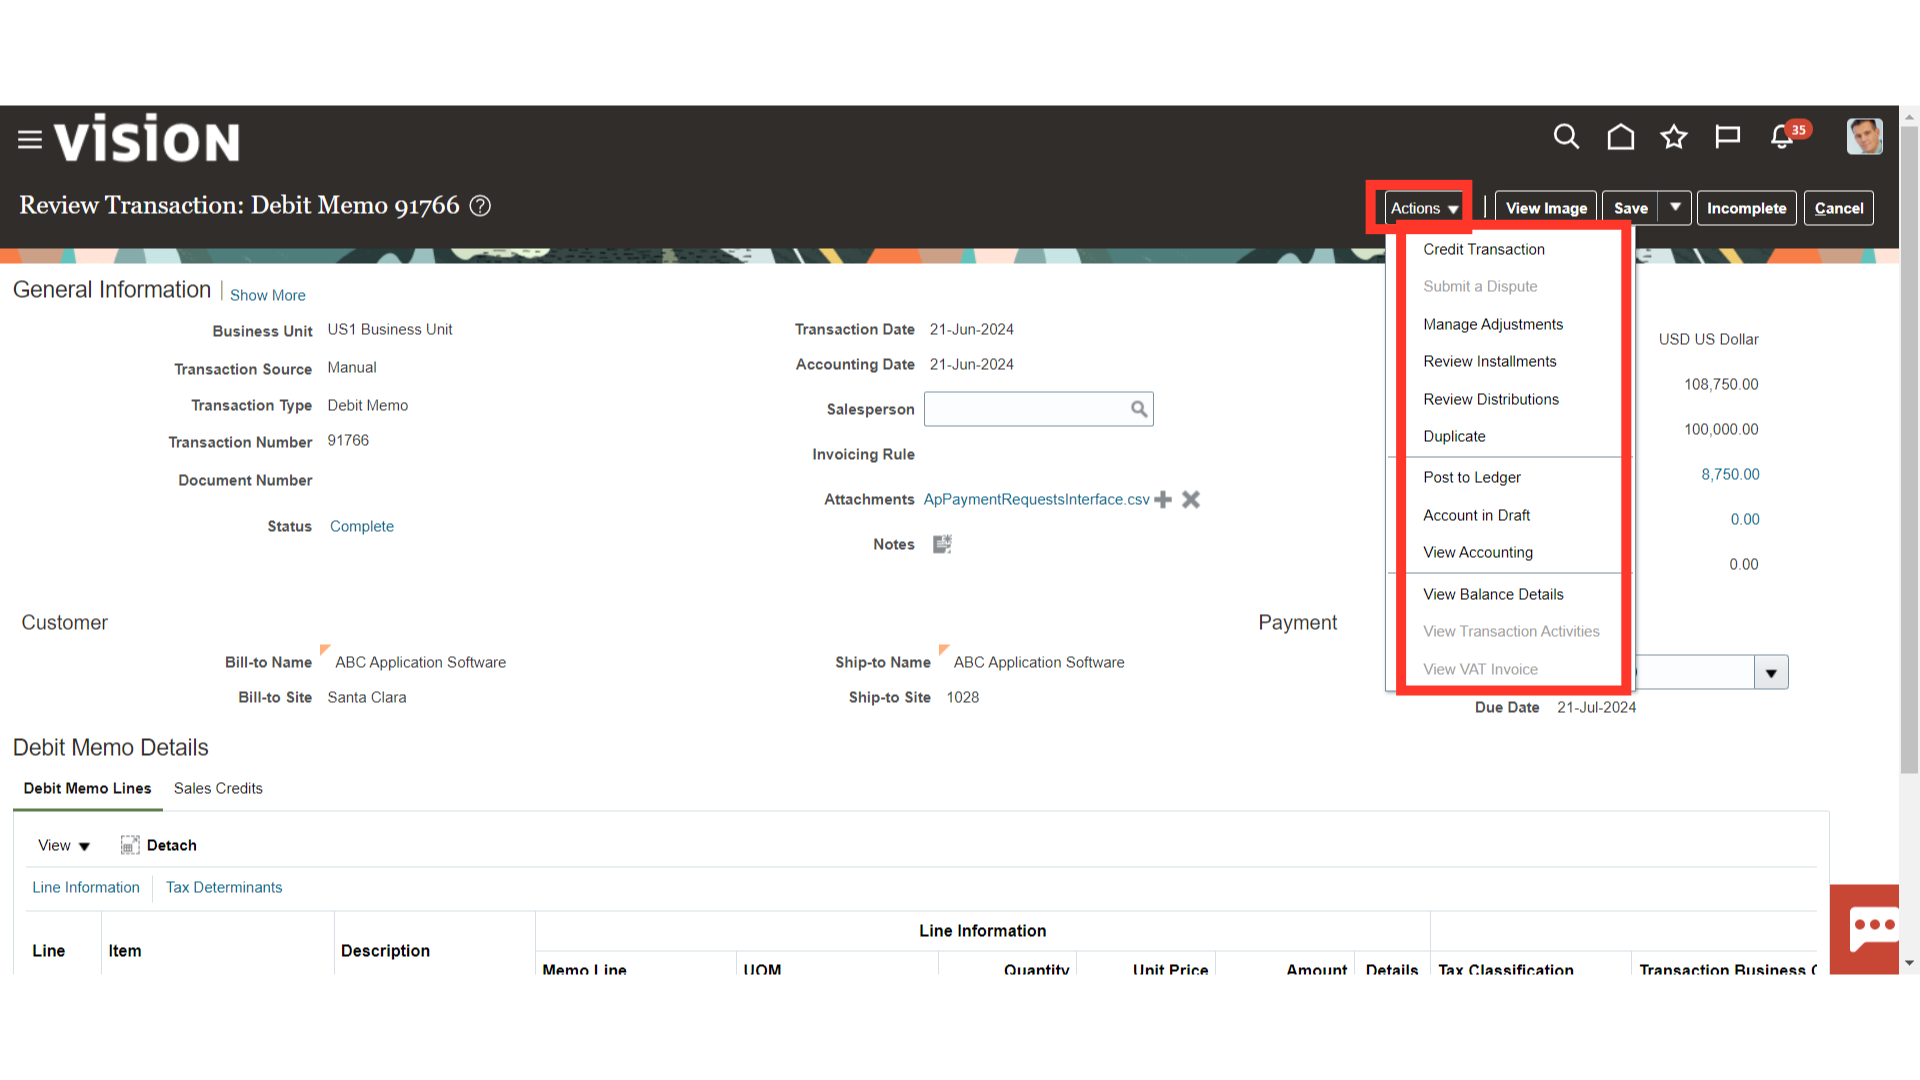
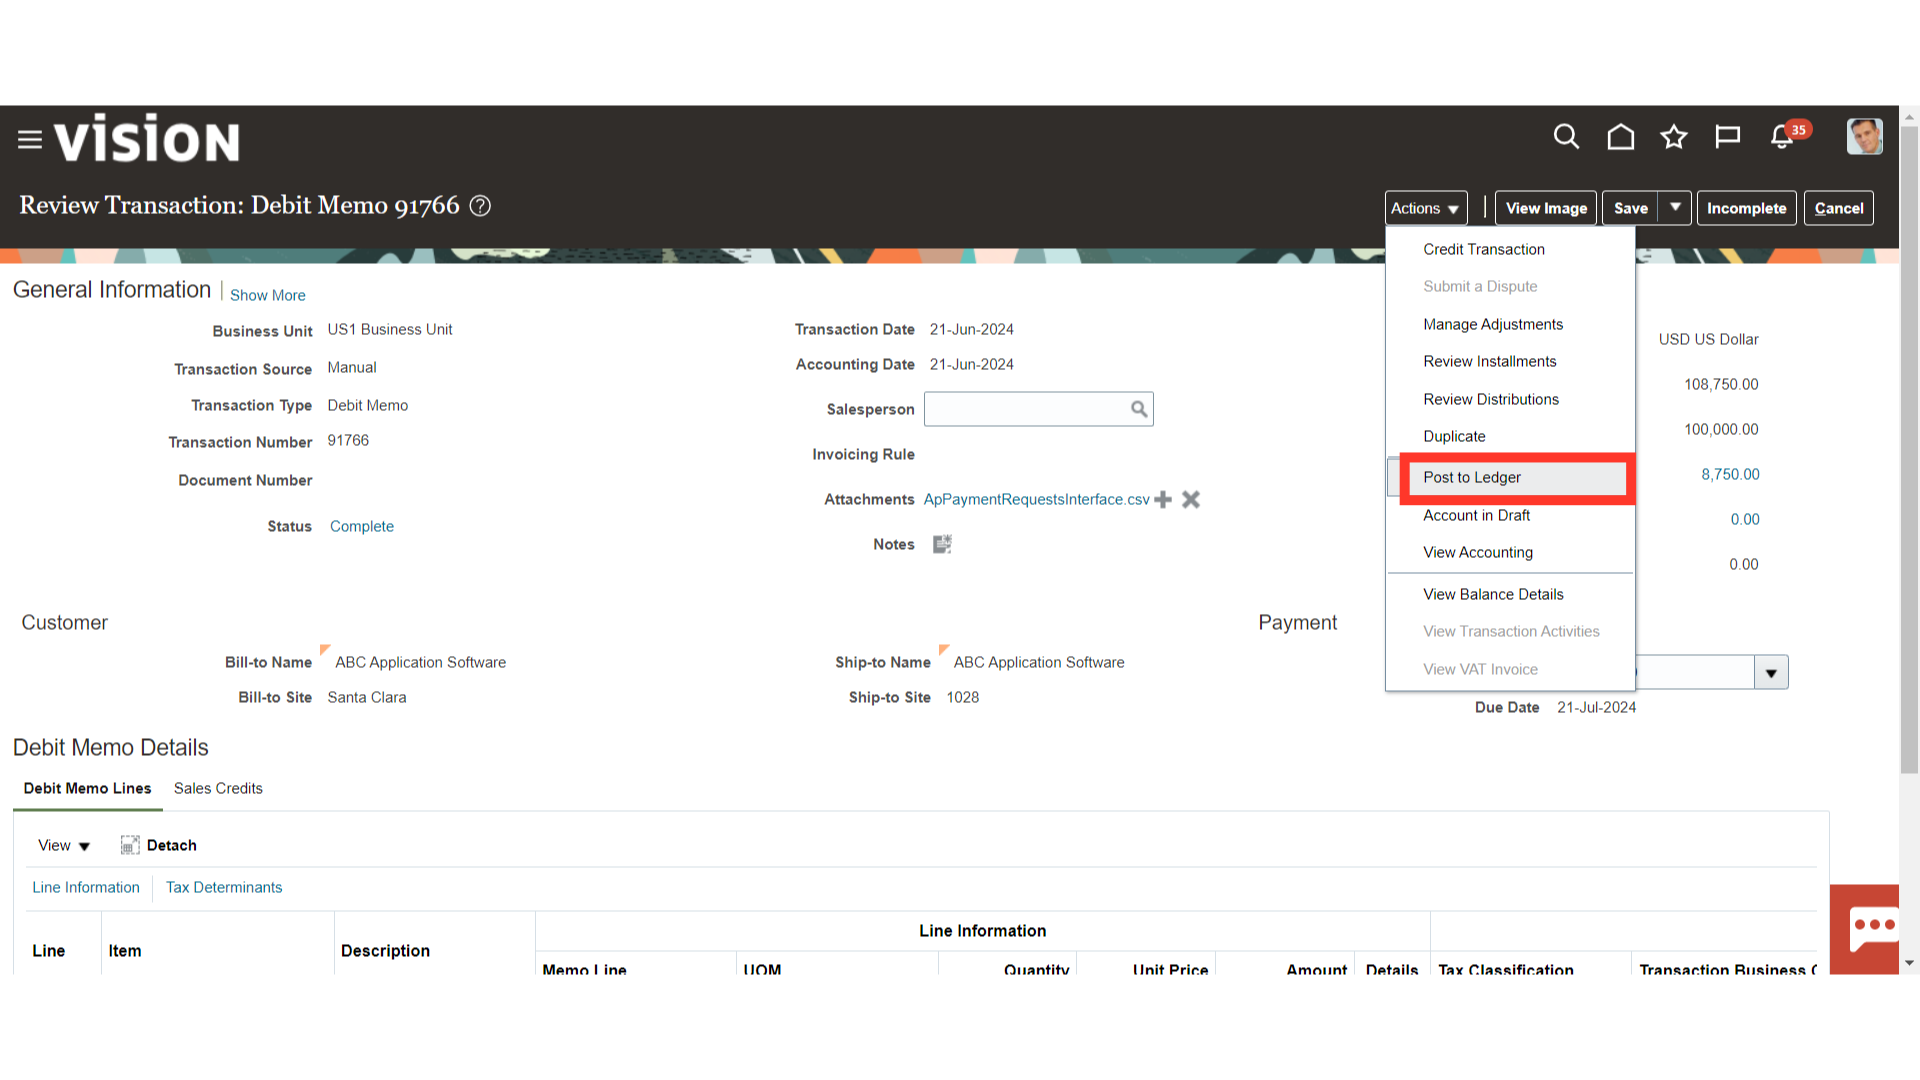
Under the Actions tab, you can do a number of tasks, such as selecting Dispute to file a dispute, Manage Adjustments to make changes to transactions, or Credit Transaction to create a credit memo for this transaction. Click on Review Installments or Review Distributions to examine and modify the installments or distributions.
To generate accounting click on “Post to ledger” after clicking on the Actions.
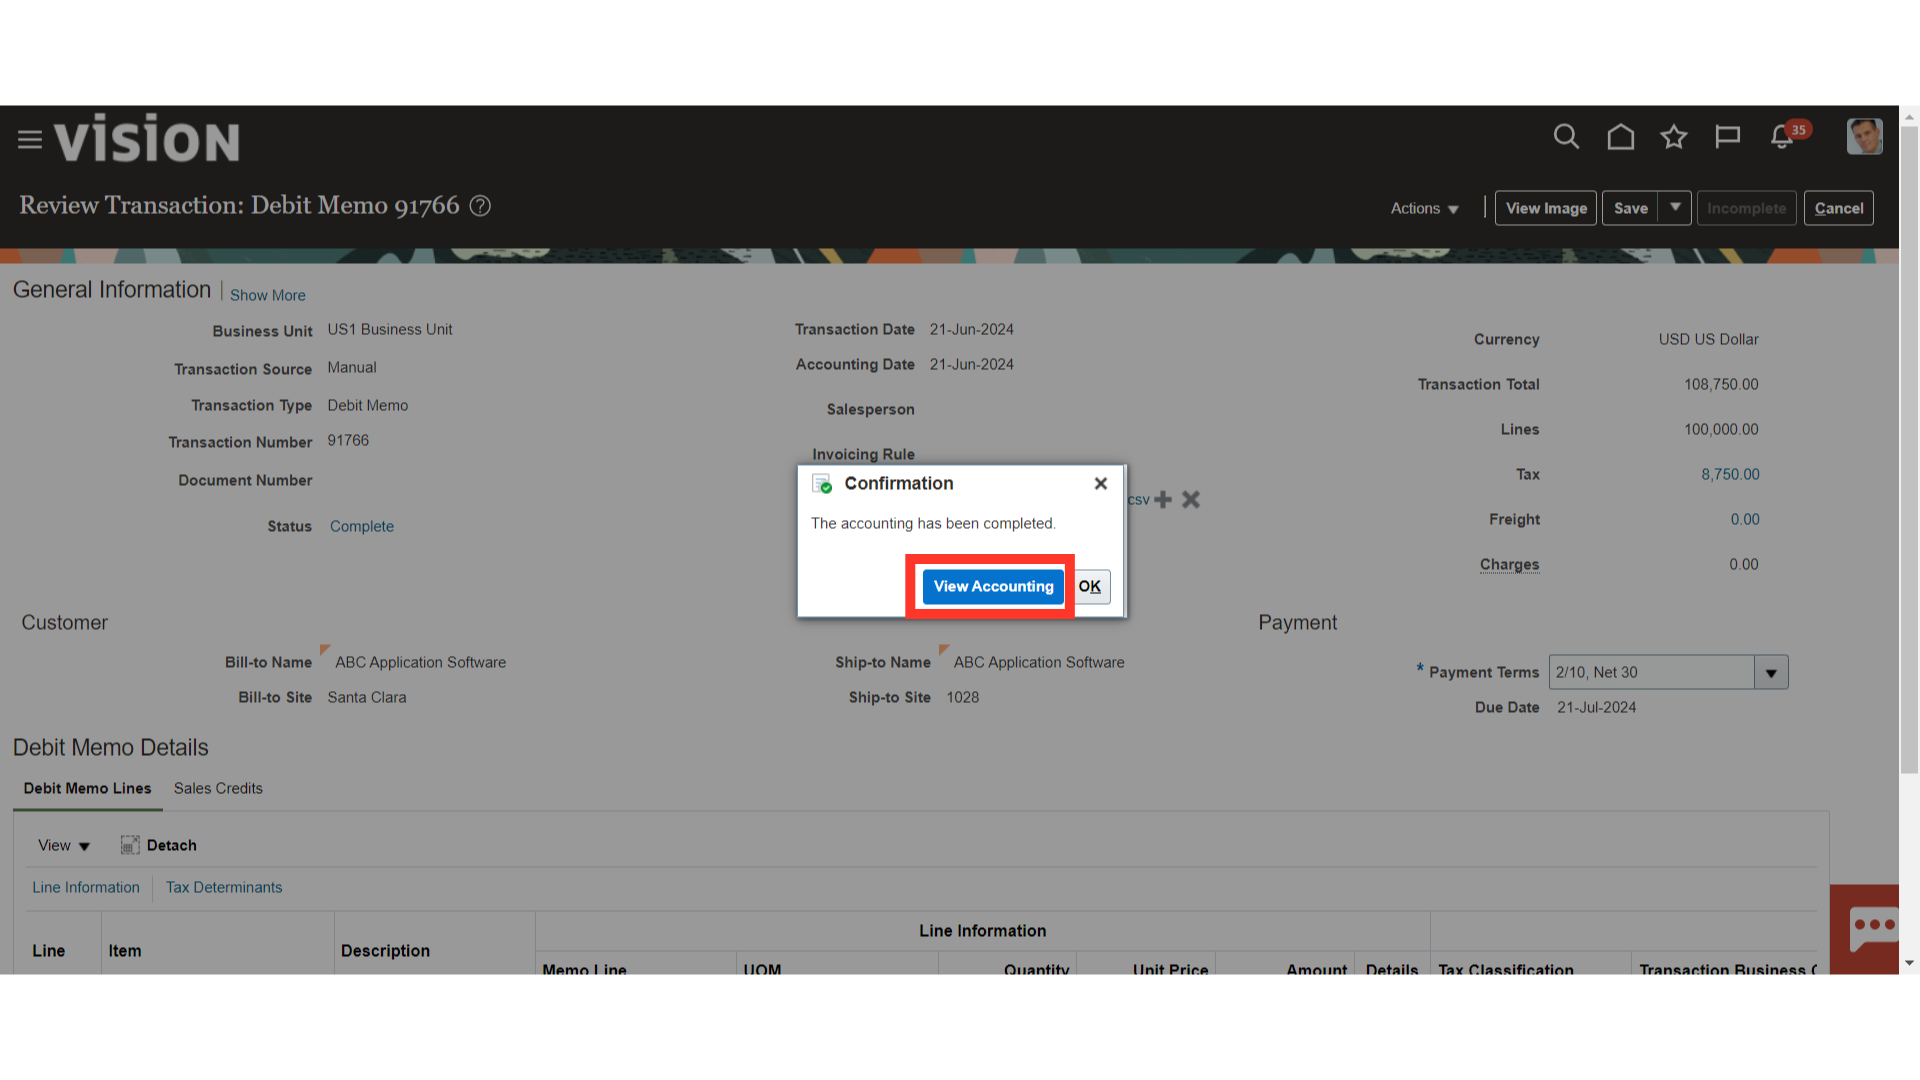
Select the “View Accounting” button to see more details of a journal entry.
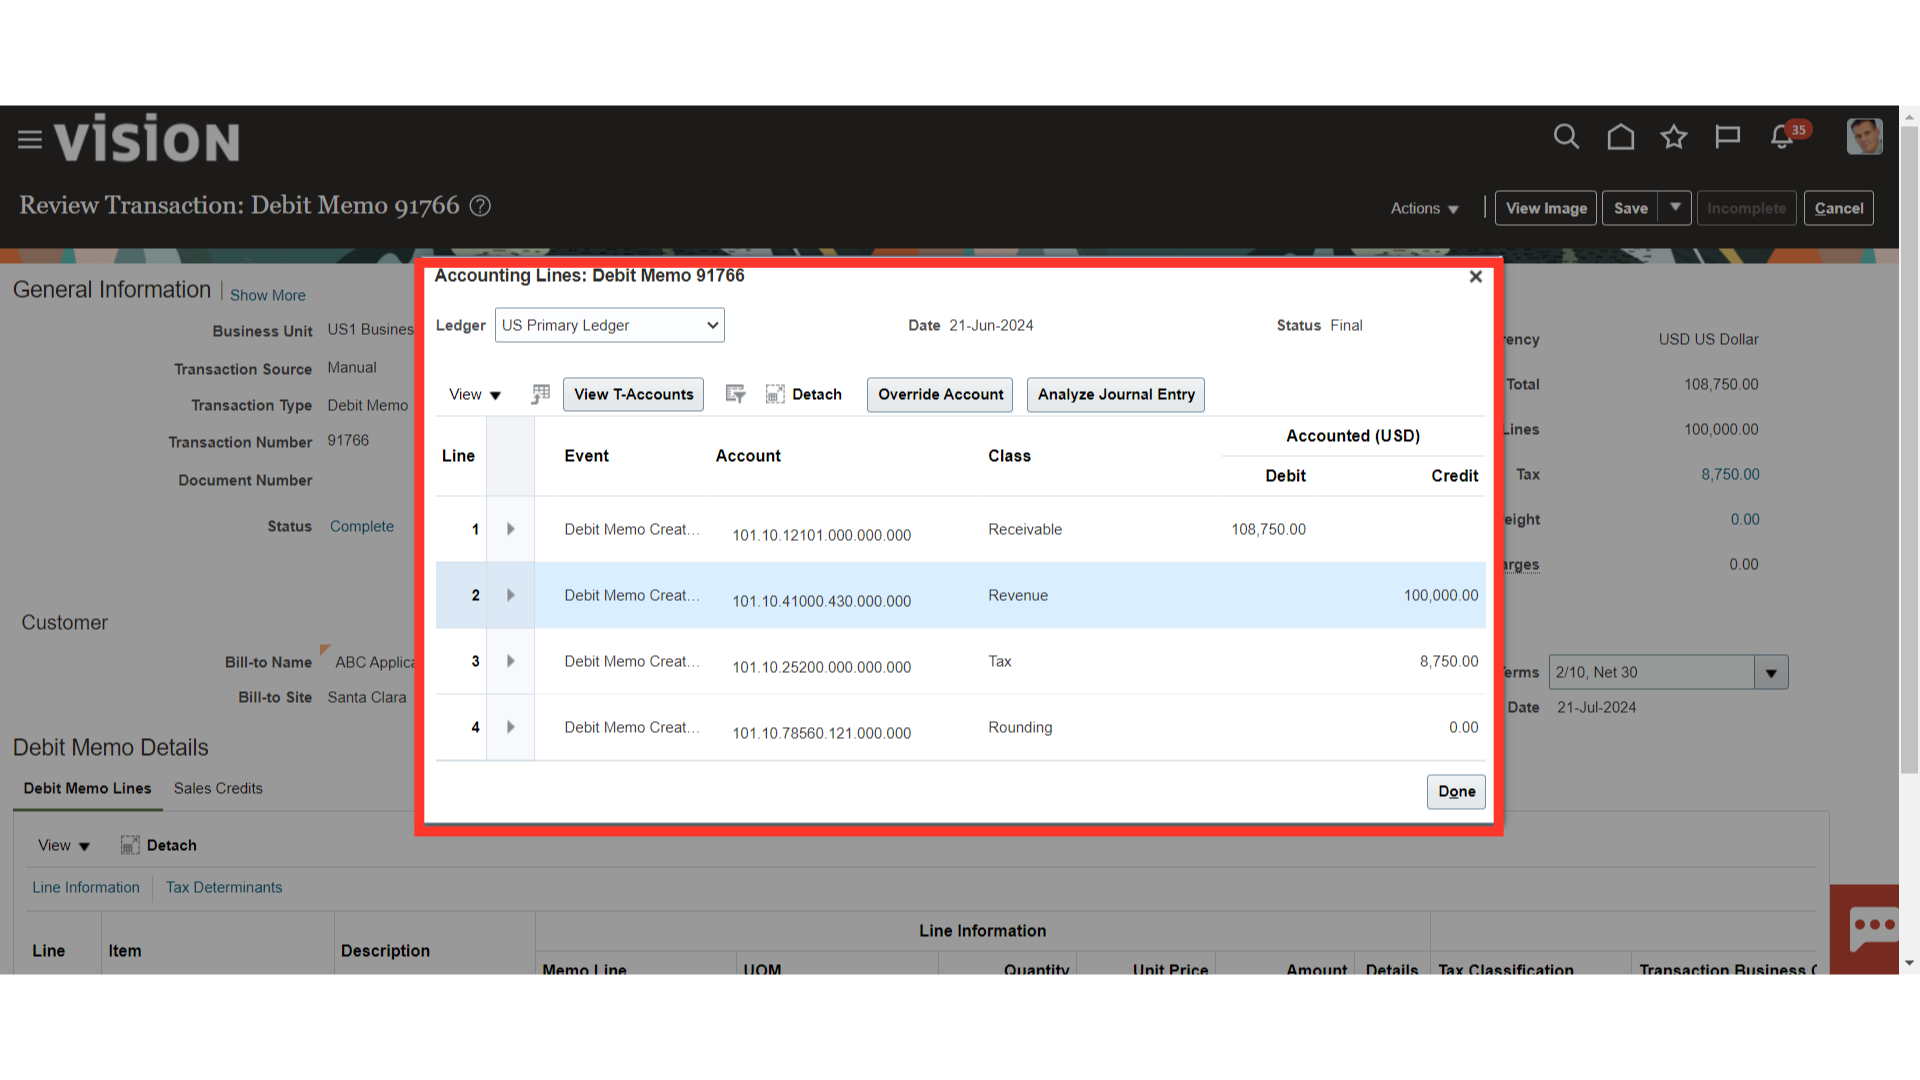
This is the journal entry generated and transferred to the general ledger for the Debit memo booked.
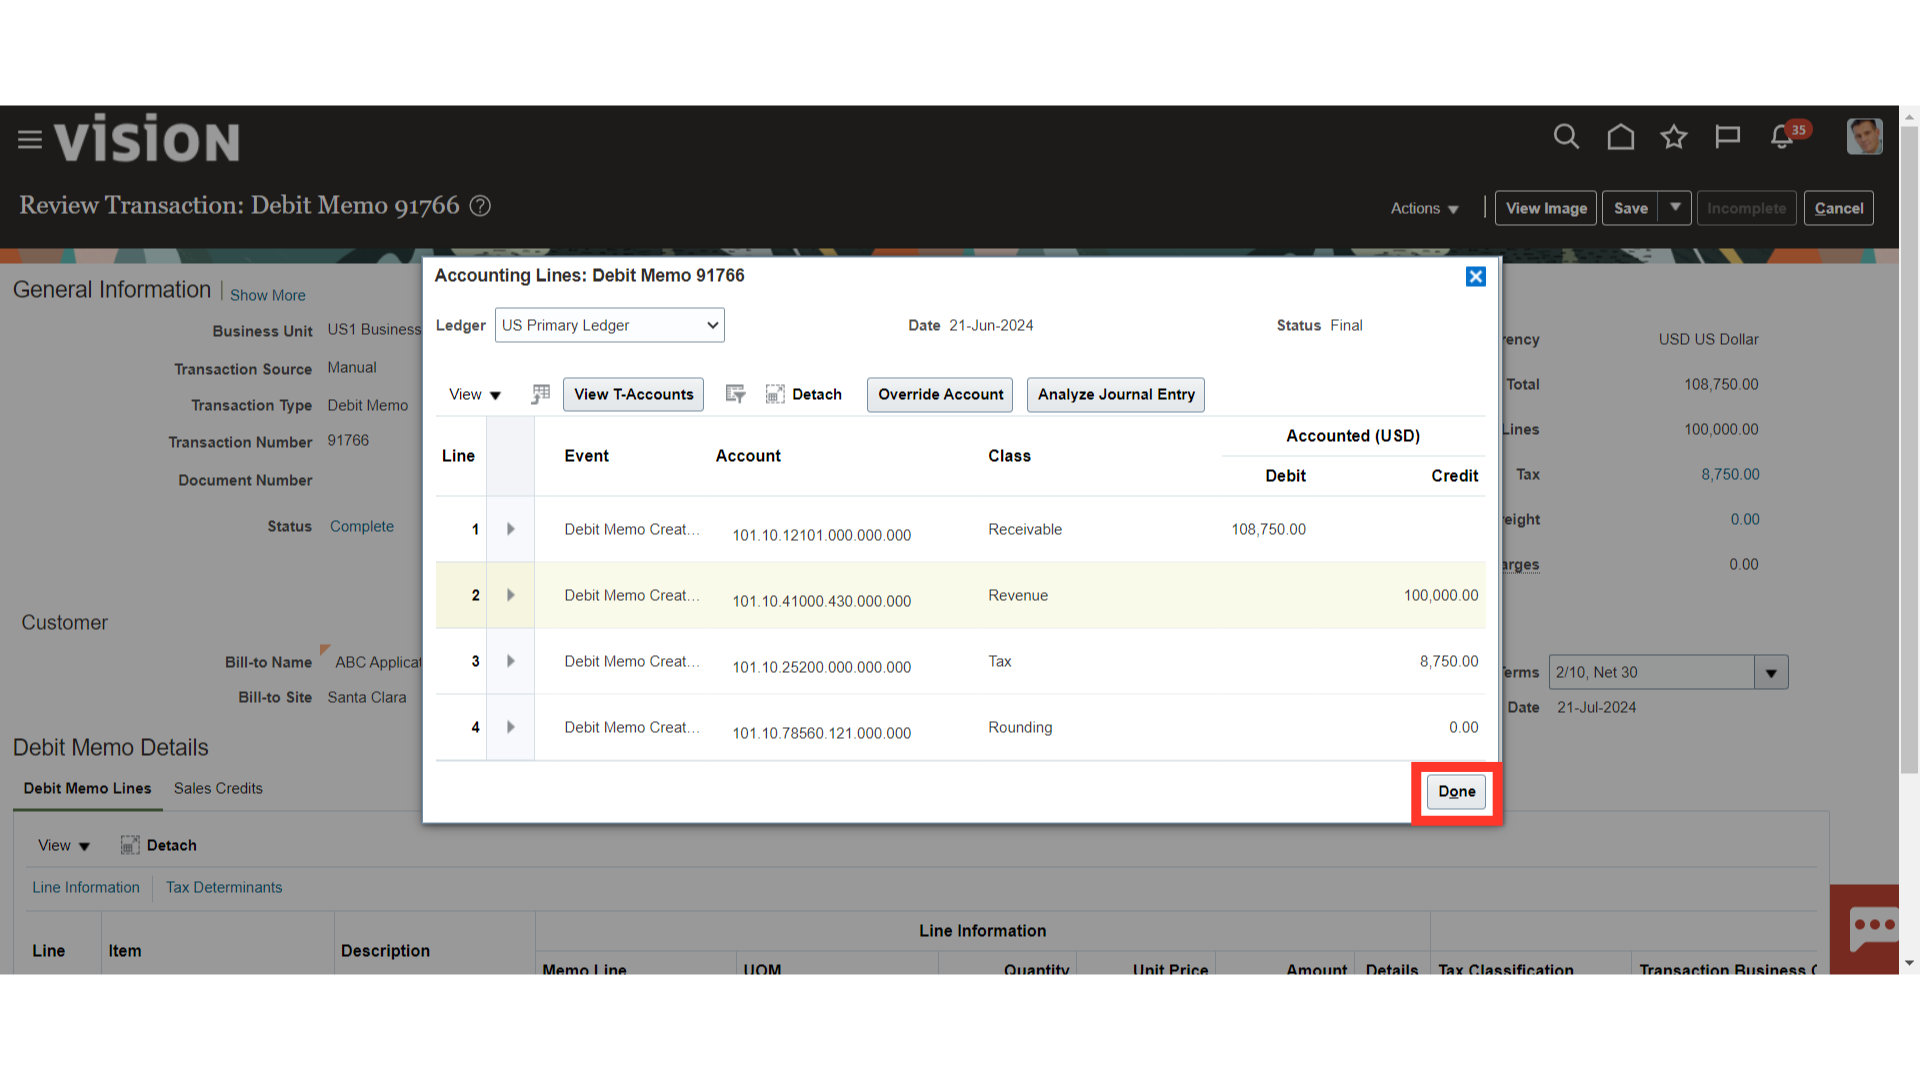
Click on the Done button to close the accounting window.
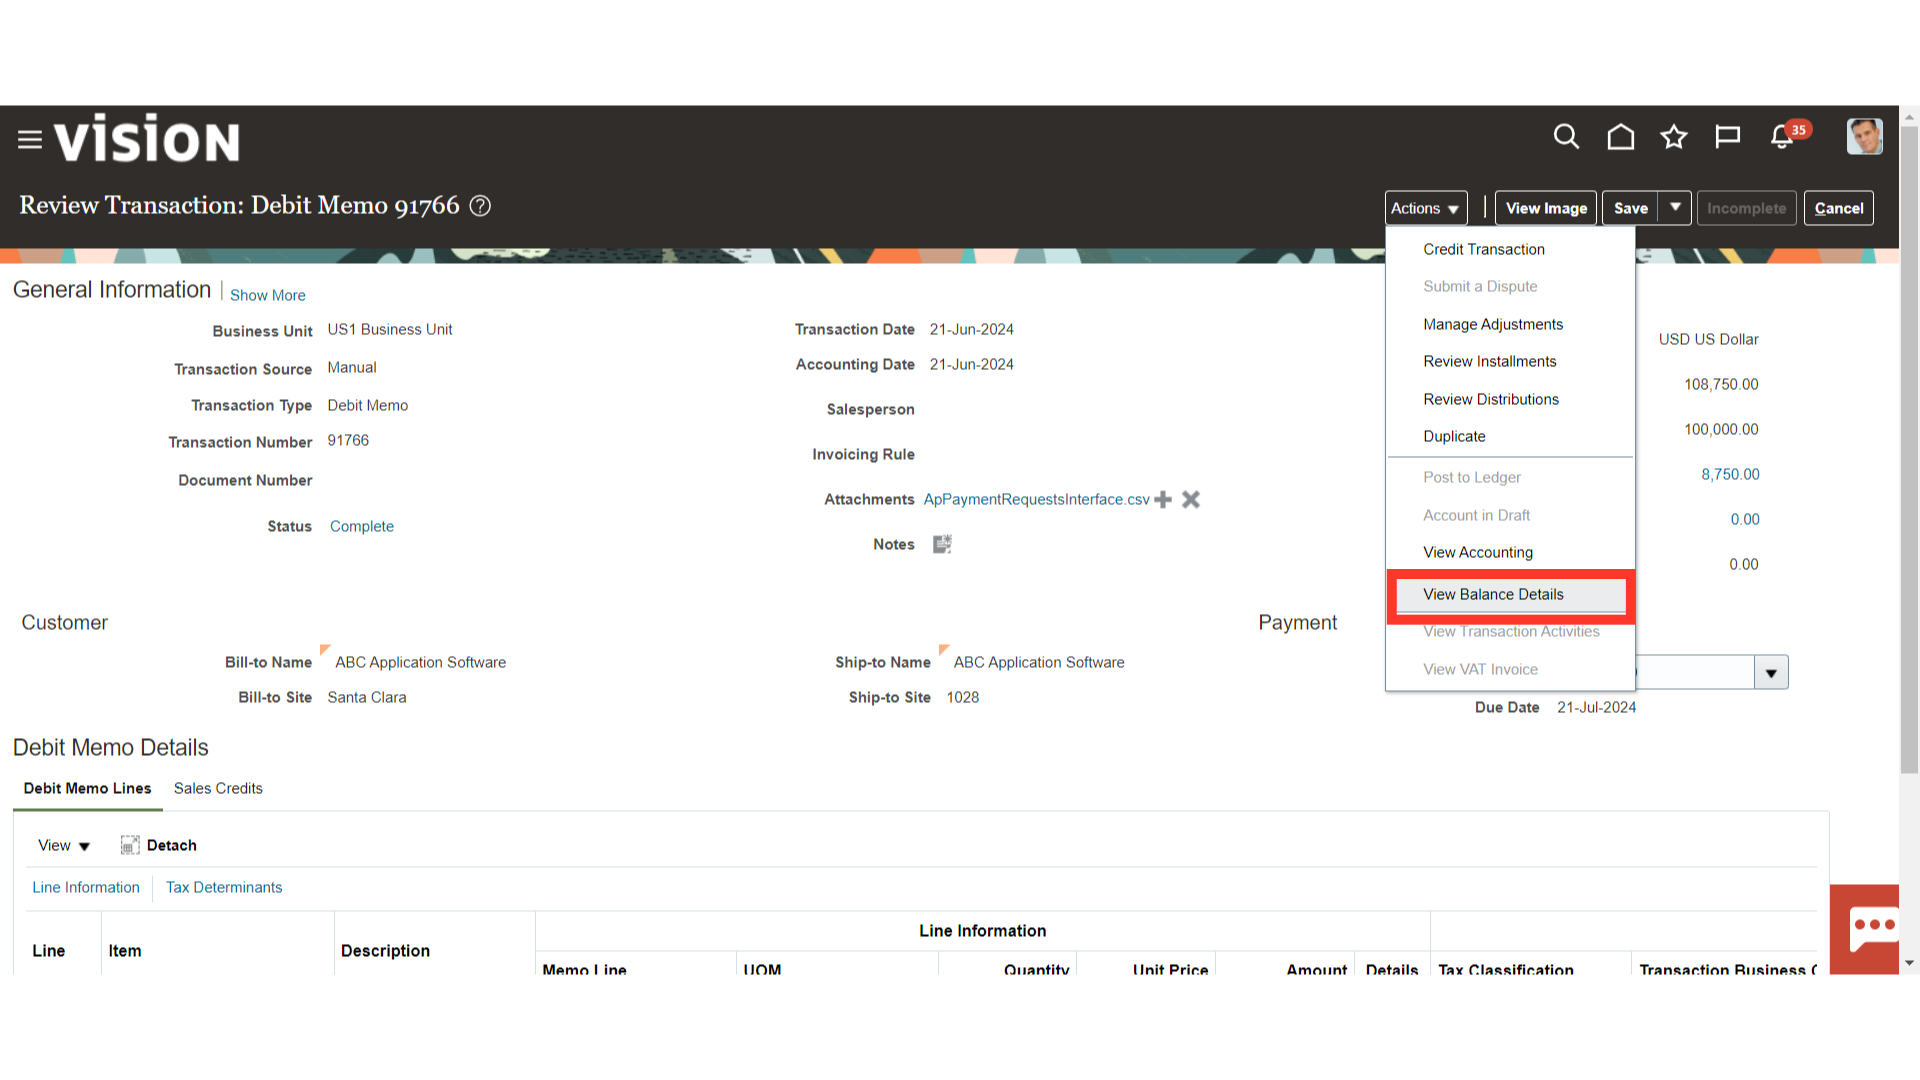
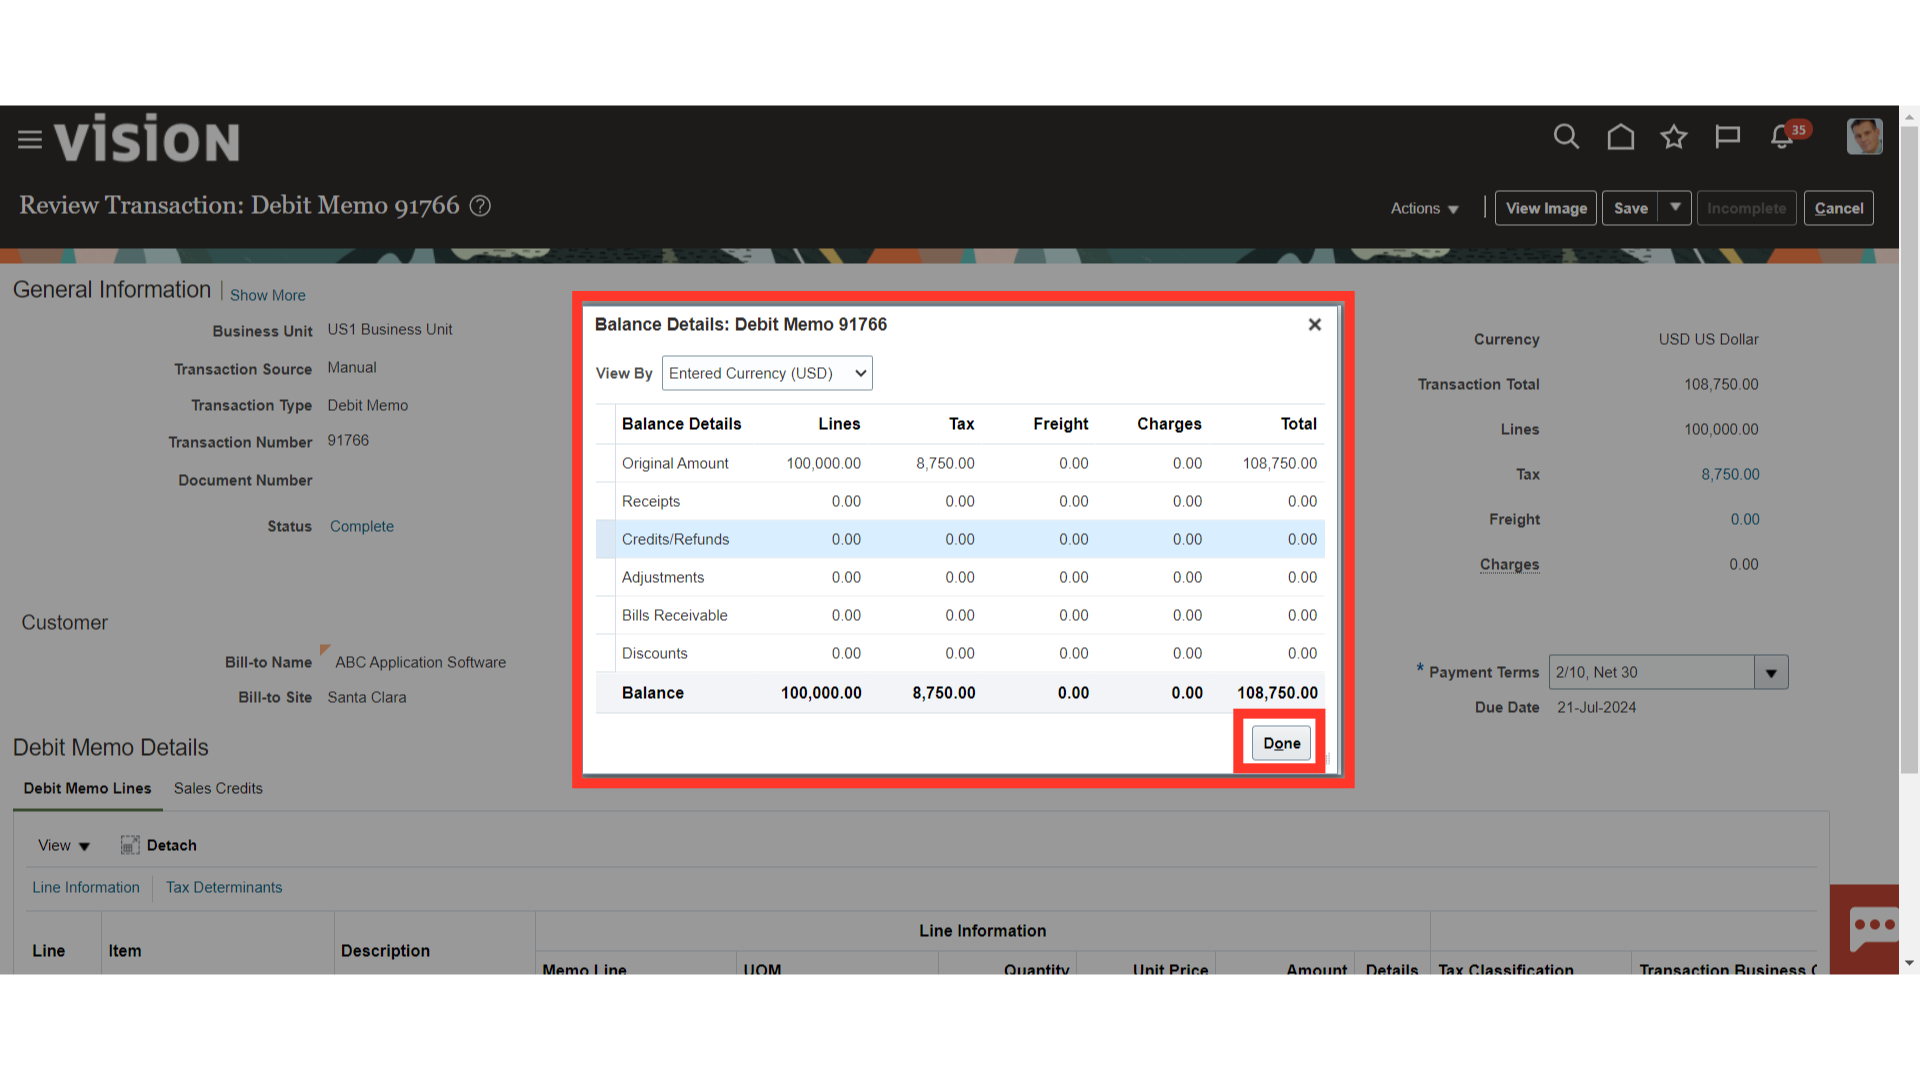
Select “View Balance Details.”
 View complete information for a specific transaction, including the original transaction amount, the total amount of payments against the transaction, any credits, refunds, adjustments, or charges applied to the transaction, and any discounts taken. Click on the Done button to close this window.
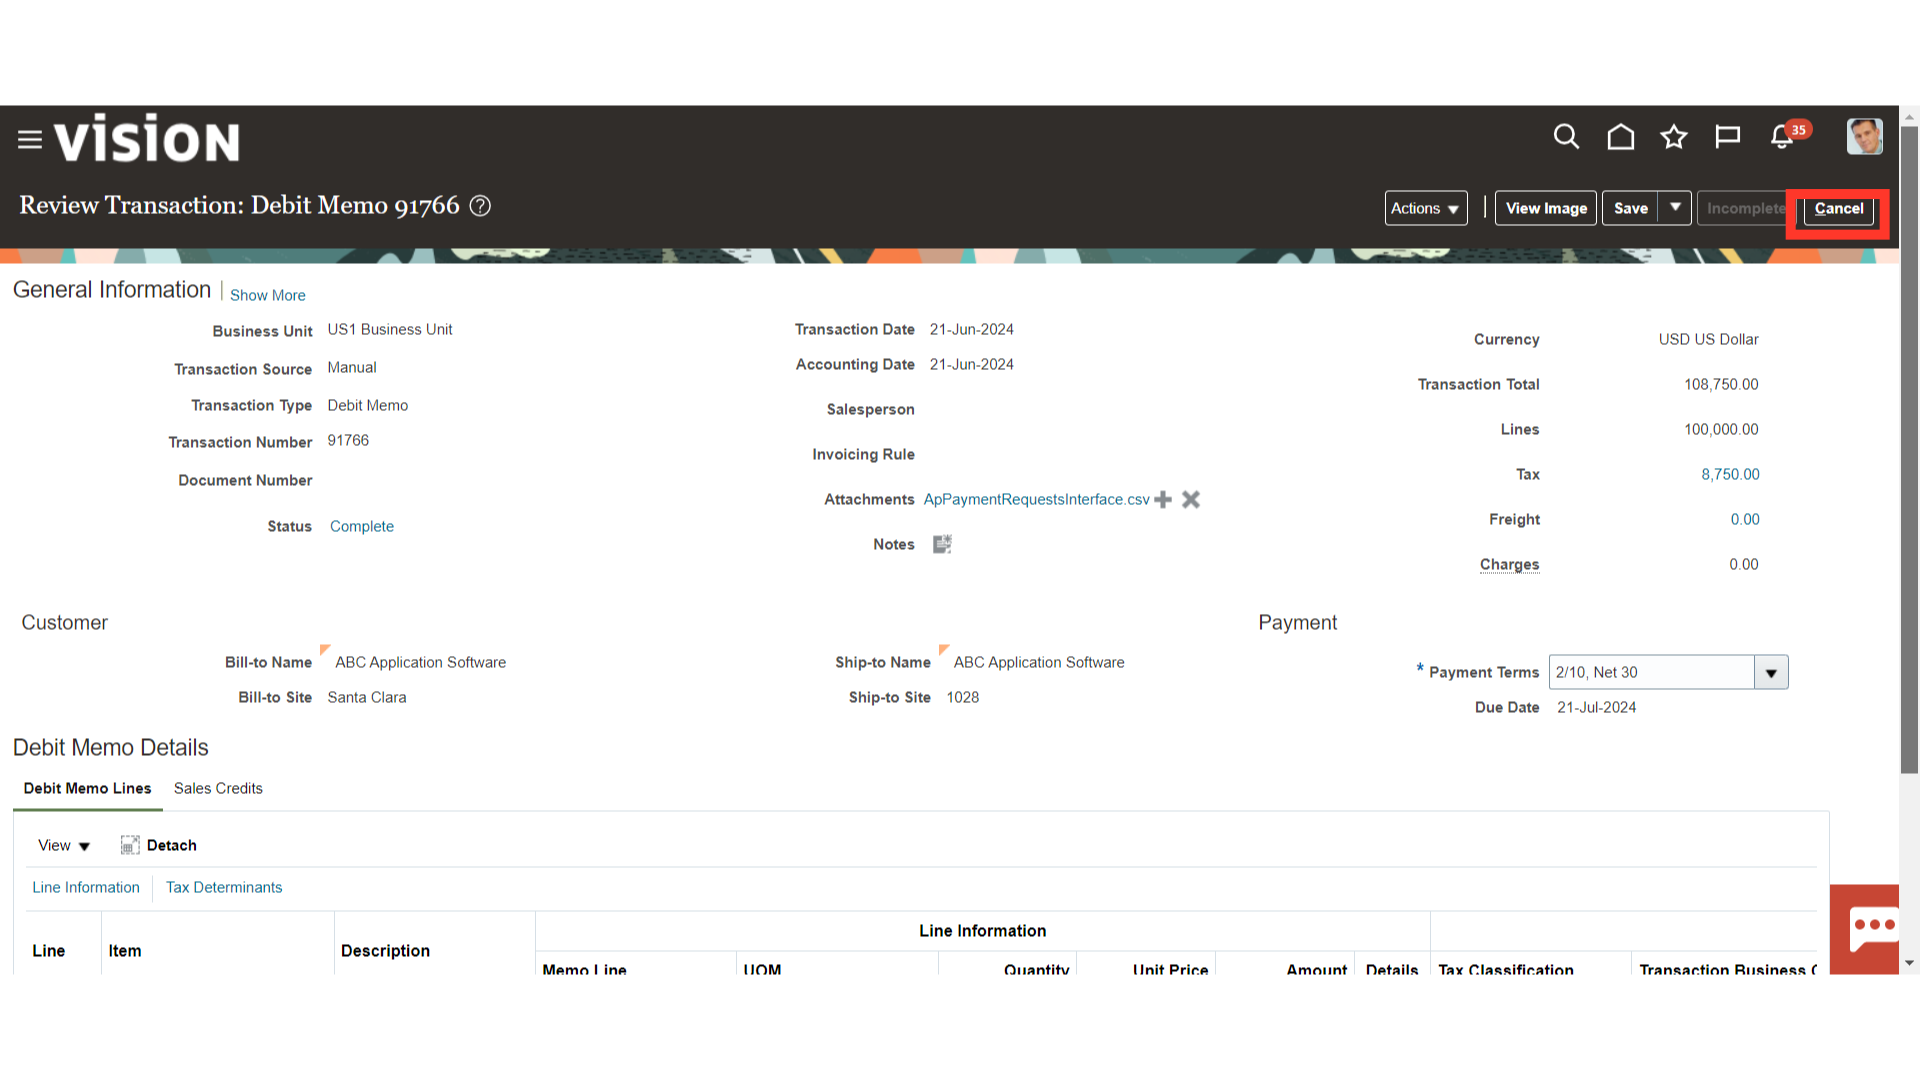
Click on Cancel button to close this transaction, and return back to Billing workarea.
This guide went over the entire process of creating a debit memo by hand, including how to access Create Transaction, fill in the required fields, and take different actions like raising a dispute, making adjustments, and producing the accounting entry.
Thank you for reviewing and using our guide; we hope you have found it helpful. If you have any questions on the content included in this guide, please contact our Training & Learning team at learn@camptratech.com