Invoice Approval and Account Coding
The procedures for starting the account coding and invoice approval processes, along with a list of possible actions for approvers, are all outlined in this guide.
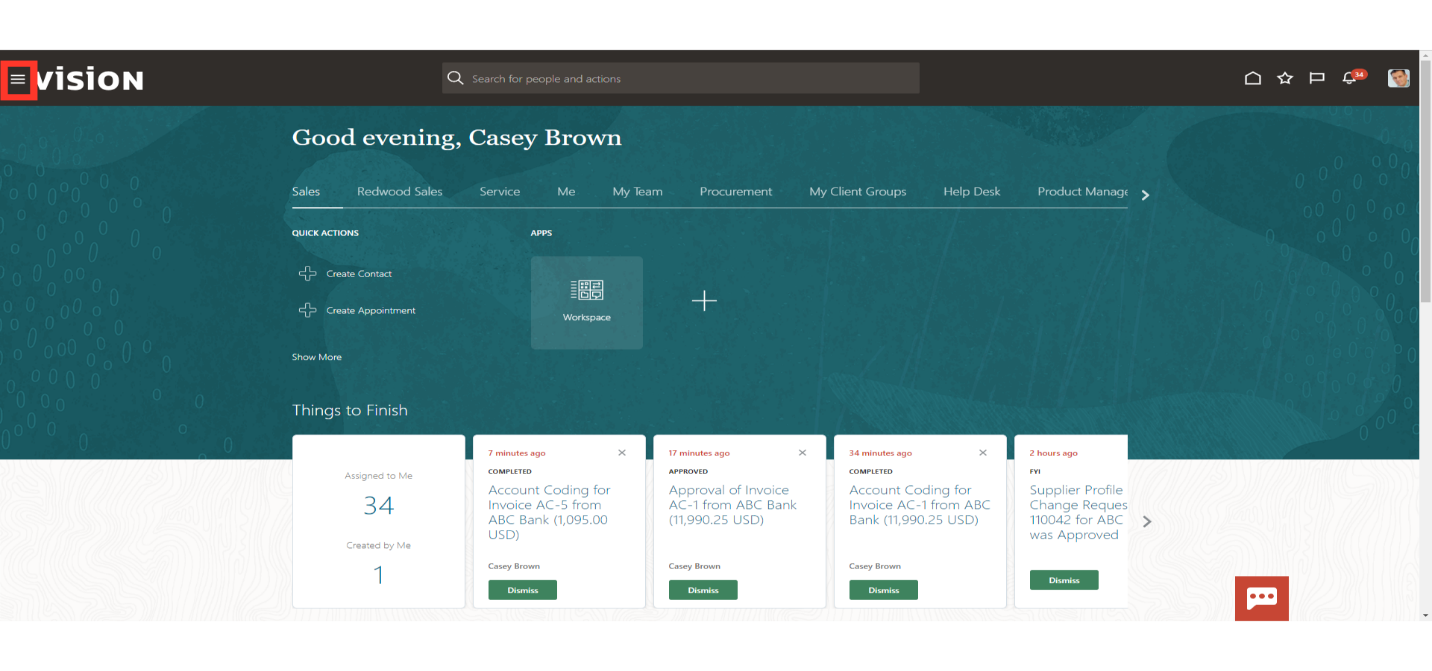
Click on the Navigator icon to access the Payables module.
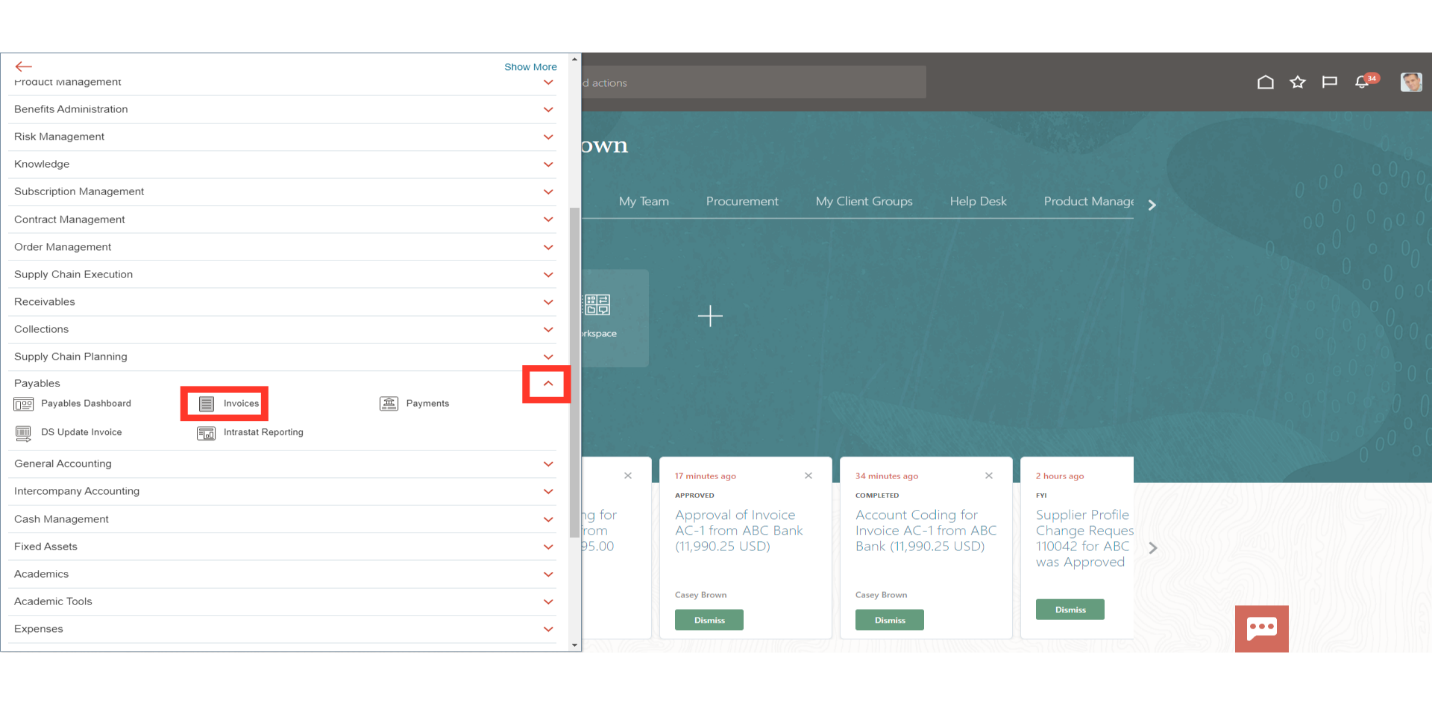
Click on the “Invoices” sub module by expanding the “Payables” module.
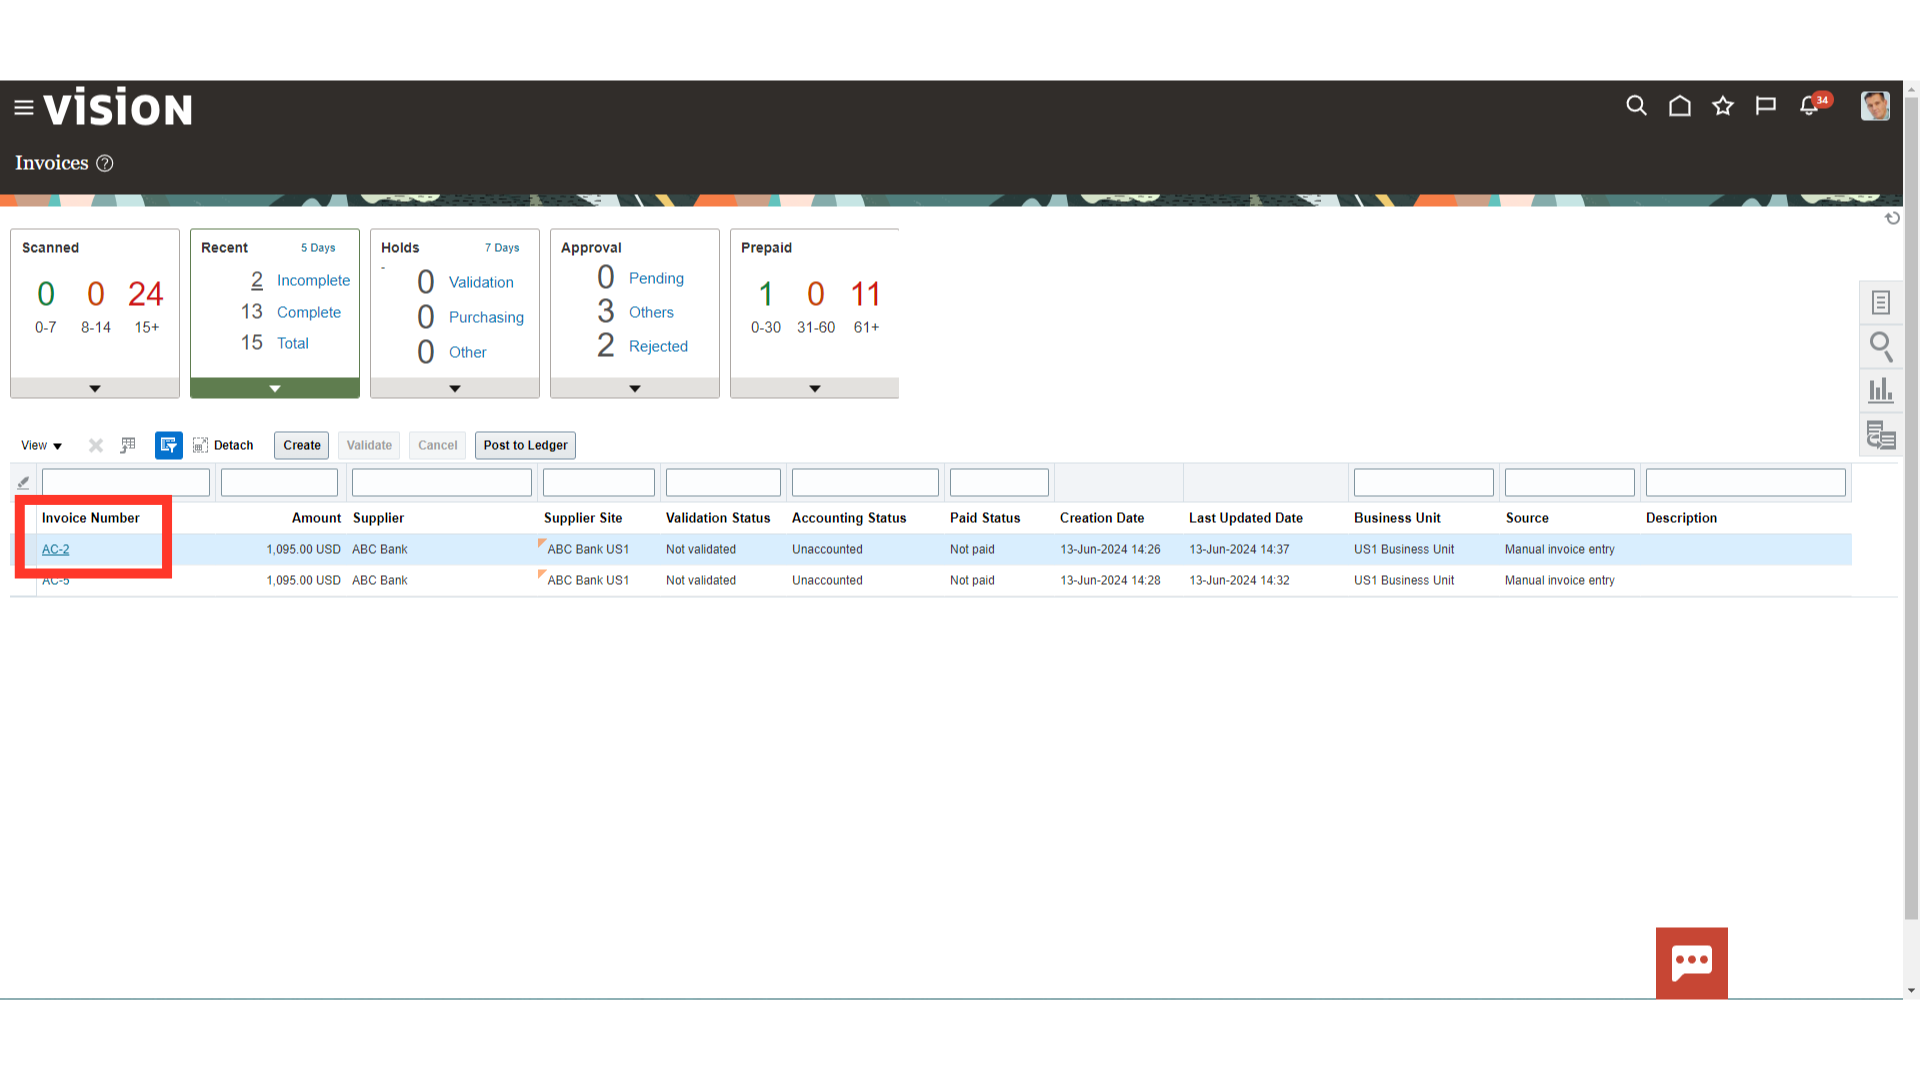
Open any Invoice under Incomplete section in Recent infotile, by clicking on the Invoice number hyperlink.
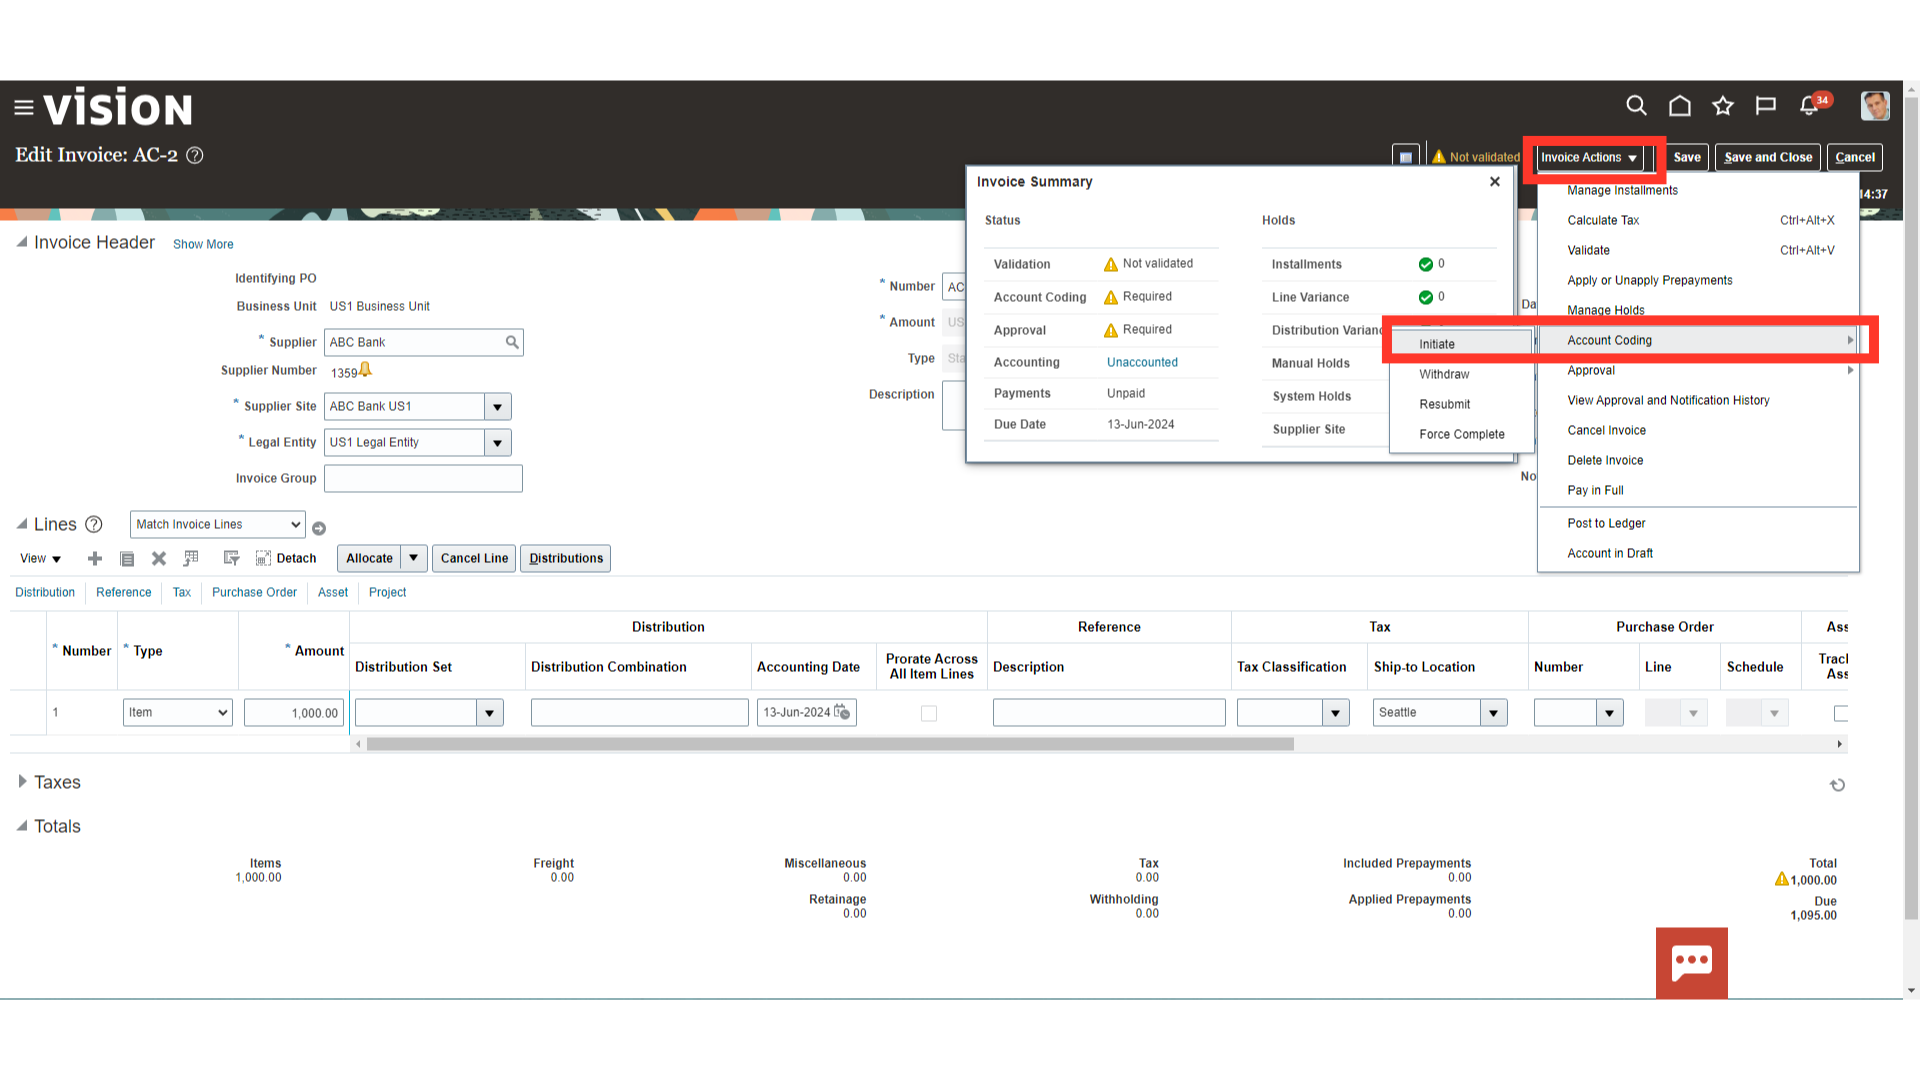
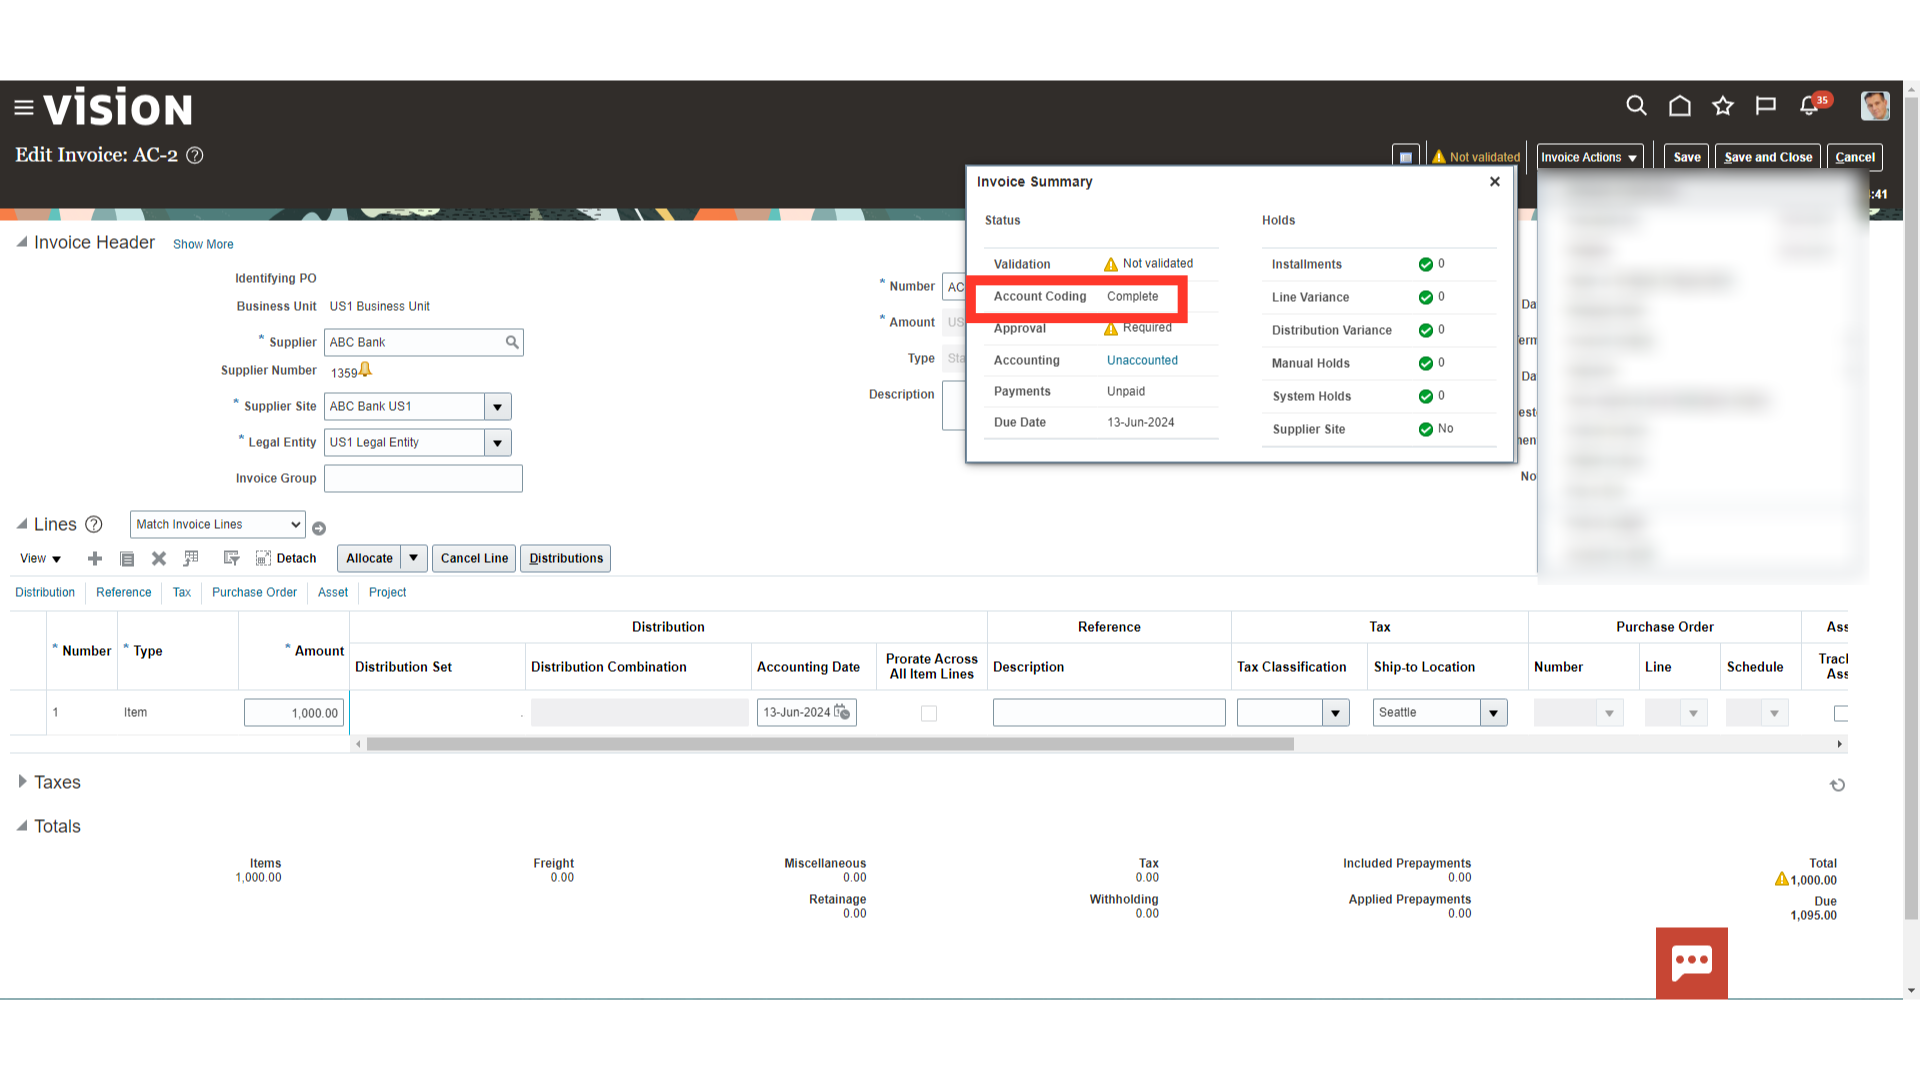
Clicking on Not validated status will reveal the account coding status. “Required” is the account coding status for the newly created invoice.
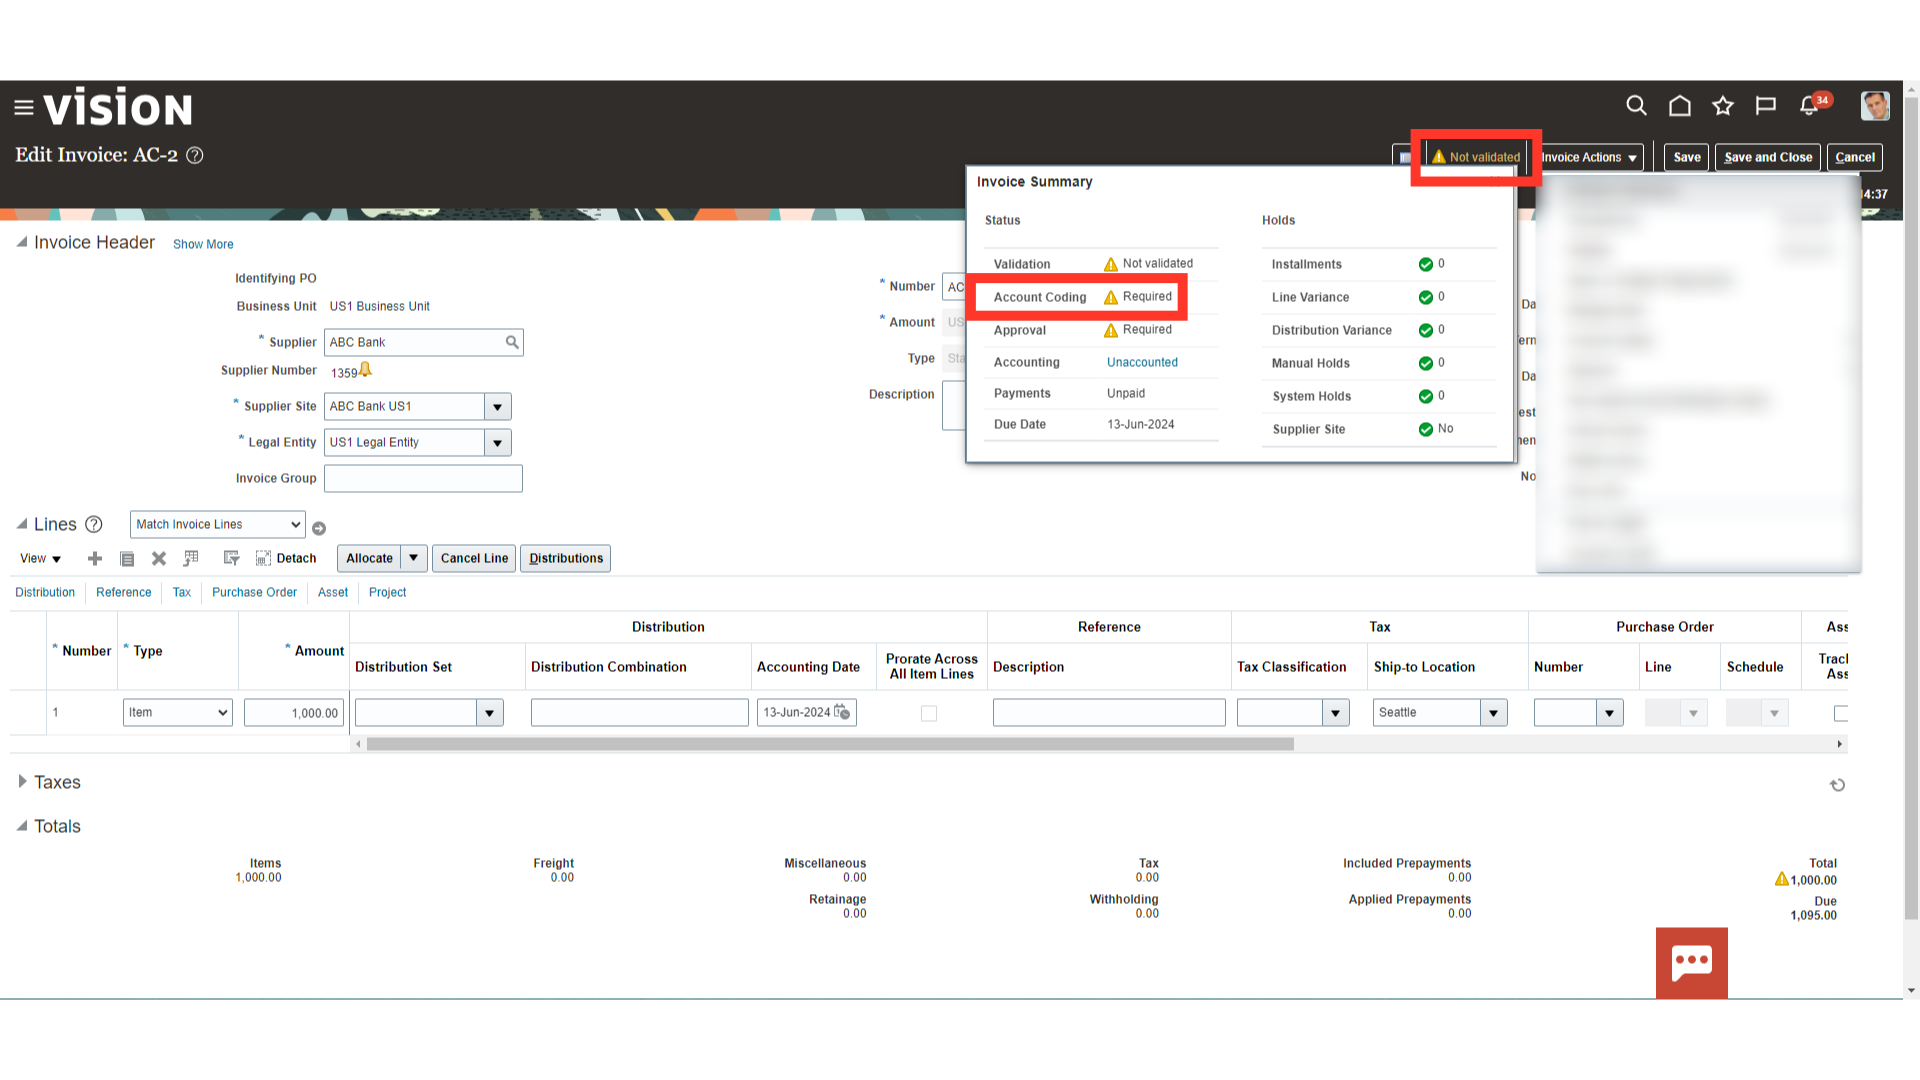
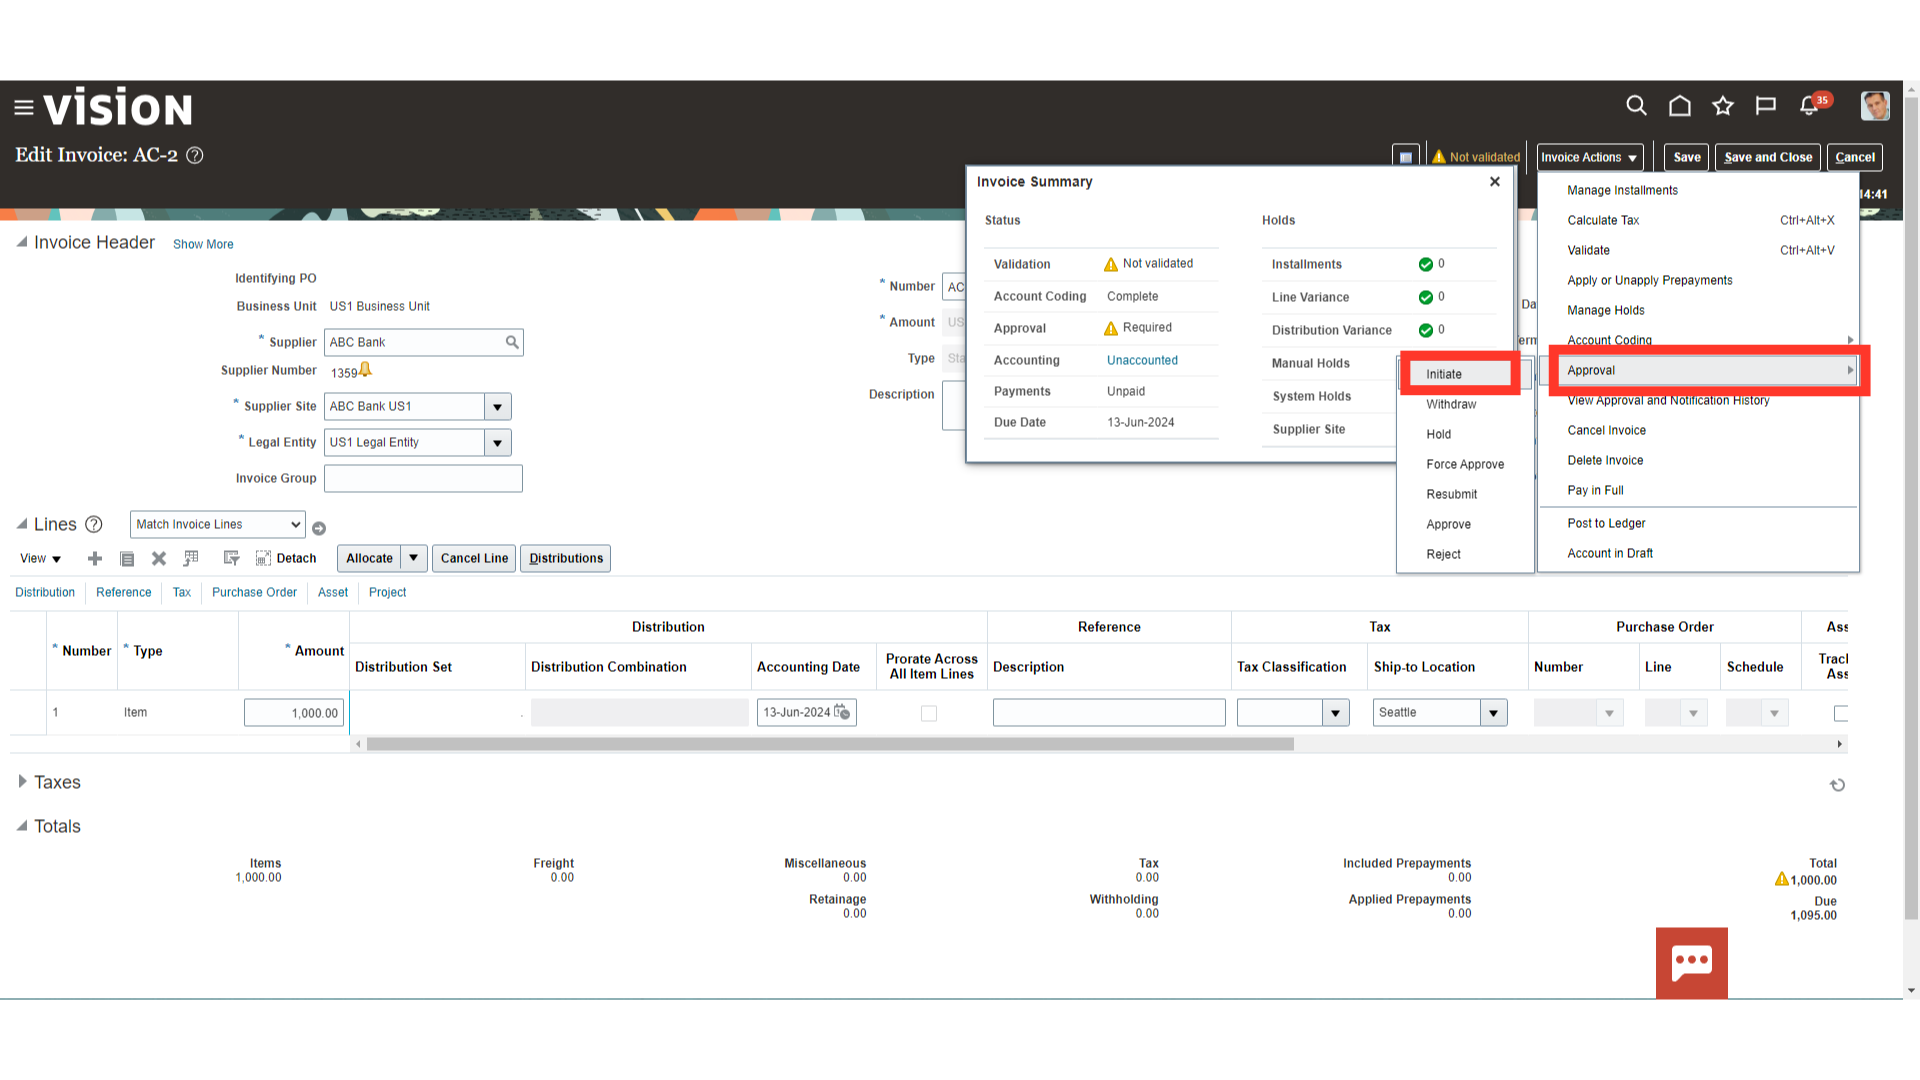
Choose the Initiate option under Account Coding option from the Invoice Actions menu to start the account coding process.
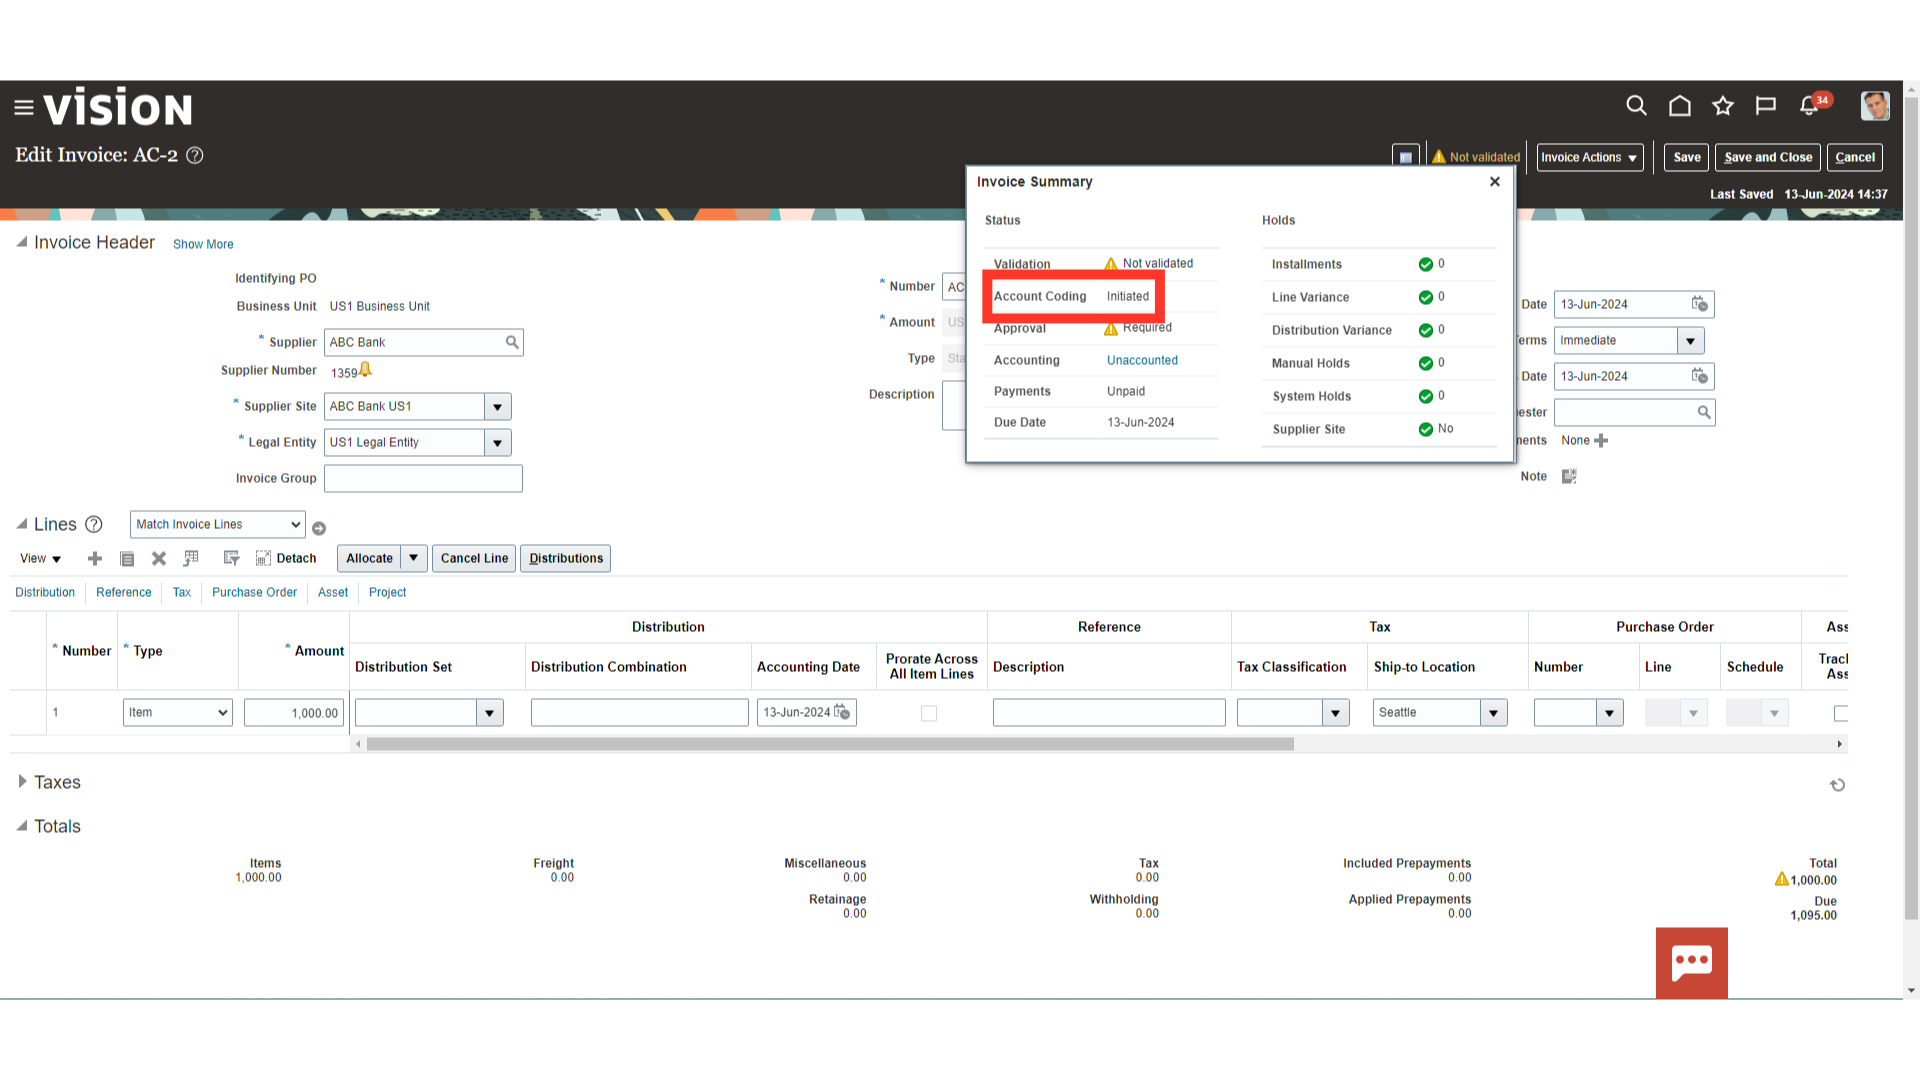
After above steps, the status of the Account coding would be changed to the “Initiated” status.
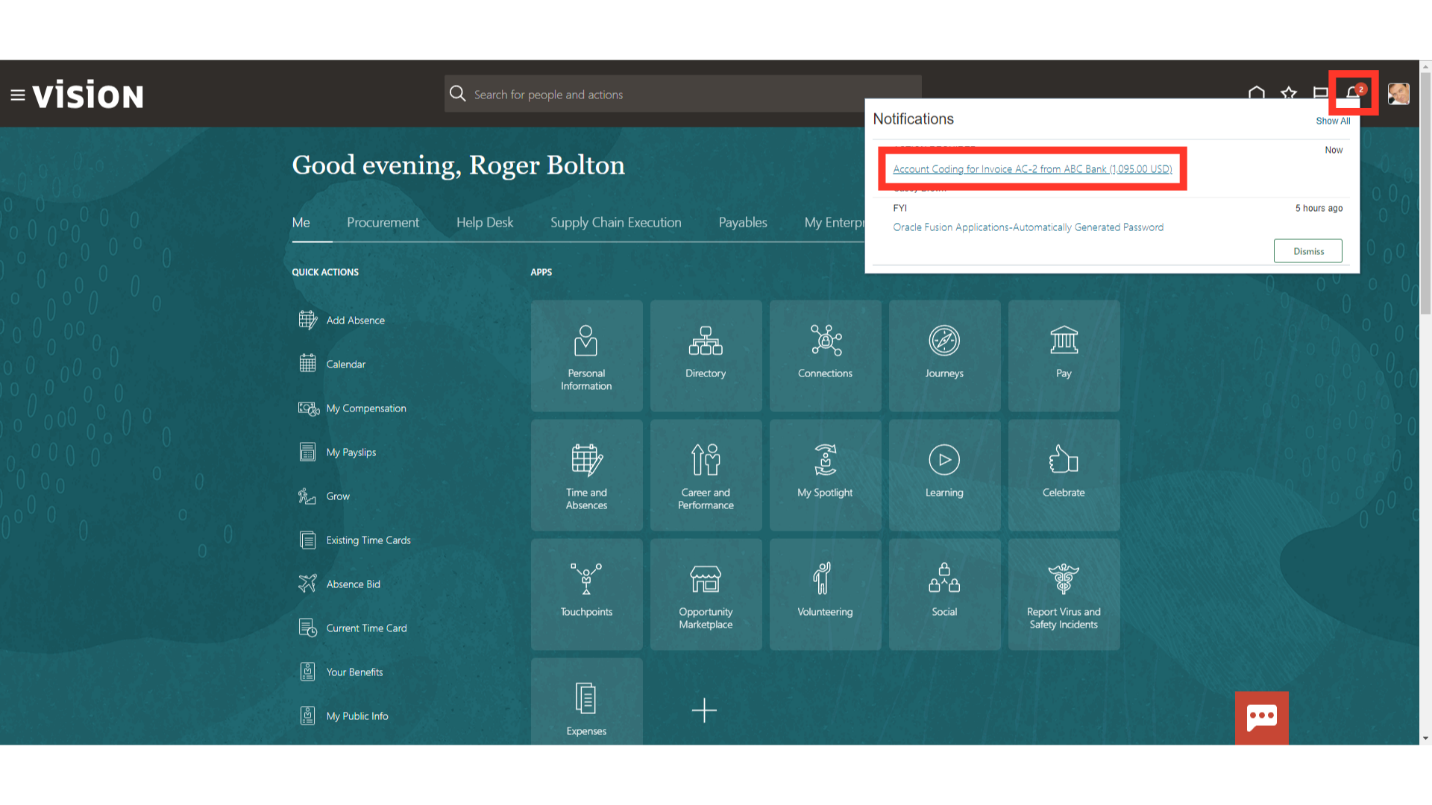
Now, if you’re someone who has received the Account Coding approval task as the assignee, select the Bell notification icon and click the Account Coding Approval notification to access it.
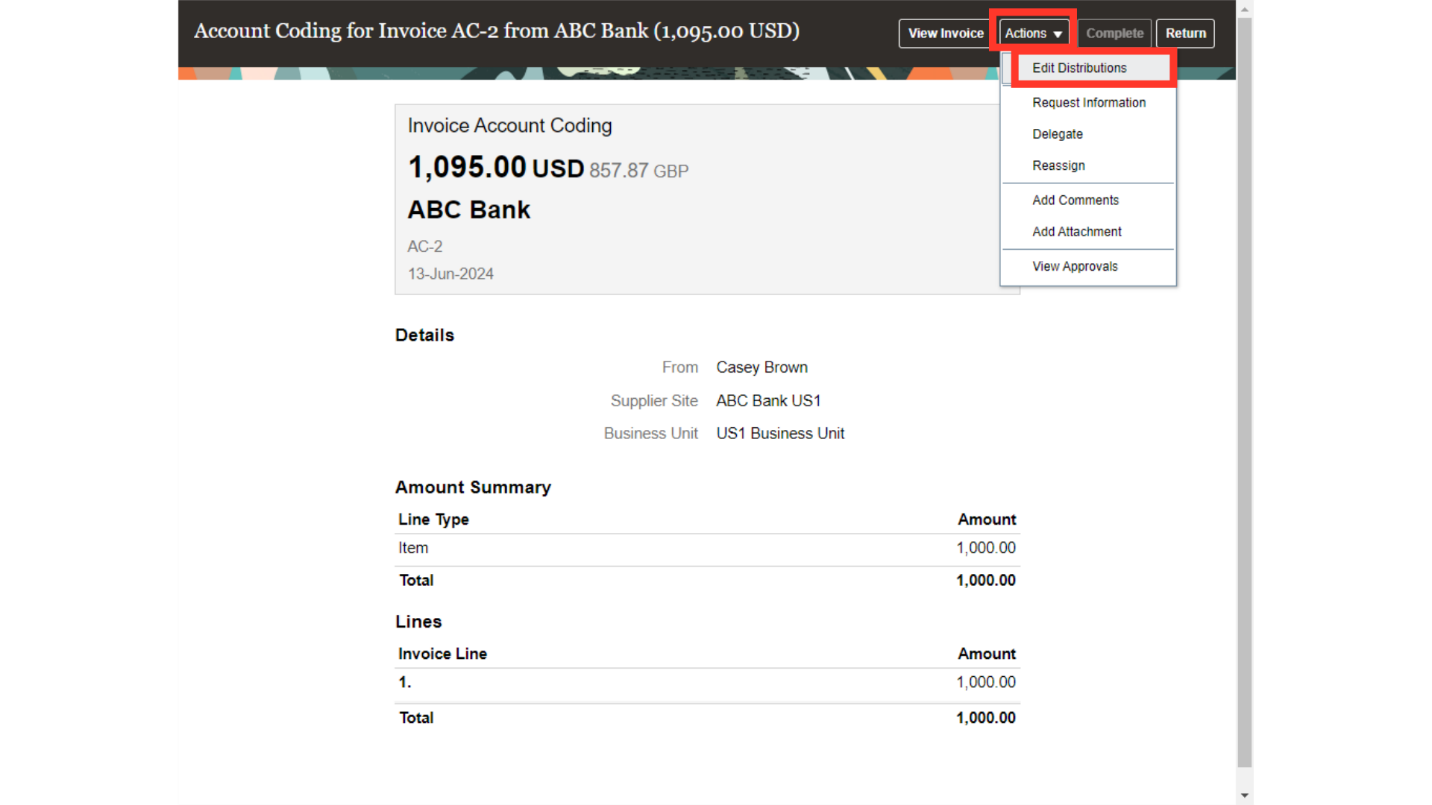
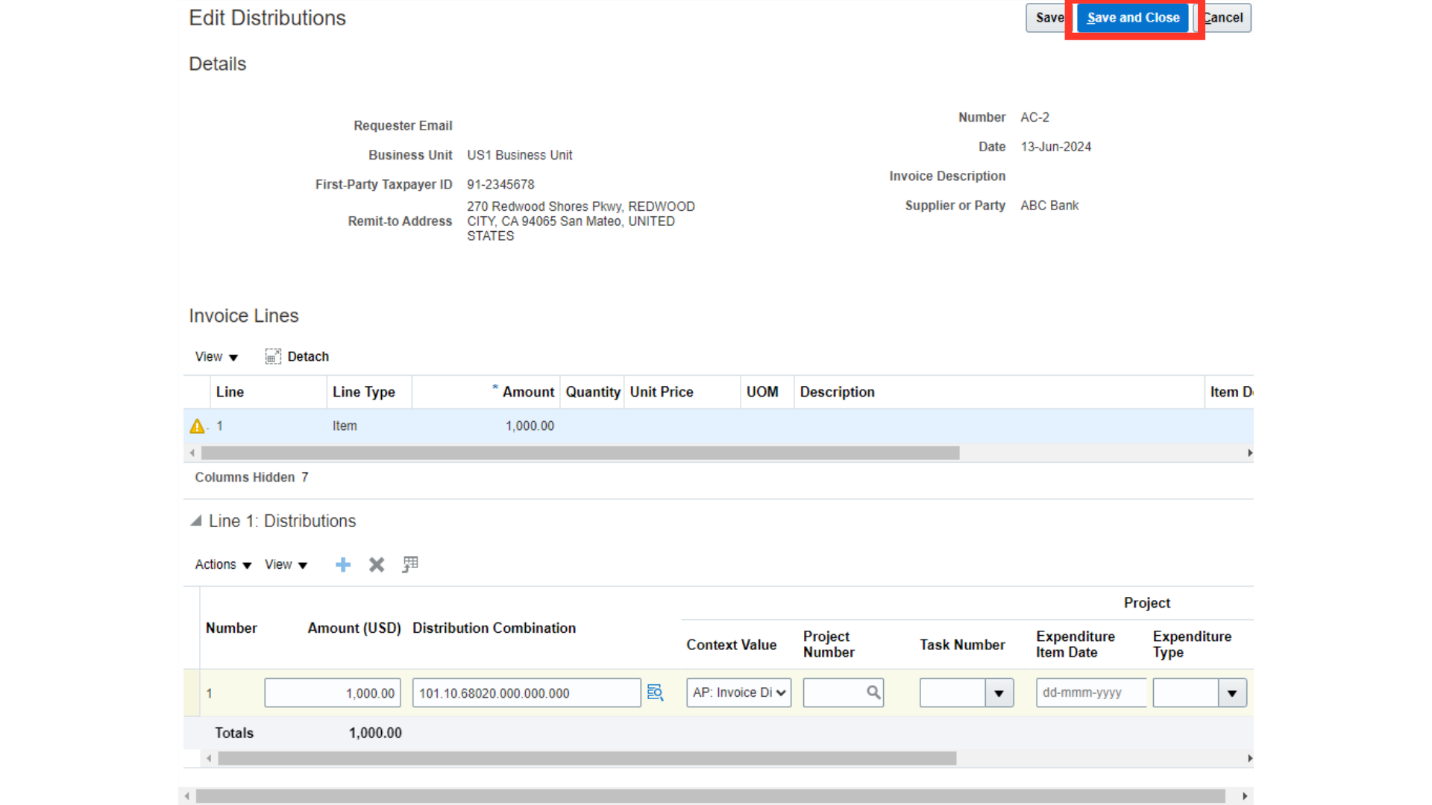
To enter the distributions, click on the Edit Distributions under Actions tab.
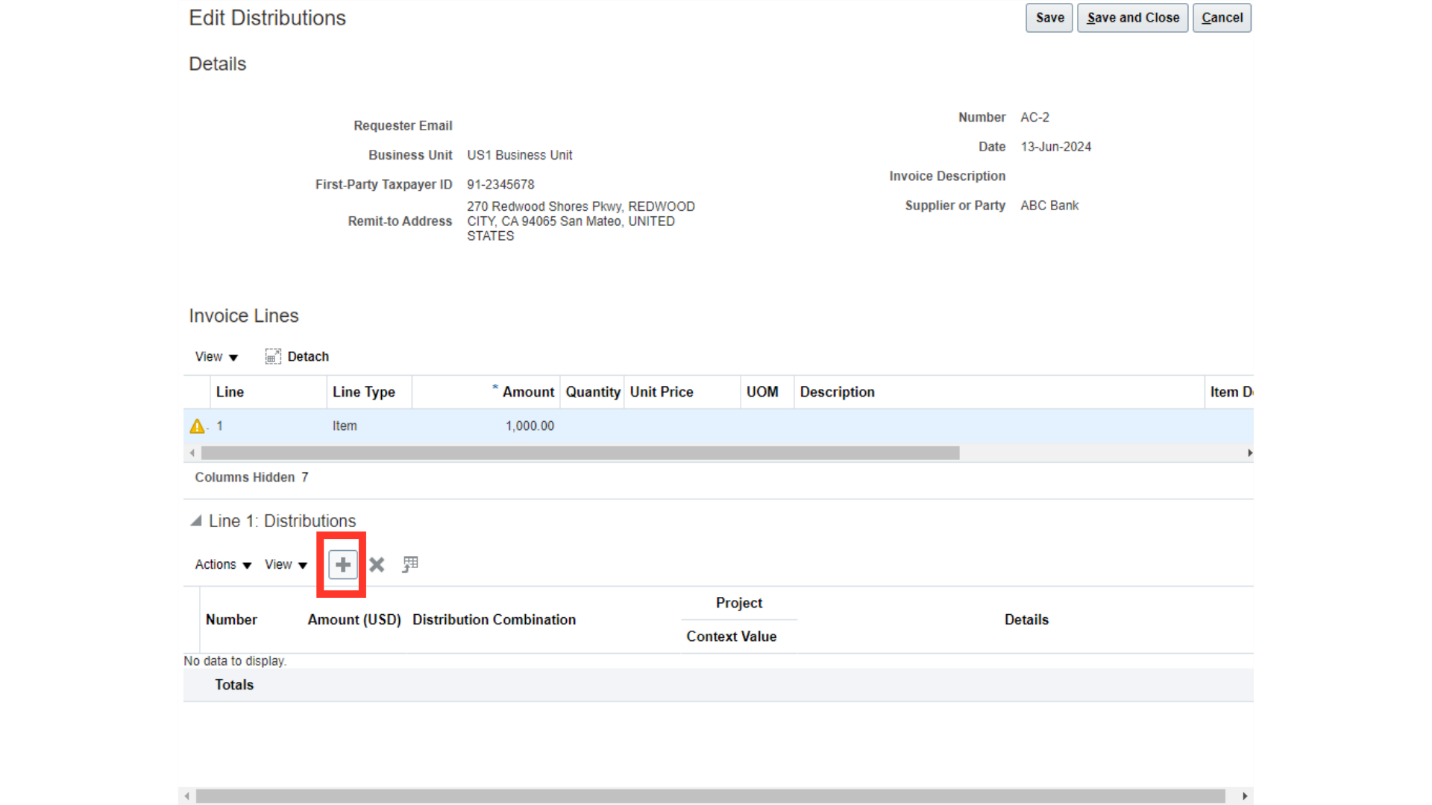
Select the invoice line for which you need to enter the distributions and then click on the Plus icon to enter the distribution combinations.
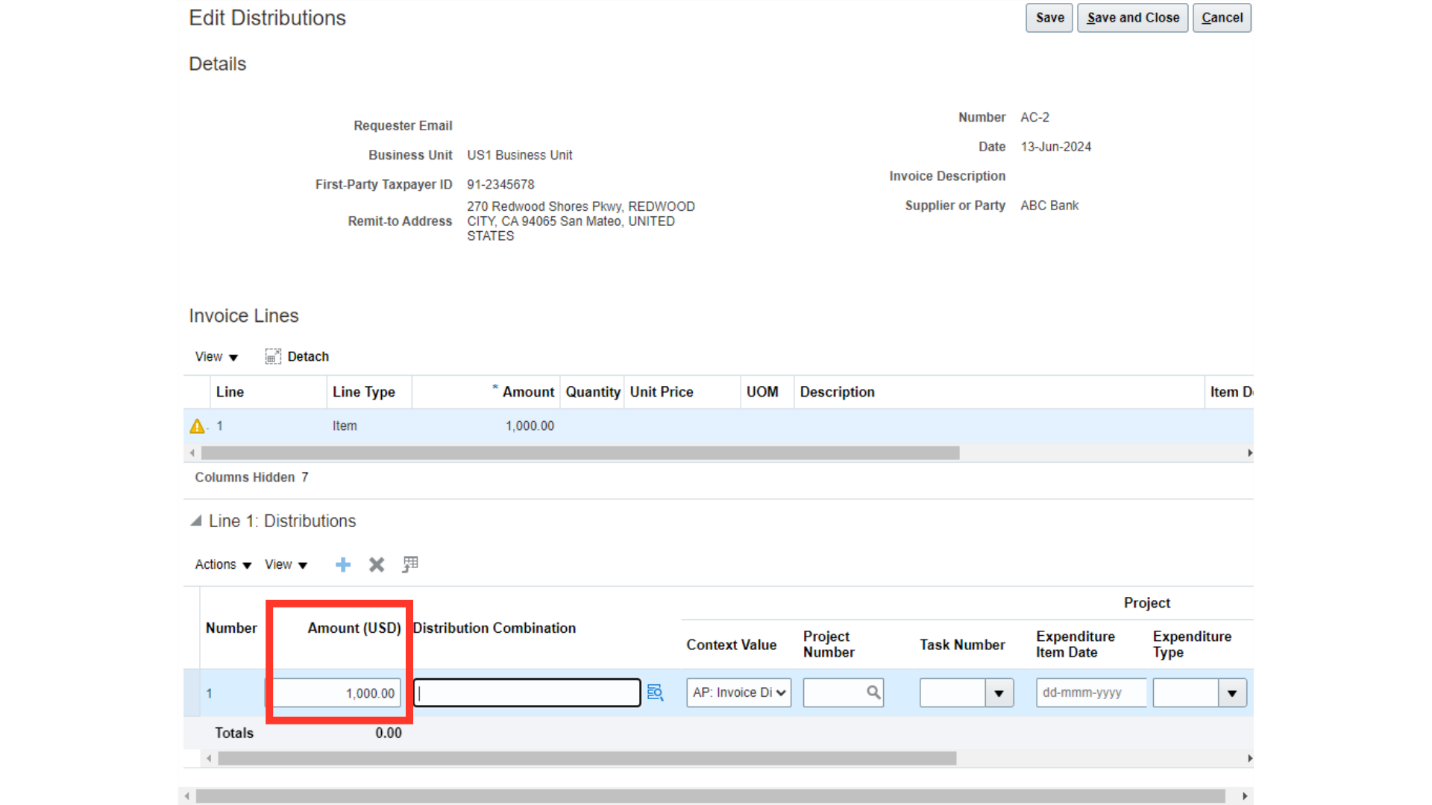
Enter the distribution amount in the amount field.
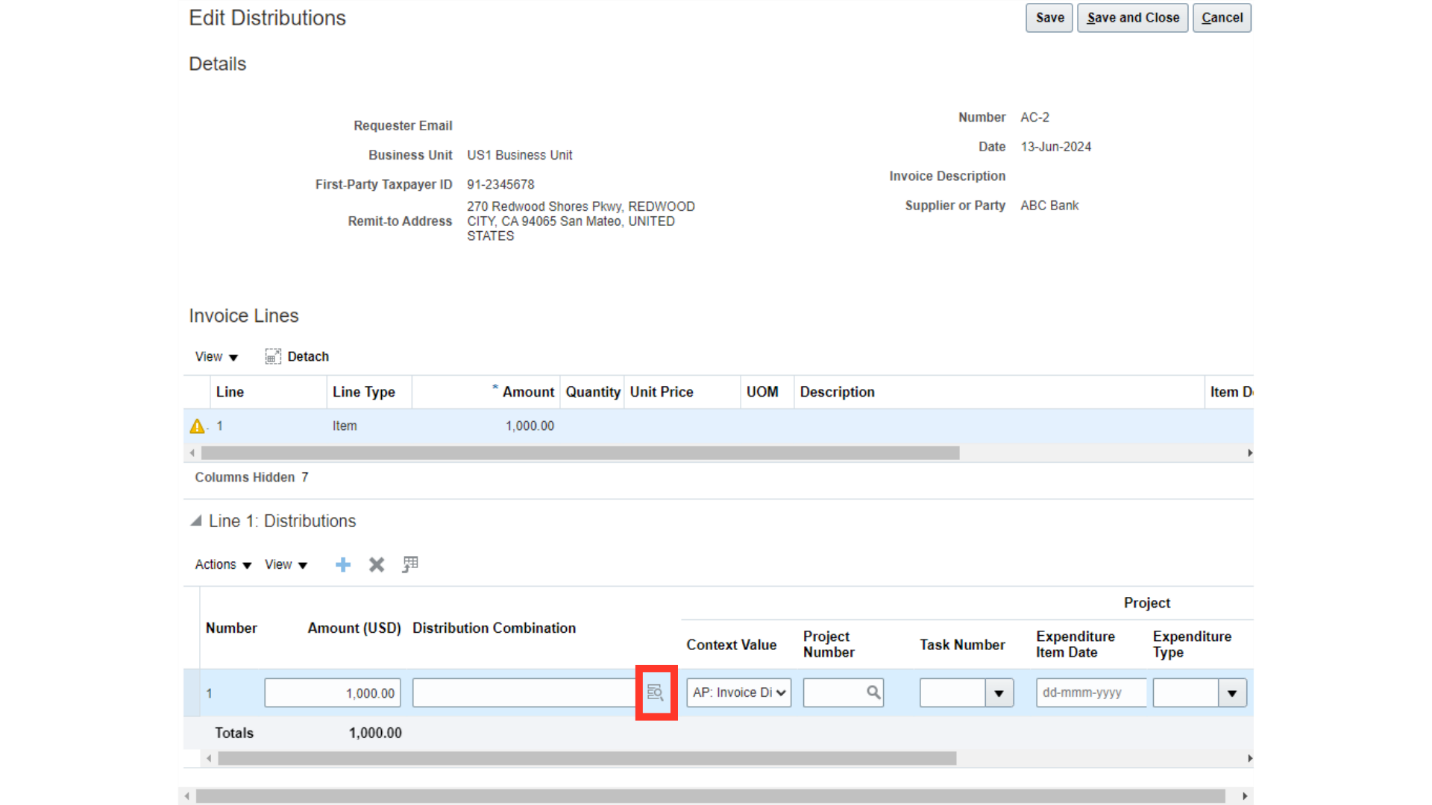
Click on the distribution combination icon, to enter the distribution details.
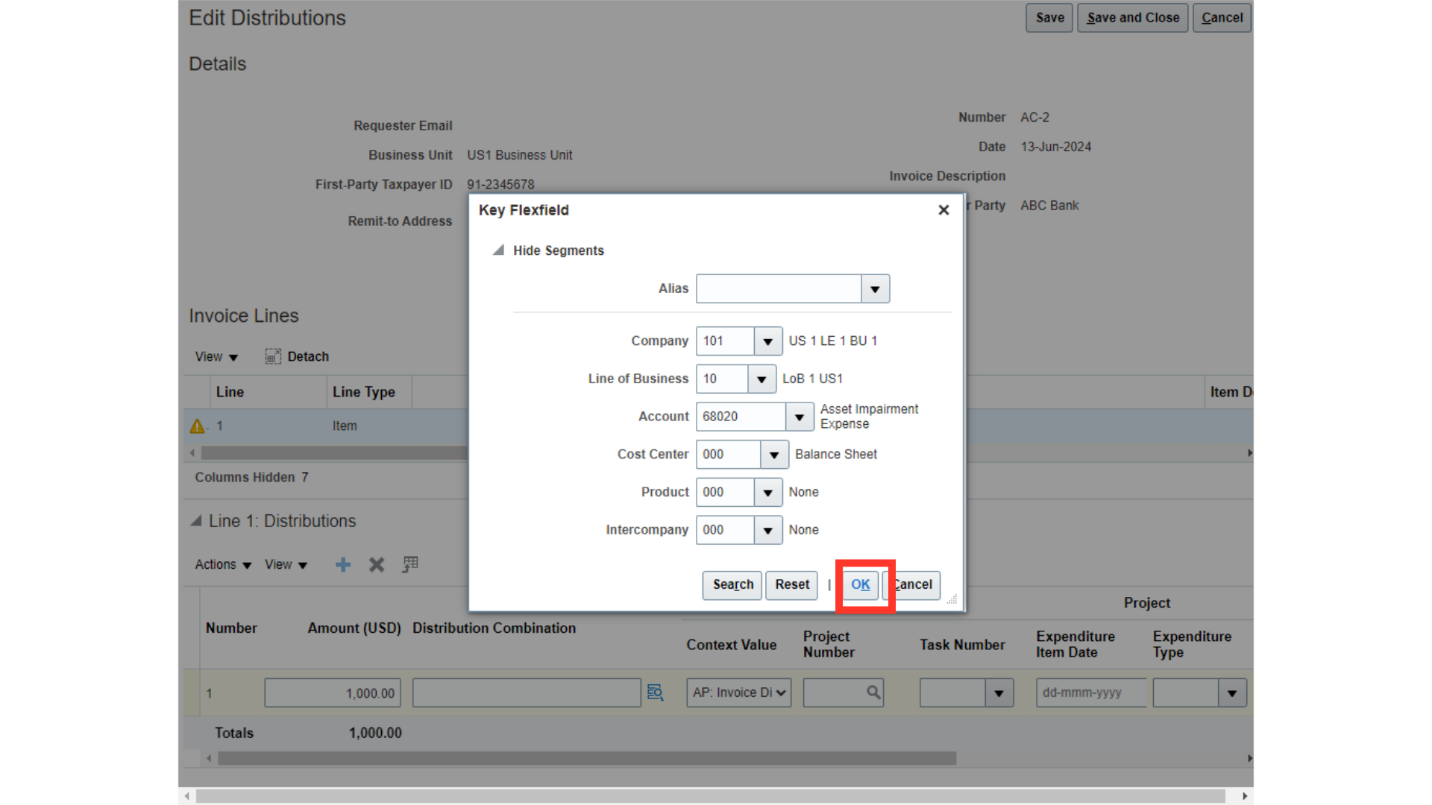
After entering all the segment values manually or by selecting from the drop down, click on Ok to continue.
Click on the Save and Close button to close this window.
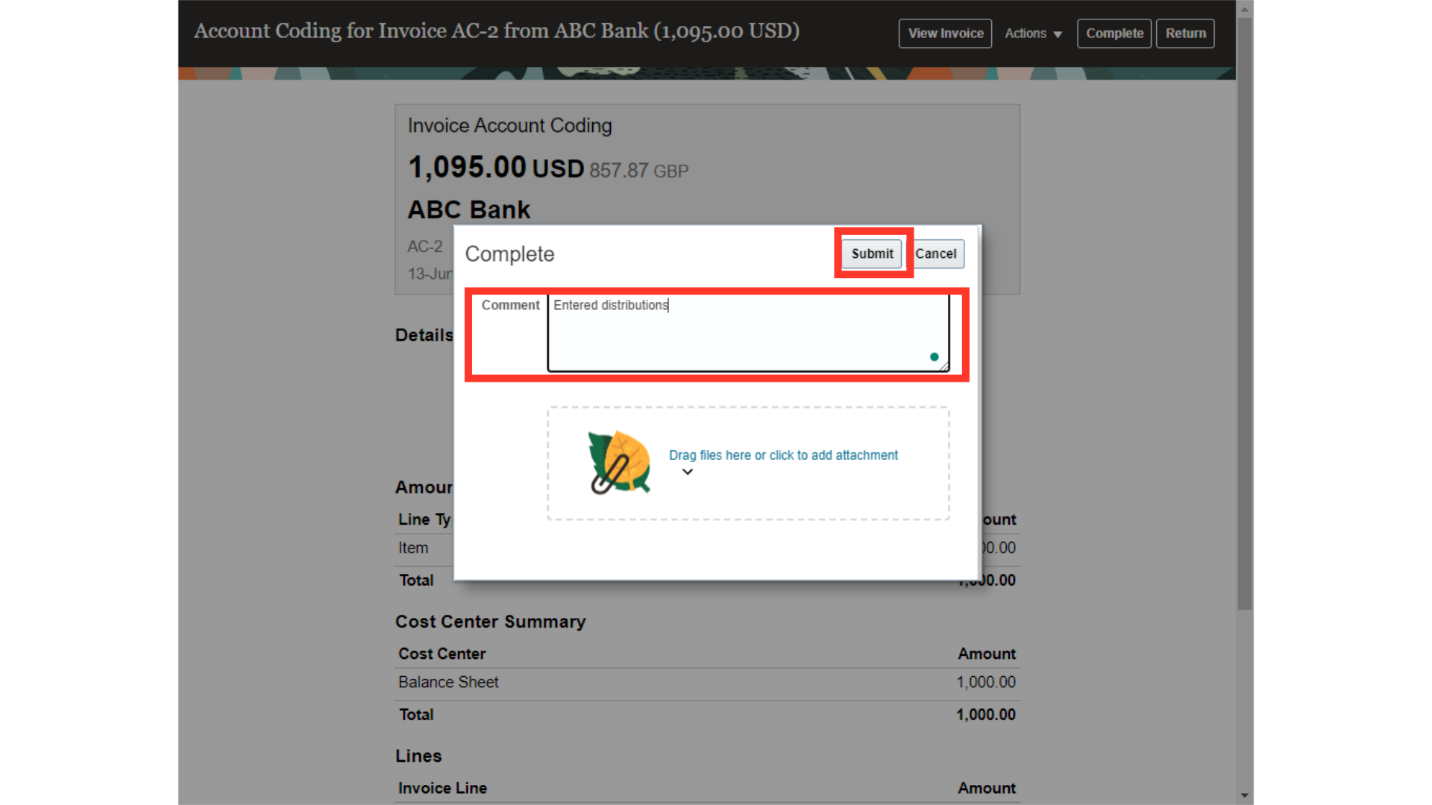
After you’ve input the account combination information the Complete button will become active. To finish the account coding workflow, click the Complete button.

After entering the relevant comments, click on the Submit button.
On opening the Invoice for which Account coding is completed, Account coding status would be changed to “Complete”.
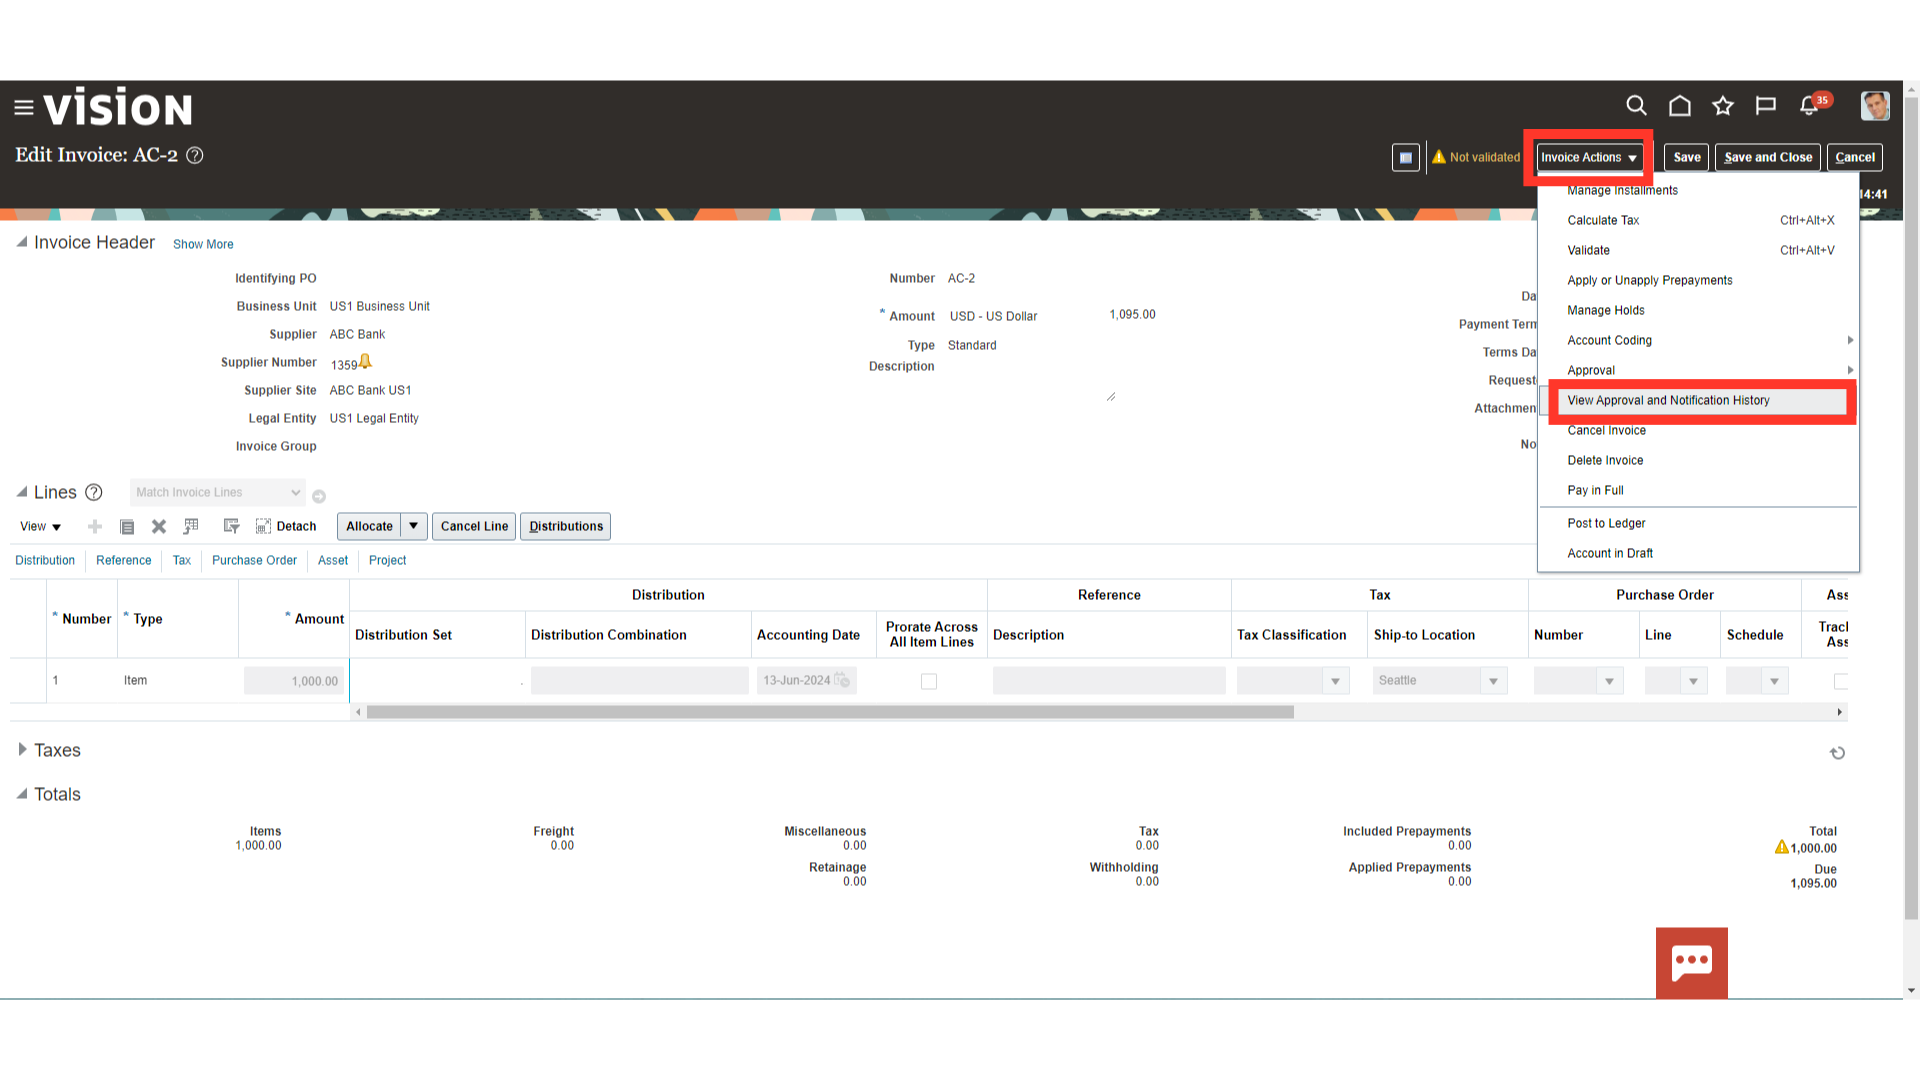
To submit the invoice for approval, expand the Approval sections under Invoice Actions and click on Initiate.
To find out to whom the invoice has been assigned for approval, choose the “View Approval and Notification History” under “Invoice Actions” menu.
This page contains all the information about who submitted the invoice for approval and to whom it was assigned for approval.
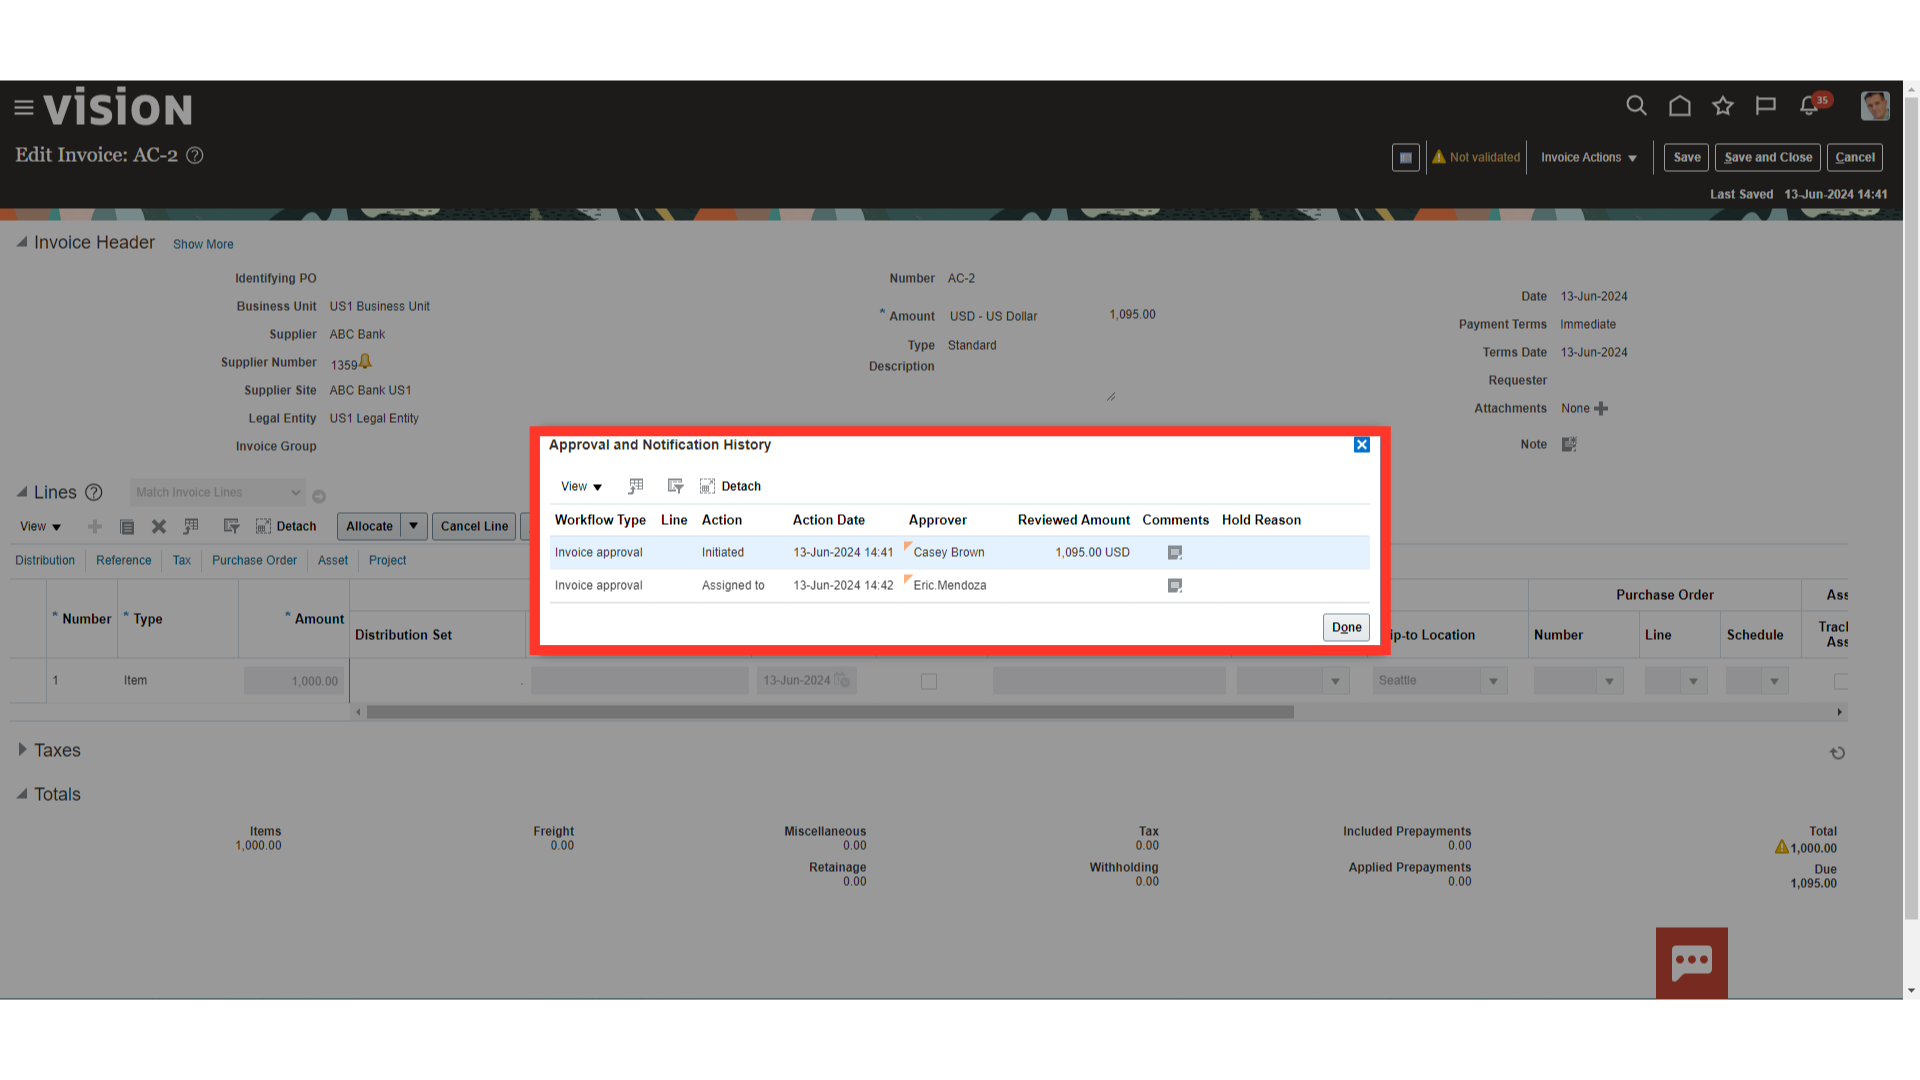
Click on the Done button to close this window.

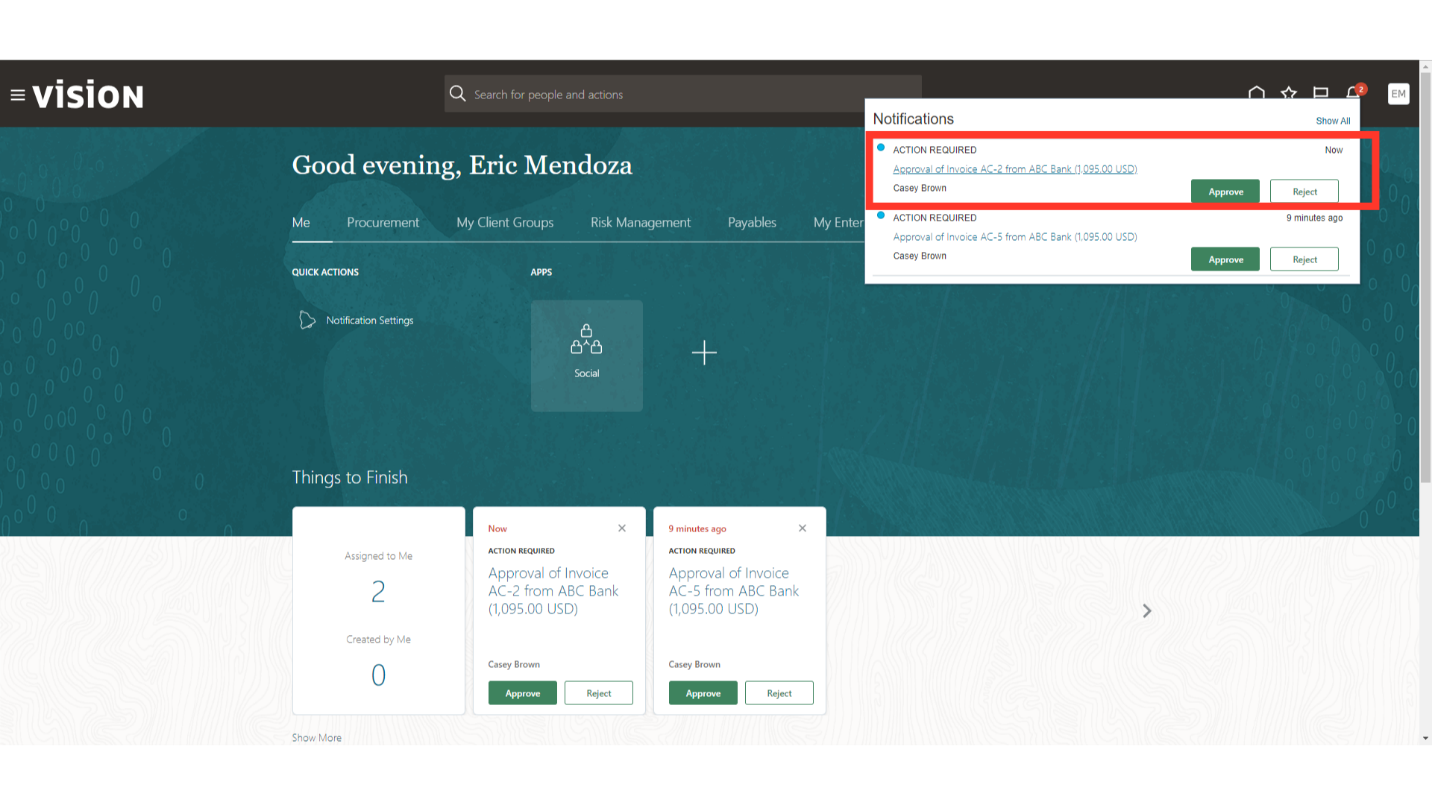
If you’re someone who has received the invoice approval task, by clicking the Approve button, you can confirm the approval from the notification. Alternatively, you can click the approval notification hyperlink to view the invoice in detail.
To view the invoice screen and drill down to the additional details, click on the “View Invoice” button.
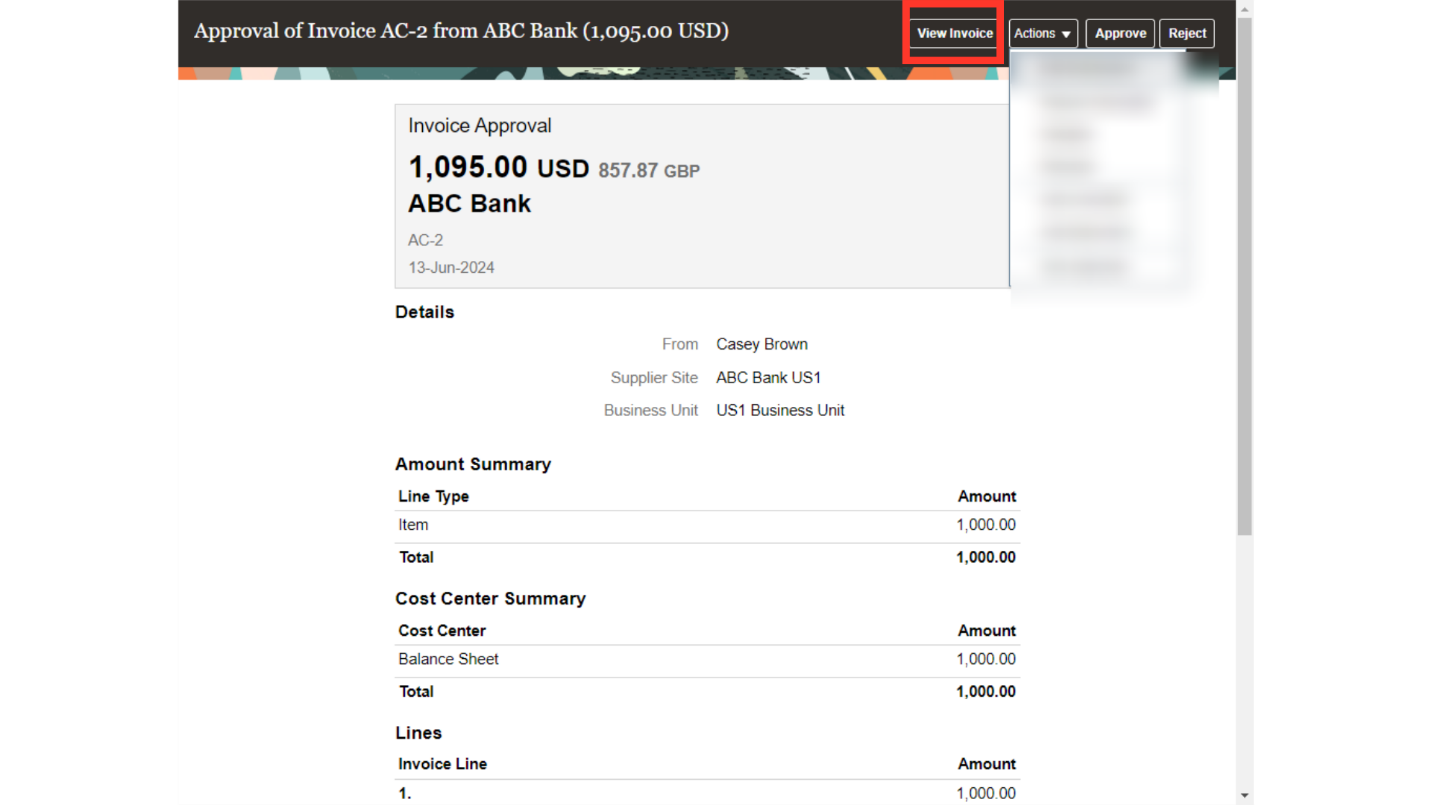
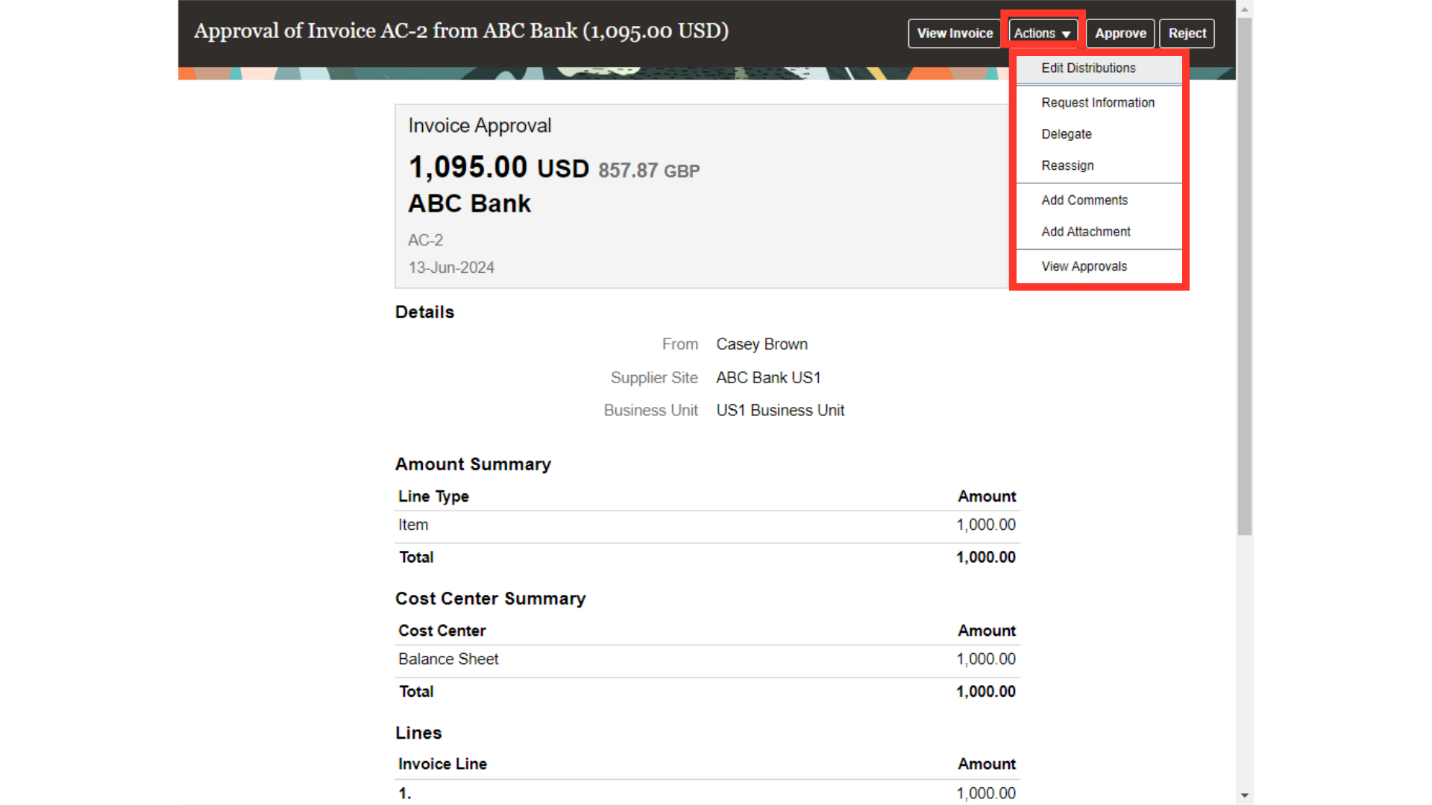
The approver has the ability to change distributions, request information, assign, and delegate approval, among other things. We’ll click on View approvals here to see the approval hierarchy for demonstration purposes.
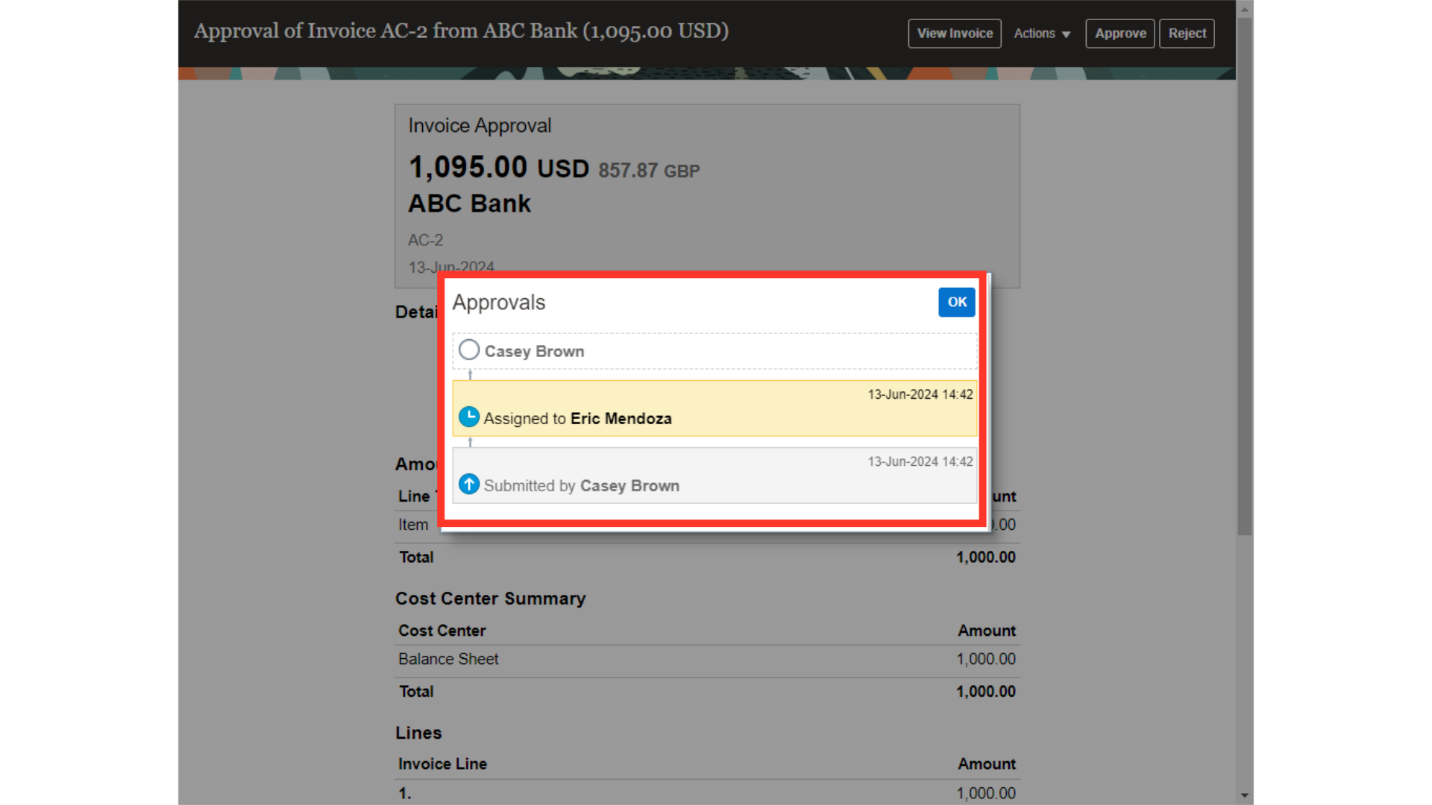
You can see the hierarchy of invoice approval as well as details about who submitted the invoice and to whom it was assigned for approval. Click OK to close this Approvals screen.
Once you have verified the details to approve the Invoice, click on the Approve button.
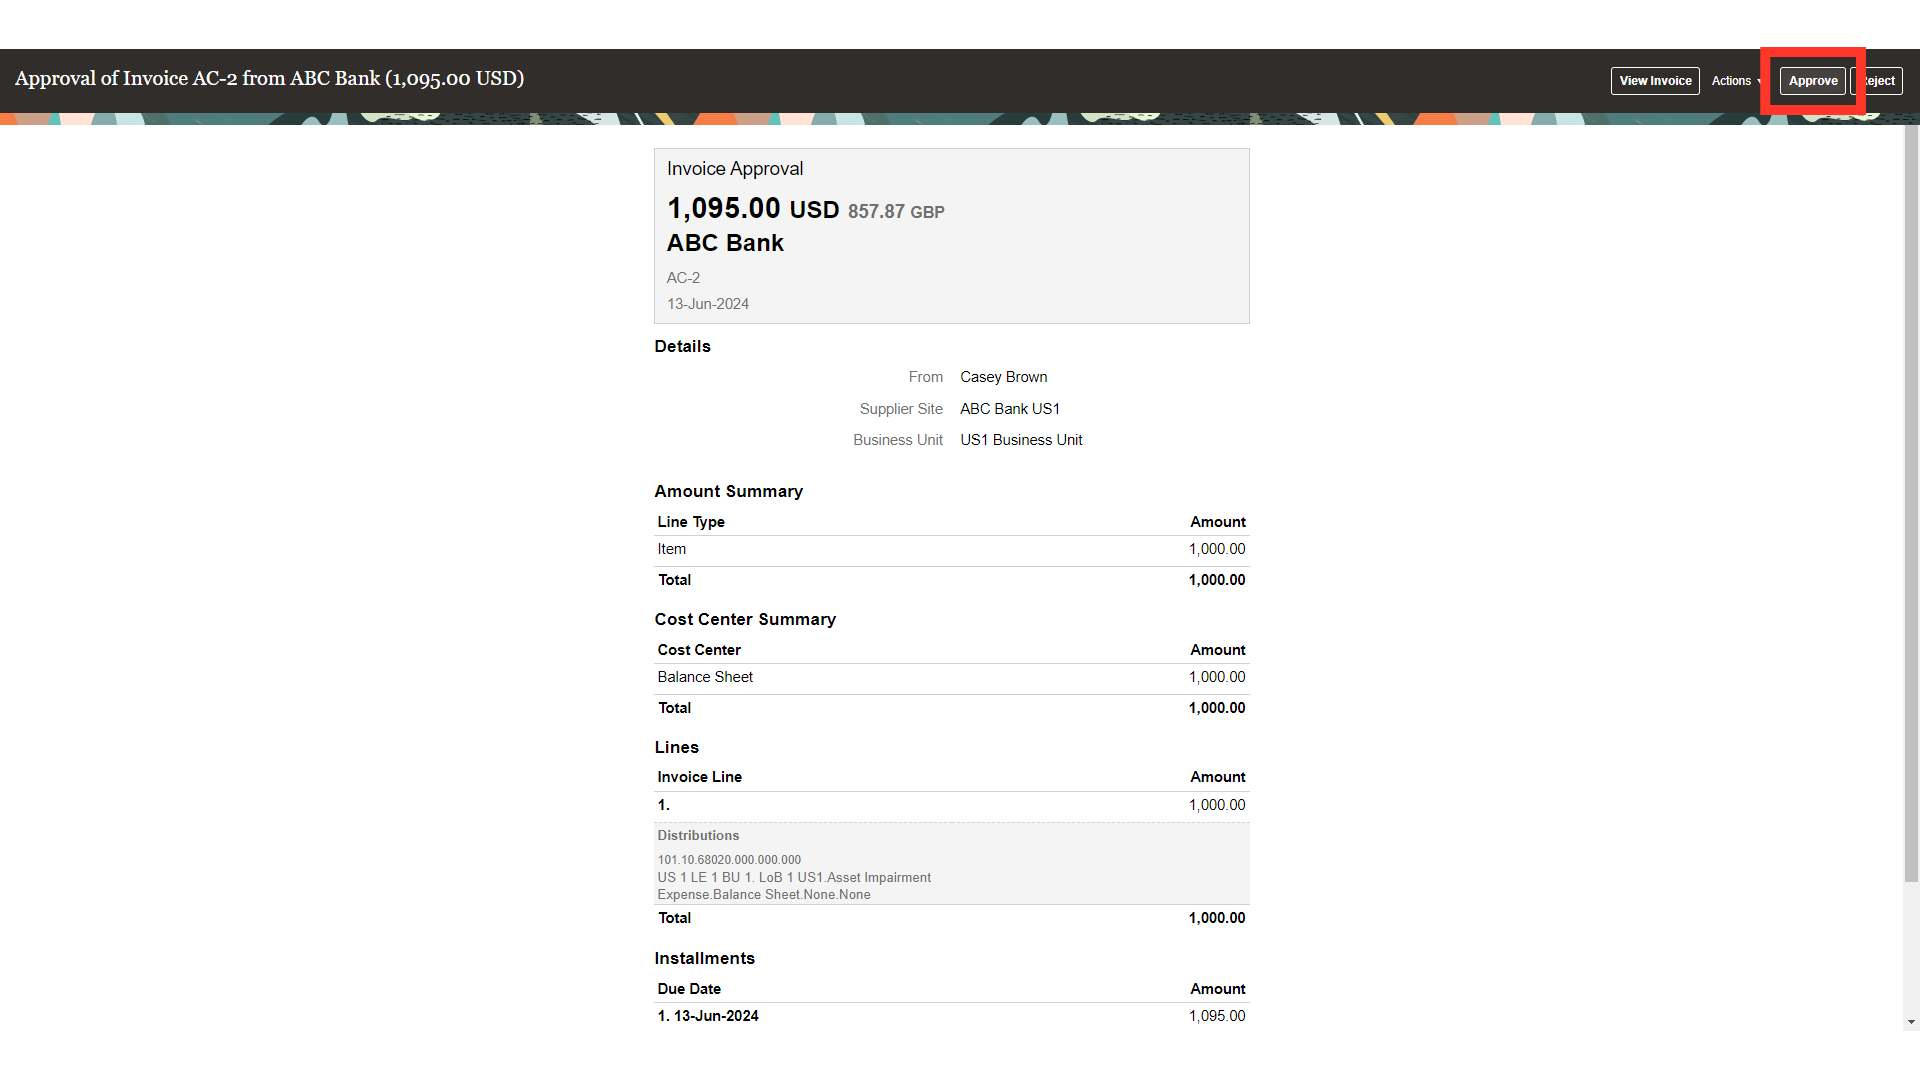
Enter the required comments, and then click on the Submit button to process the approval.

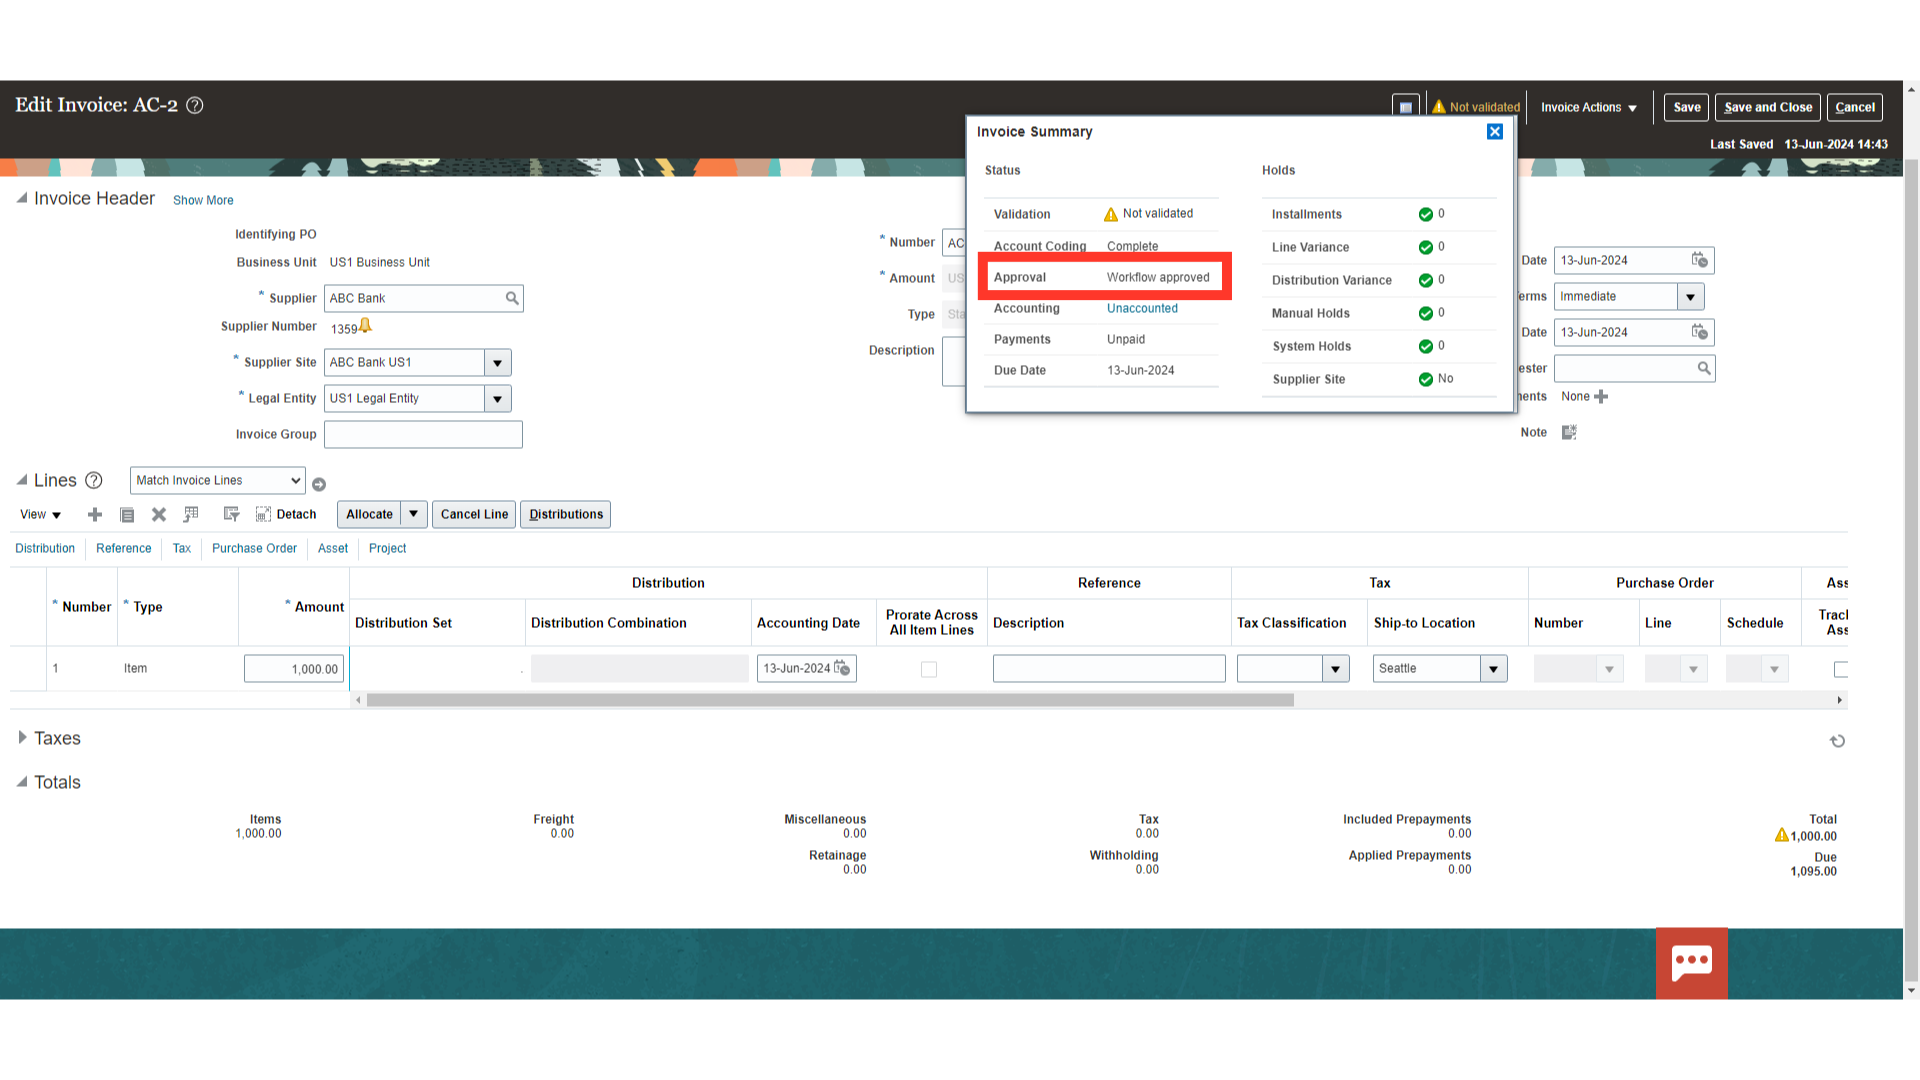
Once done, invoice approval status would be changed to Workflow approved.
This guide walks you through the processes for Accounting Coding, approving invoices, and updating distribution by approver. You have also reviewed the kinds of actions that the approver can perform.