Invoice Creation – Manual – Non-PO Matched
This guide will walk you through the detailed process of creating and validating the Unmatched Standard Invoice type, along with that process of initiating approval and generating accounting entries.
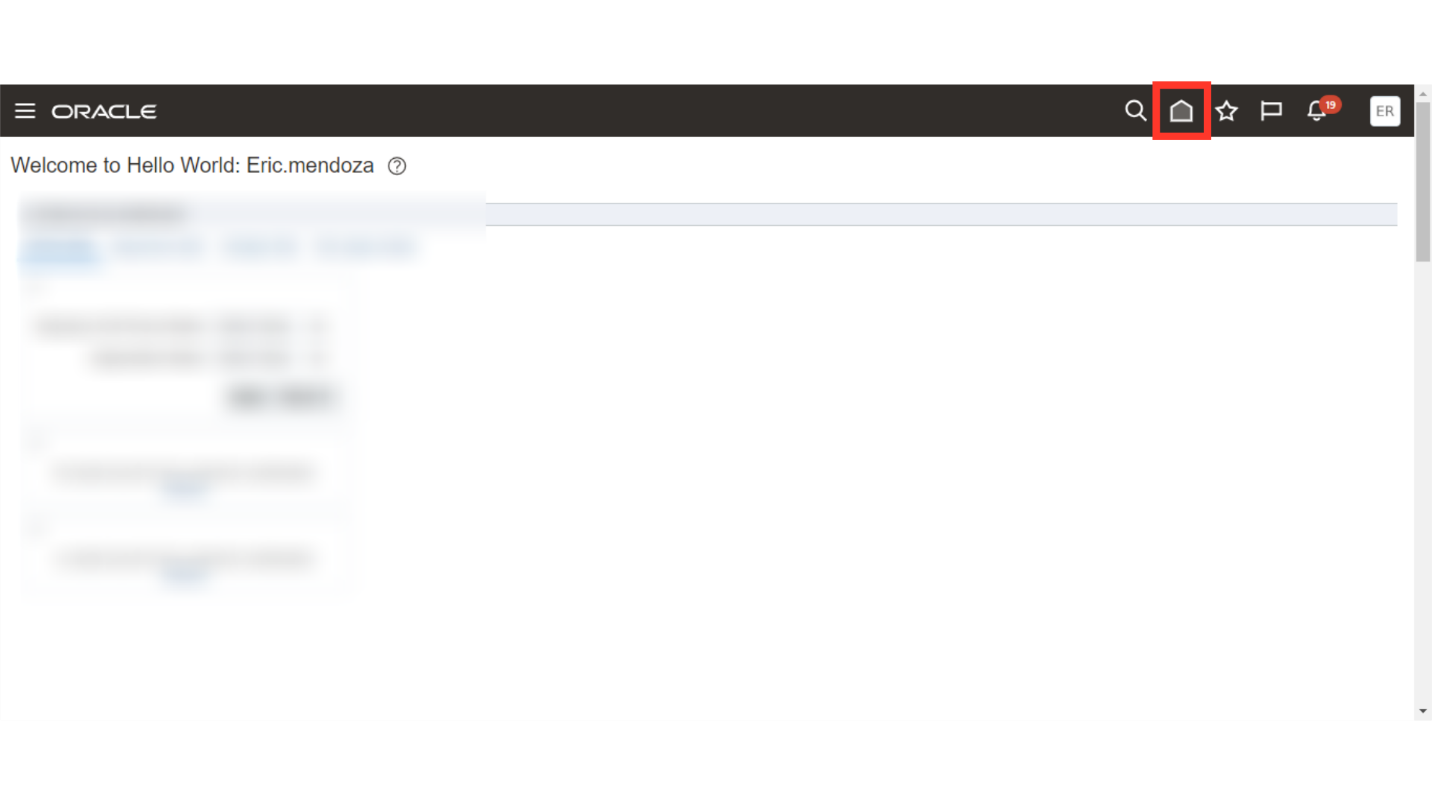
Click on Home to access the Payables menu.
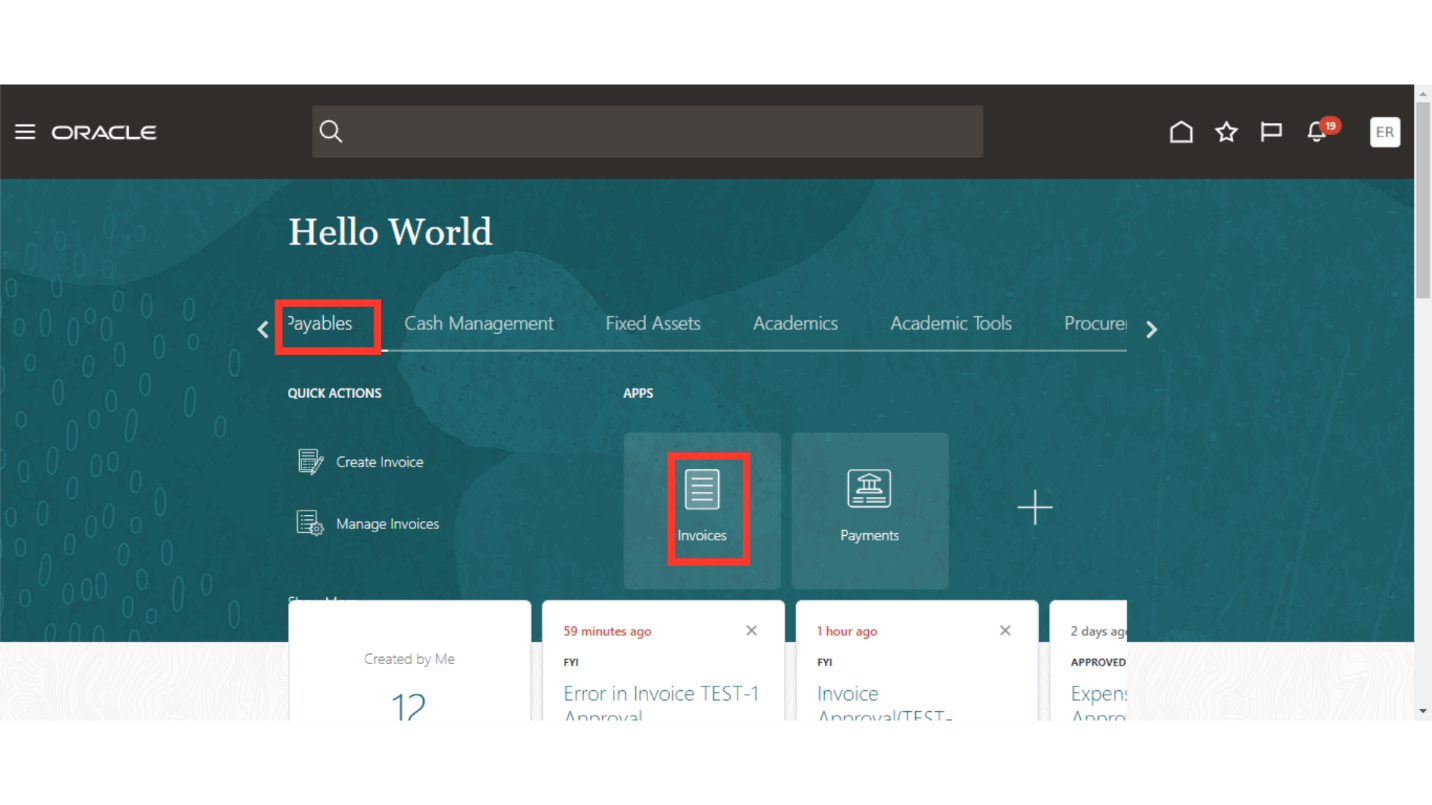
Under Payables menu select the Invoices submenu. This will take you to the Invoices work area. Alternatively, you may access Invoices work area by selecting Invoices under Payables from the navigator also.
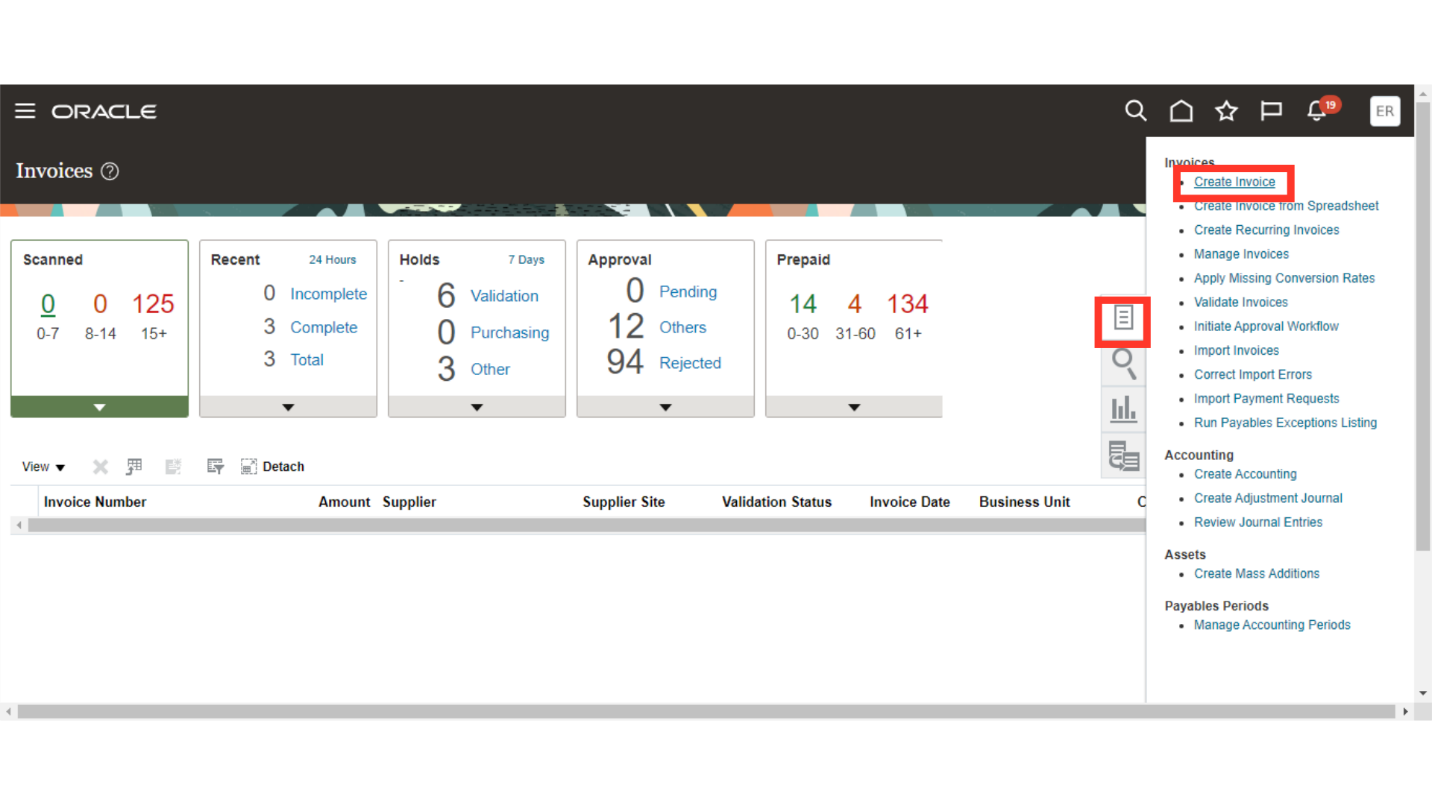
This is the Invoices Landing Page. Click on the Task icon and then click on Create Invoice.
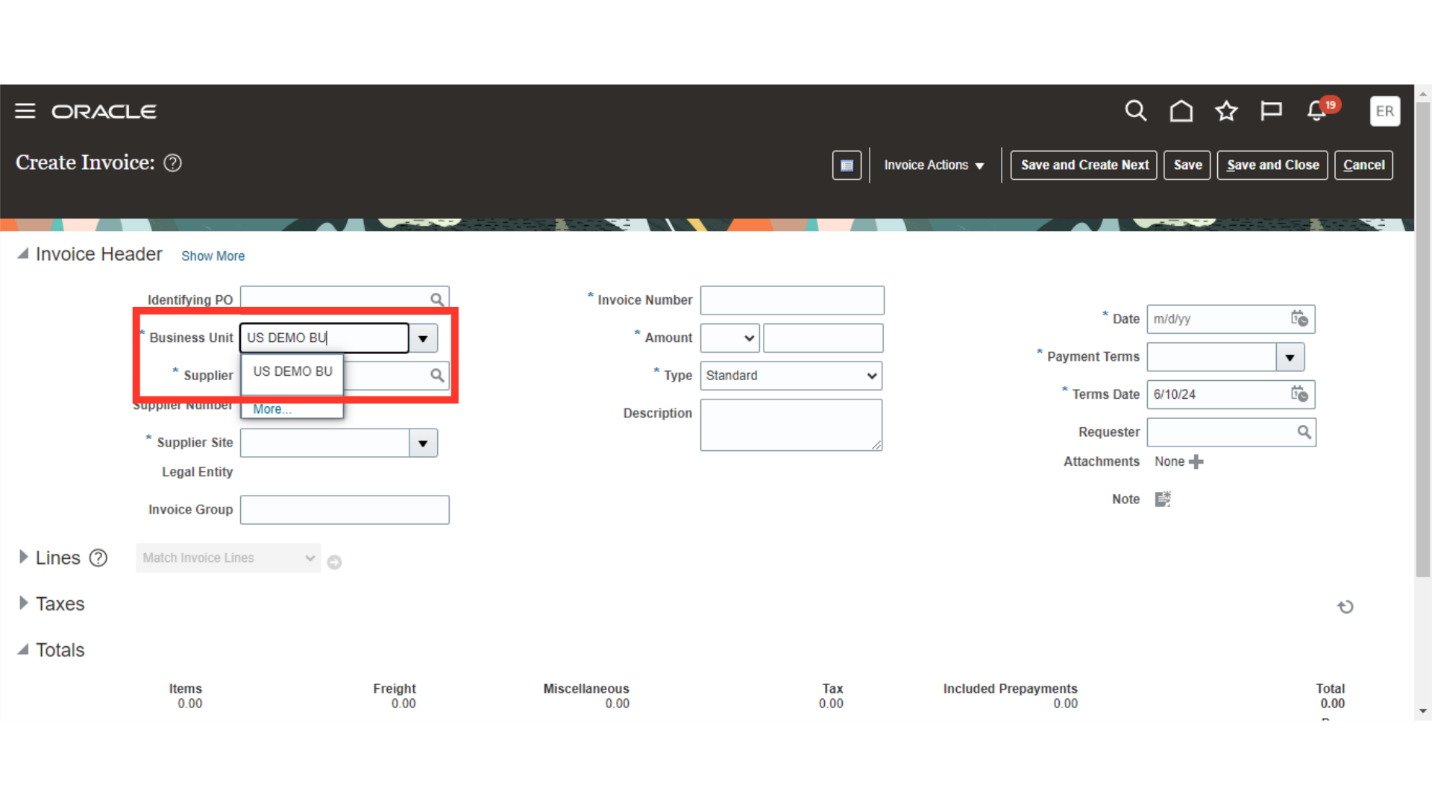
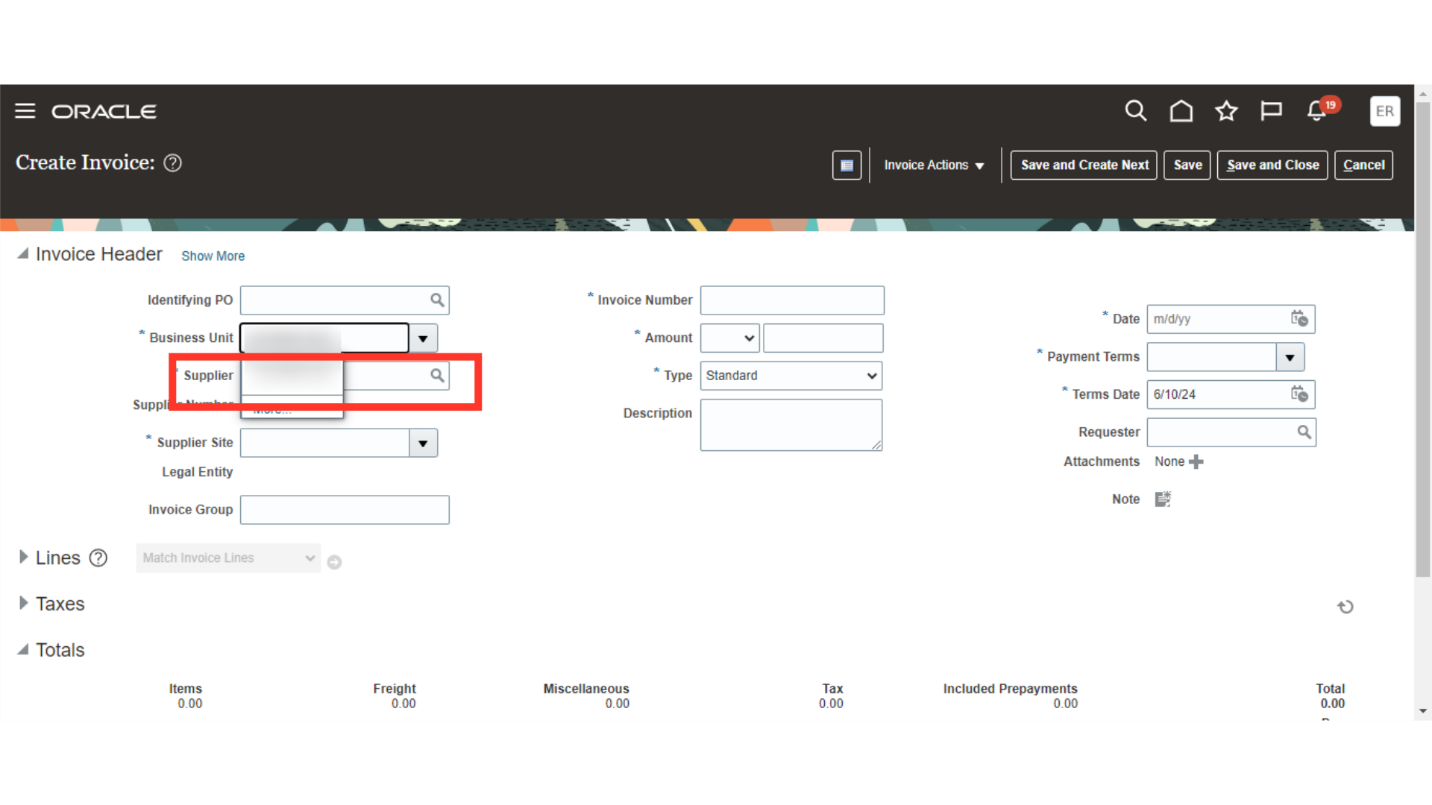
Select the Business unit for whose invoice payments to be created. Here for demo purpose, I have selected US DEMO BU.
Click on the magnifying lens to search and select the supplier.
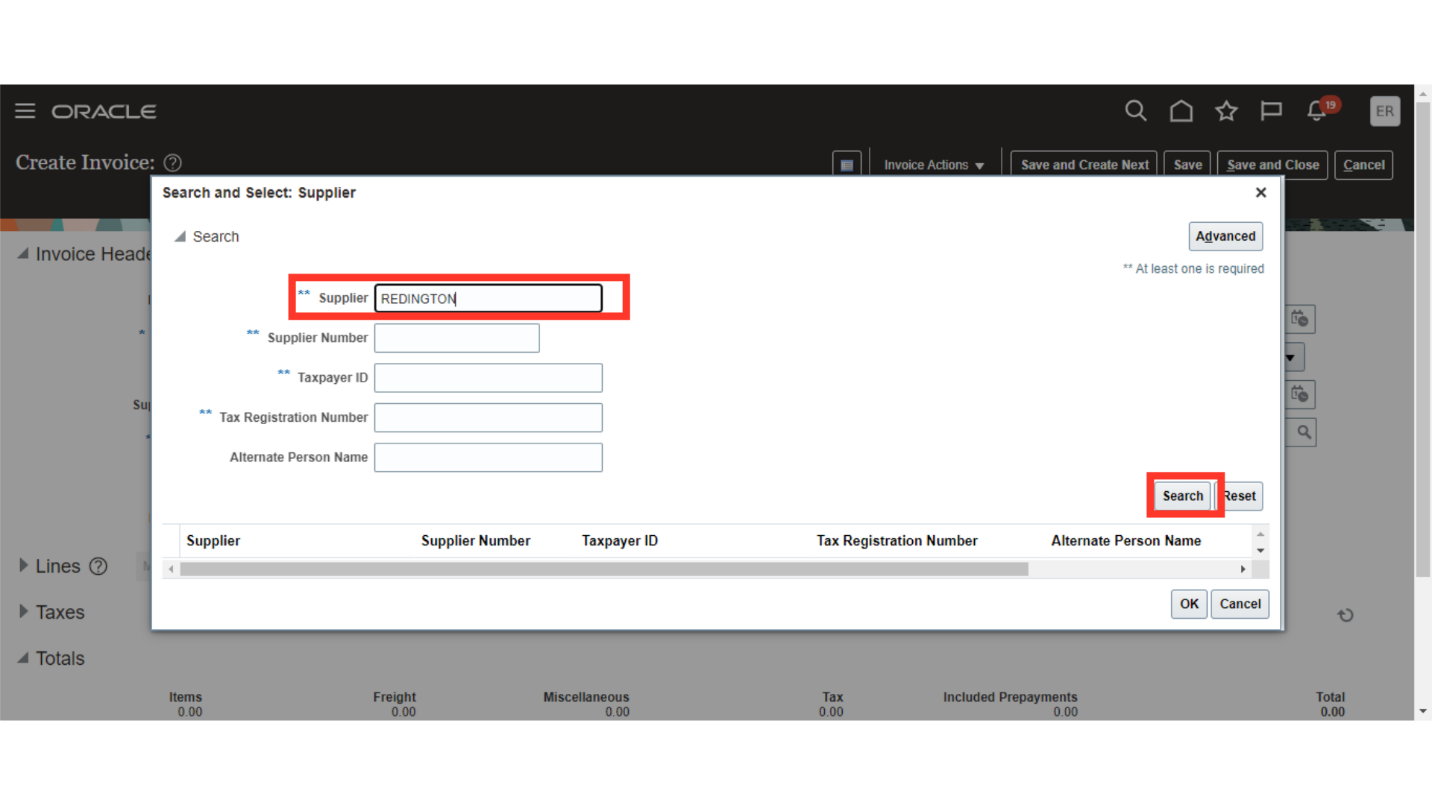
After entering the Supplier name, then click on Search button to find the supplier.
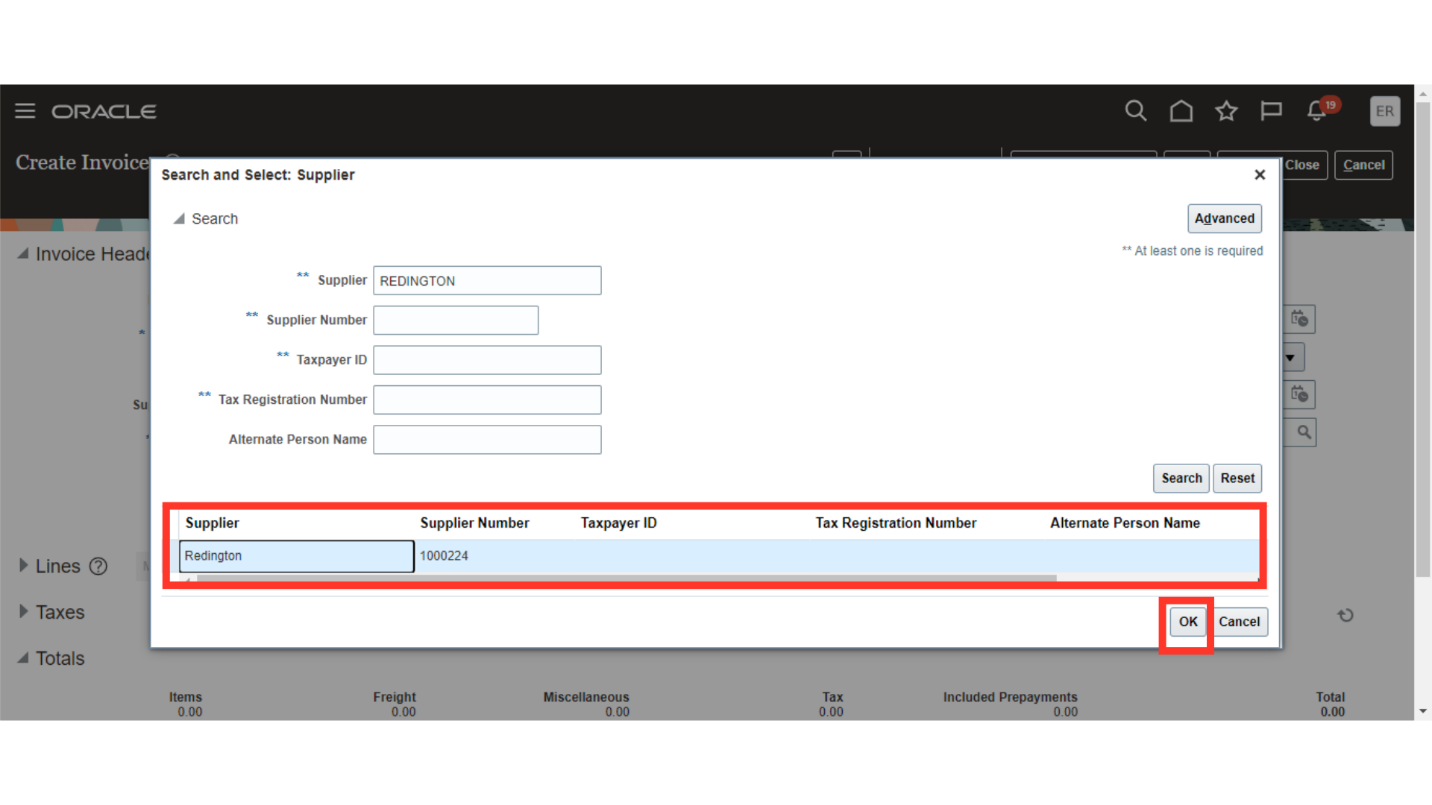
Select the supplier searched, and then click on OK button to continue to add the supplier.
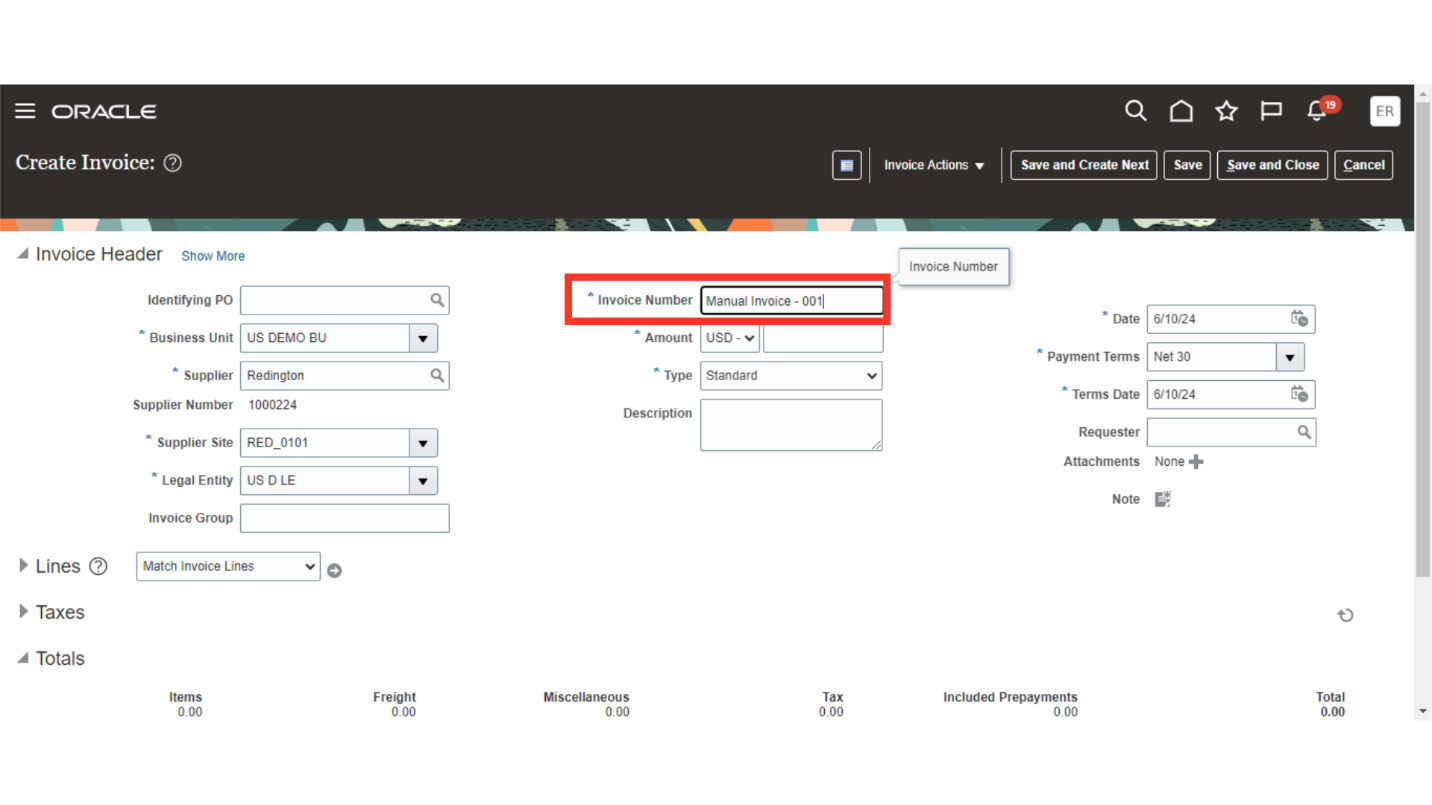
Enter Invoice number from the Invoice copy received from the supplier.
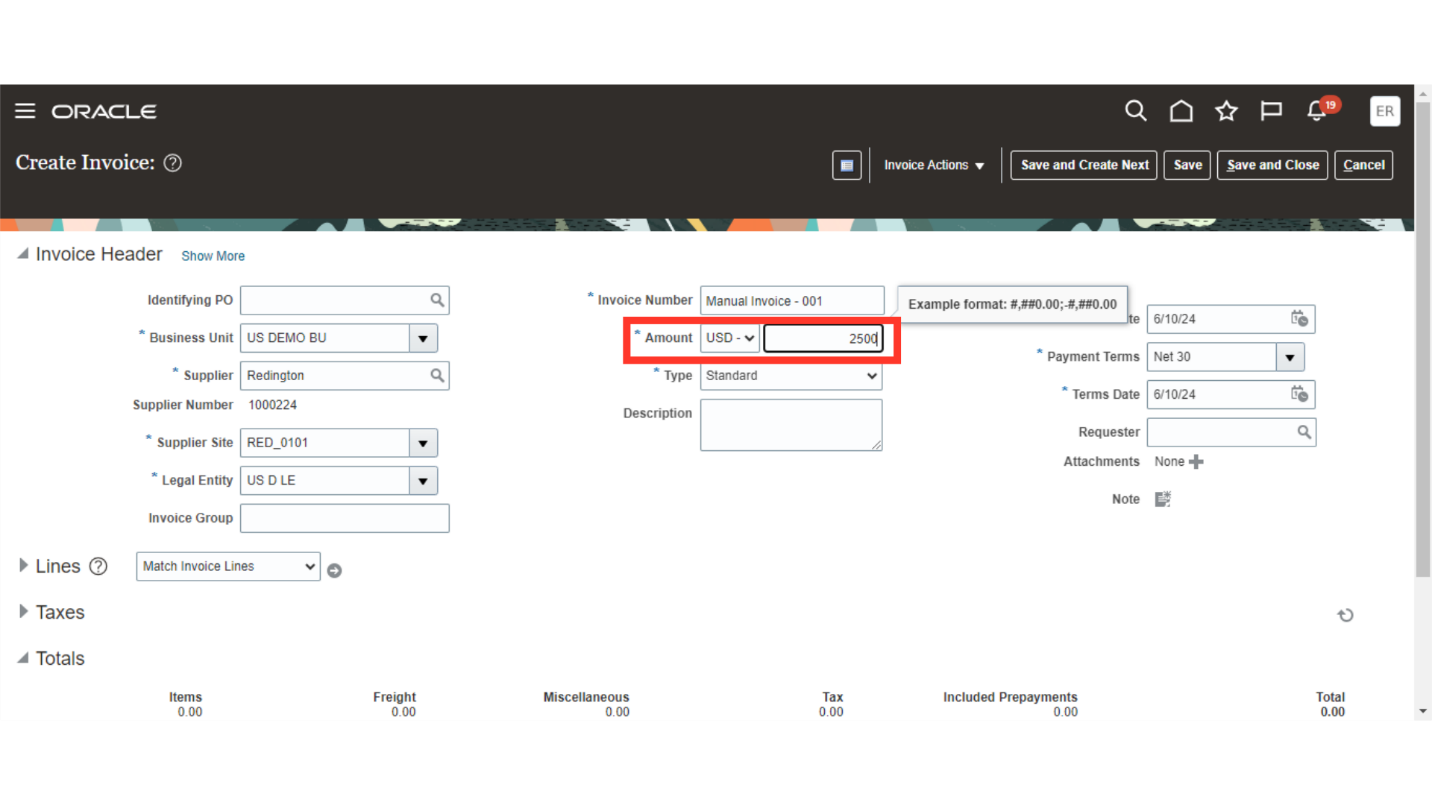
Enter the total invoice amount including tax amount in the Amount field. Also, select the currency in which invoice is to be created.
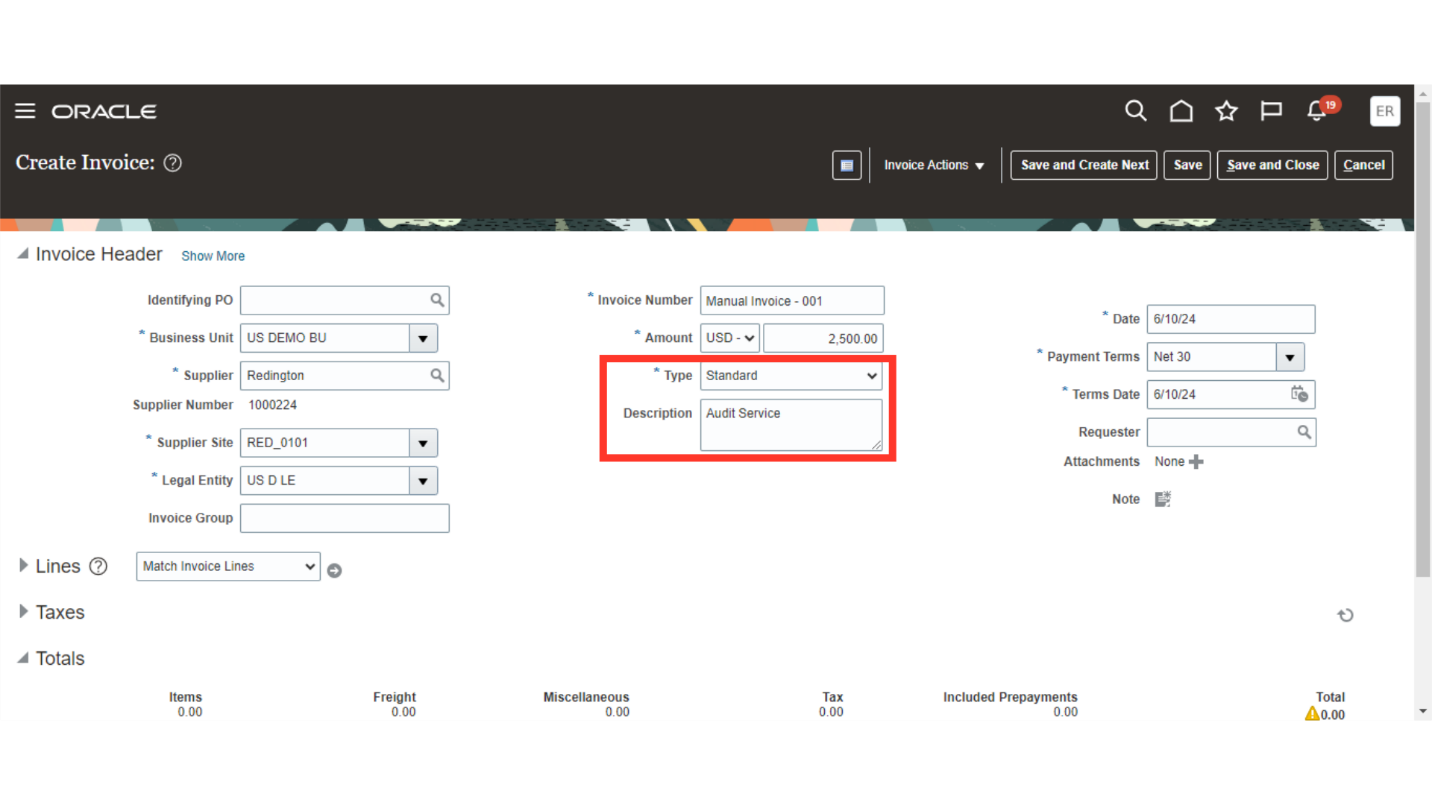
Select the Invoice type as “Standard” , and enter any additional information in the description field.
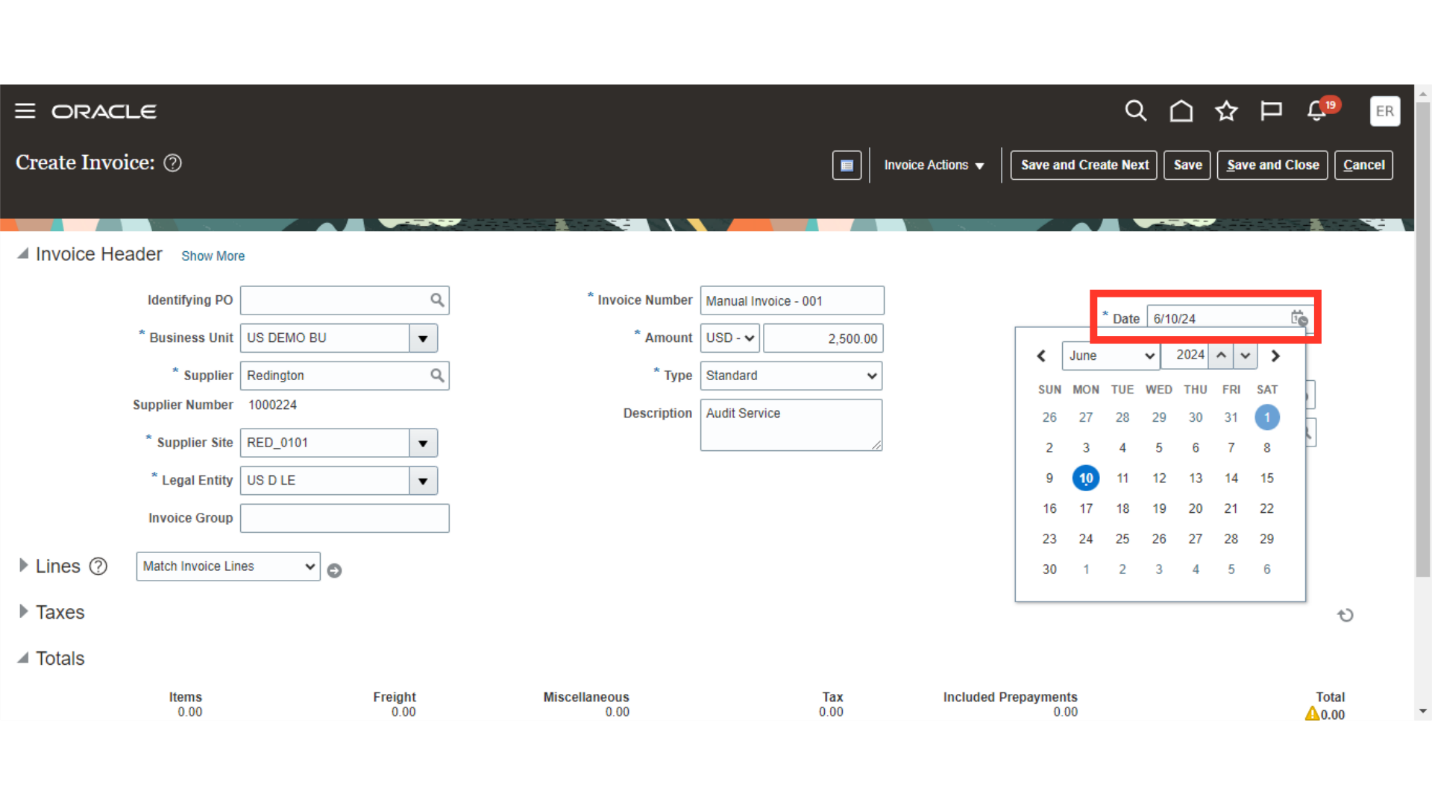
Current system date is defaulted as “Invoice date”, you can change the date manually or by selecting date from the calendar.
Payment terms is default from the Invoice options if nothing is select at the supplier level. Whereas Terms date is calculated based on the Payment terms.

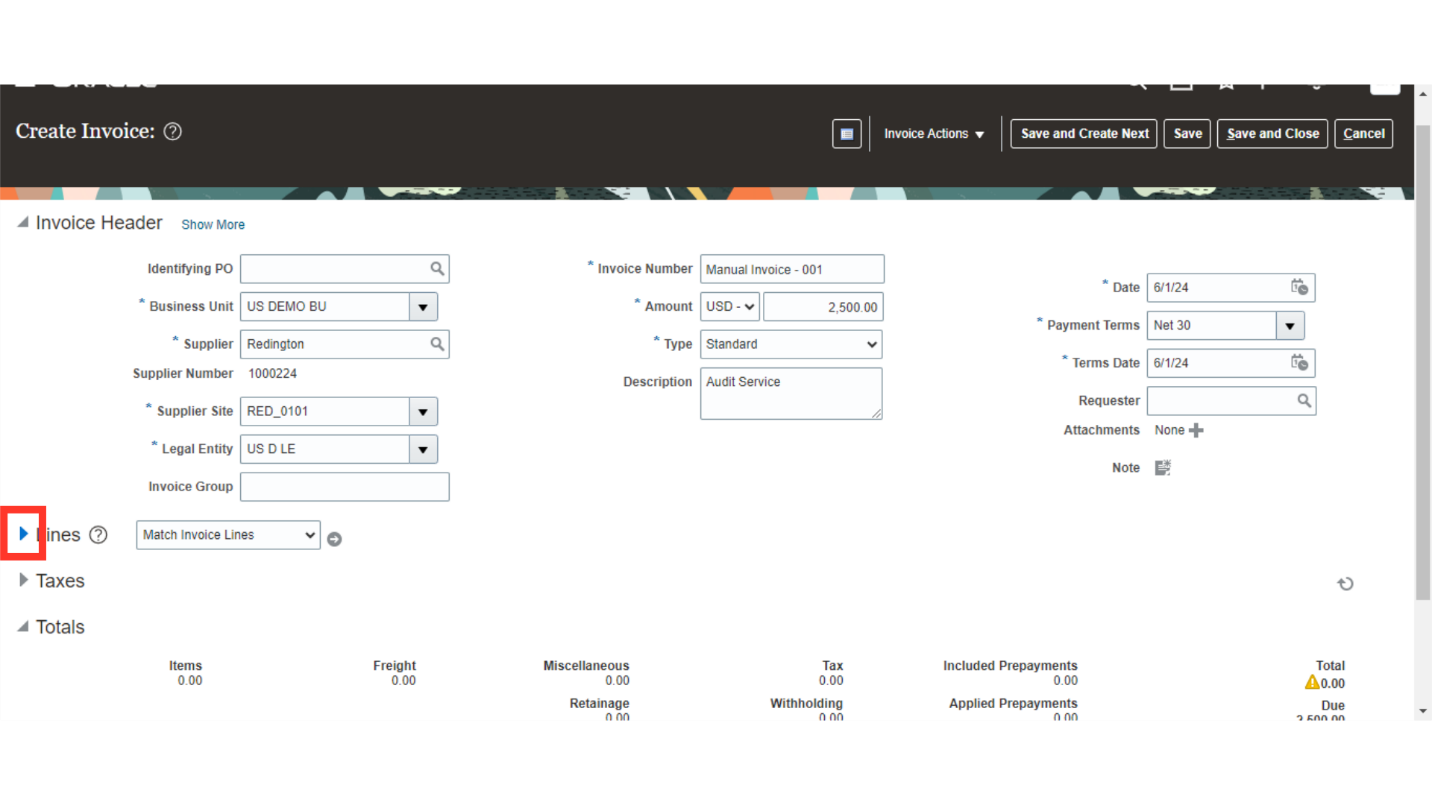
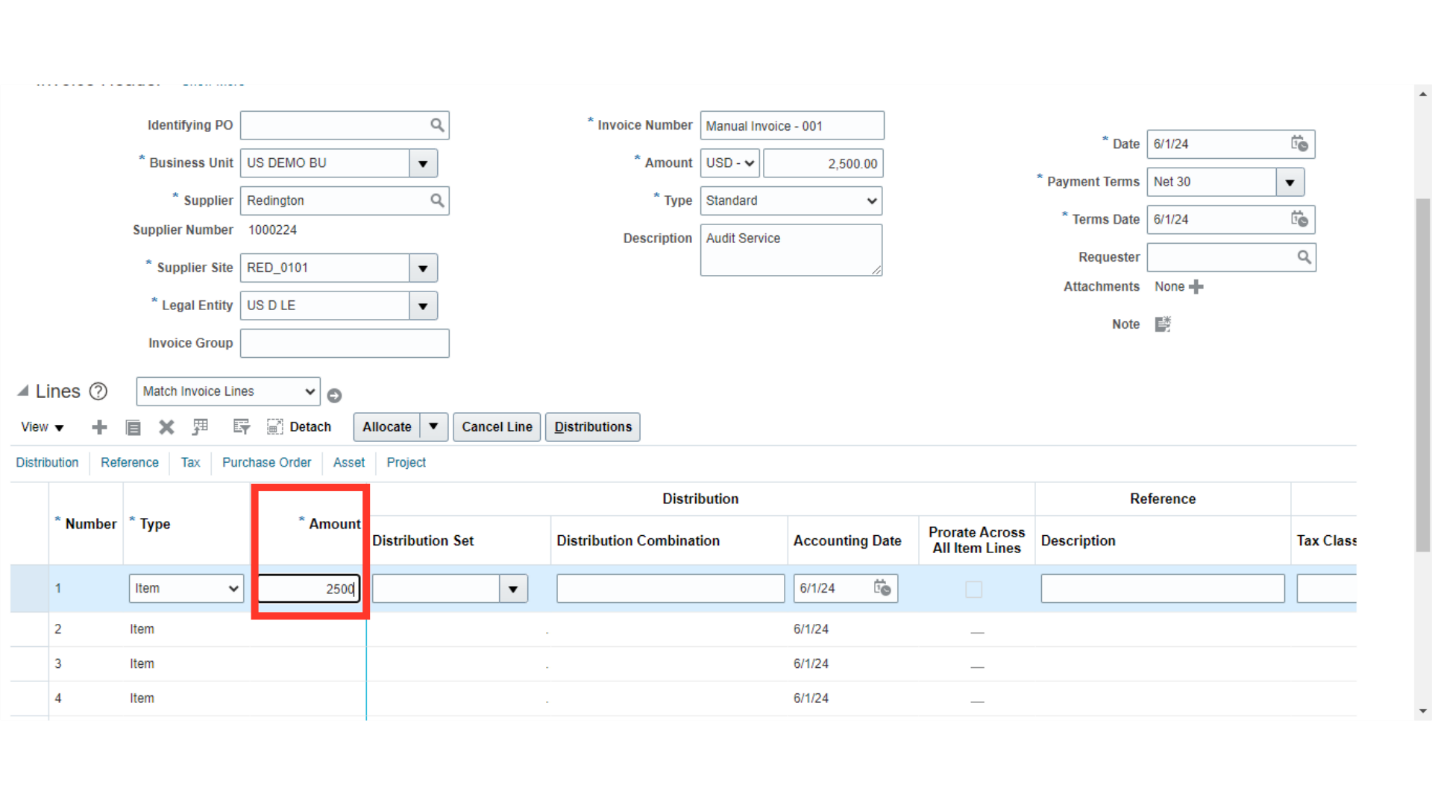
Expand the lines to enter the invoice lines and distribution details.
Enter the Invoice line amount at the invoice line level.
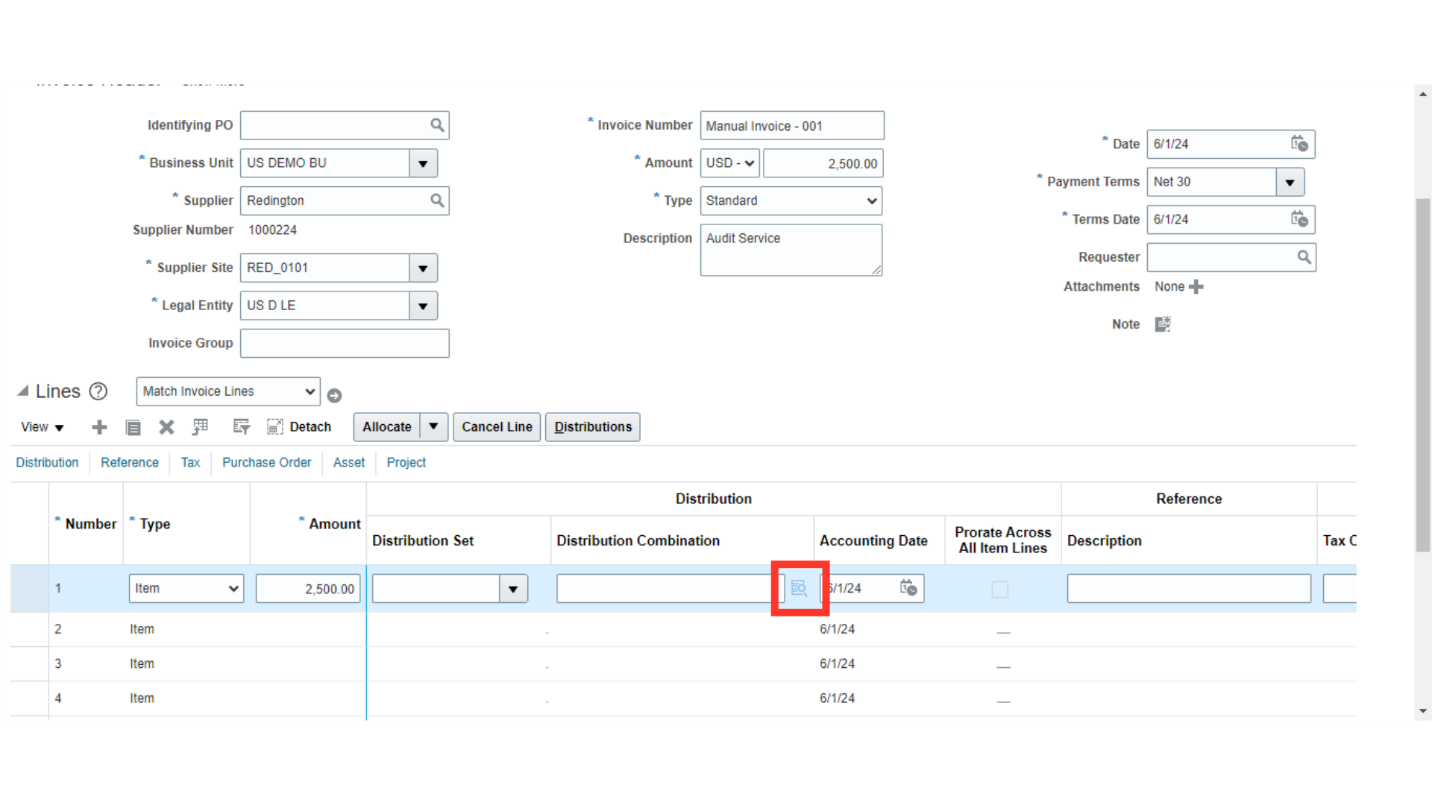
Click on the Account combination icon to enter the distribution combination details.
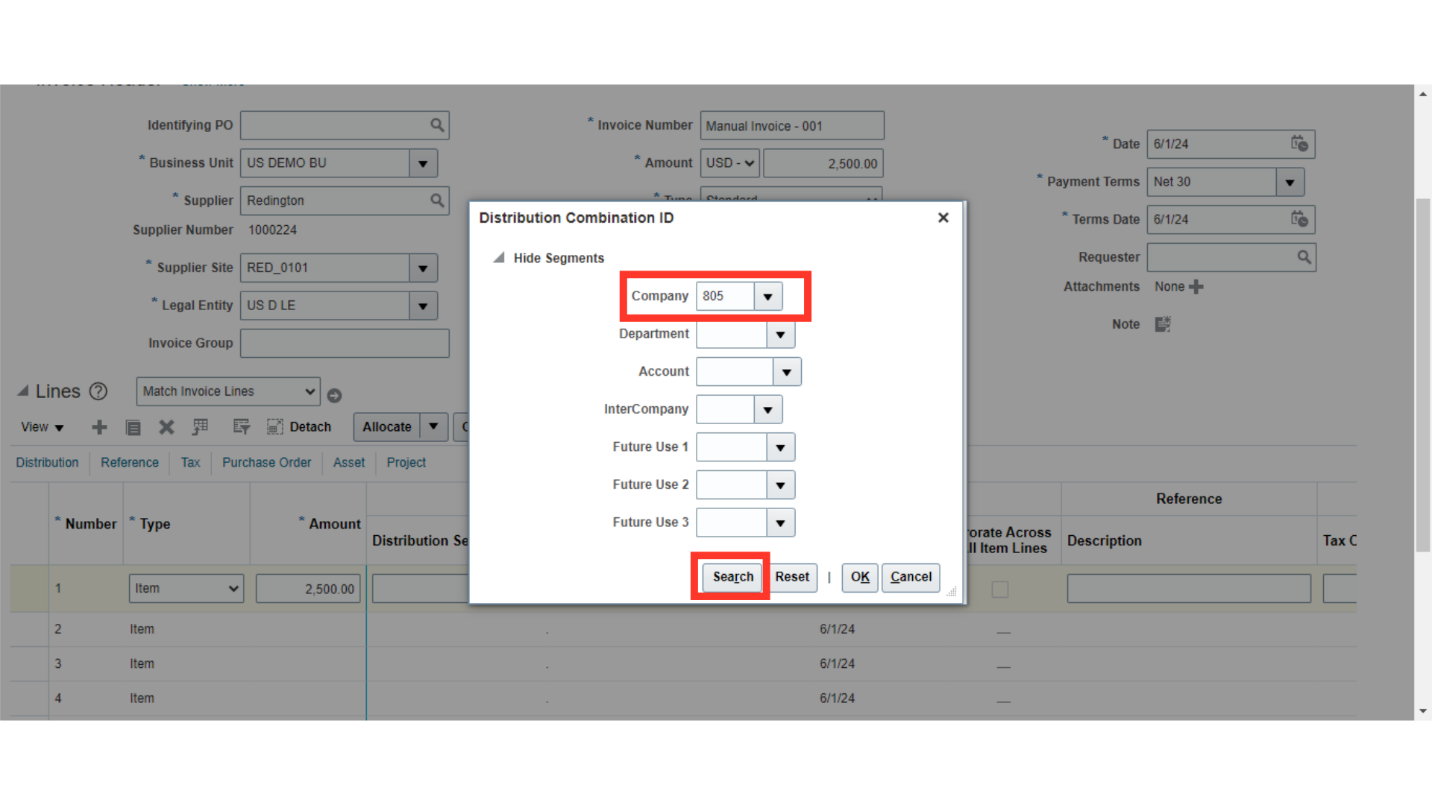
Select the company value manually or from the list of values, then click on search to find the already existing account combination details.
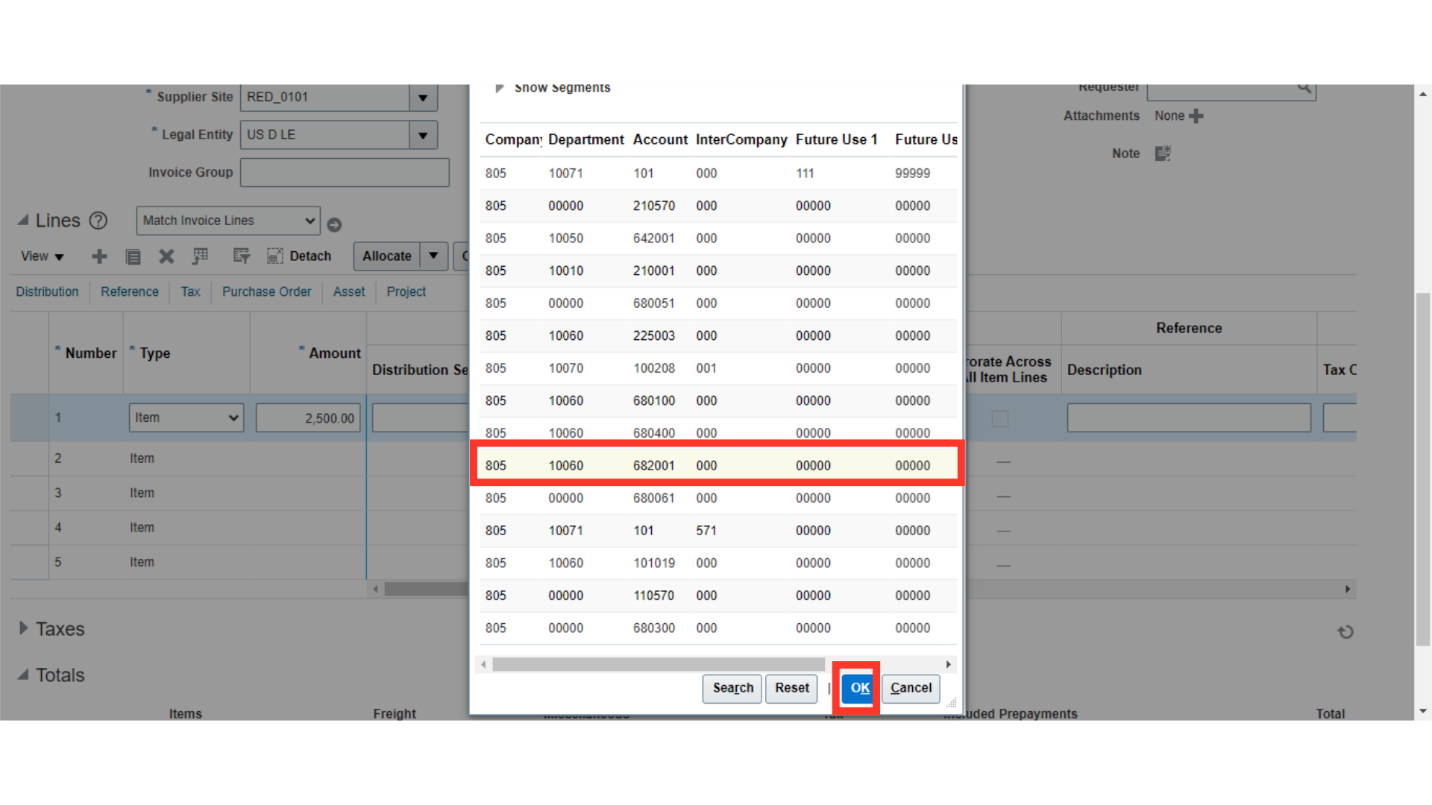
Select the distribution combination based on which accounting entries would be generated, and then click on OK to continue.
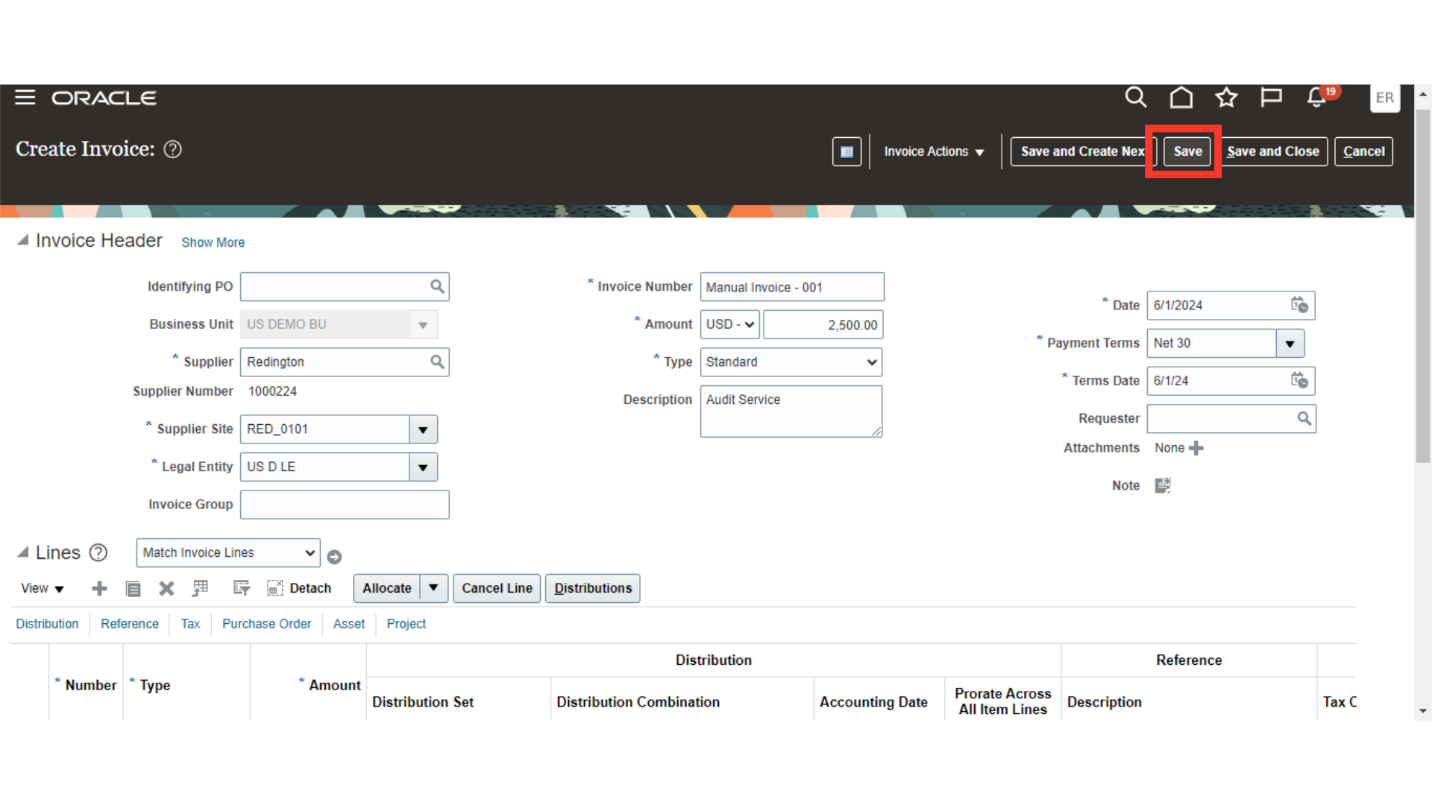
Click on “Save” button to save the invoice details.
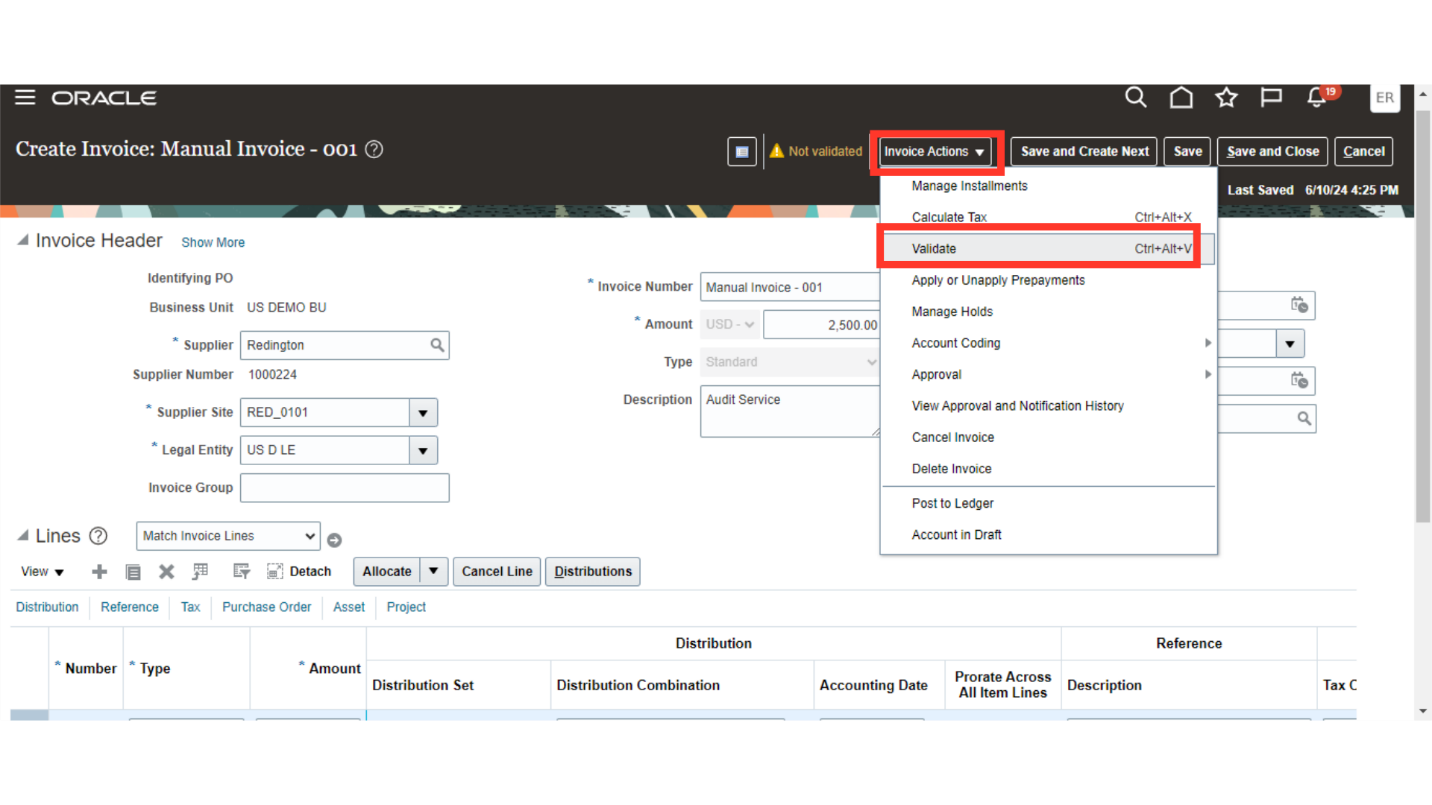
For validating the invoice click on “Validate” after clicking on the Invoice Actions.
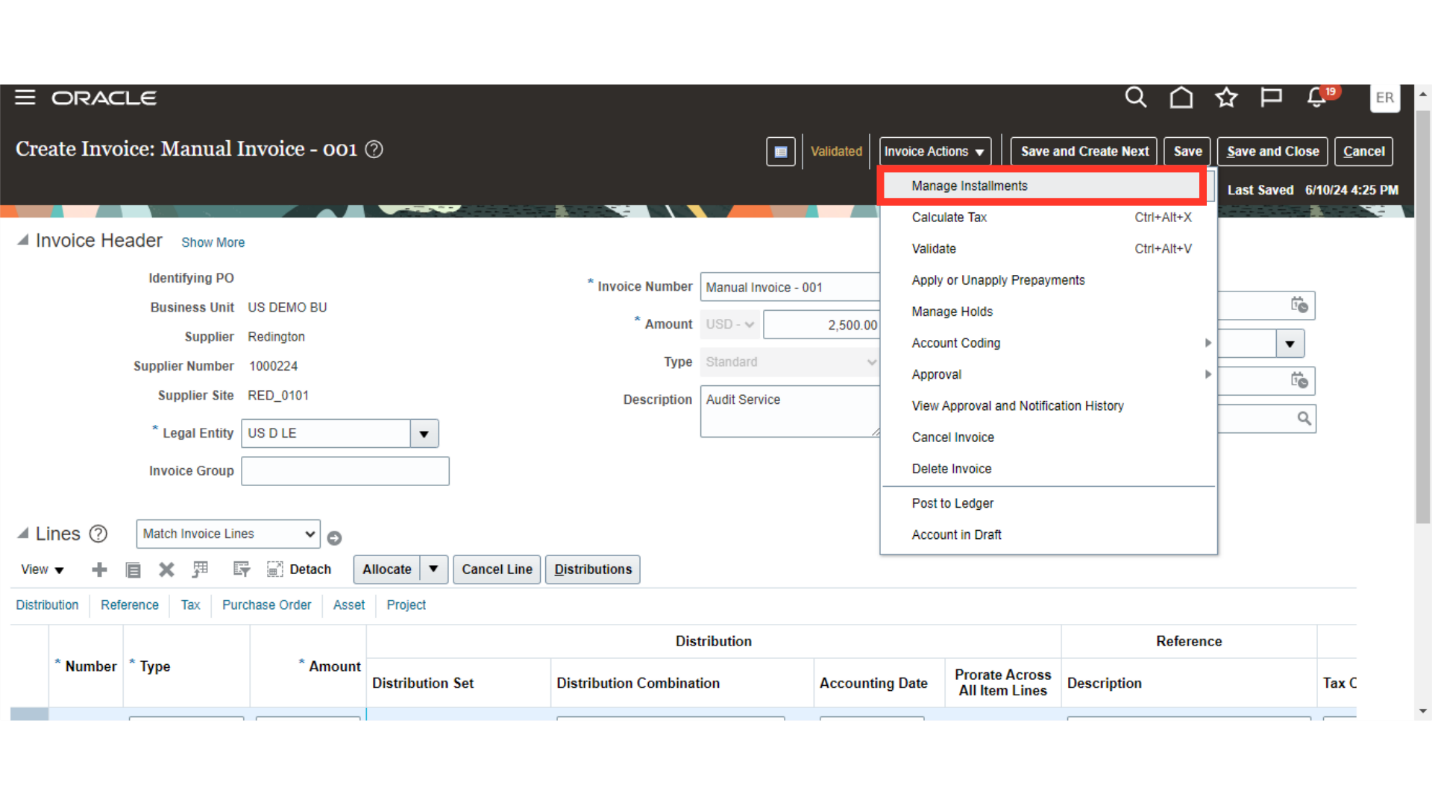
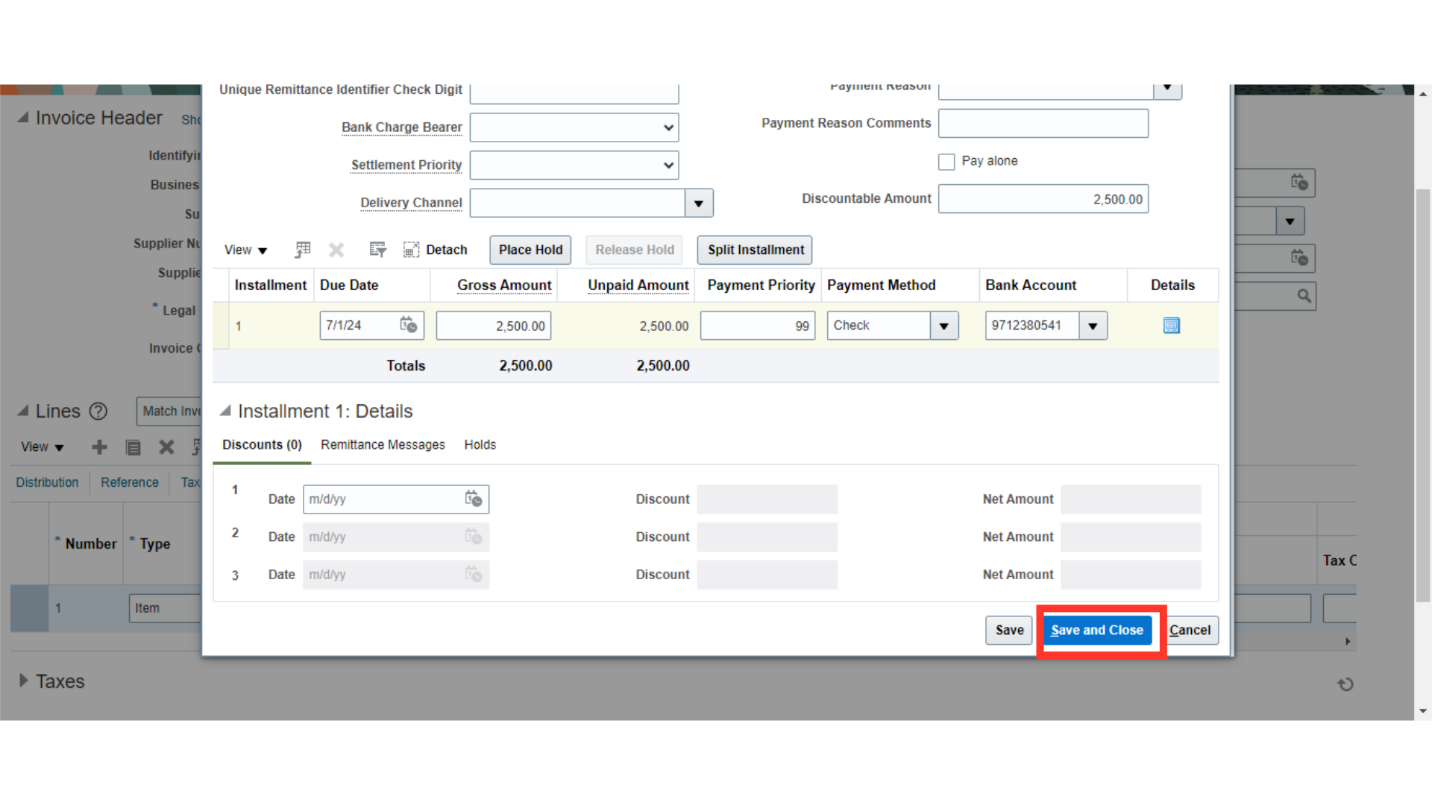
Click on Manage Installments under Invoice actions to see the installments details such as payment method, Pay Alone etc.
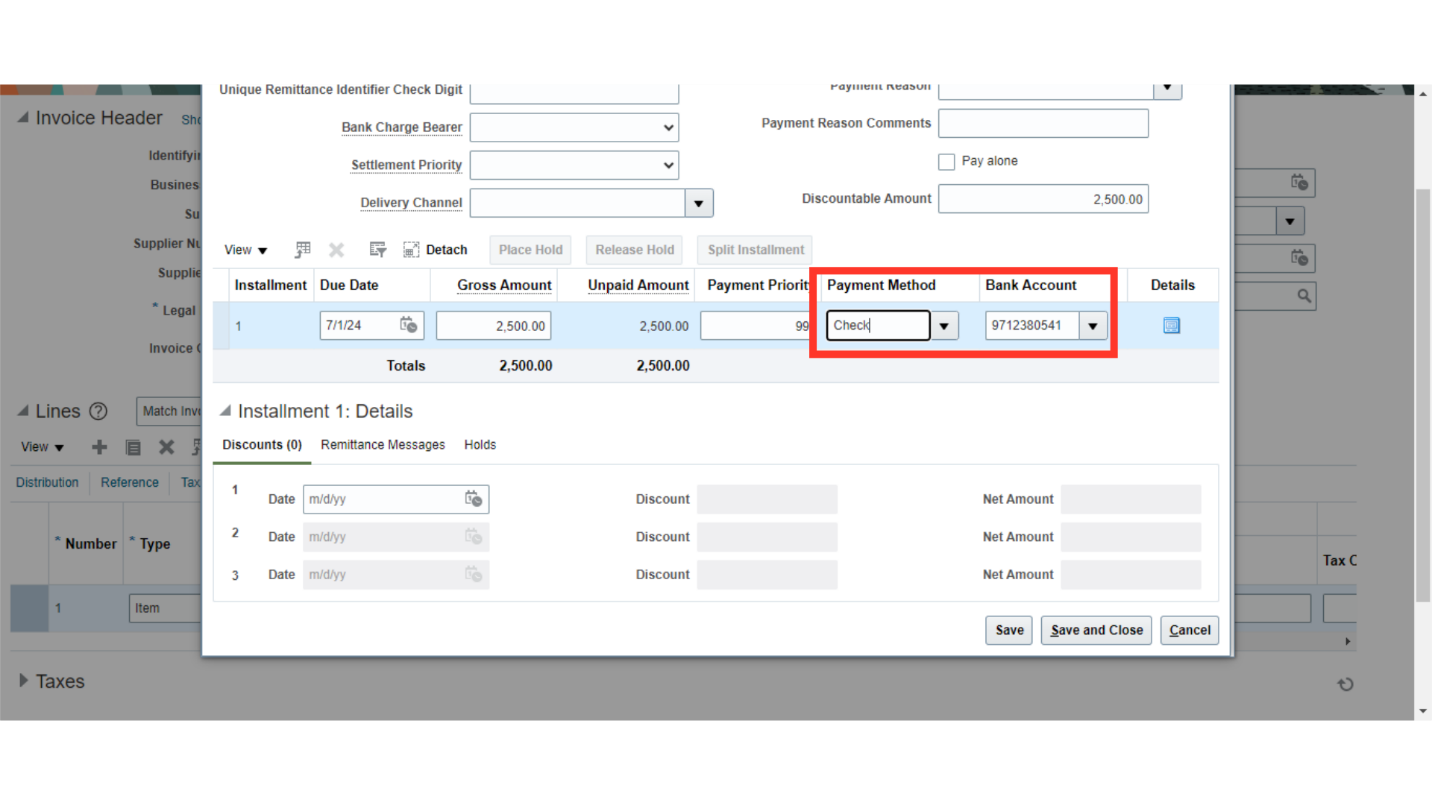
If default payment method is not set at supplier level, then Payment method is defaulted from the setup. Also, the primary bank account set at supplier master is defaulted at the invoice.
Click on “Save and close” to close the Manage Installments page.
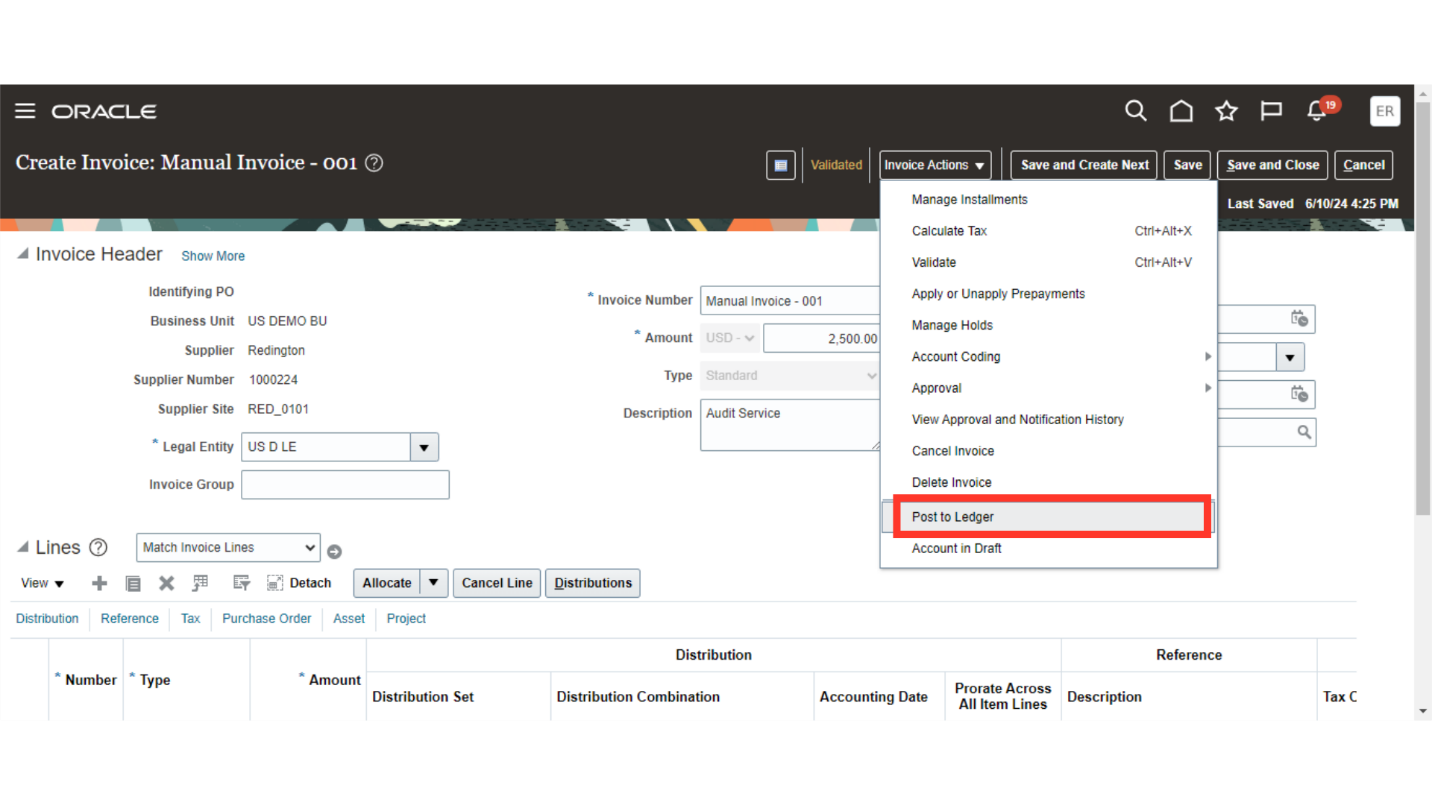
To generate accounting click on “Post to ledger” after clicking on the Invoice Actions.
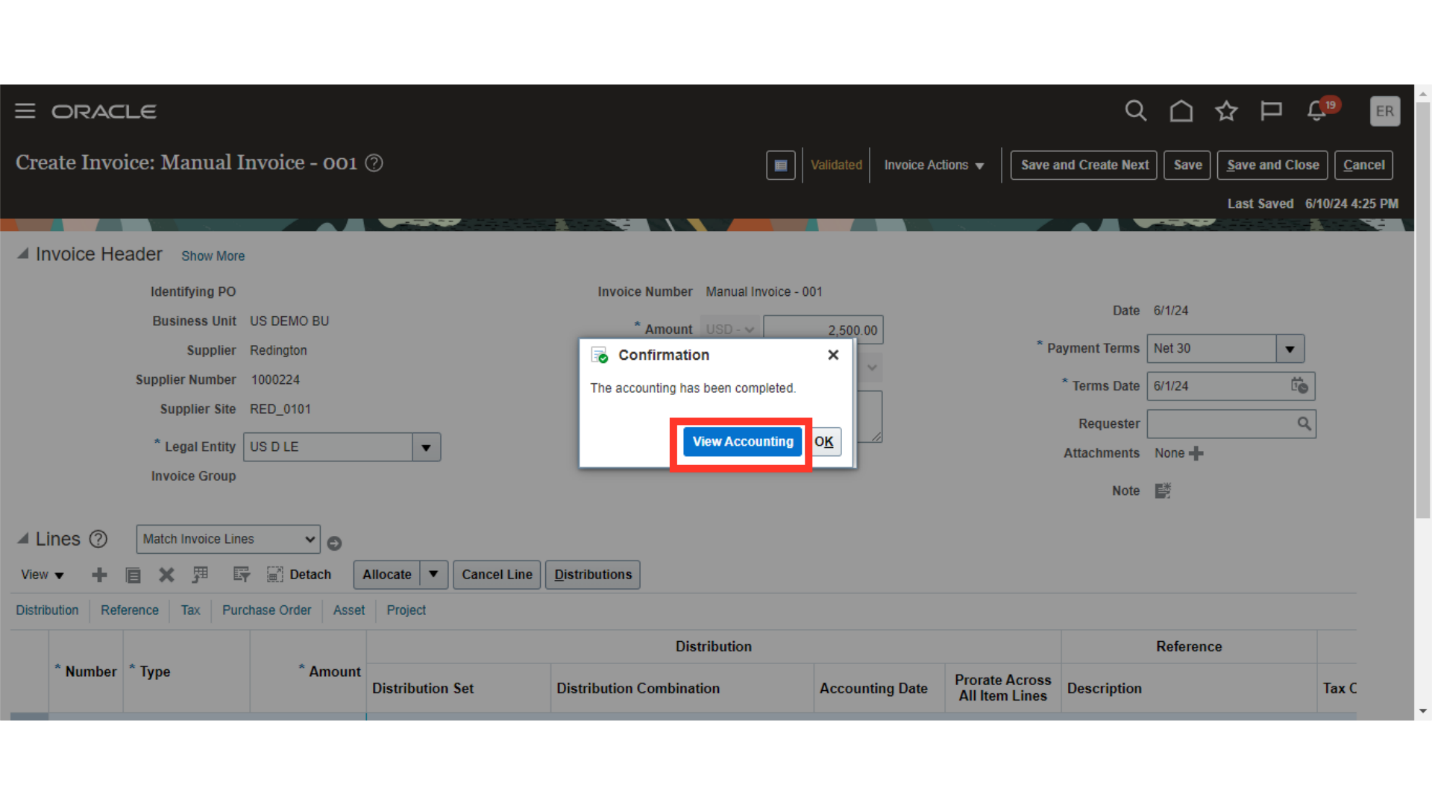
Select “View Accounting” button to see the more details of journal entry.
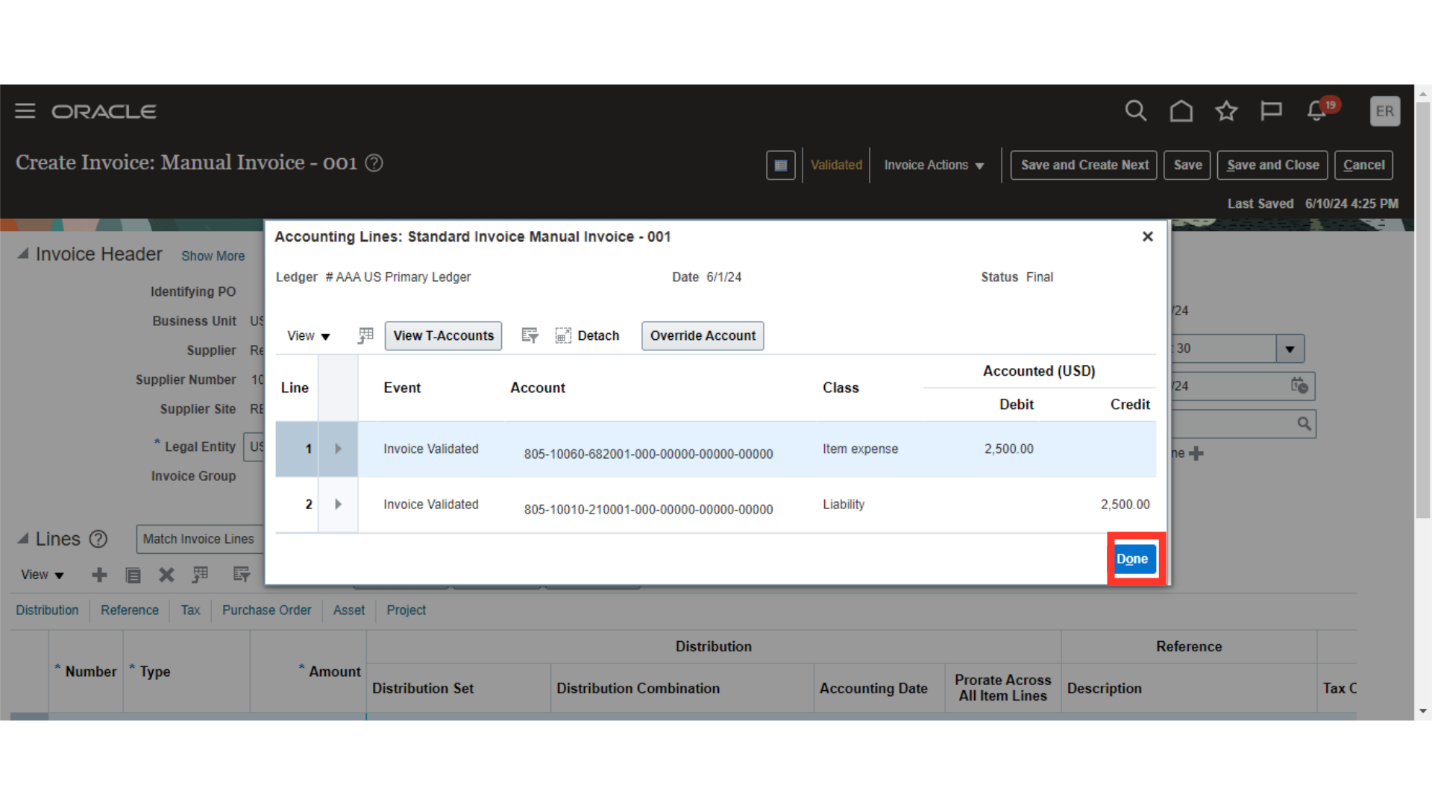
This is the journal entry generated and transferred to the general ledger for the Invoice booked. Click on Done button to close this window.
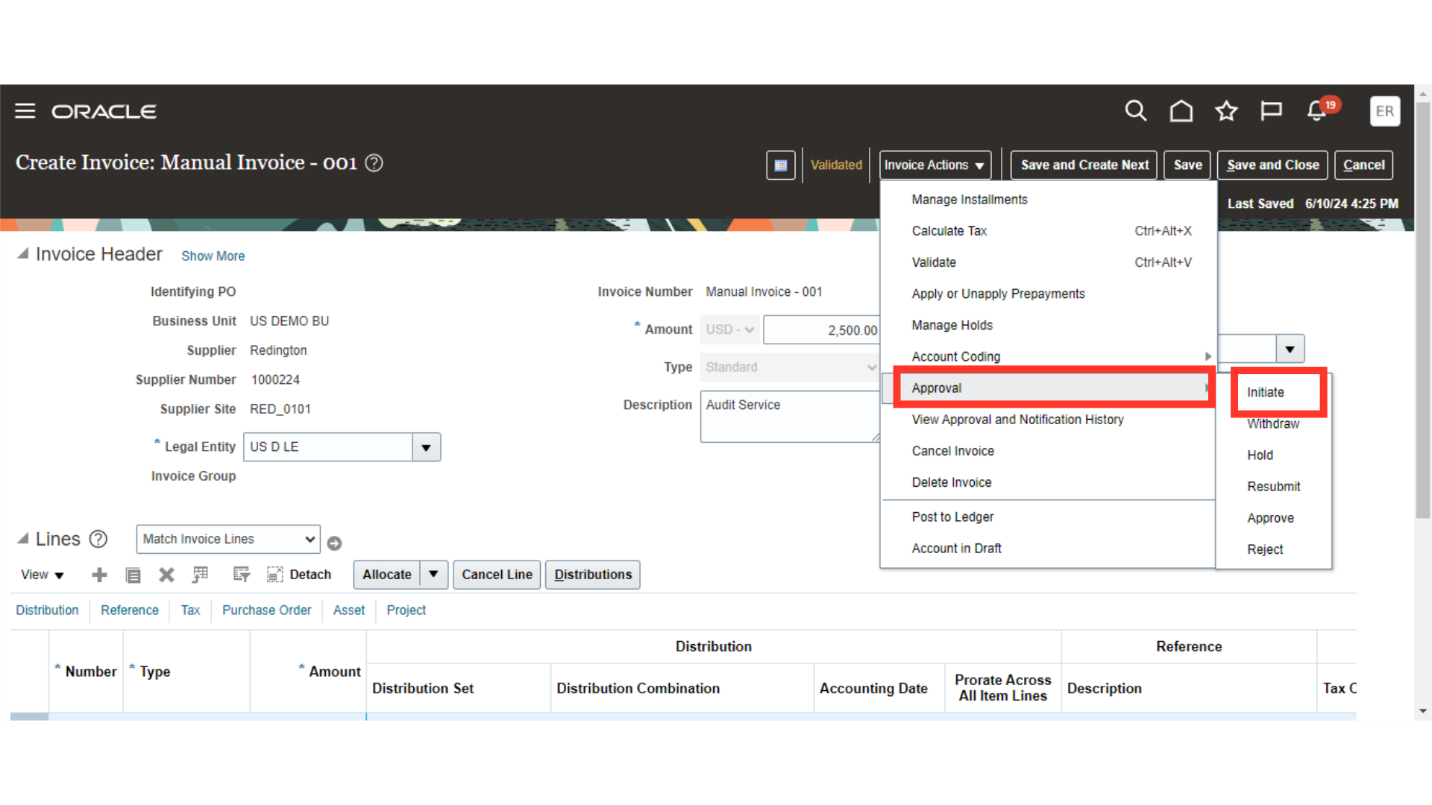
To initiate the invoice approval, select “Initiate” option from the Approval under Invoice Actions.
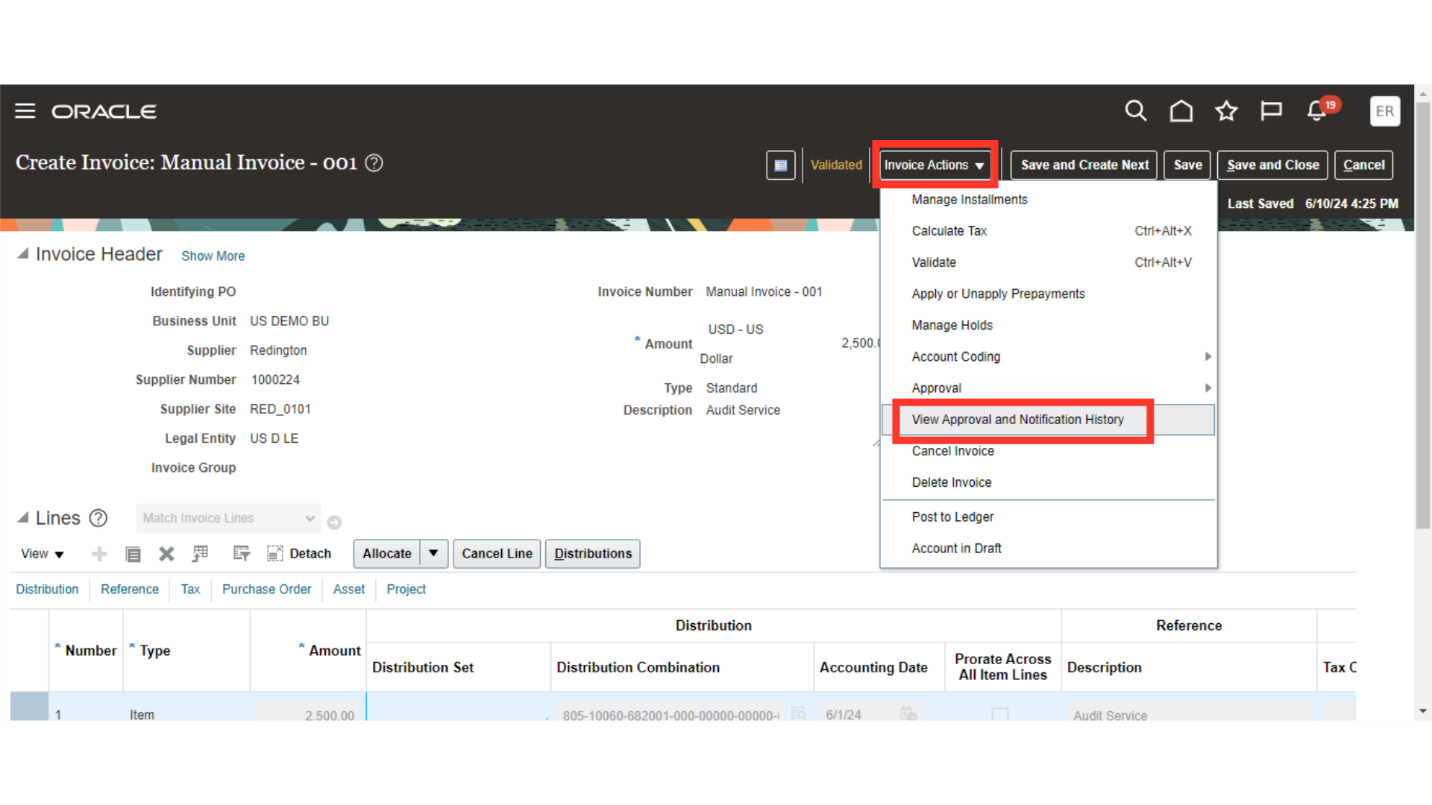
To see the whom invoice is assigned for approval, click on “View Approval and Notification History” under the Invoice Actions.
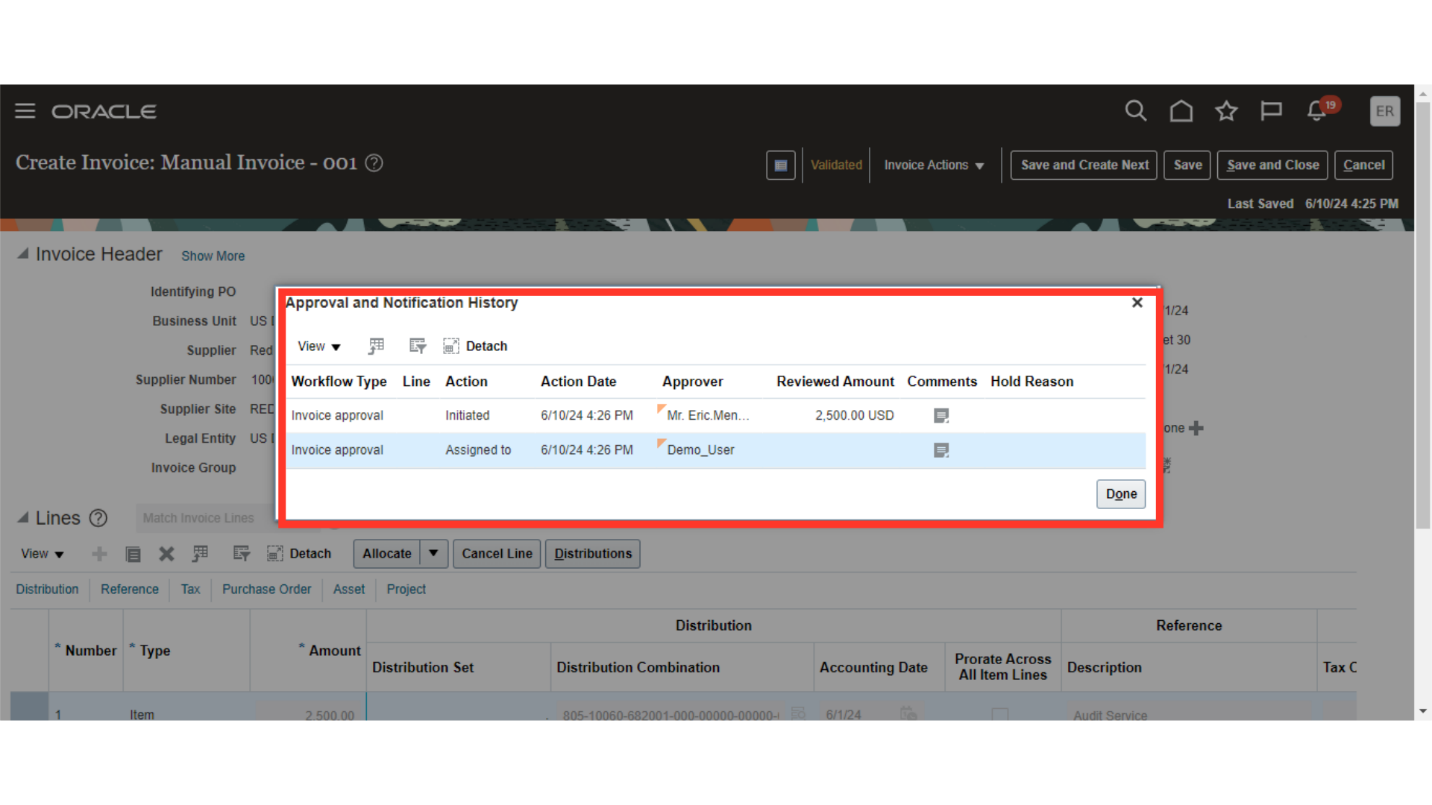
The details of who has submitted the invoice for approval, and to whom its assigned for approval all the details are available in this page.
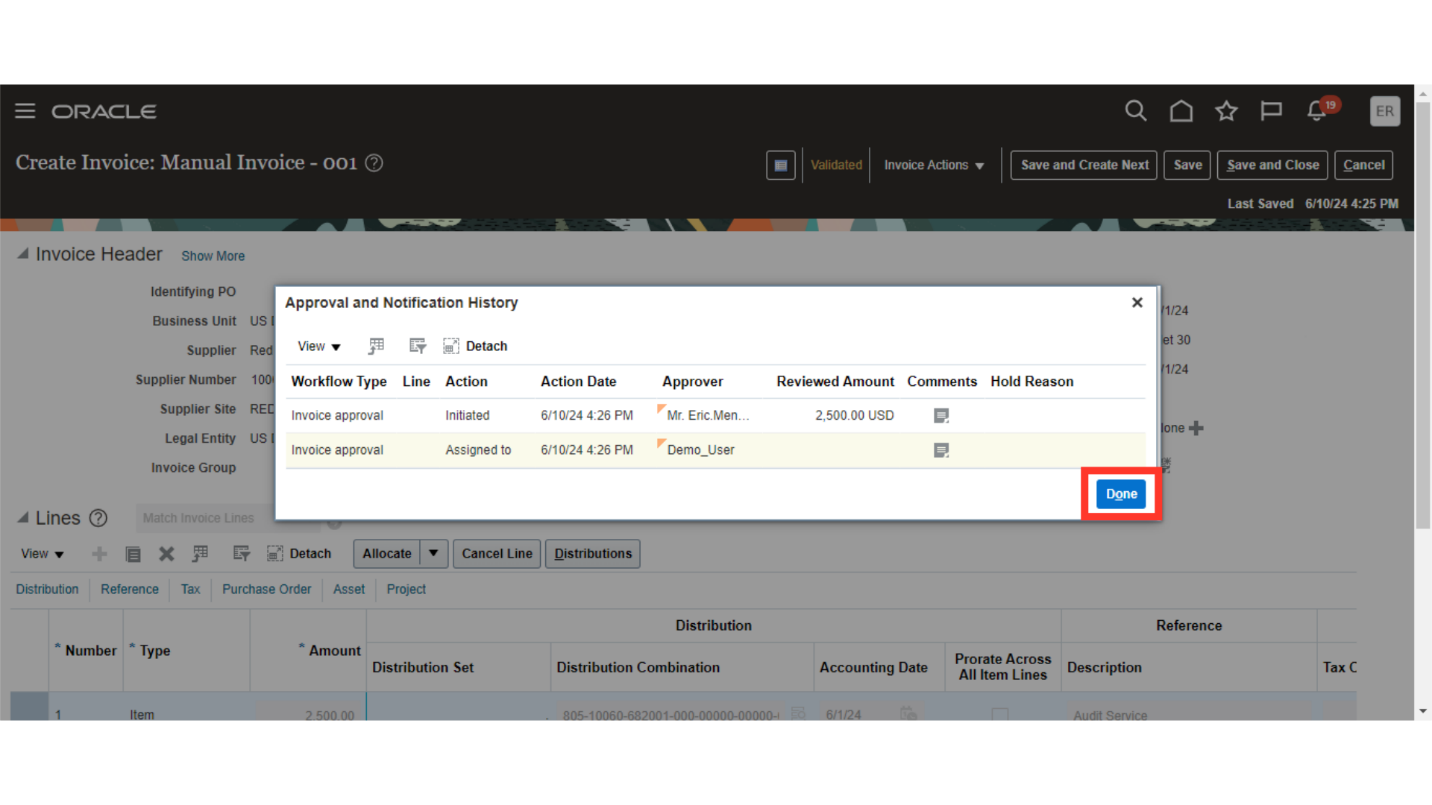
Click on Done button to close this Approval and Notification History window.
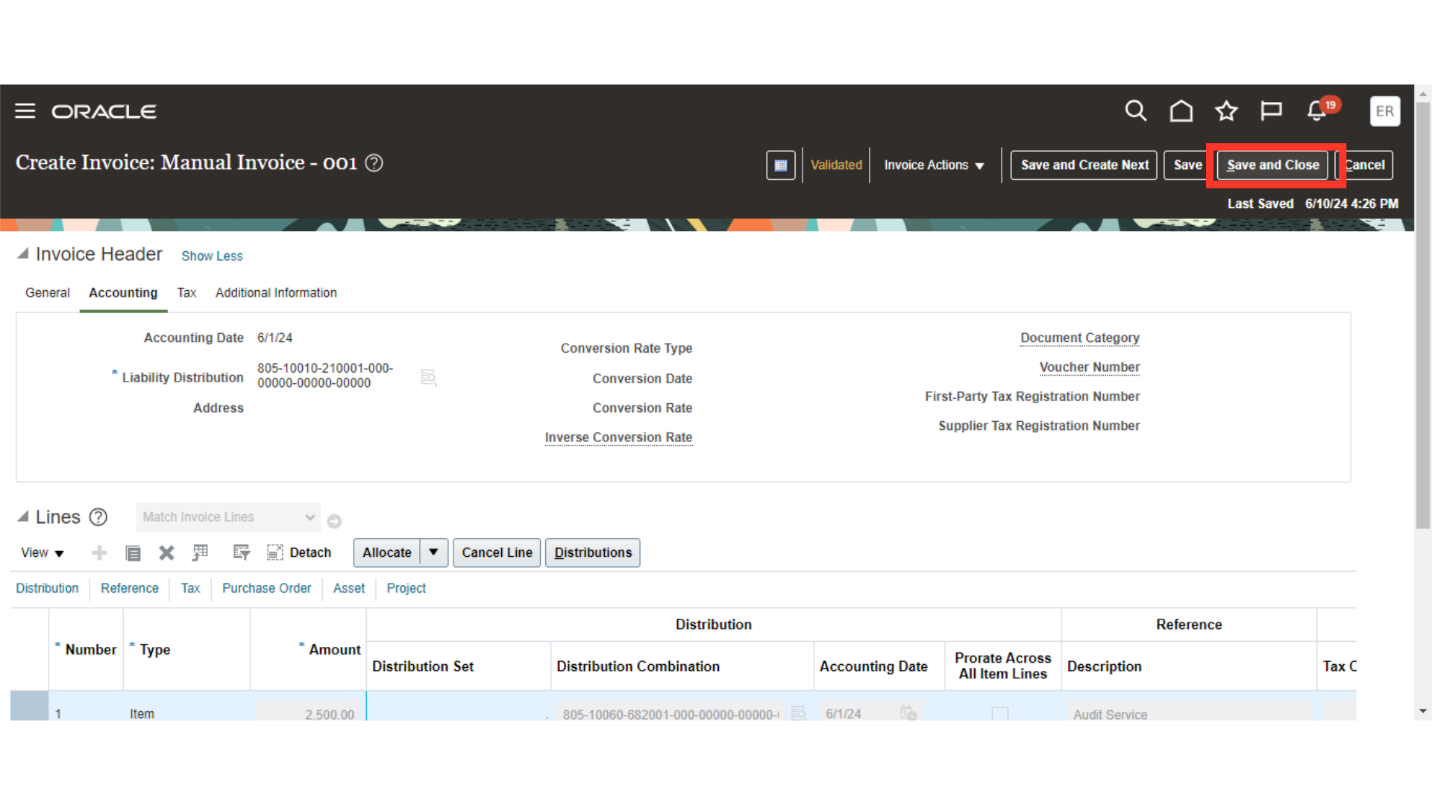
Click on “Save and close” to return back to Invoice workbench.
The process for creating an unmatched Standard Invoice-style invoice, validating it, and submitting it for approval is laid out step-by-step in this guide. You will be able to create Unmatched Invoice with more ease and confidence after reading this guide.