Invoice Creation – Spreadsheet
You can expedite high-volume invoice entry for simple invoices that don’t require extensive validation using Create Invoice ADFDI spreadsheet. This guide will demonstrate the detailed process of uploading the bulk invoices using the ADFDI spreadsheet along with steps to verify whether invoices are imported successfully or not. The prerequisite here is that Oracle ADFDI desktop integration should be installed on your local system.
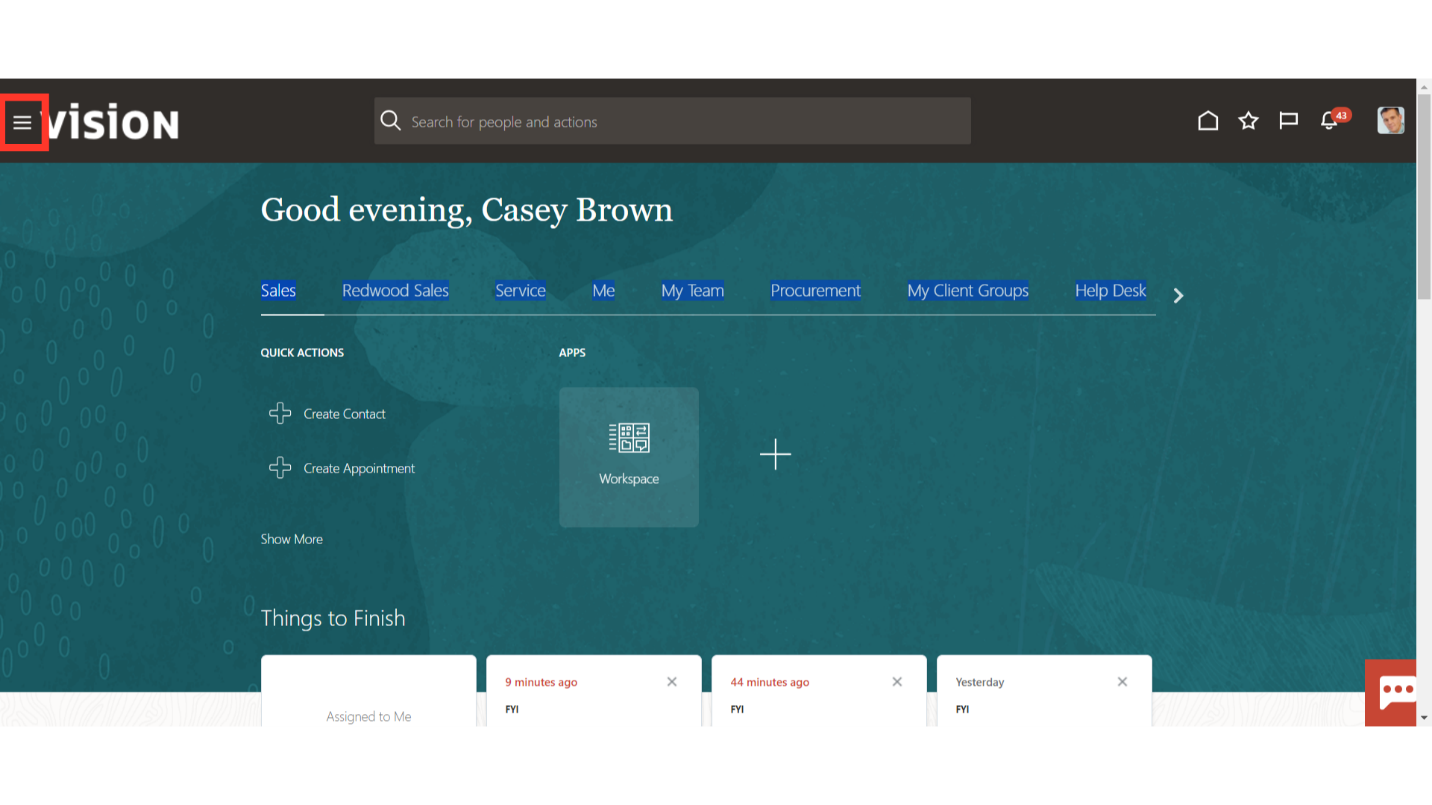
Click on the Navigator Icon to access the Payables module.
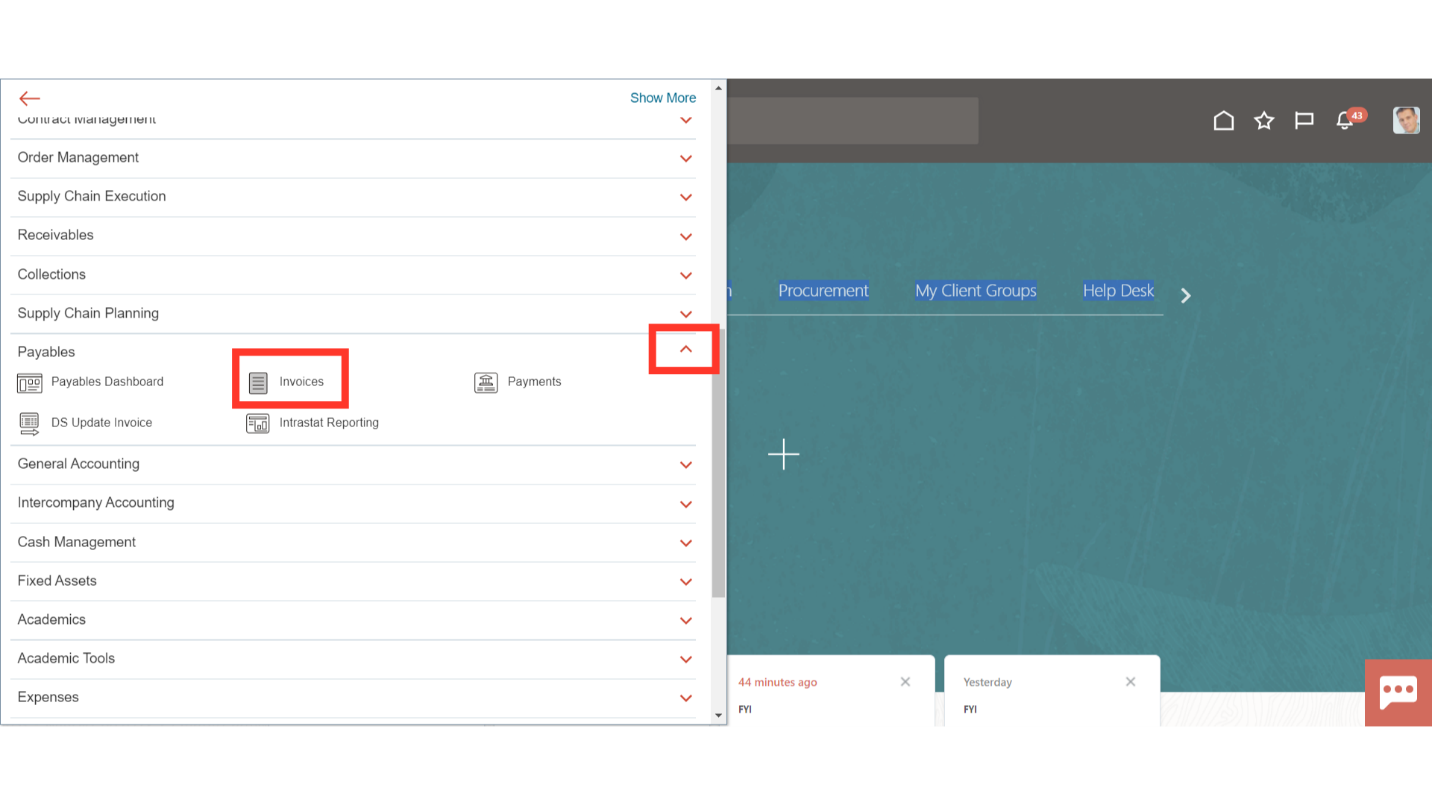
Expand the Payables menu to select the Invoices submenu.
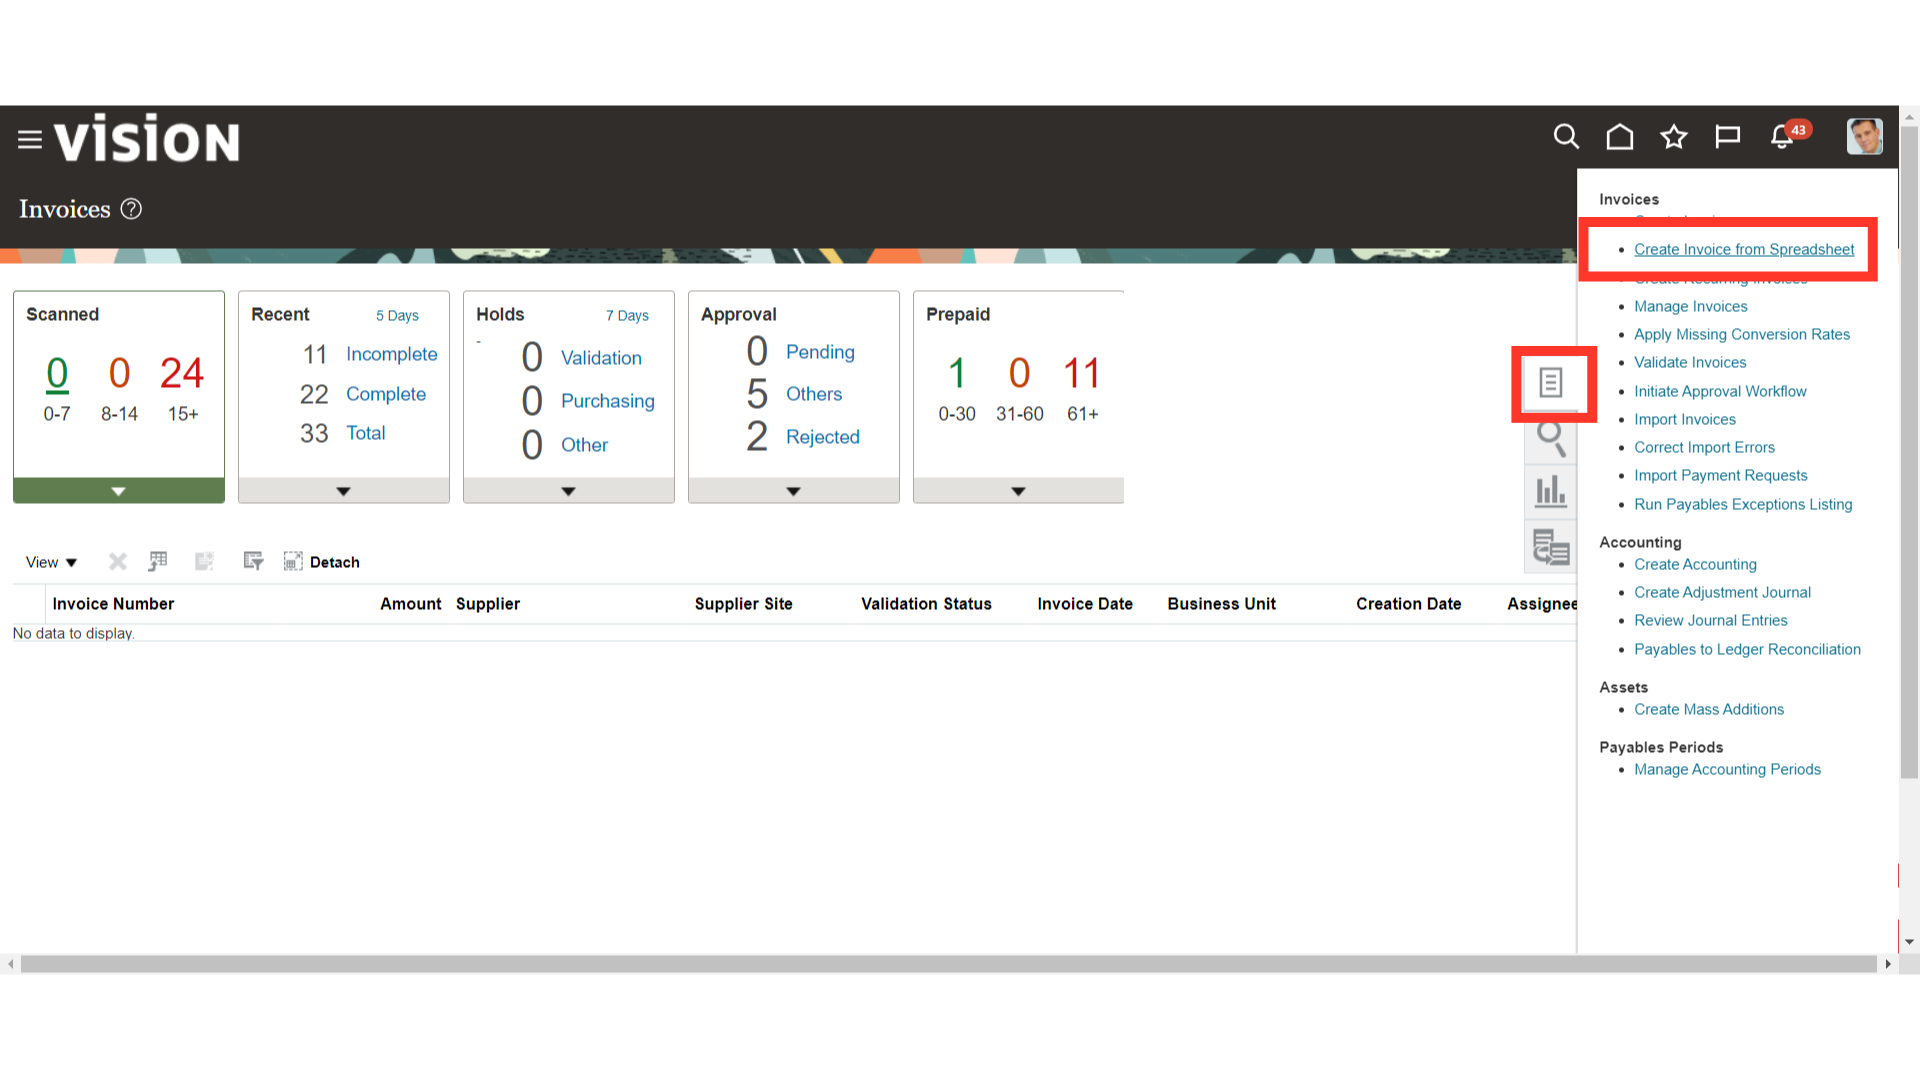
To download the ADFDI spreadsheet for uploading multiple Invoices, click on the “Create Invoices from Spreadsheet” from the task list.
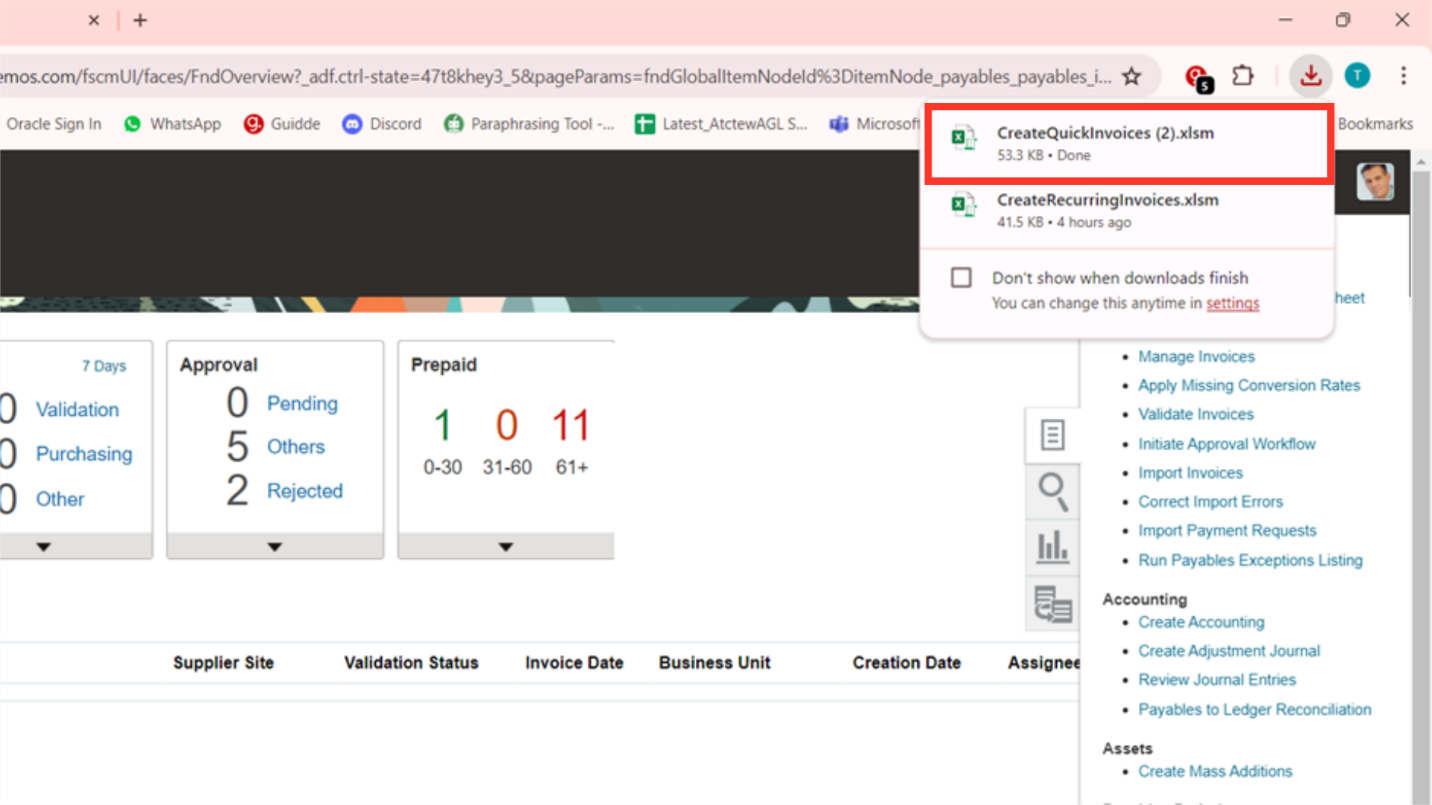
Open the downloaded ADFDI spreadsheet on your local desktop to enter the Invoice details.
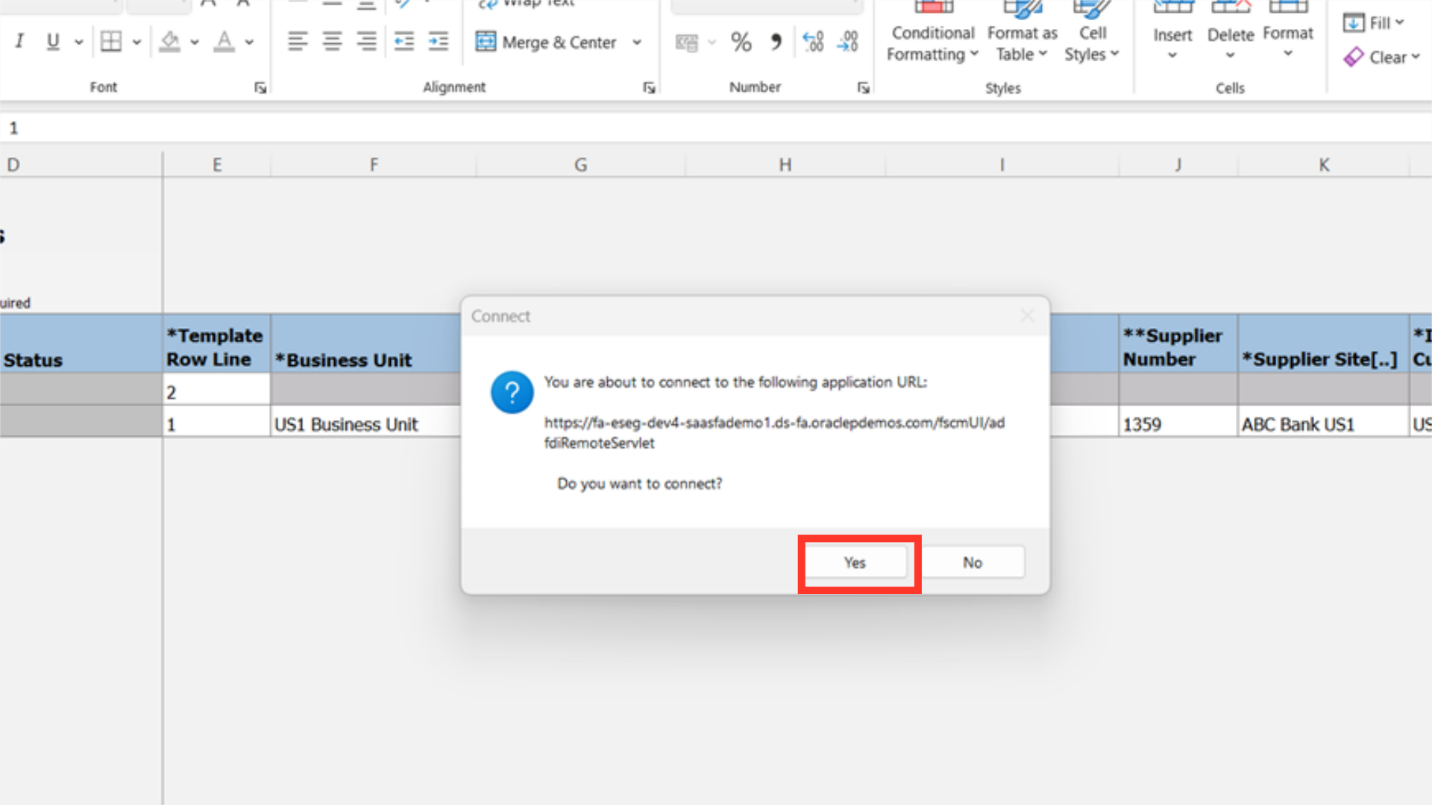
Click on the “Yes” button to log into the ADFDI spreadsheet.
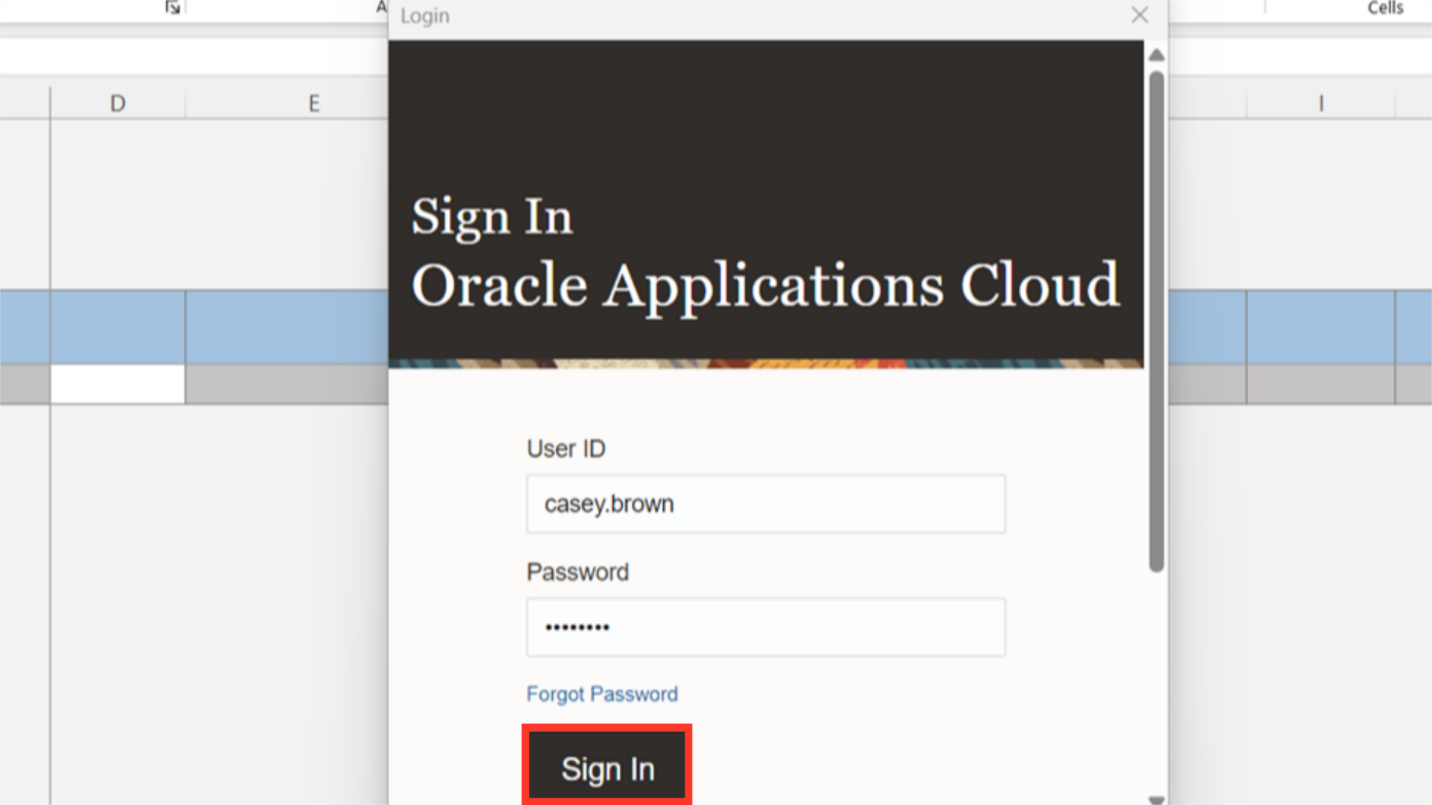
After entering the Oracle Fusion user credentials, click on the Sign in button.
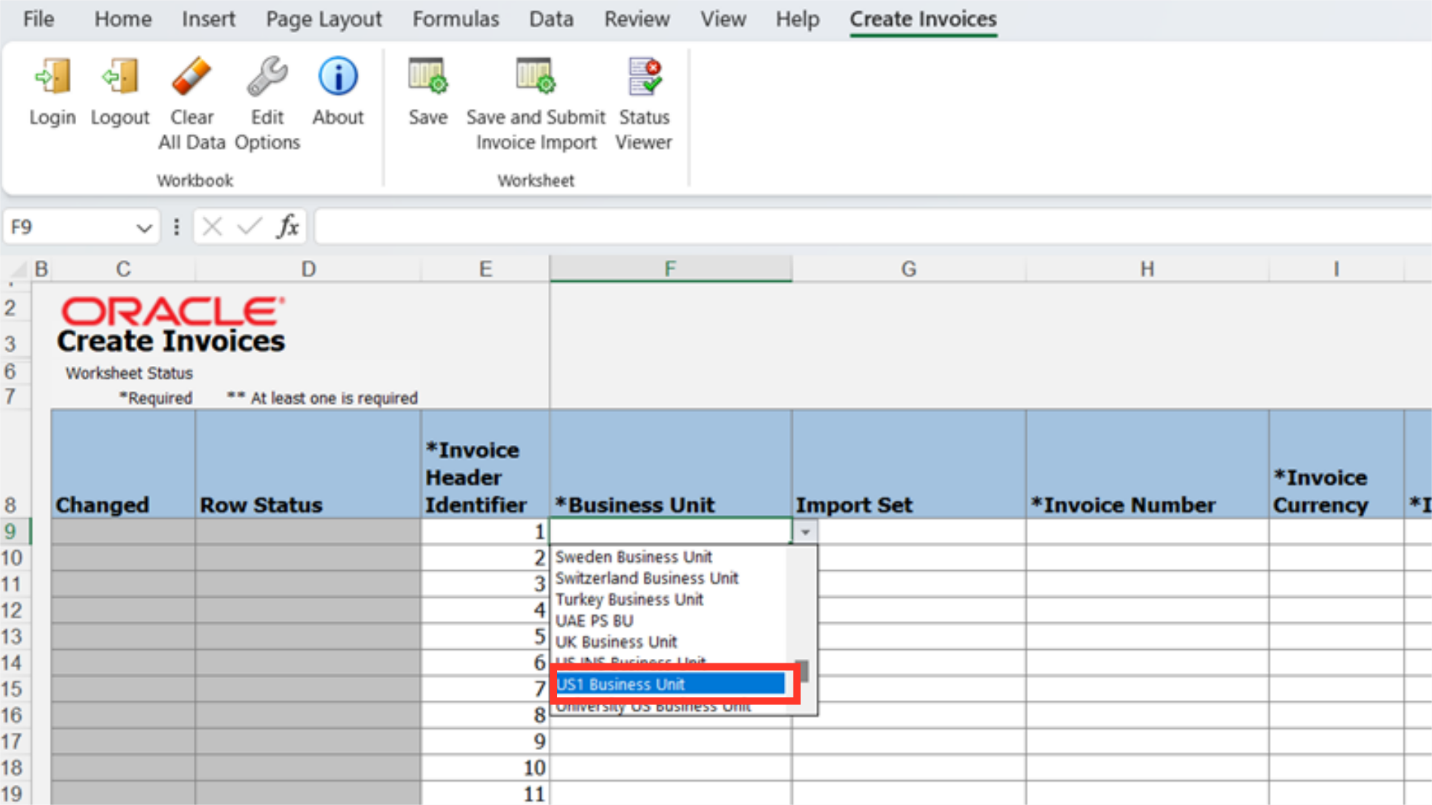
Select the business unit under which invoices will be created from the list of values or manually enter the business unit name. For Demo purpose, US1 Business unit is selected here.
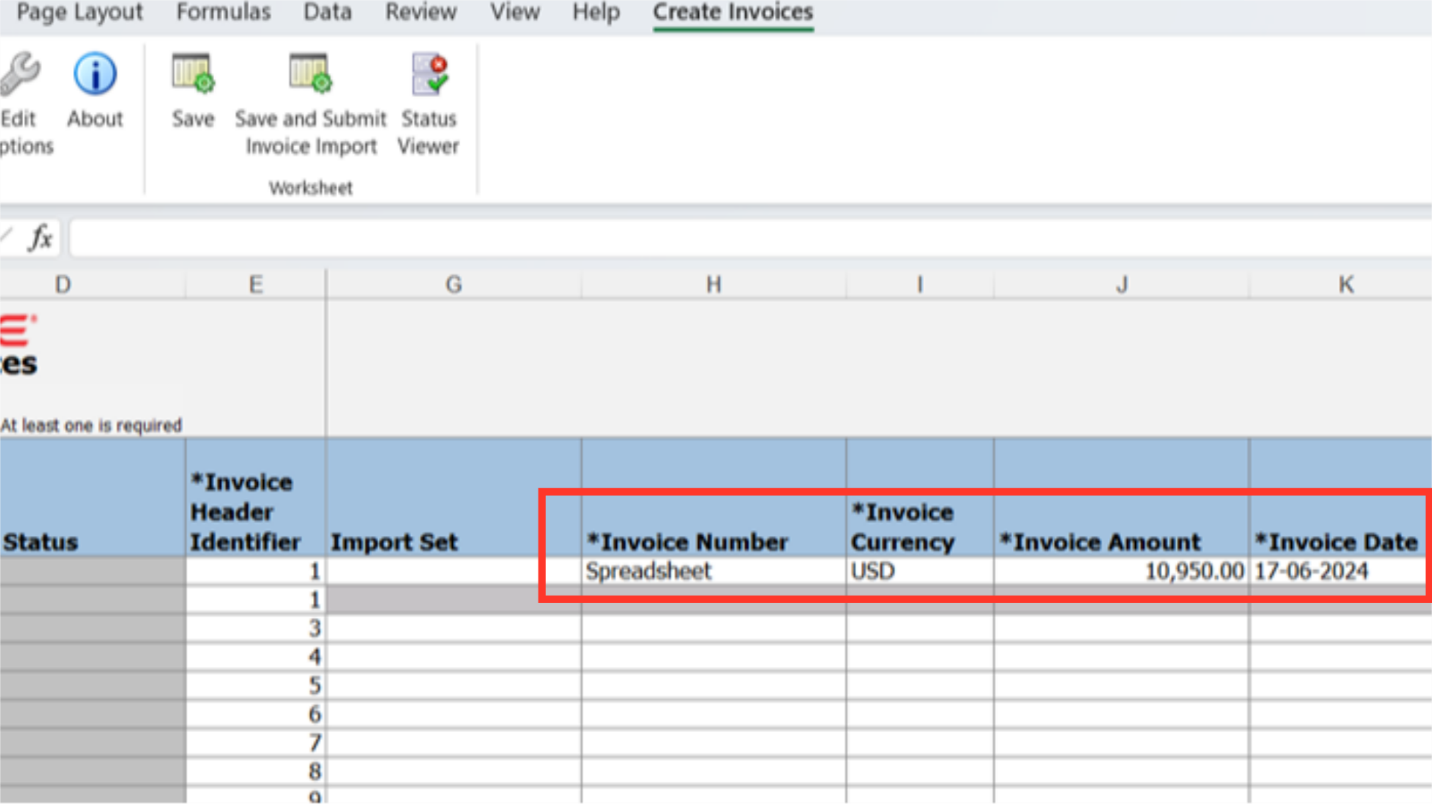
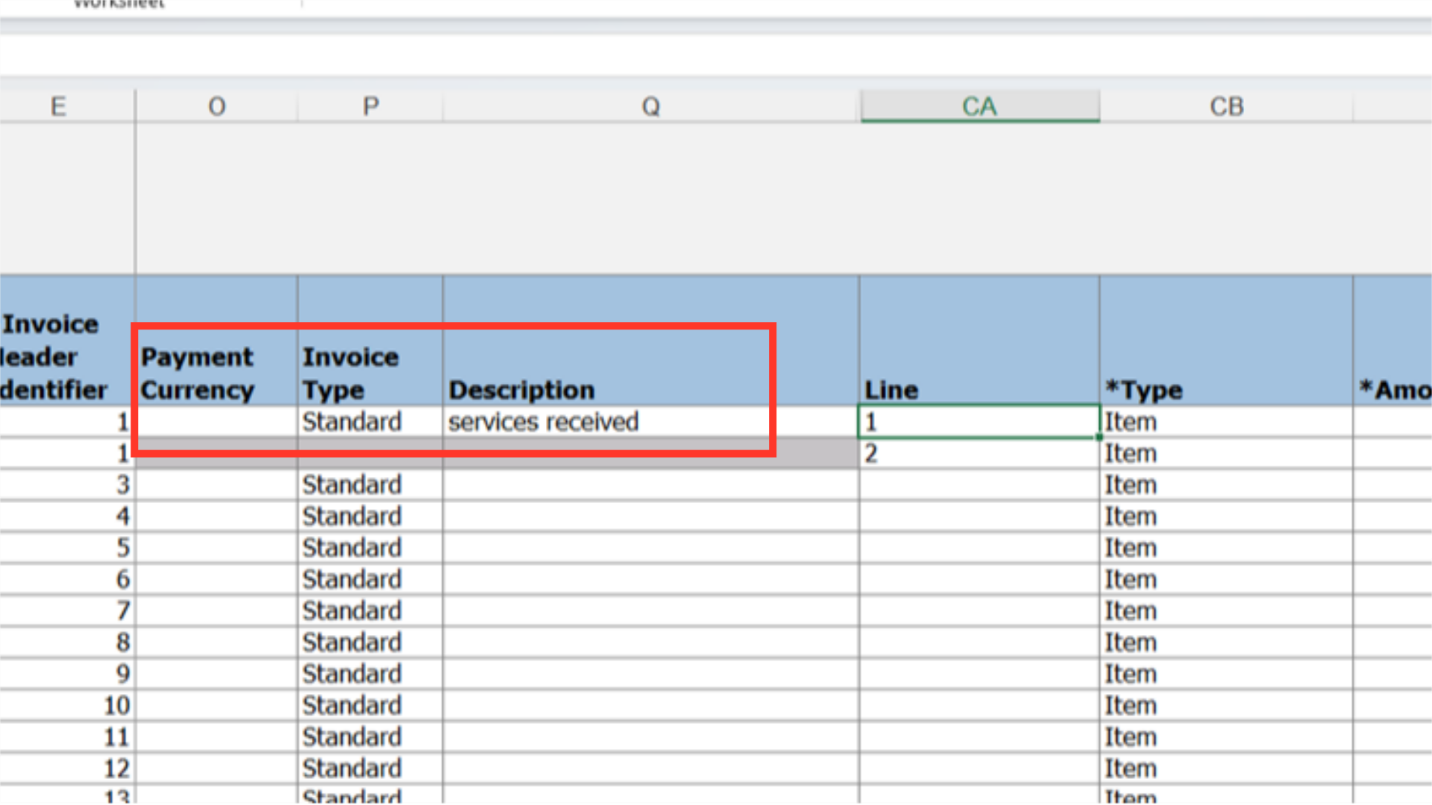
To add multiple invoice lines under a single invoice, enter the same number in each required row under the Invoice Header Identifier column. The invoice header information, including the invoice number and supplier name and number, will default from the first row to the following rows if we choose the same number for the invoice header identifier.
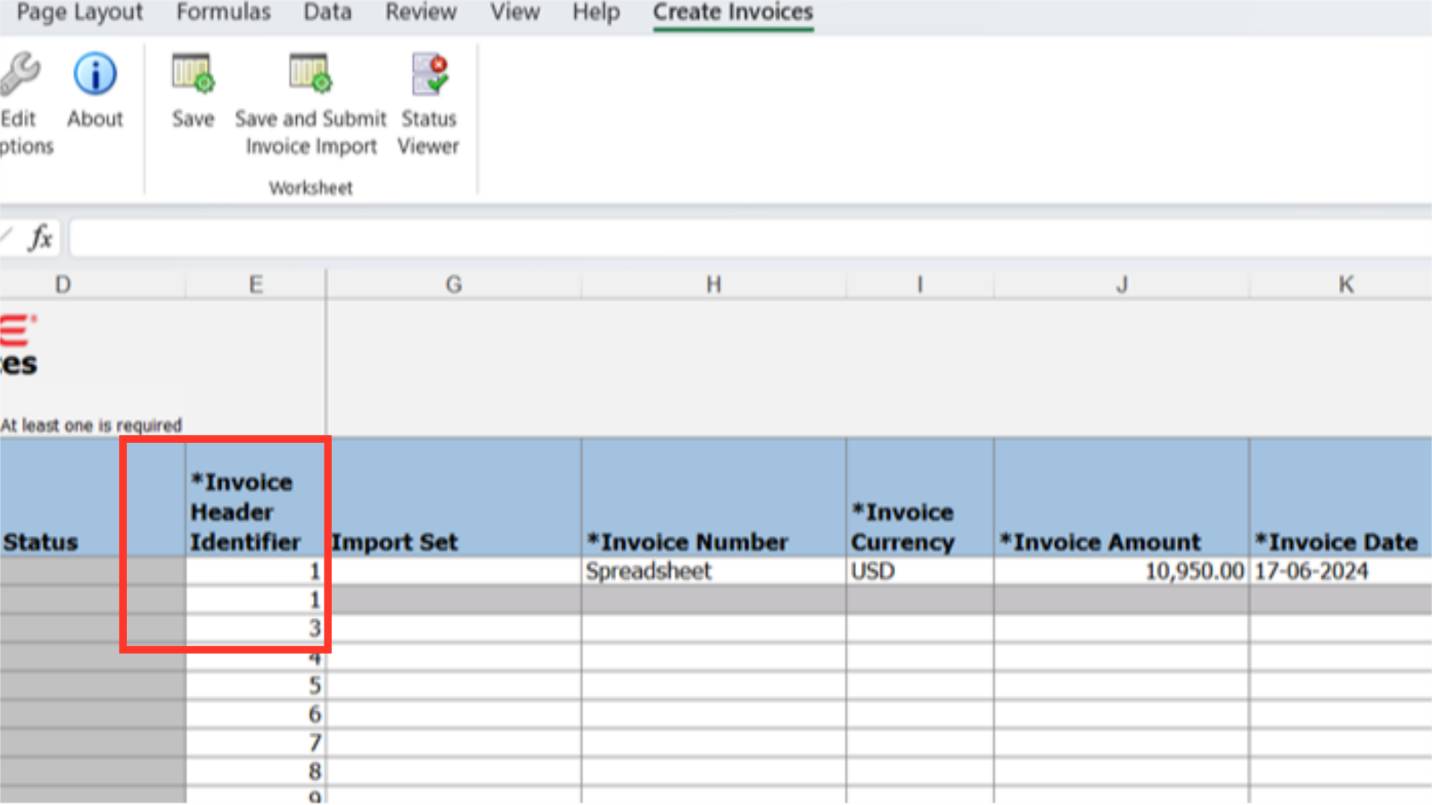
Enter the Invoice number and Invoice date from the invoice copy received from the supplier in the respective columns. In the Invoice amount column, enter the total amount, including tax. From the list of values under Invoice currency column, choose the required invoice currency.
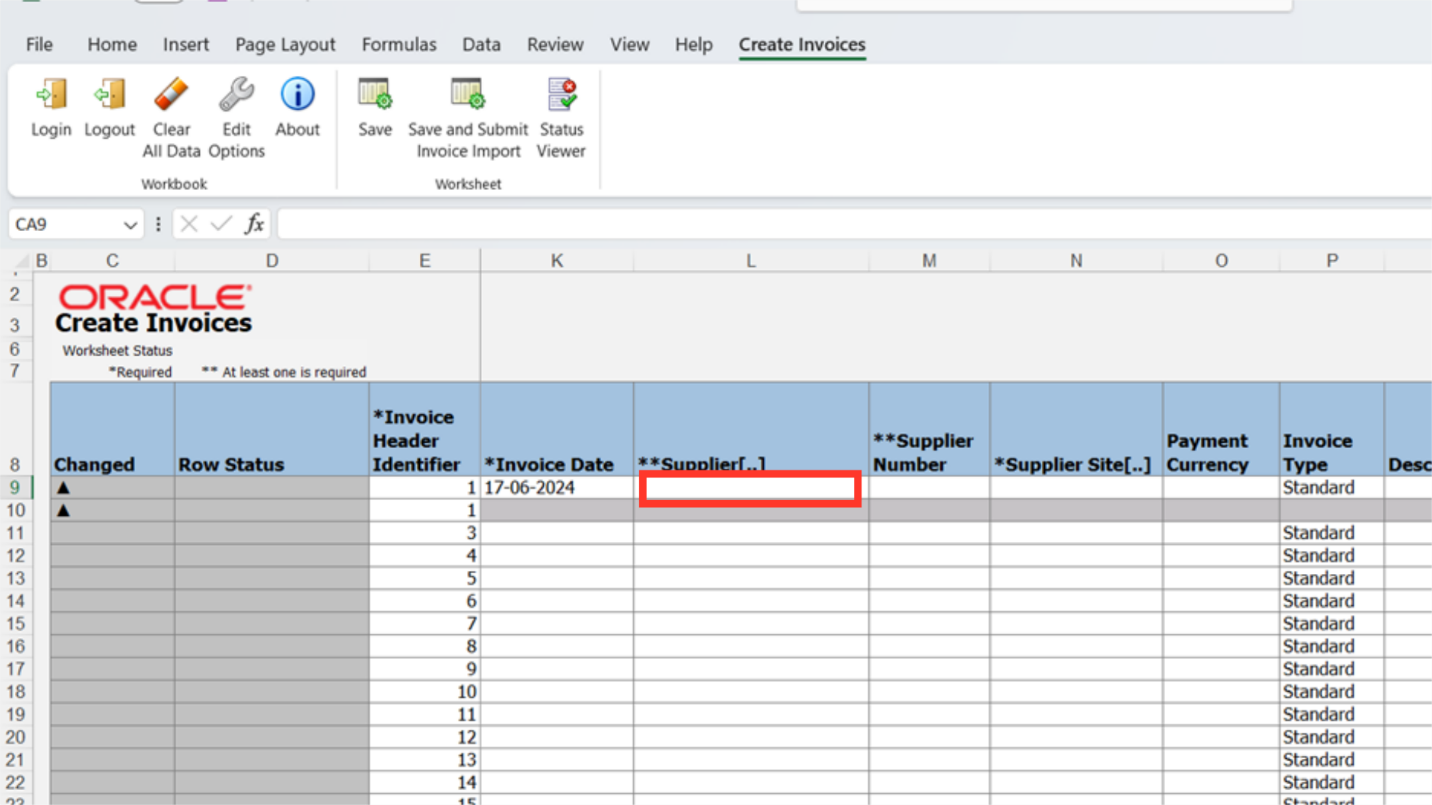
Double-click on the row under supplier’s name column, an Oracle Fusion-connected pop-up menu will appear, allowing you to quickly retrieve supplier records
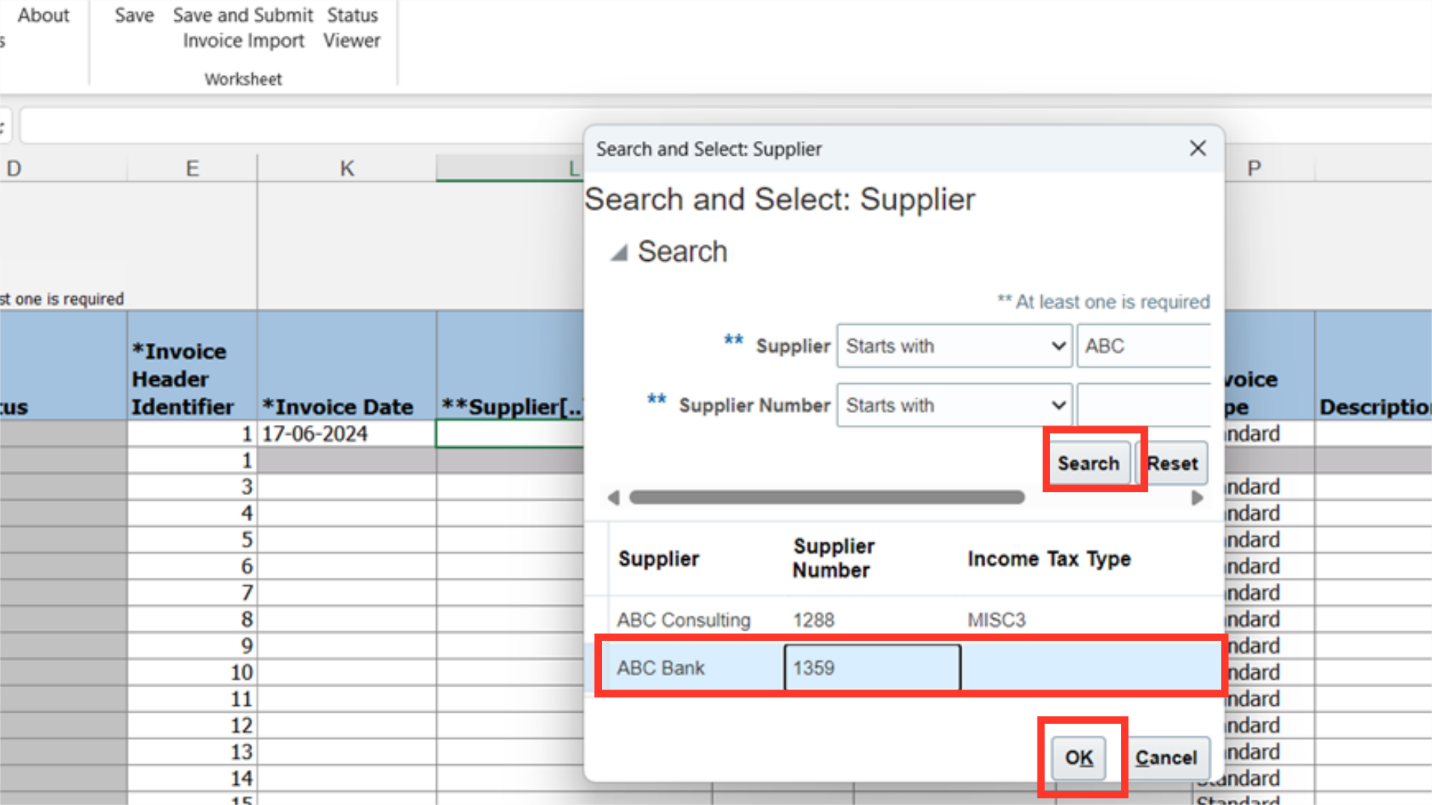
To locate the supplier record, enter the supplier’s name and then click the Search button. Next, select the required supplier record, then click on “OK” to proceed.
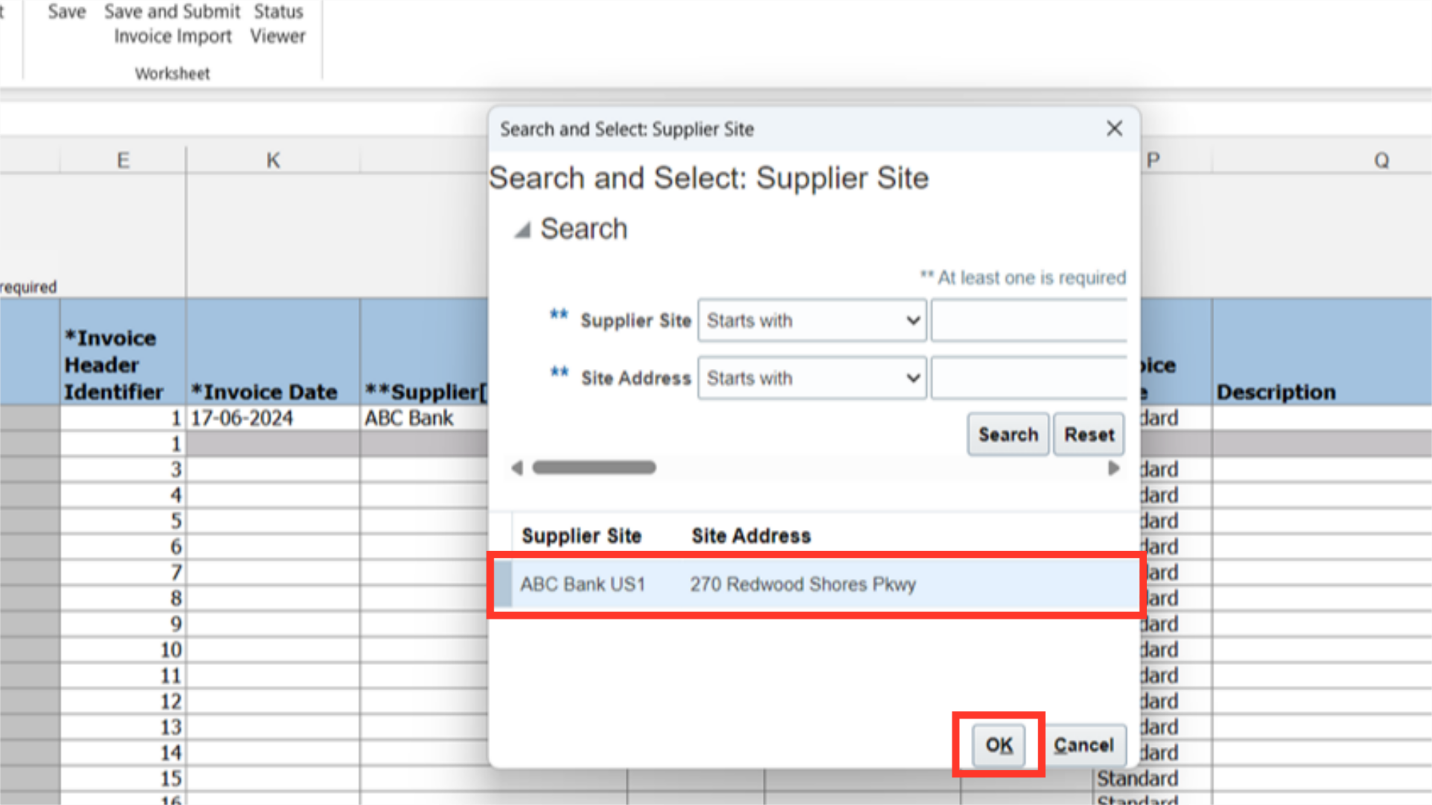
The supplier site that is linked to the supplier is displayed in a pop-up menu. To proceed, choose the site and click the OK button.
Select the payment currency in which payment is to be made, if it’s kept blank then invoice currency will be defaulted as the payment currency. The type of invoice to be created such as Standard, Debit, Credit memo, and Prepayment can be selected in the Invoice type column. Subsequently, add relevant and important additional information in the Description field.
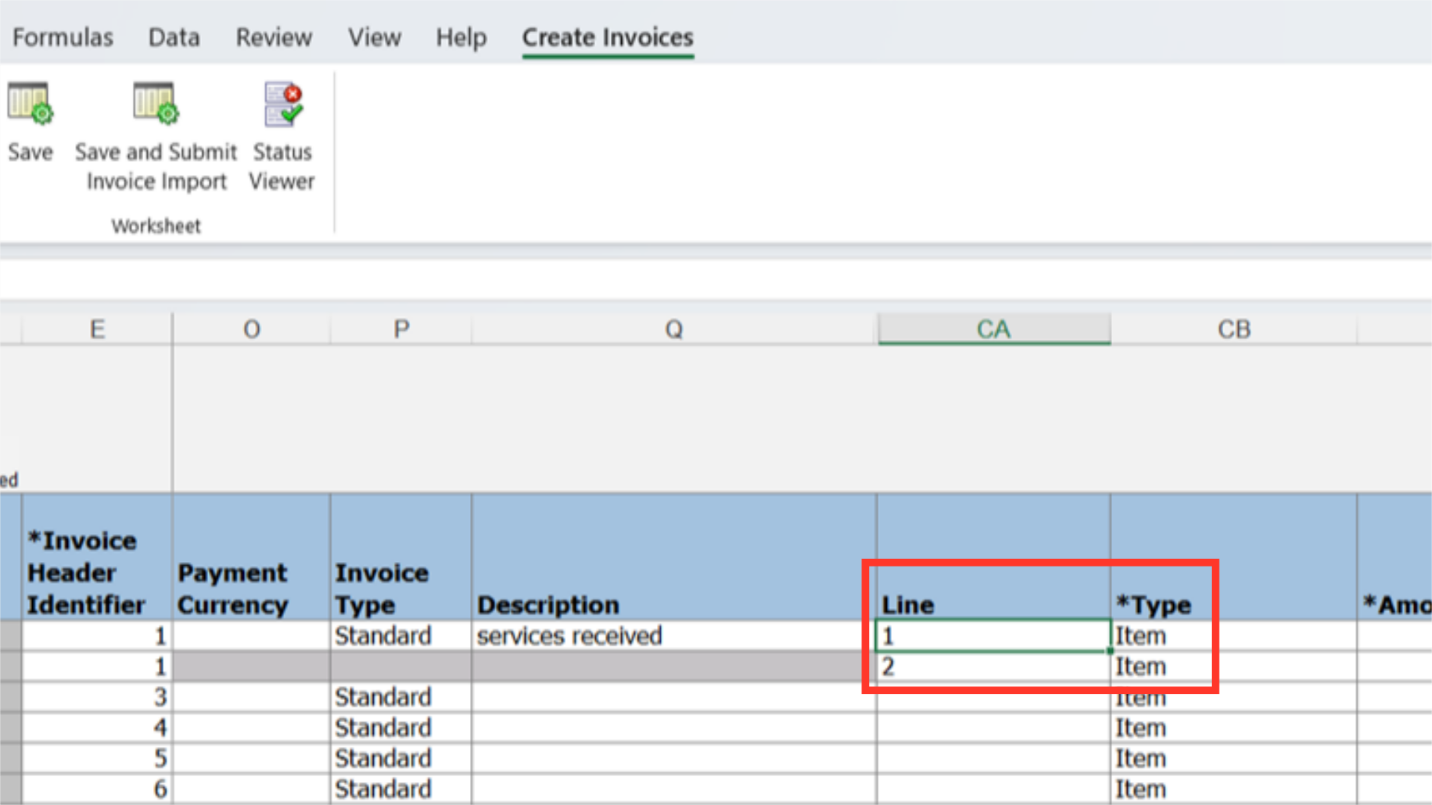
Enter the line number’s details in the Line column. Furthermore, the line type is set by default to ITEM, but it can be modified if necessary.
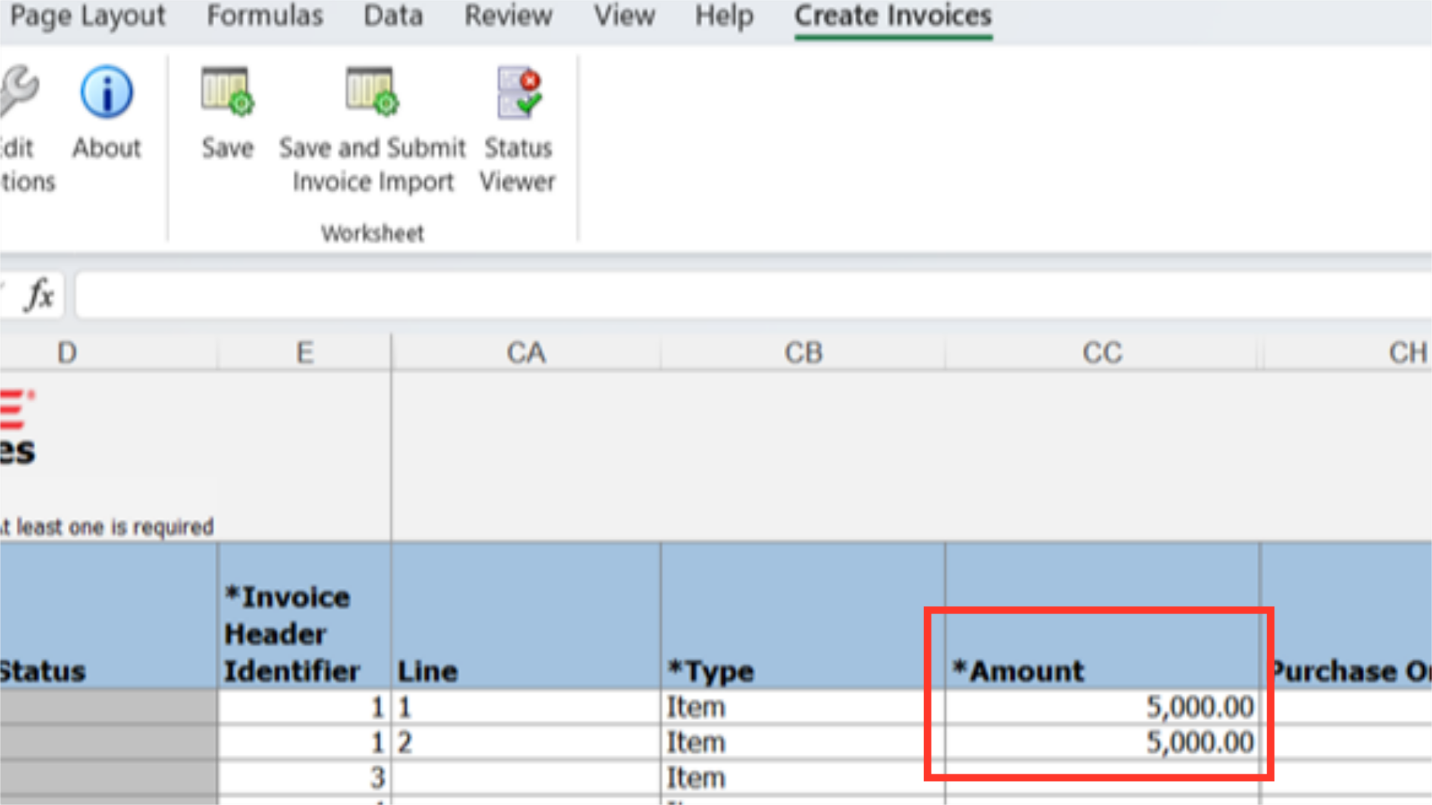
Enter the tax exclusive line amount in the Amount column.
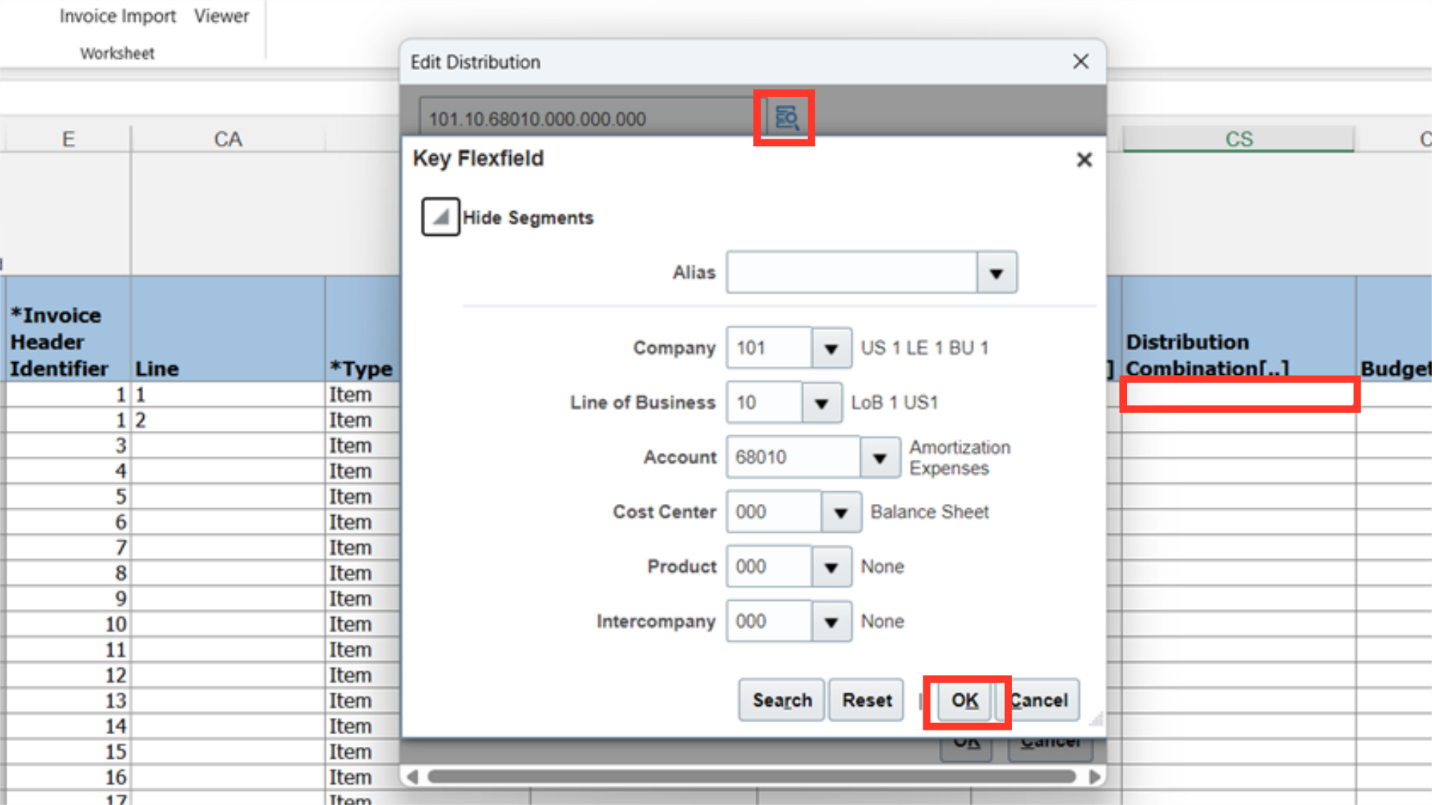
Double-click the row in the Distribution Combination column, then select the Account Combination Icon to enter the account combination. After entering the account segment details manually or by selecting from the list of values, Click on OK button to continue.
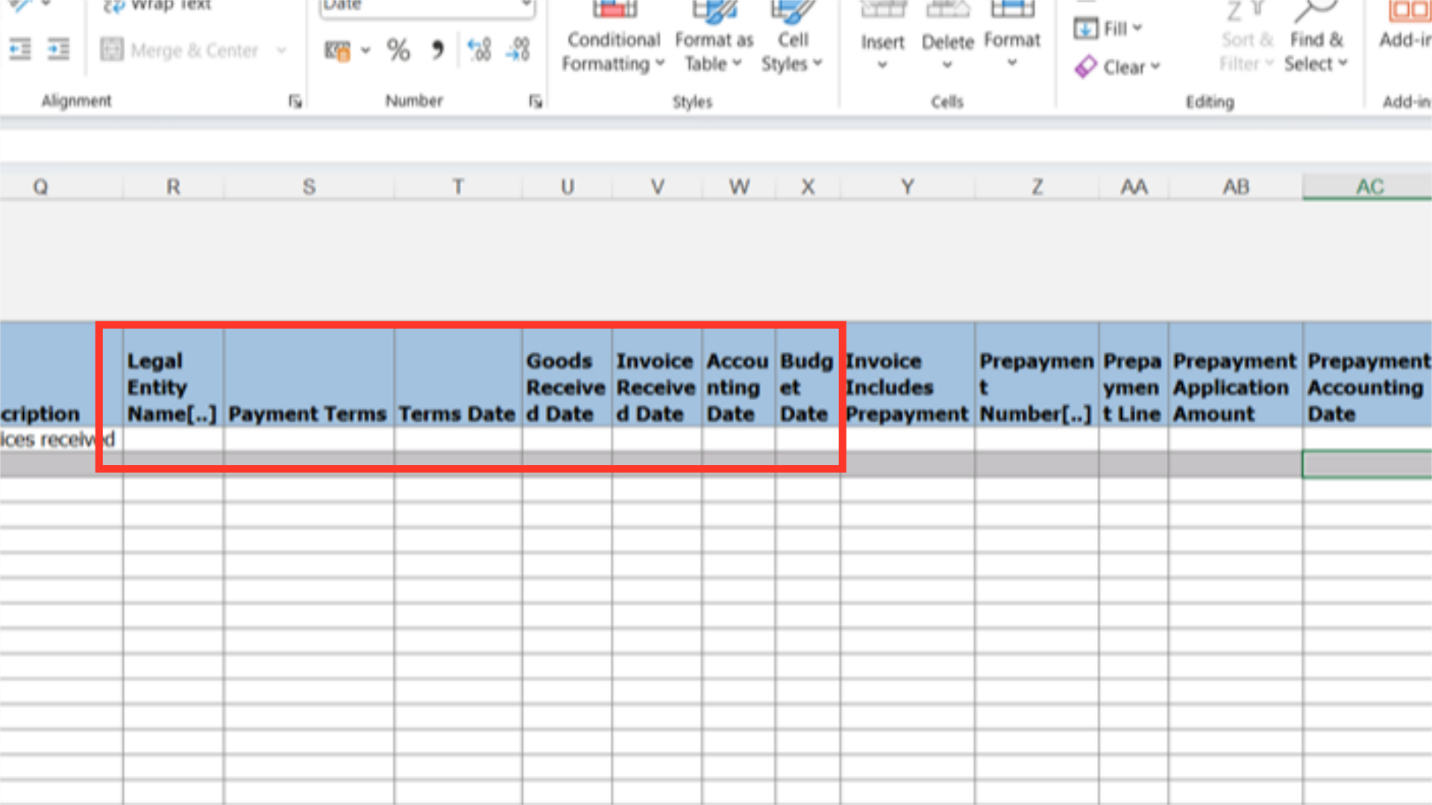
By unhiding the columns in the excel, optional details can be filled such as Payment terms, Terms date etc.
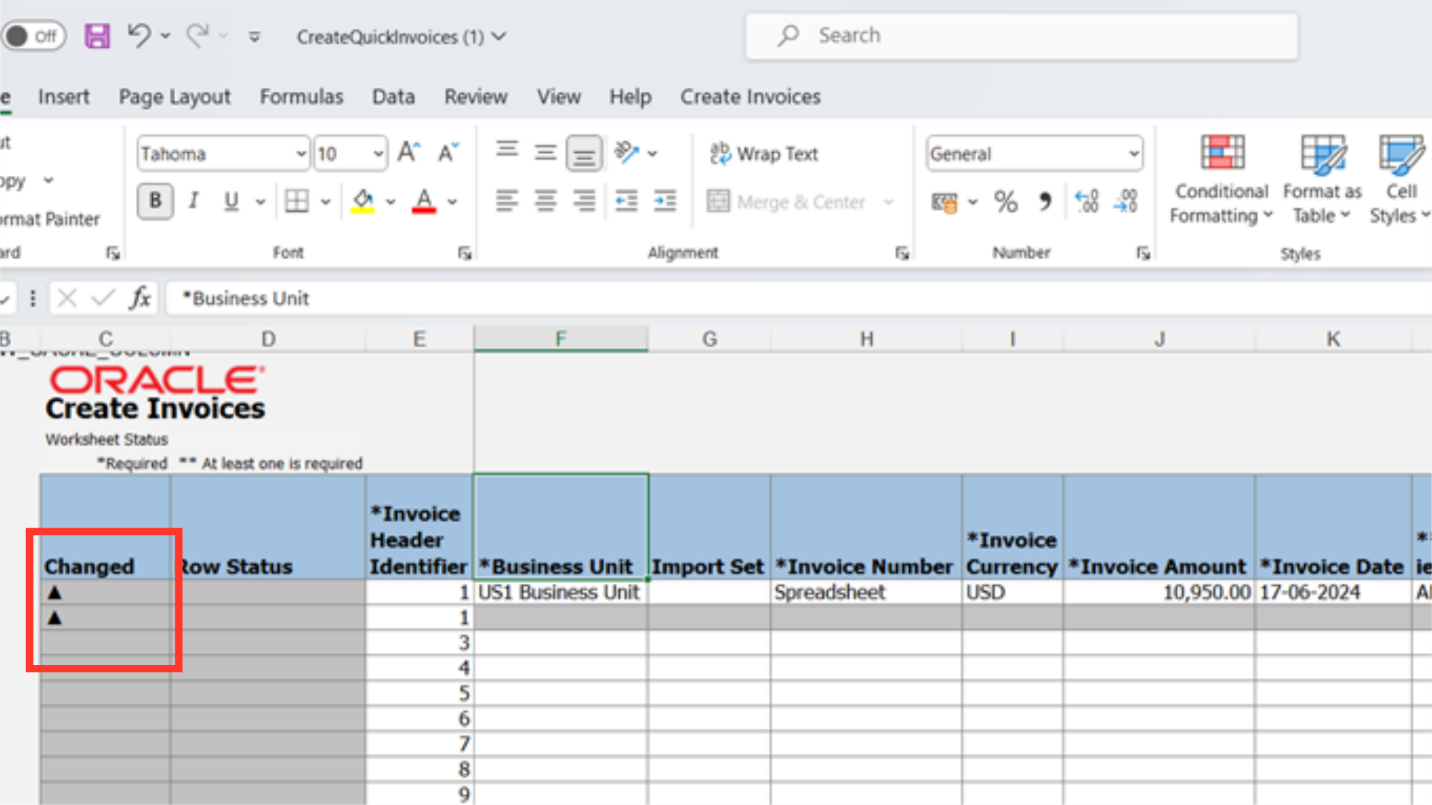
The rows with the triangle-shaped icons are the ones that will be uploaded. The triangle icon appears in the column that has changed next to the row whenever any rows are updated or new details are added.
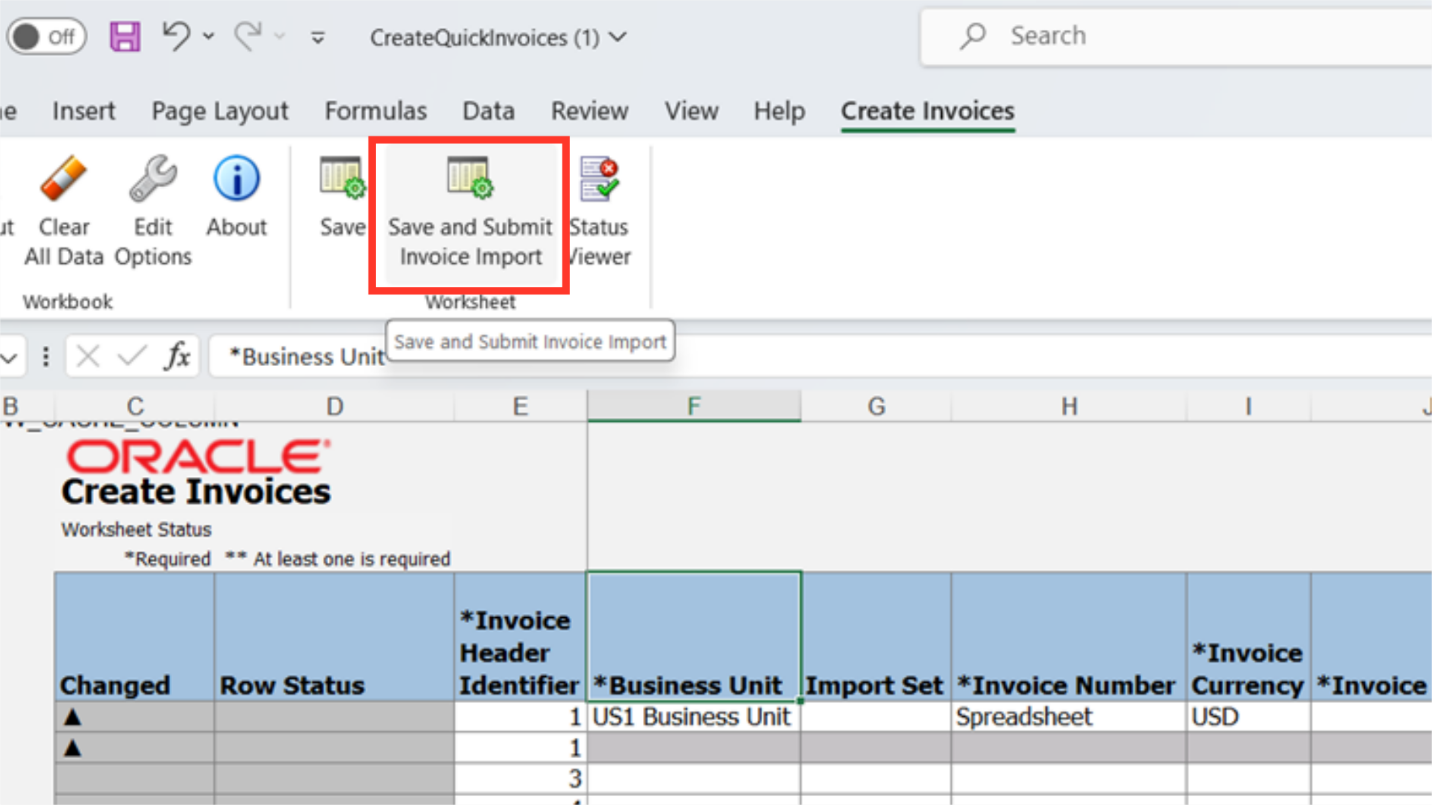
Click on the Save and Submit Invoice Import option under the Create Invoices tab, to upload the invoice details to the system.
There are two options in the upload options pop-up. If we select the first checkbox, the system will upload the invoice details in all subsequent rows—aside from the one that contains an error. The upload status of each submitted row can be downloaded using the second checkbox.

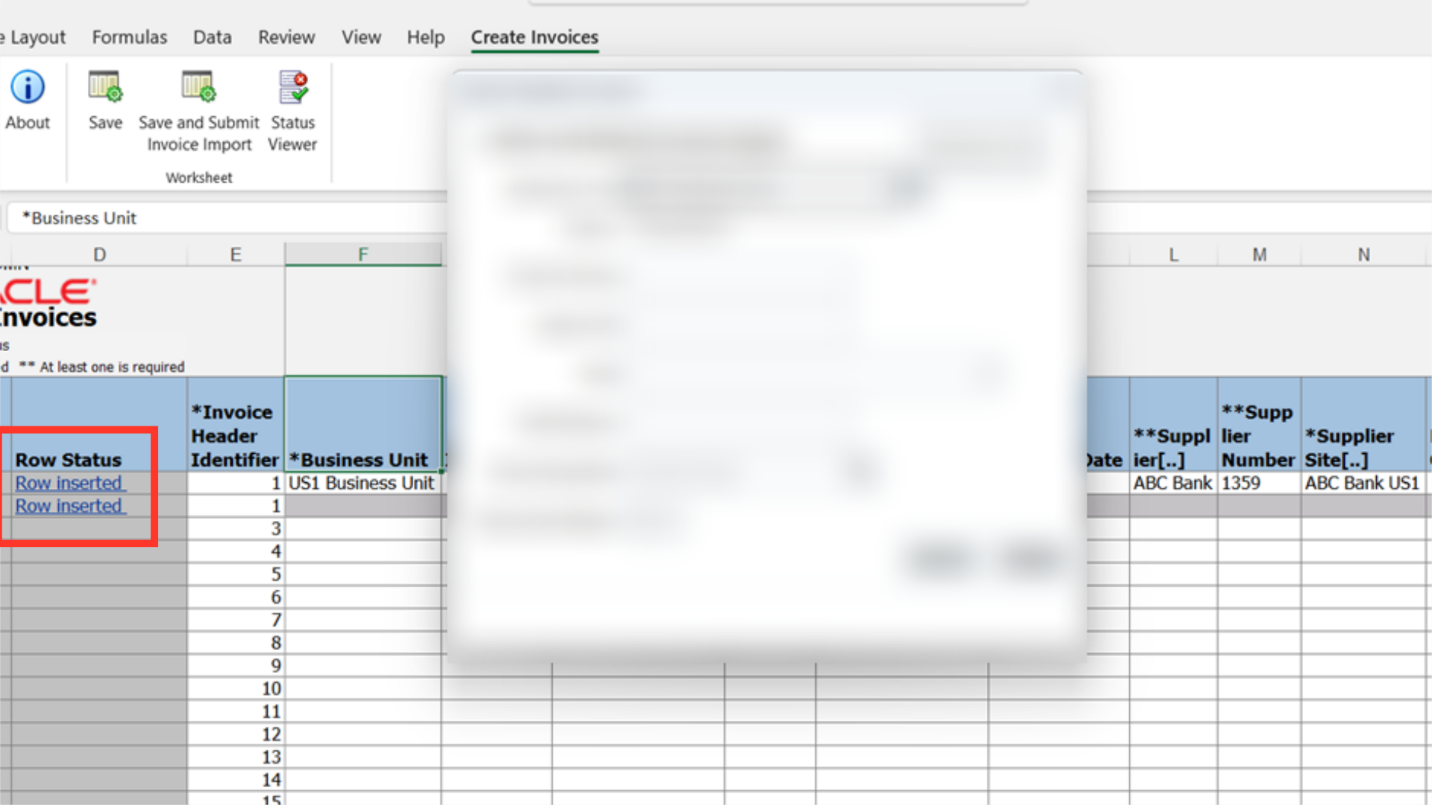
As the line get uploaded successfully, the row status changes to ‘Row Inserted successfully’. If the message says otherwise, you need to select that row, click on the ‘Status Viewer’ and check for the errors preventing the upload. Once the errors are rectified, you can try to upload again.
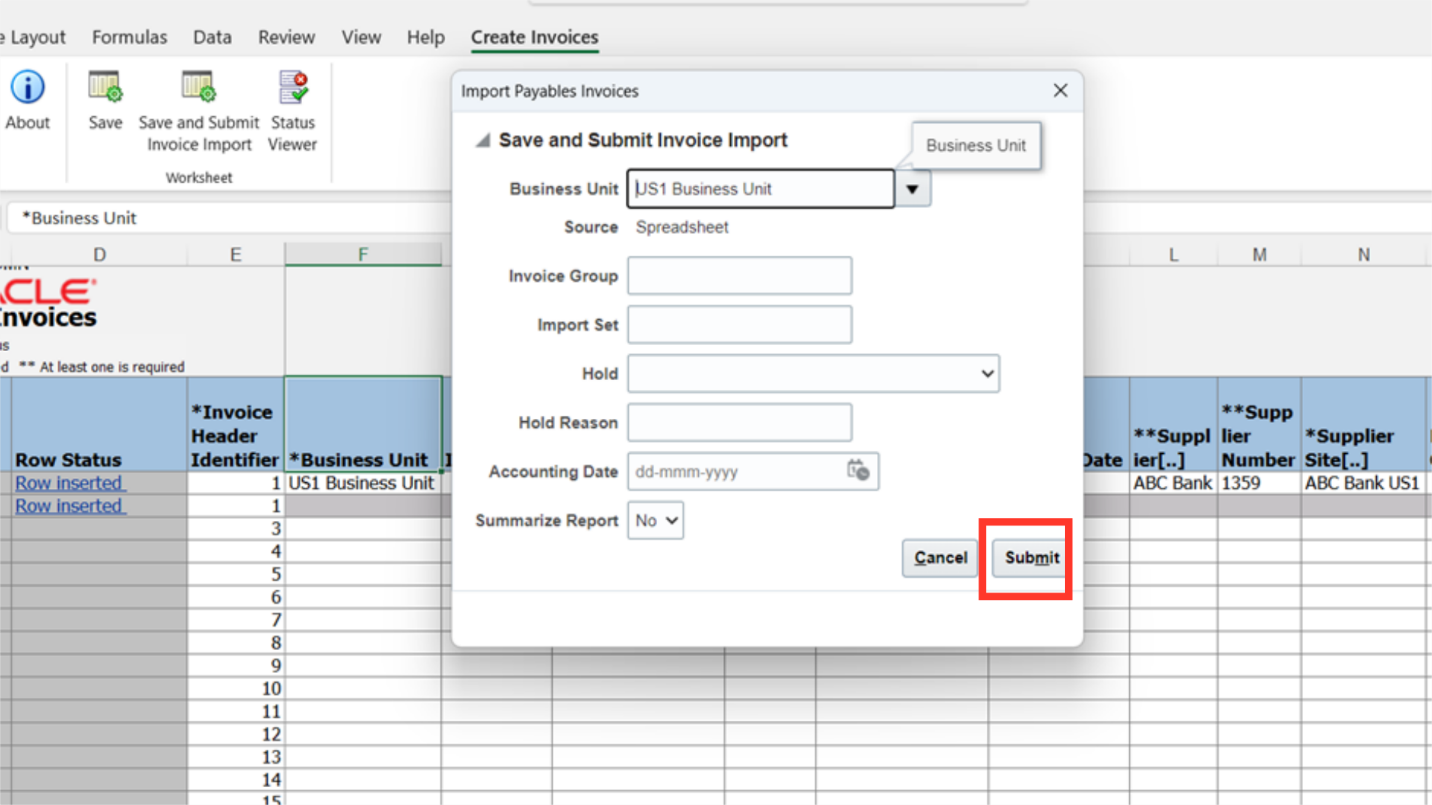
Select the Business unit for which invoices are required to be uploaded, and invoice will be created with source Spreadsheet. Invoice Group, import set and the accounting date can be entered to import invoices specifically falling under those parameters. Additionally, the Hold parameter can be selected to apply a specific hold to all imported invoices. After entering all the required parameters, click on the Submit button to run the import process.
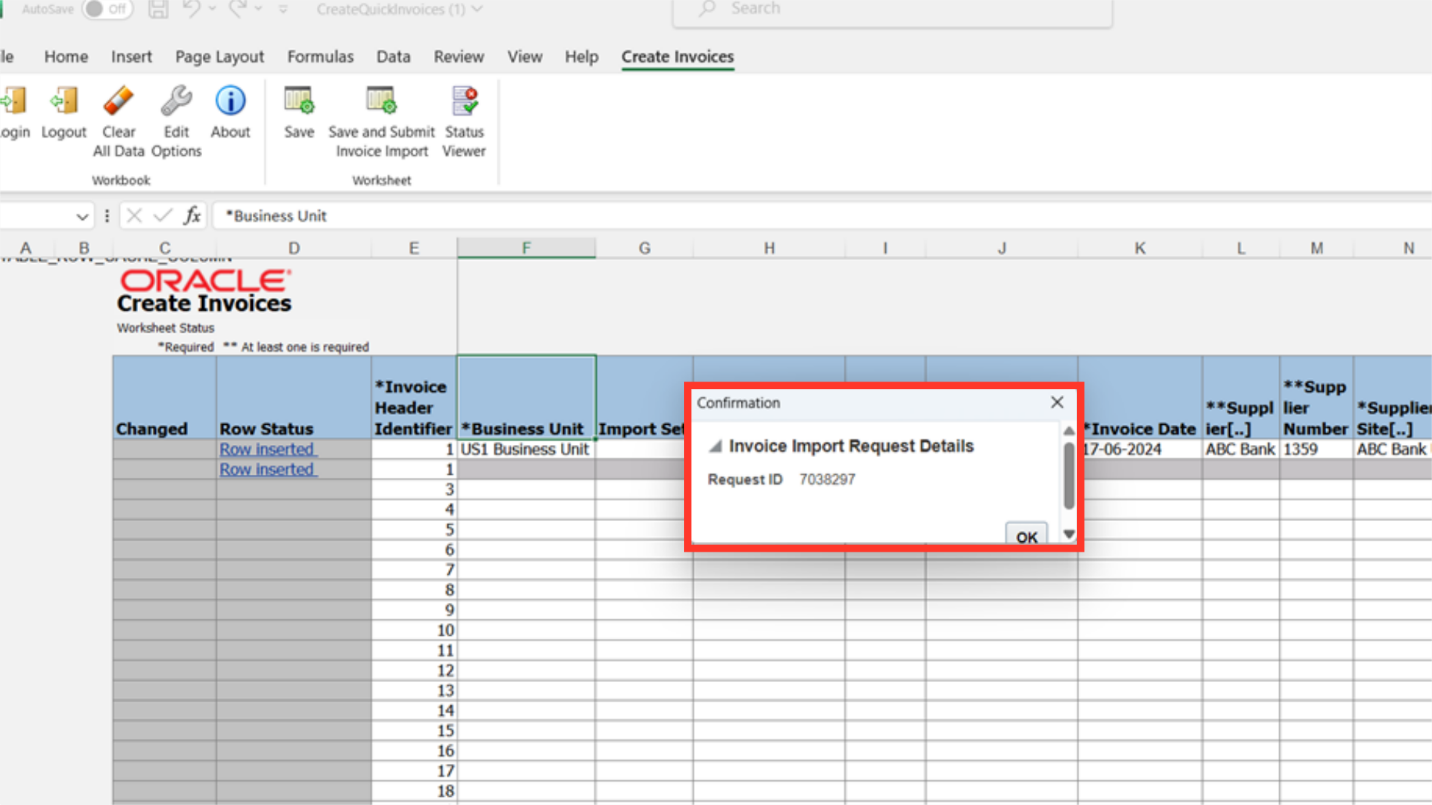
A confirmation message is displayed along with the request ID number. Click on OK to continue.
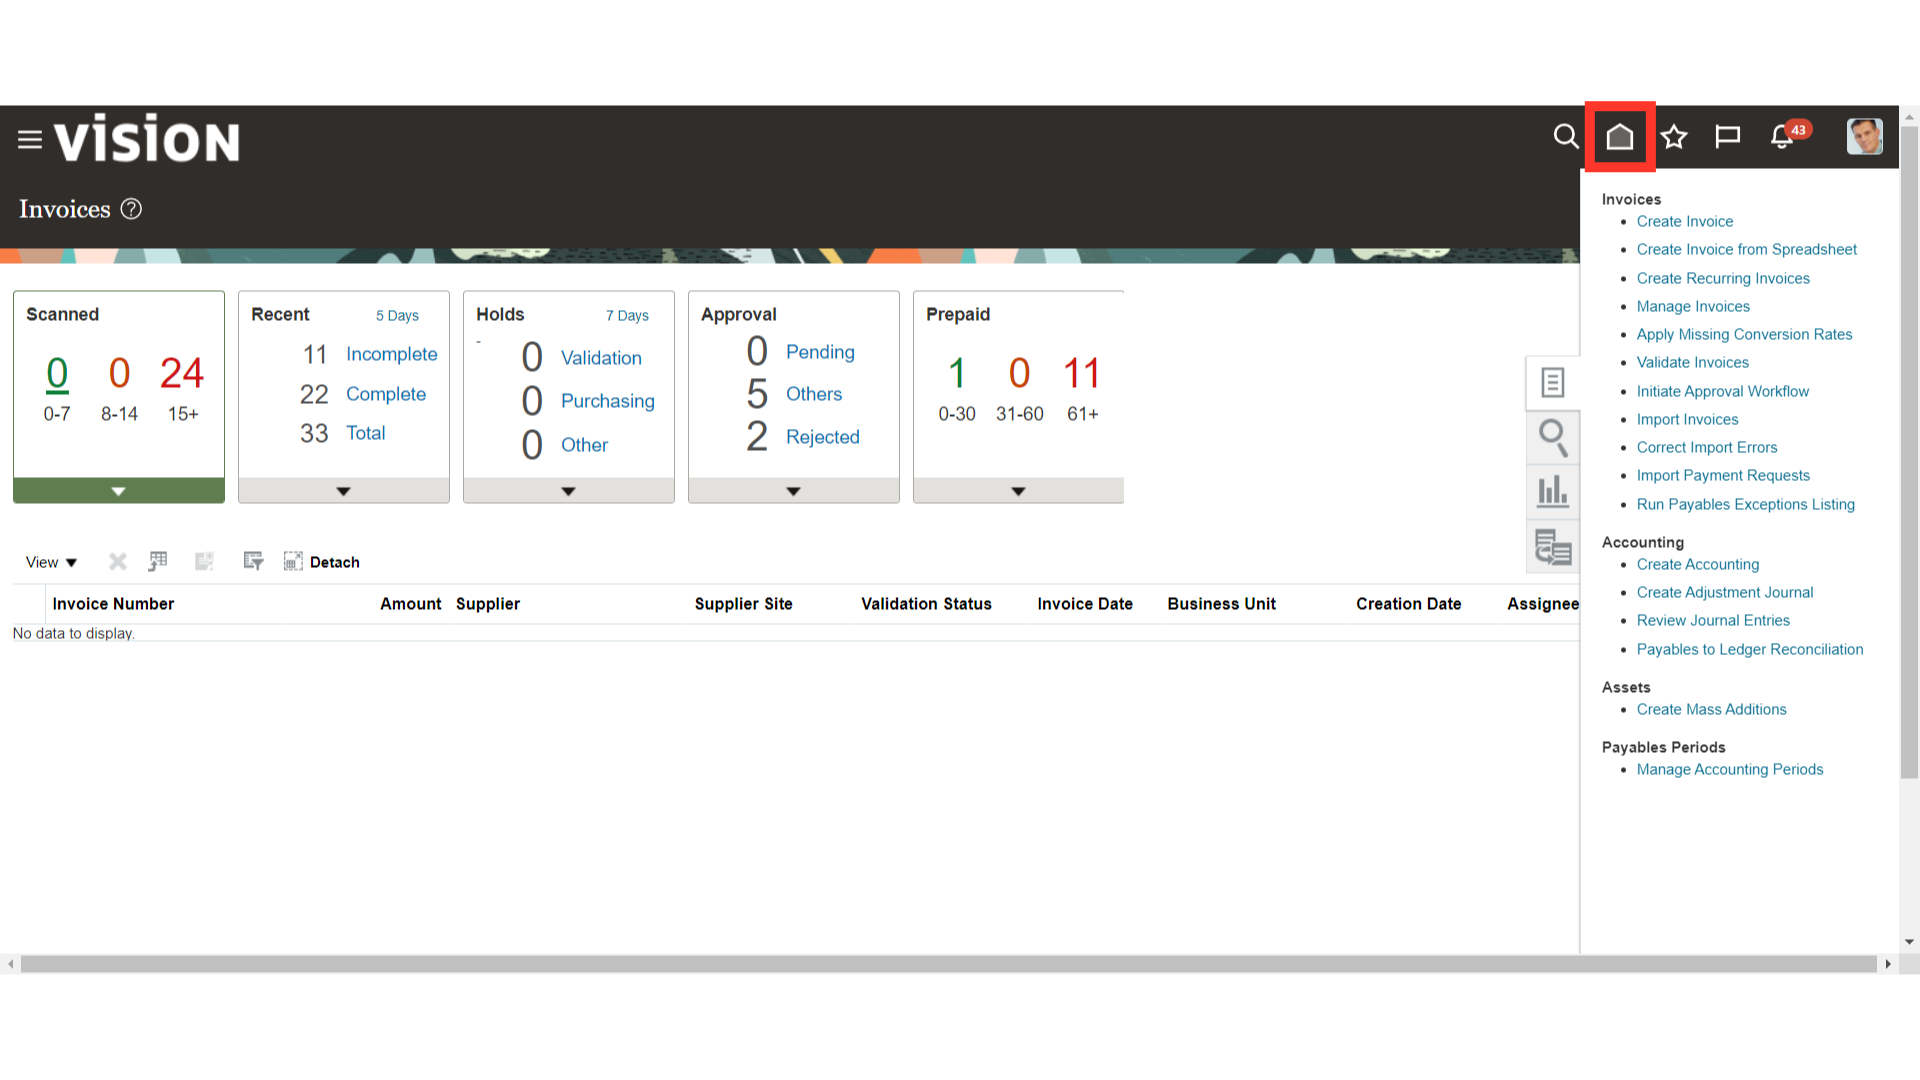
After uploading the Invoices, open the Oracle Fusion, and then click on the Home icon to navigate to Scheduled Processes.
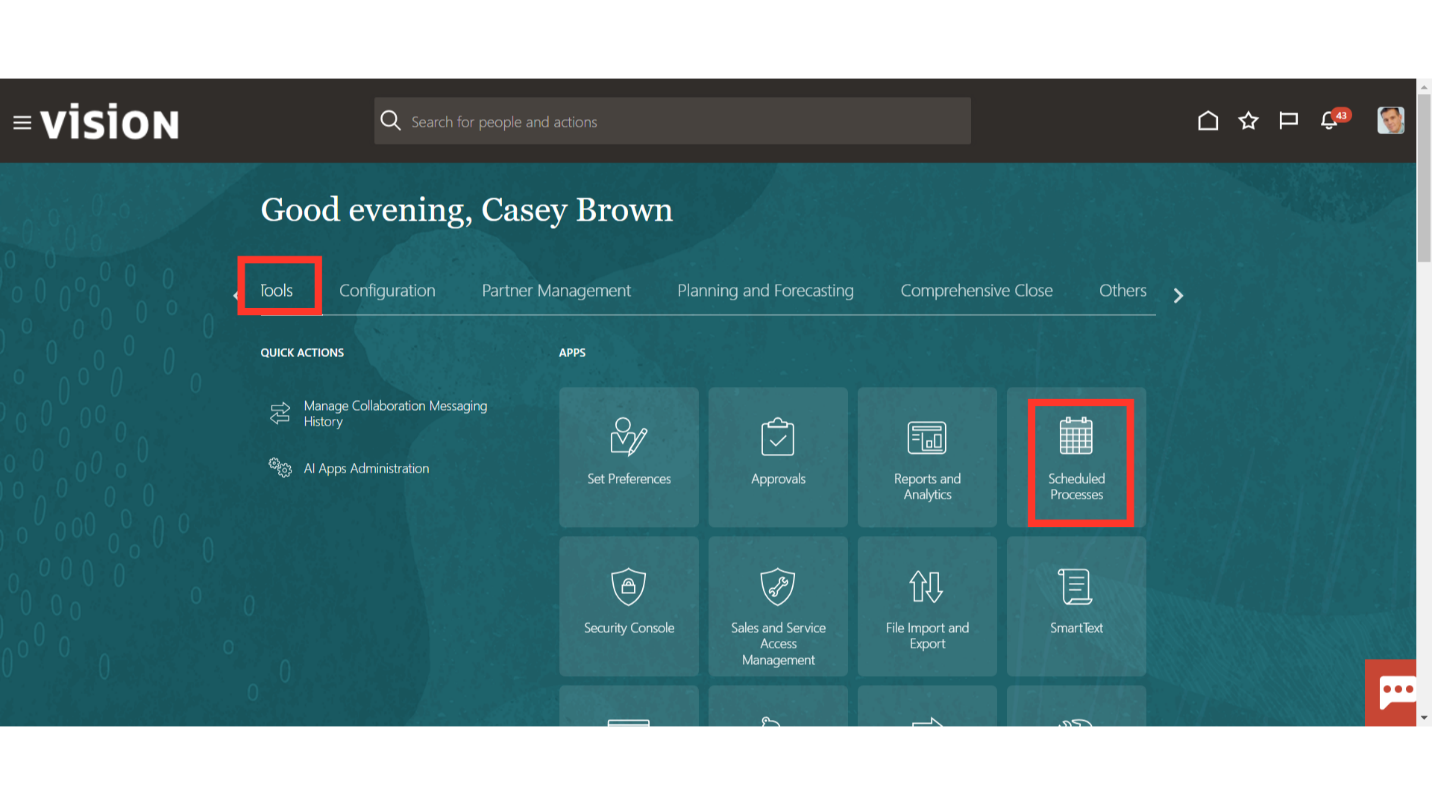
To view the import process’s status, select the “Scheduled Processes” submenu from the Tools menu.
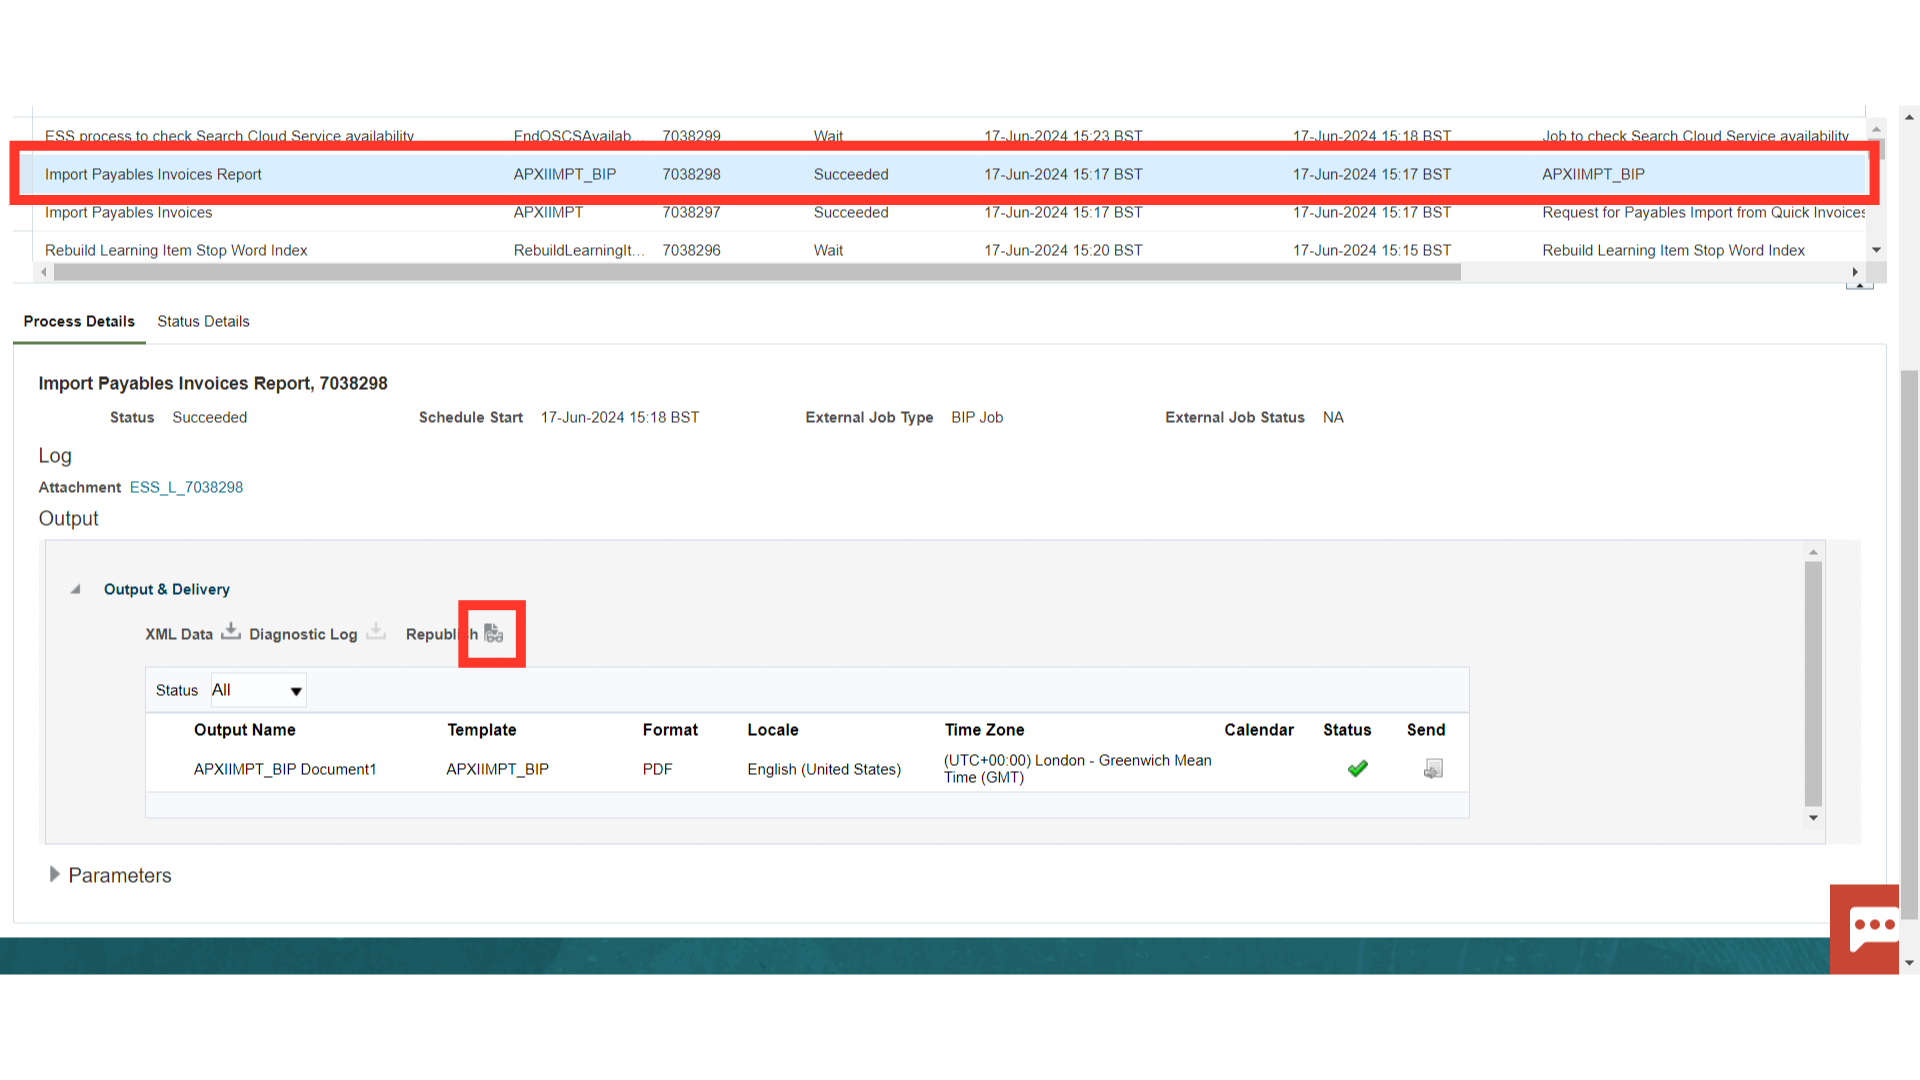
To download the report, select the Import Payables Invoice report process and click republish after the Import Payables Invoice process has been successful.
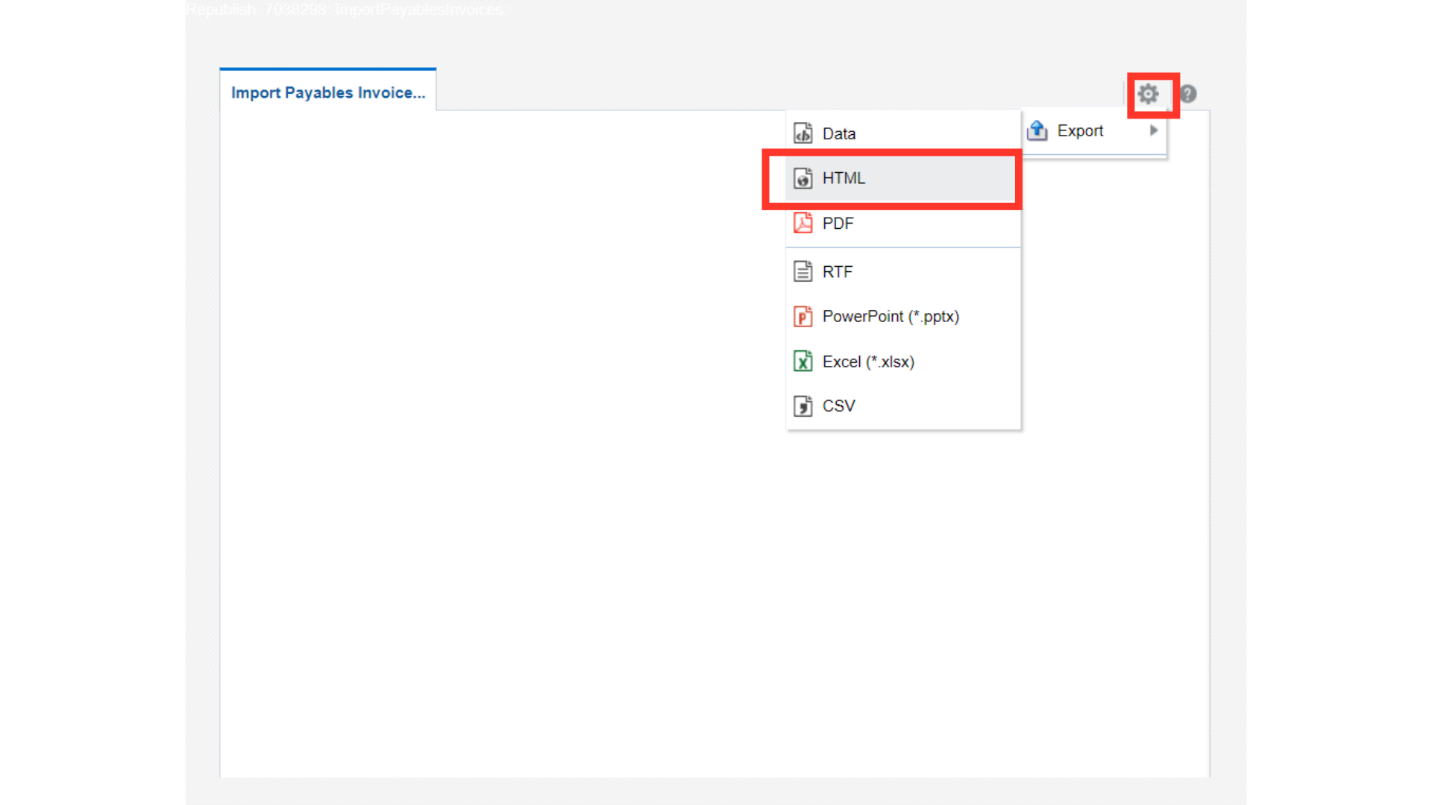
After expanding the settings icon, click on HTML format under Export option.
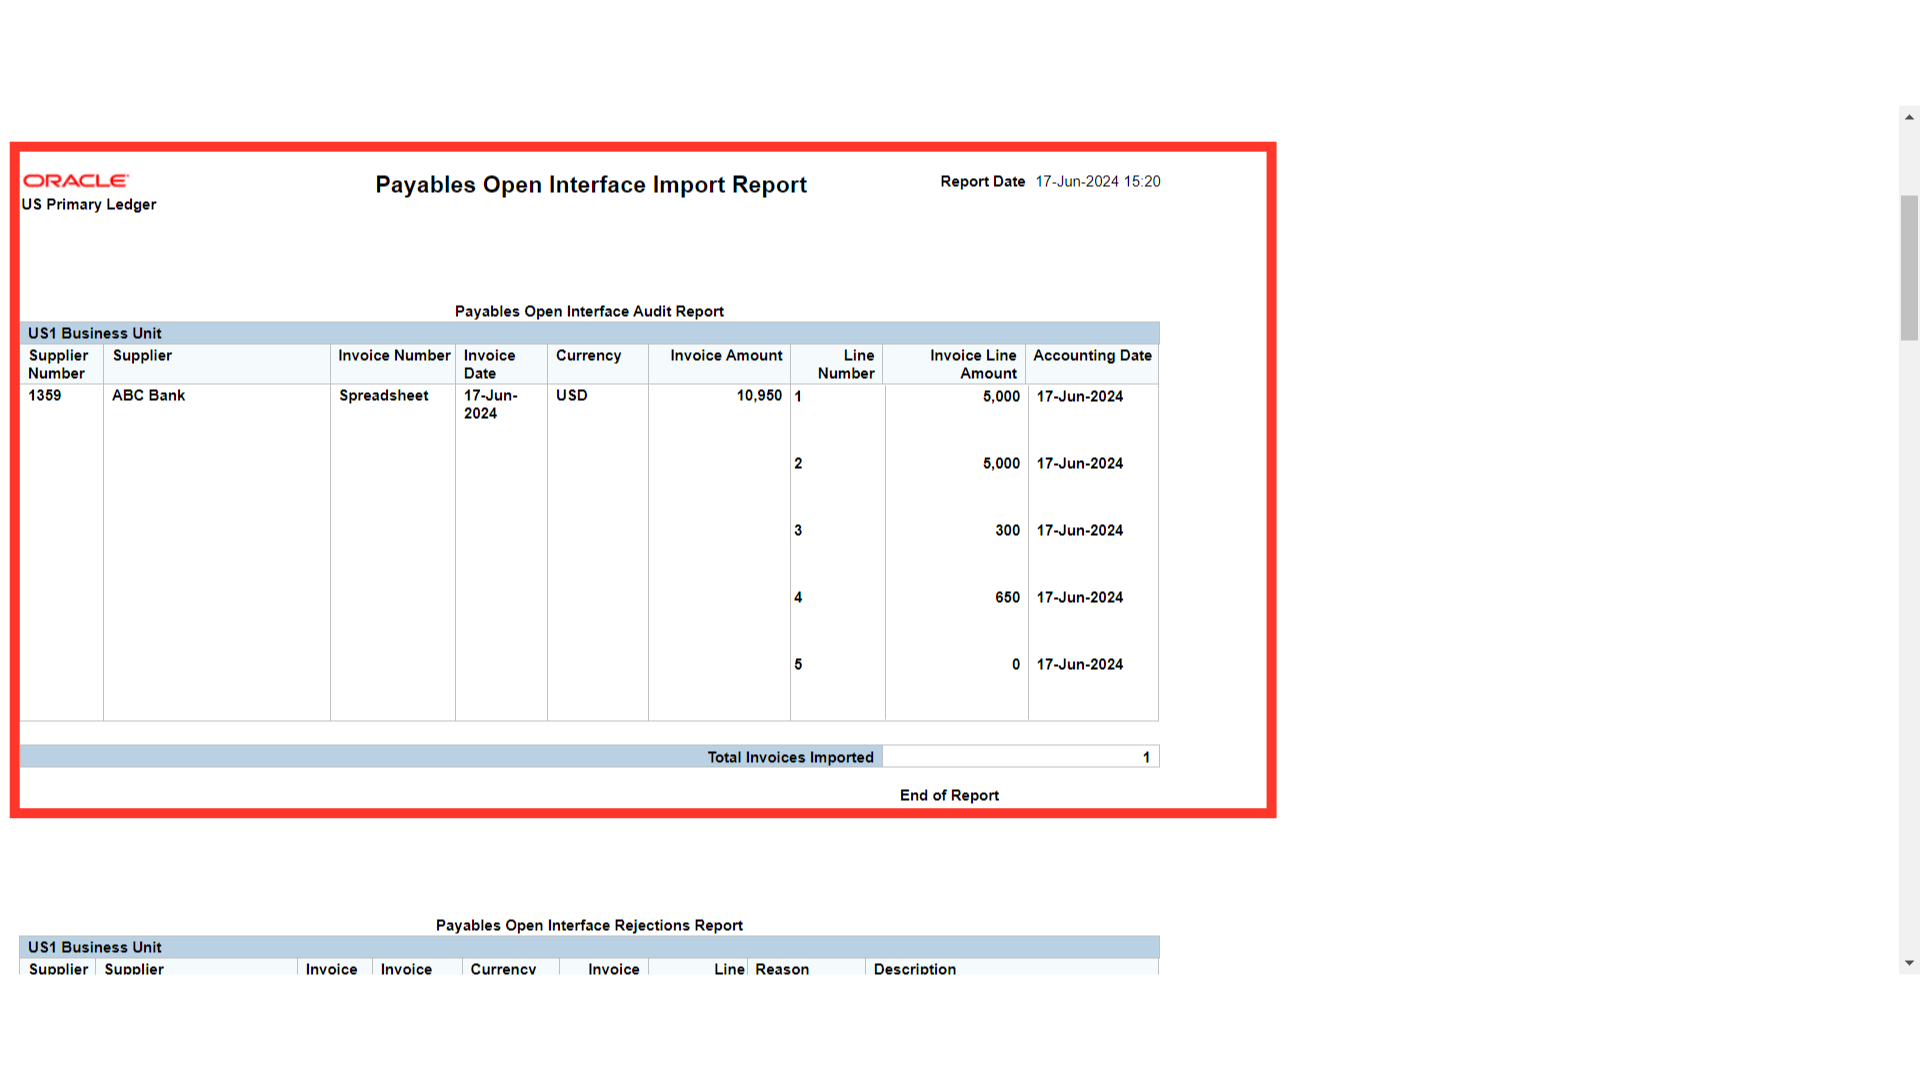
The report contains details of invoice imported successfully in the Payables Open Interface Audit Report table.
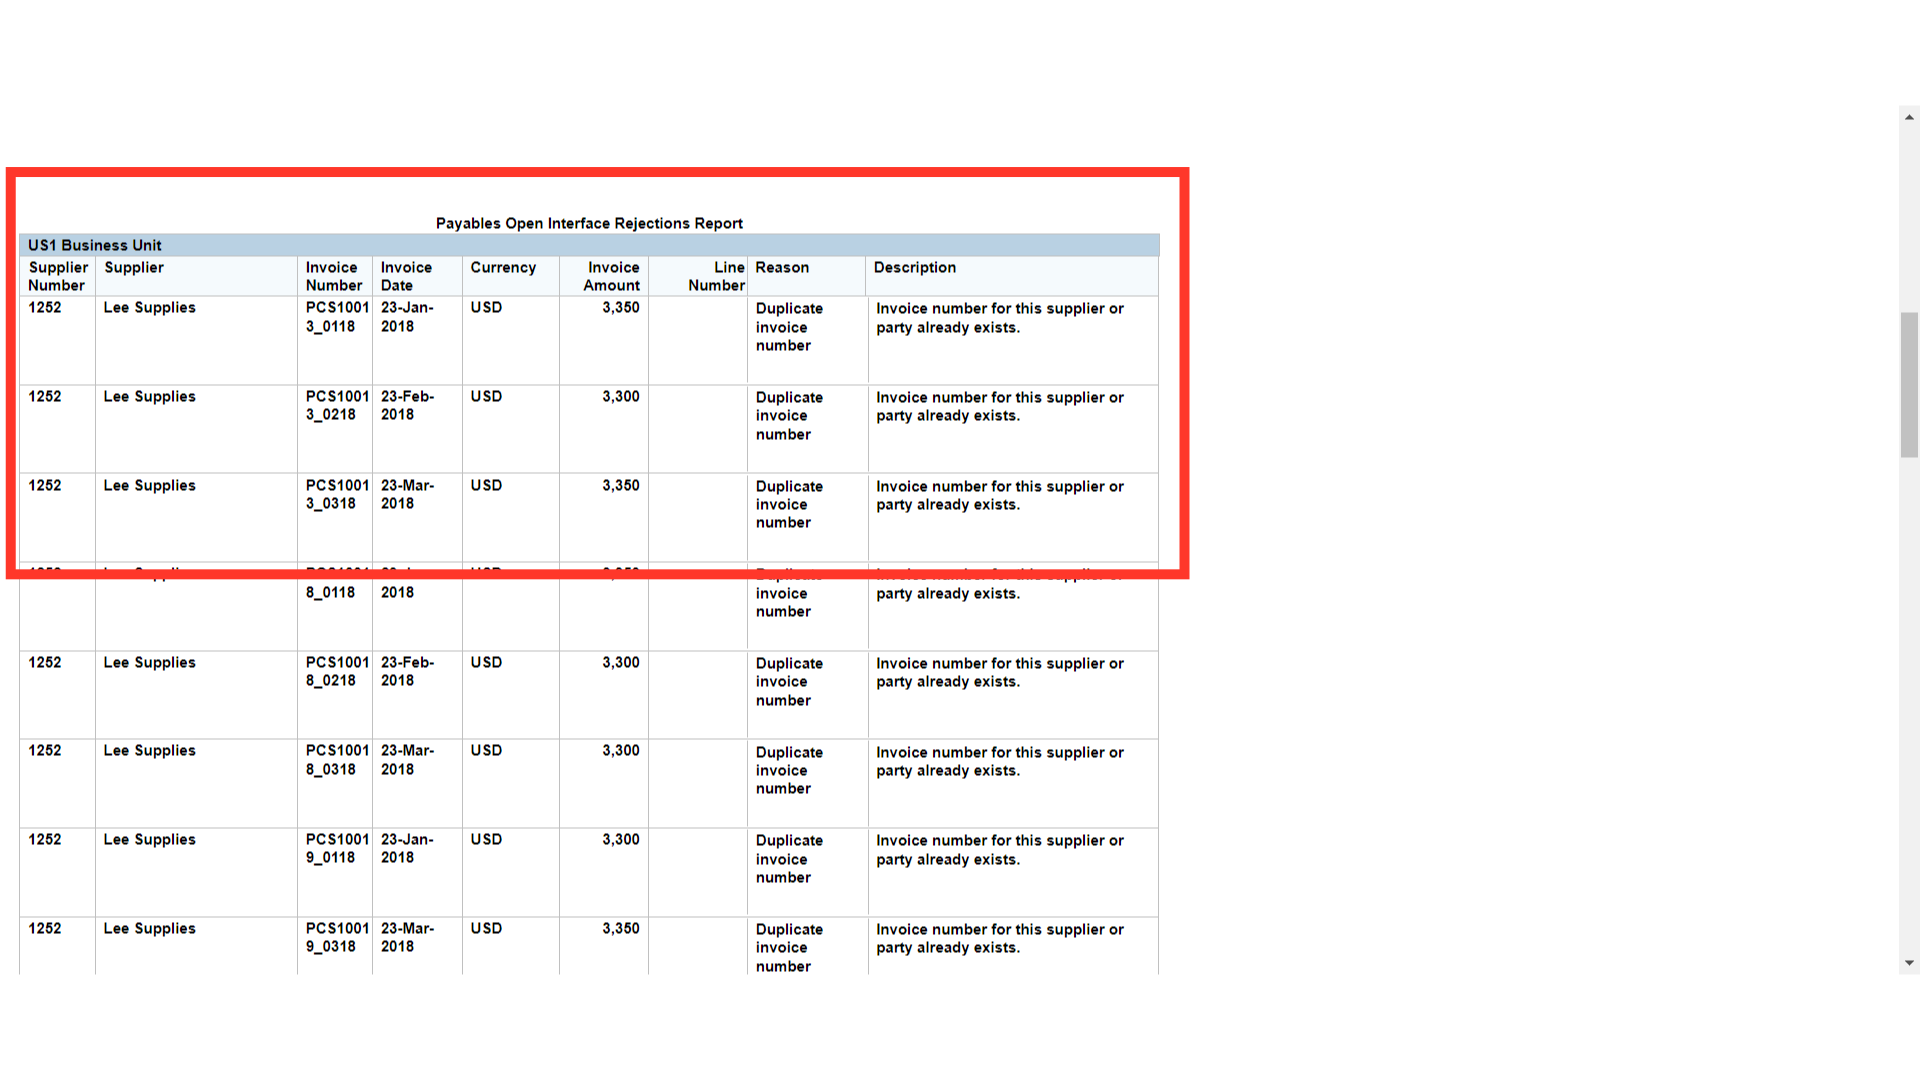
On the other hand, the Payables Open Interface Rejections report displays rejected invoices. You can fix these invoices by re-importing them using the Correct Import errors ADFDI spreadsheet.
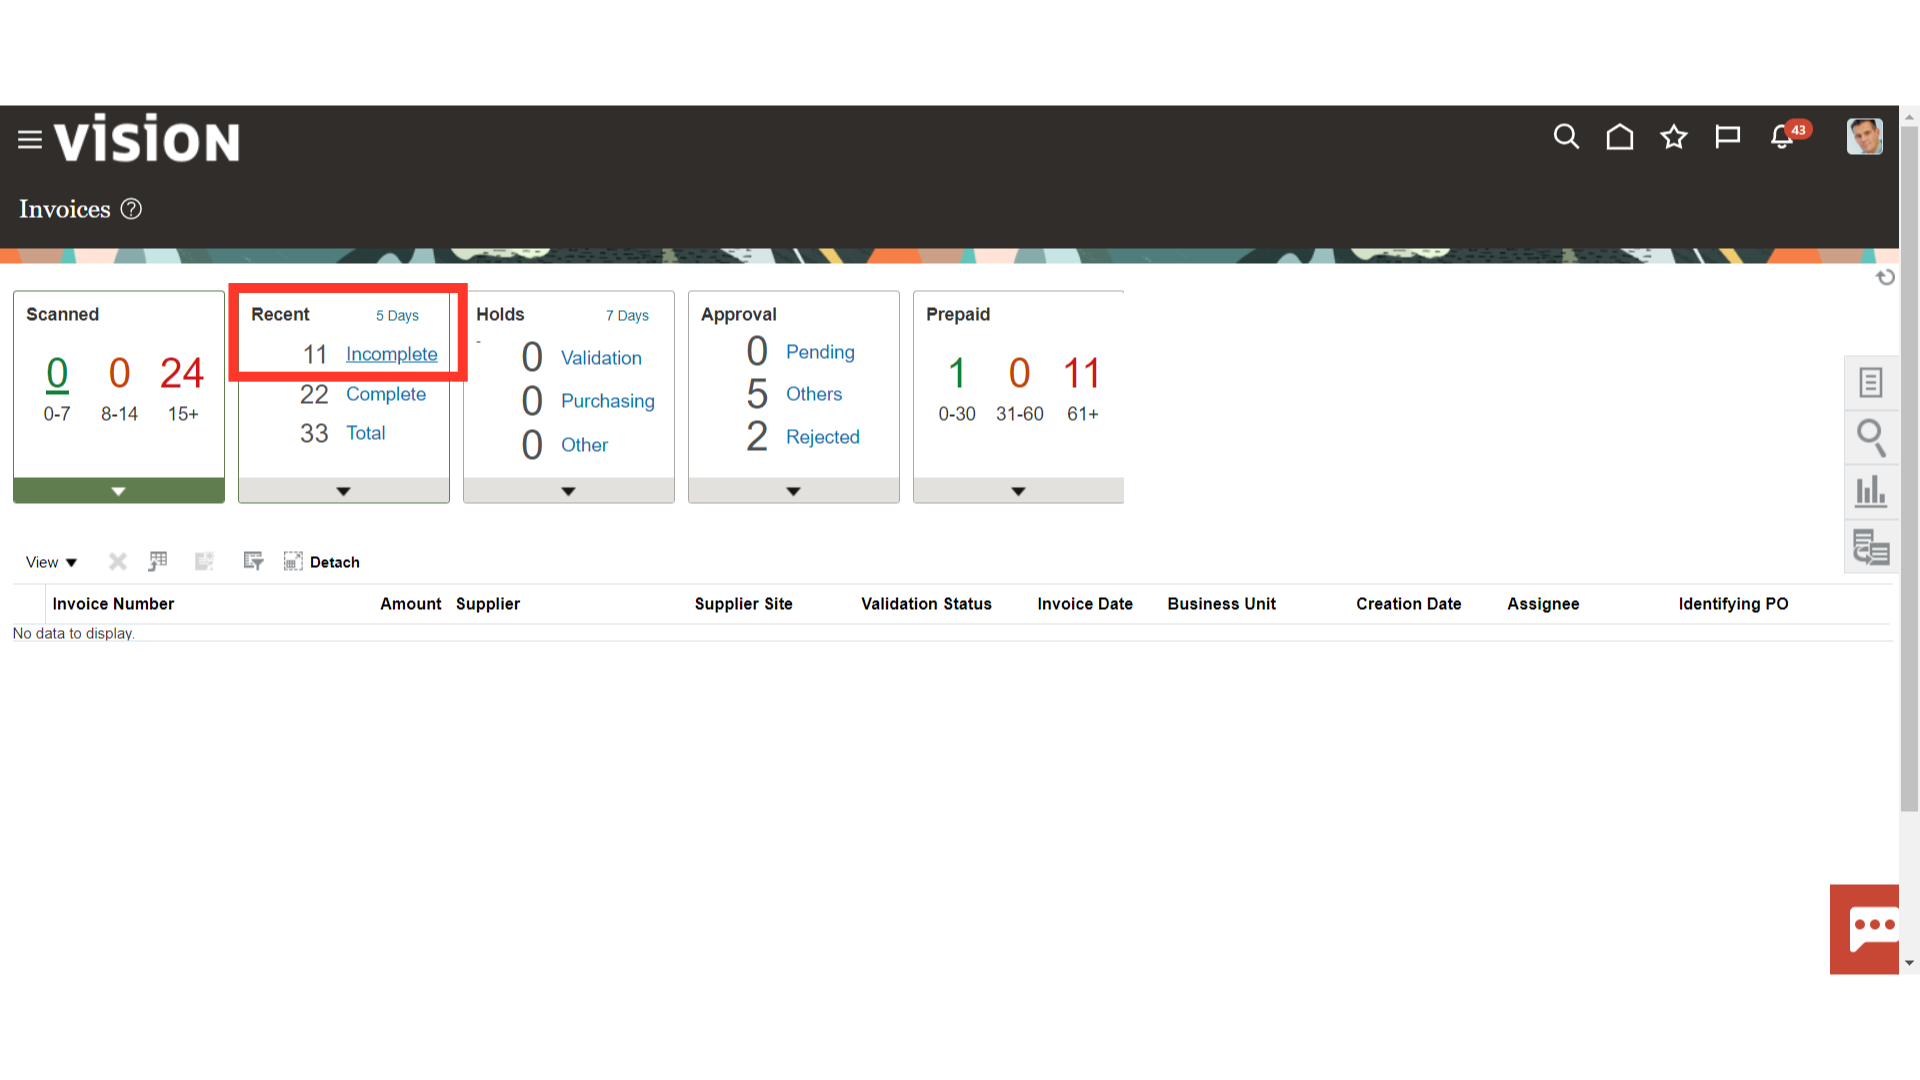
Once you have verified the Import payables spreadsheet report, navigate to Invoice workbench to view the created invoices. To do so, select the Incomplete link found under the recent infotile.
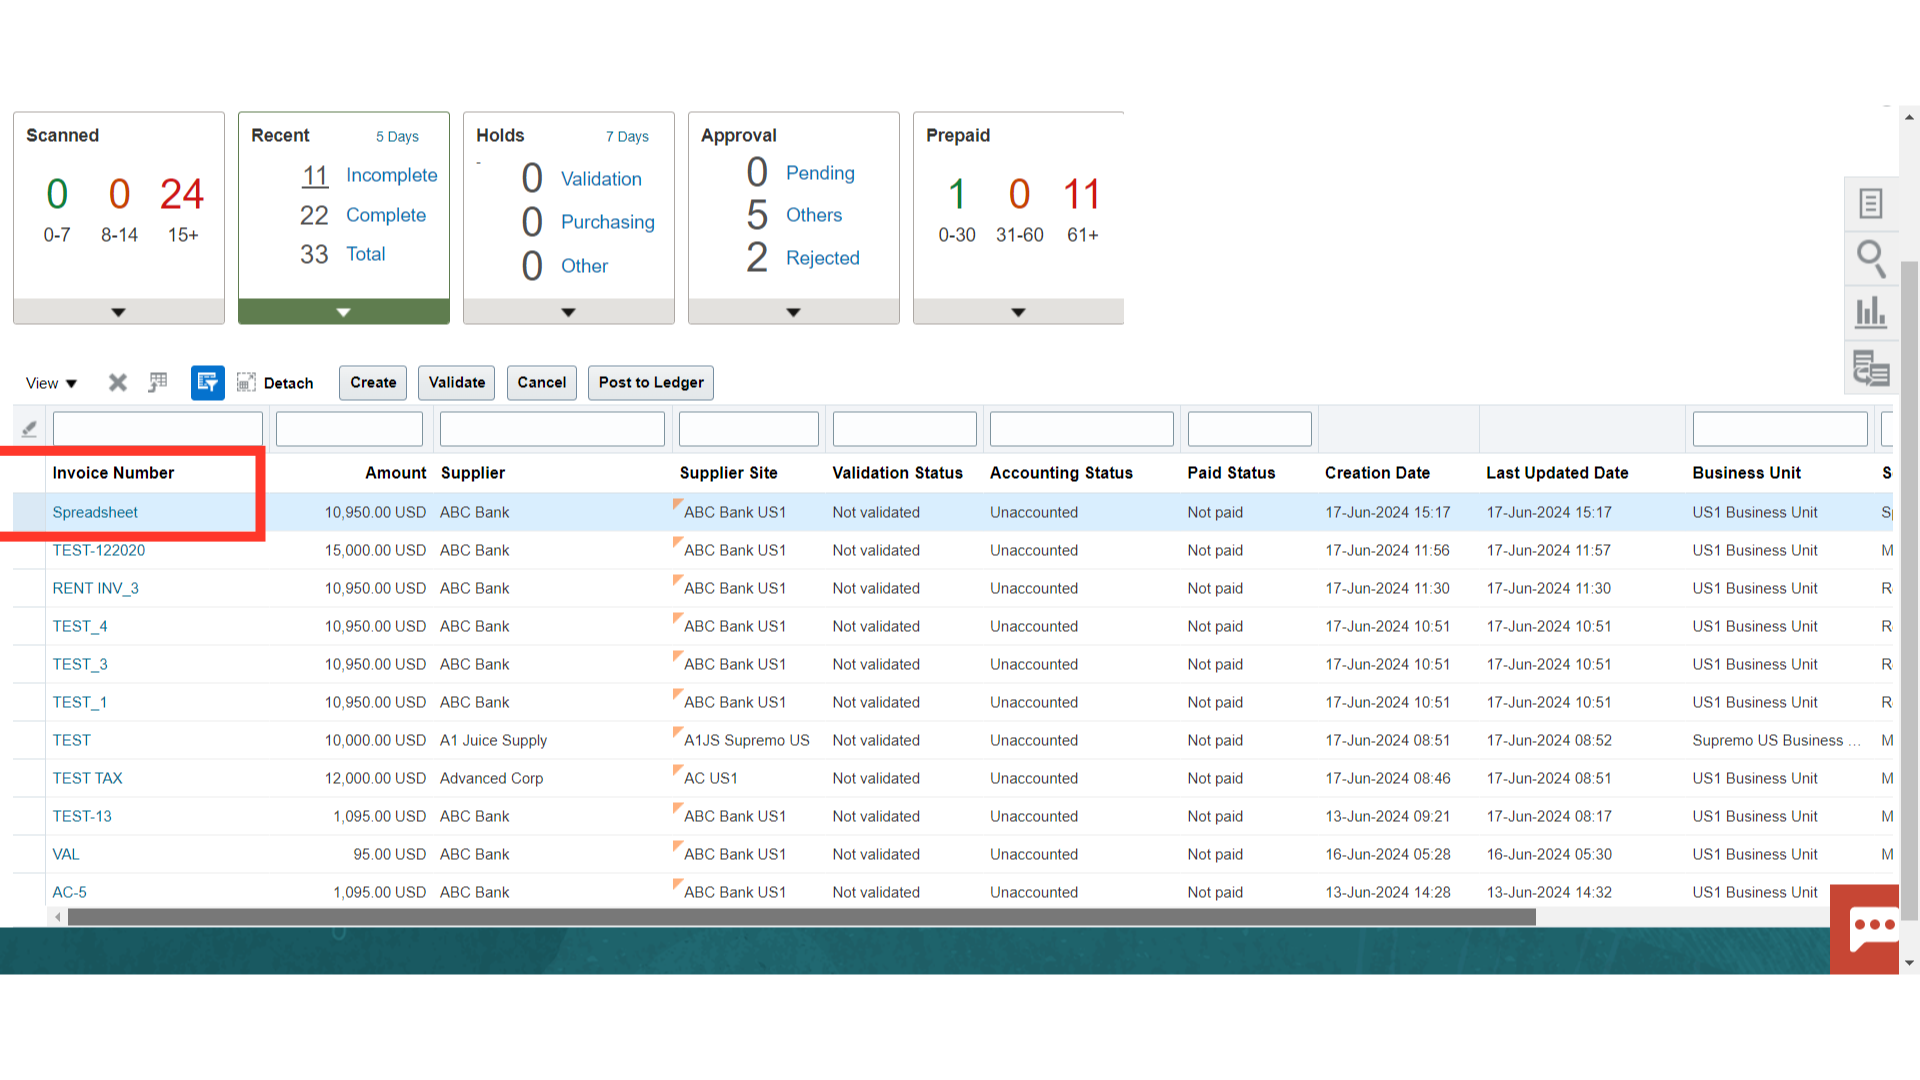
To finish the remaining steps, like validating and starting the approval process, click the invoice number to open it.
This guide offers a thorough, step-by-step breakdown of the entire process, beginning with downloading the spreadsheet to create invoices, filling it out, and uploading the data to Oracle Fusion.