Manage Customer Receipts & Application
This guide will walk you through each step of applying the transactions to the open receipts and the different options available under the Manage receipts.
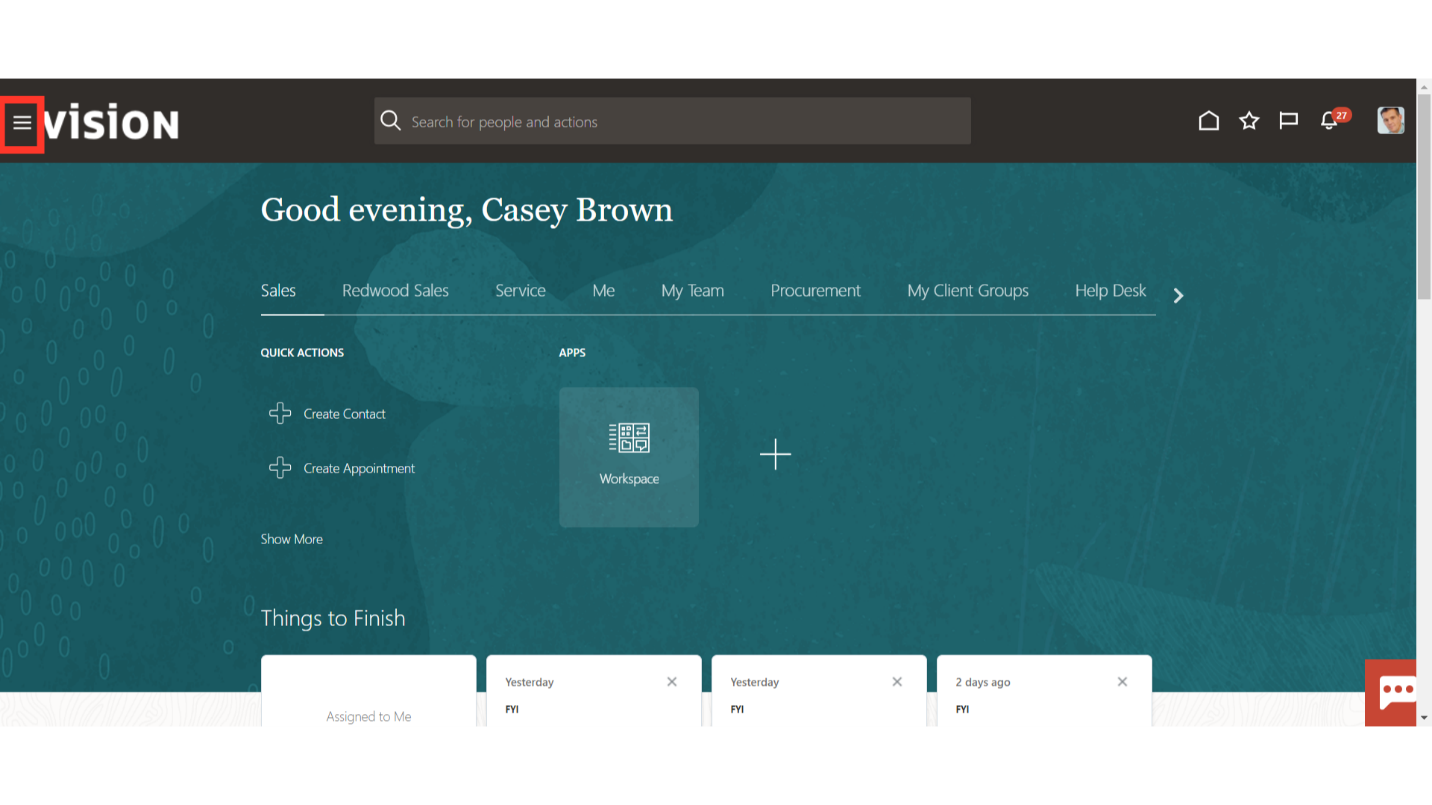
Click on the Navigator icon to access the Receivables menu.
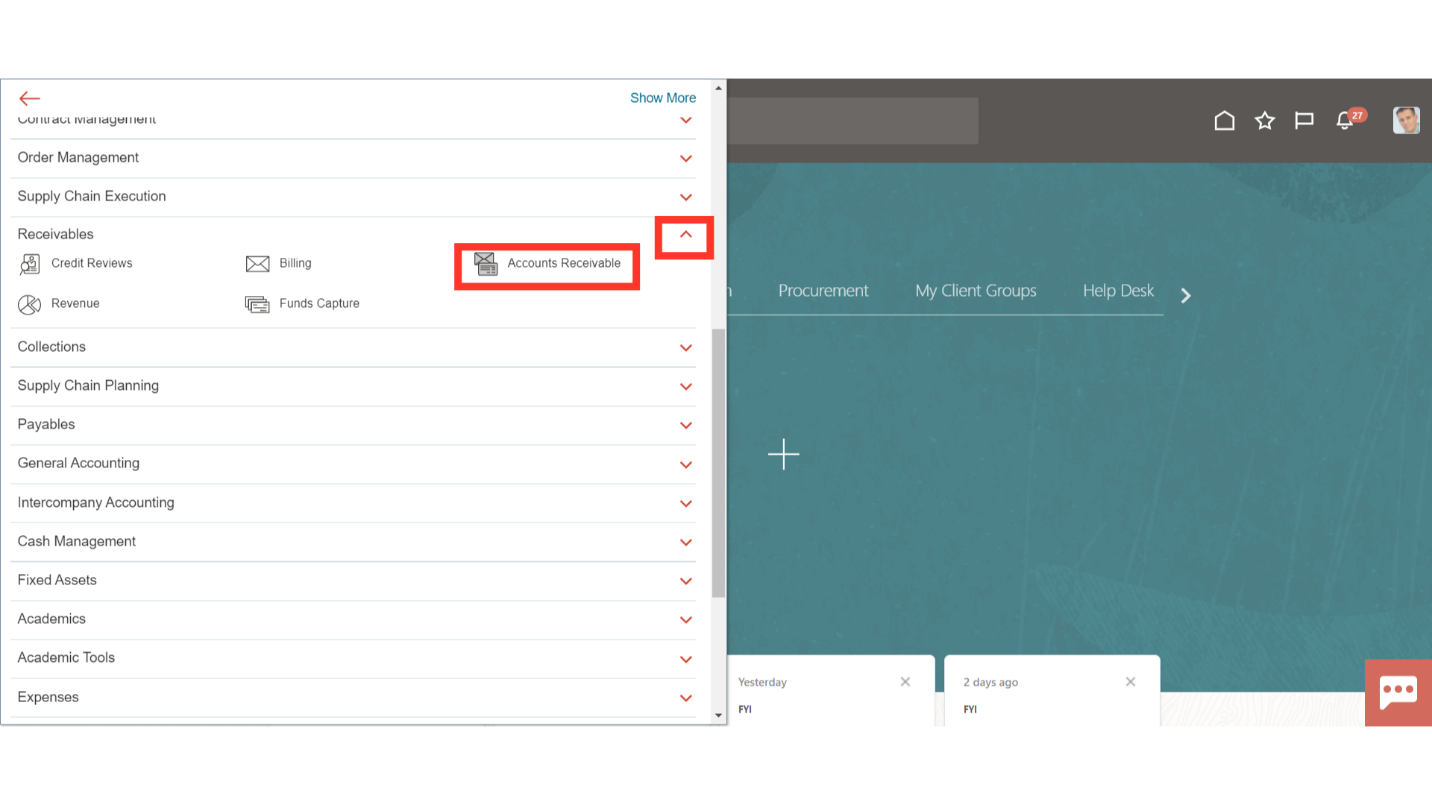
Access the Accounts Receivable work area by selecting Accounts Receivables under Receivables from the navigator. Alternatively, on the Home page, you may select the Receivables menu and under that select the Accounts Receivable submenu.
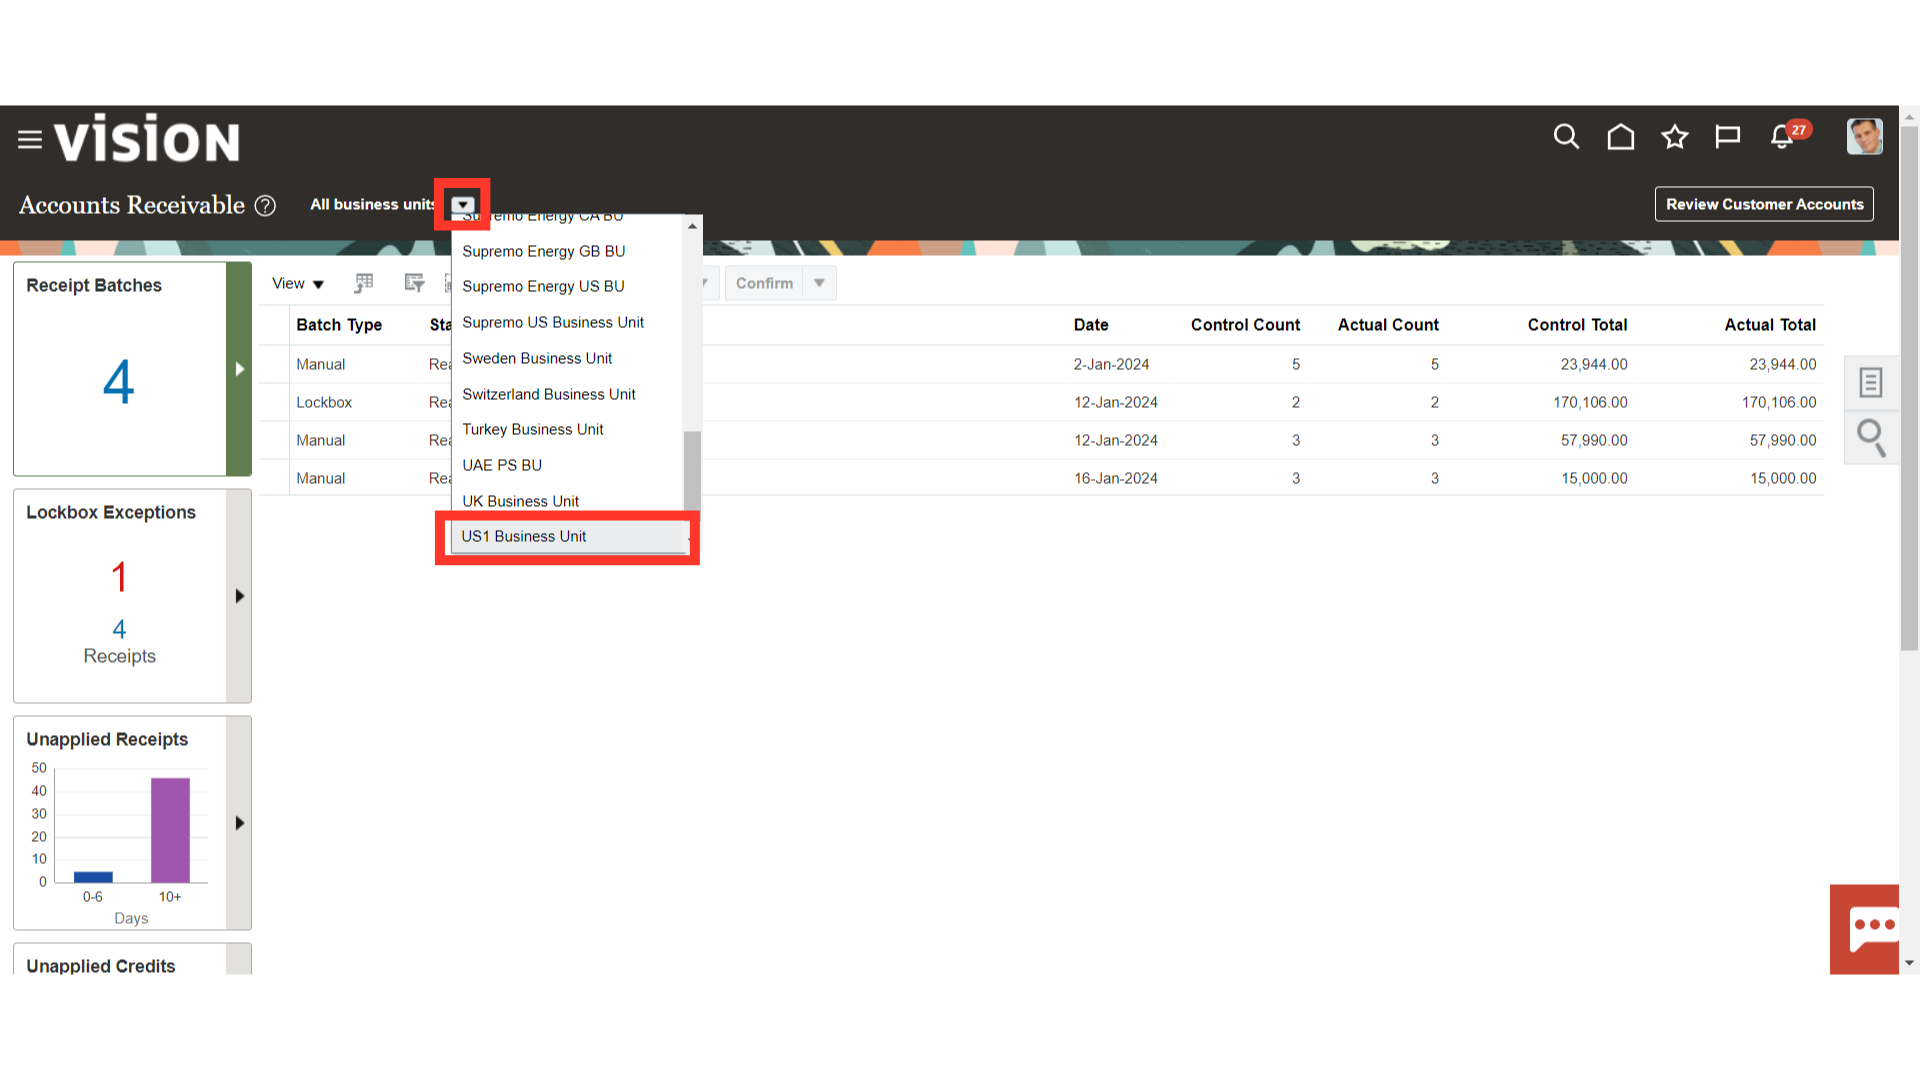
By default, data would be displayed for All Business units, if required specific business unit can be selected to display data for the same.
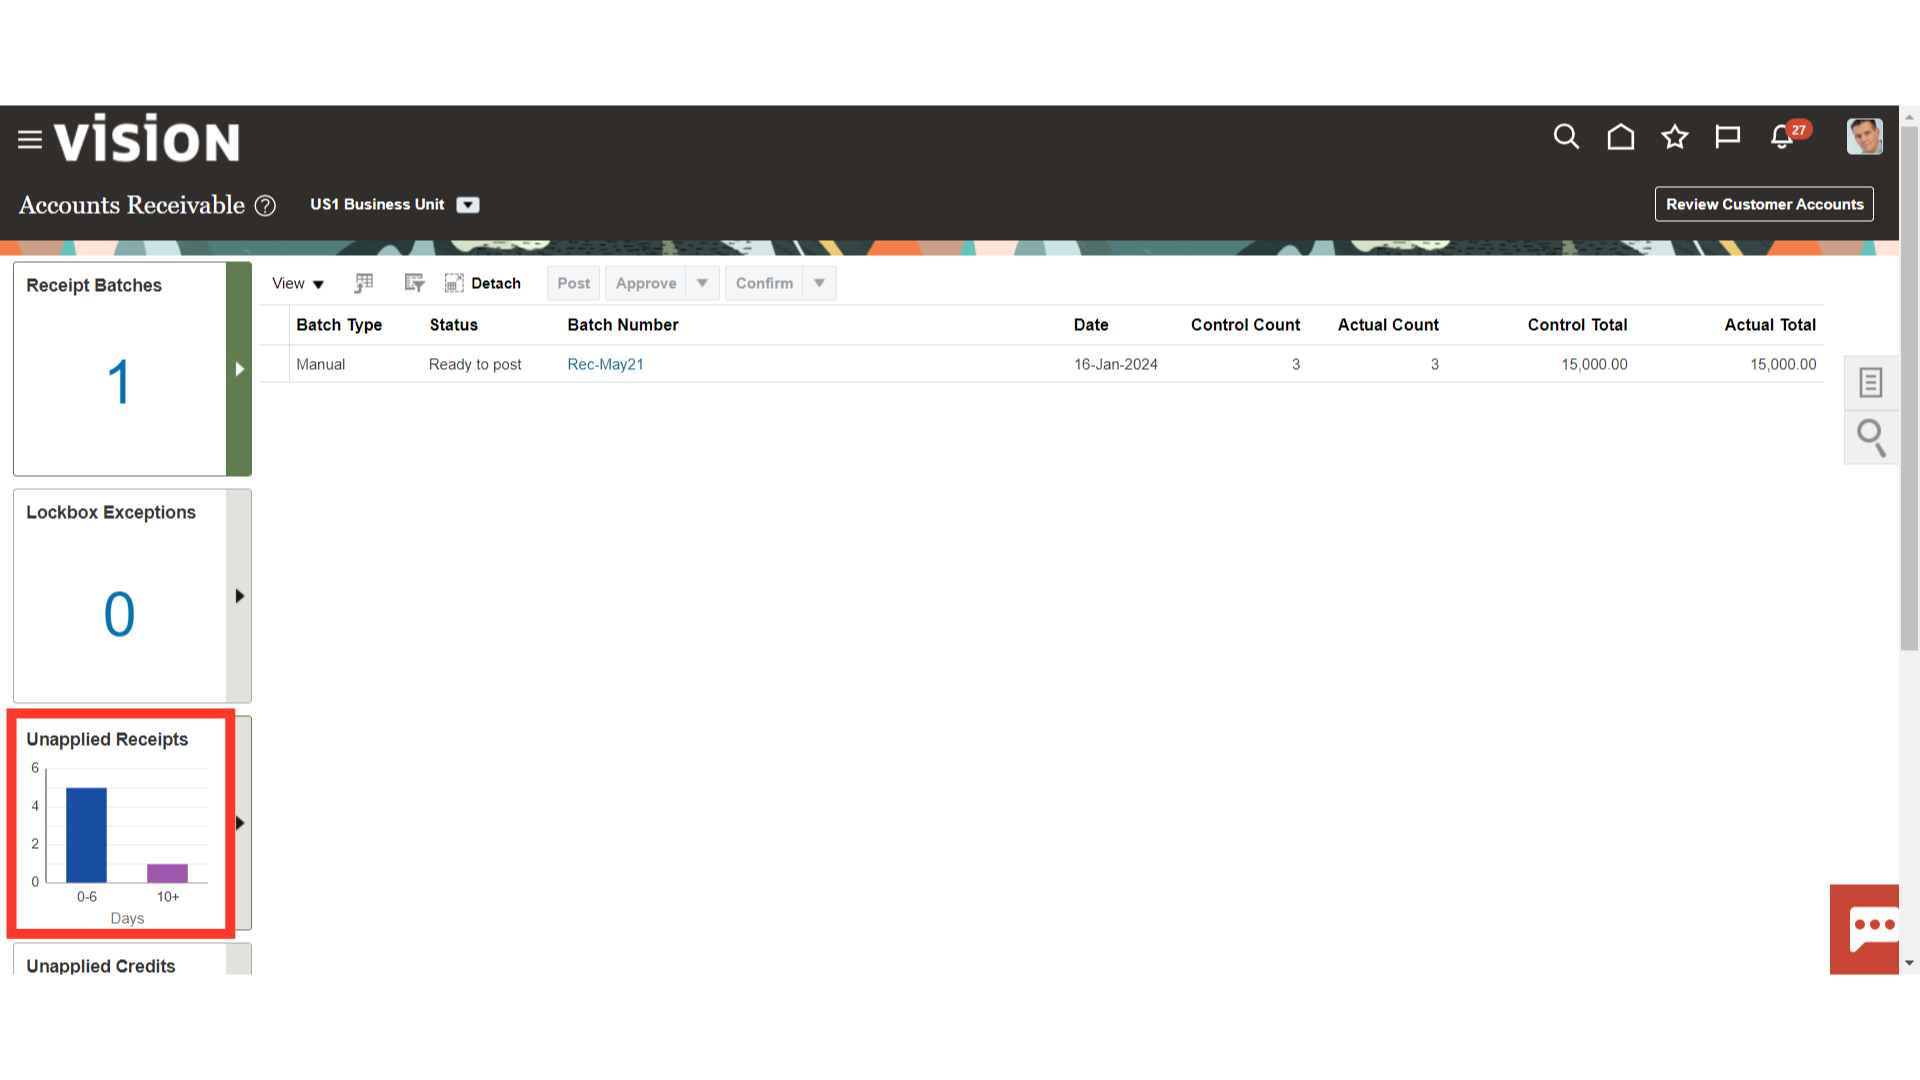
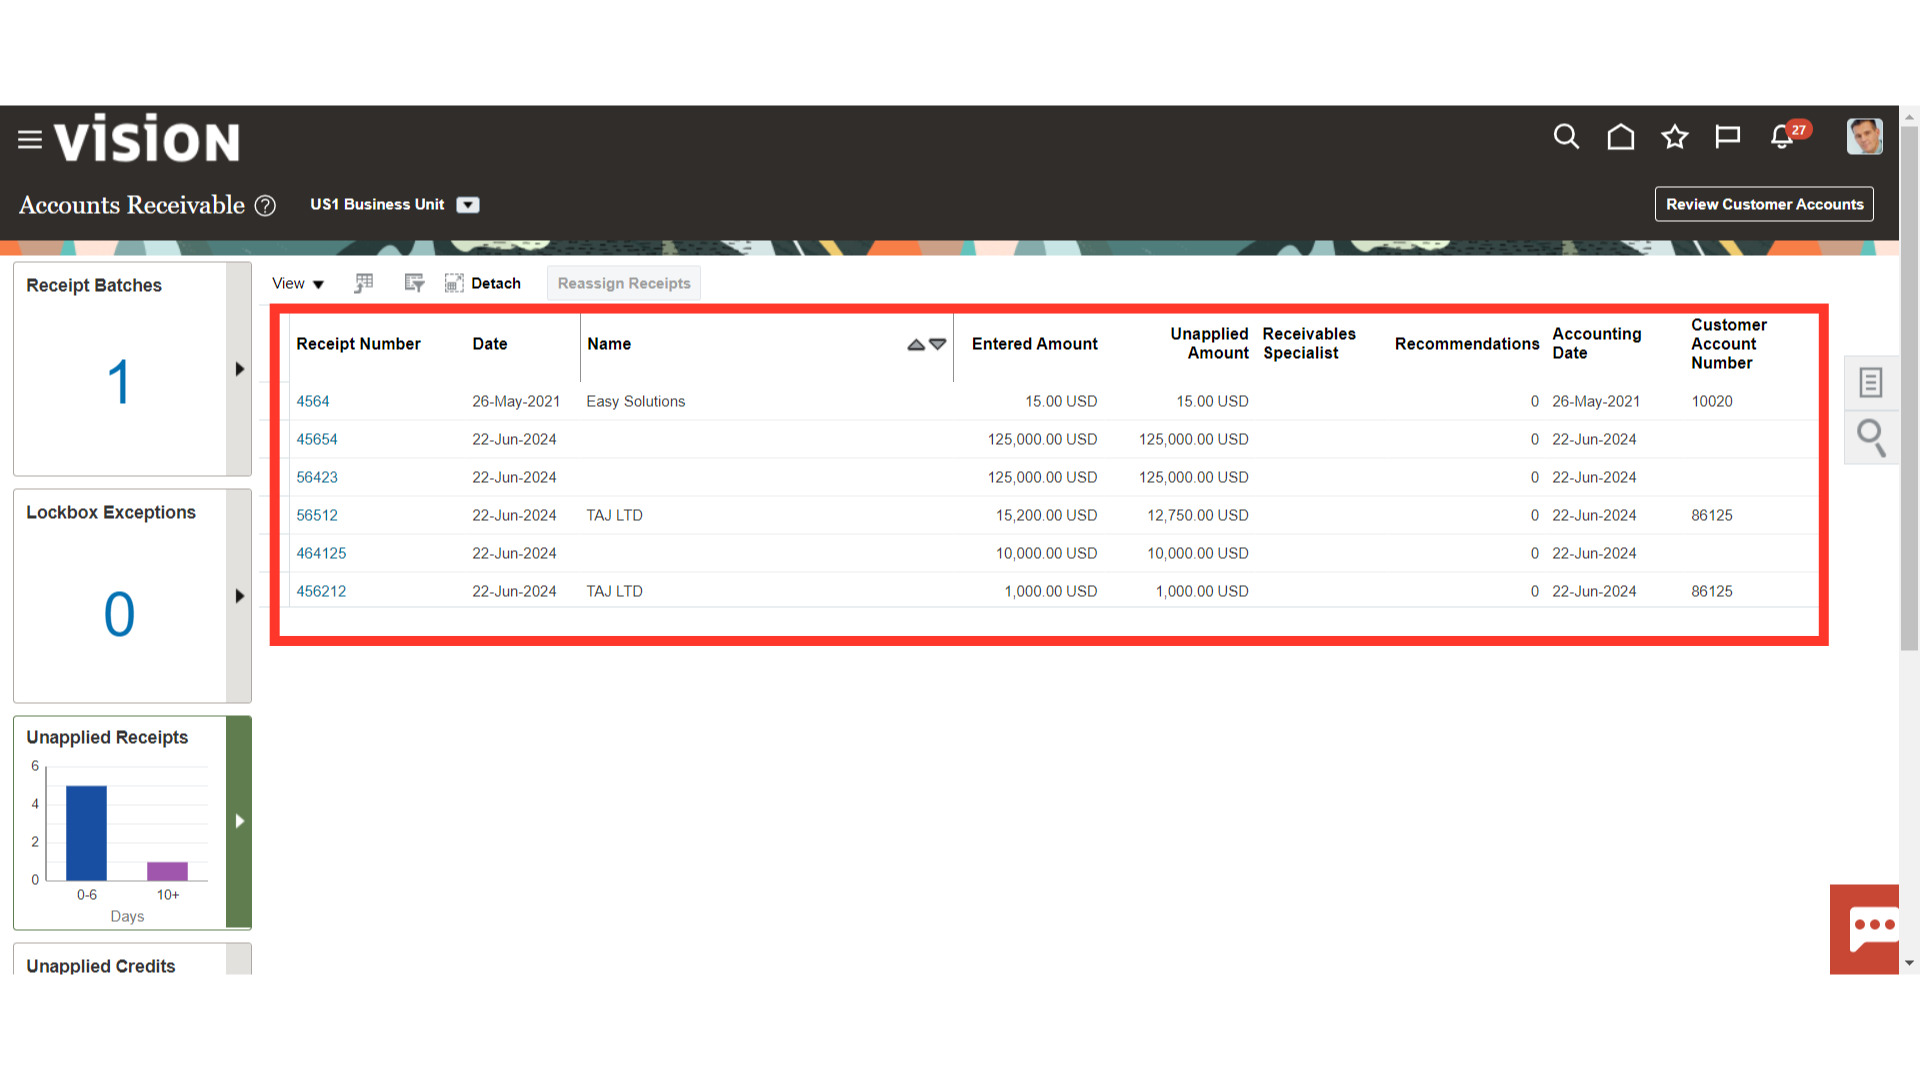
Use the Unapplied Receipts Infotile to review summarized receipt counts of your open receipts displayed in graphical representation and categorized into date-range buckets: 0-6 days old, and >10 days old. Click on a specific date range bar on the graph, and the detail table filters the receipt data accordingly.
After clicking on the Unapplied Receipts infotile, a list of open receipts opens up. Receipts for application purposes can be opened from here as well as from the Manage Receipts.
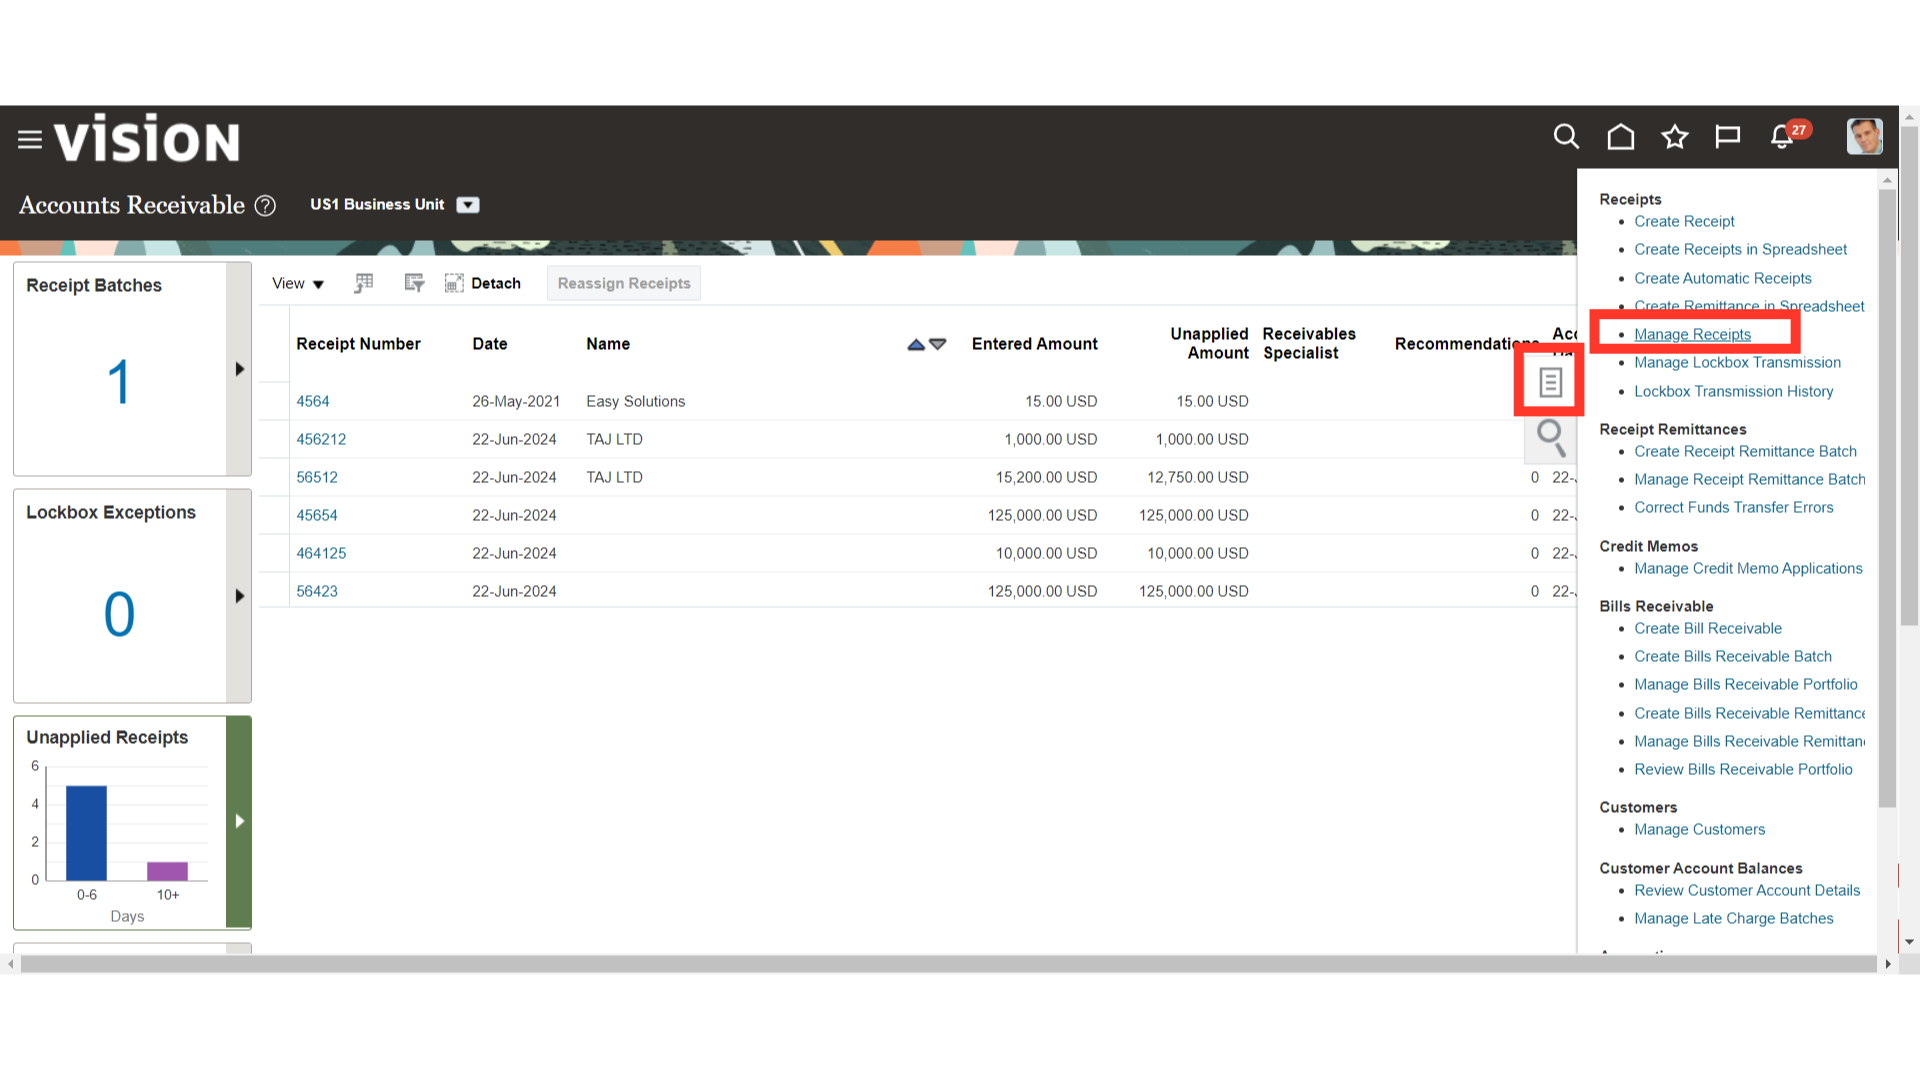
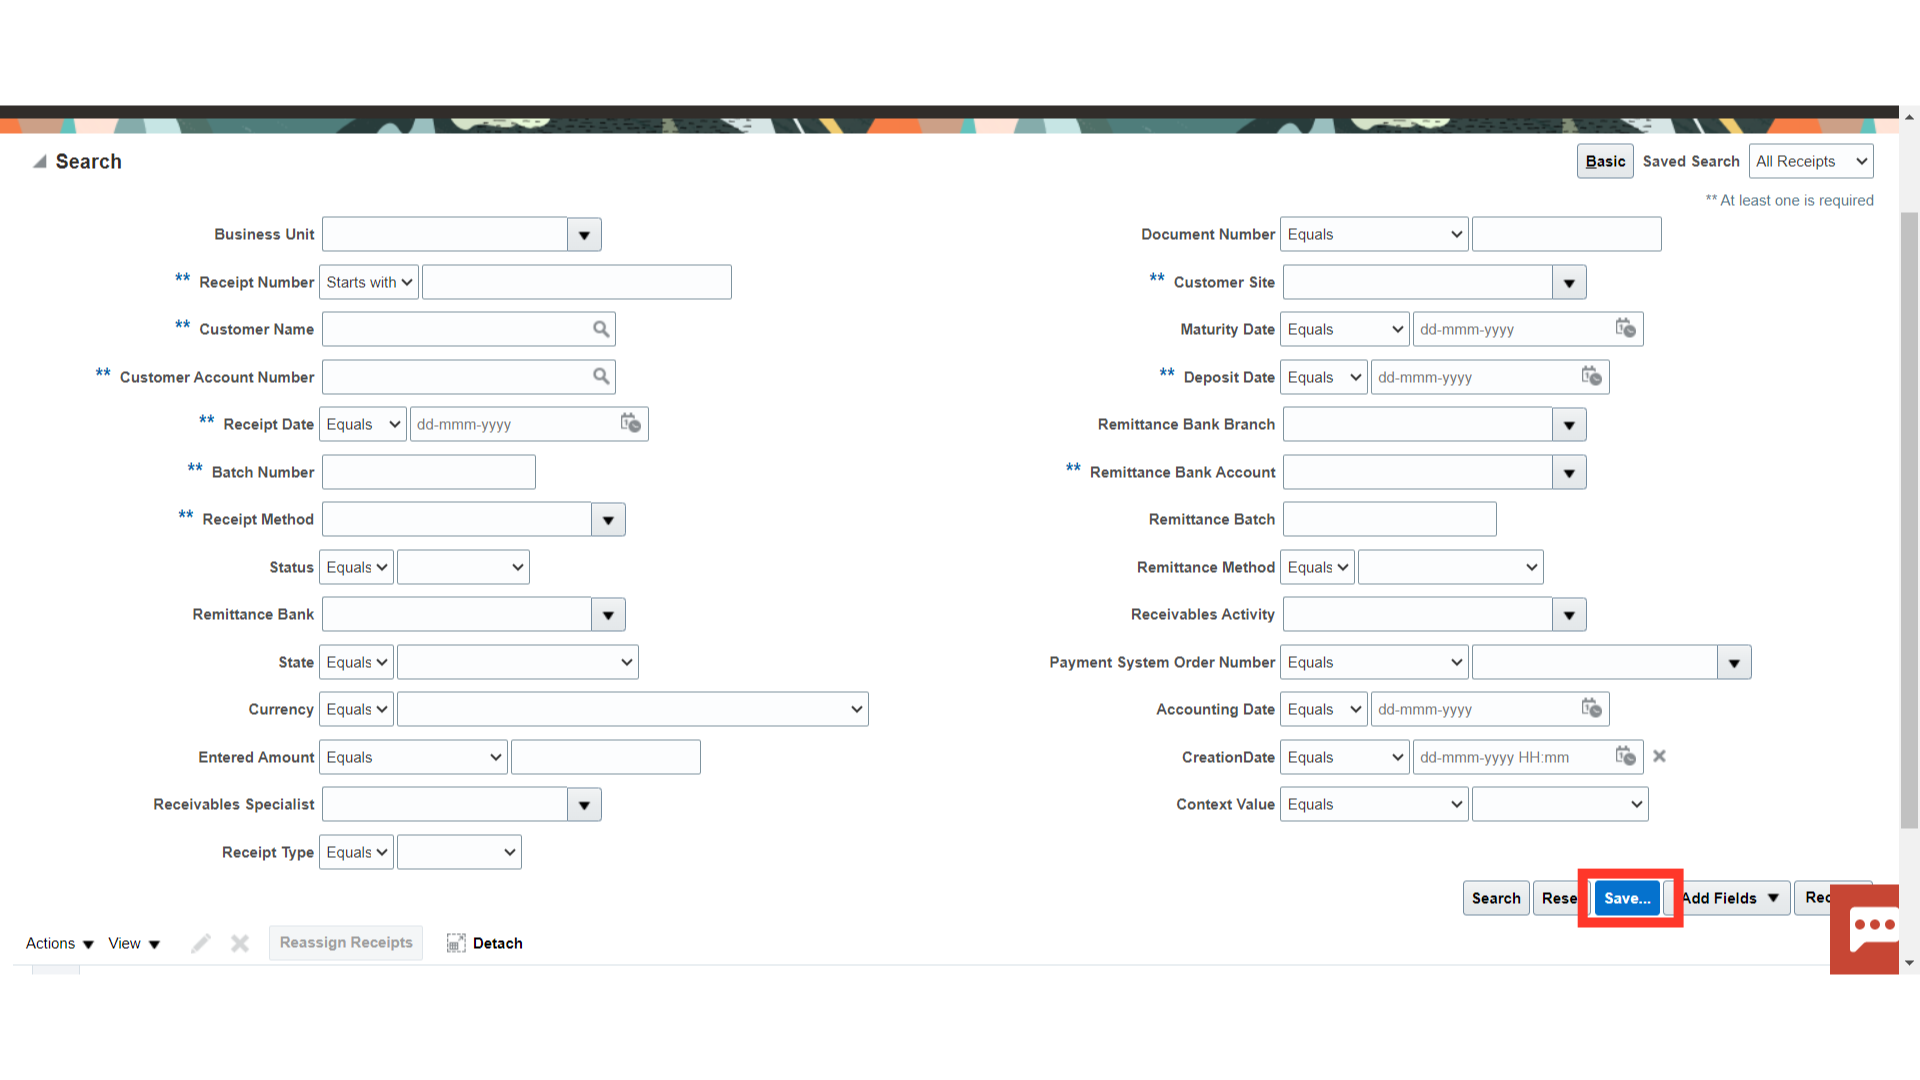
Click on the Manage Receipts hyperlink under Receipts from the task list to search for the receipts.
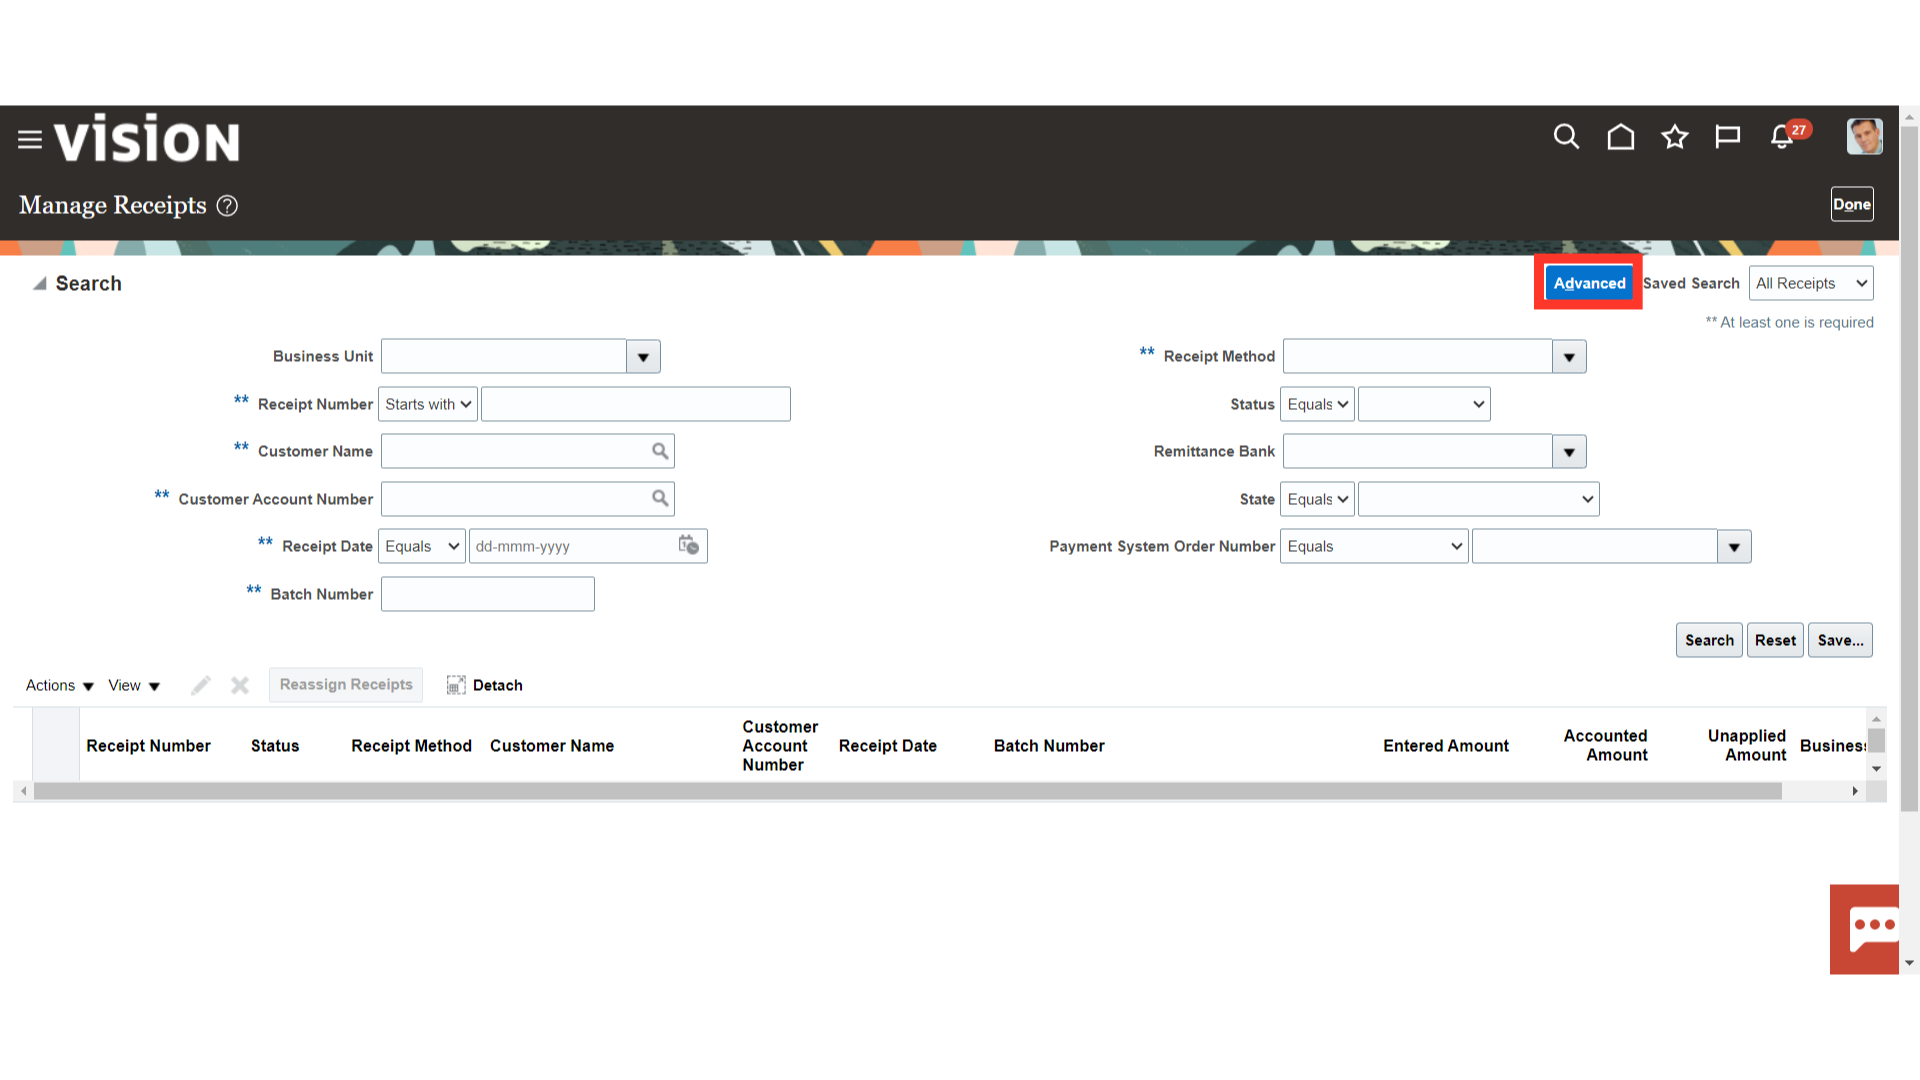
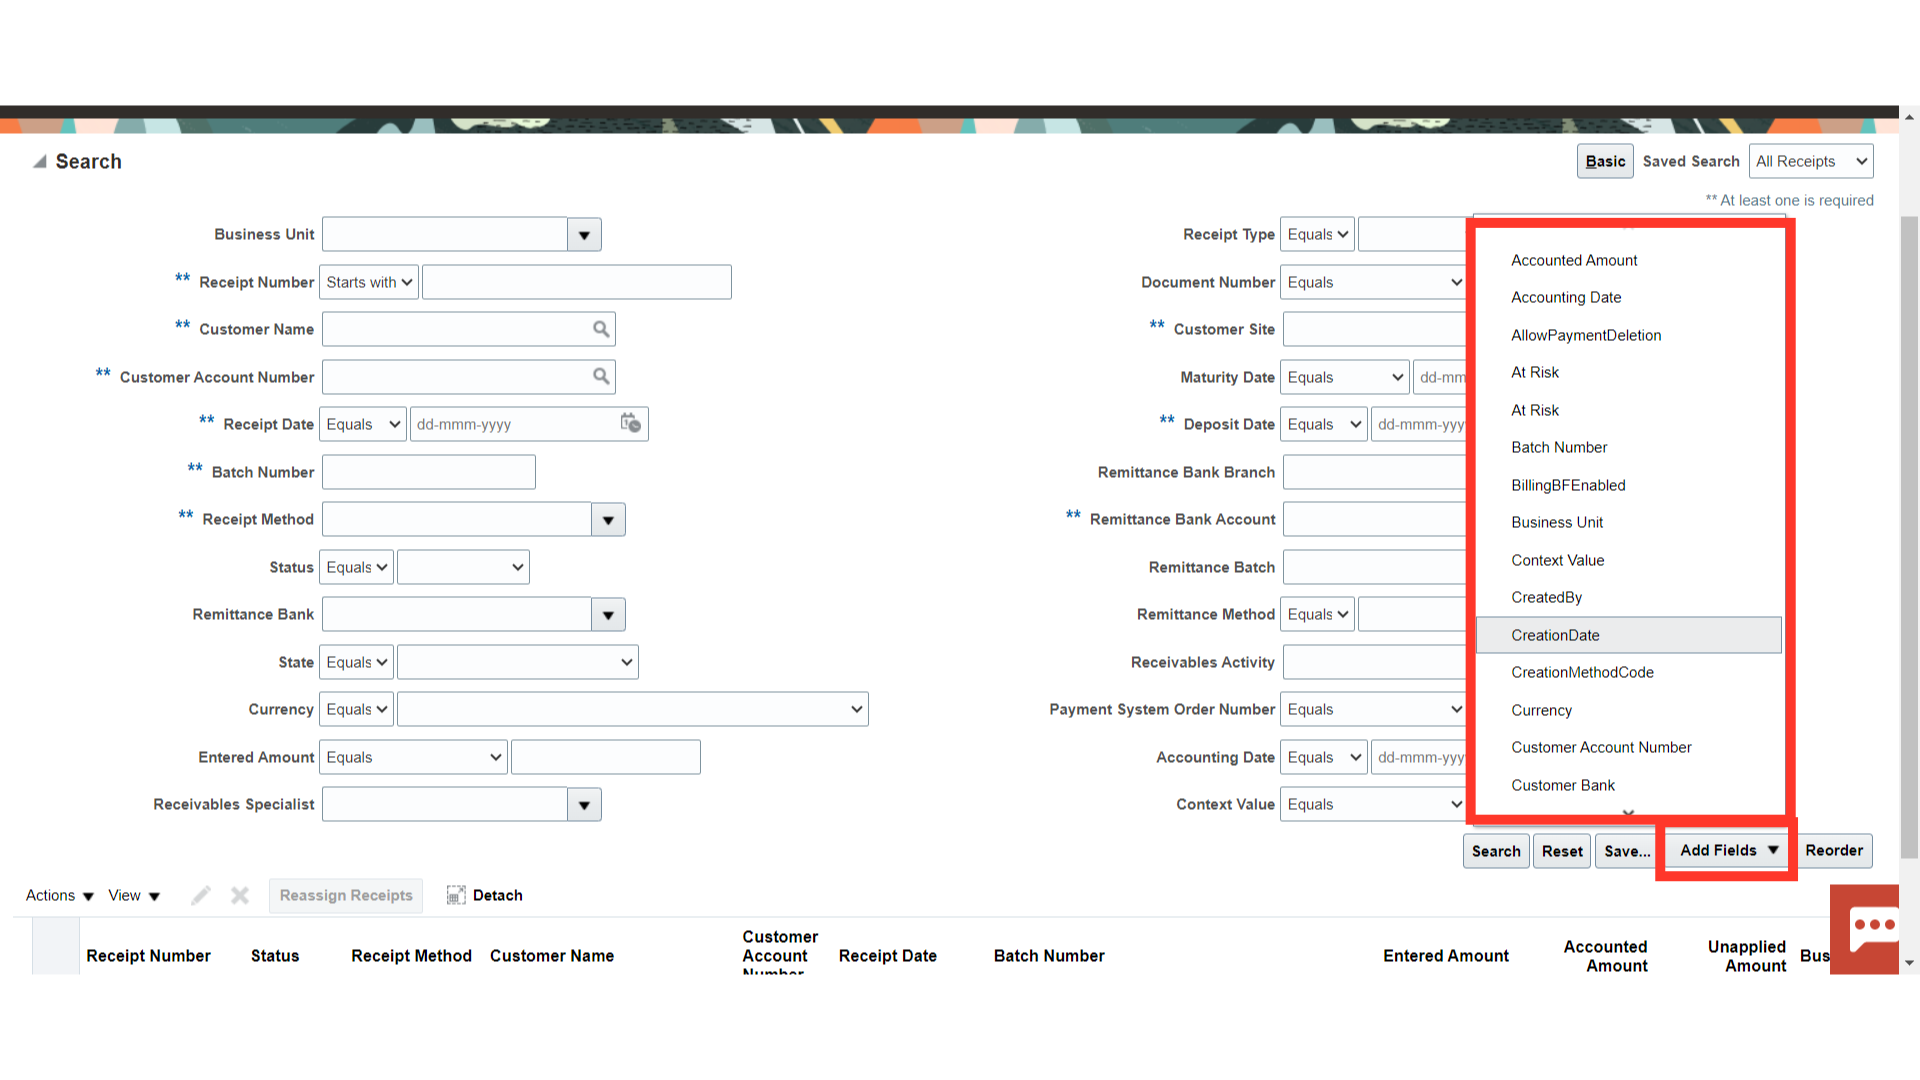
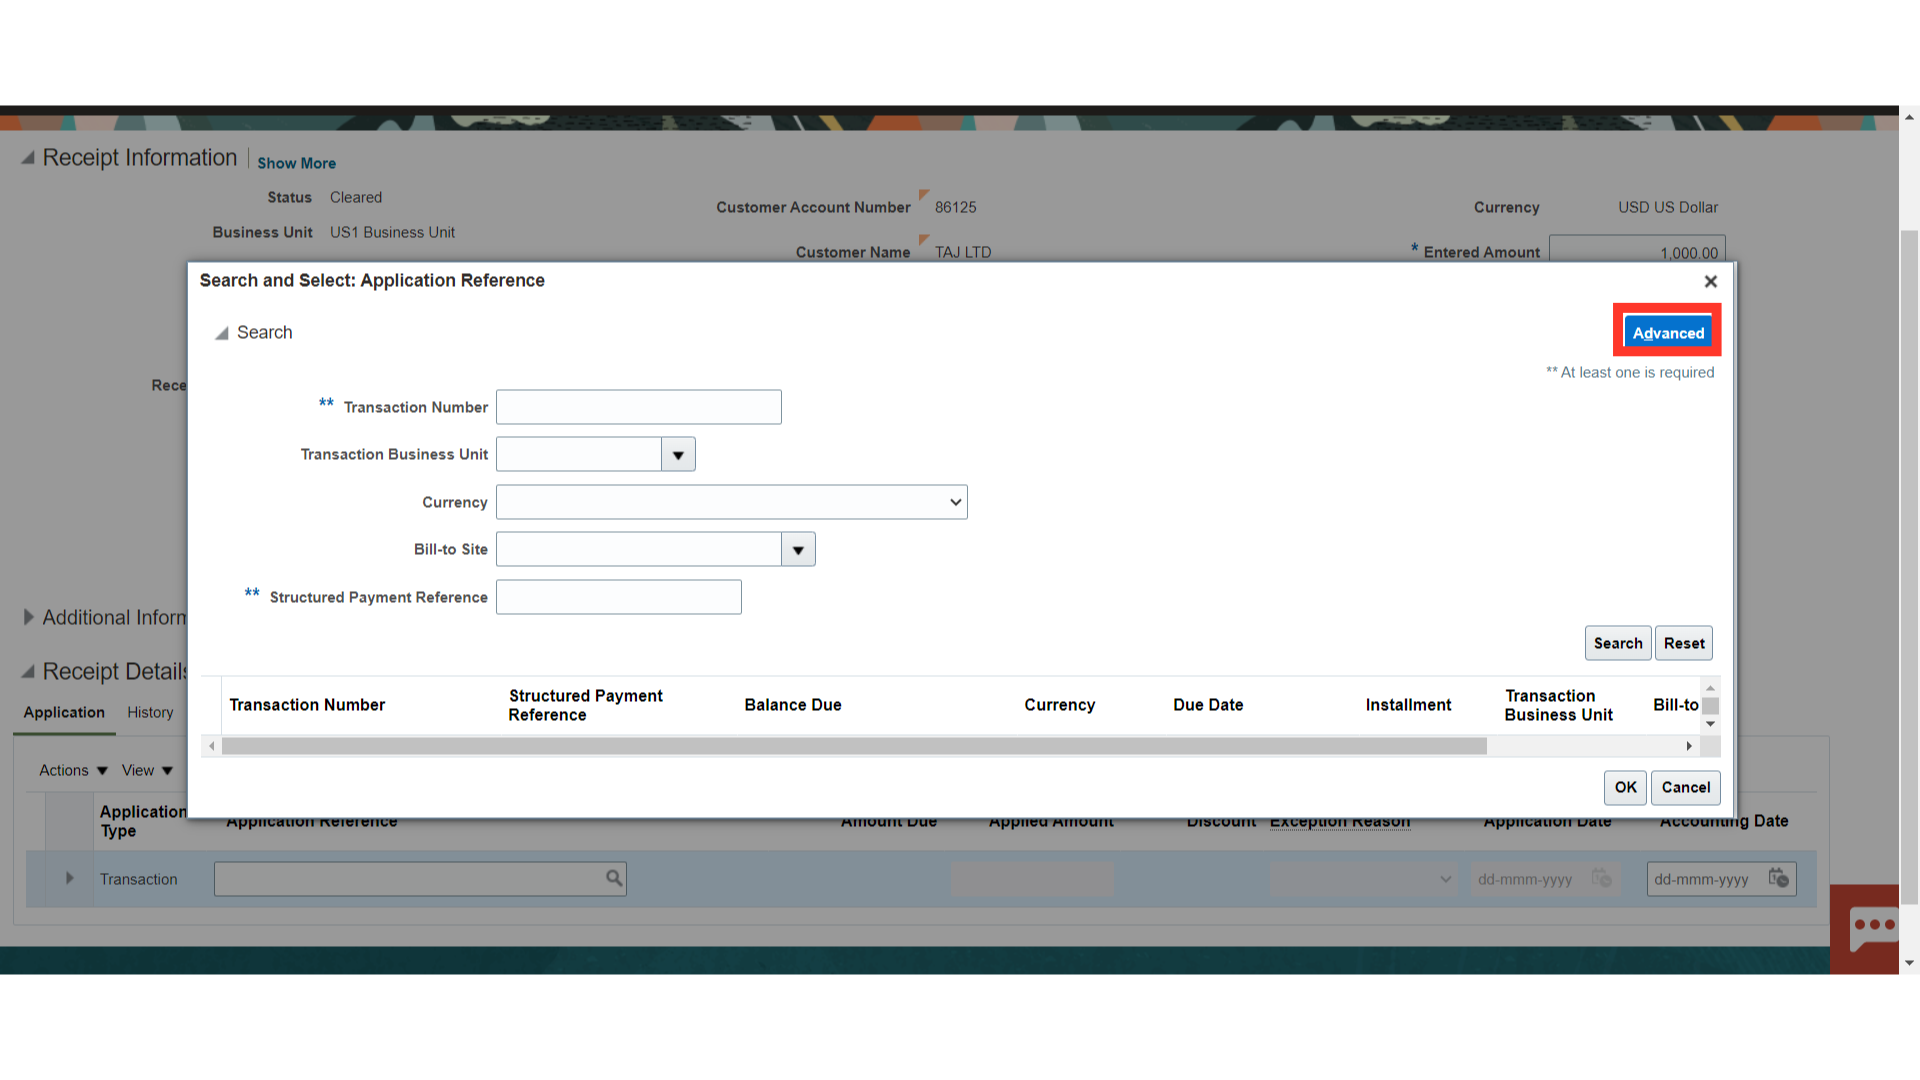
If the required search criteria are not available, you can add the parameters by clicking on Advanced.
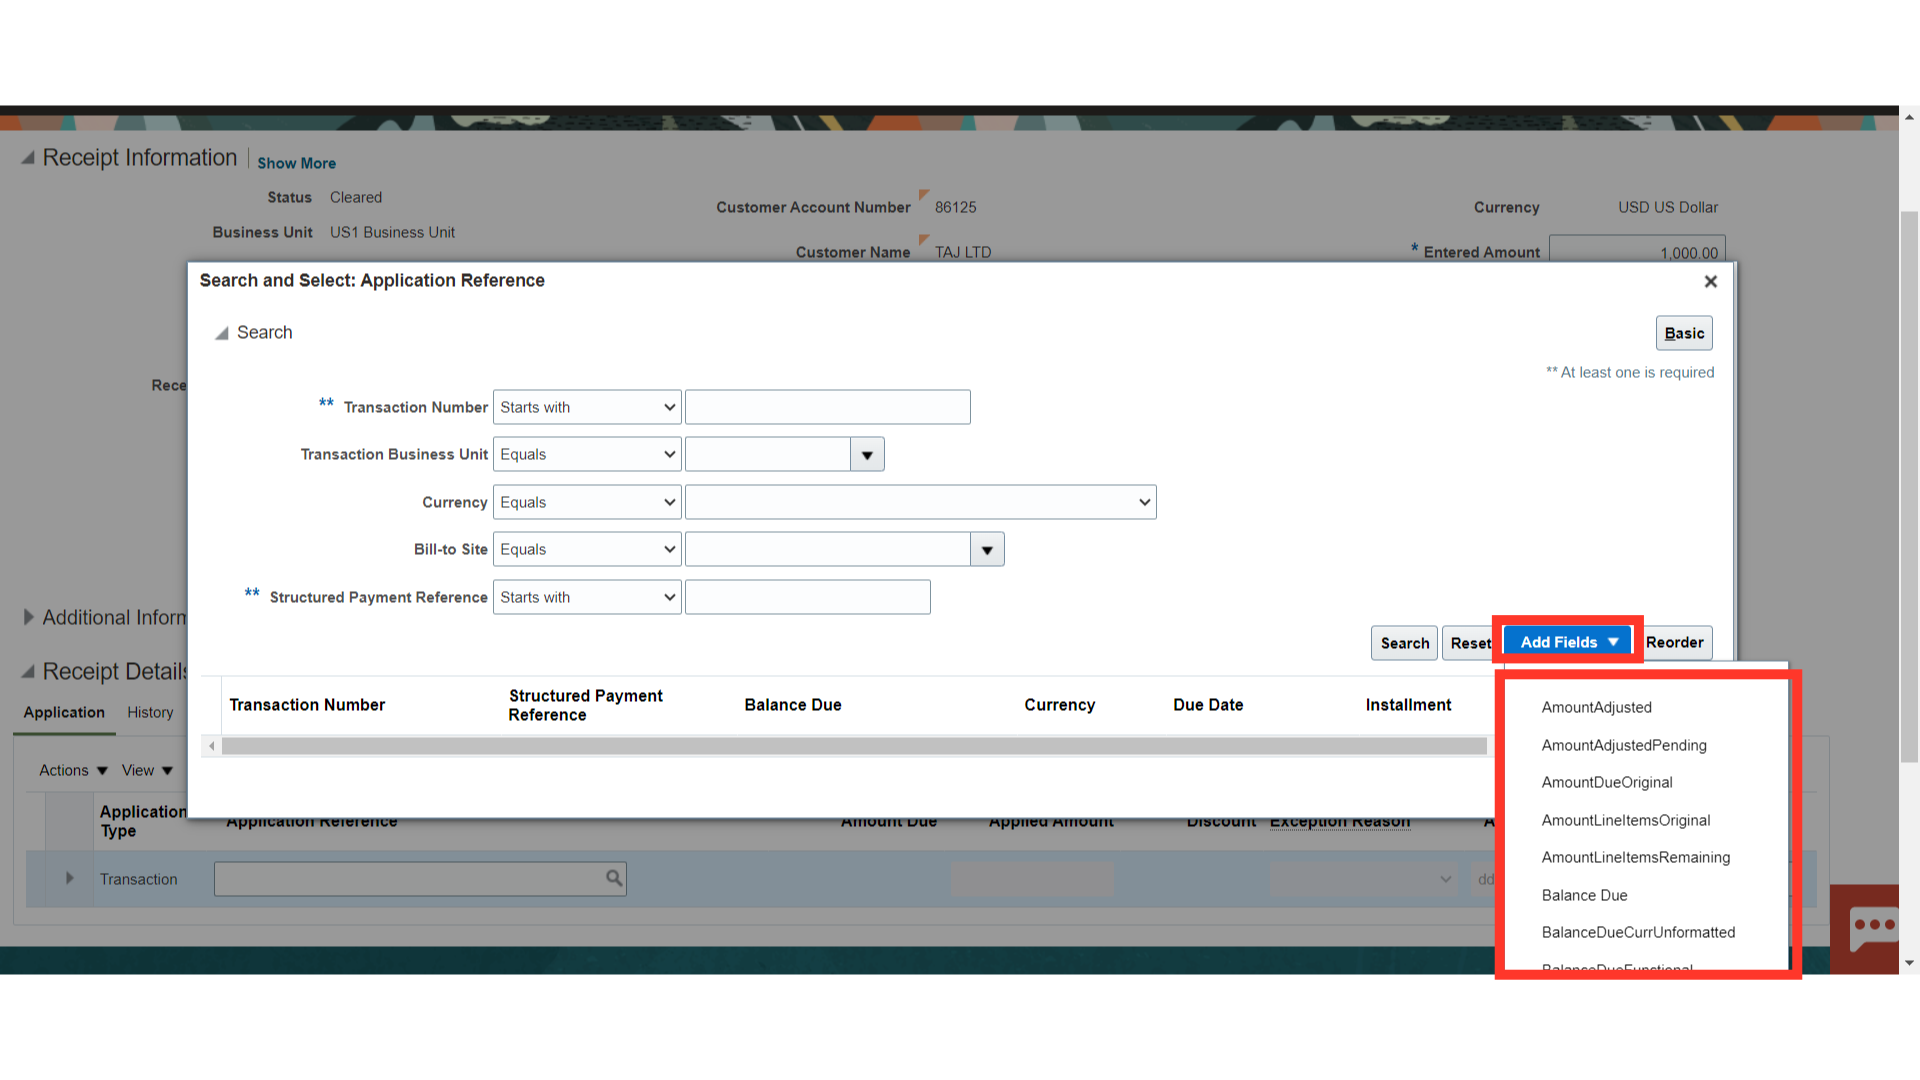
Add Fields button will be activated after clicking on Advanced. Select the field required from the list available. The field will be added in the Search section.
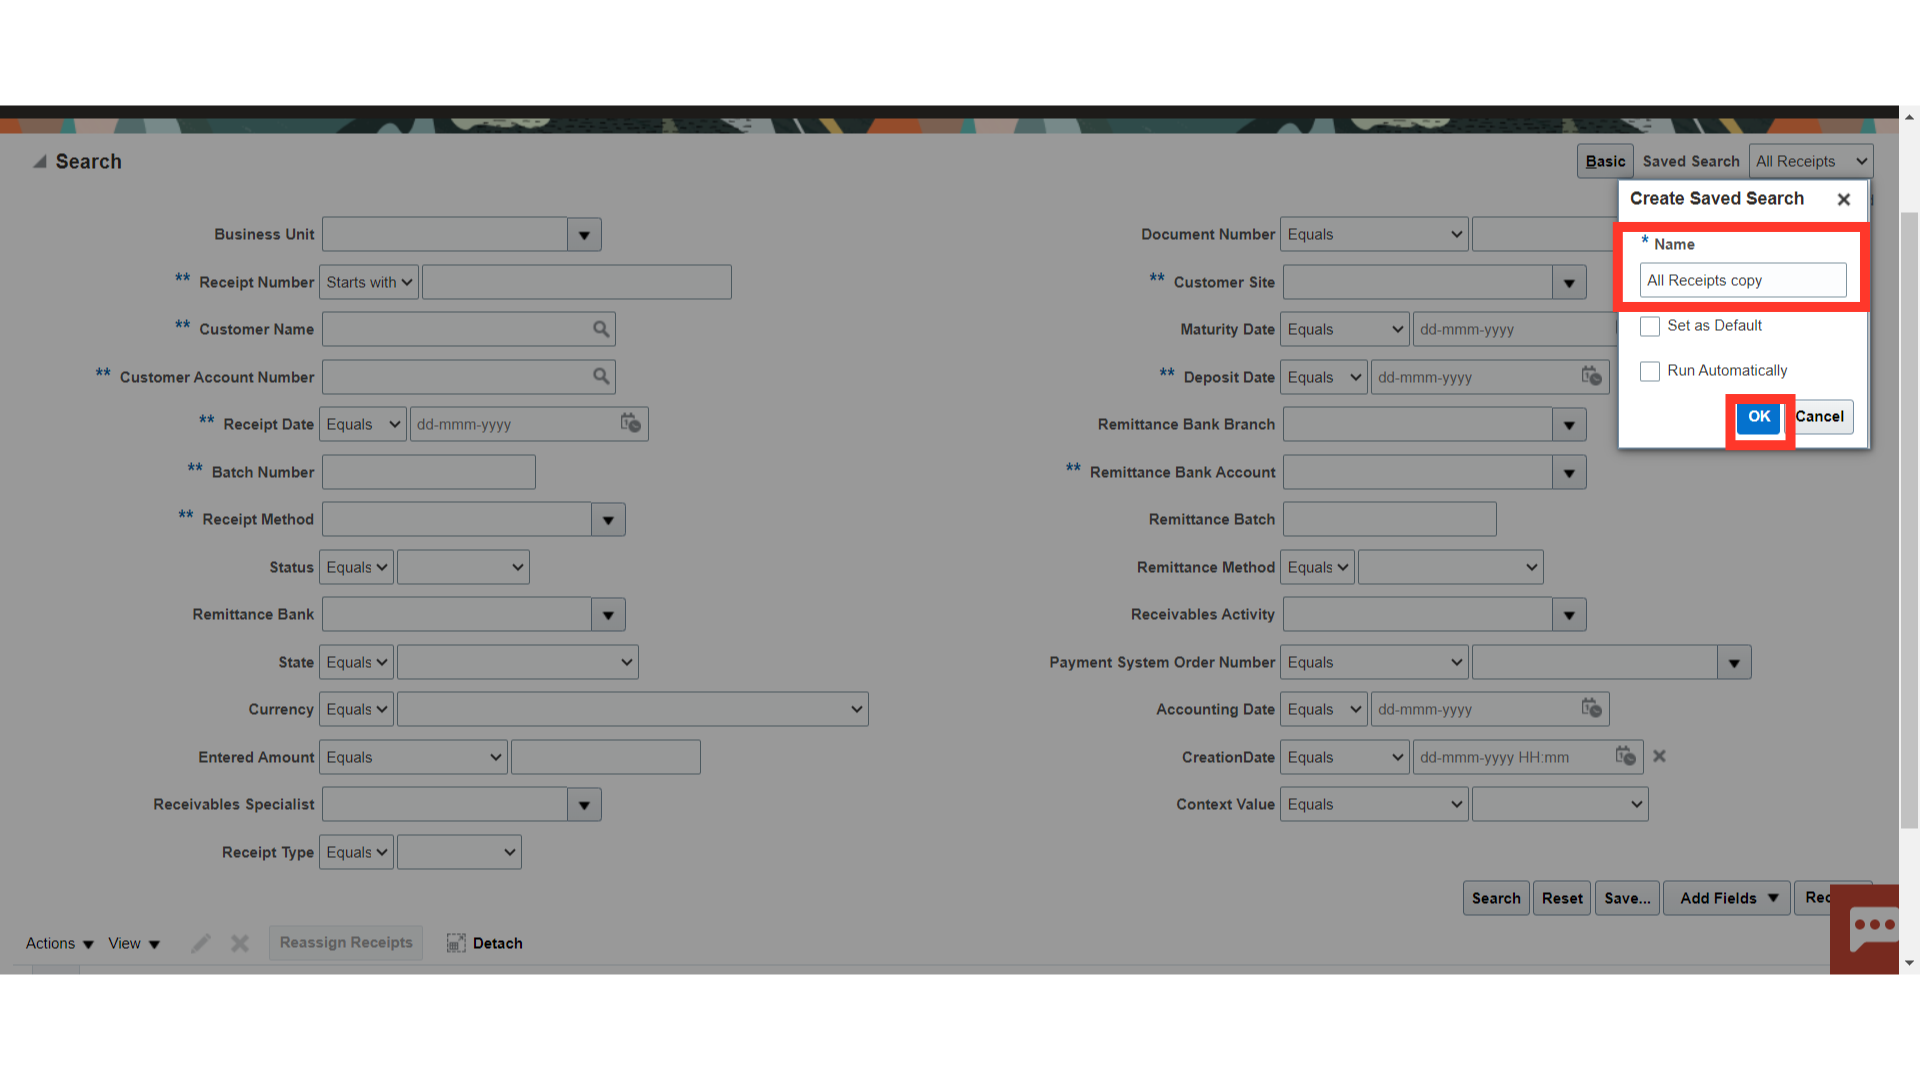
If the search parameters entered are required frequently then Oracle provides the option to save the parameters and the values selected for future use. After all the parameter details are entered click on Save button.
Enter the name of the Search Criteria and click on OK. There are other options also available. Select them if required. If Set as Default is selected, whenever the Manage Receipts page is opened, the parameters will appear as already entered. You only need to click on Search. If Run Automatically is selected then clicking on Search button will also not be required and every time the Saved Search is selected system will automatically start searching.
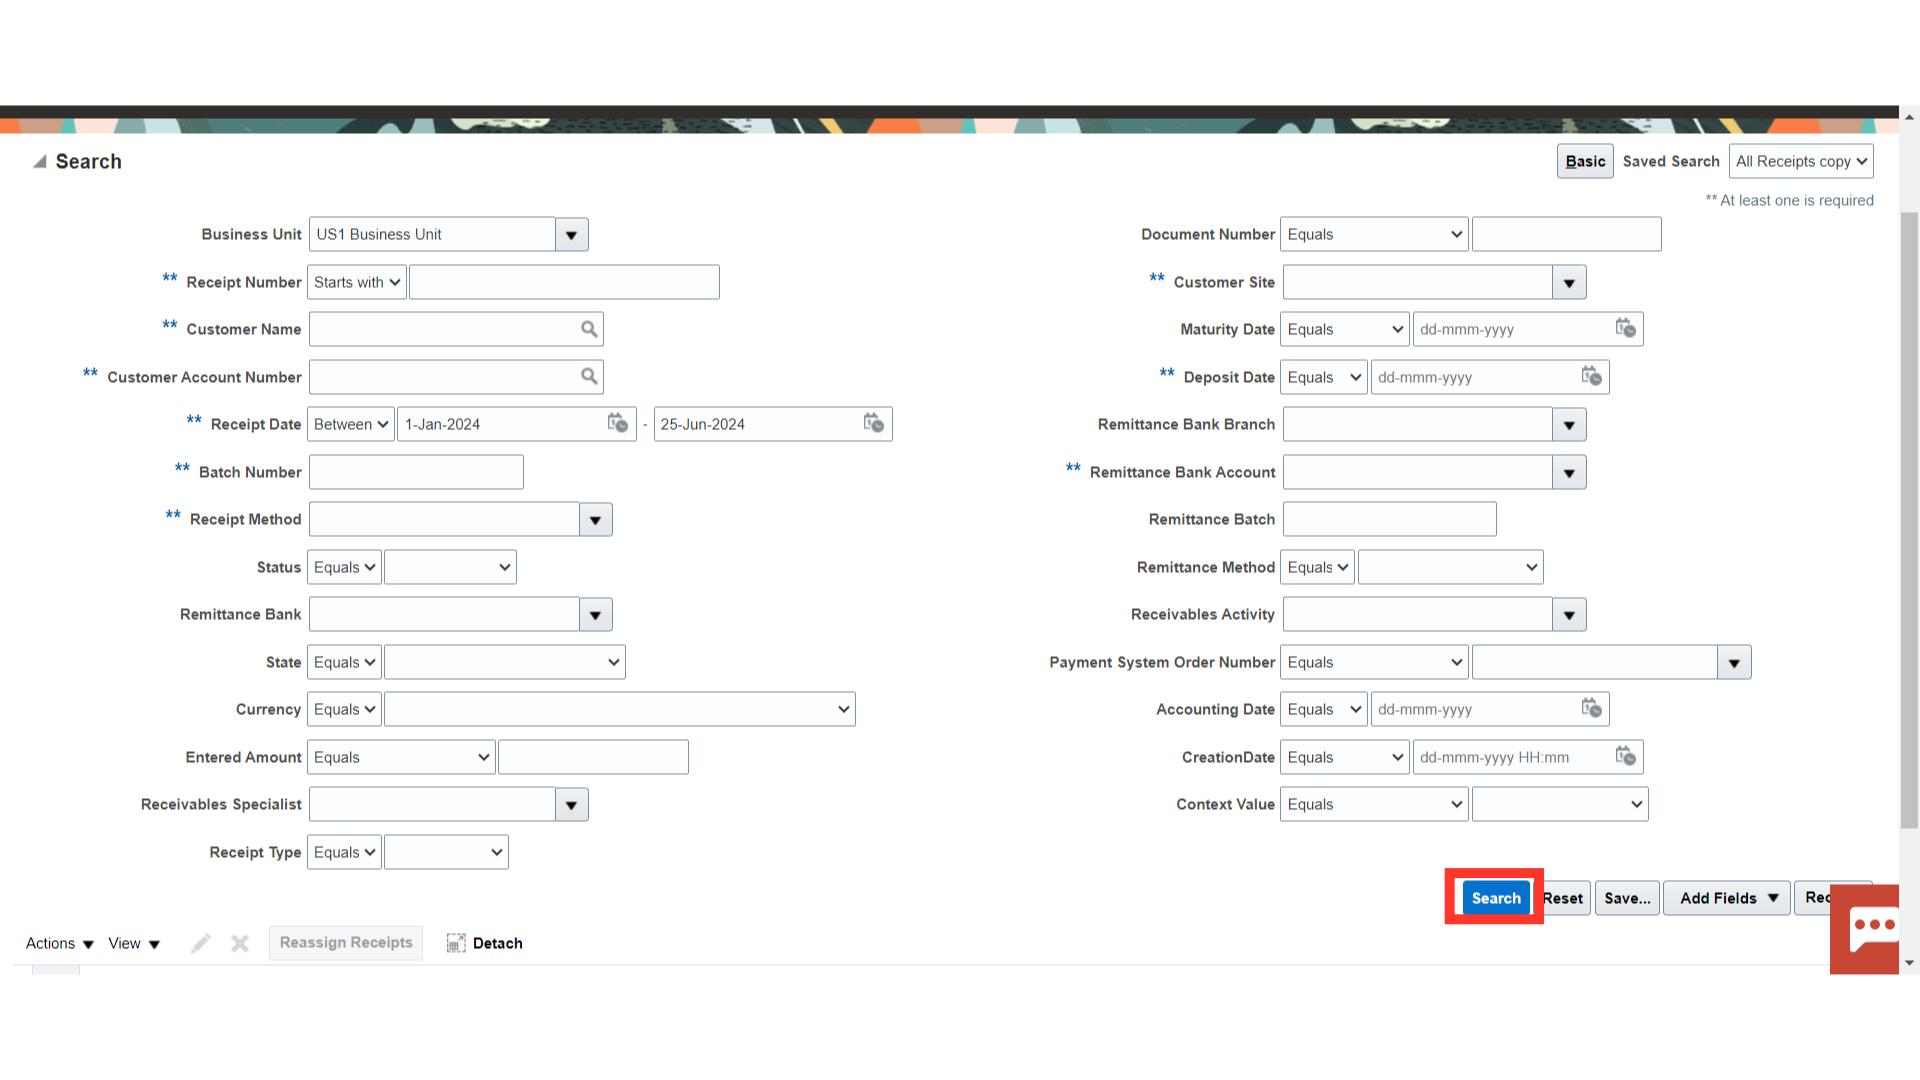
To search, once all the required parameters are entered, Click on the Search button.
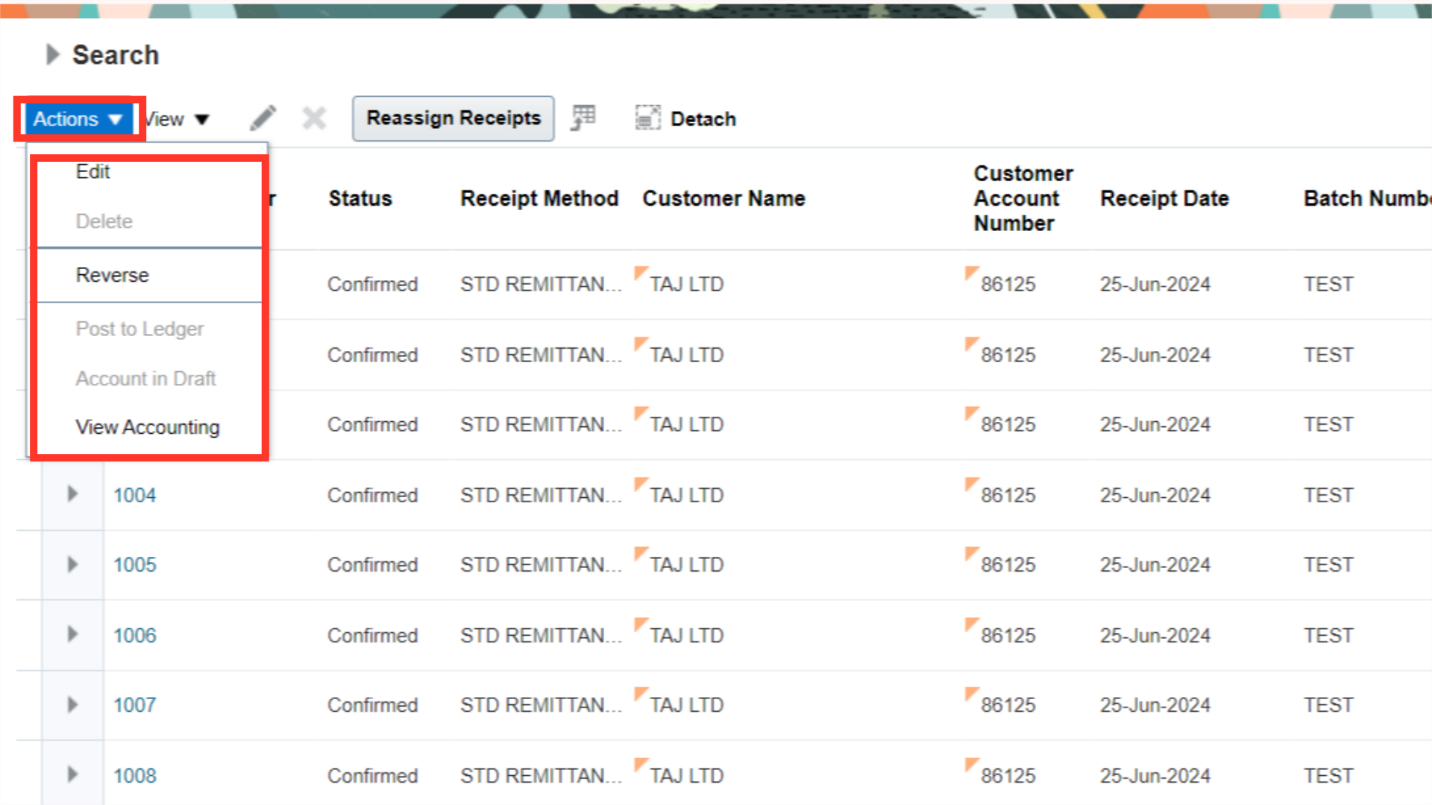
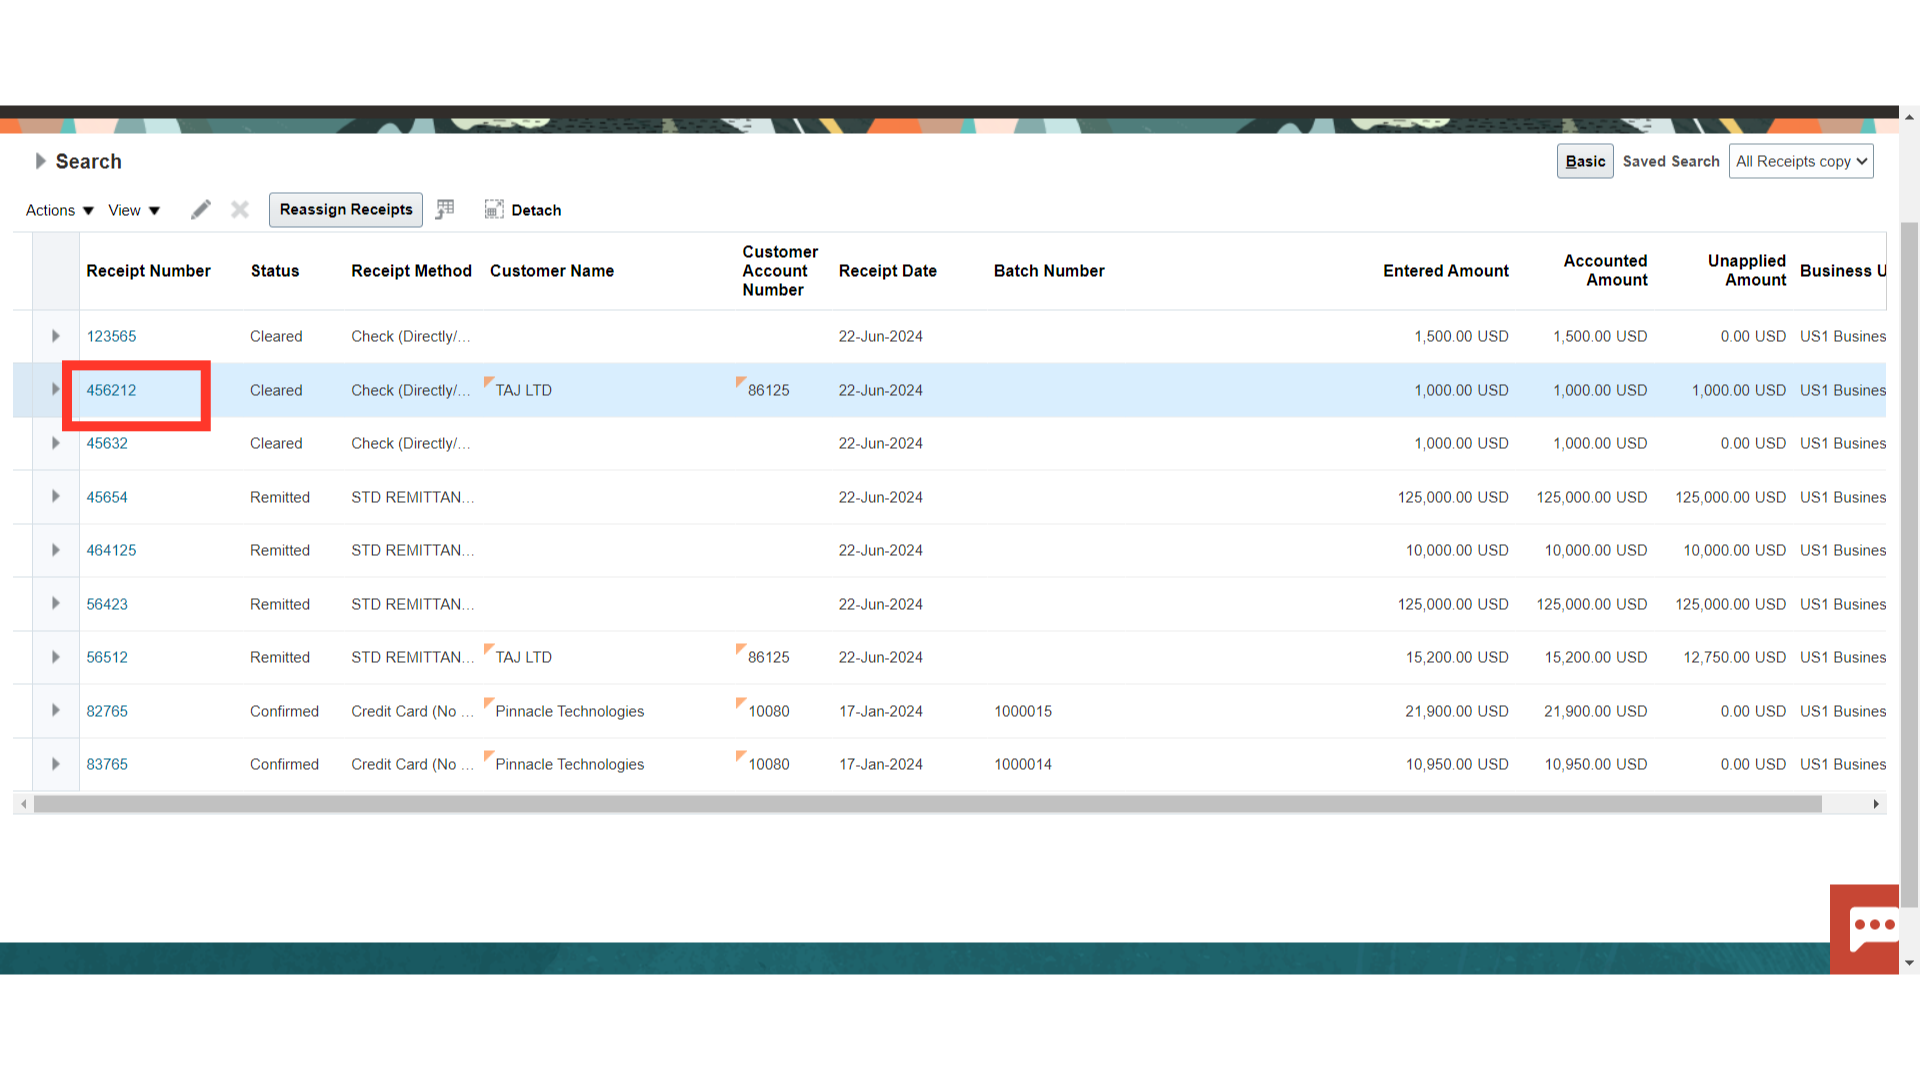
All the Receipts as applicable will appear. Select the receipt row for which any action is to be performed.
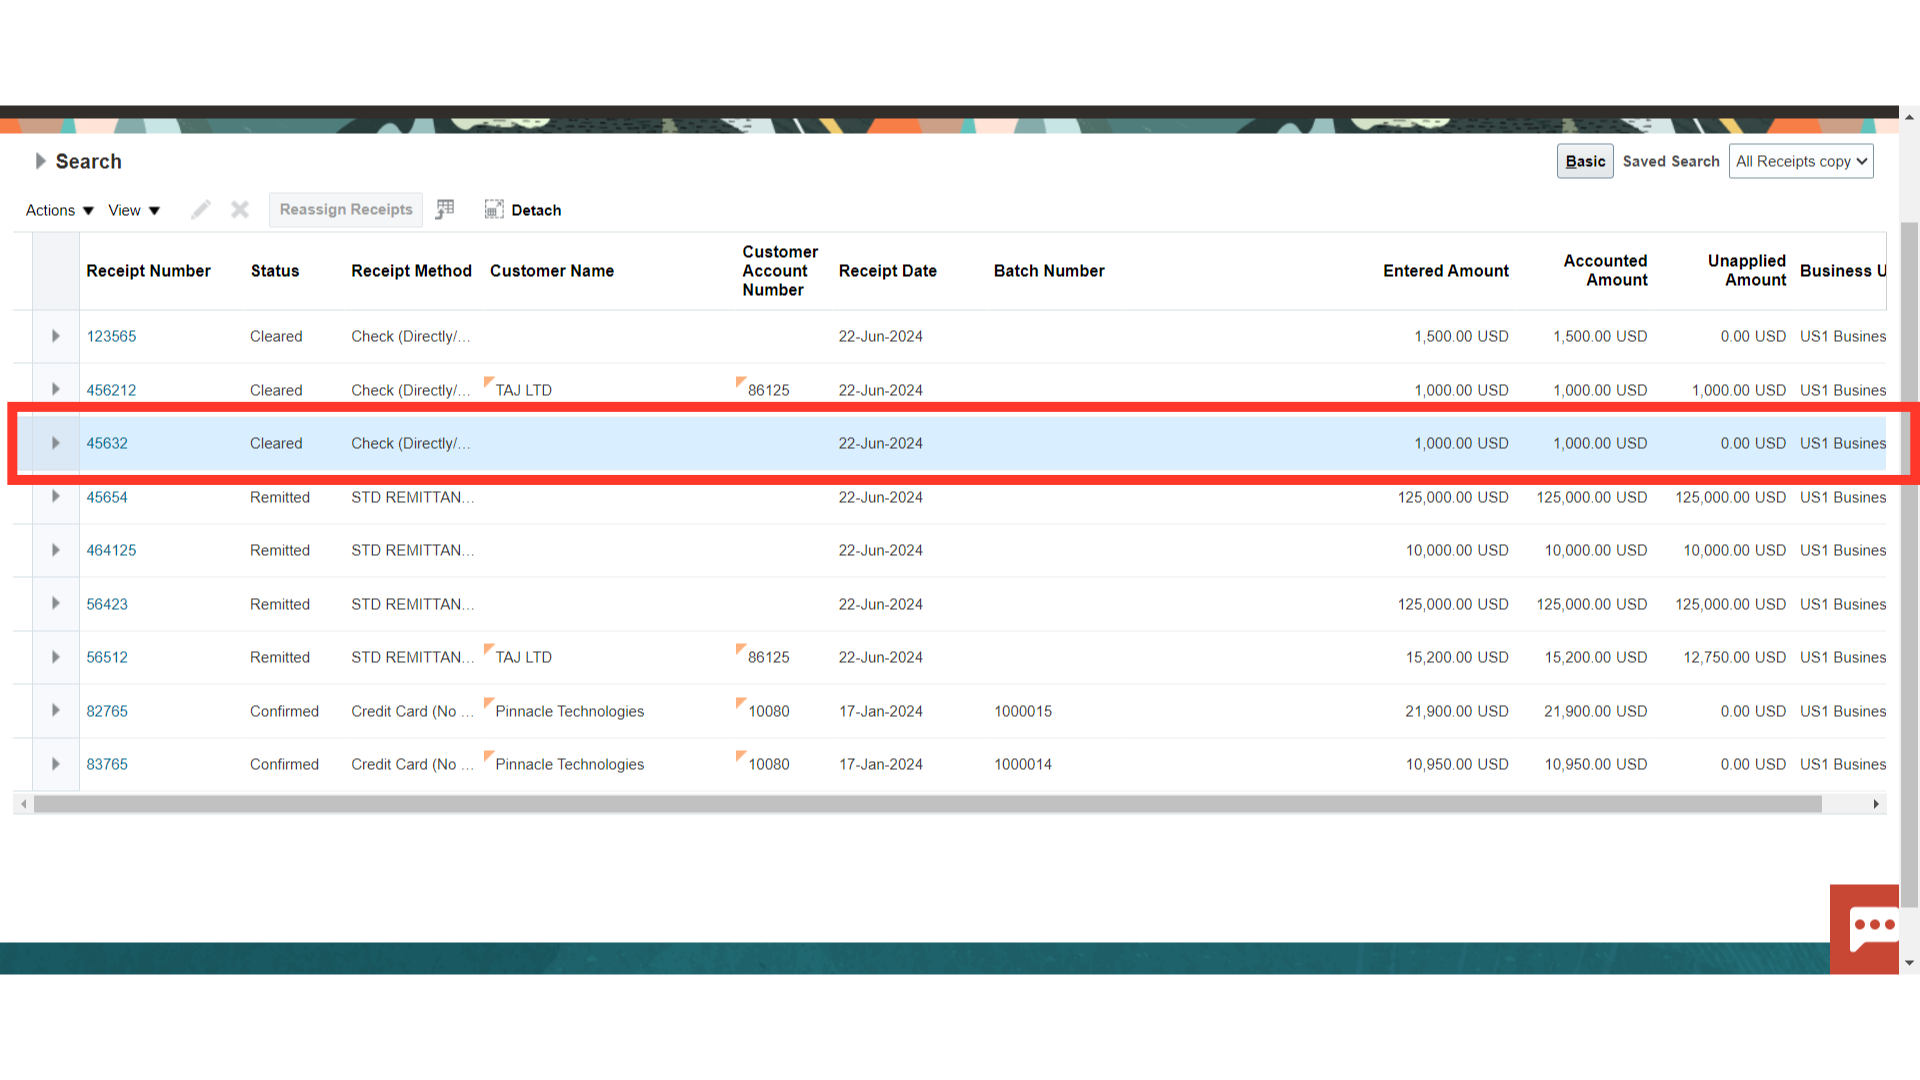
Select the Actions button. The list of actions that can be taken on the receipt selected will be there. Select the relevant action required to be performed.
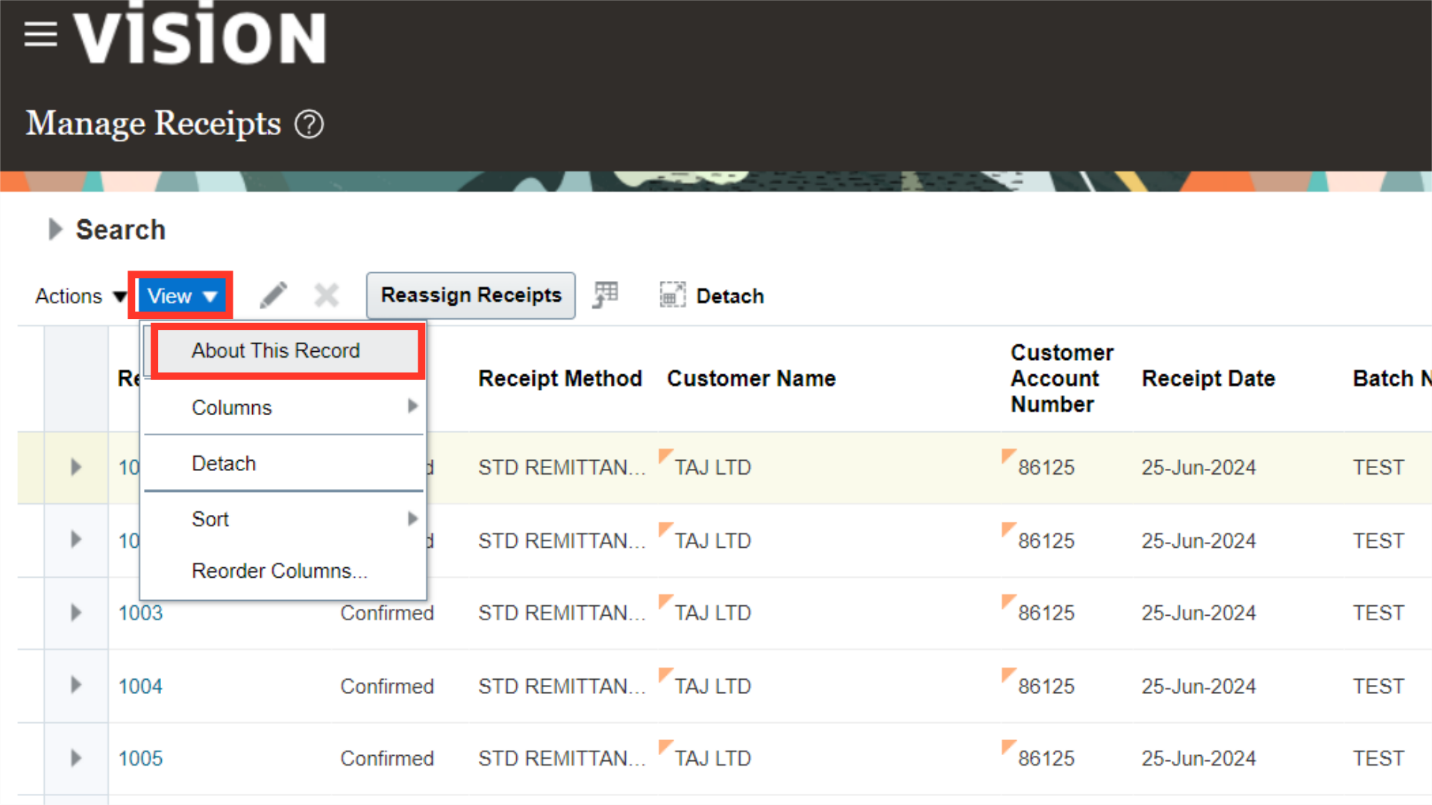
To view the creation and updation details of the invoice selected Click on View and select ‘About This Record’ from the list.
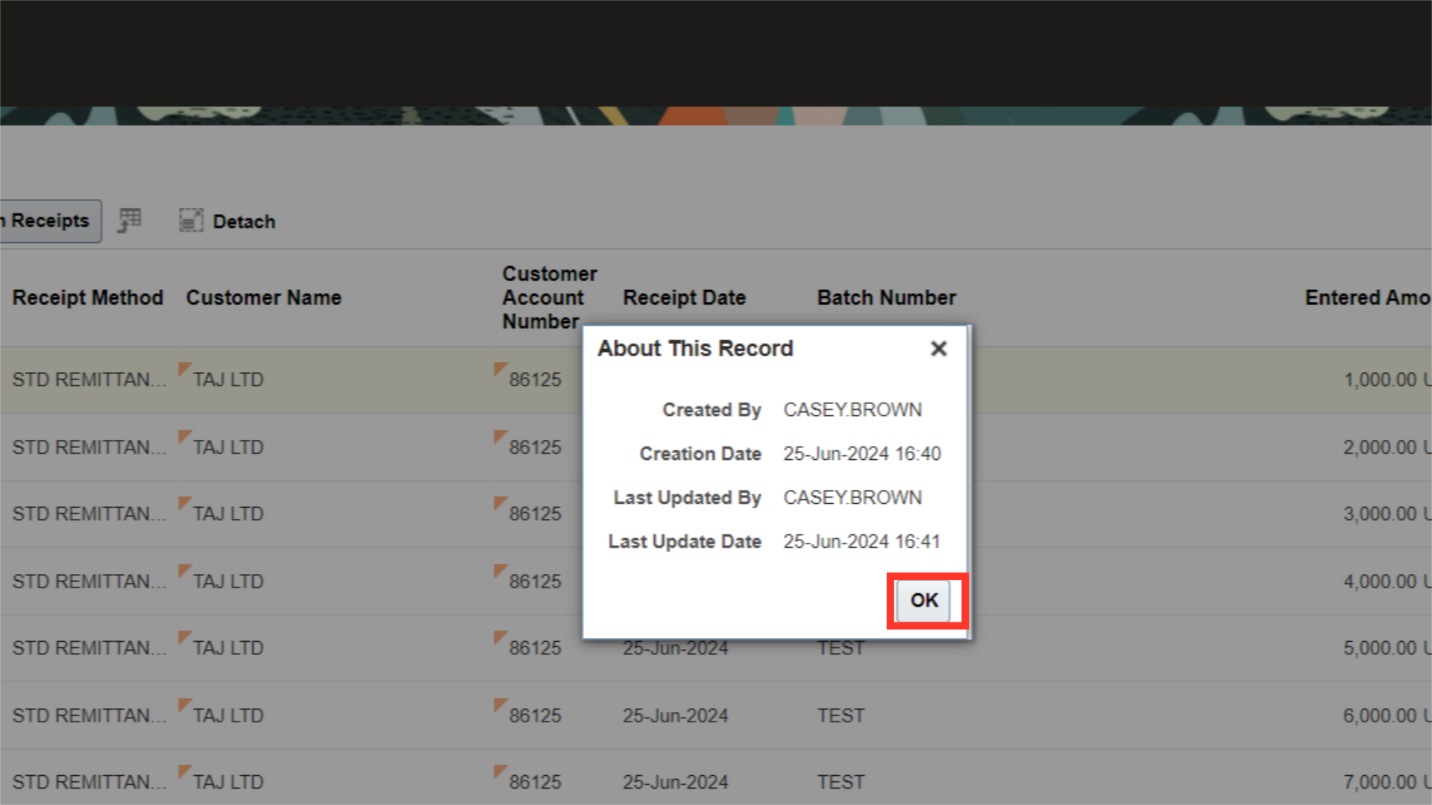
Review the details and click on OK.
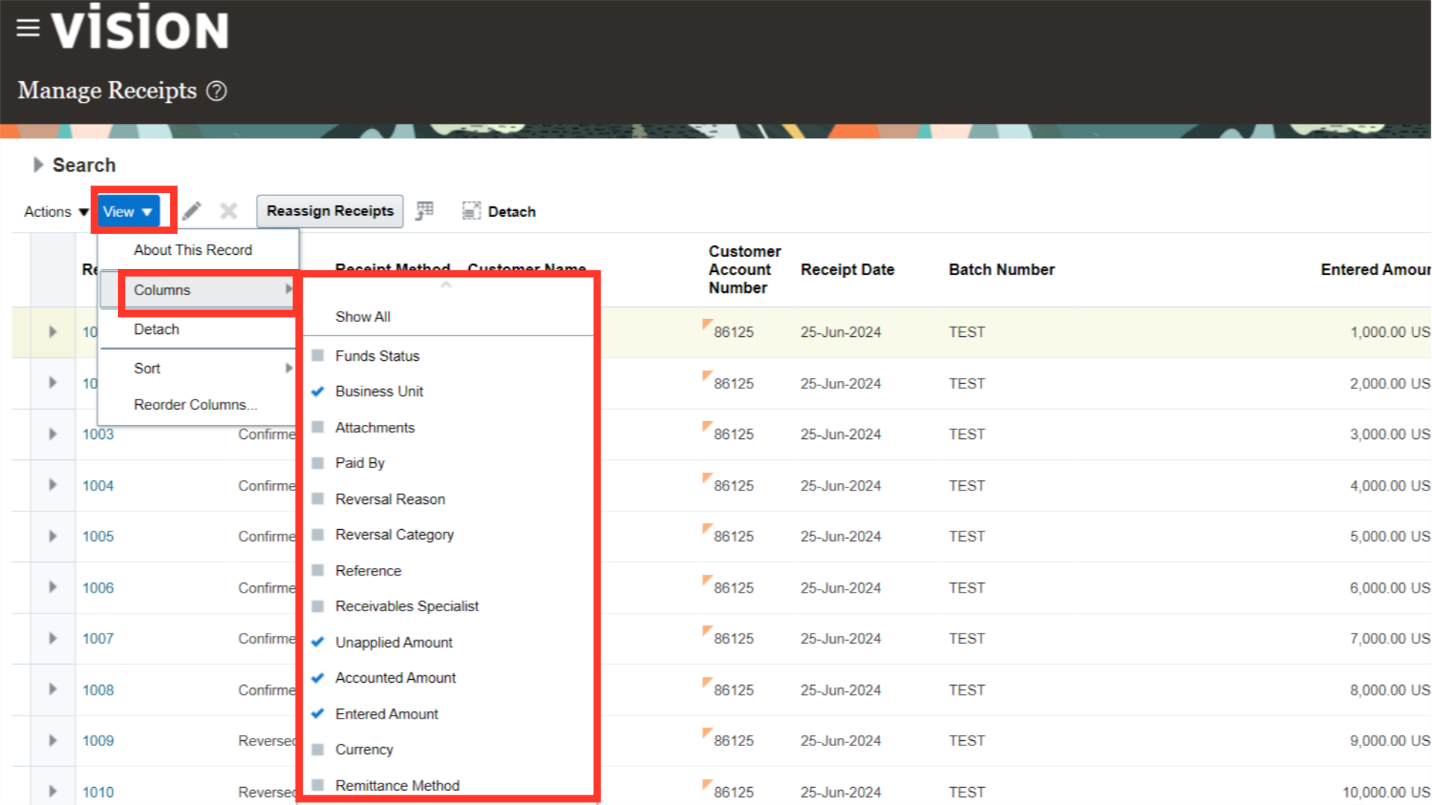
You may customize the view by adding or removing columns or by rearranging the columns. To Add or Remove columns click View > Columns > Select the column which is required to be added and select the value which is required to be removed. Show All, will bring all the columns to the view.
There are two ways to sort the data. One is to select the column and then click on the Sort option under View and select Ascending/ Descending/ Advance. Advanced allows you some additional ways to sort.

Another way to sort the data is by clicking on the Arrows available next to every column header.
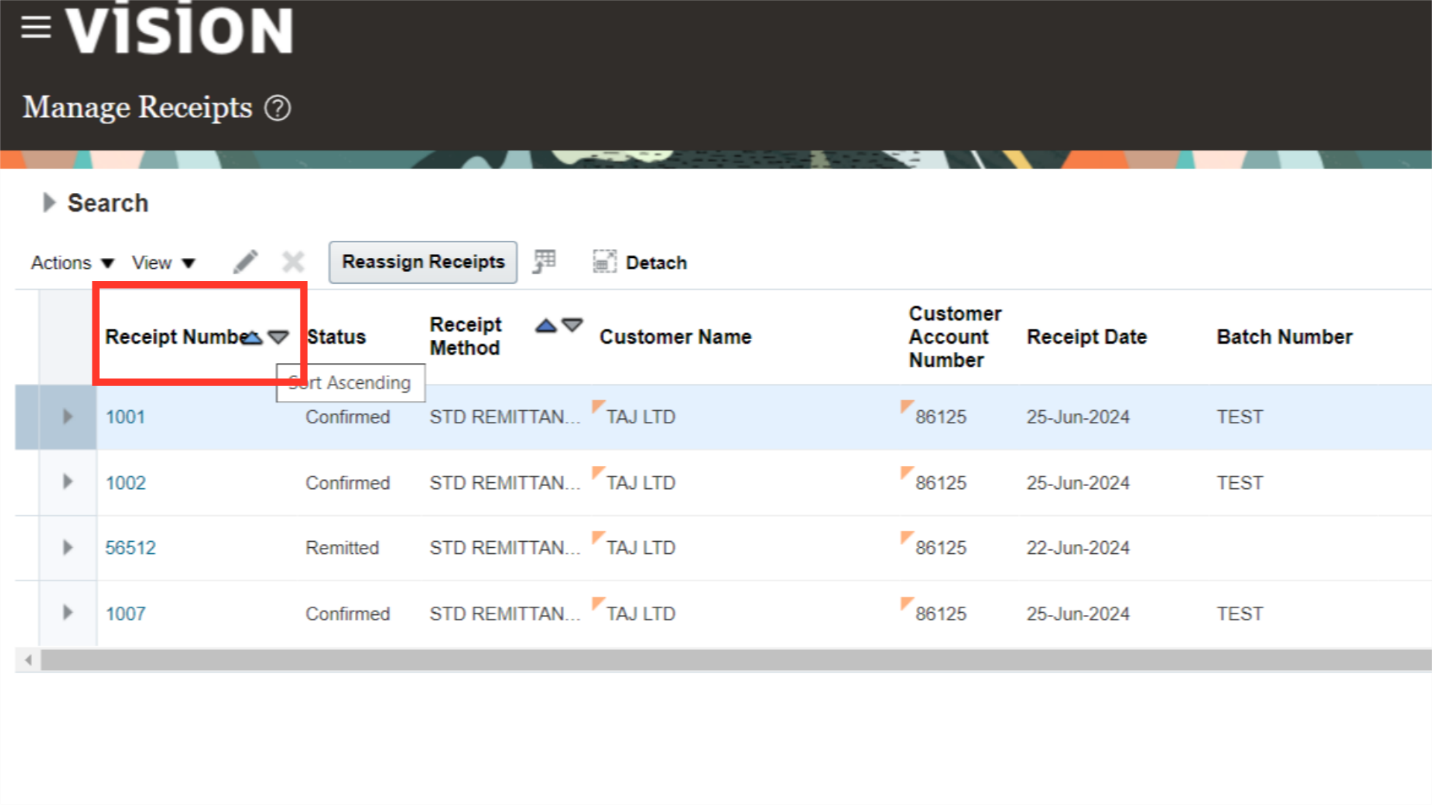
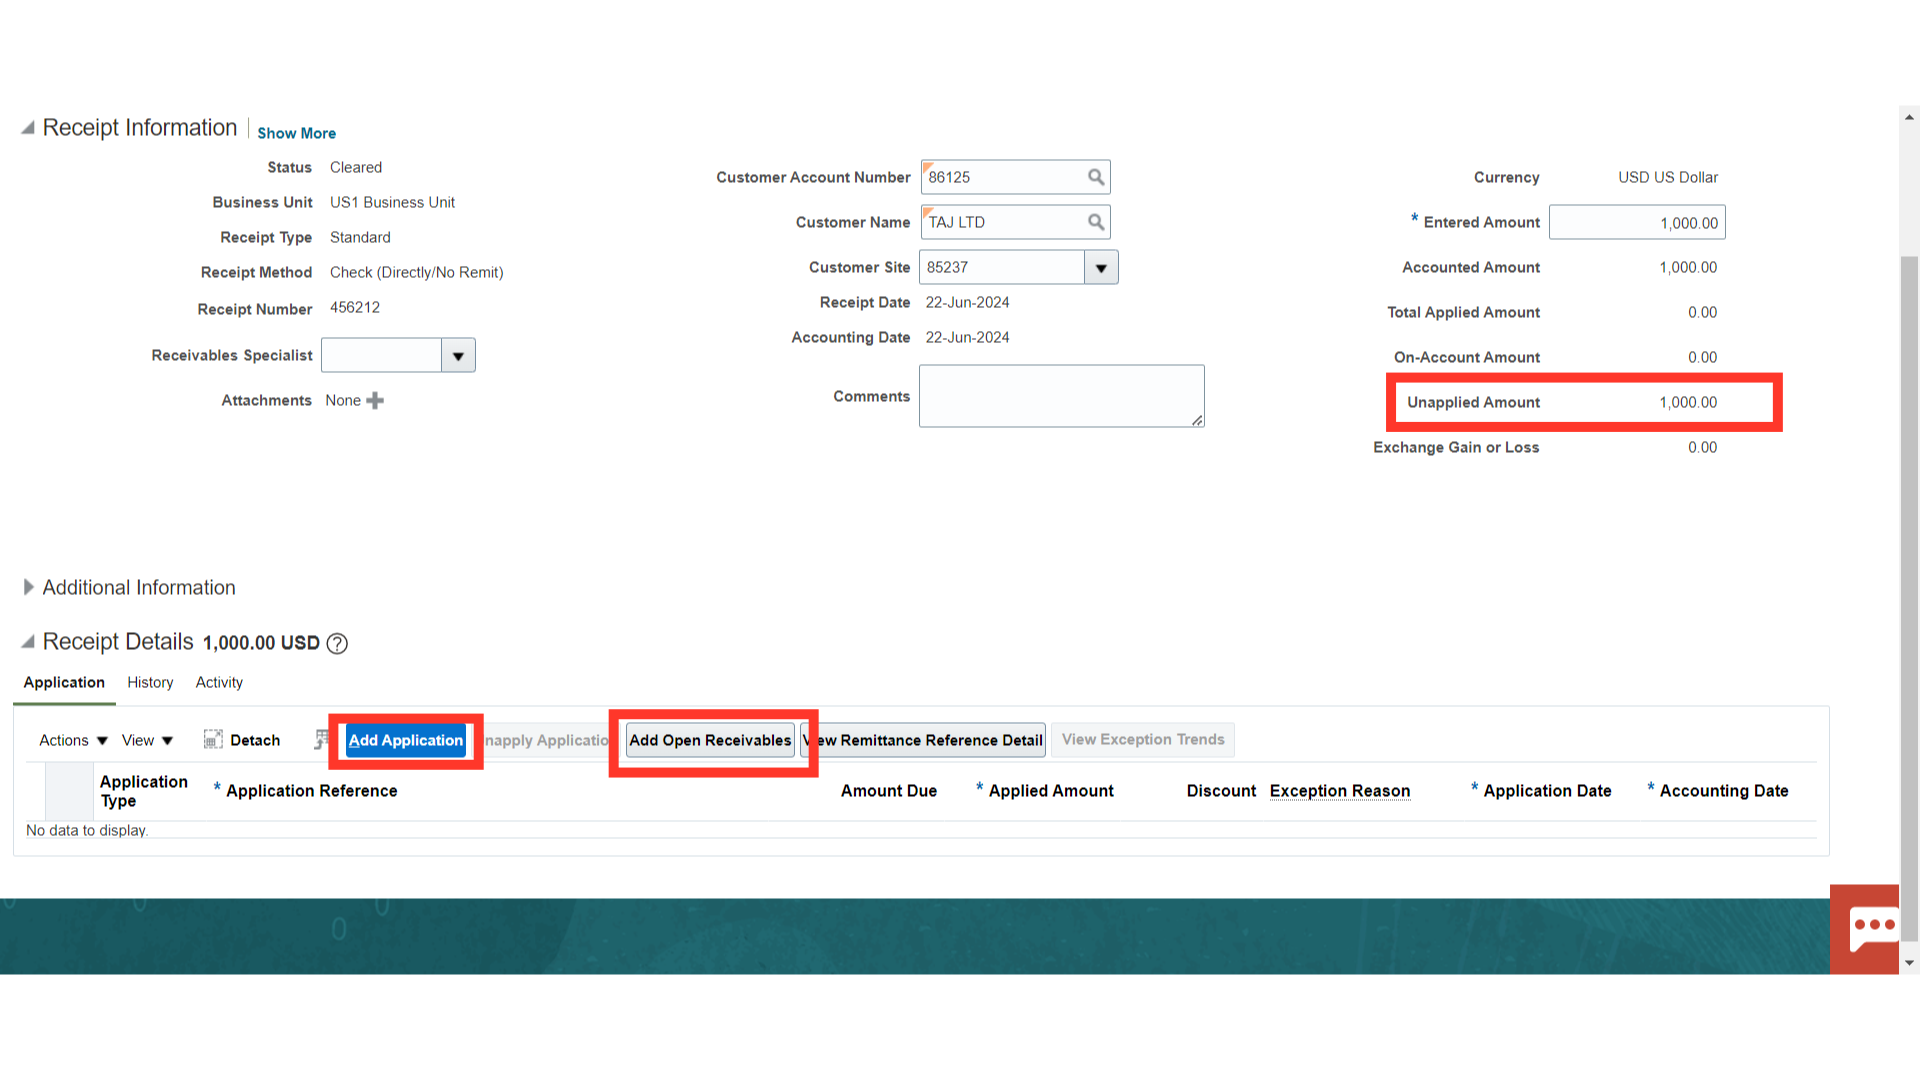
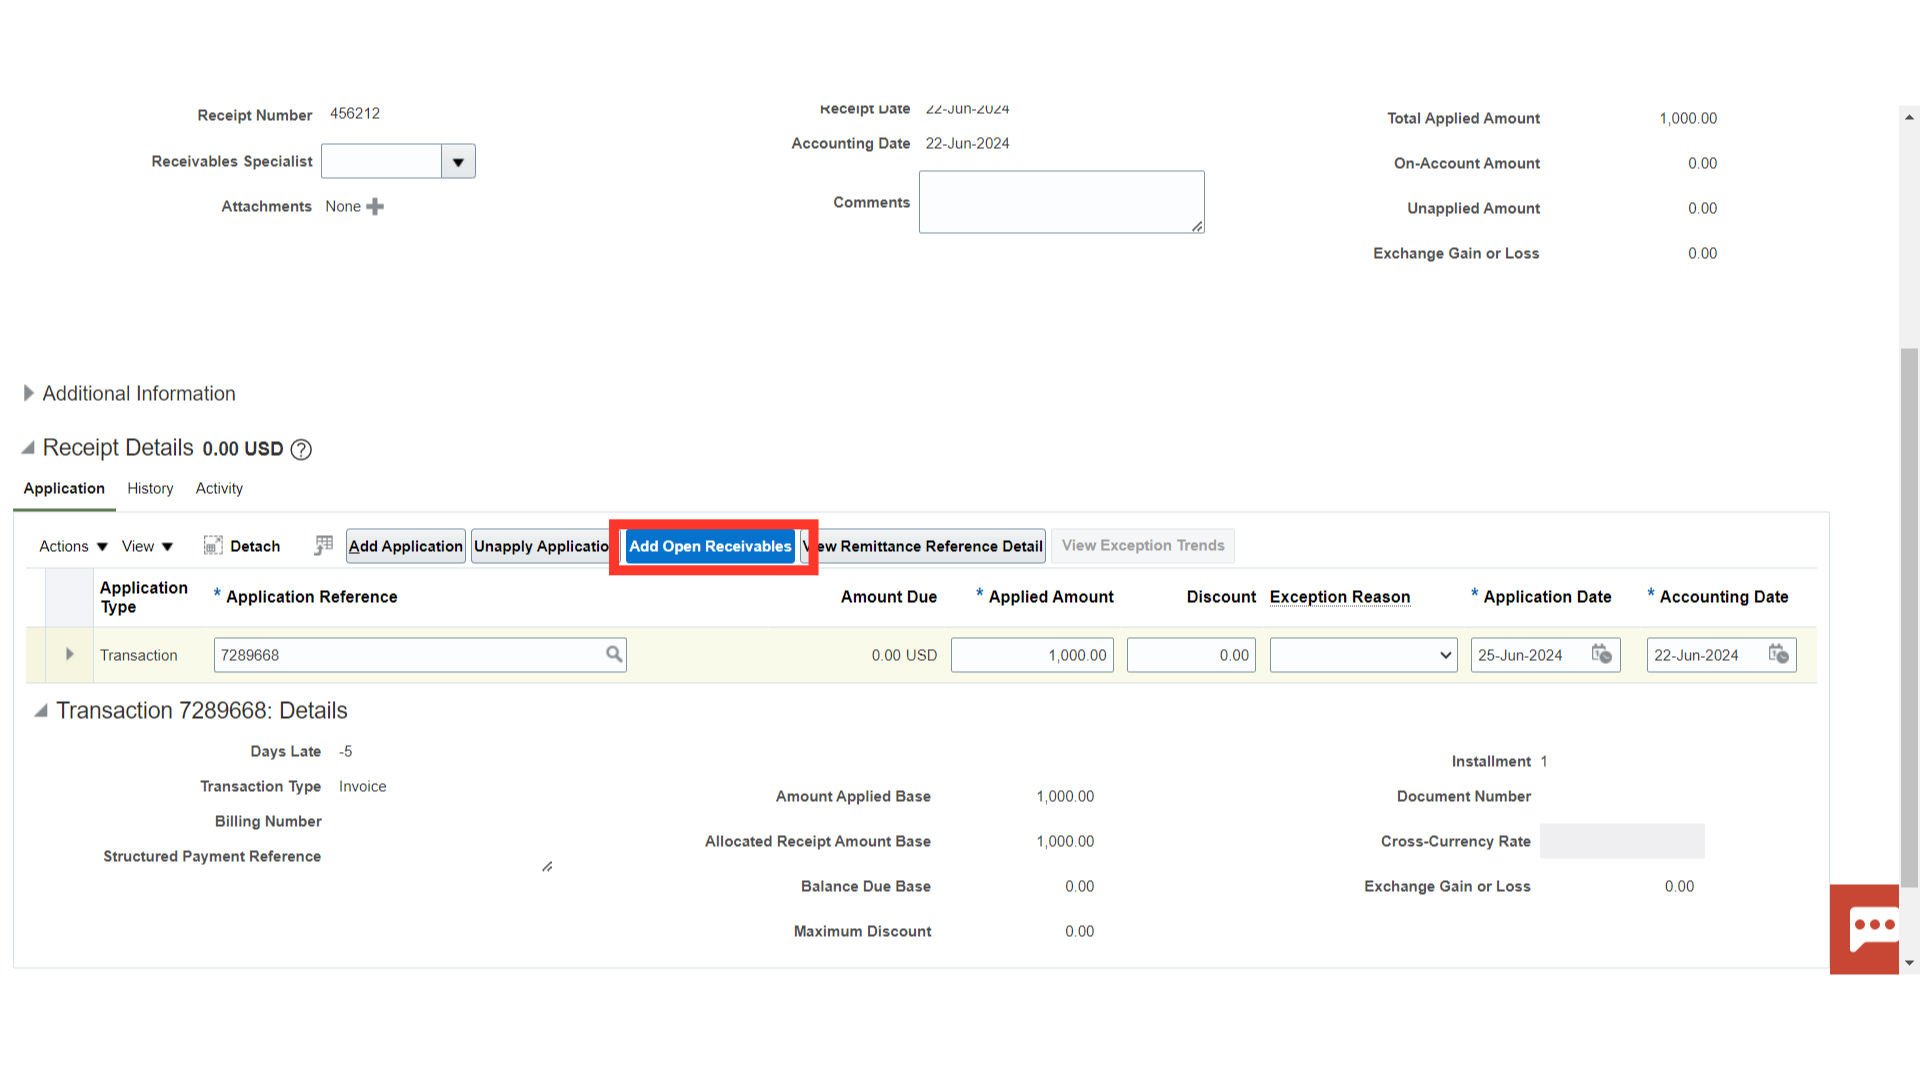
To apply the transaction, Open the receipt by clicking on the Receipt number hyperlink.
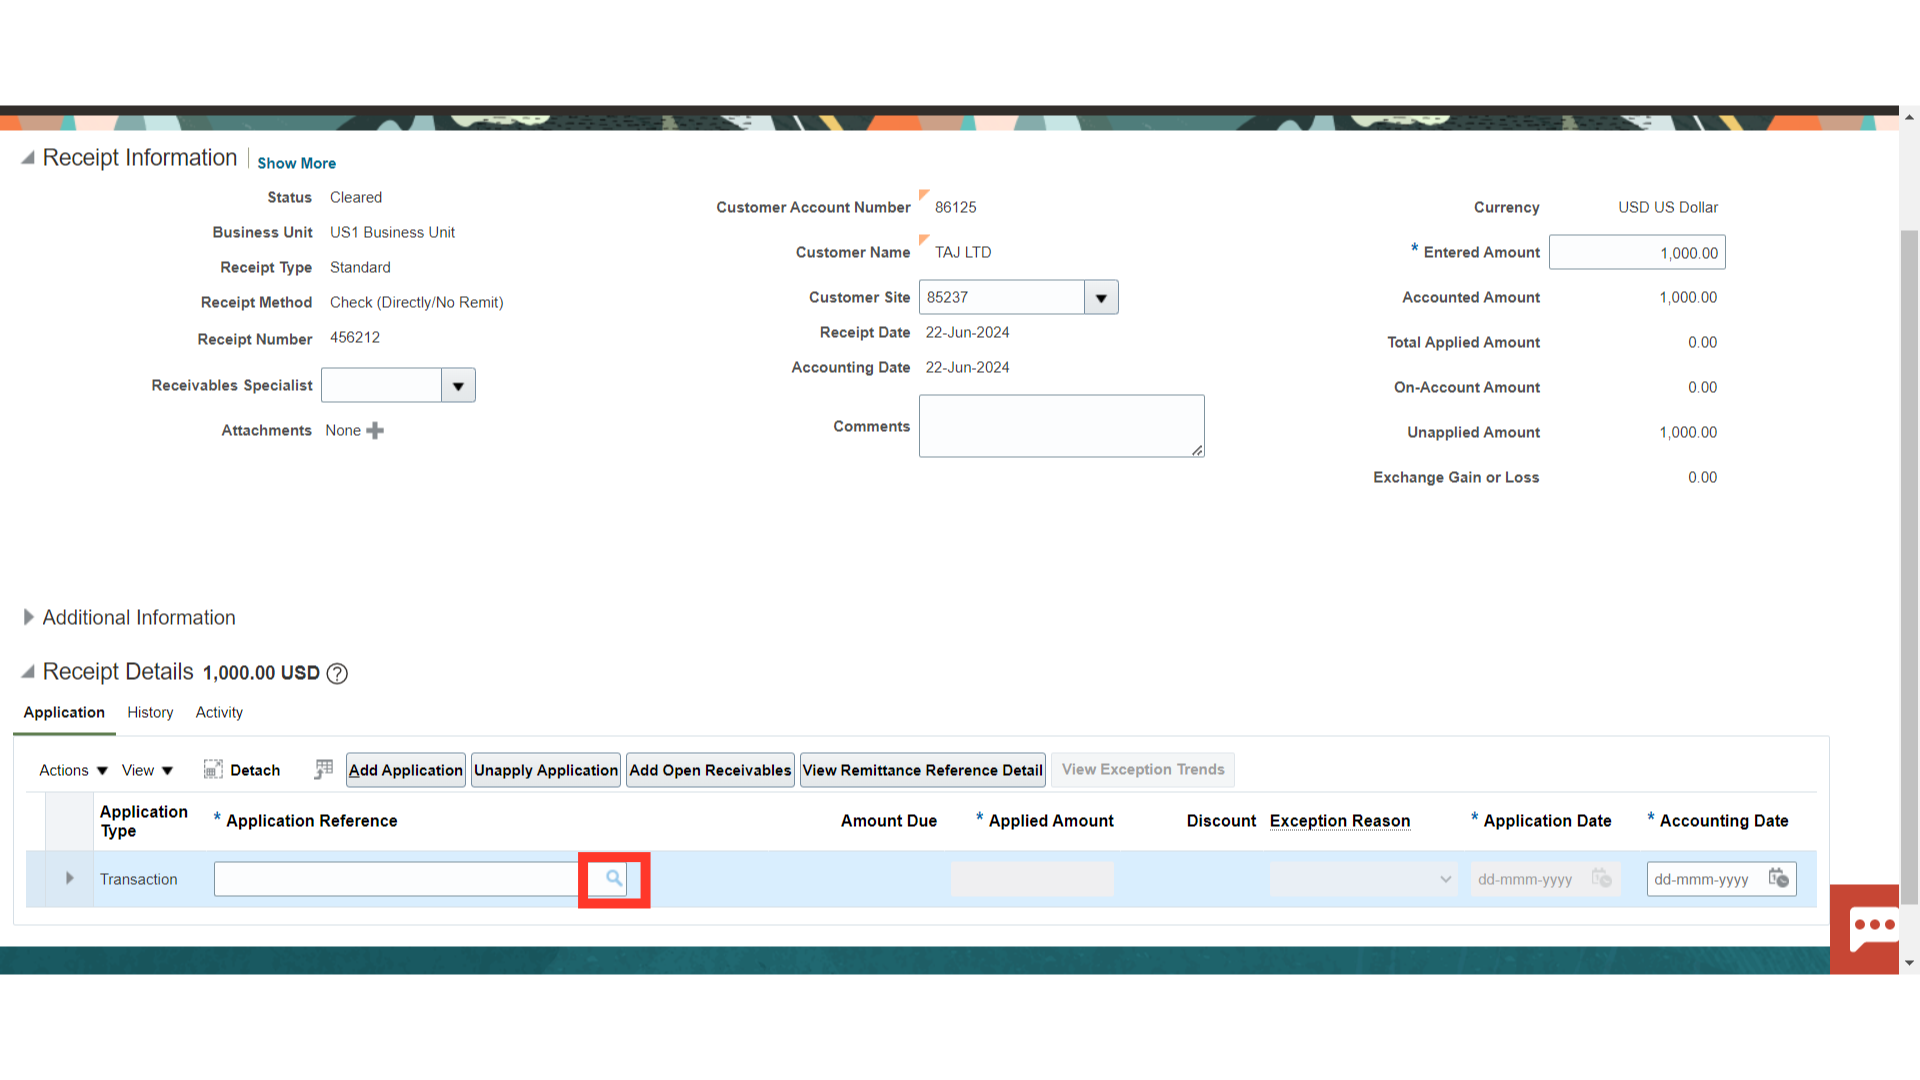
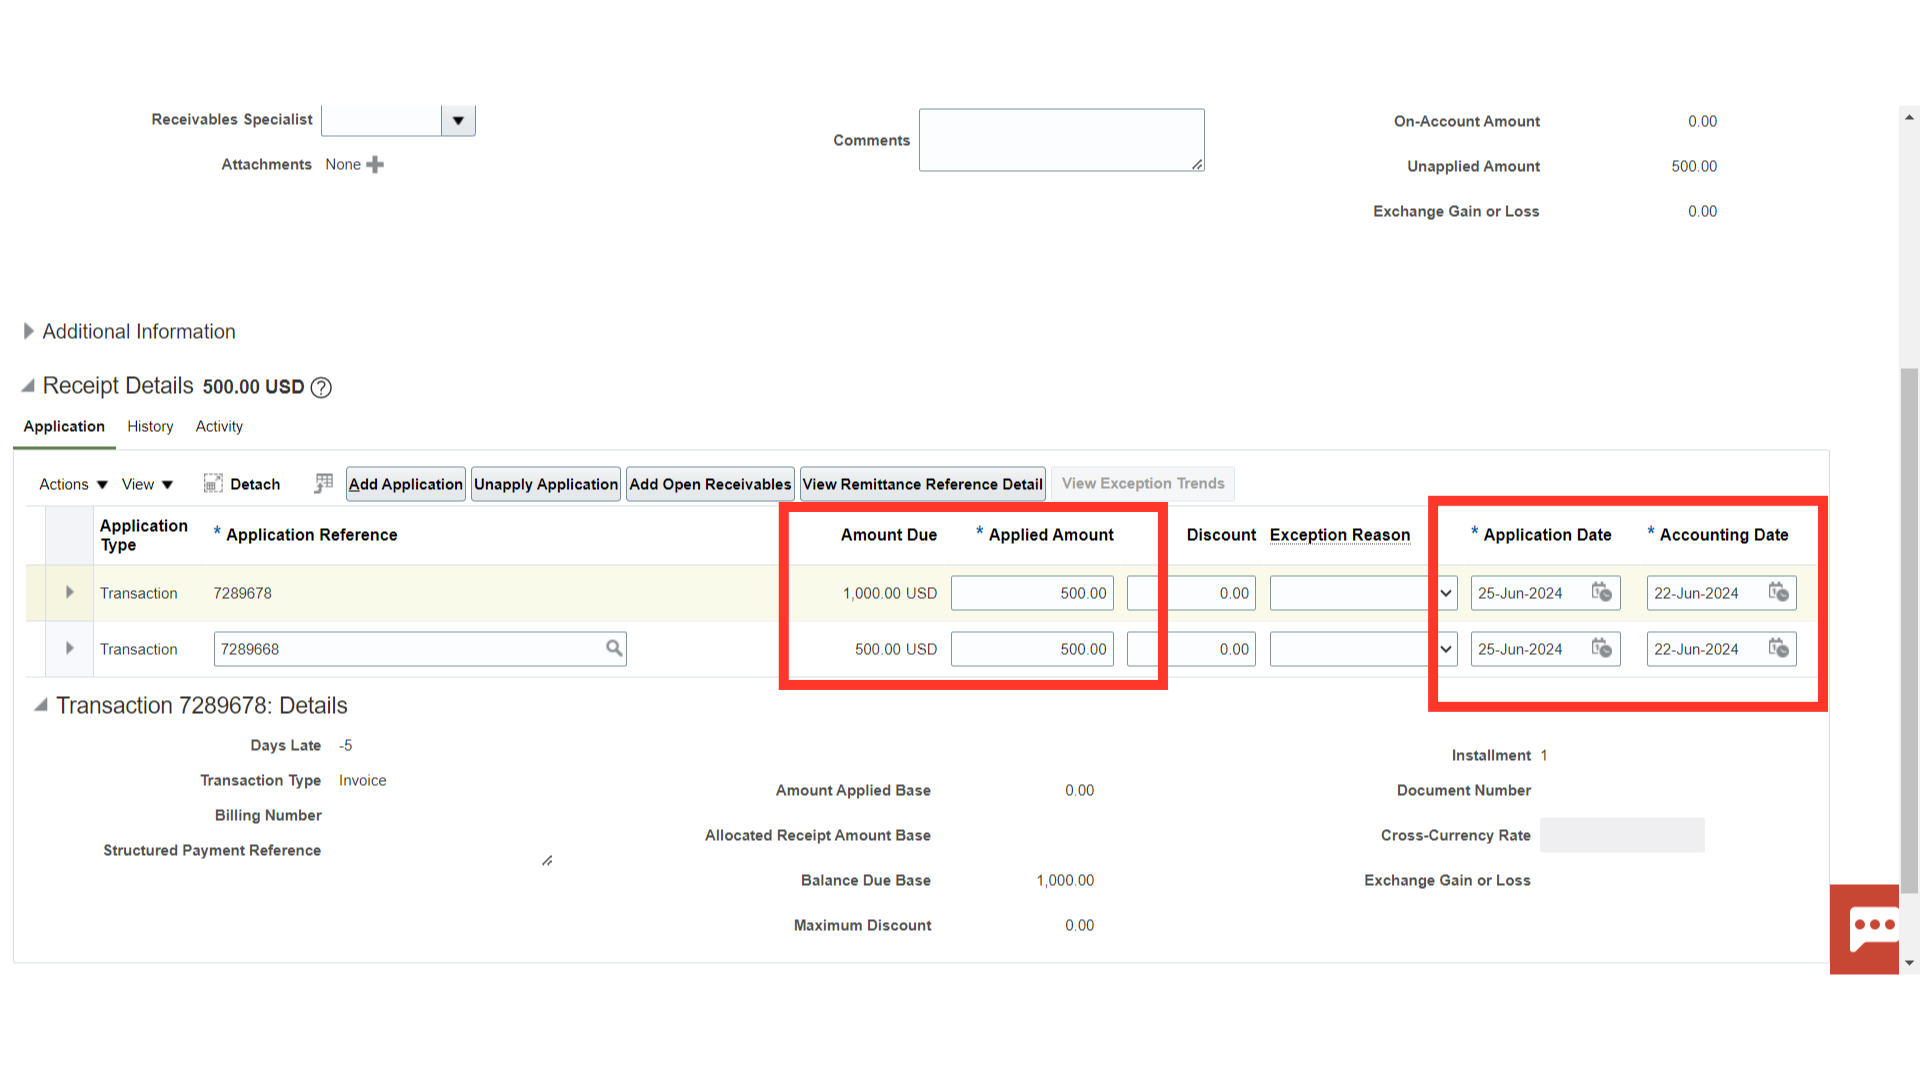
Unapplied receipt amount is shown at the Receipt header level. The application can be done by clicking either on the Add Application or Add Open Receivables. Add Application only allows you to enter a transaction number or search by transaction Number. Add Open Receivables allows you to search by different fields such as transaction number, customer name, or customer number.
Click on the magnifying lens to add the Transactions by searching the Transaction number
If the required search criteria are not available, you can add the parameters by clicking on Advanced.
Add Fields button will be activated after clicking on Advanced. Select the field required from the list available. The field will be added in the Search section.
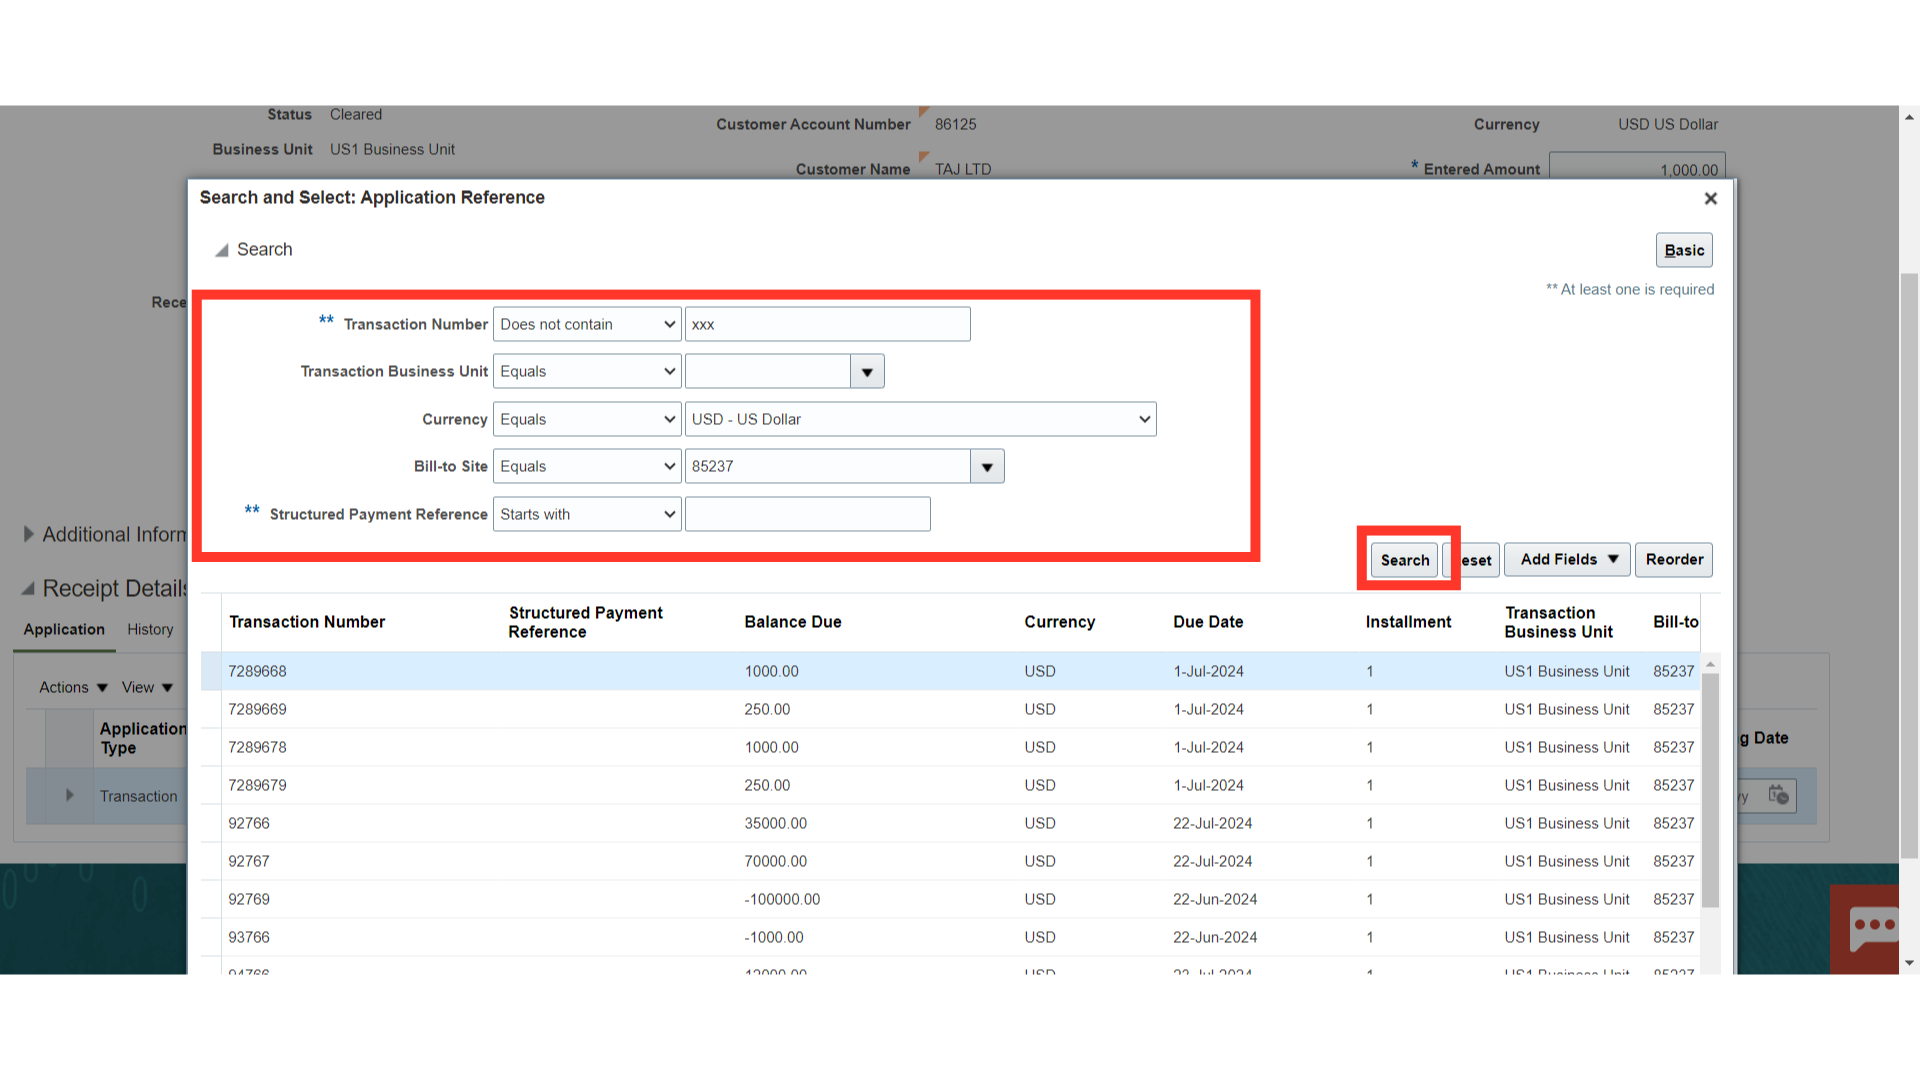
After entering the required parameter details, click on the search button.
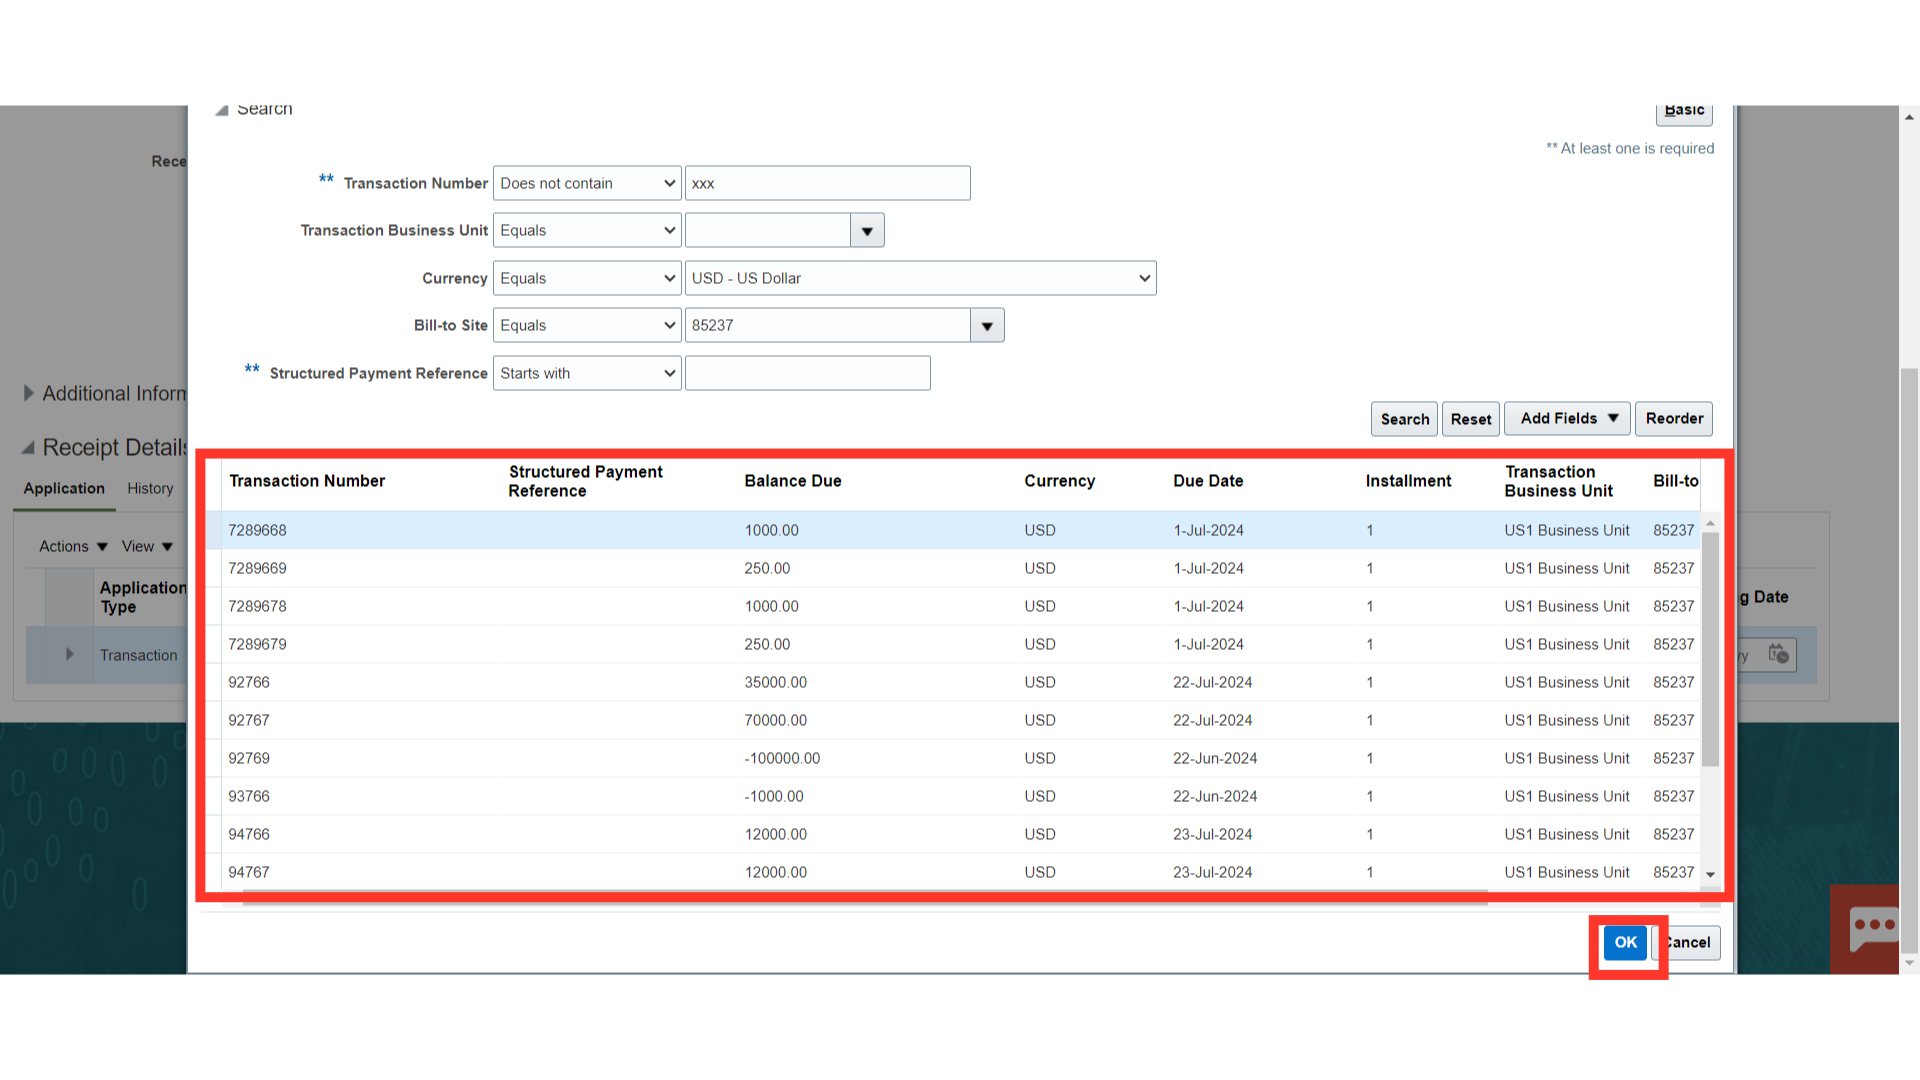
Select the Transaction name that is to be applied one by one or select all by pressing Control plus A , and click on the OK button.
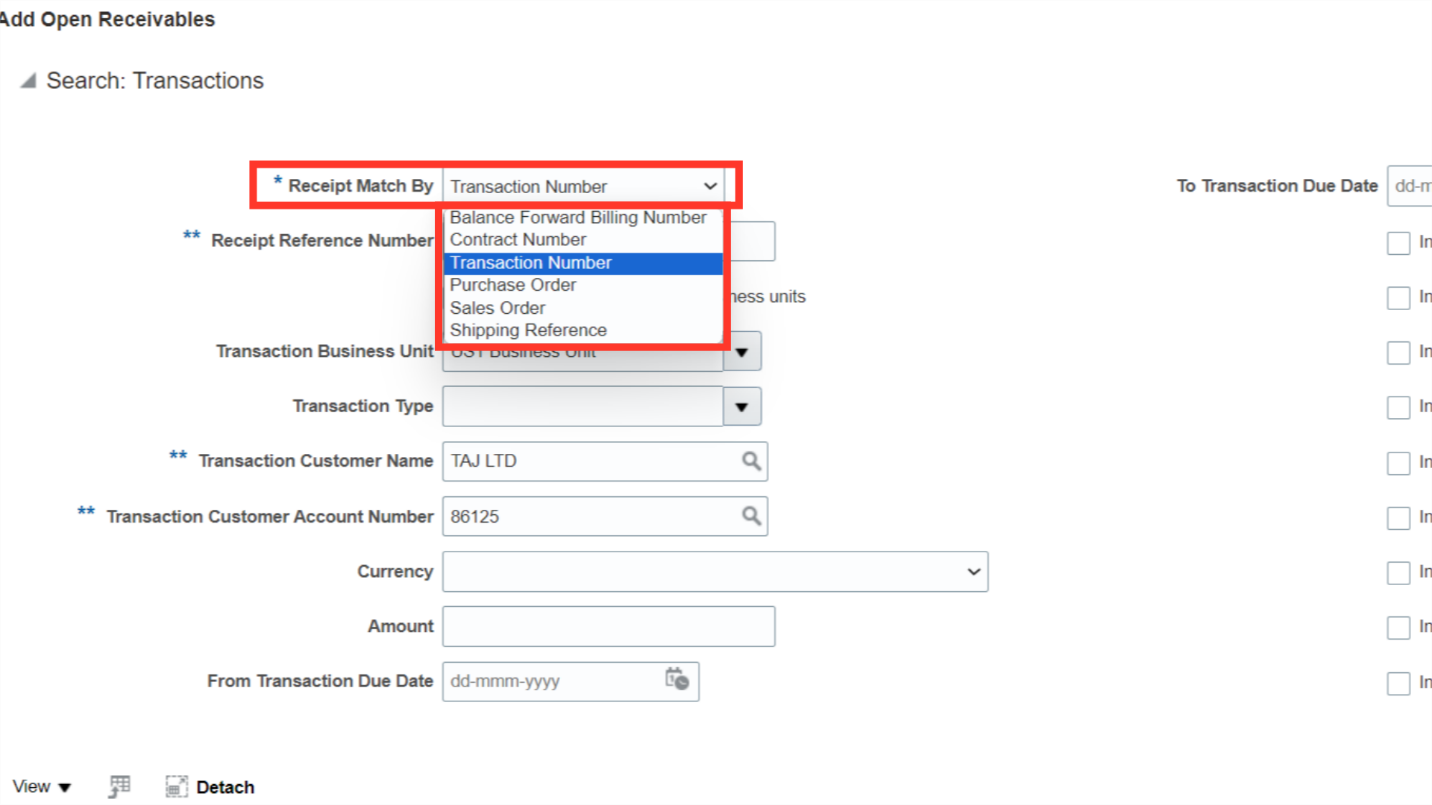
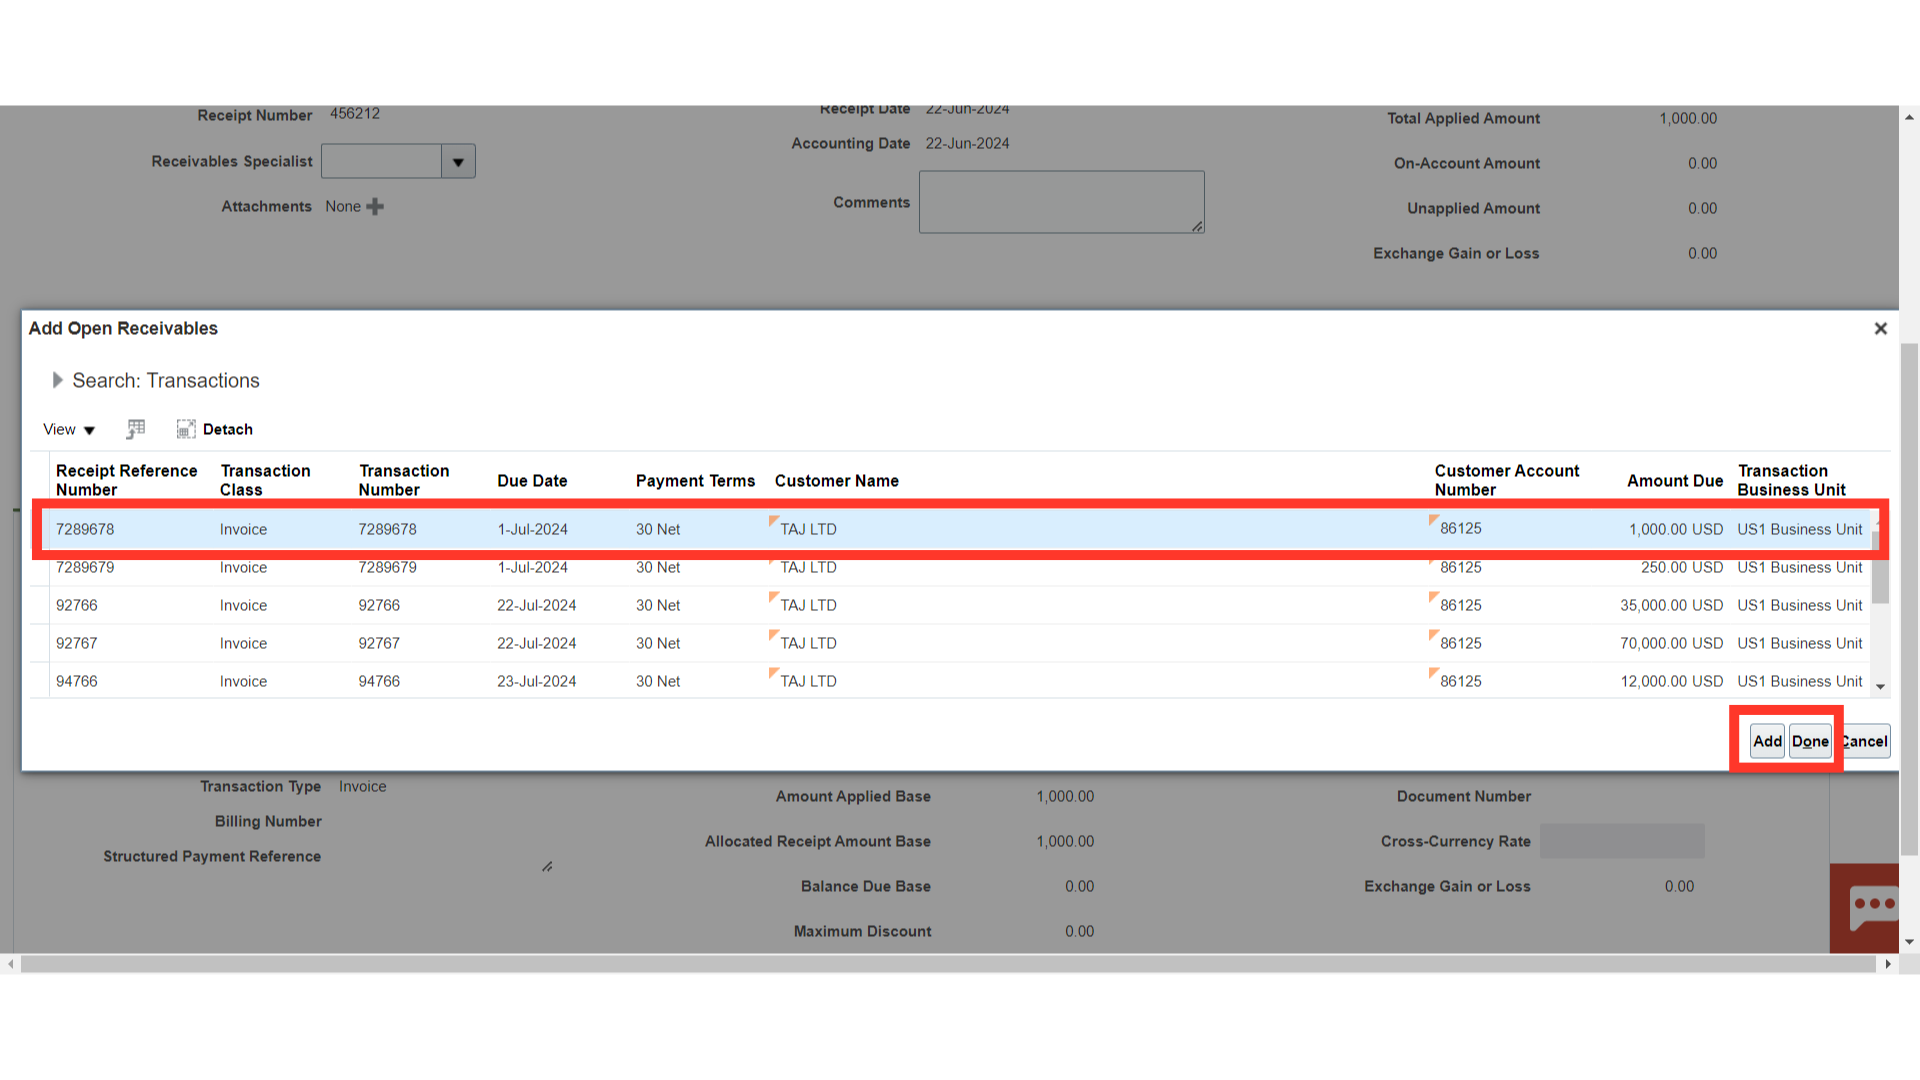
Click on the Add Open Receivables button to search the transactions for the application.
Select the appropriate Receipt Match by options based on which Reference number can be entered for applying the transactions against the receipt.
Enter the other parameter details to search the specific transactions such as Customer name, Account number, Transaction type, business unit, Currency, and Amount. Transactions can also be searched based on due date by entering the date in the fields “From Transaction Due Date” and “To Transaction Due Date”. Additionally, if transactions falling under specific cases are to be included such as transactions of inactive customers, Debit memos, Credit memos, Bills Receivable, cross-currency transactions, etc. then enable the checkbox.
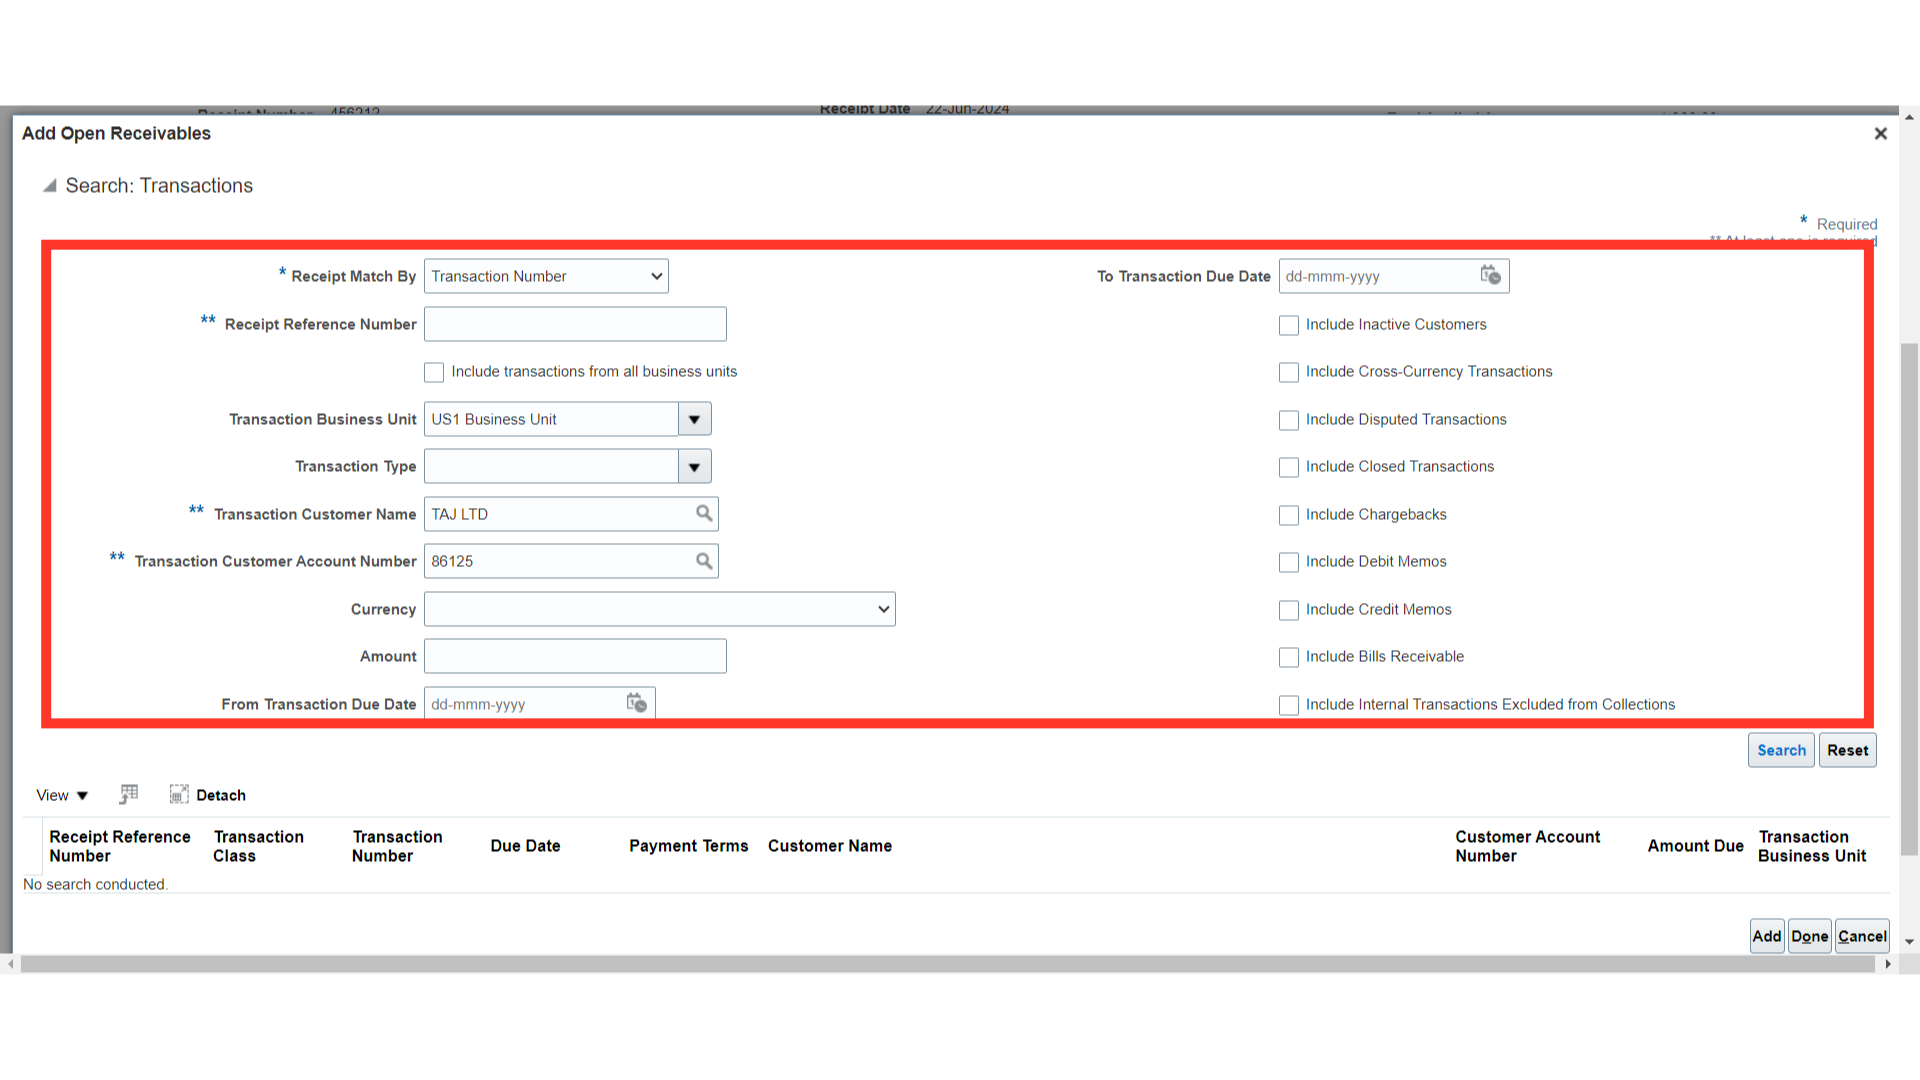
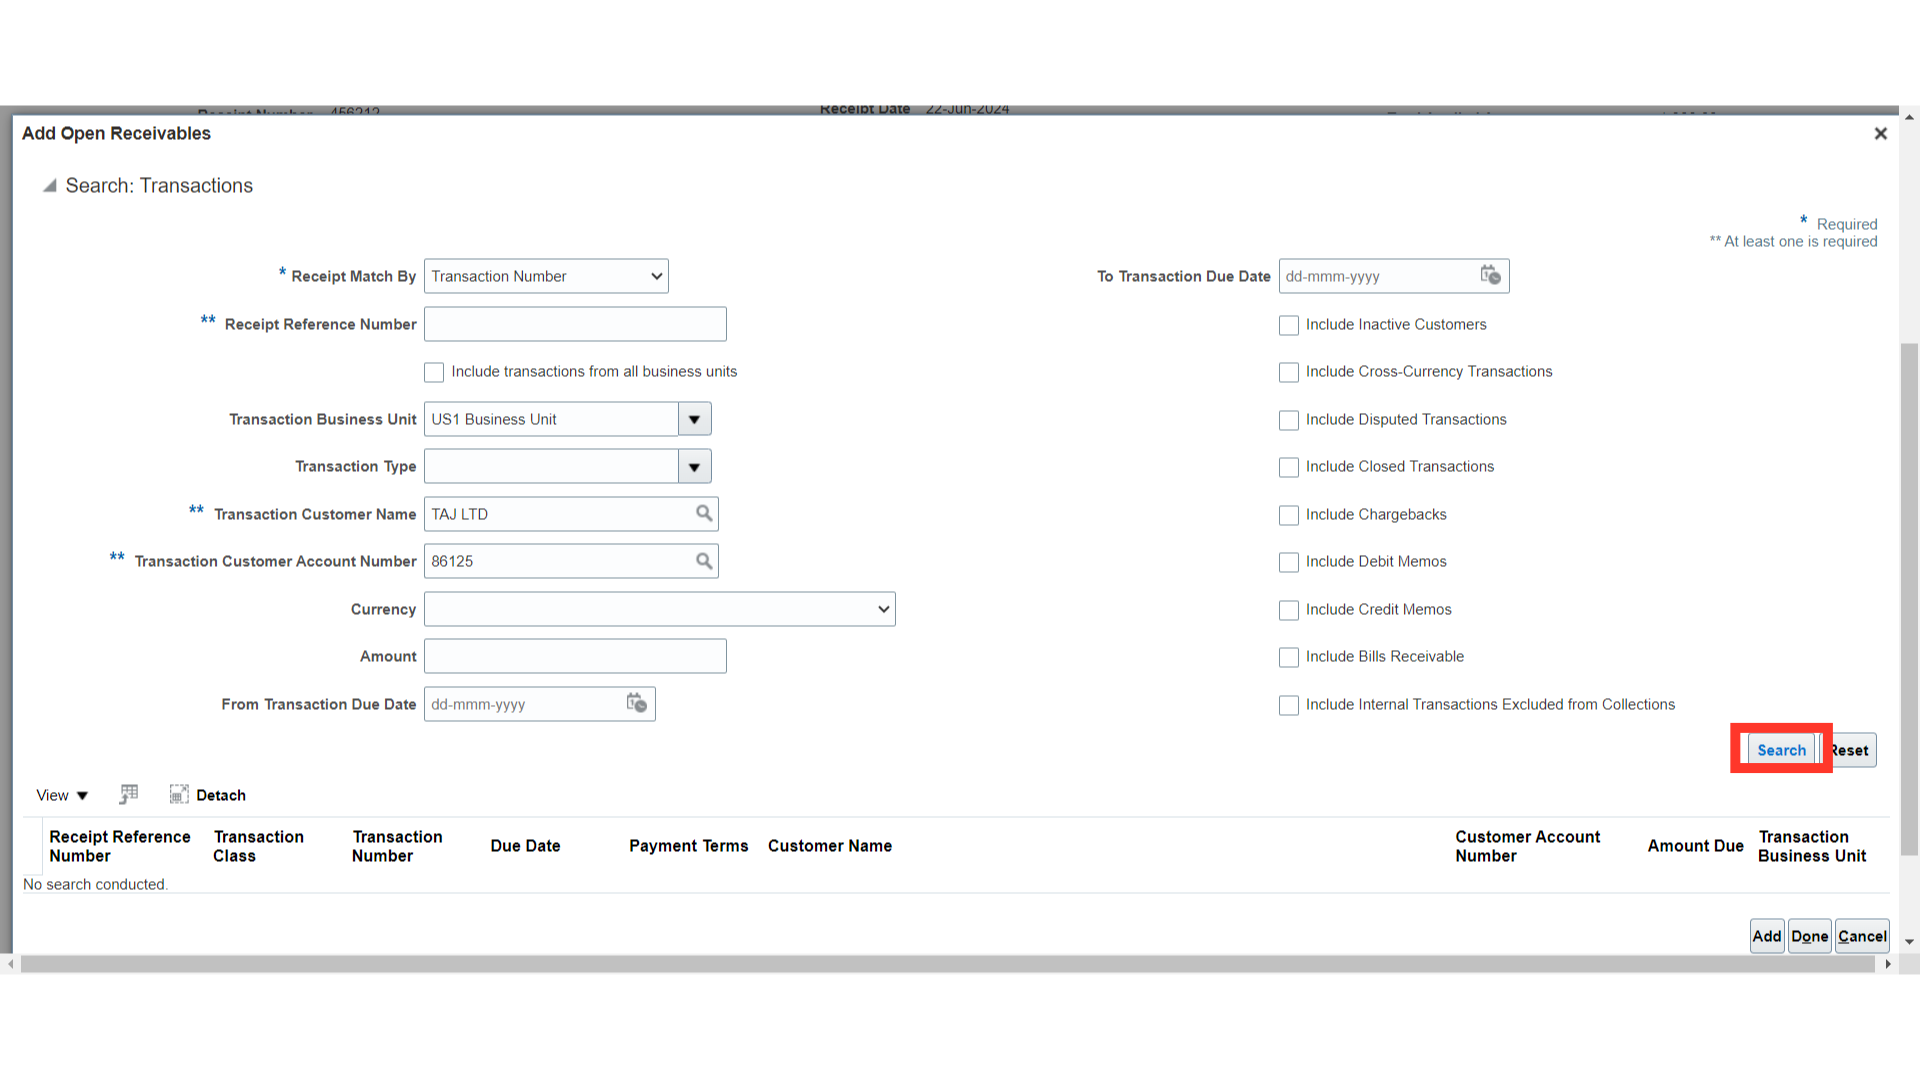
After entering all the relevant parameters, click on the search button.
The Transactions can be added individually by selecting the transaction name and clicking the Add button. After that, click on the Done button to close this window.
If necessary, the Applied amount can be modified by adjusting the value in the field that is highlighted. The remaining sum that must be applied to the transaction is automatically determined. The application date and accounting date can be manually updated or chosen from the calendar, although they are set as the current system date by default.
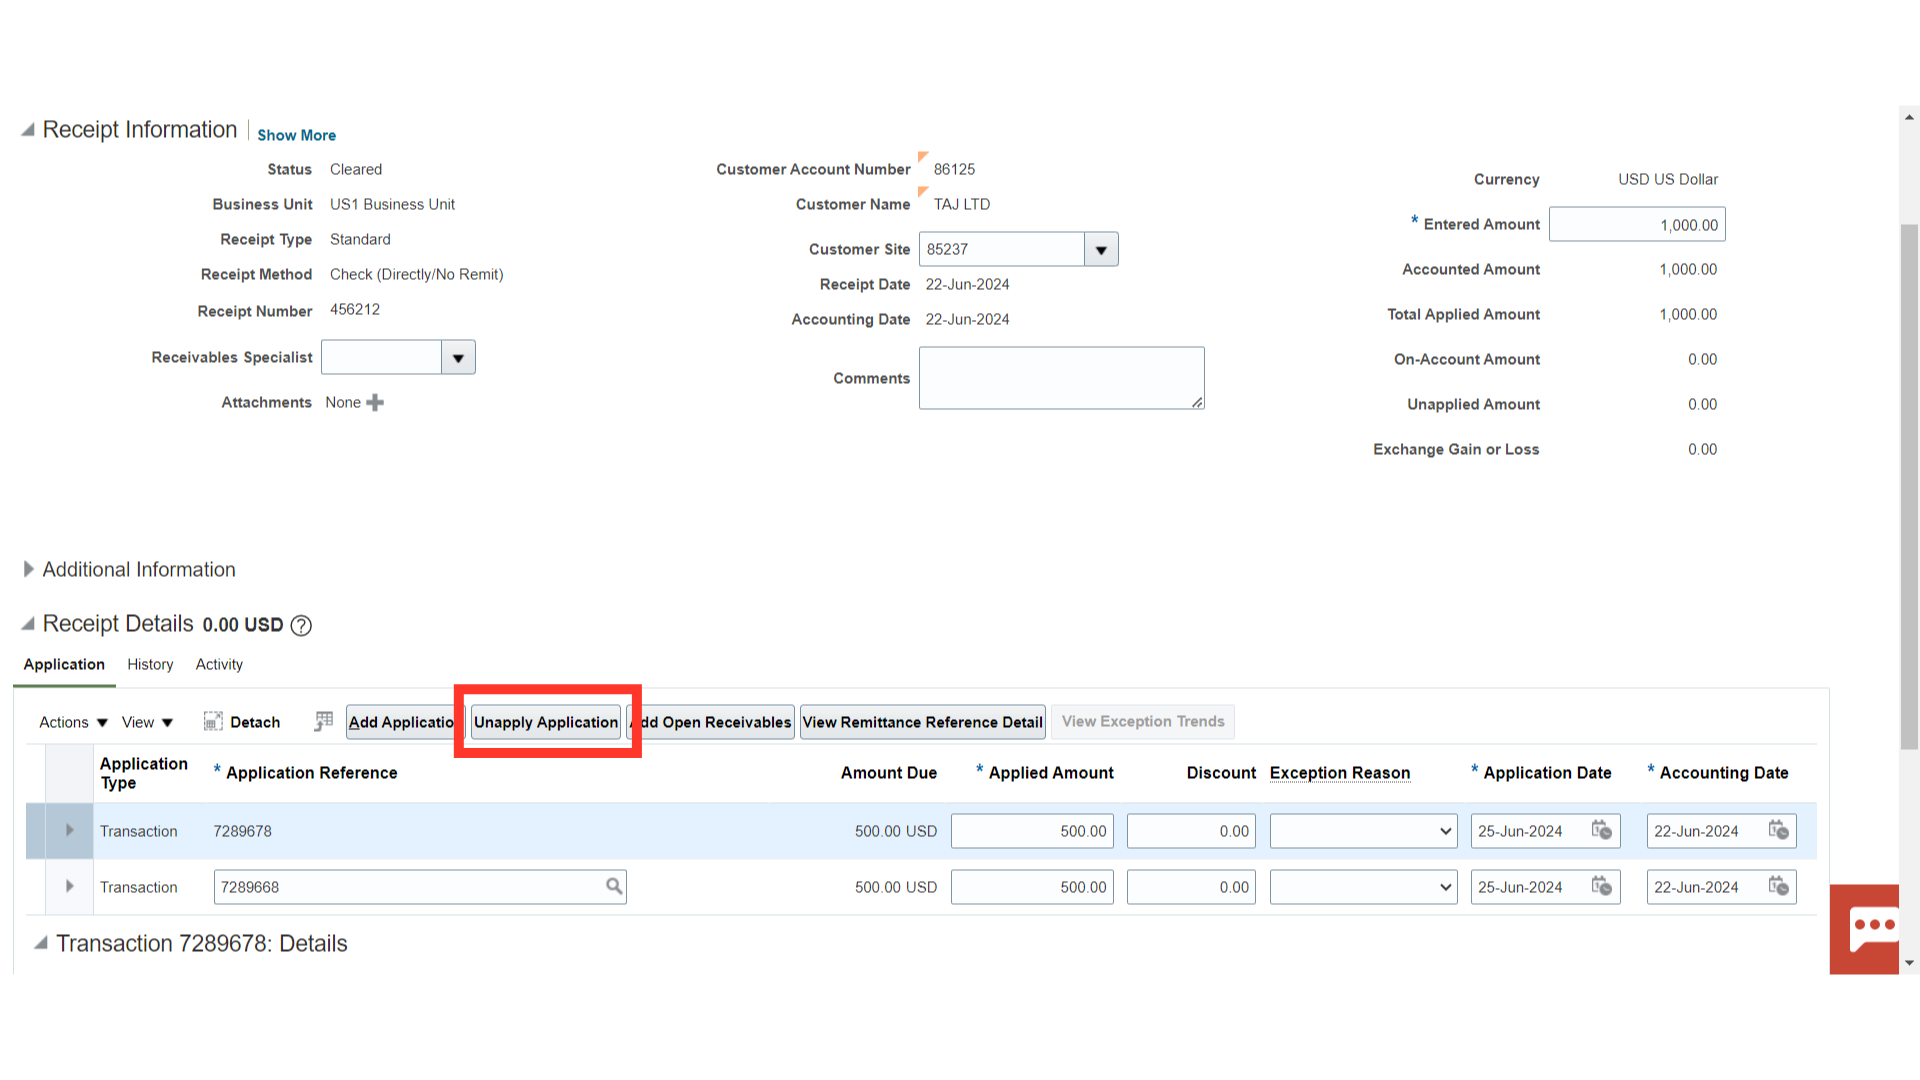
If the transaction is to be unapplied, click on the Unapply Application button.
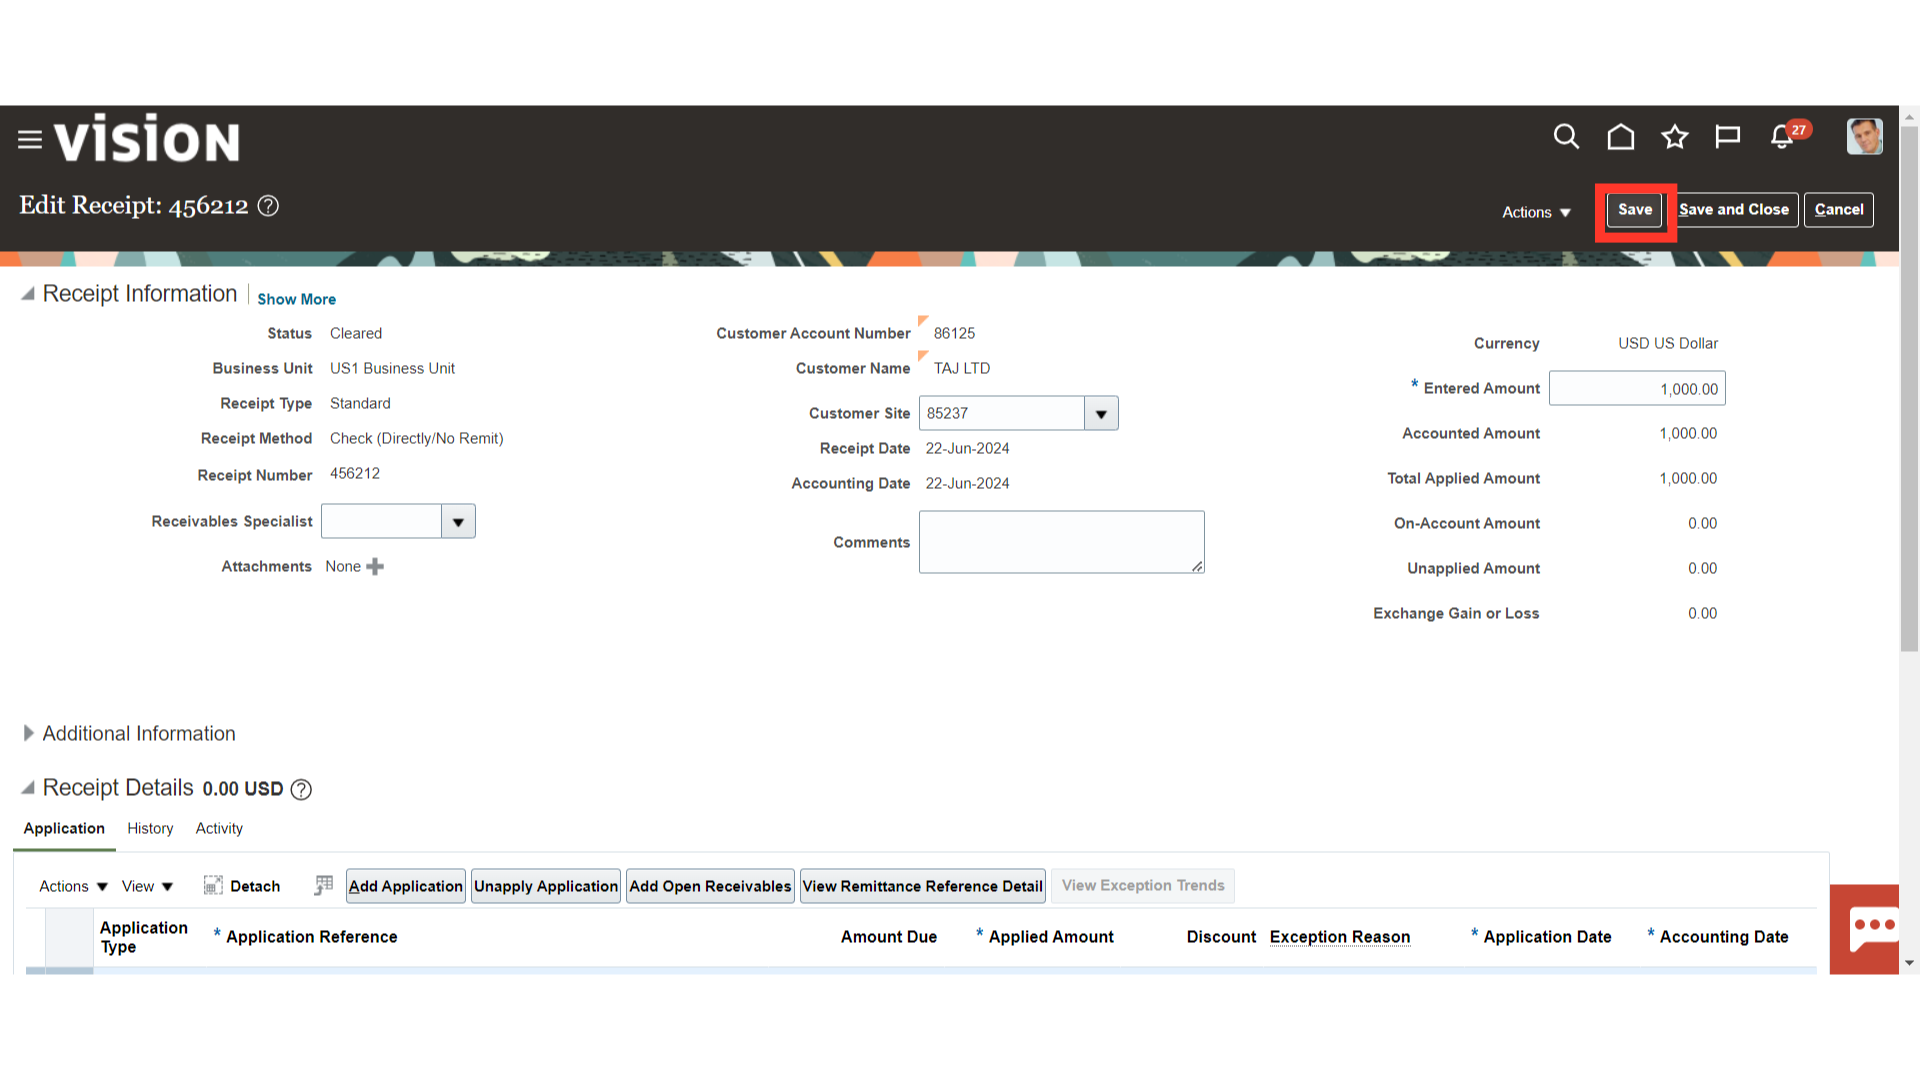
Click on the Save button to save the changes.
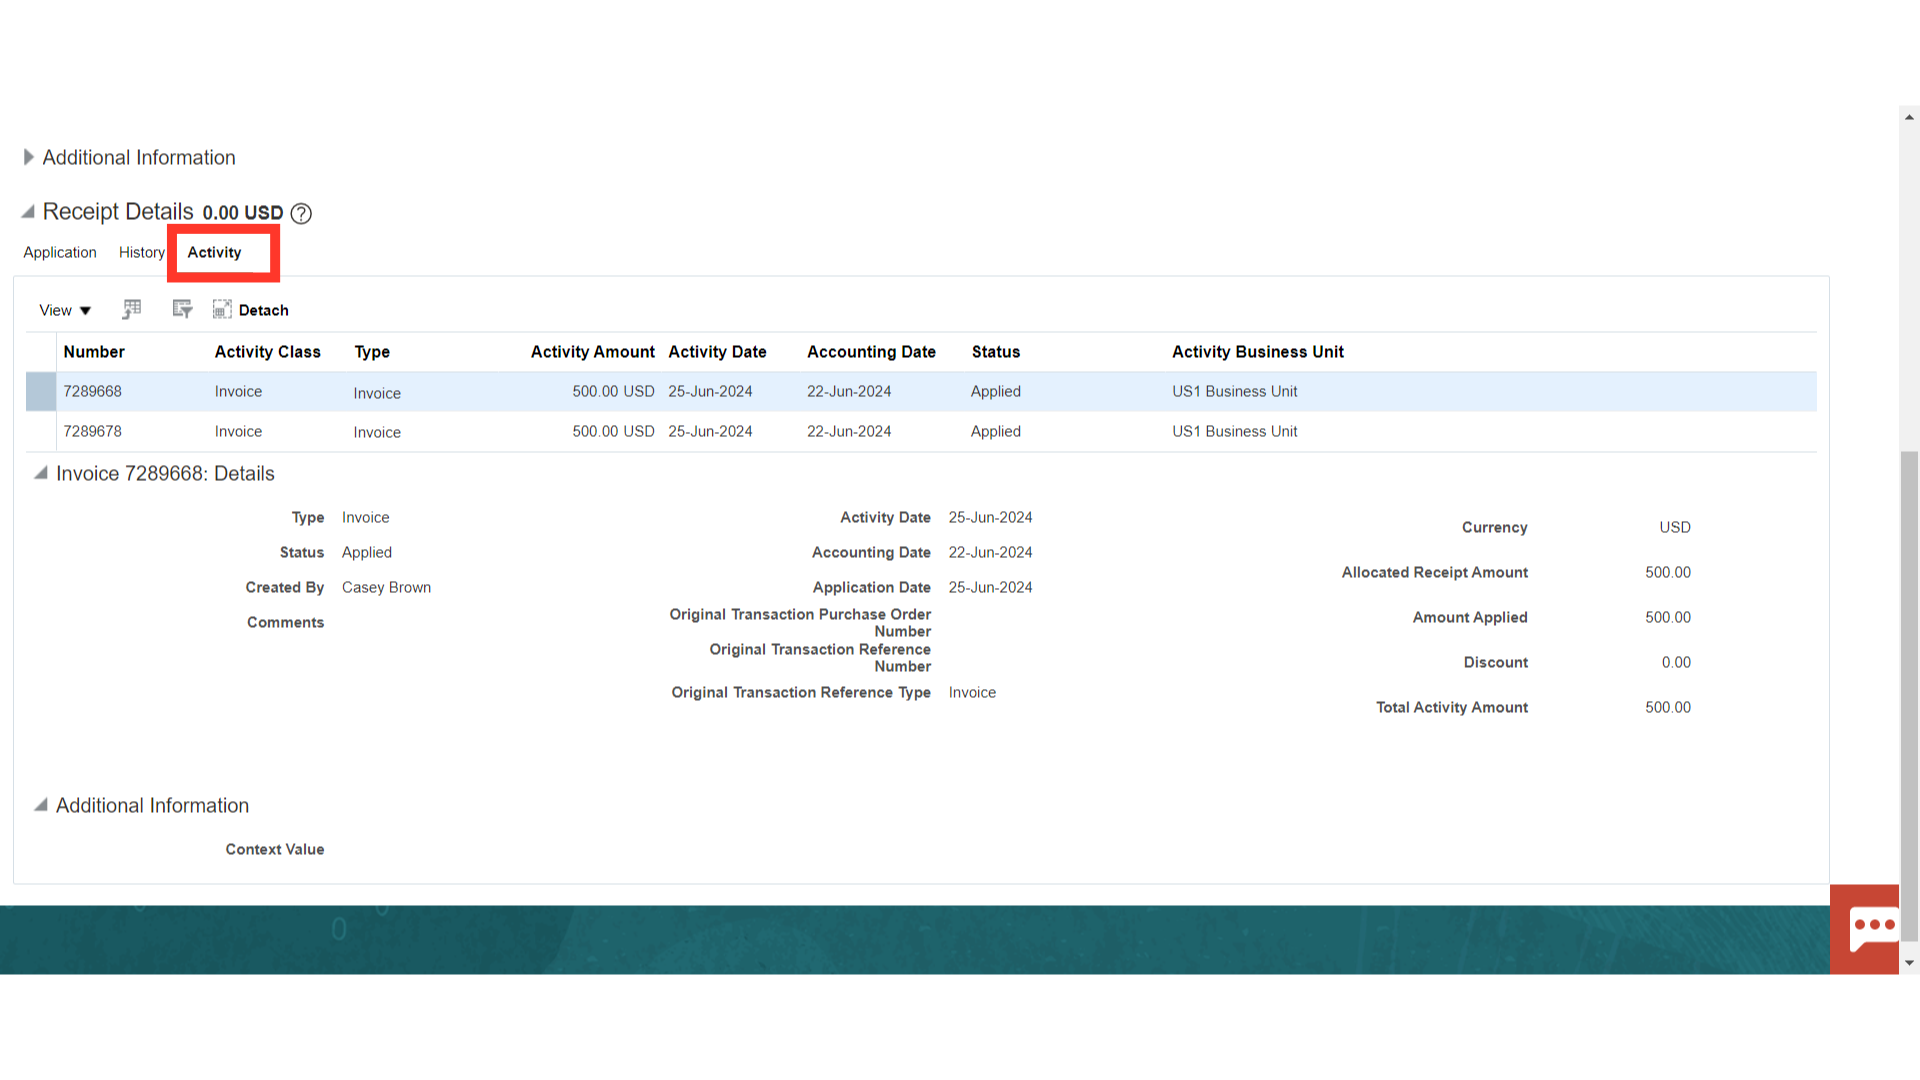
To view the details of the Receipt application and unapplication, such as the the transaction number, date, and activity date, scroll down and select the Activity tab. By selecting the Export to Excel option, you can export the details into Excel.
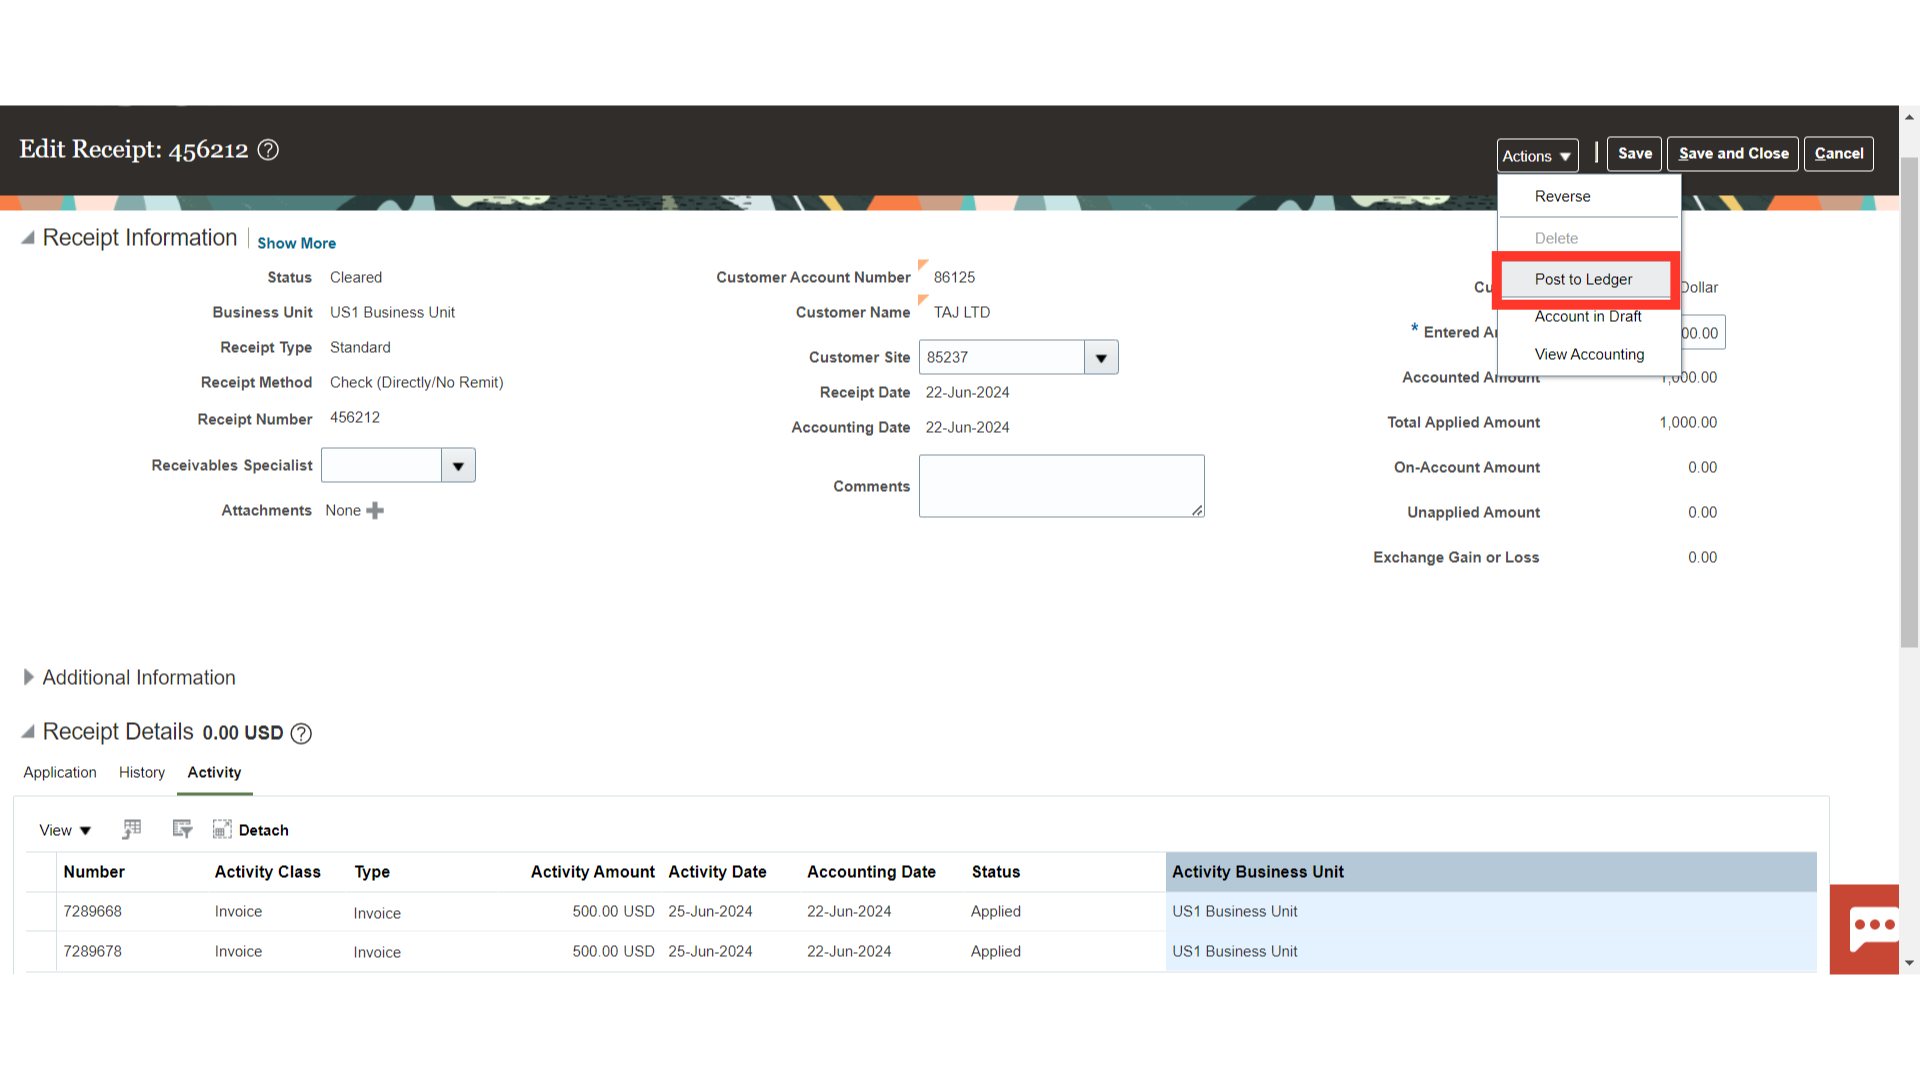
Select the Post to Ledger from the Actions tab to generate the accounting entry.
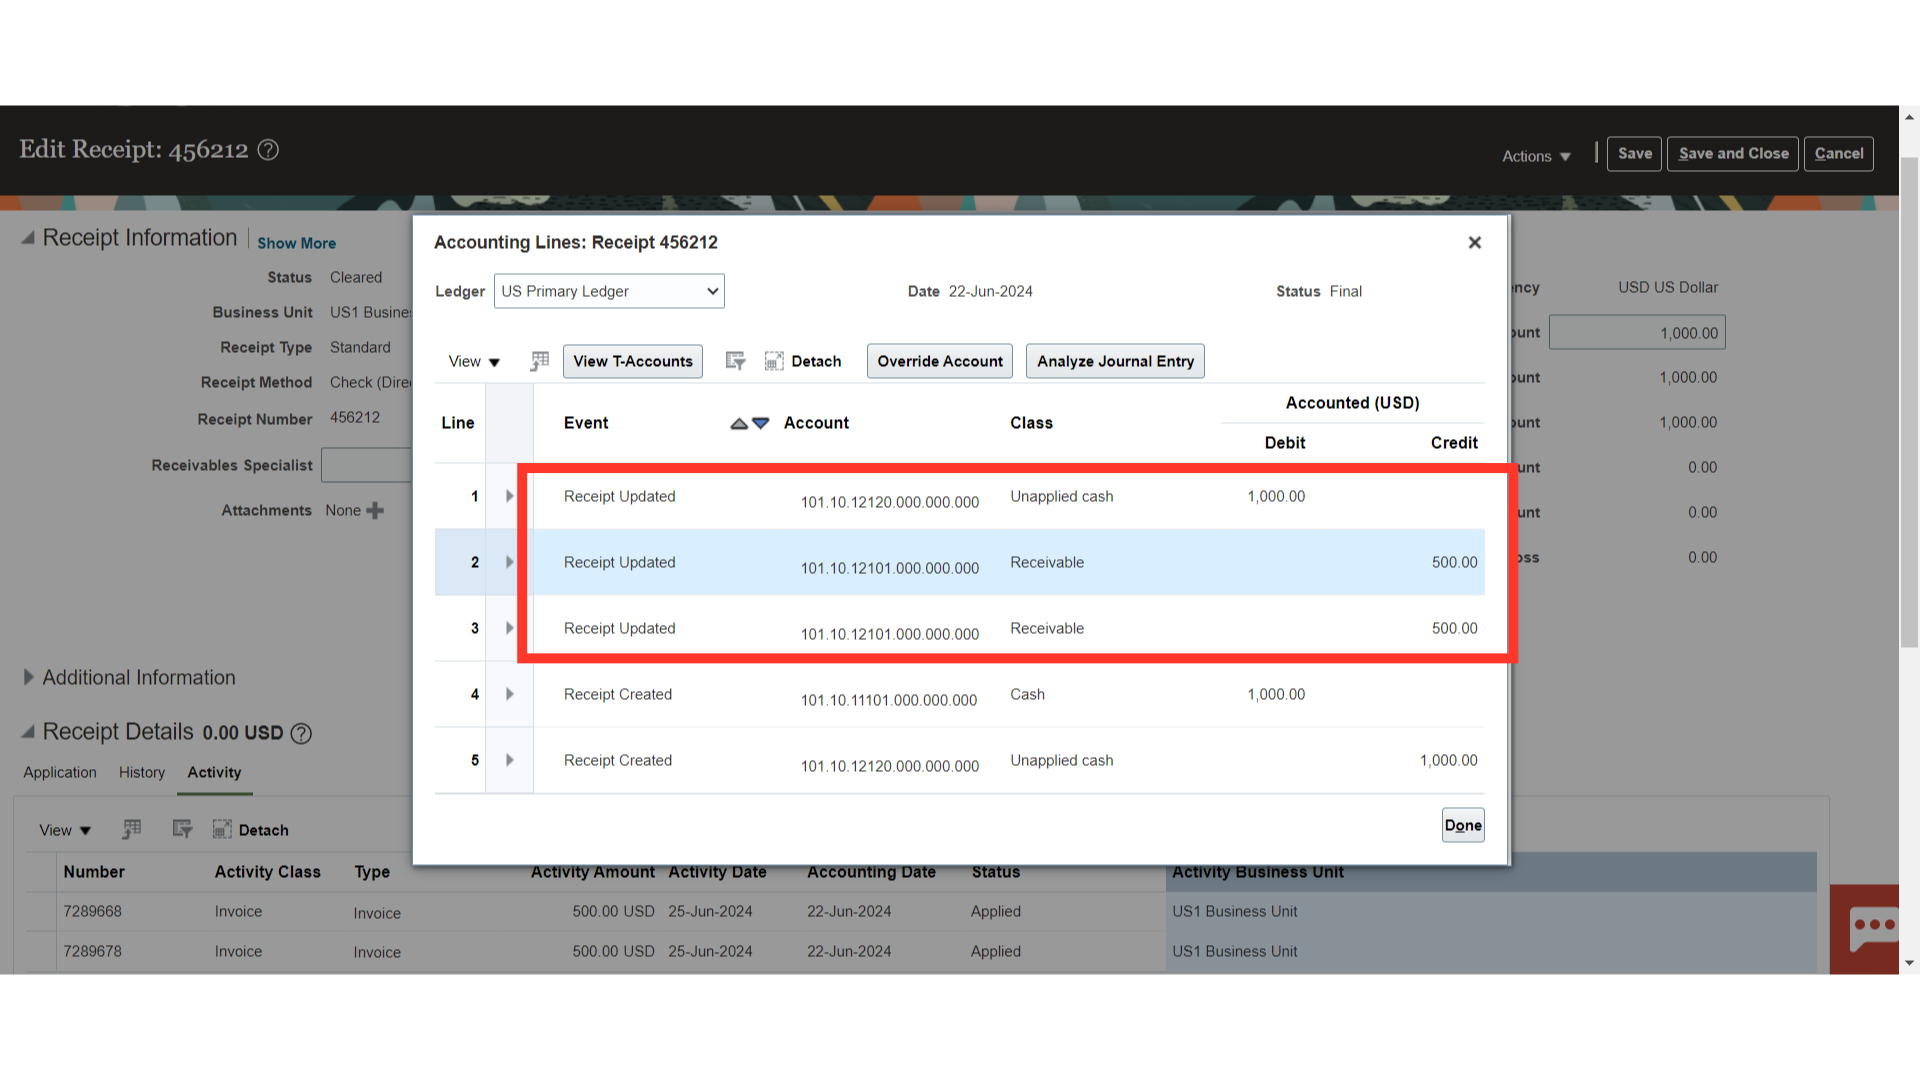
To view more details, click on the View Accounting button.

This accounting entry was created to document the application event of receipt by crediting the Receivables account and debiting the Unapplied cash account.
The application process for receipts has been thoroughly explained in this guide, beginning with gaining access to the Accounts Receivable work area. The application process involves applying the receipt using the Add transactions and Add open receivables options, as well as explaining the accounting entry of the receipt application.