How to Manage Qualification Area
This guide walks through the process of creating a Qualification Area for Supplier Qualification in the Oracle Fusion application. The qualification area contains multiple correlated questions. Follow the detailed instructions to effectively handle the qualification area for Supplier Qualification.
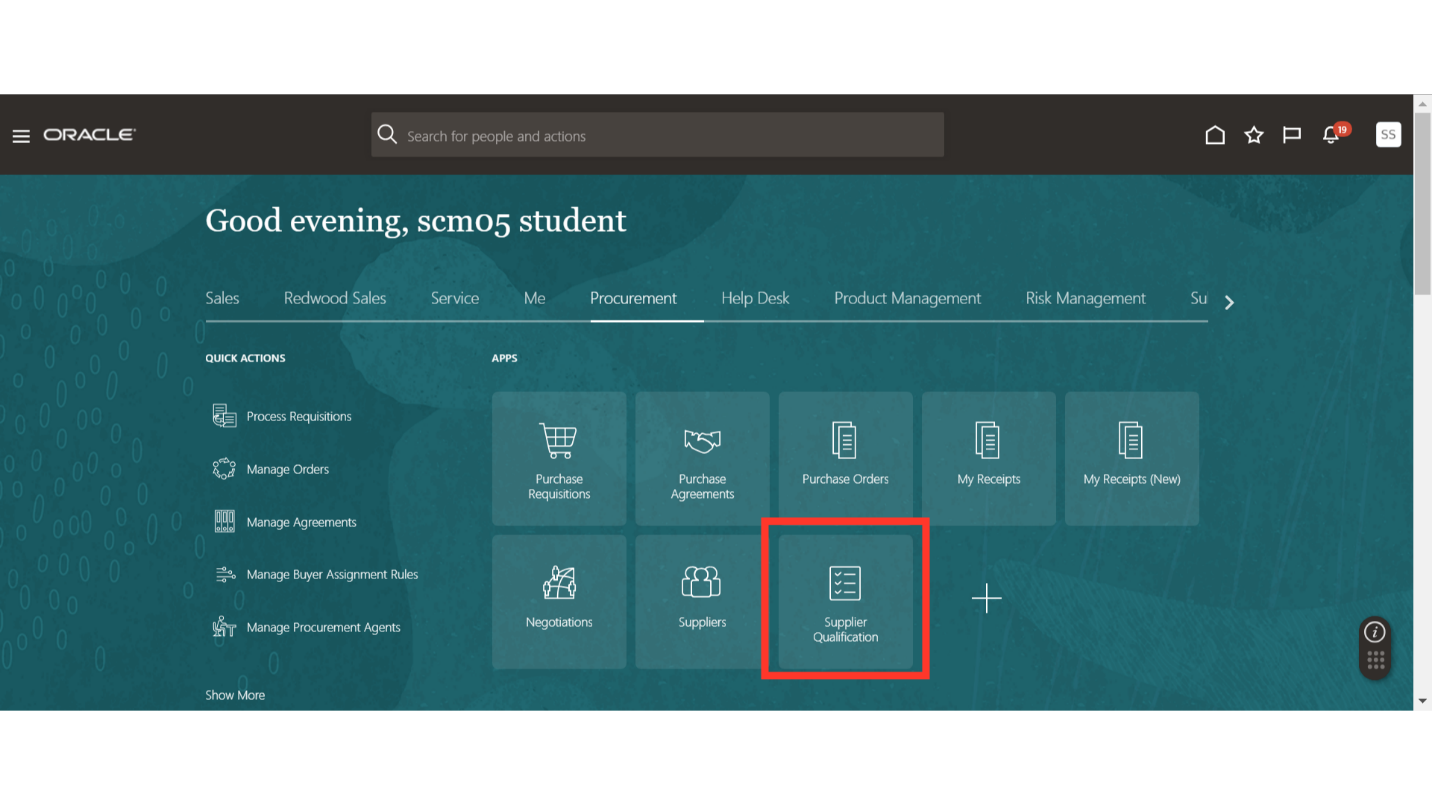
After logging on to Oracle Fusion, navigate to the Procurement tab and click on the Supplier Qualification infotile.
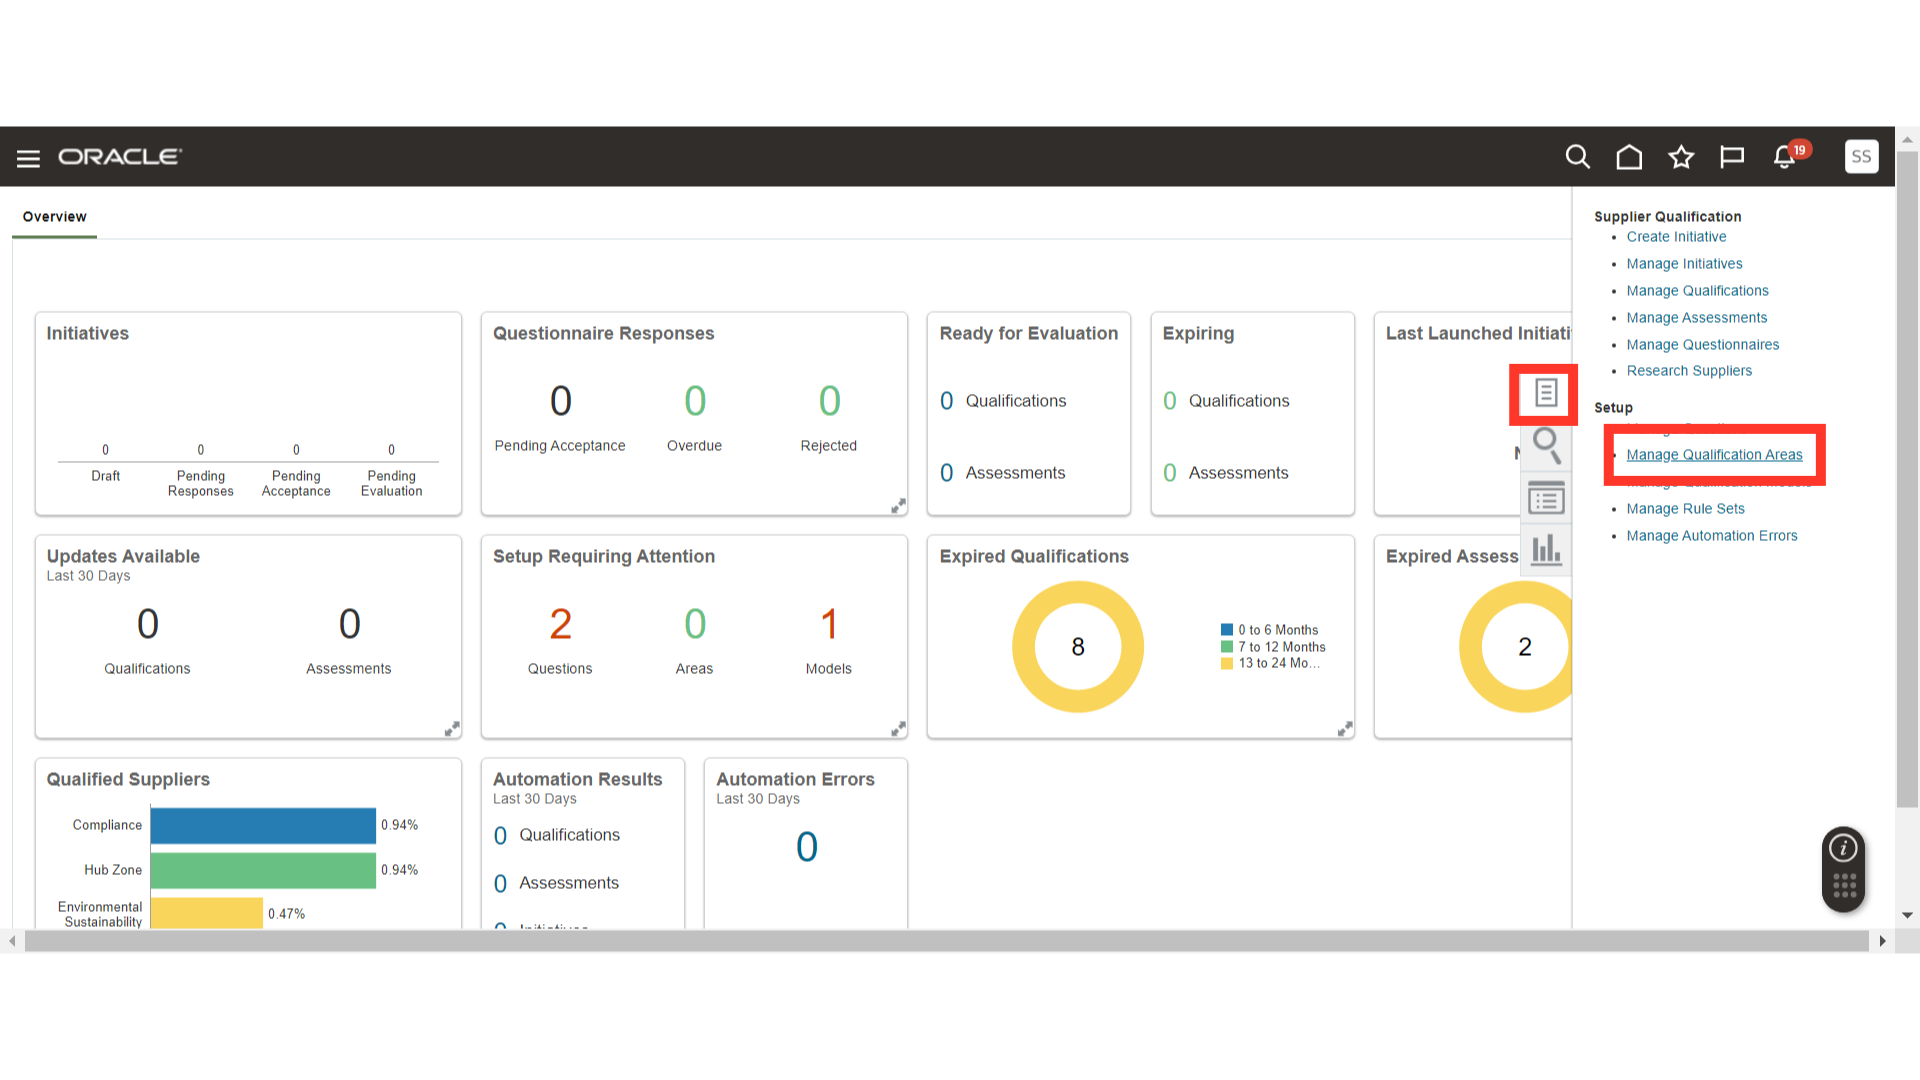
In the Supplier Qualification work area, click on the Tasks button and then click on Manage Qualification Areas under the Setup section.
In Manage Qualification Areas, click on the Plus icon to create a new qualification area.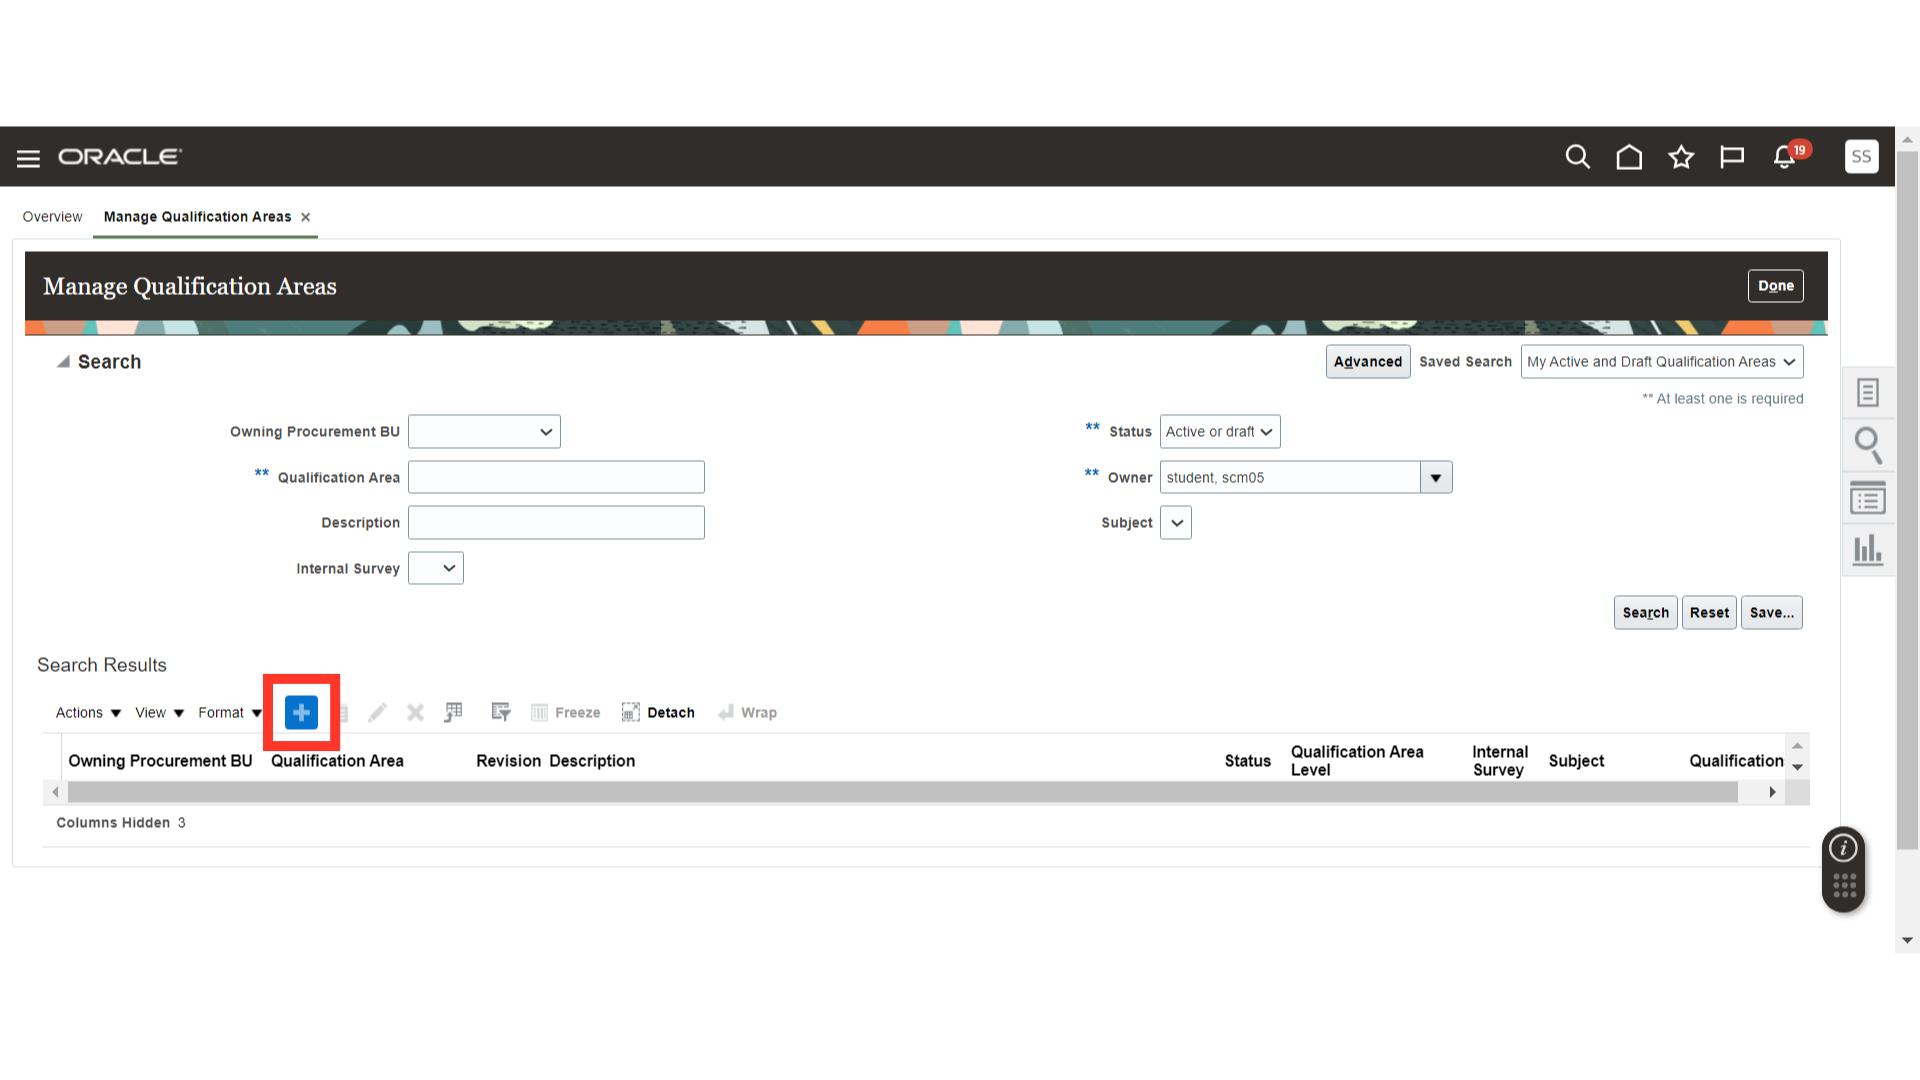
In Create Qualification Area, provide the name of the Qualification Area, Section Name, and Owner.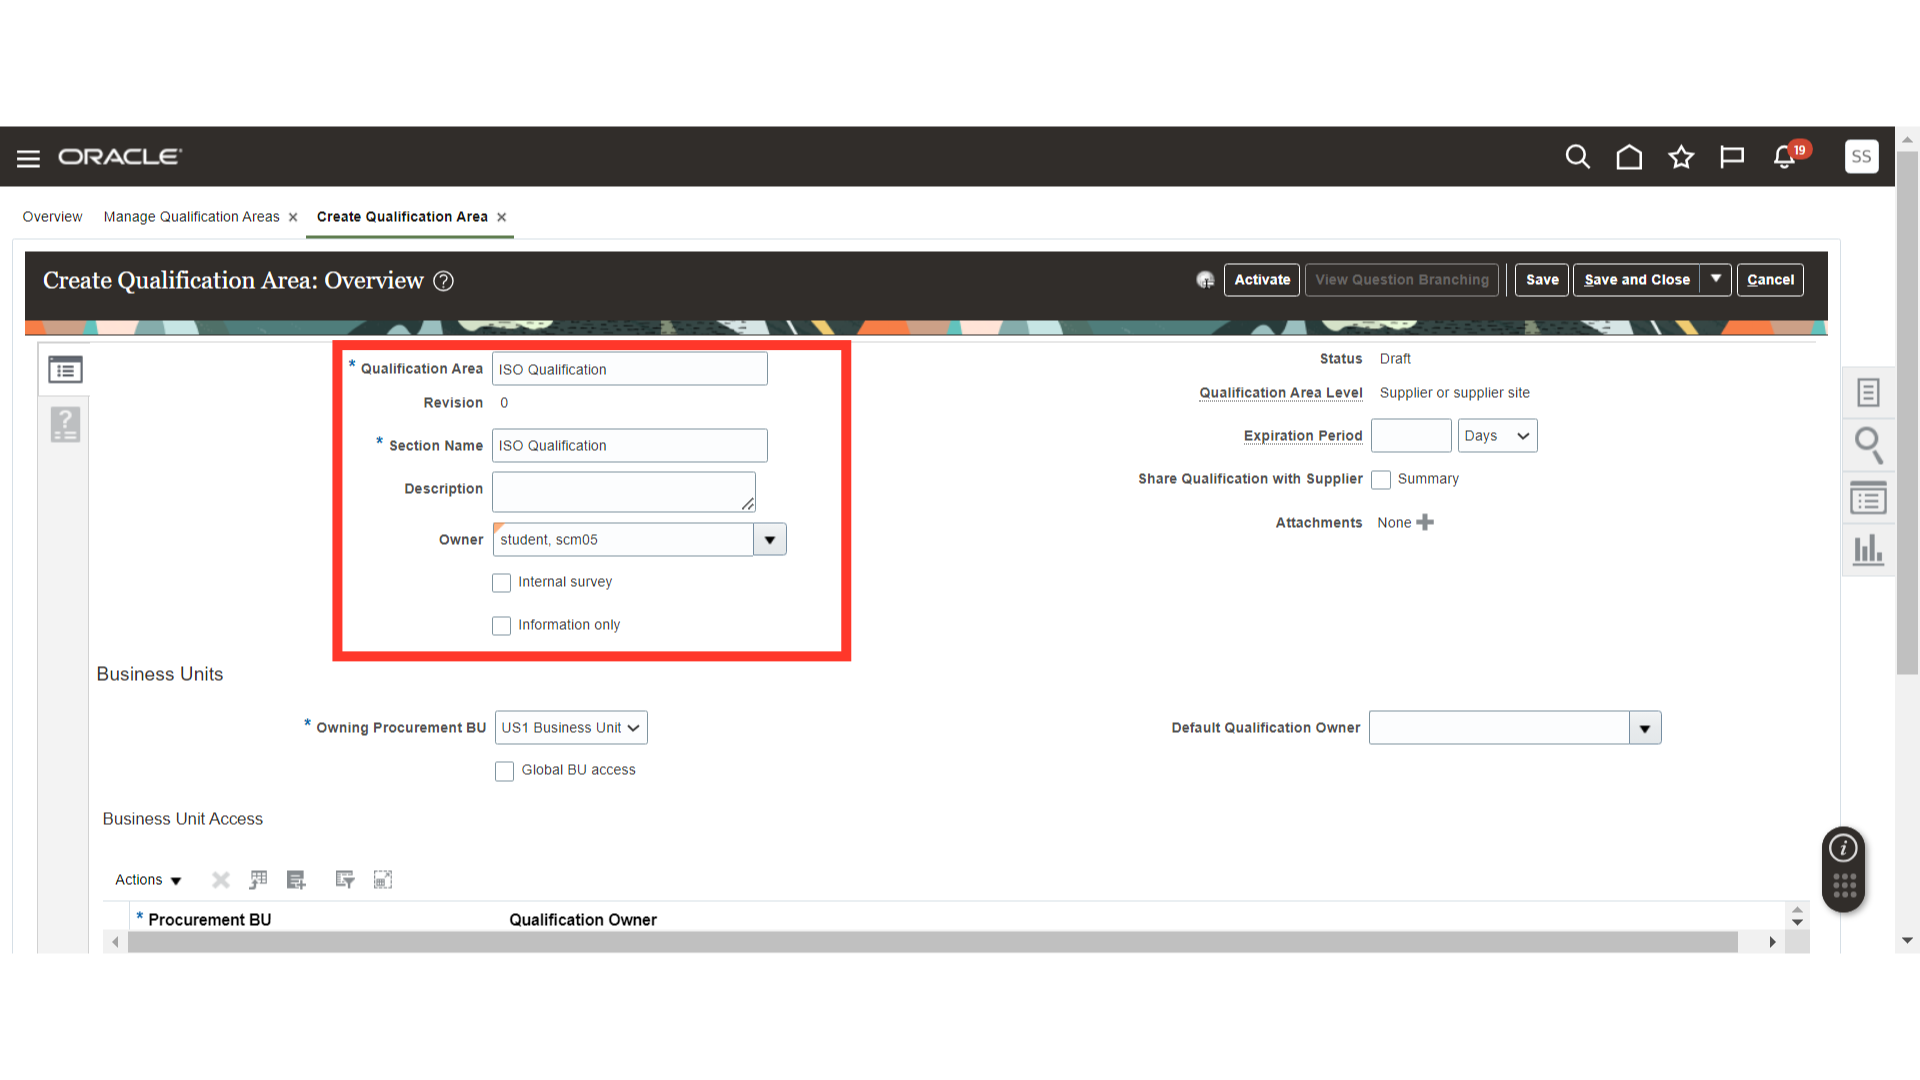
You can select the Expiration Date for the Qualification Area and share the qualification summary with suppliers by enabling the checkbox. You can also add attachments for the qualification area.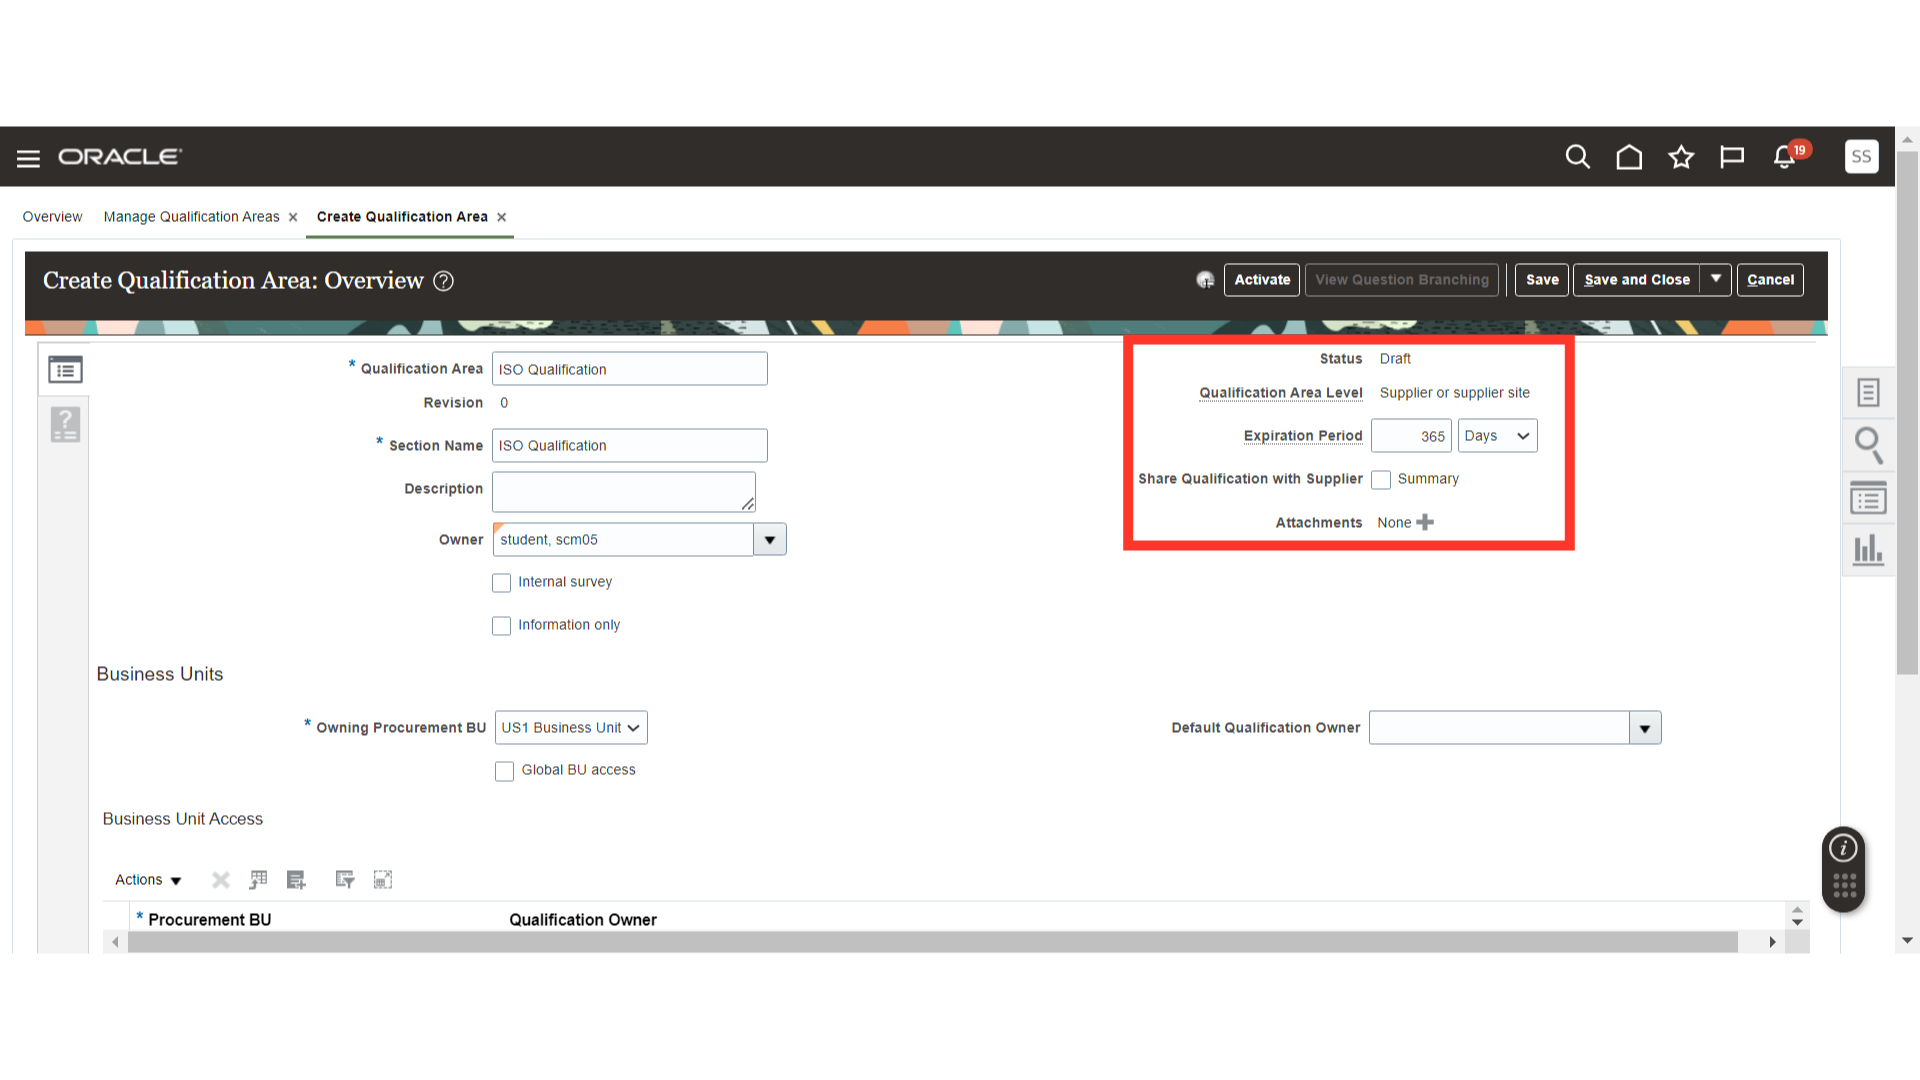
In Business Units, select the Owning Procurement BU and Default Qualification Owner.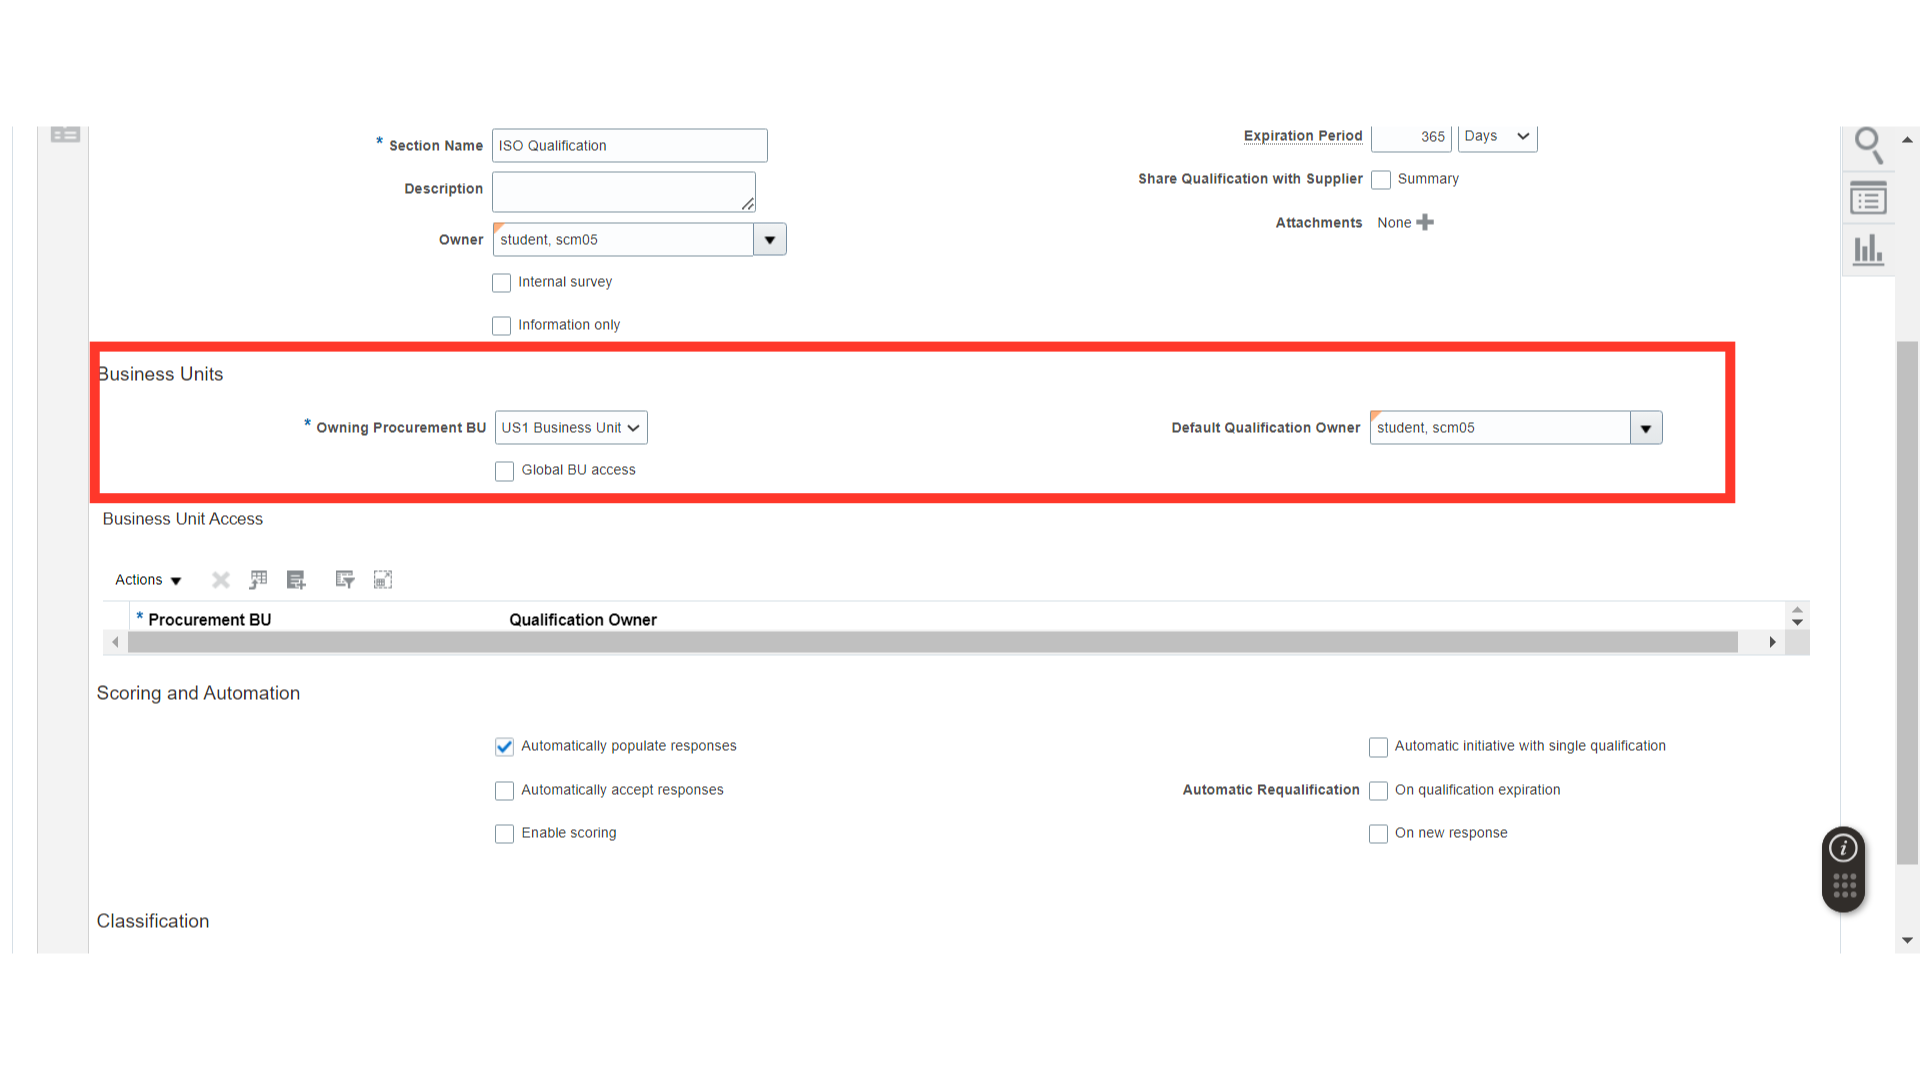
You can also add other business units for the Qualification Area if required.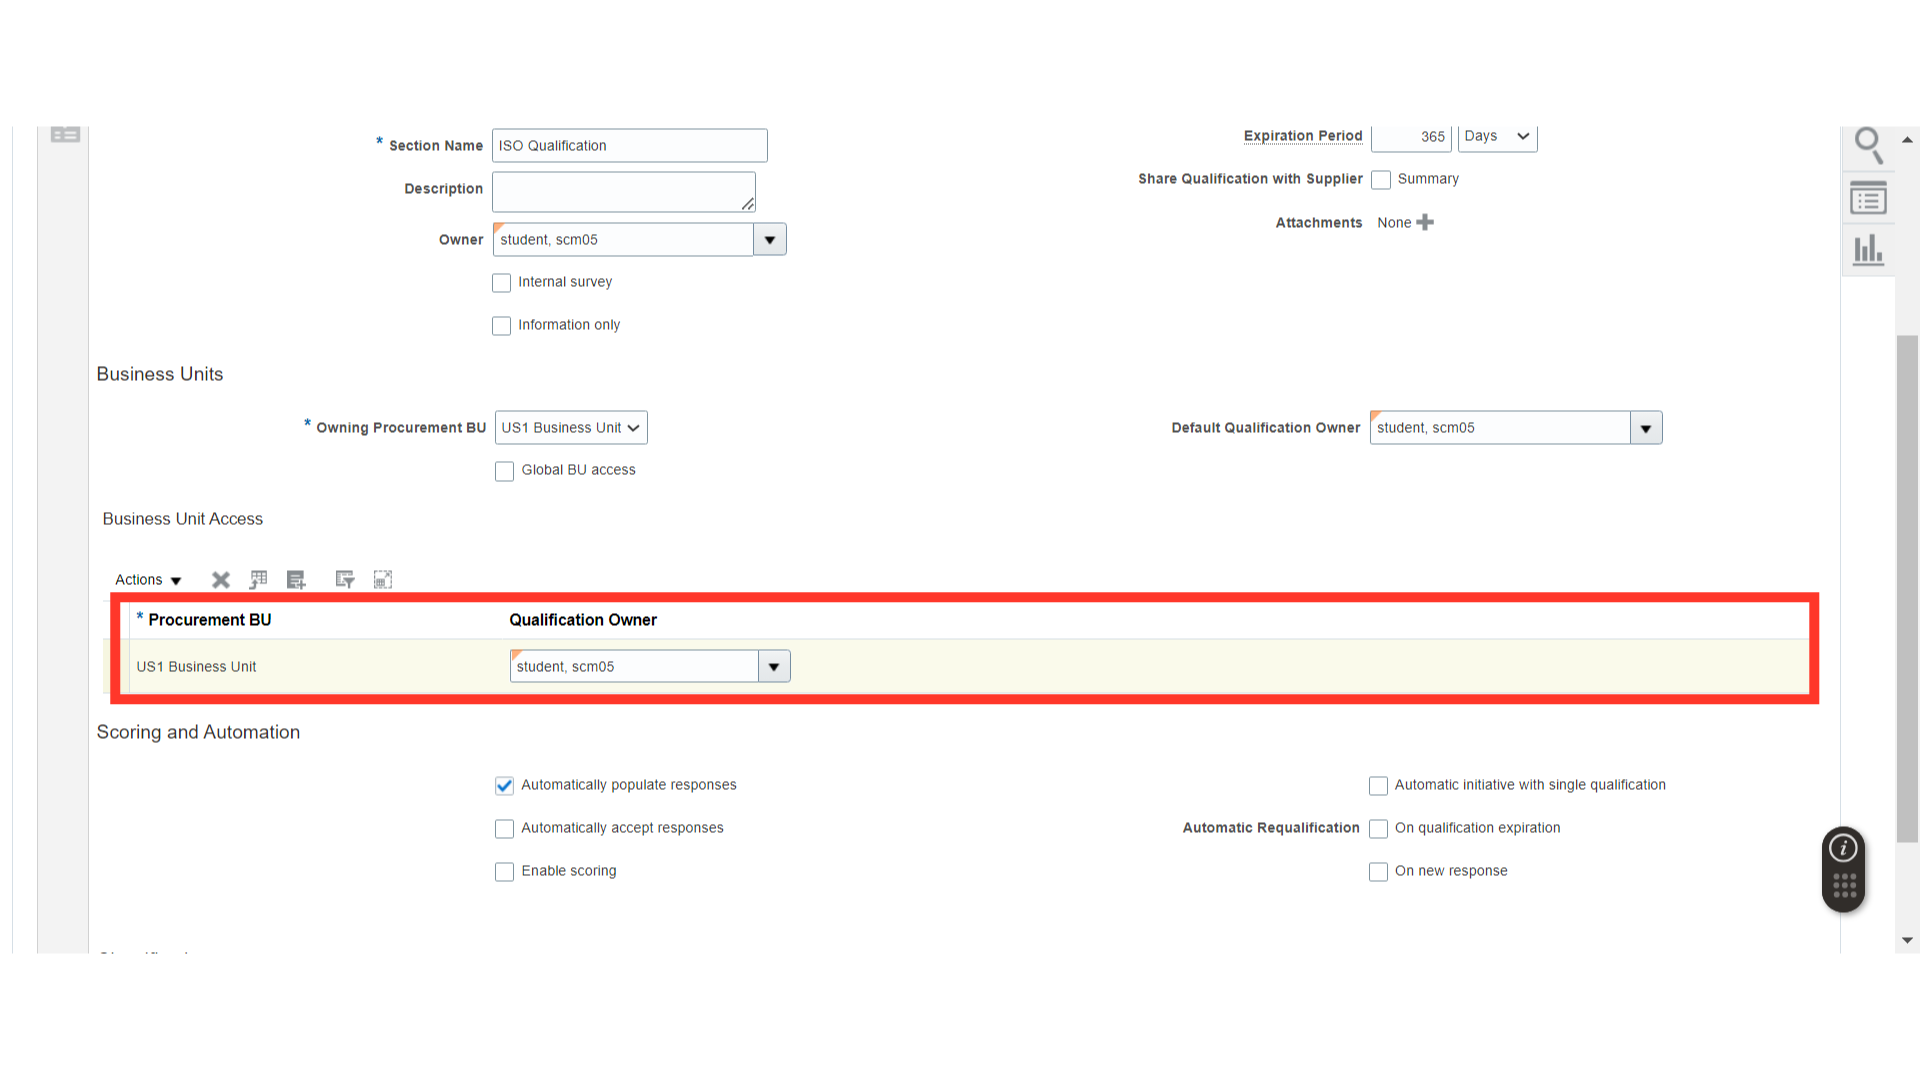
In Scoring and Automation, enable Automatically populate responses, Automatically accept responses, and enable Scoring. You can also select Automatically evaluate qualification for Automatic Qualifications.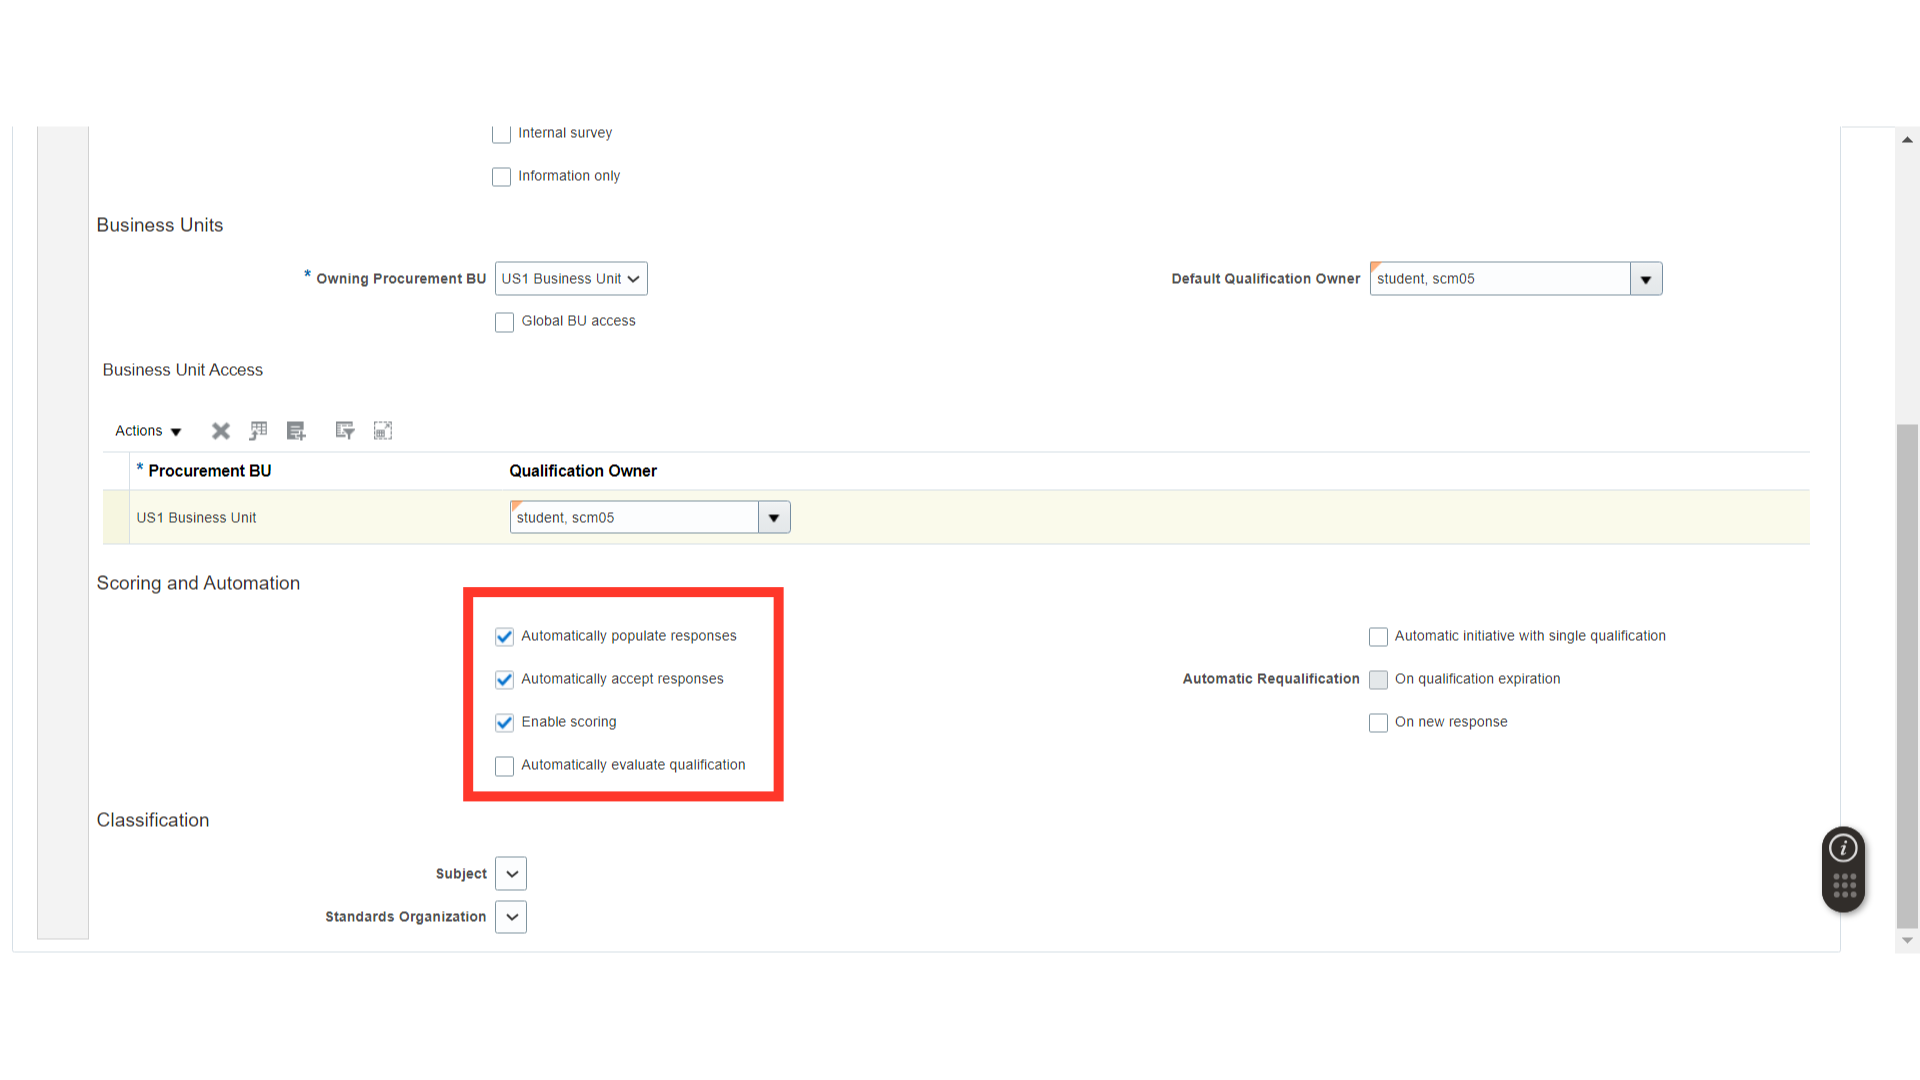
In Automatic Requalification, select when the automatic requalification will take place. For example, you can select on qualification expiration.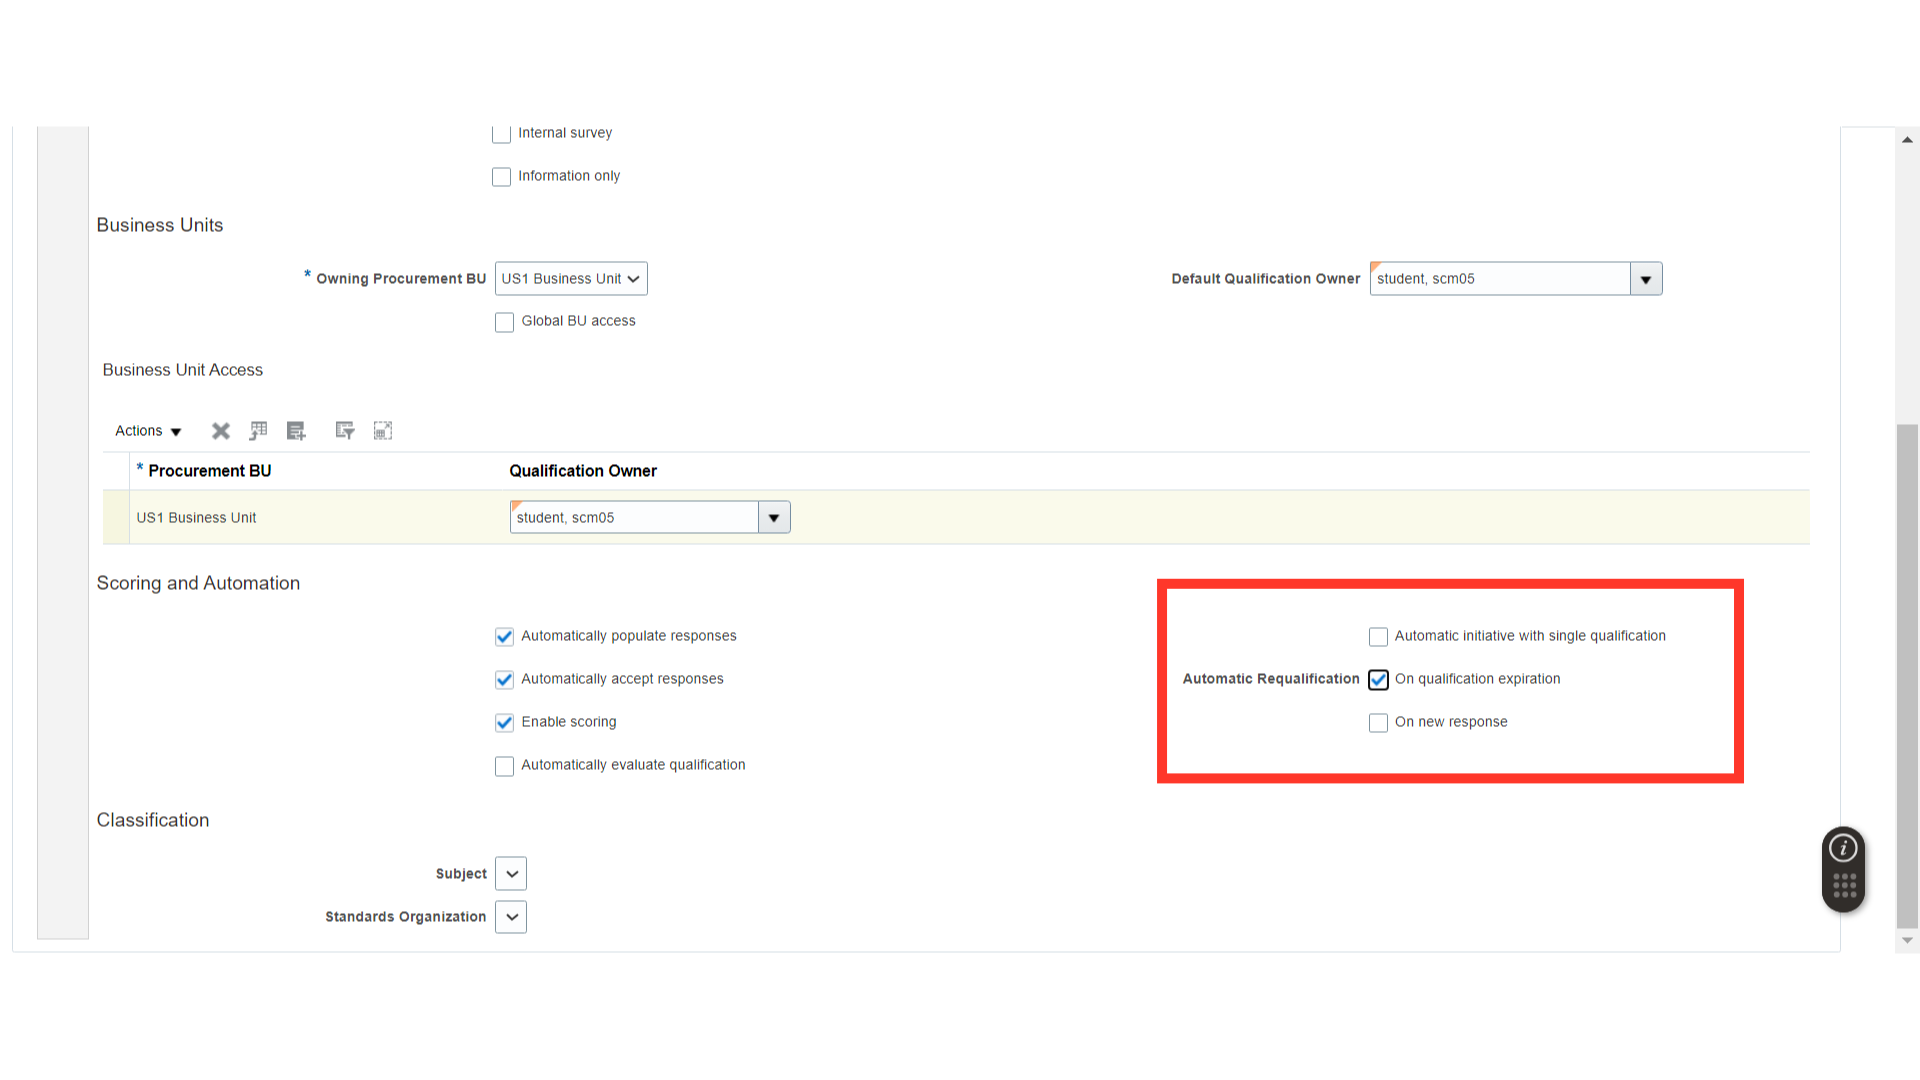
Once all the details are filled in for the Qualification Area, click on the Save button.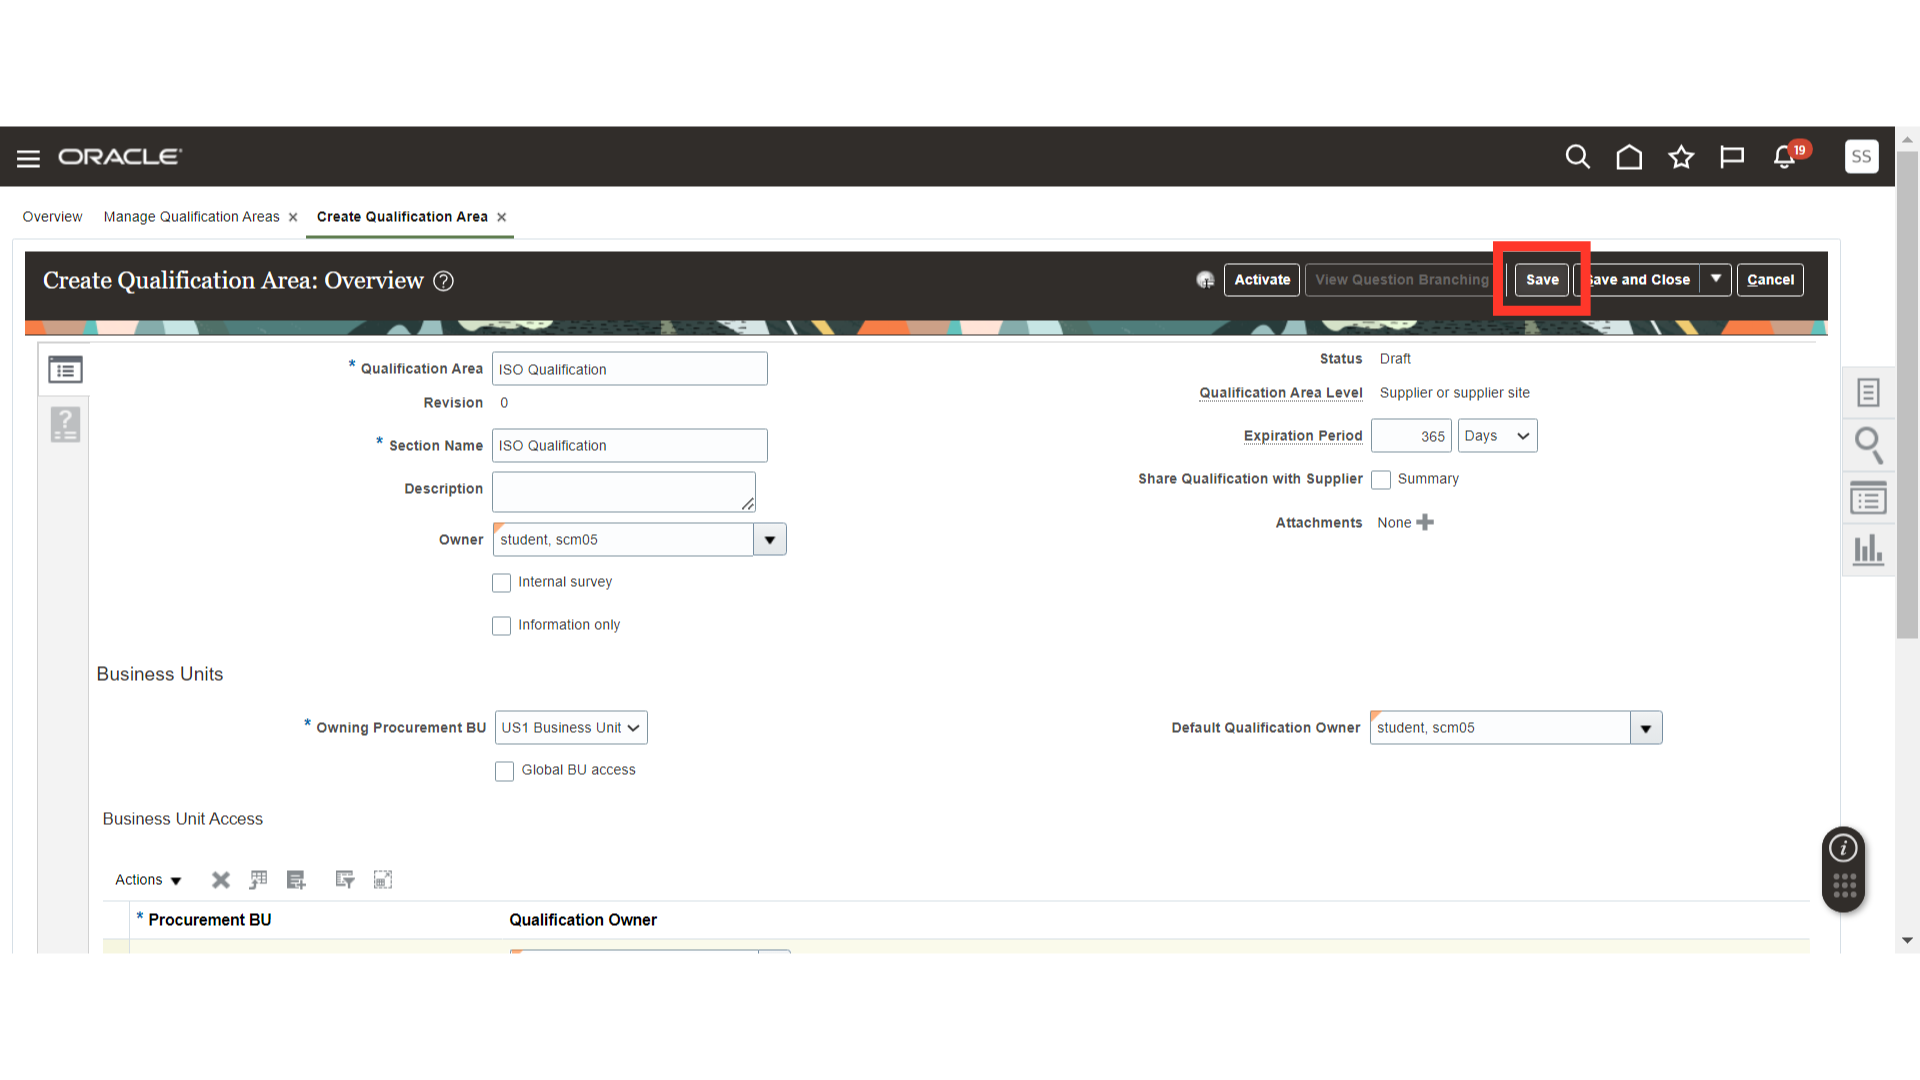
Now, click on the Questions and Outcome section.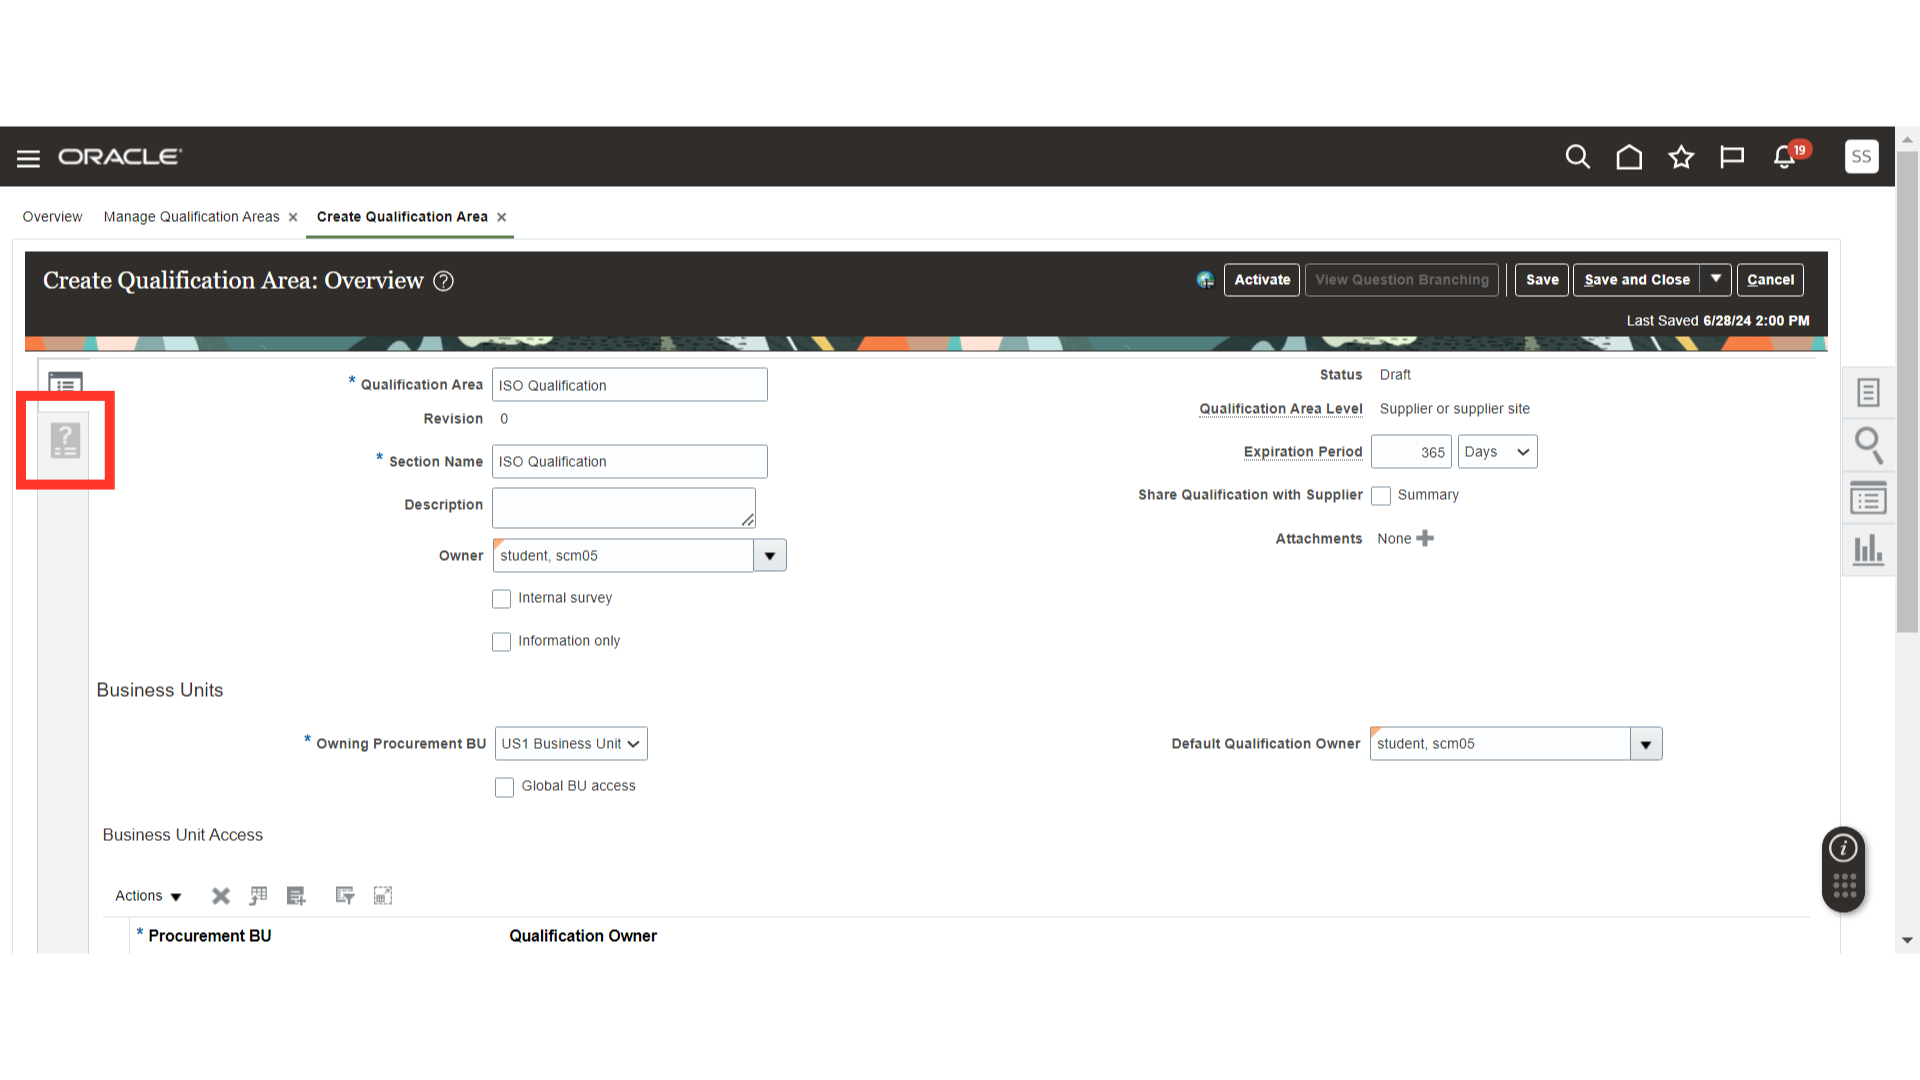
In Questions, search and add the questions required for the Qualification Area. Also, provide the weightage and knockout score for each question.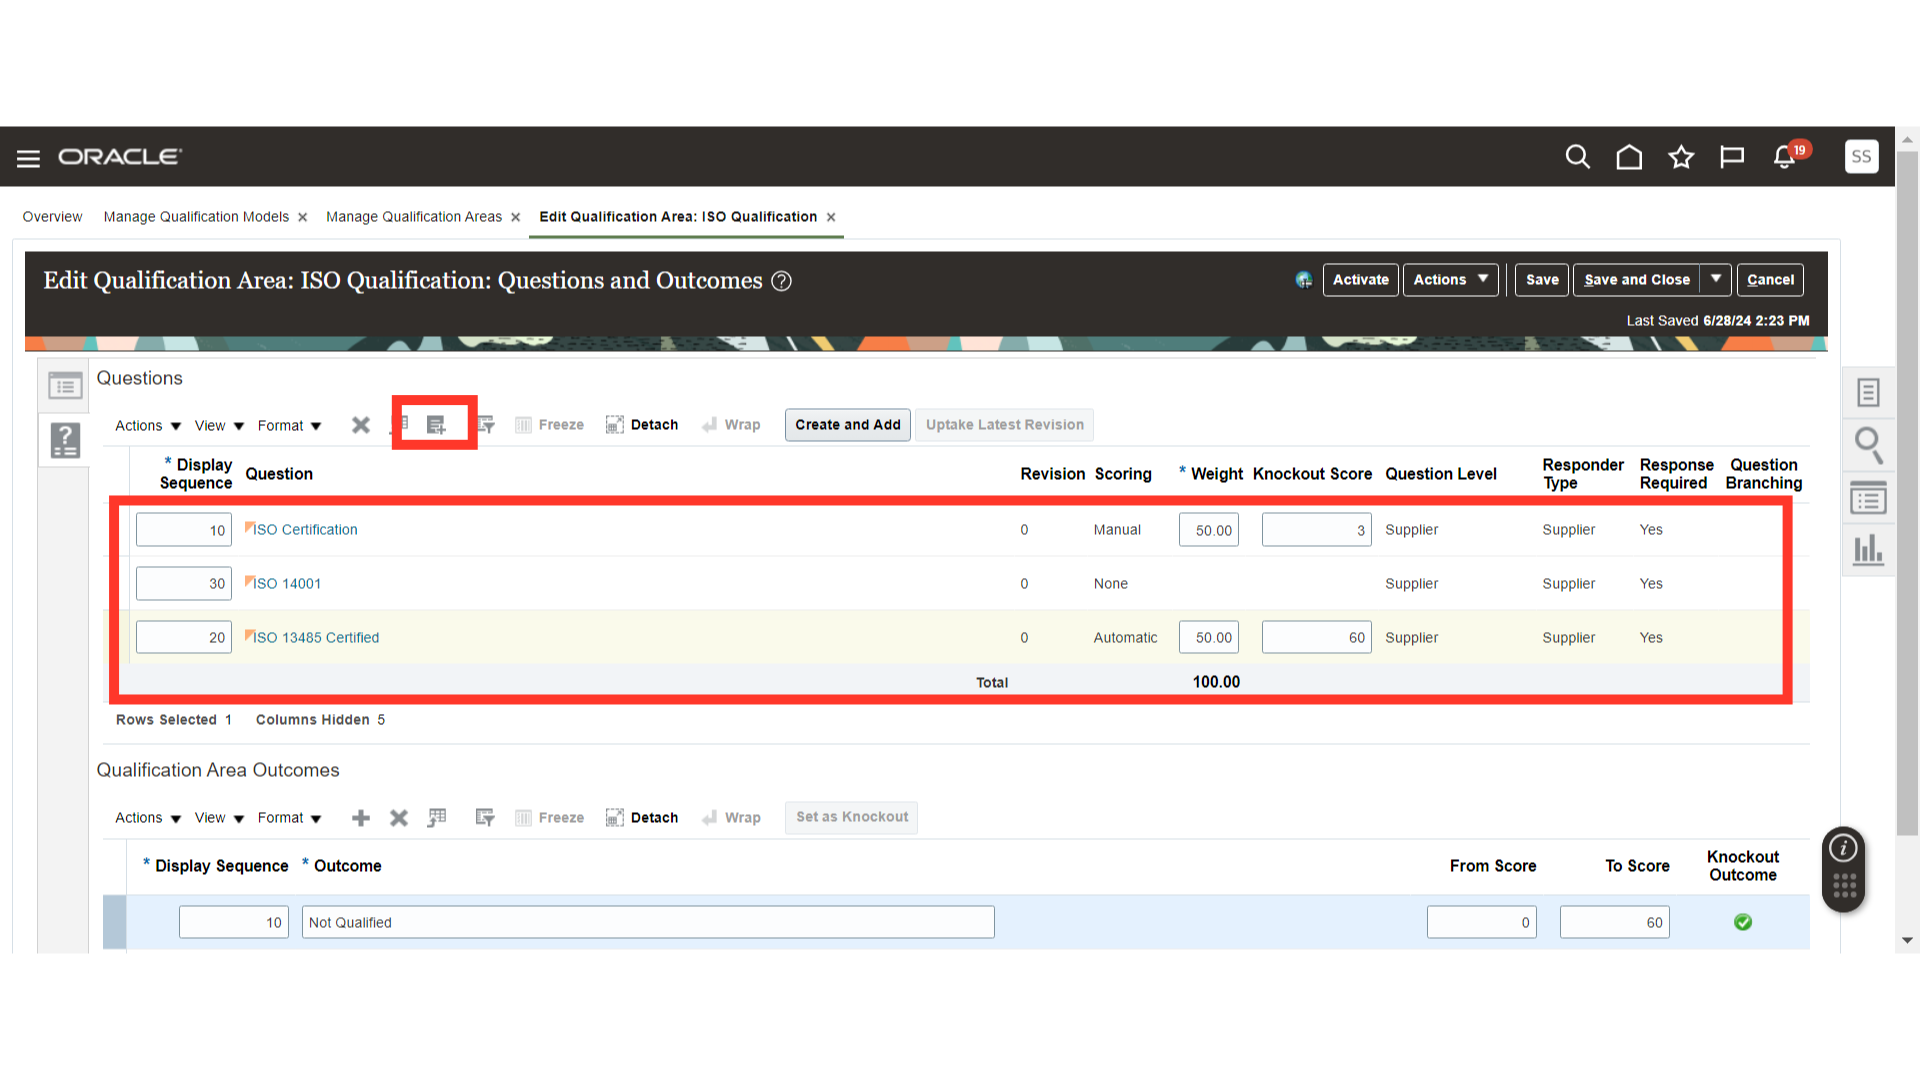
In Qualification Area Outcomes, click on the Plus icon to create the outcomes. Provide the Score Range for each result.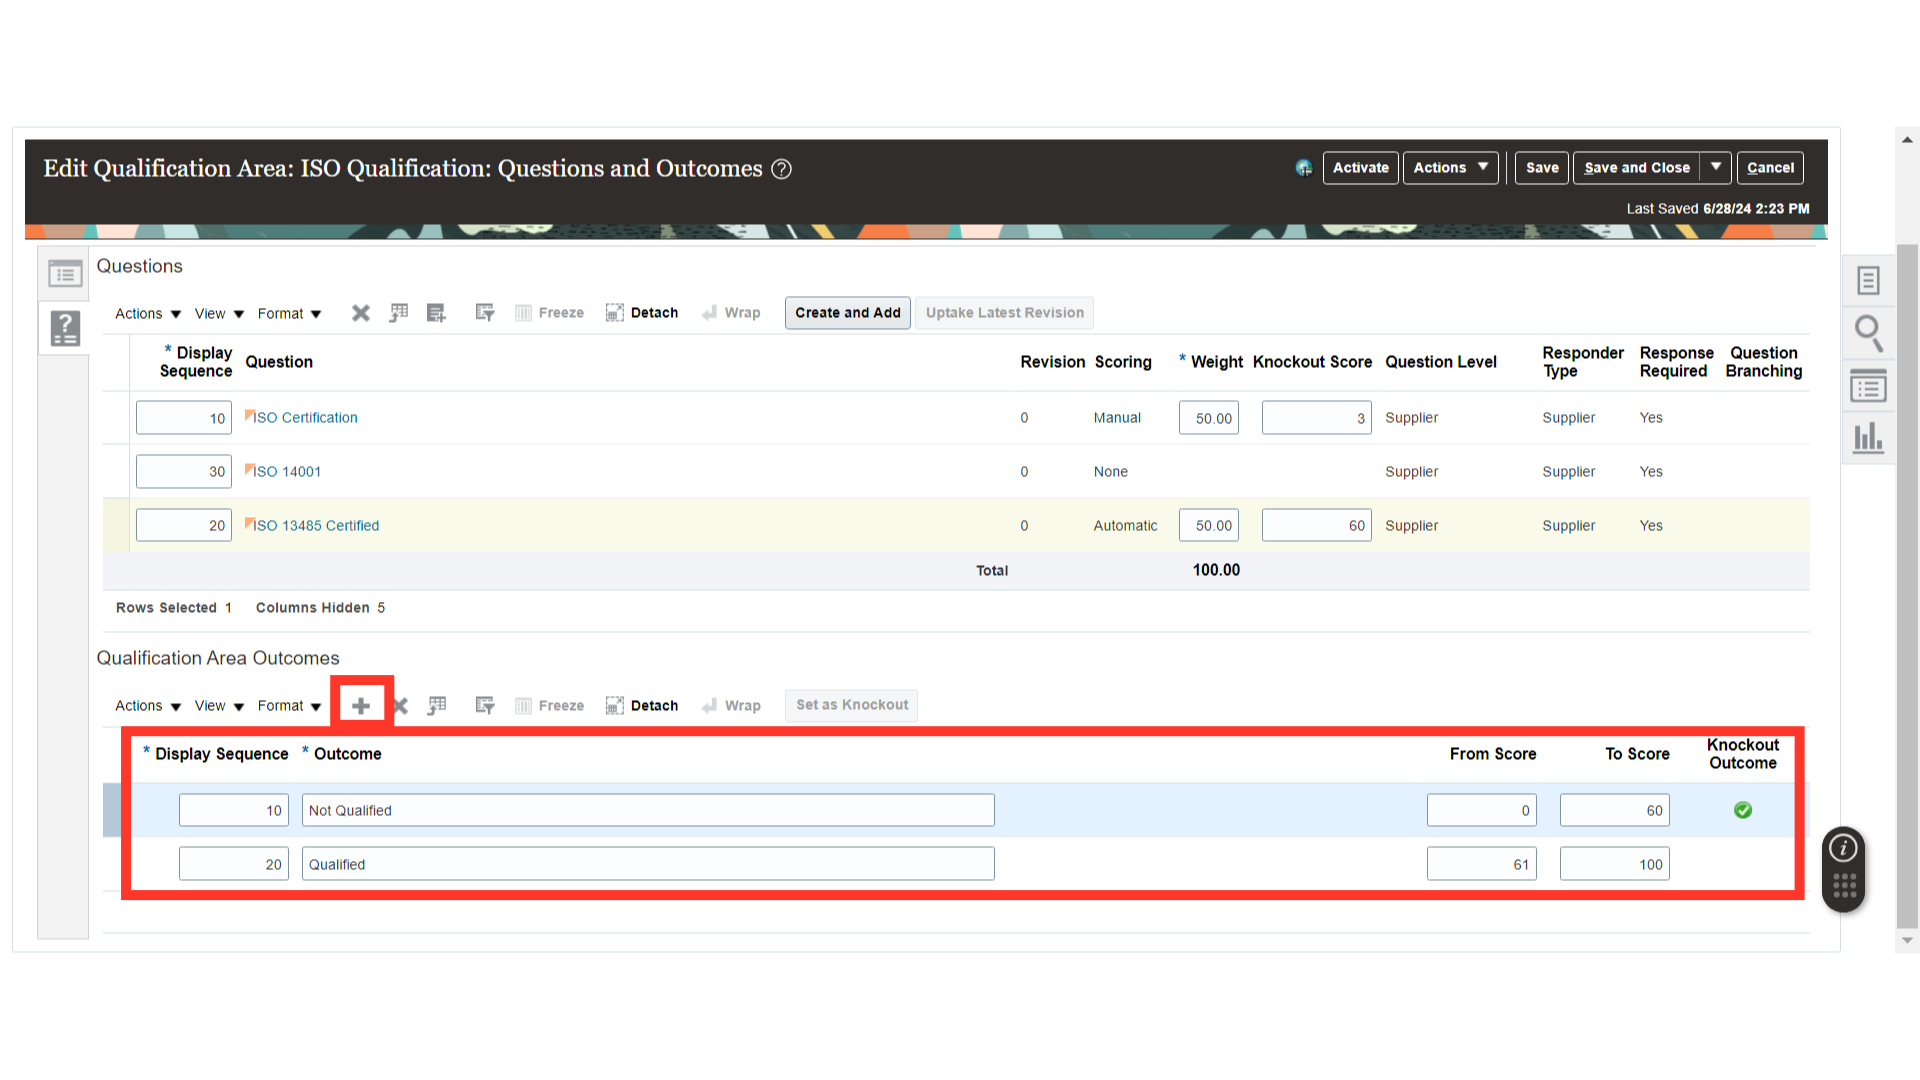
Select the line that should be used for the knockout and click on the Set a Knockout button.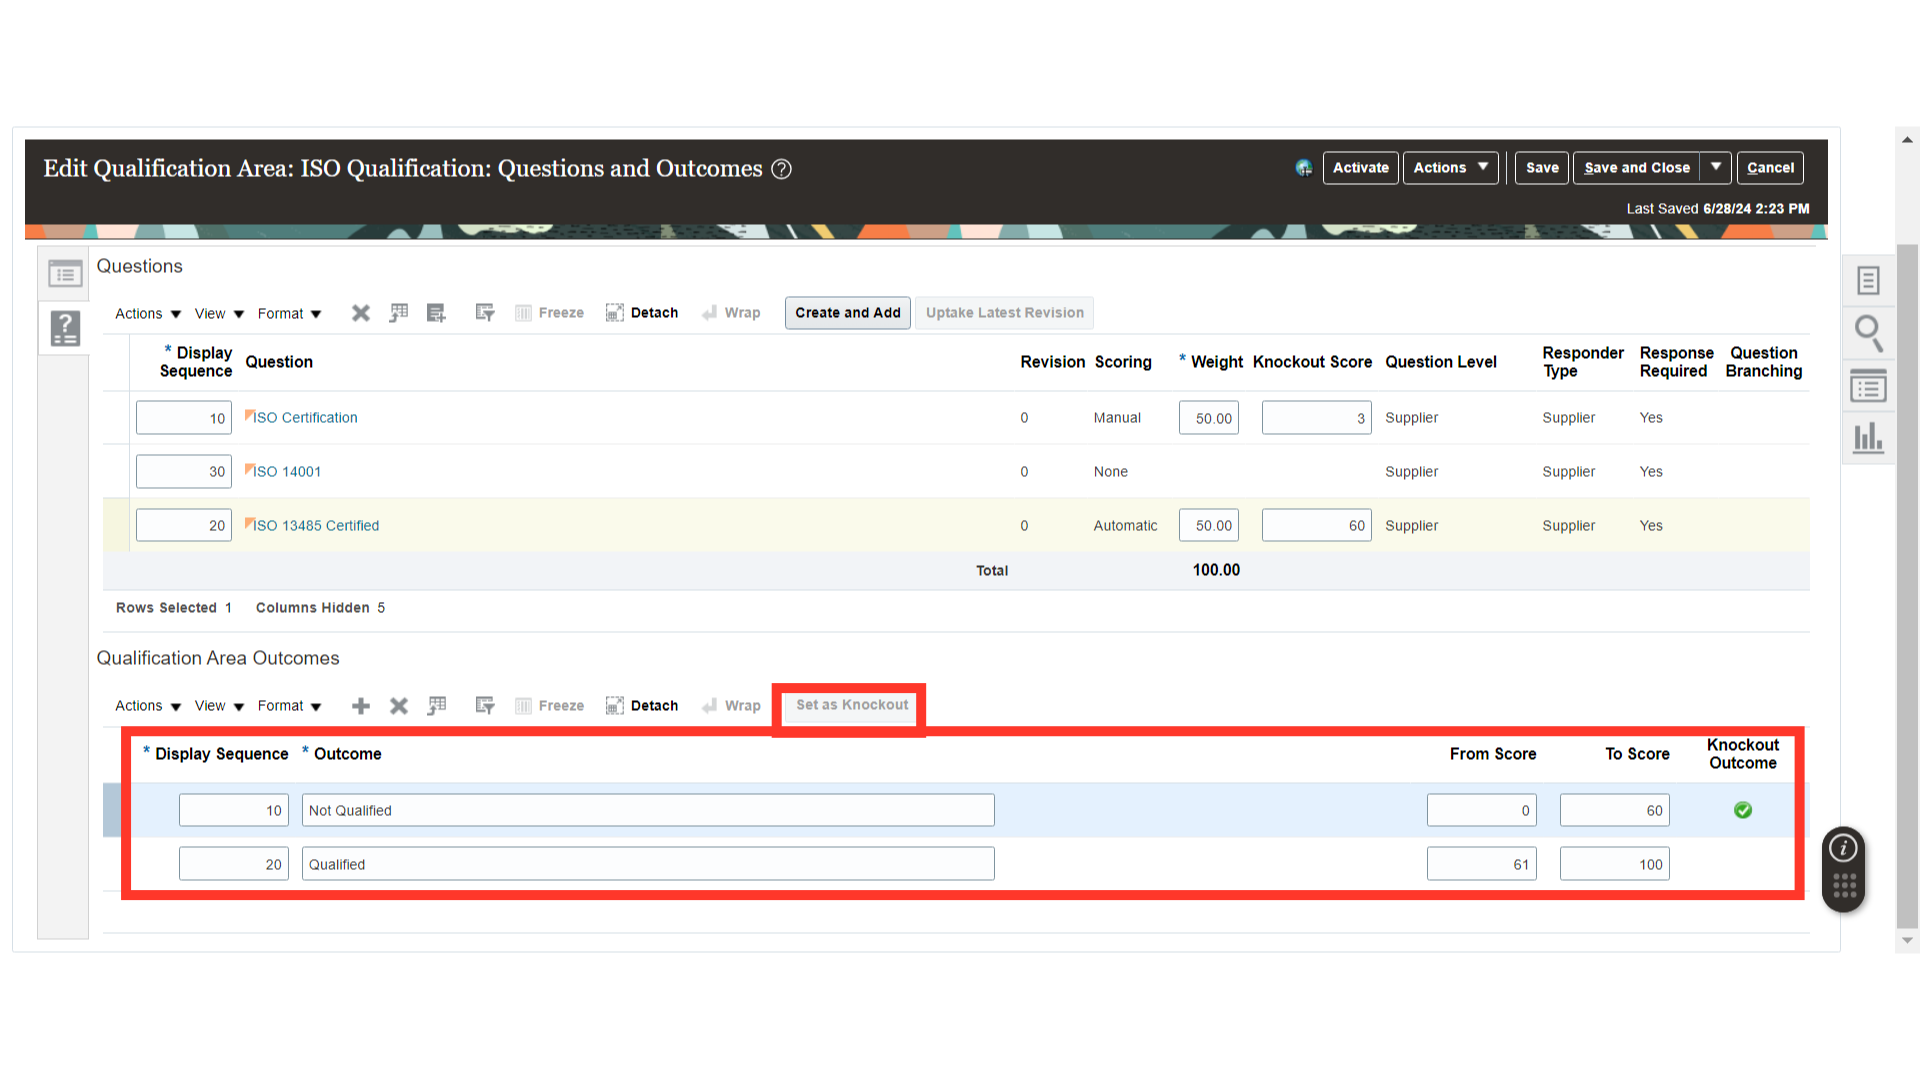
Once all the details are mentioned for the qualification area, click on the Save button.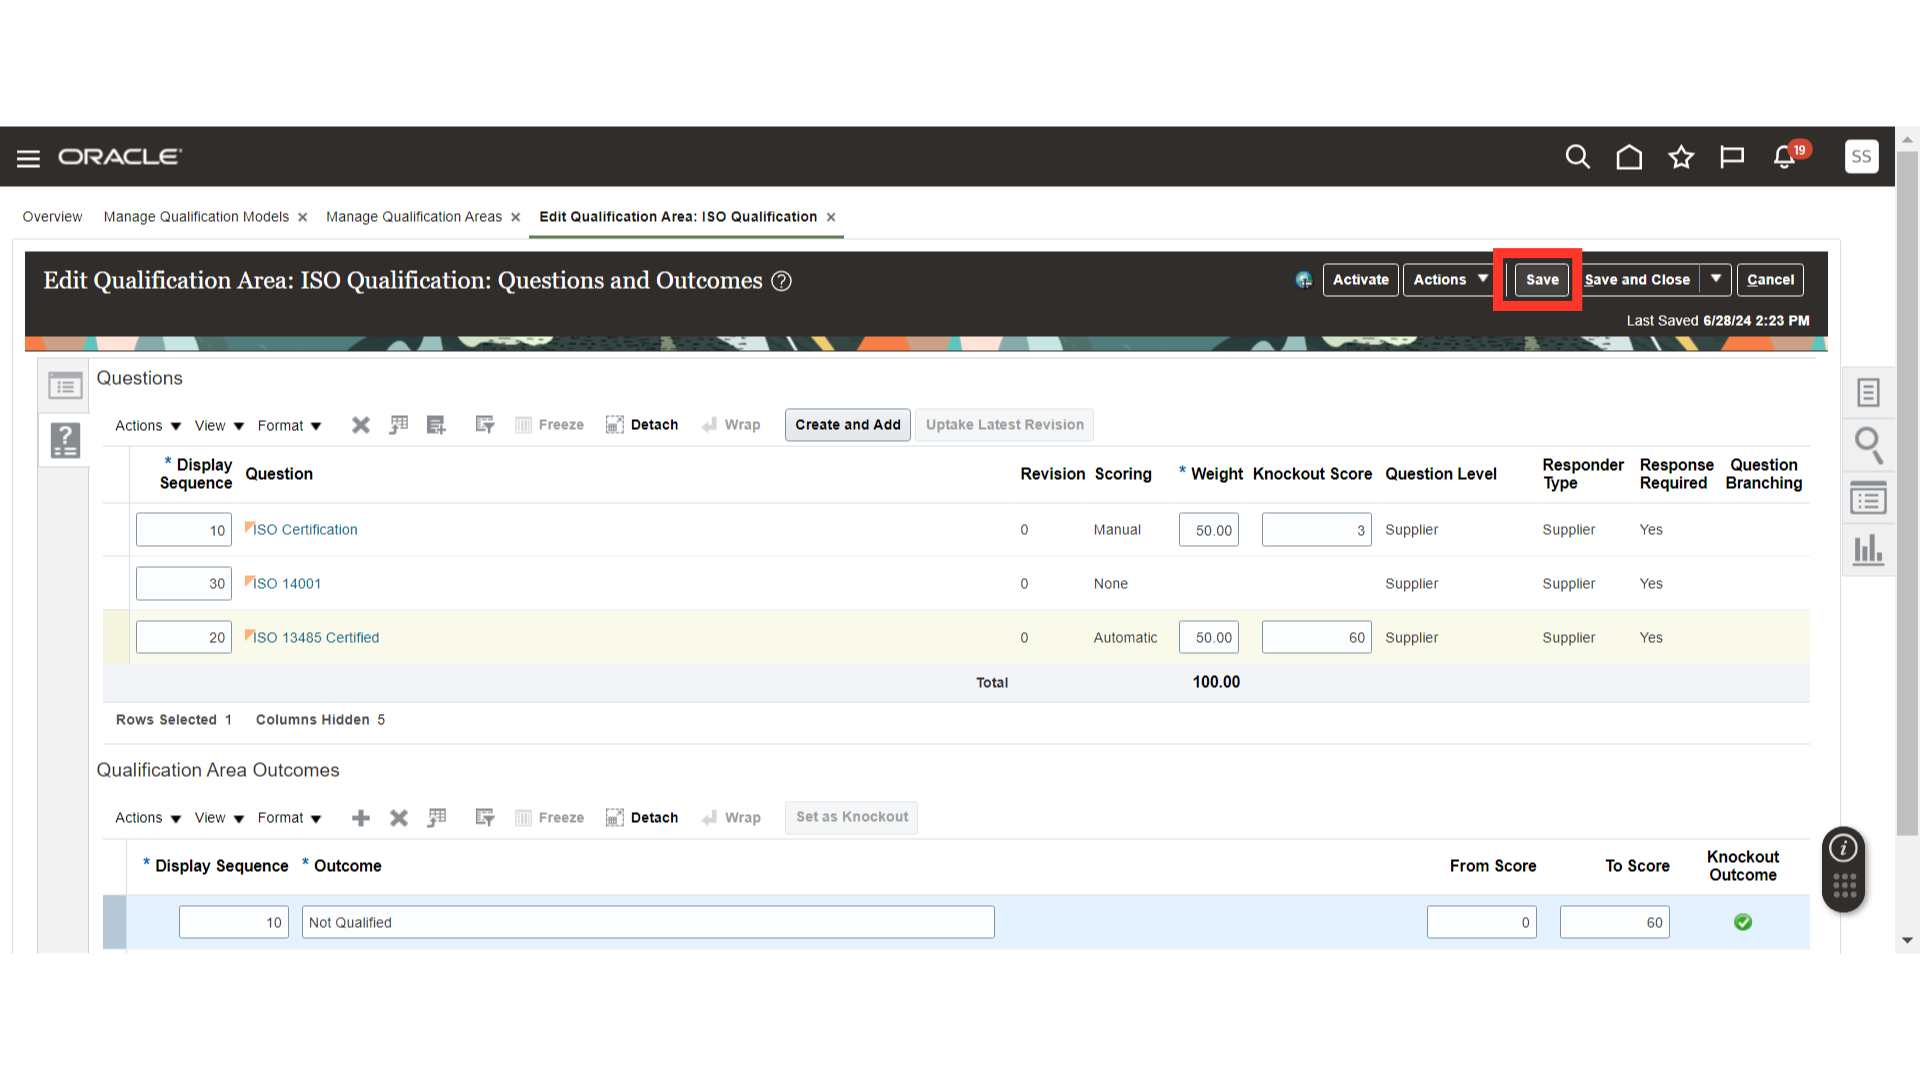
After saving, click on the Activate button to use the Qualification Area in Supplier Qualifications.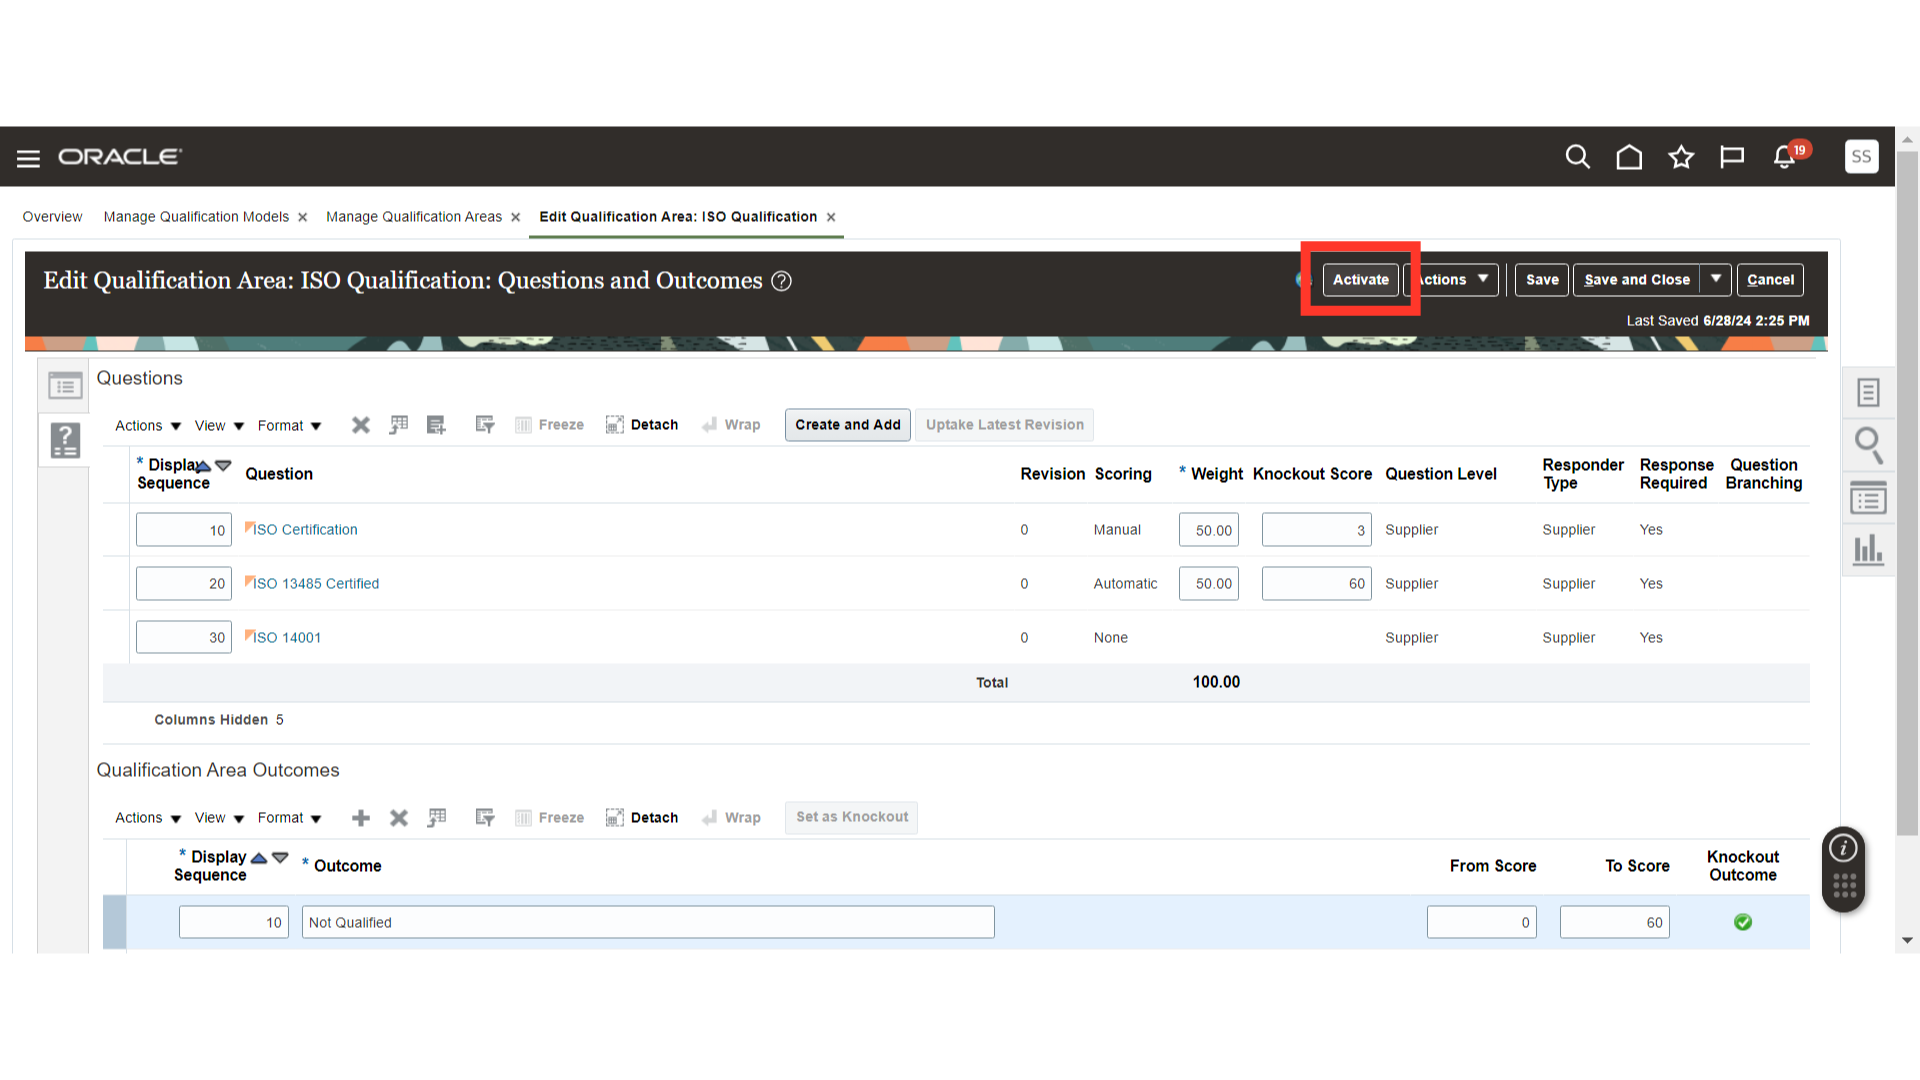
This guide covered navigating through the Manage Qualification Area in Oracle Fusion, including selecting questions, entering response outcomes, and finalizing changes with activation and saving. By following these instructions, users can efficiently create and manage qualification areas for Supplier Qualification.