Multi-Period Accounting
Multiperiod accounting enables you to create accounting entries across more than one accounting period for a single accounting event. This guide will take you step-by-step through the entire process of creating an invoice for a multiperiod expense and creating an accounting entry for it.
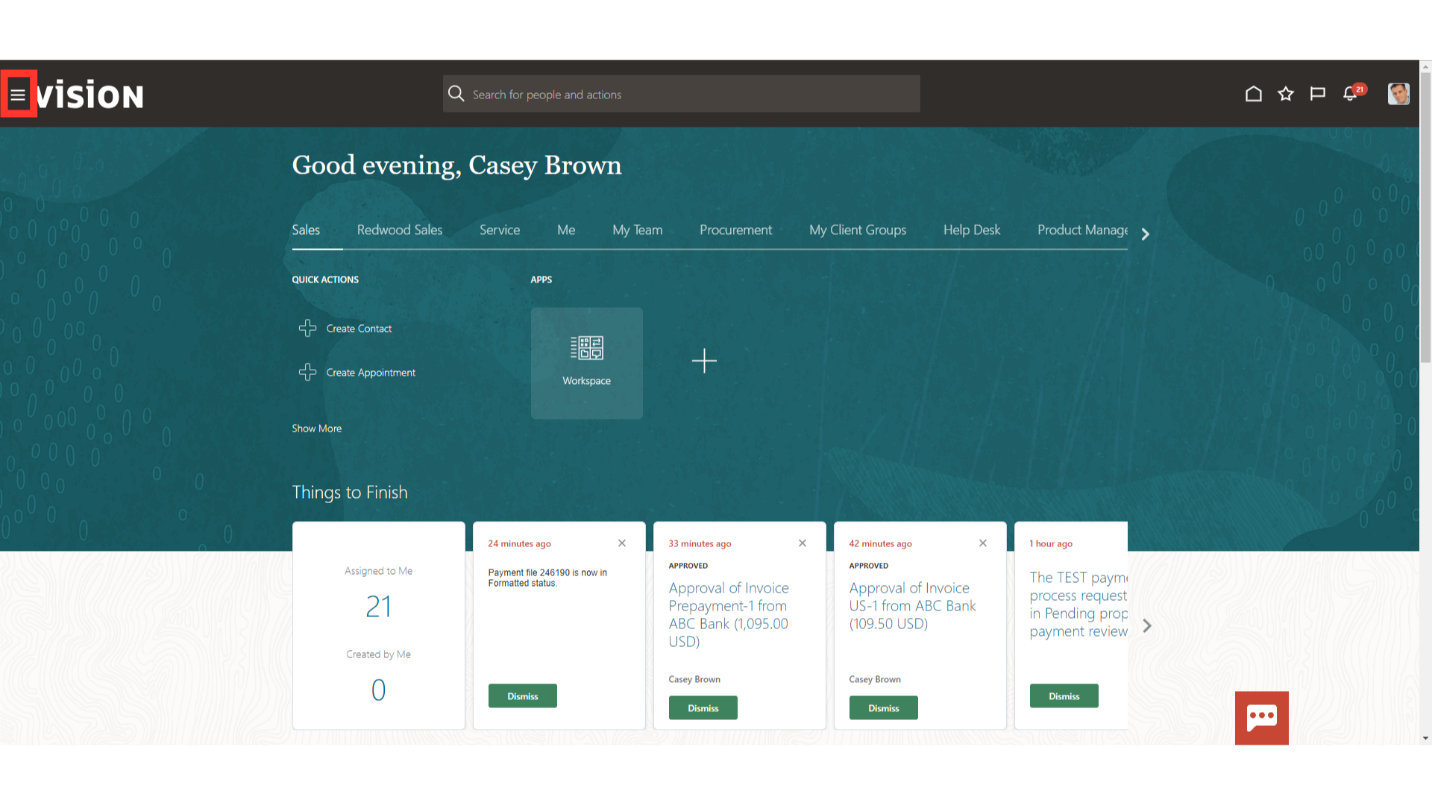
Click on the Navigator icon to access the Payables module.
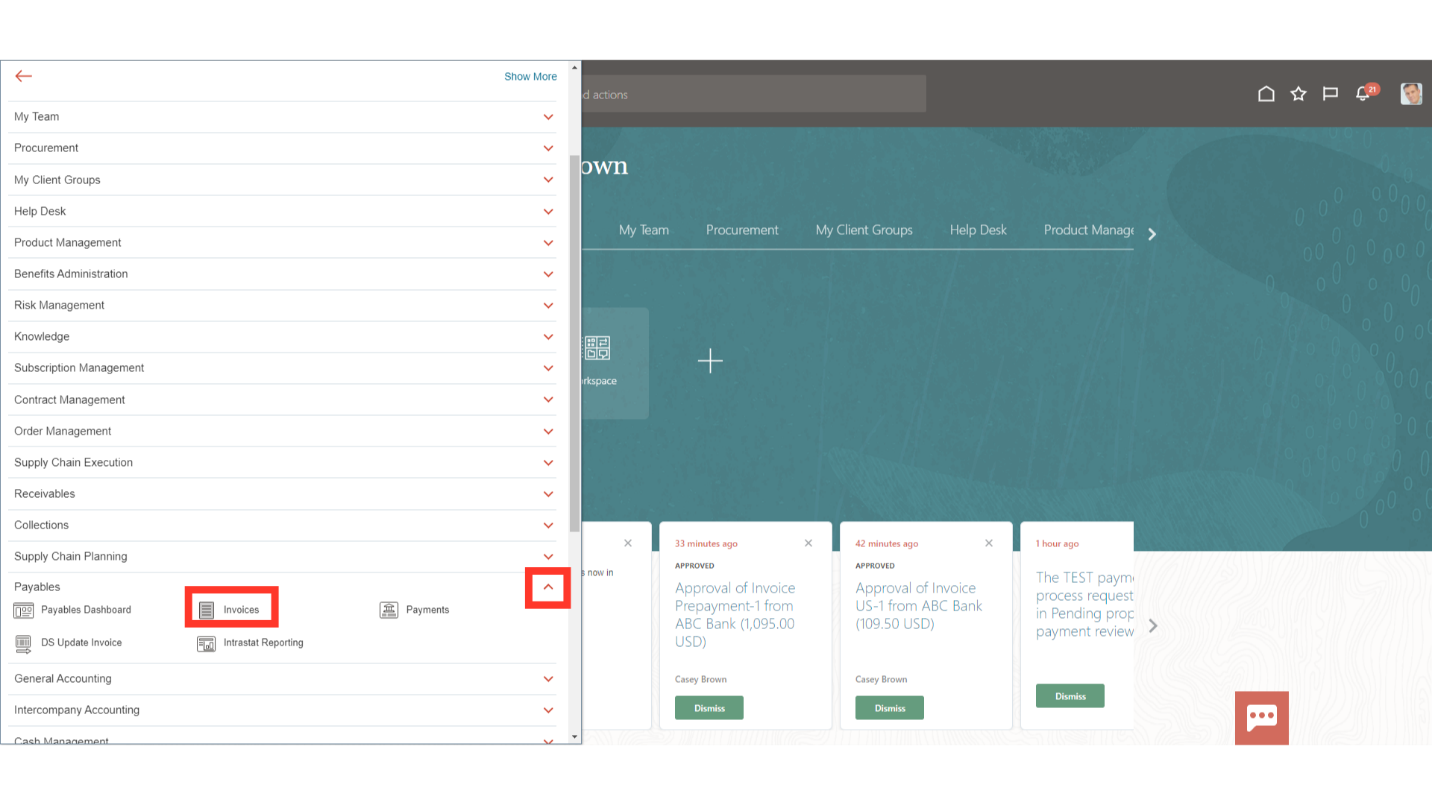
Click on the “Invoices” sub module by expanding the “Payables” module.
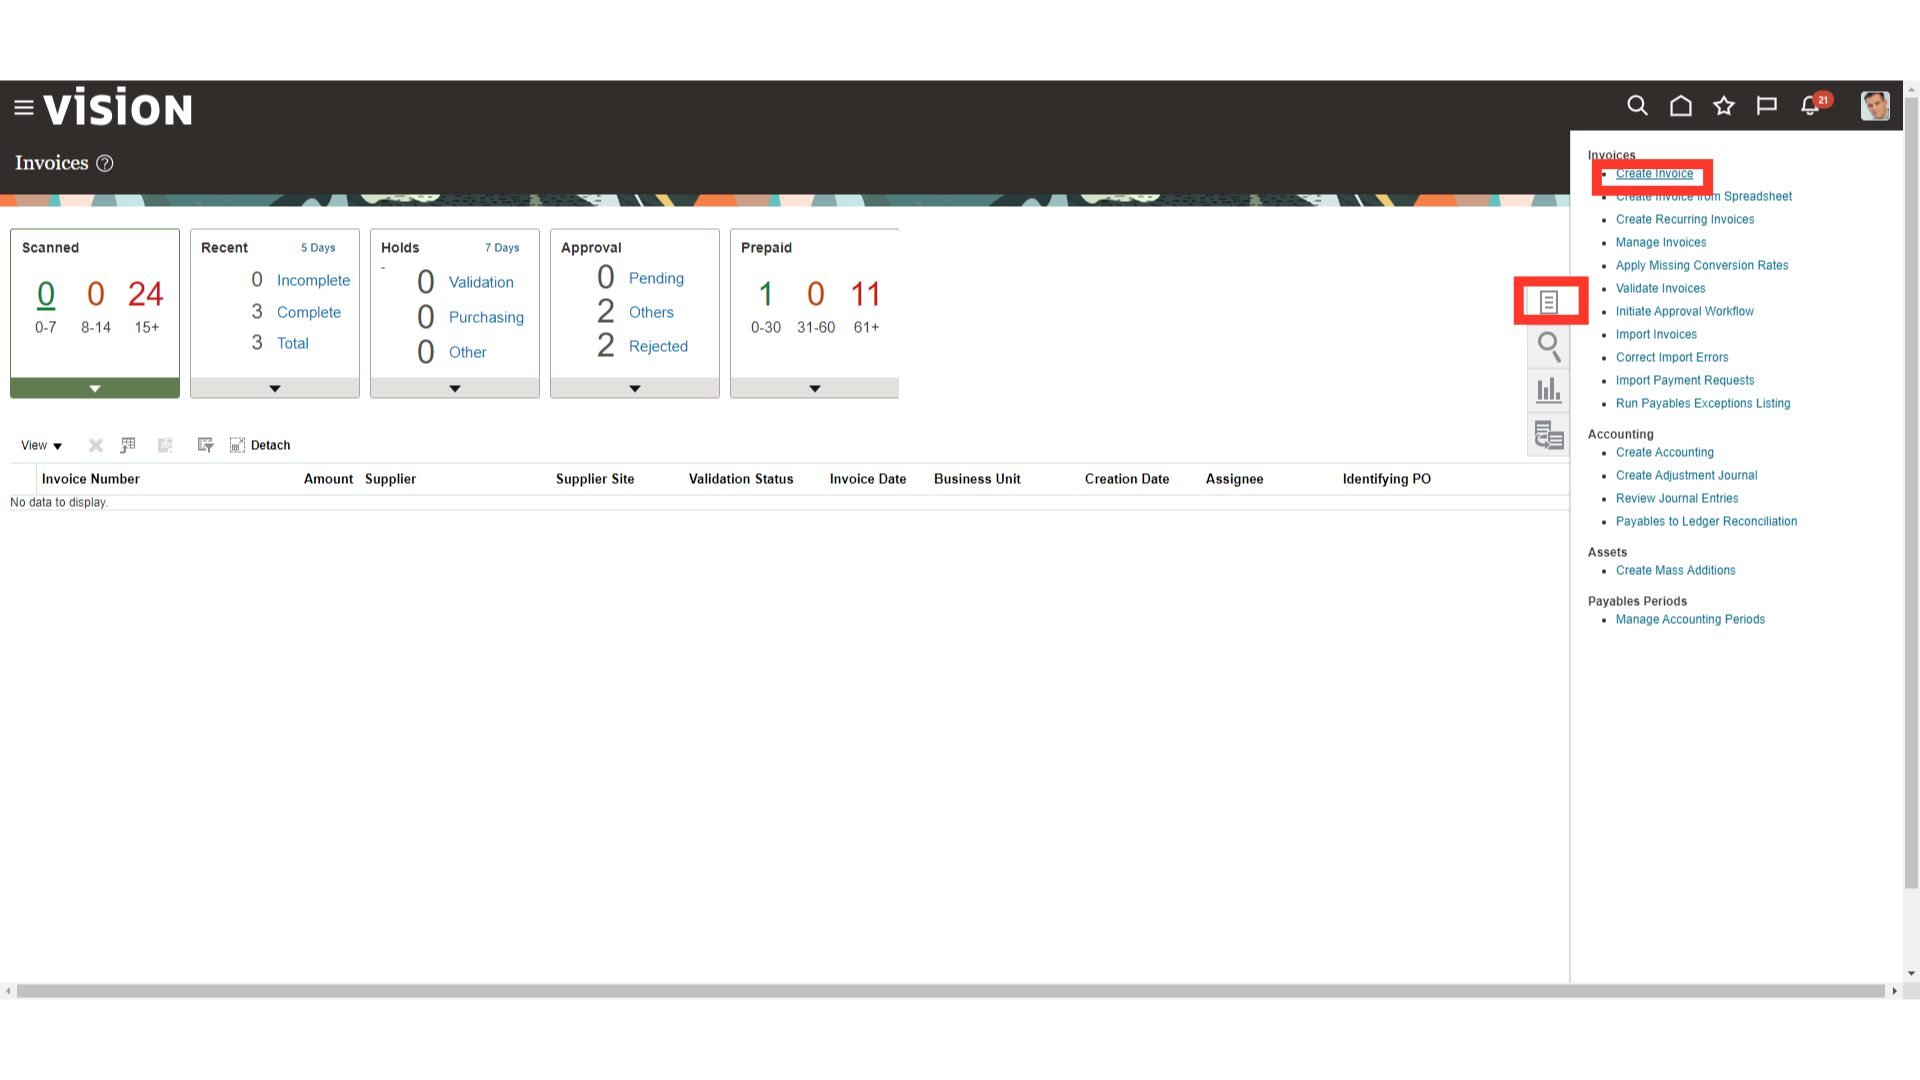
Once you land into the Invoice workarea, select the “Create Invoice” option from the Task list for recording the invoice.
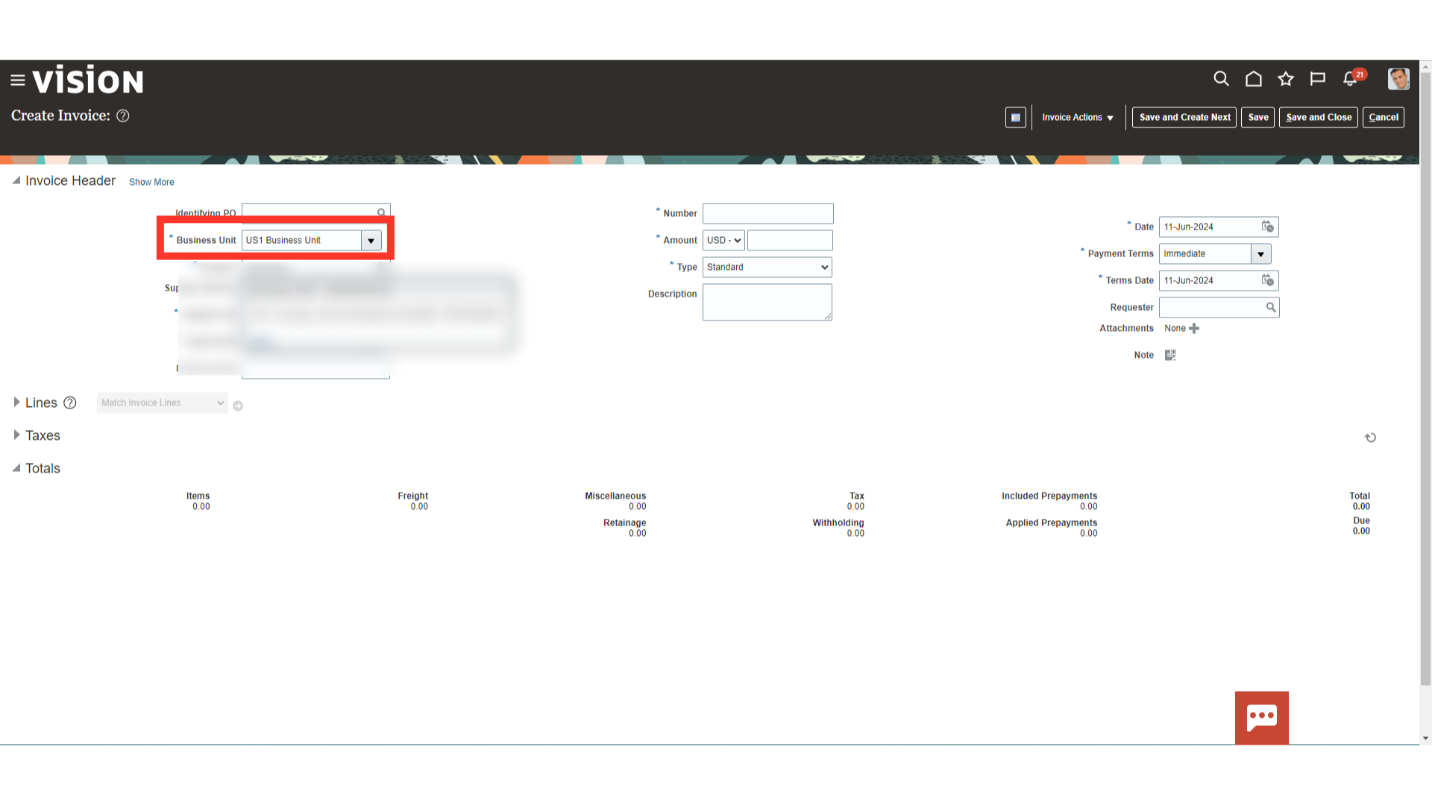
Select the Business unit for whose invoice payments to be created. Here for demo purpose, we have selected the US1 Business unit.
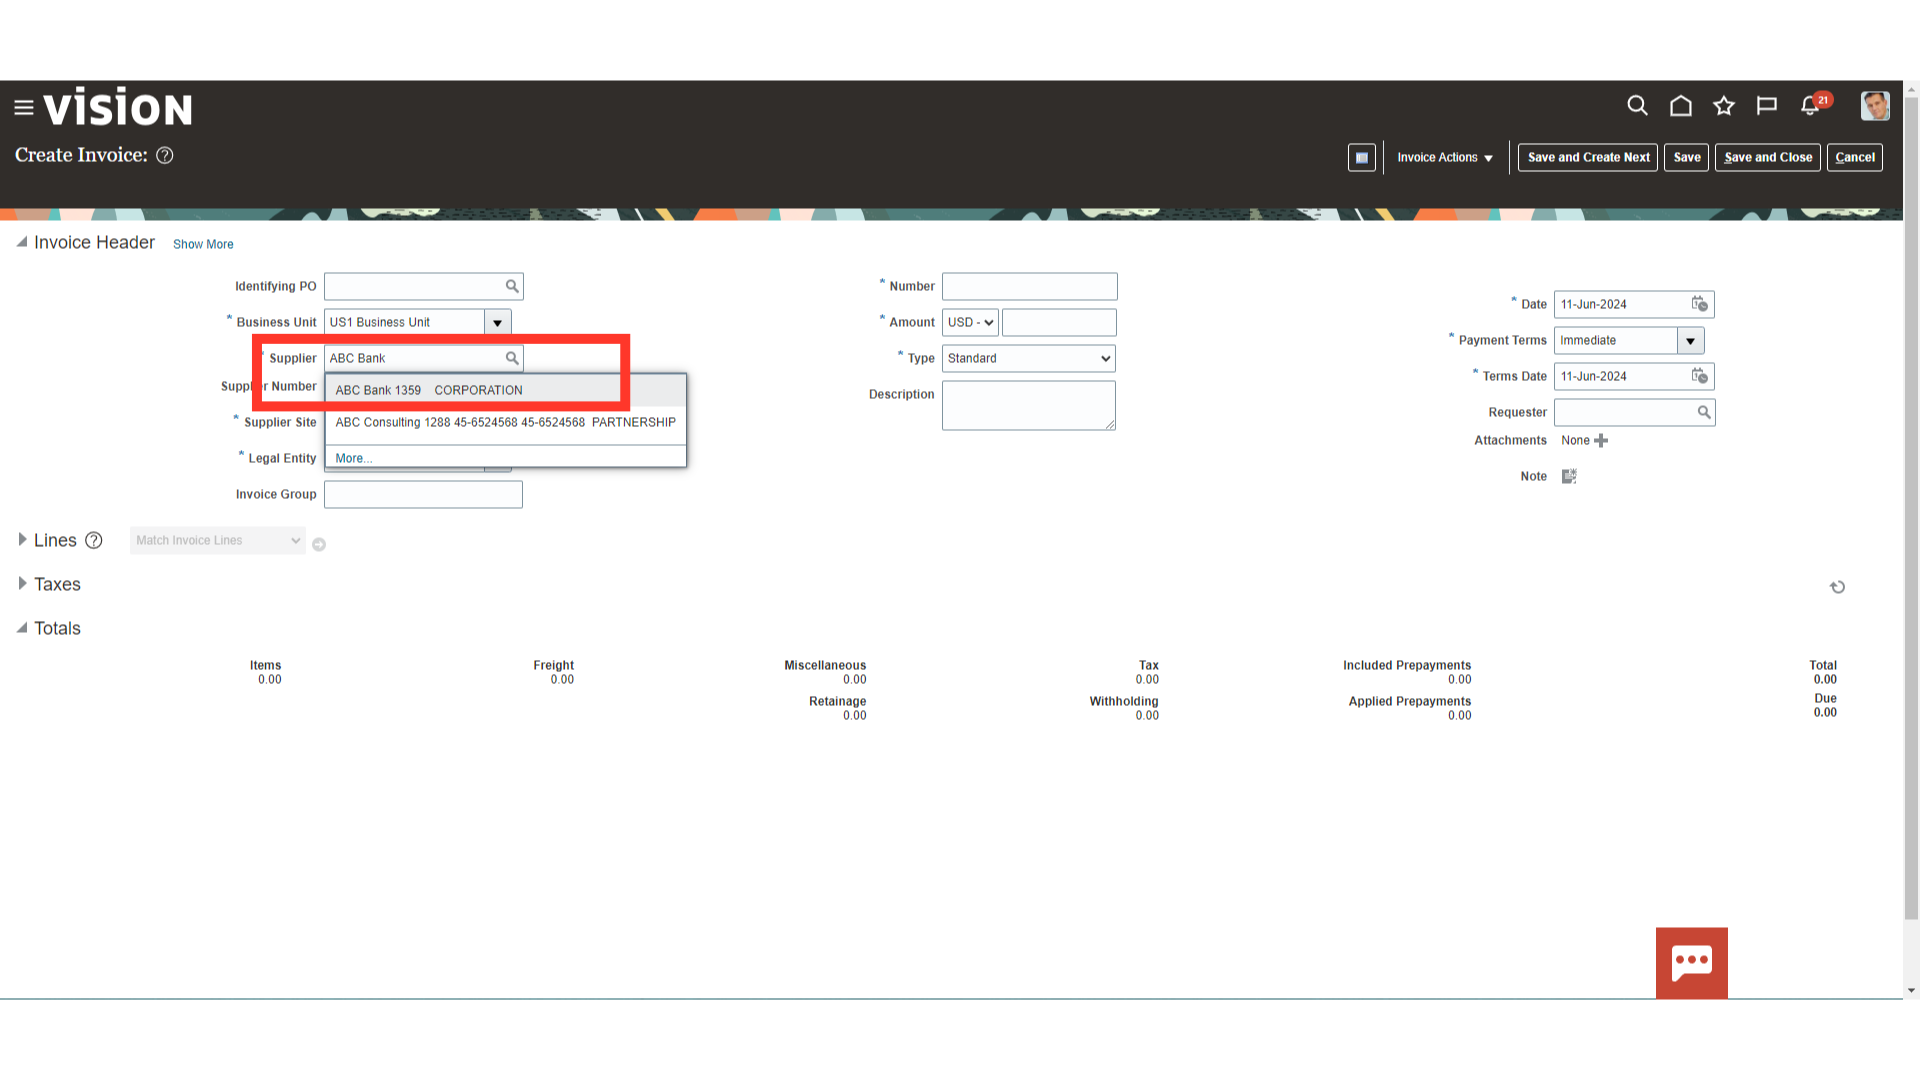
Once done, enter the Supplier for this invoice by entering the supplier’s name or by searching and selecting the supplier’s name by clicking on magnifying lens.
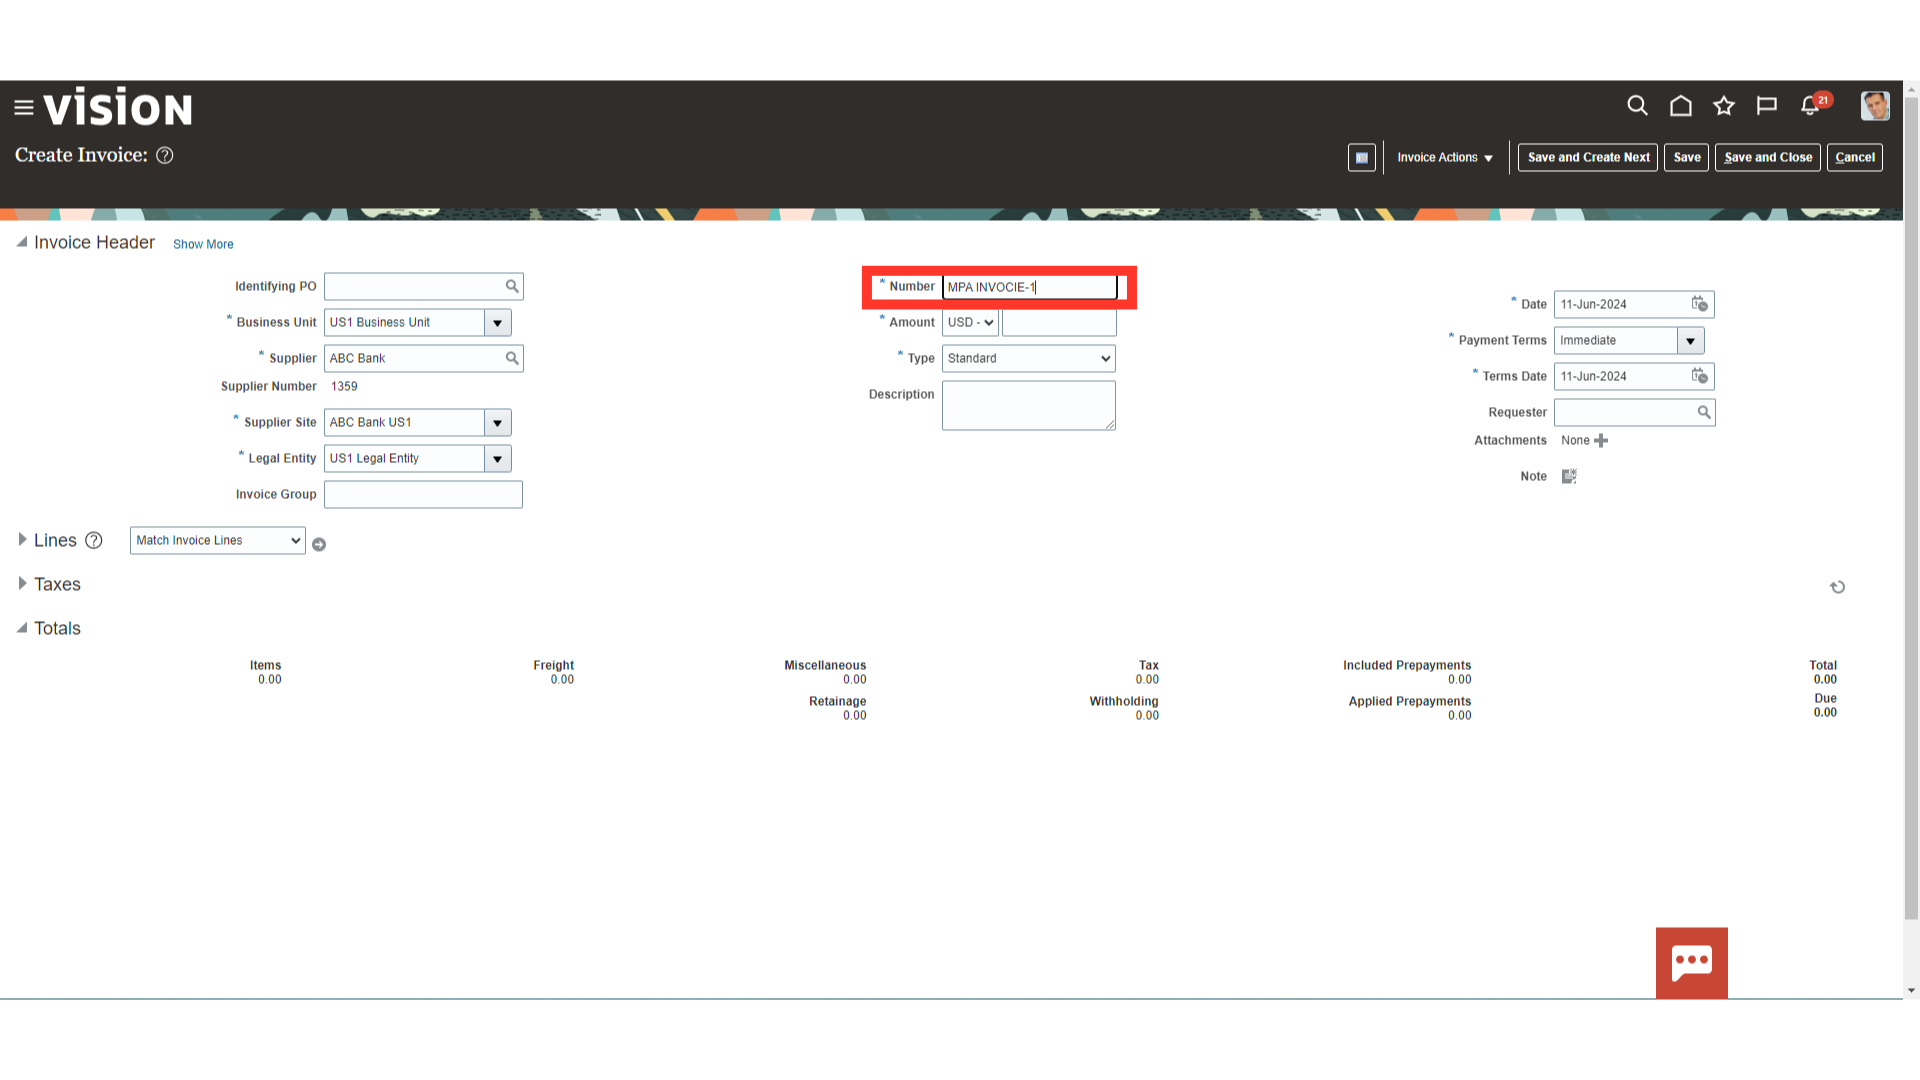
Enter the Invoice number from the Invoice copy received from the supplier.
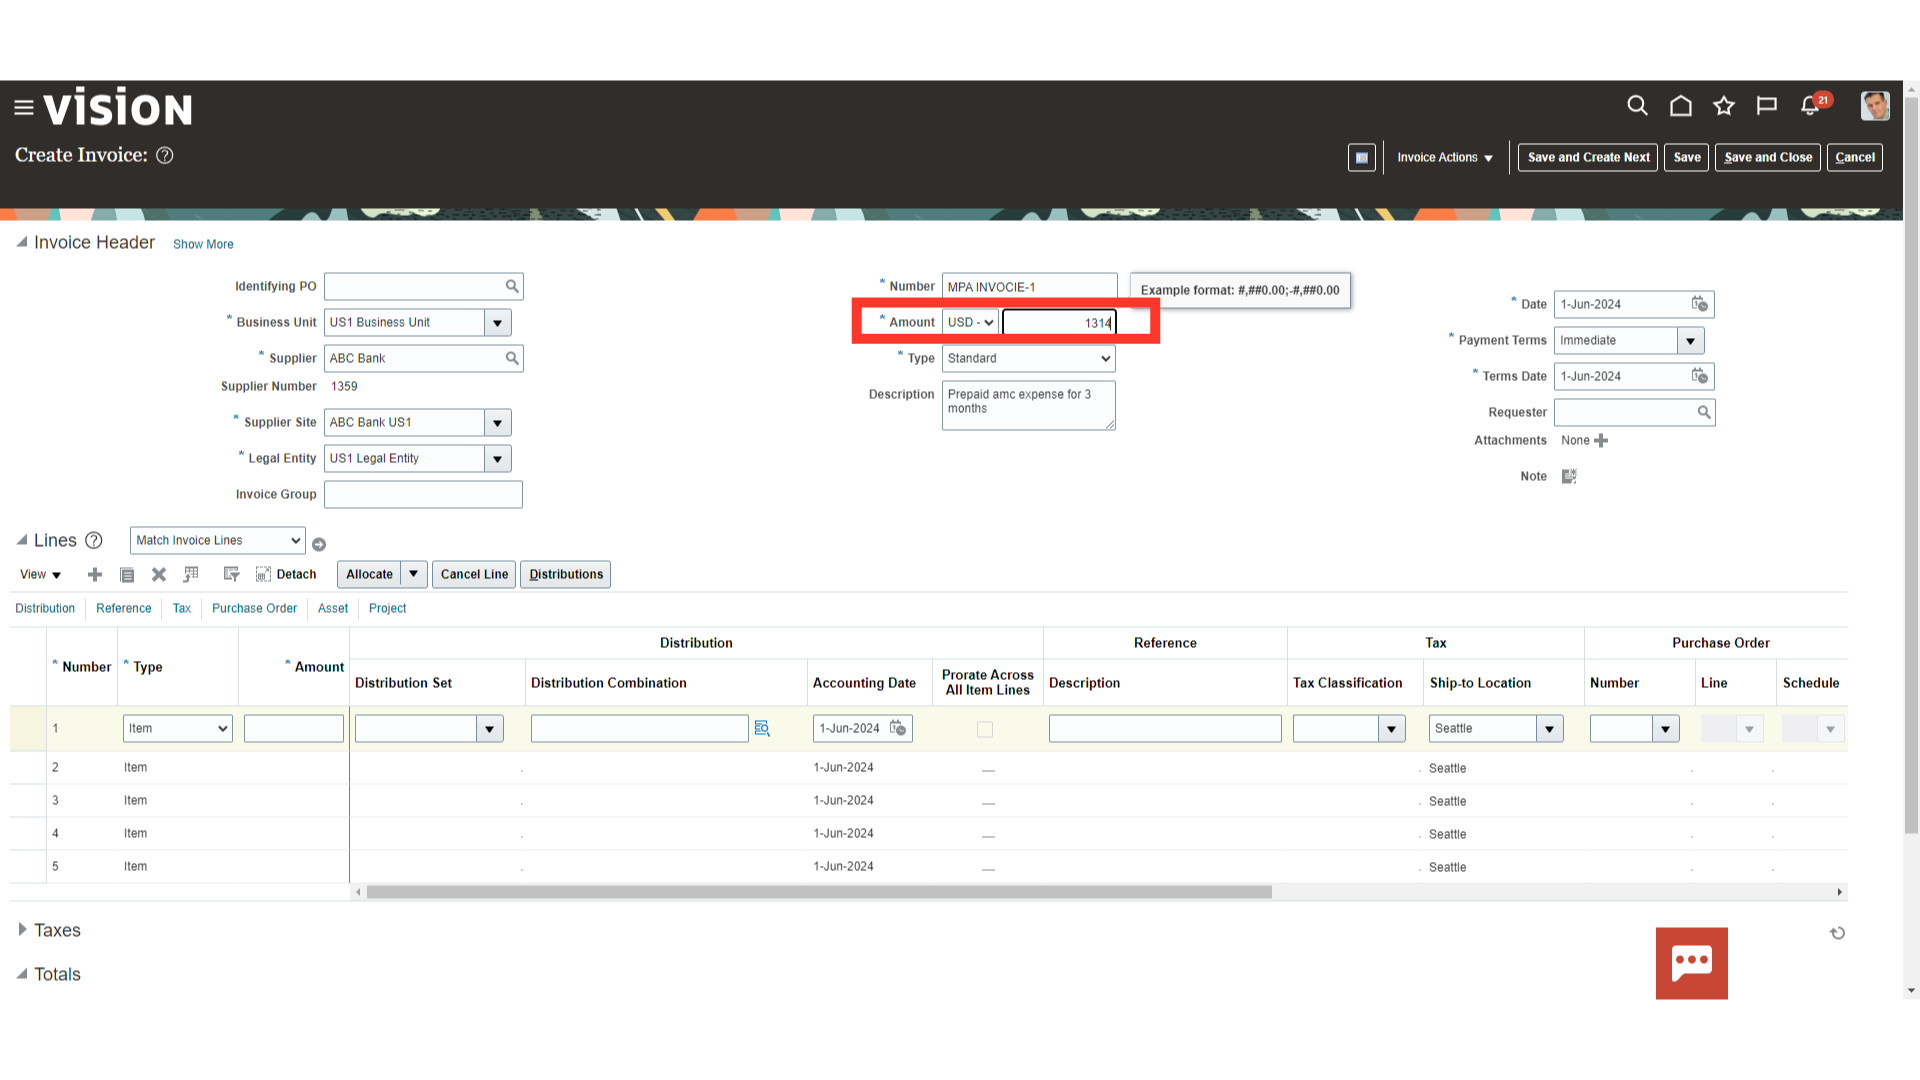
Enter the total invoice amount including tax amount in the Amount field. Also, select the currency in which the invoice needs to be created.
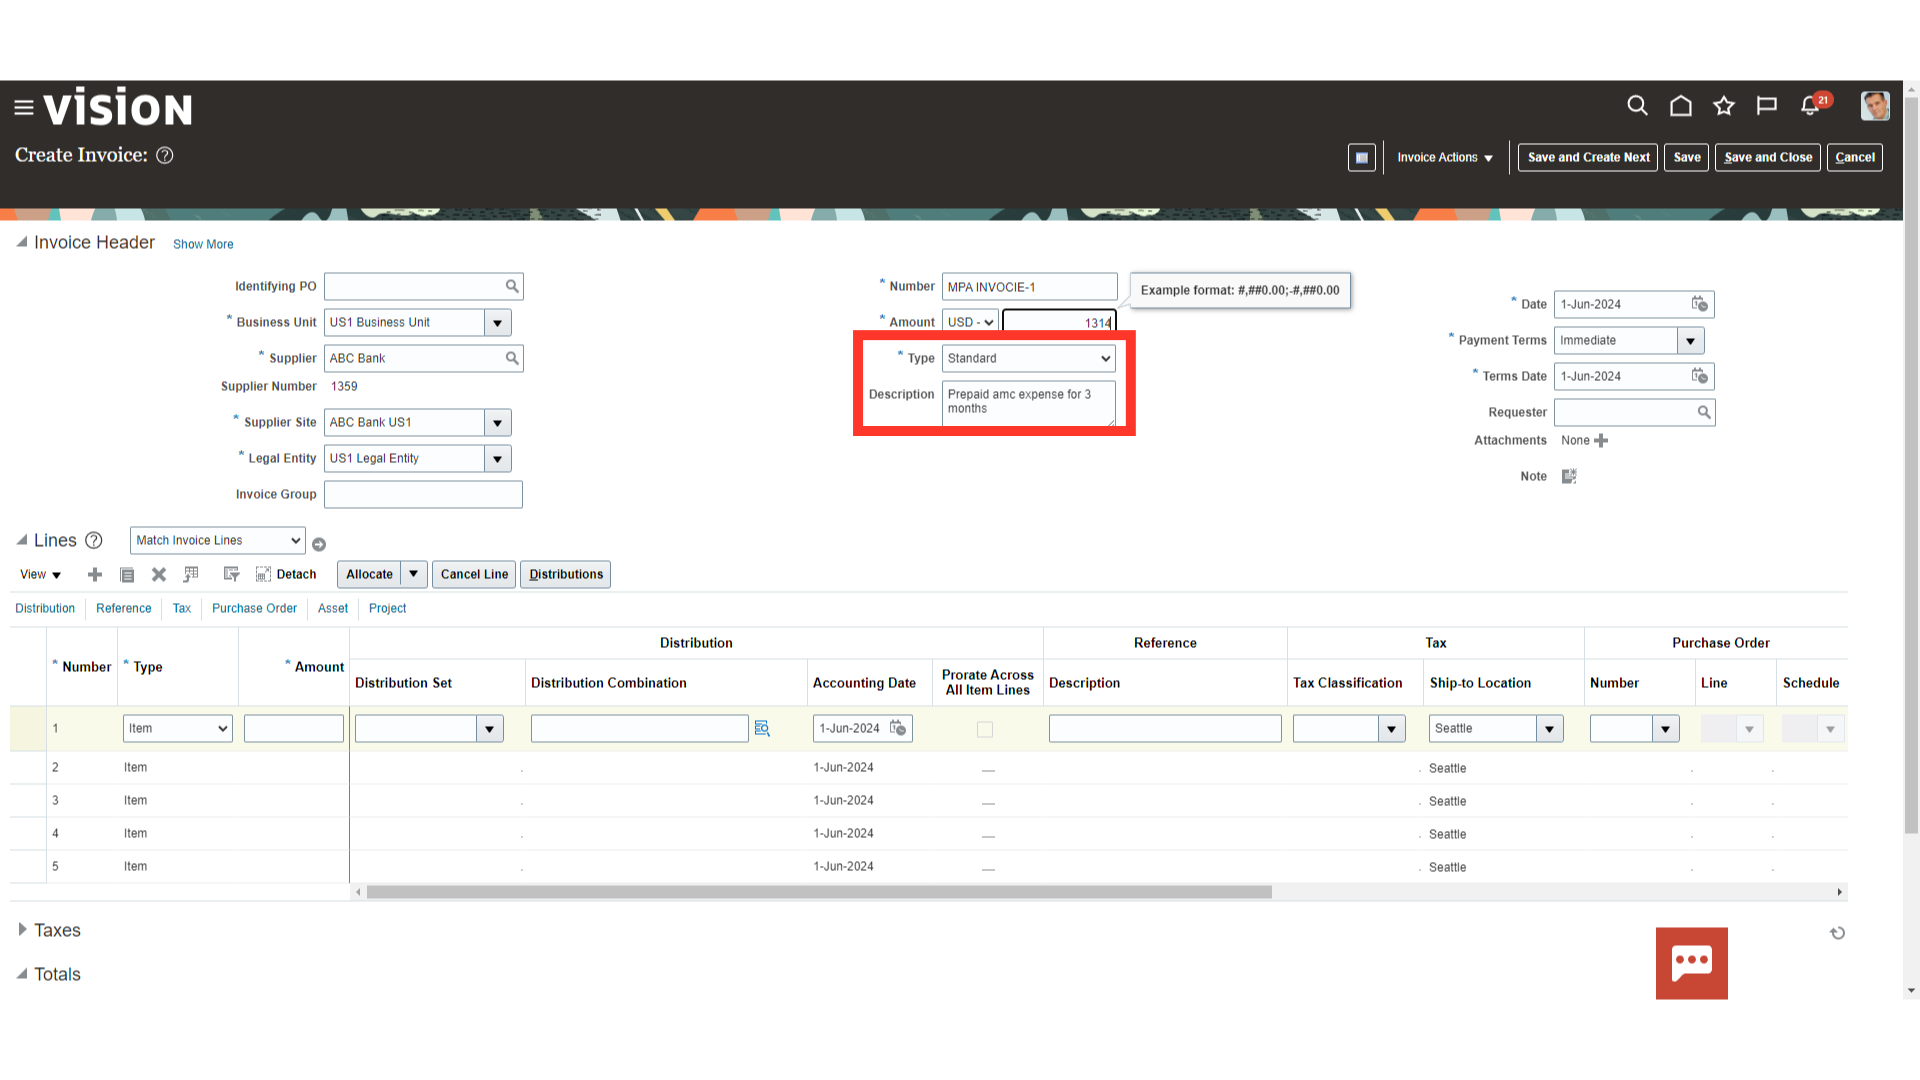
Select the Invoice type as “Standard” and enter any additional information in the description field.
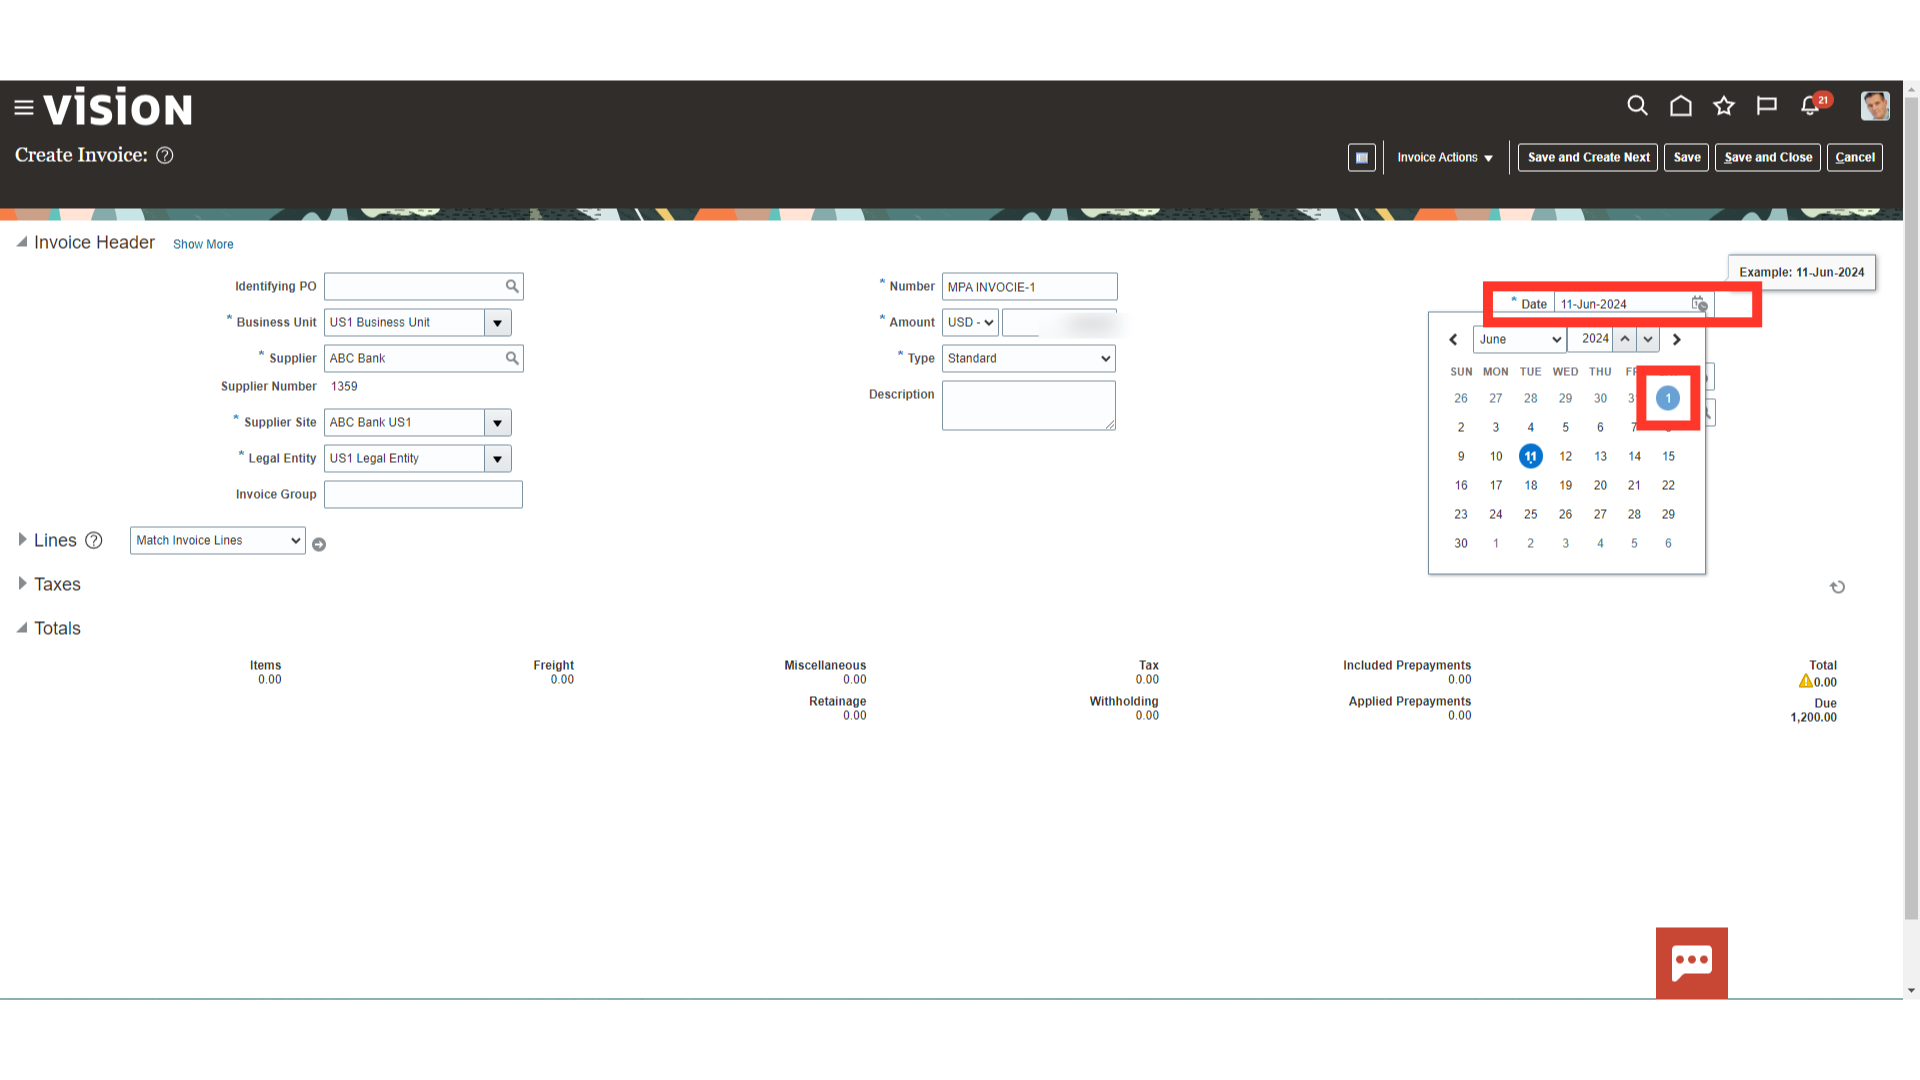
Current system date is defaulted as the “Invoice date”, you can change the date manually or by selecting date from the calendar.
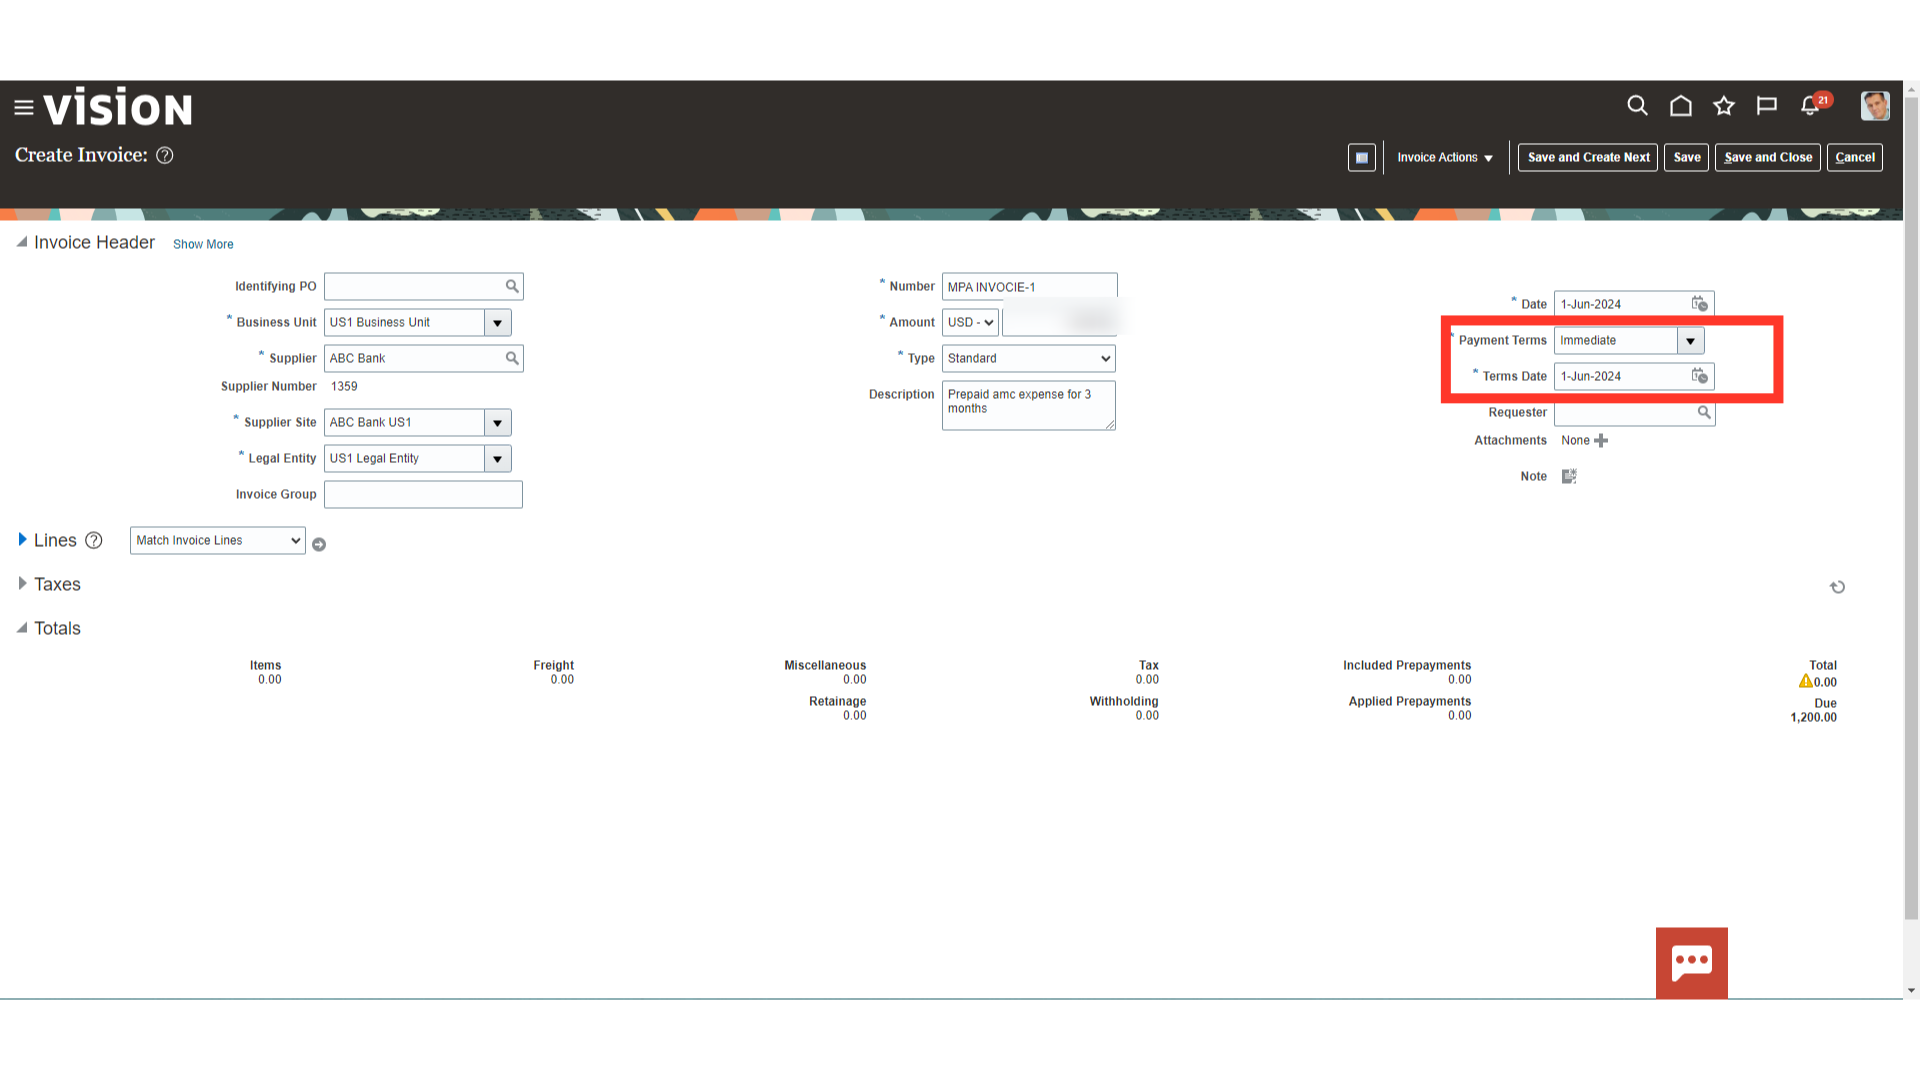
Payment terms is defaulted from the Invoice options if nothing is configured at the supplier level. Whereas the Terms date is calculated based on the Payment terms.
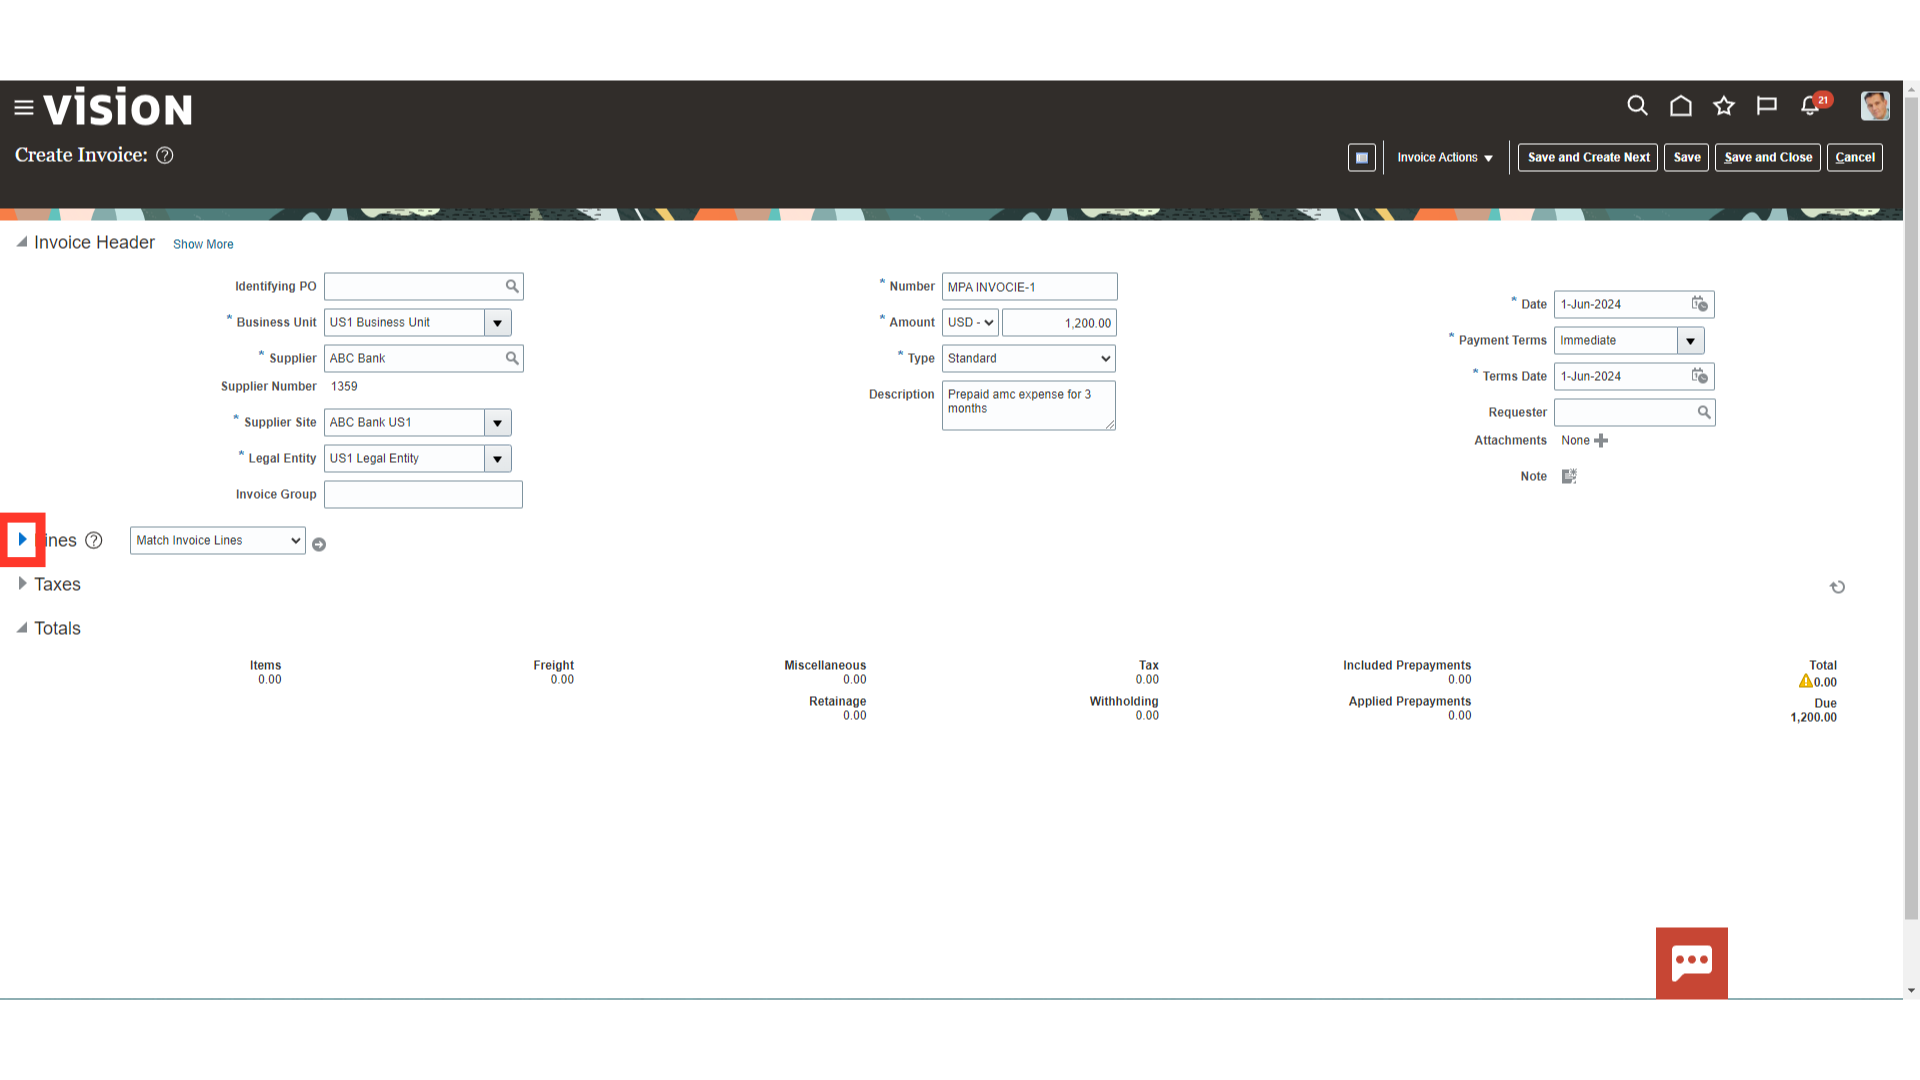
Expand the lines section to enter the invoice lines and distribution details.
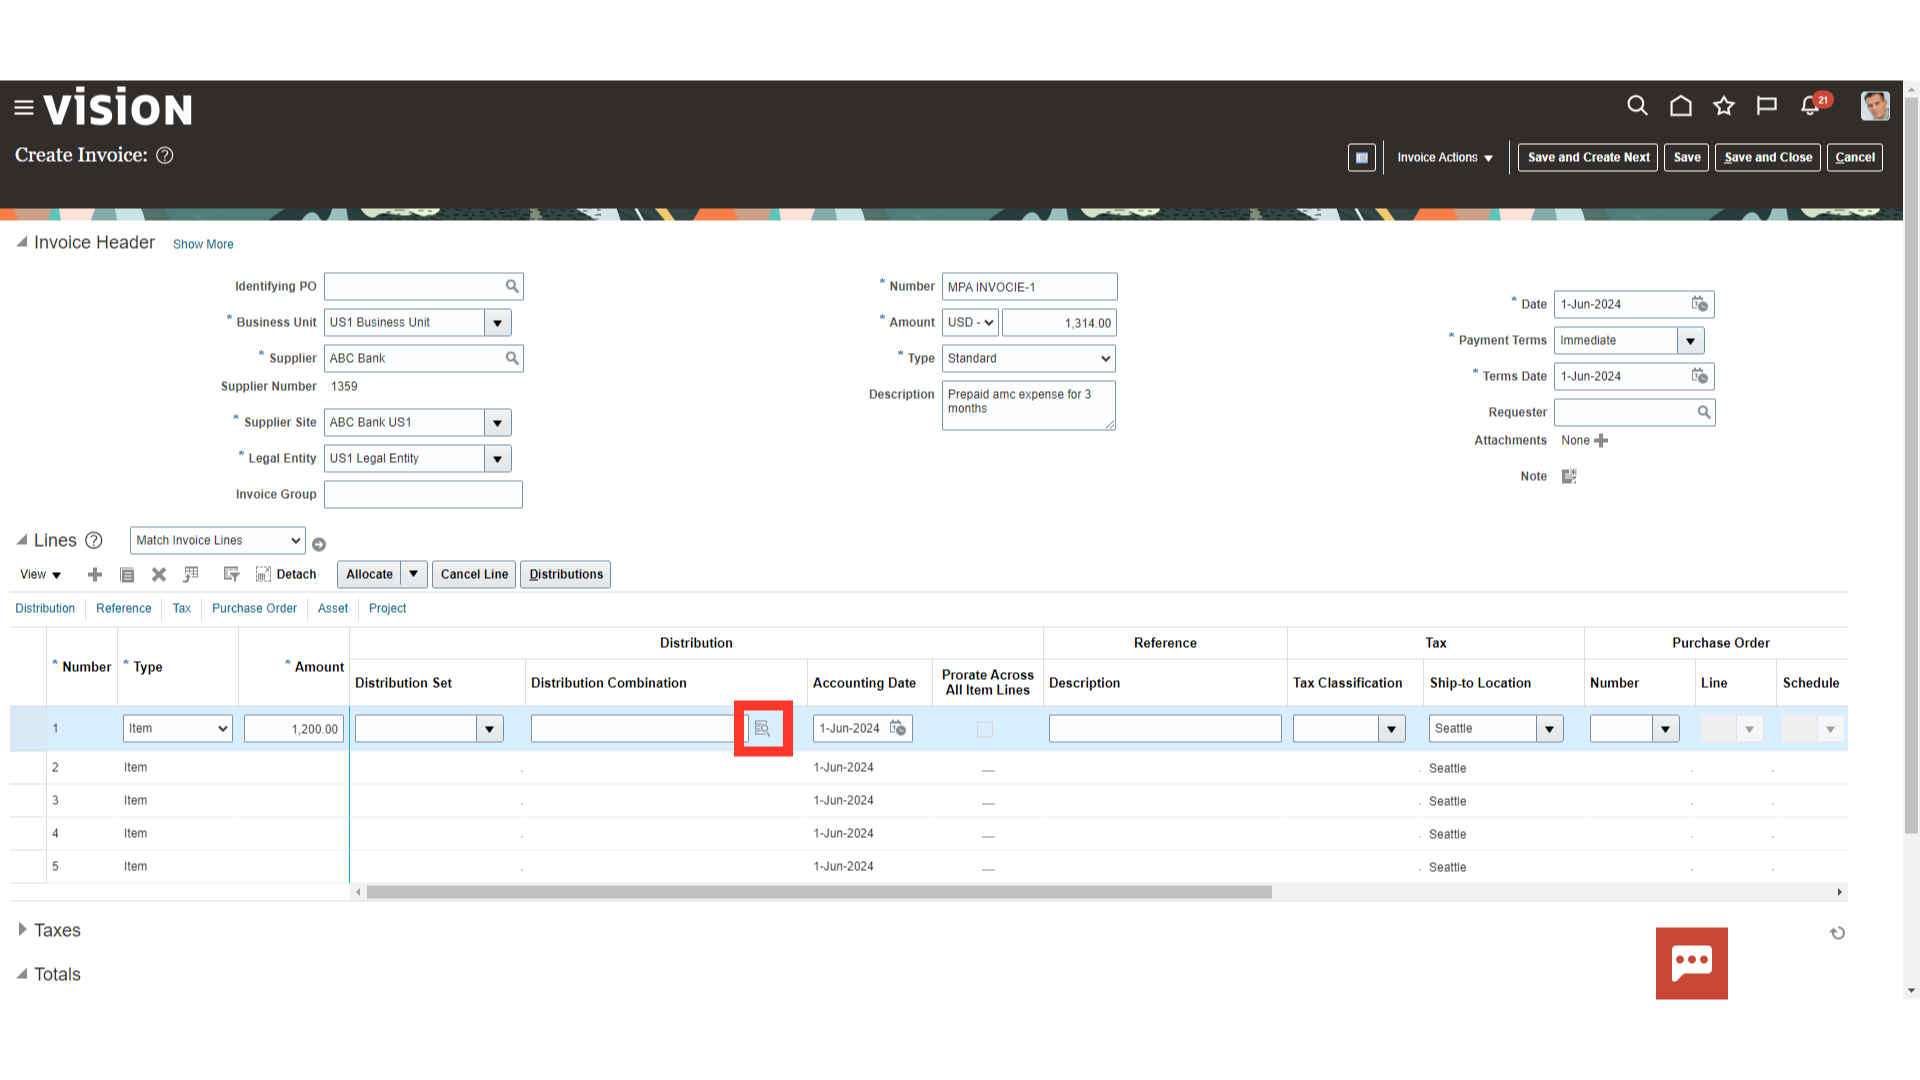
Enter the Invoice line amount at the invoice line level.

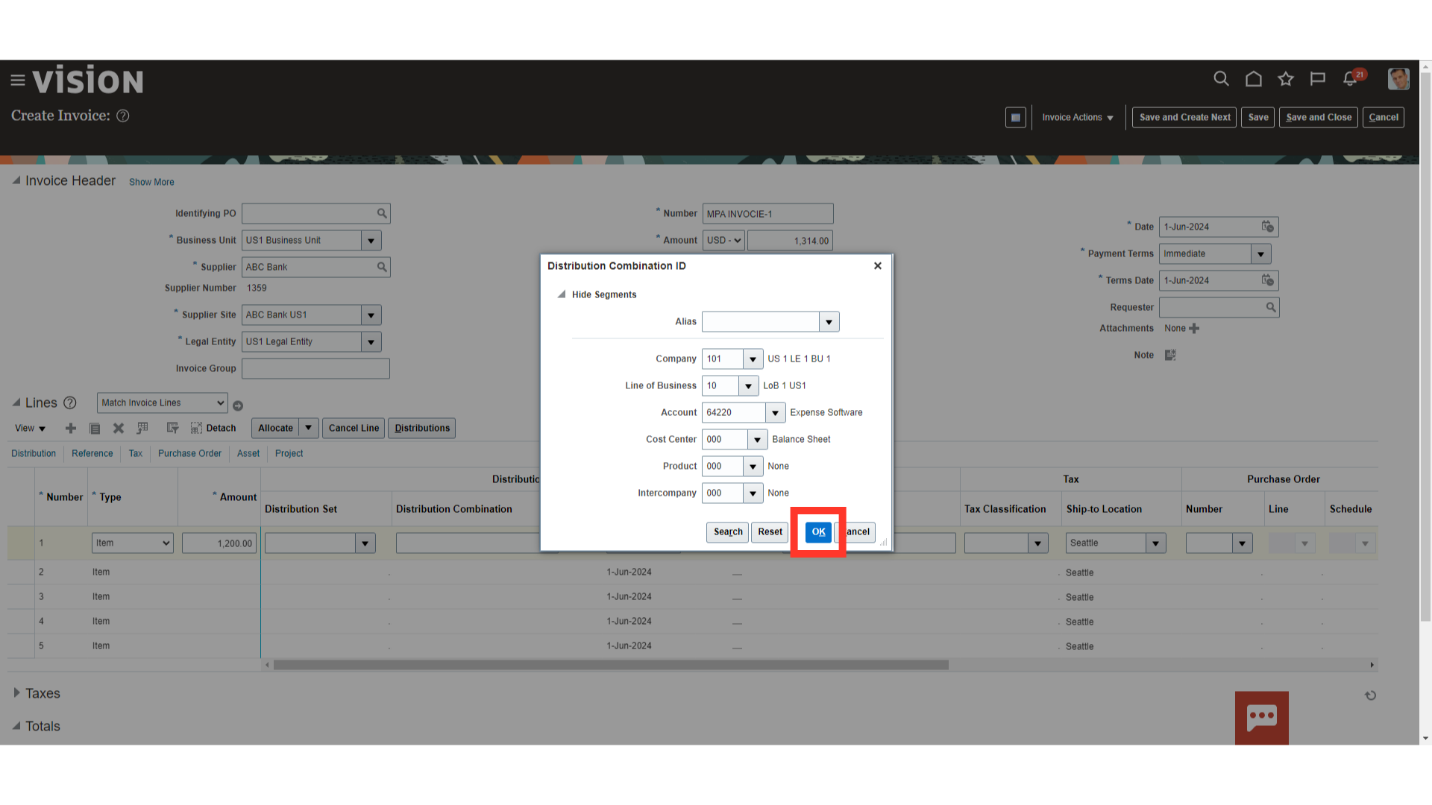
Click on the account combination icon to enter the distribution combination details.
Enter accounts details by entering the value manually or by selecting the value from list of values. Once done, click on “OK” to close the distribution combination window.
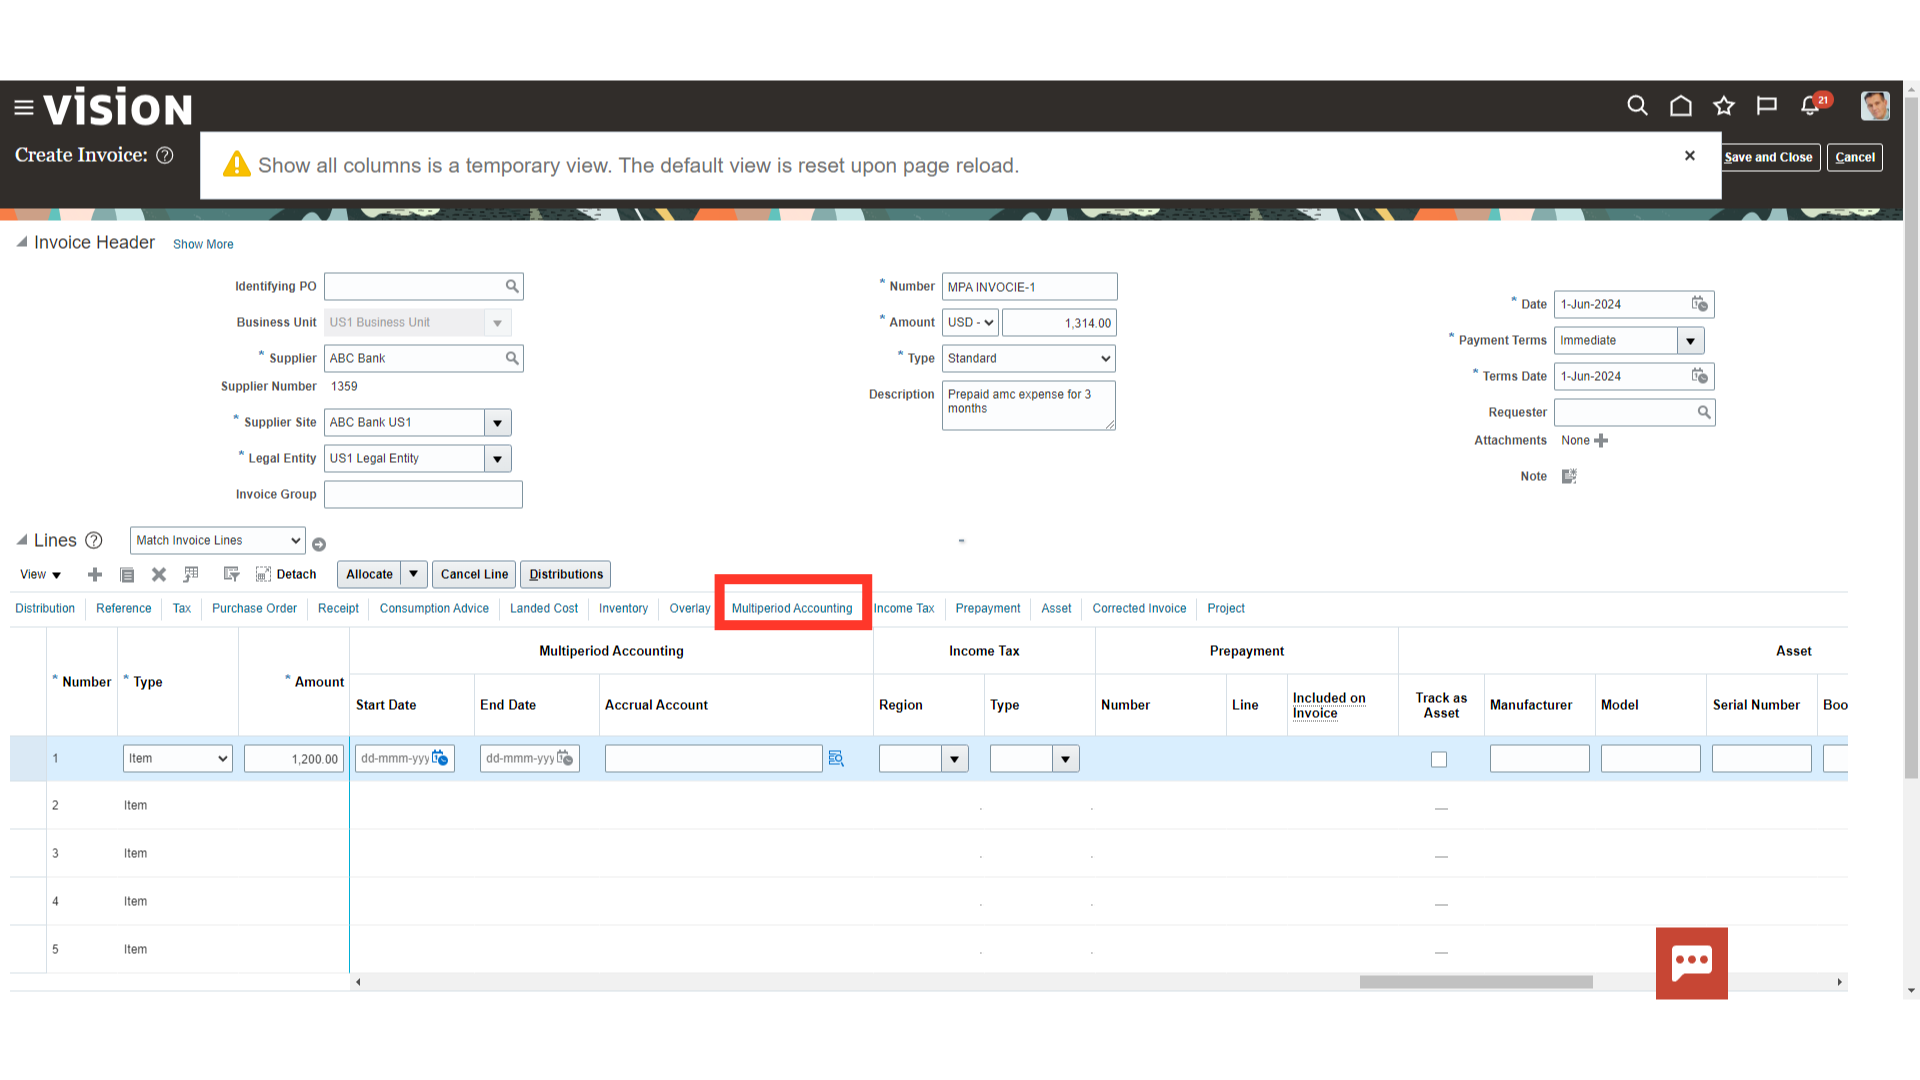
After clicking on the View tab , select the Show All options under the Columns options to display the Multiperiod Accounting tab.

Click on the Multiperiod Accounting tab to open that section for entering the data.
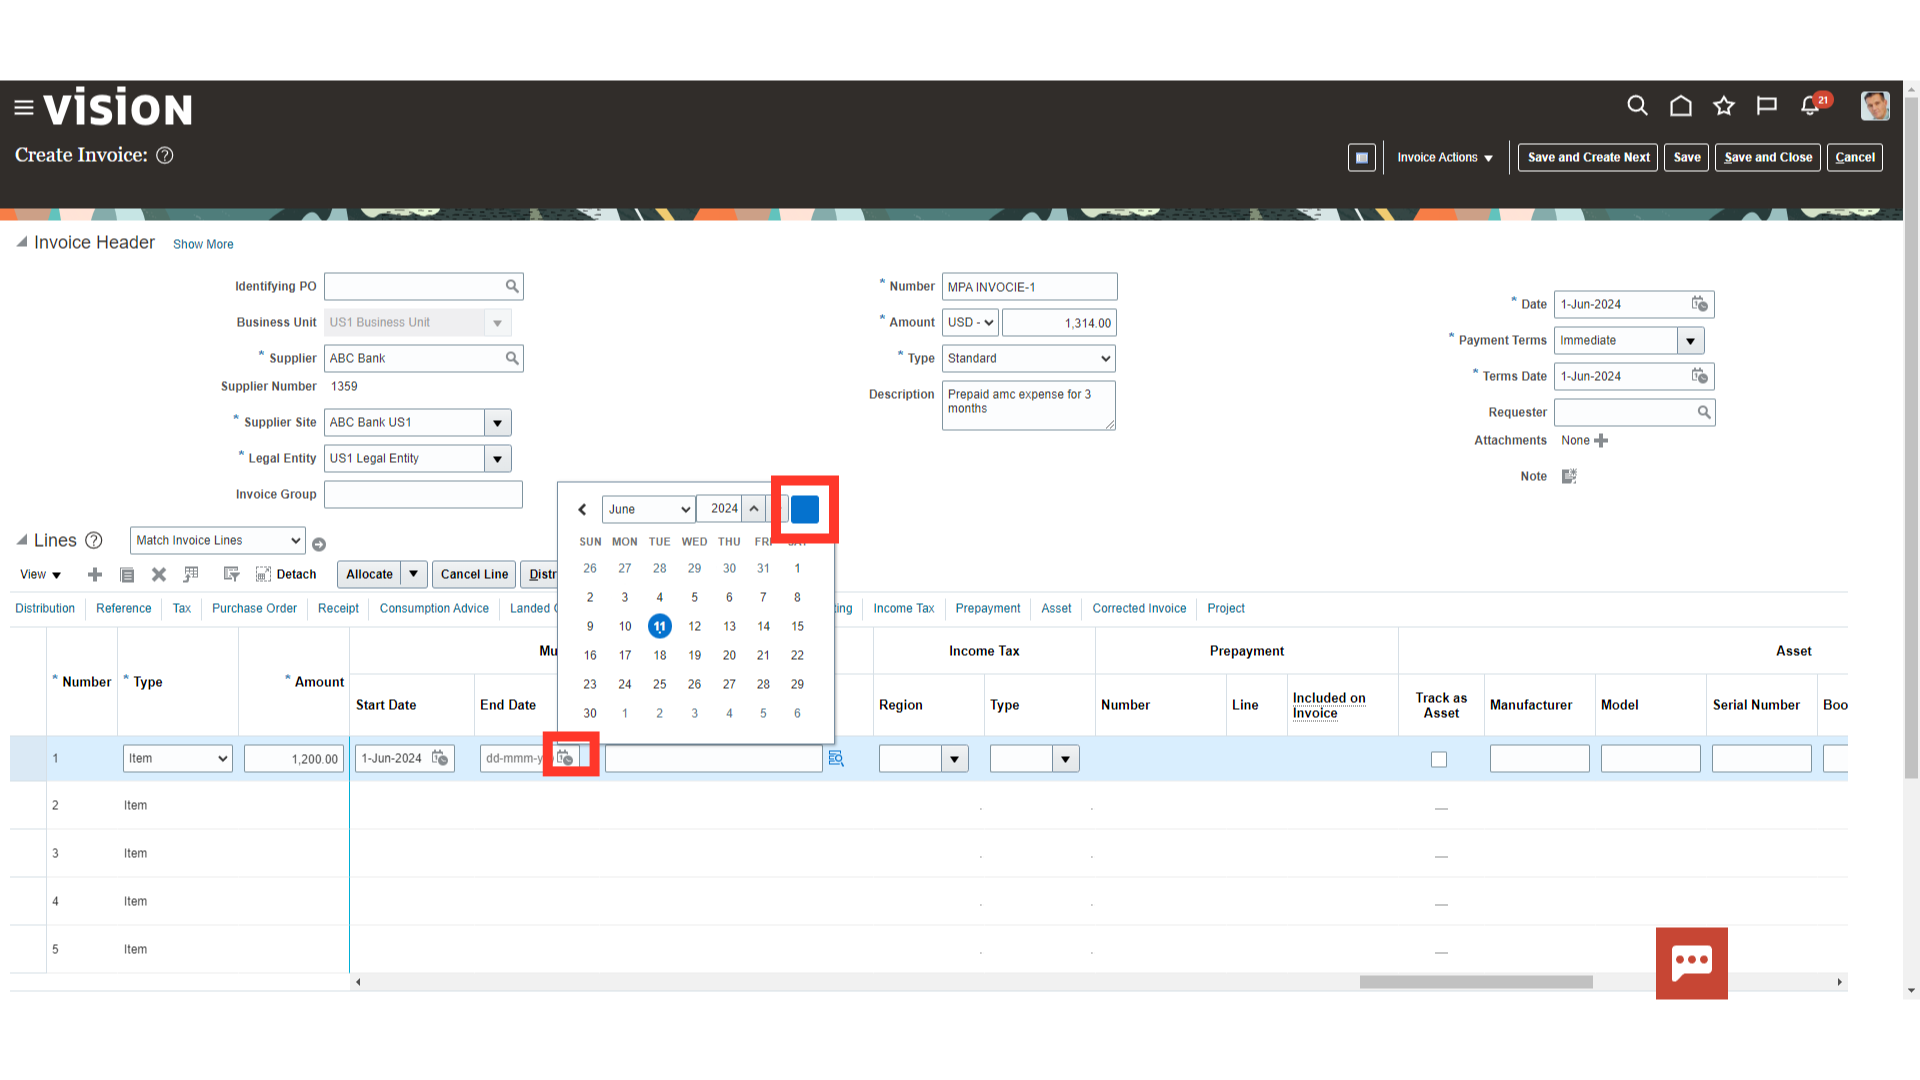
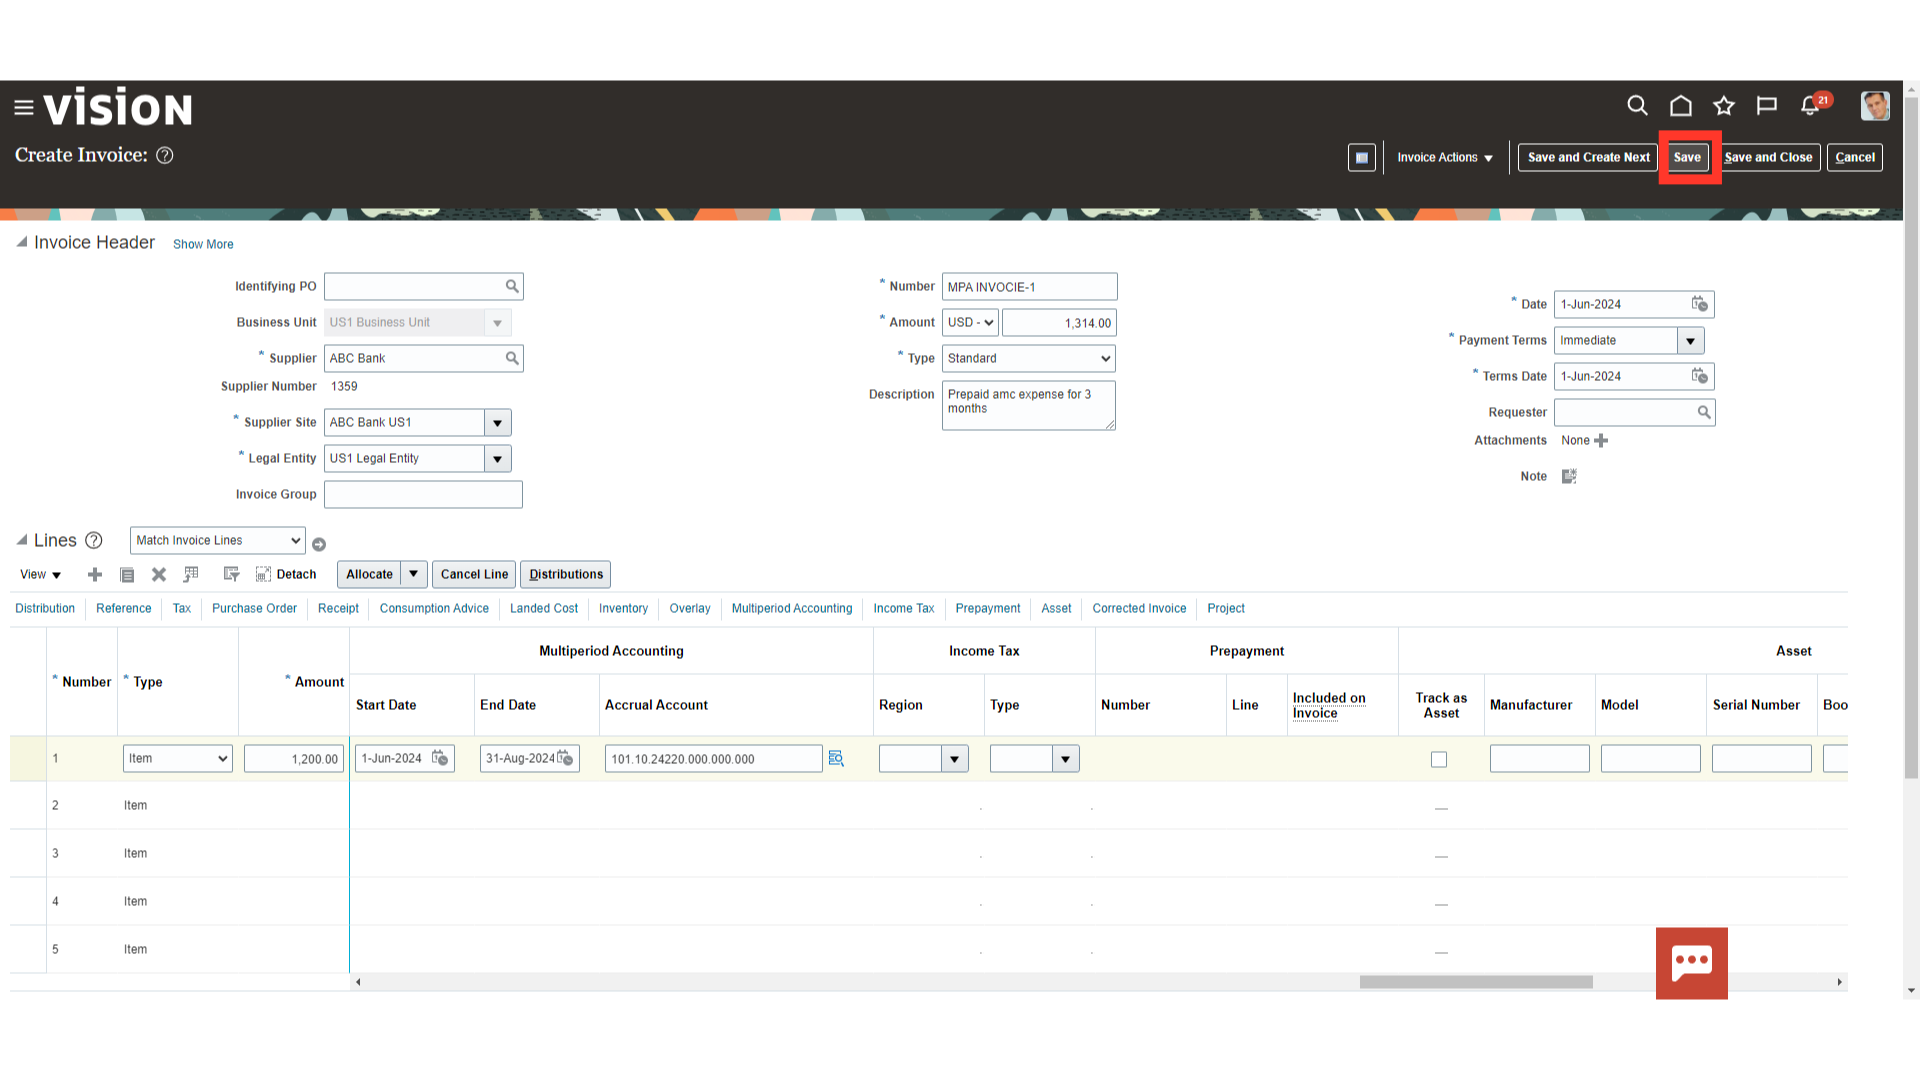
Enter the start date and end date between which expense is to be amortized by entering the date manually or by selecting the date from the calendar.
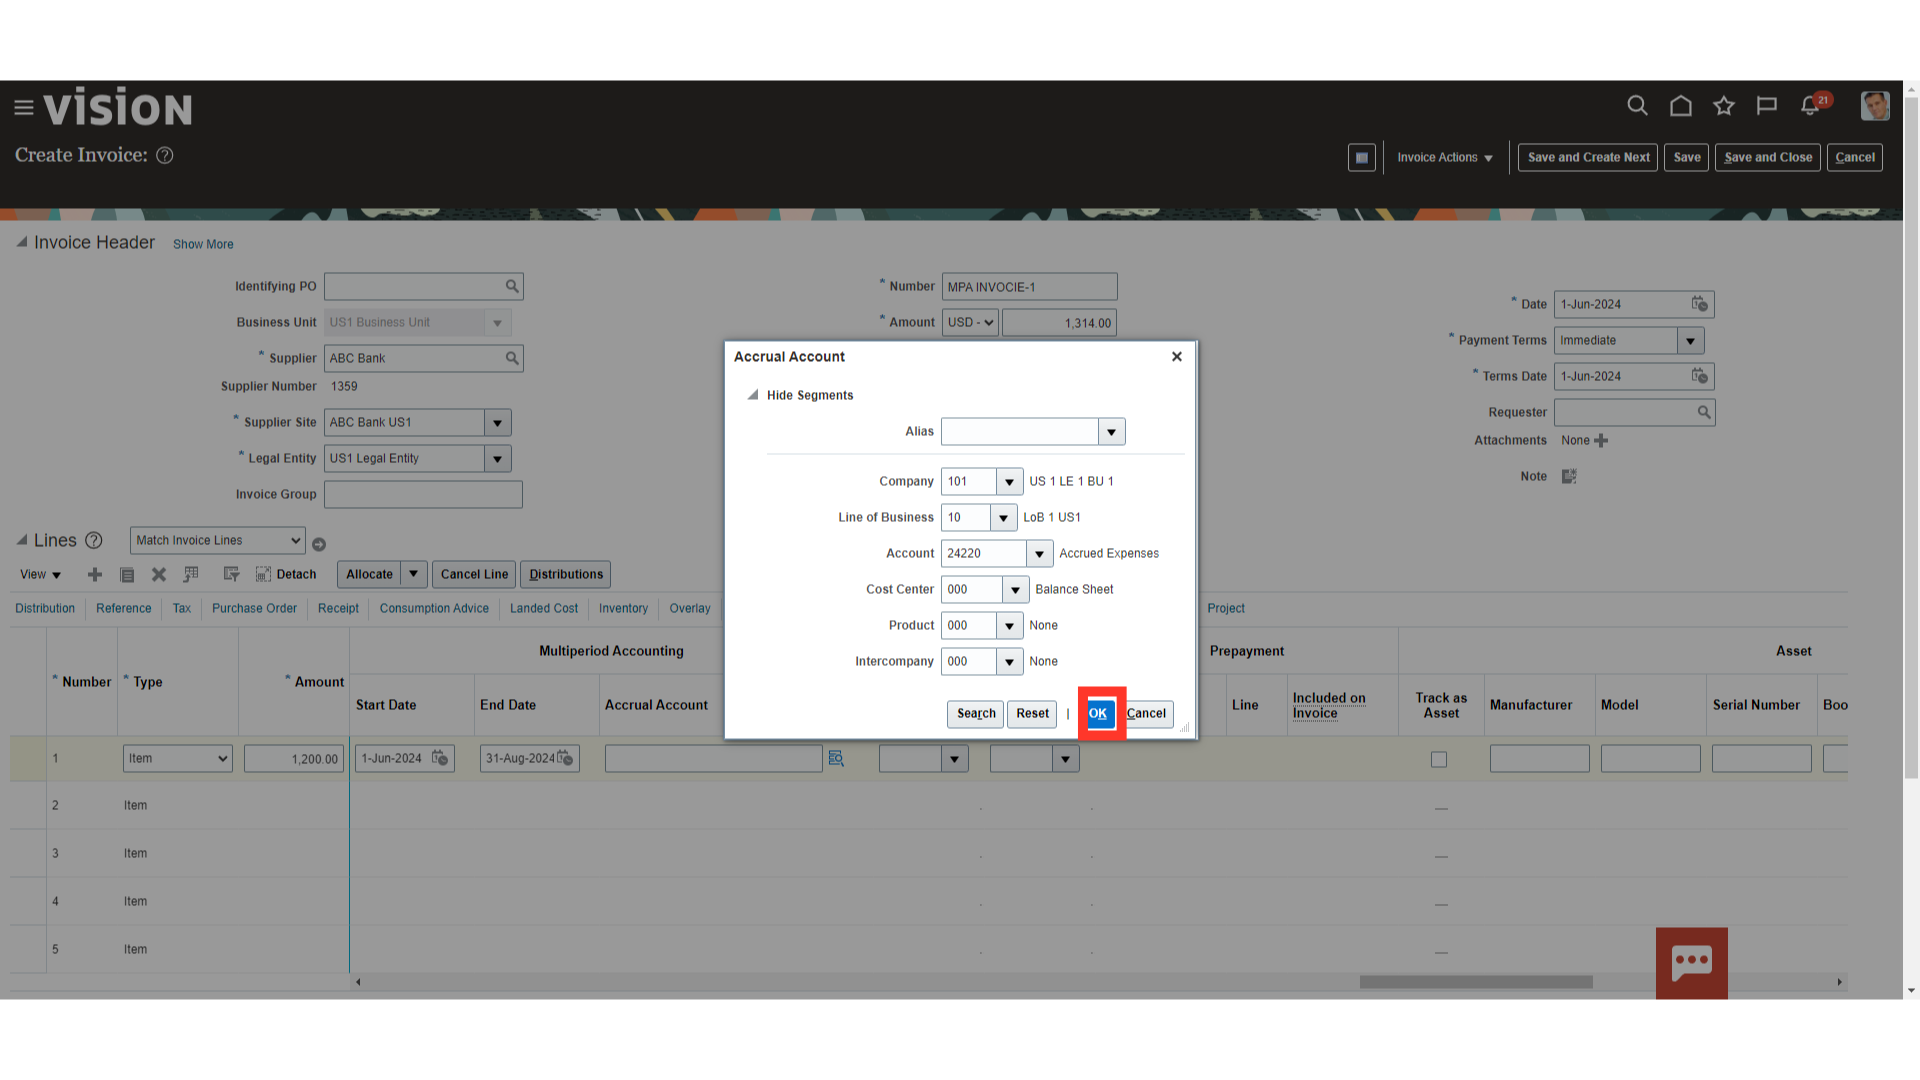
Under the Accrual account section, click on the account combination icon, enter the Accrual account in which prepaid expense amount will be recorded and transferred to expense account gradually.
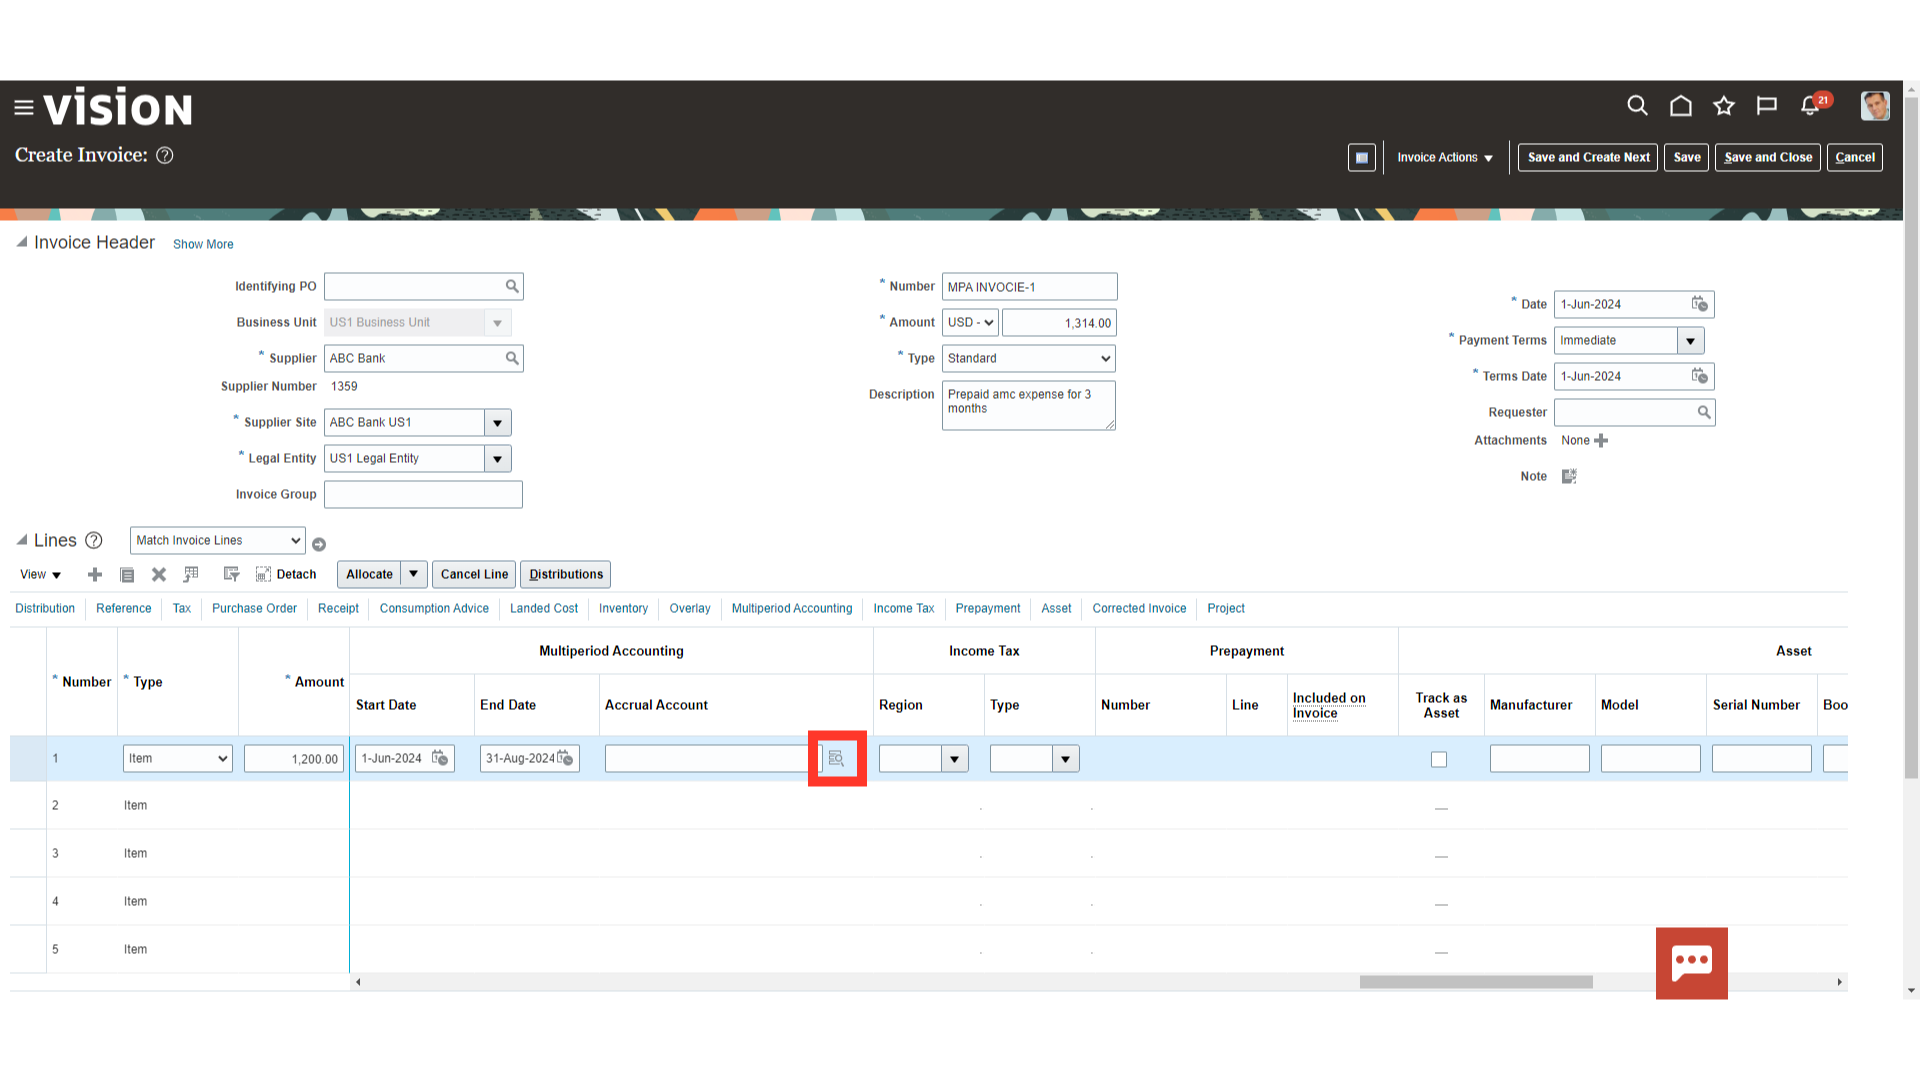
After entering the account details click on the OK button to continue.
Click on the “Save” button to save the invoice details.
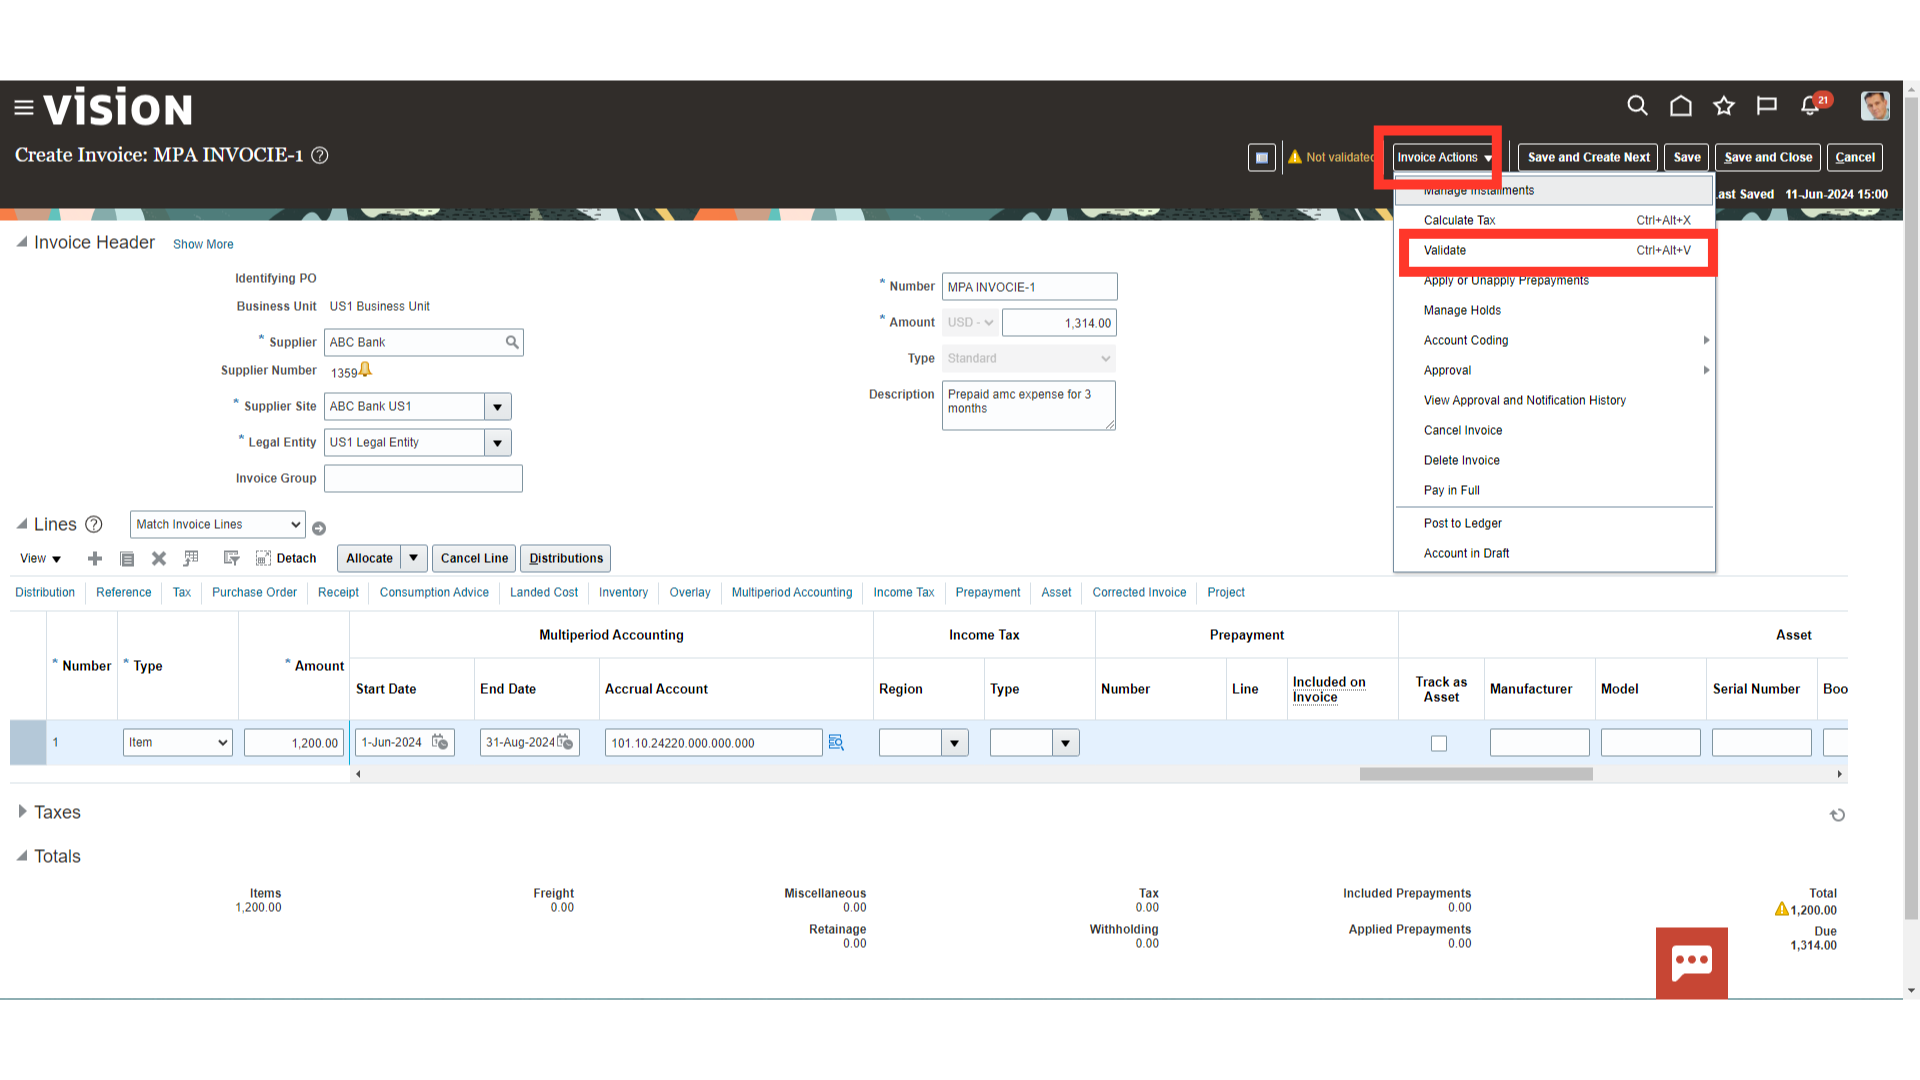
For validating the invoice, click on the “Validate” option under the Invoice Actions menu.
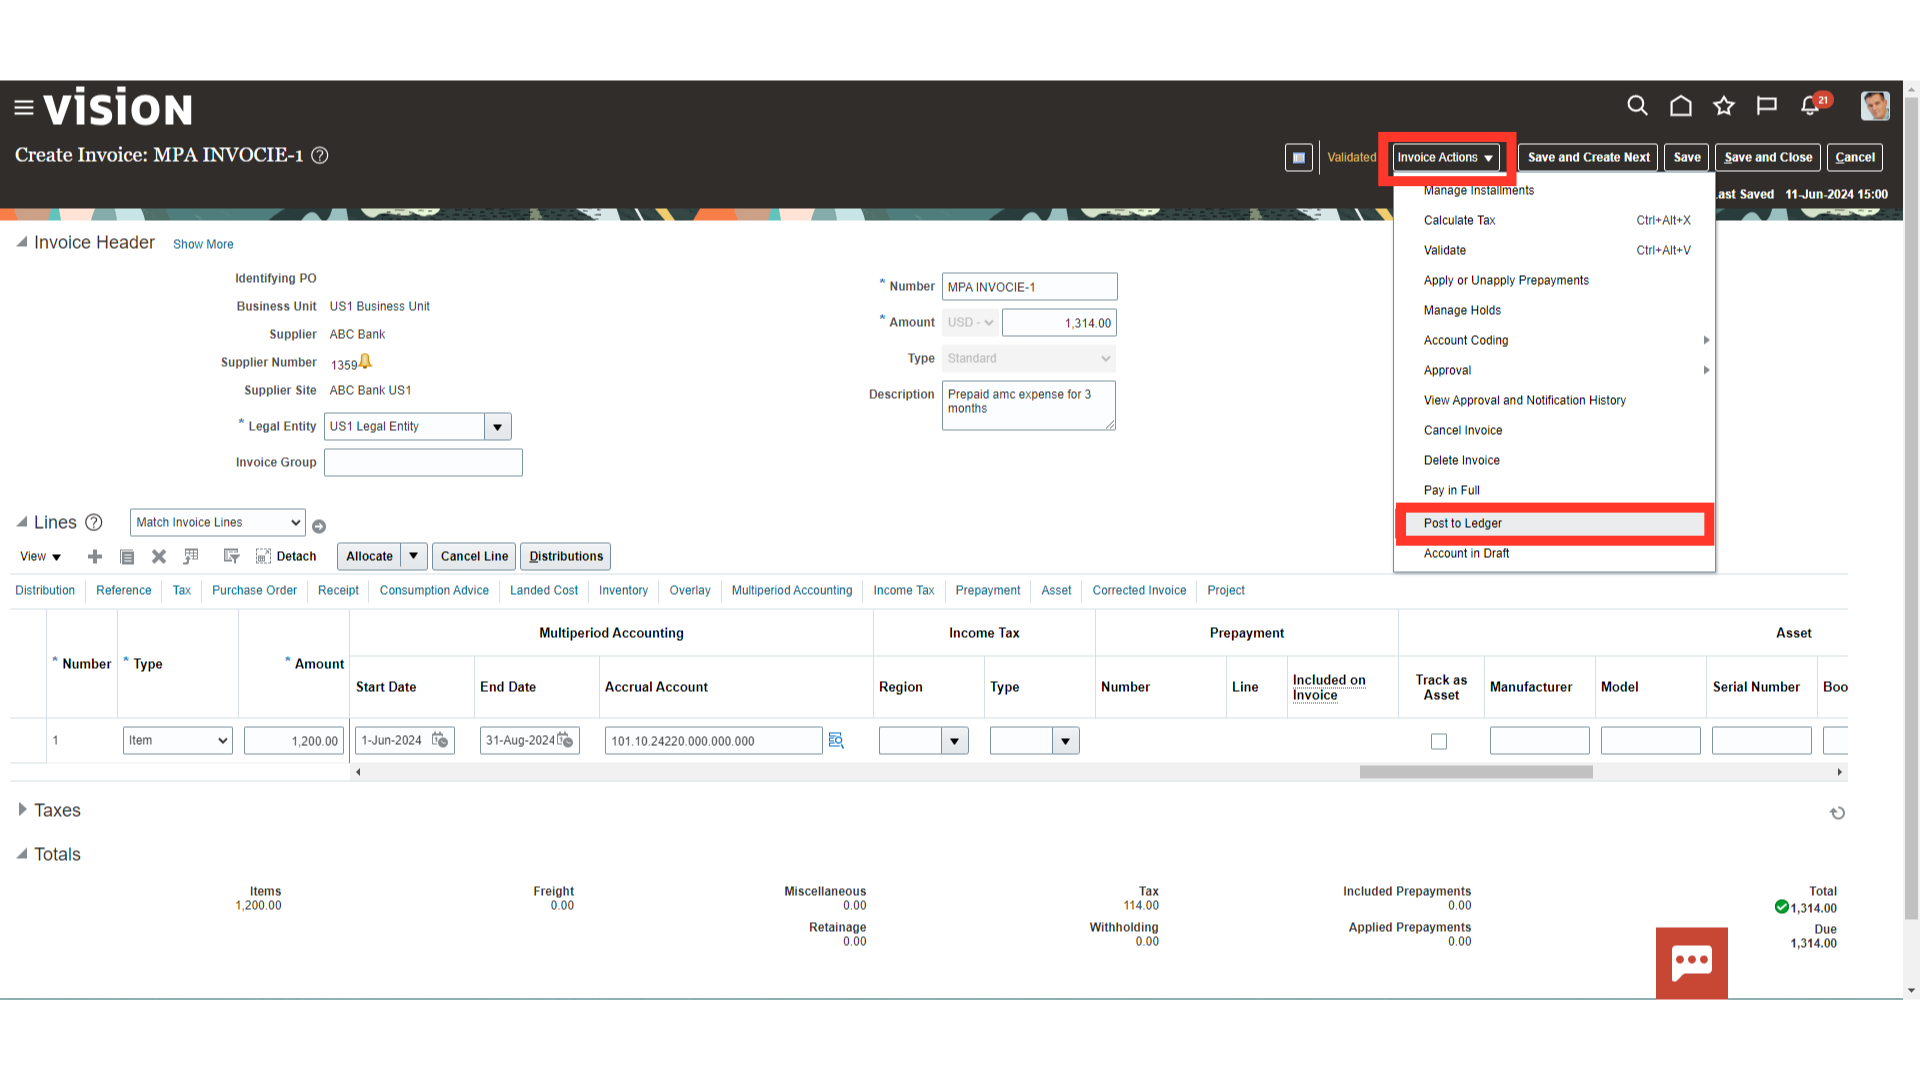
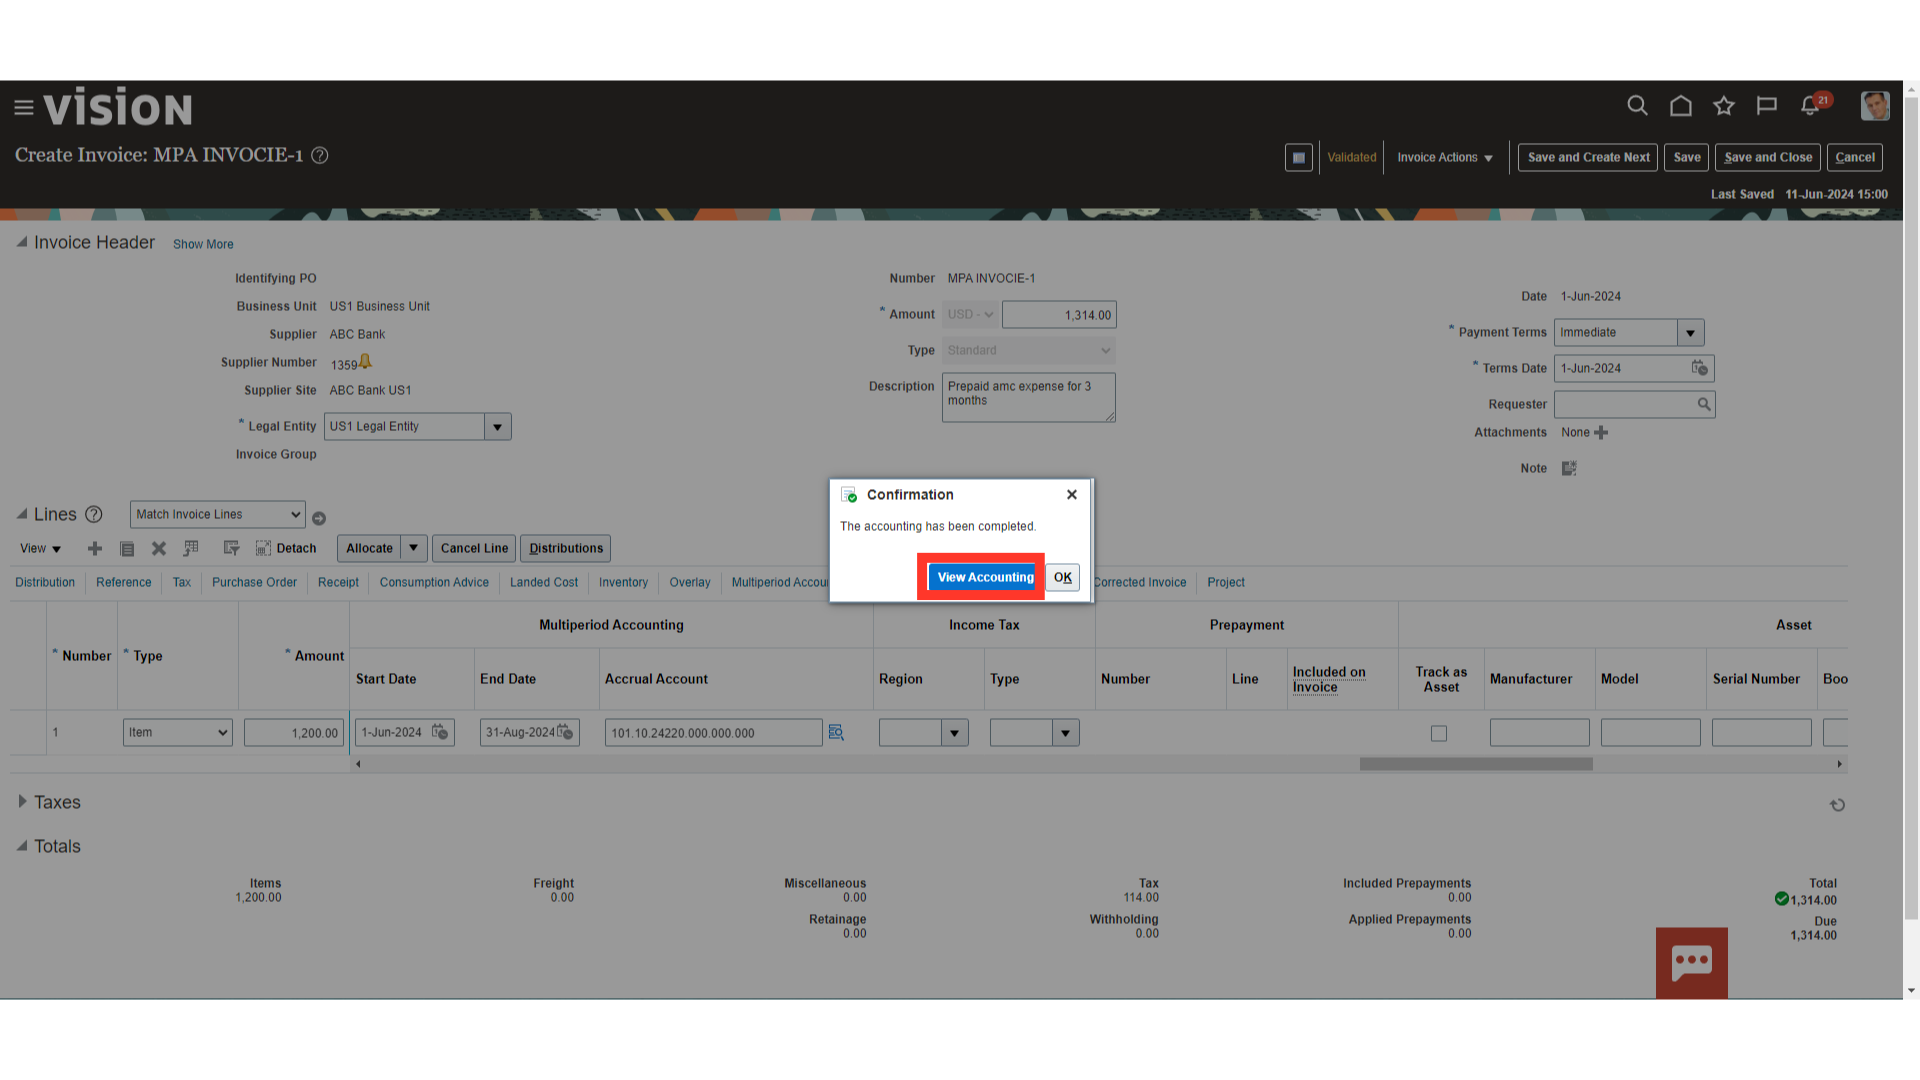
To generate accounting, click on the “Post to ledger” option under the Invoice Actions menu.
Select the “View Accounting” button to see more details of the journal entry.
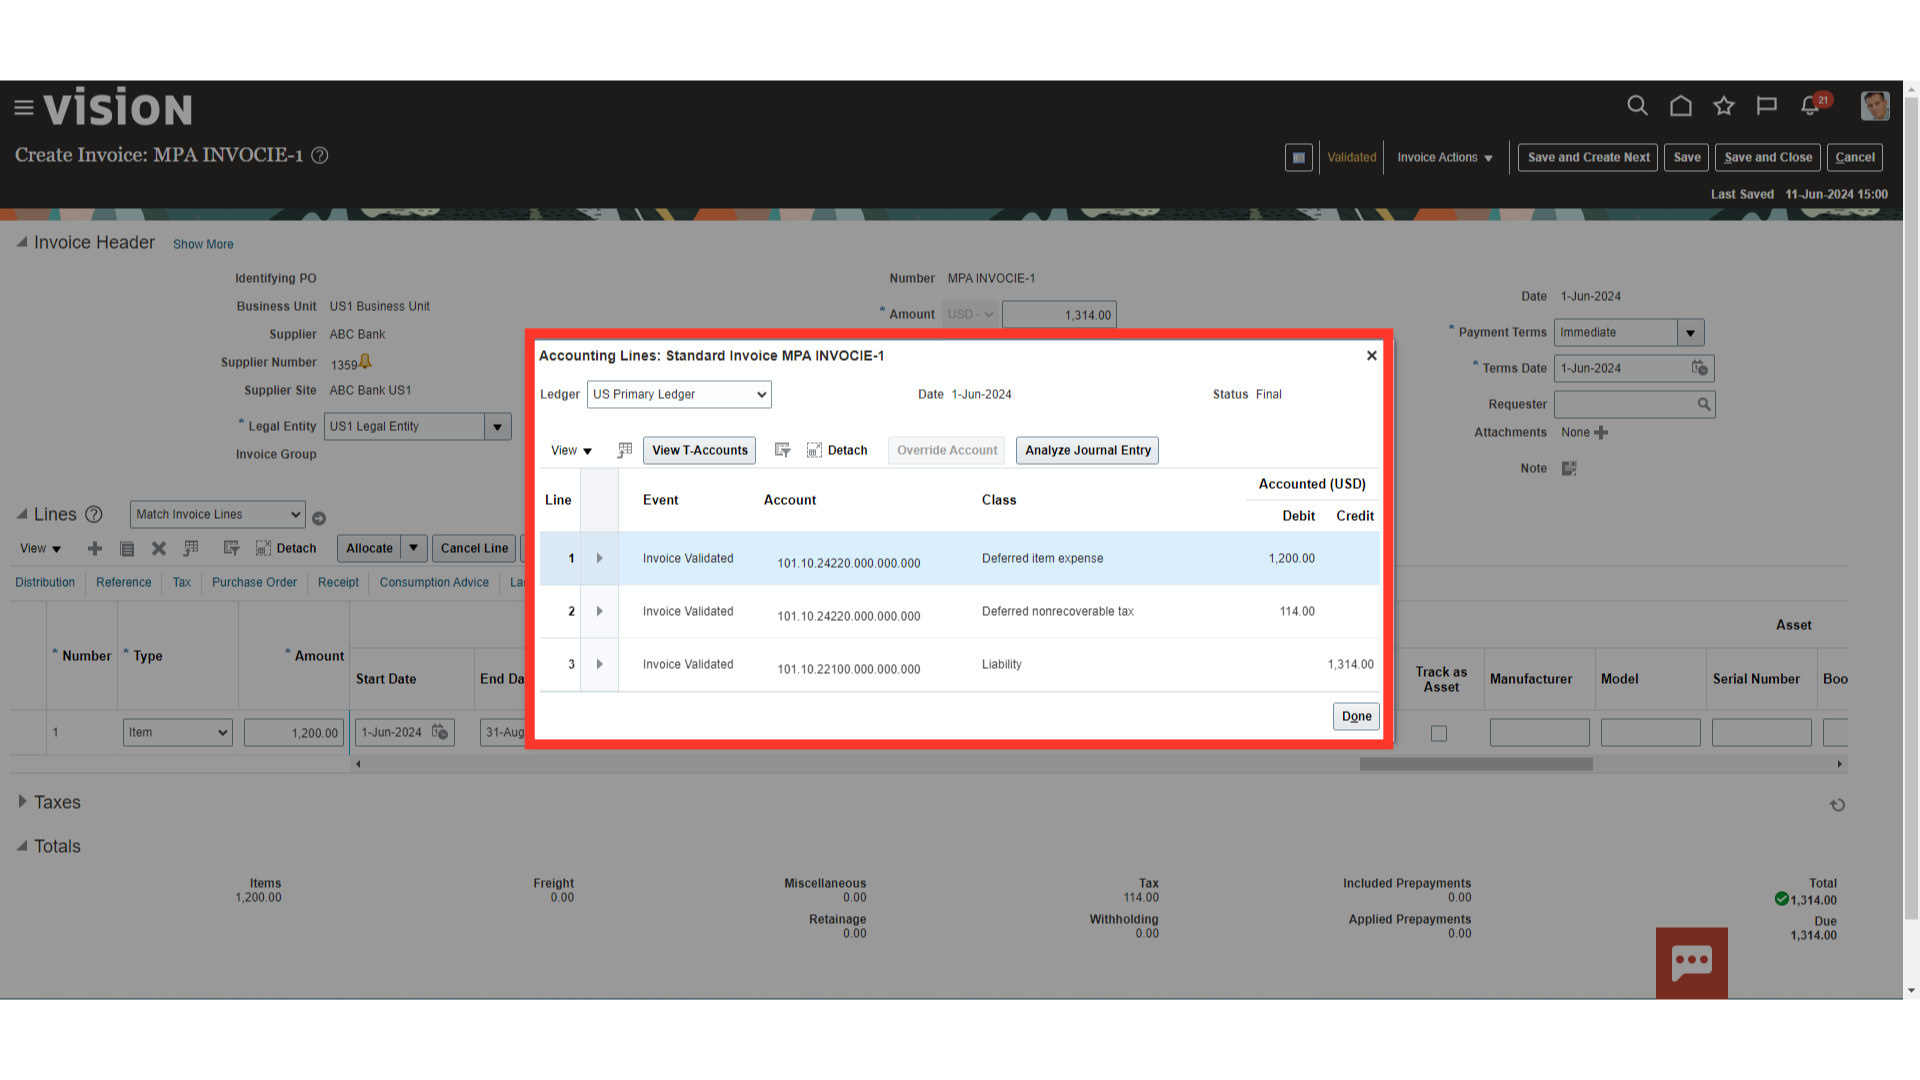
This is the journal entry generated and transferred to the general ledger for booking the expense amount in the prepaid account.
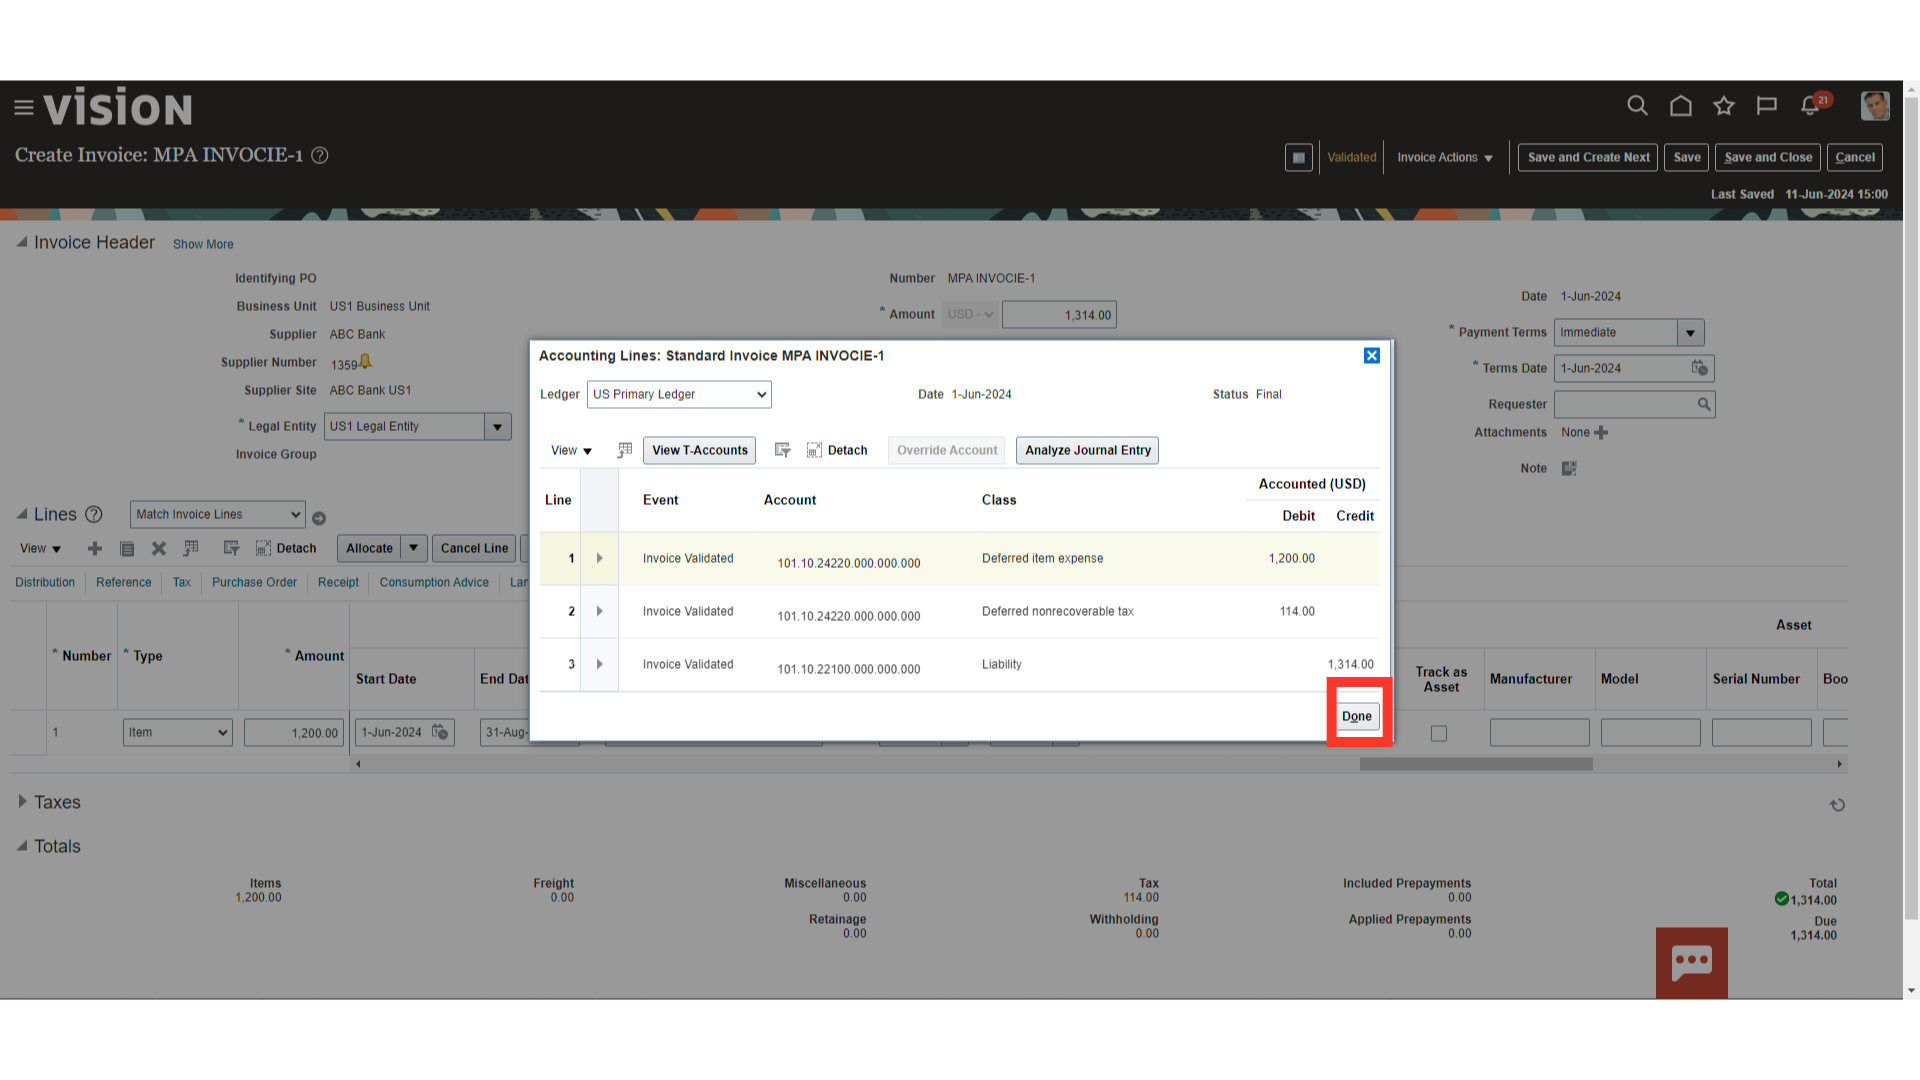
Click on the Done button to close the accounting window.
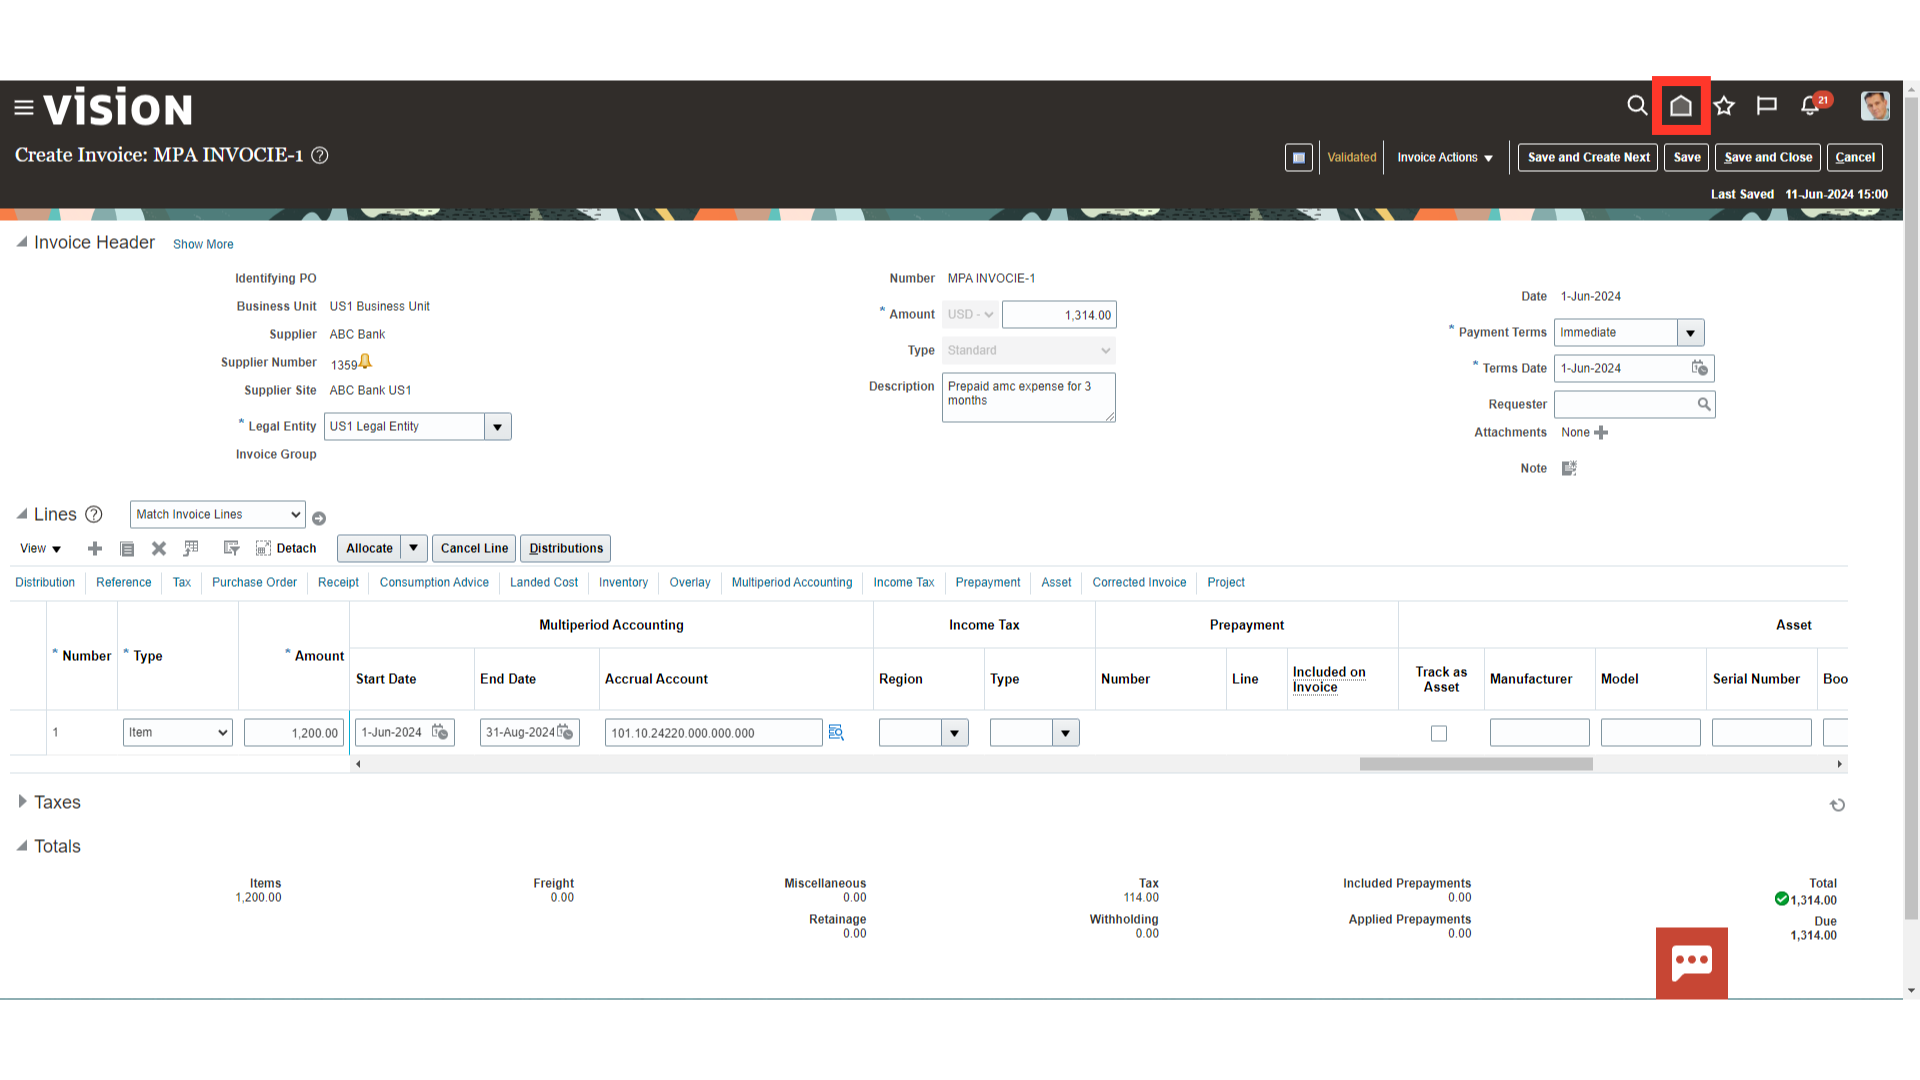
Click on Home icon to land on to the Oracle Fusion home page.
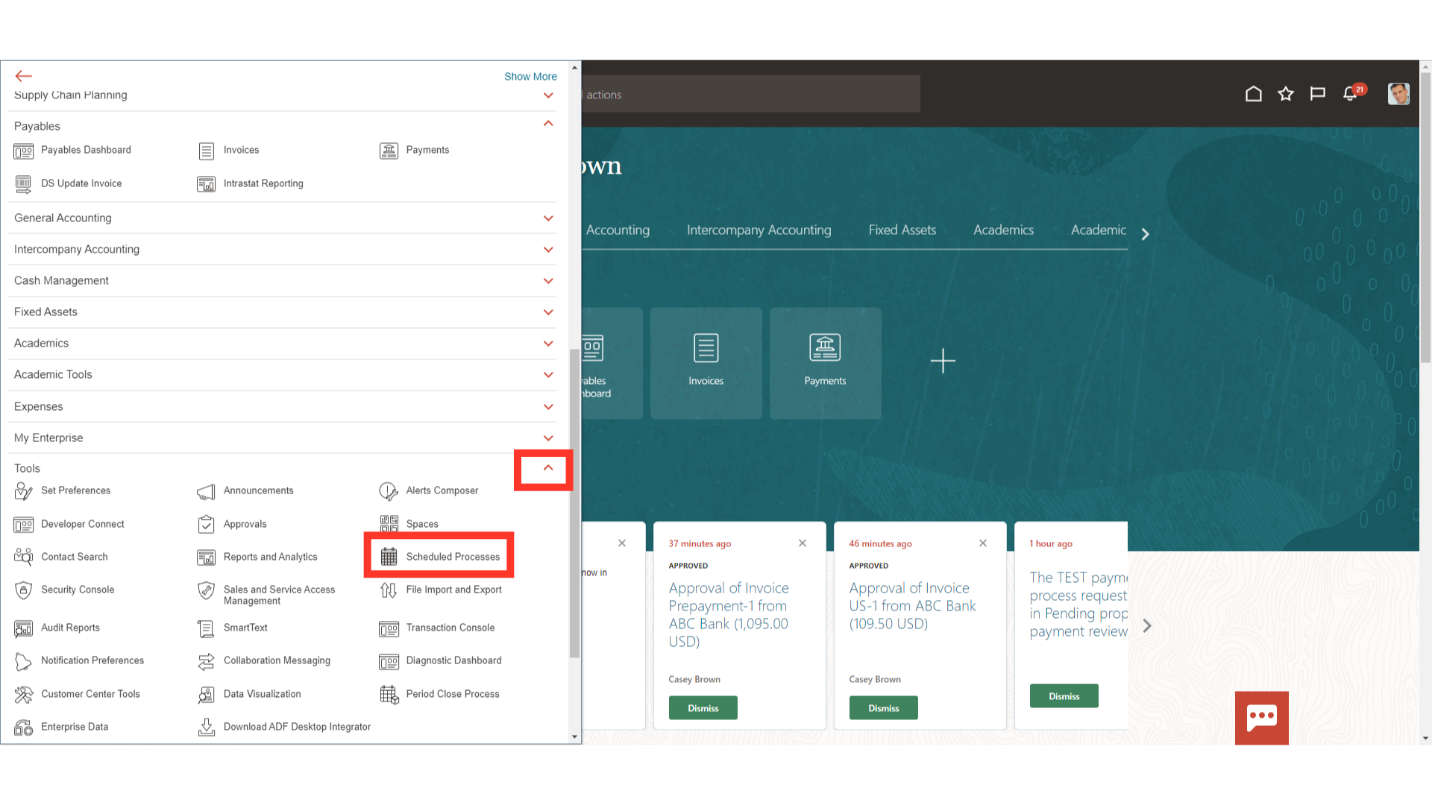
Click on the Scheduled Processes option by expanding the Tools section.
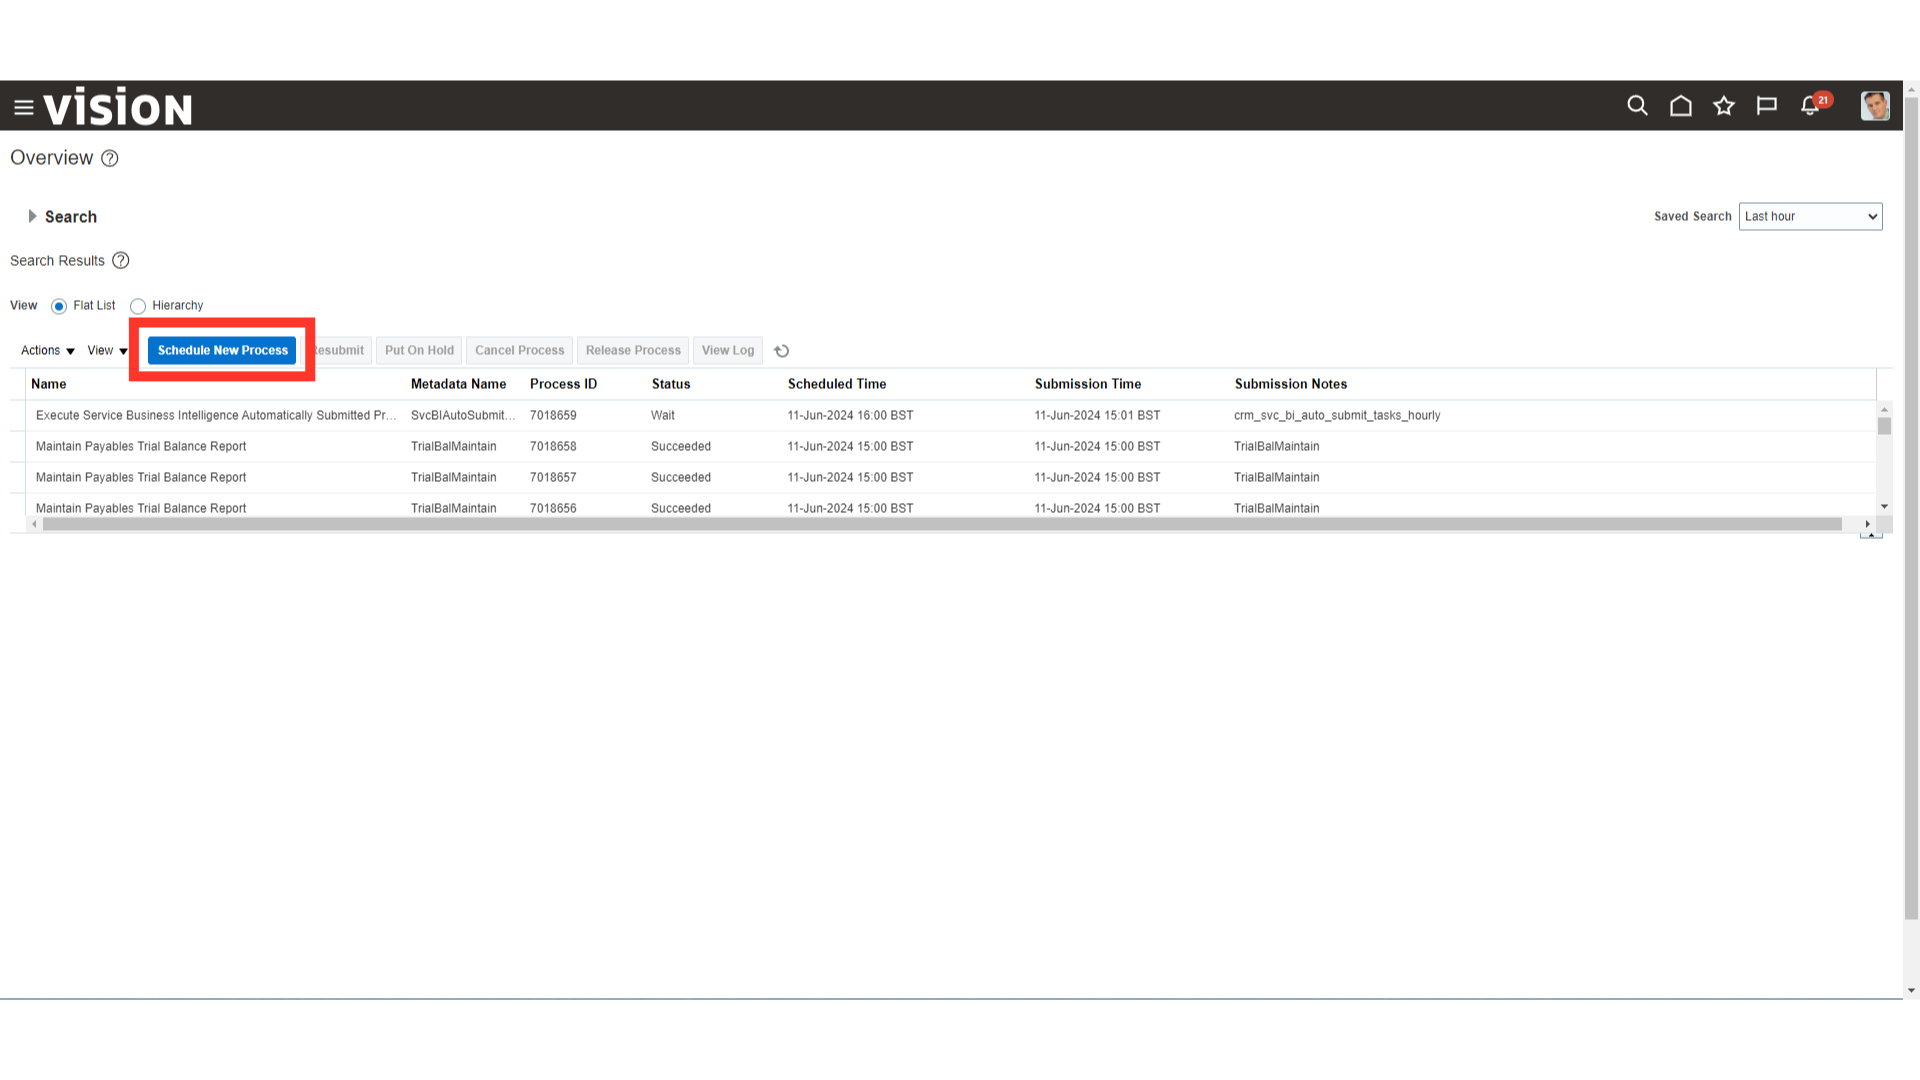
Click on the “Schedule New Process” button to run the Create Multiperiod Accounting Process.
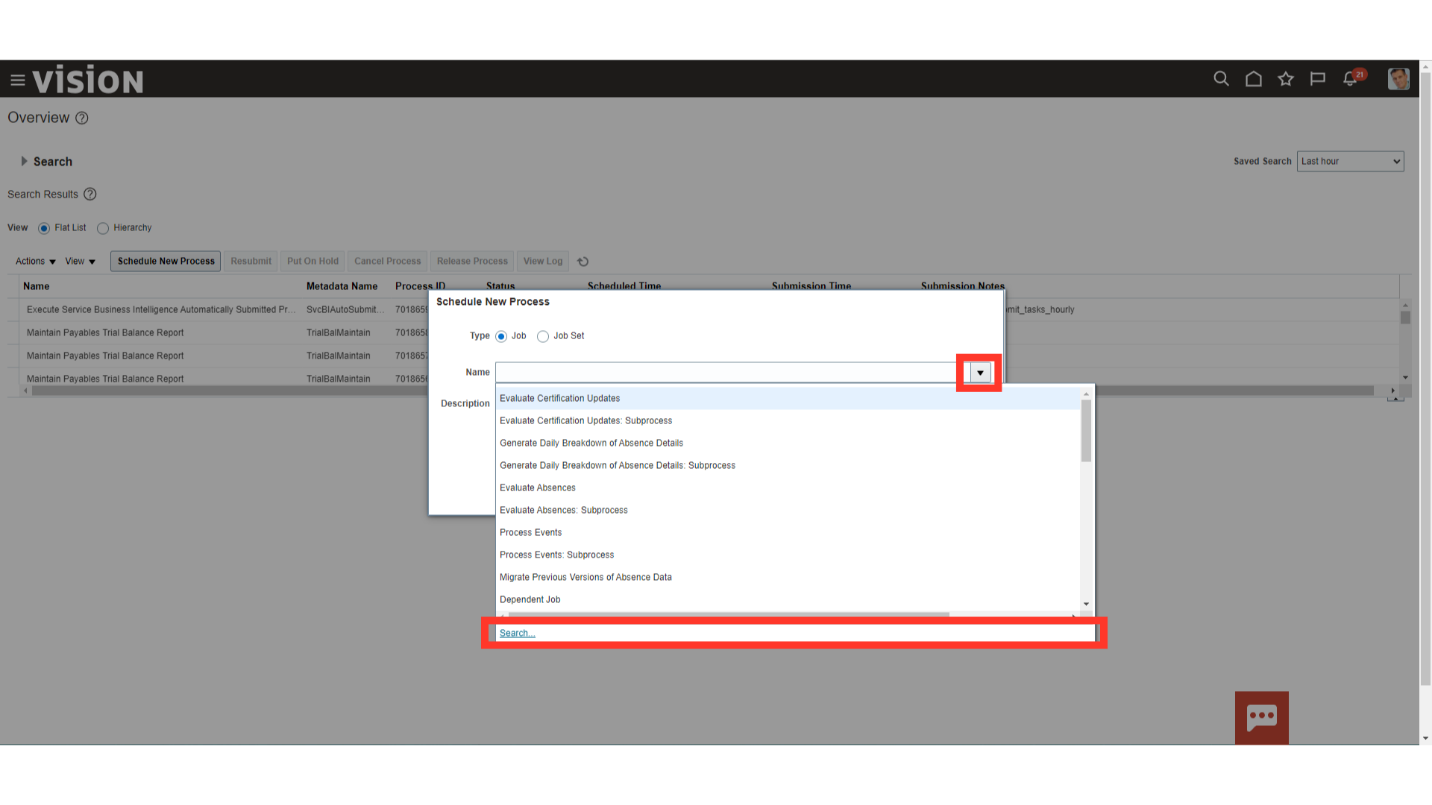
Click on the Search hyperlink after clicking on the drop down menu, to search the Multiperiod accounting process.
After entering the process name as Create Multiperiod Accounting, click on the search button.
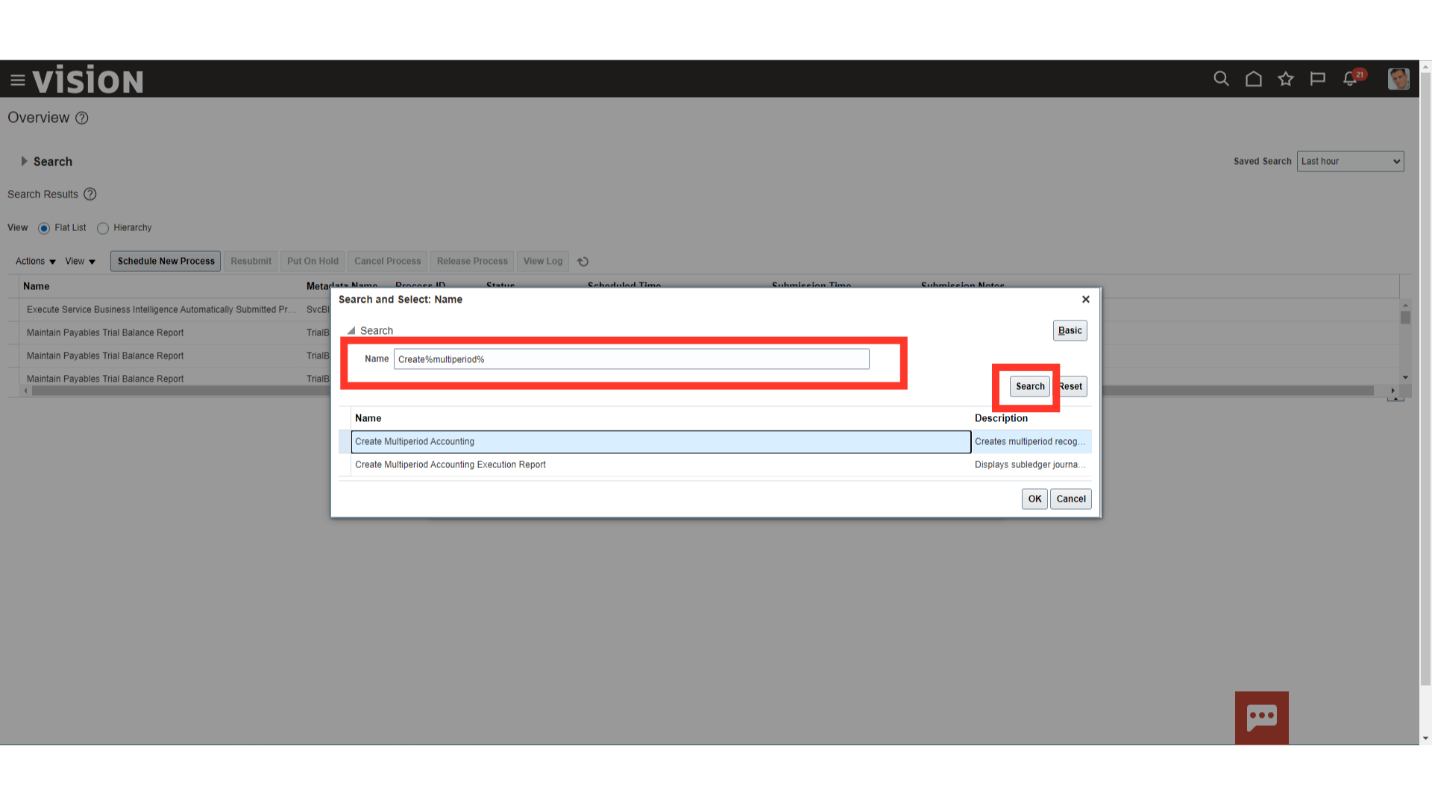
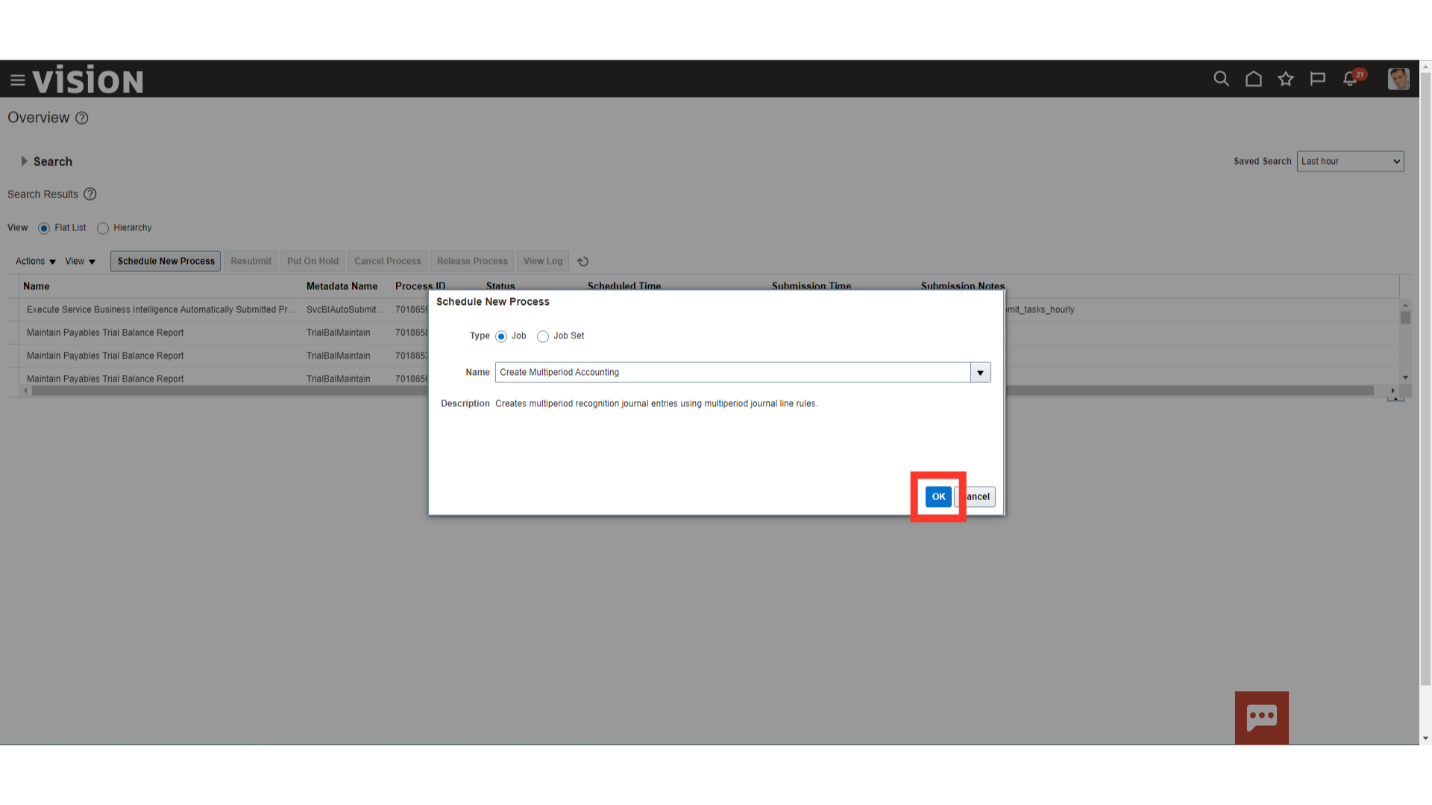
Select the Create Multiperiod Accounting process from search results, and then click on the OK to button to continue.

Now, again click on the “OK” button to submit.
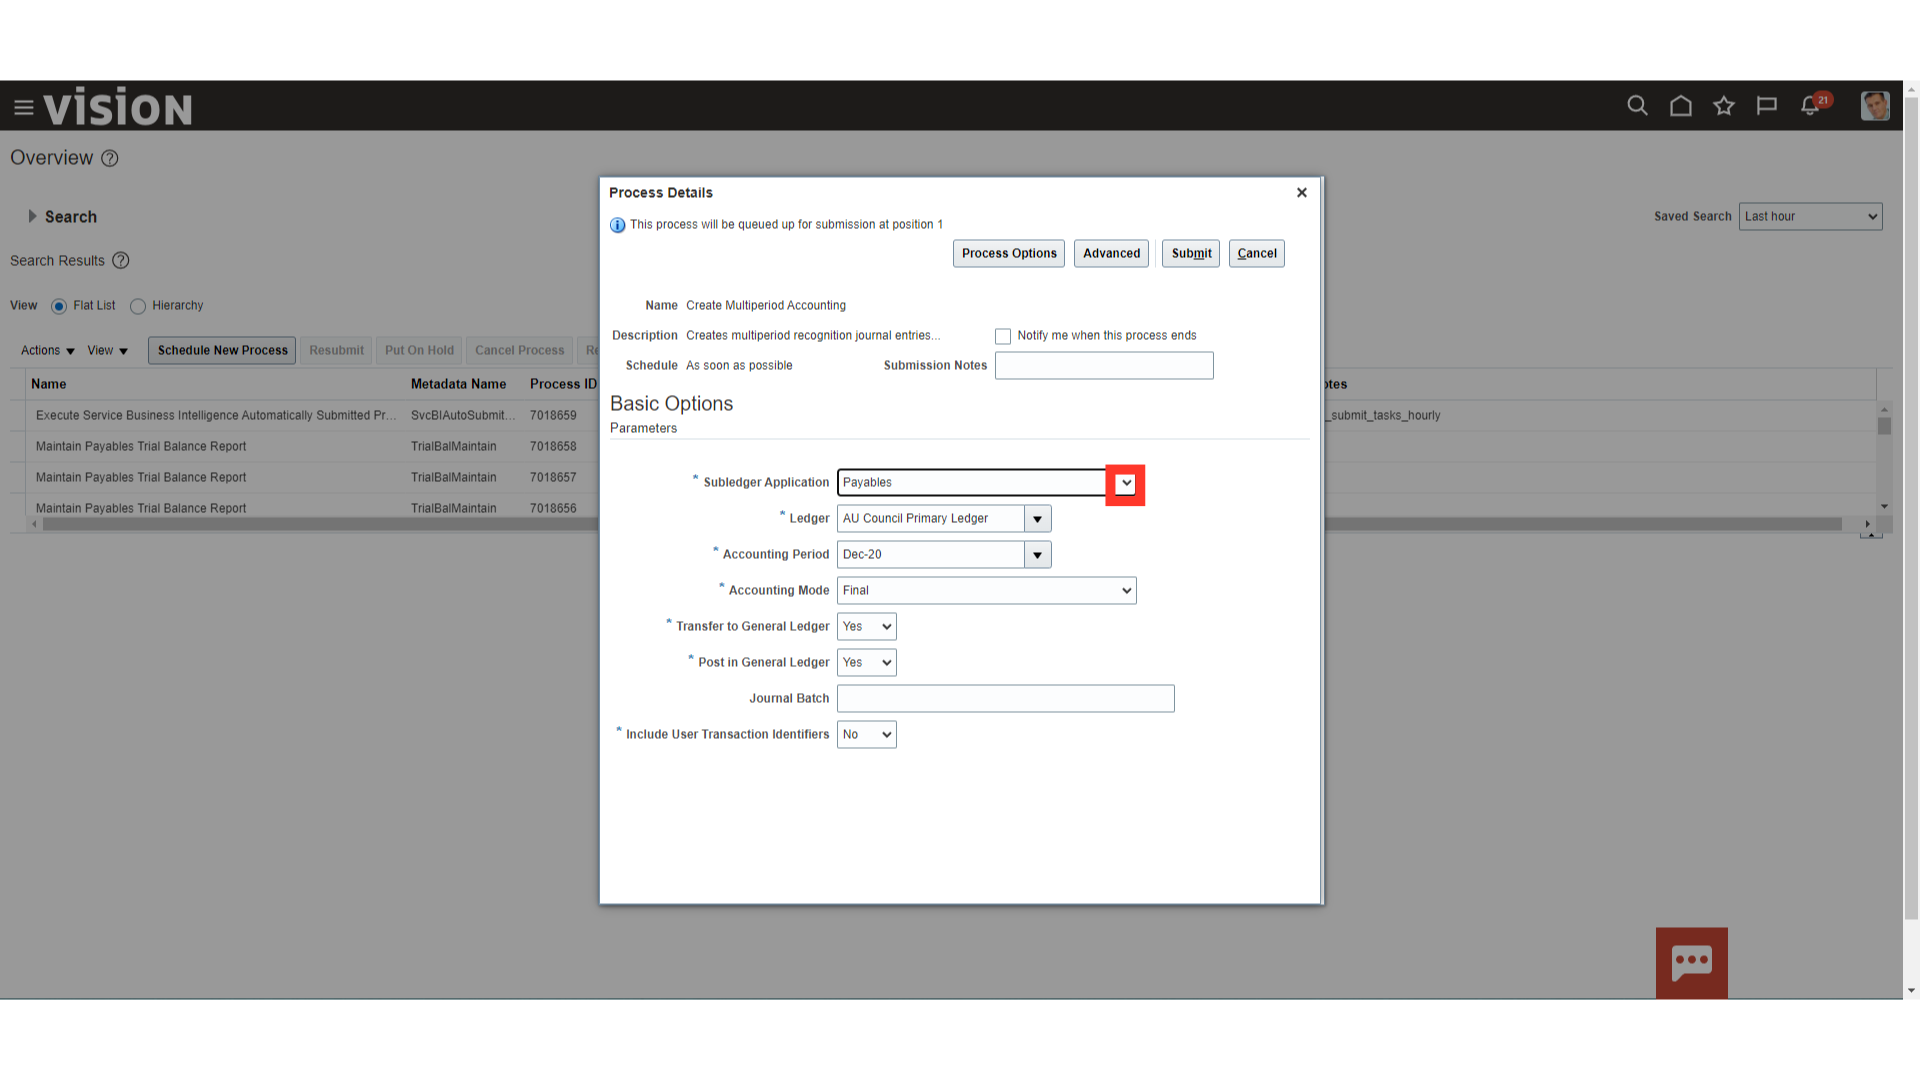
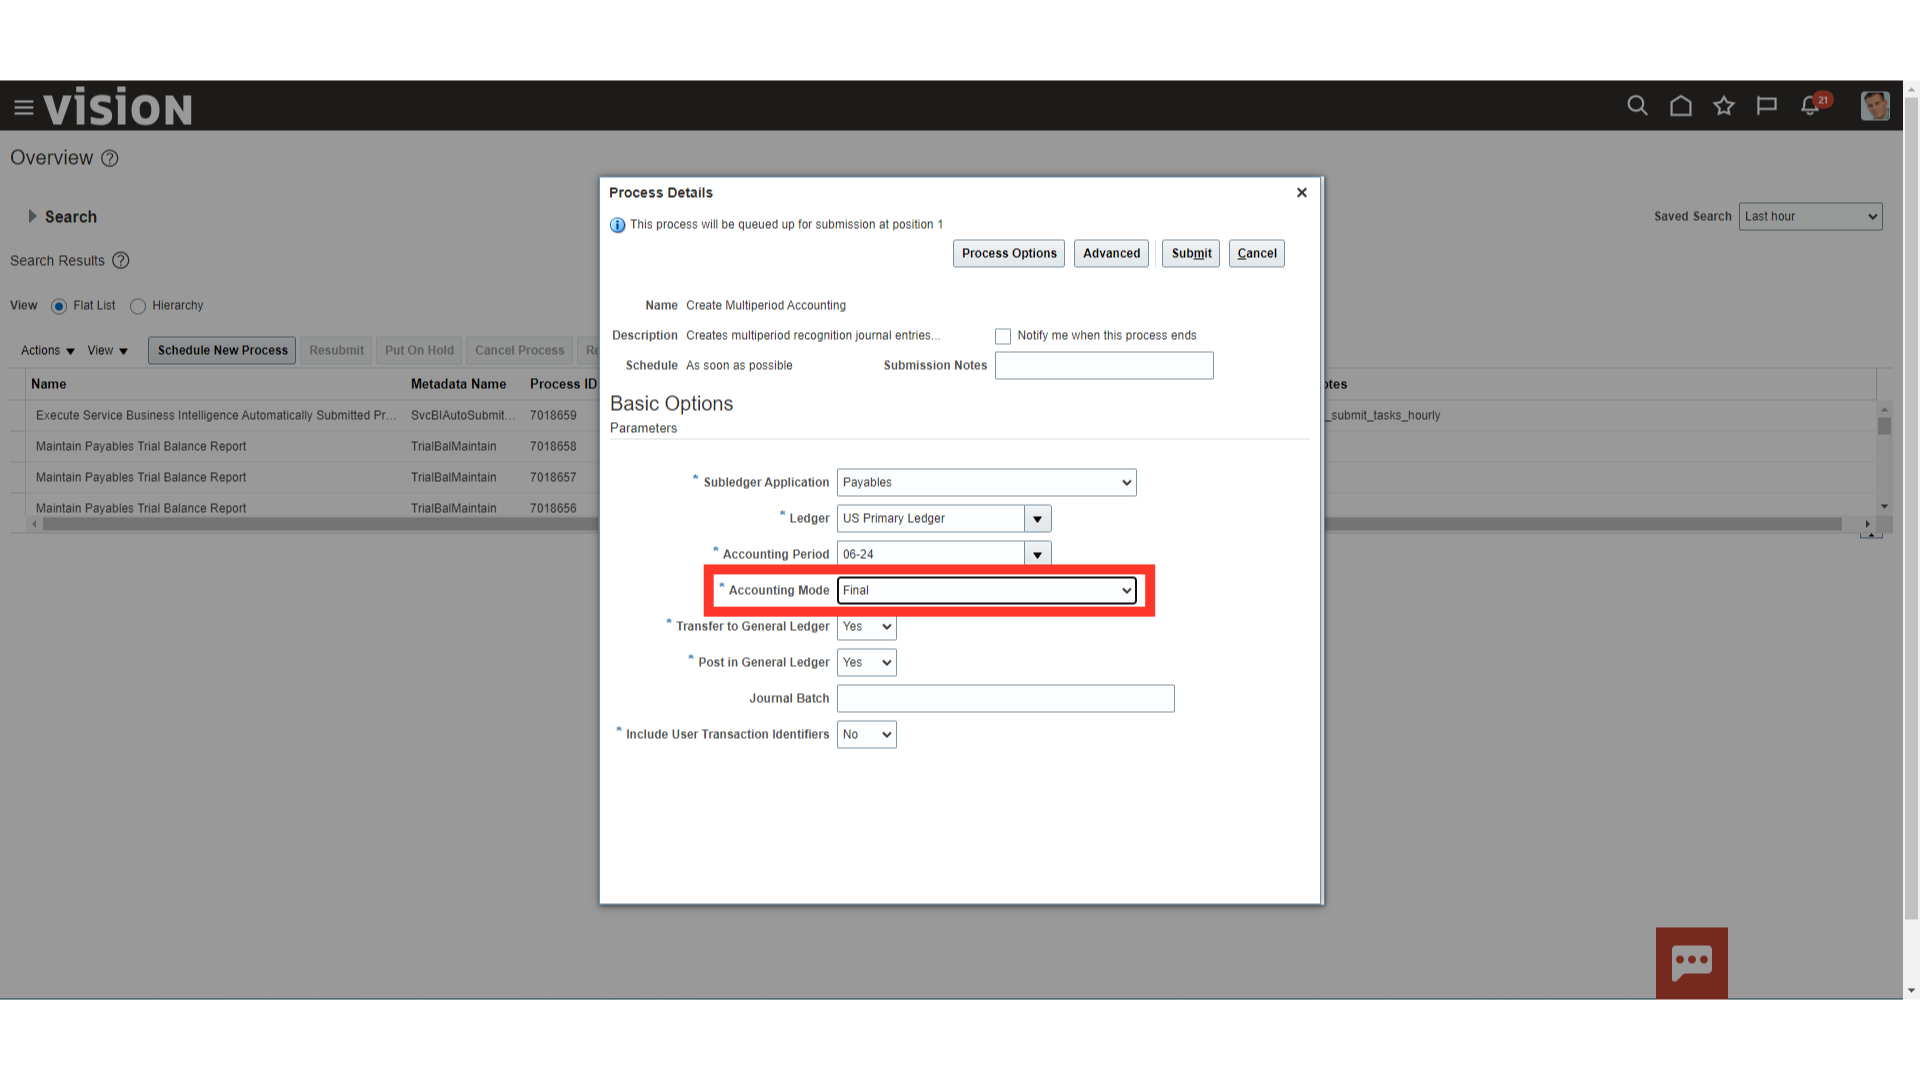
Select the Subledger Application as “Payables” from the drop down.
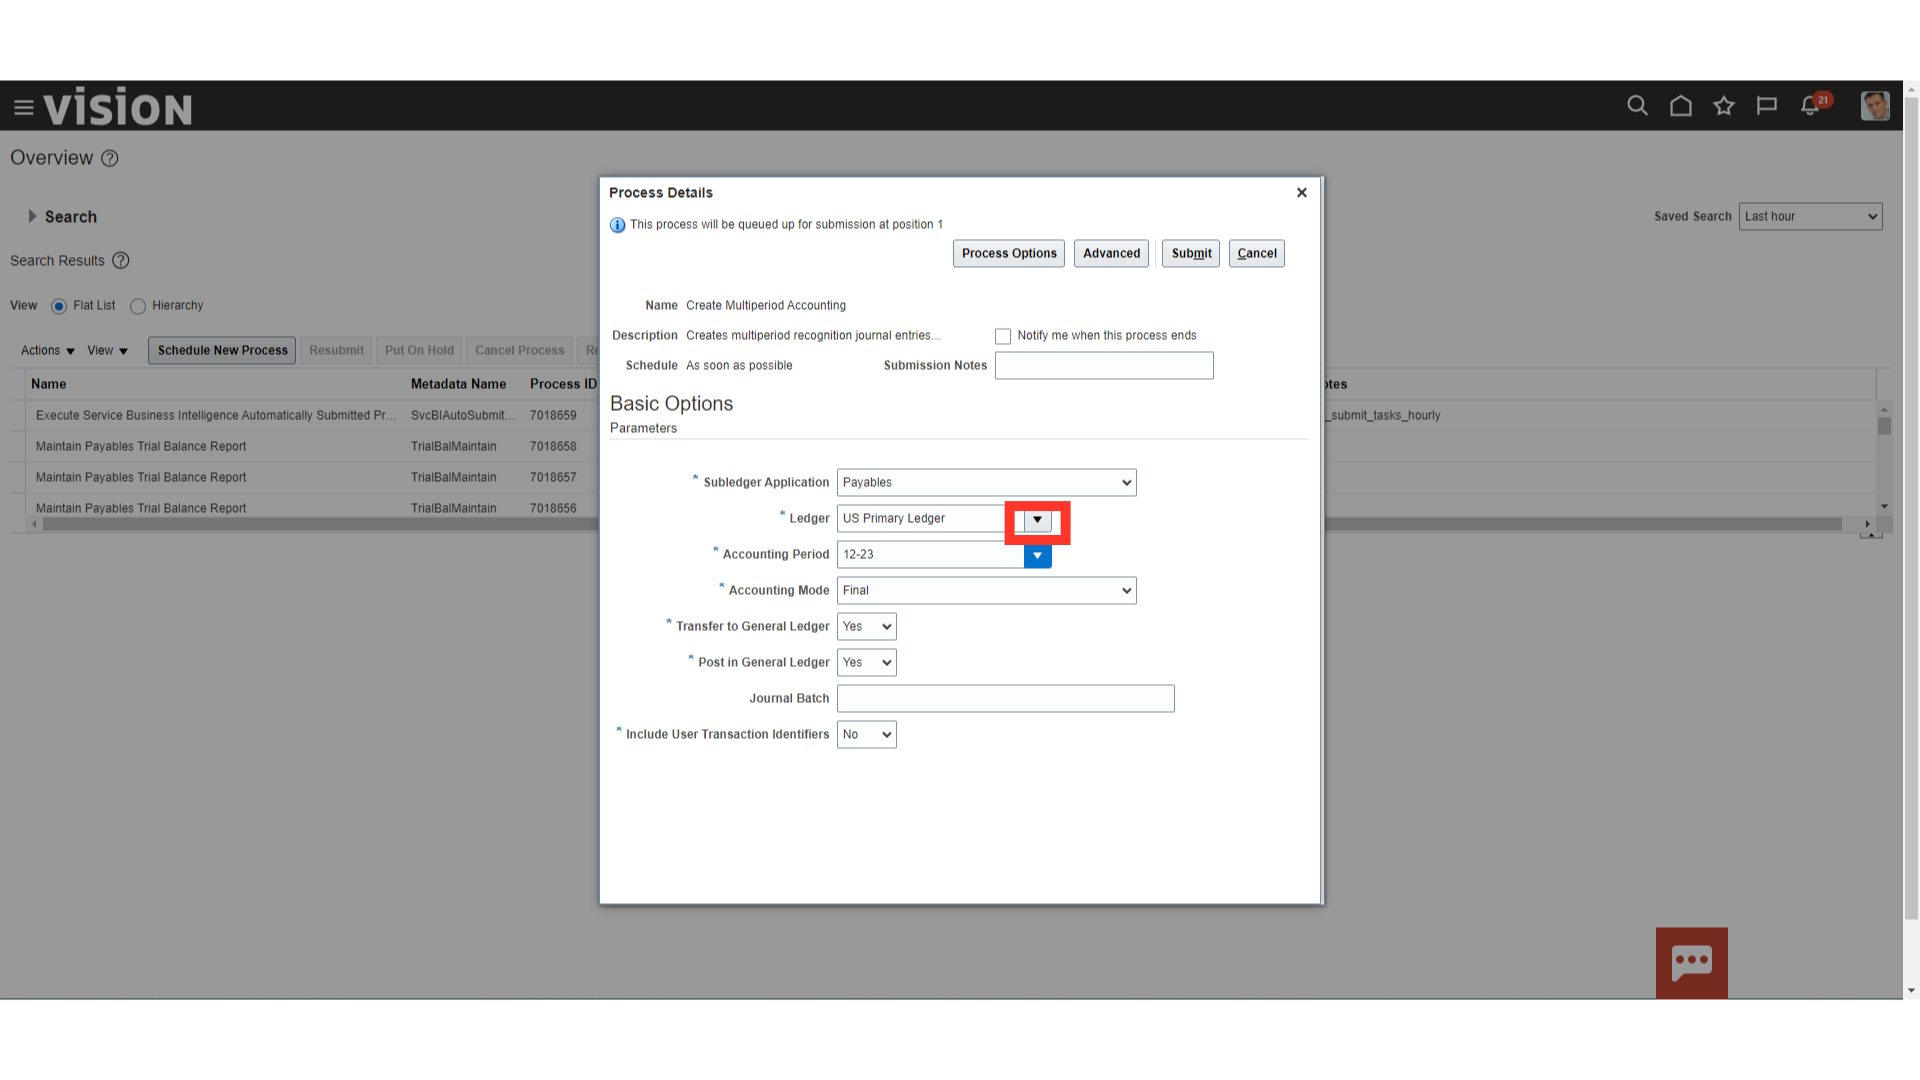
Select the appropriate ledger name from the drop down. Here for demo purpose, we have selected US Primary ledger.
Select the Accounting period in which accounting is to be generated.
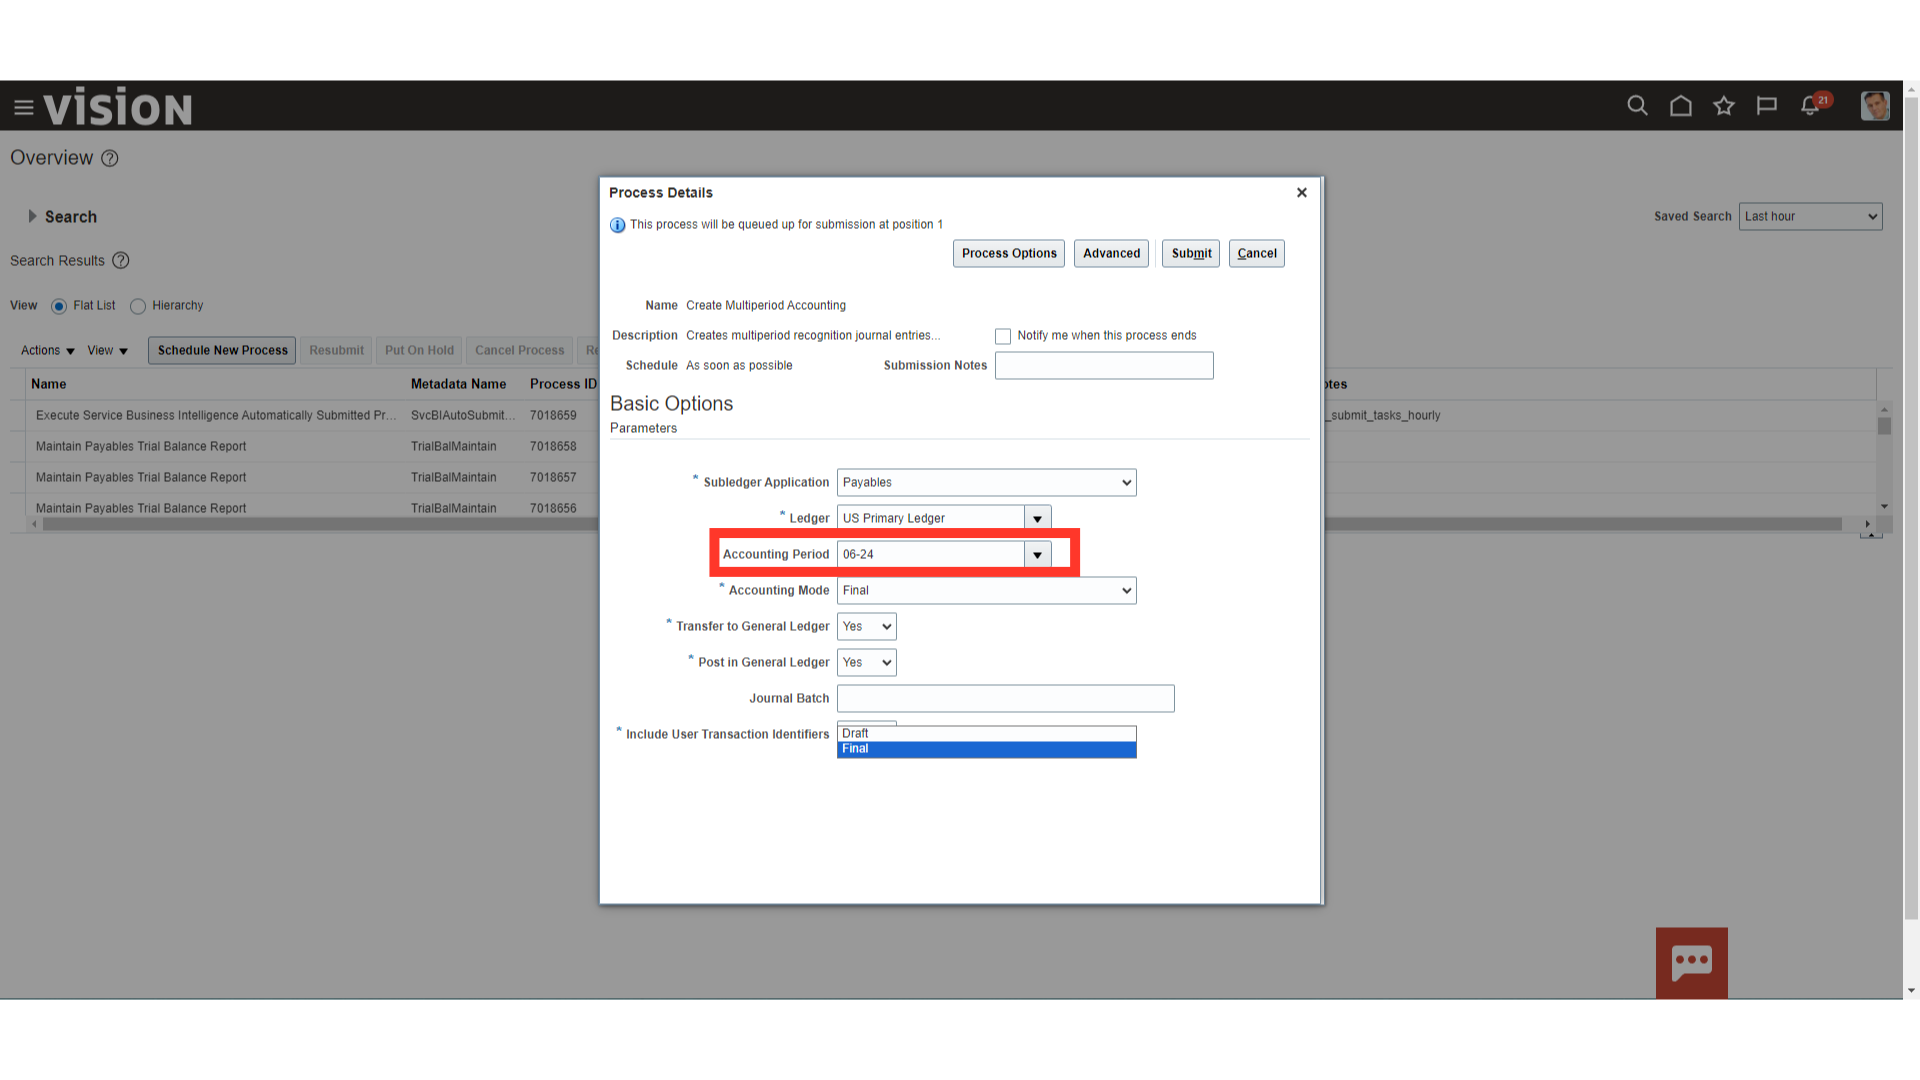
You can submit the process first in Draft Accounting mode to see if the account combinations are coming properly, and then submit the process in final mode. Here for demo purpose, we have selected “final” mode.
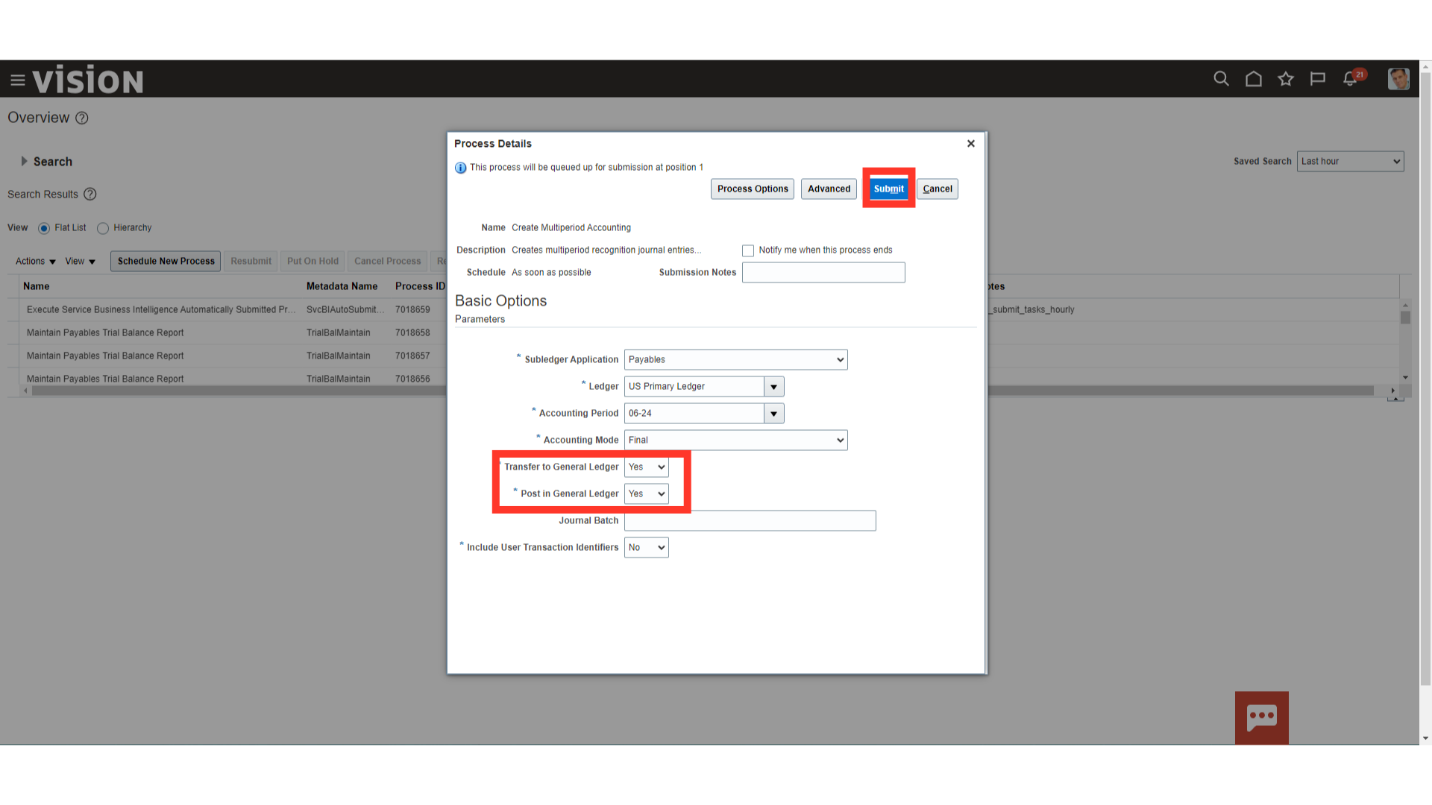
Select the Transfer to General ledger and Post to General ledger parameter as “Yes”, to finally post entries to the General ledger. After that click on Submit button to run the process.
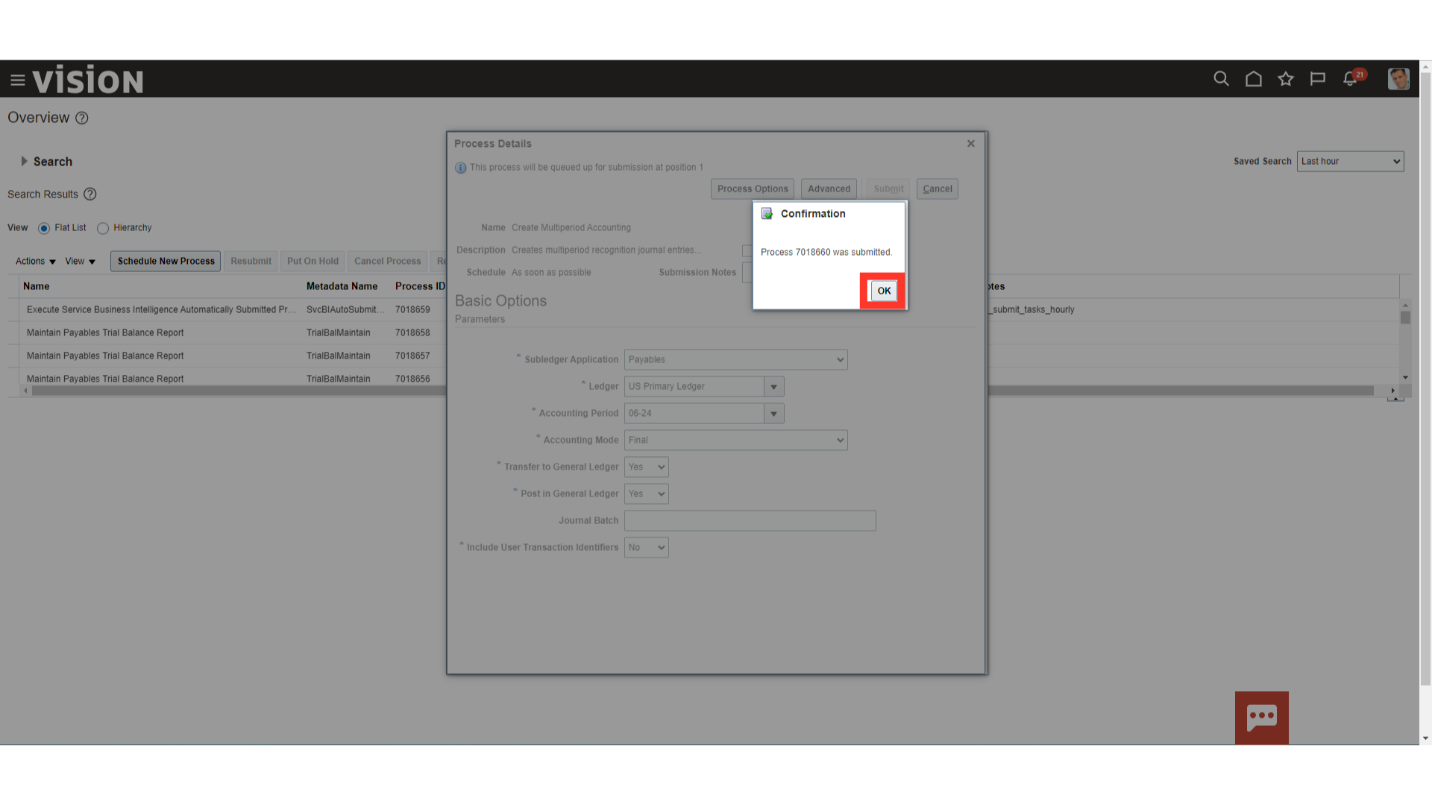
Confirmation message along with Process ID is displayed, Click on OK to continue.
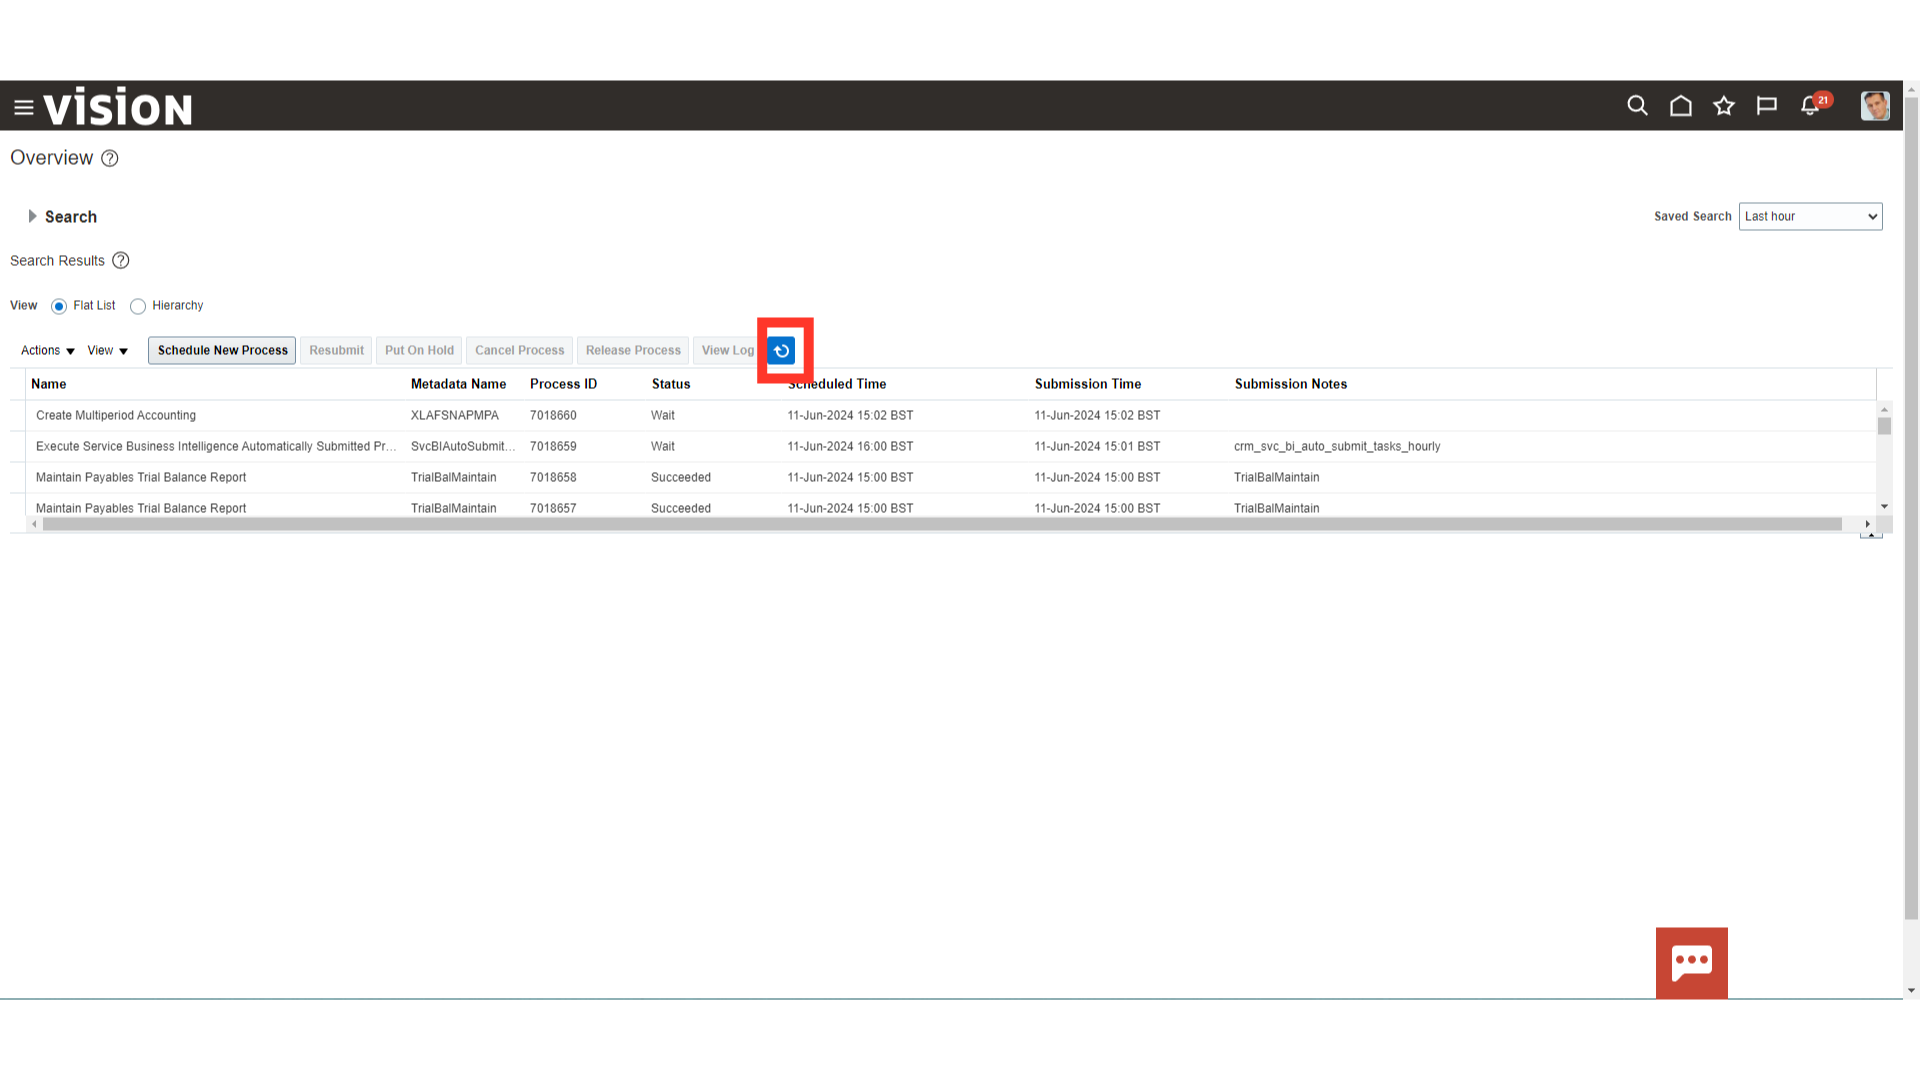
Click on Refresh icon to refresh the process status.
Select the “Create Multiperiod Accounting Execution Report” name, and then click on the Republish button to download the report.
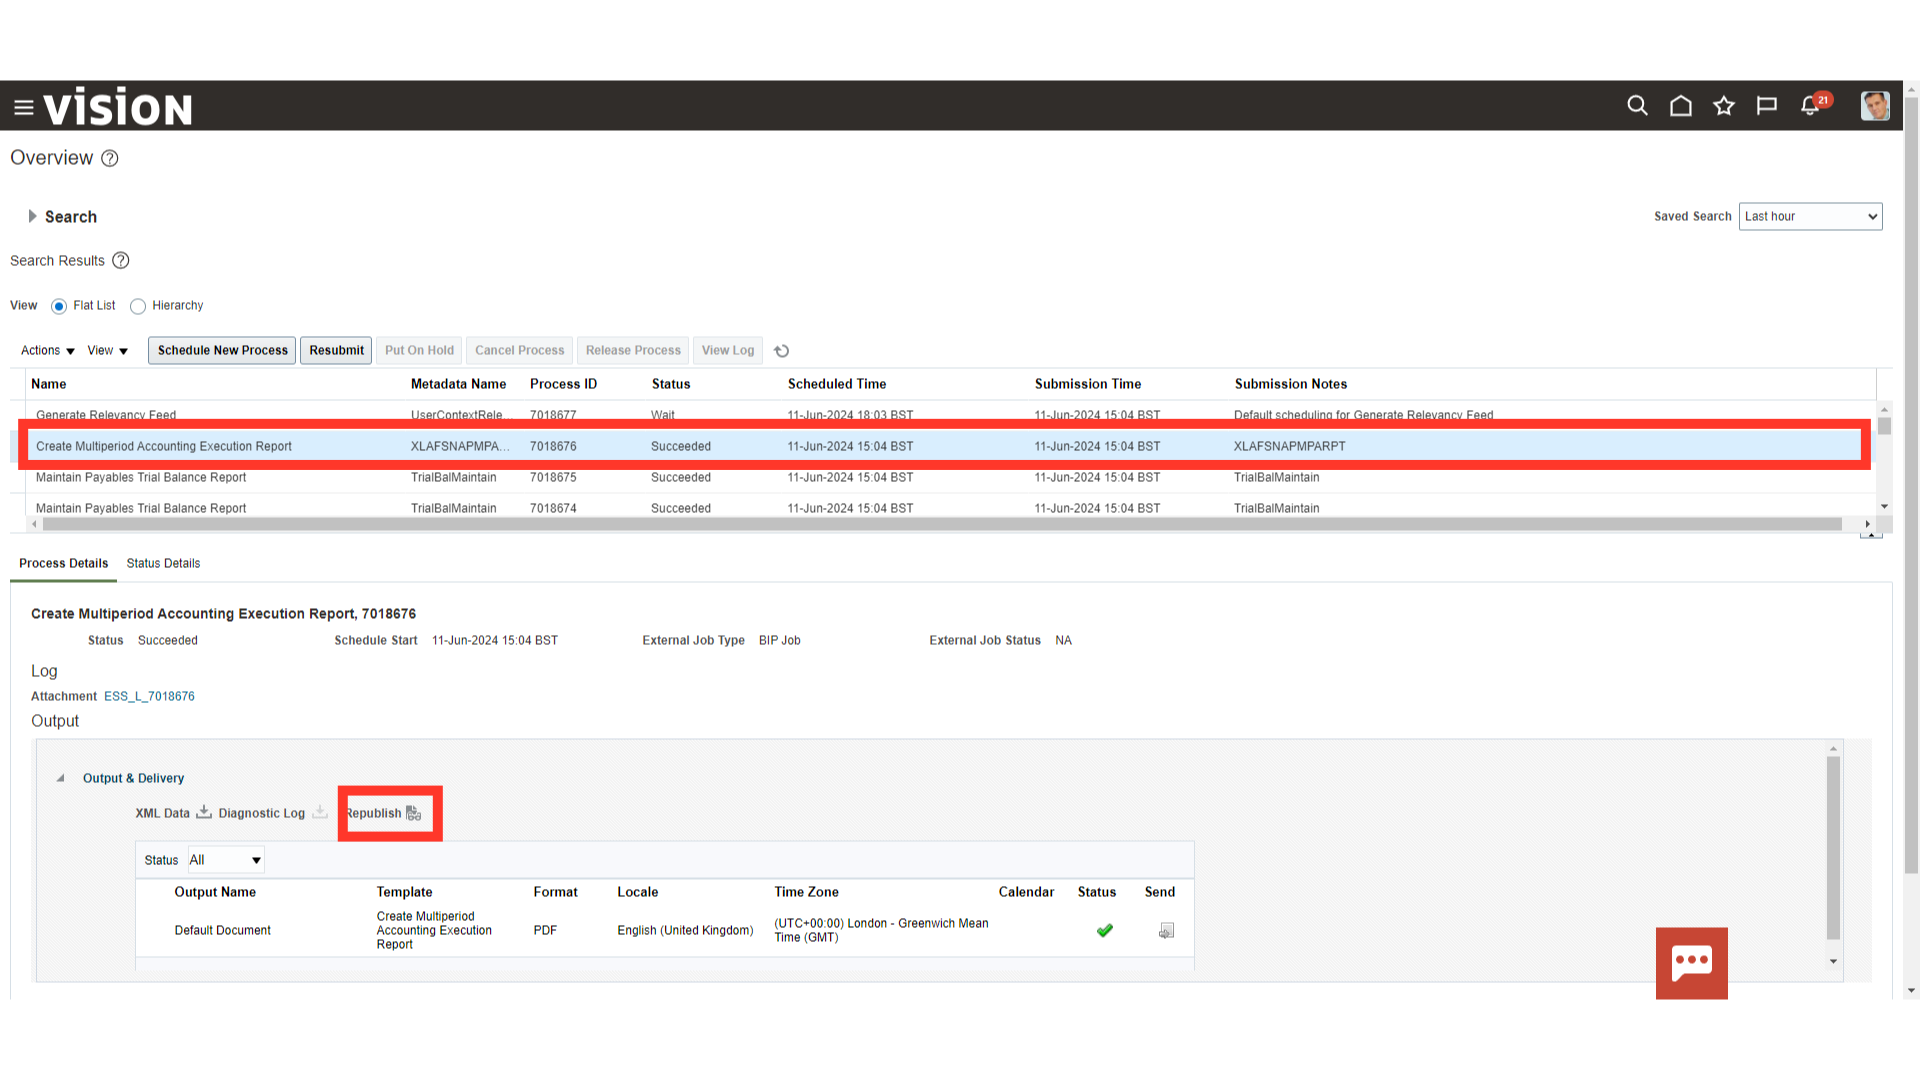
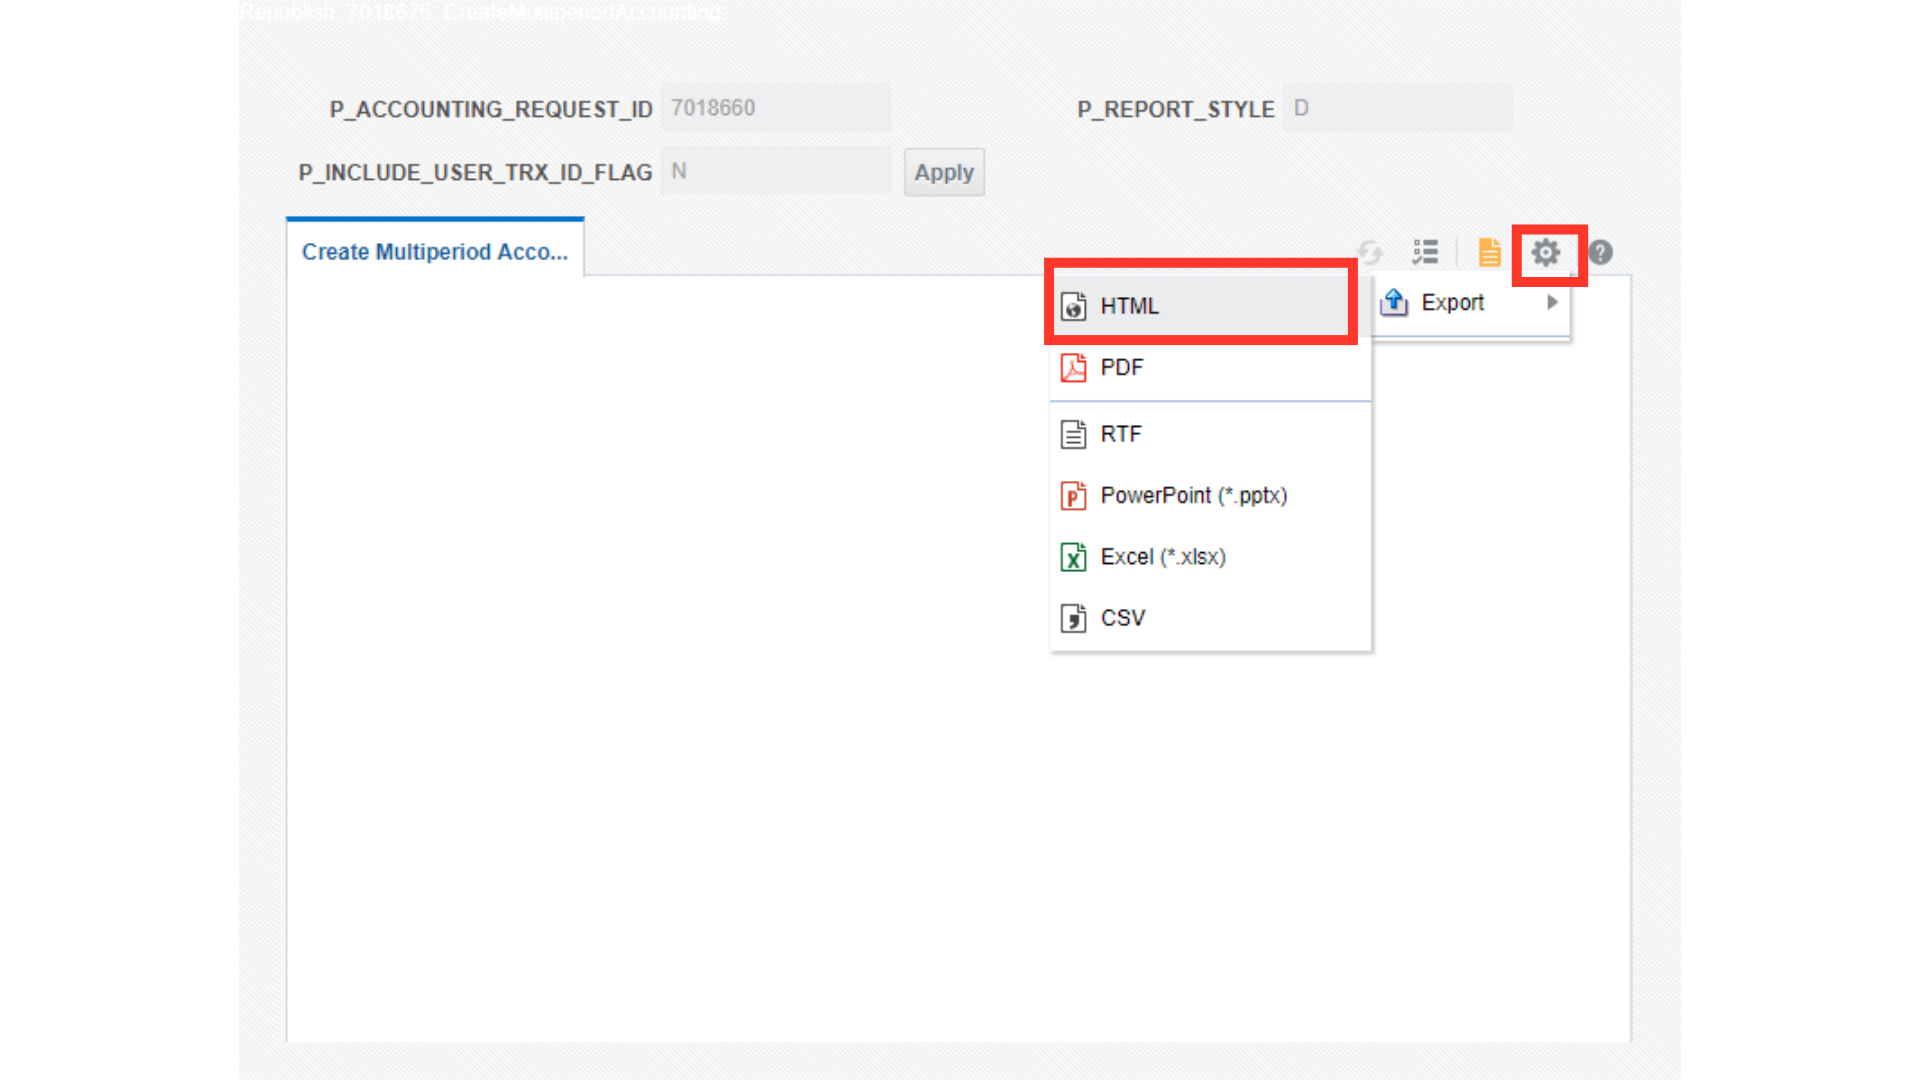
Click on the gear icon, and then click on the HTML view option under Export.
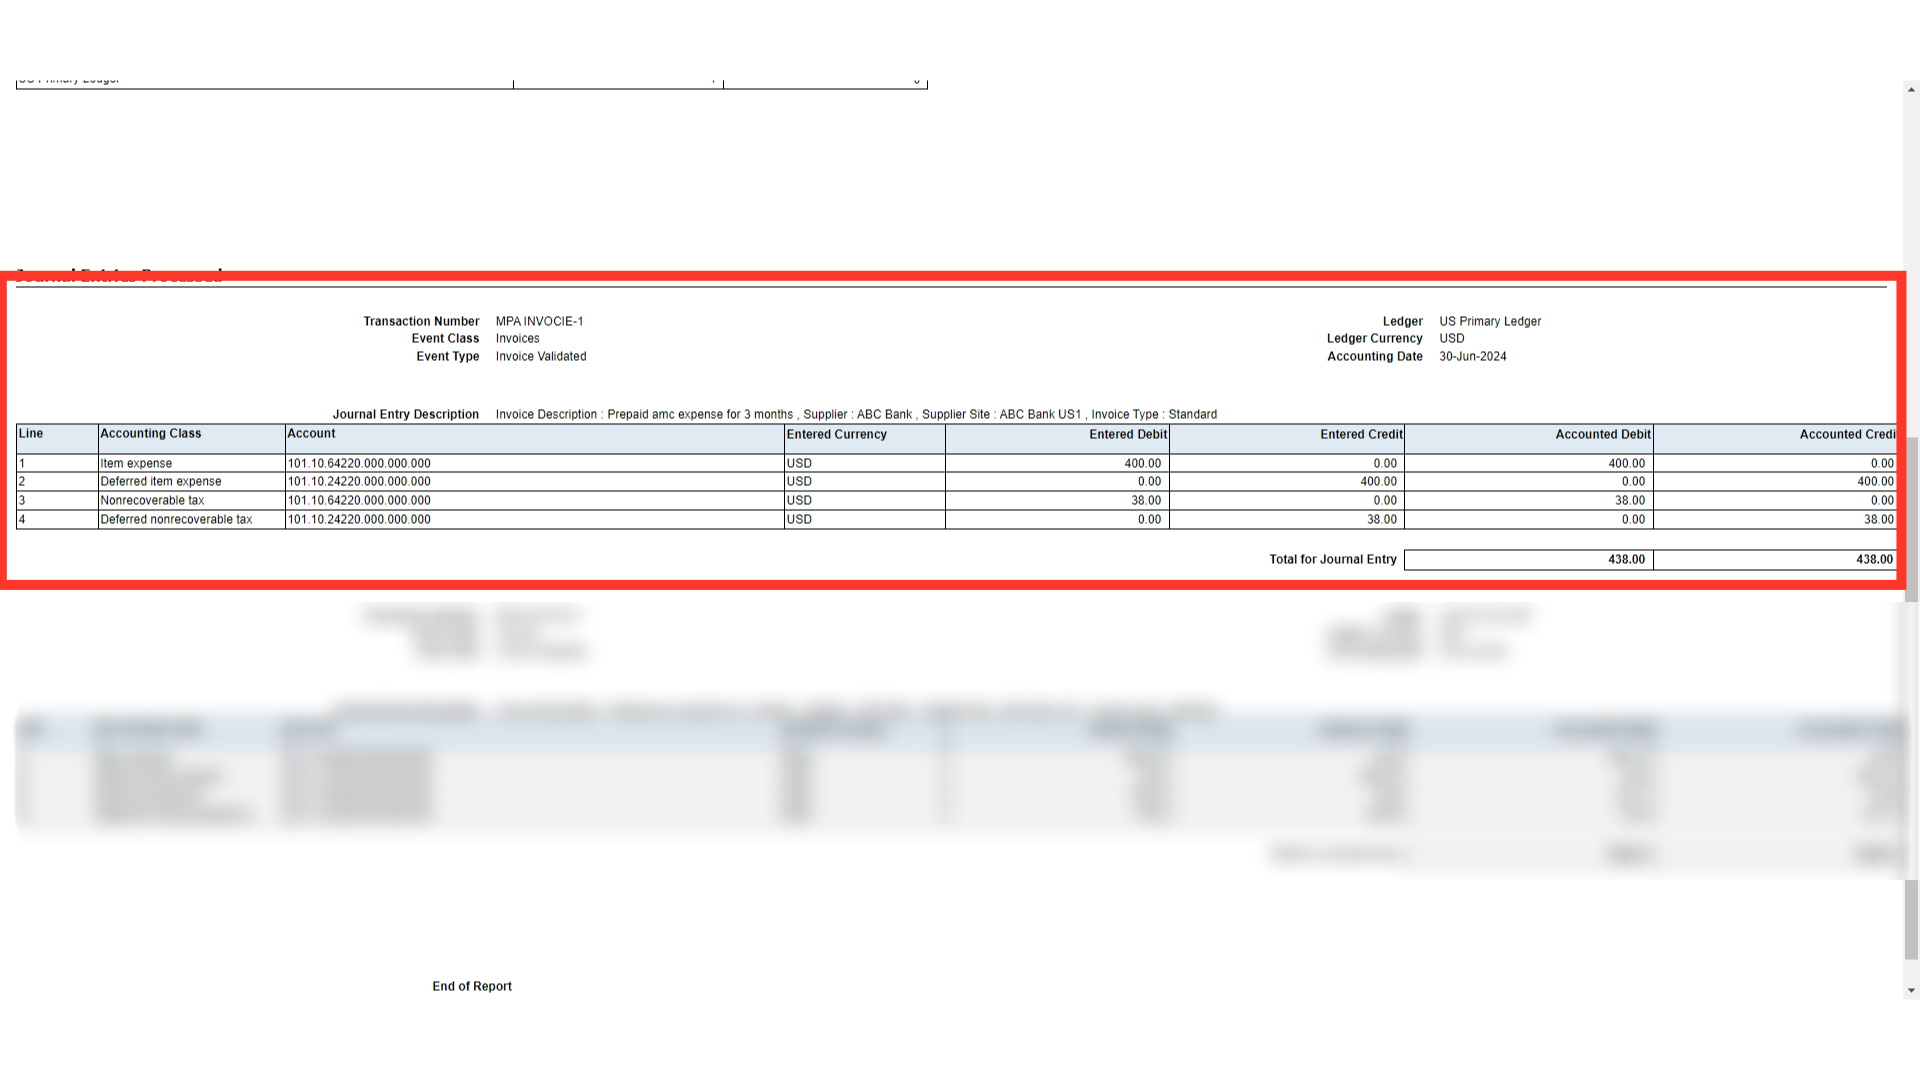
This is output of the journal entry generated for amortizing the expense.
To see the accounting entry from the invoice click on the “Accounted” hyperlink after clicking on the Validated option.
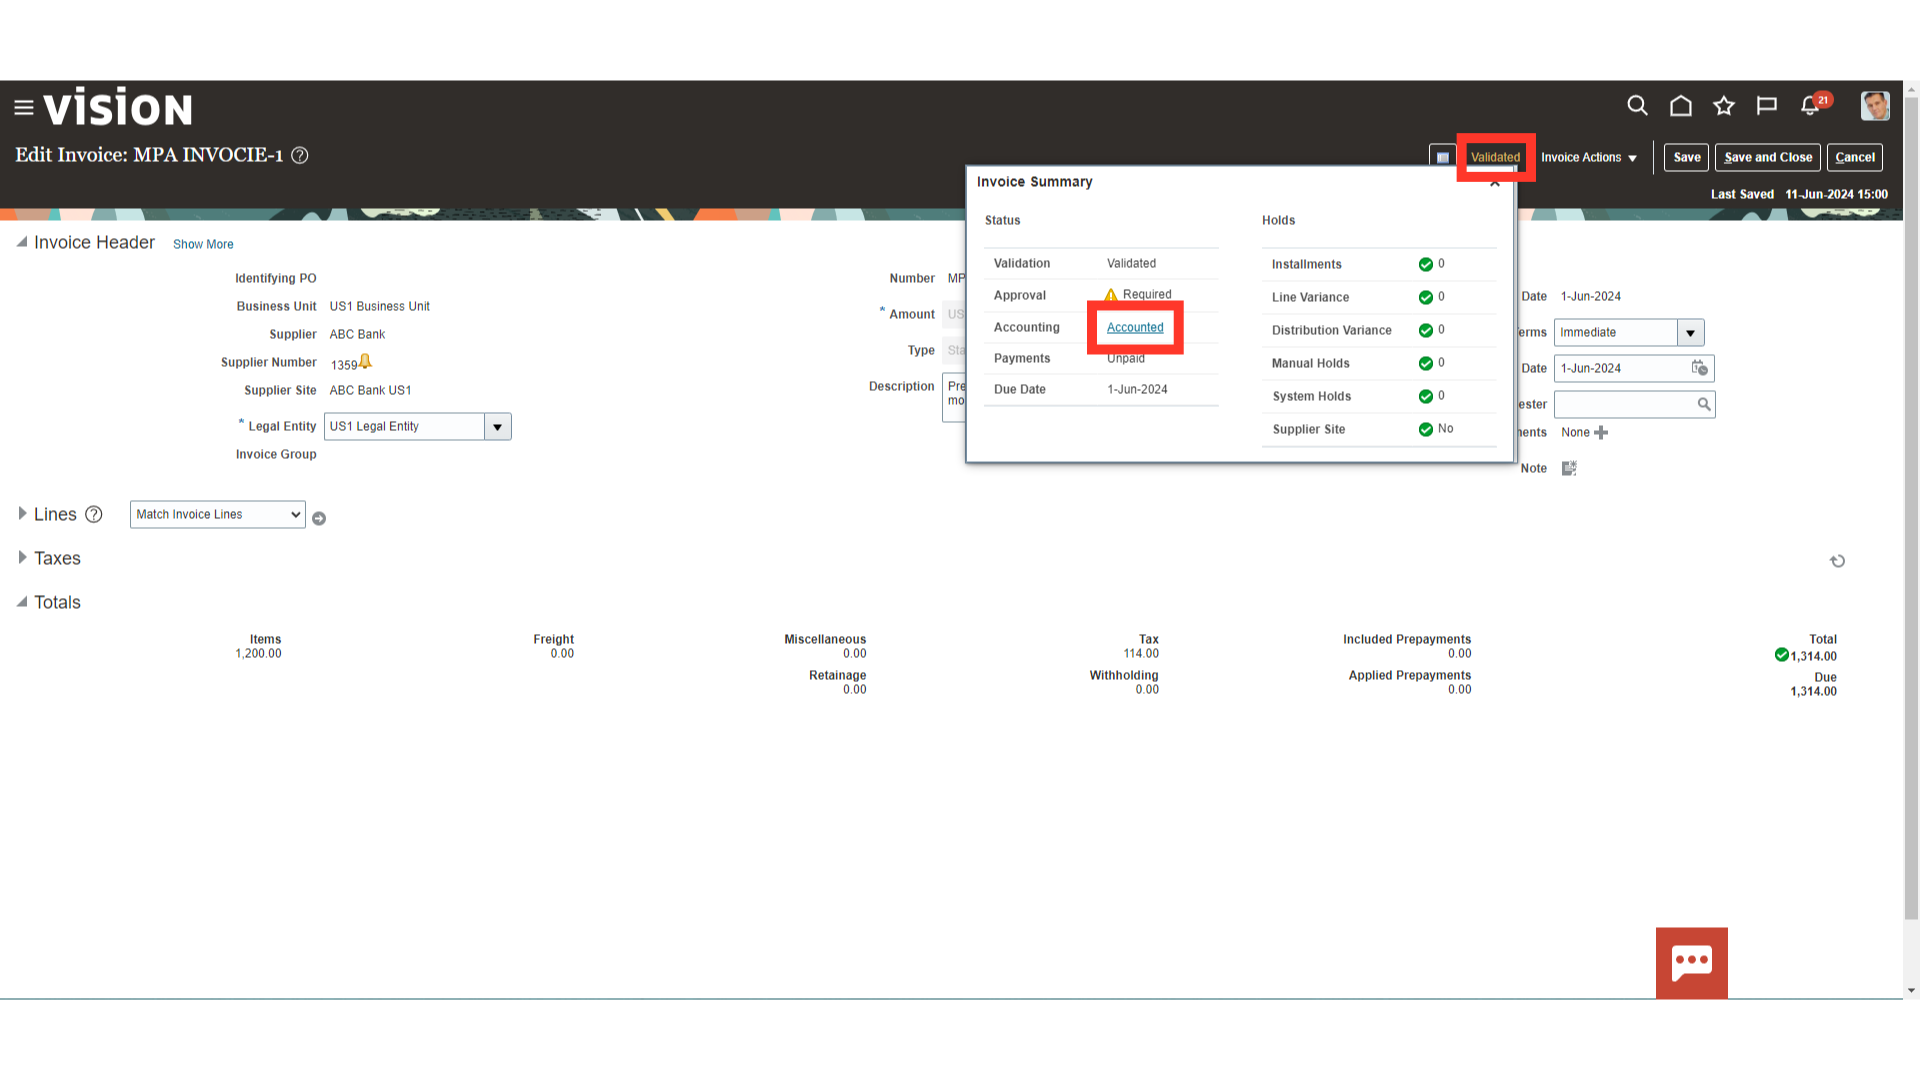
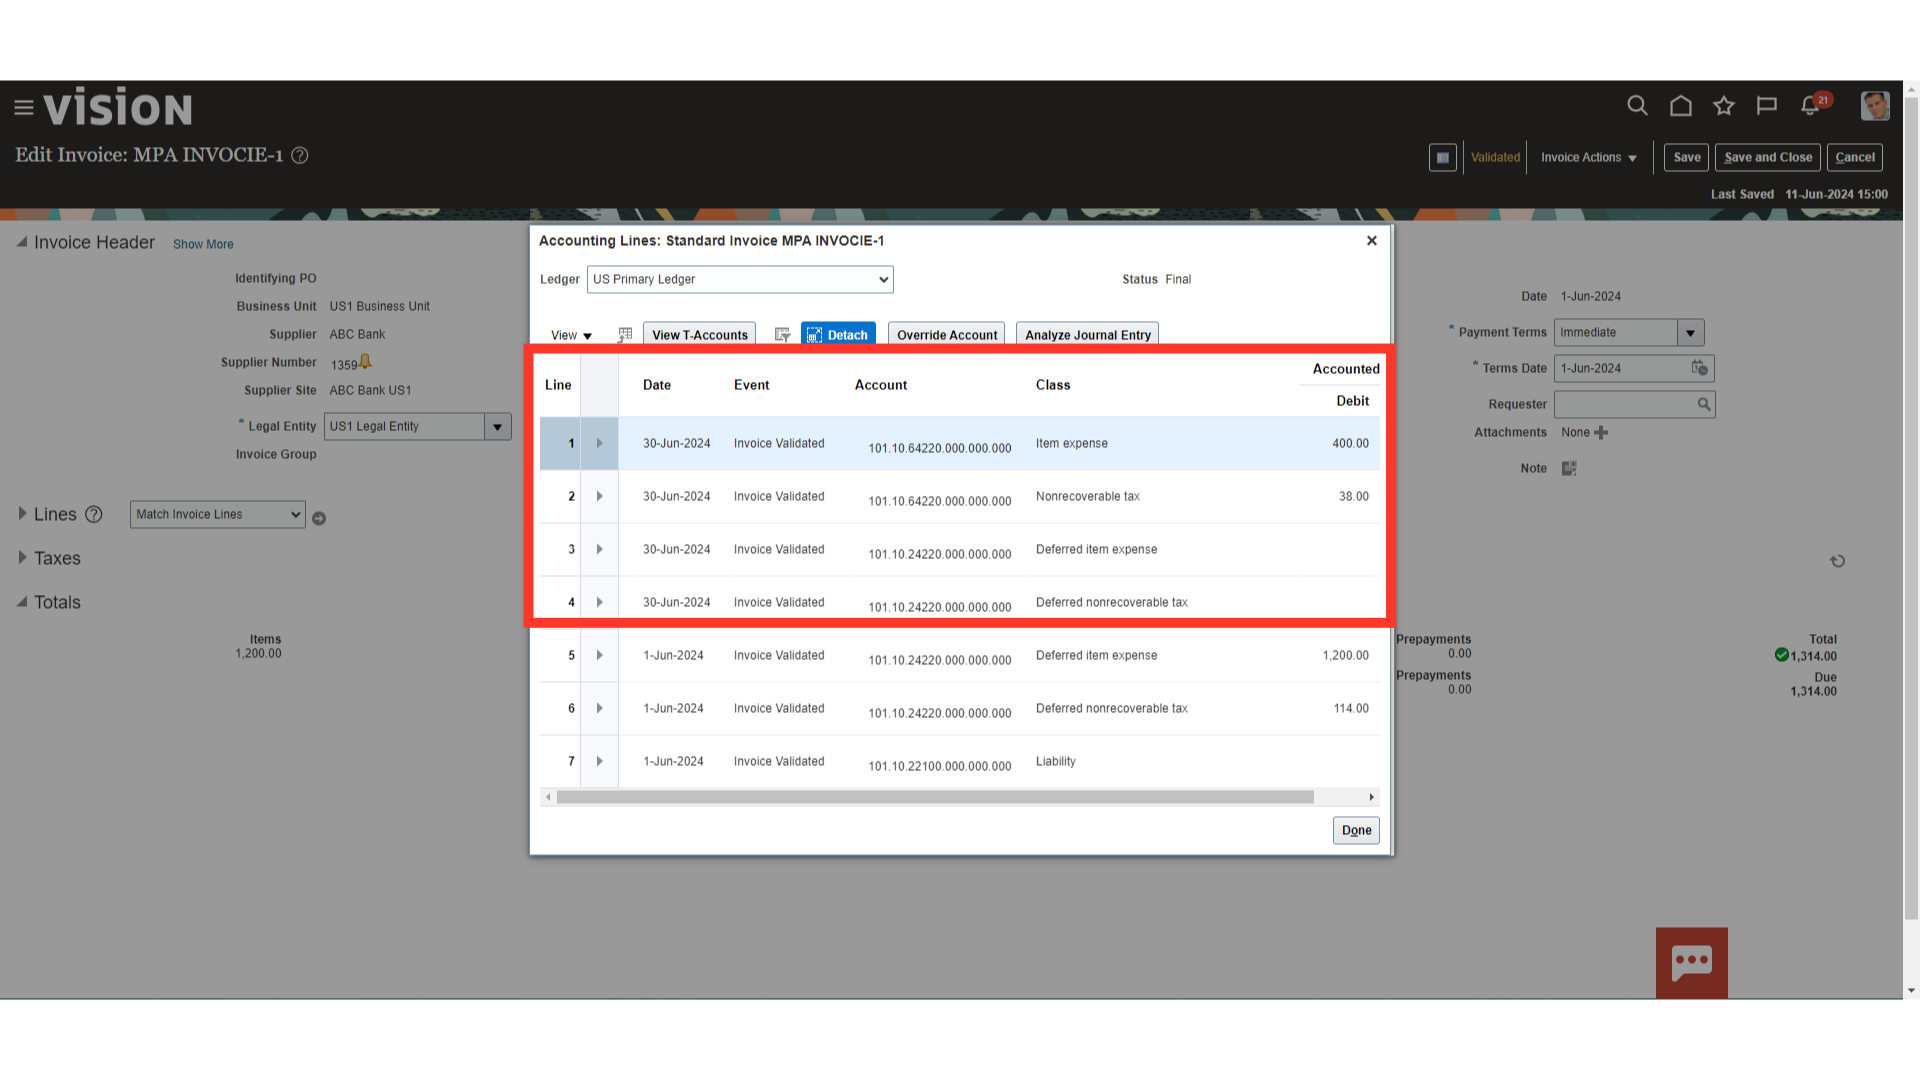
This is the accounting entry generated at the end of the month after running multiperiod accounting process. In same way, the Create Multiperiod Accounting process should be run for remaining months to book the expense.
In this guide, you have gone through the process of creation and validation of the multiperiod invoice, and what are fields to be entered for generating the amortization journal entry of Prepaid expense. Also, process of running the Create Multiperiod Accounting process have been demonstrated.