How to do External Supplier Registration
This guide will walk you through the step-by-step process of registering as a Prospective/Spend Authorized Supplier in Oracle Fusion. From entering your email address to providing company details and bank account information, follow these instructions for a seamless registration experience.
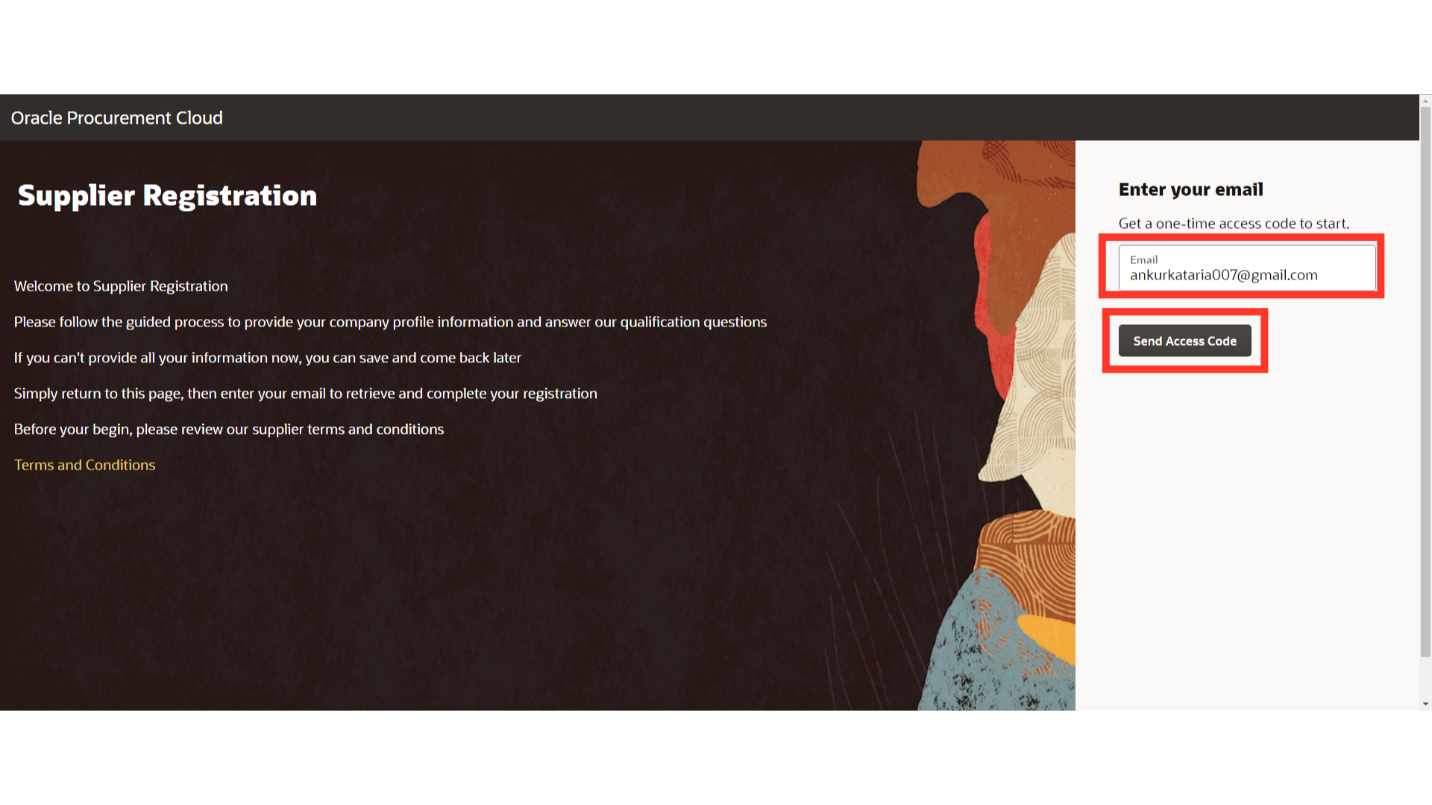
The Supplier Management team provides the link to the suppliers for the registration process. Prospective and Spend Authorized links are separate but follow the same registration steps. After clicking on the link, you will land on the Supplier Registration Page. Here, provide the email ID as the Supplier Organization and click on the Send Access Code button.
Enter the Access Code you receive in your email and click on the Continue button.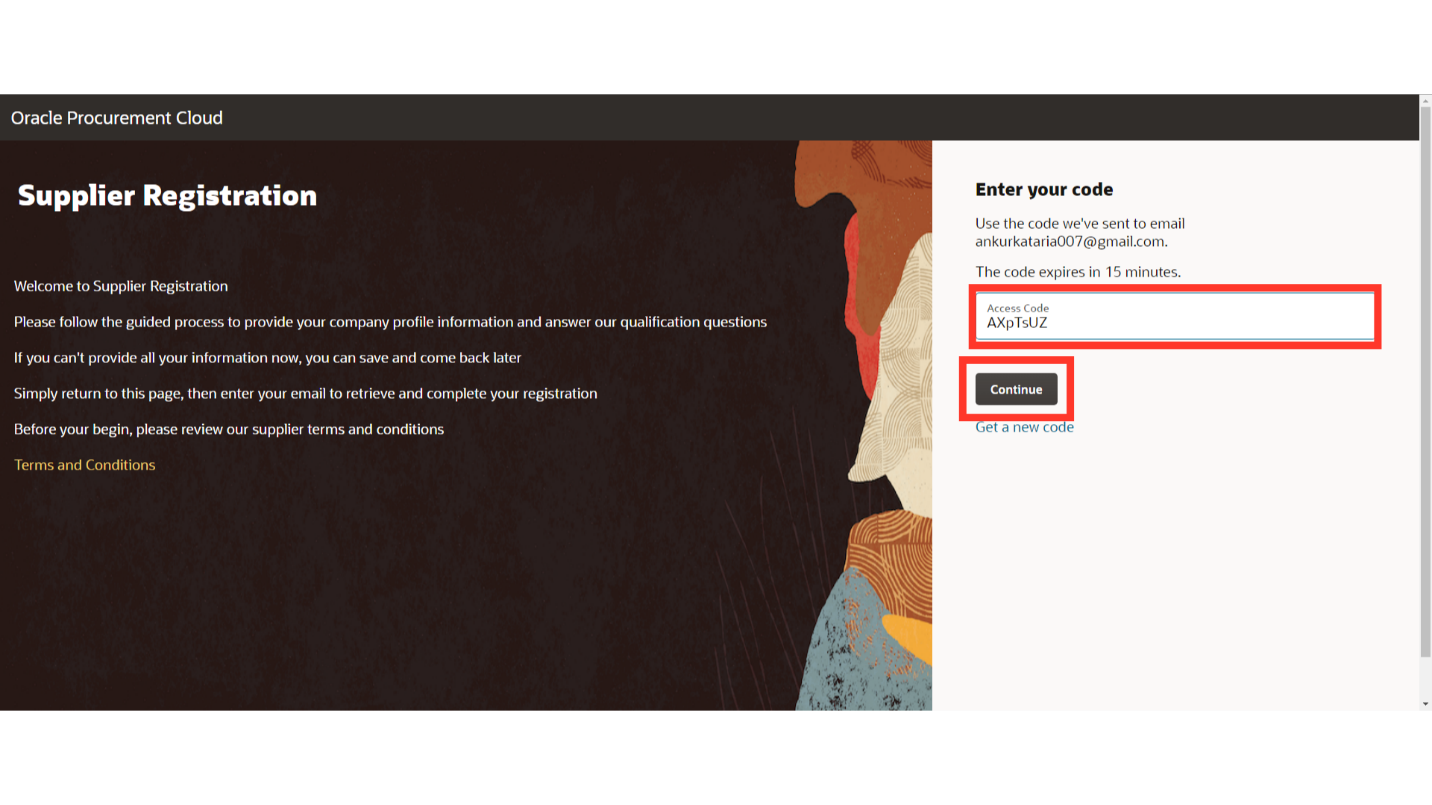
In the Company Details section, enter the Company Name, Email Address, Country, Tax Registration Number, Supplier Type, and other details.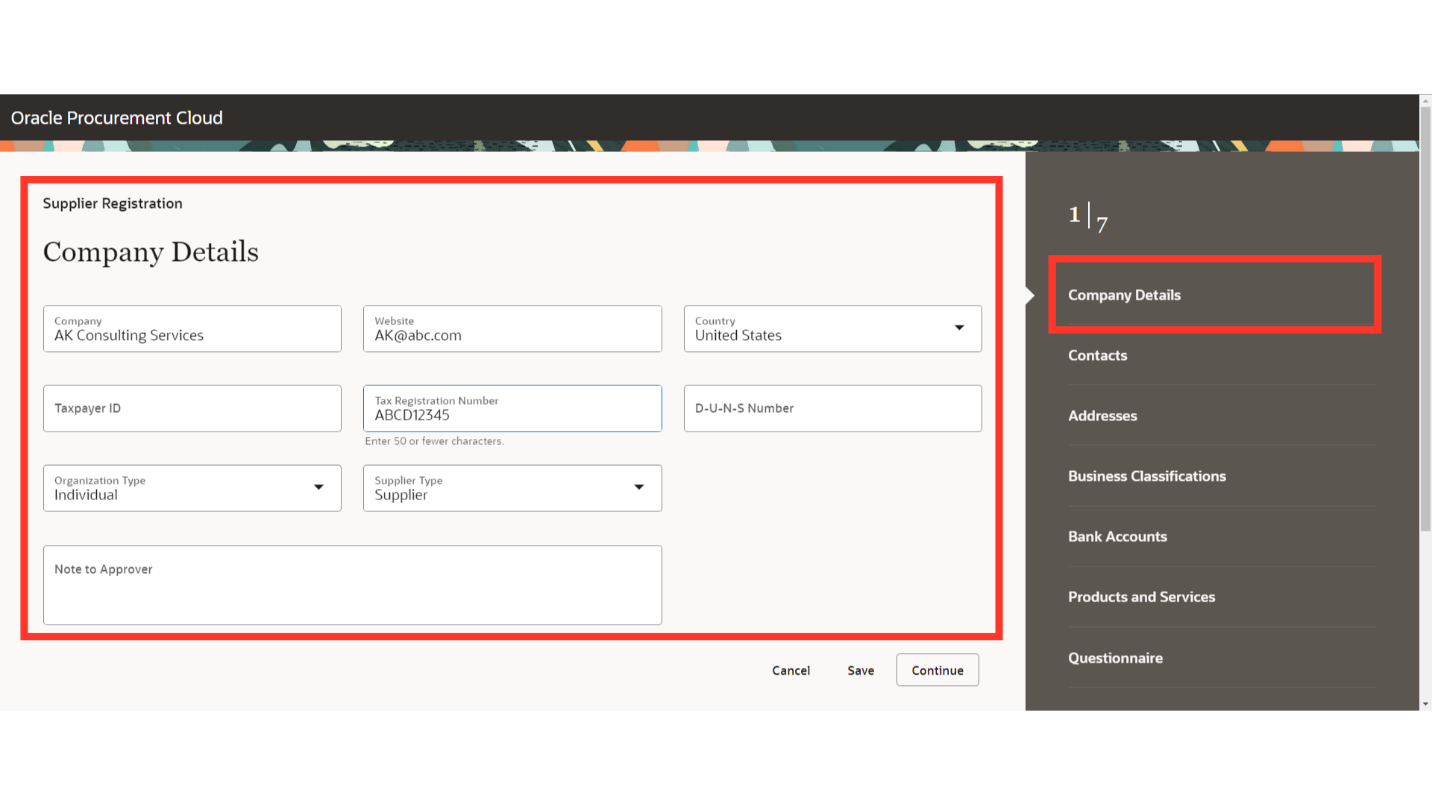
Scroll down in the Company Details section and provide the attachment details required by the Buying Organization. Once all the details are filled in, click on the Continue button.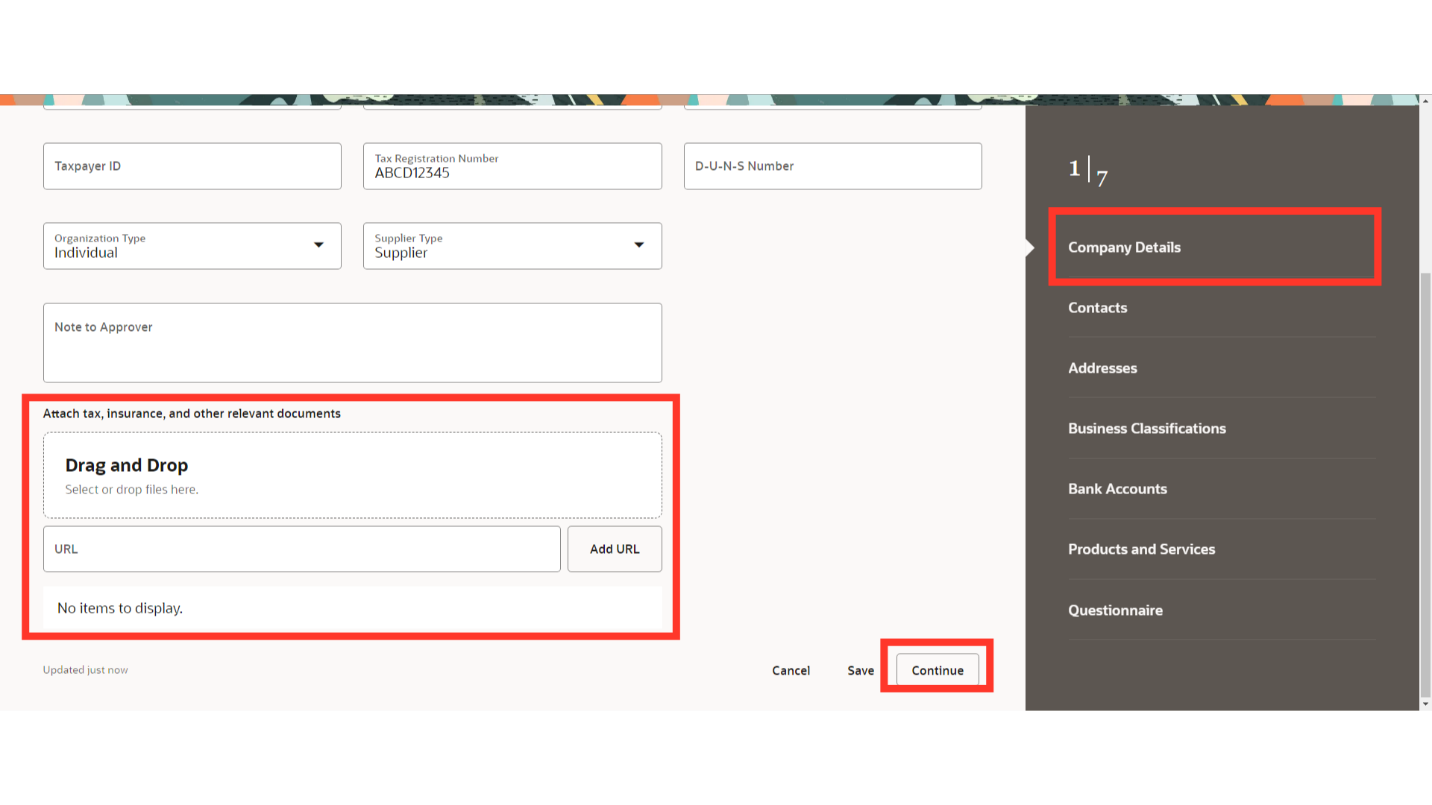
In the Contact Details section, enter the Contact Name, Email Address, and Phone Number.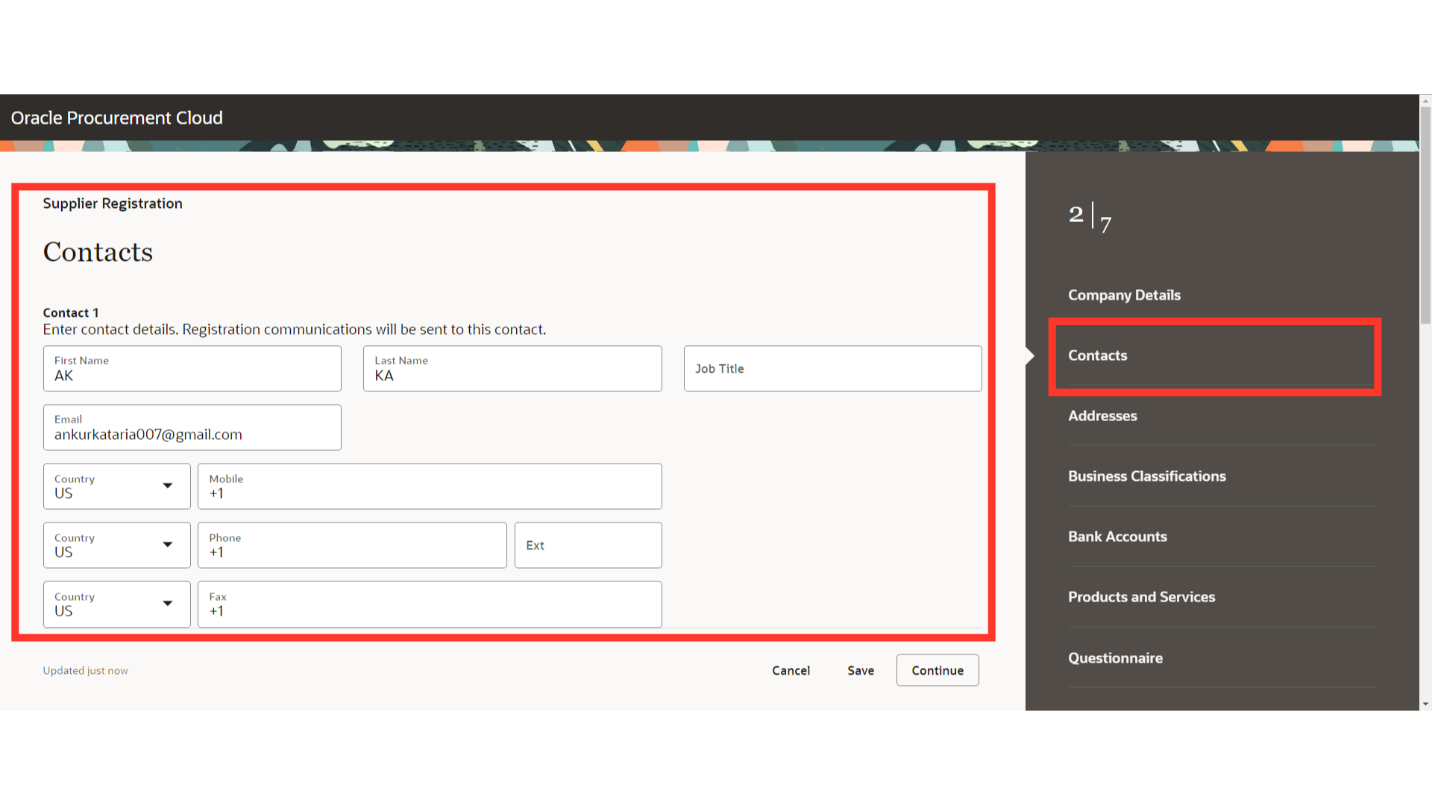
Scroll down in the Contacts section. If this is an Administrative Contact, click Yes. If a Supplier Portal account is required for this contact, click Yes on User Account and select the roles required for the User Account.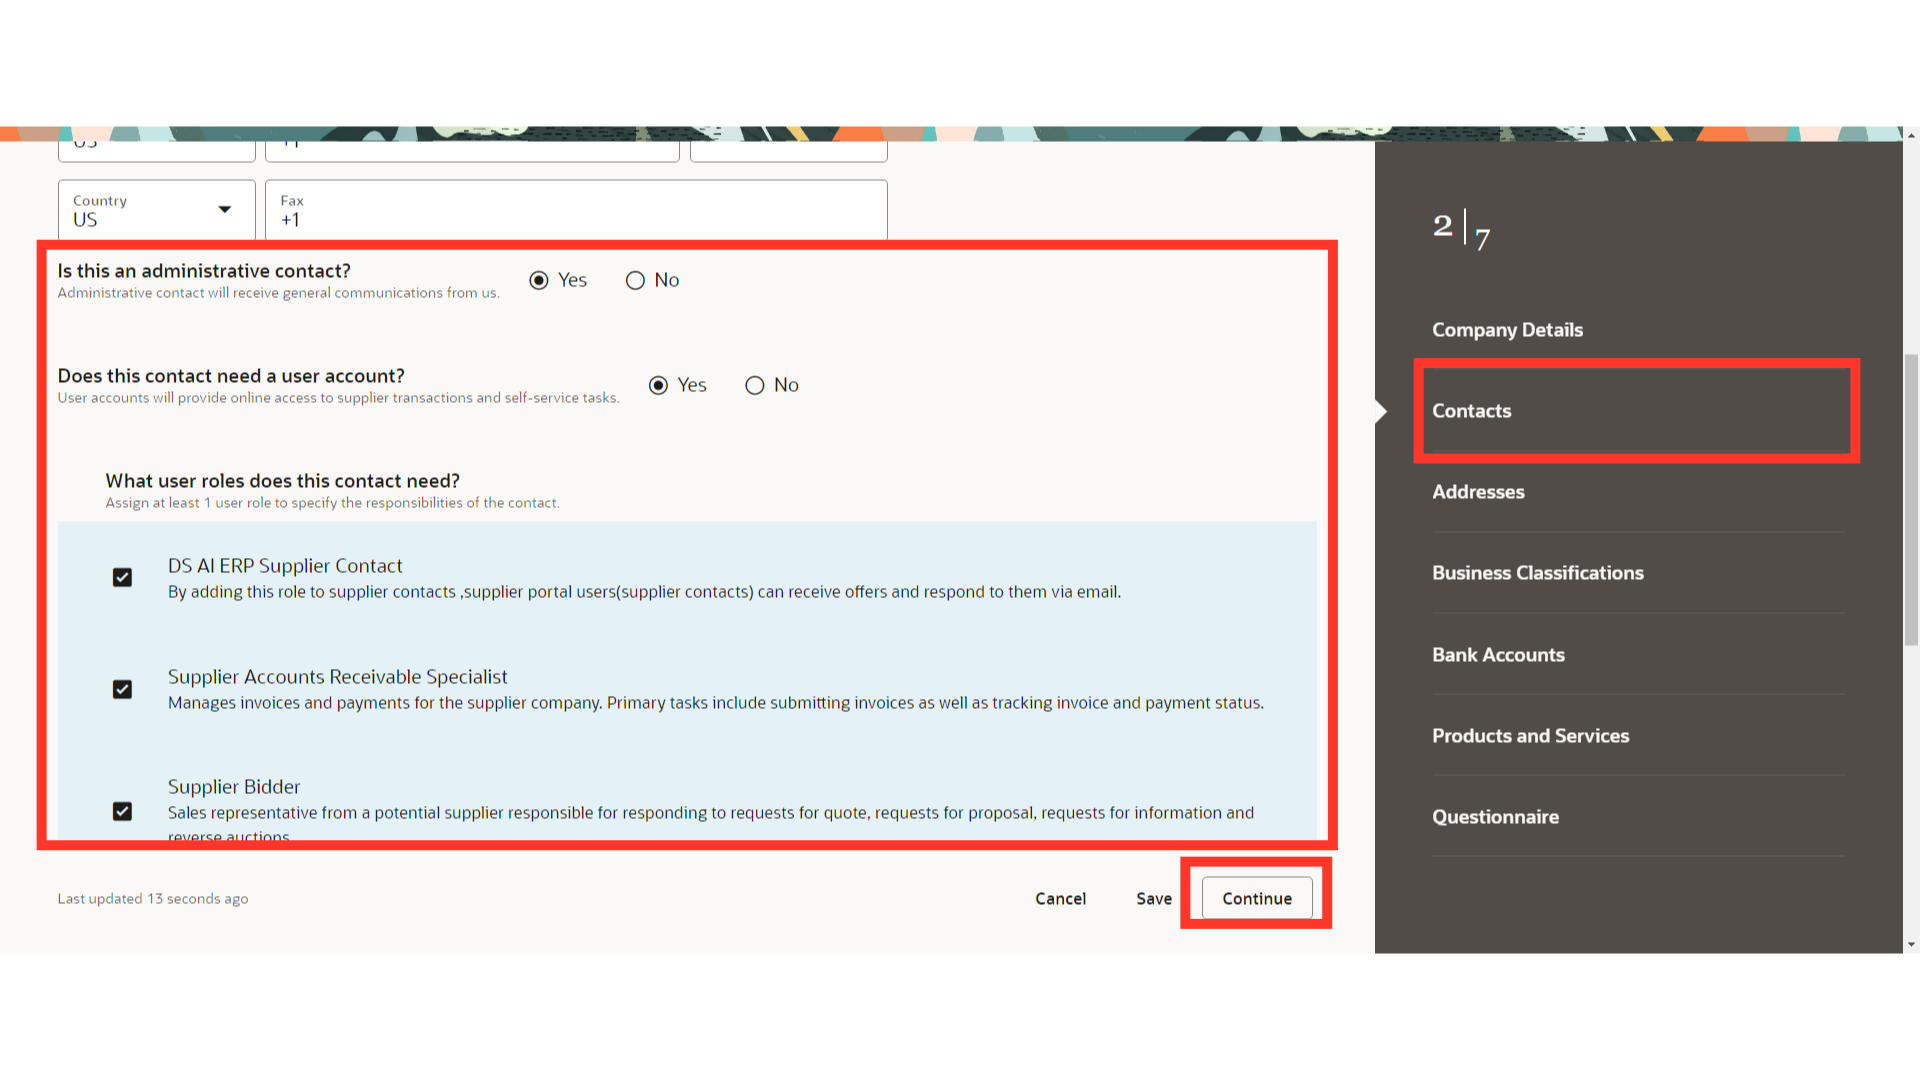
Click on the Add Another Contact button if more than one contact is available. Once all the contact details are filled in, click on the Continue button.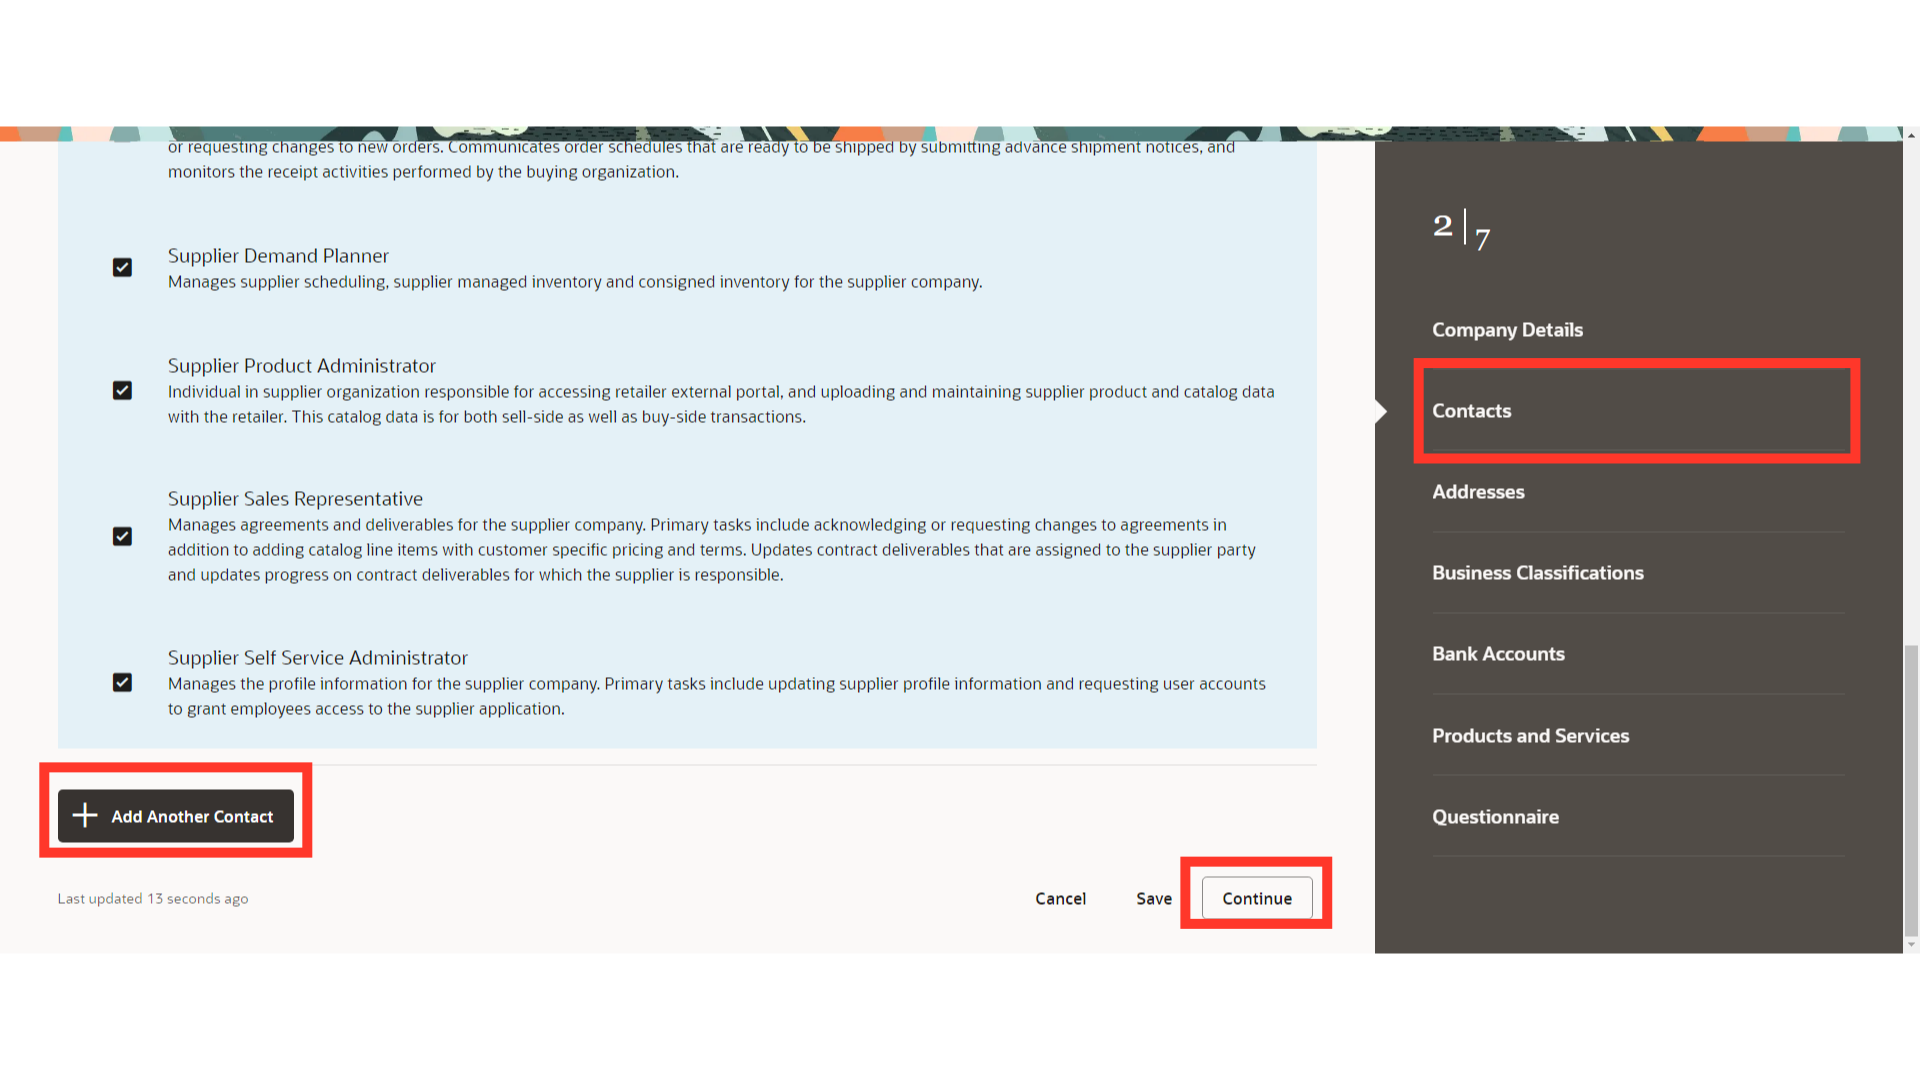
In the Addresses section, provide the address of the Supplier and the purpose of the address.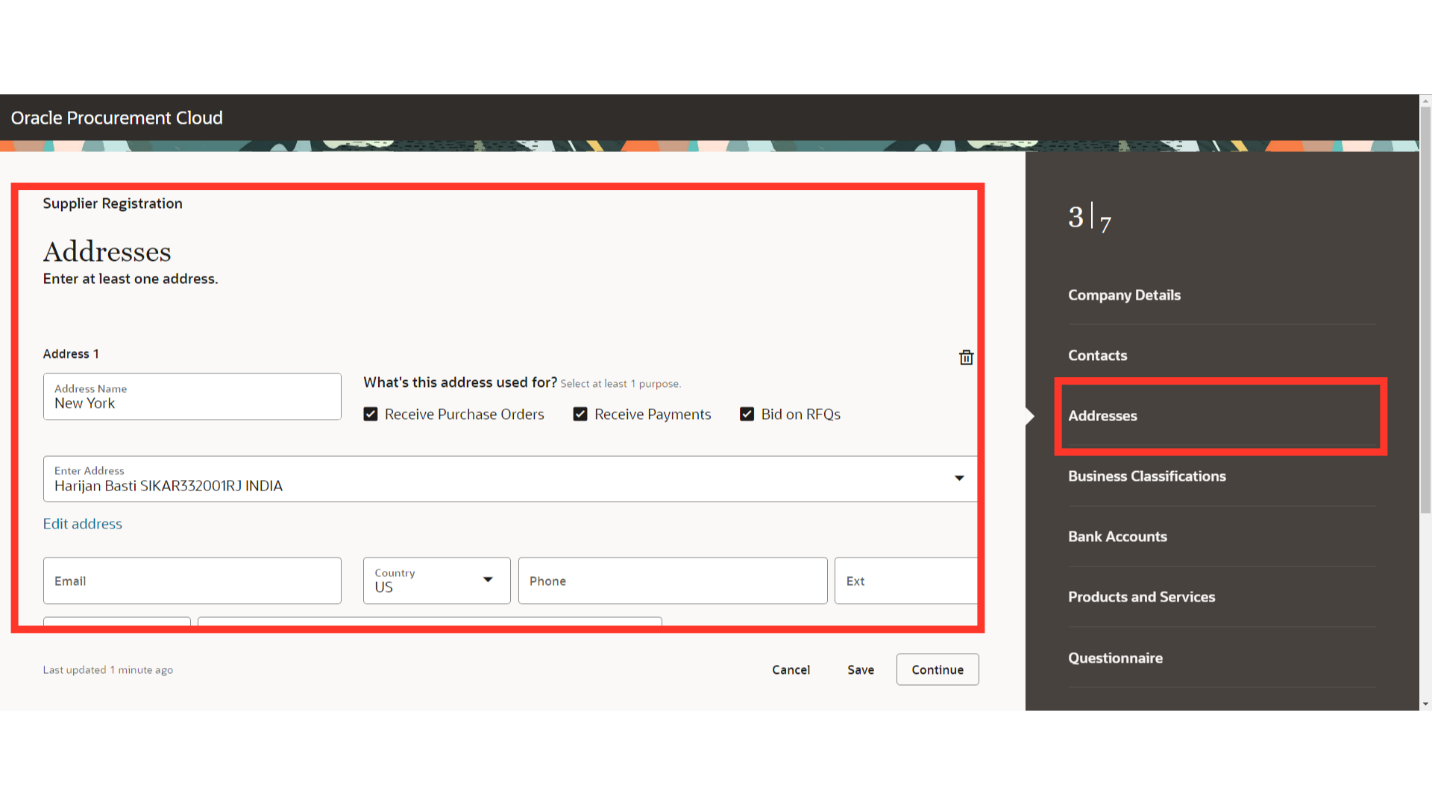
Scroll down in the Addresses section and select the associated contact for the address. Click on the Add Another Address button to add more than one address. Once all the address details are filled in, click on the Continue button.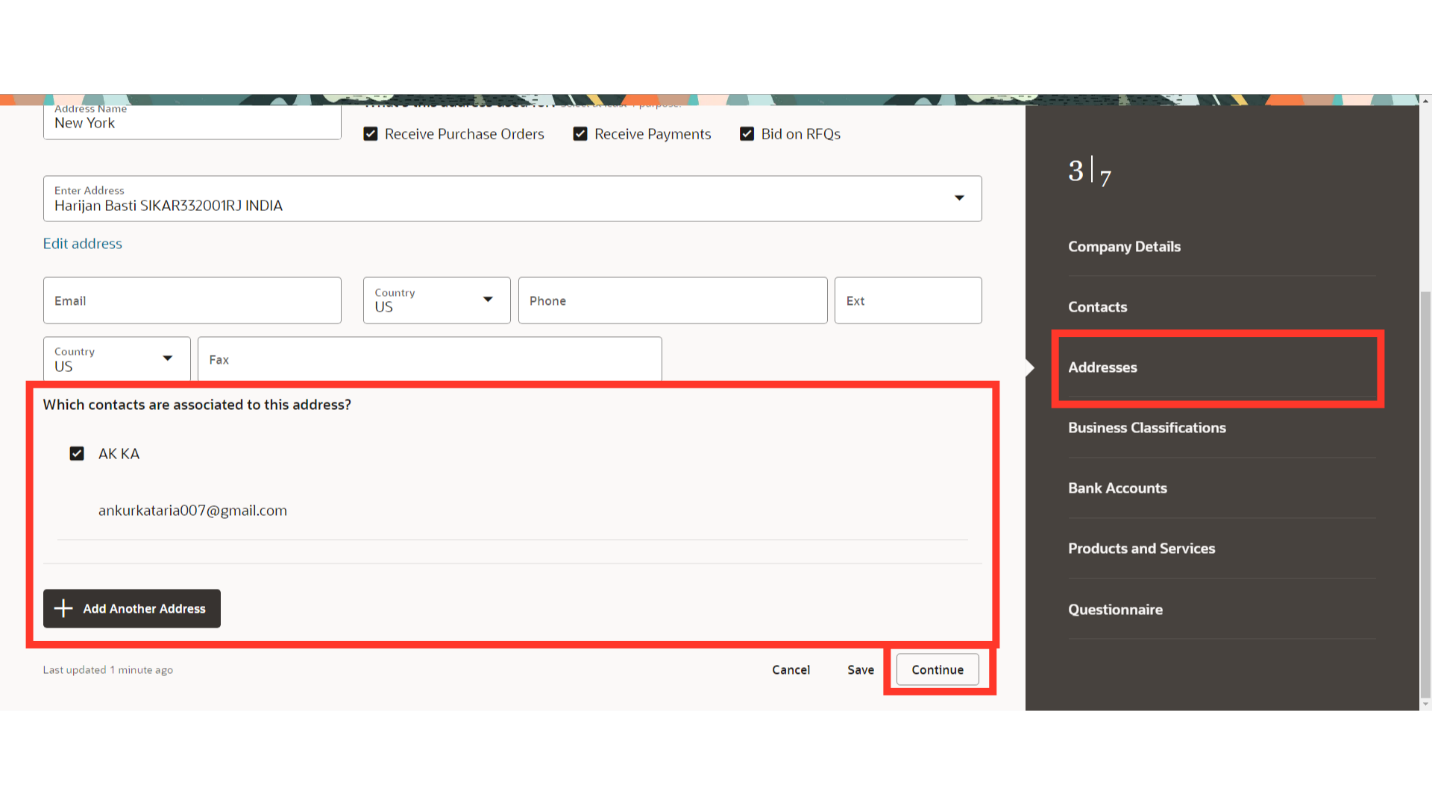
In the Business Classifications section, provide the certifications and documents required, such as ISO and environmental certificates.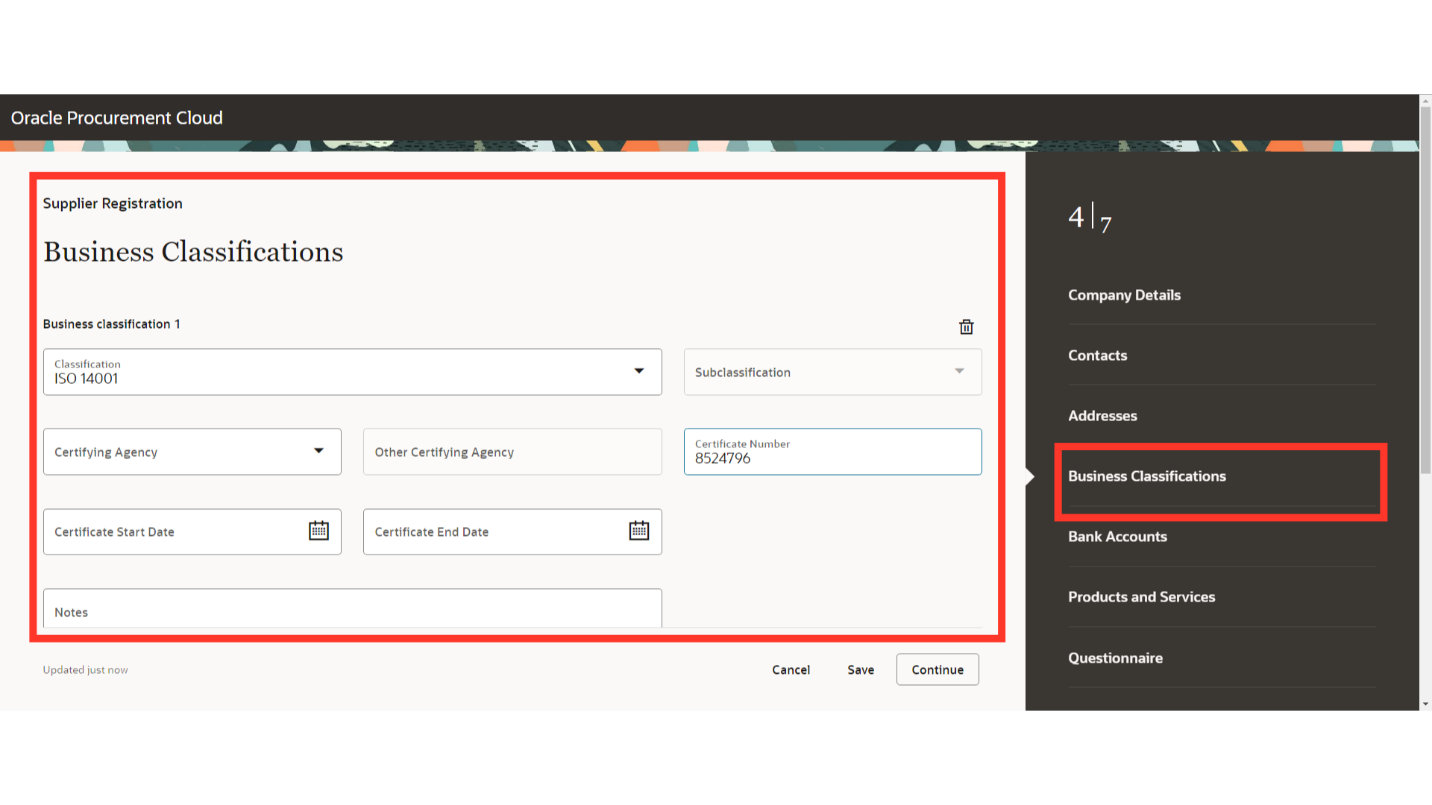
Scroll down in the Business Classifications section and attach the business classification documents. Click on Add Another Business Classification to add more than one business classification. Once all the details are filled in, click on the Continue button.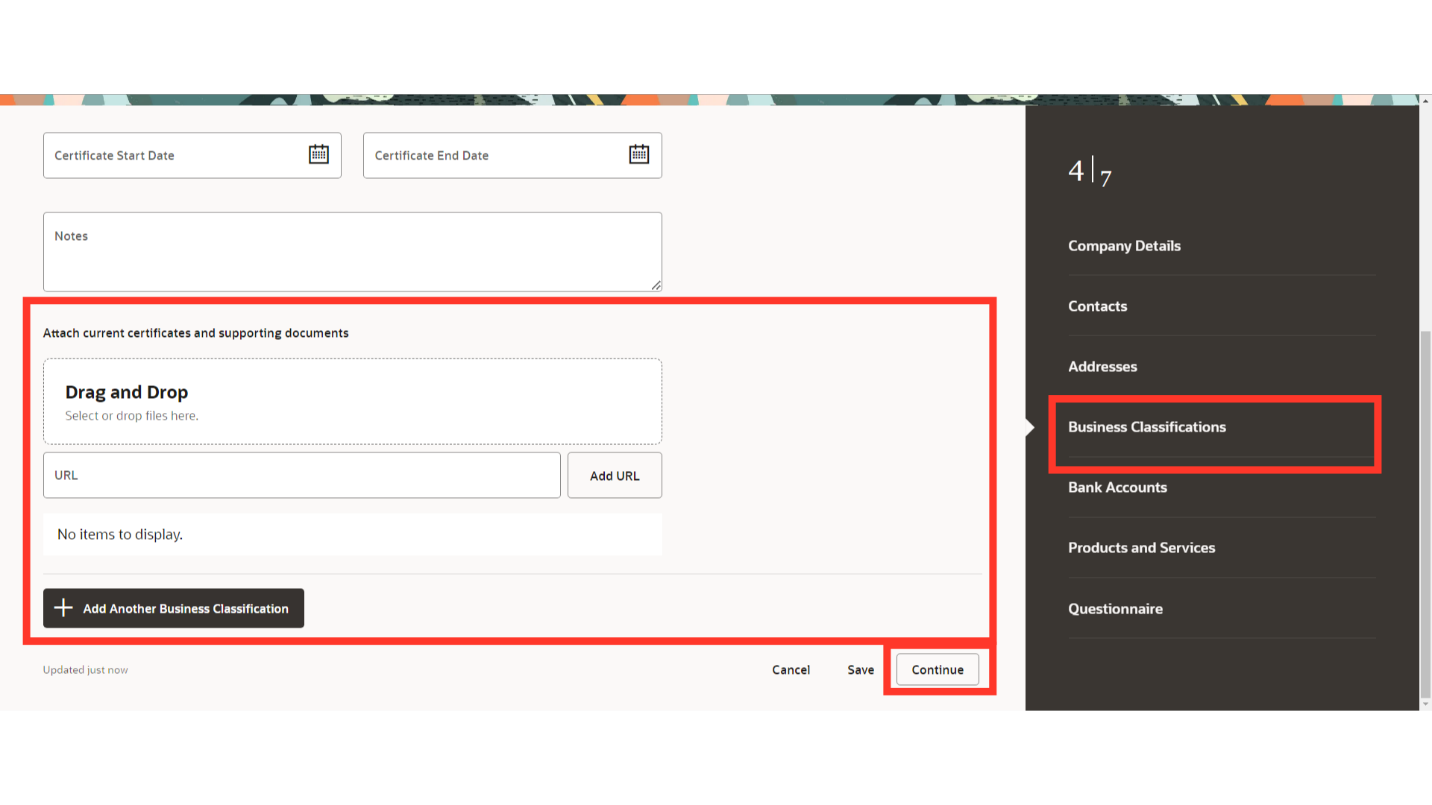
In the Bank Accounts section, enter the bank account details of the Supplier.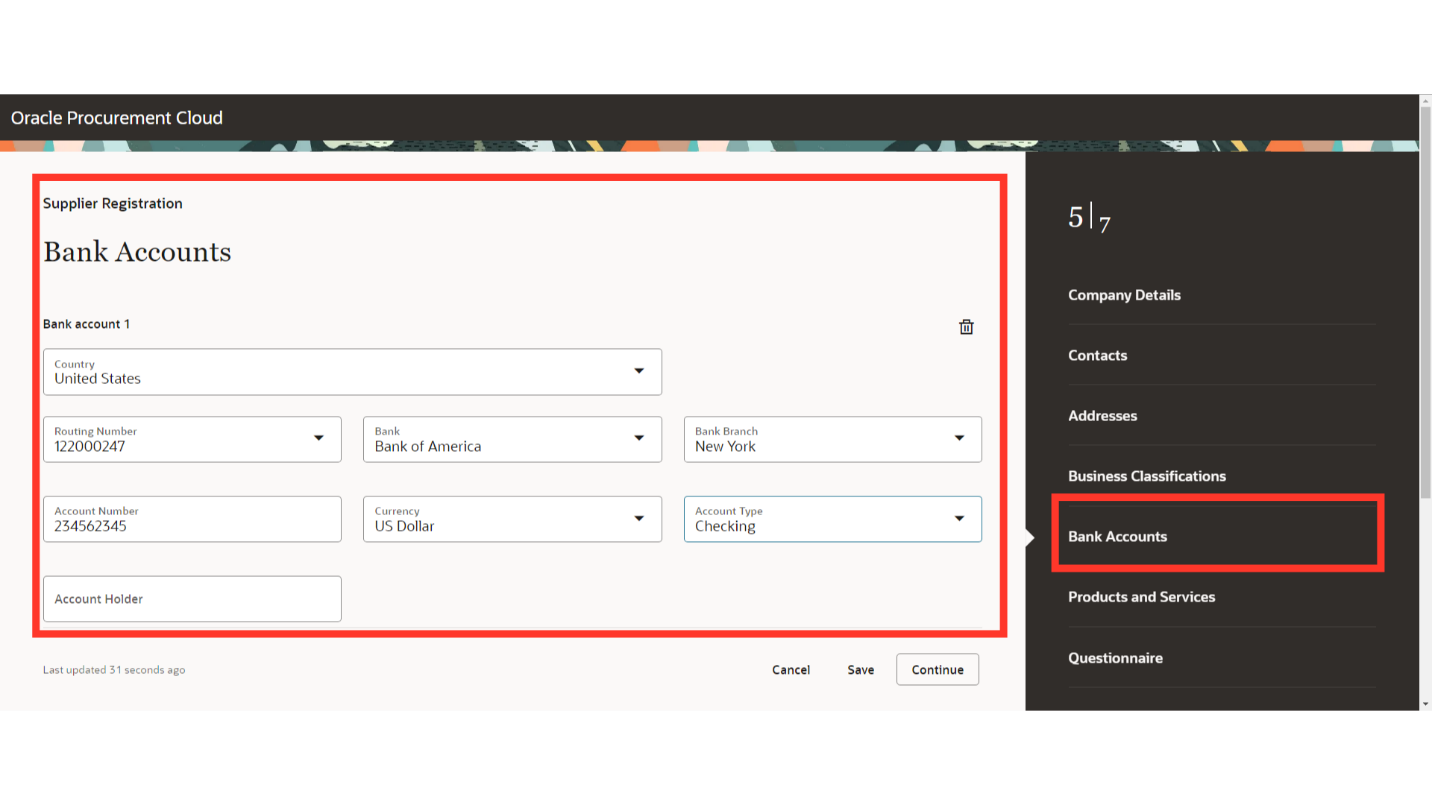
Provide attachments of bank account details. Click on Add Another Bank Account if there is more than one bank account. Once all the details are filled in, click on the Continue button.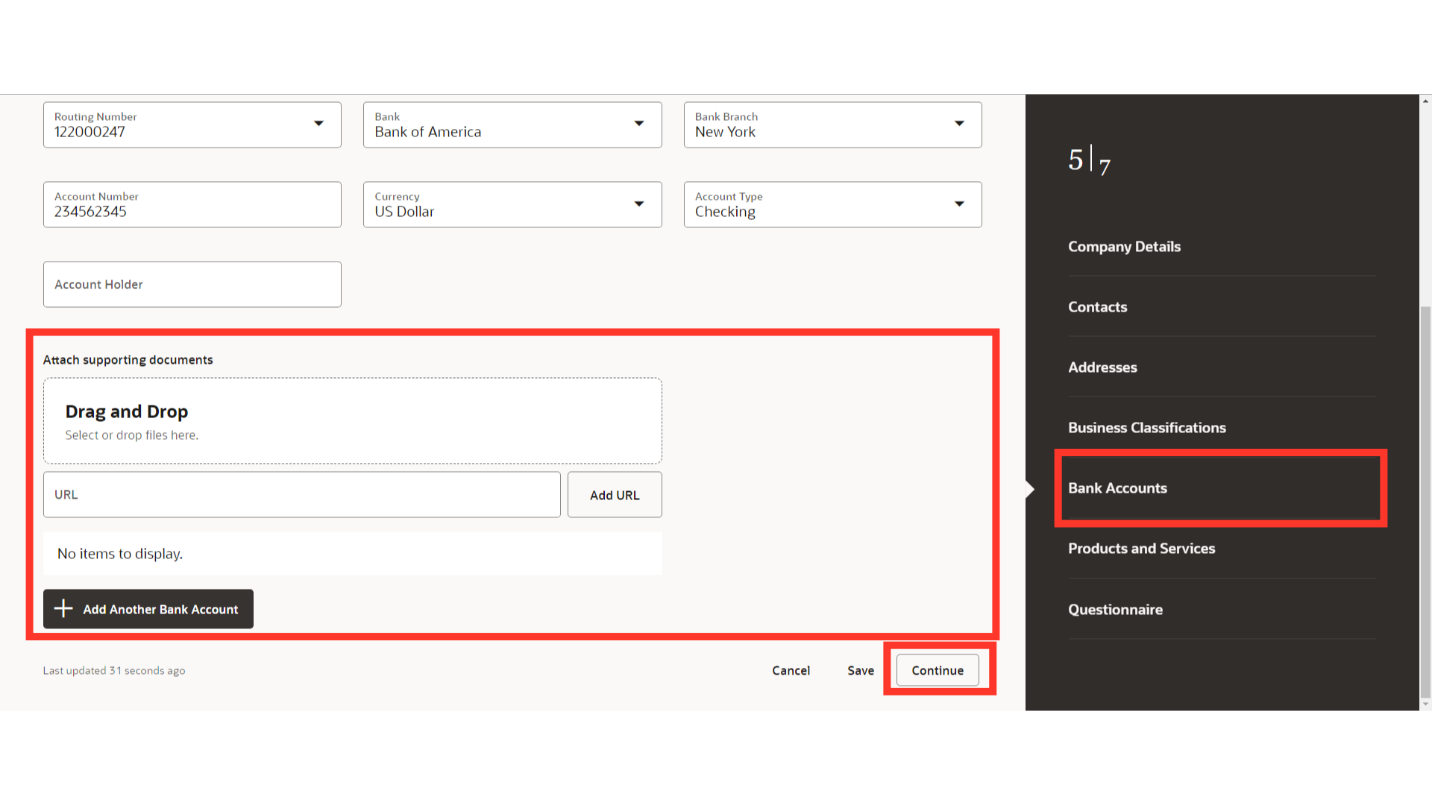
In the Products and Services section, select the supplier’s product and services-related categories. Once done, click on the Continue button.
In the Questionnaire section, provide answers to the questions required by the buying organization and click on the Submit button to submit the Supplier Registration.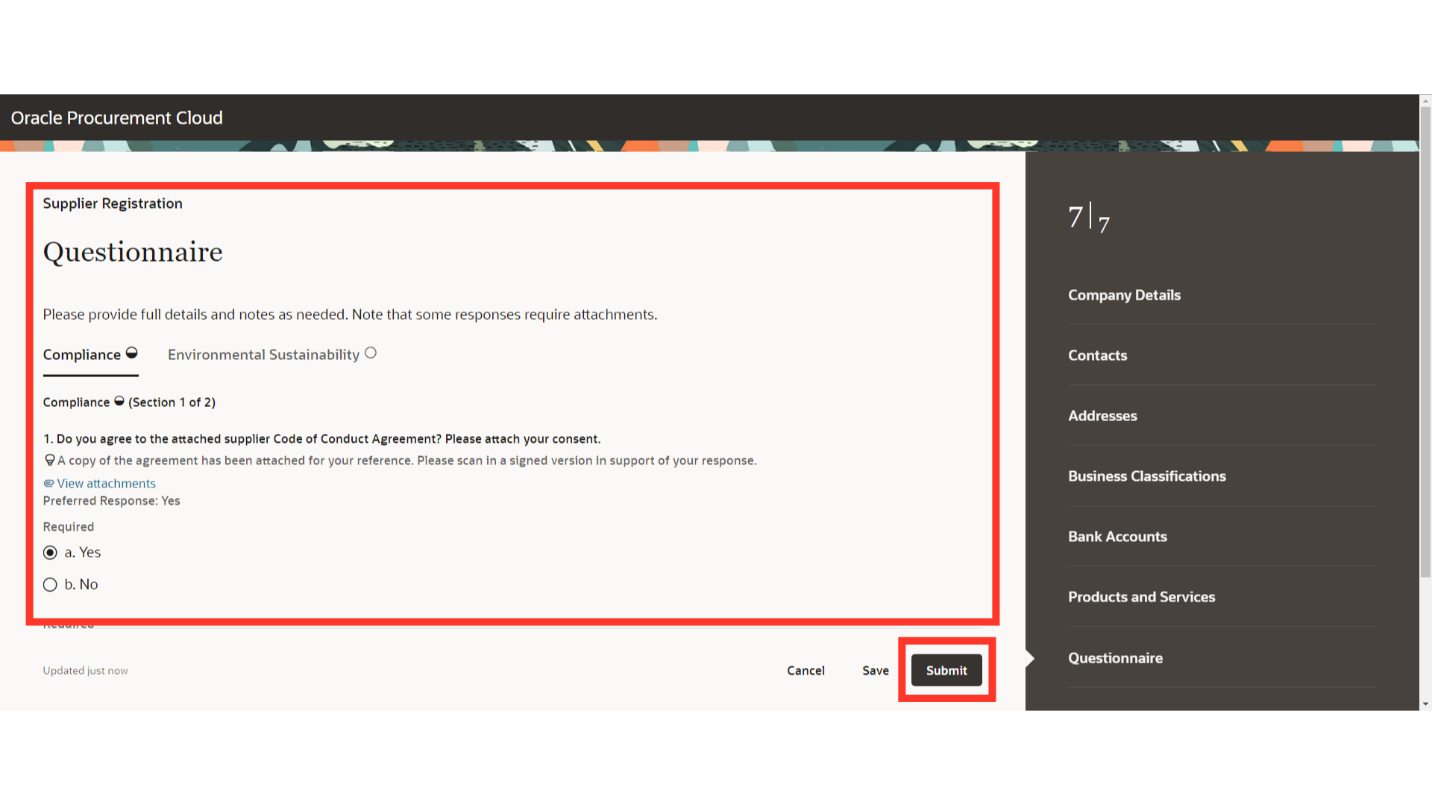
This guide covers the detailed process of registering as a Prospective/Spend Authorized Supplier in Oracle Fusion. From filling out personal information and addresses to adding bank account details, each step is outlined for a successful registration process.