Create Accounting
This guide will help you with both the report download and the Create Accounting process submission for the Receivables sub ledger from the scheduled process.
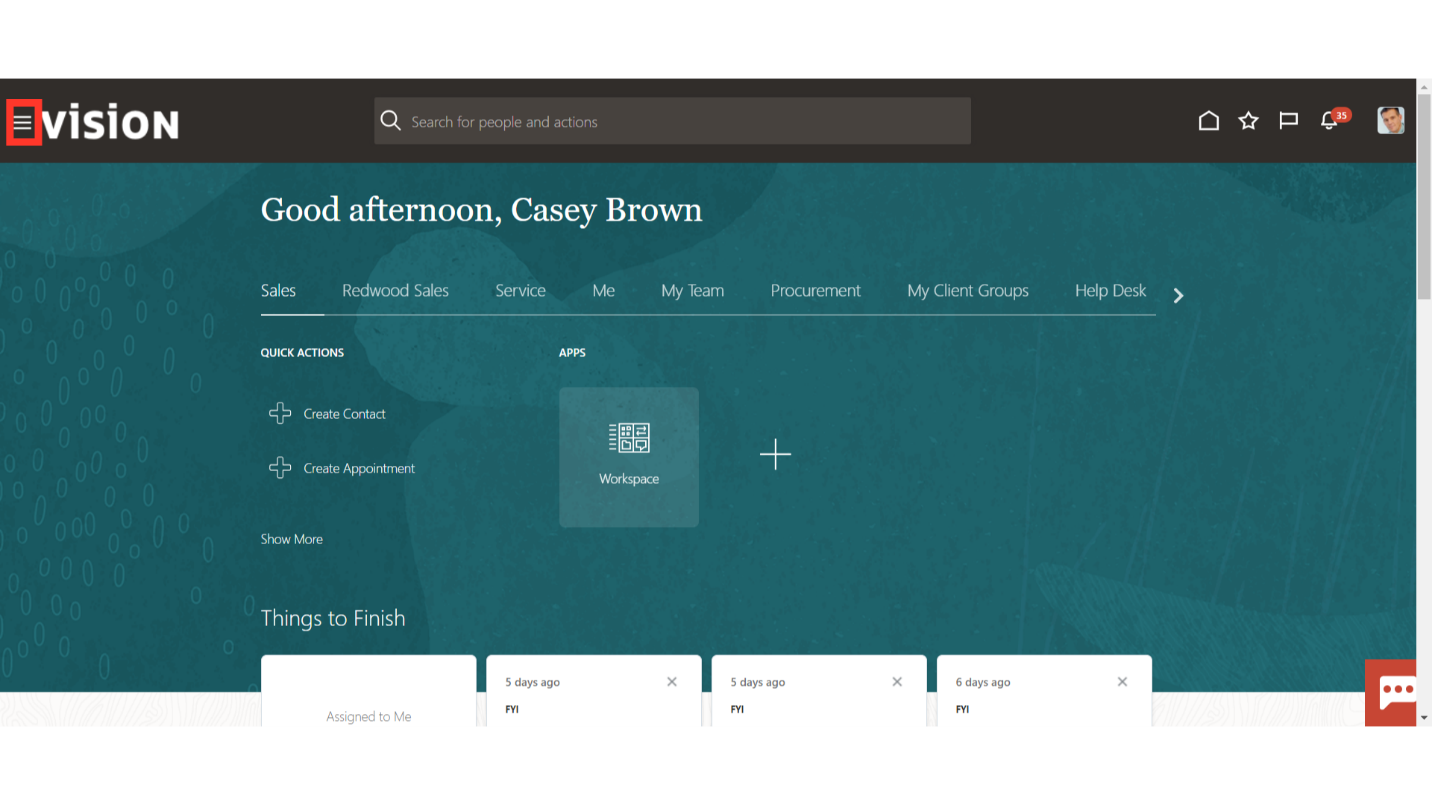
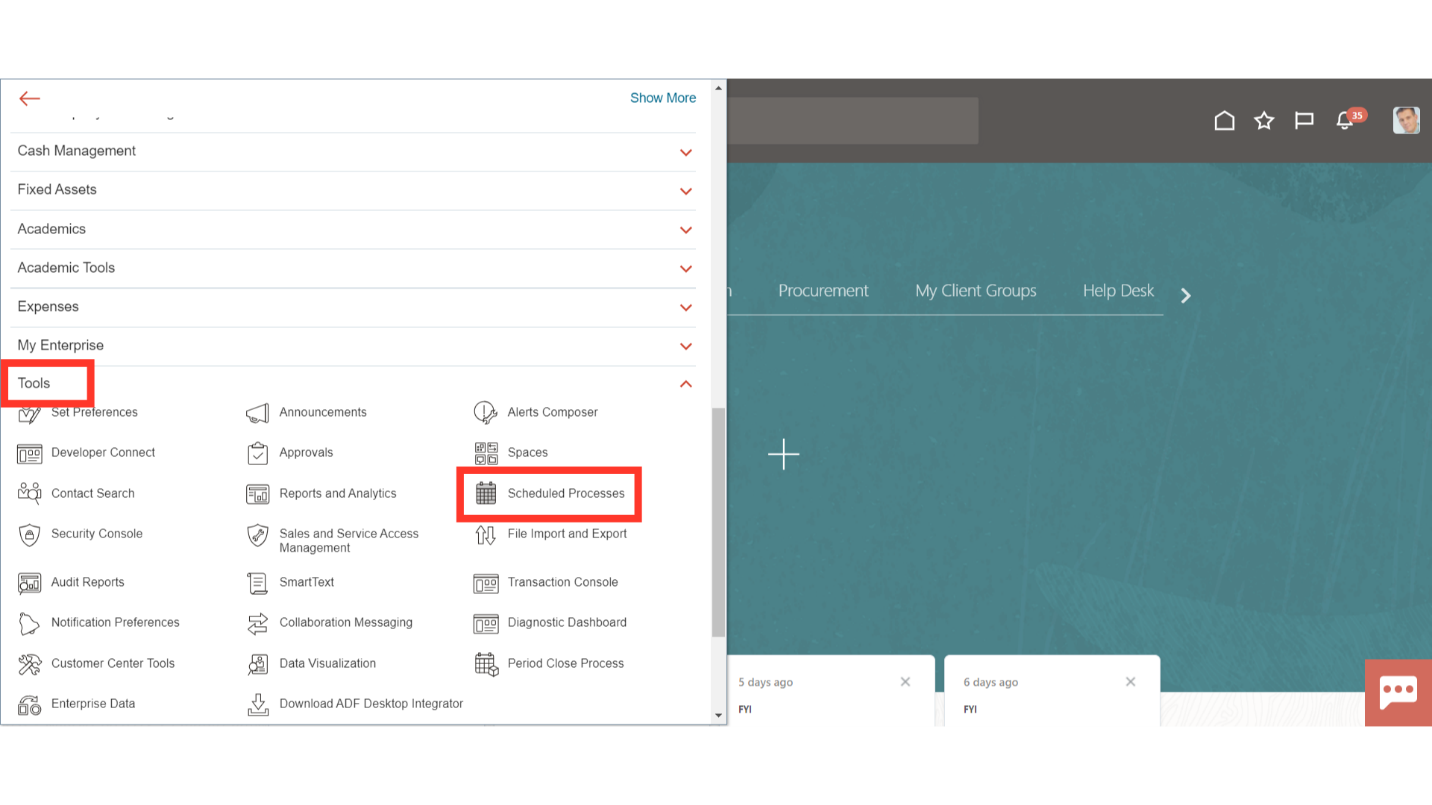
Click on the Navigator icon to access the Tools menu.
 Access the Scheduled Processes work area by selecting Scheduled Processes under Tools from the navigator. Alternatively, on the Home page, you may select the Tools menu and under that select the Scheduled Processes submenu.
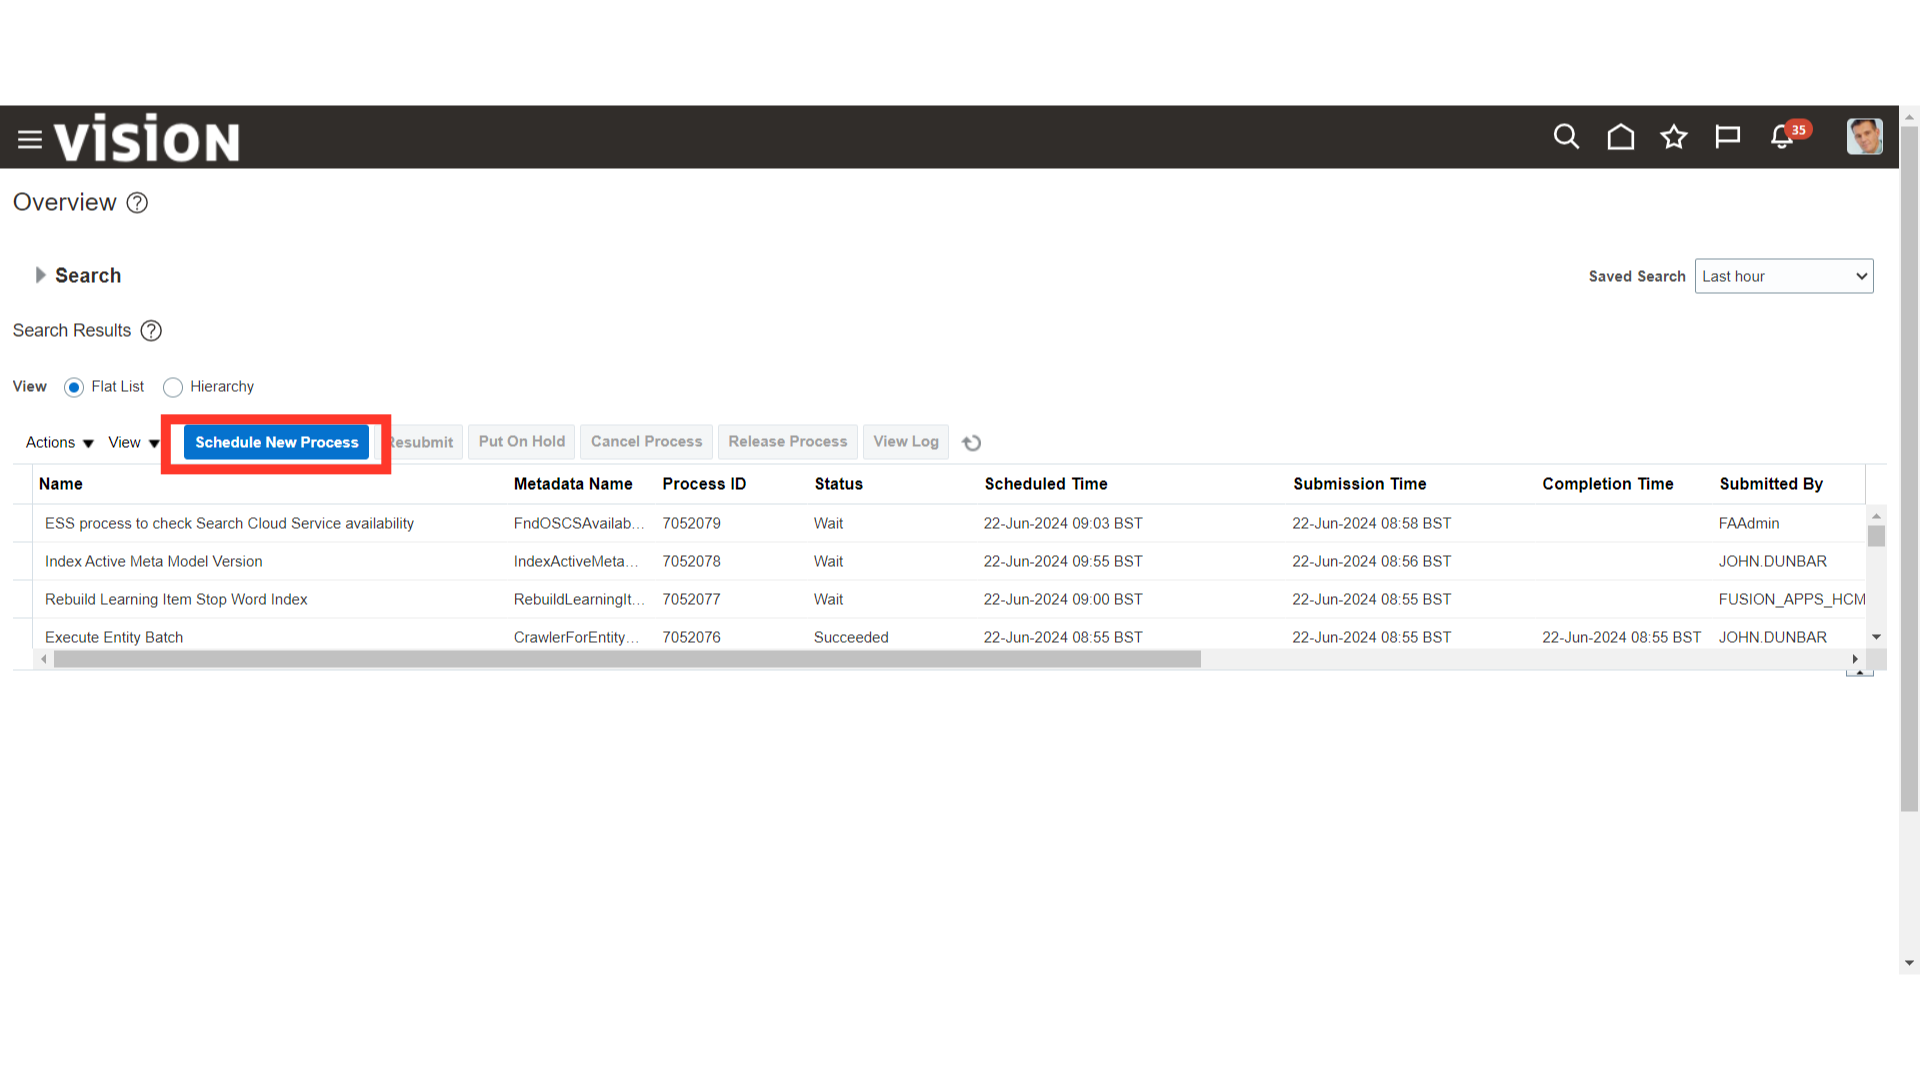
To run the new process, click on the Schedule New Process icon.
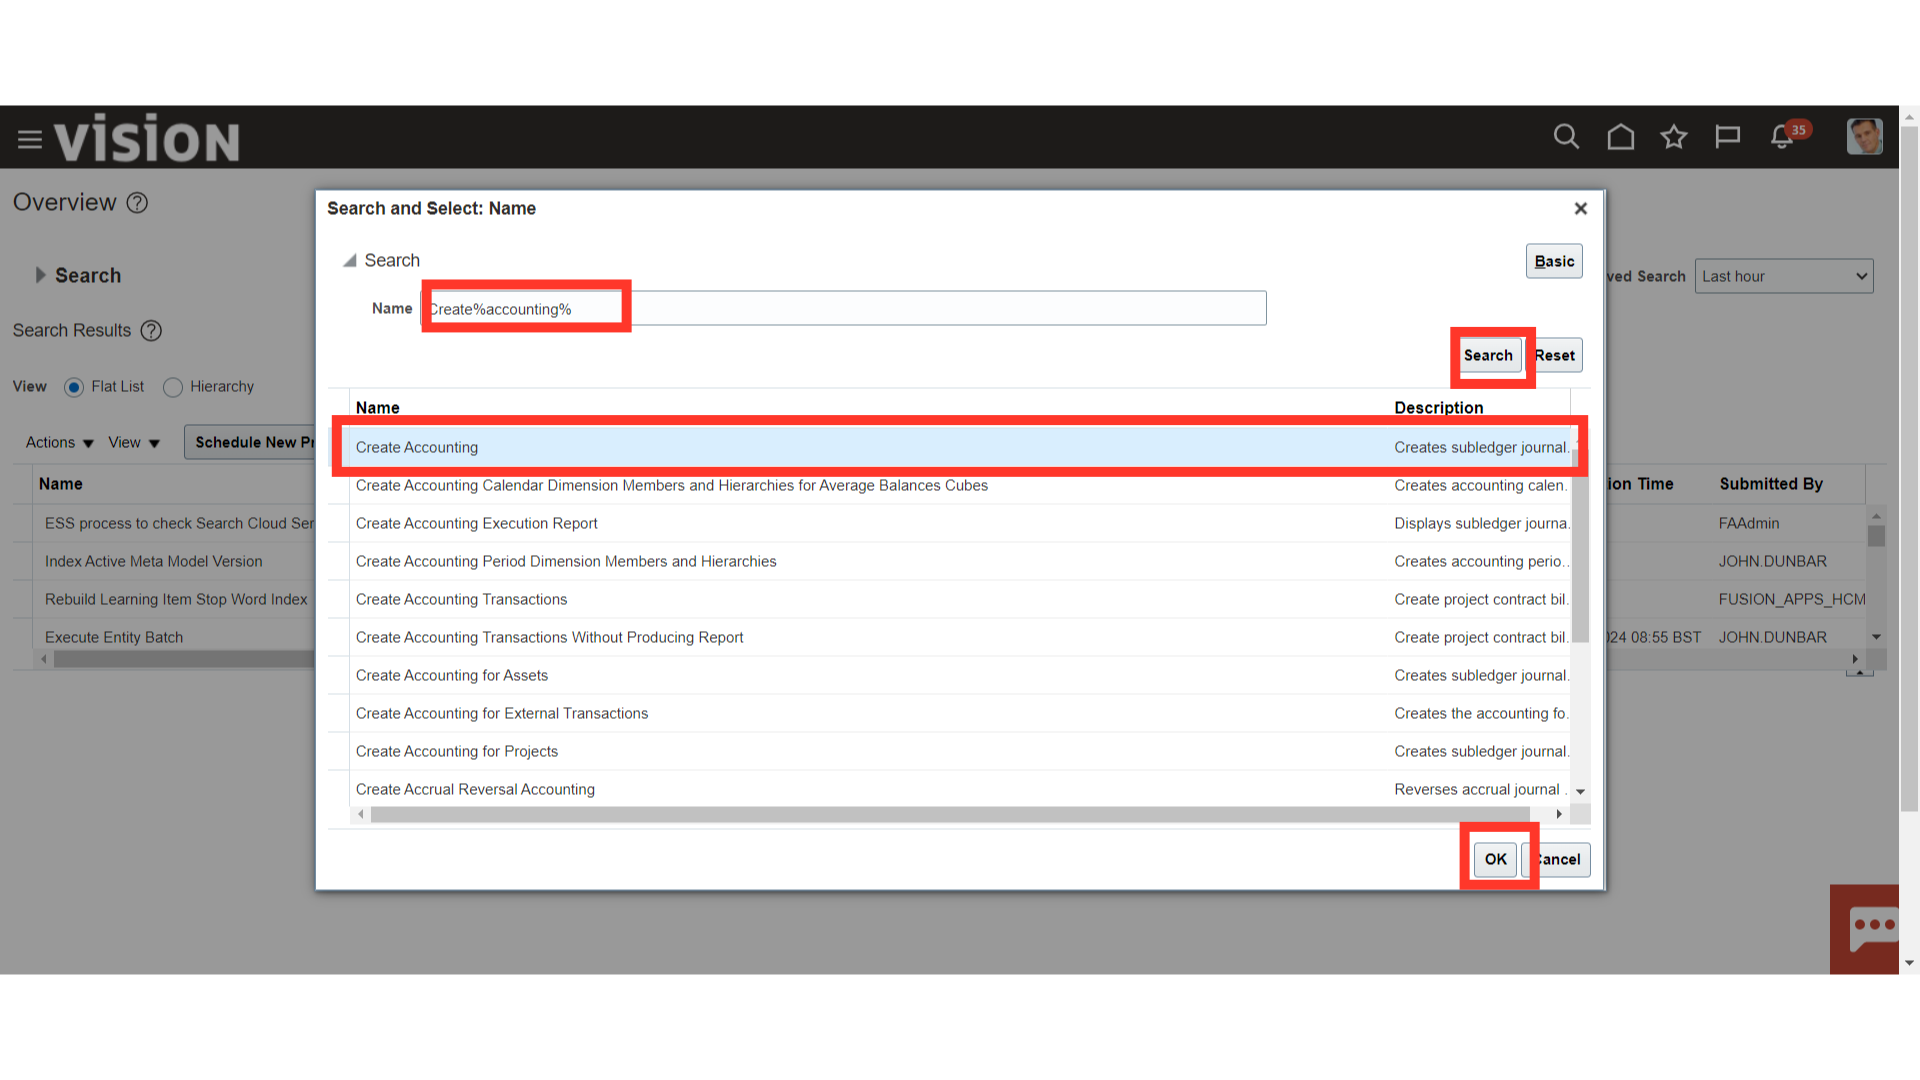
After selecting the Drop-down icon, click the search hyperlink to find the process name.
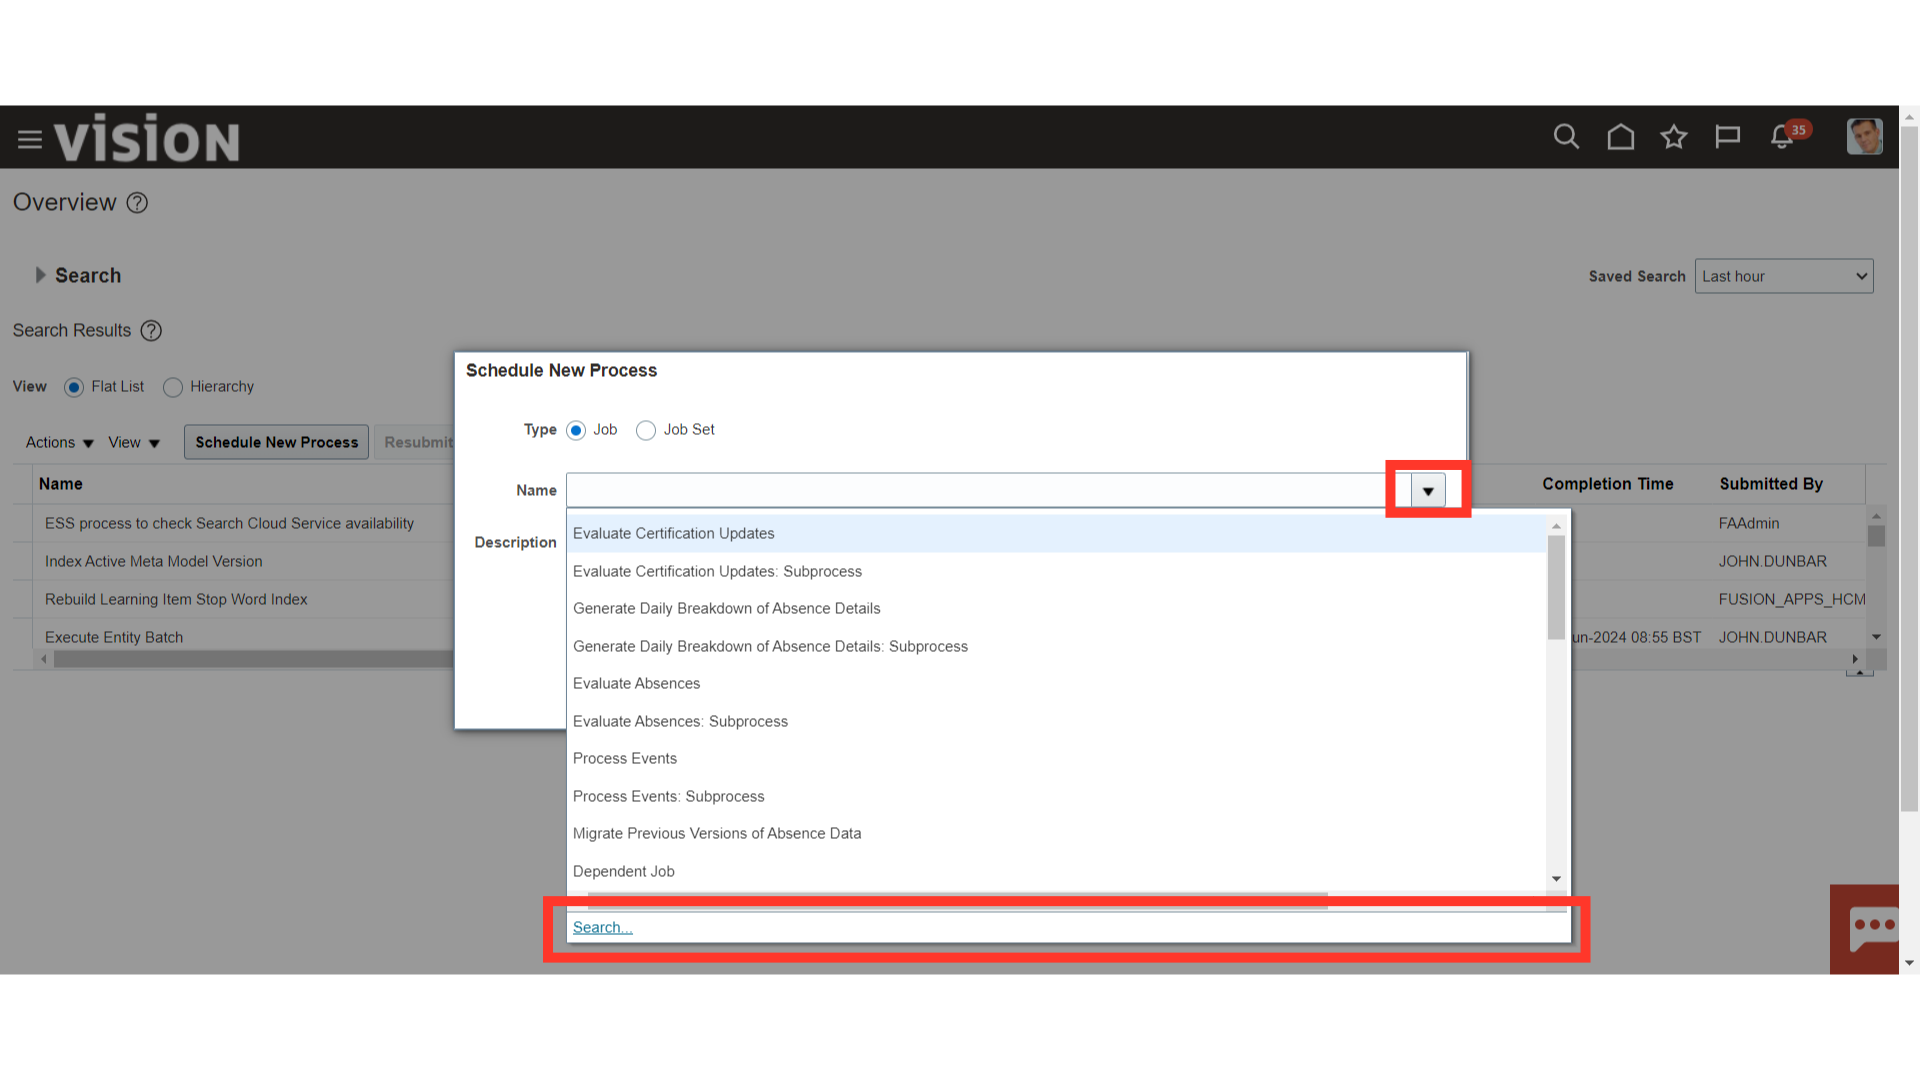
After entering the process name, using wild character search with a percentage sign click on the Search button to search the process name. Select the Create Accounting process name, and then click on the OK button to continue.
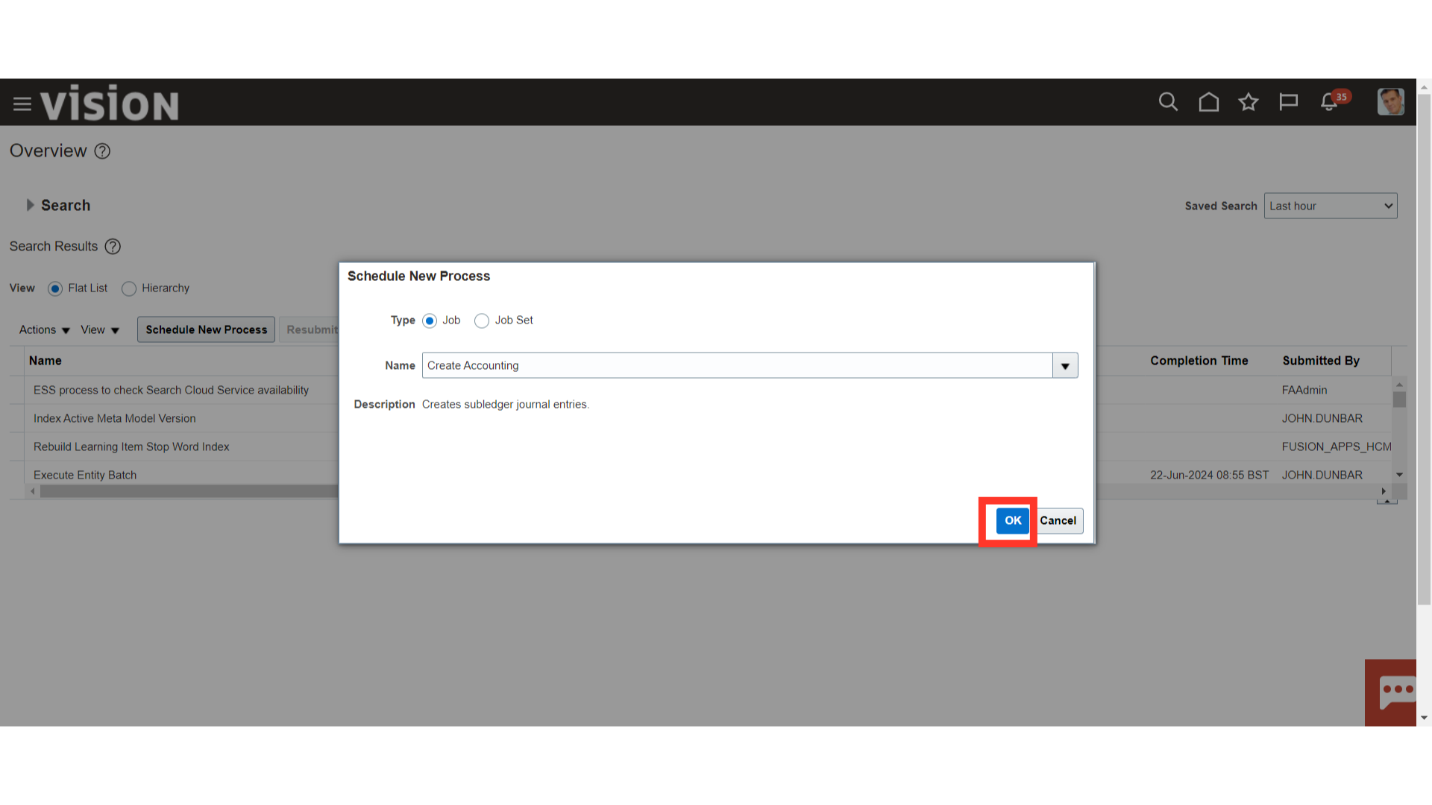
Again, Click on the OK button to run the Create Accounting process.
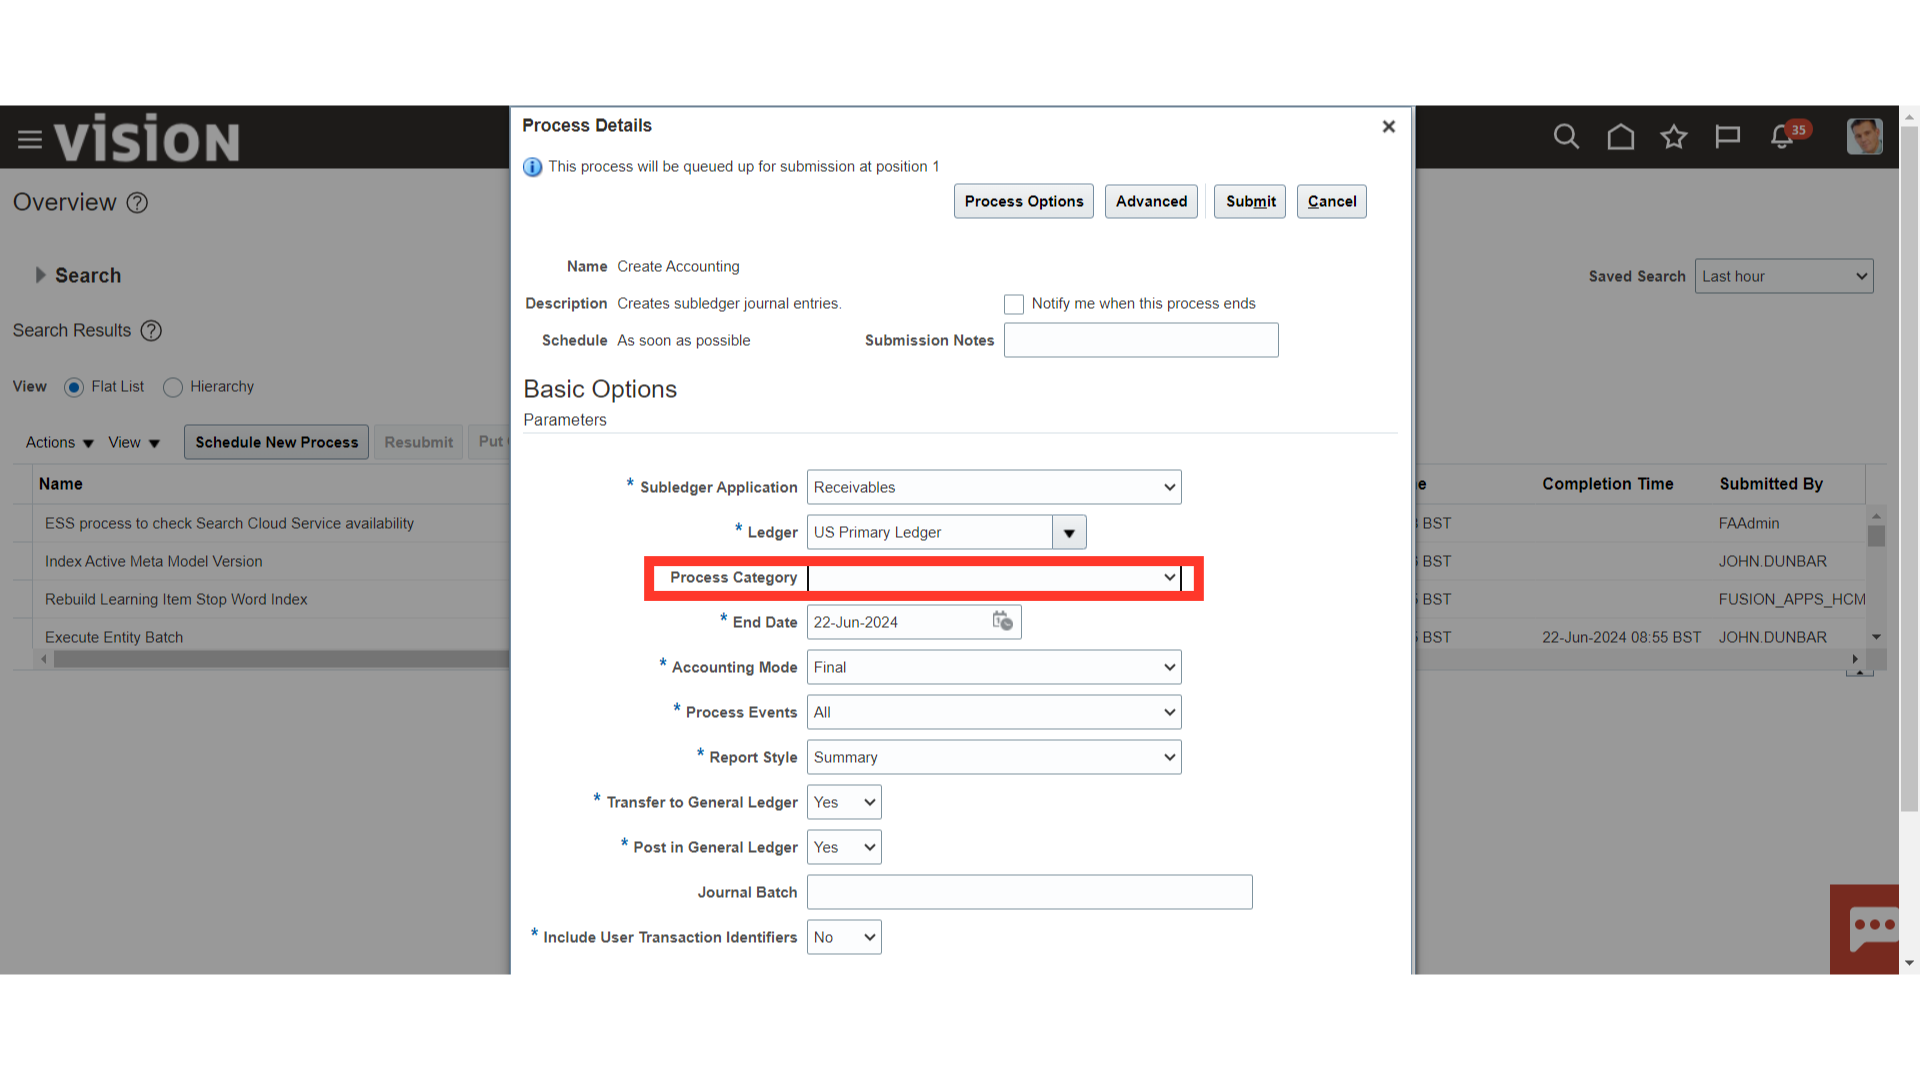
Select the Subledger Application ” Receivables” from the list of values, to generate an accounting entry from the Payables and transfer the same to General Ledger.
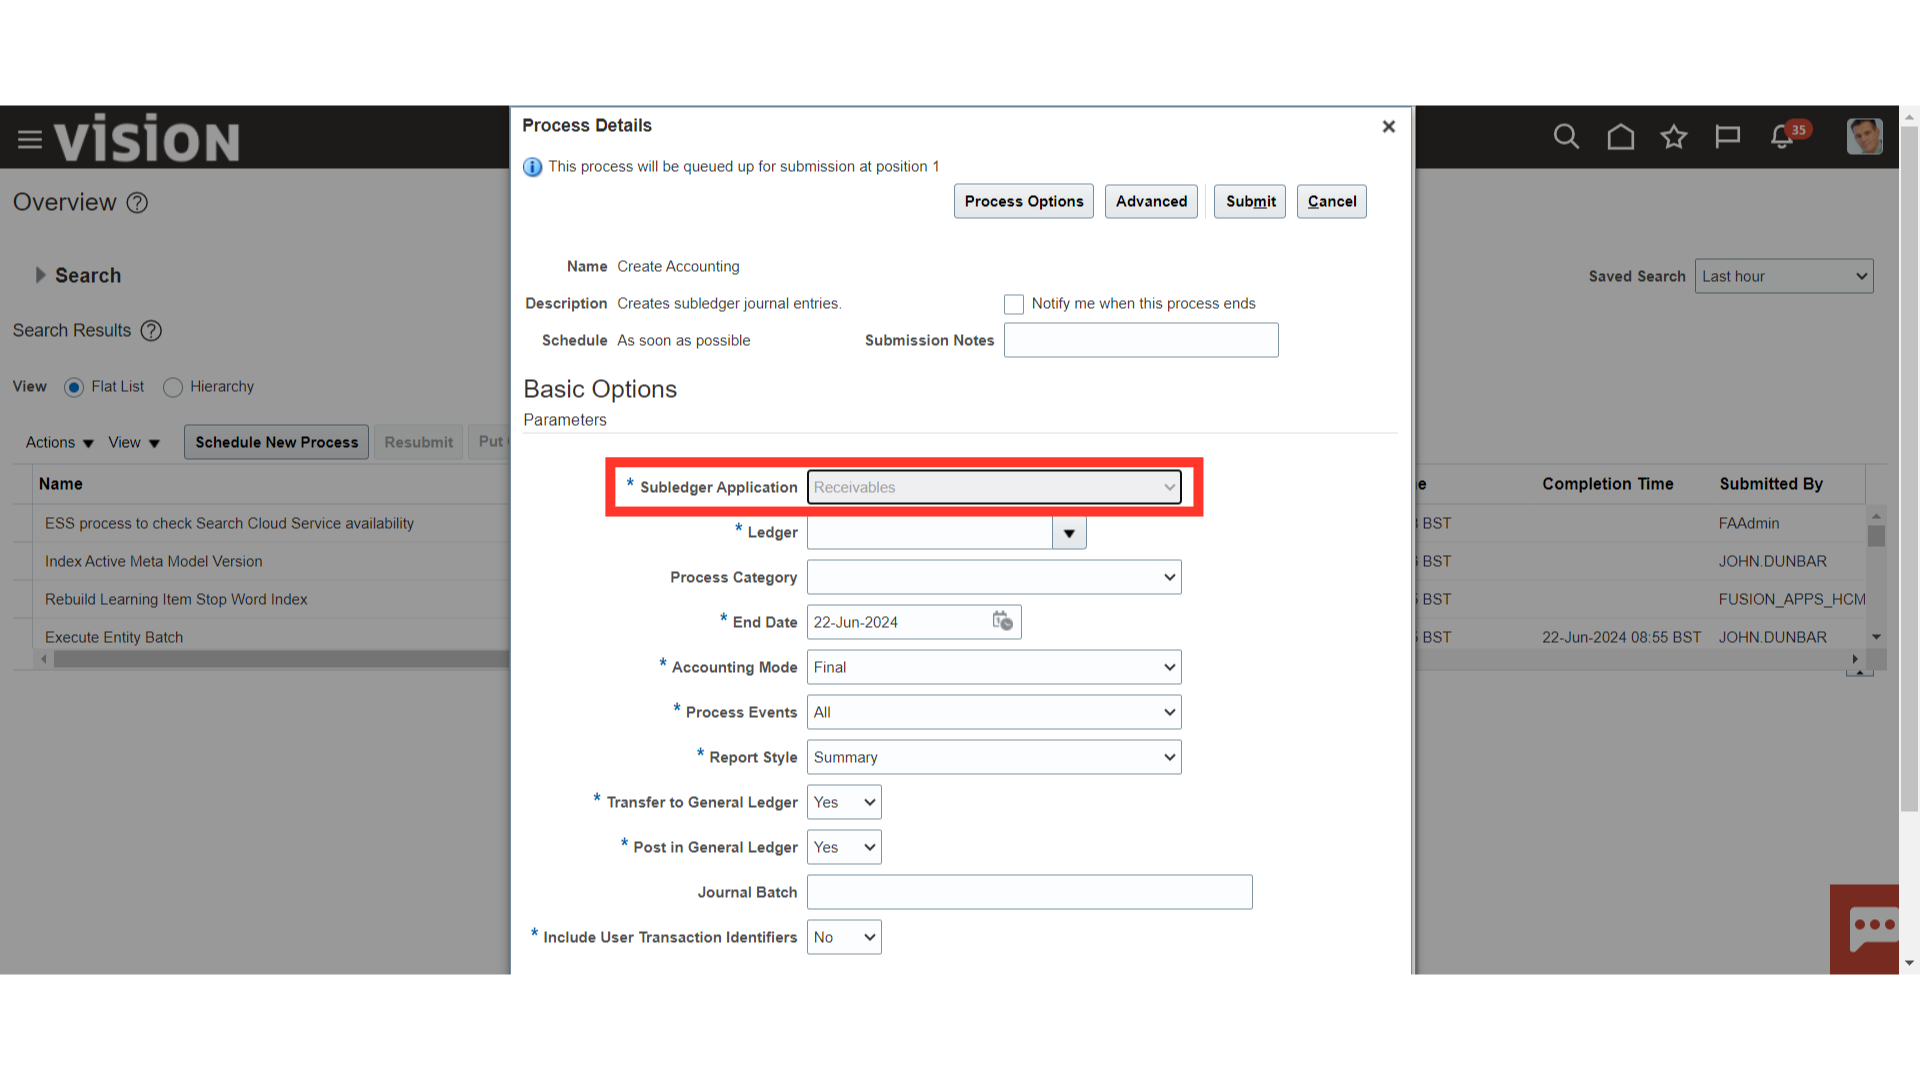
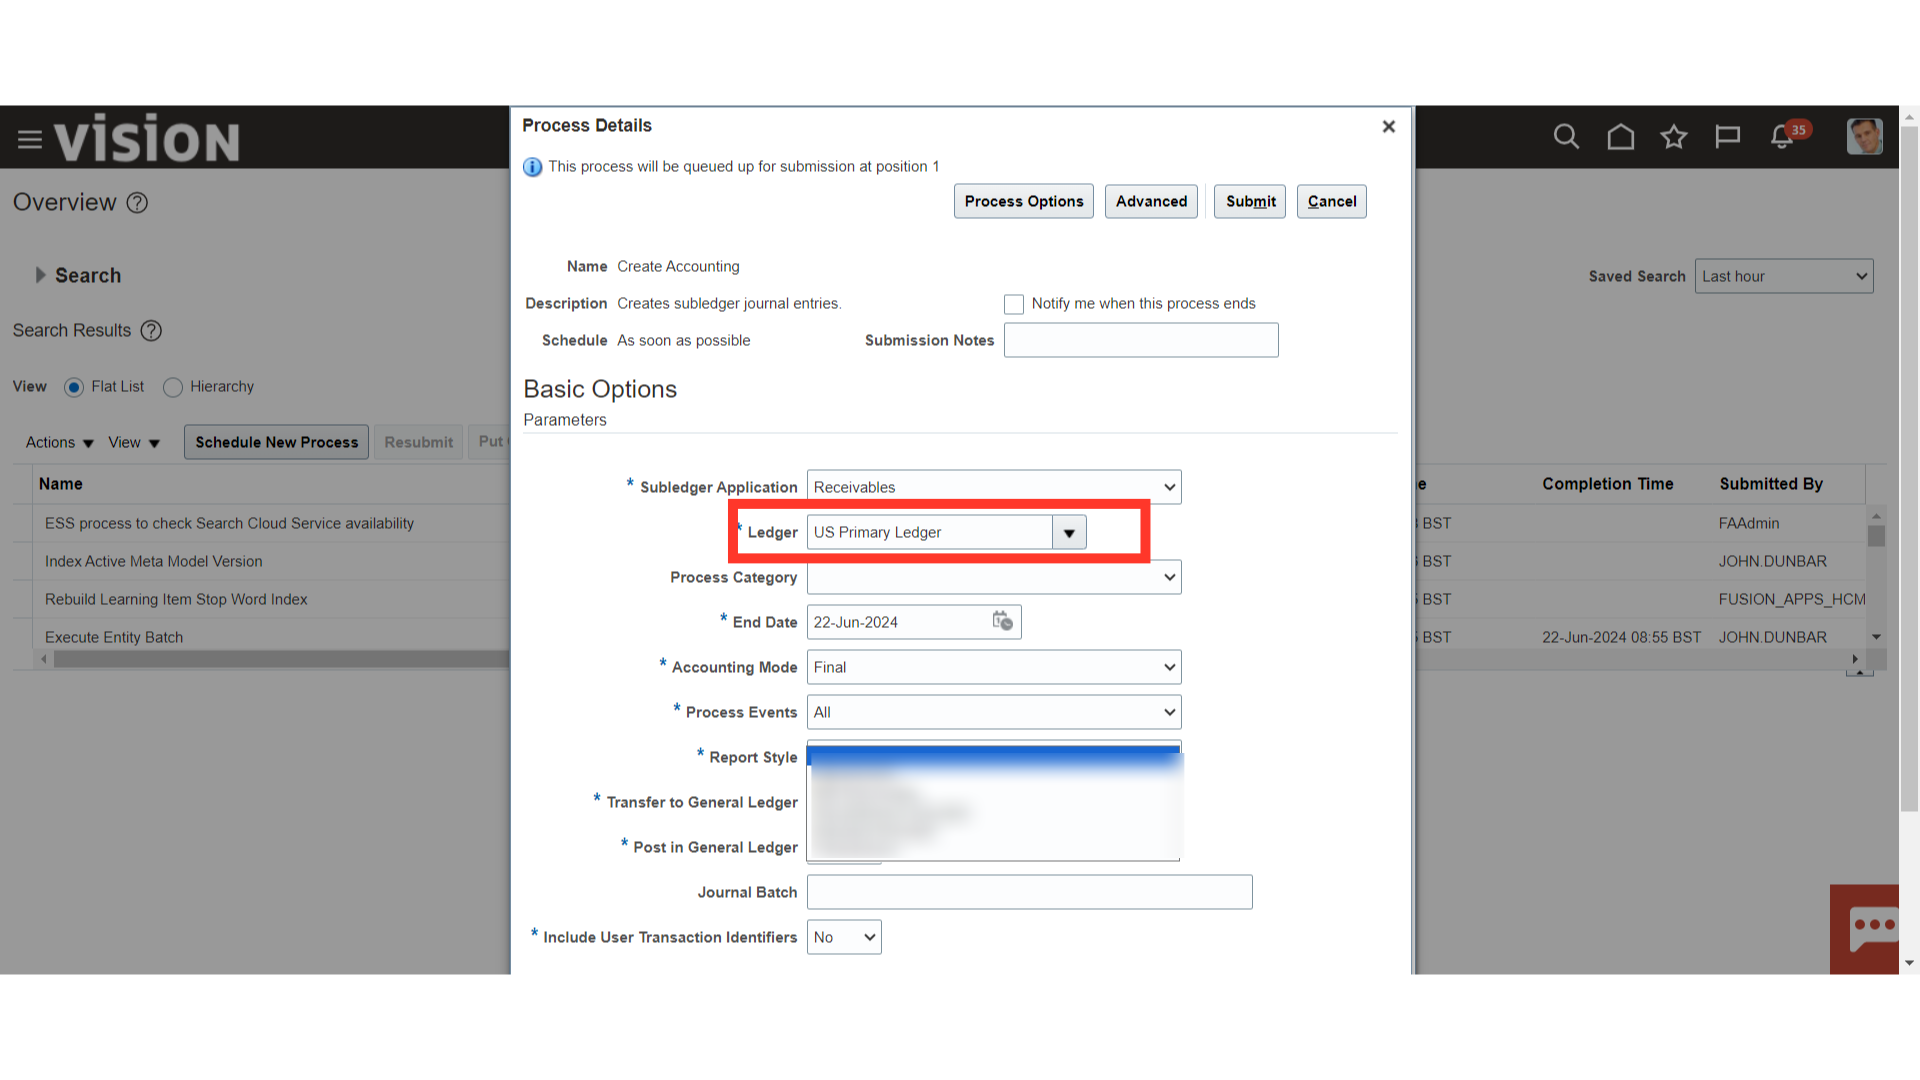
Select the Ledger name for which the accounting entry is to be generated. Here for demo purpose, I have selected the “US Primary Ledger”.
Under the Process category, if you select any of the categories such as Transactions, Bills Receivable, Standard Receipts, Miscellaneous Receipts or Adjustments, then an accounting entry would be generated for the specific events. In case, if you kept blank then accounting entries would be generated for all the categories.
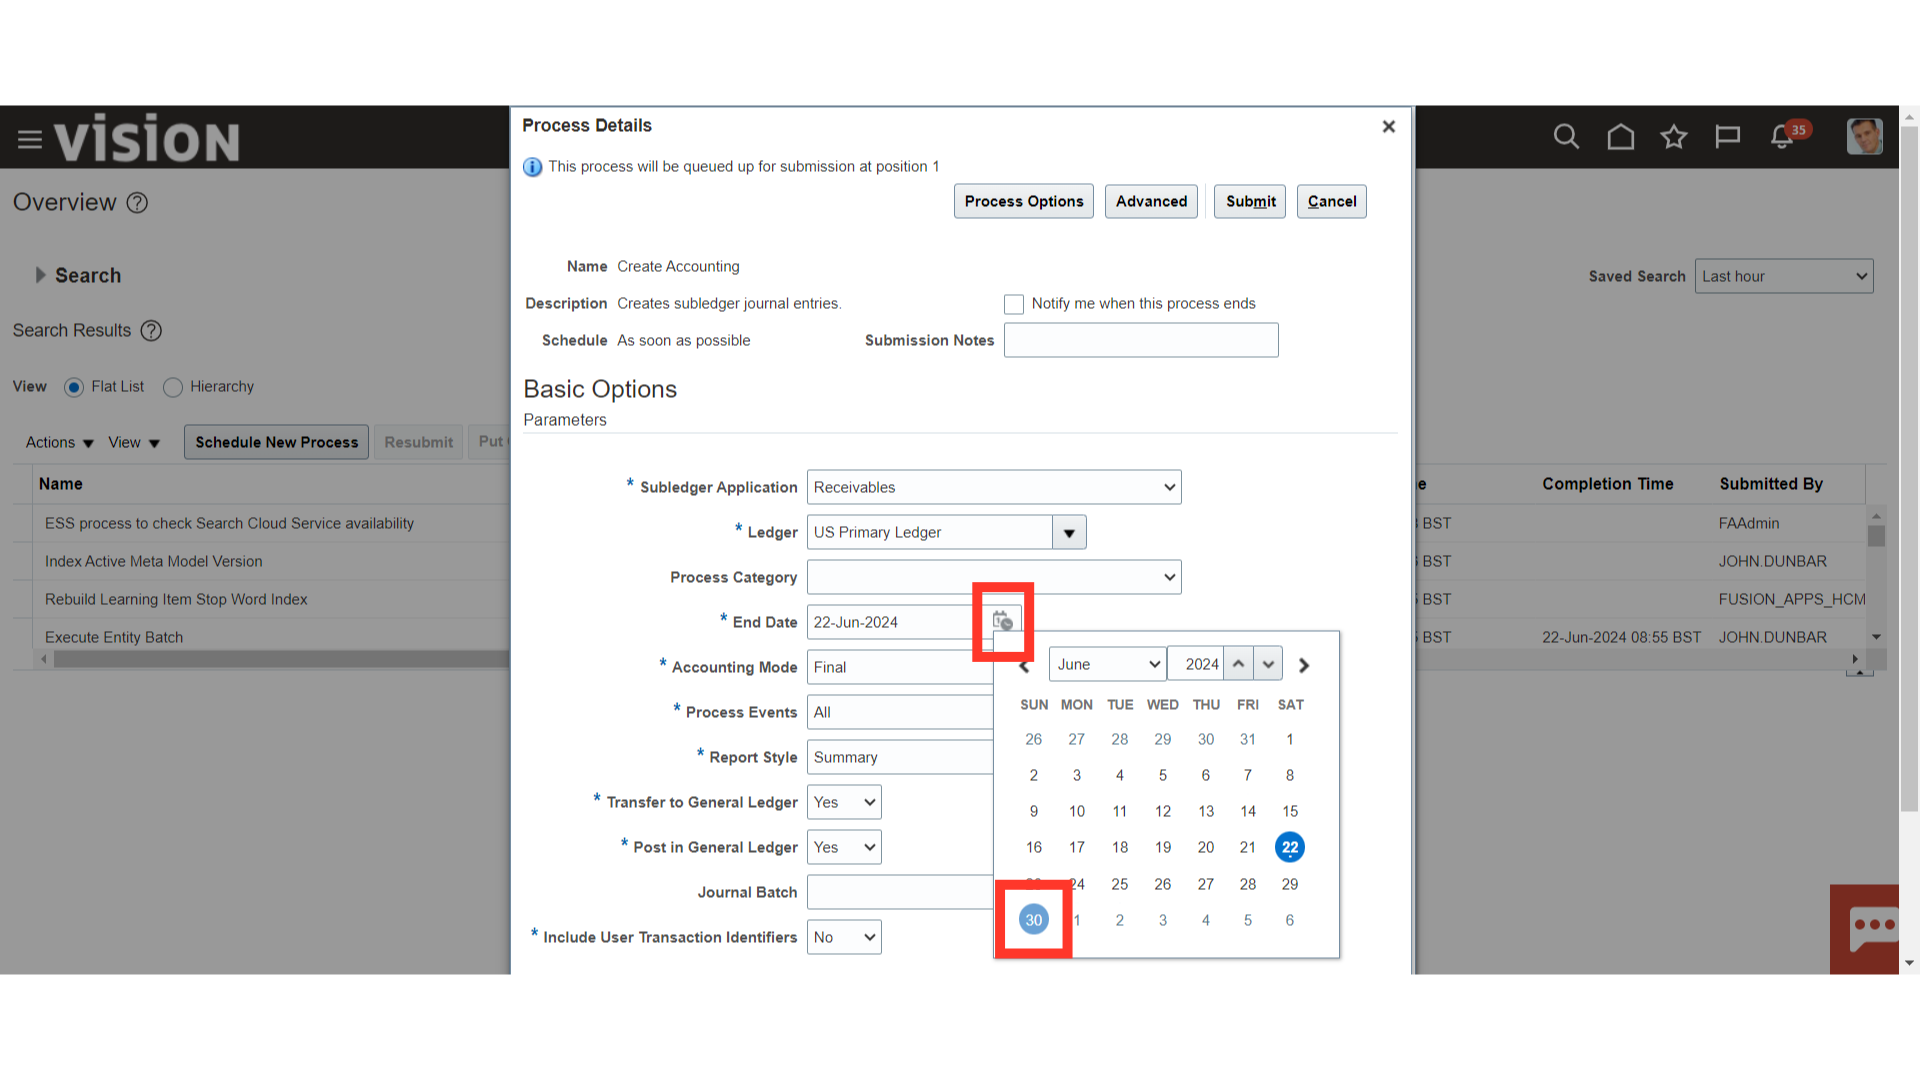
Select the Cut-off date based on which accounting entries would be generated up to that date only.
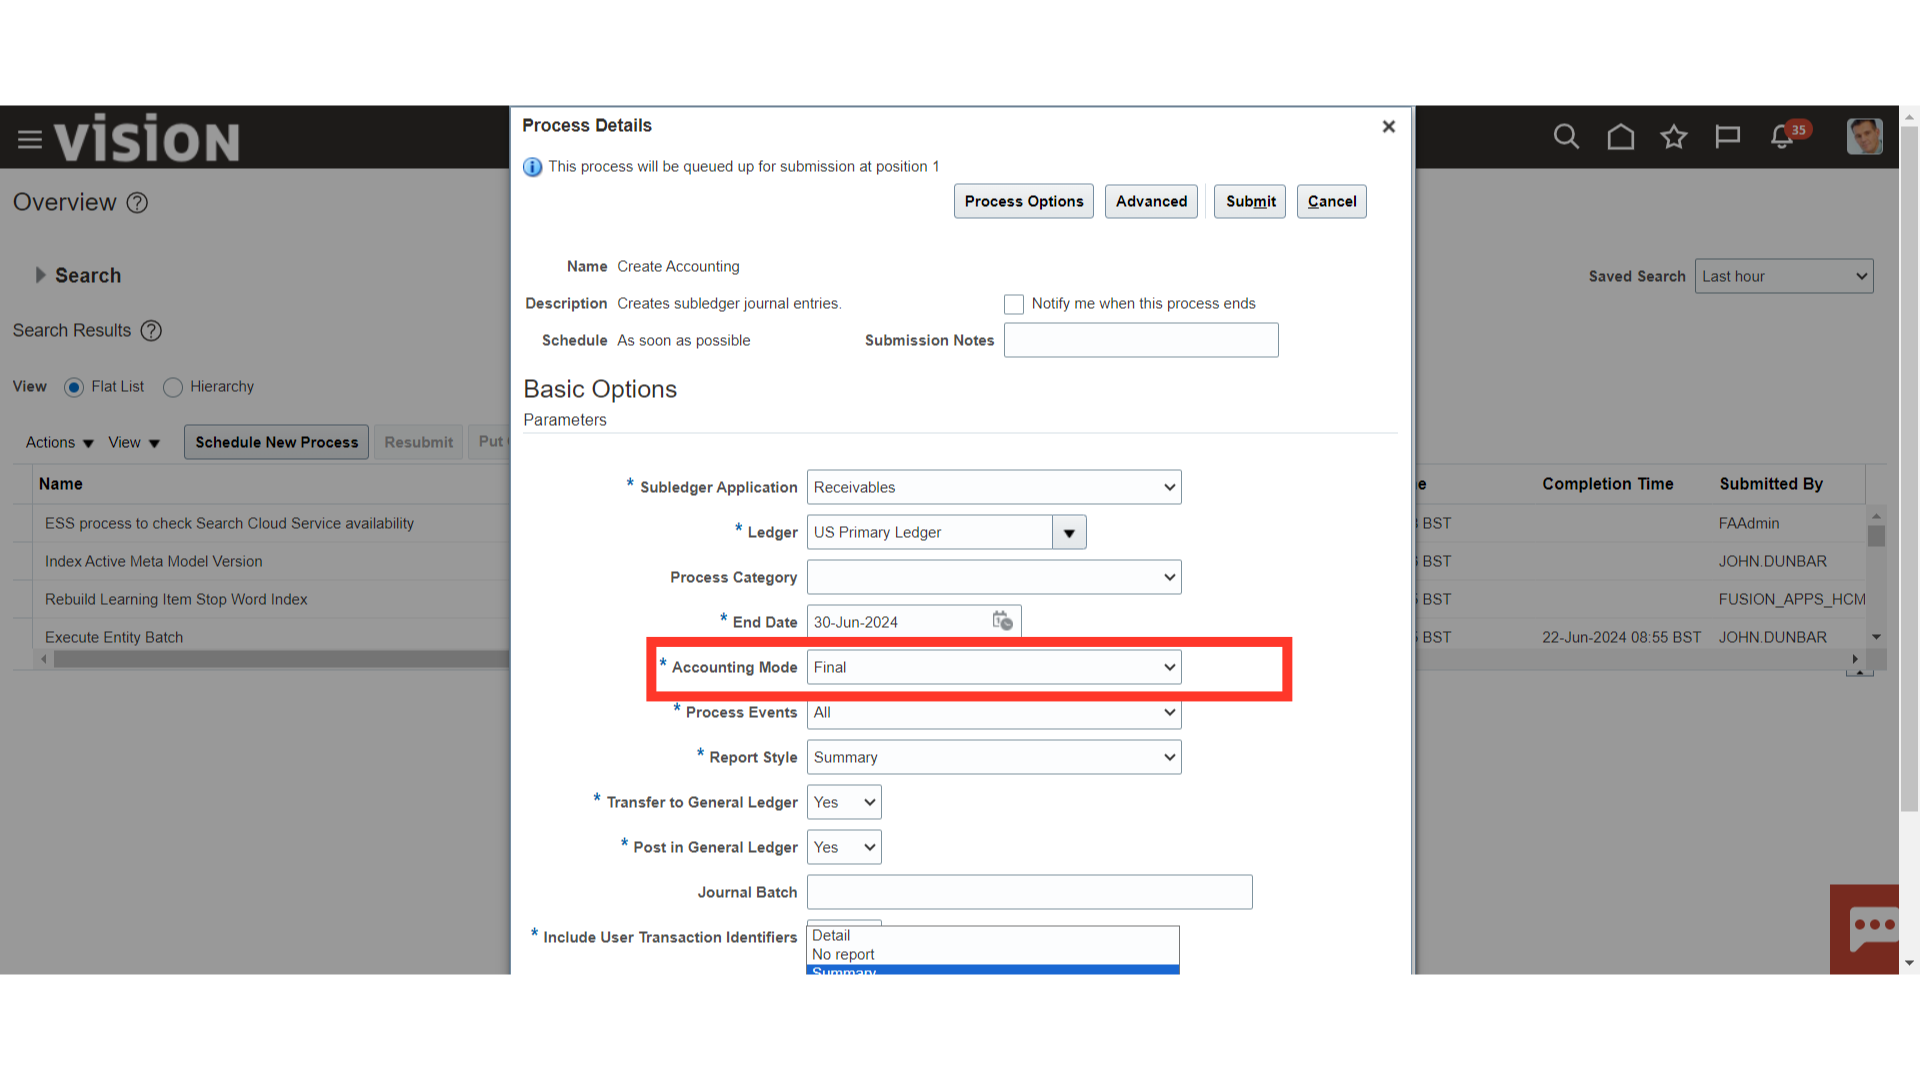
Select the Accounting mode as ” Draft ” mode to create a draft of journal entries for data verification purposes. While, if you select the “final” to generate the final accounting entries.
Select what process events you want to include in the journal entries. You can choose from the following. All, Error events with diagnostic, Errors, and Invalid accounts.
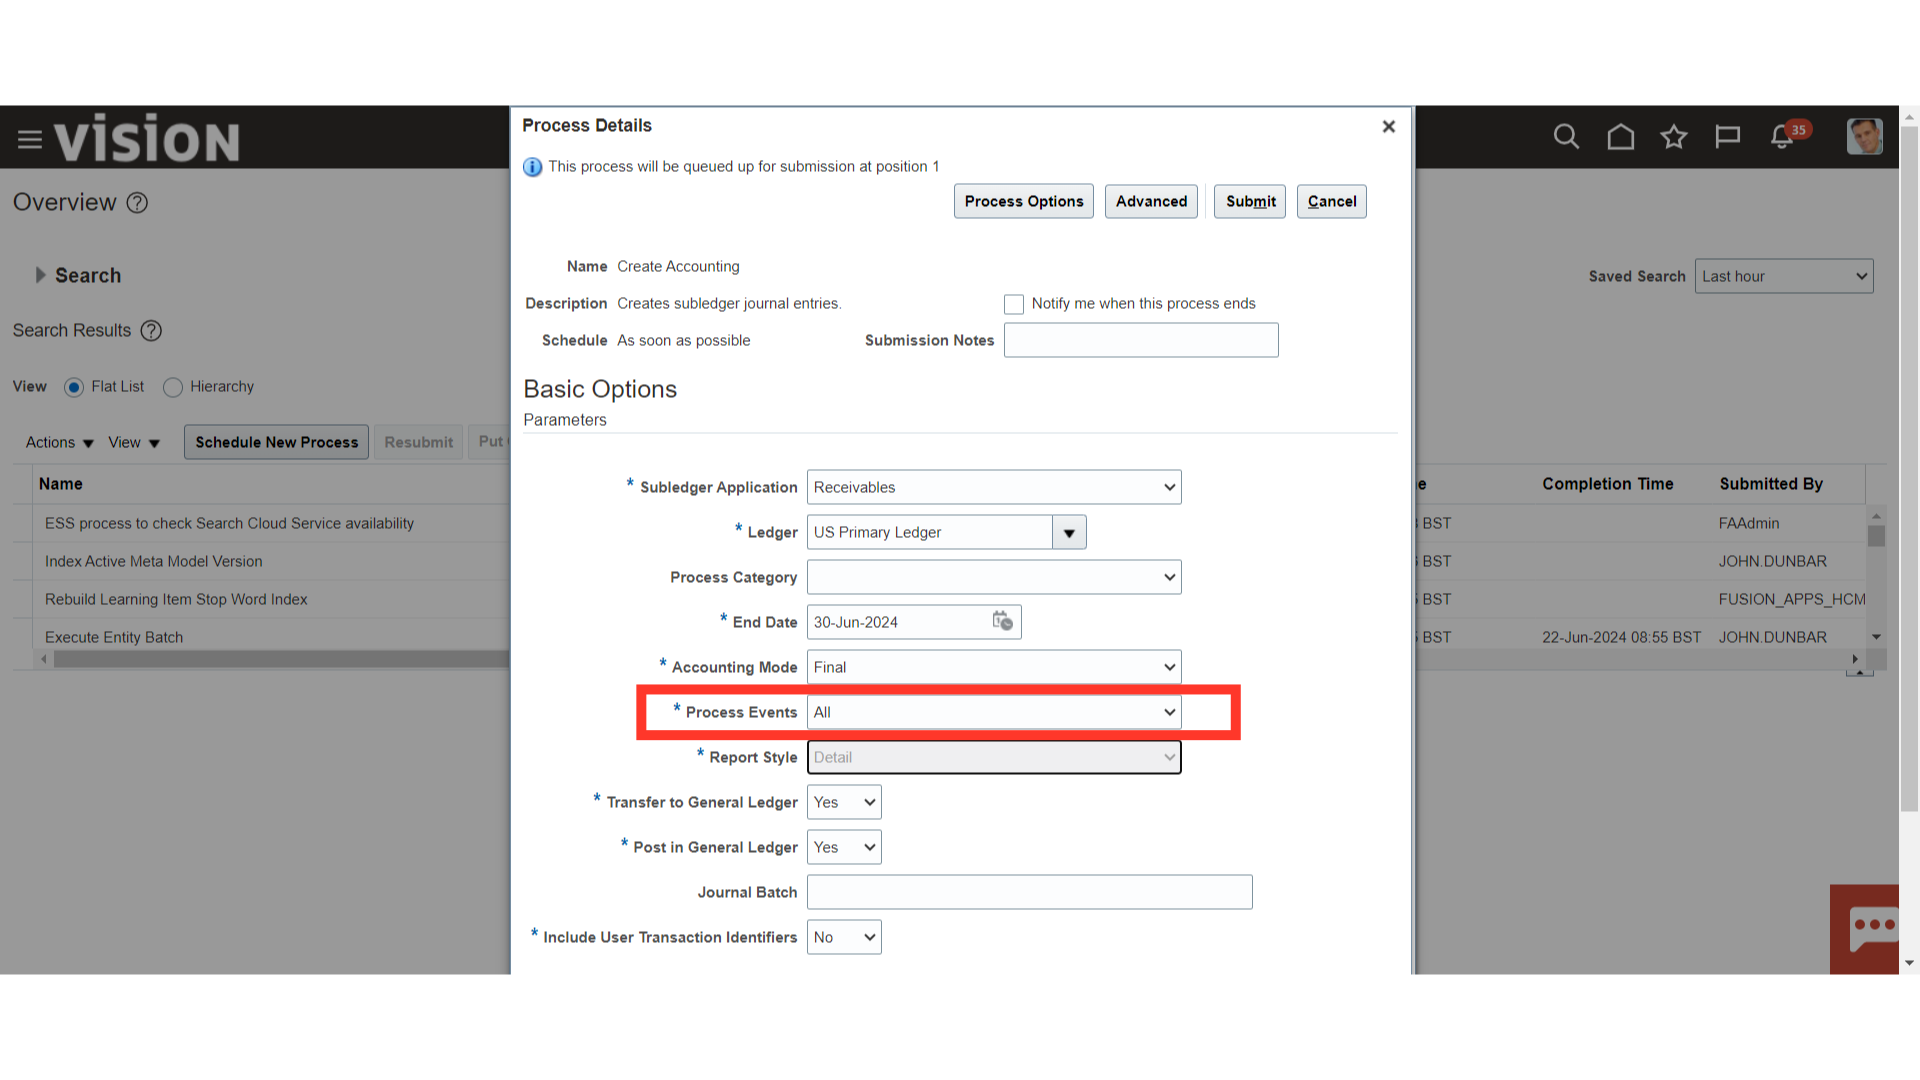
Depending on the Report style parameter chosen, the accounting entry’s output can be downloaded in either detail or summary form.
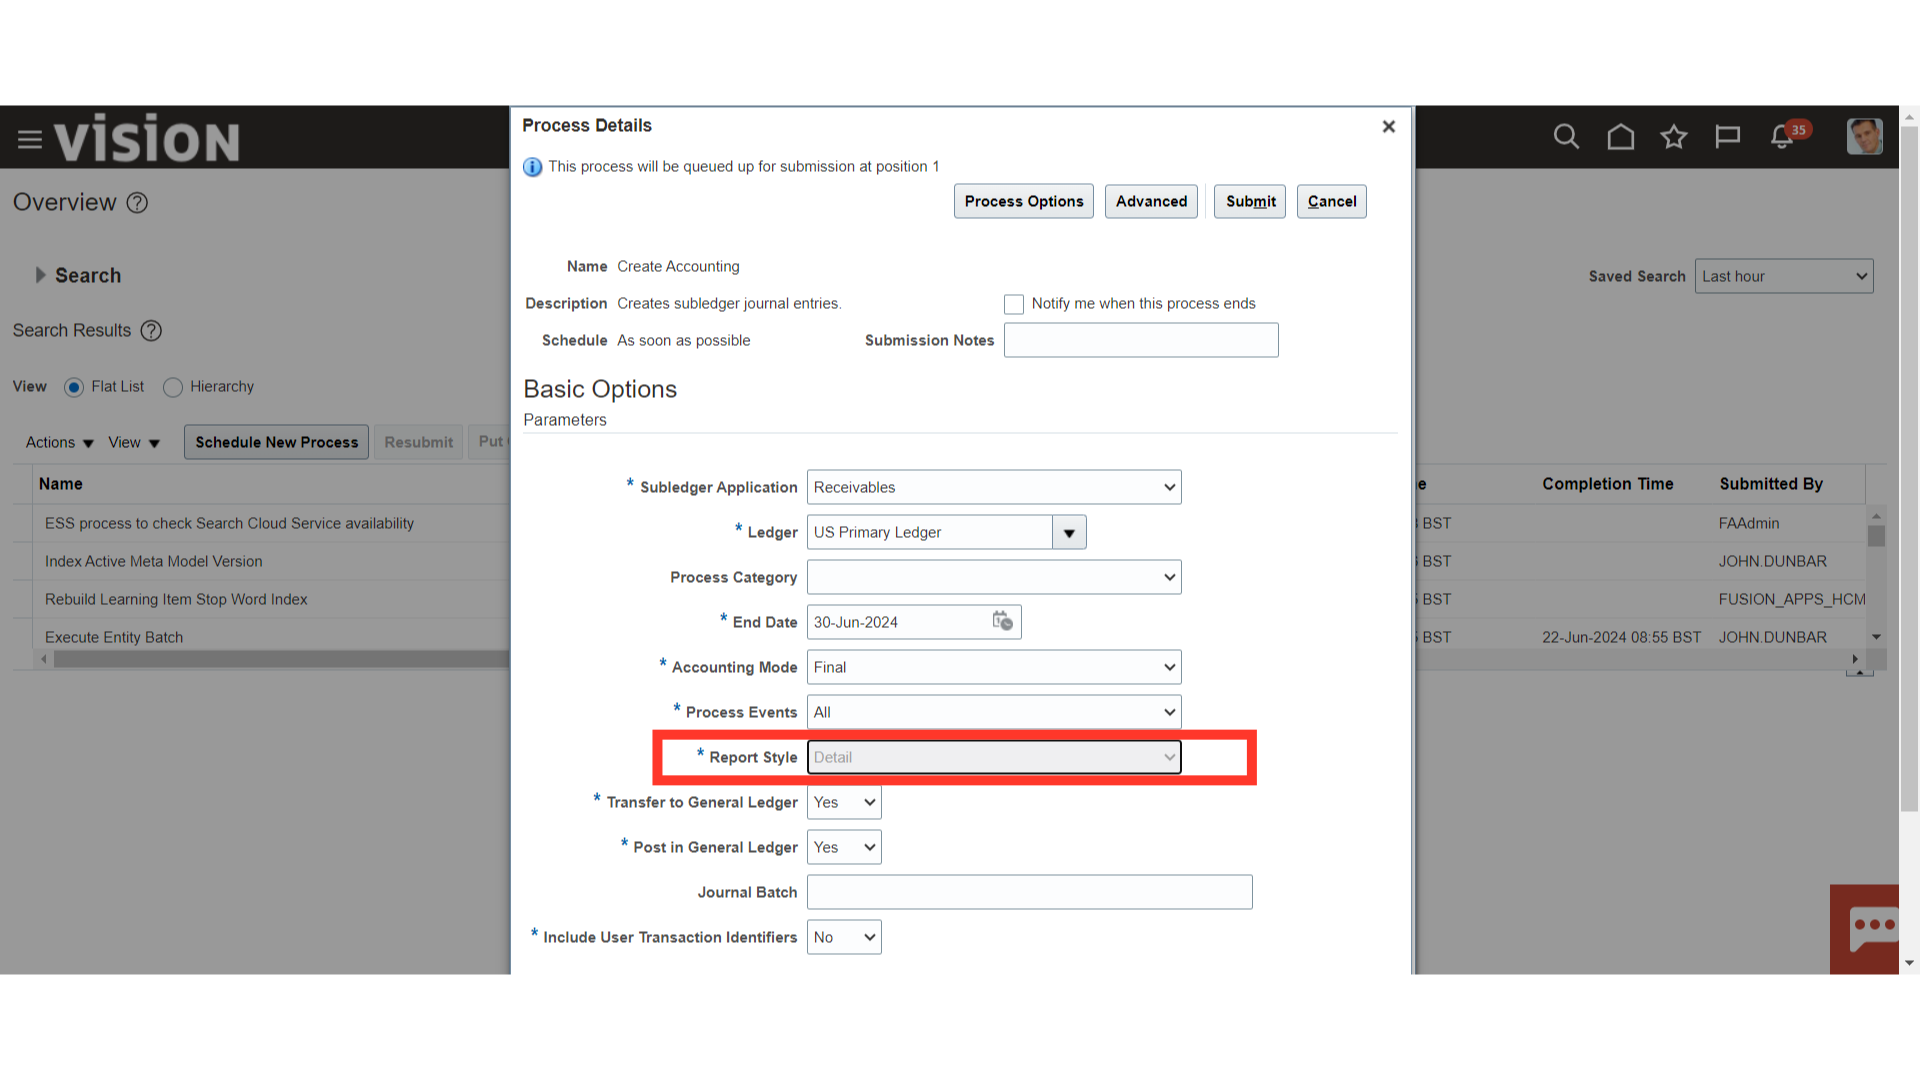
Select the Transfer to General Ledger parameter if you want to move entries from the subledger to the General Ledger. In Similar way, select the Post in General Ledger as “Yes” to post the entries to the General Ledger.

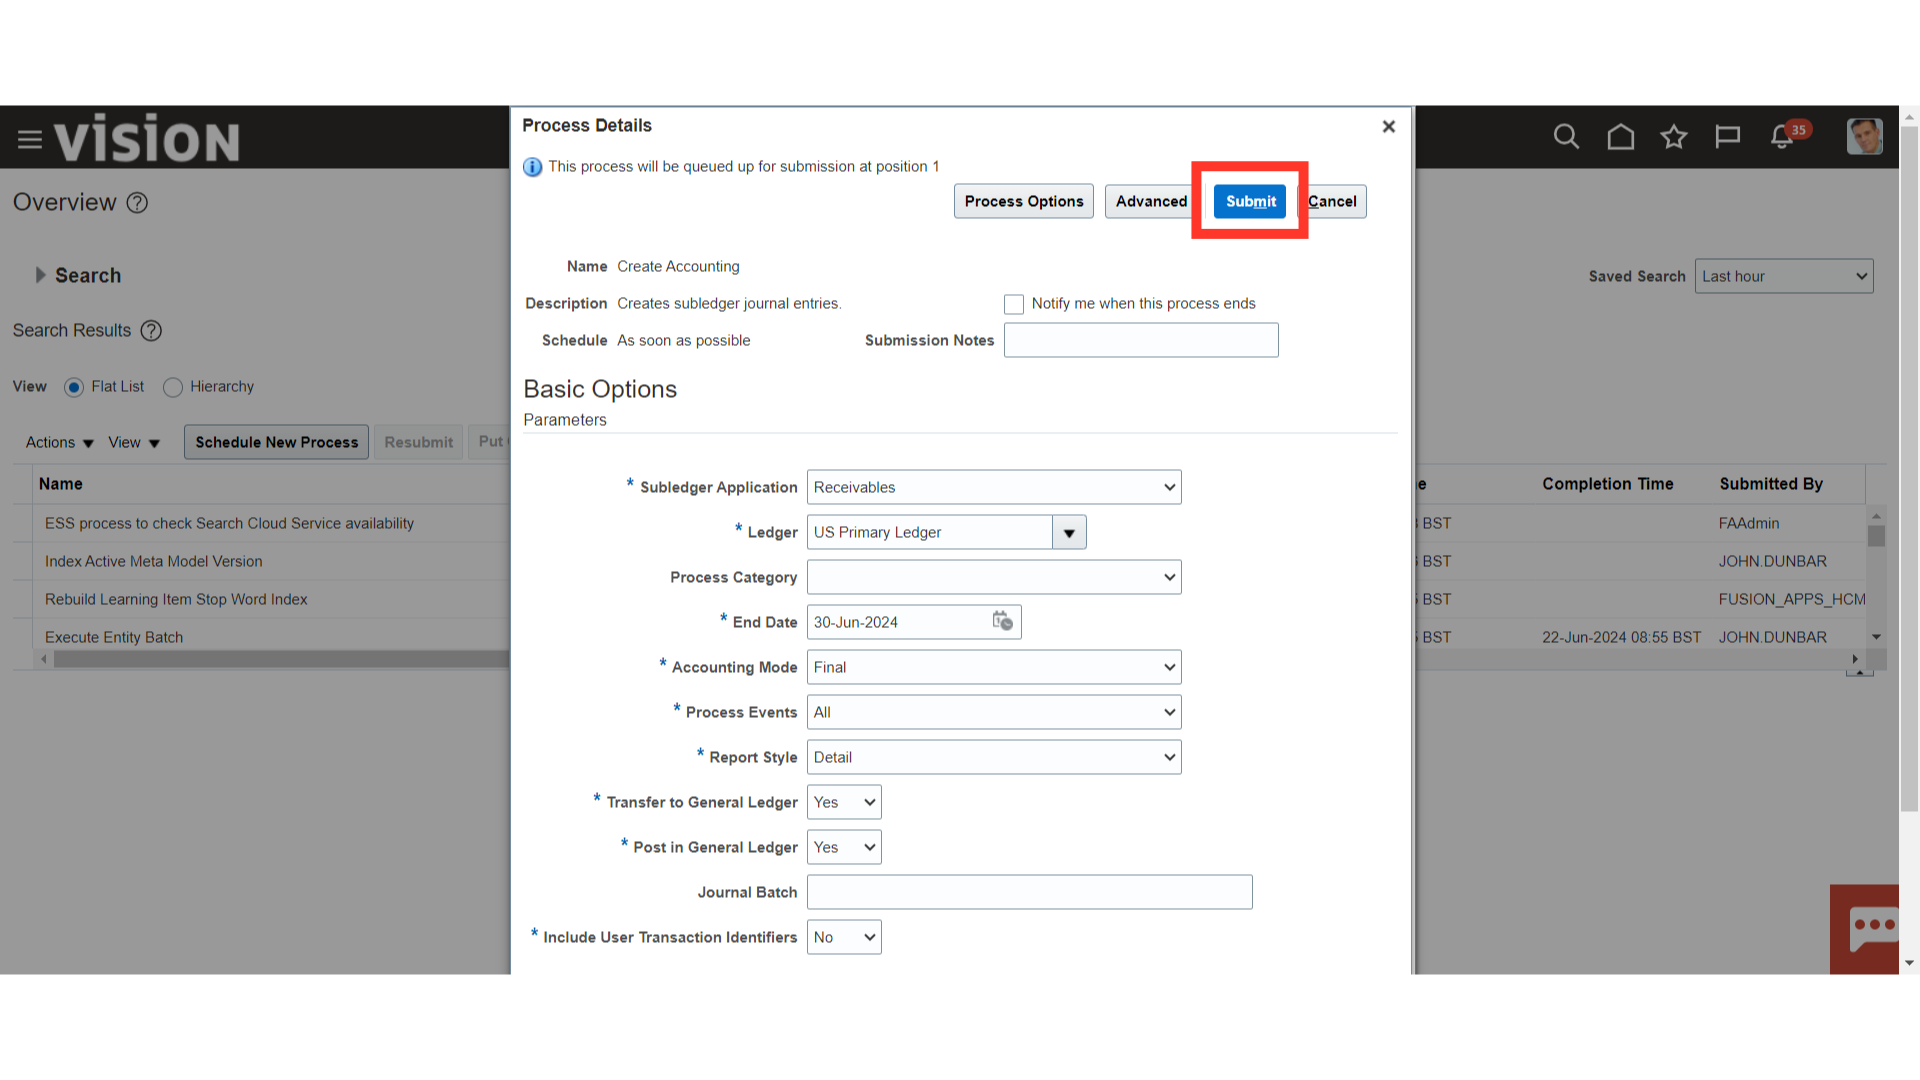
Click on Submit button to submit the process for generating accounting.
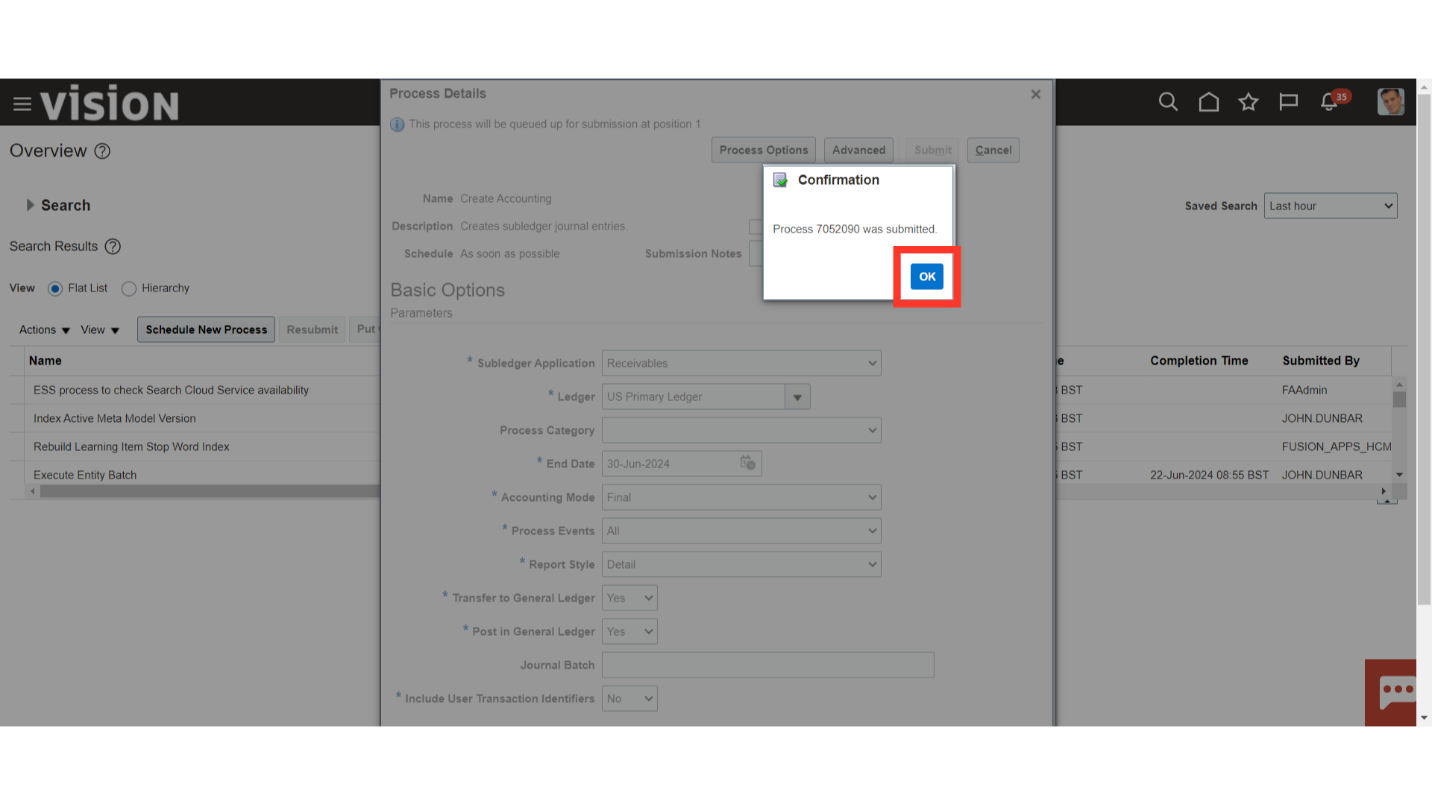
A confirmation message is displayed along with the Process ID. Click on “OK” to continue.
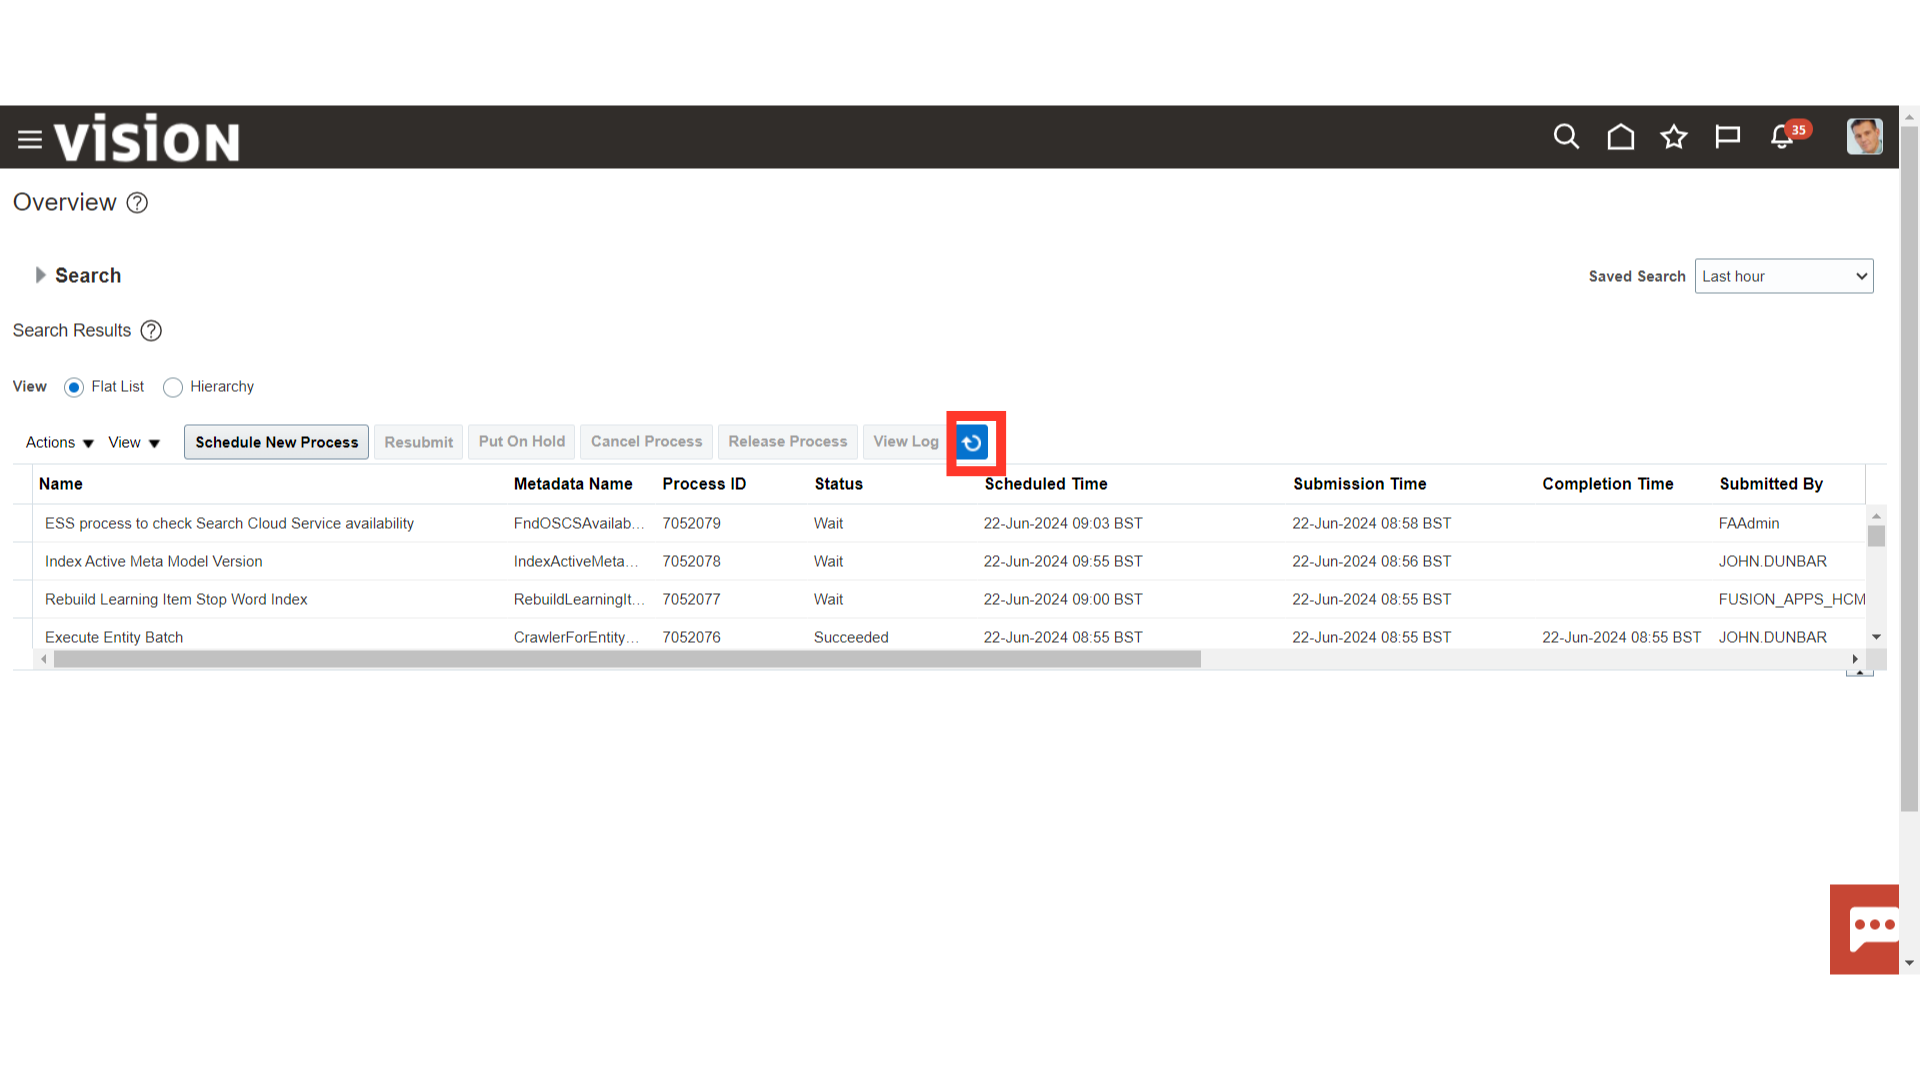
Click on the “Refresh” Icon to refresh the Create Accounting process.
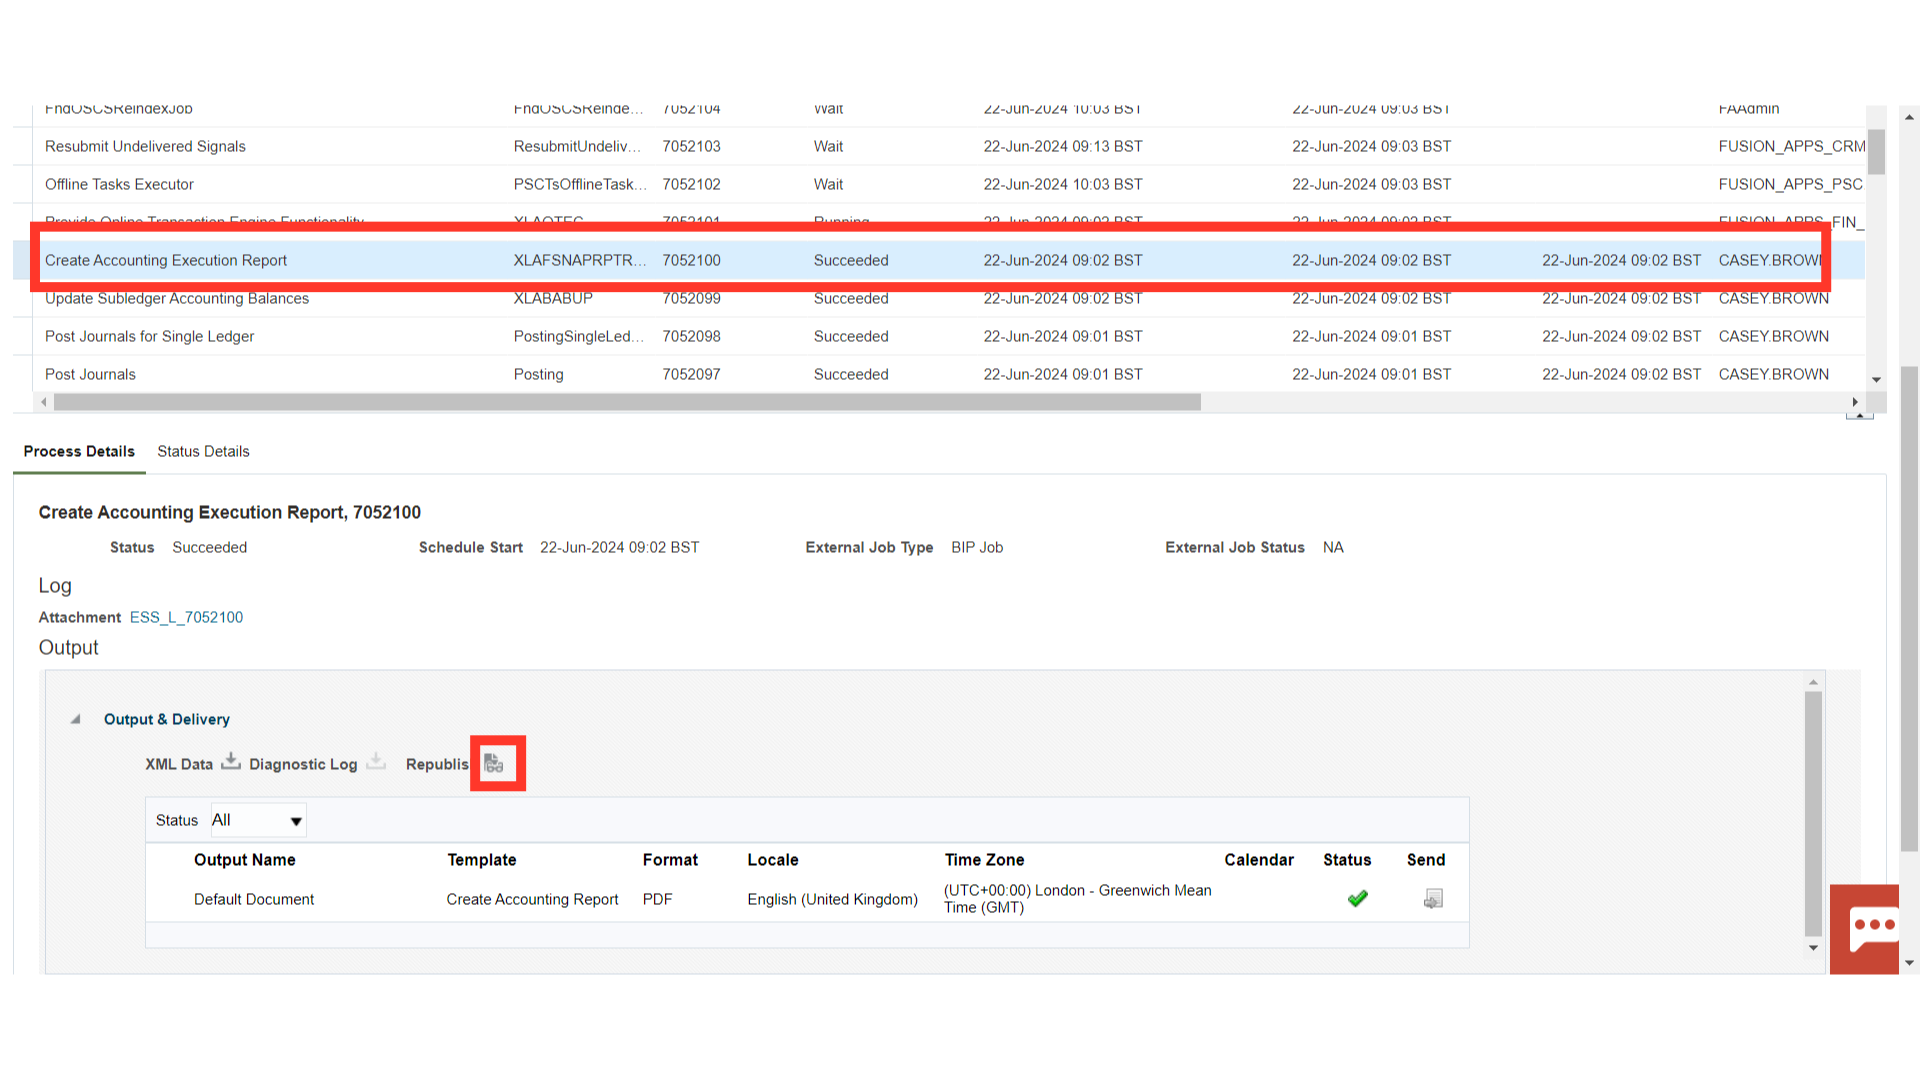
When you submit the Create Accounting process, the Create Accounting Execution Report is submitted automatically if the Create Accounting process is completed with a success or warning status. Now, to download the report select the “Create Accounting Execution Report” process, and then click on the Republish button.
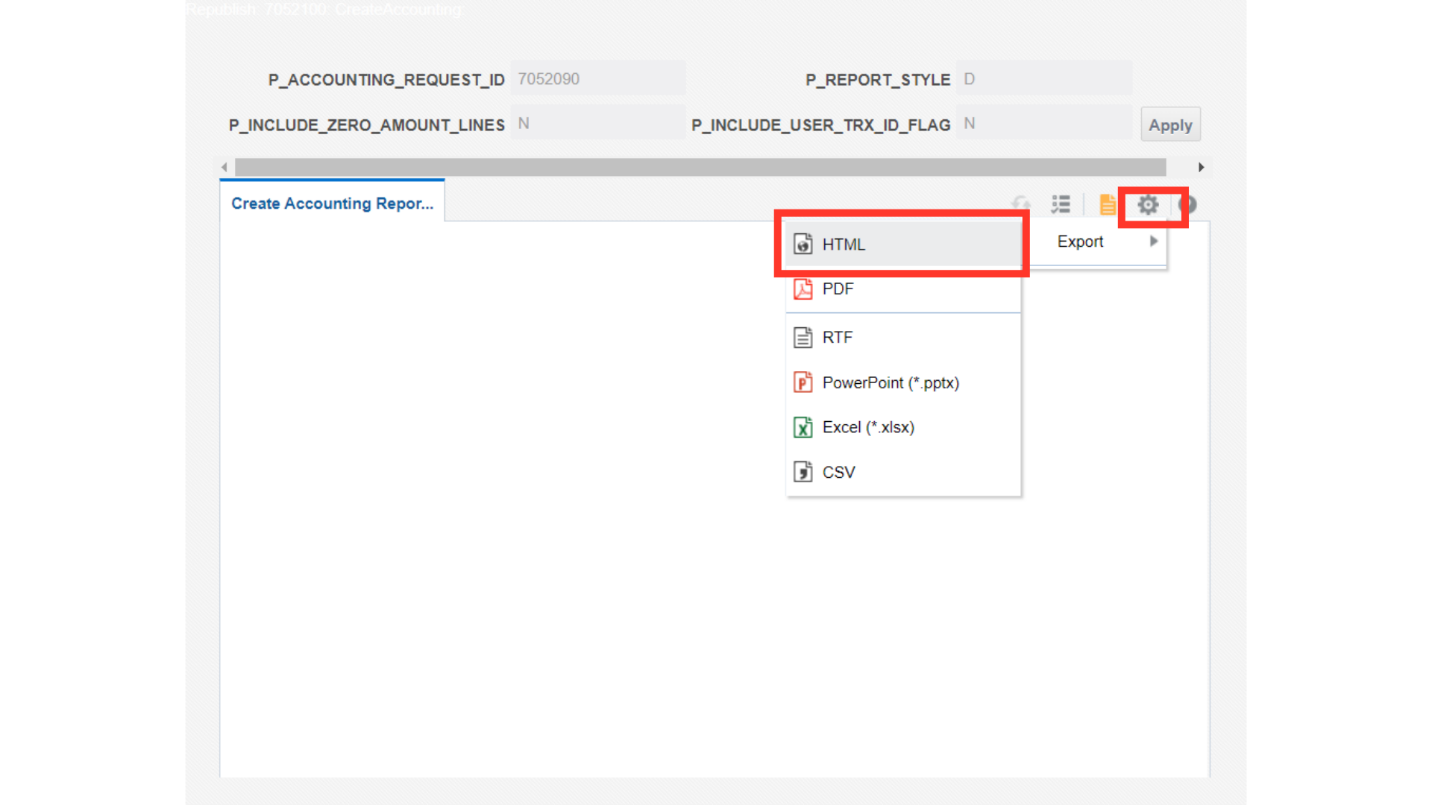
Click on the Gear icon, and then click on the HTML view option under Export.
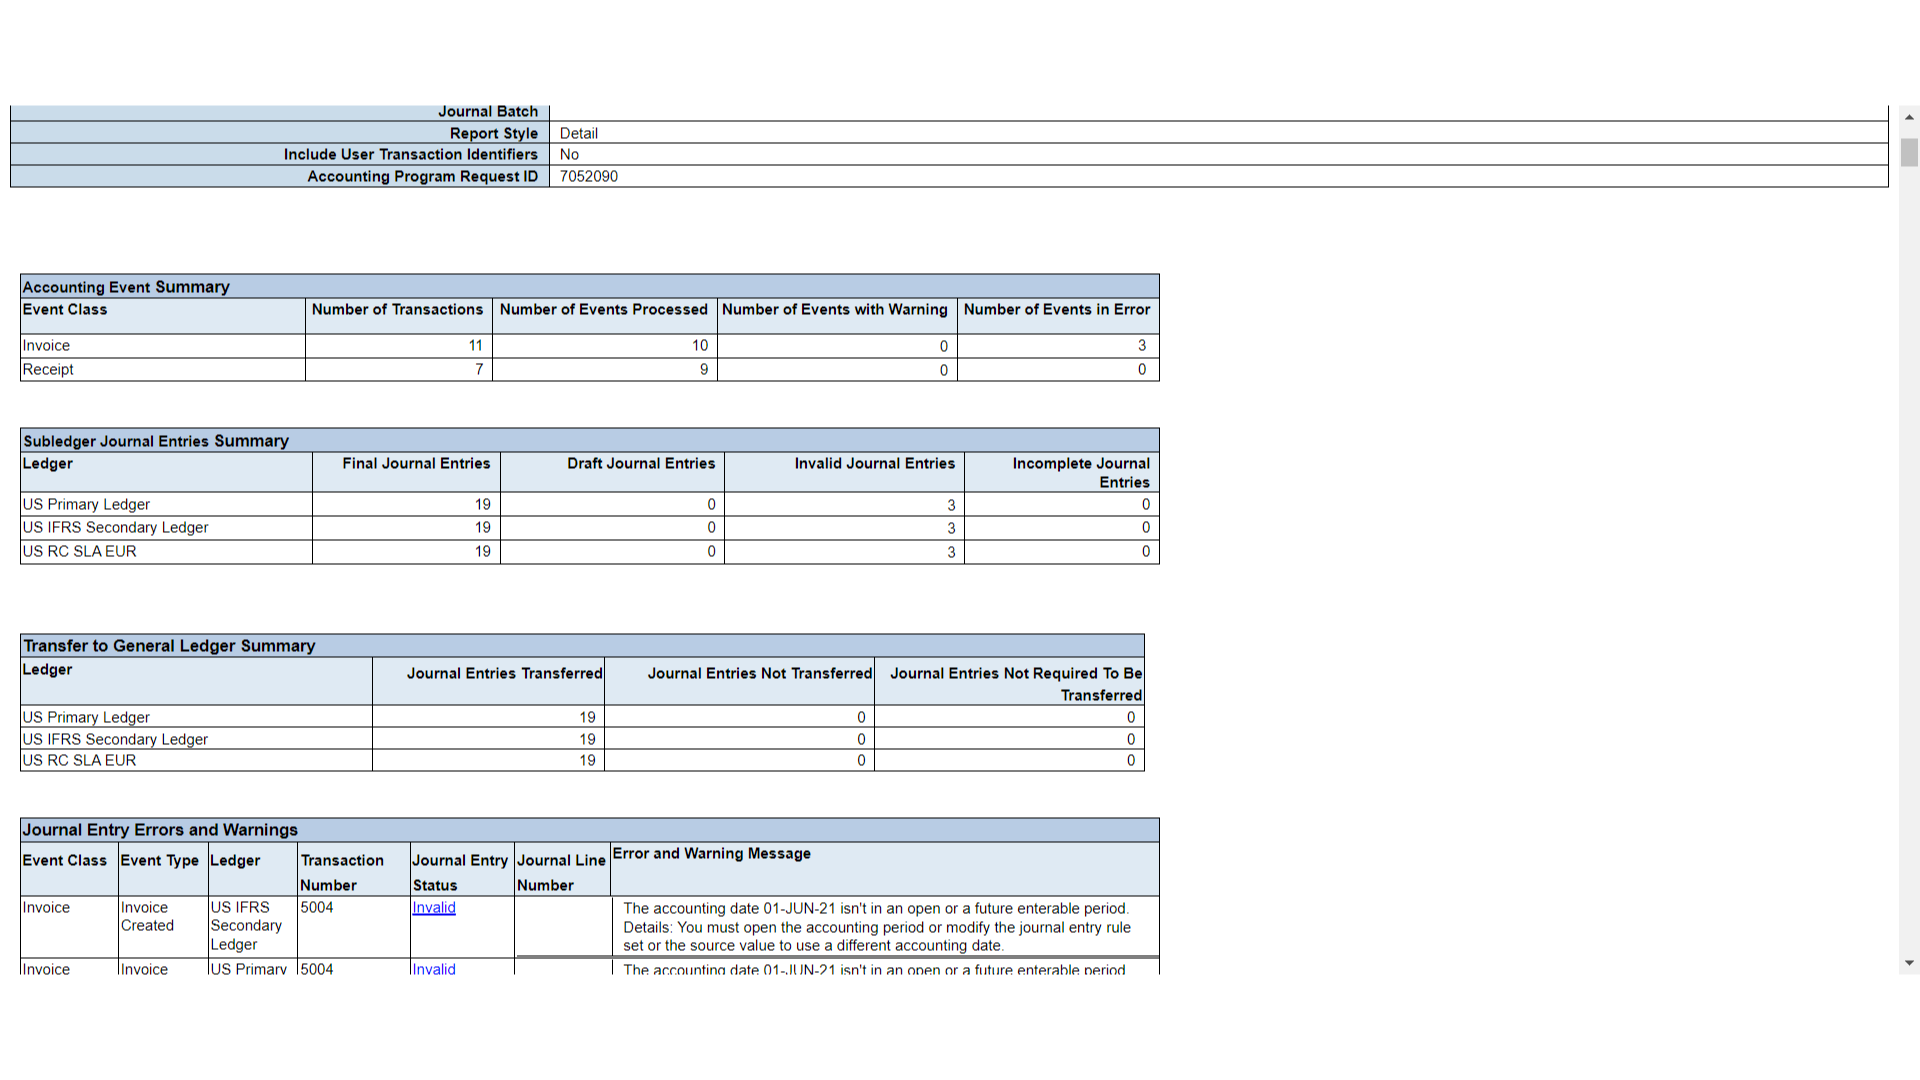
The Report output shows the counts of a journal entry transferred or in error status along with an error or warning message. With the help of these corrective action can be taken to resolve this issue and again run the Create Accounting process.
You can find a comprehensive step-by-step explanation of how to submit the Create Accounting process in this guide, along with instructions on how to download the report and check the status of the process. You should be able to create and move accounting entries from the subledger to the general ledger after reading this guide.