Create Transactions via Spreadsheet
This guide facilitates the creation of transactions via FBDi spreadsheet on Oracle Cloud. From the preparation of data in a spreadsheet to uploading and managing transactions, this step-by-step walkthrough ensures a seamless transactional experience for the creation of invoices in bulk manually.
Download the spreadsheet template from the below link. Once downloaded in your local system open the Excel file. The template used to generate the Comma Separated Values (CSV) files for loading transaction data from other Oracle applications and also from external sources to Receivables.
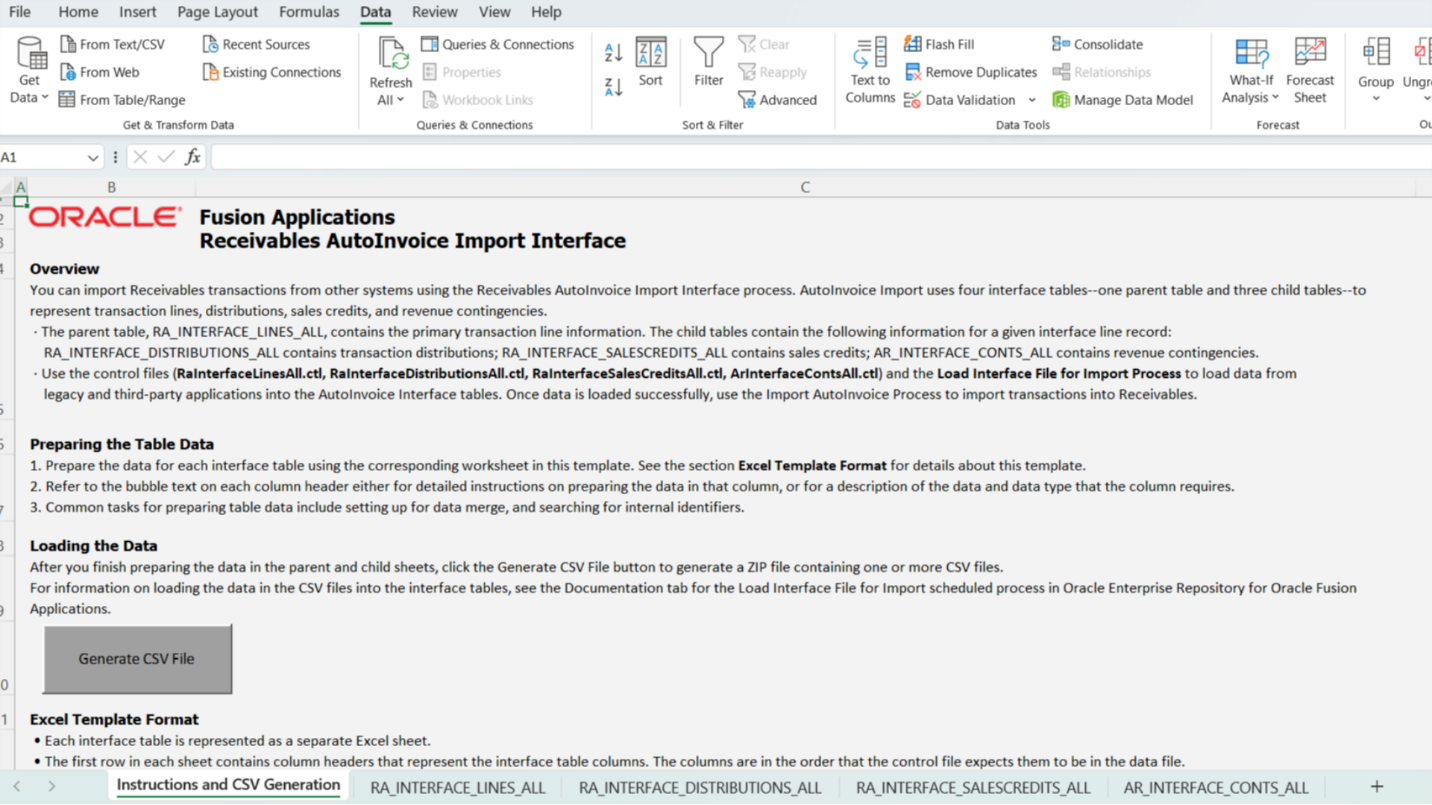
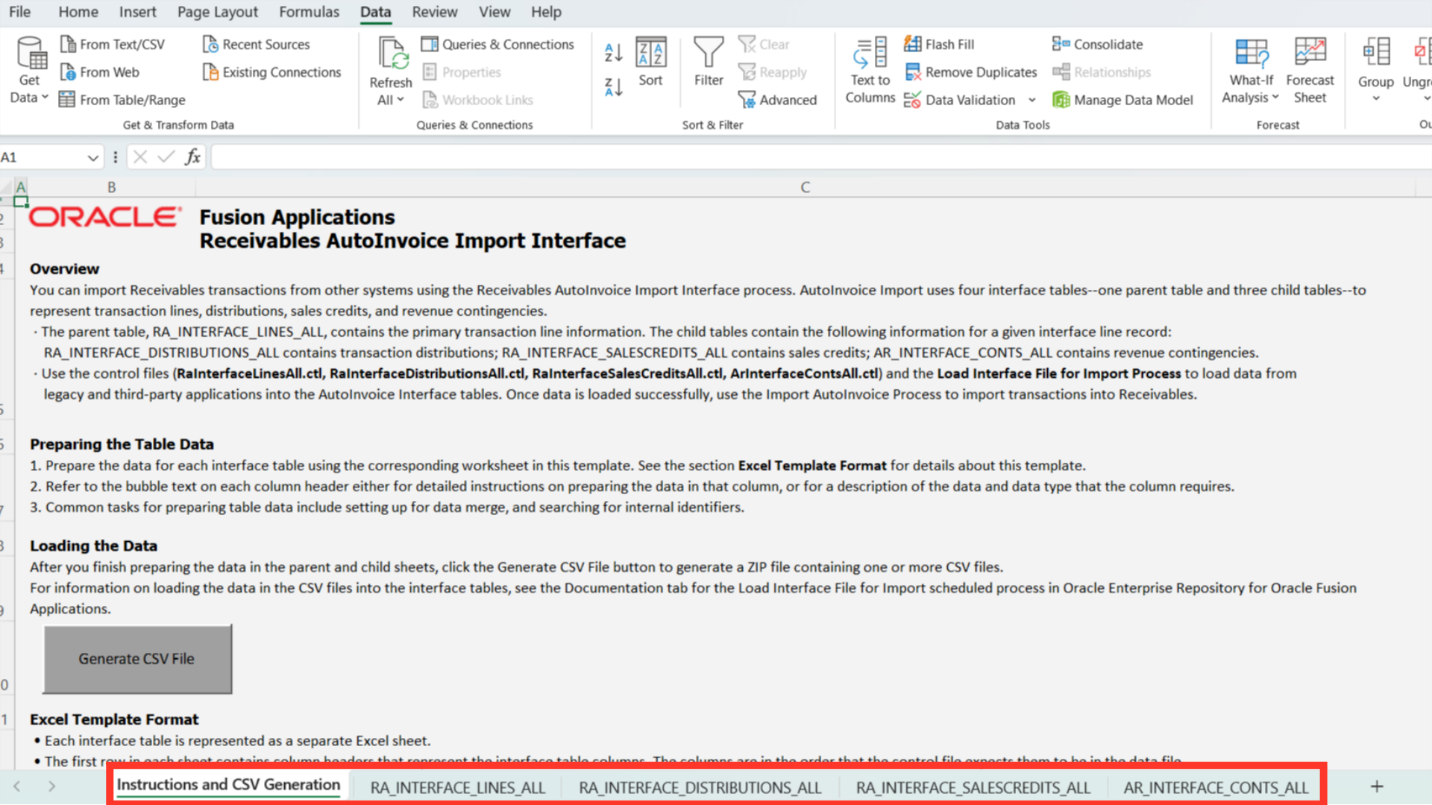
There are five worksheets in the spreadsheet: Instructions and CSV Generation : This sheet contains Instructions on how to prepare the file and how to import it. FA_INTERFACE_LINES_ALL, RA_INTERFACE_DISTRIBUTIONS_ALL, RA_INTERFACE_SALESCREDITS_ALL, AR_INTERFACE_CONTS_ALL : In these four sheets enter the transaction data that is to be uploaded.
To understand what is required for each column, There is a note present for each of them. Hover the cursor over the right corner of the column header and review the Instructions for the format and kind of data to be entered Columns with one asterisk (*) indicate that it is mandatory; all other columns are optional.
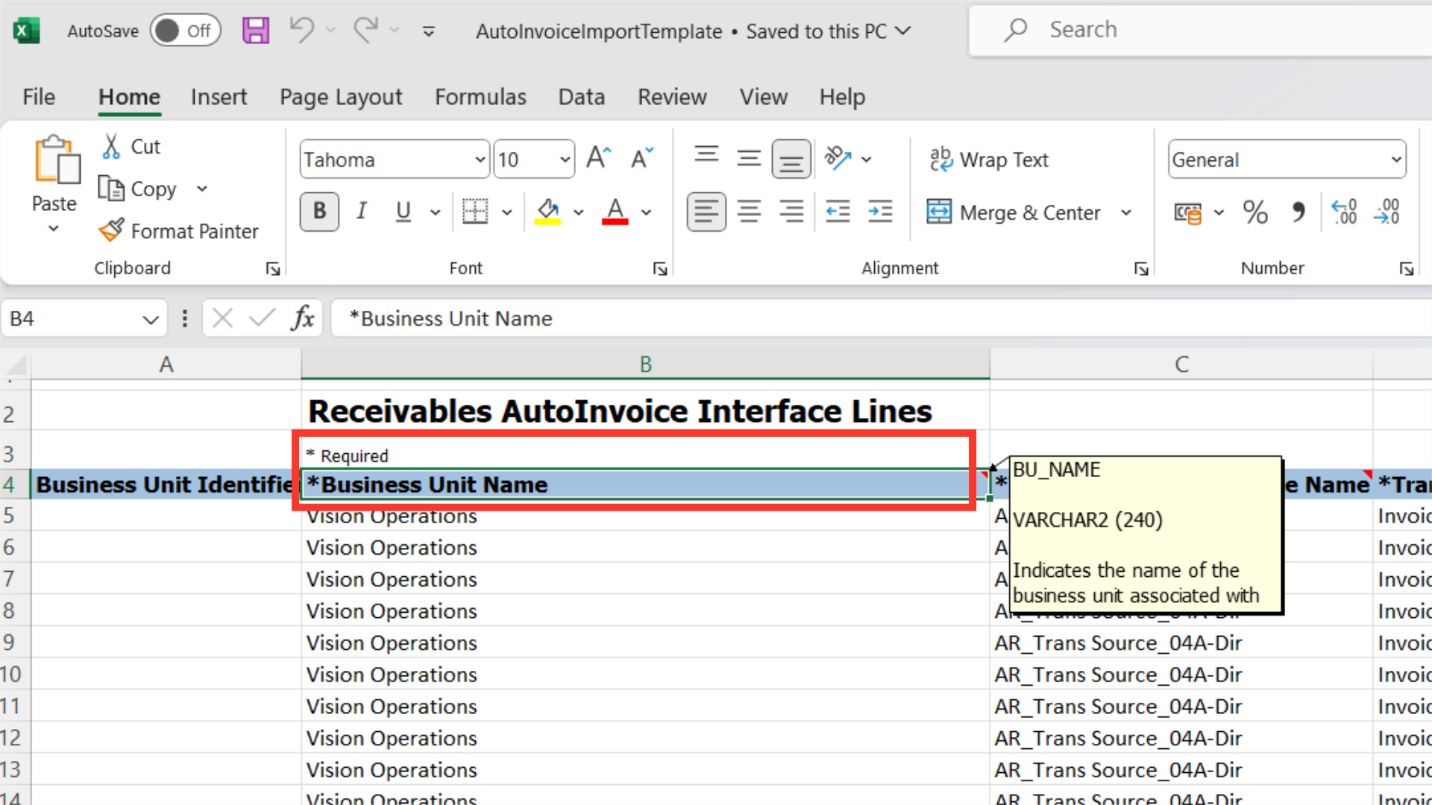
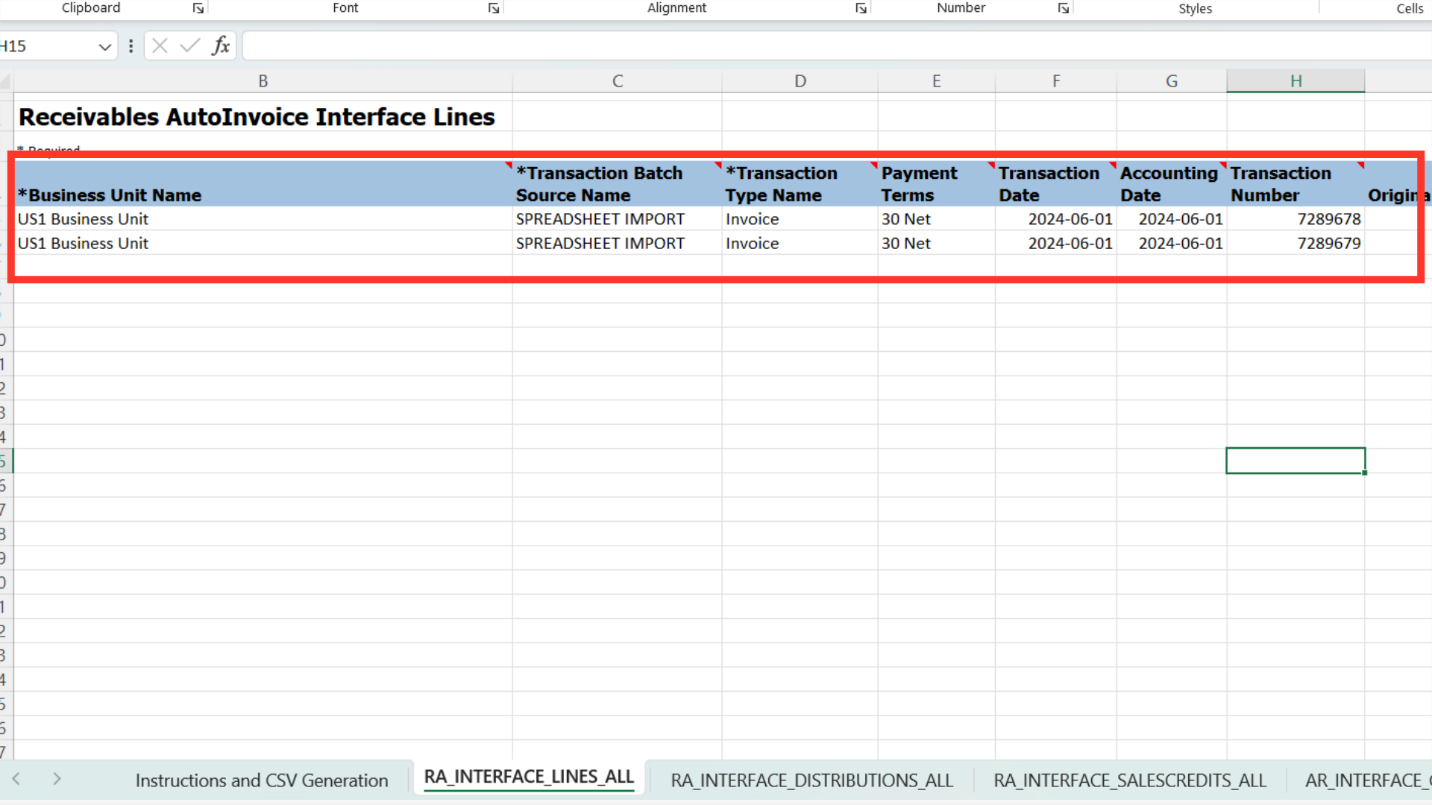
The Template will already contain the sample data. Review how the data is entered. Remove the sample data and then enter the correct data that is required to be created. In the Sheet RA_INTERFACE_LINES_ALL, enter Business Unit Name: Business Unit for which the transaction is to be created.
Transaction Batch Source Name: Check with the IT administrator on the exact value that would required to be entered here.
Transaction Type Name: Enter the transaction Type as provided by IT administrator.
Payment Term : Enter the Payment term applicable to the customer and the transaction Transaction Date: The date on which the transaction occurred
Accounting Date: The date on which accounting is required to be generated and posted. This date should be in an Open accounting period.
Transaction Number : Enter the Invoice number only if it is not being auto-generated.
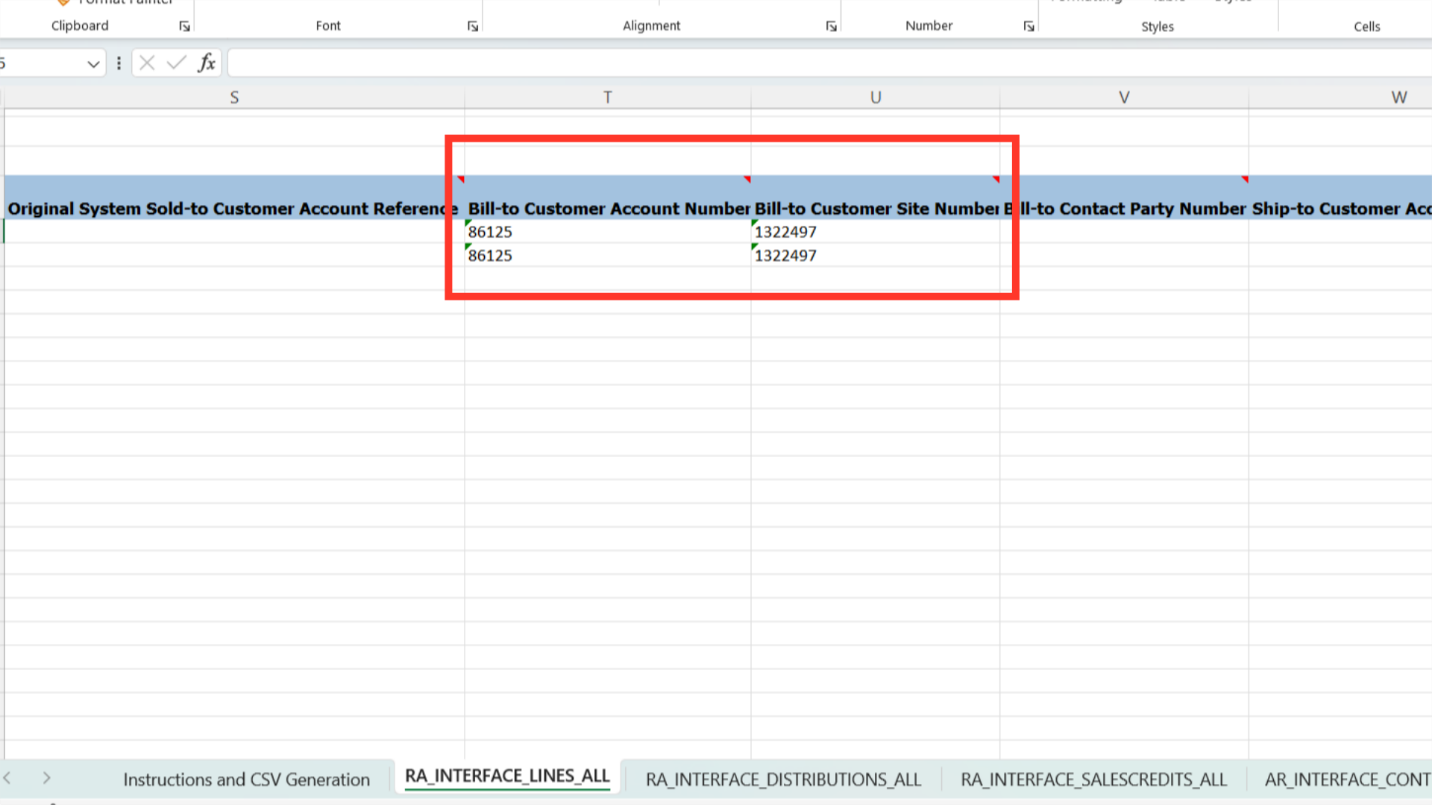
Scroll to the right on the Spreadsheet and enter the relevant data such as Bill-to Customer Account Number and Bill-to Customer Site Number
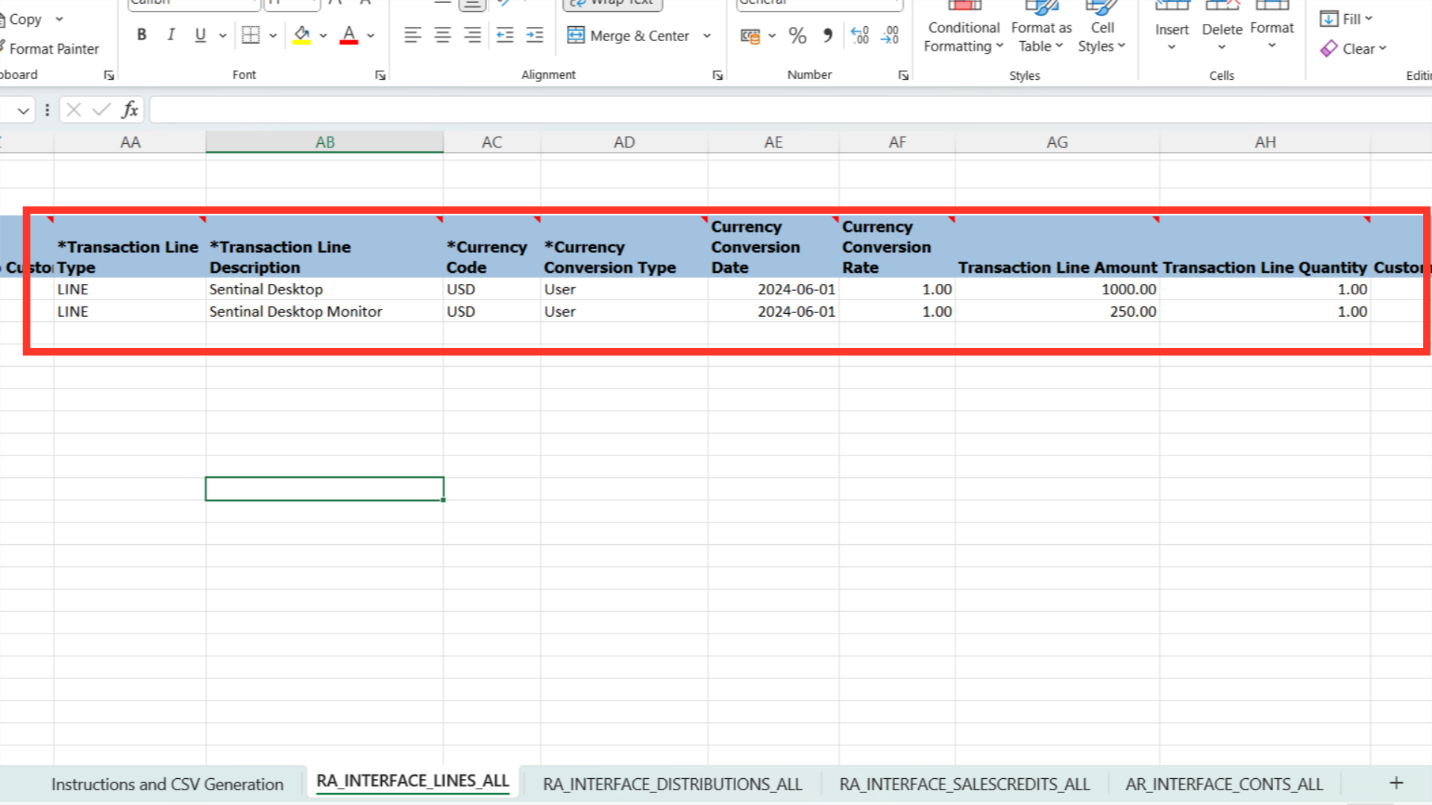
Enter the relevant Line details from column AA to AJ such as line type, amount , Currency details etc,
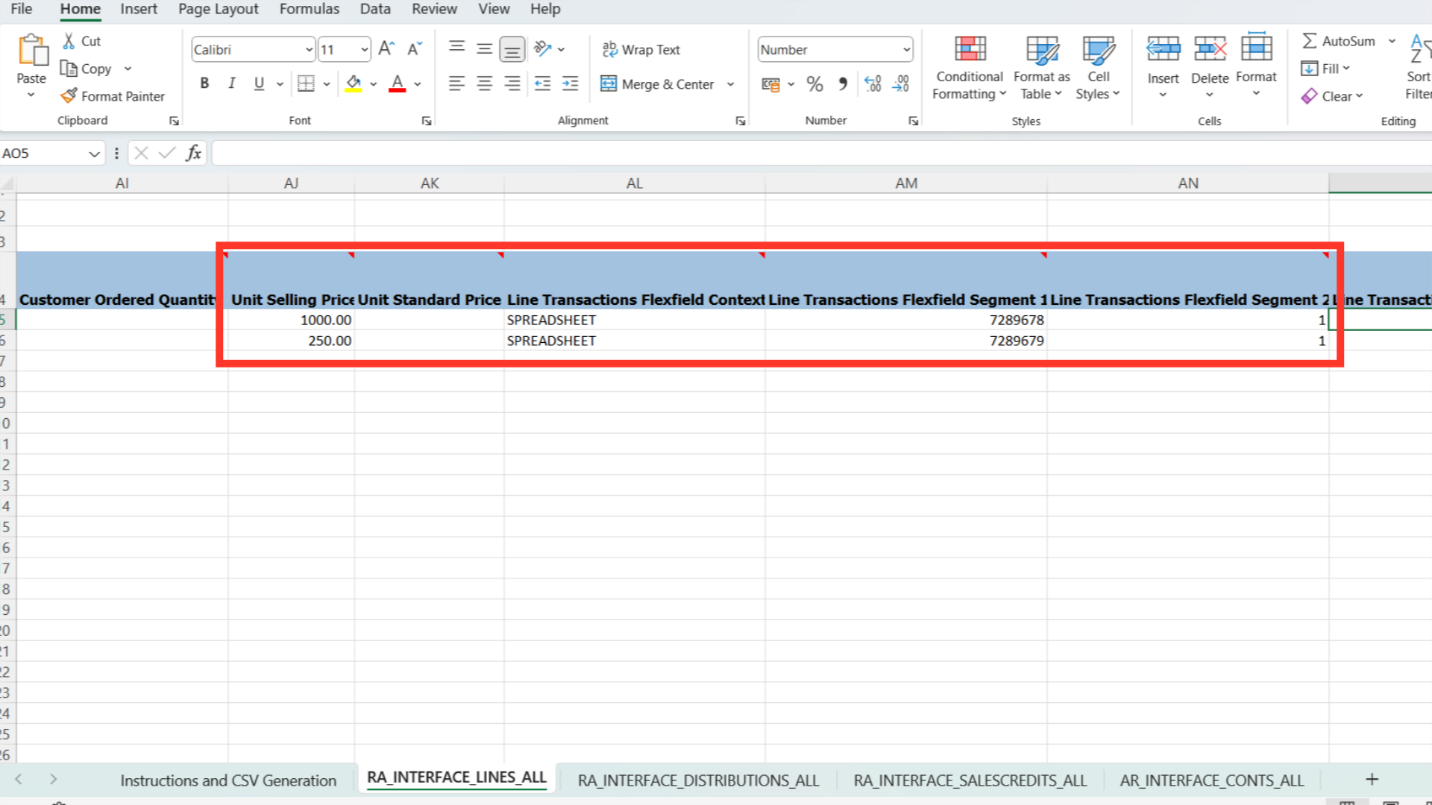
It is mandatory to enter the data in columns Line Transaction Flexfield Context, Line Transaction Flexfield Segment 1, Line Transaction Flexfield Segment 2. If an invoice has multiple lines then these values will remain the same for all the lines except for Line Transaction Flexfield Segment 2, which indicates the line number. These fields will be used to link the transaction data across different sheets too.
The Sheet “RA_INTERFACE_DISTRIBUTION_ALL” will contain details of the account combination for accounting purpose, Enter the Business Unit name as entered in the RA INTERFACE LINES ALL sheet. The Accounting Class will be REV for the revenue line and REC for the Receivable accounting line. The amount/Percent column decides the amount that would be charged to account combination provided. As mentioned earlier enter data in columns Transaction Flexfield Context, Line Transaction Flexfield Segment 1, Line Transaction Flexfield Segment 2for the respective transaction line. This data would be similar to what is entered in RA INTERFACE LINES ALL sheet
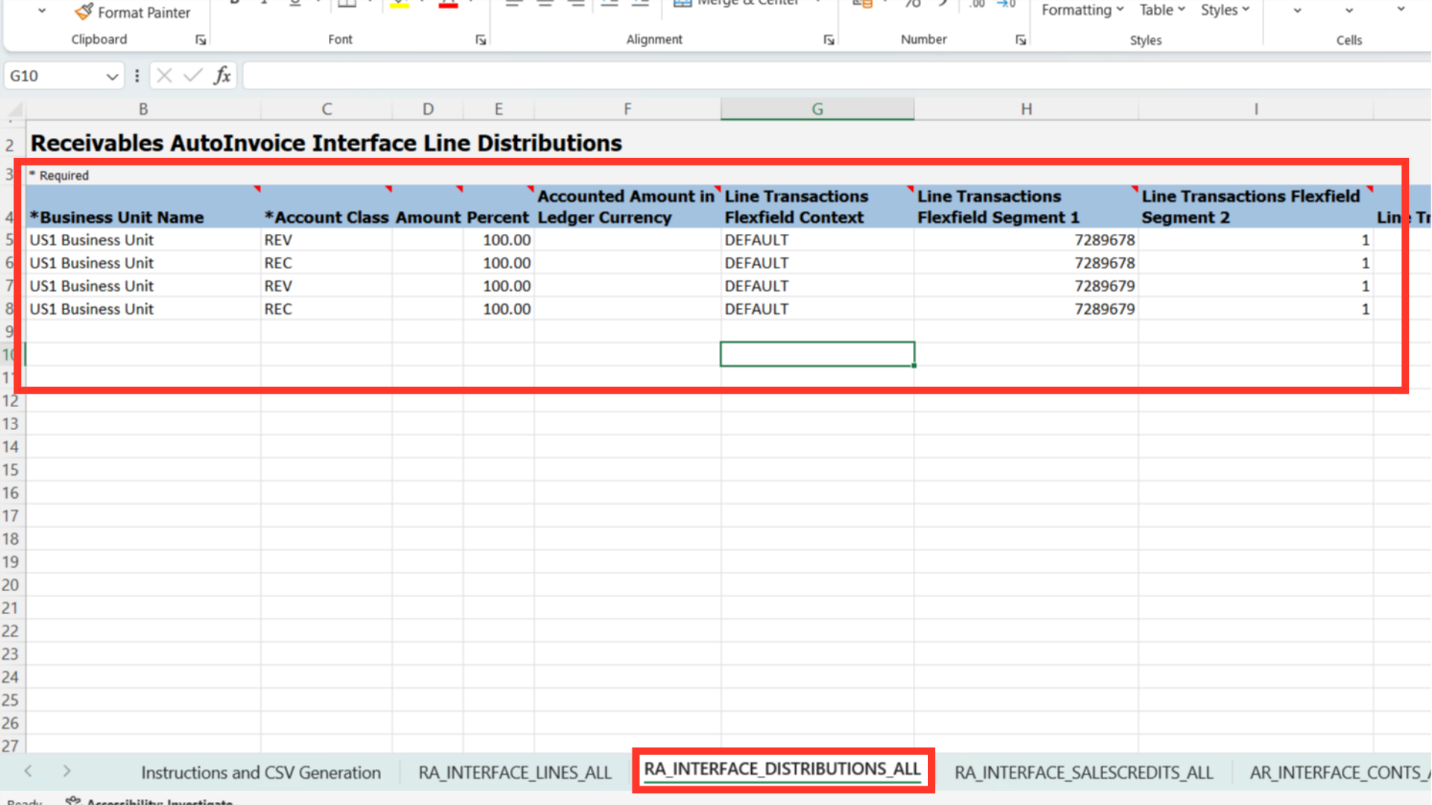
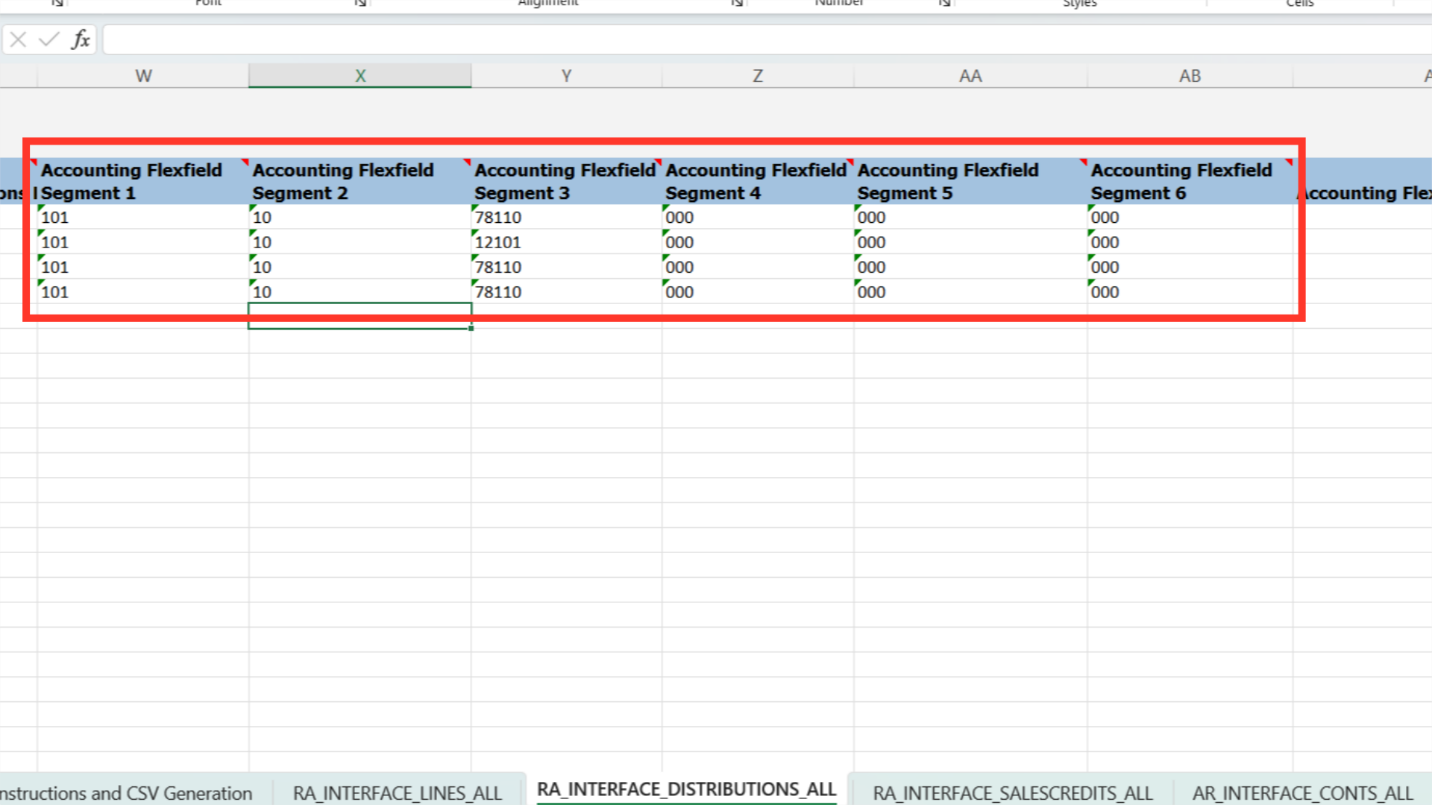
Enter the Account Combination. Accounting Flexfield Segment 1 to Accounting Flexfield Segment 6, these are the respective accounting segments.
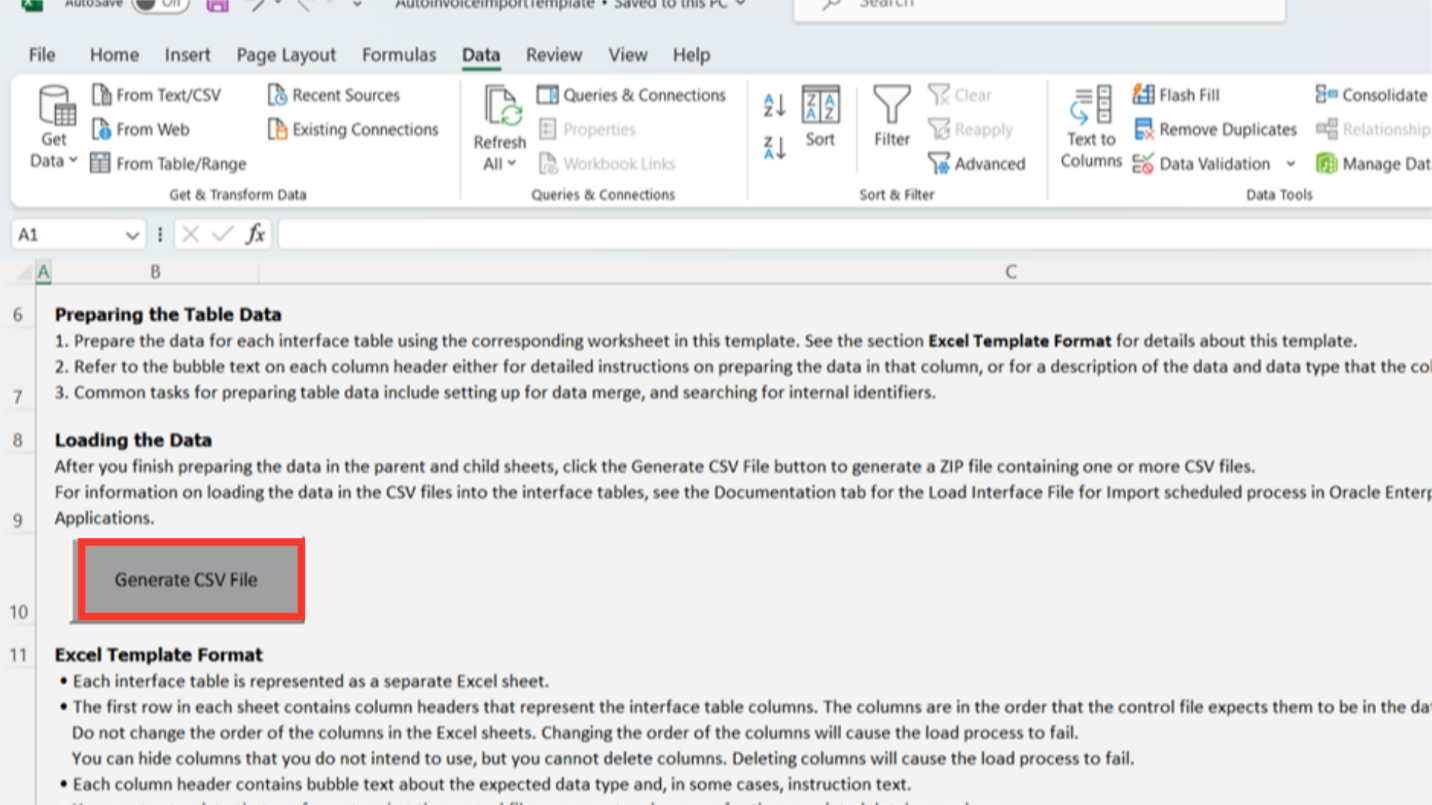
It is not mandatory to enter data in the other two sheets unless it is required to add data for the person and its credit related details. After the Data is prepared, Go to the Instructions and CSV Generation sheet and click on Generate CSV File button
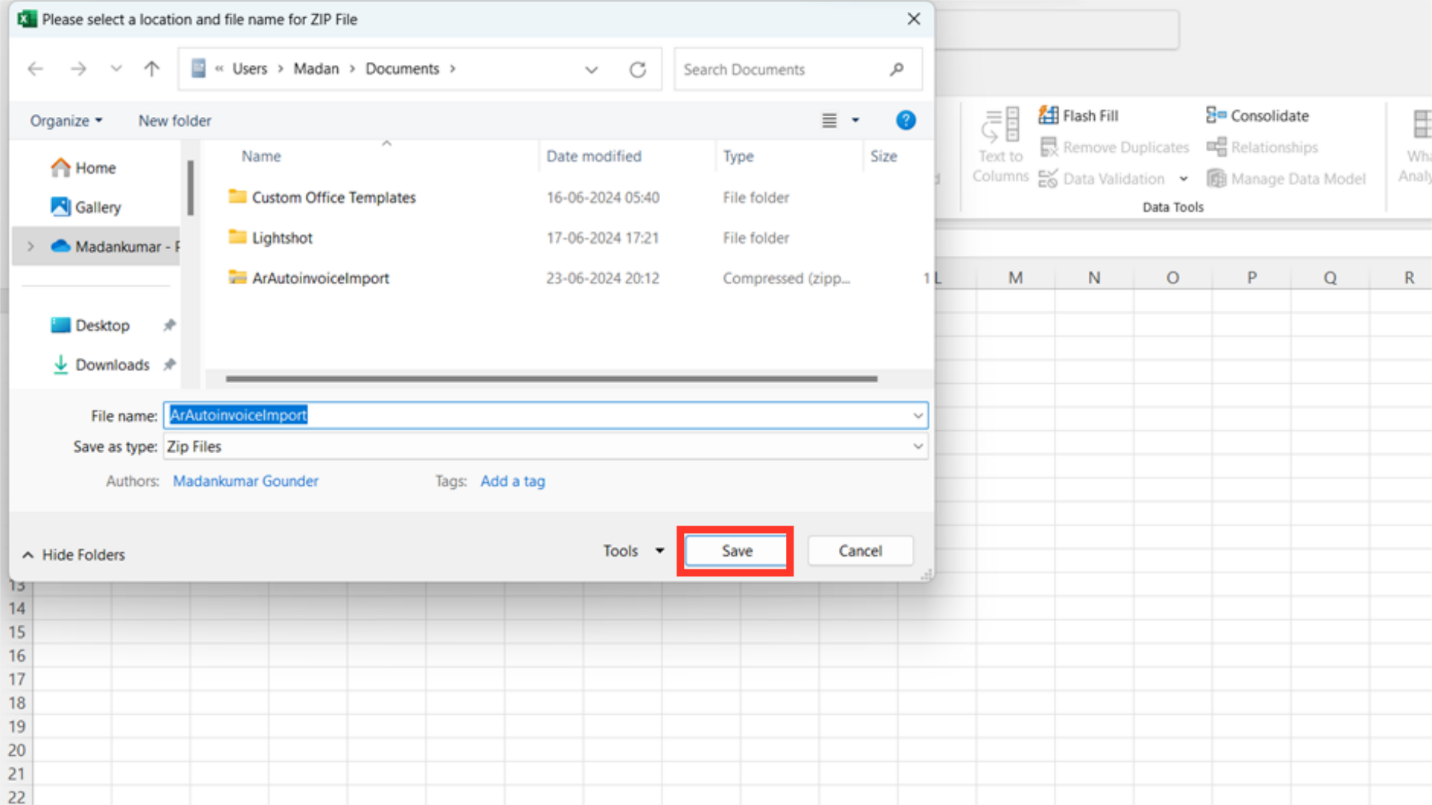
The system will prompt to ask for the location to save the Zip file that would be generated. Store the Zip file in your local system.
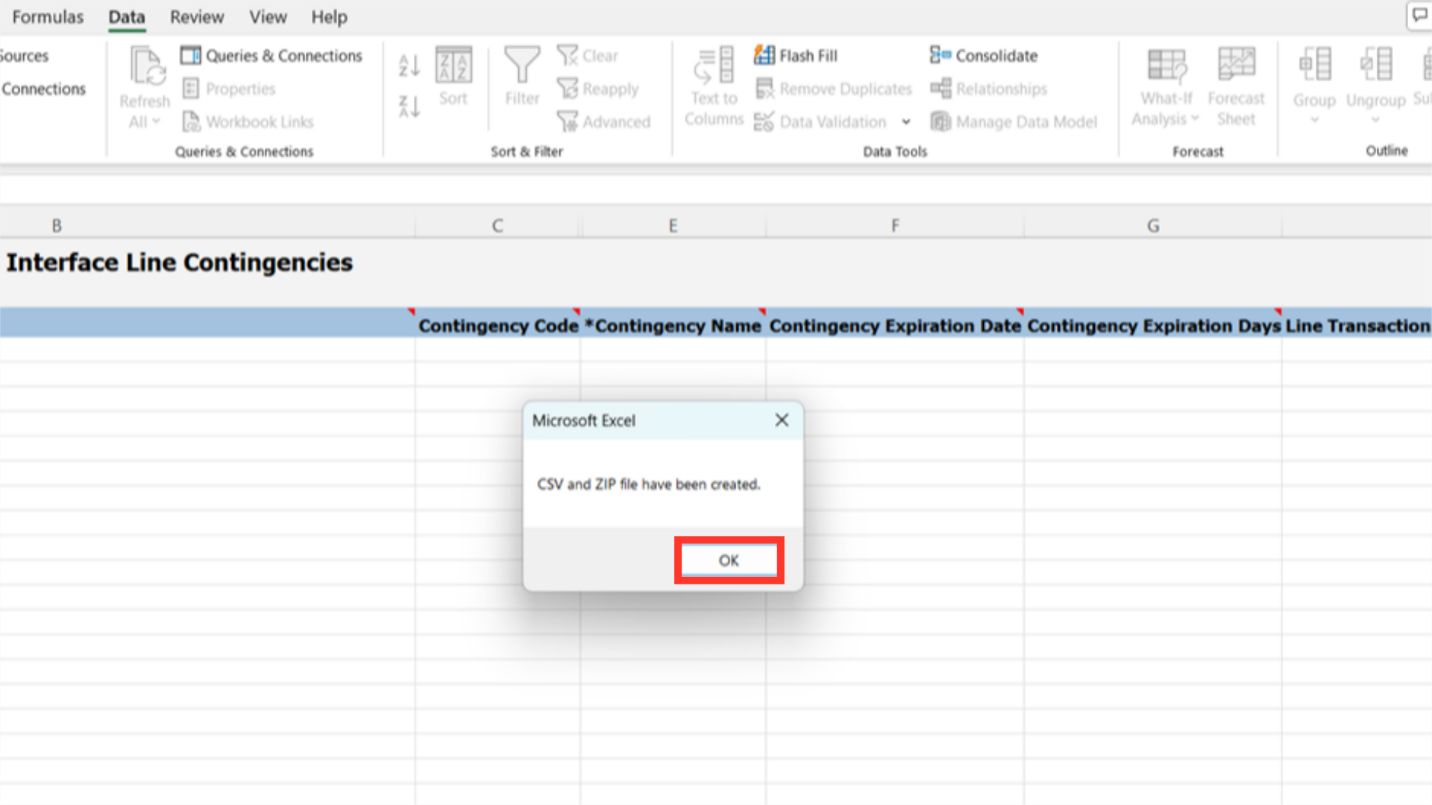
Once the Zip file is generated successfully excel will display the below message. Click on OK.
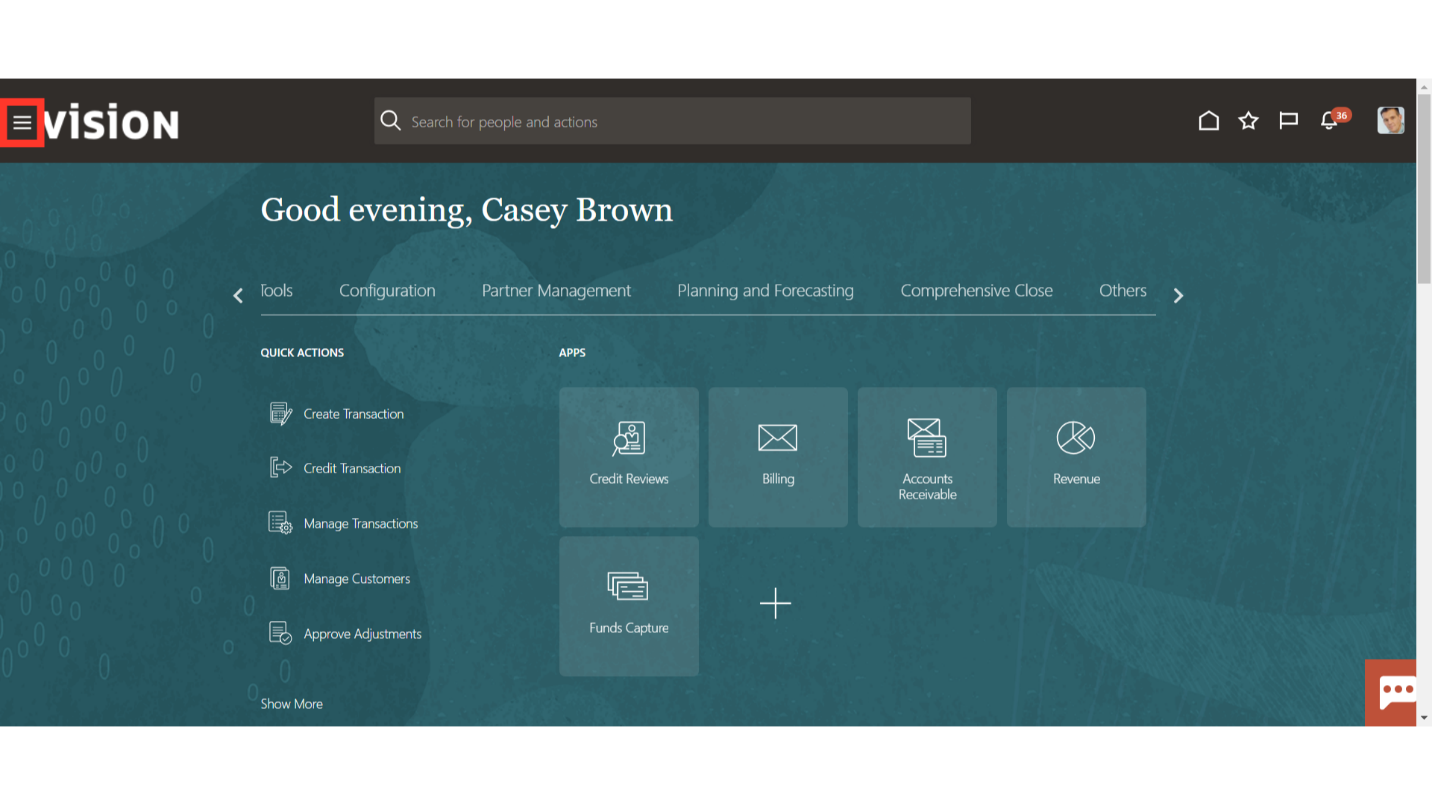
To upload the File, Login into Oracle Cloud Application. On the Home page click on Navigator.
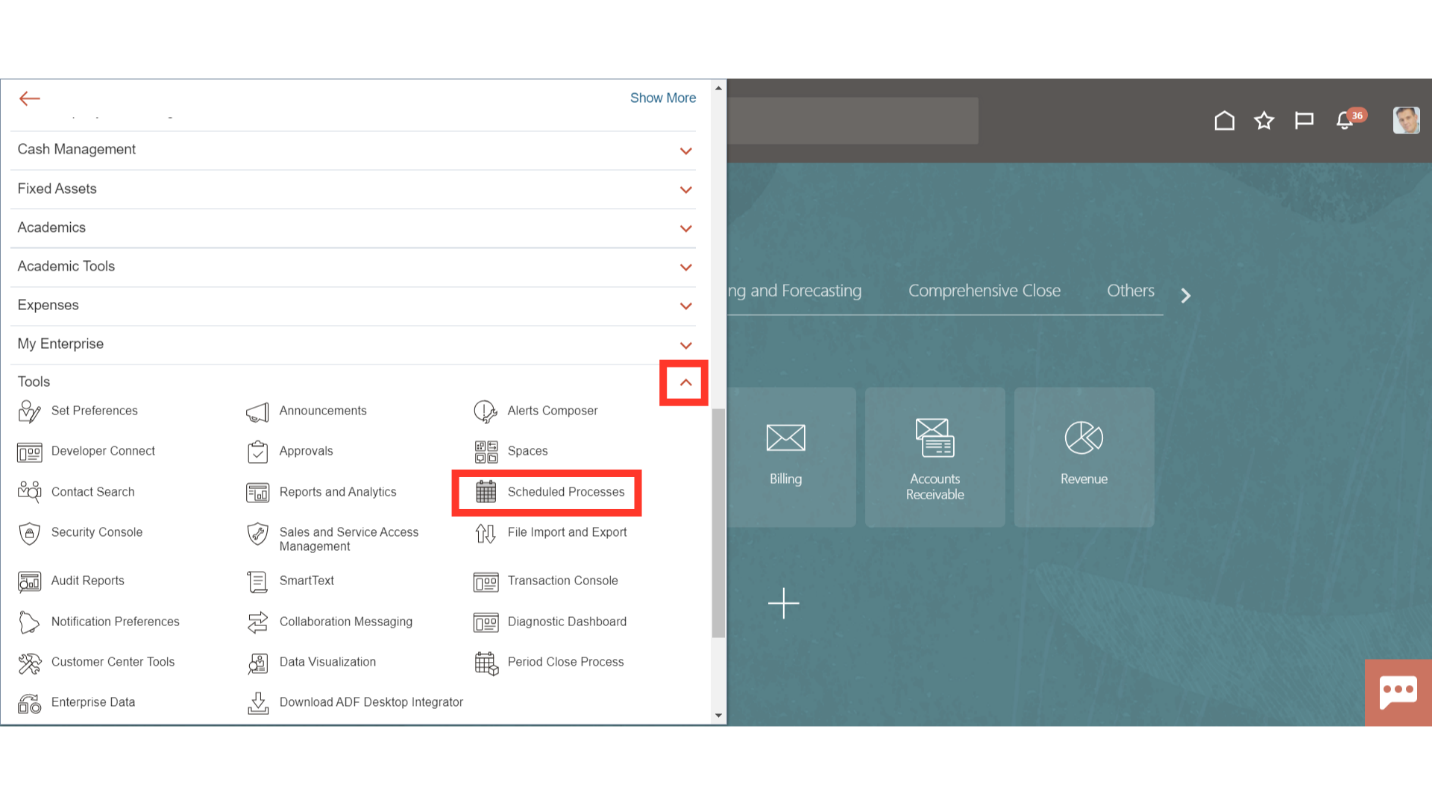
Navigate to Tools section, expand it and select Scheduled Processes.
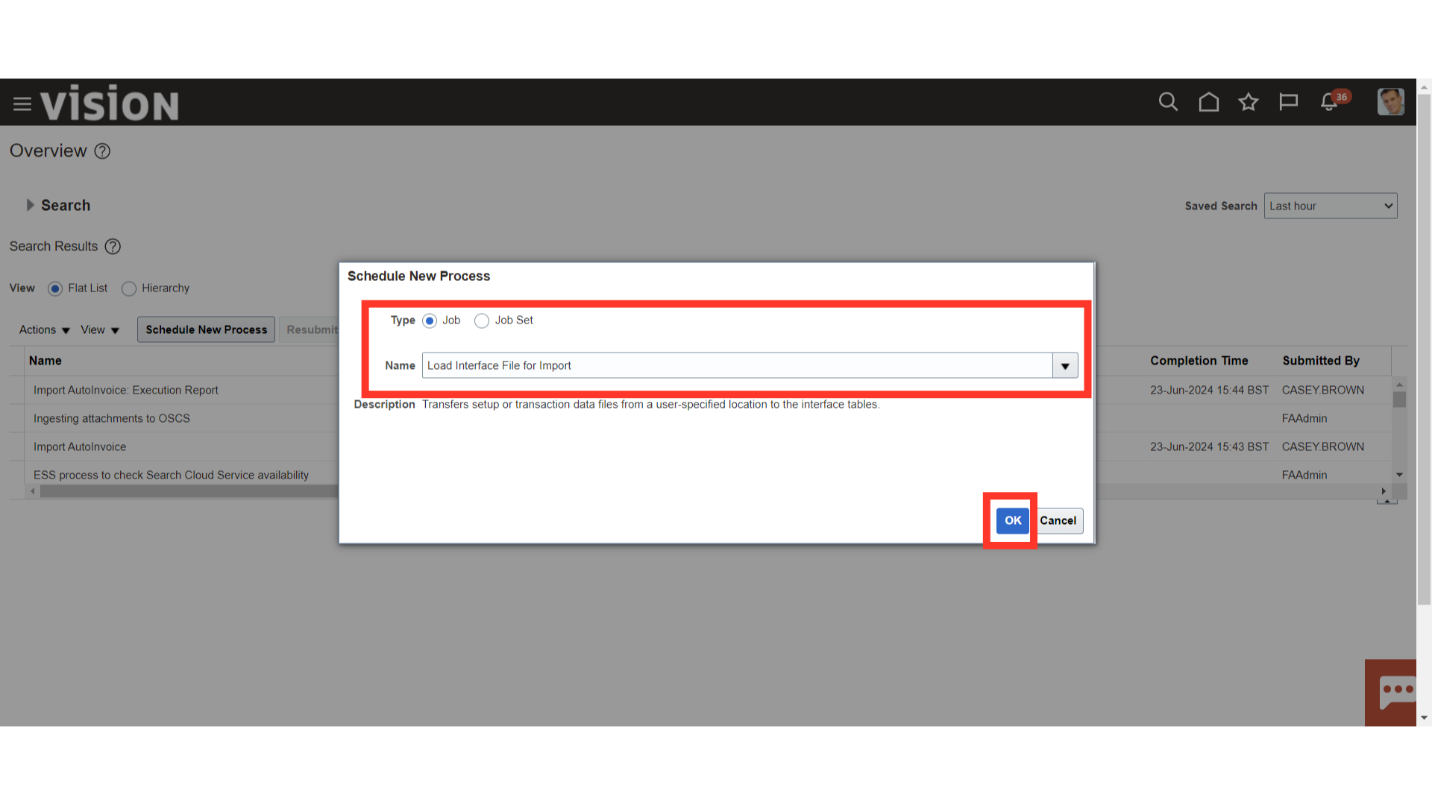
Click on Schedule New Process button.

Select the Type as Job. In the Name enter “Load Interface File for Import”, click enter and once the description appears below click on OK. This process will bring the data to the Interface Tables.
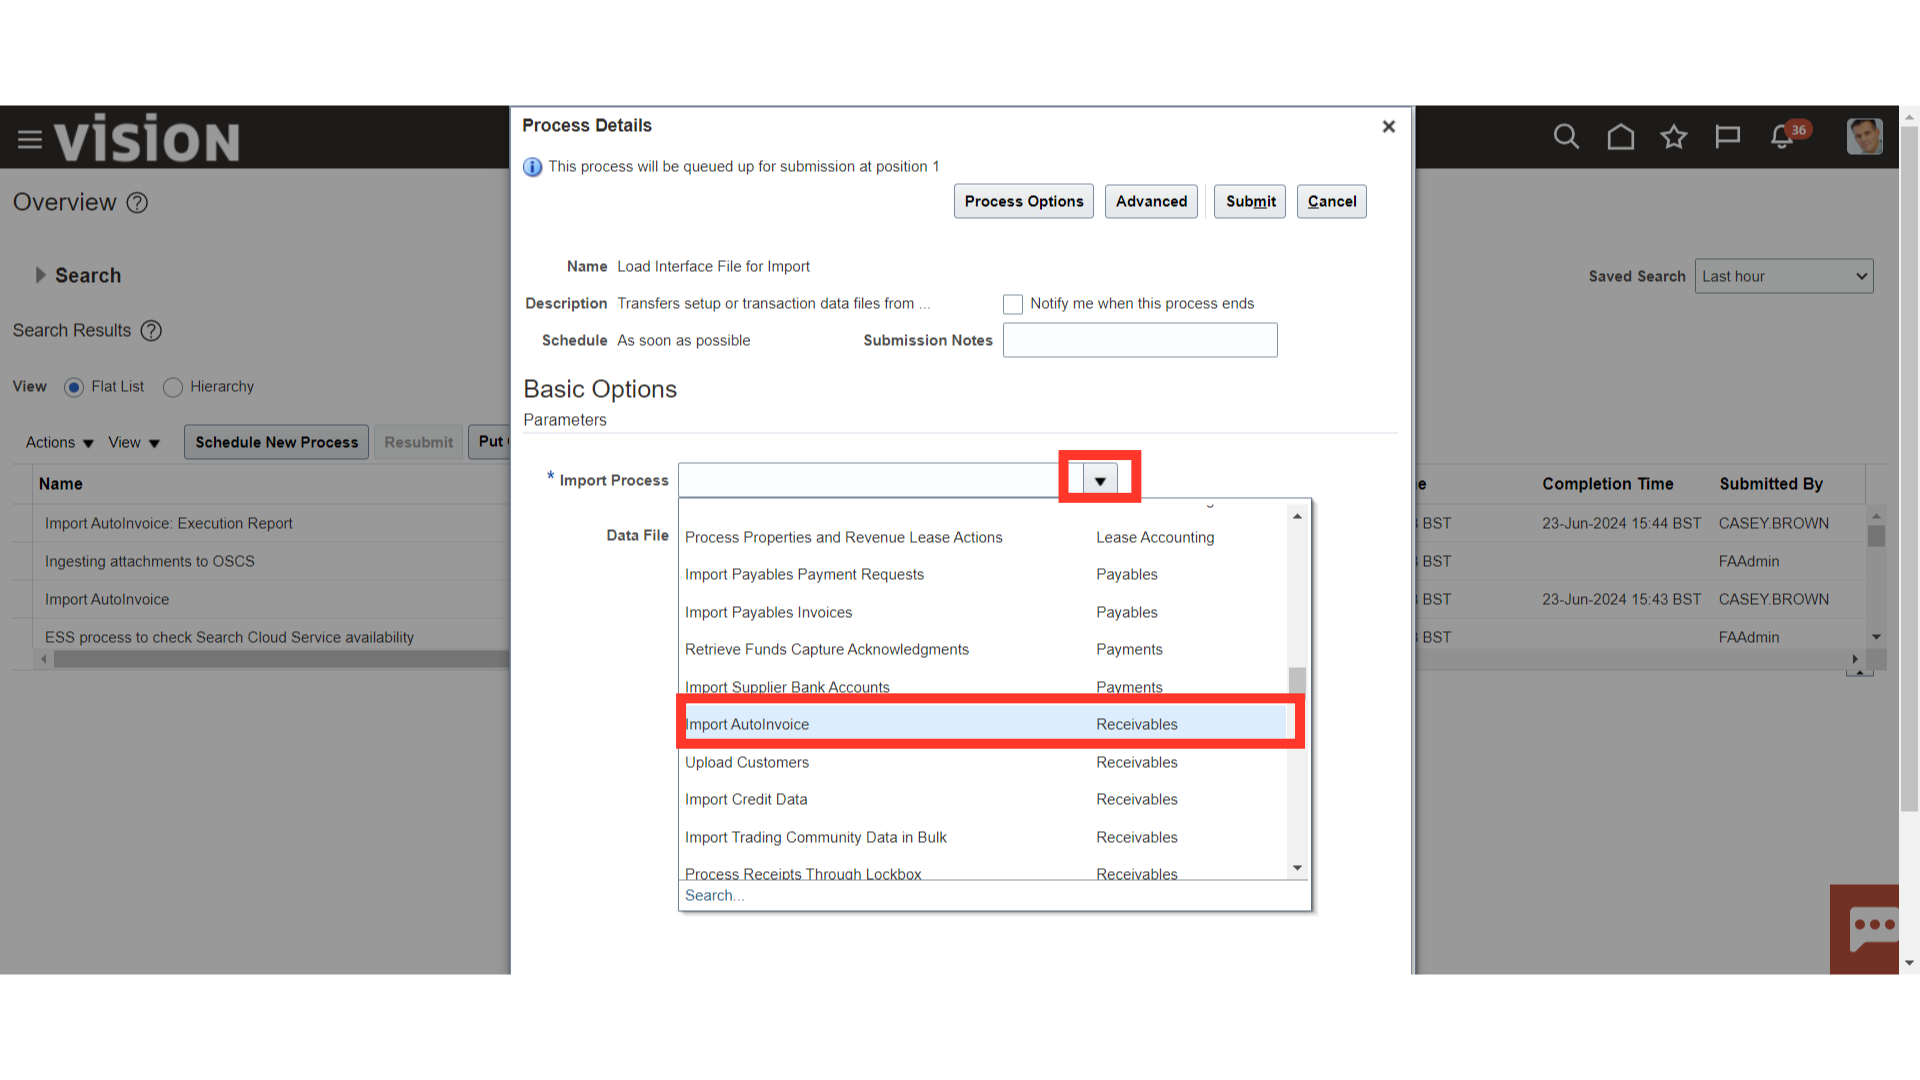
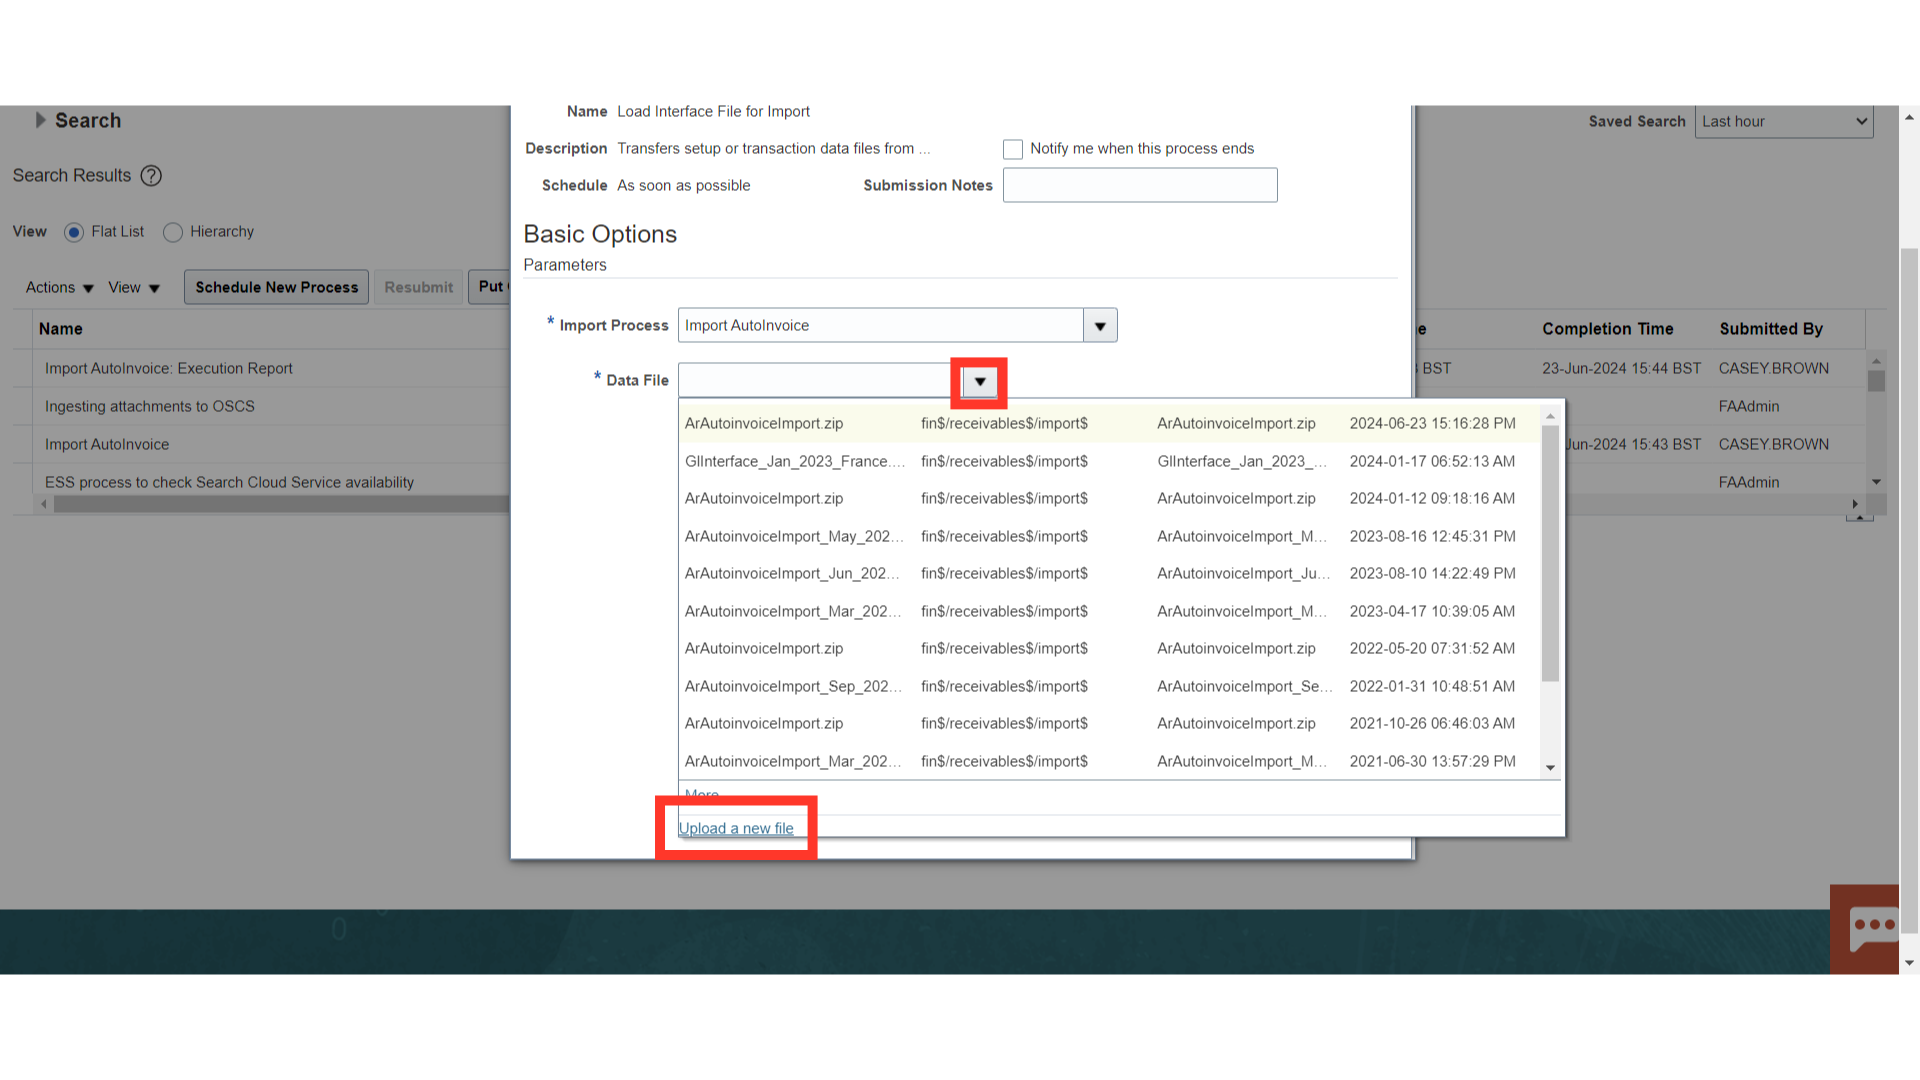
In the Import Process, click on drop-down and select Import AutoInvoice.
For Data File, click on the drop-down, scroll down and select “Upload a new File”
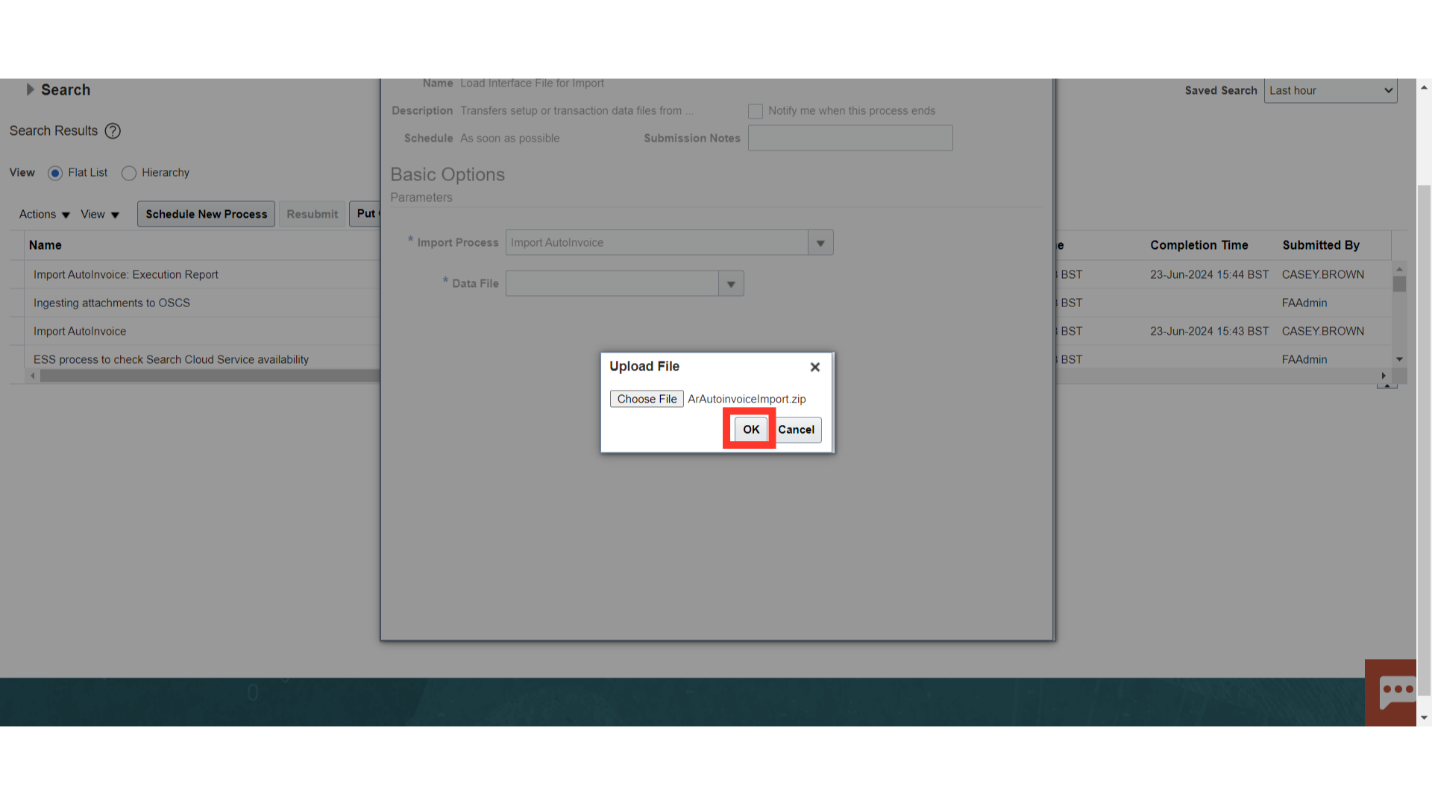
Click on Choose File, browse the zip file that got generated and stored in your local system and click on OK.
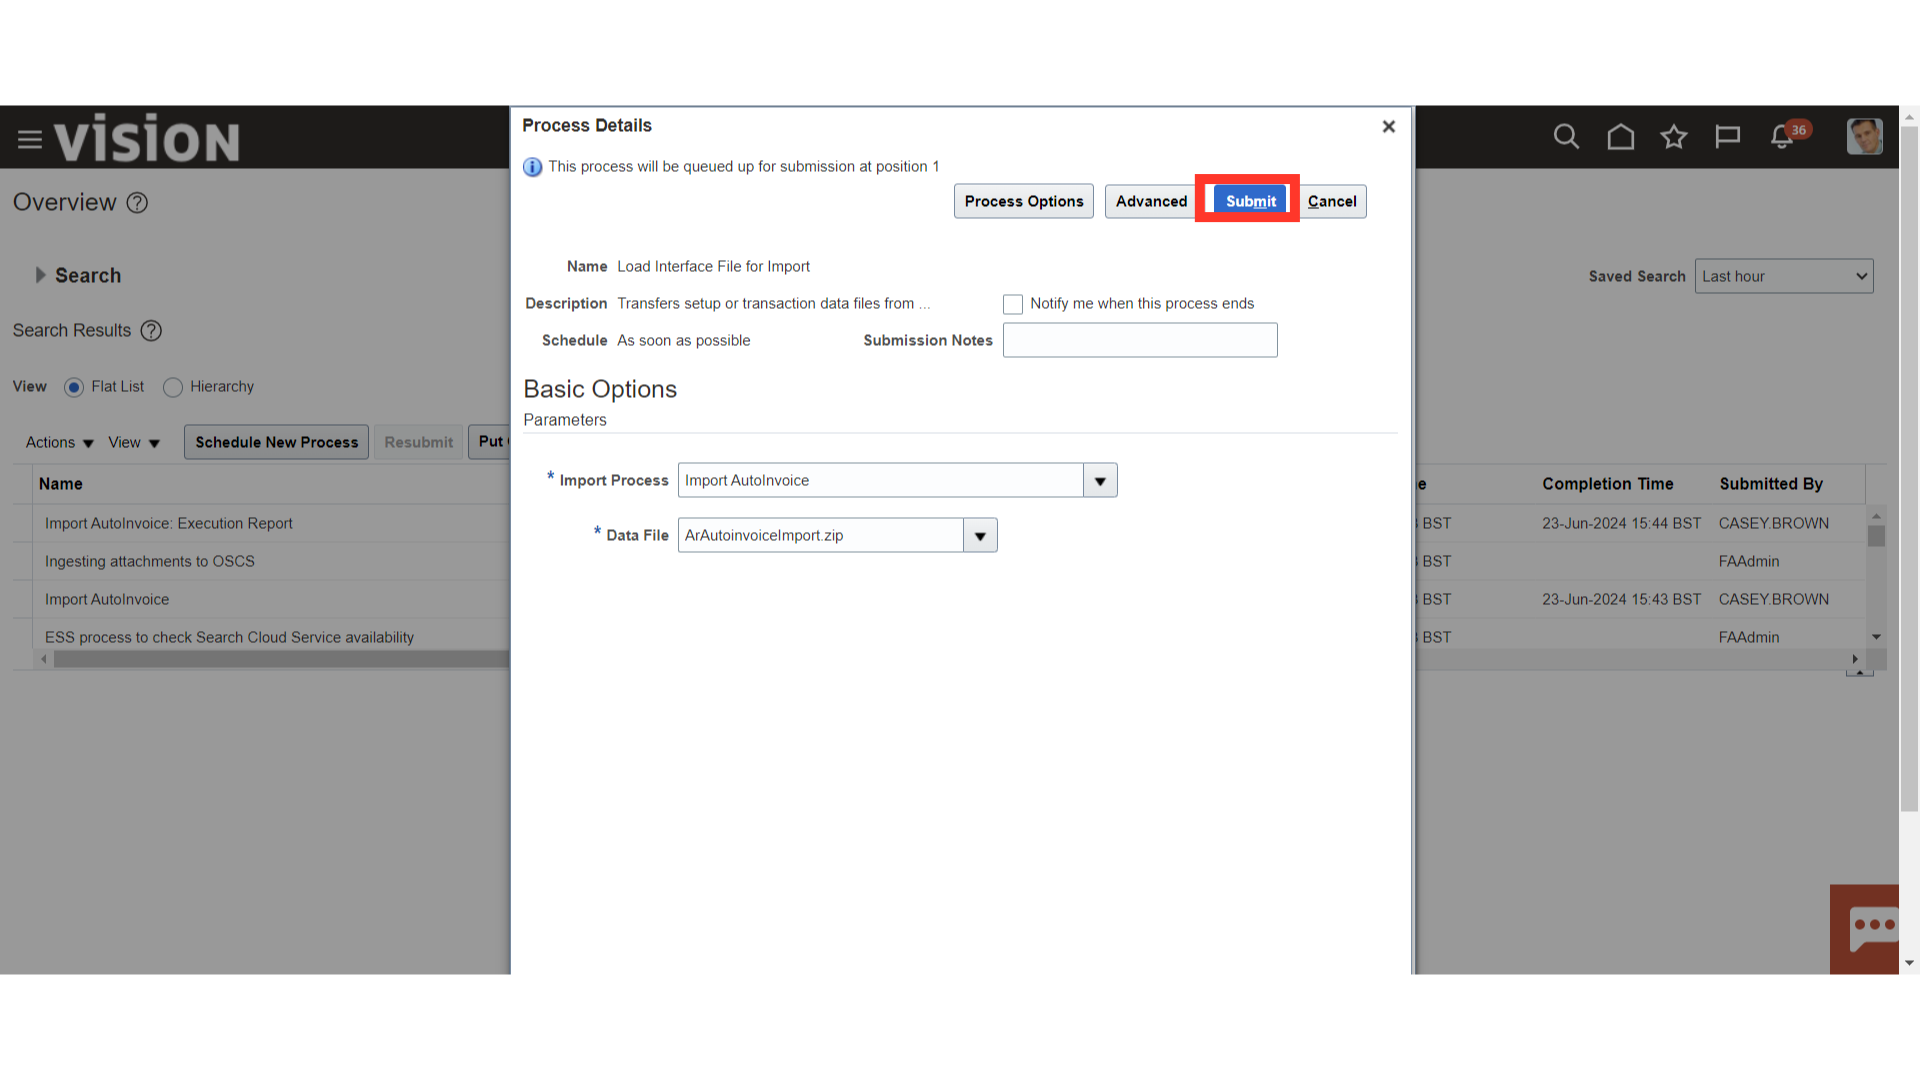
The File will automatically appear as selected. Click on Submit.
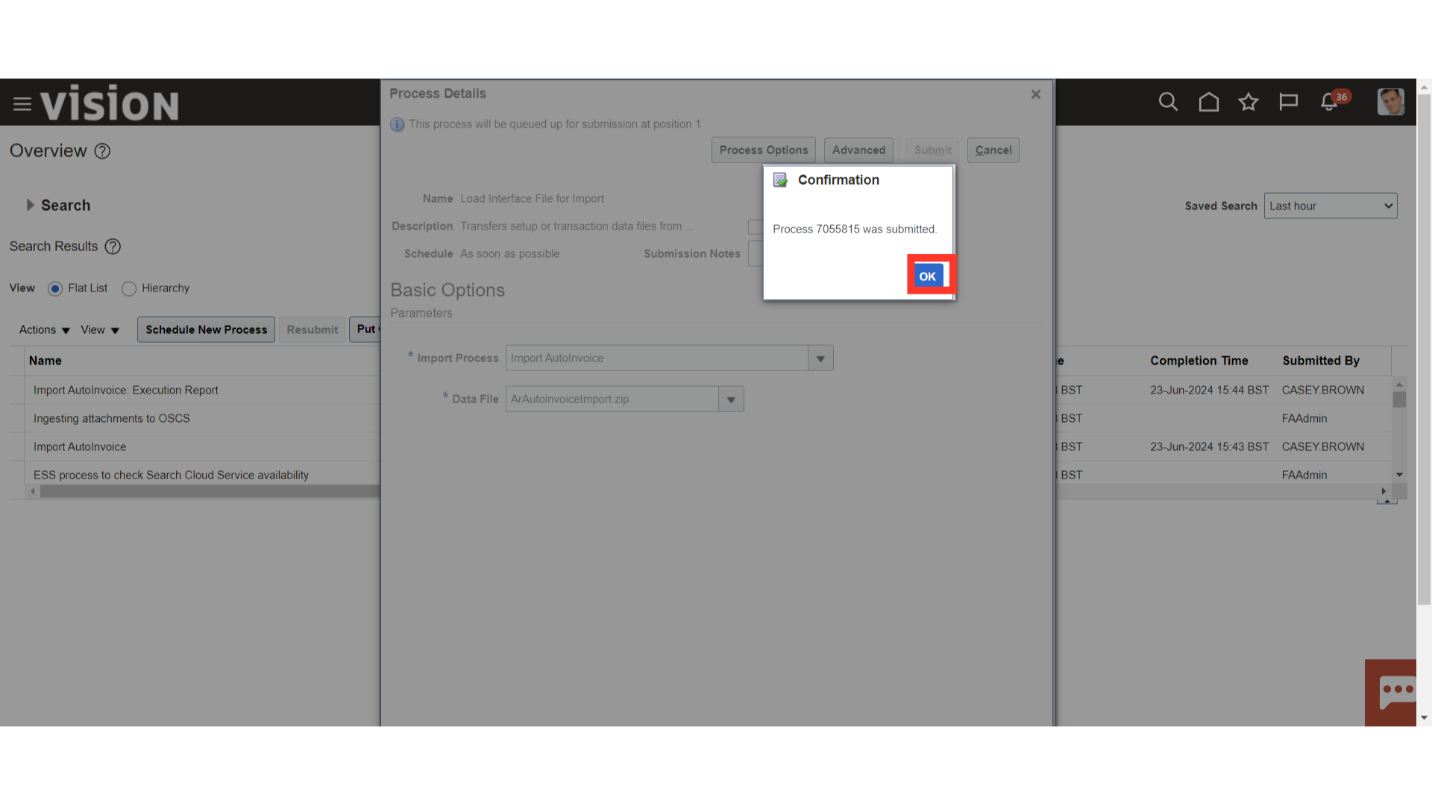
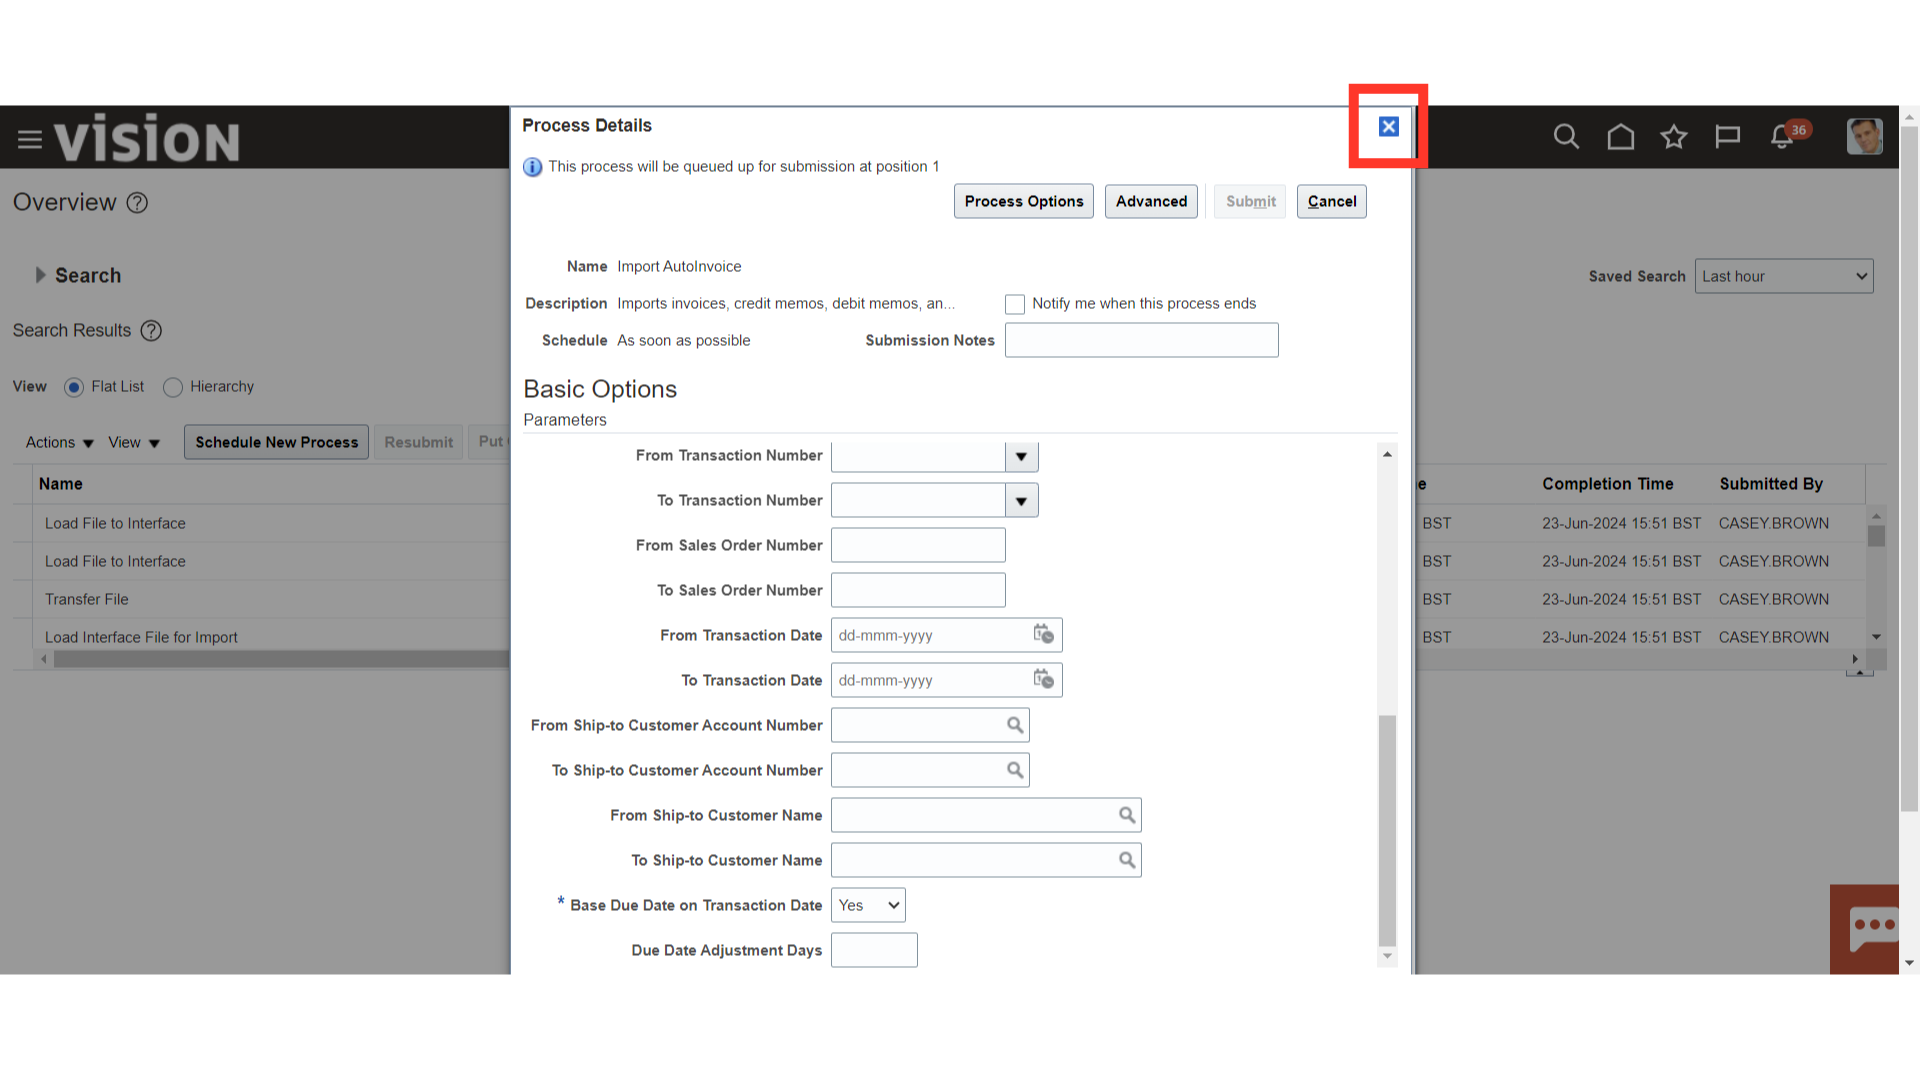
A Pop-up would appear with Process Id. Click on OK.
Click on the Cross icon to close the window.

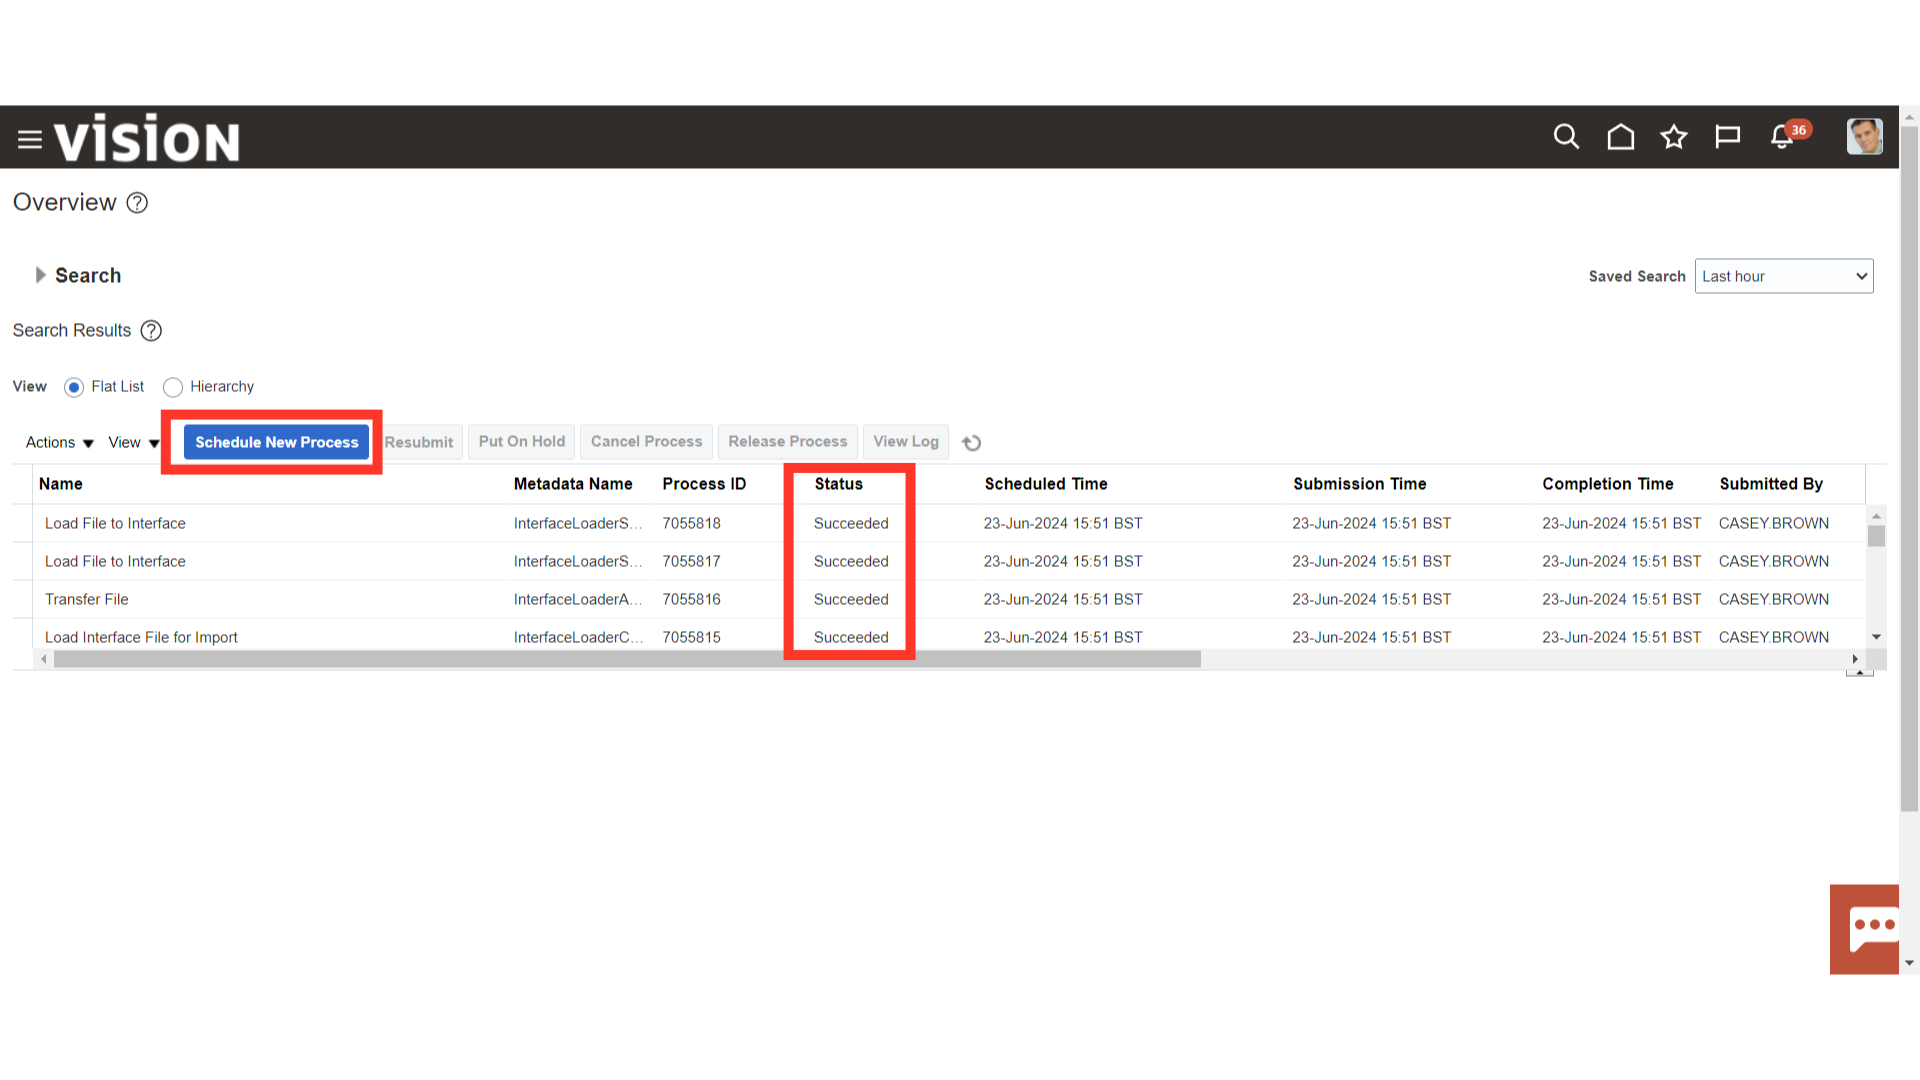
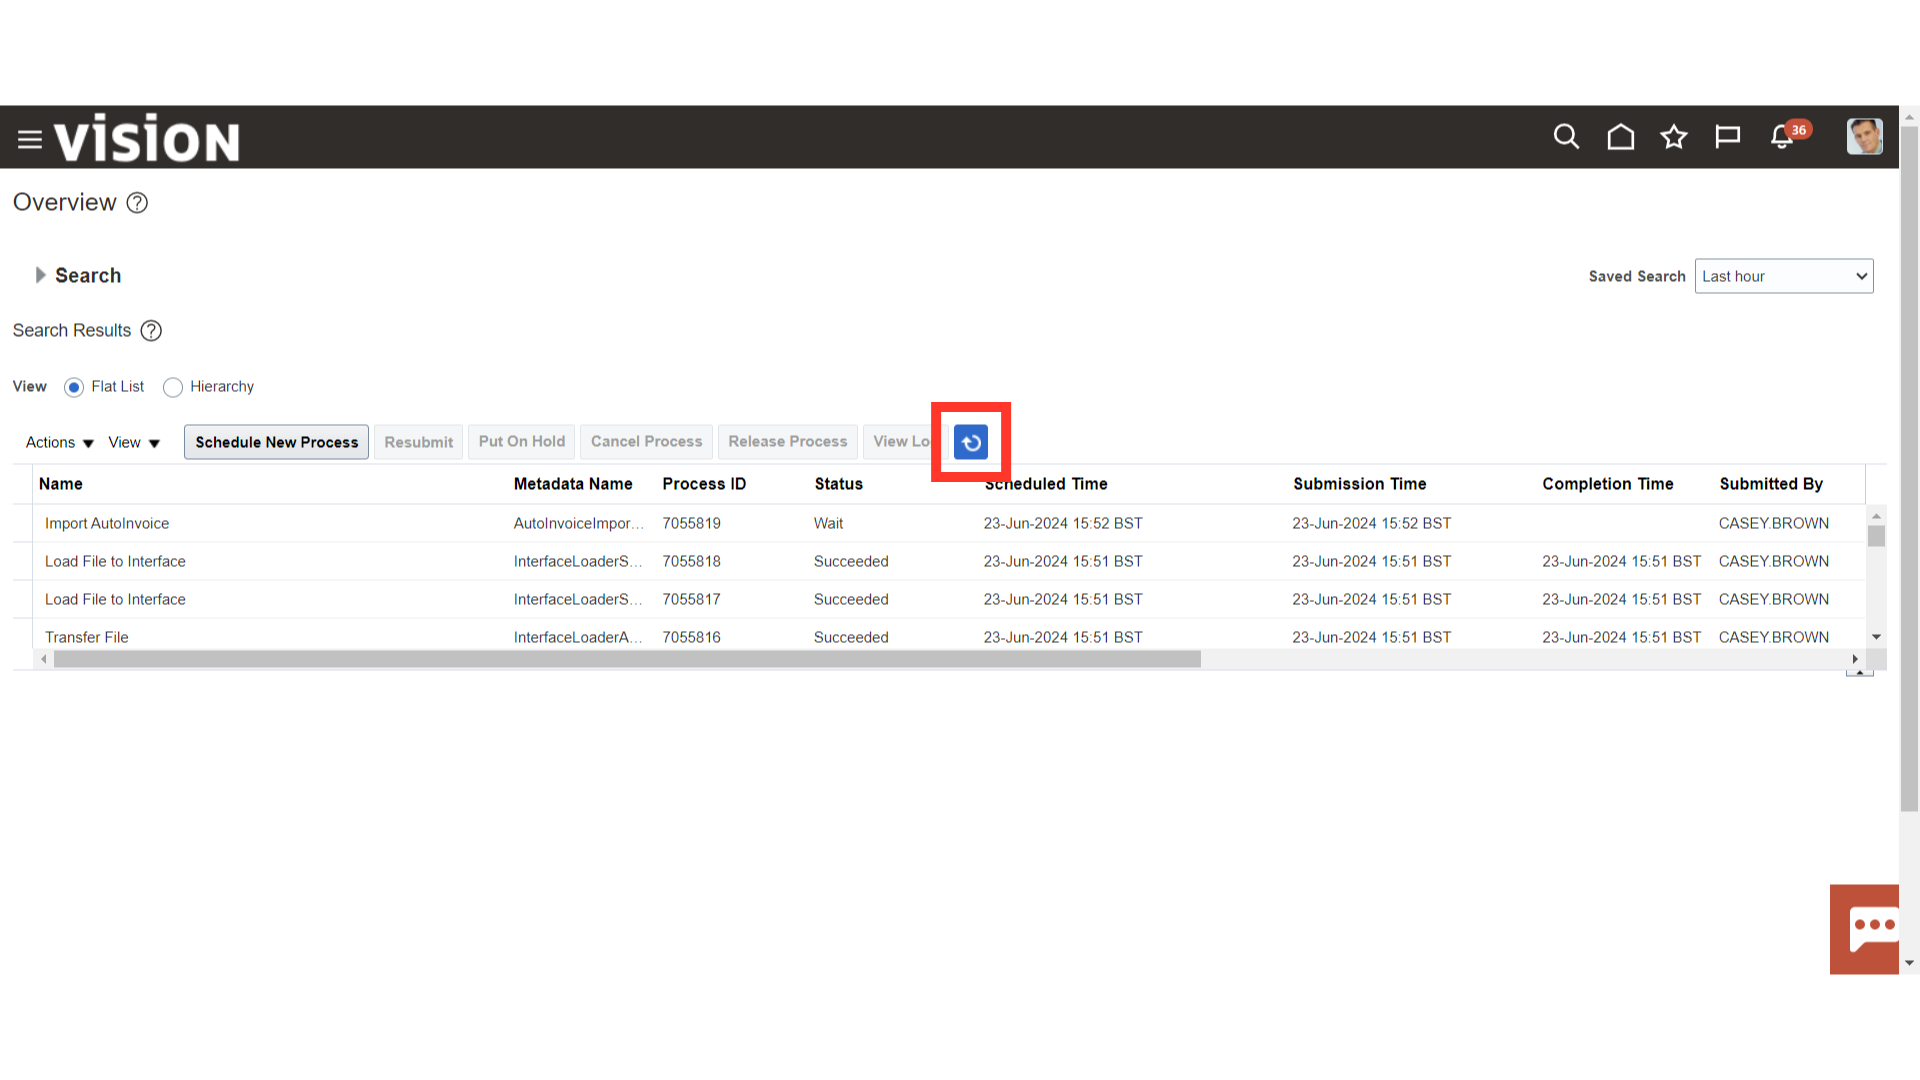
Check the the status of the Process, it should be completed successfully and the status will appear as ‘Succeeded’ Once it is succeeded again click on Schedule New Process.
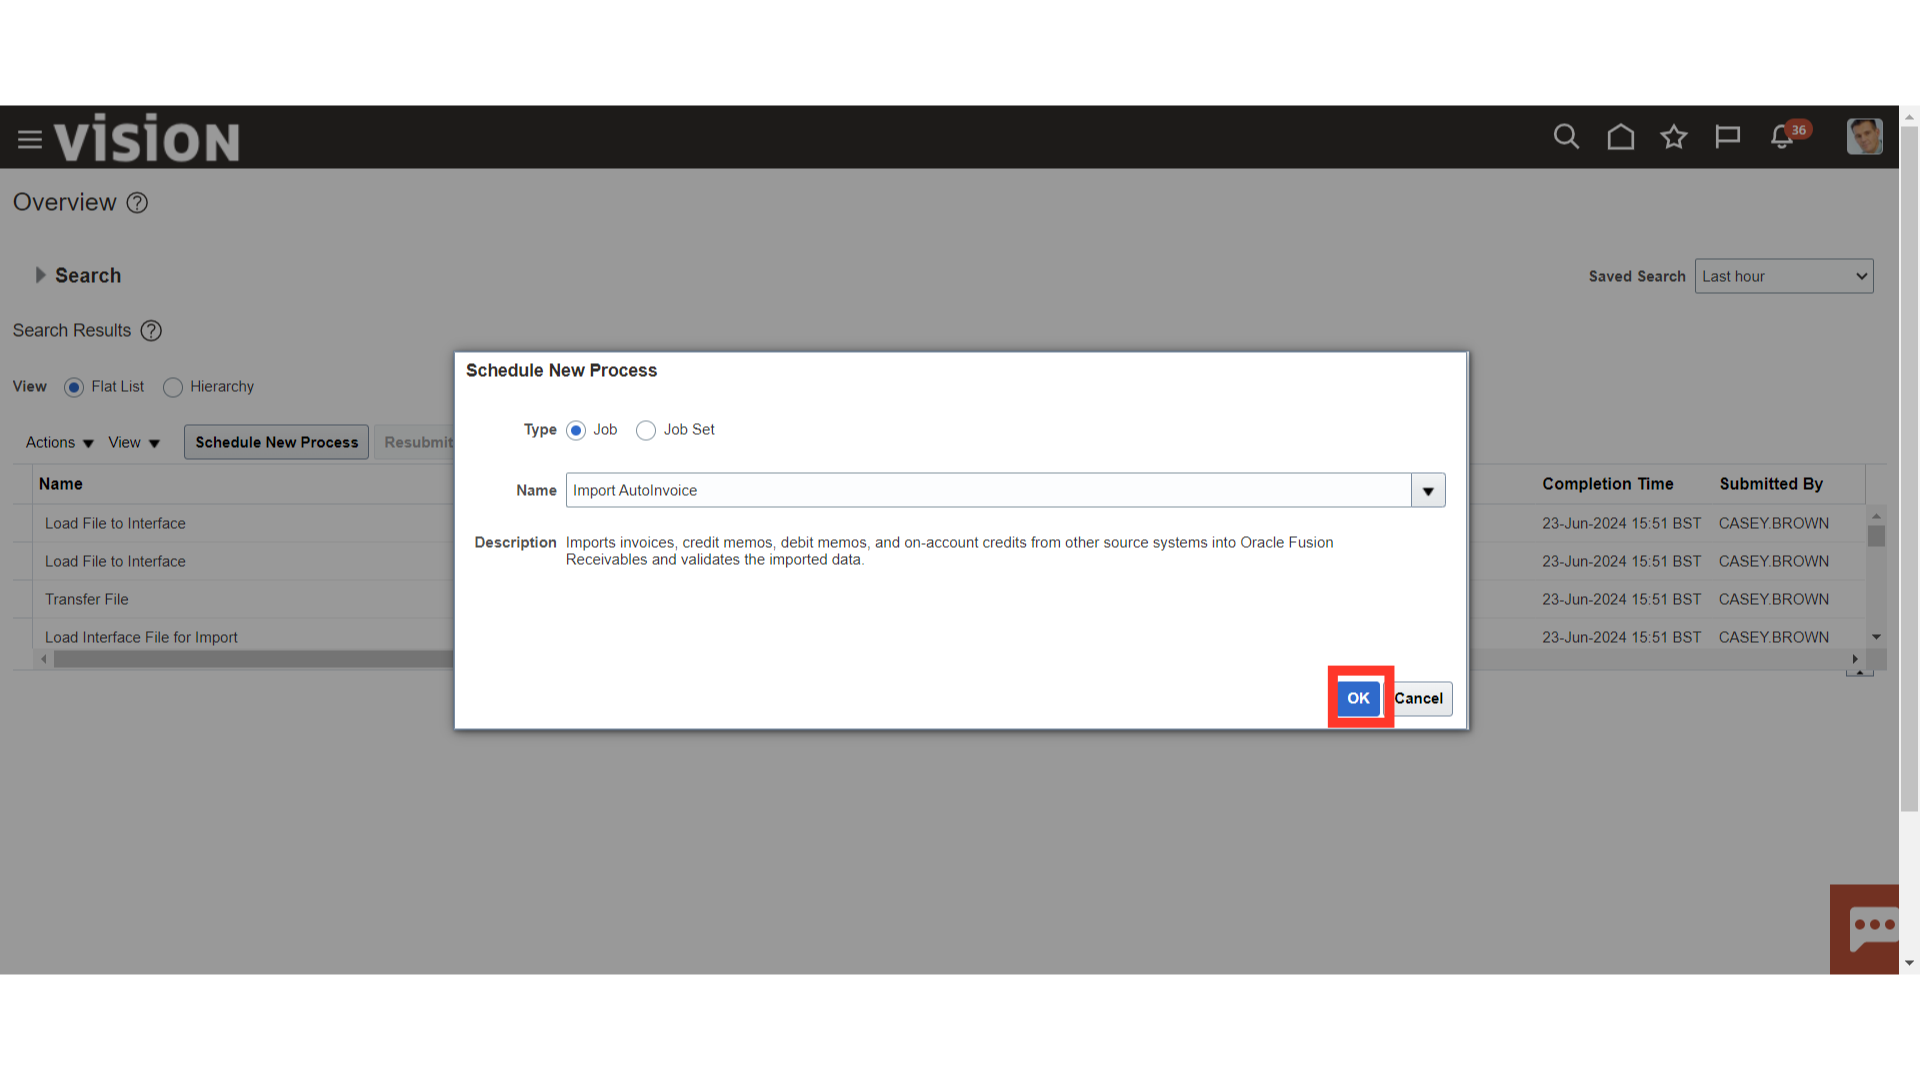
Select the Type as Job. In the Name enter “Import AutoInvoice”, click enter and once the description appears below click on OK. This process will create the transactions. It transfers data from the Interface Table to the Base Tables.
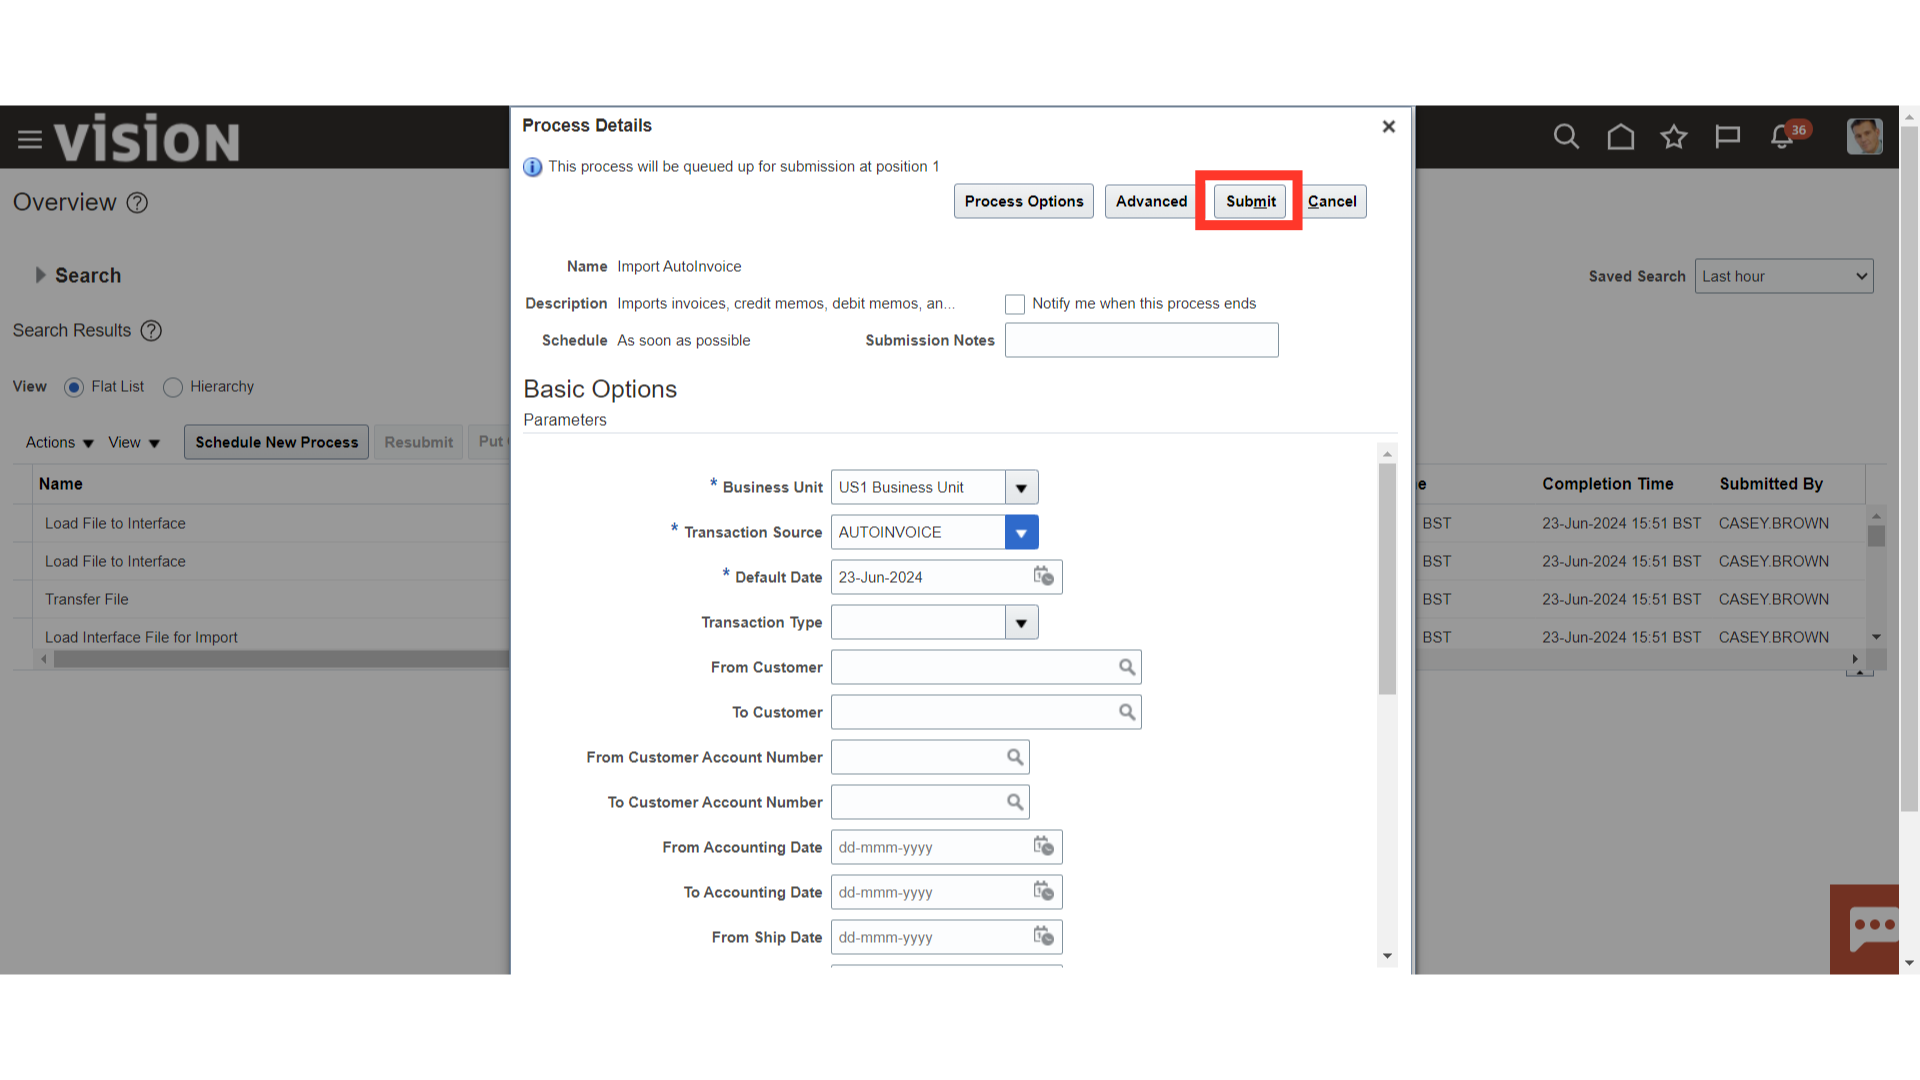
Select Business Unit, Transaction Source as entered in the file preparation. The Default date will automatically be the current system date. Oracle will import transactions till the Default Date. Enter other parameters to further narrow down the Importing of transactions to specific transactions. After all the parameters are entered click on Submit.
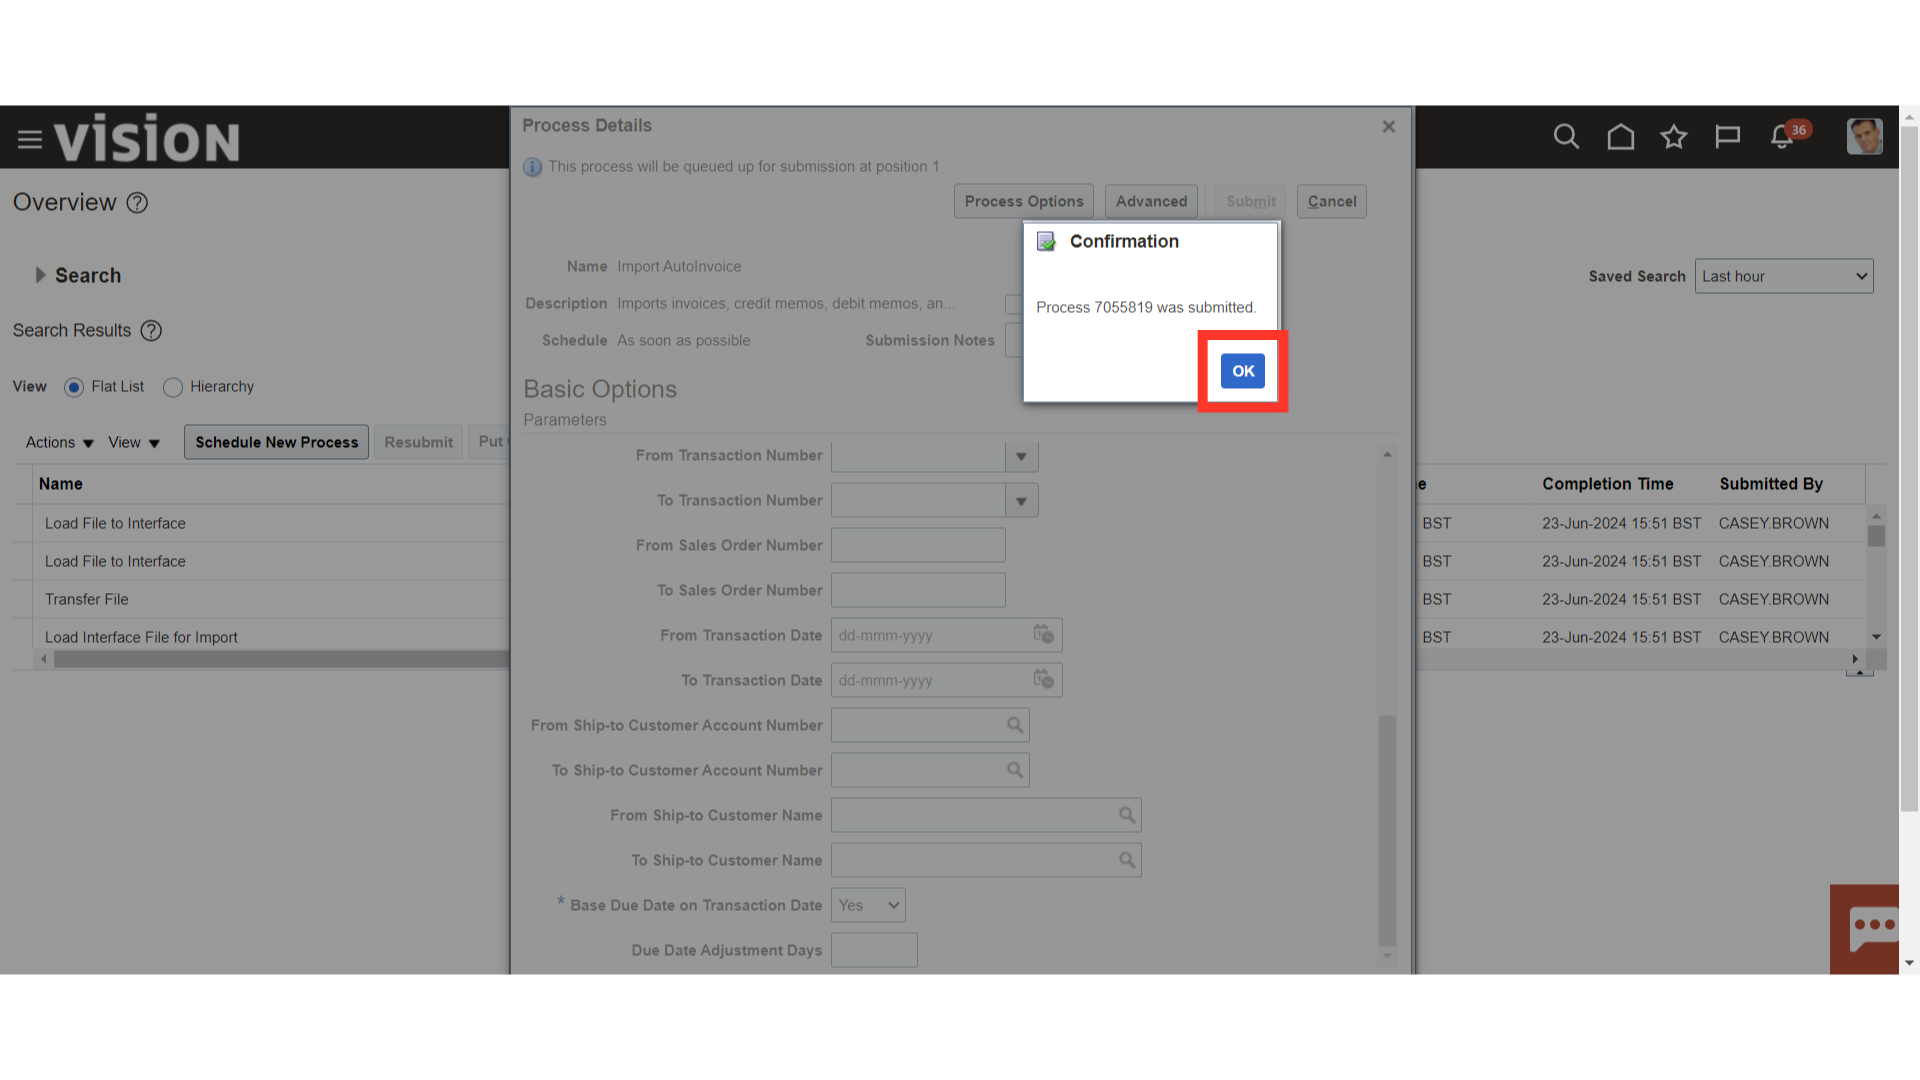
A Pop-up would appear with Process Id. Click on OK.
Click on Cross to close the window.
Check the status of the process and its child process. It should be Succeeded.
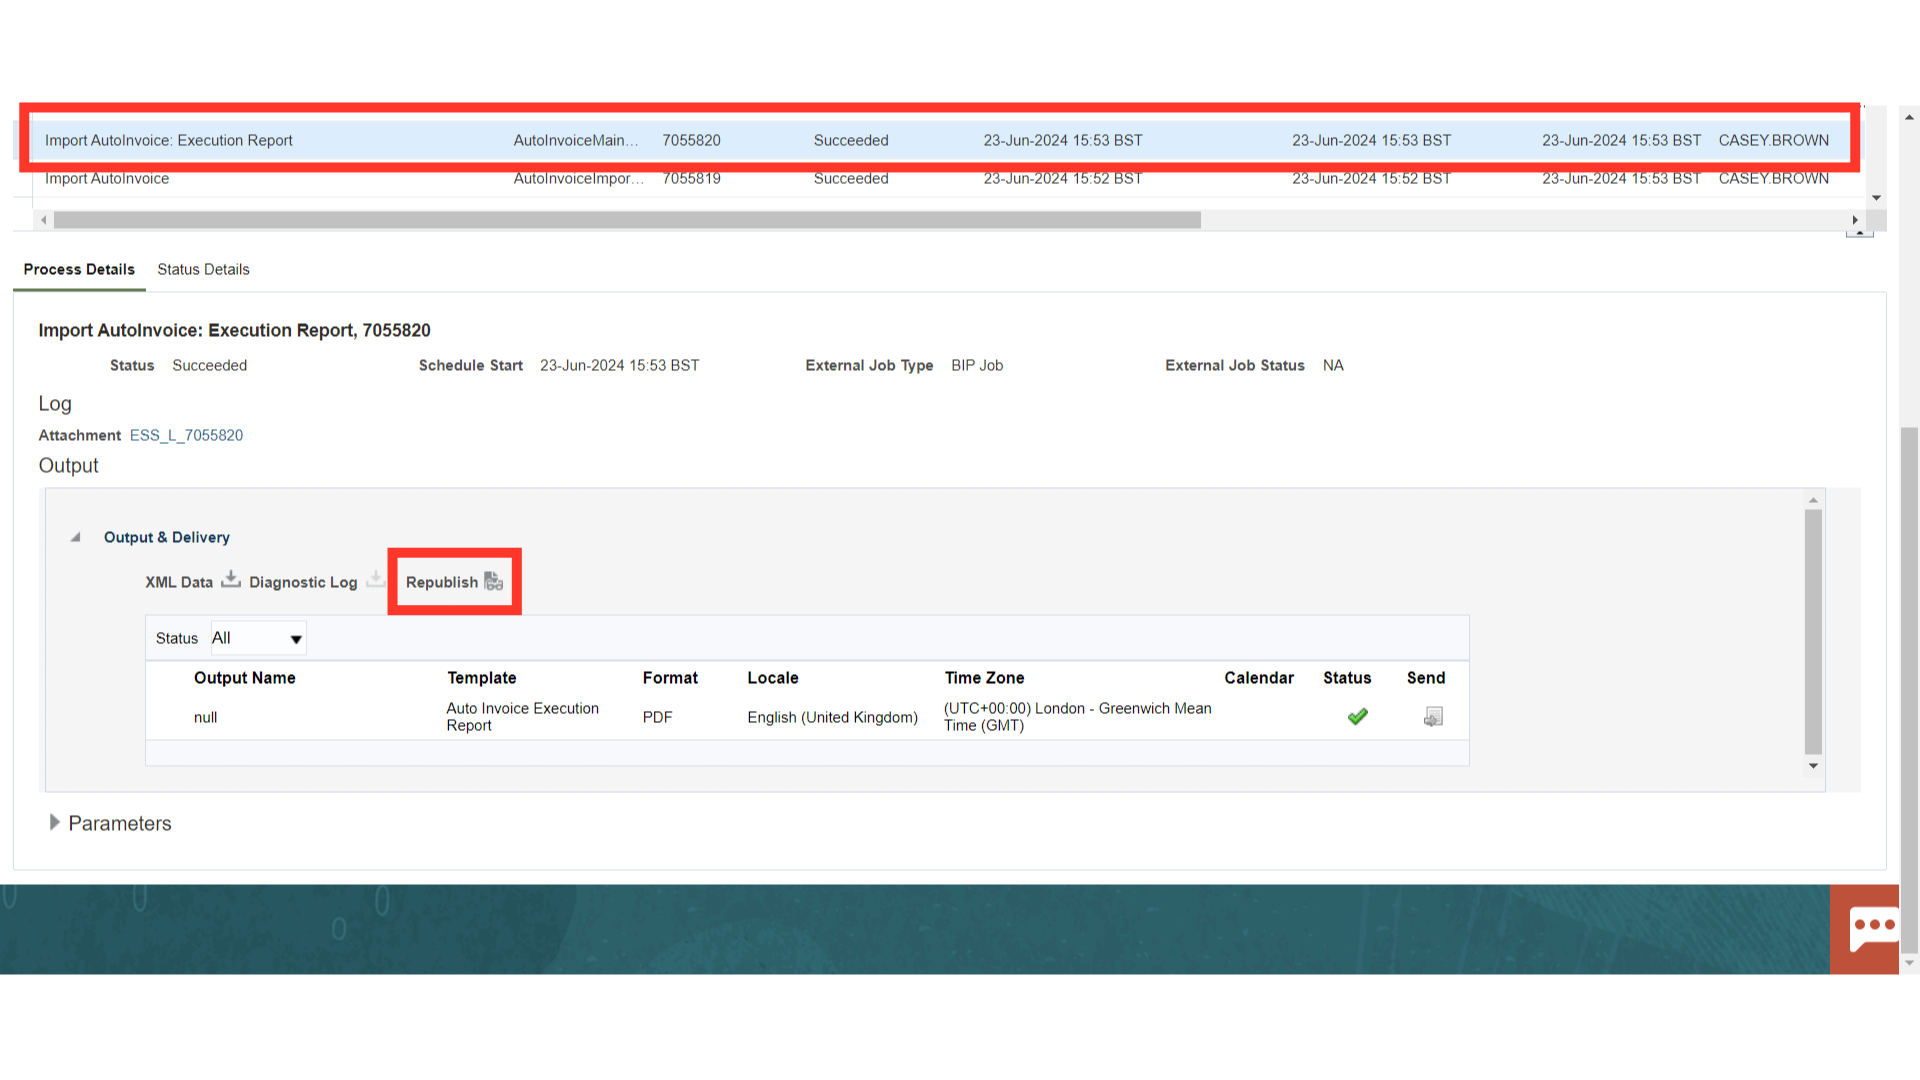
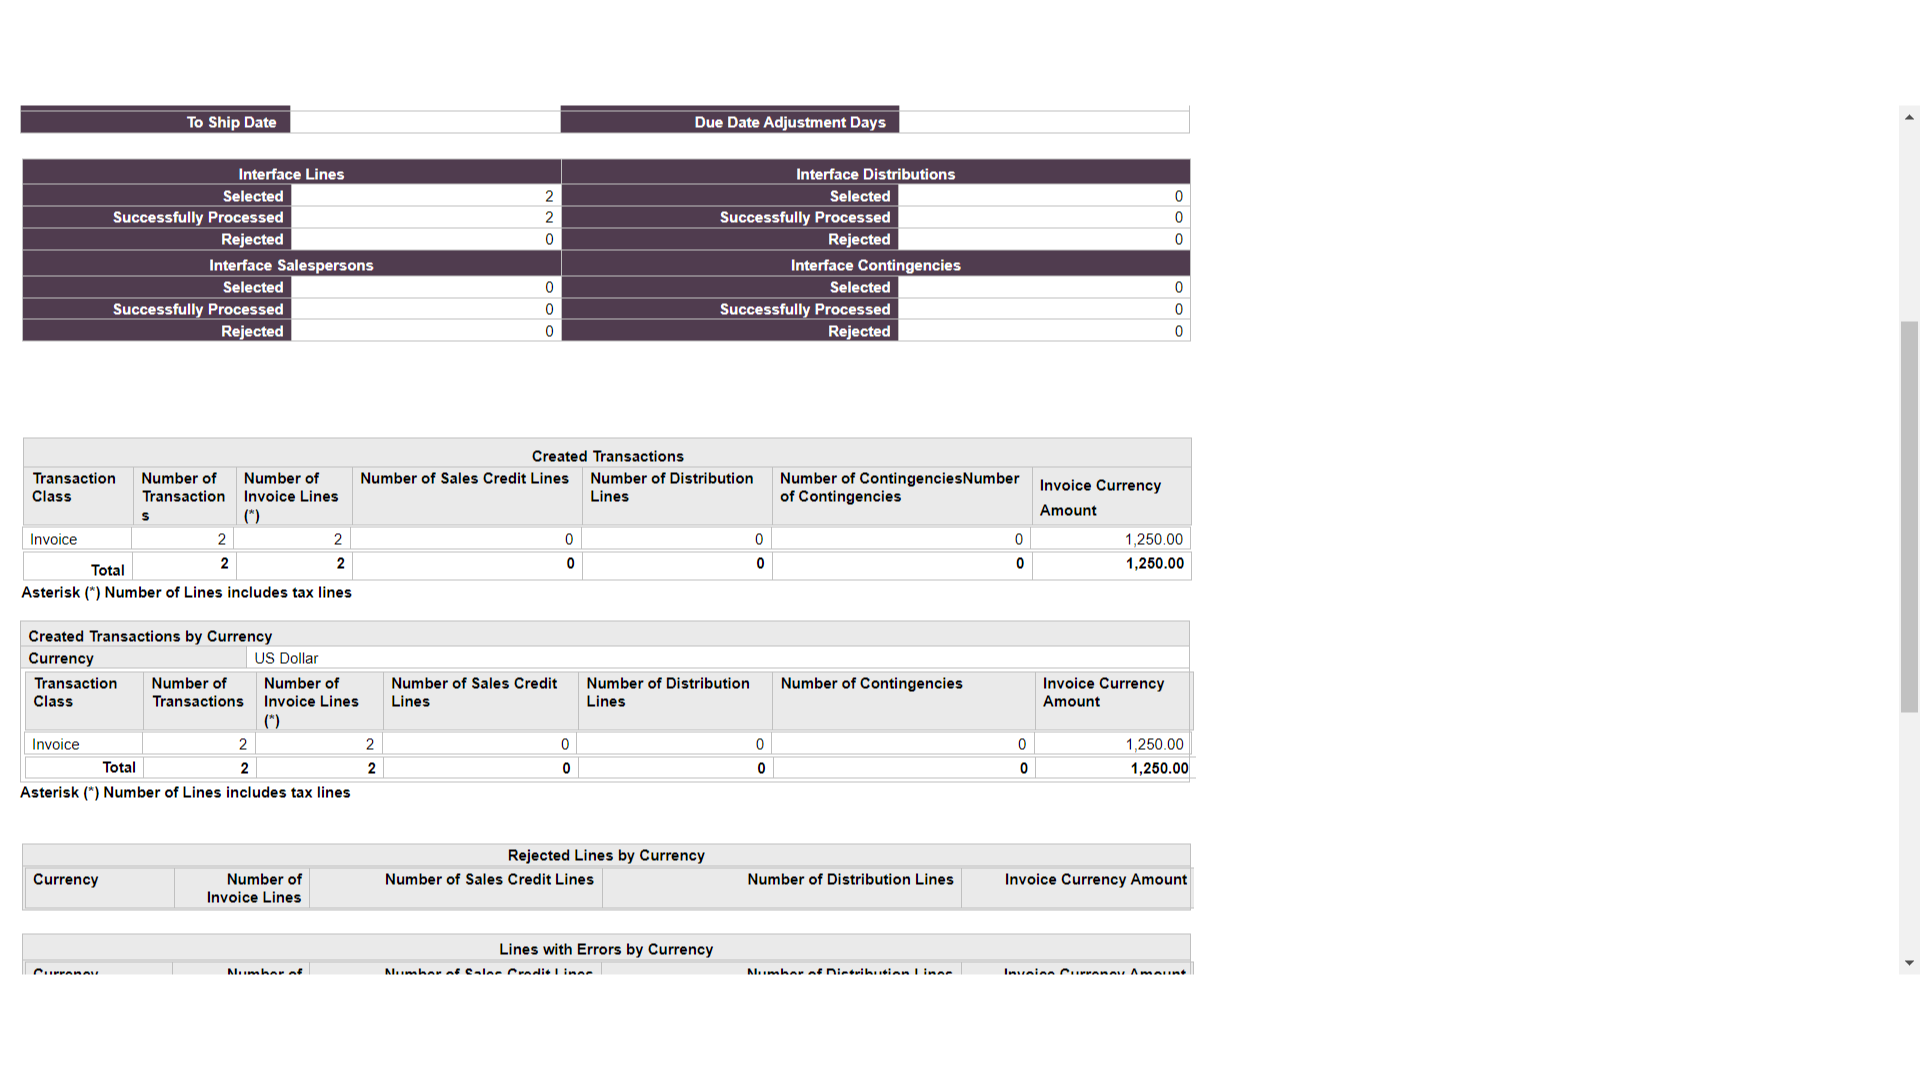
After the Import AutoInvoice process is completed successfully, there will be a process that would have run which is the ‘Import AutoInvoice Execution Report’ process. Select that row. Below under the Output Section click on the Republish button as highlighted.
Click on Setting icon > Export > Select the format in which you want to review the data. For Demo purpose HTML is selected.
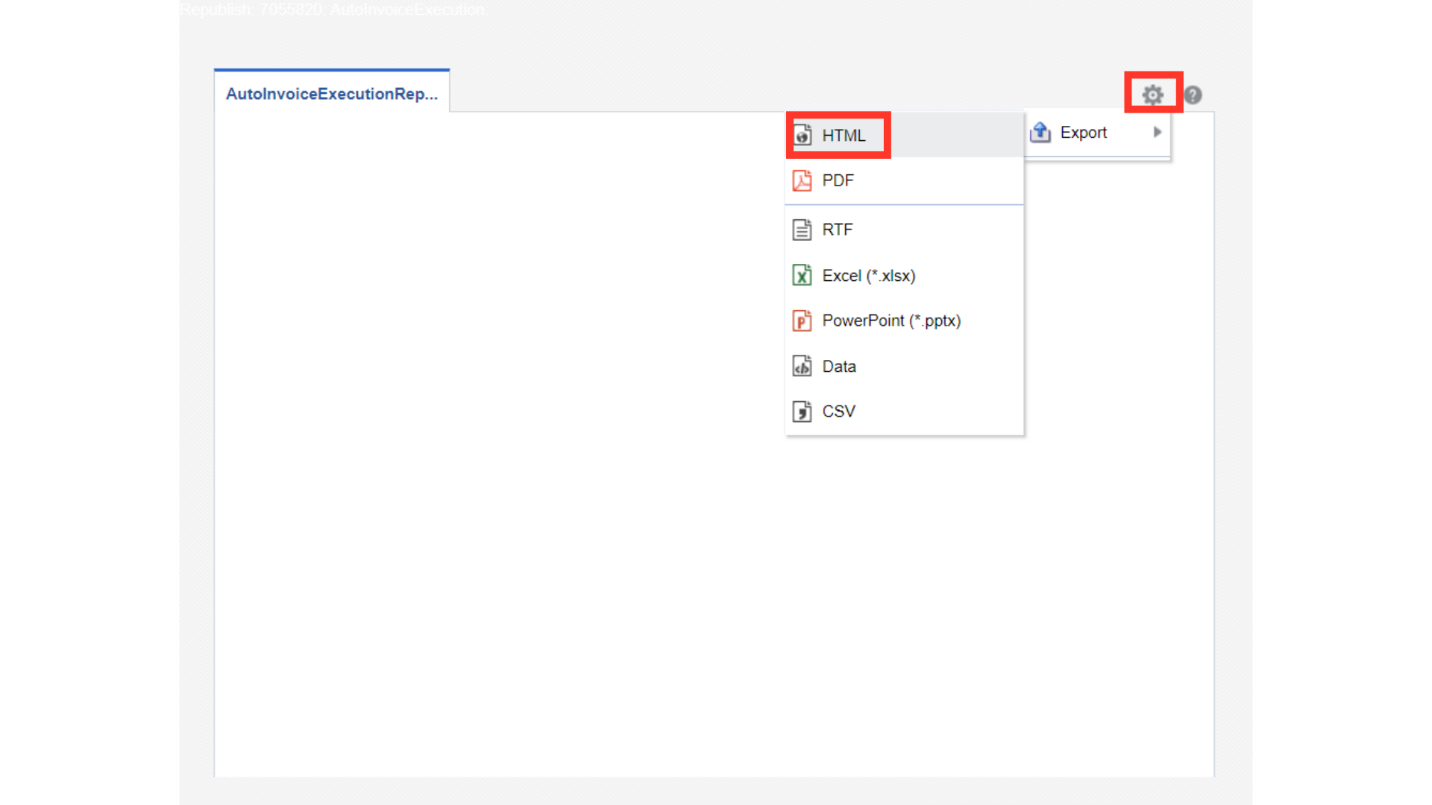
The report will contain all the details of the transaction as to how many got imported successfully and how many of them failed due to various errors.
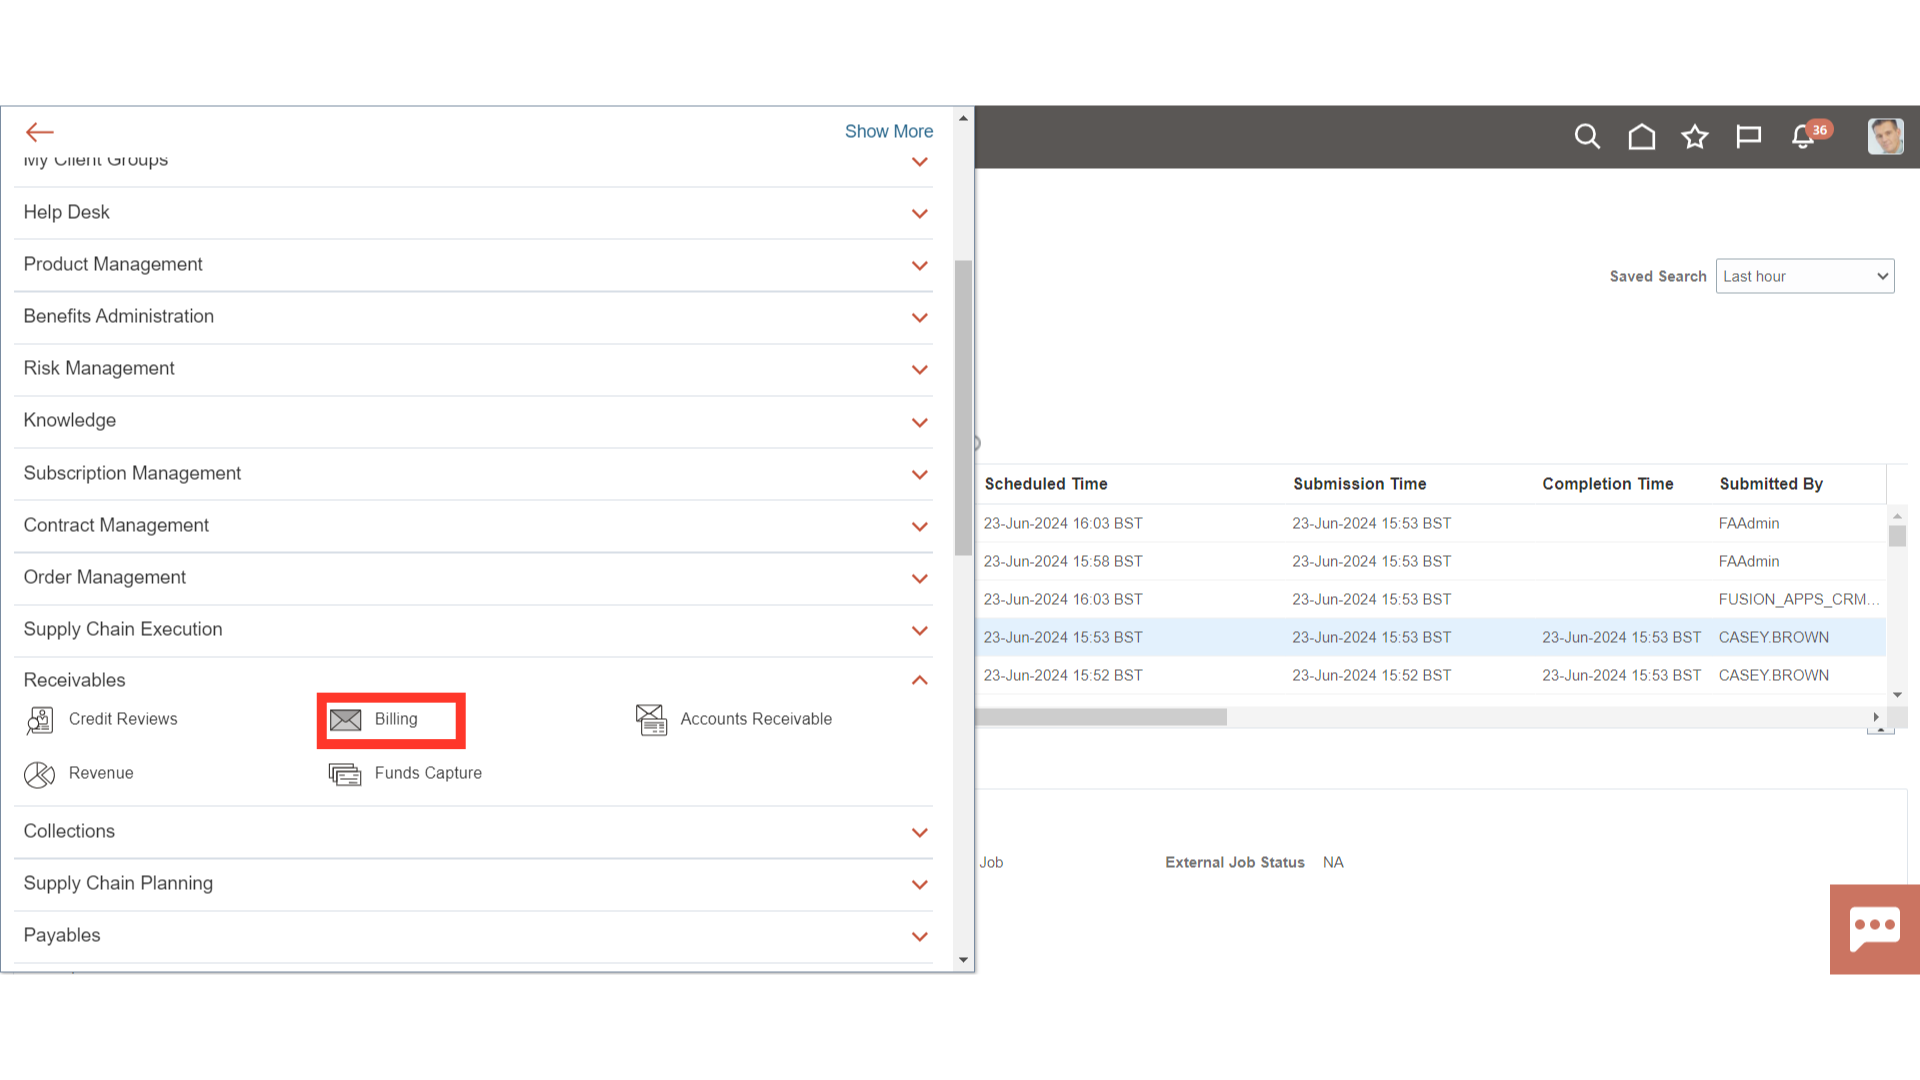
To check the Invoices that are generated, click on Navigator, navigate to Receivables and select Biling.
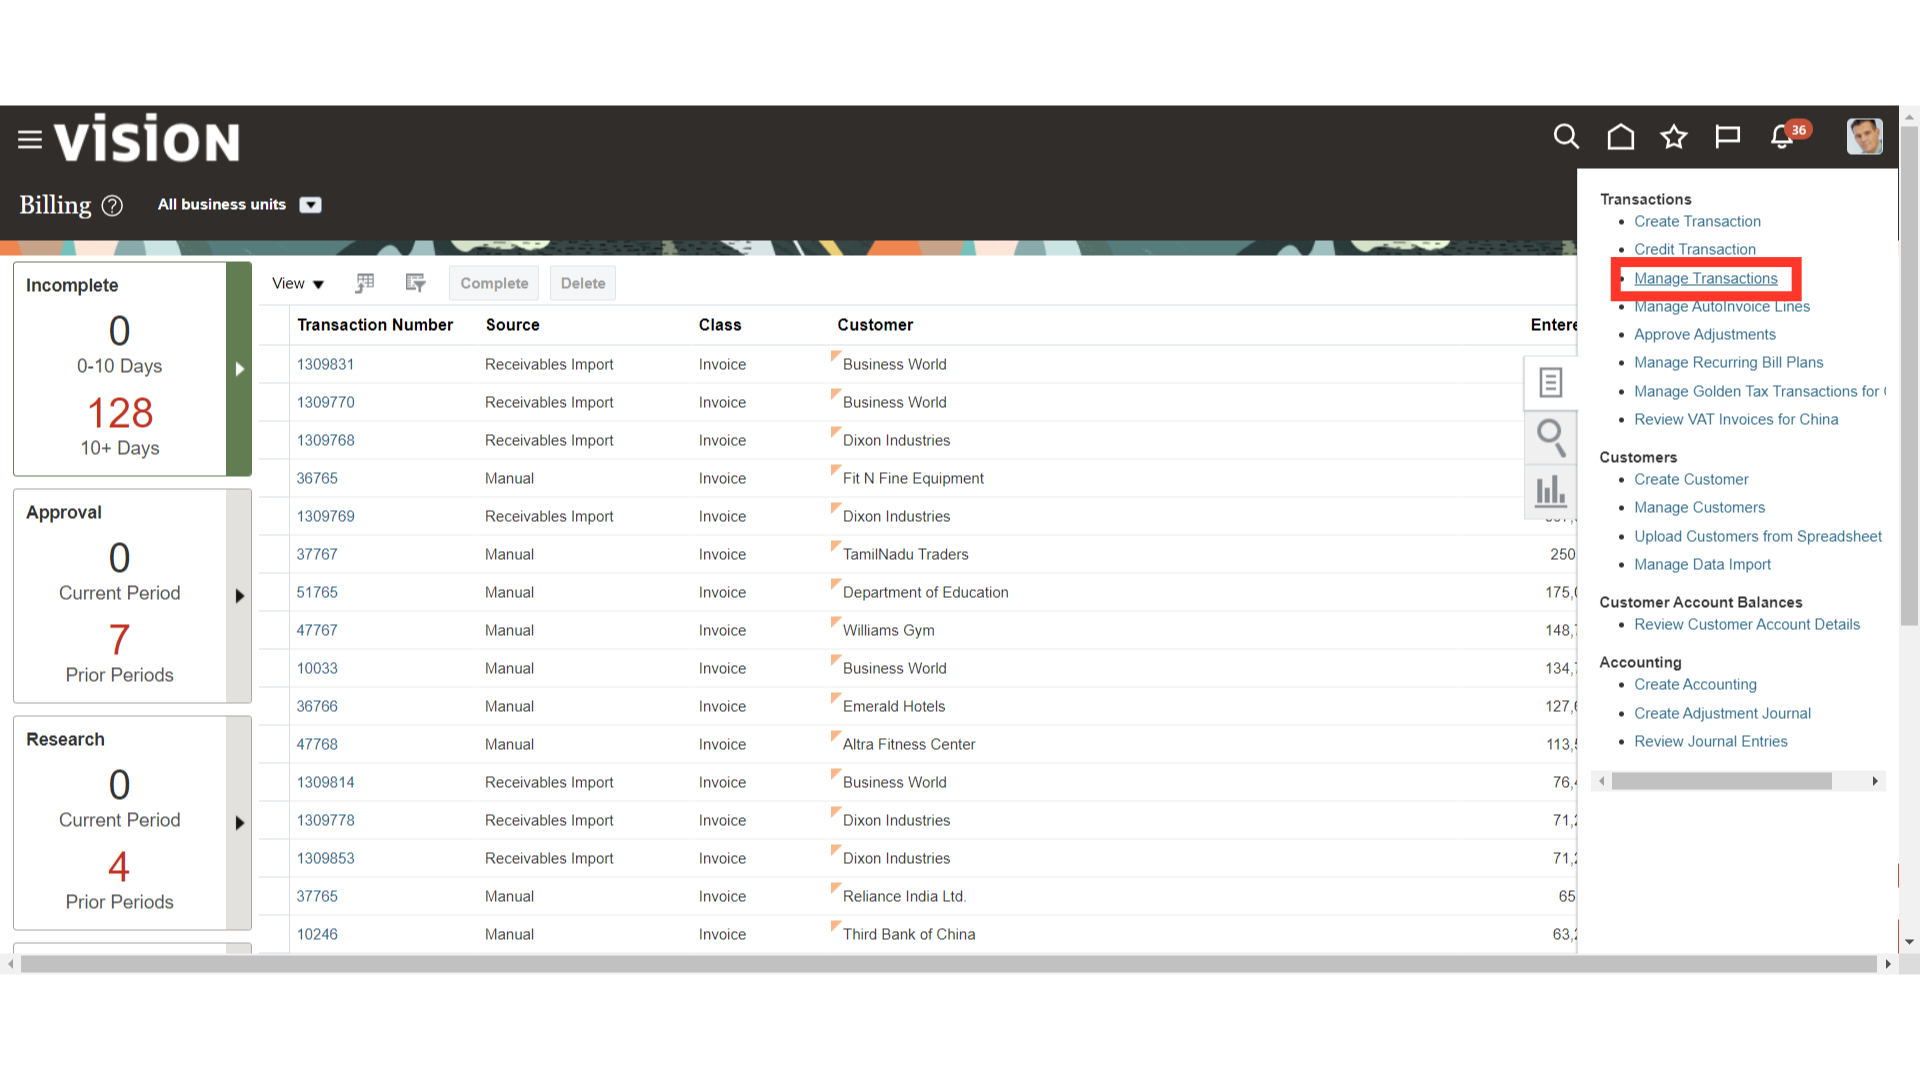
On the Billing work area, click on task > select Manage Transactions from the list.
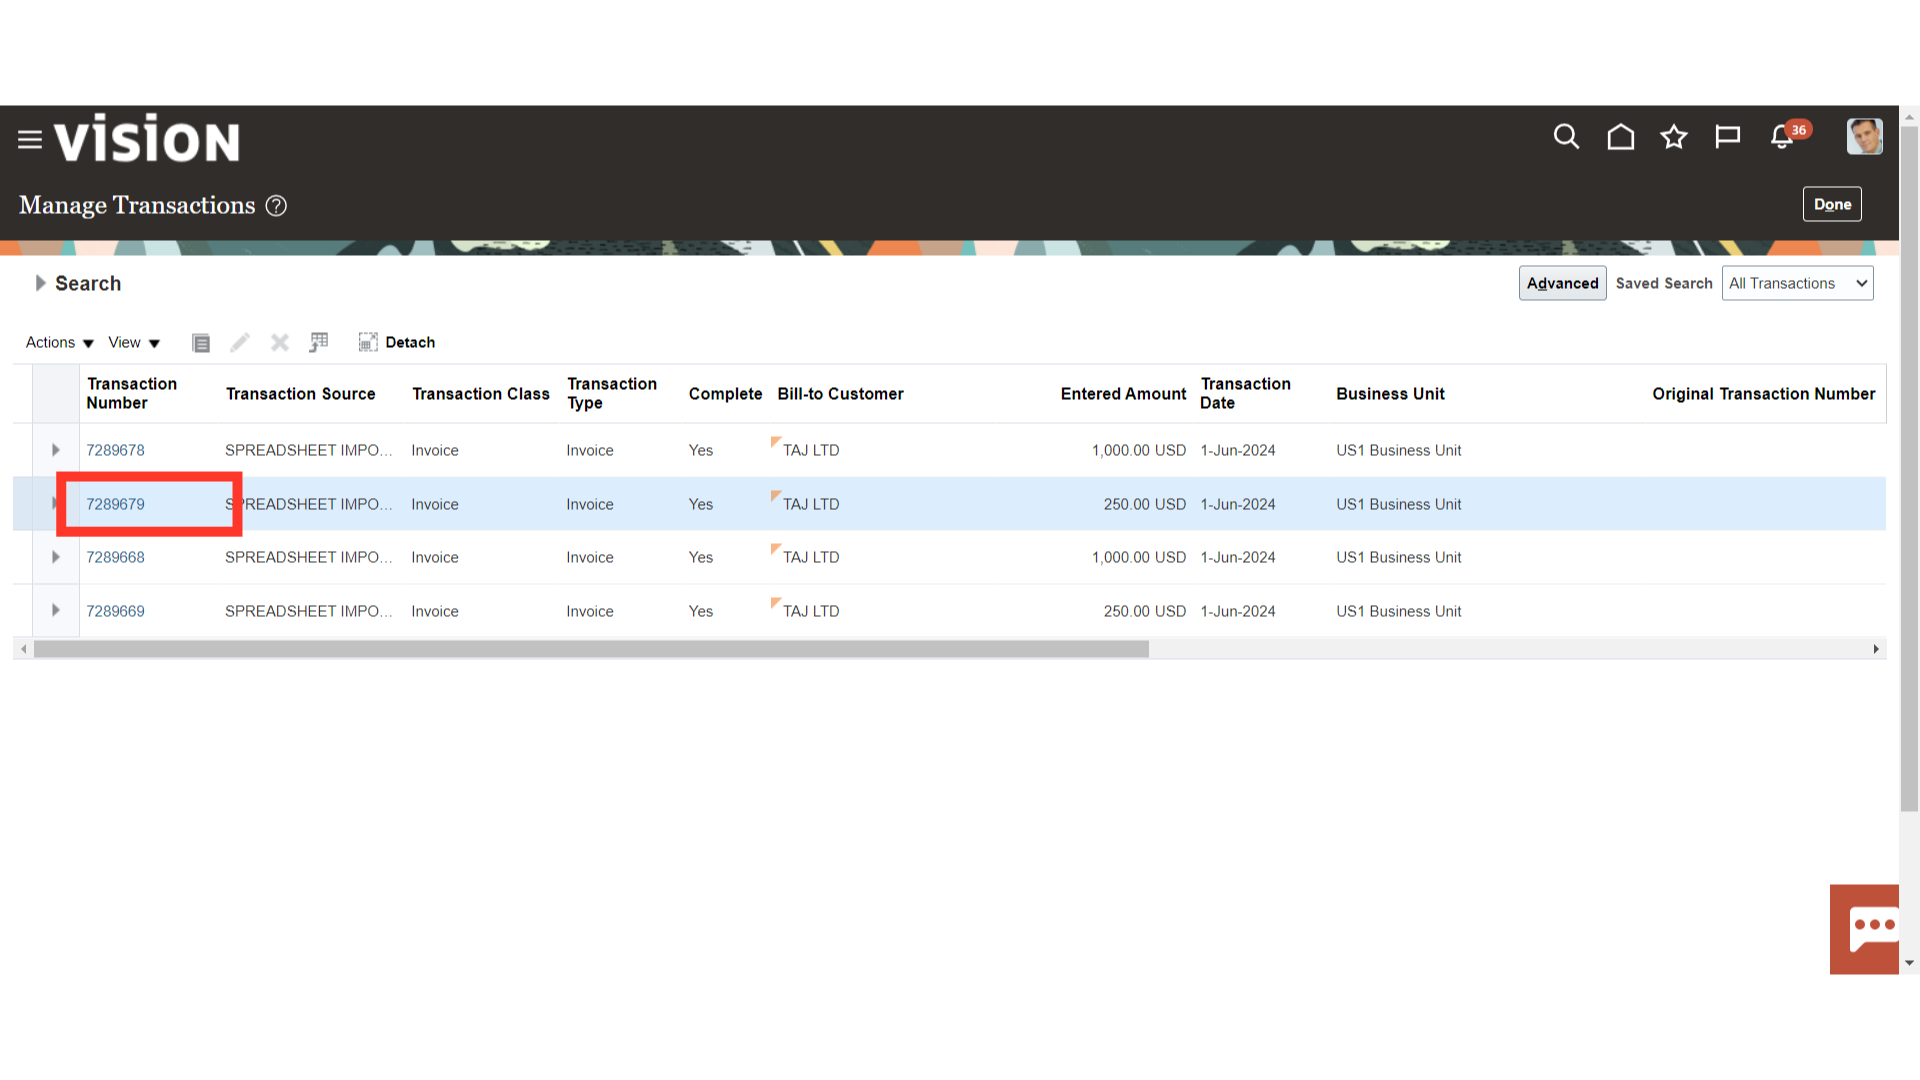
Search for the relevant Transaction that is generated successfully and review it.
This guide covers various actions for preparations of the data in the spreadsheet and importing those transactions to Oracle cloud.