Customer Invoice Processing with Revenue Scheduling
This guide will provide a detailed walk-through for creating a receivable transaction with a revenue scheduling rule to defer either the recognition of revenue or receivables in the Oracle fusion
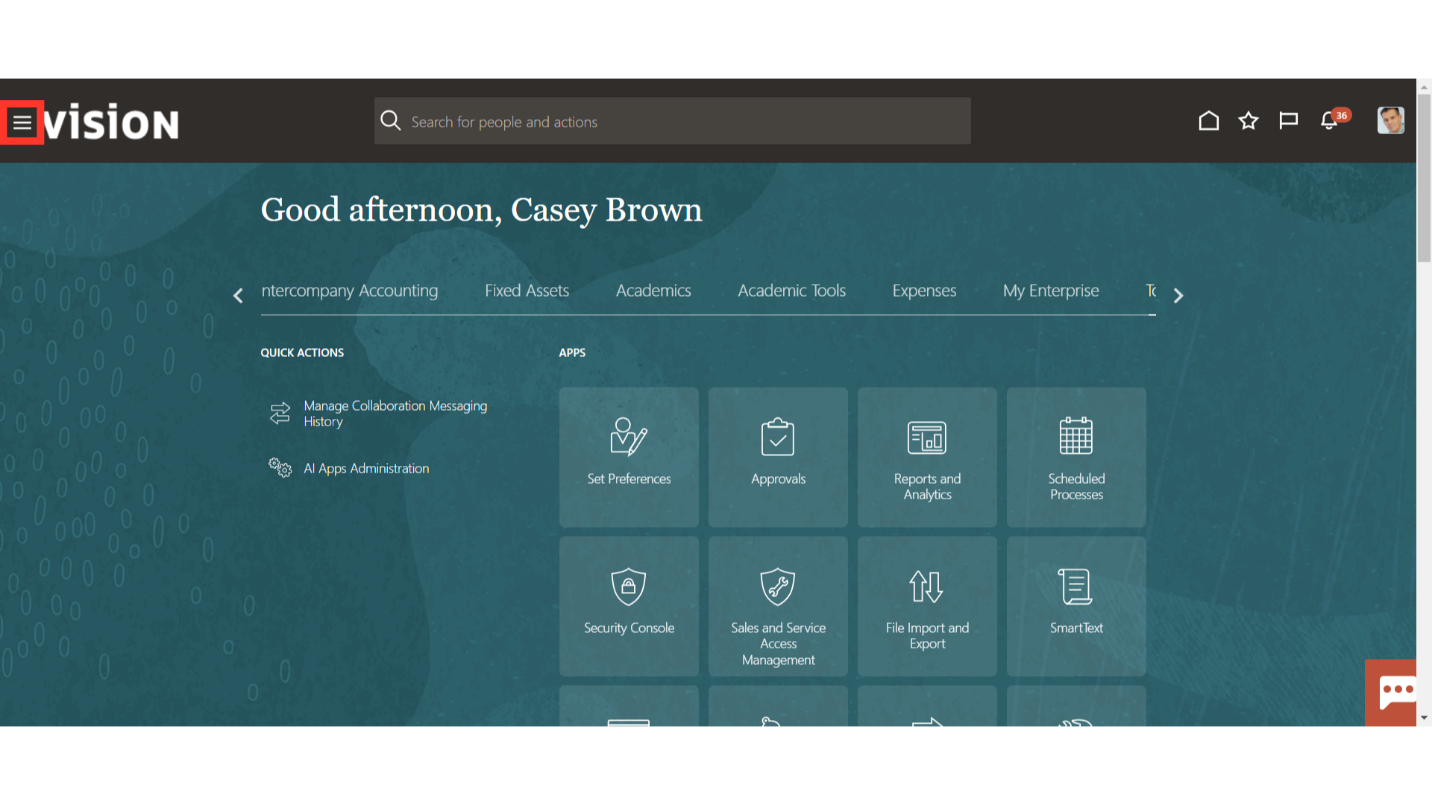
Click on the Navigator icon to access the Receivables menu.
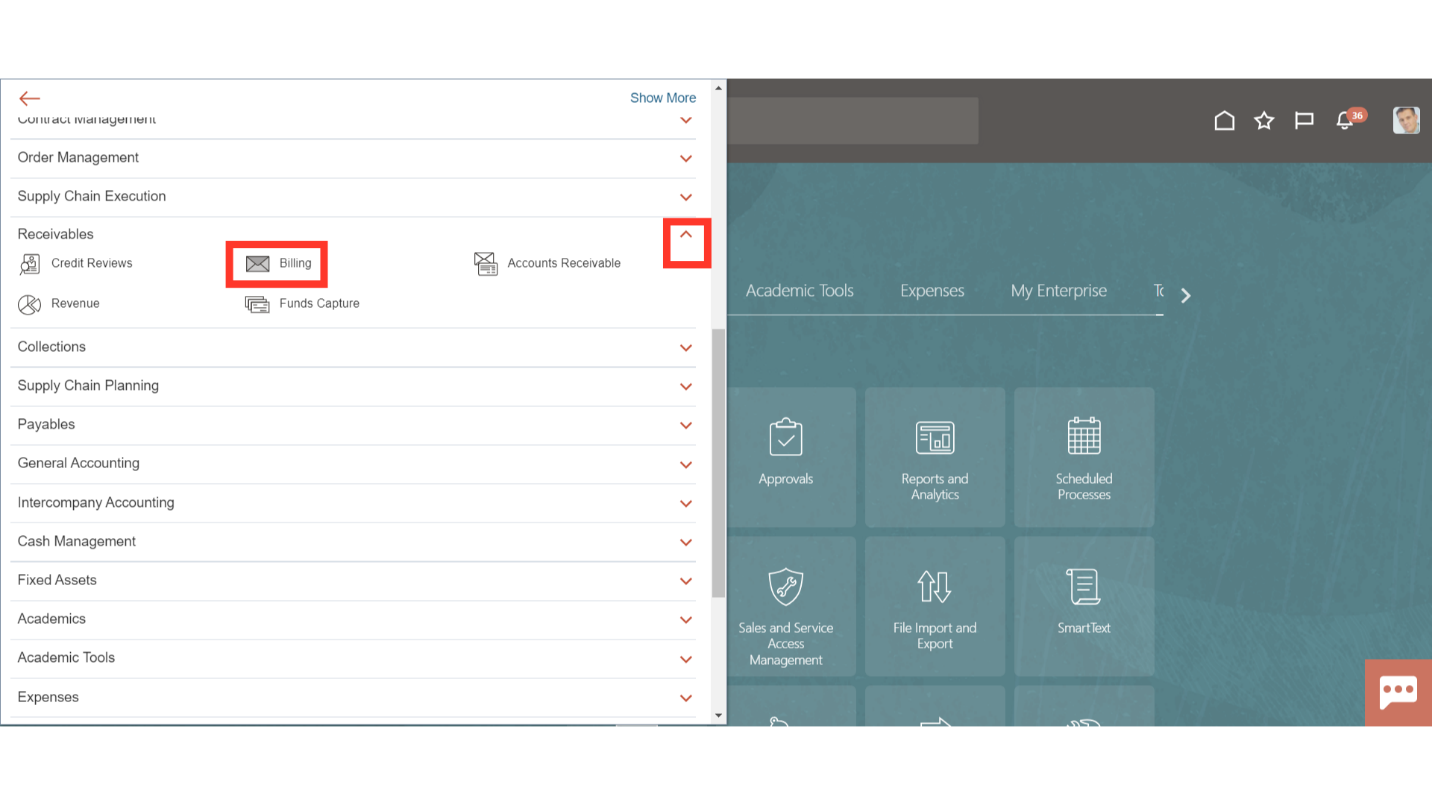
Access the Billing work area by selecting Billing under Receivables from the navigator. Alternatively, on the Home page, you may select the Receivables menu and under that select the Billing submenu.
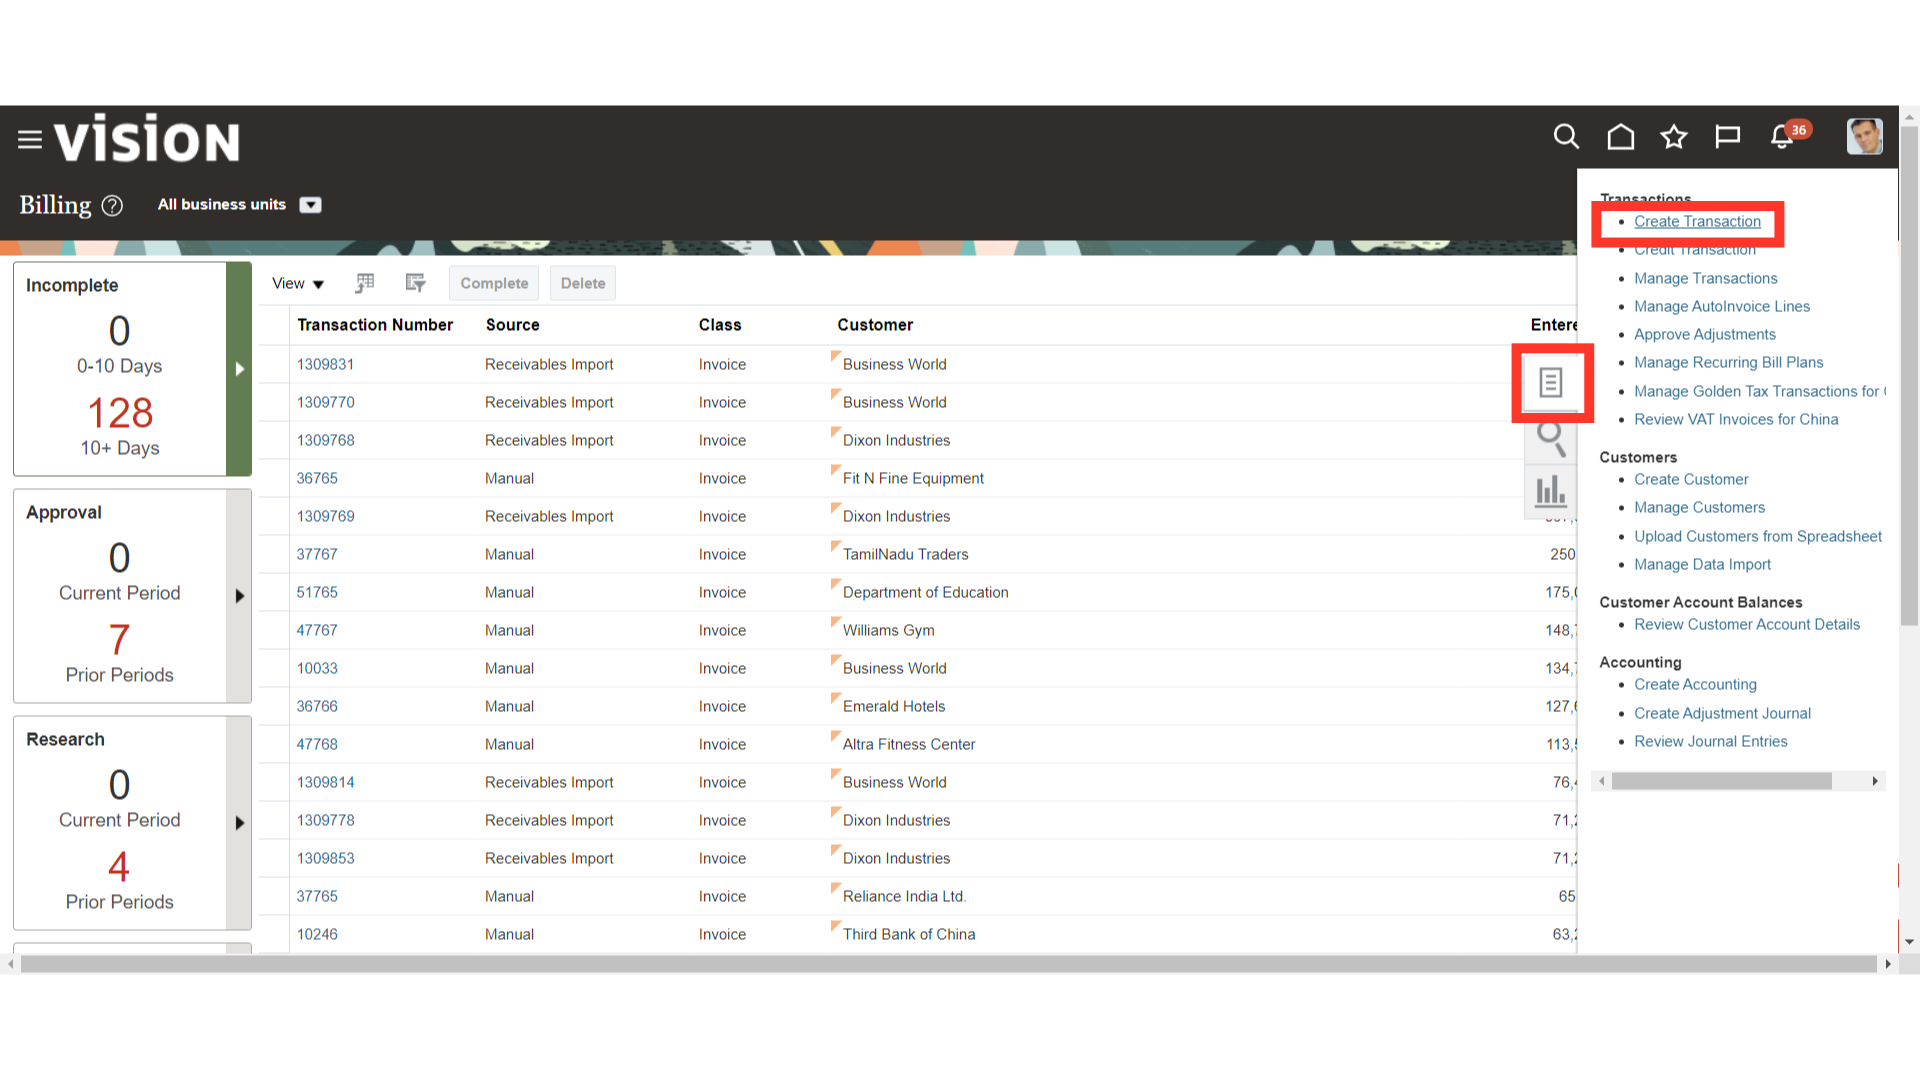
Click on the “Create Transaction” hyperlink under Transactions from the task list.
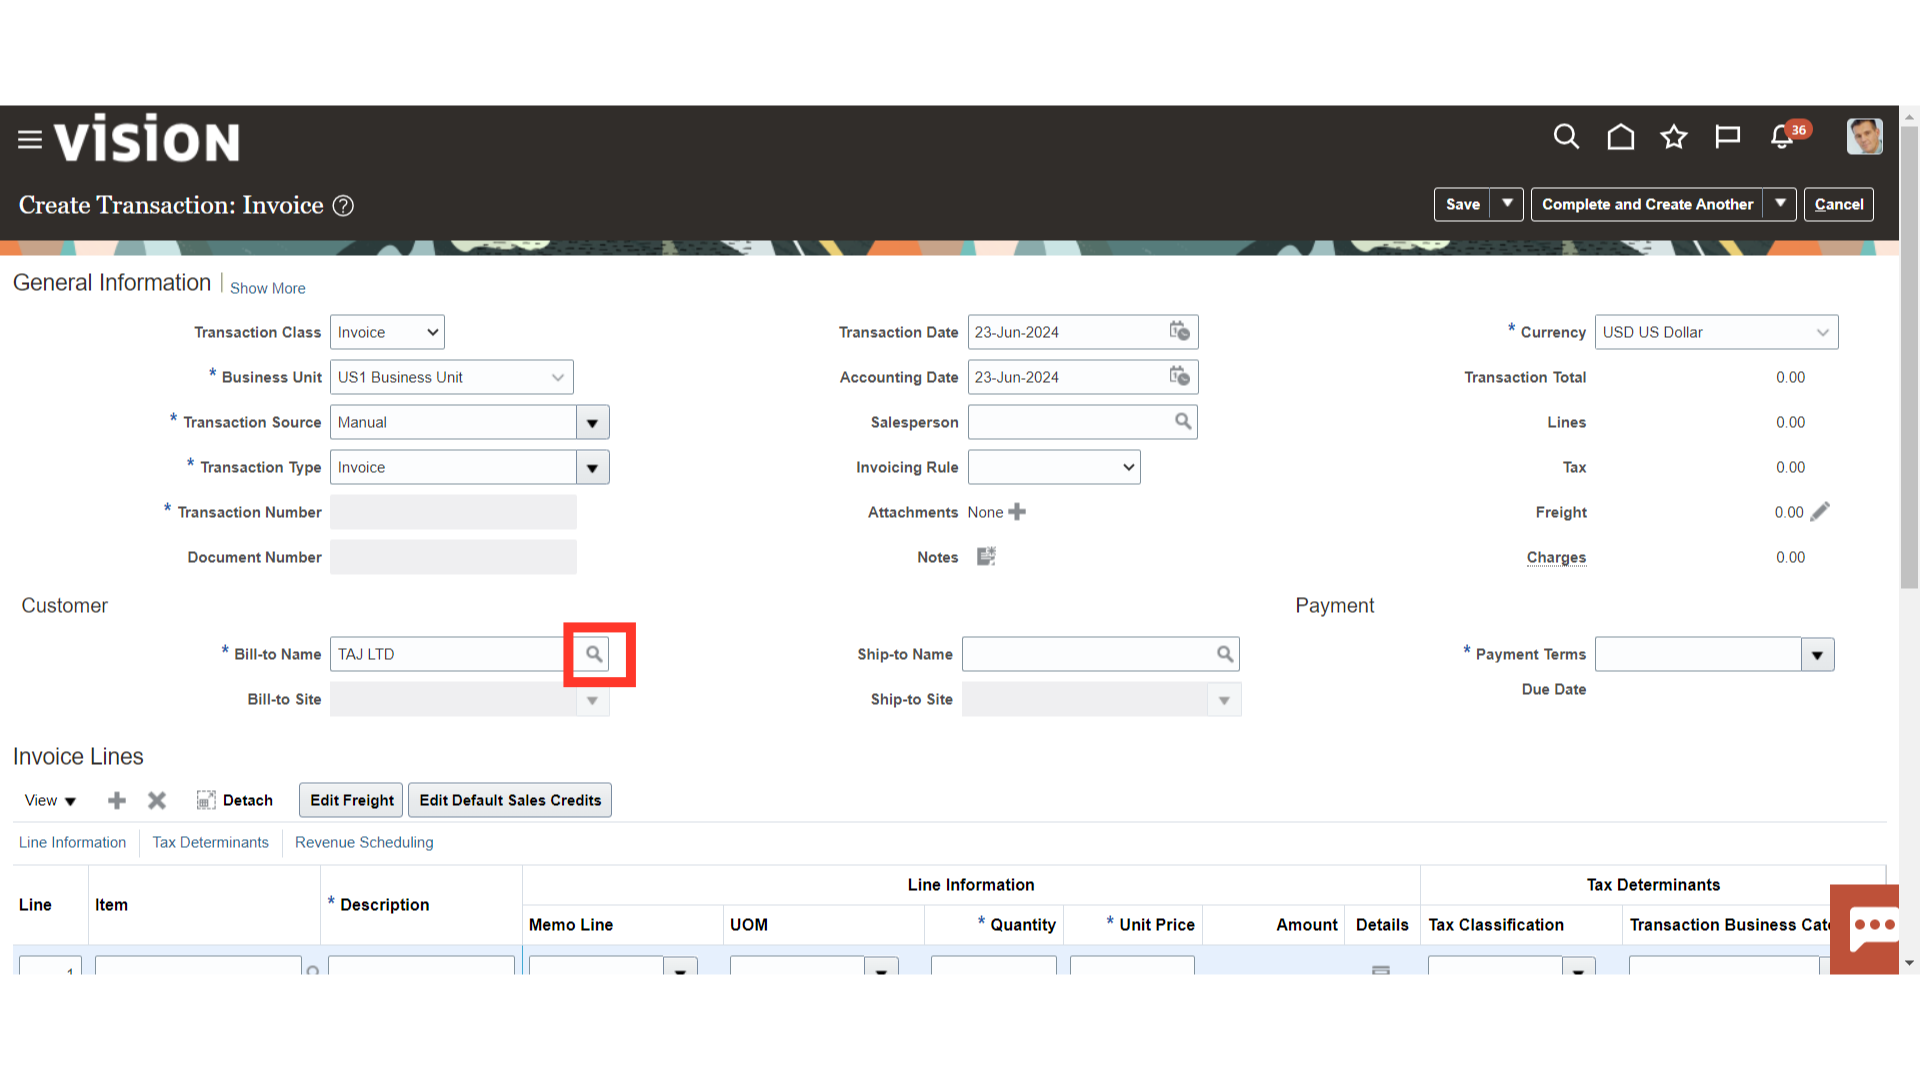
Enter the customer’s name manually in the field Bill to Name field or click on the Magnify lens icon to search and select the customers.
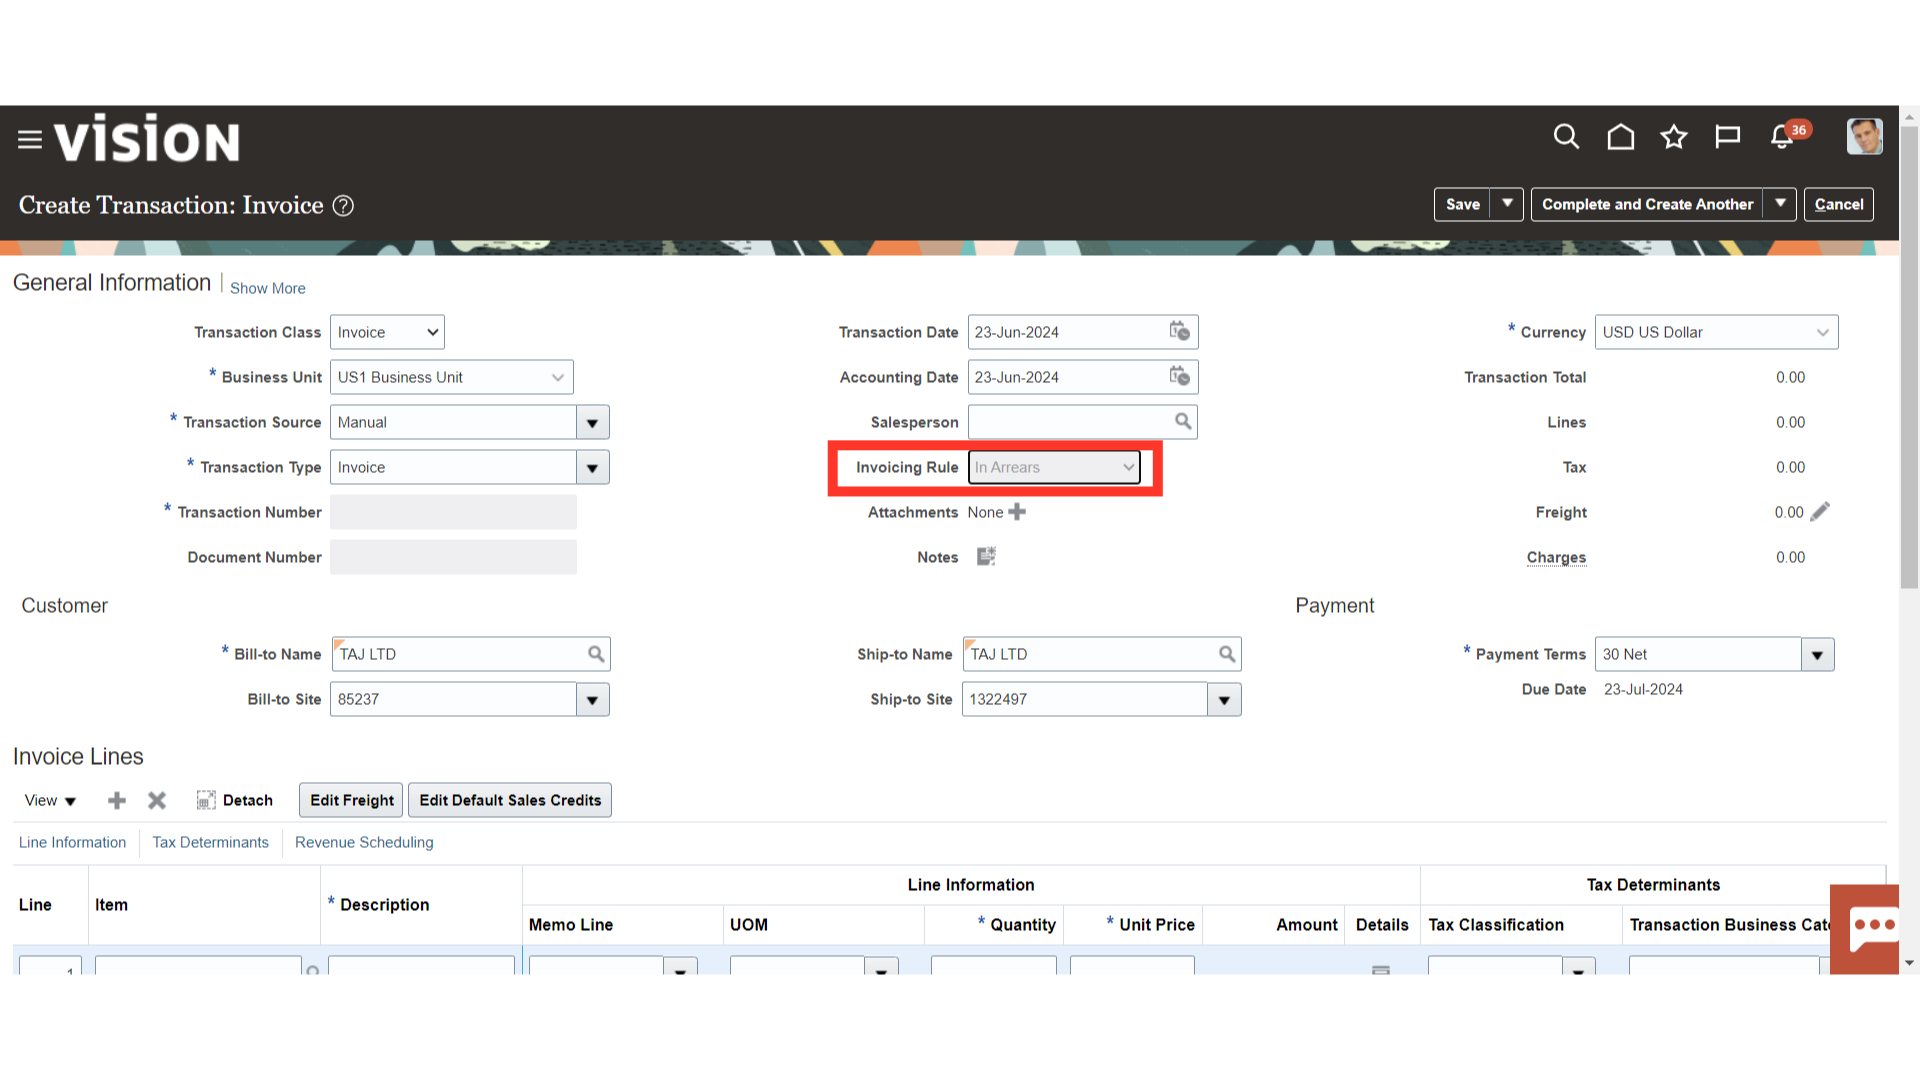
In advance and arears are the two rules governing invoices. The “In Advance” rule is chosen to postpone revenue recognition and recognize receivables right away. On the other hand, the “In Arears” rule is chosen to delay the recognition of receivables while recognizing revenue right away.

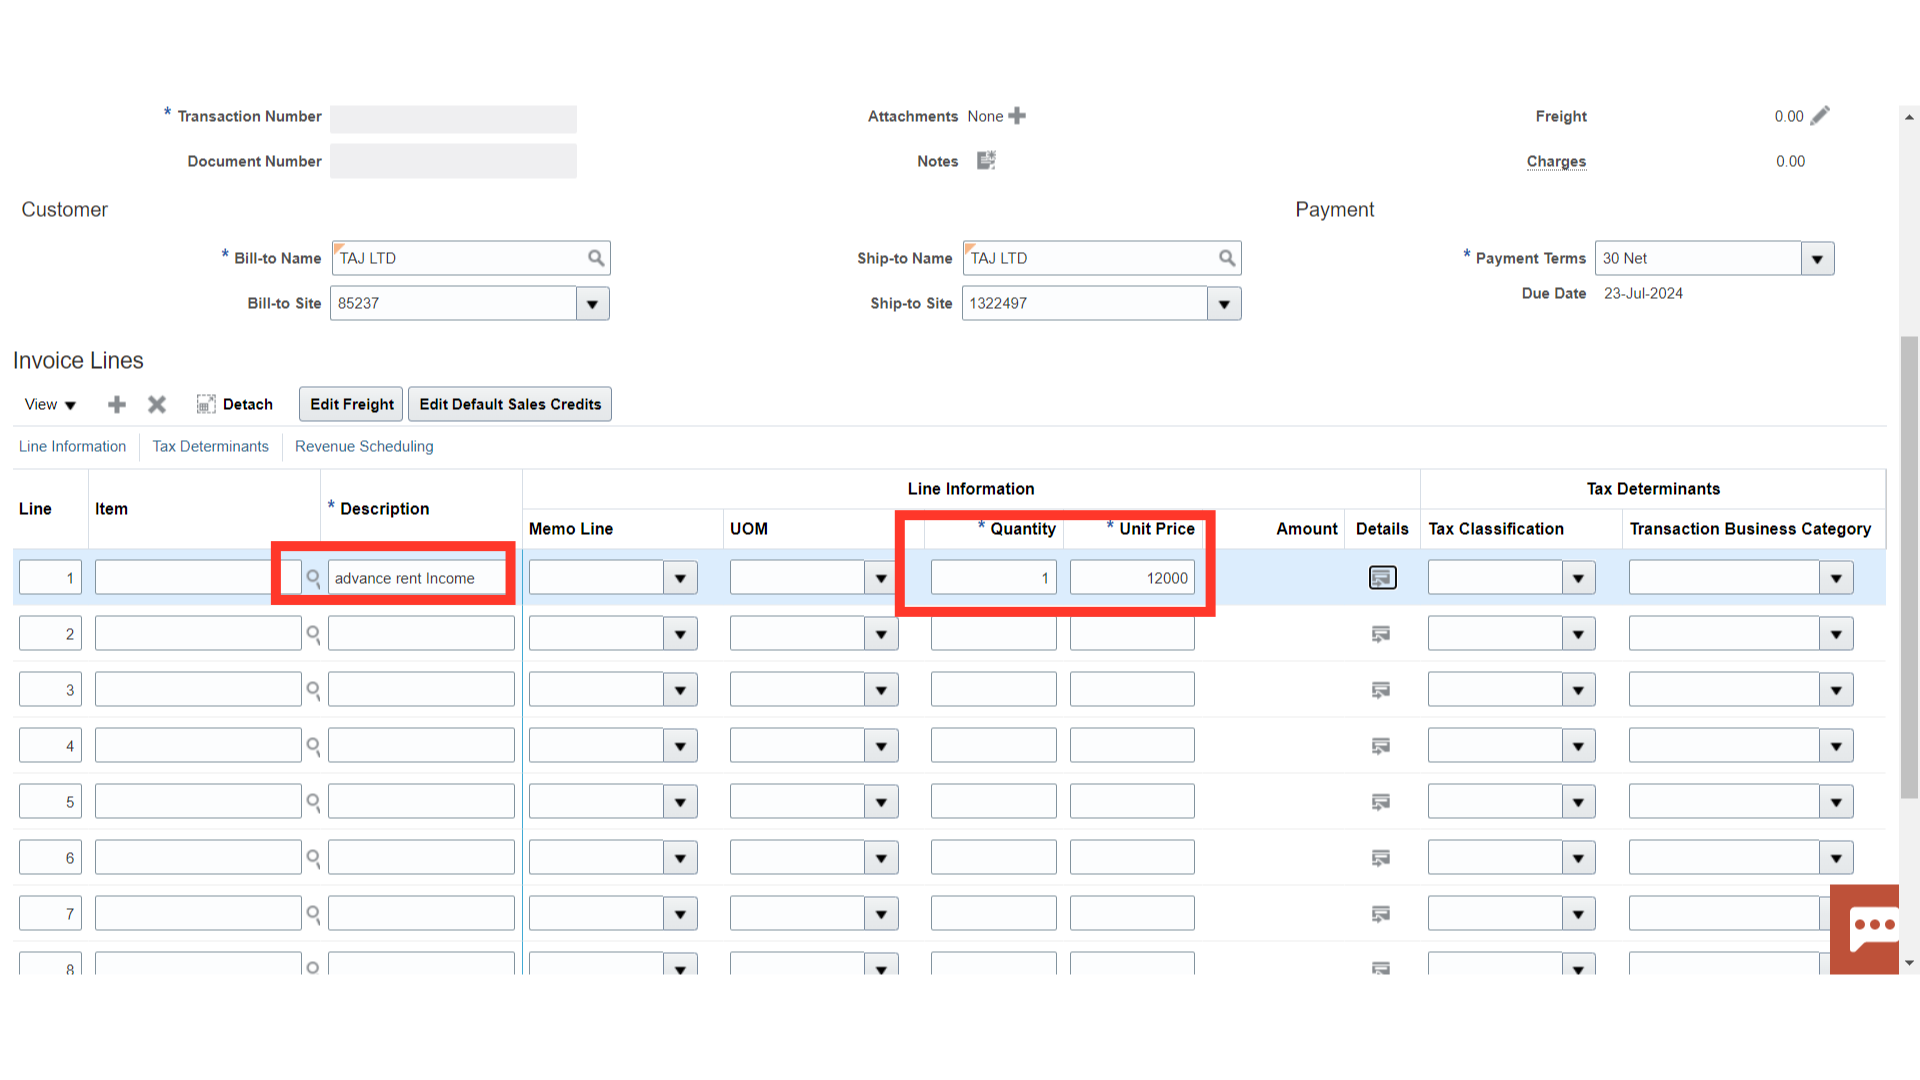
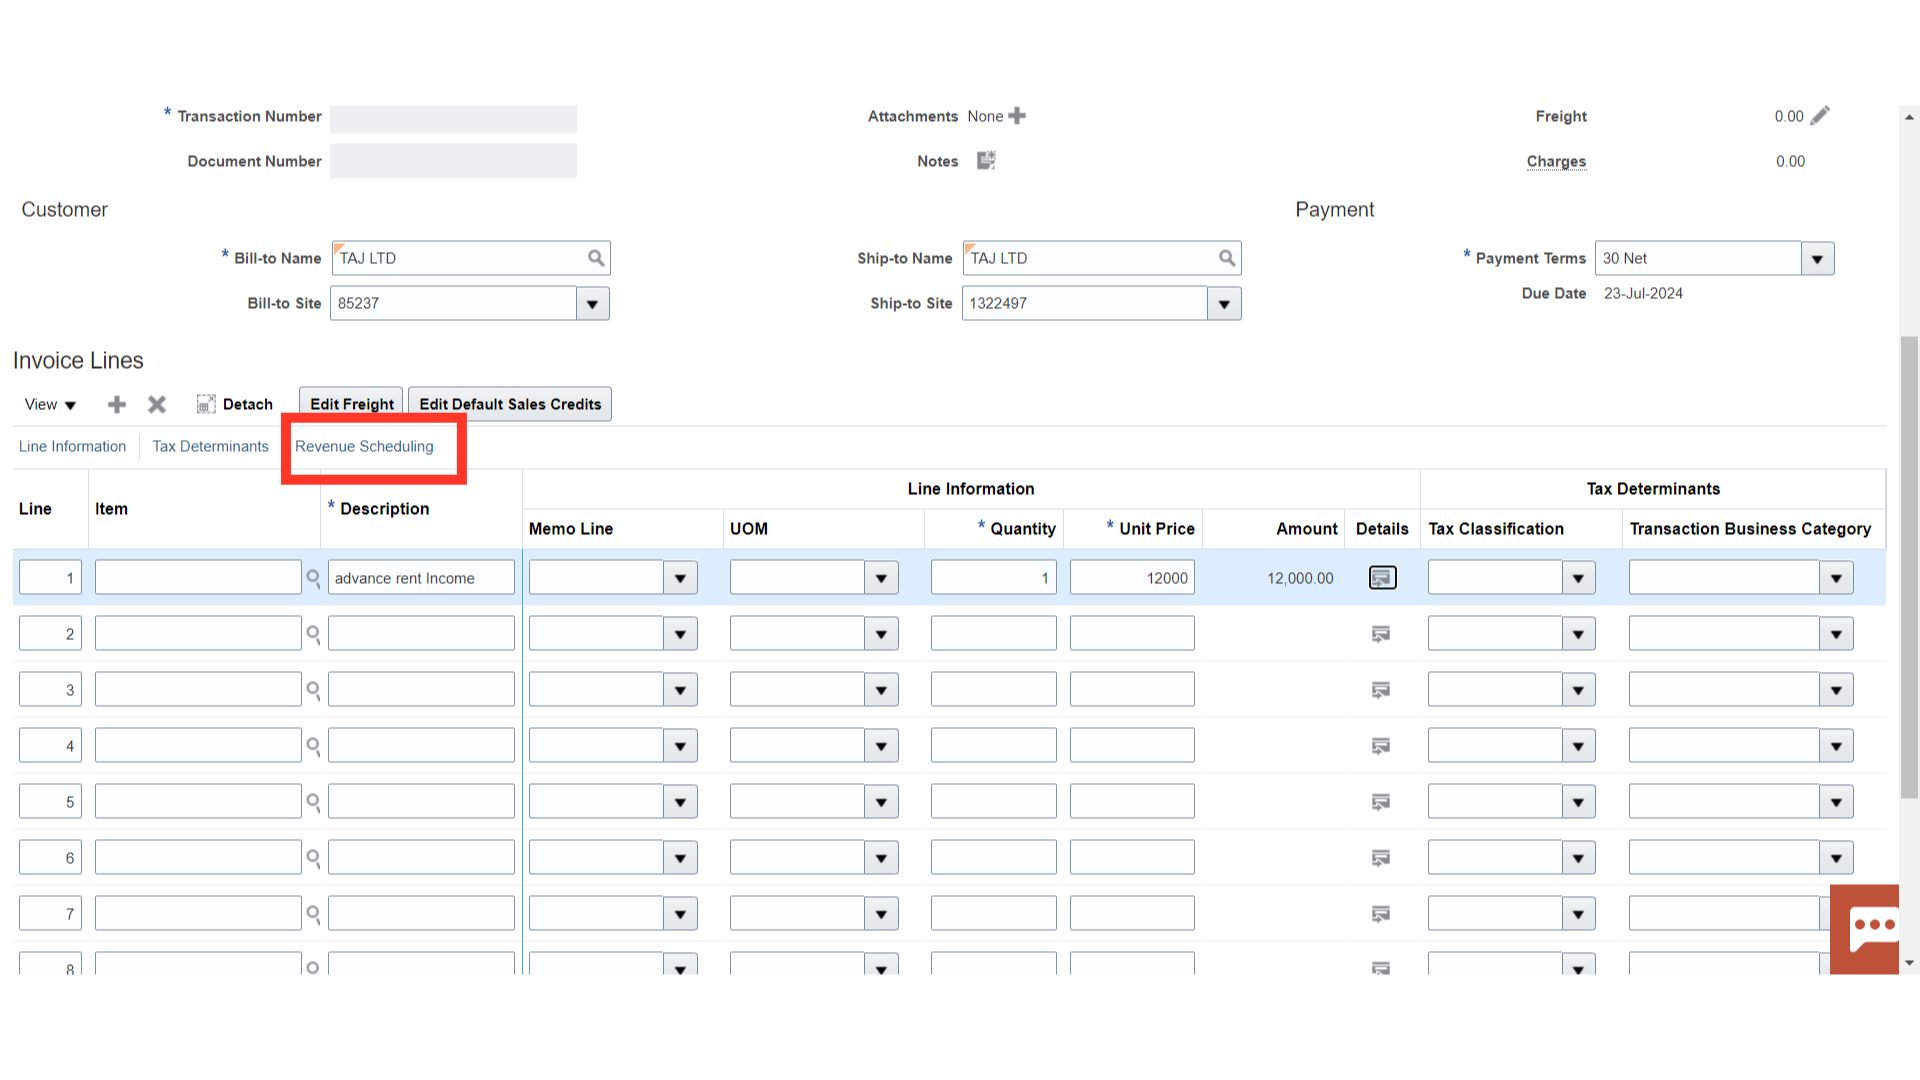
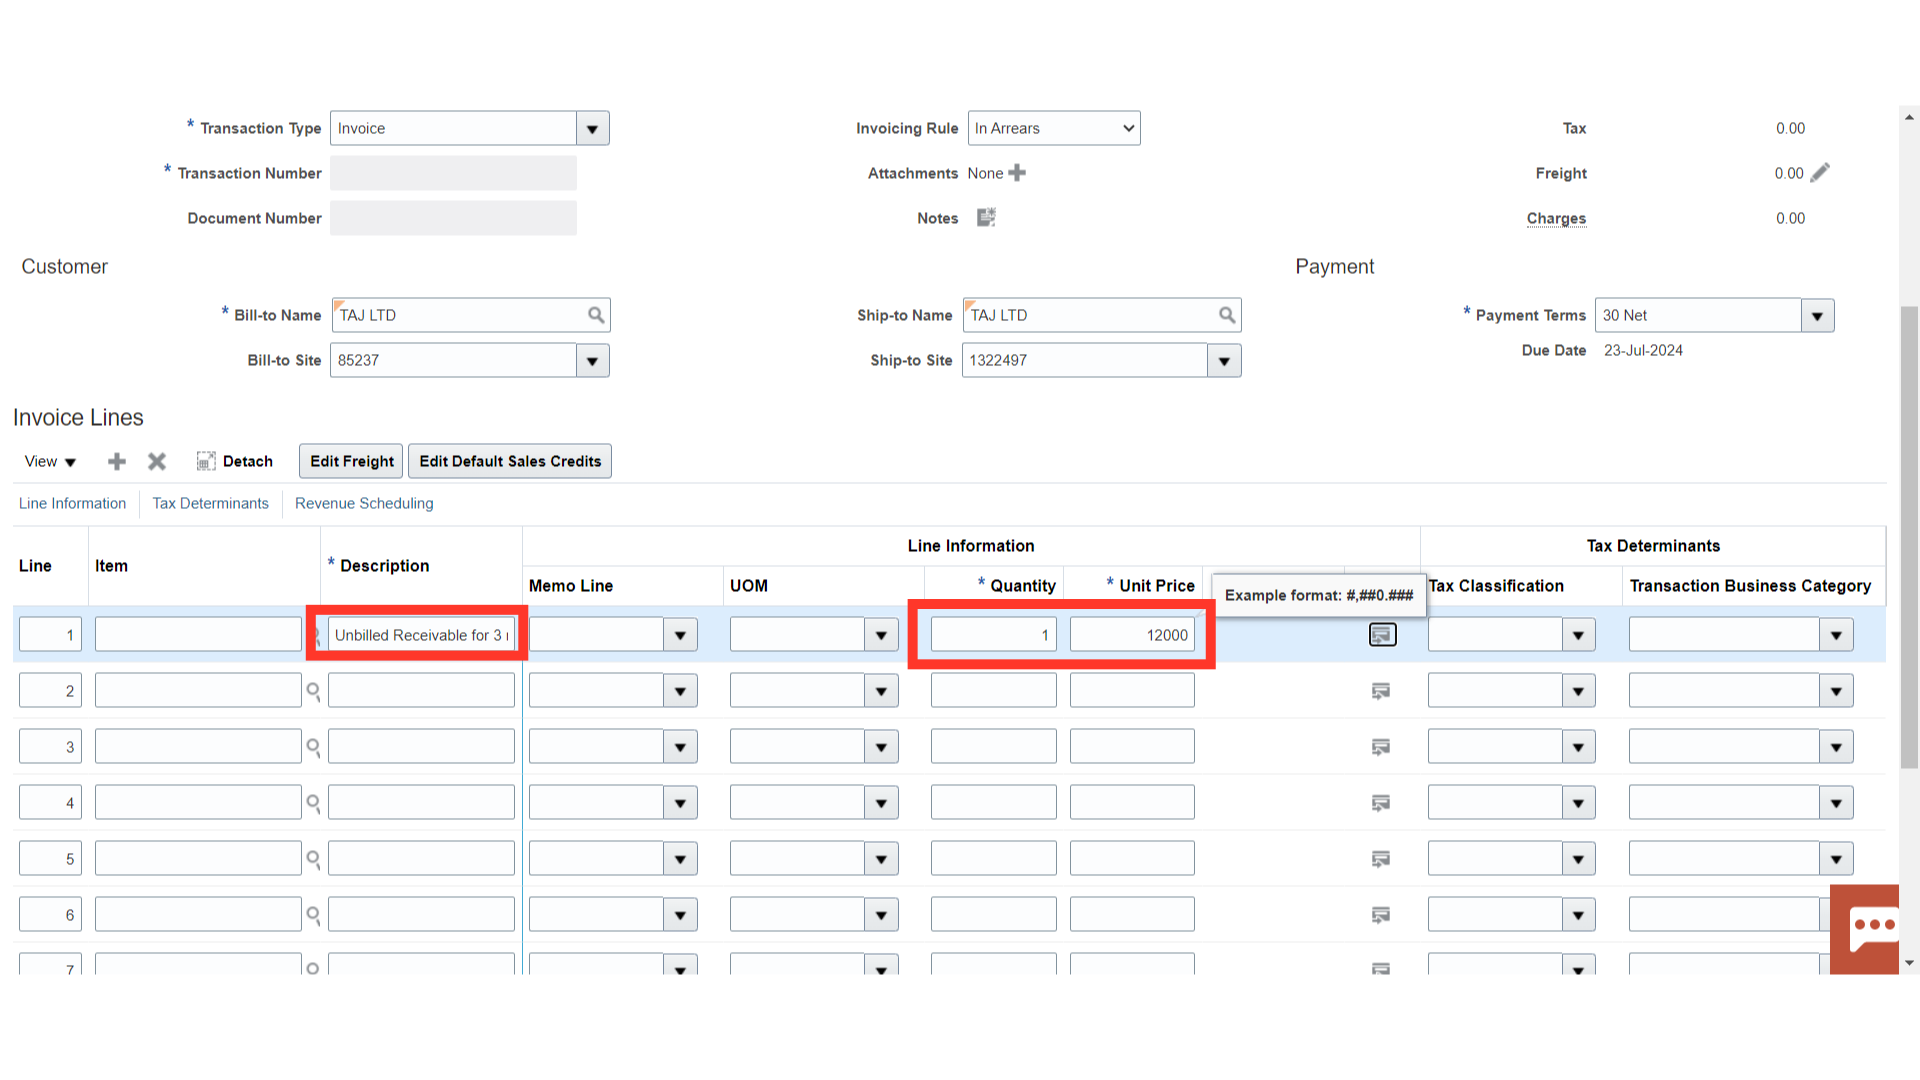
Scroll down to enter the line details such as description, Quantity, and Unit price. While the amount would be calculated automatically based on Quantity and Unit Price.
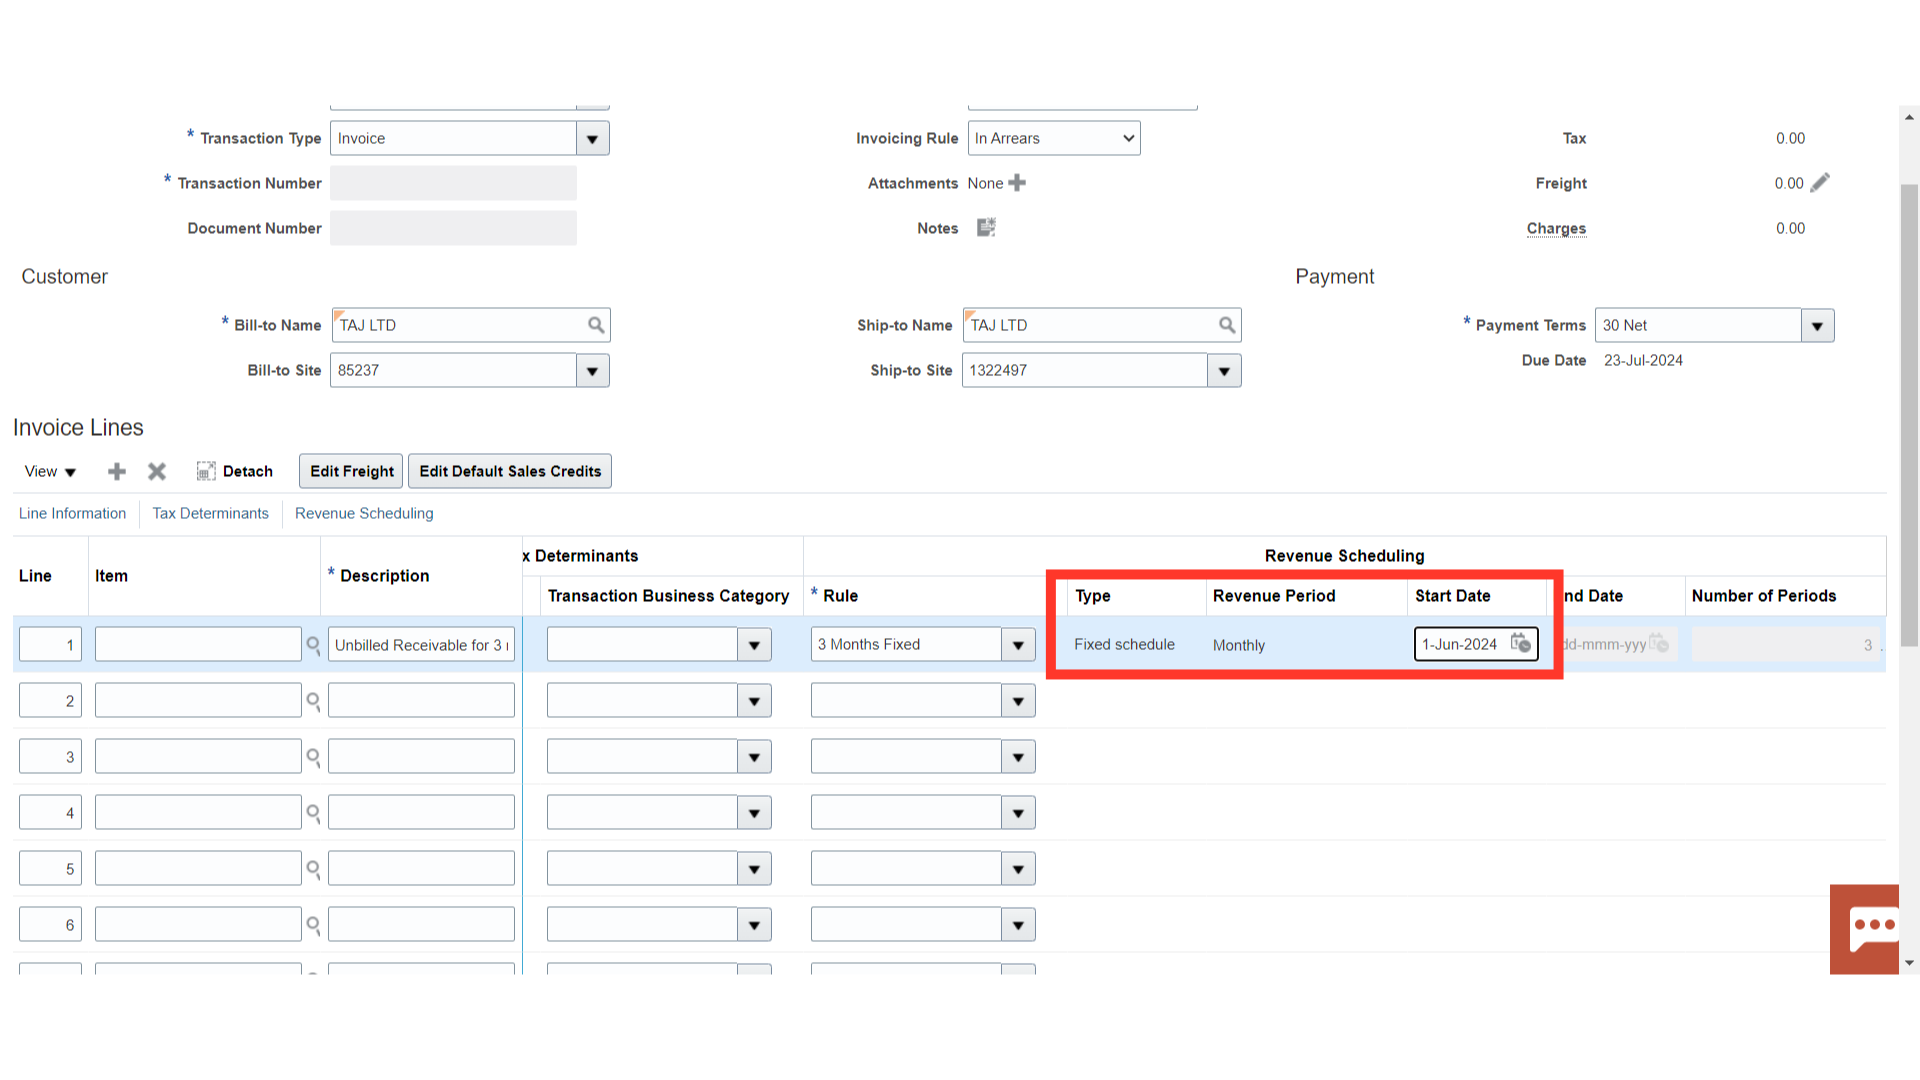
The Revenue Scheduling tab appears to enter revenue recognition-related details after the revenue recognition rule has been selected at the Invoice header level.
To use revenue scheduling rules on a transaction, you select an invoicing rule for the transaction and assign revenue scheduling rule information to each transaction line. Perform these entries for each rule type that you select on a transaction line:
Daily Revenue Rate, All Periods or Daily Revenue Rate, Partial Periods: Enter a rule start date and a rule end date for the transaction line.
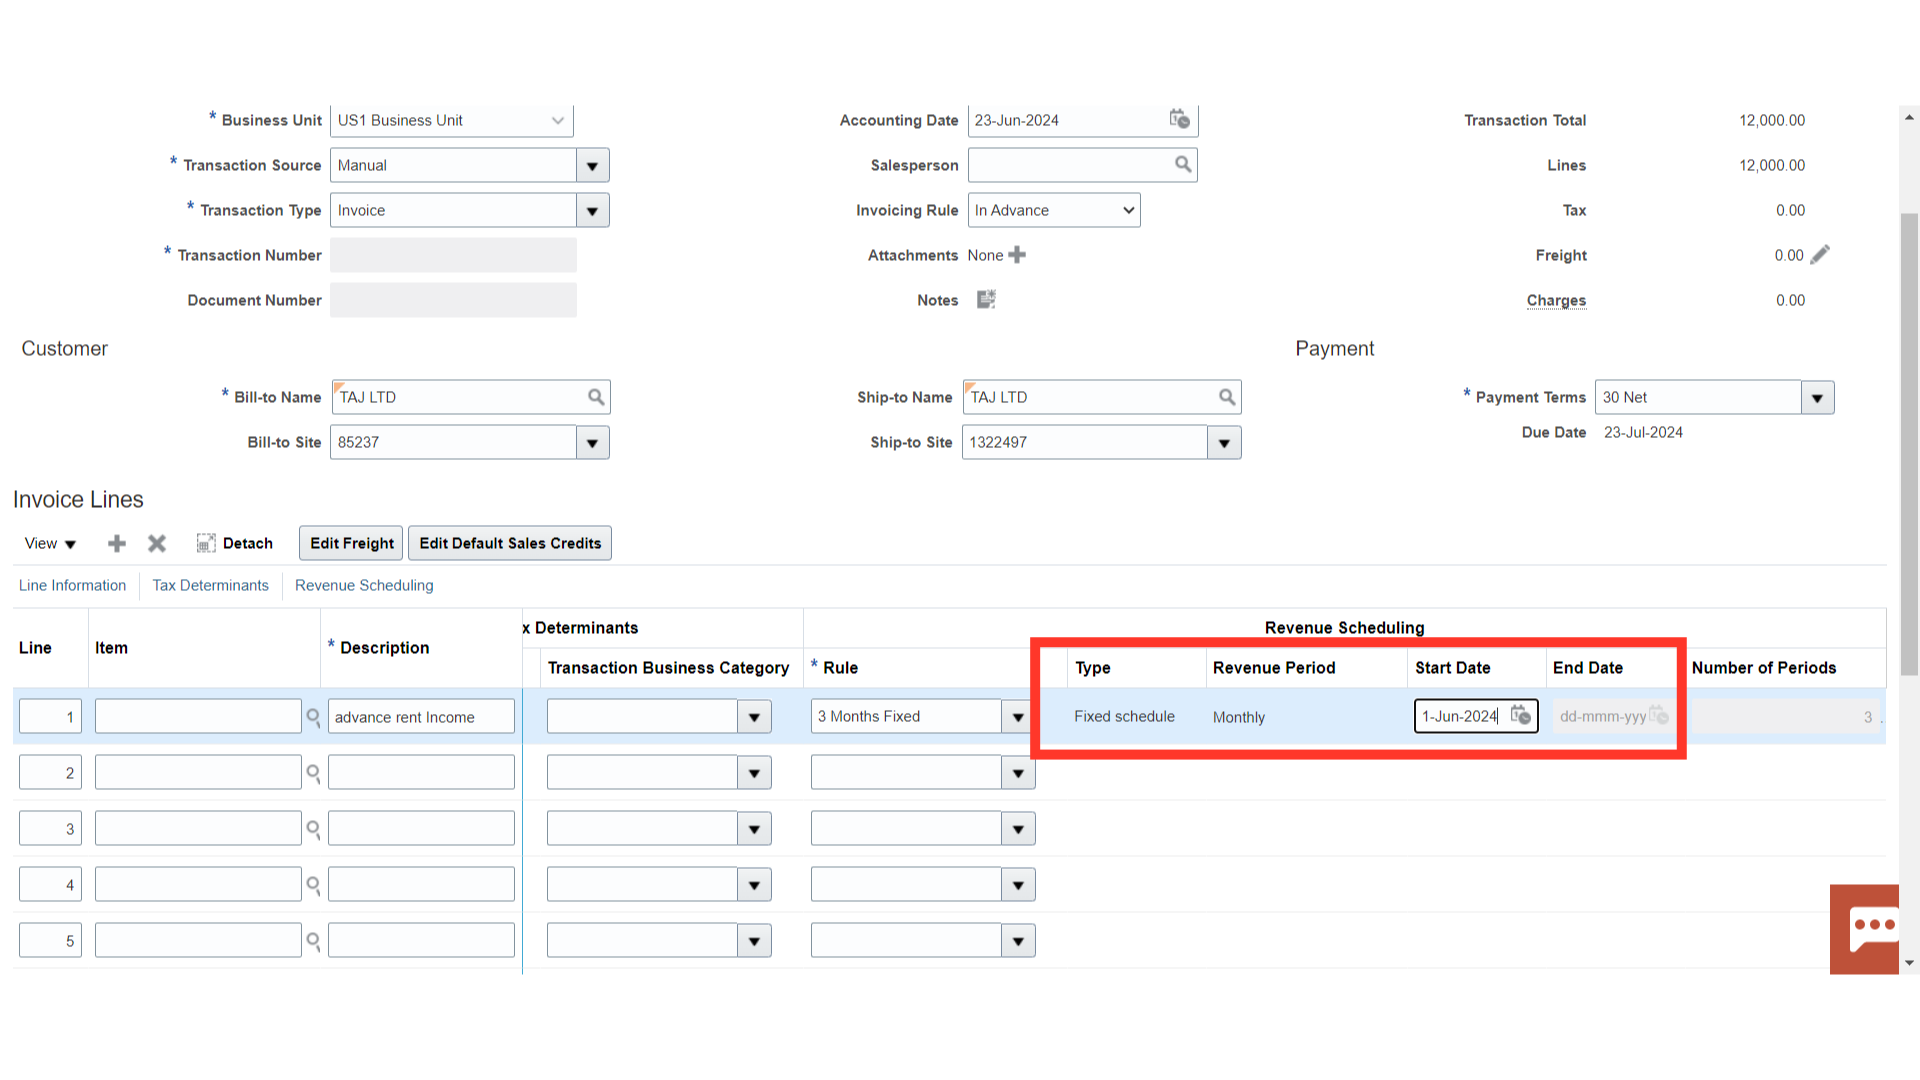
Fixed Schedule: The default rule start date is the transaction accounting date, but you can change it. The number of revenue periods is populated on the transaction line according to the rule type definition.
Variable Schedule: Enter a rule start date and the number of revenue periods over which to distribute revenue for the transaction line.
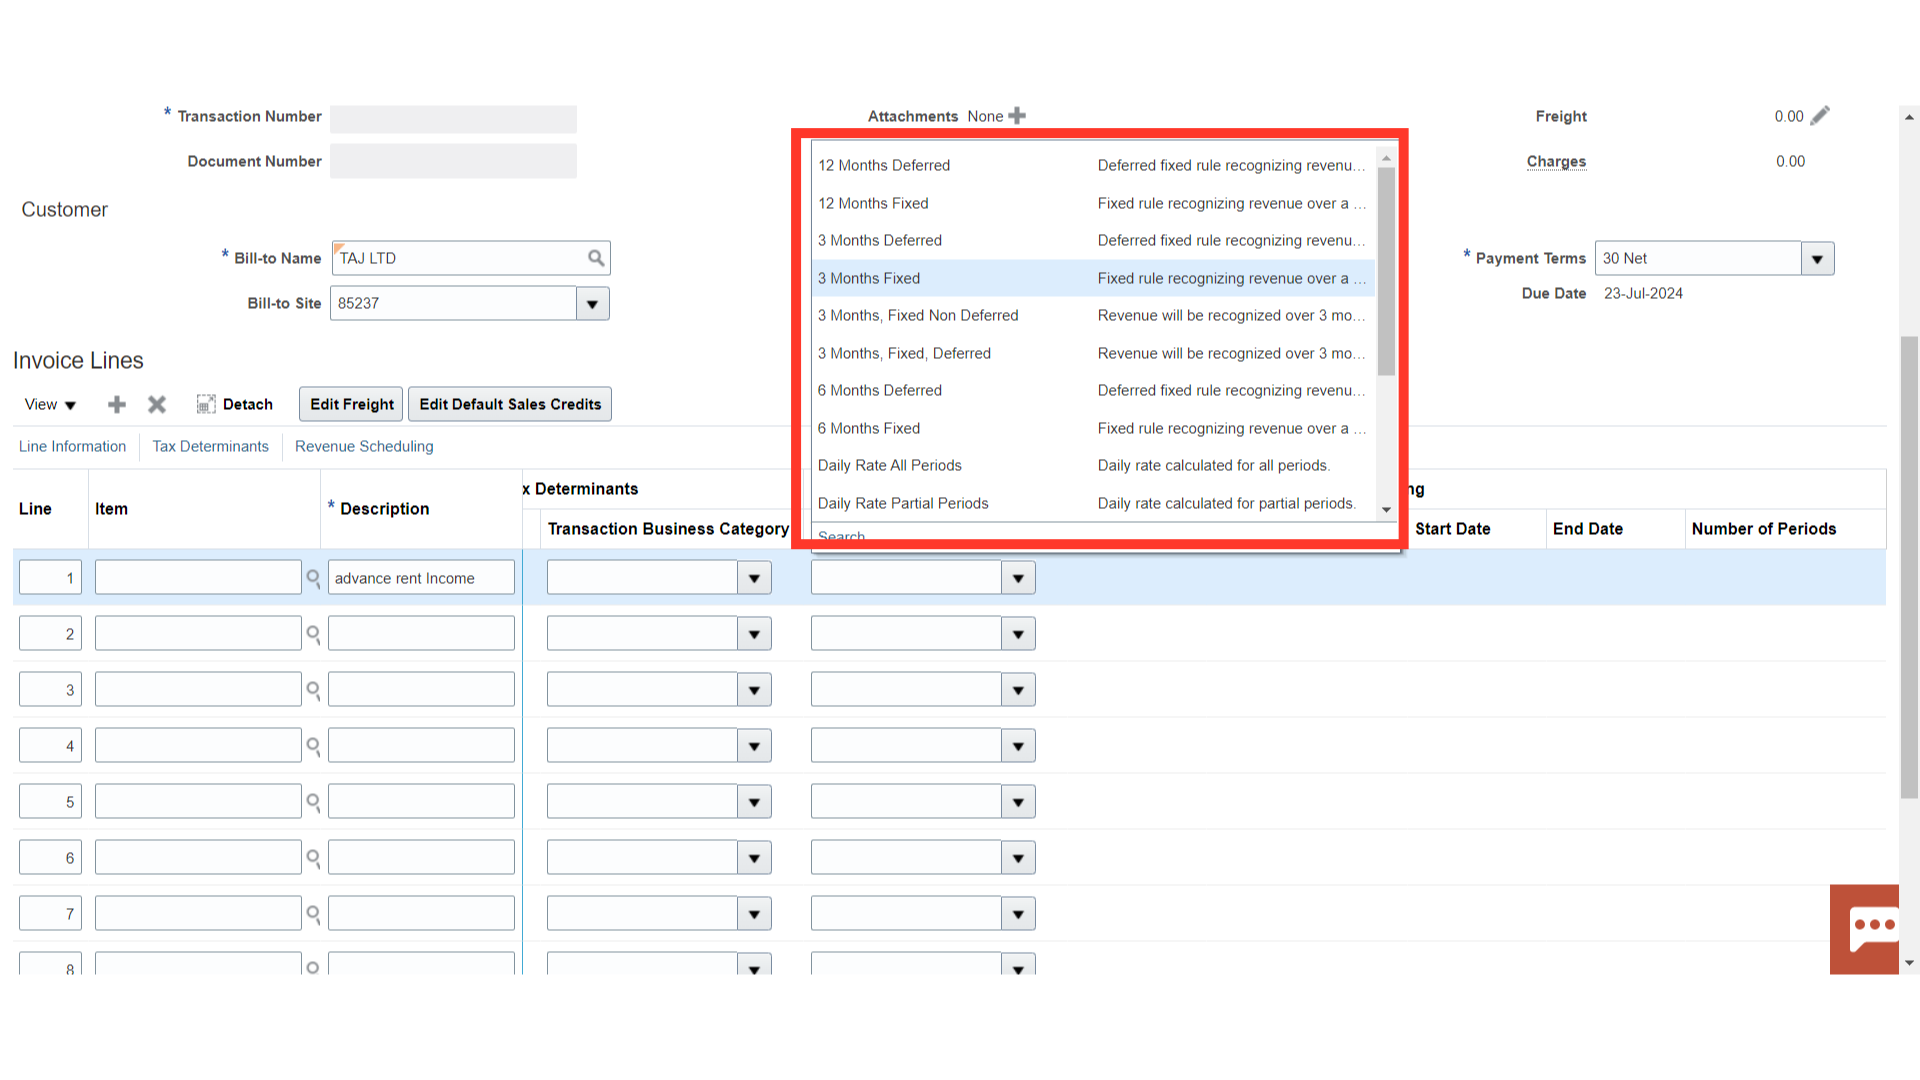
Here, for demo purposes, the Fixed Schedule rule type is selected to amortize revenue over a fixed period from the date mentioned in the start date.
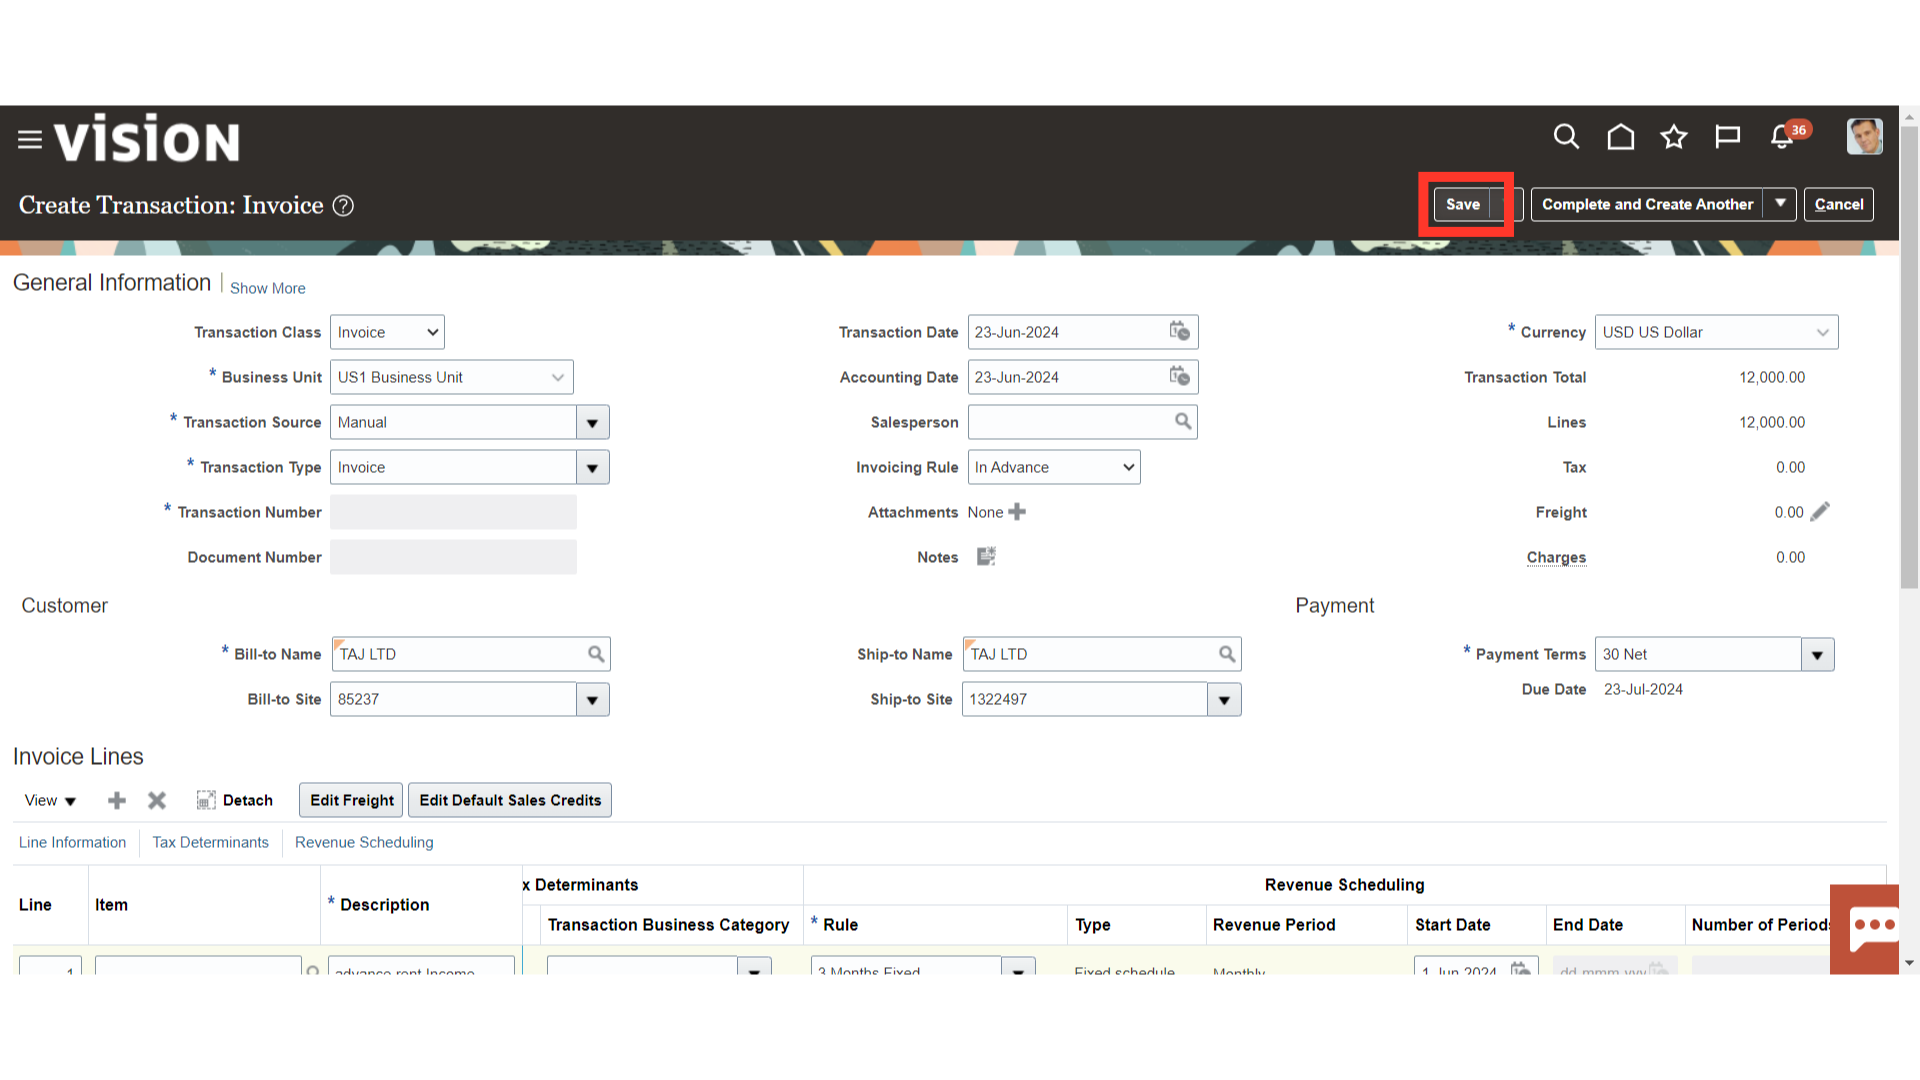
Click on the “Save” button to save changes.
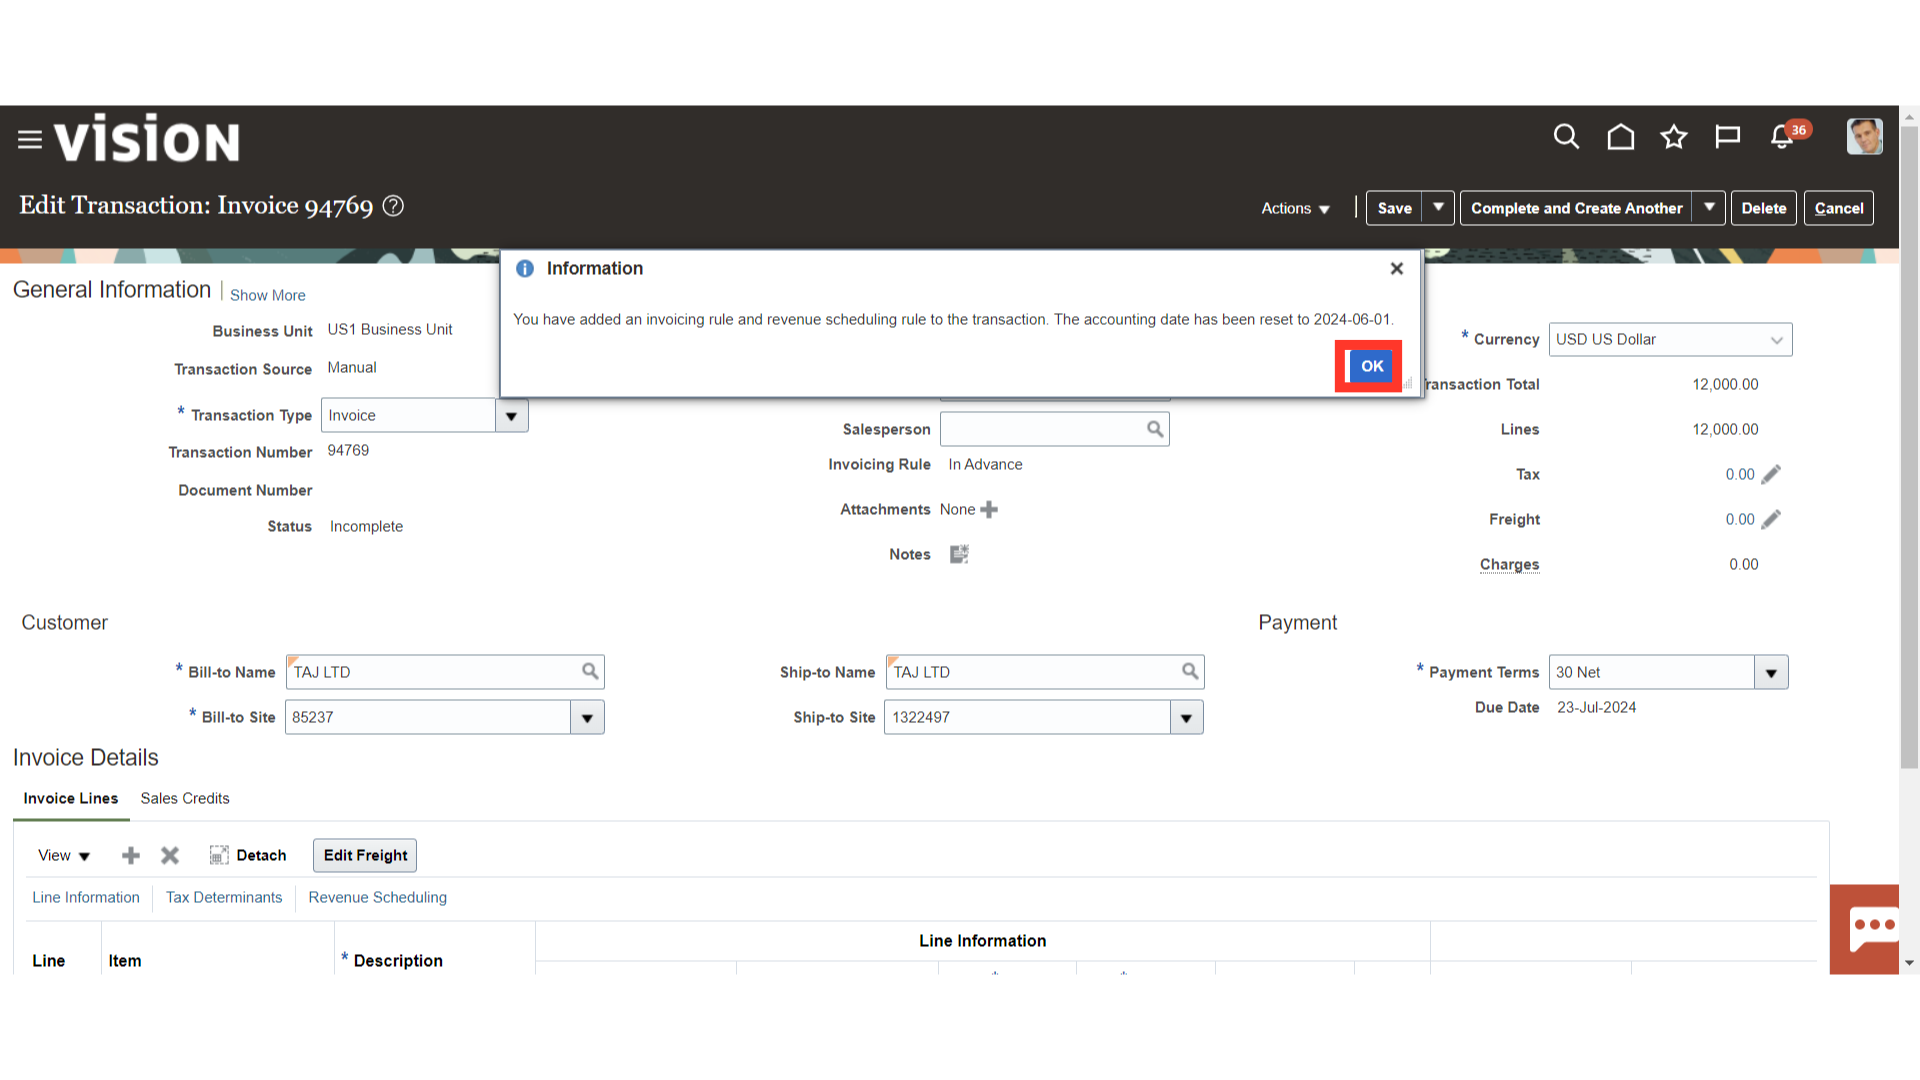
A confirmation is displayed regarding the change of accounting date to the beginning of the month, click on OK to continue.
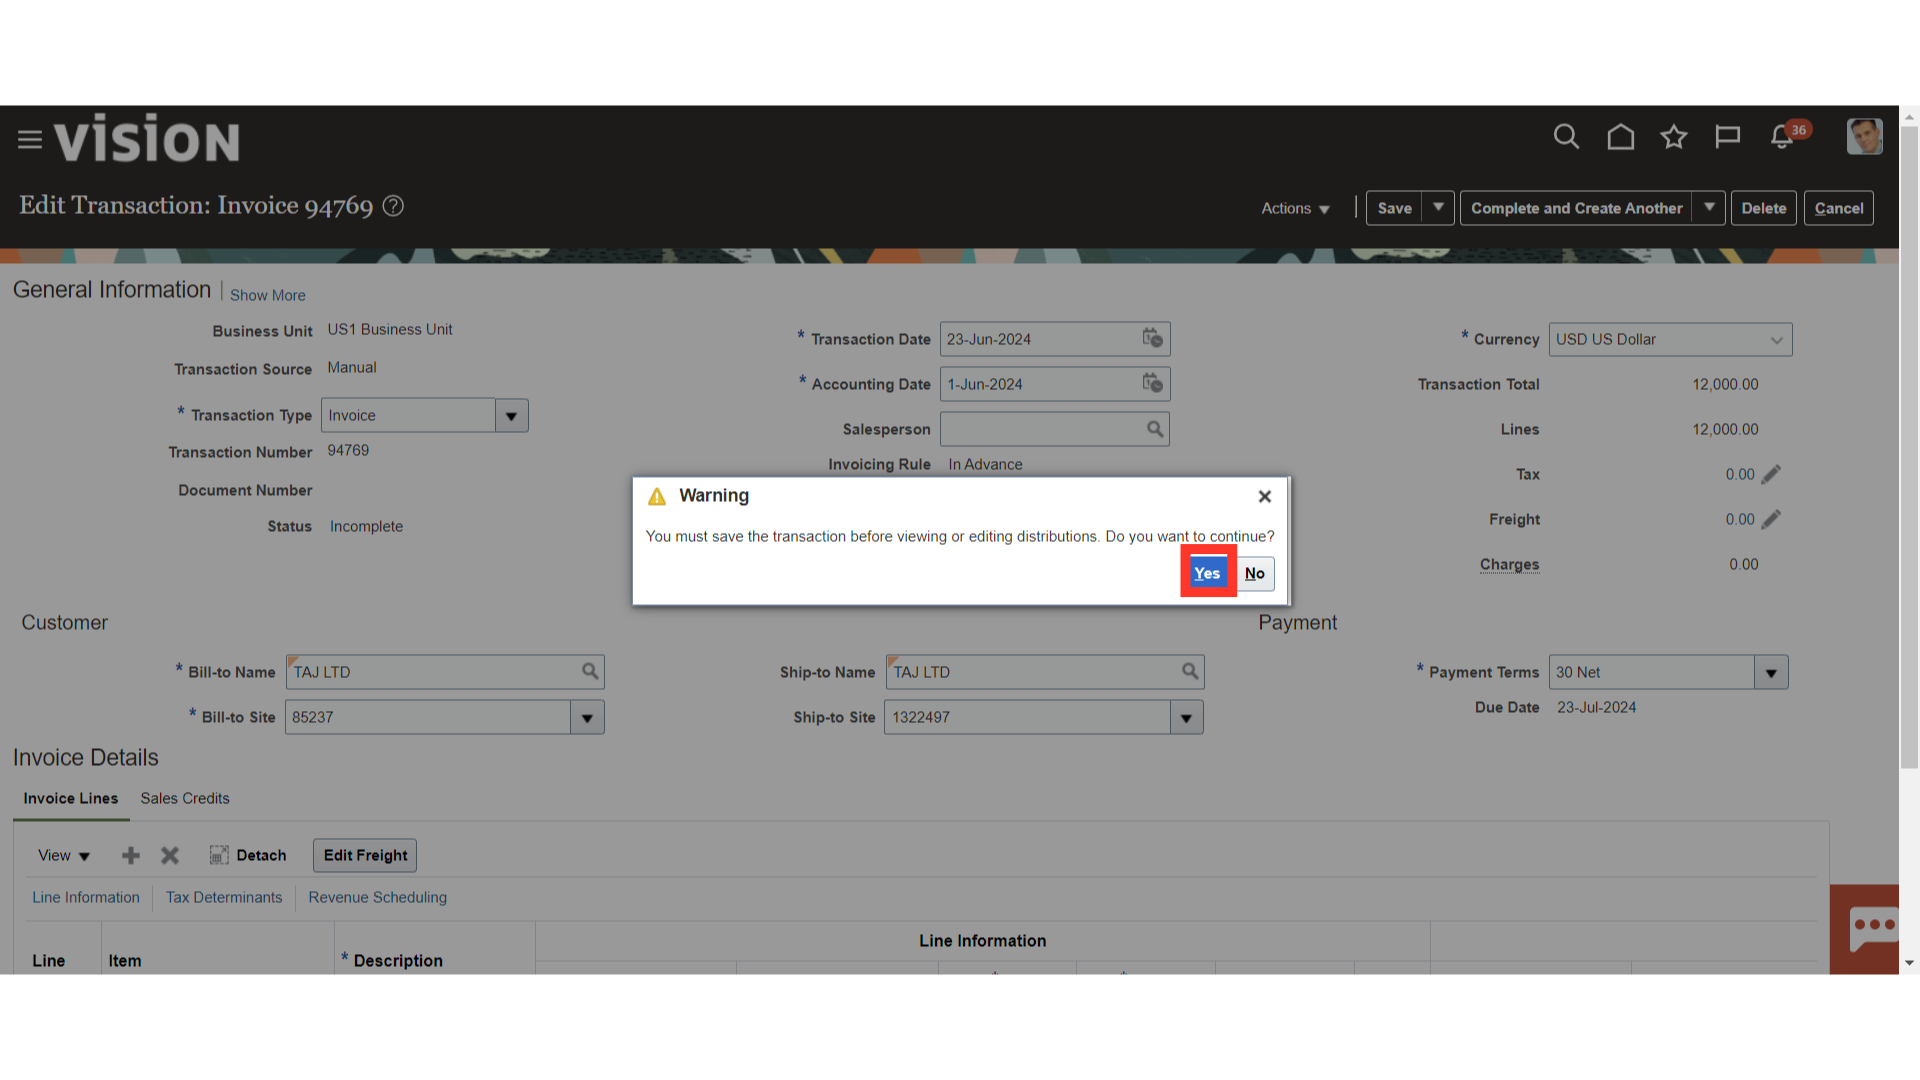
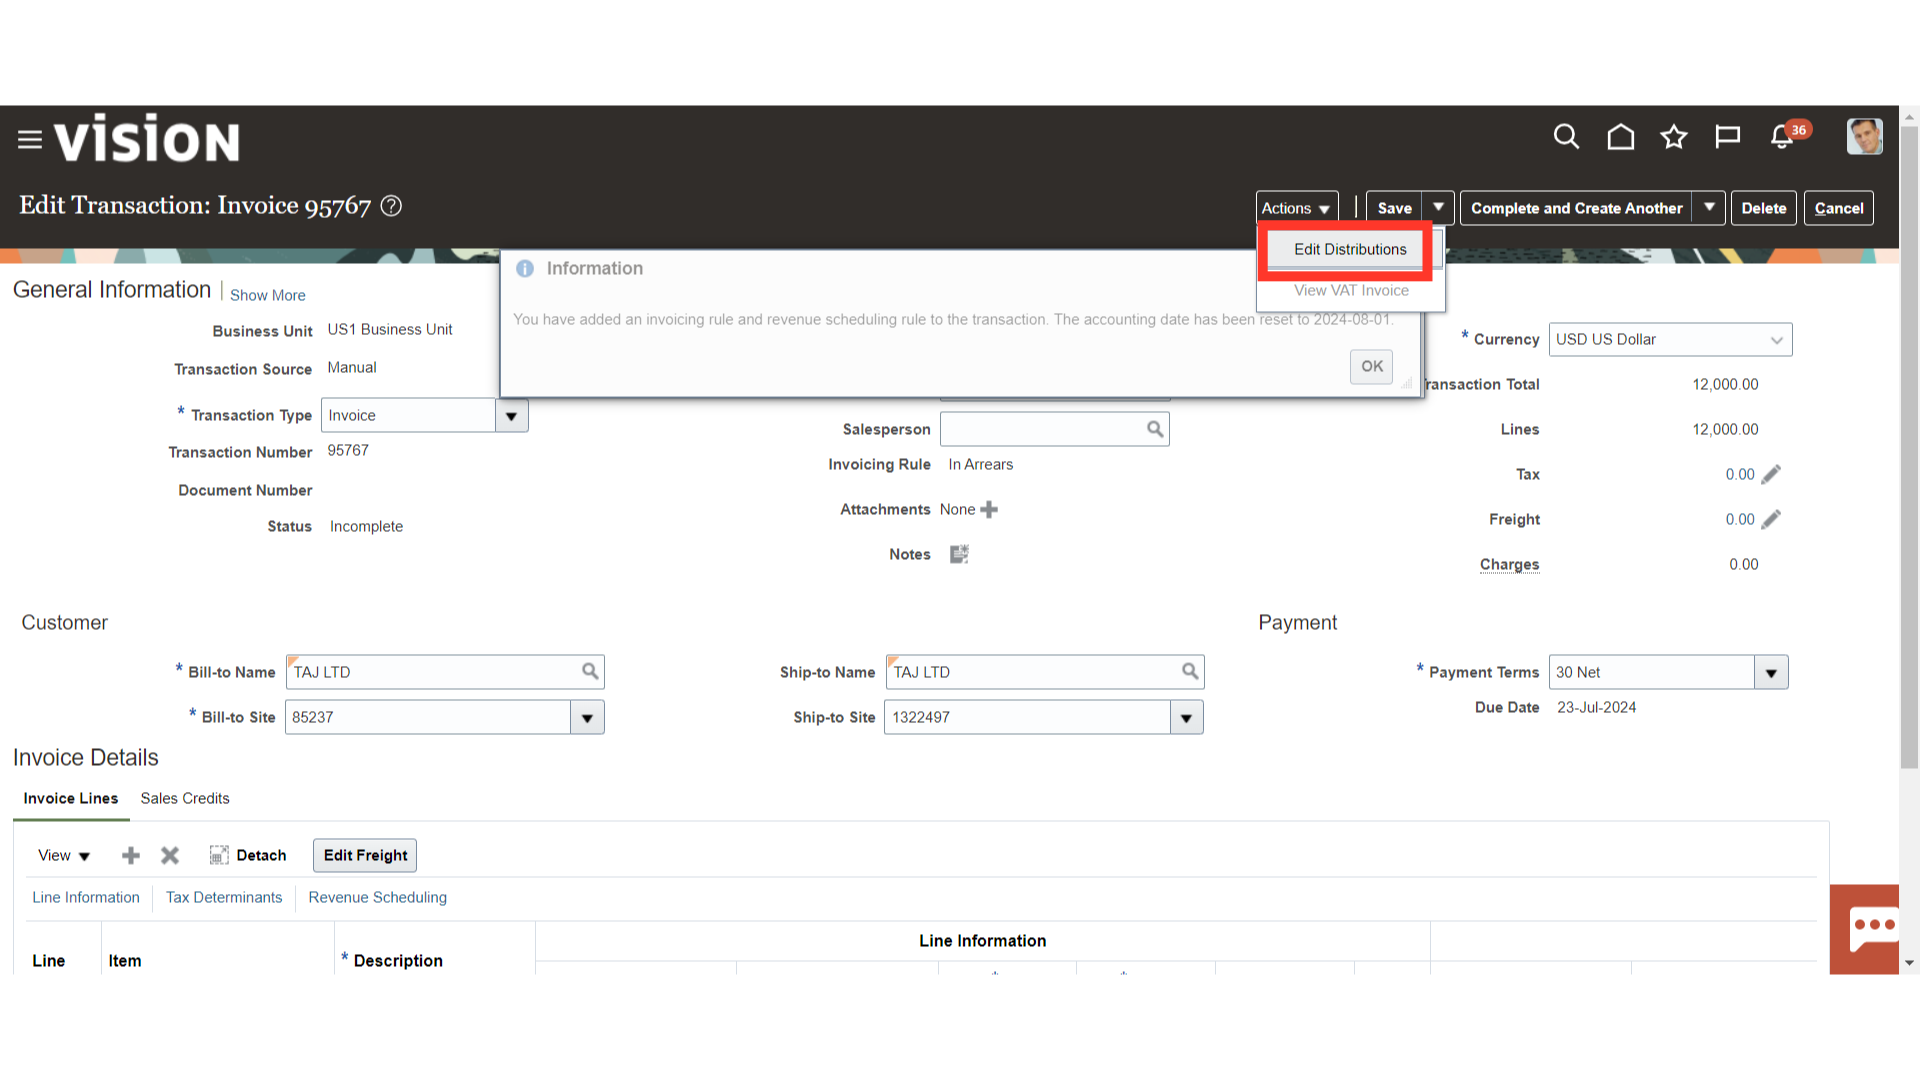
Click on Edit Distributions under the Actions tab to see and modify the details of account combinations.

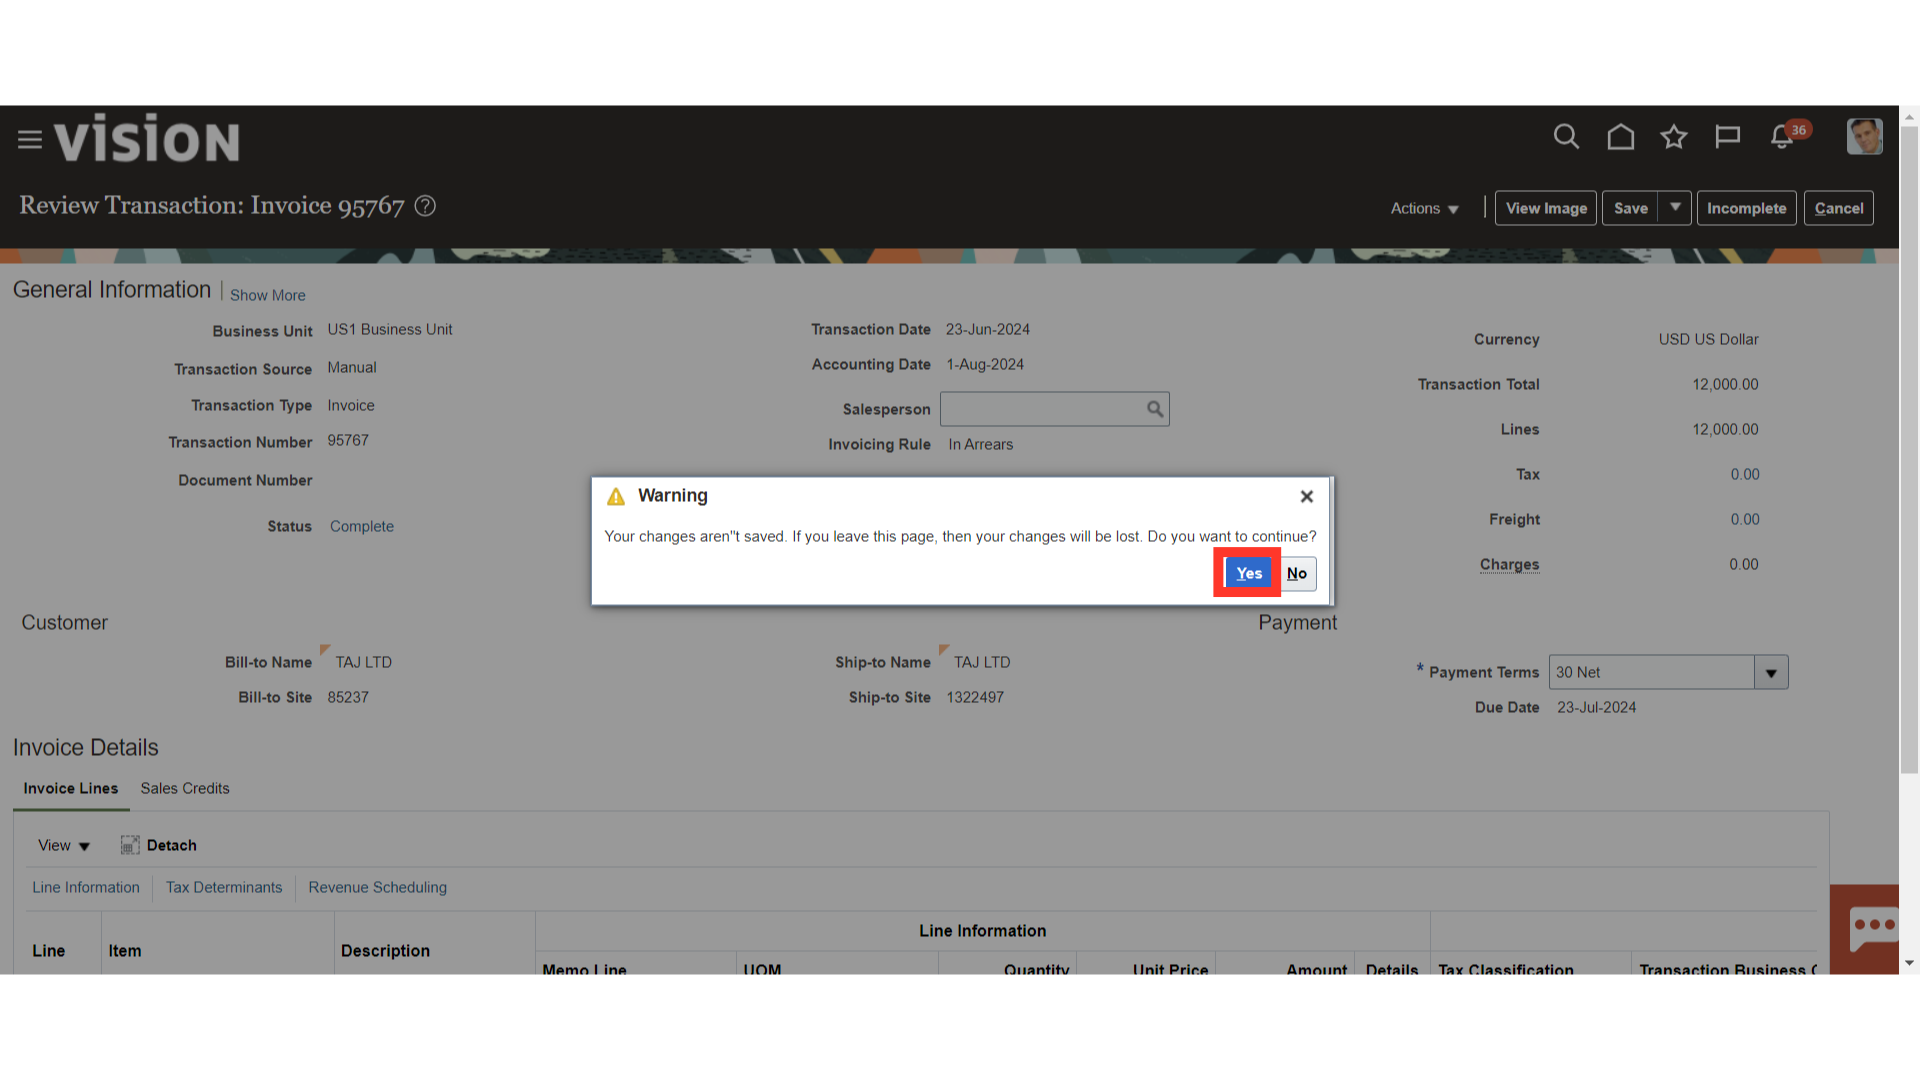
A warning message is displayed to save the transaction, click on the Yes button to continue.
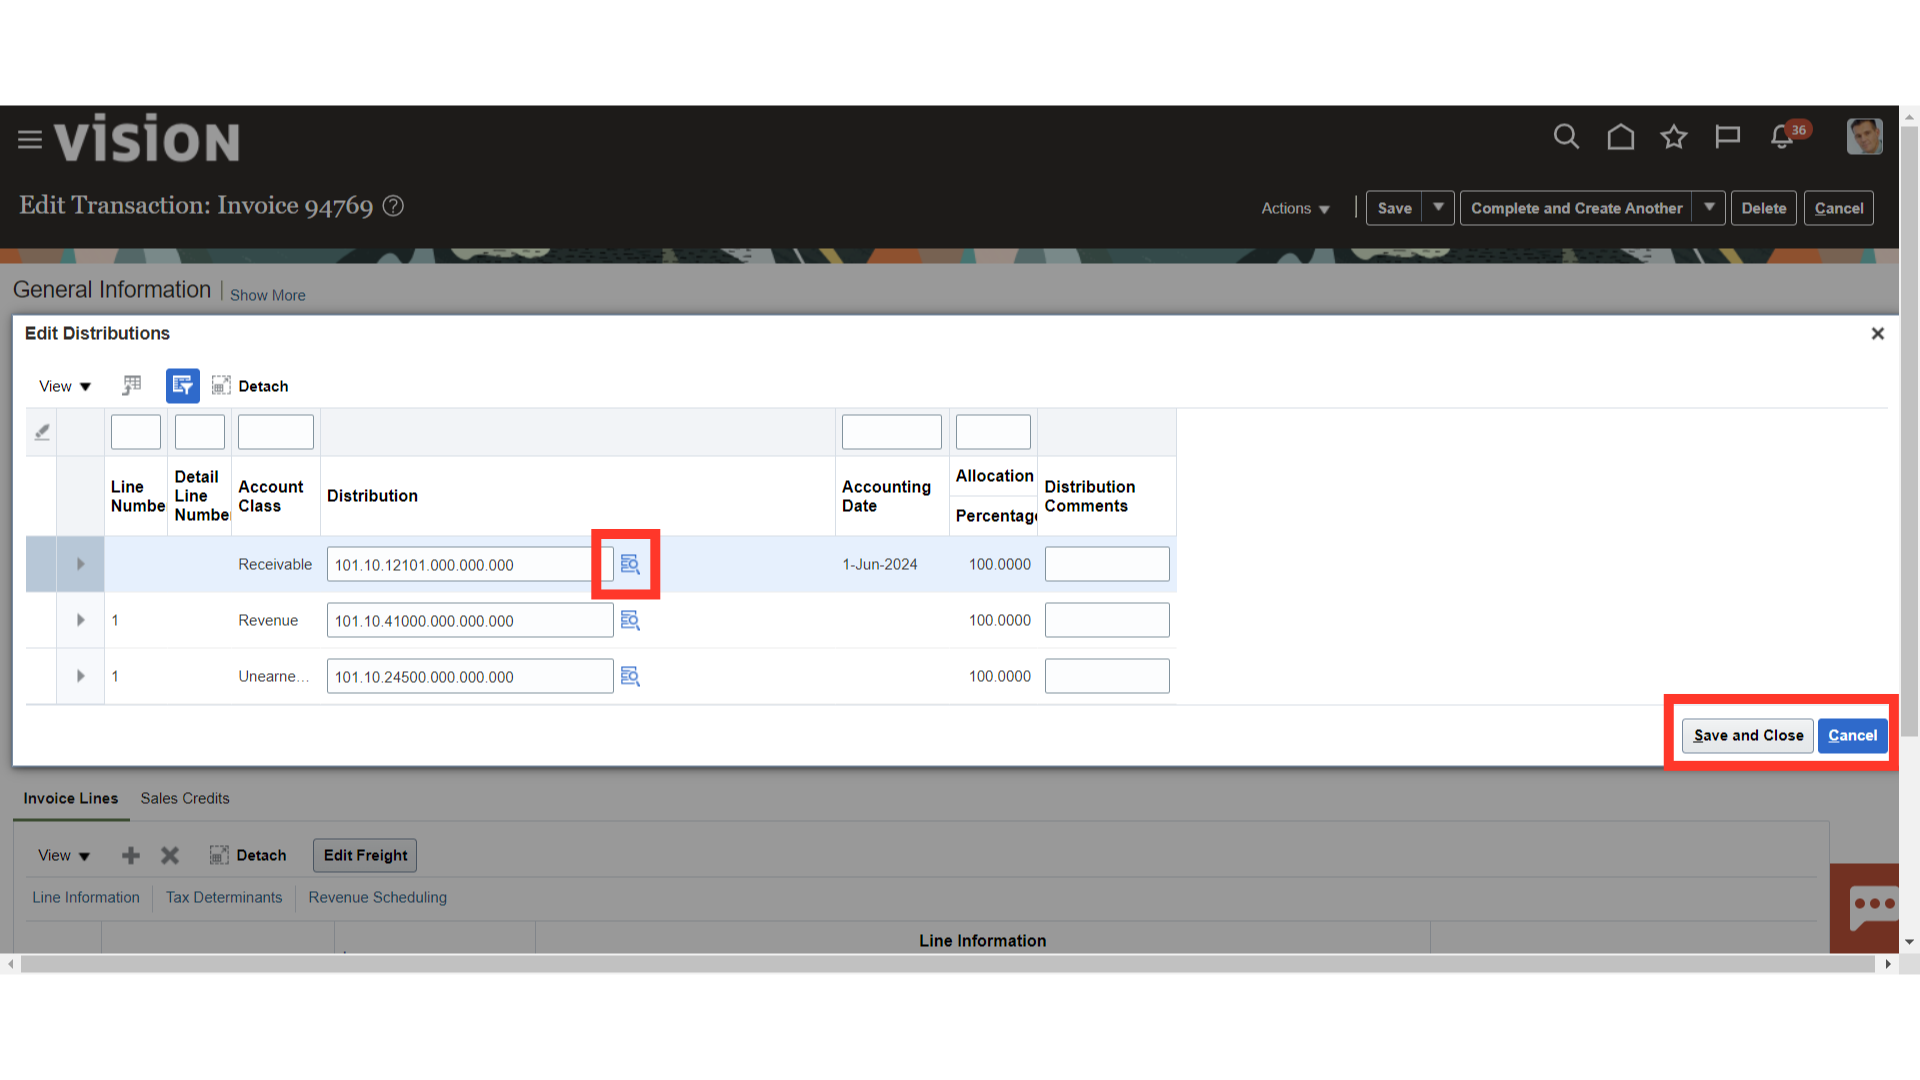
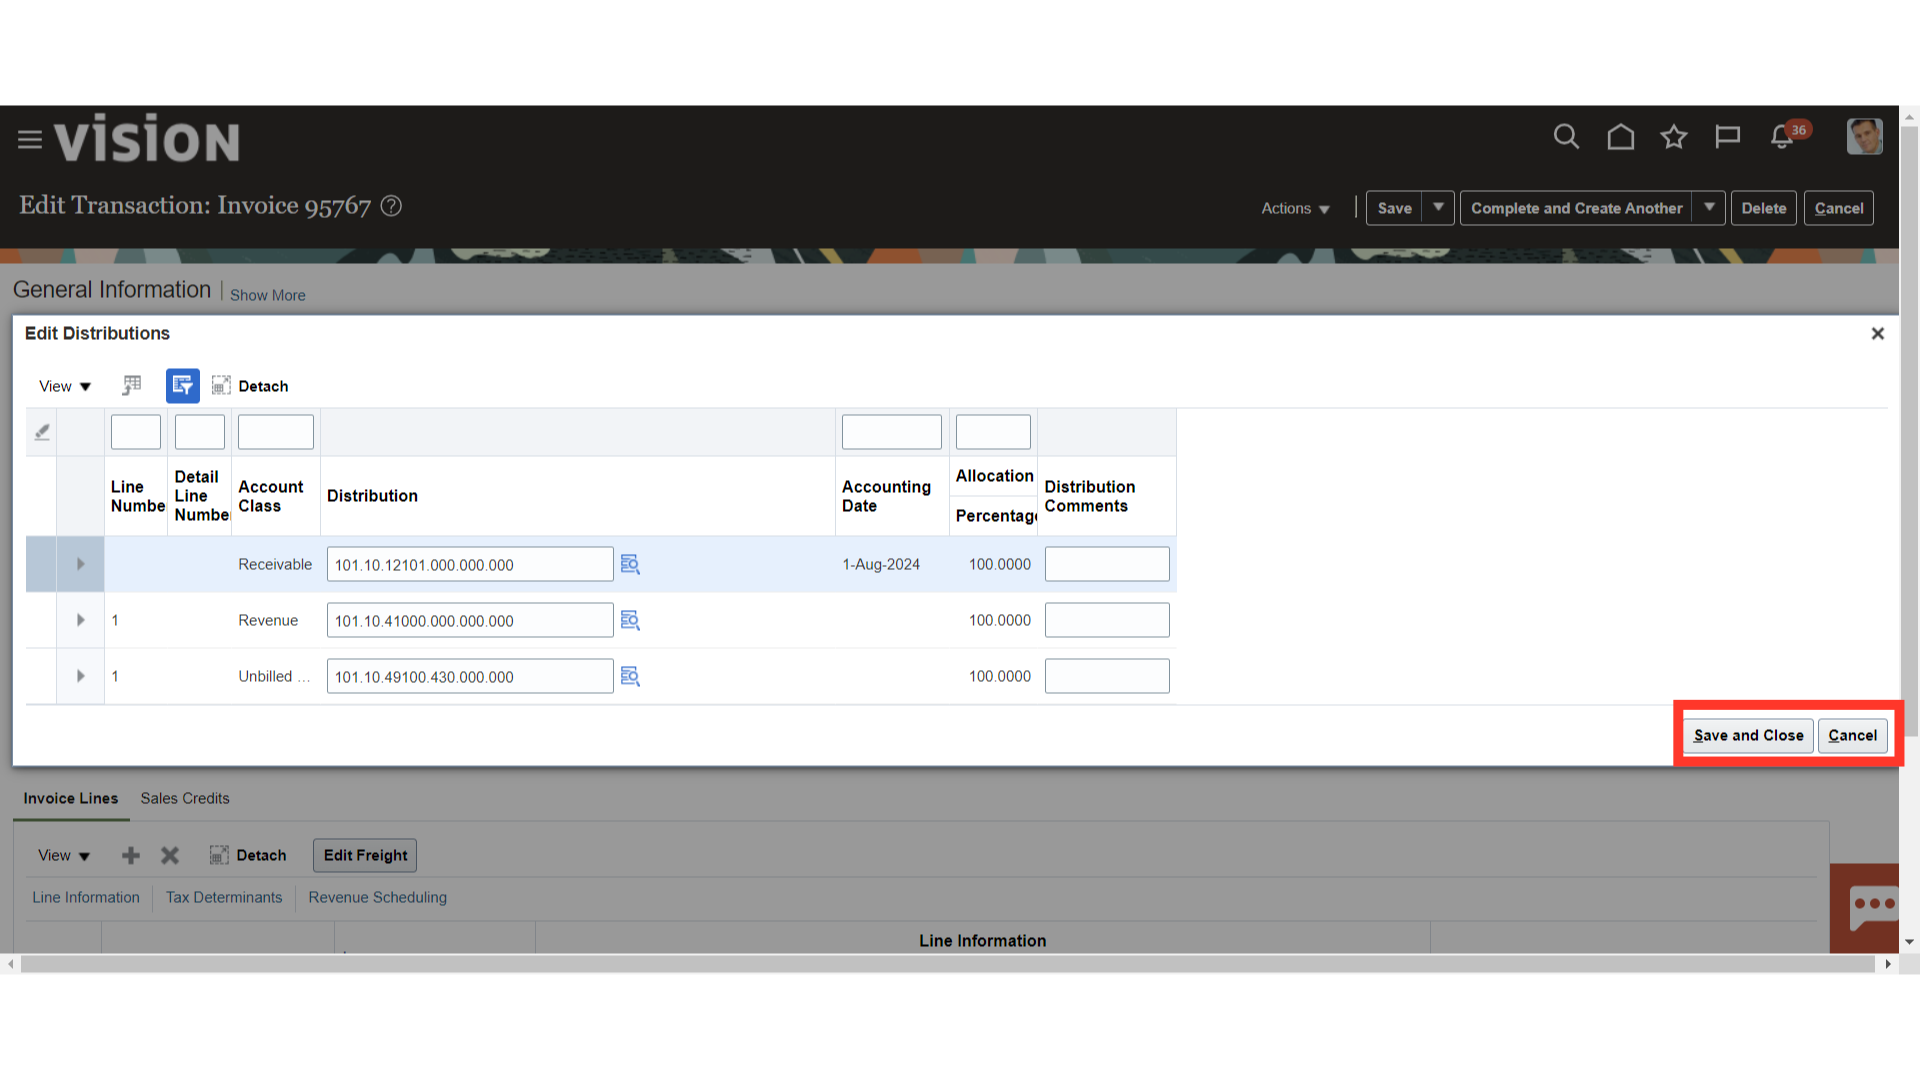
Click the distribution icon to change the account segment details for each accounting class. Click the Save and Close button to save the details, or click the Cancel button if you would rather not.
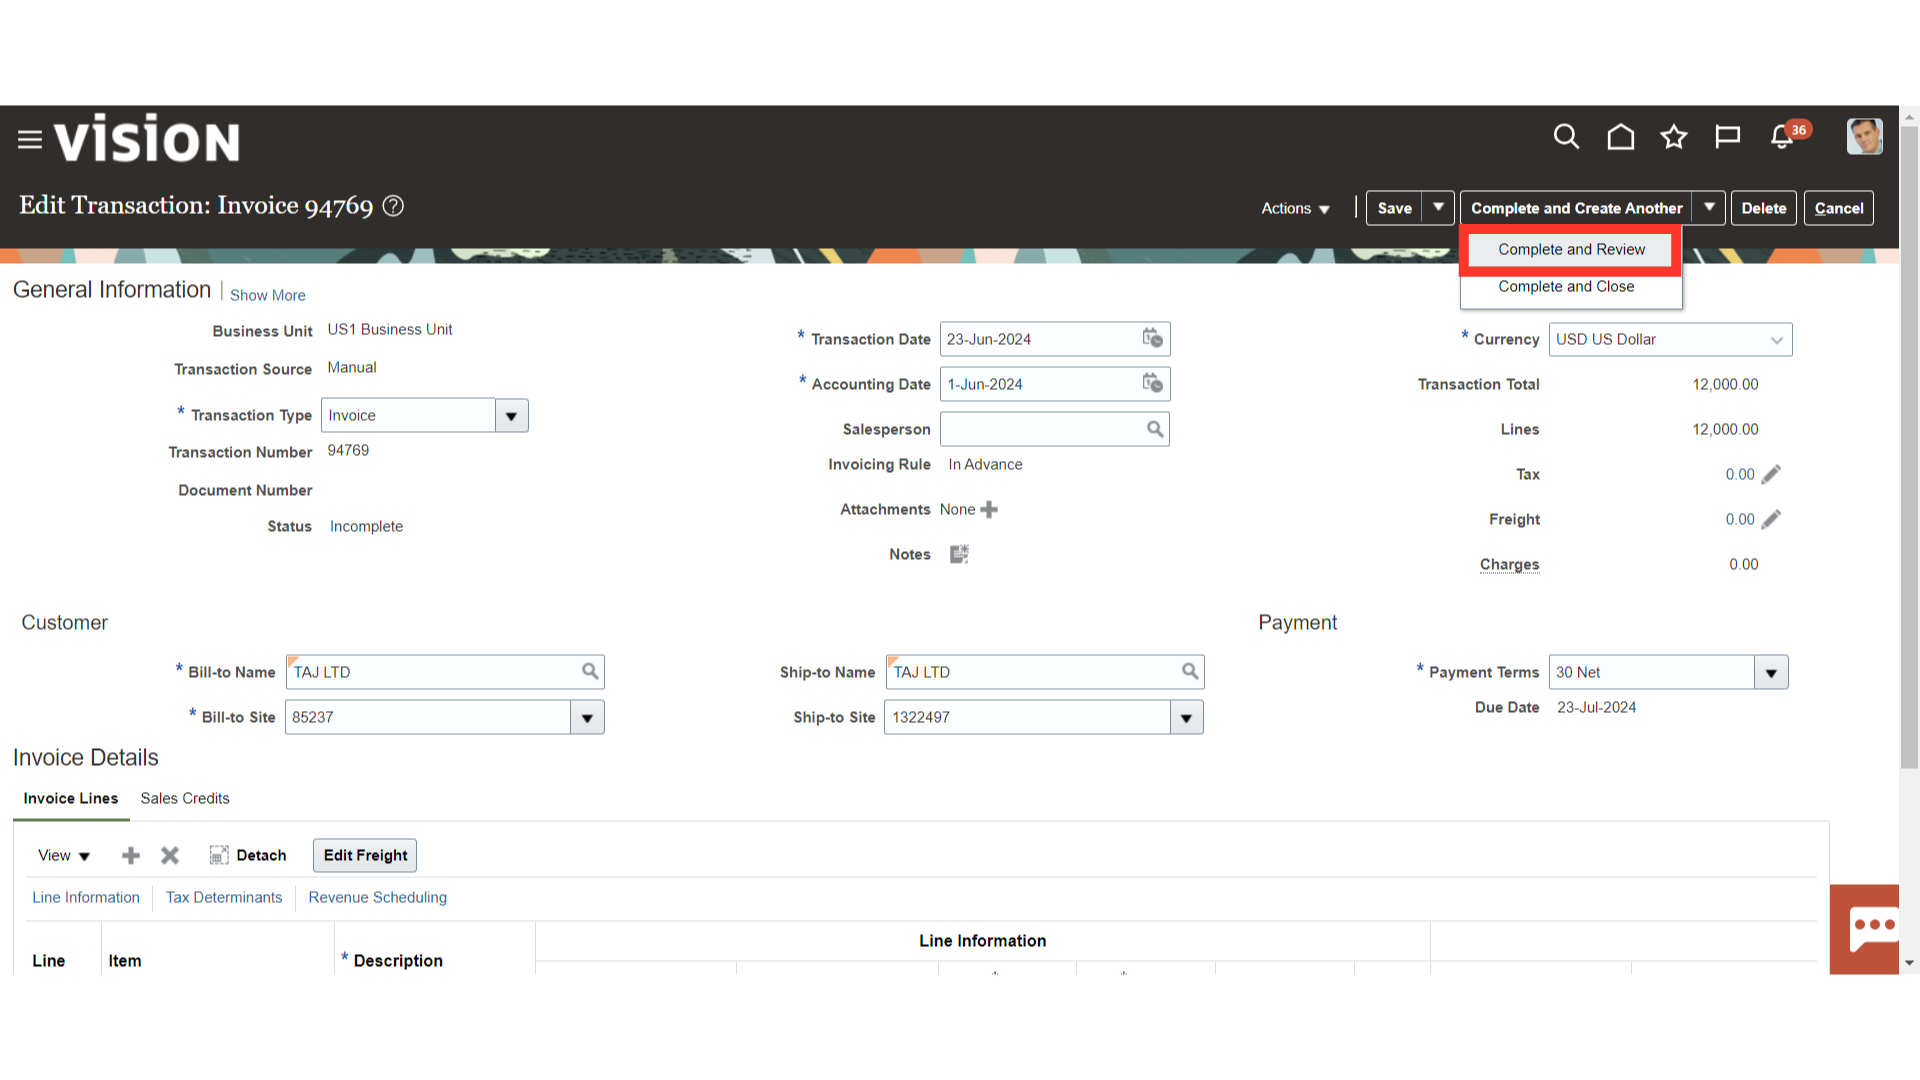
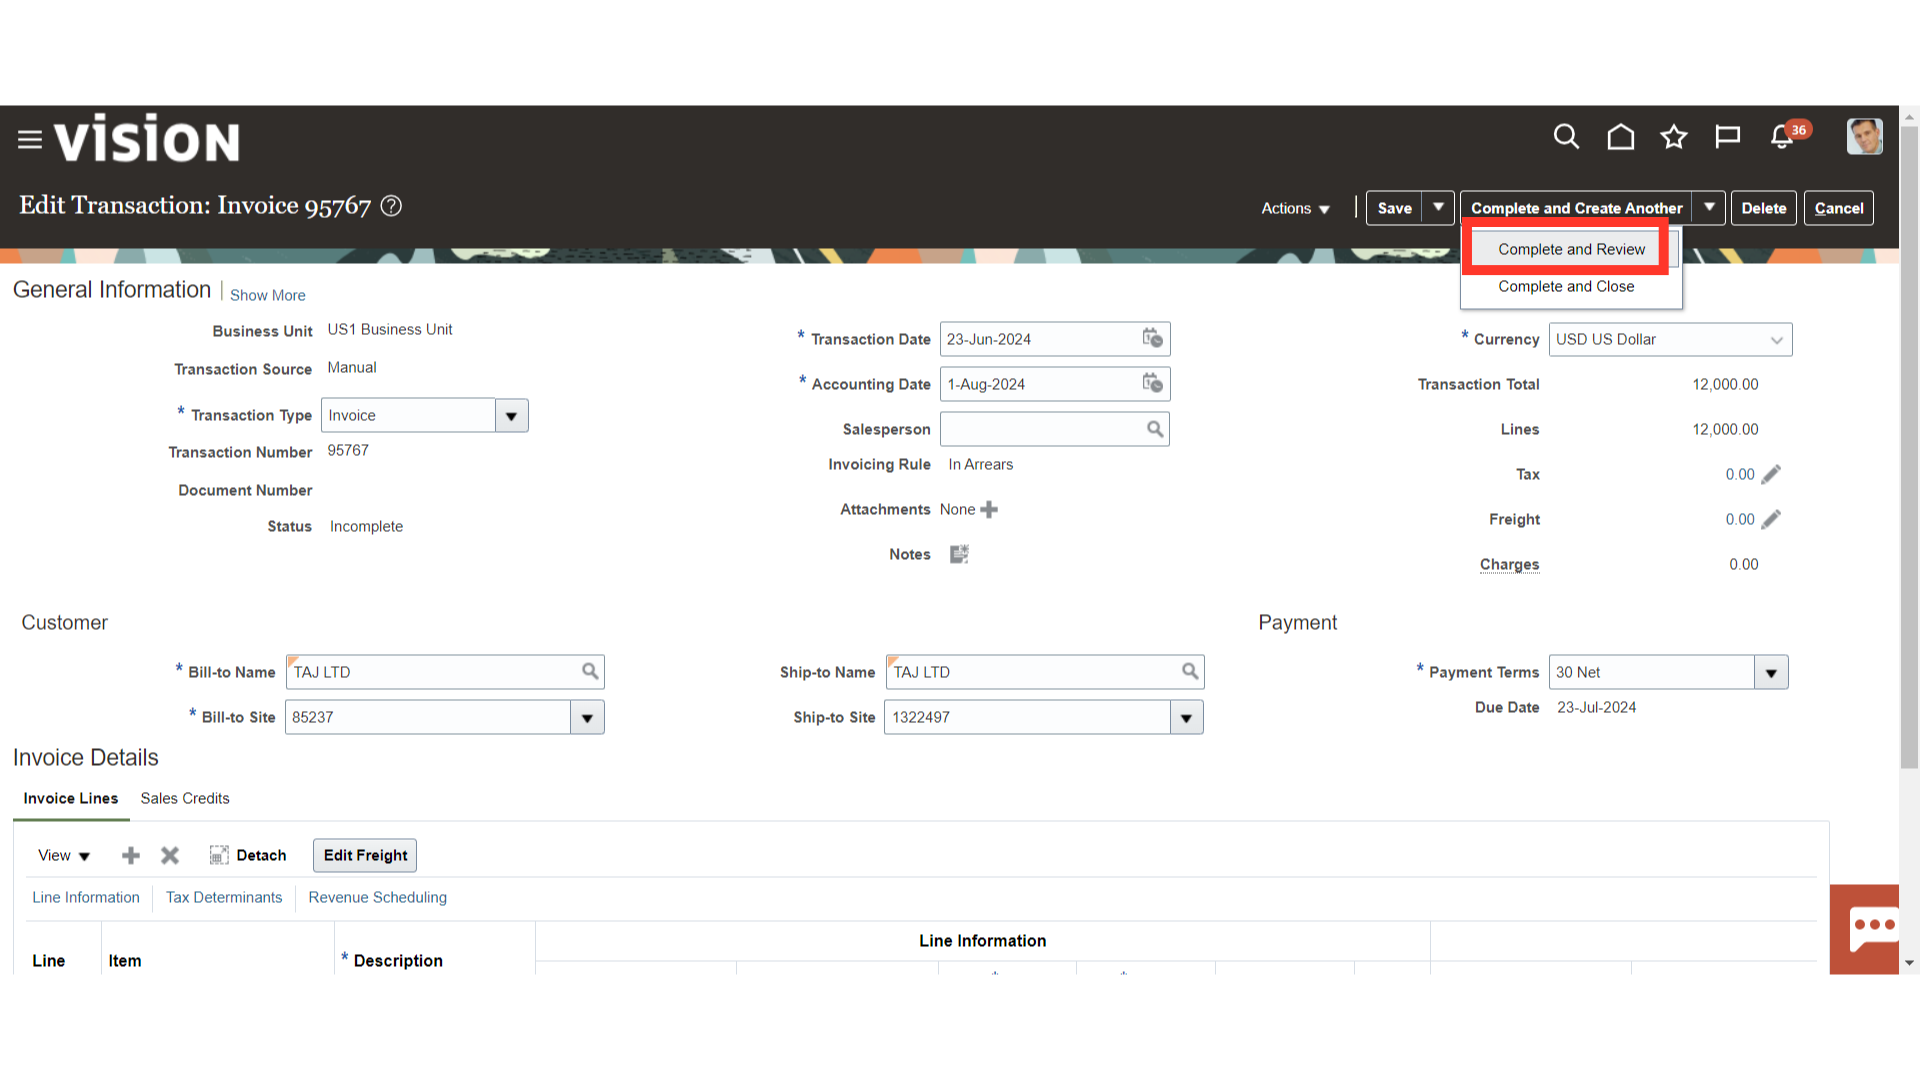
To enter another transaction details, click Complete and Create another. As an alternative, click the drop-down menu and choose Complete and Review to mark the transaction as complete. From there, it is possible to review the transaction or choose Complete and Close to finish it and close it. Here for demo purpose, Complete and Review is selected.
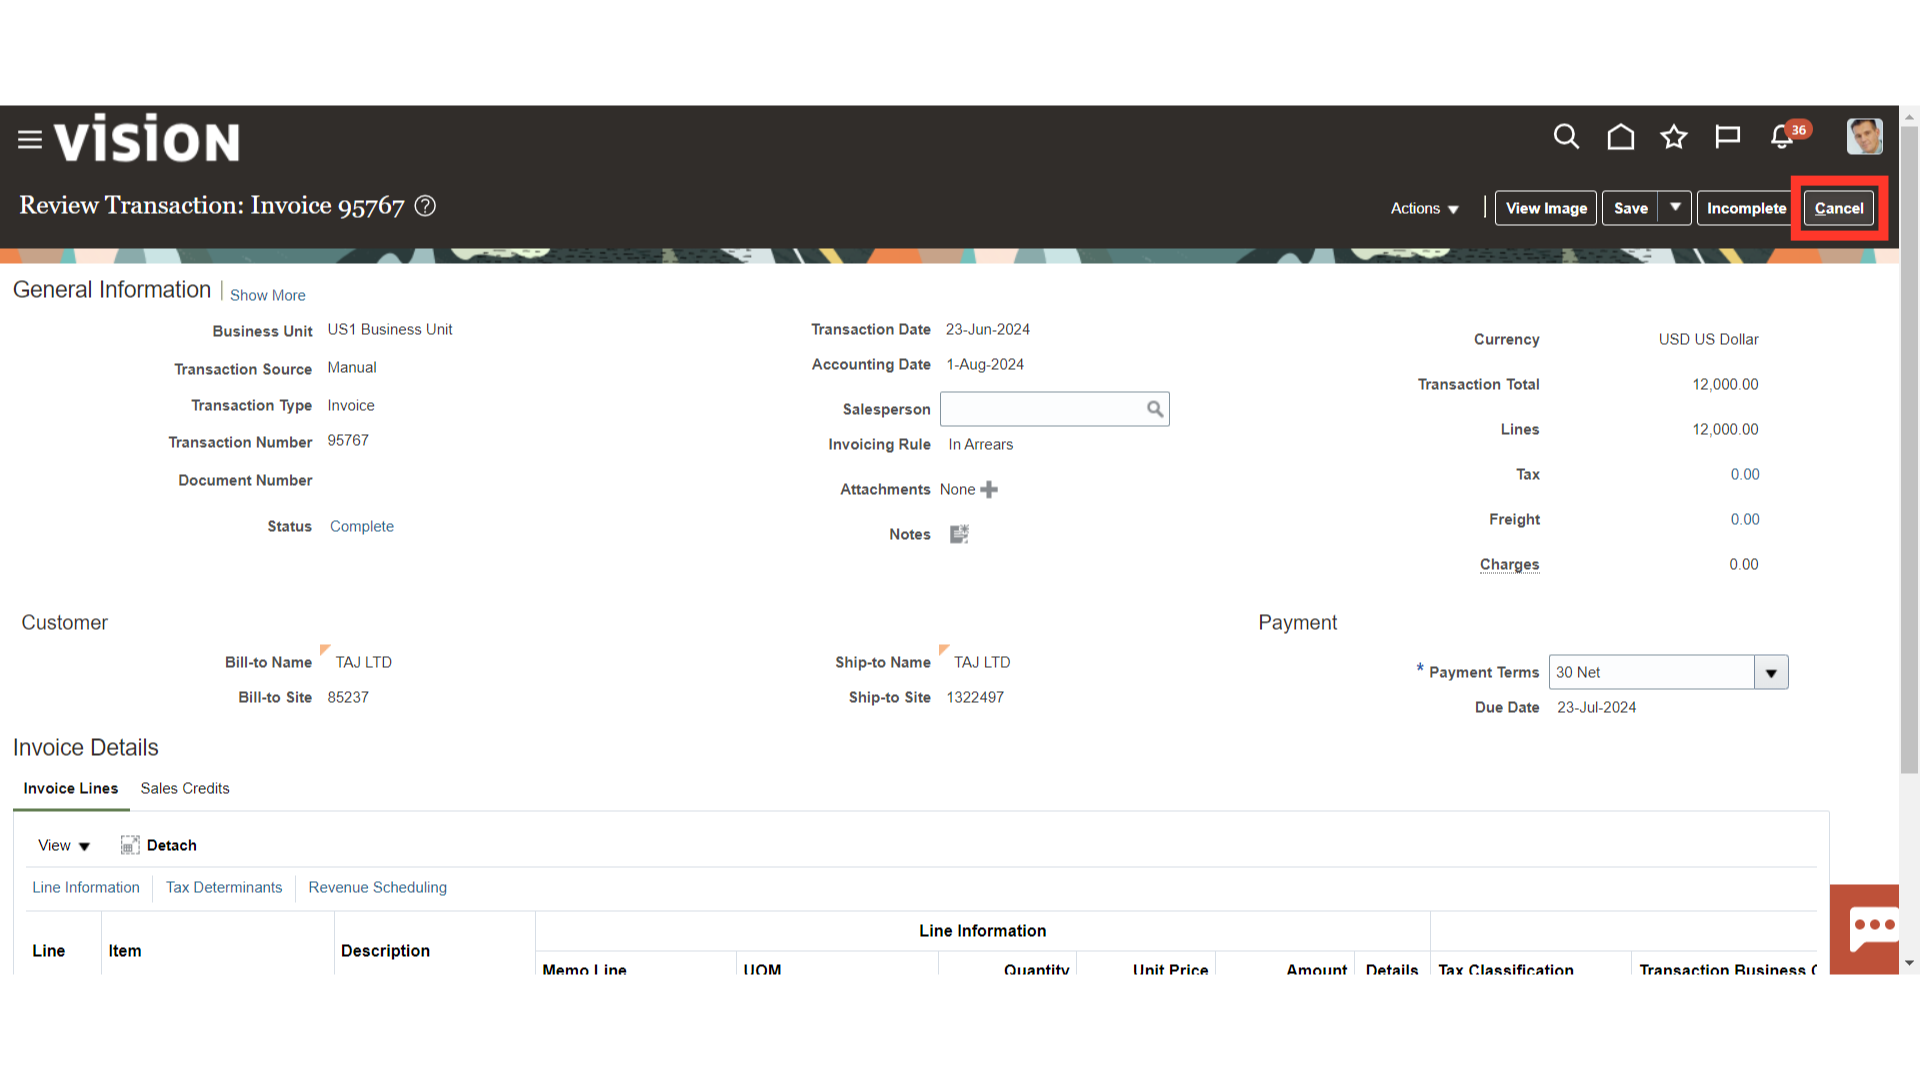
Click on the cancel button to create another transaction with the invoicing rule as “In arears”.

Select the Invoicing rule as “In Areas” from the list of values to recognize revenue immediately and defer receivable.
Scroll down to enter the line details such as description, Quantity, and Unit price. While the amount would be calculated automatically based on Quantity and Unit Price.
Select the appropriate Revenue recognition rule type and enter the start date.
Click on Edit Distributions under the Actions tab to see and modify the details of account combinations.
Click the distribution icon to change the account segment details for each accounting class. Click the Save and Close button to save the details, or click the Cancel button if you would rather not.
Select “Complete and Review”, to mark the transaction as status Complete and to review it.
To end this transaction and go back to the billing work area, click the Cancel button.
Click on the Yes button to proceed.
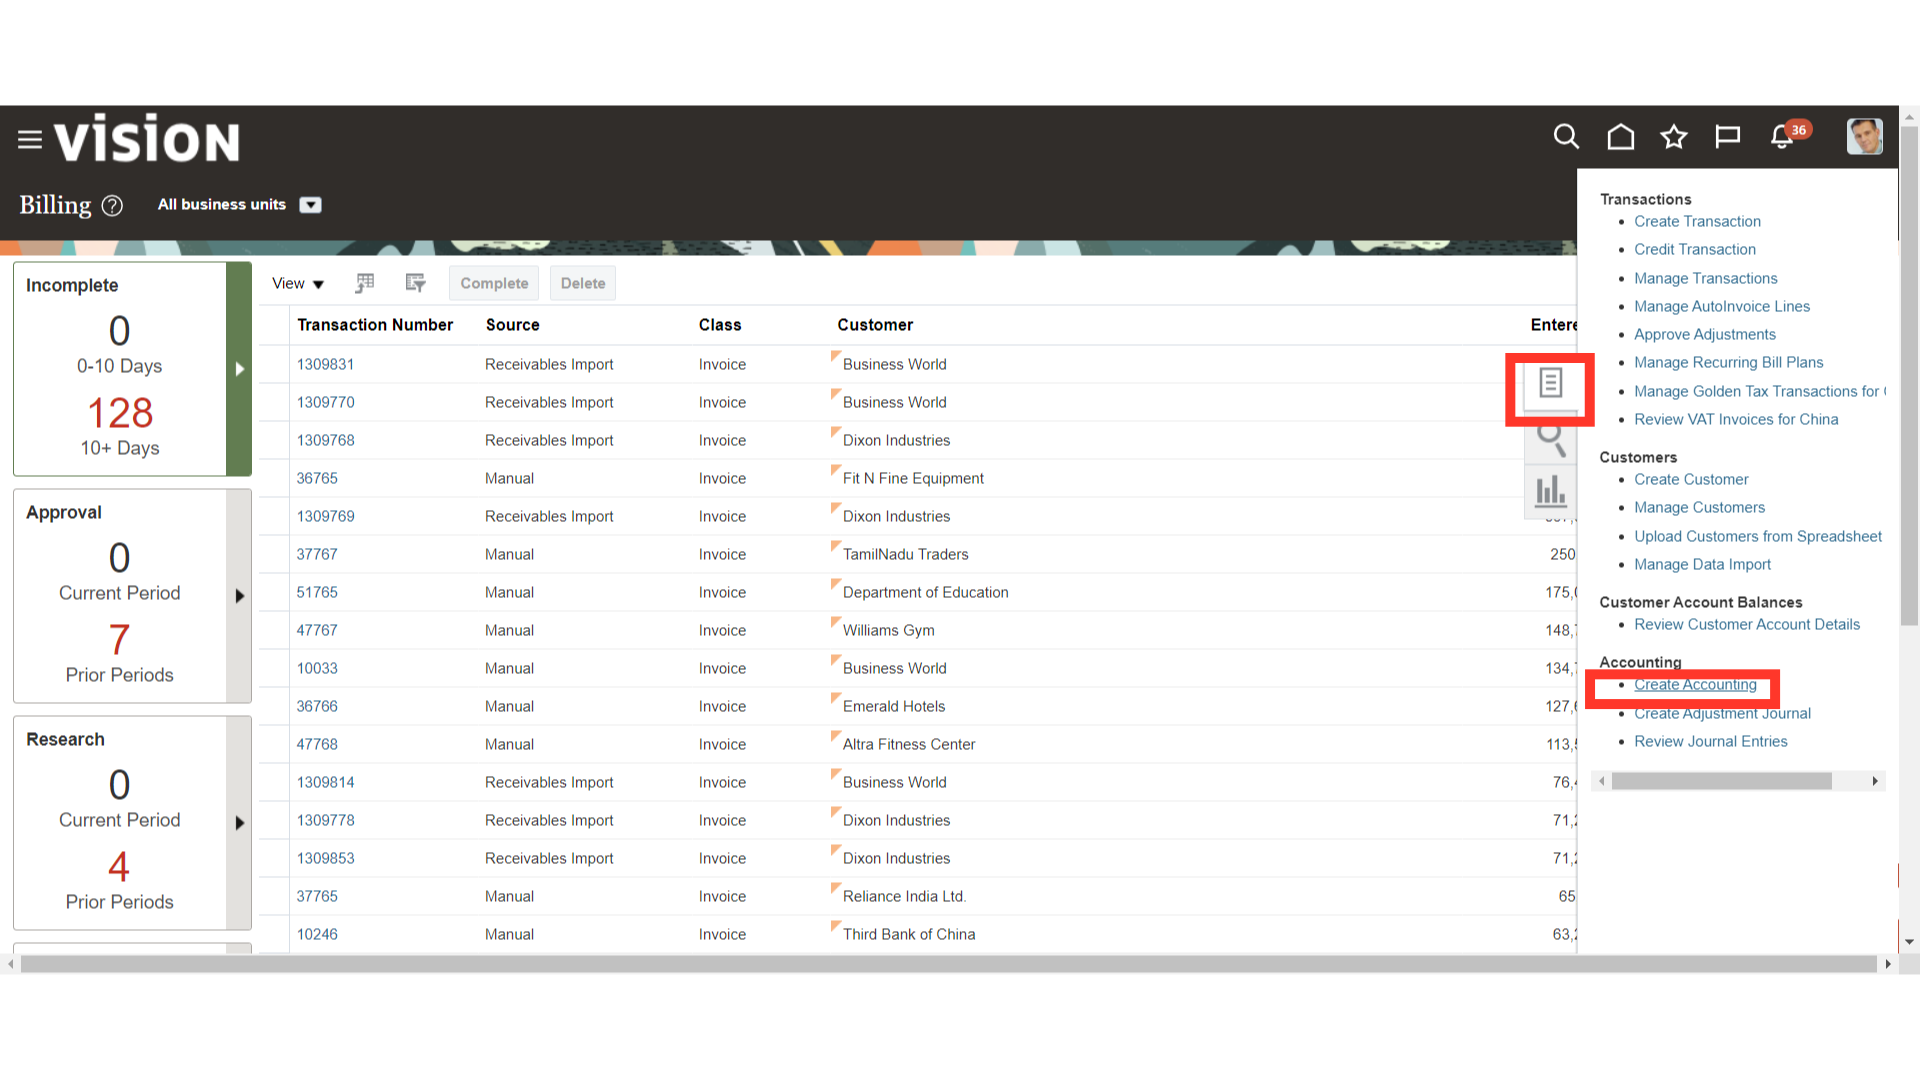
Select “Create Accounting” from the task list to generate and transfer the accounting entry from the receivables to the general ledger.
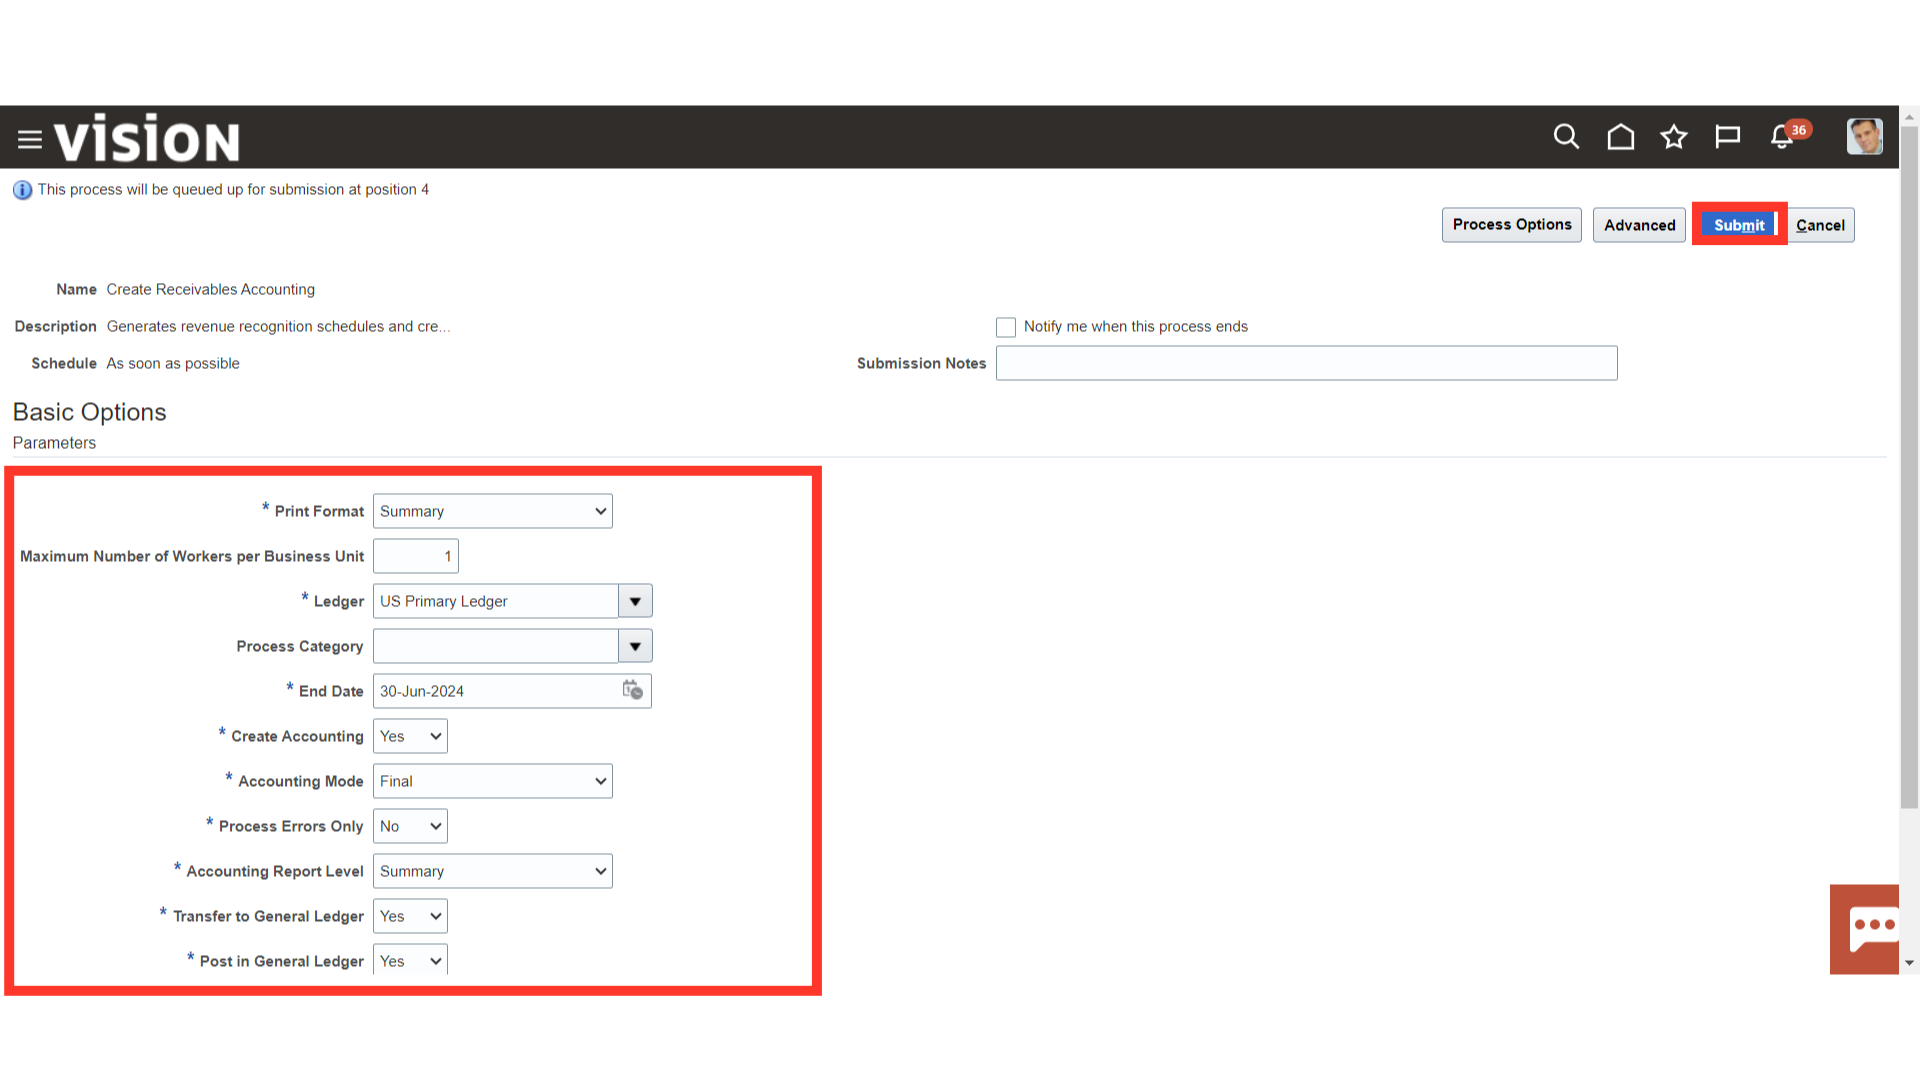
Once all mandatory parameters have been entered, press the Submit button.
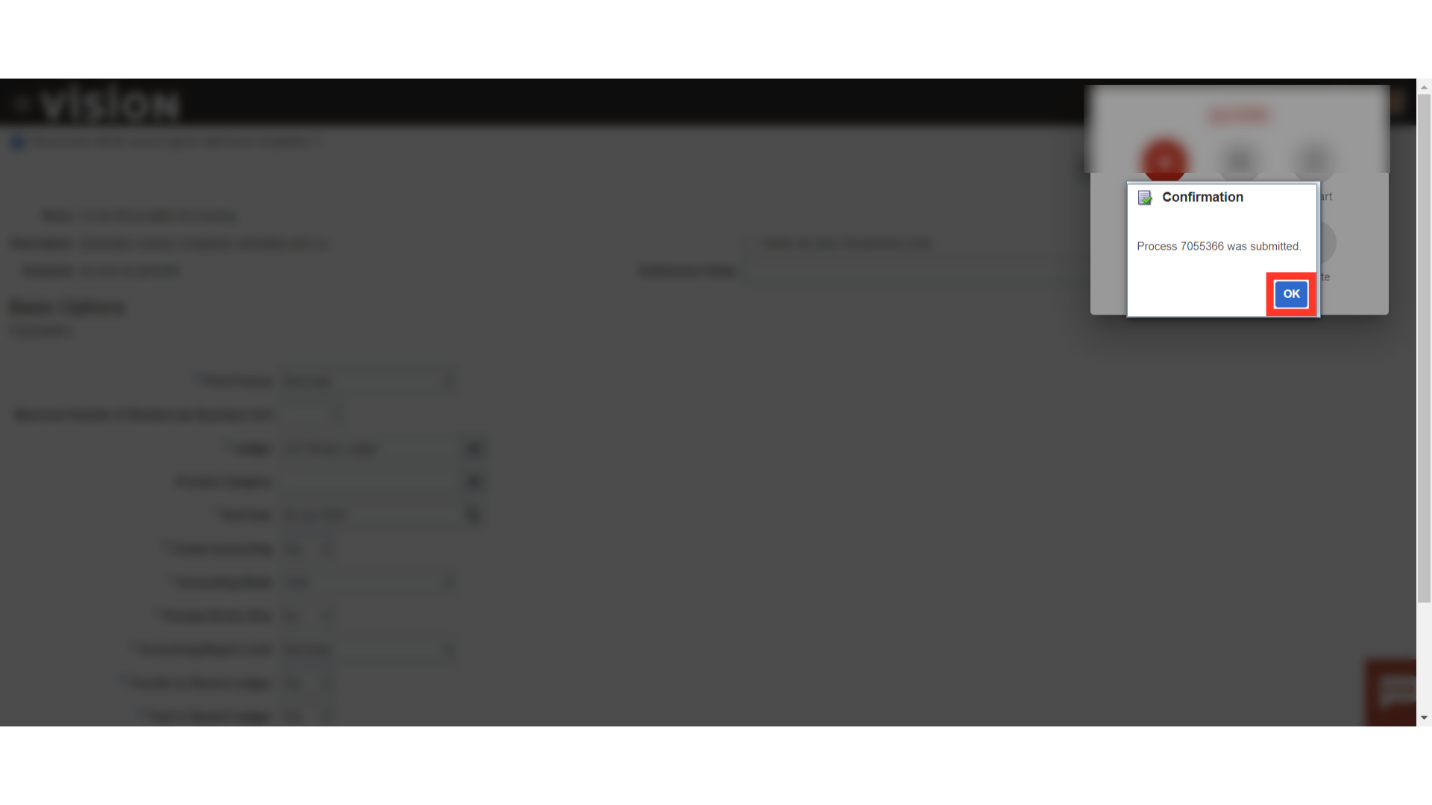
A confirmation message is displayed along with Process ID, click on OK button to continue.
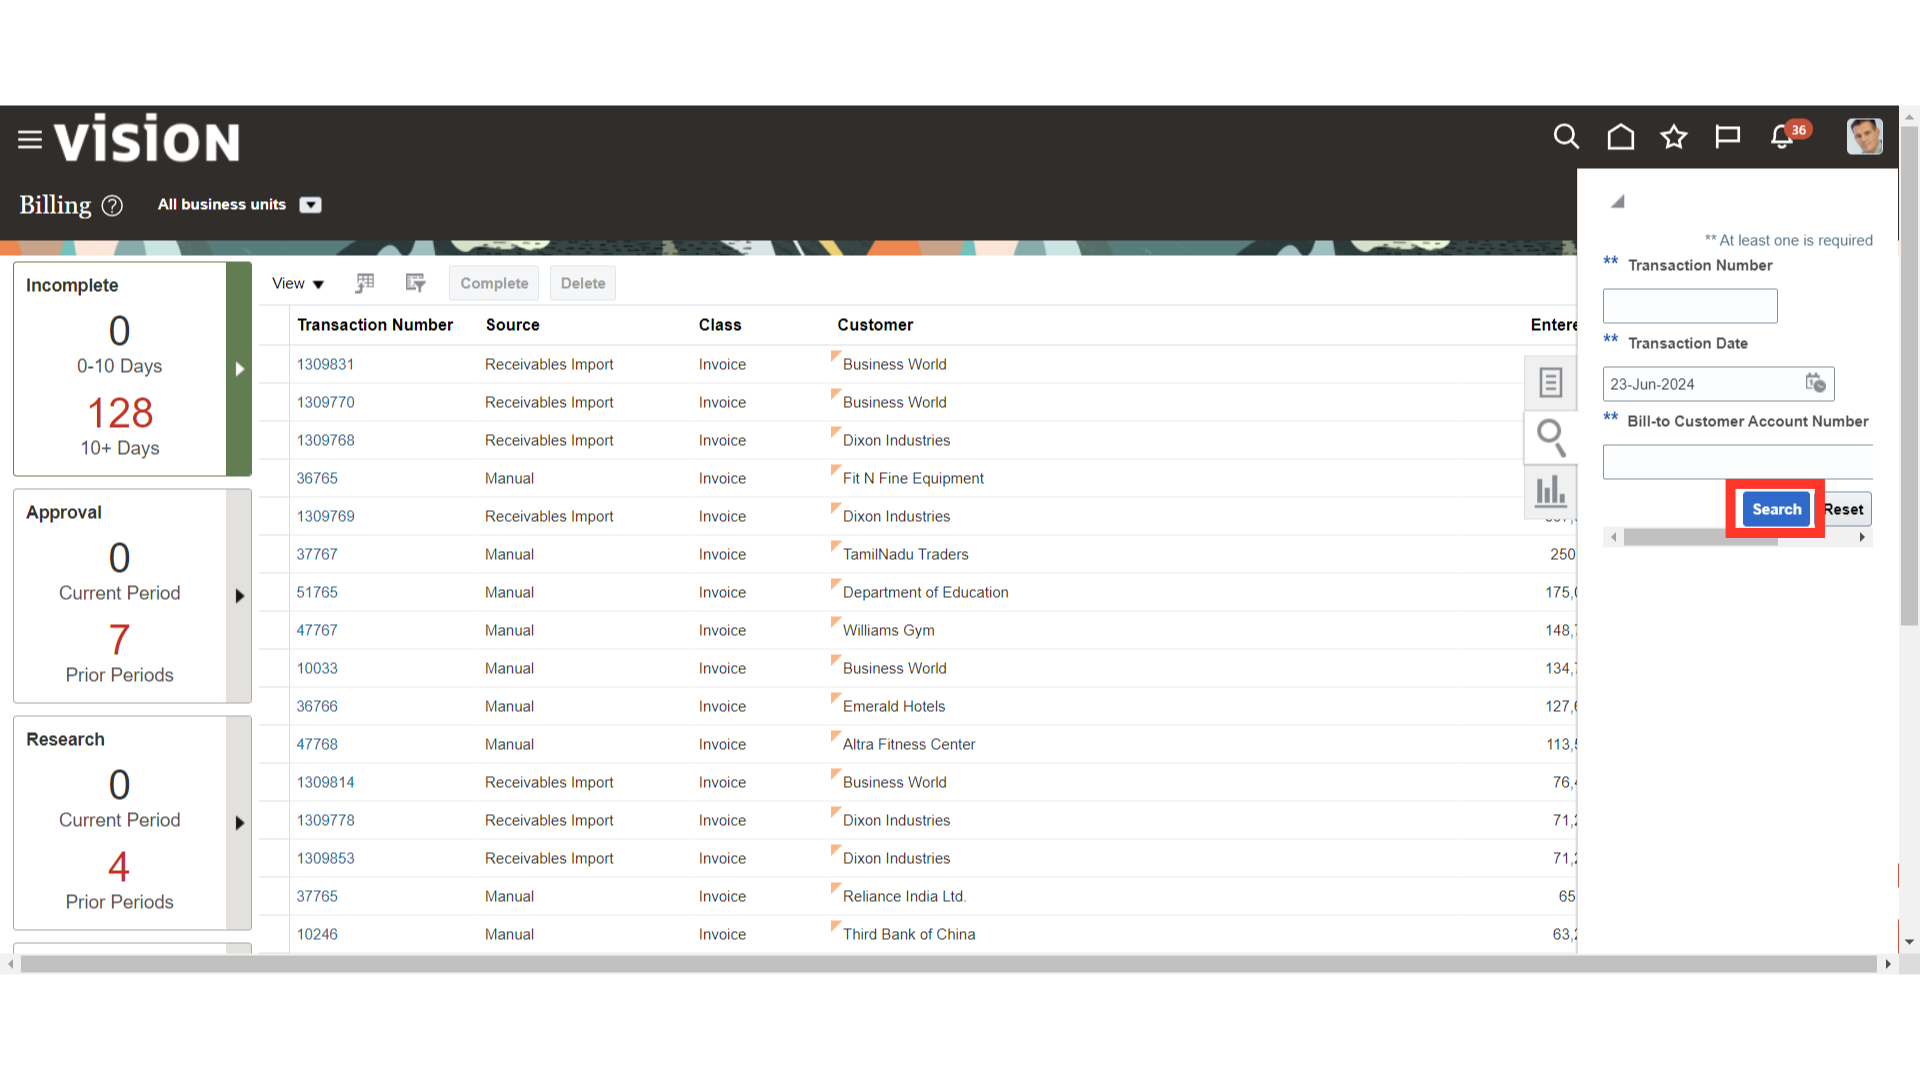
Search the transactions to view the accounting entry for the transactions created with the invoice rule.
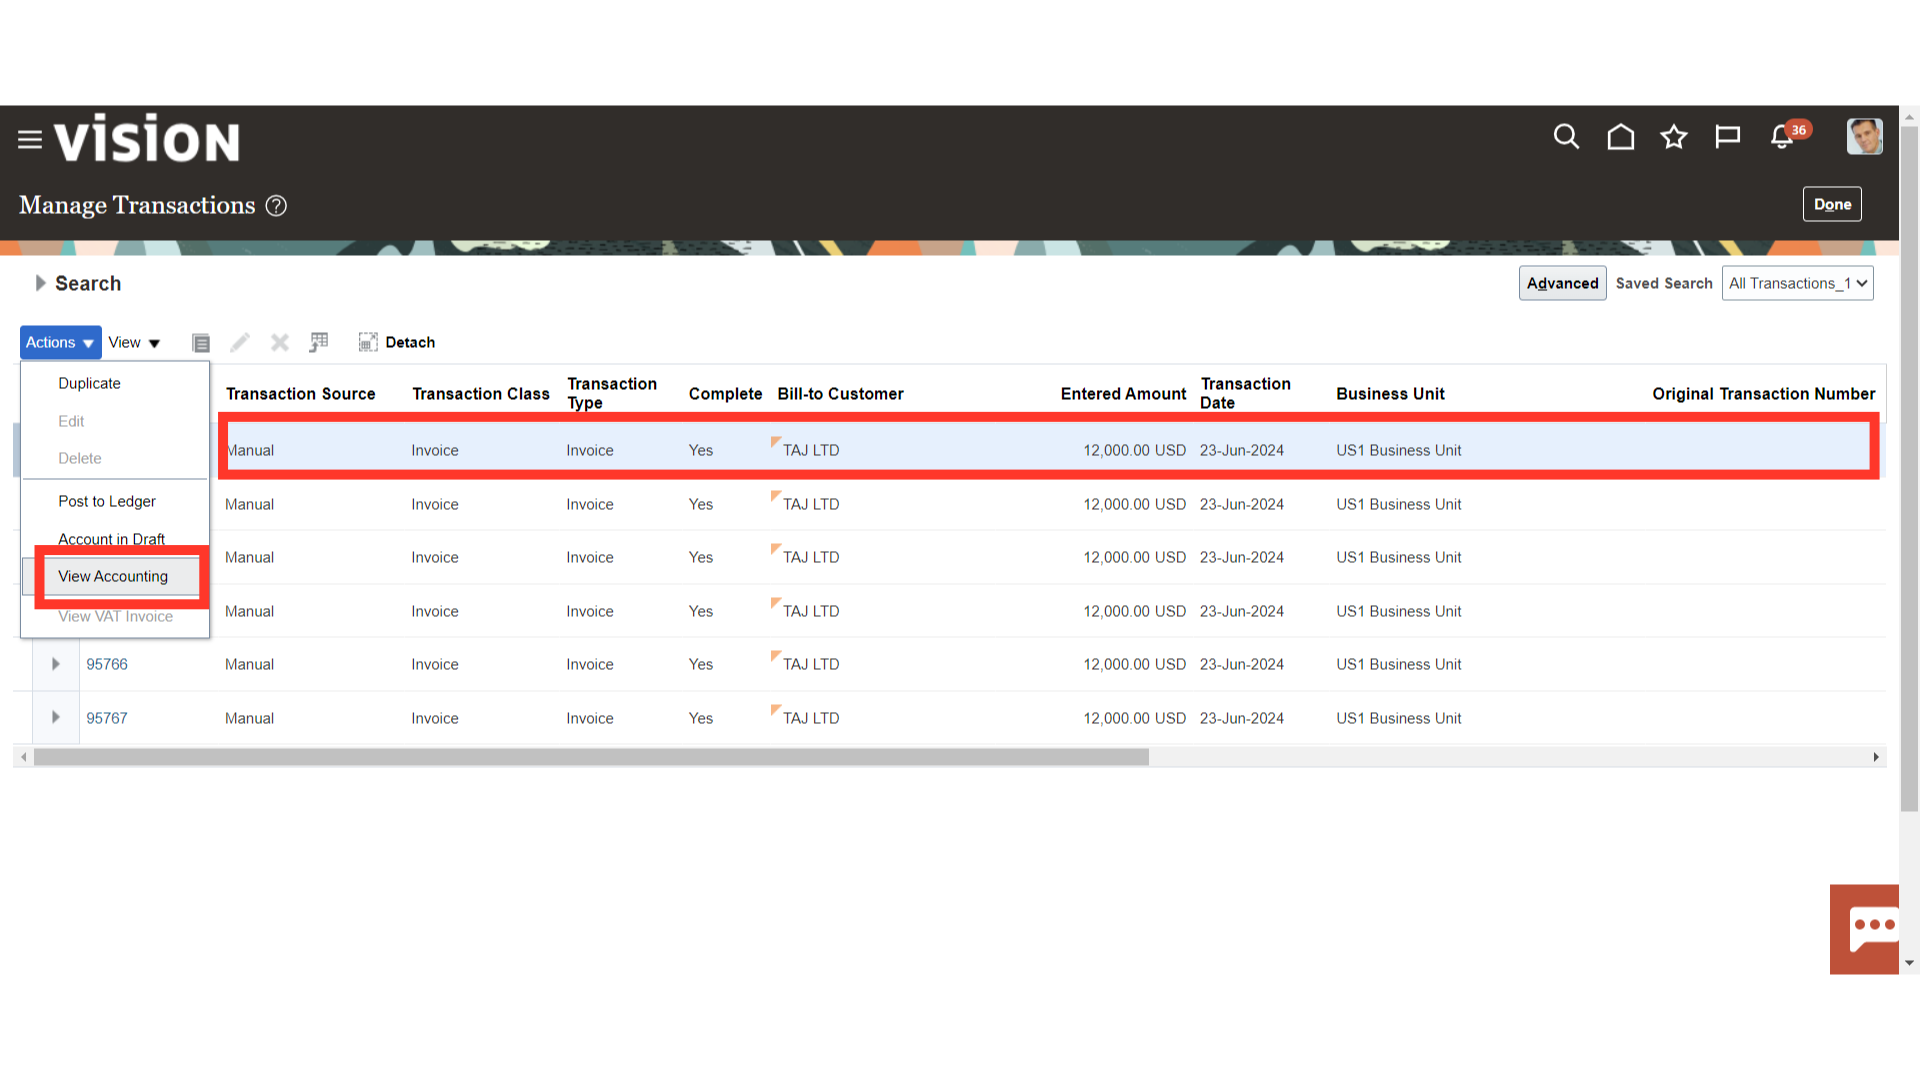
After choosing the transaction, go to Actions and choose View Accounting to view the accounting entries.
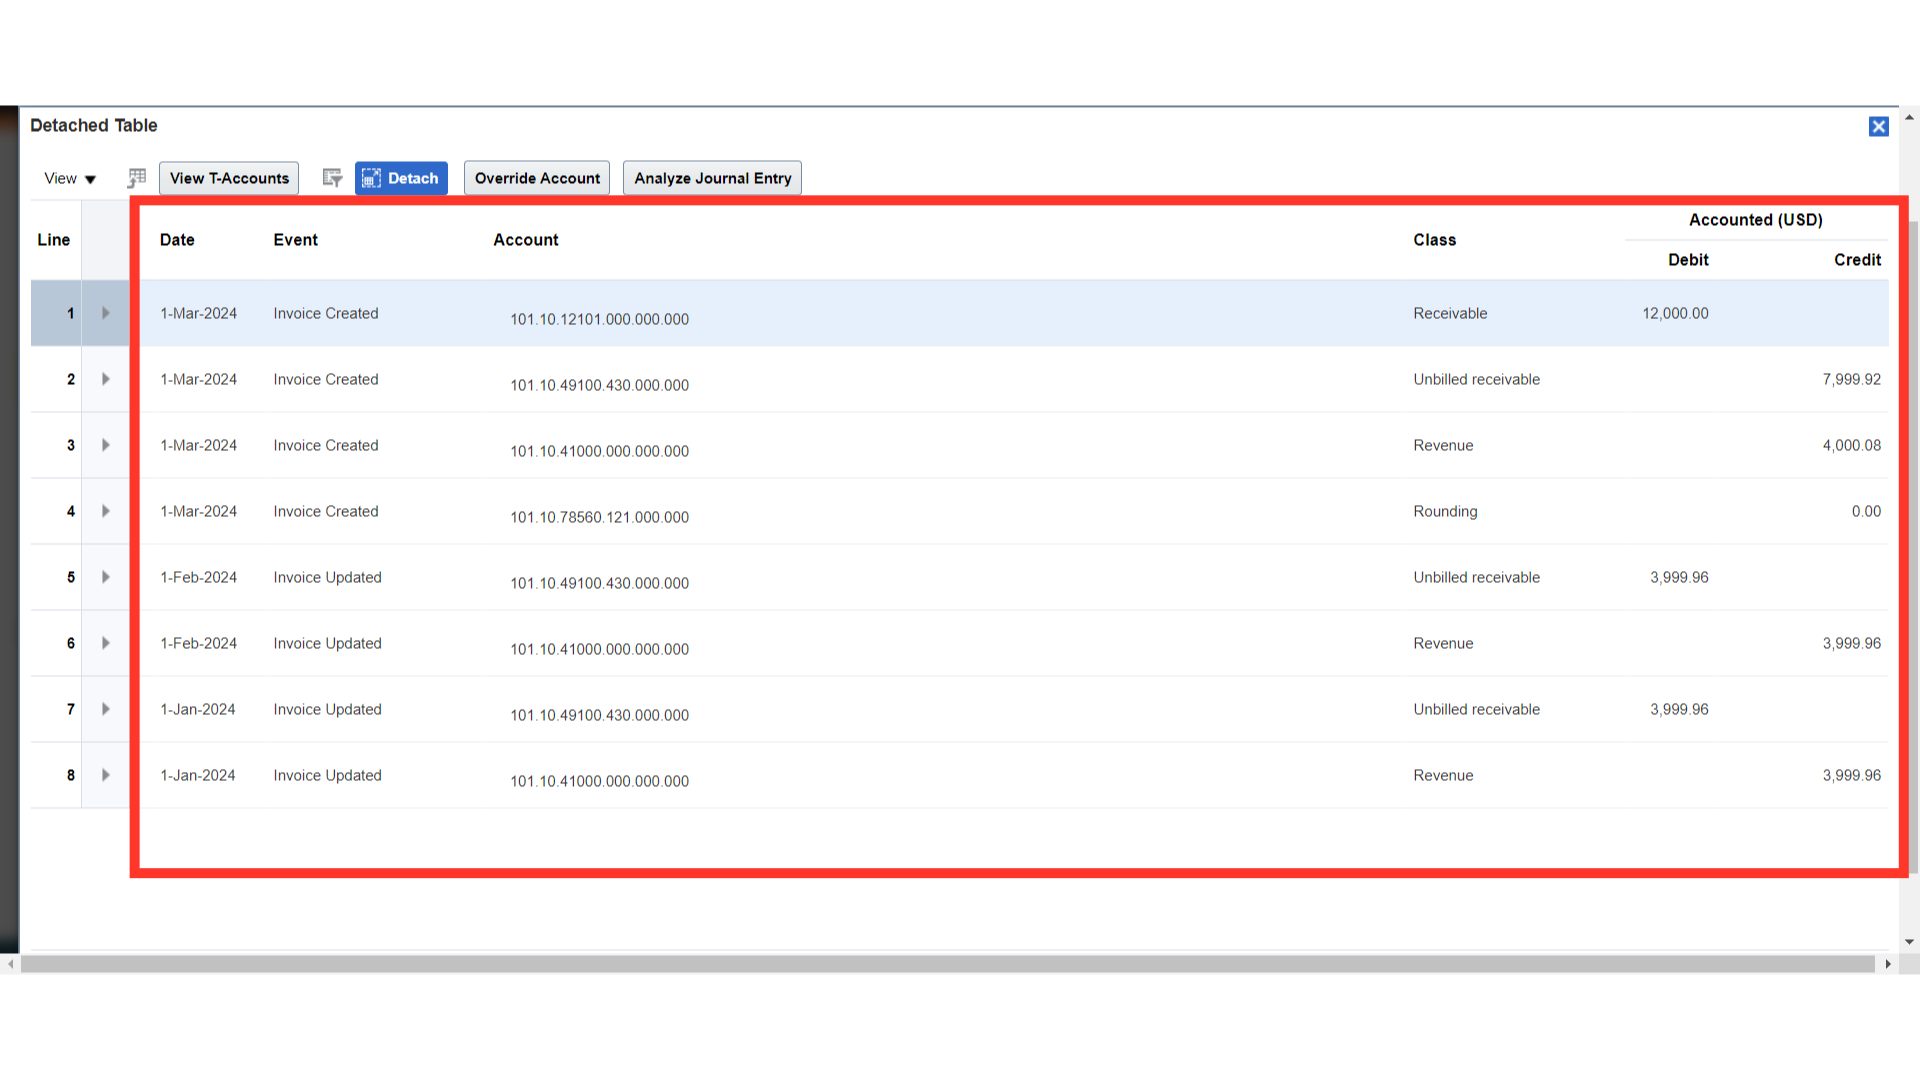
This accounting entry was created in order to recognize revenue over various time periods. The accounting entry will be created and added to the general ledger if the period is open; if it is closed, the accounting entry will be marked as “invalid.”

This is the accounting entry generated for the “In arears” invoice rule in which receivable is booked at the end of the period.
The process of creating an invoice with revenue scheduling, beginning with the creation of the invoice rule with In Advance and moving on to In Arears, as well as the steps involved in generating the accounting entry, have been thoroughly explained in this guide.