Manage Customers
This guide will walk you through efficiently managing customers on Oracle Cloud. From creating customers to updating and maintaining profiles, each step is designed to enhance your experience managing customers.
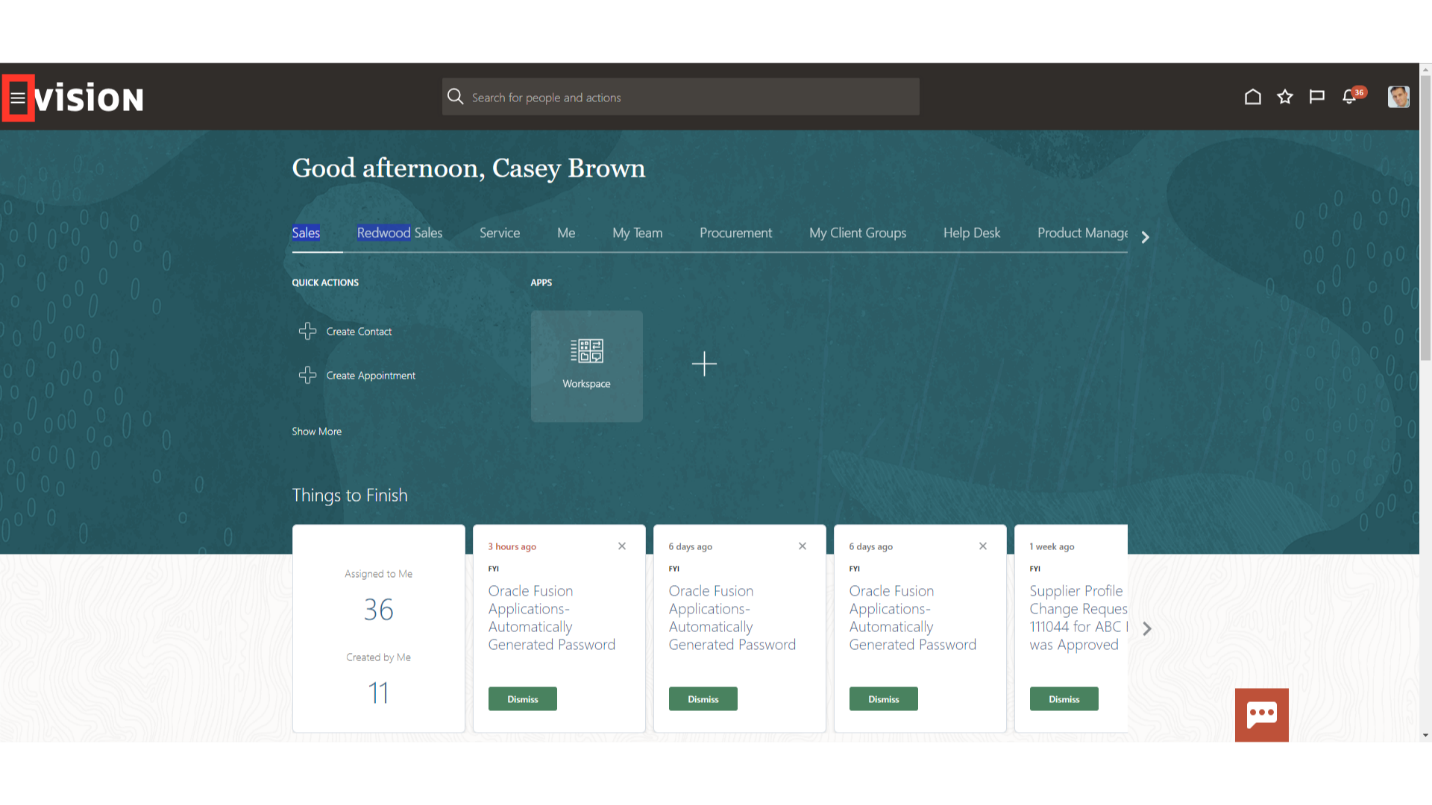
To create and manage customers navigate to the Manage Customer page. Click on Navigator.
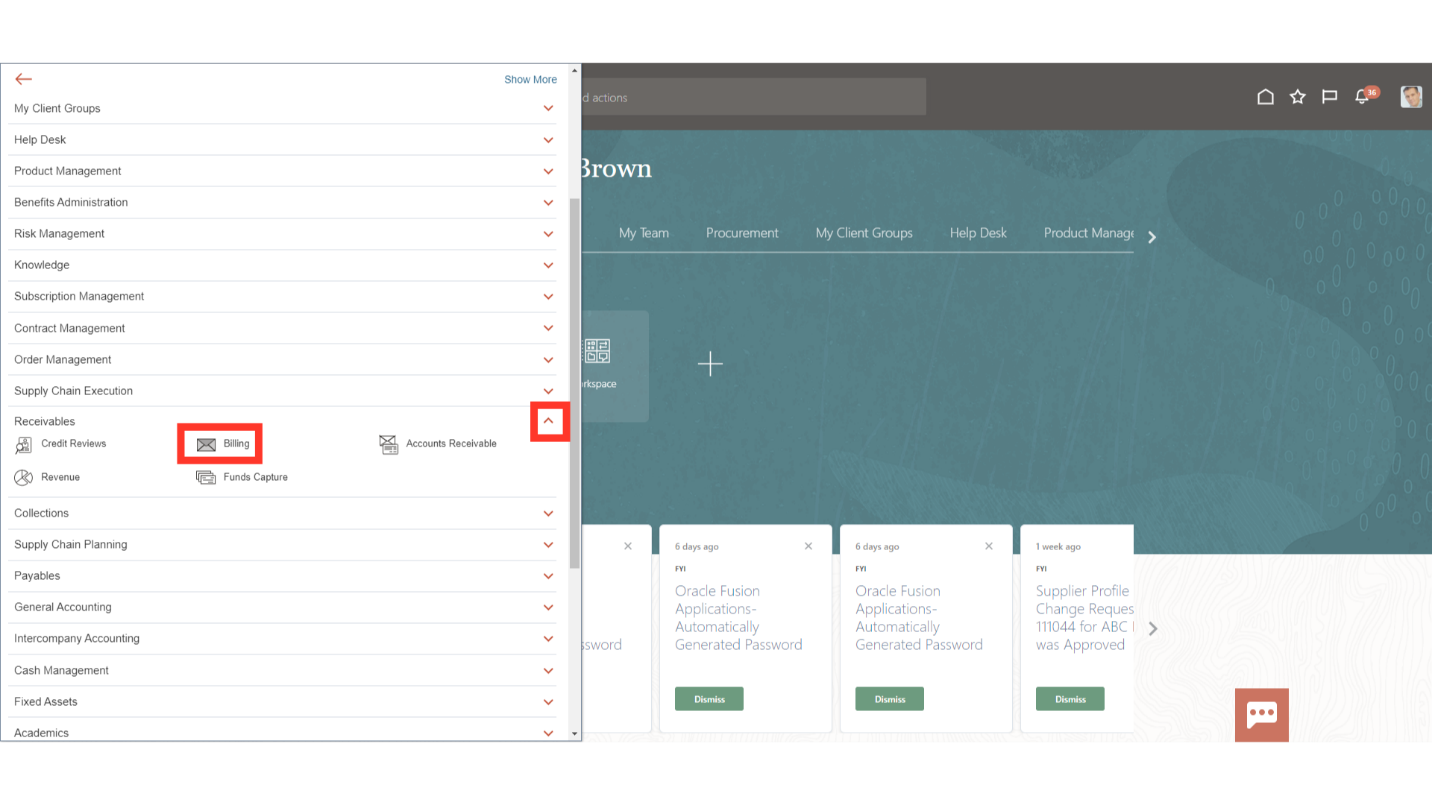
Expand Receivables and select the Billing option.
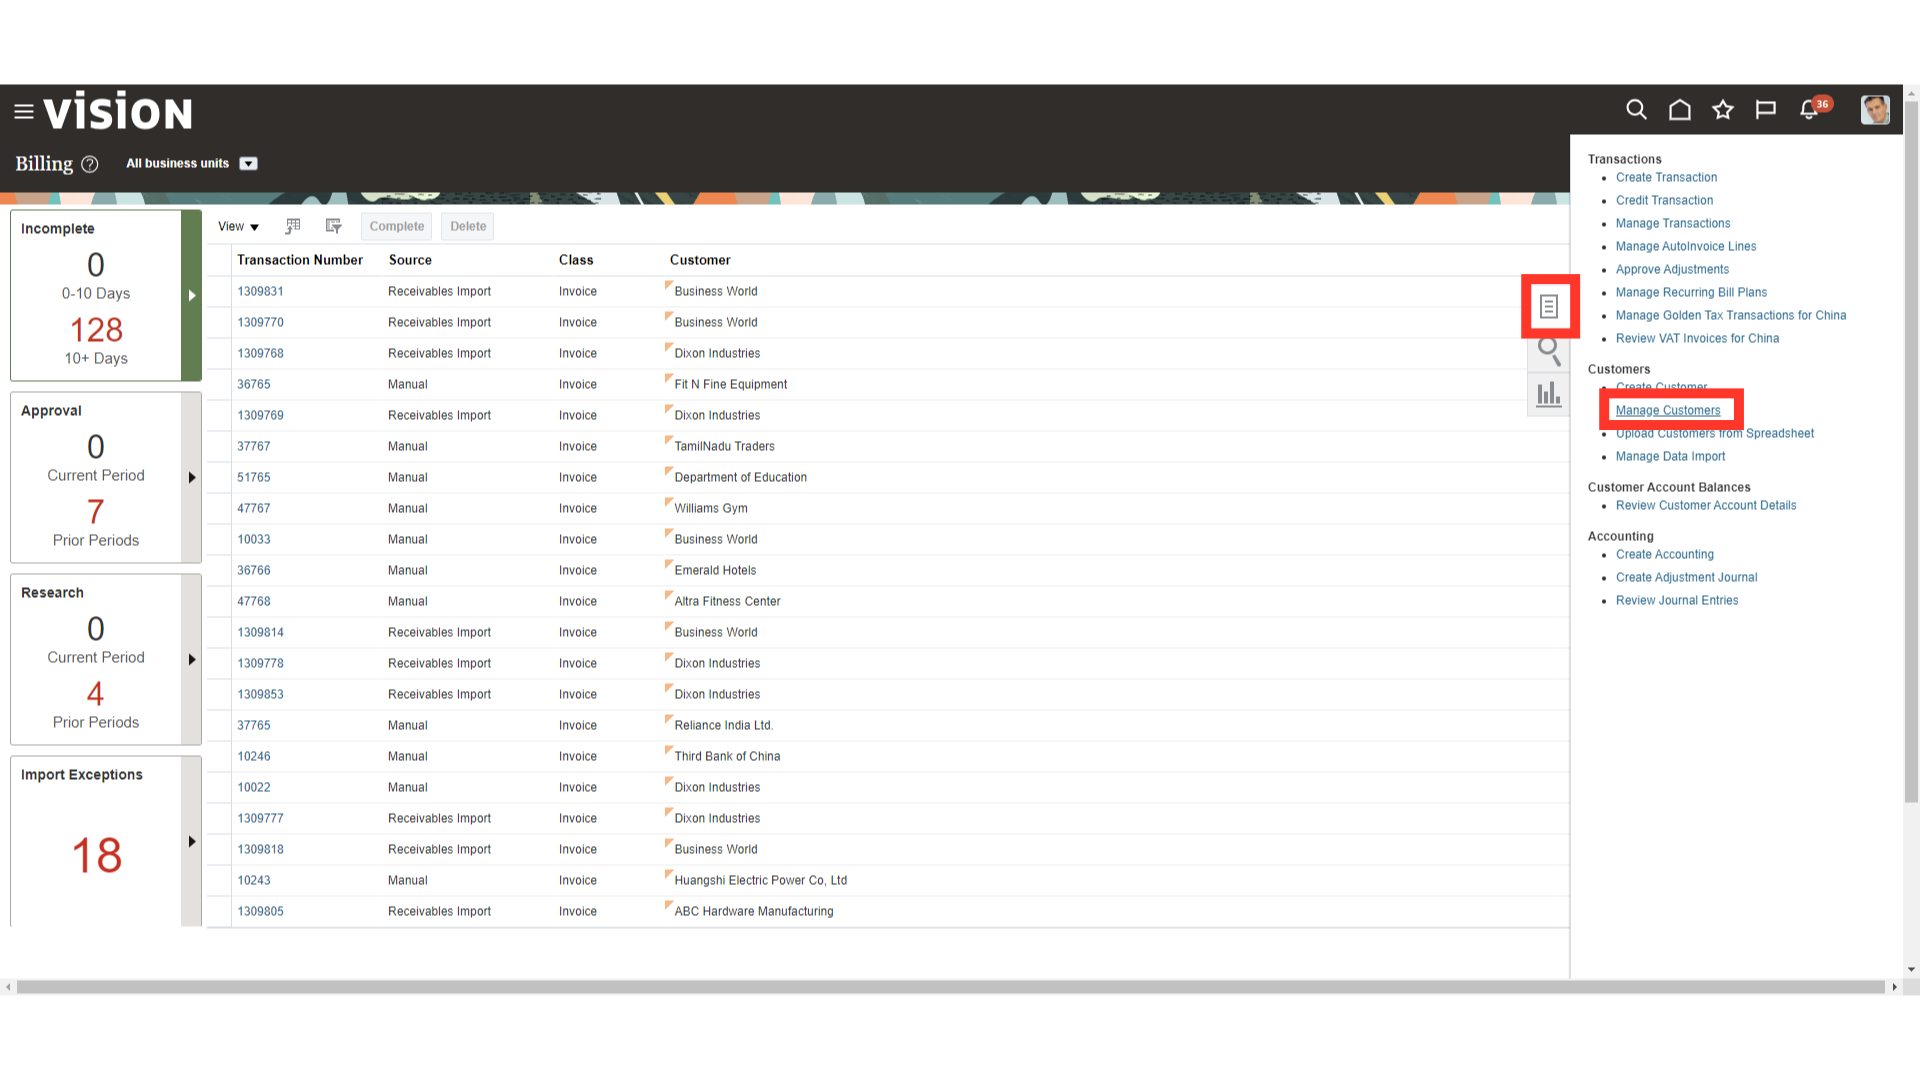
On the Billing work area, click on the tasks icon and select ‘Manage Customers’ from the list.
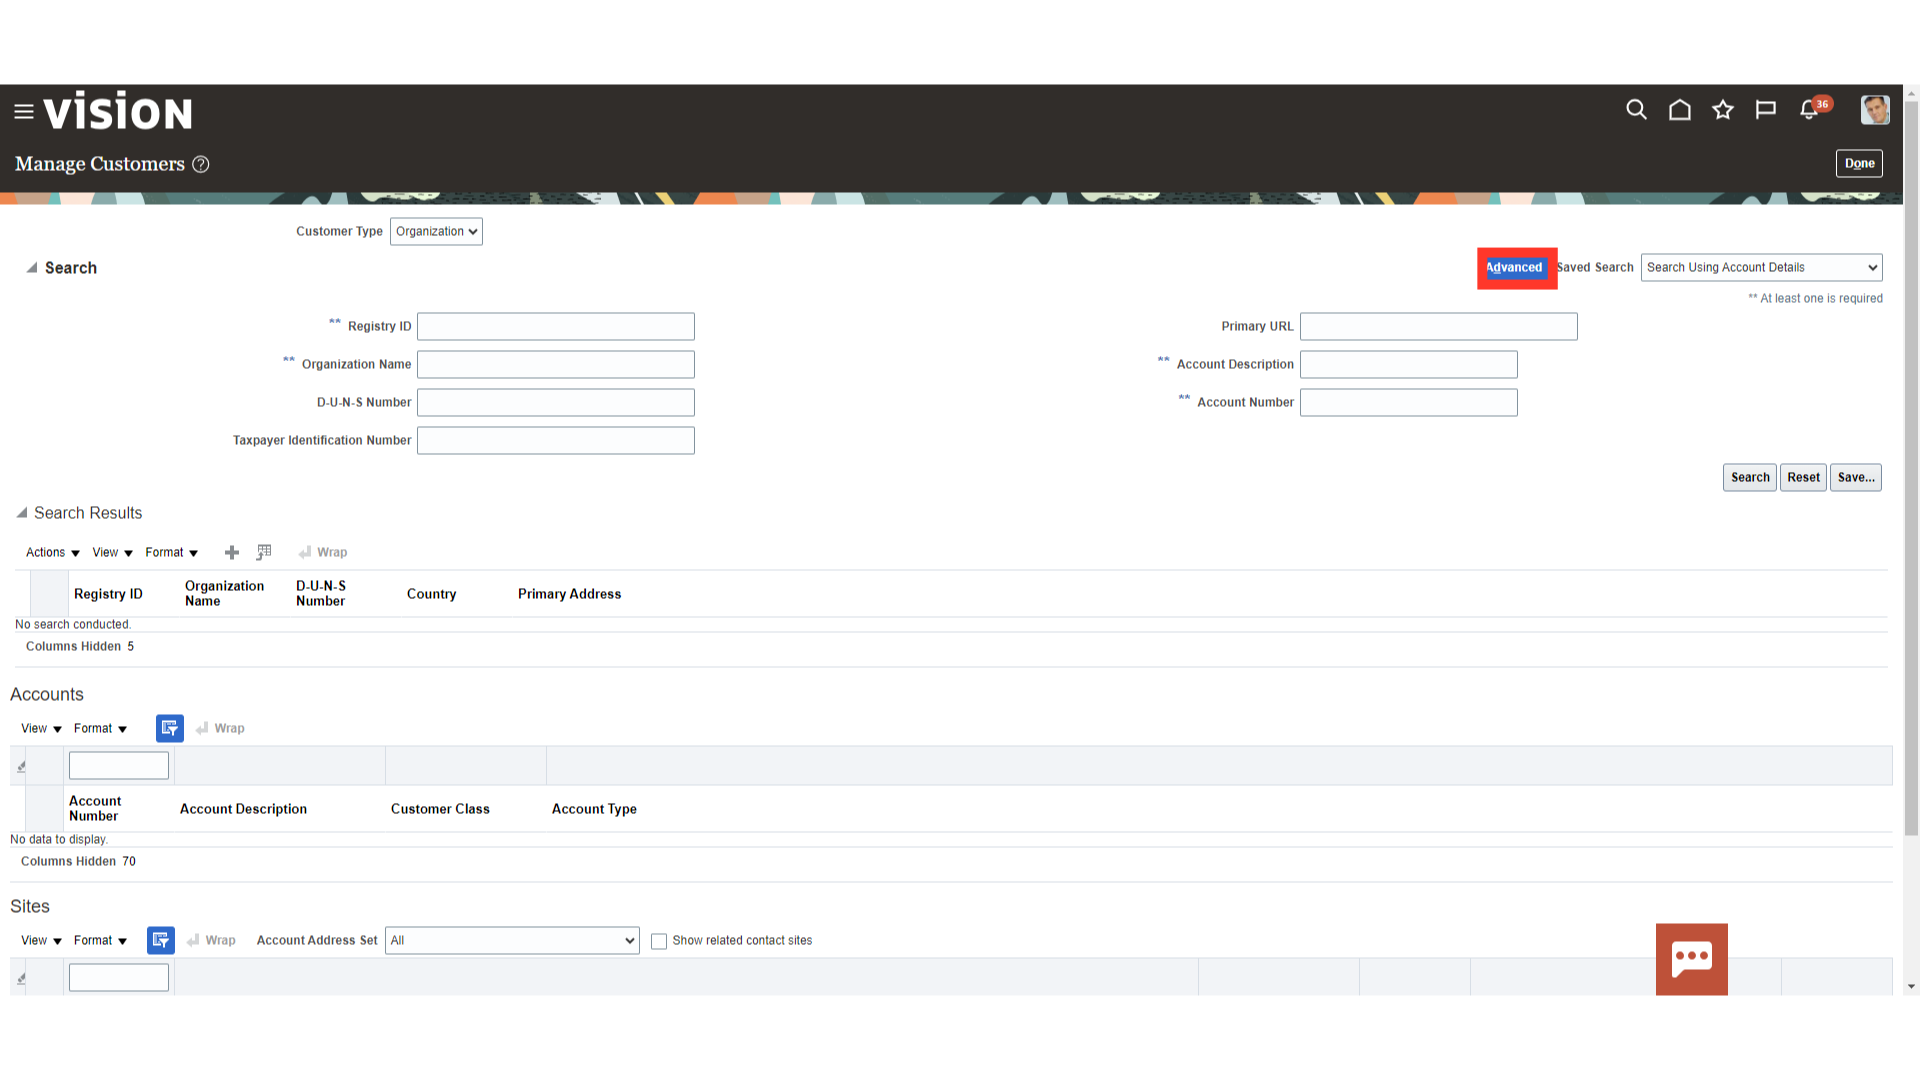
Select the appropriate Customer Type based on the customer required to be searched.
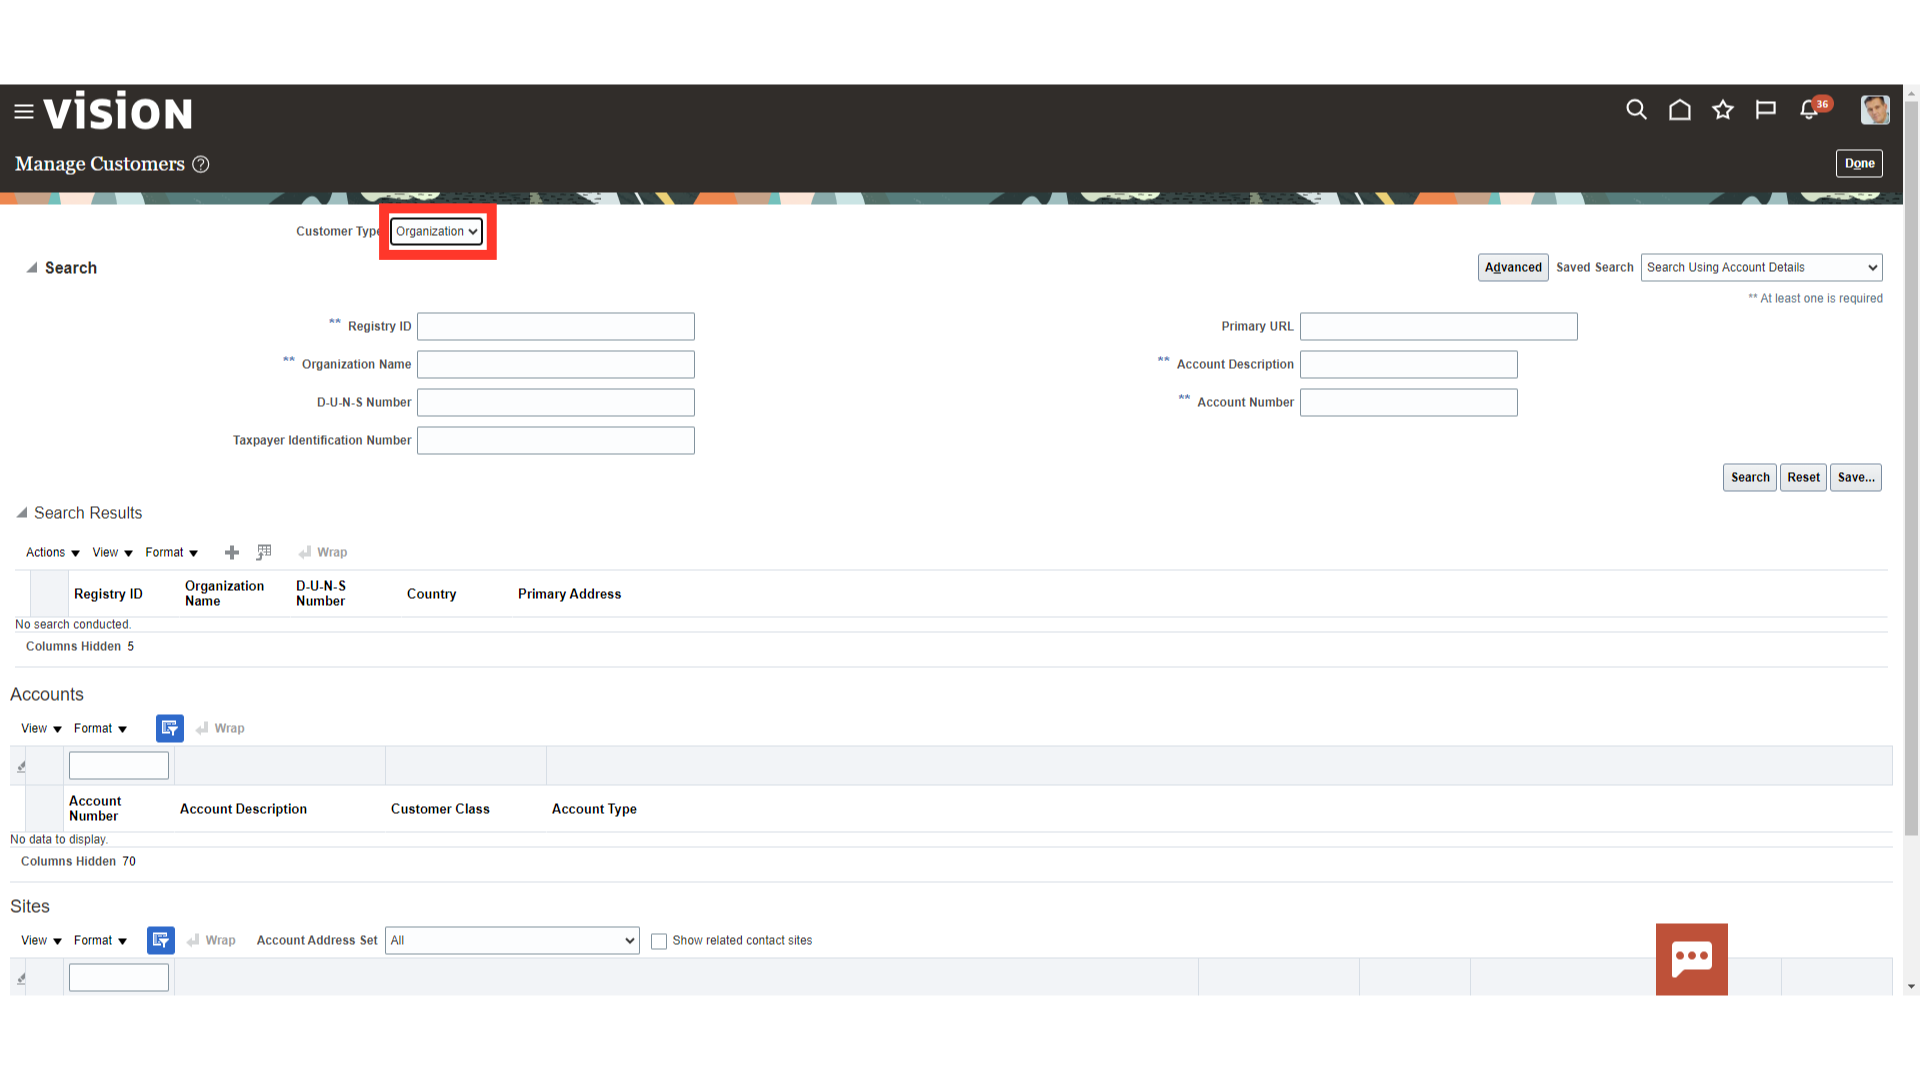
To have additional search parameters enabled, click on Advanced.
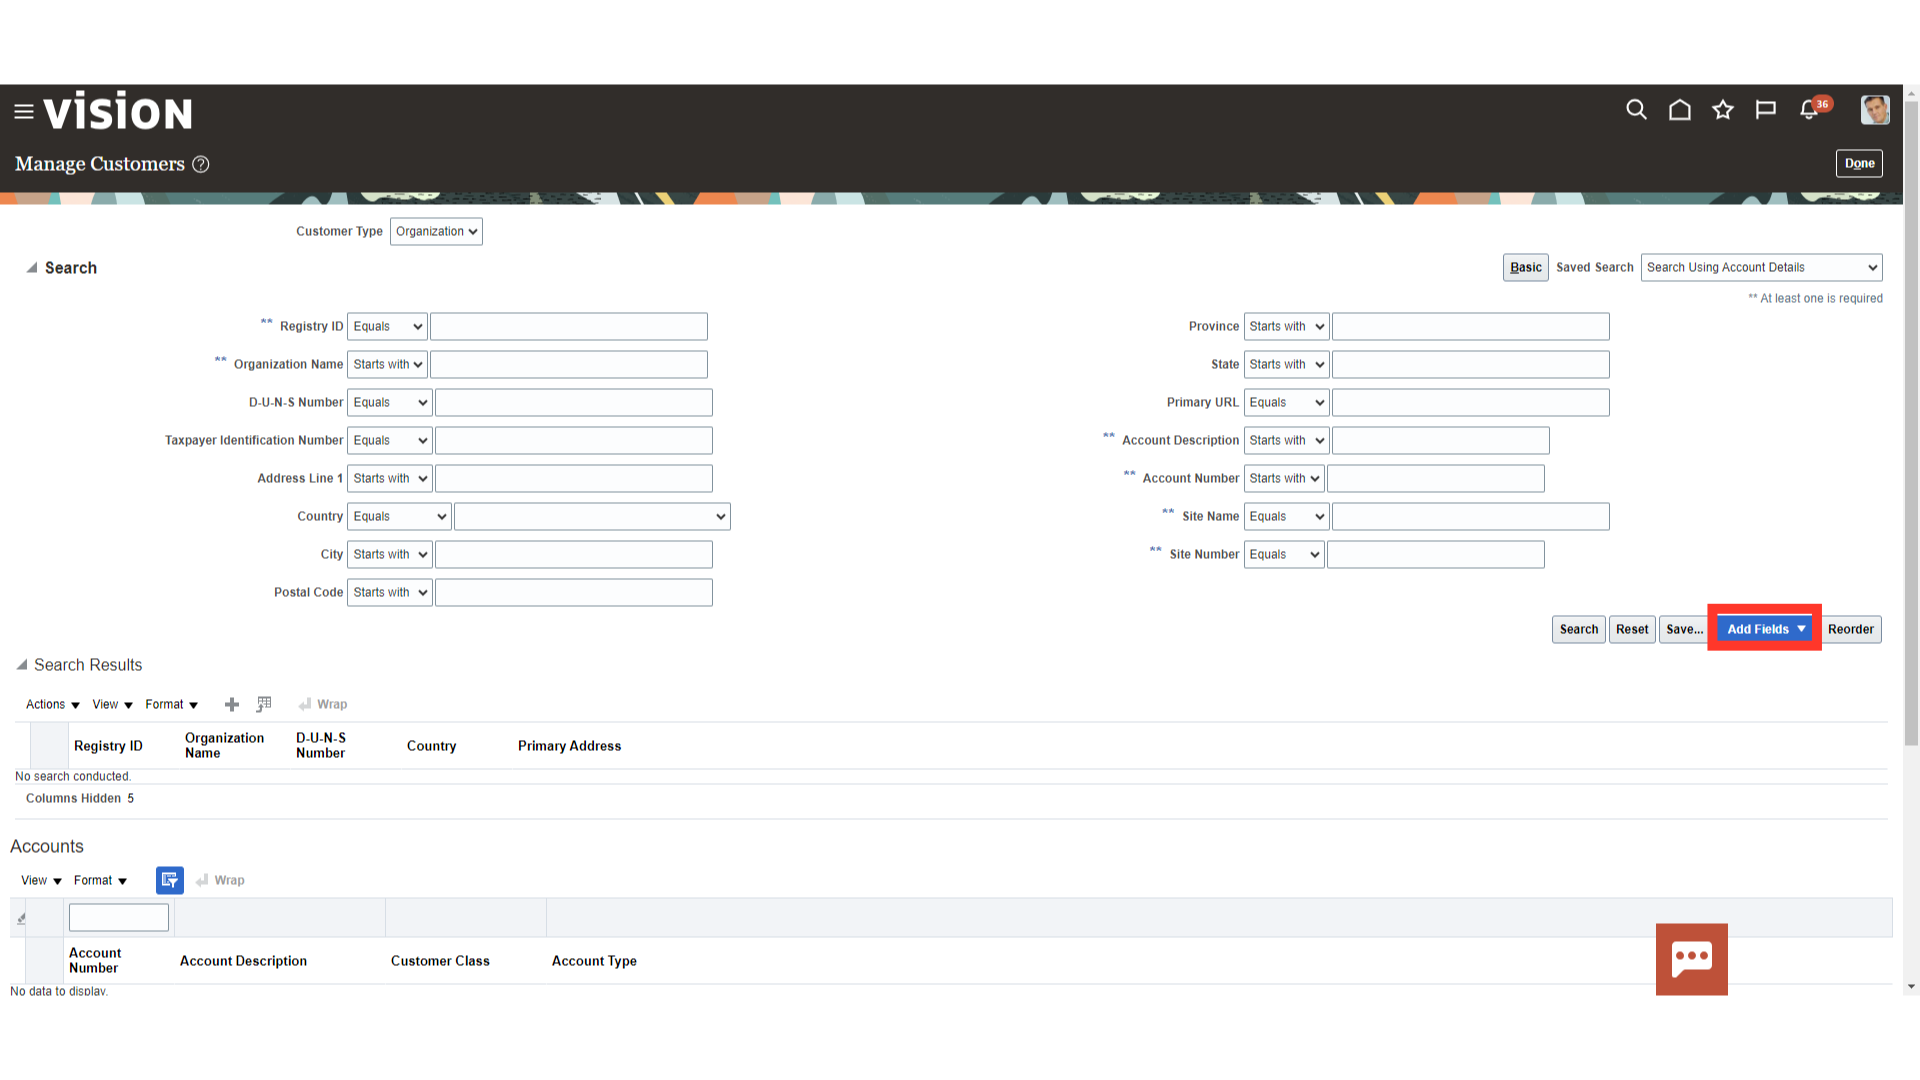
The Add Fields button would become active. Select the required search parameter from the Add Fields button.
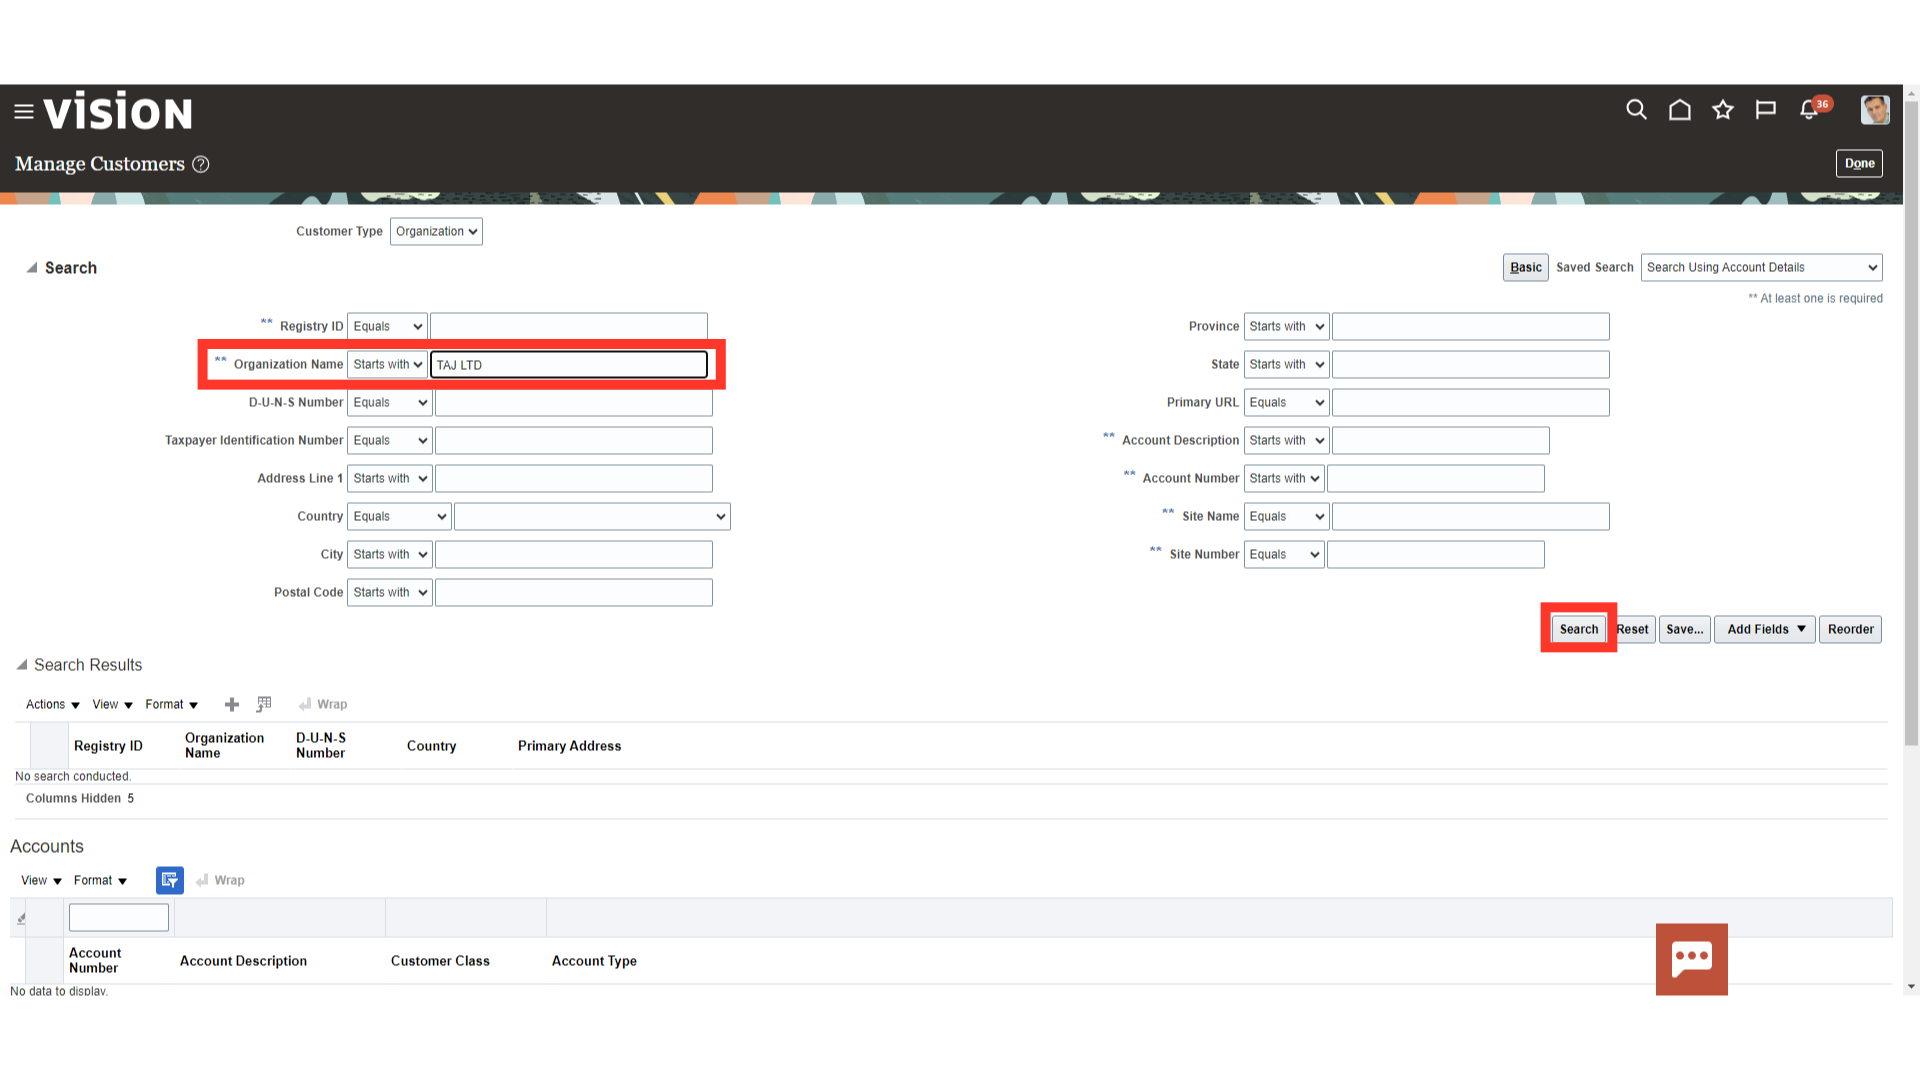
Enter the required parameter, and click on the Search button.
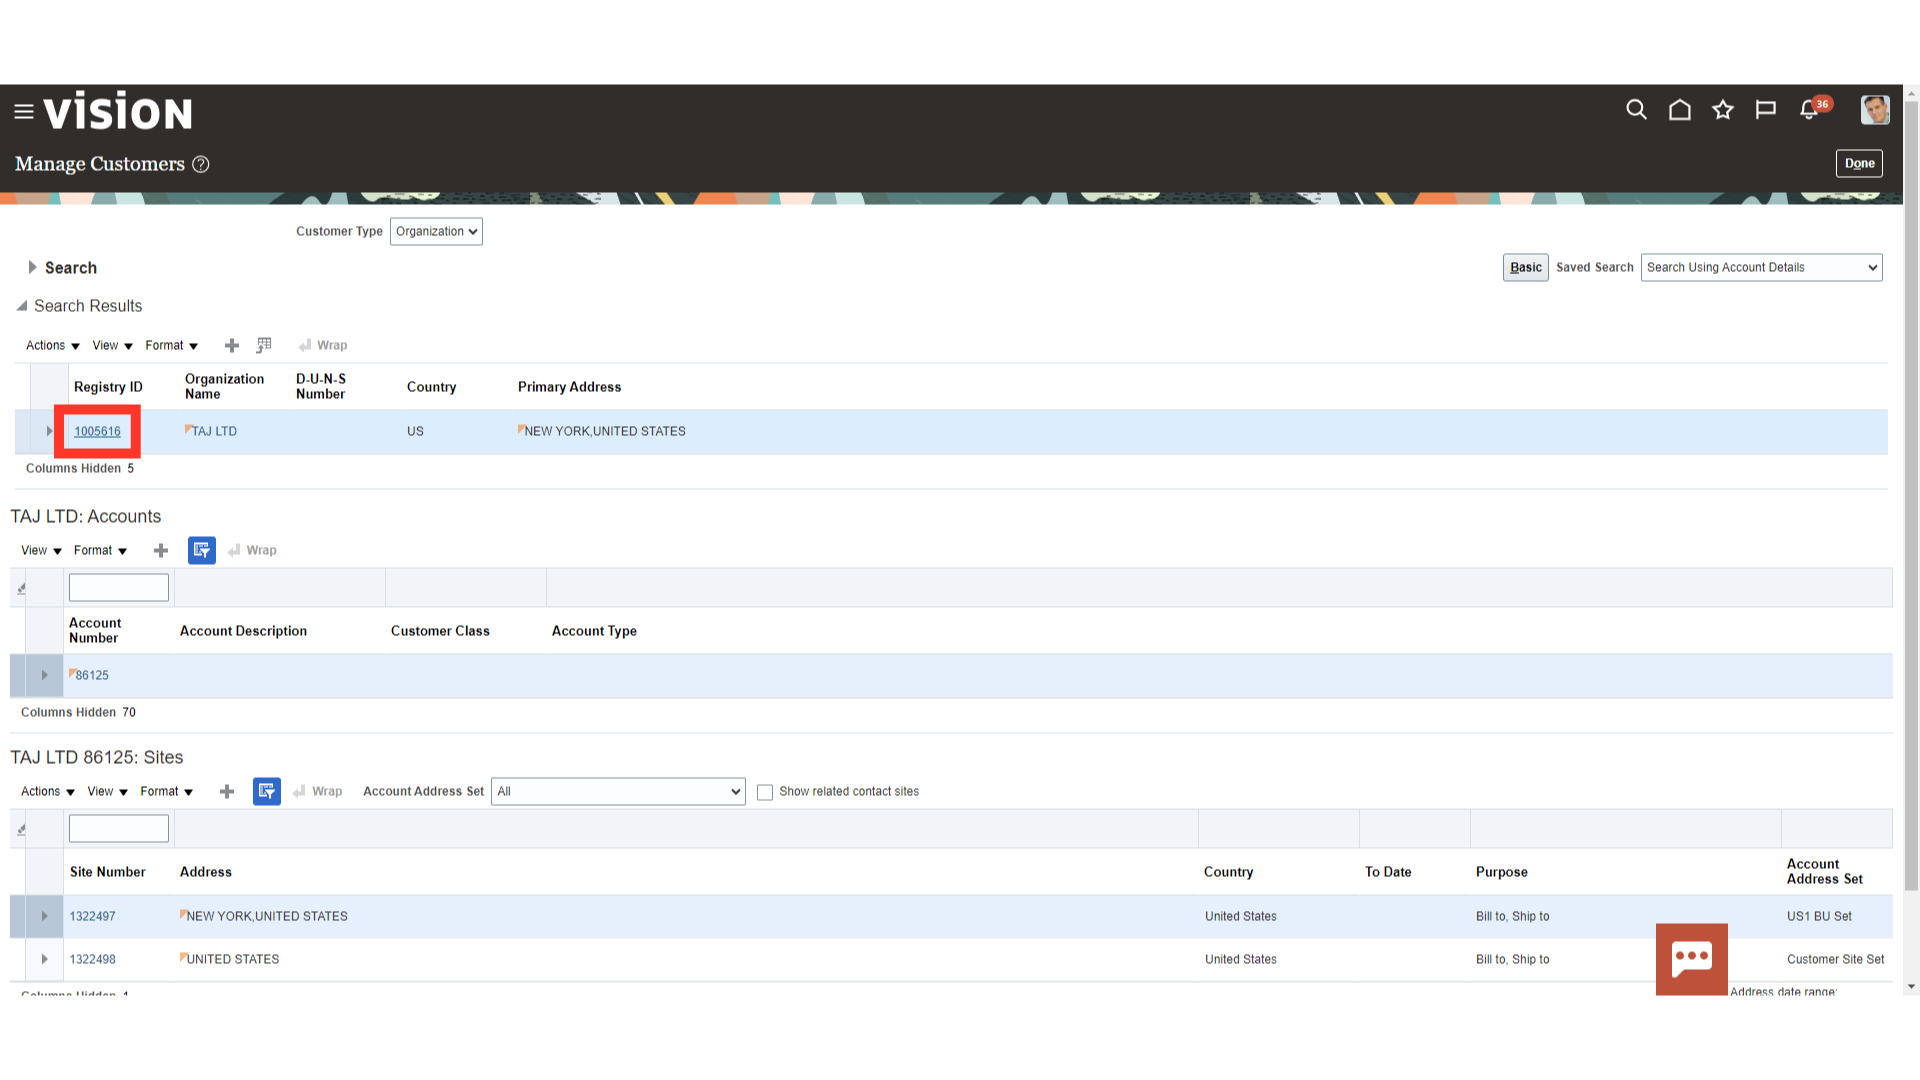
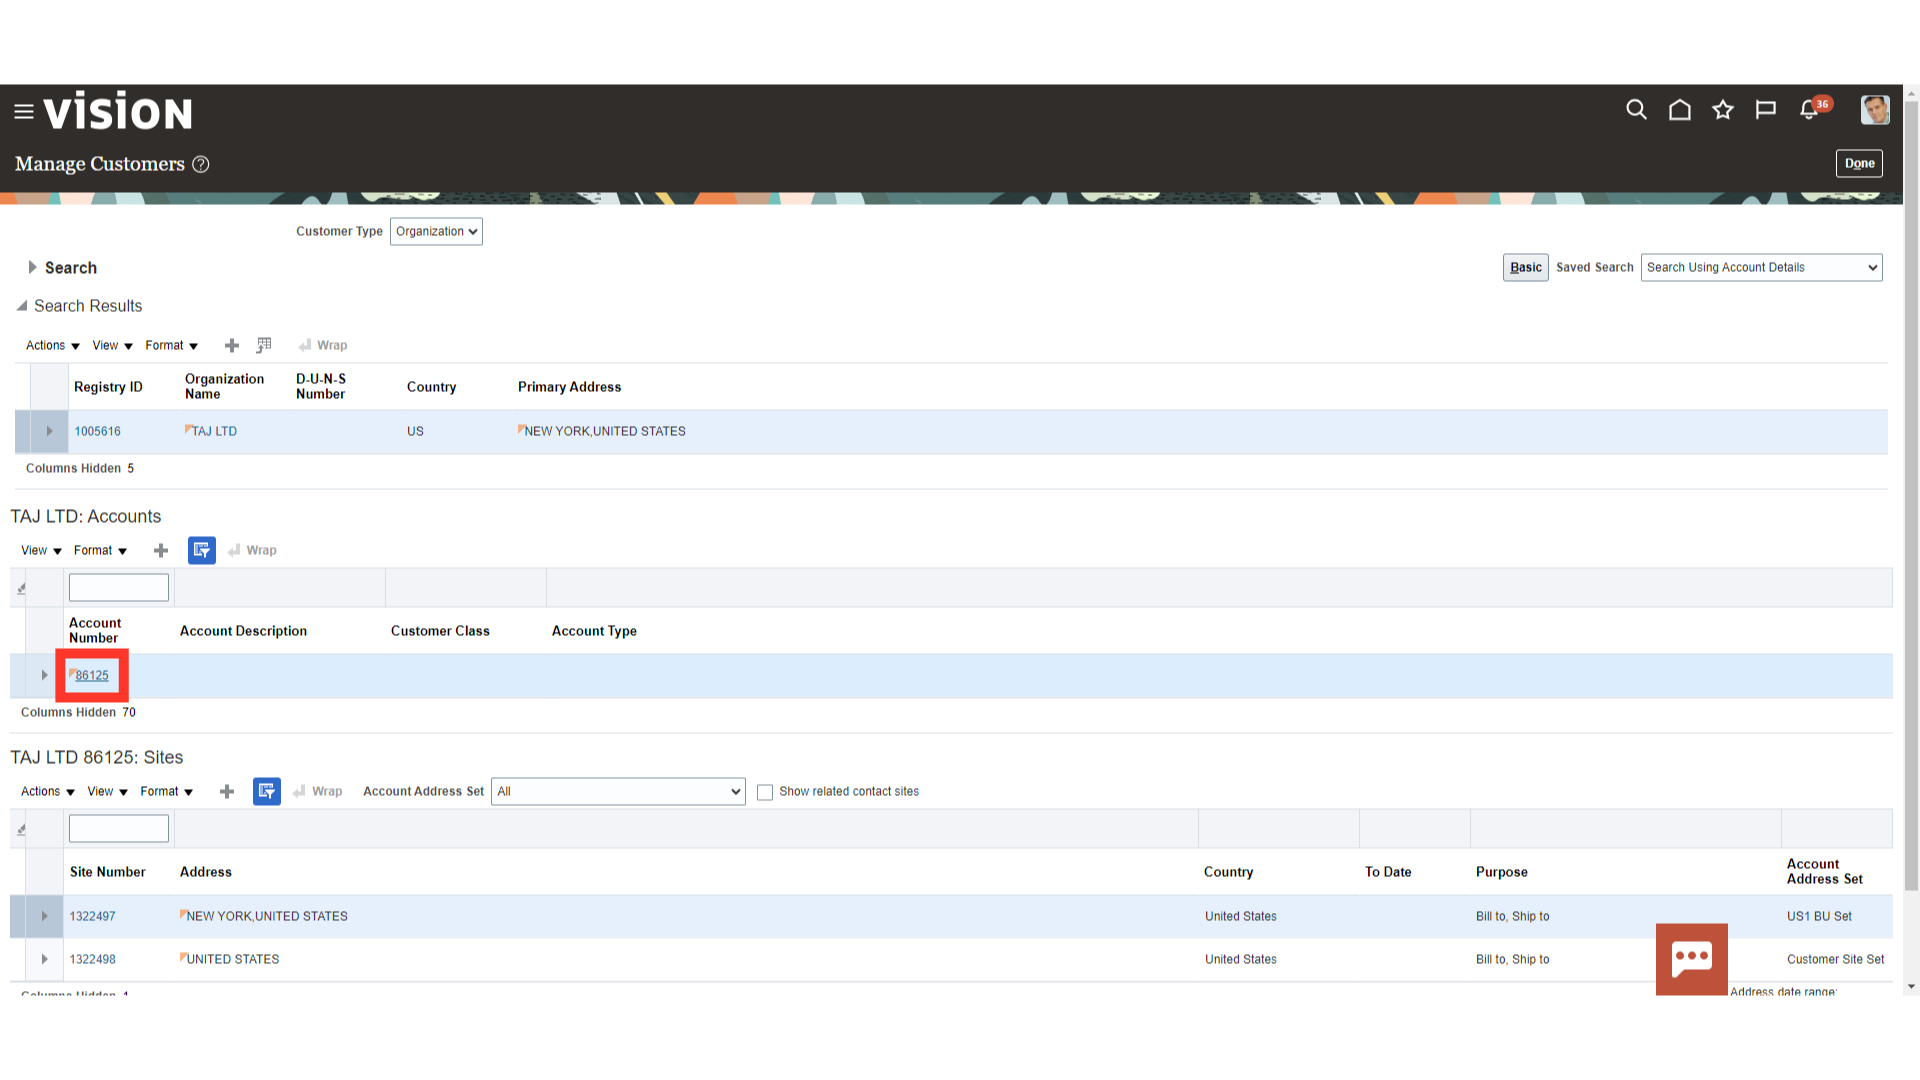
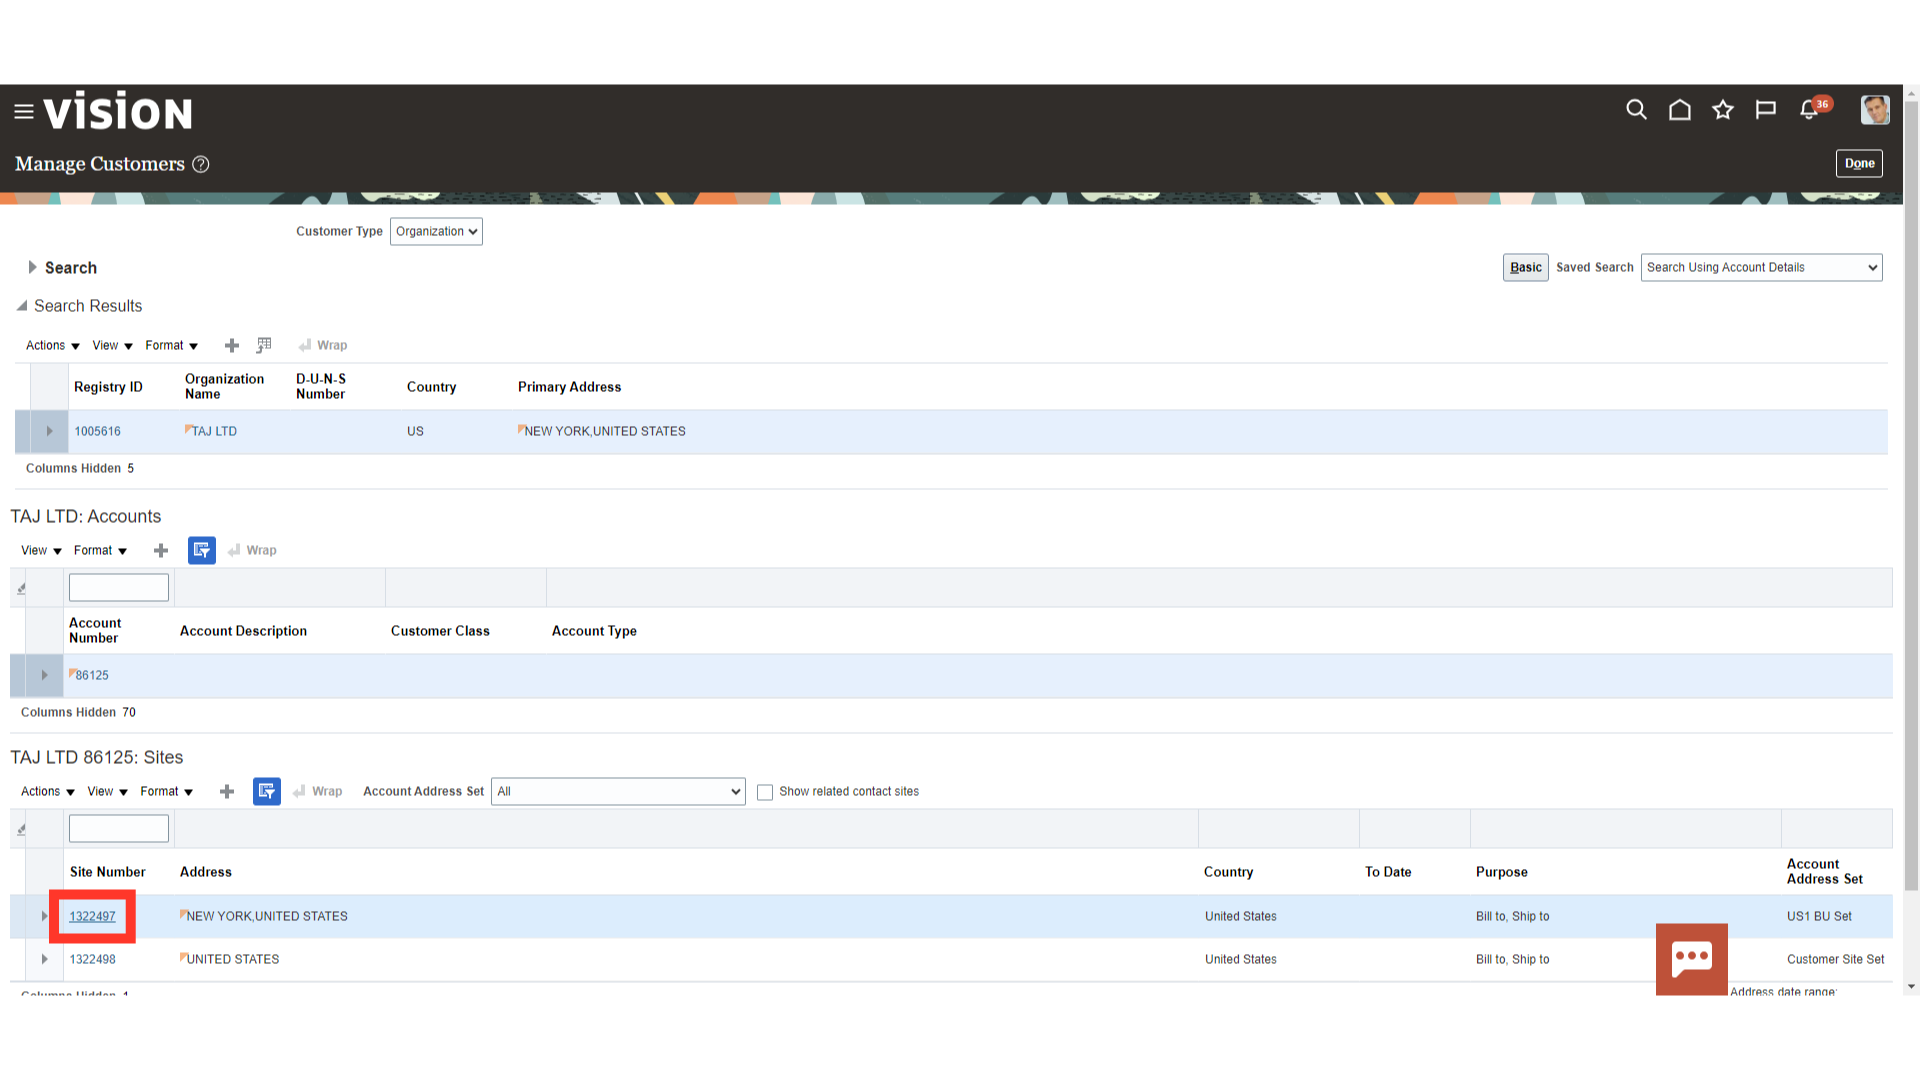
All the customer-related details will be available. Registry ID, Accounts, Sites. Click on the Registry ID hyperlink to check the customer profile details.
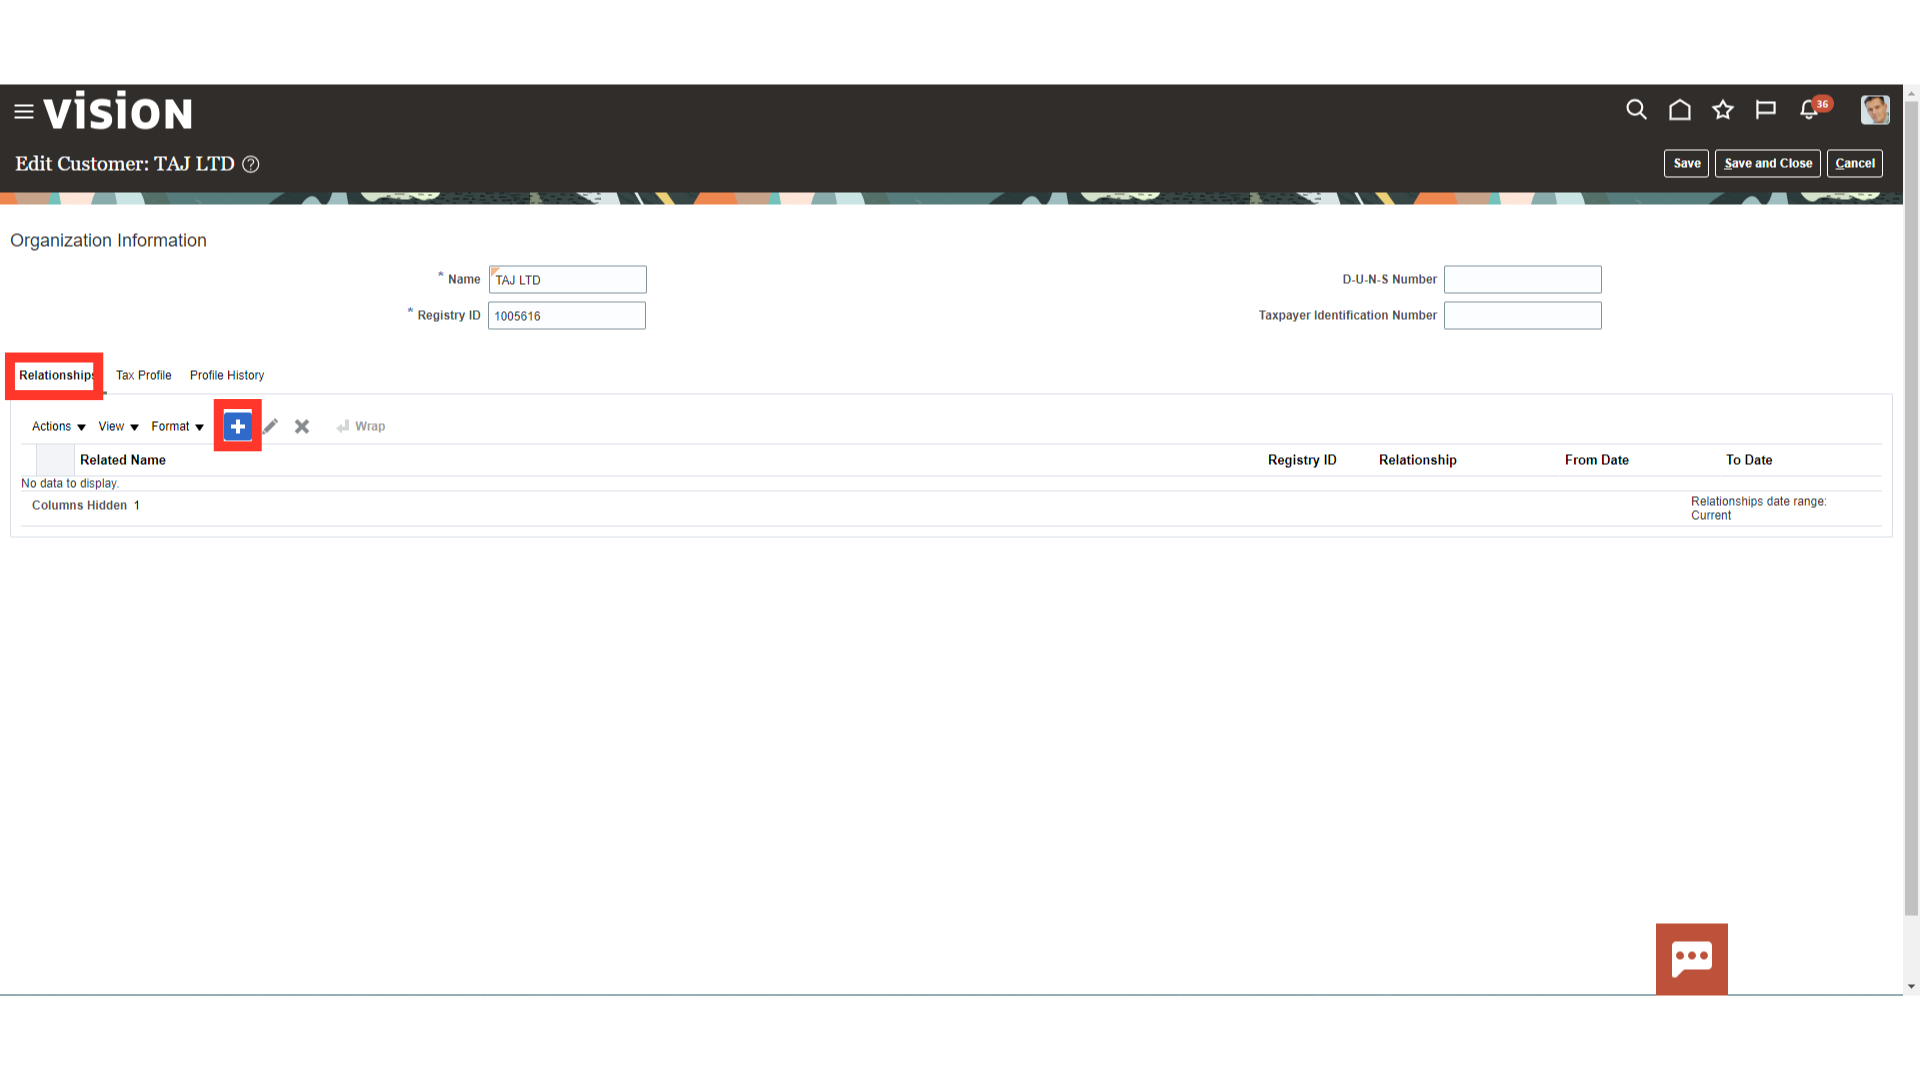
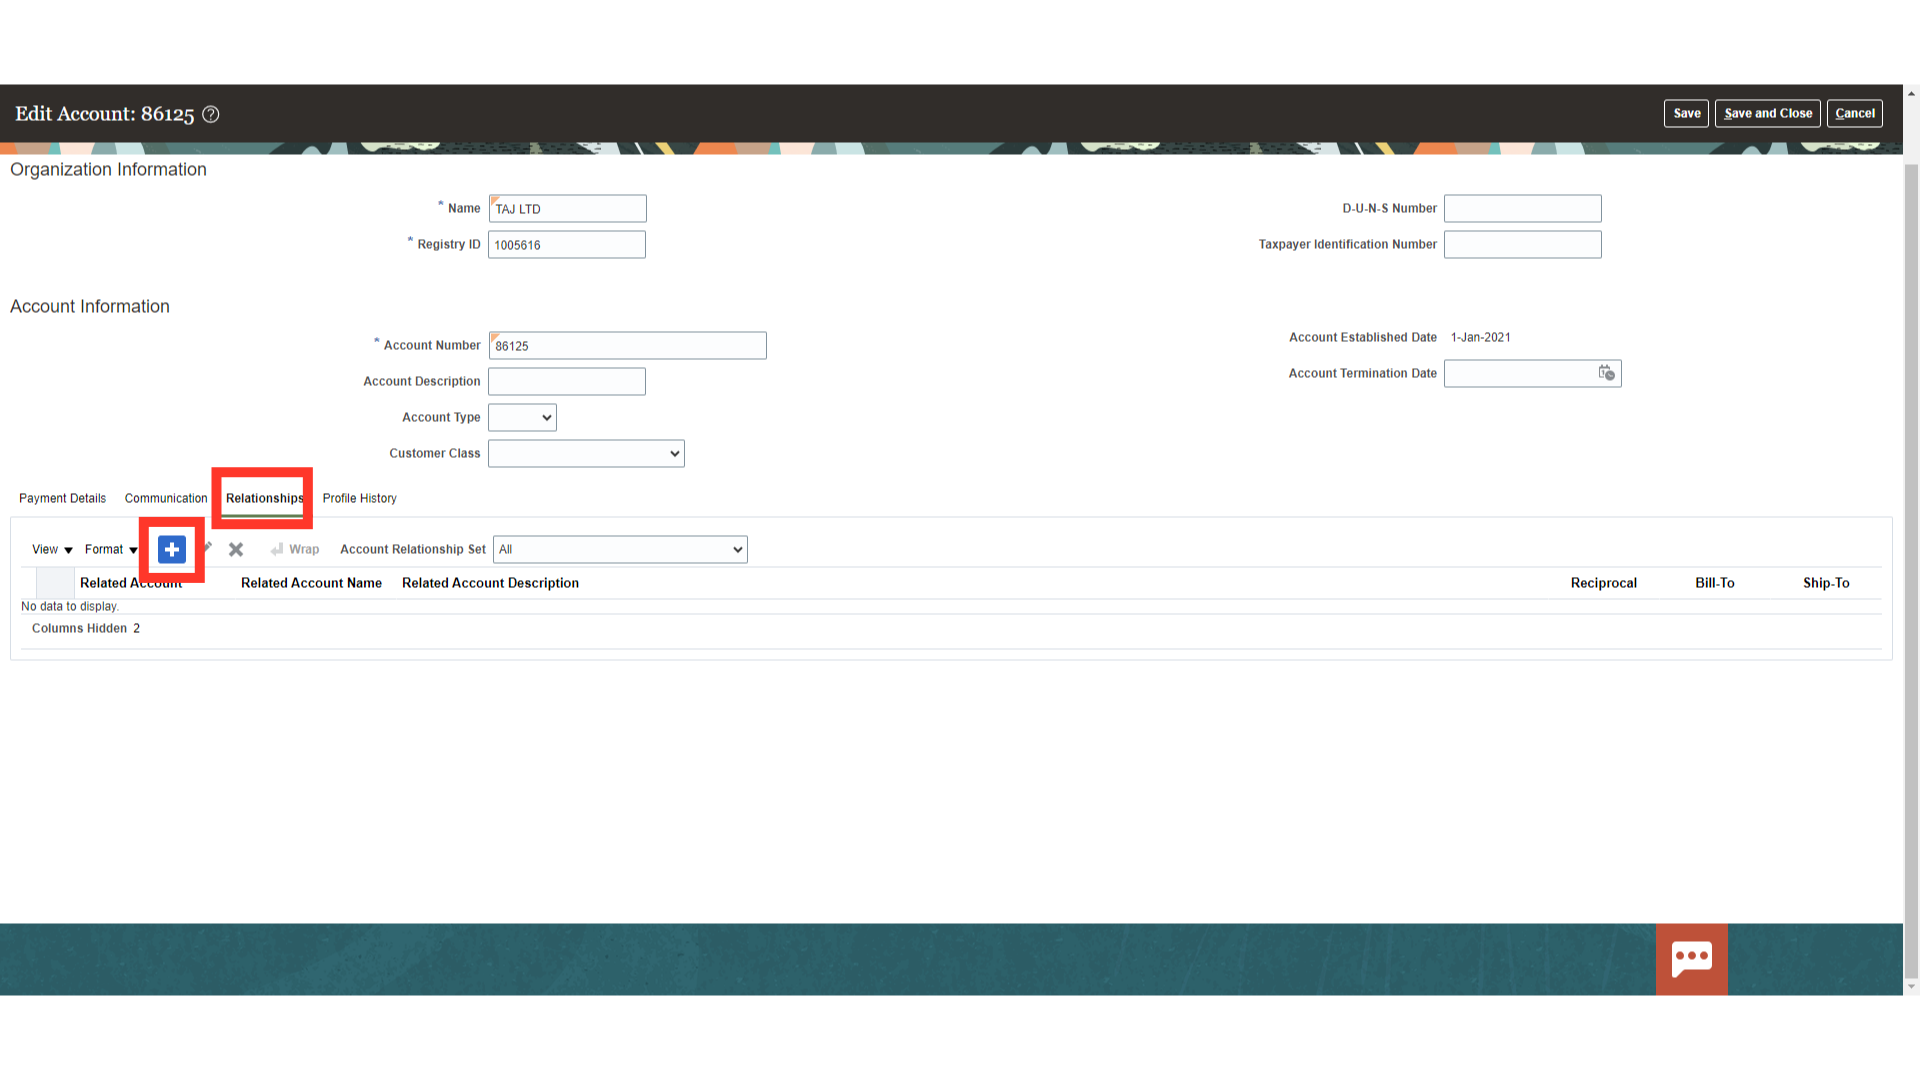
On the Relationships tab, click on the Plus icon to add the relationship.
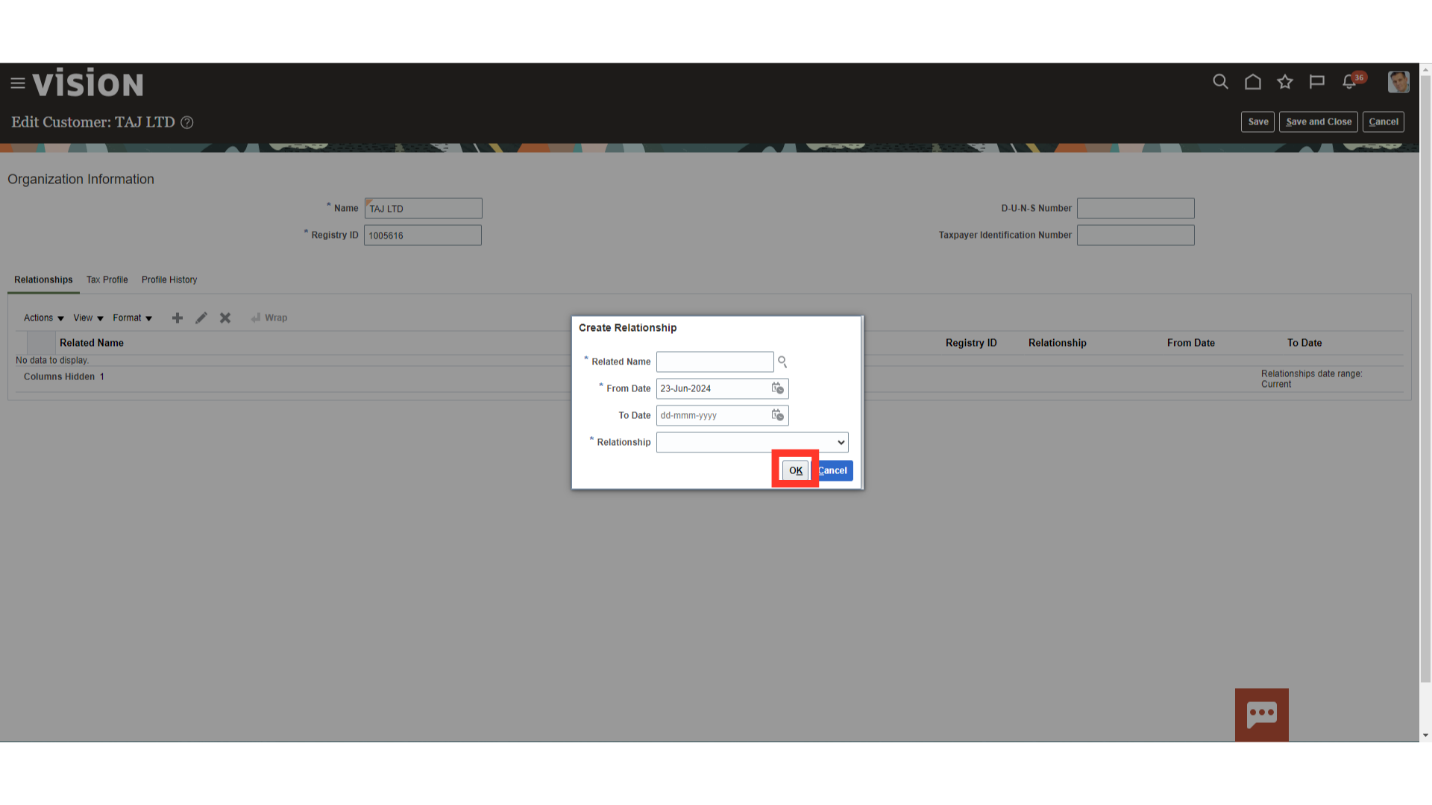
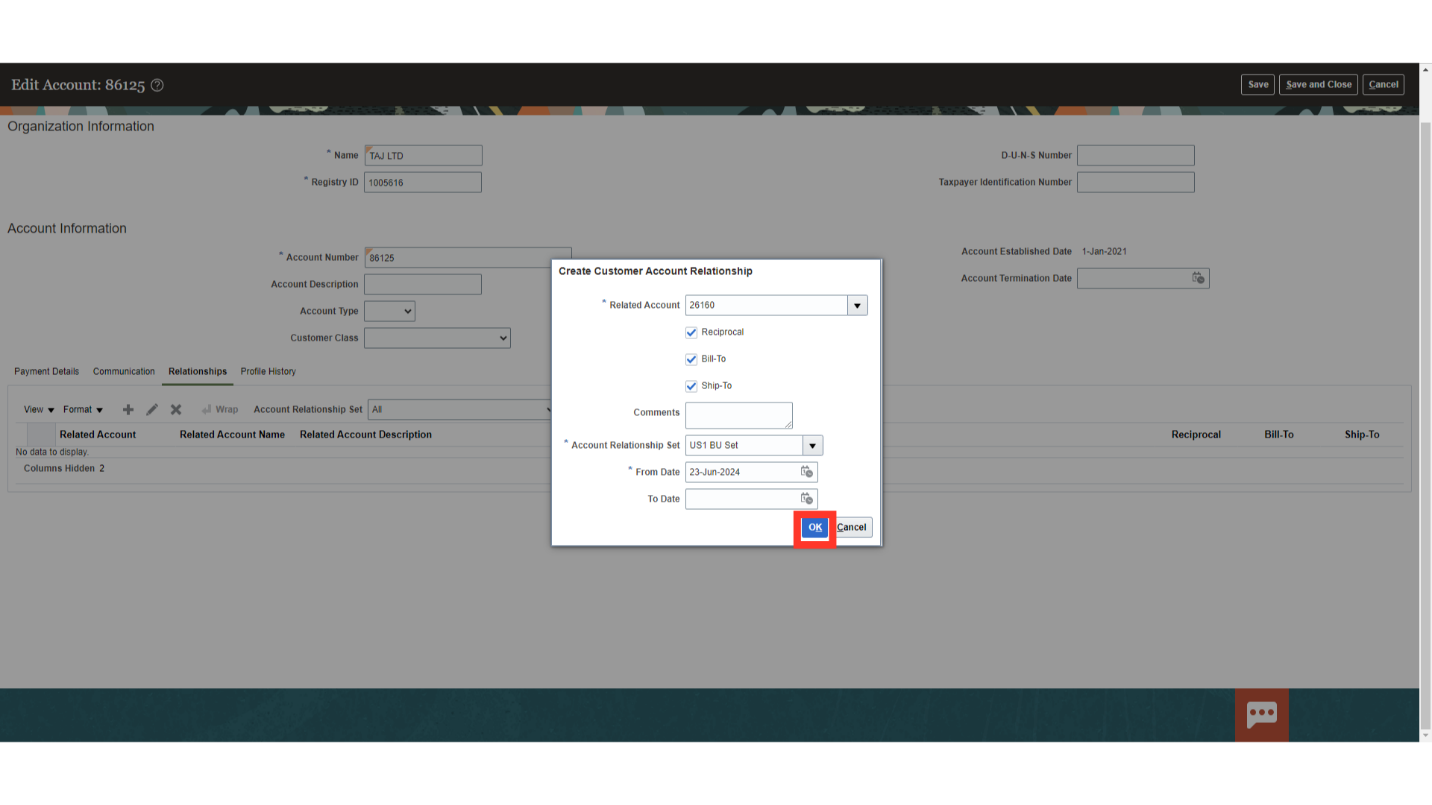
Enter Related Name, From Date, and Relationship and click on OK.
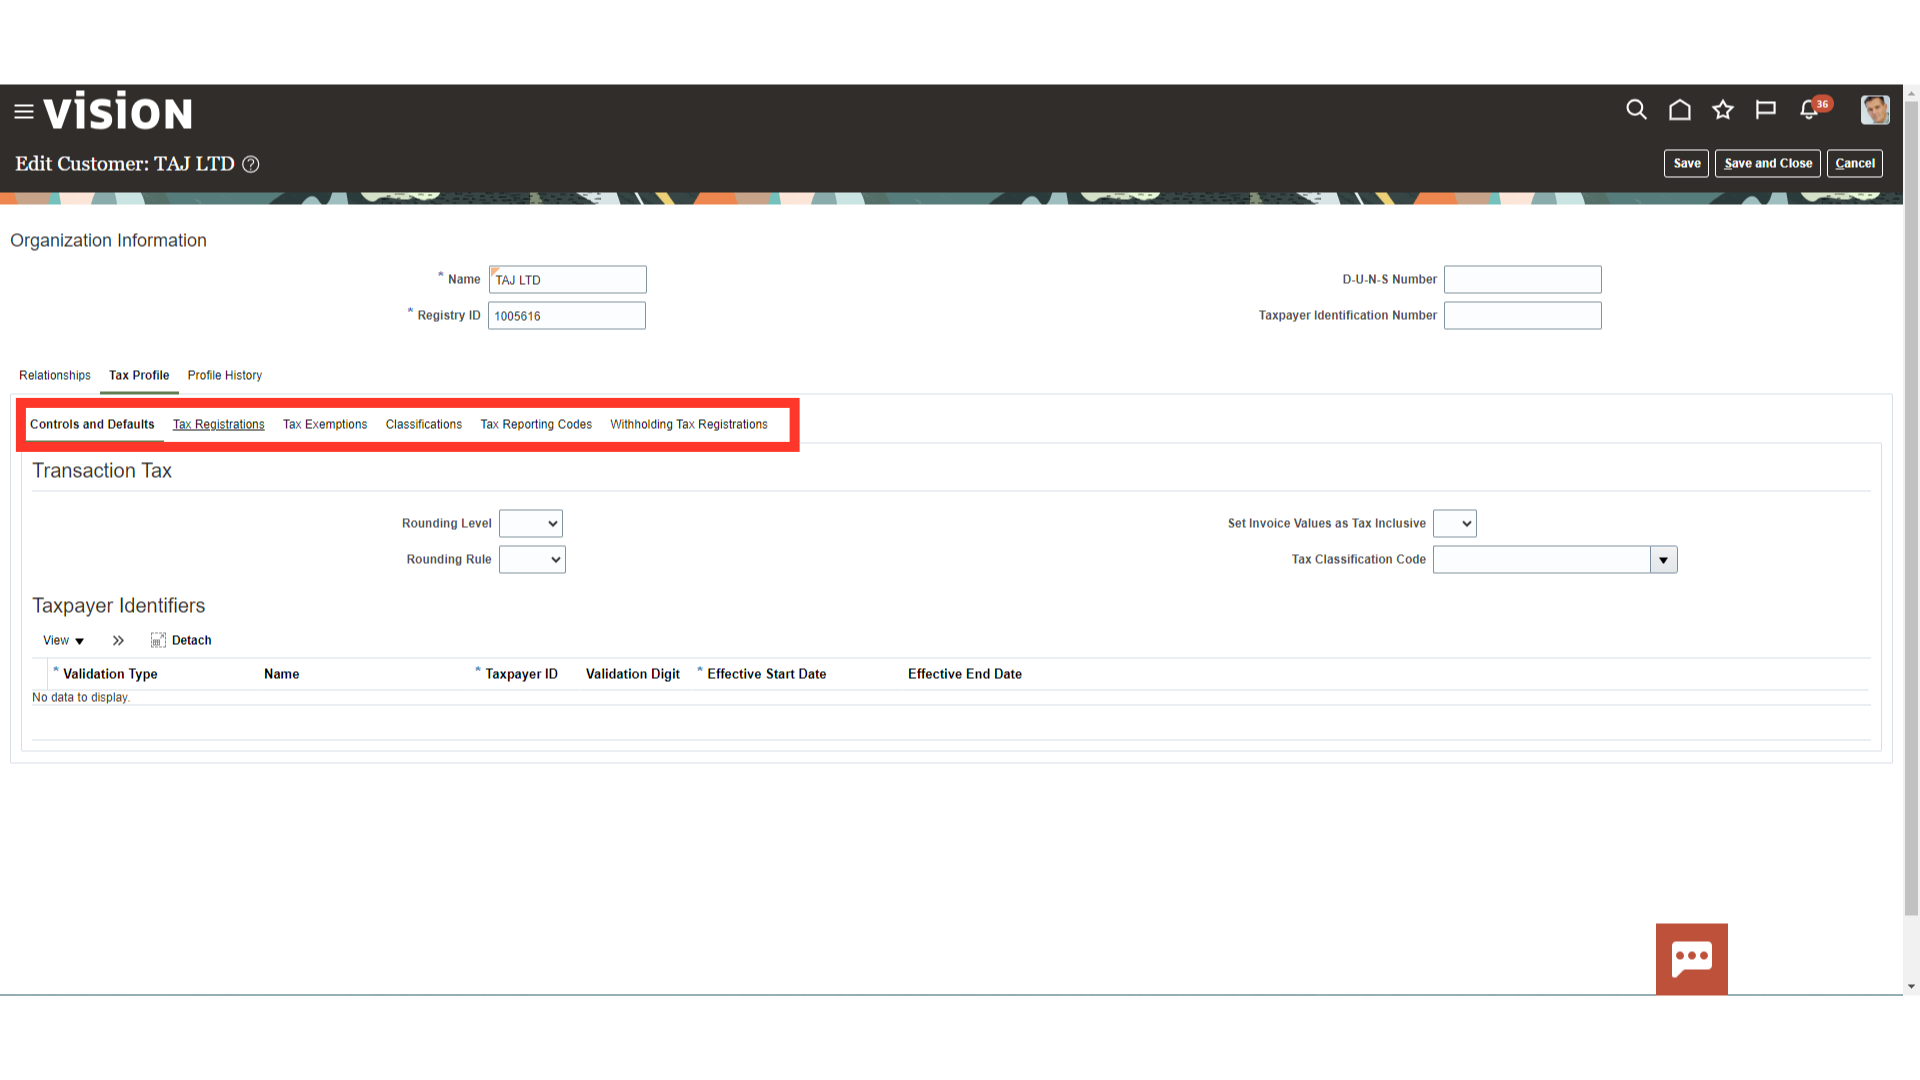
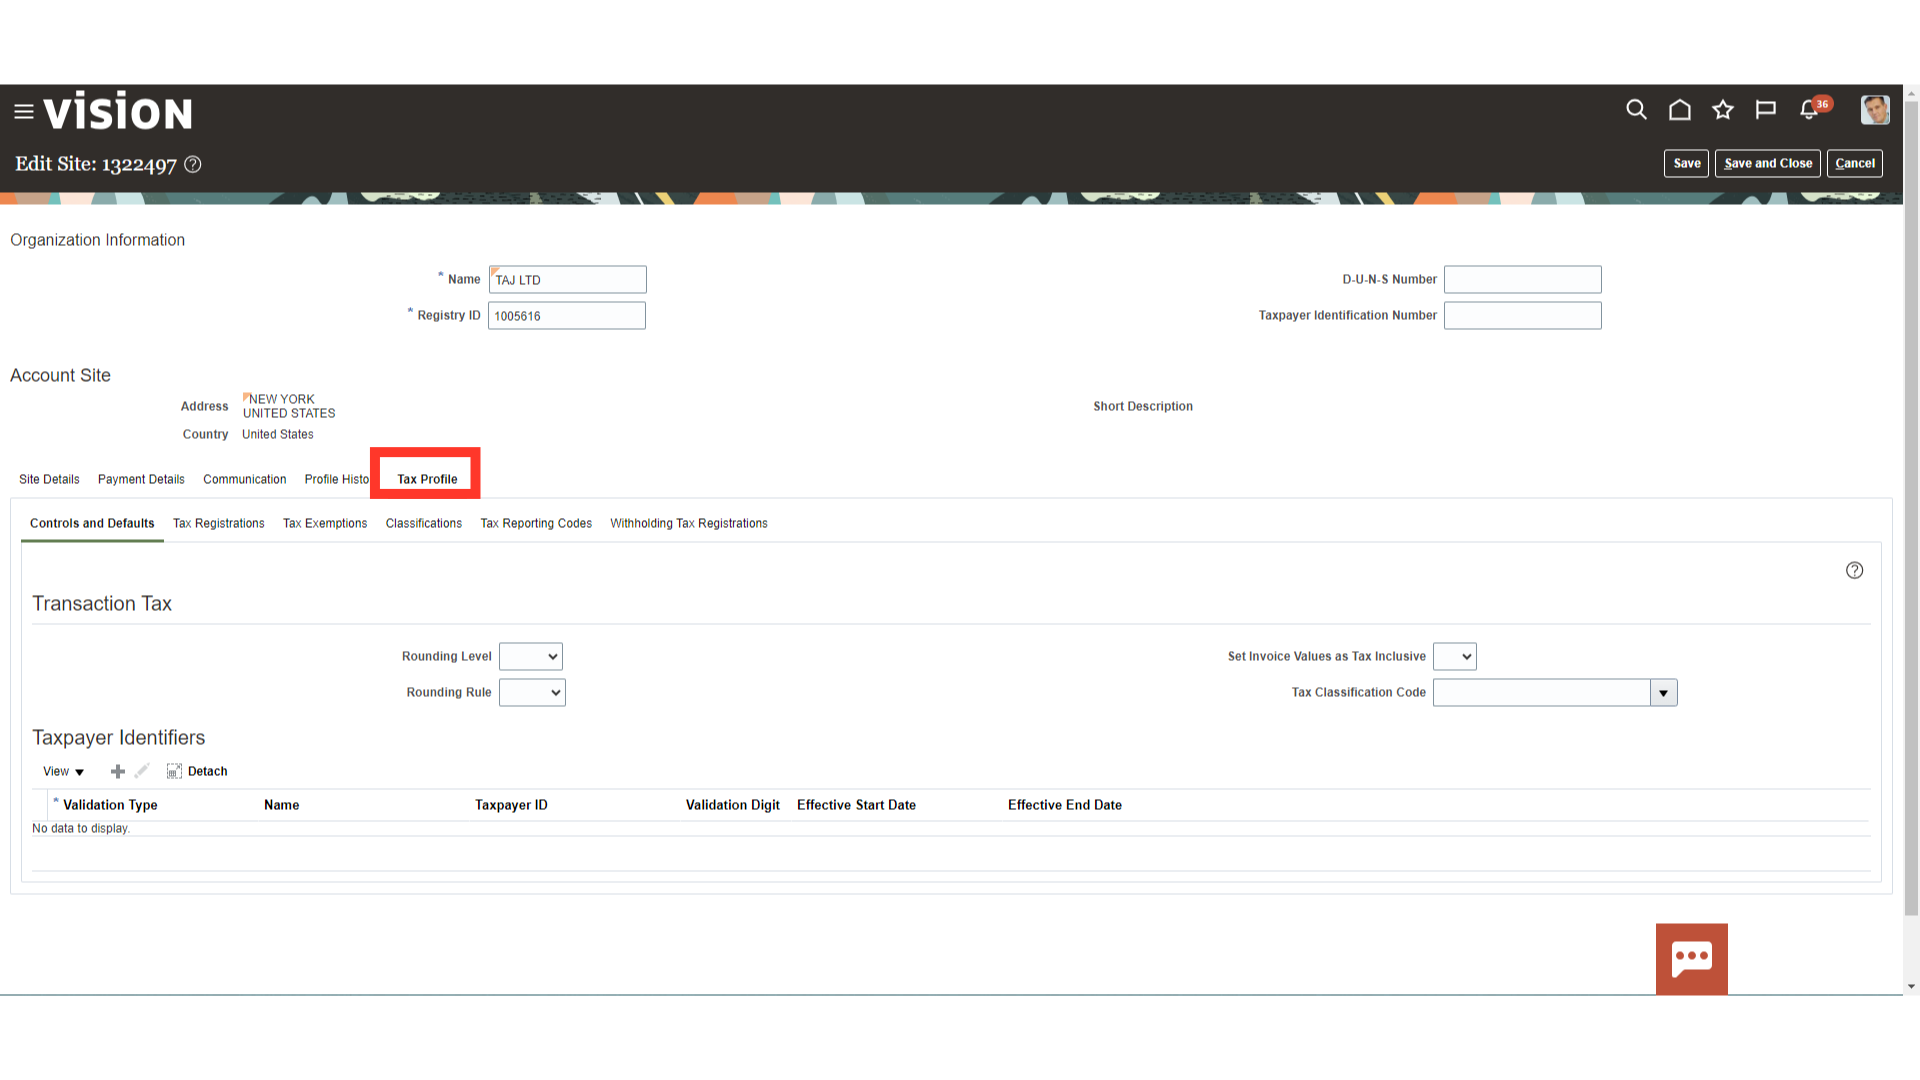
A tax profile is the body of information that relates to a party’s transaction tax activities. A tax profile can include main and default information, tax registration, tax exemptions, party fiscal classifications, tax reporting codes, configuration options, and service subscriptions.
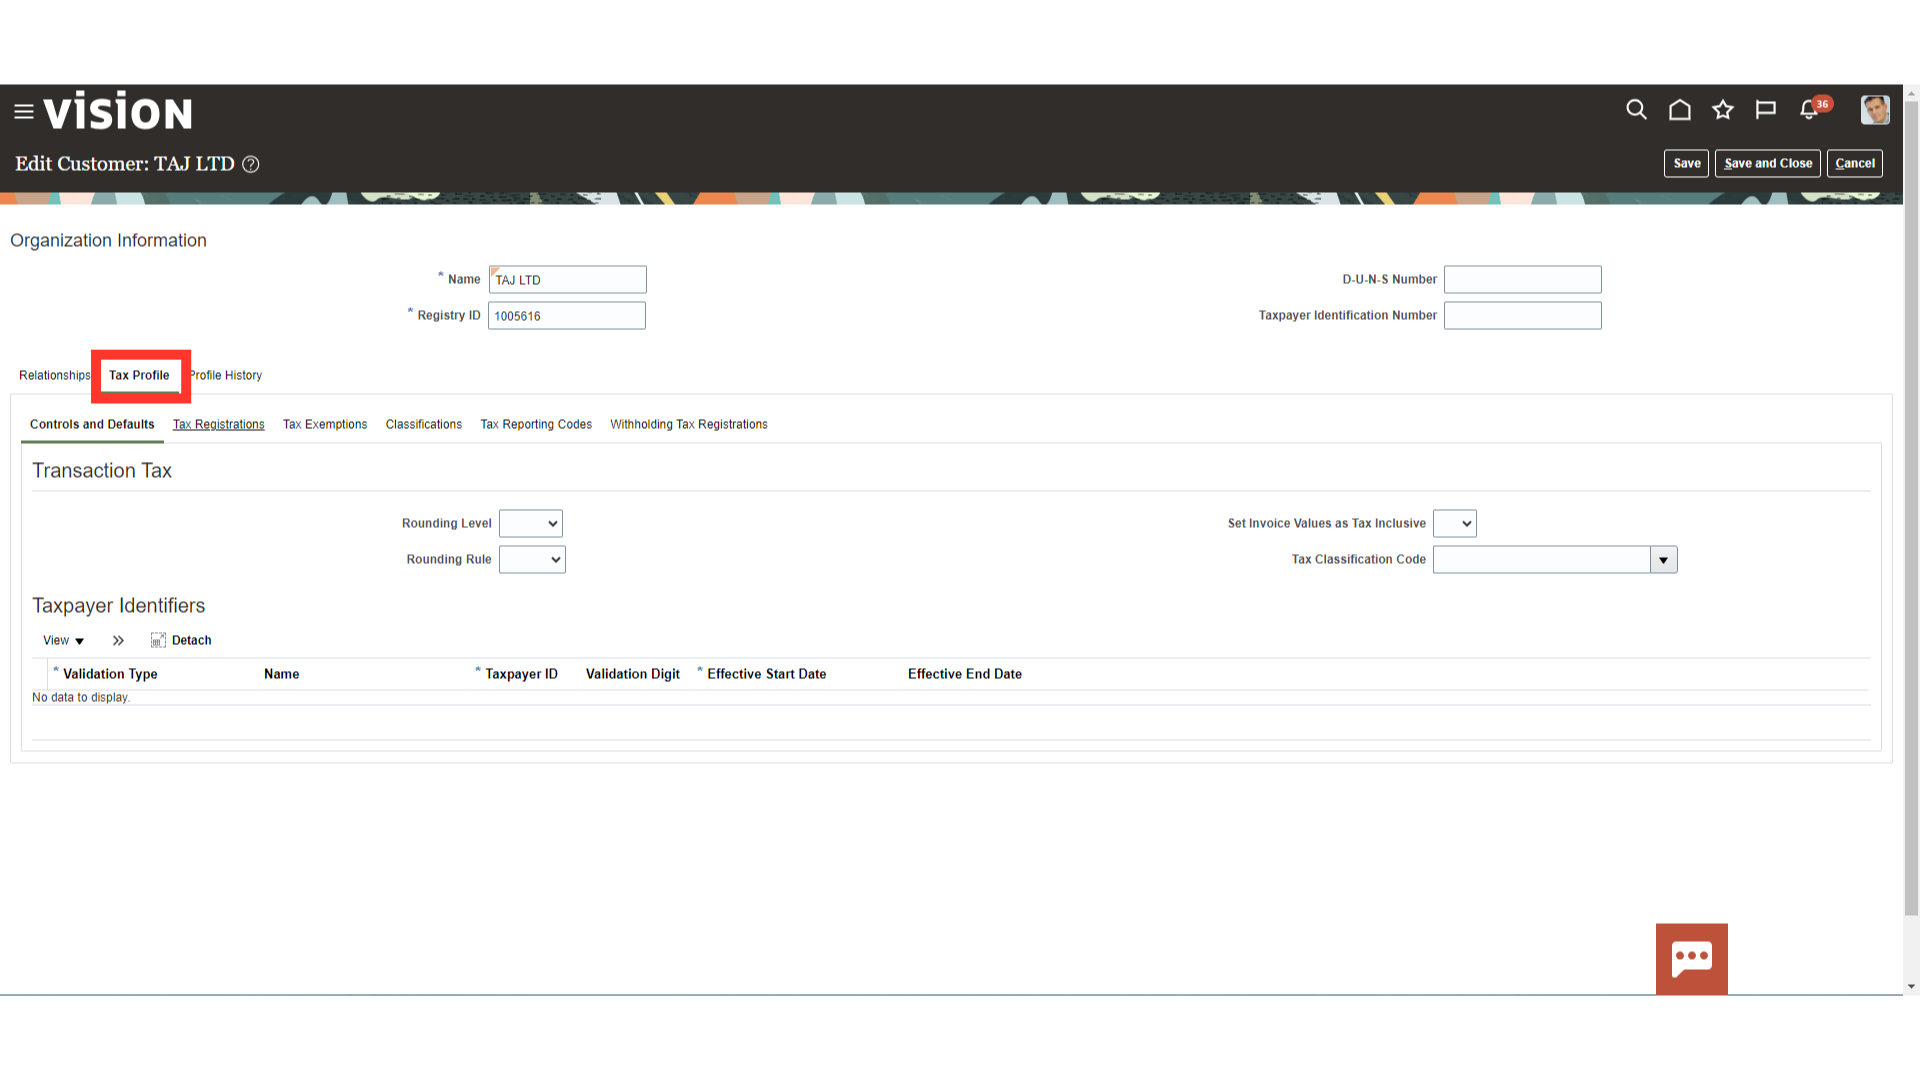
Enter the Tax-related details under Tax Profile. These details entered will default at the Account and Site level.
Click on Save and Close once required changes have been made.
Click on the Account number hyperlink to edit the account level details of customer.
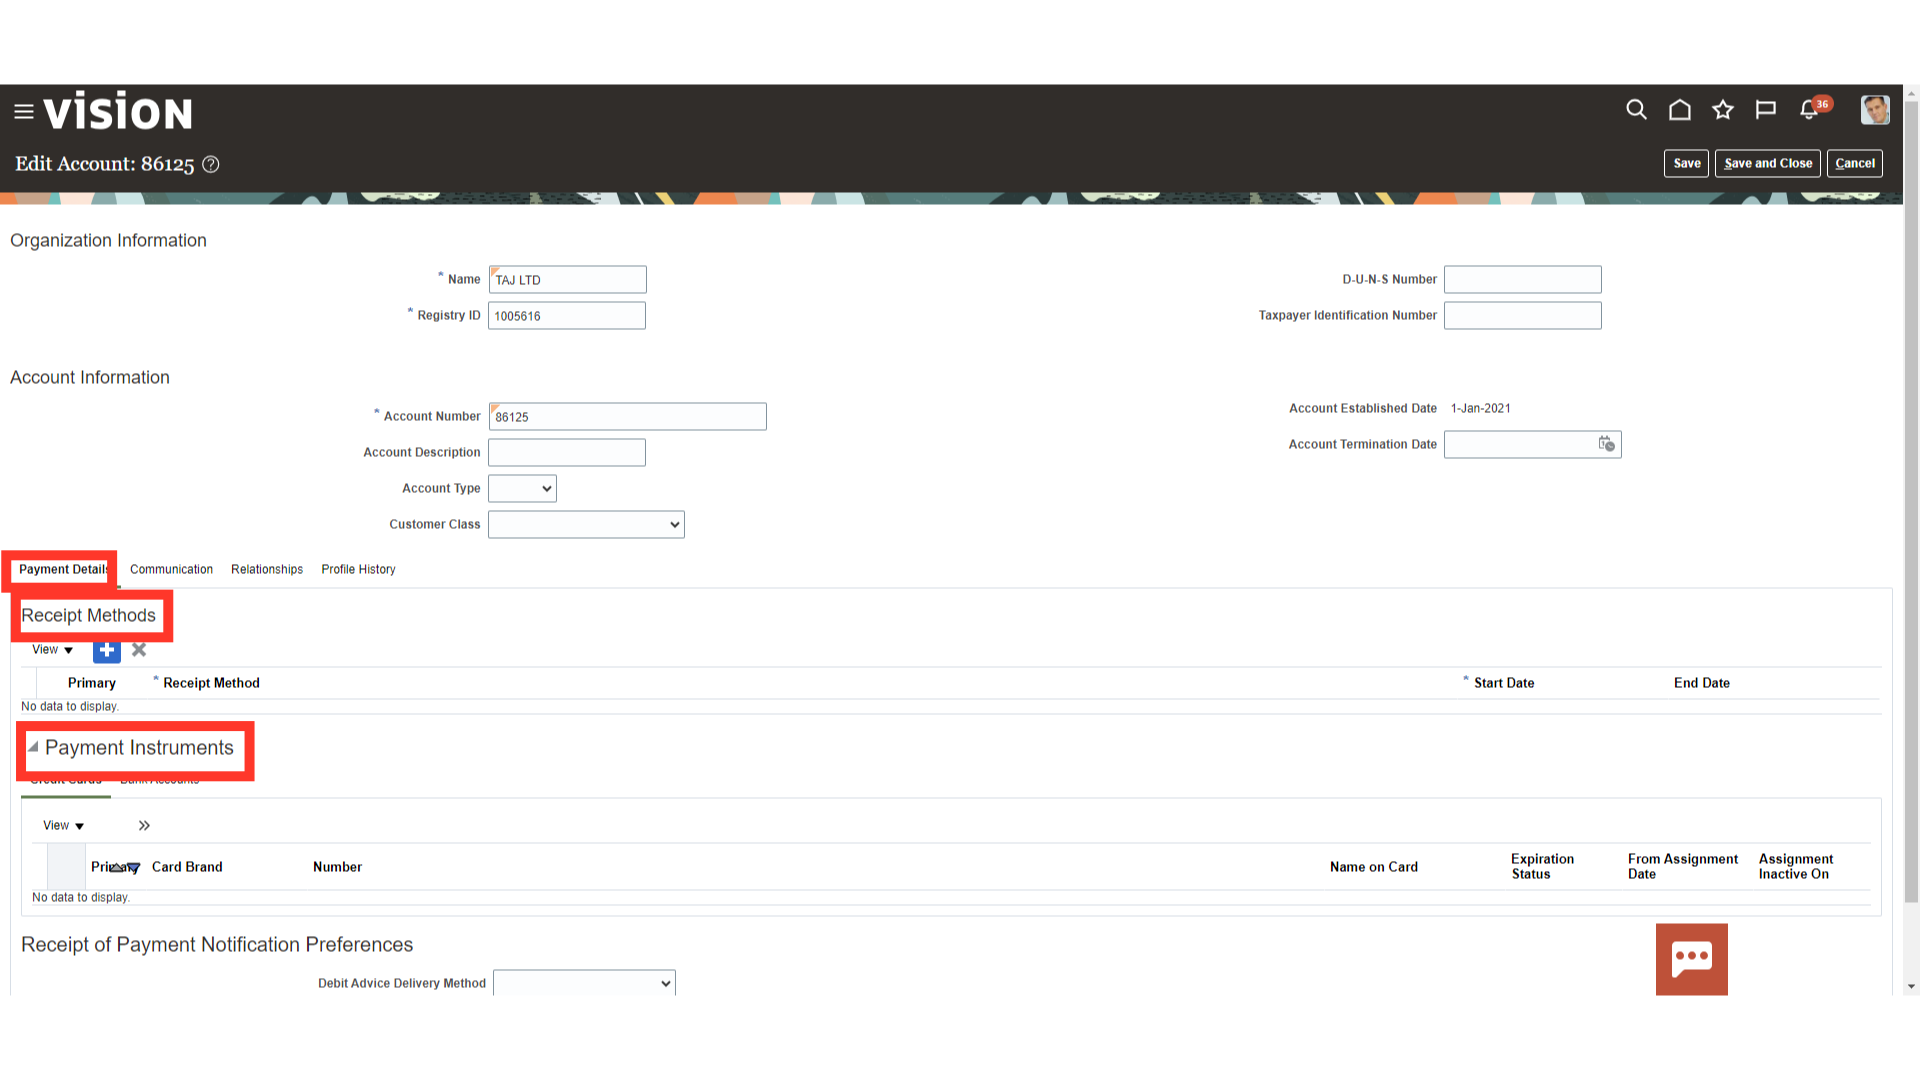
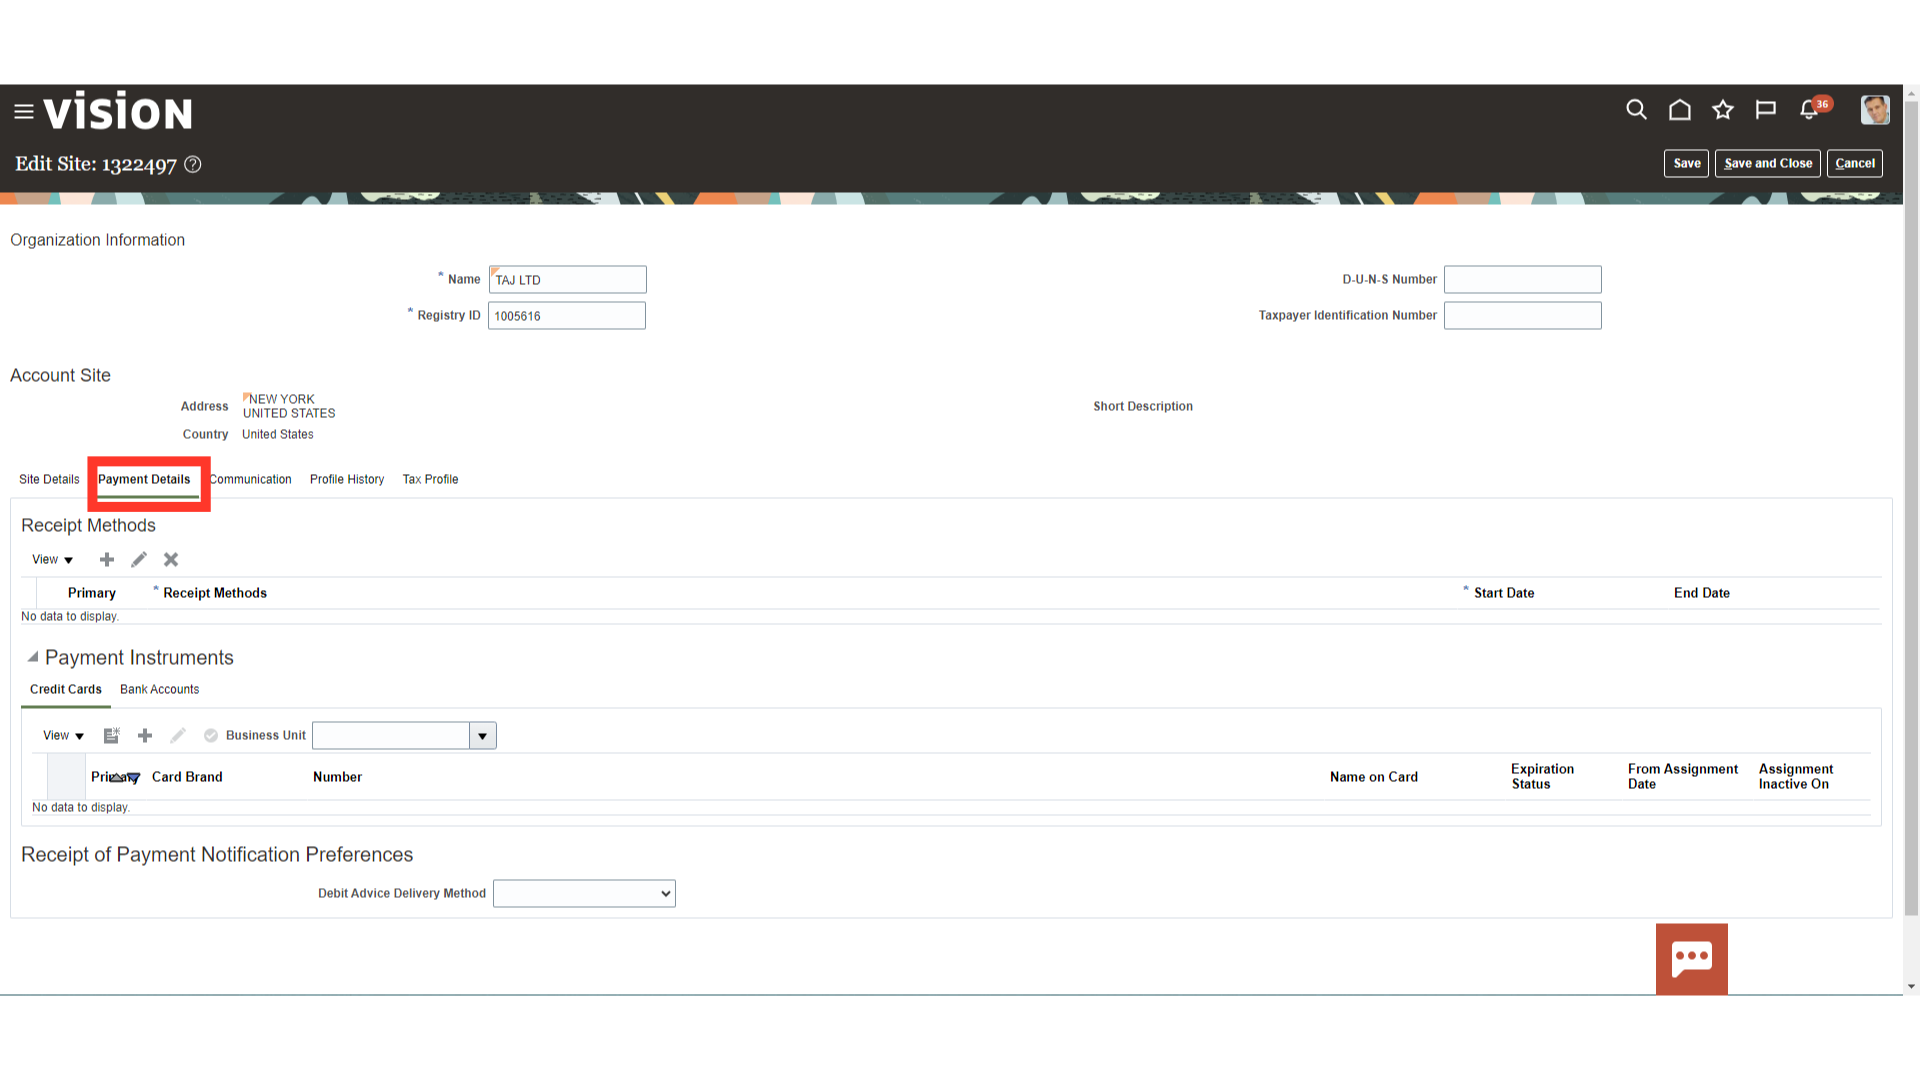
Use the Payment Details section to maintain active receipt methods and payment instruments for use by each customer account.
Receipt Methods: Assign automatic and manual receipt methods to each customer account. Start and end dates for each receipt method can’t overlap.
Payment Instruments: Assign credit cards and bank accounts to each customer account. The payment instrument information that you create for a customer account is stored in Oracle Payments for use during funds capture processing.
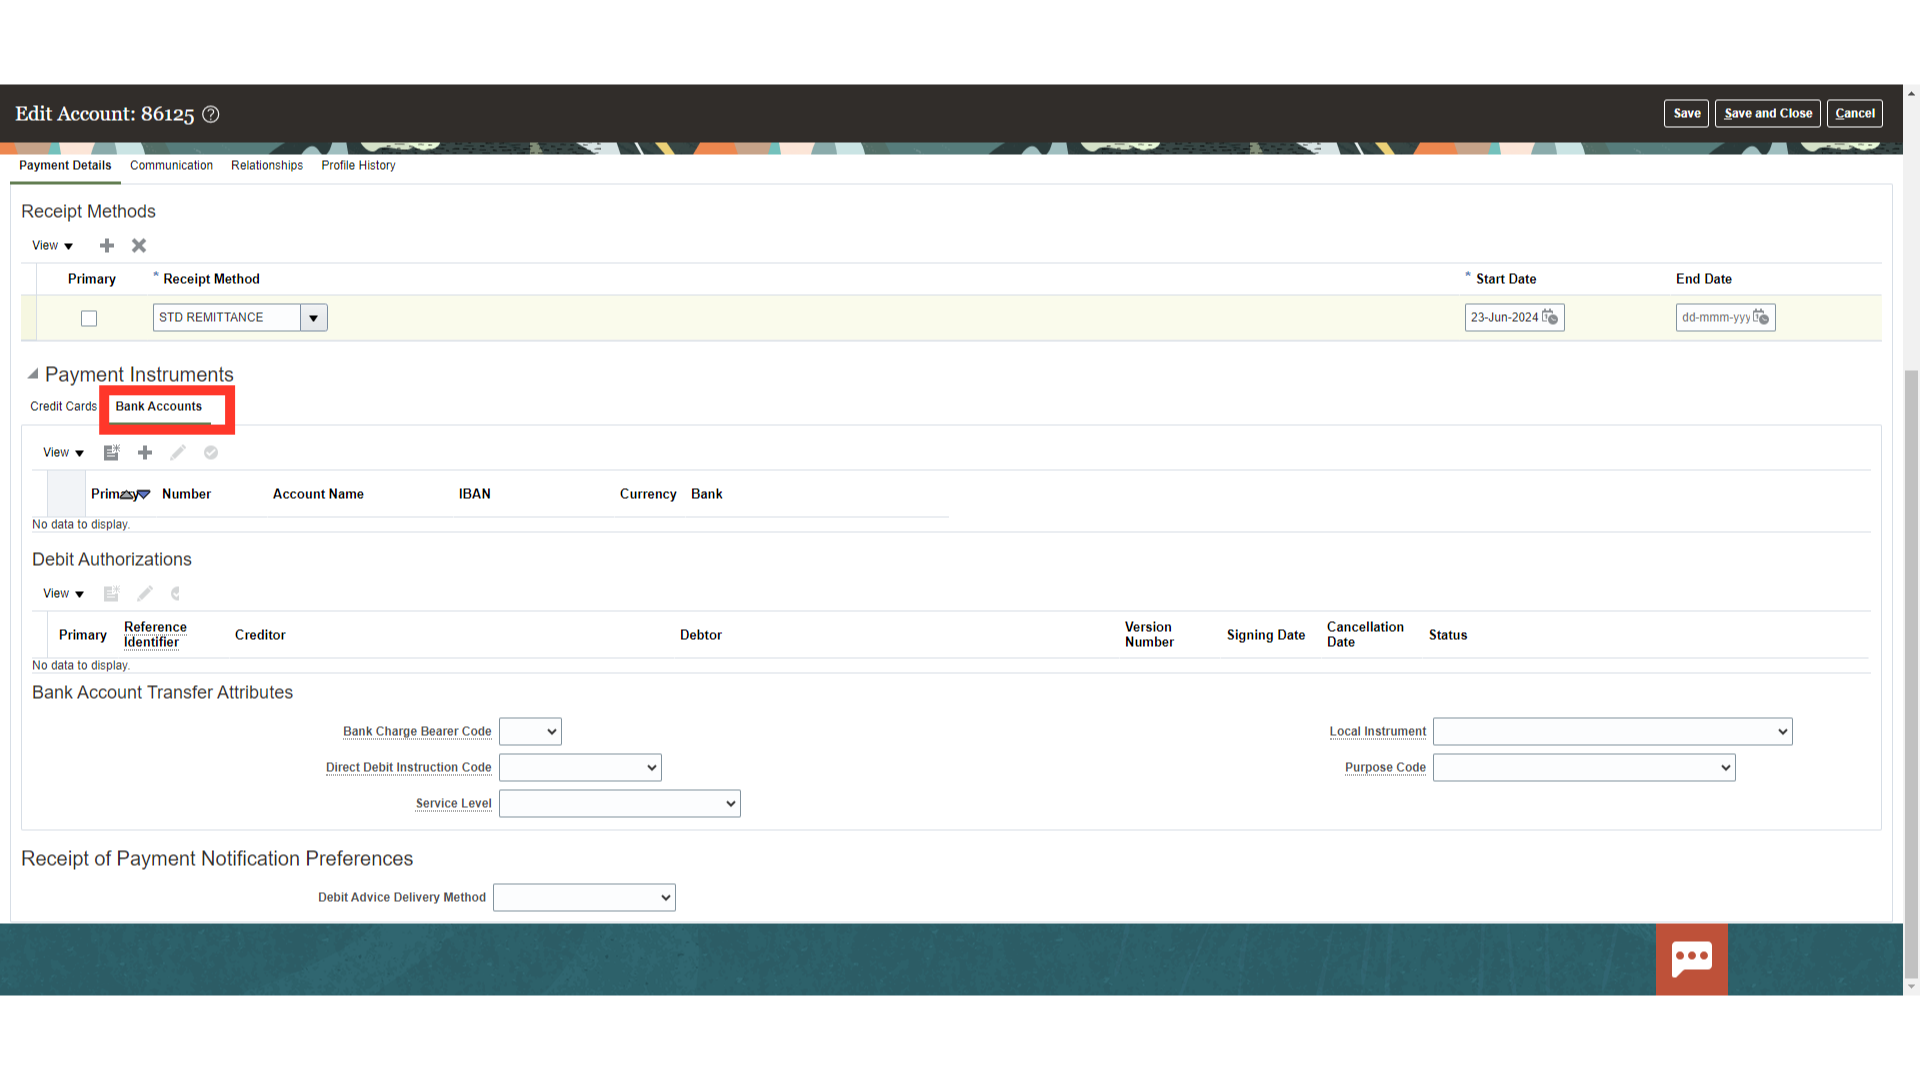
Assign bank accounts for use with automatic receipts. The bank accounts you specify are used by the automatic receipt process to transfer funds from these accounts to your remittance bank accounts.
Define multiple customer bank accounts in different currencies and assign bank accounts to customer addresses. The primary bank account for a particular currency is used as the default account during automatic receipt processing.
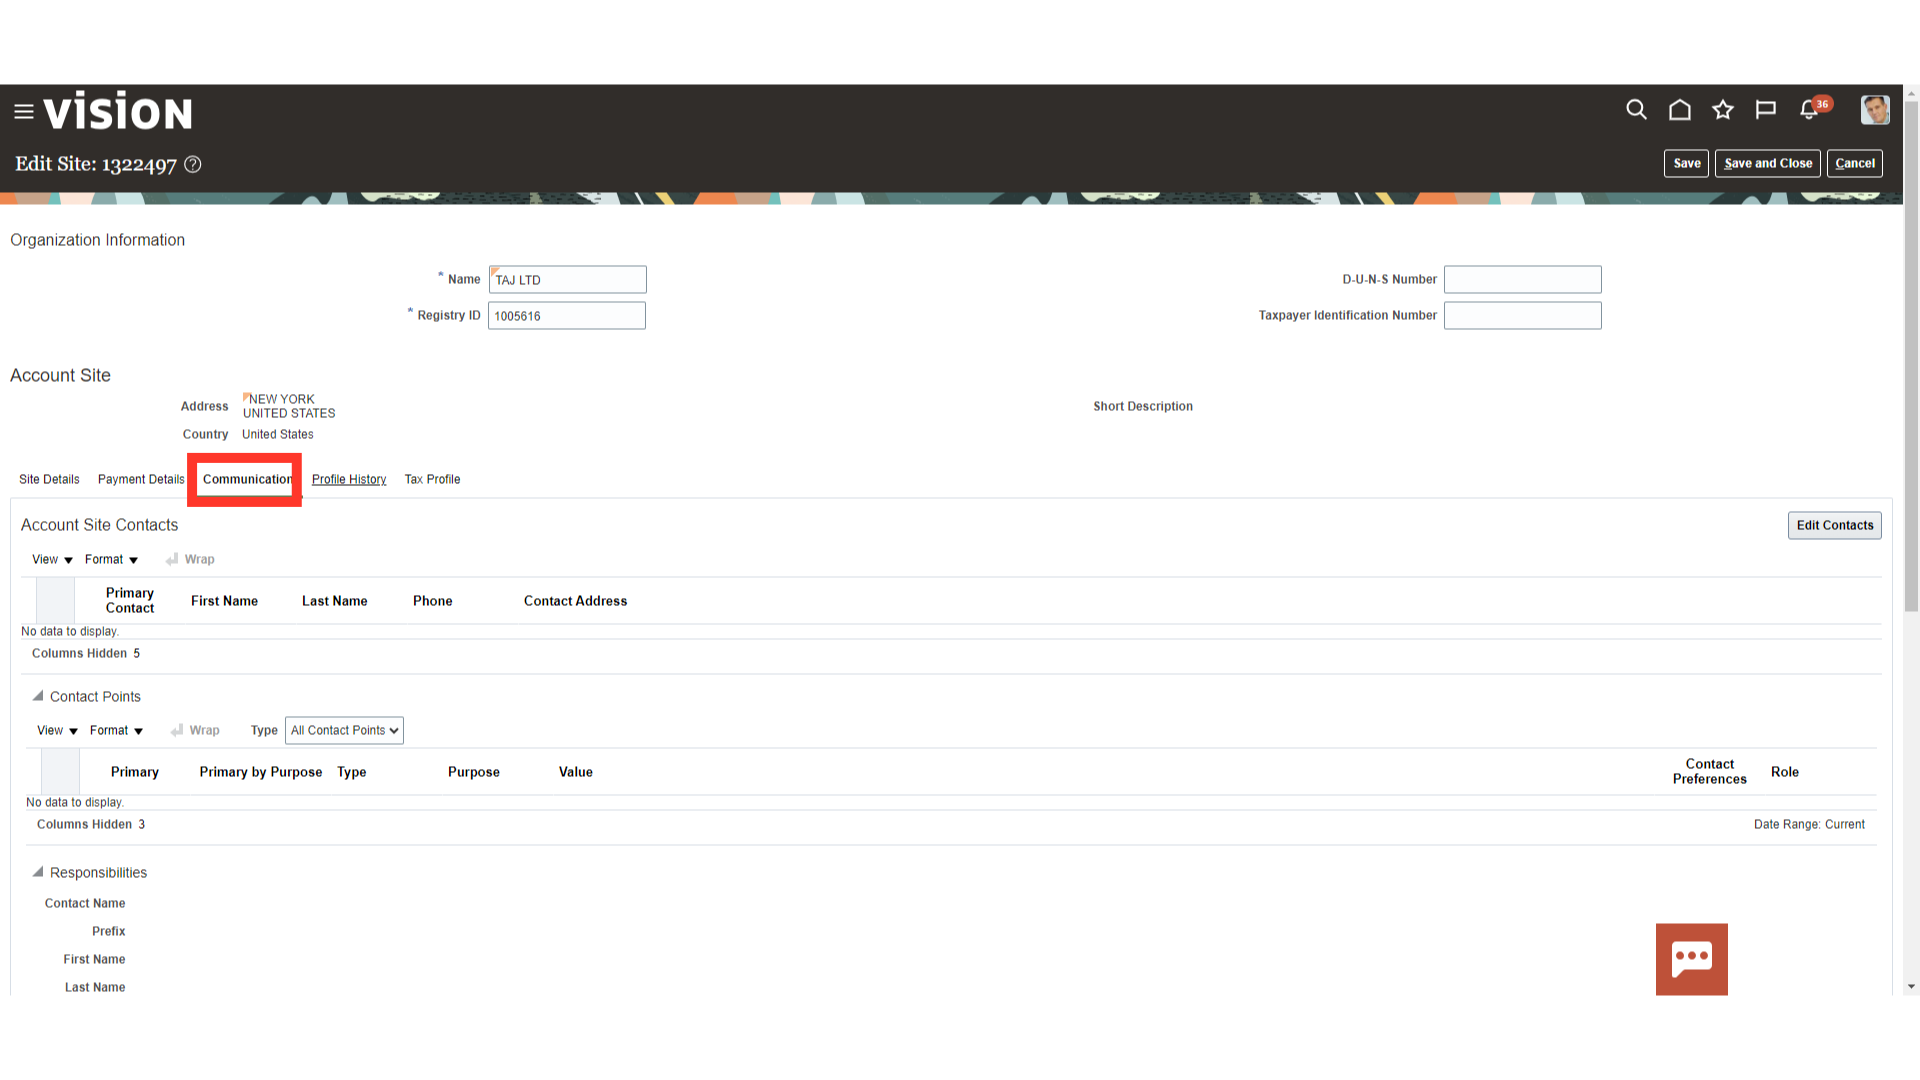
Use the Communication section to maintain customer contact persons for each customer account. You can create a new contact person or add an existing contact person for a customer account or account site. If you’re adding an existing contact person, you must define a party relationship at the customer level for each party and assign the party the Contact role type.
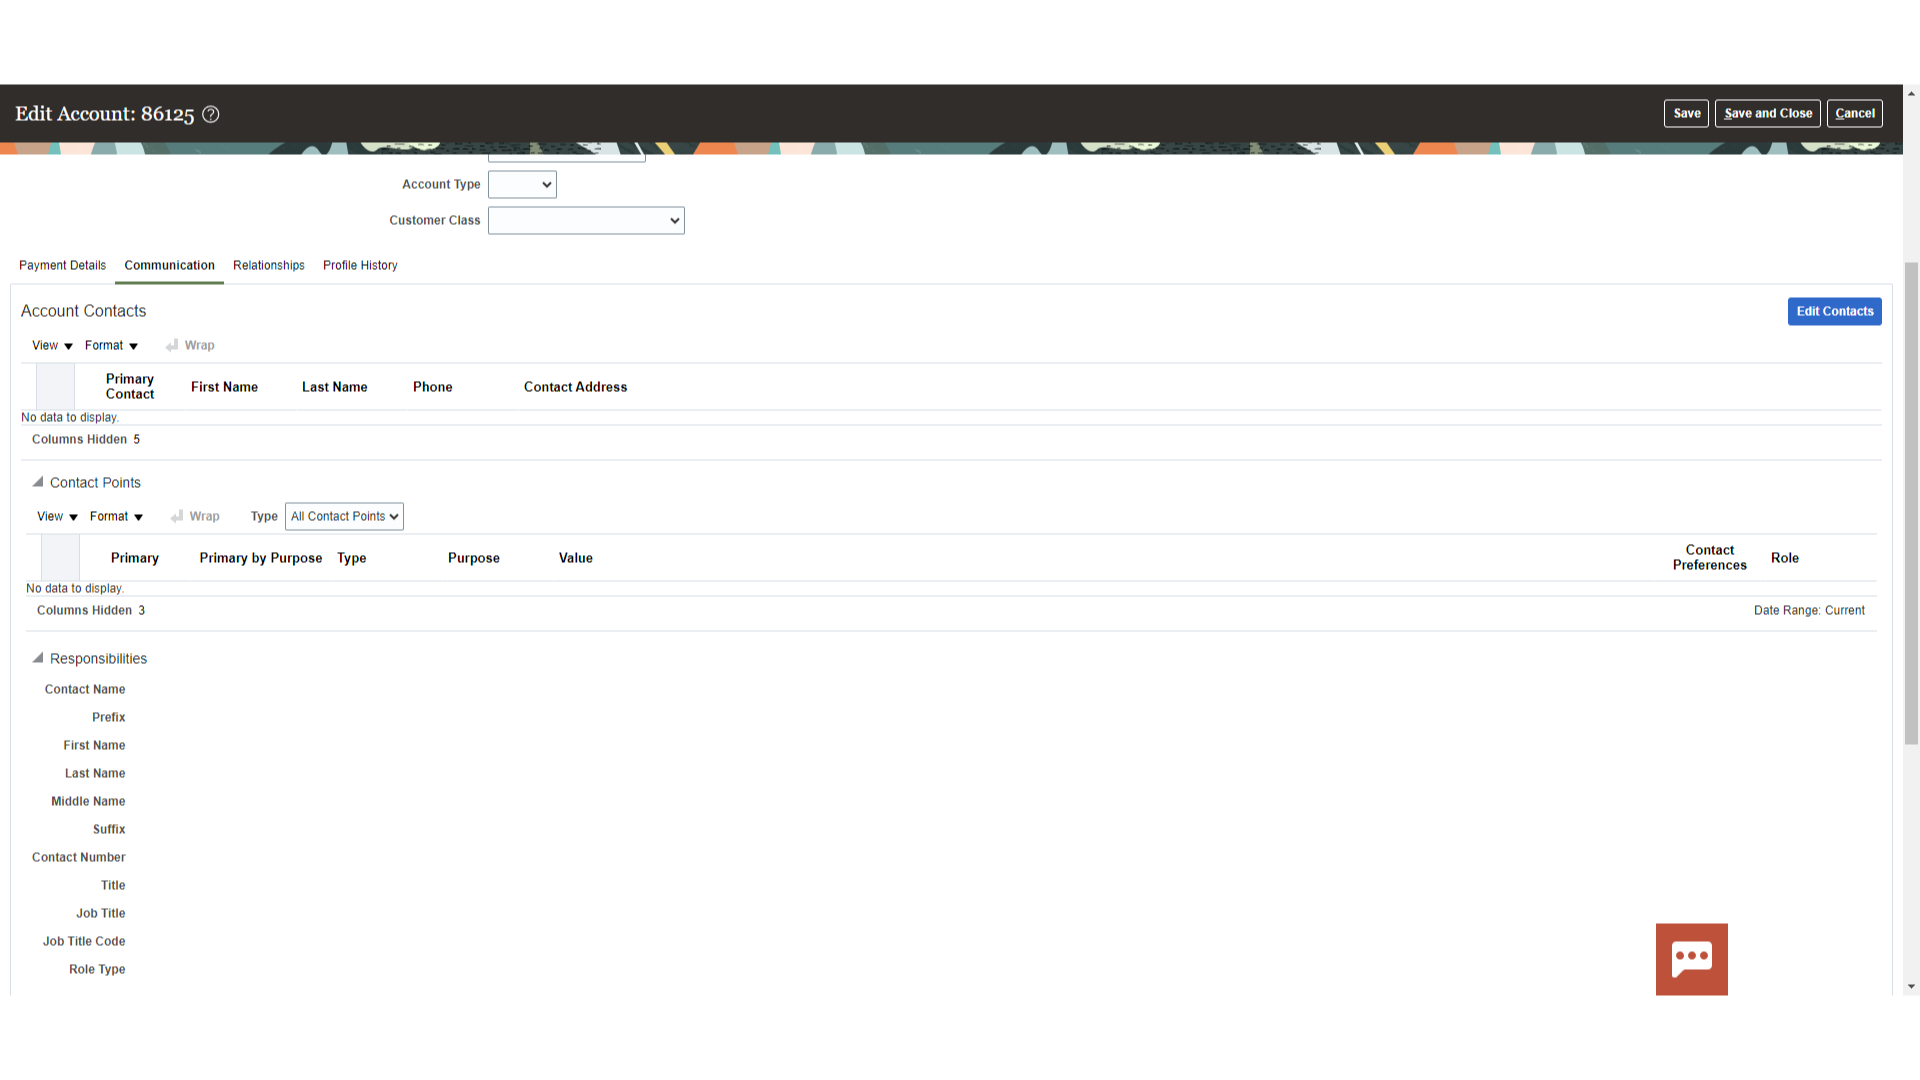
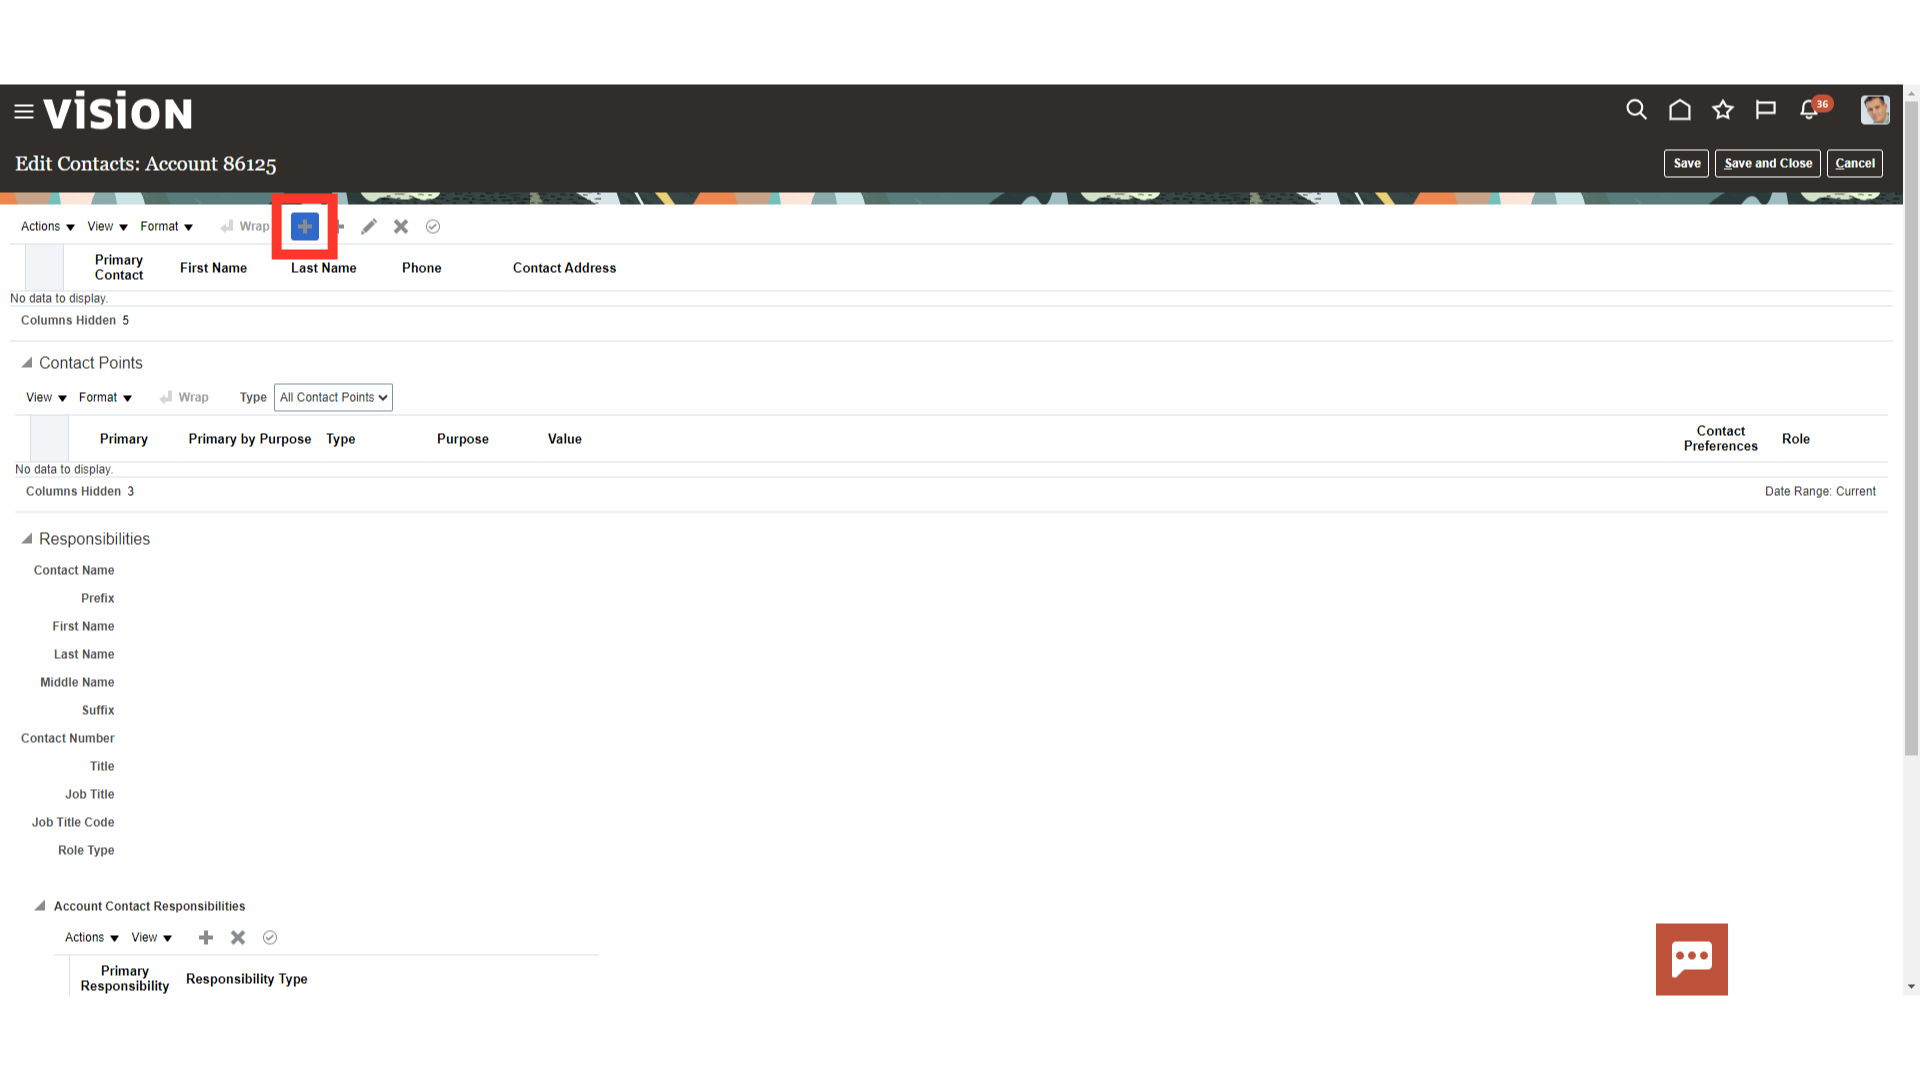
Click on the Plus icon to add contact details.
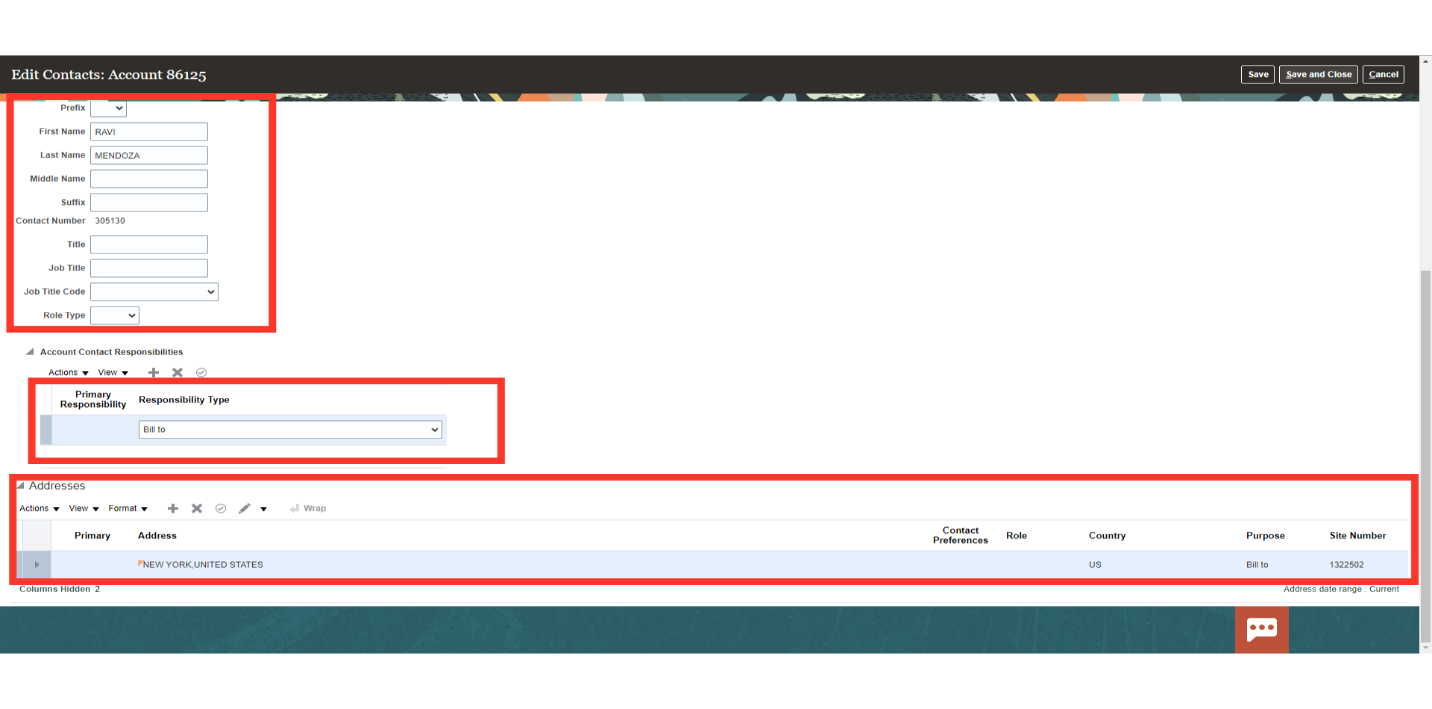
Information that you can maintain for each contact includes: Name and job title. Contact points, such as phone and fax numbers, email and instant message addresses, and URLs. Job responsibilities. Addresses. You can either enter new addresses specific to the contact, or you can enter addresses of account sites belonging to the customer account.
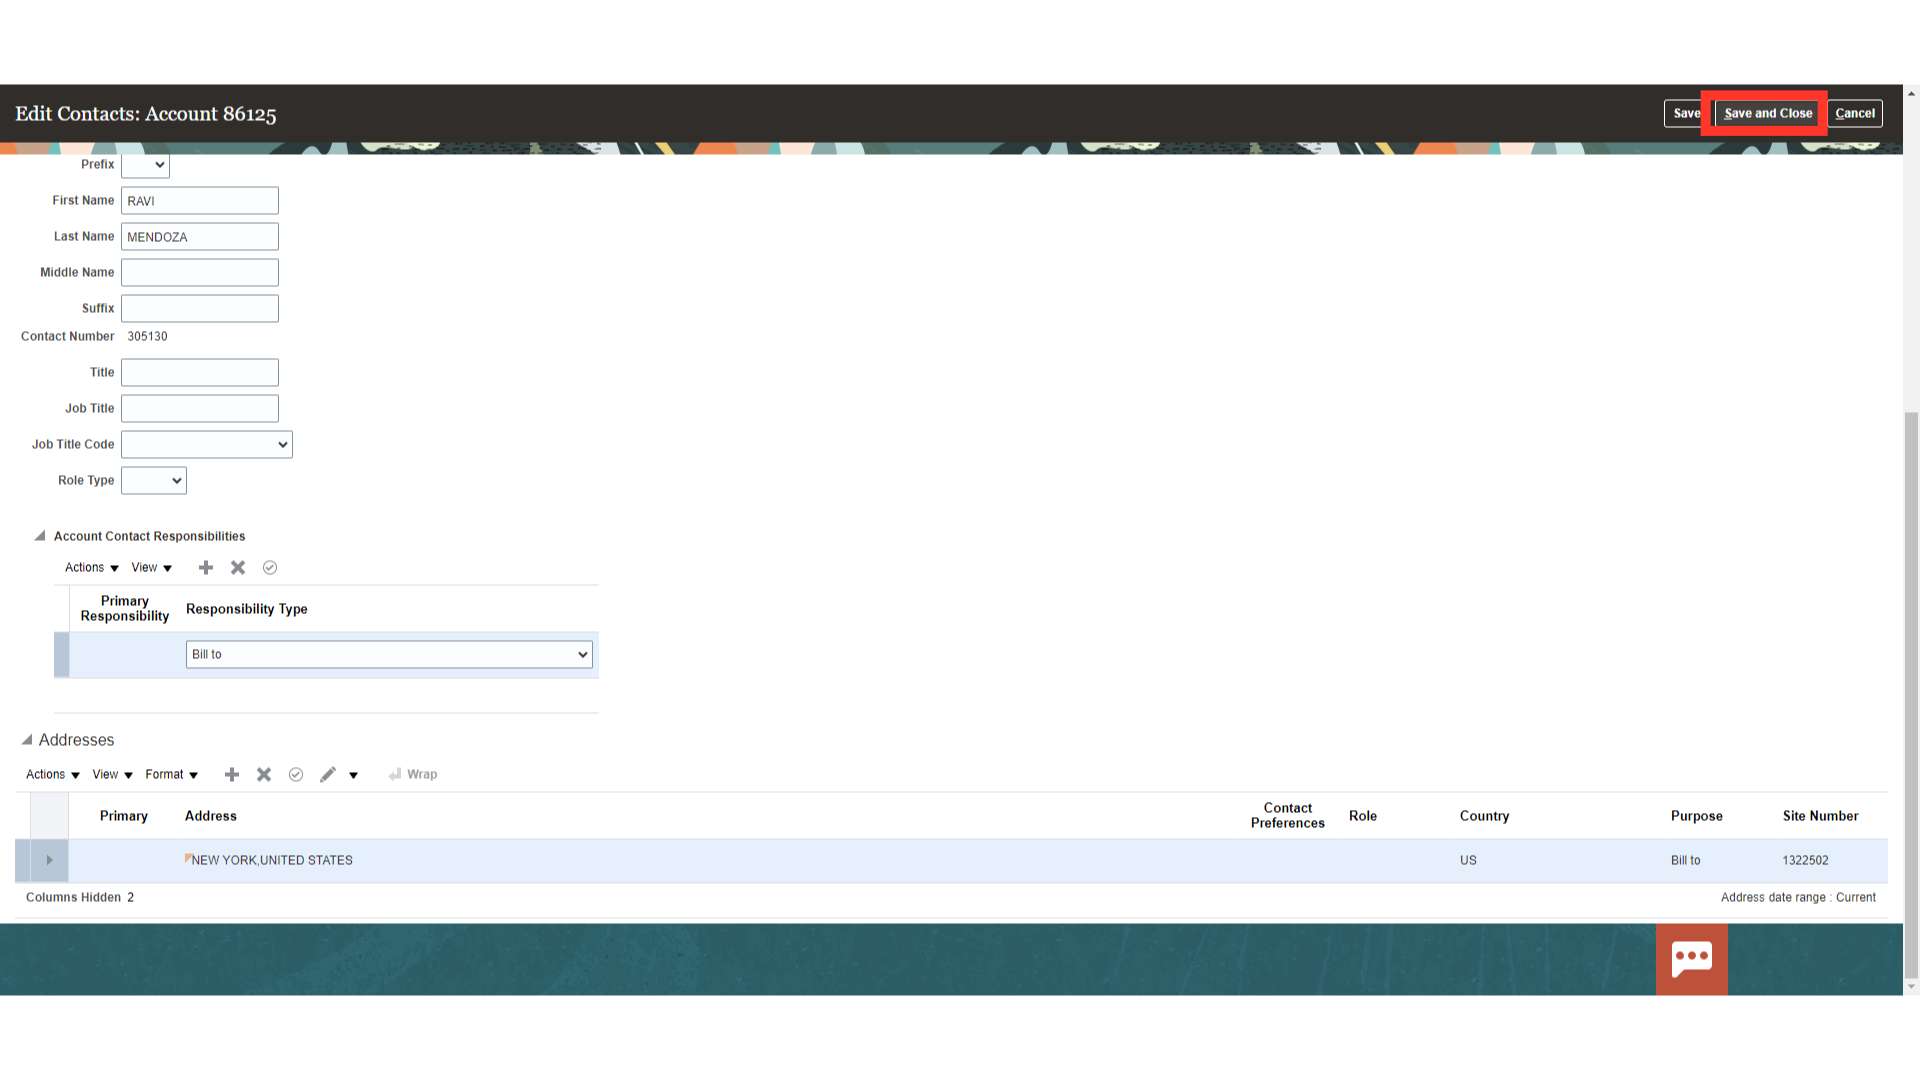
Once all details are verified, click on the Save and Close button.
Use customer account relationships to manage the sharing of billing and shipping services and payment activities between two accounts. Click on Plus icon to add relationships.
Enter the related account, which is the account number of the related party. A customer account relationship is either a one-way relationship or a reciprocal relationship. If you want to allow the two accounts to pay for each other’s open debit items, then enable the Reciprocal option for the relationship definition. Enable the Bill To and Ship To options for relationships that involve billing and shipping services. Click on OK once the data is updated.
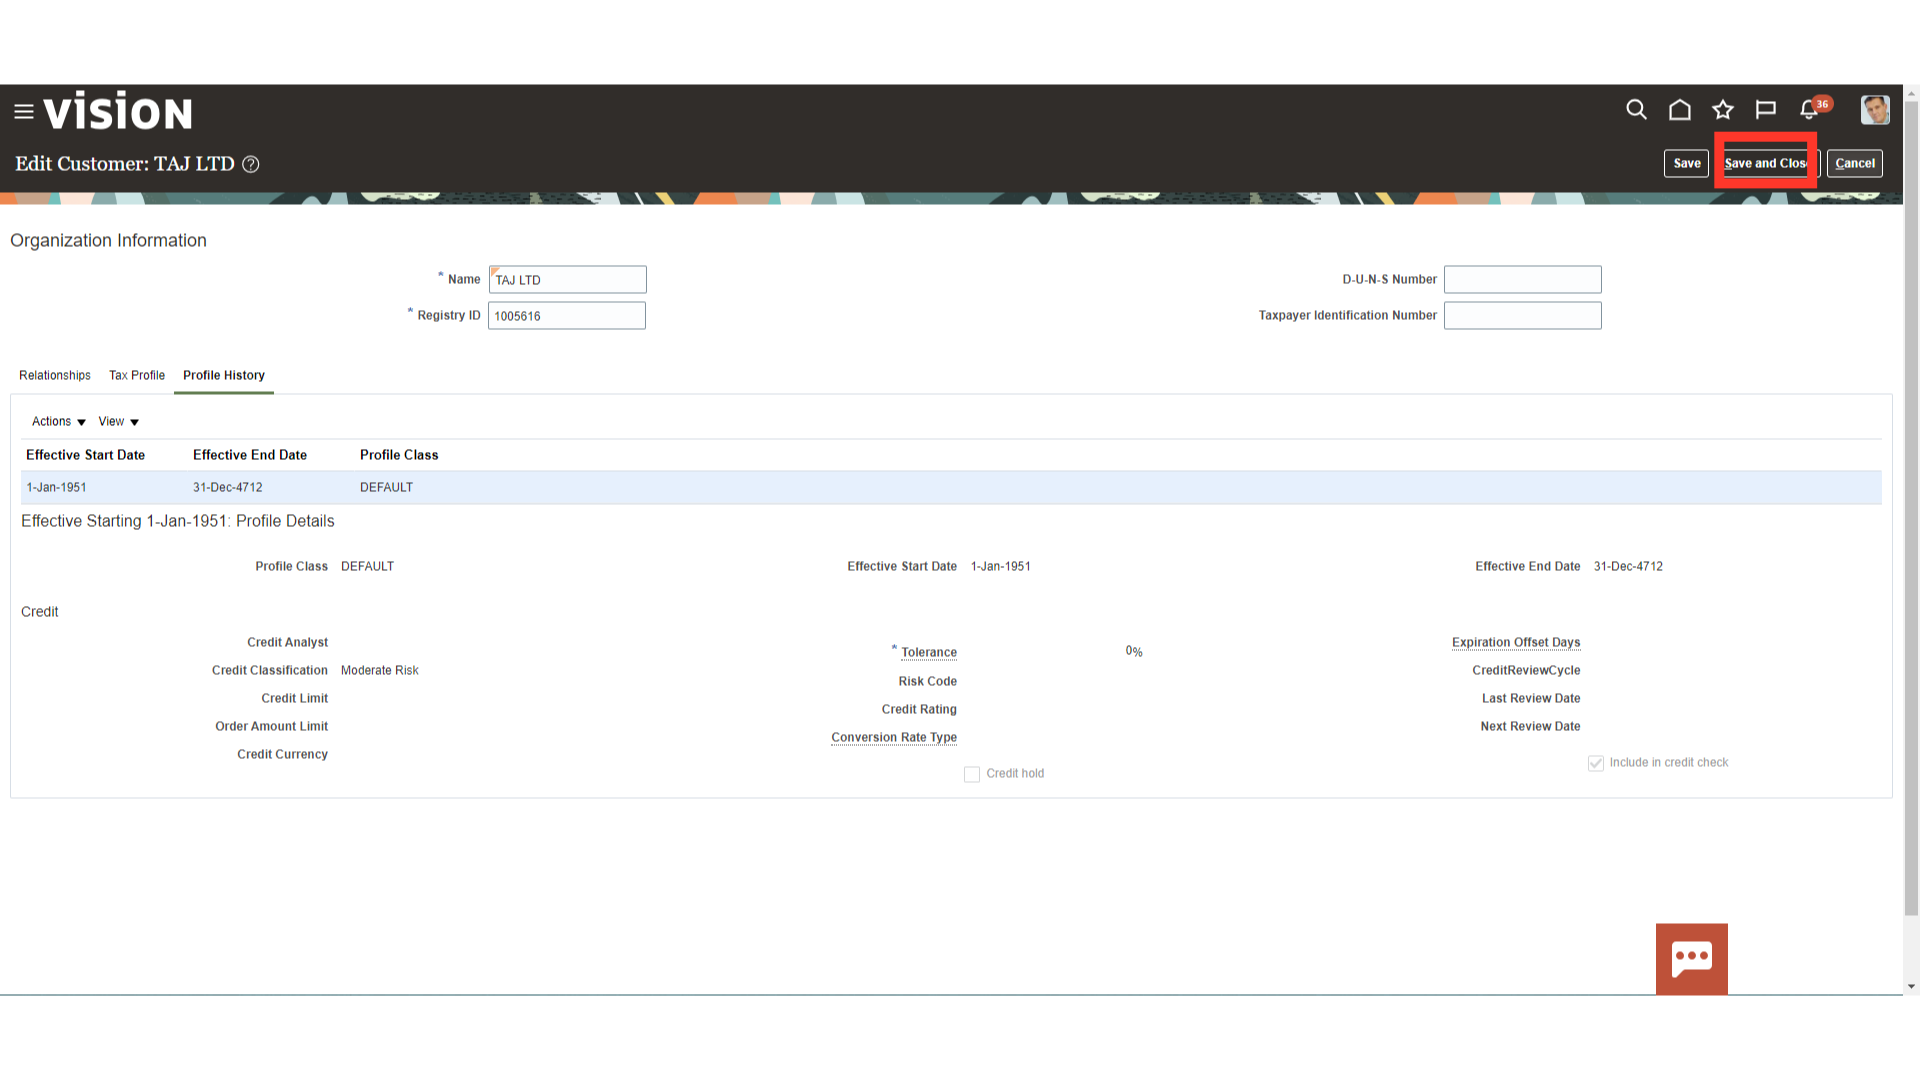
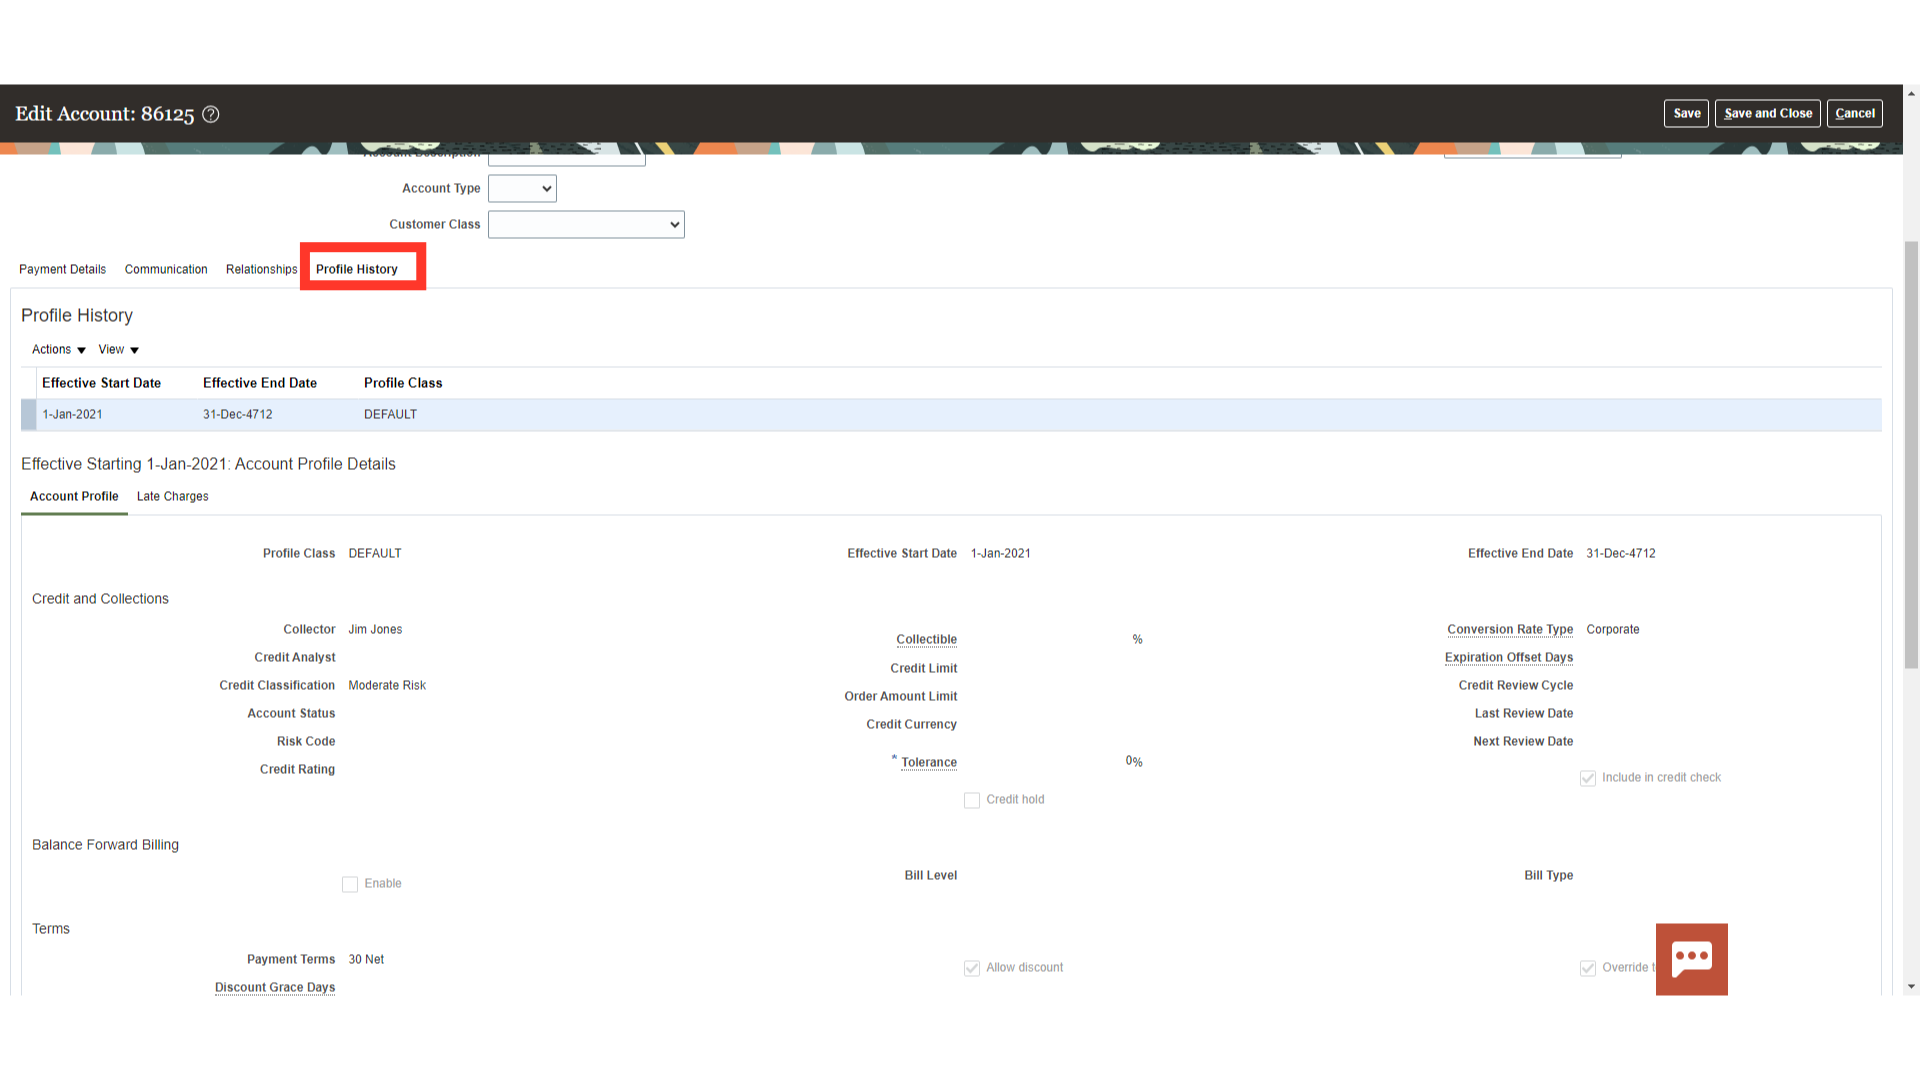
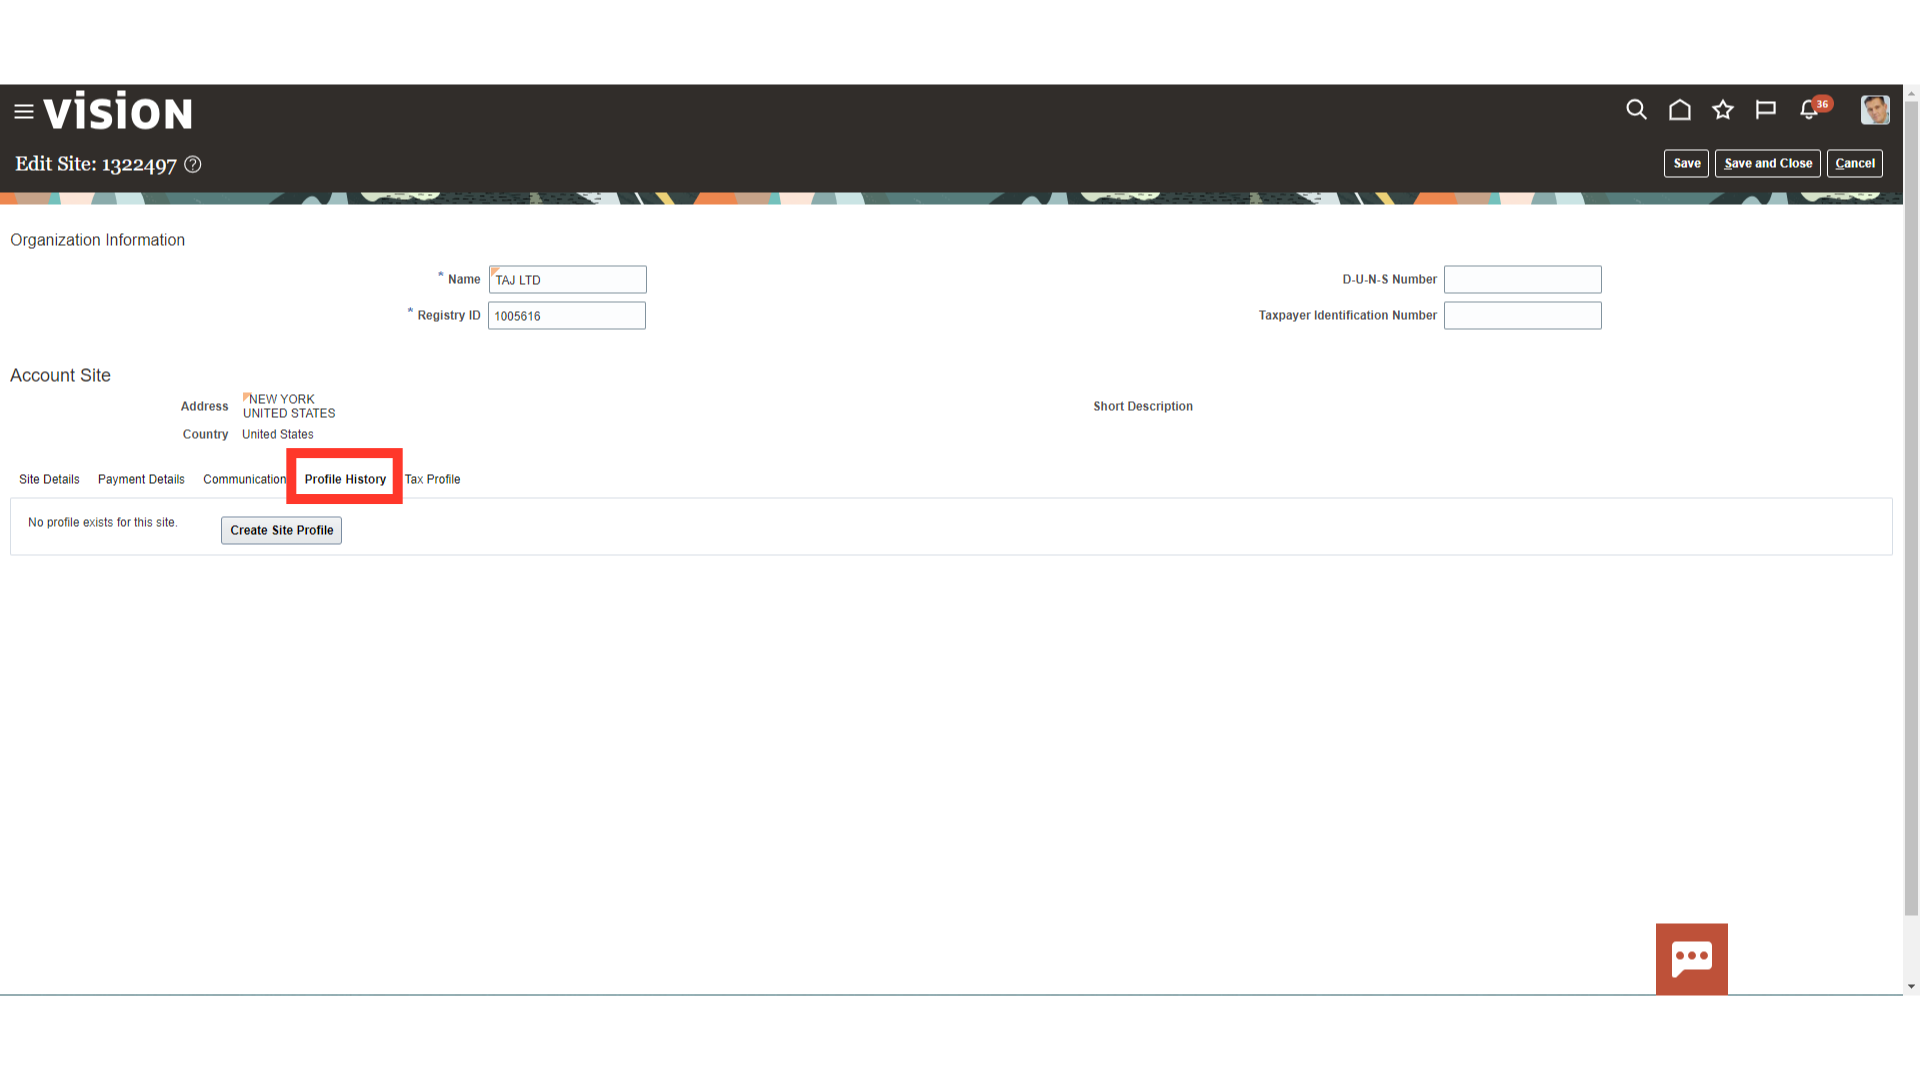
The Profile History tab provides you with a history of the changes to the profile of a customer entity. Account Profile: Use profile classes to organize your customer accounts into categories that reflect the needs of your enterprise. The profile class record contains generic options that you can set in different ways to group your customers into broad categories, such as by industry, location, size, creditworthiness, business volume, or payment cycles. After you assign a profile class to a customer account or site, you can modify details of the profile class to meet specific requirements for that account.
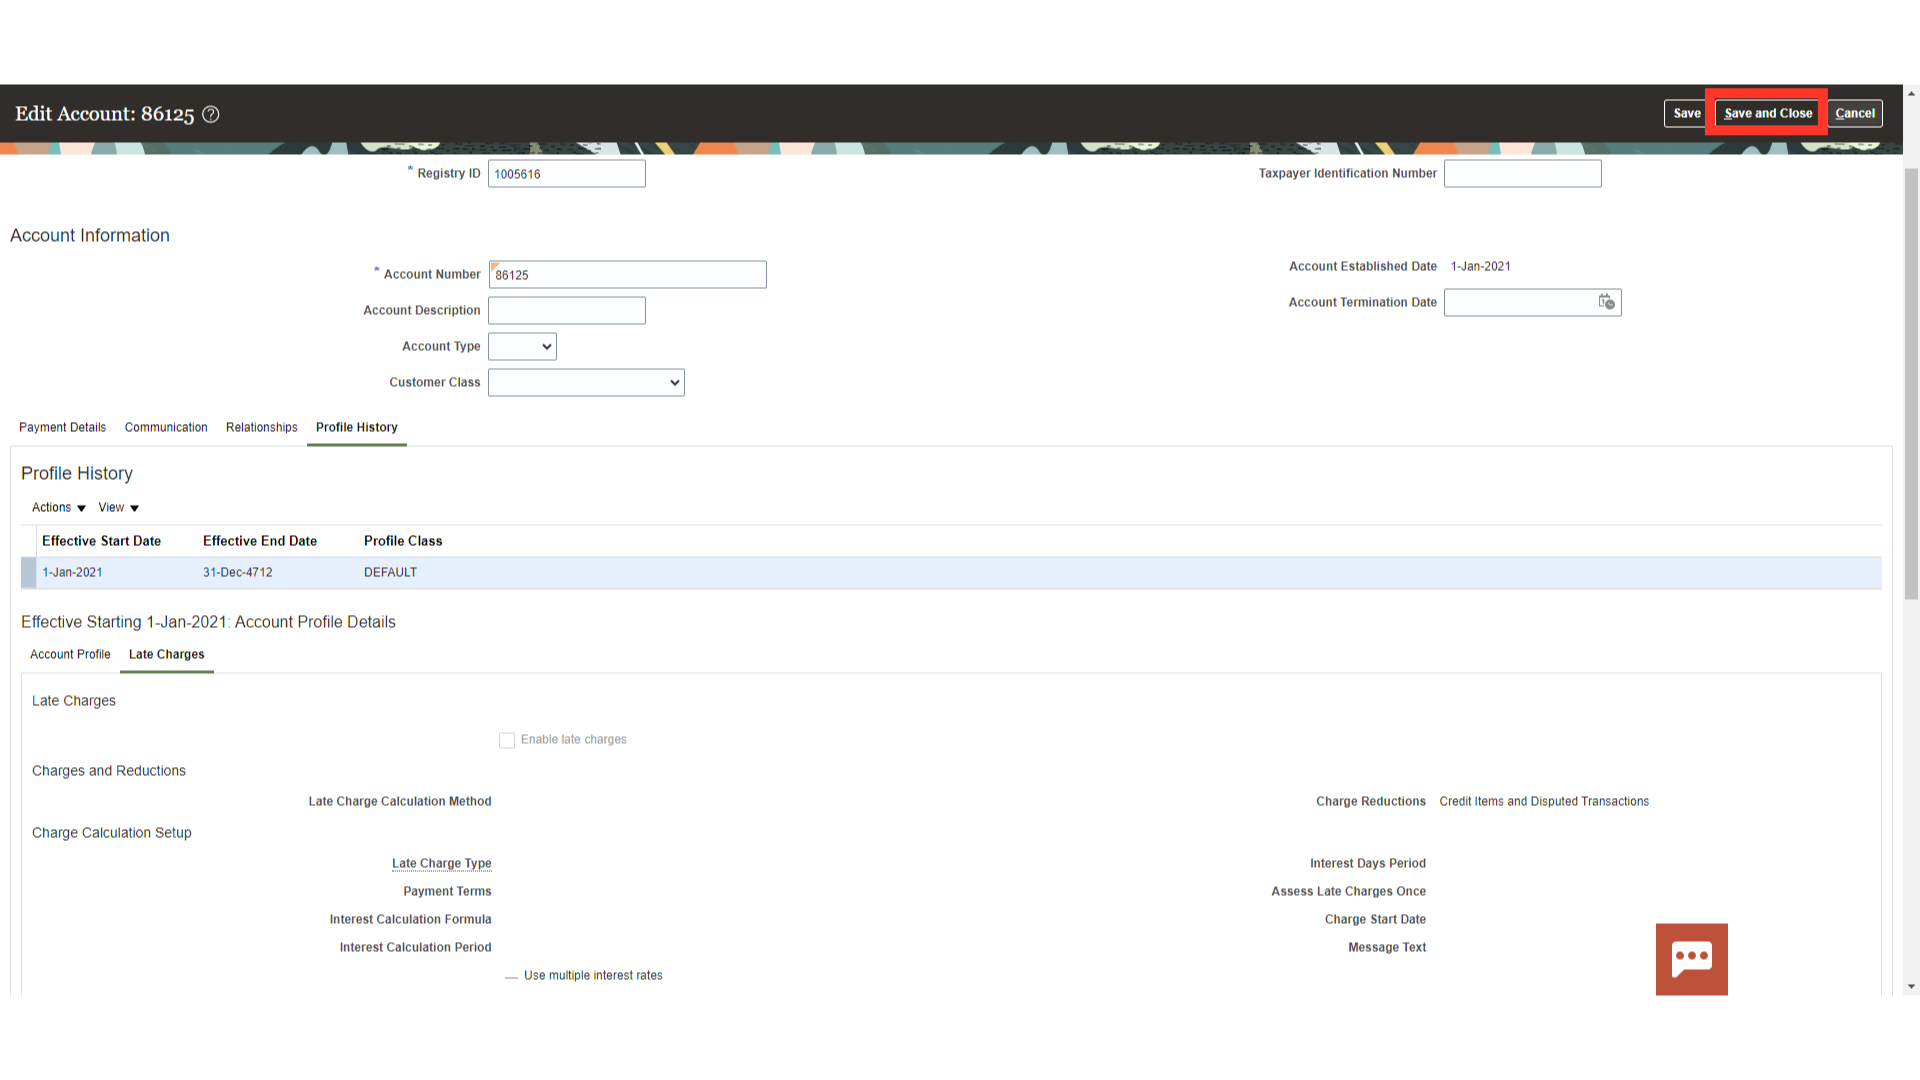
After all the details are entered click on Save and Close.
Click on Site number hyperlink to edit the Customer Site level details. A site is a point in space described by an address. A party site is the place where a party is physically located. A customer site is a party site that’s used in the context of a customer account. A single customer account can have multiple sites.
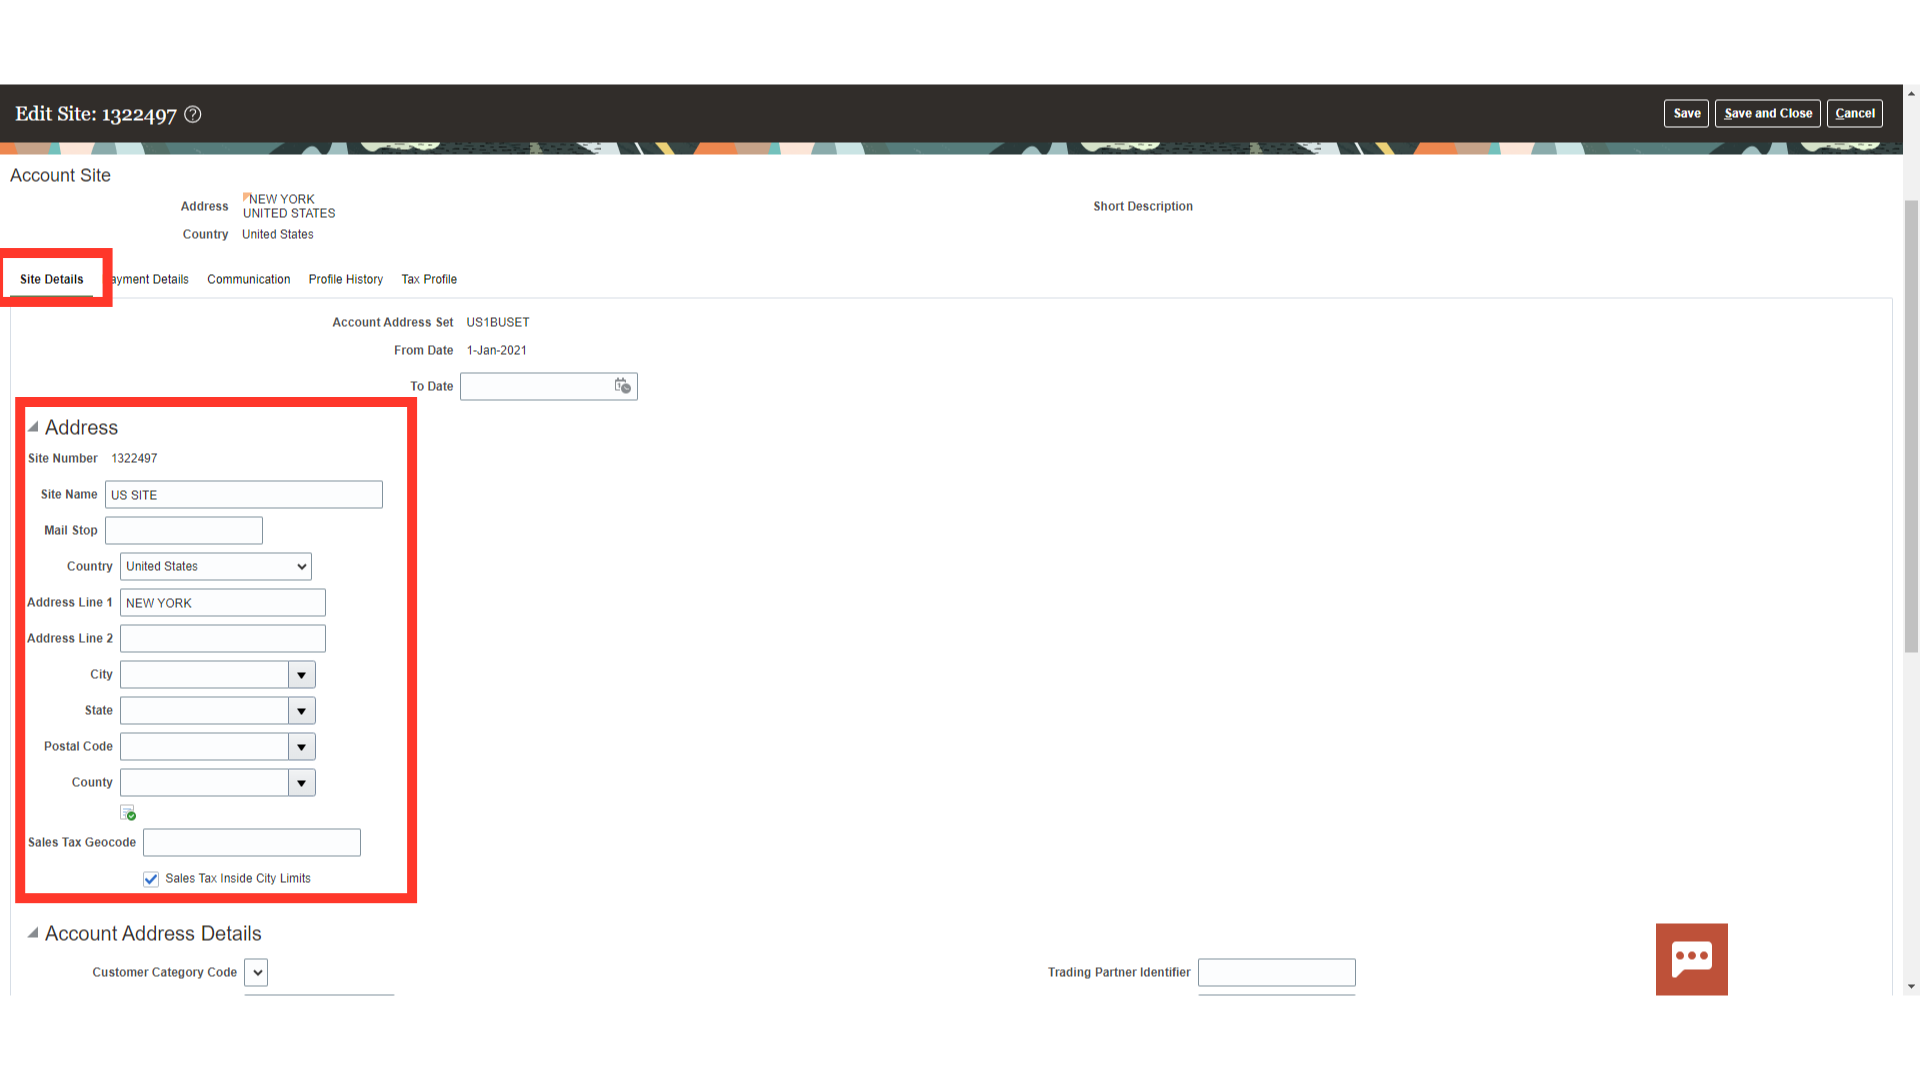
Enter the Address details for which the site is being created.
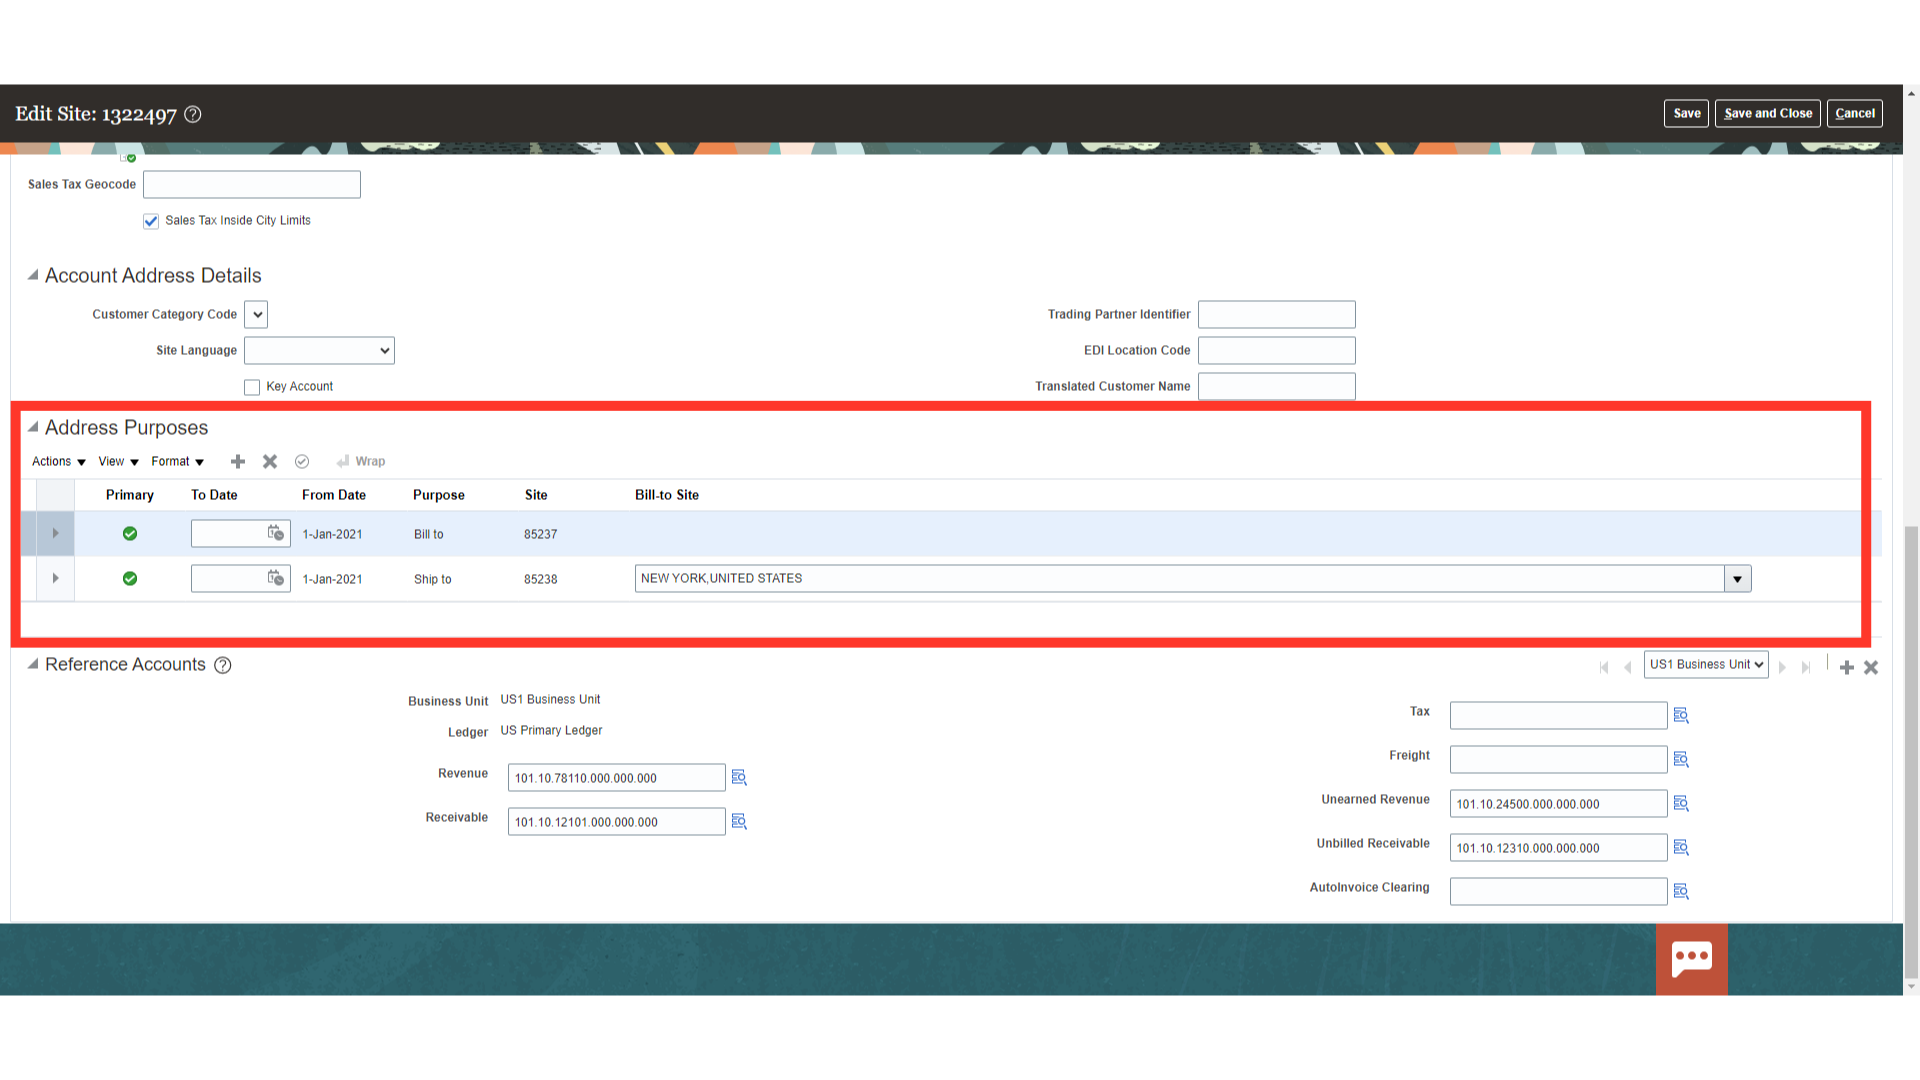
Assign address purposes to account sites to identify the functions performed by each particular customer account site. You can designate one account site as Primary for each address purpose.
Common address purposes include:
- Bill-to: Assign the bill-to address purpose to account sites designated to receive and process bills. You must create at least one bill-to site to process transactions for a customer.
- Ship-to: Assign the ship-to address purpose to account sites designated to receive goods purchased by the customer account.If you create a ship-to address purpose, you must indicate the related bill-to site that processes the bills for the shipped goods. Bill-to sites available for association with ship-to sites either belong to the same customer account or to related customer accounts.
- Deliver-to: Assign the deliver-to address purpose to sites that receive all or part of goods sent to a ship-to site.
- Bills of lading: Assign the bills of lading address purpose to sites that manage contracts for carriers that ship customer goods.
- Dunning: Assign the dunning address purpose to sites that receive dunning letters from you.
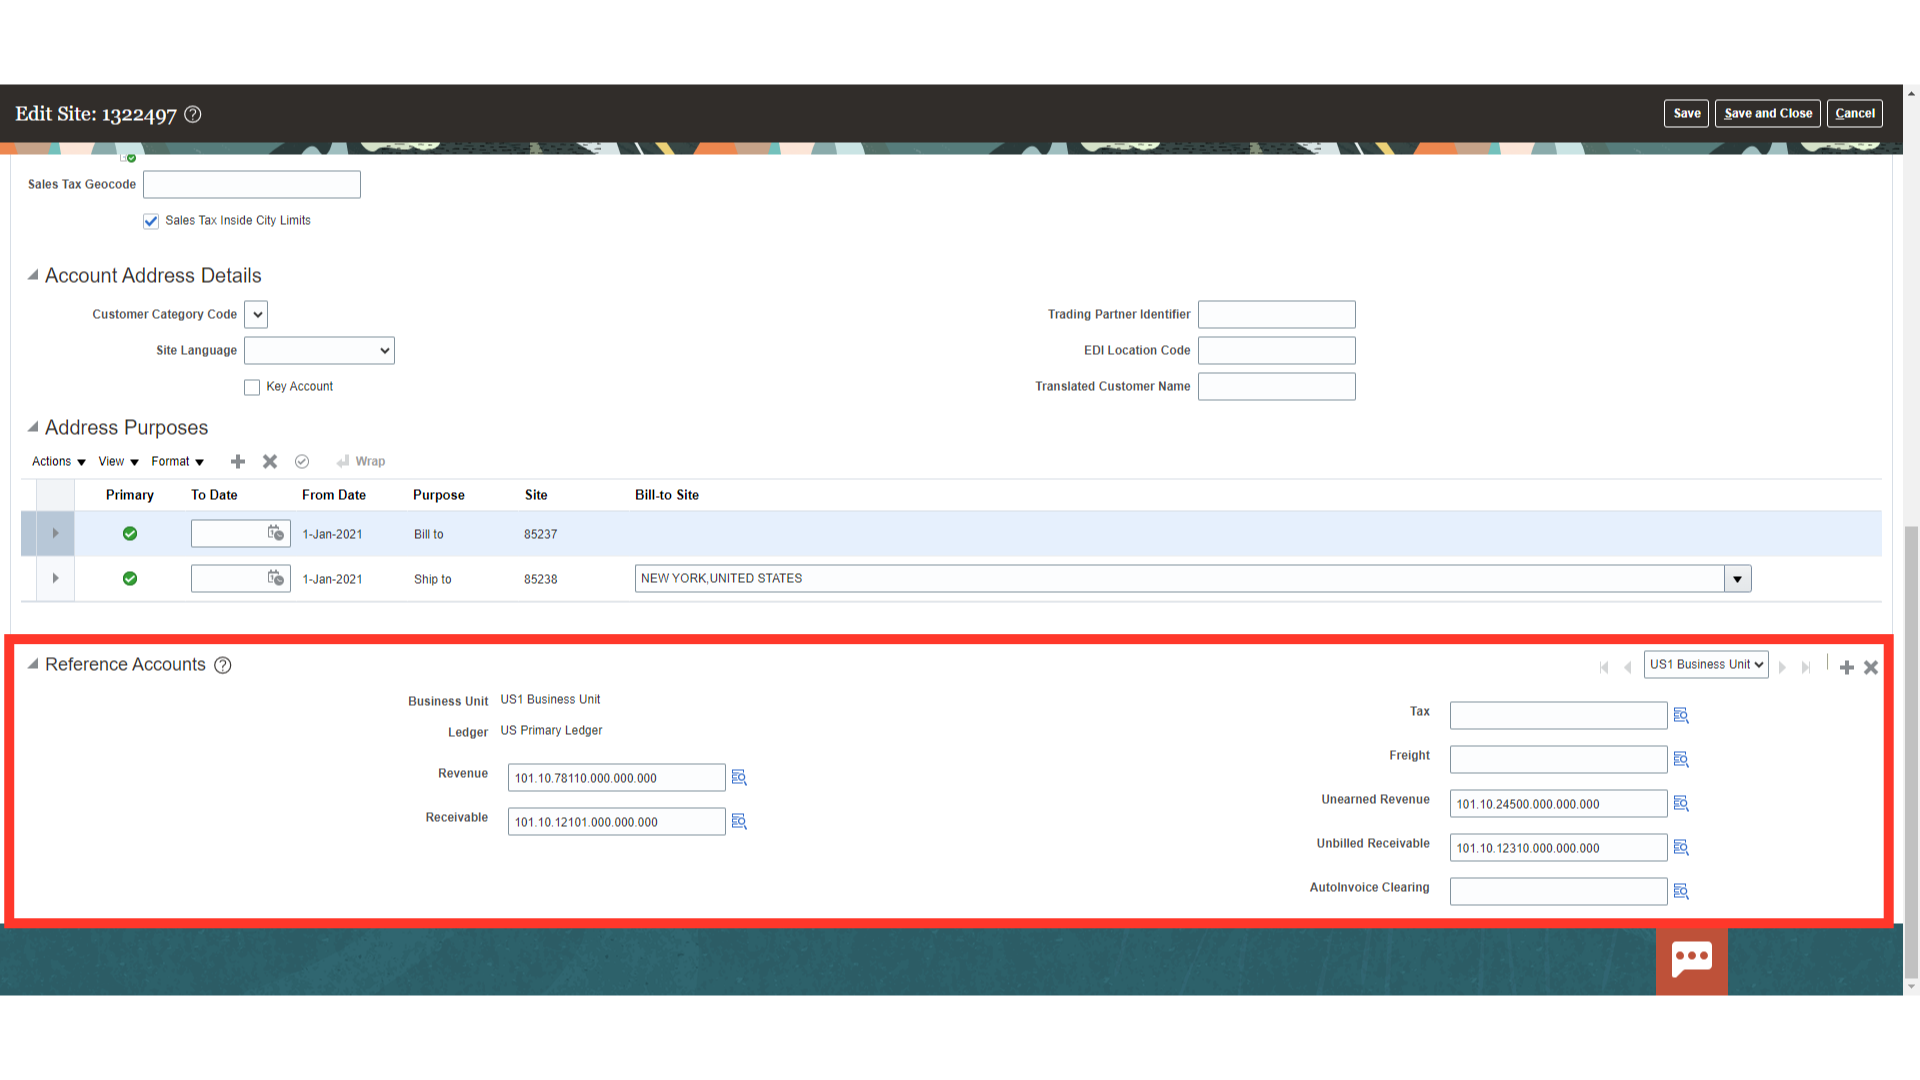
Account combinations such as Receivables, Revenue etc can mentioned at customer site level for defaulting at time of creating the Transaction.
Similar to Customer Account Select the Primary Receipt Method on the Payment Details tab. The details configured as Site level will over-ride the details configured as Account level.
Enter the Contact details specific to that particular site.
The Profile History at the site level has the same details as at the Account level. Create a profile history specific to site if it is different from the one created at Account.
At the Tax profile, maintain the customers tax related details.
After all the details are entered click on Save and Close.

This guide has shown how to keep track of customer data at different stages, including Party, Account, and Site, which includes tax profile, profile class, site purpose, and Reference Accounts.