Receipt Reversal, Refund, and Write Offs
This guide will explain the process of writing off a receipt, giving a refund, reversing a receipt, and creating the accounting entry for those occurrences.
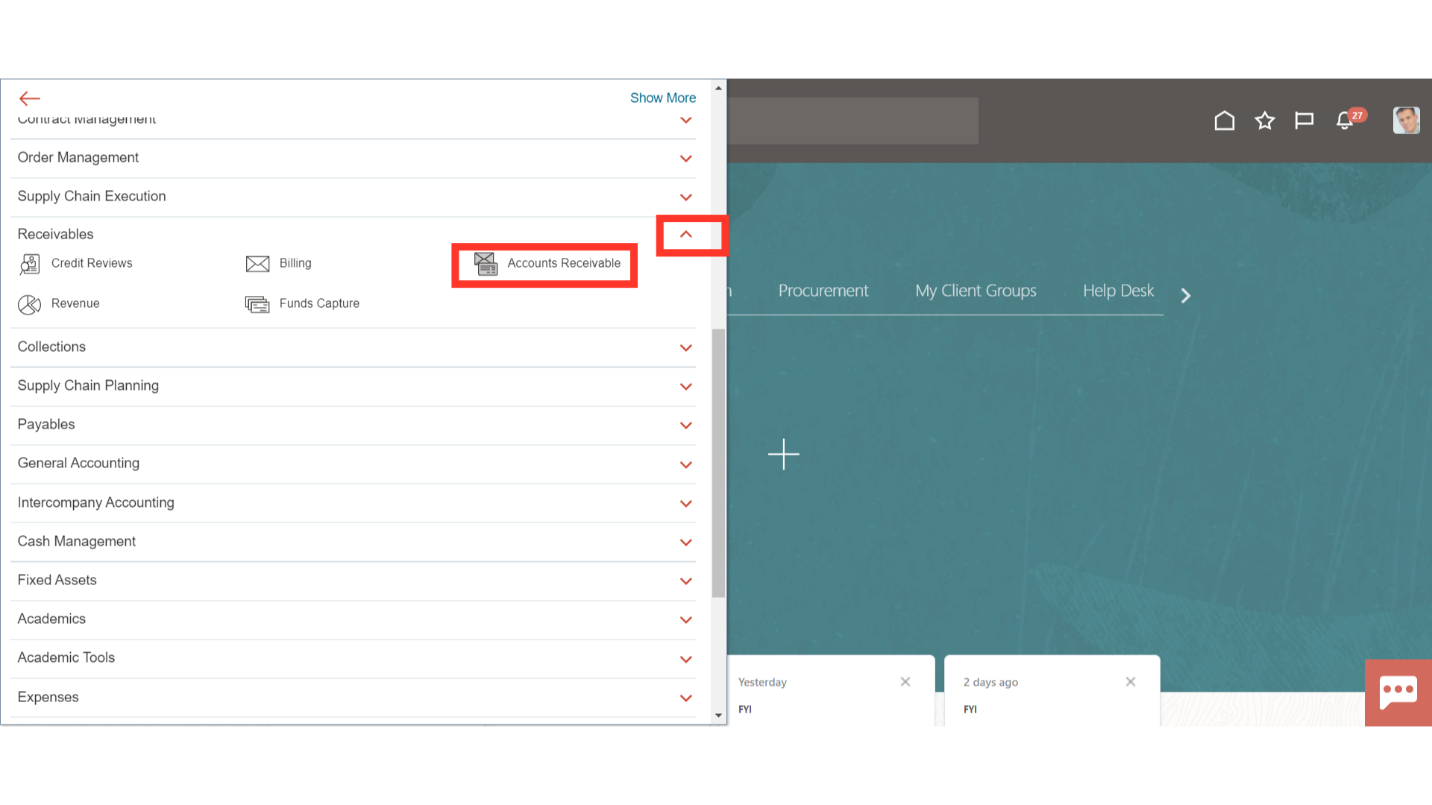
Click on the Navigator icon to access the Receivables menu.
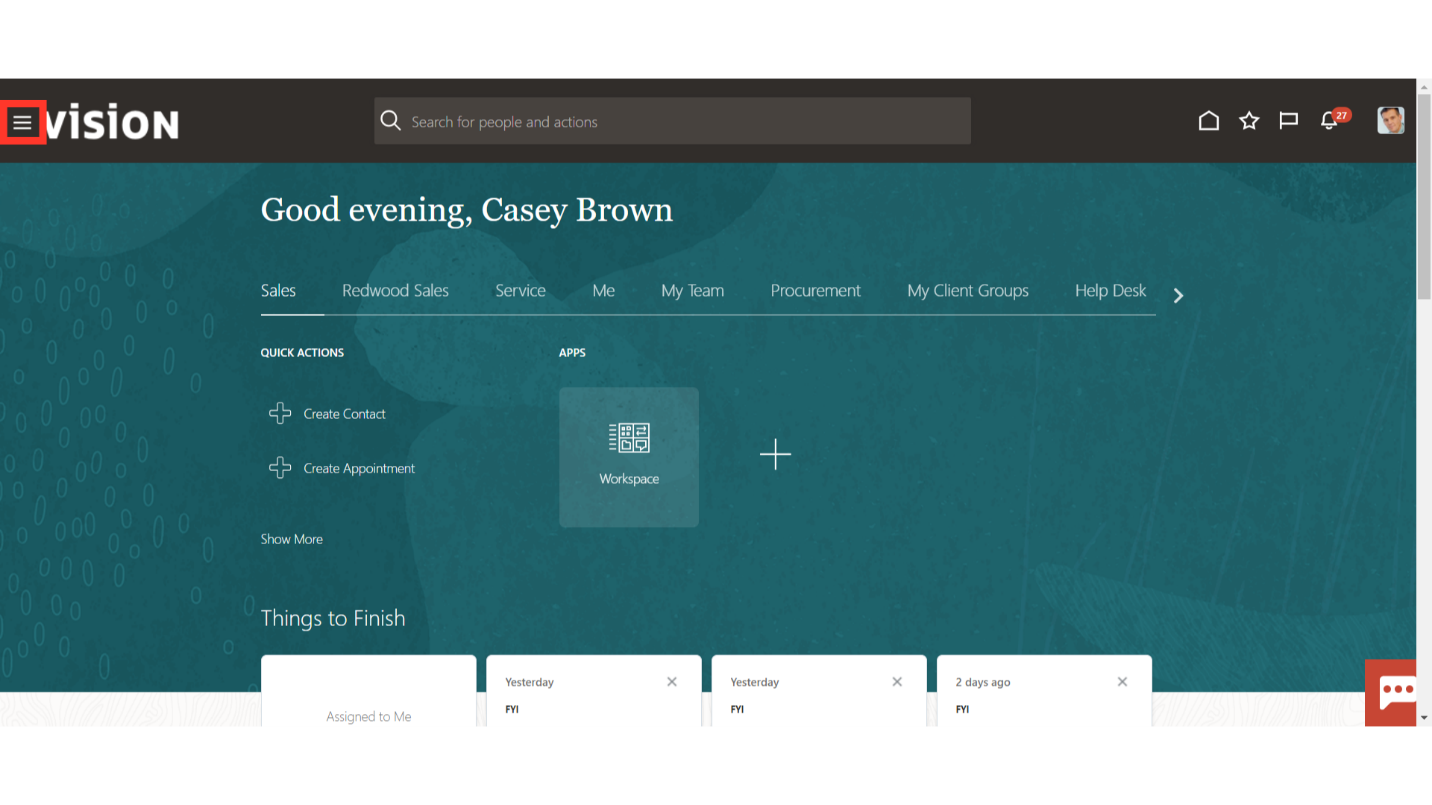
Access the Accounts Receivable work area by selecting Accounts Receivables under Receivables from the navigator. Alternatively, on the Home page, you may select the Receivables menu and under that select the Accounts Receivable submenu.
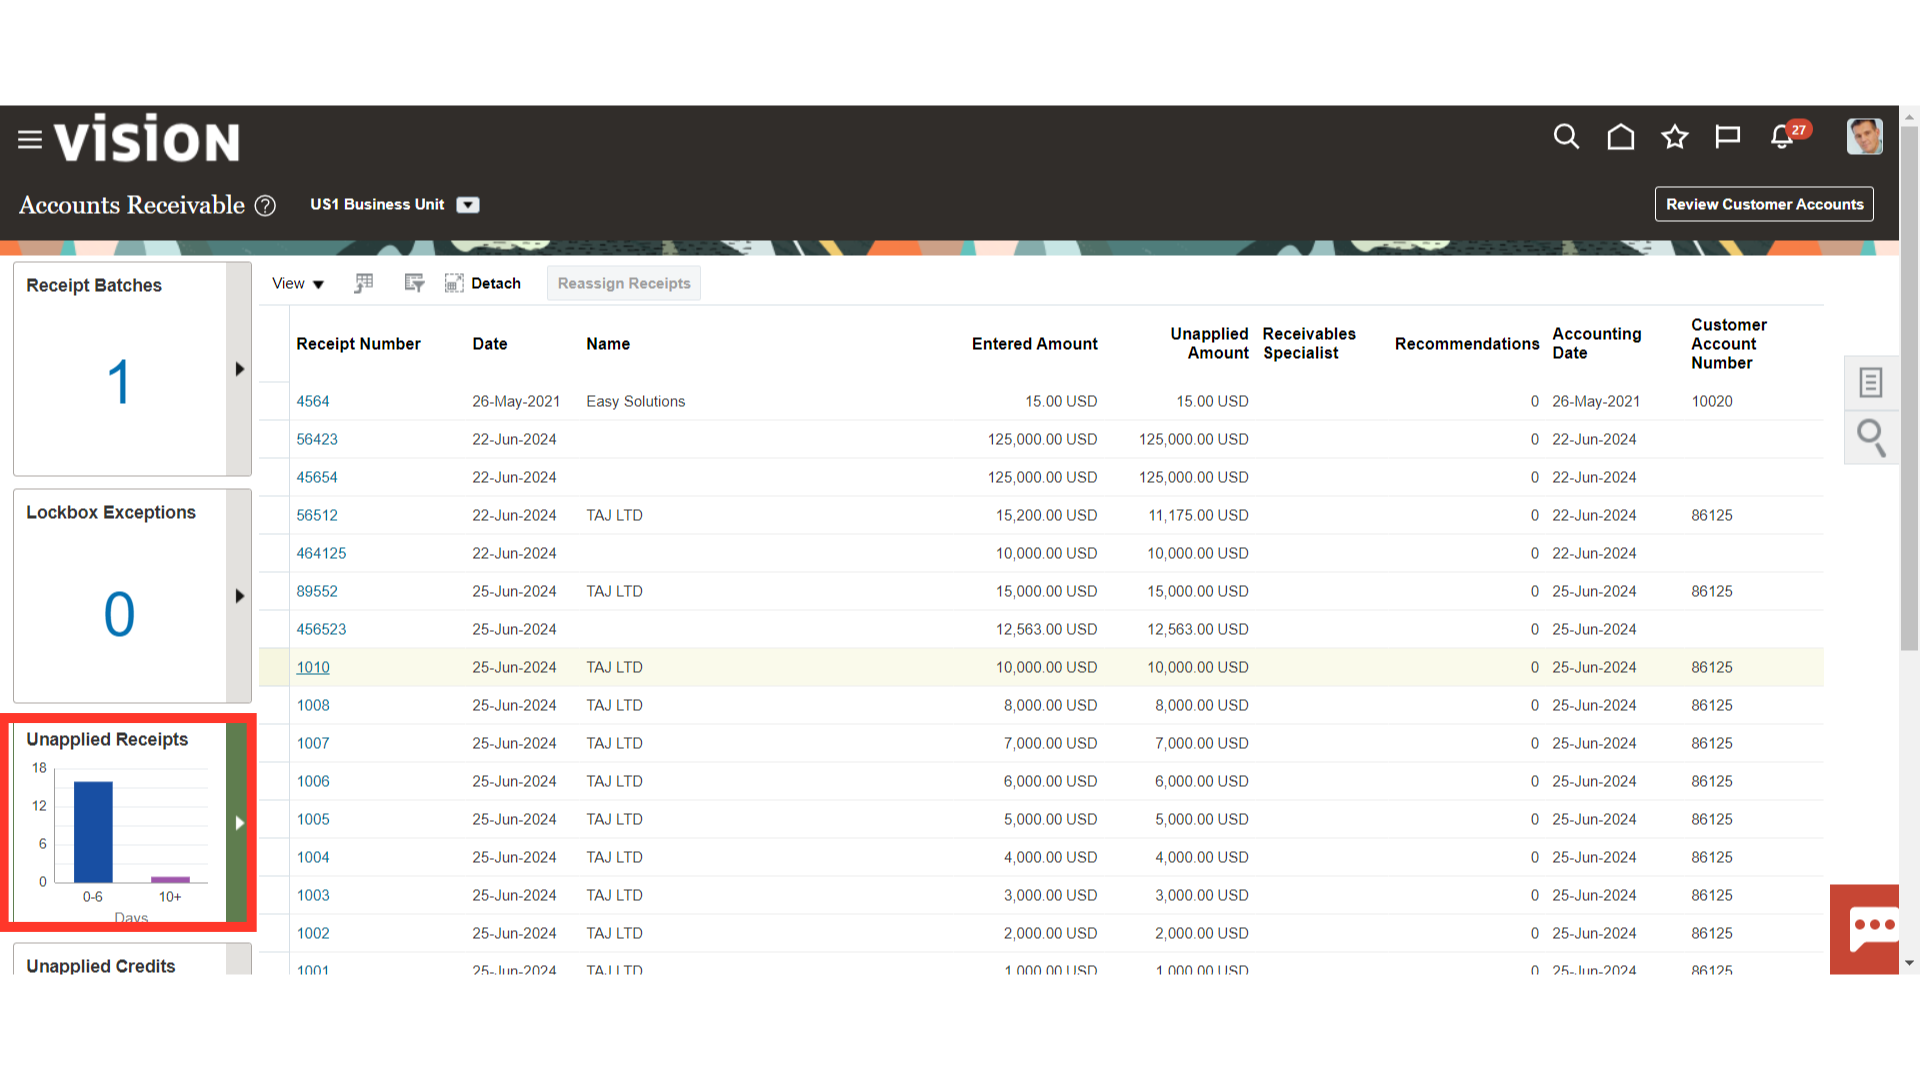
A list of open receipts appears when you click on the Unapplied Receipts infotile. Alternatively, the Manage Receipts page allows you to search for unapplied receipts.
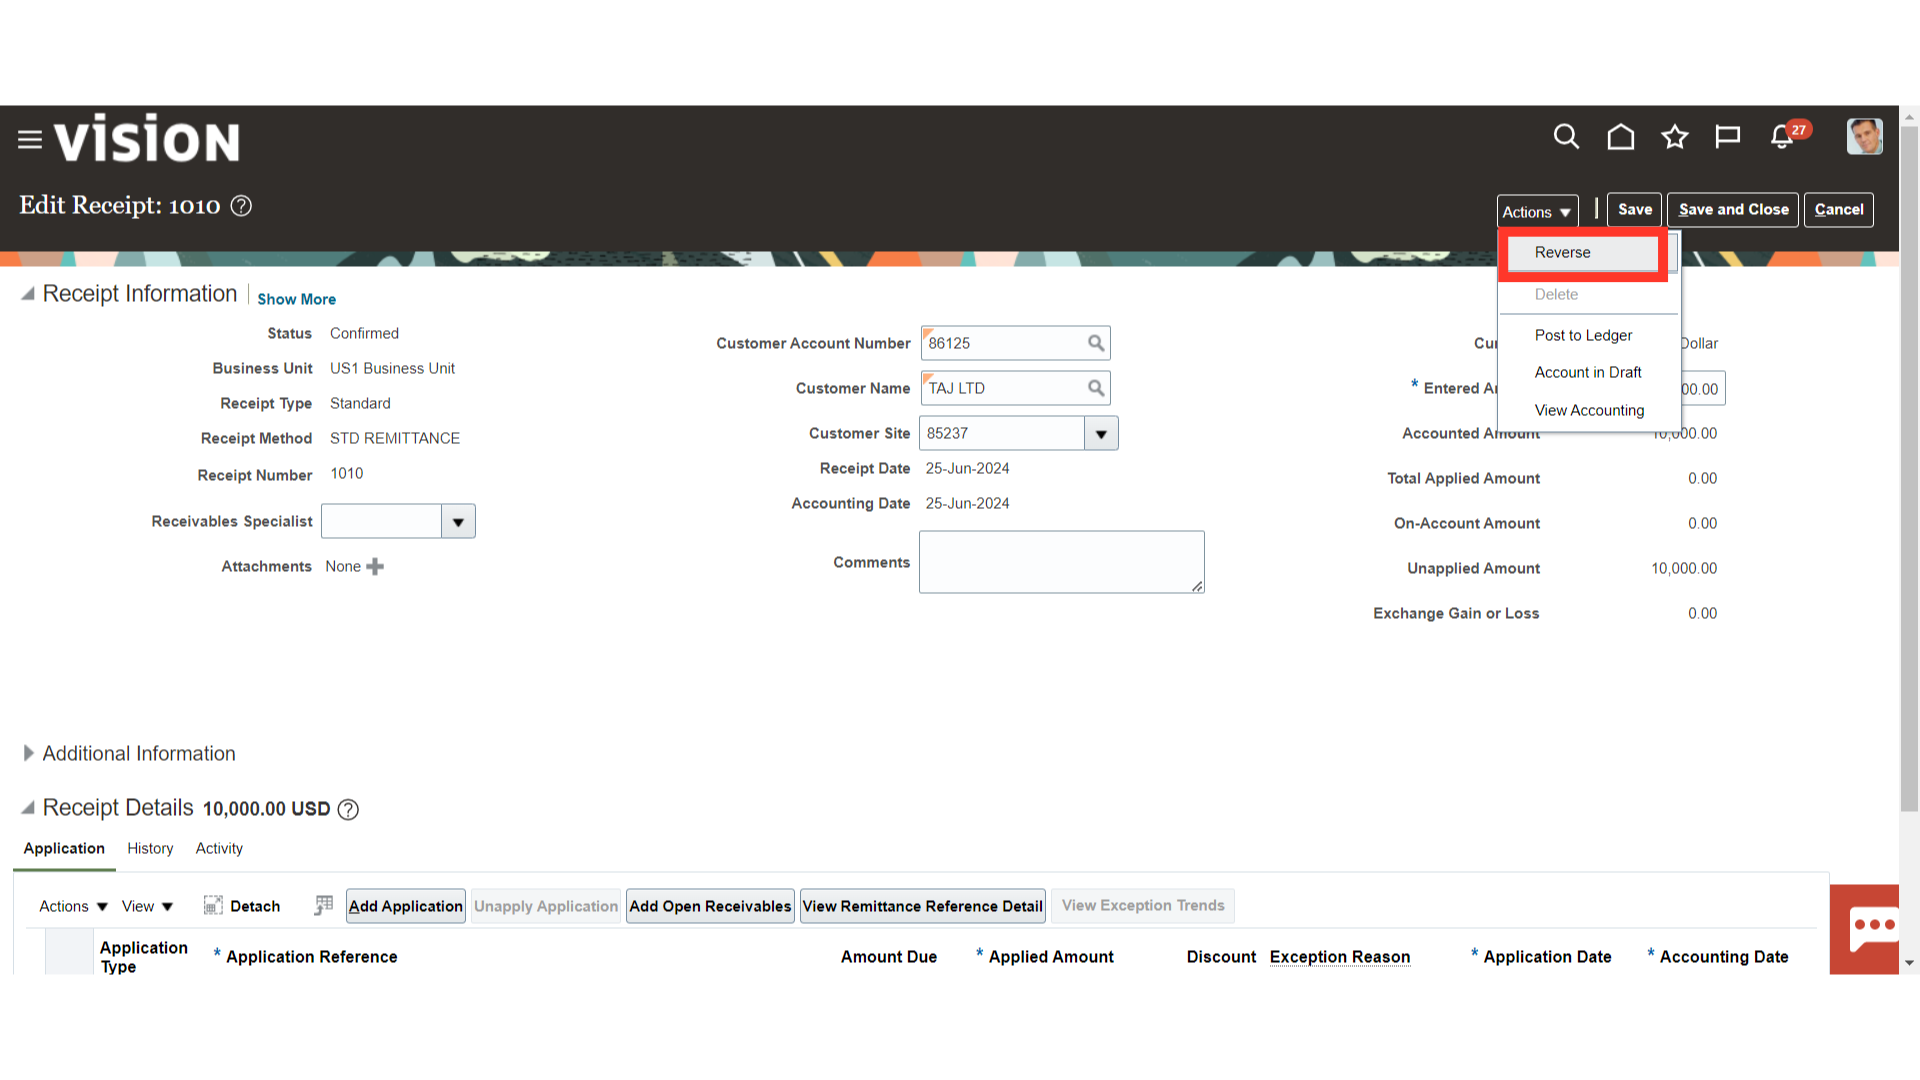
Click Reverse on the Actions tab to reverse the receipt.
Input the accounting date and the date the receipt needs to be reversed. To find the reversal for additional processing, utilize the reversal categories. To reverse a credit card refund miscellaneous receipt, for instance, use the Credit Card Refund Reversal category. Additionally, indicate the reason for the receipt’s reversal and enter any additional comments in the comments field.
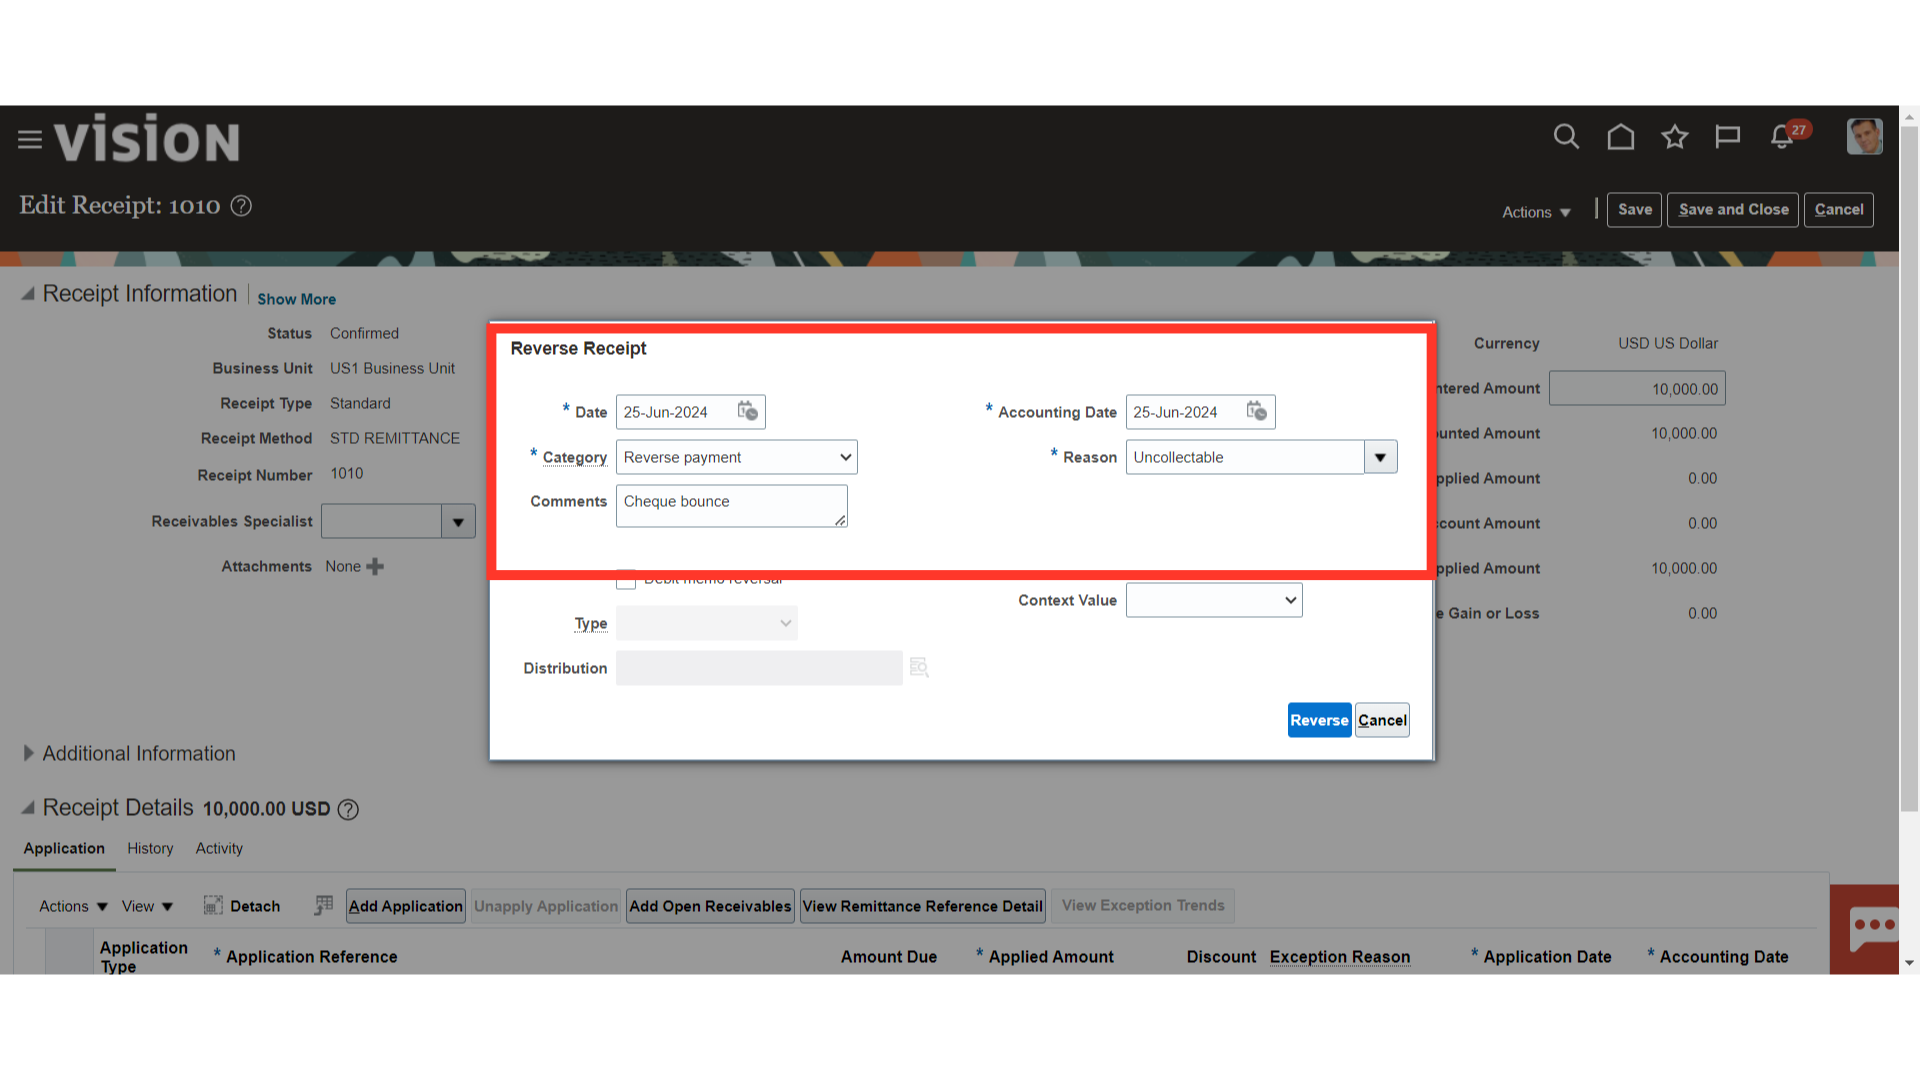
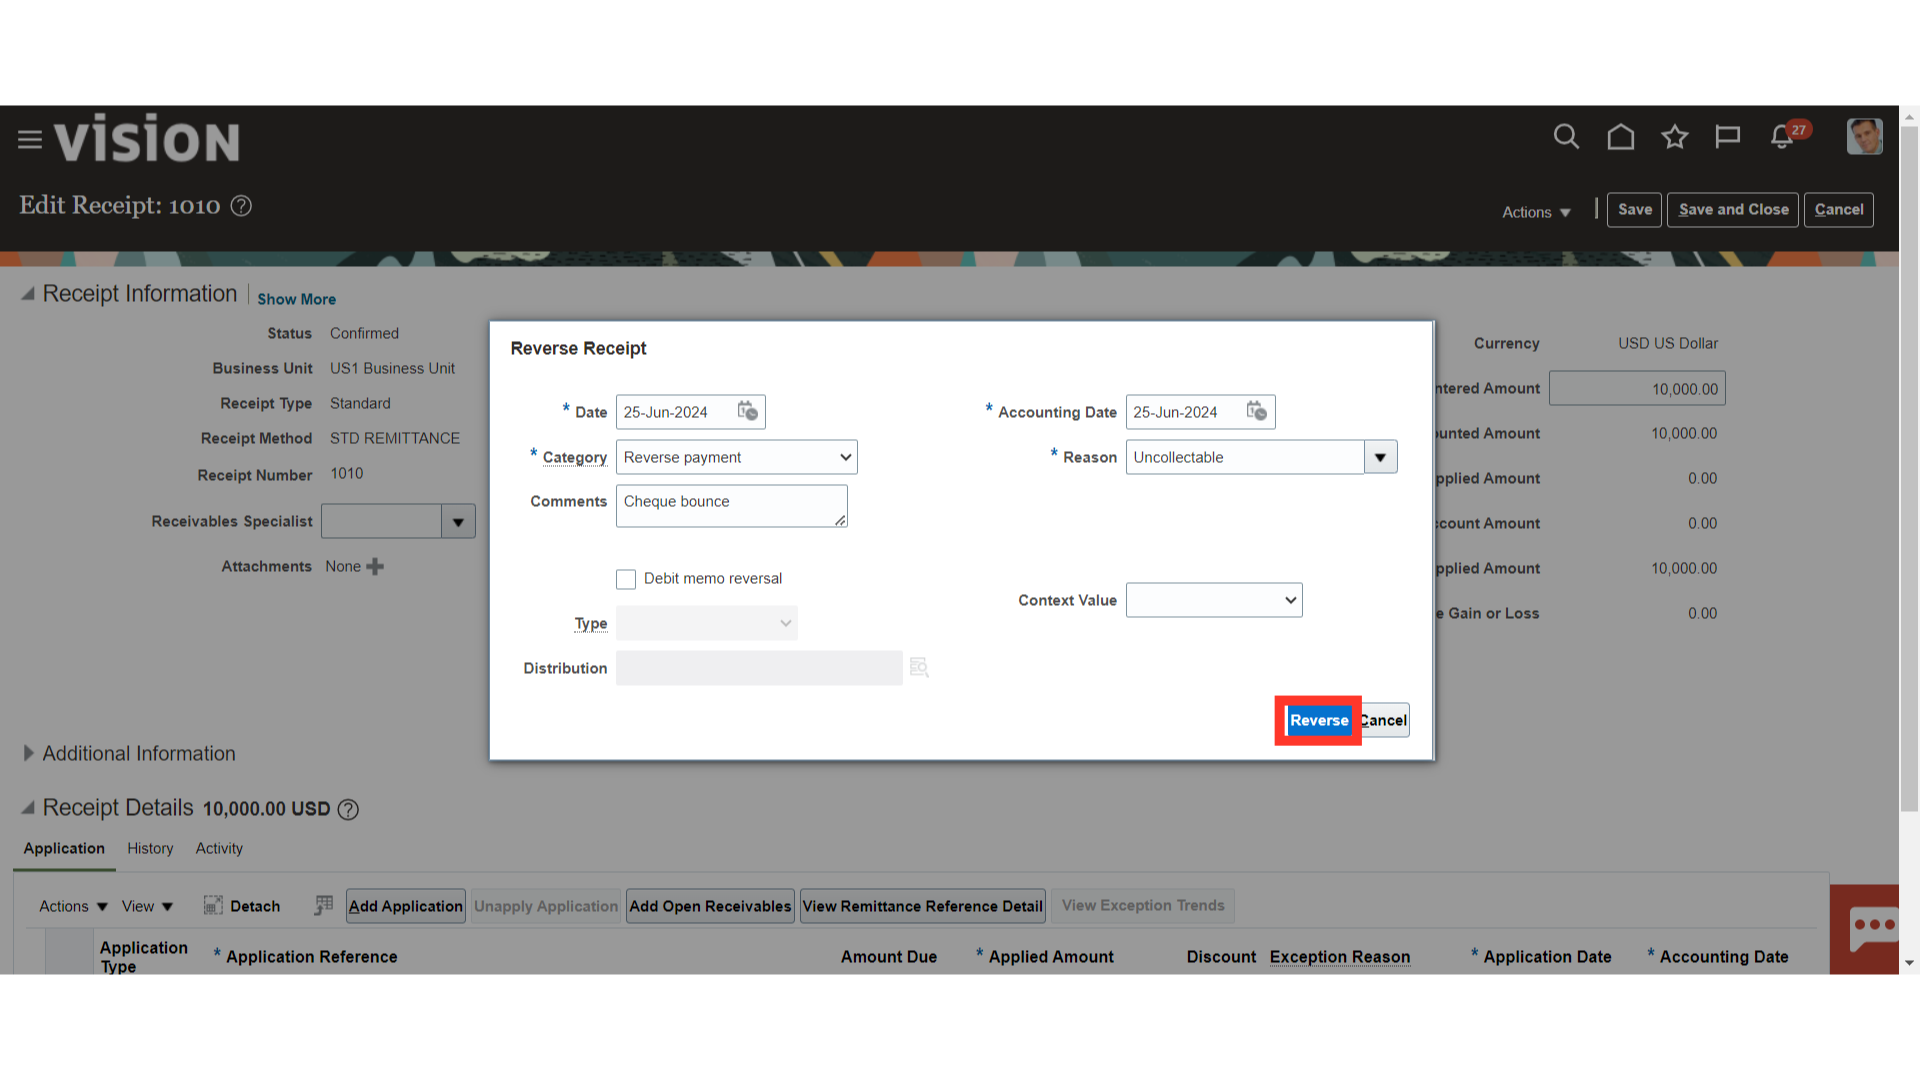
Click on the Reverse button to finally reverse the receipt.
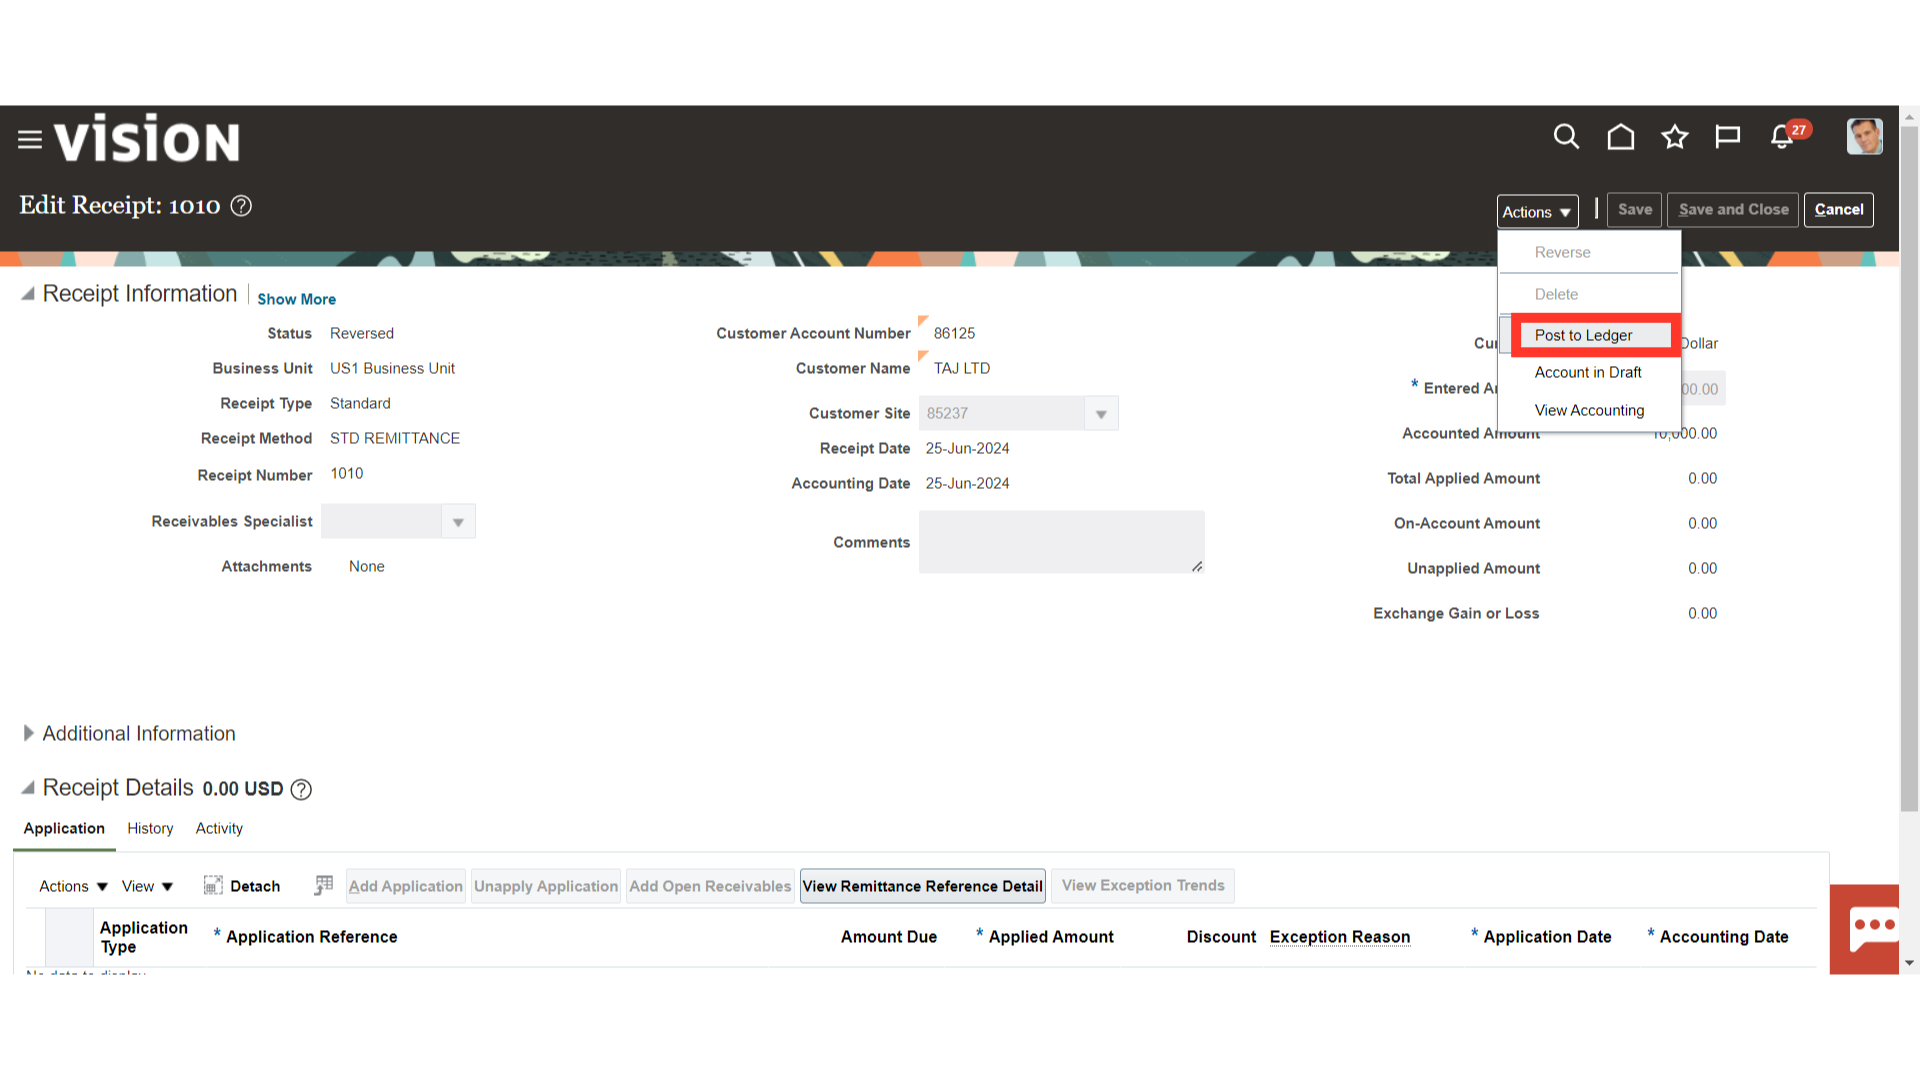
Select the Post to Ledger from the Actions tab to generate the accounting entry.
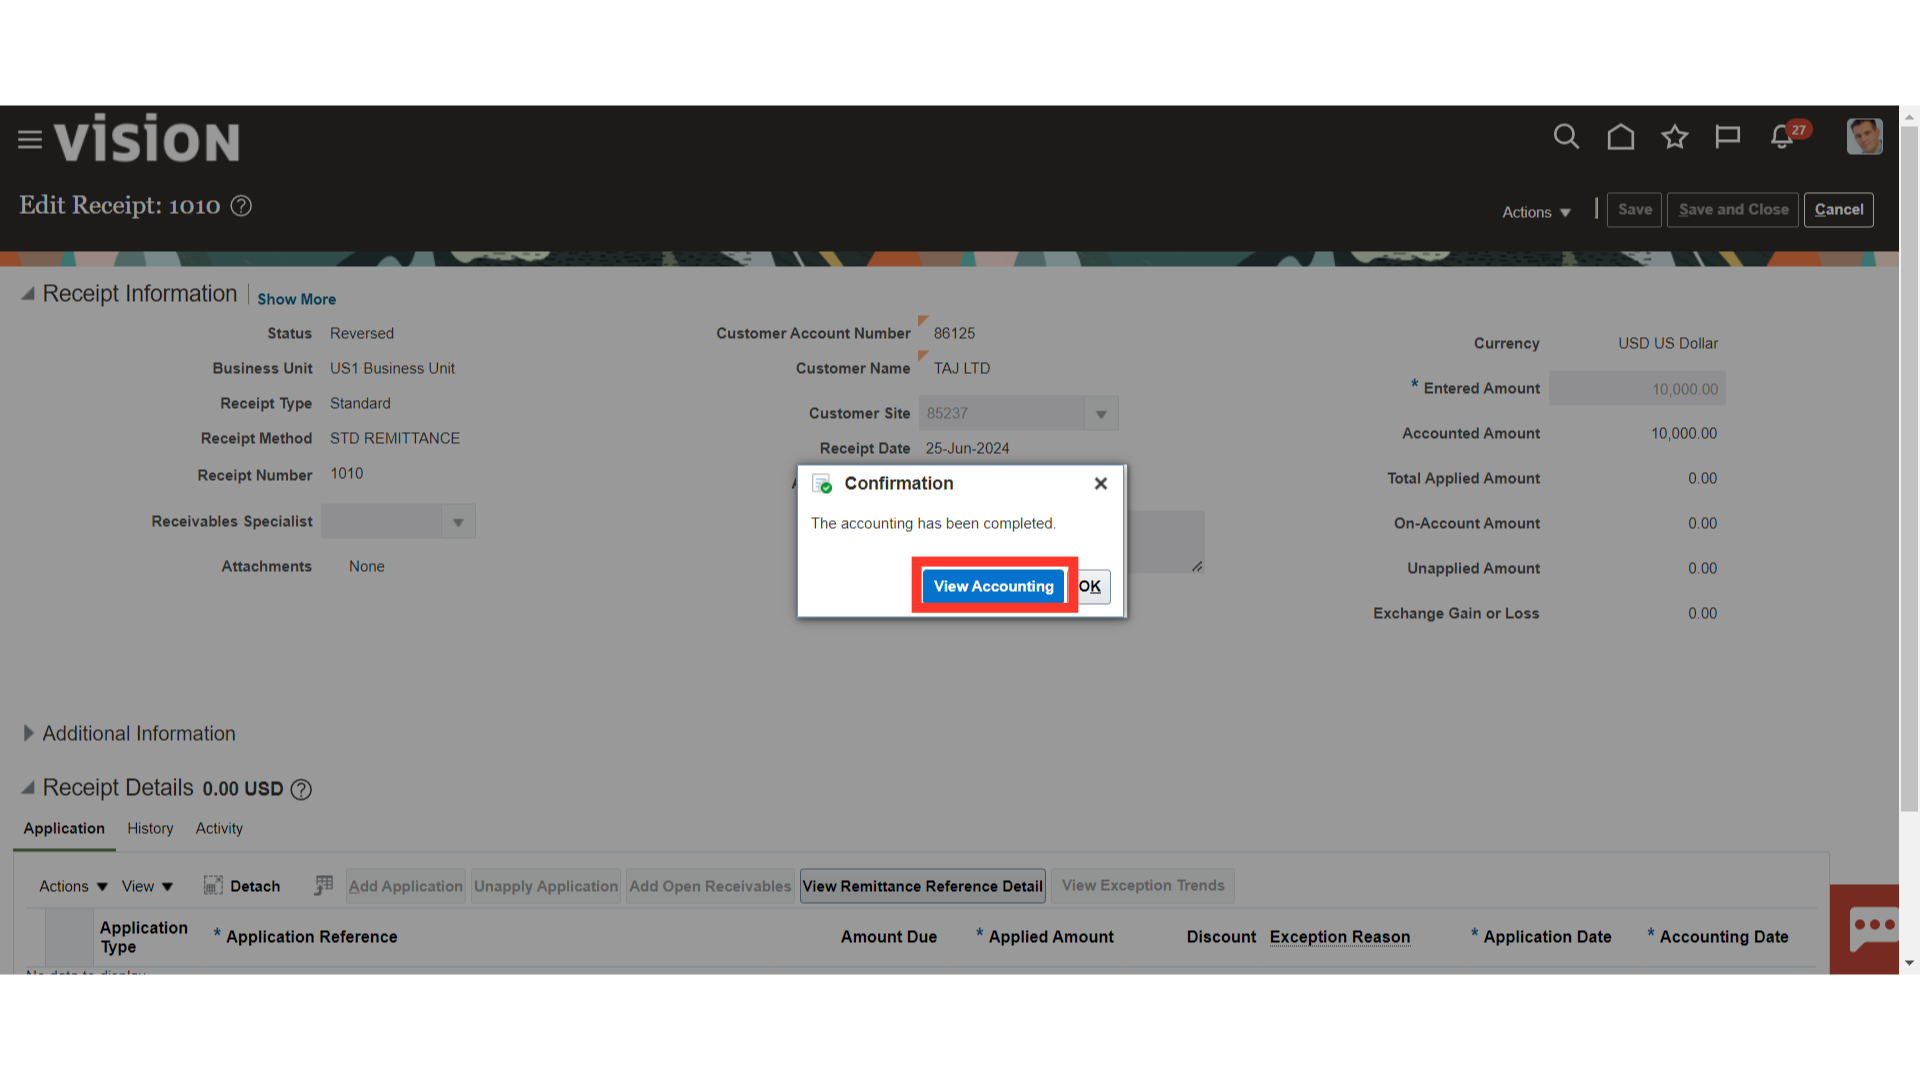
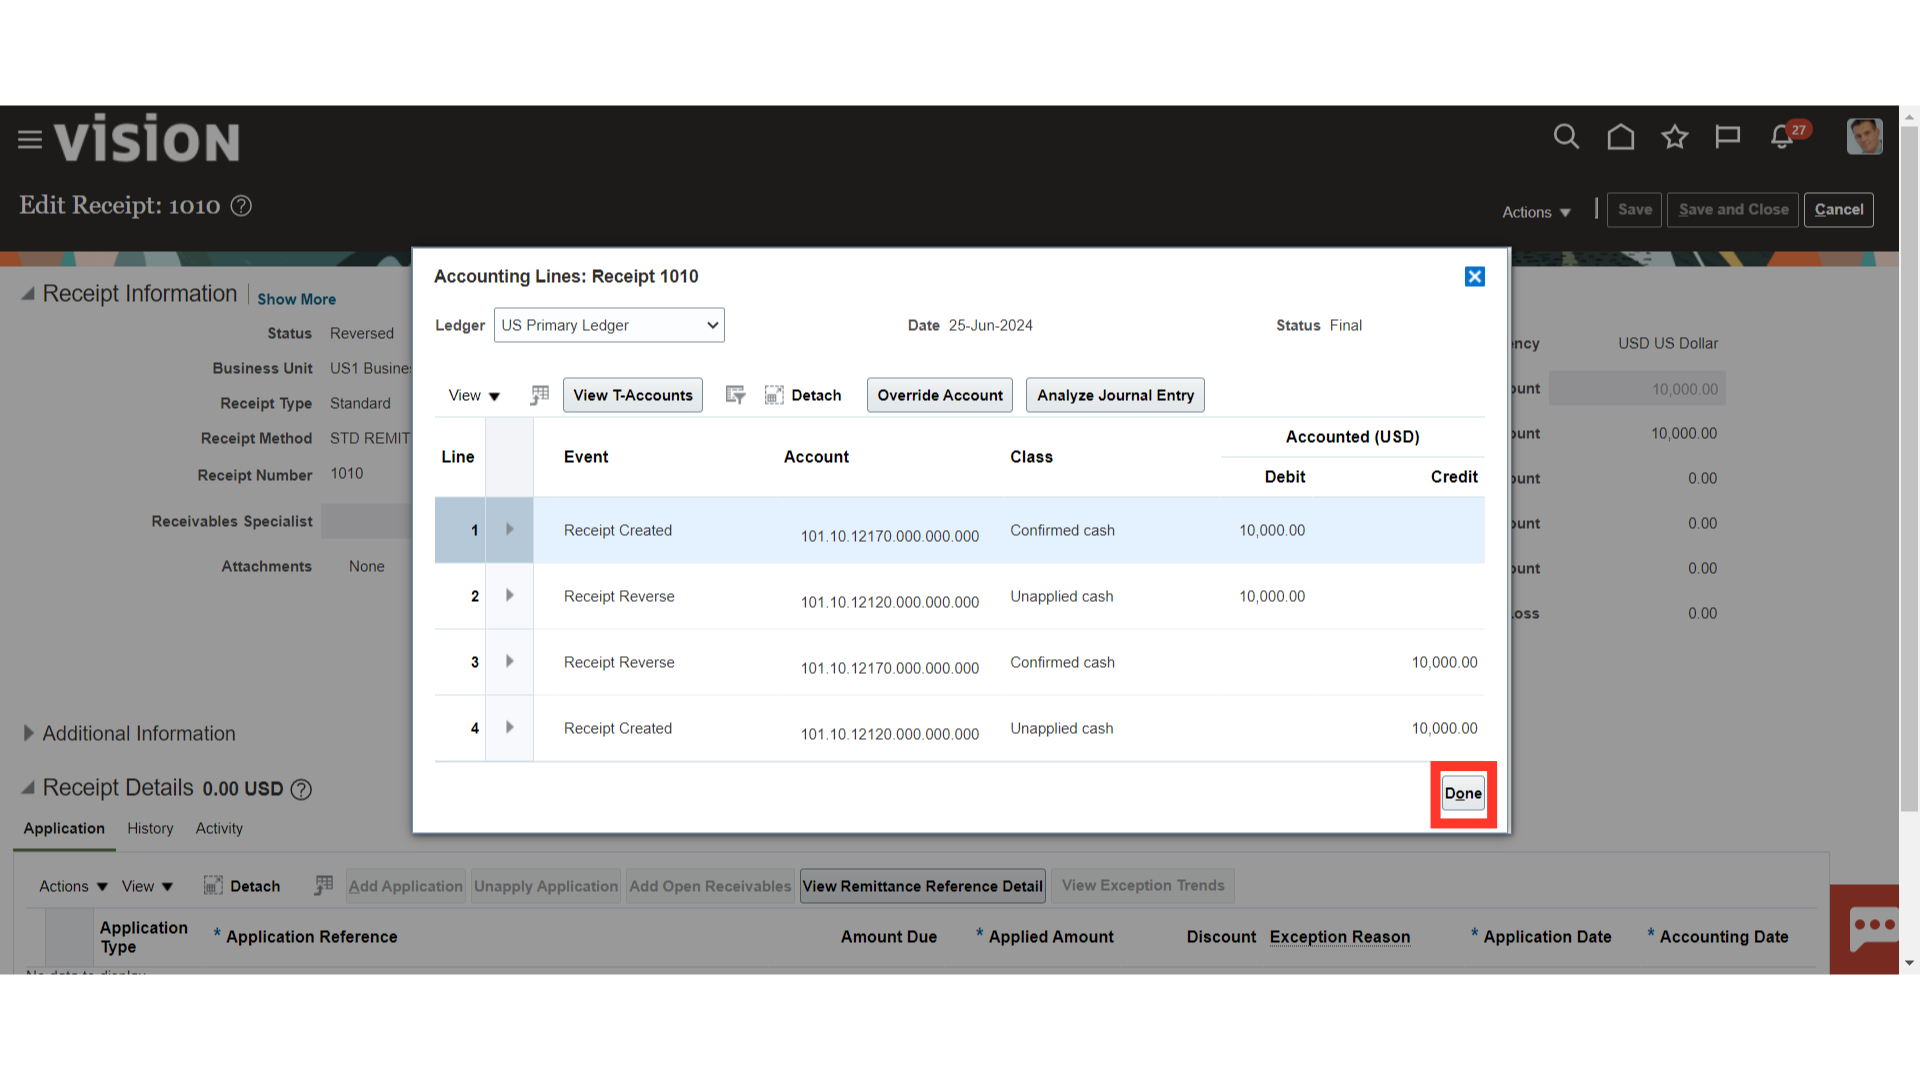
To view more details, click on the View Accounting button.
This is an accounting entry generated for the receipt reversal process in which the entry generated at the time of receipt creation is reversed. Click on the Done button to close this accounting entry window.
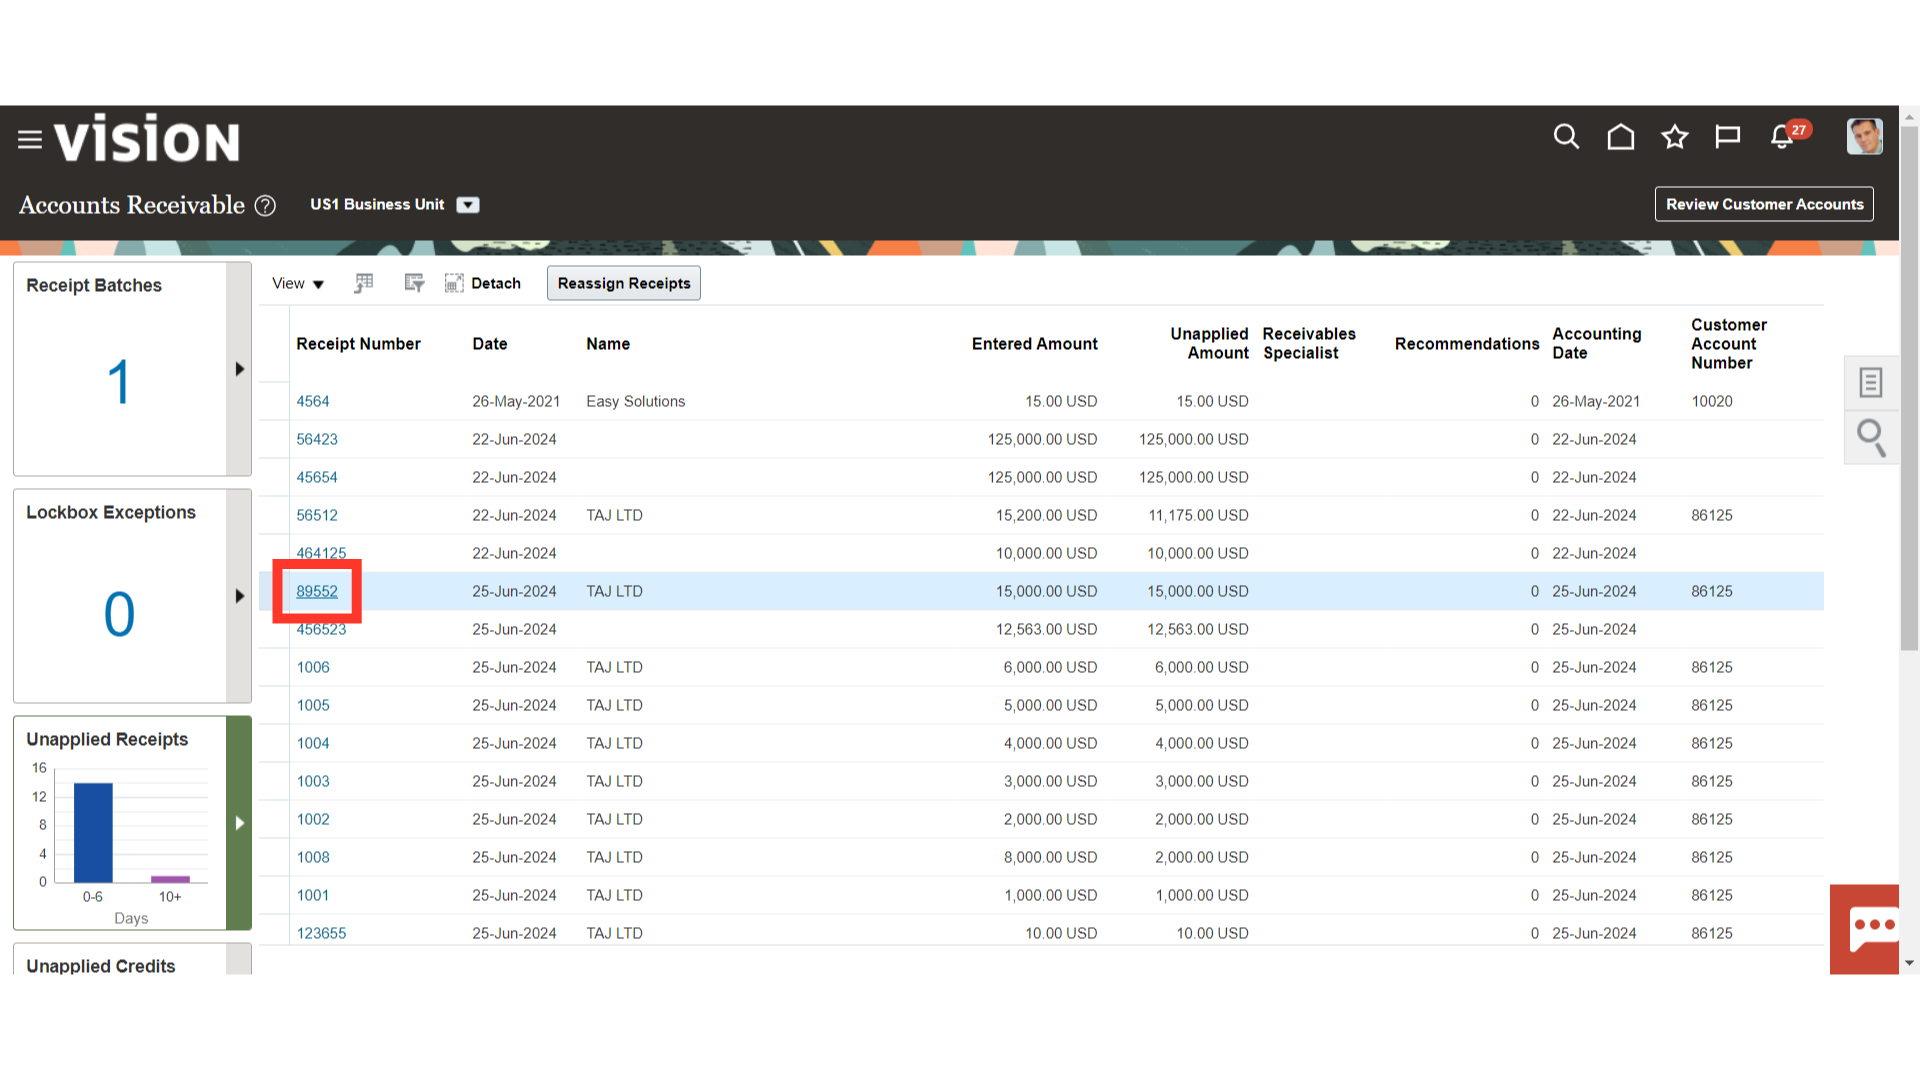
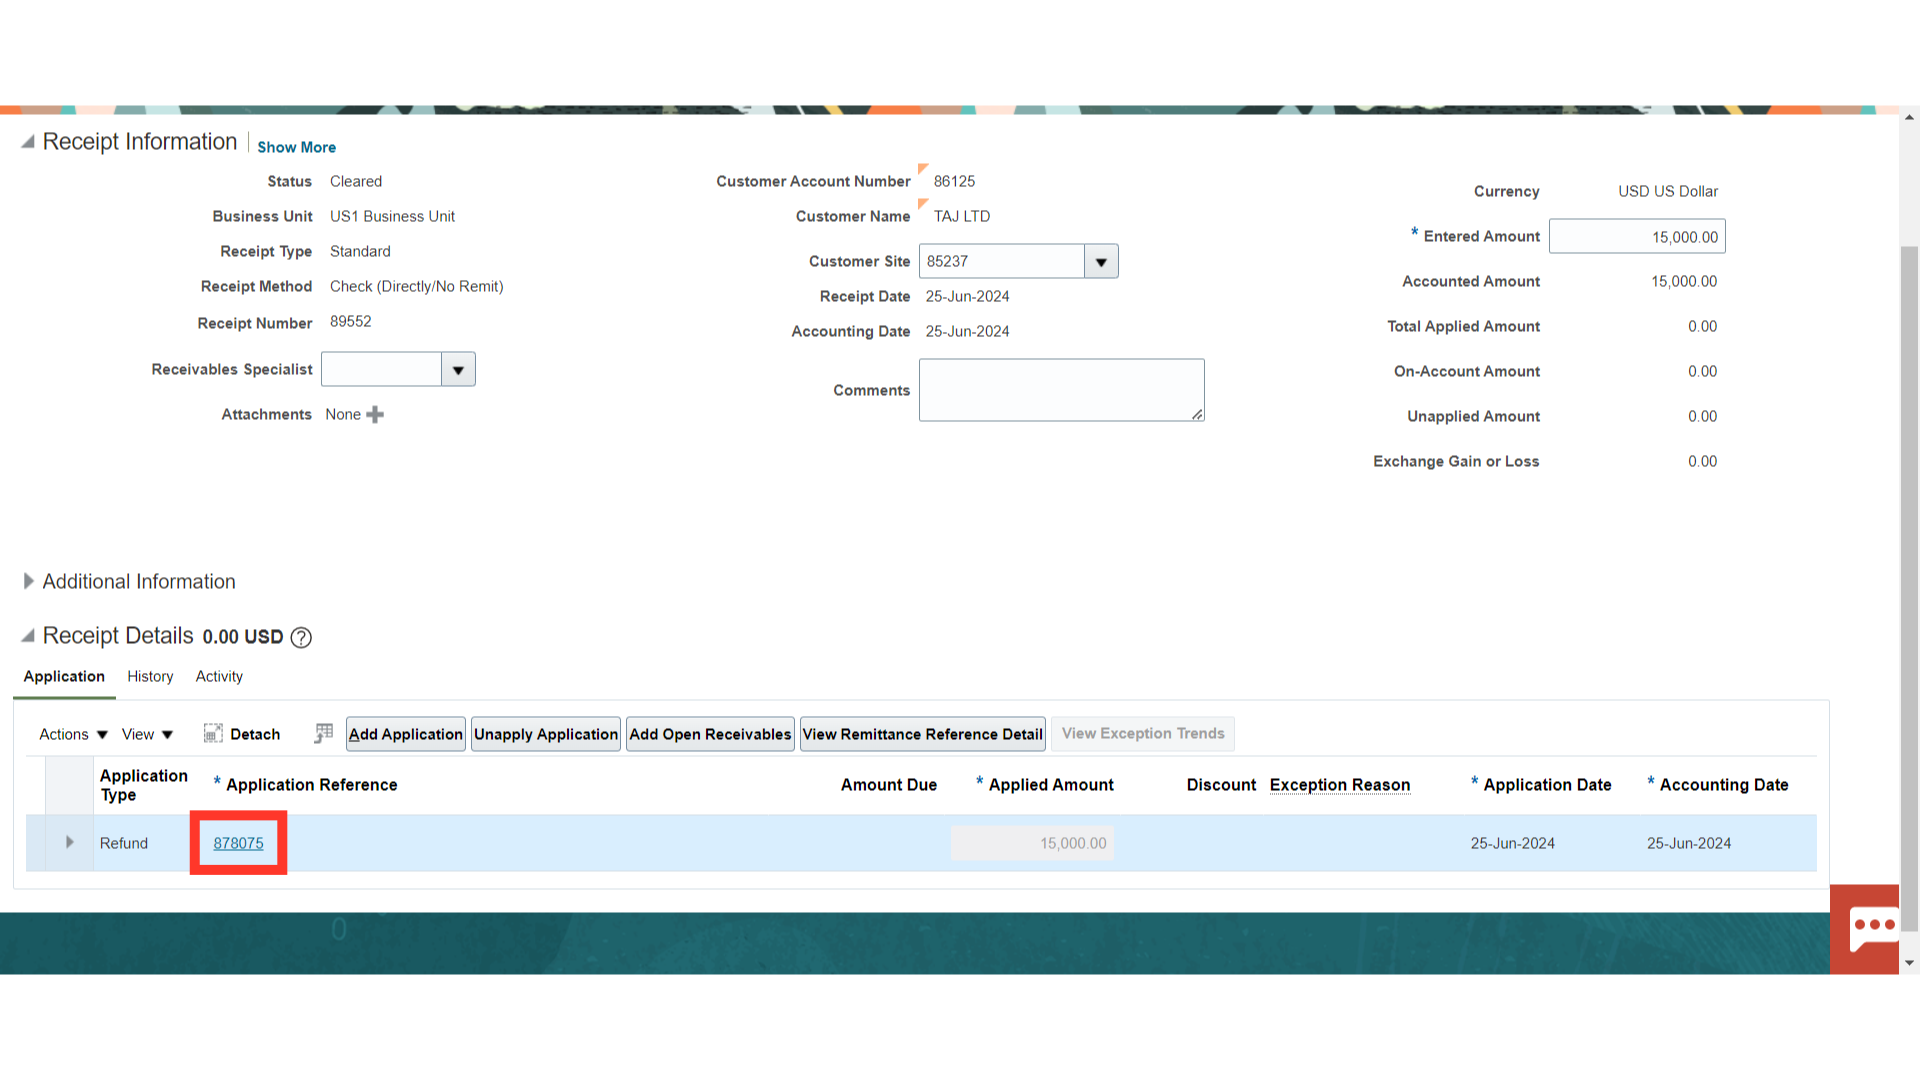
 In Oracle Fusion, the customer receives a refund upon closing their account and returning any unapplied receipts. Open the receipt by clicking on the receipt number, to issue the refund.
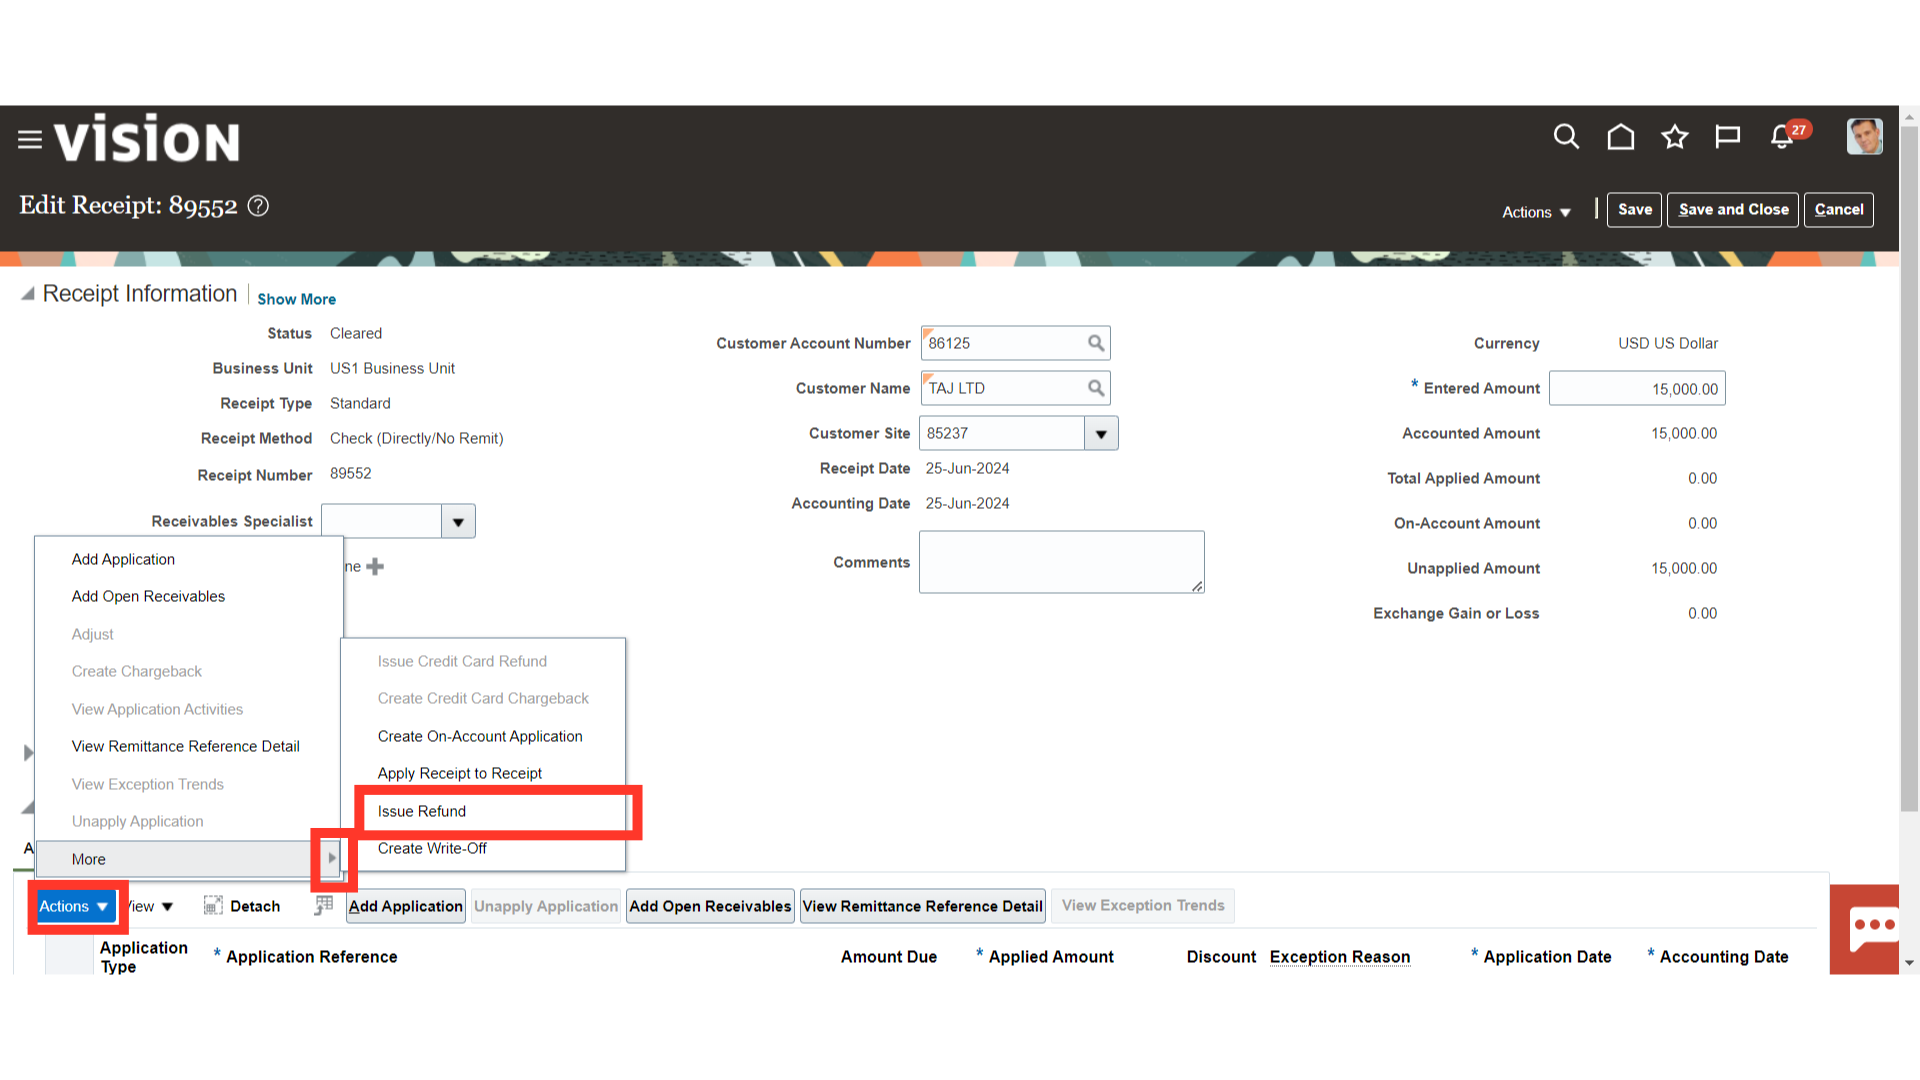
Select Issue Refund by expanding the More section under the Actions tab.
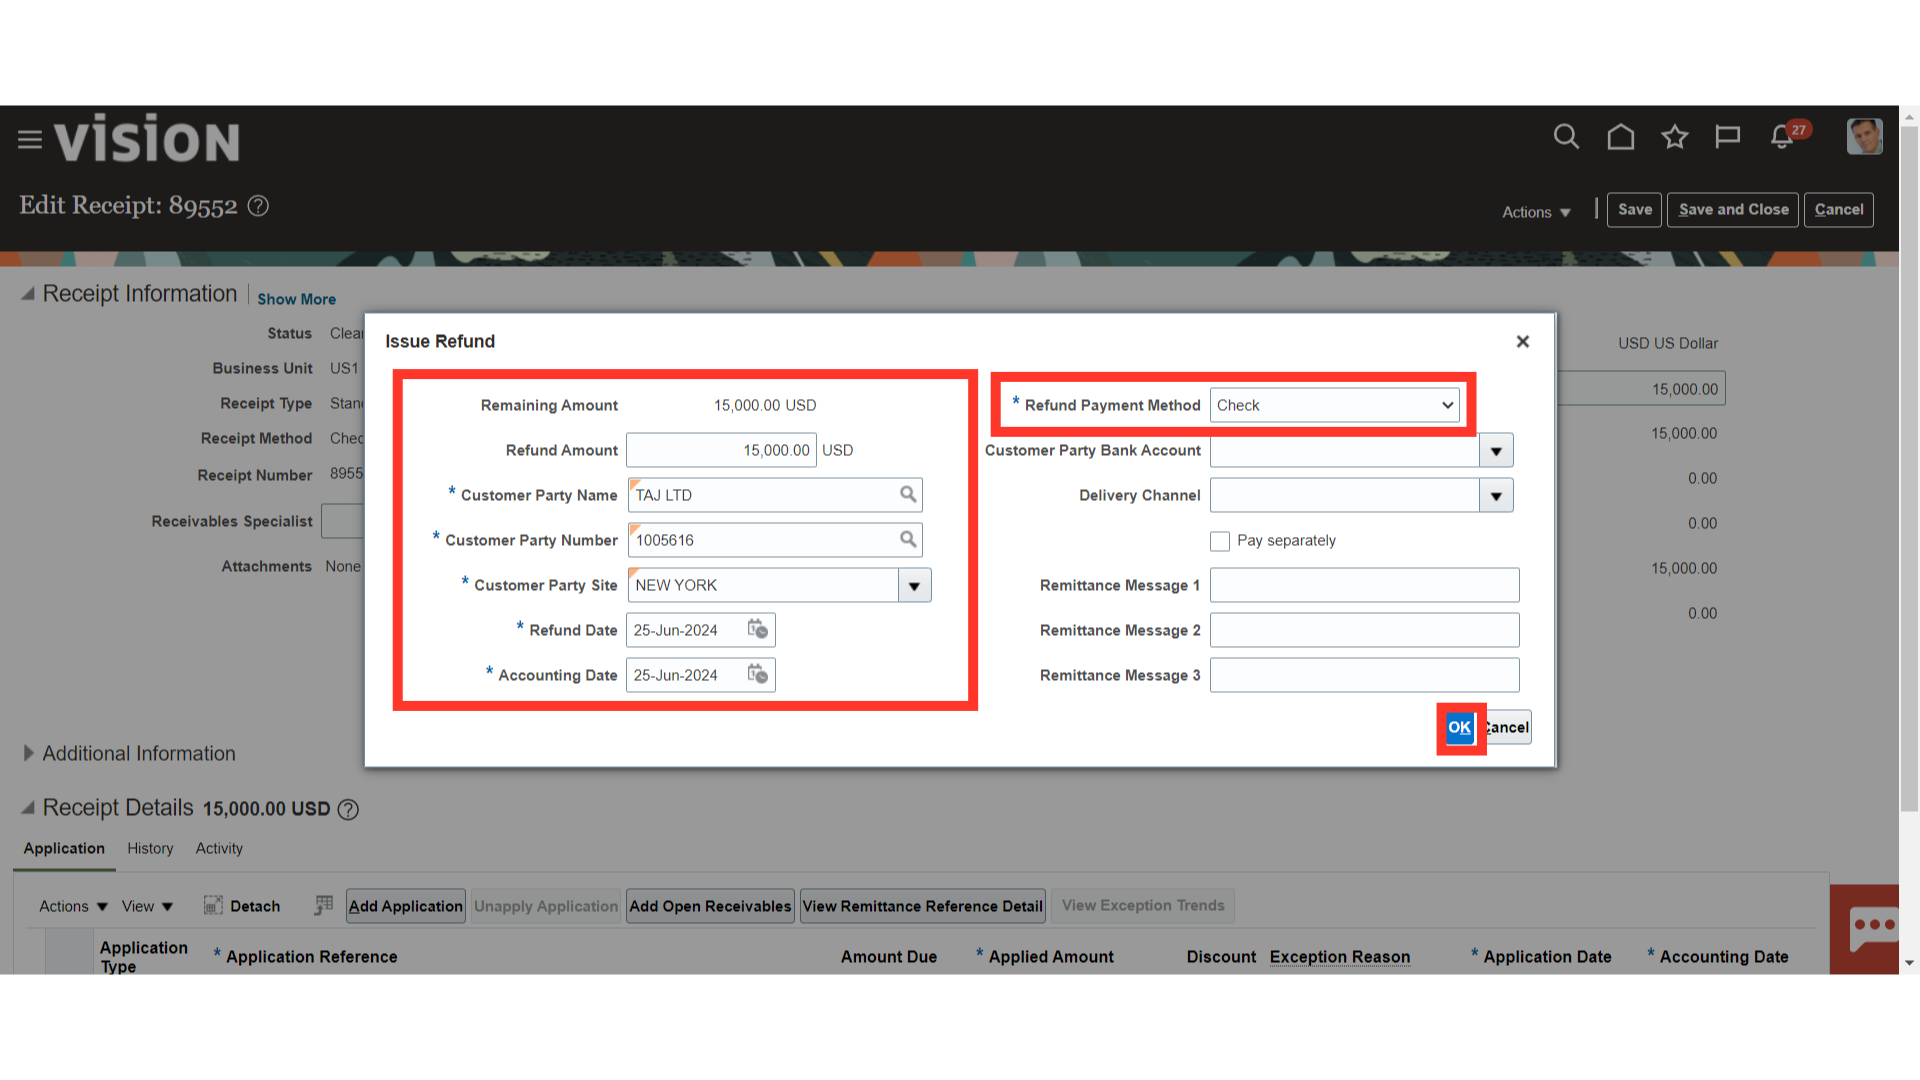
Select the method by which payment is to be issued to the customer. After entering all the details click on the OK button to continue.
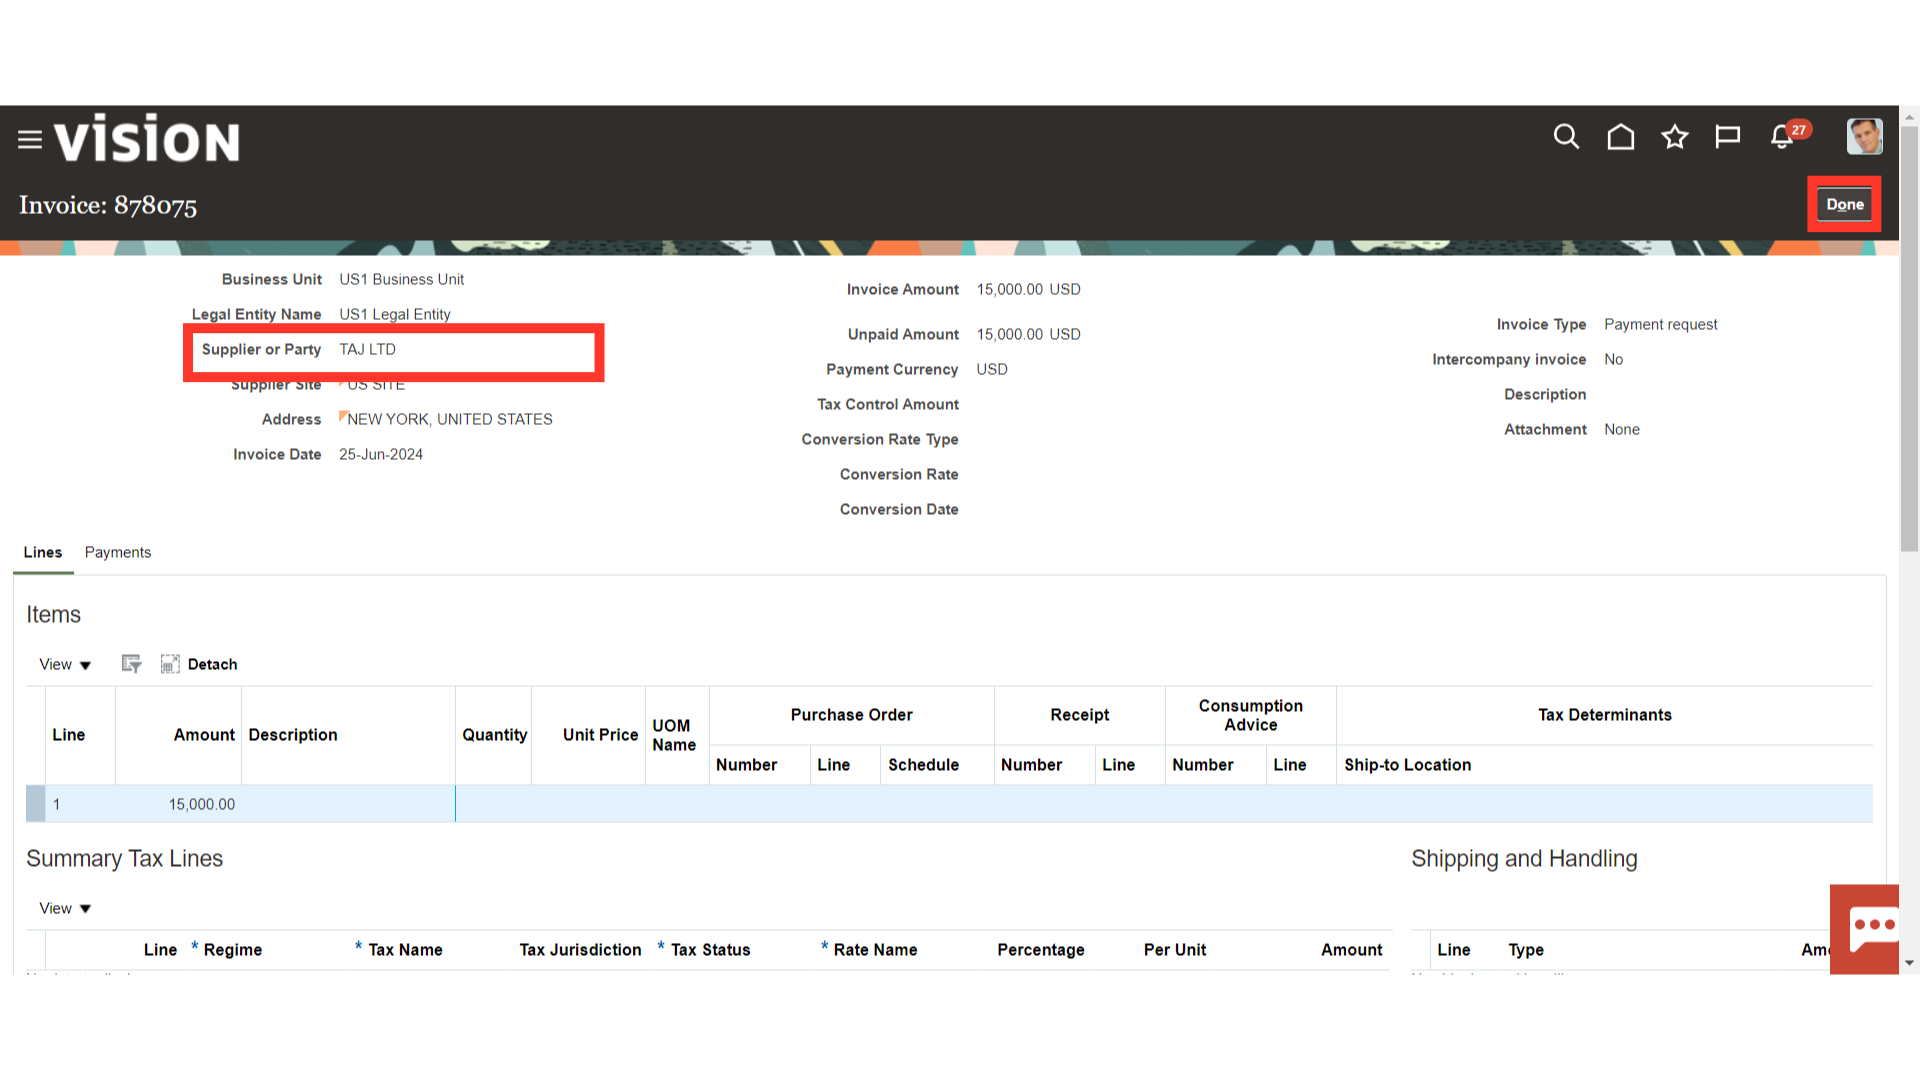
Click the Application Reference number hyperlink to view the invoice that has been booked in the customer’s name and through which payment is to be made.
This is the invoice generated for the refund issued in the name of the customer’s name. Click on the Done button to return to the Receipt form.
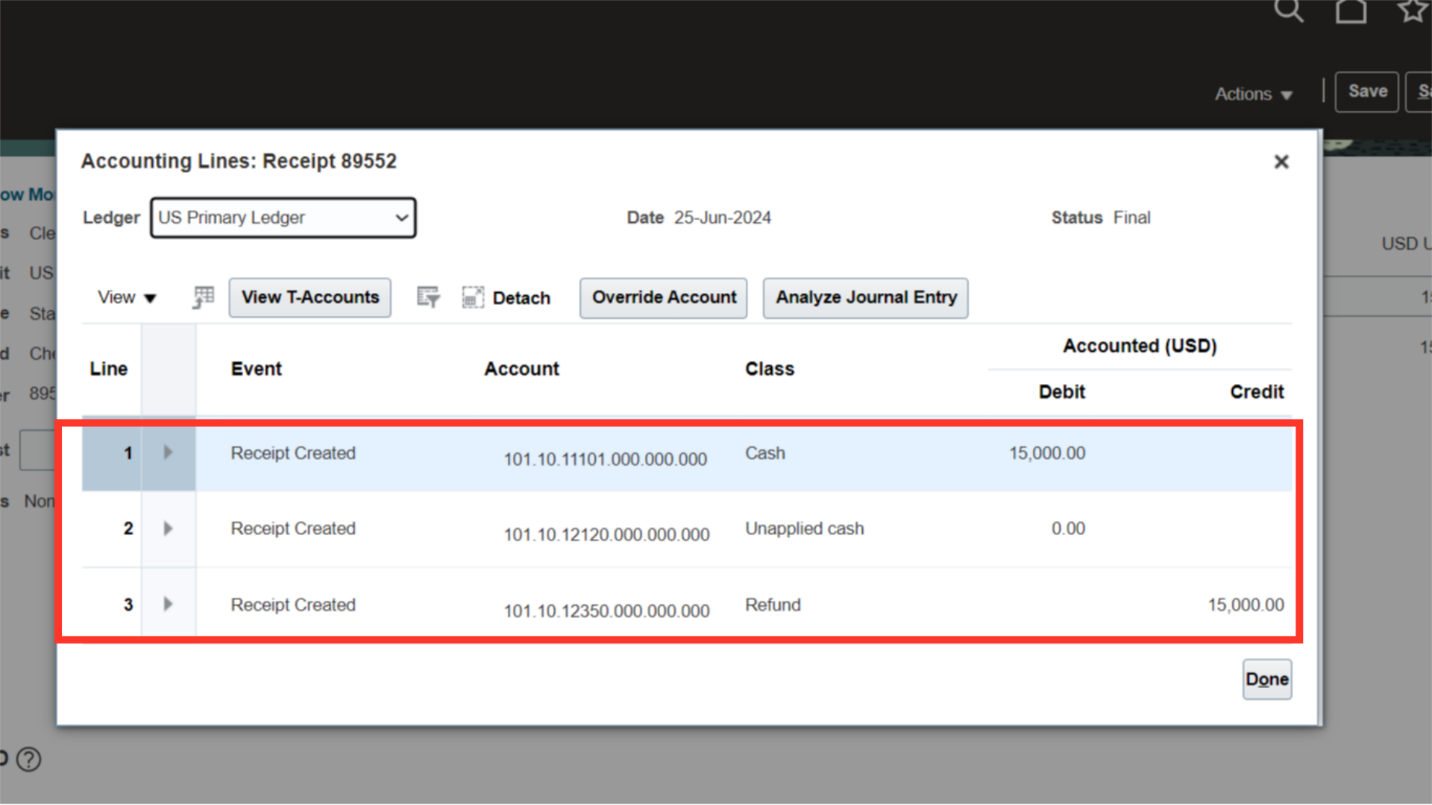
This is the accounting entry generated for a refund issued in which account combinations for refund are defaulted from the Receivable activity.
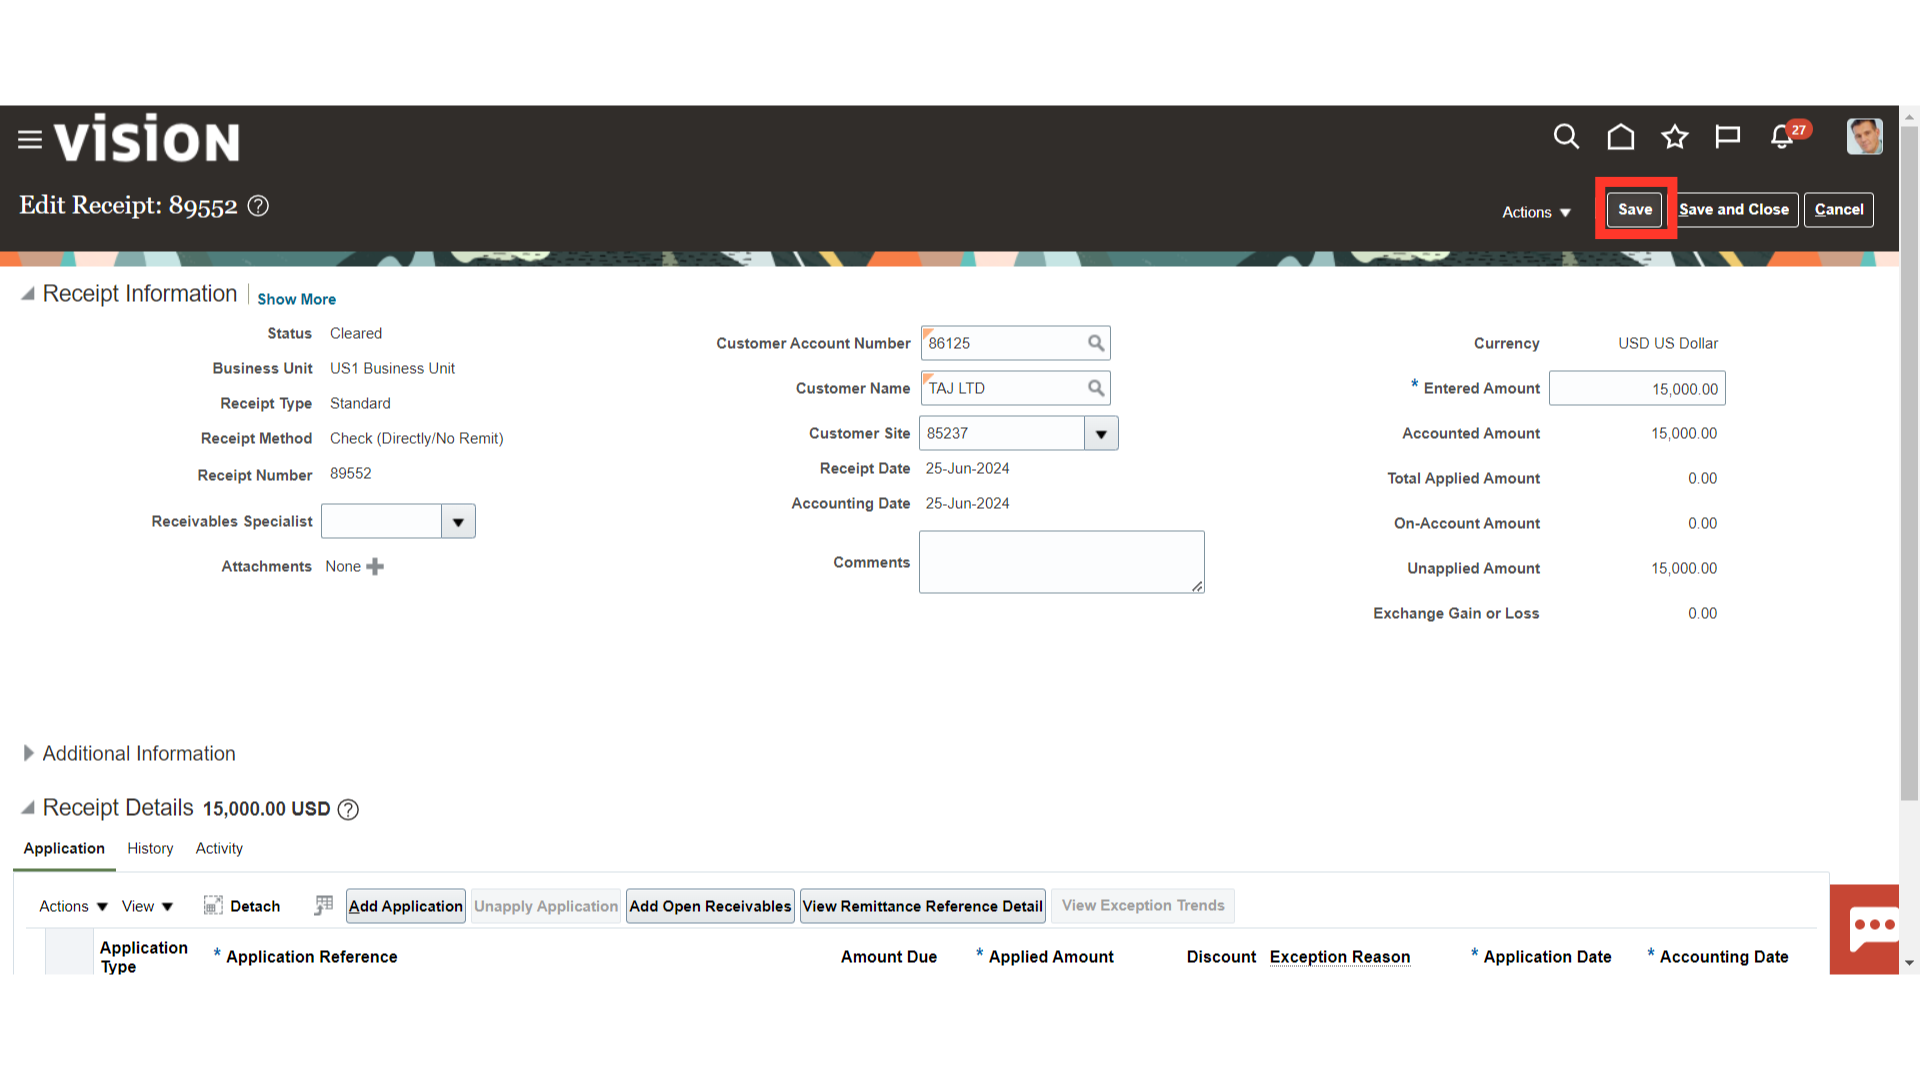
Click on the Save button to update the receipt.
A receipt write-off is a receipt activity that cancels a small unapplied amount remaining on a receipt which your organization considers to be immaterial.
There are two methods available to create these receipt write-offs:
Manual – a write-off is created from the Accounts Receivables Work Area, and the second one is automatic.
A write-off would be automatically created by running the Create Automatic Receipt Write-offs Program. It would look at the approval limits that are assigned to the user running the process.
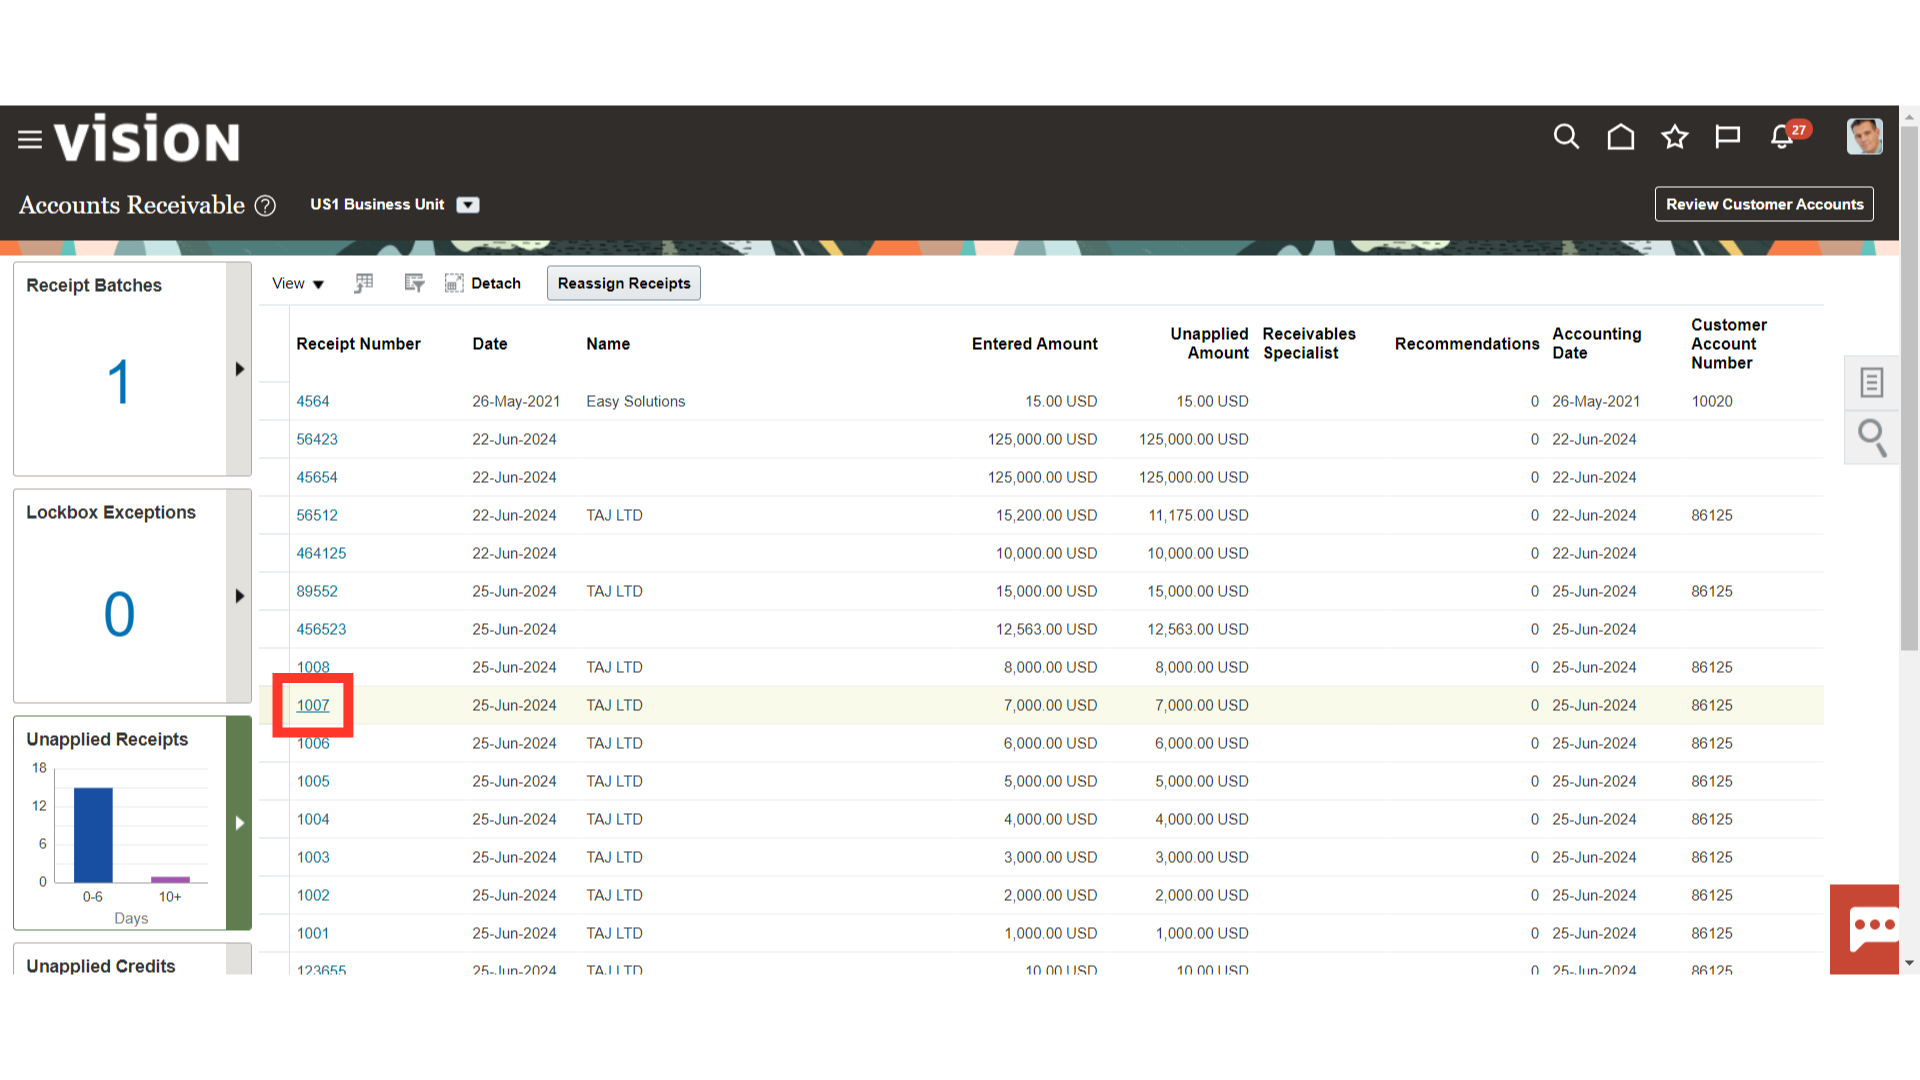
Open another receipt by clicking on the receipt number hyperlink, to write off the receipt manually.
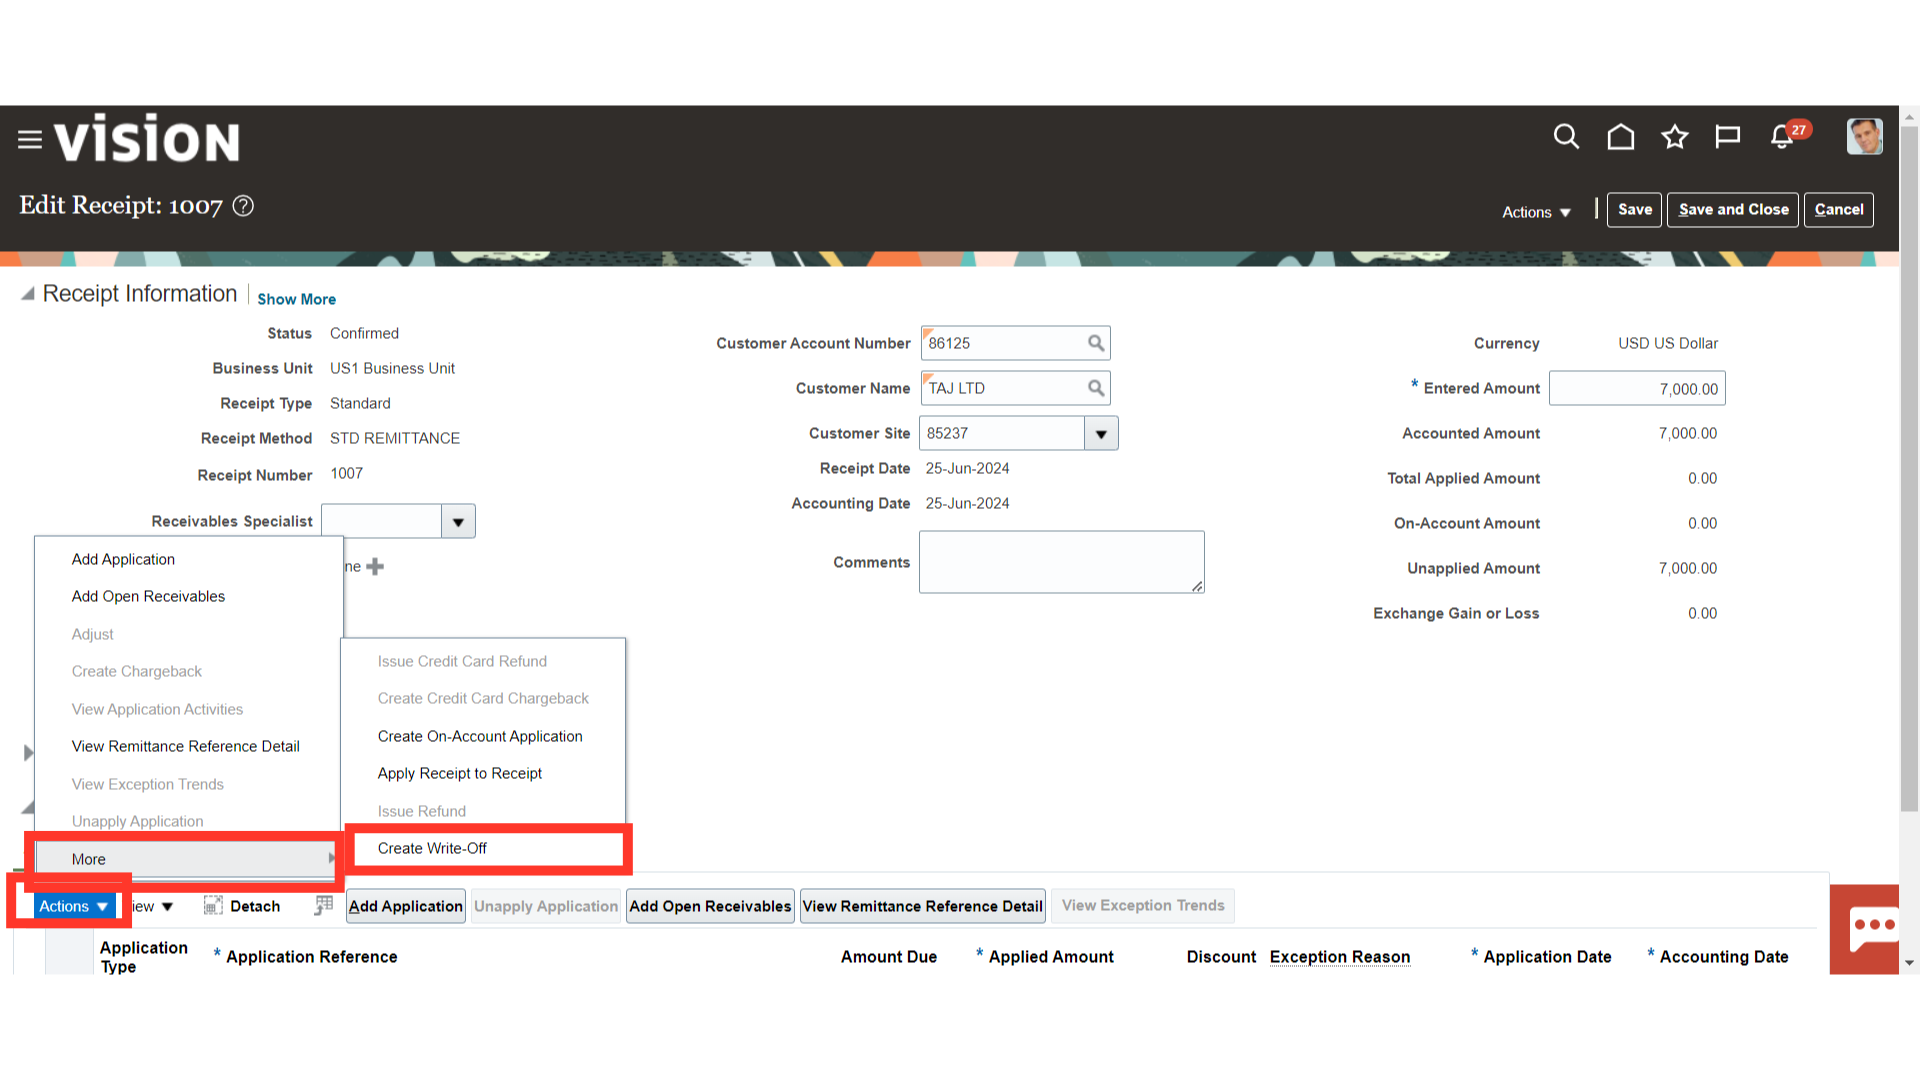
Select Create Write-Off by expanding the More section under the Action tab.
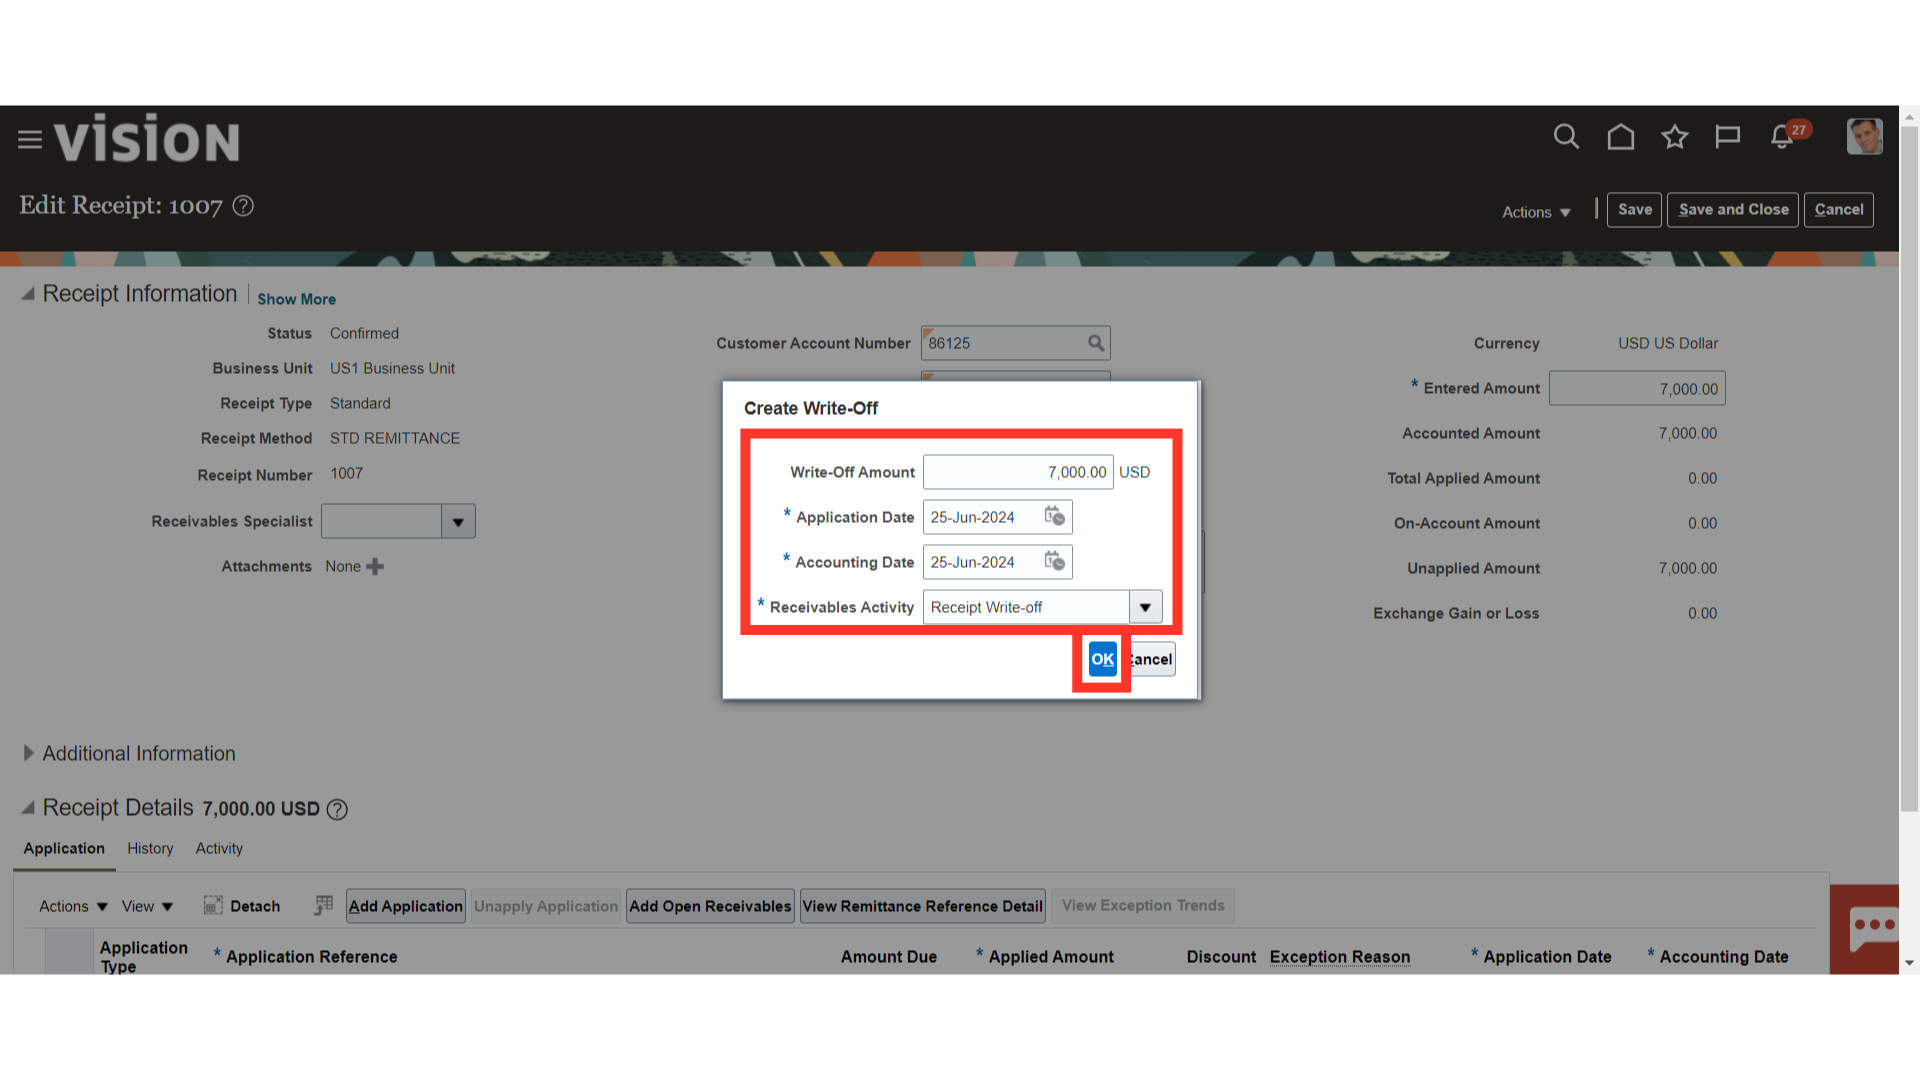
Choose the Receivables activity based on which accounts would default and enter the amount to be written off in the Write-Off Amount field. Choose the accounting date and the day that the written-off is to be created either manually or by choosing any day on the calendar. Click on OK button to finally create the write-off.
Click on Save button to save the changes.

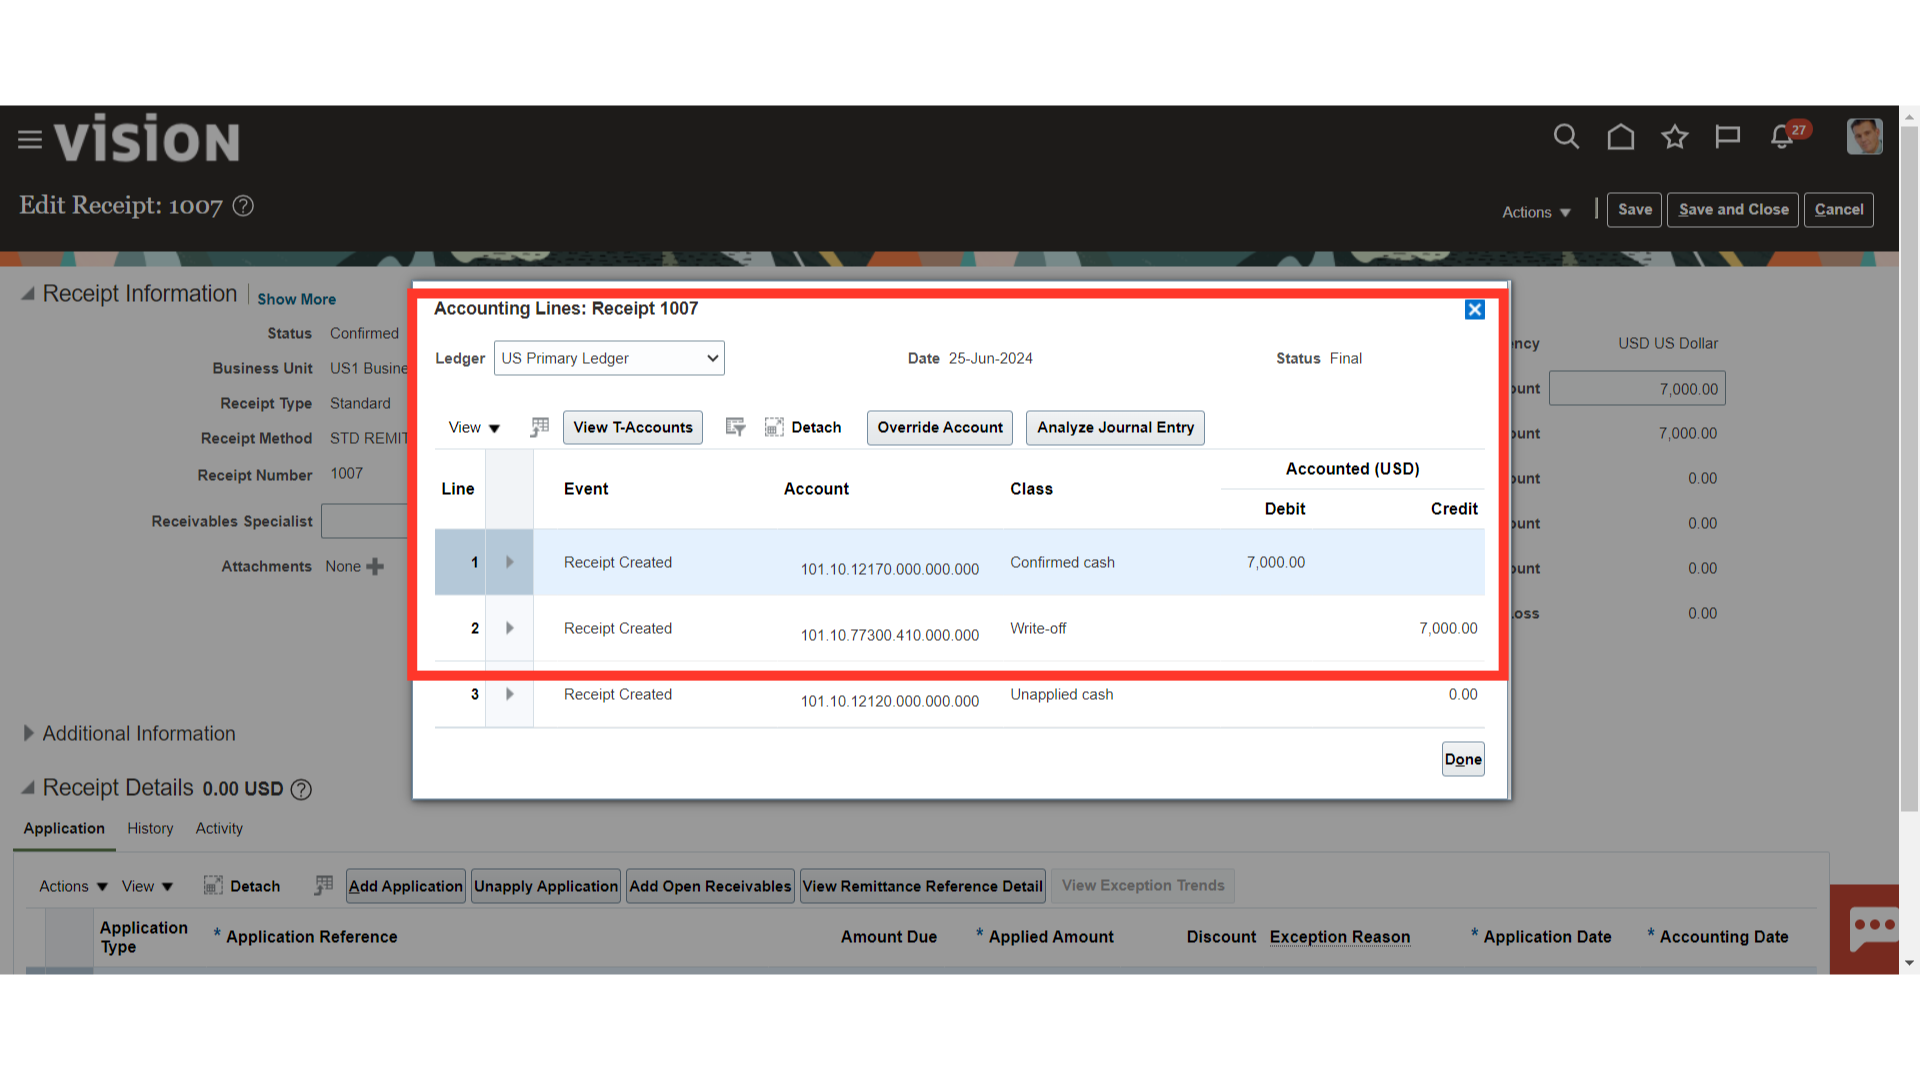
After selecting the Post to ledger under Actions, the accounting entry is generated and transferred to close the receipt balance.
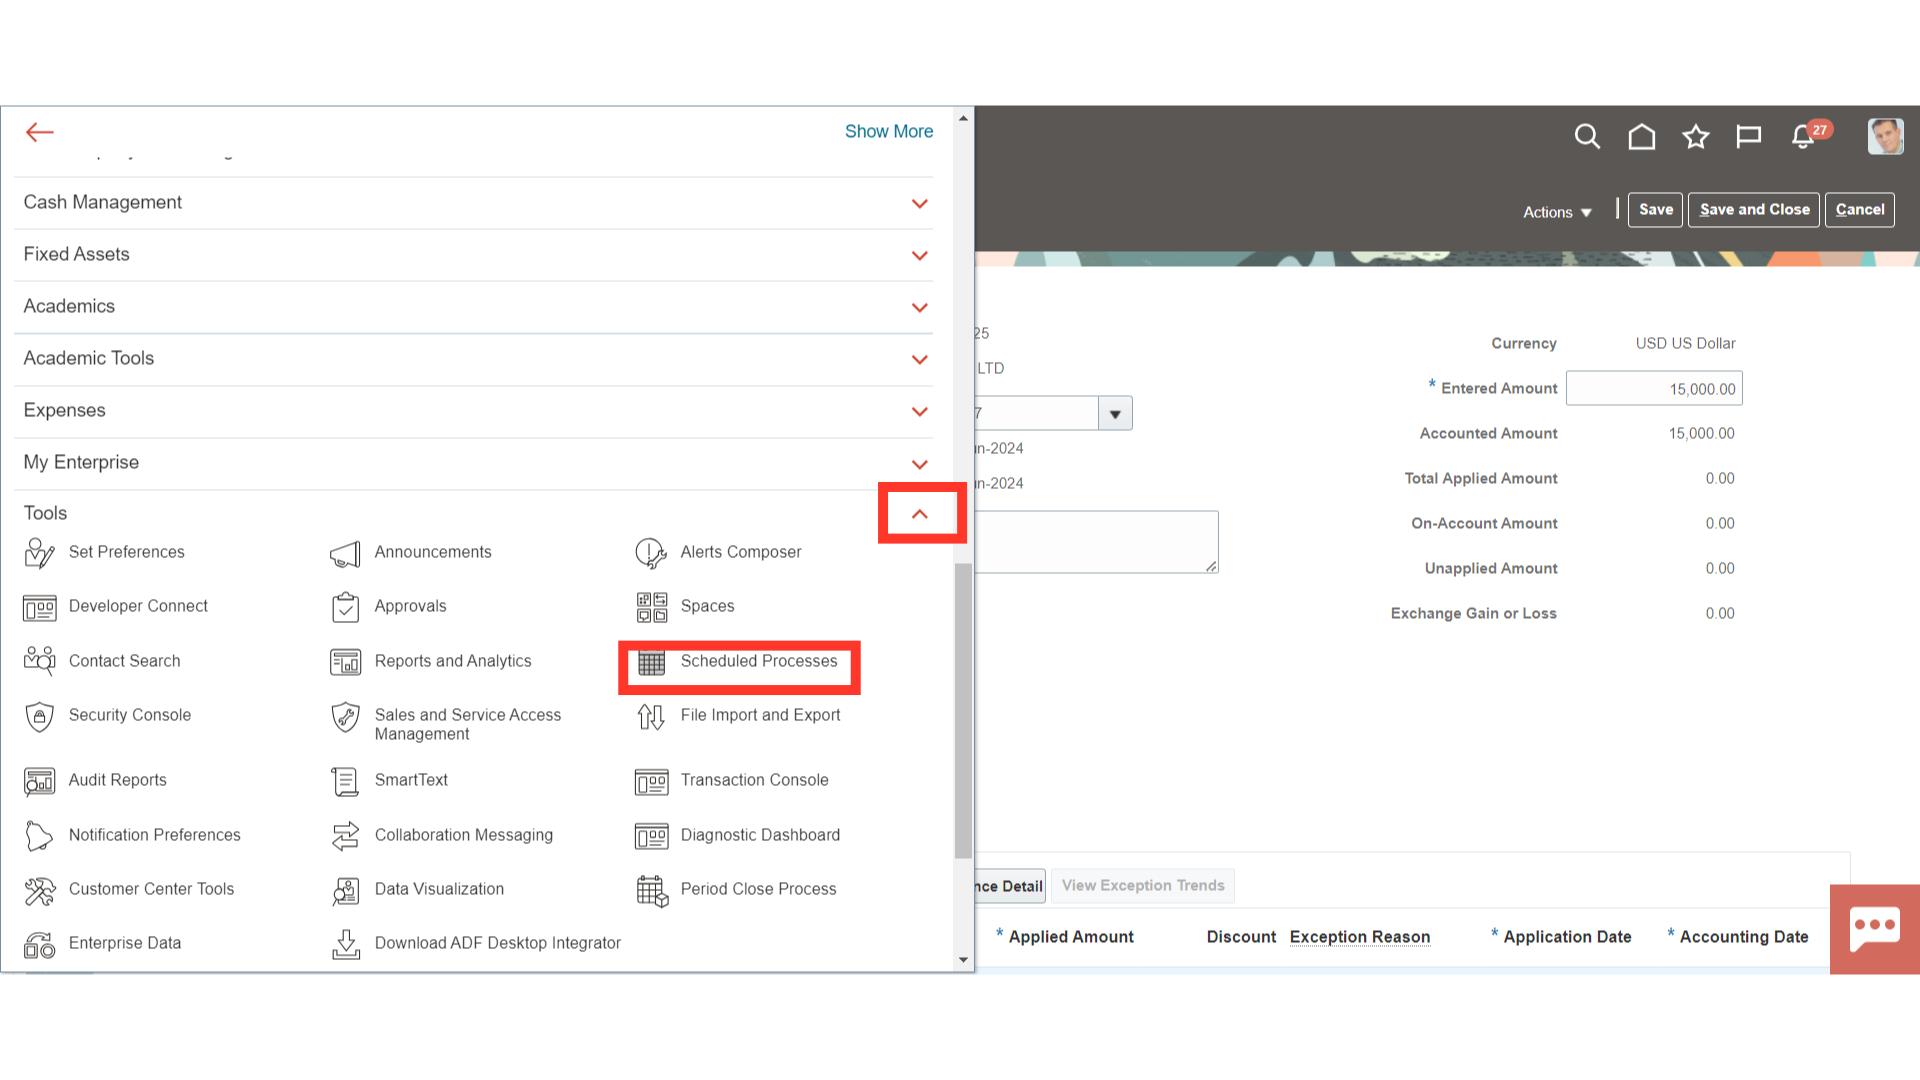
Access the Scheduled Processes work area by selecting Scheduled Processes under Tools from the navigator. Alternatively, on the Home page, you may select the Tools menu and under that select the Scheduled Processes submenu.
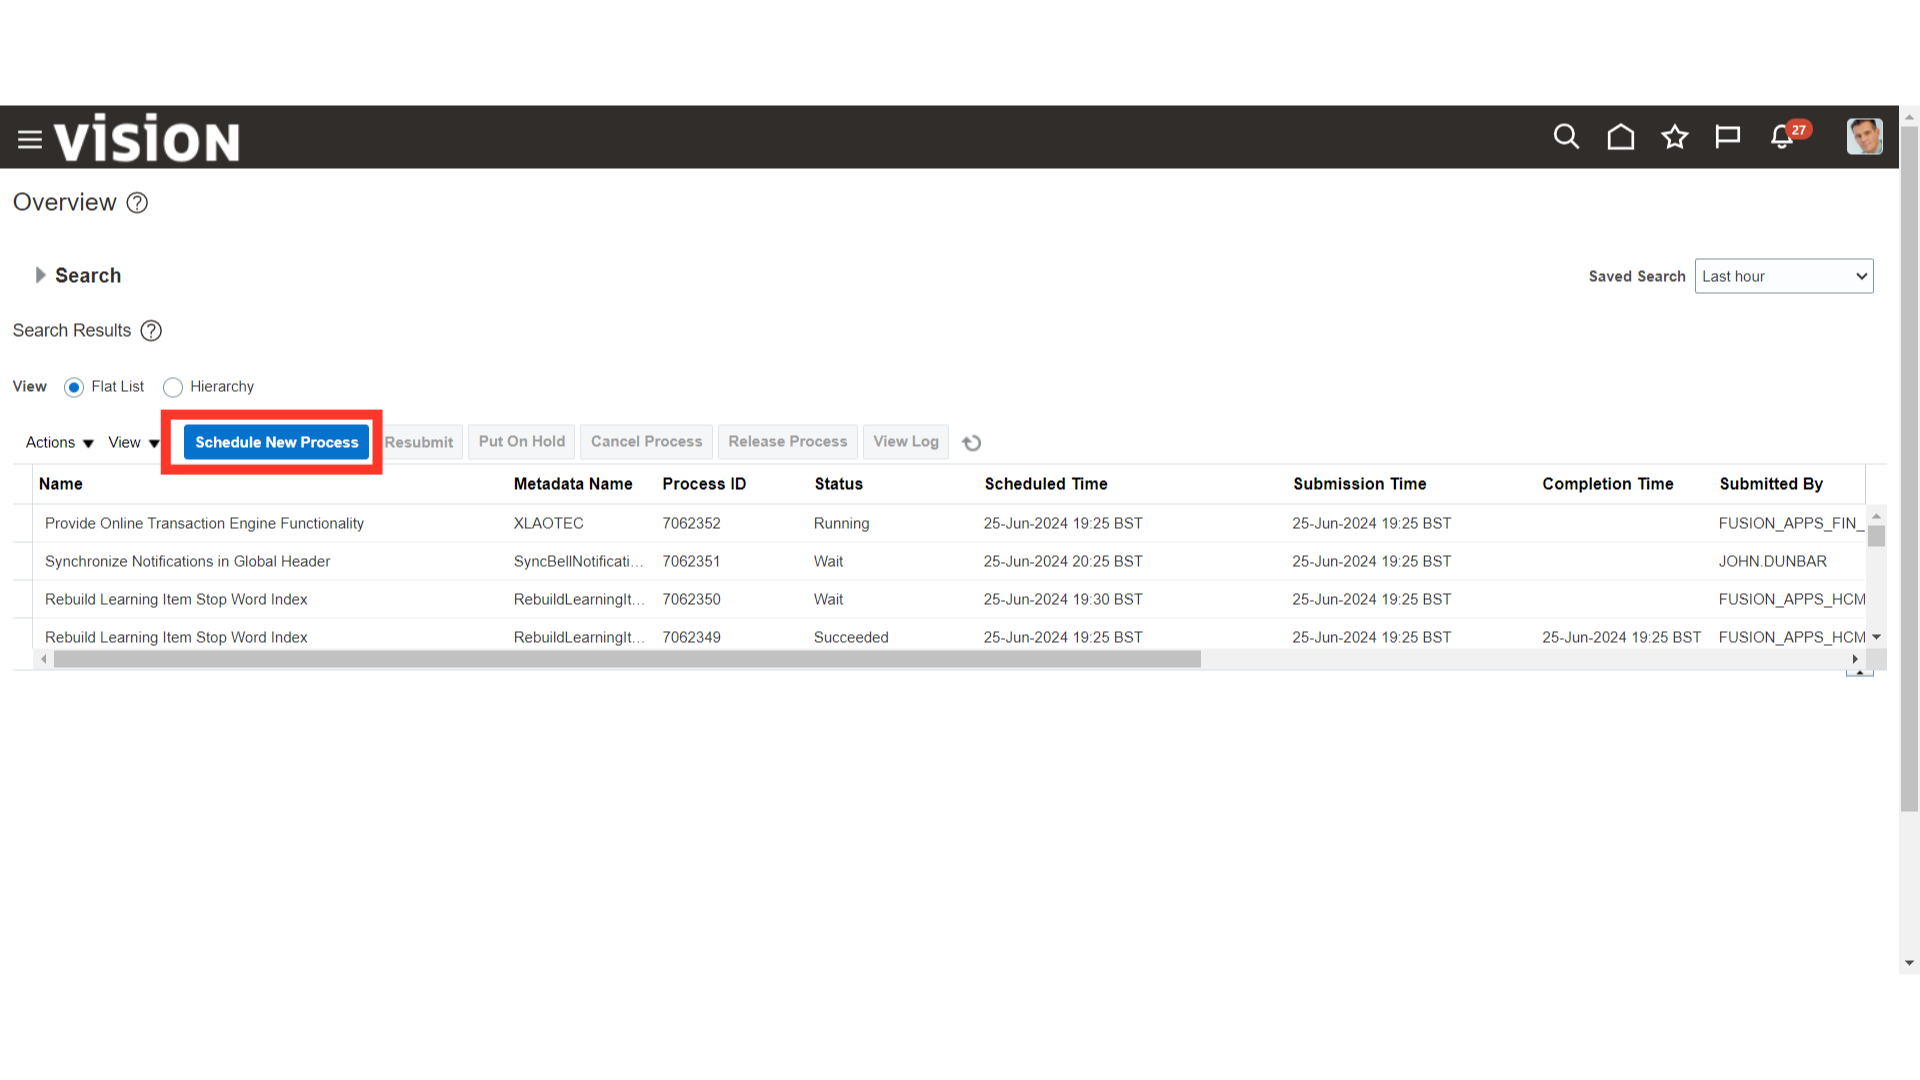
To run the new process, click on the Schedule New Process icon.
After selecting the Drop-down icon, click the search hyperlink to find the process name.
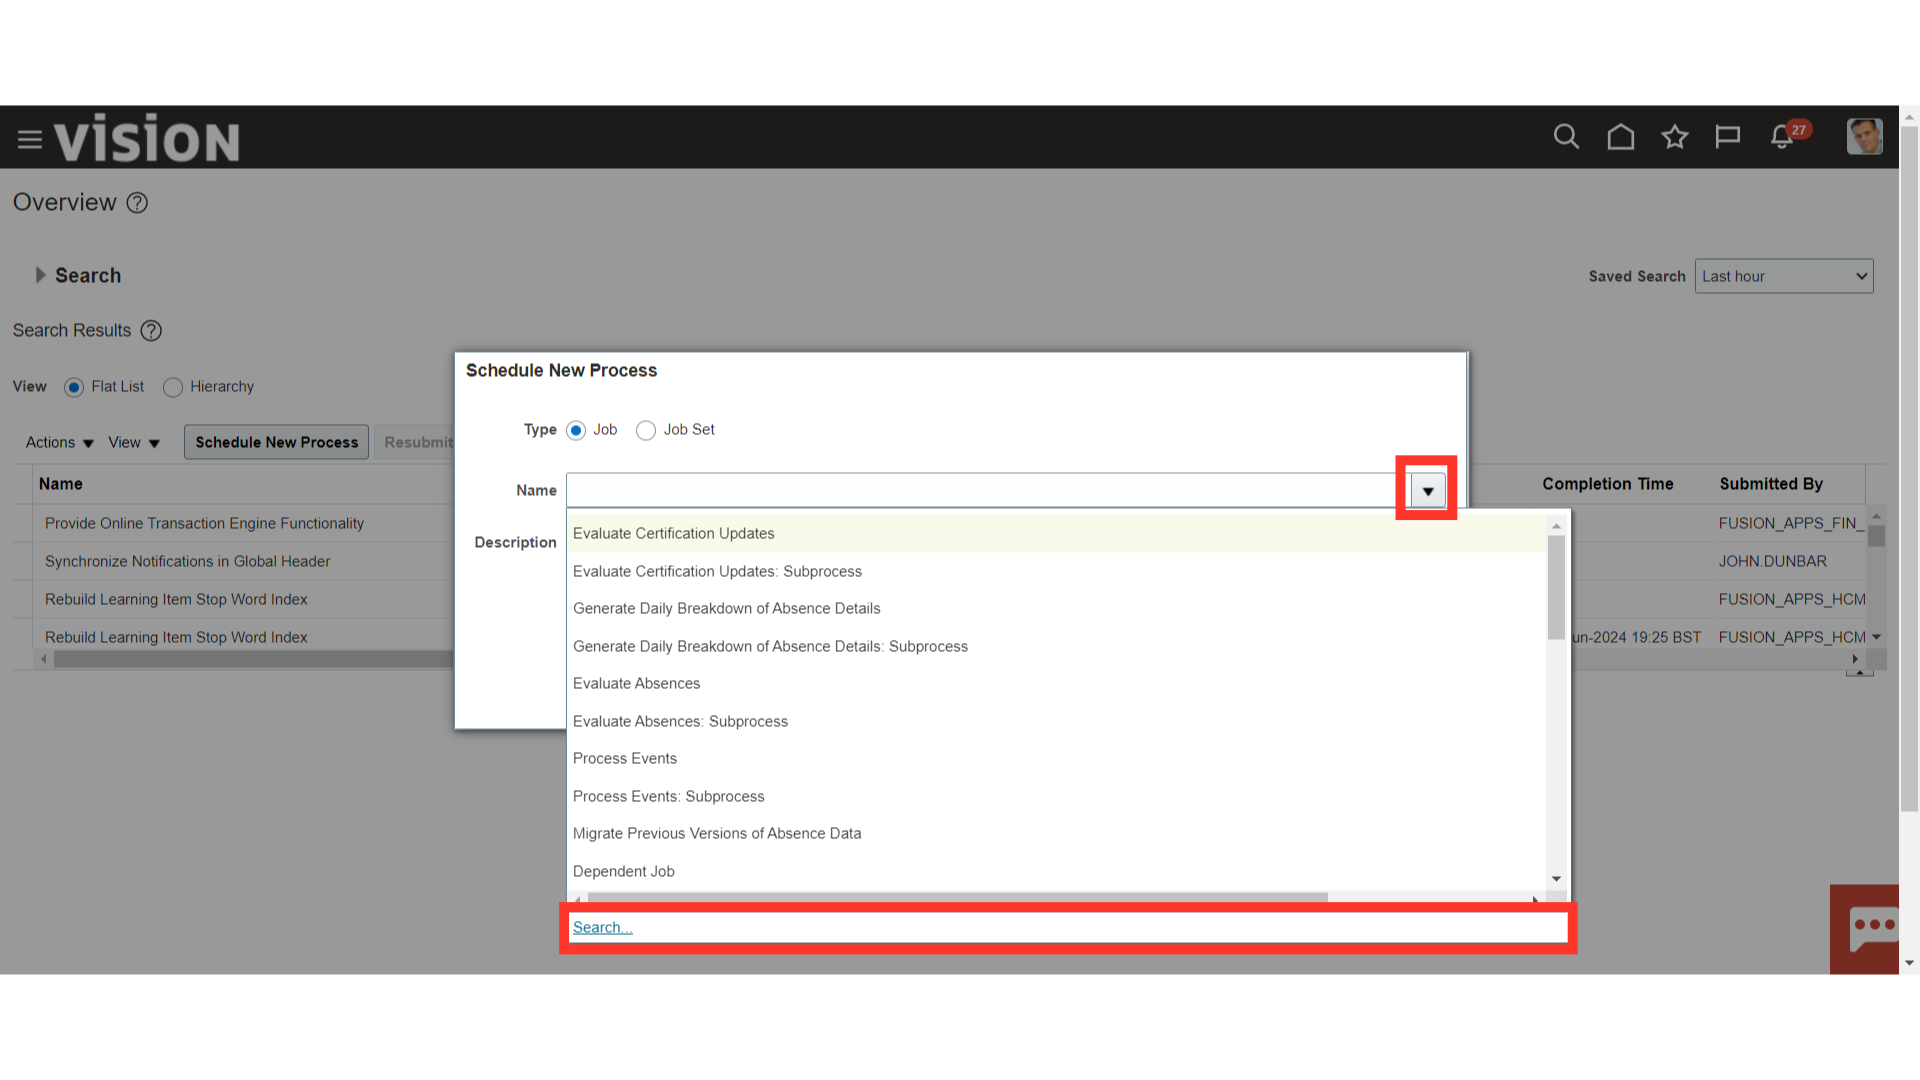
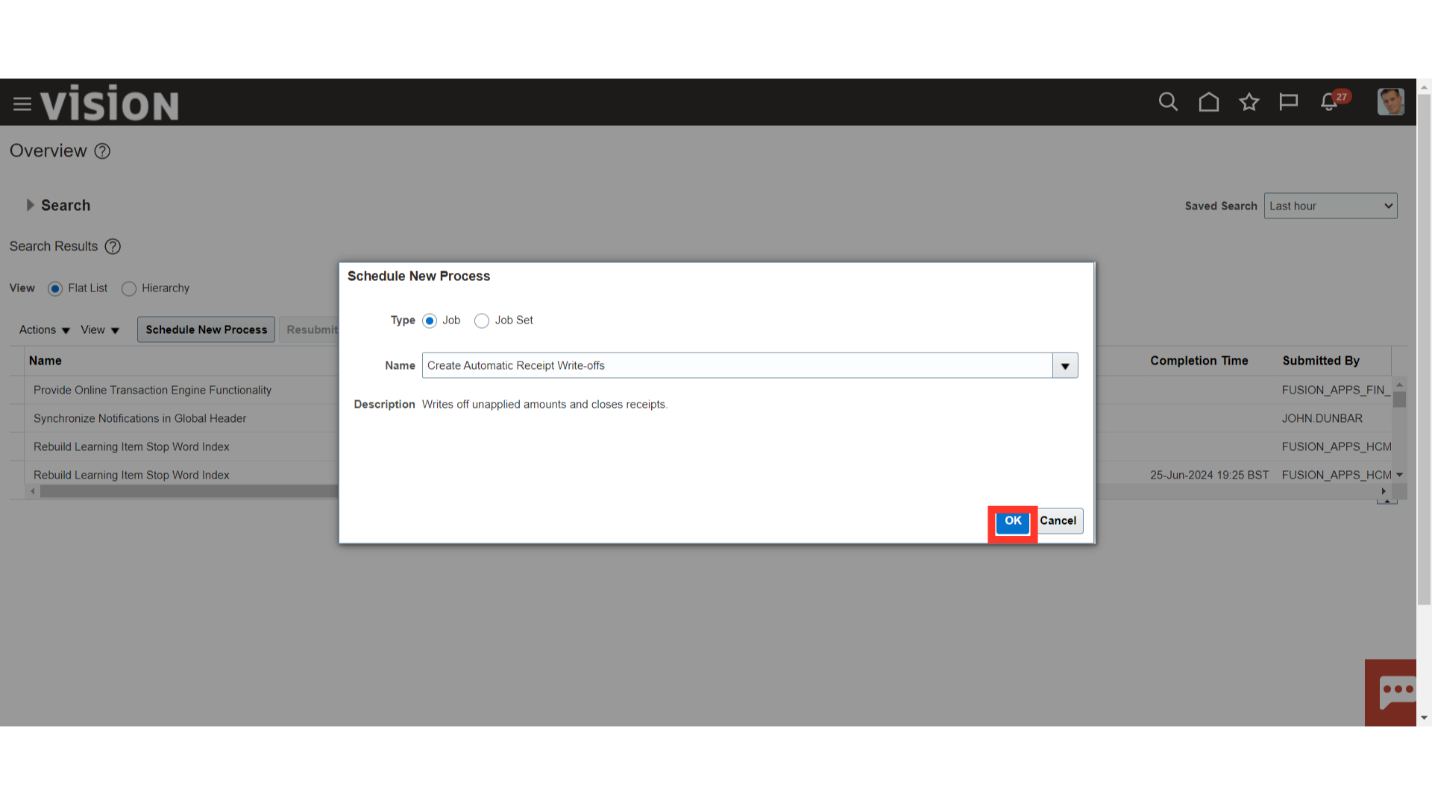
After entering the process name, using wild character search with a percentage sign click on the Search button to search the process name. Select the Create Automatic Receipt Write Offs process name, and then click on the OK button to continue.

Again, click on the OK button to run the Automatic Receipt Write-off process.
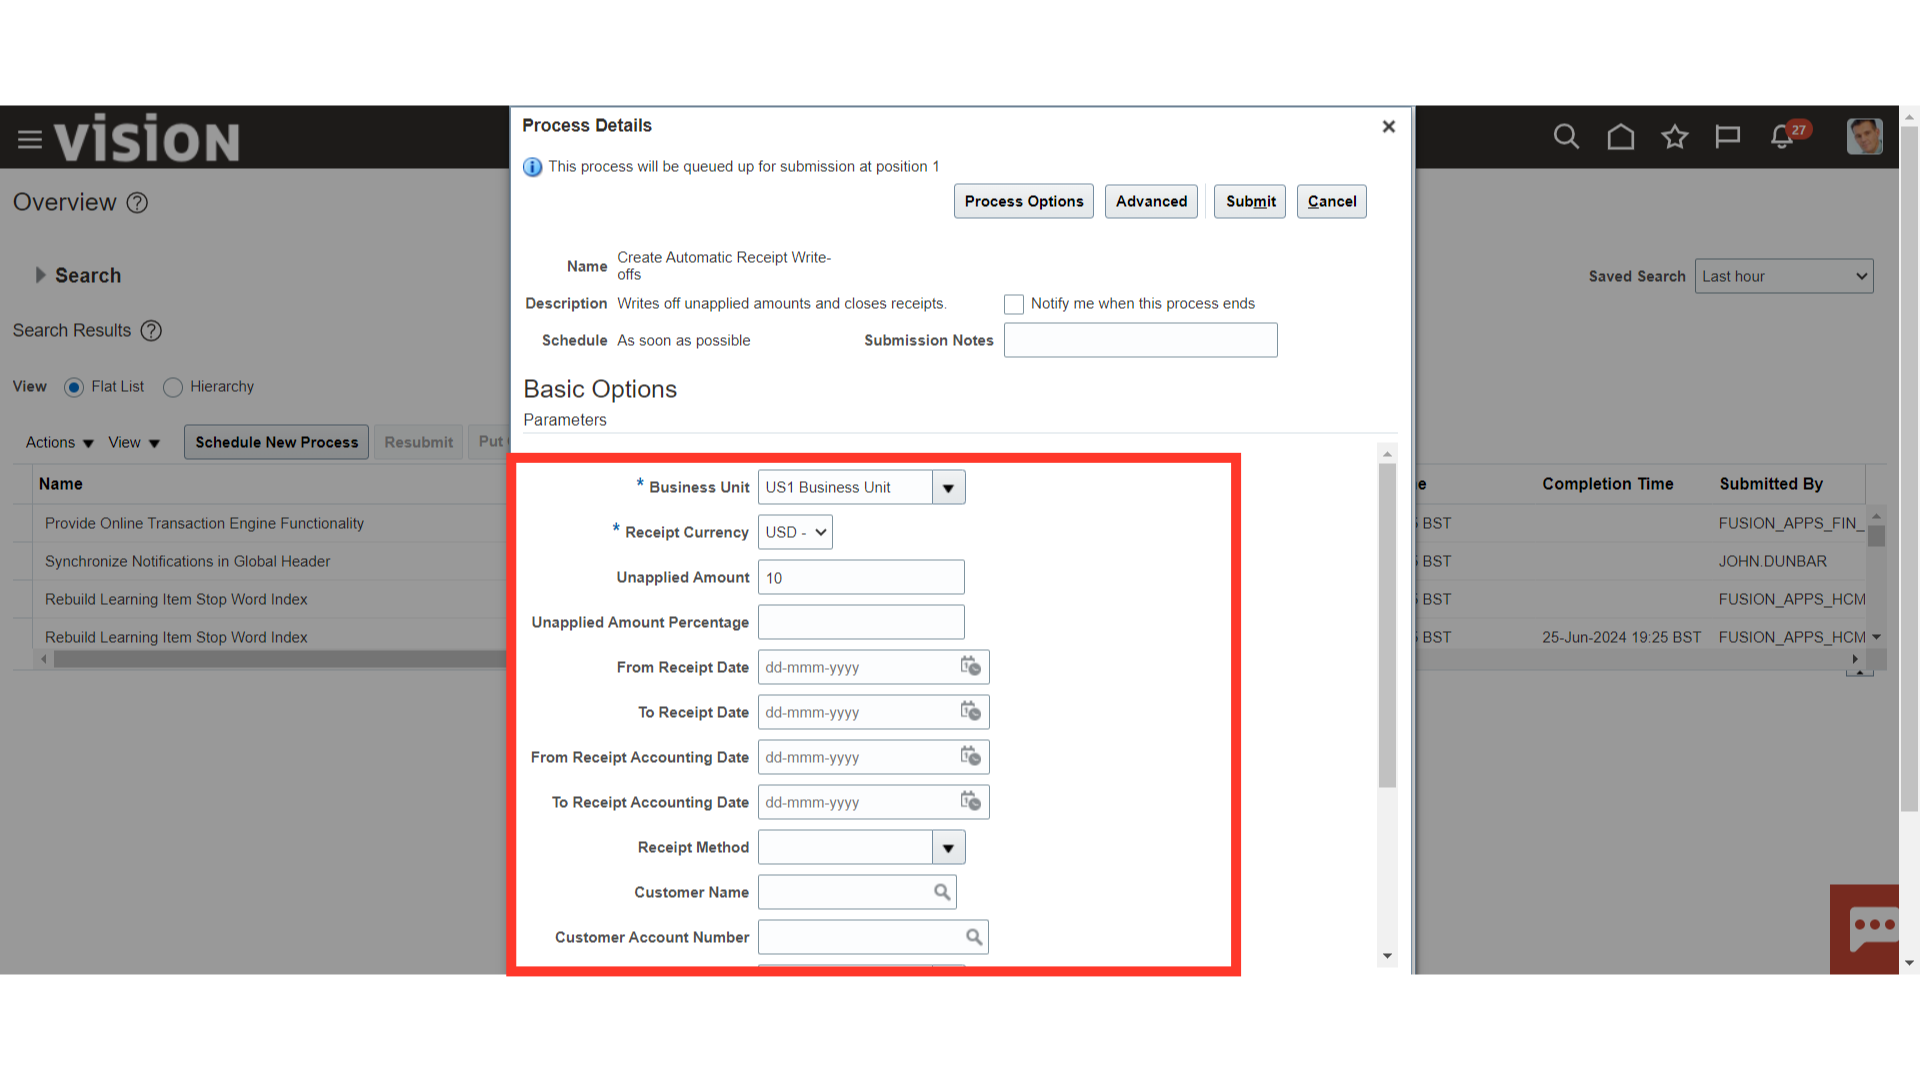
Select the applicable business unit and Receipt currency from the list of values. Limit write-offs by a percentage of the original receipt amount and by the policy of your enterprise. To write off particular receipts, additional parameters can be added, such as the method, customer information, accounting date, and receipt date.
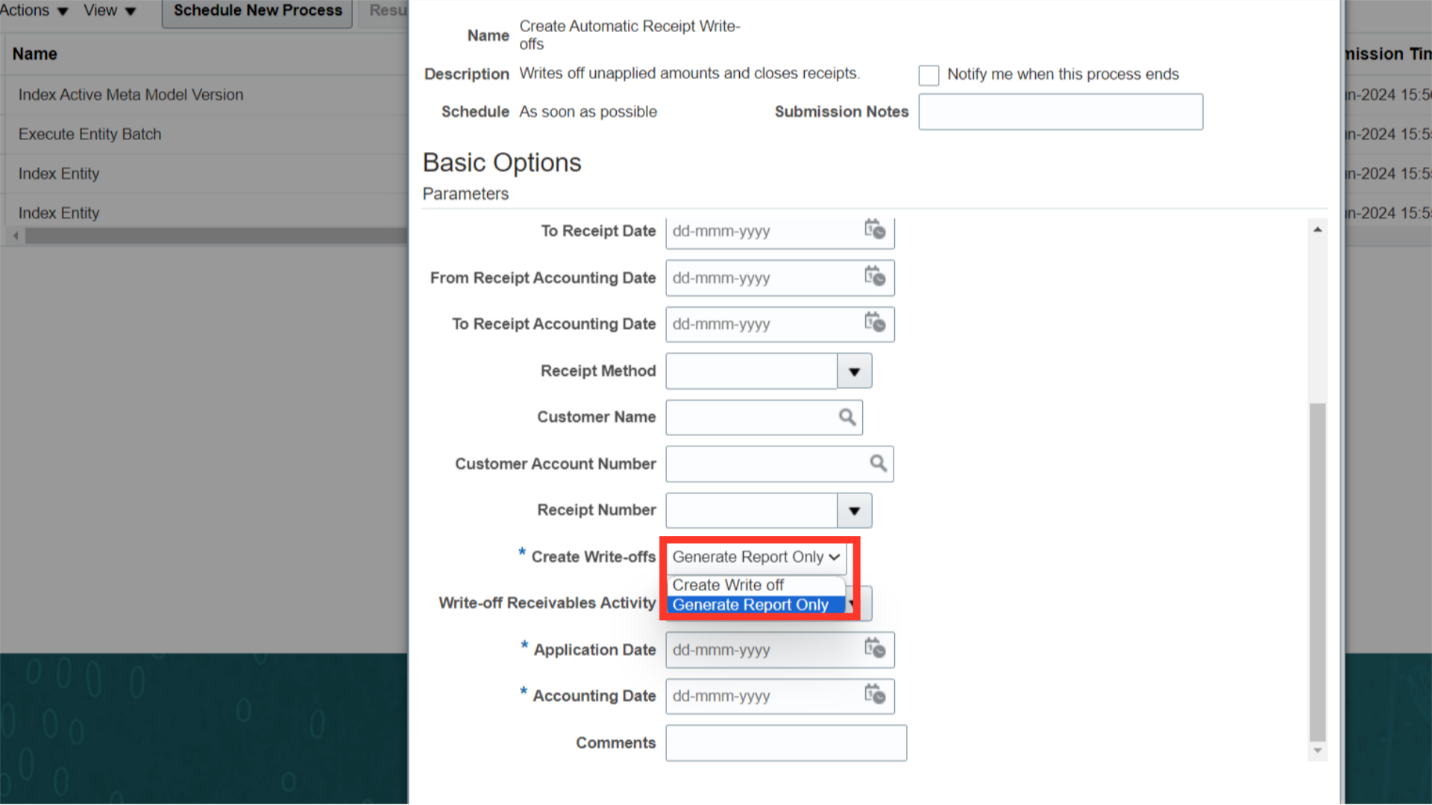
We can also print and review write-offs generated by the program before applying them by selecting Generate Reports only against the Create Write-Off, and after details are confirmed then Create Write-Off can be selected.
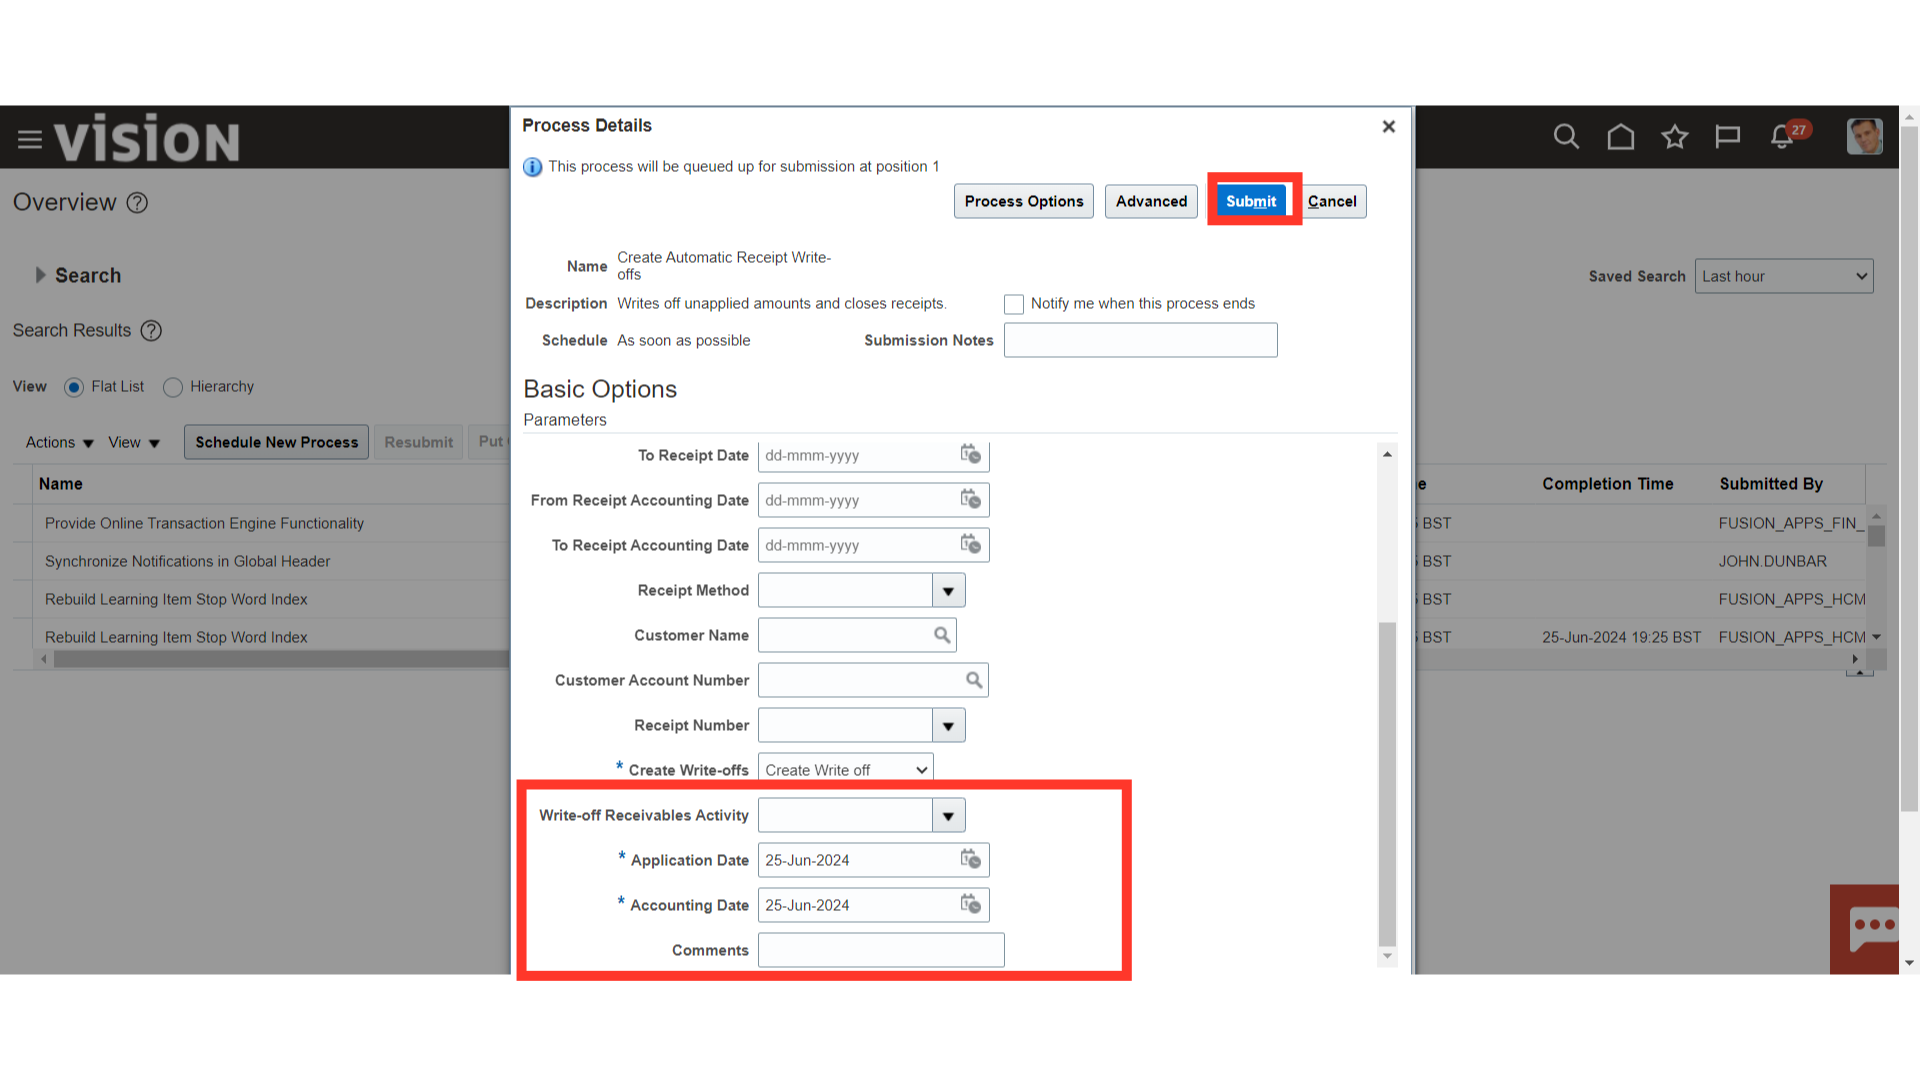
Choosing the appropriate Write-off Receivables activity depends on which account combinations would be used by default when the write-off is been recorded. In the Applicate date field, select the date that write-offs should be recorded. In the Accounting date field, select the date that accounting should be recorded. After the details have been confirmed, press the submit button.
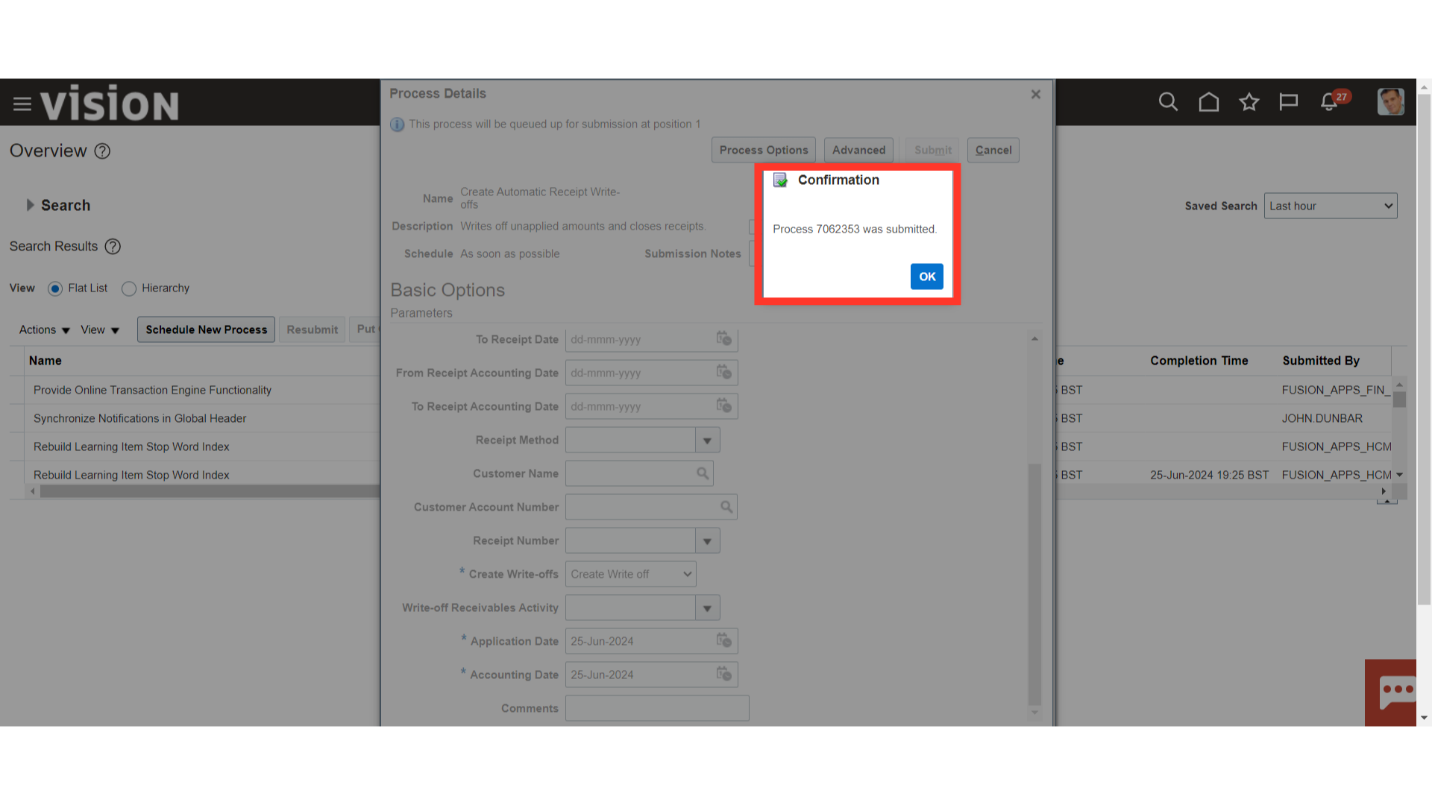
A confirmation message is displayed along with the process id, click on OK button to continue.
Click on the “Refresh” Icon to refresh the process status.
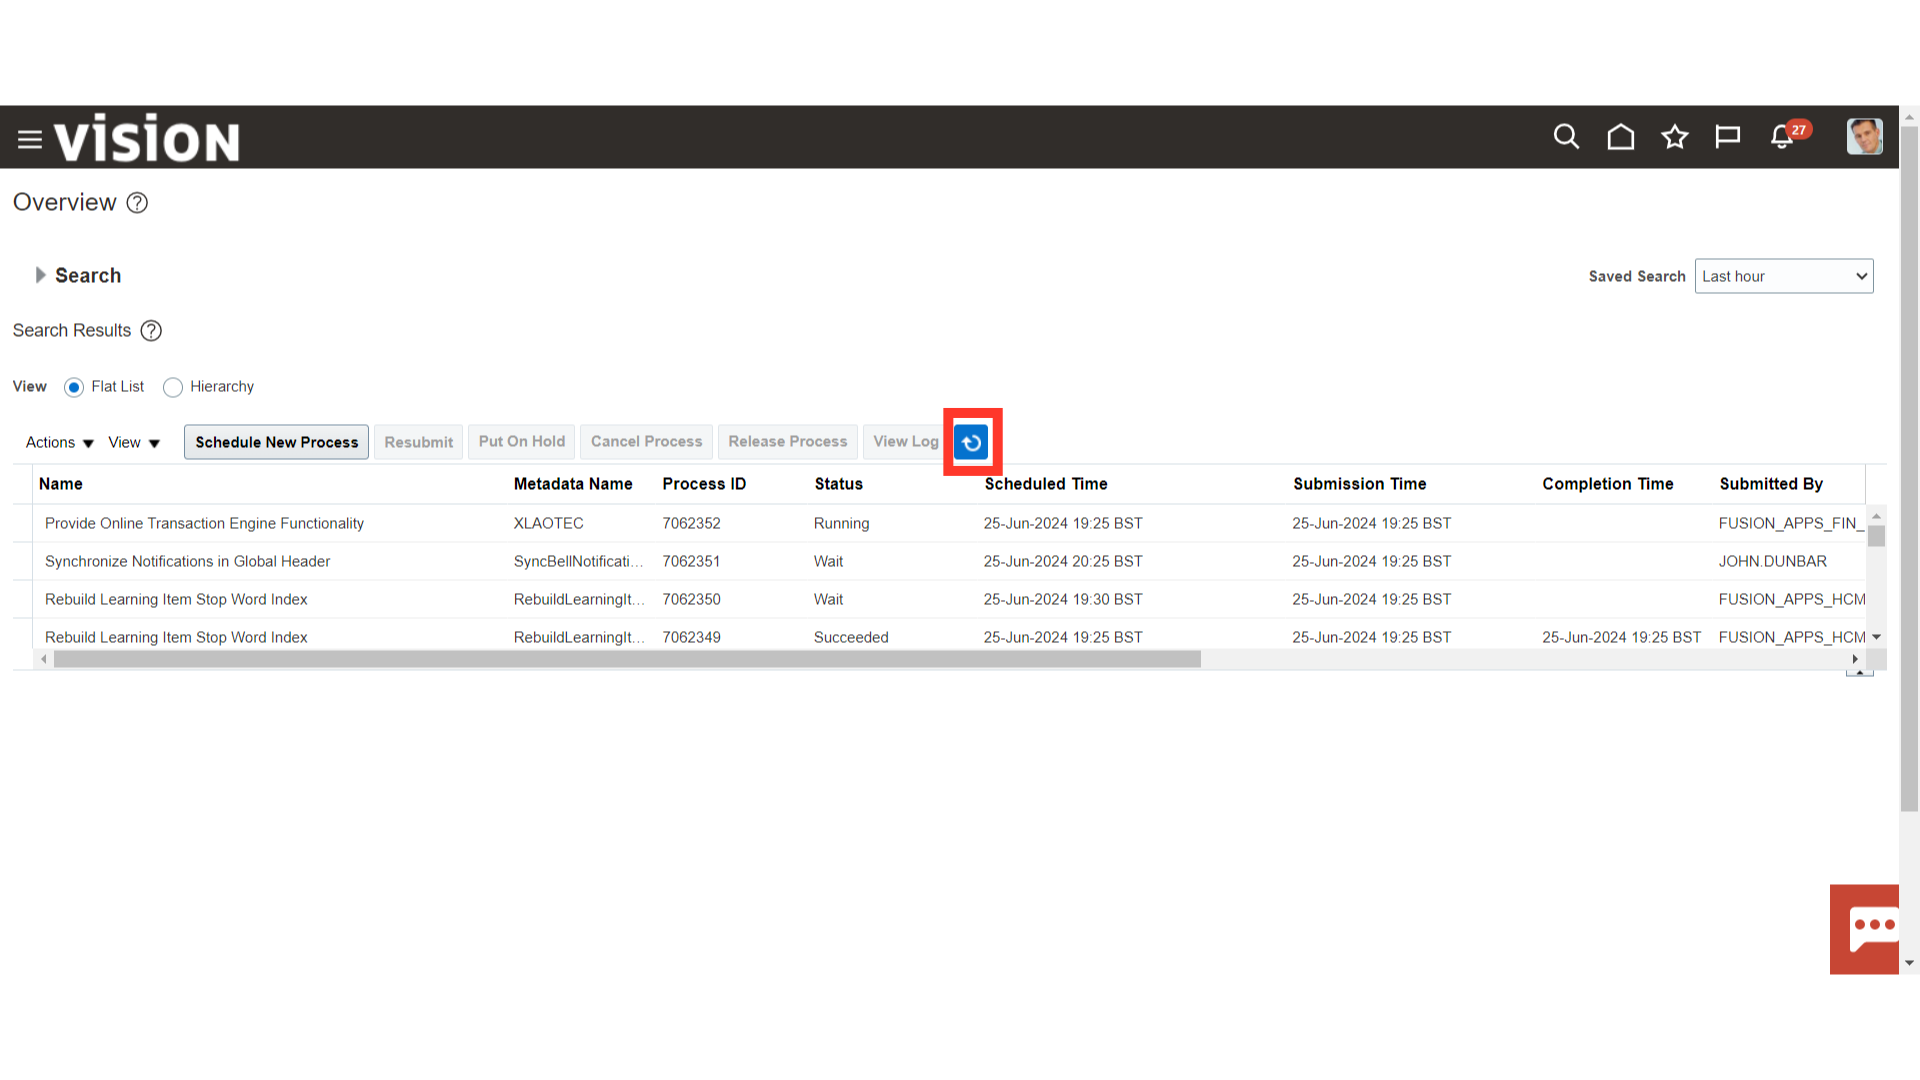
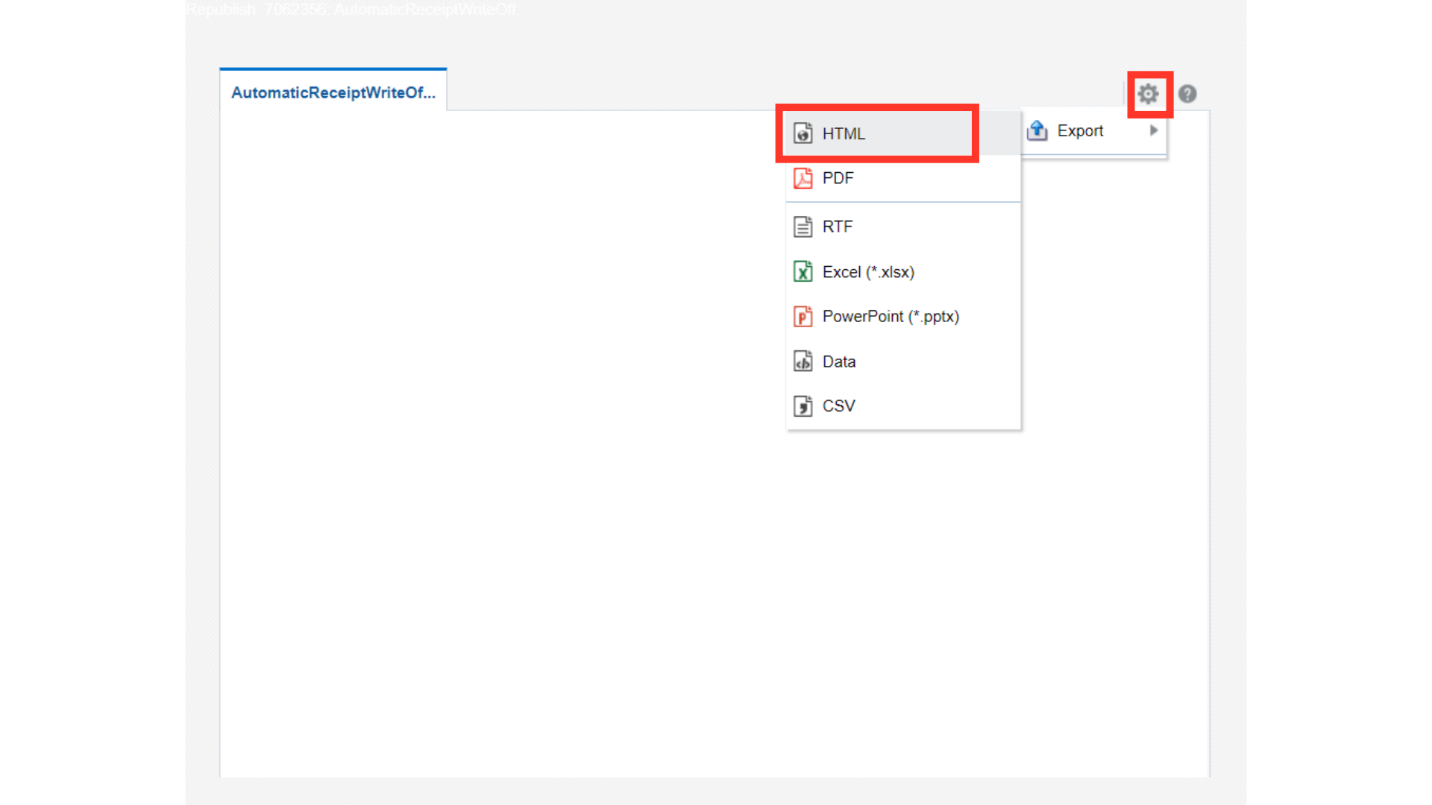
When you submit the Create Automatic Receipt Write off process, the Receipt Write Offs Report is submitted automatically. Now, to download the report select the “Receipt Write Offs Report” process, and then click on the Republish button.

Click on the Gear icon, and then click on the HTML view option under Export.
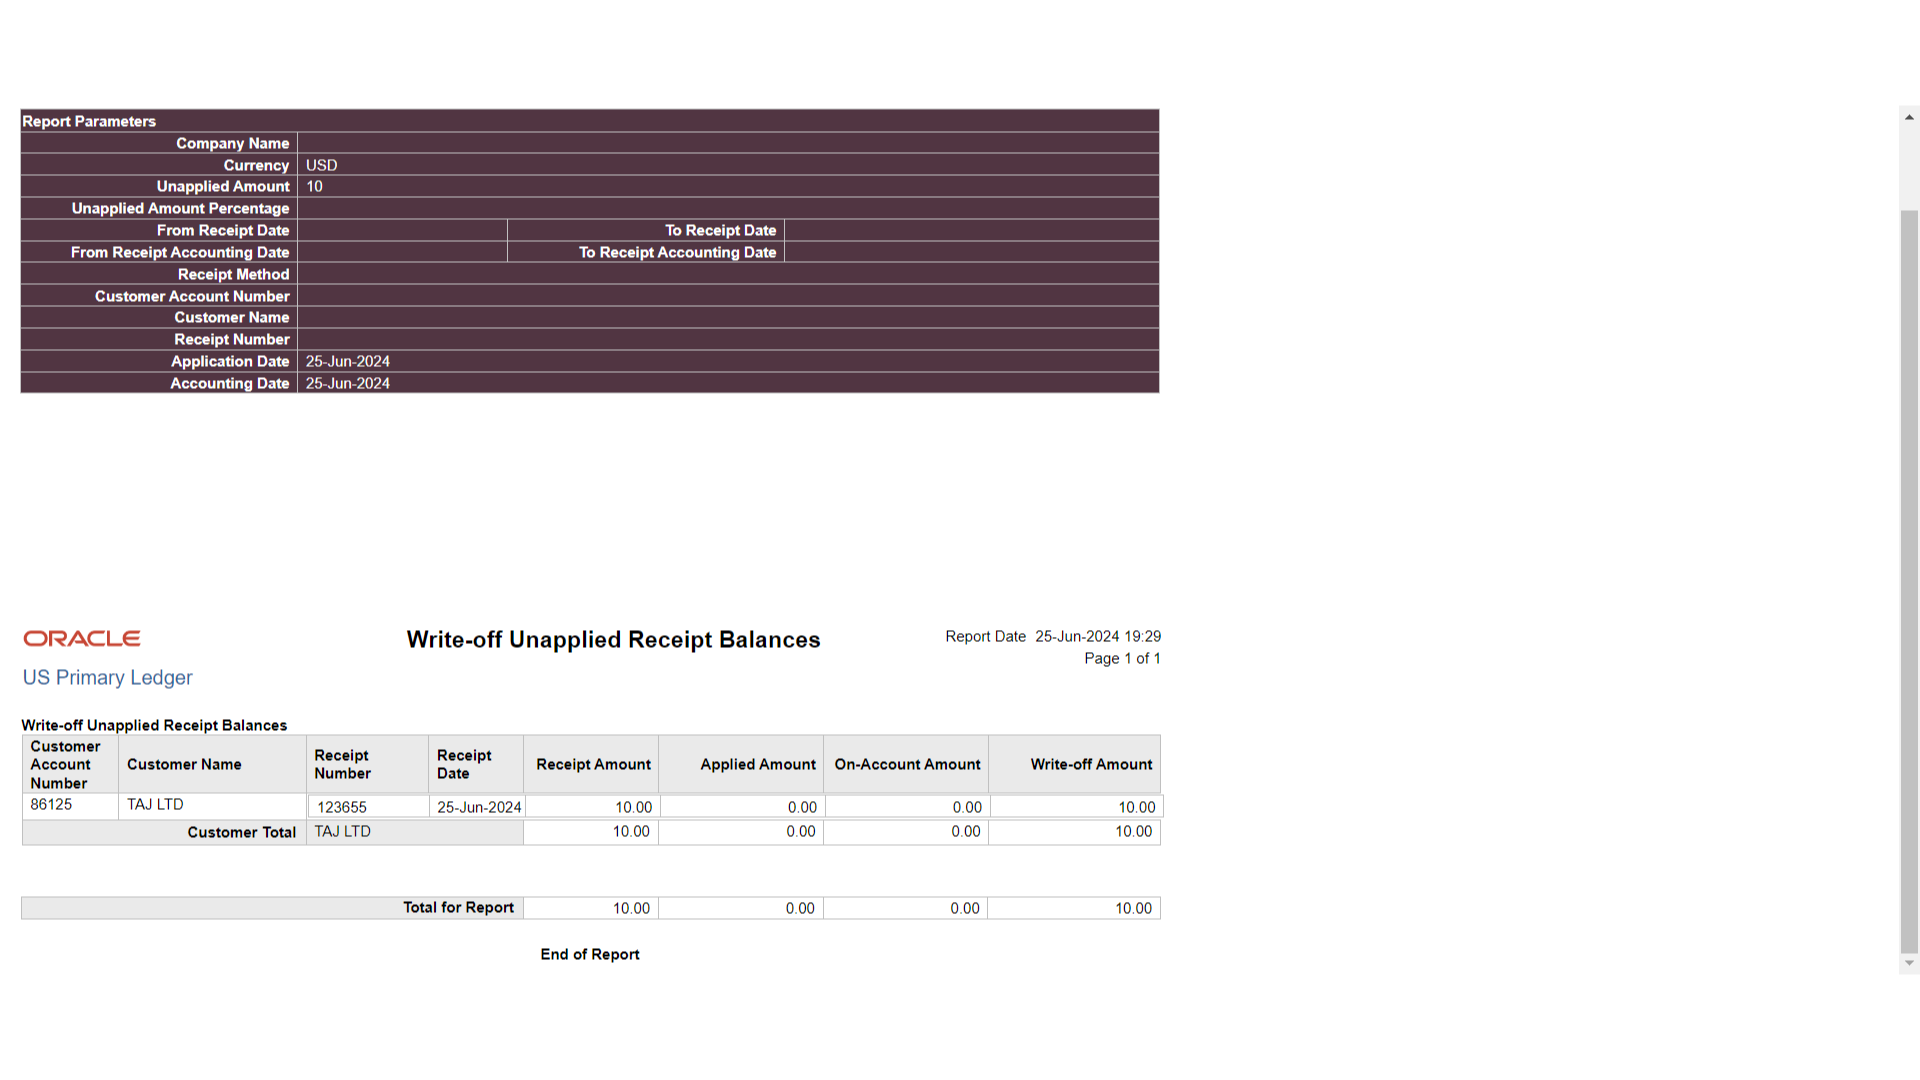
This report includes information about the written-off receipt as well as receipt specifics like the amount, customer information, and receipt number.
This guide has offered a thorough explanation of how to carry out different actions on the receipt, beginning with reversing the receipt, issuing a refund on the receipt, and creating an automatic receipt write-off process or doing it manually.