Transaction Print and Email to Customer
Use the Print Receivables Transactions process to submit your invoices, credit memos, debit memos, chargebacks, and balance forward bills for printing. You can print all available transactions, a range of transactions, or new transactions only. This guide will walk you through each step of the process in detail for sending transactions to the customer’s mail ID and explain the parameters you need to enter when submitting the process.
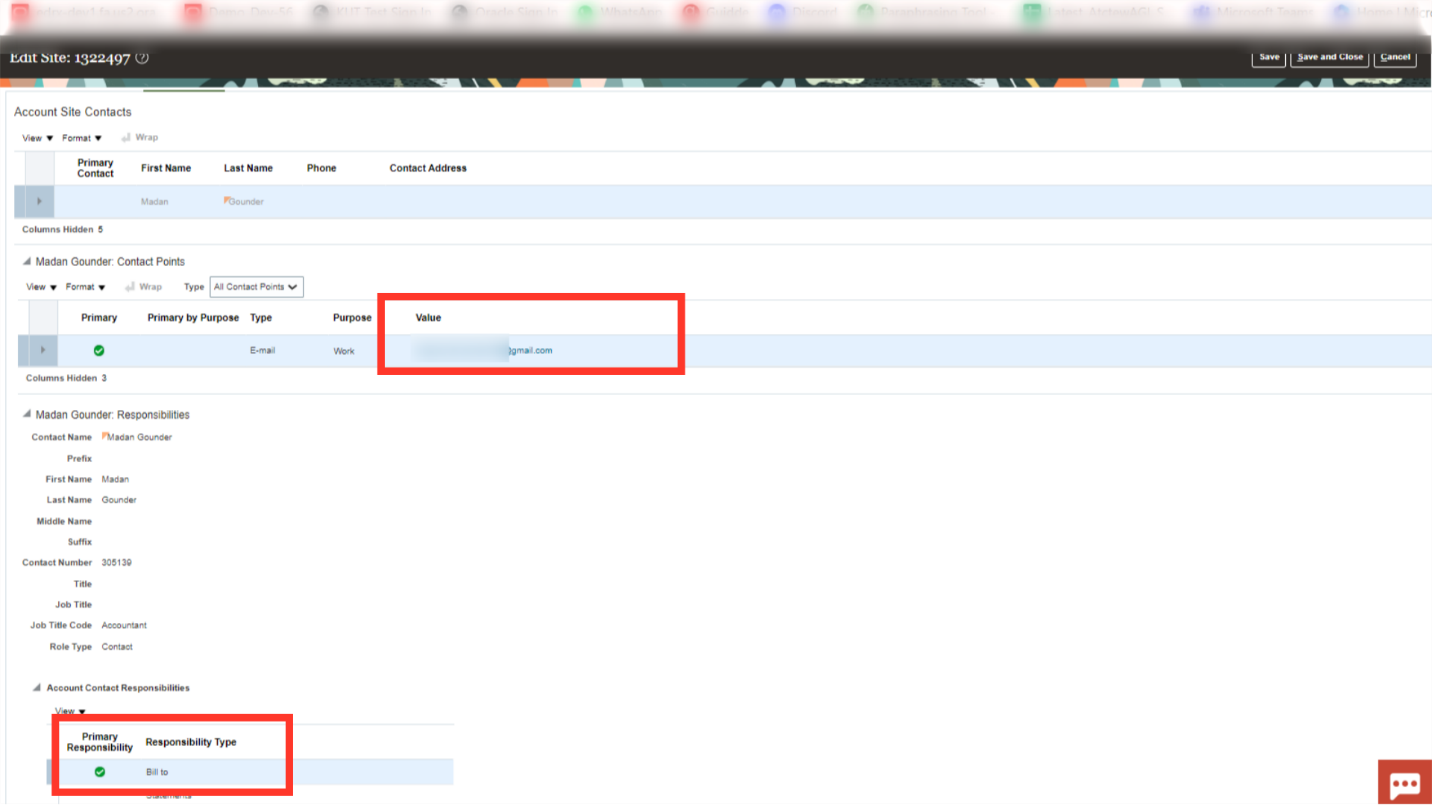
Prior to printing the transactions, it is necessary to add the customer’s email address and the Bill to Responsibility type to the customer site. If not, there will be a warning state for the Print Receivables Transaction process.
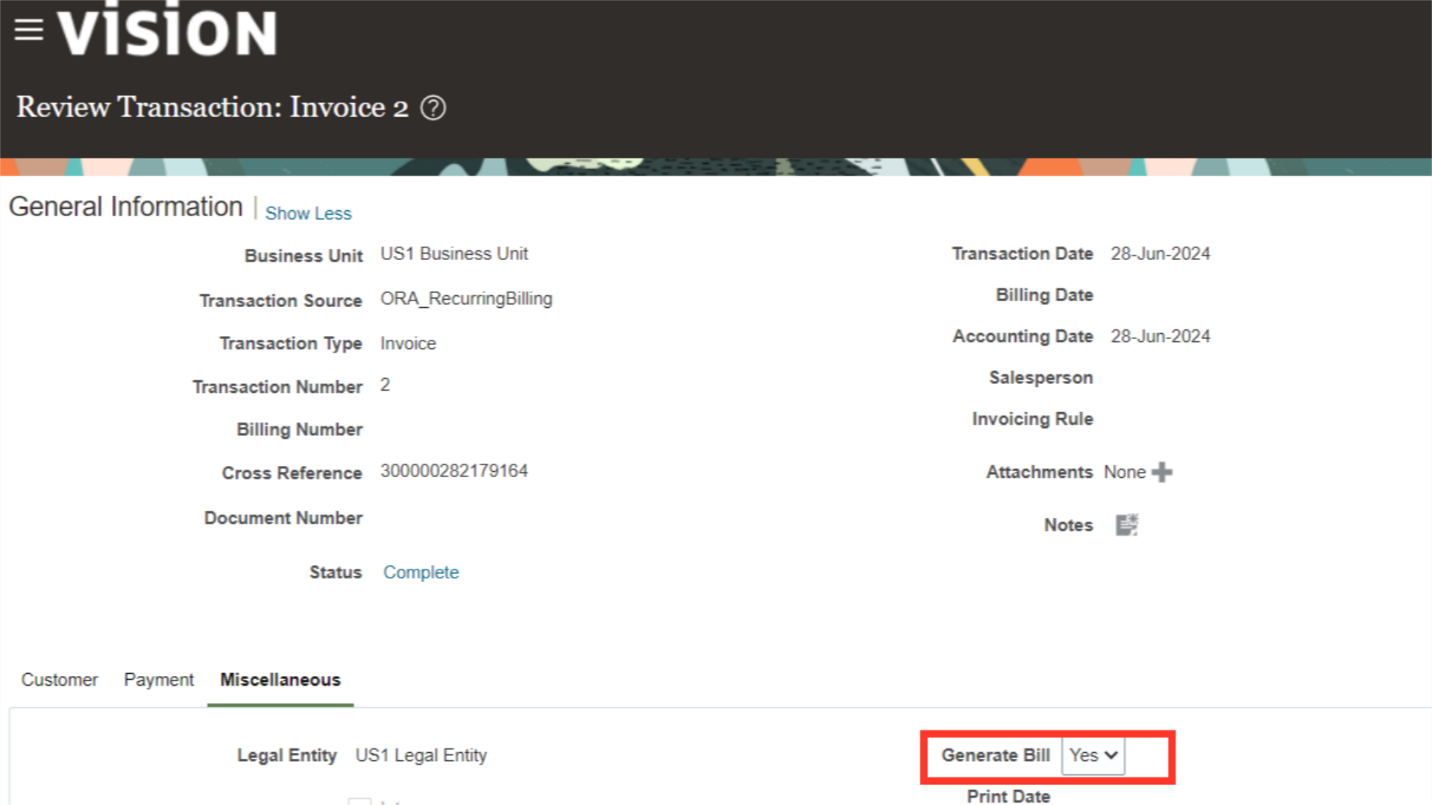
Before printing the transactions, please make sure at the invoice level Generate Bill under Miscellaneous is selected YES to be eligible for print address.
Click on the Navigator icon to access the Tools menu.
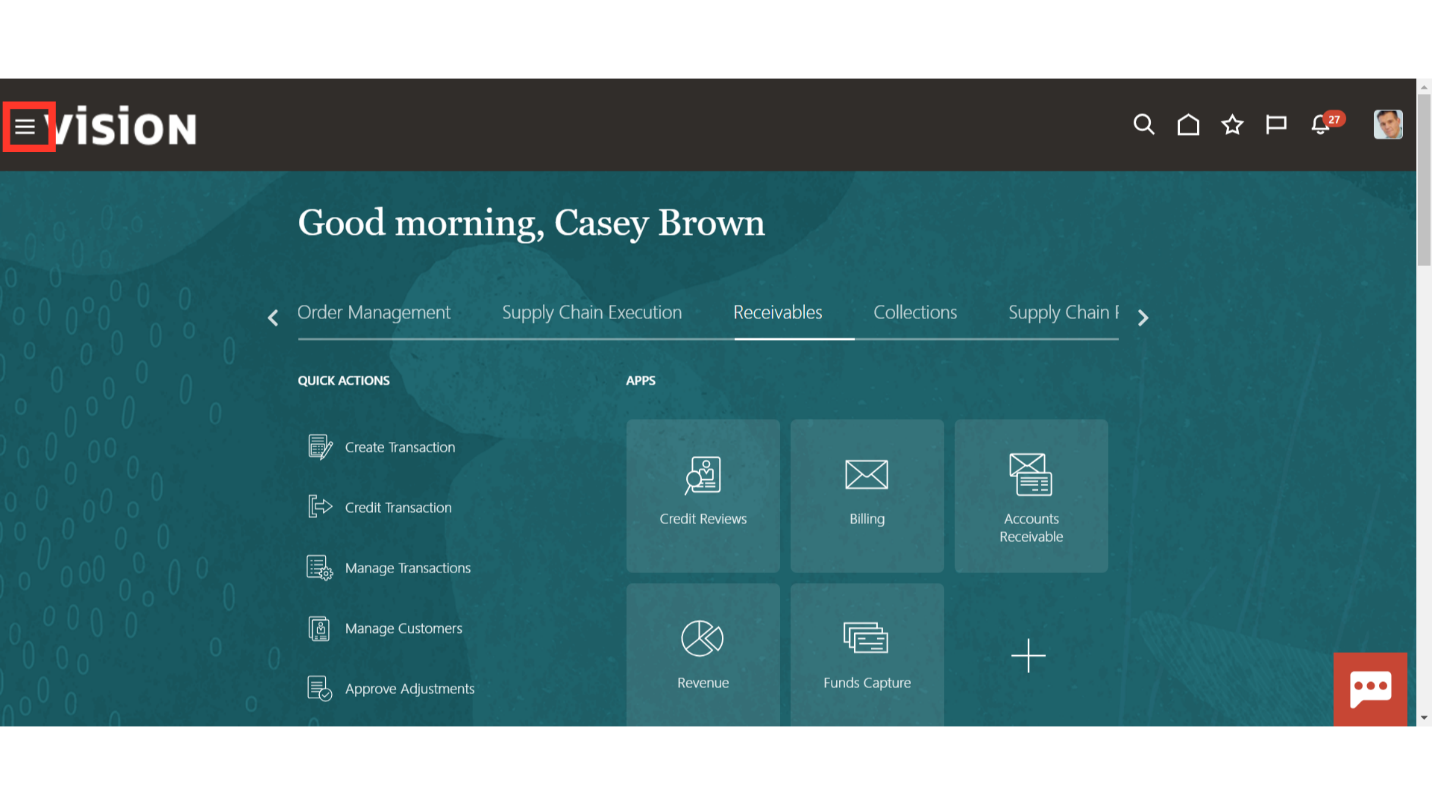
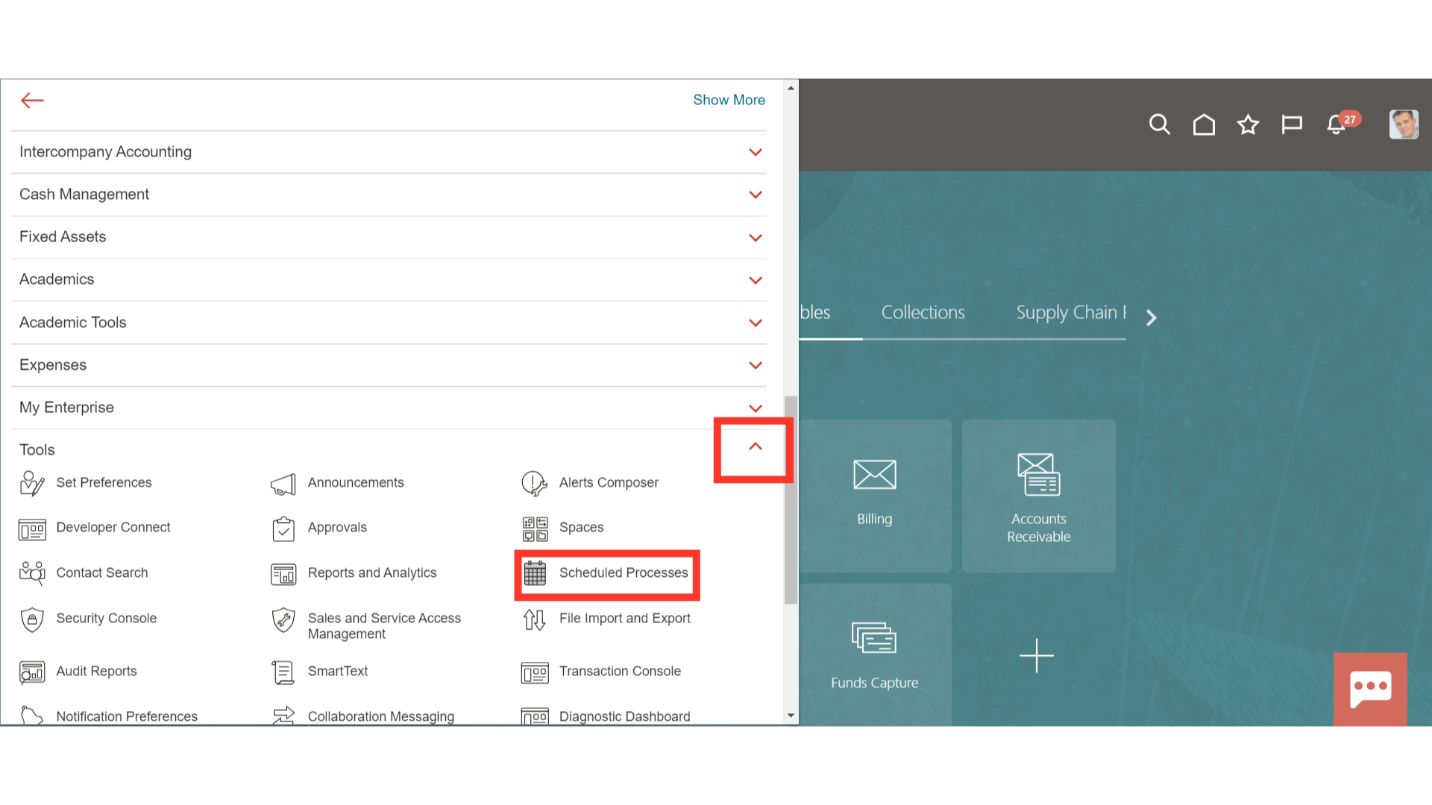
Access the Scheduled Processes work area by selecting Scheduled Processes under Tools from the navigator. Alternatively, on the Home page, you may select the Tools menu and under that select the Scheduled Processes submenu.
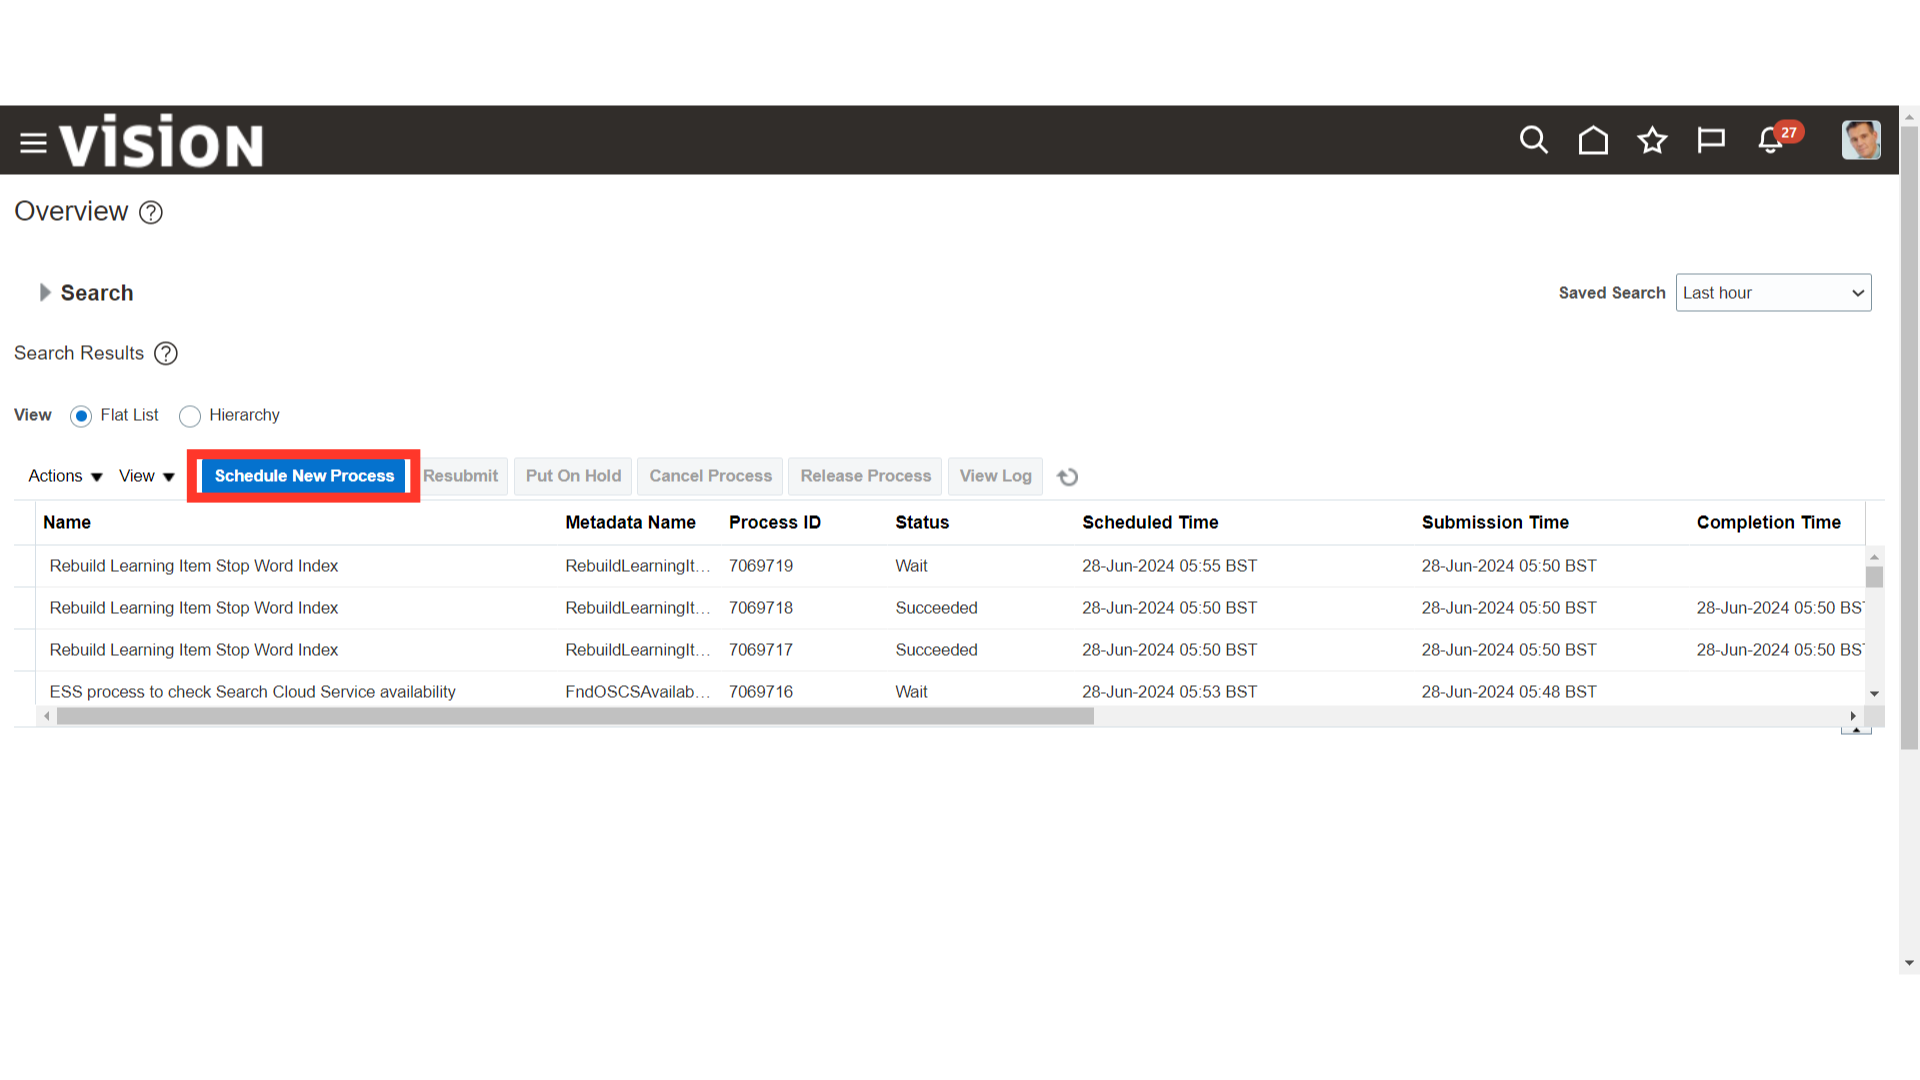
To run the new process, click on the Schedule New Process icon.
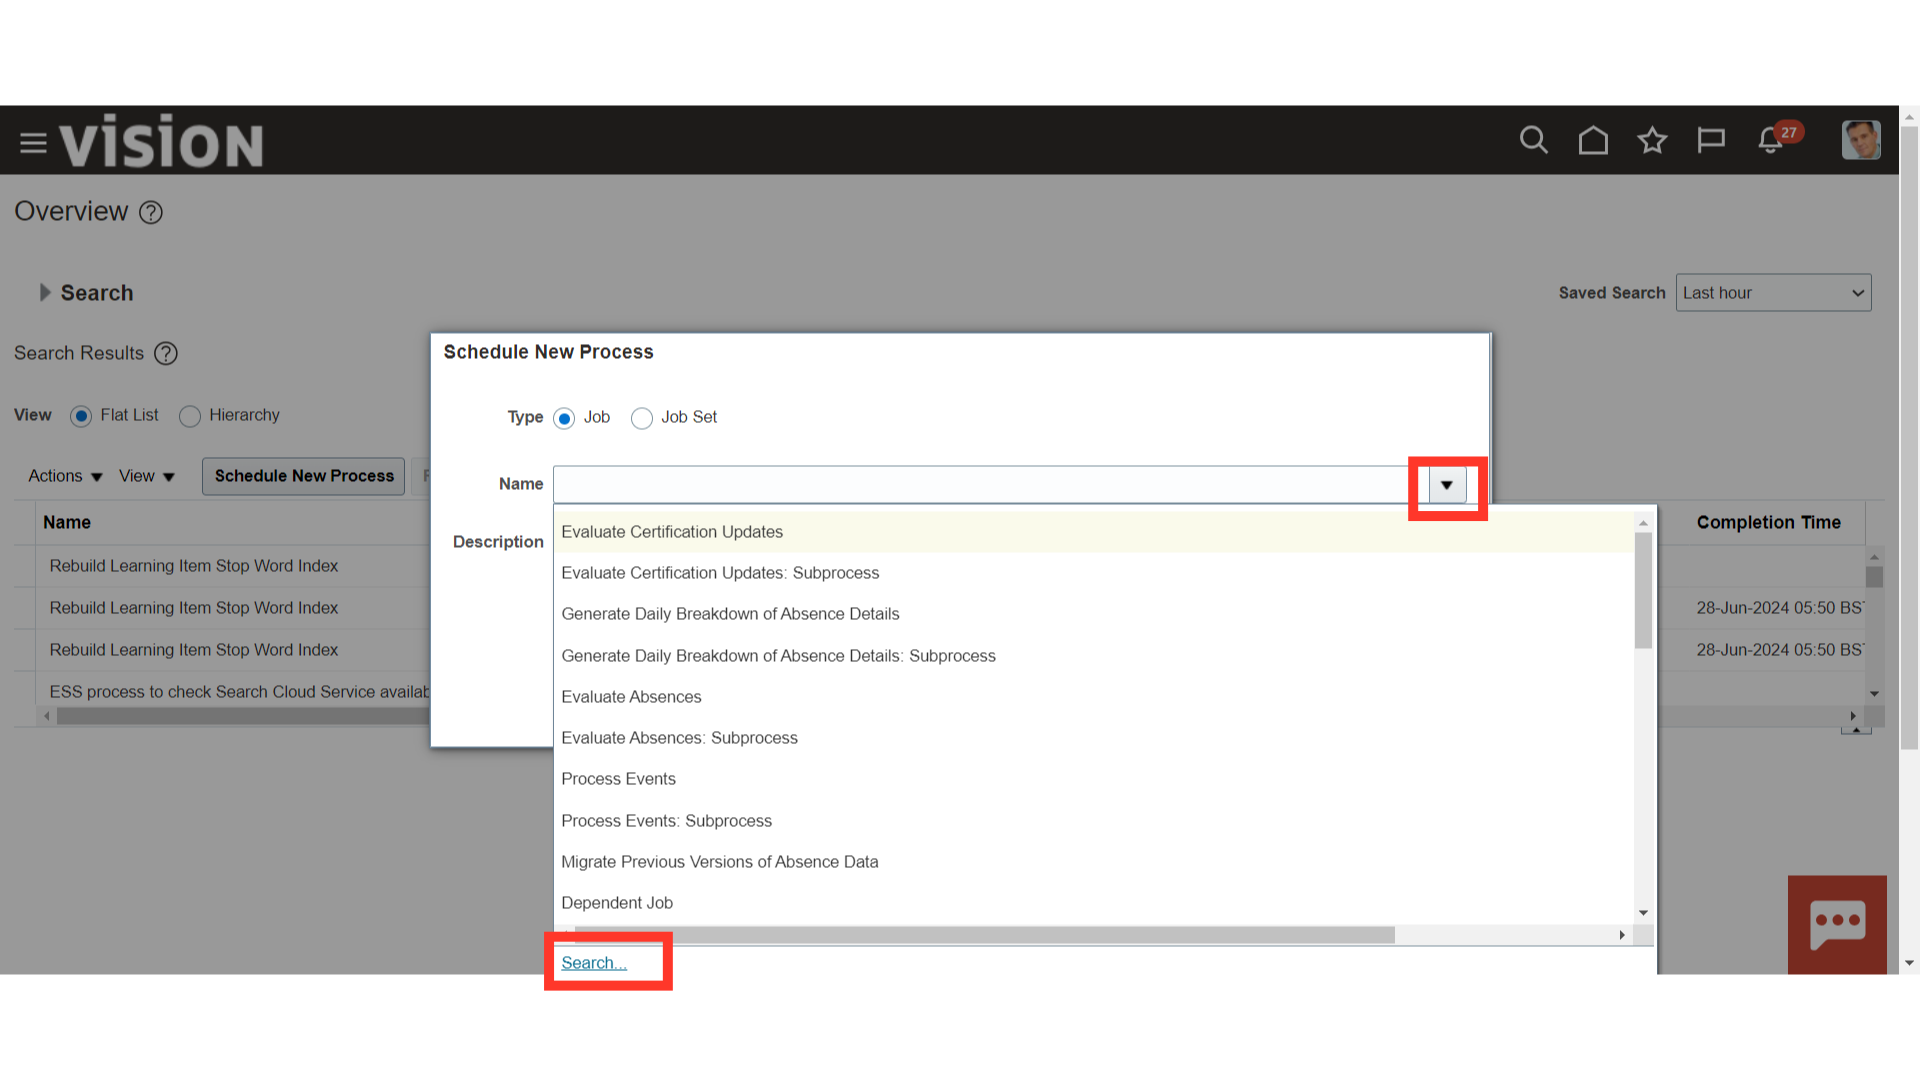
After selecting the Drop-down icon, click the search hyperlink to find the process name.
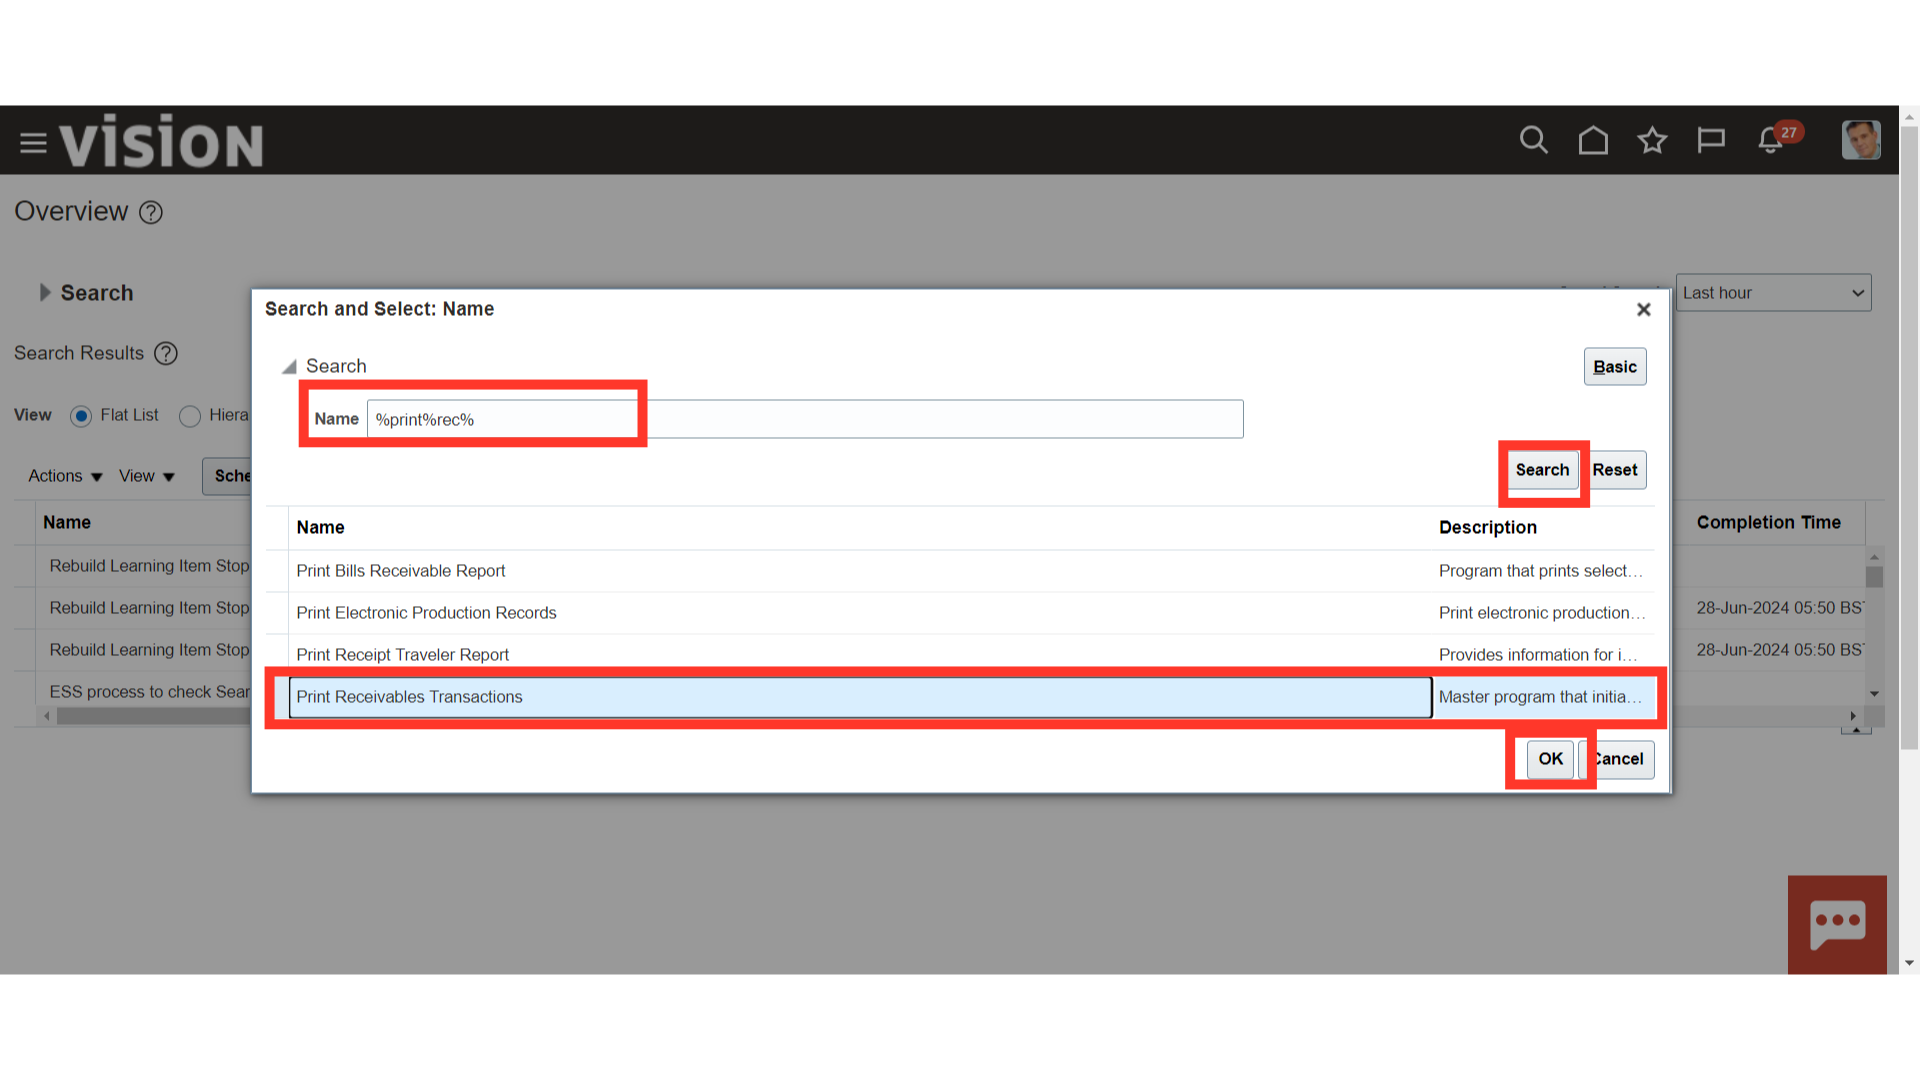
After entering the process name, using wild character search with a percentage sign click on the Search button to search the process name. Select the Print Receivables Transactions process name, and then click on the OK button to continue.
Again, Click on the OK button to run the Print Receivables Transaction process.

Transactions to Print has 3 options that is Printed, Unprinted, and All.
- Printed: Prints only those transactions that have already been printed.
- Unprinted: Prints only those transactions that have never been printed.
- All: Prints both printed and unprinted transactions.
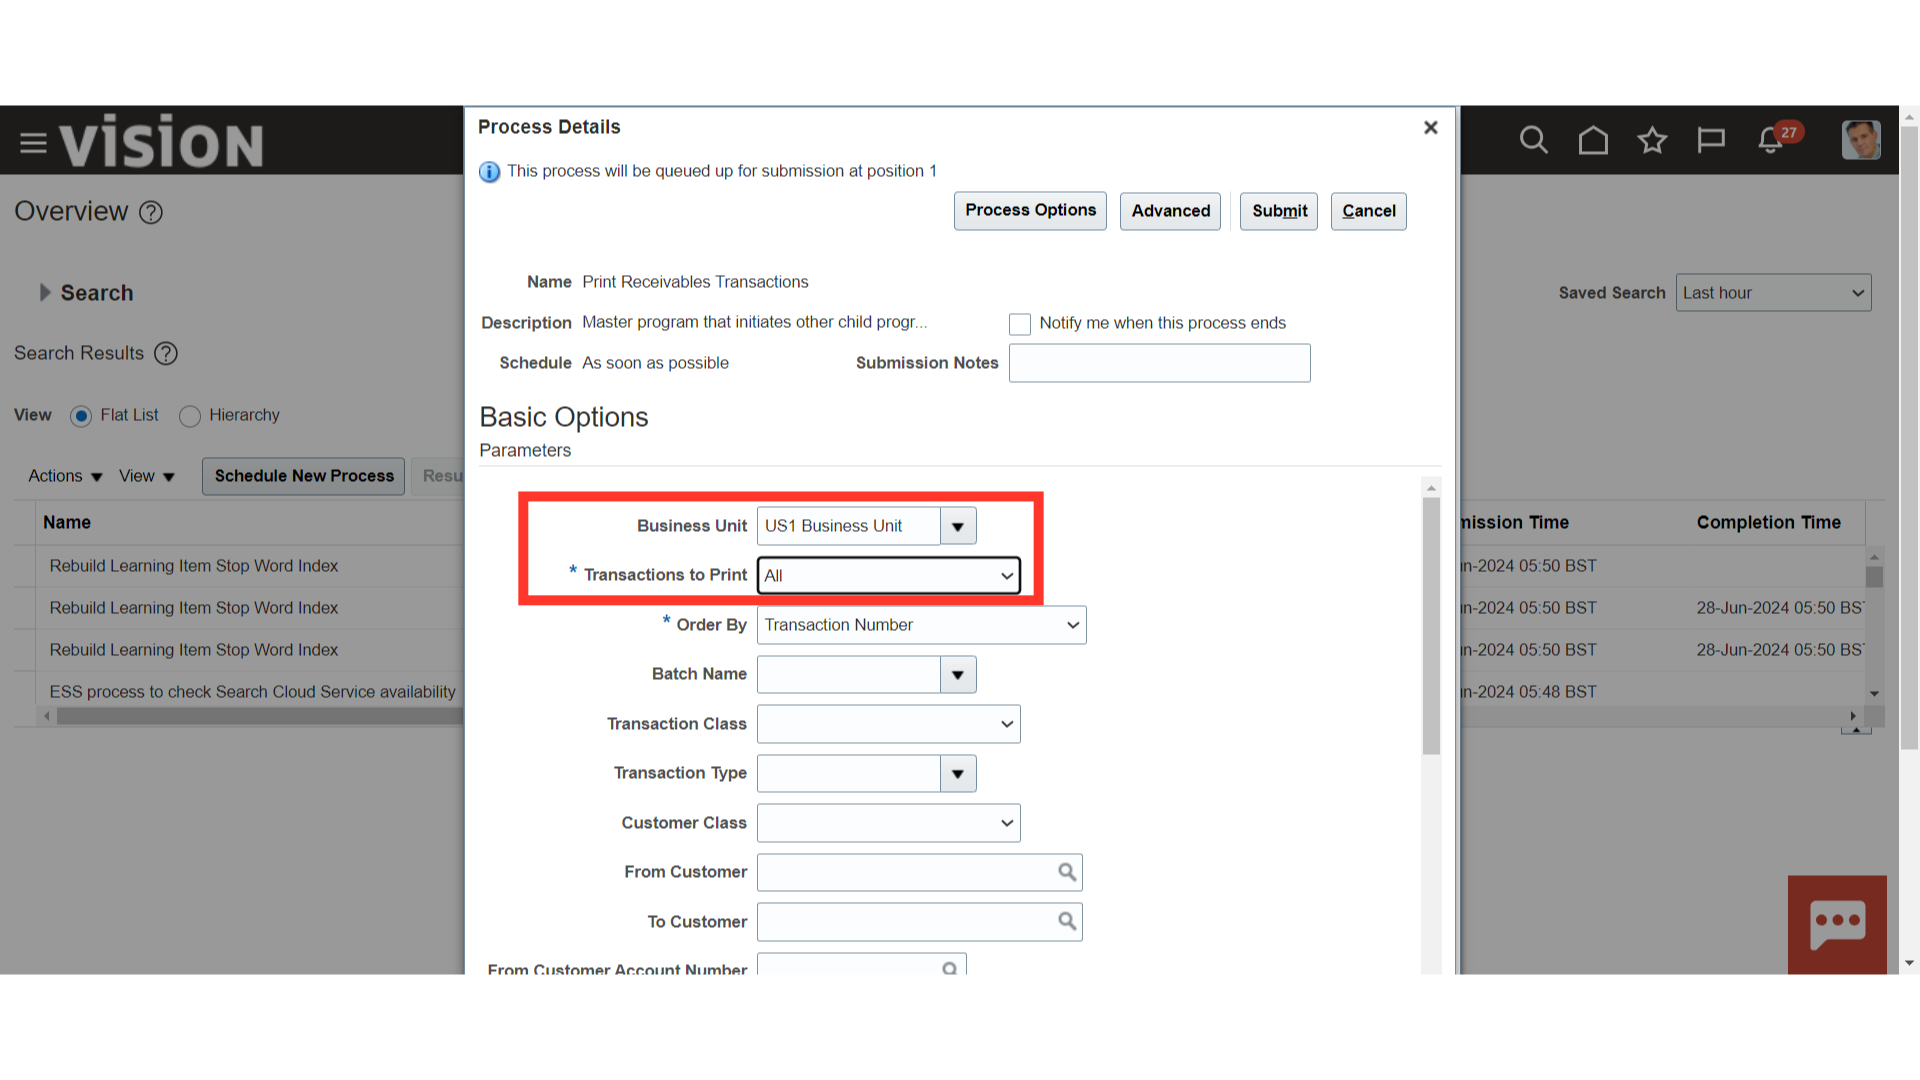
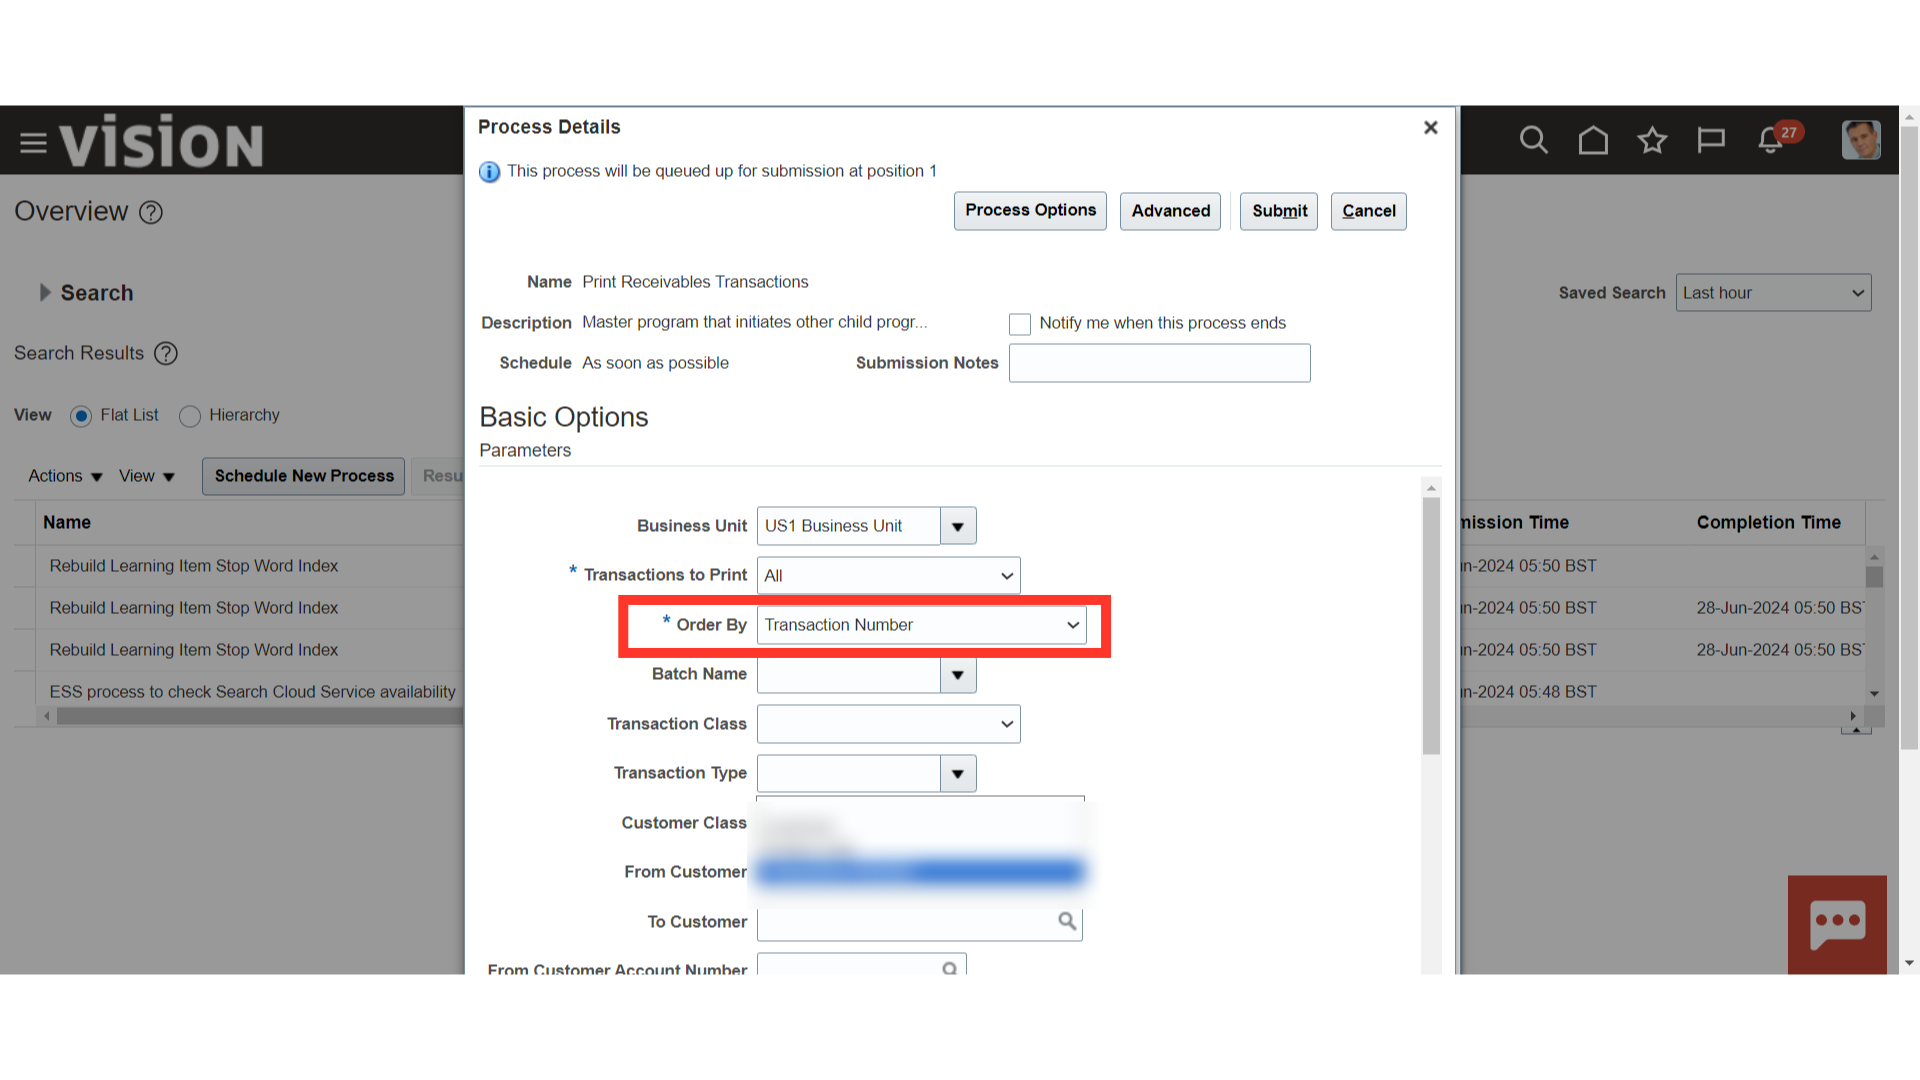
Order by Identifies the order in which the selected transactions are printed either by Transaction Number, Customer, or Postal Code.
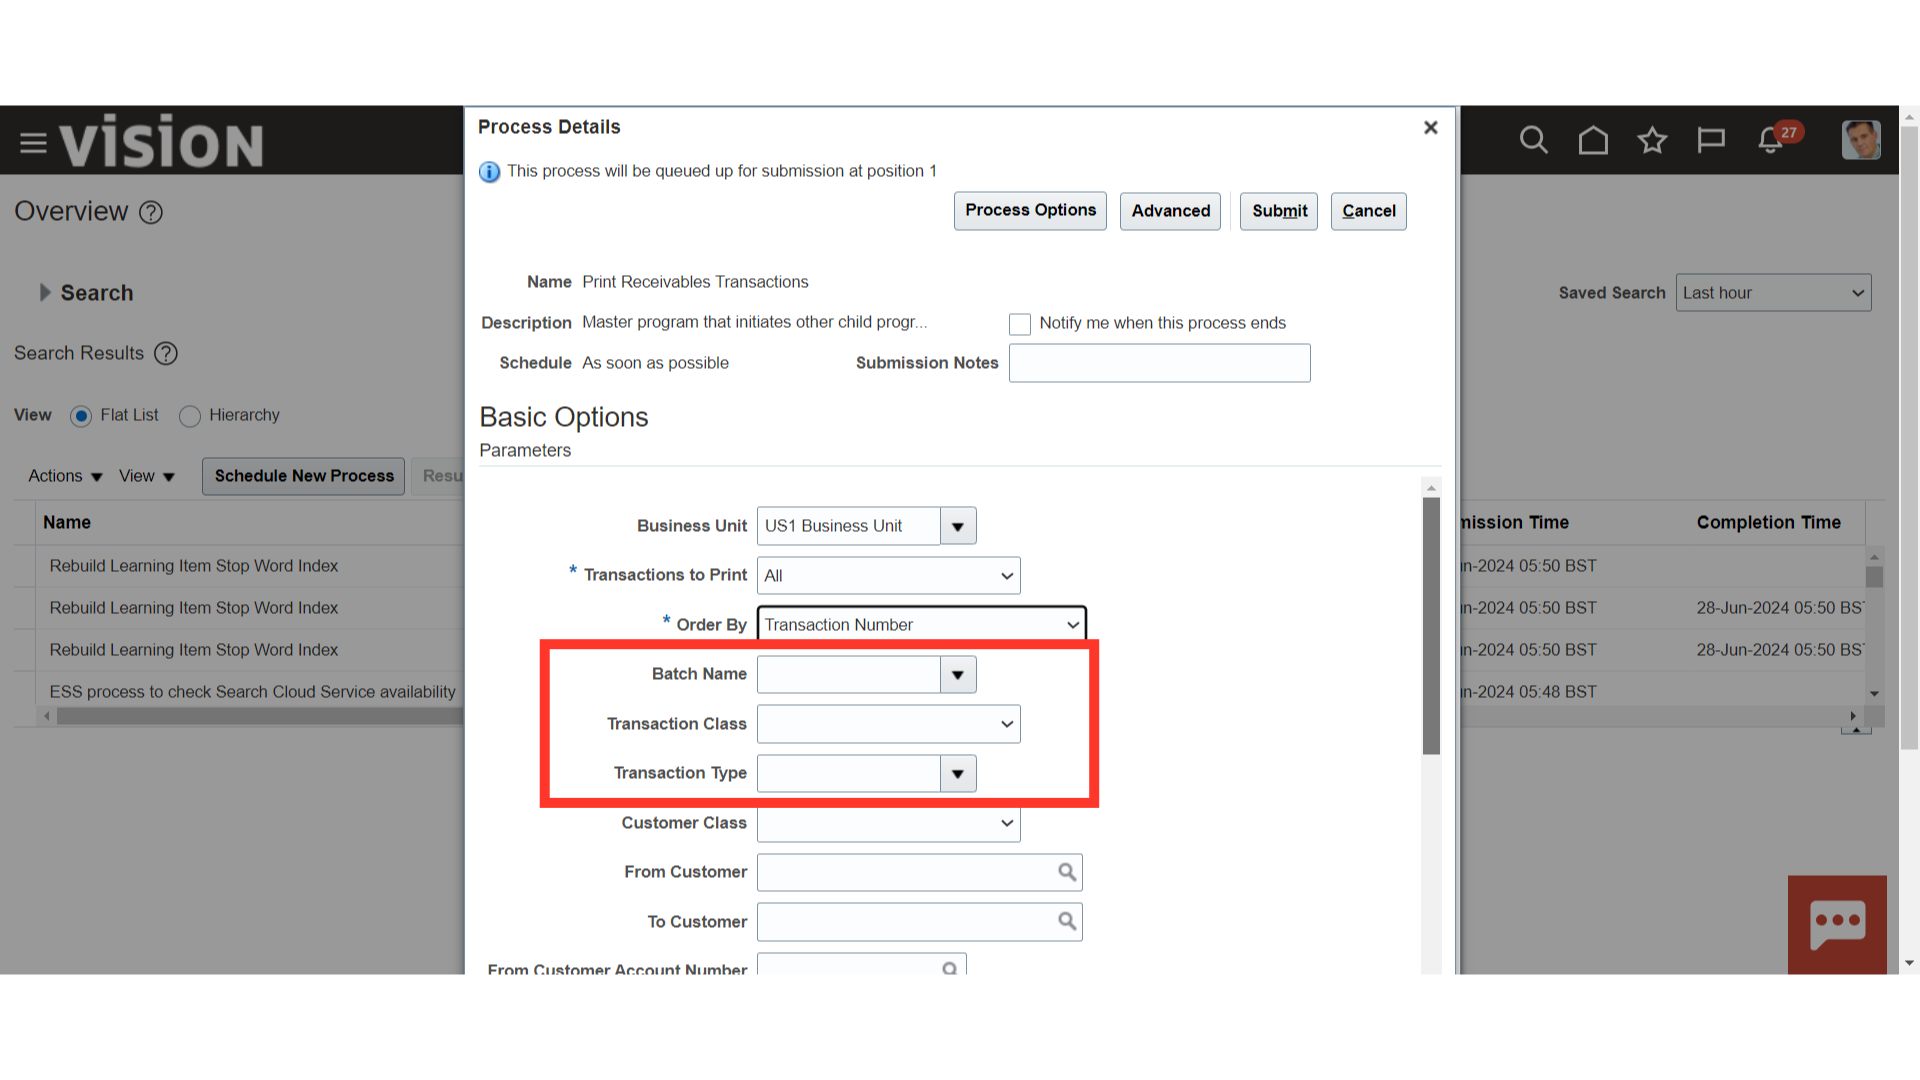
Batch Name is used to Print transactions belonging to the specified transaction batch.
Transaction class is a parameter used to print transactions belonging to the specified transaction class only: Invoice, Credit Memo, Debit Memo, Chargeback.
Transaction Type parameter is used to Print transactions belonging to the specified transaction type only. If you entered a value in the Transaction Class parameter, then the list of available transaction types is limited to this transaction class.
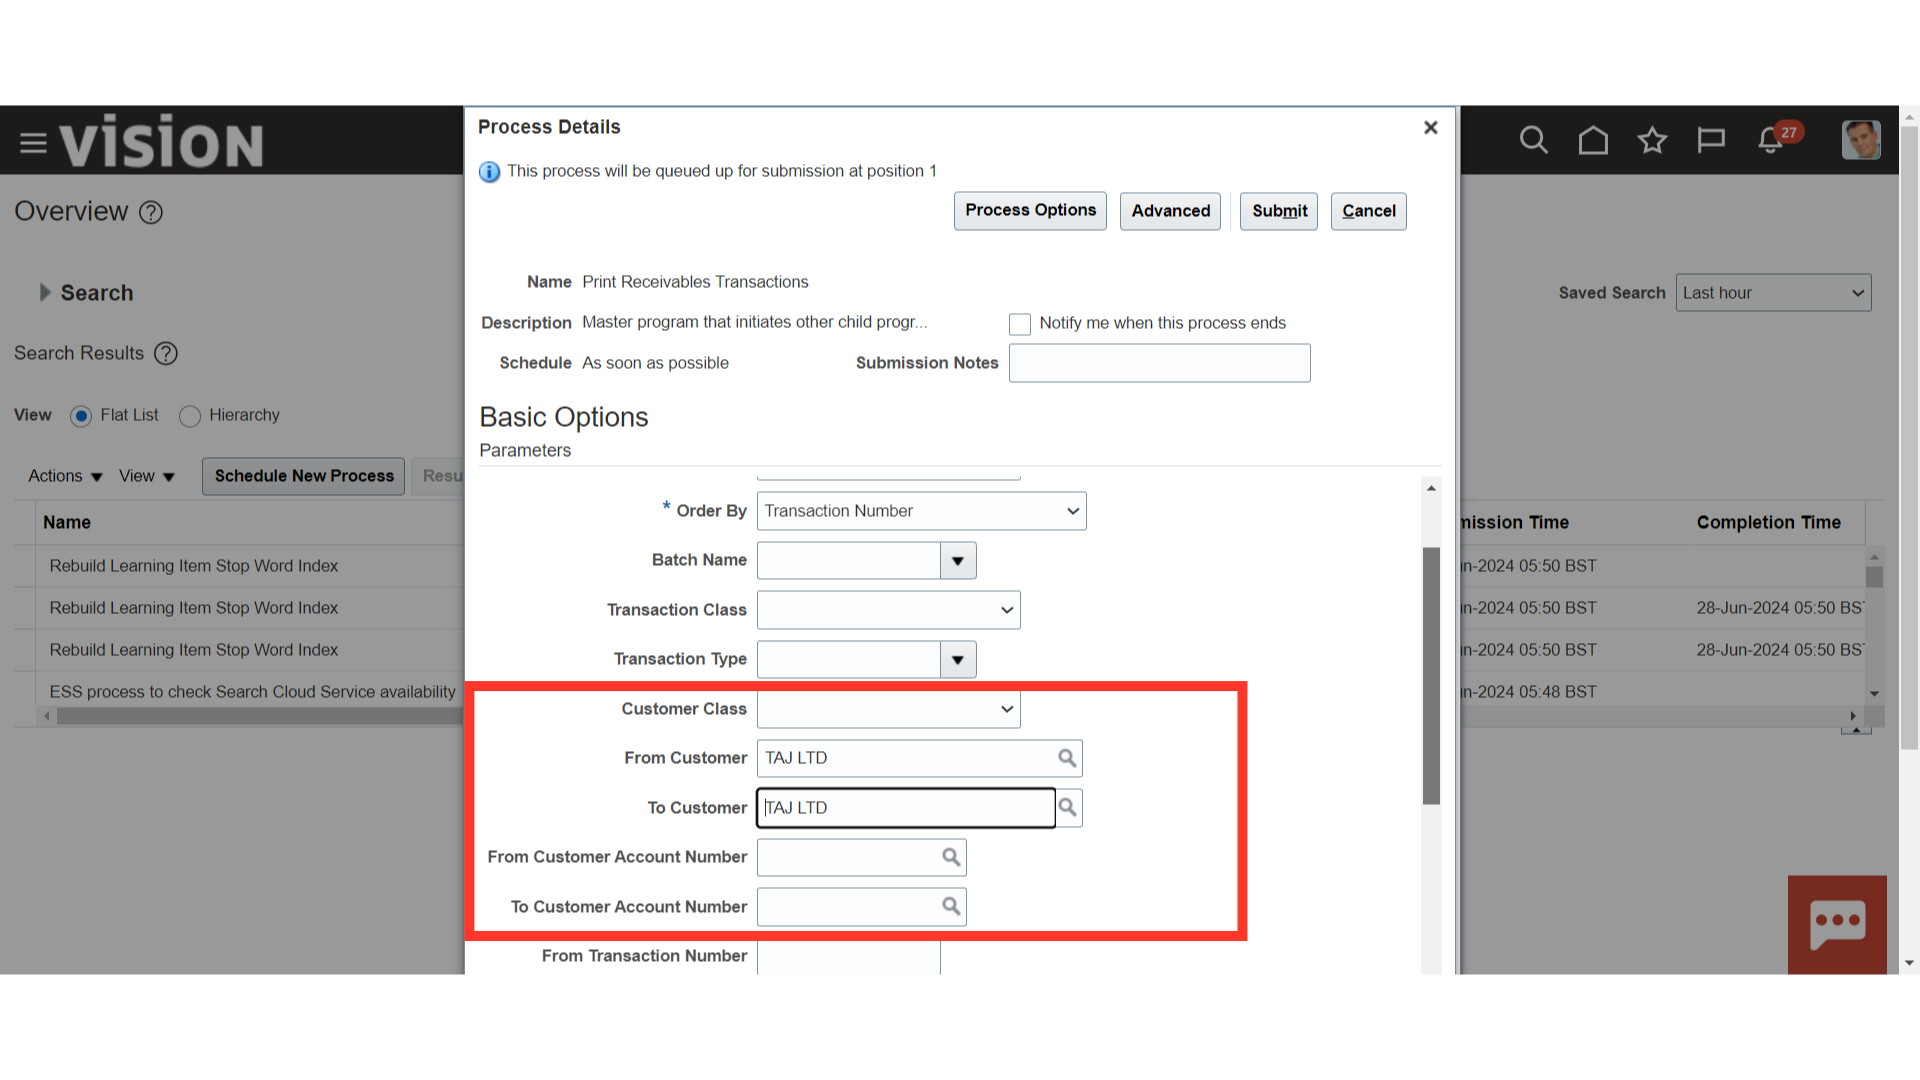
Customer class Print transactions belonging to customers with this classification only, for example, Commercial or Government. And, If wanted to print the transactions related to specific customers enter the Customer name, and Account number details.
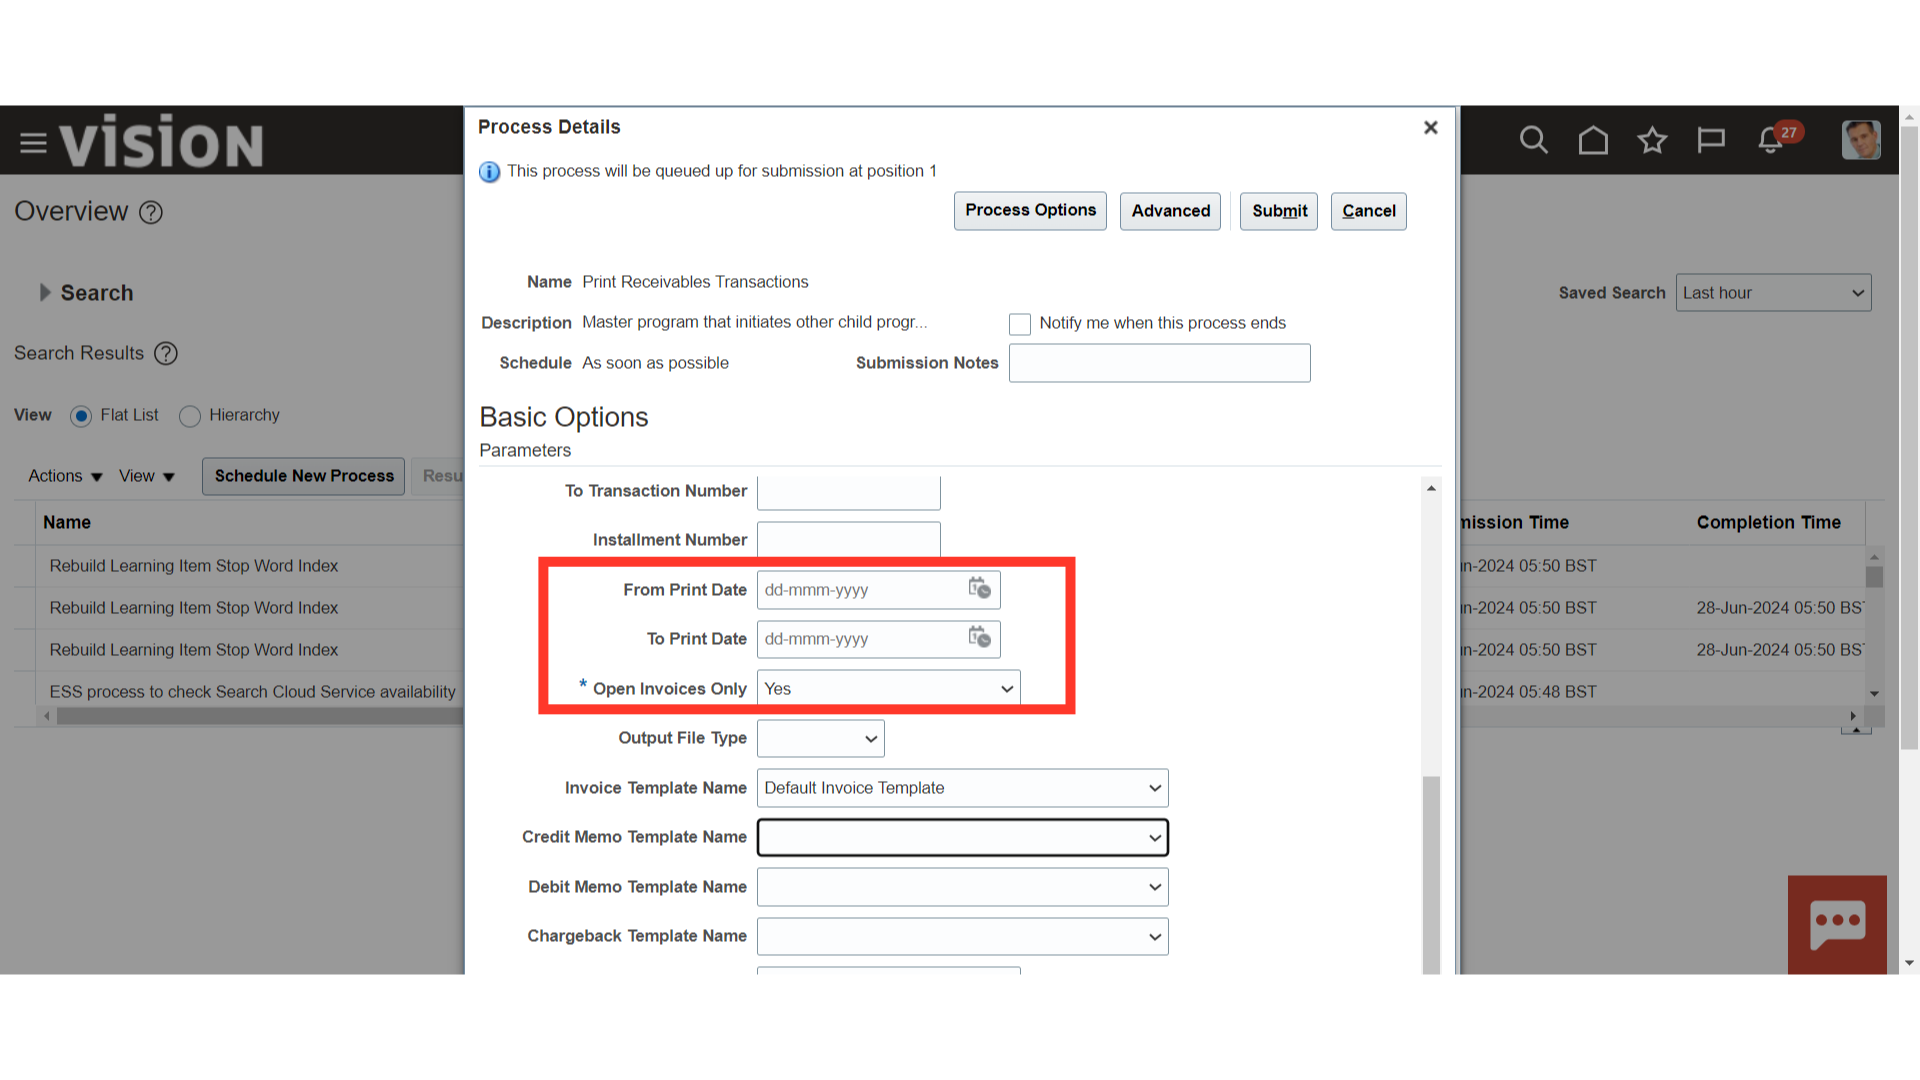
For transactions with split payment terms, you can specify the installment number. To print all installments, don’t enter an installment number.
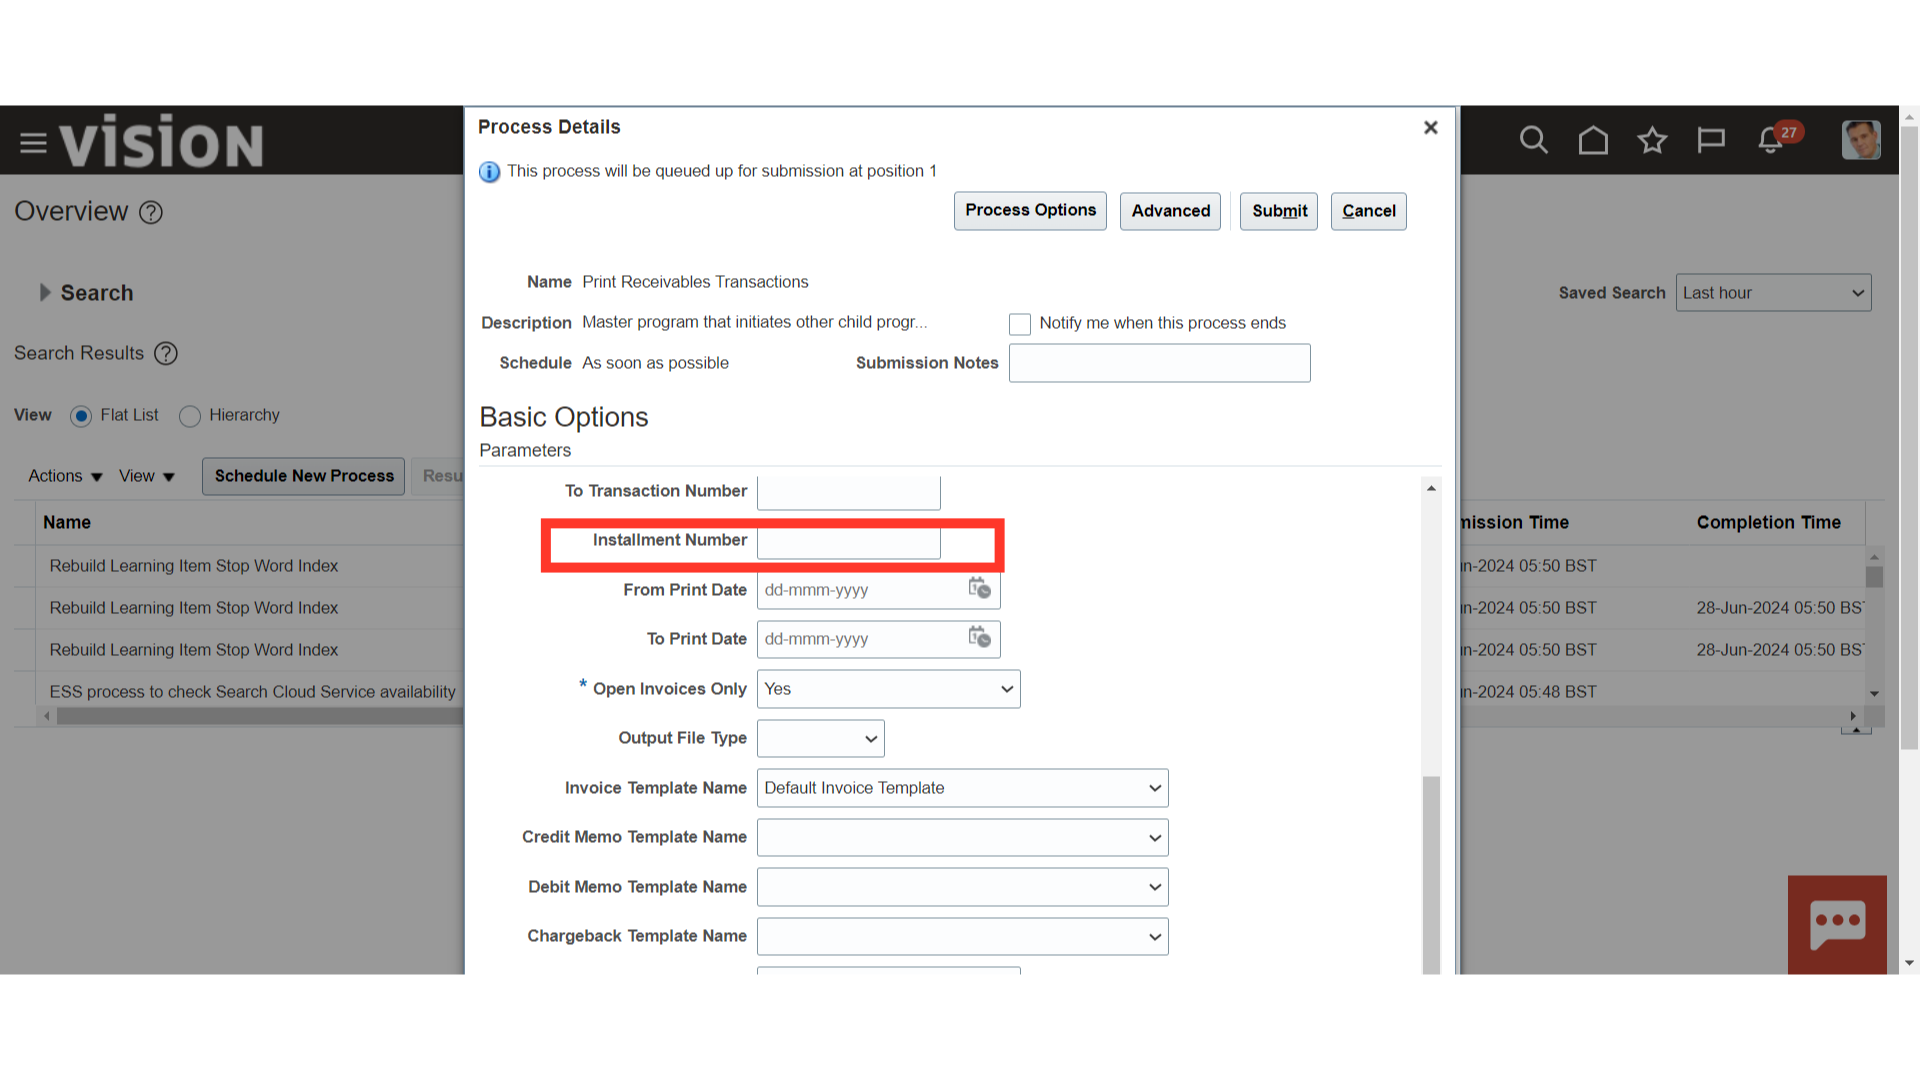
Print transactions for the print date range you specify. The print date is the transaction date, unless you have specified print lead days on the payment terms, in which case the print date is the number of lead days before the transaction due date. Open Invoices Only specify whether to only print transactions with open debit items. The default is Yes.
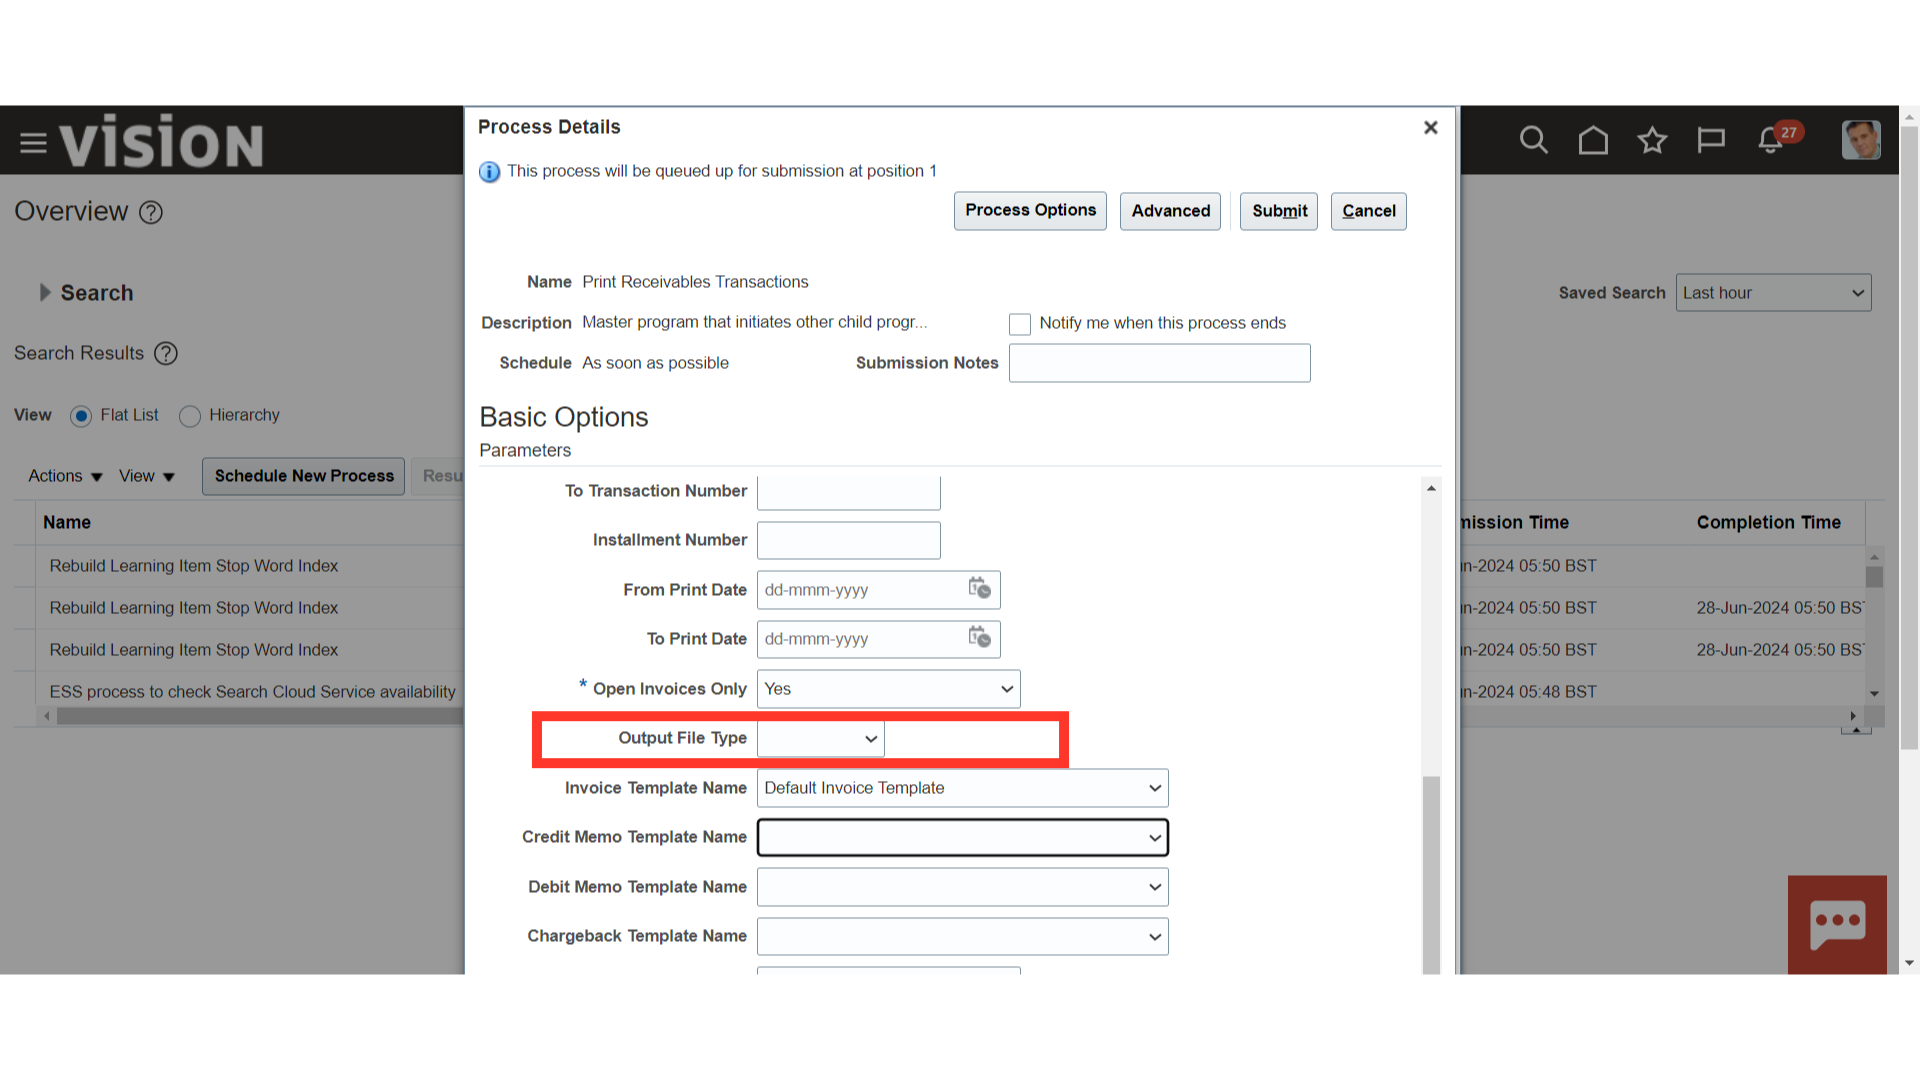
 Specify the output to use for the print run: HTML, PDF, Zipped PDFs: Includes an index file of the print run, to identify the first and last page of each printed transaction ,and Excel.
Select the template to use to print transactions for each transaction class or the selected transaction class. The process uses the default template unless you specify a template that you created. Itemized Tax by Line specifies whether to print itemized tax information for each transaction line.

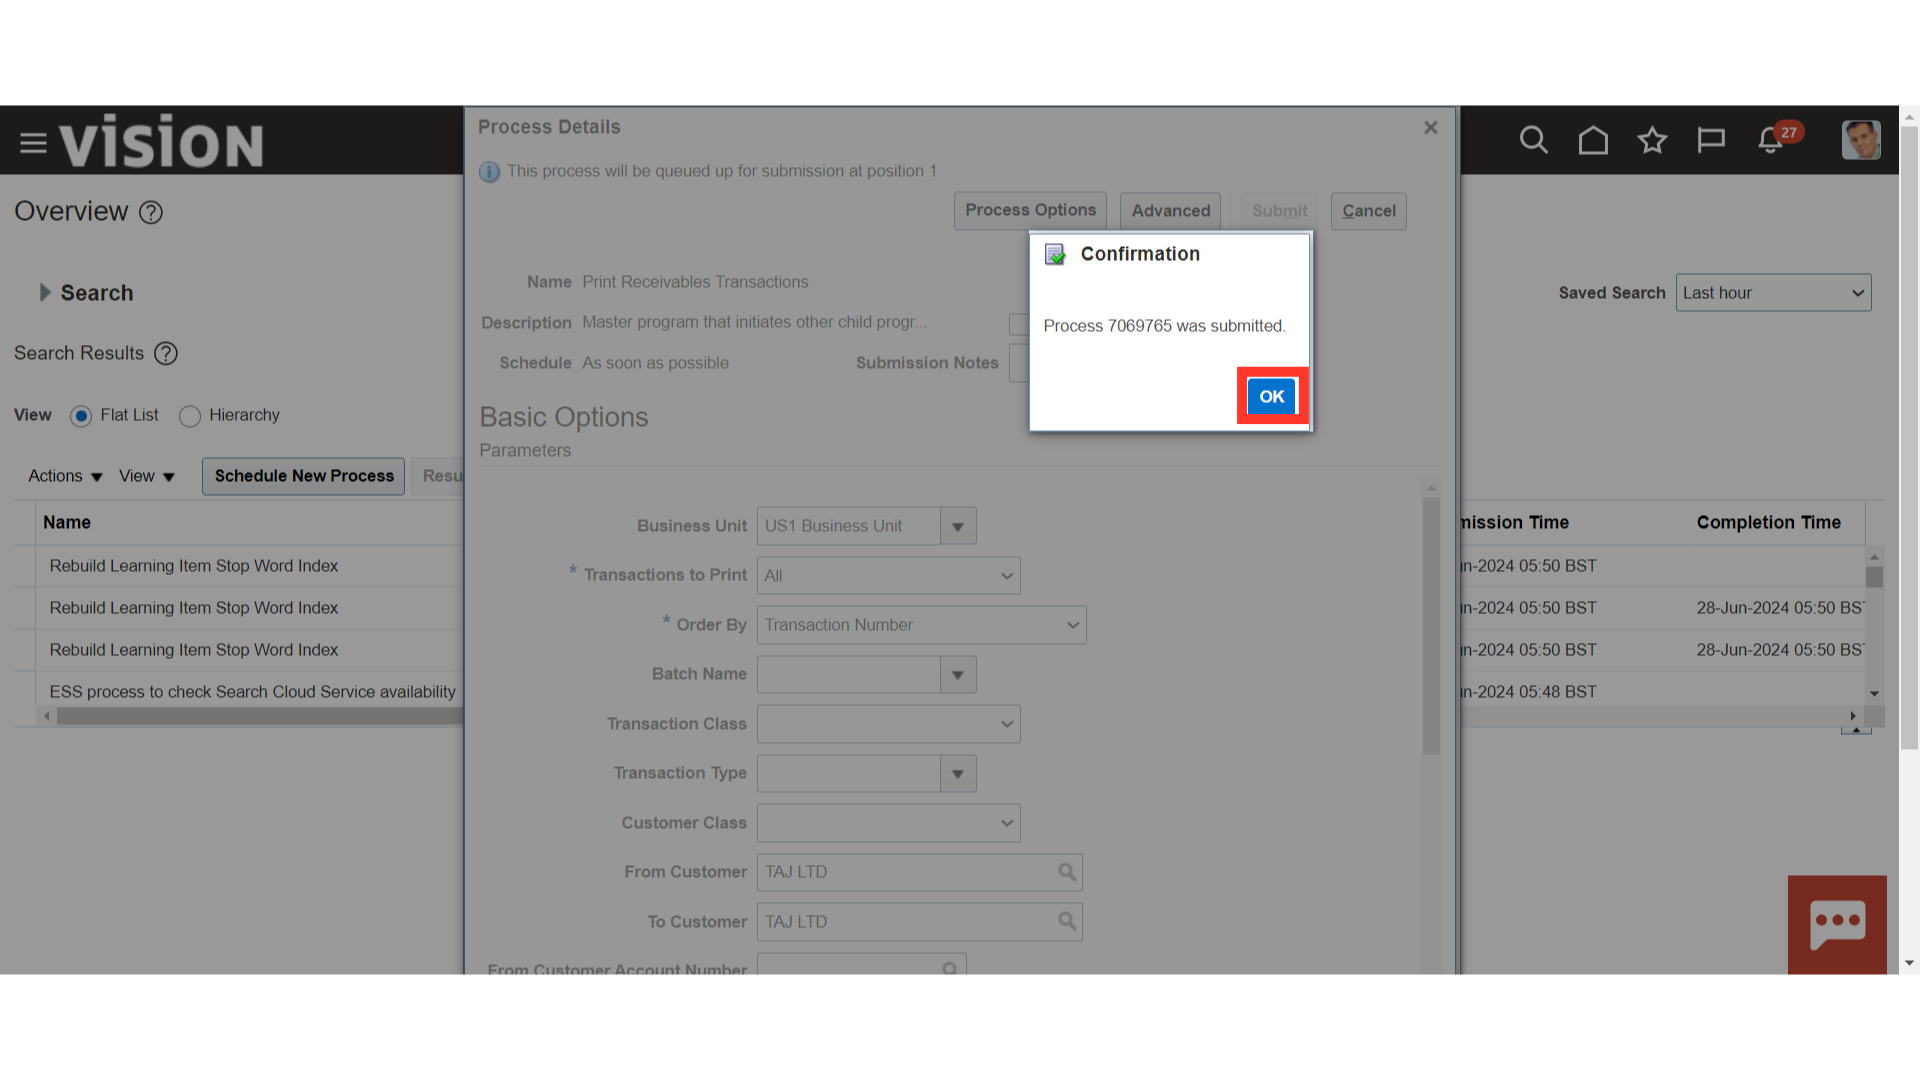
Click on the Submit button to run the process.

A confirmation message is displayed along with the Process ID. Click on “OK” to continue.
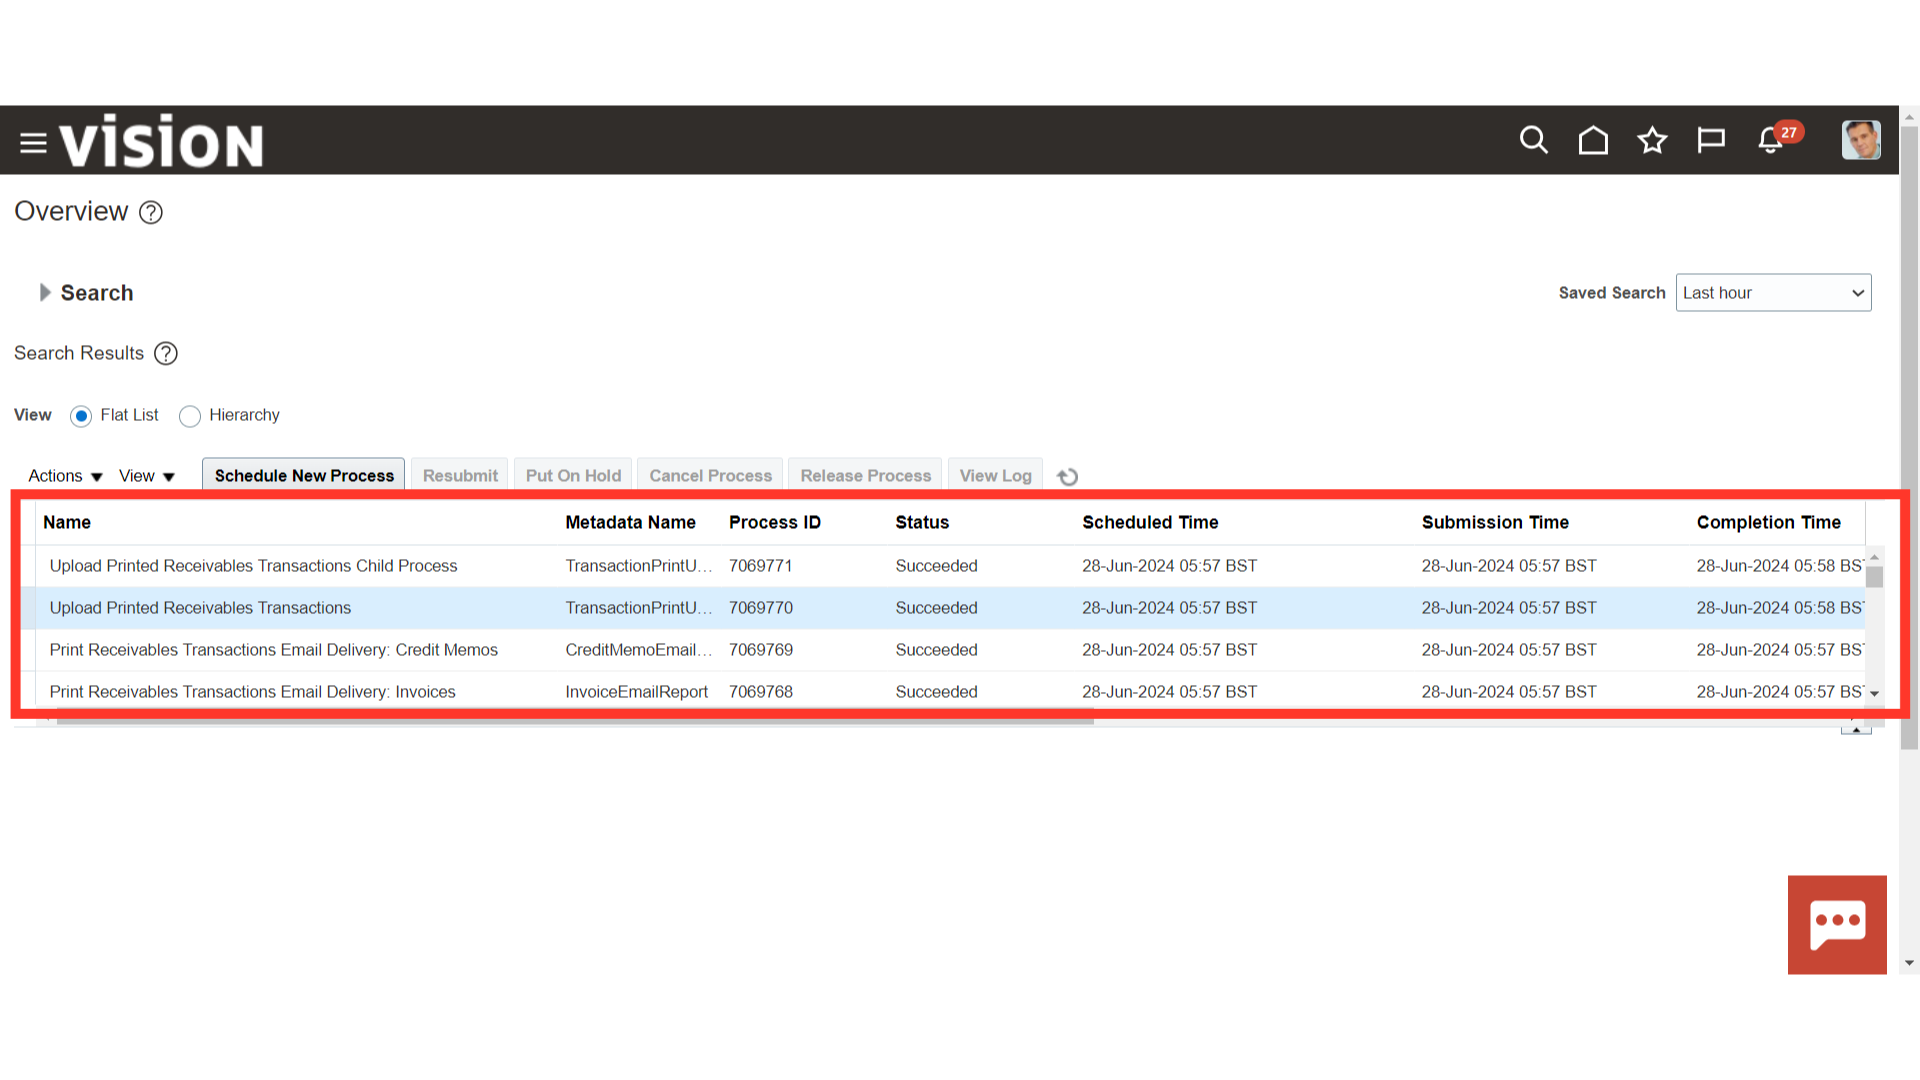
 Click on the “Refresh” Icon to refresh the Create Accounting process.
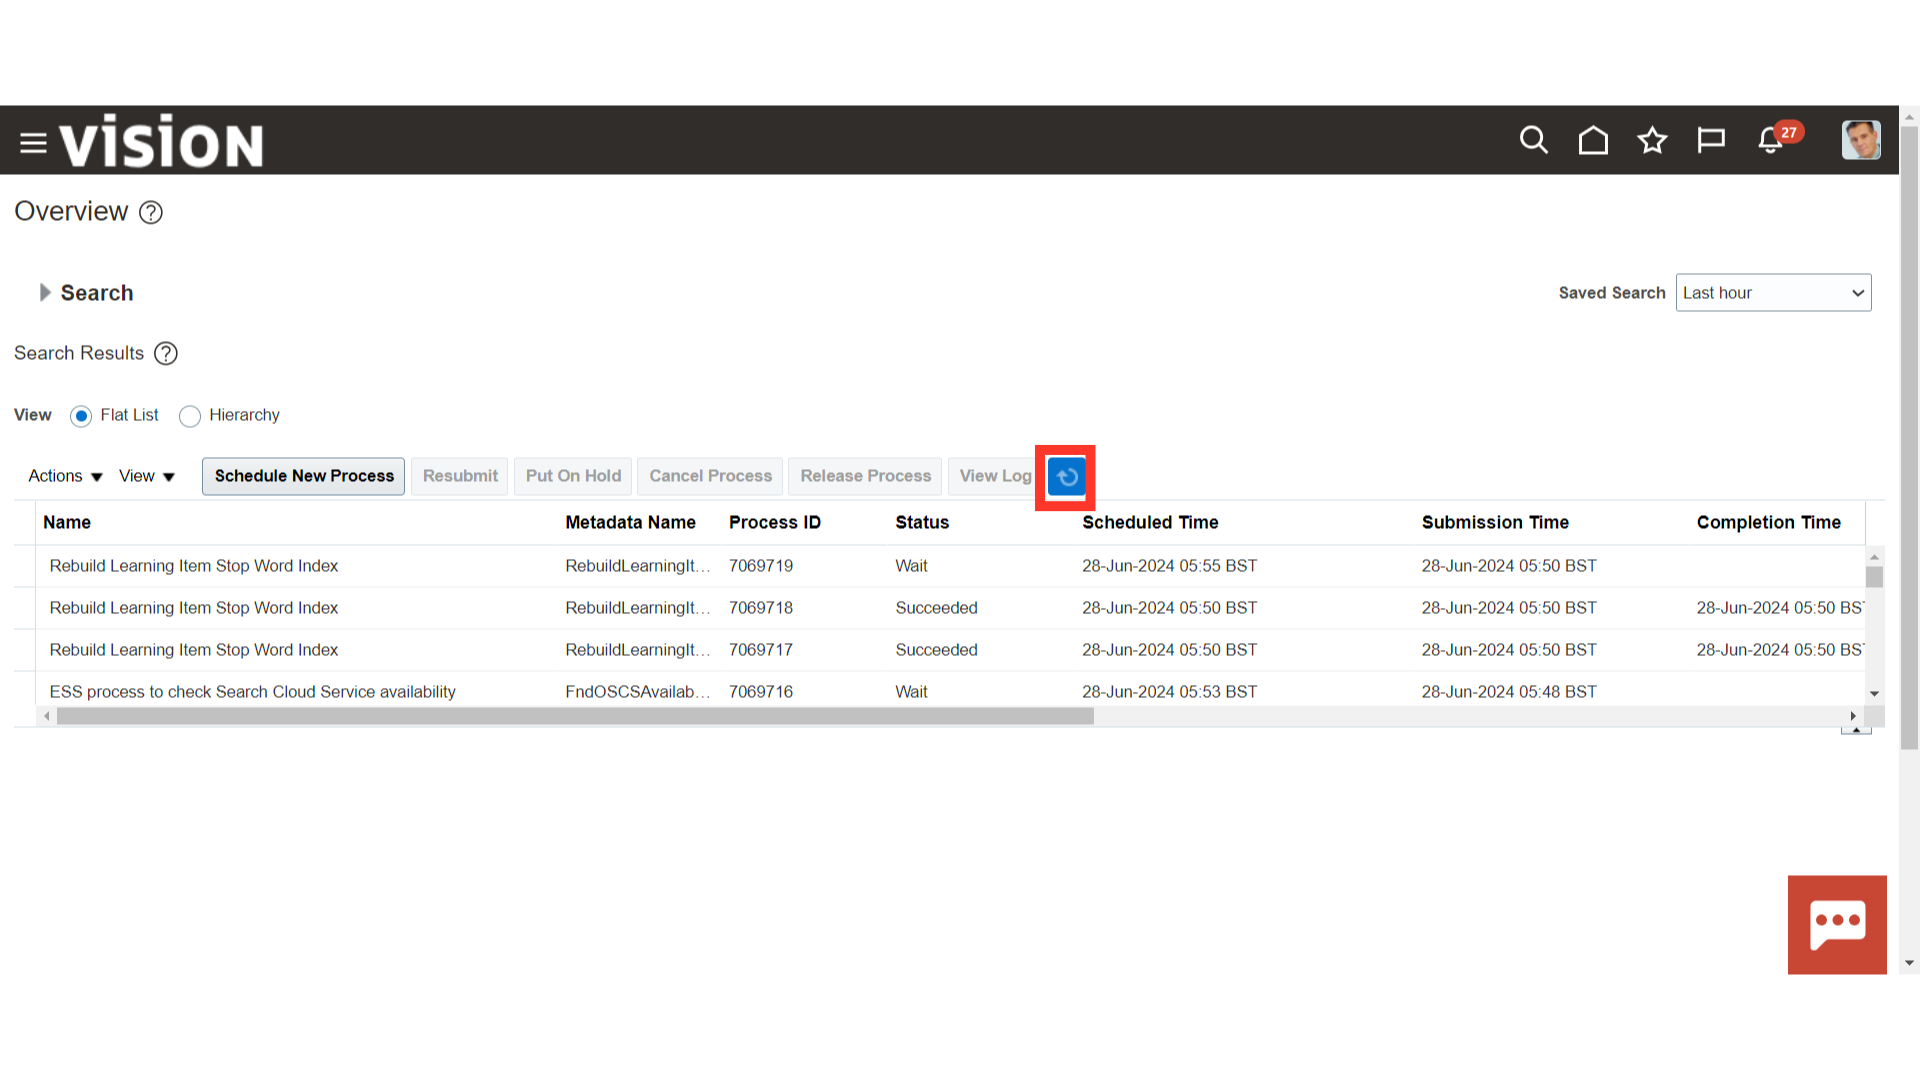
Check whether all the parent and child process statuses are Succeeded.
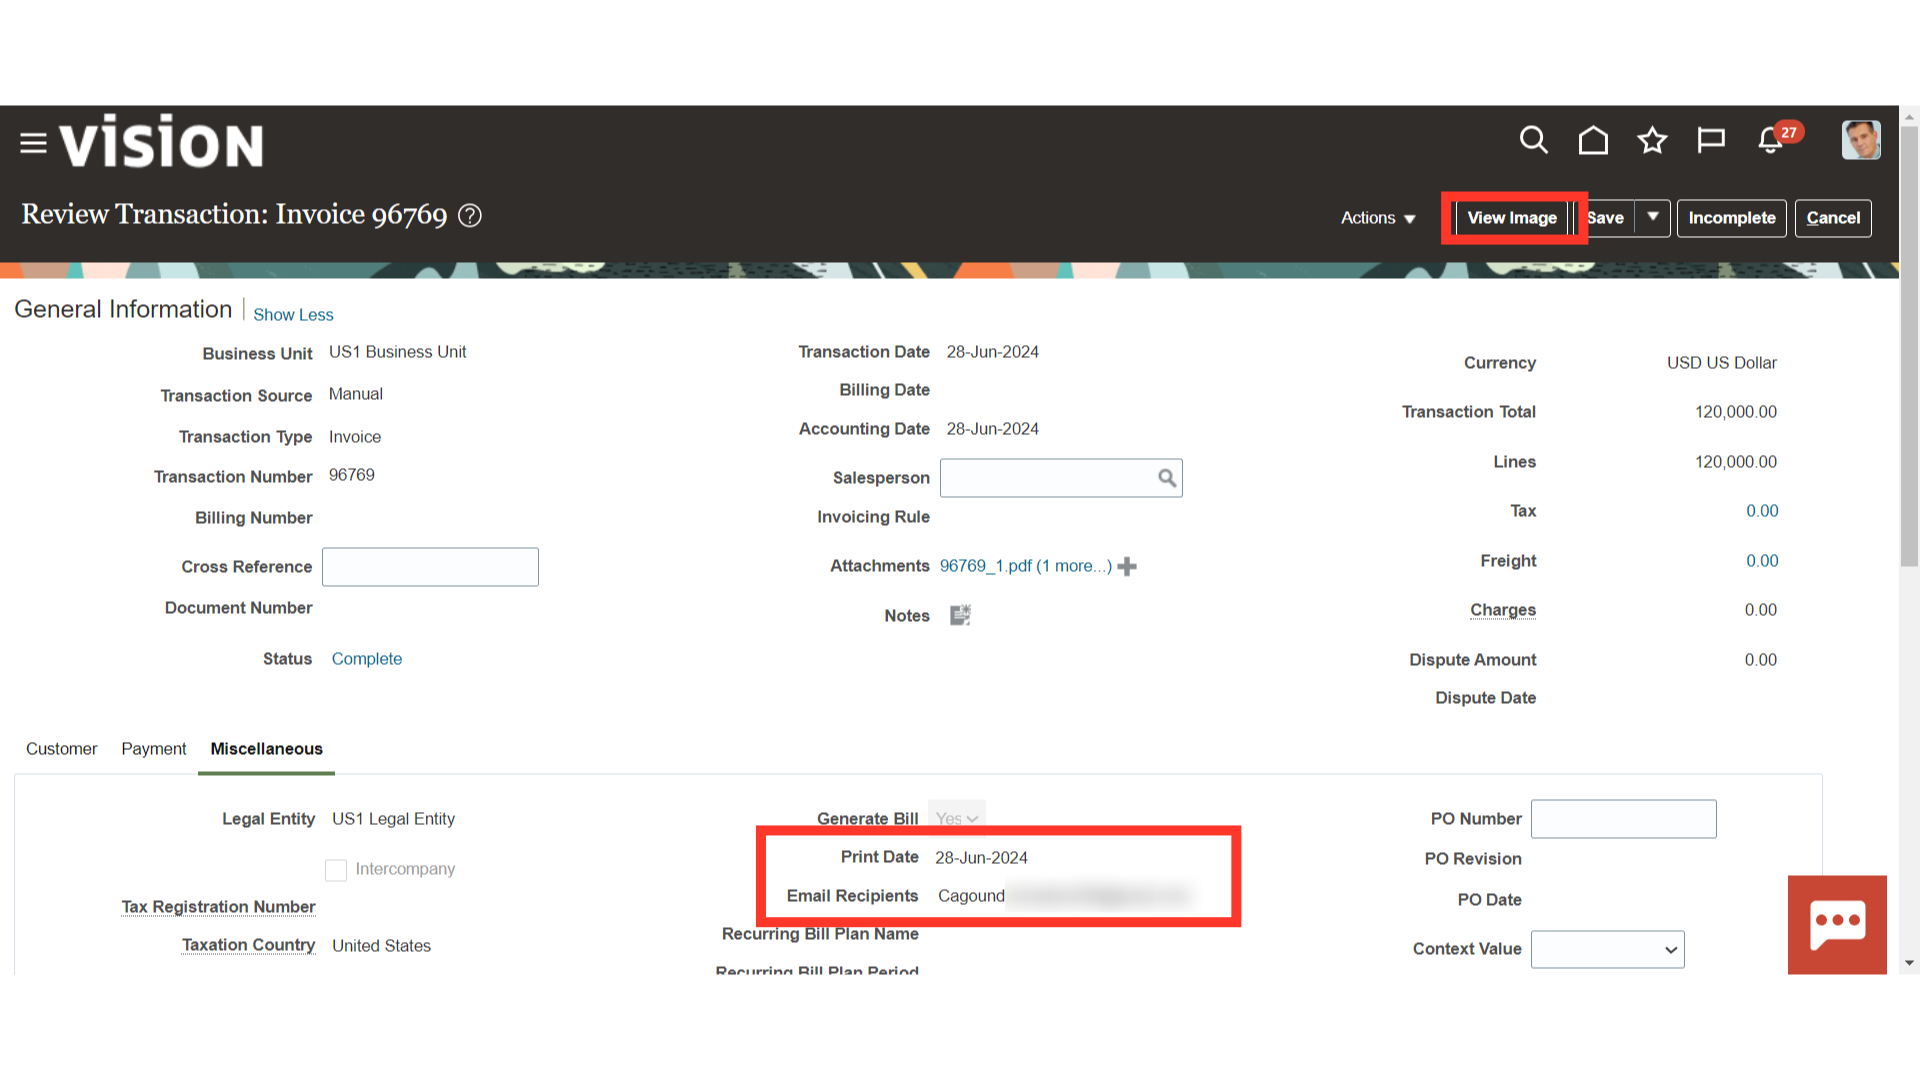
After processes are succeded, Open any transaction and click on the Miscellaneous tab to see the Print Date and Email Recipients. Click on View Image to download a copy of the Invoice.
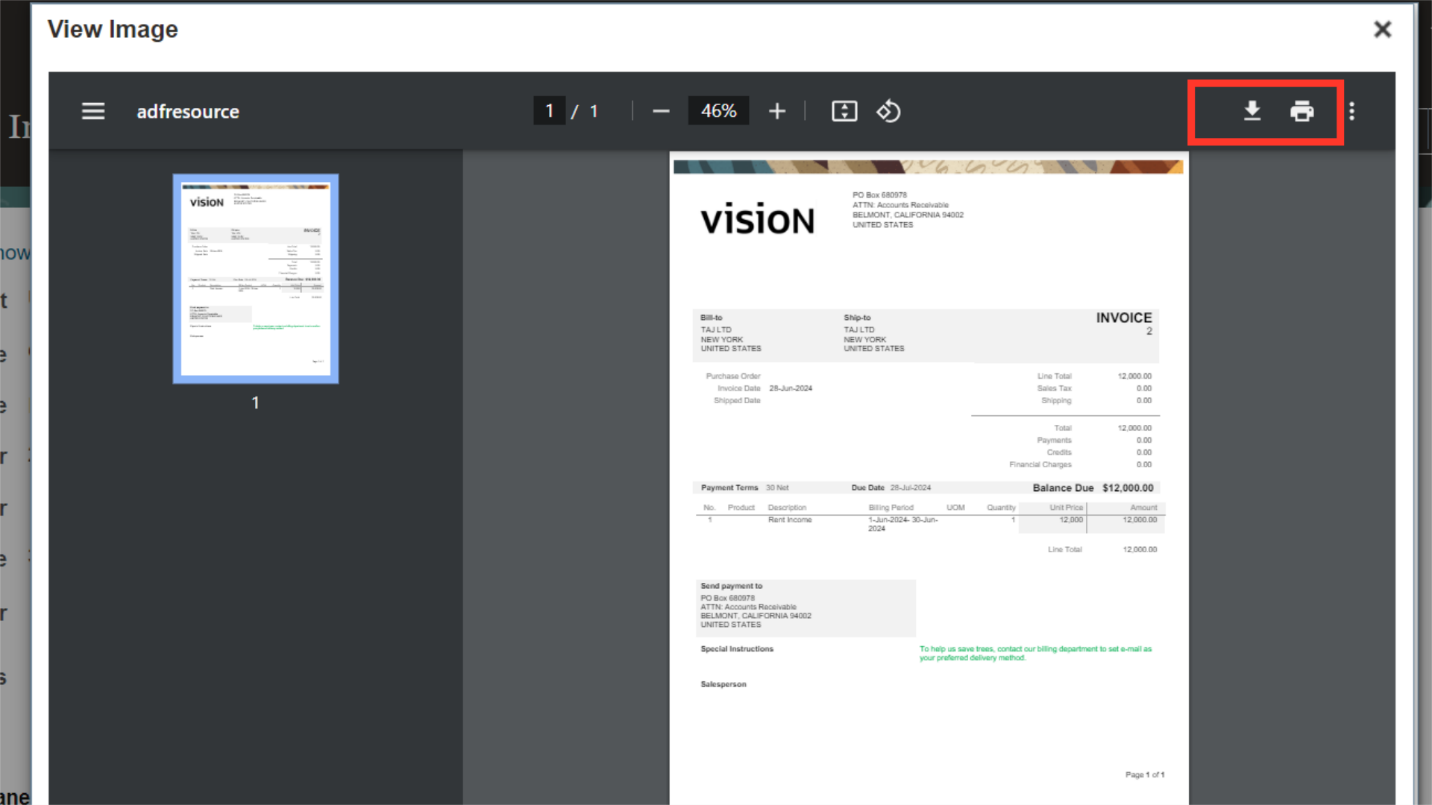
This is the output of the Invoice format, click on the download button to save the invoice copy, and click on the Print button to print the invoice.
The requirements in the customer master to maintain mail id and transactions to be enabled for print have been covered in detail in this guide, along with a step-by-step process for printing the receivable transactions. The next steps are the submission of the Print Receivables transactions and the verification of the print date and recipient mail ID through the transactions.