How to Create Invoice against Sales Order
In this guide, we will see the process of Auto-Invoicing for Sales Orders. Once your order is in Awaiting Billing status, you can run this process. Please follow the detailed steps to efficiently perform Sales Order invoicing.
After logging into Oracle Cloud, navigate to the Tools tab and click on the Schedule Processes infotile.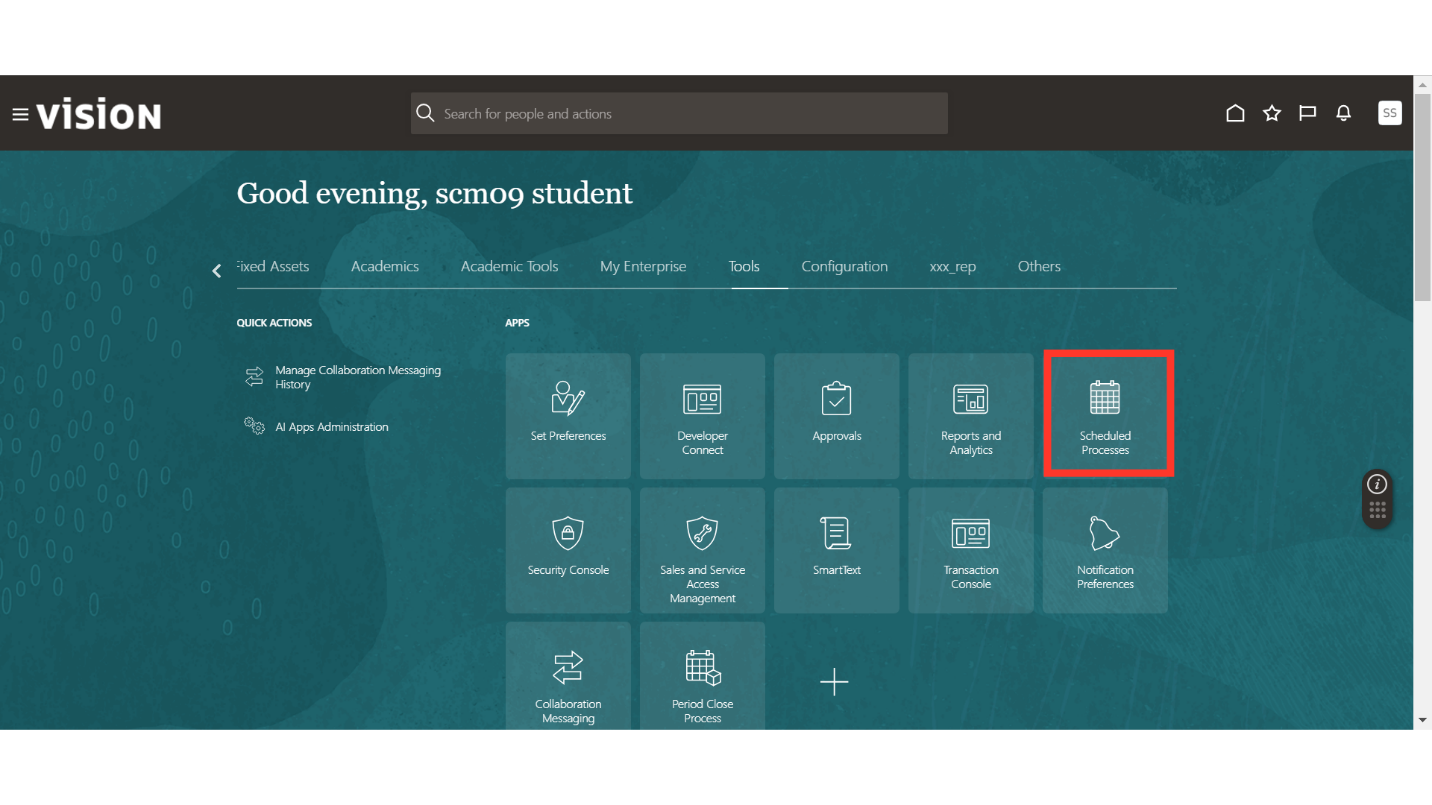
In Schedule Processes, click on the Schedule New Process button.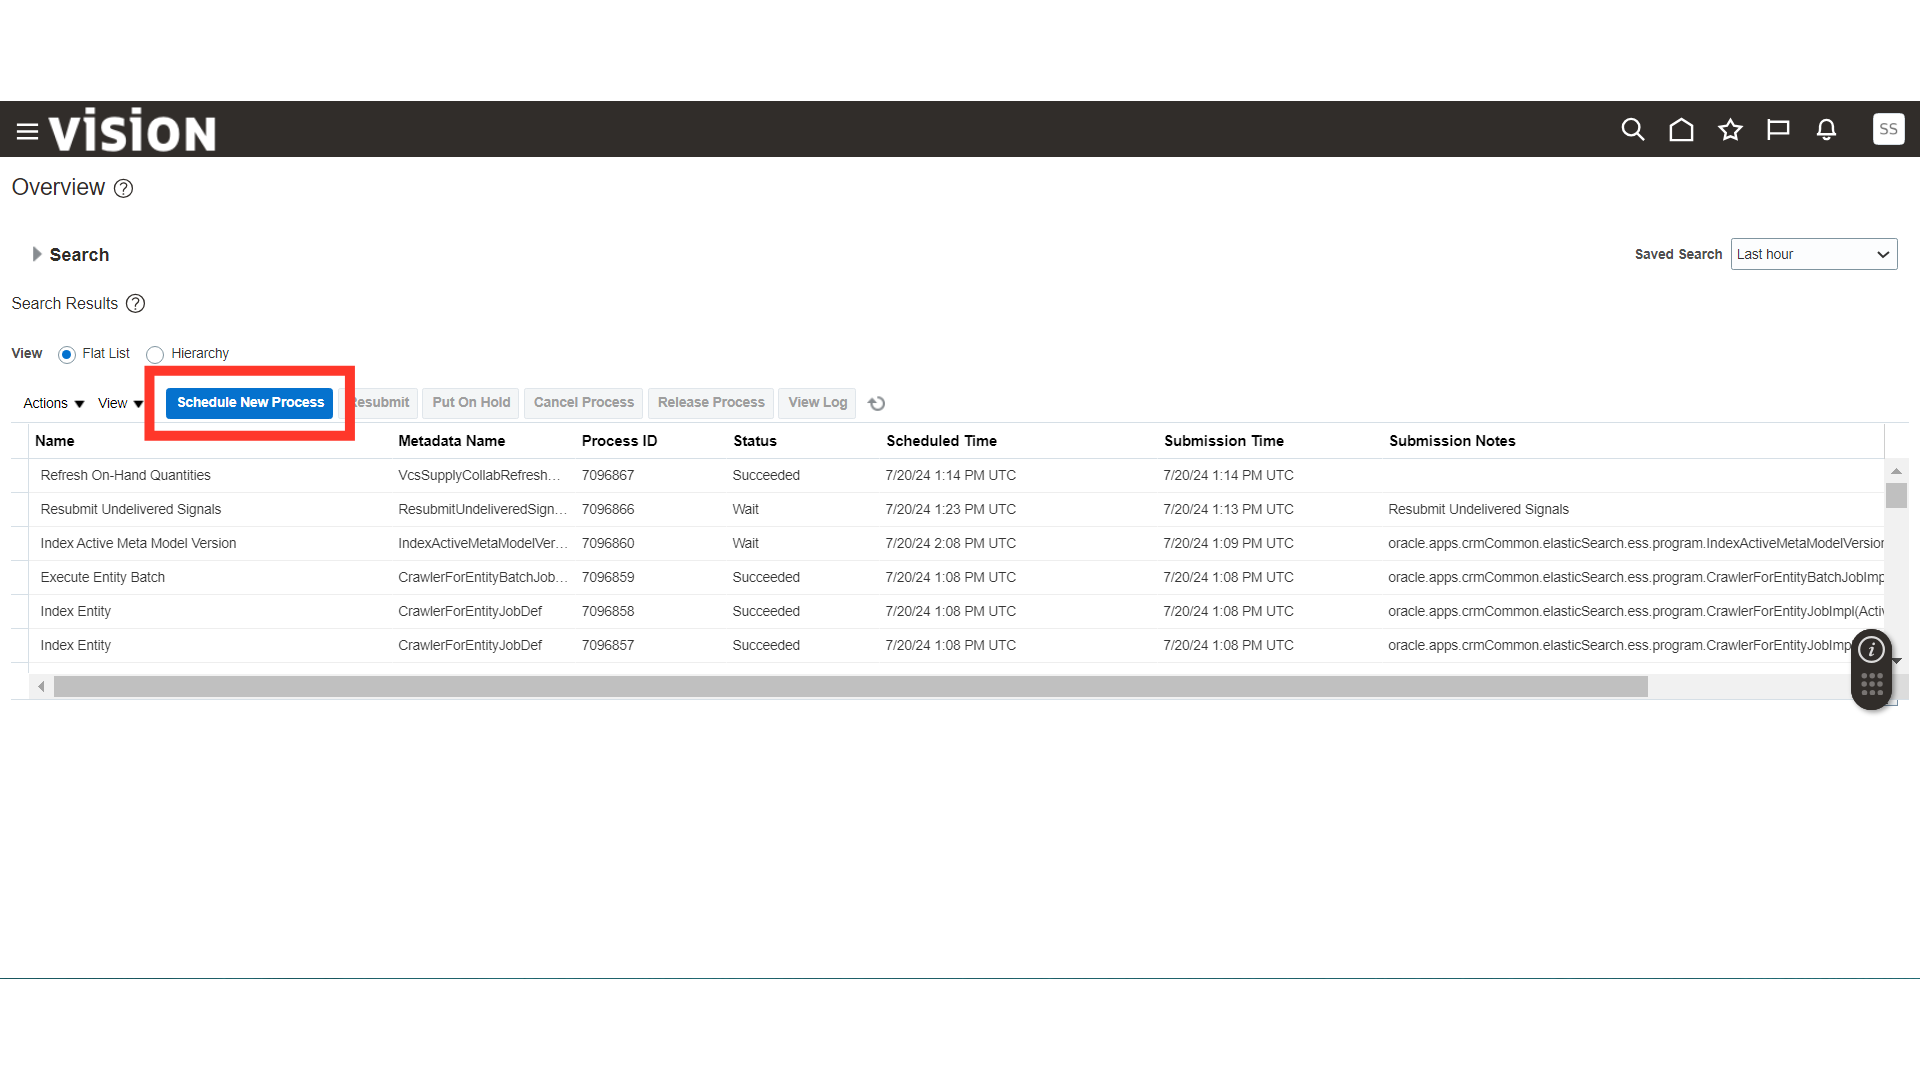
In Schedule New Process, select the “Import Autoinvoice” process and click OK. Import Autoinvoice is generally scheduled to run automatically, but for demonstration purposes, we are running this process manually.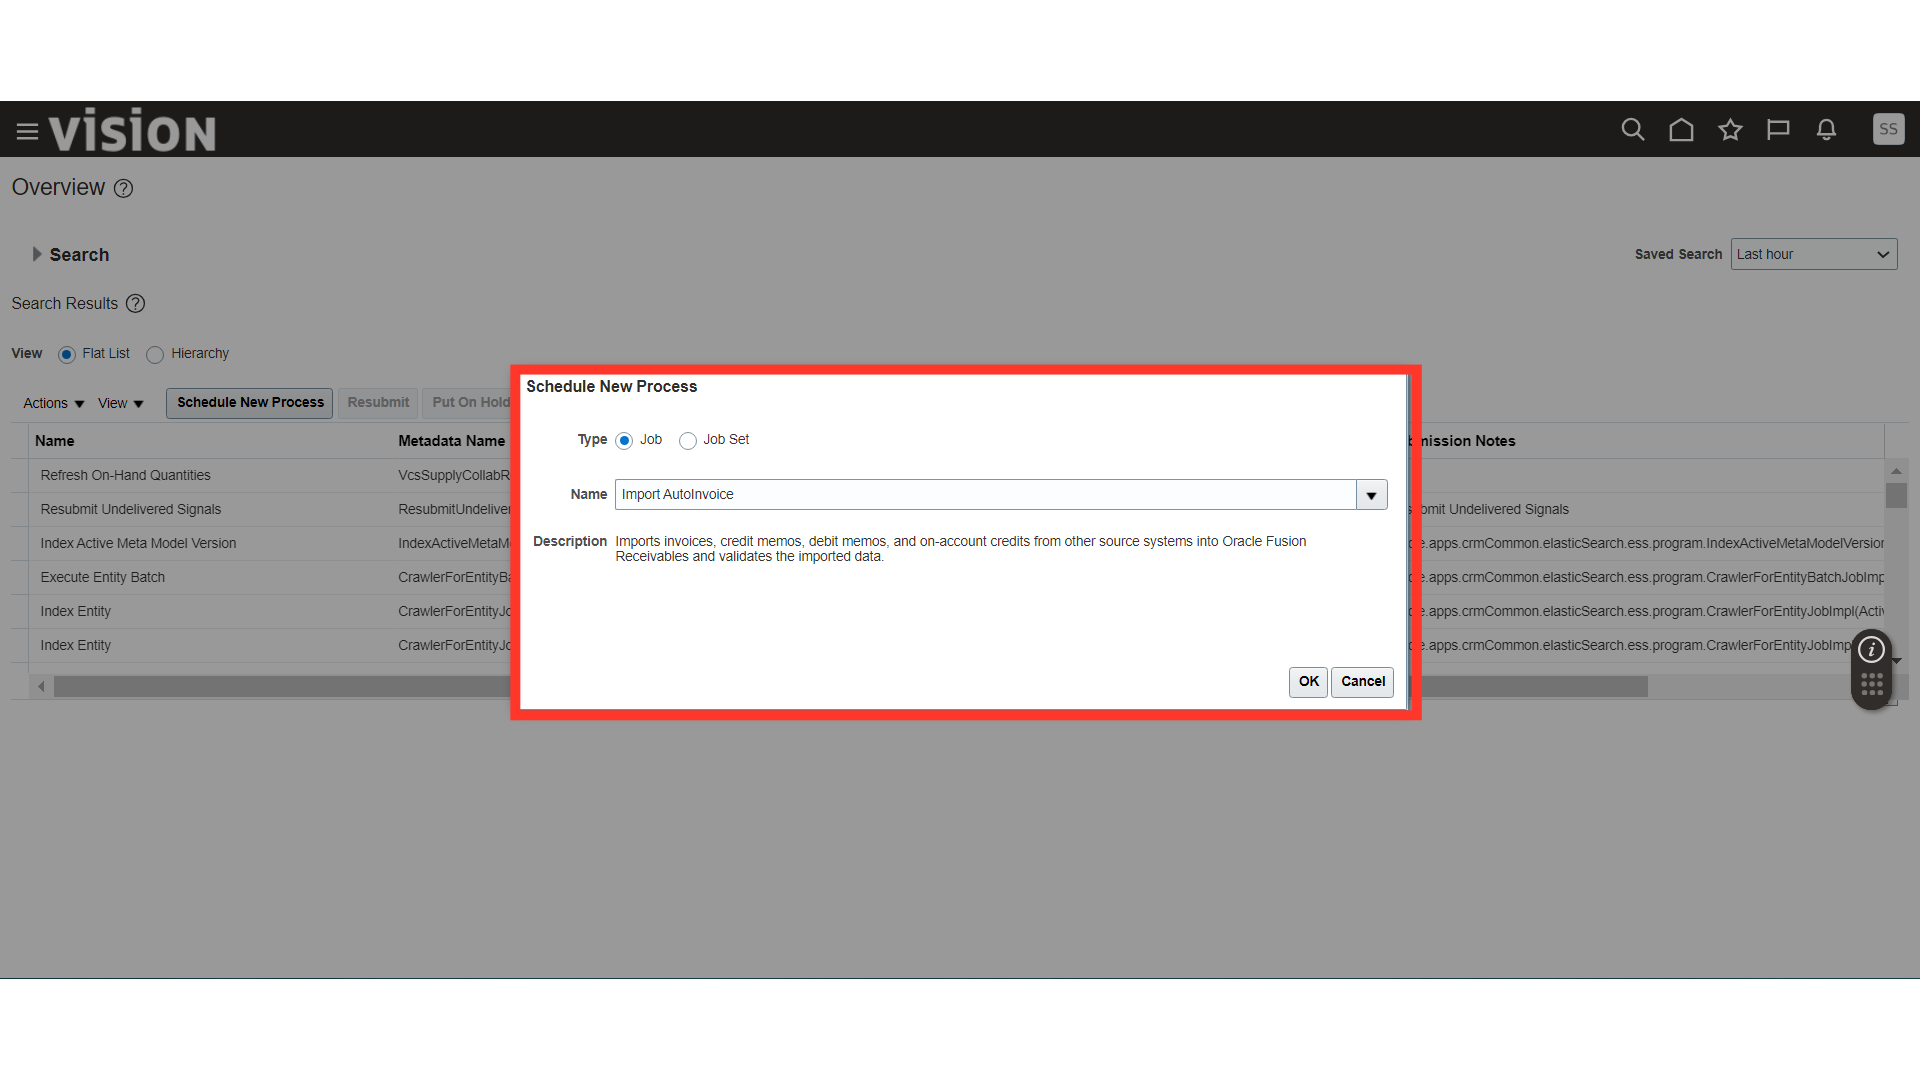
In Process Details, select the Business Unit, Transaction Type as Distributed Order Orchestration, and Default Date.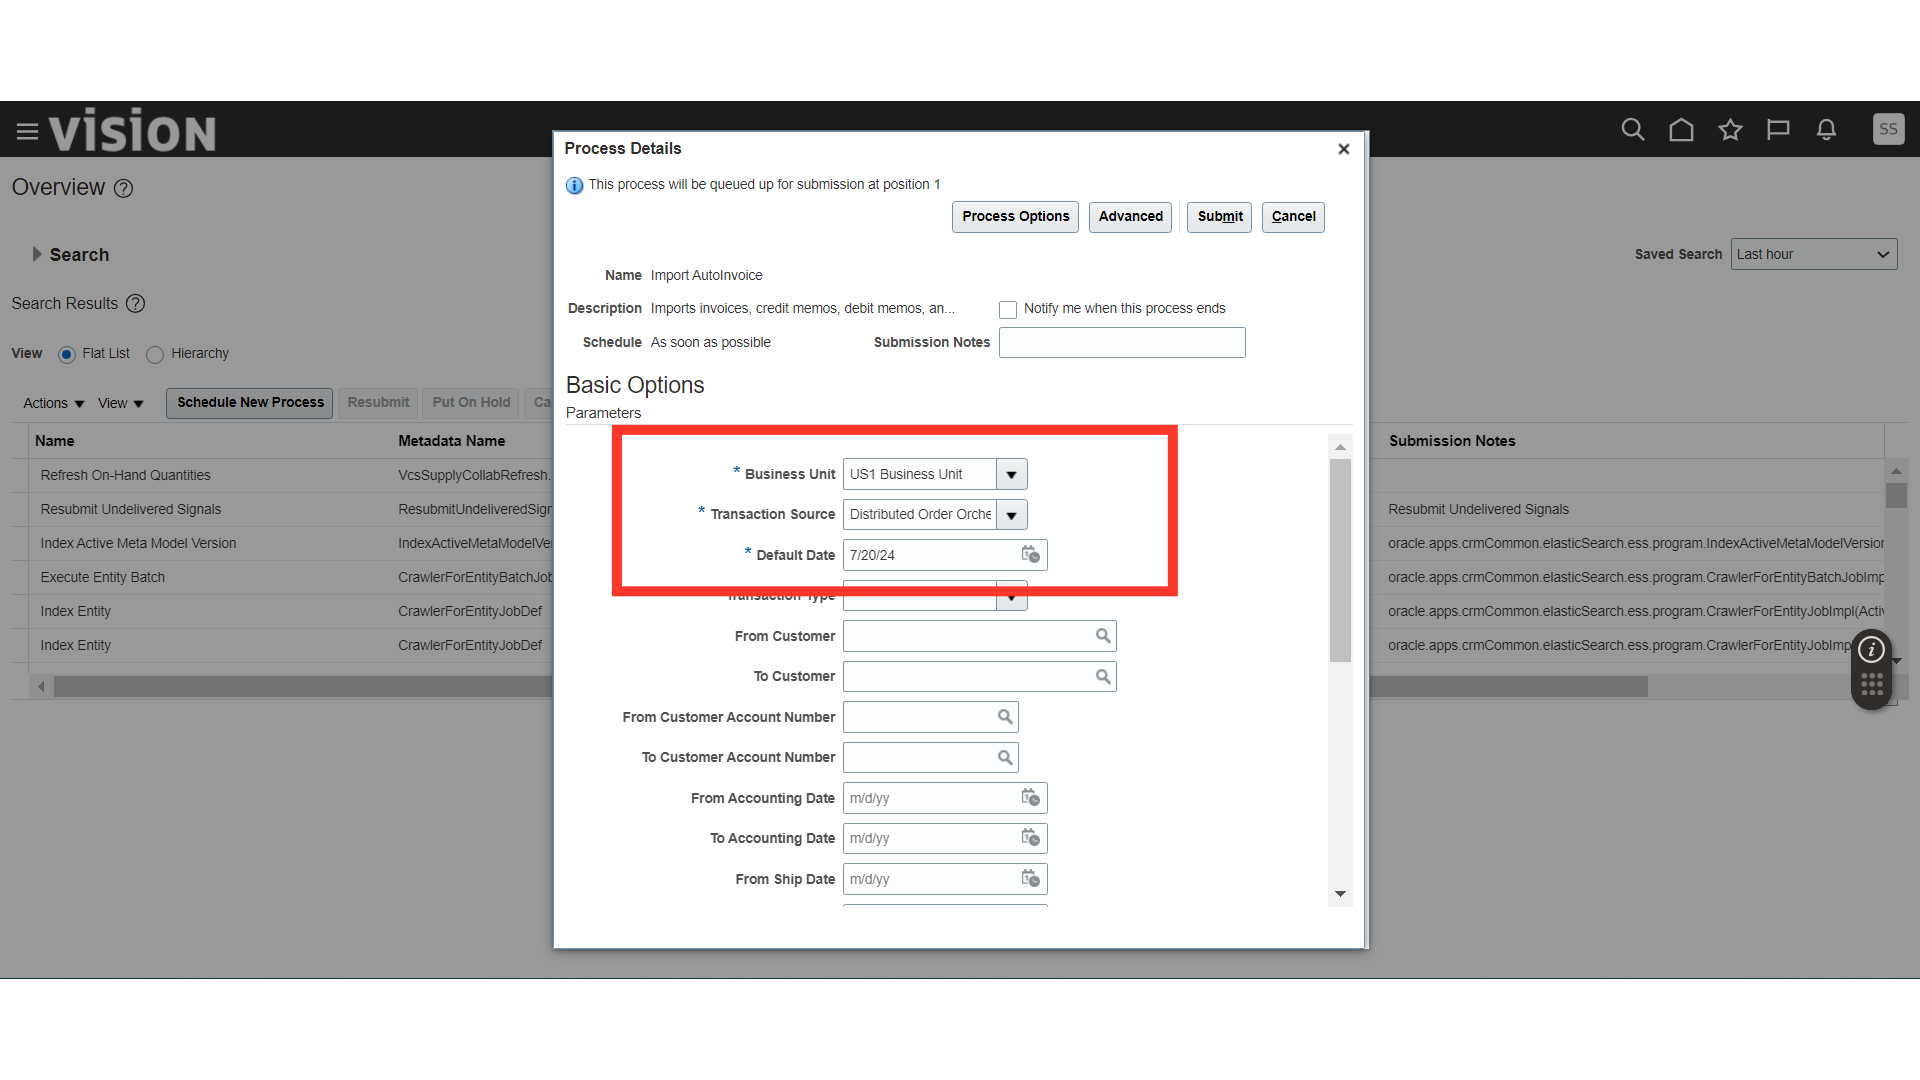
Scroll down further in Process Details and enter the Sales Order number in From Sales Order Number and To Sales Order Number.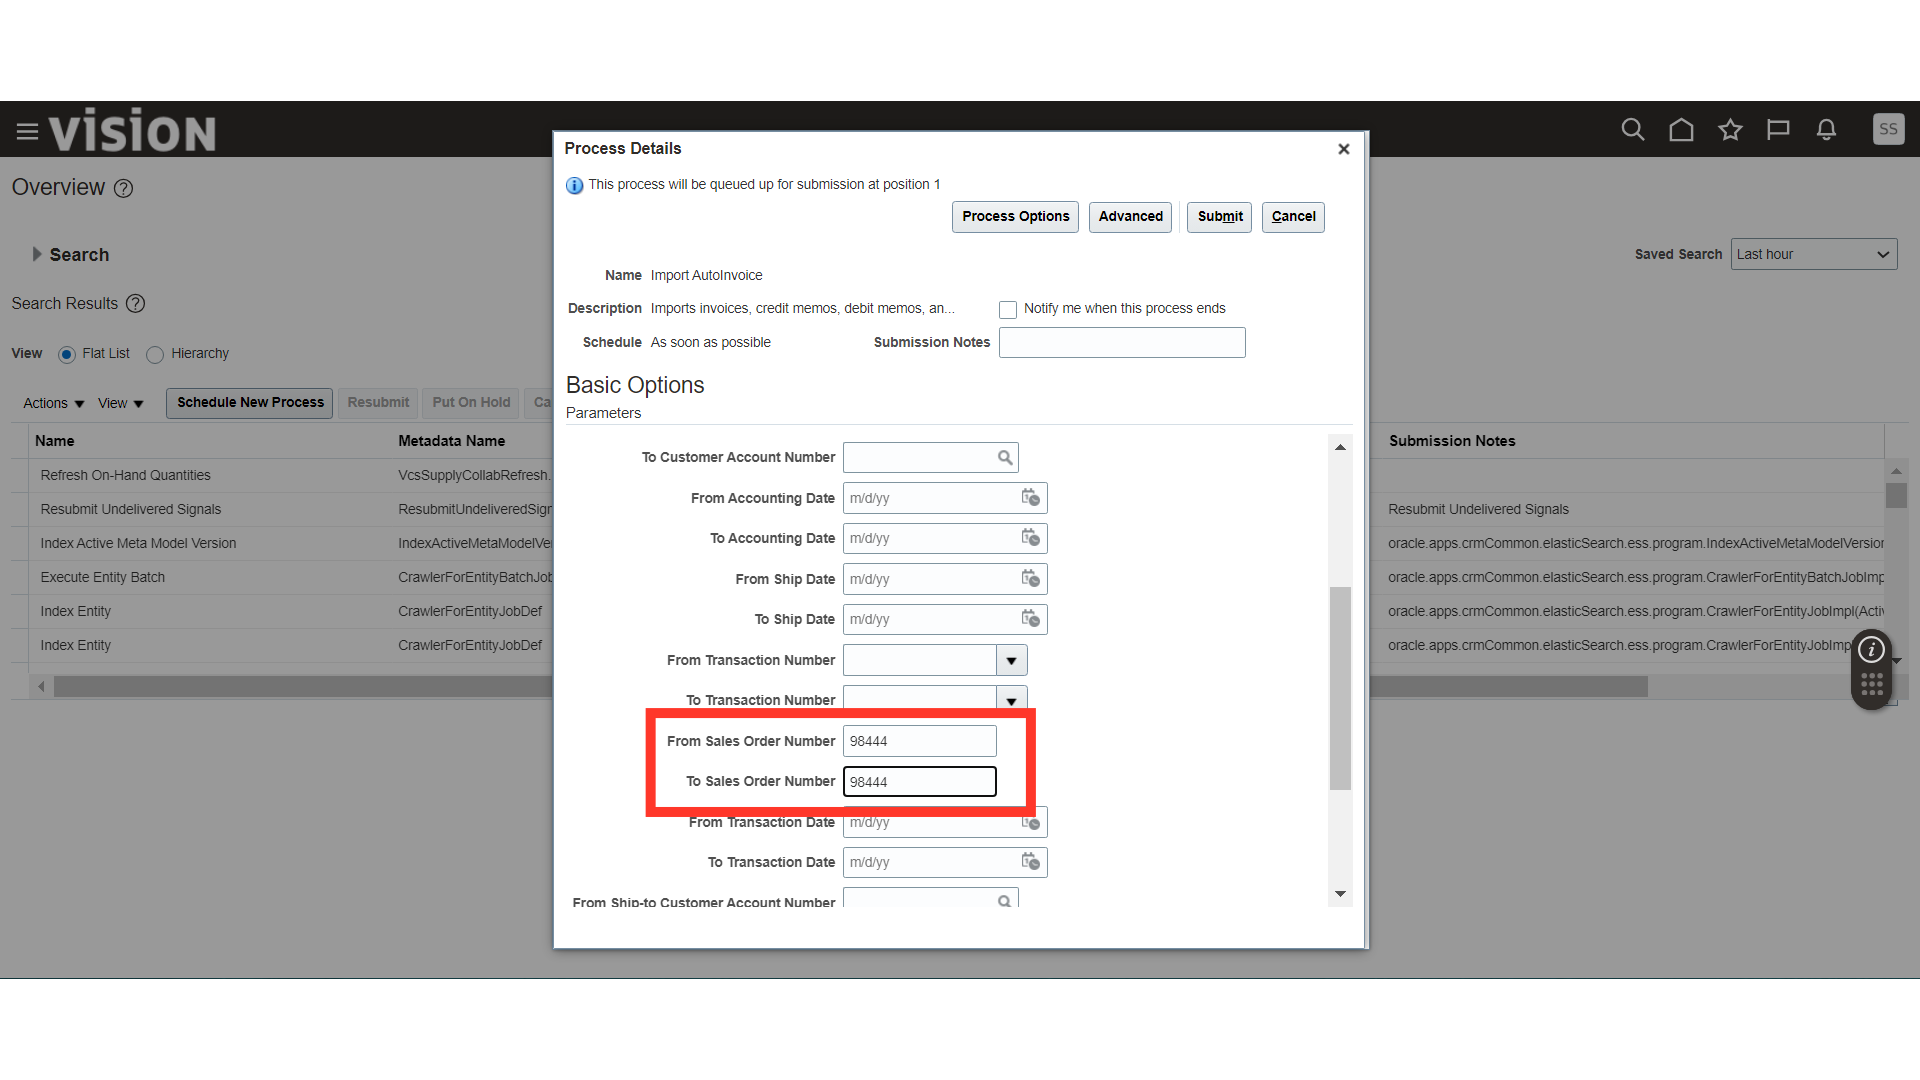
Once all the parameters are filled in, click on the Submit button.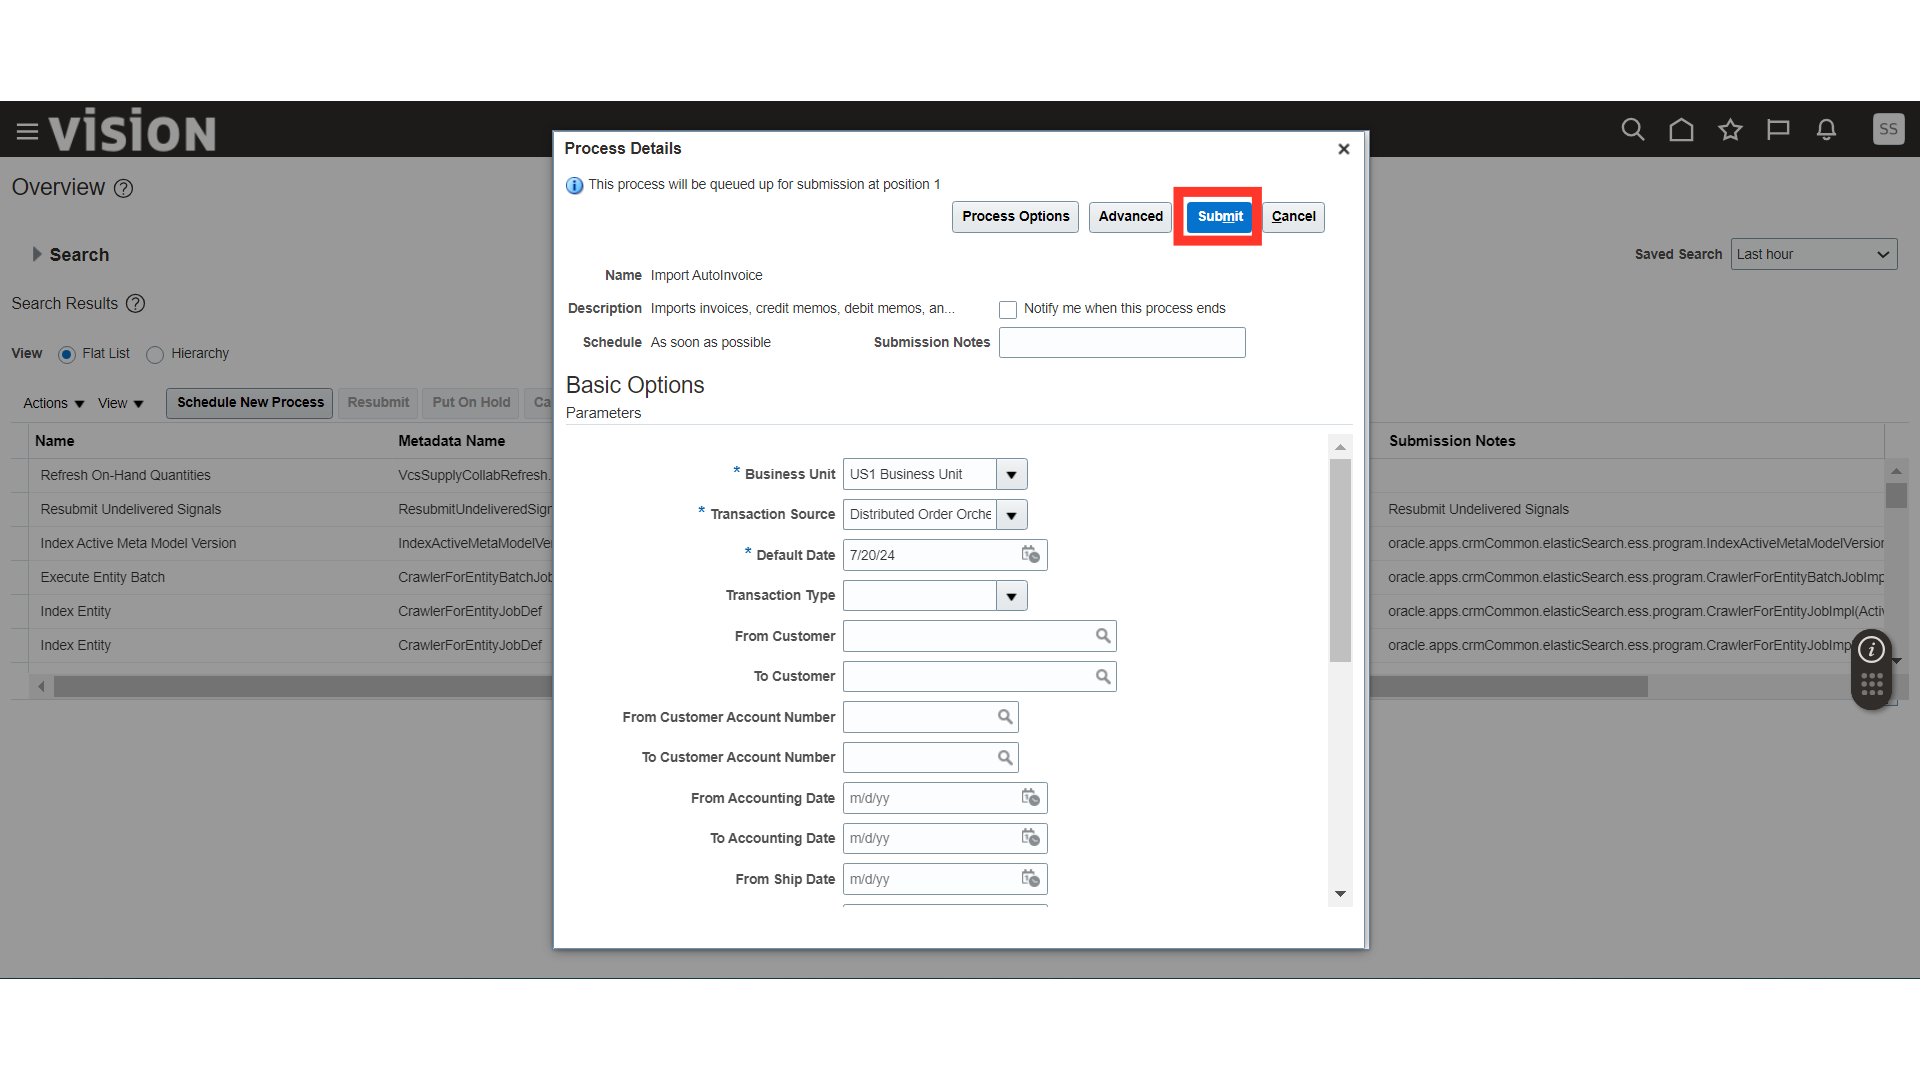
The system will generate a confirmation message about the process submission; click OK.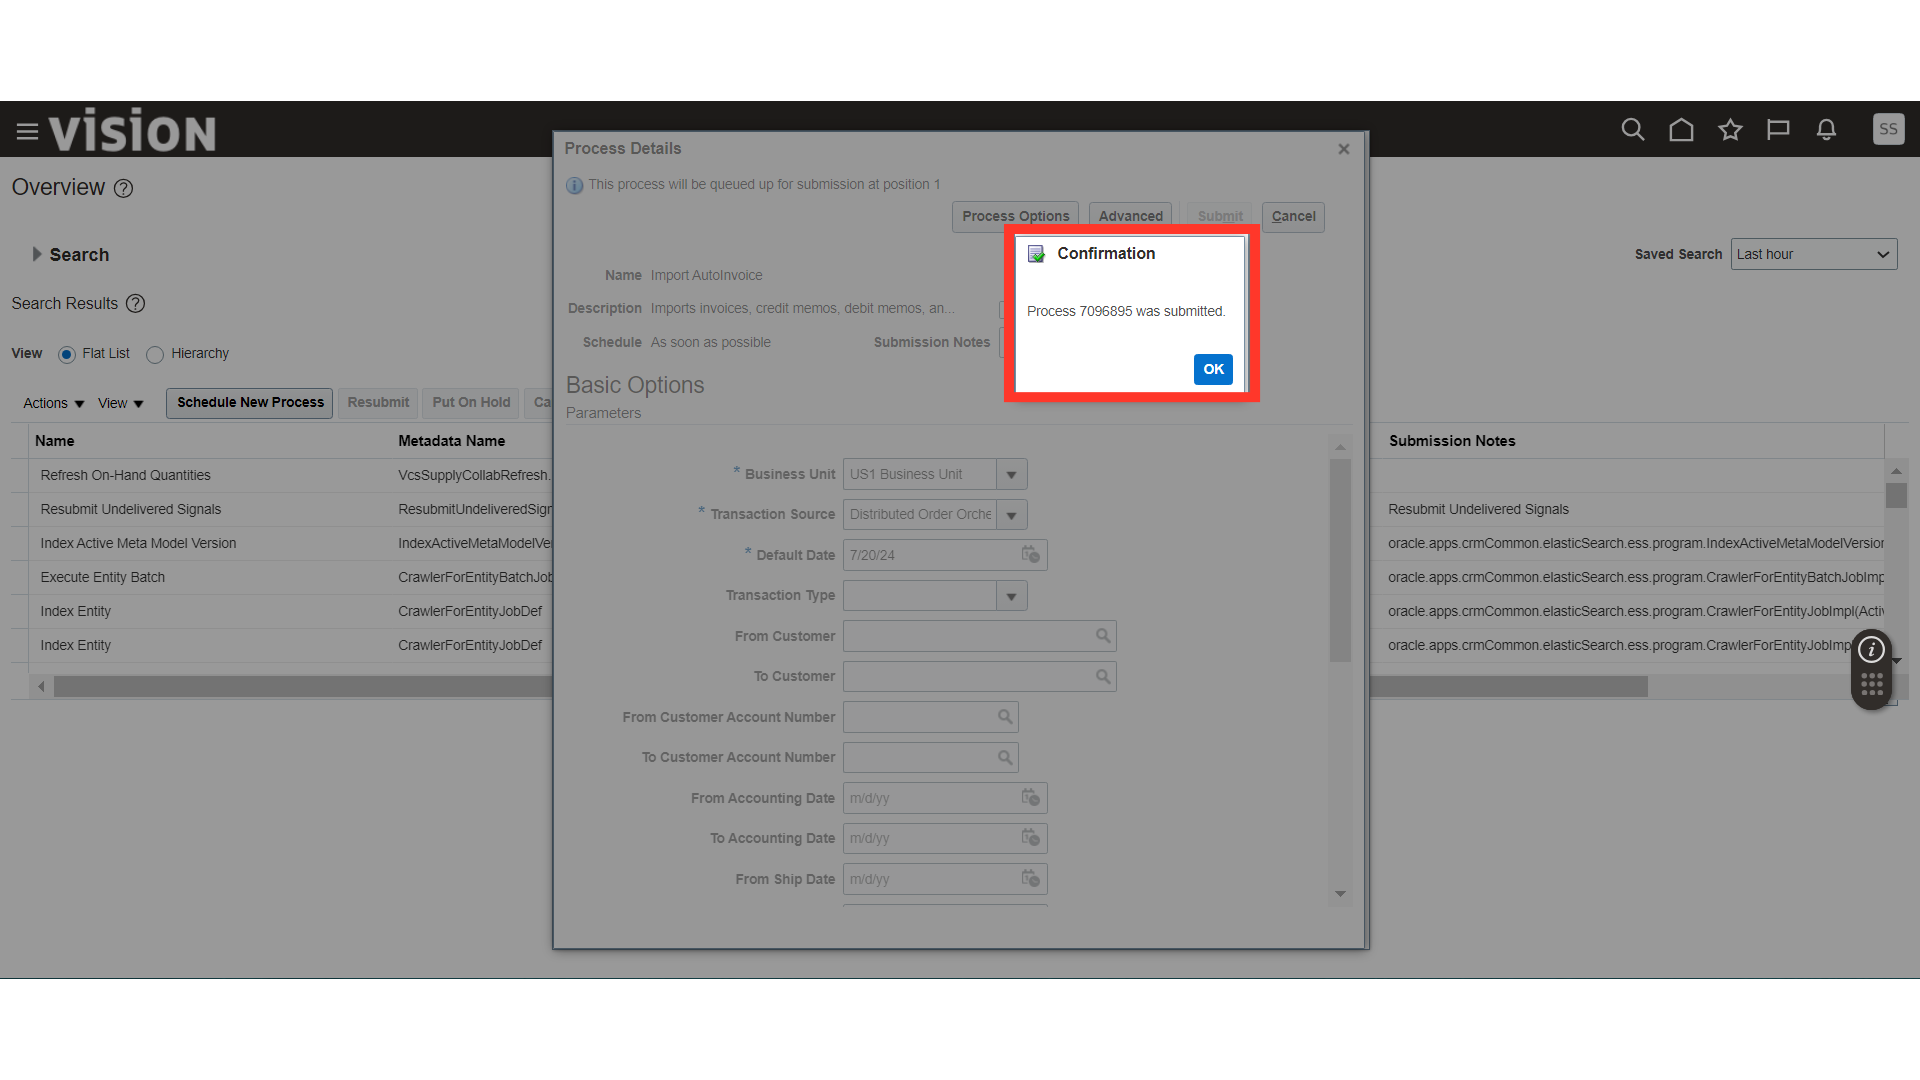
Once you click on the Refresh button, you will be able to see the Import Autoinvoice process running.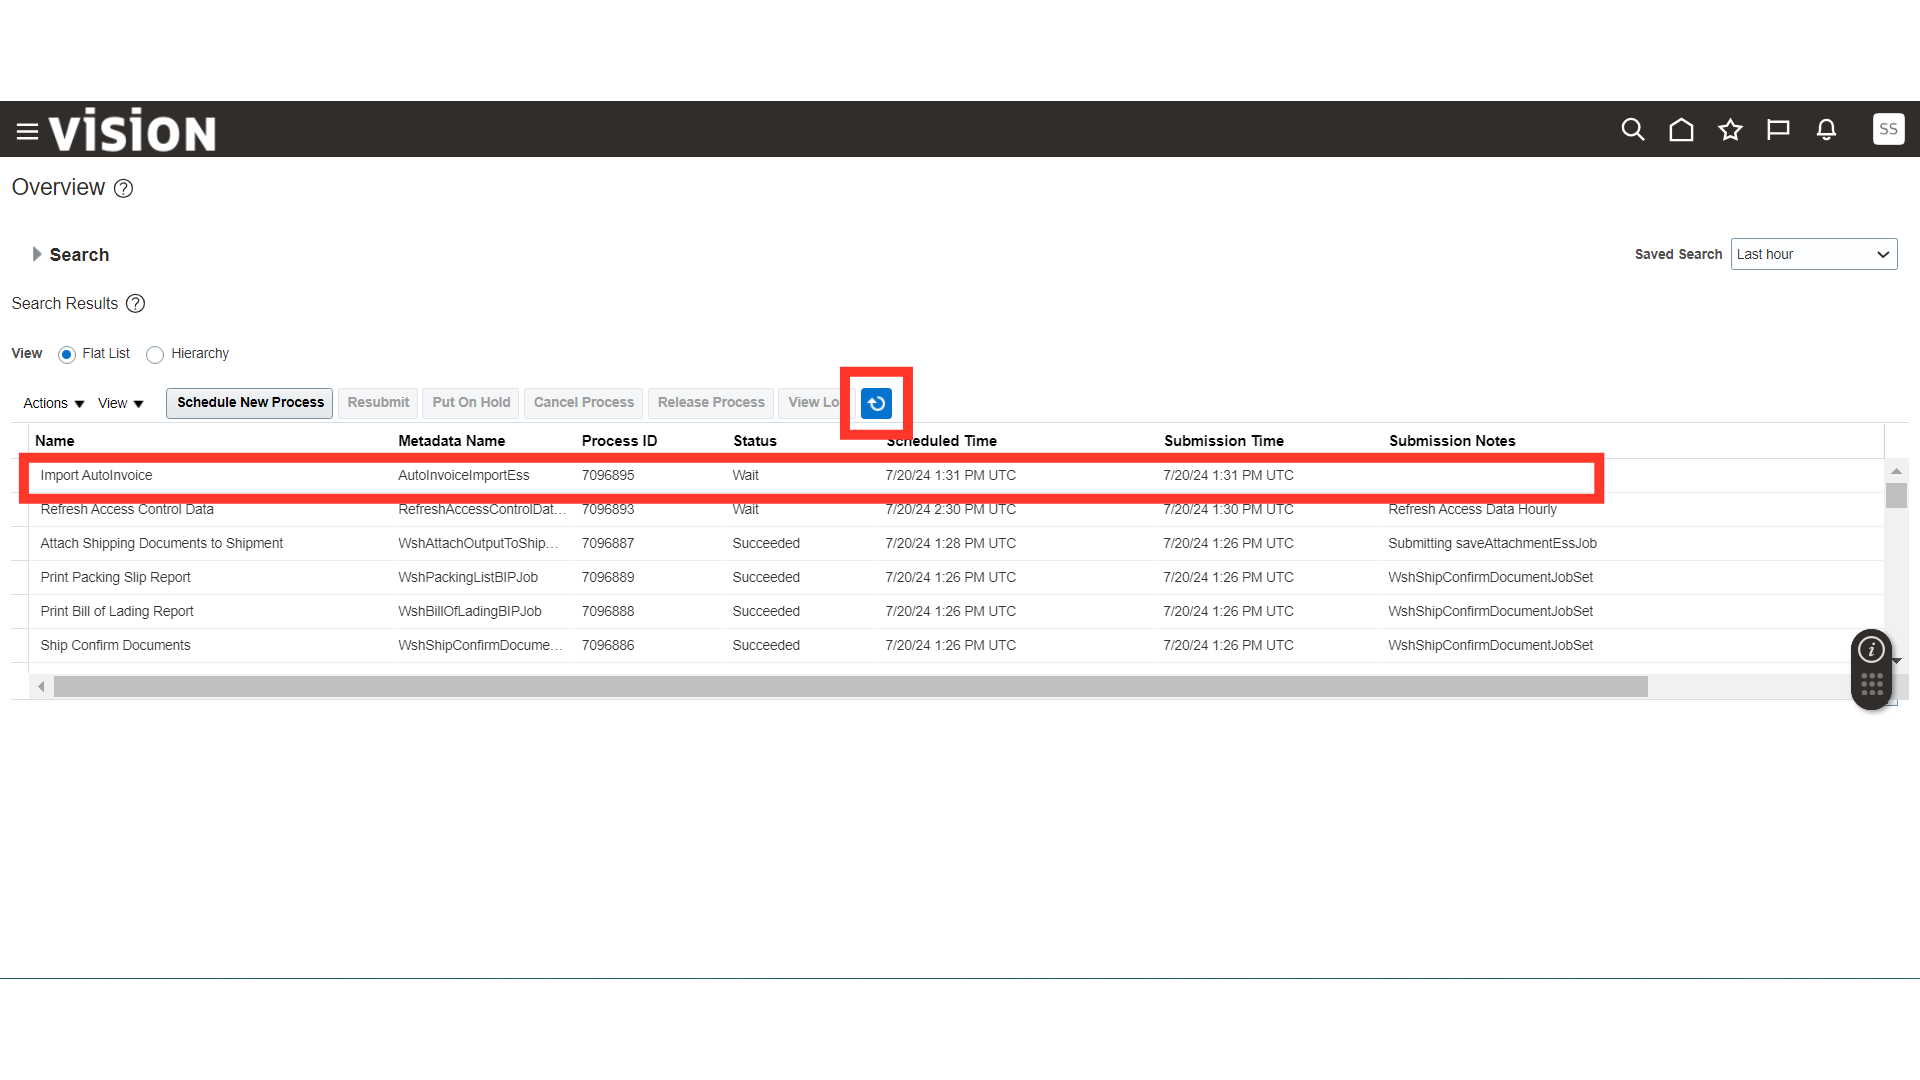
Once the process status is in Succeeded status, select the process and scroll down to the bottom.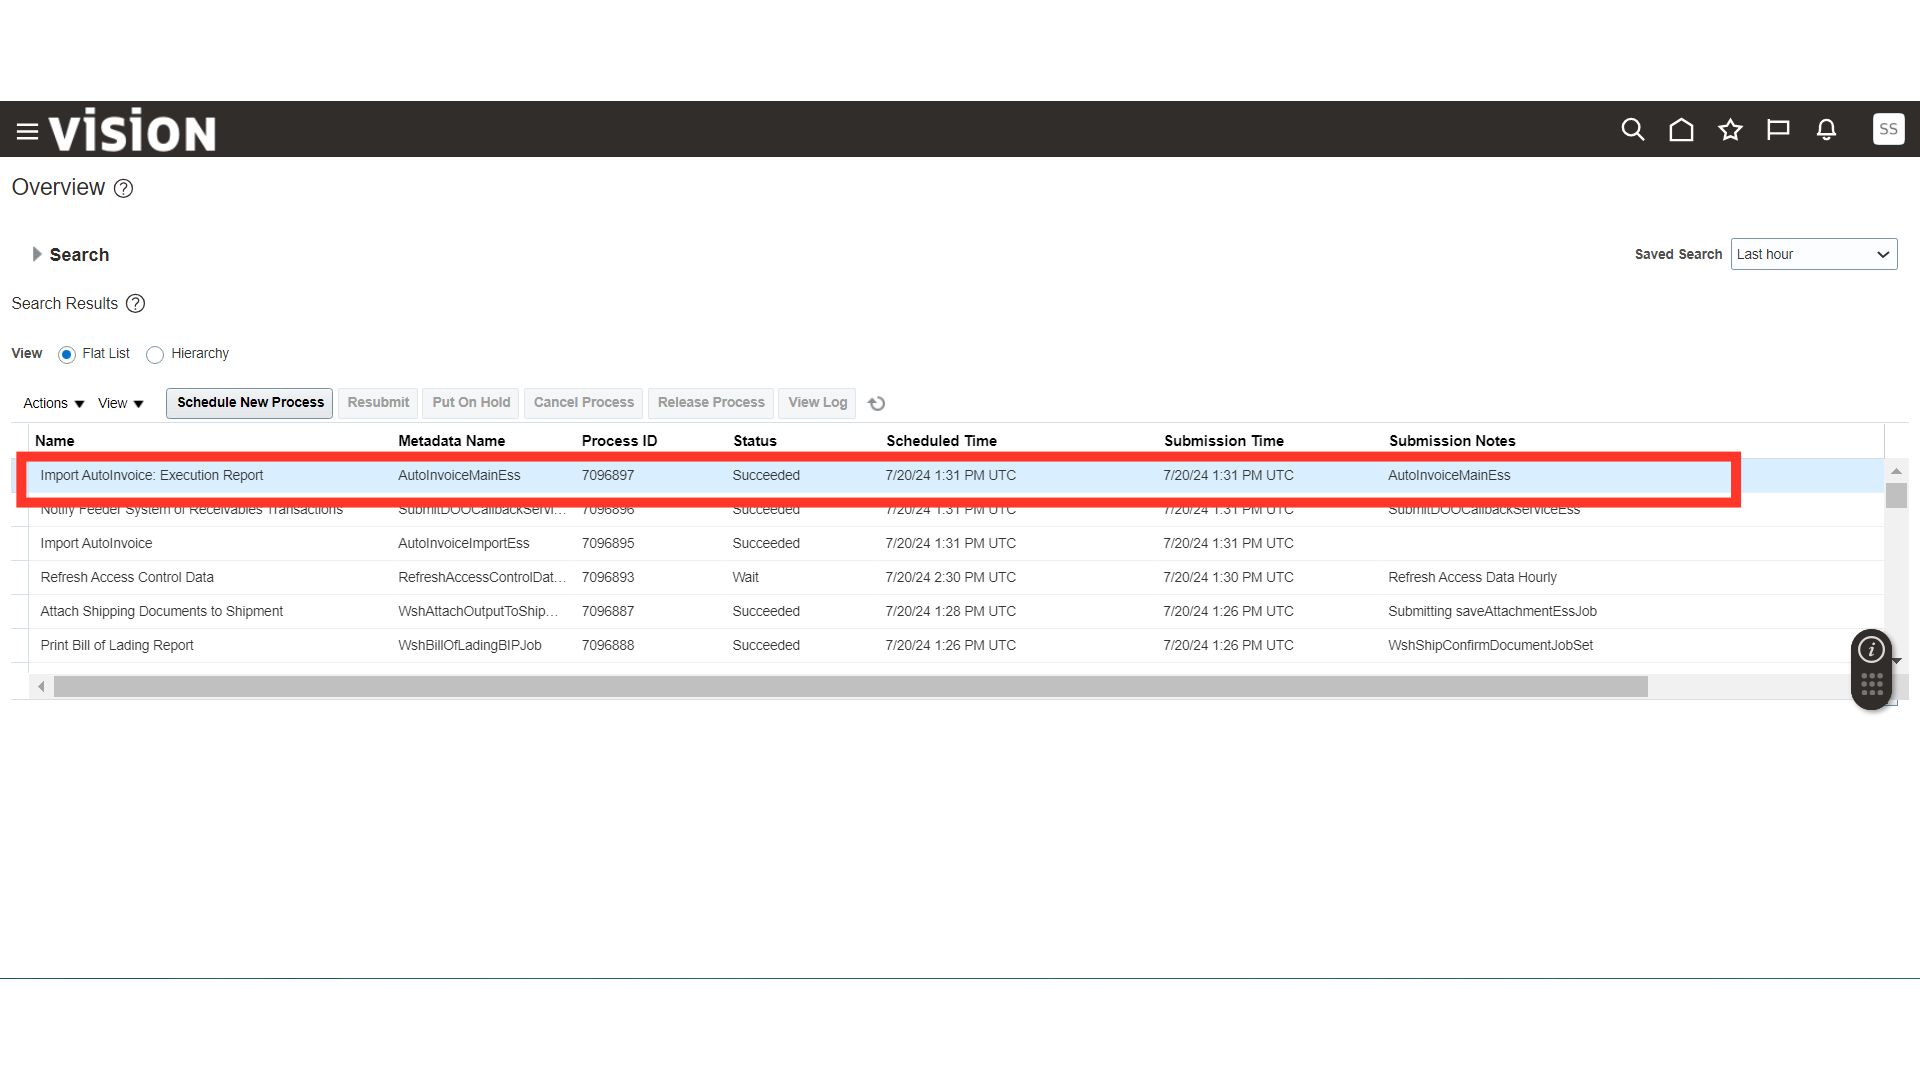
In Output, click on the Republish icon.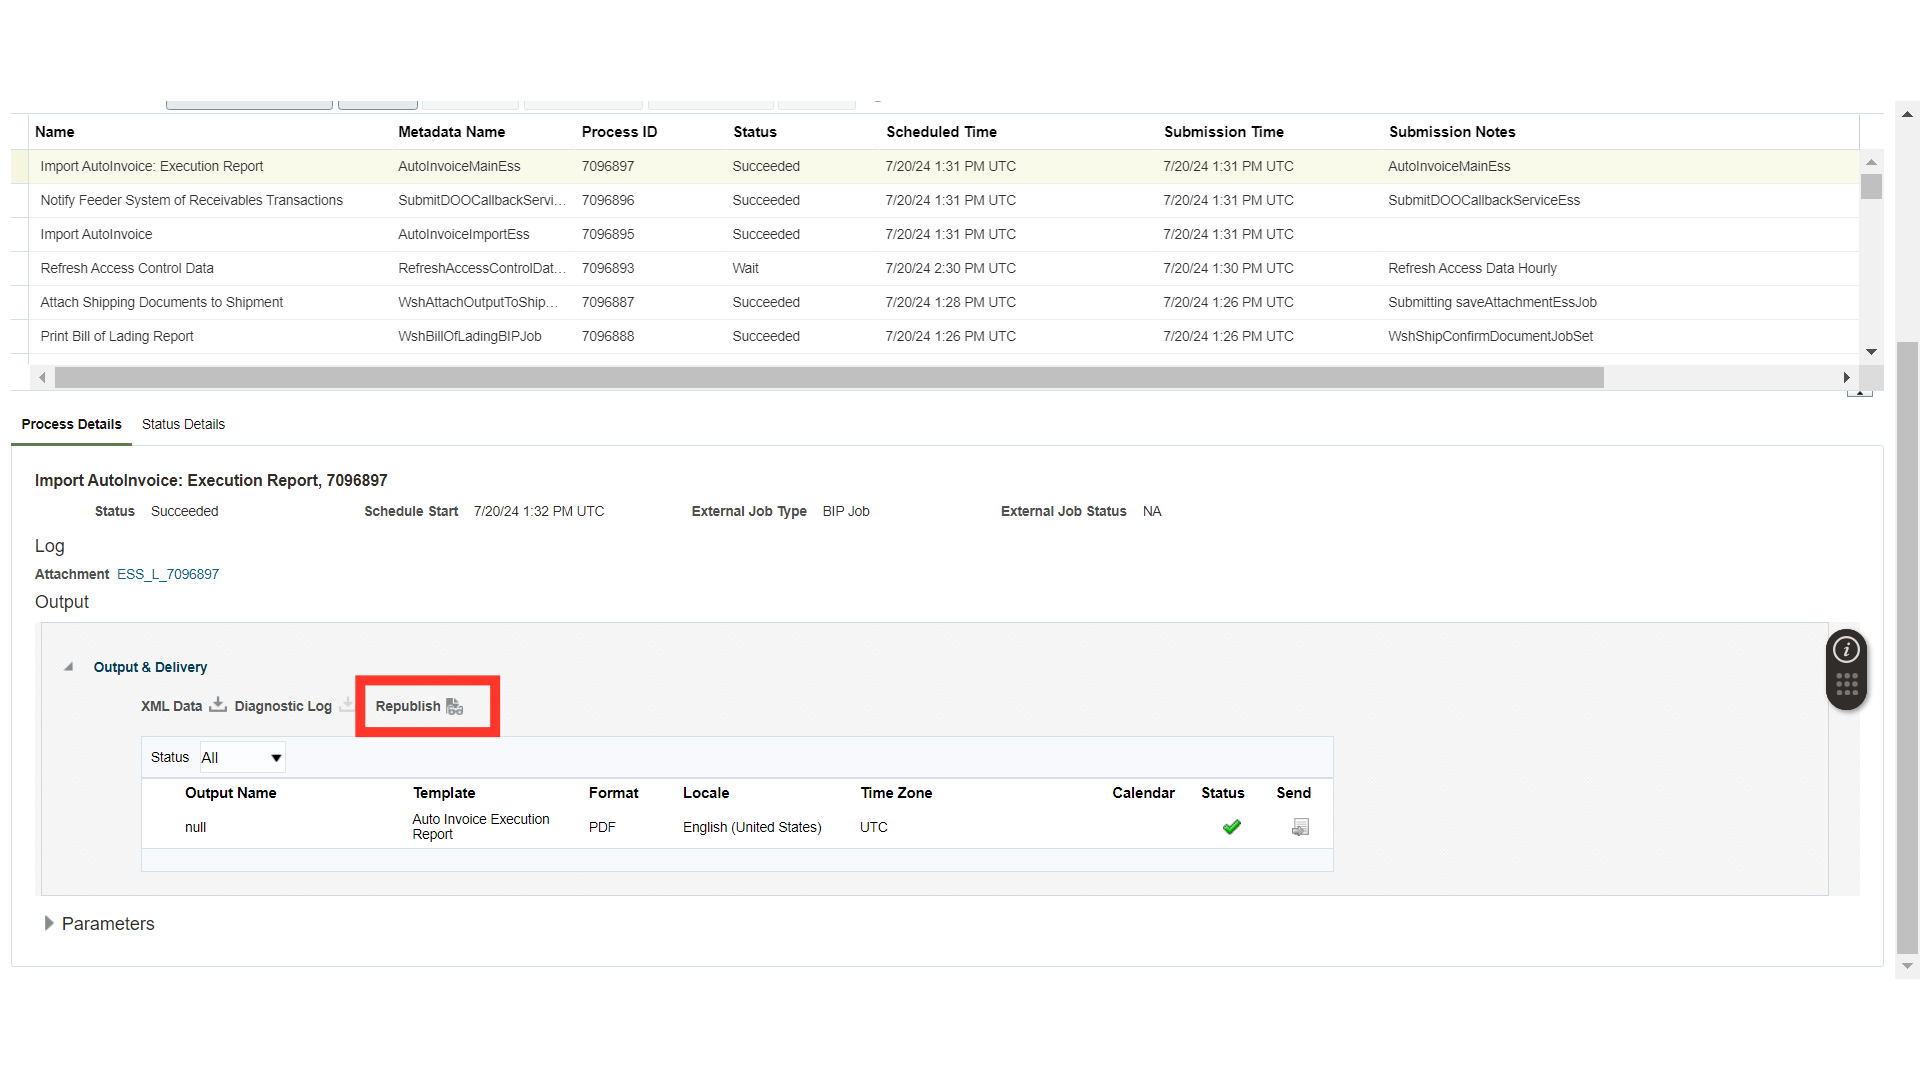
In Republish, click on the Gear icon.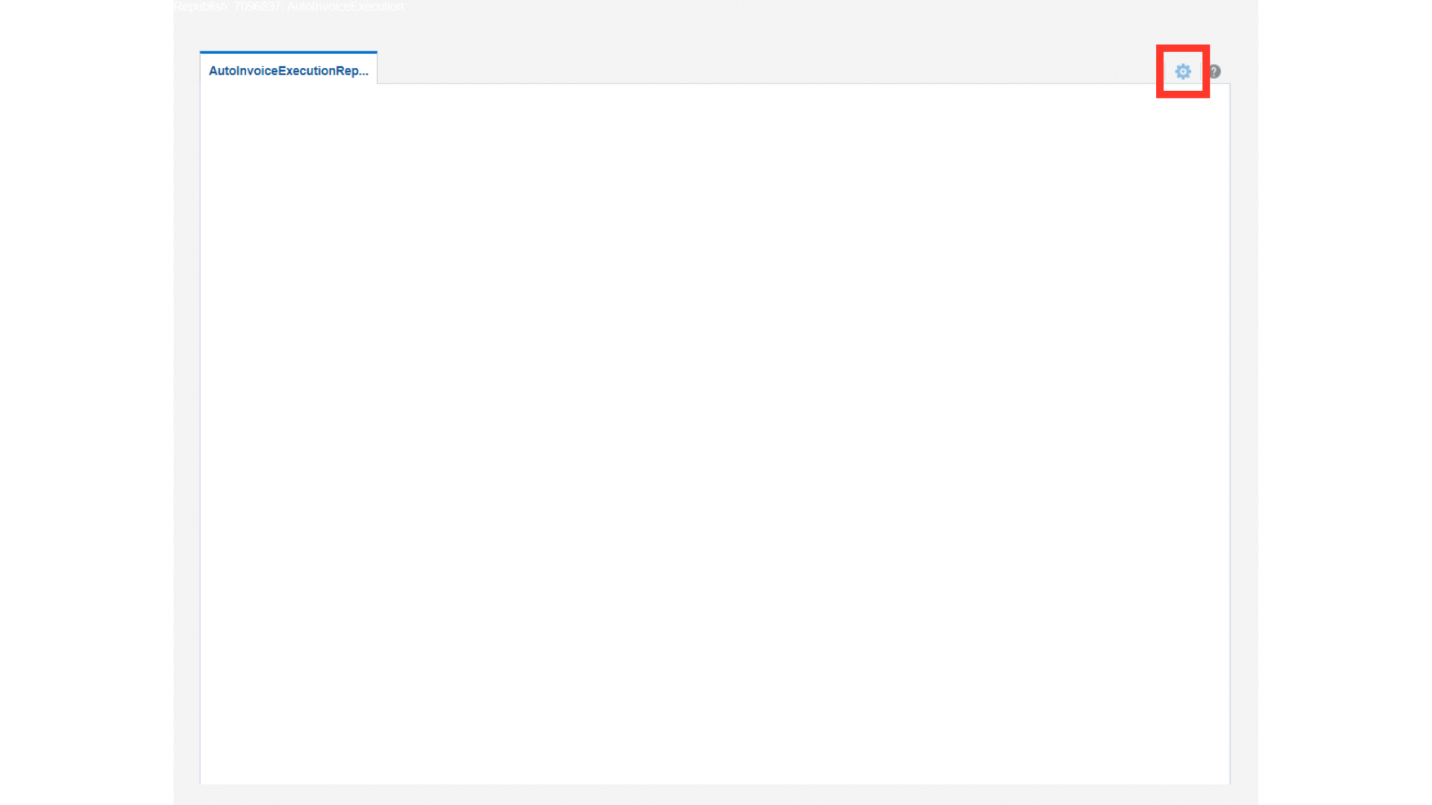
From here, you can download your Sales Order invoice in multiple formats. Click on one of the formats and download the invoice for further processing of the Sales Order.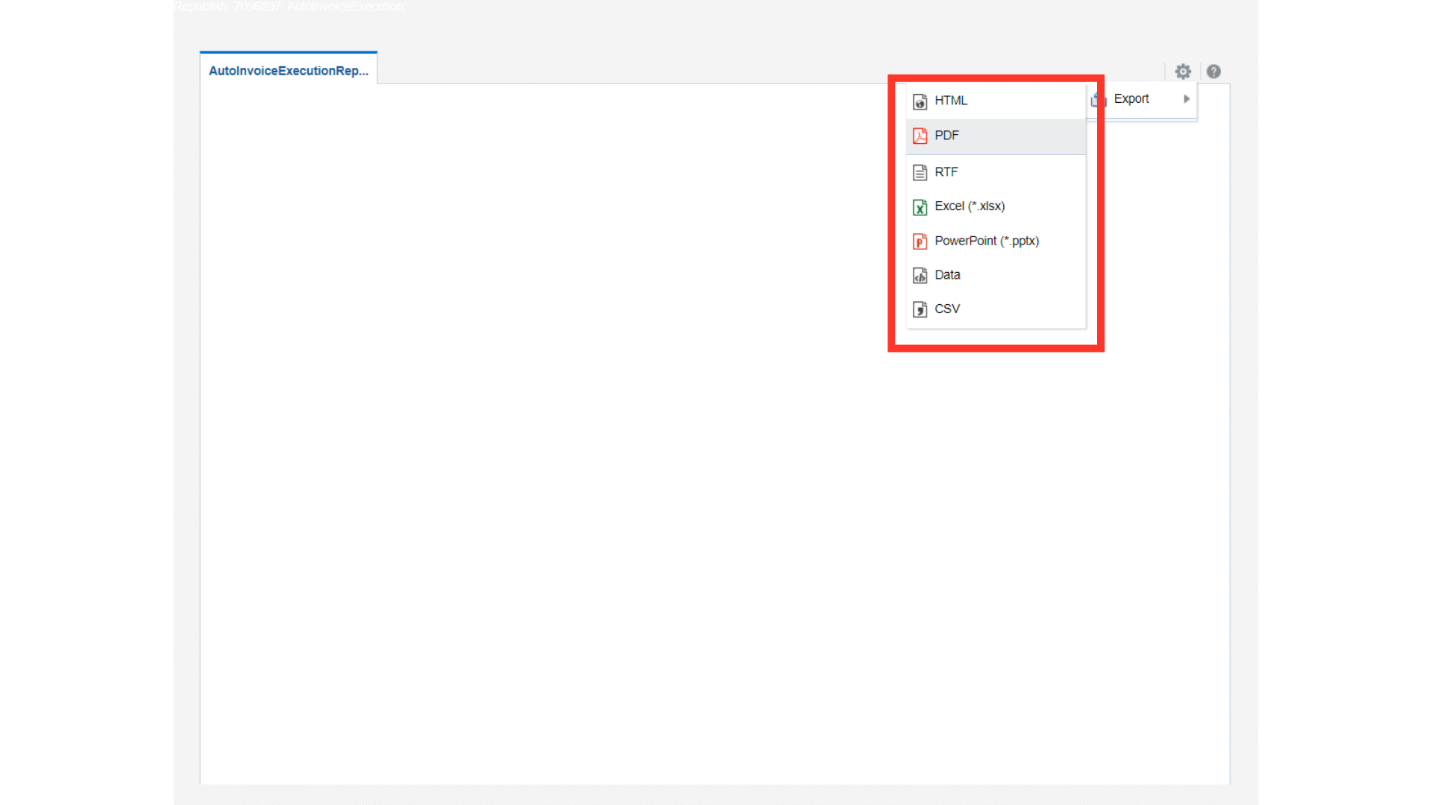
This guide covered the process of creating an invoice against the Sales Order in Oracle Cloud.