HFRS REPORTING
This guide will provide the detailed step-by-step process of creating and running the Financial reports from Financial Reporting Studio in Oracle Fusion.
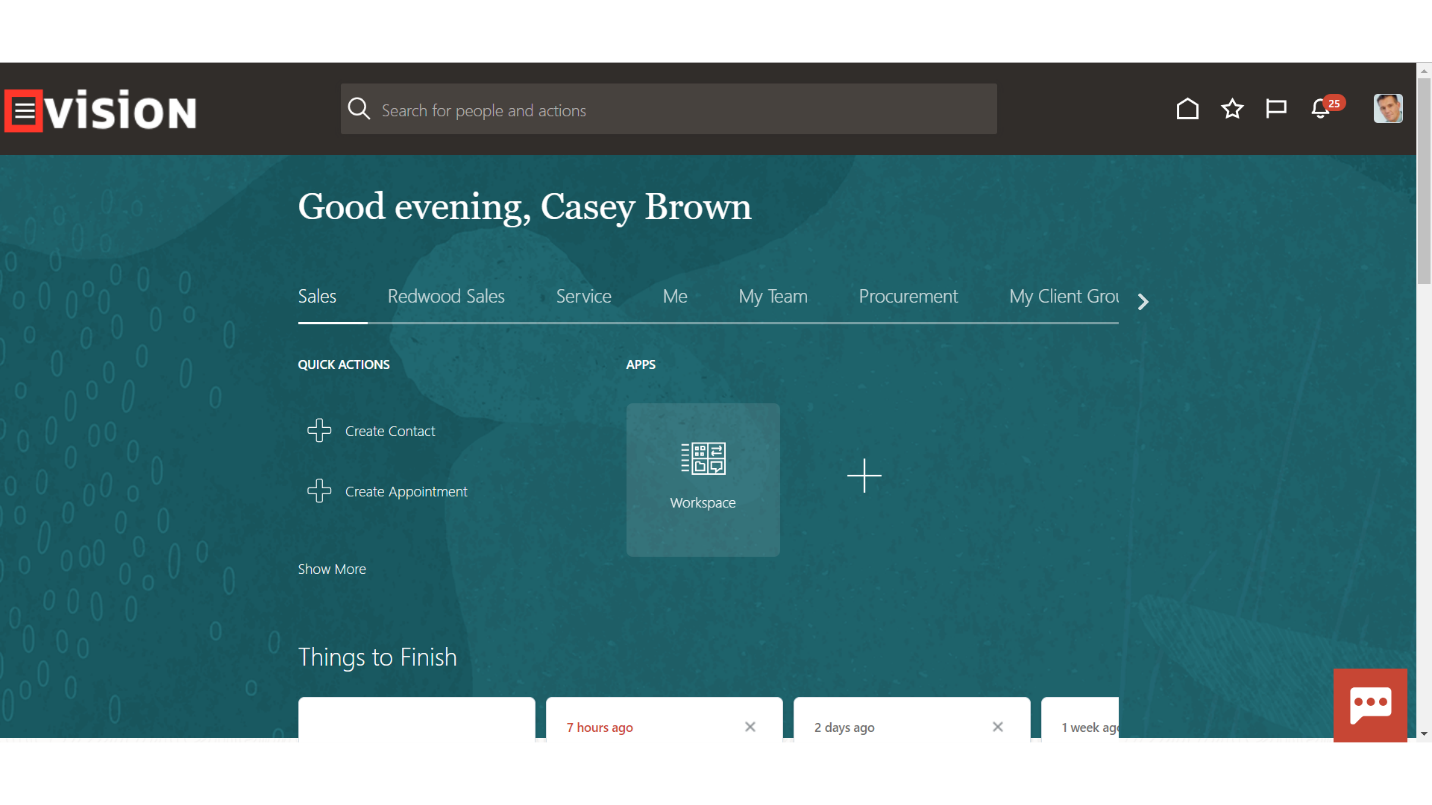
Click on the Navigator icon to access the Others menu.
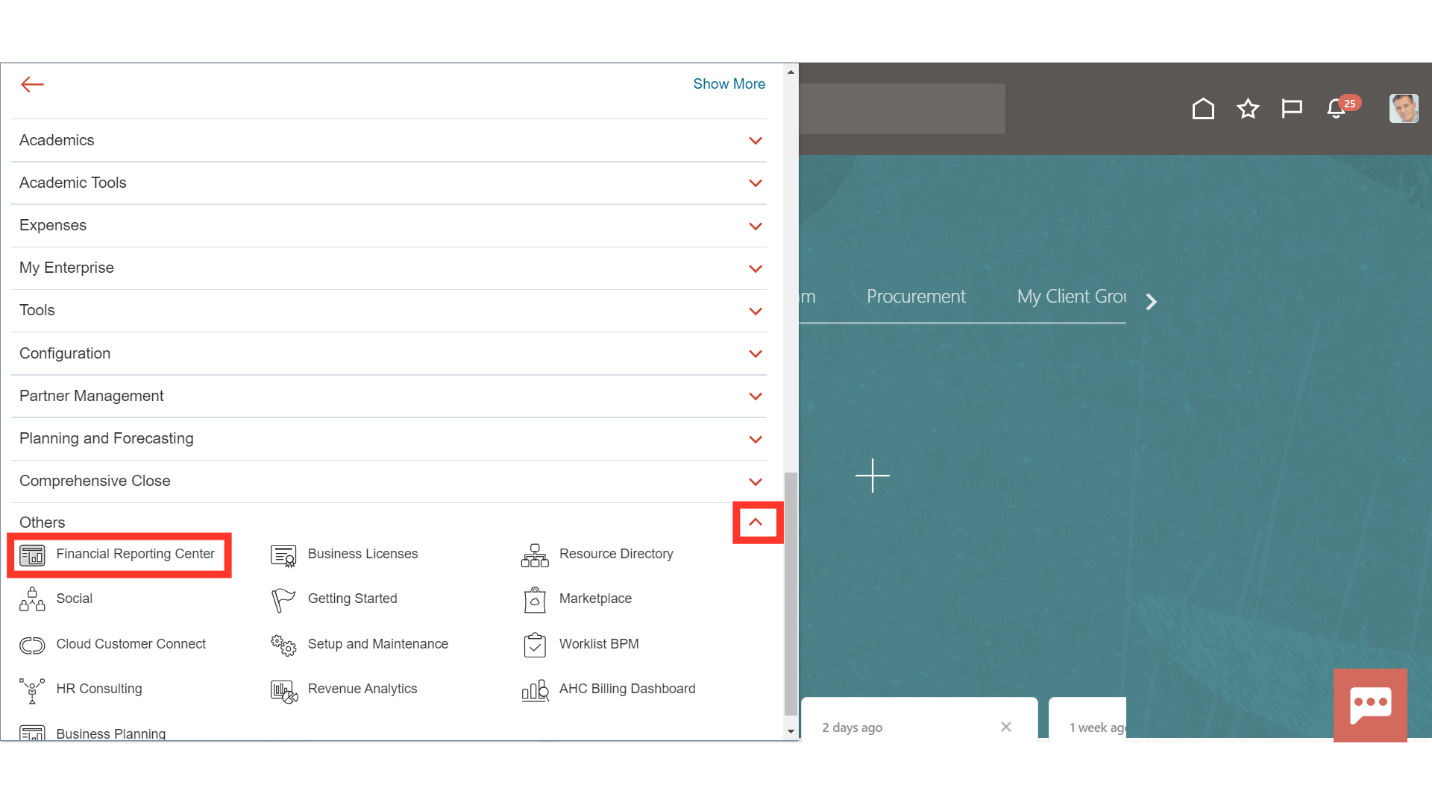
Click on the Financial Reporting Center submenu under Others menu.
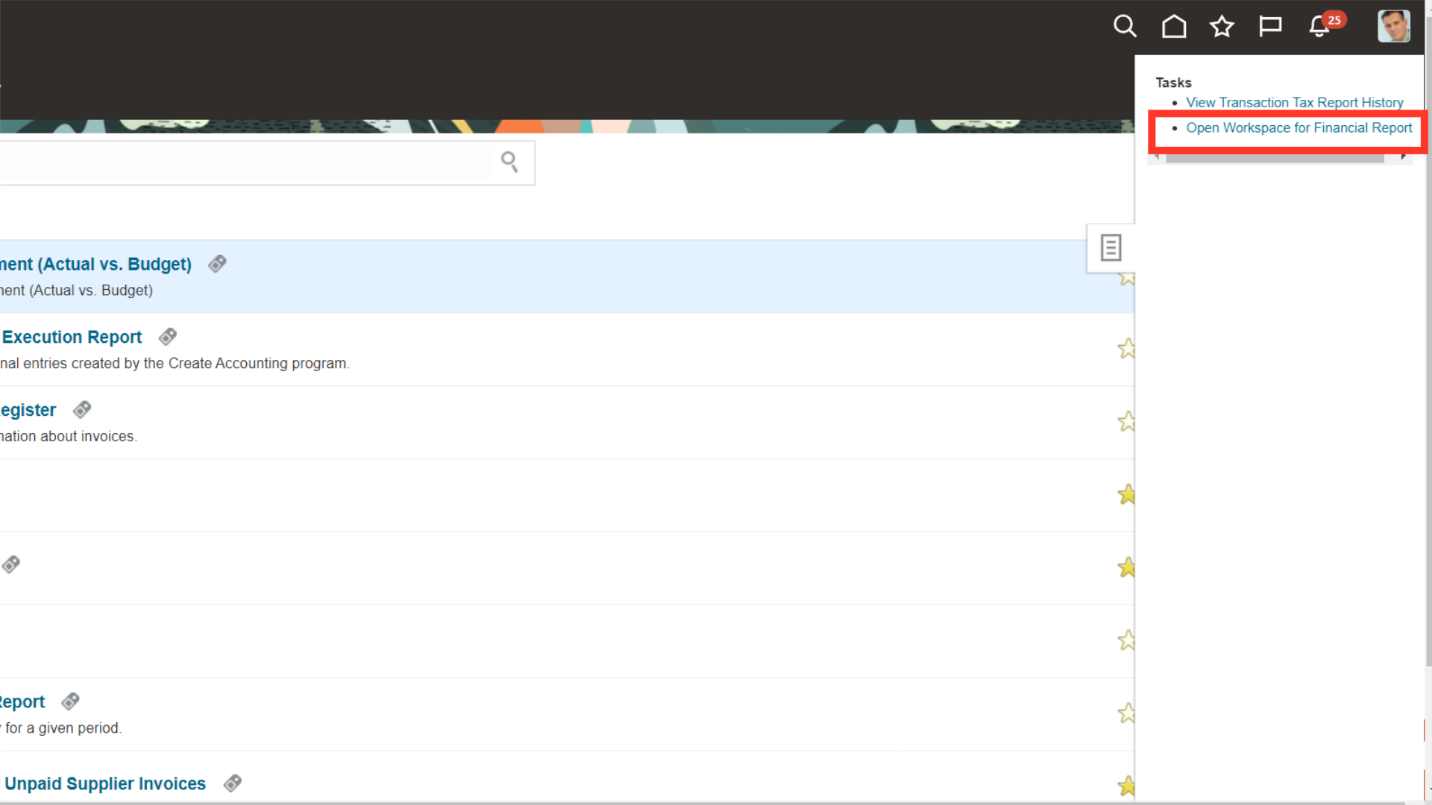
Click on the Open Workspace for Financial Report from the task list.
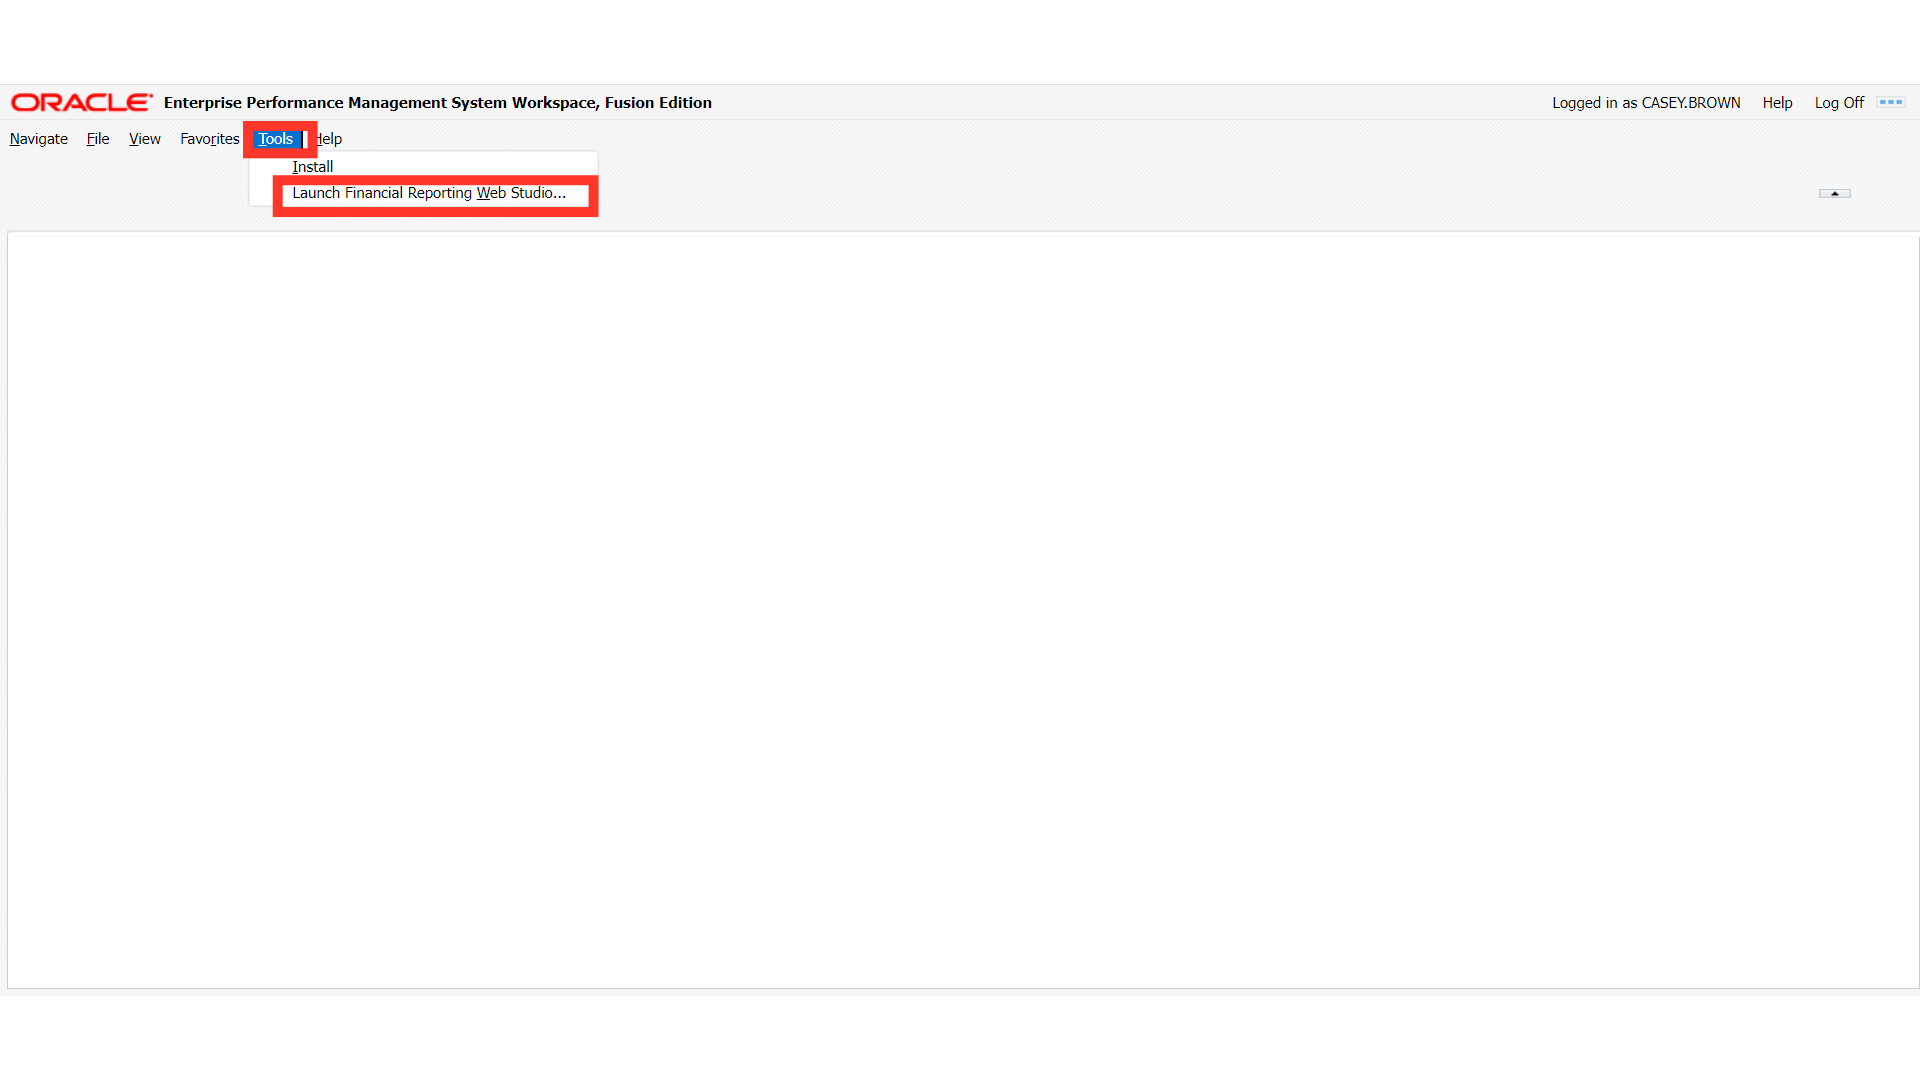
To access the Financial Reporting workarea, select Launch Financial Reporting Web Studio under the Tools tab.
To create new report, select Report by expanding New section under File tab.

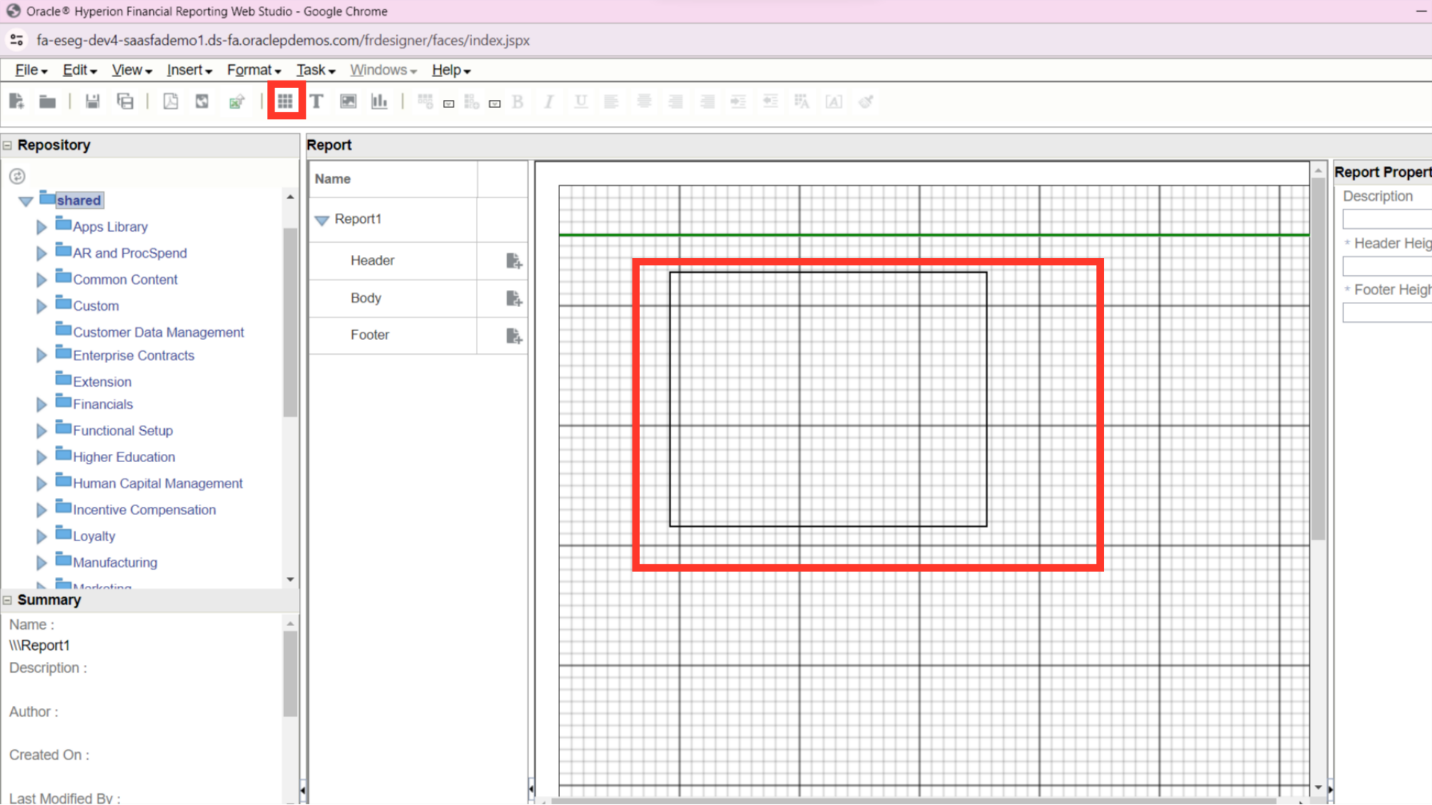
To select new dimension, create a rectangle type box after selecting on the Grid icon.
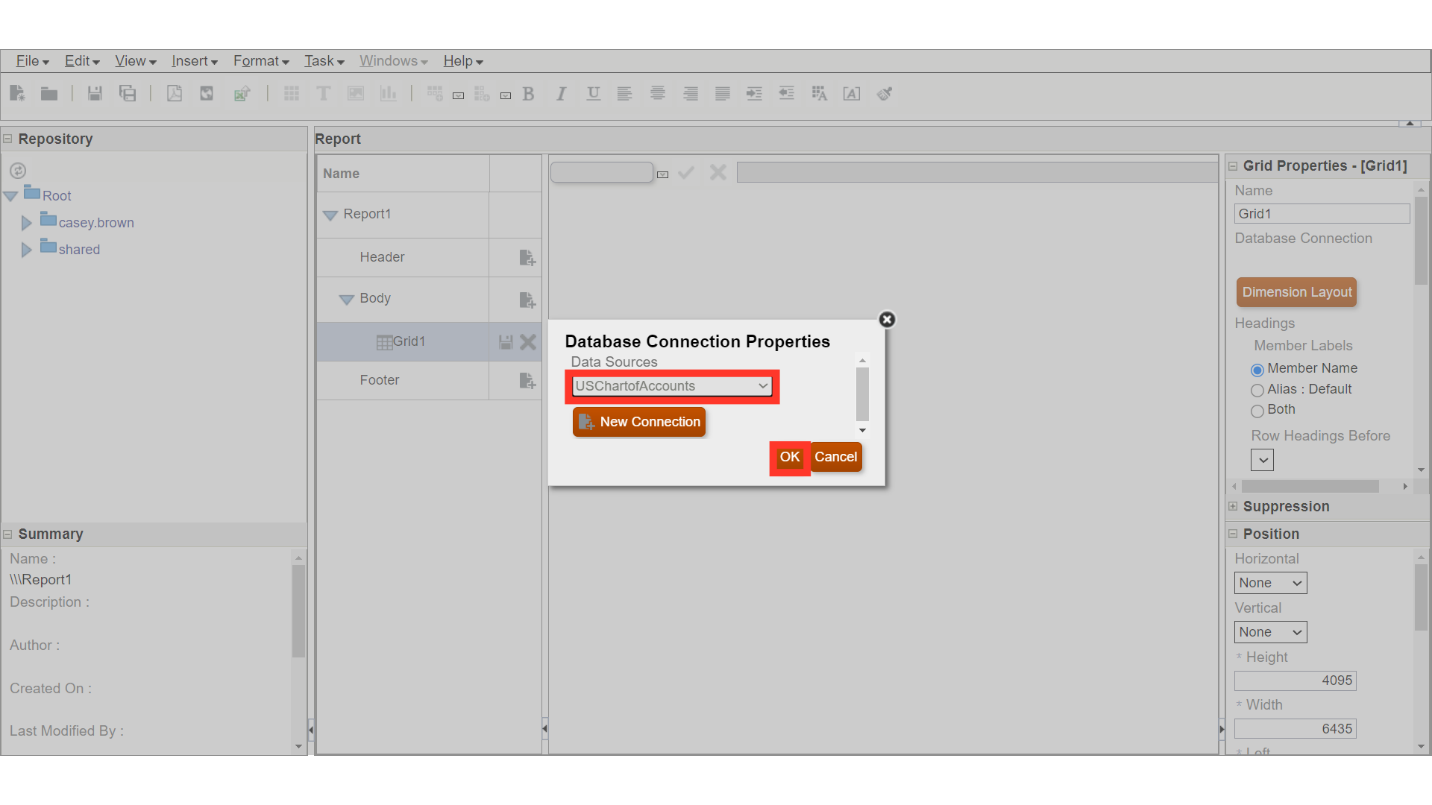
Select applicable Chart of Accounts from the list of values and click on the OK button.
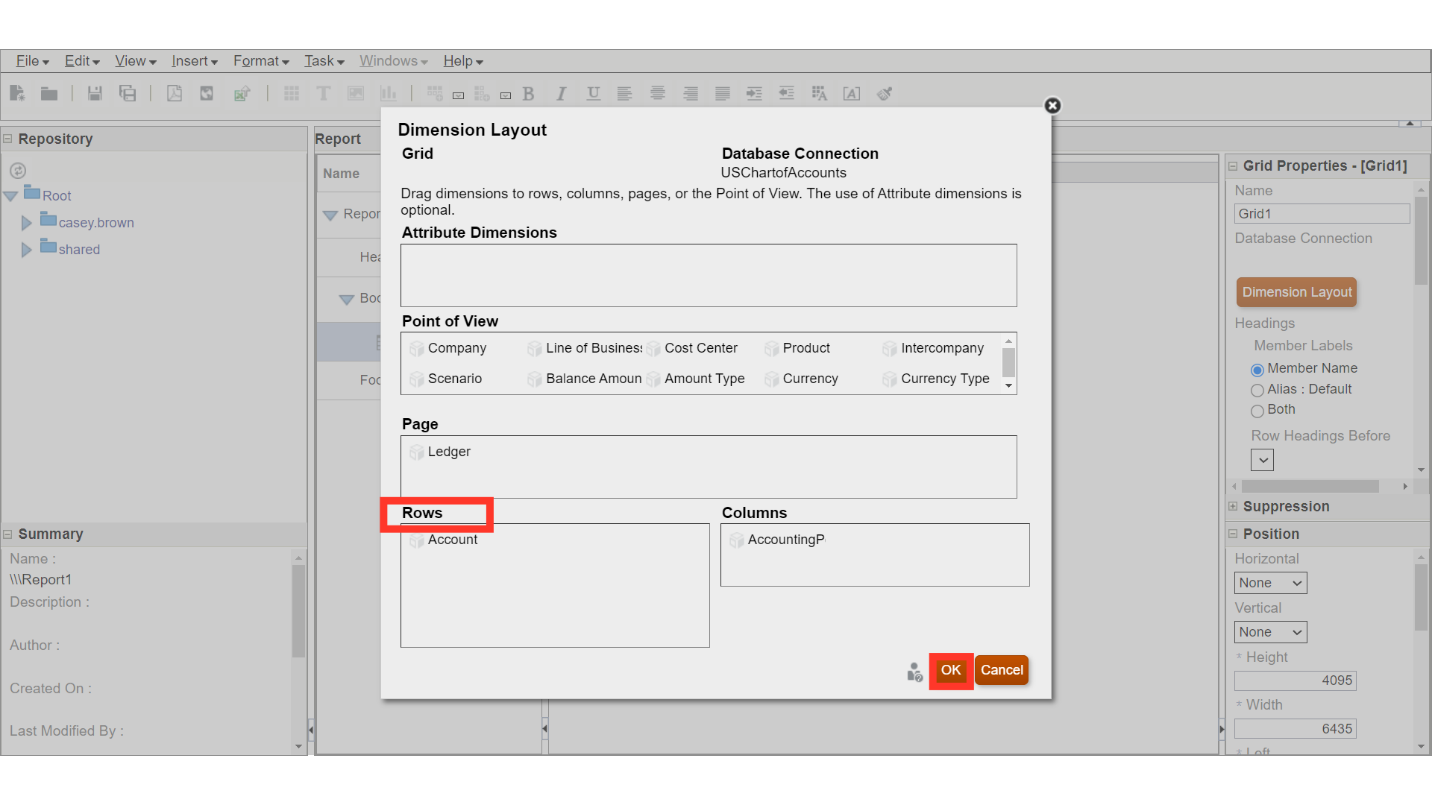
The Dimensions under the Point of view remains constant while running the report.
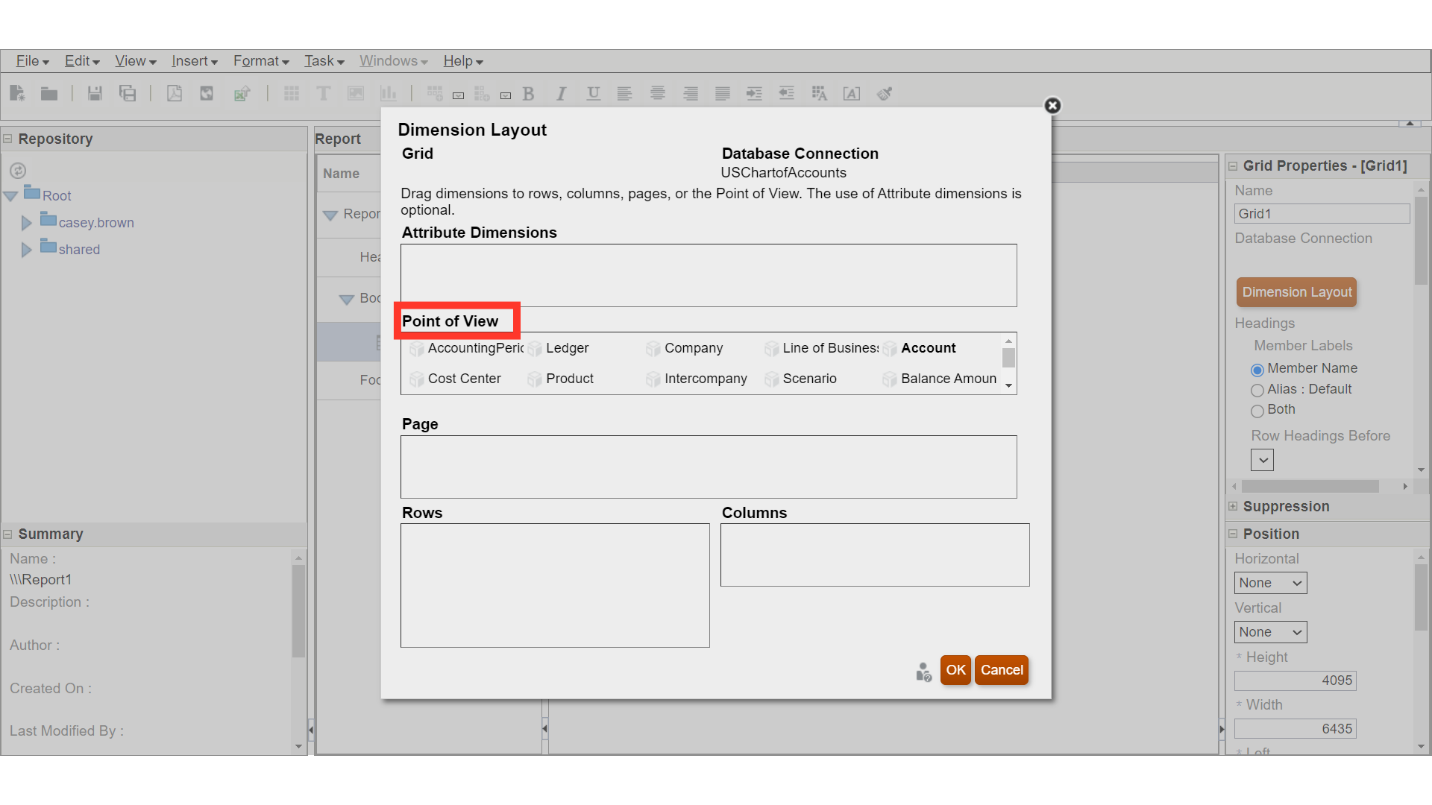
Drag and drop the details into Columns section to display the details in the column.
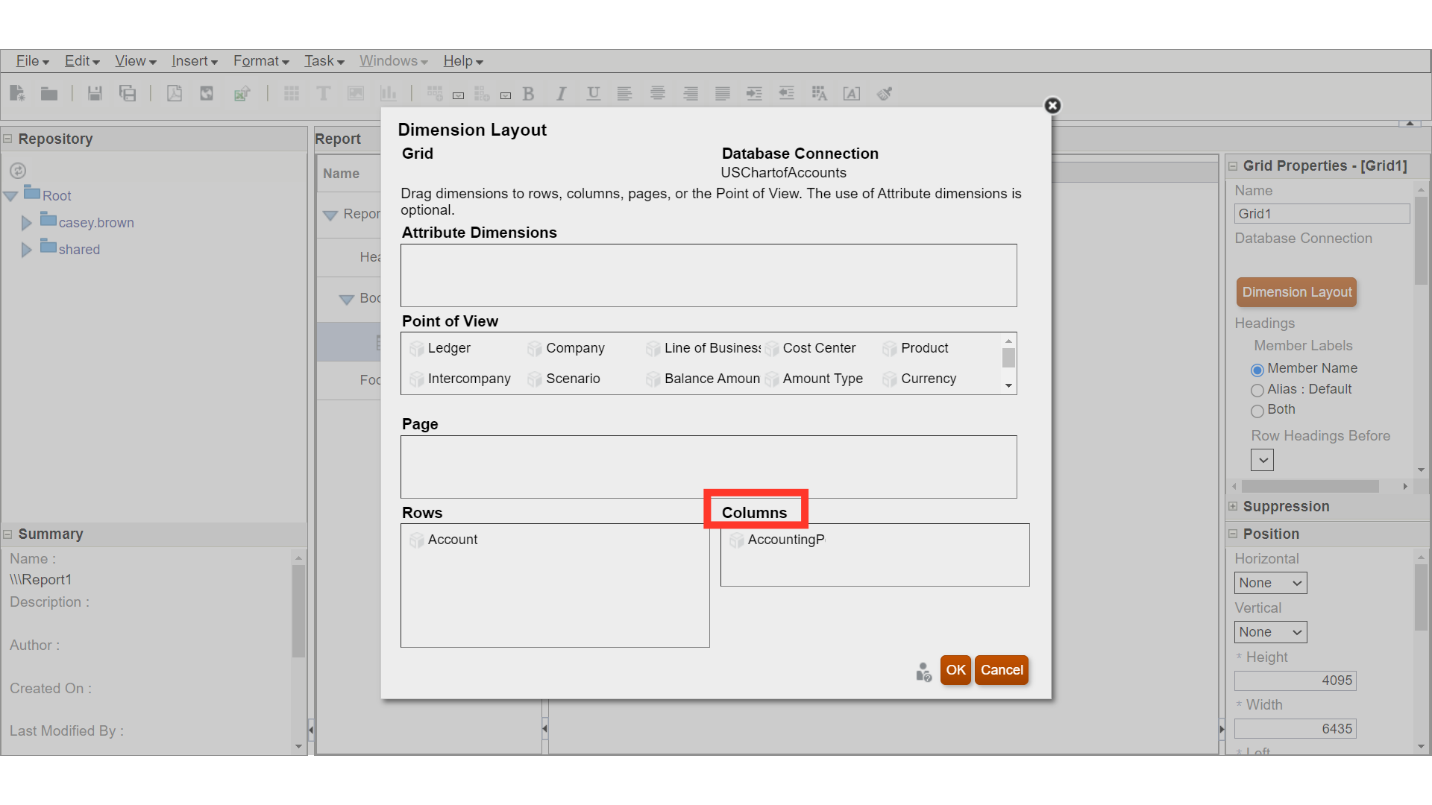
While, Drag and drop down under the Rows section to show dimensions at the Row level. Click on the OK button to Continue.
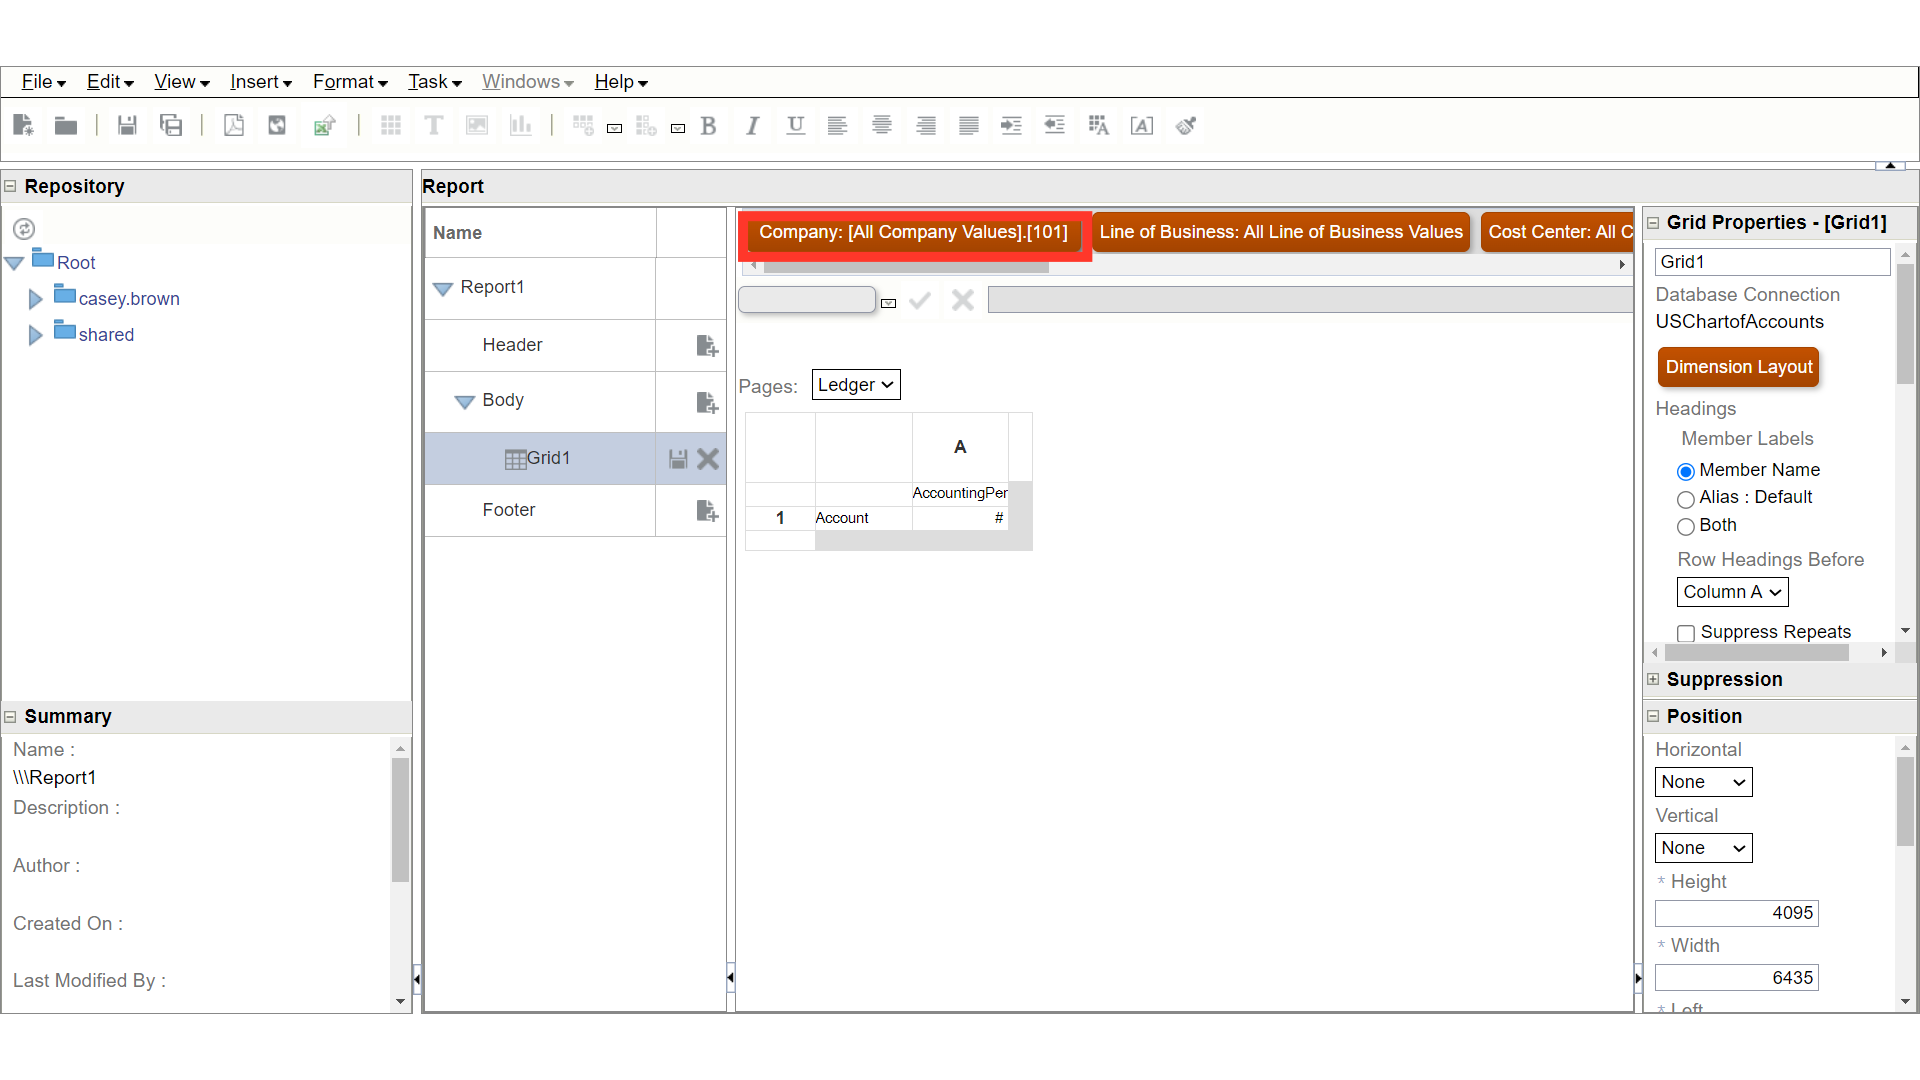
To select the constant value for Dimensions under the Point of view section, click on the Dimension.
Expand the Company segment to select the segments for running the report. Each single value of Dimension value can be selected under the All Company Values. While, other consists are Parent-Child hierarchy of Company values.
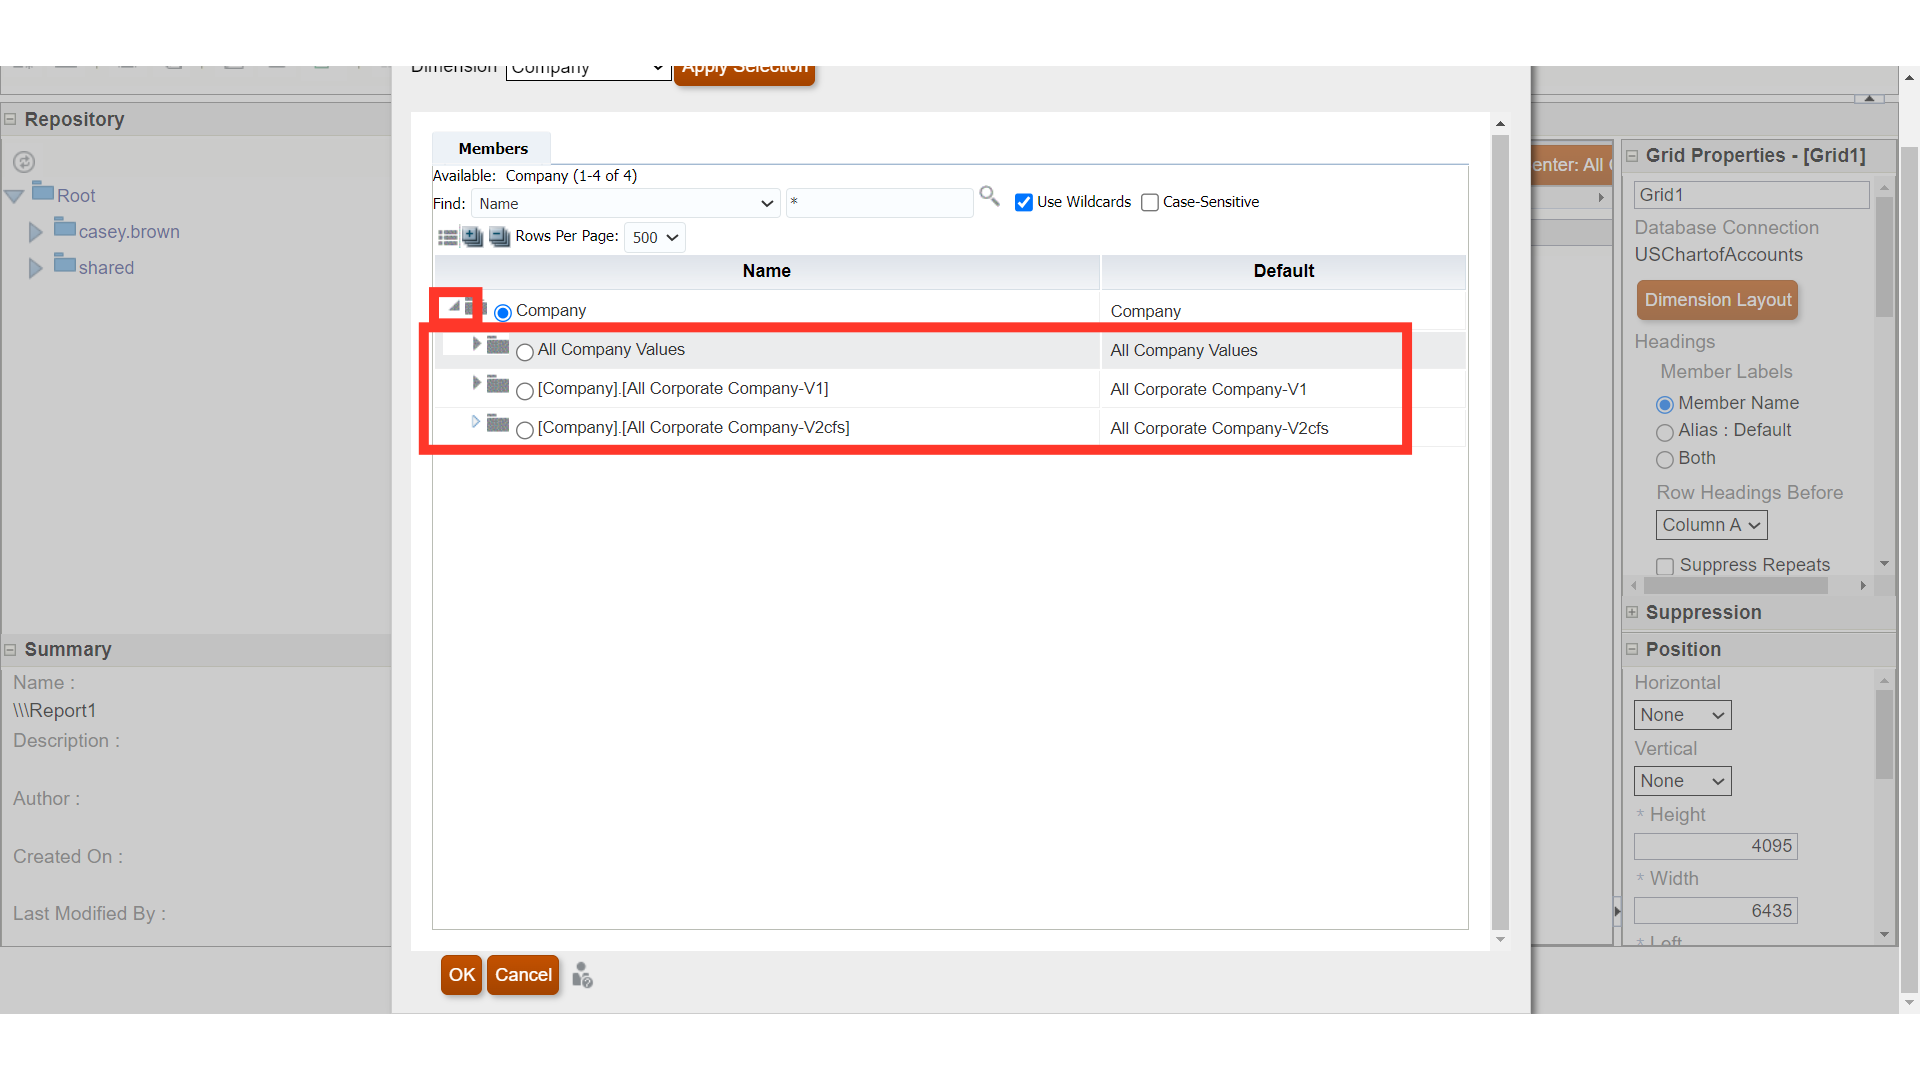
After selecting the checkbox against the segment value, click on the Ok button.
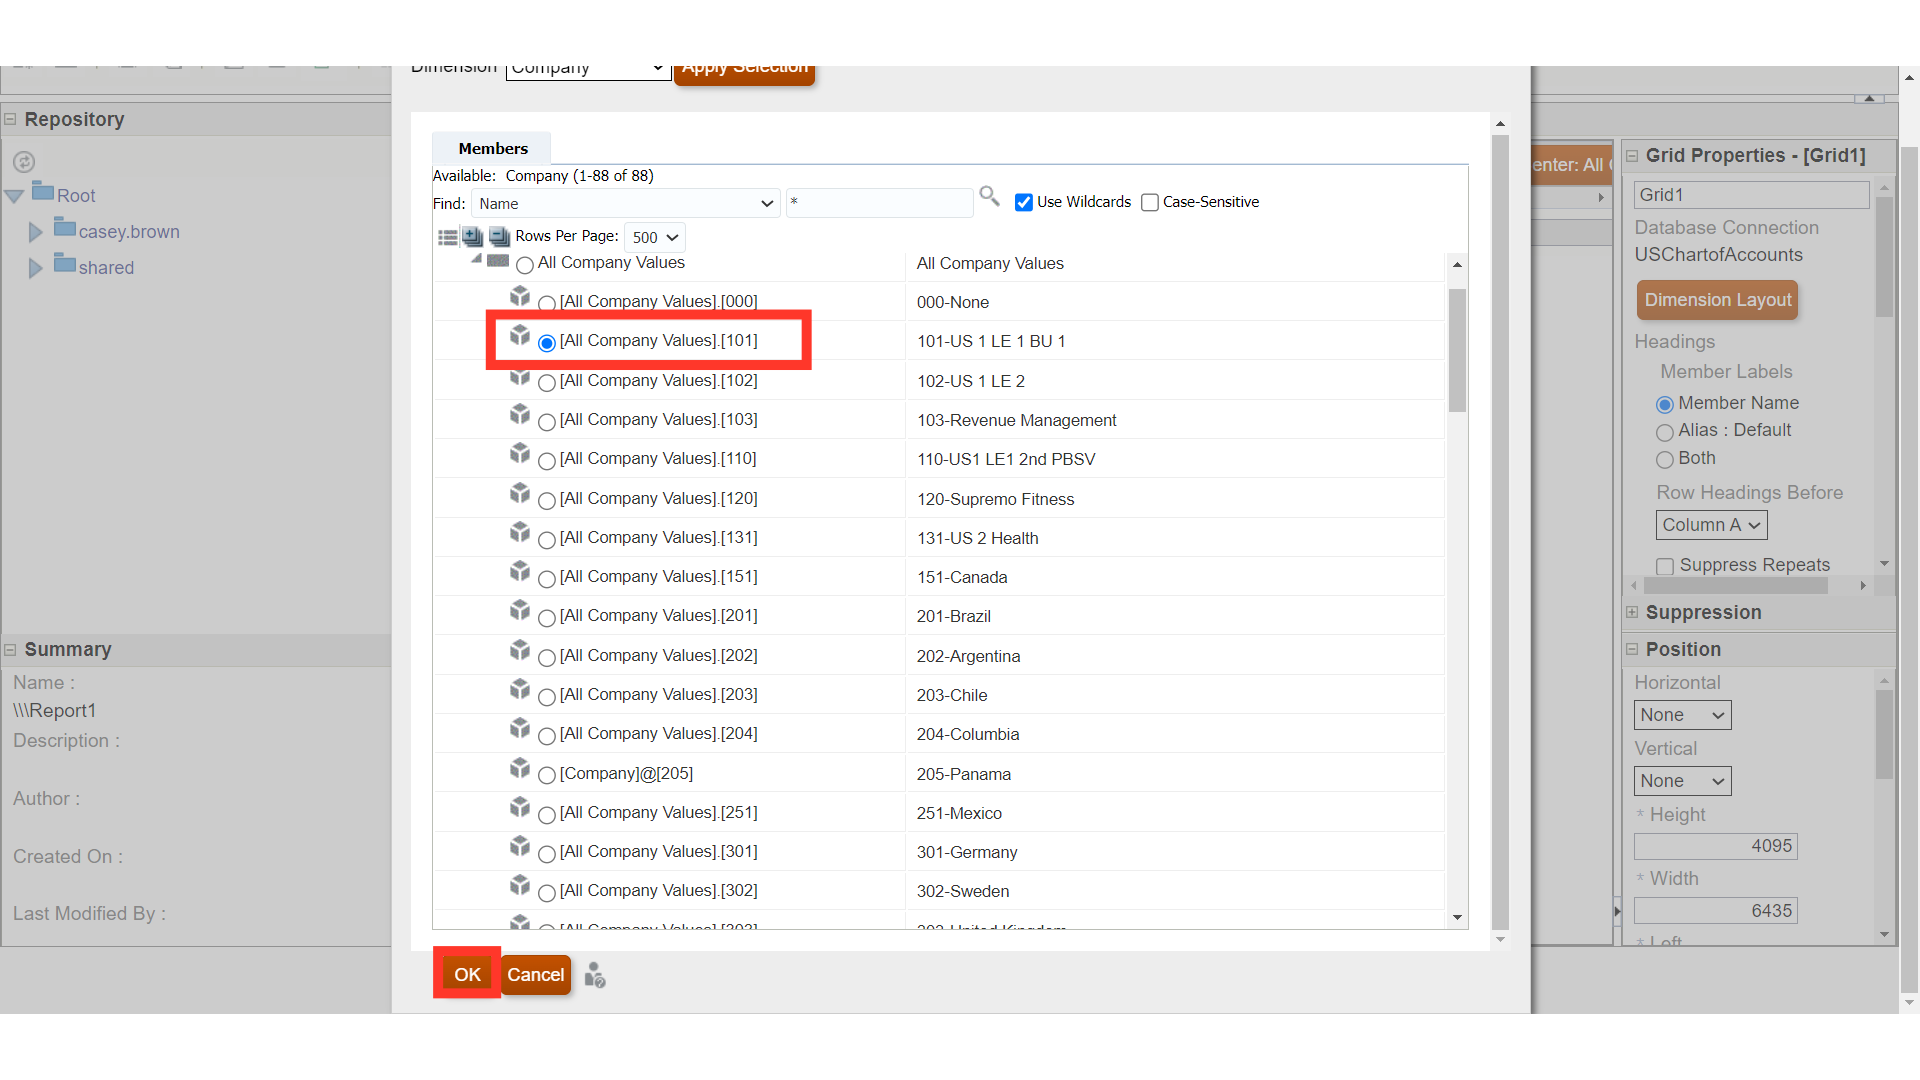
Again, click on the OK button to continue.

To select the other dimensions in Rows, Columns or Page section, click on the Dimension.
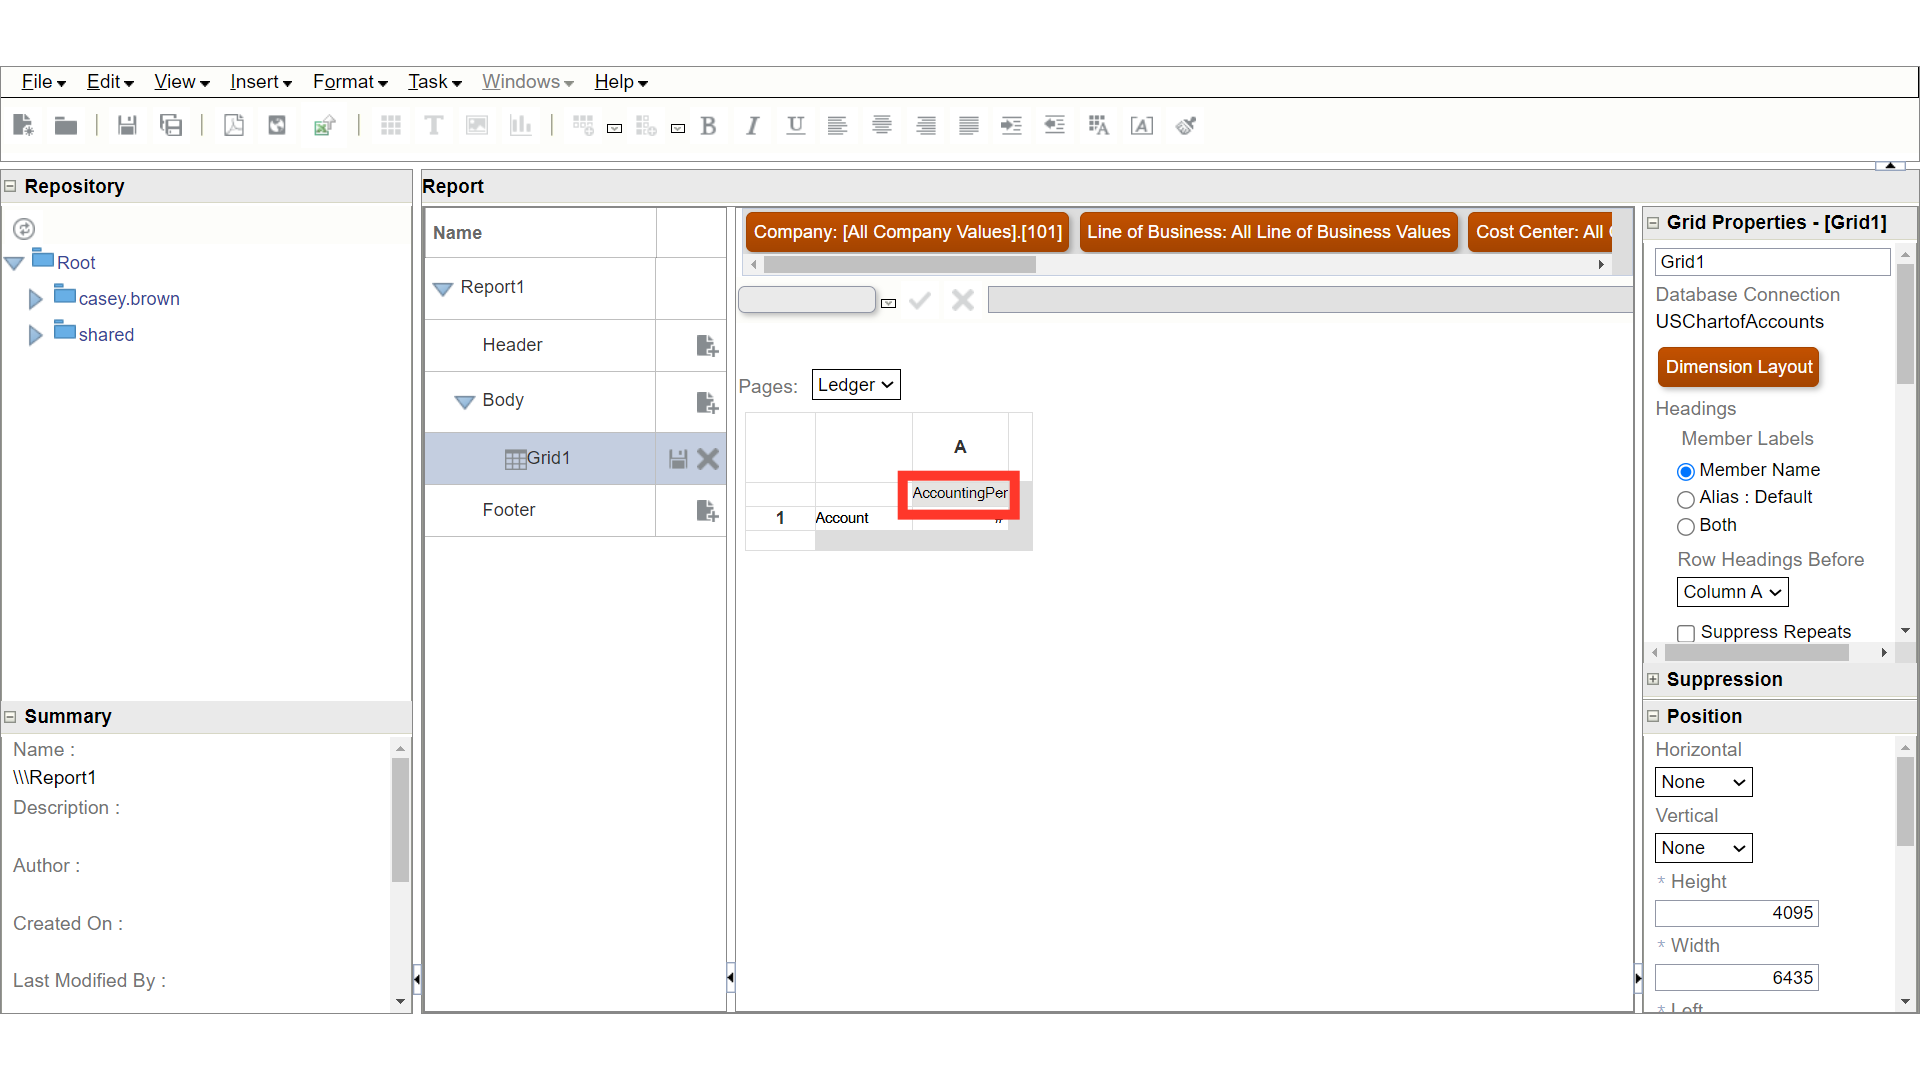
After that, again click on the same dimension to open the selection page.
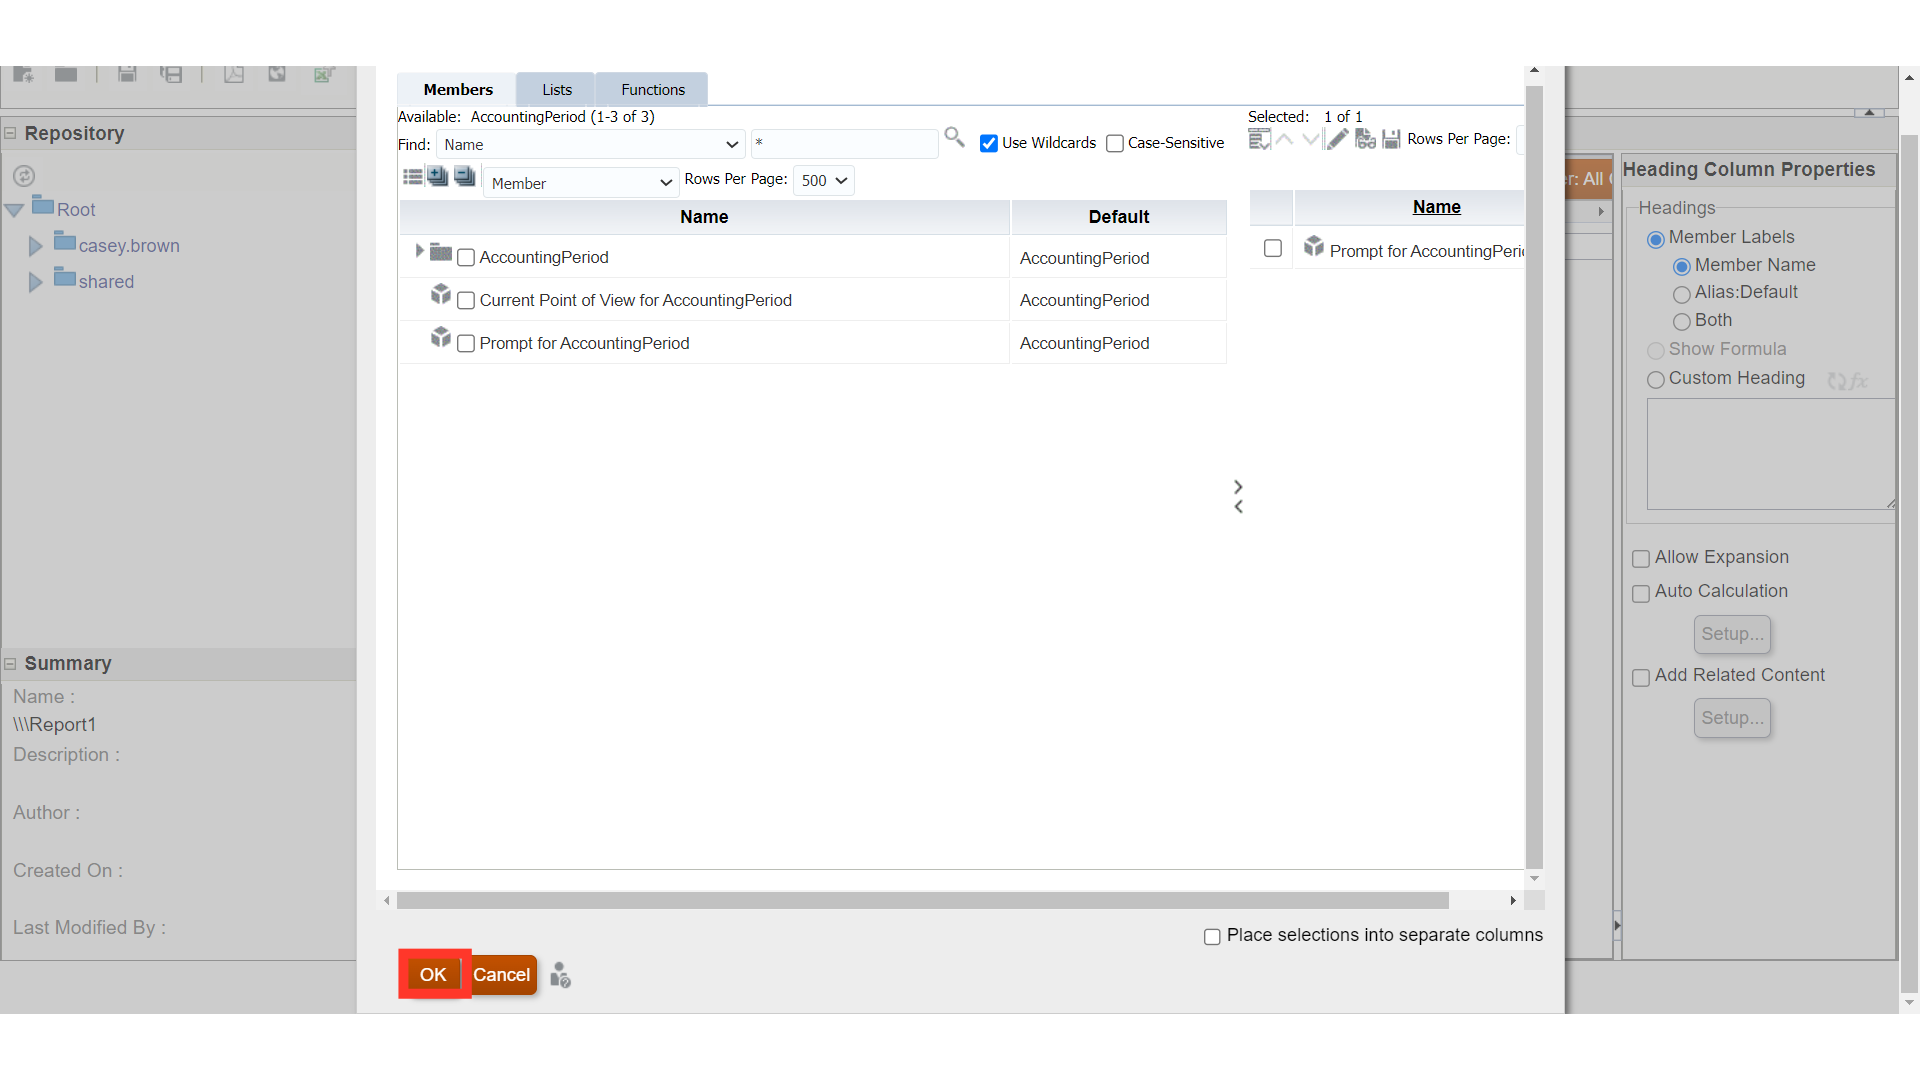
To keep the specific dimension value, select the values by expanding the highlighted section. While, to show the dimension as prompt enable the checkbox against Prompt for Dimension value and select right side facing arrow to move the under-selected section.
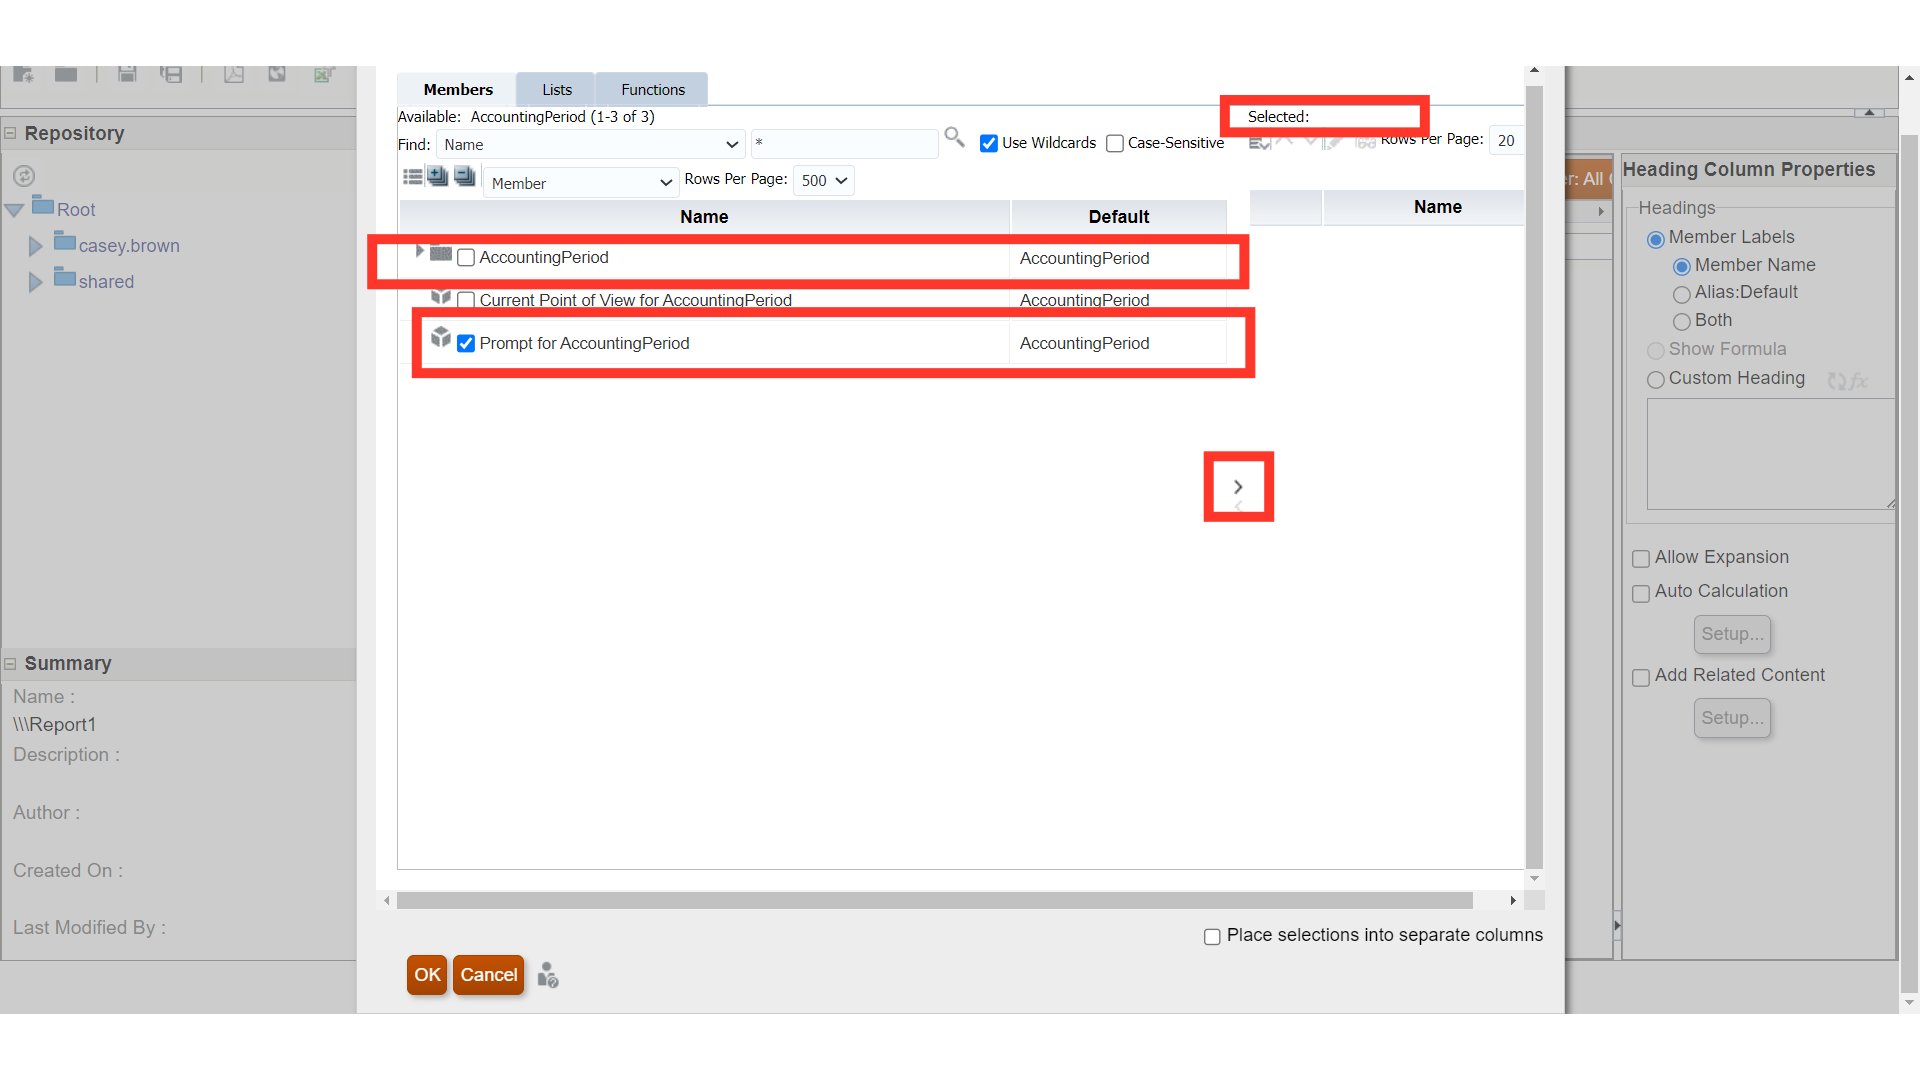
Click on the Ok button to proceed.
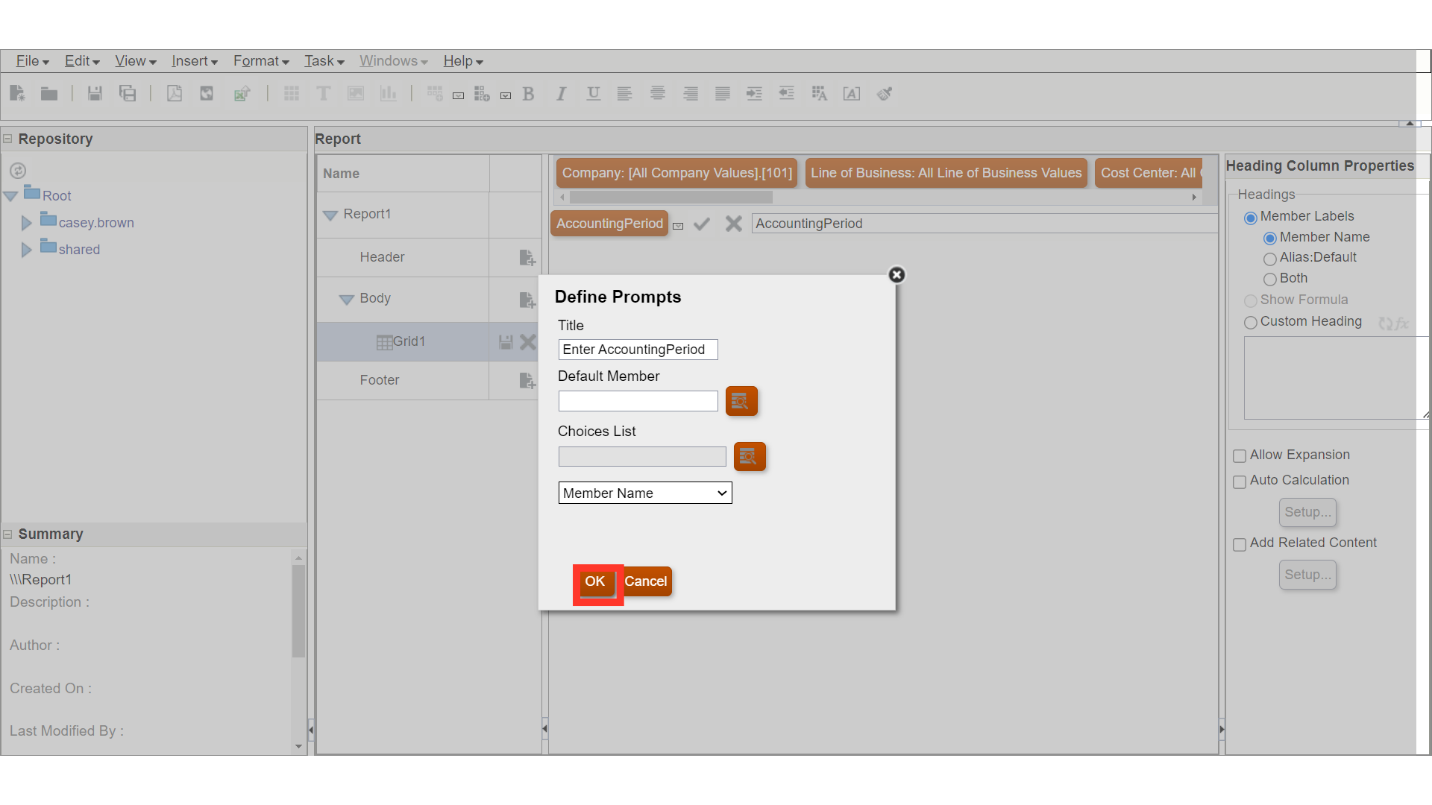
Enter the Prompt name under the Title field. Default member can also be mentioned, and then click on the OK button.
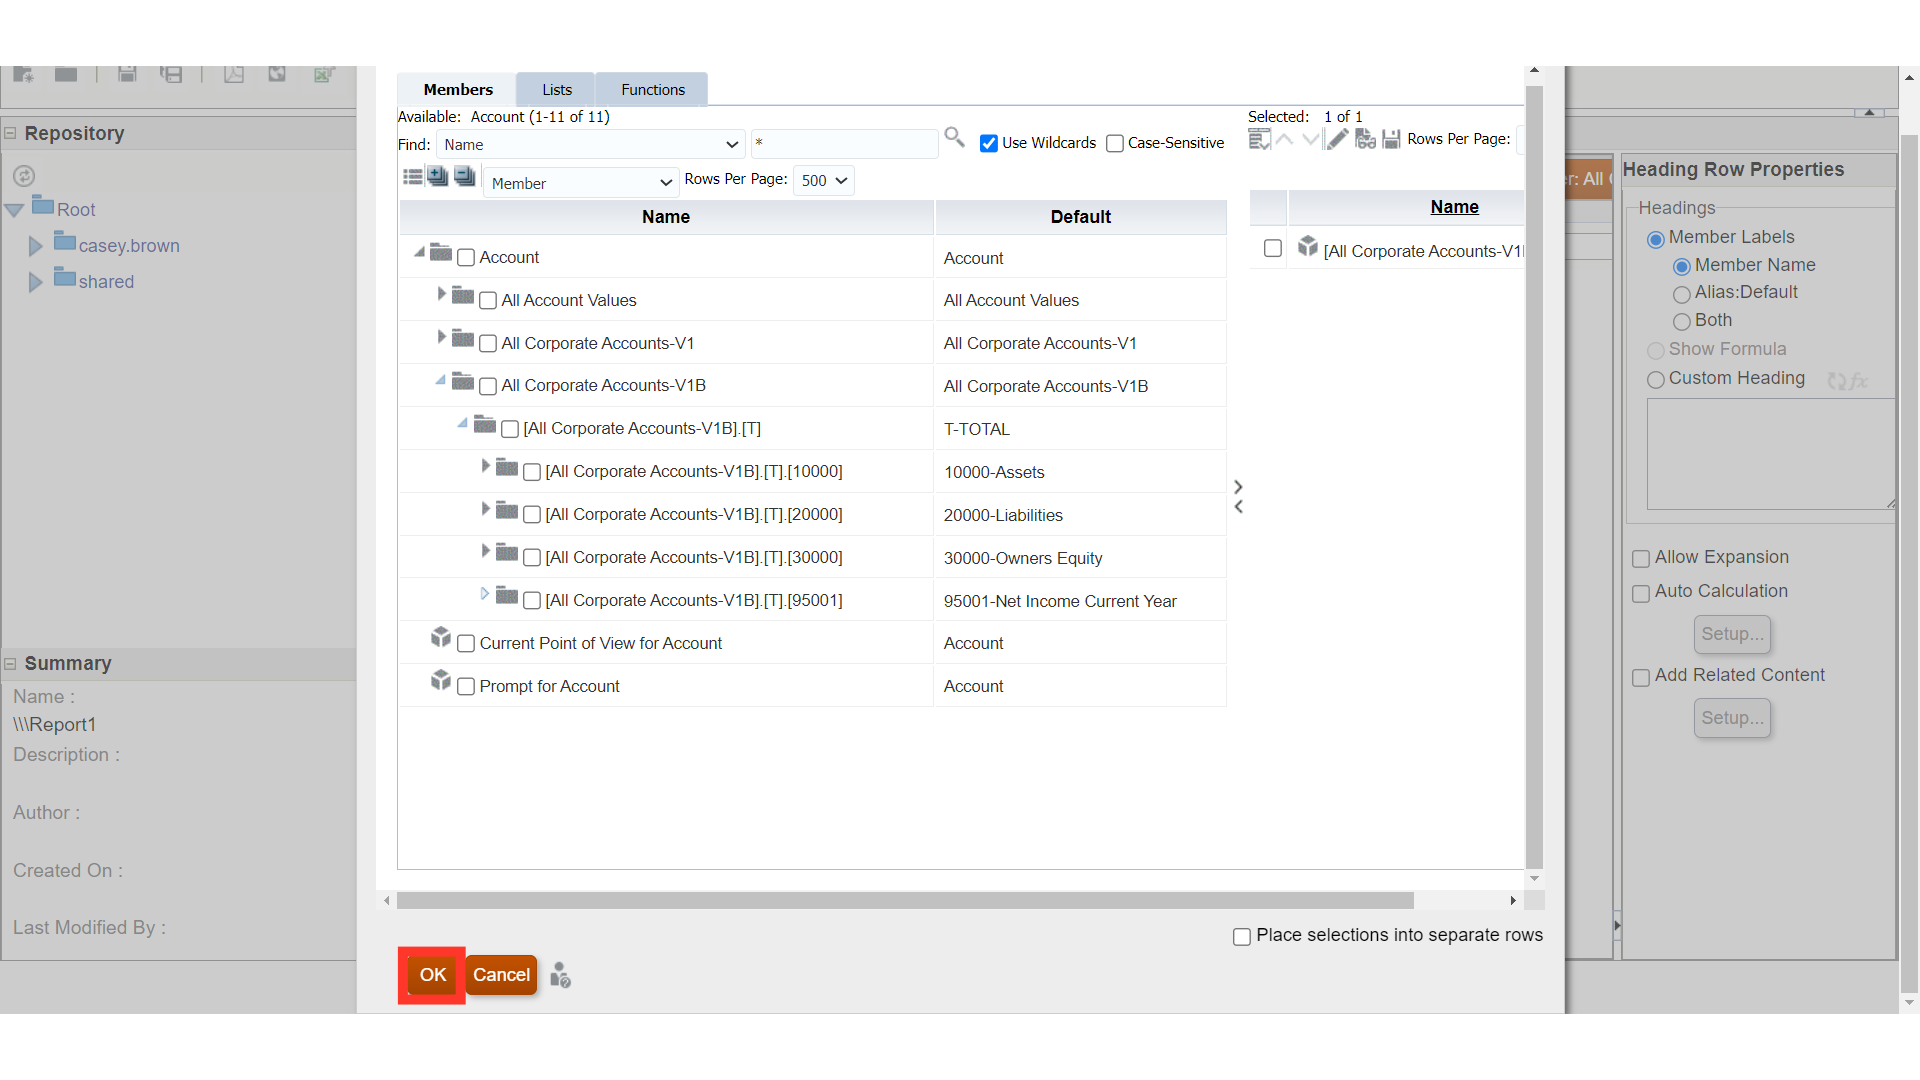
Click on the Dimension under the Rows section.
Click on the highlighted button to open the dimension selection page.

After selecting the dimension value, click on the highlighted icon to move the value under selected section.
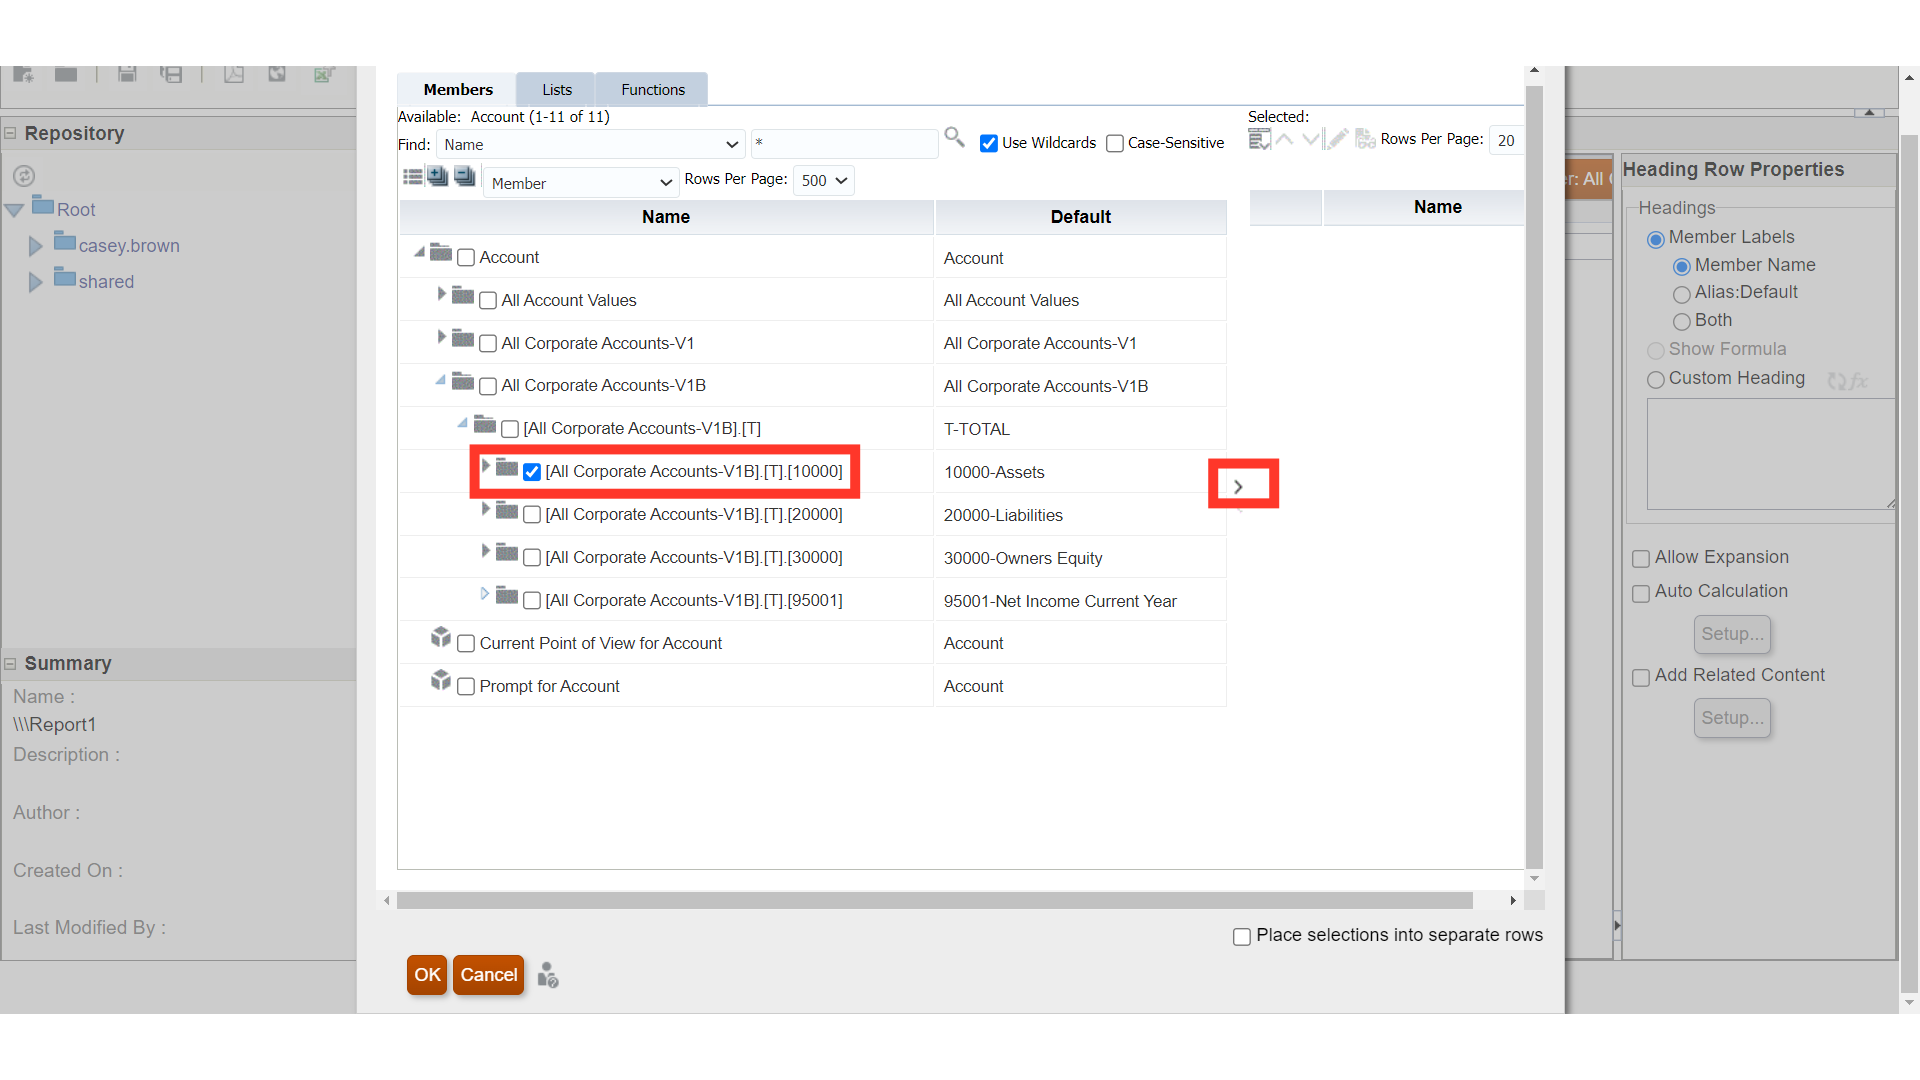
Choose the “OK” button to close this window.
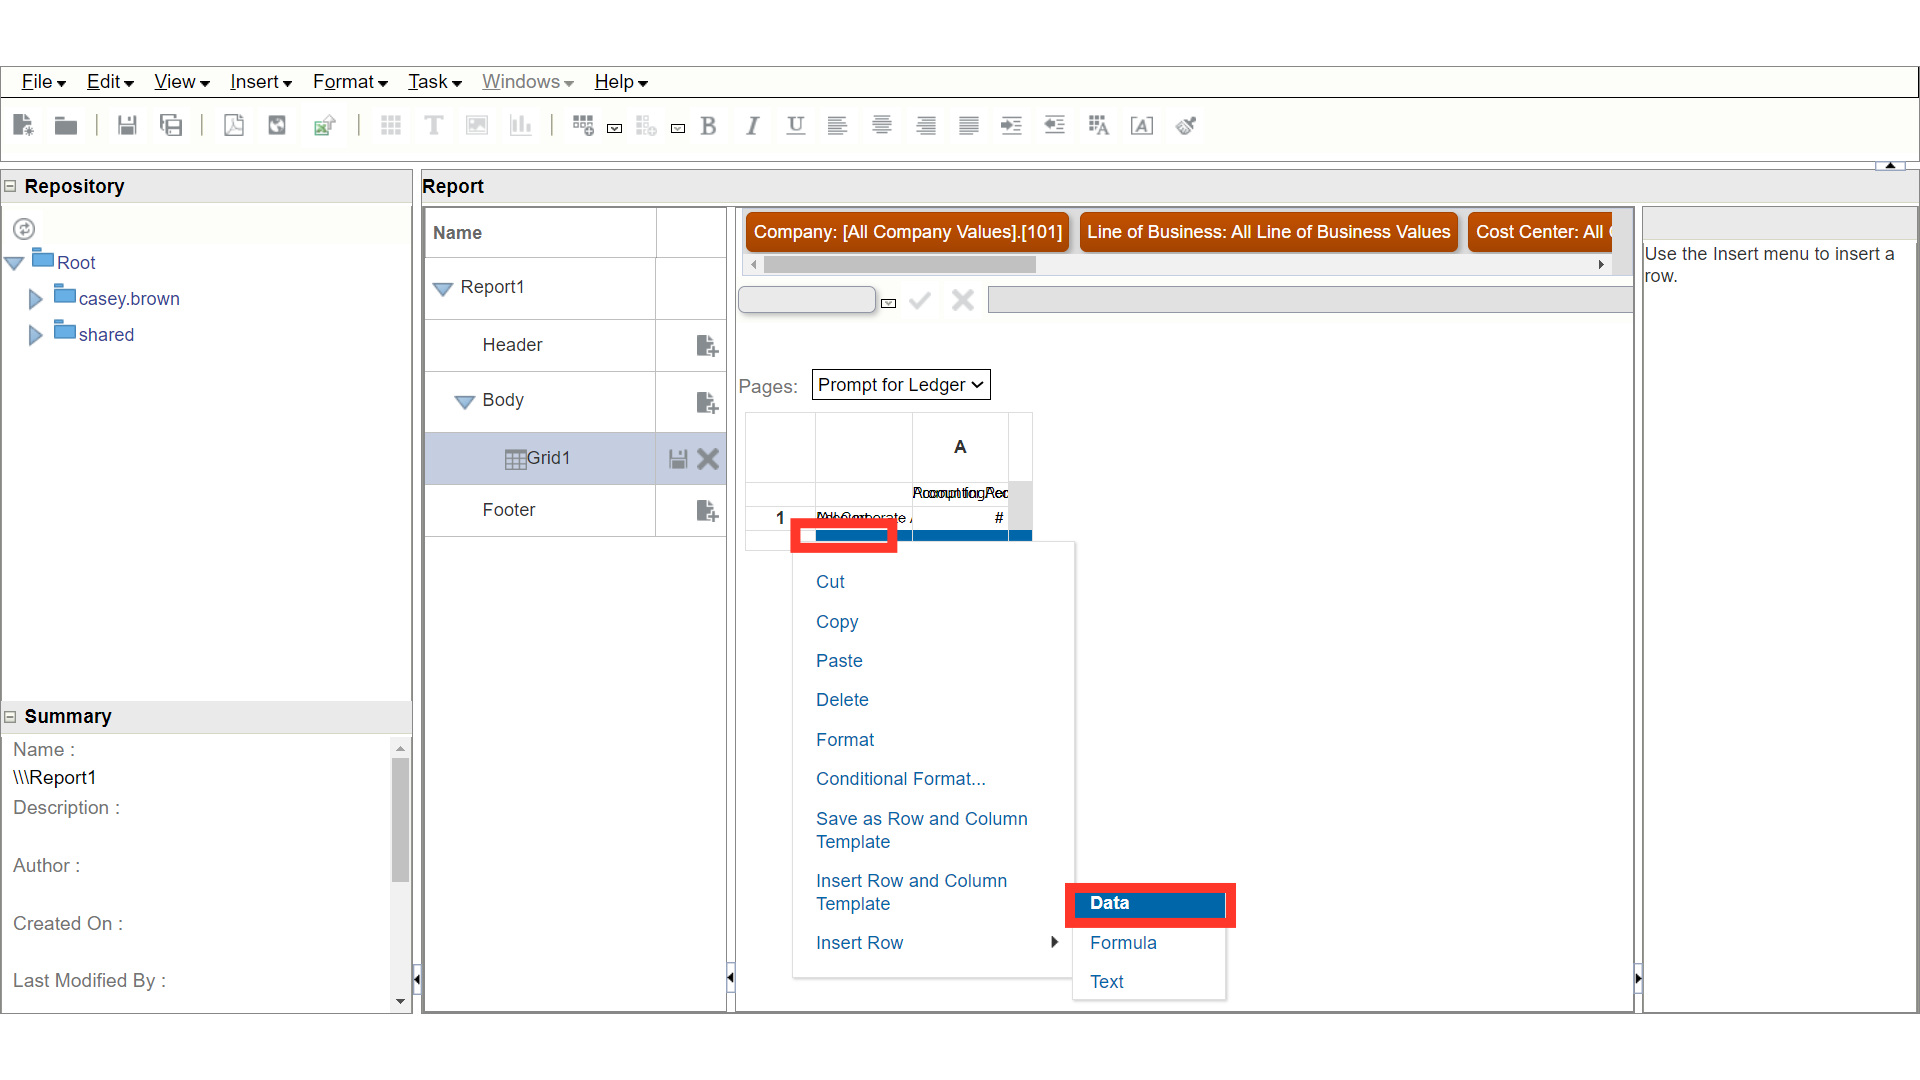
To insert another row, right click and select the Data by expanding Insert Row section.
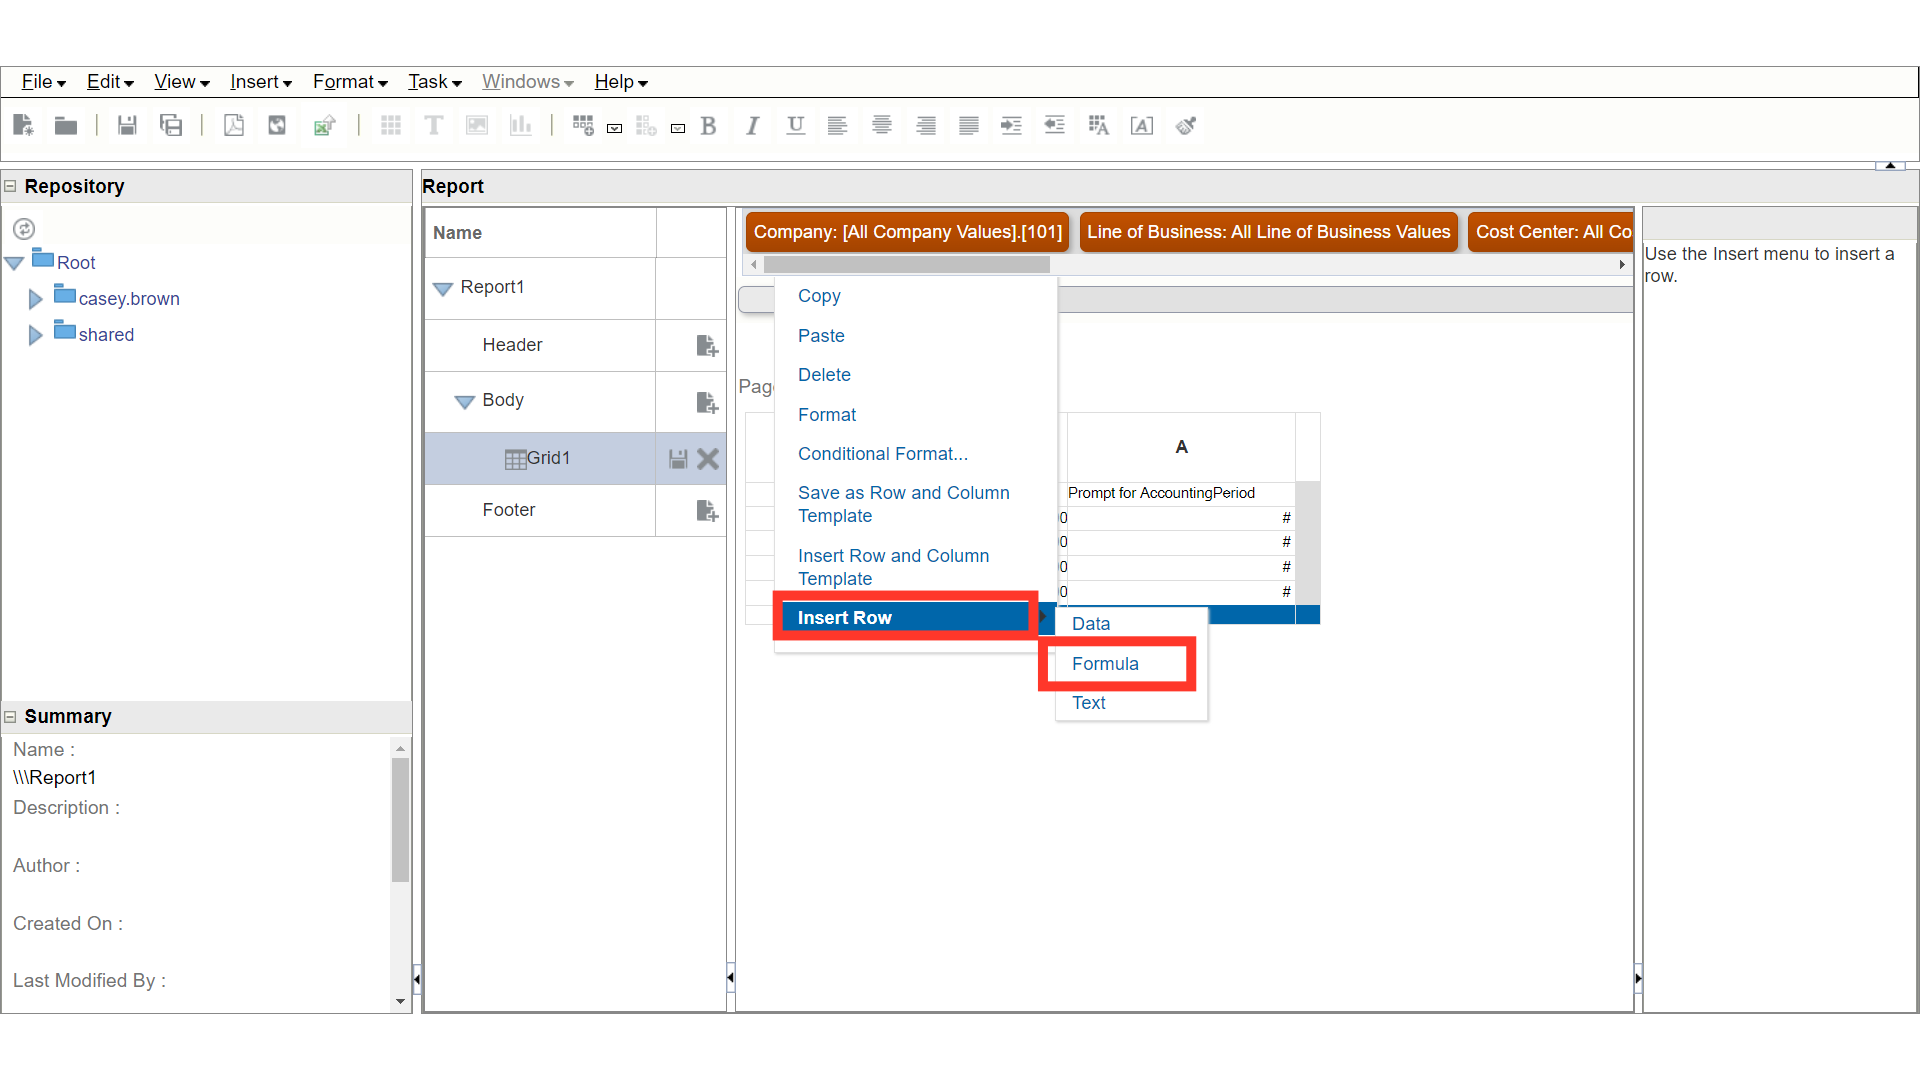
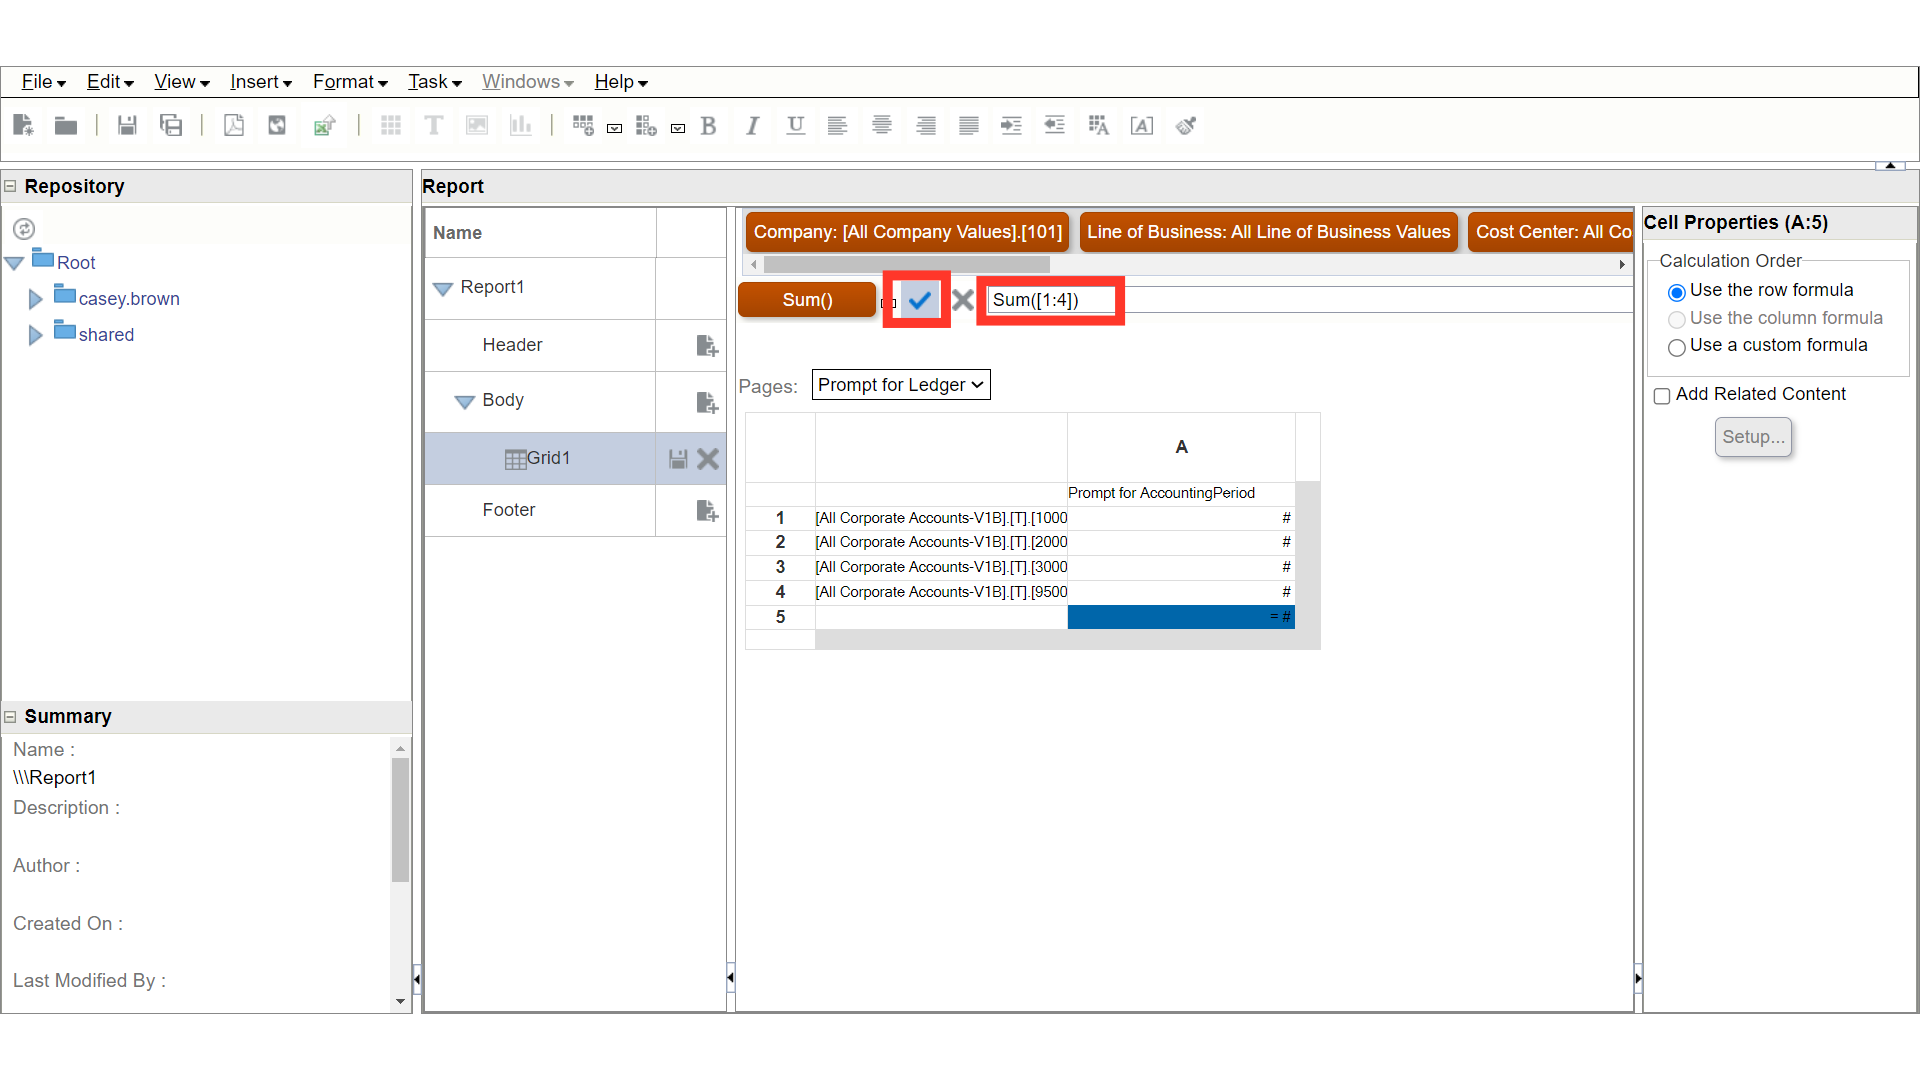
To insert a formula, right click on the cell and select Formula under Insert Row.
To insert a type of formula, select the formula from the List of values.
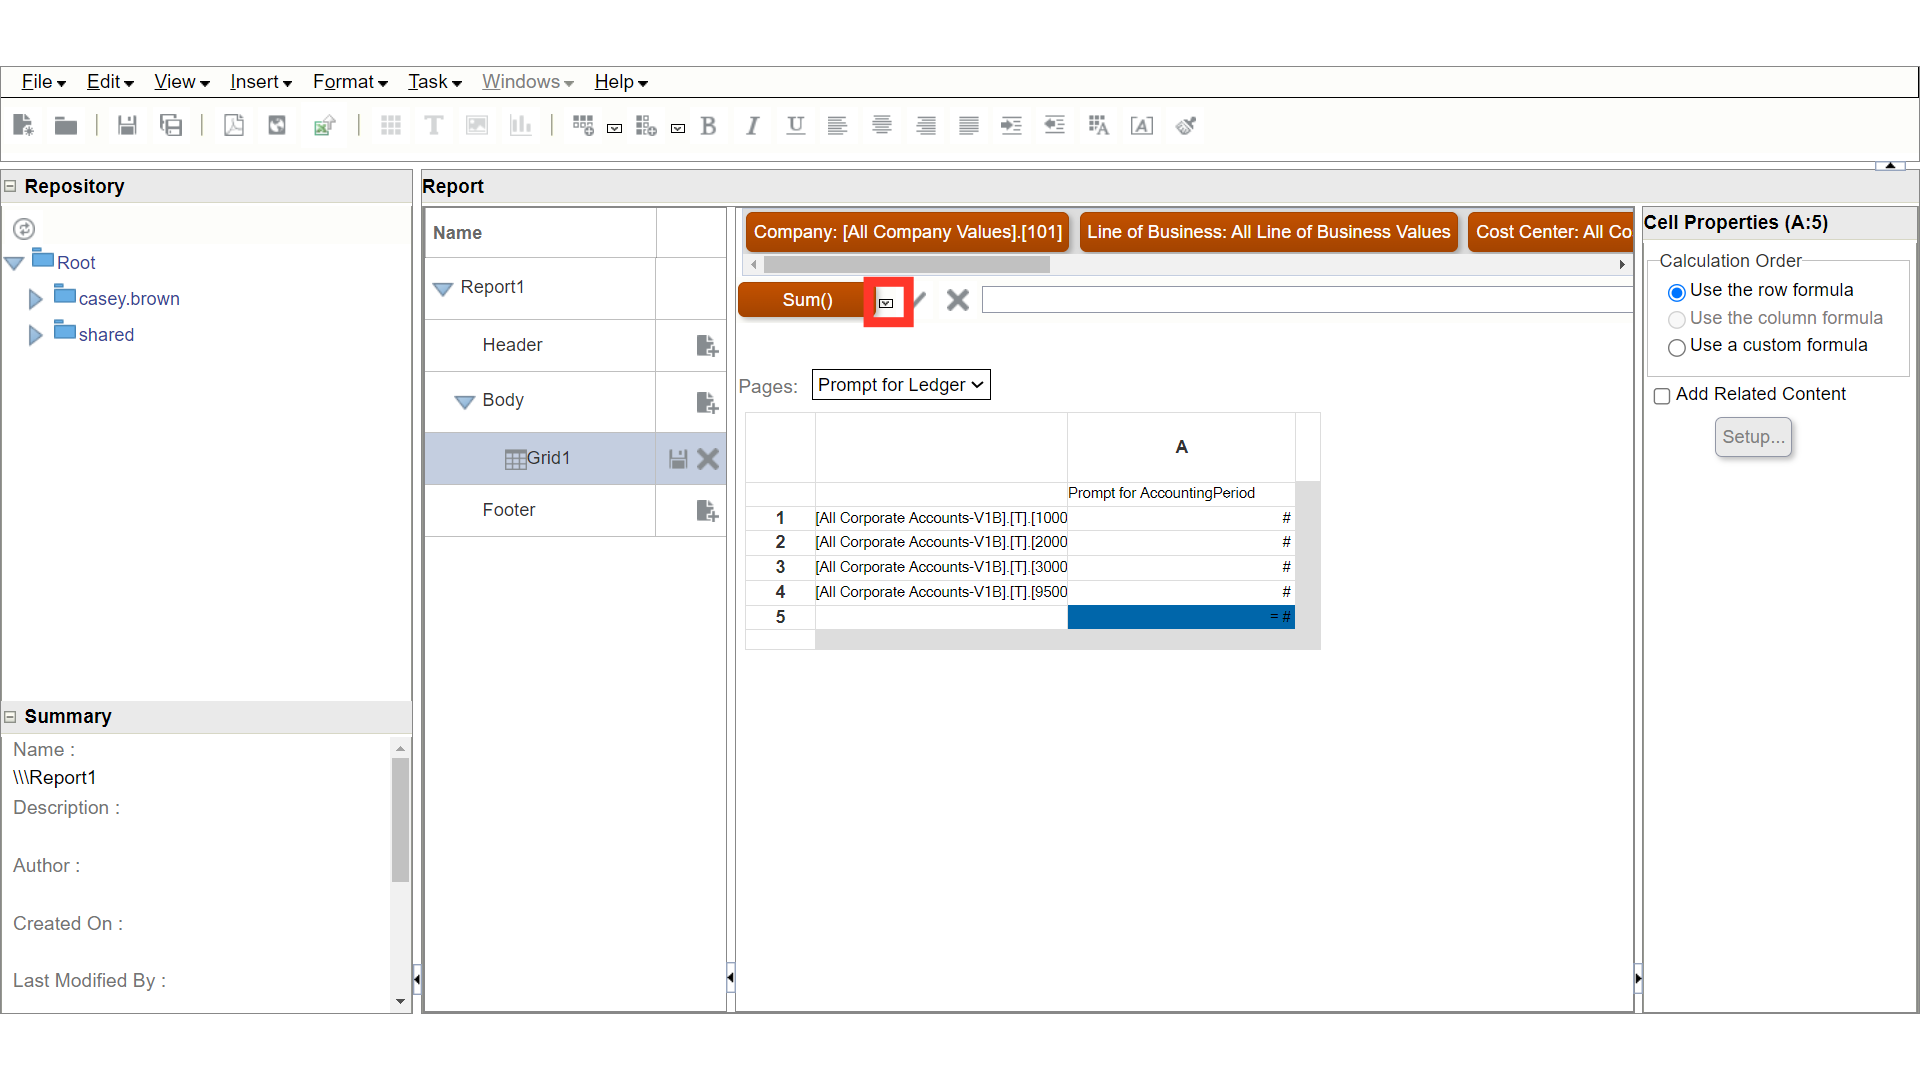
After entering the formula, to validate the Formula click on the Tick icon.
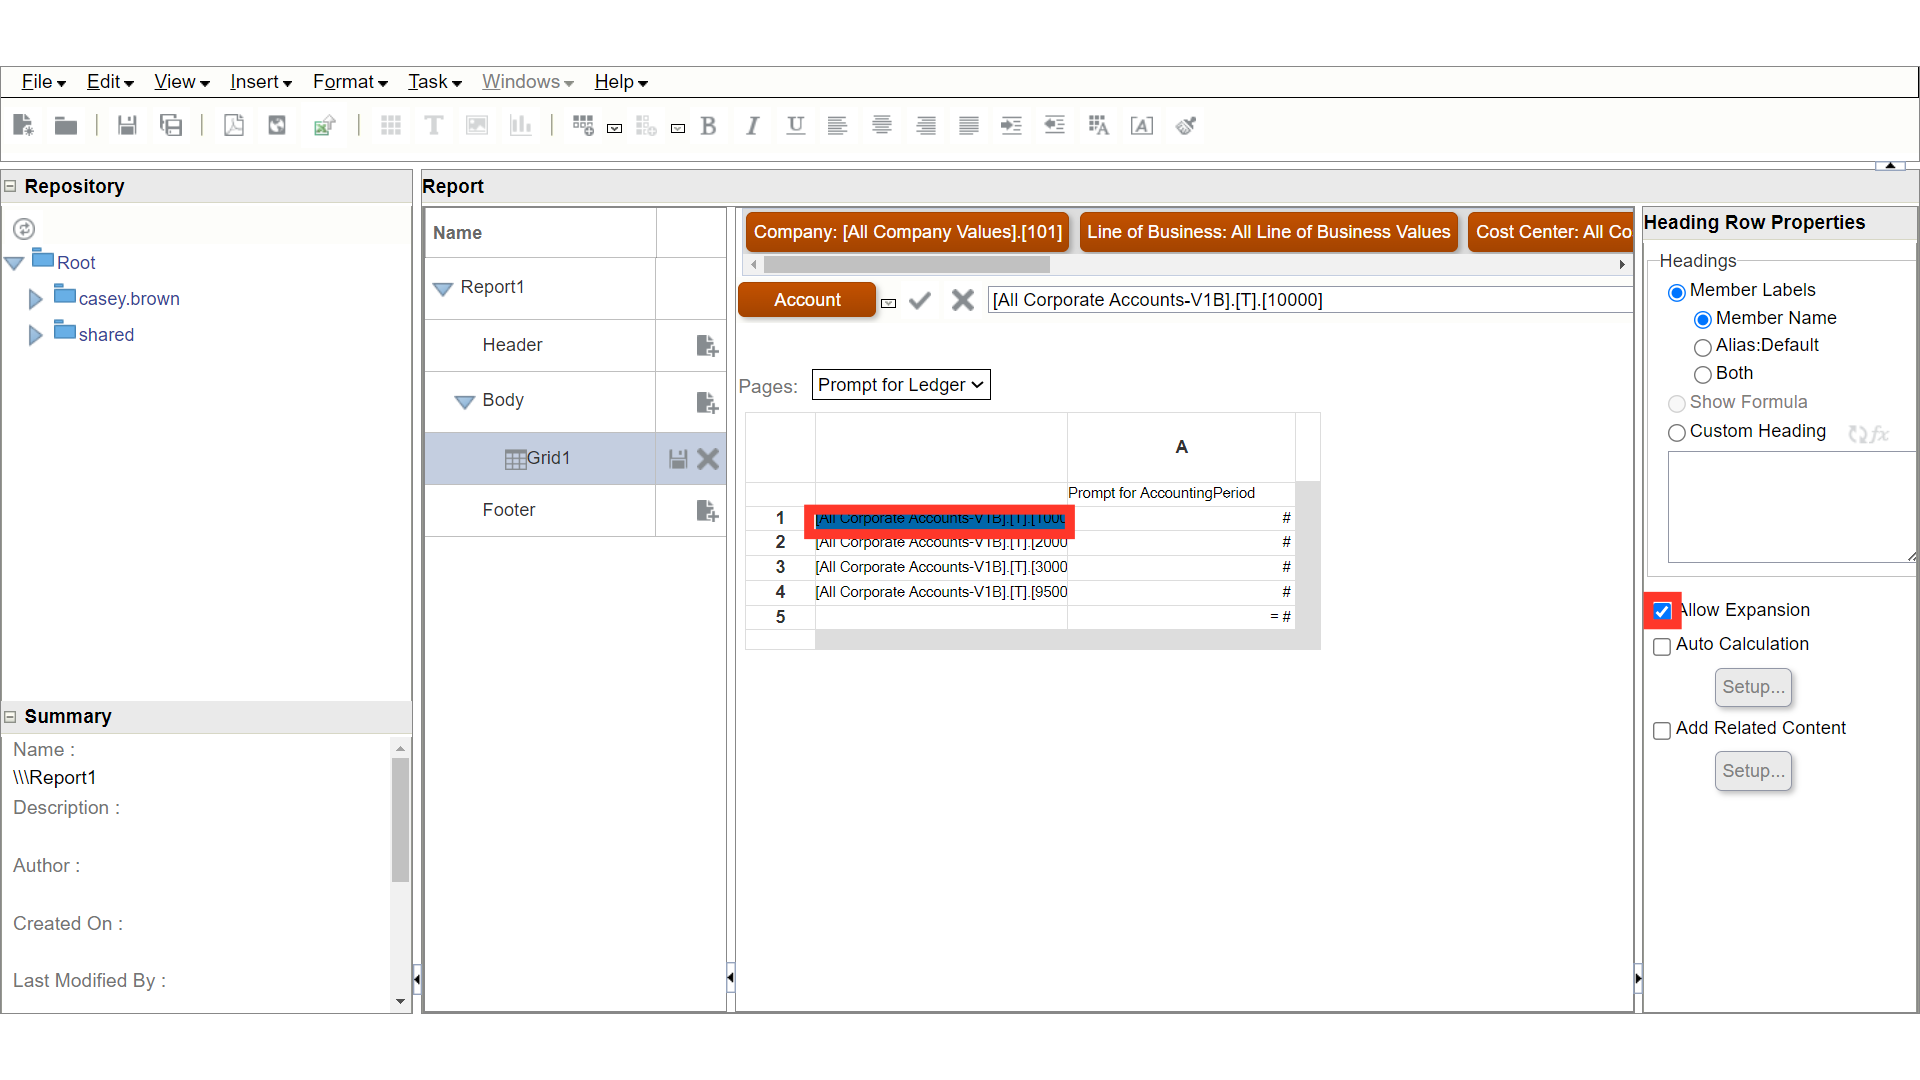
To expand the Dimension to child values, select the dimension and enable the check box against Allow Expansion.
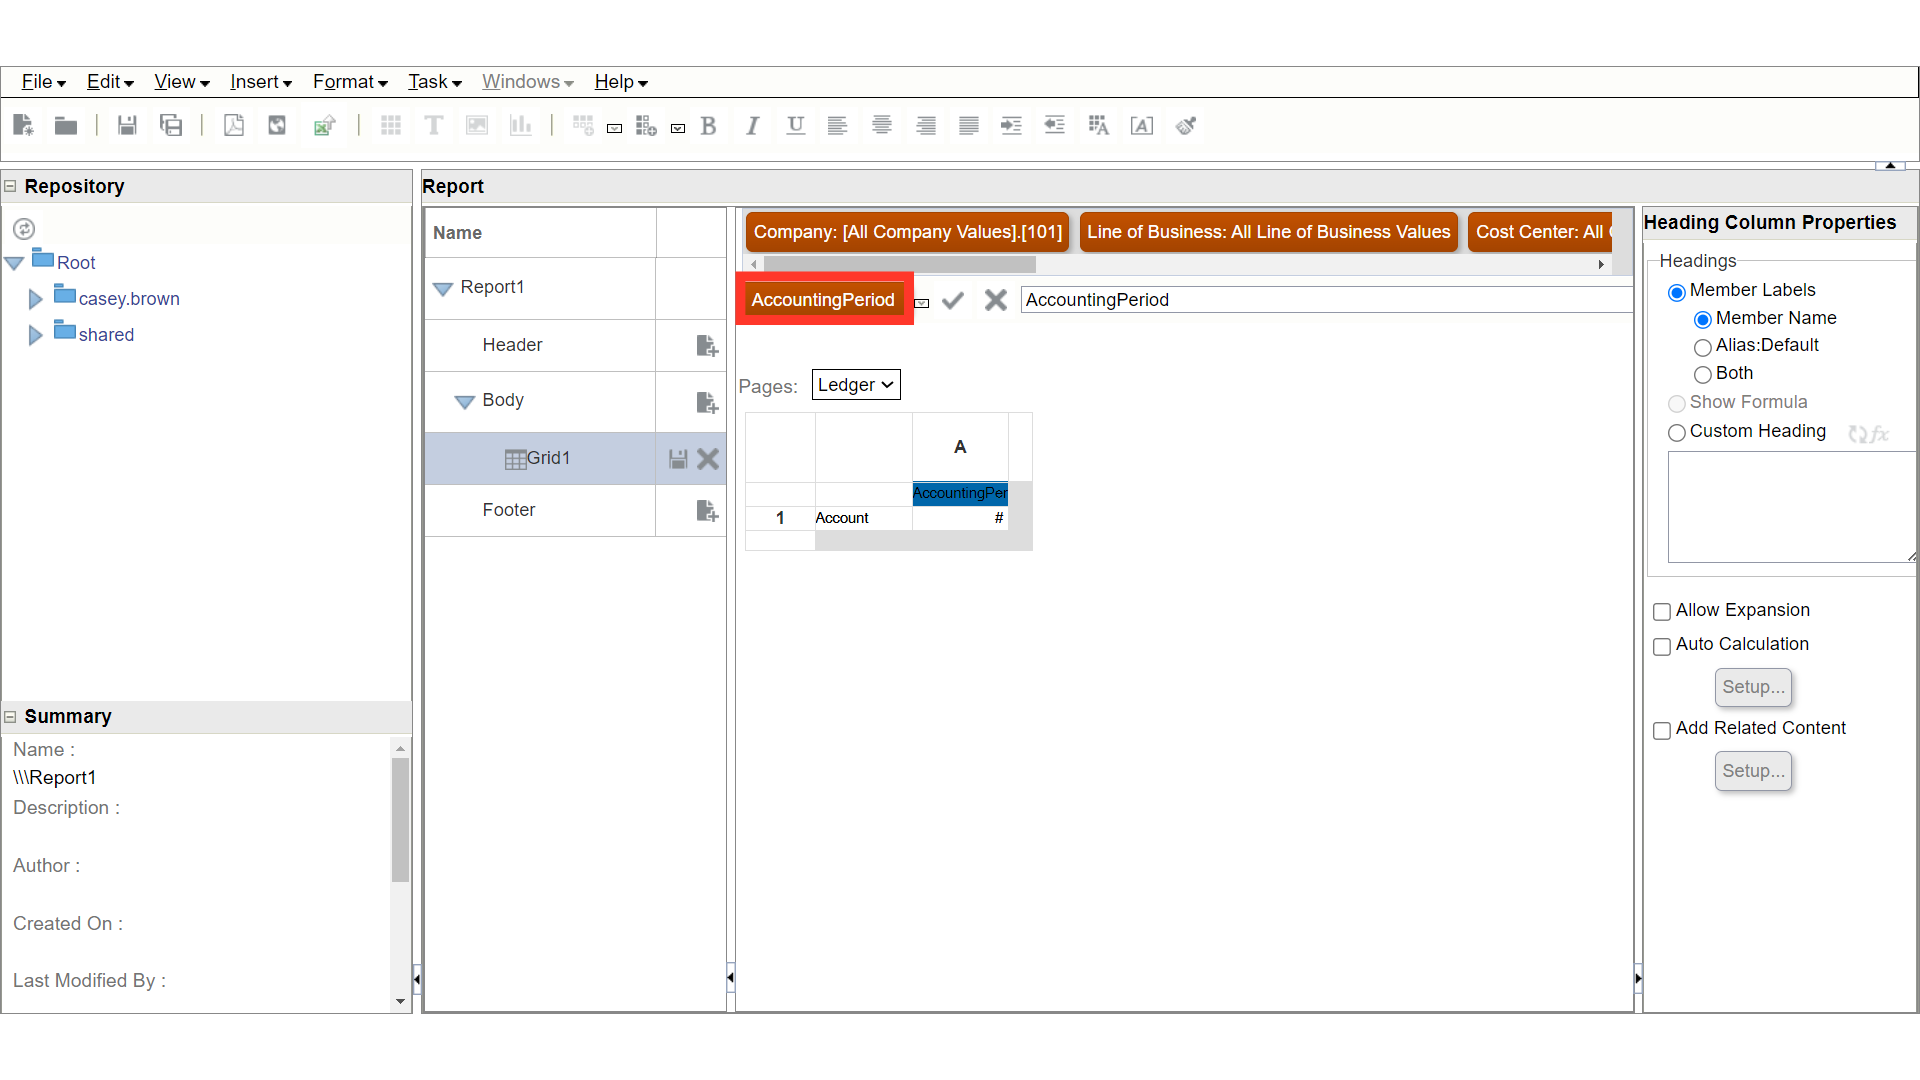
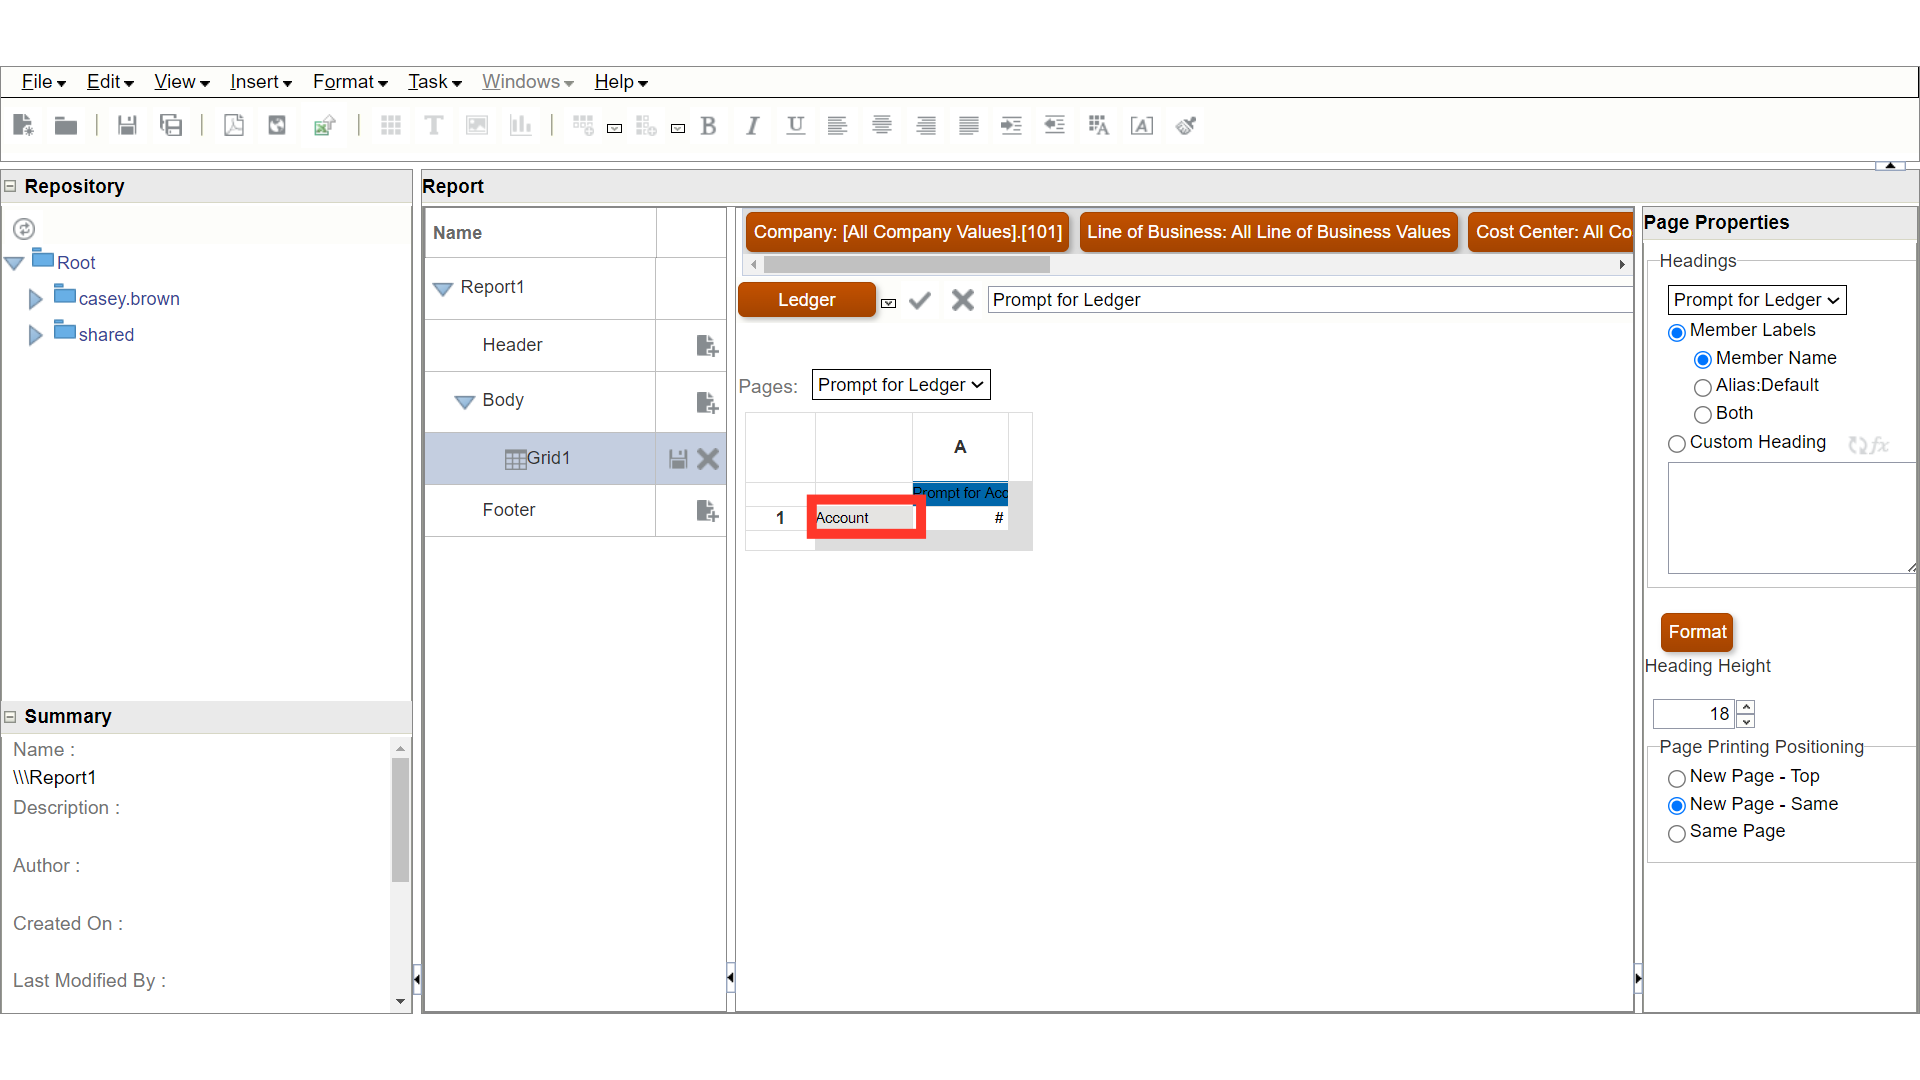
To enter any custom name click on the Row or column and select checkbox against Custom Heading.
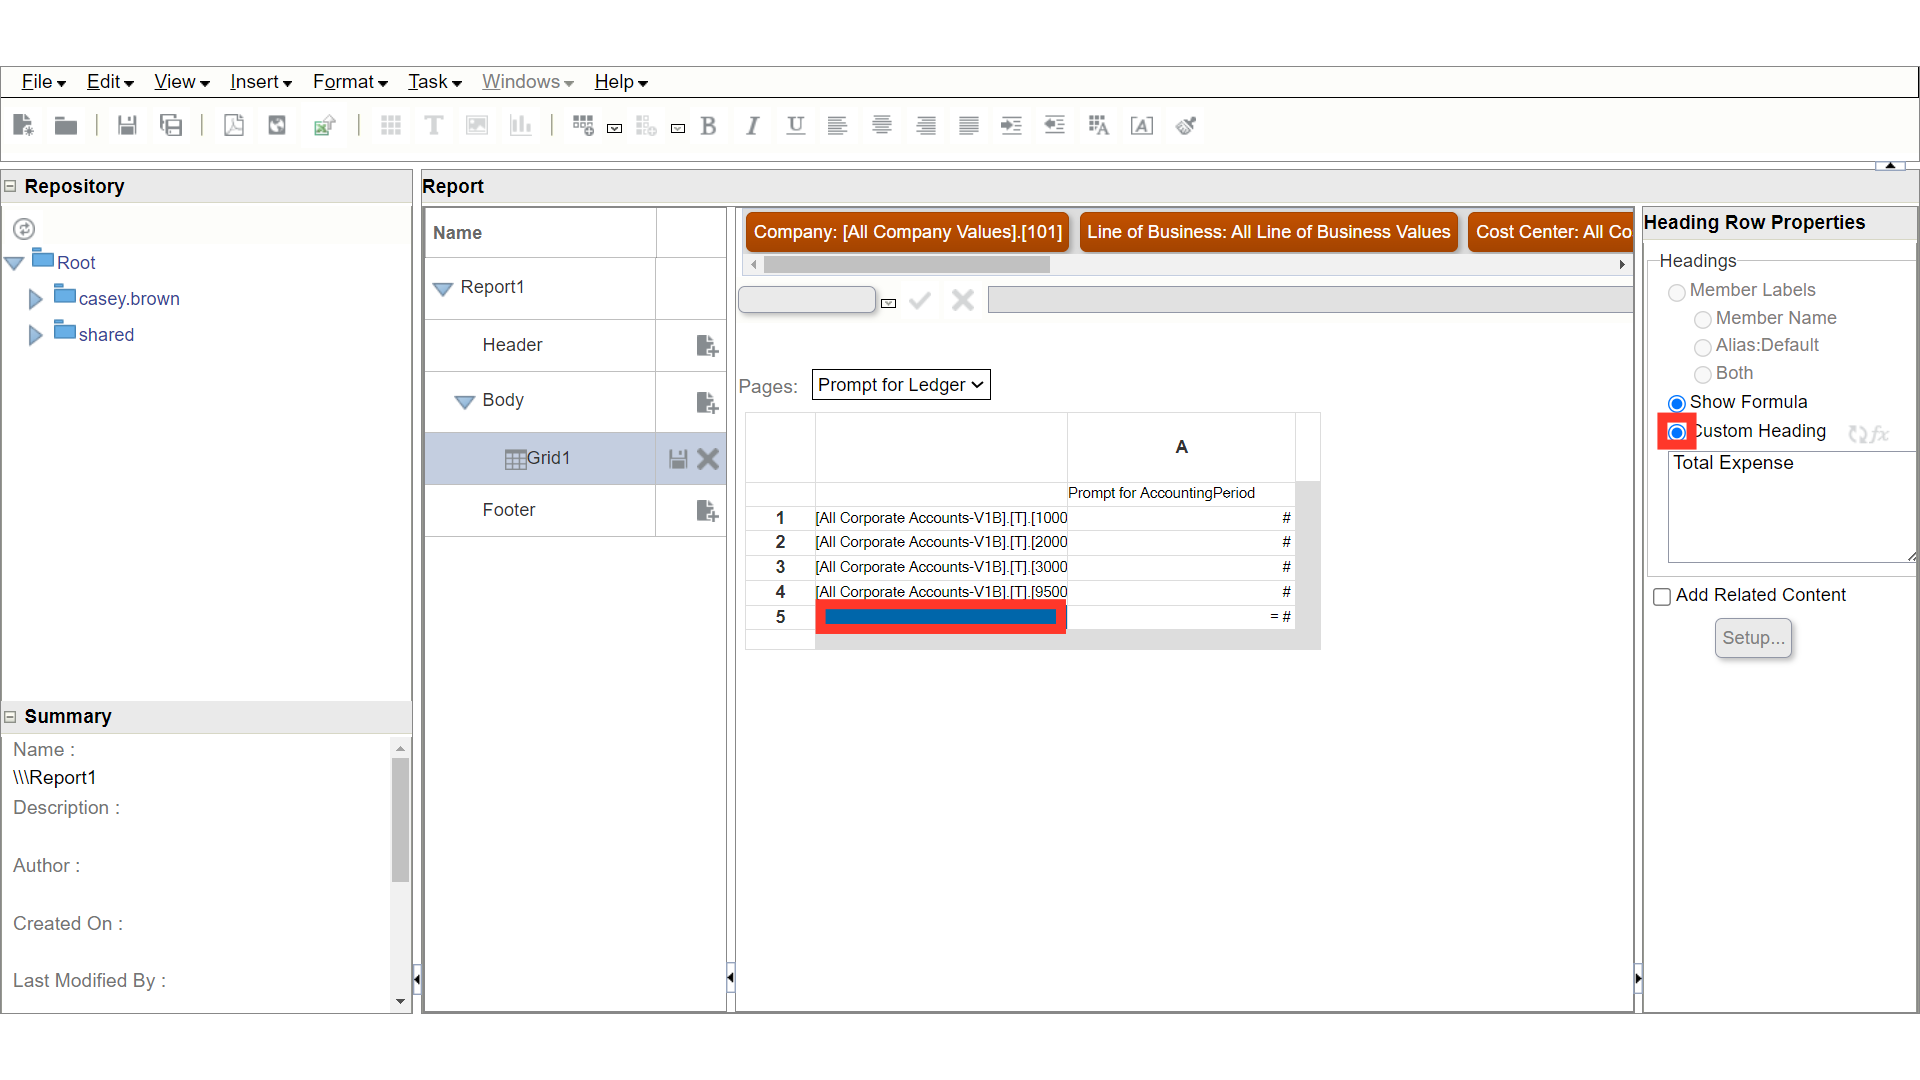
After entering the name, click on the Refresh icon to save the name.

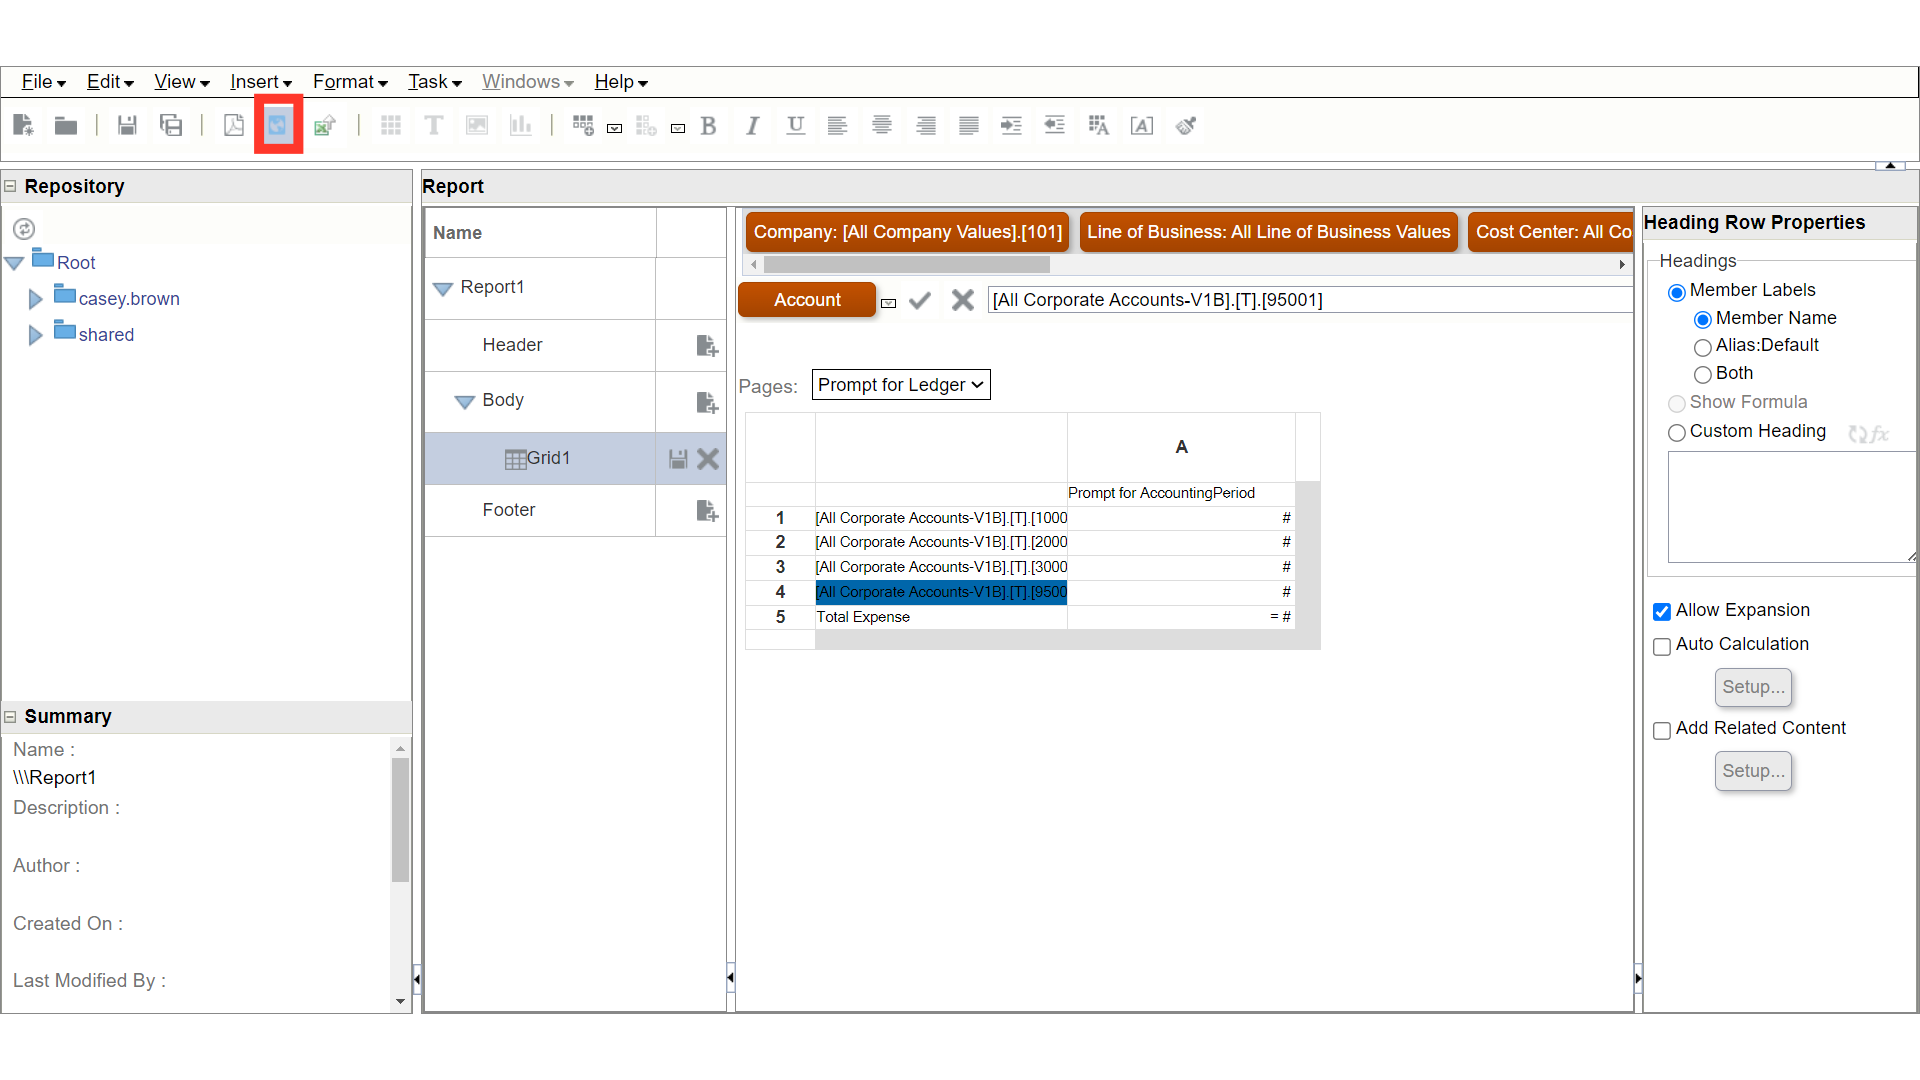
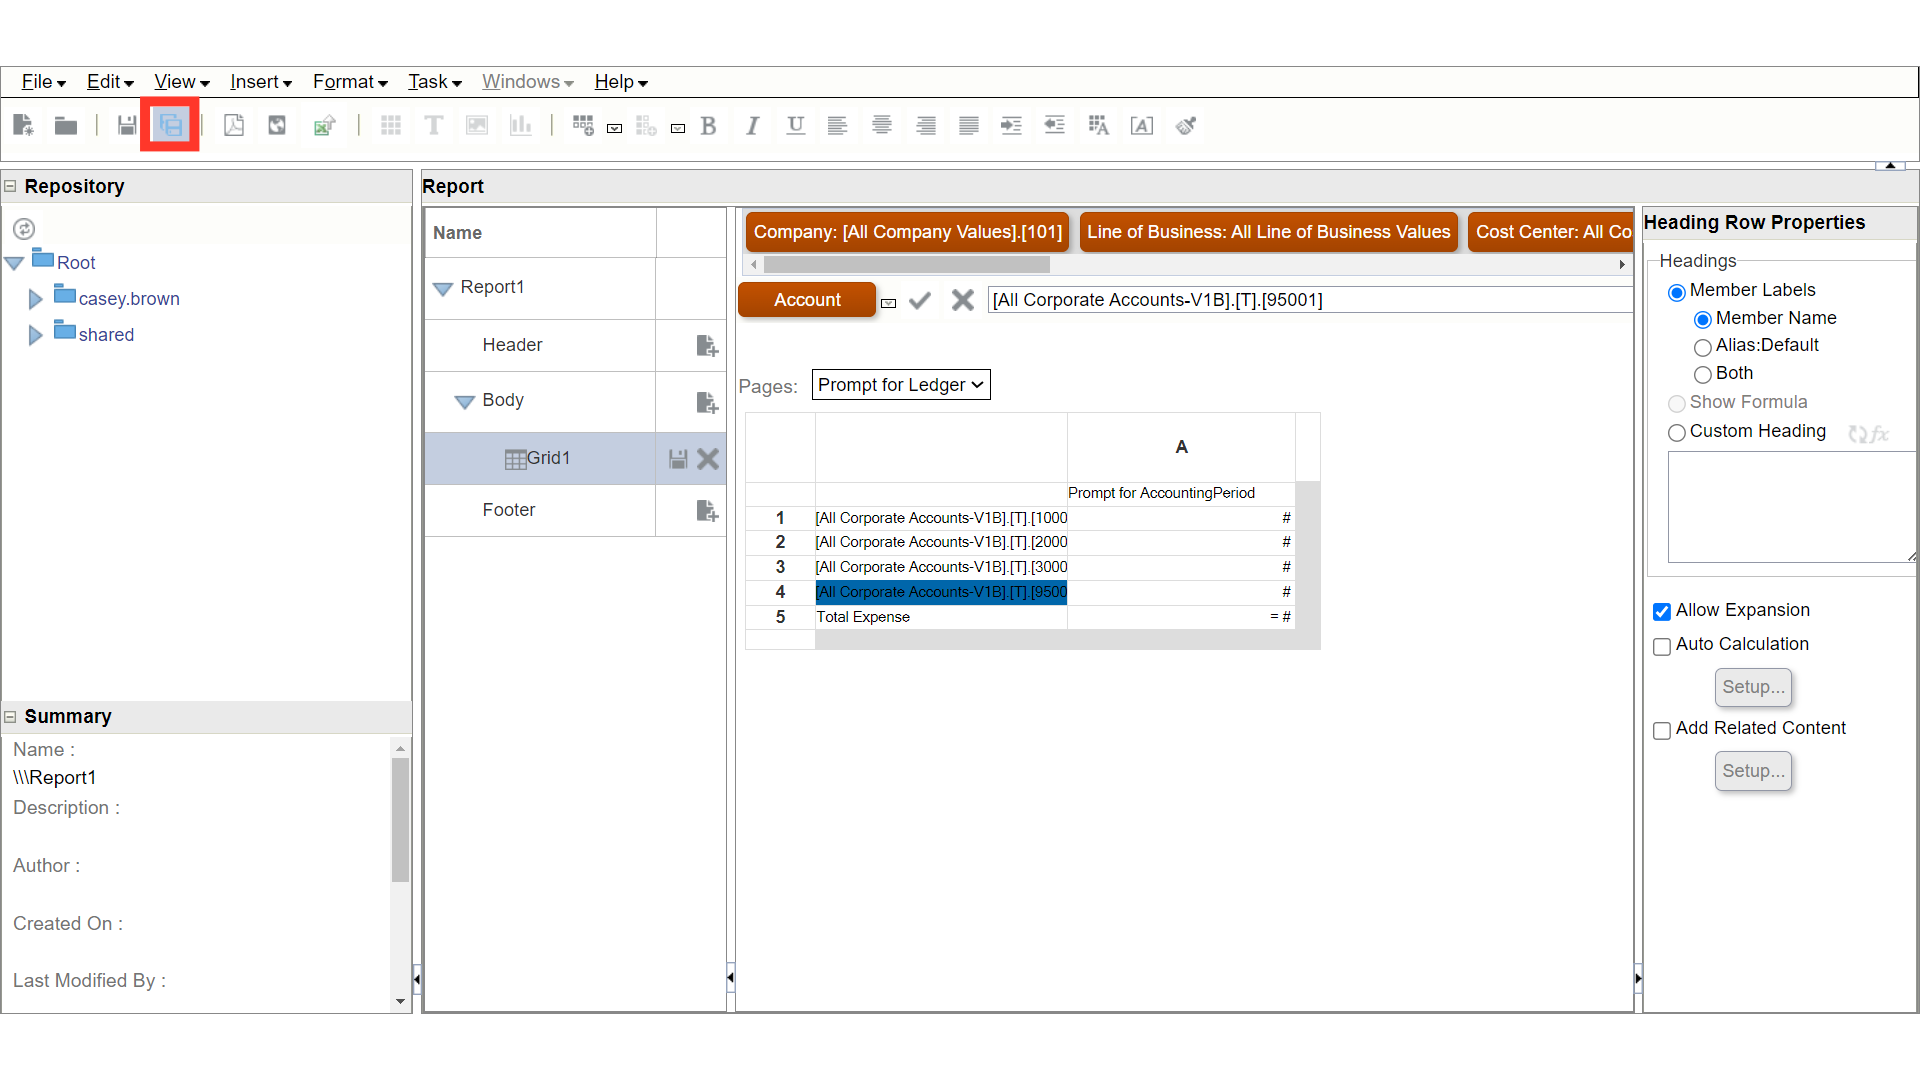
Click on the highlighted Icon to open the report in HTML preview mode.
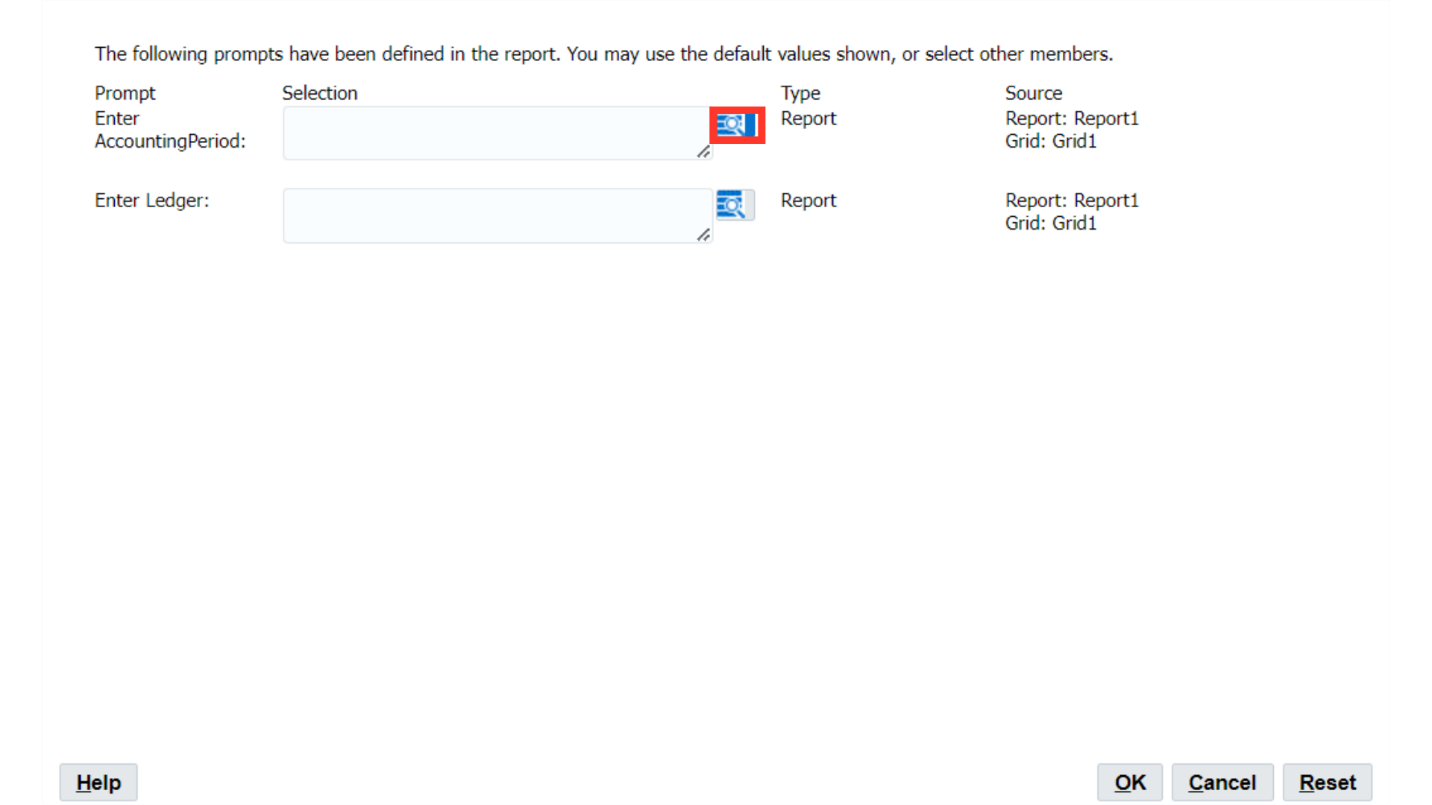
Click on the Highlighted icon to select the parameter.
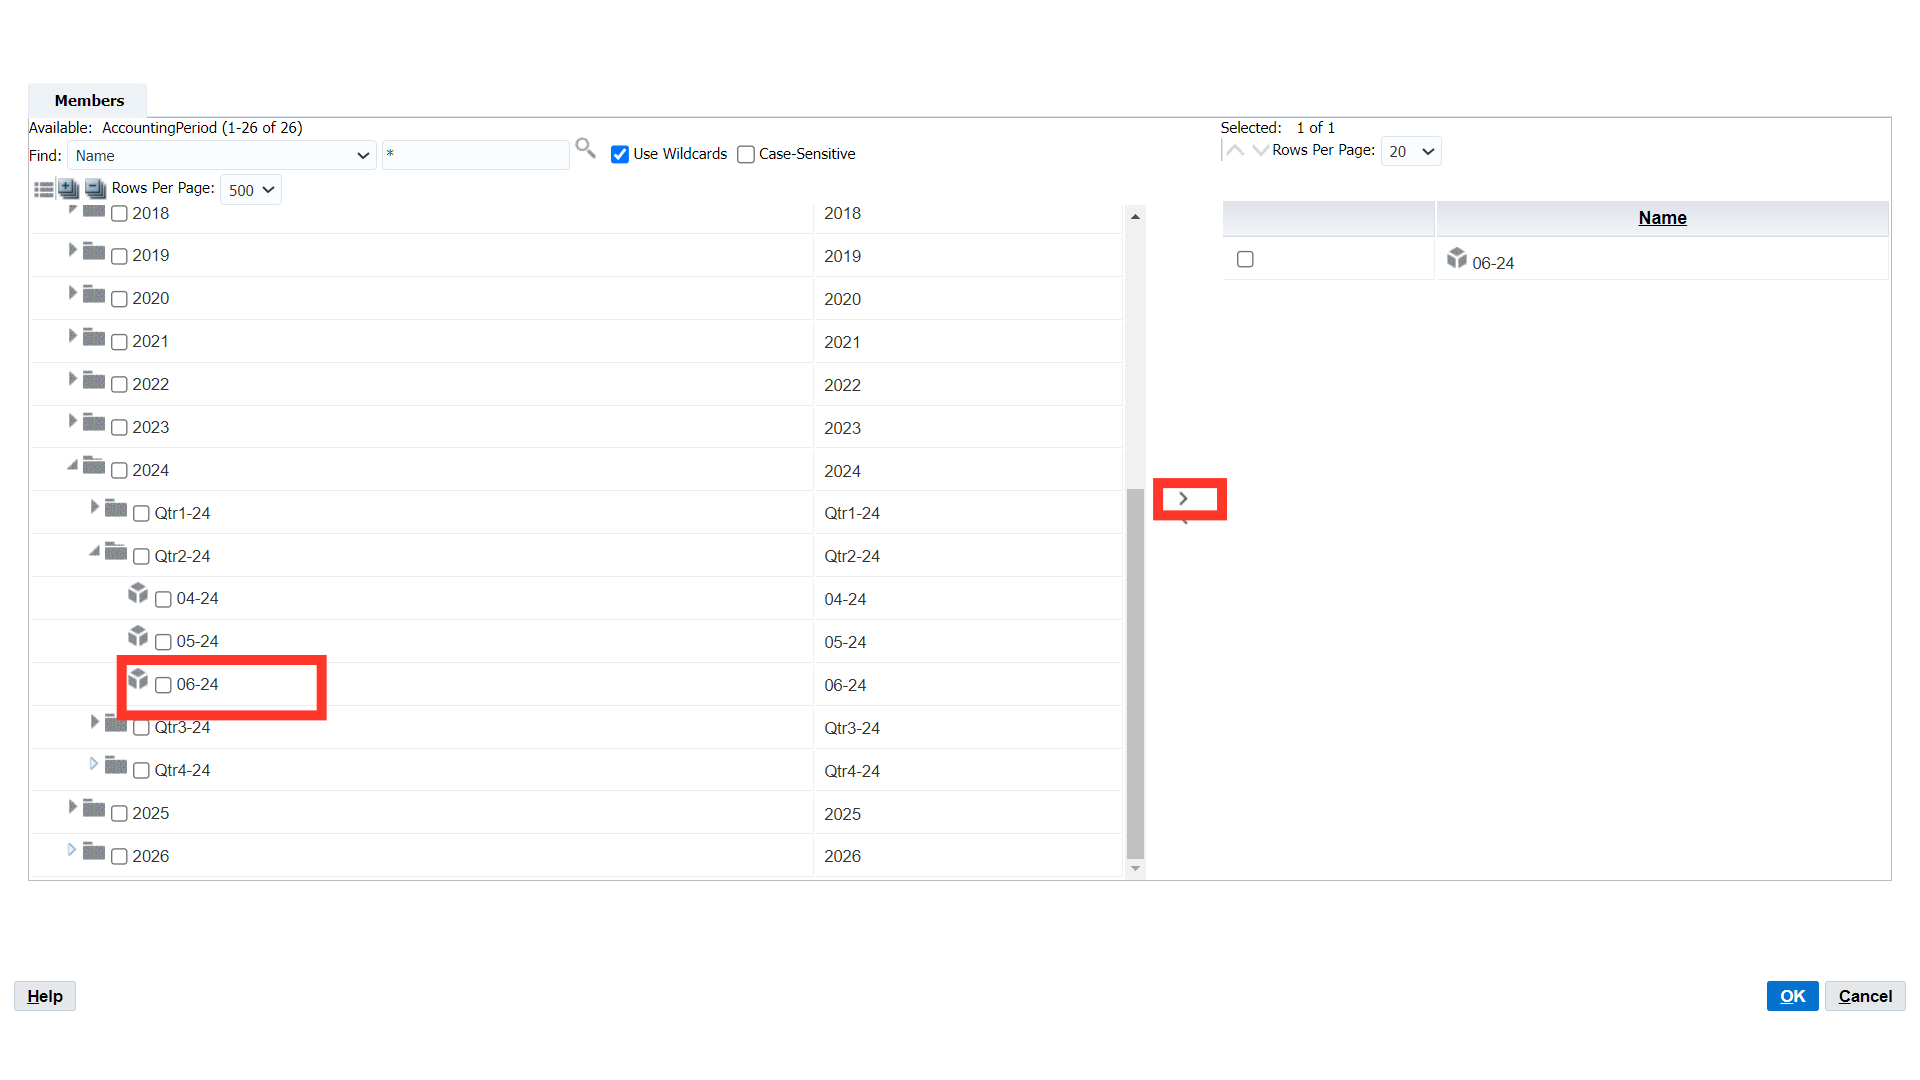
To move the dimension value under Selected section, enable the checkbox and click on the Right hand side facing arrow.
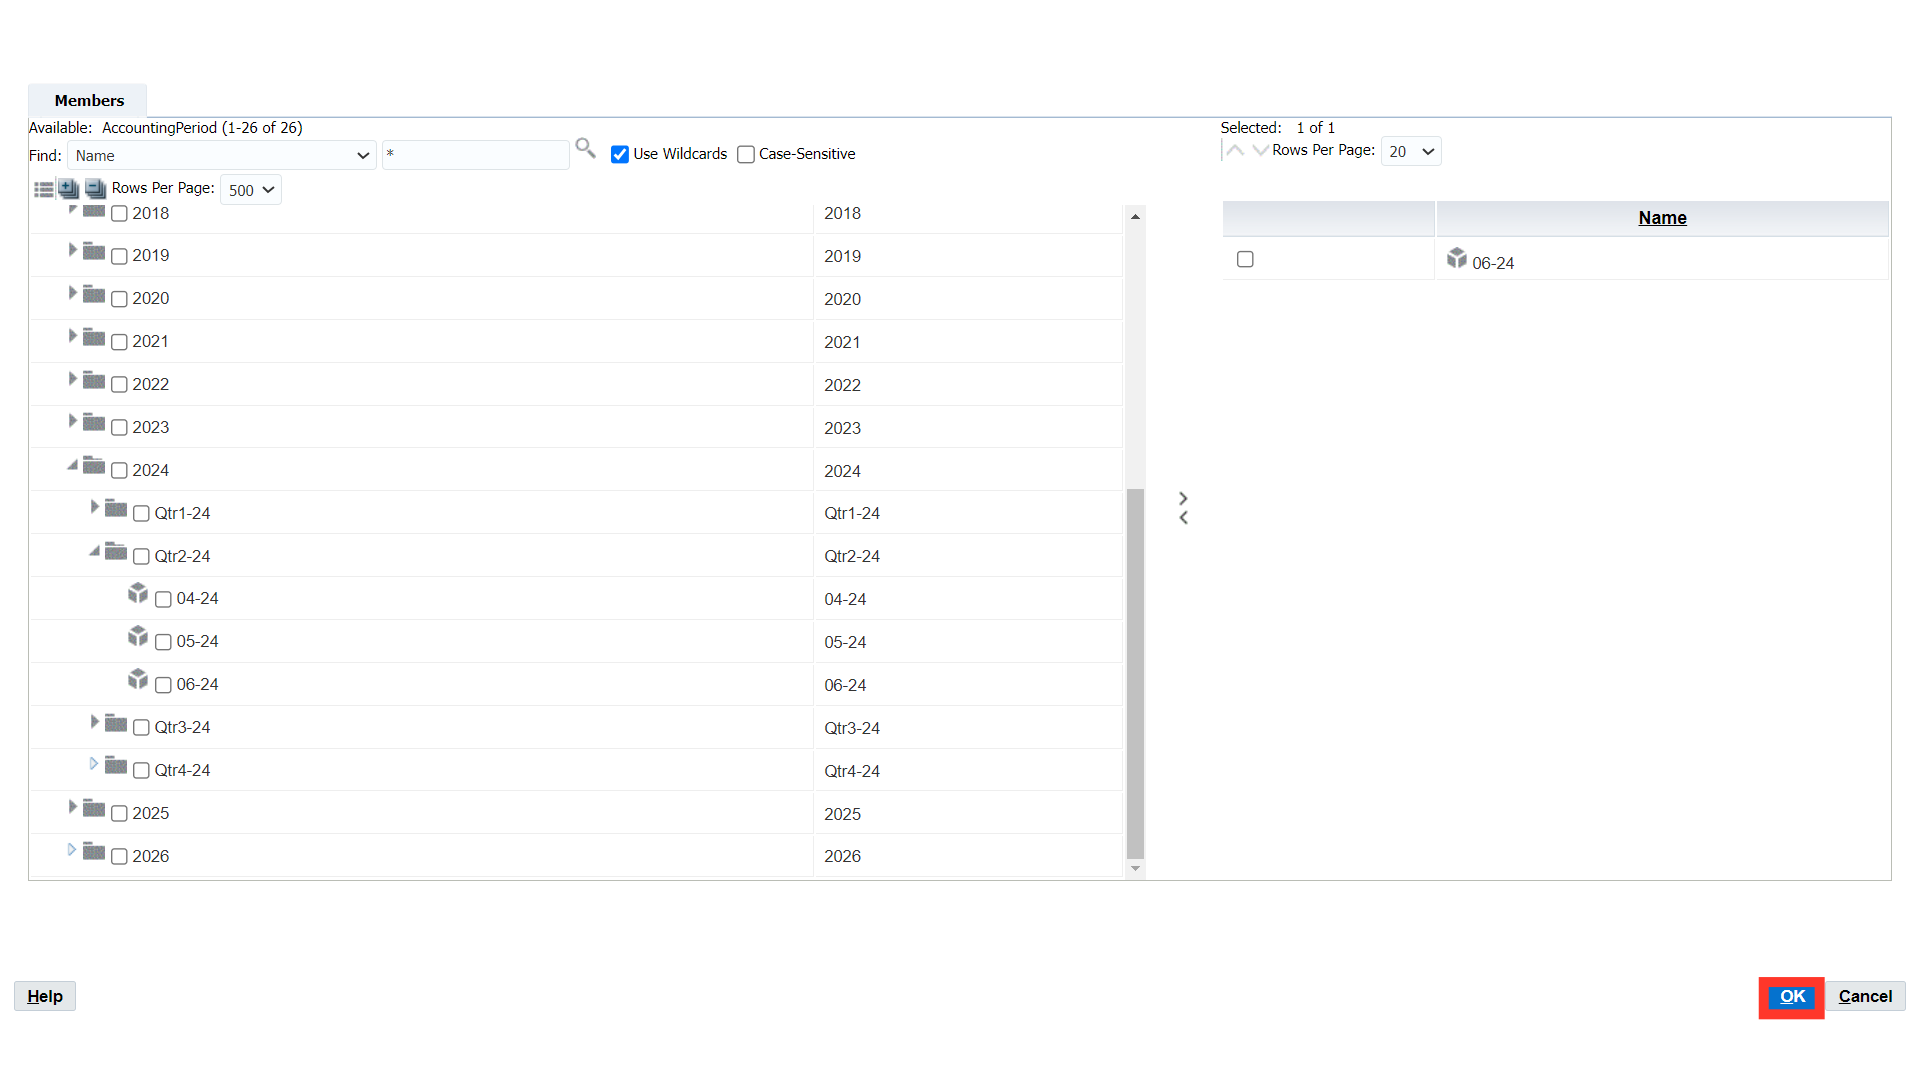
Click on the OK button to continue.
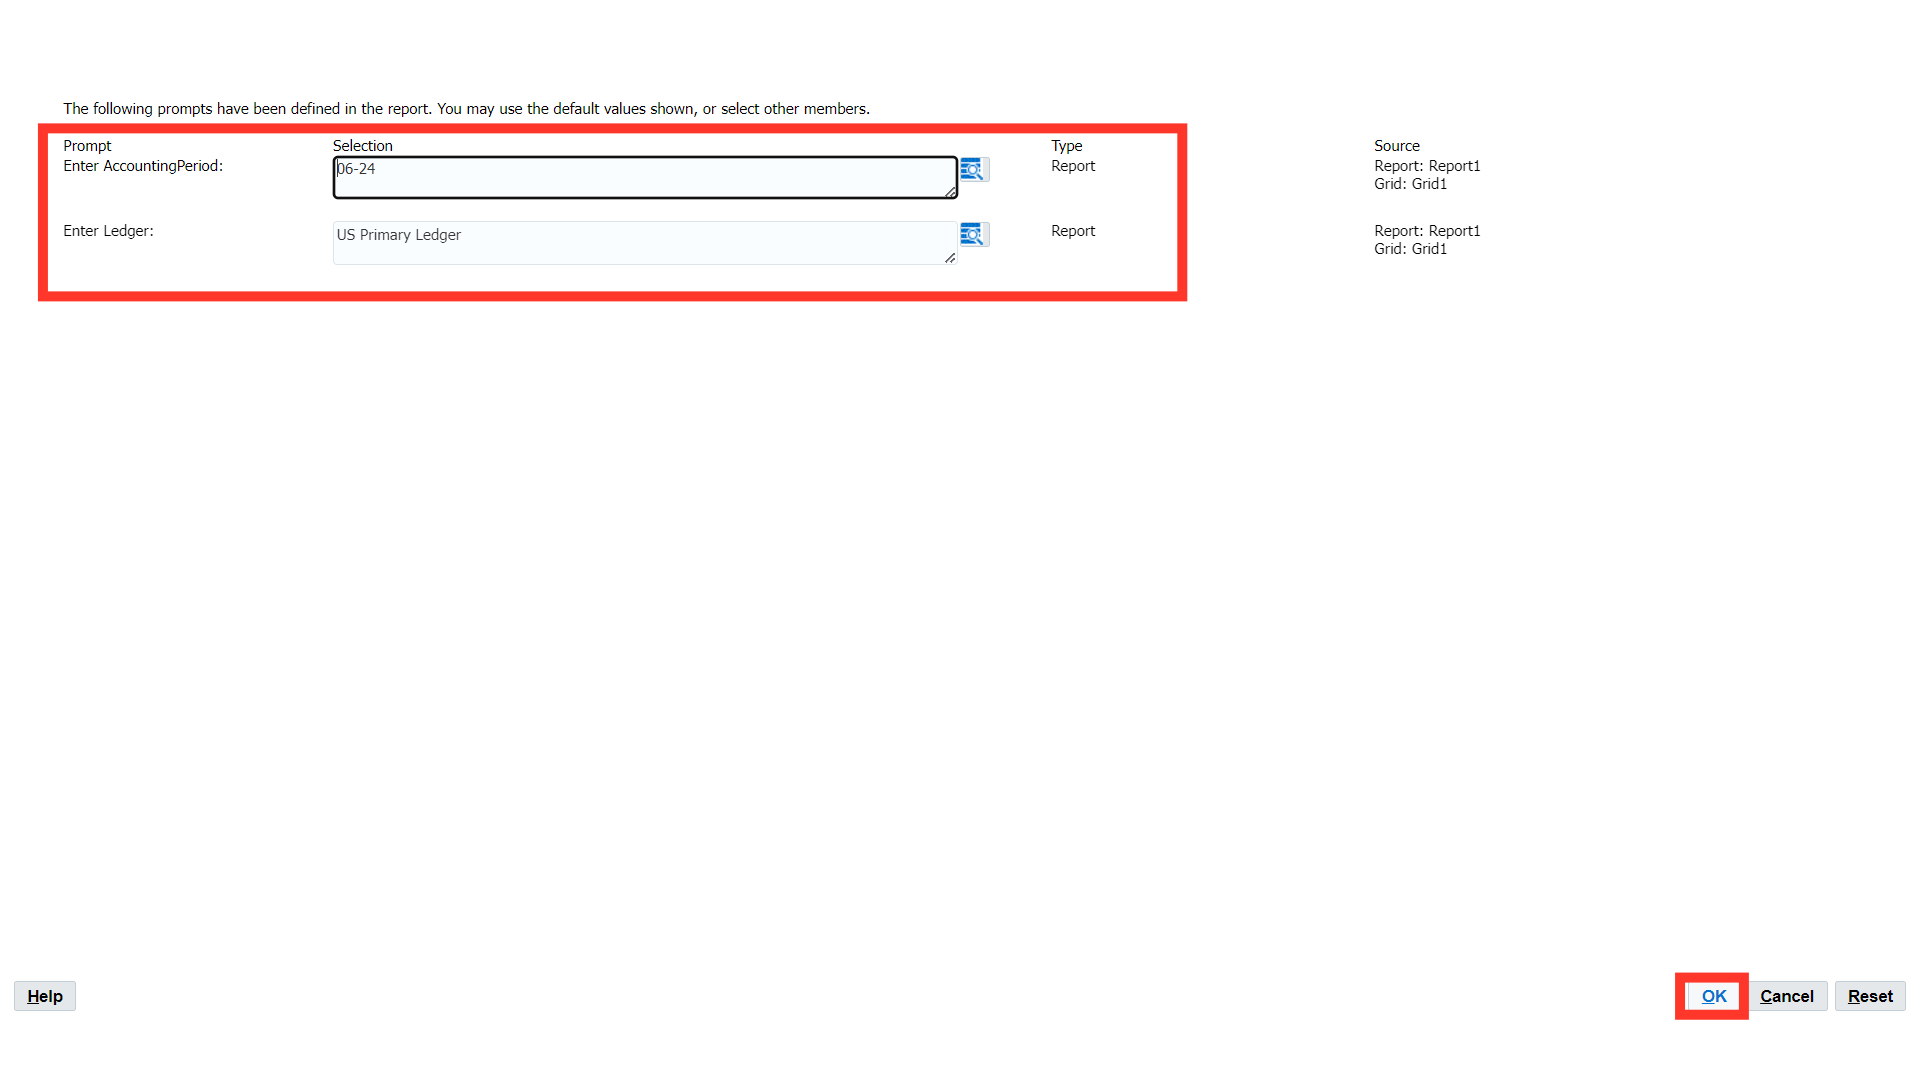
After entering all the parameters, click on the OK button.
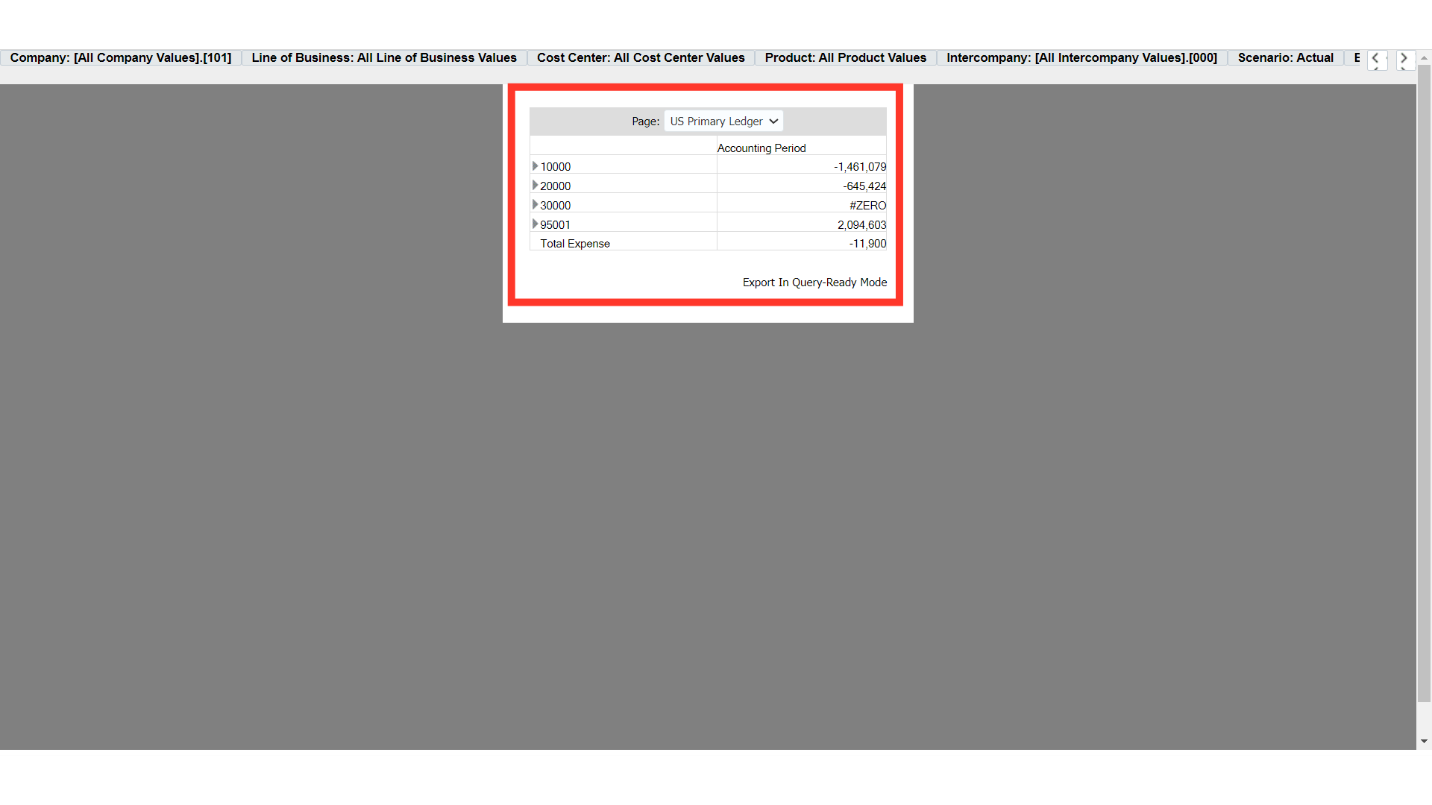
This is the output of the report based on parameters entered.
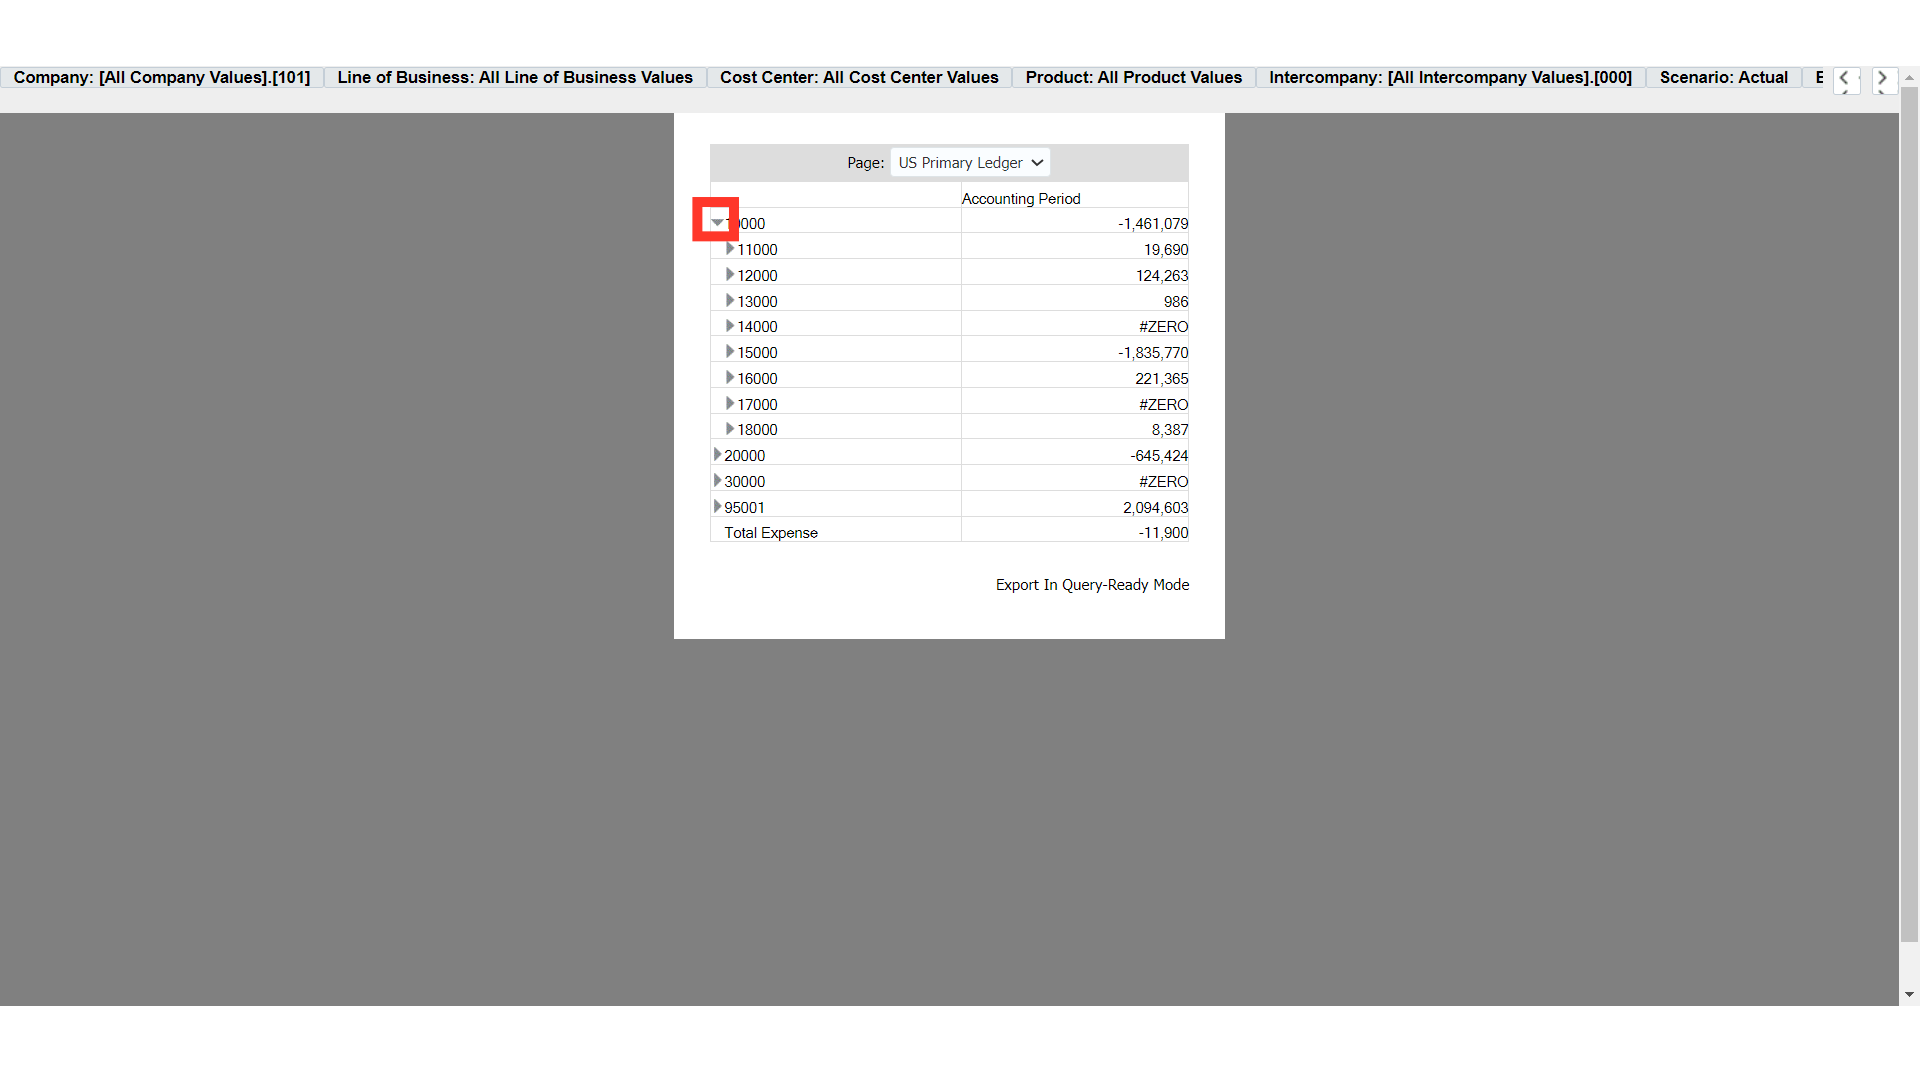
To see the detailed value of values, click on the expansion icon.
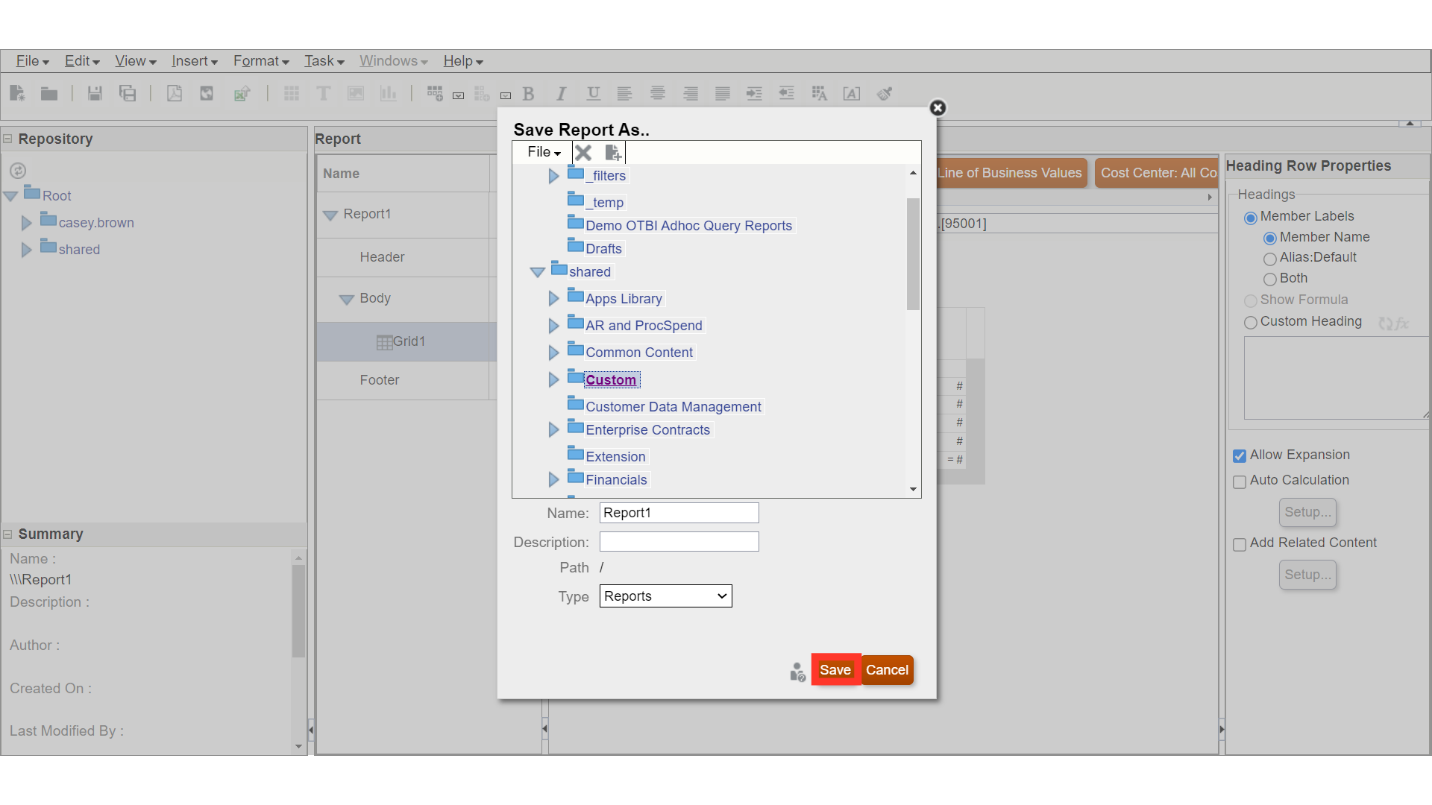
To save the report, click on the Save As button.
After selecting the report path, click on the Save button.