Intercompany Journals
Create and Manage Intercompany transaction by automatically creating journals for the provider and recipient entities using Oracle Cloud. This guide involves a series of actions to smoothly complete the intercompany transaction between entities.
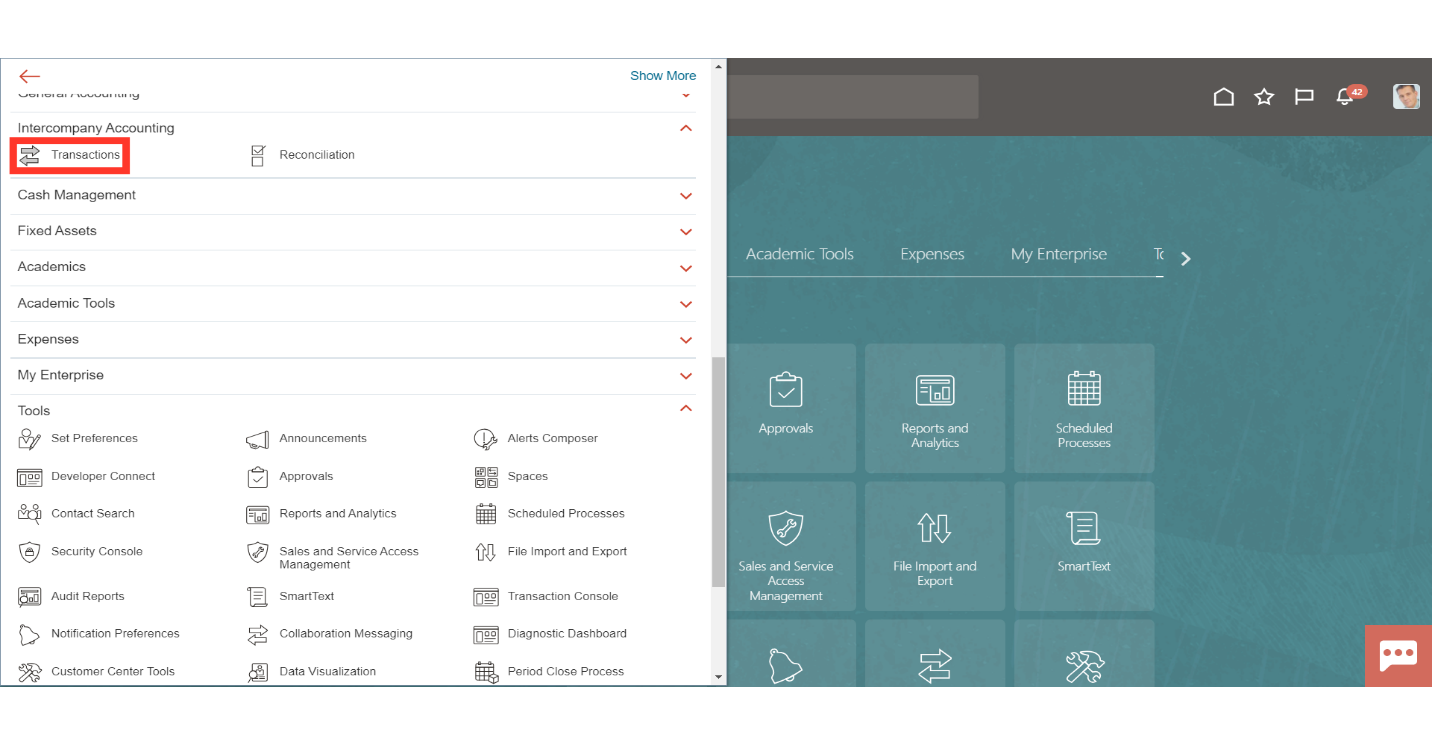
Navigate to Transactions by selecting Transactions submenu under Intercompany Accounting Menu on the Navigator.
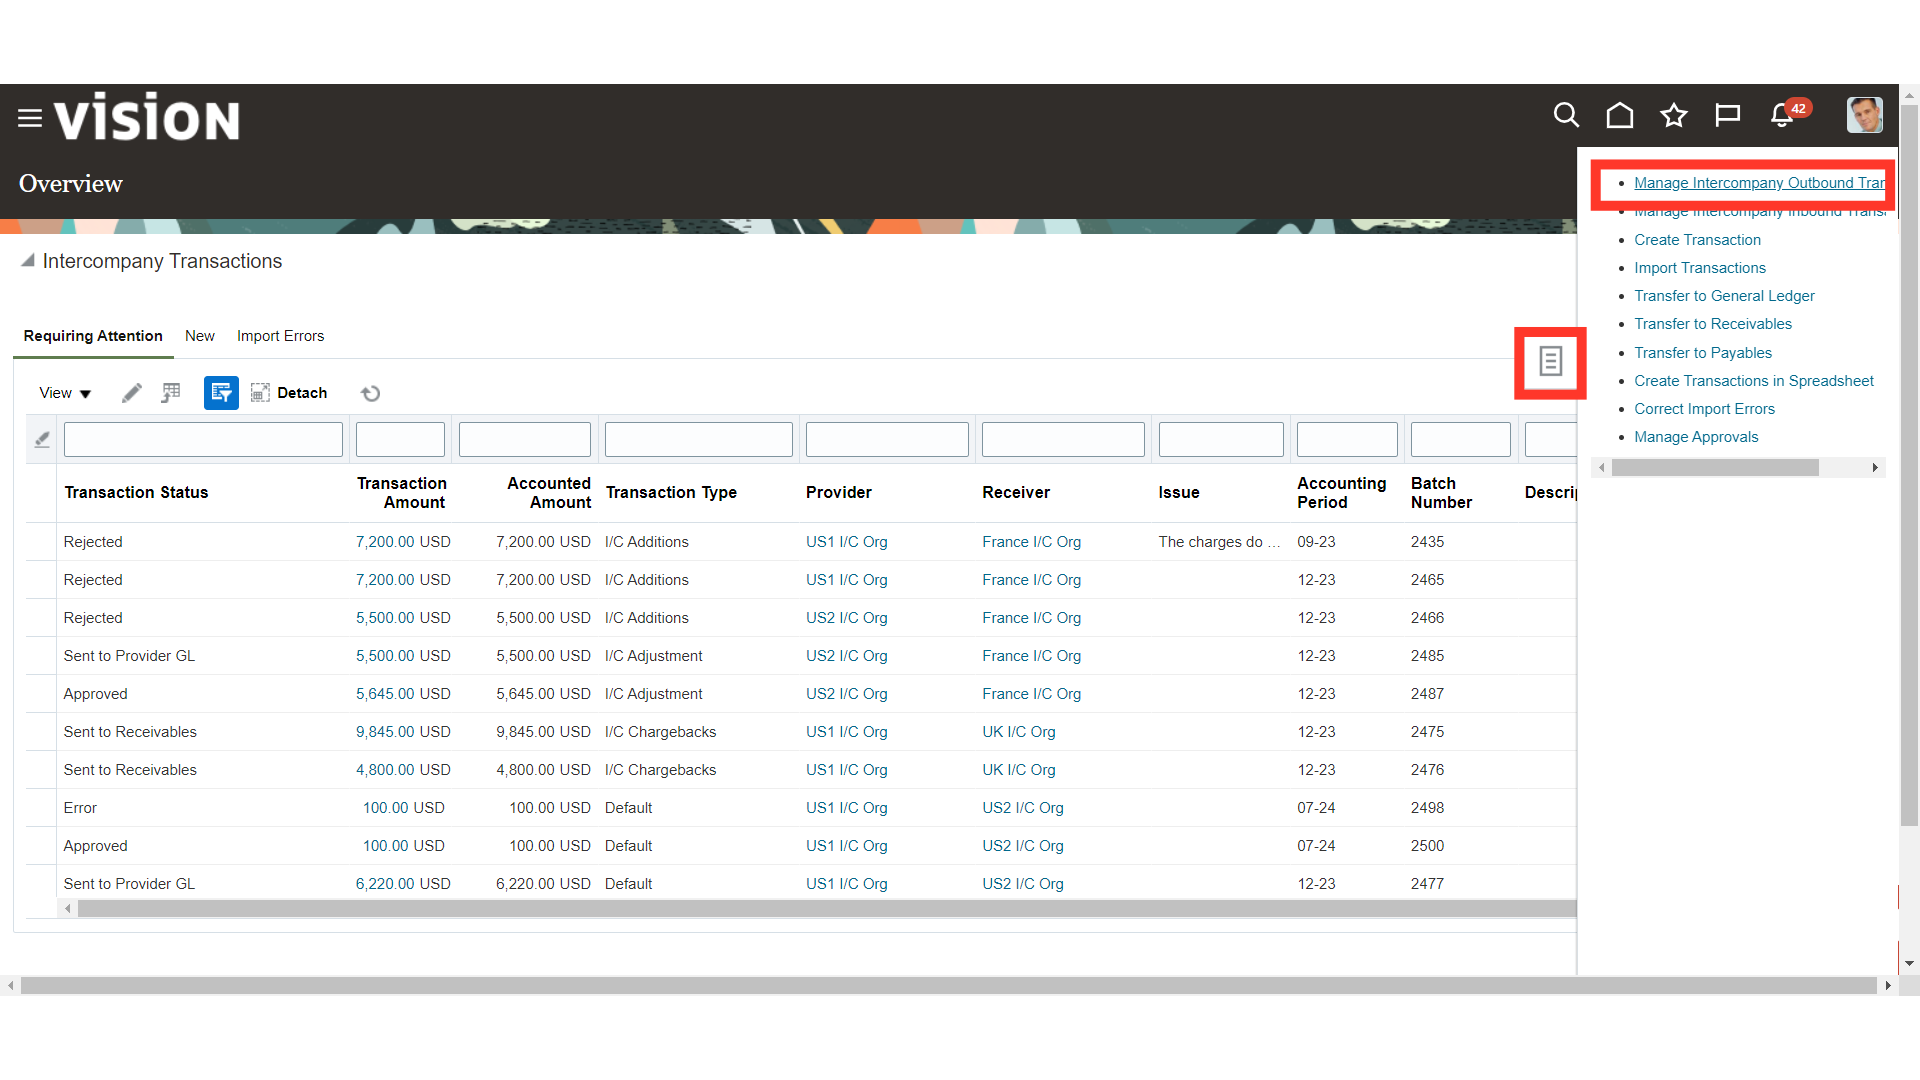
On the Intercompany Transactions landing page expand Tasks list and select the ‘Manage Intercompany Outbound Transactions’ from the list available.
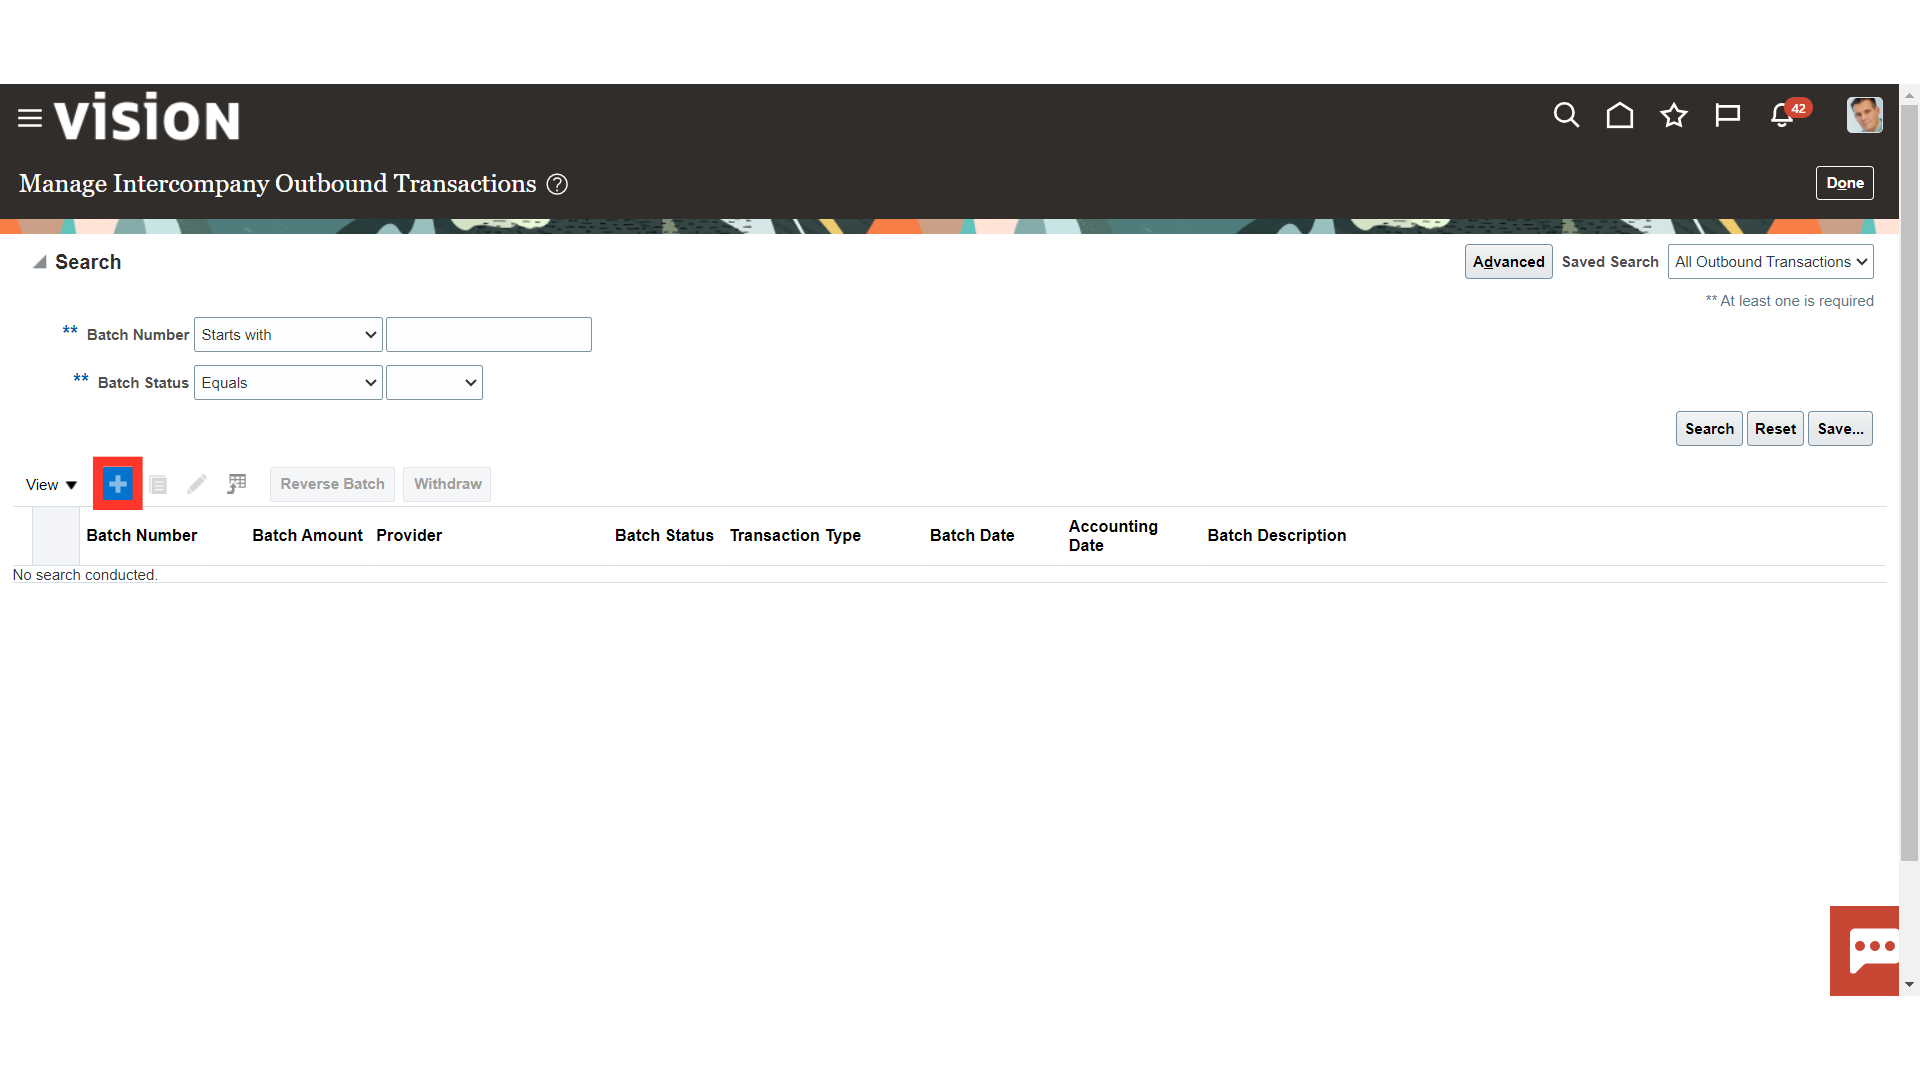
To create a new Intercompany Transaction click on ‘Plus’ icon.
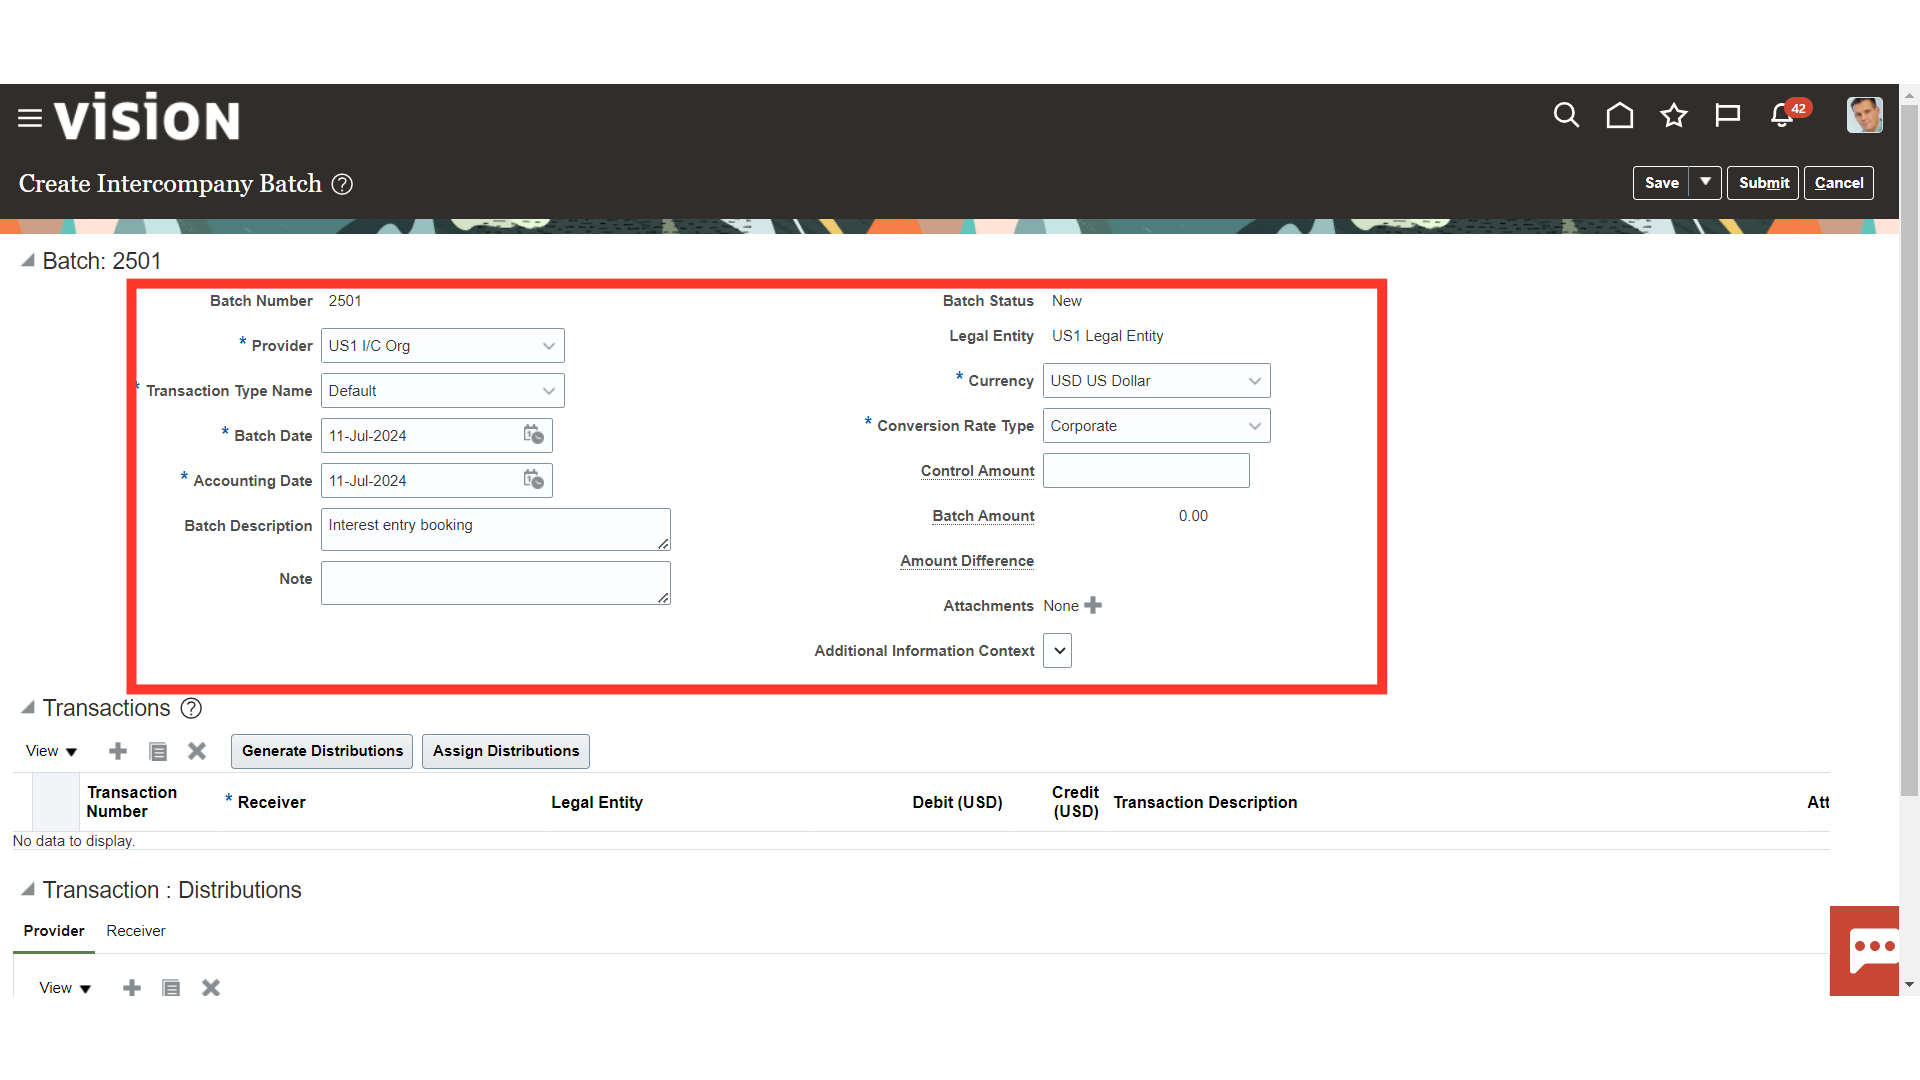
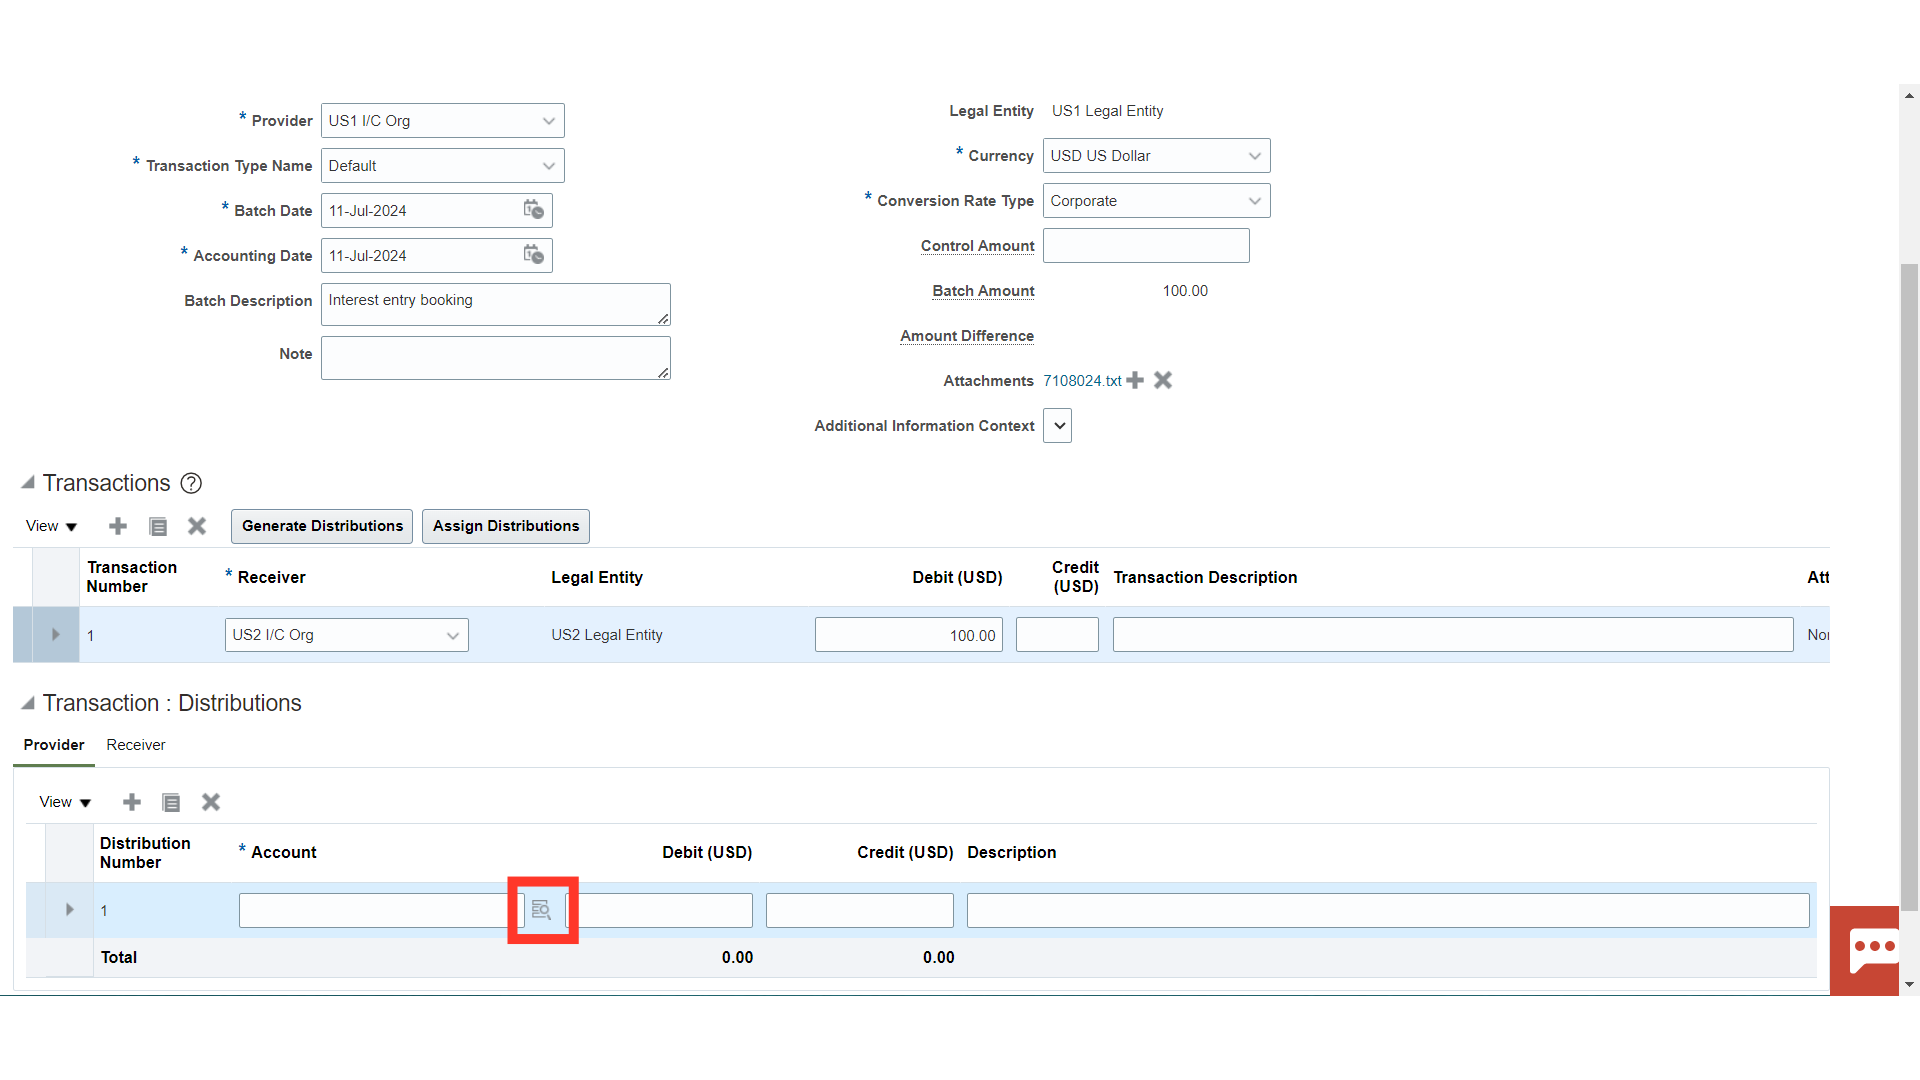
Enter the Intercompany Batch details. An intercompany batch has one or more intercompany transactions. Enter following details Provider: It is the entity initiating intercompany transaction. Transaction Type Name: Select the value defined for IC purchasing and sales. For Demo value ‘Default’ is selected. Batch Date: The date for which the batch is to be created. Accounting Date: the date on which the transactions are to be accounted. Currency: select the currency in which transaction is taking place. Conversion Rate type: Select the appropriate Conversion Rate Type.
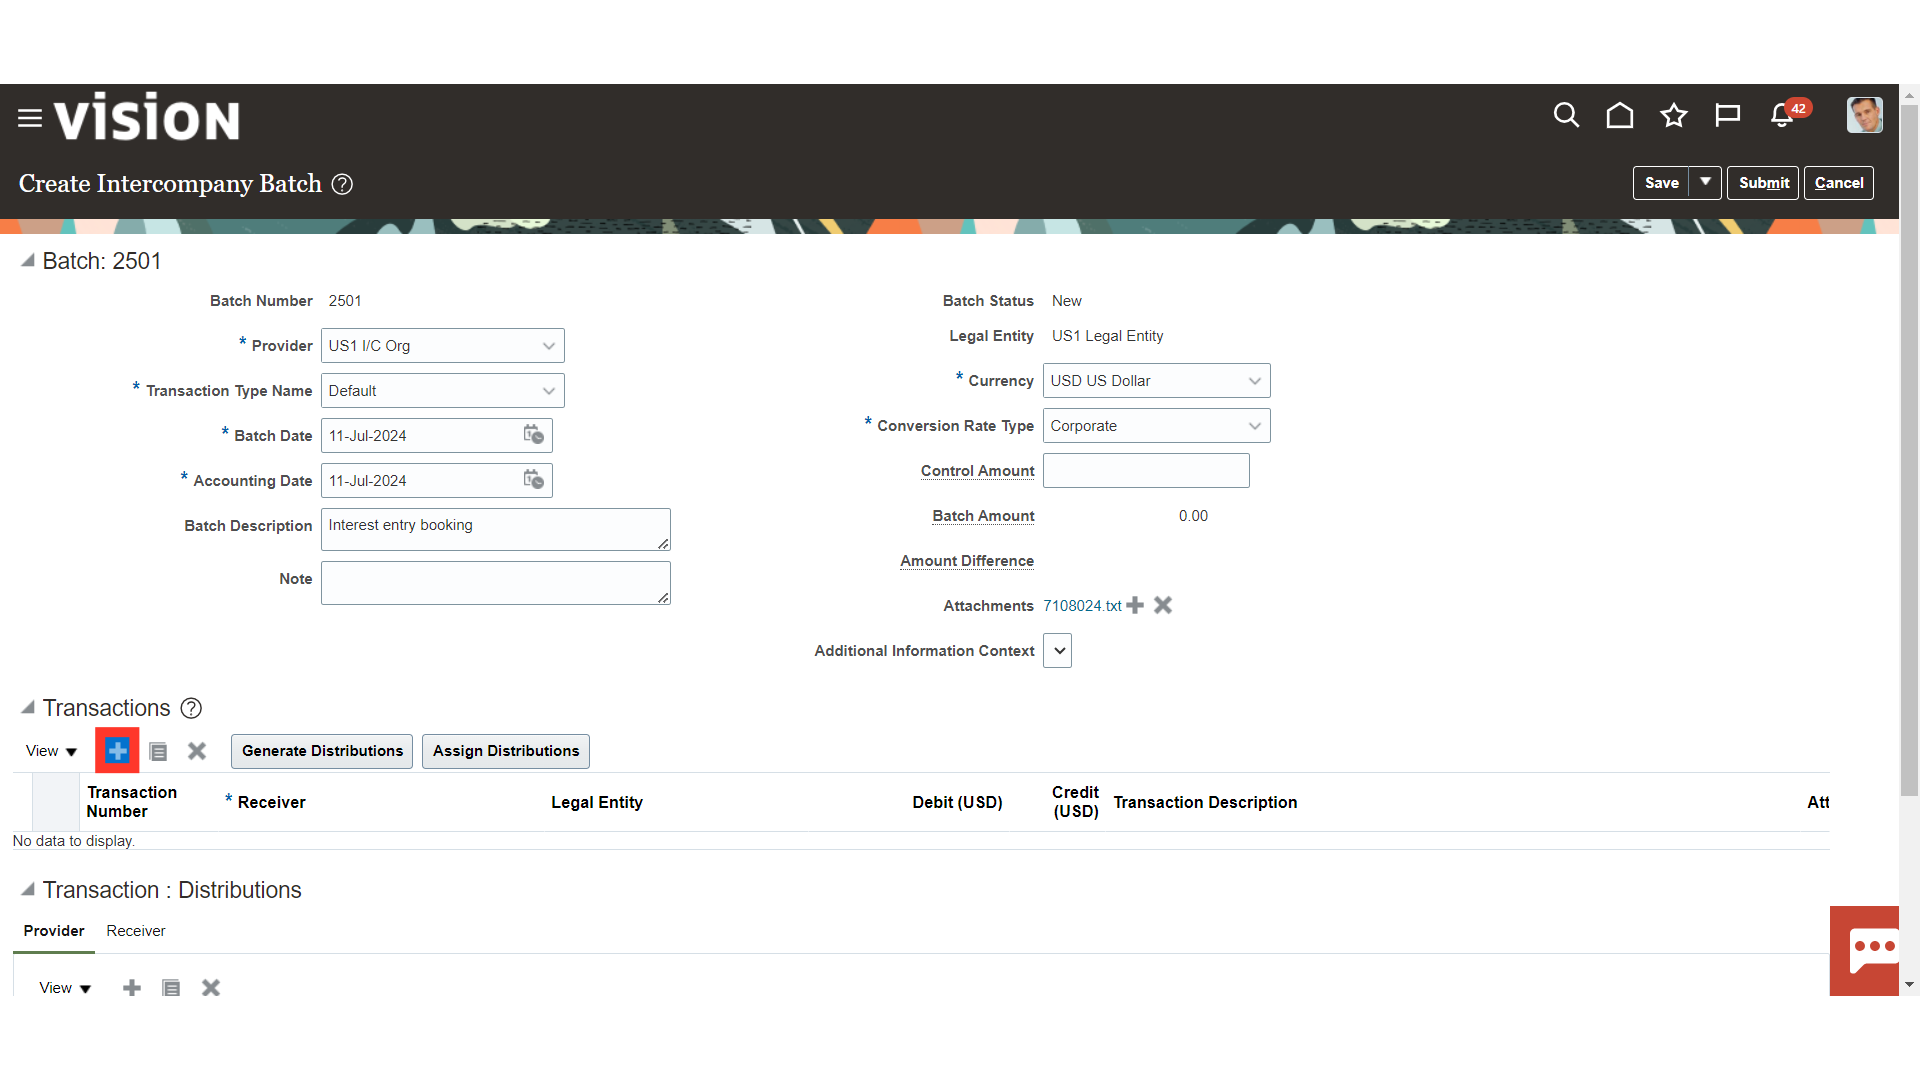
To add Transactions details click on ‘Plus’ Icon.
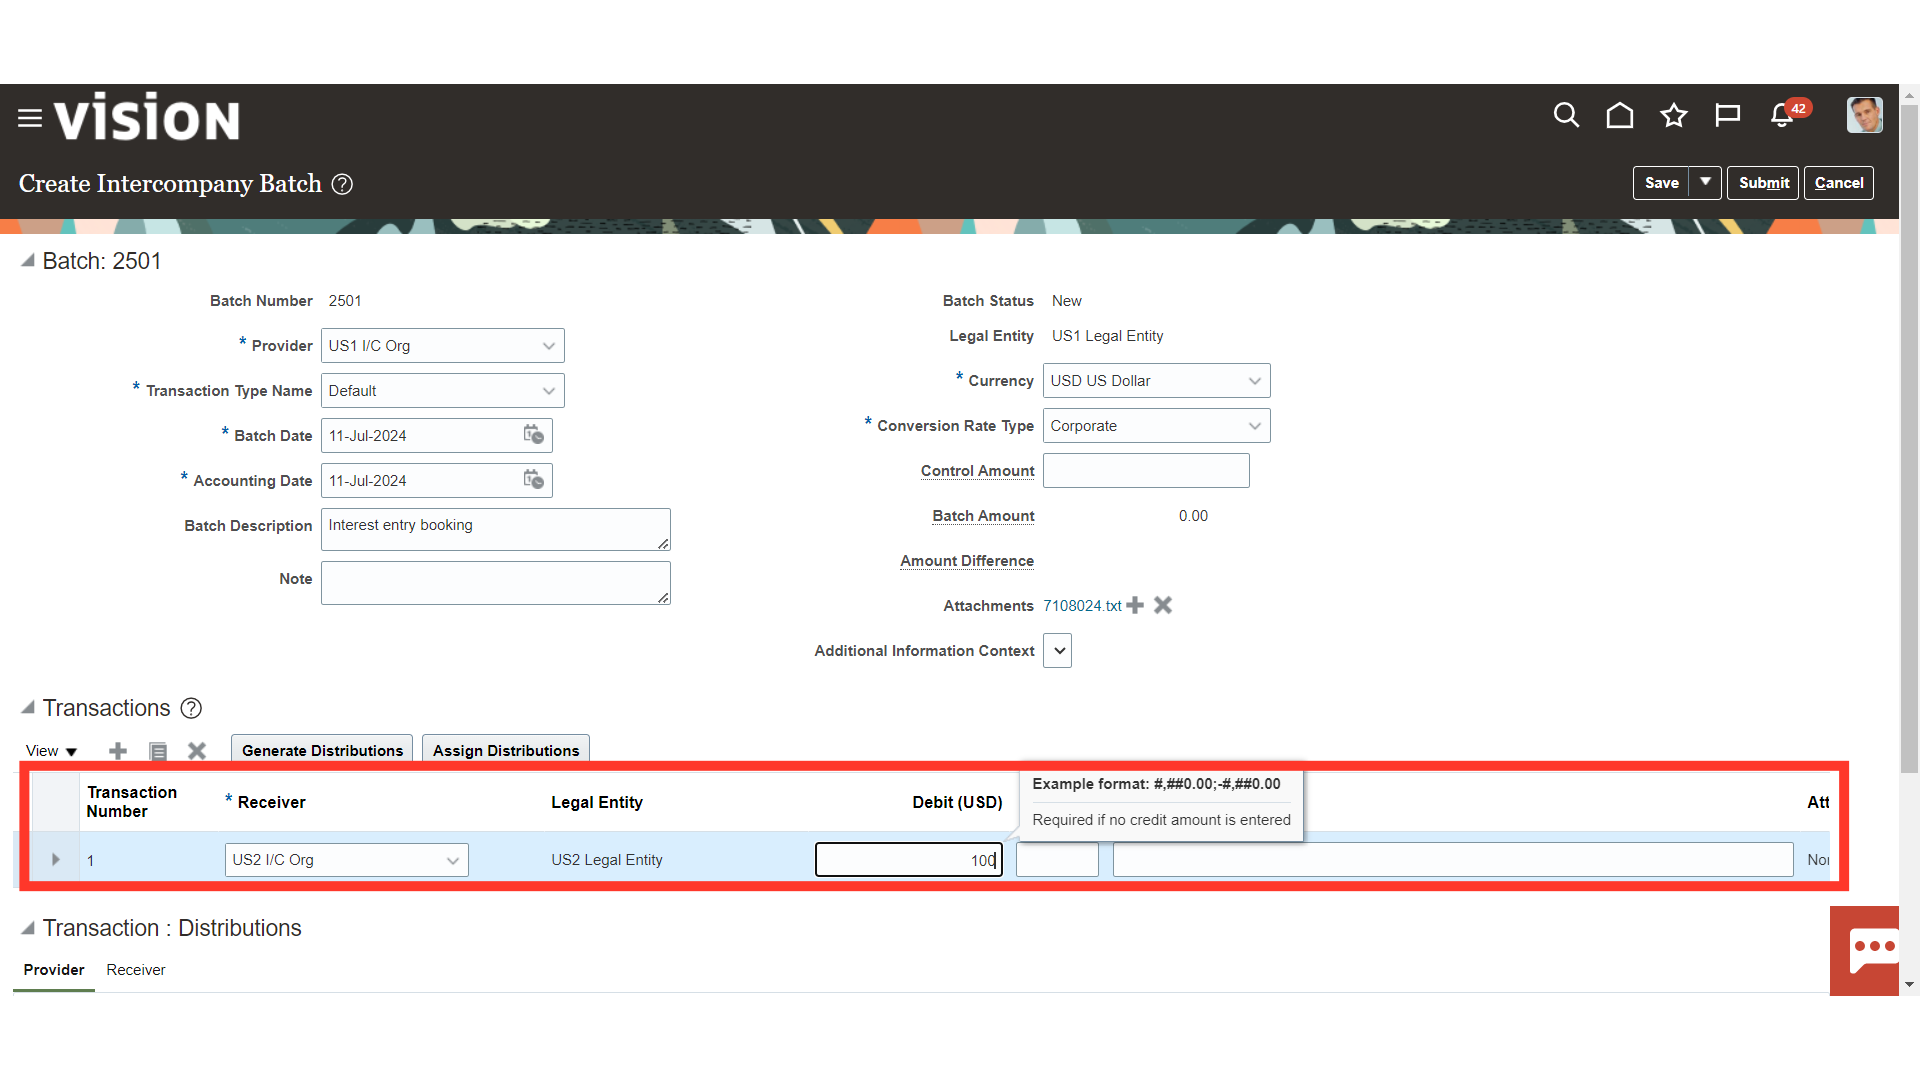
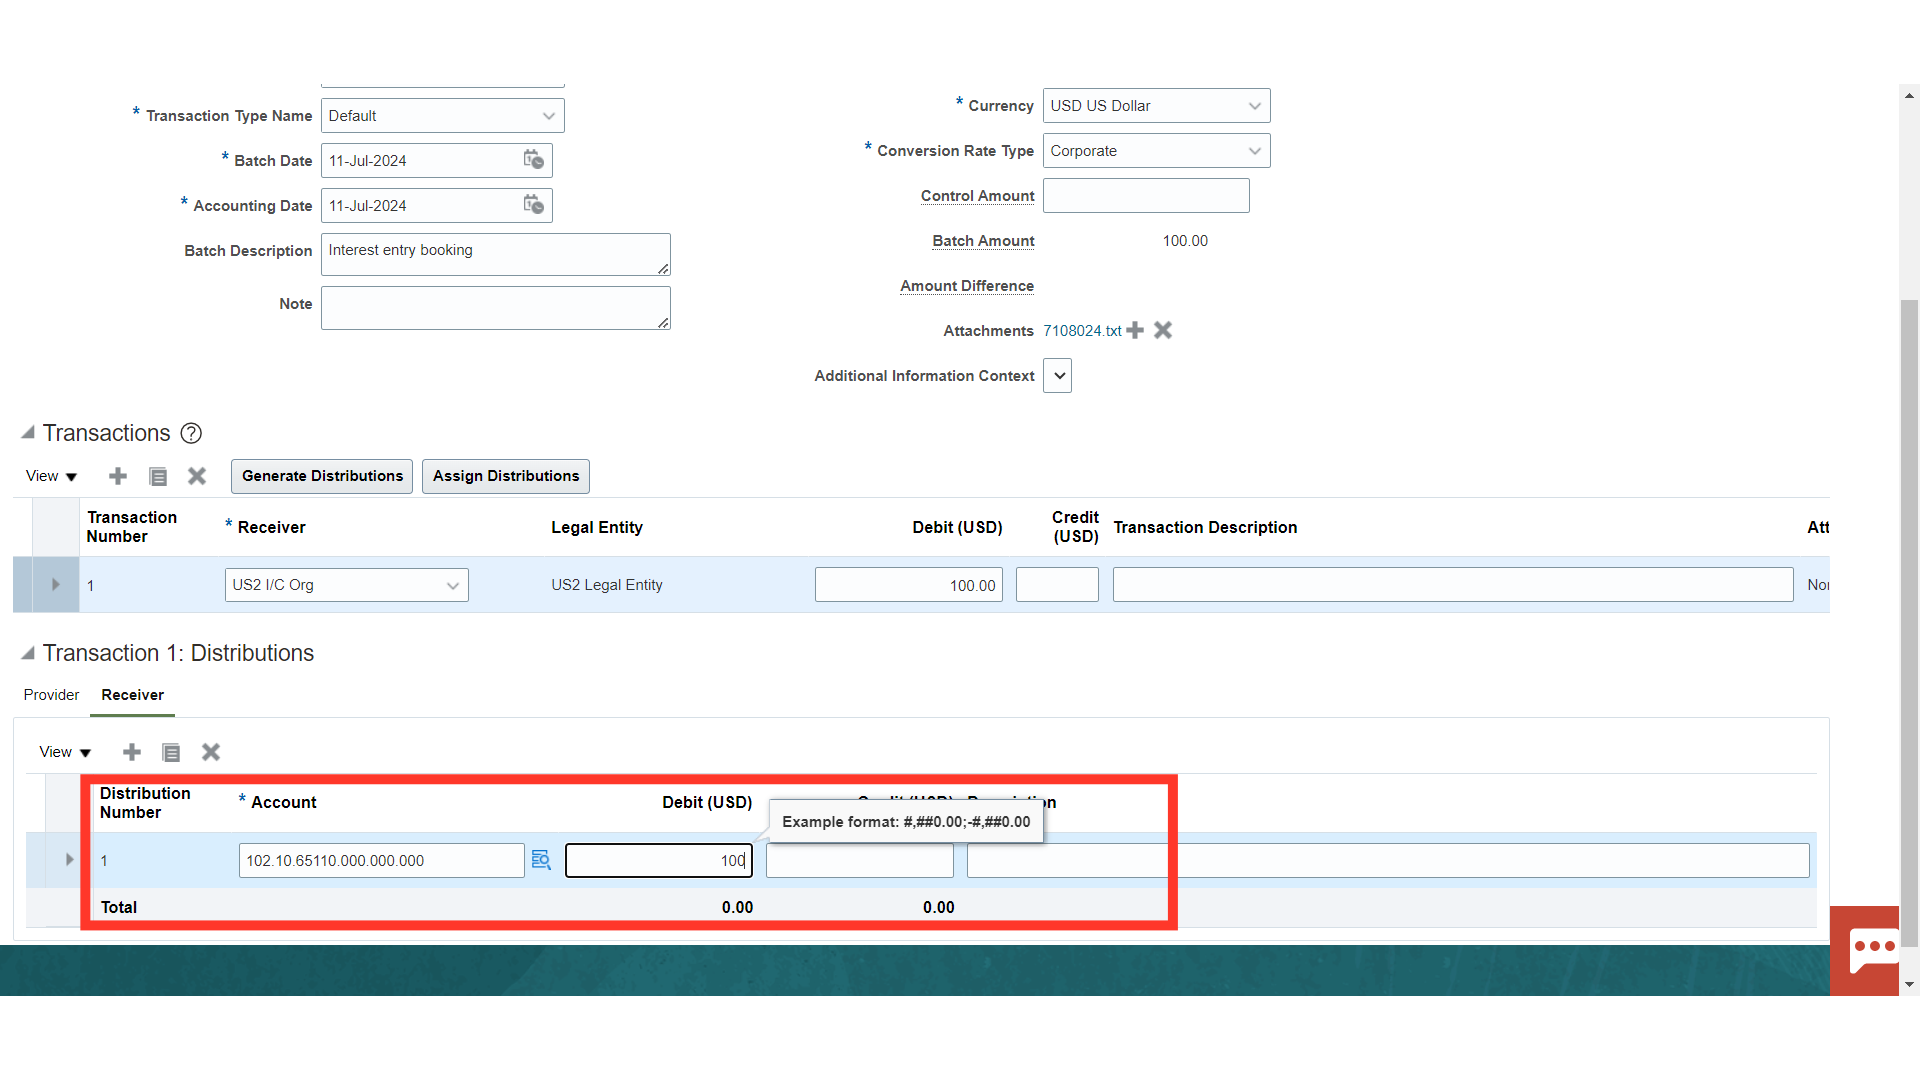
A row would be added, enter the Receiver entity. Receiver is the entity with which the IC transaction is being entered with. Enter the amount. If the recipient is to be debited the enter amount in Debit. If the recipient is to be credited then enter amount in Credit.
Scroll Down to Distribution section. Enter the Expense or Income distribution combination for the IC transaction initiator i.e. provider. Click on Plus icon. A row will be added.
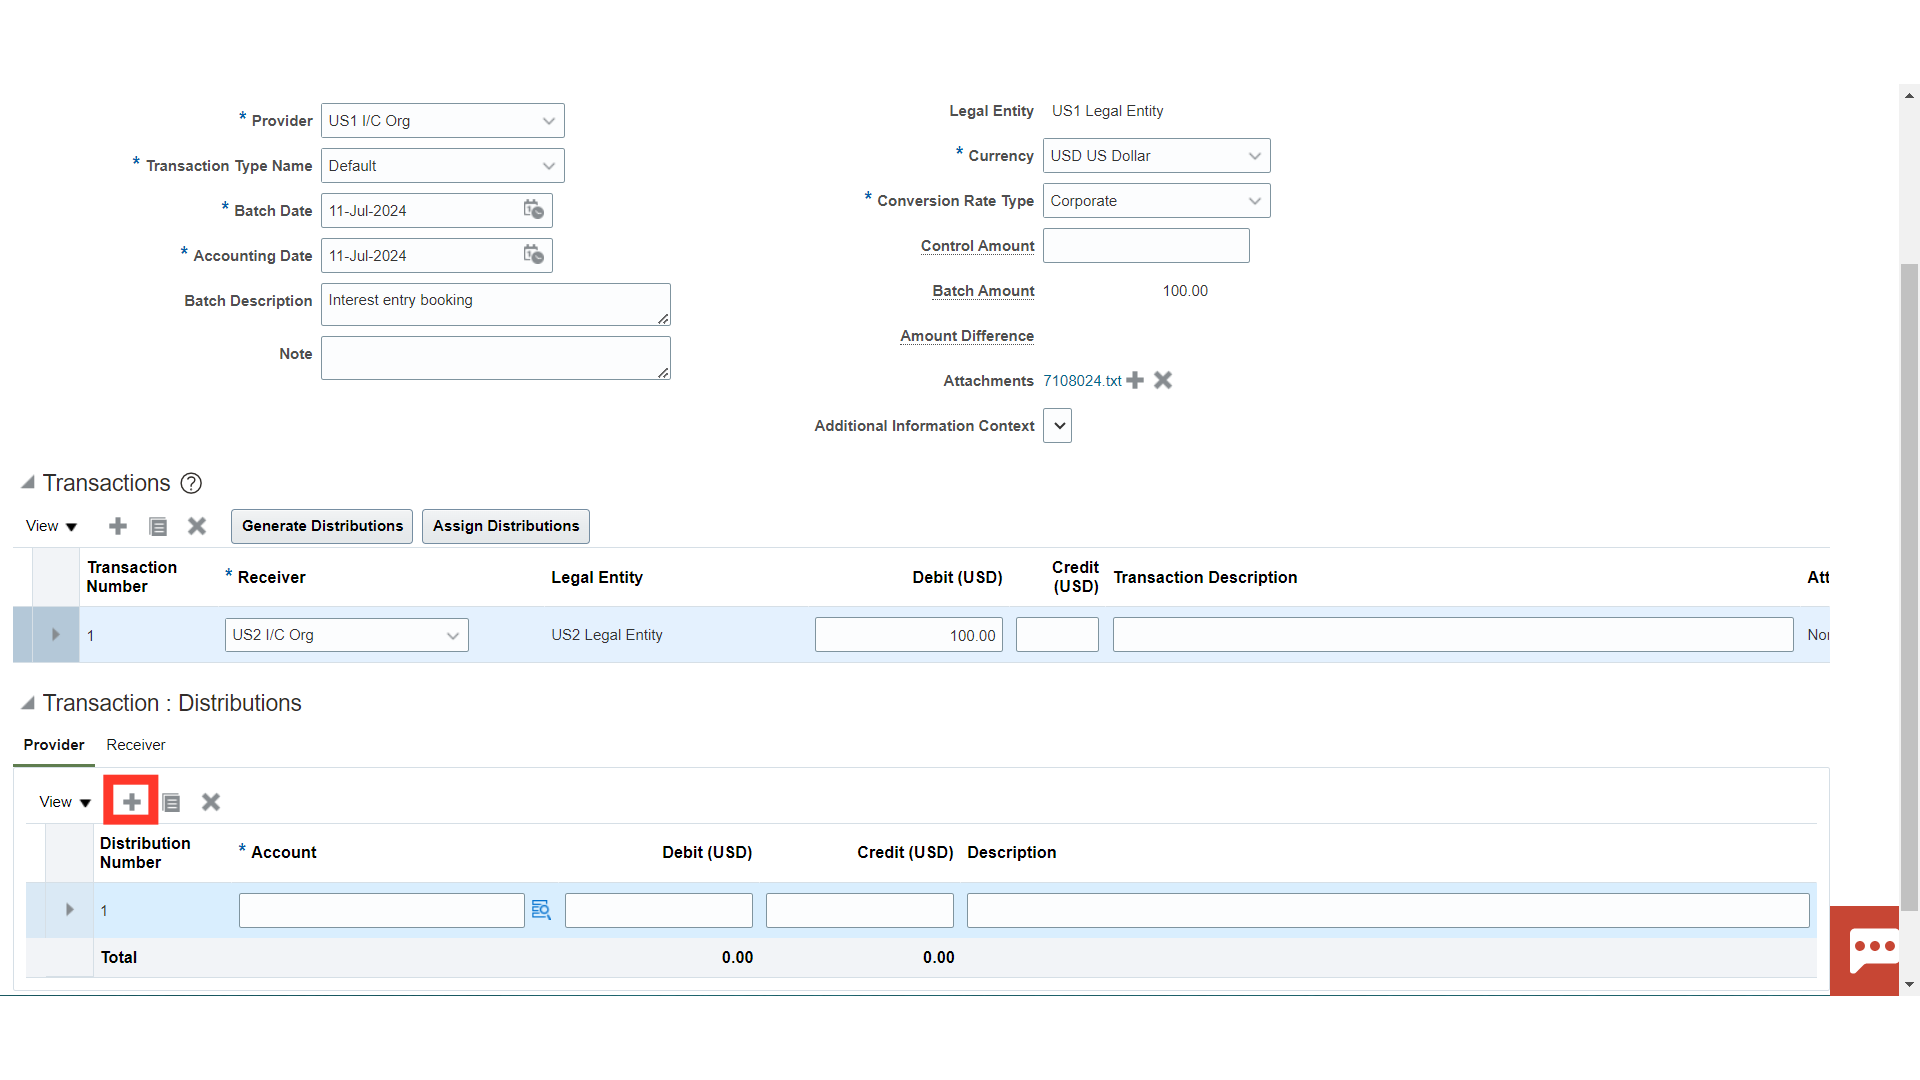
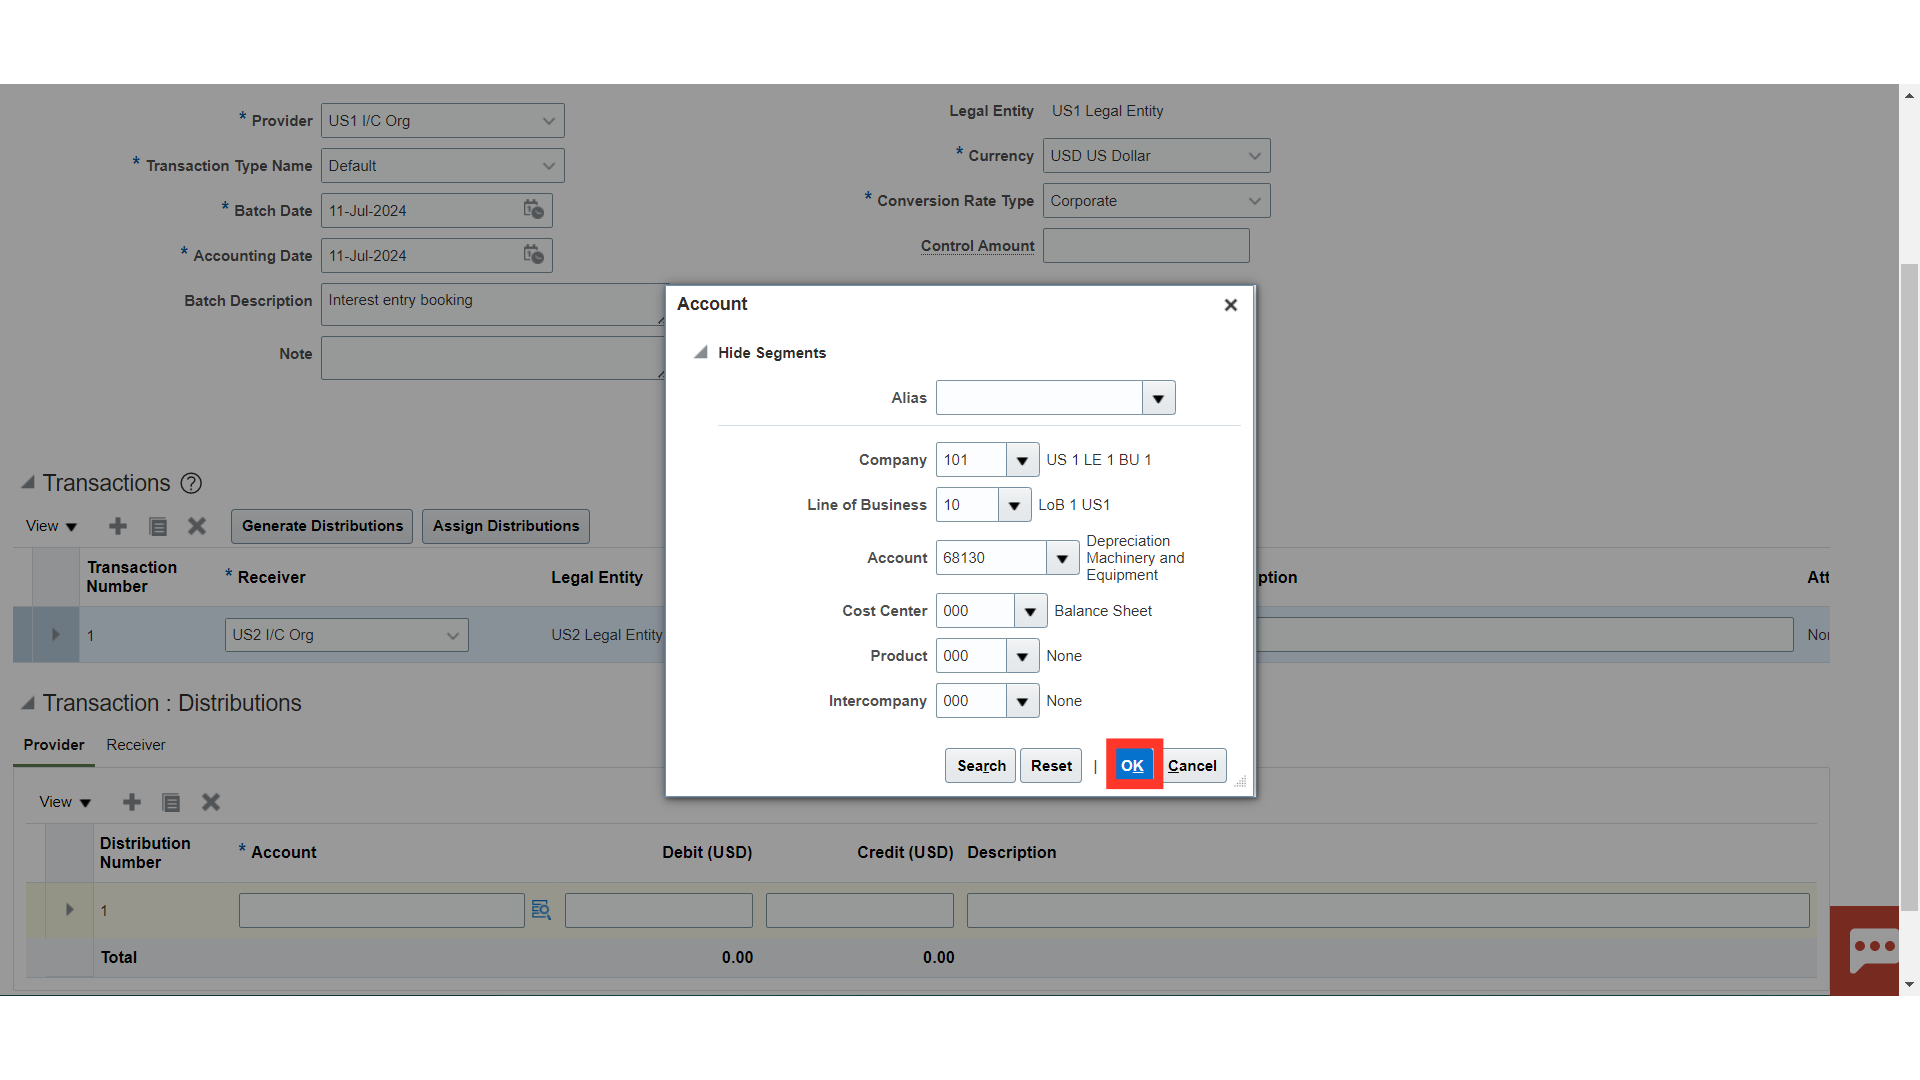
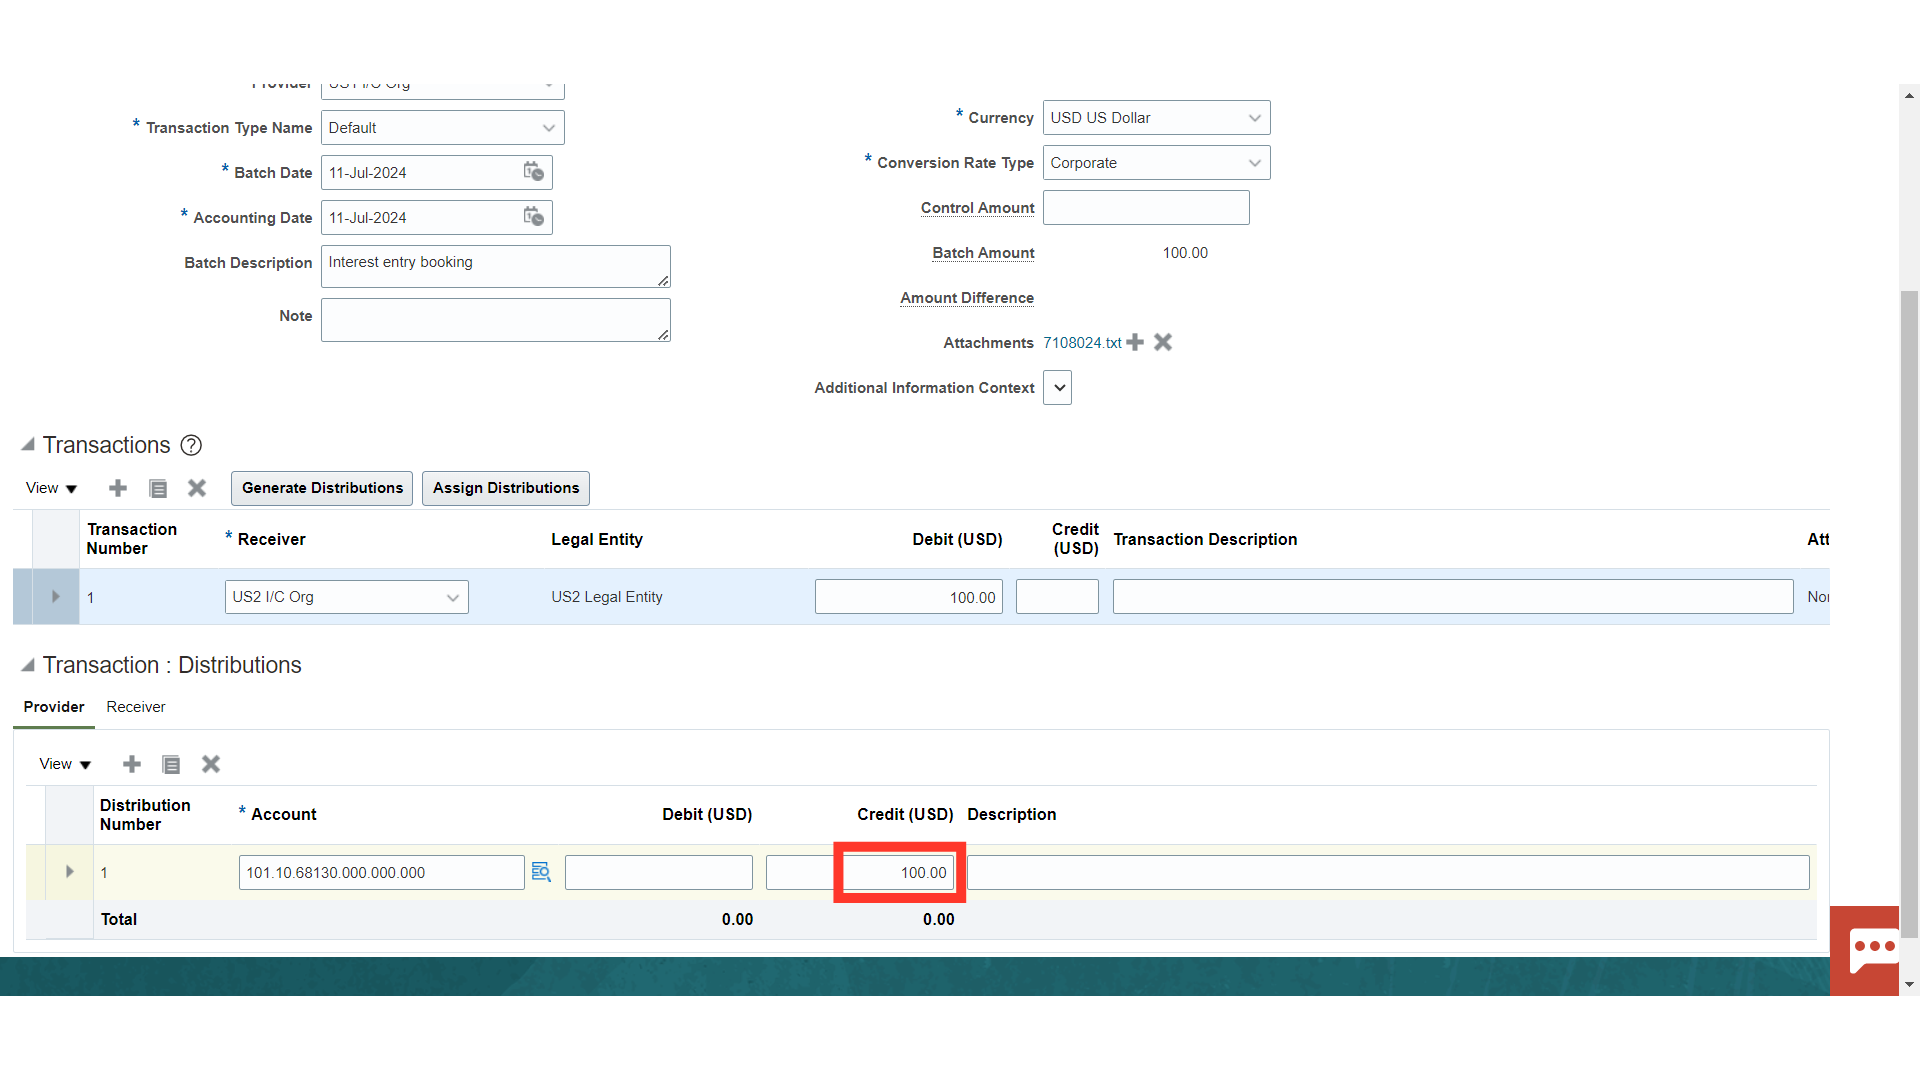
Click on distribution icon to select the account combination.
Select all the values of the account combination and then click on OK.
After entering the Account combination enter the amount for which it is required to be debited or credited.
Go to Receiver’s Tab and enter the Expense or Income distribution combination as applicable to recipient entity. Click on Plus icon
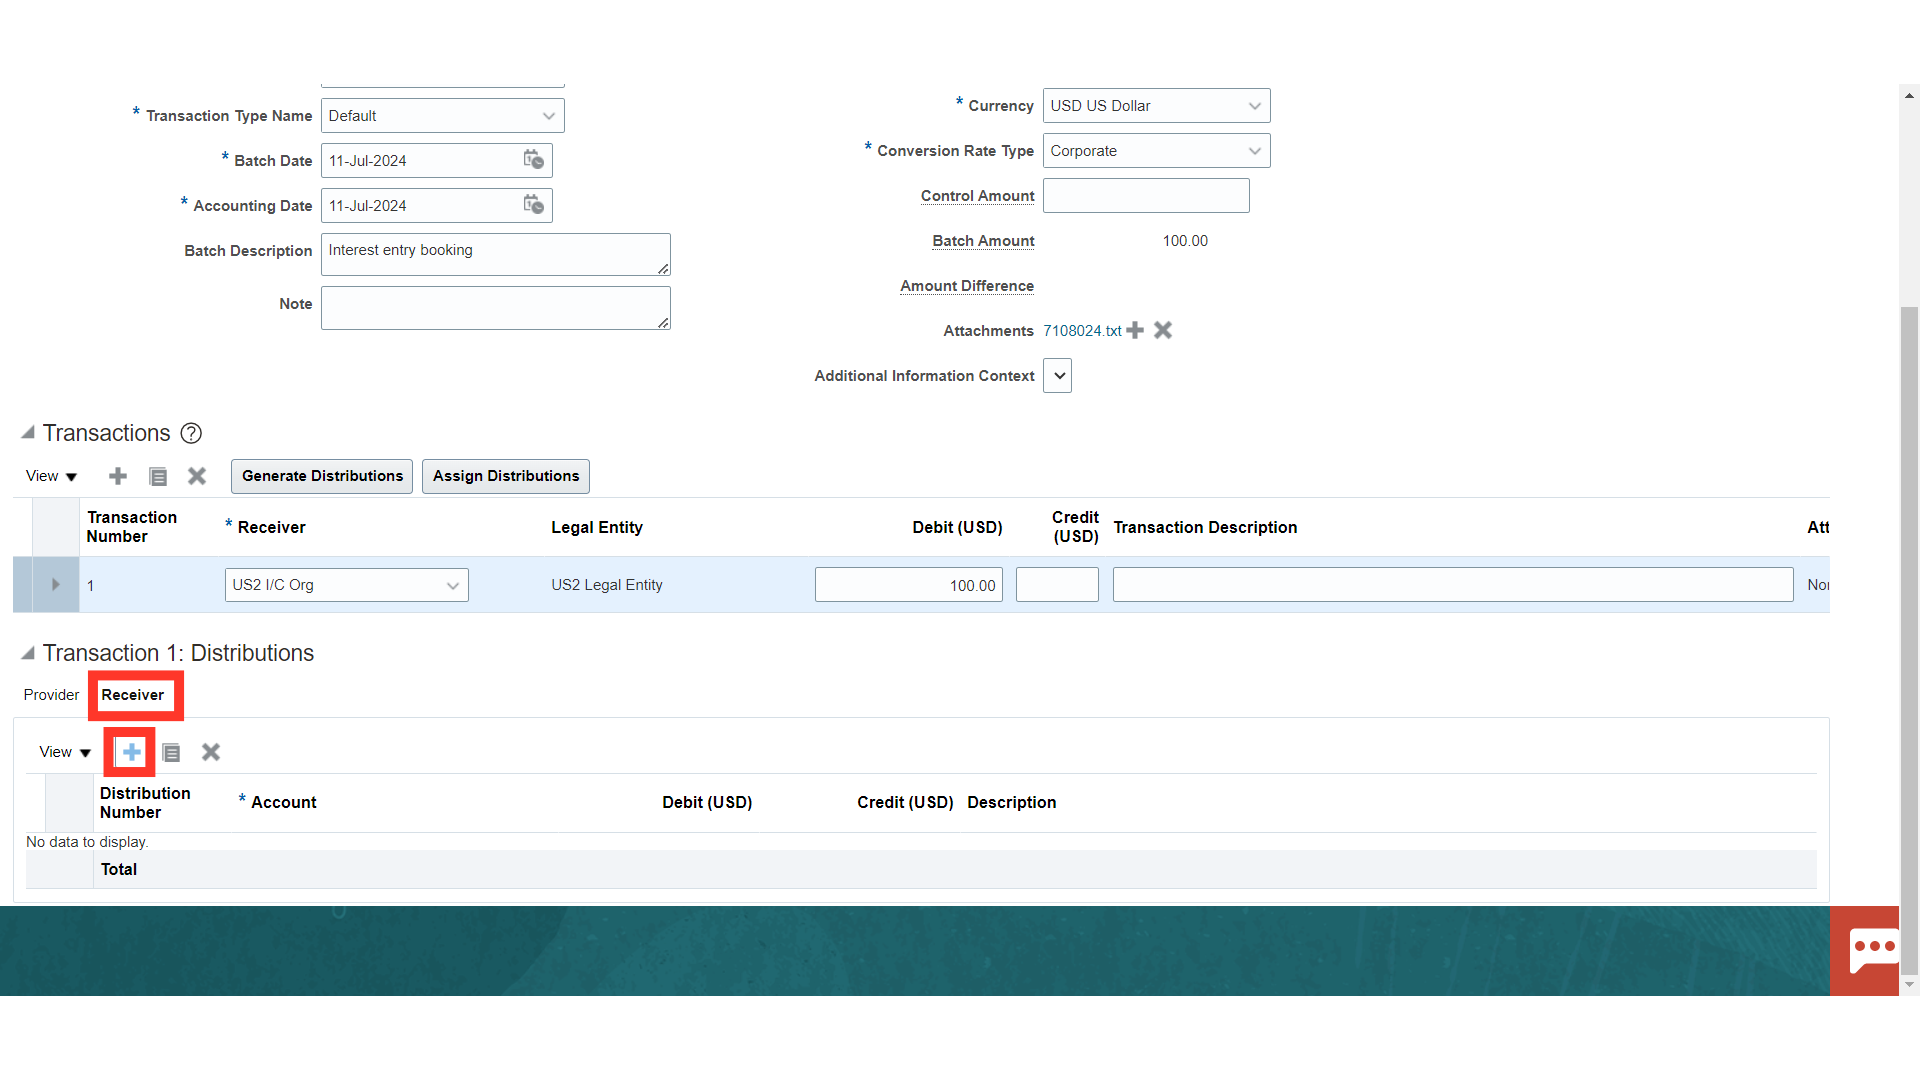
Enter the account combination and the amount as required by the transaction. Enter the account combination directly or select by clicking of search icon.
After all the details are entered click on Submit.

A Confirmation pop-up would appear for the submission of Batch. Click on OK. Click on the Batch number hyperlink to review the transaction.
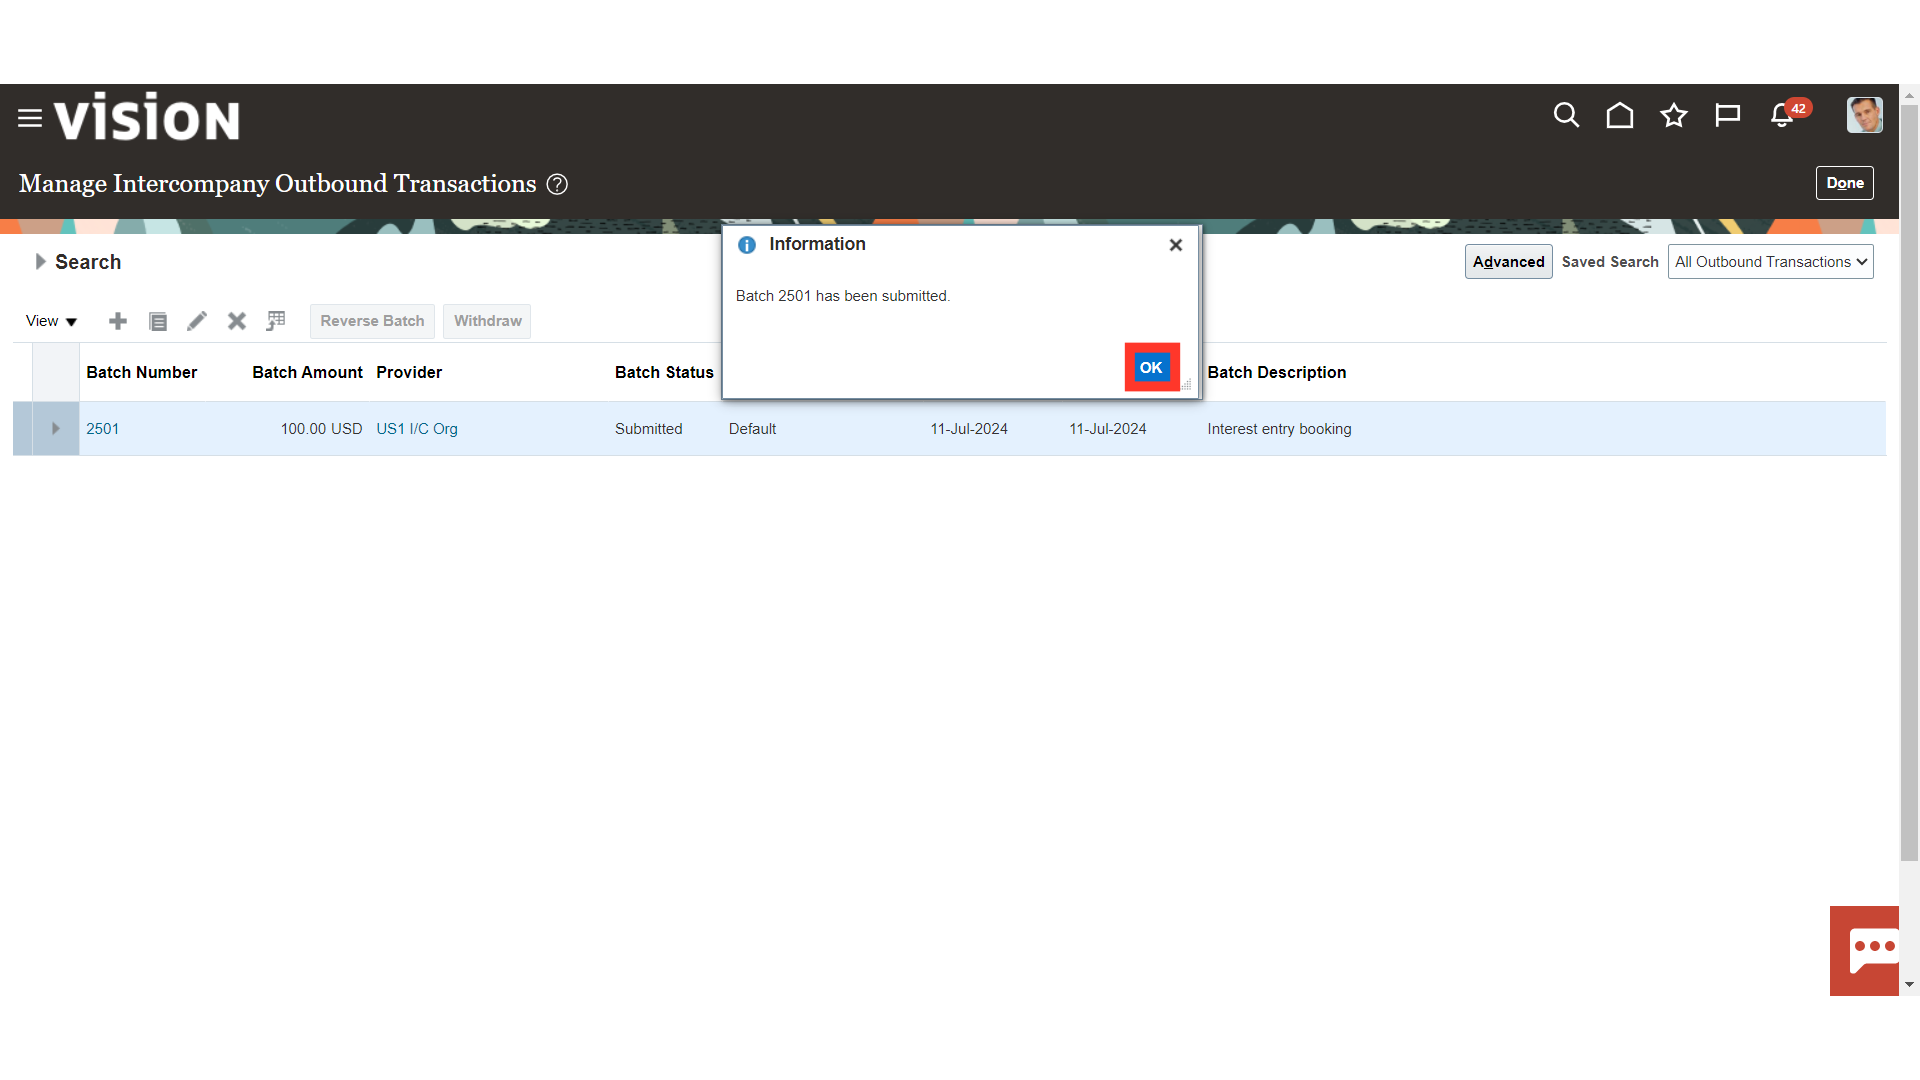
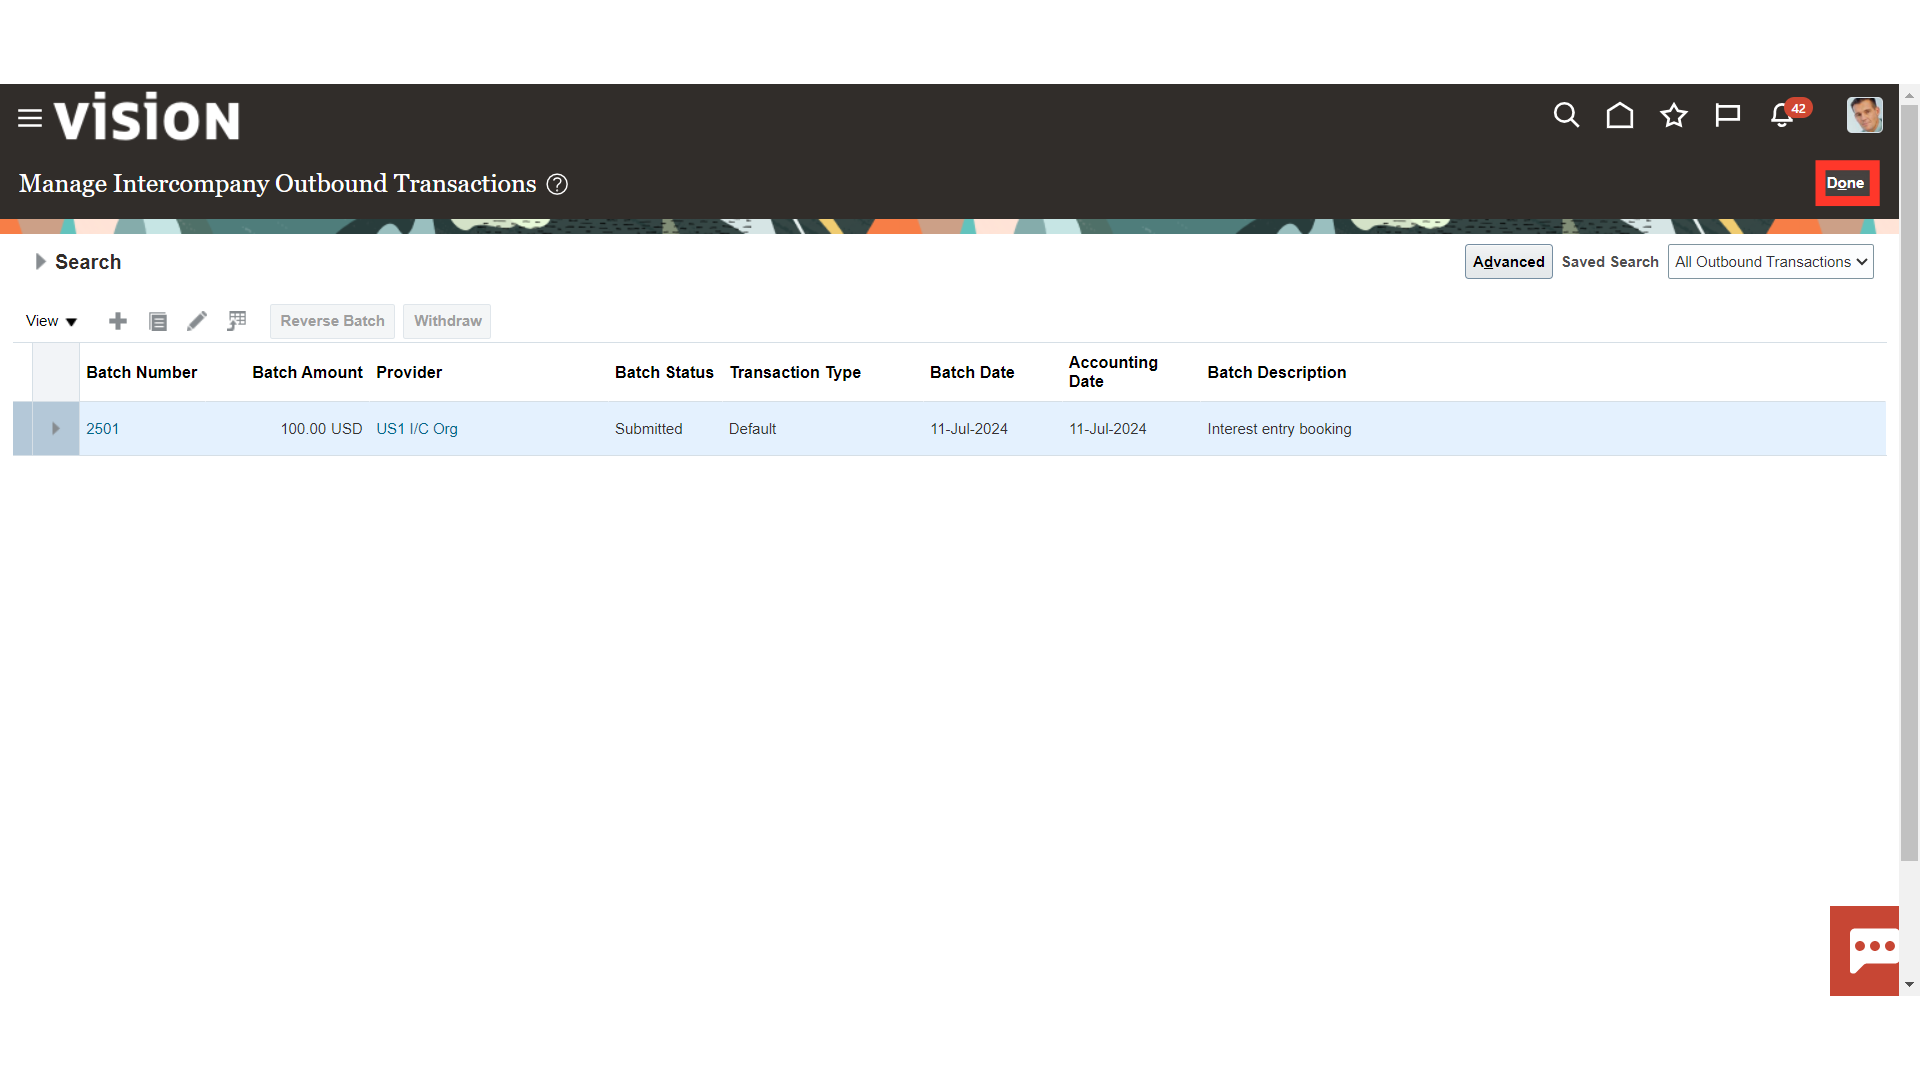
The Batch status will be Submitted.
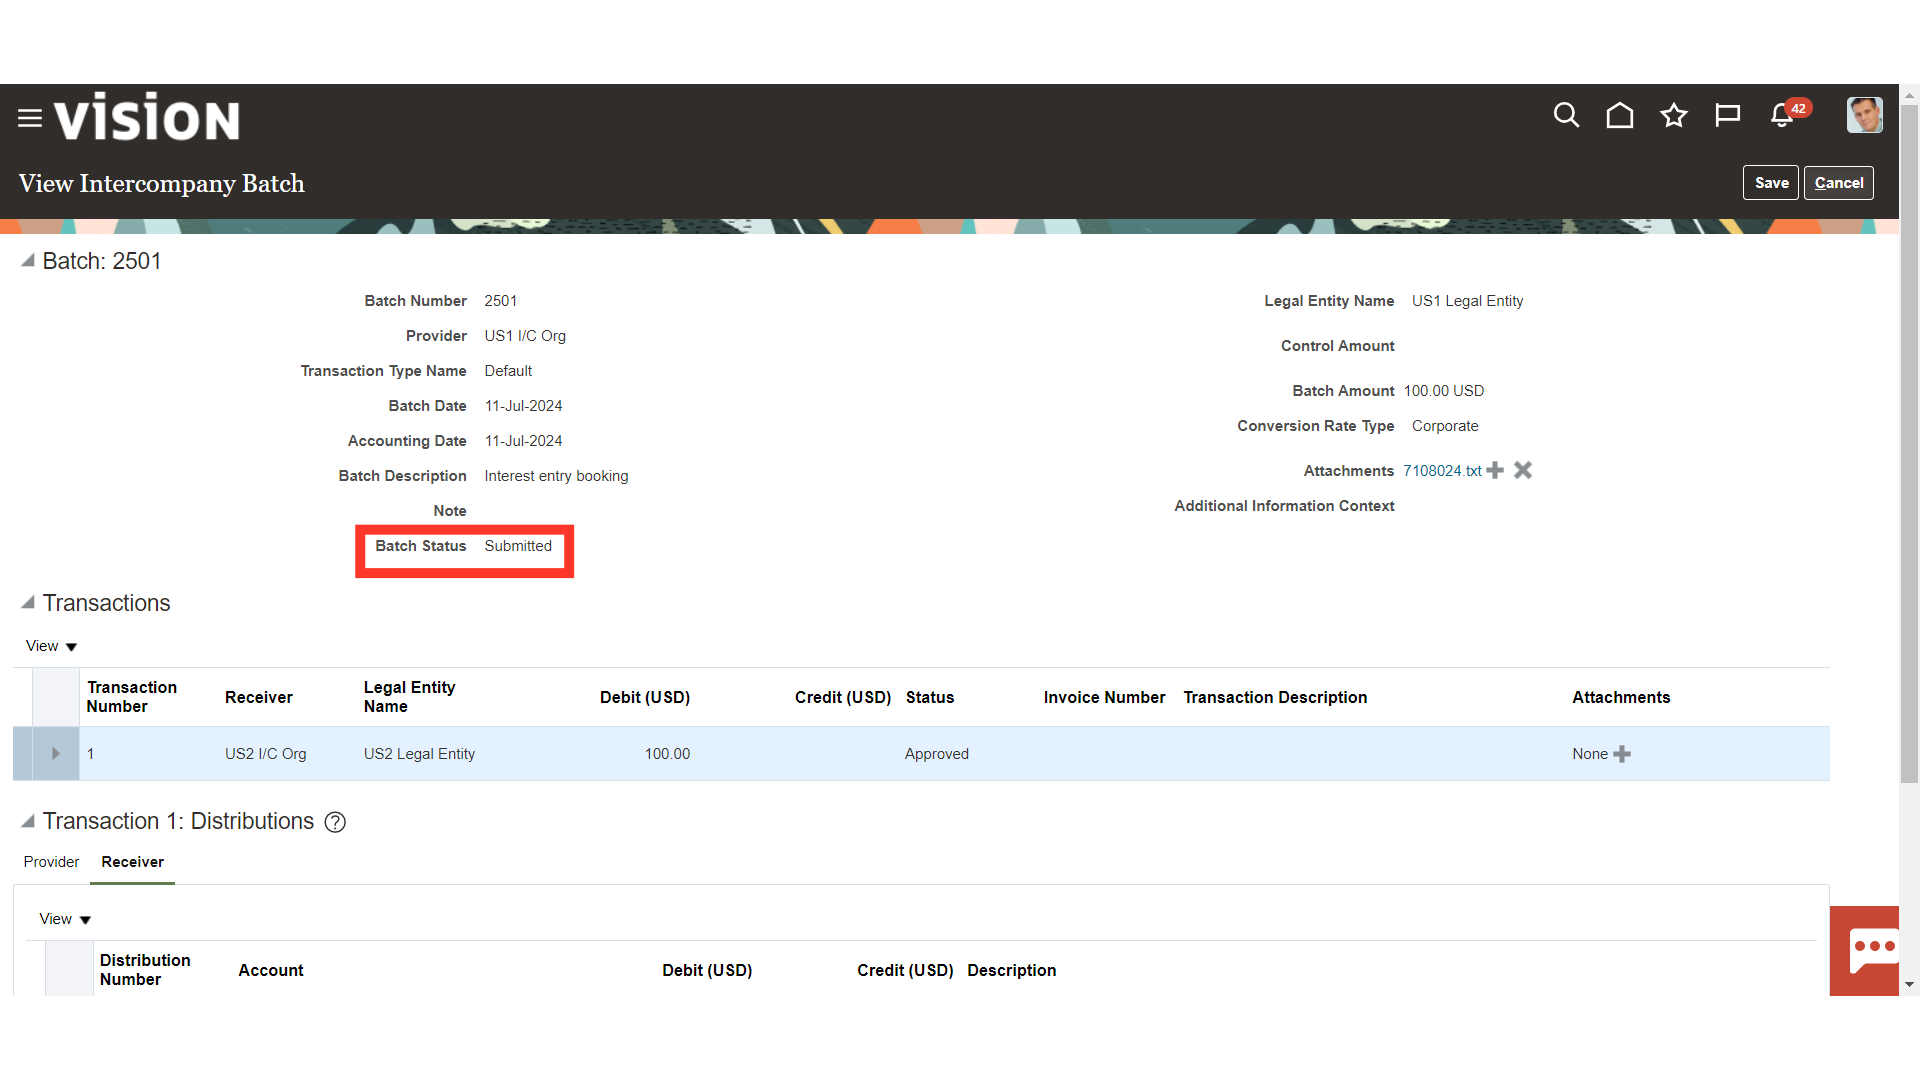
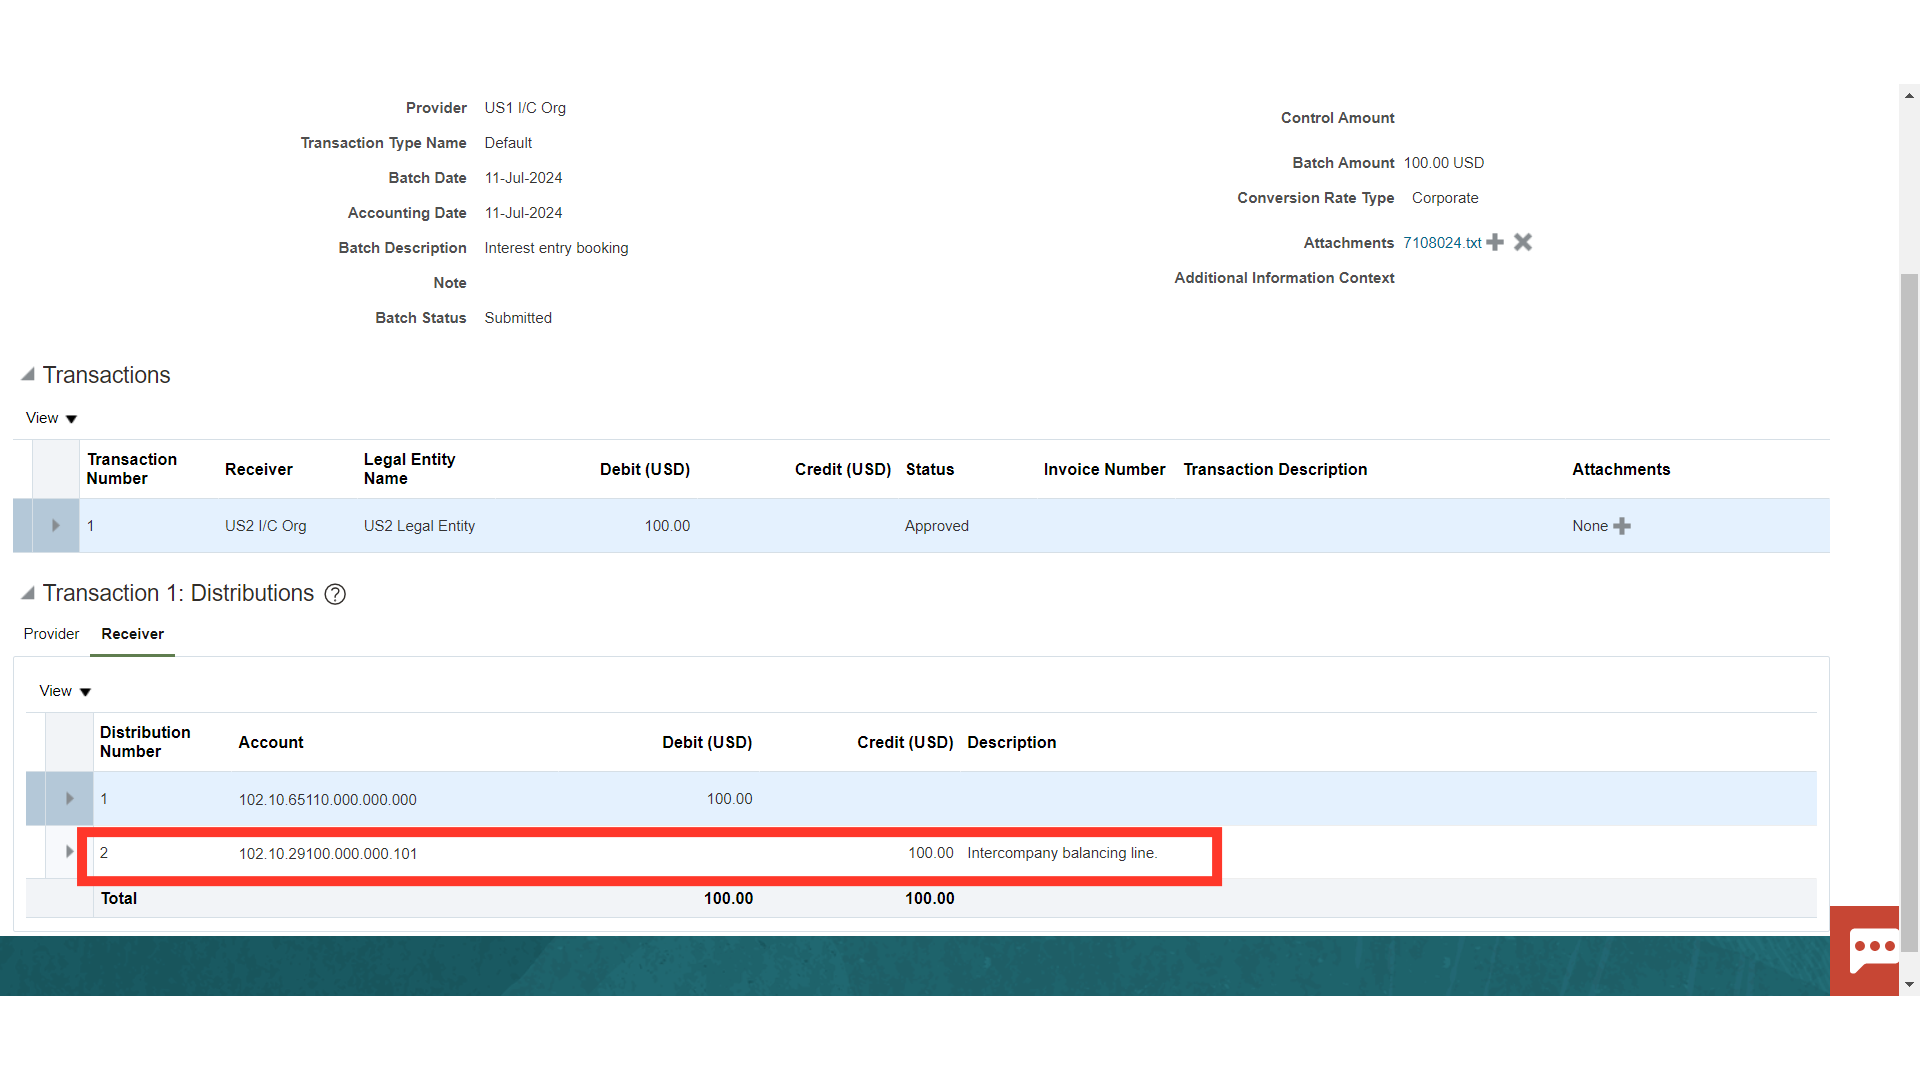
Review the Distribution section. The Intercompany line would be generated for both the Provider and Receiver entity.
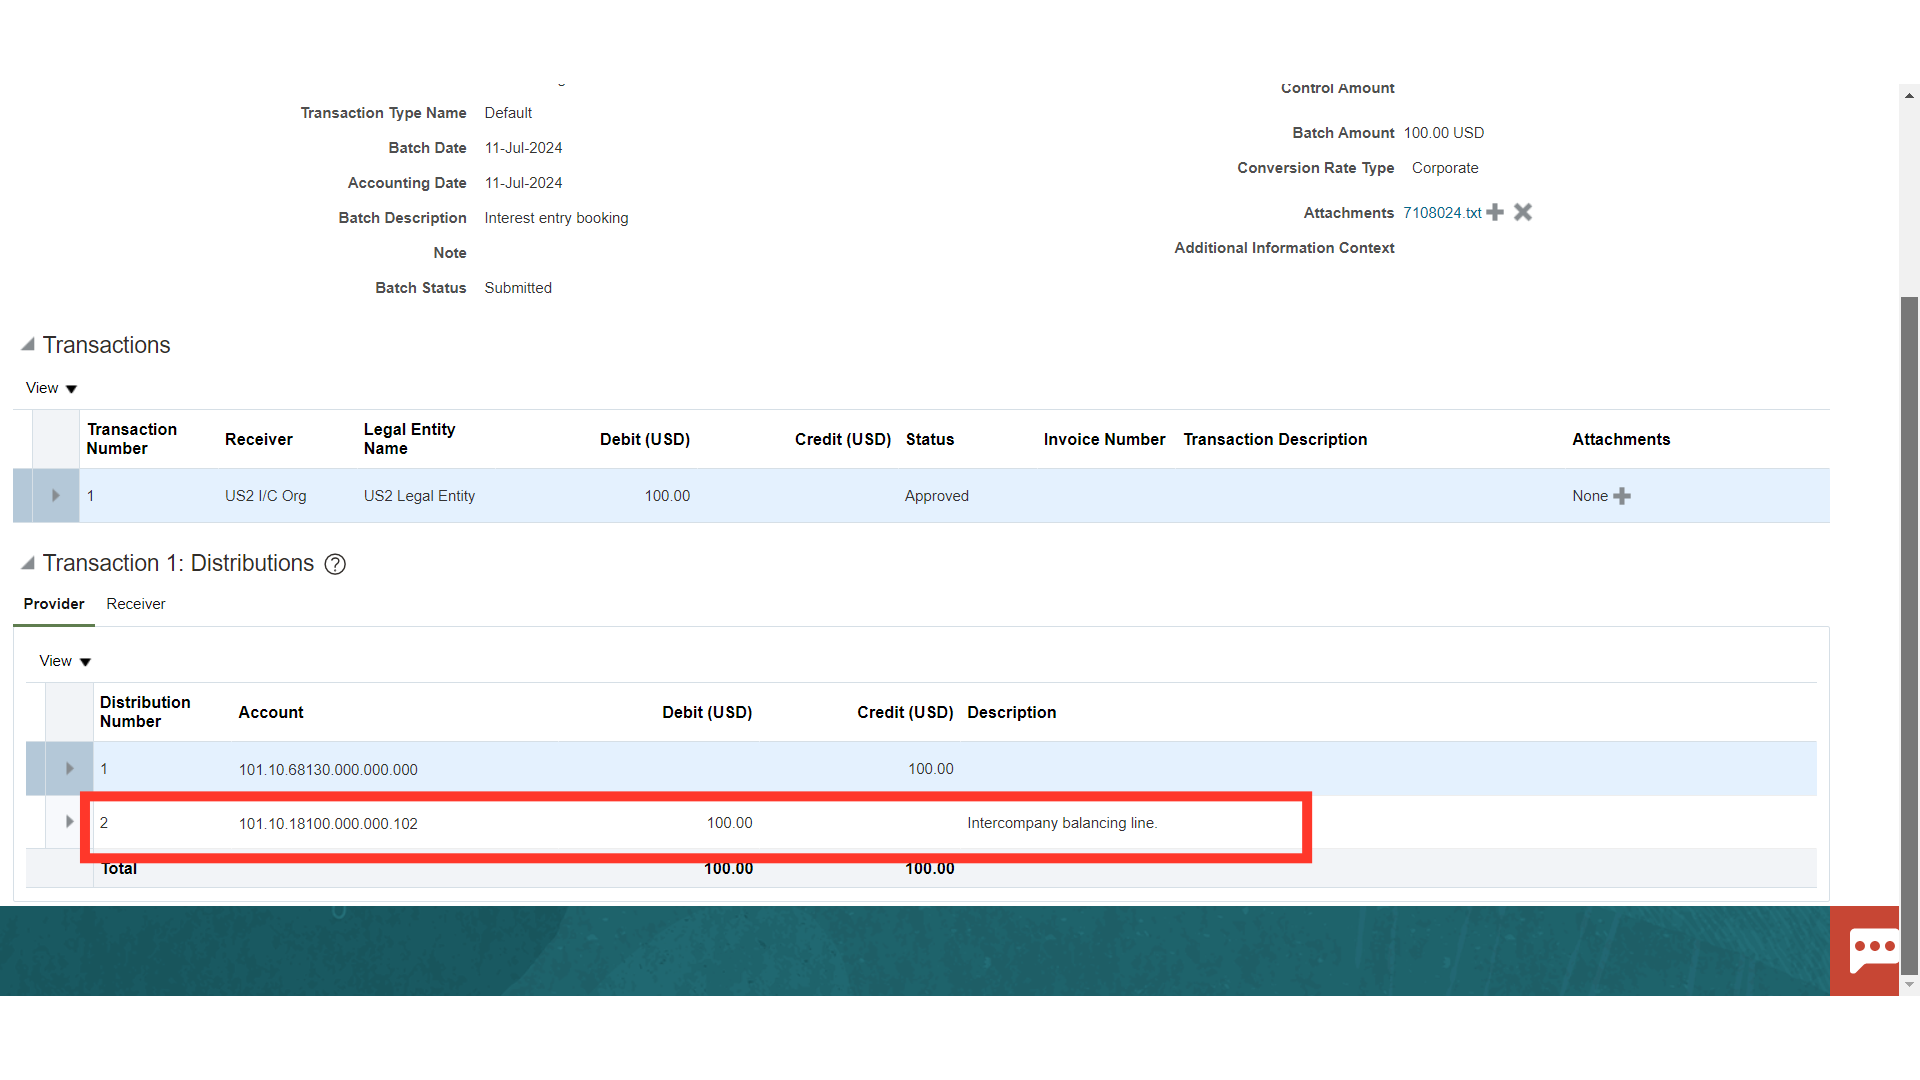
Intercompany Line will be generated for Receiver too.
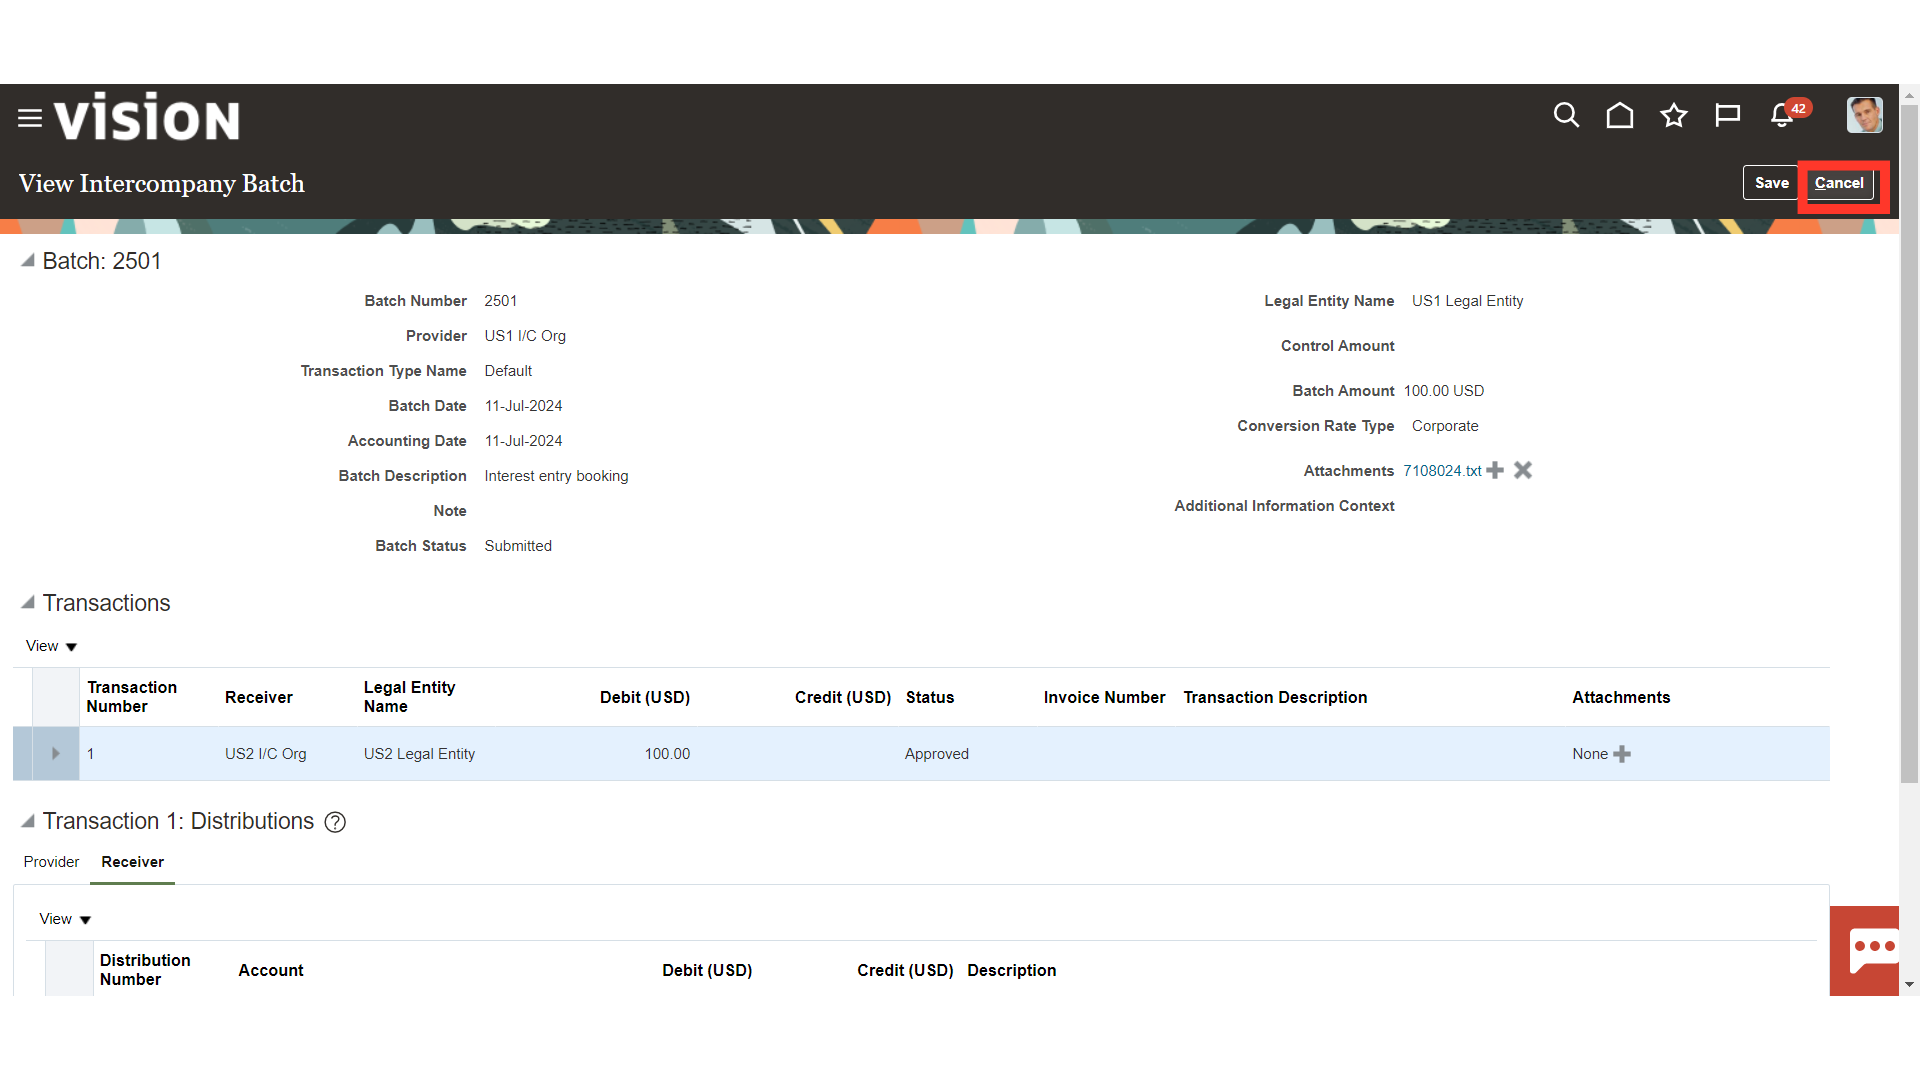
After reviewing the transaction click on Cancel.
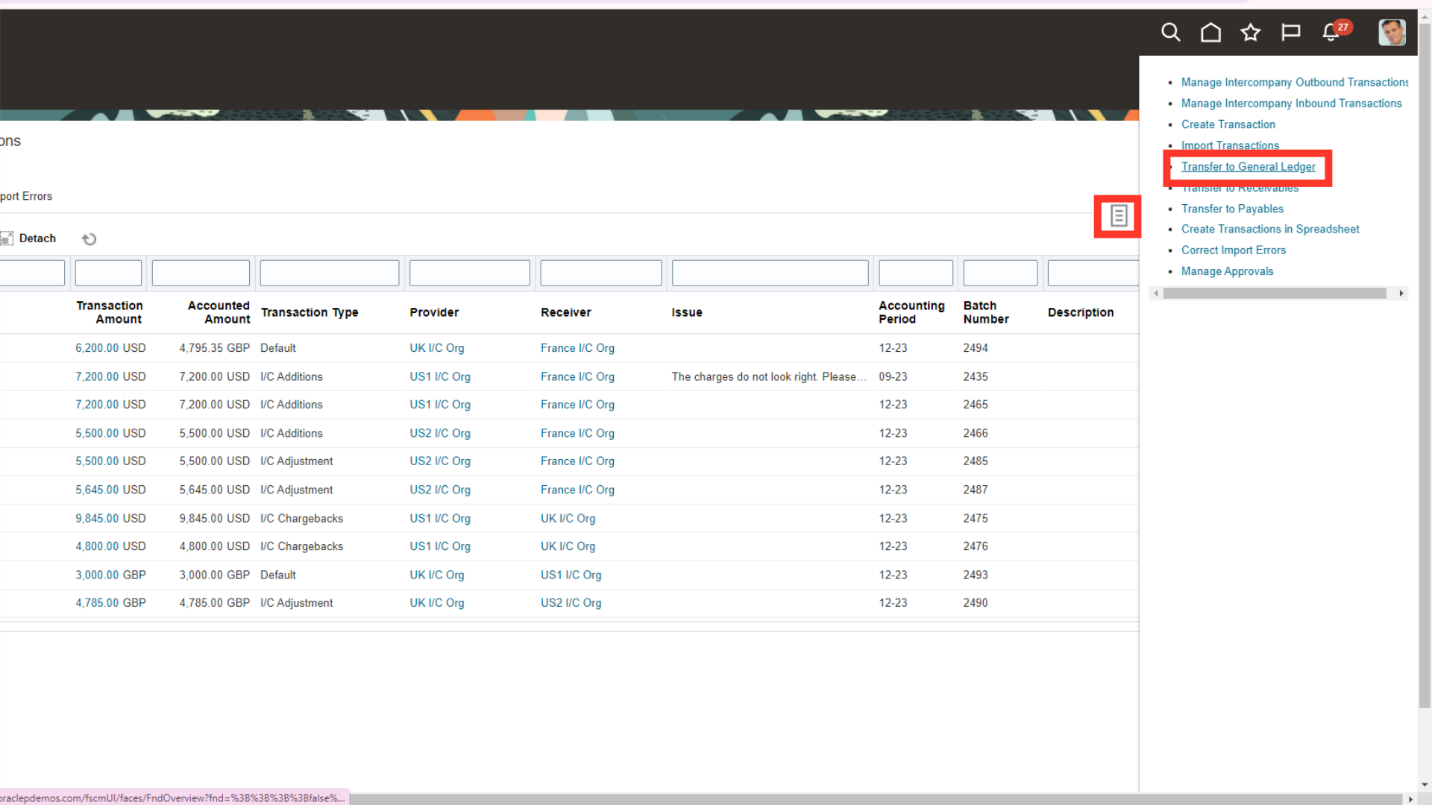
On the Intercompany Transactions landing page, expand the Tasks and Select Transfer to General Ledger from the list available.
Click on Done.
Intercompany transactions that do not need invoices are directly transferred to General Ledger once approved. Use the Transfer Intercompany Transactions To General Ledger program in the Schedule Request page to transfer or schedule and transfer the transactions to General Ledger in batch mode. The following table explains the parameters for this program. Note: The program transfers all transactions irrespective of the intercompany organizations assigned to the user who schedules the request.
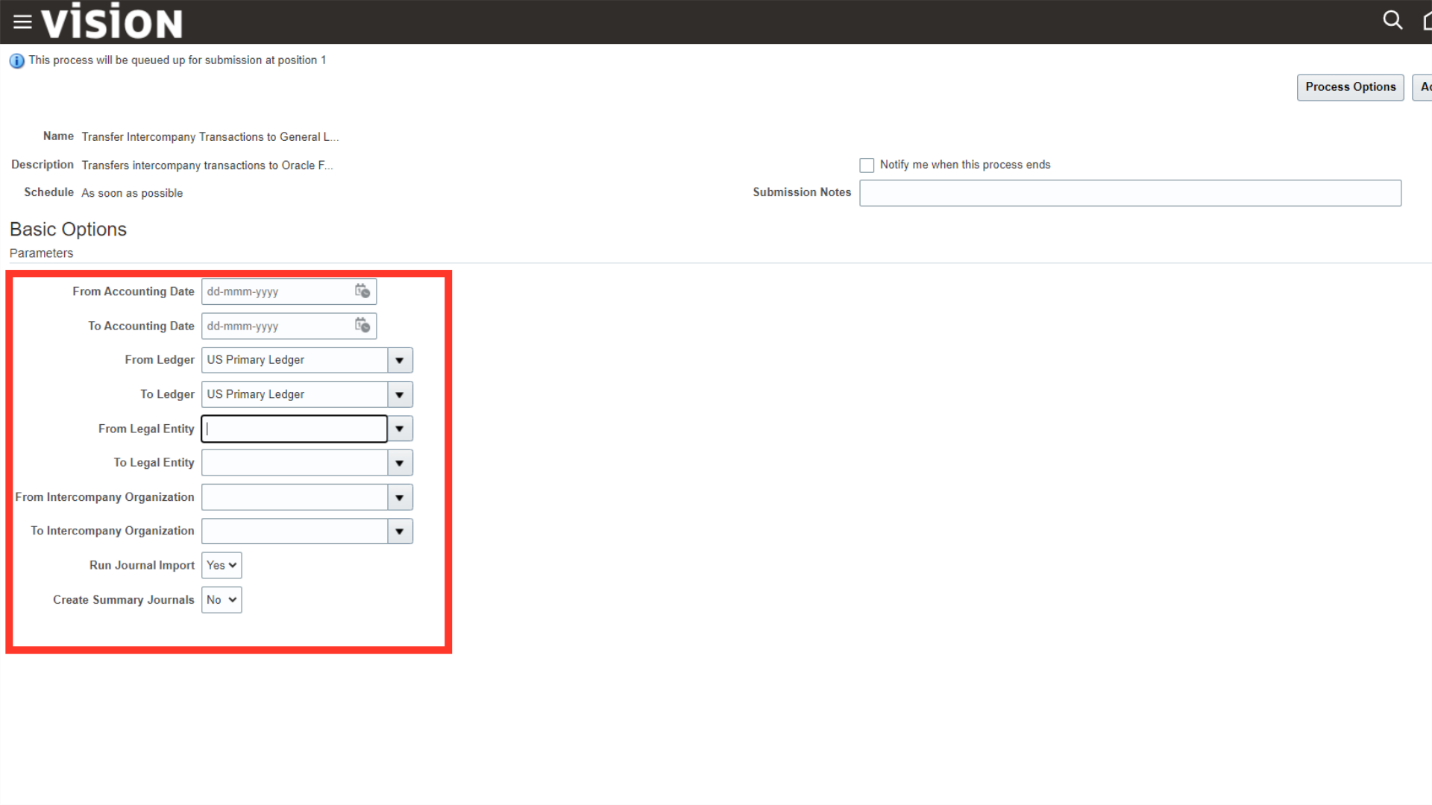
Parameter Description
From Accounting Date: Specify the General Ledger start date of the transactions.
To Accounting Date: Specify the General Ledger end date of the transactions.
From Ledger: Select the starting ledger from the list of values.
To Ledger: Select the closing ledger from the list of values.
From Legal Entity: Select the top legal entity from the list of values.
To Legal Entity: Enter the bottom legal entity from the list of values.
From Intercompany Organization: Enter the top Intercompany organization from the list of values.
To Intercompany Organization: Enter the bottom Intercompany organization from the list of values.
Run Journal Import: Select Yes to run the GL Journal Import process.
Create Summary Journals: Select this option if you want to create the journal entries in summary format in general ledger.
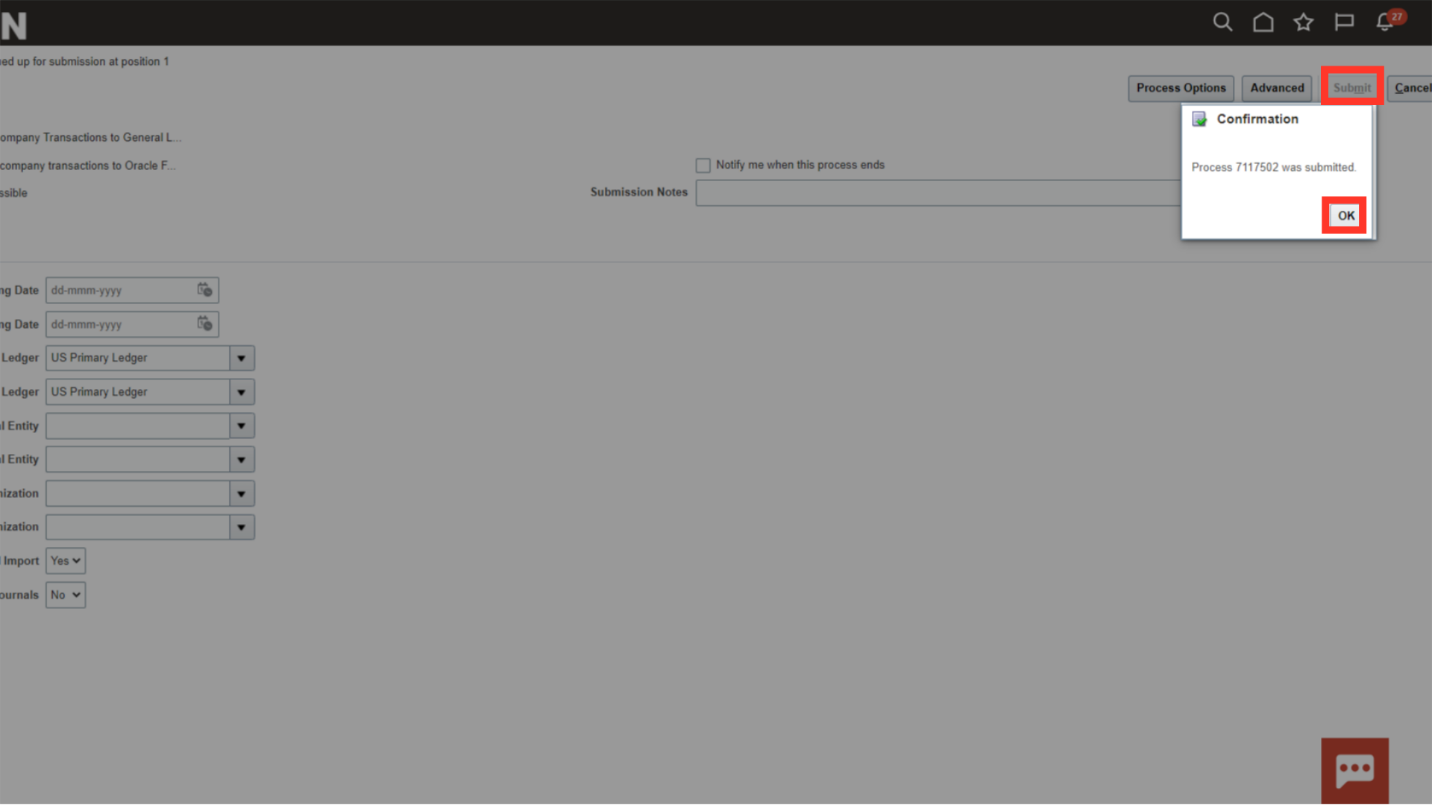
After the parameters are entered click on Submit. The Process Id would be generated. Click on OK
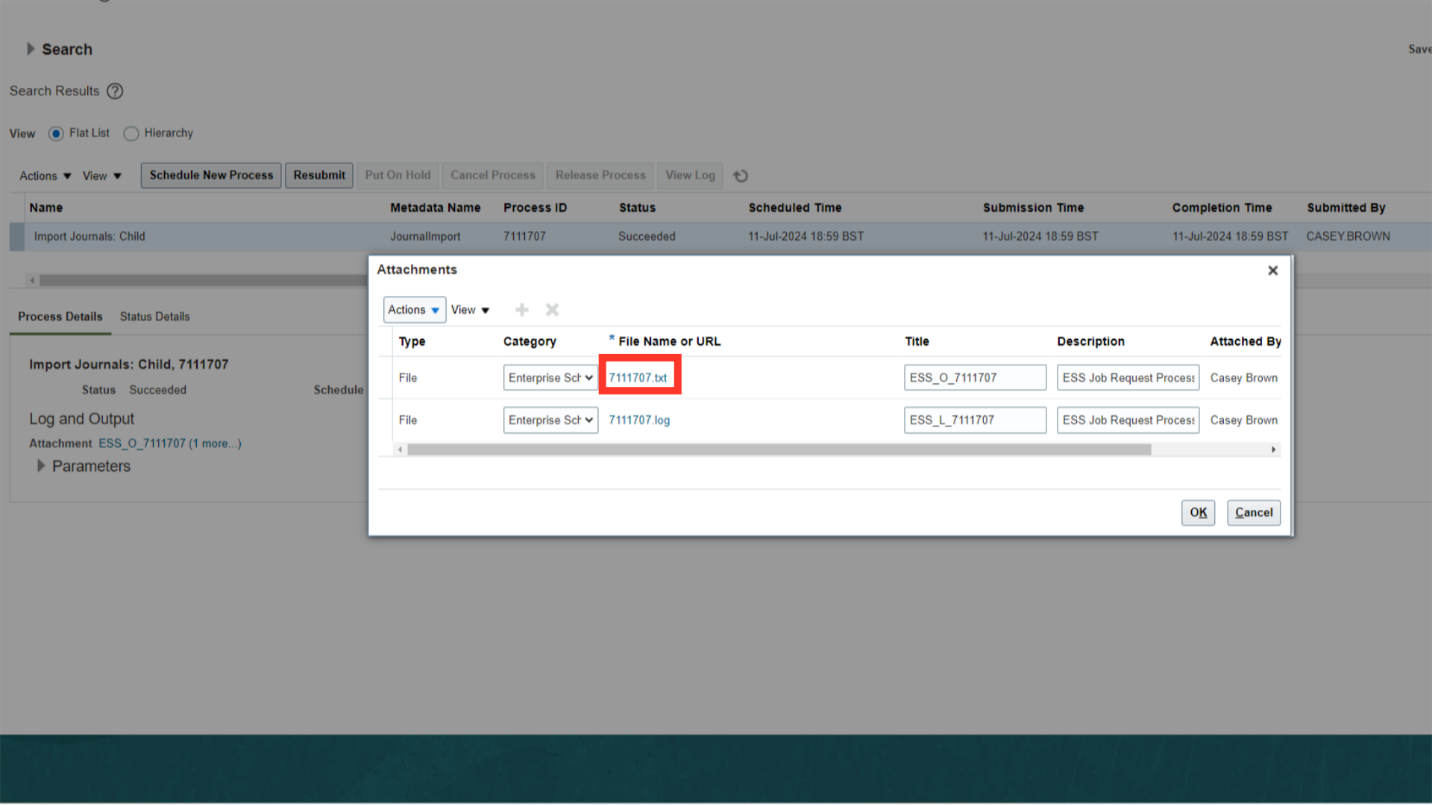
Once Transfer Intercompany Transactions to General Ledger process is succeeded, Import Journals process is automatically ran. To download the report, click on 1 more hyperlink against Attachment after selecting Import Journals: Child process.
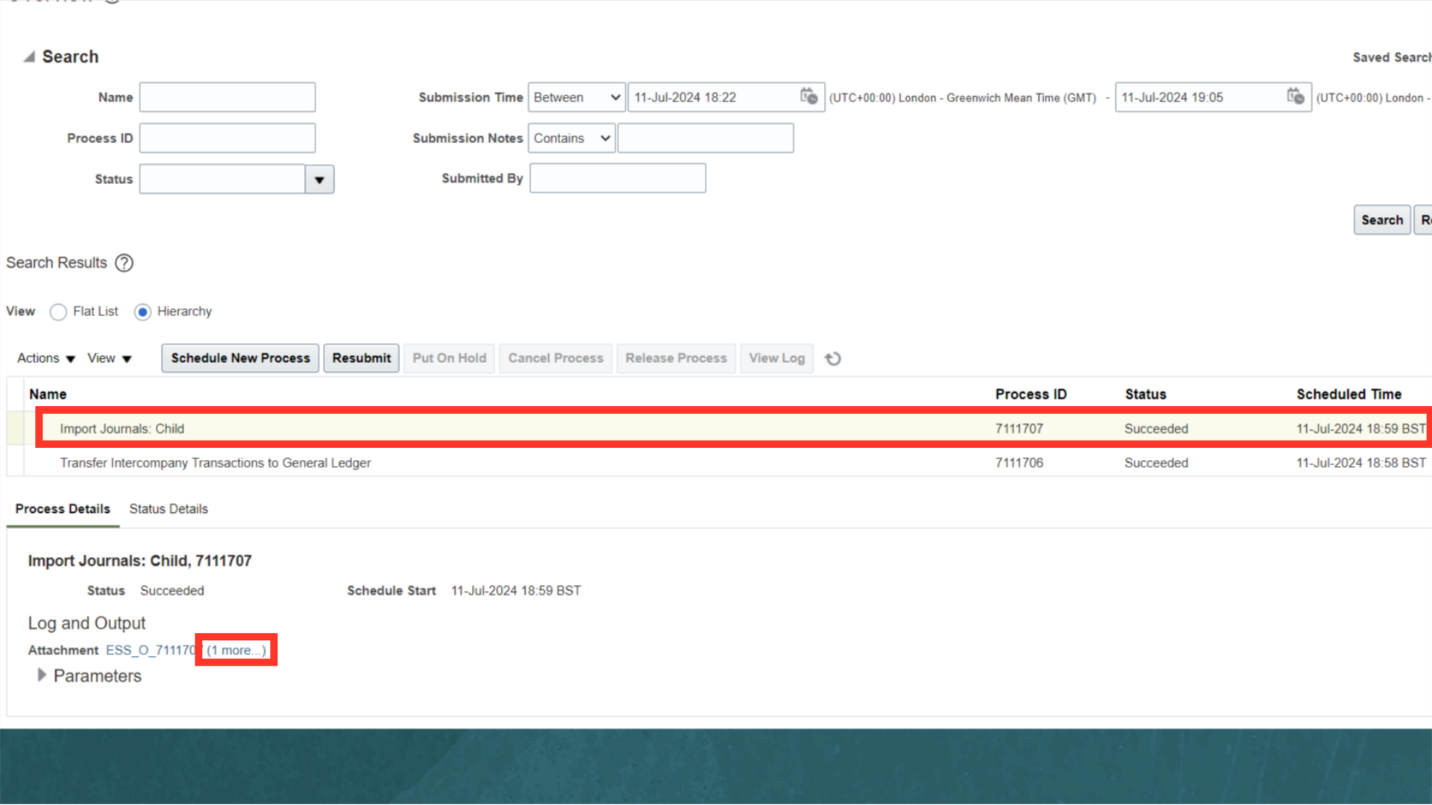
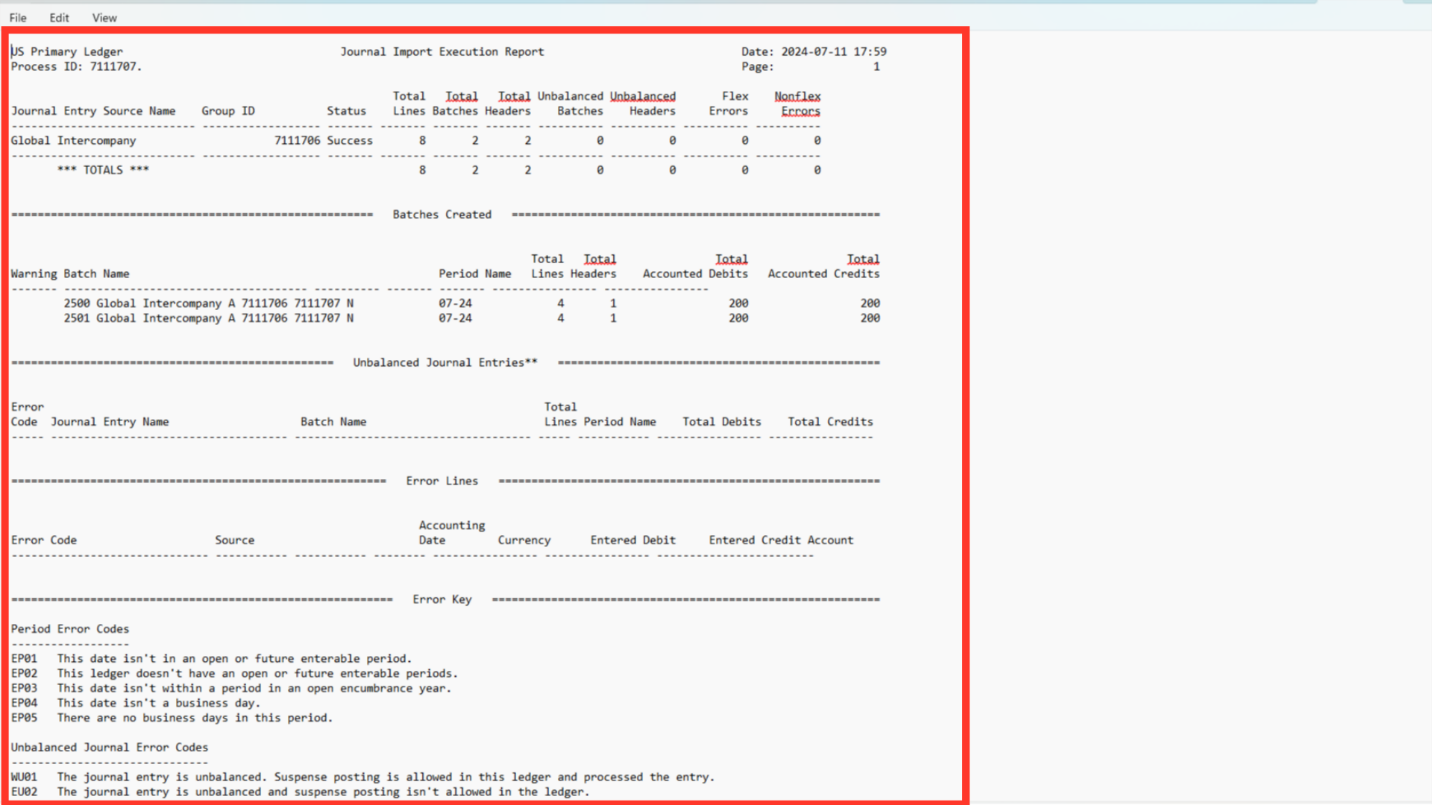
Download the Text file. It will contain details of all the transactions that got transferred to General Ledger. Along with the details of the Journal Batch name.
Review the Text output. The report contains details of not only Journals created but also if any journal is in error and the error details.
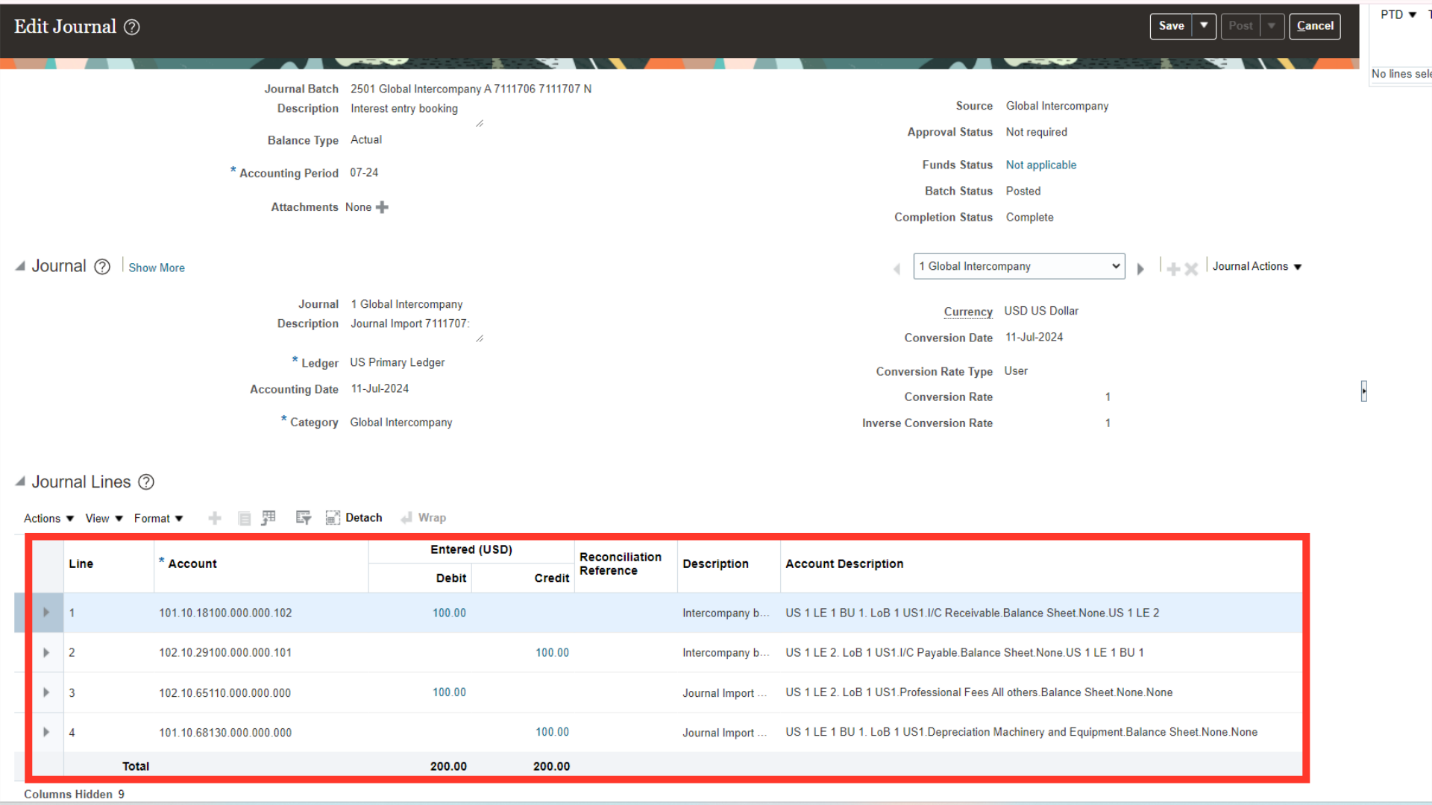
Search for the Journal Batch created from the Manage Journals page.
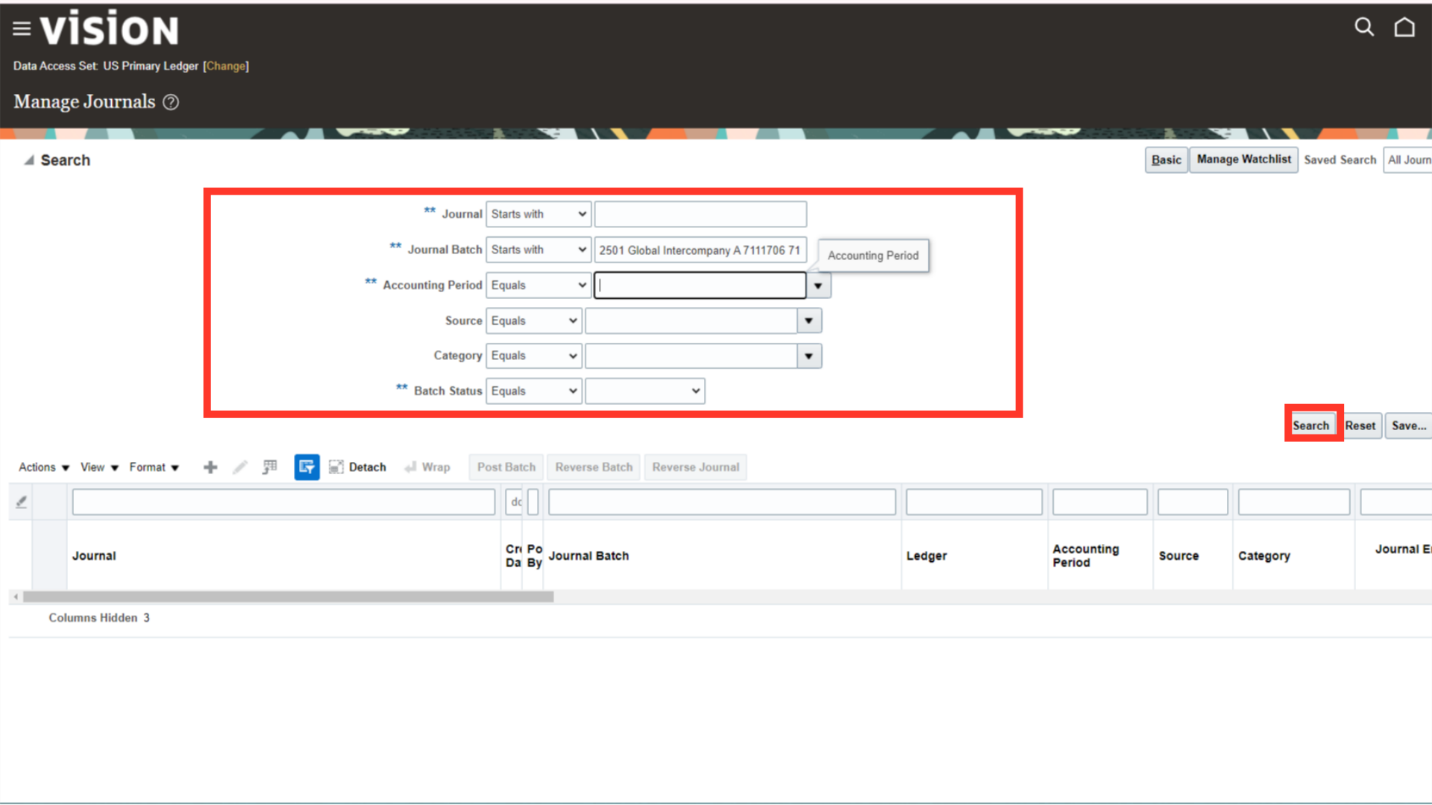
There will be two journal batches that would be searched, one for each ledger of the two entities i.e. Provider and Recipient entity. If both the entities belong to same ledger then only one Journal Batch would be created.
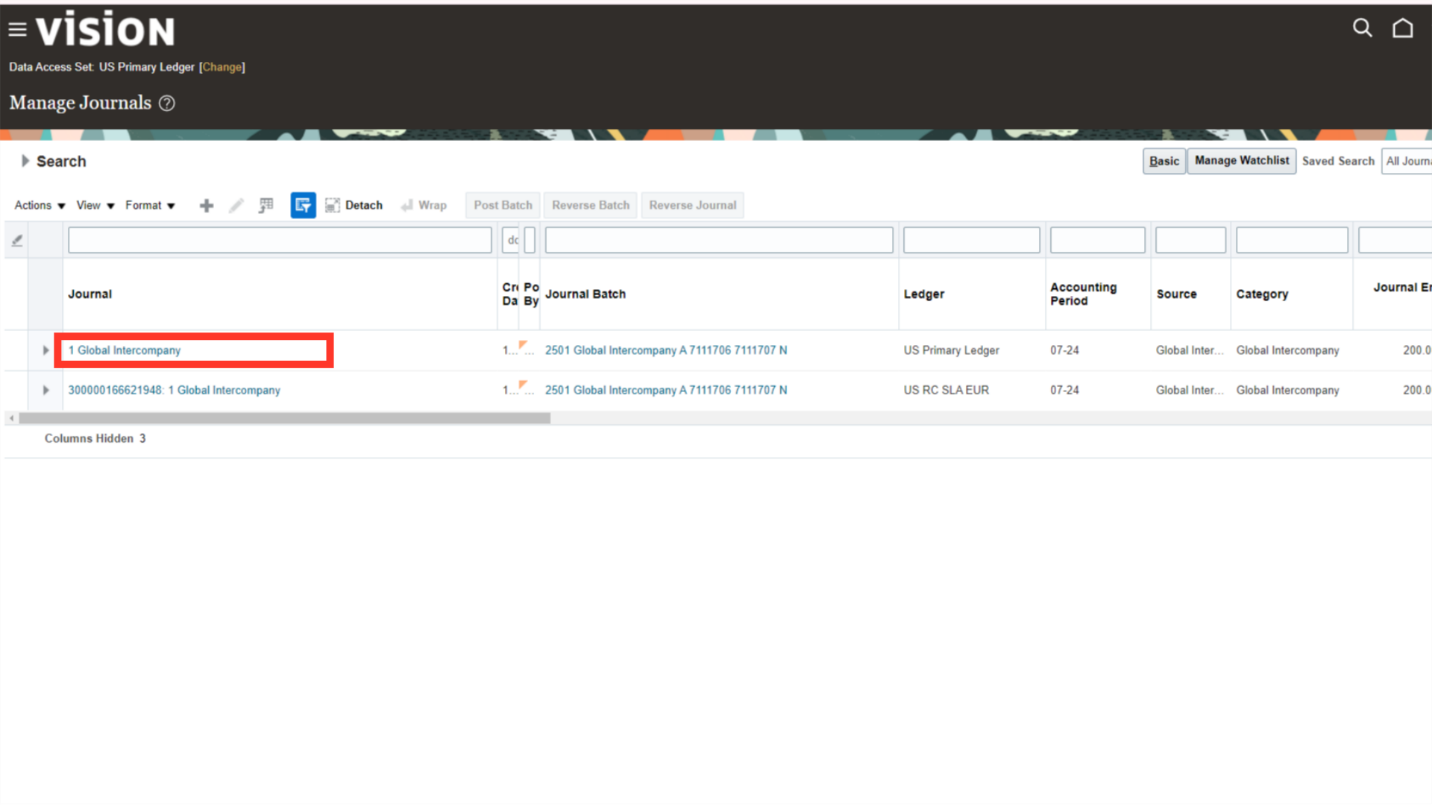
Review the Journal Batch and the Journal lines created.