Internal Contracts – Billing – Review and Accounting of Invoice in AR
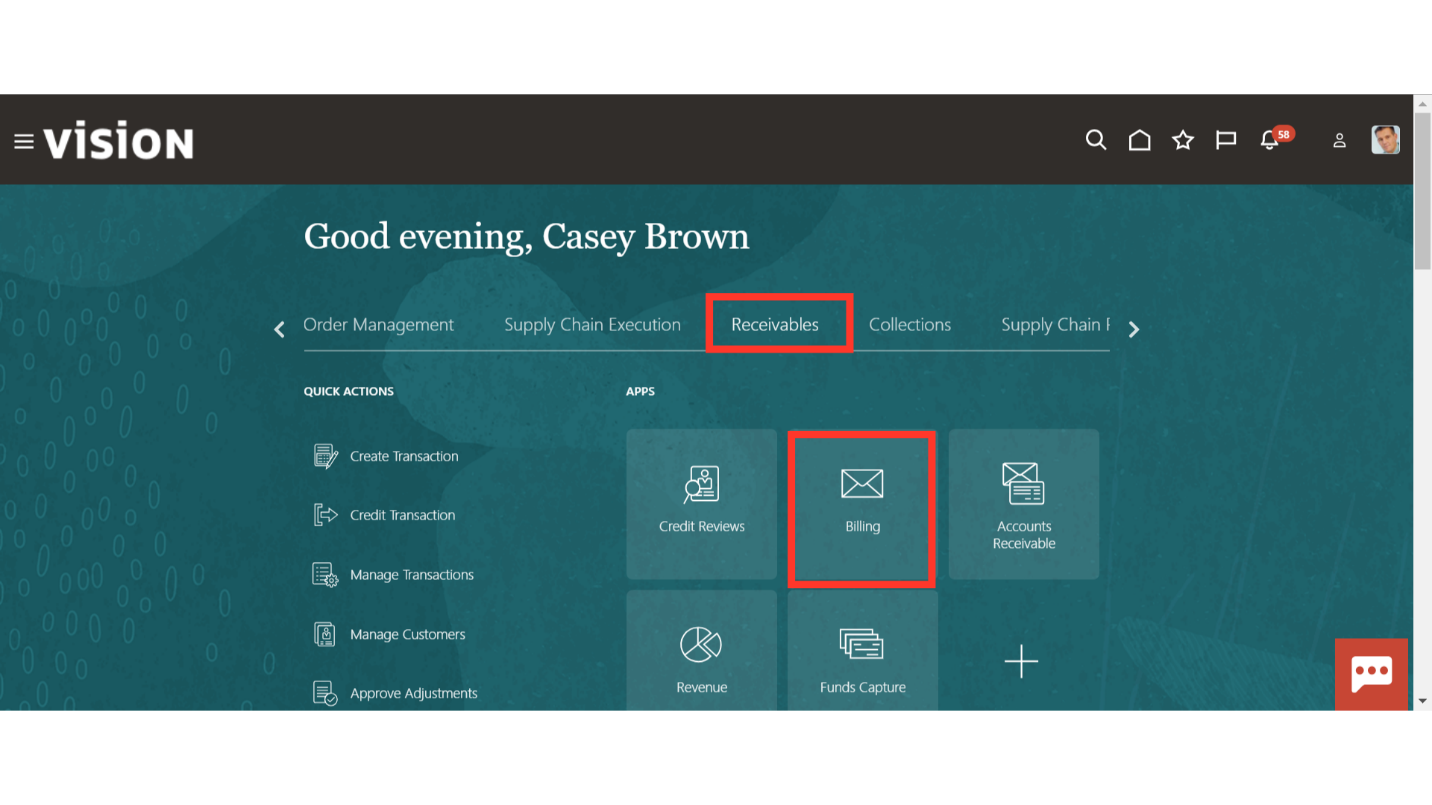
Navigate to the ‘Billing’ sub-menu under the ‘Receivables’ menu from the Oracle Cloud home page.
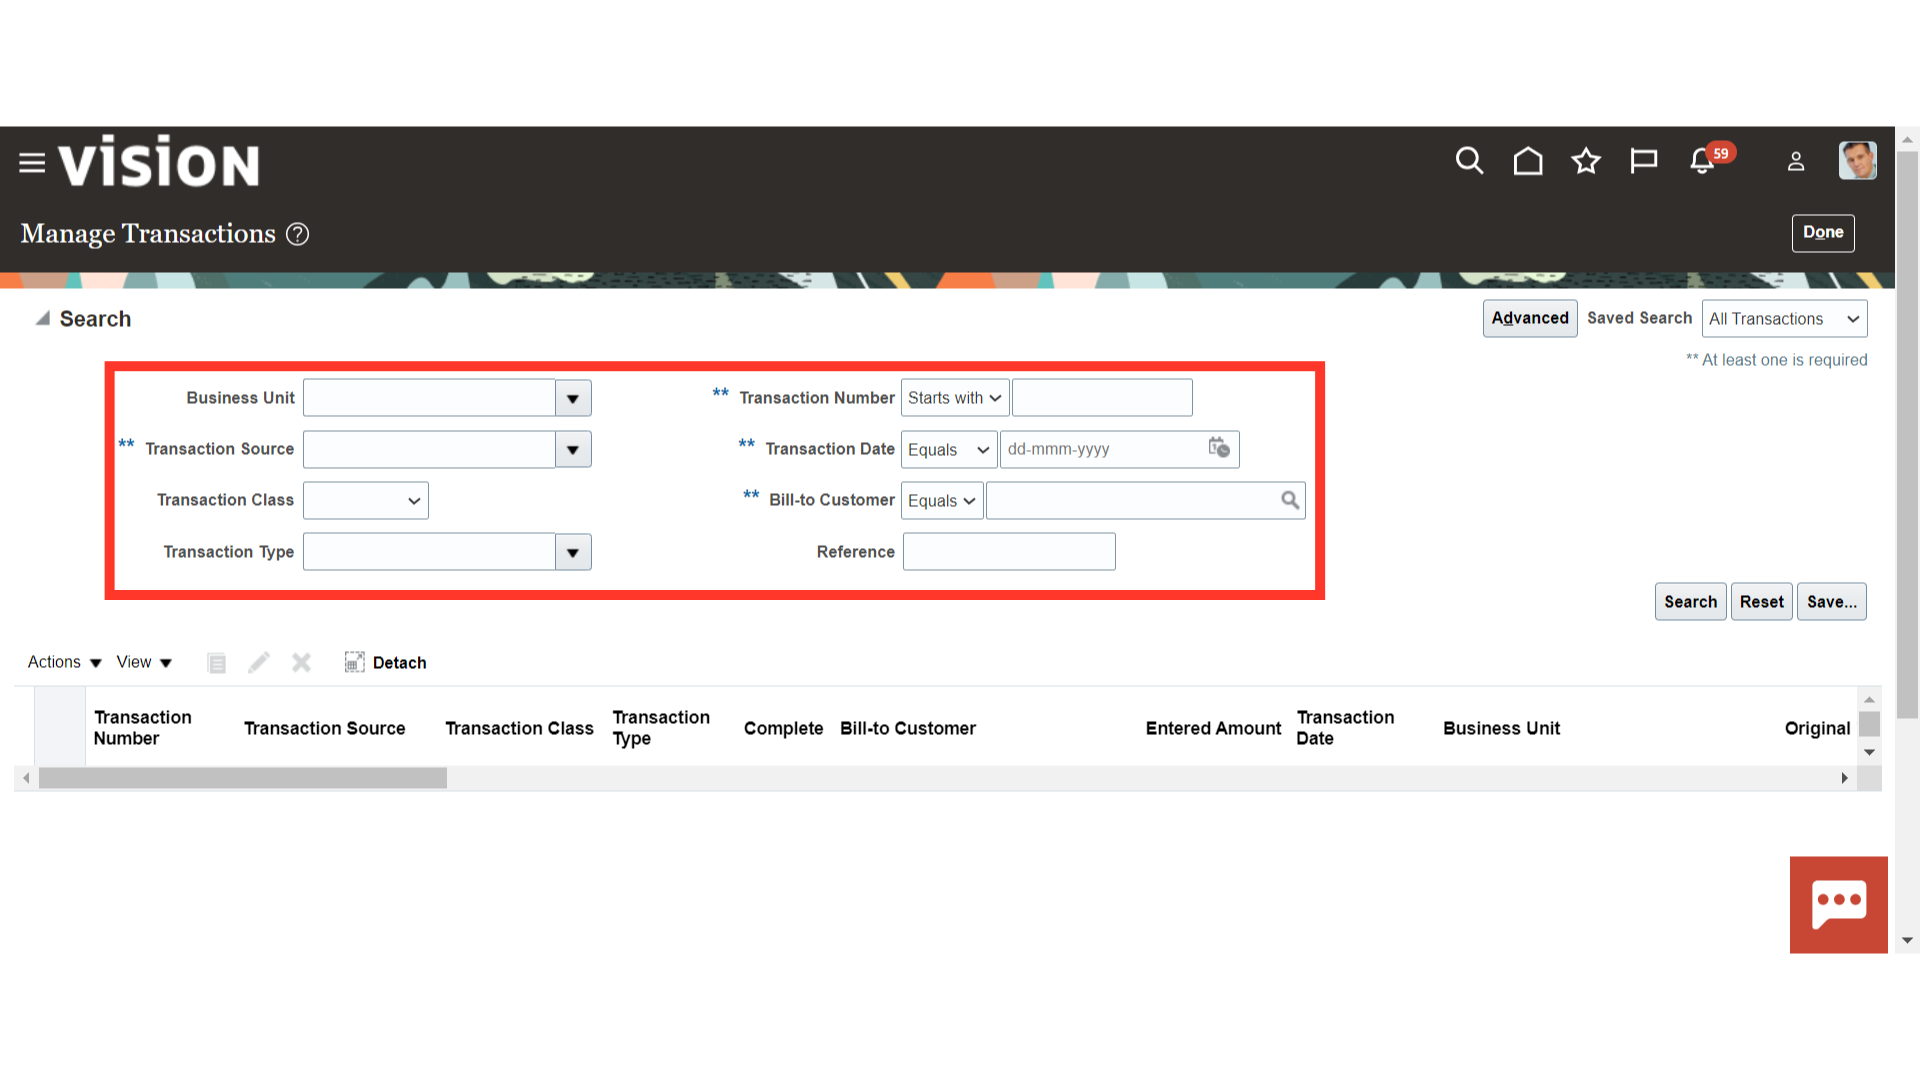
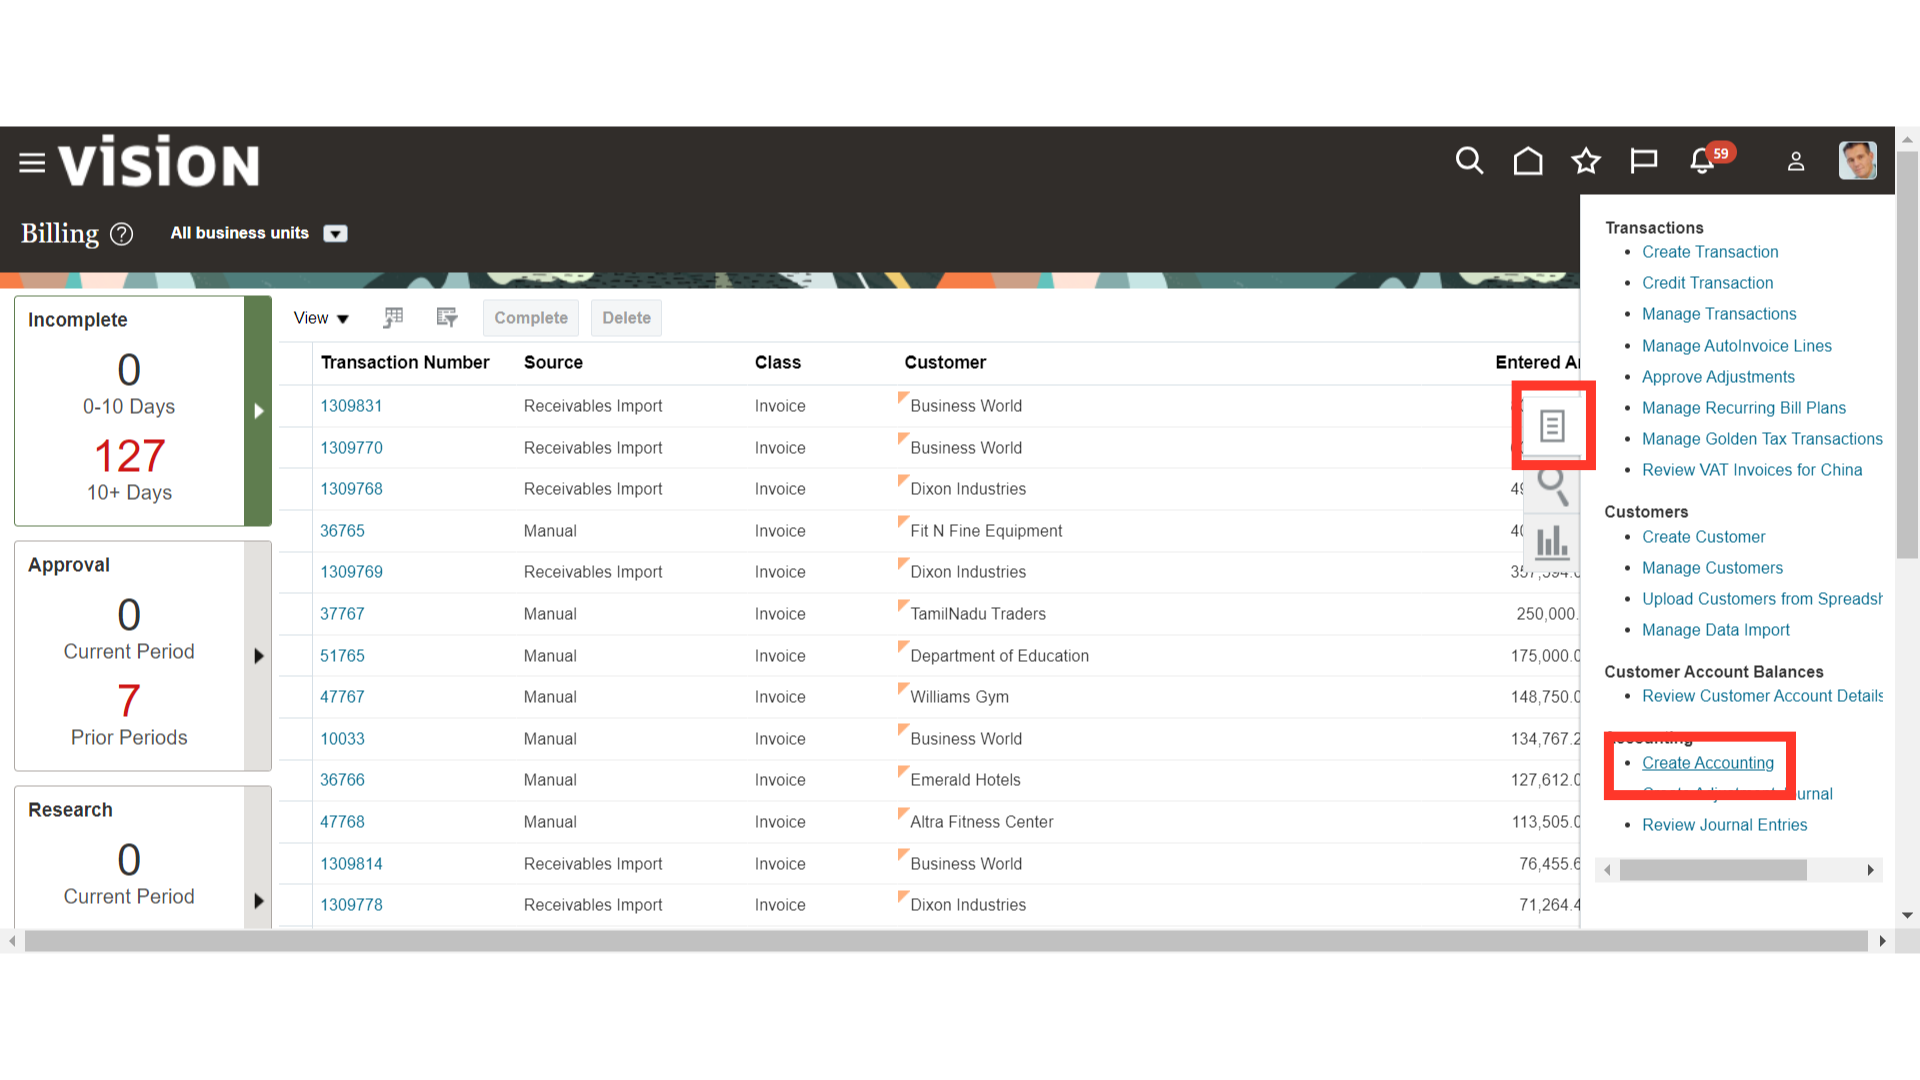
Navigate to the ‘Manage Transactions’ from the Task list.

You can search by entering the values in the provided parameters like Business Unit, Transaction Source, Transaction Number, Transaction Date etc.
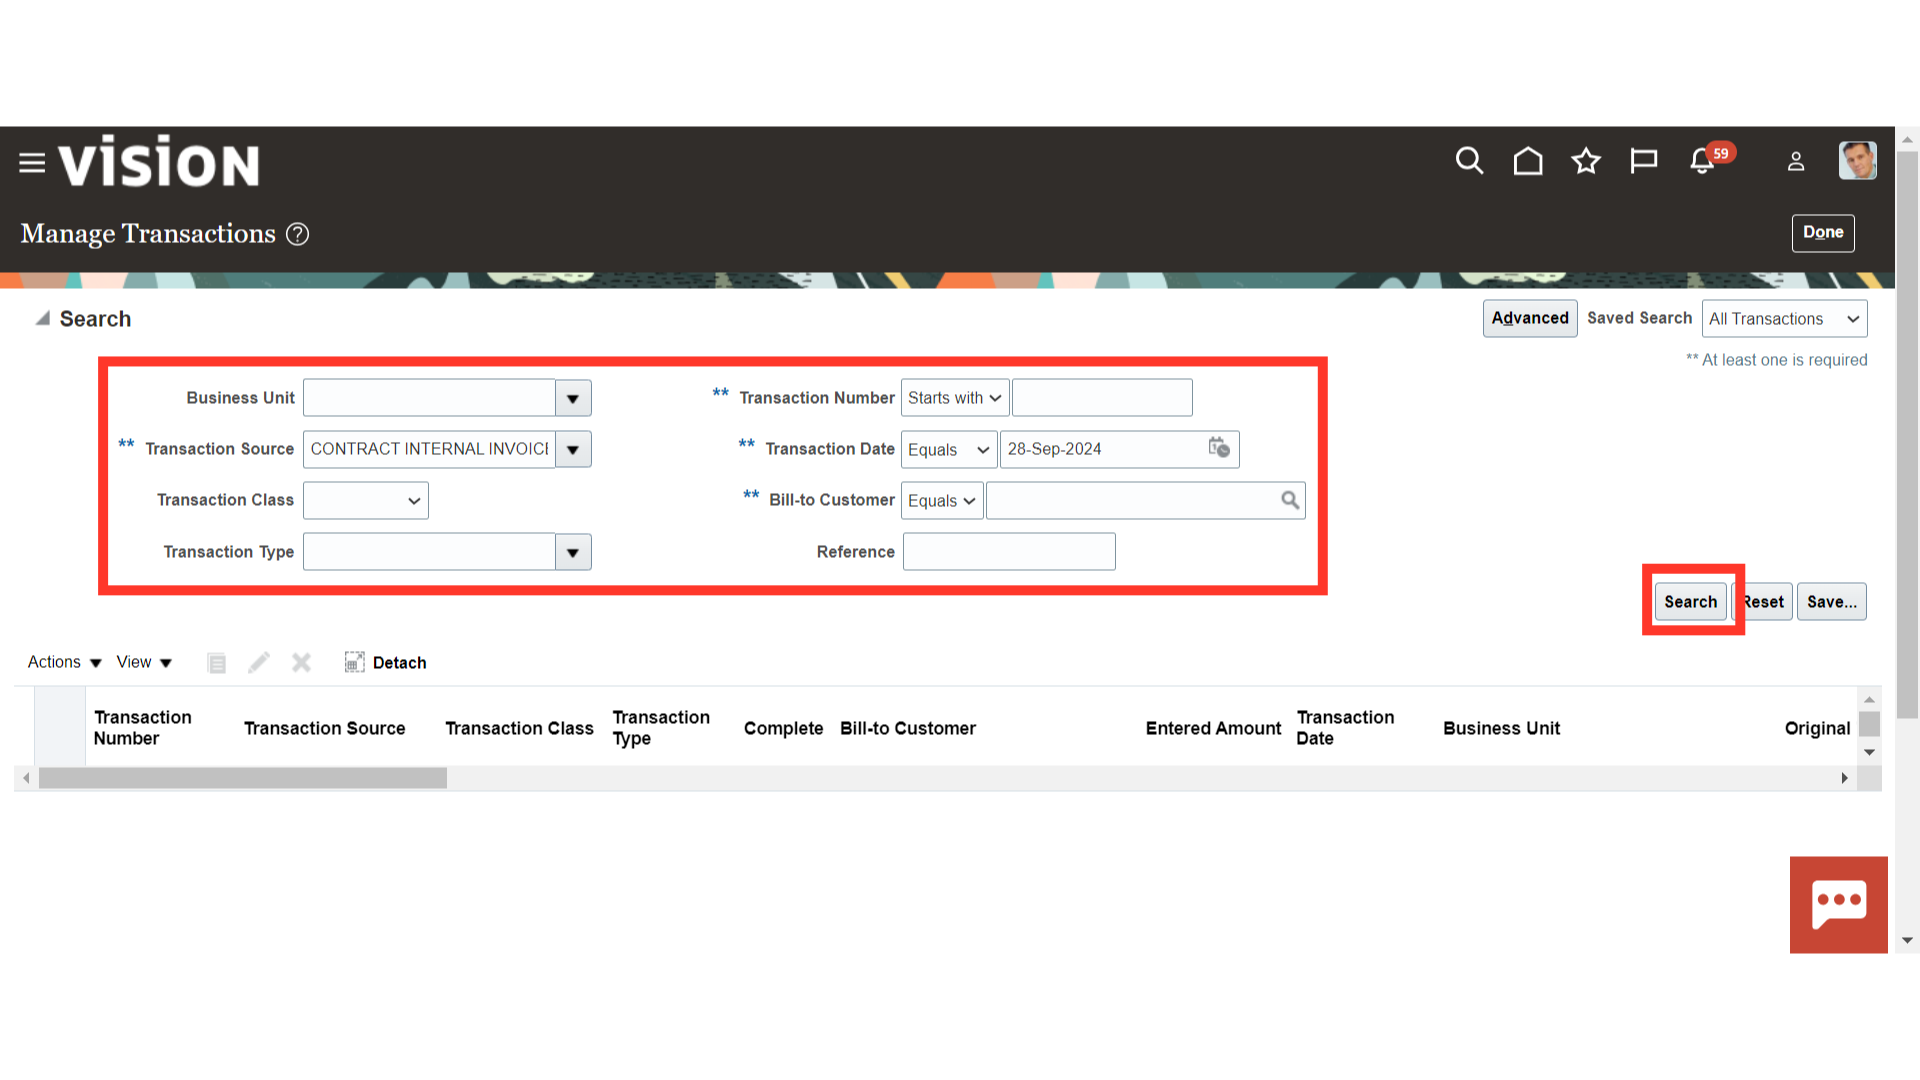
Enter the specific details in the search parameters and ensure the Transaction Source is set to ‘CONTRACT INTERNAL INVOICES’ for internal contracts. Click on ‘Search’.
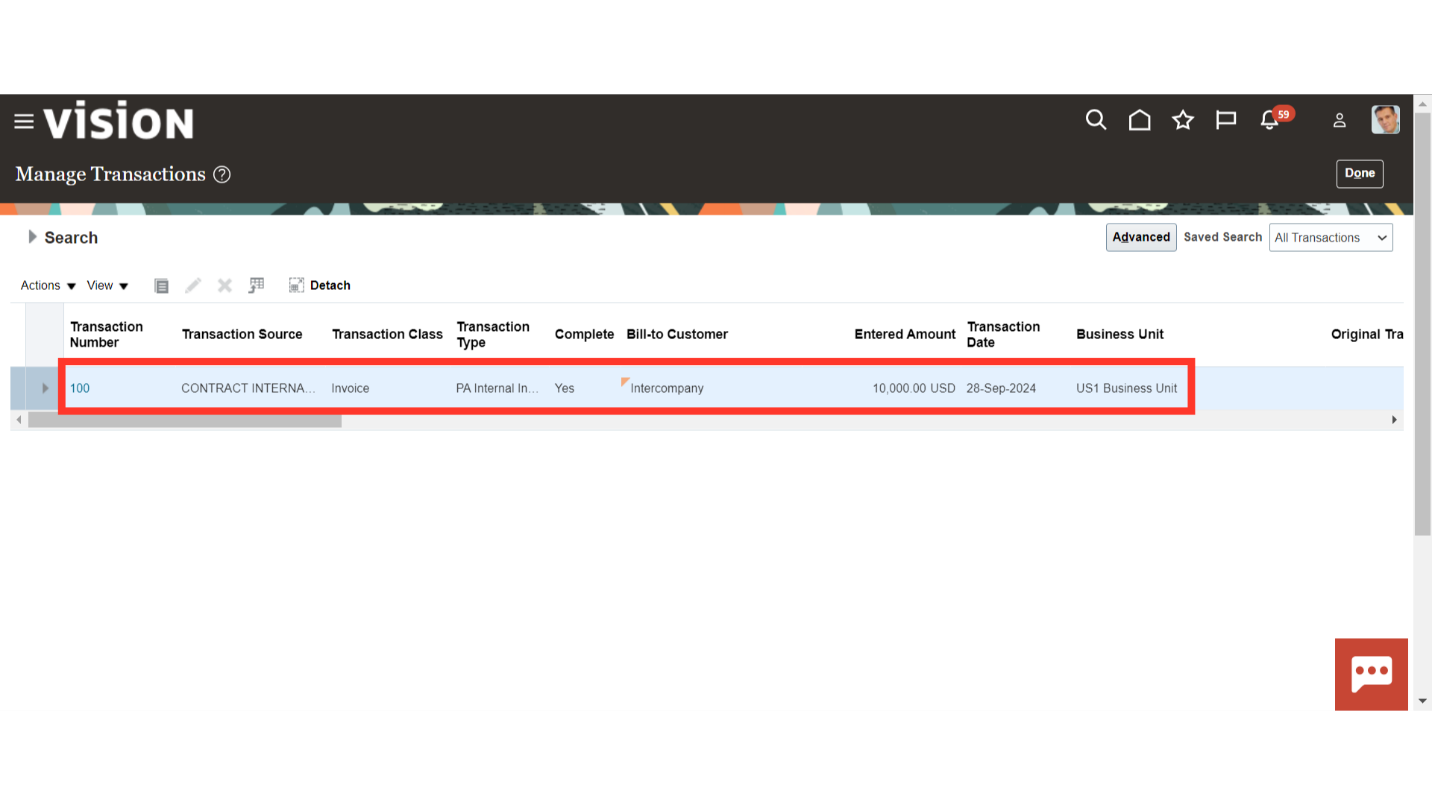
Oracle Cloud will show the results as per the values provided in the search parameters. Select the invoice transaction line and click on the hyperlink of the transaction number.
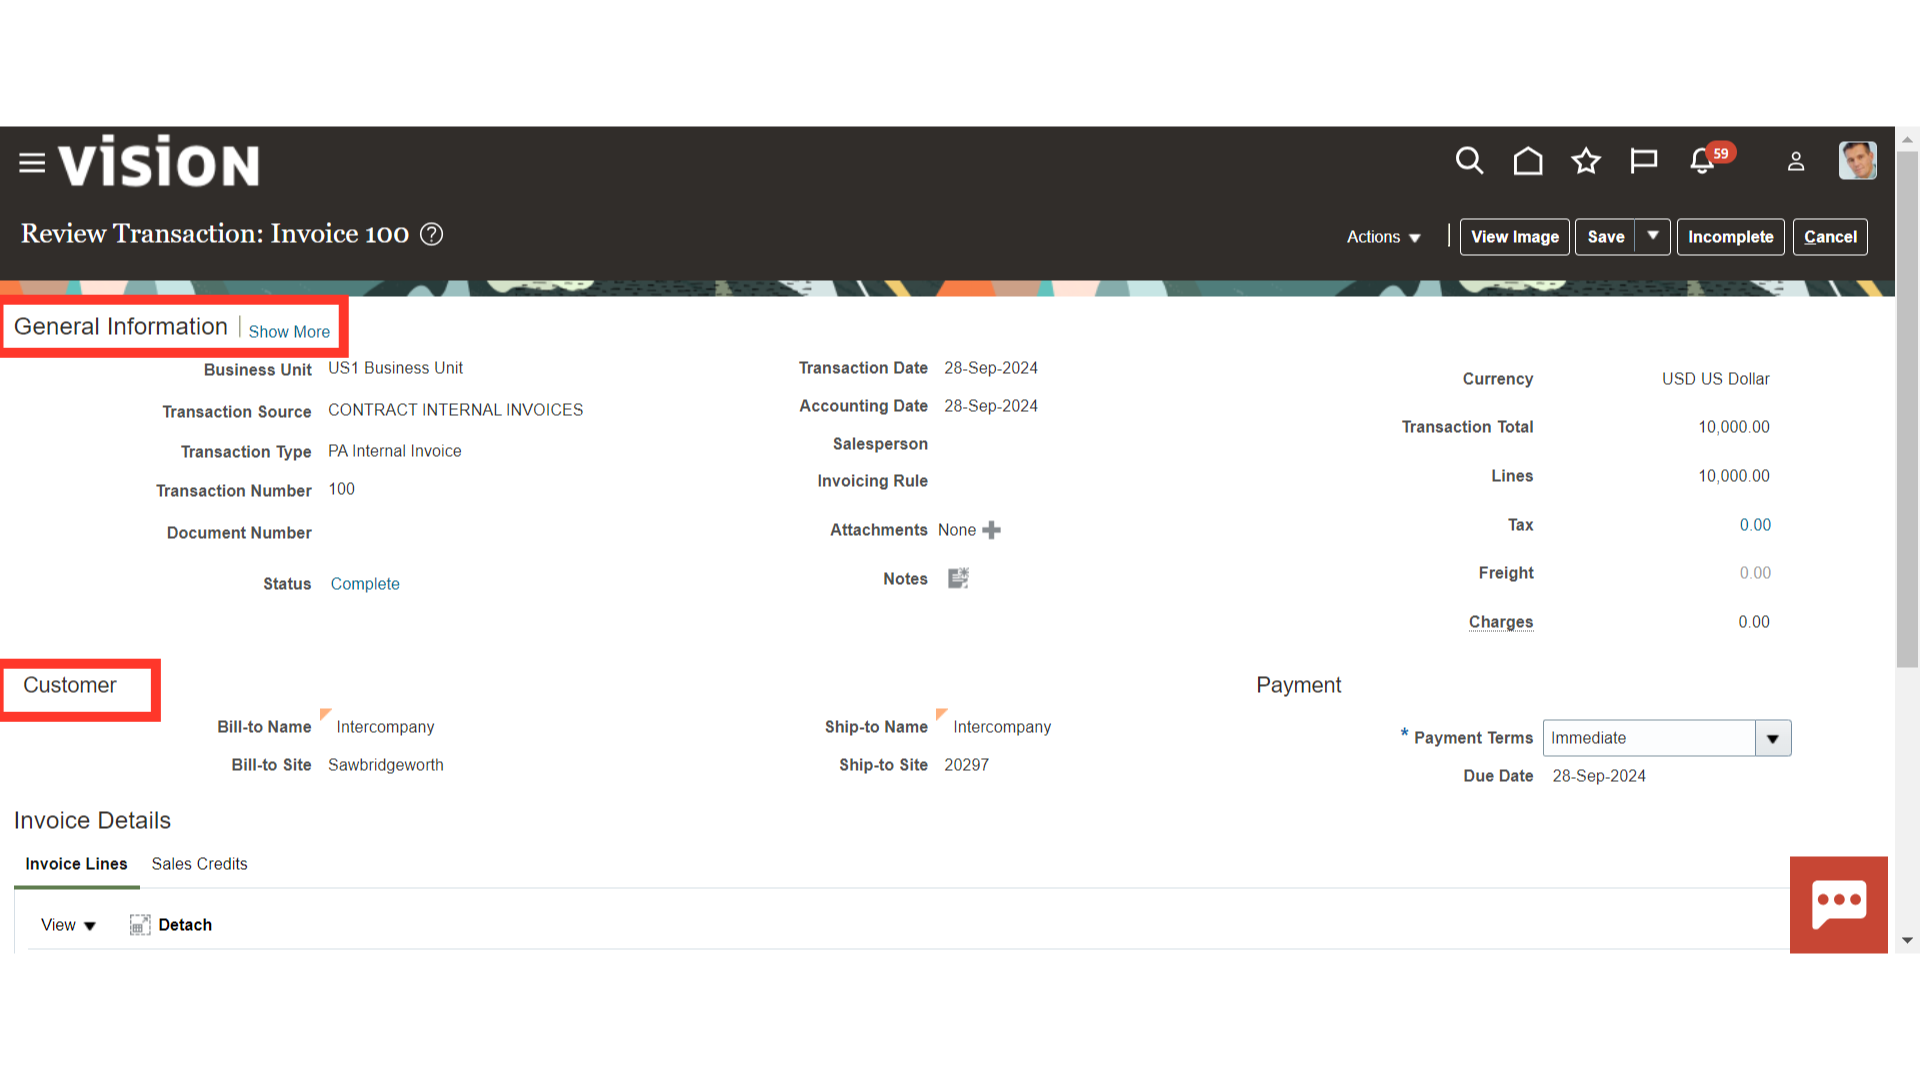
You can review the invoice header details such as Business Unit, Transaction Source, Transaction Type, Transaction Number, Transaction Date, Currency, Amount etc. in the ‘General Information’ section. You can also review the customer details and payment terms.
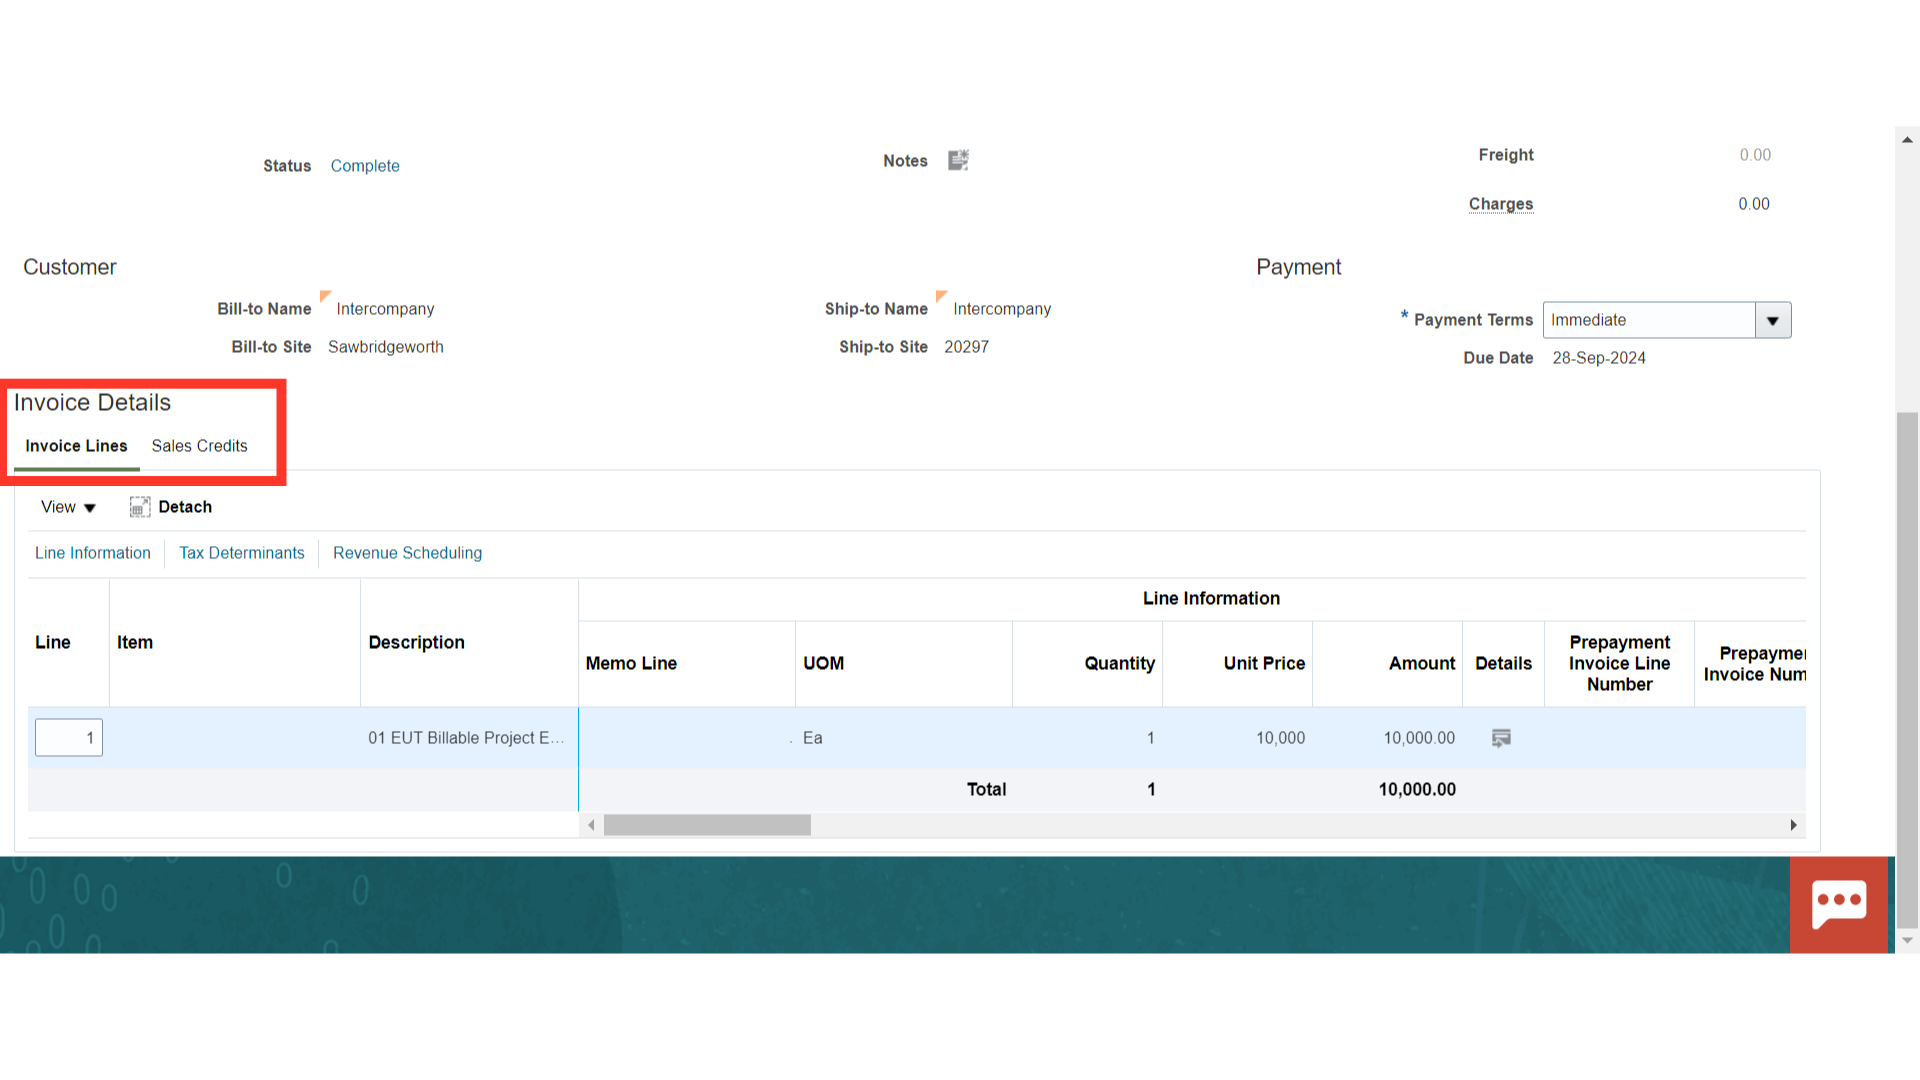
Scroll down to review the Invoice Line Details such as Description, Amount etc.
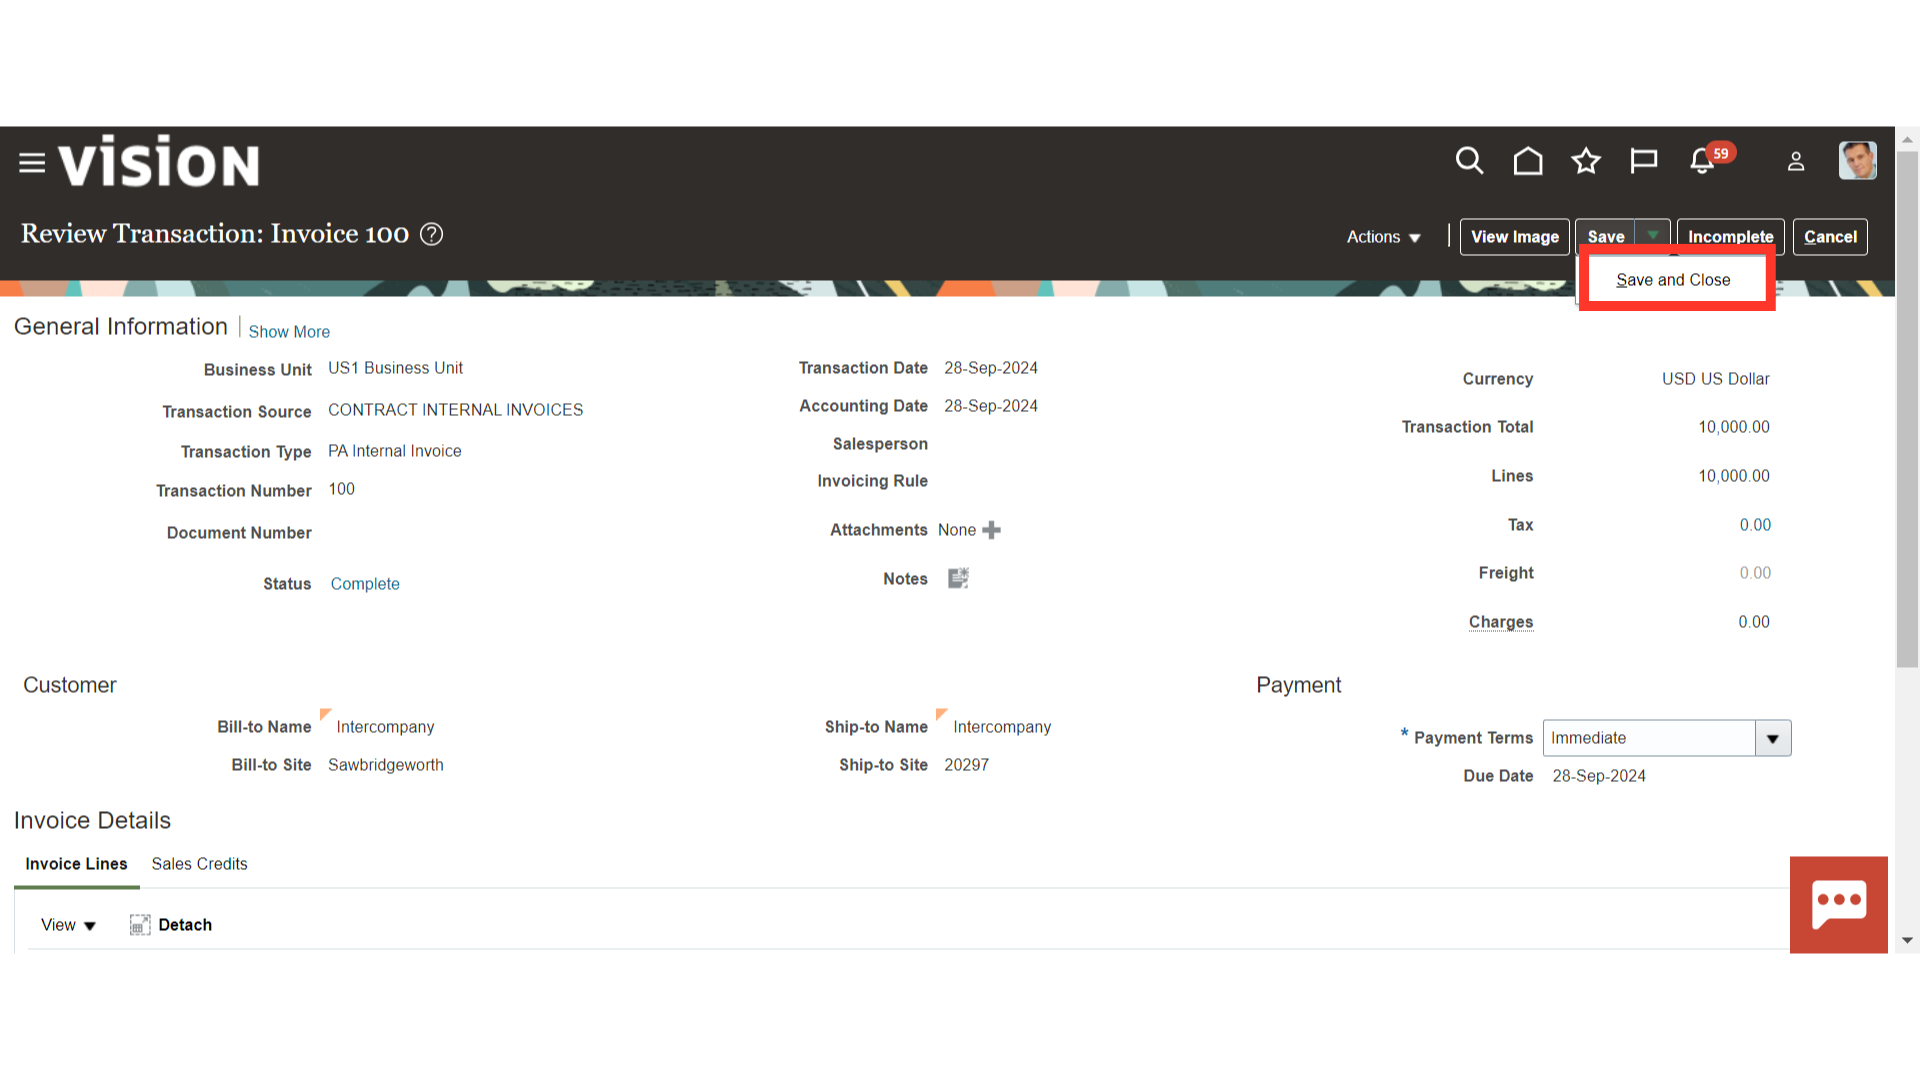
Once reviewed, click on ‘Save and Close’ to complete the process.
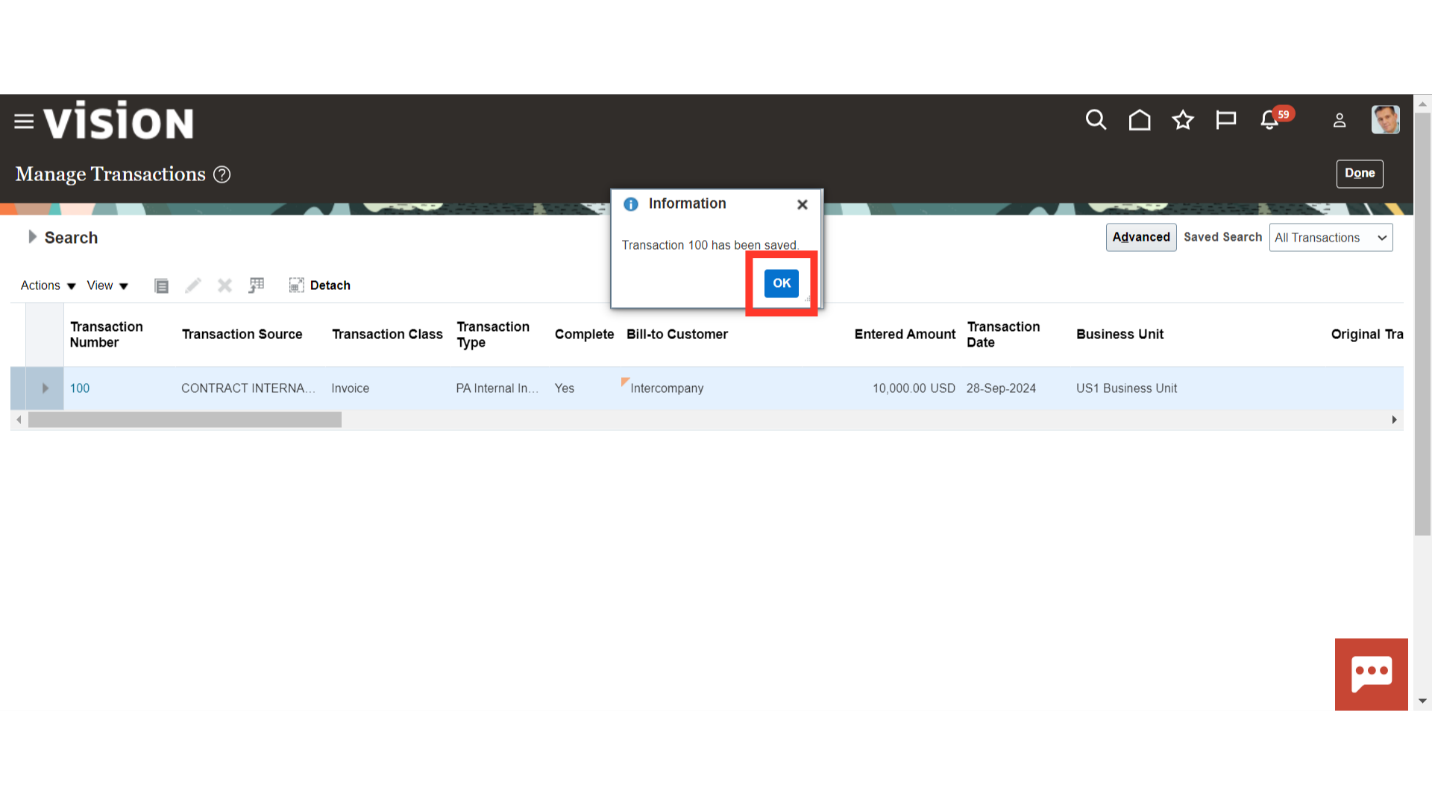
Oracle Cloud will give a confirmation message. Click on ‘OK’ to proceed further.
Navigate to ‘Create Accounting’ from the Task list. Oracle Cloud will run this process as per the defined schedule. However, if required, user can run it manually on ad-hoc basis.
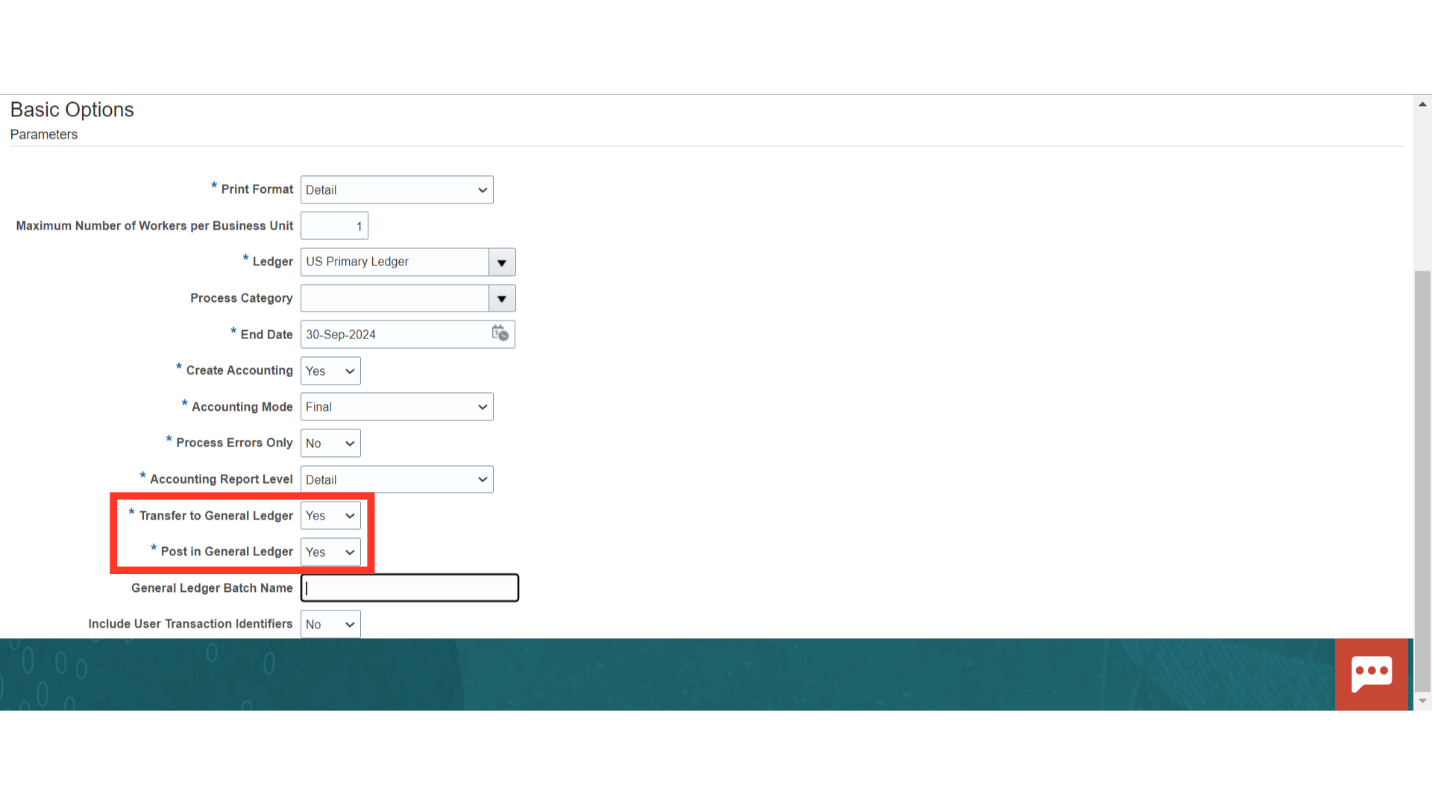
Run this process to create accounting for the Receivable sub-ledger. The required fields (*) must be filled, while the other fields are optional, allowing you to restrict the process using those optional parameters.

Select the Ledger, Process Category and End Date. All eligible Receivable transactions up to that date will be considered for accounting creation. Optionally, you can keep the Process Category field blank to create accounting for all eligible unaccounted transactions.
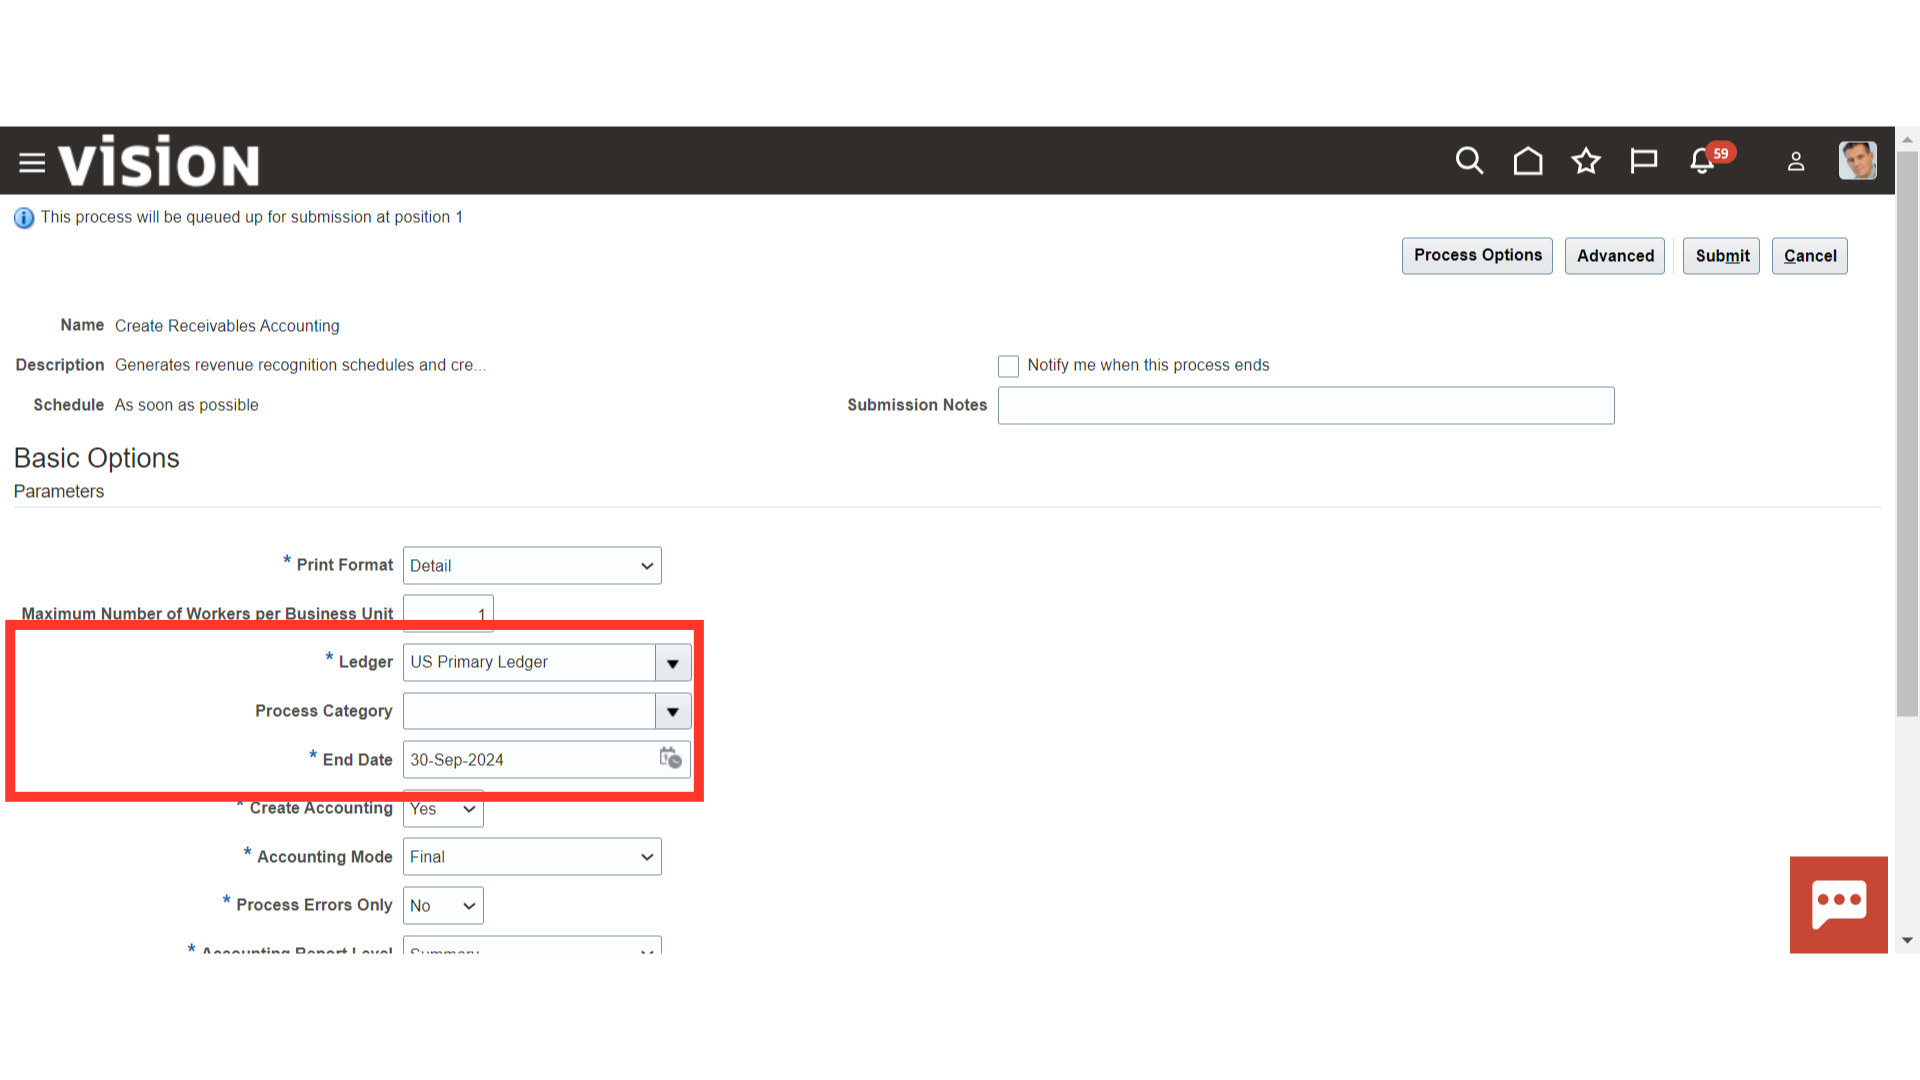
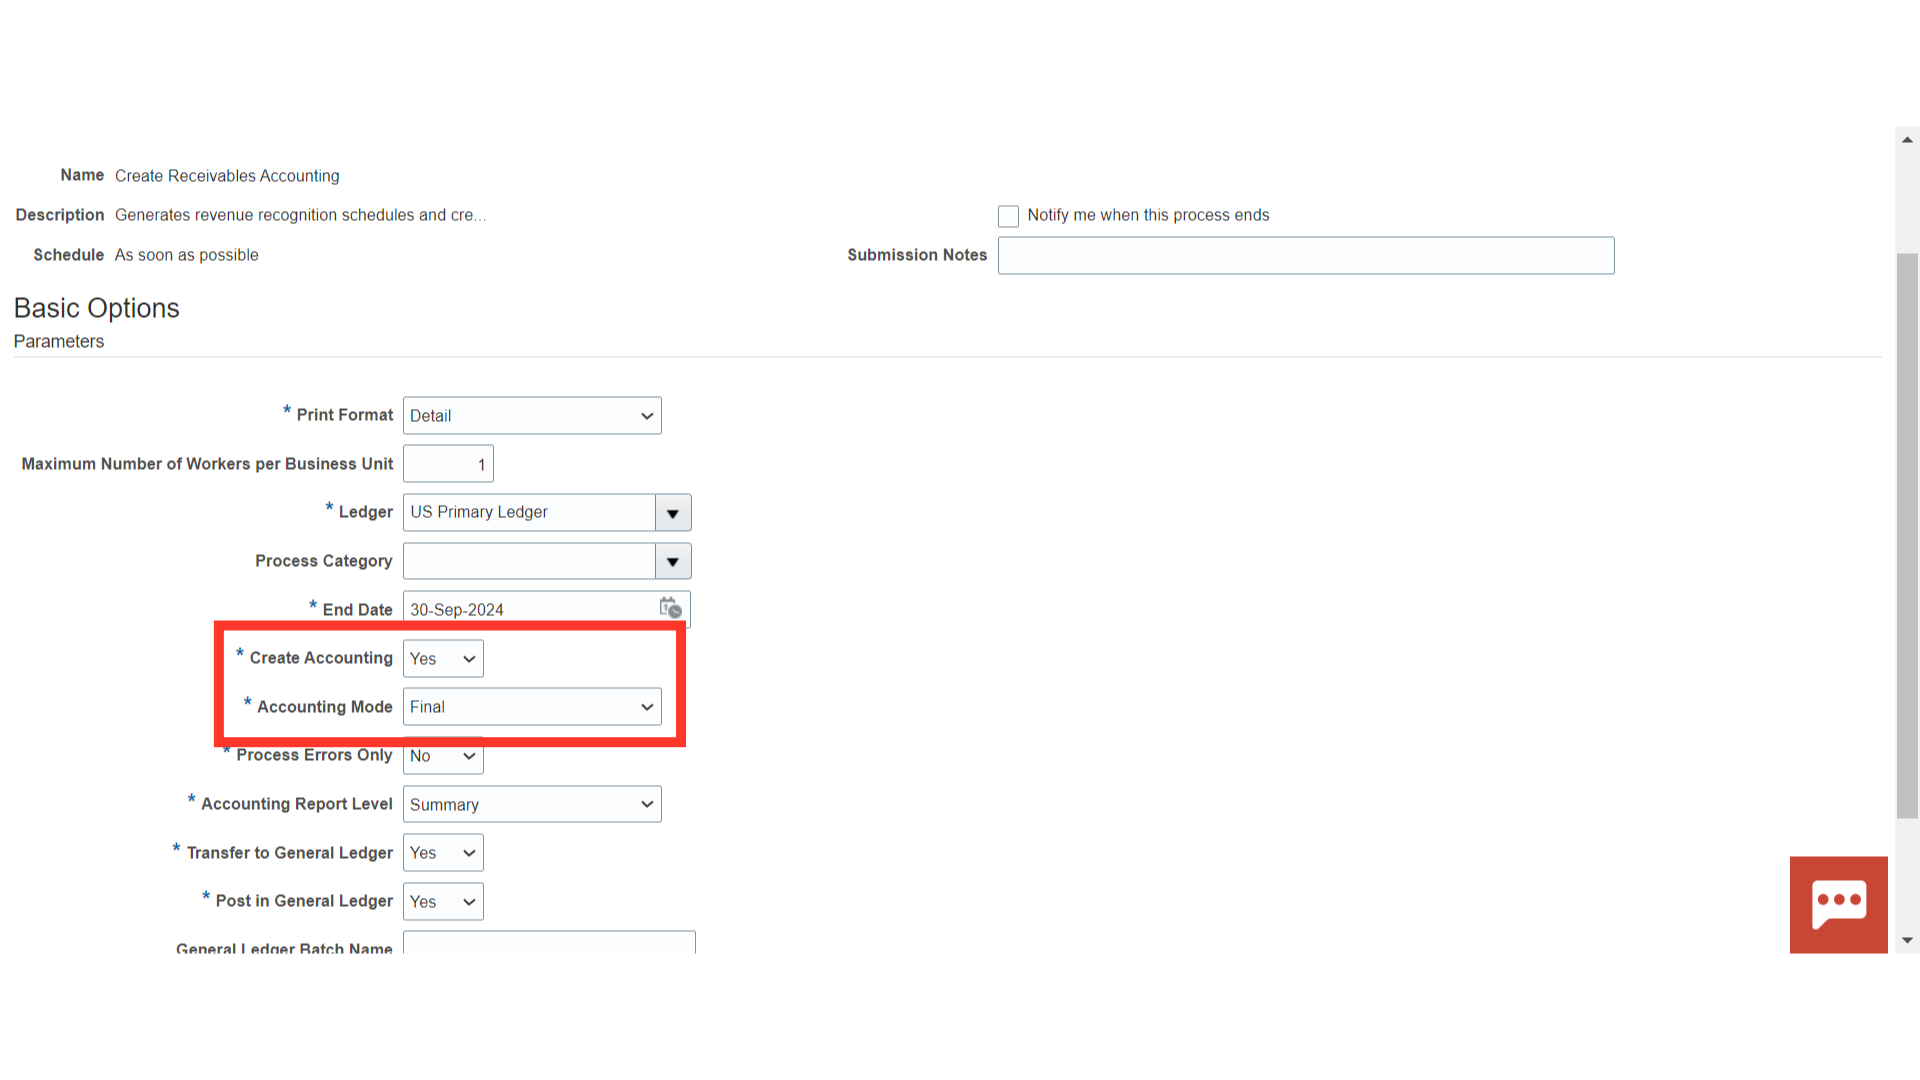
Choose ‘Yes’ in the Create Accounting field and Accounting Mode as ‘Draft’ or ‘Final’, as required. Select ‘Draft’ if you wish to check the accounting code combination without having any accounting impact in the Receivable sub-ledger. Else select ‘Final’ to run the accounting in the final mode in the Receivable sub-ledger.
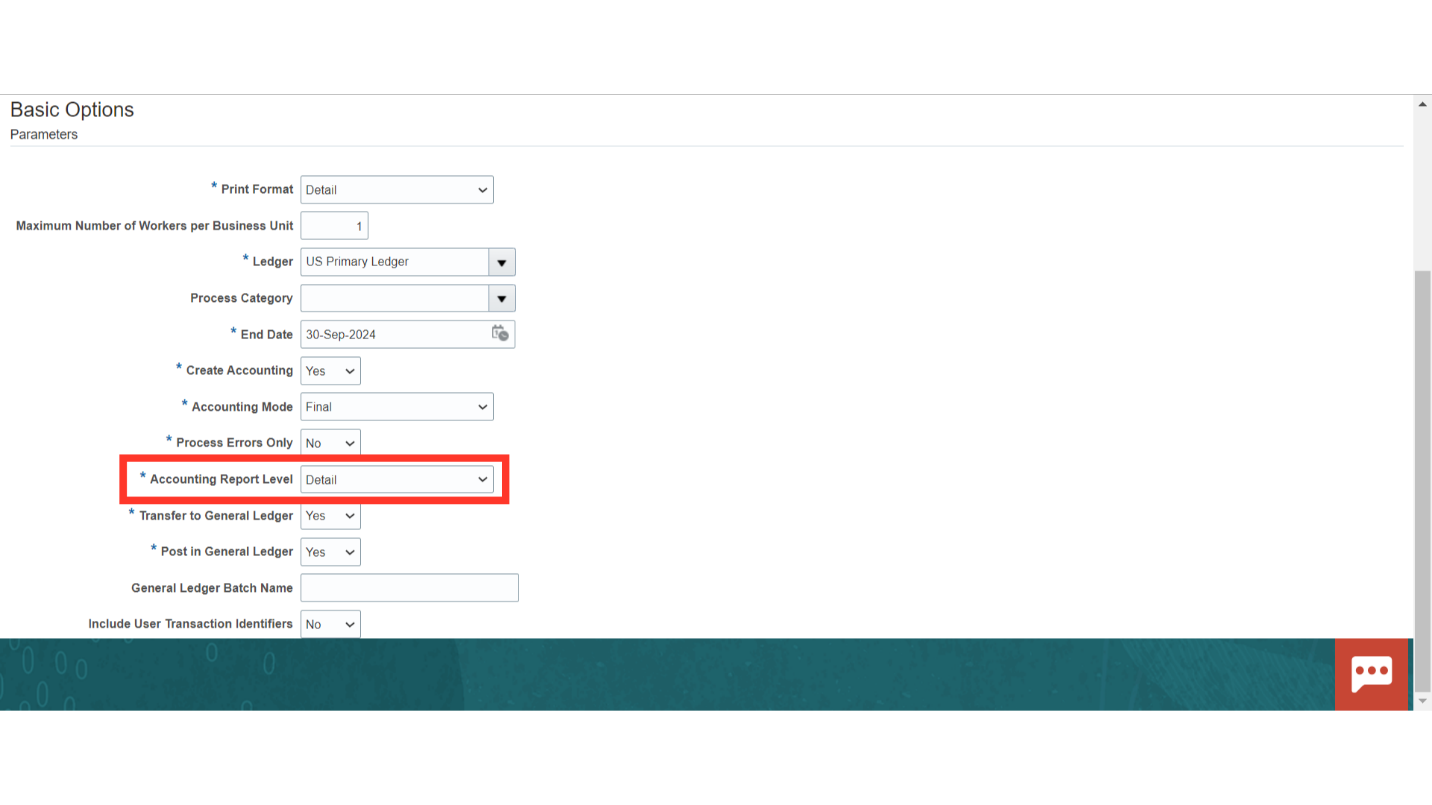
You can select the report style as ‘Summary’ or ‘Detail’ as required.
Select ‘Yes’ or ‘No’ for the ‘Transfer to General Ledger’ field. If you have selected ‘Yes’ in the ‘Transfer to General Ledger’ field, then you have to choose whether you want to post to General Ledger or not. Select ‘Yes’ or ‘No’ as required. If you have selected ‘No’ in the ‘Transfer to General Ledger’ field, then this field is not relevant.
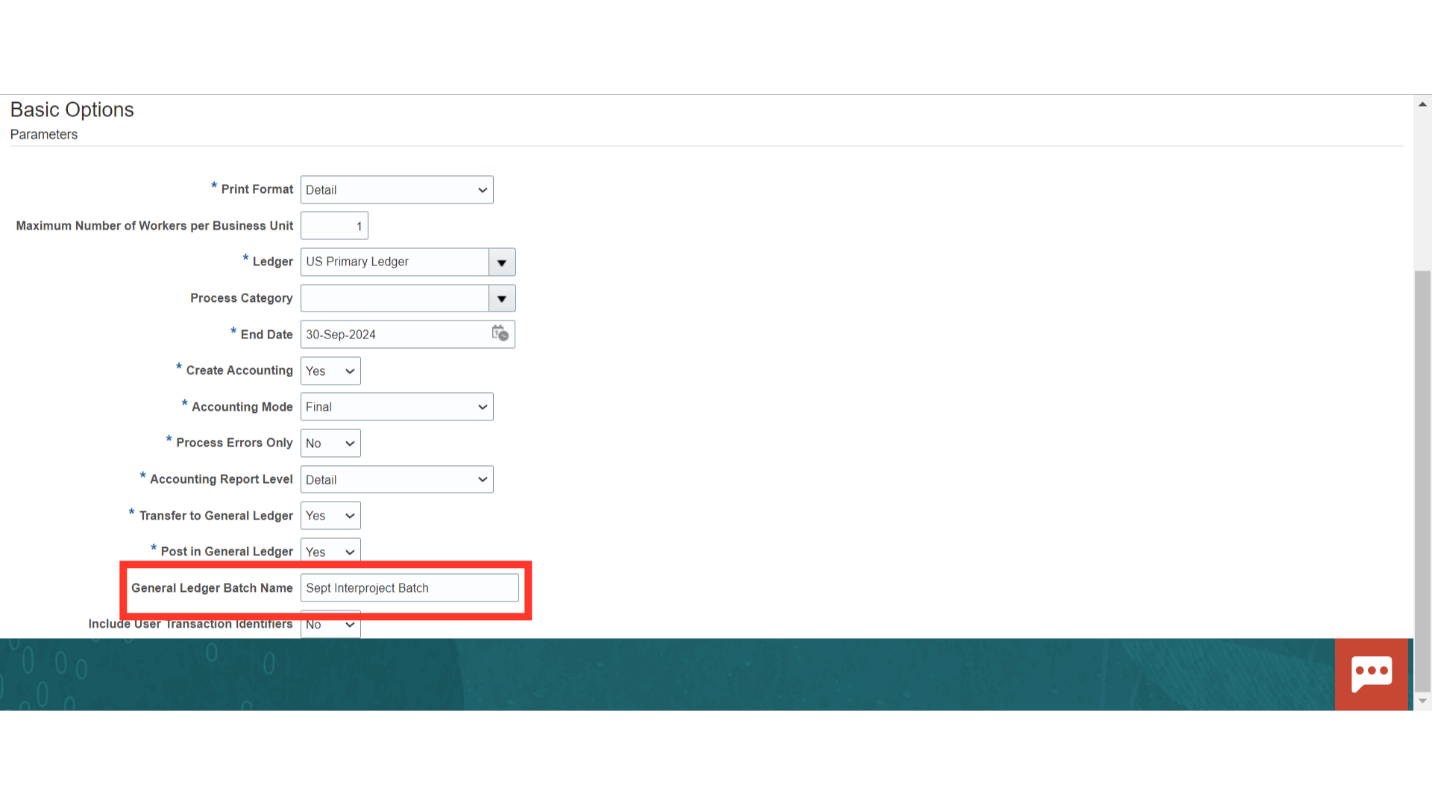
Optionally, you can provide the General Ledger Batch Name.
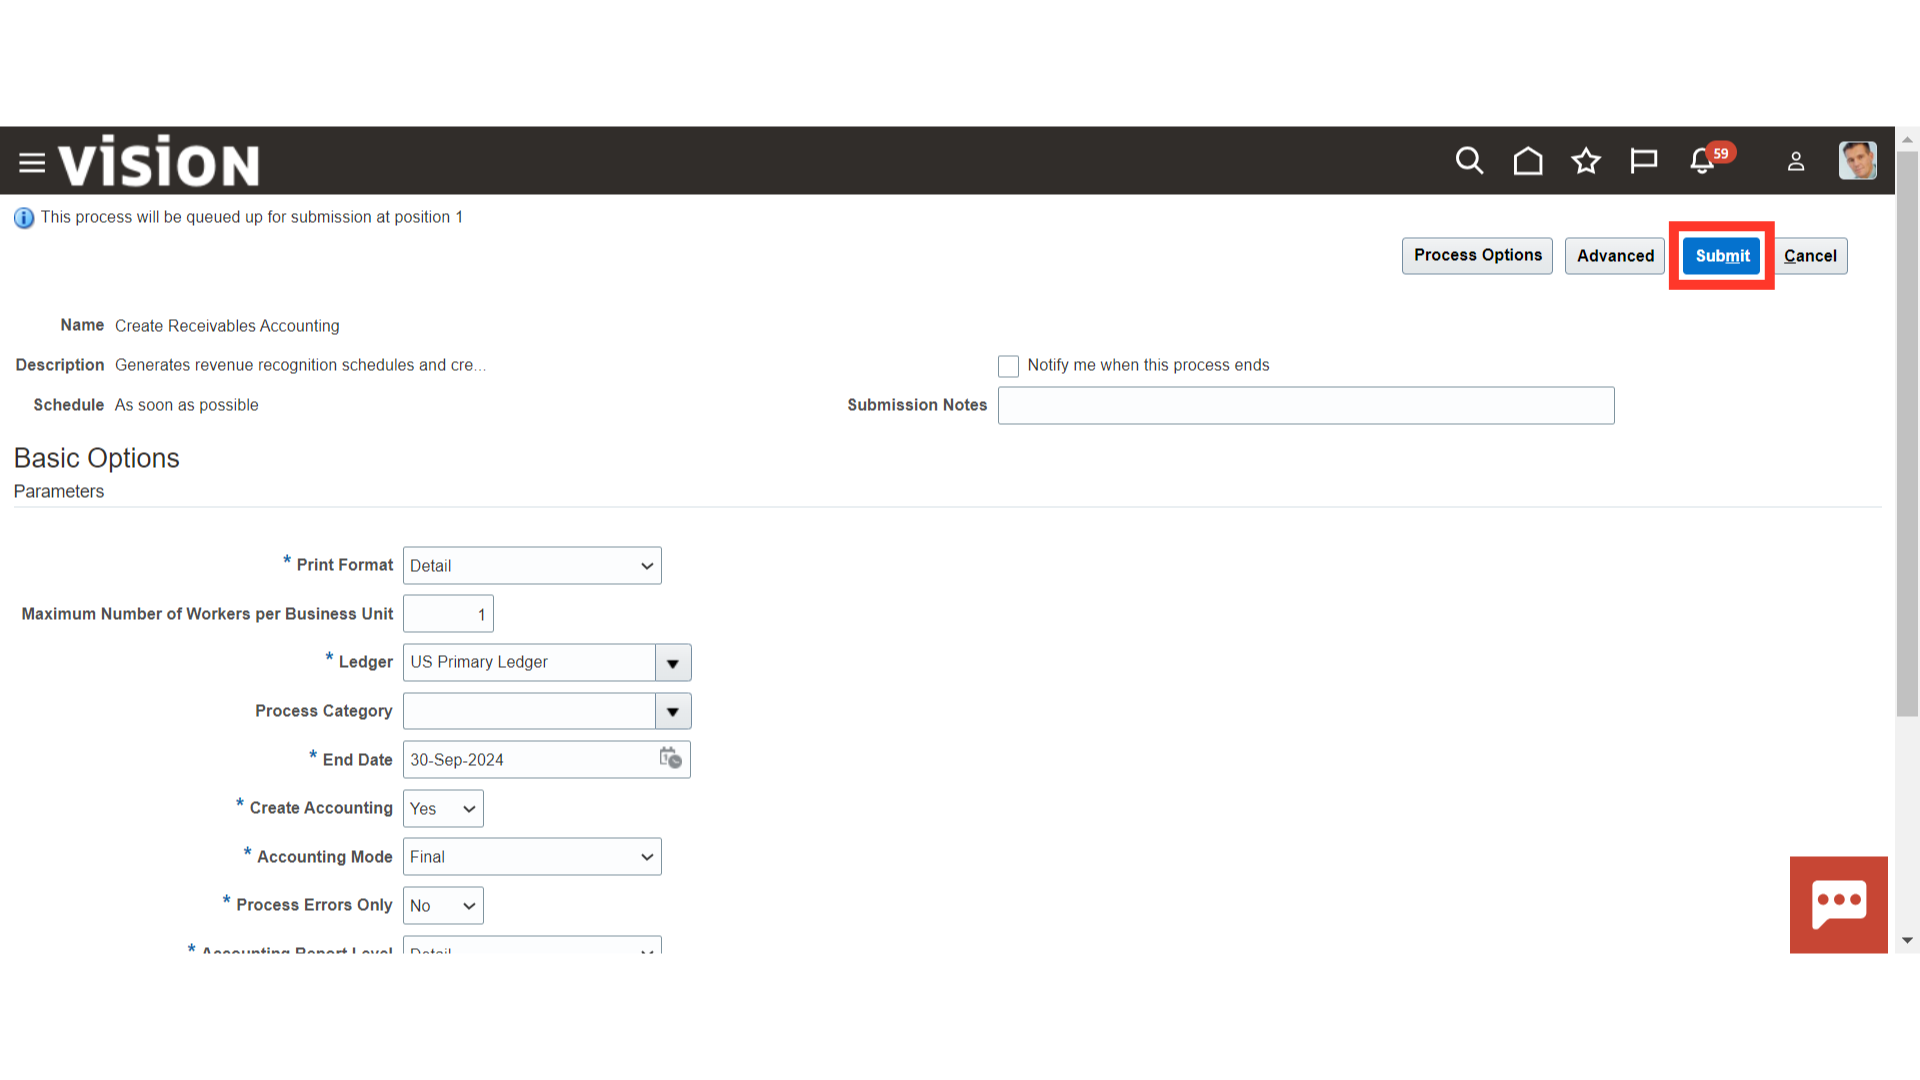
When you have reviewed the specific details in the parameter, click on ‘Submit’.
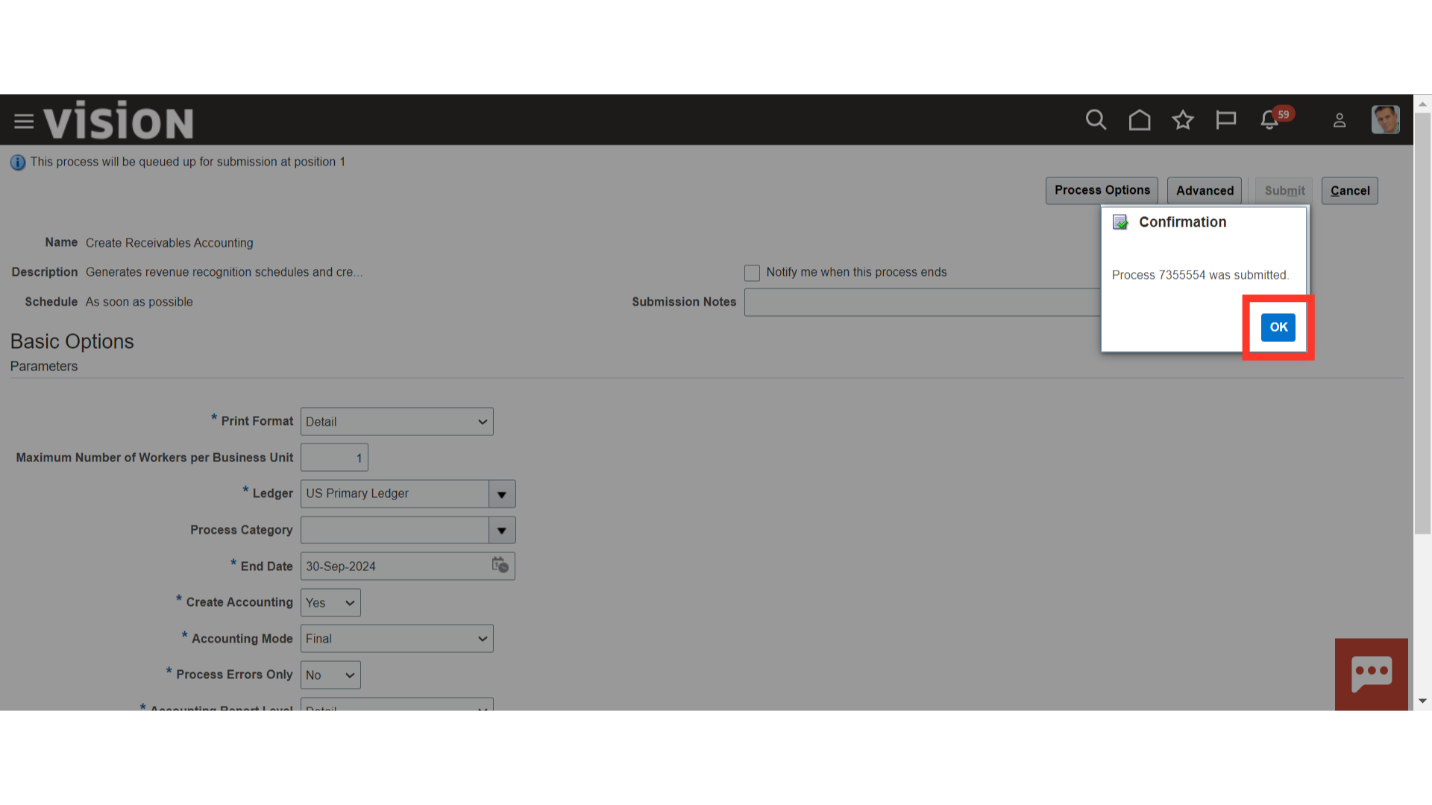
After clicking Submit, a confirmation message will appear. Click ‘OK’ to proceed.
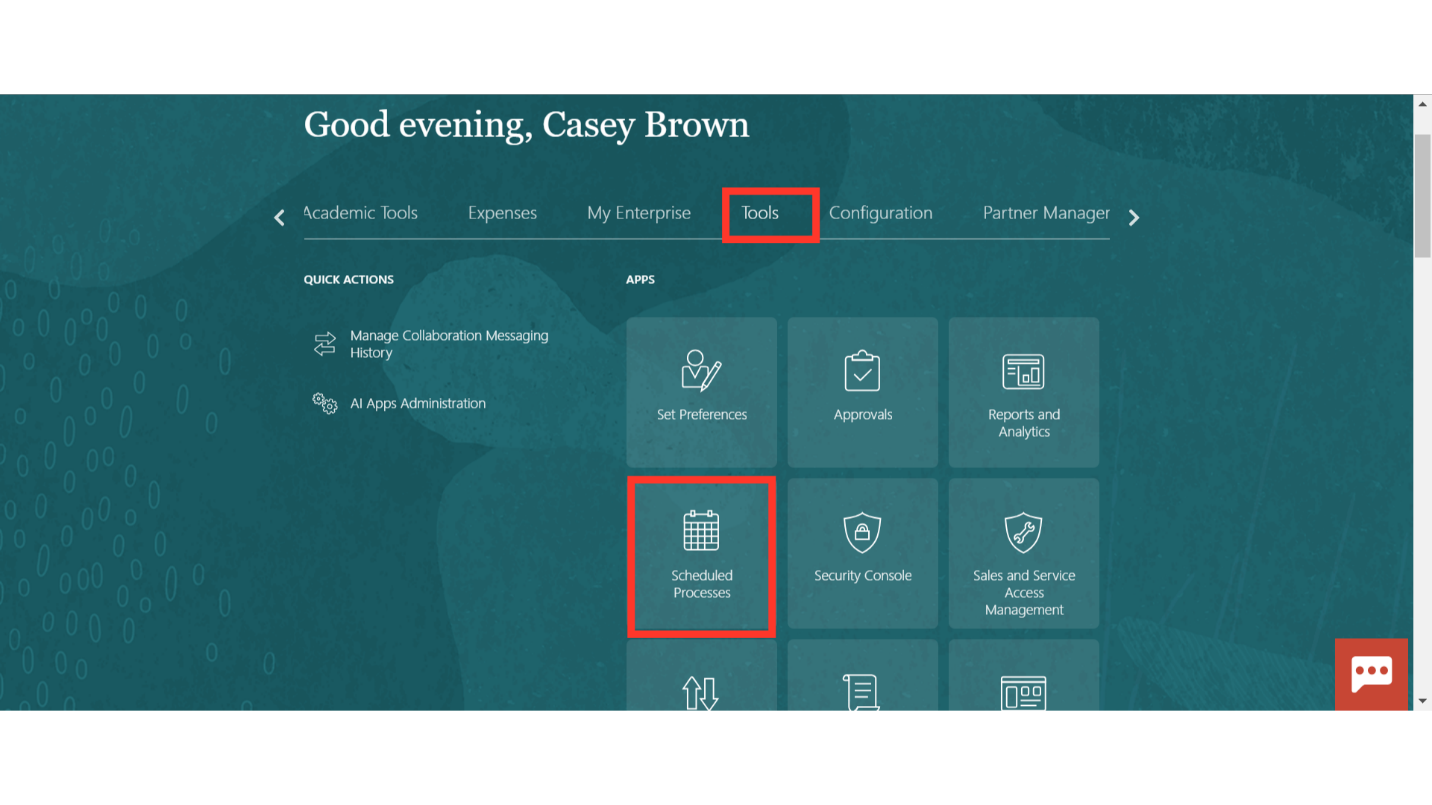
Click on the ‘Schedule Process’ sub-menu under the ‘Tools’ menu from the Oracle home page.
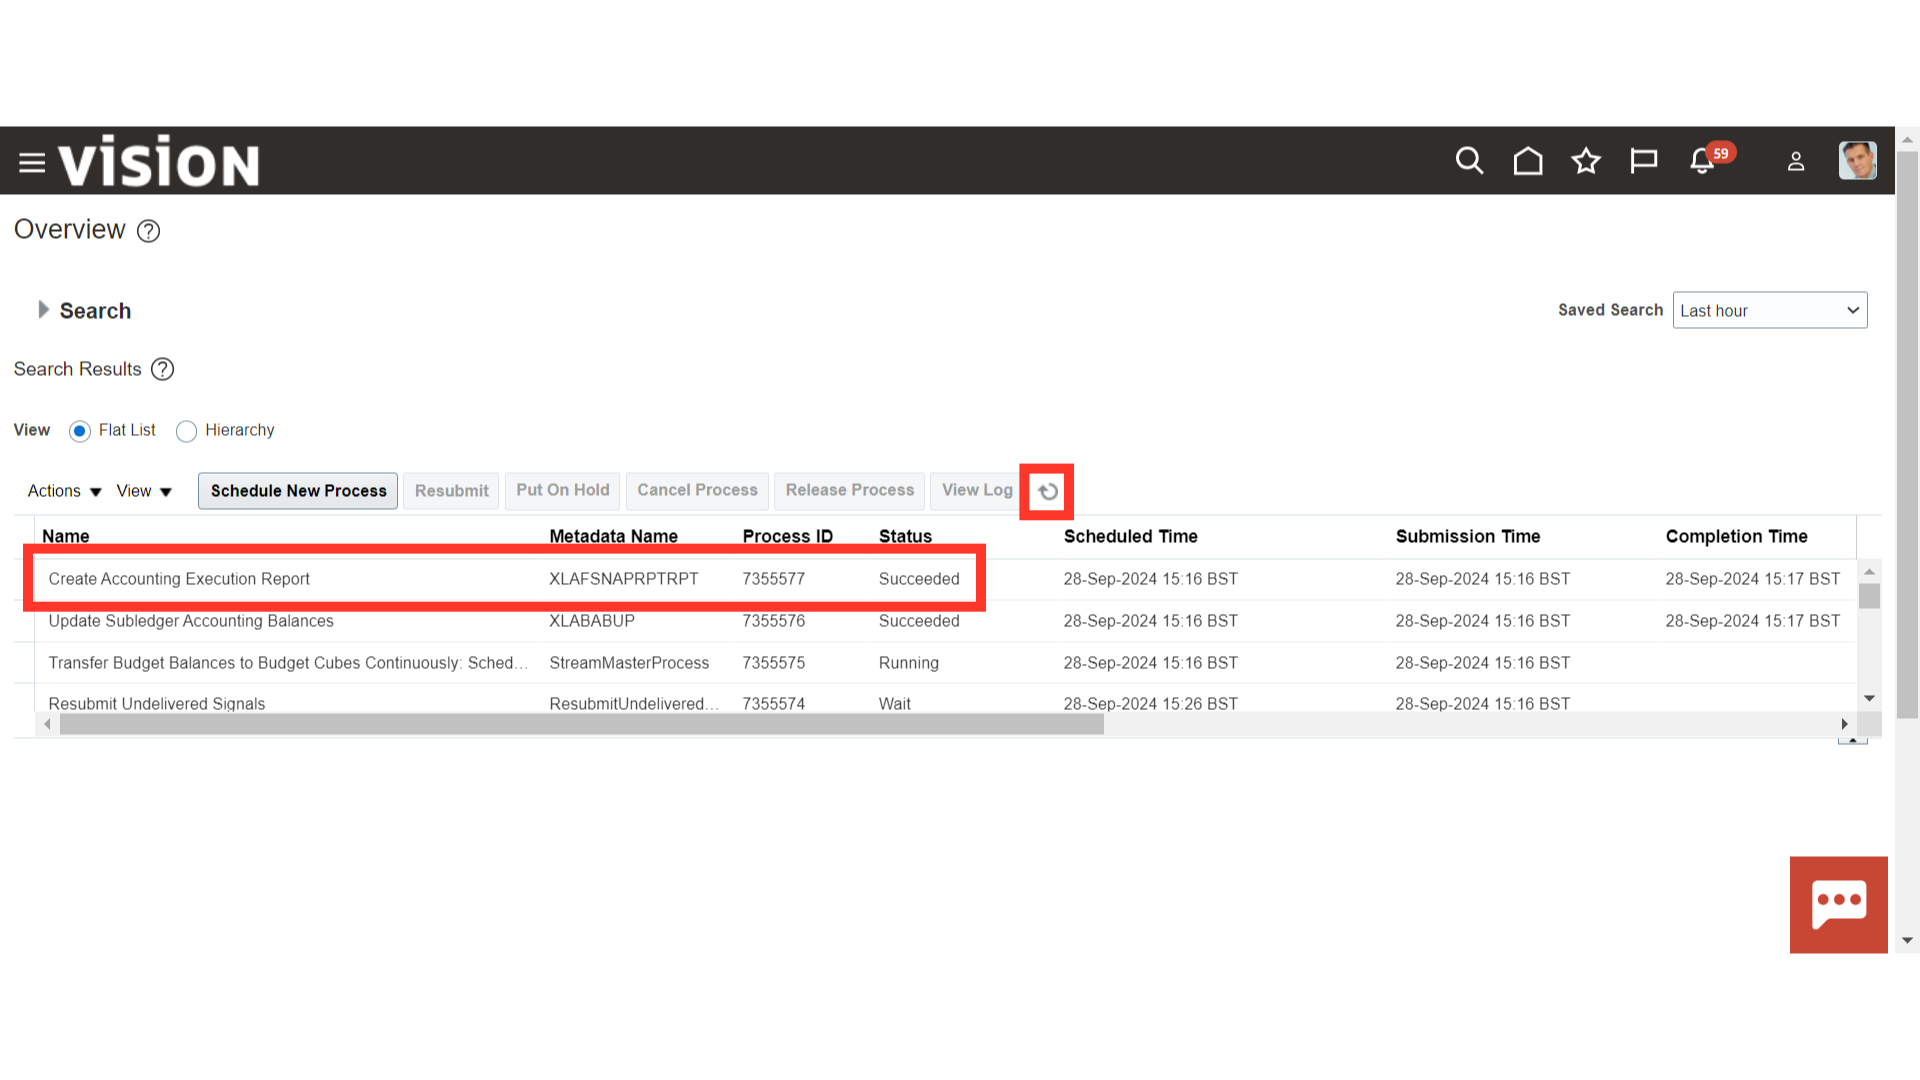
Click on the refresh button till the process status is successful. Click on the Oracle Home Page.
 Thank you for reviewing and using our guide; we hope you have found it helpful. If you have any questions on the content included in this guide, please contact our Training & Learning team at learn@camptratech.com