How to do Physical Count in Inventory
In this guide, we will see the process of conducting a Physical Count in Oracle Inventory Cloud. Please follow the detailed steps to perform a Physical Count efficiently.
After logging into Oracle Fusion, navigate to the Supply Chain Execution tab and click on the Inventory Management infotile.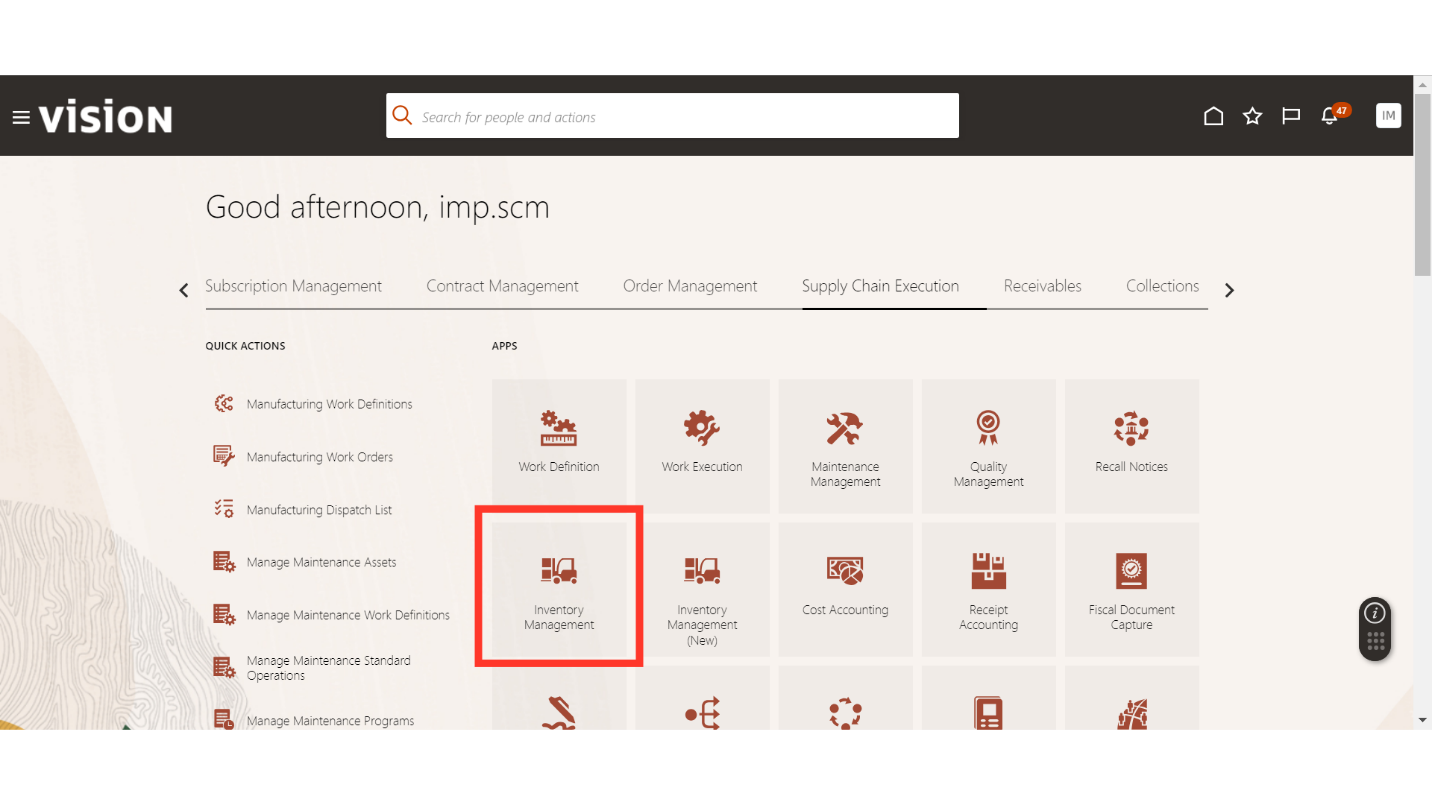
In the Inventory Management work area, click on the Tasks button, select Counts in More Tasks, and click on Manage Physical Inventories.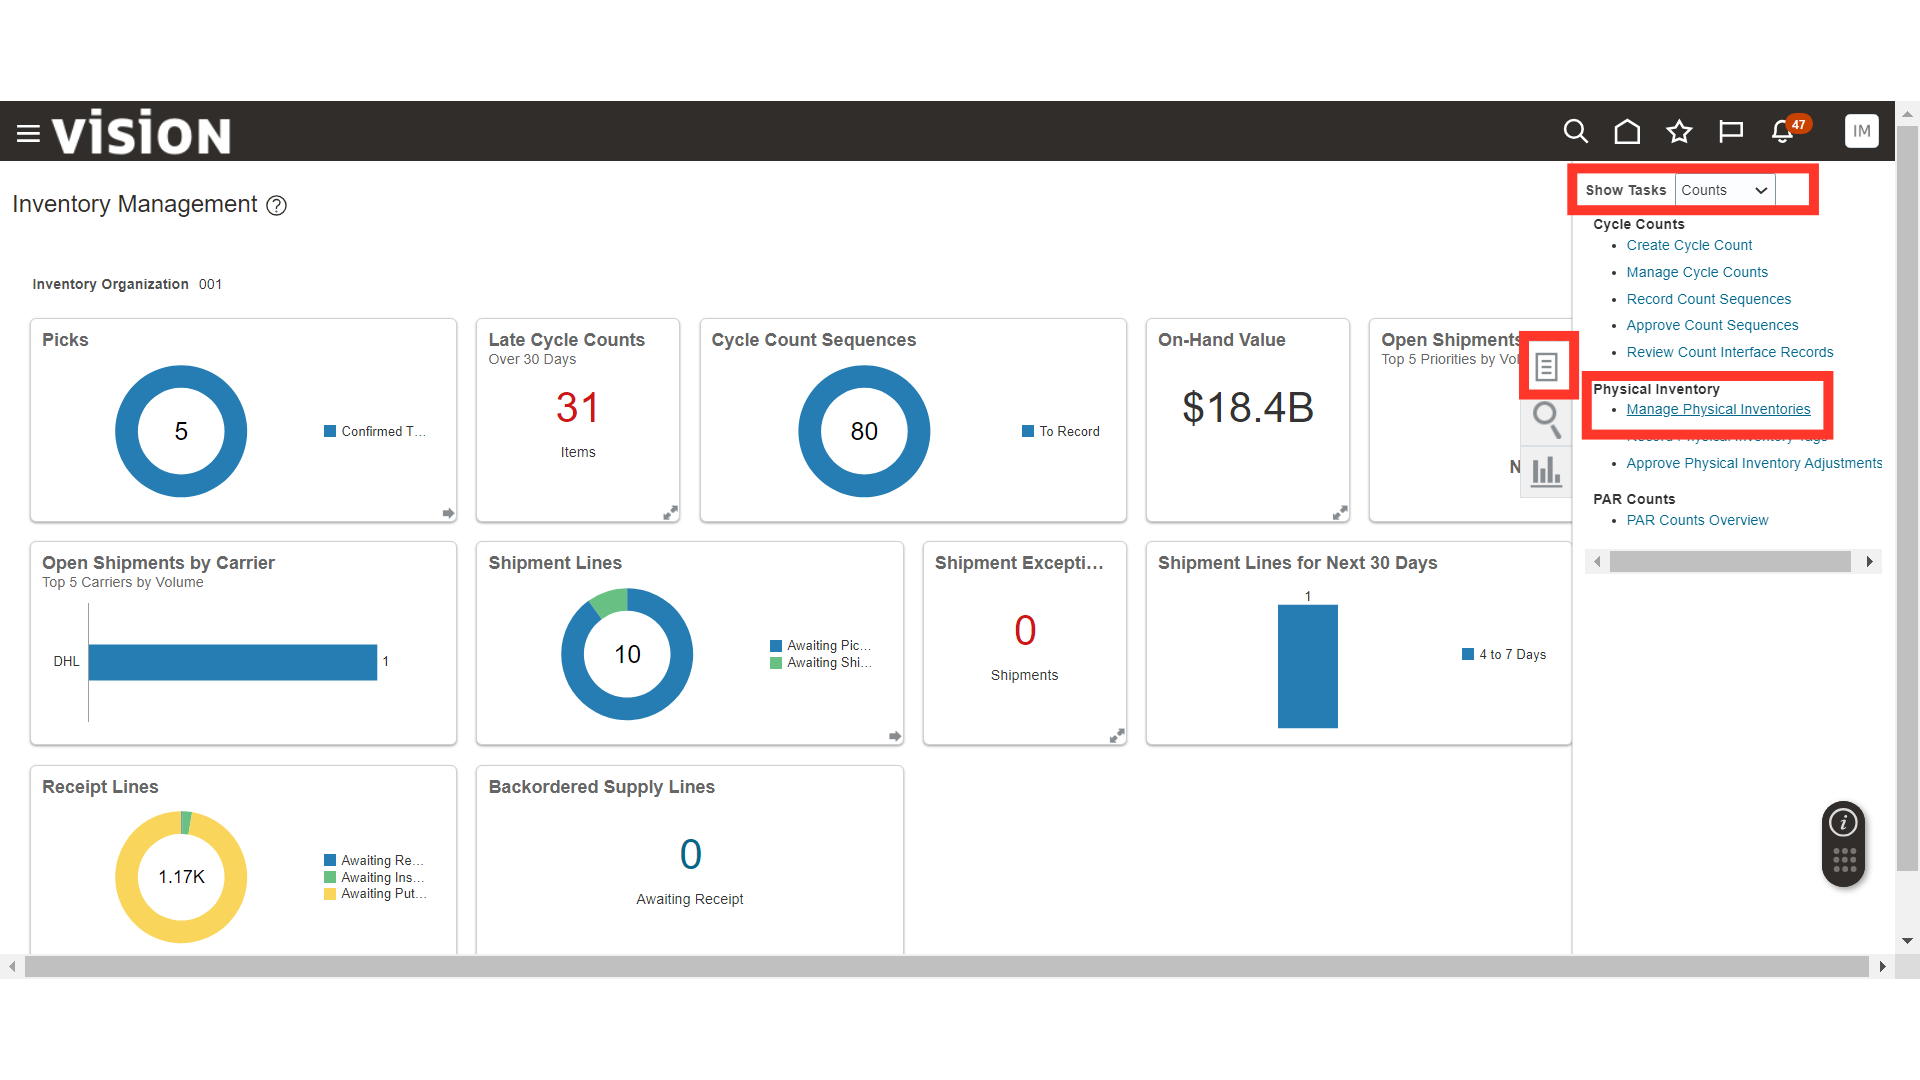
In Manage Physical Inventories, click on the Plus icon to create a new physical count.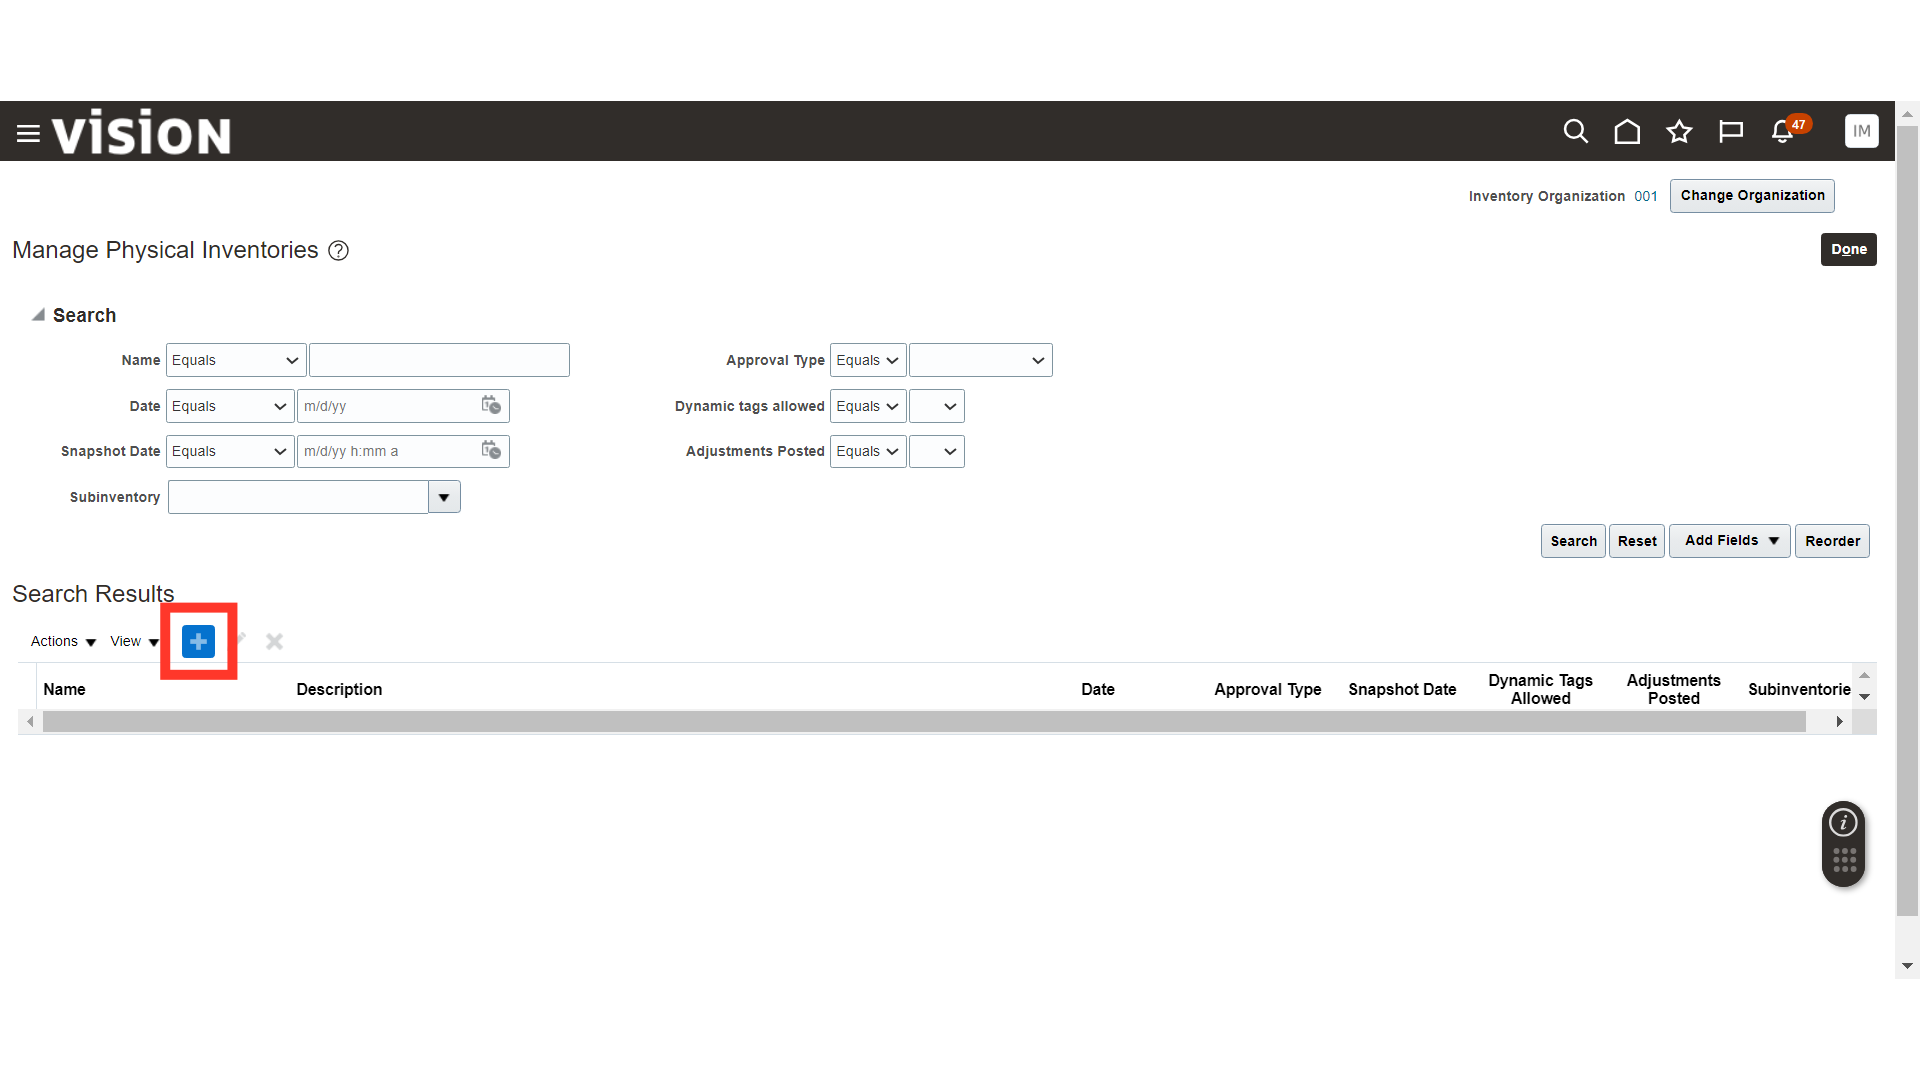
In Create Physical Inventory, provide the primary details such as Name, Description, Date, and enable functions as per your requirements. Also, select the Subinventory for which you want to run the Physical Count.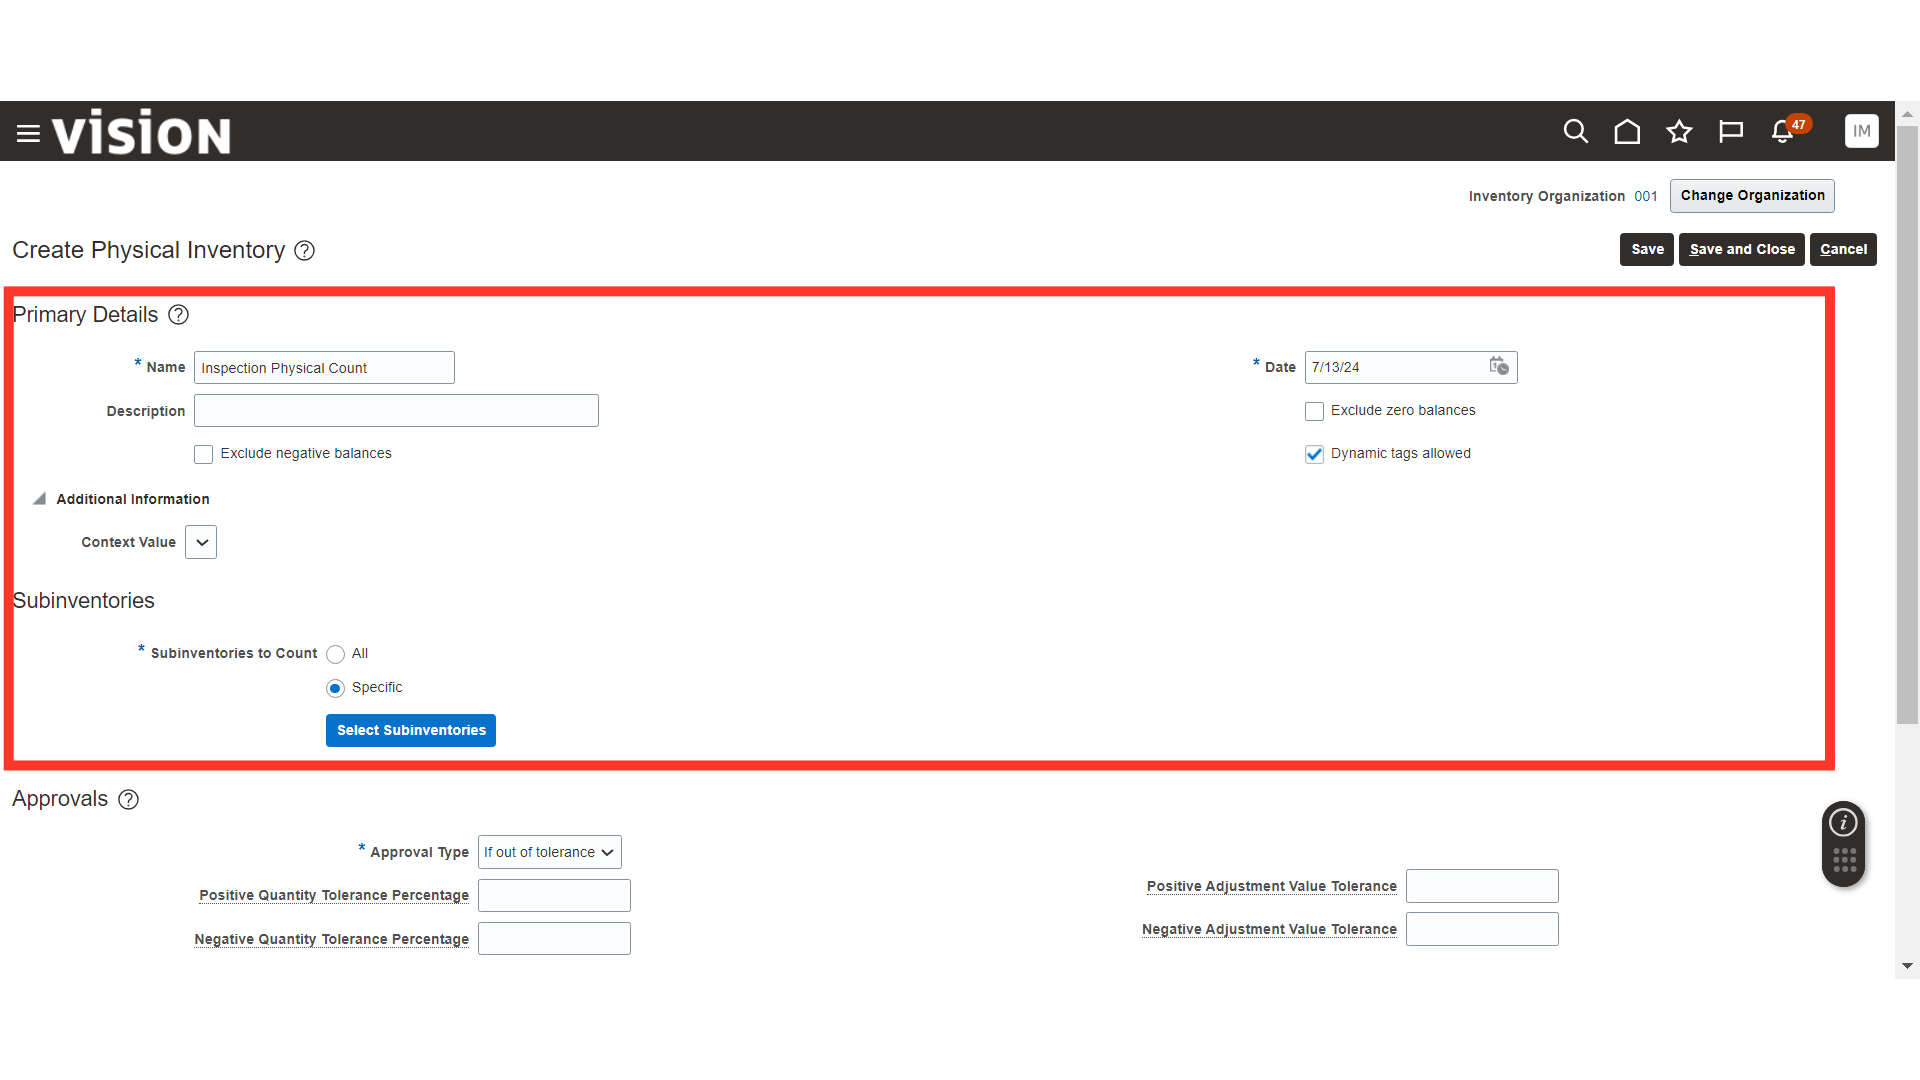
In Approvals, provide the Approval Type and set the tolerances for the adjustments to trigger approvals. In Tags, select the Tag Type and Starting Default Tag.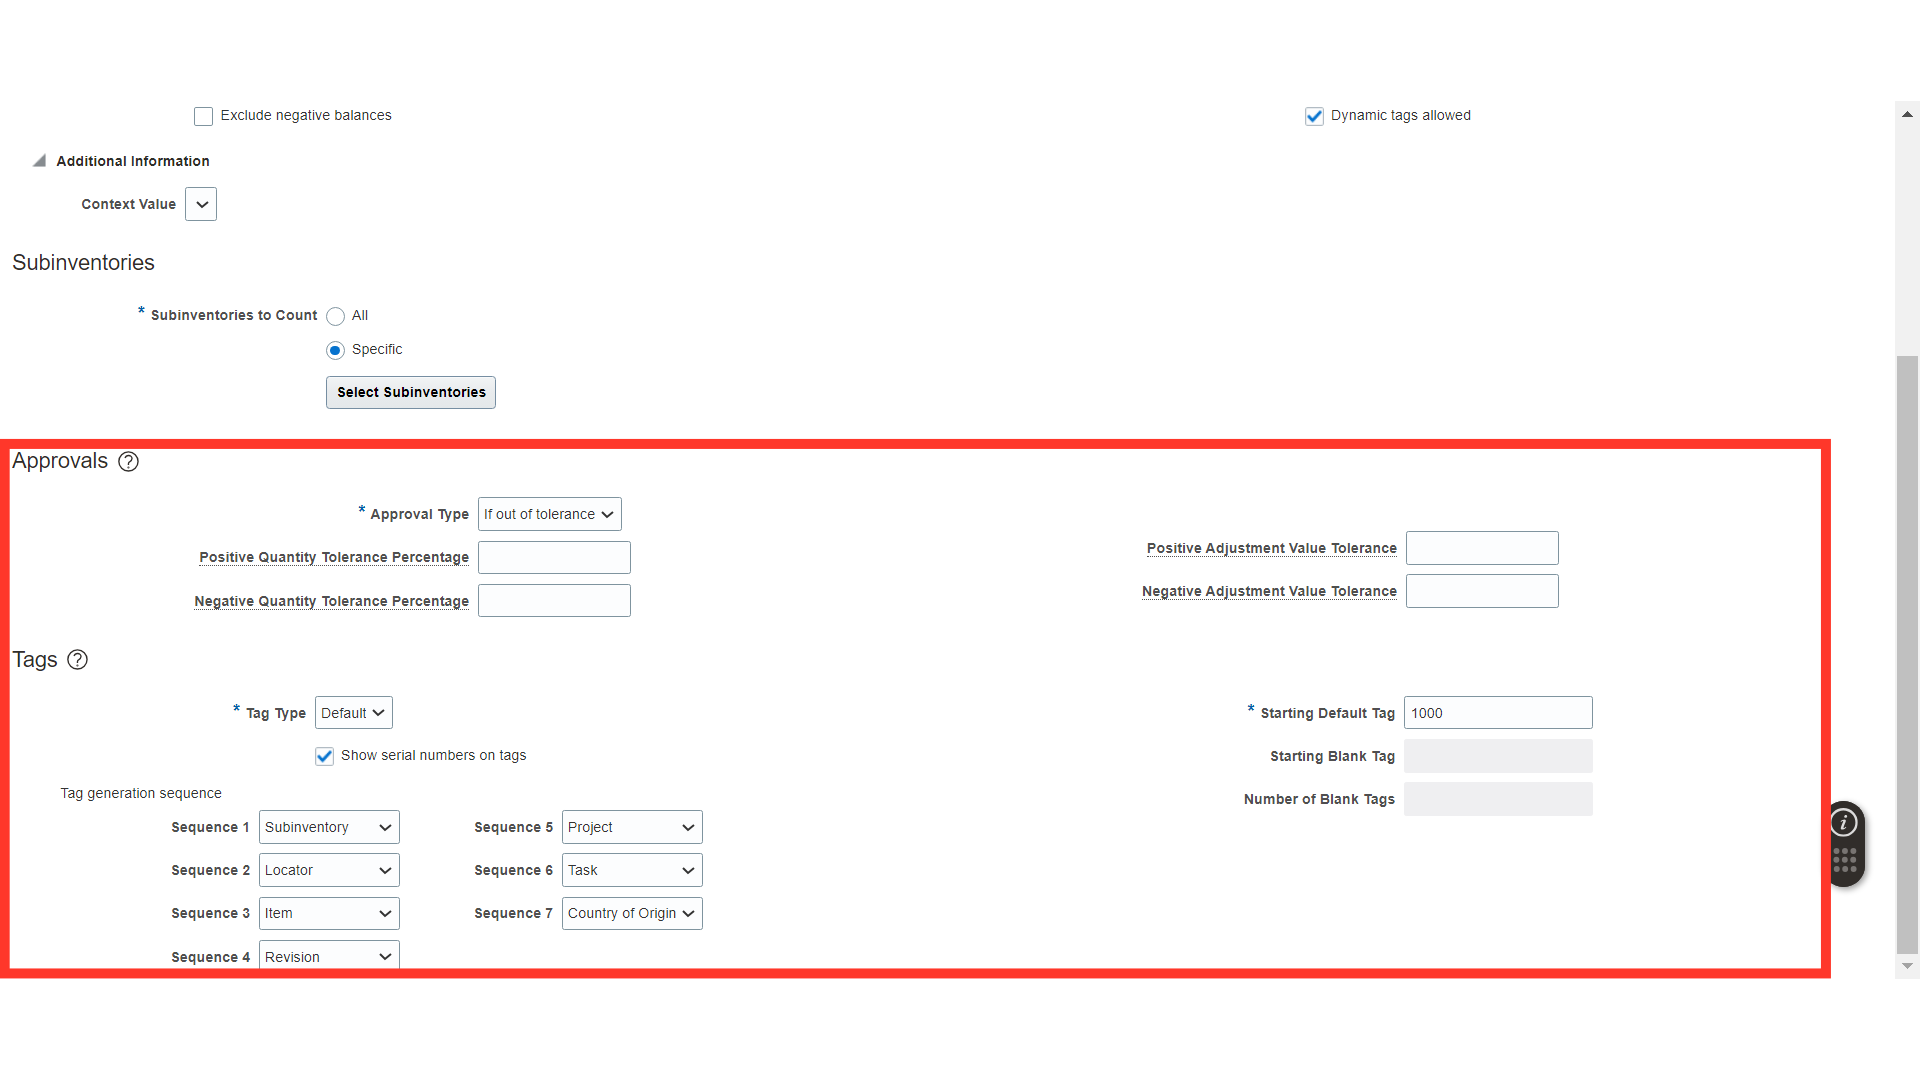
Once all the details are filled in, click on the Save and Close button.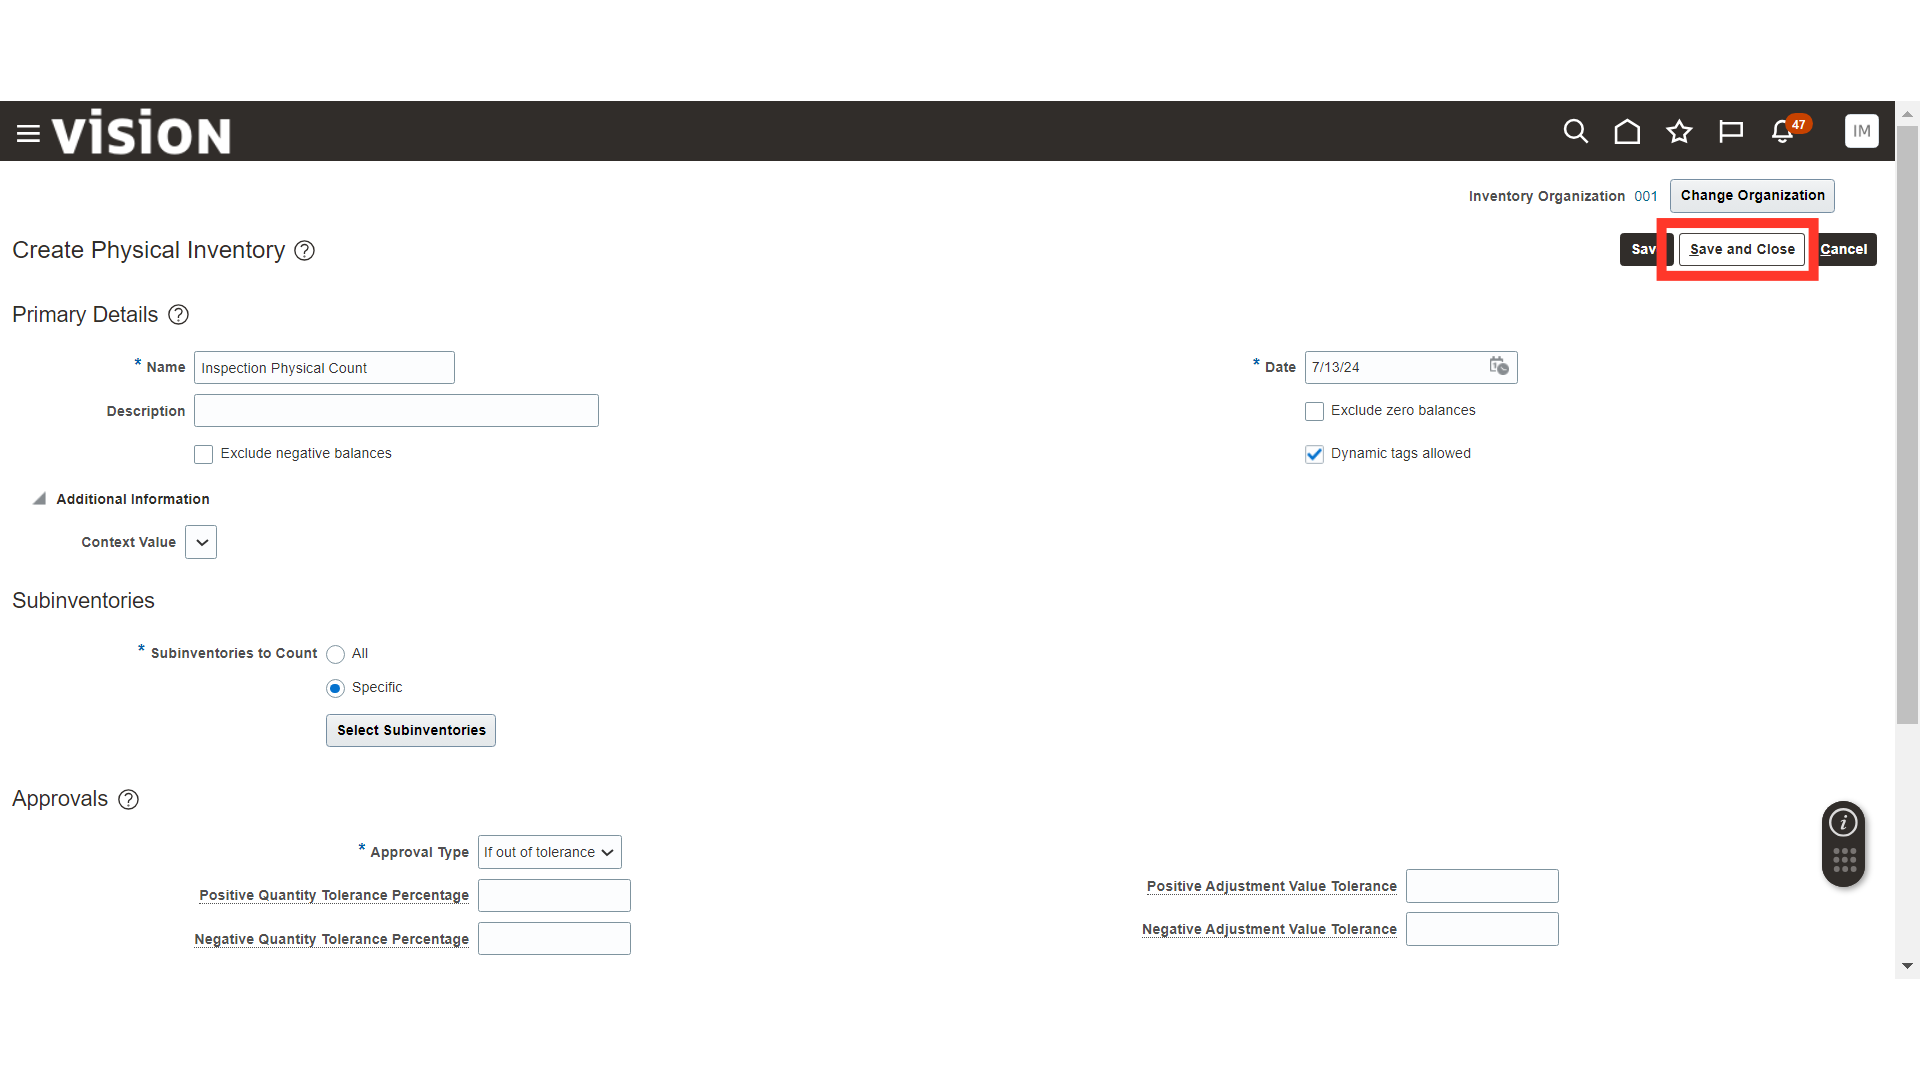
In Manage Physical Inventories, search for your Physical Count and click on the Actions dropdown button.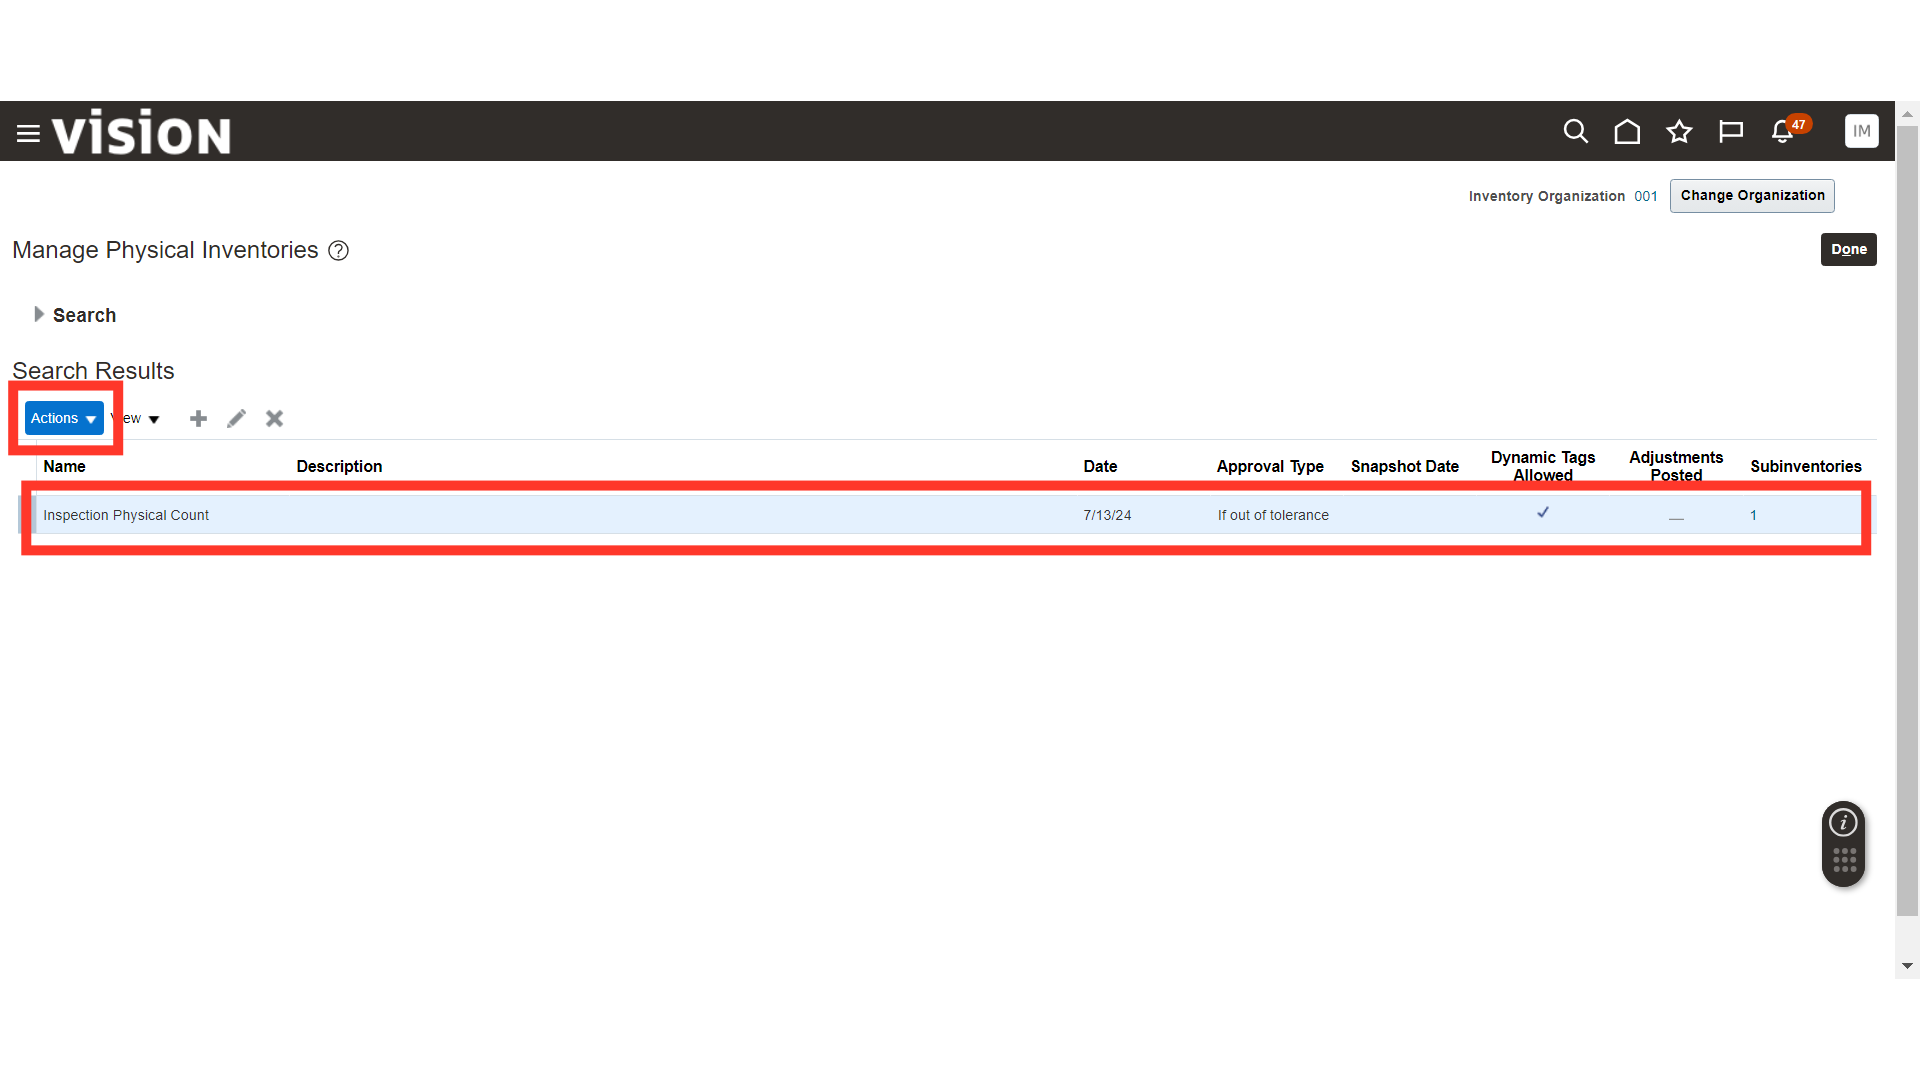
In Actions, click on Generate Physical Inventory Snapshot. This will take the existing on-hand snapshot of the item quantities available in the inventory.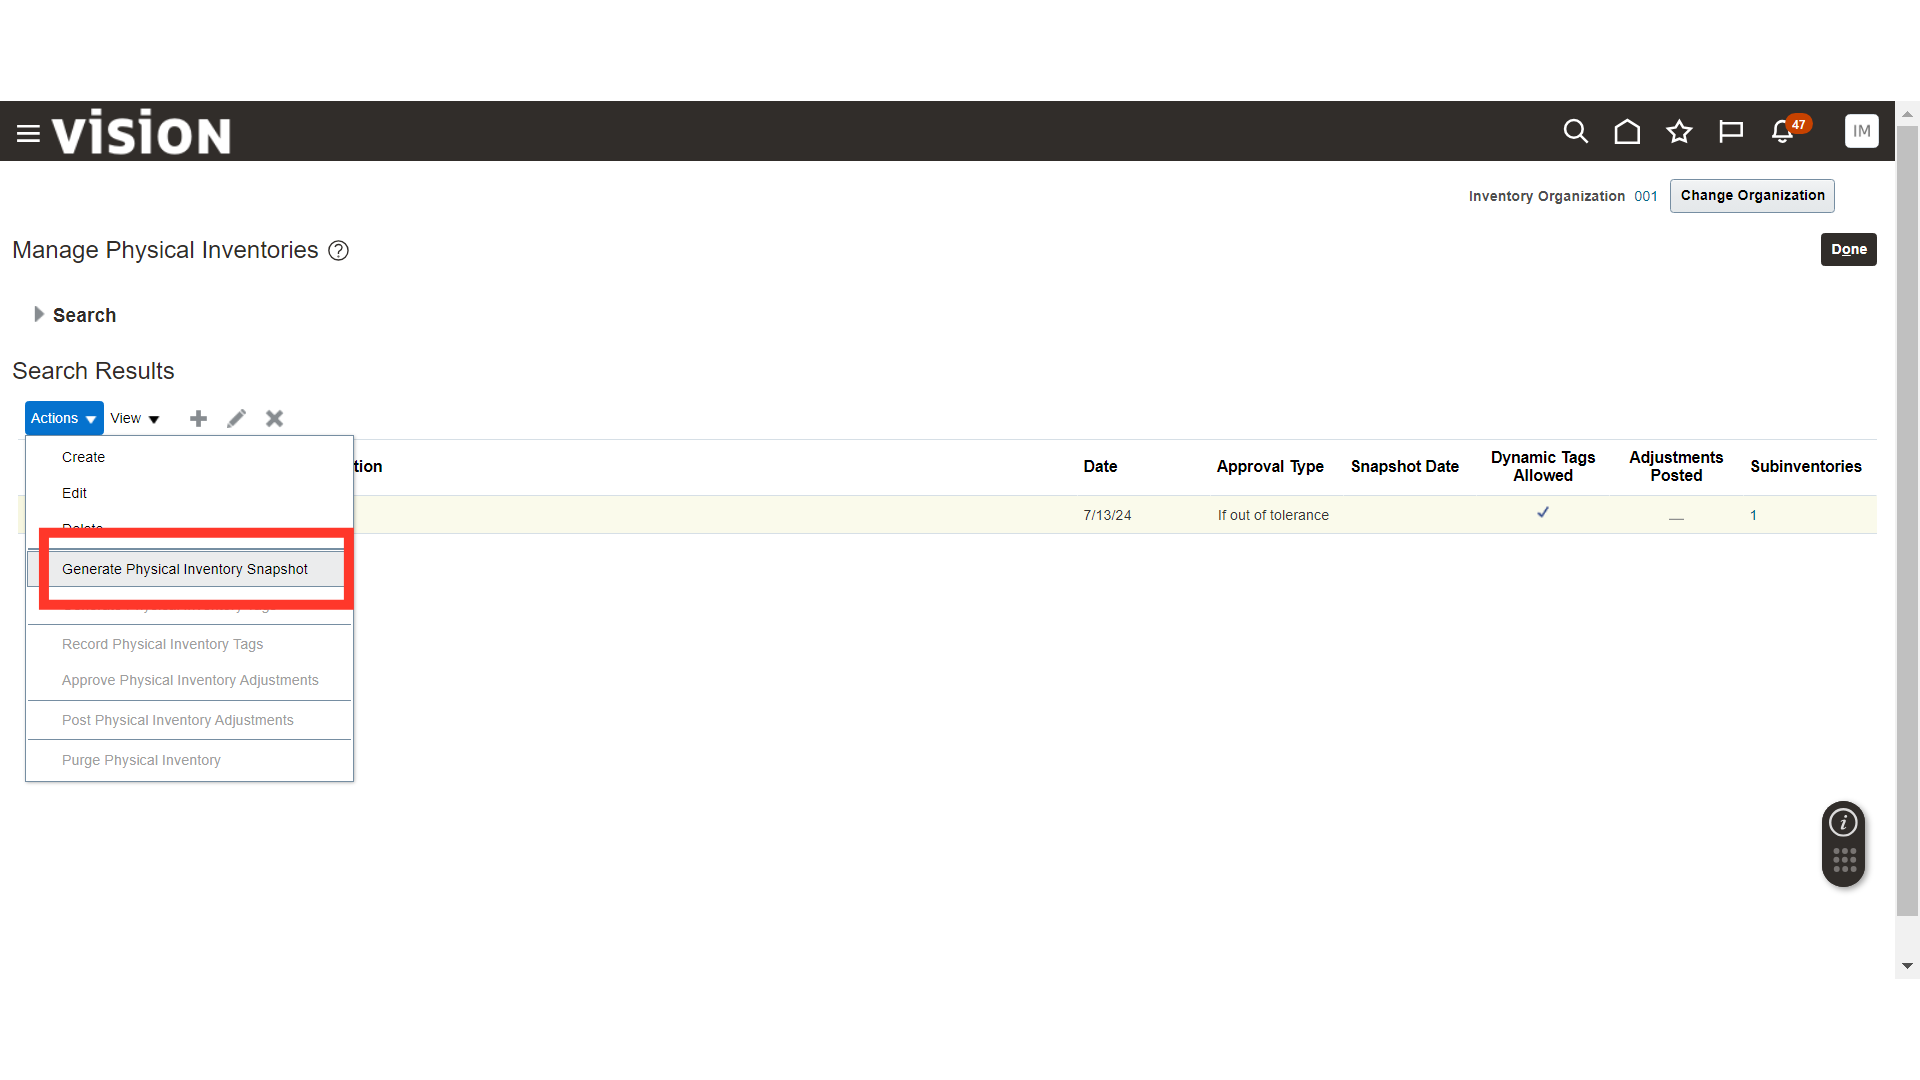
A scheduled process will be submitted for Generate Physical Inventory Snapshot. You can track this scheduled process in Tools; wait for the process to be successful.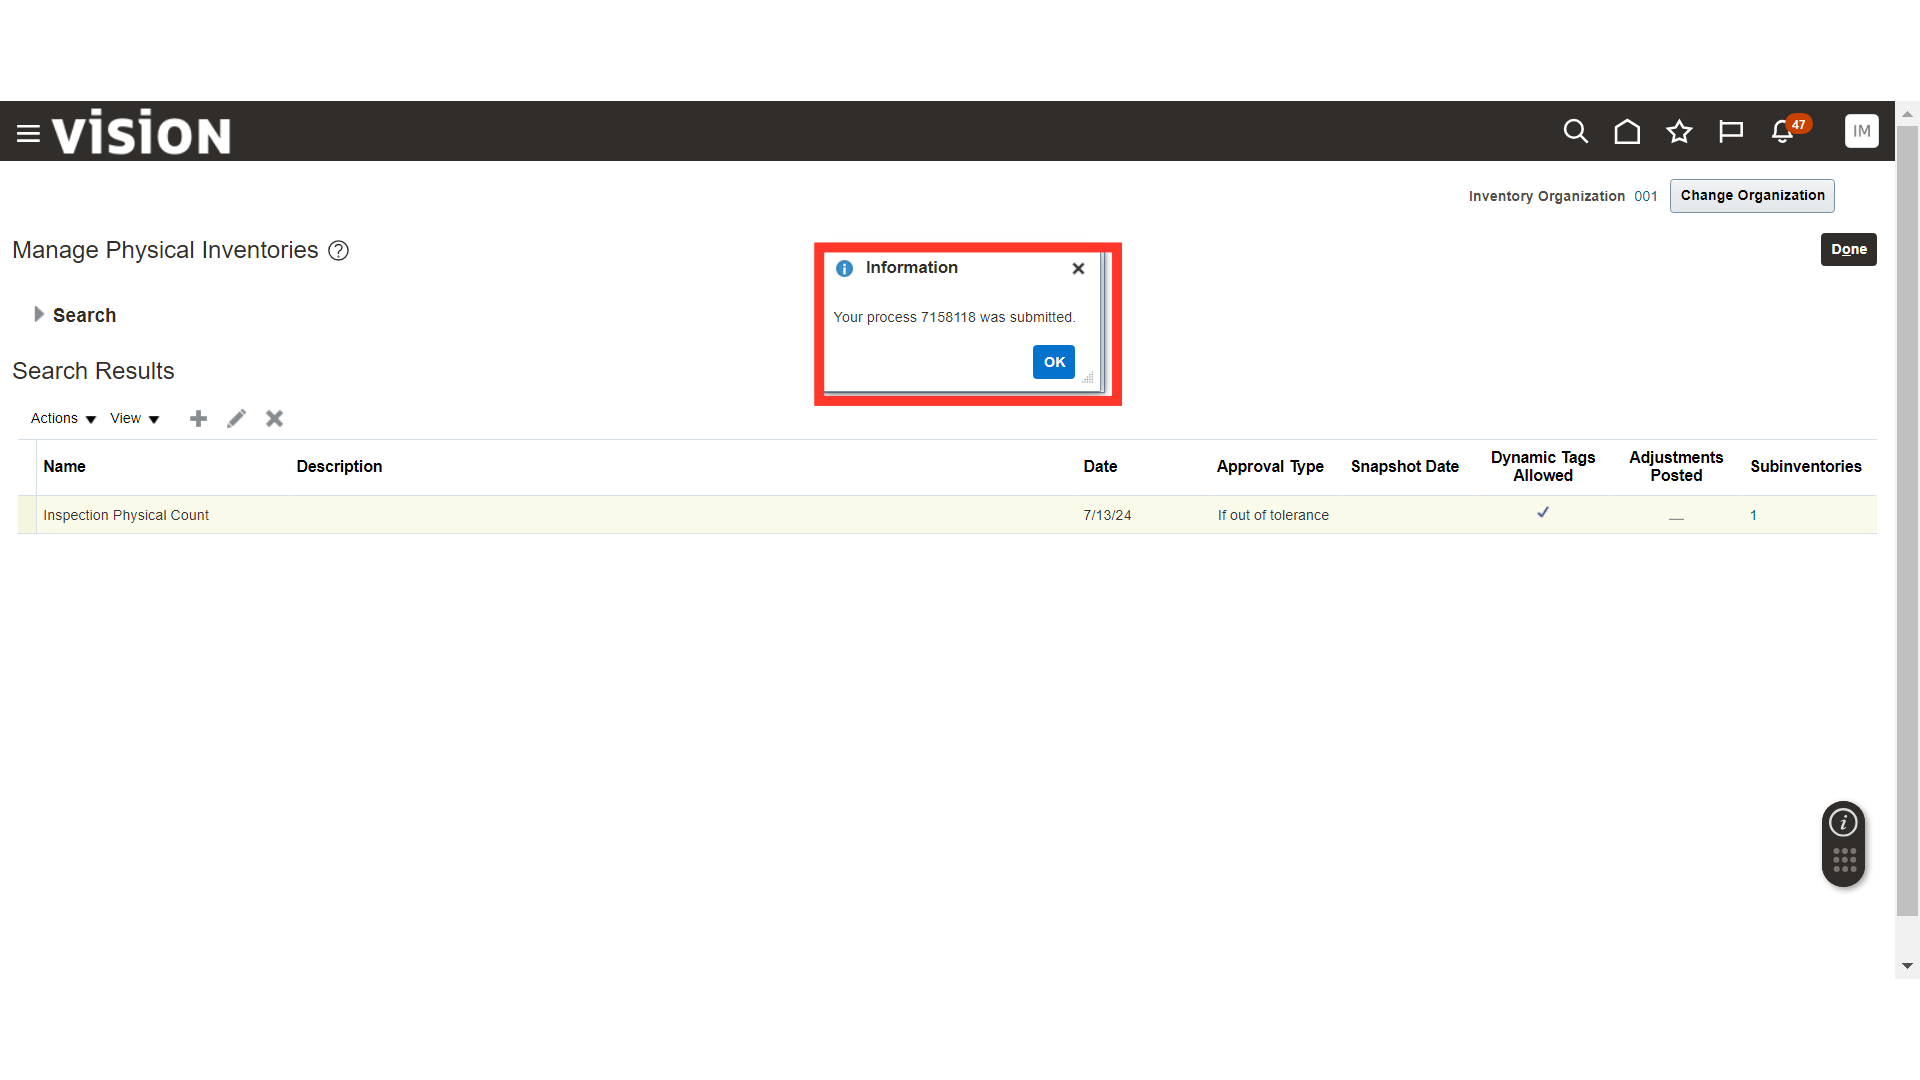
In Actions, click on Generate Physical Inventory Tags. This will generate the Physical Tags for the items associated with the Physical Count.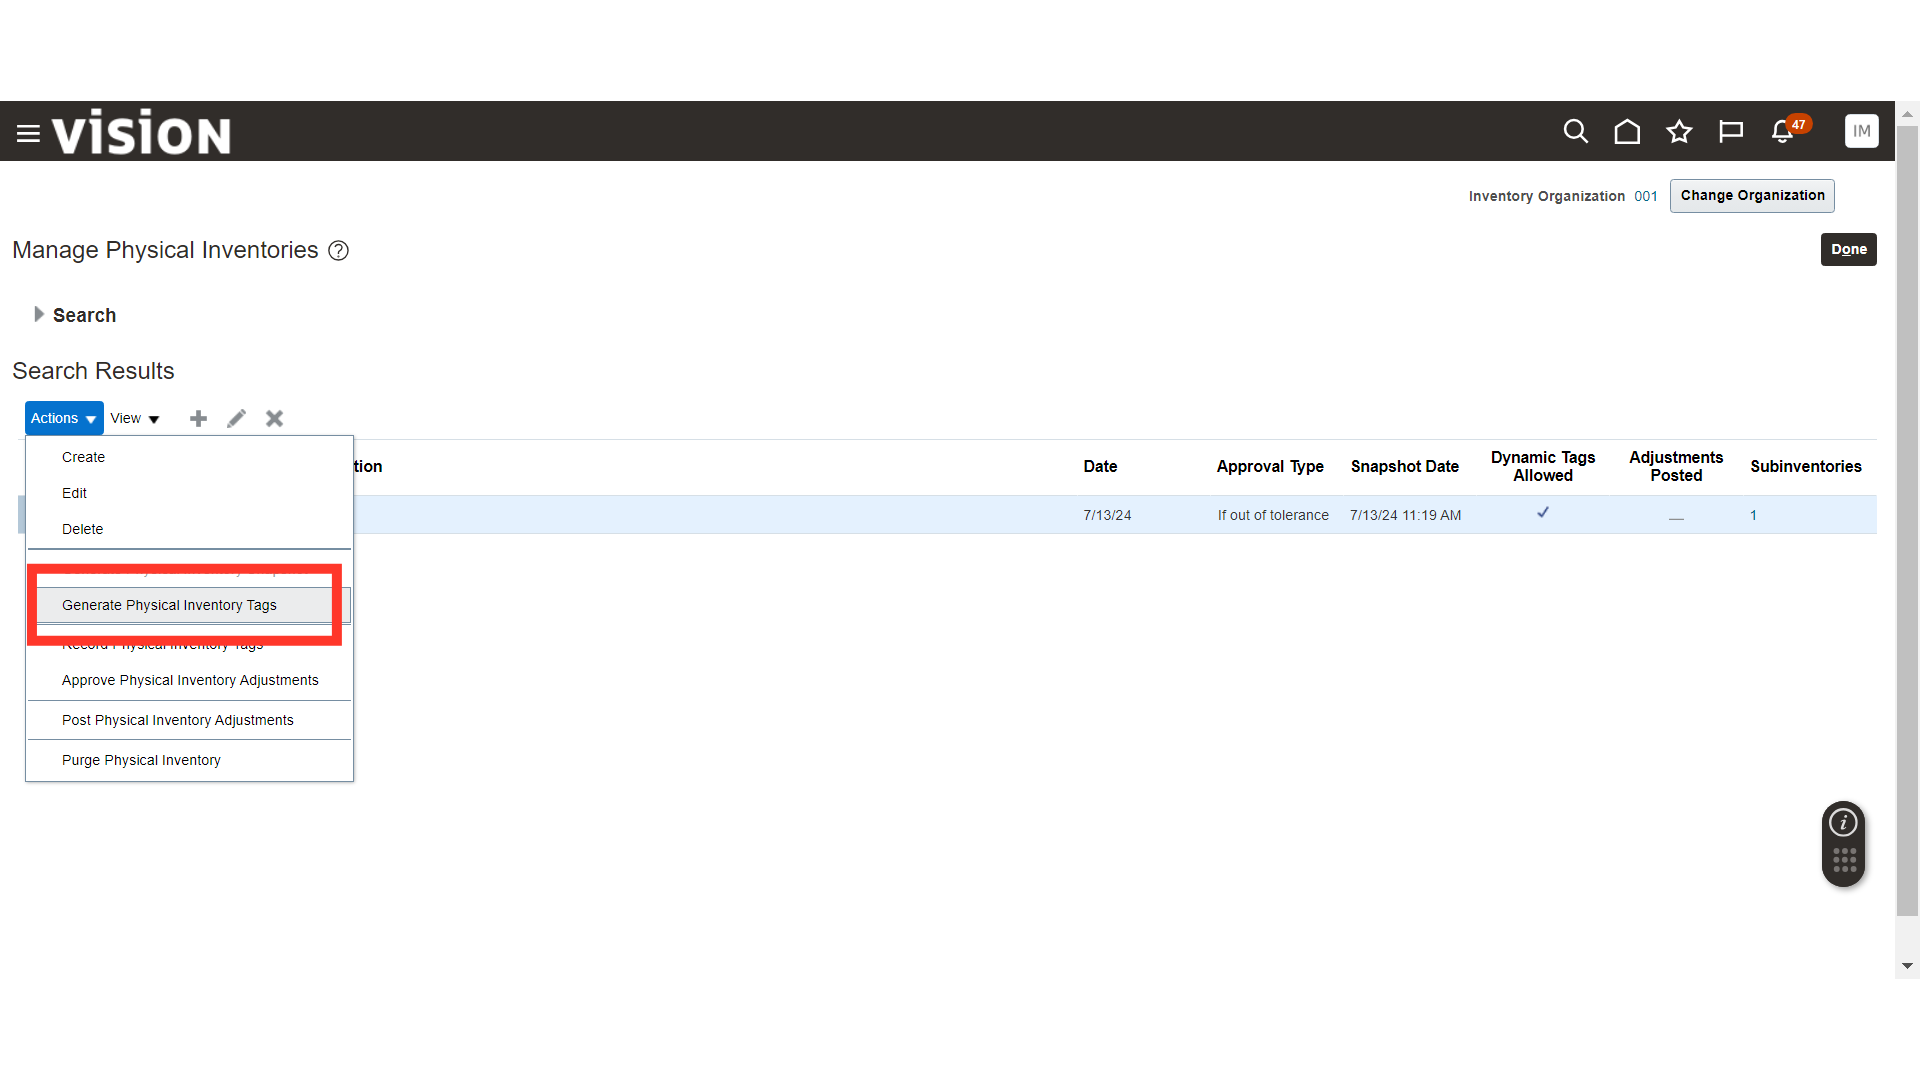
A scheduled process will be submitted for Generate Physical Inventory Tags; click OK.
In the Schedule Process under Tools, you will be able to see the status of the submitted processes.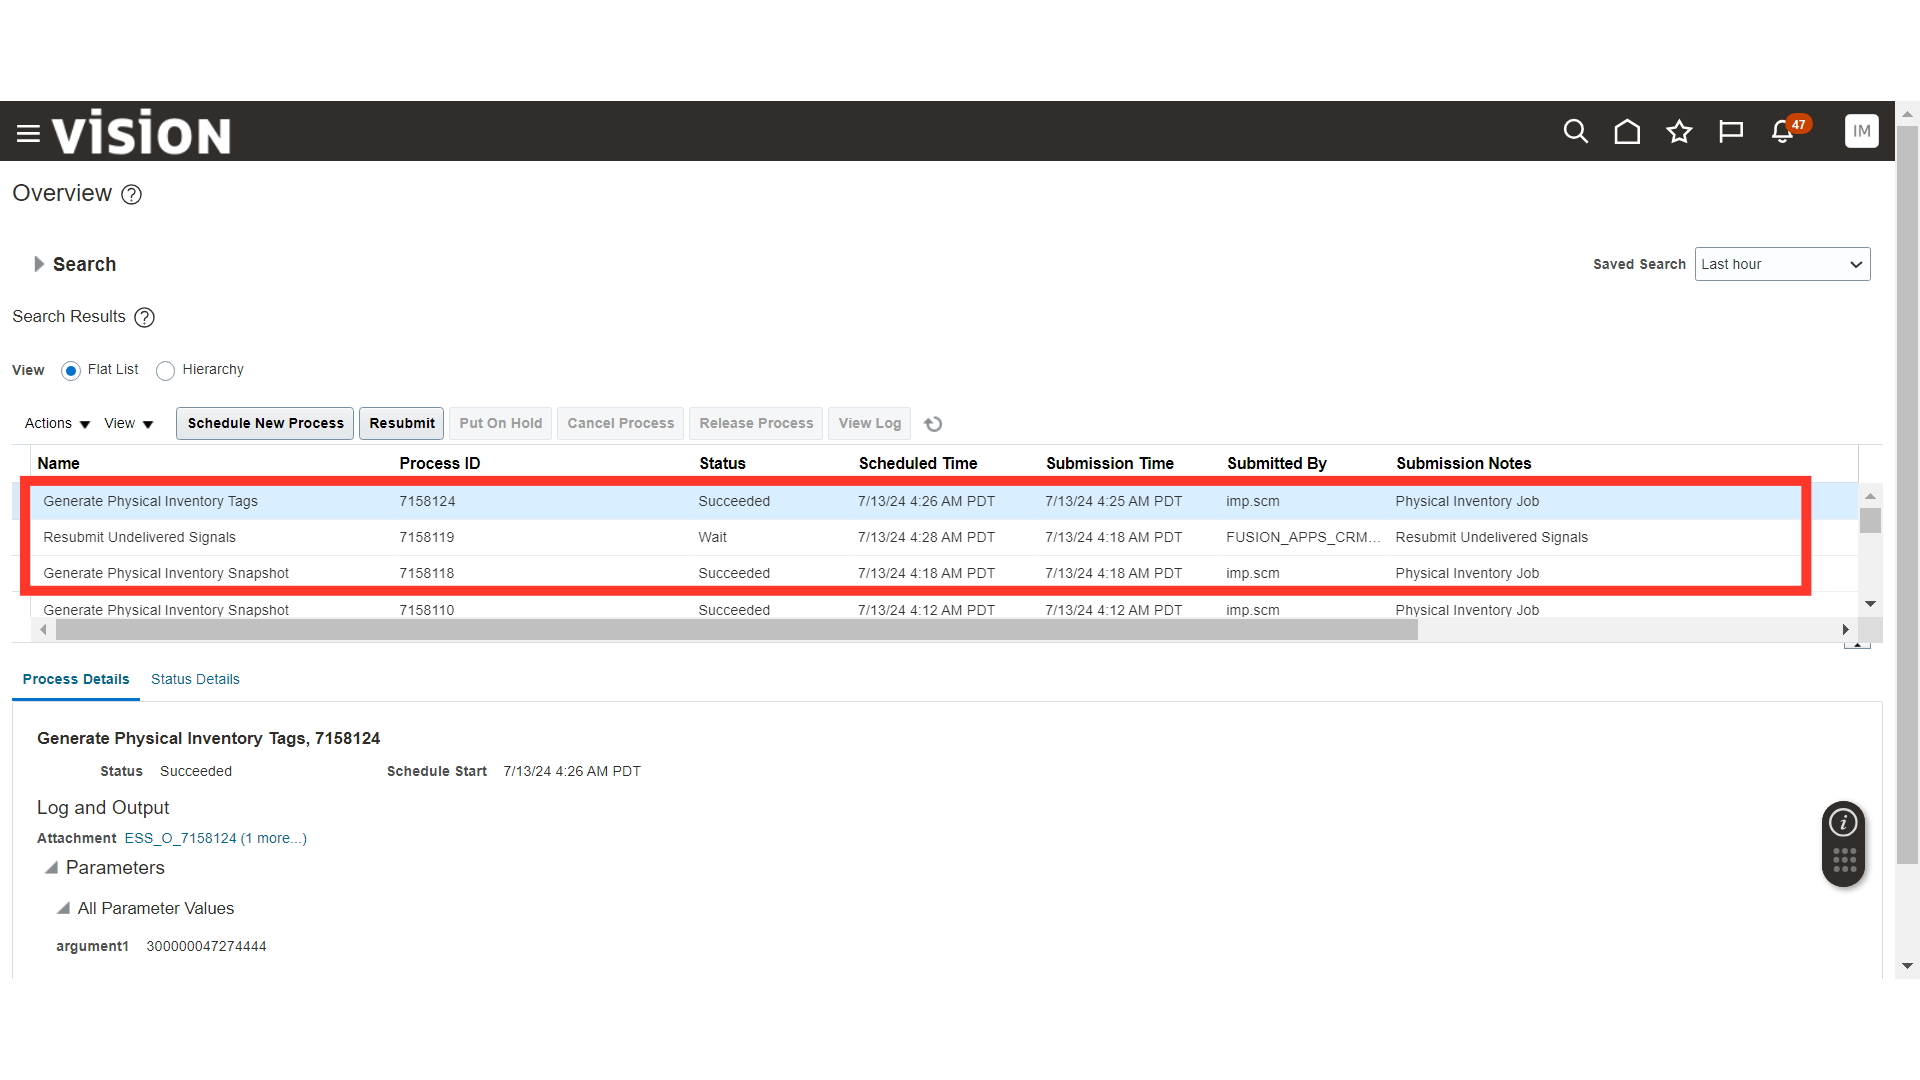
Now, click on the Schedule New Process button, run the Print Physical Inventory Tag Report, and click OK.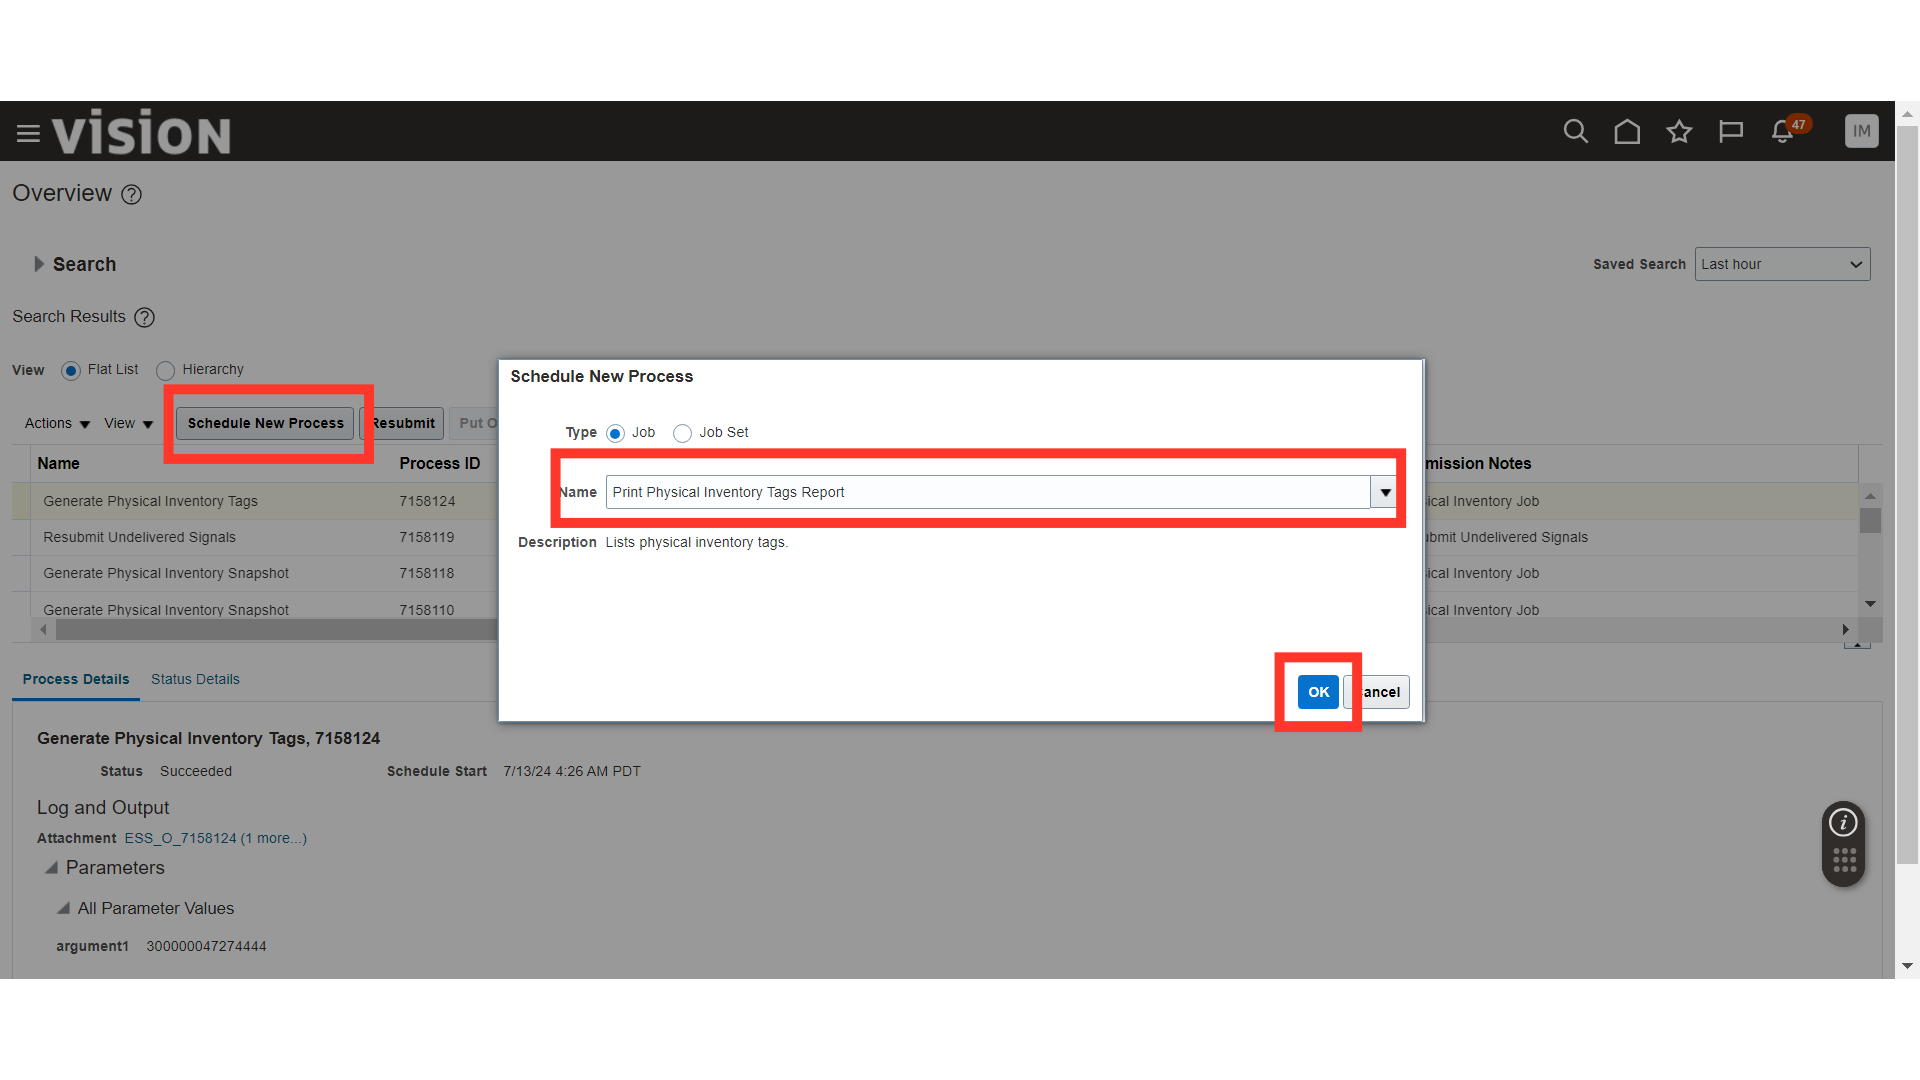
In the Process Details, provide the Organization, Physical Inventory, Subinventory, Sort By, and Range. Once done, click on the Submit button.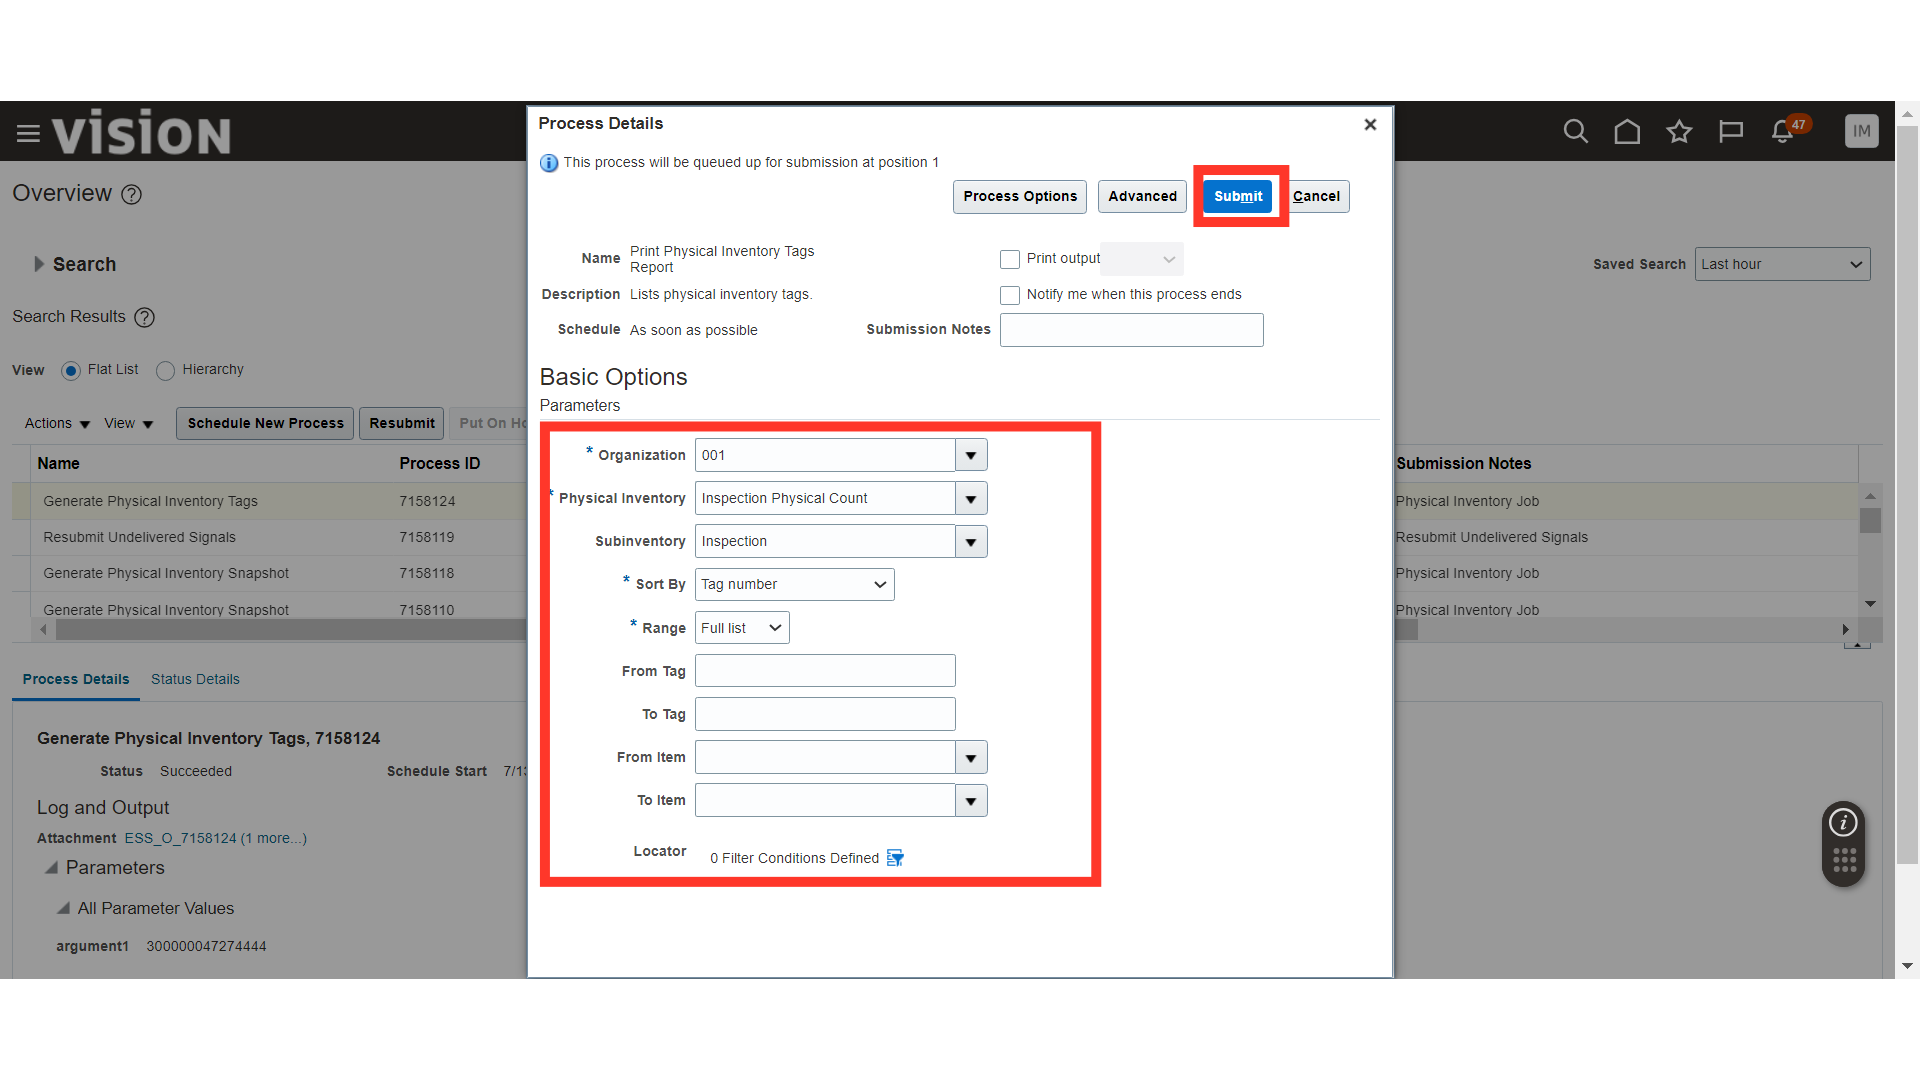
A process will be submitted for Print Physical Inventory Tags; click OK.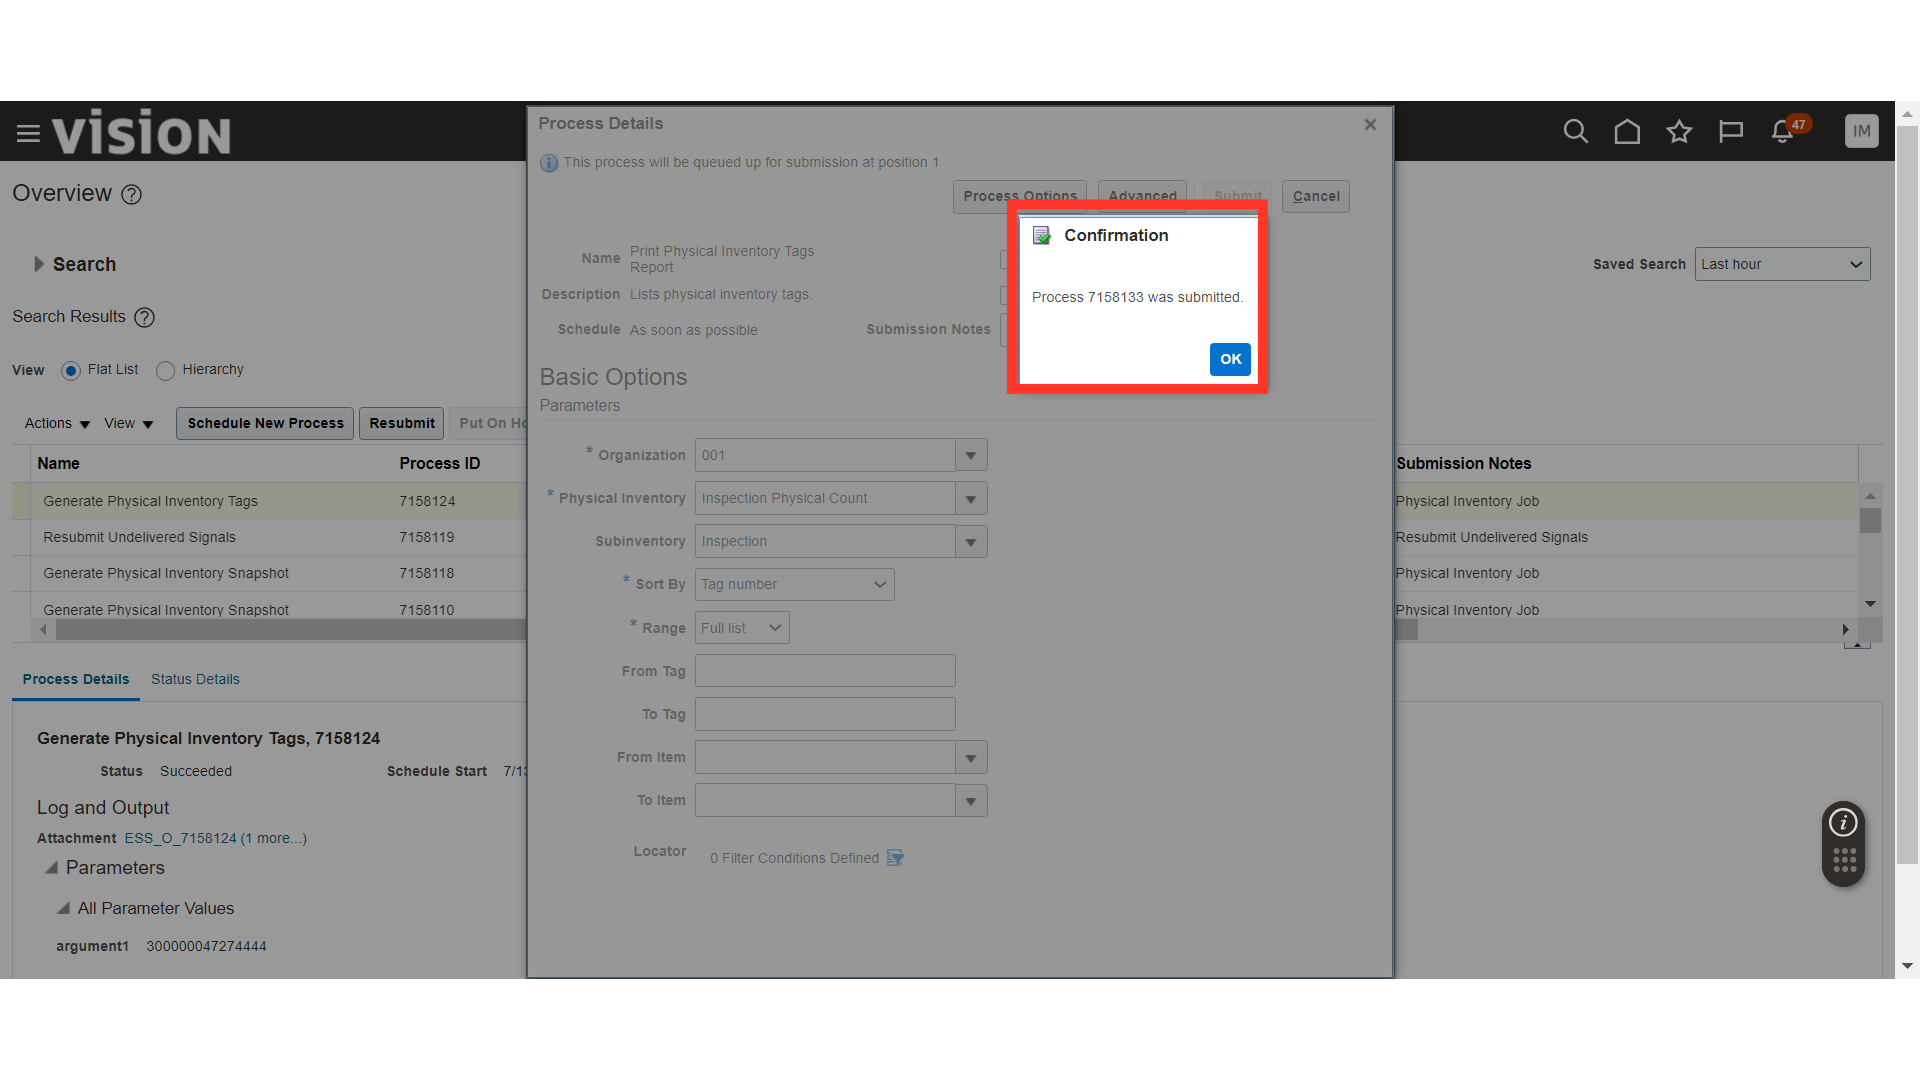
Once the process is in the Succeeded status, select the process and click on the Republish button. This will print or generate a PDF with the printed item details.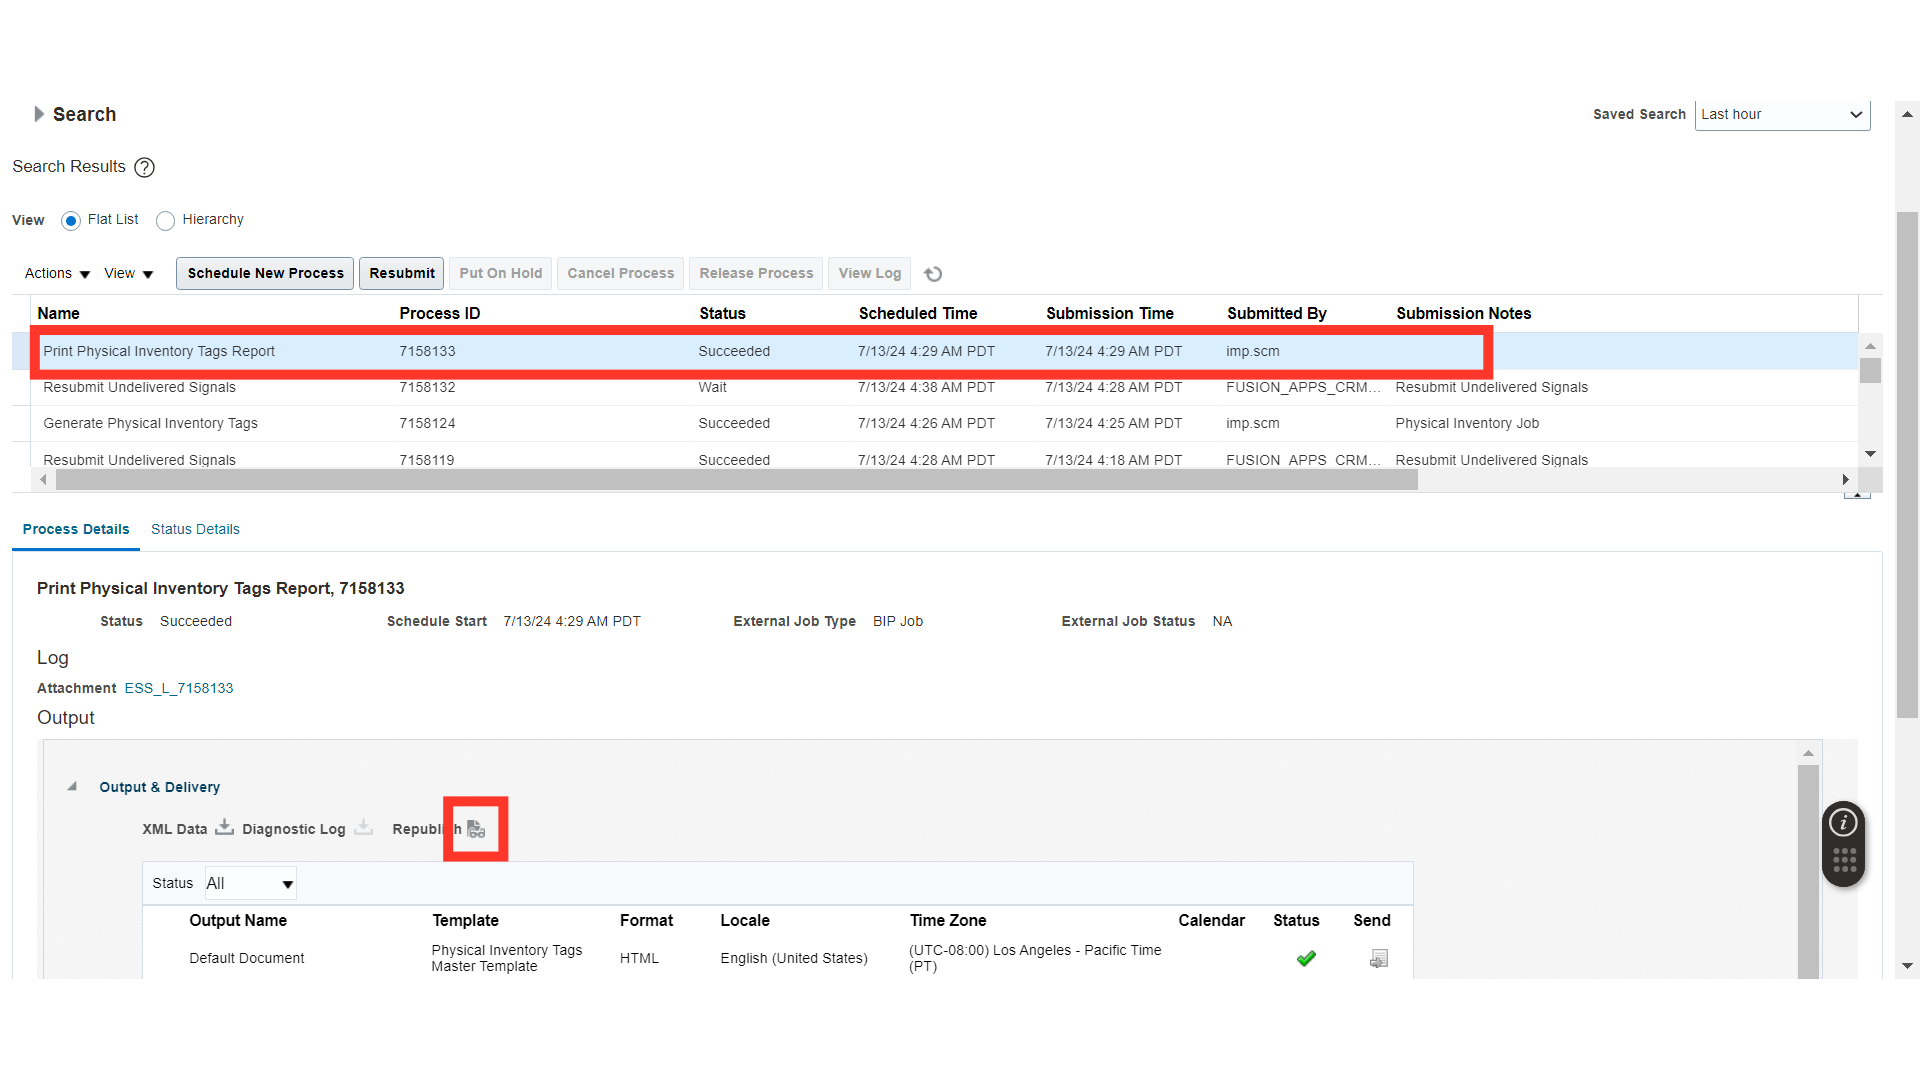
In Republish, click on the Gear icon.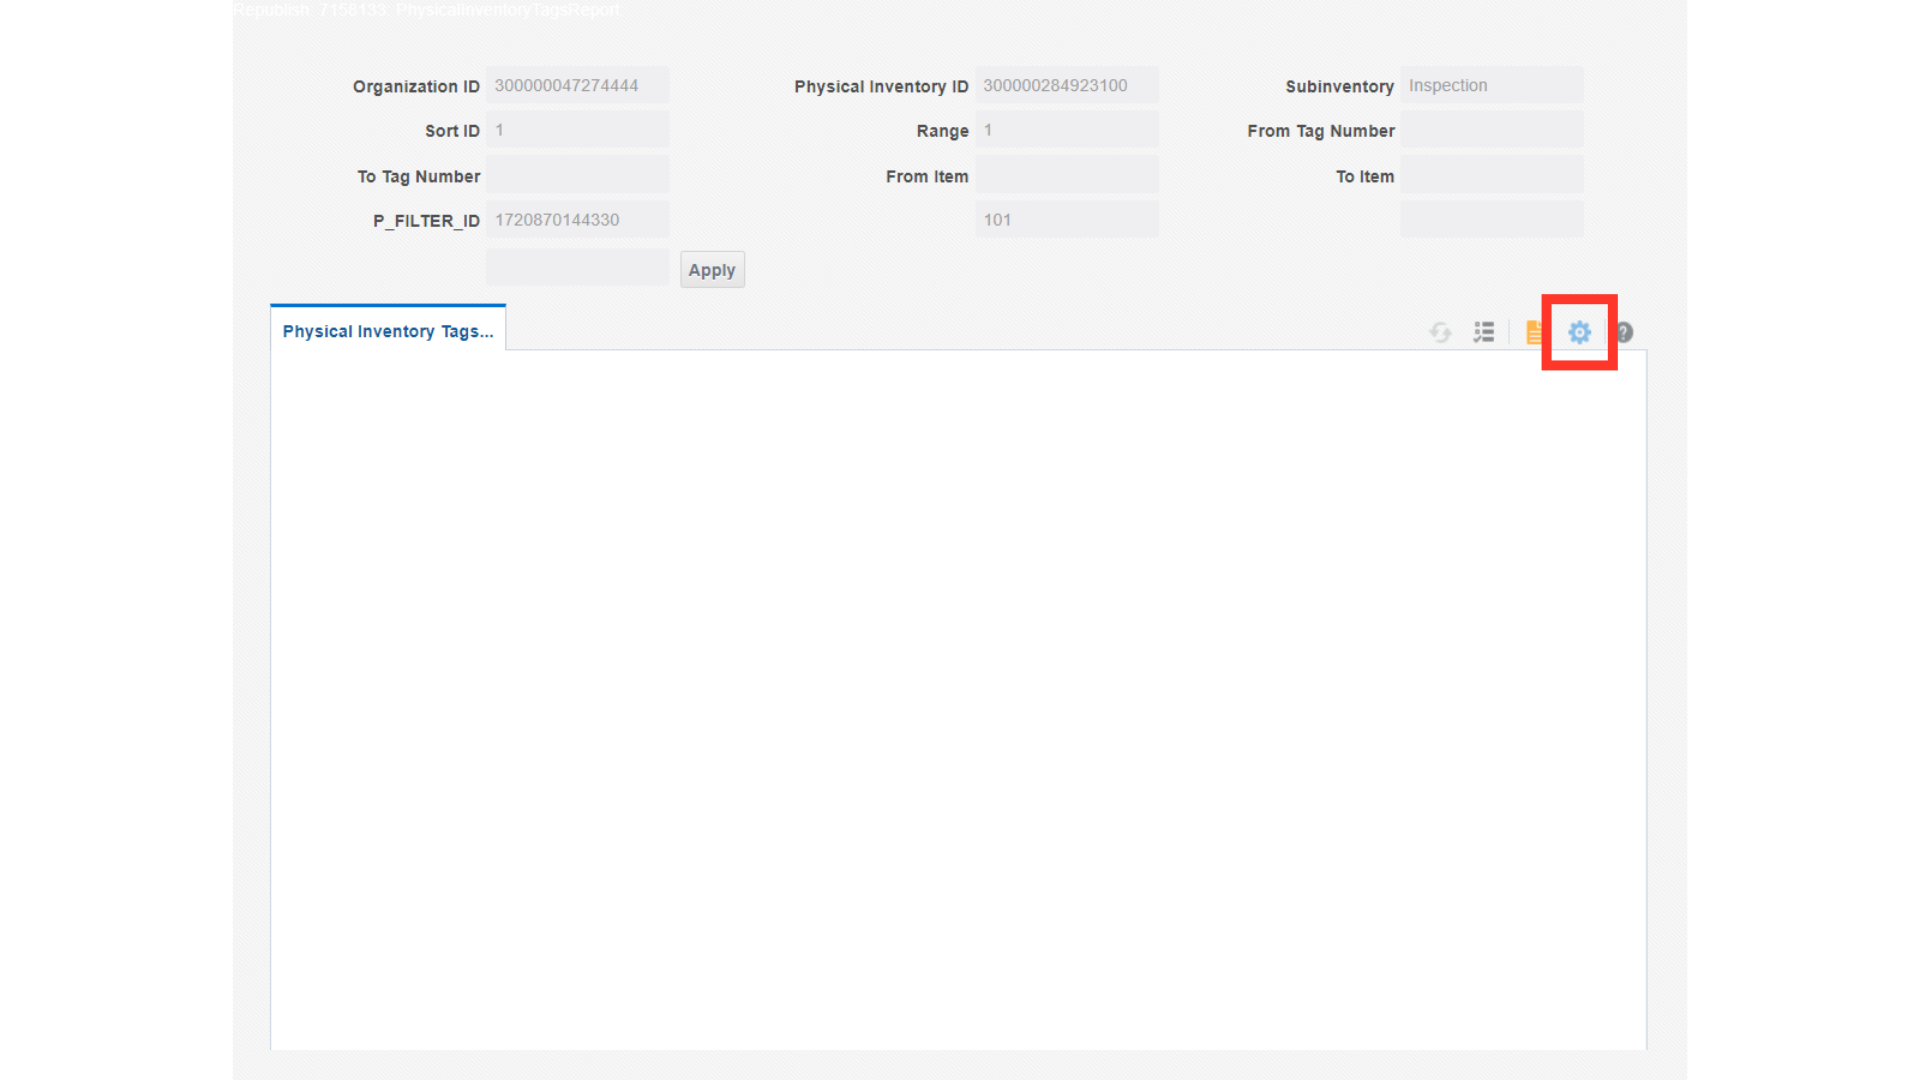
Click on Excel to download the file under Export.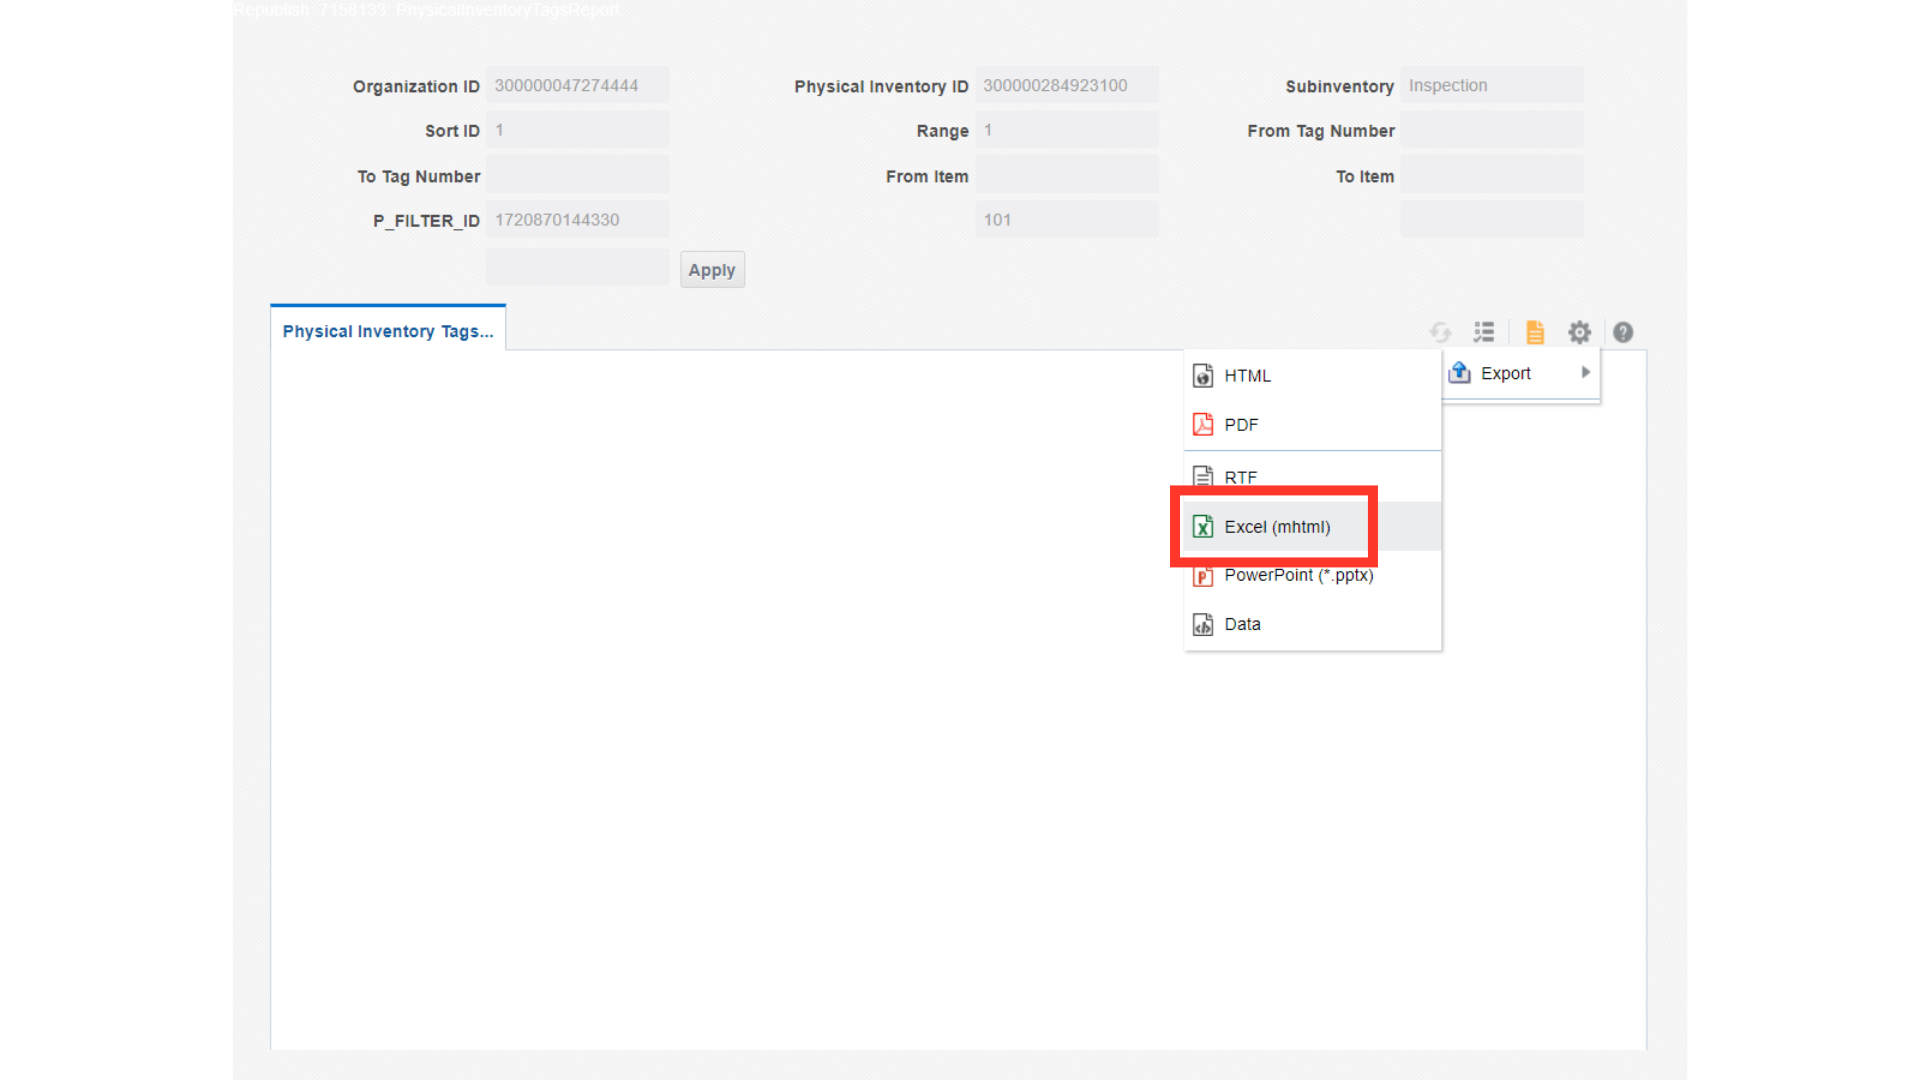
Now, in Manage Physical Inventories, click on Actions and then click on Record Physical Inventory Tags.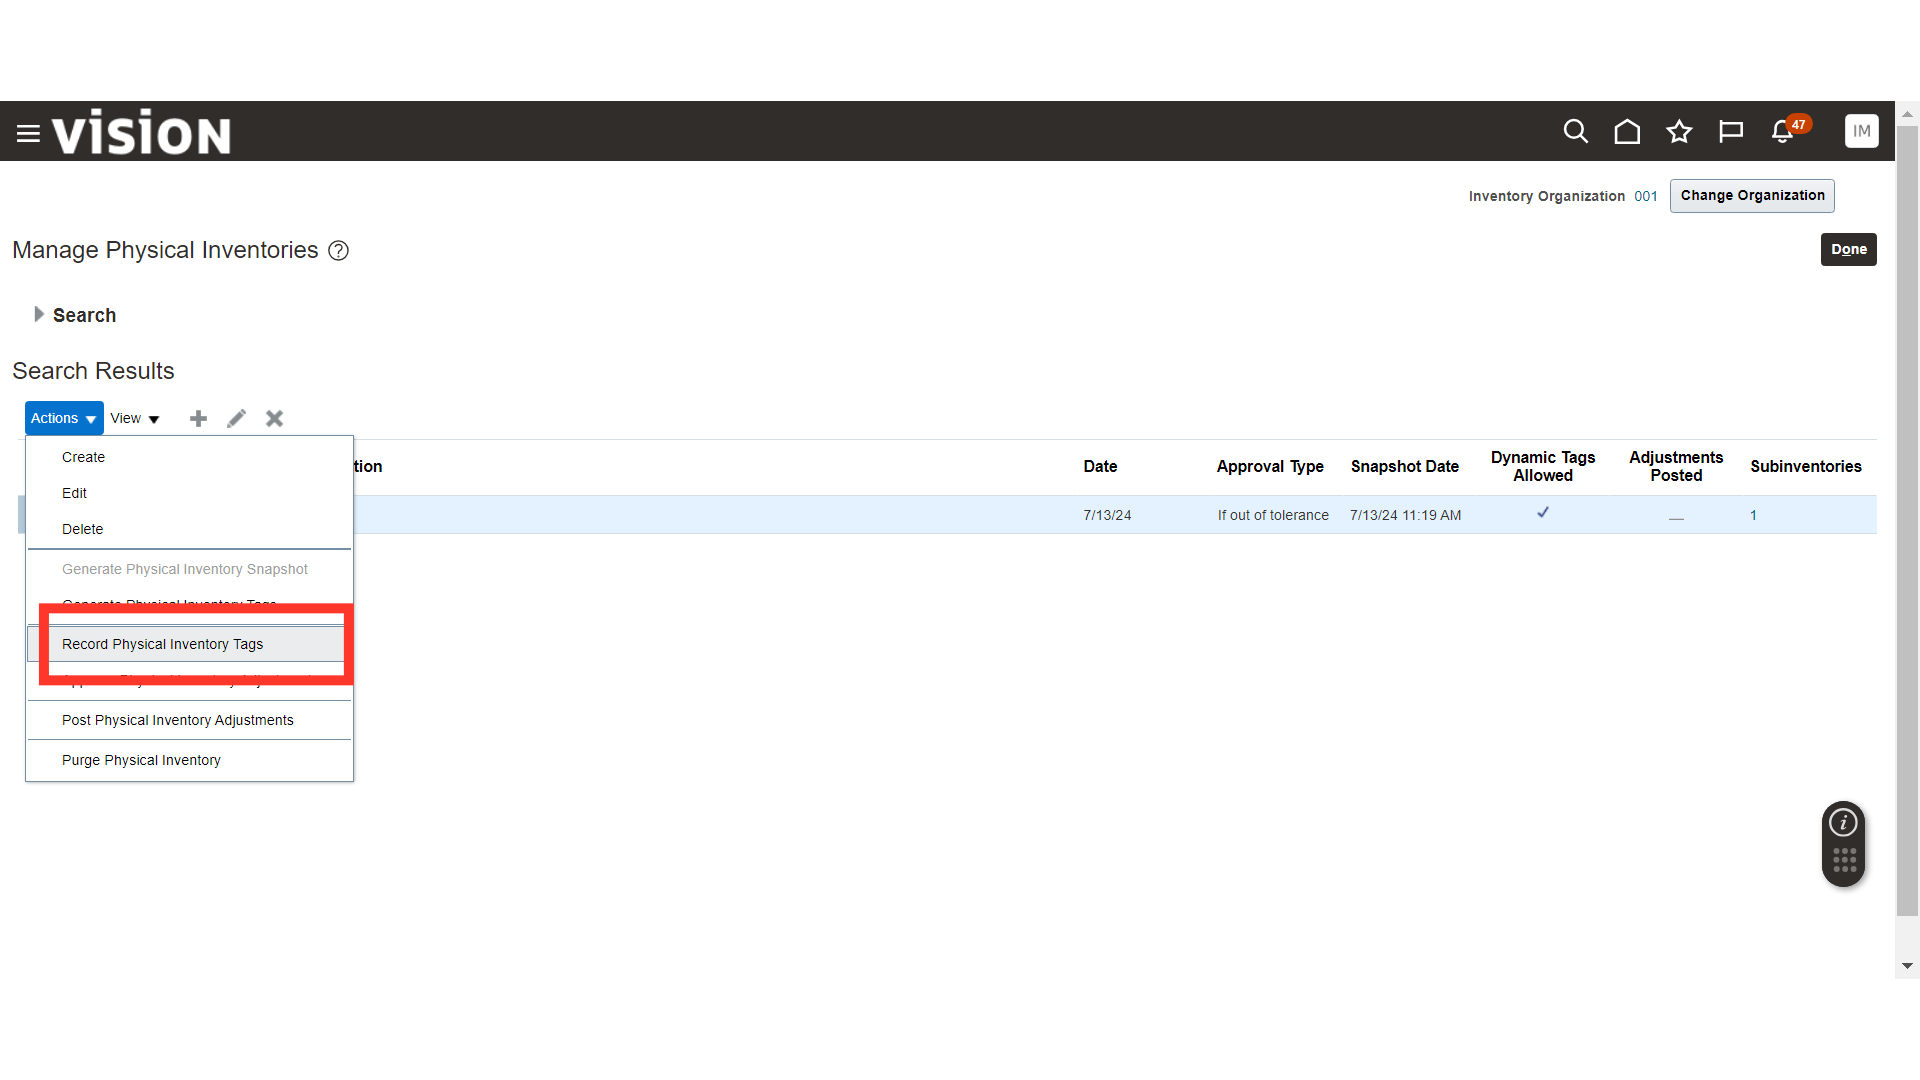
In Record Physical Inventory Tags, provide the Count Quantity which you have counted during the Physical Count for each item.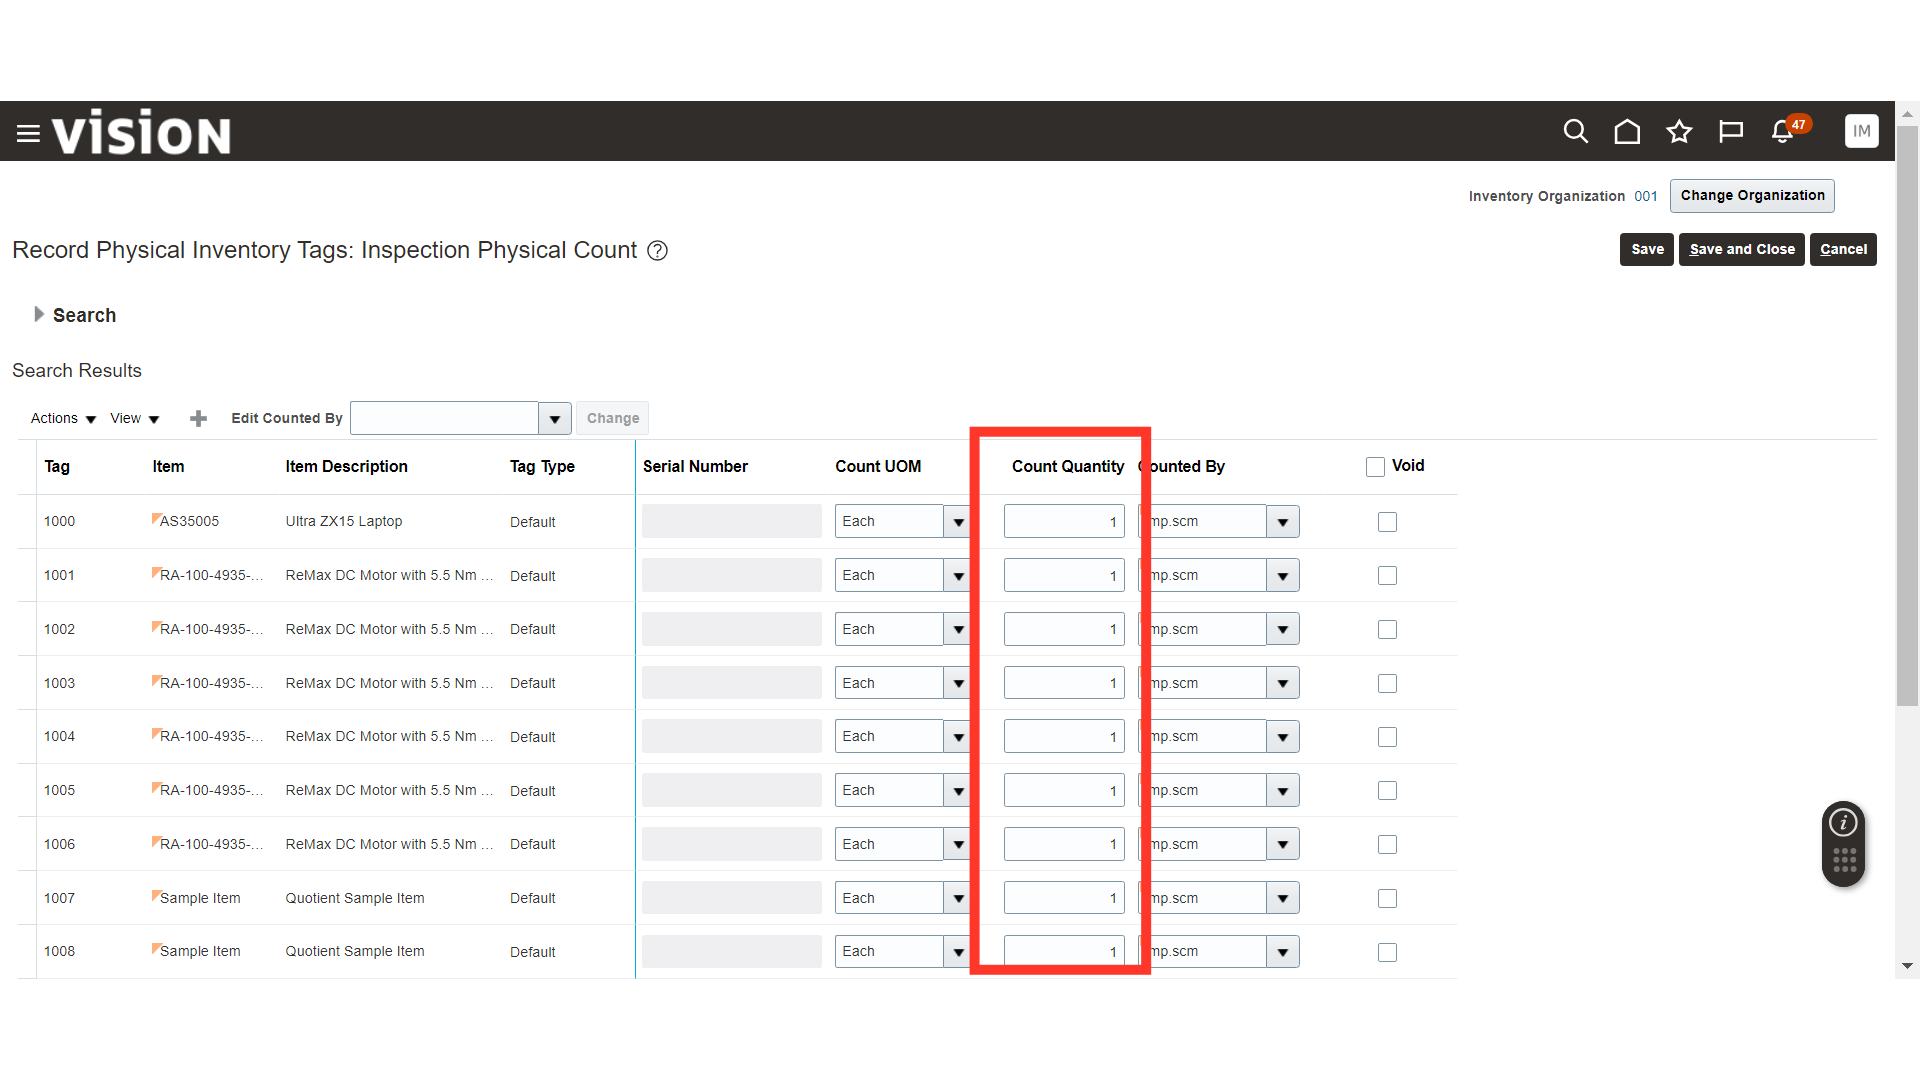
Once all the quantities are added, click on the Save and Close button.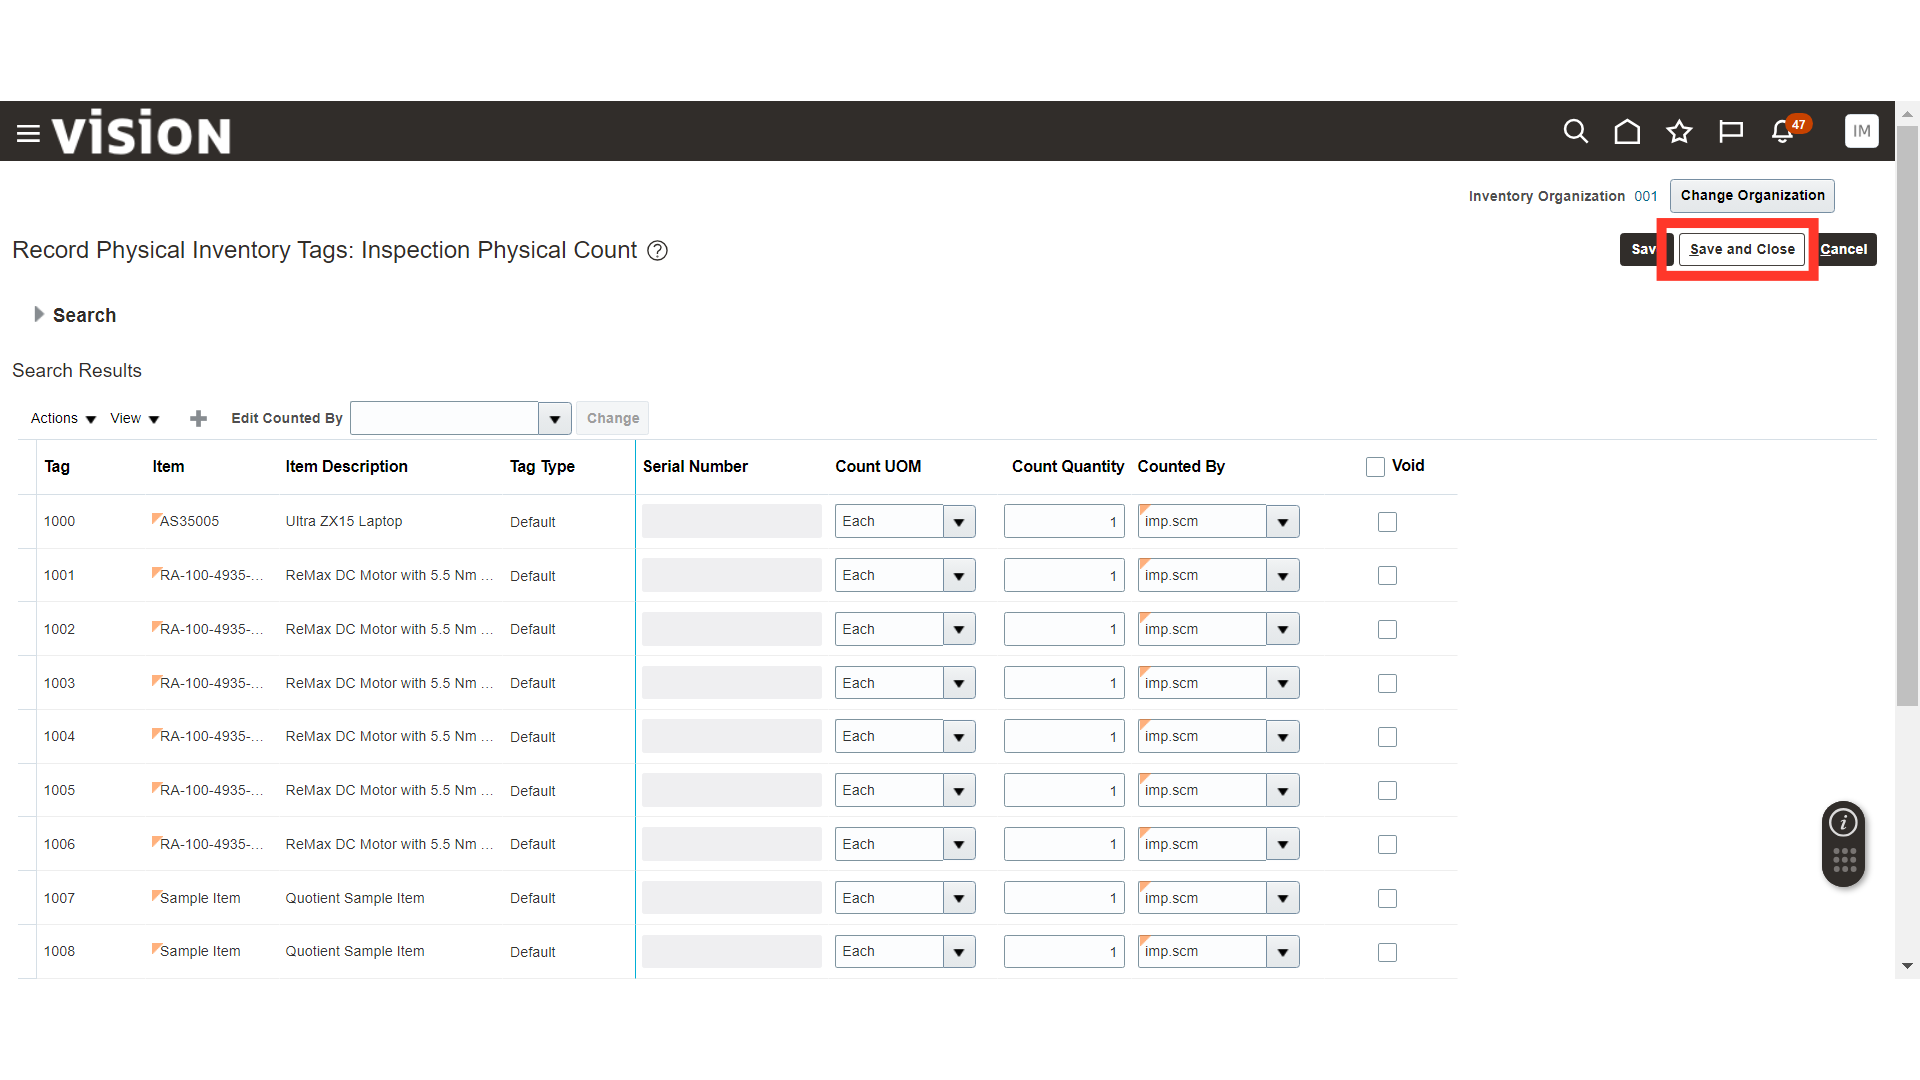
In Manage Physical Inventories, click on Approve Physical Inventory Adjustments.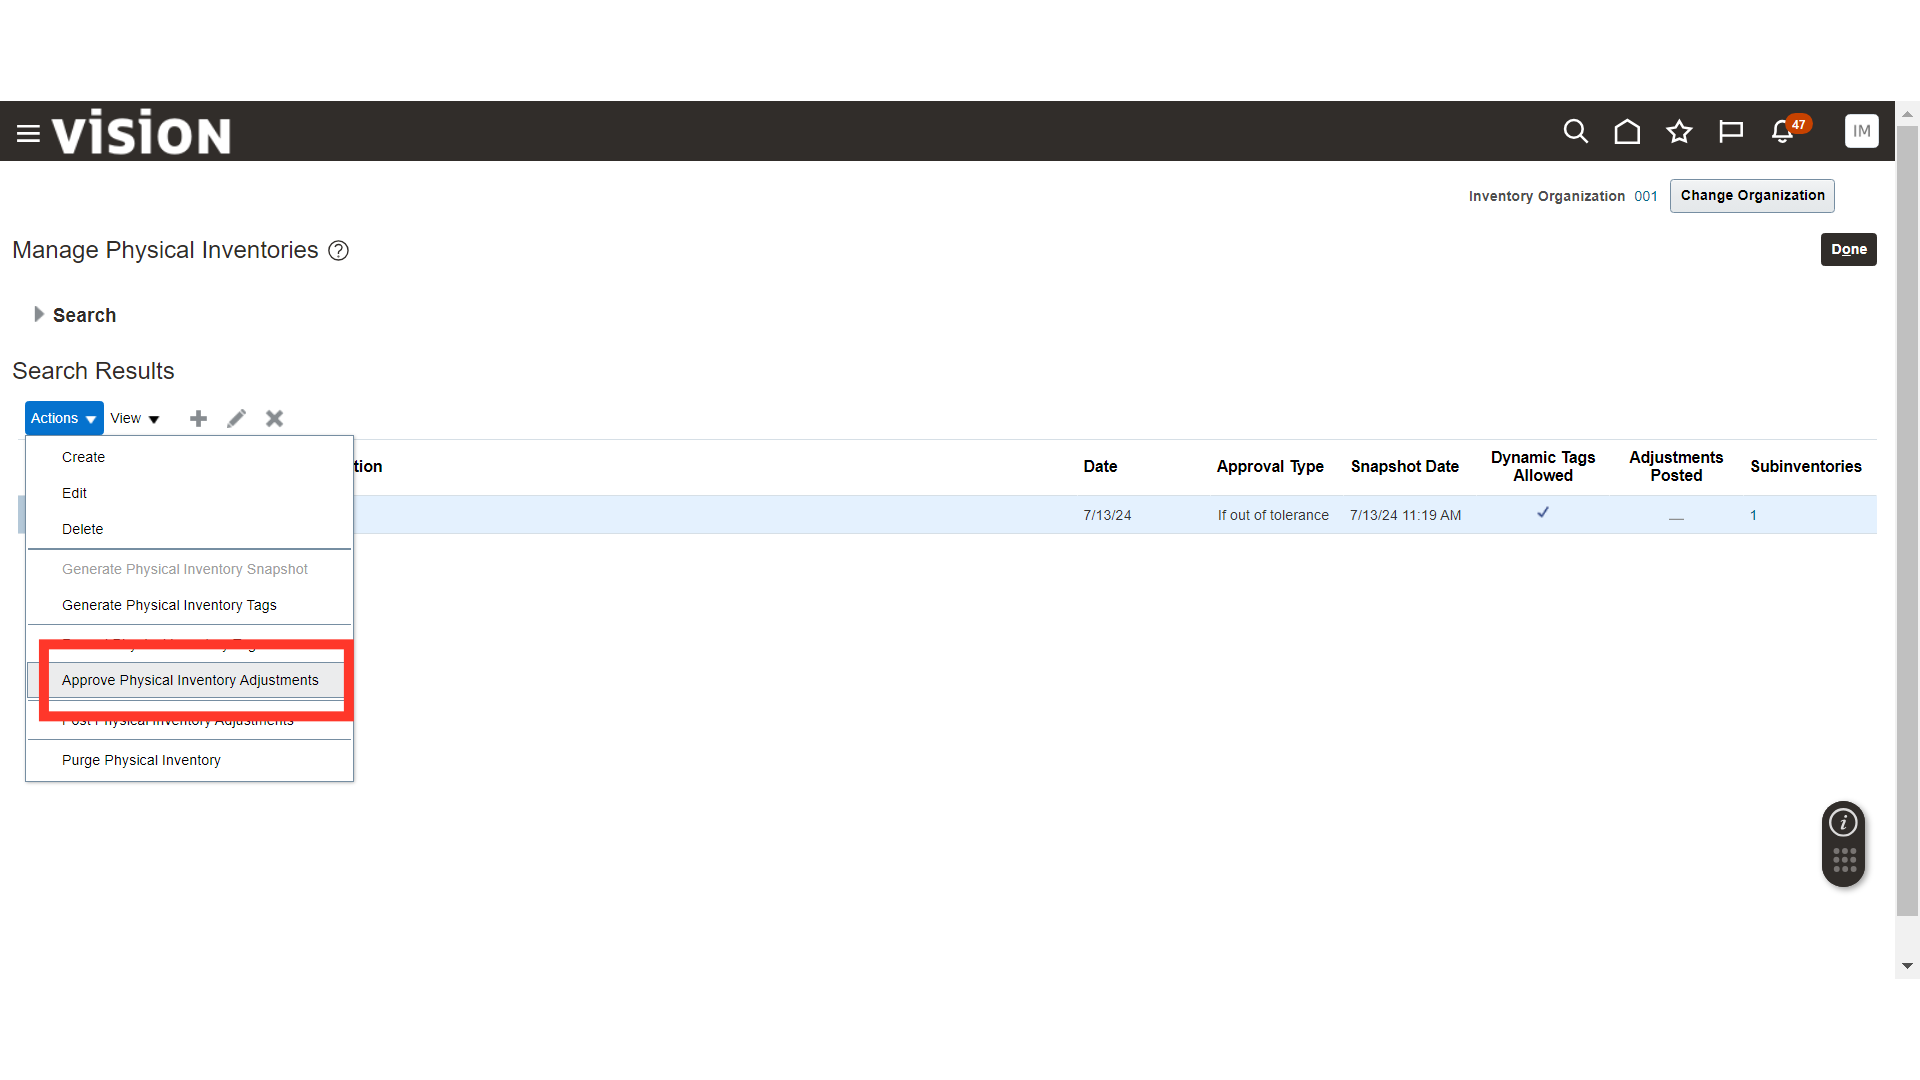
In Approve Physical Inventory Adjustments, approve the adjustments for the items.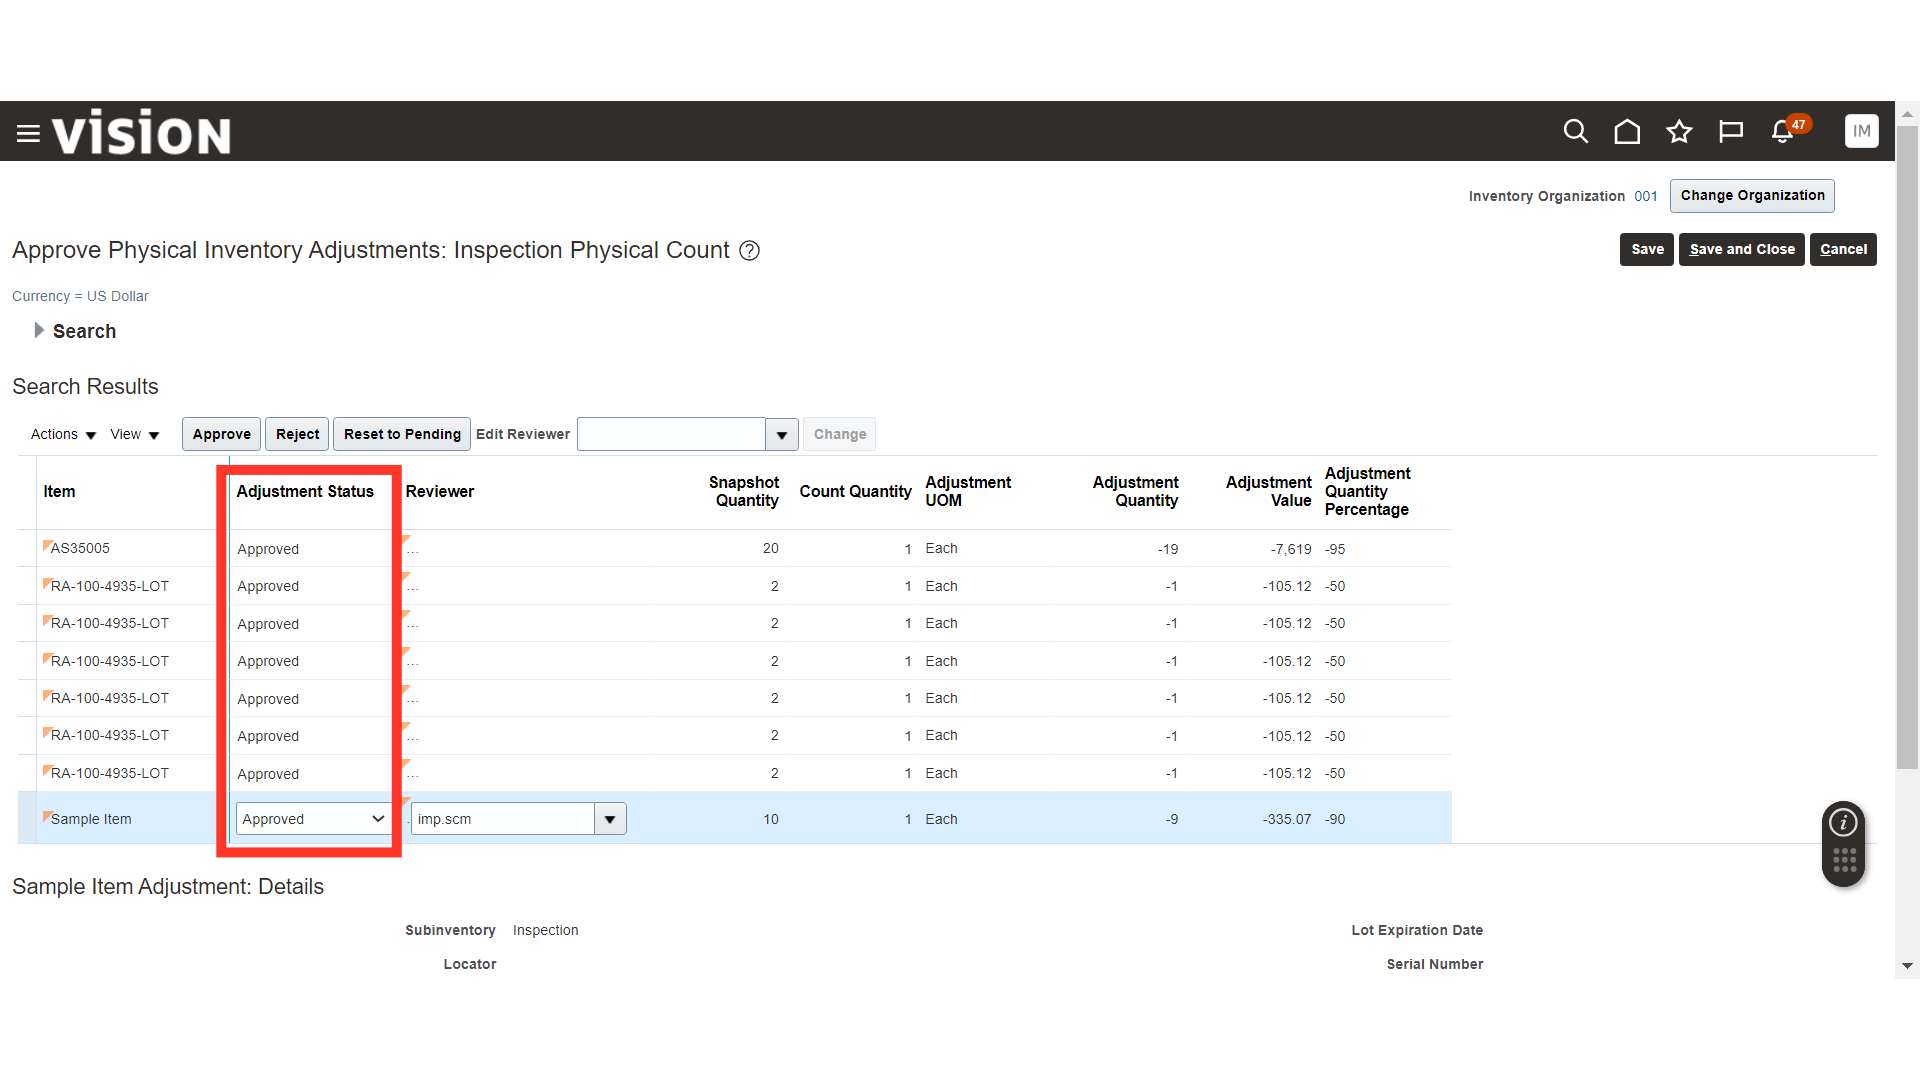
Once all the items are verified for adjustment and approved, click on the Save and Close button.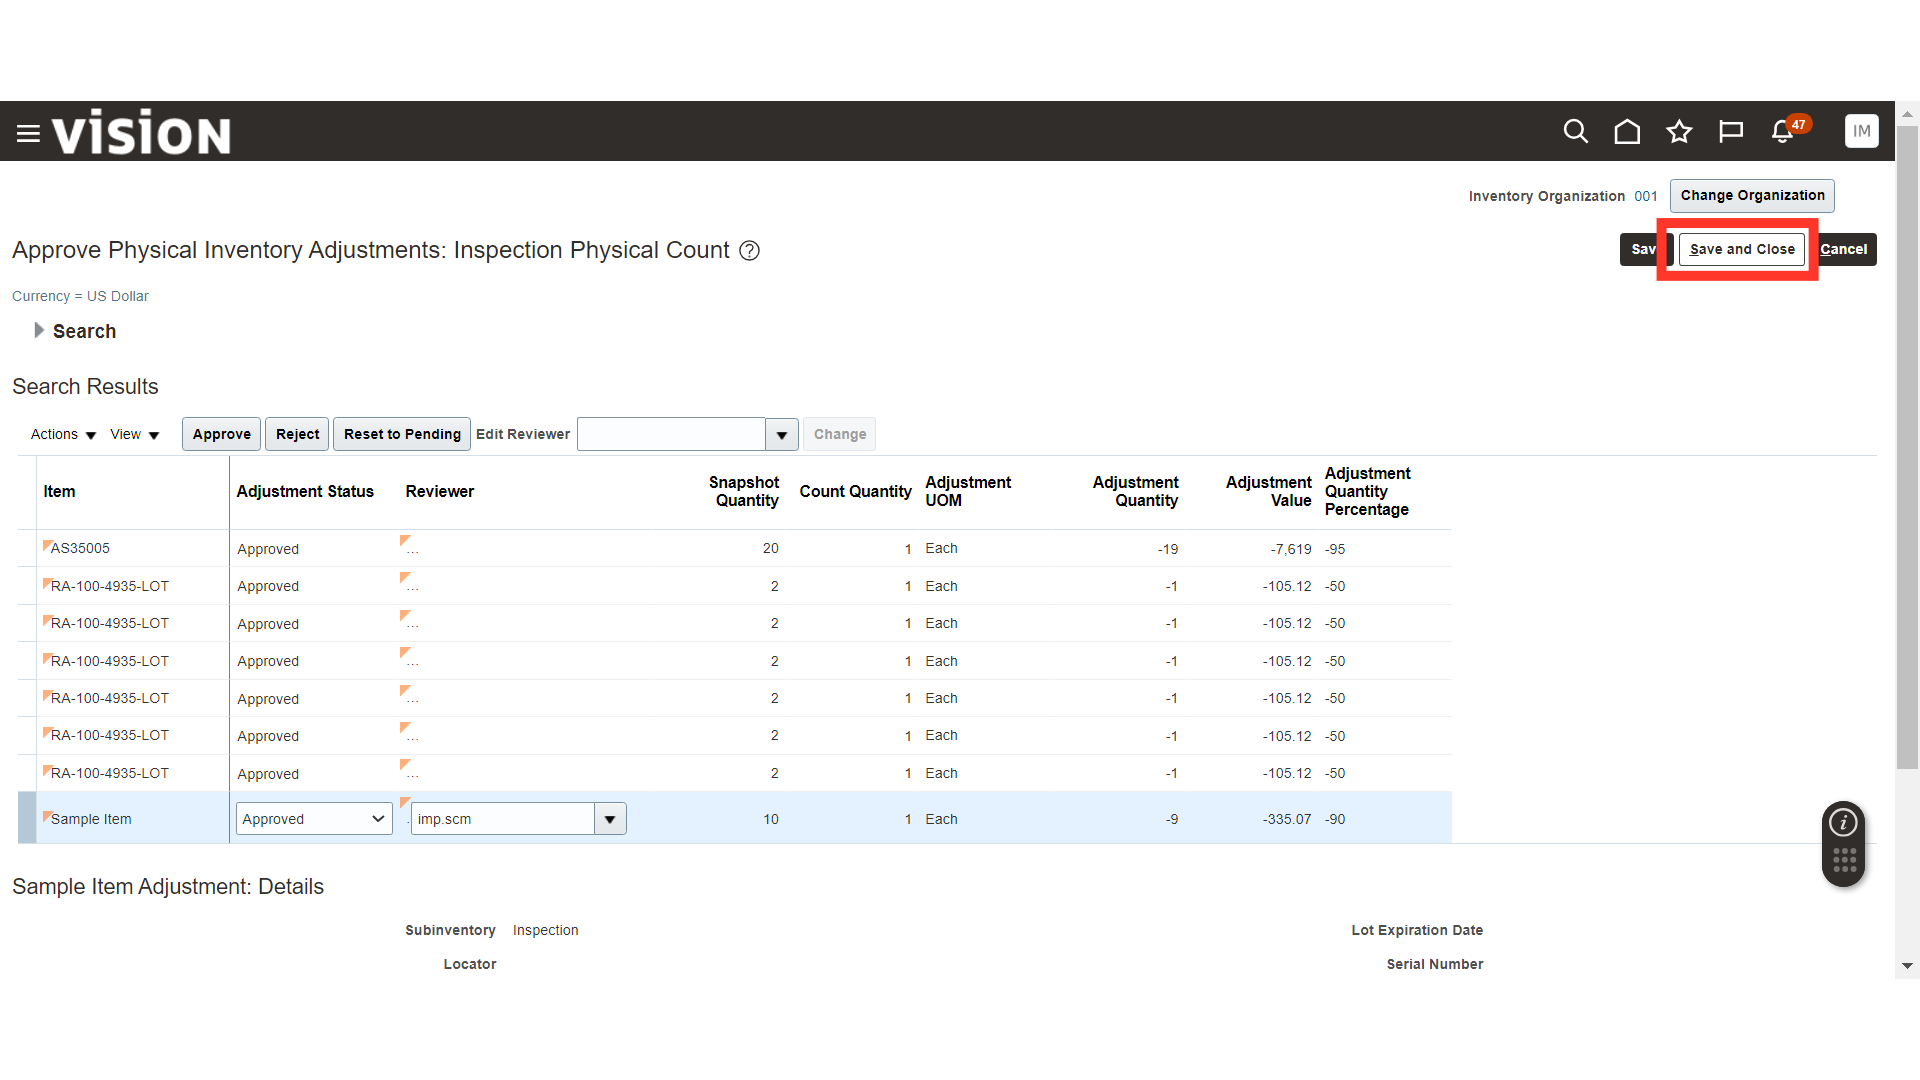
In Manage Physical Inventories, in Actions, click on Post Physical Inventory Adjustments. This will make changes in your current Inventory On-hand as per the Physical Count.
In Post Physical Inventory Adjustments, provide the Adjustment Date and click OK.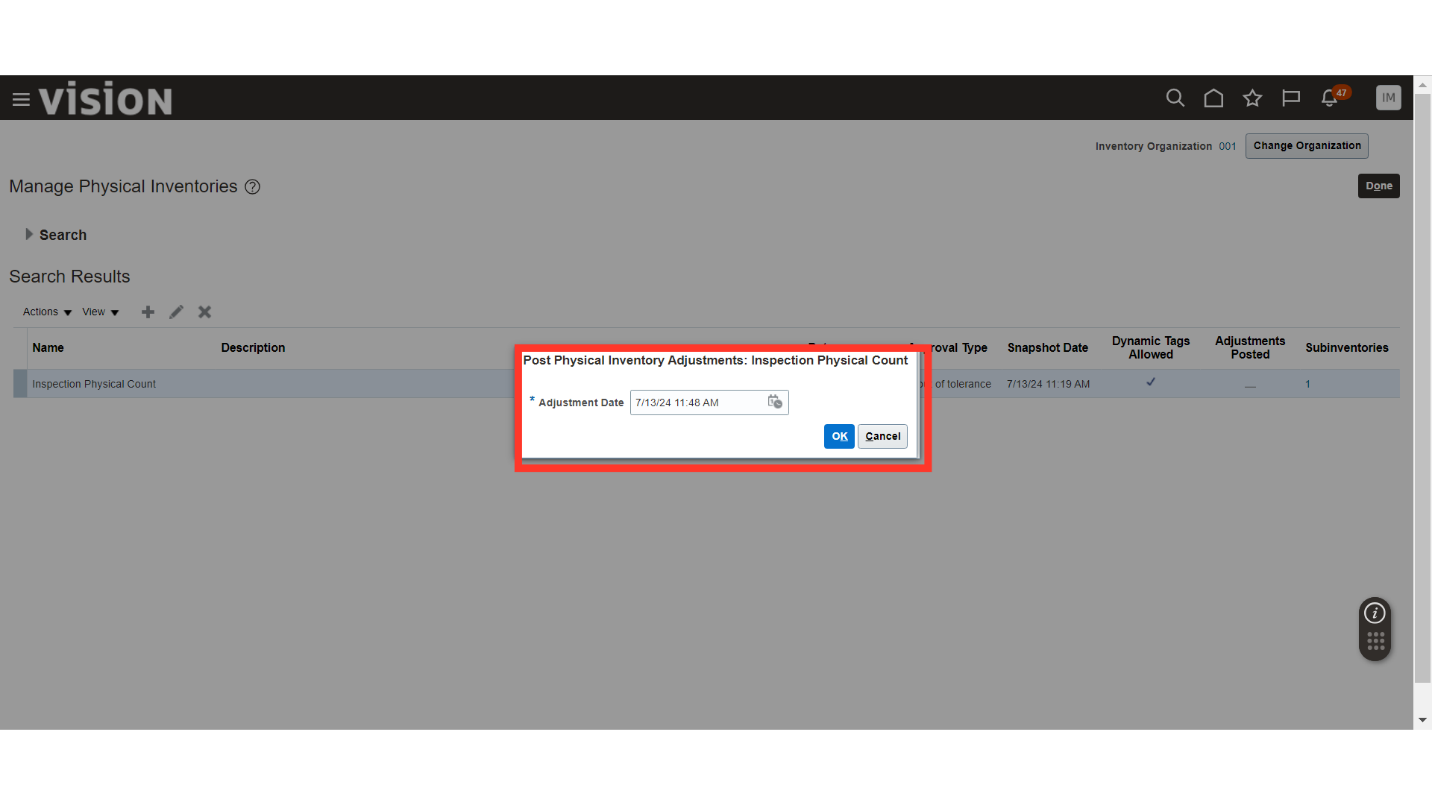
A scheduled process will be submitted for Post Adjustments for the Physical Count; click OK. Once the process is successful, the on-hand item quantities will be updated as per the Physical Count.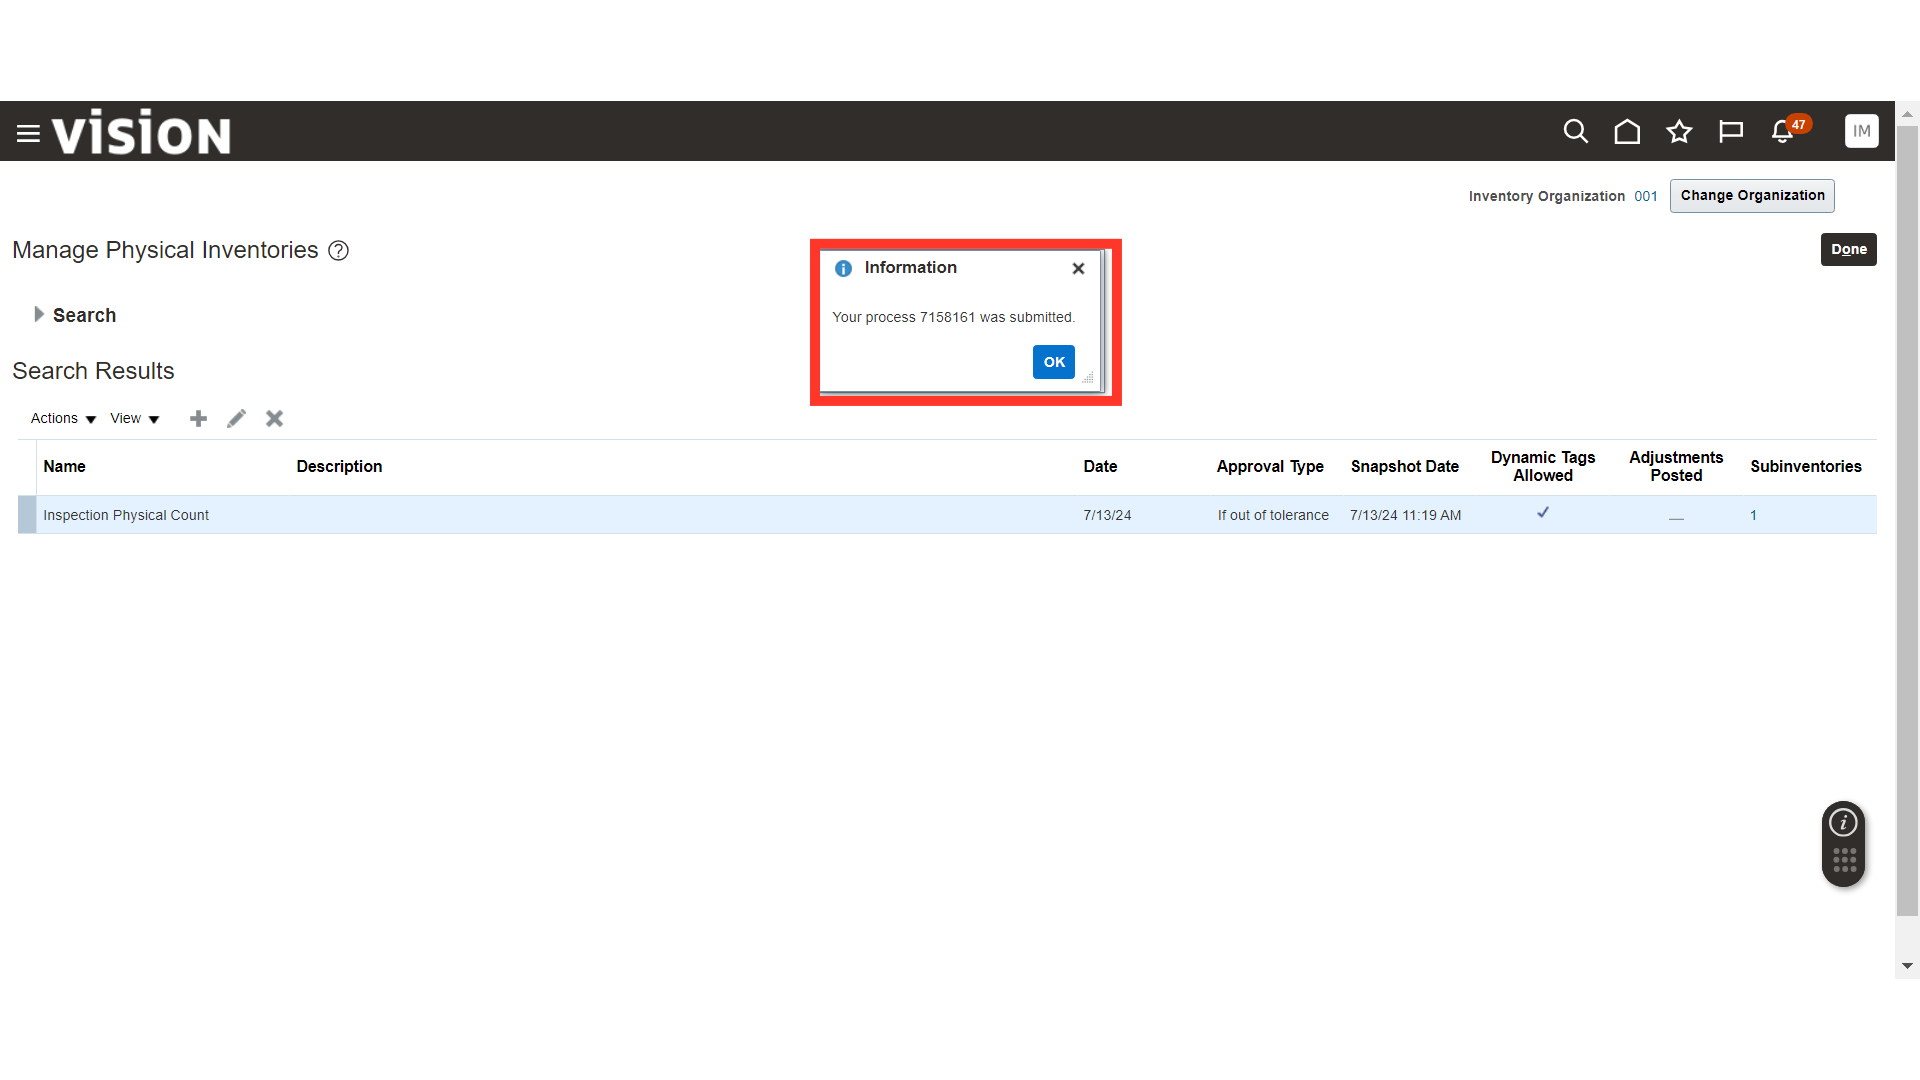
This guide covers the detailed process of conducting a physical count using Oracle Inventory Cloud, including managing physical inventories, setting tolerance percentages, generating inventory snapshots and tags, recording physical inventory tags, and posting the physical count to update inventory.